
Leaderboard


Popular Content
Showing content with the highest reputation on 09/13/14 in all areas
-
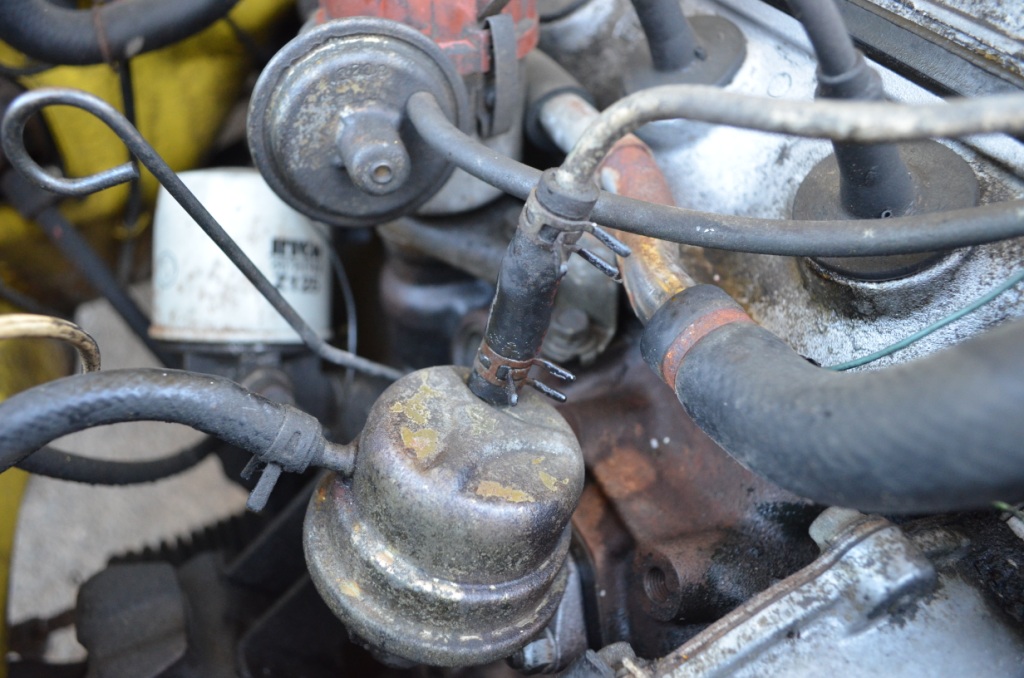
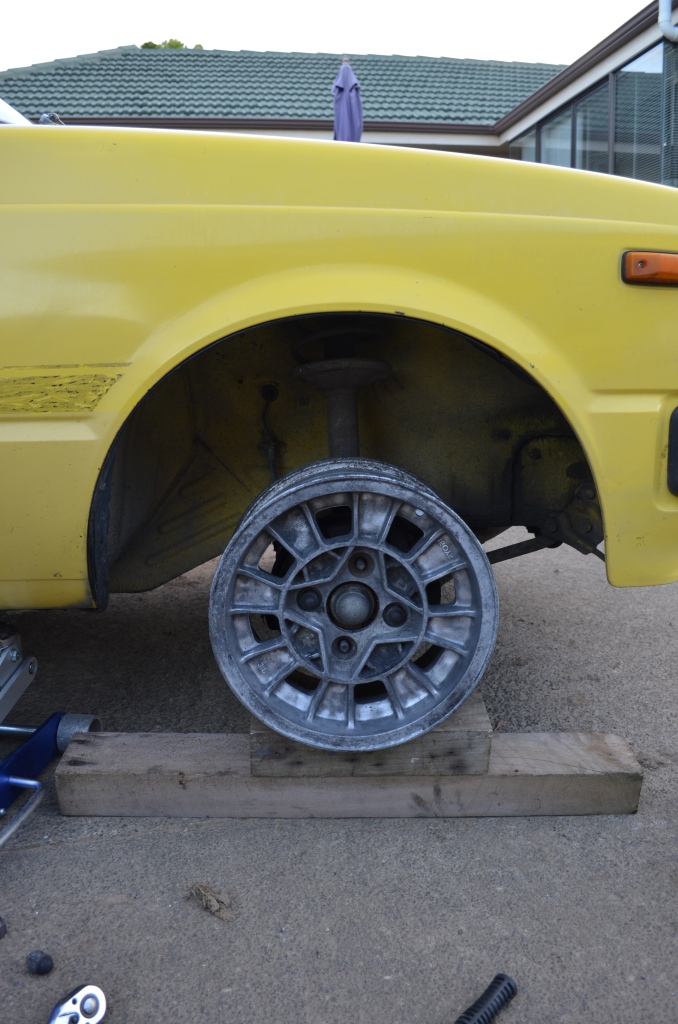
So basically my brother is going to help me maintain it and teach me a bit about these things. After getting the car home we discovered it actually had a fuel leak from the hose between the fuel pump and the carb hardline, so i replaced it with a new bit of hose. the starlet came on the original 12inch steel wheels but the tyres are no good, Shakotom had a set of 13x6 alloys that he had squirreled away for a future project; so he decided to give them to me. they need abit of a clean up but should be good. does anyone know what they are? they're stamped ryobi on the face and my grandad had them on his AE86 back in the early nineties. I just need to get some starlet sized tyres for them. maybe 155/70r13s?
 9 points
 -
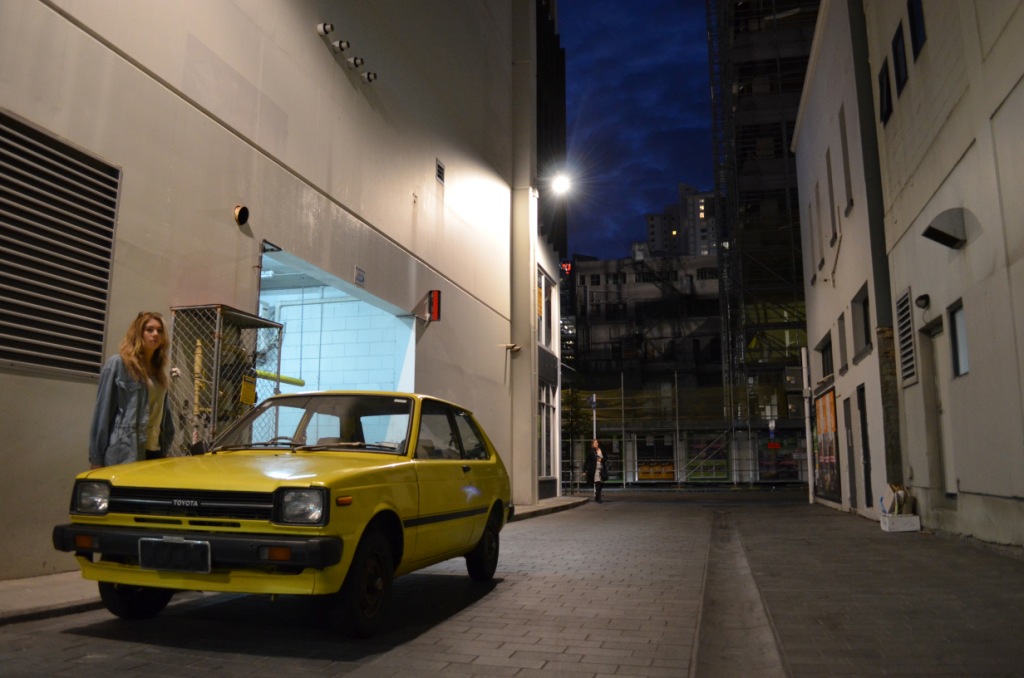
Hey! Im Aimee, I'm Shakotoms little sister. About 6 months back i went to a street culture meet with my brother to have a geeze, wandering around the meet i saw a KP Starlet and since then i fell in love. Saw this pop up and went to have a look at it, could see too much wrong with it so a couple of days later came home with it. And yes, this is Berjs' old Starlet. Meet Devon Discussion thread
5 points
-
So we poured the rest of the drive way yesterday. I can now add concrete placer to my CV...4 points
-
More gorse. More Hawthorns. More Sycamores. More bloody Blackberry. All chopped down and burned. That was last weekend- in between sitting in the sun and just chilling out. It was a really nice weekend and we really are on top of all the clearing. Plus when we turned up on Sat morning we discovered that our neighbour who has been doing all the digger work etc has started laying down fresh stone onto the driveway. It was so good being able to cruise up the steep entry bit of the drive with the van in 2wd and no wheelspin at all. It looks great too and once we have had some rain to wash the dirt off we'll have the Mediterranean looking driveway we want with the white stone gelaming in the hot sun. Just need palm trees... We have put a thermometer up and on the Veranda it has recorded 27.5 C last week sometime. Seriously gets bloody hot in this little valley as it misses the winds that the surrounding valleys get and heats up. so we arrived sat morning, unpacked the van then just sat in the sun and drank coffee while kevin sat in the bush under a fern watching the fat wood pigeons in a tree - too hot for a fluffy cat. Eventually we started chopping down shit. Then burning it. Then having a beer. Or two. We have pretty much cleared out all the gorse now except for what there is higher up the ridge which can wait. The bush is taking that over quite nicely anyway While I was down near the entrance to our drive chopping down some Hawthorns (horrible nasty trees '..spit..') an old couple came by on mountain bikes. I started chatting away and it turns out the are from around the road about 2kms away. They have been living in the valley for about 35 years. They too have a bush block and have been there, done that. Really cool people and lots of very useful advice for us. I will be grilling them for as much advice as I can get because there is so much to learn- especially as to what grows well, when to plant etc etc. They are really proactive with the local community group that looks after the estuary and beaches etc which is something I want to help out with. I will bide my time before I mention a skid pad and 1/4 mile strip.... Also turns out that their grandson in law (?) is building mtb tracks on their property and also builds alot of the tracks in Richmond for the mtb club. So thats handy- more info I can absorb! Anyway- photos. I was so engrossed in cutting down weeds and burning weeds.. that I didn't take that many photos. But here are some. Coffee on Veranda when we turned up... Kevin in the bush (Bushragdoll) The new driveway surface.. The area to the left of the driveway where we concentrated our clearing- right down to the road below. Before clearing... Then not far before finishing the clearing (always more then we think there will be!) Daddy, mummy and baby saw.... Sitting down for a late afternoon coffee on the driveway high point, Monday afternoon. So this weekend I think might be rainy. We will do what we can but just in case its really shitty I bought Hannah a massive Lego Unimog for her Birthday a while back. She has been waiting for a decent rainy weekend to start building it so that might this one coming. Otherwise its clearing out some scrub near the cabin on the boundry so we can get to siome massive pines that need felling. They block the sun in the summer afternoon and need to come down- that will be a big busy noisy weekend for sure! Oh- we also sent through our application for consent for the shed a couple of days ago. Hopefully it will get processed quickly (ha ha ha...no it wont..) so we can get on with ordering it and getting it up. I fear they might be asking for a geotech report because of our location but we will see.4 points
-
Got stuck in the driveway trying to get up the hill!! haha3 points
-
Been doing a lot of debating bubble arches vs non bubble arches recently, partially due to the costs involved, but also I'm liking the thought of staying with some reasonably small rolling stock. Been keeping an eye out for these things in 13x7" but having no luck as they only seem to be sticking to the -19 7.5" jobbies: In other news, I managed to finally complete the dash tidying up. Got a guy off trademe to do the stainless inlay, man that was a pain in the arse. After sending the first one in some flimsy cardboard and it getting bent to all buggery it took a further month to get him to finally send the replacement after bullshitting a lot about getting it done. Shame, because he had some dash pads I was keen on, but I won't be lining up to buy off him again in a hurry. Anyhoo, heres the final result:
3 points
-
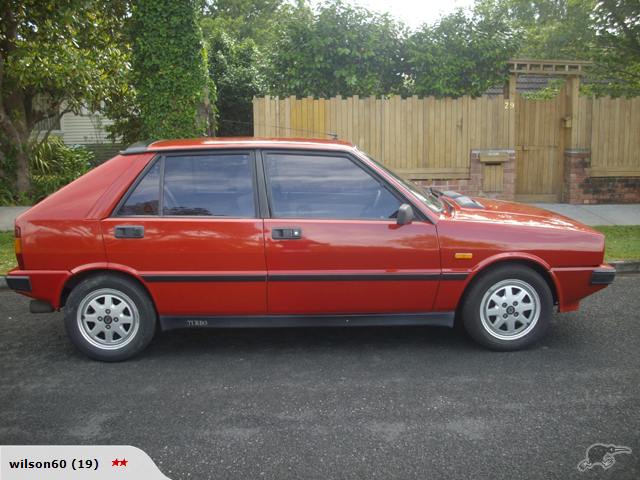
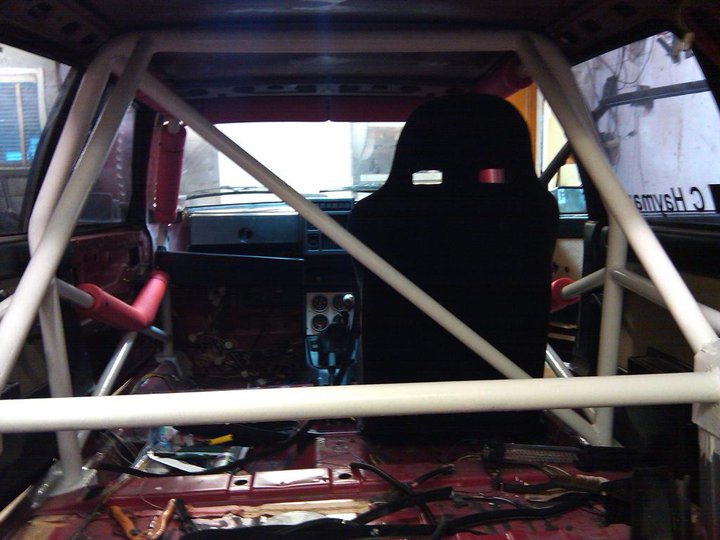
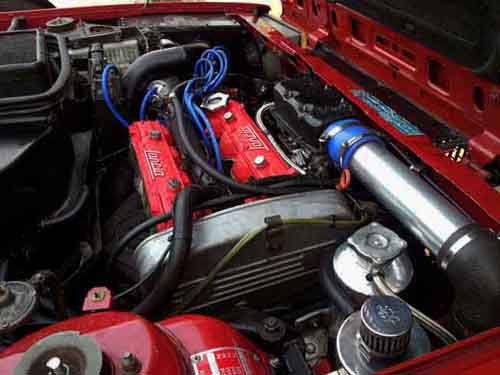
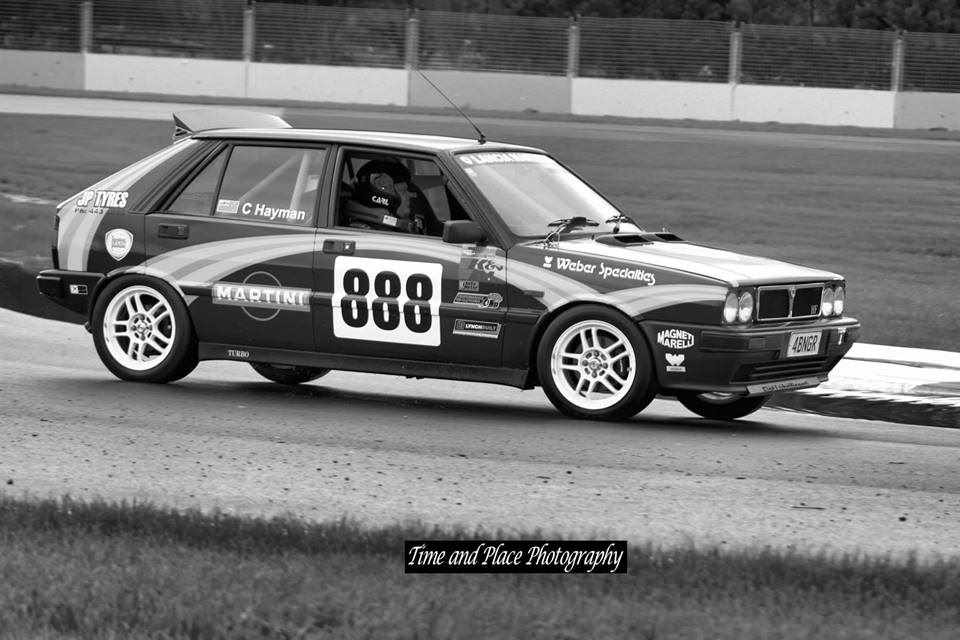
Hey guys, My project is a 1985 Lancia Delta HF Turbo. Purchased about 3 years ago as a stock-standard 130 flywheel hp front wheel drive carb turbo HF, i proceeded over the first year to rollcage it, have the suspension built, and upgrade the brakes. I then spent a year hillclimbing/street sprint/circuit racing it - then decided to opt for more power. Its now about 80% complete with a Fiat Croma 2 litre 8 valve injected turbo, same engine effectively as the Integrale but without balance shafts (the Group A cars never ran balance shafts in the block). Turbo is T28 from GTIR, bigger cams from N/A engine, bigger throttle body and manifold, front mount intercooler, 440cc evo injectors, Group A chip, Delta GTie gearbox, ARP rodbolts with new bearings, gated sump, HKS blow off valve, carbon-kevlar custom clutch with shot-peened lighter flywheel. Im hoping for roughly 200 - 220 wheel hp @ 950 - 980kgs when i turn the key.
2 points
-
Yeah man, wasn't anything major. Just the hose had perished and had developed a bit of a drip. She's so stoked on it ay, went for a cruise through town on the way back, and have put a fair bit of mileage on it since picking it up. Haven't got many massive plans for it just yet, as Aimee's still on her learners. But probably just give it a good service, fix the water leak (gonna investigate that tomorrow) and keep an eye out for parts as they pop up to tidy it up. Had been around and looked at tyres for it, but there's not much choice in 13s and can't really go very wide due to offset of wheels sitting much further out than steels, so was thinking about chucking something similar rolling diameter to the 155/80r12s and square on 6in wide wheels 155-175s for temporary use for now. Anyone got any old but good (wof able) 13in tyres kicking around home close to Auckland area?2 points
-
Photos don't do her justice, next fine day will try and take her outside and wash all the dust off. A big thanks to Jake for the panel repairs and all the lining up of boot, doors, guards etc, and a huge thanks to Todd for a sik as custom pearl paint job, and assisting in the finishing and detailing over a few jim beams, and reassembly of the beast, also a big thanks to Andy for your work on the brakes. Also to Jason for all your electrical help in getting all the electrical demons sorted. Brian for your help with tuning and general help. So as you can see I haven't done this build alone, and I'm not about to make out I have, you see I've received help from various people. People whom are passionate about old and rare cars and want to see it back on the road and in pristine condition. To those who have helped I'm grateful for your help and support in making this project what it is today, you guys are the real heroes in this build, some very minor detailing left but almost there! A huge thanks to all, Darryl2 points
-
Got new tyres fitted up and chucked on. Cant get jack under the cross member and car takes chunks out of the driveway. Perfect. Still another 1-2" of low to come.2 points
-
Today was a day to tidy up some loose ends, we fitted the radiator and cooler, oils lines on, water in radiator and oil in engine, fuel lines on, battery in boot, brakes bleed and adjusted, wheels back on, and finally started up mint, got some float issues in the ida but will sort another day, then she's drivable and off for a wof, window chrome back and front to go in and that's about it.2 points
-
Wat no rebar. I knew civil engineers were rough.2 points
-
Will come leak oil on this ASAP2 points
-
Small update, have acquired a few more parts like some nice Dyna coils. Cylinders have been bored and are ready to go, will probably sort the engine in a couple weeks once work quietens down. Have been playing with the frame a bit, cutting some stuff off like the centrestand mounts and sidepanel lugs (haven't got any panels anyway haha) Spent ages thinking how I wanted to do the tail unit, fab one out of steel or fibreglass, buy an off the shelf unit blah blah. Eventually I found a GS550 tail unit which had the shape I wanted, height and length are good, just need to section the middle a bit to thin it down It's not sitting as far back as I want here, just mocking up the lines Bit too wide but pretty close2 points
-
Fuck a curve, you guys are way to fancy. Also, yes it is completely full and I need another one of equal size/ get rid of some junk hahaha2 points
-
Anyone with a Honda Cub should replace these! play gone! 442 points
-
Build thread here-----> //oldschool.co.nz/index.php?/topic/45097-aimees-83-kp60/1 point
-
All in my heeeeeeeeeeeeeeeeeeeeeeeeead. WIll grab some tomorrow, looks much the same really haha1 point
-
Oh hai.1 point
-
Enough room to swing some O's now1 point
-
Is the bellhousing/front section of the gearbox removable? Or is the main case all one piece? If it's like two halves, then you can. If it's one large bit, (These ones usually have a flat "pan" bolted to the bottom) then you're up for a new box. If it's two main sections, then you can swap just the bellhouisng. You need to identify what "size" box it is. If it's a 63, or a 70 series box. The number is often found on the side. If it's a 63, then I have an L series bellhousing here for a 63 which is zero use to me. (I was going to scrap it tbh) If it's a 70, then you'll need to find a bellhousing from the likes of a 240, 260,280 C/Z/ZX etc. Is you box a floor of column shift? Can you post a photo of it? Are there any numbers on it. Nissan/datsun is a lot like lego really.1 point
-
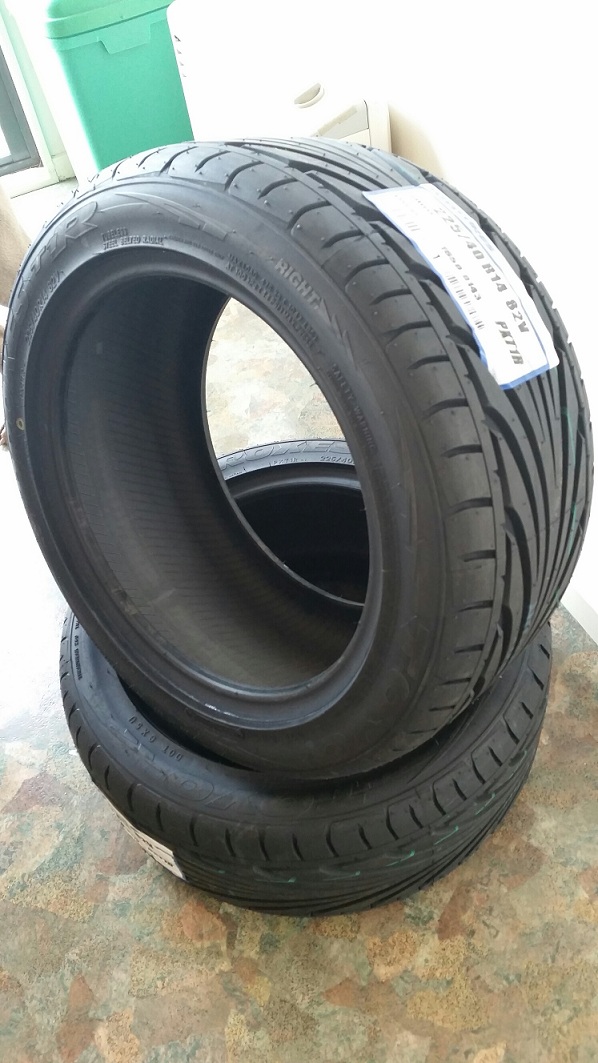
Toyo T1r - 225 40 14 Pretty happy with the look pre wheel install! Should match 195 45 14 fronts no probs. Now have a set (4) of 185 55 14s for sale approx 50% tread. $300 (one or maybe two have little bit of sidewall damage from memory. Gaz
1 point
-
that is definately my favour way to use up the space hahaha1 point
-
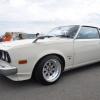
valiant engines are on the piss by a considerable amount, in the wrong direction, ie closer to the steering box. chrysler australia used the US spec floorpan which had the engine offset to clear the box. one of the reasons i put a turbo on mine, having it on the passenger side visually balances it out. originally i was going to put a blower on but the fact it would stick out the bonnet not in the middle would have bugged me1 point
-
Lewlz. Thanks for saving me again J5.1 point
-
If i import a fresh import with no paperwork and cut out the chassis numbers and plate them them in can i get it vinned? Or what if i replace the whole firewall to give it the smooth look (still no chassis numbers) can i get it vinned? Or what if i find a roof from a wreckers, some doors boot and bonnet at pick a part, some rear quarters from zebra a floor and nose cut from another wrecker and make my own firewall with no vin numbers, get the rest of the parts new from a car dealership can i get it vinned ? Even if i buy all the parts new from a dealership can i get it vinned ? Now back to my first question, what if i import an import with no papers, replace the whole firewall and say i built the whole car from new and used parts. Who would know ? I hope you like my story1 point
-
And last but not least, a couple of pics at Pukekohe with the 1.6 carb engine (which i had ported and polished, tweaked the boost, modified the carb, and was running 140hp @ the front treads)
1 point
-
^one of their mechanics got DIC'd whilst road testing a customers car. Thats how you know they are good.1 point
-
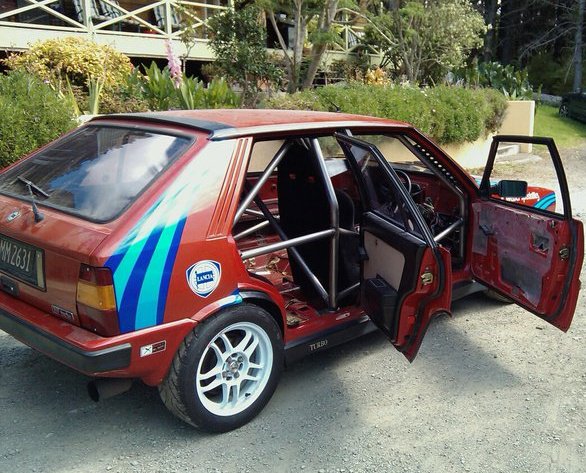
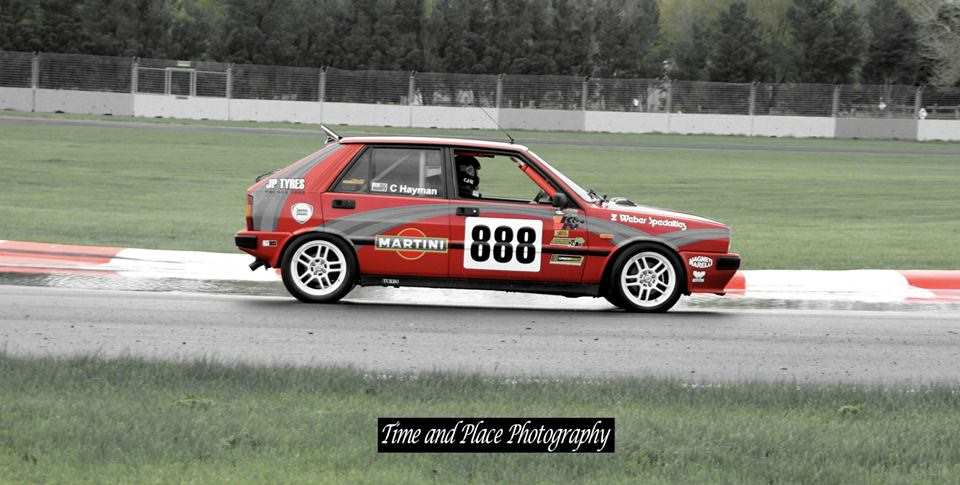
OOOHHHHH IT'S A RACE CAR NOW!1 point
-
Finally the front screen rubber and new floor pan arrived today so dropped them off and had a little look it's coming along well, I'm really pleased about taking the windows out it looks so much better Should have it back mid next week only the bringing up to warrant standards left to go and a little lowness still the sign writing to go and it will be close These arrived today as well Cant wait to get the Van back the Alfa is already sold the clock is ticking1 point
-
New purchase 40mm kawasaki ninja carbs1 point
-
Diff in and rolled her outside for a dust off, think i got the ride height pretty spot on 90mm all round. Also gave me a chance to clean up the shed haha. IMG_1469 by postlematt, on Flickr IMG_1487 by postlematt, on Flickr Also plasti-dipped two of the wheels to get idea of what they look like black.. and a few too many photos of her sitting under her own weight, enjoy haha IMG_1474 by postlematt, on Flickr IMG_1481 by postlematt, on Flickr IMG_1477 by postlematt, on Flickr IMG_1485 by postlematt, on Flickr IMG_1495 by postlematt, on Flickr IMG_1498 by postlematt, on Flickr IMG_1497 by postlematt, on Flickr //oldschool.co.nz/index.php?/topic/38745-matt-spitfires-ta22-daily-driver-buildresto/page-41 point
-
Took the car to a panel beater friend to get some work done. Very pleased with the results, Got the rear guards redone as I ruined the last ones trying to get the wheels to fit. More clearance under the rear doors and a slight flare. Gets pretty low now with only slight rub on one side. Got the front valance put in again, this was always missing to allow room for the fans, the fans are now on the engine side of the radiator. And a wee diff bump to stop my big dick diff hitting the floor.1 point
-
64 Impala Convertible. Ground up resto about to go to paint!1 point
-
Love that colour1 point
-
loooking bloody sharp man, one day ill get a 2 or 3, must finish current project first tho haha1 point
-
3 coupes look lush in blue. Looking forward to seeing some pics showing the pearl, although they are almost impossible to photograph! Also, I know the Modgies were not your first choice, but they do look good with the duck tail! And I am a massive fan of brown interiors, nothing screams 70's more than an original tan interior....1 point
-
1 point
-
So so sweet ! Plus one of that spoiler !1 point
-
That spoiler is A1, rad to see another sweet 'tang project on here.1 point
-
Shit son, love the spoiler and the coupeness, looking superb1 point
-
Mint that's better, thanks Berjjj, its a really difficult color to get an accurate pic off. its more an aqua green. same as chevette1 point
-
1 point
-
1 point
-
I was looking for the discussion thread! Cool choice of colour mate, and I'm stoked you decided to keep the rear spoiler, as I personally like them. Will look awesome with your savanna interior!1 point
-
So I just got photoshop and figured Id have a play tonight seeing as currently the lights in the garage dont work and came up with this. Filled in the side windows, and bought it down abit. I have acquired springs and blocks for this, that will be fitted in the next few weeks. Photoshops so much easier than real life1 point
-
spent /heaps more1 point
-
Site is very old, however if you're after them he has a few different options - Mild Steel, Hardened, Chromoly etc.. http://homepages.paradise.net.nz/suspensiondevelopments/ John O'Halloran. Extremely helpful guy, cannot speak highly enough of him...1 point
-
Got some new wheels, SSR mk3s 13 by 7.5s -8 They didnt fit so I hacked my diff up. took another 15mm out of each side. Simon Surfab welded it back together for me. And I put it back in to get the car rolling again. front wheels only just fit with max camber plate. I'm pretty pleased with it. Just trying to get rid of slight guard rub.1 point
-
got motivated after yesterday so i lowered it to the height i would like it at. cannot wait for the new wheels to arrive! Before After. Can still turn in full lock. Rear doesnt need any work, Front i am getting some coil overs made up so this is the mock height for that.1 point


.thumb.jpeg.384ff72c8d2b0ee0d34a7bdedb55bdcf.jpeg)


This leaderboard is set to Auckland/GMT+12:00