
Leaderboard


Popular Content
Showing content with the highest reputation since 09/07/25 in Posts
-
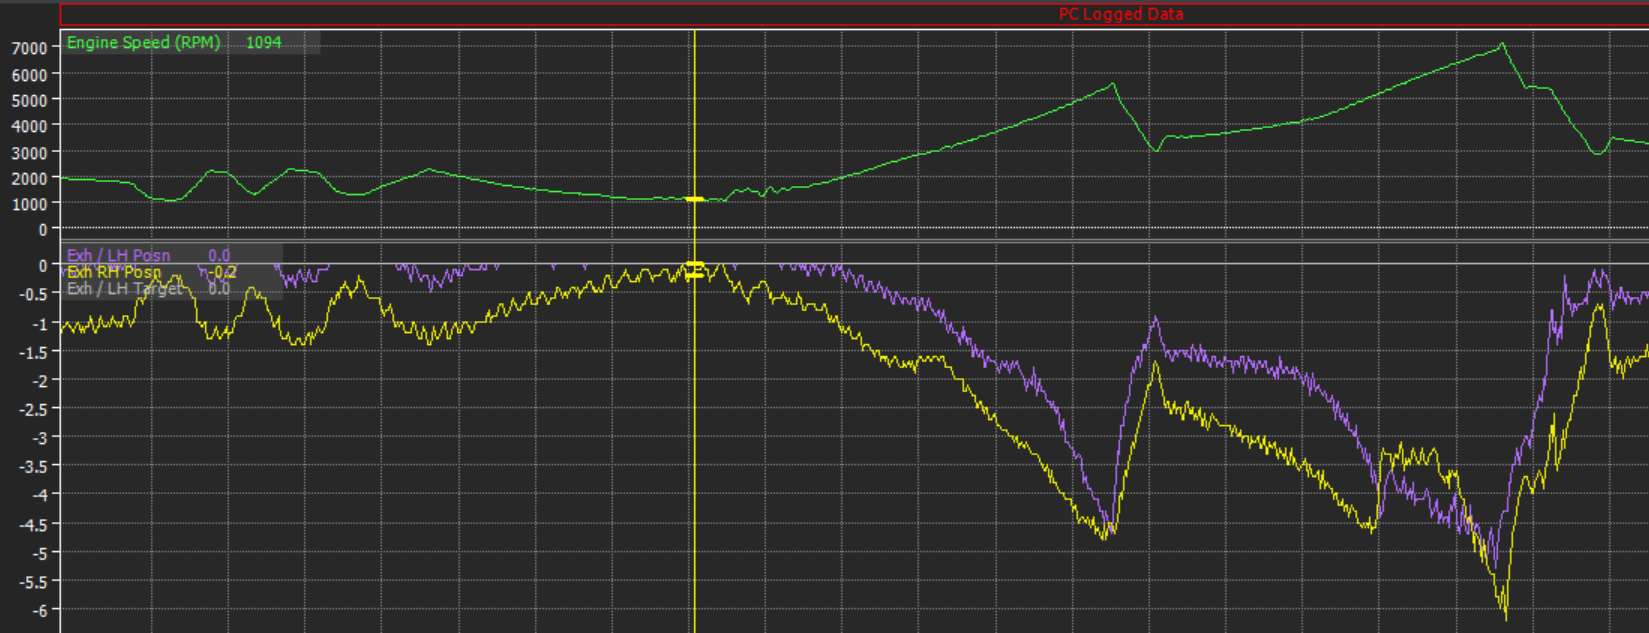
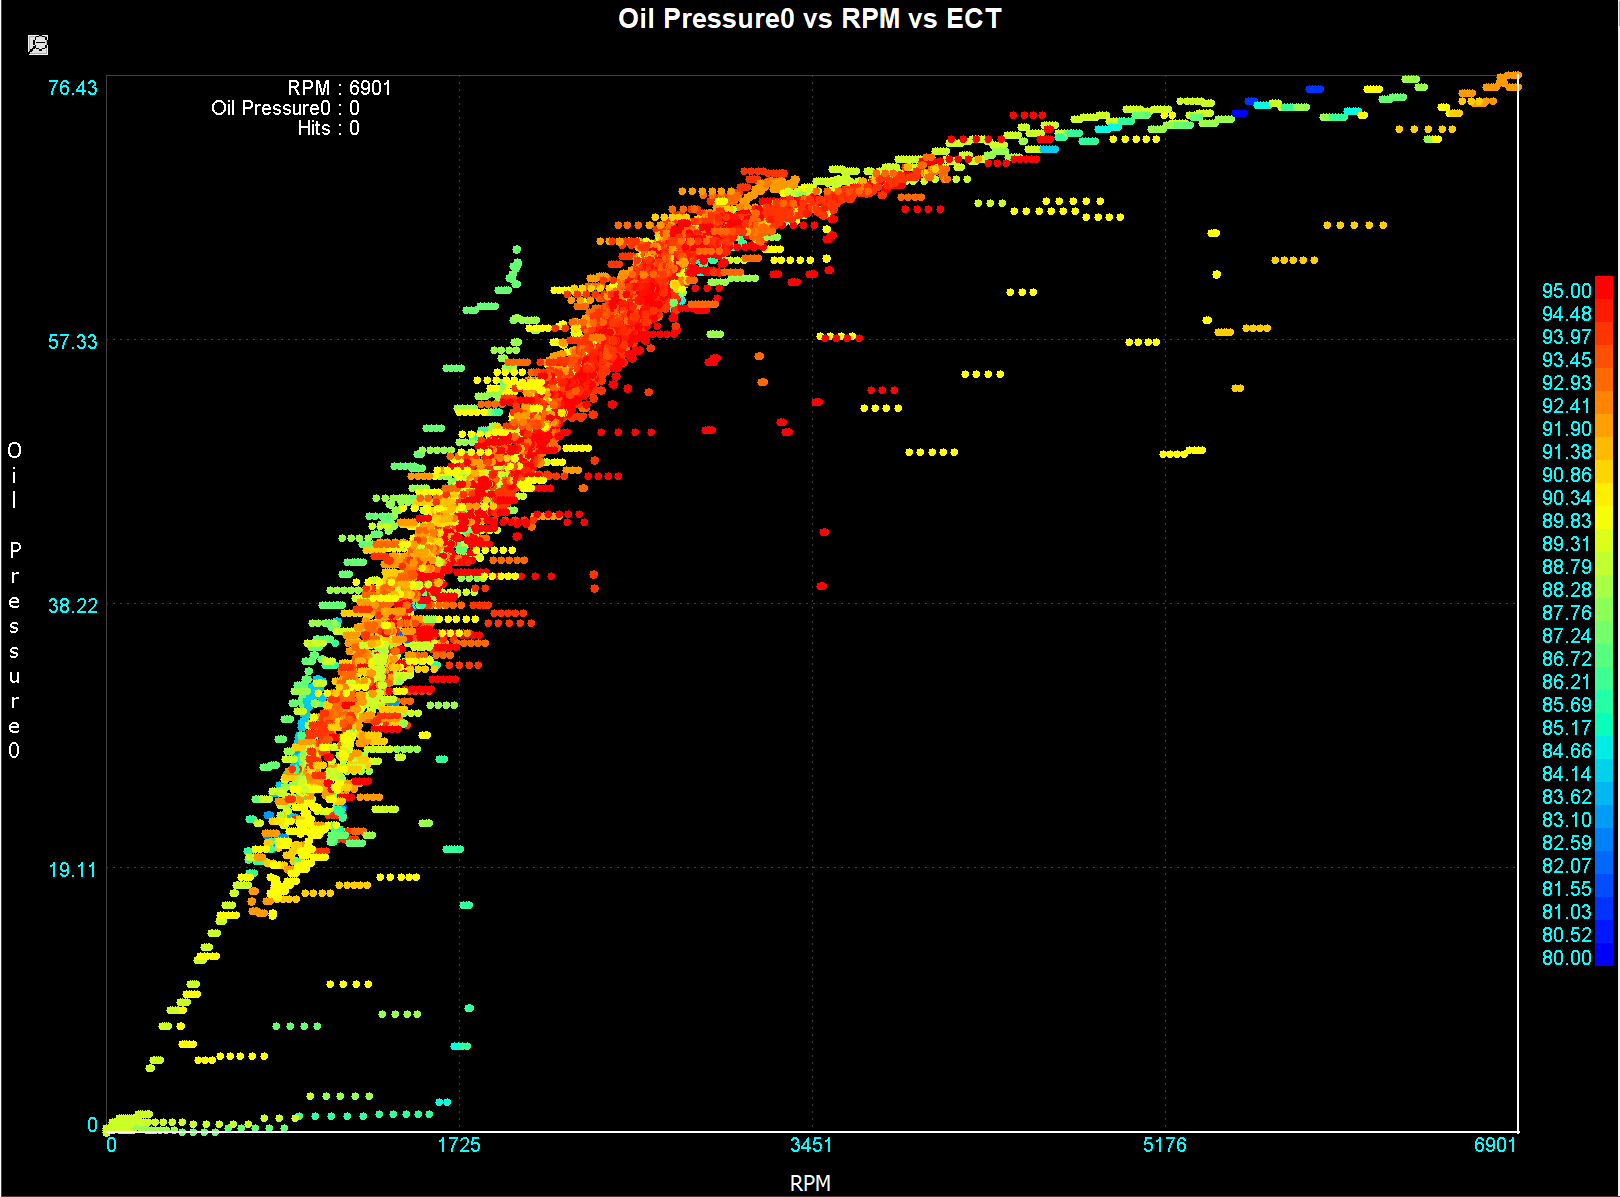
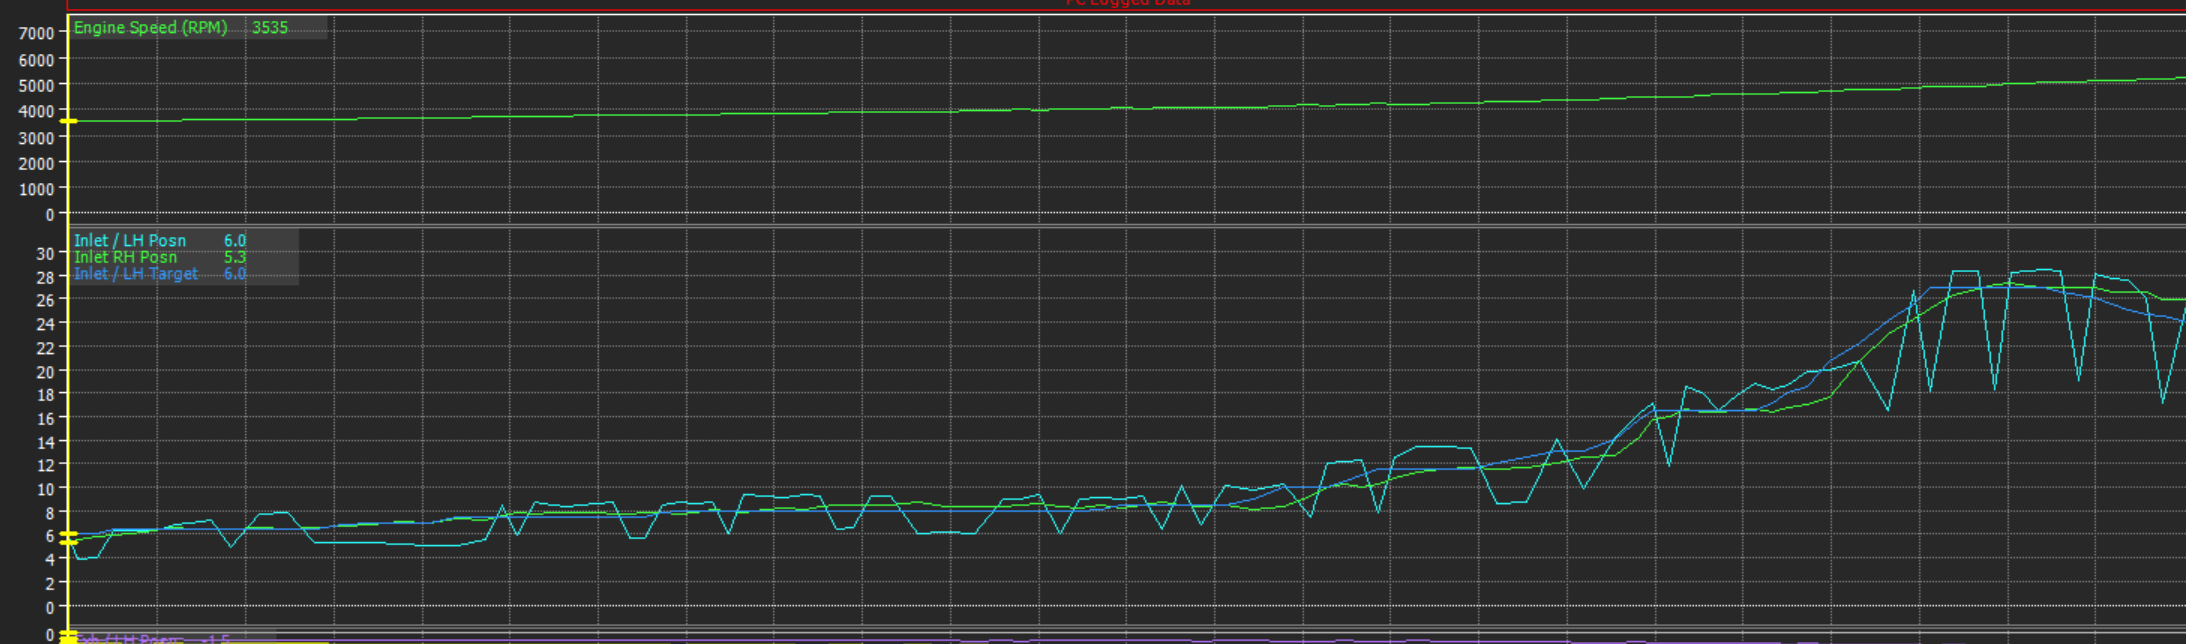
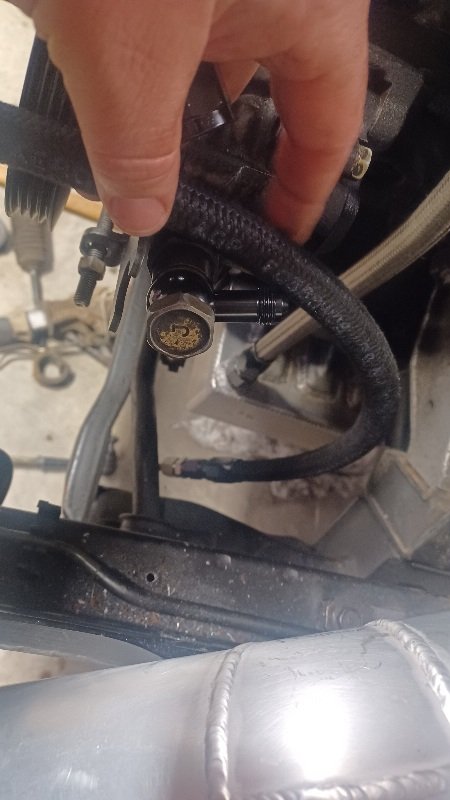
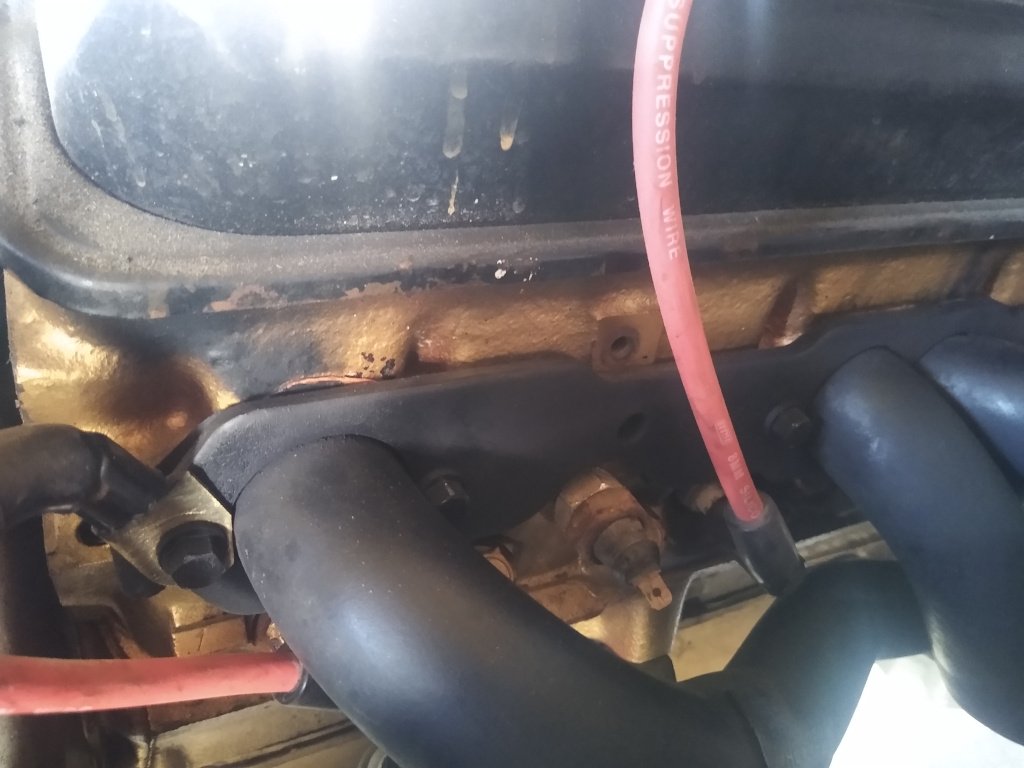
My ethrottle motor turned up, finally! I got everything as well balanced as I could then went for a little bit of a trundle up the road. I have got a few issues to sort out. I've been stupidly sick with Influenza B though so everythings been happening in slow motion recently. The exhaust VVT pulleys end up floating away from target even when there's no duty applied to the solenoid. It's unlikely to be an actual problem as people say it tends to like 10+ degrees of exhaust retard anyway. But it's interesting that there's probably no way I can force the pulleys to 0 degrees at high rpm. It's likely just because of the stiff valve springs, or maybe with a thicker oil it would stay on target (using 5w30 currently) Maybe the chain stretches, or the cam chain tensioner that goes just between intake and exhaust pulleys starts to get pushed in. I'm not sure why the signals are so jiggly but I can add some extra smoothing to it so the PID isnt going crazy trying to get to target. Not a huge problem, but interesting that it is a problem EDIT: A 2GR guy on facebook told me that it helps to set the minimum duty cycle to the solenoid, greater than zero. So will try that. General engine health: Fuel pressure stays dead flat, and oil pressure is looking good, at least to ~7000rpm. As expected, pressure drops off a little when engine is running hotter. But I've got enough of a shape there to start adding in some oil pressure alarm / shut down features. I've got a bit of an AFR imbalance between banks still. However at least now I can trim each motor independently as needed. It looks like part of this is caused by the VVTI PID settings for the intake pulleys not quite being right on default settings, causing airflow differences. Again, this is likely due to having much stiffer valve springs fitted rather than junk PID values by default. Interesting it looks like left and right banks will need different PID settings. I suspect that this is because on one bank, that cam angle sensor is assigned as trigger 2. Then the other bank, its a regular digital input. I suspect that they get treated a little different and with different priority perhaps. It will take a little bit of mucking around to adjust the settings per bank and get them tracking nice, but hopefully not too bad. I didnt do much in the way of full throttle stuff, as was mainly a bit of a shakedown to test a variety of things were okay. With the exhaust leaks at the collectors fixed, the car is sounding MUCH MUCH better. Today is the first time where I've driven it, and come back with a smile on my face because the overall experience was fun and it sounded cool. It will still sound better with an X pipe and so on, but I'm at least happy enough for now. Not much full throttle or high rpm activity so far, however the indicated power figures from virtual dyno seem about right for a healthy standardish engine. More of a health check indicator than full on performance indicator at this stage. Still need to optimize fuel map, VVT settings, and ignition timing. So should pick up a bit everywhere once all that's dialled in. No trumpets fitted at the moment either. The 4GR usually makes around 212hp at 6400rpm and 179 ftlb (at engine) Hopefully we'll be sitting somewhere around the 250whp mark with the big cams in and a bunch more rpm. so, yeah! On the whole, super happy that things are finally getting to the fun stage of the project. Where I can road tune it (to make graphs) and take it to the dyno (to make graphs) and then take it racing (to make graphs) And now I can add the cruise control switch back in, which is bloody excellent. EDIT: I had a reply from one of the 2GR tuner guys on Facebook, who said its normal to need different PID values for each of the four cams. Even when cams and springs are stock. So will just carry on setting that up and treat it as normal that they're a bit wonky currently.
 28 points
 -
Maiden drive to the chip shop. The vibration comes and goes. I can feel it in the steering wheel rather than my bum so probably the front end. Booked in for first of many LVV checks next week. Got this from a neighbour:
23 points
-
Acquired a pair of Zenith carb castings off a guy in the Netherlands. He finished his 59 a few years ago and had these left over.21 points
-
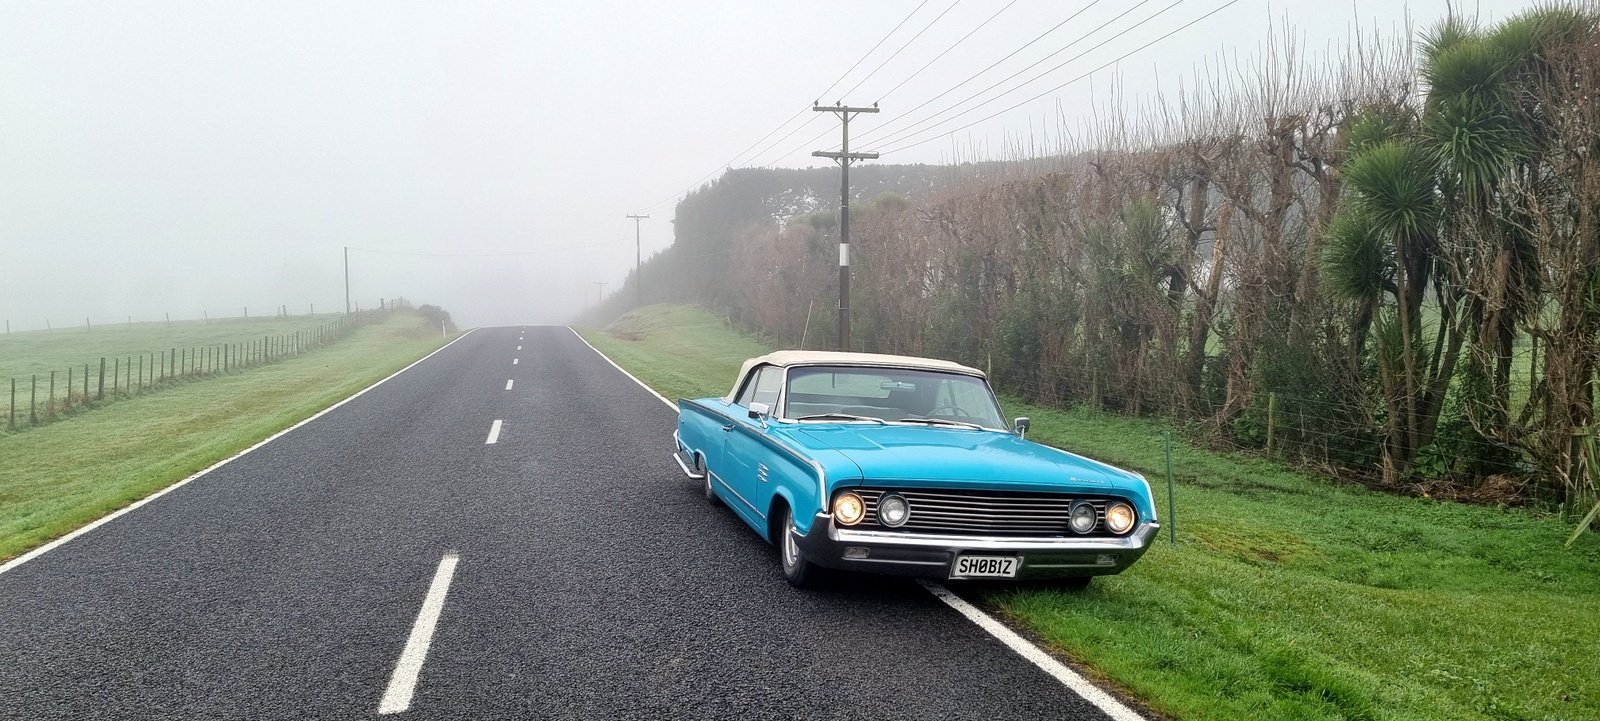
Beach Hop happened, mostly been a garage ornament since then a few local runs. WOF ran out too. Went out in the mist this morning to warm it up for an oil change. Would have been a better shot if I parked on the road.
21 points
-
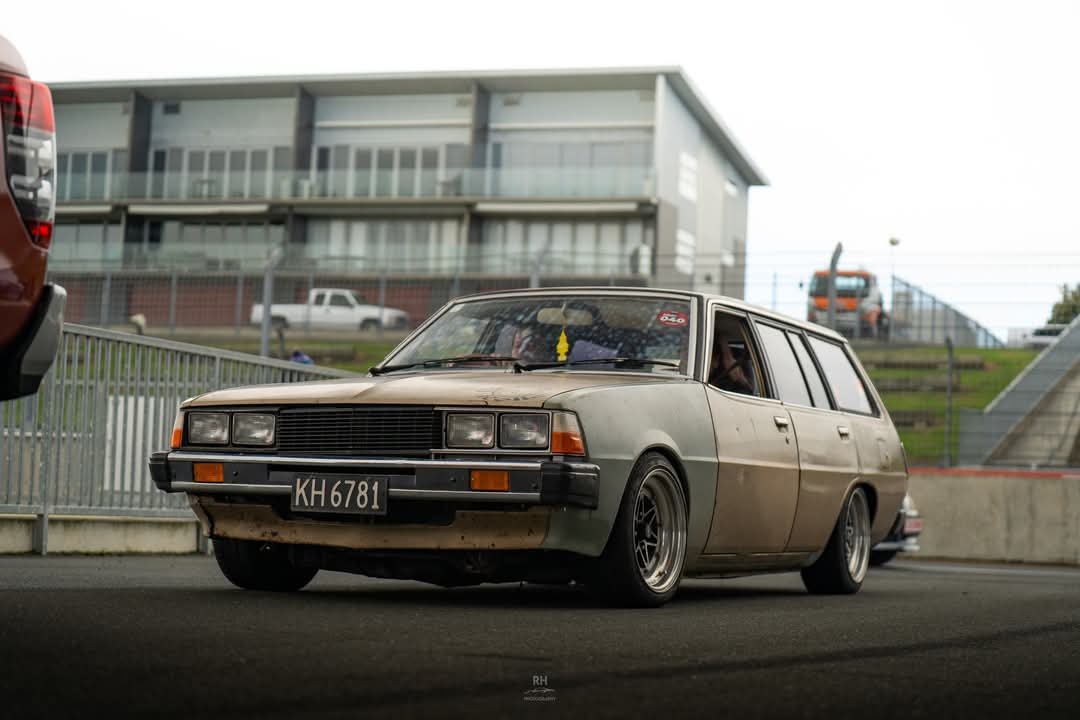
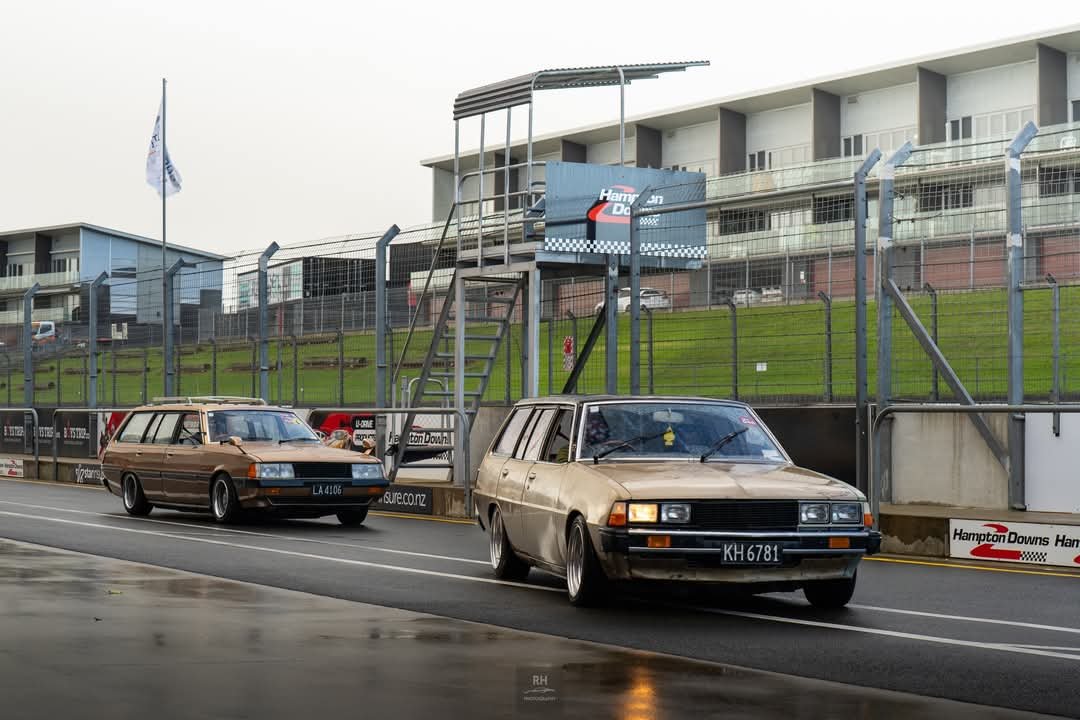
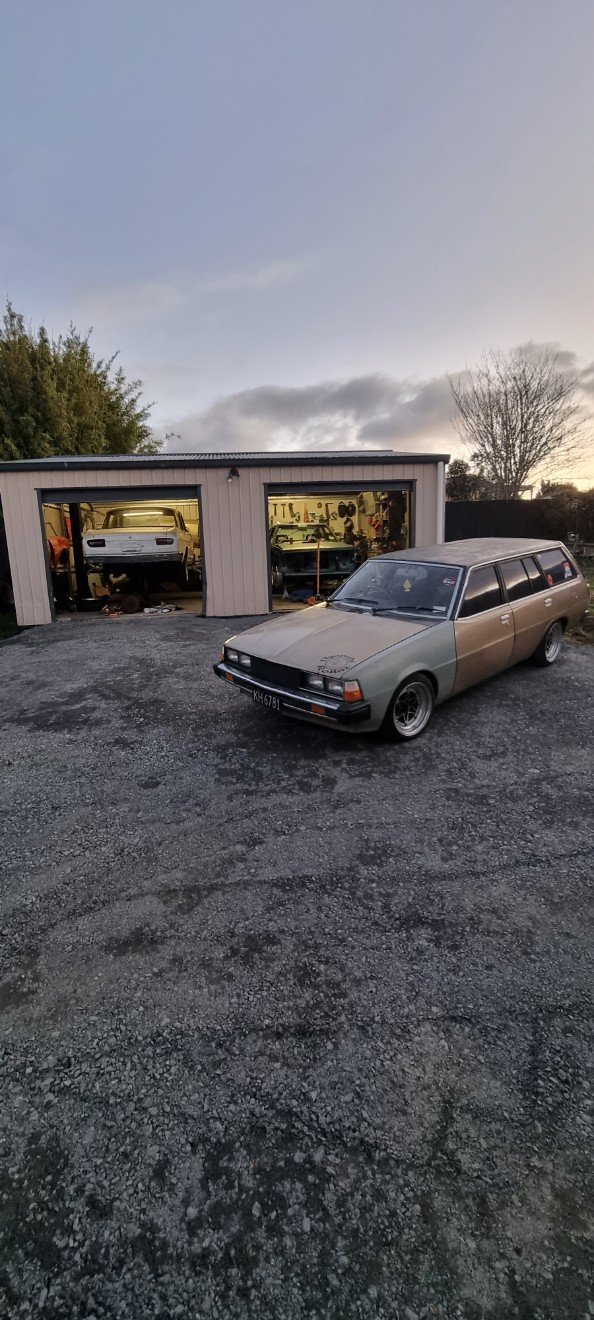
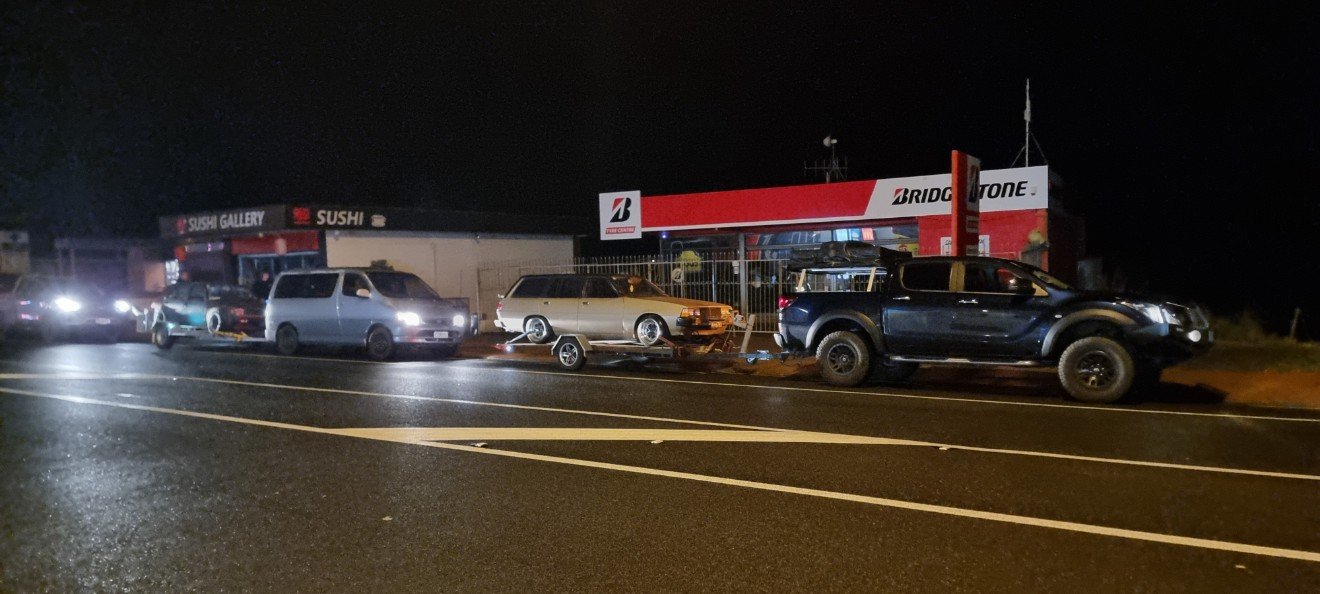
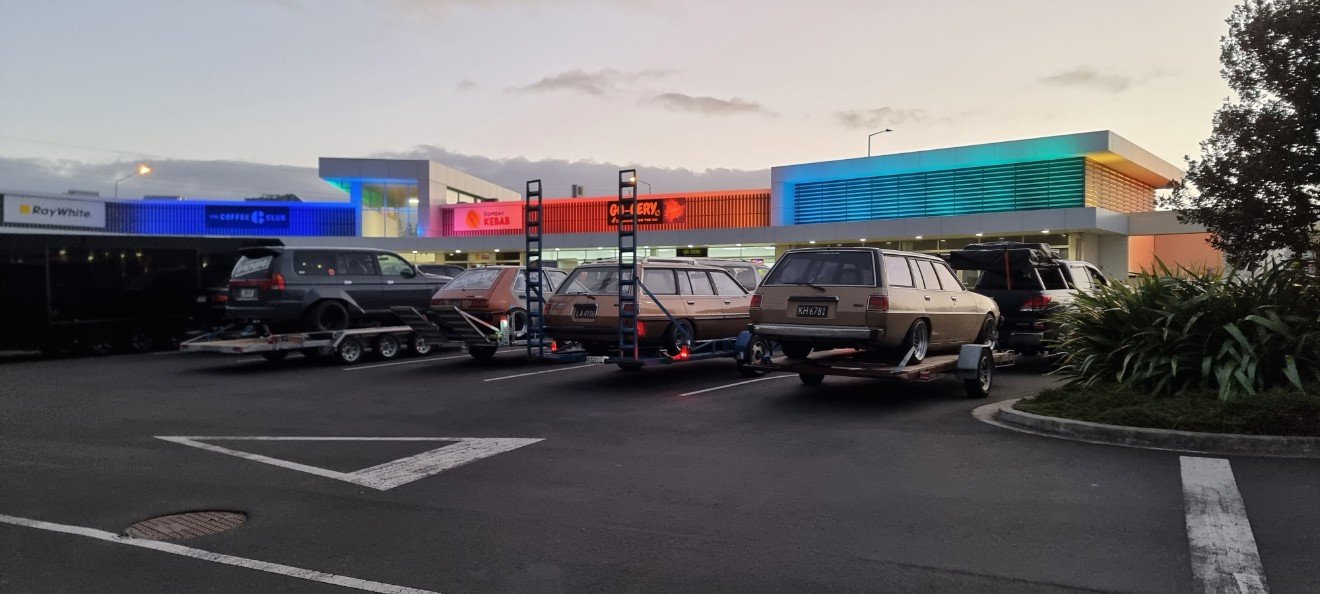
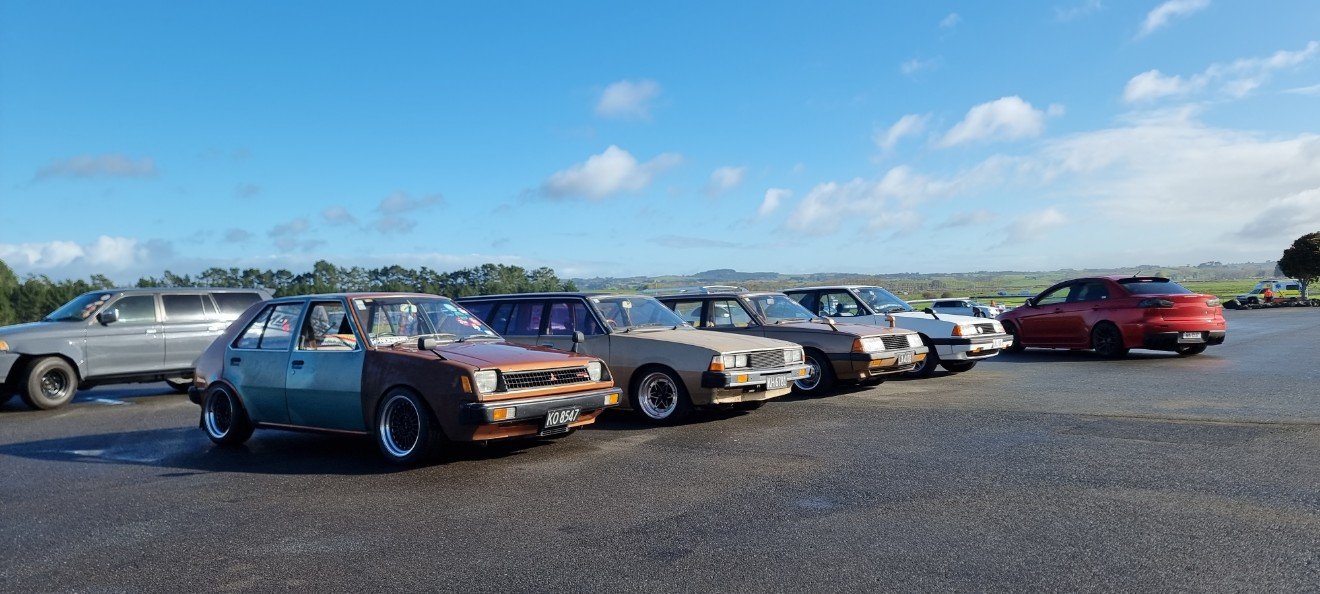
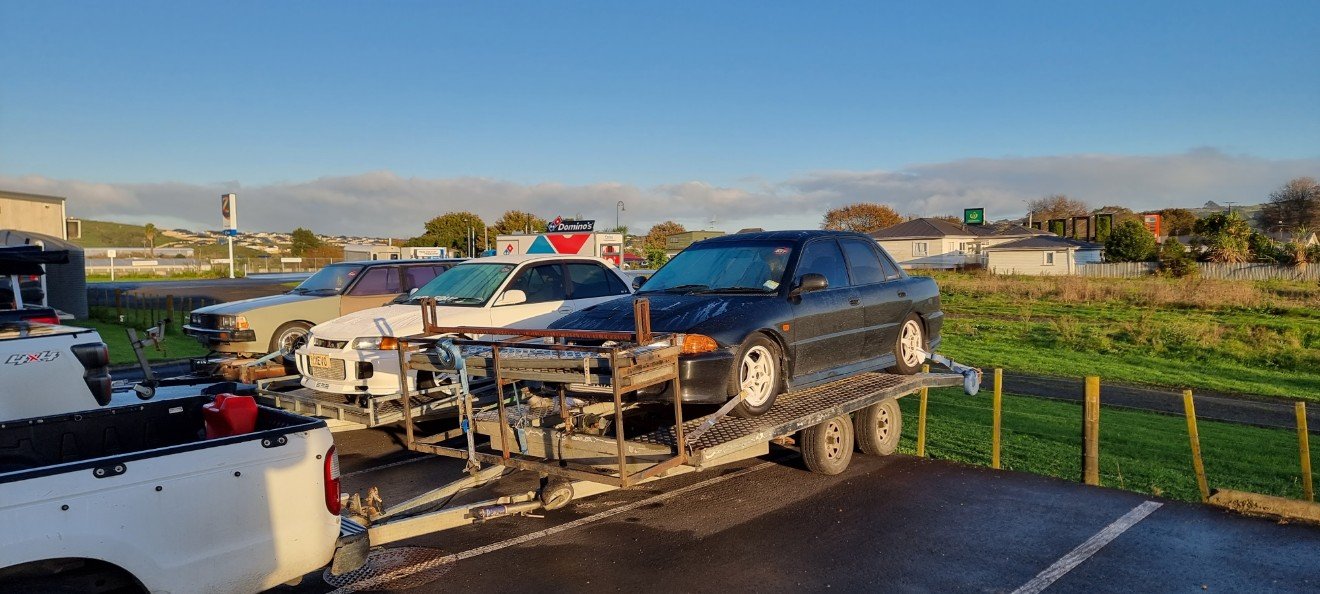
Took this heap along to mitsi owners day 2025, didn't win anything for ruffest car there but had a good day Left dubcity early early as for the trip, meeting the kaitaia boys and convoys our way down to Hamptons Then we met Damien at Bombay and onwards to the track The day went well, I welded the diff for the wet skid pan and bugger me that pad is bad for sledging, was hard with a handbrake that left the chat. Few hairy moments Even drove it off the trailer again. Unreal
21 points
-
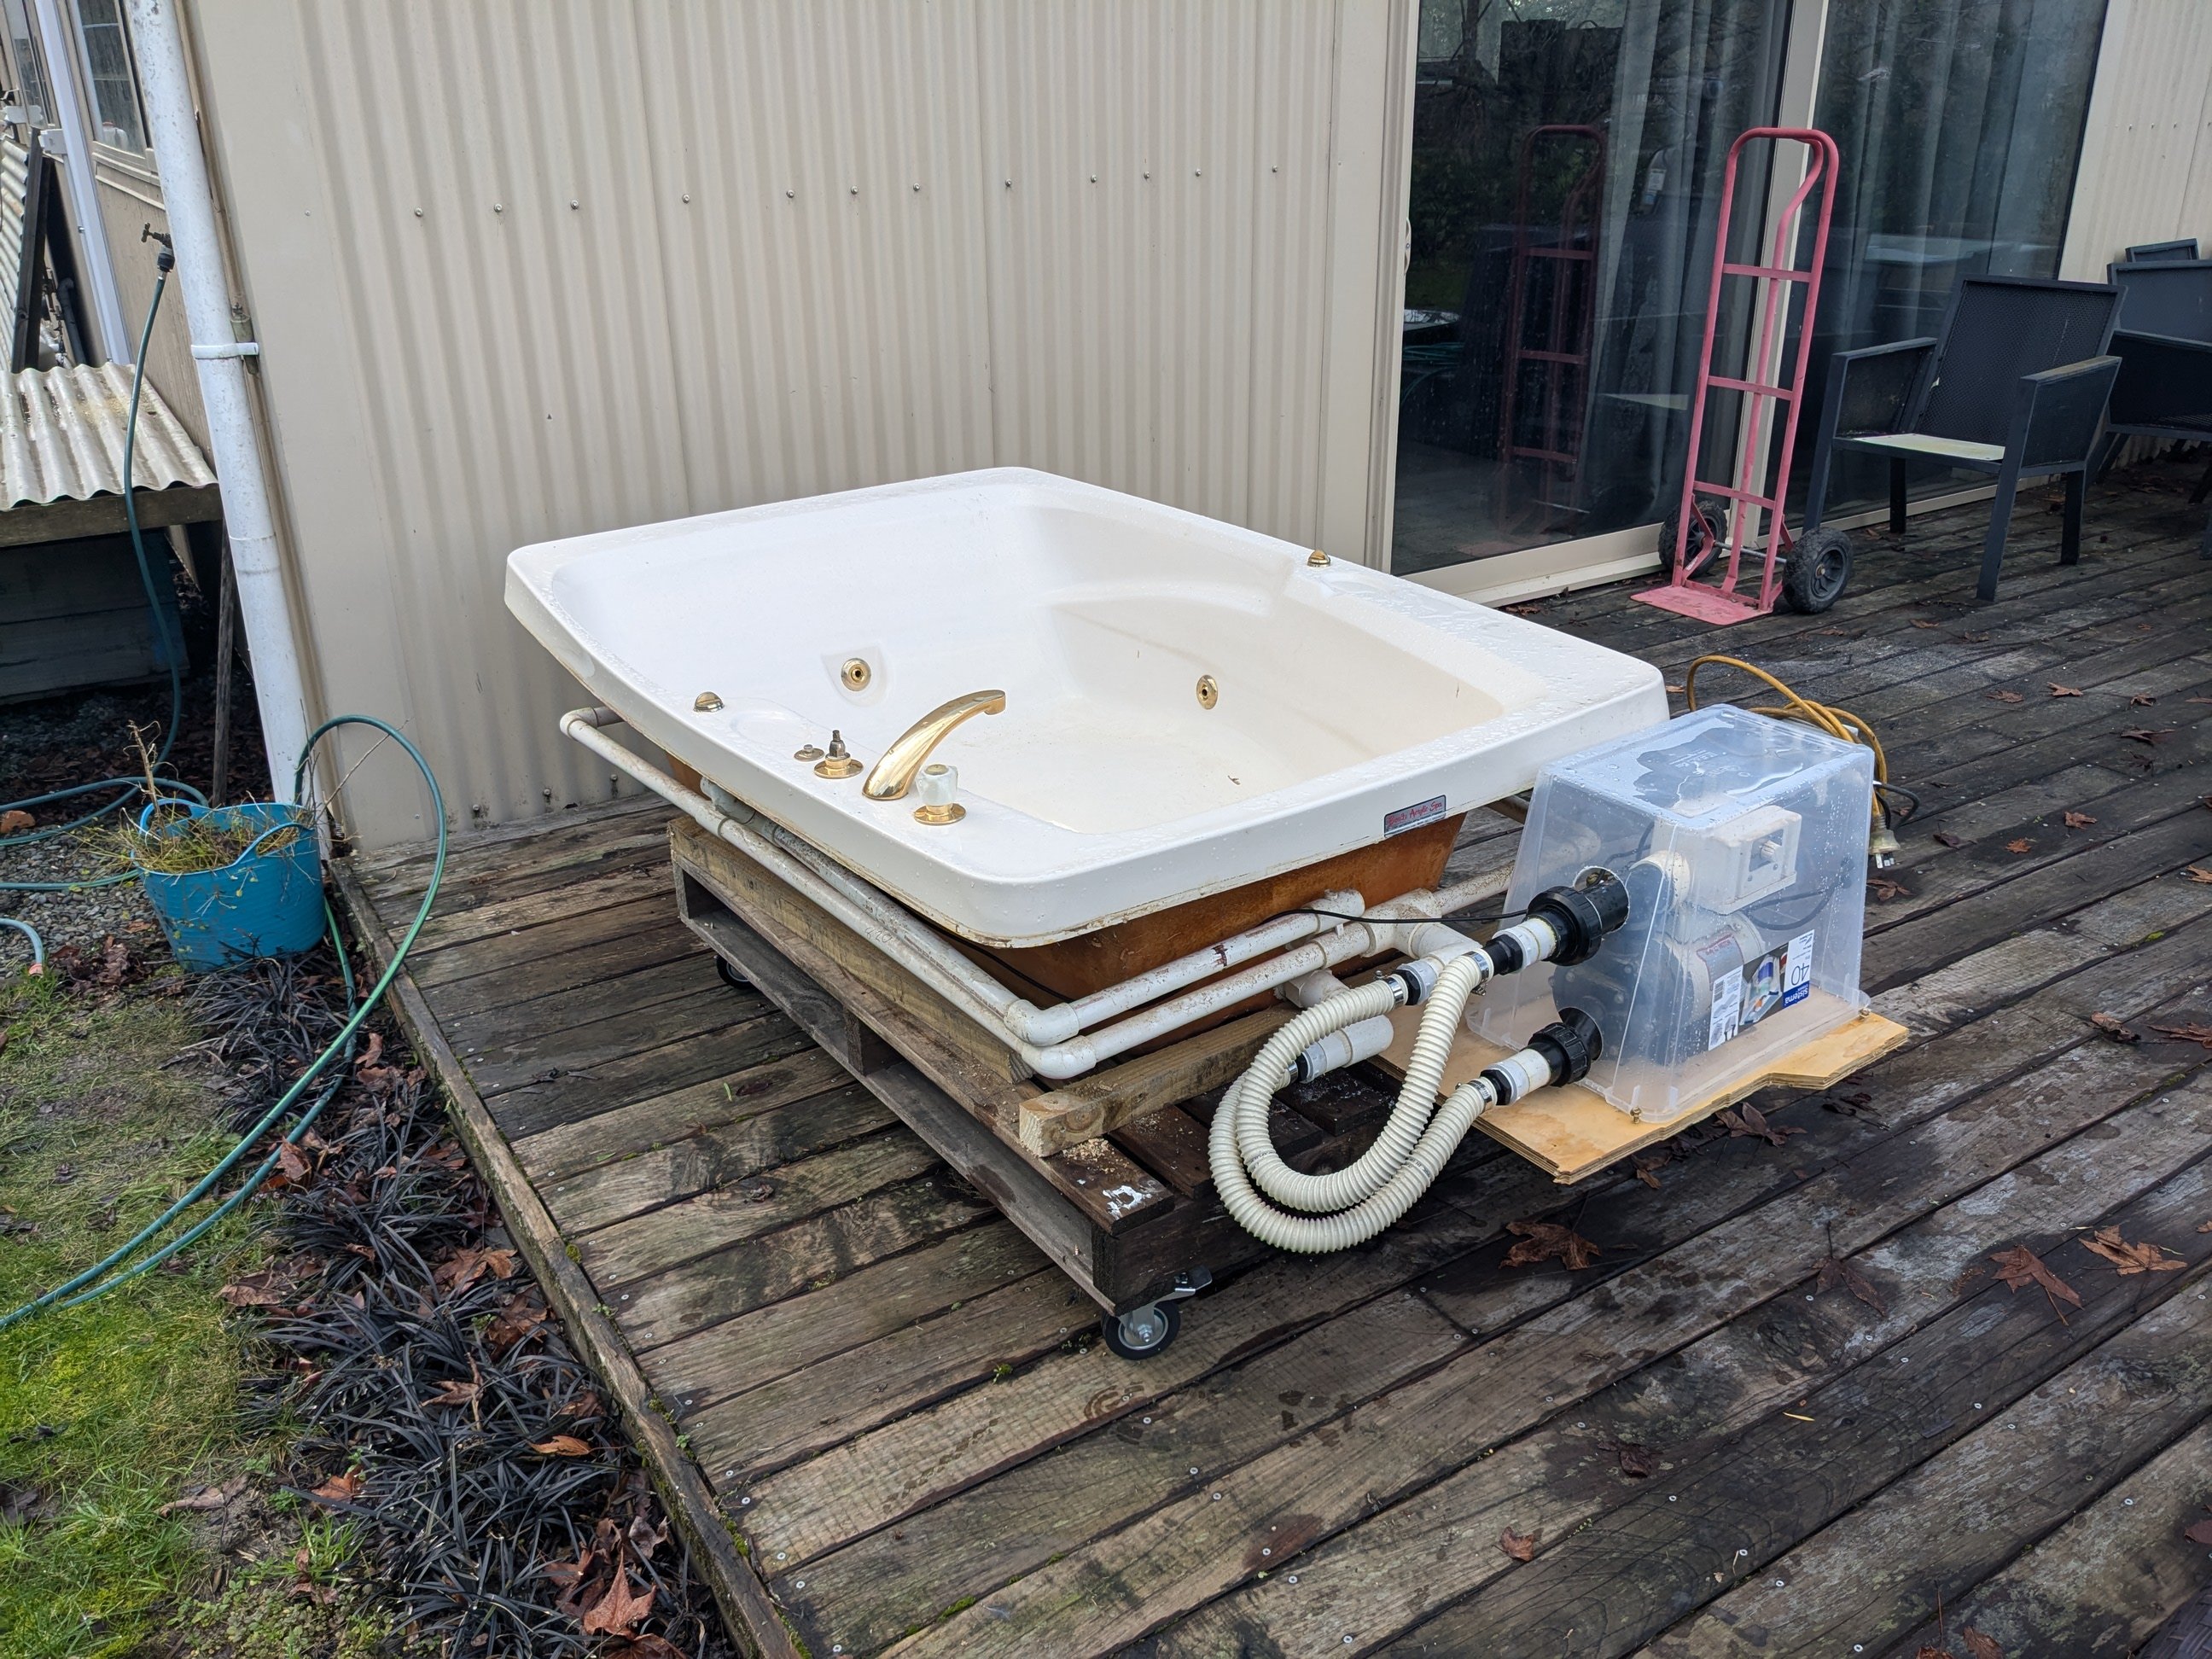
Was going to put this in the random cool stuff you built thread but in reality it is a fucking rough as bodge and probably not cool at all. However I often make things like this for a laugh and probably so do you, so now there is a thread for that stuff. Extra points for repurposing worthless shit. Like this redneck spa I smashed together over the weekend; Unfortunately the gas ran out for the califont in the shed so couldn't try it out, maybe tonight. I might put that pump on its own trolley so it can live out of the rain...
19 points
-
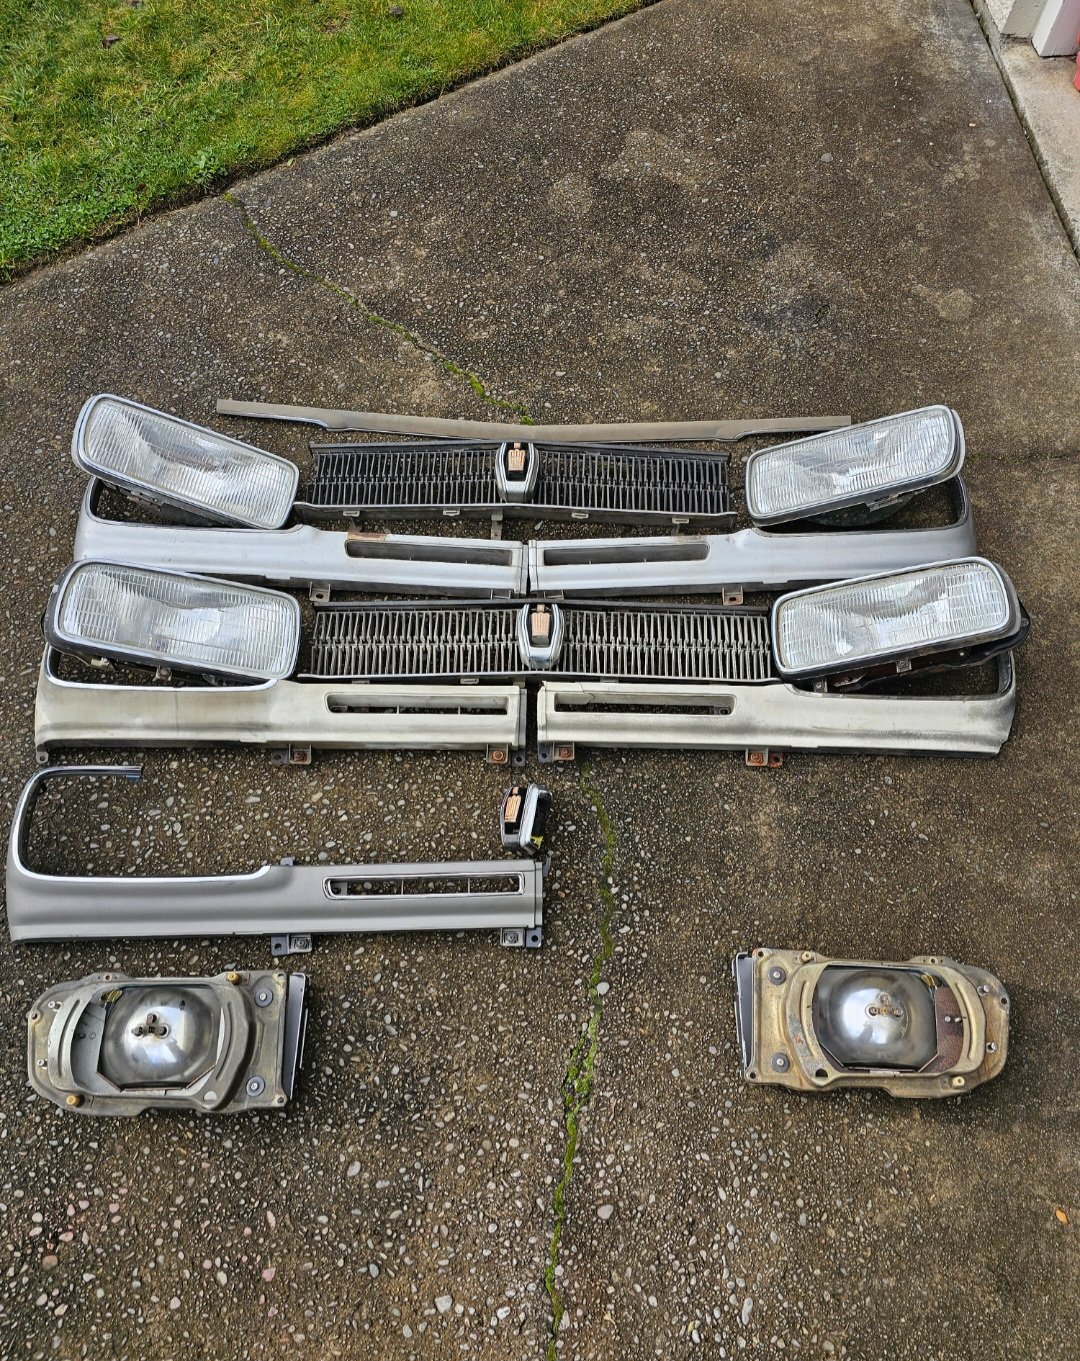
Starting to assemble the front
16 points
-
A while ago I updated the plastics on the 350, and had some graphics designed and applied by @Chunky_t via some ideas and inspiration from early 1980s KTM enduro bikes. I also fitted some flush mount sort of LED rear blinkers, as the original ones were prone to being ruined via crashes and were so cooked you could barely see them when on. I just need to sort out a reflector and bodge a number plate light so I can get this WOF'd and go get my full license. This is the result. 2019 KTM 350 EXC-F-43 by Richard Opie, on Flickr 2019 KTM 350 EXC-F-50 by Richard Opie, on Flickr 2019 KTM 350 EXC-F-57 by Richard Opie, on Flickr 2019 KTM 350 EXC-F-74 by Richard Opie, on Flickr 2019 KTM 350 EXC-F-114 by Richard Opie, on Flickr 2019 KTM 350 EXC-F-144 by Richard Opie, on Flickr The #775 is tribute to my very much missed late uncle Tony, who passed away 11 years ago from MND. This was his race number on bikes. 2019 KTM 350 EXC-F-63 by Richard Opie, on Flickr16 points
-
Quality thread dredge @kermet, thanks for fixing the pics
13 points
-
i appreciate your input guys, it all helps to try and figure out what's going on. i wasn't a good weekend in GTR land. i spent the weekend installing speakers and wiring the radio because i wanted to do something that would just work. so i did that. i was going to take the fuel pump out of the other GTR to check that off the list of "things that i have tried". when i started pulling the boot carpet out of the other car, the car my engine and ecu came out of (that was running fine with no issues at all) i discovered that the other car has had the fuel pump controller bypassed so it was never controlling fuel in the first place. the thing that really pissed me off is that ive been pretty clear on trying to get the fuel pump controller to work with the guy i bought the car off, and the guy who's car my engine was in. almost two weeks of fucking around to get it to work and they never said a thing about the tune im trying to fix not needing the fuel pump controller at all. it was at that point that i had a complete sense of humour failure and went in the house. from what i can tell by the weird way it runs the ecu is missing a piece of information (like boost for example) that it needs to correctly control fuel. every (factory) input is connected to the ecu and is showing data at the hand controller. it does have a setting for boost but there is no boost input into the ecu. the power fc has a separate plug in the side which is specifically for boost control and there was no plug in this port in the other car so if its getting boost signal its through the factory loom somehow. my understanding is that the stock ecu has no boost input and uses the maf sensors to figure all that out and that the map sensor is only used for the gauge. it probably was getting this signal in the other car somehow but asking the guys is a complete waste of time, they either dont know or have forgotten what has been done. these guys dont do any work them selves if its wiring so they have little idea of how things work. that's where im at currently. a mate of Nick the sparky's is a tuner and may have worked on this ecu in the past so im going to reach out to him today and see if he can shed some light/come and fix the fucking thing.12 points
-
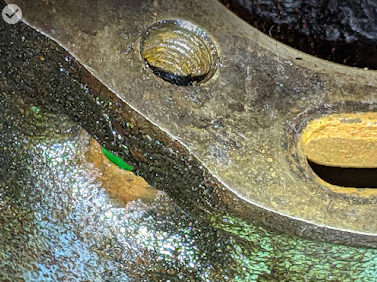
So as you do dragged out my spare block and realised my scored bores turned out to be schmuts that wipes off with CRC fan bloody tastic it's good to go let's whip the sump off check the bearings, even better they're mint no end float so I'm going to order some bits and get this ready to throw in. Even better it's a L67 so is boost friendly already. A list of abuse this old engine has tolerated Multiple 220kph runs down a airfield runway most mornings for 12 months 20,000k services while I was doing massive ks a week during Covid working in Auckland from Waikato. I ran it on waste kerosene for about 6 months Ignored 4mm of end float for 5years so much so it would lose crank sync occasionally and I'd have to push crank back with my foot for it to start. Fitted a turbo at 500000ks ran at 10psi for 6 months with basically stock timing (I pulled a little out but always ran 100octane) 40+ passes down the drag strip. And finally the 16psi of boost that killed it. I'm absolutely OK with how much this thing has tolerated what a trooper! Now I've had a taste of what it's capable of I'll get this new engine together and maybe fork out for some dyno time. 12's at drag day this year is the new goal.
12 points
-
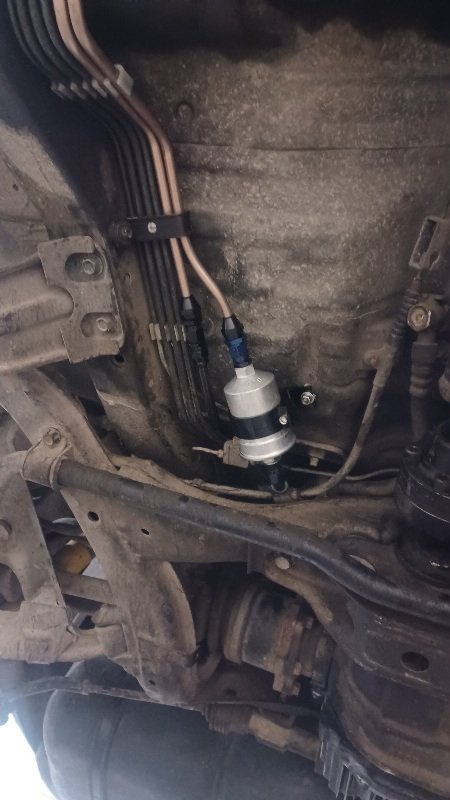
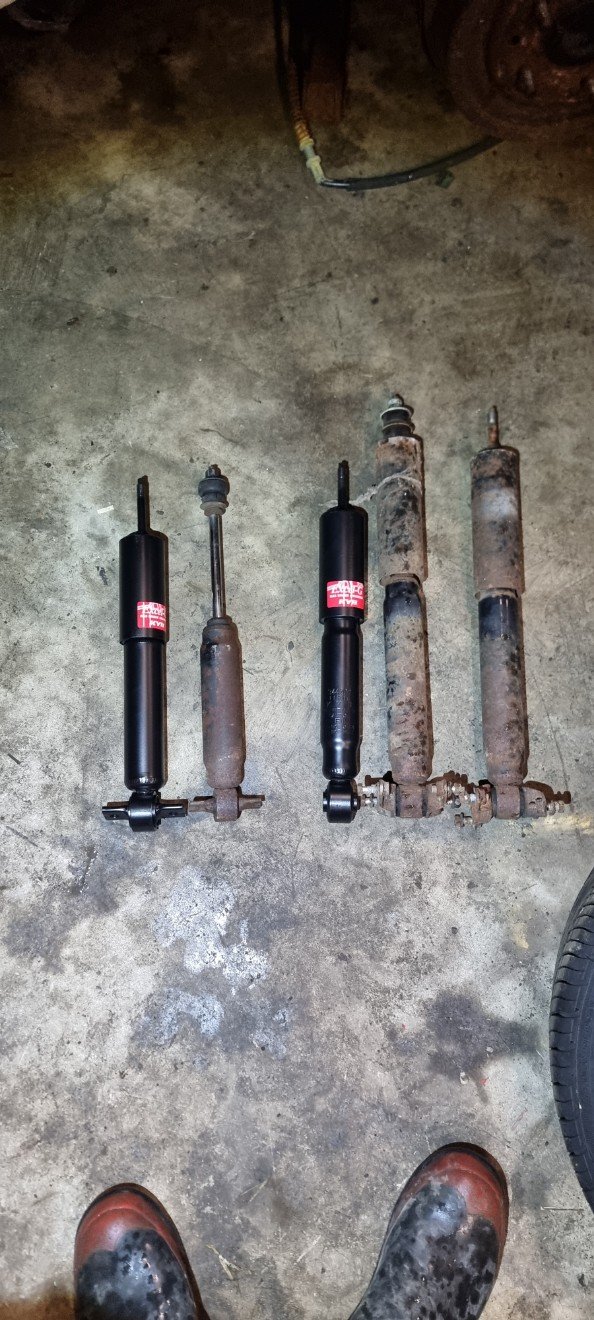
Some work, not many pics. New brake hoses all round. Got some new front brake rotors. Mounted fuel filter under the car. I kind of made my life hard here. I should have dropped the rear suspension when I made the fuel hard lines and ran them right back close to the tank and used some short hoses. But I didn't. I stuck the filter here to make some room in the engine bay Then I cut the power steering hose off that doesn't fit my pump and fitted a hydraulic compression fitting to the tube. Got some hose and fitted some ends. Well, 1 end anyway.... Fuck. So now I'll wait for the mailman to rectify that...
12 points
-
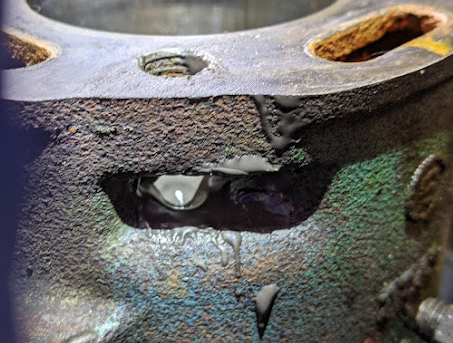
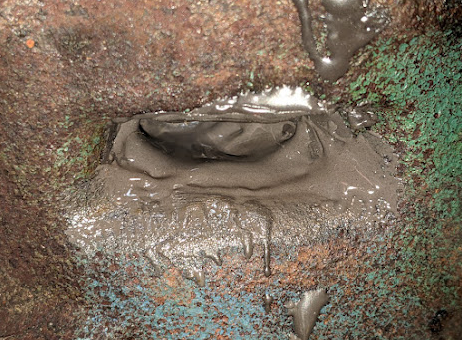
.. and sometimes bodge'em cars: JB-Weld the water jacket on a car motor? Job done (dusts hands). <still holding fluids in, years later>
11 points
-
When you forget over 10 years what parts you already have and just keep buying more.
11 points
-
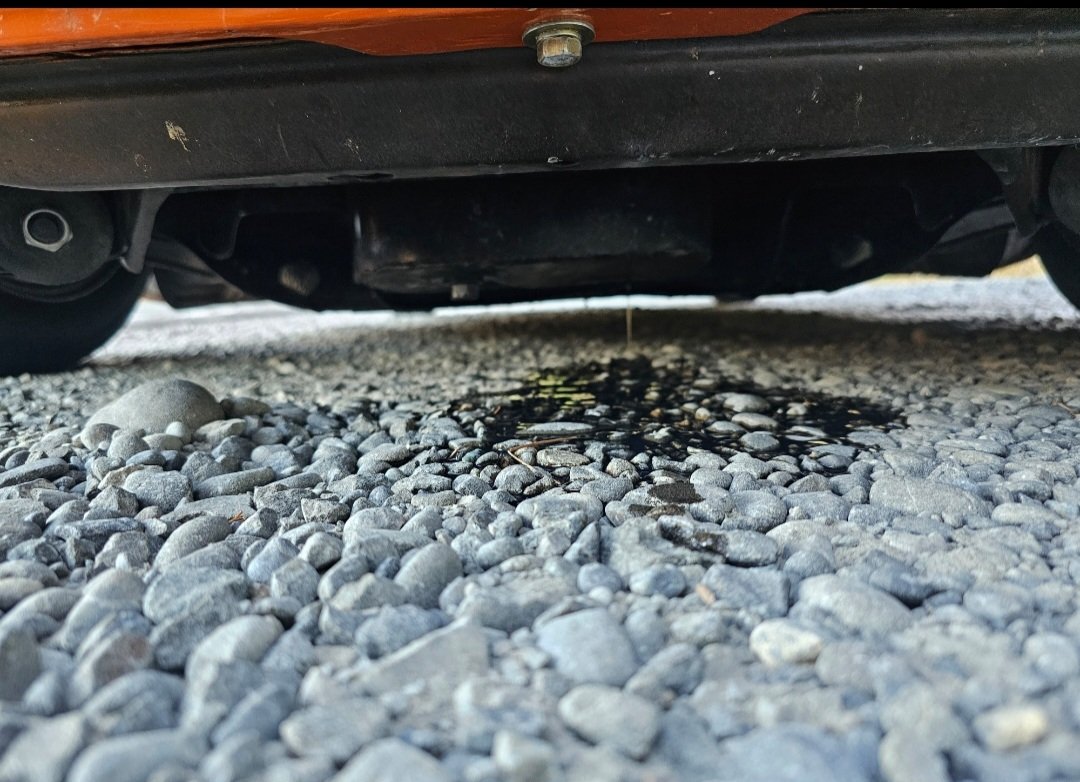
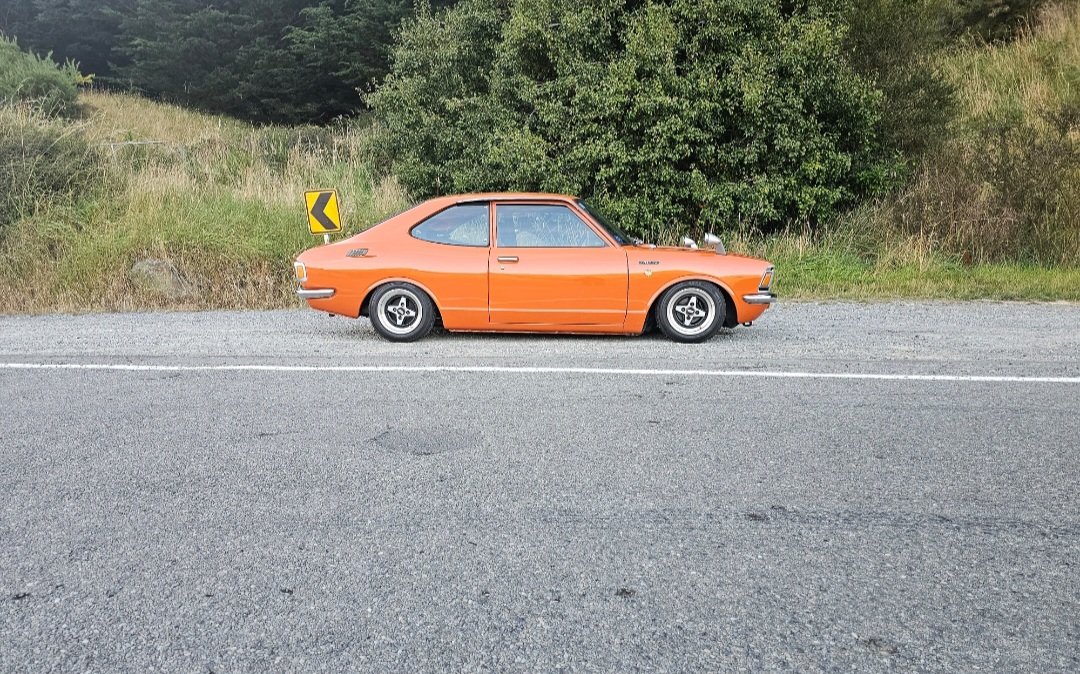
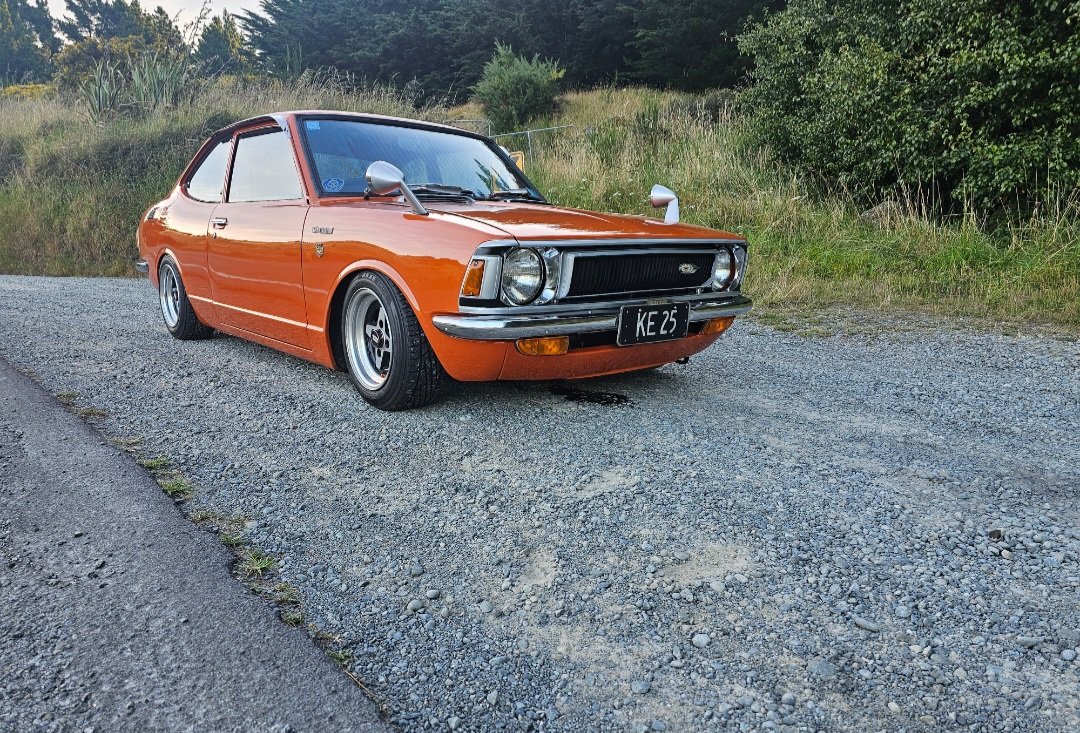
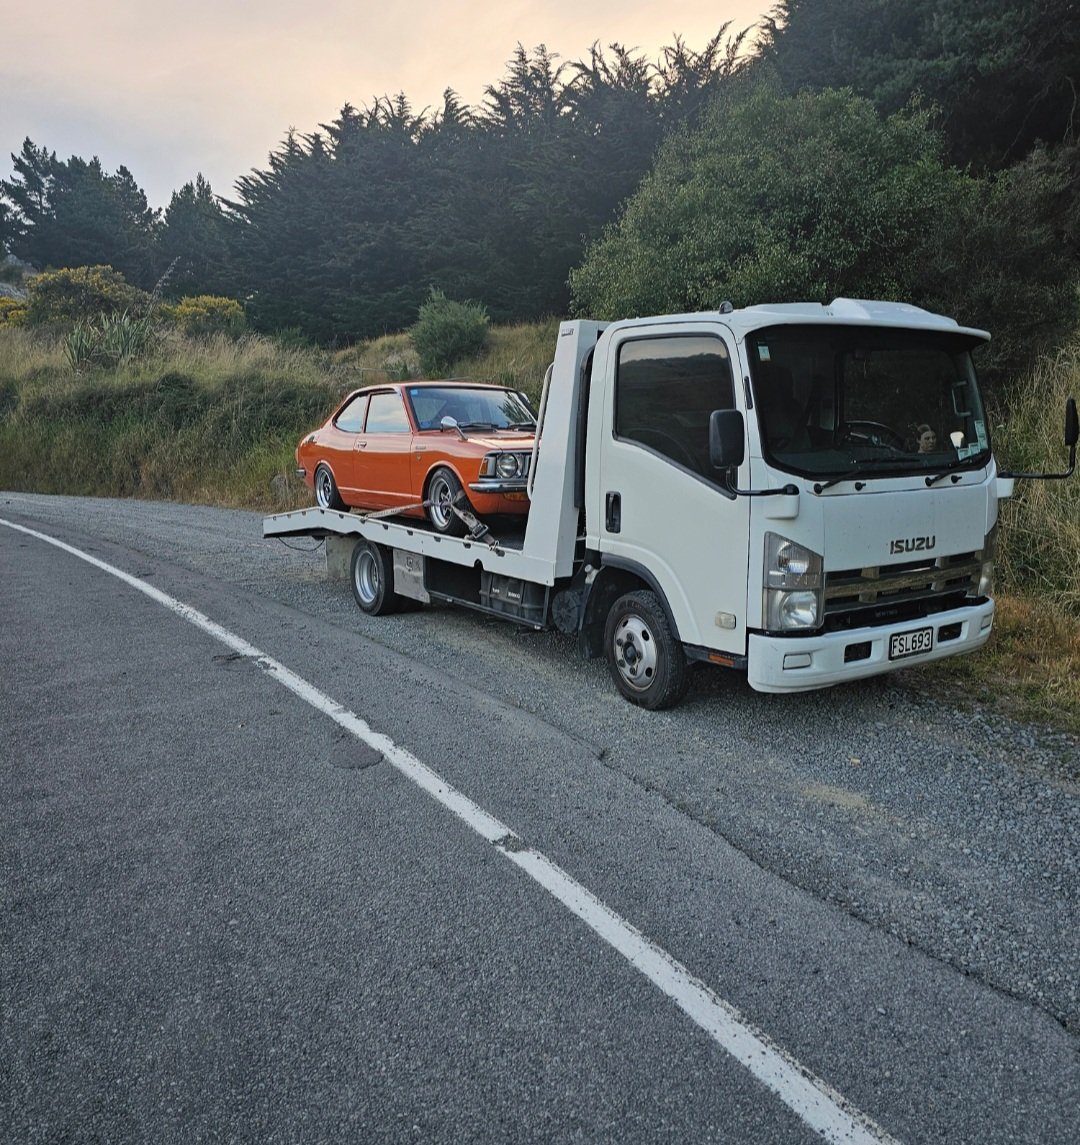
On one of its 1st test drives i put a hole in the sump on a pothole over a rise. Also have te27 sprinter trueno taillights and badges now
11 points
-
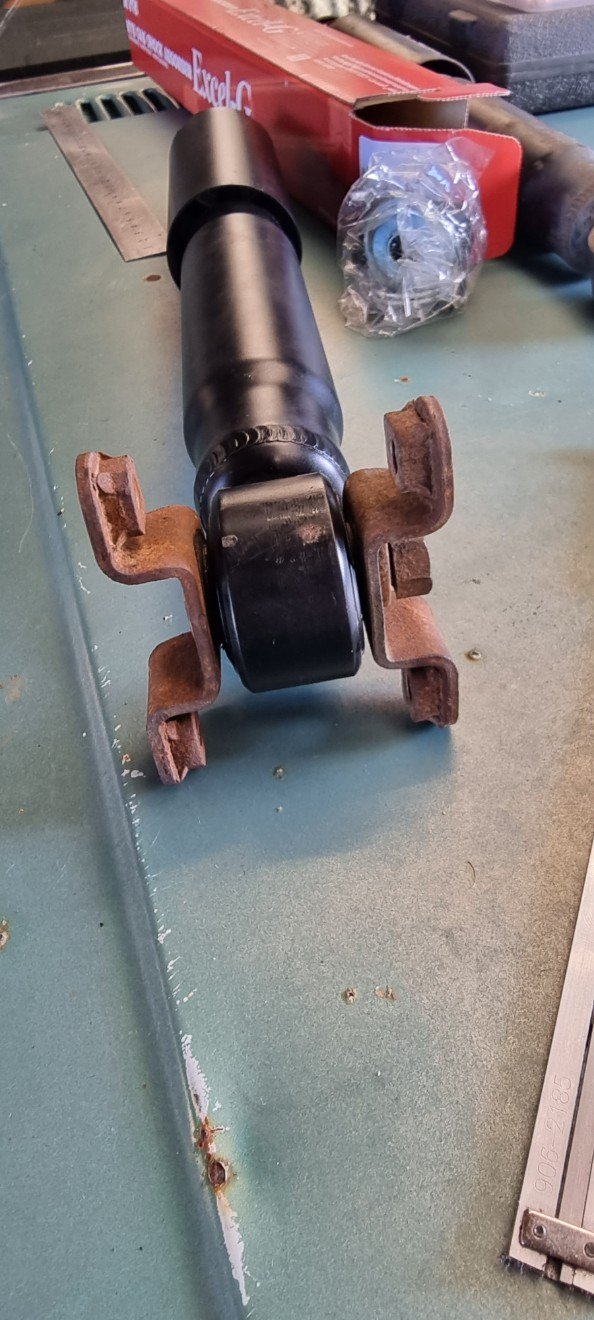
Been slowly tinkering on this, ended up putting the front hubs off the silver crown onto this as haven't found a hilux disk conversion yet. Also swapped front springs over while there, went to swap rear springs but they're a little too blatantly cut. Took measurements so I can search wreckers for something more suitable with makita treatment Found a hilux surf front shock was ideal for rear end and roughly 2 inches shorter, thanks to dion for the old shock to test. For the front a L200 4wd front shock was slightly shorter so went with that. New front bumpstops too Better then the cut ones it had Made an attempt on cooling system, two new hoses and found the heater thingy leaks. Looped the heater hoses for now. Homemade thermostat gasket too and it seems to hold water fine. Will give it a better run on a weekend. yeah nah nah
11 points
-
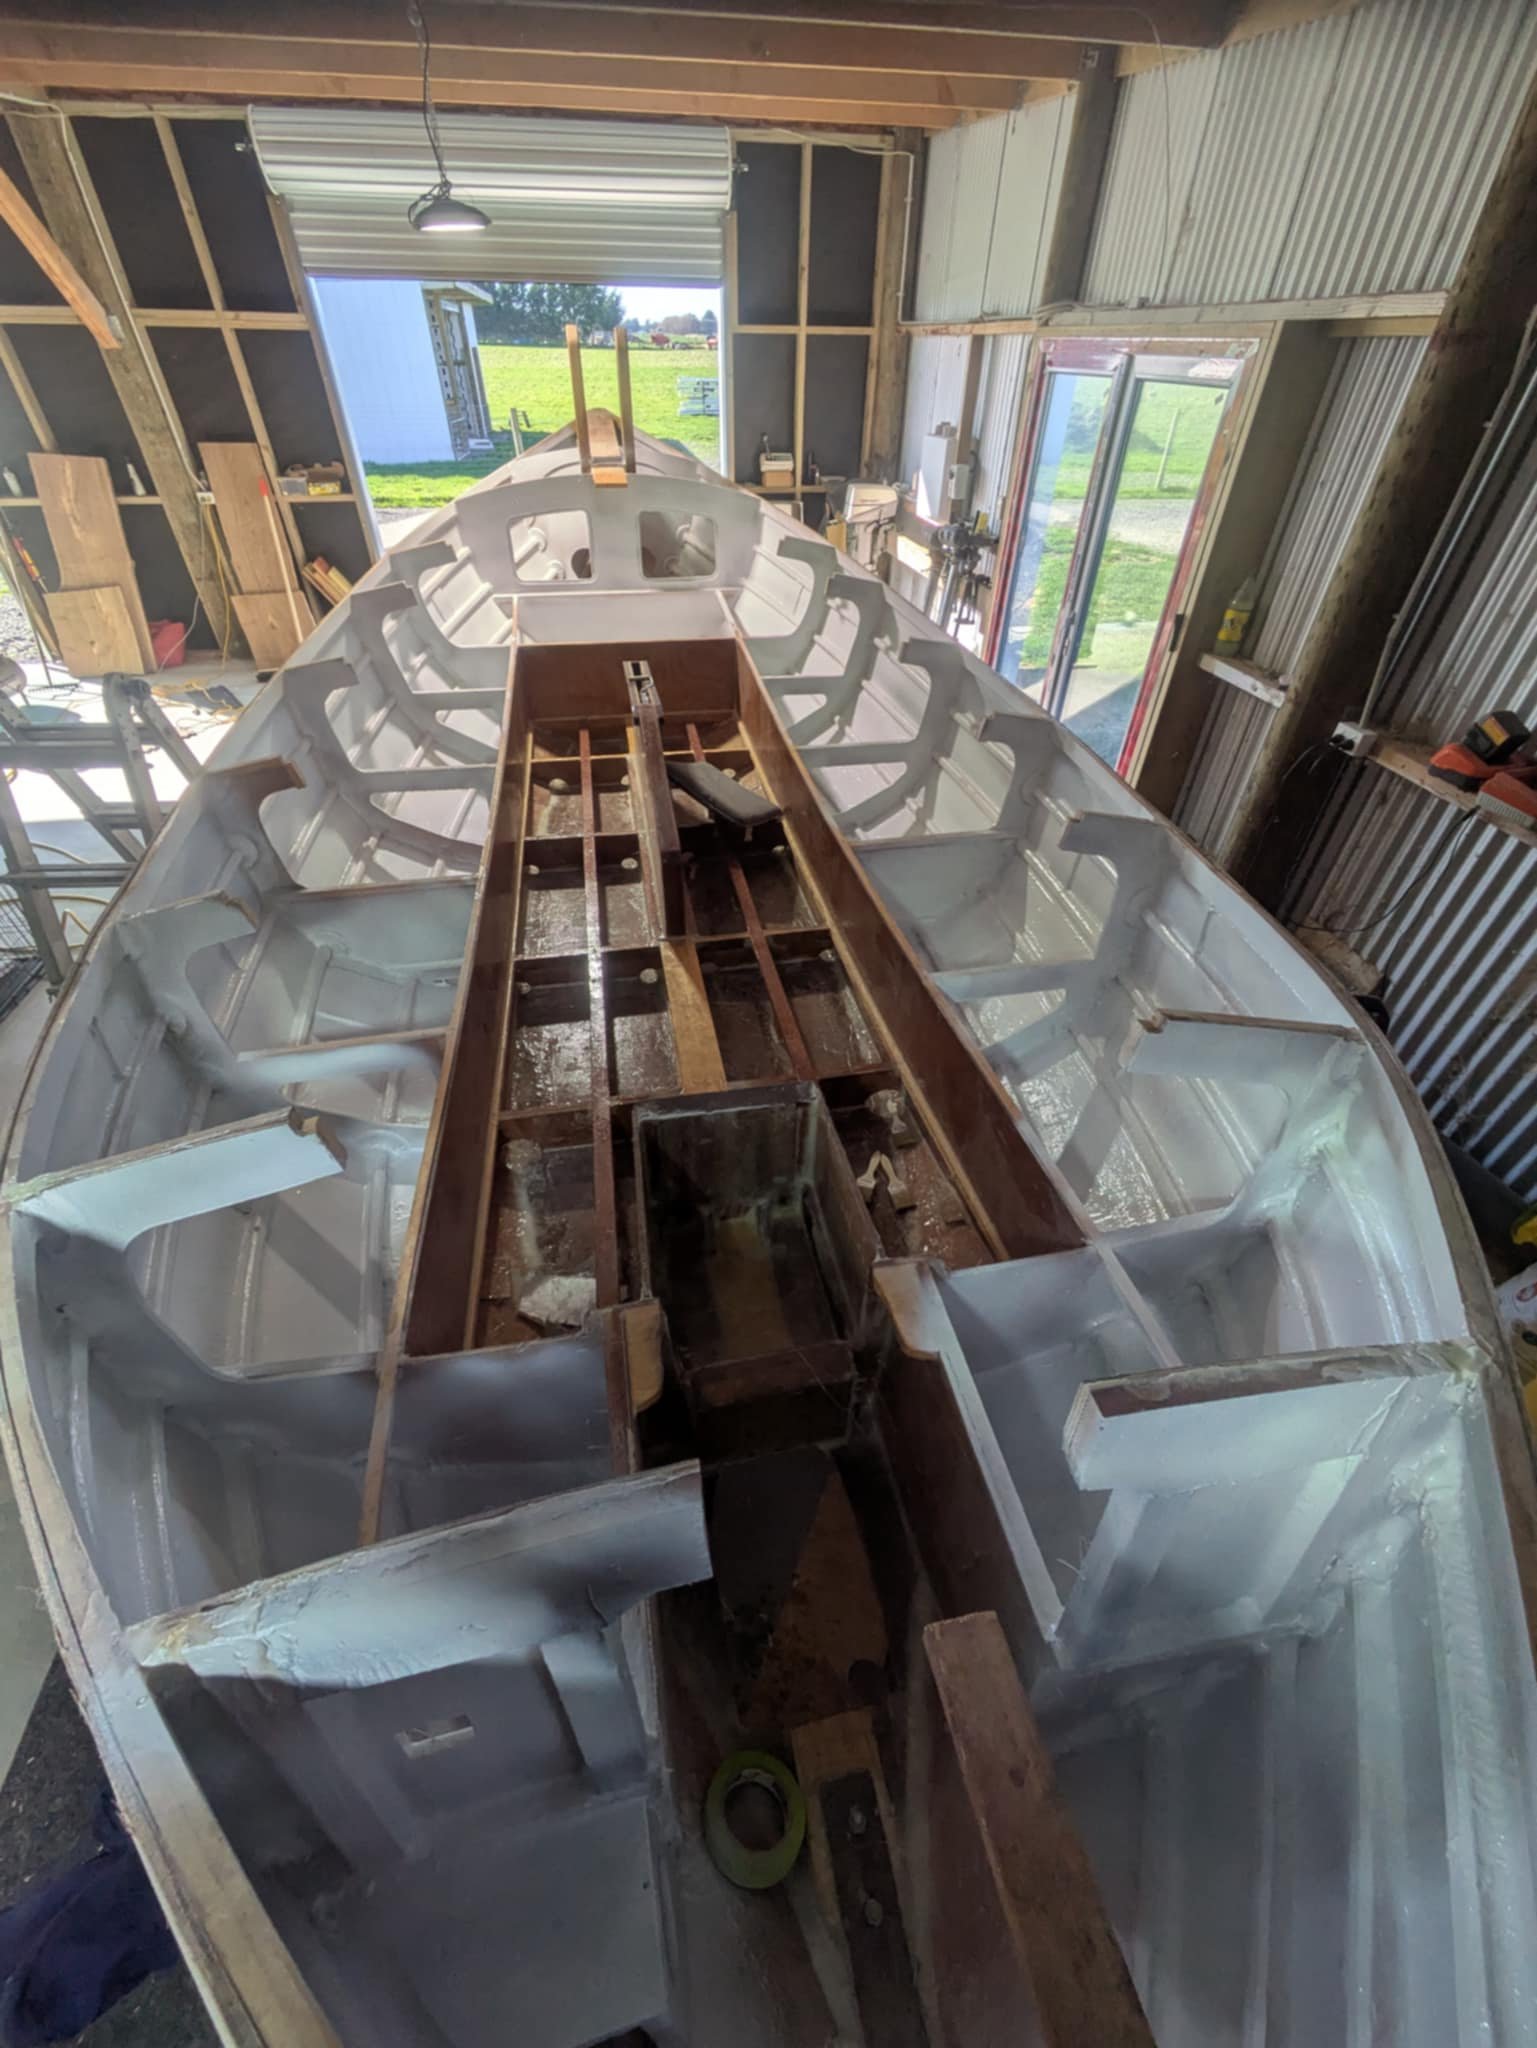
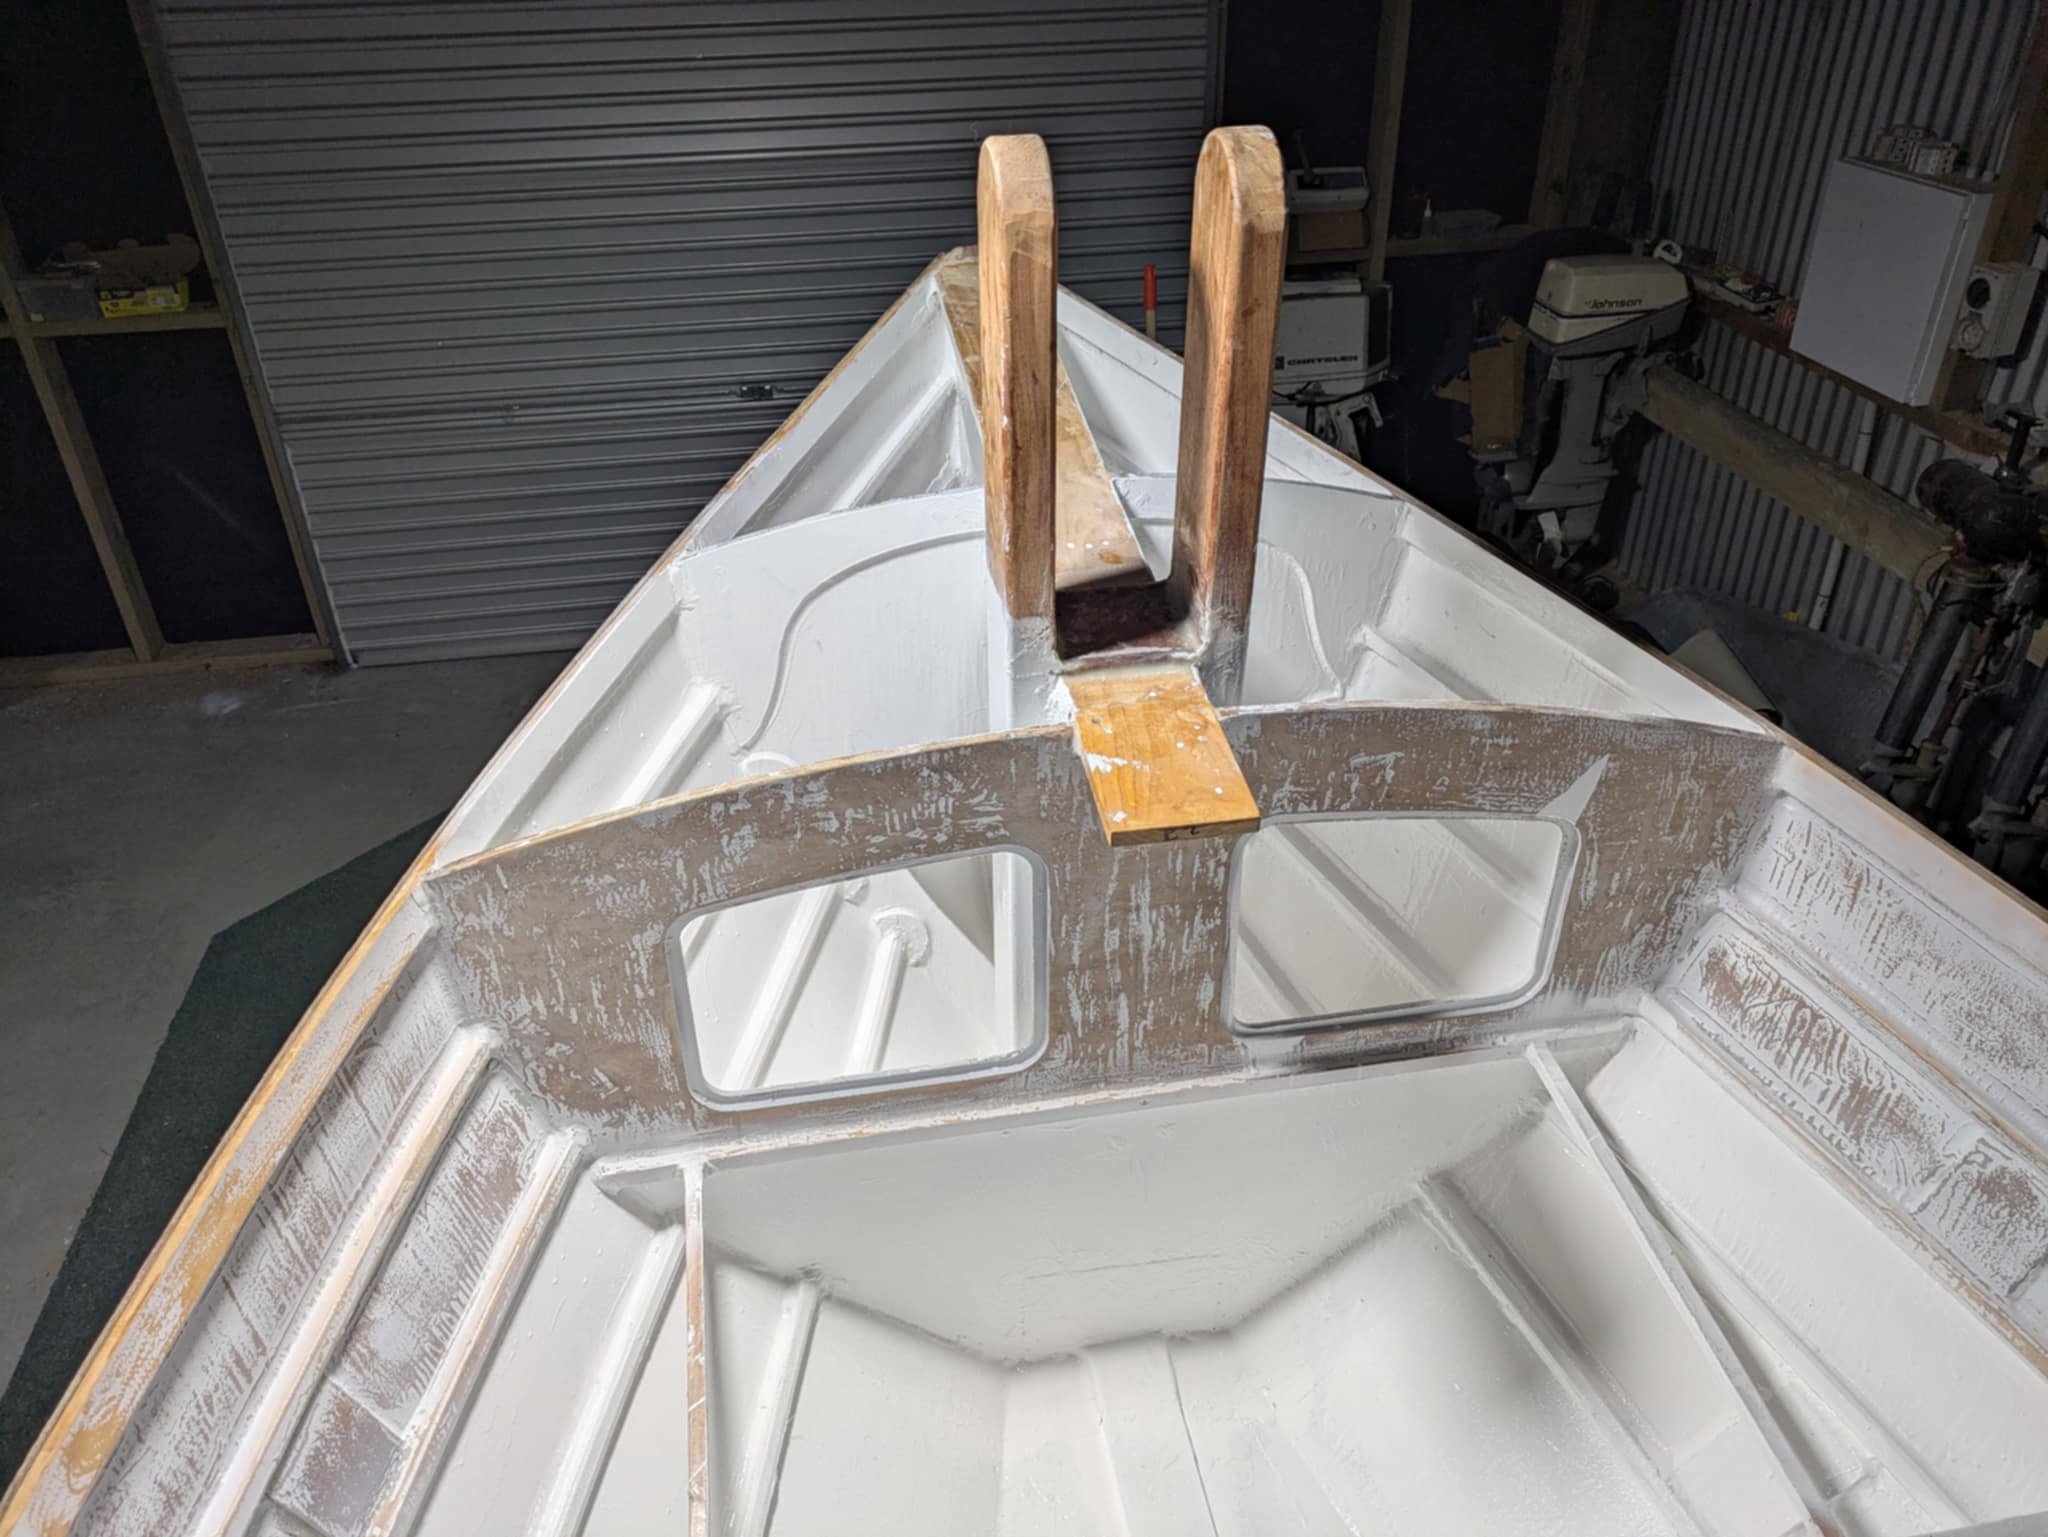
Slapped the first coat of primer on the lockers and had half a pot left over so rather than chuck it out I kept going. So many drips and runs from epoxy coating last weekend looks like this weekend will be spent entirely sanding. Standing back and having a look I think I have to agree for once with @cubastreet that it looks so much nicer open than with a cabin. Maybe I need to revisit to slide over/fold up bimini/tent.
10 points
-
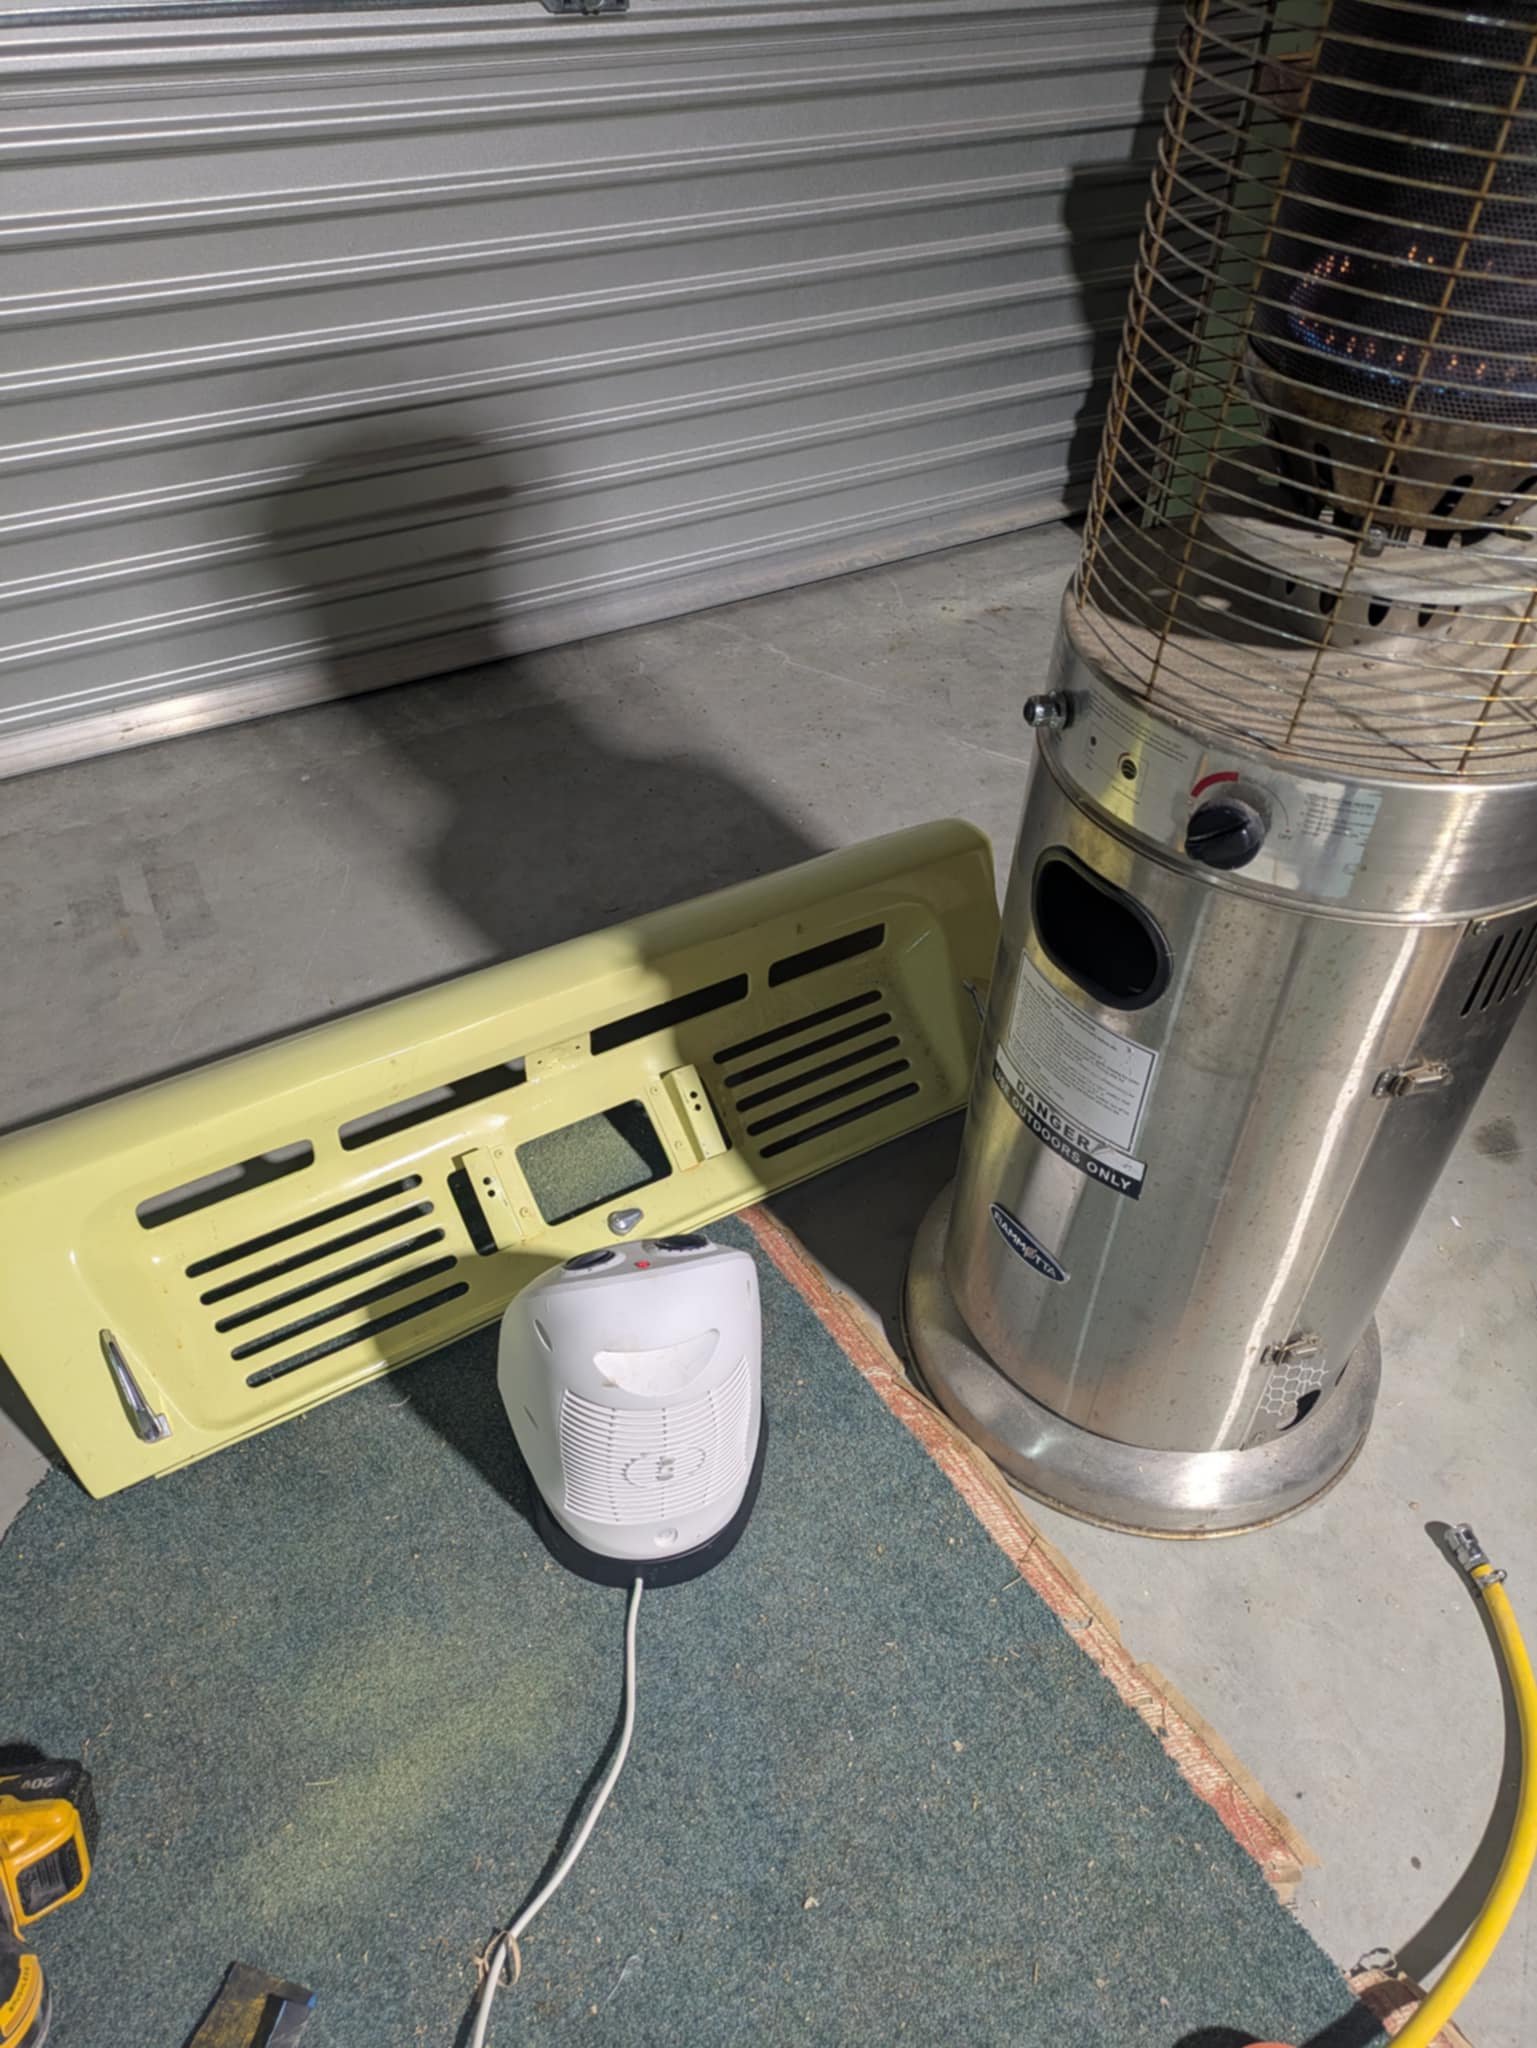
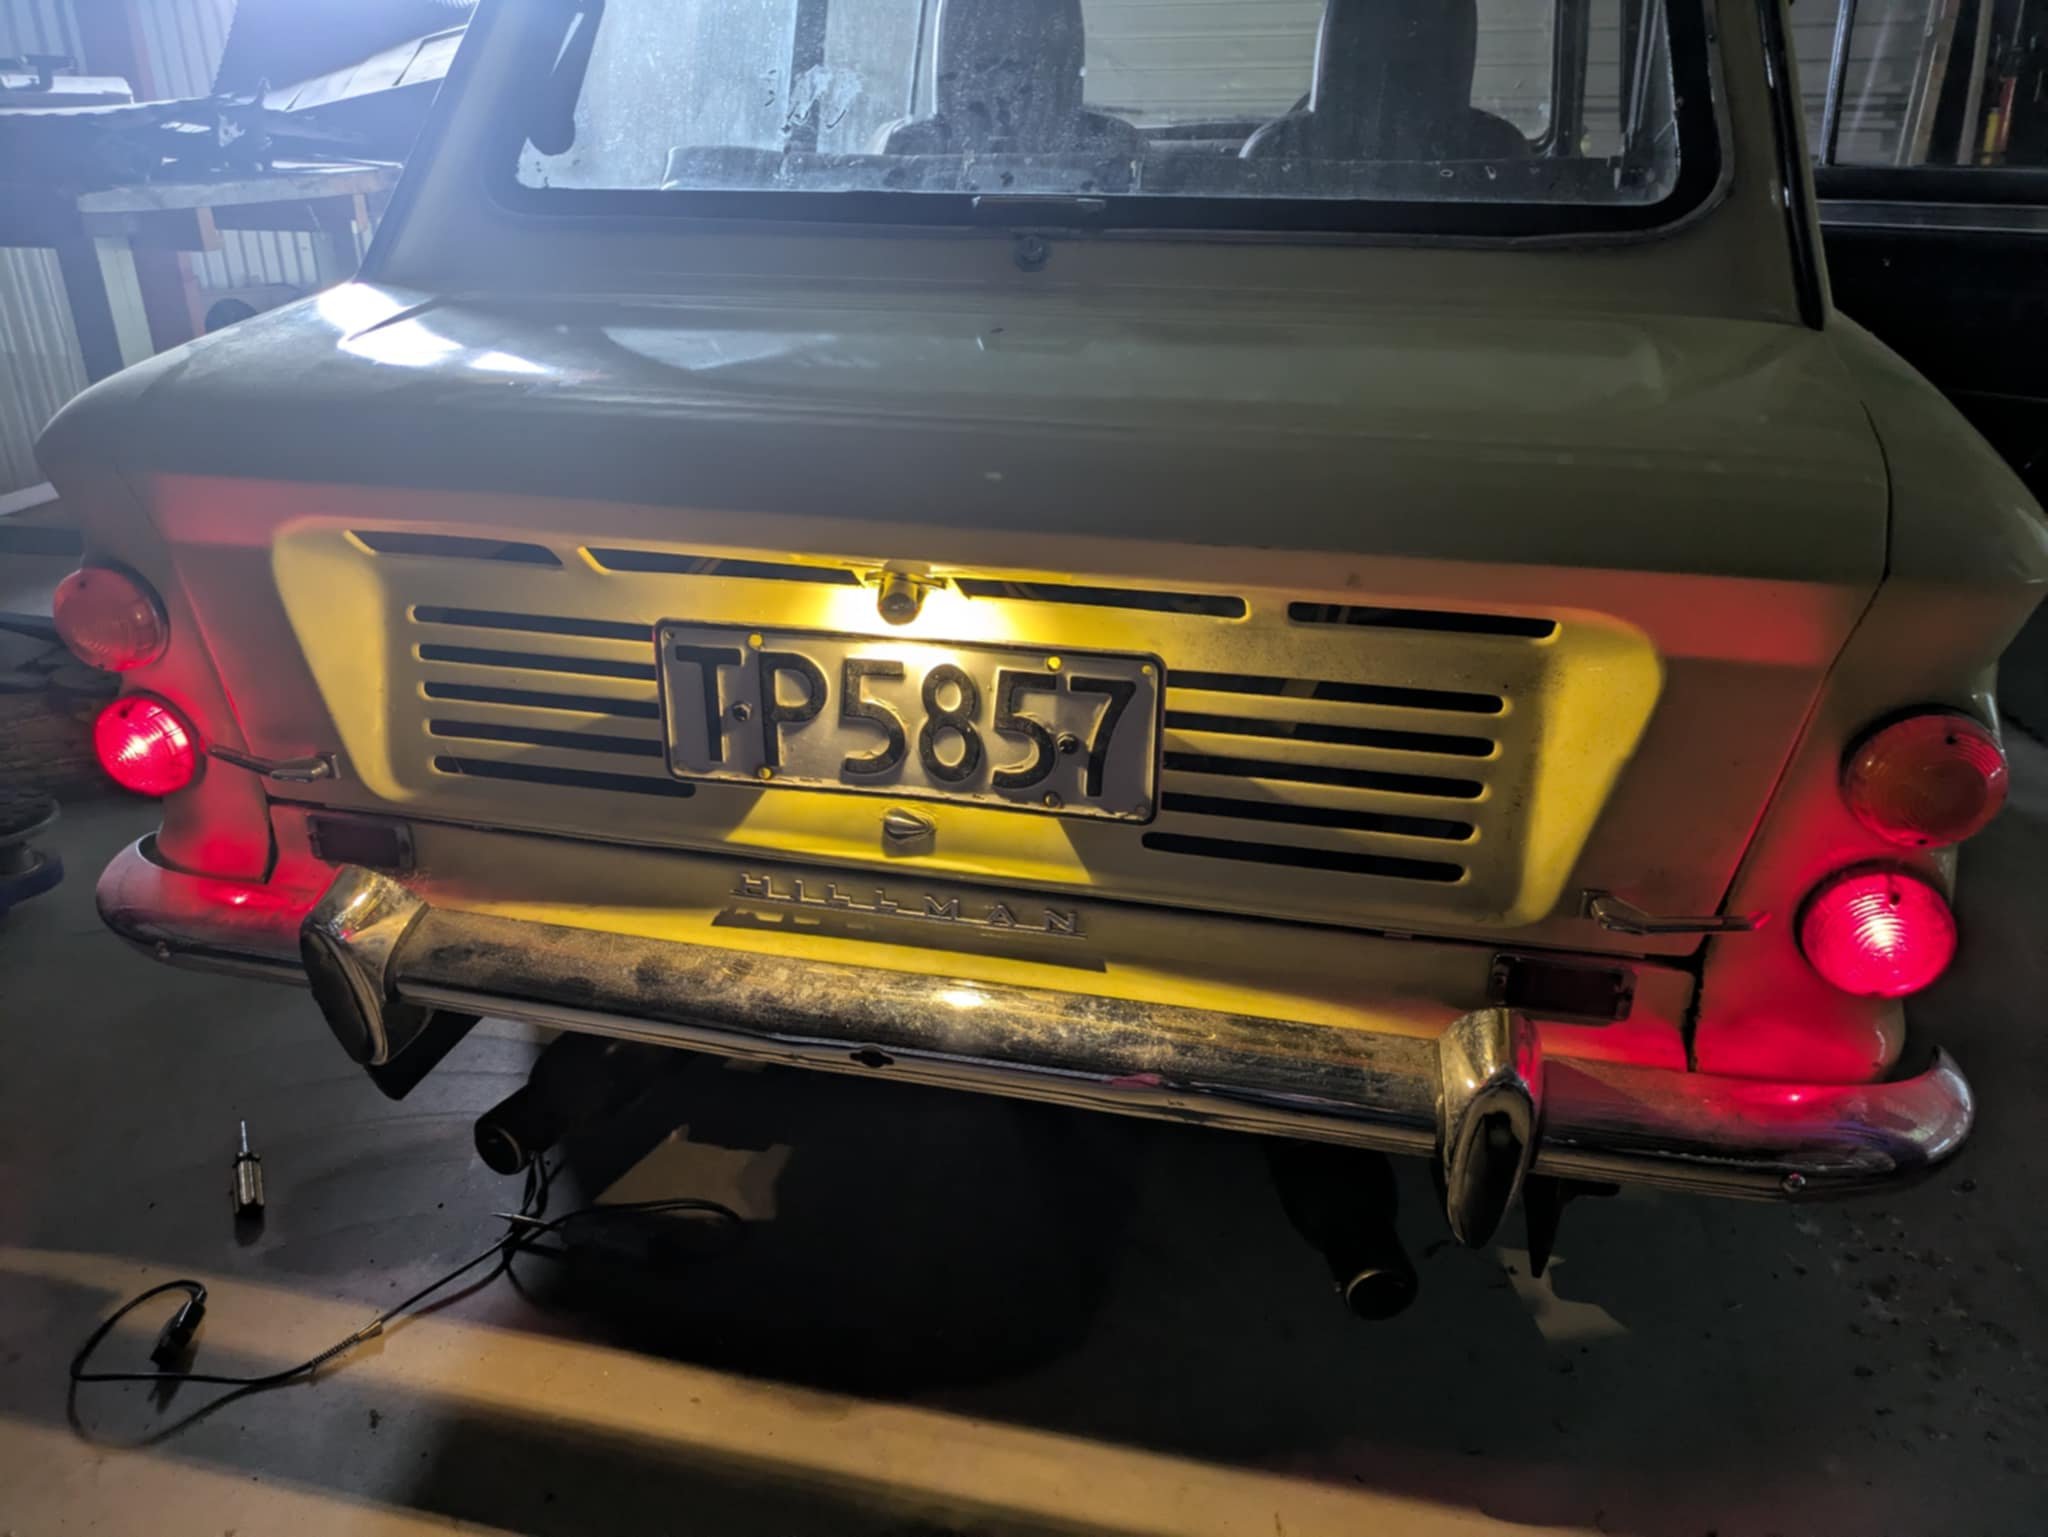
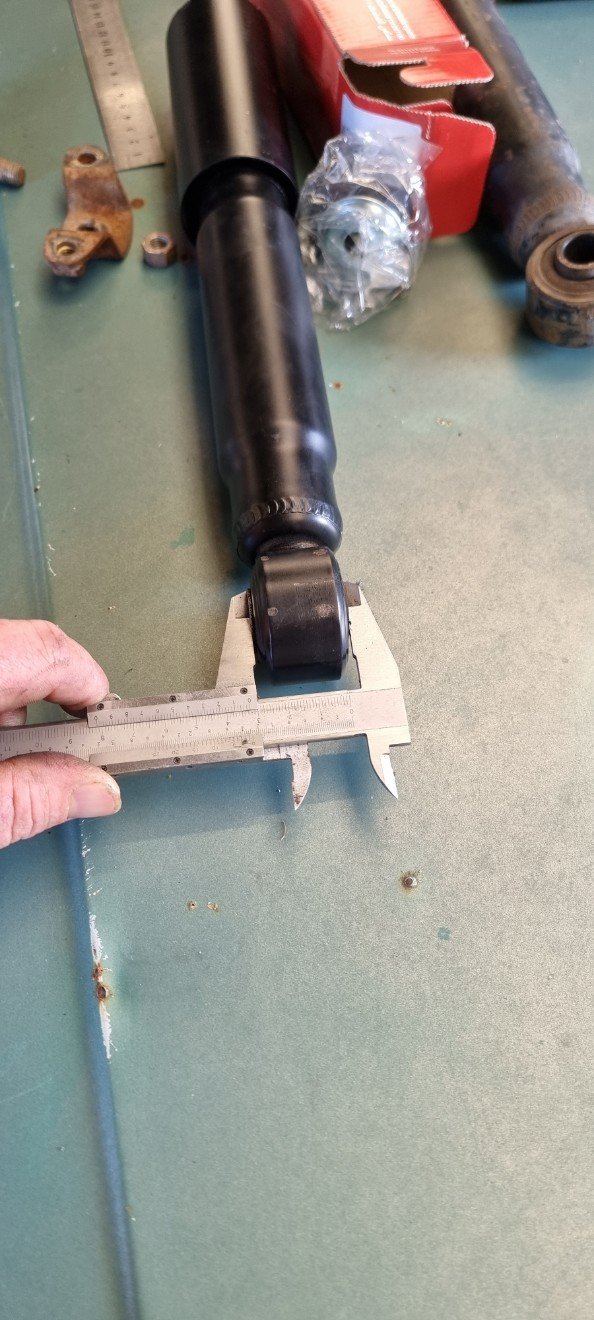
I was giving the car a bit of a once over and realised the GT lid didnt have a number plate light. That would have been embarrassing. So I found a spare one I had and welded on a small plate to attach it to. I have no idea what it had stock and couldn't see what else it had to attach to so it is what it is. The biggest problem I had/have is fighting the cold. The first coat of colour I slapped on just sagged. So I waited a day for it to harden to take off again and try again with backup. A little fan heater and an outdoor gas heater. It was touch dry in about a minute. All I had was an LED bulb so I may have to put some tape around it as it looks pretty bright. Next on the vagenda is to change the wide rims for the old pizza cutters. I still get a slight vibration at speed in and out of gear. I think possibly one of the wheels isn't balanced correctly which is an issue I have had with the local tire man a couple of times.
10 points
-
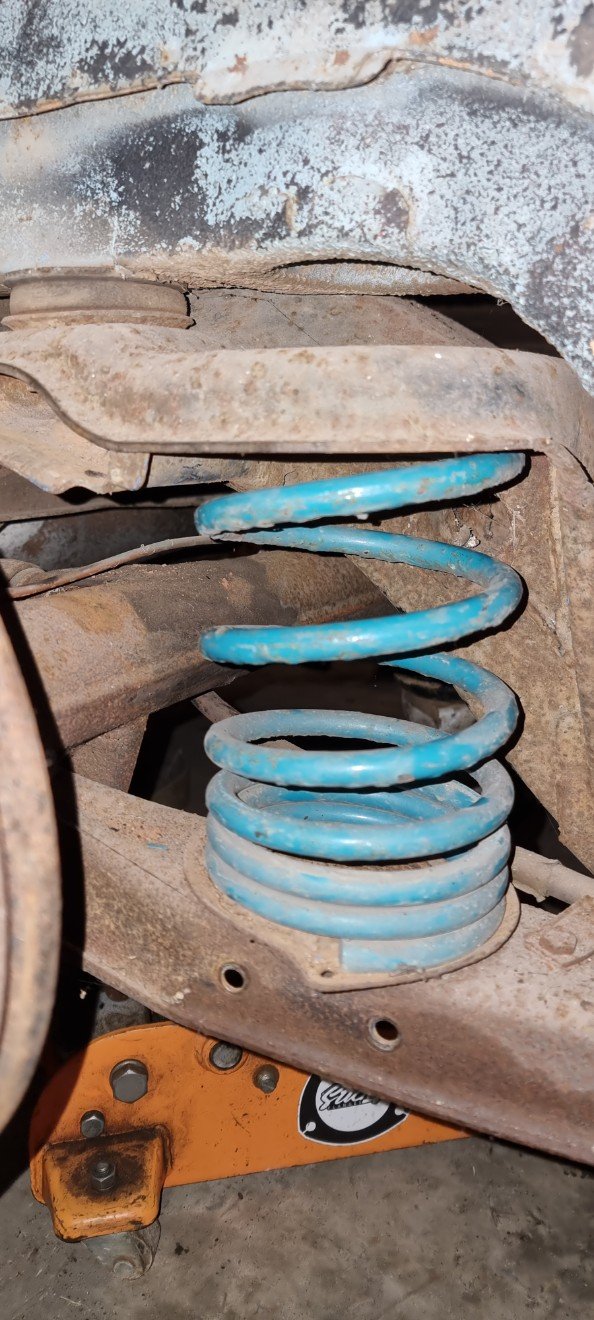
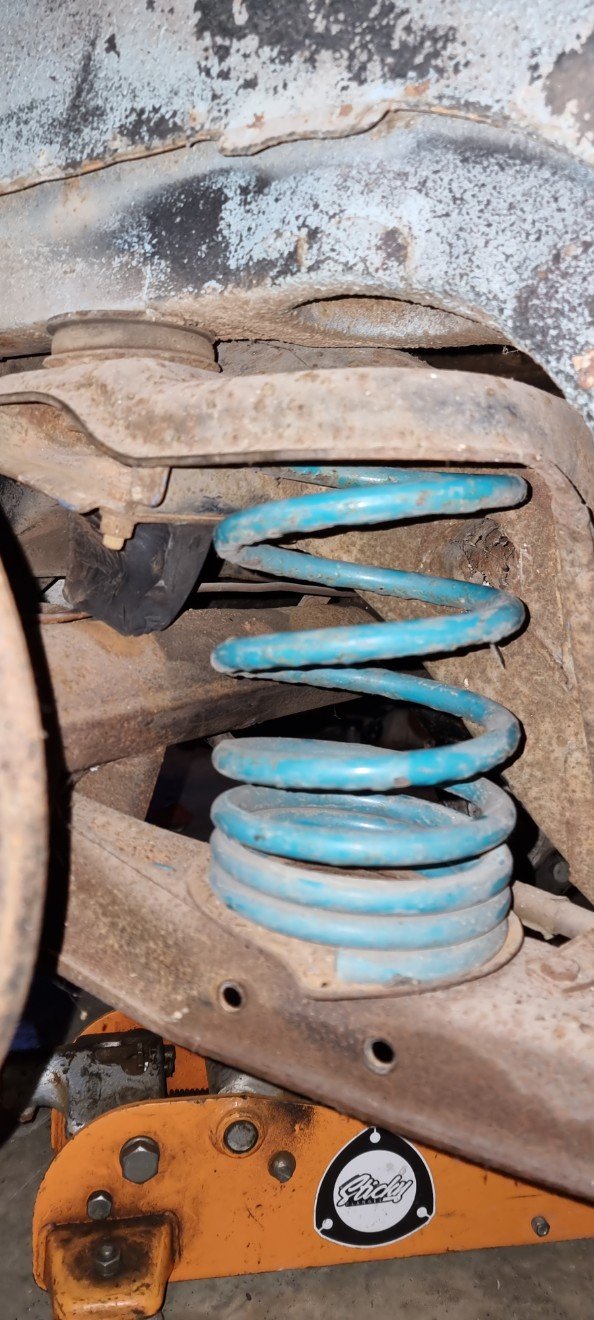
Was doing some spring measurements and my eye wondered towards the lancer..... ended up pulling the front springs out Right diameter, and around the length I was after Sat straight on bumpstops, so did what any reasonable bloke would do and deleted the bumpstops Had to shave down the tube on shock to fit crown brackets This is full droop, springs captive Peek the supervisor This is it on ground but exhaust is touching between diff and chassis so will remove and go under diff or change it somehow. wheres seedy al at?
9 points
-
I just updated my pictures in these posts as ihug shut down, so sorry for lack of content.....9 points
-
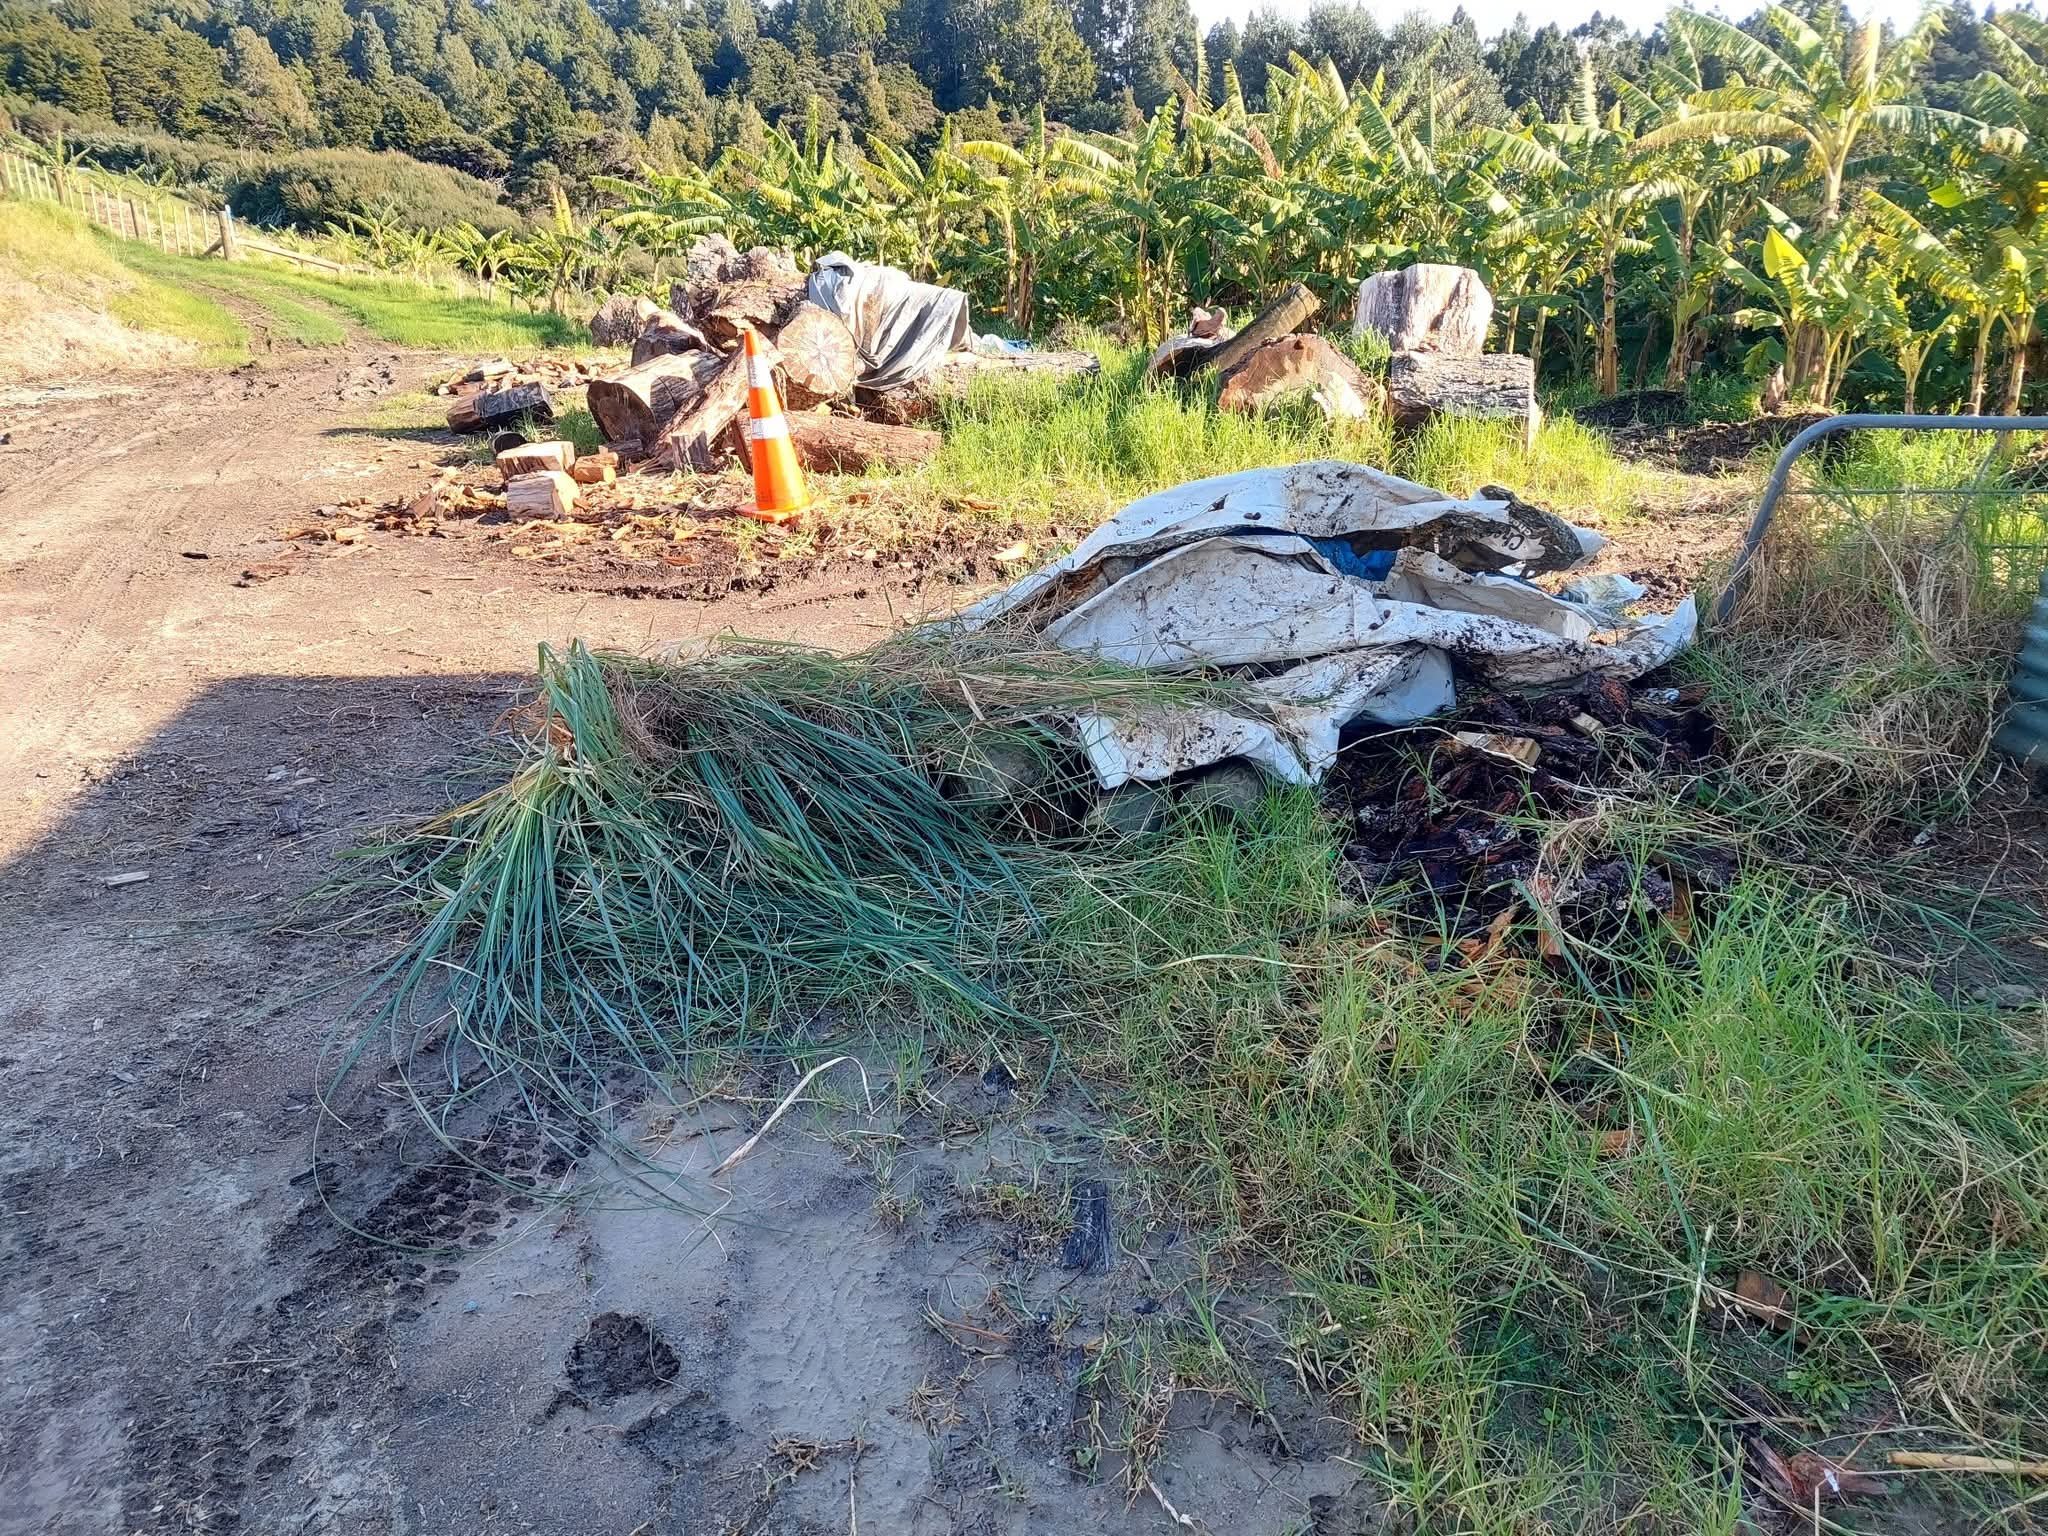
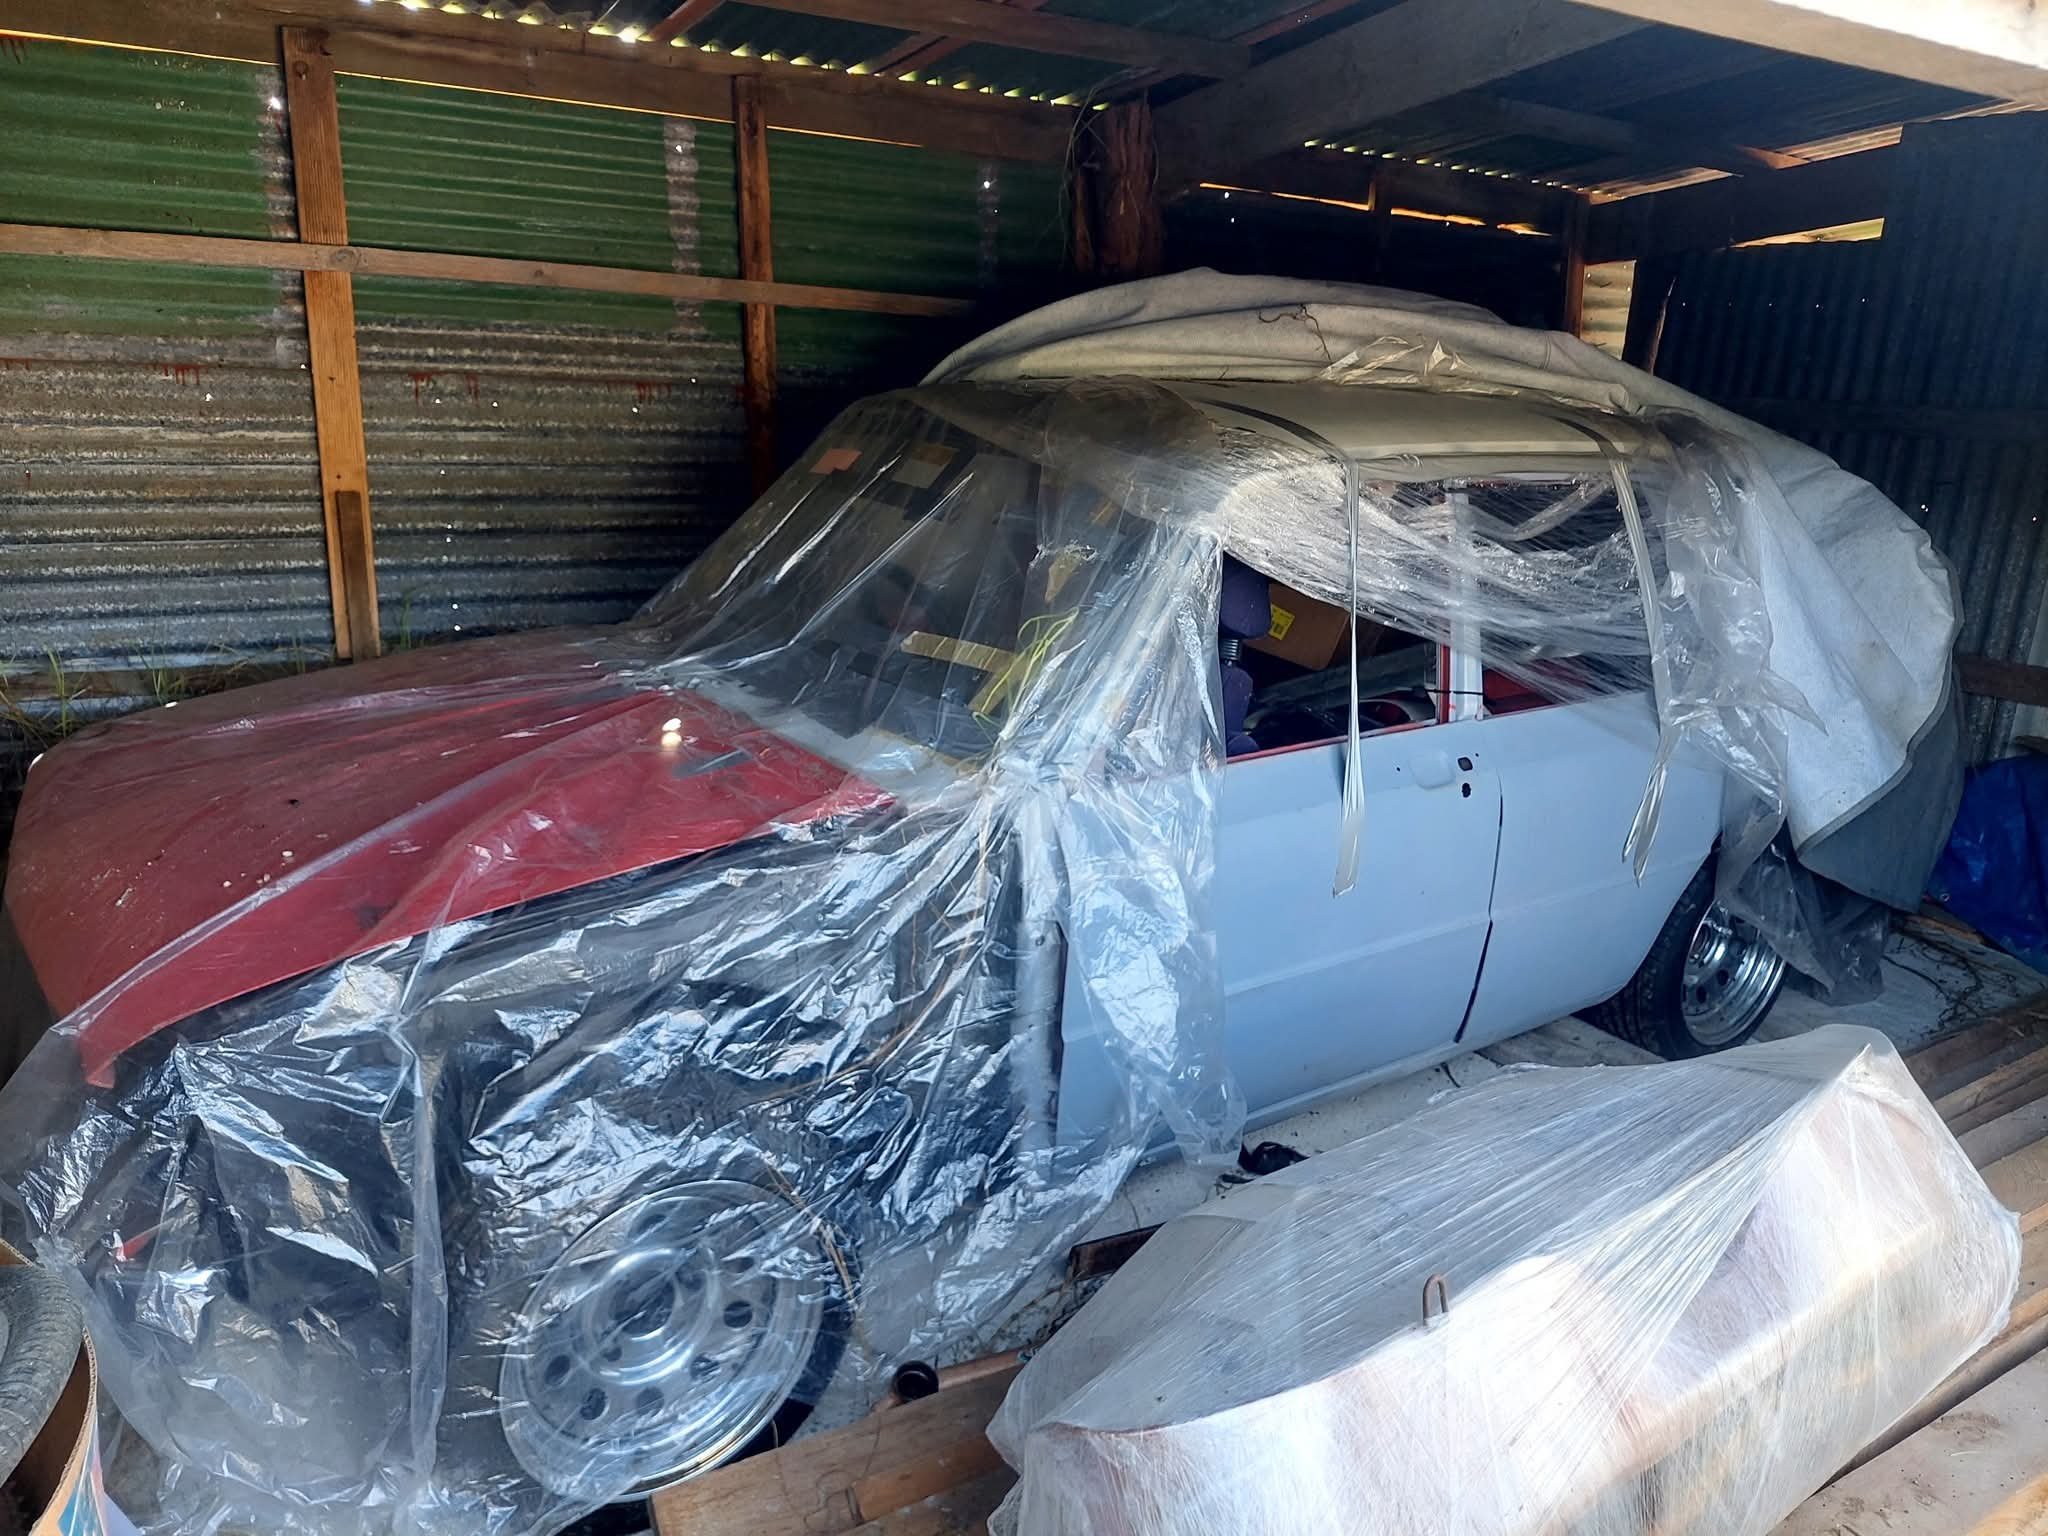
Fake news This still exists, its not full of rat droppings and looks basically how it was left (bar some extra cobwebs). The boy was stoked to check it out. Pretty happy as that the seats haven't been eaten up by rats and the engine still turns over all good by hand. I've just moved back to NZ and now living up close to where it's stored. Slowly getting the new rental setup and shifting all the stuff that I left at mum and dad's over. I'll start sifting through the car parts and bits and pieces soon, then make a plan on the next step with the slow burn build. Stoked the shed hasn't fallen over yet as the posts have all rotted out haha. See how we go anyway. Chur, Tai
9 points
-
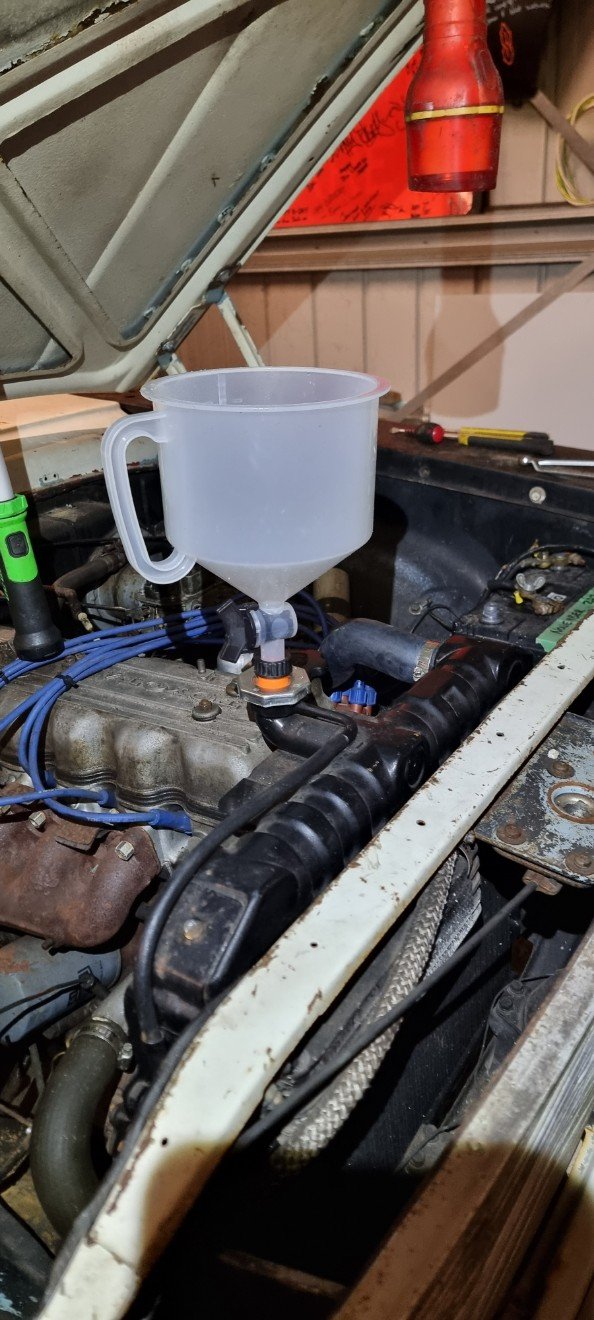
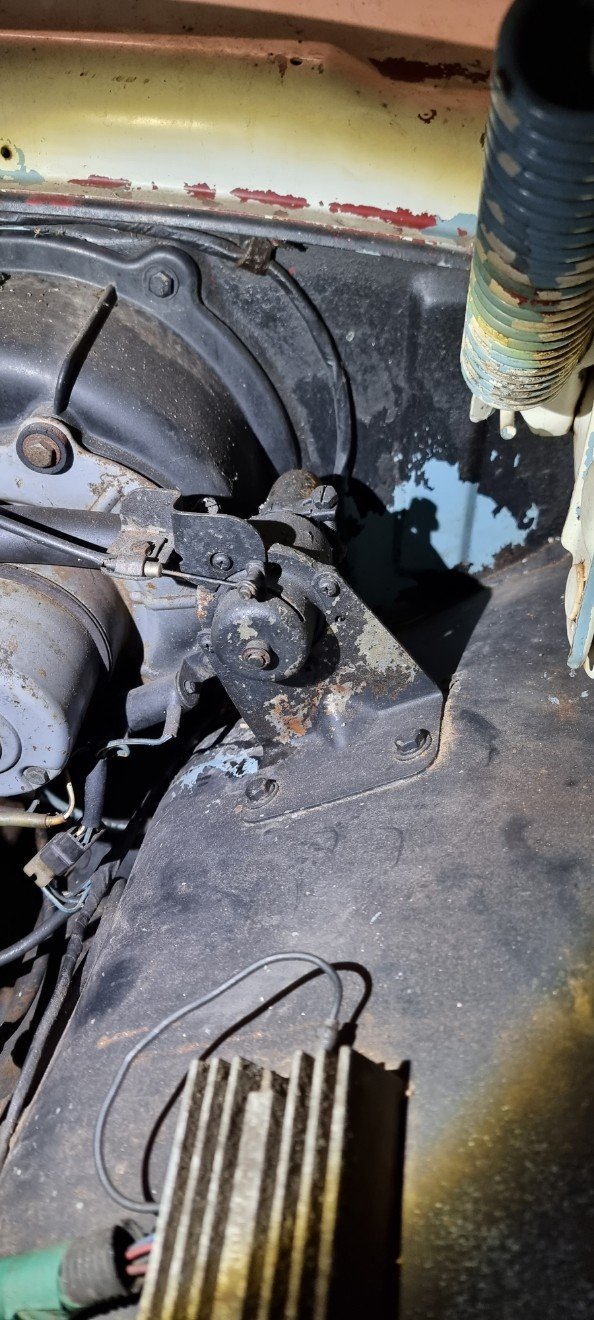
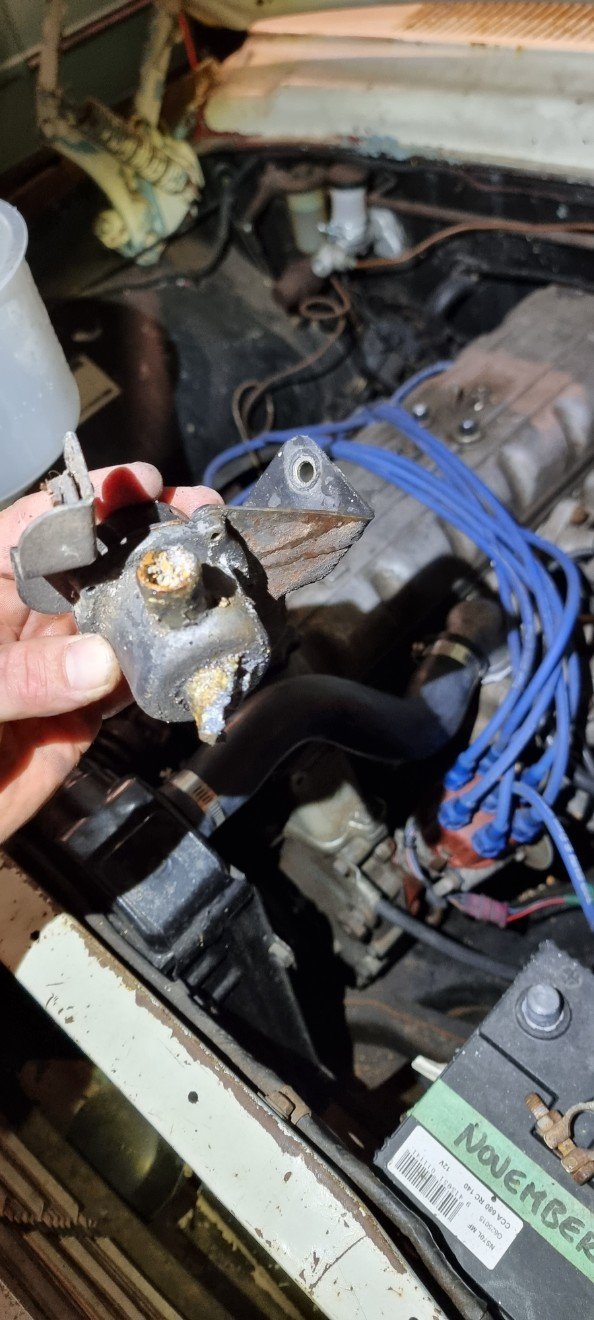
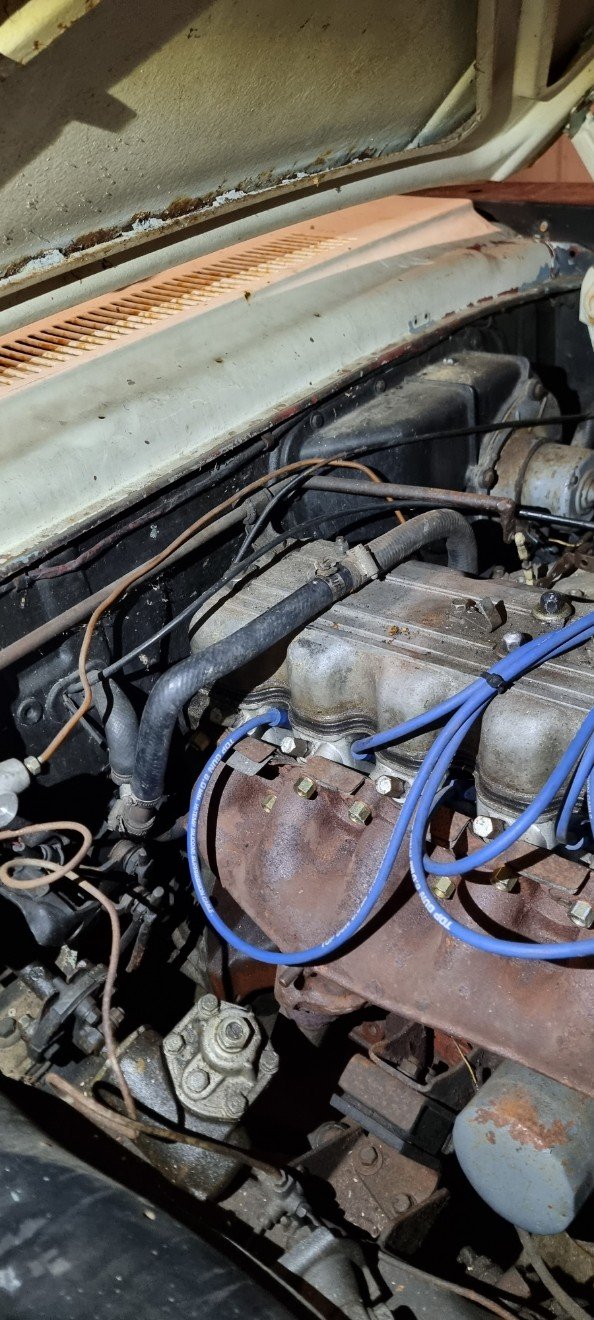
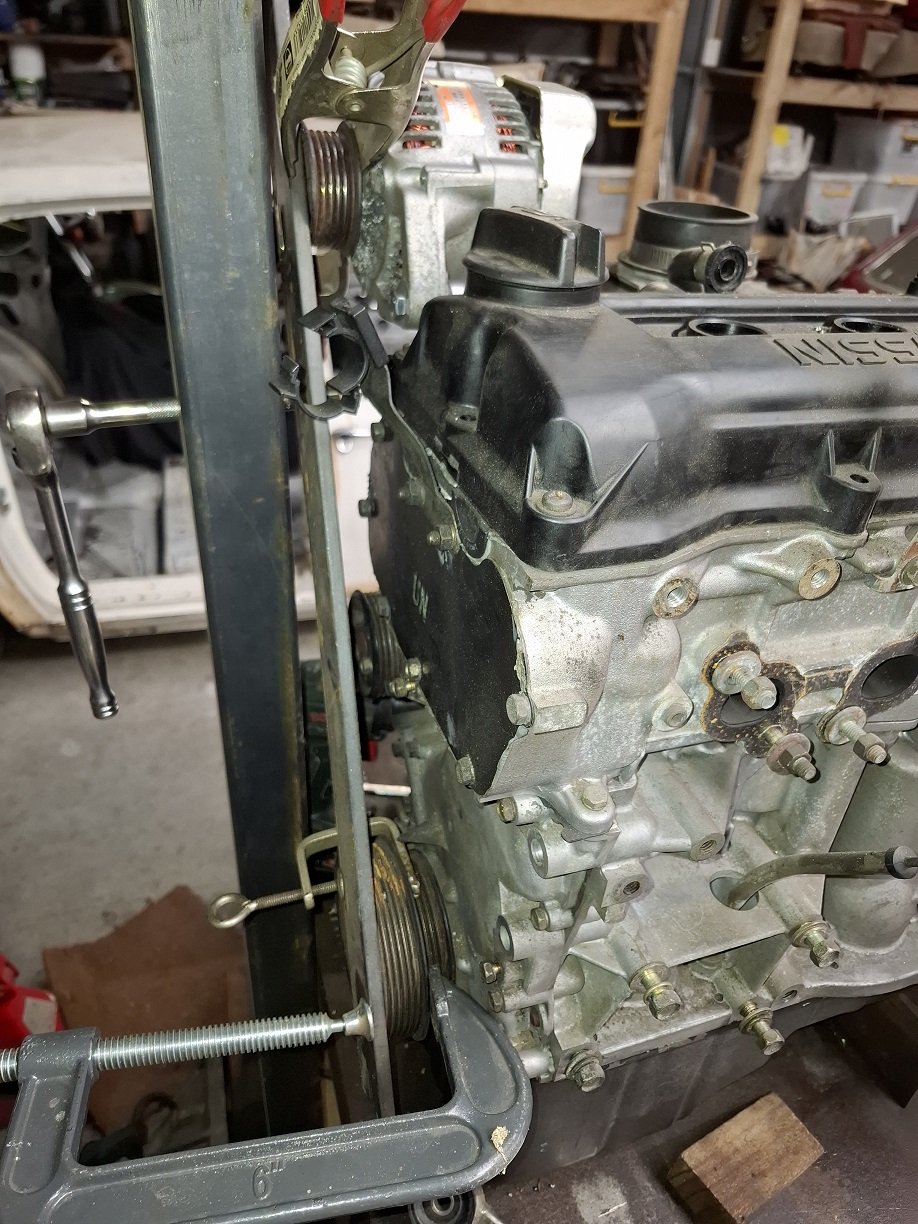
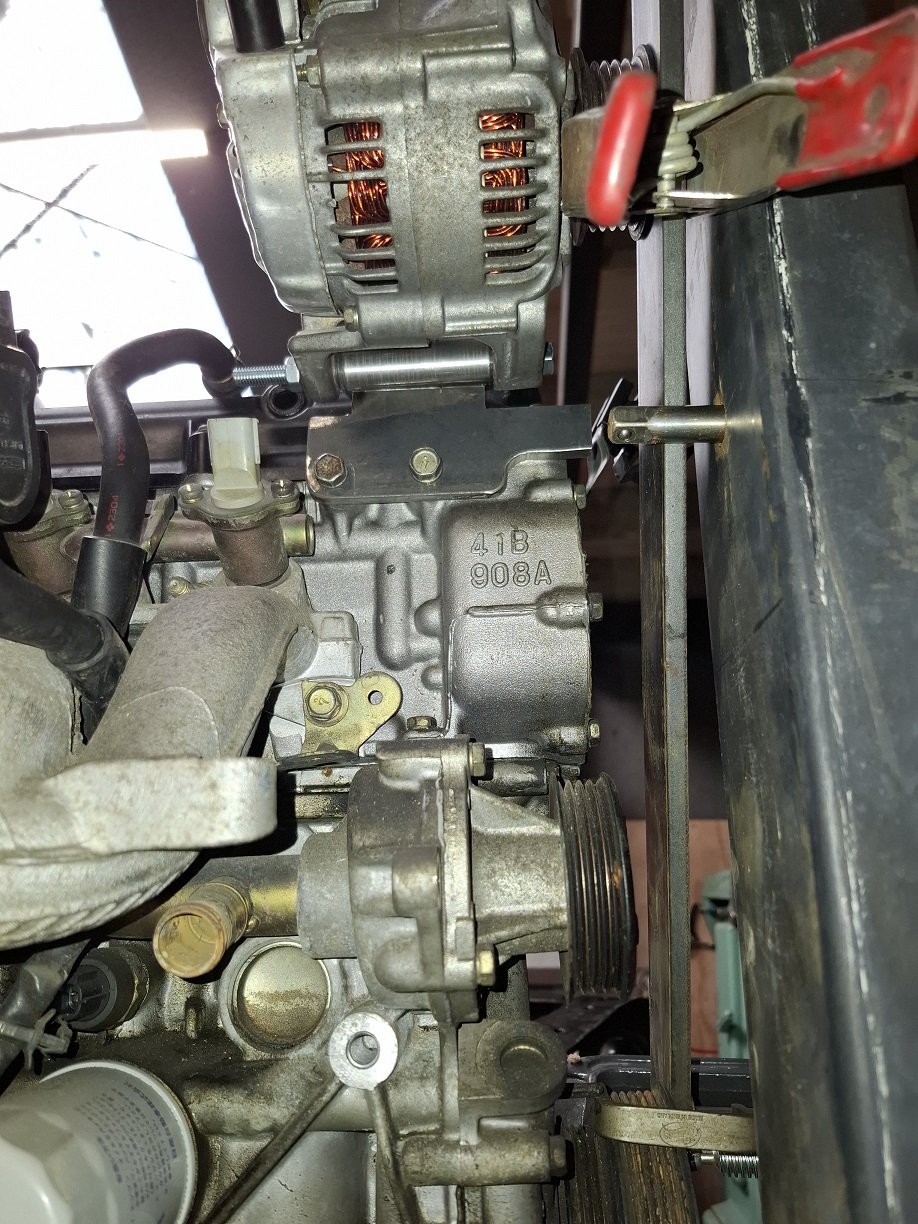
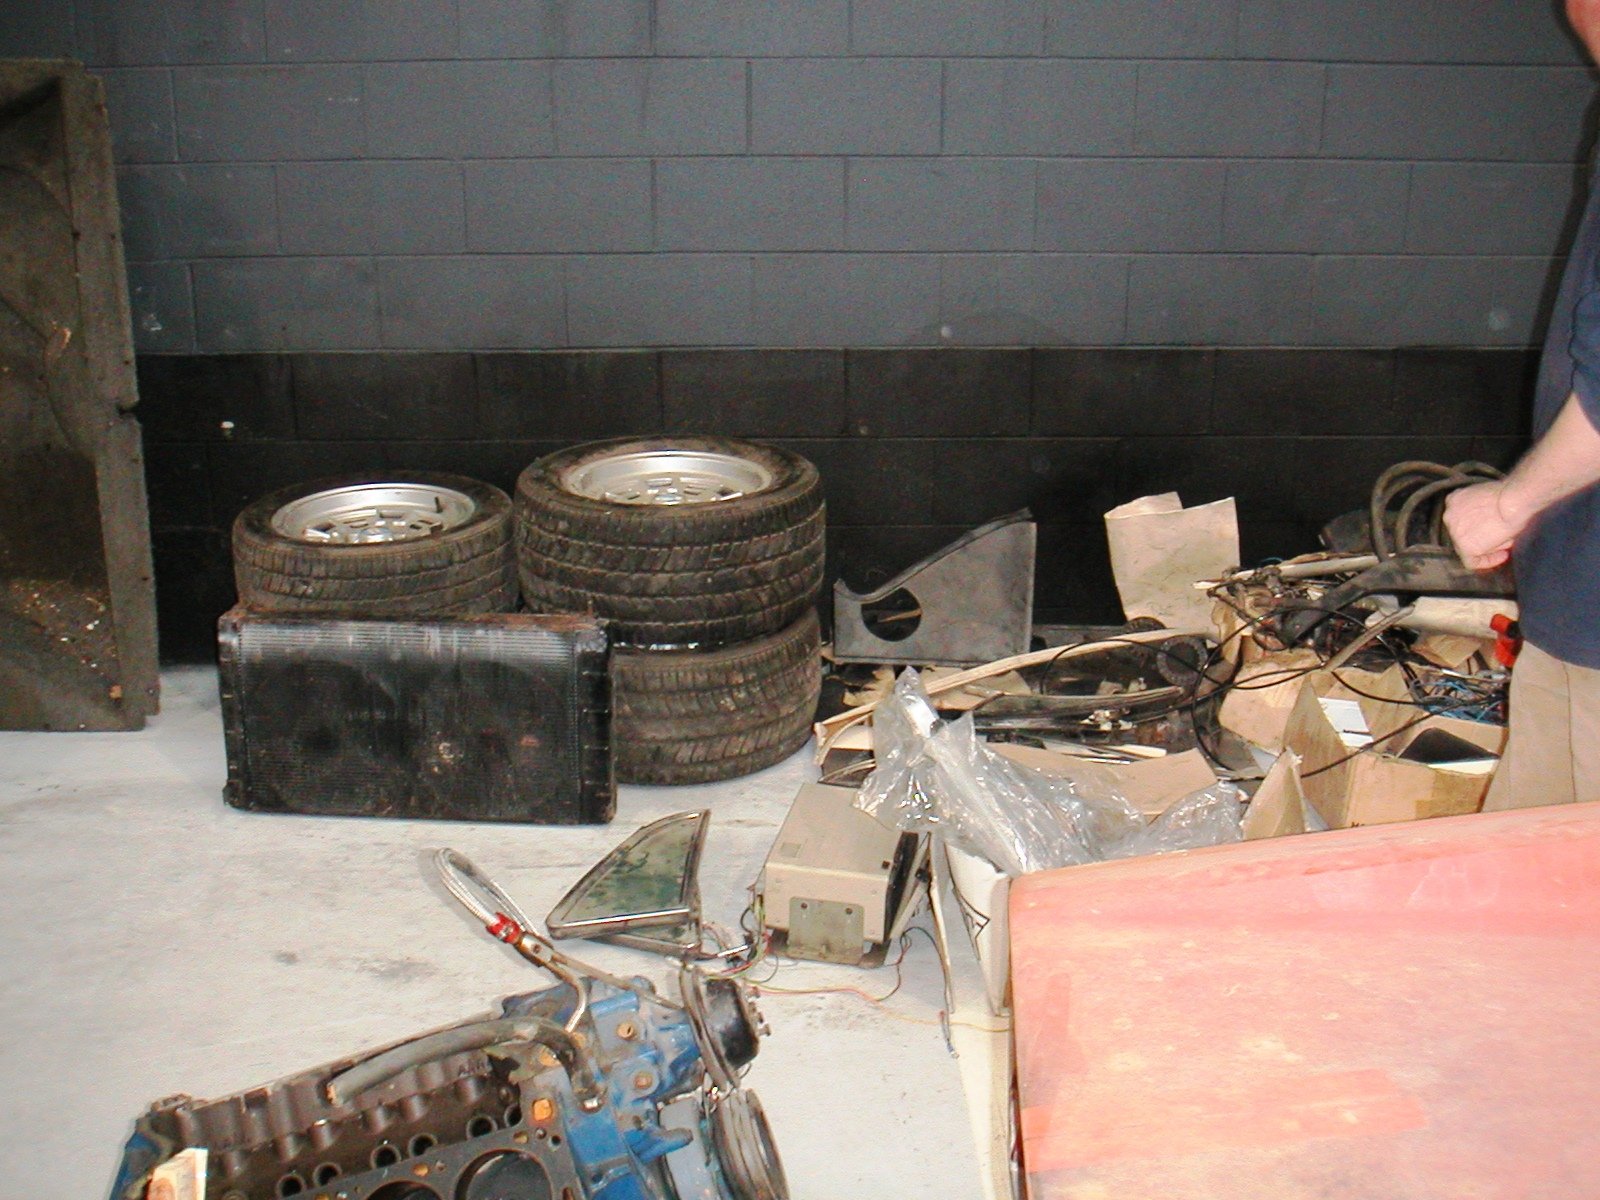
Alternator has got to be WAY up here. Fortunately, I have a spare engine on the bench. Those two bolt holes are 8mm. Not sure if I'll be overloading them with that bracket. I could tie it into one of the 6mm bolts for the cam sprocket covers. Maybe with a long bit of 2.5mm flat bar so it can flex a little to allow for some bolt misalignment. Got to make an adjuster thingy off the lug behind the water pump that also clears the firewall. Just realised I only took photos before welding the bracket...
8 points
-
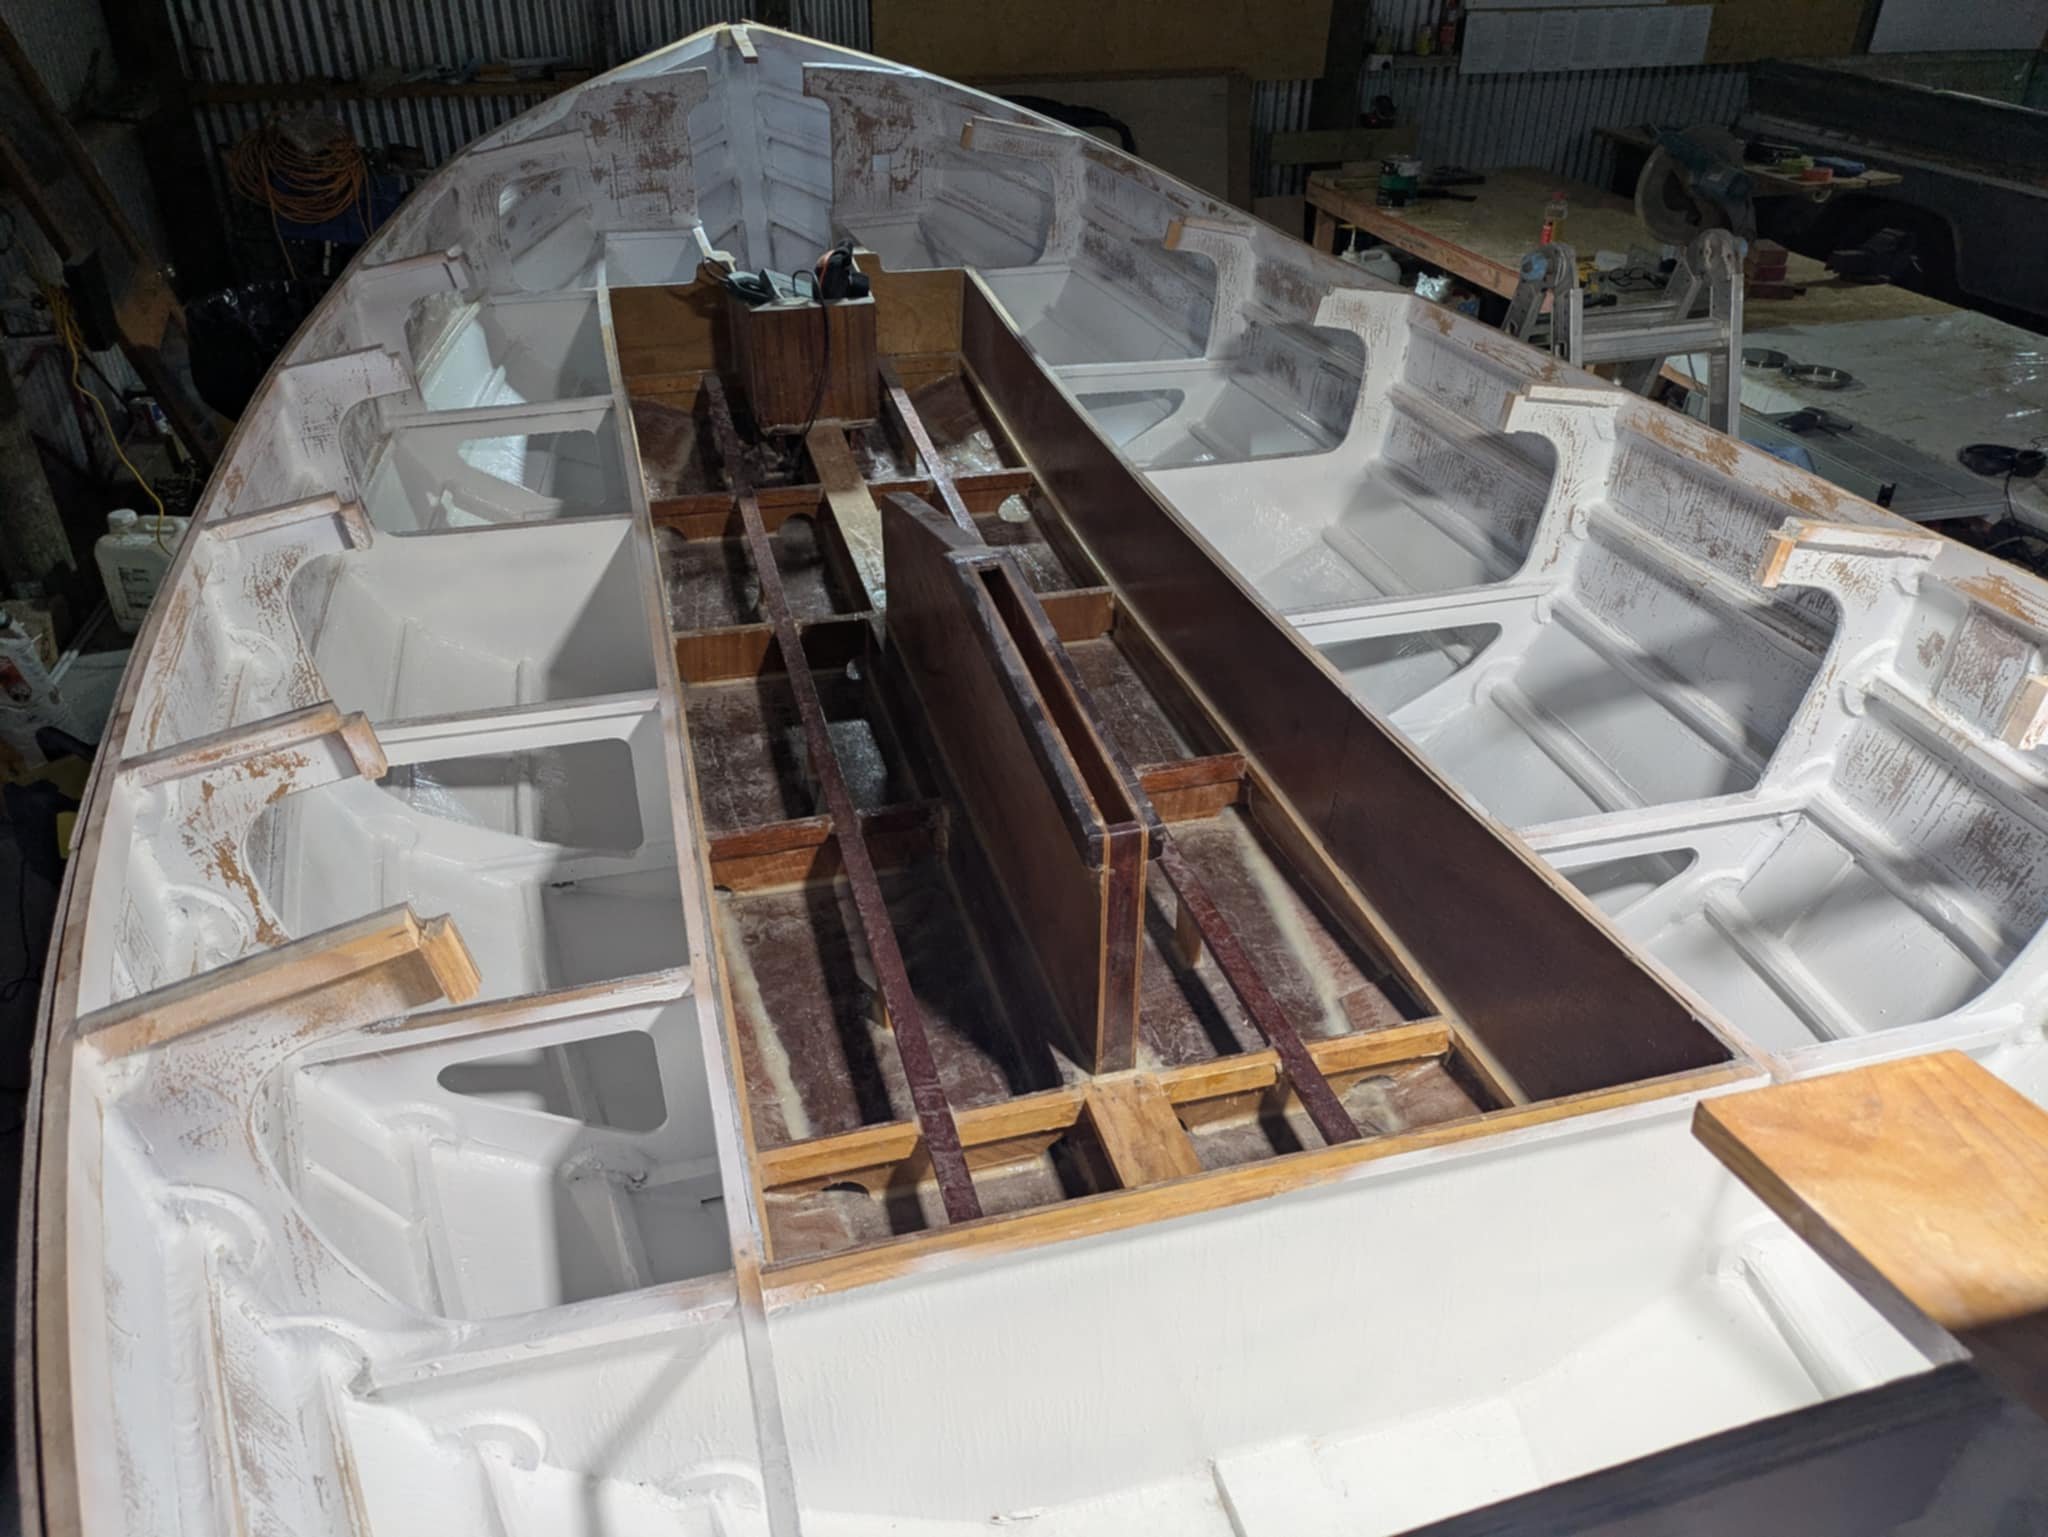
So as predicted it was a long weekend of sanding. I have a few sanding tools but the one that got the biggest hiding was the cordless palm sander. For some parts that will be seen I'm not entirely happy with them so I'll wait until the next nice weather day and put some fairing filler over the top to make smooth. On the sides I'm not sure what will be visible under the coaming and above the cusions so I'll just sand as best I can and forego the filler. If it looks shit I can always redo it. Anyway under the lockers has been done and as I had a bit of paint and time left, I redid the entire bow area. I used some exterior oil based enamel house paint and a long brush. A 4l tin is $50. It's for storage areas or lockers so I couldn't justify a 3hr round trip and extra $300 or so for the gucci boat paint. Not for a boat that will live in a barn for 99% of it's life anyway. Above decks I'll use the nicer stuff. Hoping to get the seat tops screwed and glued on this week and the access hatches at least cut out. I really dont like the plastic ones so have got a 316 stainless steel one I'll use as a template then when I'm feeling rich will buy the other 7 or so. Whilst making the seats I can take the time to think if I want an anchor locker or a solar panel up front.
8 points
-
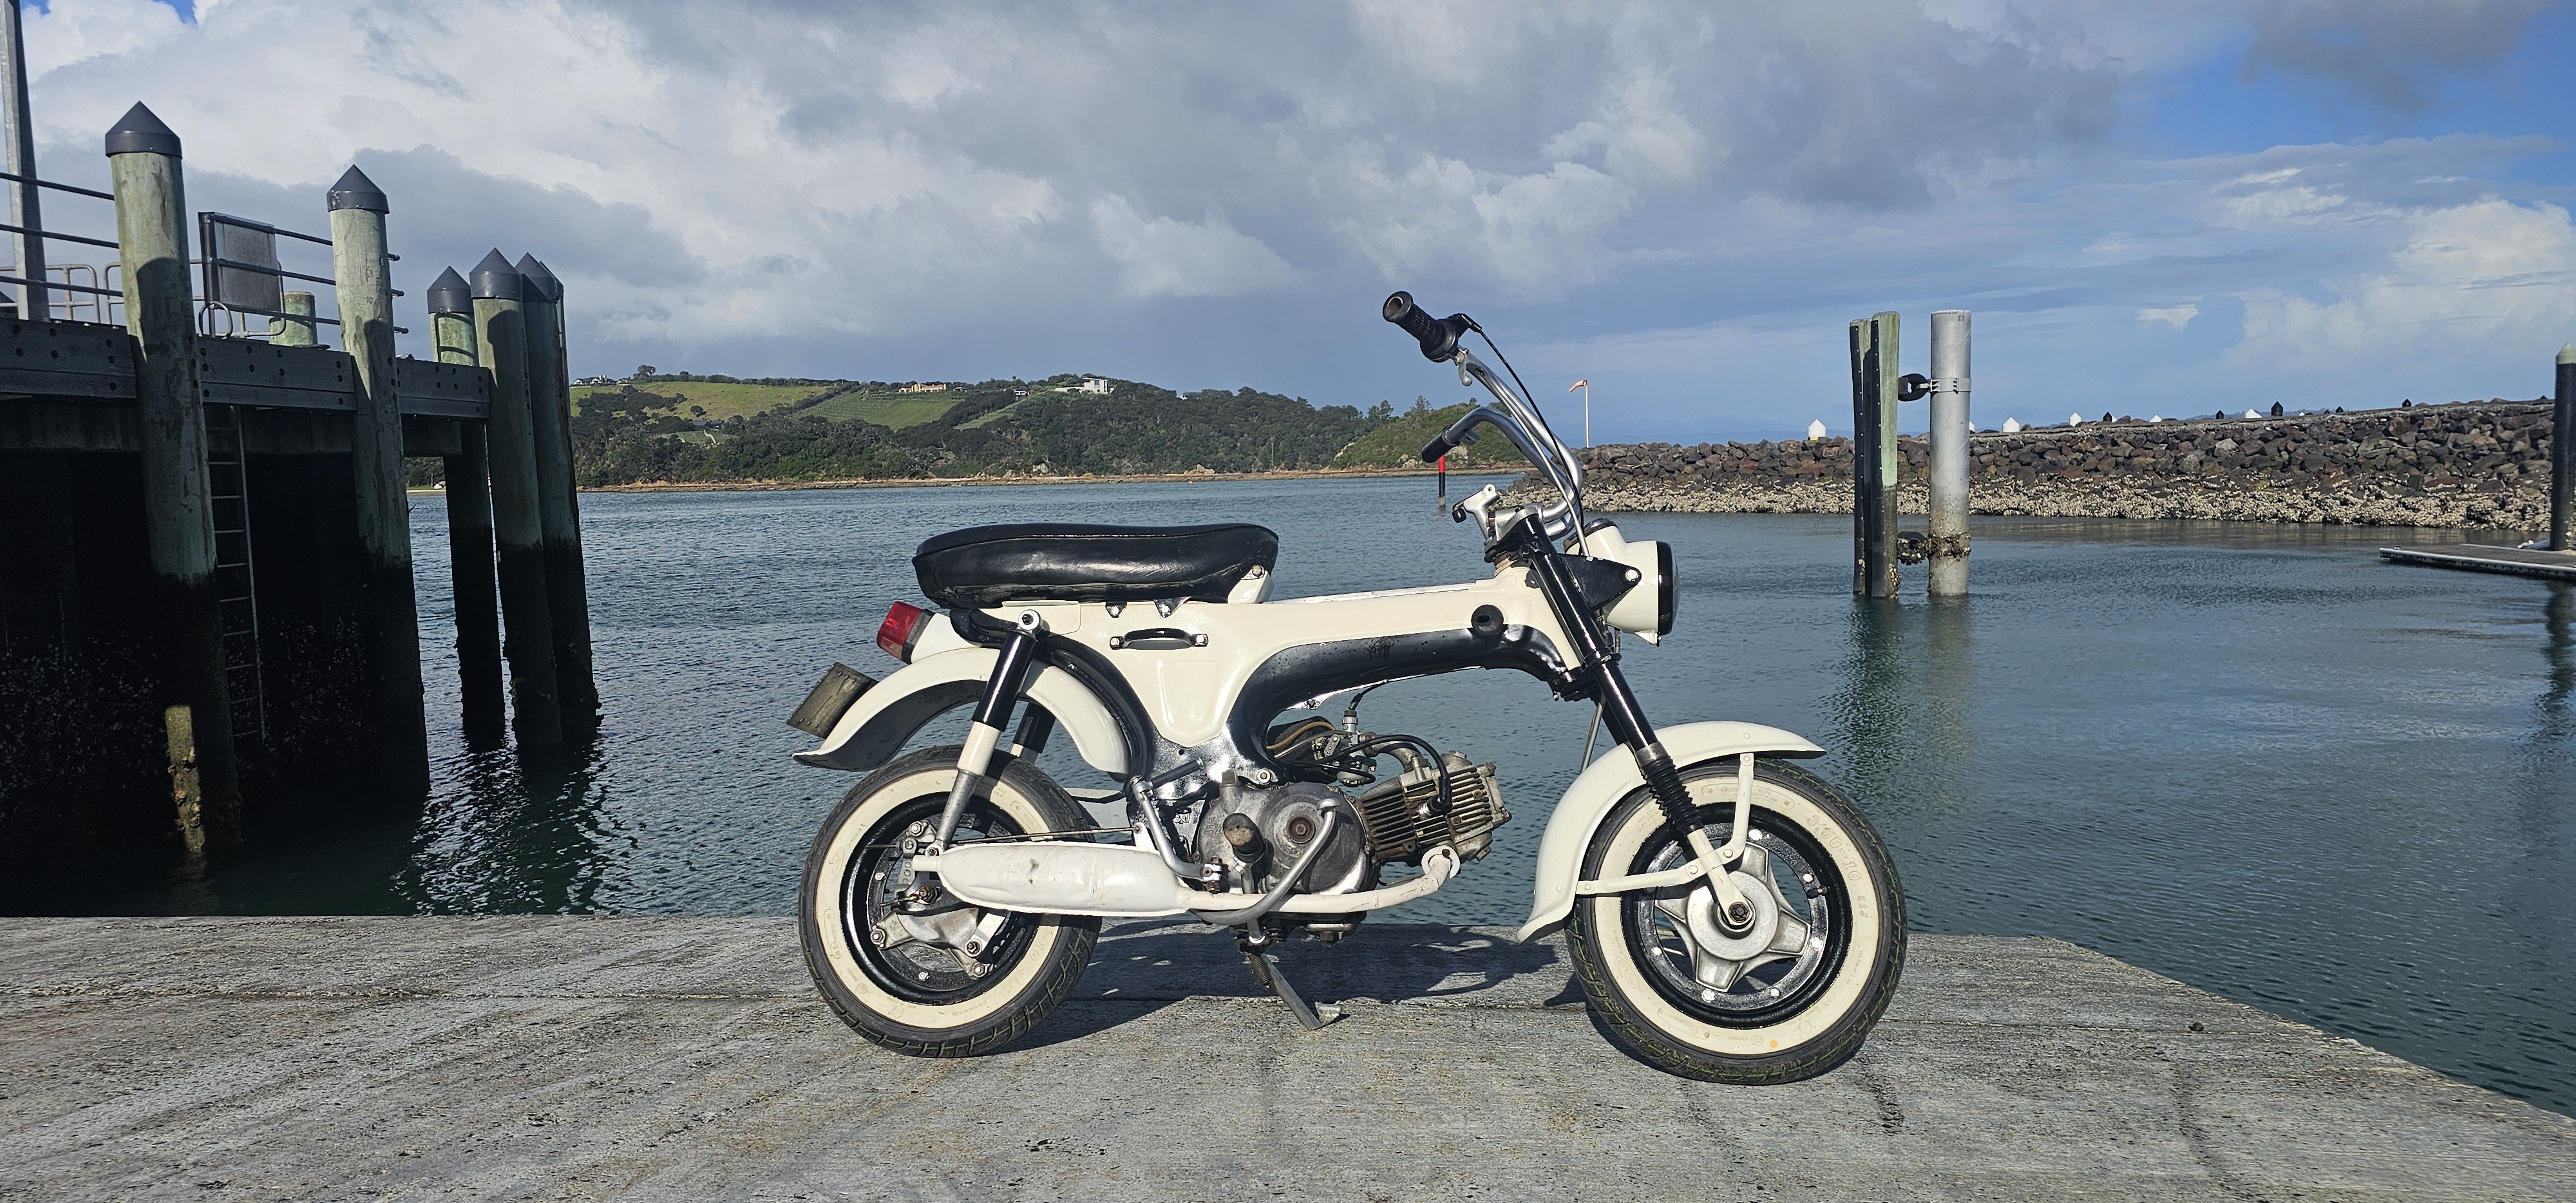
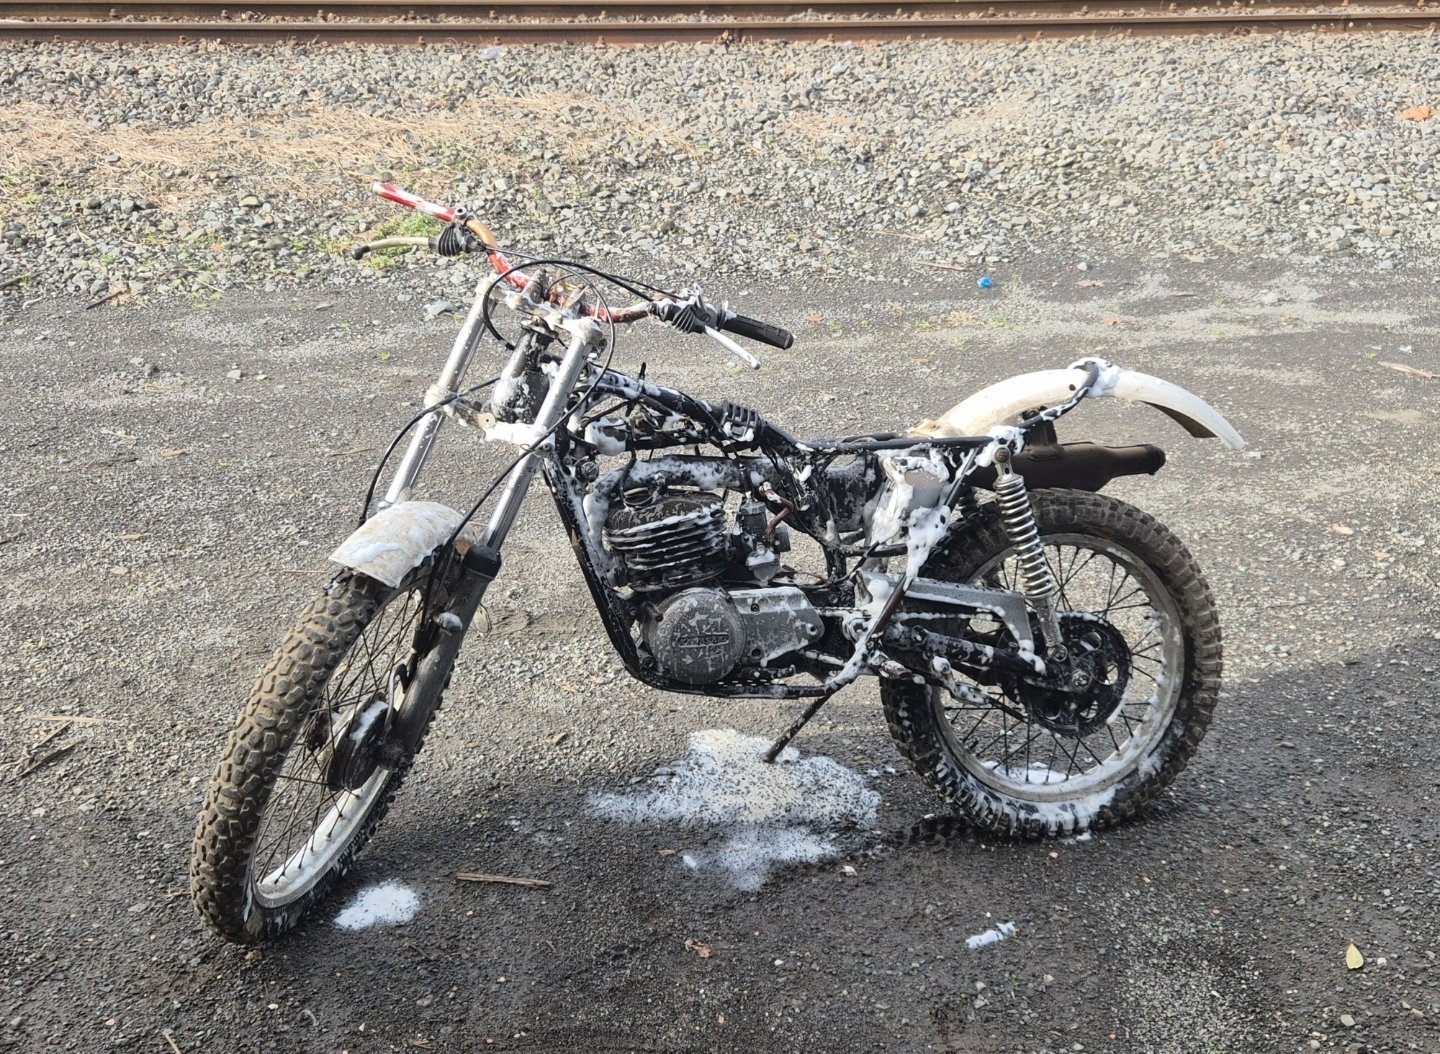
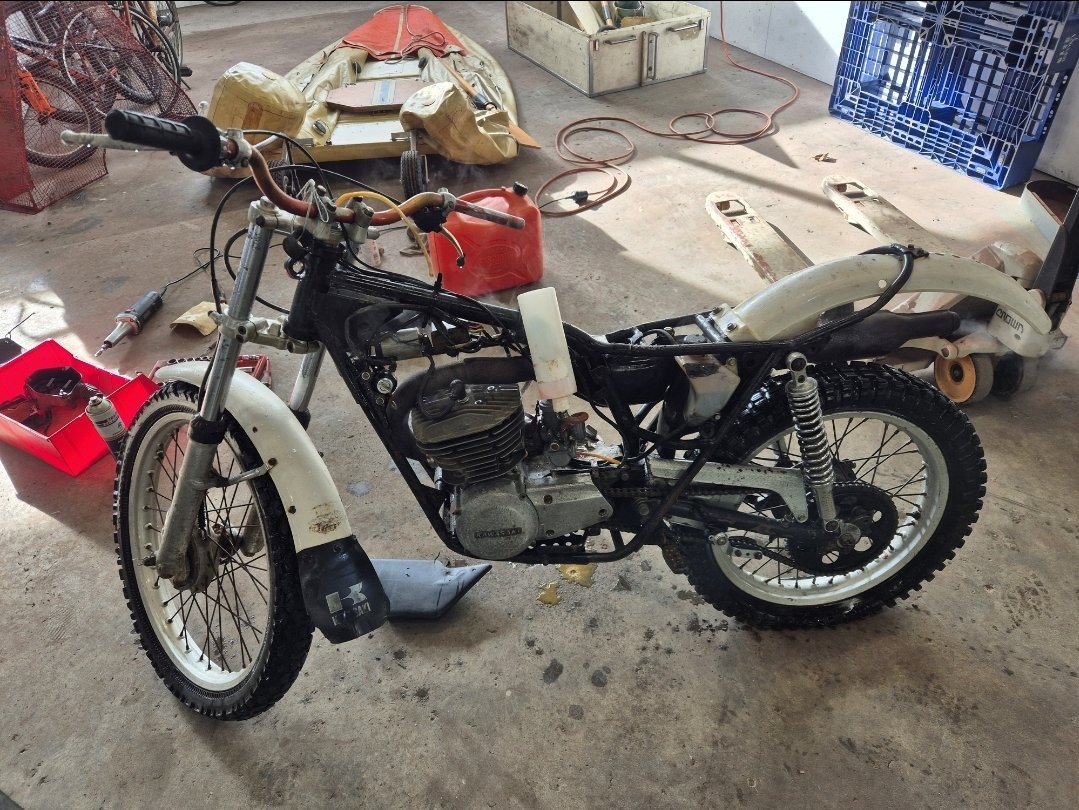
Fuck yeah! Sealink weren't going to let me push the bike on, it was a bit touch and go. Apparently you have to ride the bike on. Given it doesn't go right now, that wasn't happening. Dude said I'd have to order a tow truck, get it on the tow truck to transport it to the other side due to health and safety rules. I must have given him my best "tf you just say" face. He then said, well hold on, let me ask the captain if we can do this as you look capable of performing the task. Captan looks out window...no problem...come aboard... yes!! So happy with this bike, its fucking mint. Its had a bare metal restoration. There's a few things that aren't my taste, but such a good base. Its 95% original and complete. Only some trivial stuff to finish it
8 points
-
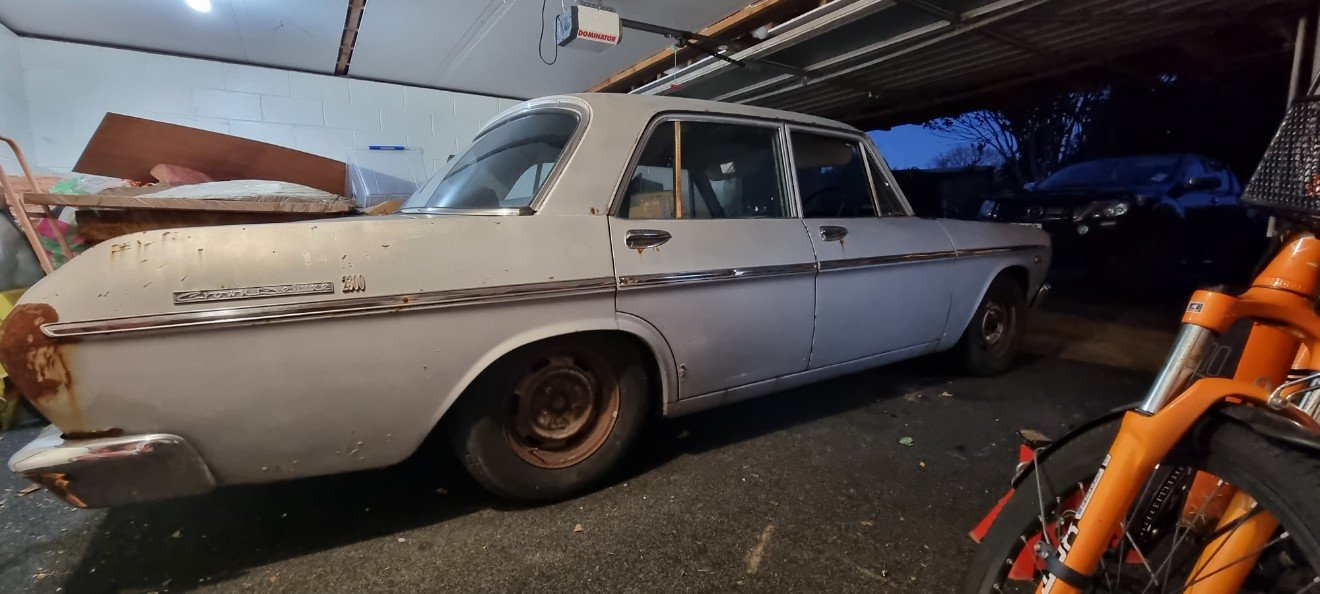
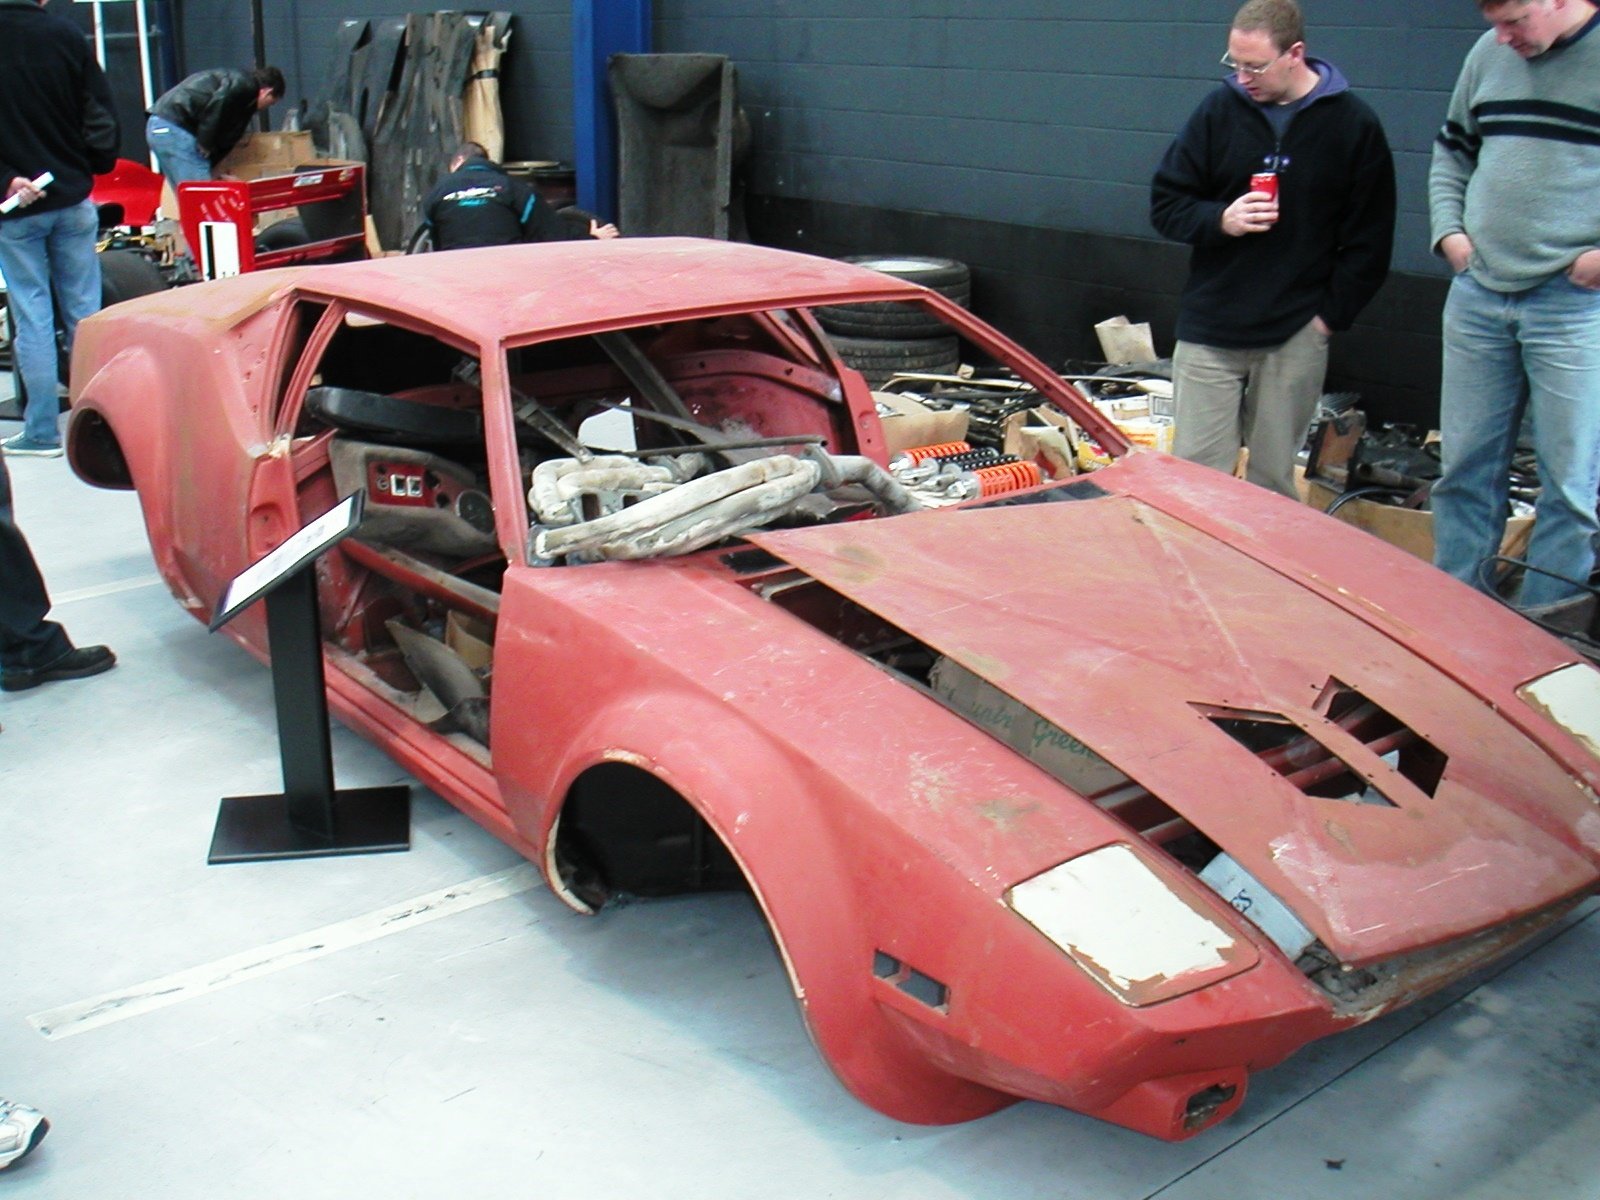
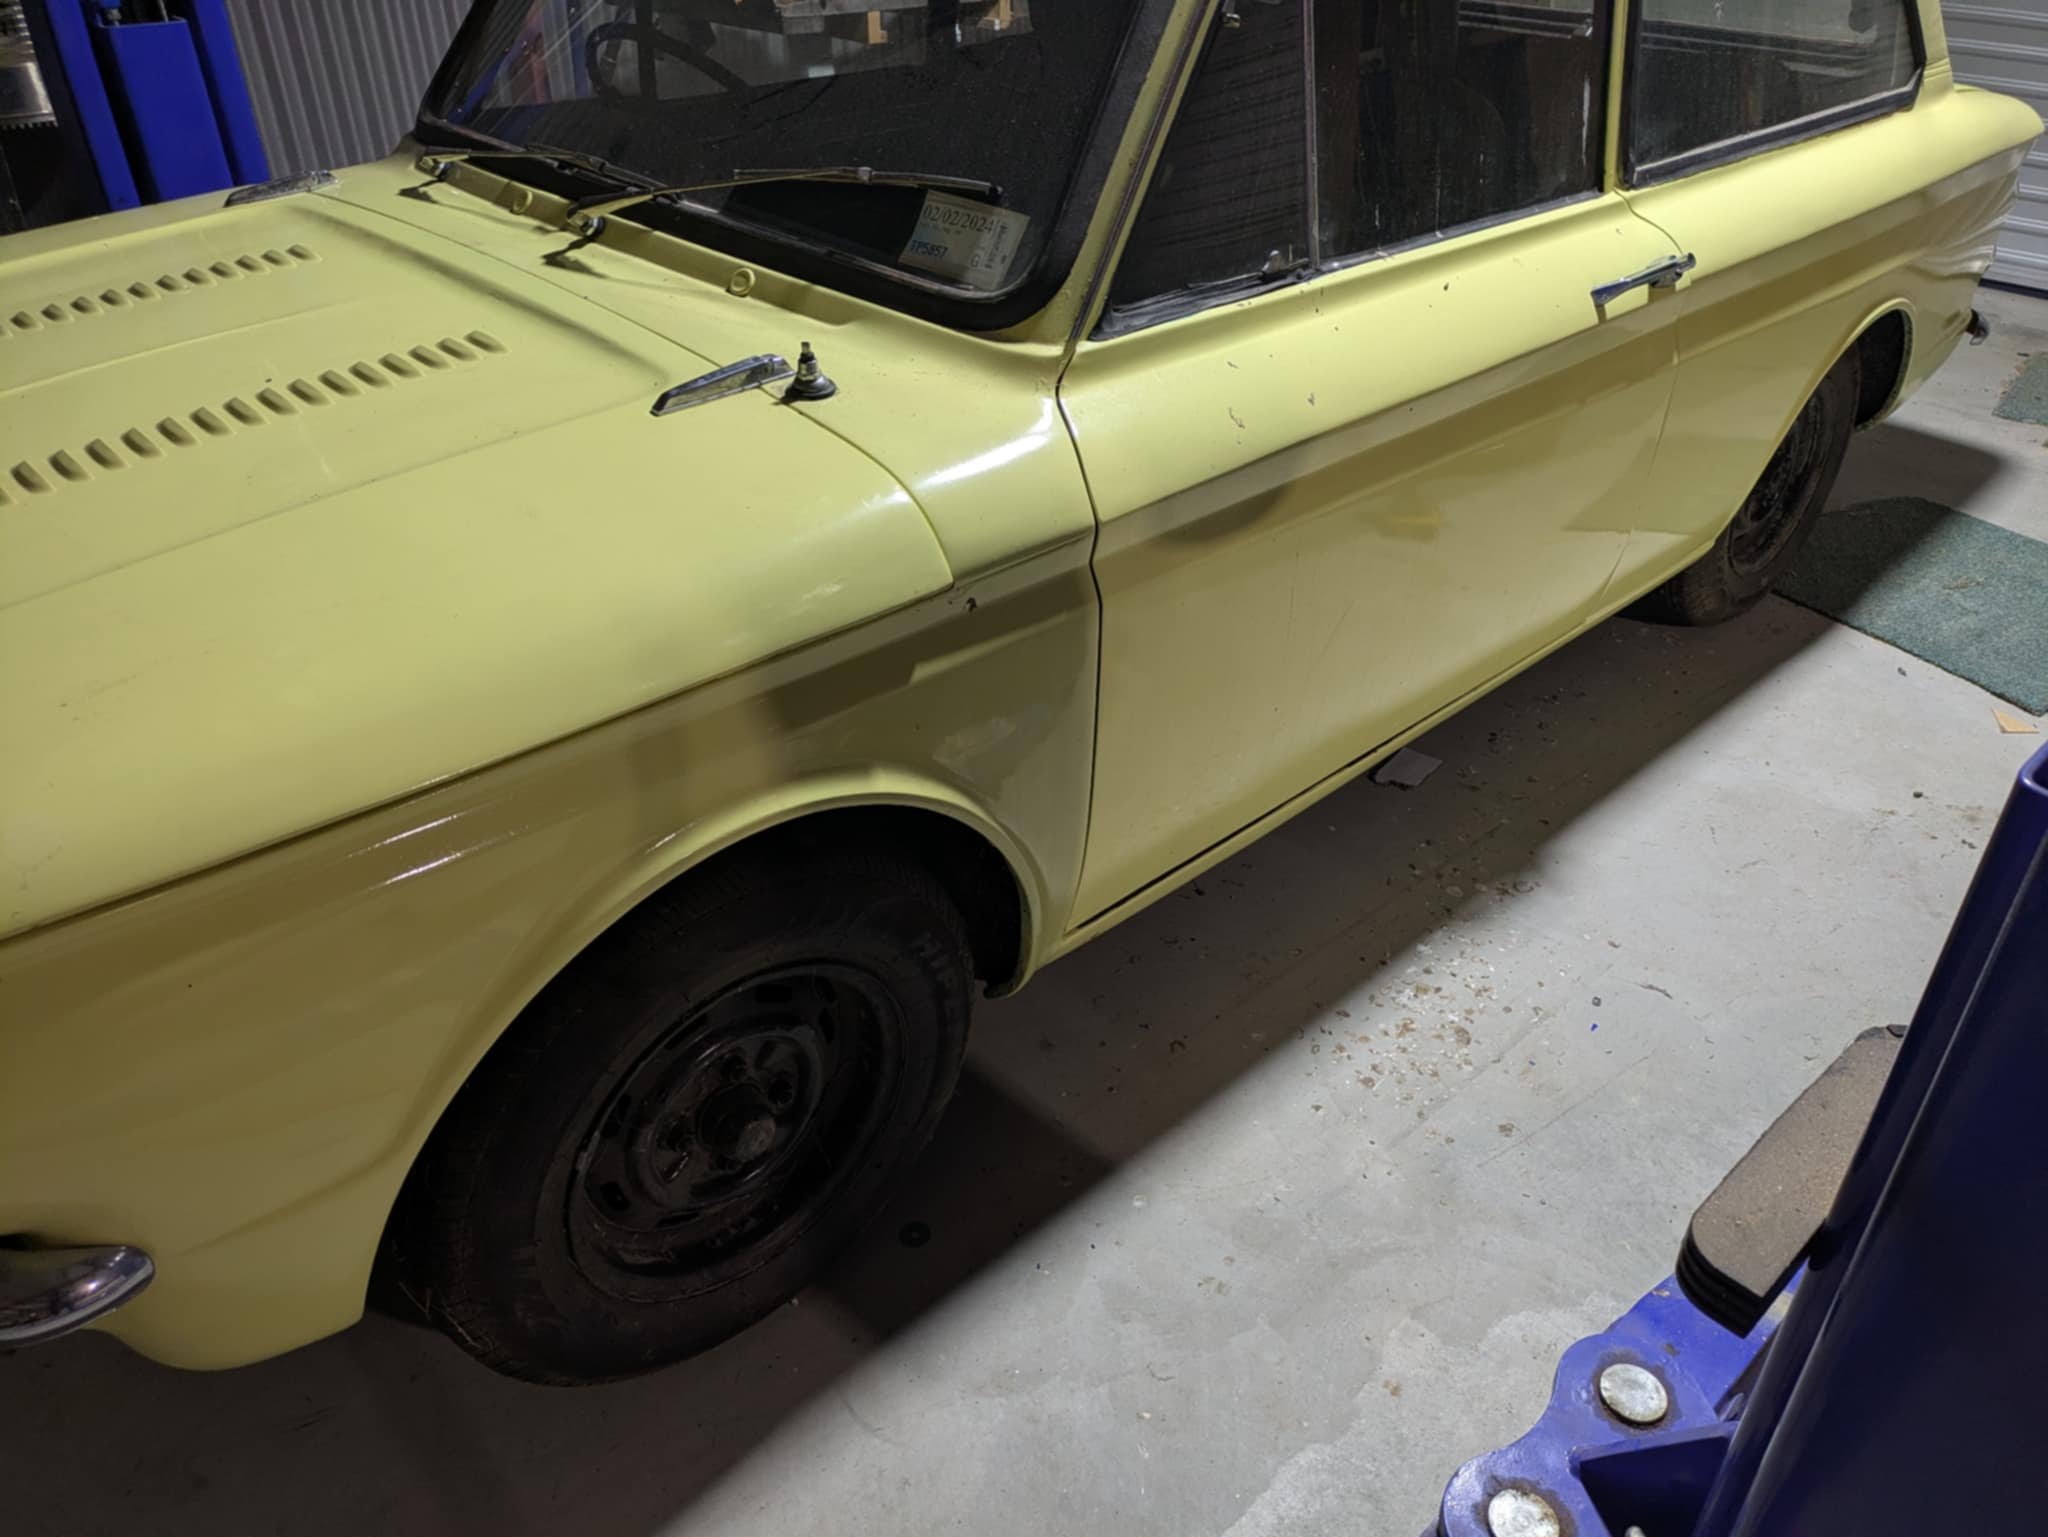
It was black and white in the early 1970's When we bought it at the Turners Police auction in Aug 2000 it was completely stripped with primer on the body.
8 points
-
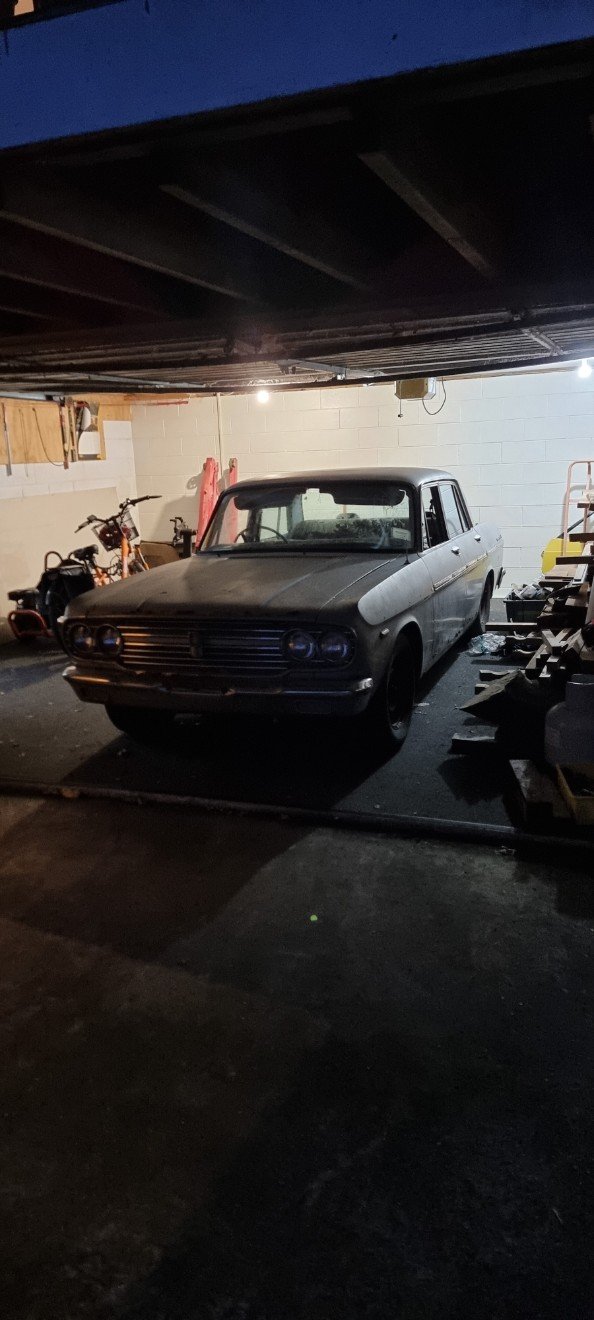
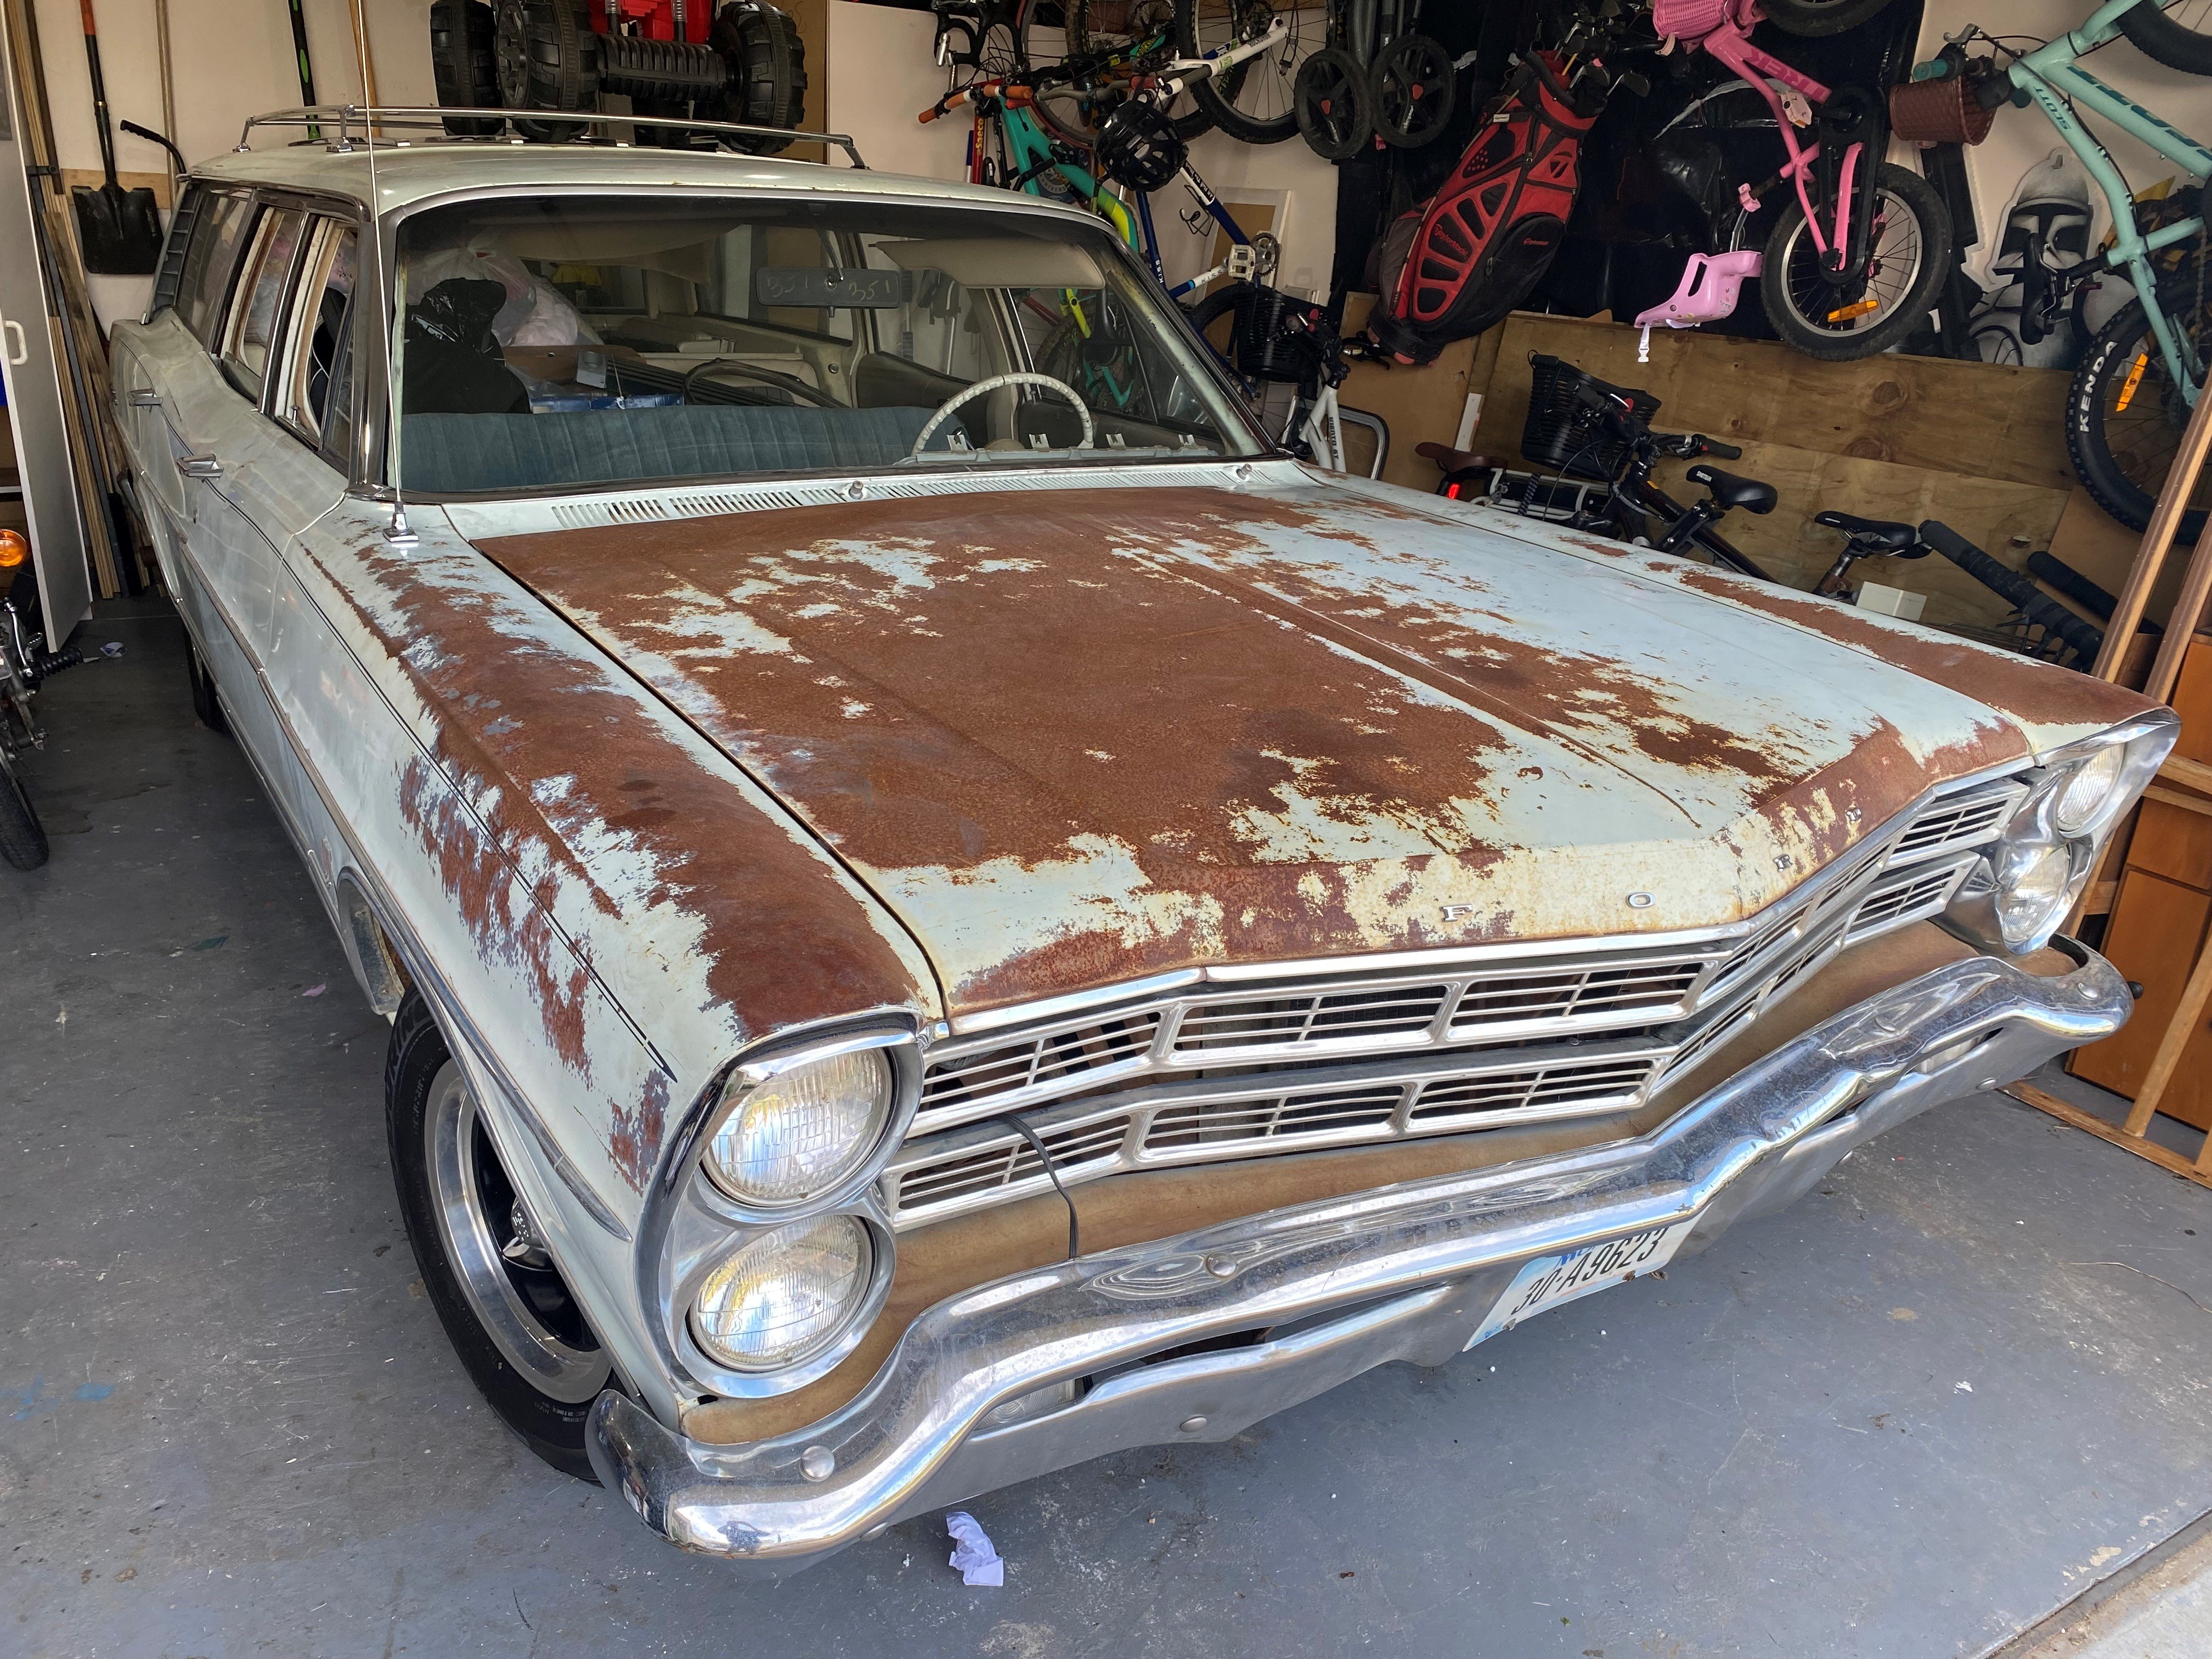
Windscreen is installed. Thanks to Taranaki Windscreens. Now, FINALLY, I will be able to give it a wash. When it arrived from the states it got pushed straight into the shed, then had no suspension, then no window, now its ready for a bath.
8 points
-
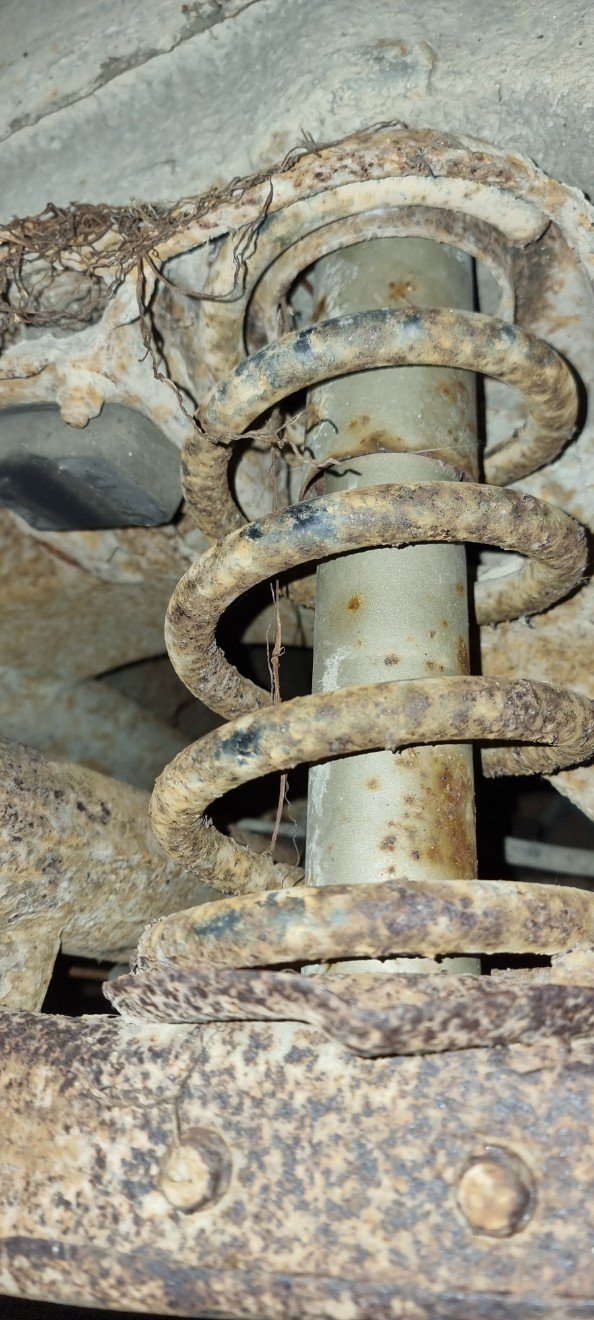
Found some pre paint job photos seem to have a design floor with the rear window have a large gap around it (I assume for the vinyl) this allows all the water to sit there and rust….7 points
-
7 points
-
As many on here will know Tasman district has had fair amount of rainy weather recently. Last weekend we had a big atmospheric river and got 320mm over 36 hours. Lots of local flooding and quite a few unlucky souls have lost quite a lot. For us it was just some of our driveway getting washed downhill and a few trees coming down so mustn't grumble. Anyway - it was a good excuse to stay indoors, crank the fireplace, music, espresso machine and tinker with the Imp. Ages ago I had picked up these Mitsubishi V6 pajaro instruments from the wreckers.. In previous posts I had stripped them down, chopped off all the excess bits not needed (trip meter etc) so they'd fit into some housings I machined out of thick walled alloy tube. I had found a Toyota speed sensor that I adapted to fit my Subaru transmission. Wired them up and checked it worked, which it did well but it was reading a good 10 ~ 15kph out. I then packed the lot away in a box and stashed it away. It was time to crack on and make something of them. First job was to work out an accurate speedo face to suit the setup. I cut a circle of paper, fit it in place and we went driving. Using a GPS speedo we marked out all the various speed points. Then I used a program online... https://www.blocklayer.com/gauge-templates ..however it didn't create what I wanted as most speedos have non linear markings, especially 0-20. I chatted to the fella who was running the website and he added some custom bins into the program to suit and it worked great. We printed off a new face that matched the hand drawn one and went for a drive to check it was good.. Then I spent some time having fun creating some gauge faces. I had a particular style in mind. My current design turned out pretty boring given how far one could go with the variety of fonts, colours, images, text but I wanted a 60s/70s look to suit the car and dash layout I have in mind. Fun thing is I can change it easily now I have a saved accurate template * Used the big printer we have that barely gets used. Cut them out to suit. Machined up some tiny wad punches to do the holes. Into the housings. The backside. Later on I'll need to add some led lights to shine through the white font.I'll also re-set the odometer to match the current reading even though it'll be in km from now on. The needles will then go back in place once I have finished all this. I removed the original Imp dash pads and instrument cluster. Its a heavy bit of kit. Comical wiring layout too. Sat in the car and eyed up how I'd like the gauges to sit. The idea is to build a pod that will work with the original MK1 Imp dash pads which I really do like the style of. I had part sheet of 1.2mm alloy which I cut, bent, rolled, twisted and tweaked to shape, welding all the bits together doing my very best to try not to create holes. Not the easiest thickness alloy to tig weld but managed ok. I also welded up a bolt on pod that sits below to take the original Imp indicator stalks. Checked it was ok. Covered the outside in medium density foam.. Bought some more cow that local canvas place still had a stash of.. Very carefully cut and glued it in place. Painted the other alloy parts in etch primer then satin black. Added some tiny warning lamps. Most important gauge, the oil pressure gauge, resides in the middle.. Really happy with the finish. There's a couple of blemishes (tiny knife nick) but overall considering the awkwardness of this build I'm stoked. And bolted in place. I can adjust the angles of the gauges quite easily too but its currently good for both of us. Ties in really nicely with the dash pads.. Next job is to sort out the wiring. I'd already made it far more user friendly compared to stock by having added several multi plugs. I'm going to re-do it though and use some smaller wire where I can along with Deutsch plugs. There will be a new dash face below the dash pads that will house 3 gauges, some rocker switches and a Triumph eyeball vent at each end. * Edit - here's an example..7 points
-
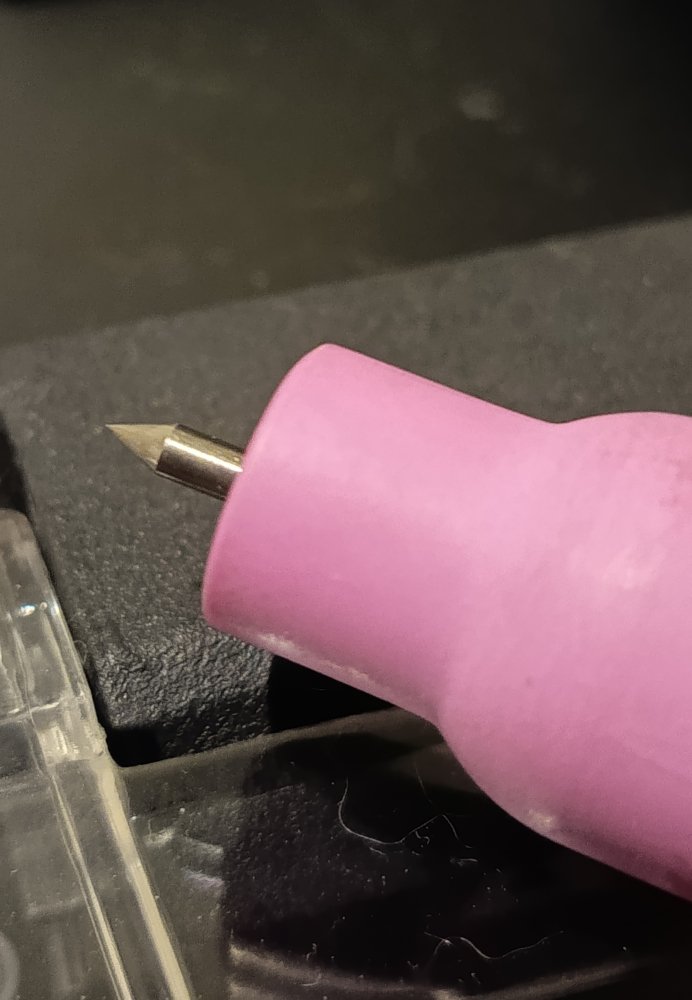
Better learn some bog smithing I guess6 points
-
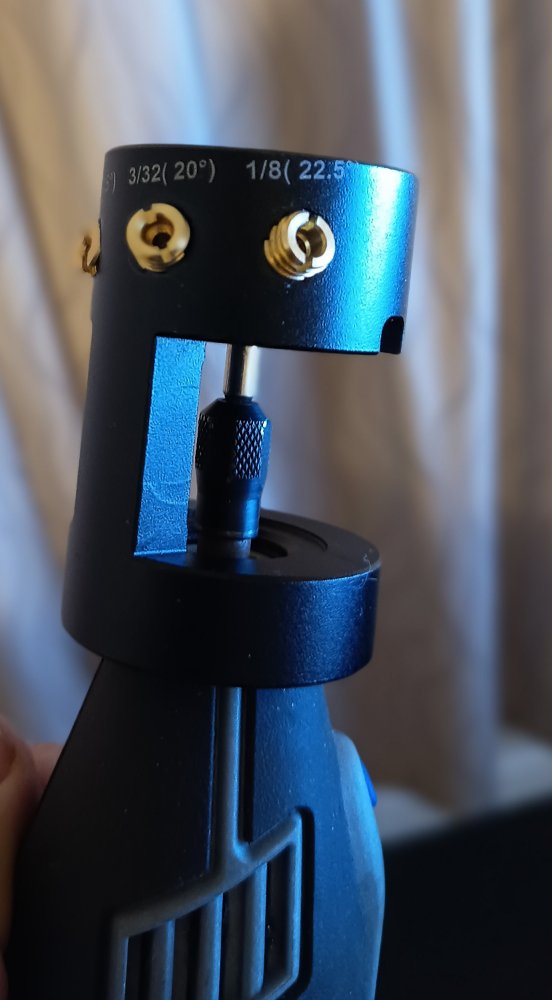
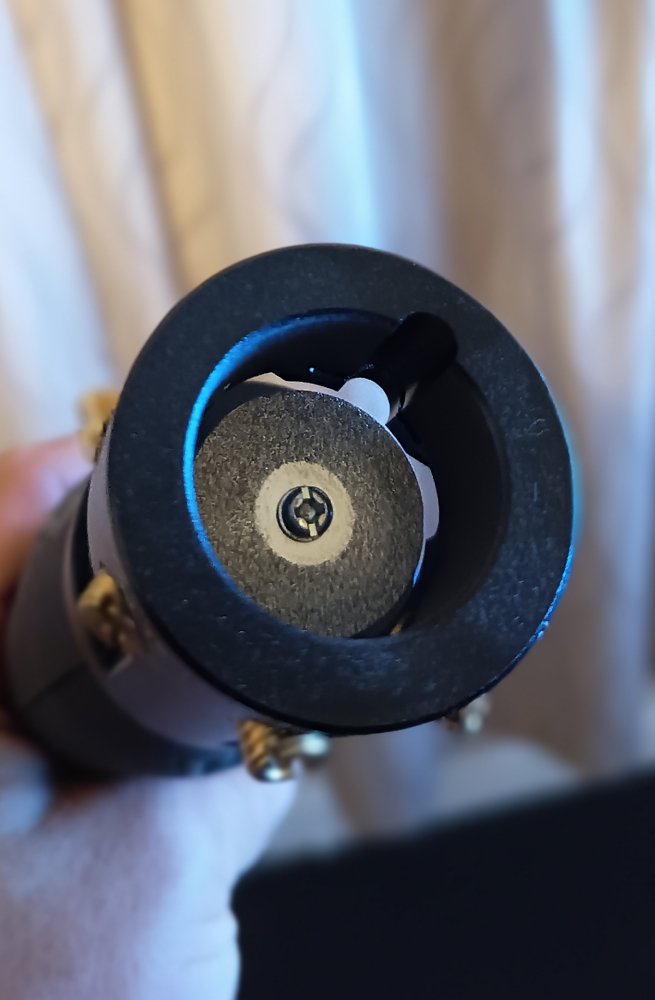
Picked up an AliExpress tungsten grinder Dremel attachment cheap, I'm rather impressed with it! Been using a silica carbide green wheel on my bench grinder for years, that's getting swapped out for a SS wire wheel now as I won't be going back to sharpening tungsten on it in any hurry!
6 points
-
Photoless updates are pointless *sigh* but she’s been at SprintRE for the last 8 weeks. the new engine looks epic, and is ready to fire up. stopped by today to catch up with them. exhaust is complete and looks so damn good. looking forward to hearing it on Friday . had many curveballs get thrown around so far, mainly with the faulty Wilwood master and the fact that StealthRide don’t seem to acknowledge emails or follow up with warranty stuff. Wankers6 points
-
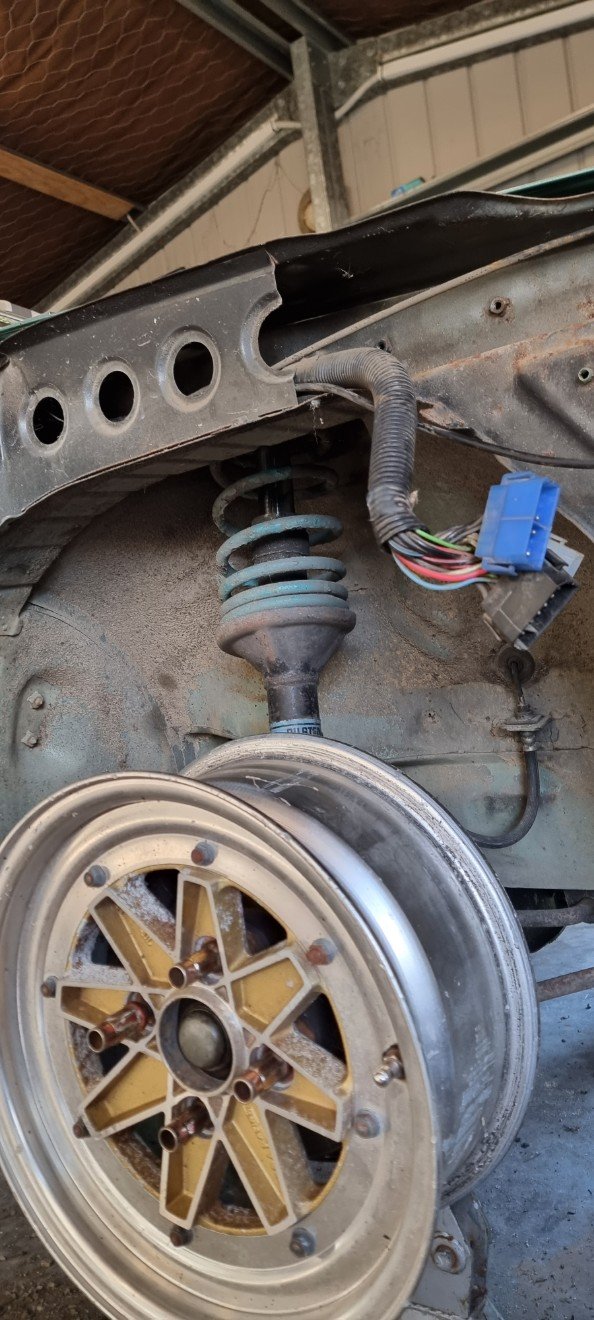
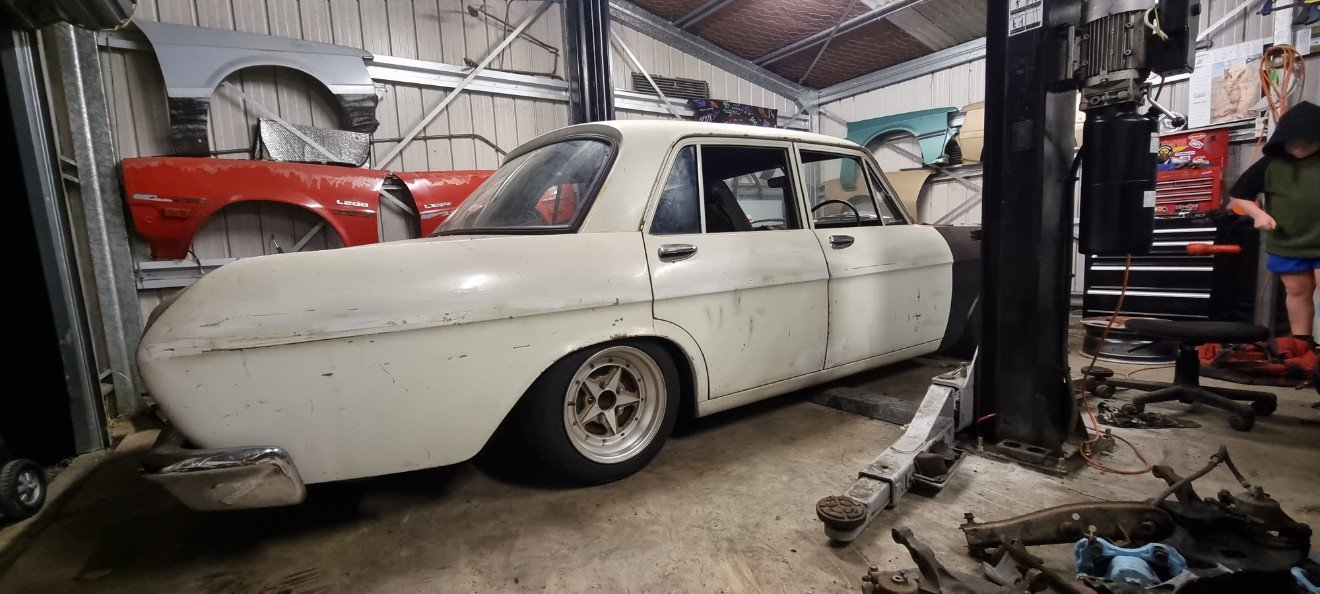
So the vibration seems to have gone away so it was the wheels. I say seems to because it's a noisy old car and I'm deaf. Only problem is now I'm stuck with the crappy pizza cutter wheels. They look shit. THE CURE IS WORSE THAN THE DISEASE!
6 points
-
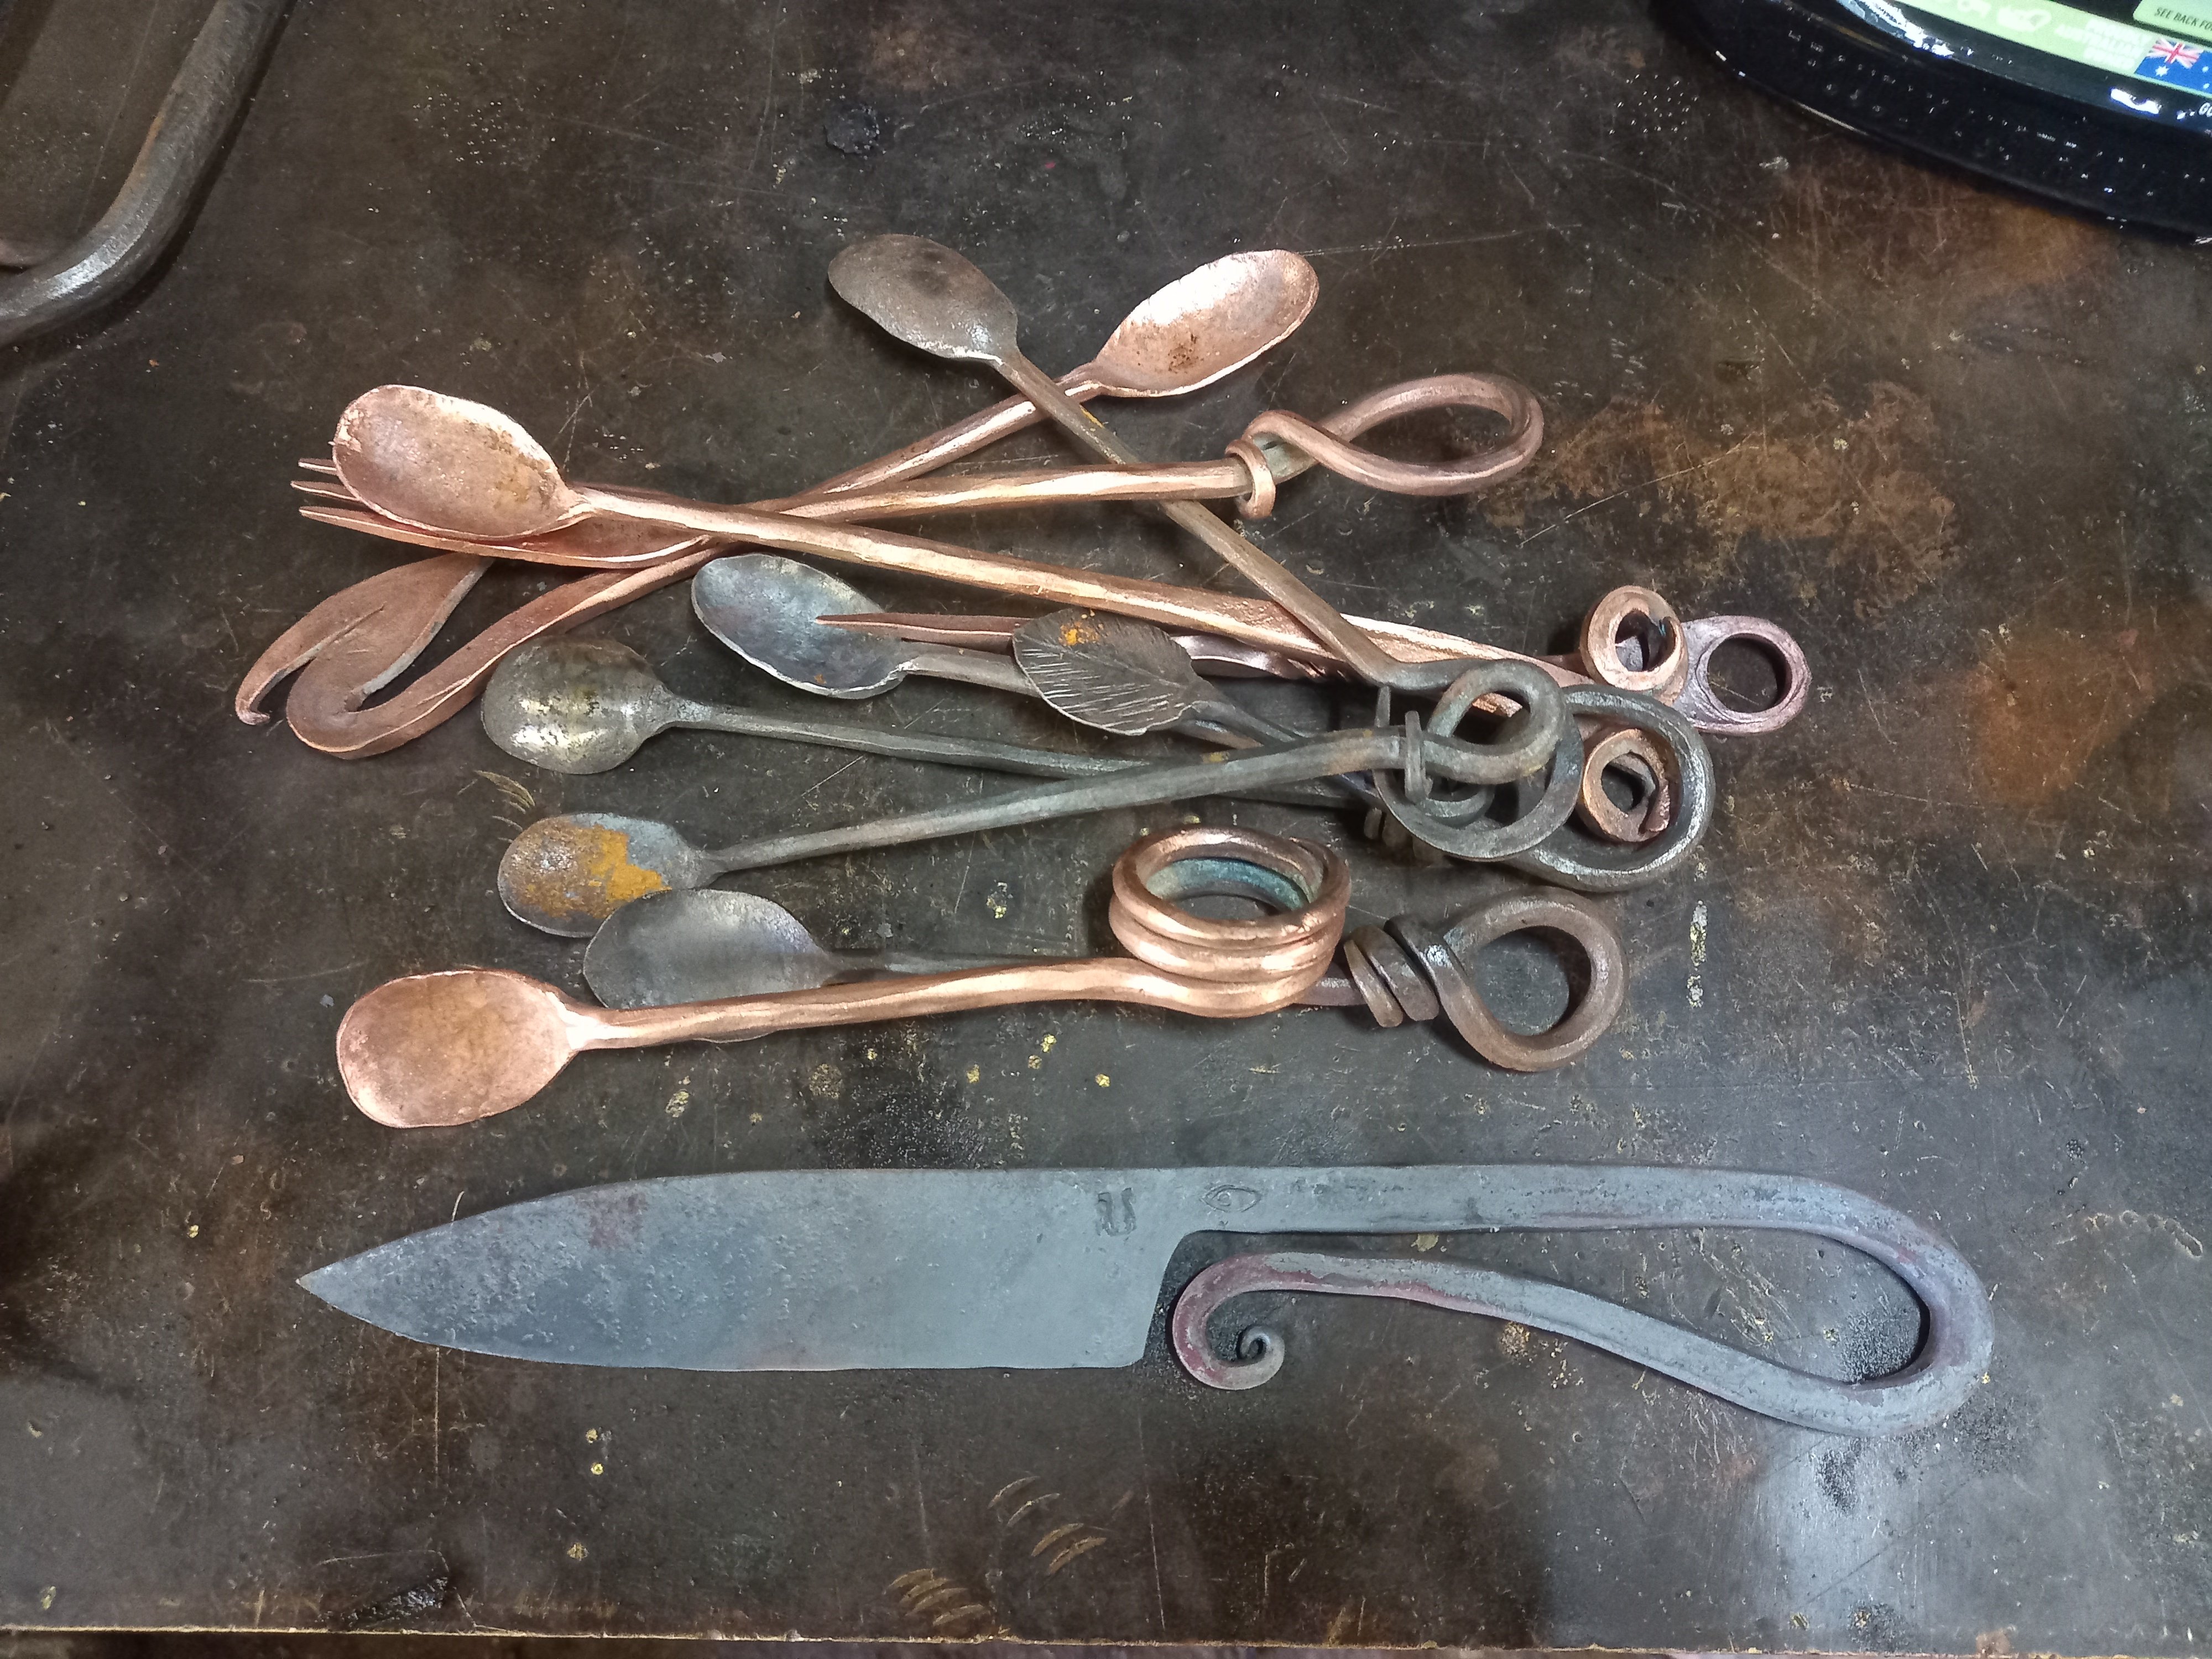
Someone wanted me to make that knife but then never got back to me, still needs hardening and grinding, also made a few spoons
6 points
-
Surely cable ties would have been the final fix, I am slightly disappointed that you properly fixed it..5 points
-
Yeah! Real exciting. Good to have some confirmation that needing things like 4x different PID values for each of the gears is "normal". Hopefully doesnt take too long to sort out. But this is definitely one of the benefits of getting some road tuning done initially. Figure out all these types of things and get them sorted first, so hopefully when it comes to dyno time I can just progress straight to throwing a rod out of the block Also this motor is VERY touchy on first throttle press. So it's great to have the ethrottle setup, will pull a bit of sensitivity out of the first half of pedal press. Will be awesome to have cruise control working again too, but I need to find where my switch ended up...5 points
-
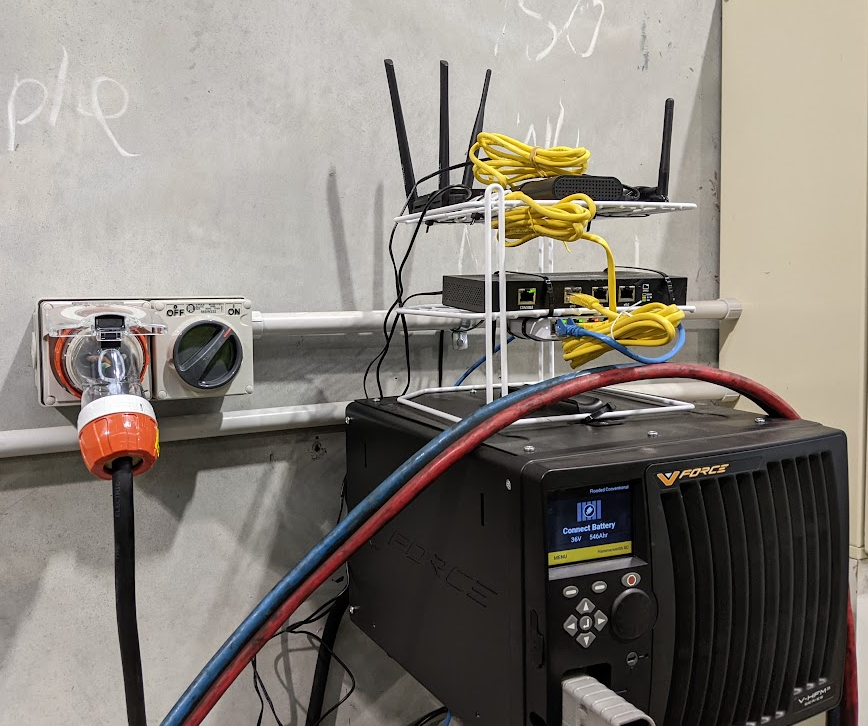
I too play bodge'ems, sometimes with shower racks and network investigation gear:
5 points
-
New engines getting some ARP head studs gaskets and another sump with a bigger drain so I can tee the catch can in to it. Might squirt some paint on too. Bought all the stuff 4 years ago it's just been on shelf waiting for this to die.5 points
-
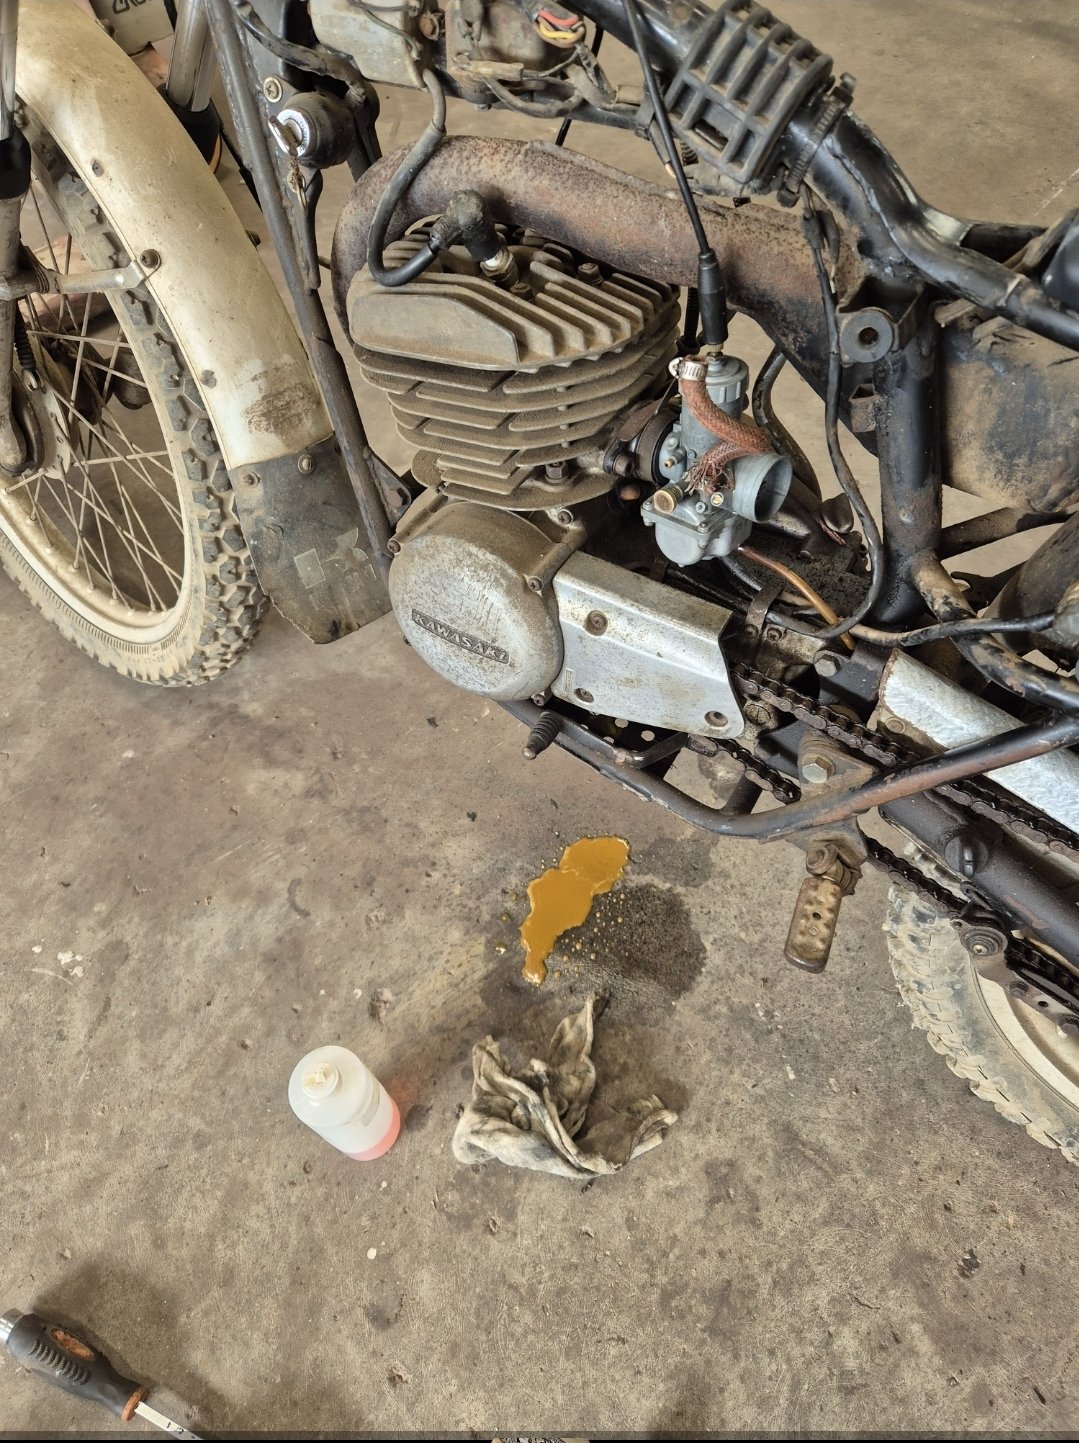
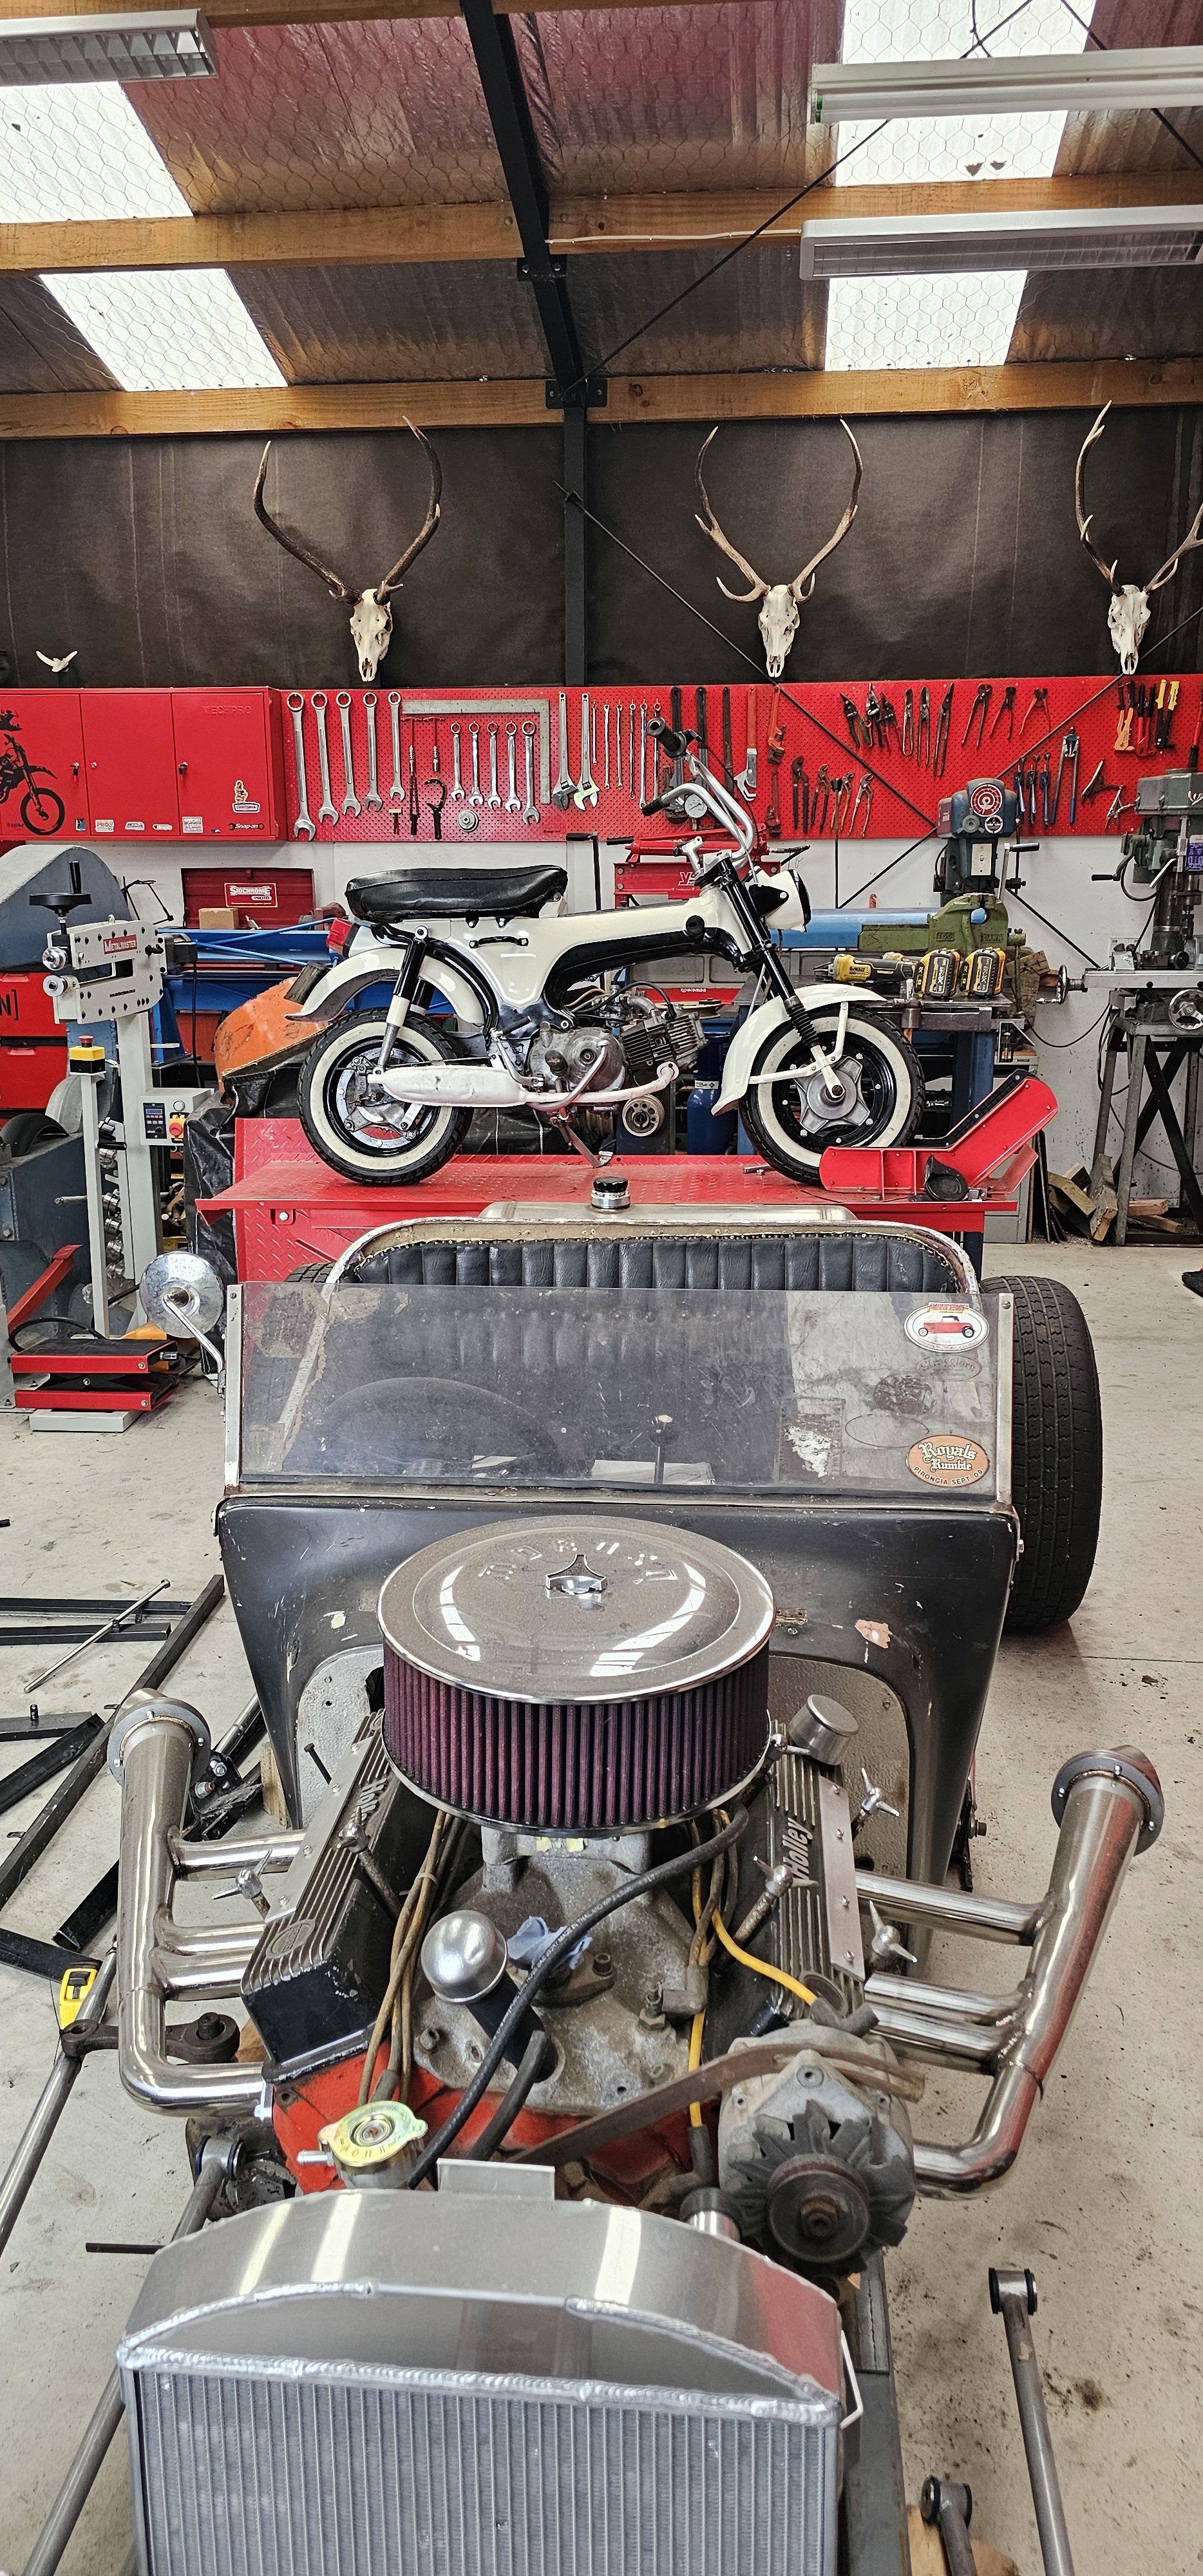
So, it turns out to have a 90cc motor in it. CT90 with high/low ratio gearbox. Ive decided to repower it with a high compression ratio 140cc motor after talking to the brains trust of the speedcocks. So plans are now in place. This will involve a re wiring as the 6v system is dog shit anyways. So I'll sort out a 12v harness and accessories etc. It'll be good to upgrade the 56 year old wires anyway. Looks at home in my shed. I'm pretty fucking happy with the condition its in. Super tidy for its age.
5 points
-
Woohoo!! Spun it to 6200rpm last night log only showed 2 knock events (not audible) in transition and I've got a whole heap of headroom now to up boost and have timing adjustable to go with it. Its ultra rich with weak timing as basically I'm starting from scratch again but I think I've got my head around how to get it set up and make decent power. Cheers HP academy without which my rods would have fallen out a long time ago.5 points
-
I would 100% fit a centre lap belt if you have a suitable one to use. (As per the previous discussion) Busting your face up on the dash is (lap belt lyf) is heaps more preferable to ripping your head open on a broken windscreen. (Ask me how I know) Even more so because anyone sitting up front is going to be somebody you give a shit about. (Family, or a mate etc)5 points
-
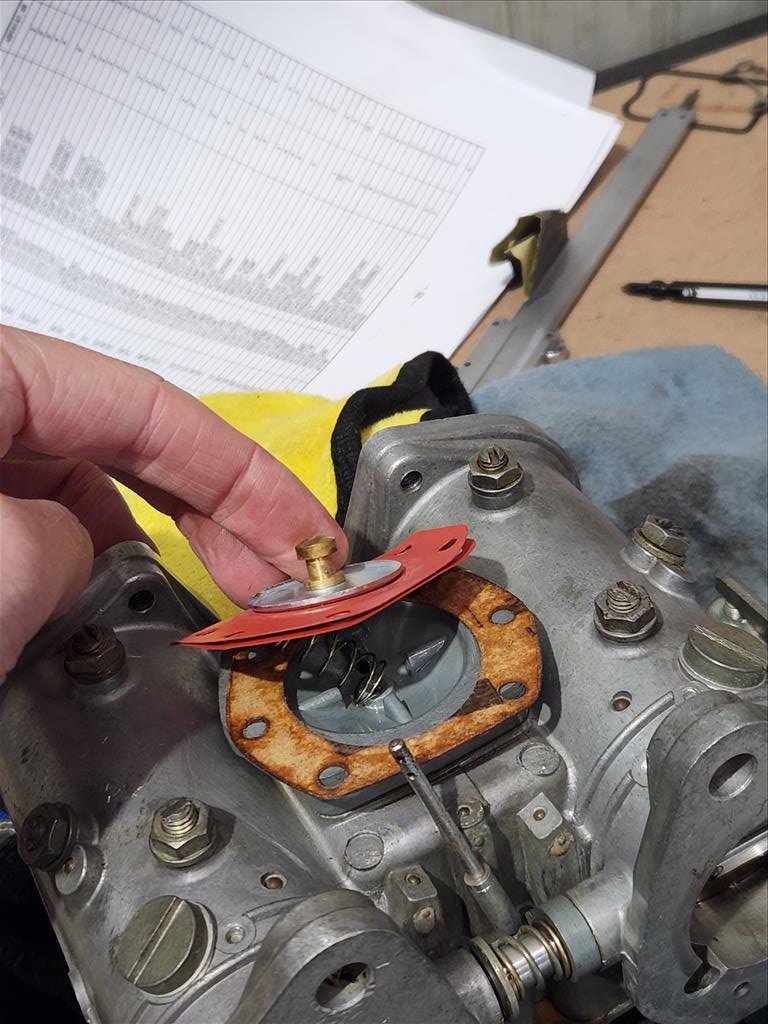
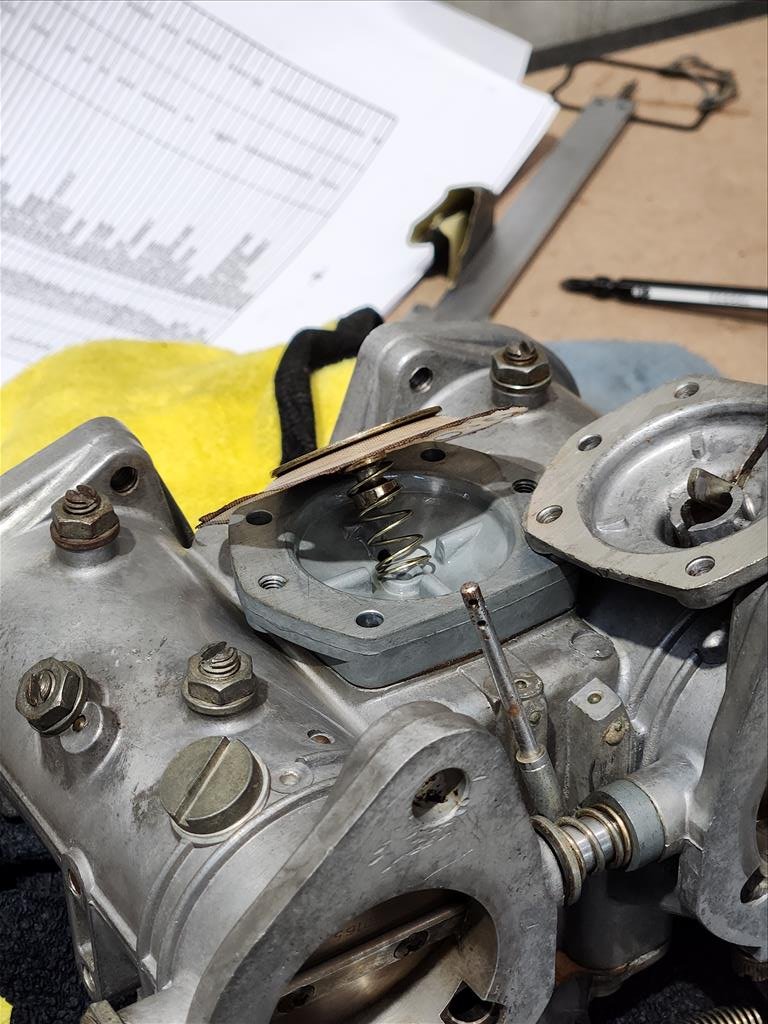
I'd like to introduce you to the smartest man alive, me. I believe I resolved the accelerator pump problem that (would you believe it) I caused. Apparently when I took the stuff apart and took photos I didn't actually take photos of the correct orientation of the diaphragm for the accelerator pump. I did think it was a little weird that the pump arm didn't really do anything. So this is how I had it.. And this is how it was meant to be. Obviously the spring is straight when it's screwed down. People smarter than me would have worked this out immediately but hey, live and learn. A free lesson that I'll remember. So yeah, I'm a dumbass but seems to be working again on the bench. Yet to run the car, still have that whole cooling thing to work through.
5 points
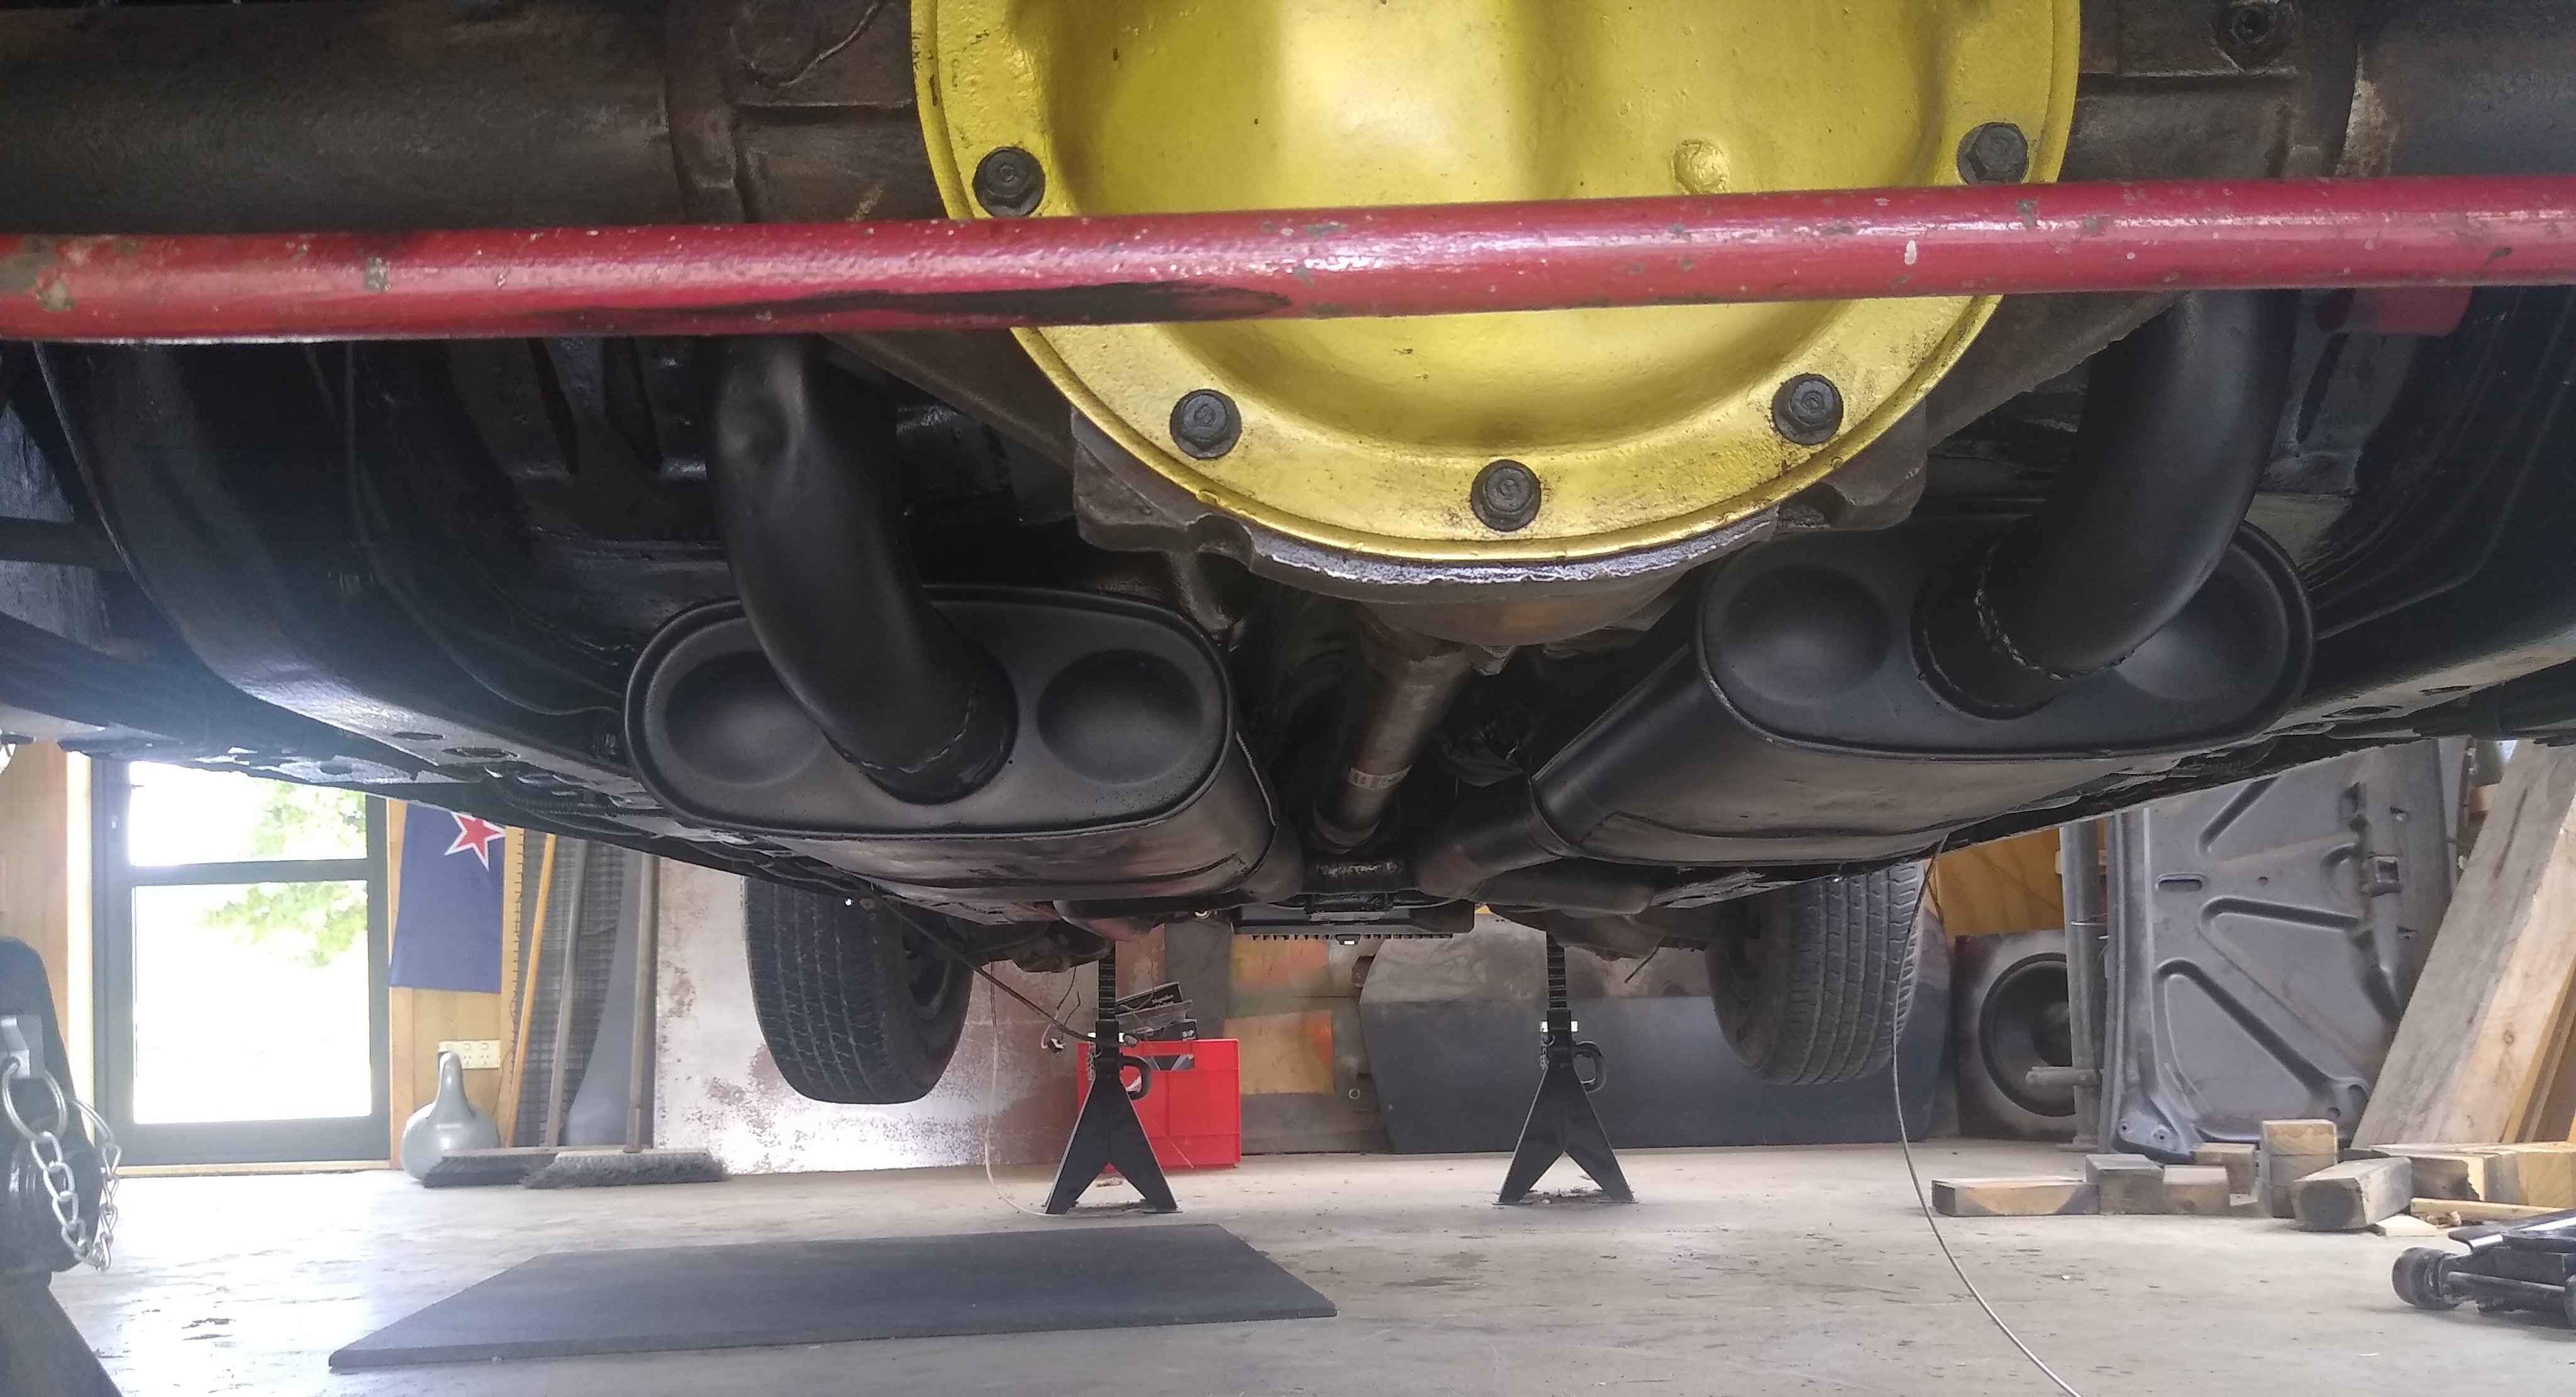
-
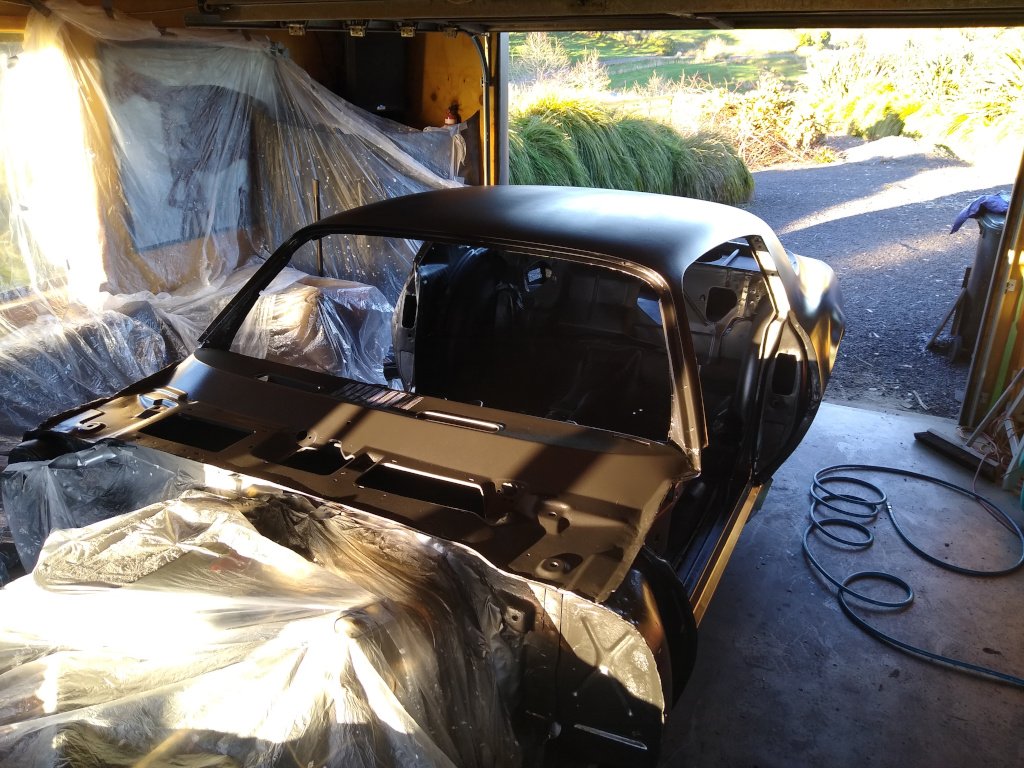
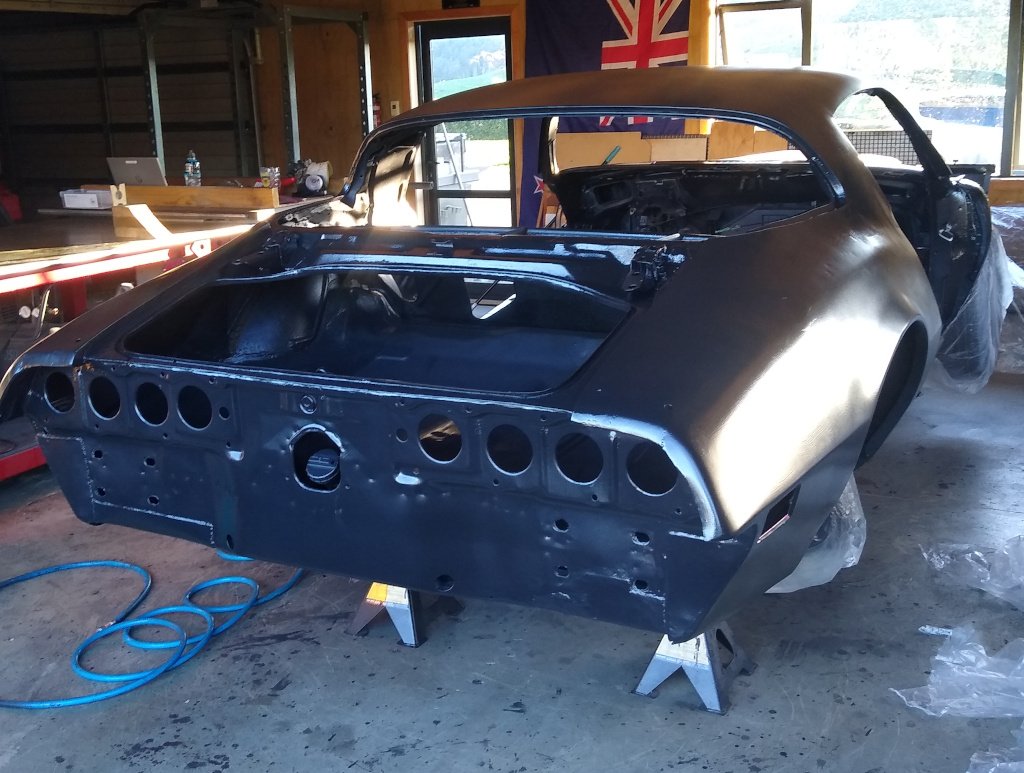
Since the last post Stripped paint off the underside of the body and repainted it Exhaust; Modified to hang it closer to the body to avoid dragging it down the road. I added flanges to the pipes near the rear axle to make any future removal possible without cutting anything. Replaced a few sections of 2.25" pipe that had been used in some bends with 2.5" to match the rest of the exhaust. Probably added 50 odd HP there alone. Painted the headers and rest of the pipes with high temp paint Cleaned out the fuel tank and repainted Painted the whole body car inside and outside with 2 coats of epoxy primer. The plan is to do body work over the top of this epoxy primer This was my first time using a paint gun. There were some runs and overspray so I'm getting the full beginner experience. My plan is to now reassemble the car after cleaning up the parts and priming them while off the body. It feels like a real milestone getting paint on it. I was getting sick and tired of seeing surface rust slowly build up on the bare metal or any new patch panels I'd welded on. Anyway, time to start on the rear bumper, then the boot lid, then, then, then, etc
5 points
-
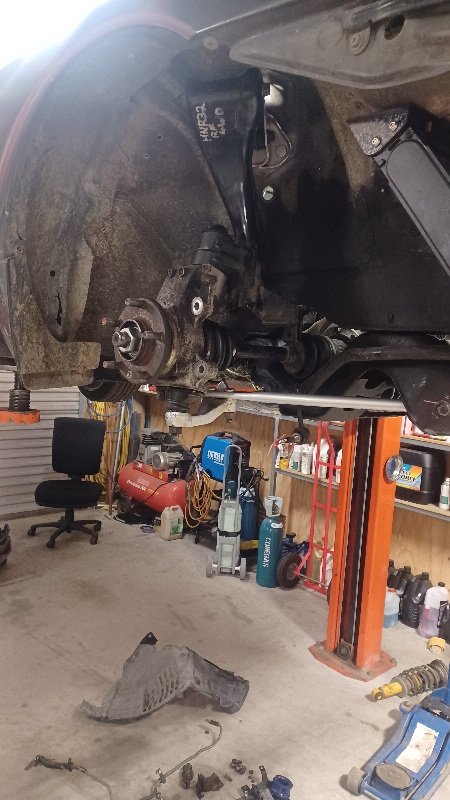
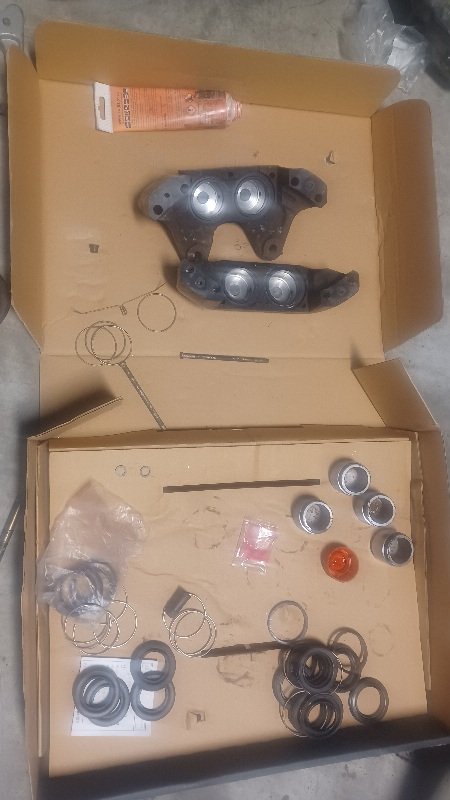
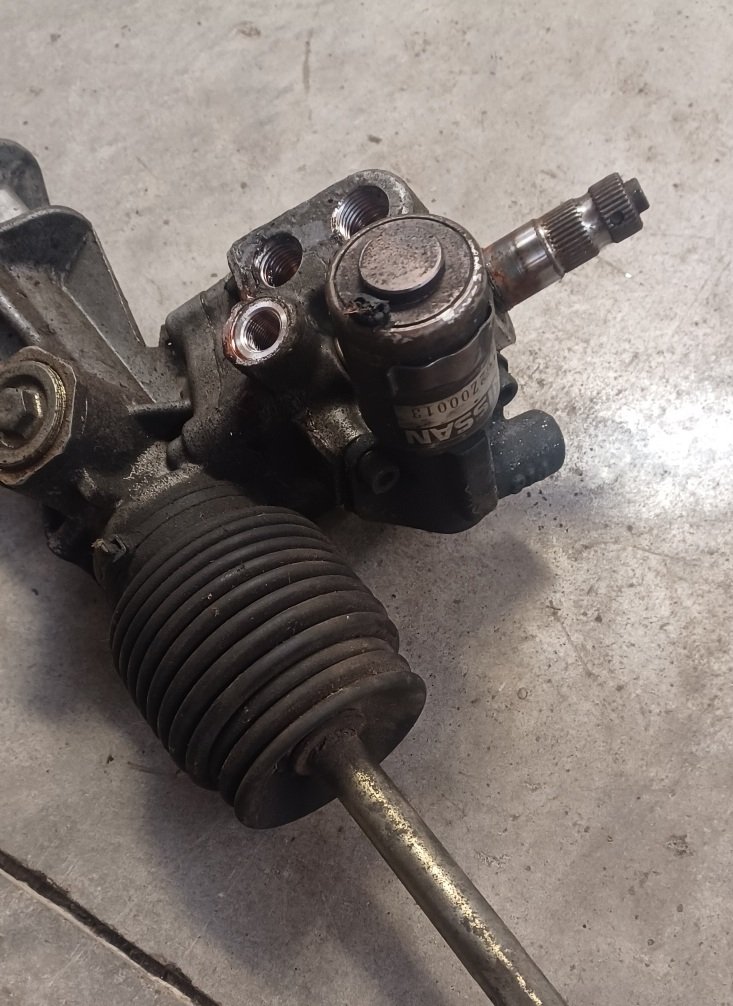
Suspension together. Wrecker mate has found me the bolt I need too. I'll chuck some stock gtr brakes on the front for now to get it running and driving. I had a set from ages ago so chucked a new seal kit in. Also wanted to solve the issue of having heavy steering. Hicas R32s have variable assist power steering. Mine was always heavy and I never bothered at the time to sort it, but it was the wires missing off the solenoid on the rack. So I found a spare rack in stock to make 1 out of 2. Unfortunately there are a few little bits I still need so start the 3 week timer for parts from Japan again...
5 points
-
Pulled the dash out of the ute over the weekend, found another skink, got tired of rusty screws so left the heater box for another day. Neither the xd steering wheel i put in the sedan nor the xd wheel in the rotten ute have the centre cap. Started playing with freecad and learning the ropes to suss out some ideas now i have a 3d printer. I prefer the option on the left so far, i think in black with copper inlay should look sweet. Will do some more mucking around during the week.
4 points
-
This one time, the steering on my jet boat failed whilst I was quite a ways up a river in a rapid. The 3mm thick angle that held the end of the cable thing snapped off, managed to bodge it up with a couple of cable ties and make it home. The throw of the arm was off also, so it could over center one way and suddenly reverse your steering, made for a few very exciting moments. Fixed it properly with a chunky mount and a throw adjustment.4 points
-
Maybe I should cut the other muffler off and since I have the grinder out cut the back half off4 points
-
4 points
-
i saw windows xp booted up onto one of those 1" screens. Show off to the consooooomers with apple watches when you boot that bad boy up4 points
-
Well Flashed in the Big Beautiful Tune Today i've been working on took for a test drive, Ultra Peppy let it warm up a bit before leaning on it too hard 70% Throttle breaks traction at 80kph WOOHOOO! on same boost. took a log everything is happy gave it a full stab holy shit. checked logs again yup nothing to worry about lets stick 2 clicks in the boost controller........ WAAAAARP..........shit. so 2 clicks is too much.4 points


This leaderboard is set to Auckland/GMT+12:00