
Leaderboard


Popular Content
Showing content with the highest reputation on 03/07/25 in all areas
-
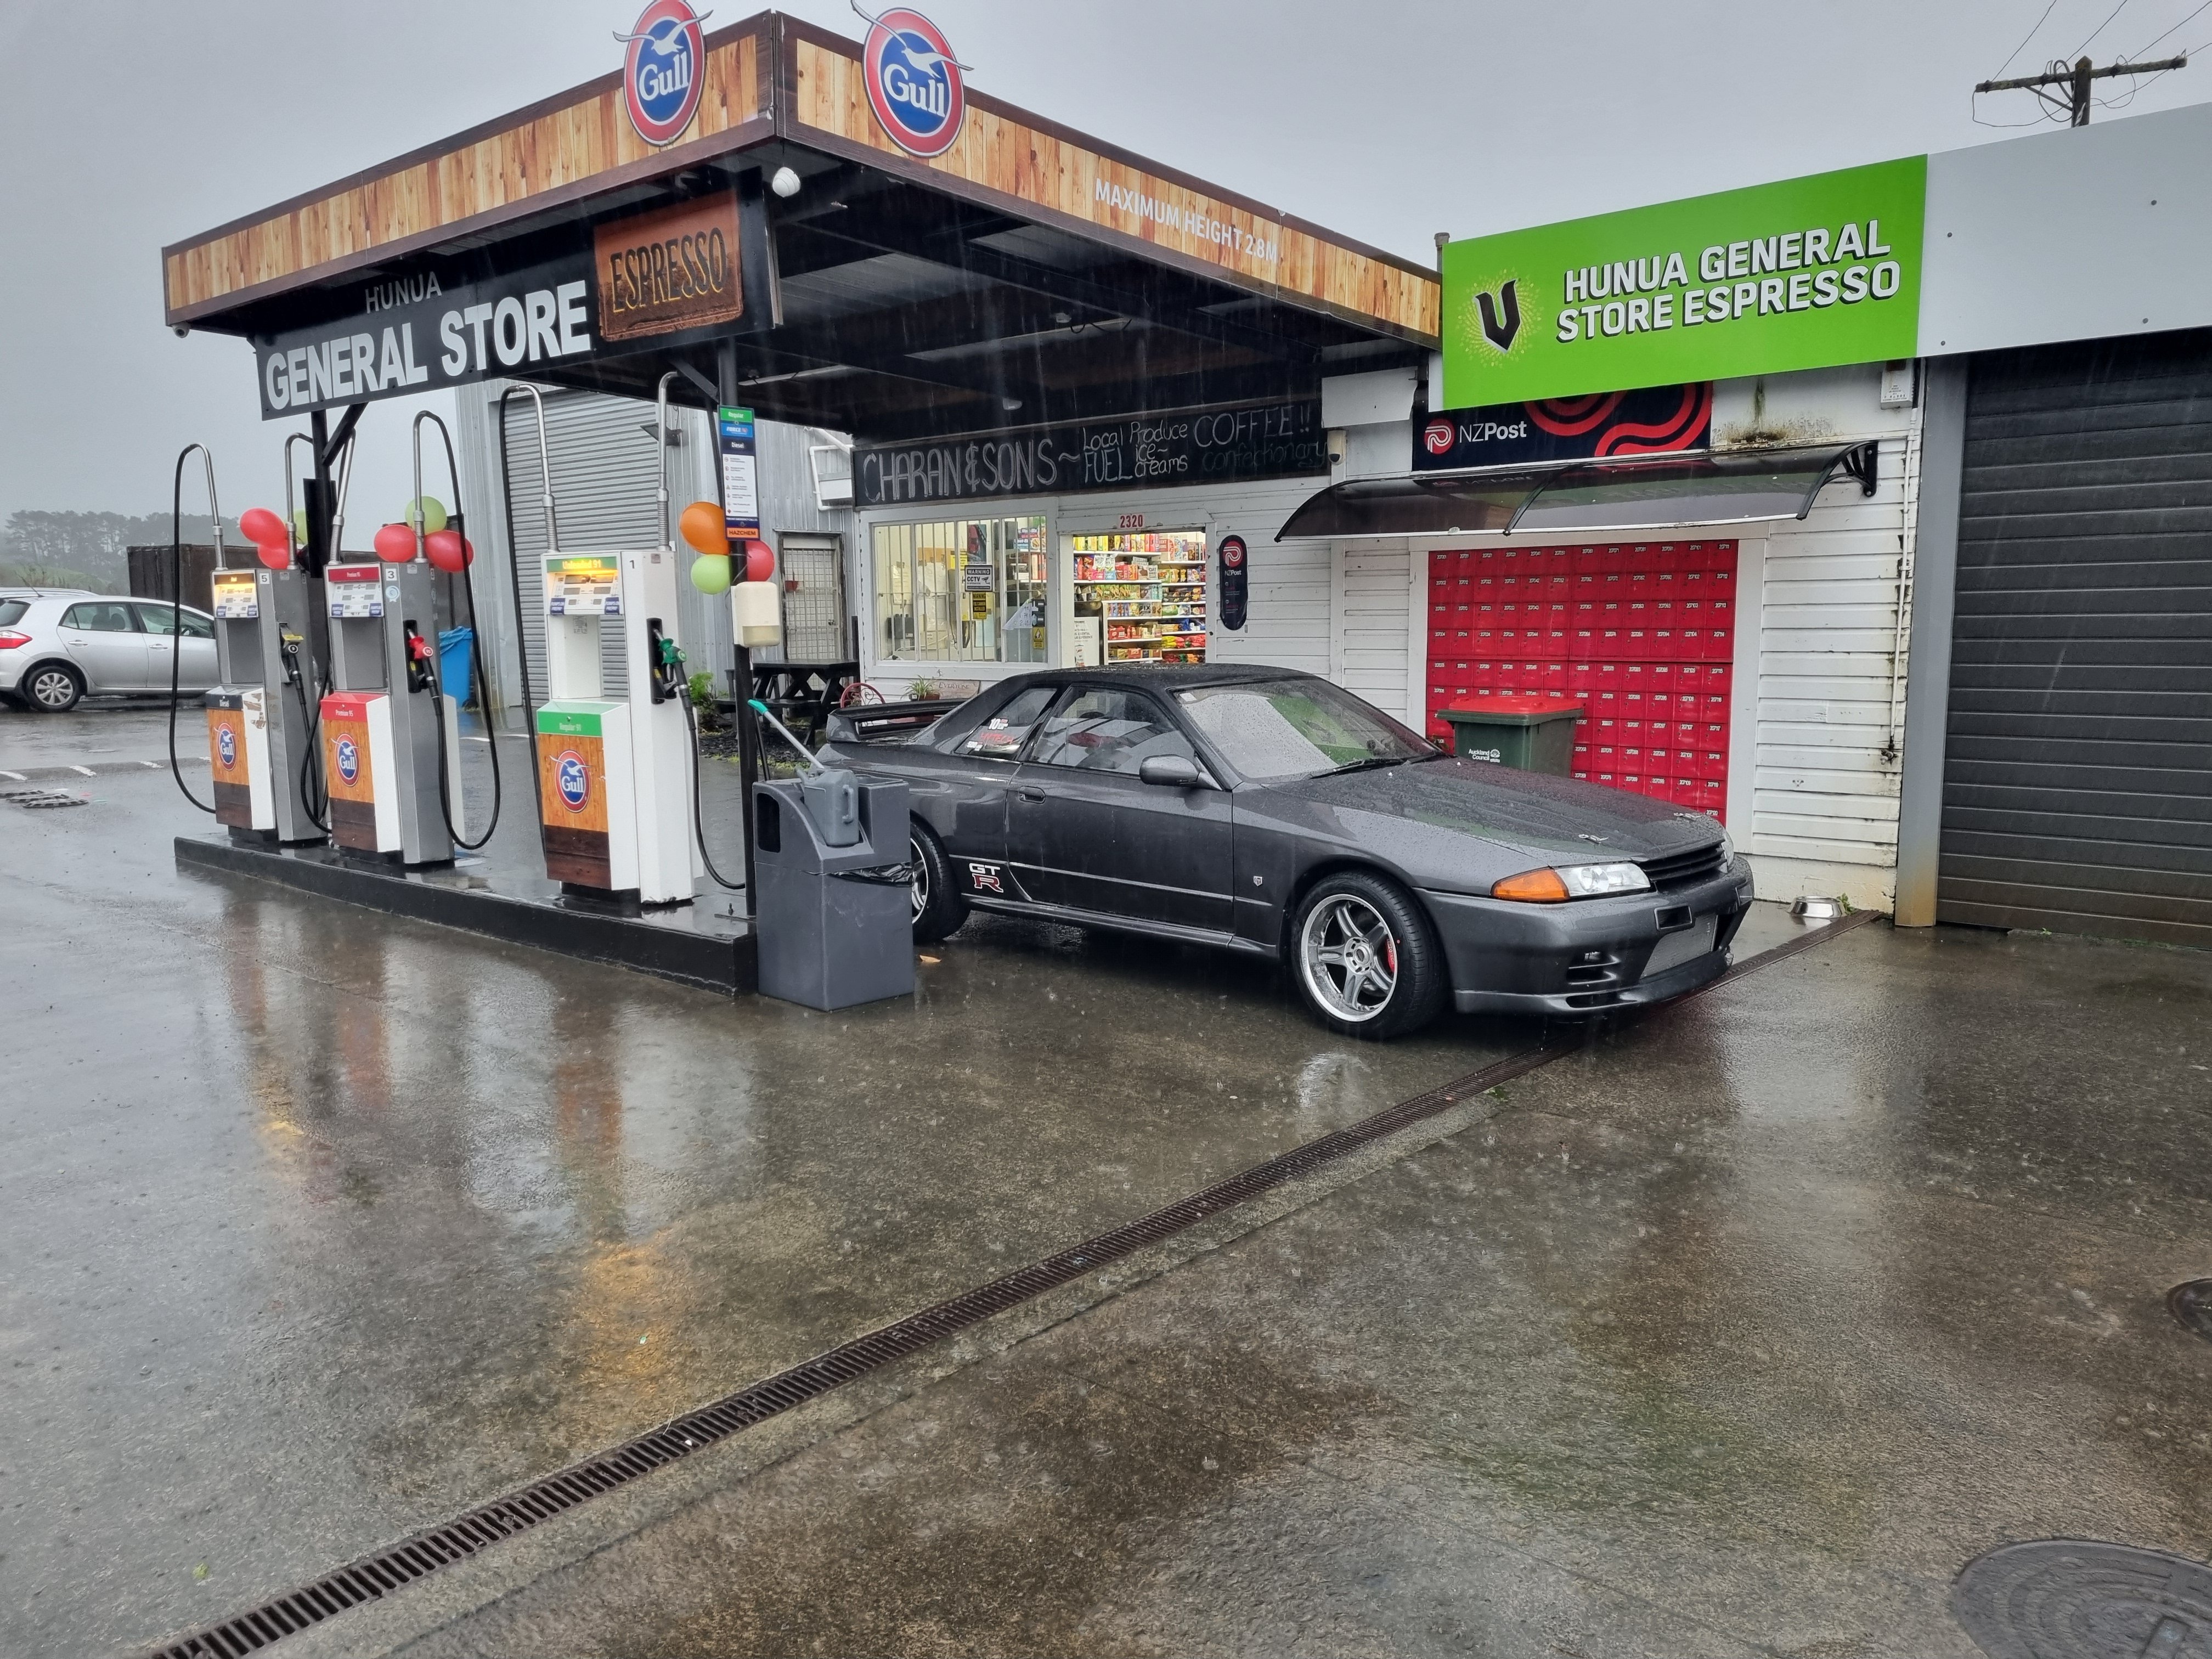
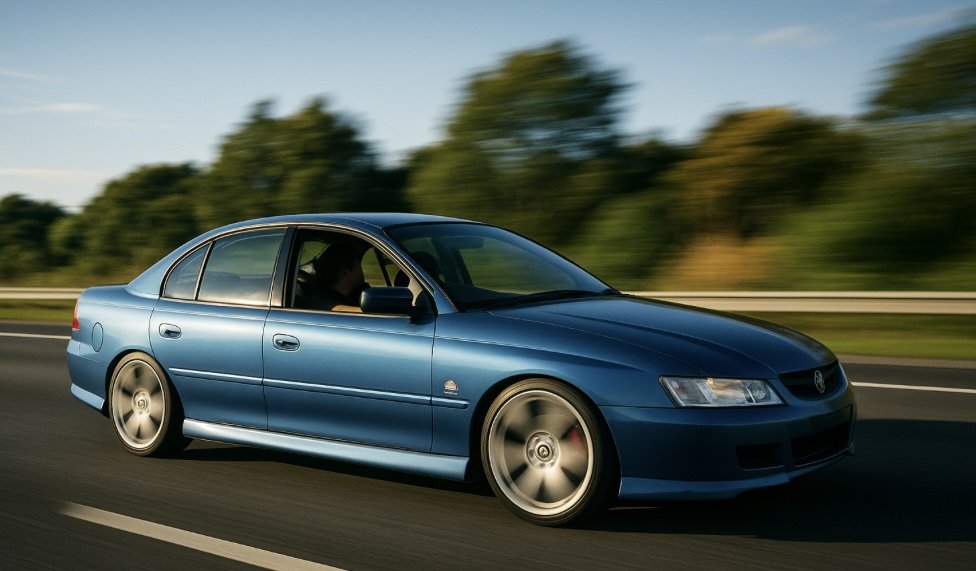
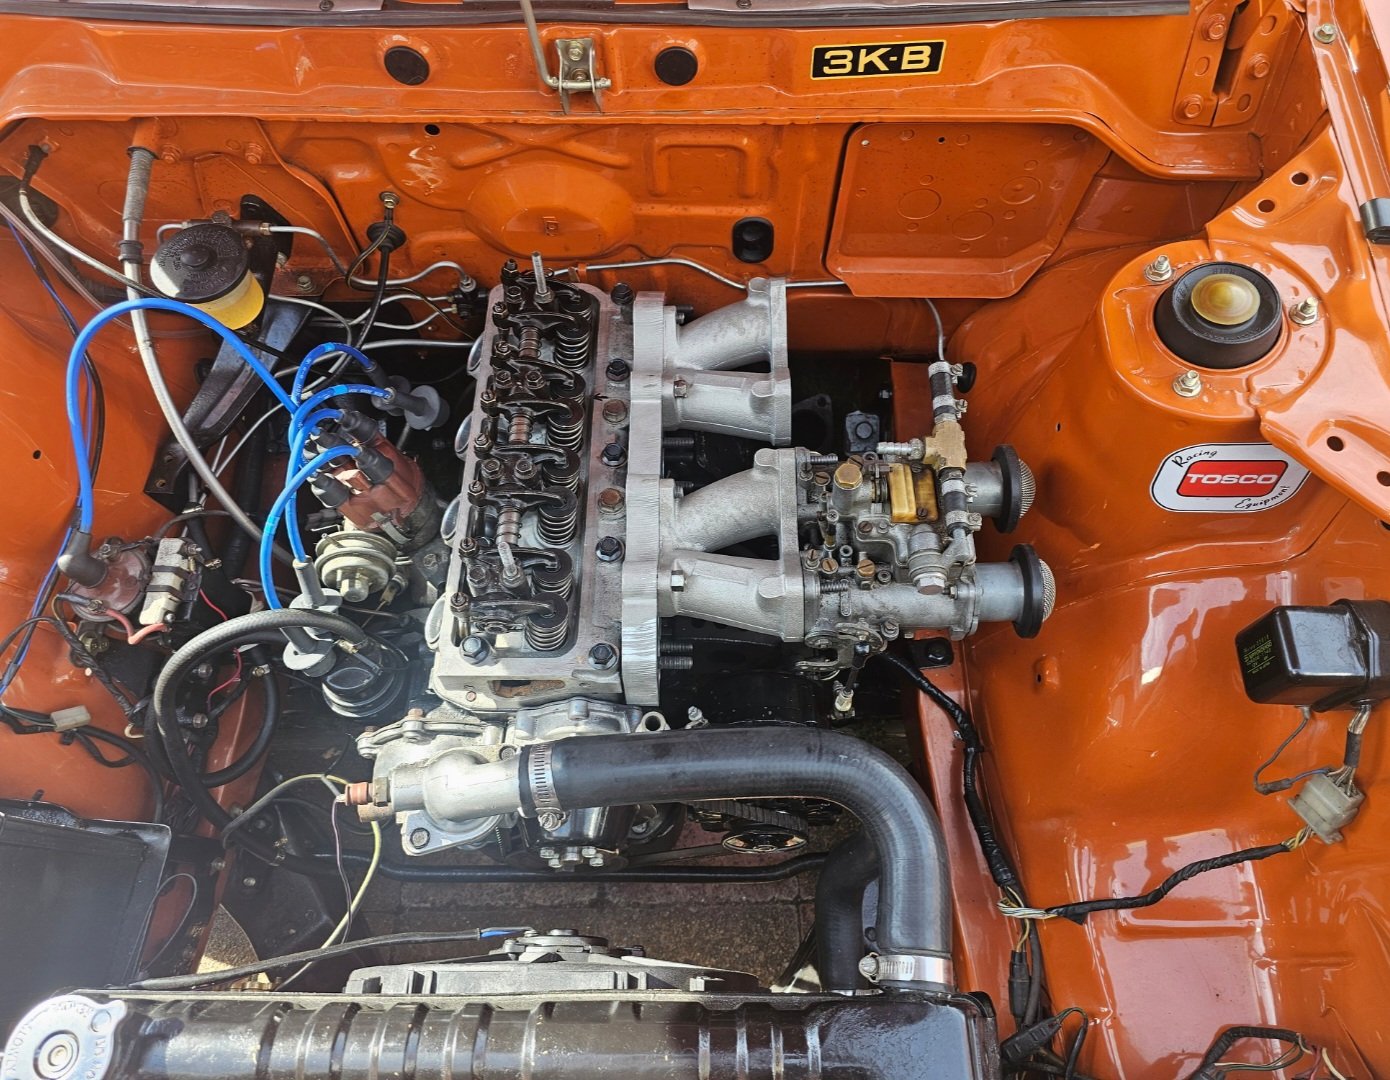
Fuck did i have some issues getting it running. On the plus side I now know what every single wire on the ecu plug does, and that it's properly connected and working, as well as 90% of the entire cars looms. One i got the thing to actually run i thought the sensible thing to do would be take it for a drive. It's still running like a dog but I drove it anyway. Fuck it's choice, even though I've only driven it 10ks in a fucking cyclone I can already feel how amazing the thing is. I'M HAVING A BEER WHO'S WITH ME!!!!!!
 9 points
 -
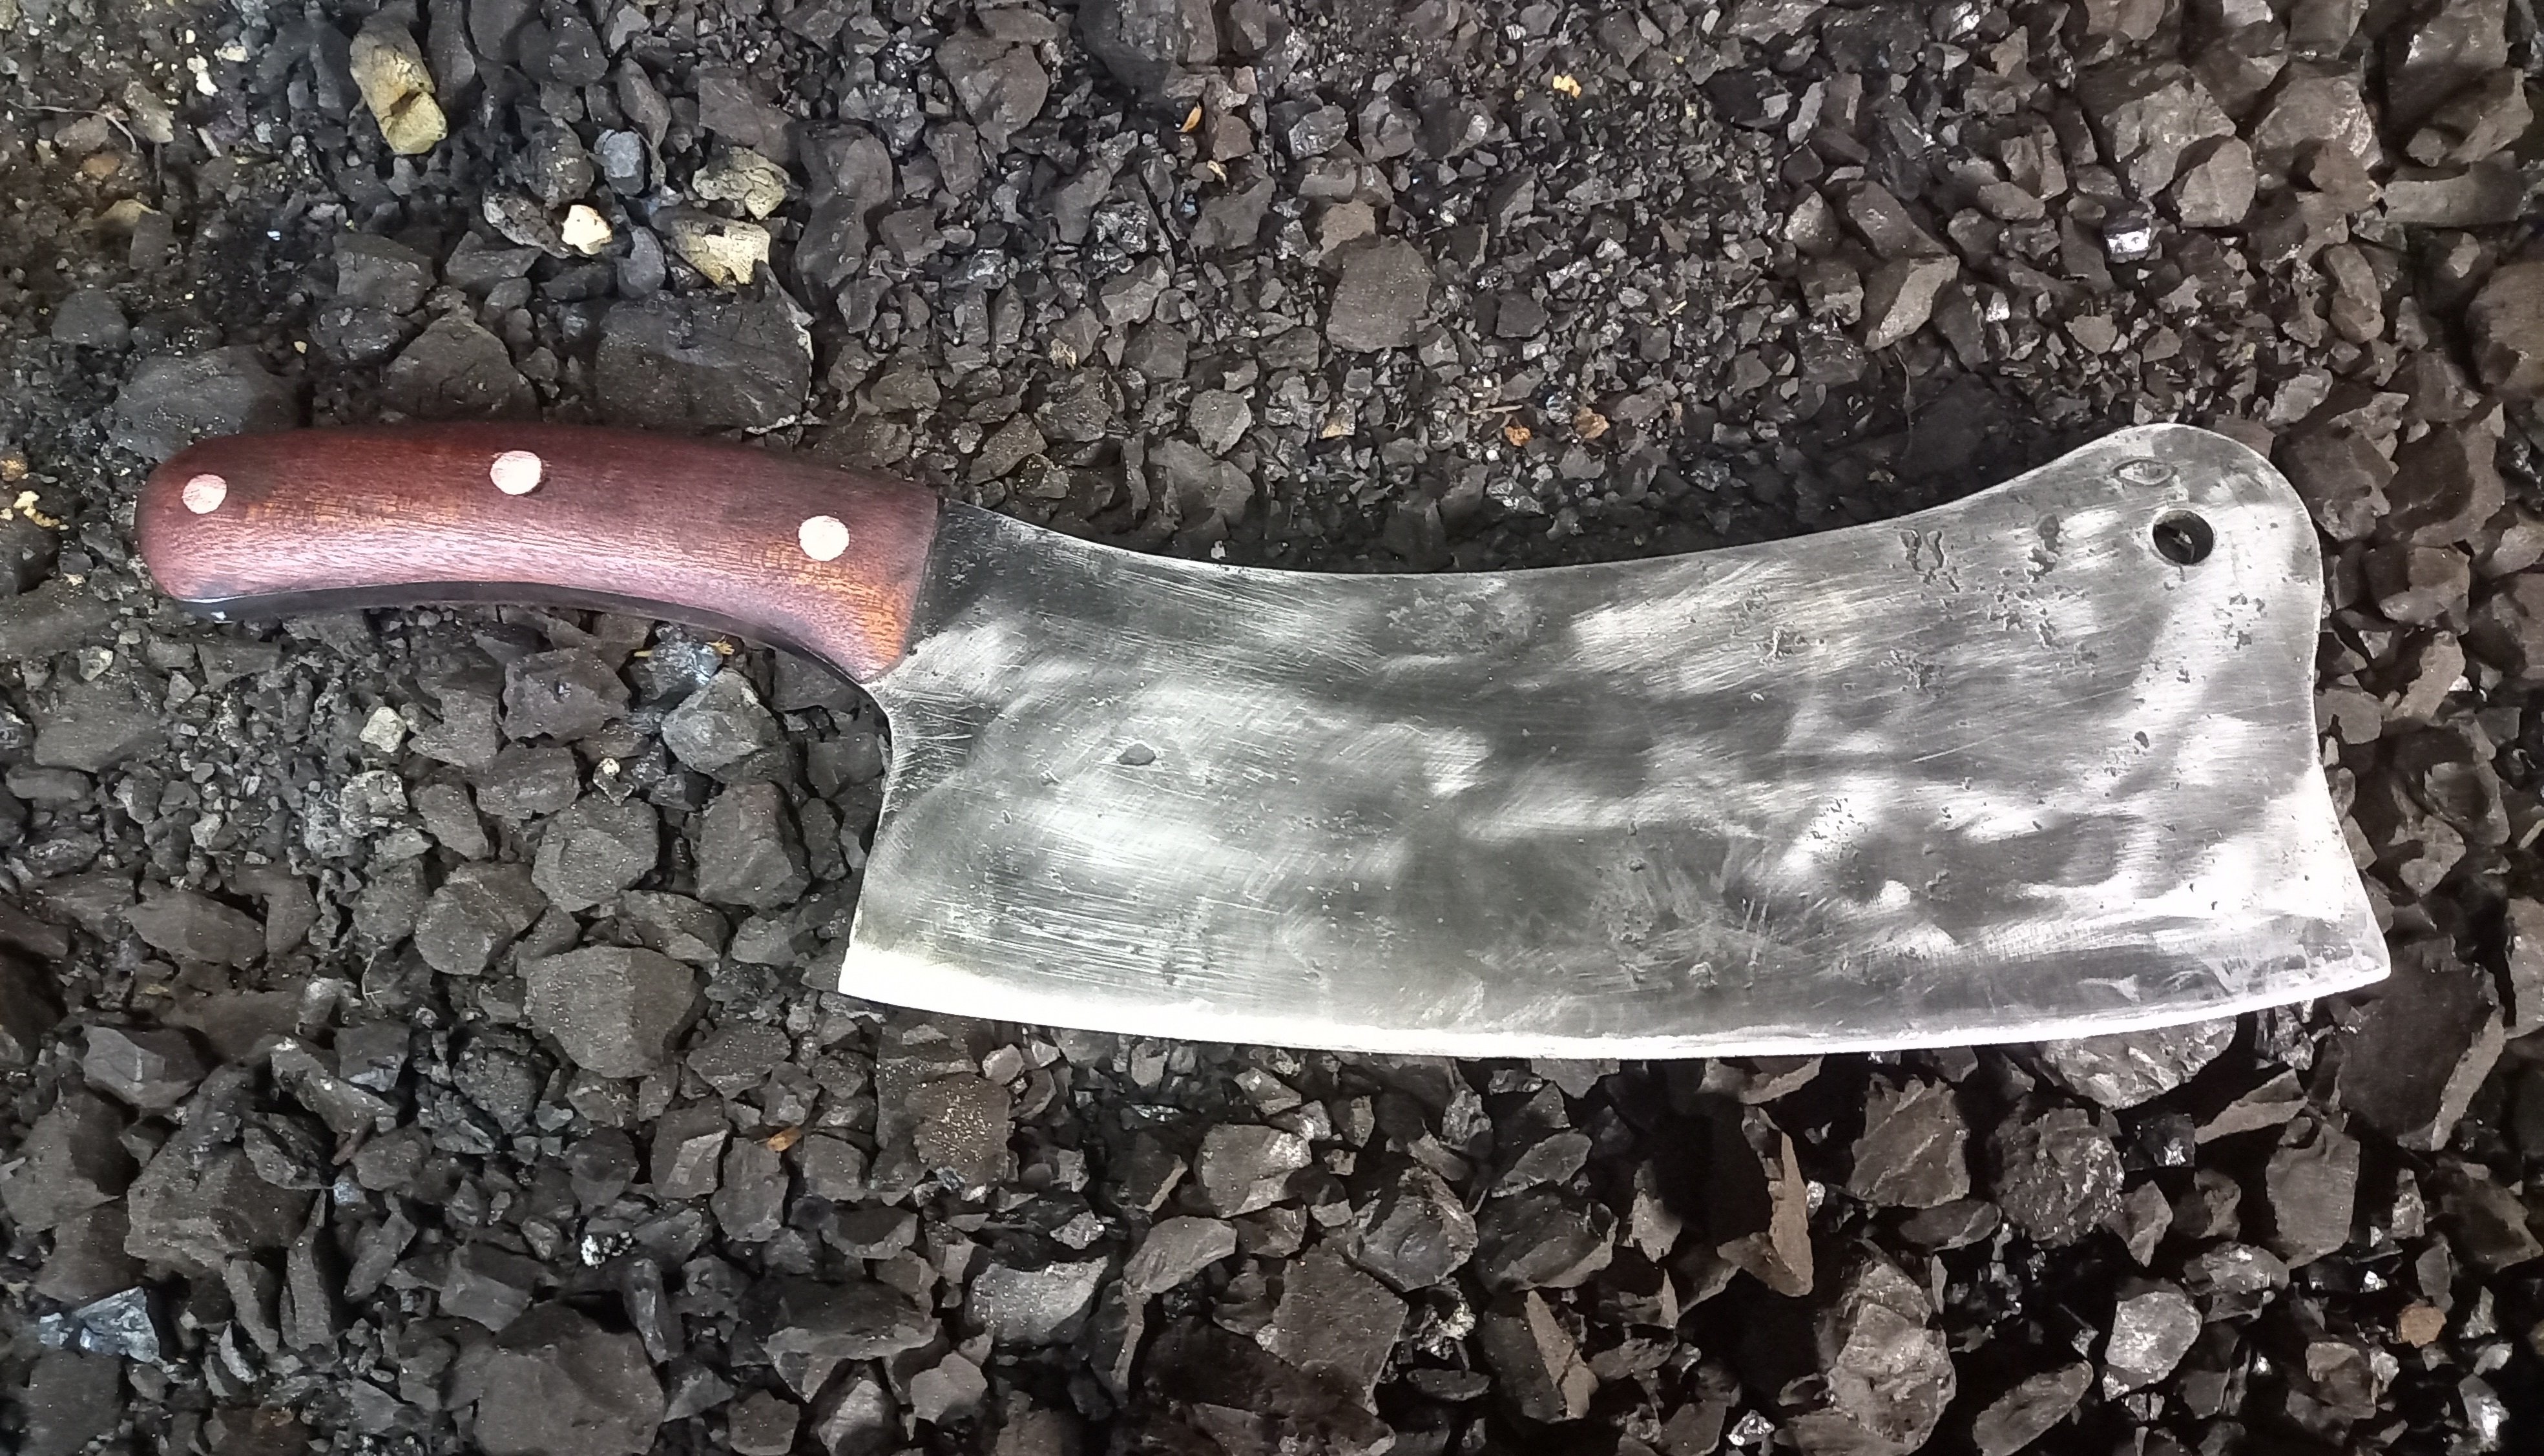
Heavy duty meat cleaver I forged, its not cut from plate, it will cut virtually anything and hold an edge, I spent the afternoon splitting fire wood with it and cut an old tire off a rim with it.
6 points
-
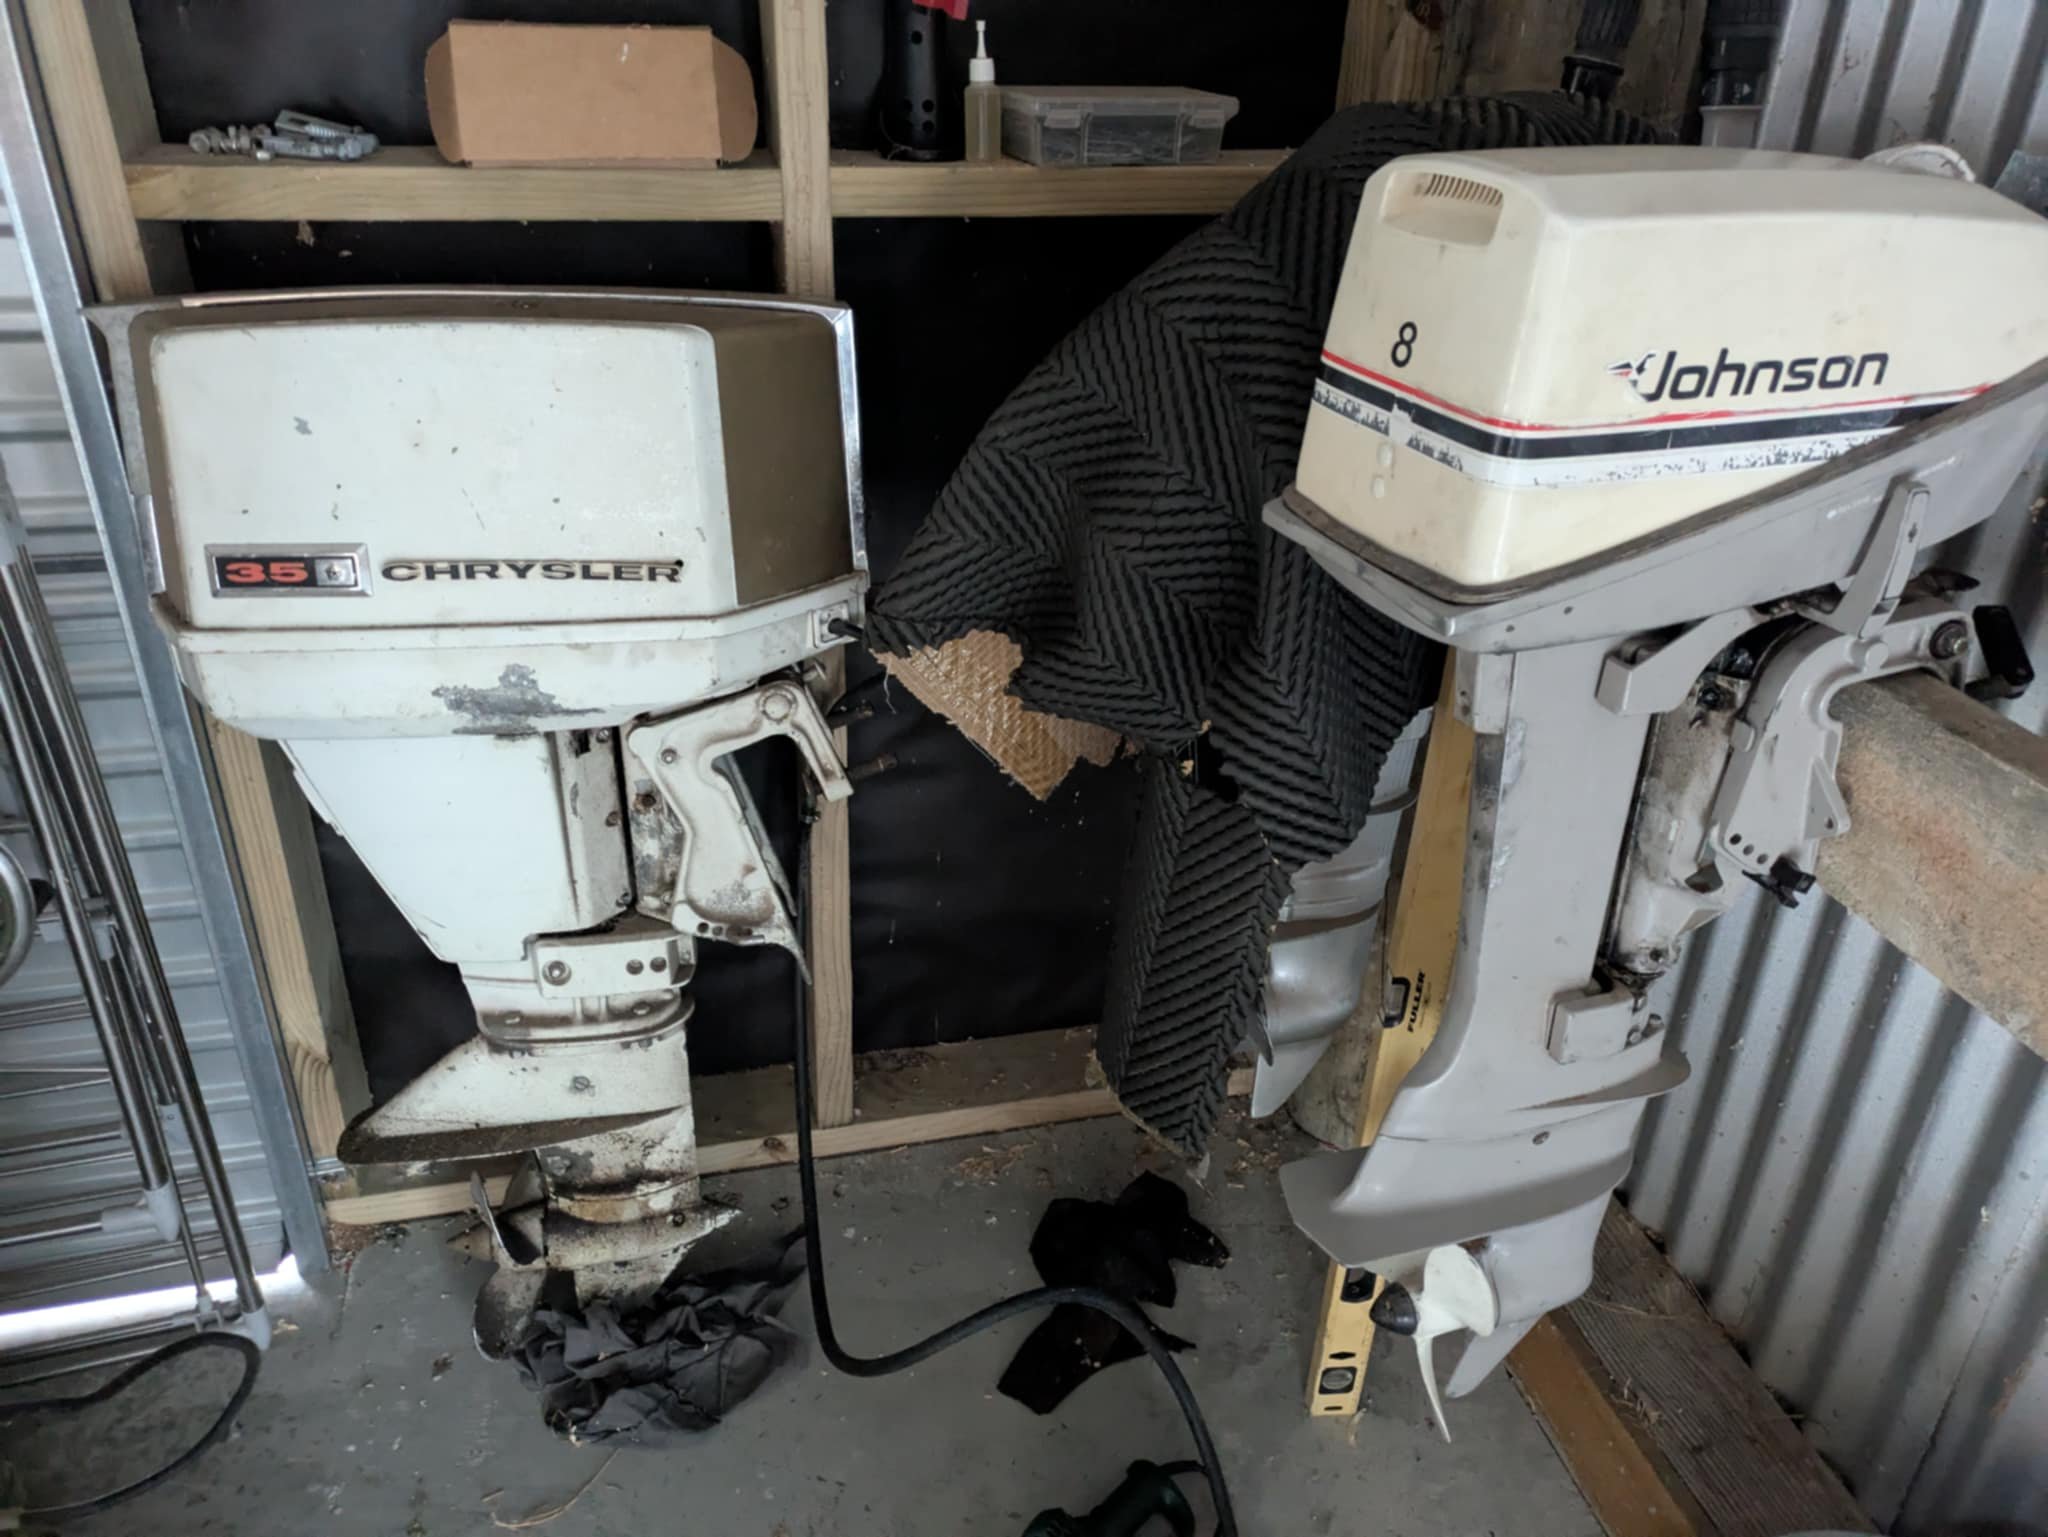
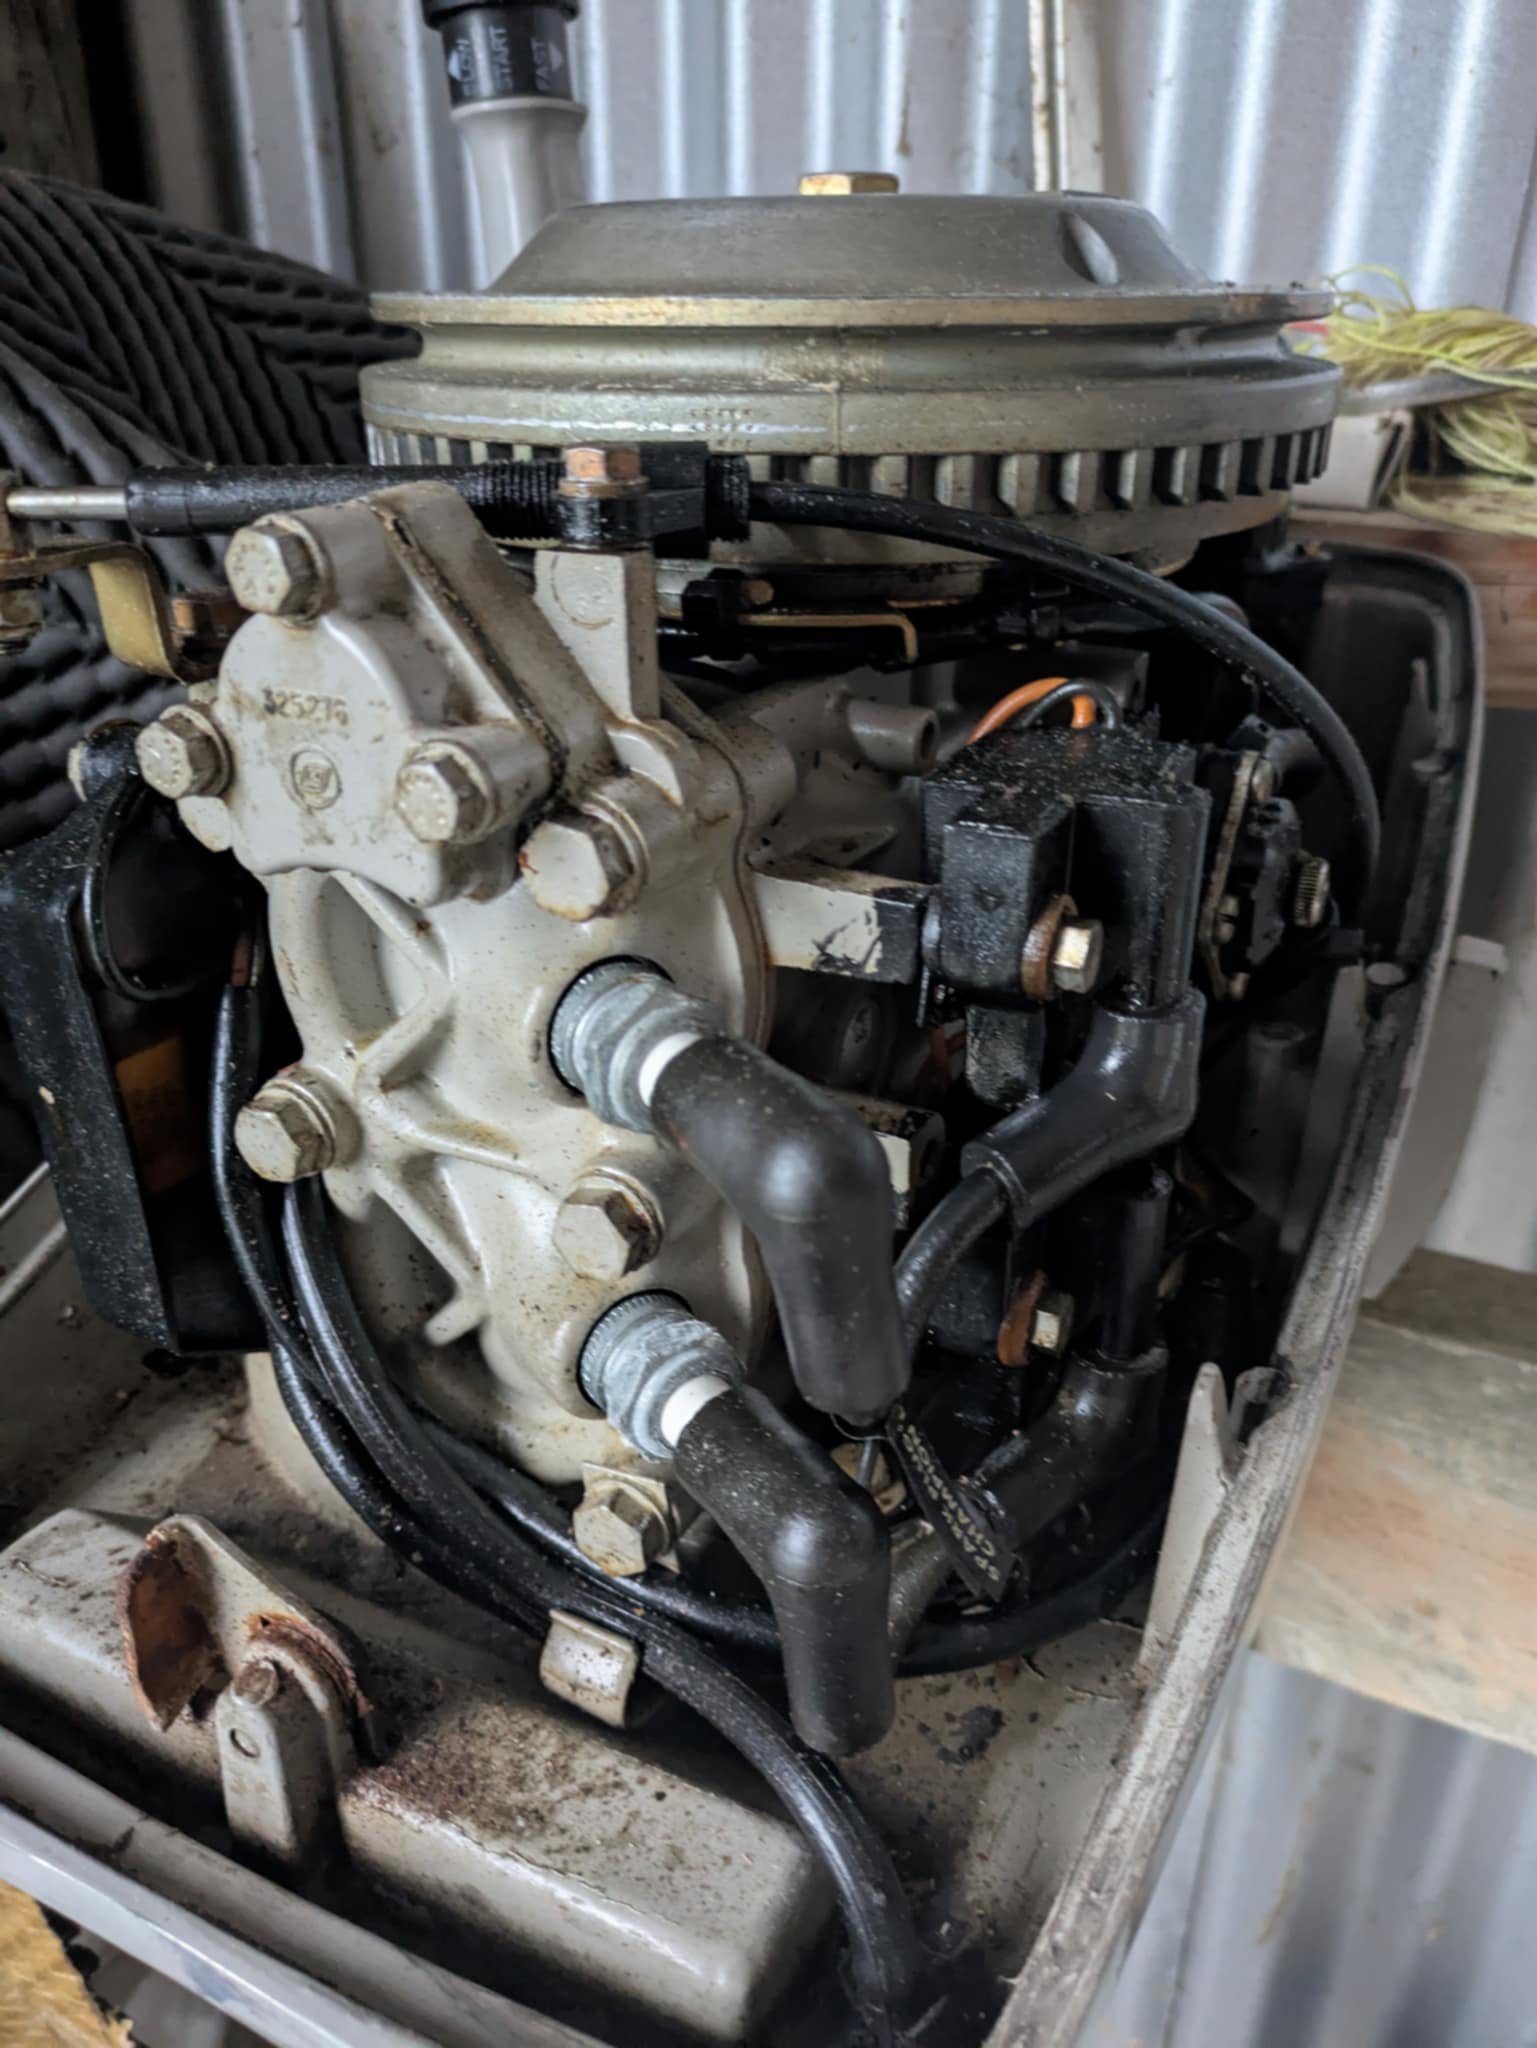
I have this nifty little Johnny in the wings which I quite like. Came from a one owner Barry who mentioned that he used the shit out of it but only in fresh water which seems to be true looking under the cover. Both barrels have 90+psi so I'm calling it good.
3 points
-
The paint match is not even close 😅 Not a drama though as it will all be covered by the glue and chrome. It was a good test for the rust repair I have to do though. For that I might have to take the fuel door off and get it paint matched by the laser paint matcher thing.
3 points
-
Yep nz made savage. Old boss had a 16ish foot one with a 115 yammie. Went hard as a ski boat.2 points
-
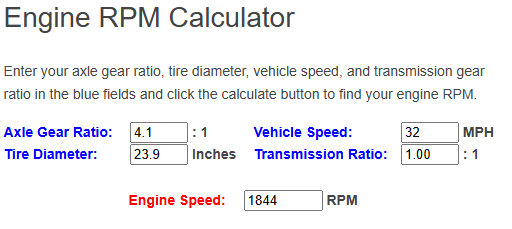
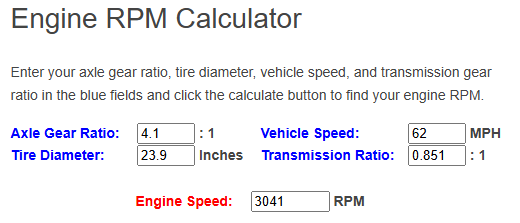
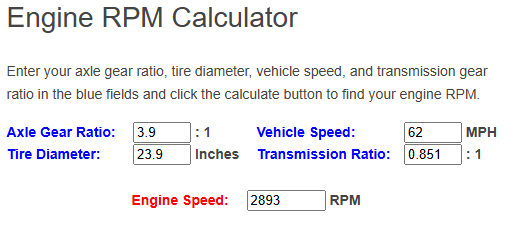
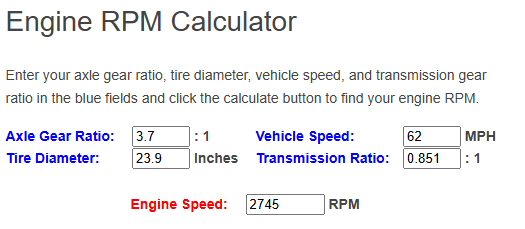
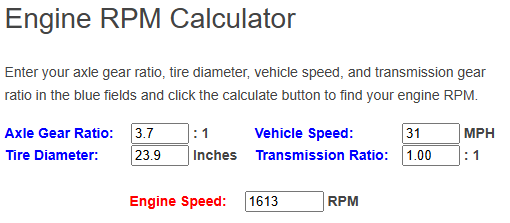
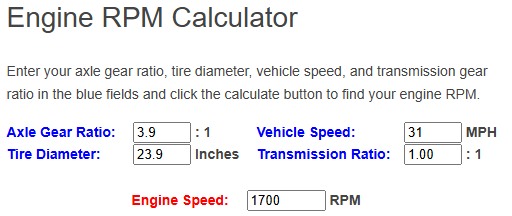
OK, sweet. Doesn't matter that you don't have an RPM counter, just makes it harder to verify the change to what you want with actual numbers. What gear do you use for around town at 50kms and obviously you're in 5th for 100. Here is your current setup. I have used 4th gear @ 50kph : 5th gear @100kph: So if we go to a 3.9 final drive ratio: 50 kph in 4th: 100kph in 5th: So if we go to 3.7 final drive ratio: 50 kph in 4th: 100kph in 5th: OK. There you can see the differences at nominal speeds. But what about 1st gear you say? I'm not going to do a @Roman spec graph for you which would be alot easier for your veiwing pleasure but the basics are this: 1st gear, 4.1 Final drive: 8kph = 1132 rpm 16kph = 2264 rpm 1st gear, 3.9 Final drive: 8kph = 1077 rpm 16kph =2154 rpm 1st gear, 3.7 Final drive: 8kph =1022 rpm 16kph =2043 rpm This would be easier, if I did an RPM to kph speed for you to see easier but because I'm lazy and cbf starting again, you can think about this the long way around it. But as it seems: 1st gear @ 20/21kph is the roughly similar revs at 100 kph with 4.1 ratio (2943 rpm ) 1st gear @ 20/21kph is 2800rpm with 3.9 ratio 1st gear @ 20/21kph is 2656rpm with 3.7 ratio Alot of funny numbers there. What I would do at this point, would be a cheap shitty RPM gauge that you can put in temporarily to see whats what. I question that you may be feeling like the revs are higher than you think which is not uncommon when you're sitting on top of the motor, not behind a firewall and alot further forward ( quieter ). The average becomes around 150 RPM in any gear in 0.2 change of final drive ratio. This also doesn't allow for wanting to change gears at different speeds with those without knowing what your RPM is in any gear/speed. Feels like dropping to a 3.9 may not be enough, but someone with more experience with your motor may be able to answer is the 3.7 going to make the motor suffer from torque. I'm almost about to question are yoou sure the gearbox is correct as the numbers don't look scary bad. TL;Dr - Not that certain I have actually answered anything or helped.
2 points
-
OMC 4 LYF Y'ALL!2 points
-
Well..... I wandered back out to get the garage to stir the porridge and but then got a bit carried away. The ultrasonic cleaner also heats so decided to try and unstick the piston in the caliper after it had been which I did successfully with some compressed air. Inside was gross, Also took to the master to see if I could get the circlip that retains the piston out. it's basically impossible to do without destroying the circlip but c'est la vie as the spainyards would say. As it turns out... it's a bit of a mess. I did buy a replacement master piston but for reasons I could never possibly understand the two sizes available were 14mm and 5/8th of three barley corns (ripe and dried laid end to end) I bought the 14mm. The old piston was not 14mm. Sooo. I've decided to bench the old master and grab a Chinese one for now. Maybe I'll revisit it later, but for not we're looking for progress not perfection. More... less soon.2 points
-
Presents? thingsorganisedneatly So checked off the order and it all appears to be here. I decided to look into the front brakes. They do not look neato. A bit more disassembly of the master Turns out the ultrasonic cleaner really likes to mess with my phone camera, but this is what under the reservoir looked like. The brown stuff is dried brake fluid and it came out like very shitty cocaine. And the caliper Into the porridge they go! Side quest has progressed. I got the carbs cleaned up on the GSX500e and it now runs very nicely on all four cylinders at all revs. Still doesn't like a cold start very much but it's.. better. Booked for VTNZ to get certified on Monday so.. fingers crossed that exhaust isn't too loud. More soon.2 points
-
Oh yeah plugs and leads arrived…. no spark Ordered coil and rotor dist cap arrived 6am this morning so will try tonight buuuut turns out these things run a mono leaf rear with 2 vertical air shocks run off a compressor and reg and two horizontal shocks air shocks are shot hence it squatting its arse these seem to be NLA 335MM compressed 485mm extended found these with similar specs (another 50mm extension) https://www.summitracing.com/parts/gab-49205#overview any reason they shouldn’t work? I’m sure I can manipulate the regulator to get the correct ride height/make it adjustable even Disregard, more googling shows rock auto list them for 1968 on ones it’ll be fiiiiiine2 points
-
NNNoooooo............... Im penning a strongly worded letter to my signwriter. (In Comic Sans and Wingdings, of course.)
2 points
-
So.. I got a bit distracted... Short version. I picked this up with a carb issue and dead reg since 1990. Have now fixed the carb, and working on re-reg with black plates. I'll pop in some updates as that progresses. Bit of a side quest but I'll pop in some updates. This is a catch and release so if anyone's interested in a 1983 GSX550E with 25k's on the clock, fire me a line. It'll be road registered with classic reg and ready to go. Anyway, back to the subject.. big box of parts for the RD 50 has arrived so I'll be getting stuck into that in the next few weeks. Leftchevronthree2 points
-
There is a 15hp Chrysler for sale Im eyeing off as an aux kicker next to it. Considering I wanted to get a small tinny to test out my outboards I can state that I failed this mission successfully.2 points
-
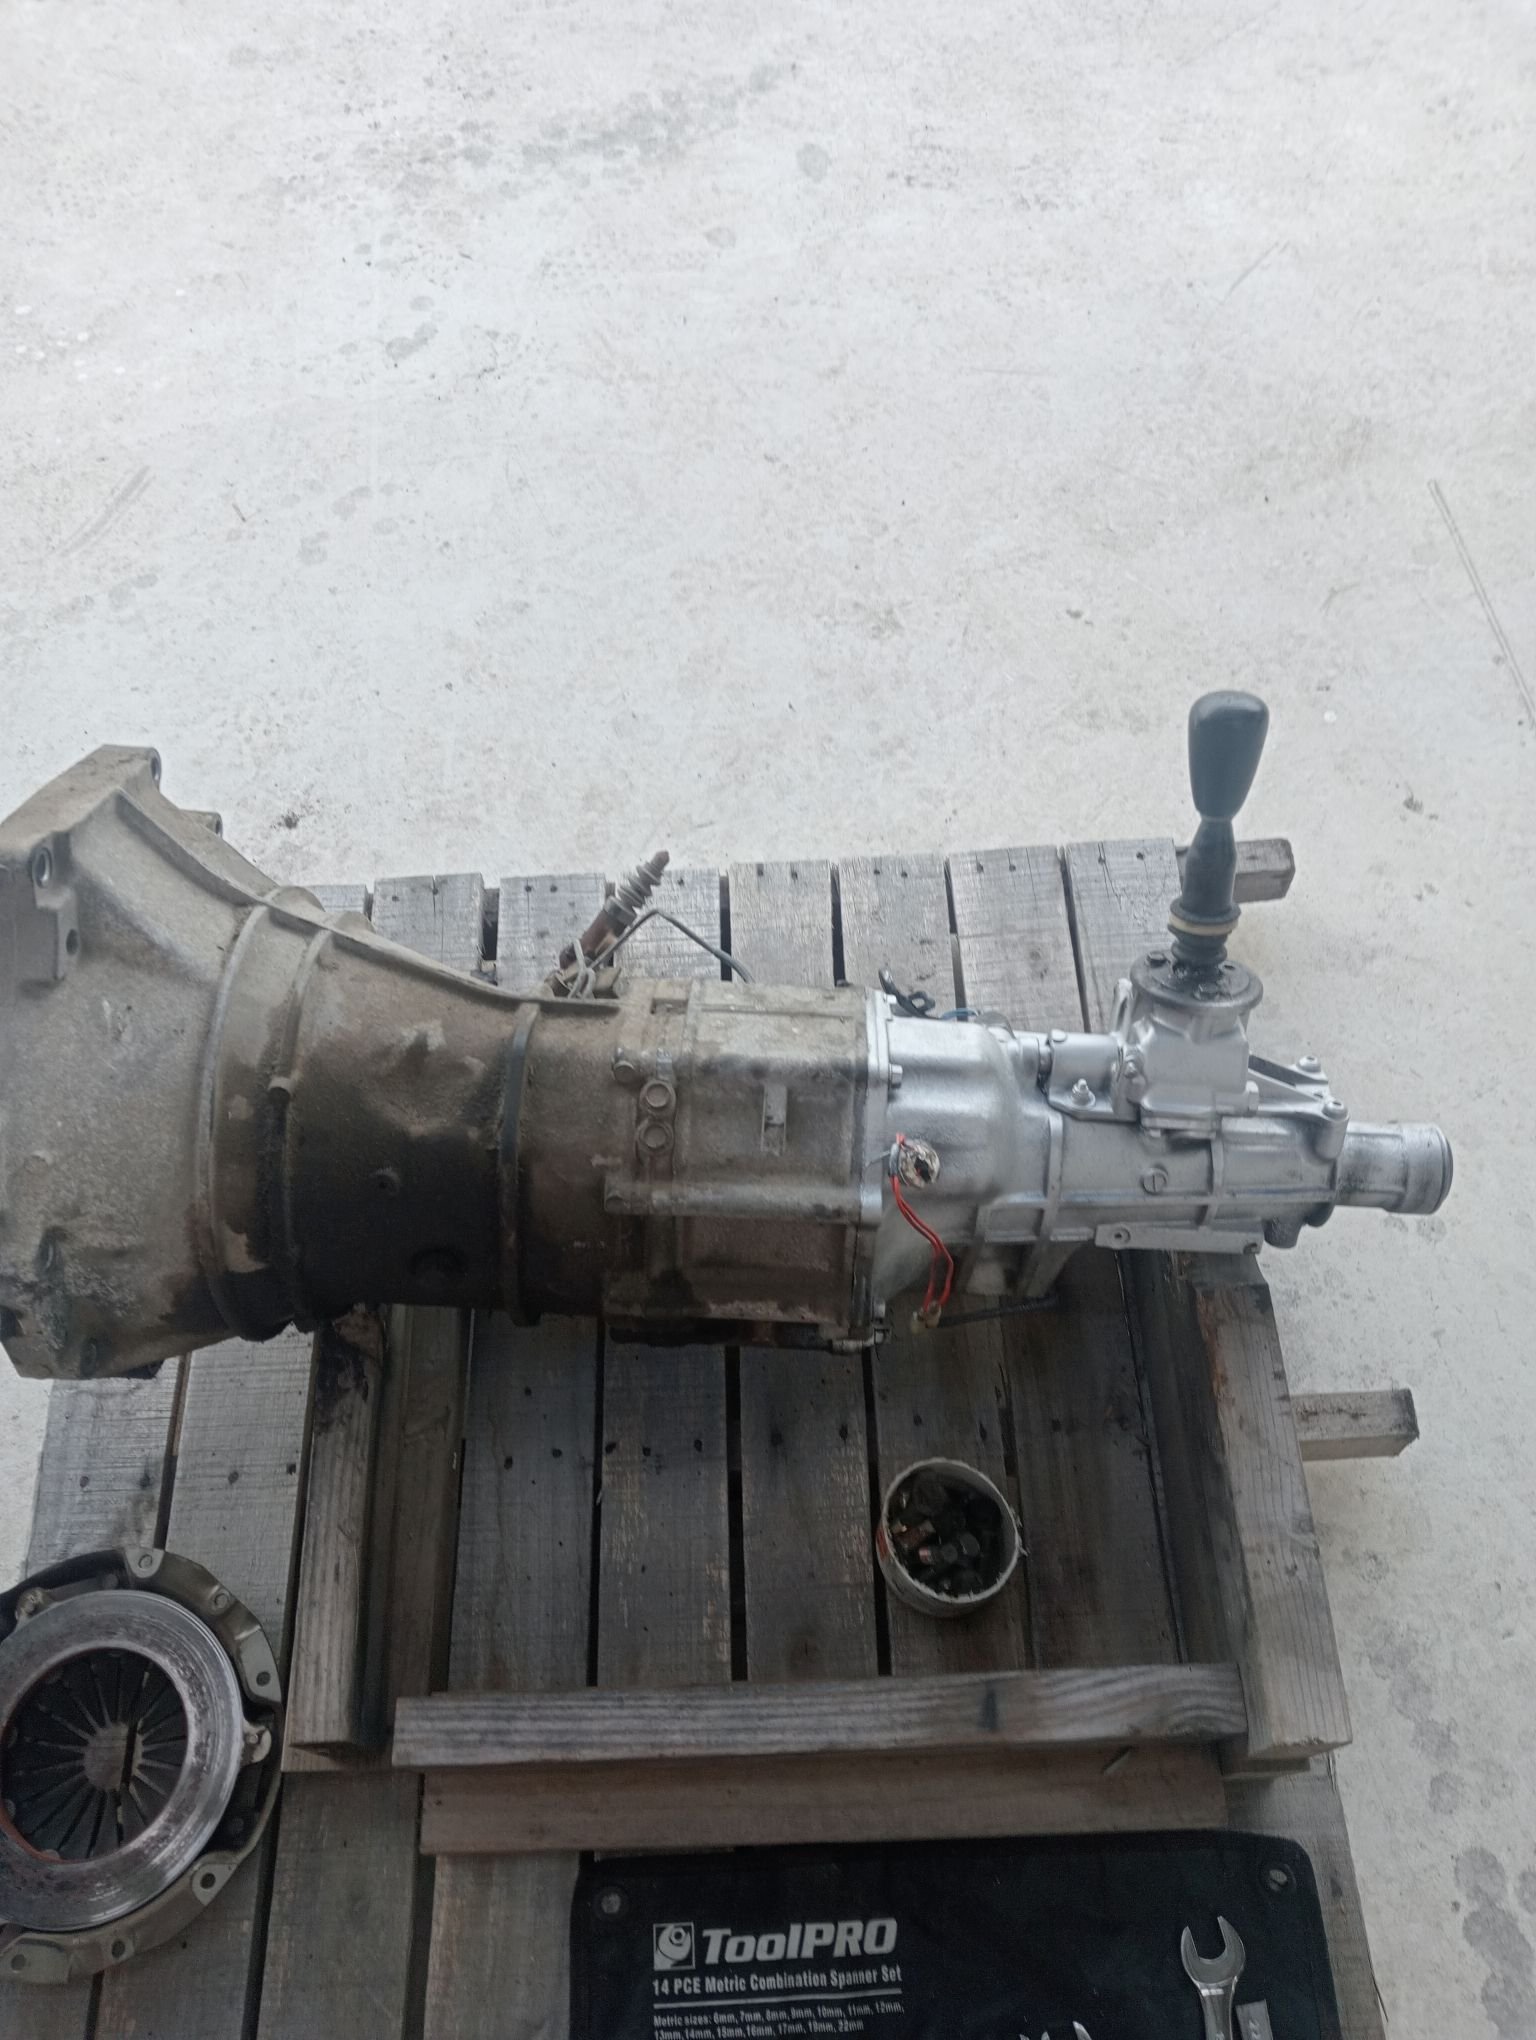
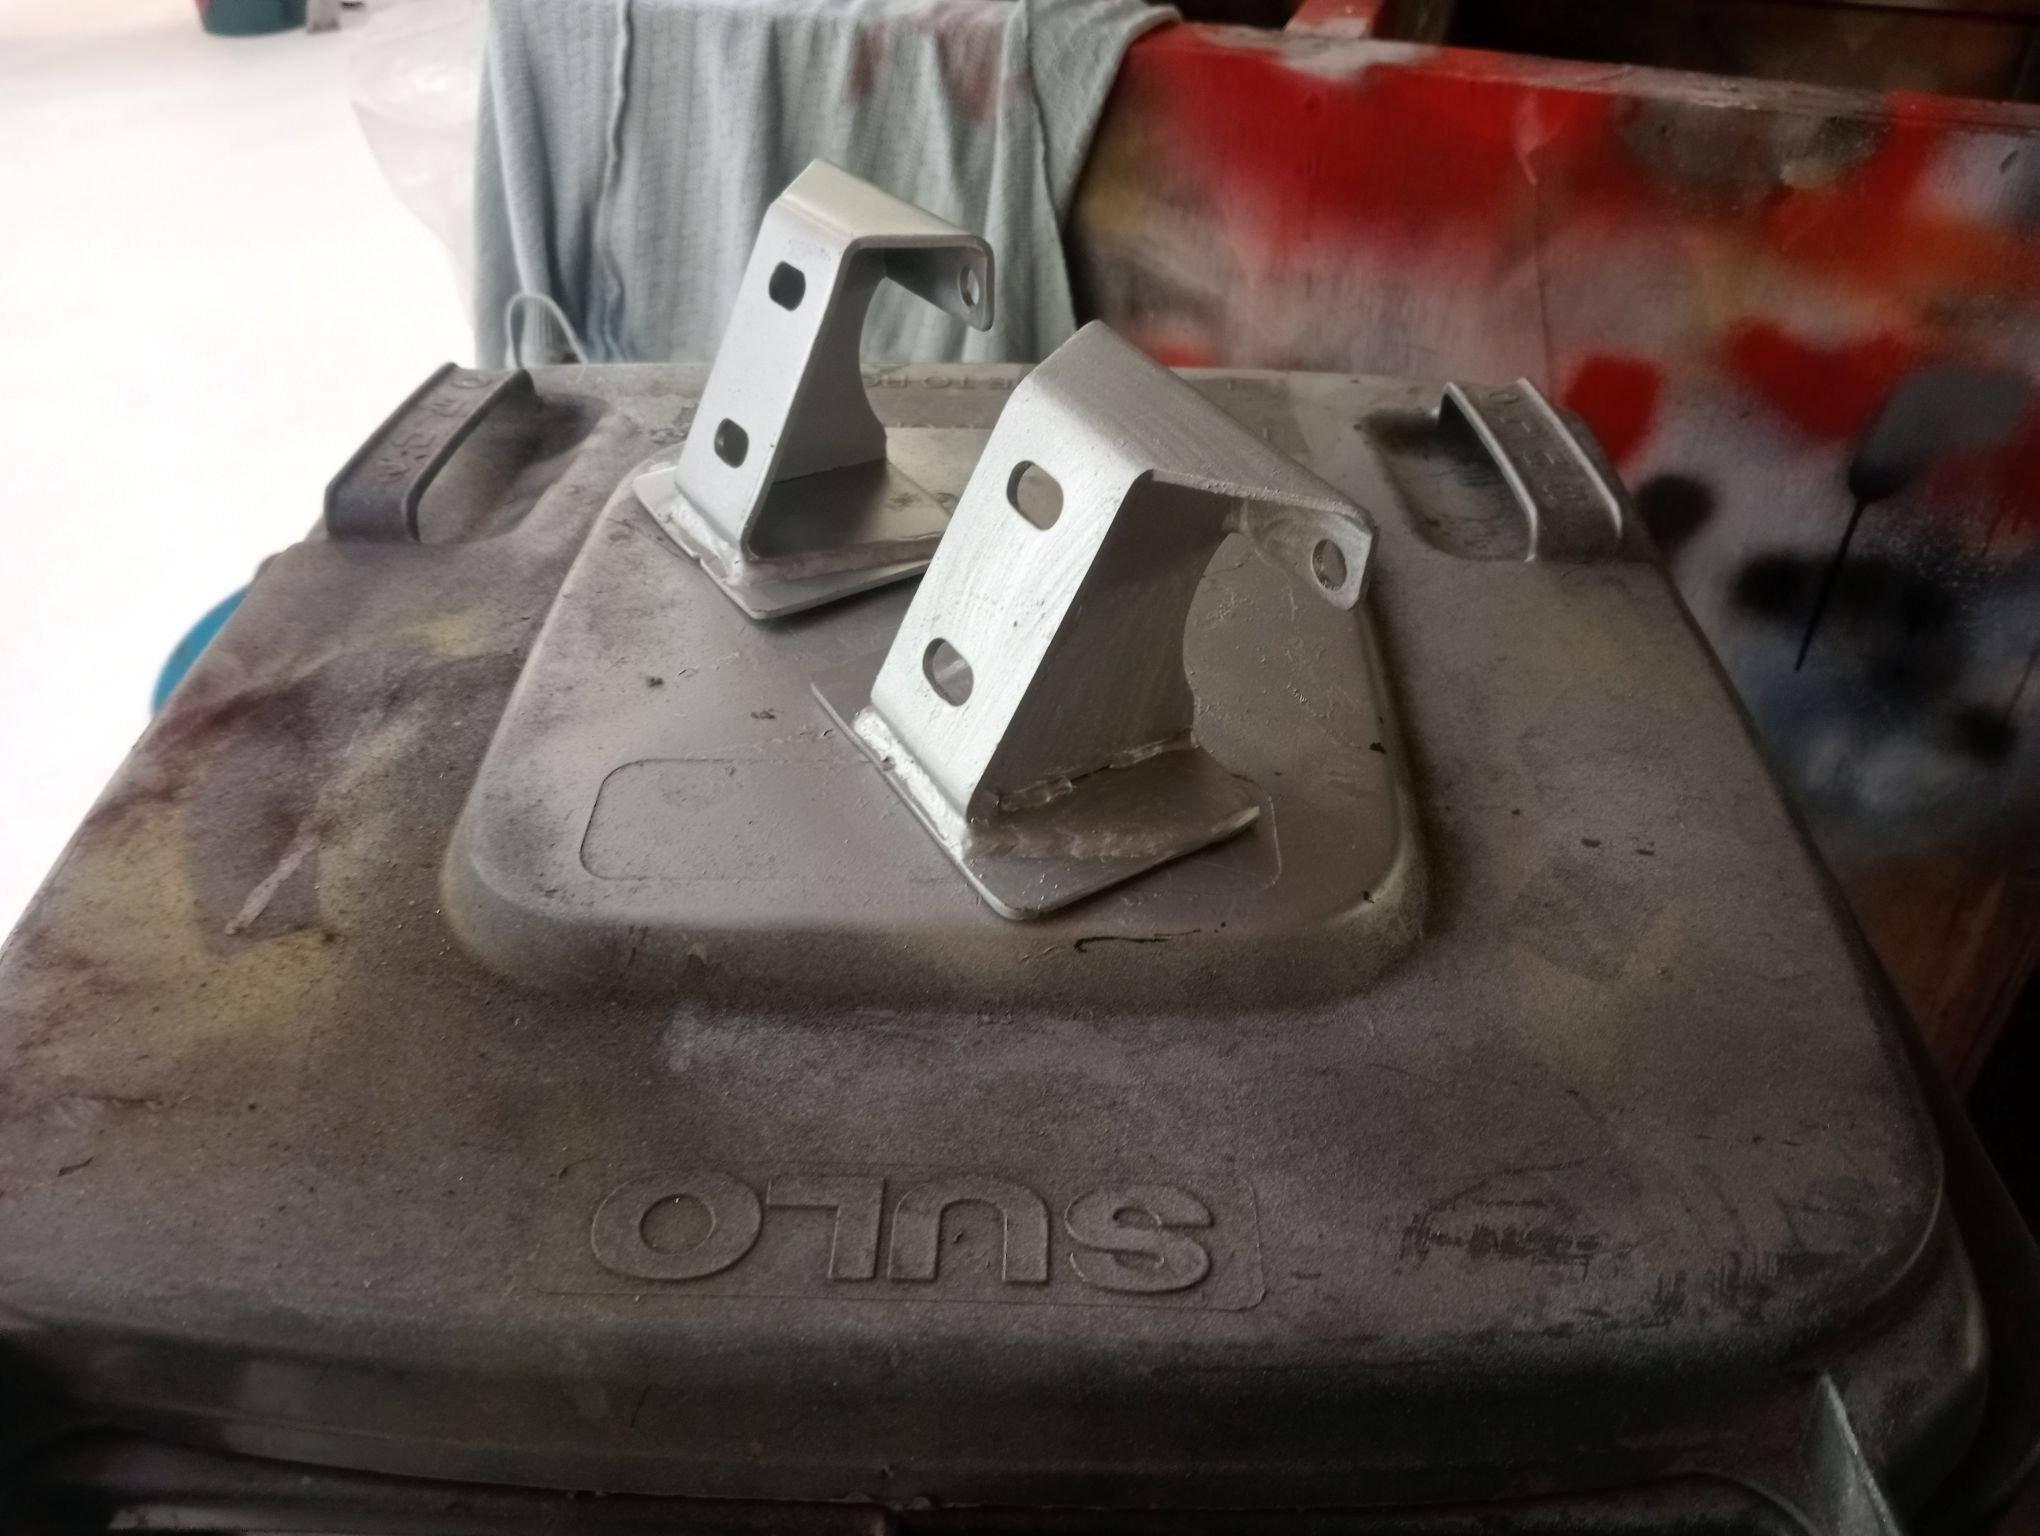
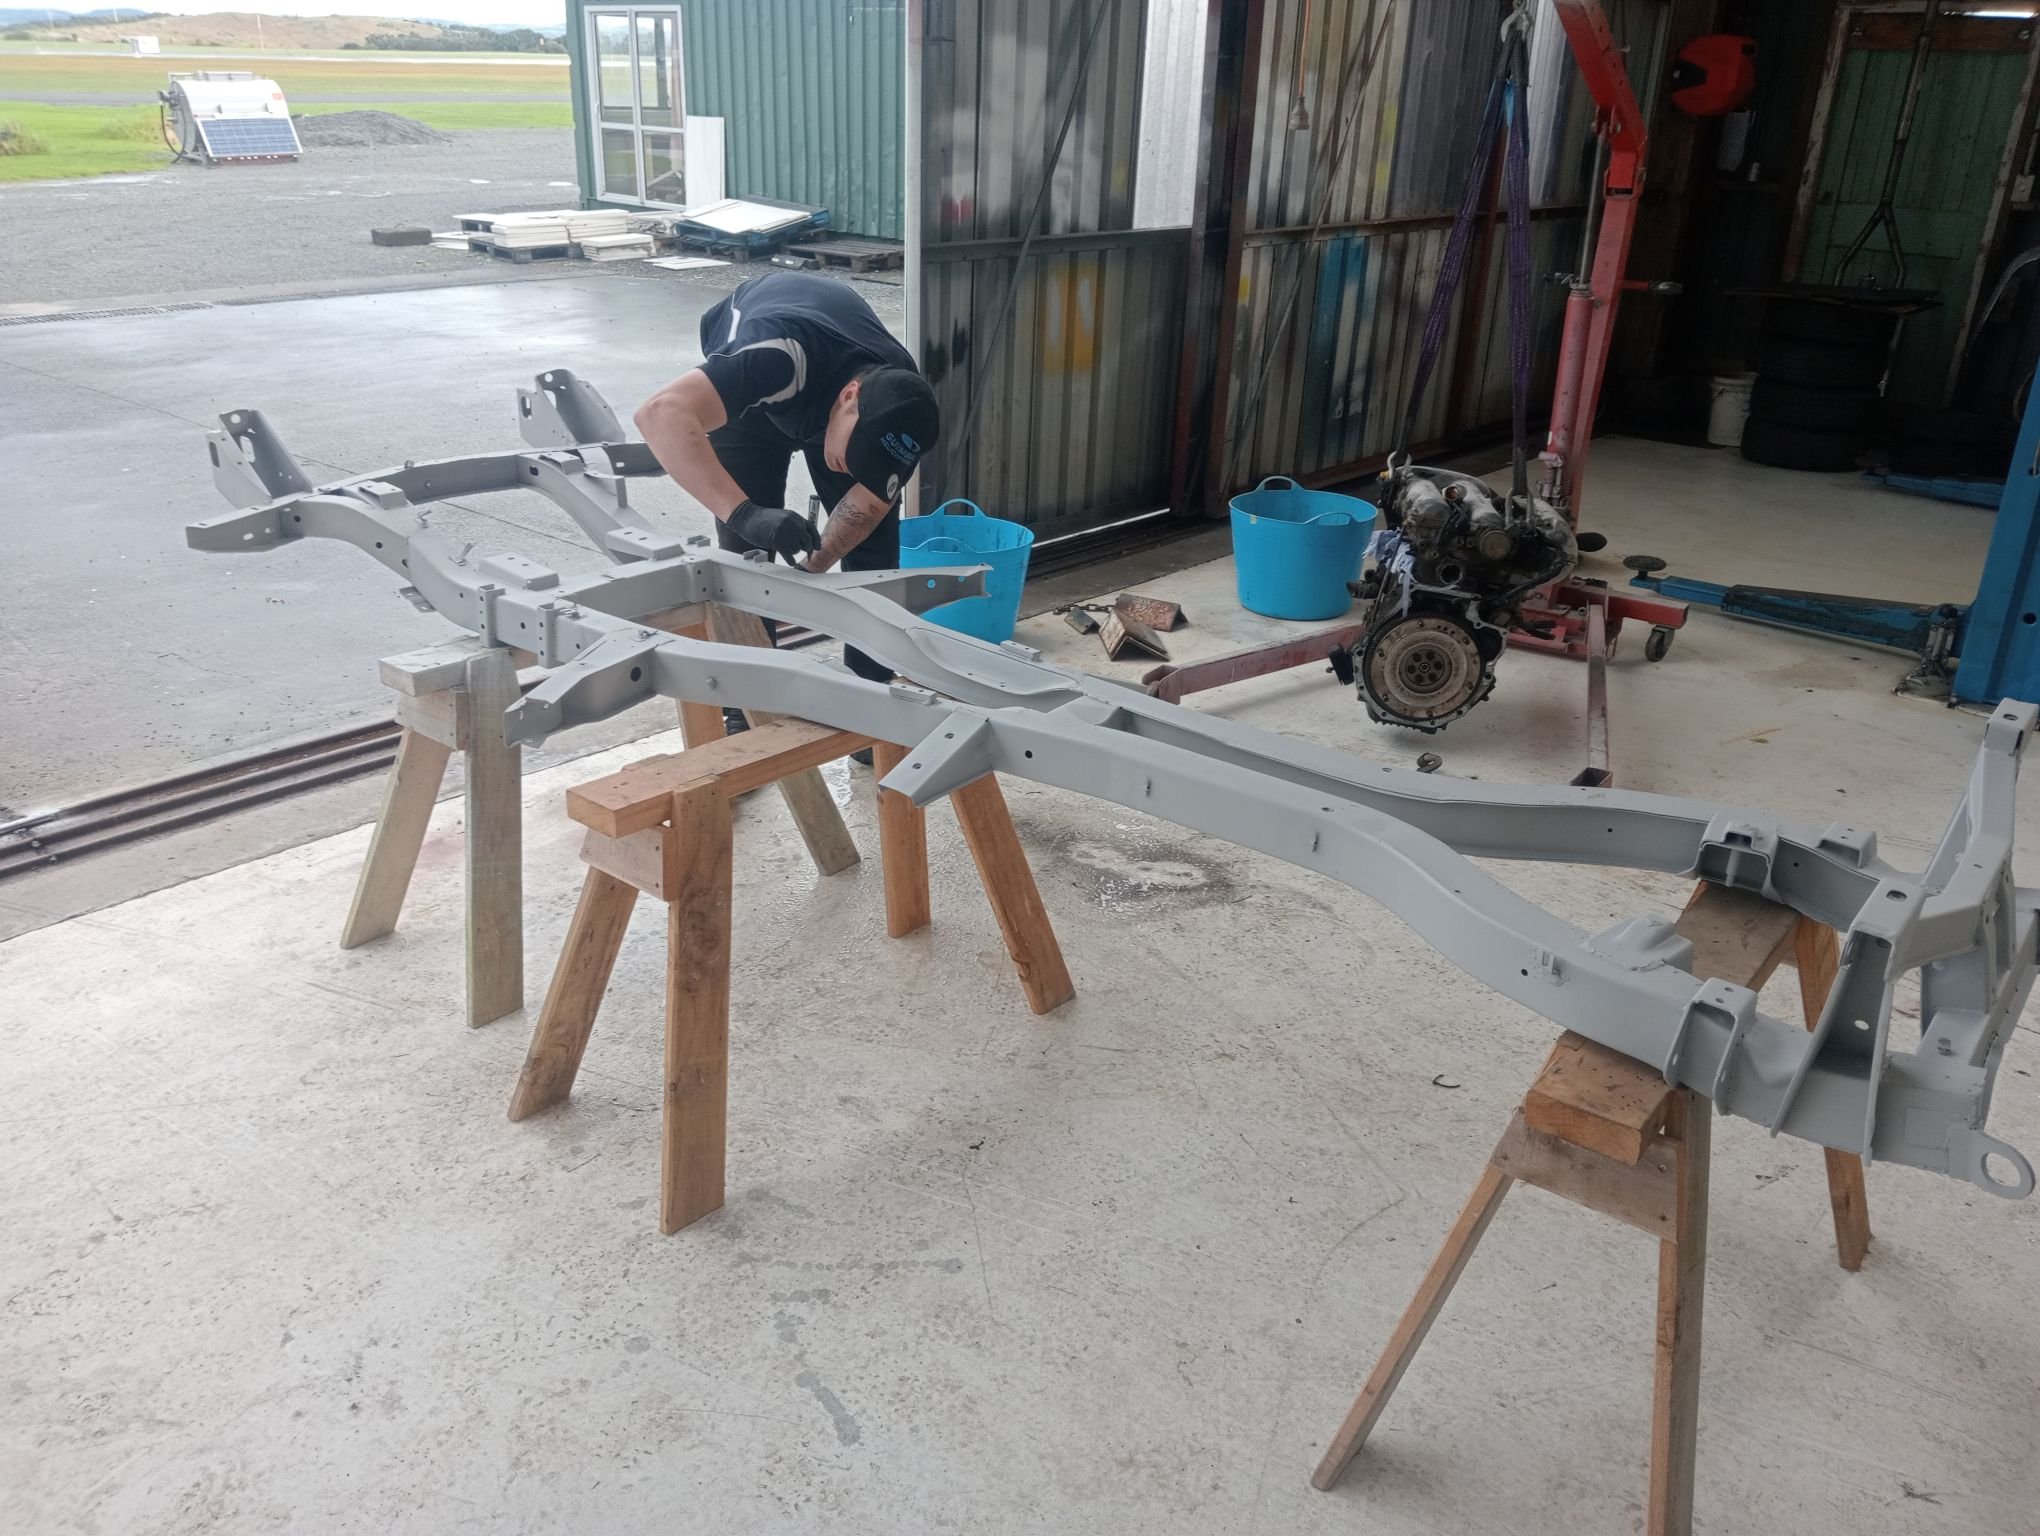
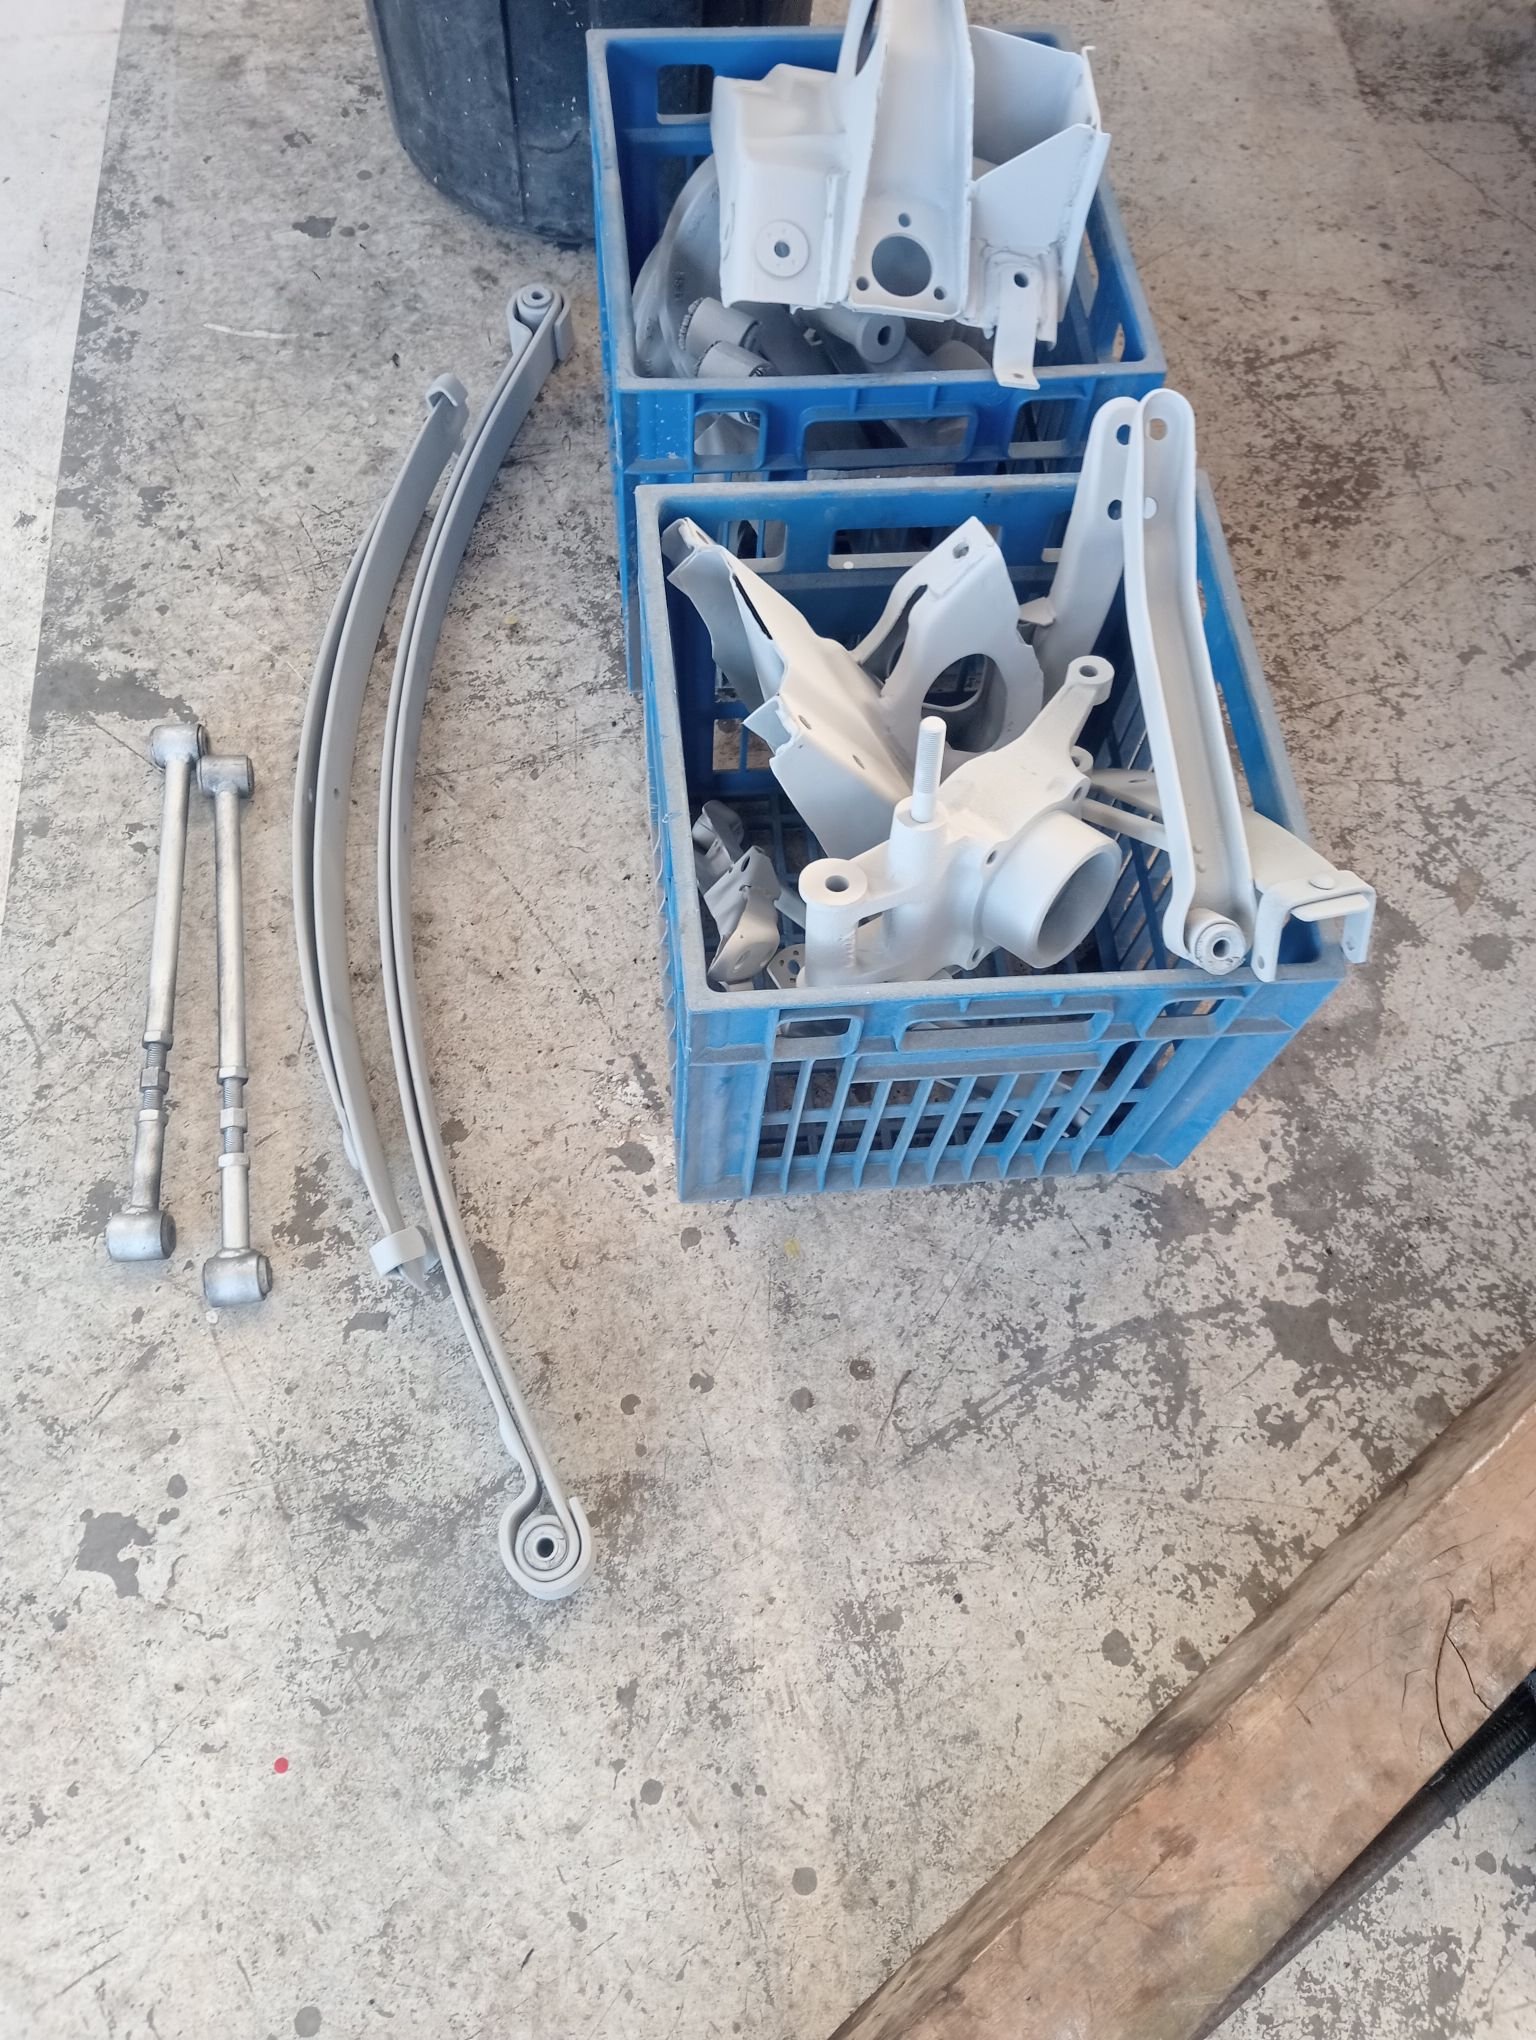
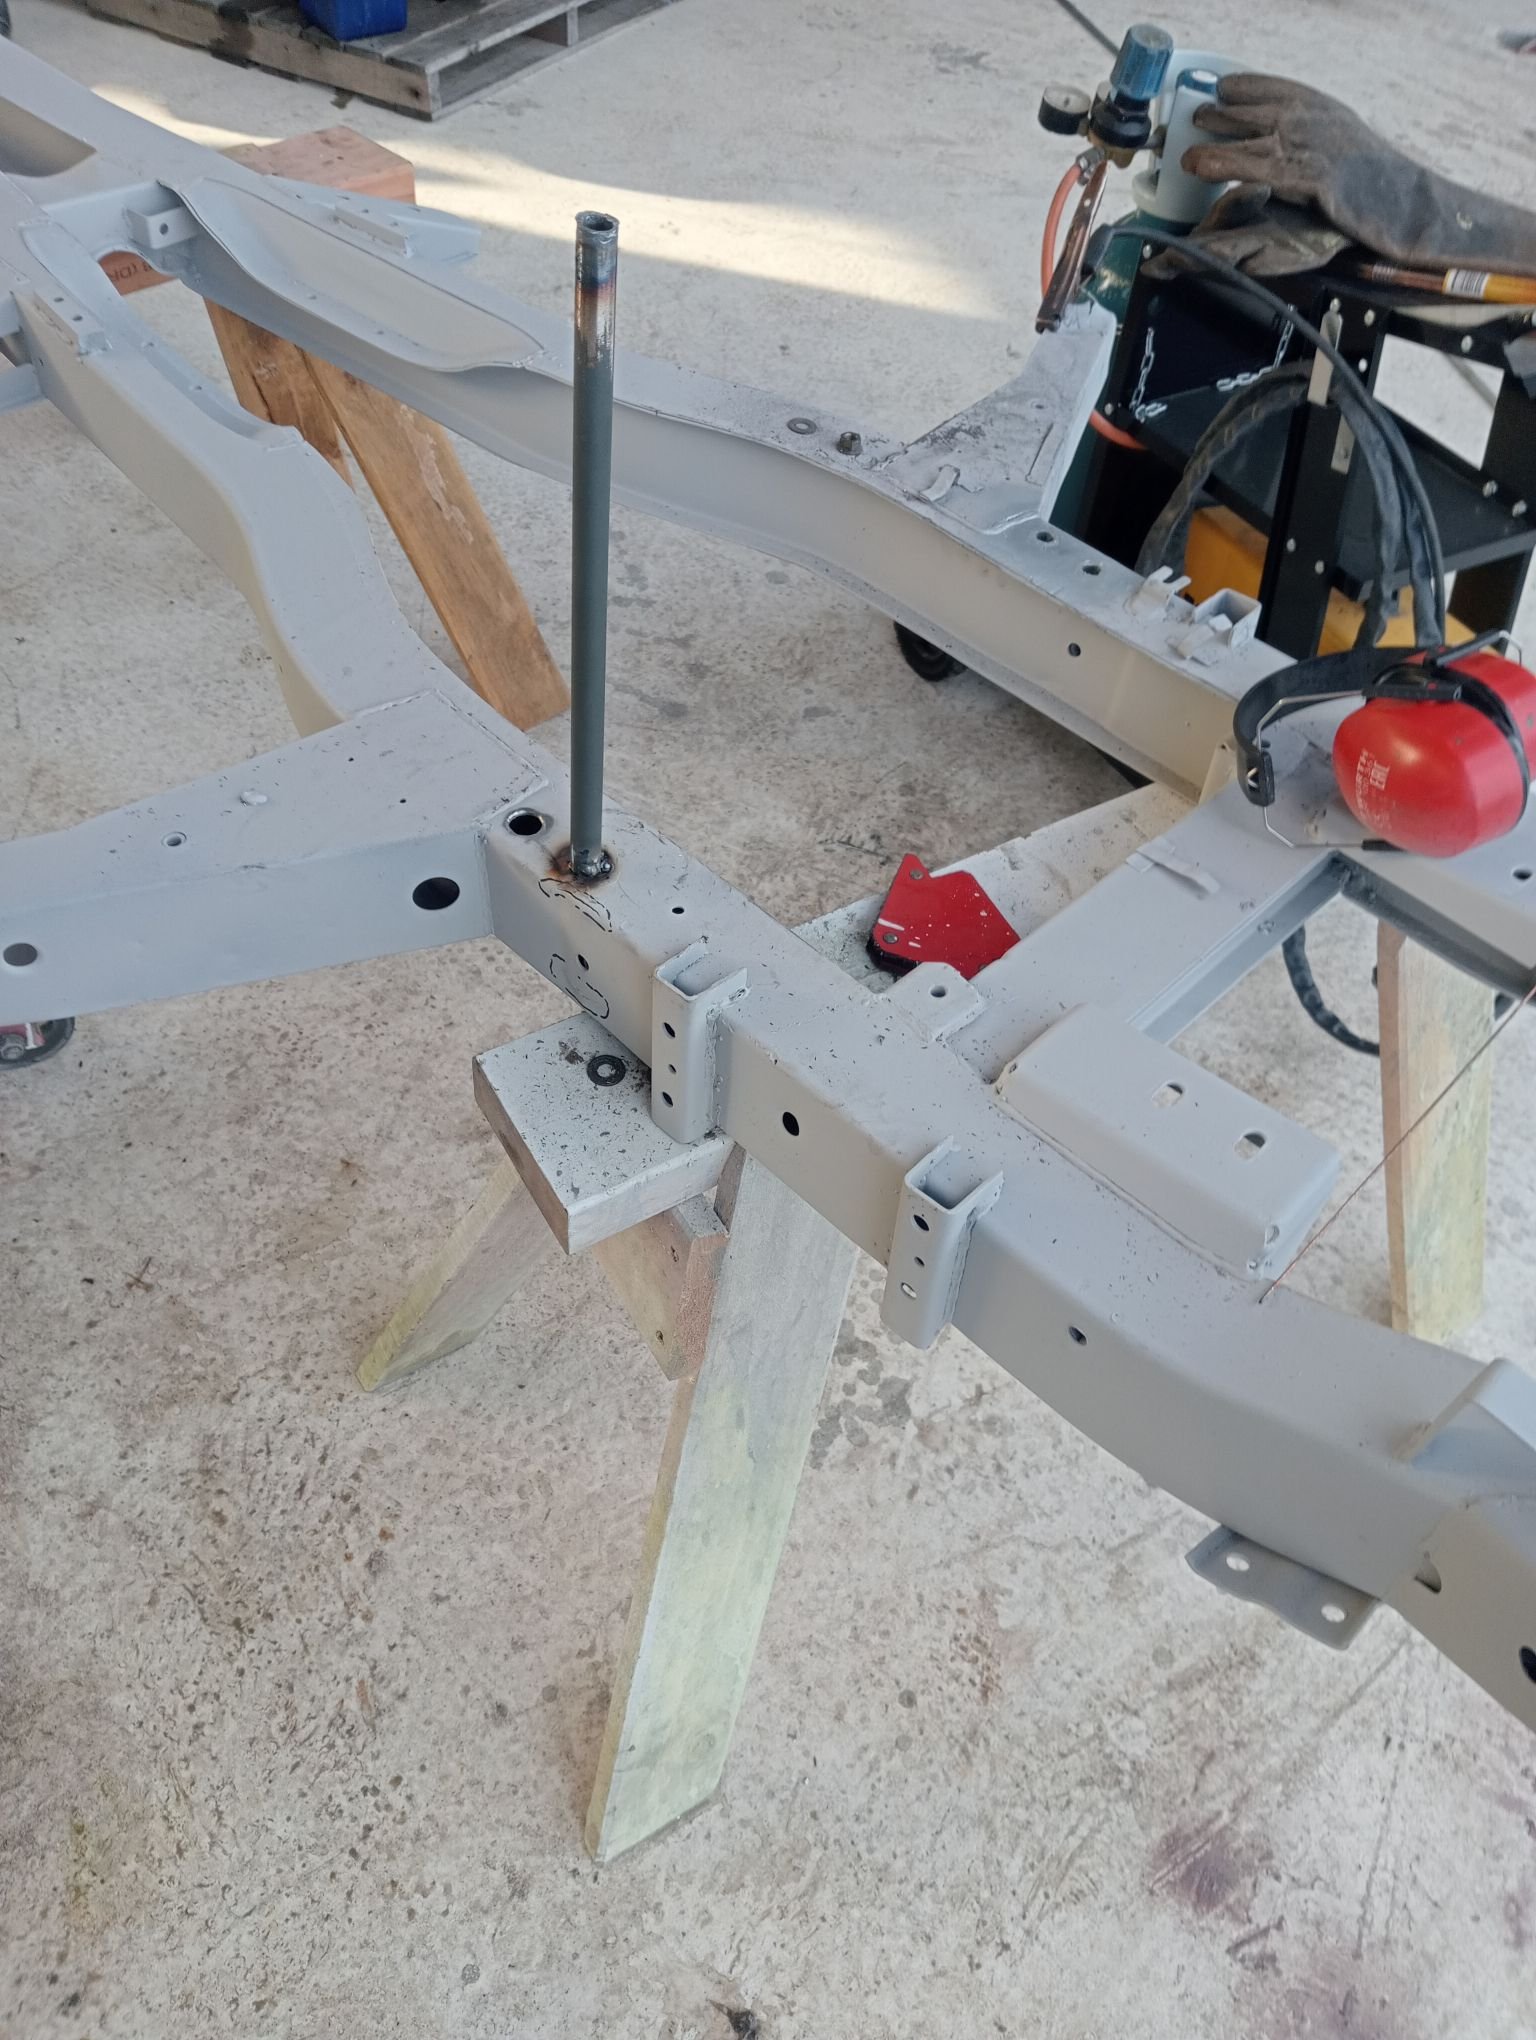
extension housing finished, installed and cynically painted in a coat of hammerite direct-to-shit silver. presented on this angle which just so happens to hide every single weld, how convenient. Ended up having to ream it out as the selector rod kept getting locked up mounts welded up and pretty much finalised, these are comprised of 80% stock triumph mounts on their side and 20% bunnings pool umbrella stand. chassis came back, one of my guys got to play "mark all the cracks" uh oh. as suspected, it was definitely time for a birthday. (Also, are all chassis welds this bad under the paint?) RHS lower wishbone attach point lots of other bits came back at the same time I was having a mental health moment earlier, the diff did NOT have a drain port. It does now. crush tubes going in for where the mounts will sit. I guess I could have welded the brackets on directly but it might've made getting the engine back out a bit funny. Plus the chassis is so thin I'd much rather have the big bolt sandwich Frustratingly I don't have half the suspension bushes that I need, otherwise I'd probably have the chassis repainted and all the doodads back on it this week. Also waiting on a new clutch and drive axles.
2 points
-
2 points
-
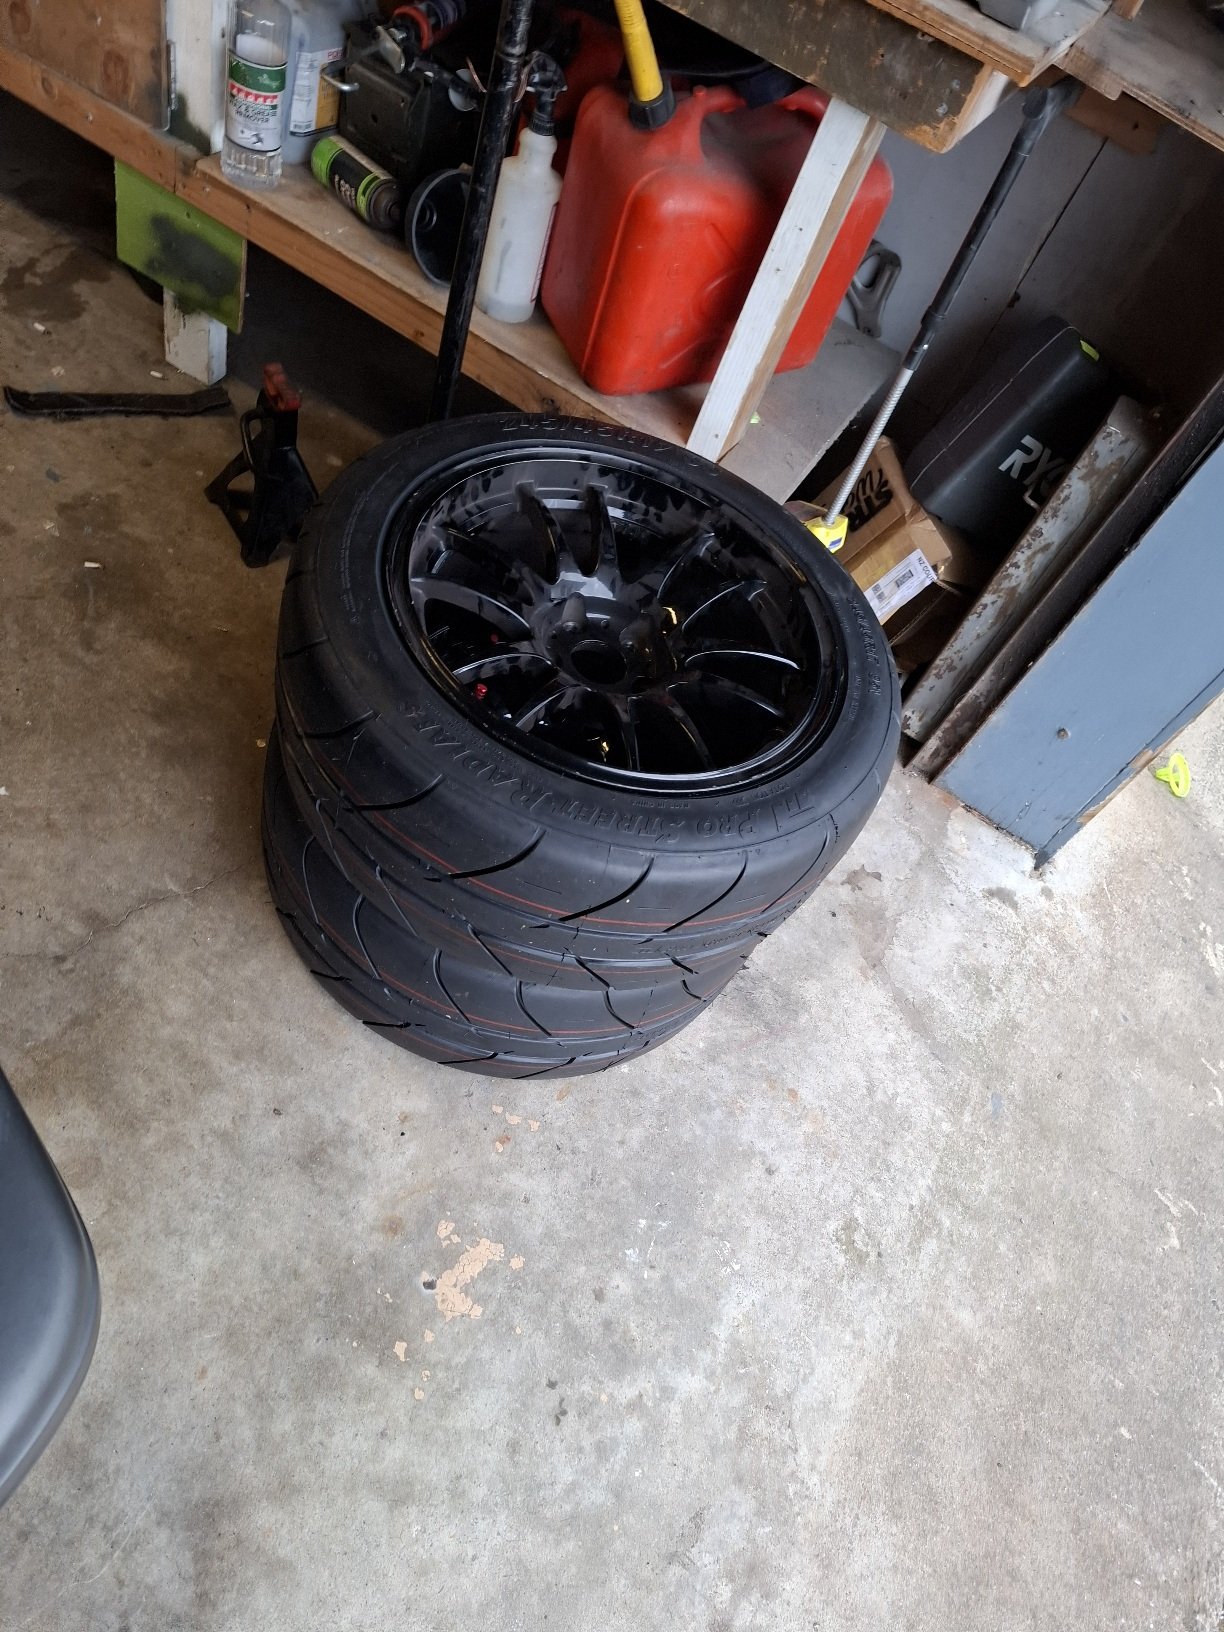
Ordered tyres for this. As its mainly going to be on road, I decided against knobblie s as wet white lines are not a good mix with knobblies. I have a pair of shinko 402s coming. Although its a dirt bike, these tyres will be good on road.1 point
-
I havent torn off the floor but I assume it's all glass with ply/timber stringers. It says it is a Savage 350. It may be a NZ brand as it looks very similar to a Savage Bosun which every man and his dog owned in Straya but there are differences.1 point
-
This is a good calculator to help you out; https://spicerparts.com/calculators/transmission-ratio-rpm-calculator https://tremec.com/aftermarket/resources/gear-ratio-calculator/1 point
-
Gonna try and get a plate on friday. Wish me luck!!1 point
-
Recently got a bit more done on the trailer. Made sure it was about the right size etc, and made the up rights/sides. For ease of use and simplicity, the front and back tailgate board things just slide into slots made from angle and flat off cuts, Then I figured out where the axle needs to be, then whipped up said axle on the BIL's lathe, made some mounts and welded it on, As you can see in the background of the pic posted above in the last update, the alloy wheels were very oxidized (they have been outside for years) so I gave them a water blast, spray painted them black, and then buffed the paint off the face of the wheel to make them all shiny again. Slapped some tyres on that match the cruisers, and good to go. Then I whipped up some mud guards. Decided just to make them out of 3mm thick steel and not bother with mounts, and just weld them directly to the frame. Found an off cut of steel, cut the desired shape out, removed the rust, and put them in my fancy press brake and bent them into shape. I don't know why, but I find the little mud guards soooo adorable! Now I just have to cut and mount the wood, paint everything, and its done. Regards VG. P.S. Say hi to your mum for me.1 point
-
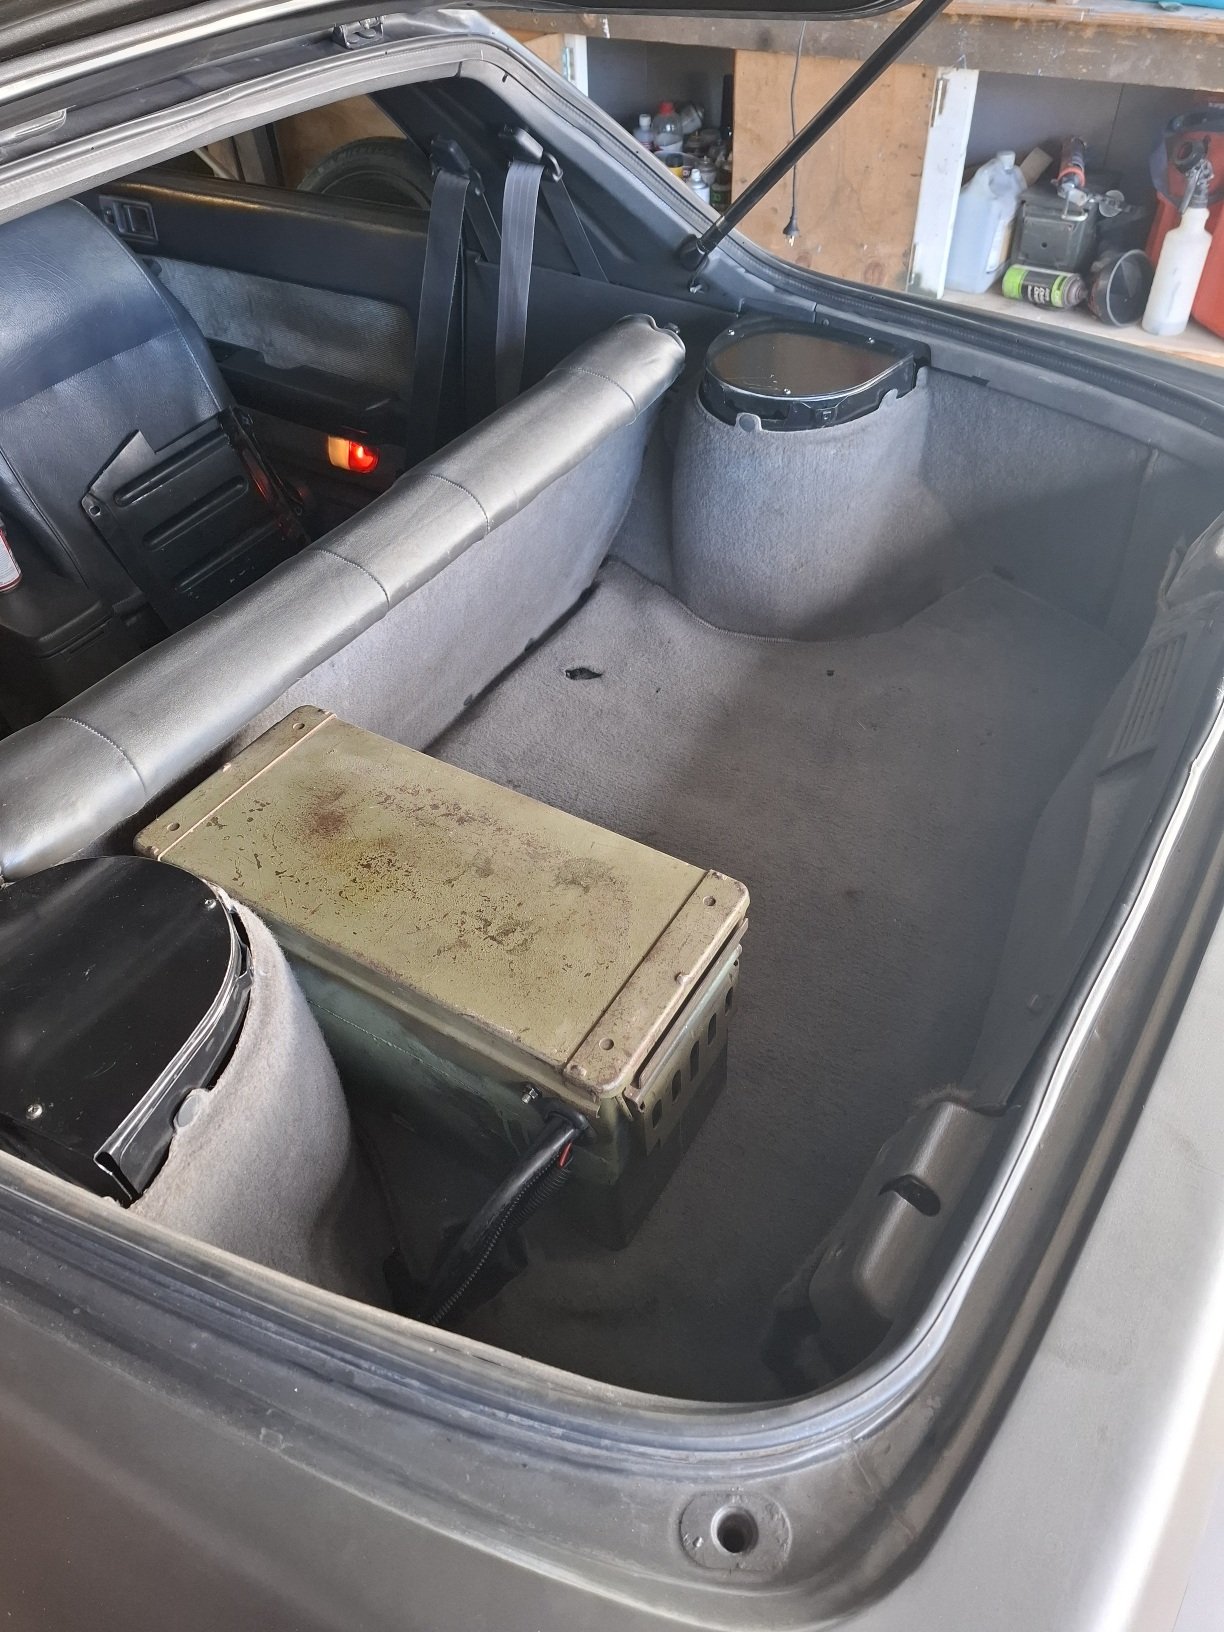
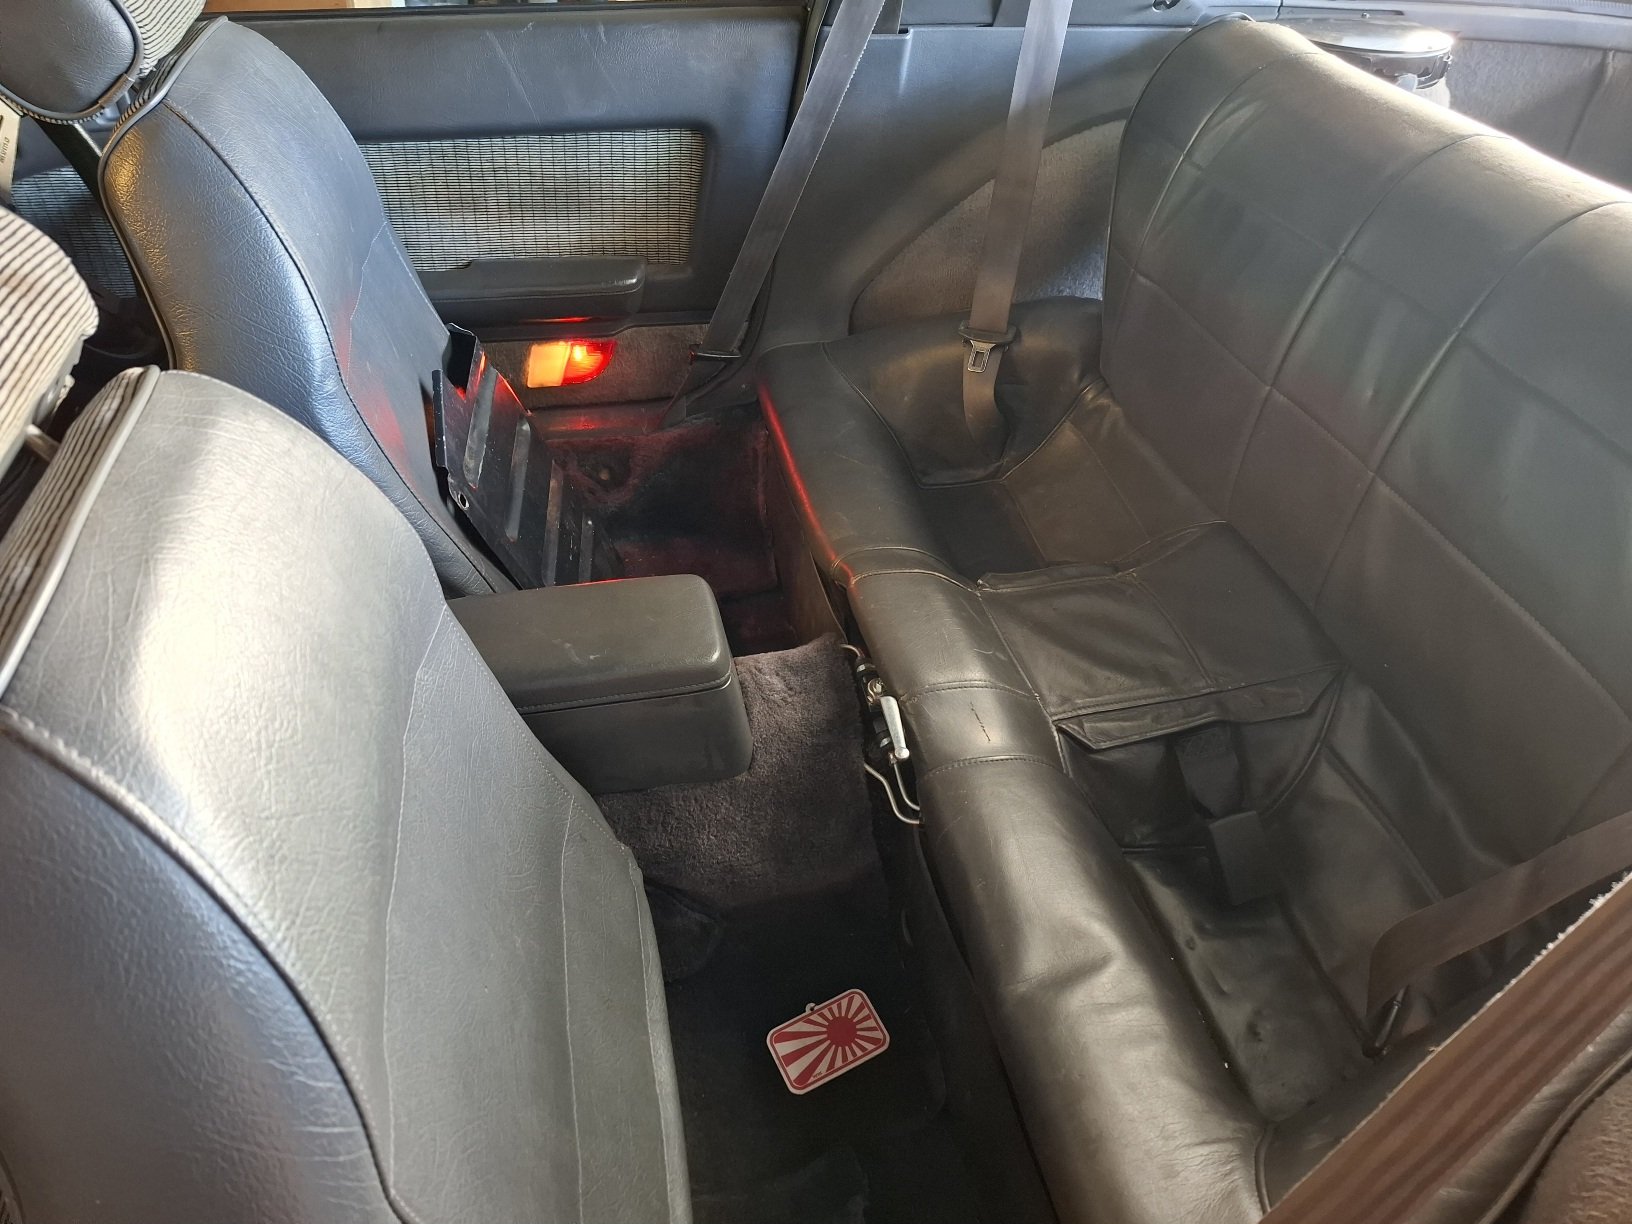
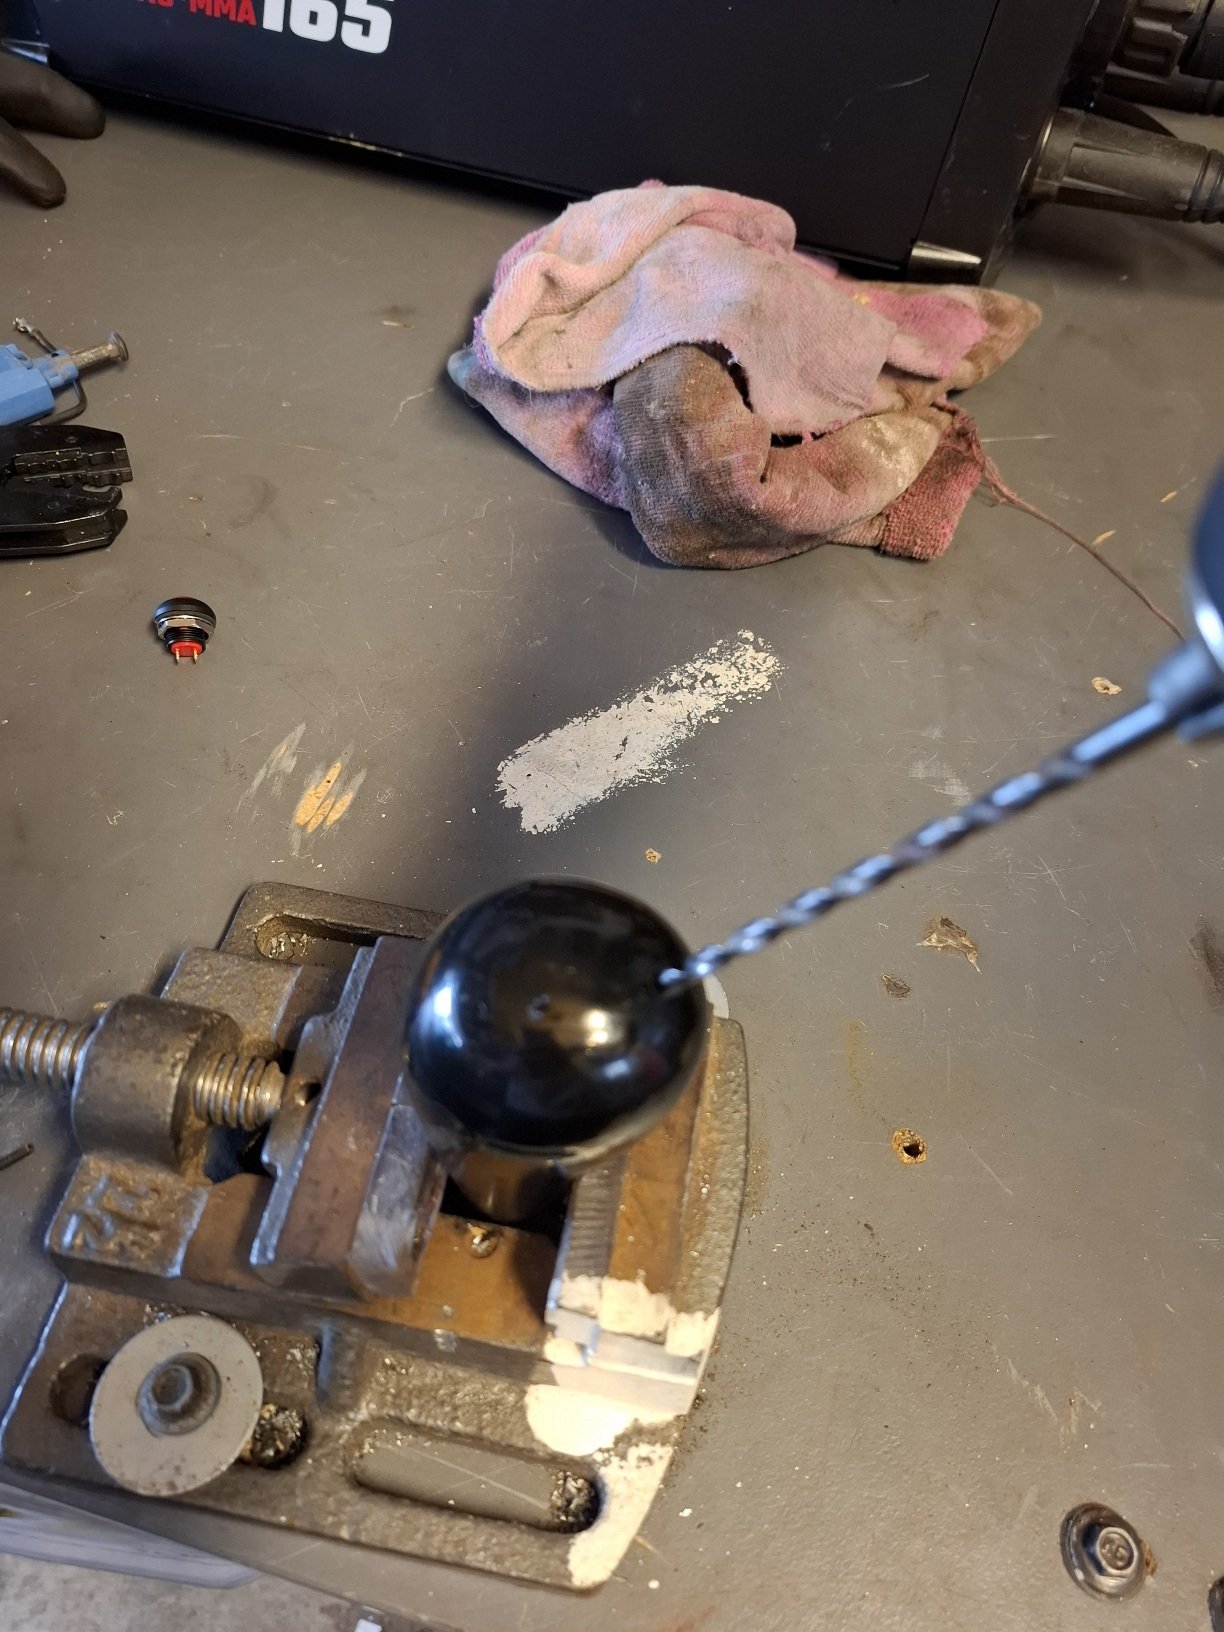
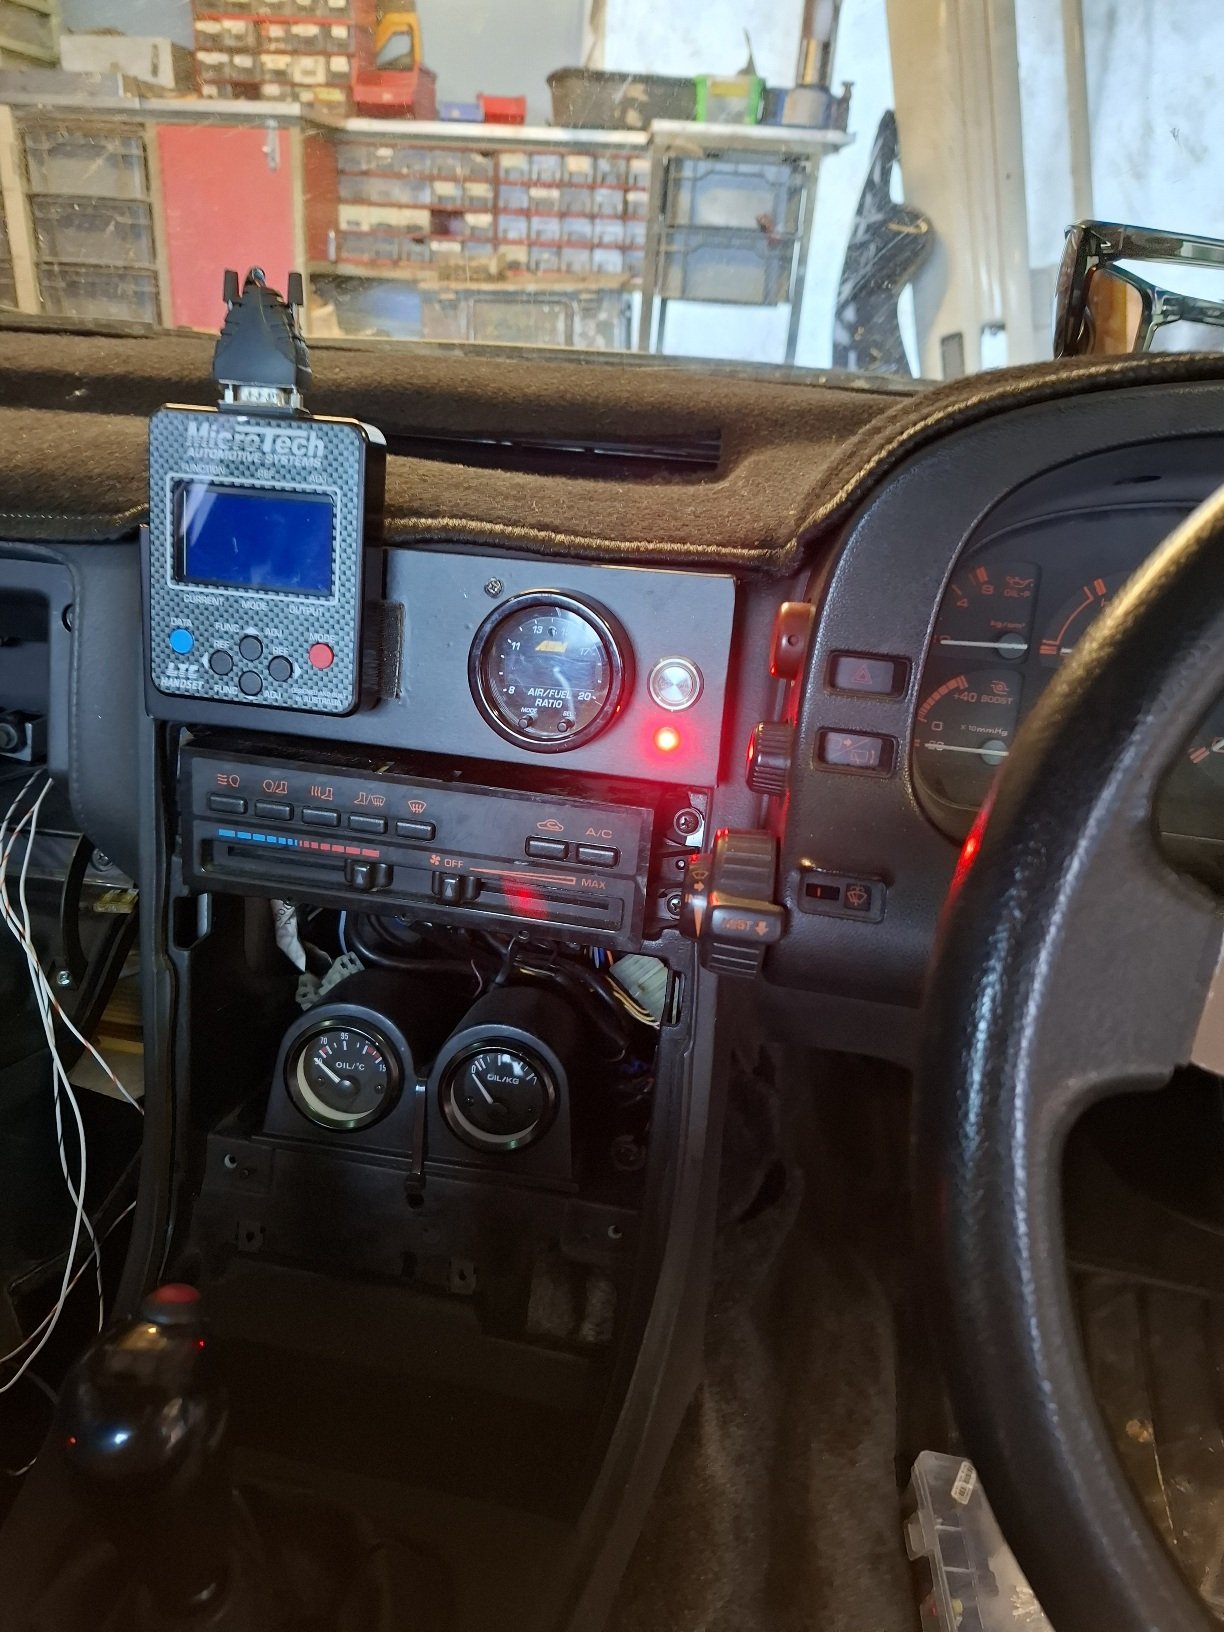
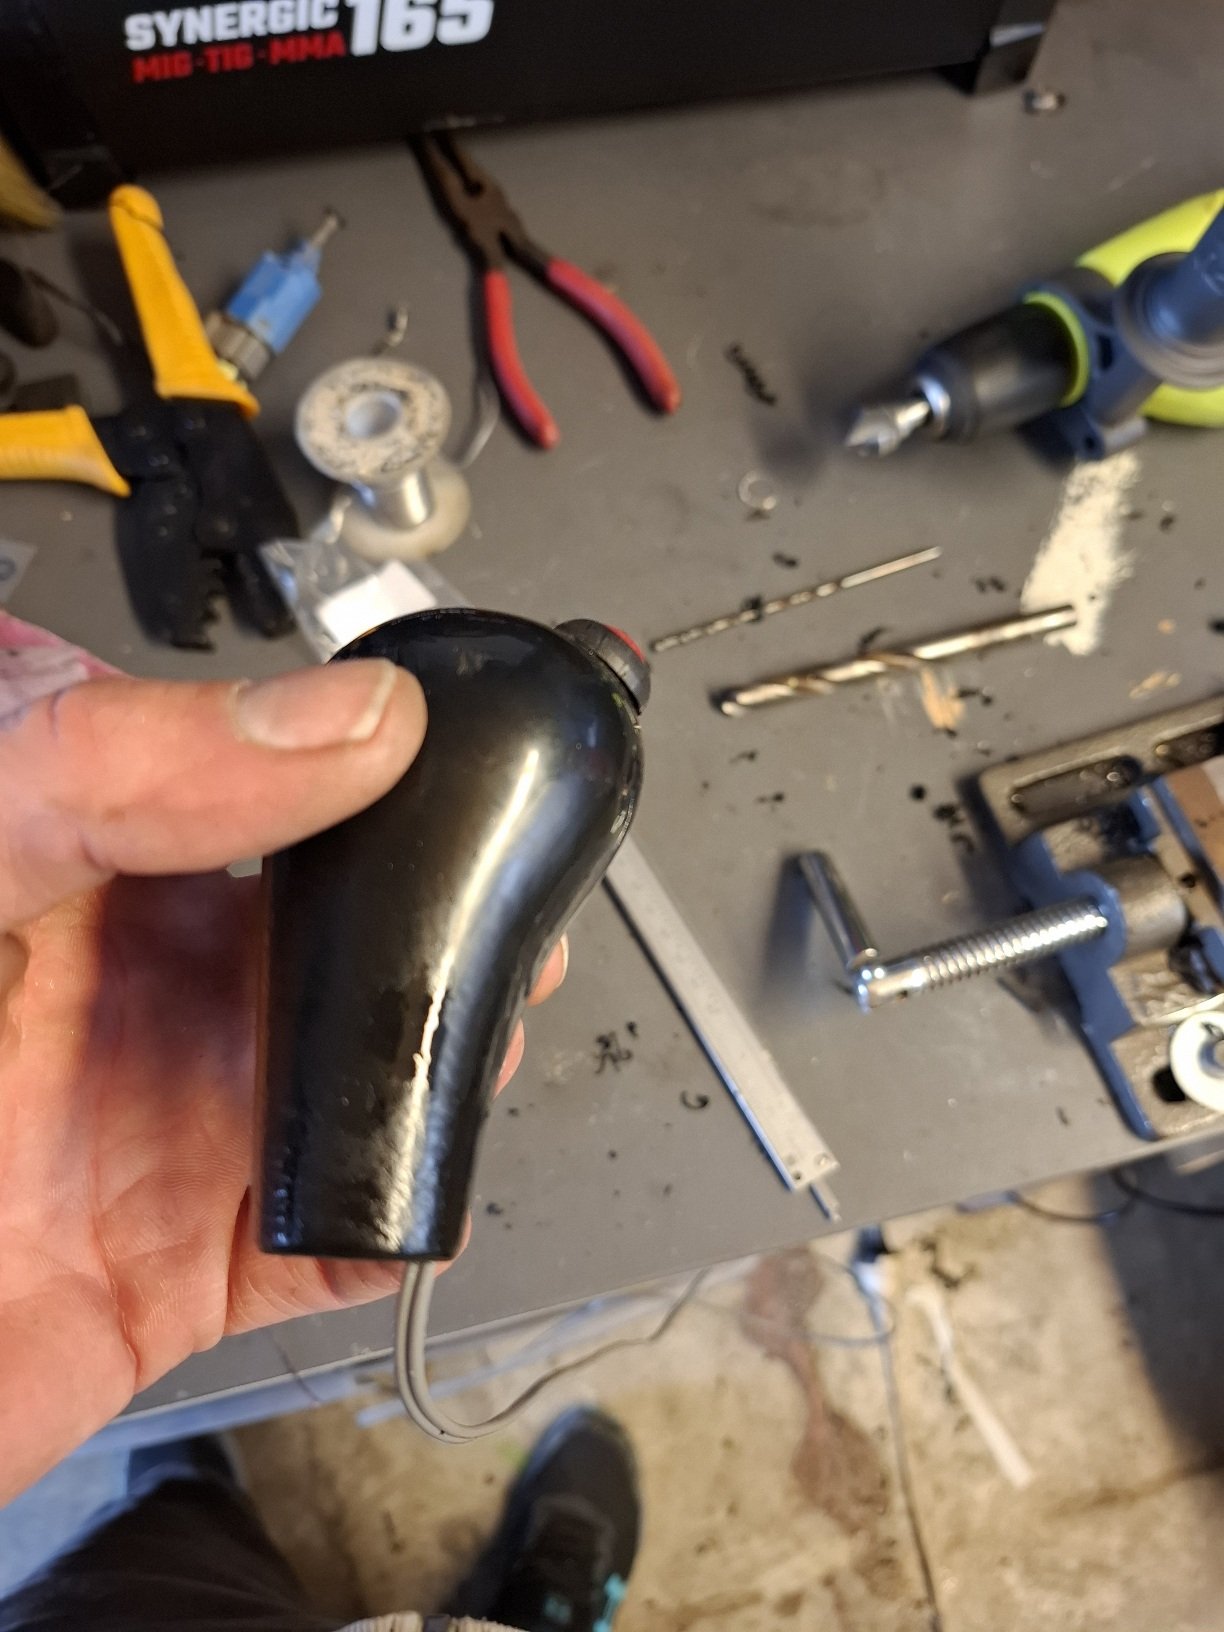
Found rear seat and carpet etc Went to jaycar and got a shift light, and a momentary button for launch control, so when it gets final tune that will be an option, drilled through the gear shift but doesn't interfere in the thread or how you put it on.. you do have to press it in fairly hard so wont hit it on accident shifting gears etc, both go through relays and fuses, i may change it to steering wheel maybe will see how it works.
1 point
-
Chat gpt rollers look pretty cool
1 point
-
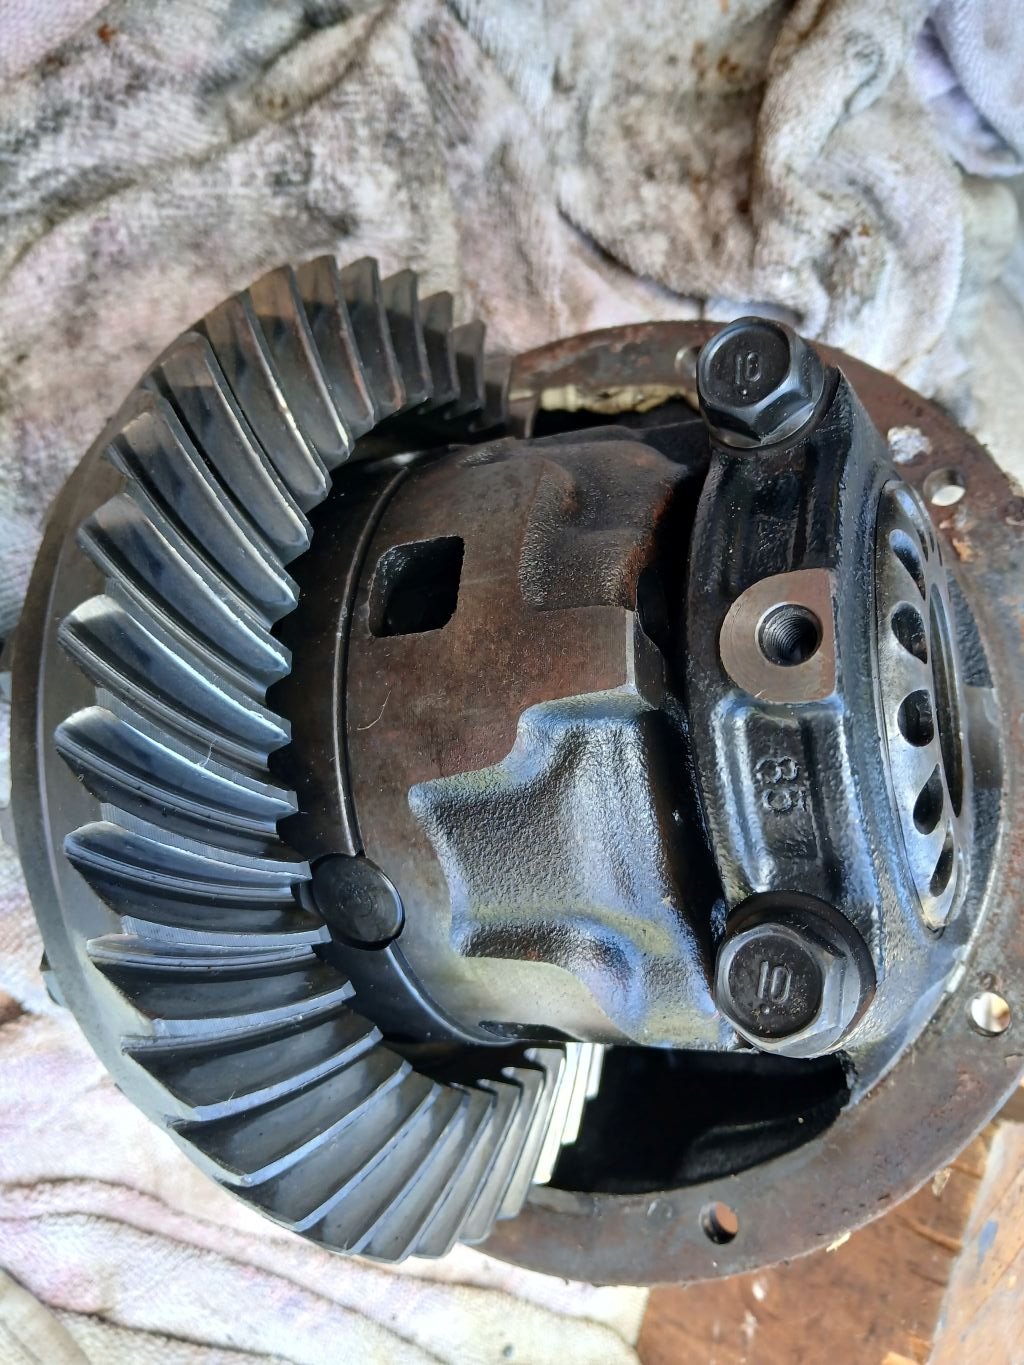
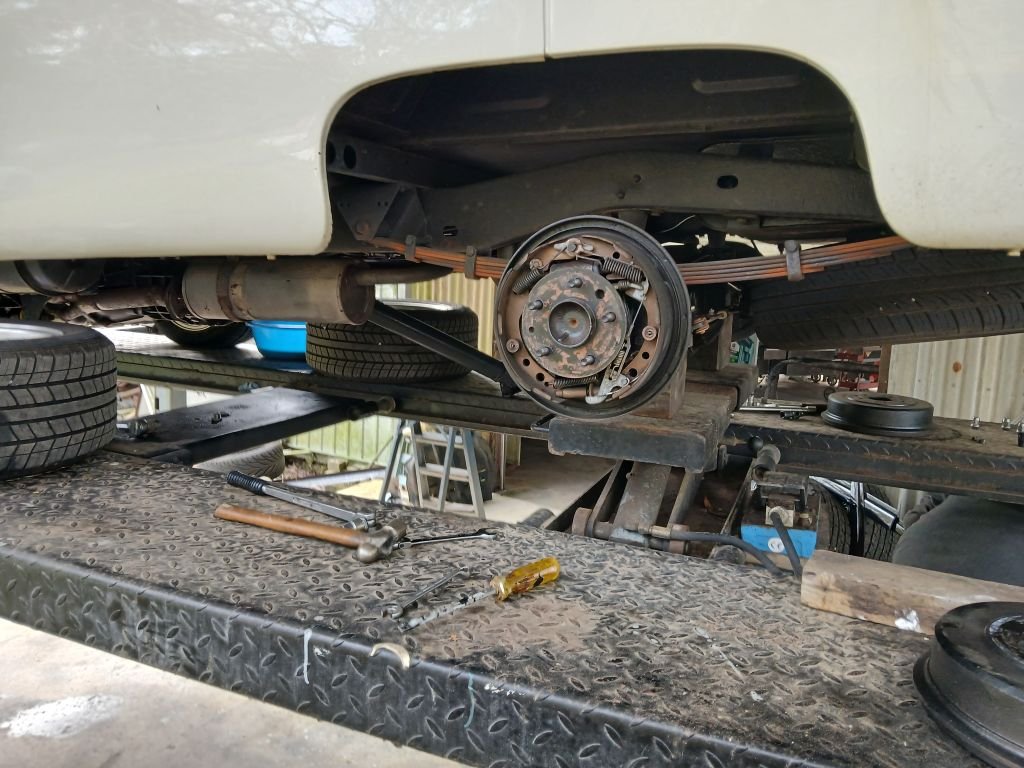
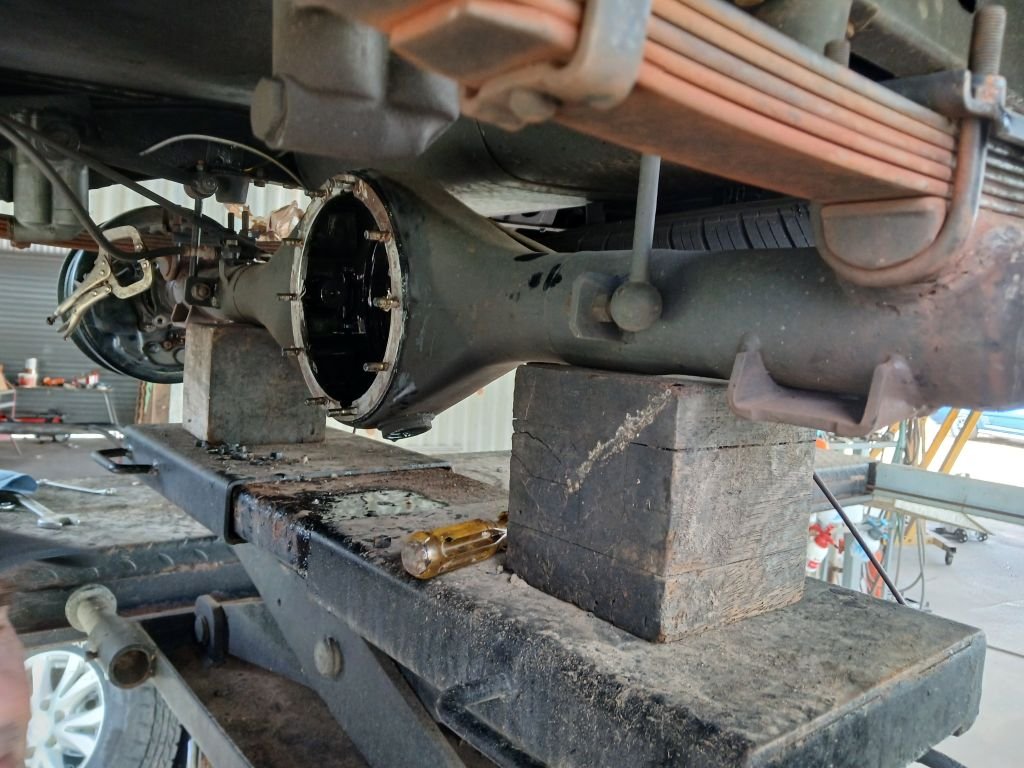
It's been almost 3 months since my last update on the Thames and he is still running like a champ. So following the old adage of "if it's not broken why fix it" ringing in my ears I figured now was a good time to stuff around with something. These days I've given up using first gear as its just too short and since the old Thames seems happy enough to pull off in second, things are hunky dory. But in the back of my mind I've been wondering what life would be like with a taller ratio diff. So a good 4 or so years back a mate of mine was parting out a Toyota Surf 4x4 and donated the diff to my Thames project. Winner I thought as it is a 4.1 ratio LSD and apparently an easy bolt in modification to replace the Y series HiAce factory 4.3 open diff that my van is blessed with. On Friday last week my mate Grunty had his hoist available, so I loaded up my tools and the spare diff centre and headed over to his place for a bit of spannering. And this is where the wheels on my plan literaly and figuratively start to fall off: When I pulled the original pumpkin I immediately spotted the "post factory" gasket sealer - a sure sign that someone had been in here before. I'm obviously a bit slow as I still didn't smell a rat: Anyhoo buggerlugs here carries on regardless and chucks in the pumpkin from the Surf together with lashings of super spendy fancy gear oil that the LSD apparently needs. Got everything together again and headed out for a test drive. Now those of you who may have watched an episode of the TV show called "The Nanny" back in the day will hardly forget the voice of the leading actress, a lady called Fran Drescher. Well when I tell you that the old Surf pumpkin whined worse than Fran does, you will have an idea of how bad it was. Yikes ! To add insult to injury the bloody gearing seemed no better. How can that be I figured. Now being the numpty that I am, I never physically checked the diff ratio when I transplanted the HiAce axle into the Thames. I'd always assumed it was the factory original 4.3 ratio based on the Toyota factory data plate that I found attached to the donor van chassis. Not so grasshopper. On doing a teeth count on the original pumpkin it turns out that old mate had swapped out the factory diff for a 4.1 somewhere along the line. What a rookie mistake. So now its late Friday arvo. I'm cold and hungry and my van sounds bloody terrible. My mate Grunty took pity on me and suggested I leave the van on the hoist over the weekend and then shoot back out on Monday to swap the original diff centre back in. Being the GC that he is he even gave me a lift home in his work ute. So yesterday in the pouring rain I hopped in Mrs Flash's Moke and headed on out to Grunty's to reverse the swap. I'm glad to say that the Thames is now back to normal and I'm now giving some thought to my next steps in terms of the diff. At least all the experiment cost me was some wasted LSD oil, a bit of gasket sealer and a few hours of discomfort out in the cold. Ideally I'd like to replace the current diff with a taller ratio so that I can make decent use of 1st gear and at the same time drop the revs down a bit when I am cruising in 5th gear. In hindsight I can't really justify fitting an LSD. So I'm currently thinking about sourcing a reco'ed pumpkin from a crowd down in Gympie, but I'm not sure whether to go for a 3.9 or a 3.7. I'd love to get some advice from those who know more about diff ratios than I do, so any suggestions via my discussion thread would be greatly appreciated. Thanks for reading folks.
1 point
-
Just a heads-up, the CCM is now up on the website in .pdf form, no login or email needed: https://www.lvvta.org.nz/documents.html#nzccm1 point
-
Getting the VIN plate was pretty straight forward. I believe there had to be some proof of ownership, but that was pretty vague. Mostly they just needed to site the vehicle, check it's details (chassis number etc) against records. The car had been in the system till ~2015 with the same plates so it was still in the system with the same details. As the VIN plate replaces the chassis number as the vehicles primary form if identification it was largely a bureaucratic process. To the best of my knowledge, the rest of the process goes as follows. After this once the structural work is done, (both repair and further mods to support the new components etc) it has to go to a structural engineer to be signed off, Next it can go for a WOF, where it will fail on the appropriate parts which require a cert, Next to the certifier to certify those parts (EG engine, gearbox, suspension etc etc, Back to get the WOF signed off In theory then, it's just a matter of paying for registration as per normal. There also a point where we'll need to contact NZTA to apply to use the old black plates.. Markku sent me this about that. Dead Black Plates renewal process. Do Not Get your car vinned or attempt to re-license. Follow this process first: To re-use your old Black Plates you need to ring this number: 0800366988 Email: reuseofplates@nzta.govt.nz with the following information: They want photos of the plates Photo of body tag Proof the plates are from the vehicle like a photo of wof sticker or receipts for work done to the car with plates listed. And or ownership papers or bill of sale like a declaration etc. Your contact details 10 day process time or sooner. IMPORTANT: Do not start the vin process or the plates will be disallowed for ever ie unusable forever. Wait for LTSA to send you the ok with a number you are to give to the VIN agent like VTNZ or VINZ.1 point
-
So.. When you have too many projects..... An old mate has had a Mk1 Cortina since 1997. Started as a run about, turned into a project, then along came life, so it was parked for ??? years. The time has come to bring it out of hibernation and see if some life can be breathed into it. Disclaimer: This is not my car, this is not my project, but I'm involved and connected and figured some of your might enjoy the thing. Also disclaimer, the owner and chap who's restoring it are 100% happy for me to share the project here. Step 1: Unbury The light of day for the first time in ???? Load 'er up Delivered down to the (Hawkes) Bay and ready for revival. Since the car was imported pre 19?? it doesn't have a vin. Annoyingly the rego had lapsed with an address change, so it required a trip to VTNZ for us to tell them how to do their jobs and get the car a VIN. Tow vehicle activated. As we'd researched the process and let VTNZ know what to do we got through this pretty easily so the car was back to the workshop in good company. Some tidy up required. Throttle body was pretty well stuck, fuel tank has a leak, oil was ??? years old. Some remedial work and.. Gotta love that toyota reliability and a link ECU with an good link base map, albeit a bit rich. The body looks pretty straight, it's had some repair in the right rear at some point in the distant past. There's some re-work to do on some questionable mounting that was done in it's early mod life but nothing that can't be fixed etc. Other projects have been moving in the right direction so there will be some more movement on this coming soon. Further disclaimer, Projects are fun but take time and I have little of the latter. I'll try to keep the updates rolling as they come in but don't expect them weekly. P.P.P.S. I'll get an engine bay shot next time I'm there. LeftChevronThree.1 point
-
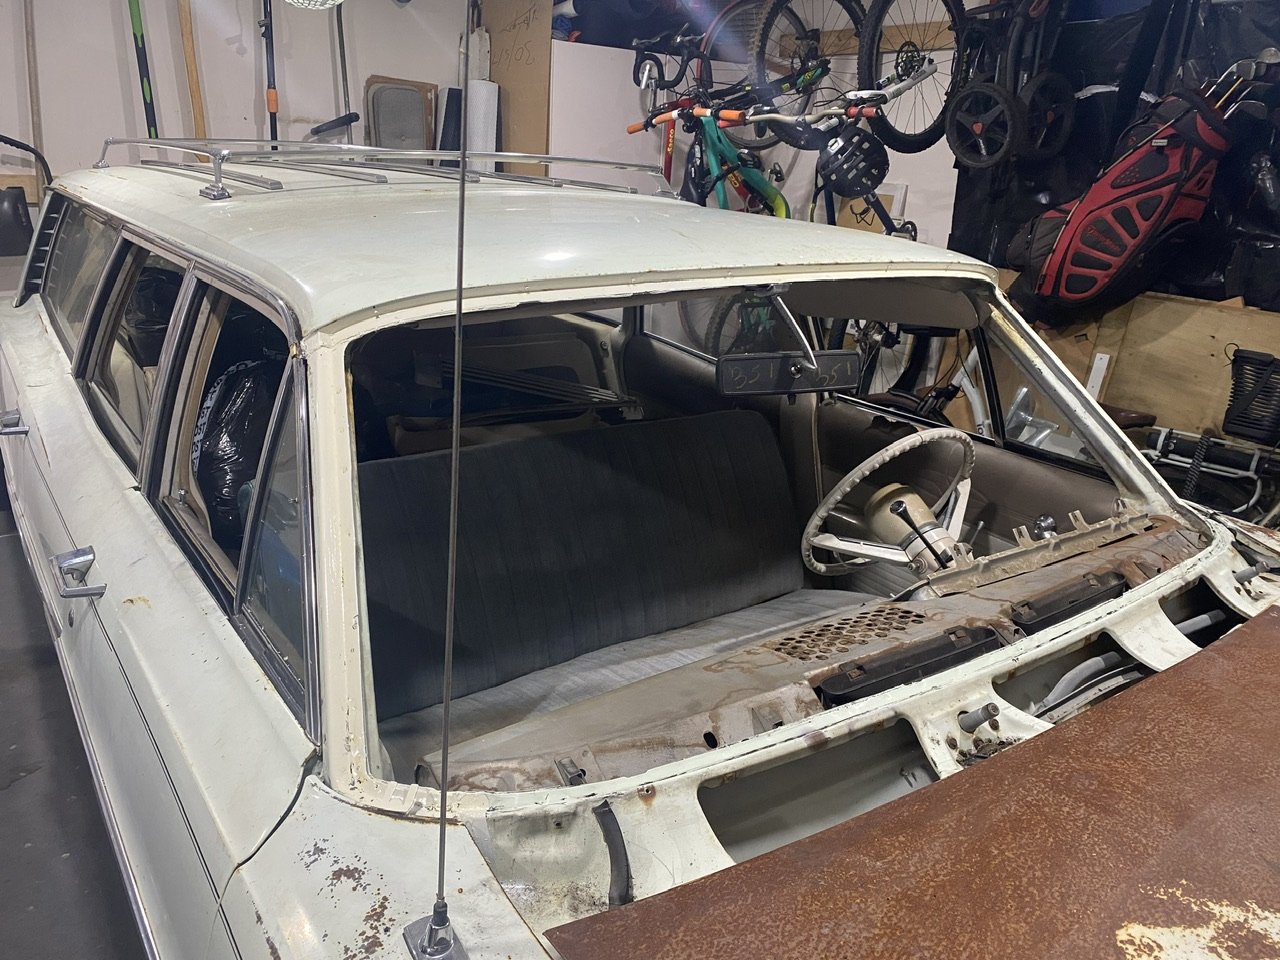
Have mainly been doing a lot of stripping work on the wagon as of late and have been working on the rear tailgate section. Stripped all the sound deadening from the foot well area for the rear seat and found some more rust so have sprayed it with rust converter and working on some new metal to go in.
1 point
-
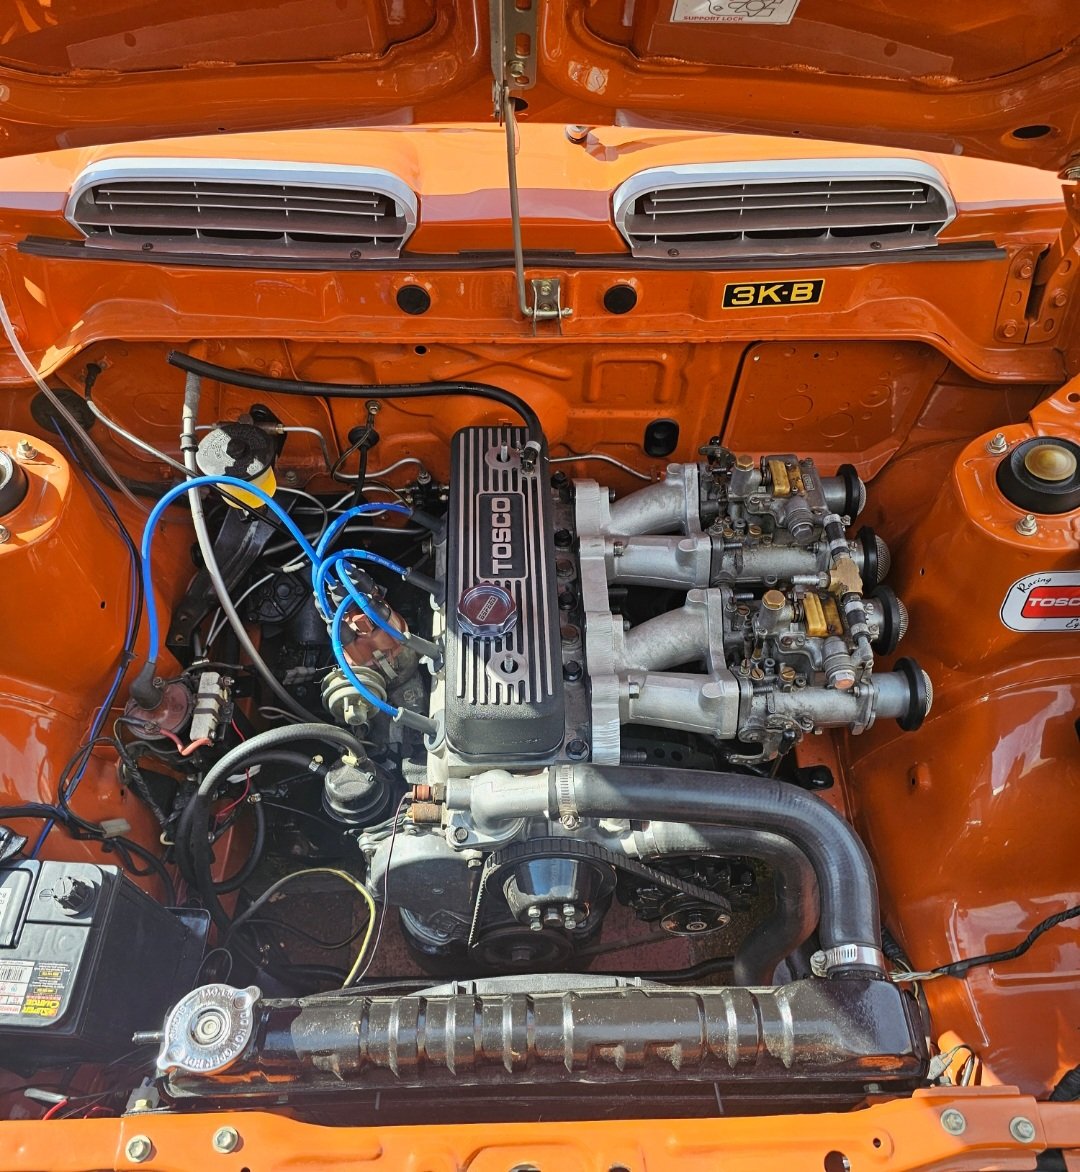
I've got a lead on a healthy high compression 173 which barry said has some trick head work and was built for boost, might be a easier option than pulling and refreshing 202 and putting the cam etc in1 point
-
Got 2 great sump castings and a 3rd with a small defect that would be fine once welded.1 point
-
1 point
-
1 point
-
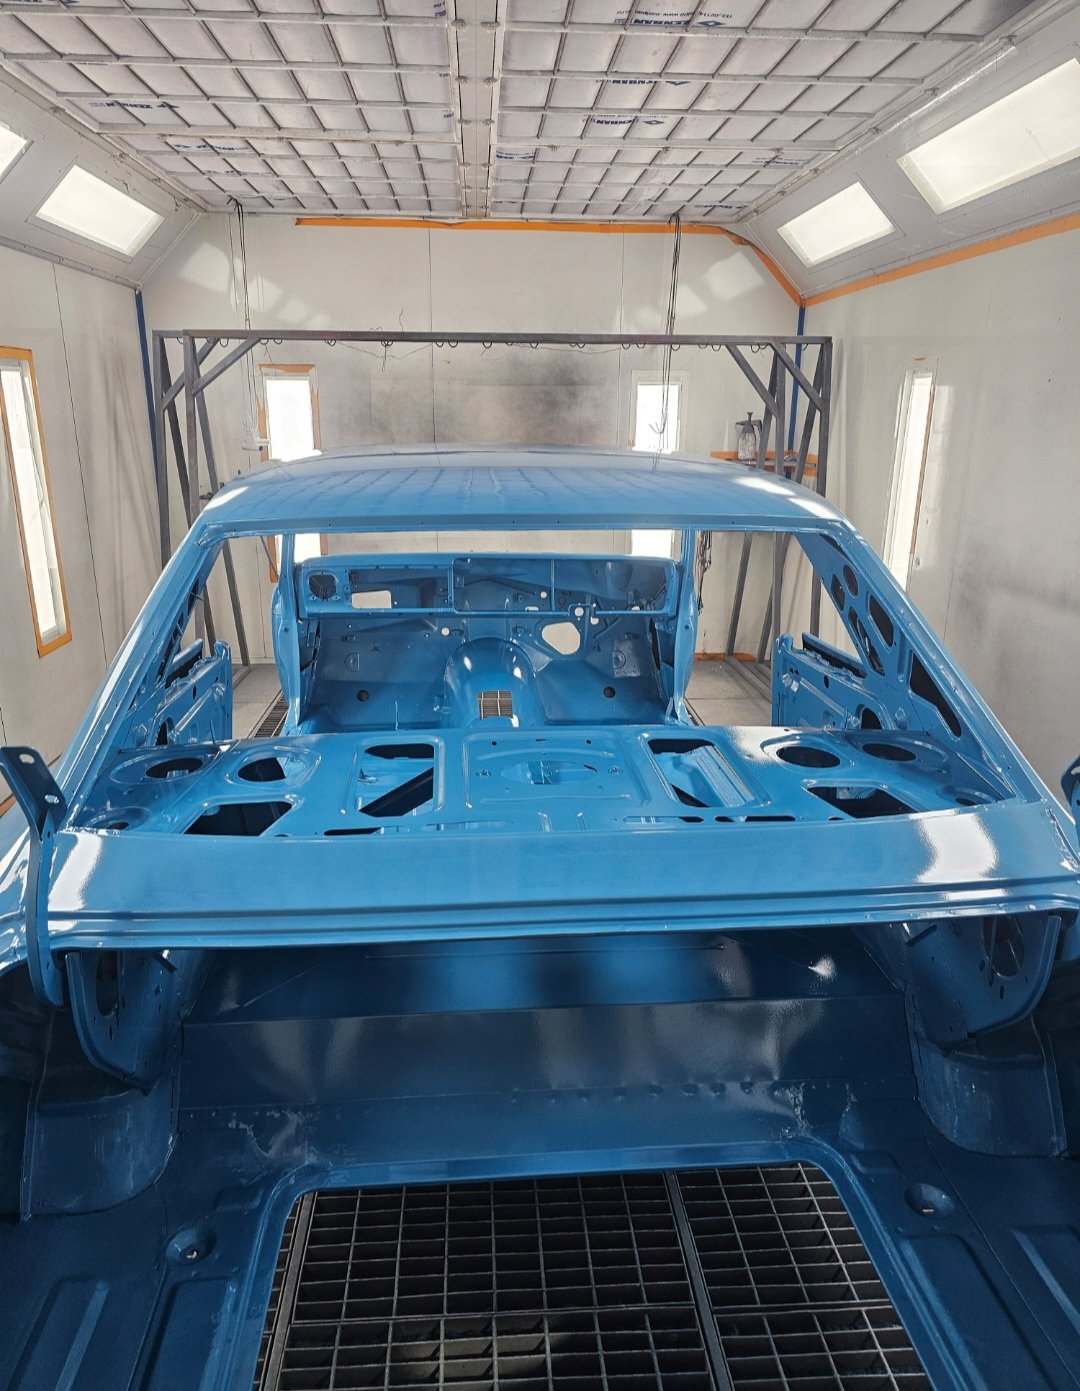
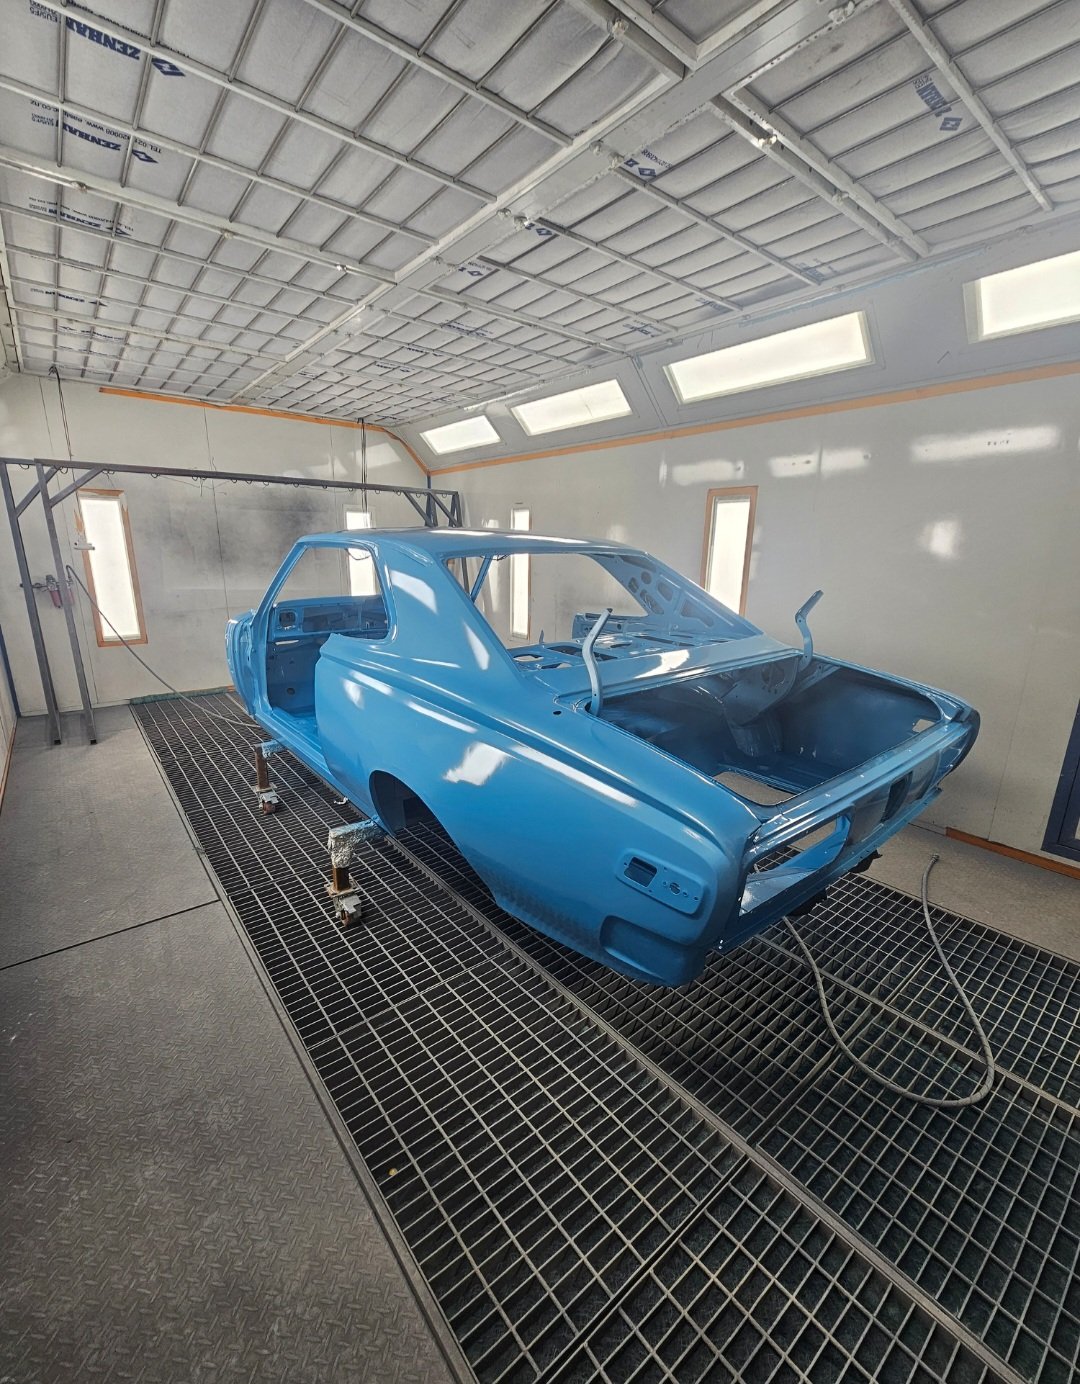
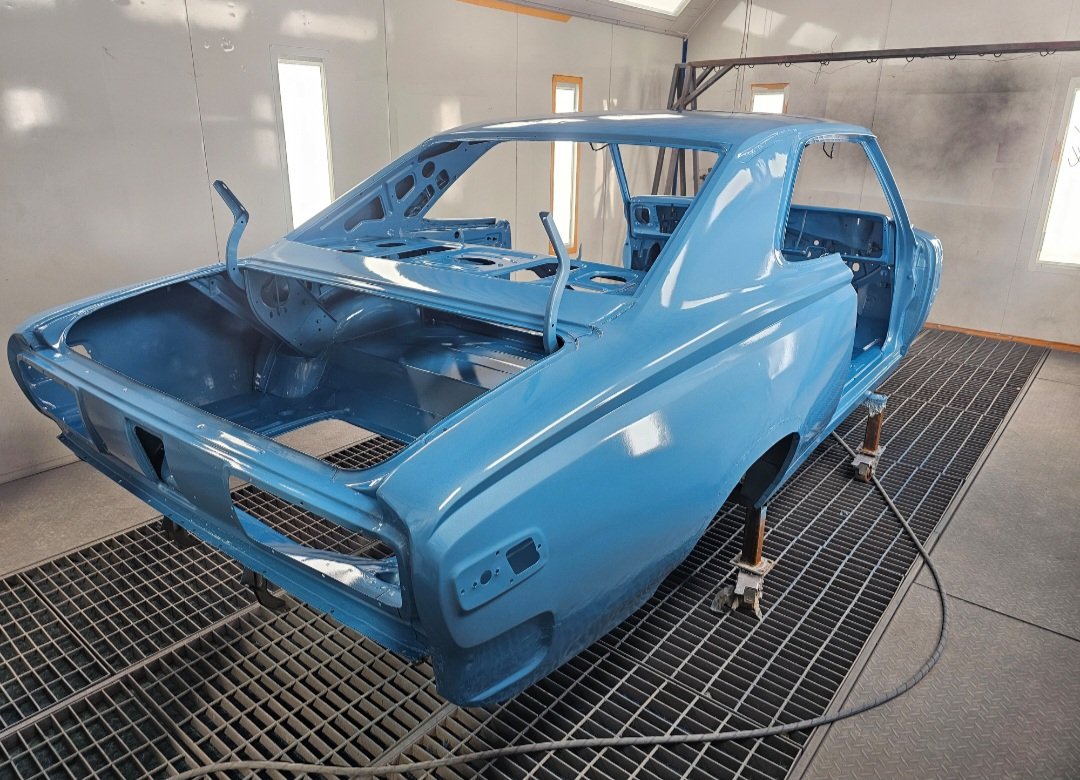
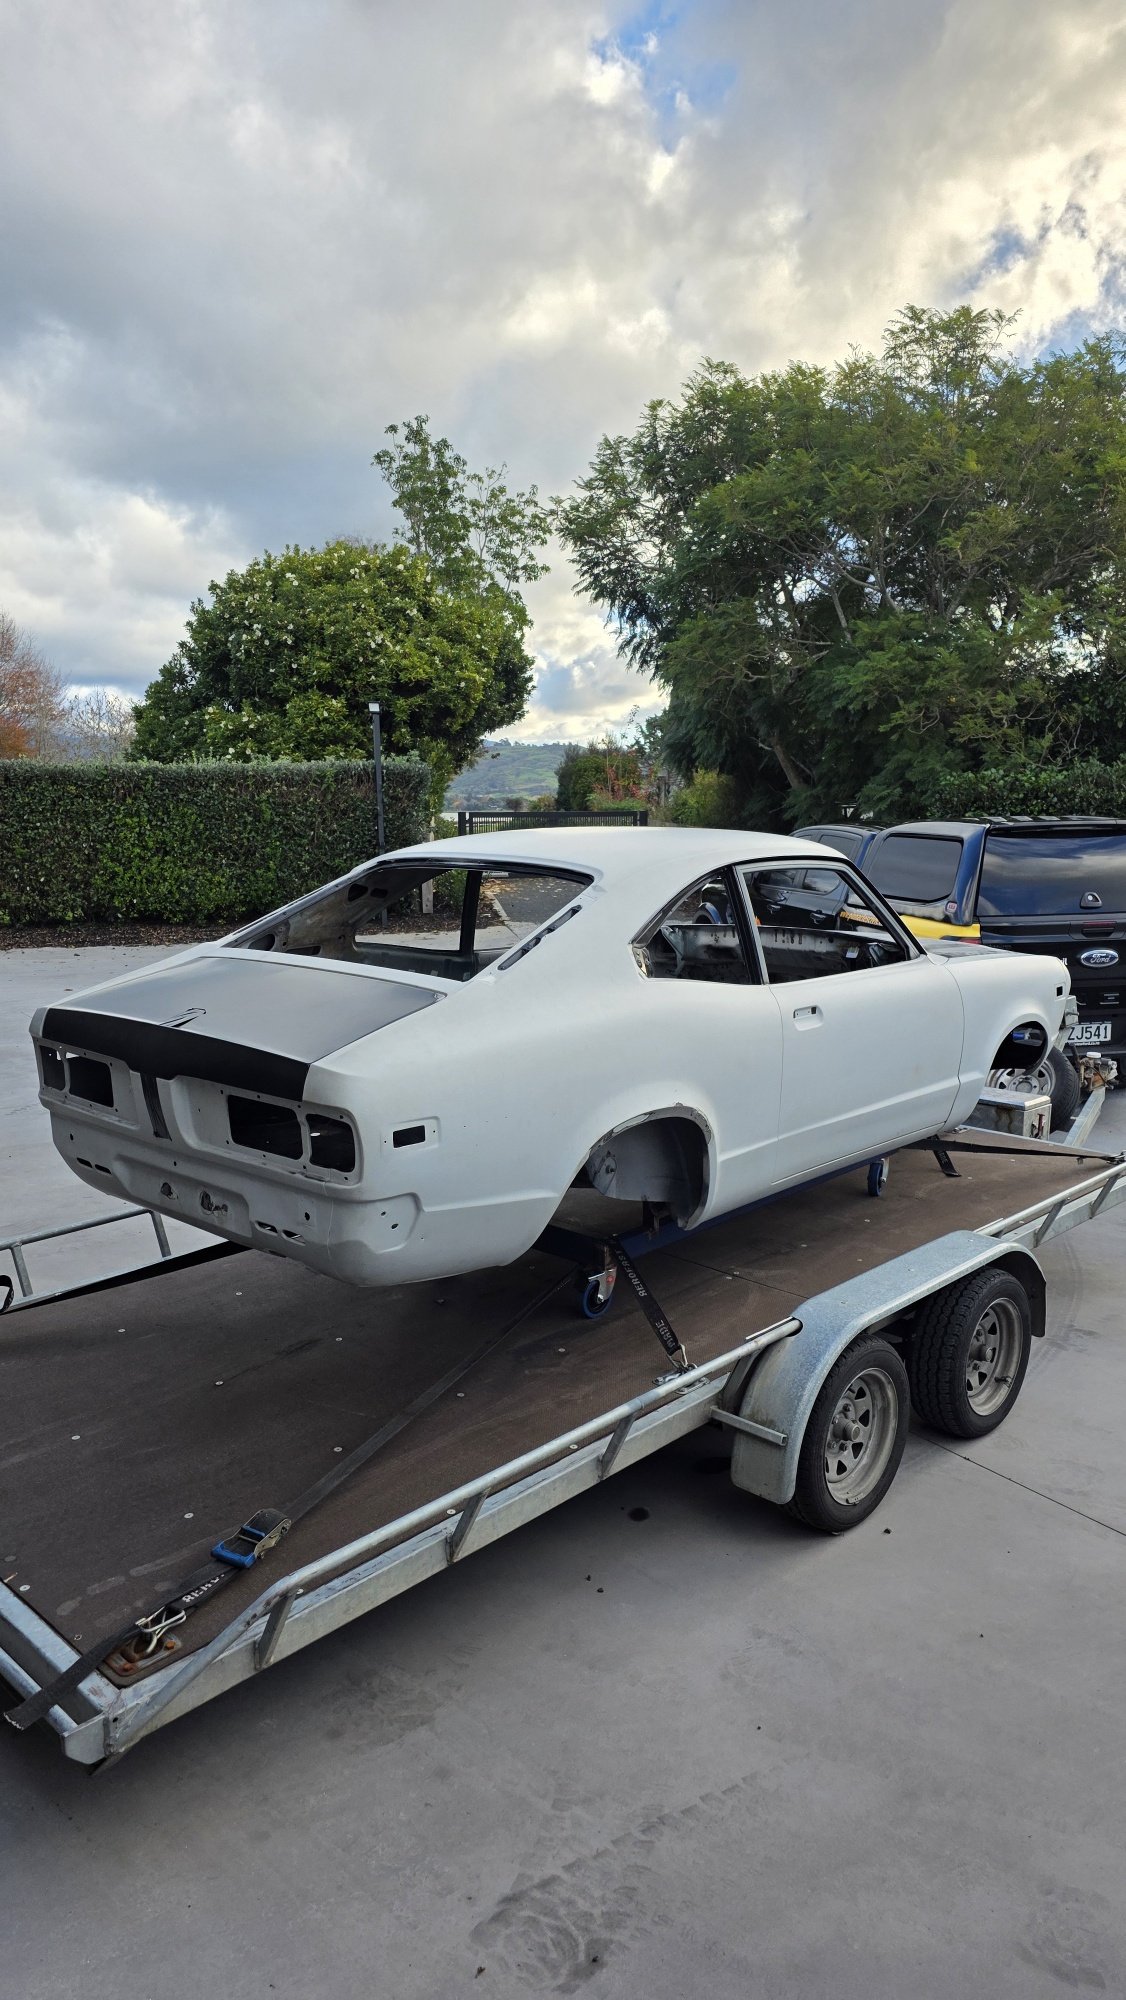
Feel like we have come so far in the last few days. Went with a #ppg direct to metal in Toyota 8v7 instead of an epoxy primer. Will get the car revined and on the road like this so they can see all repairs and modifications done. Then will pull back down and do filler work, primer and top coat. Once back on the road and certified. Thanks to the team and Canterbury auto fab Warrick, josh and josh
1 point
-
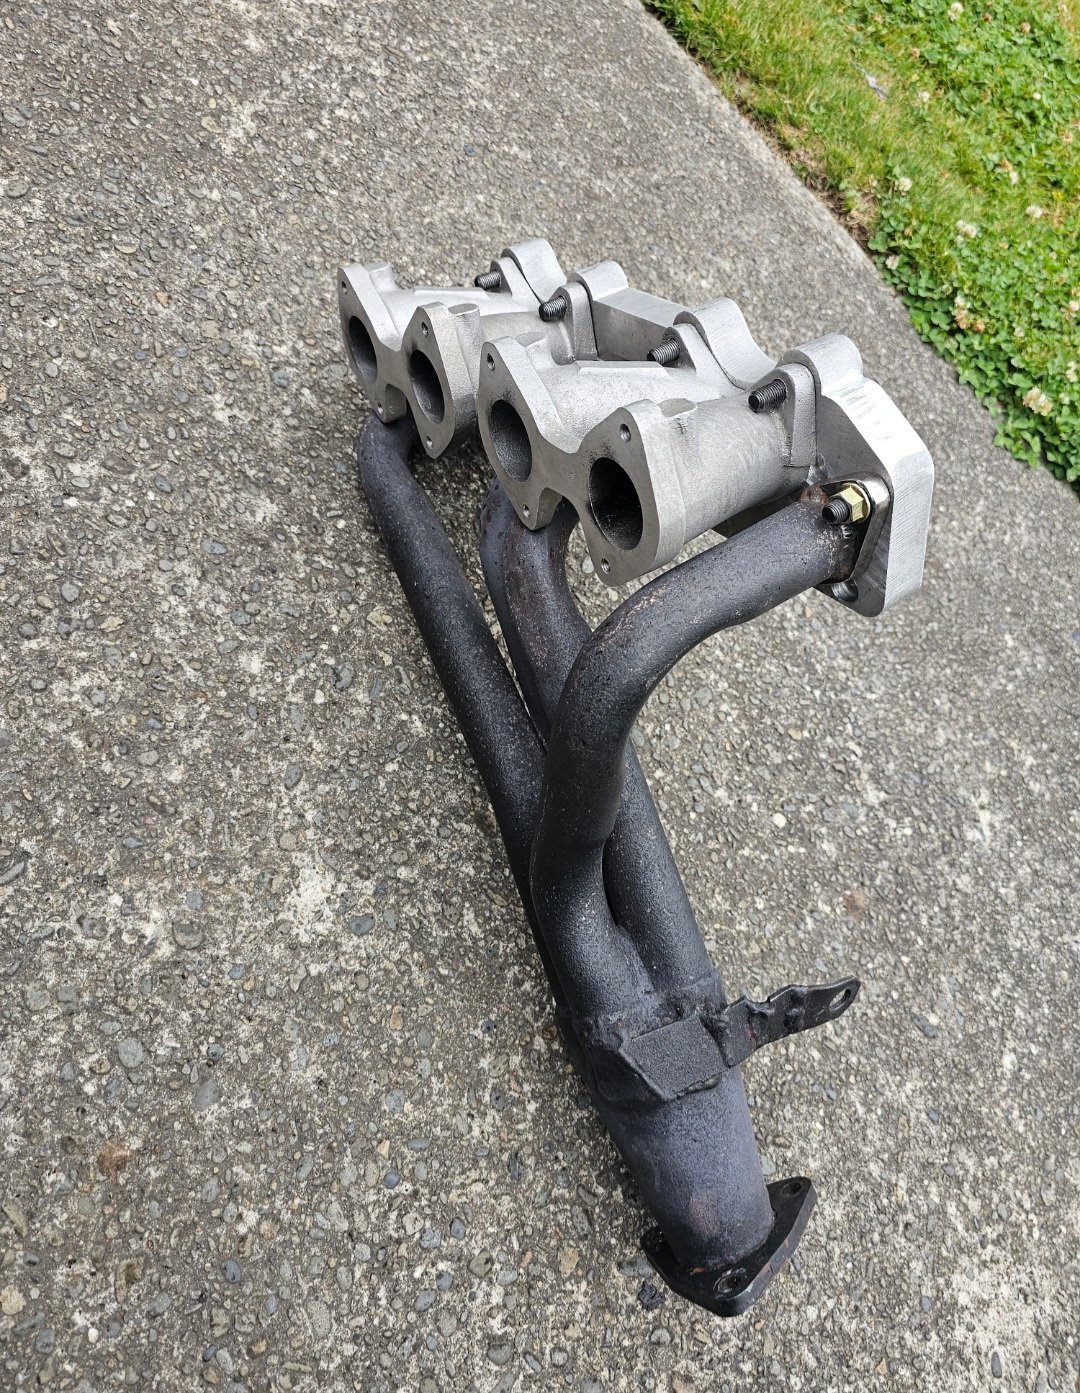
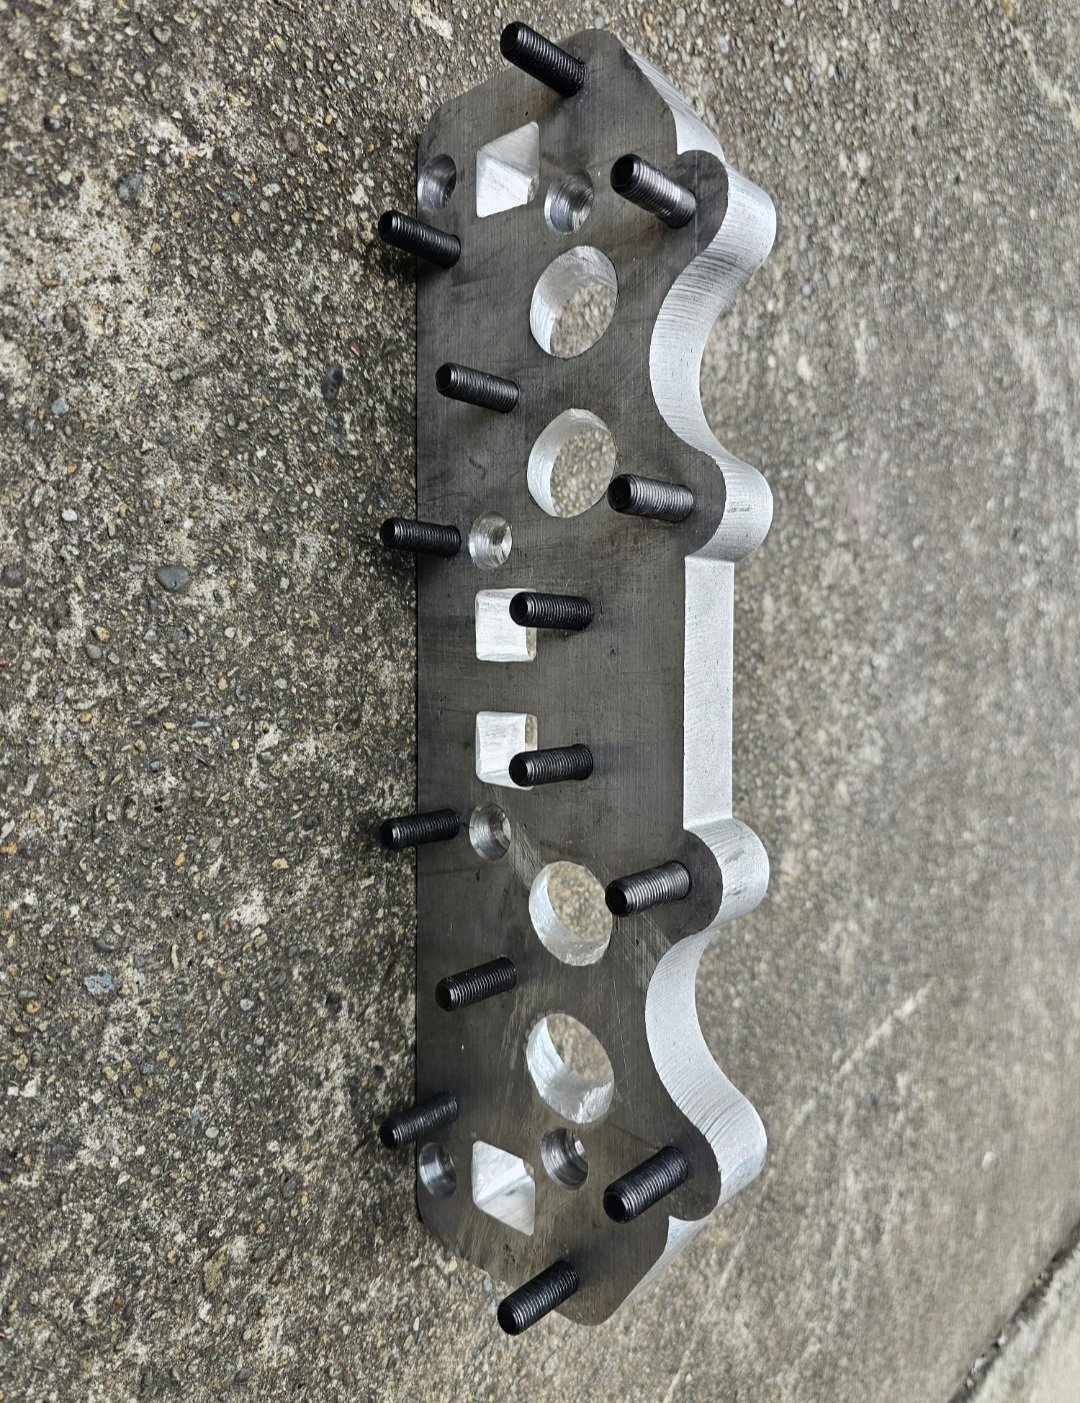
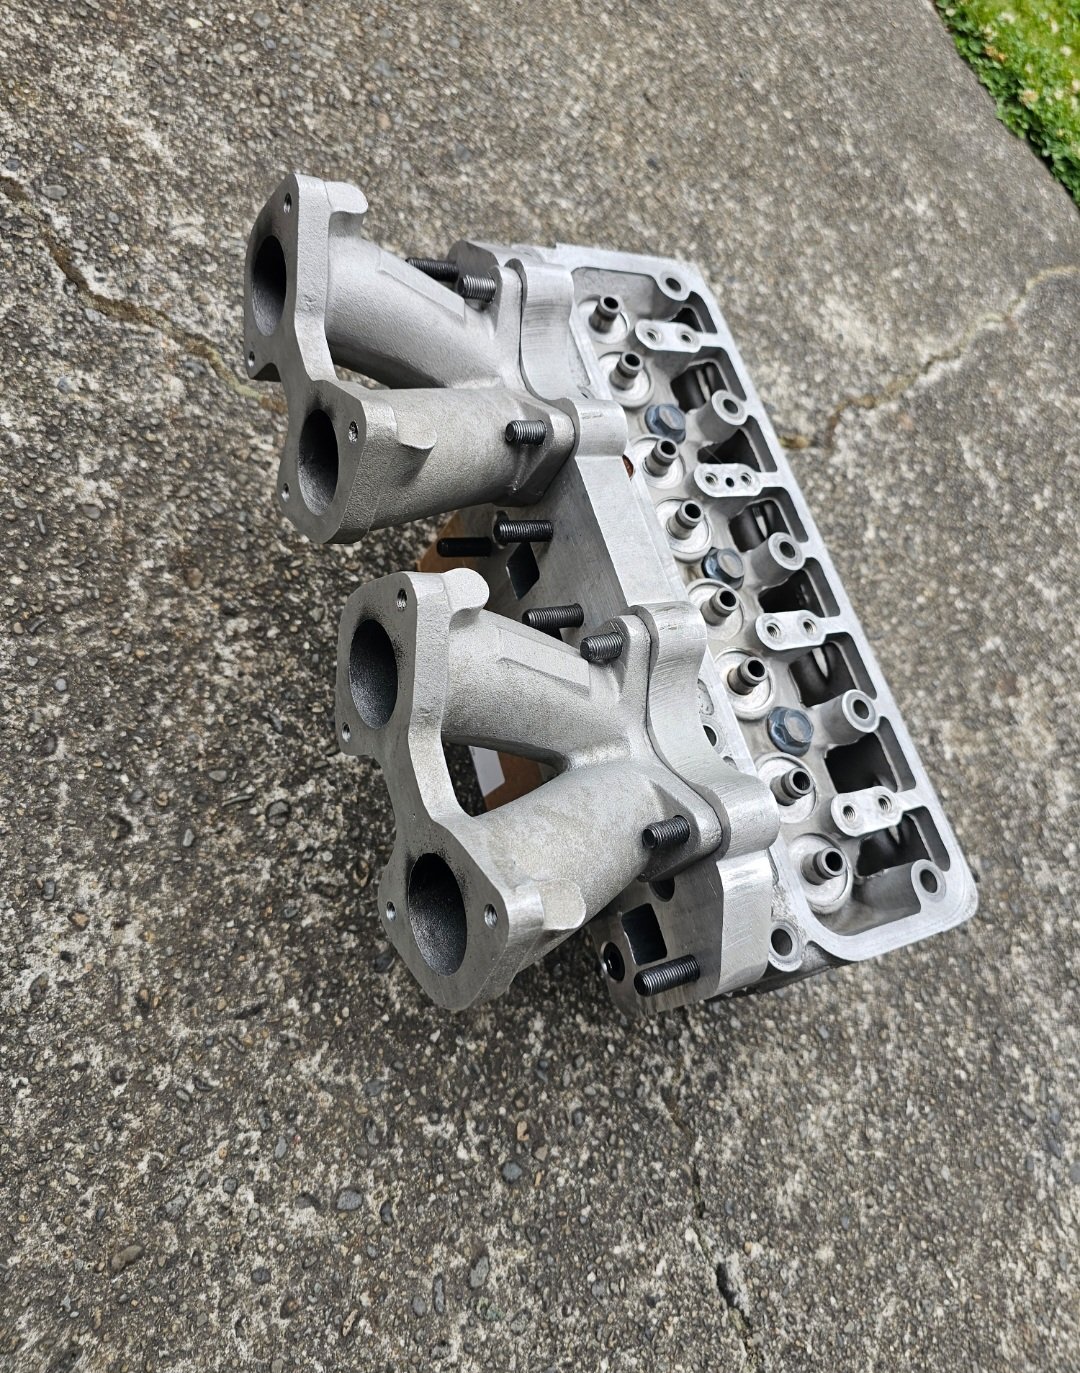
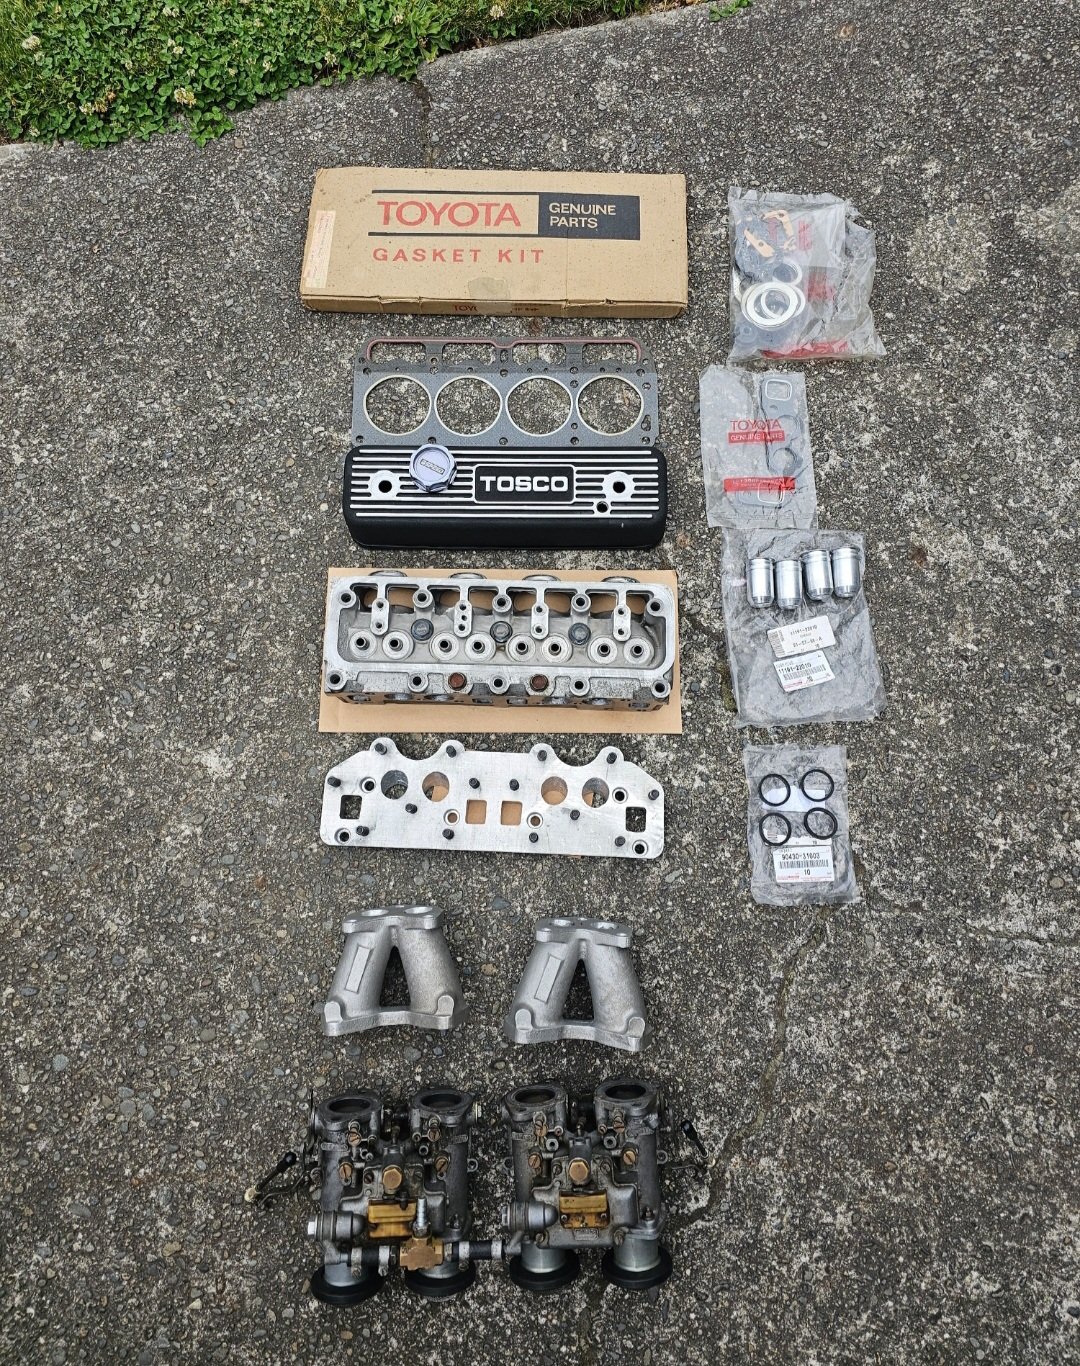
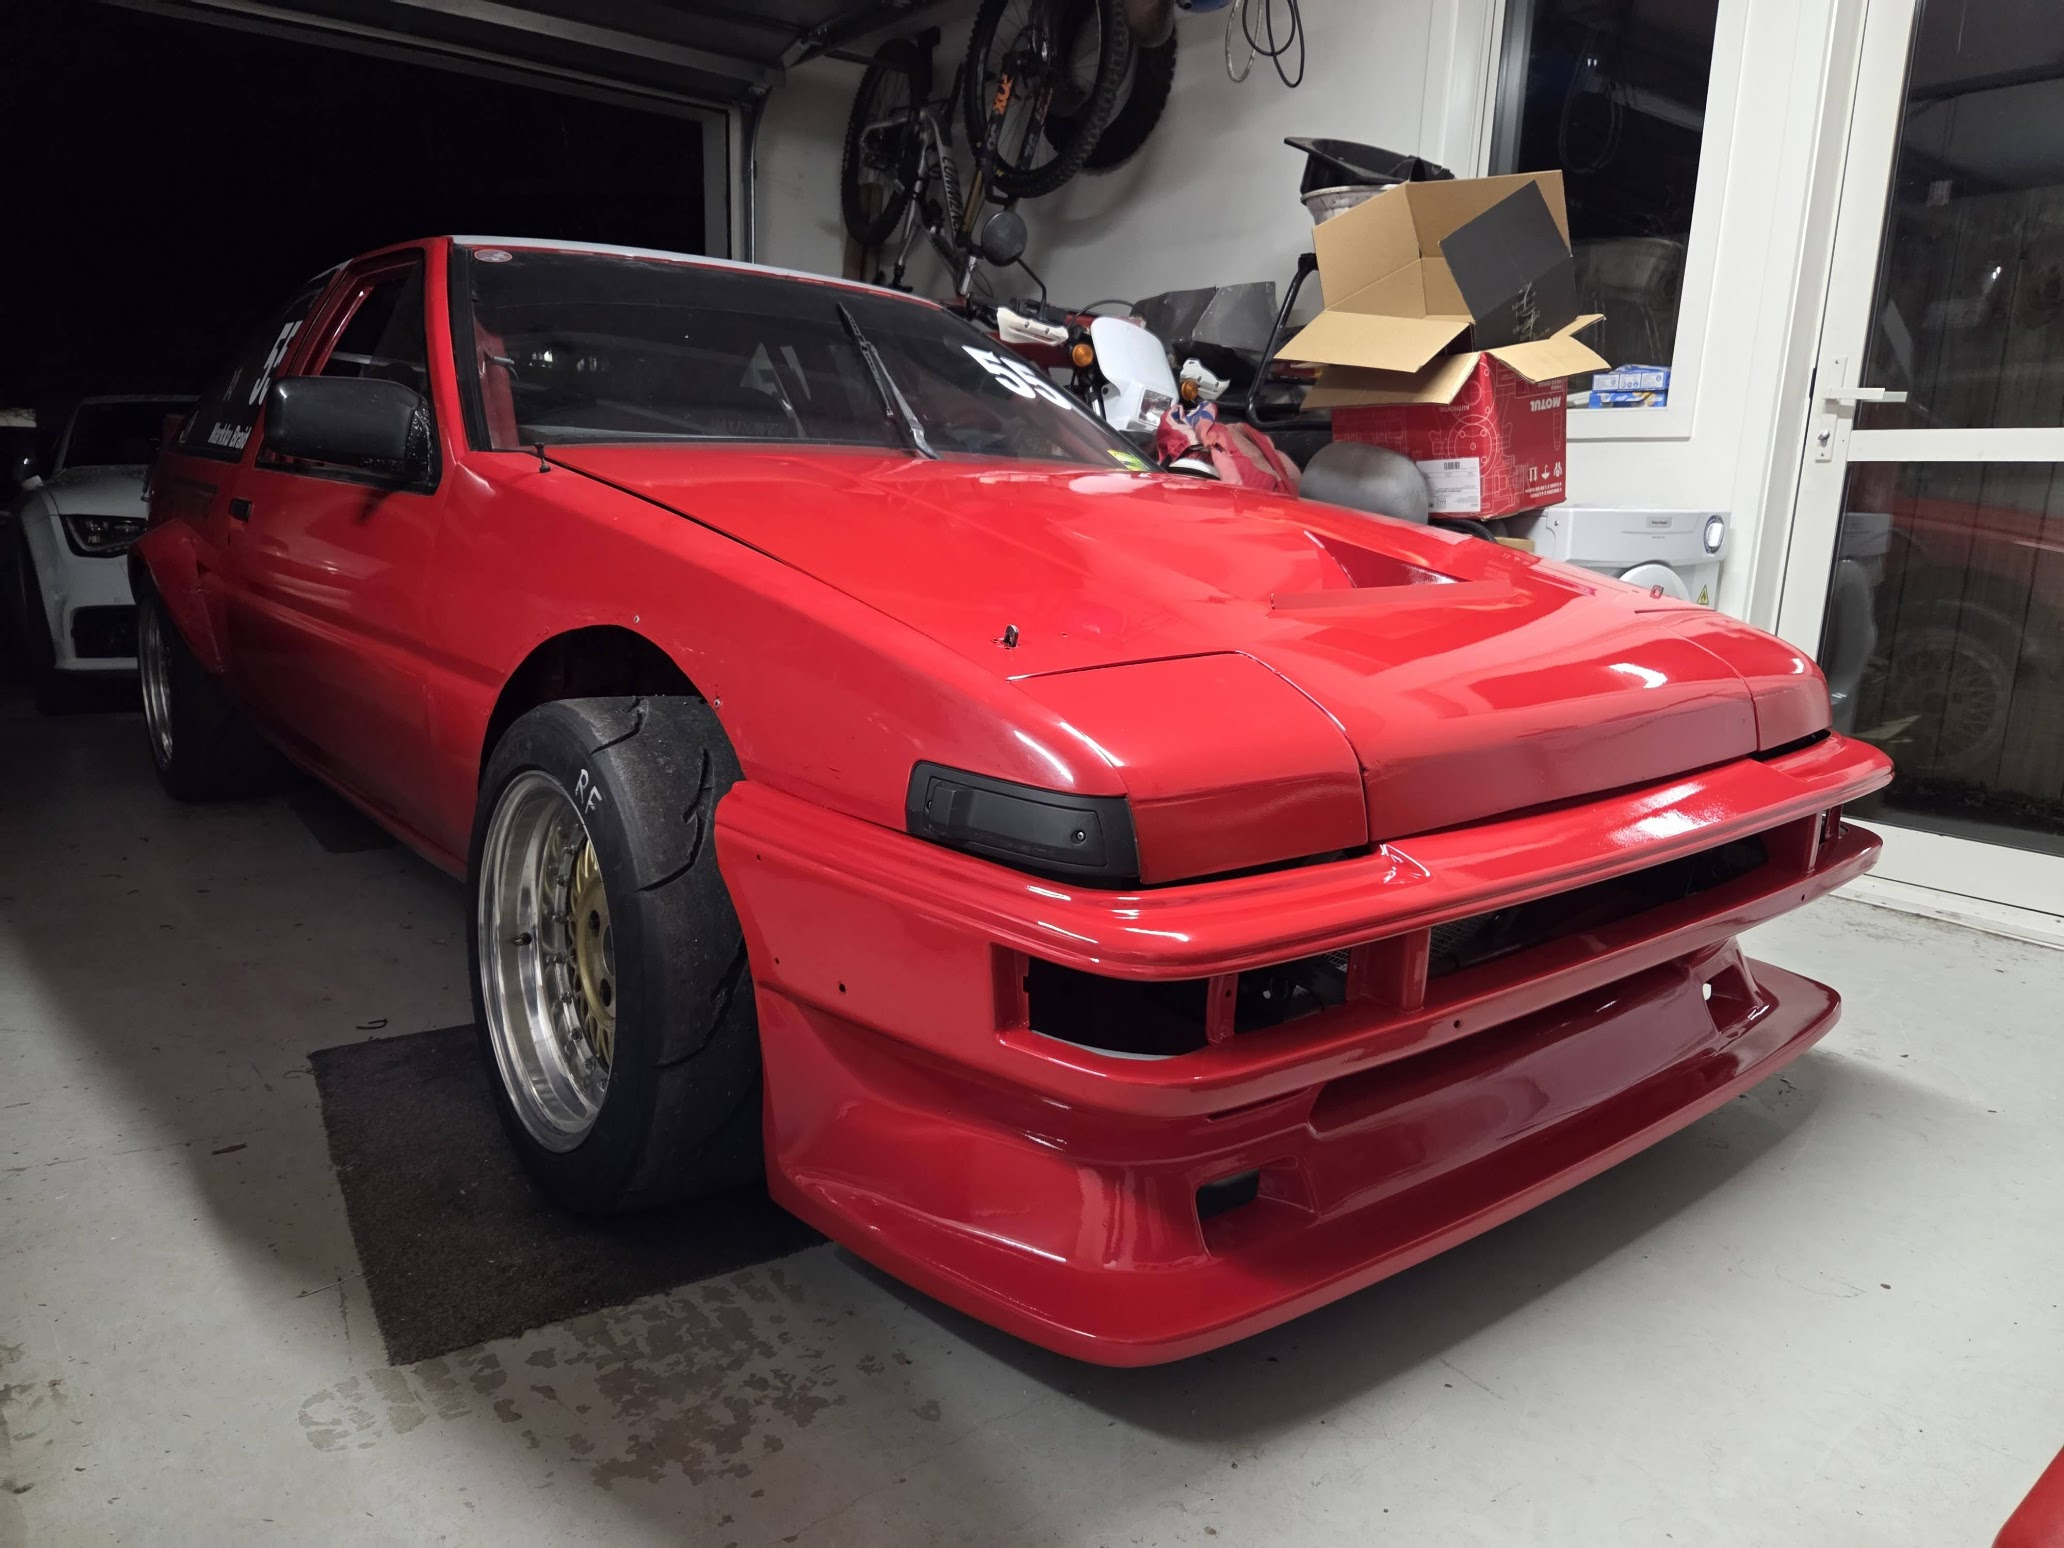
Ke25 is also back on the road after the mishap. Been back on the road for about 3 months. Intake upgrade now. With some head work from Justin Neil. Sheldon rush intakes. And the adaptor plate designed by feild fab.
1 point
-
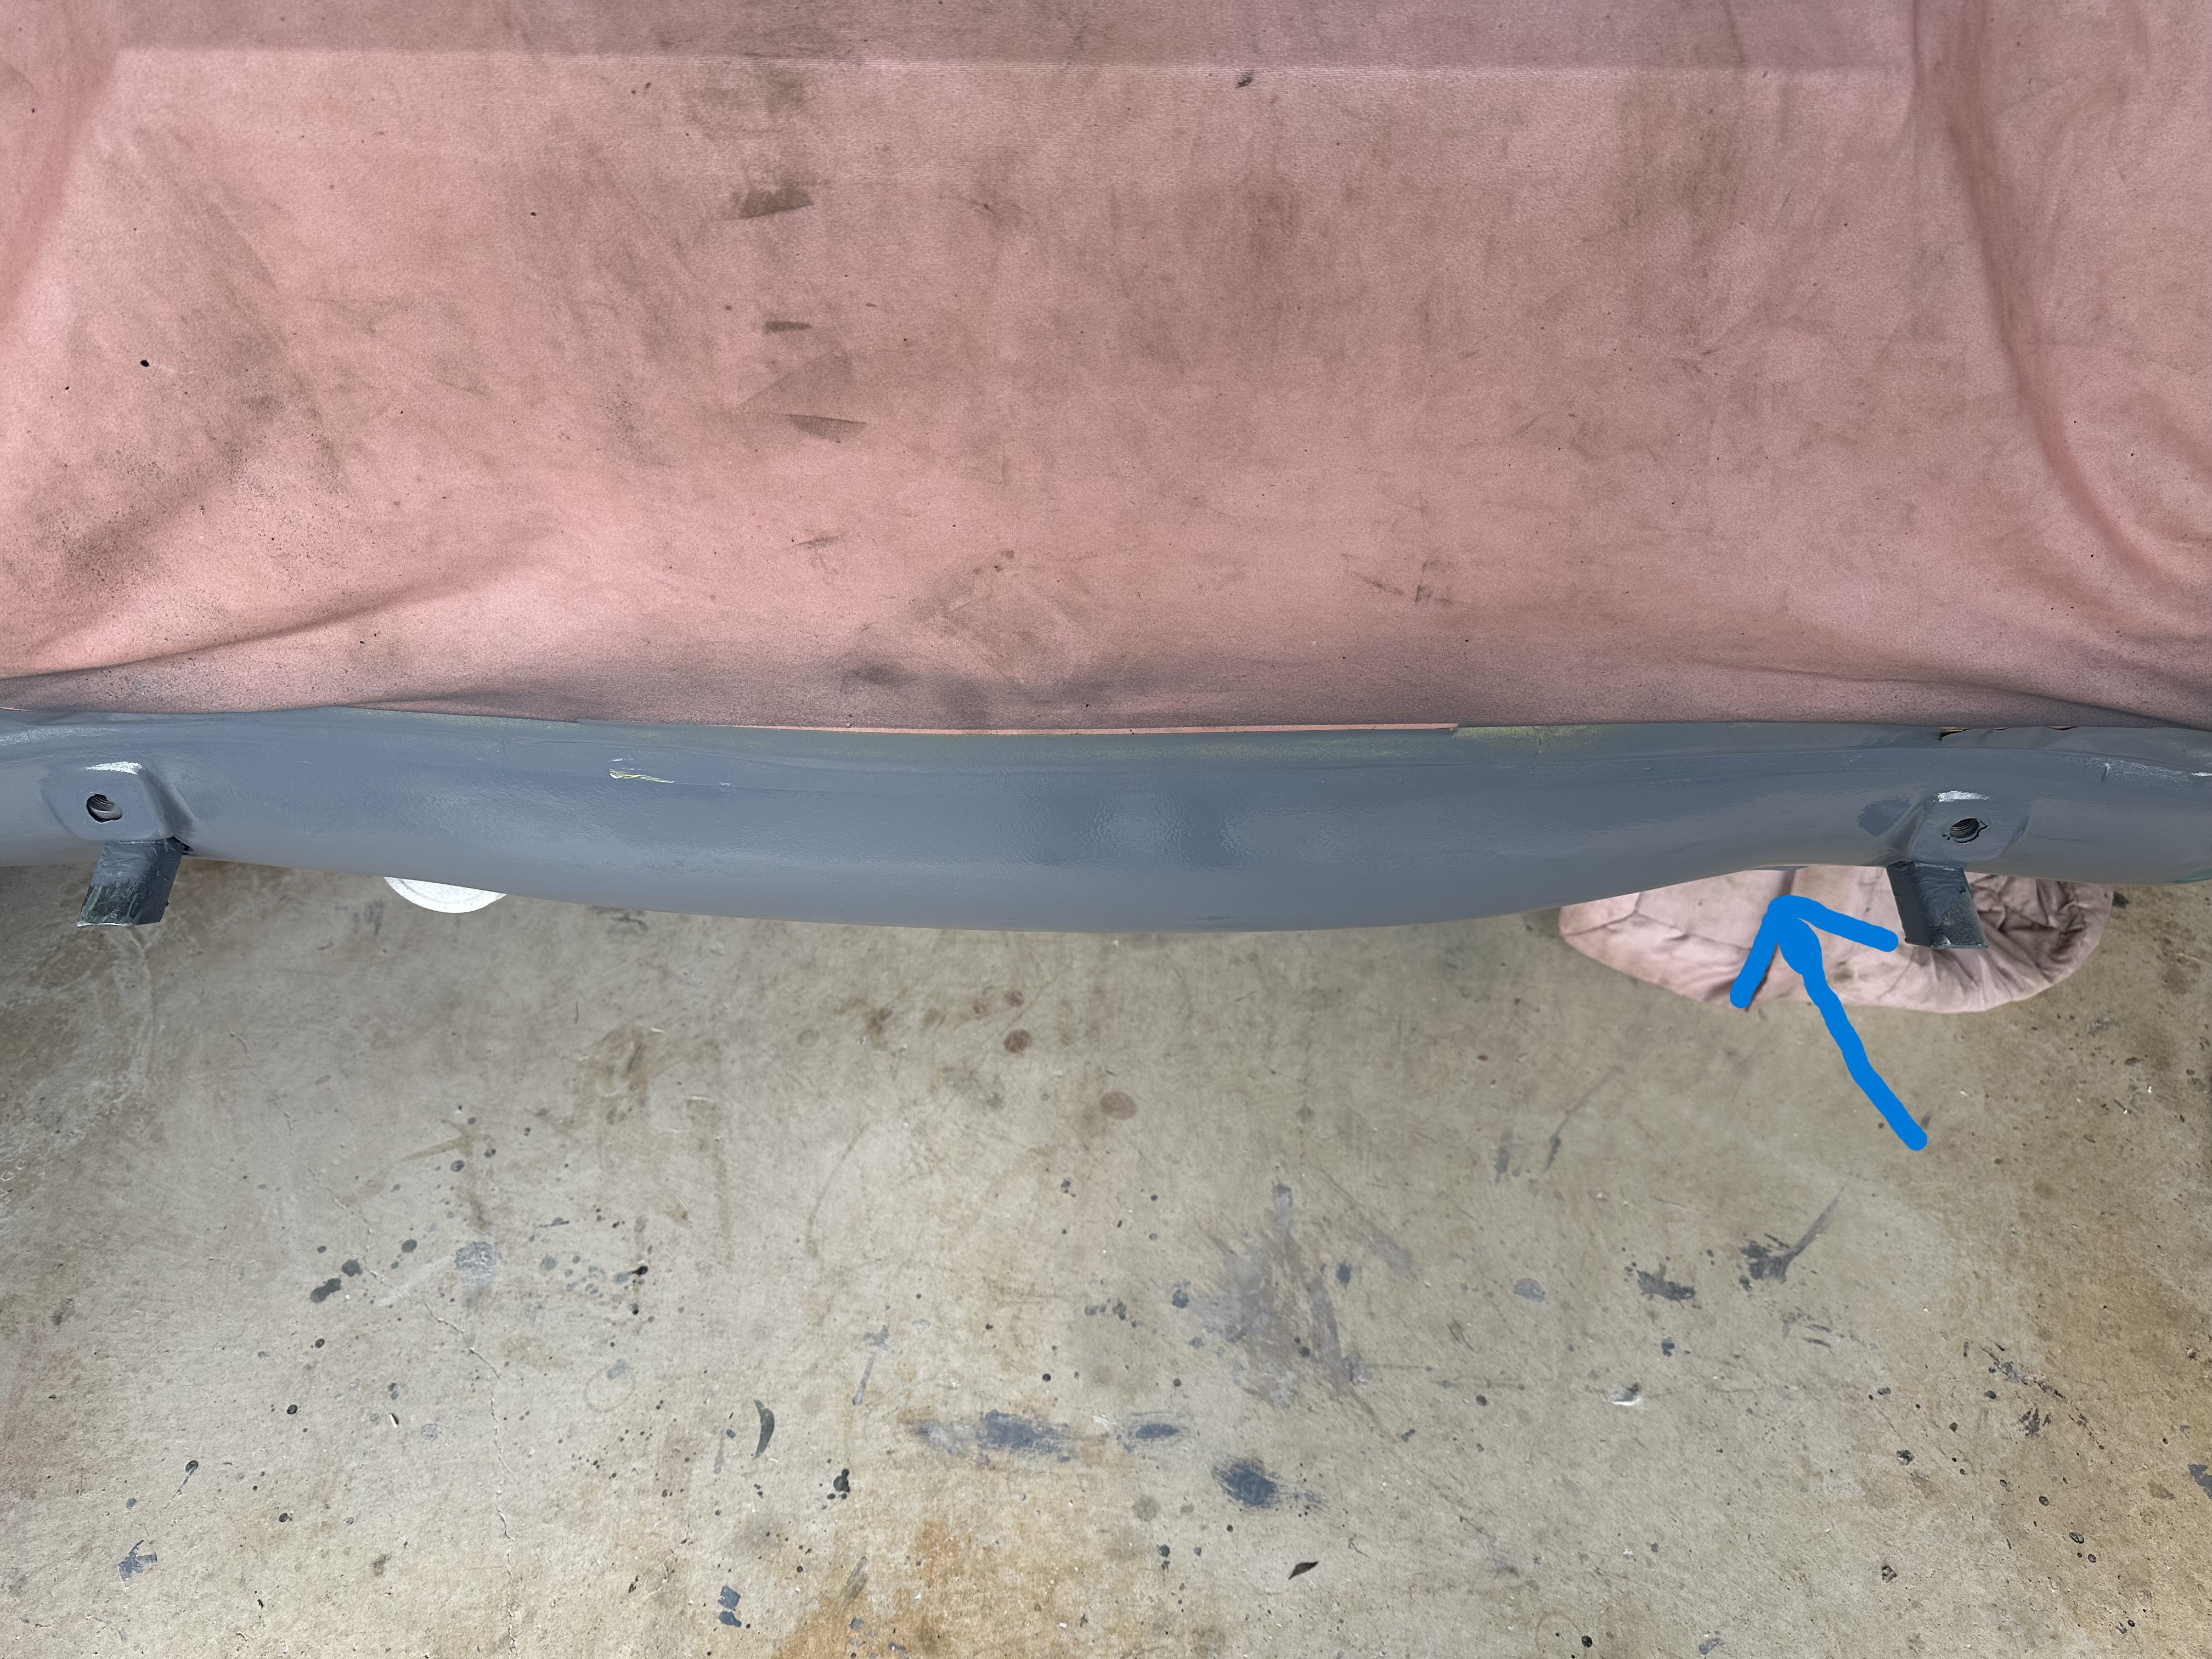
I finished of the metal work yesterday and gave it a coat of epoxy by brush and left it overnight to harden. Then gave it a light sand with 80grit and some scotch brite which took the shine off the low spots. Today I used a very very small amount of filler (yes I know what your thinking) which is why it only took me approx three hours to do. Anyway I cleaned and degreased it and sprayed another coat of epoxy primer on it. I can see i need to add a bit more filler where the arrow is and shape the opposite side more to get them more symmetrical. Probably not hugely important to be perfectly the same but closer would be better. There are still a few high spots etc to iron out but overall I am pretty happy about it.
1 point
-
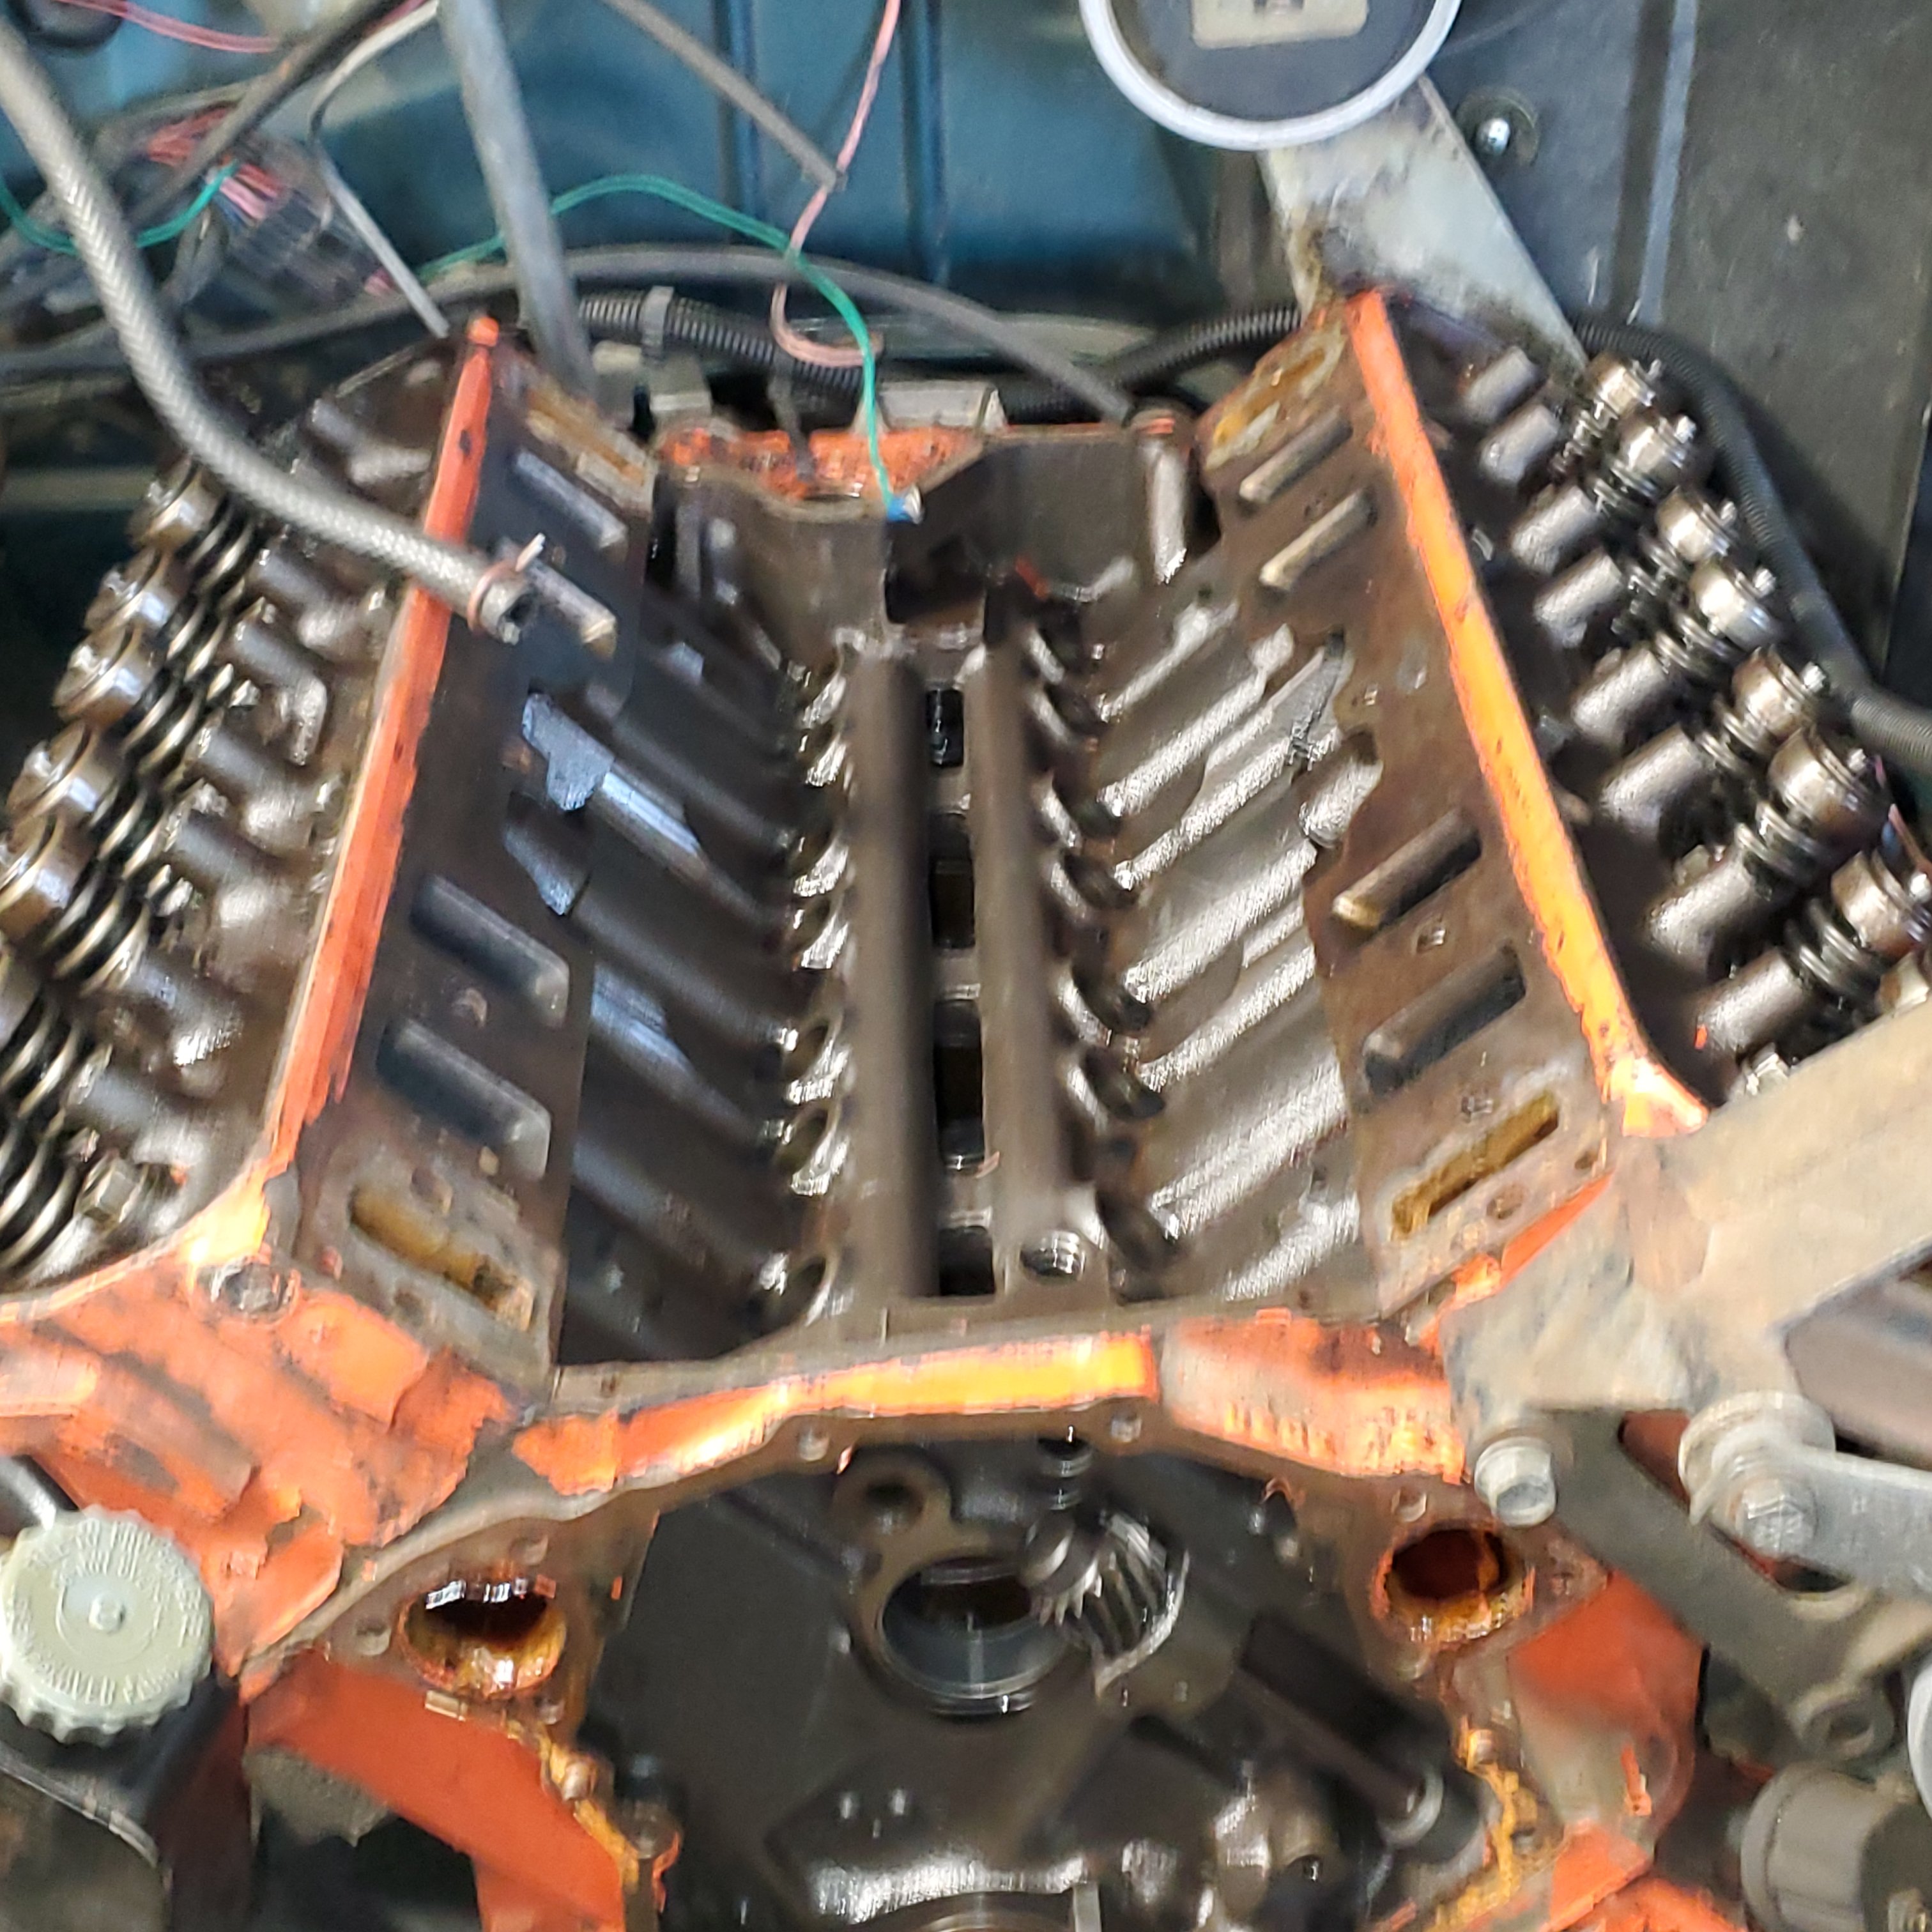
so , for the last 10 years. I've had a cam , in an engine. that's being choked out by restricted exhaust manifolds , a 2.6:1 diff . and probably generally shit tuning. and I did 5000ks in it haha. the funniest thing though, and mods you may tell me off for this. one of the arguments I had with my ex-wife was kinda funny now I think about it. She drove the car for a short period while I sorted her car out ( bad idea) anyways after a week, she's spouting off at me during one of our weekly arguments ( this was in the final year of marriage when we just weren't getting along) " I know that old car better than anyone" do you really? hahahahahaha small ironies. anyways back to the car . I have two options either get a tamer camshaft or........... build the rest of the engine car to suit the cam. thoughts please in the the discussion thread. pic for fred
1 point
-
its hard to keep track of all of the different revenue gathering that us certifiers do, especially after i hurt my head diving into my swimming pool full of money, i wasnt thinking about my money diving because i was preoccupied with thinking up new random rules to make things difficult for the peasants modifiying their motor vehicles and also trying to find a new hitler uniform because my old one is worn out from wearing it to work (where i do 10 minutes of work and write out an invoice for $2500) also i have a tiny penis, that is why i became a certifier1 point
-
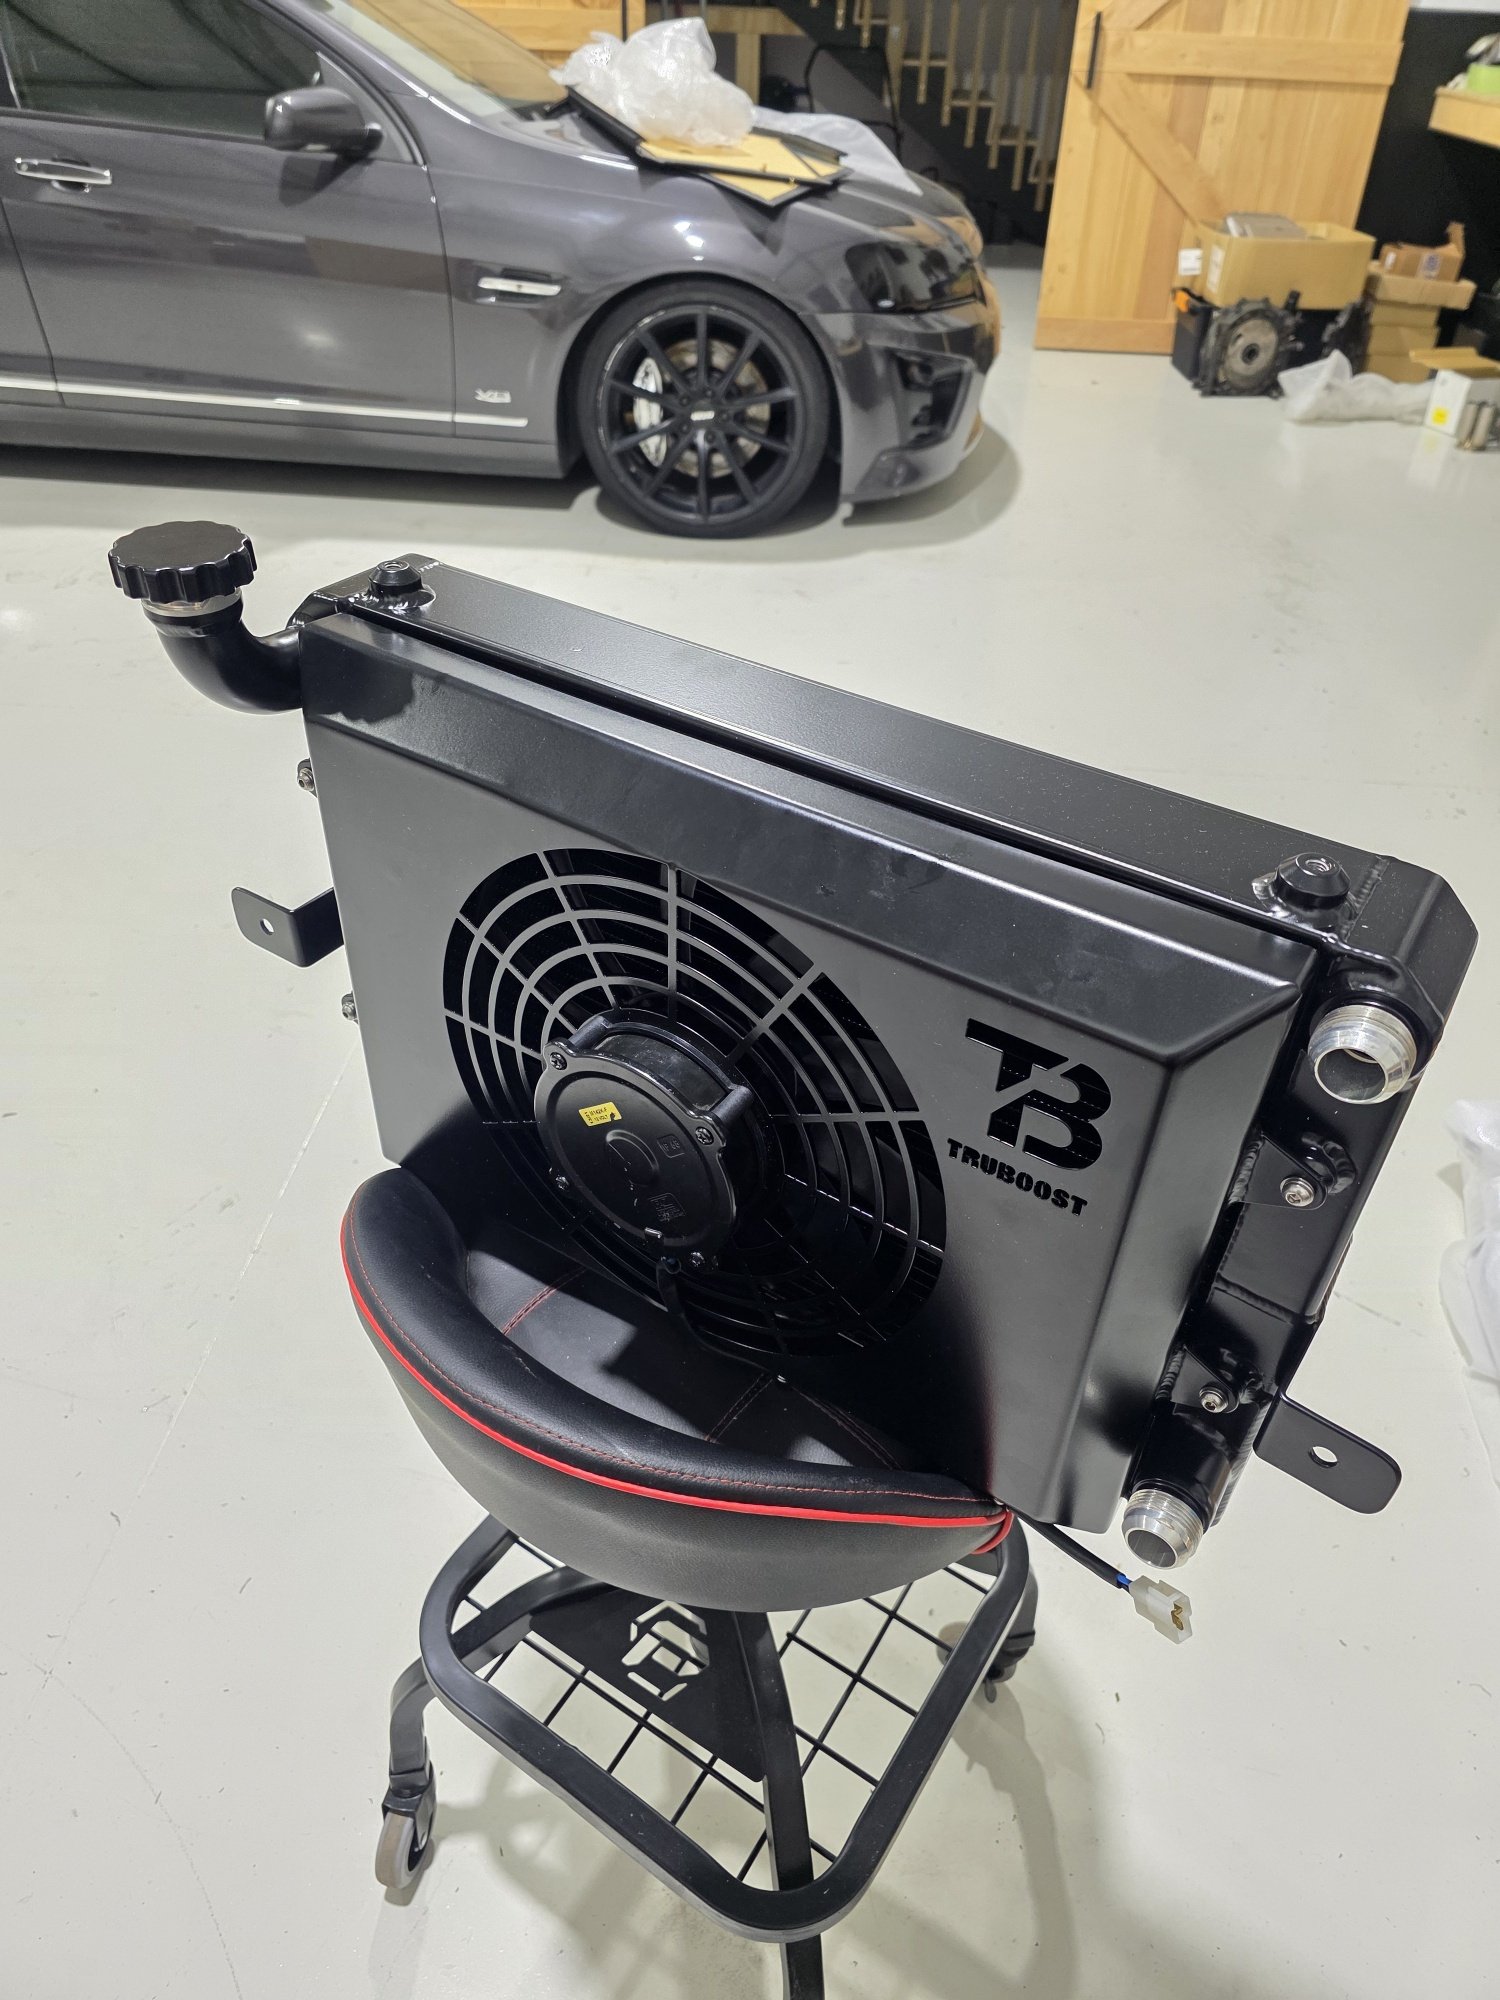
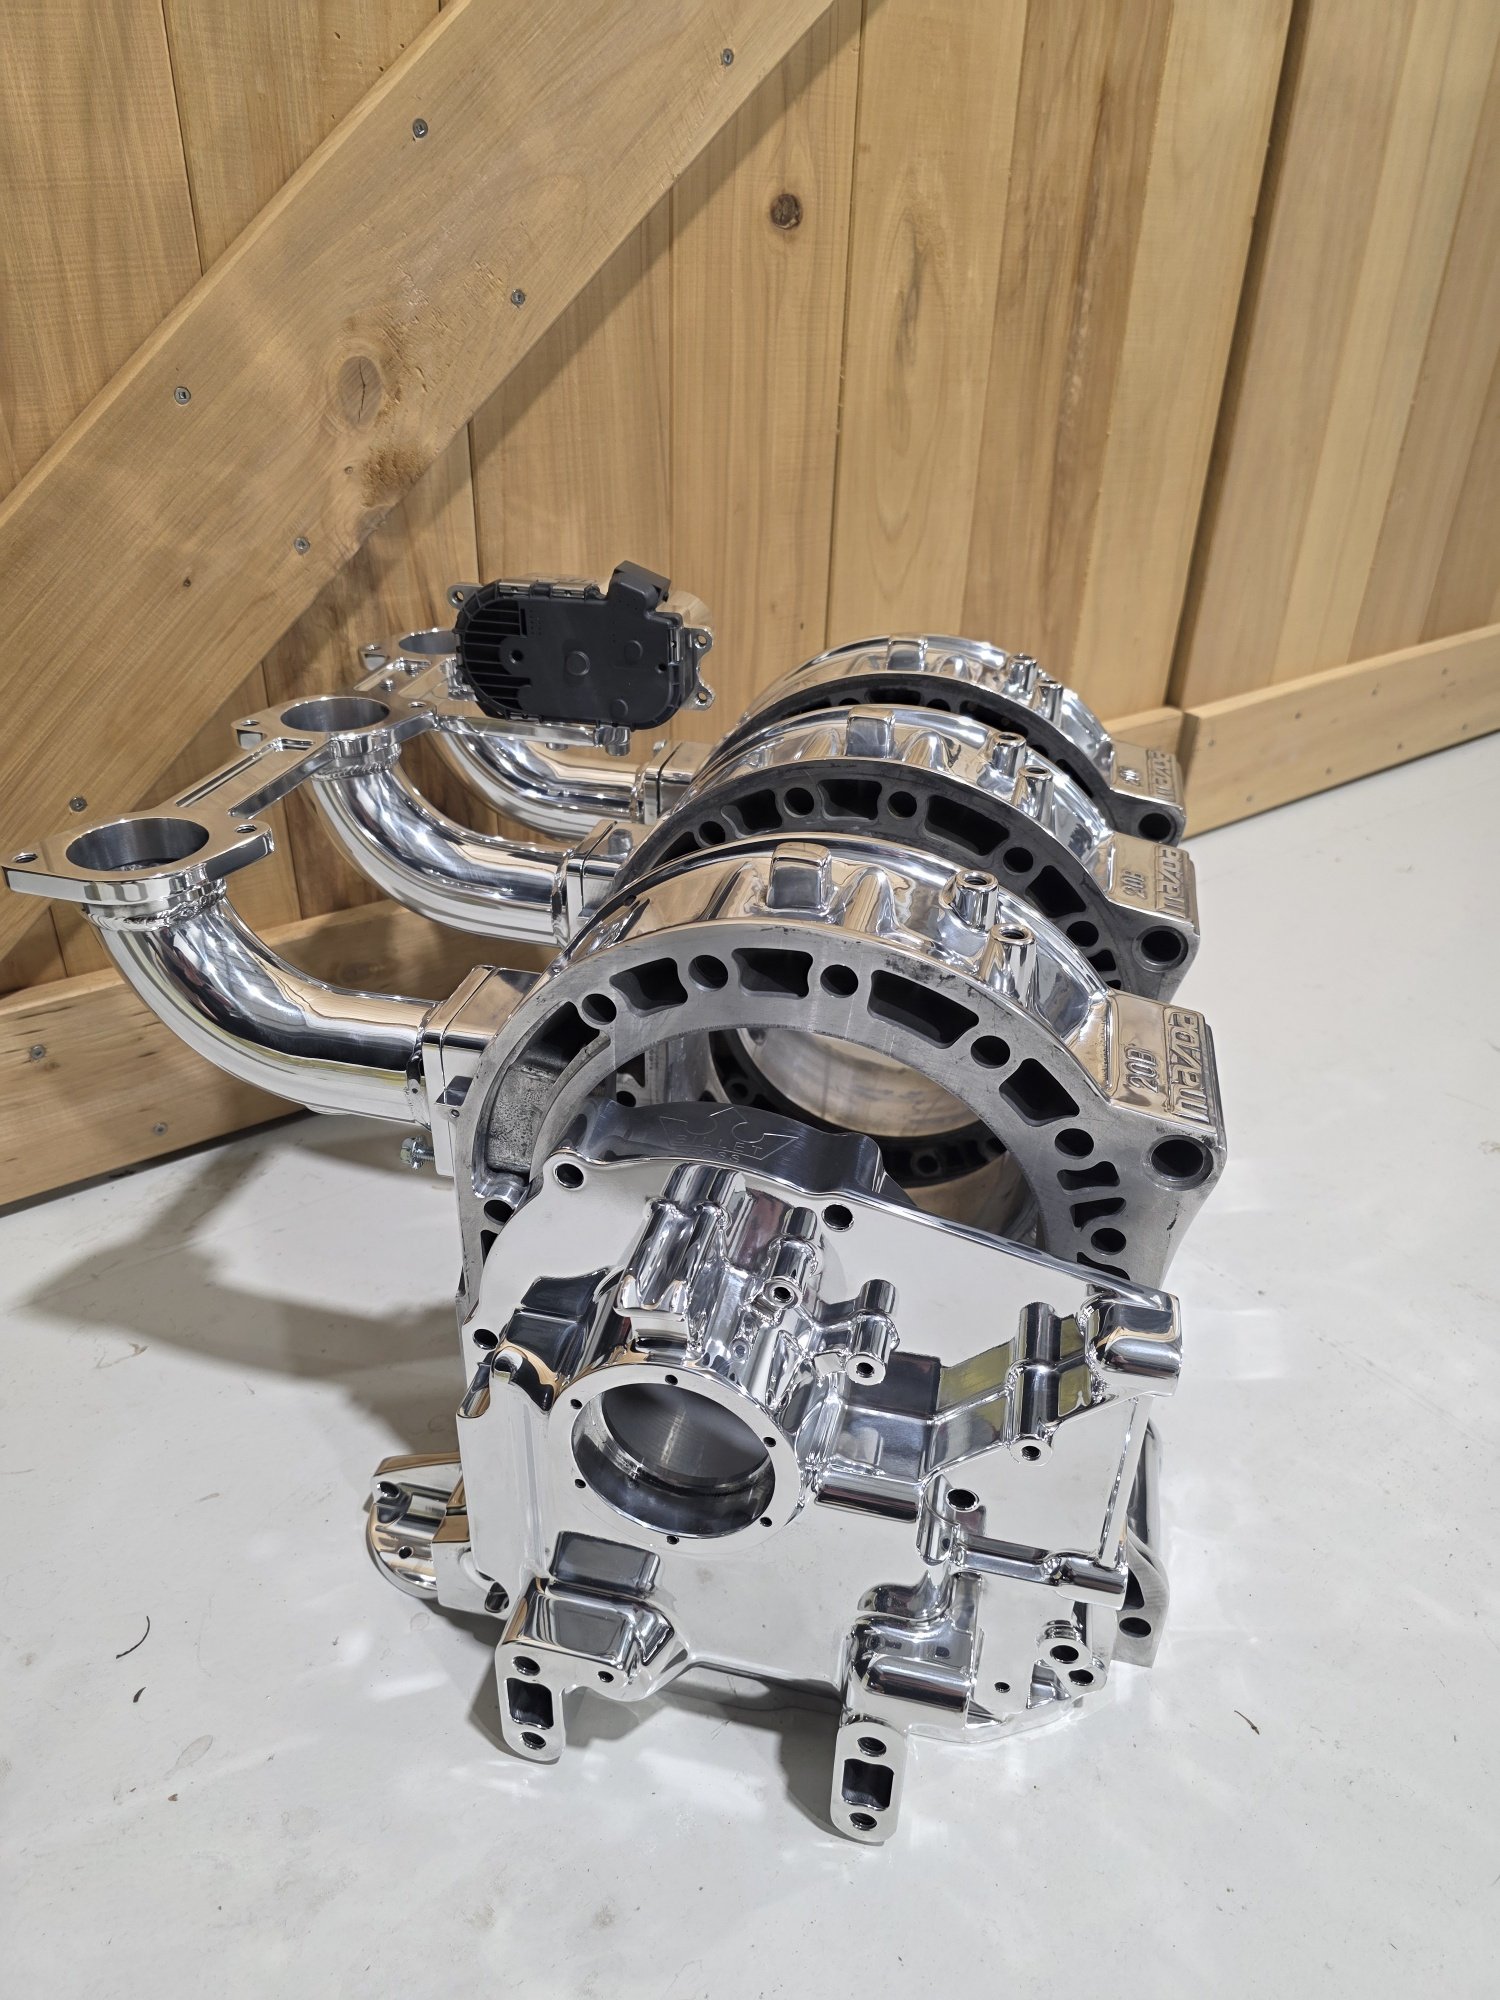
Well shes been all bloody go round here! Progressing along real nice getting alot of finishing touches off Got a ton of stuff powder coated, subframe, lower arms, gearbox xmember, radiator, oil cooler, catch can, over flow, all the dash brackets, a ton of brackets made for the loom etc. Came up bloody mint! Also got a few engine bits and gearbox adaptor etc anodized black. And RKM polished my housings, front cover, intake manifold, water pump adaptor, EWP etc. Came up bloody mint And the shell has been back at my painter for about 4 weeks. All go, Blocked in 80g and 140g and about to hit it with the 240g before final prime. Body lines, gaps etc are coming up mint! Photo before the journey to painter, looking alot different now!
1 point
-
Interestingly , lately the more common situation, because of the stretched tyre look no longer being cool - and people being more aware of what sizes are allowed, is people putting too wide tyres on narrow rims- usually older blokes who get a bit fizzed up when their hot rod or beach hop special fails because they put 275 60s on a 7 inch wide rim and I tell them it's because of the young buggers who stretch their tyres so now we have this chart thing "aww bloody ridiculous it's been like this for years it's just revenue gathering bloody LTNZ etc etc"1 point
-
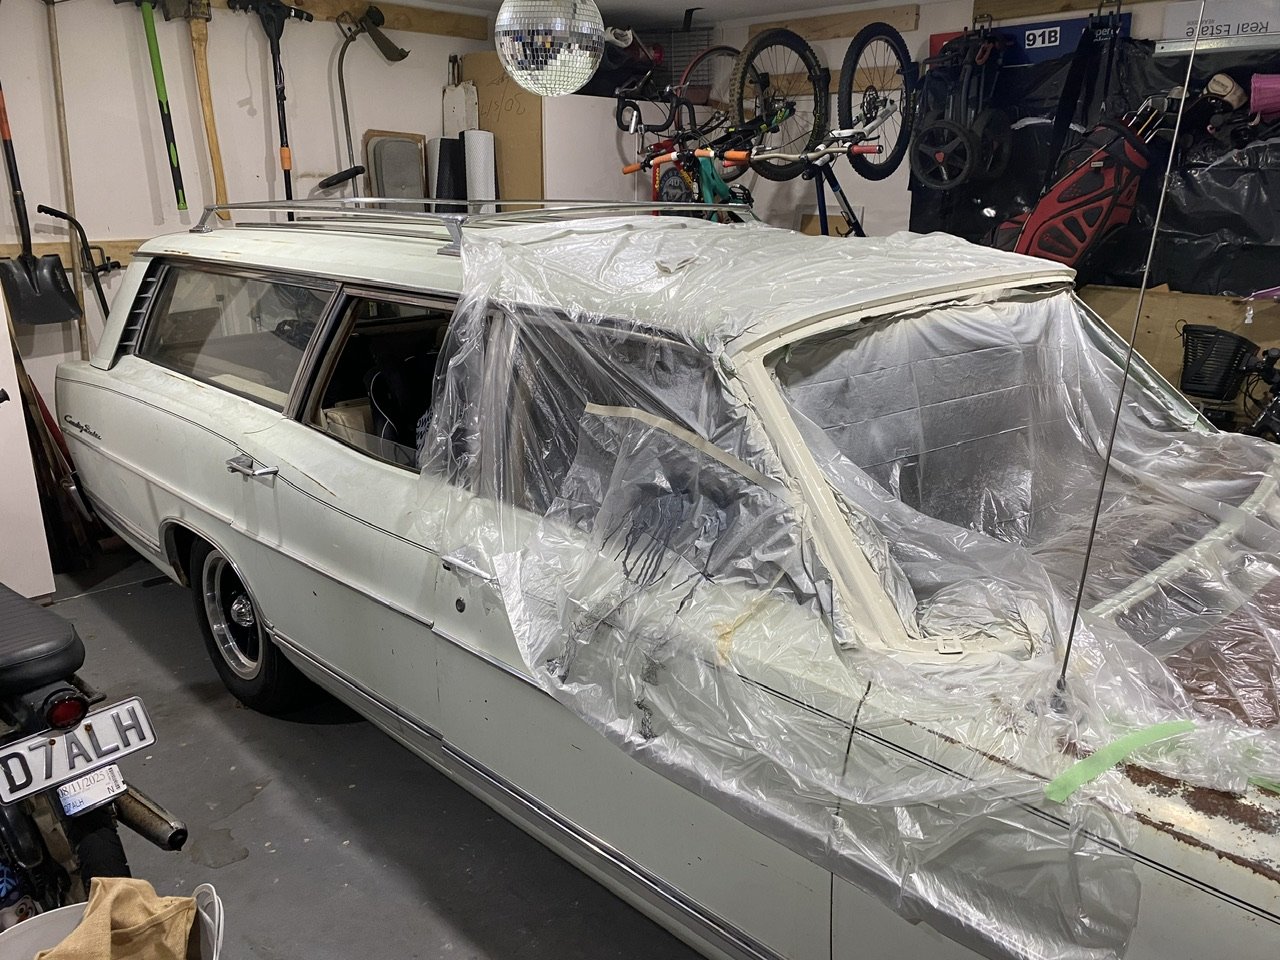
I’ve been spending some time locked in my garage with a heater running and some strong aerosol paint fumes this week. Primed it, smoothed out some pitting, primered again, and sprayed white. Don’t let me forget the clearcoat… I only remembered that as I’m writing this… It’s nearly ready for the windscreen to go back in. I also fitted the roof rack. It’s a proper wagon now.
1 point
-
The vanity light switch is still luminous! I know what you are thinking, that is a fantastic photo of darkness. But look on the rh side.
1 point
-
Not bad.
1 point
-
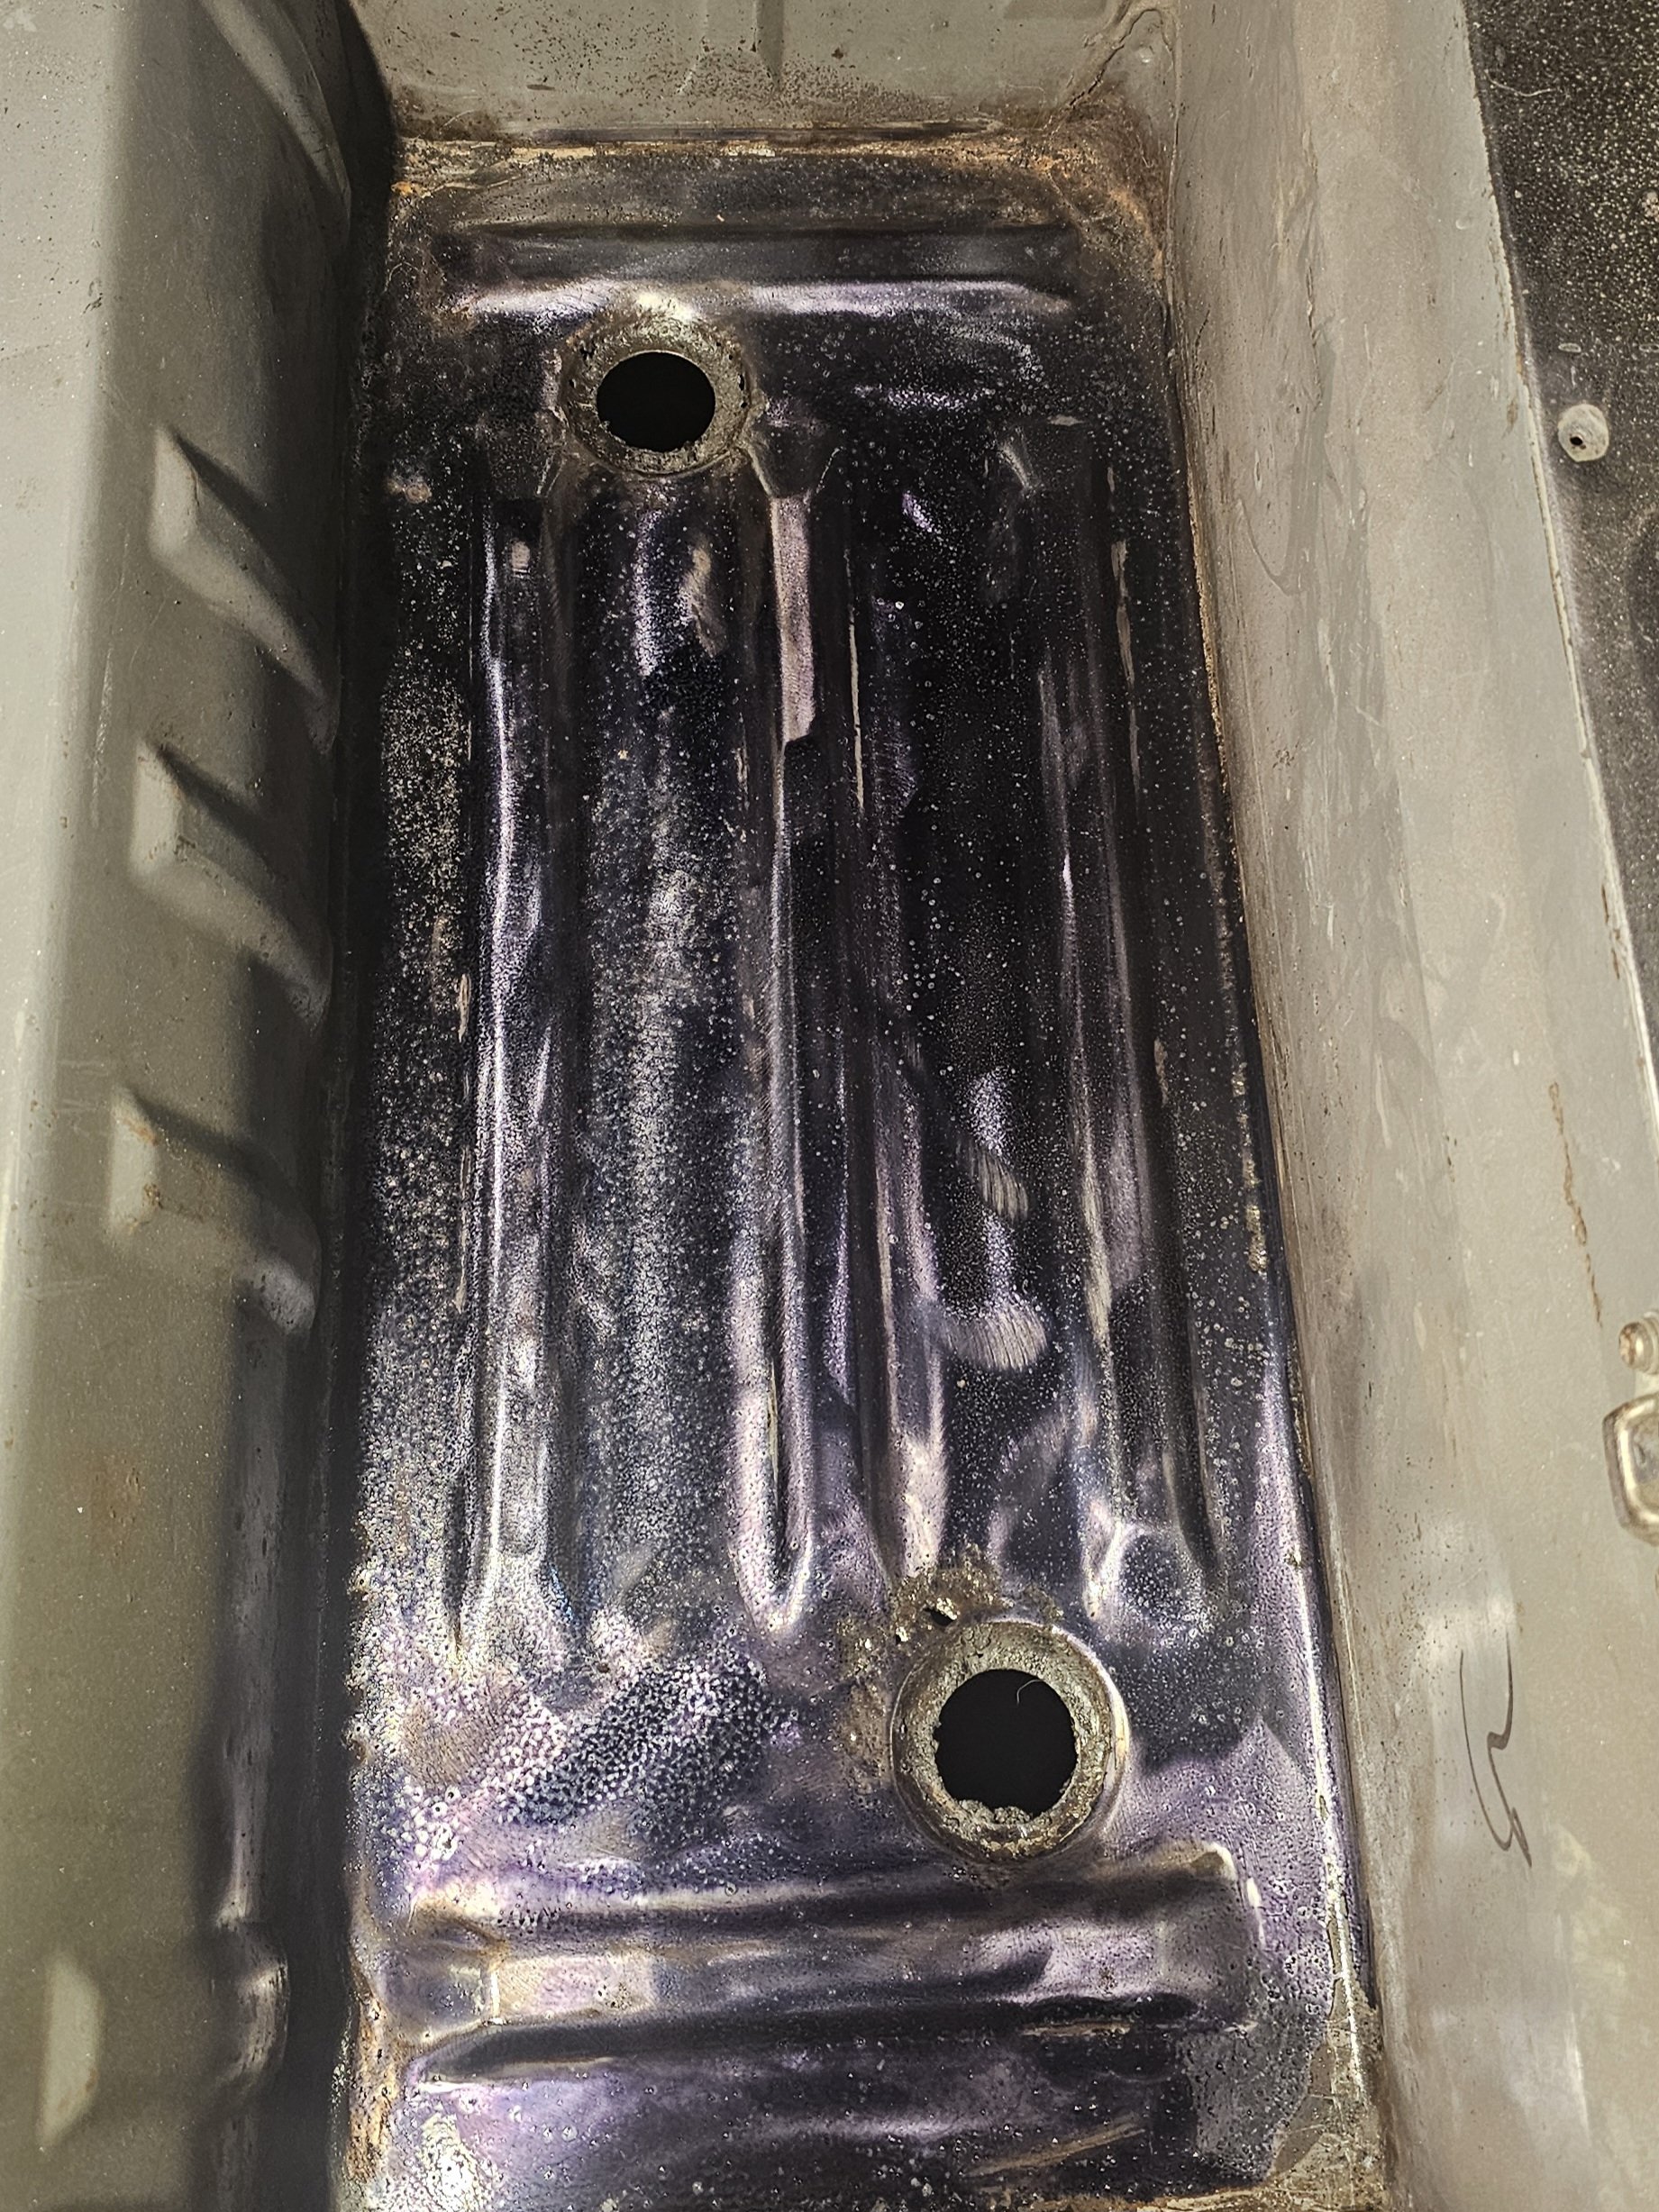
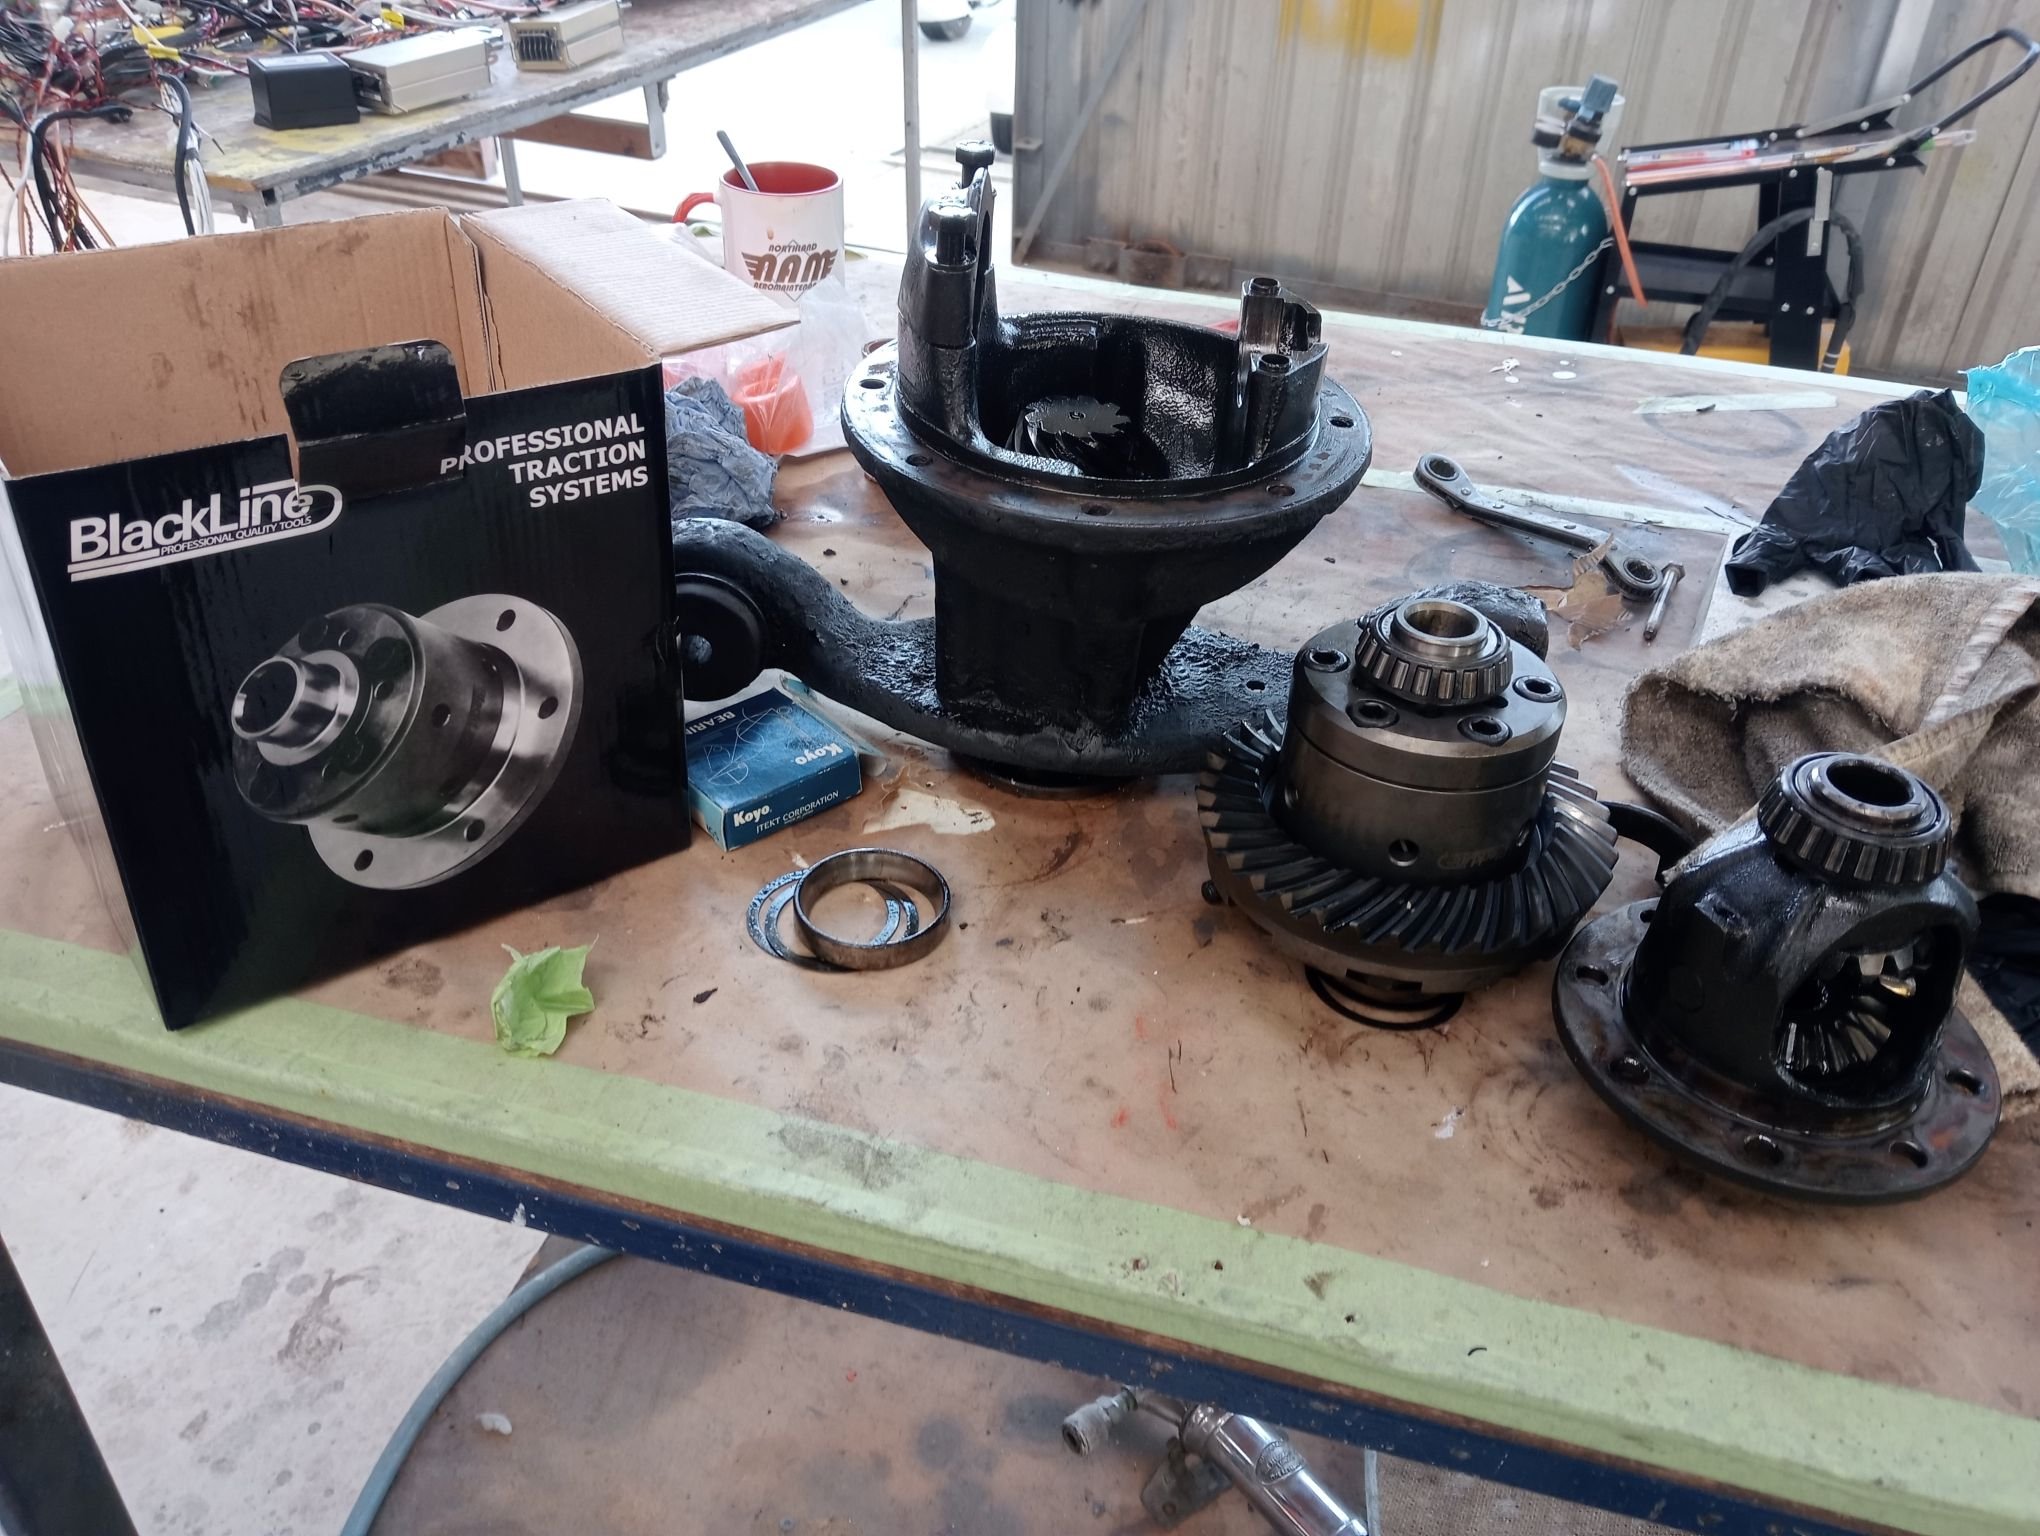
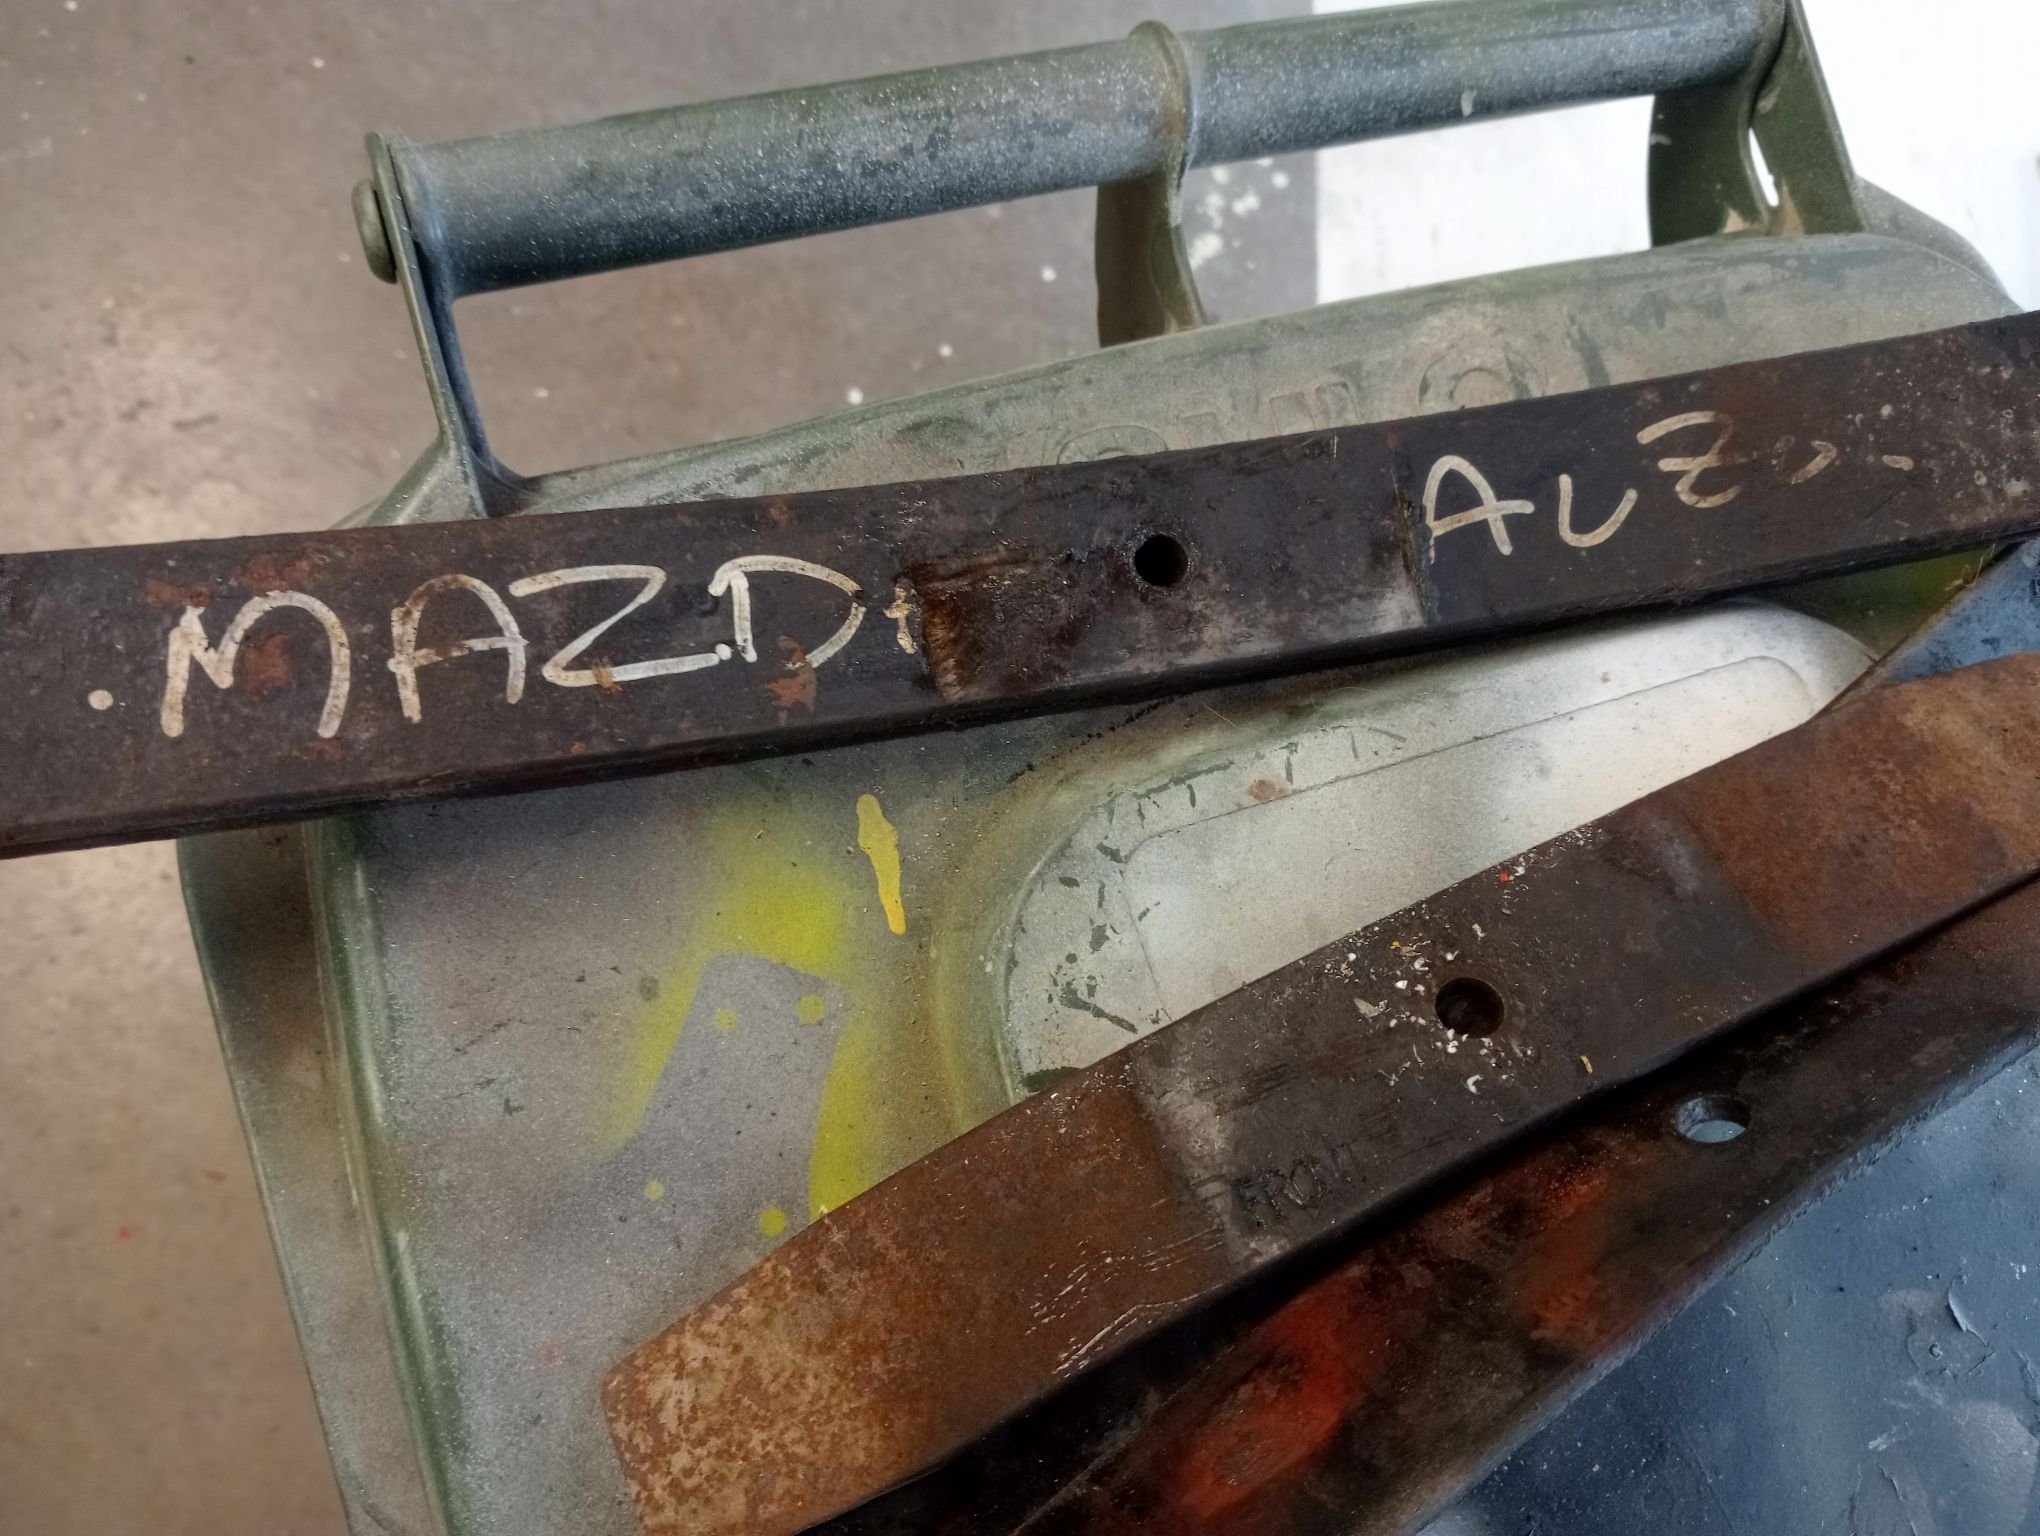
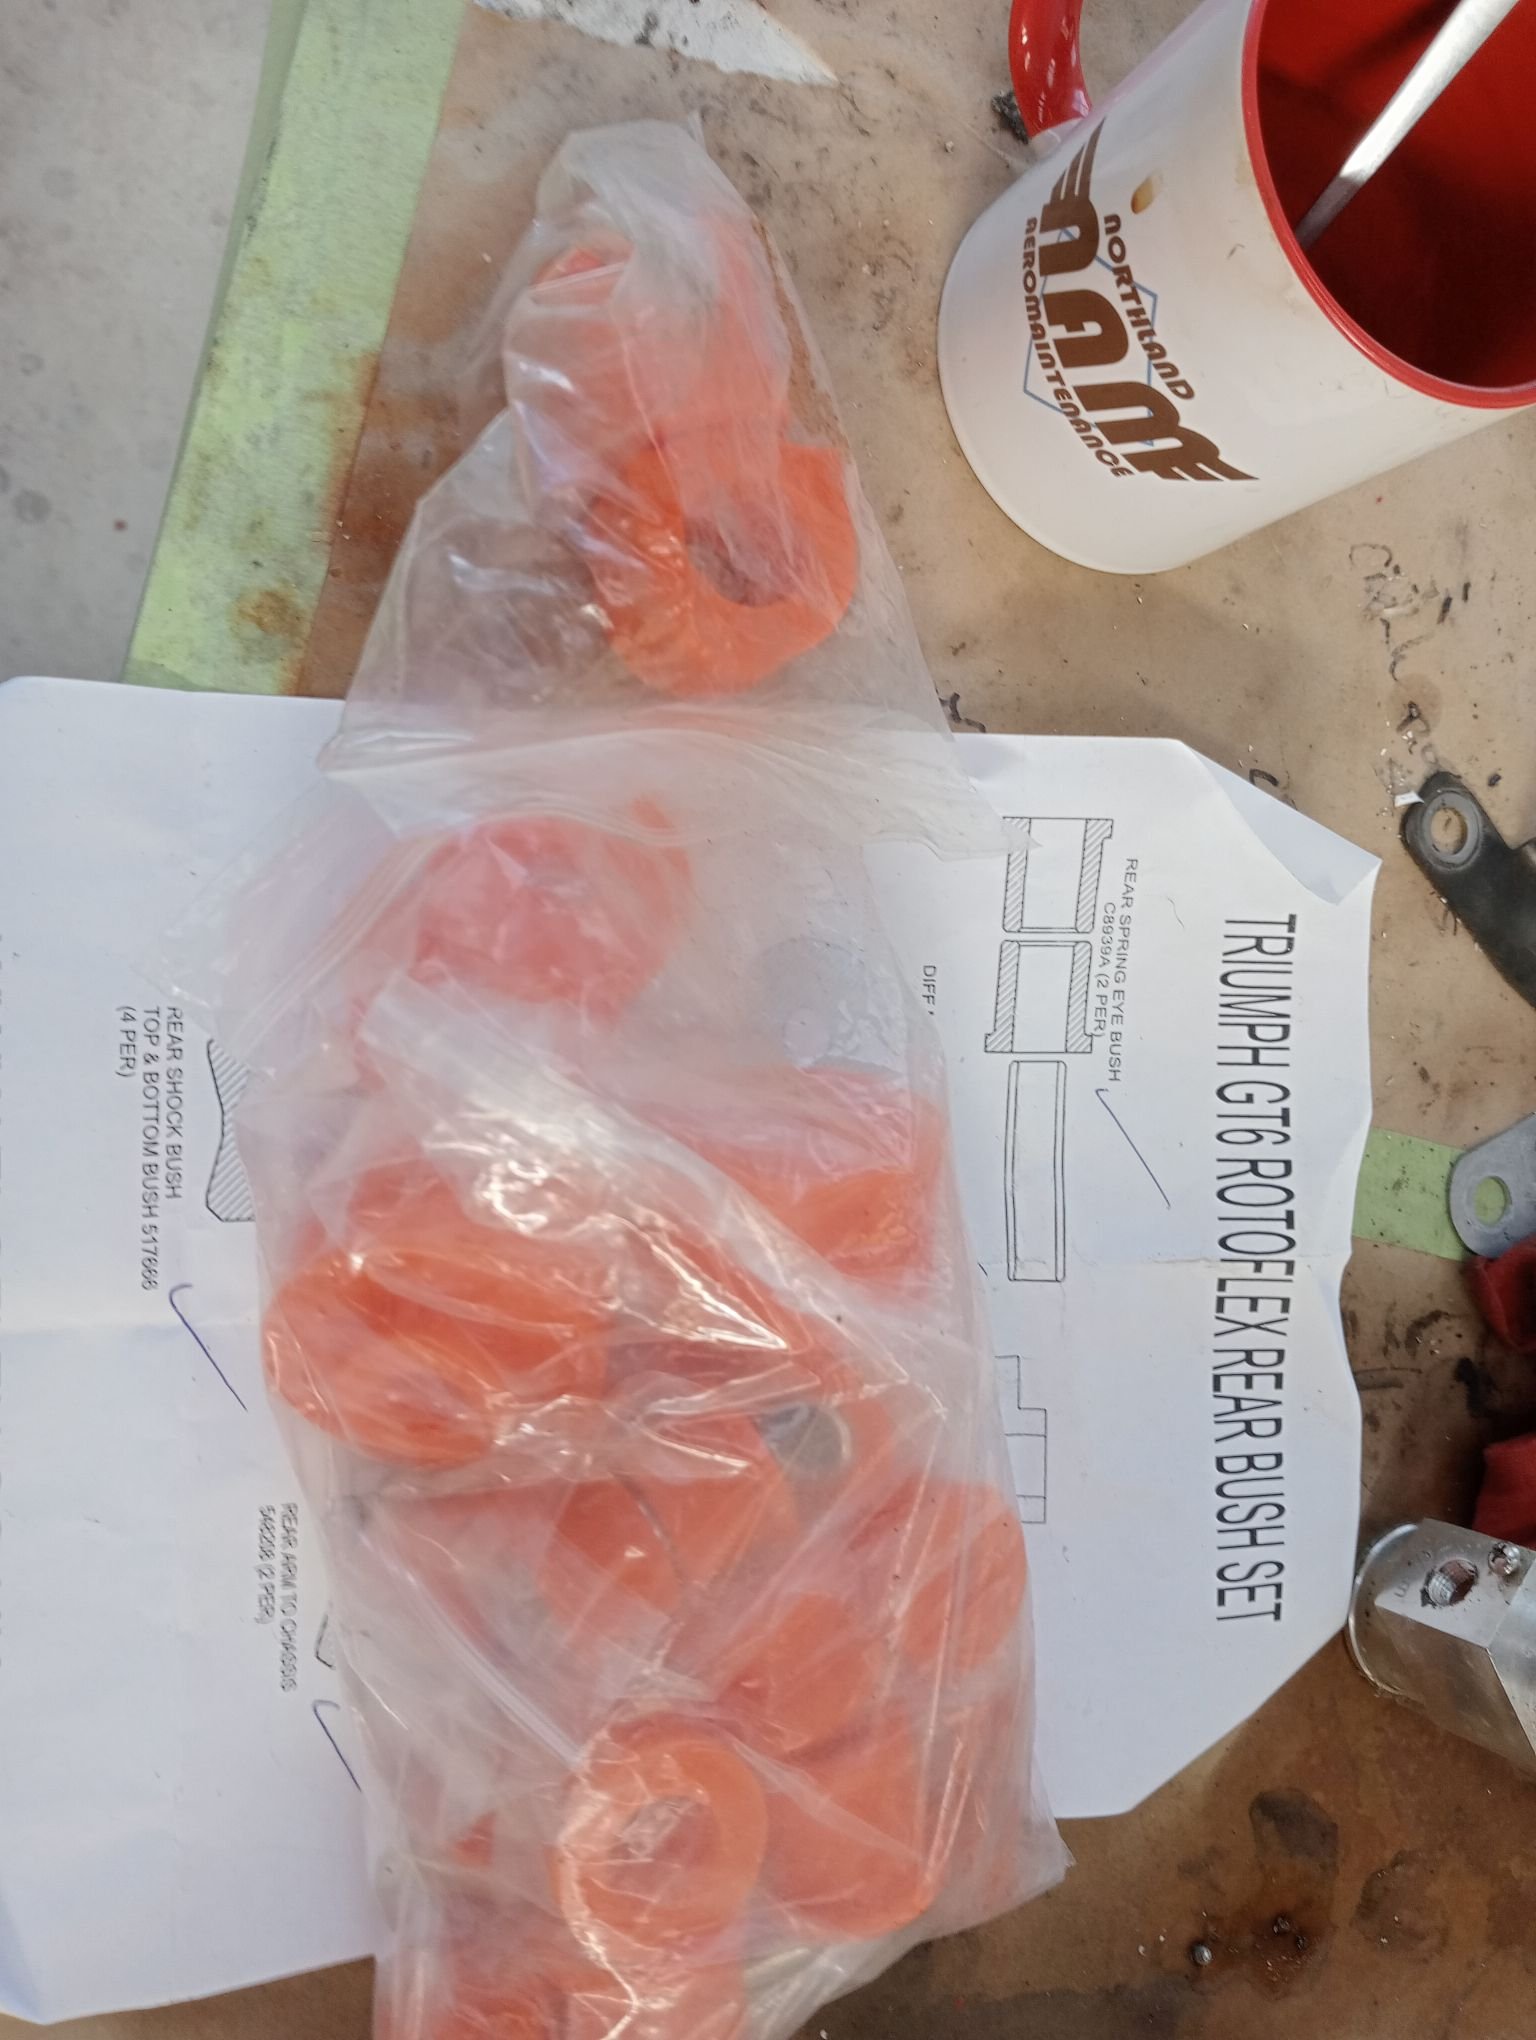
the wife and kids went away for the day so I snuck downtown for some filthy rear end action Having being informed that the gear carrier was the weakest point of the diff, and that the diff is the weakest point of the car, it seemed the simplest solution to replace the whole unit with an "I Can't Believe It's Not Quaife" LSD. The maintenance manual talked about carefully spreading the carrier bearing caps with a Churchill tool in order to extricate the carrier, well mine just fell straight out, but I decided to not be worried about this and forge ahead. By the looks of things someone has been in here before. Another thing to do was install a drain plug, and that's already been done. It was difficult to see originally because the entire diff looked like a small planetoid consisting of mud and oil. Surprisingly had a lot of oil still in it. Going to give it the mega clean off but I'm doubtful it'll ever get clean enough to repaint it. Incidentally the carrier on this on is in good condition, perhaps it's worth something to someone pulled the rear suspension and hubs to bits, which was shitty and greasy but not difficult. Did some research and couldn't see any truly compelling reason to not send the drums off to the sandblasters along with the rest of the bits and pieces. The buggered bushings can stay in place because I suddenly had an ancestral memory from decades ago and remembered; I still have a set of rear poly bushes in the garage! I bought them shortly after I bought the car, did the fronts which was a huge pain in the ass, took one look at the rears and decided it'd keep for another day. Incidentally the radius arms and lower wishbones in the rear already have polybushes, guessing the previous owner was slowly replacing them as they crapped out. They actually look pretty good and sometimes I wonder if a quarter-century old bush is actually better than a modern pirate part made God knows where pulled the rear leaf apart and wondered why it has "MAZDA" written on it, very odd. There's apparently some button guide thingies which are supposed to be between them but they are long gone there is now a large and growing list of things that I am waiting on which is preventing anything from going back together. Ergo the only way to progress is to pull things more apart. I also have some major grudge purchases like new engine mounts, probably a clutch and a cambelt and all the other bits and pieces you really wished you did when it was in bits and easy
1 point
-
Well there's nothing like 2 months with back to back booked weekends to get a project going. Fortunately all madness must come to and end and I was able to spend a bit of time on the RD50 last weekend. Got it cleaned so none of the yuck fell into the yum part. Everything was pretty dusty/oily so gave it a cursory clean on the coldest day of winter (so far) then got it pulled down to see if I could free up the piston and look into what else needed to be done. I managed to get the piston freed up. It was stuck about half way down the exhaust port. Got it freed up with a bit of heave jose. MUFFIN BREAK! The carb was missing the throttle slide spring so had to make a trip to simply springs here in hawkes bay to pick up some options. It's missing the clip to hold down the needle but I'll find/make a washer to hold it under the spring for now. Carb was understandably gross and gives credence to the concept that it was parked for the better part of 4 decades. ' The overall engine was good but a bit untidy. Fired up the ultrasonic and gave them all a birthday. ######## SOUND WARNING ############### Even after two rounds in the ultrasonic there was still some treasures. I might also need a new air filter. Anyway. That's the progress. The plan is to reassemble now that it's clean and see if/what else is/isn't working. See if I can get it to run, then put an order together for yambits or the like for all the bits I need to get it really refreshed. The front brake is seized also so that'll need attention/rebuild. More to come.1 point
-
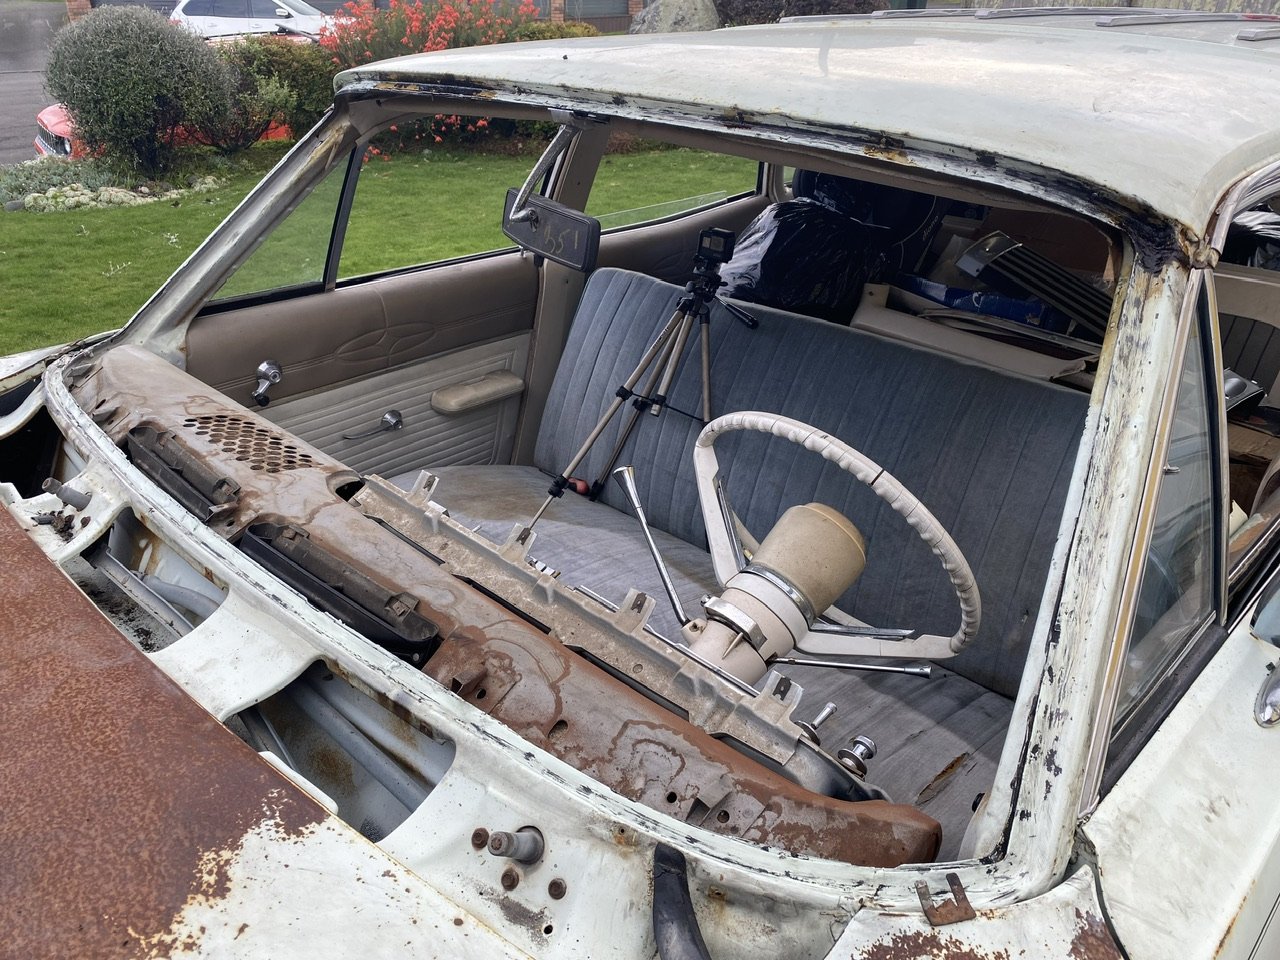
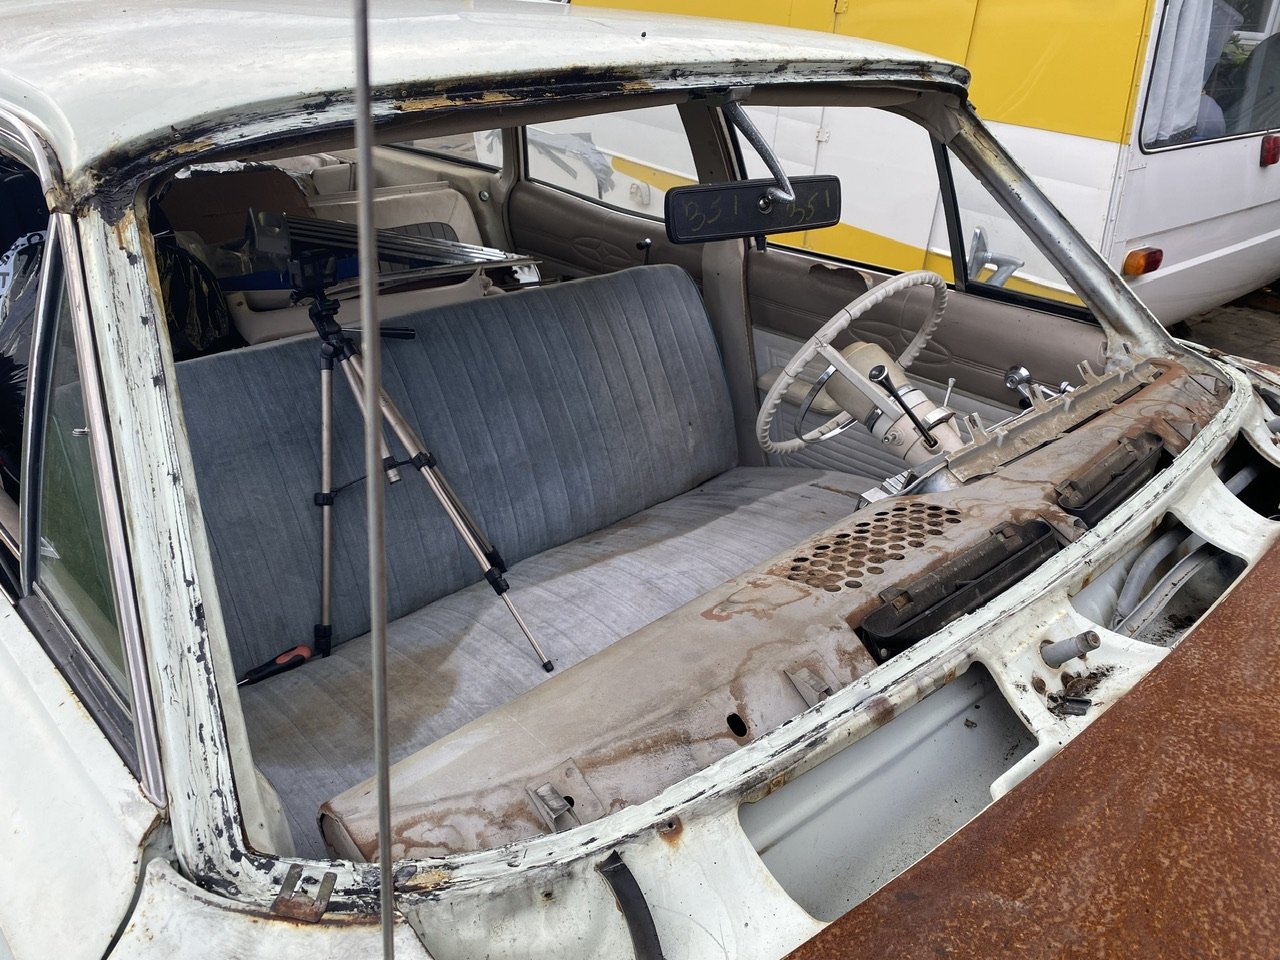
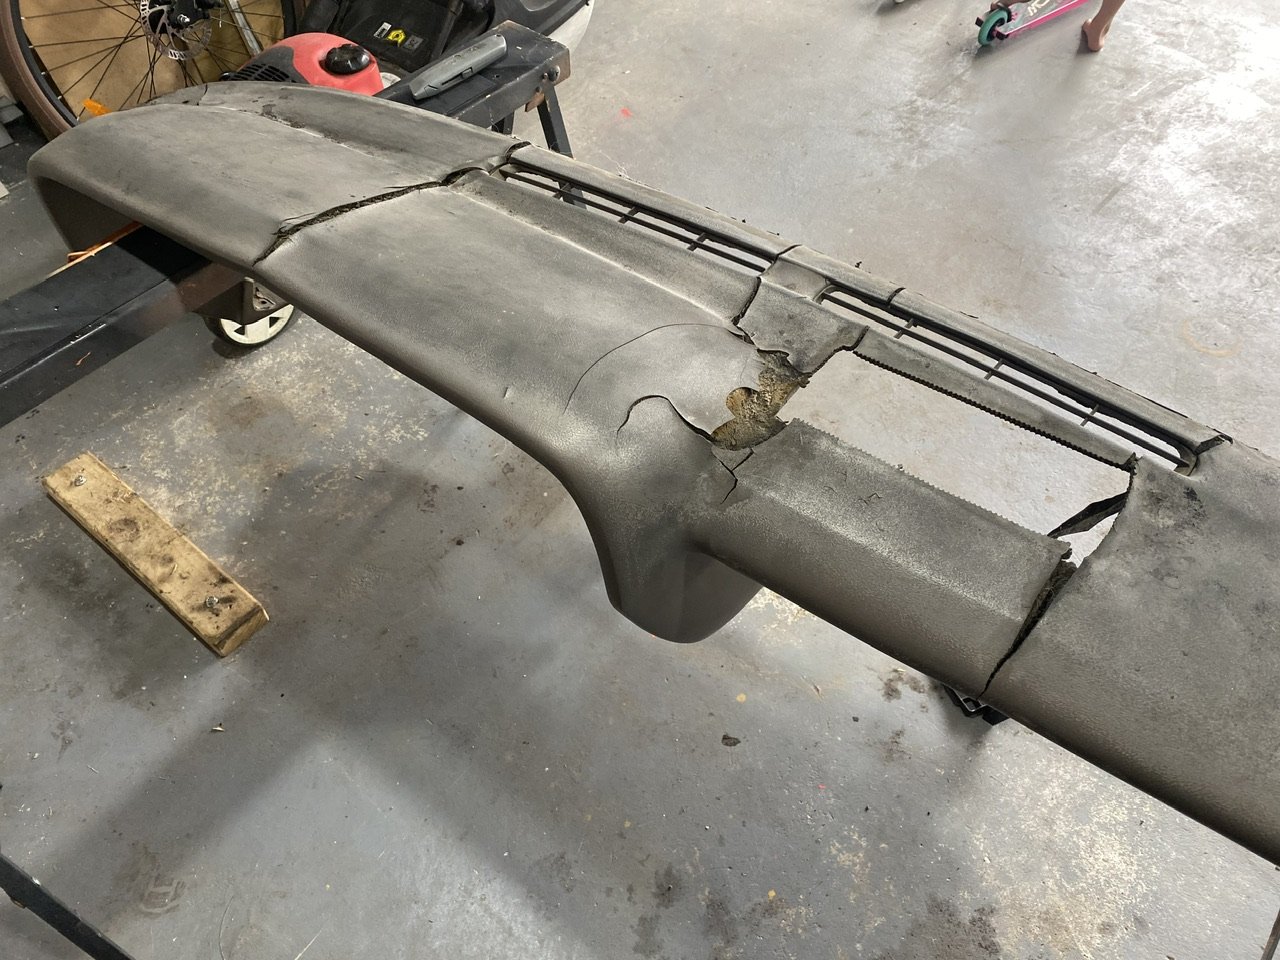
Today I took the day off work with the plan of pulling the engine and box, but that plan fell through, so I shifted it outside and took the opportunity to give my shed a decent sweep out for the first time this year. Then I spent the afternoon getting all the windscreen adhesive off. What a shit of a job. It’s resting with some rust treatment on the surface rust at the moment. It’s in surprisingly good shape. Next on the list is to tackle the dash pad.
1 point
-
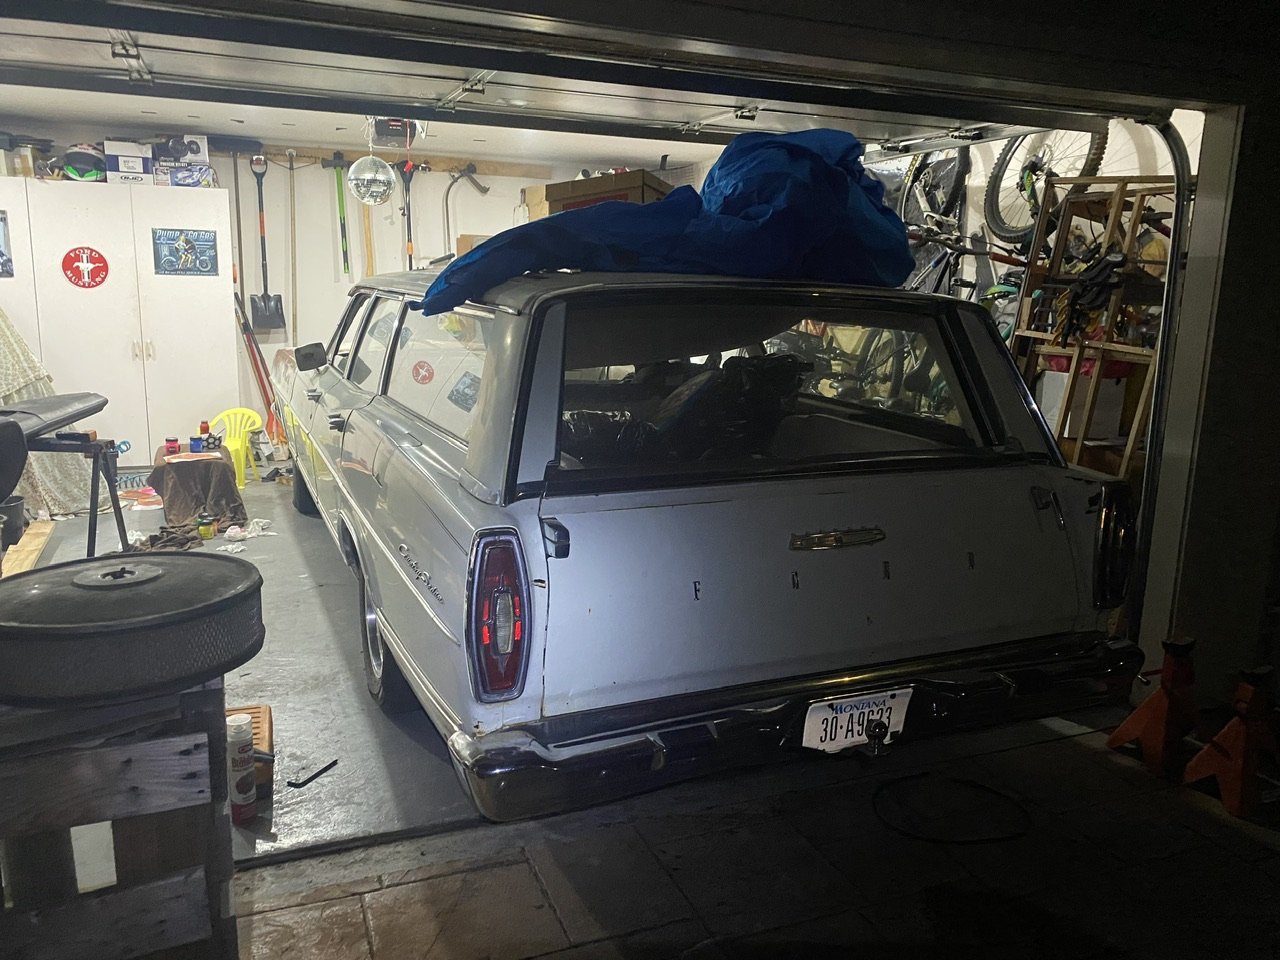
I have been slowly chipping away at jobs on this. i got the brakes back together a few weeks ago and put it back on the ground. One thing I noticed while poking around underneath, was that one of the trans cooler lines had a hole in it… I patched it up with some hose and clamps as a temporary repair, and checked the oil which had the correct level, but was suspiciously clean… Nevertheless, it was time to attempt movement under its own power. I fired it up, got the whole family out to watch, and put it into D. Nothing happened… I gave it a rev, and as the rpm came back to idle it lurched forward and started to drive. I managed to get it out of the shed, which was good cos then I could give it a proper warm up and run for a while. Sorted a couple of leaks and then backed it back into the shed with the same rev-lurch approach. So yeah… I’m thinking the transmission might be a bit stuffed. I gave it another good warm up yesterday and checked the fluid and topped it up a wee bit. Then managed to drive a lap of the cul-de-sac! It seems to be really shitty at selecting gears, so I’m wondering if the valve body needs some attention. Proof that I drove it, it’s the wrong way round in the garage. Edit: photos are failing from my phone. I’ll come back and finish this on my pc!1 point
-
Have some big decisions to make with the cockpit layout and possible cabin.
1 point
-
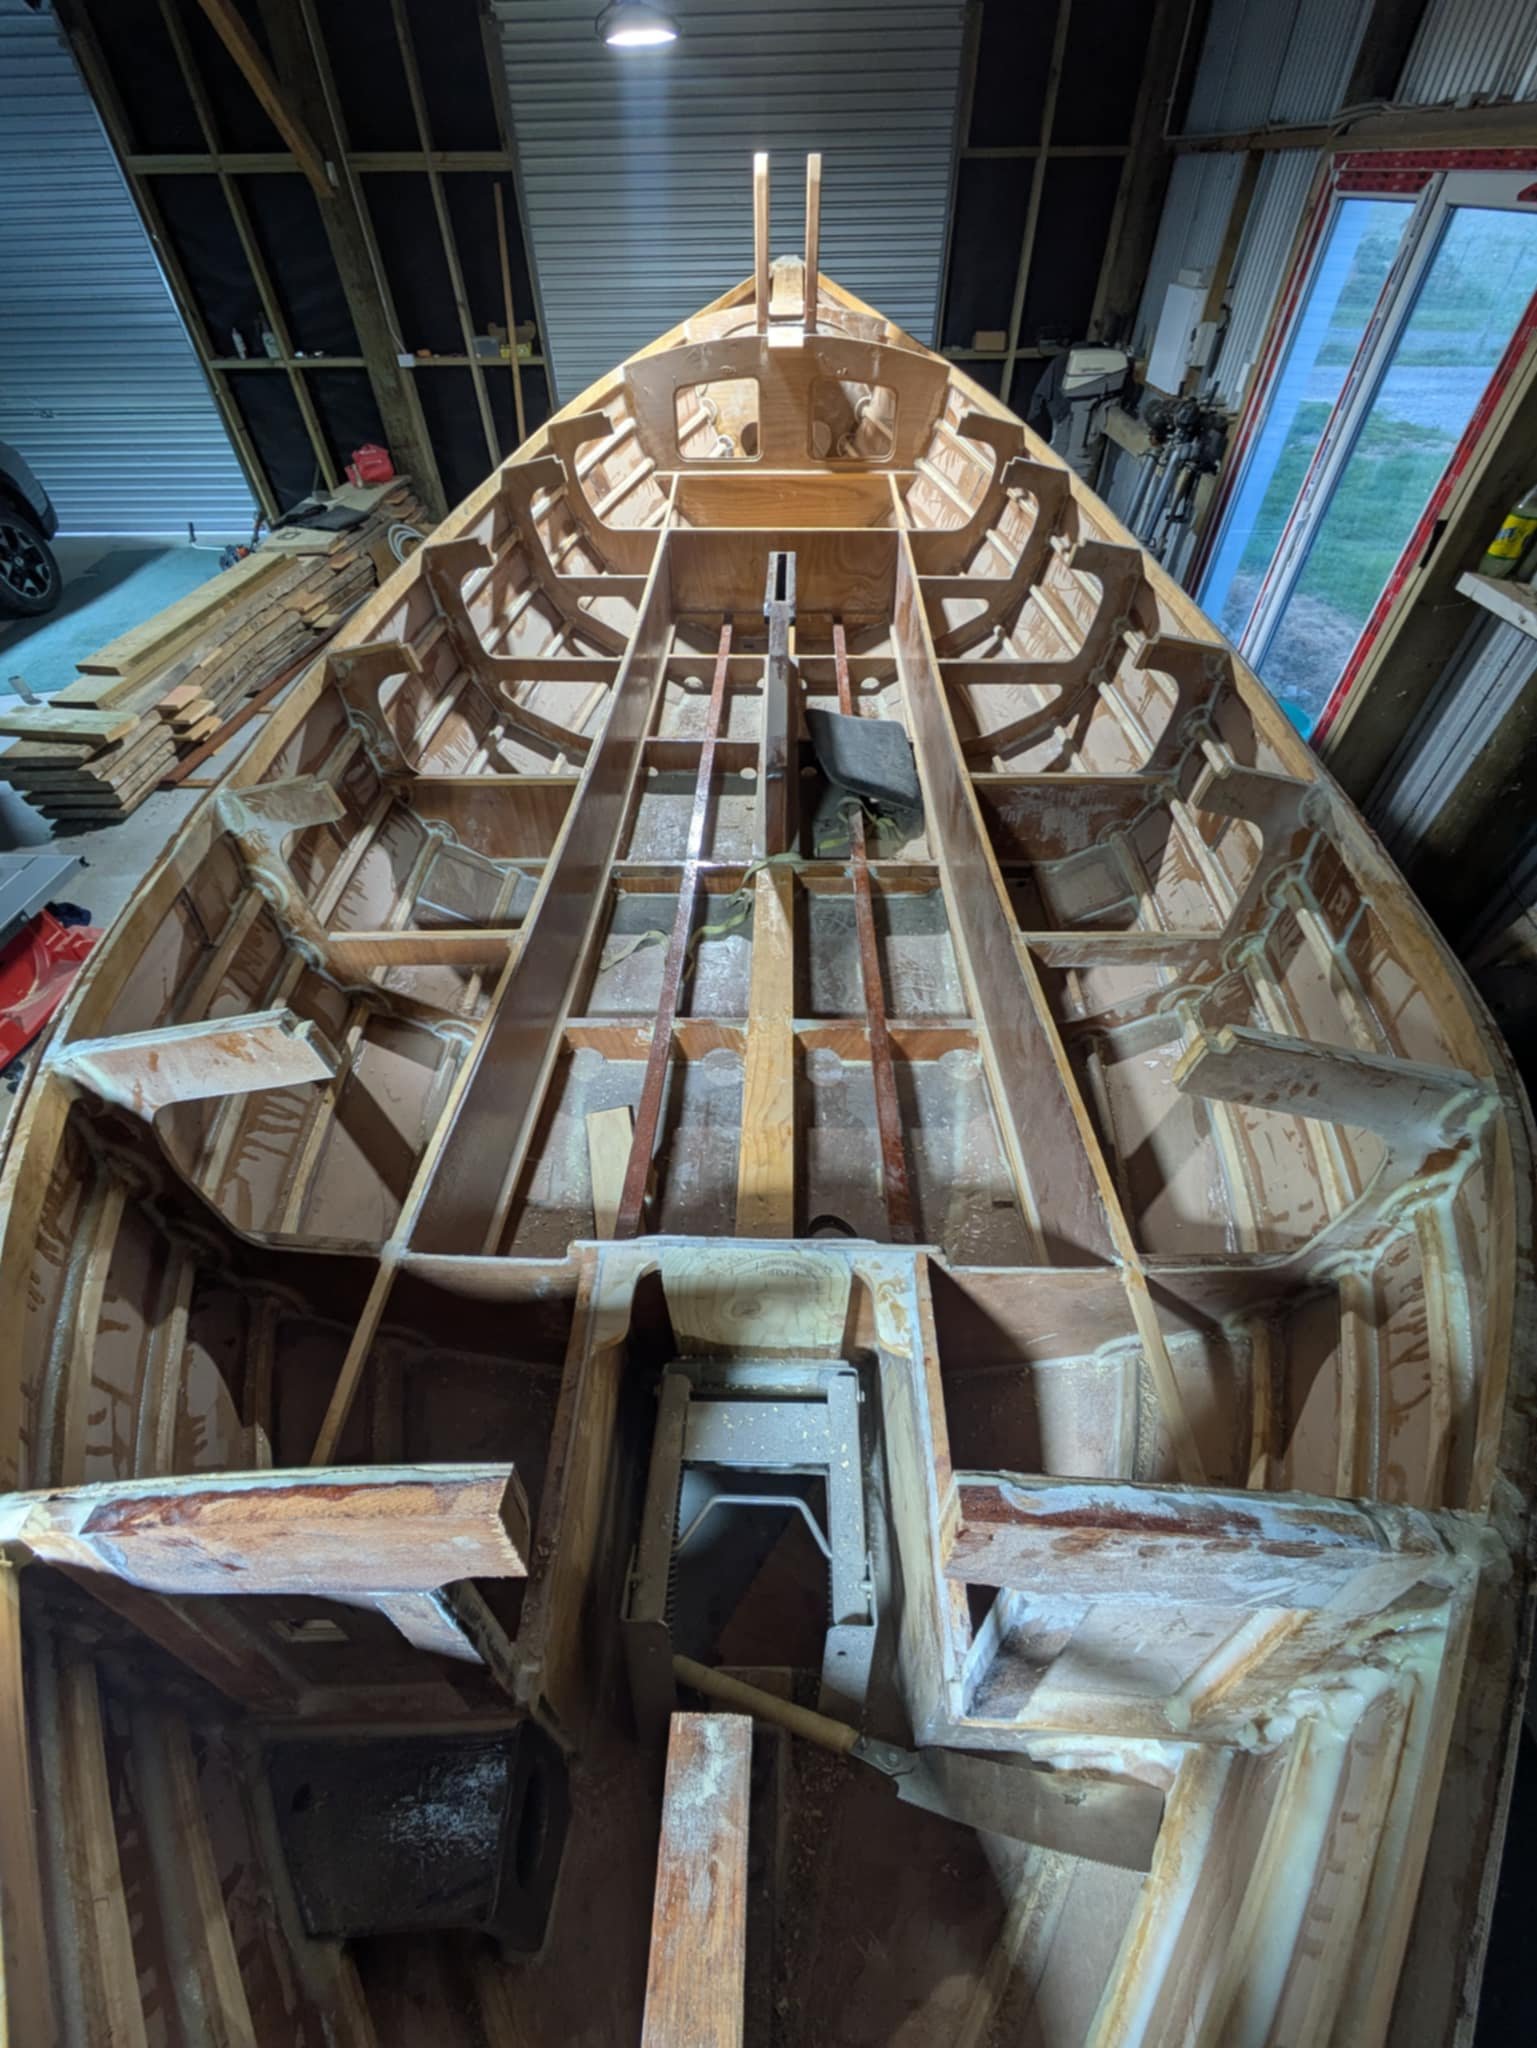
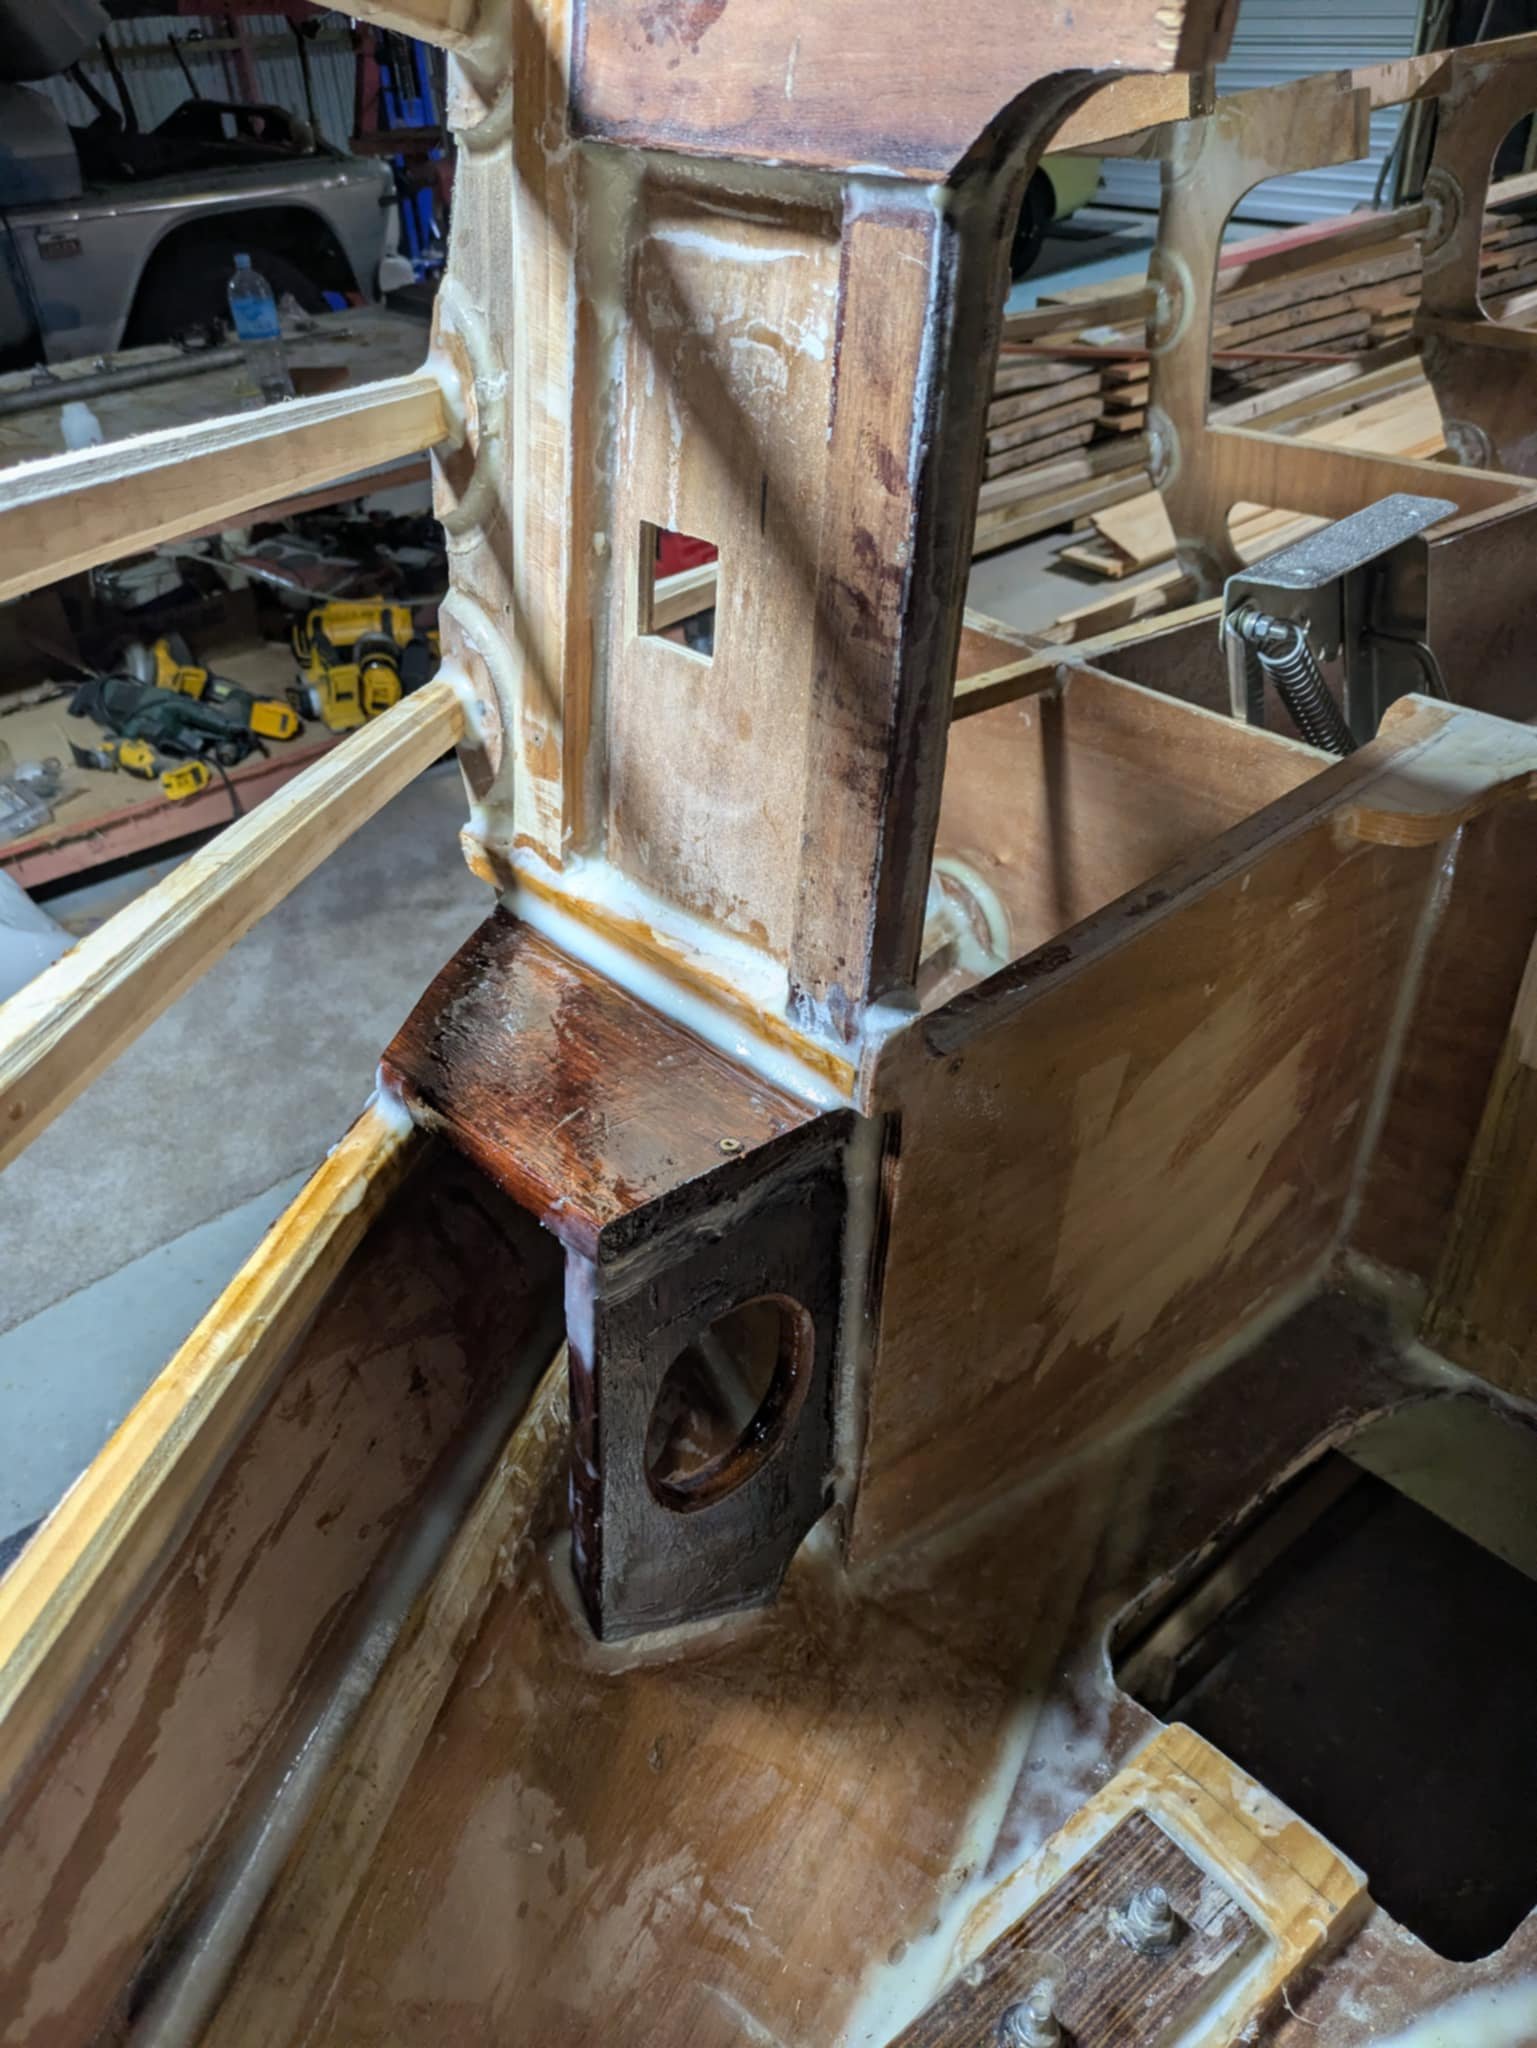
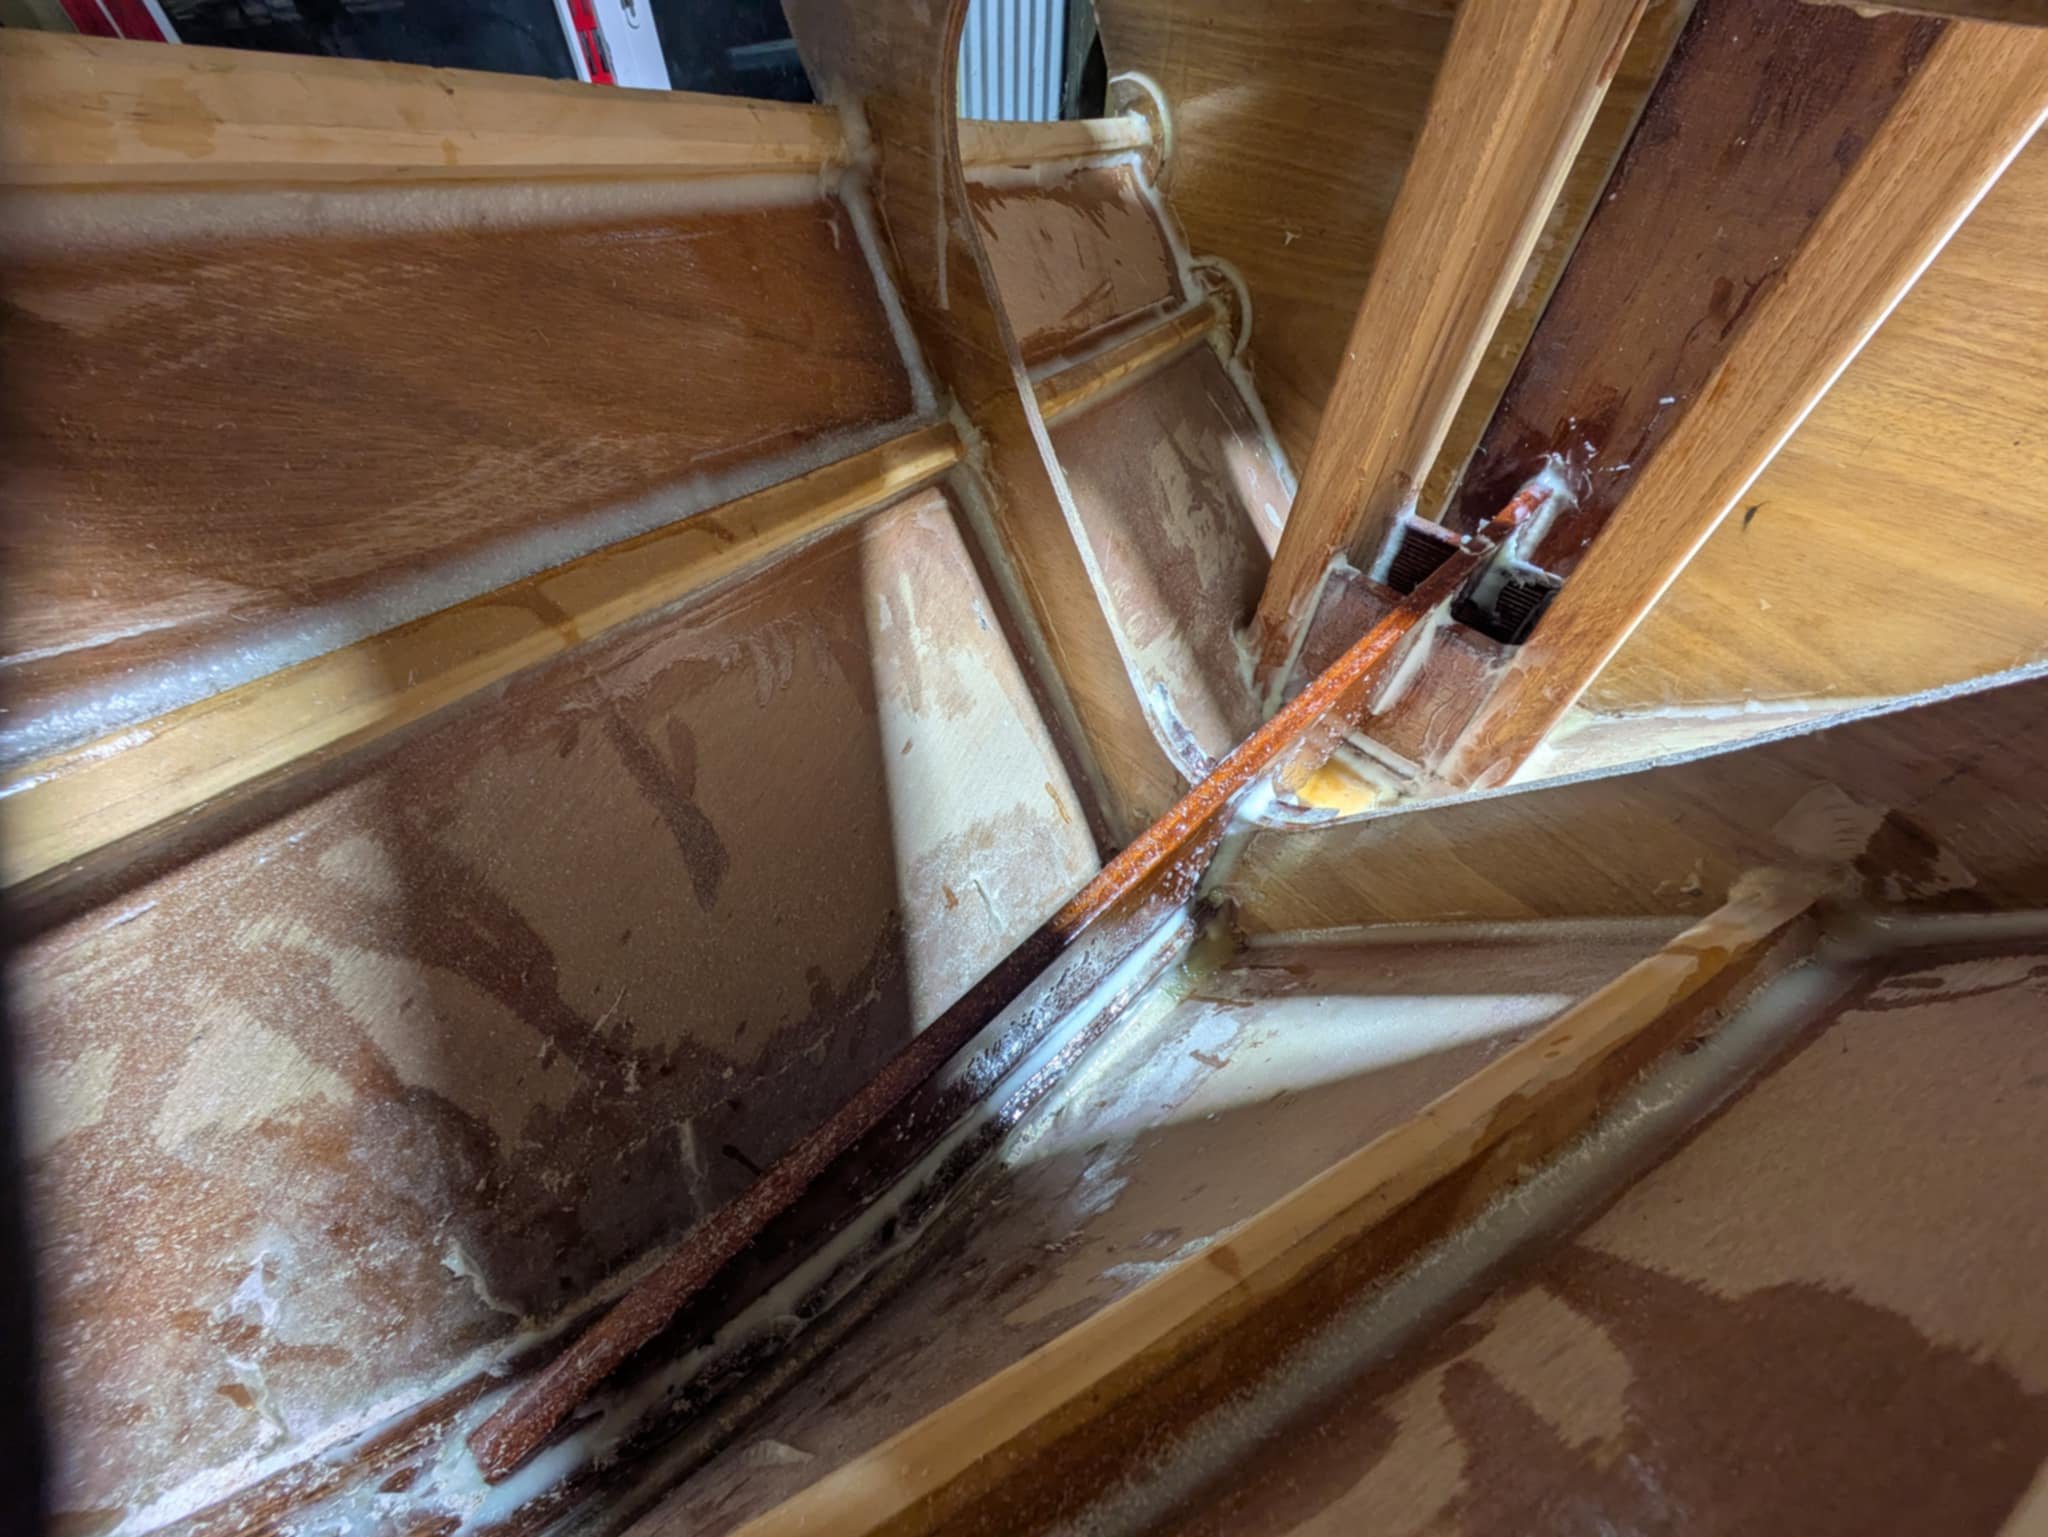
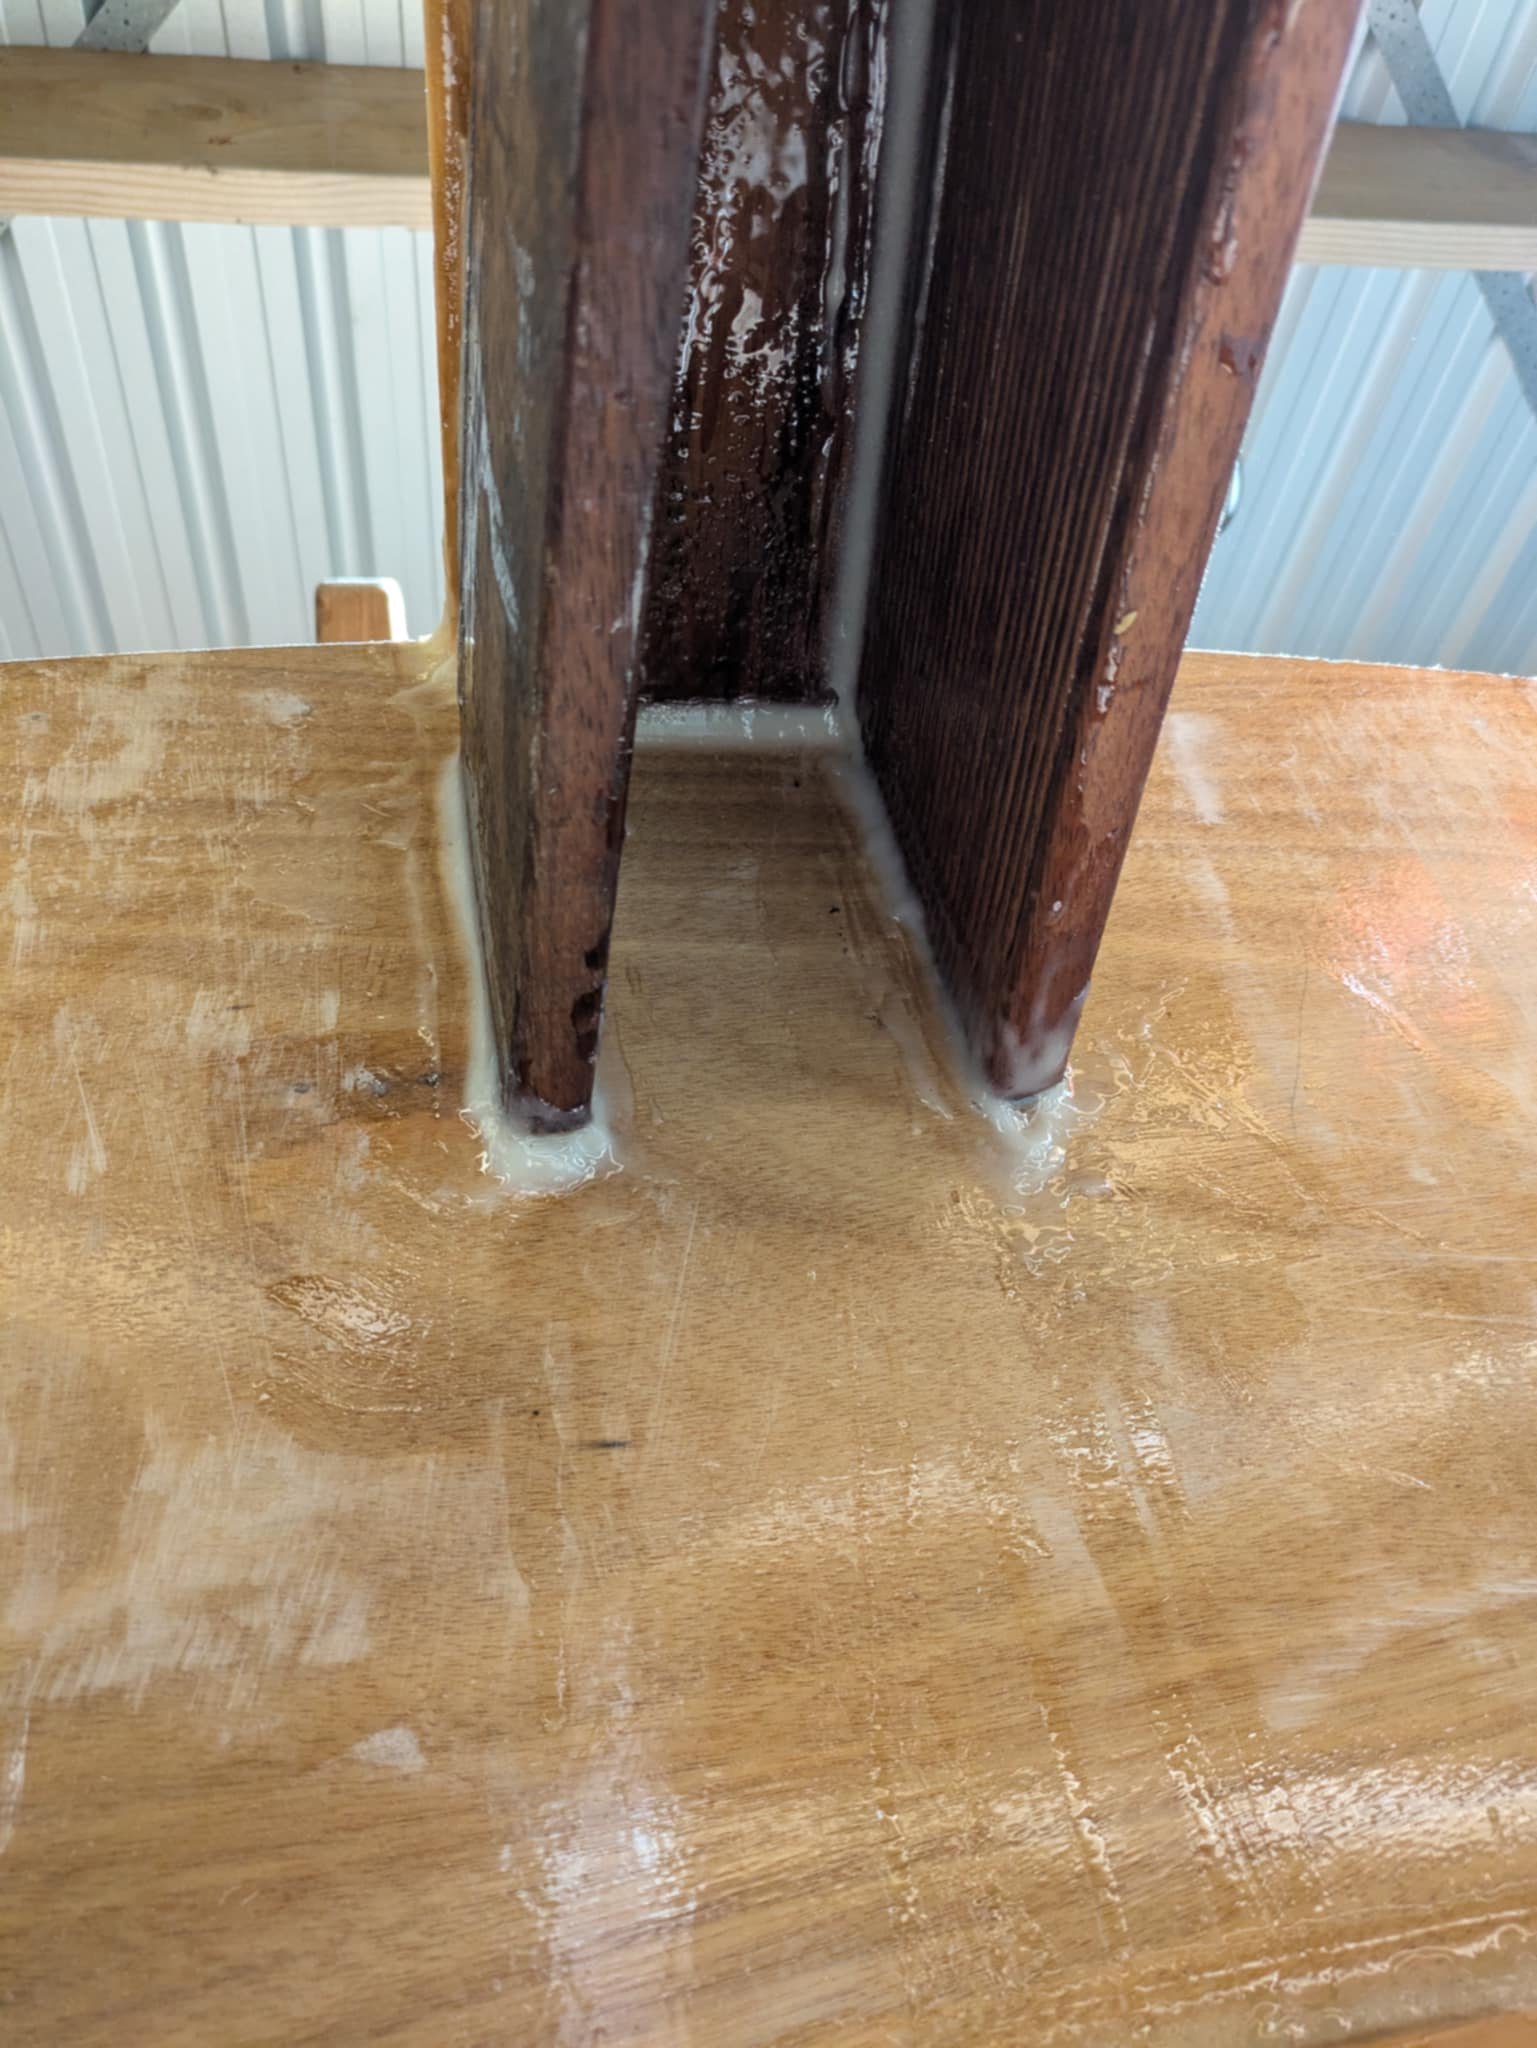
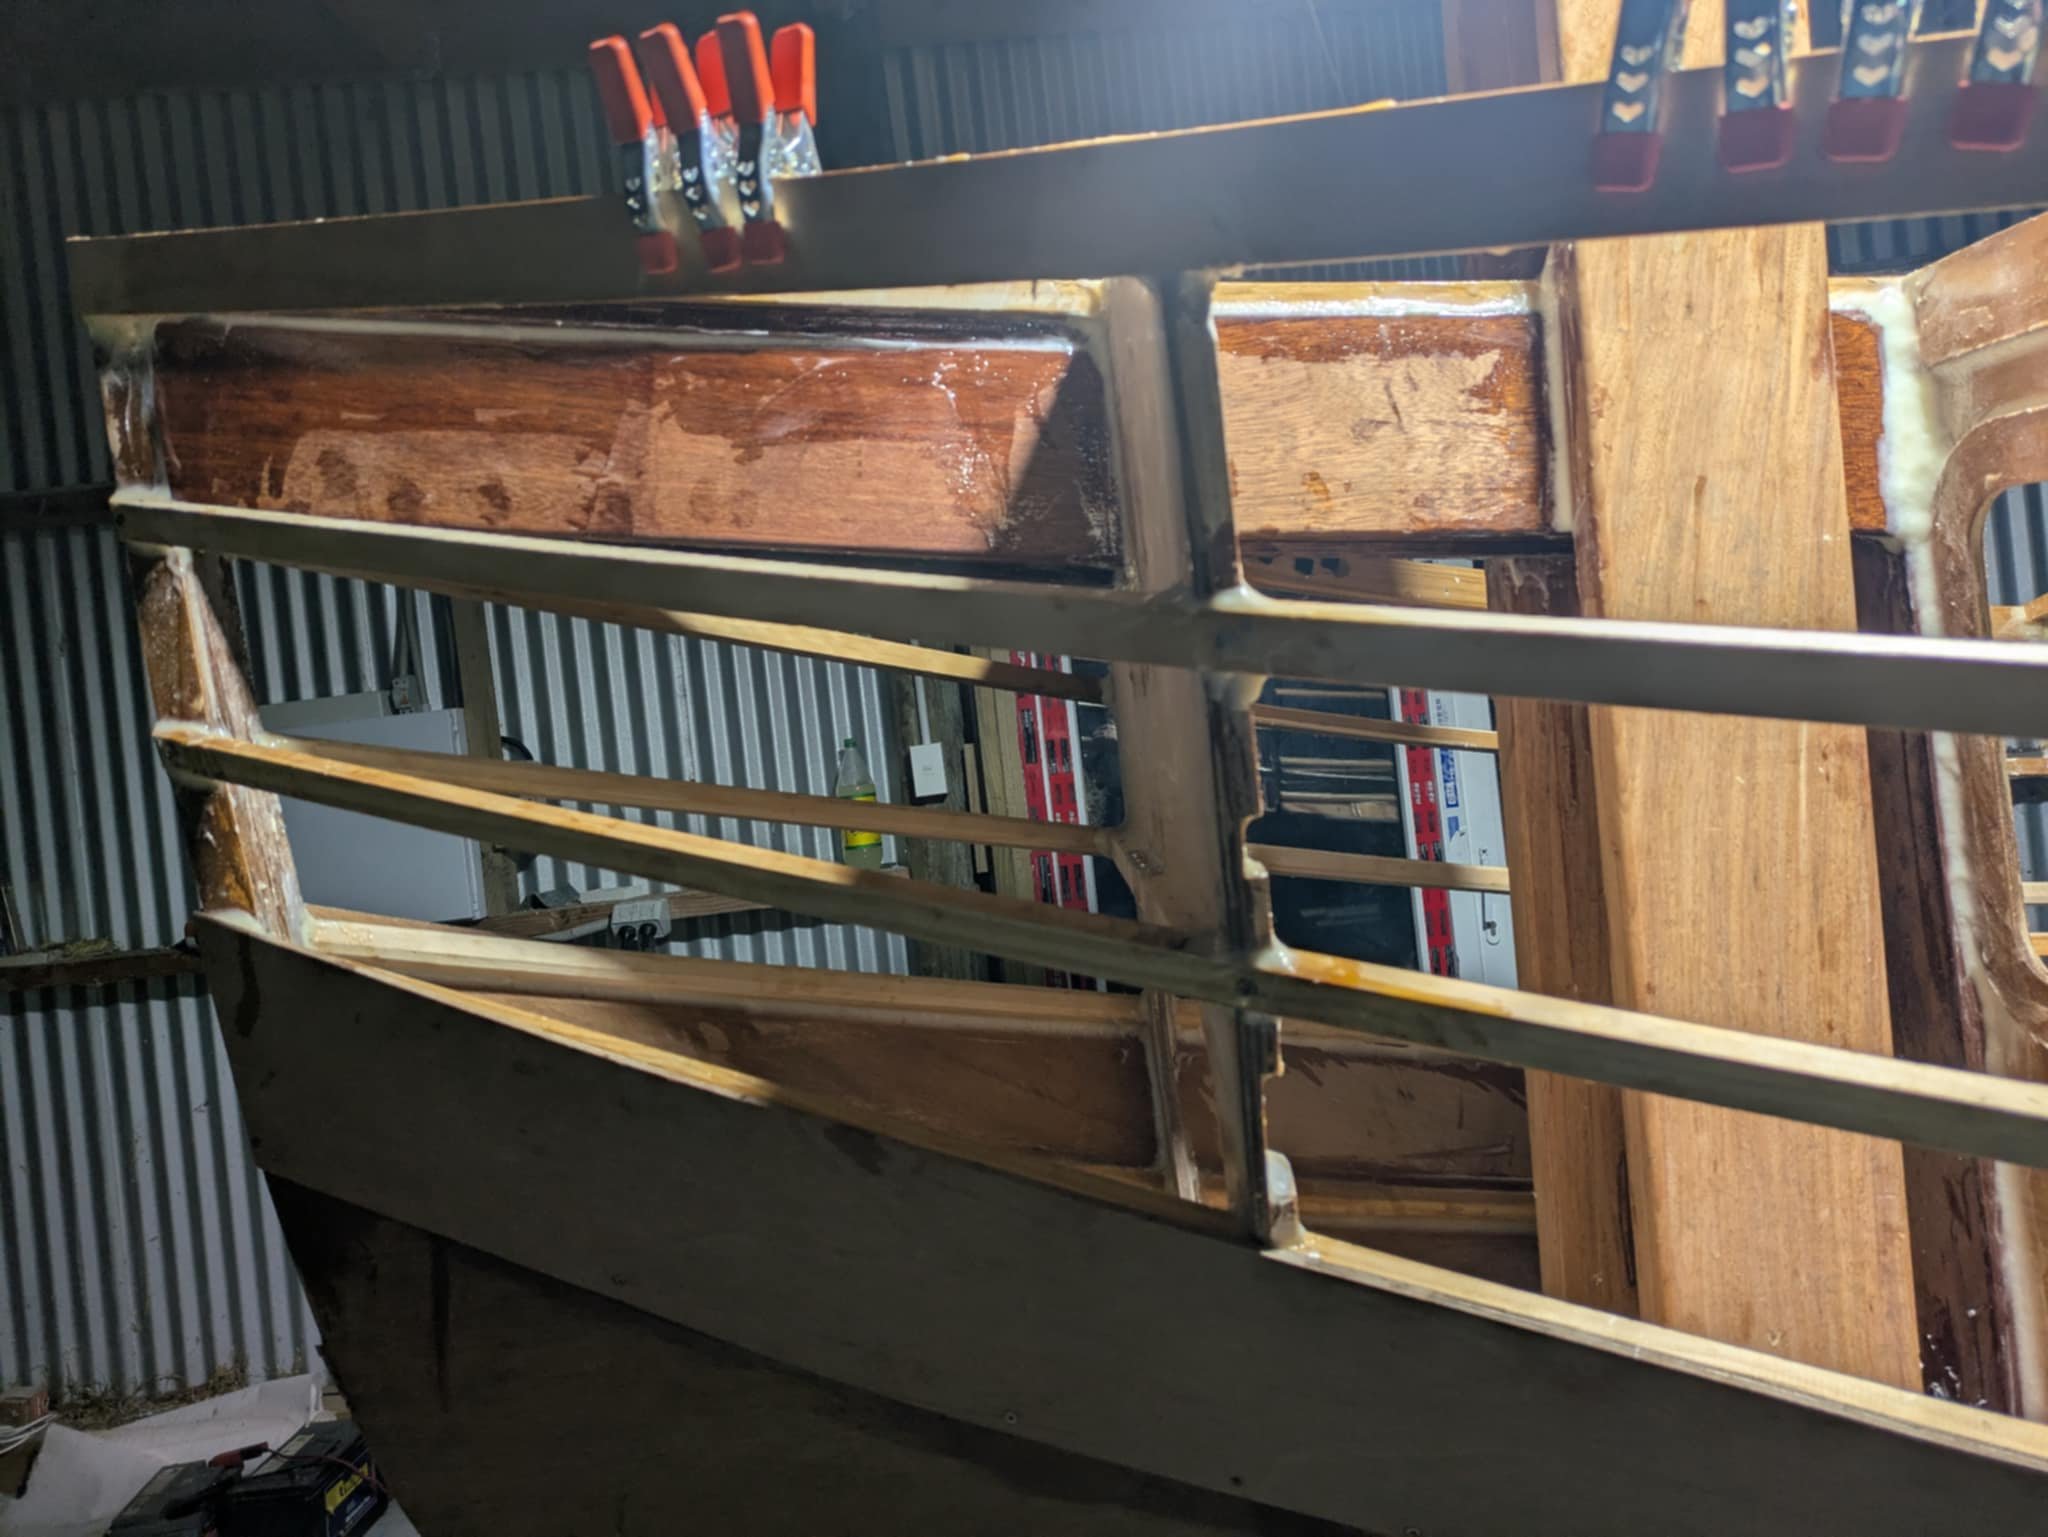
Boring update but perhaps could be of note for somebody building similar to see what not to do. Spent yesterday doing things that will be a pain in my assholes with it fully planked. Of which I'm planning to do this long weekend. Put in the mizzen mast step. I havent decided if I'll make a tabernacle for the mizzen or just a slot for a smaller mast. So this means I can do either down the line. Also put in some strengthening to the bow. As well as a doubler for any cleats up front, I wanted to link the bow stem to the mast tabernacle at the top and bottom. Adds a bit of weight but should be very rigid with hardwood lengths in there.
1 point
-
1 point
-
1 point
-
Where the vid of the guy whjo custom made one , fires at 2000 RPM or something ludacris ..... oh here it is *edit . skip to 3:50ish to go straight to bbbrrrrrttt1 point


.thumb.jpg.570970b401ac8d26ce9af7c1bf2bd8cd.jpg)


.thumb.jpeg.b39a639a8ff8a614681c3c9dca730a70.jpeg)

This leaderboard is set to Auckland/GMT+12:00