
Leaderboard


Popular Content
Showing content with the highest reputation on 10/12/24 in all areas
-
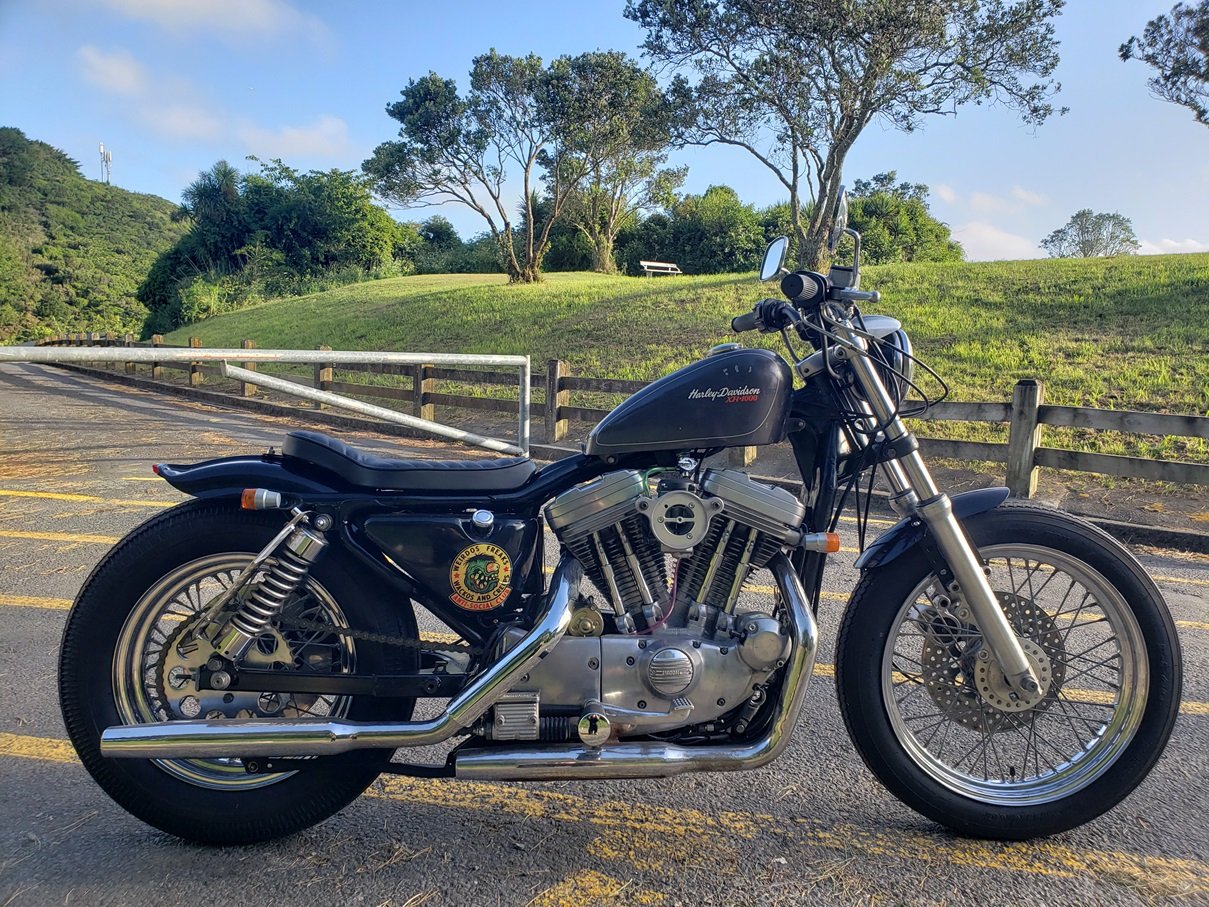
Finally got this finished. All legal. Taken it for a few rips. Super fun. So small and light. Oh so narrow: For sale now. As I enjoy the journey more than the destination. Already neck deep in another build.
 14 points
 -
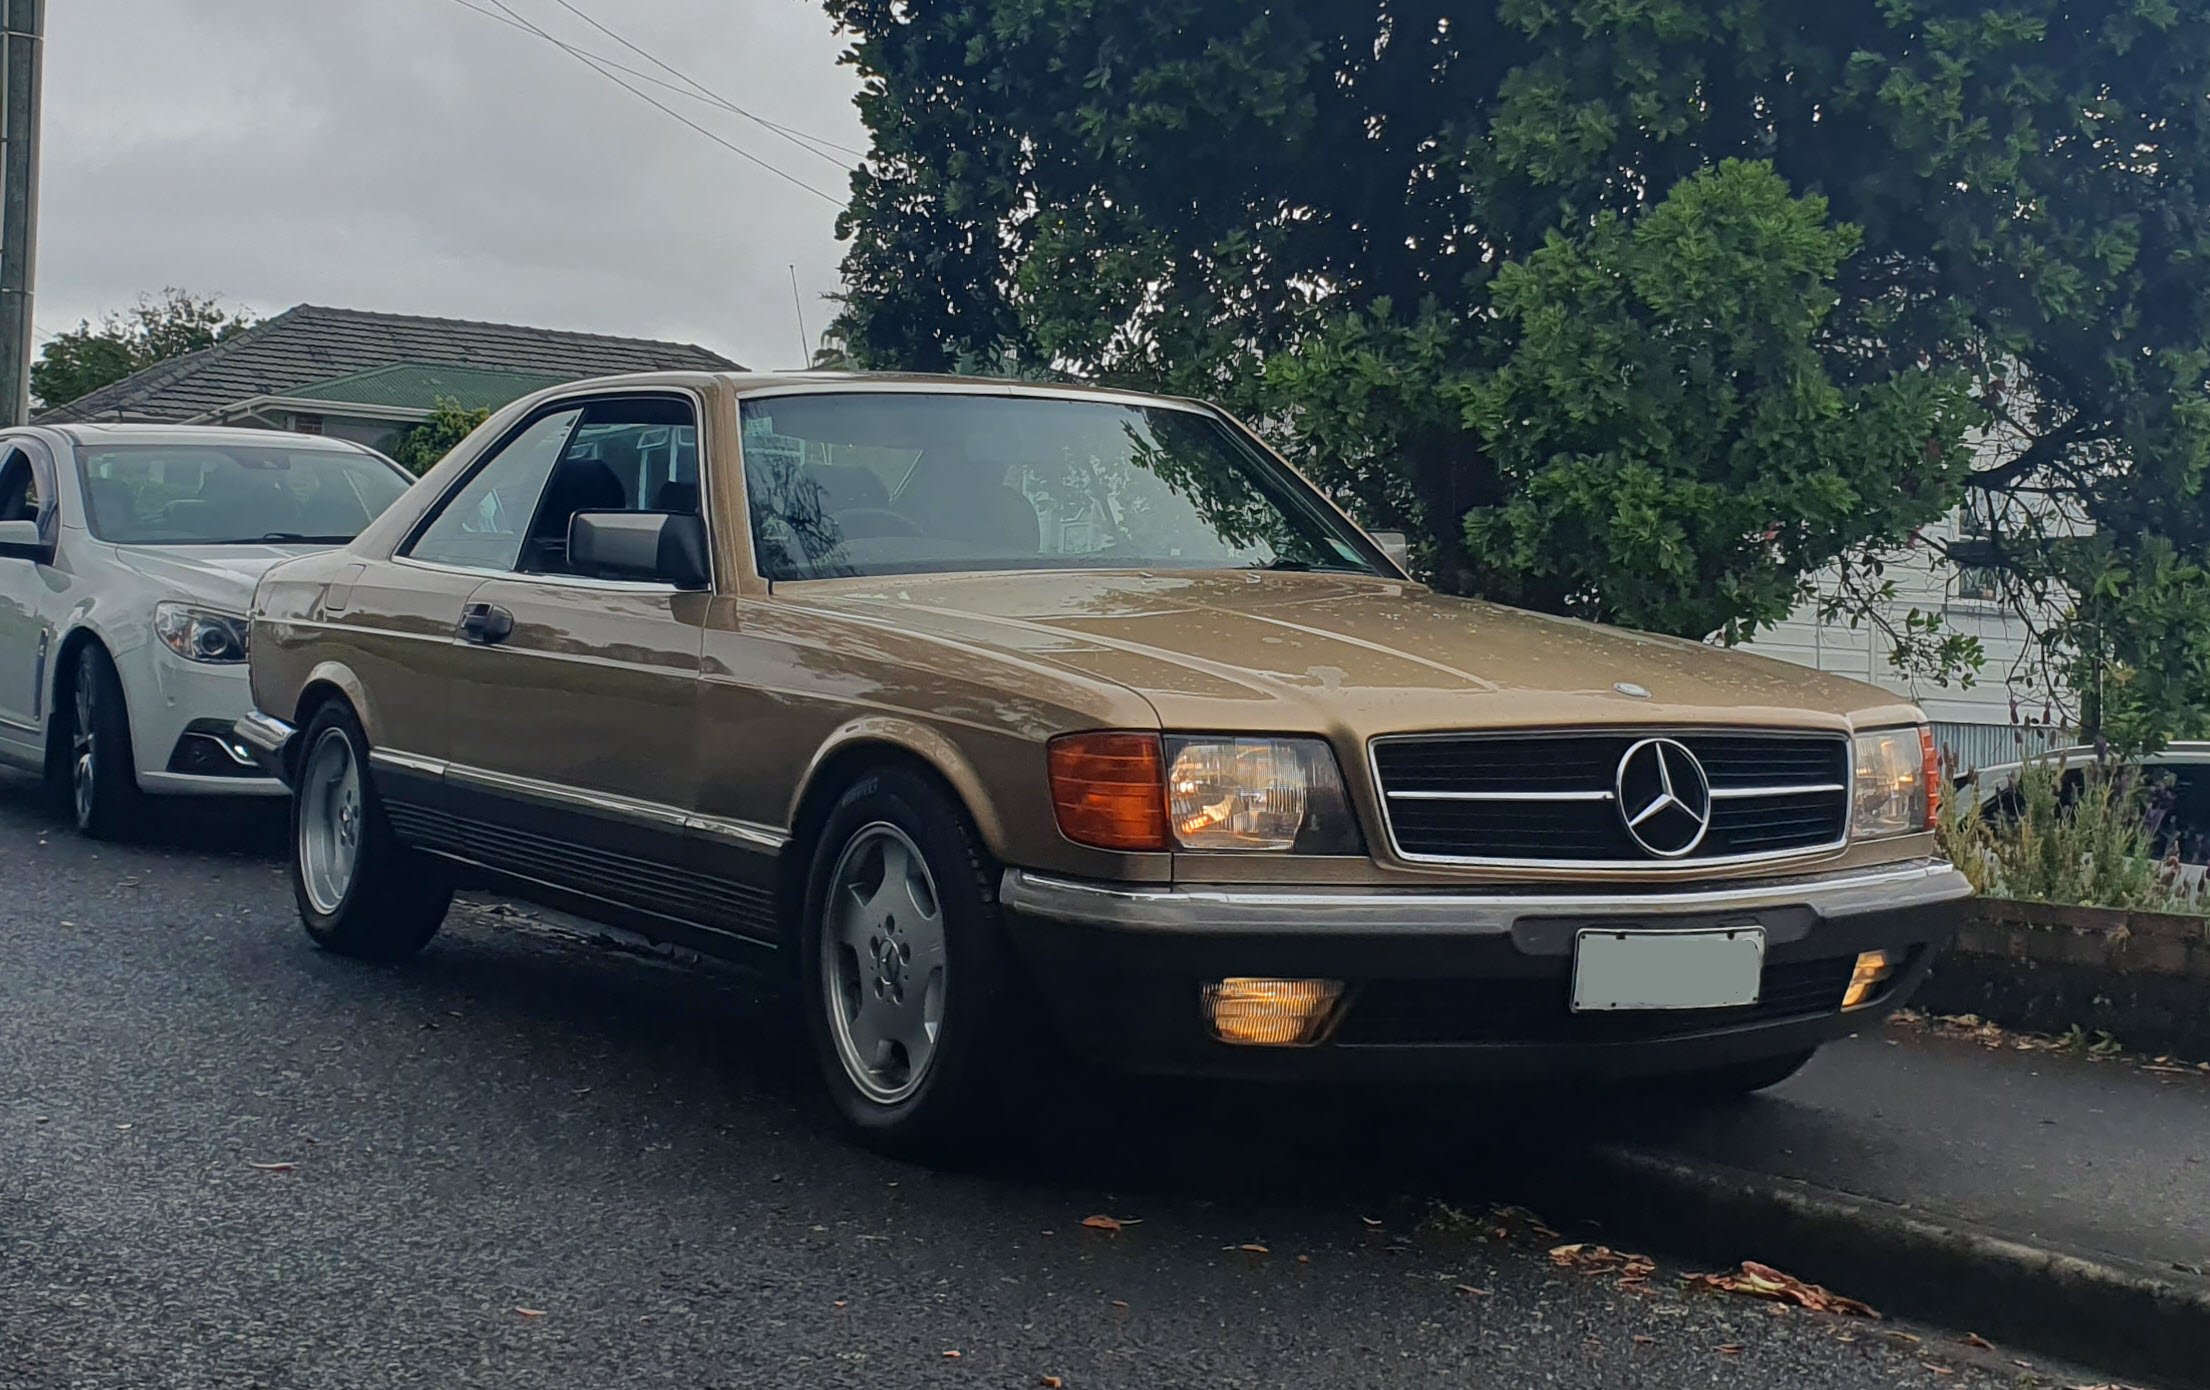
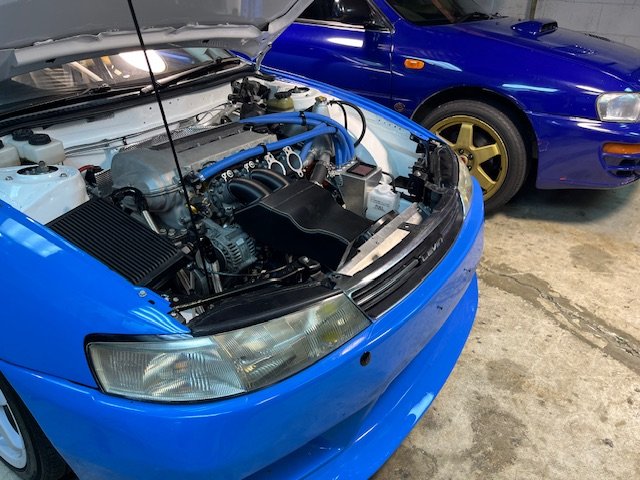
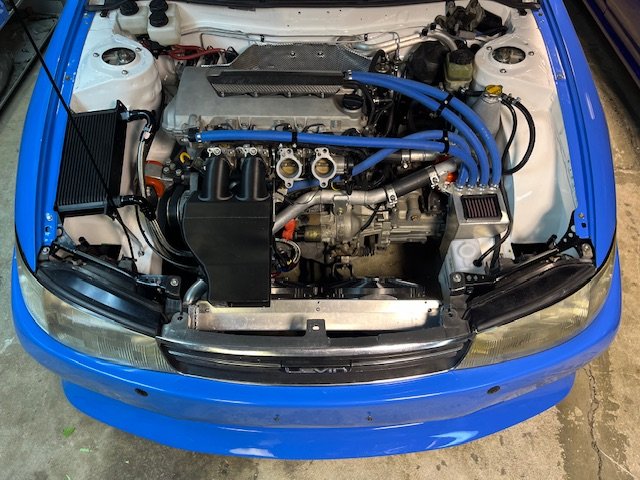
KP progress has slightly stalled due to a certain German tank entering our lives.... Picked her up from Welly and drove back the next day in convoy with @mk2marty Didnt miss a beat! M117 and............. 5 speed manual! Huge list of stuff to sort, need a better diff ratio as the current one is far too tall, so something out of a 280SE would be ideal. Needs AC sorting ASAP as its the family car. So if anyone knows of or has any W126/C126 parts please message me! Have a lot of things to source.
11 points
-
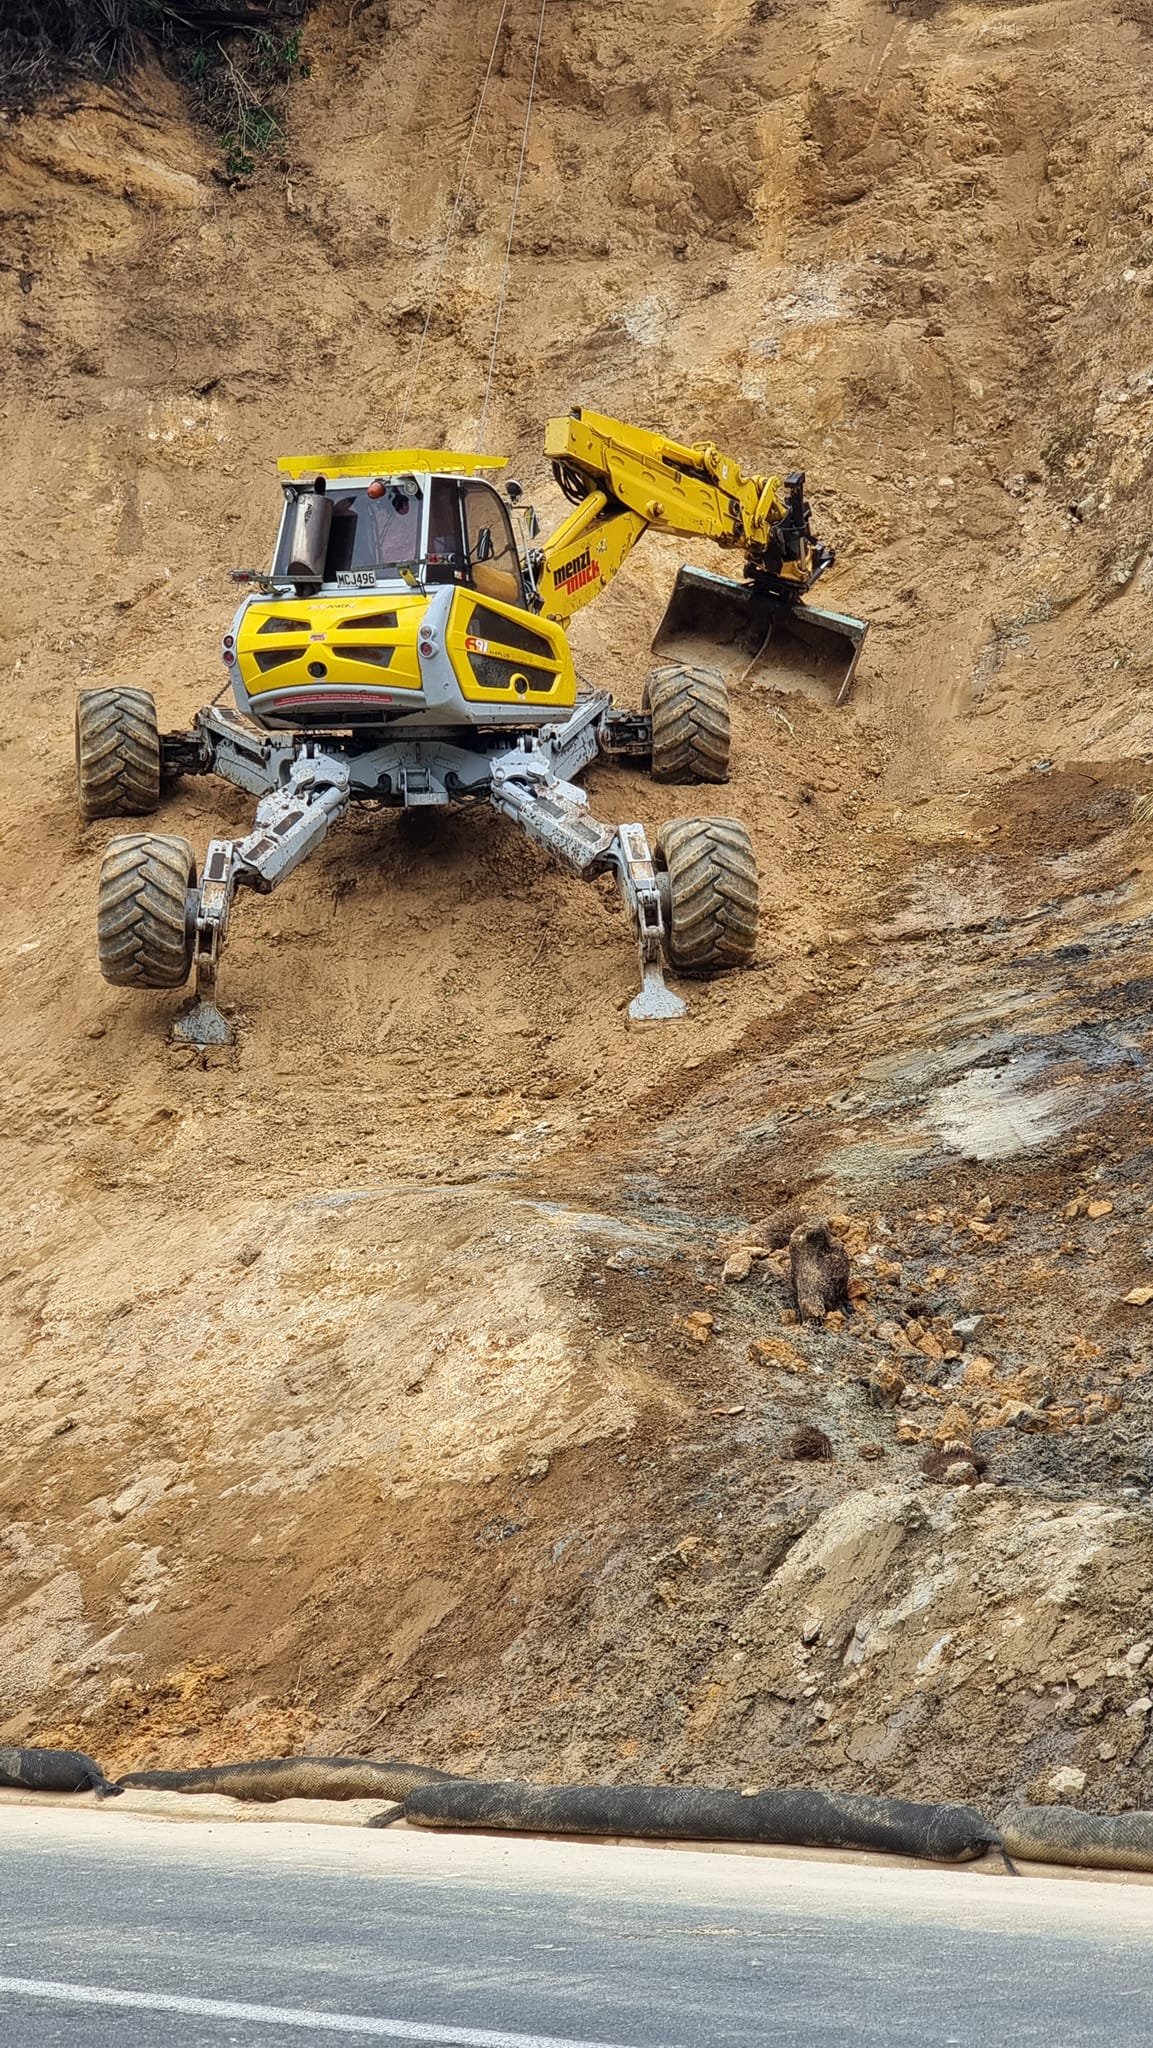
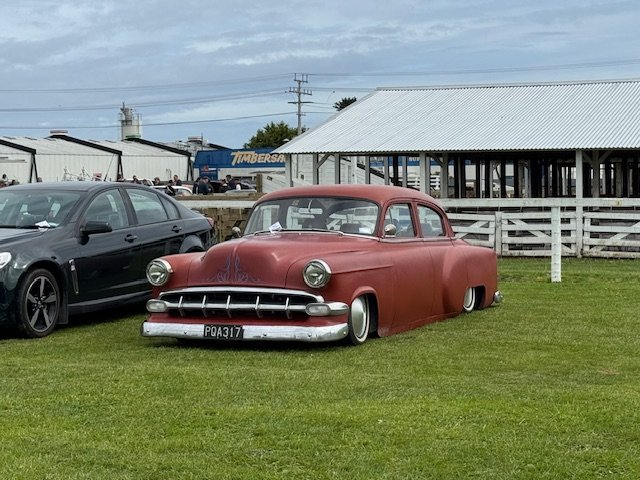
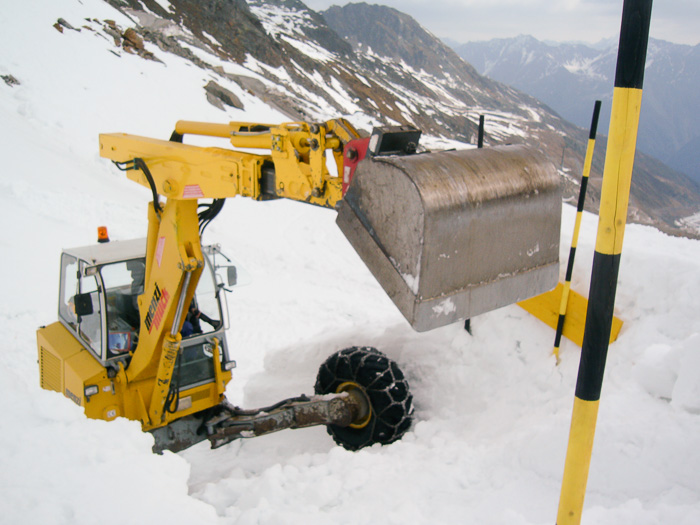
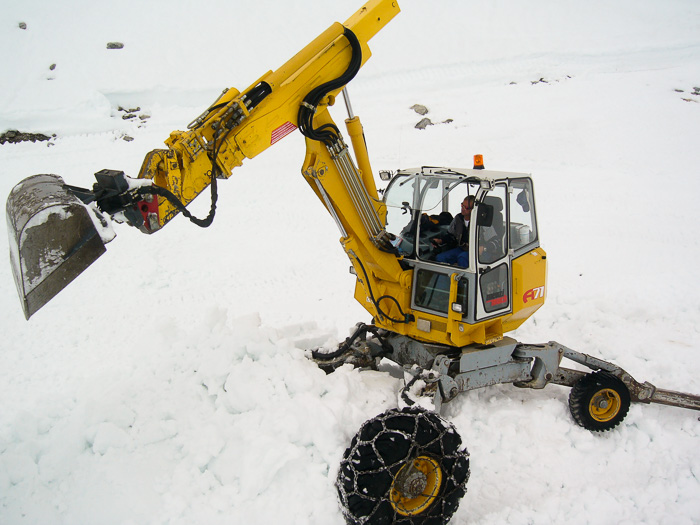
Still waiting for an update, this thing has been working in the Karangahake gorge, this is how they park it.
9 points
-
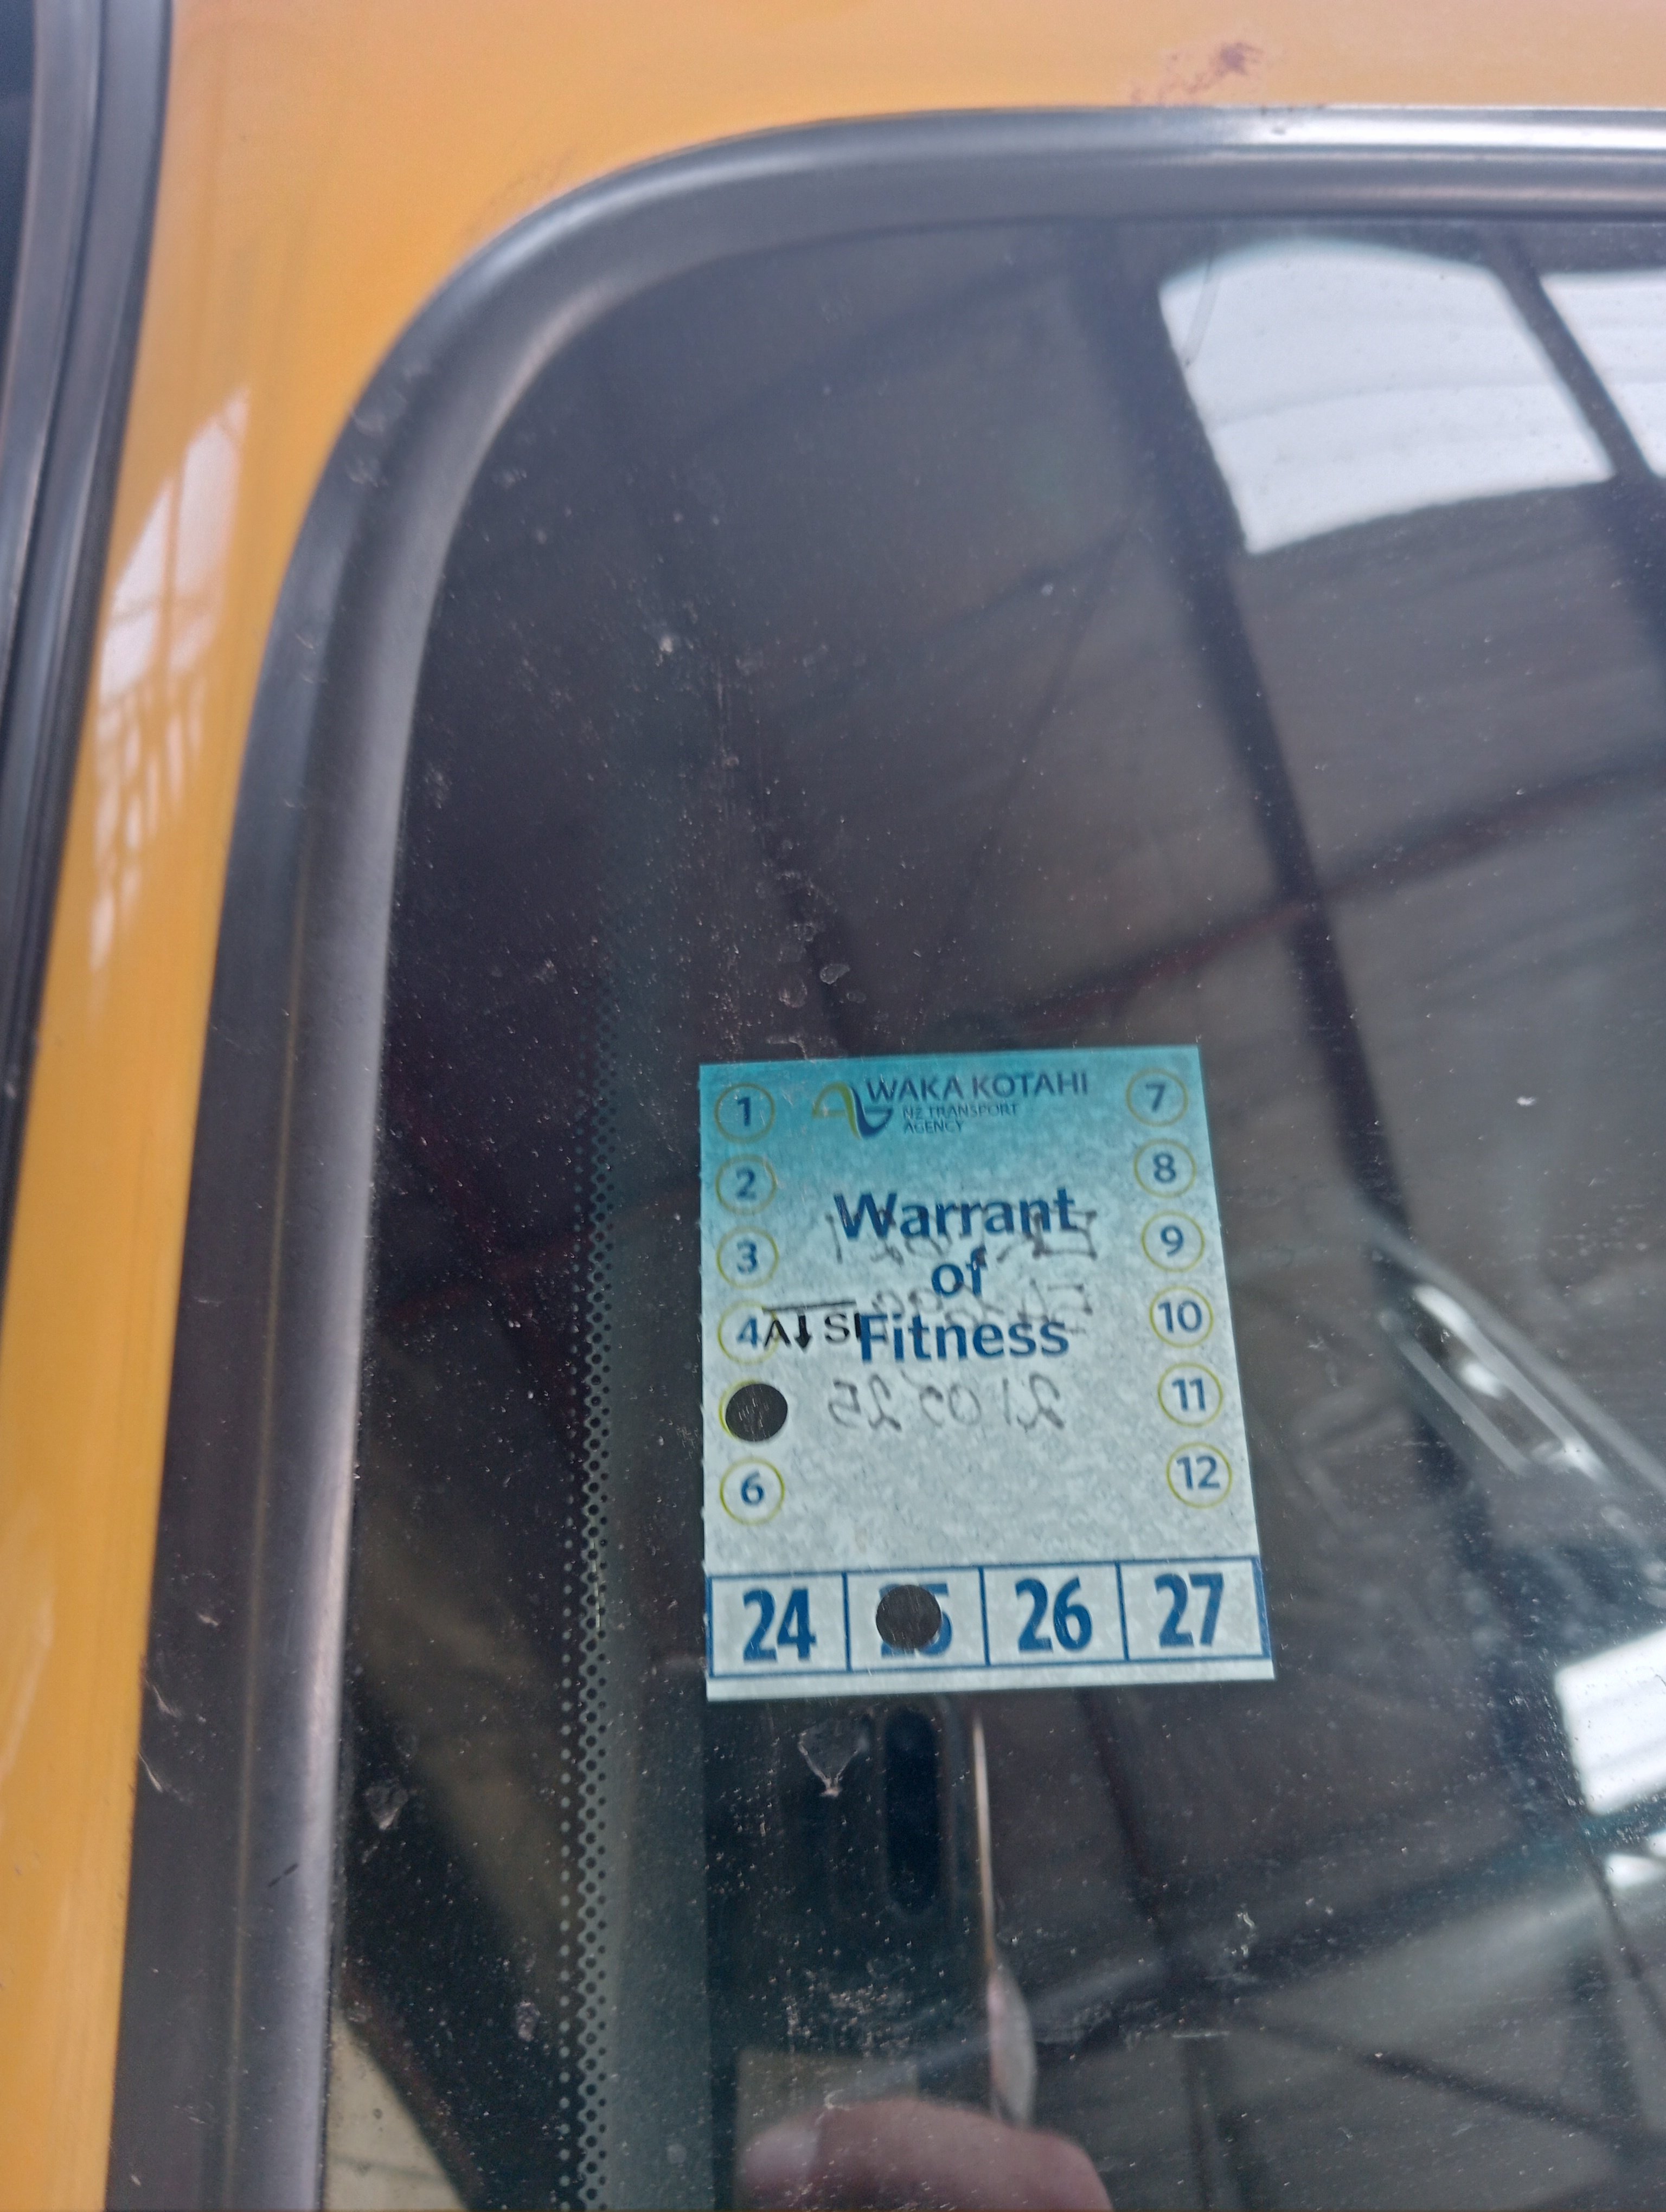
She's alive! 100kms into bedding in the new rings and she is driving super nice. There's no tinny rattle coming from the loose turbo heat shield and there's even a rattle, that I thought was coming from the front suspension, that's gone so that's a win. WOF and Rego'd, aircon regassed and ready to cruise - but I do feel like a bit of a plonker having to rev it at intersections and not let it flat idle (engine rebuilders recommendation) but oh well. I should be able to get a good drive in this week and chew through some kms. Then when the oil and filter get done I'll put on a new crank pulley (squeaky and delaminating) and a few viscous fan clutch. The rest of the 'to tinker with' list is: Wheel alignment Cut and polish New radiator pipe bracket Fish oil rad support and refit front mudflaps and new bolts/clips for lower fender and inner fender liners Repair drivers seat Repair shrunken vinyl on T-Top trim and in back seat New clock Repair centre console lid Fix rattle from windows Tighten up door latch's - not perfectly flush Repair cracked boot plastic Secure sub When $$ Allows: New Wheels Closed door respray - fitting new windscreen, mouldings, quarter glass and door glass trim and Targa seals.4 points
-
If you still had the 16in front it may have made the bike unstable at the top end. The 17 front has given you some more trail which equals stability. At some point the CV carbs have been rejetted for the pods. Running without is roughly equal to #10 smaller in mainjet size. I'd do a few precautionary plug chops. I've done enough 1100 heads to be wary of running for long periods without filters. Race engines, fine. Road, not so much. Edit - Probably not what you wanted to hear. But damage the head or hole a piston and it gets very spendy very fast. And good heads are rocking horse poo.3 points
-
Will swap for ironhead. haha3 points
-
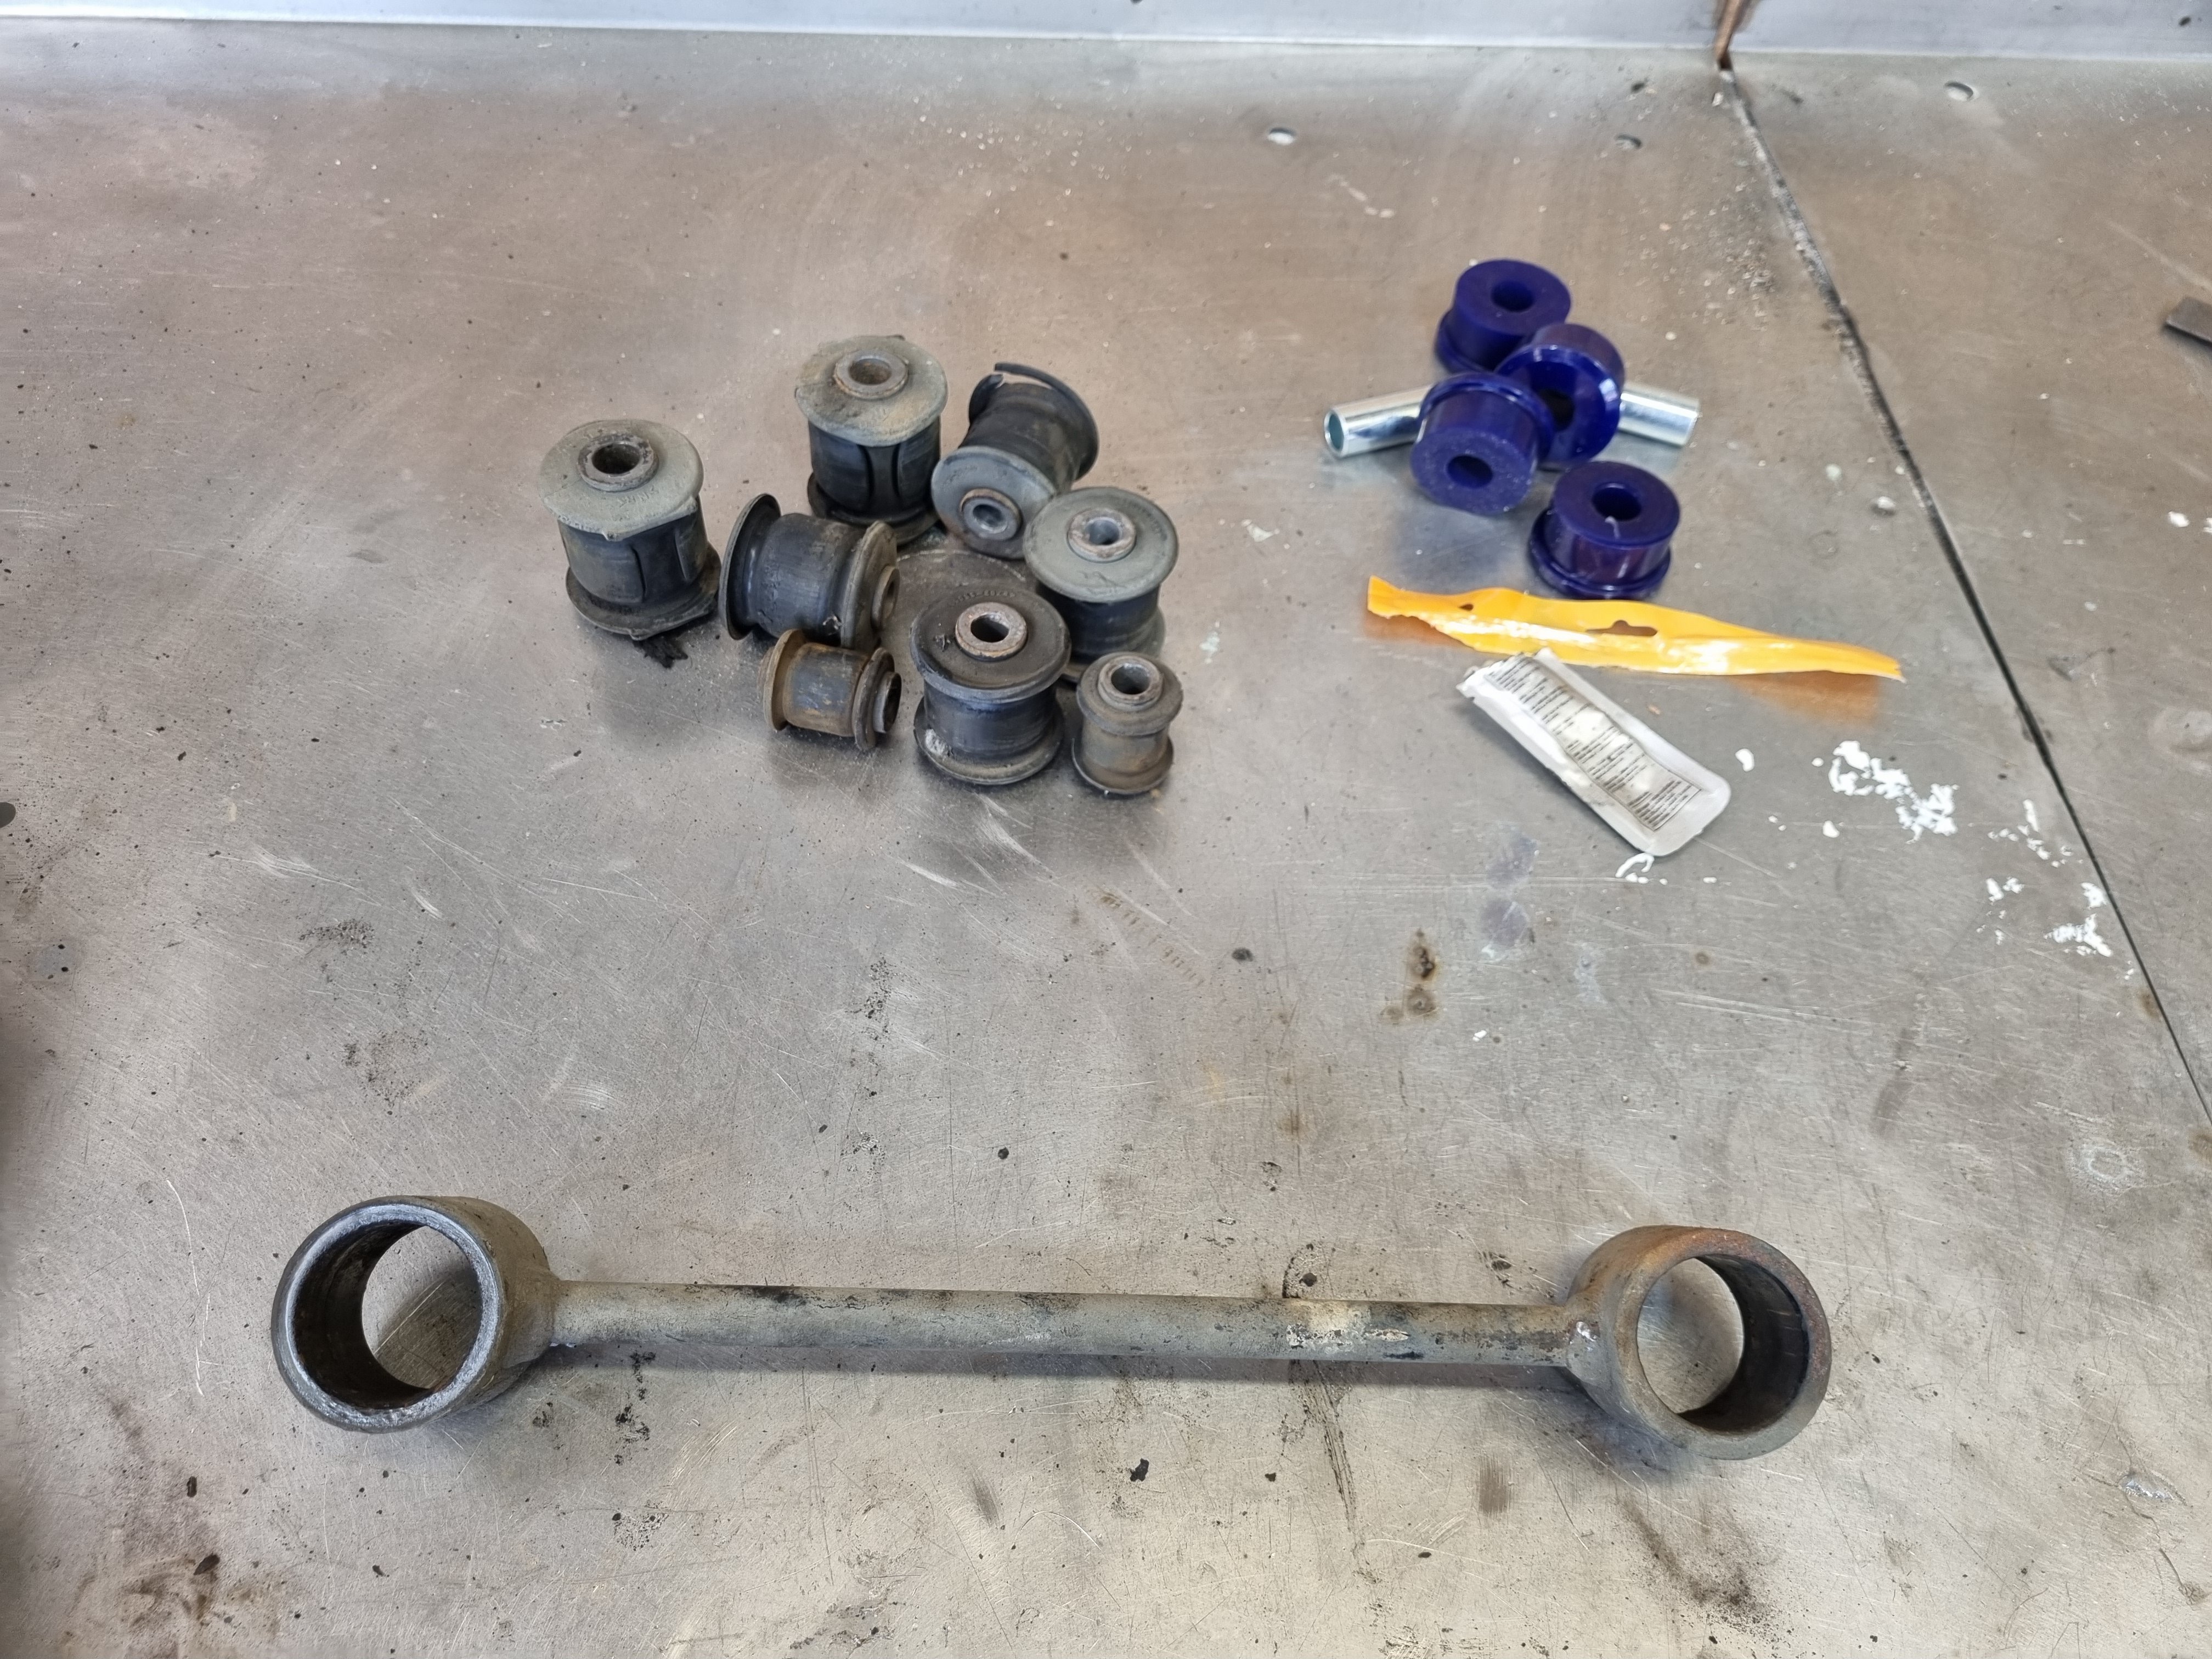
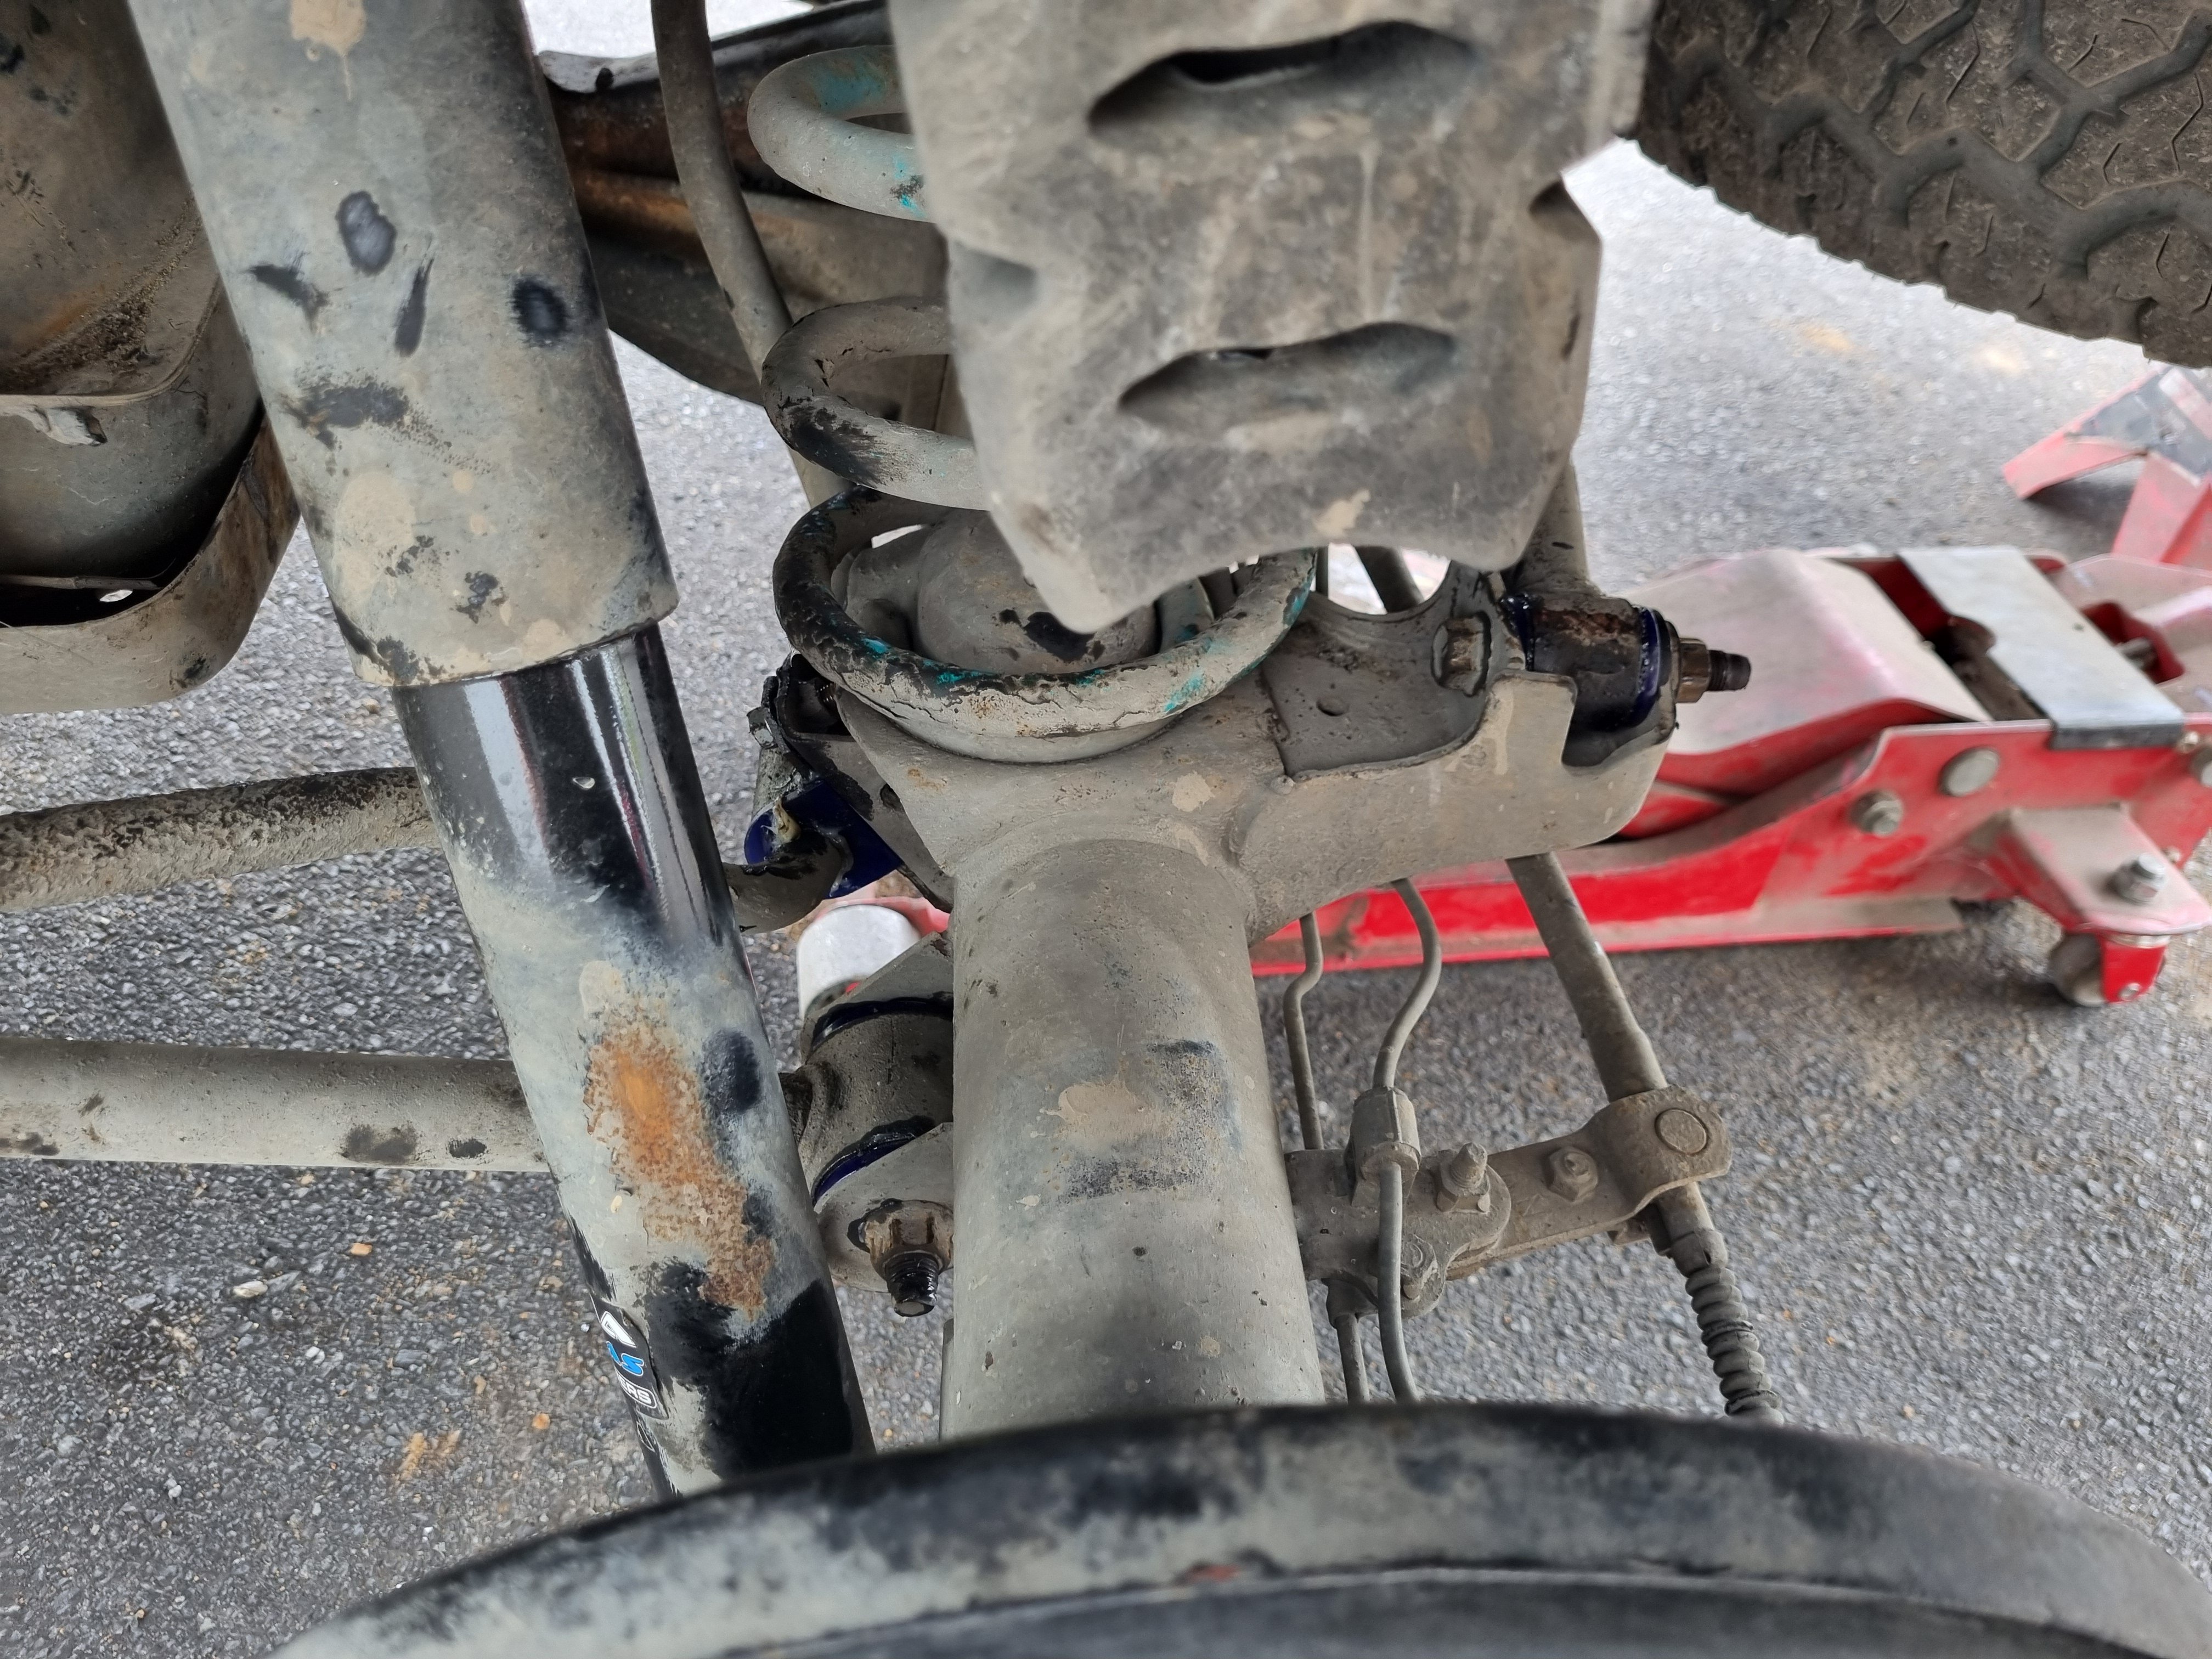
drove the truck to work today, fuck what a difference! the rear end feels so much more stable, looking at the bushes i took out i wouldn't have thought they were that bad but i guess they were.3 points
-
It will decimate all after you spend about 15 grand on it. And if you have to, overnight parts from Japan. Just put it on your tab at Harrys.3 points
-
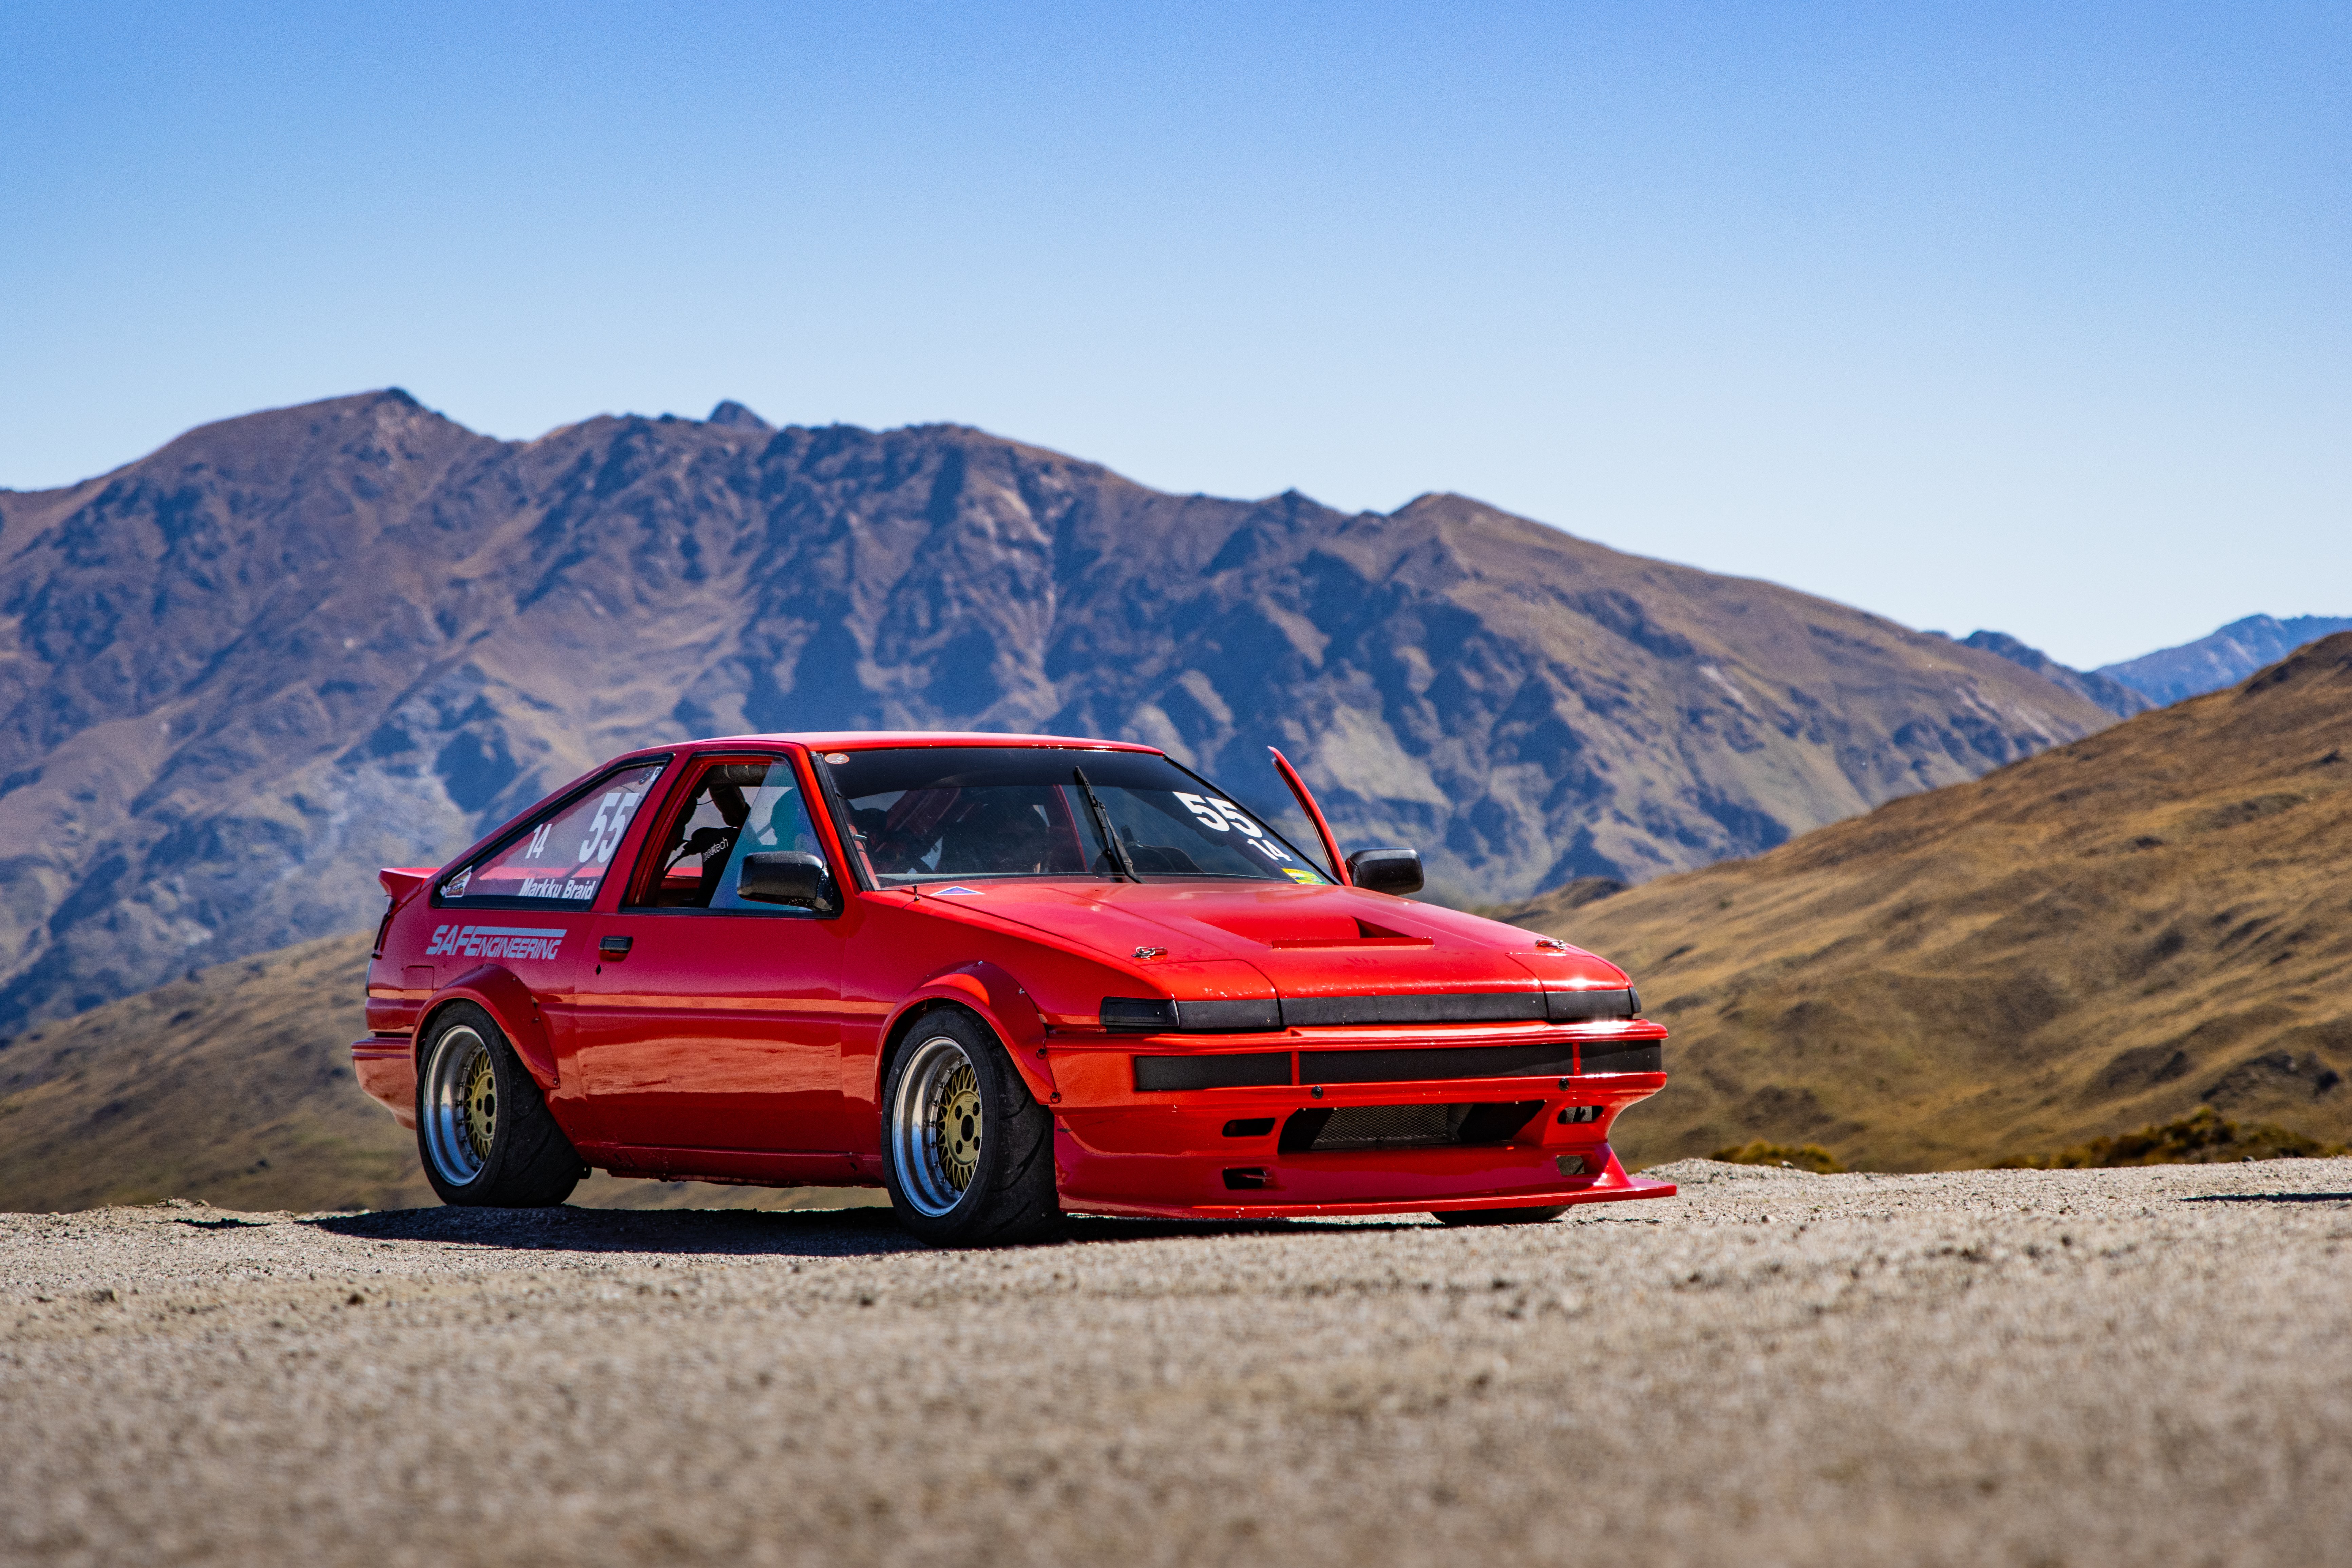
Entered a hillclimb in the weekend. I'll come back to tell the story soon... for now, here's some eye candy.
3 points
-
Cheers for that, I had since swapped the filters back on already. Plan is to chuck a 02 sensor in the pipe and monitor it and do some plug chops when I get some free time to do some testing. Hit up a guy to do some tuning on a dyno and it was $500-$700 and a week which isn't really that bad, just not in the budget. Yeah between the 17 inch set up and the 16 inch set up is 6mm difference of over all height with the 16 inch set up been taller. with the shocks been shorter I'd say I've lost height over all and created more rake. When @Kimjon was measuring the trail it seemed very similar to the og set up.2 points
-
Went for a ride with the trumpets on and it felt great. And i stopped in to see dad. 1st time he had probably seen the bike in 20 years. Over all went well and was a good ride. Later in the week we went to night speed drag wars. I had some shit test runs and got nocked out 1st round. So had plenty of time to look at other bikes and think about modifications. Enough time to start doing some research, research on limit straps and followed up with some chats with @MostlySuzukis about how to make them with out spending 100s of dollars. I spoke to @flyingbrick about them and asked if we could make some spacers to help make these limit straps. Quick trip to his and used the lathe. He already has these spacers made so I just had to make the hole a bit bigger in the middle. Then I searched the net for hours trying to find some 25mm anchor plates locally, to which @Raizer found some from nzkw which would have worked. But I was after some even more local as i wanted the job done. Ended up buying some 5mm plate after not finding any local. Got to it. These now bolt through the forks to the brake calipers on either side. I had bought a cheap camlock tie down from supercheap auto and cut the tie down off and used some webbing I had here. Sewed a loop in the end This is how it works. Managing to get about 70mm of compression on the front. Before hand And after. Not bad, $25 for the tie down, steel and hardware. Fuel and time on the other hand.... The experience was worth it and it'll be great to see if it makes a impact on drag racing.2 points
-
Got bored the other night and went looking on Aliexpress for random things that might be of use to me. $16 later Don't think I could have them posted for that let alone 3d printed in nz. Off with these Quick modification on the outer one. Like a glove Time to duplicate this on the other side Job done Happy with that.2 points
-
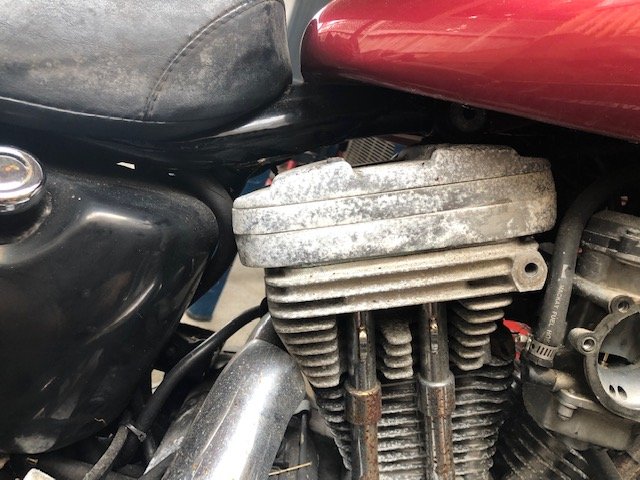
Yeah, primary cover gaskets are the same. I'm sure you could fit the primary cover on a later model ironhead and vice verca. Clutch has alternator behind it (they only did this for the first few years of the evo as it was a bit of a sucky setup). And has a pull release instead of a push. Quite a lot nicer action. And its easy to select neutral when its running! Still havent taken it for a ride yet. But should be a blast. Will do some laps this weekend. Have taken 50mm out of the forks, and dropped the back 50mm too. Feels like a tiny and compact bike. Plus there is nothing to it either. Just an engine and 2 wheels really. I relocated the key to under the battery and cleared all the VOES and other wiring, hid the coil behind the oil tank and setup all the wiring there. To keep it clean under the tank. Will get some propper pics soon. But i actually put in quite a bit of effort doing subtle things to keep it looking as clean as possible, but also looking retaining an OEM look. Want to keep it minimalist too so need to figure out where to tuck the speedo to keep it clean. I've tried to do this build as cheaply as i could. The most expensive thing i have done was getting the frame blasted and powdercoated for $400 and that was worth every cent. The shinko tyres were from a 15% off at motozone, and the seat was spendy at 350nzd landed. The rest of the bike is just elbow grease. This has really been a budget build. Reusing all the fasteners (after wire wheeling them), cutting front springs, 2nd had trademe shocks, and lots of autosol. Pretty happy for how this has turned out. It looks like a very tidy wee bike. Especially considering the condition it started with. Has been a very rewarding journey.2 points
-
I'll shout a side of fries to anyone who actually shows up in an oldschool car1 point
-
@MACKAZ @rb drifter @Dudley @kpr @gibbon @GARDRB1 point
-
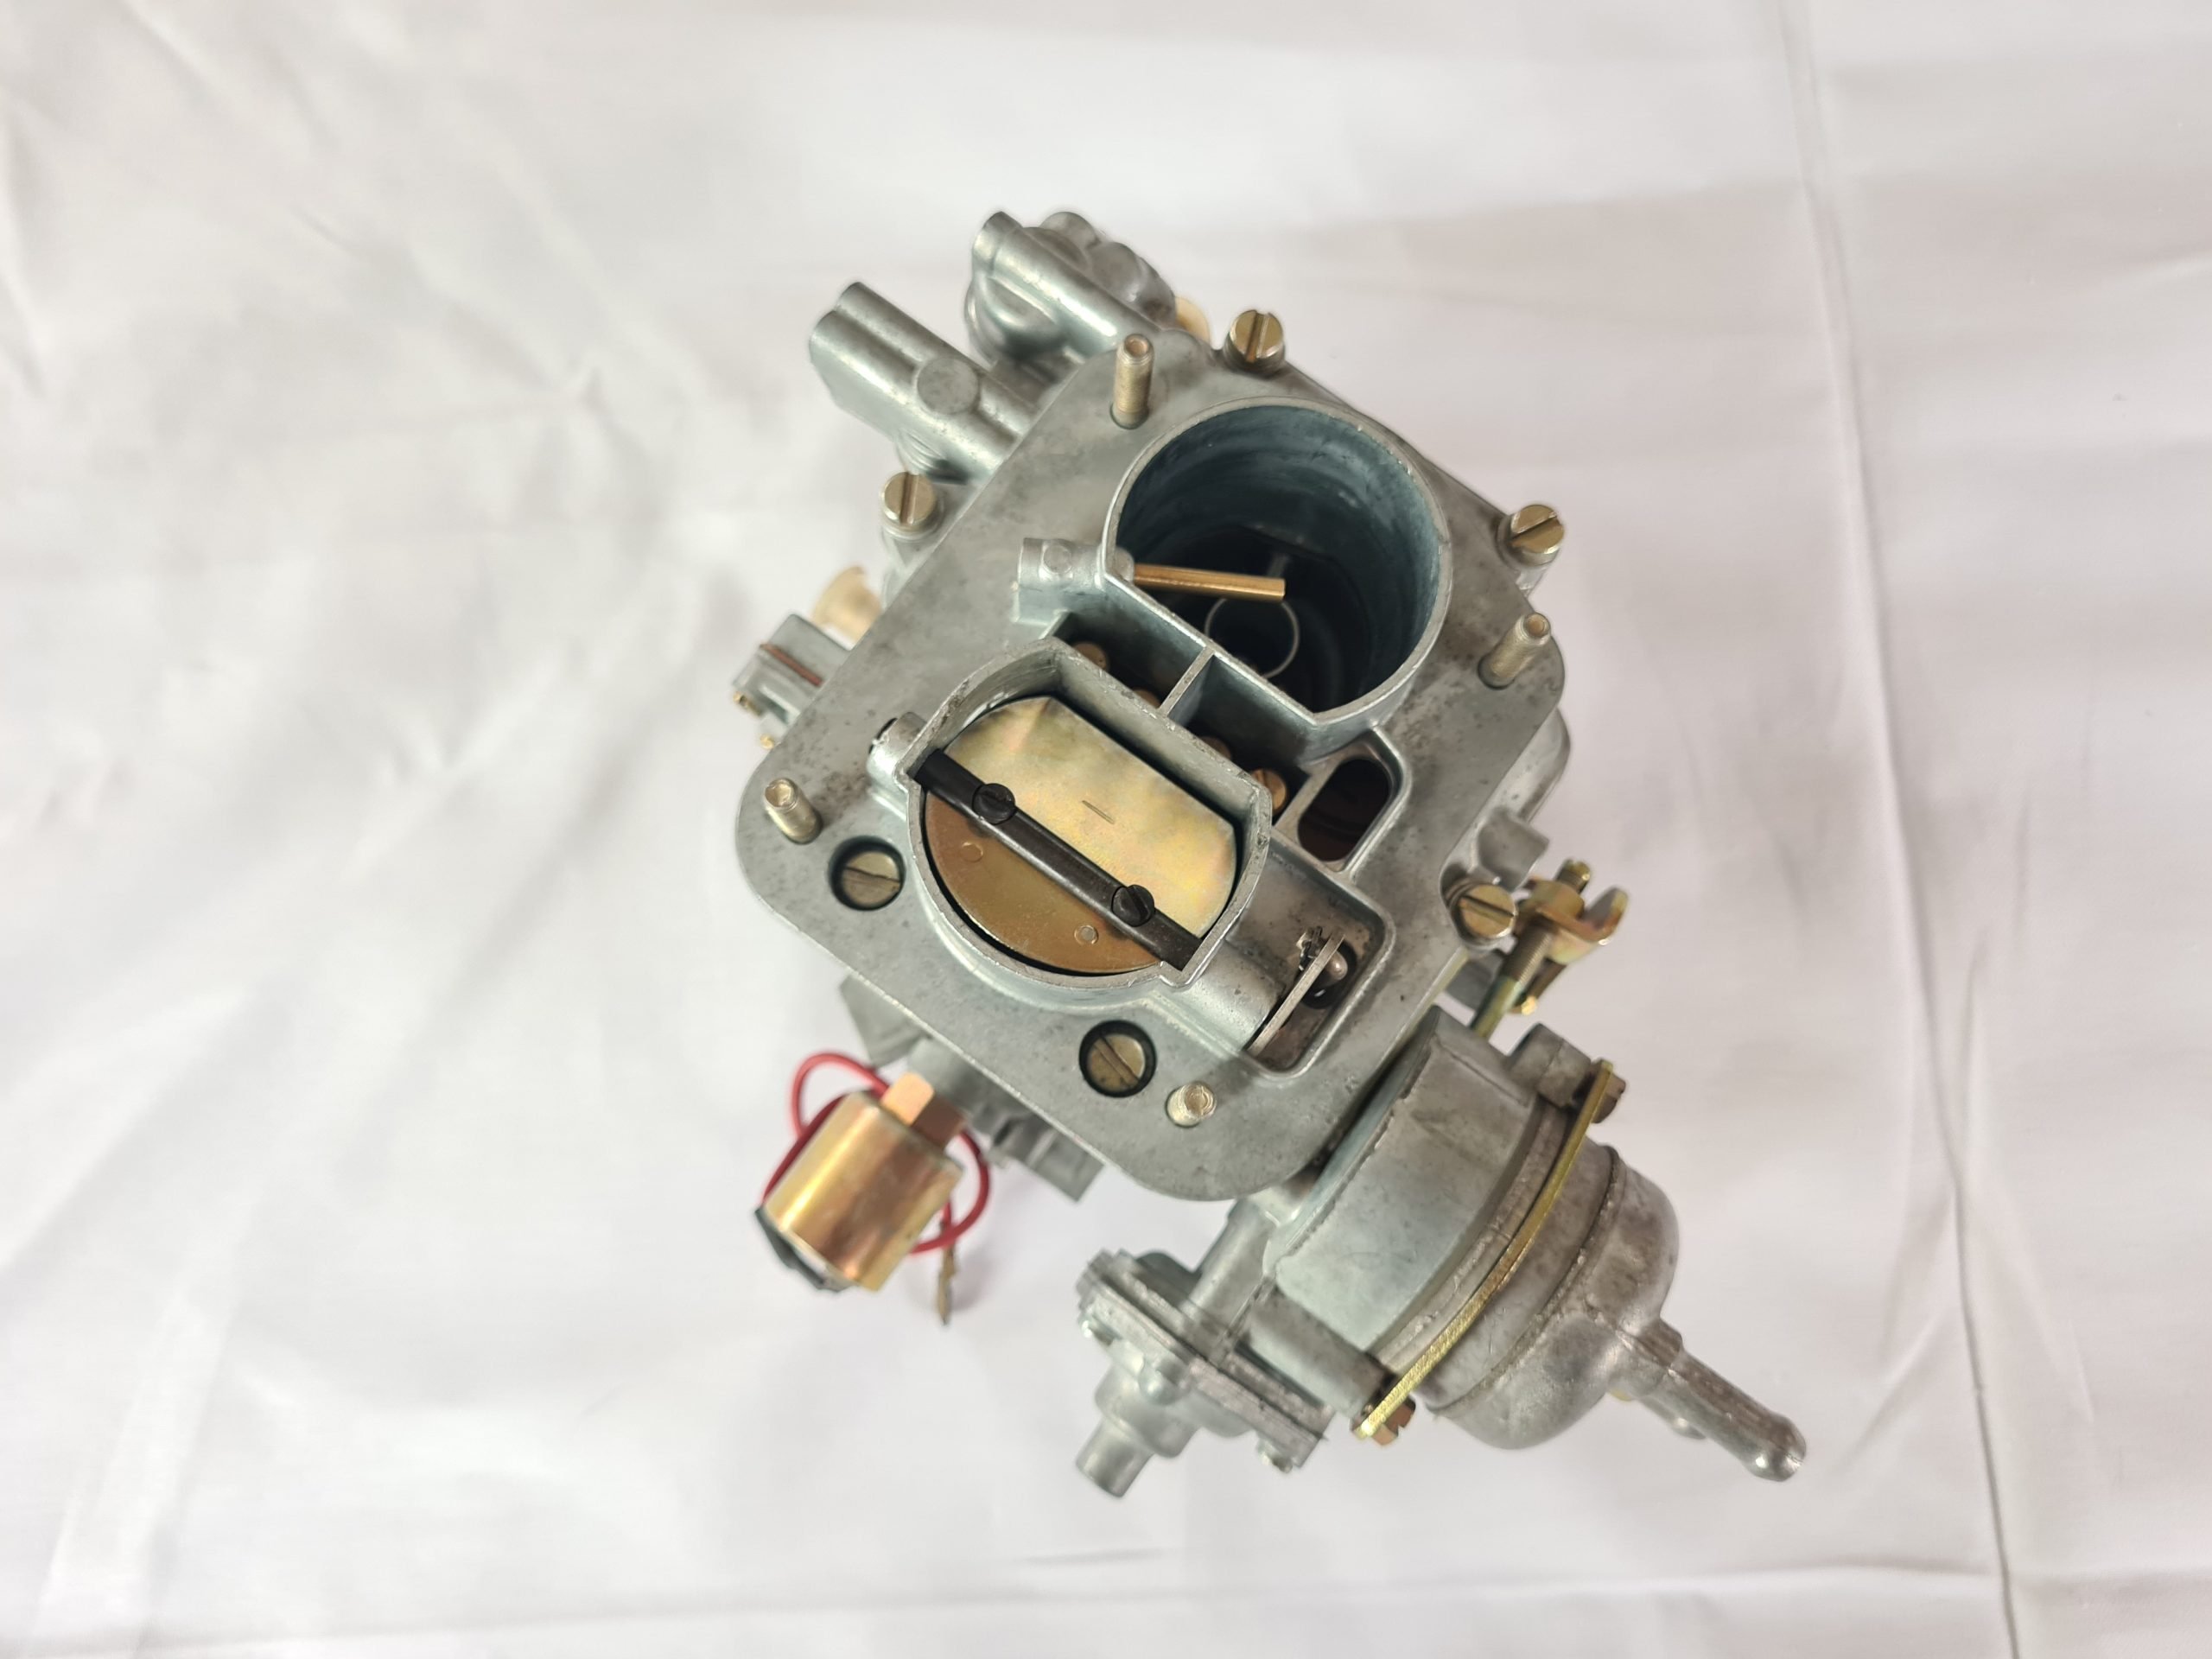
Well my dumb ass has lost the choke plate for my carburetor which is a big womp womp moment for me, may be sourcing a new carb to steal off but, still extremely frustrating and anxiety inducing as it was in the car in a plastic bag then poof, the whole car interior got pulled apart out of desperation and to no avail, so if there are people with spare x1/9 1500 carburetors around, may be handy to have a spare as my carb has issues anyway and is making my car run rich, it has also developed a miss from time to time which is worrying, it will probably be due to the car running rich, pictured below is a nice version of my carb but it shows the brass plate which has poofed on me if anyone has one thatd be mint, im nelson based
1 point
-
Did you find an answer to the mystery plug? Might be to the k-series engine loom? 5 wires? Themrofan sensor, oil pressure sensor, points distributor, reverse detent sensor x21 point
-
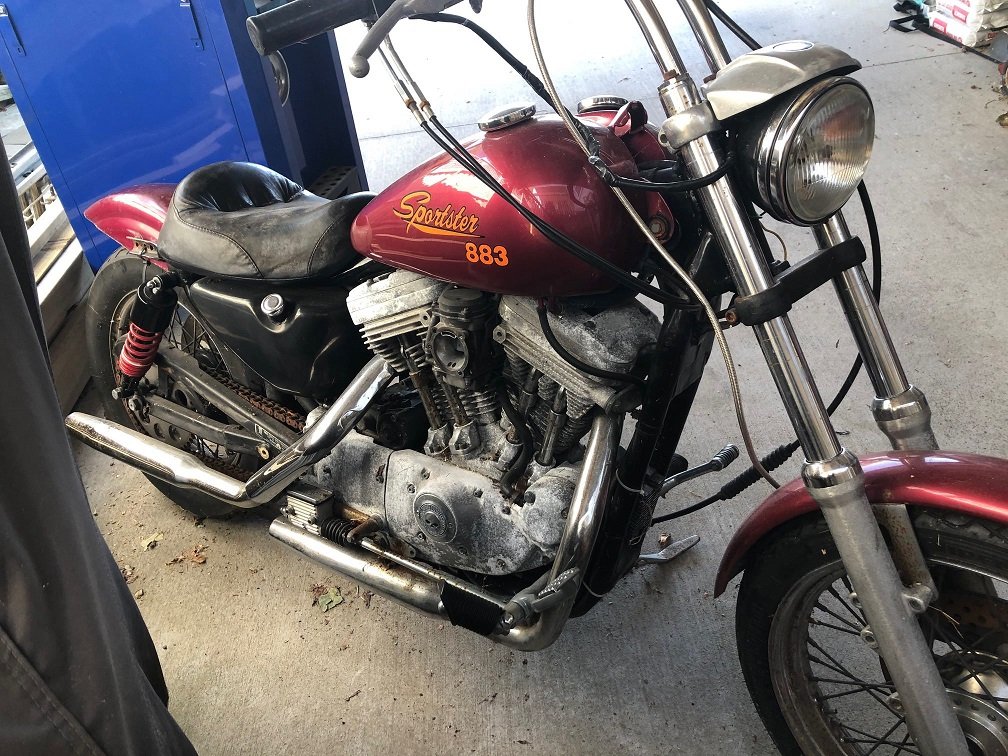
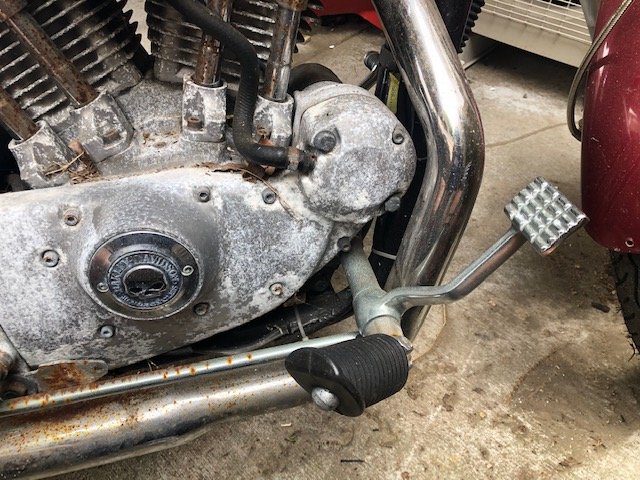
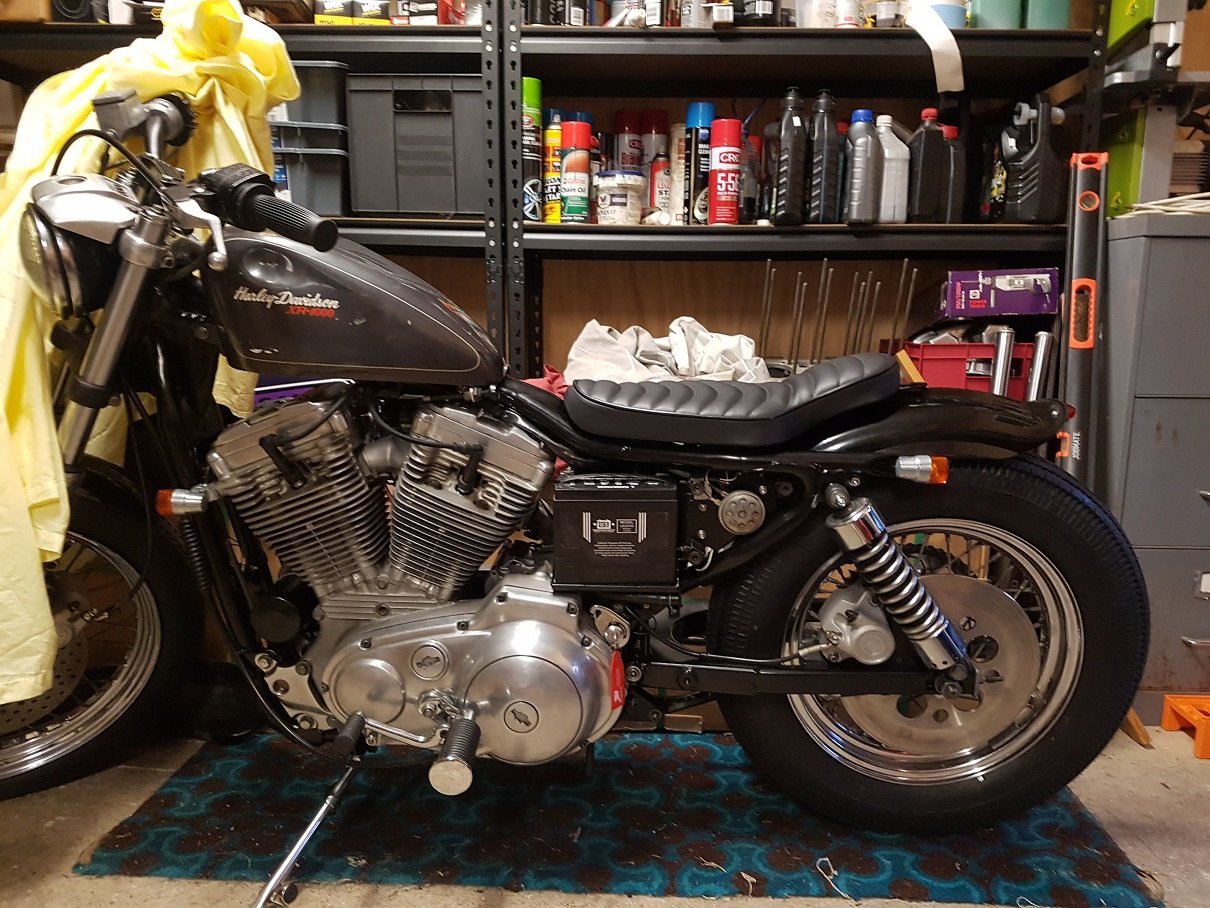
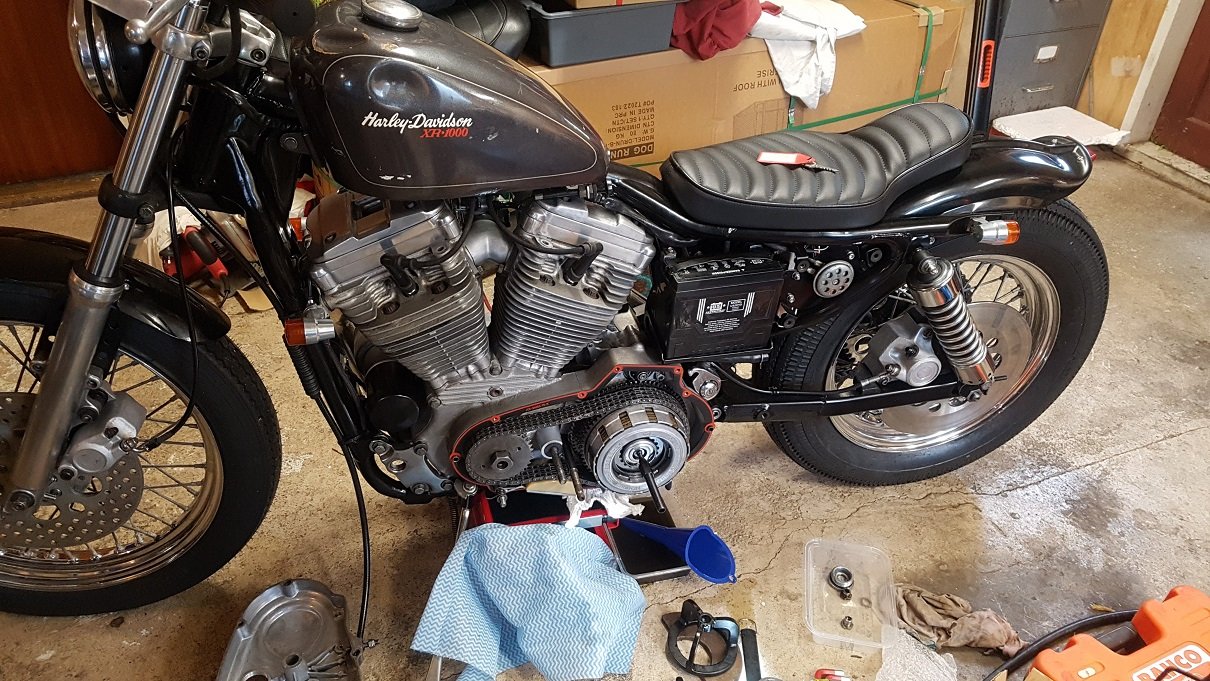
So yeah, pretty into these turds. Saw this come up super cheap on trademe. Reg on hold. Bought it site unseen and had it shipped down to me. Oohwee, what a turd she was: Its an 1988 883 evo sportster. The successor to the Ironhead. It was cheap, and I really like cleaning stuff up. So something to keep me busy between rage quits with the Goldwing, Laverda and my Ironhead.
1 point
-
That sounds like my brothers iron head owning experience. Every time he rode it something broke off or fell off or shit itself. I can still clearly recall a bunch of us making evasive maneuvers on a ride to avoid his gearlever bouncing down the road in front of us.1 point
-
Mental! I couldn't stand mine. I built a sidecar for a bike build off and the stress of needing it to start in front of the judges was almost unbearable. I sold it to somebody about a km away and pushed it most of the way there because I didn't think it would survive the journey without something else breaking. IIRC I swapped the brakes for Honda sports bike ones and they were the only good things on it.1 point
-
That is a sweet ride. I've had a few evo's over the years and they have been proven to be bulletproof. Ironheads on the other hand...1 point
-
bitta heat and youll be away in no time if it doesnt flex enough to the curve you need instantly.1 point
-
Hired out an old bakery for the ovens, had some big concrete culvert pipes and fired the heat through them I believe. Then layer the acrylic over those to let them bend into the tunnel sections (first in the world)1 point
-
I sold my RGV the day before SYDS but because I am a Boomer have now got a 1980 bike to do this on.1 point
-
Gave the Thames his weekly bath today and while he was clean I added some bling. Before: After:
1 point
-
The shit thing about owning a rotary/any classic car is you inevitably come to a point where you have decide to either go the full Monty or pull back and give it up. Do you like it enough to go the full Monty. Is this FD worth it? You could upgrade from the Power FC to a Link and get smart coils. This also future proofs the car for later mods? All costs $$$ *The series 5 Rx-7 had a (stock) function that if you started the car with your foot flat to the floor on the accelerator it would disable the fuel pump to make it easier to start if it was flooding? Apparently flooding was a huge fault of the Series 4. Do FD’s have this or is that negated the moment you install an aftermarket computer such as your Power FC?1 point
-
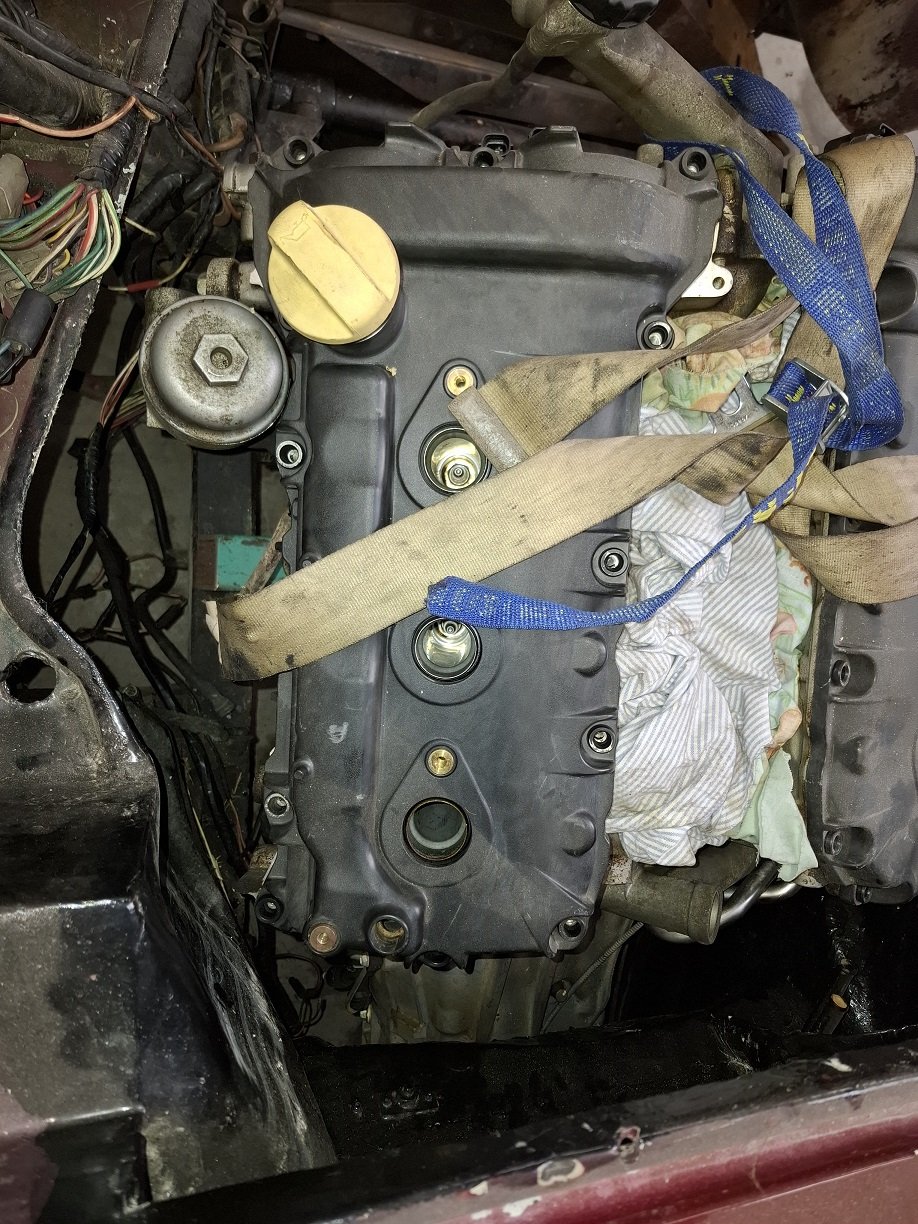
so with the new air seperator cap on, the cooling system has finally been able to build to operating pressure. which of course means all of the leaks have now become apparent. Including the water lines that somebody secured with zip ties, wonderful I ditched the plastic AST at the advice of everyone and fitted an aluminum one as the original one is apparently a hand grenade Then it developed a misfire, and then I got too cute moving the thing around the workshop in small trips and inevitably flooded it, lesson learned. So. Changed the plugs (very wet and very worn), dribbled some ATF into the chambers, and it fired back into life with a hiss and a roar, or rather, a miss and a roar and a LOT of smoke. Decided to pull the leads off and check them. #2 leading was having none of it yeah that'll be the misfire Mazda had the forethought to put the coils in the dumbest fucking place on earth, so I had to pull lots of bits off to get to them. My wife walked past at one stage, saw the mess and said "I guess that's the end of that then isn't it" One silver lining is that I was able to take the throttle body off and get a real good look at the fast idle adjustment (which is on the back side of the throttle body because it was designed by the same guy who mounted the coils). found a wear notch in the idle stop cam which probably caused some of the weird surging idle, dressed it out. I'm conscious that with the age of the car, anything still original on it is probably getting towards the end of it's first life. I don't really want to just clean out that coil and use it as-is. I definitely don't want to put them back in that location. The stock coils are apparently good enough, but they're pretty pricey new from mazda. And the engine bay is cluttered, there's no really obvious candidate for relocation. So again I'm staring down the barrel of spending lots of money modifying a car that I never really intended to go crazy with, because the alternative is spending lots of money building stock problems back into it I'd add more (not particularly interesting) photos but I'm not savvy enough to resize them.
1 point
-
I used to have 4 Orion Extreme 15" dual voice coil subs in a civic setup in Isobaric many moons ago that gradually unpicked many of the spot welds. It was utterly stupid probably explains why I have tinnitus, it some how had a back seat still and was great at making people vomit as a party trick.1 point
-
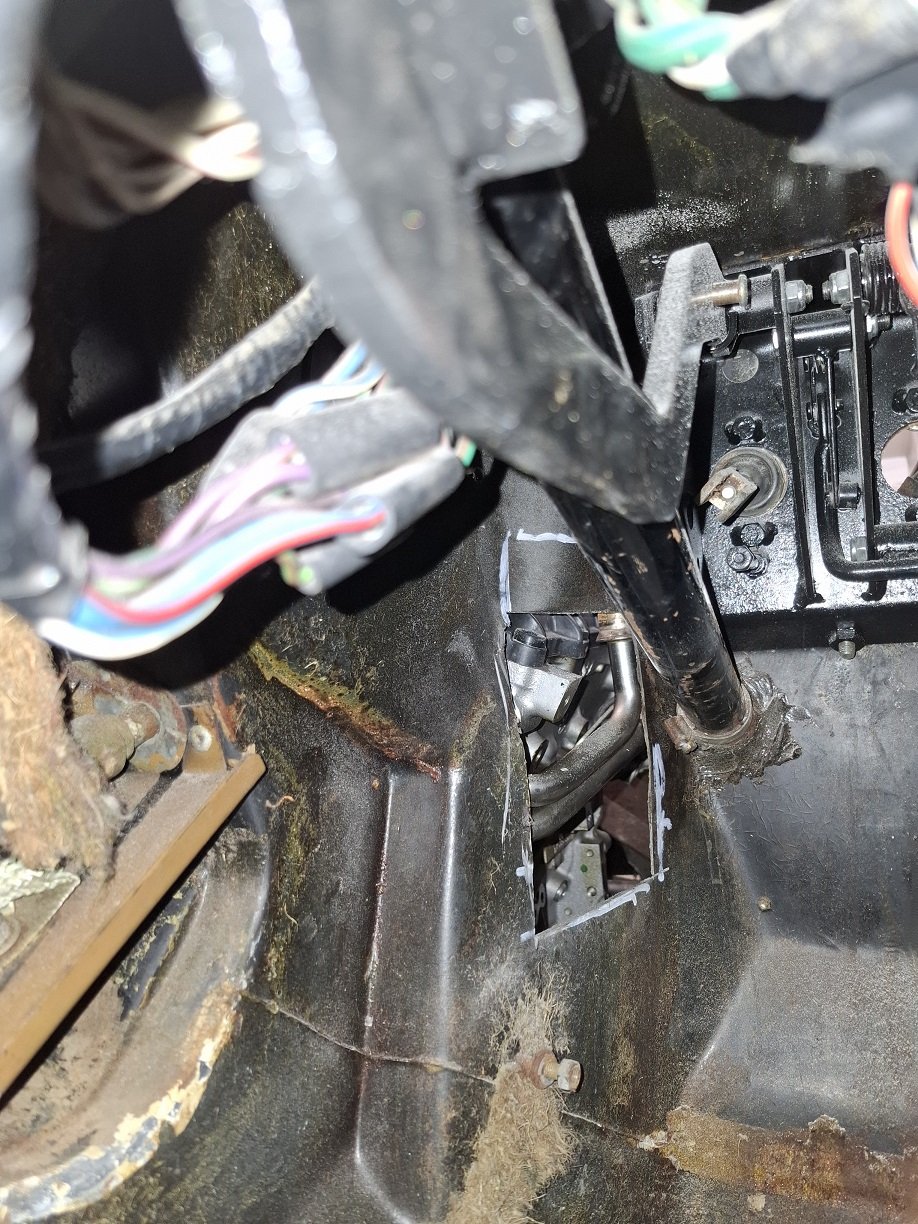
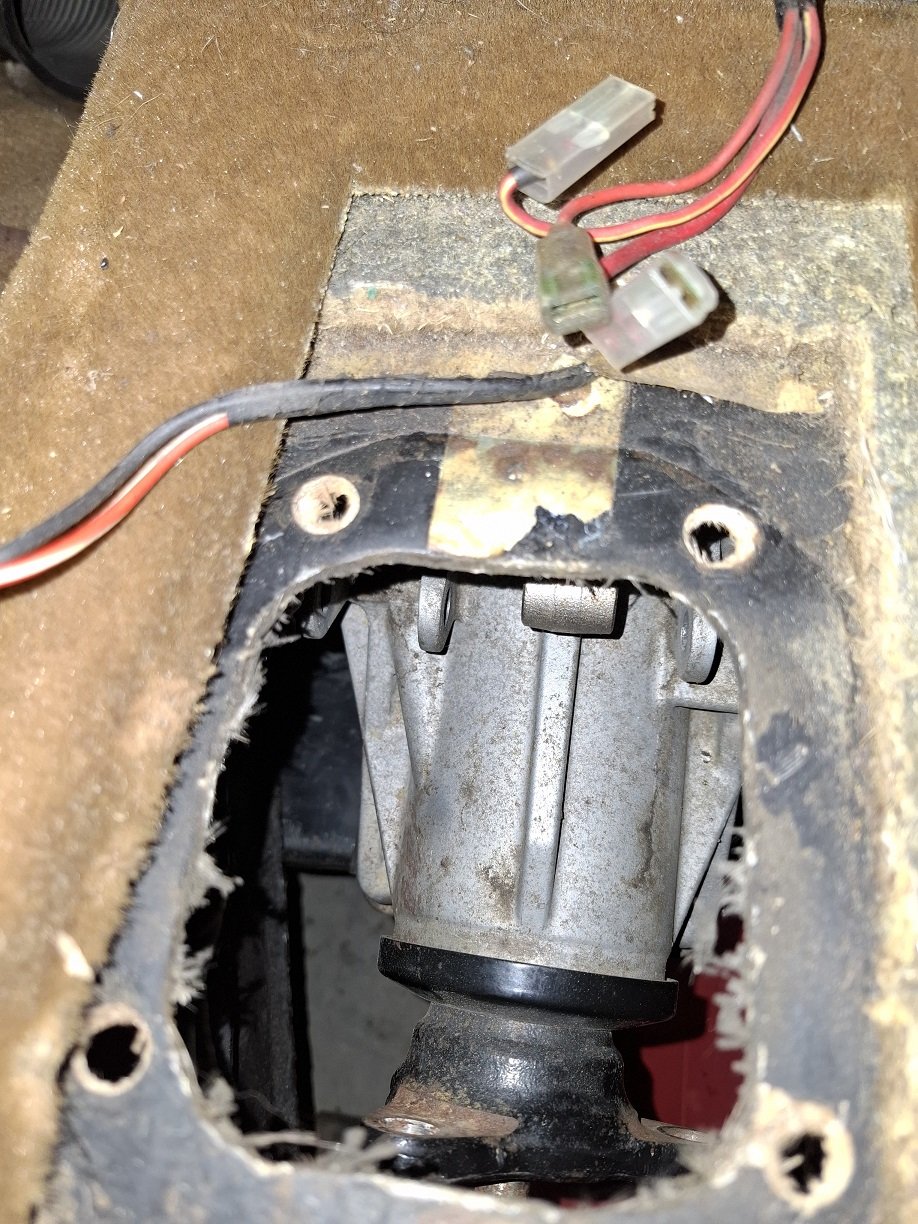
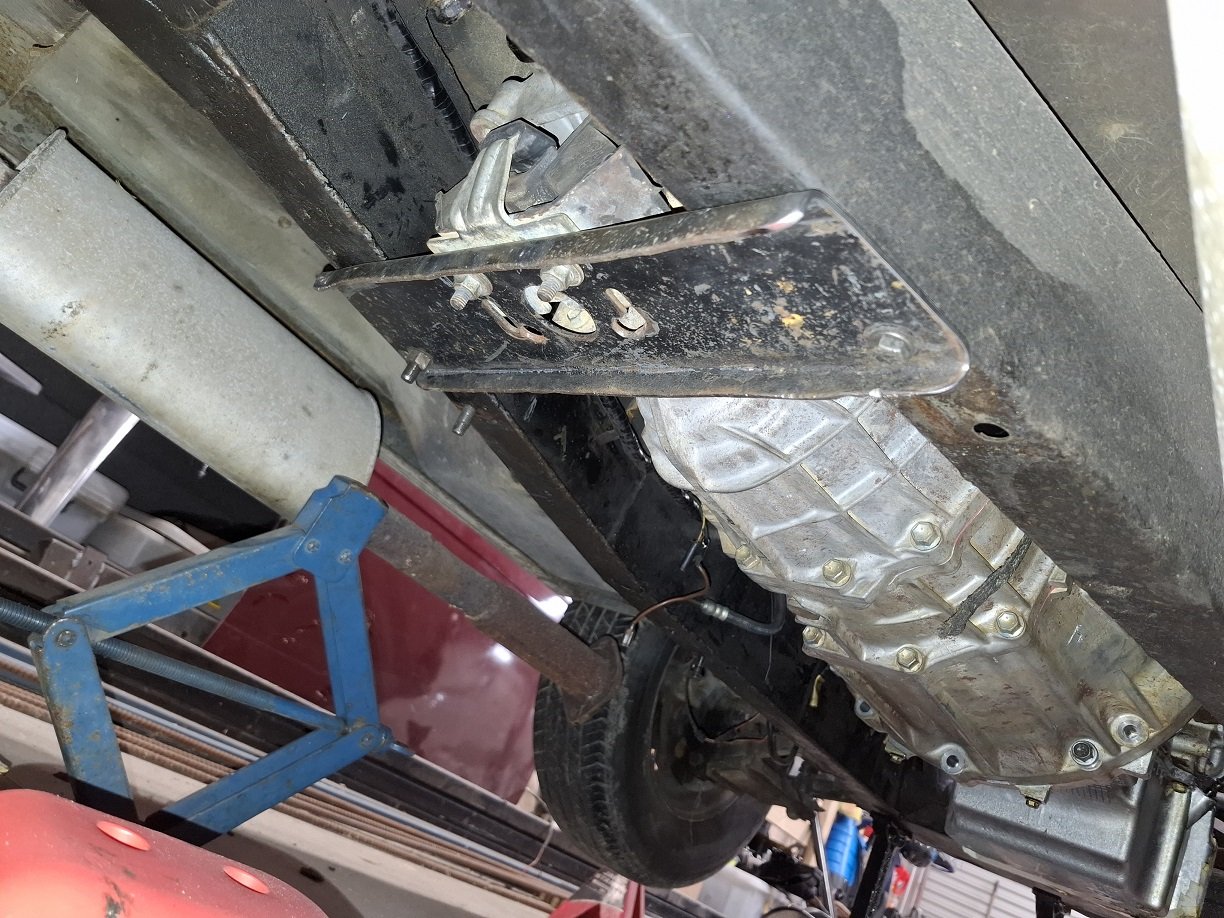
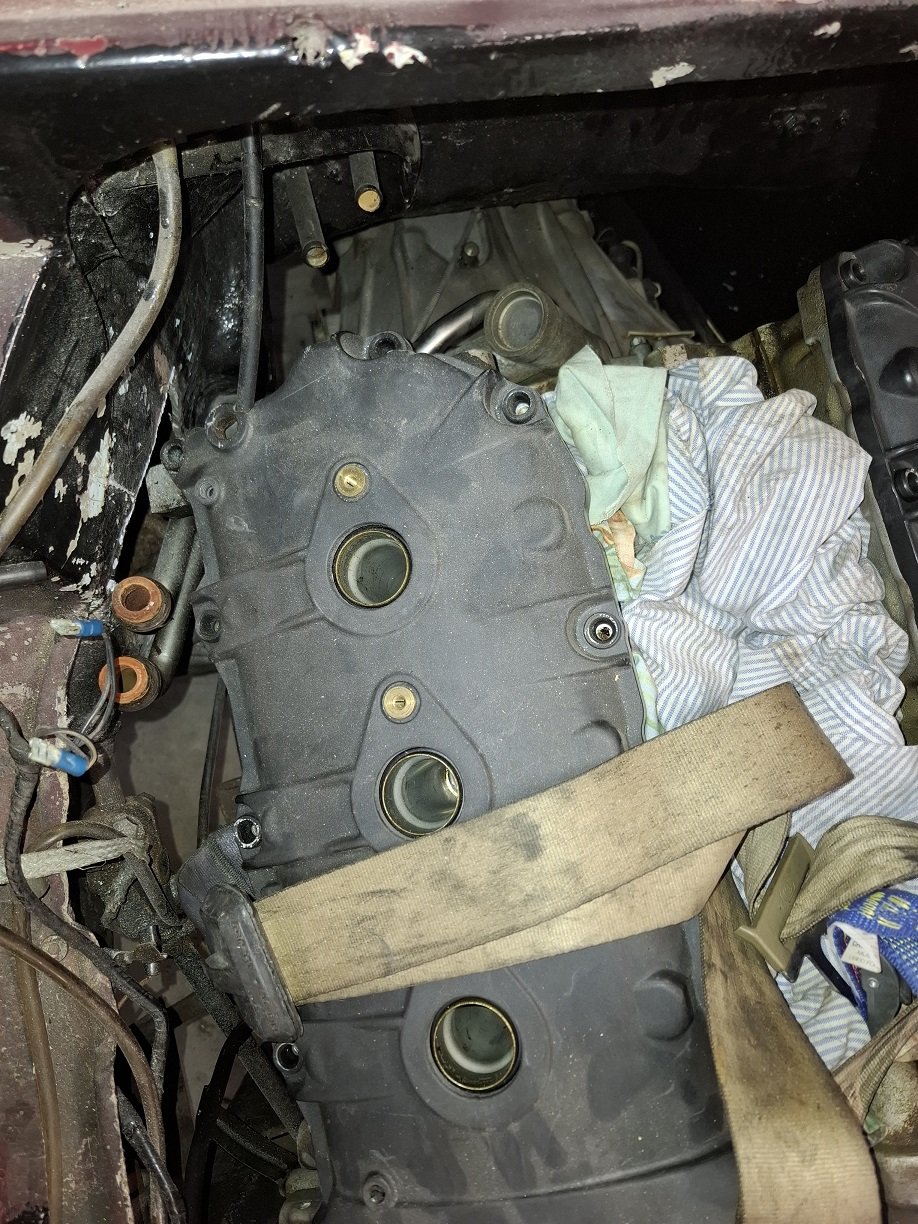
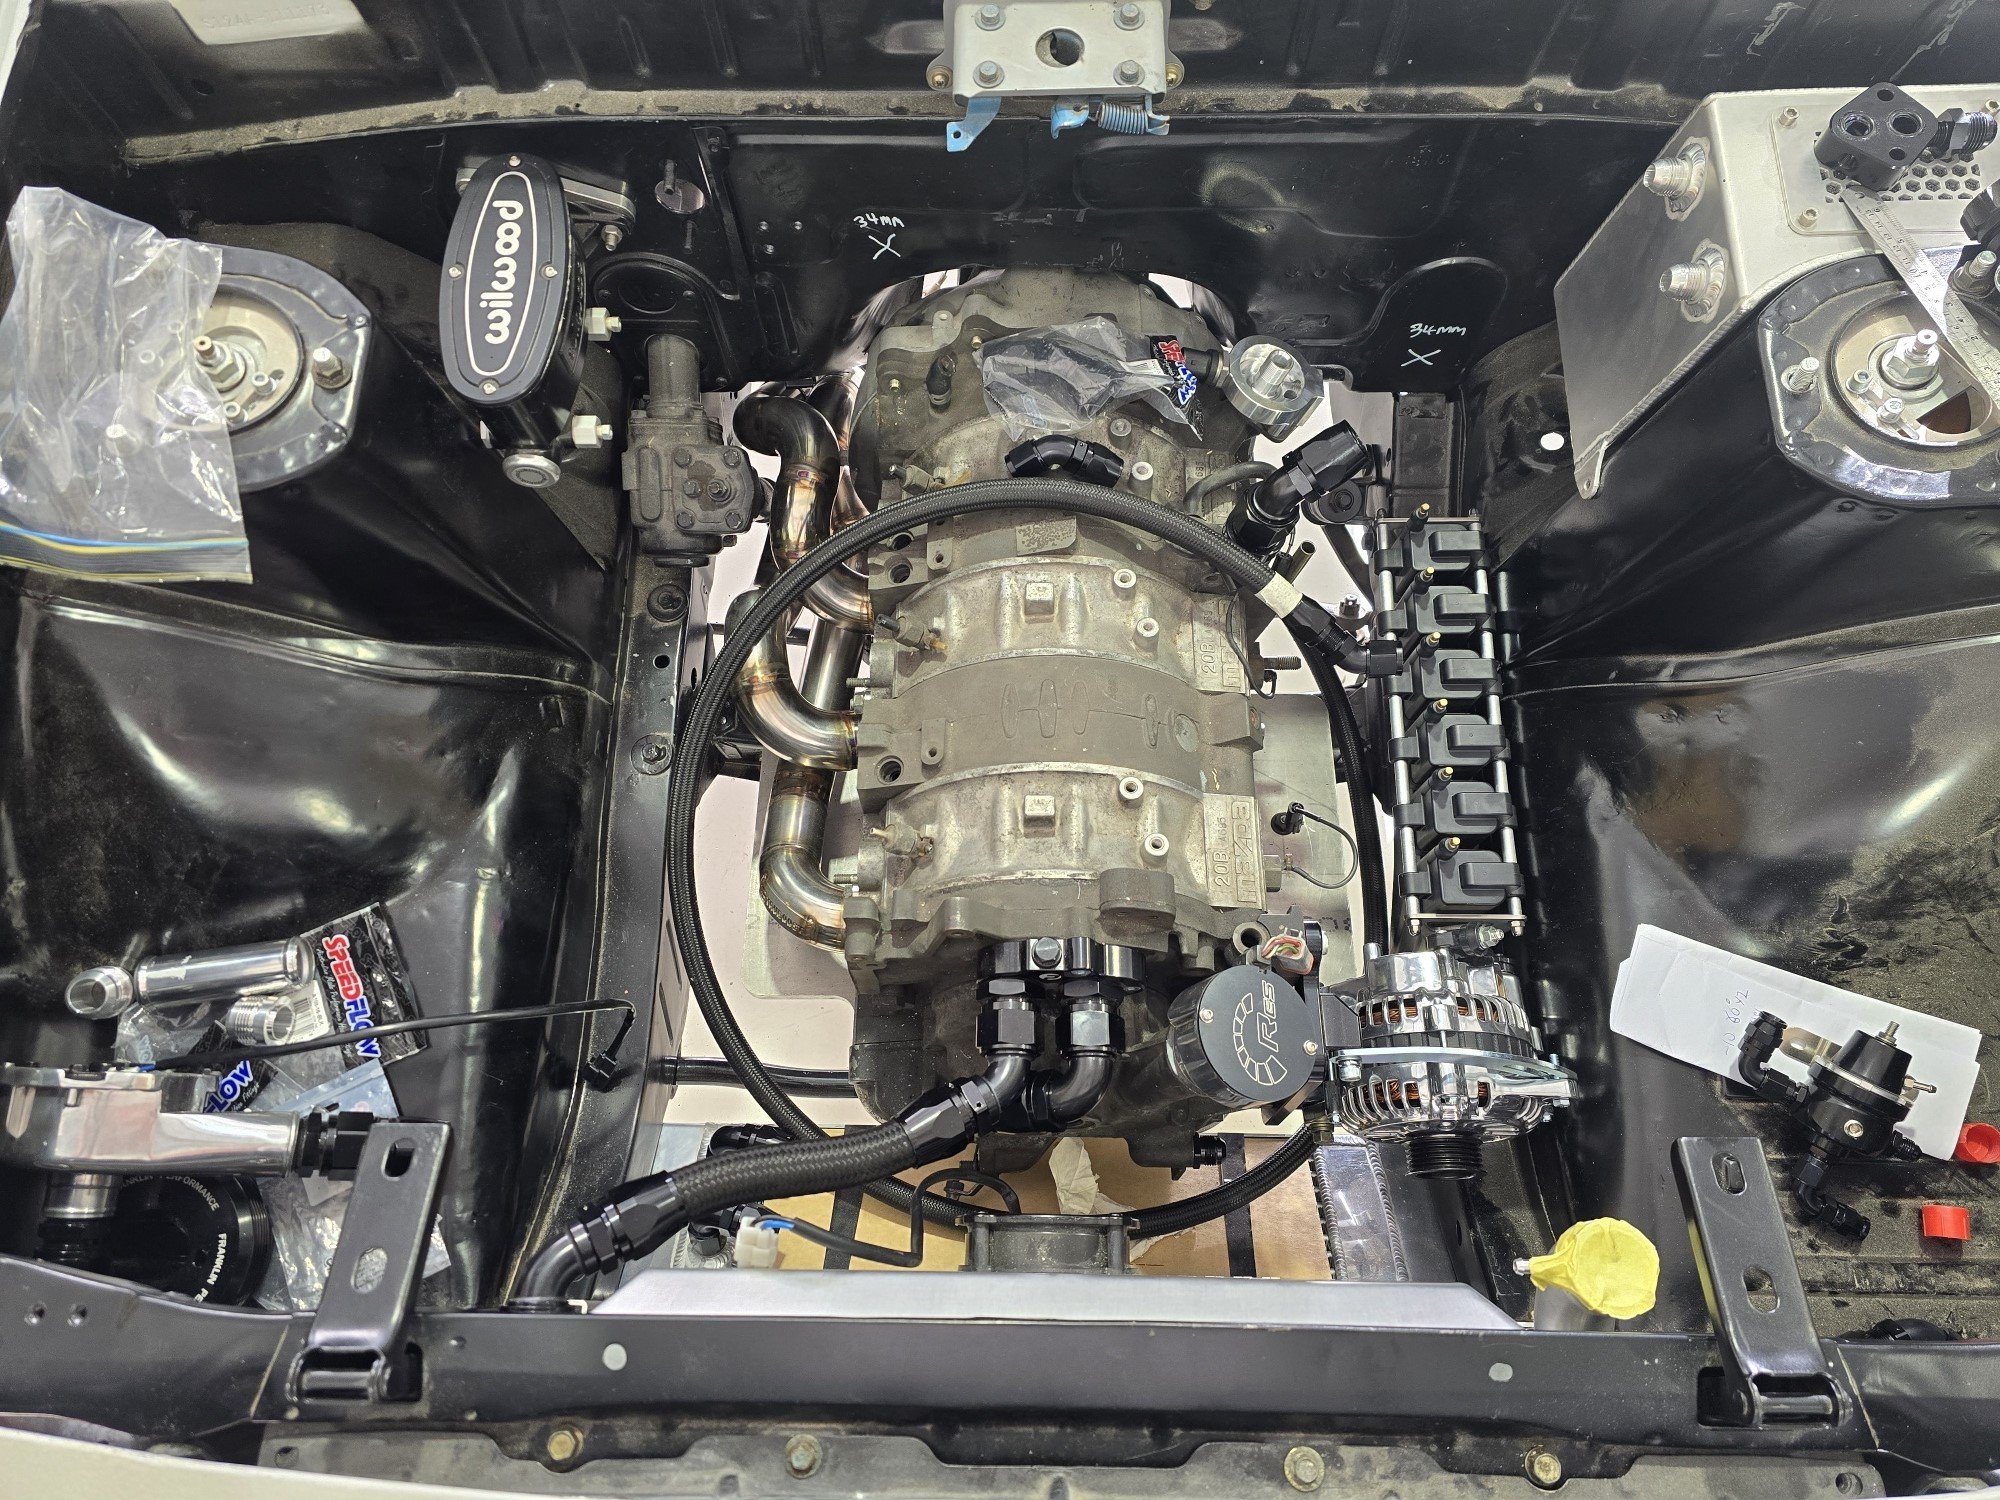
Spent some time getting the engine where it needed to be. Back corner of one head wanted to be in the same place as the footwell/bulkhead. The small amount of intrusion. Flipped the gearbox xmember backwards and it got close enough to work with a couple extra holes. I'll modify it a bit more to lift the box a little. As well as needing extra captive nuts in the chassis. Gear linkage didn't come with the box, they sell it separately, it also sits way too far back, so I need to make one. Or maybe adapt one from a K11 for the lolz
1 point
-
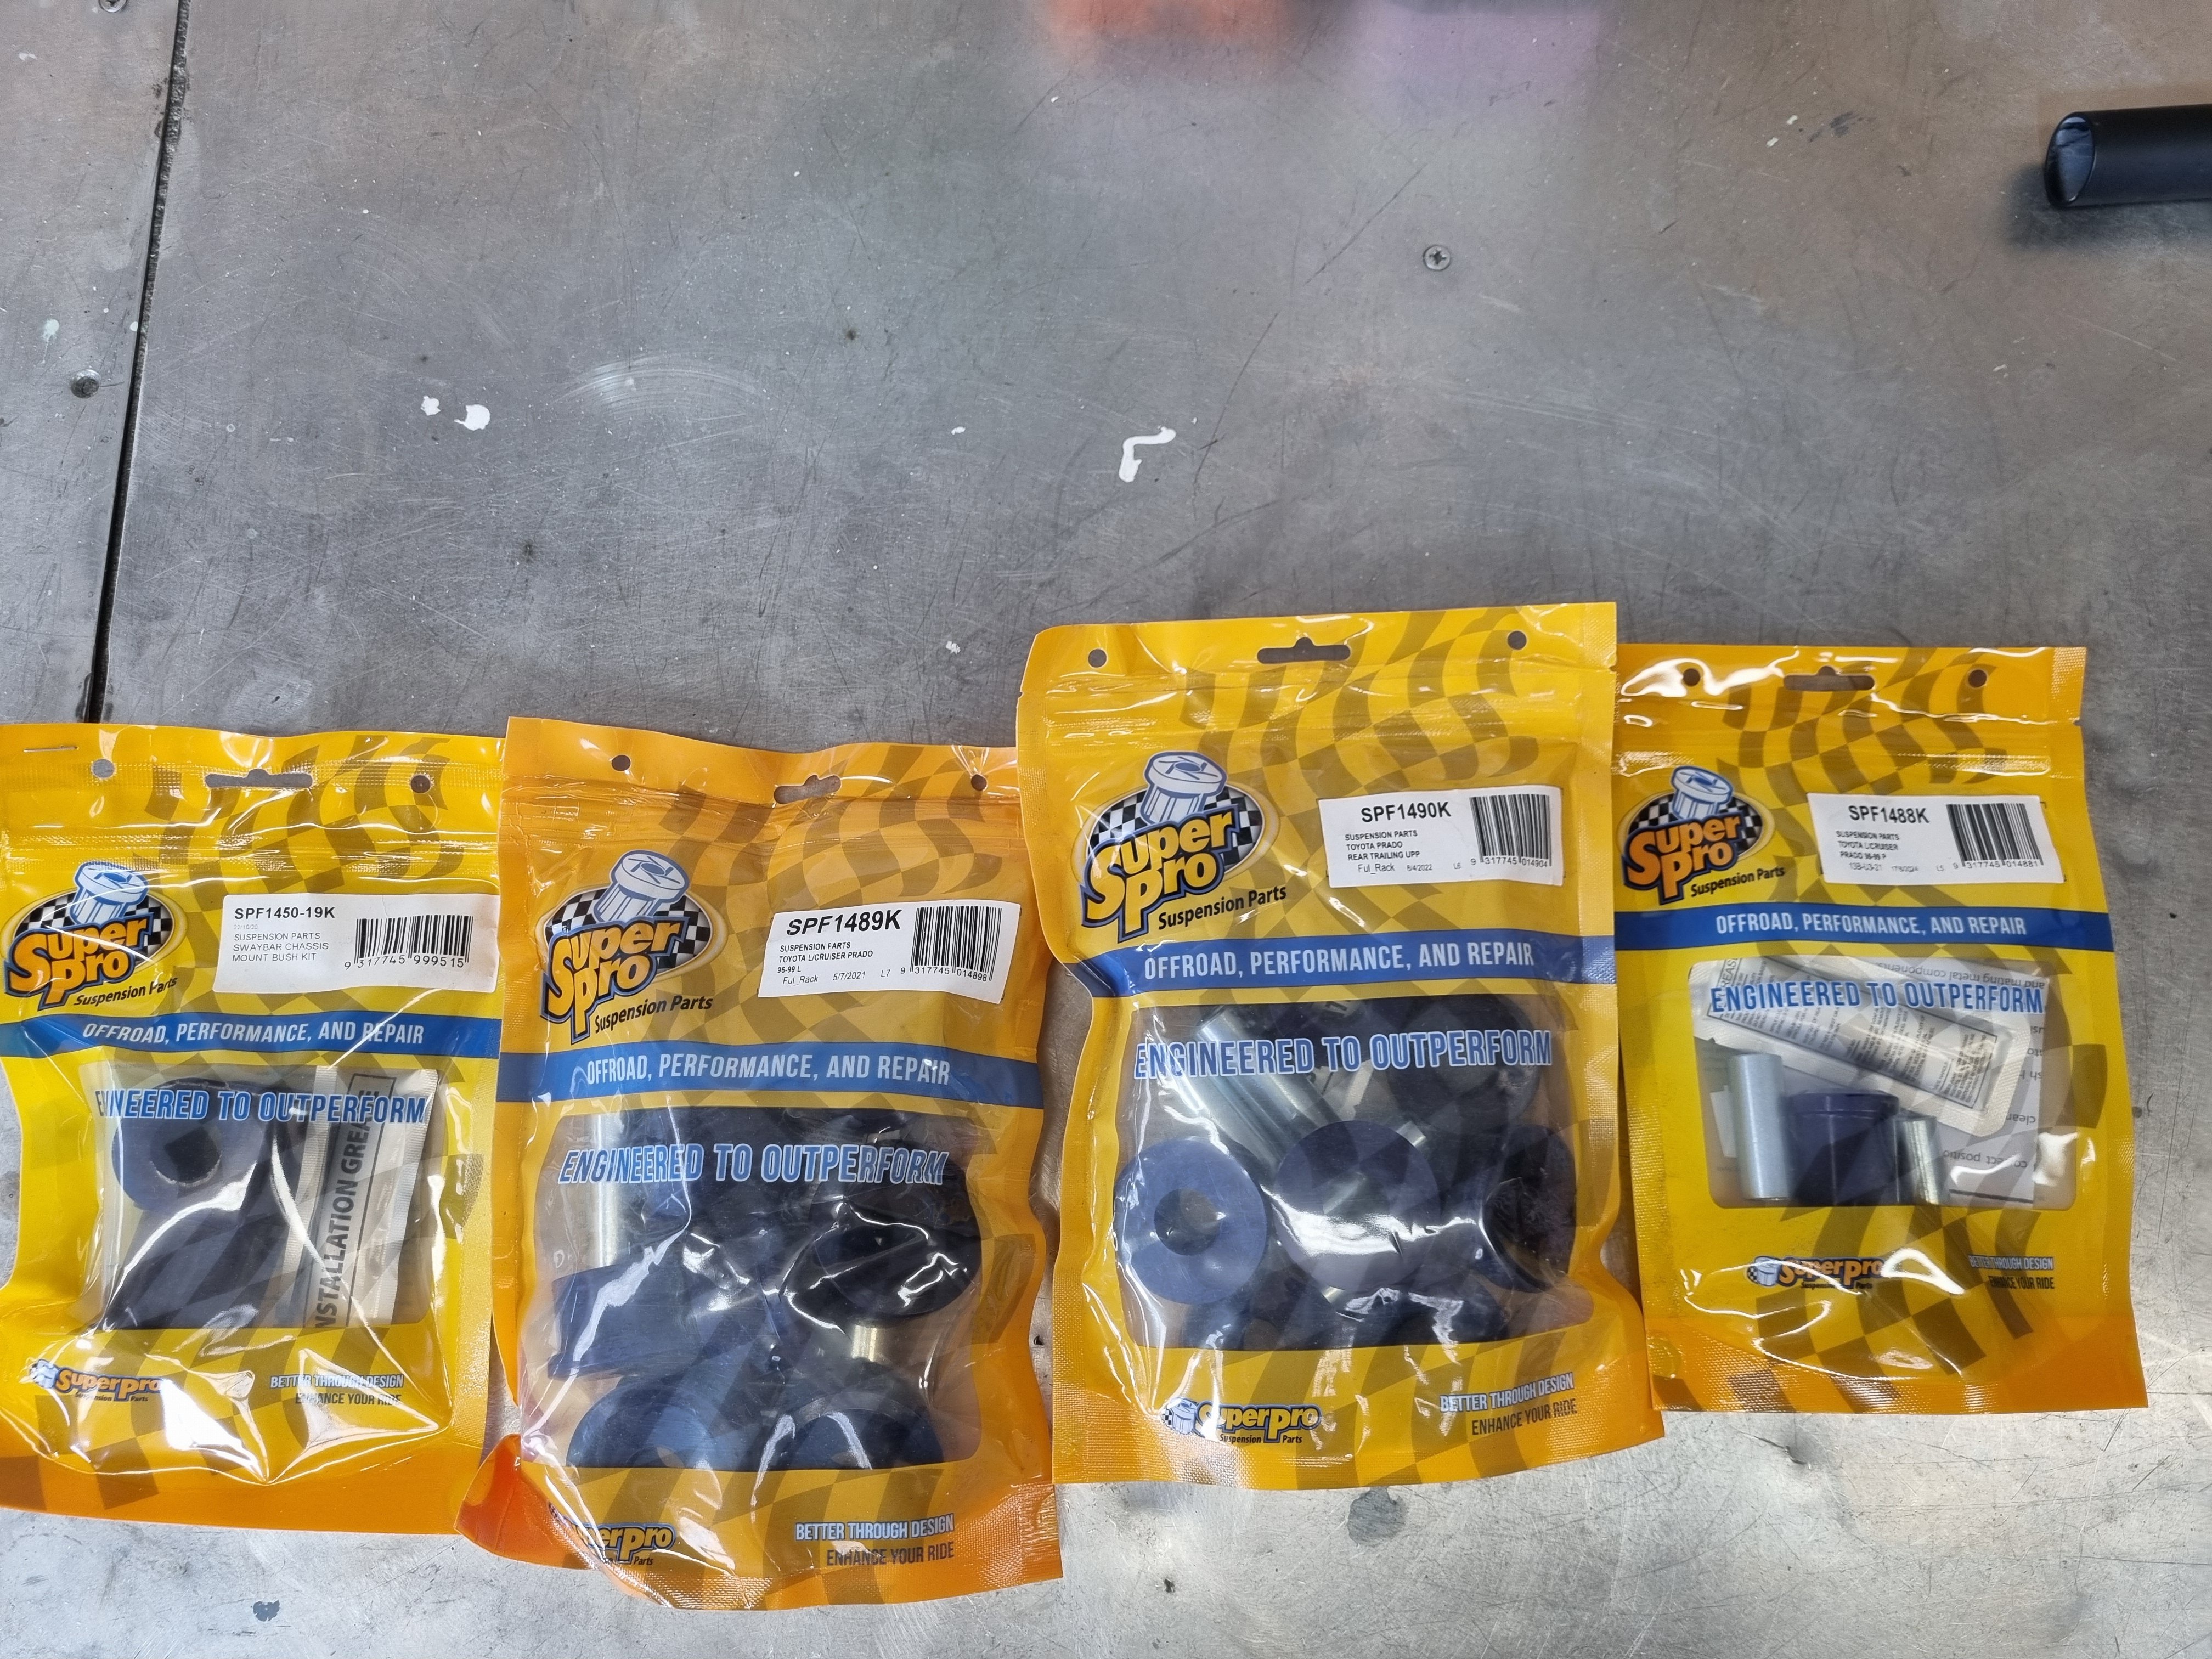
Put all new bushes in the rear. Trailing arms, panhard and swaybar. I think it's already been done once before, the rubber bushes came out fairly easily and they had no outer steel sleeve I had to fight with so I'm assuming not factory. Anywho they were a bit fucked and I changed them. Does feel better in the bum now.
1 point
-
Think the 20mm rule is for spacers, 30mm for adaptors1 point
-
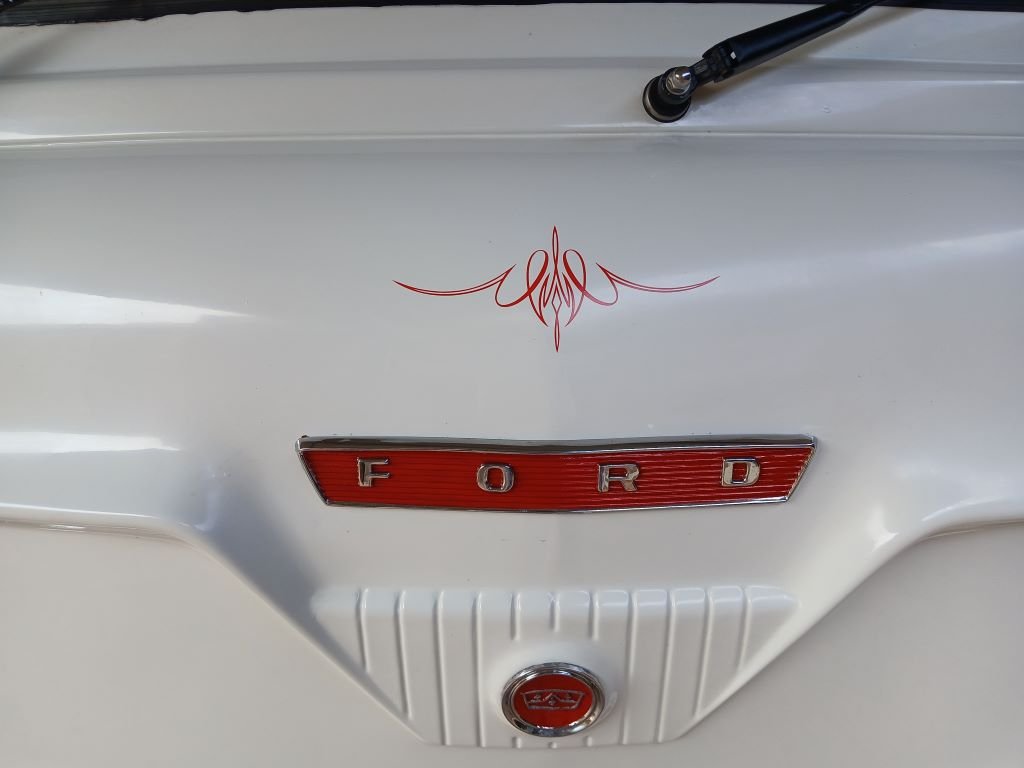
A mate of mine custom made an old style engine cover for his modern engine with period correct old style paint and graphics. At first glance you think cool old engine, but then on second look you realise the truth.1 point
-
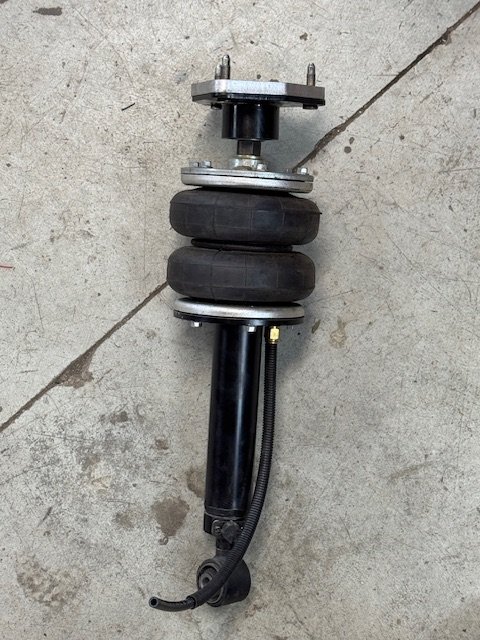
made some new Top Hats for the rear. As it went too low and wouldn't raise up high enough. Was a right pain trying to get into driveways without smashing the bumper on the ground. Was a lovely day in Whanganui for their annual show at the high school. Same at Levin's show. Taking a brake from this for a while. We did get a commercial sewing machine, so going to give Upholstery a go. Also needs Painting. But in the mean time ive brought an 84 C10 to try and get just as low. So will just keep driving this.
1 point
-
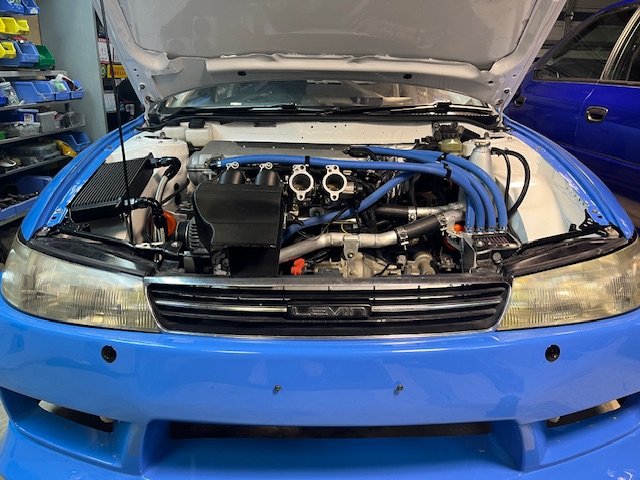
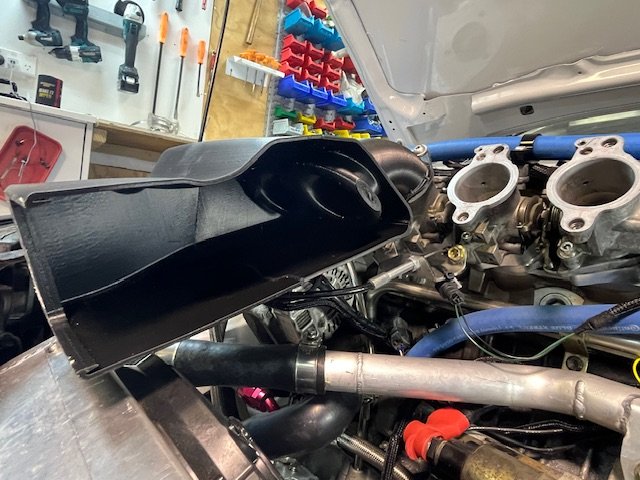
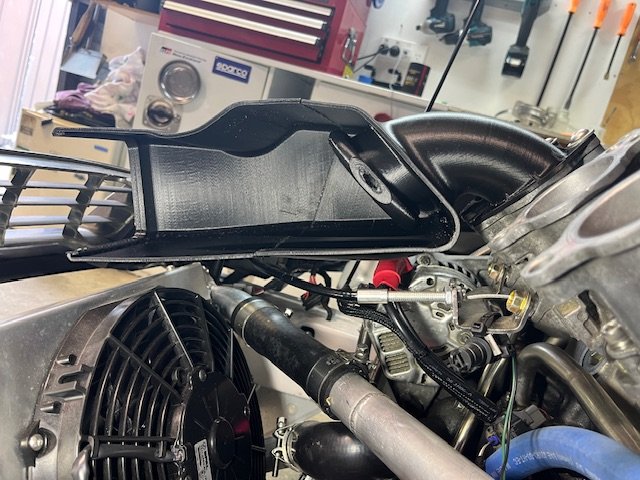
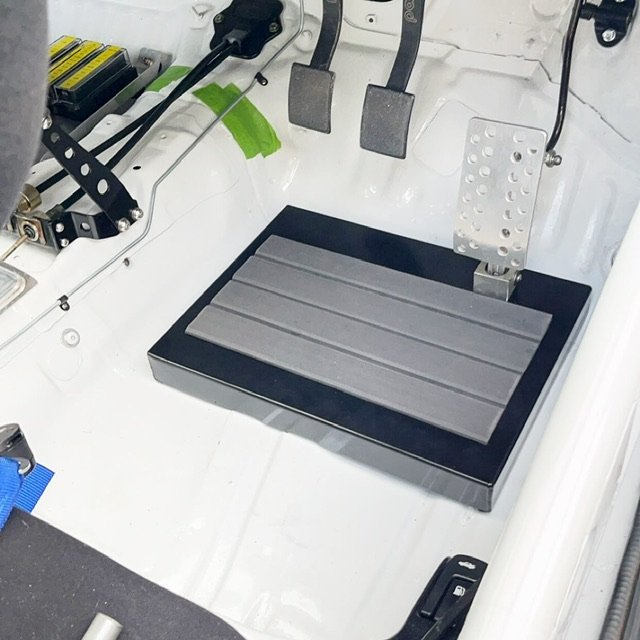
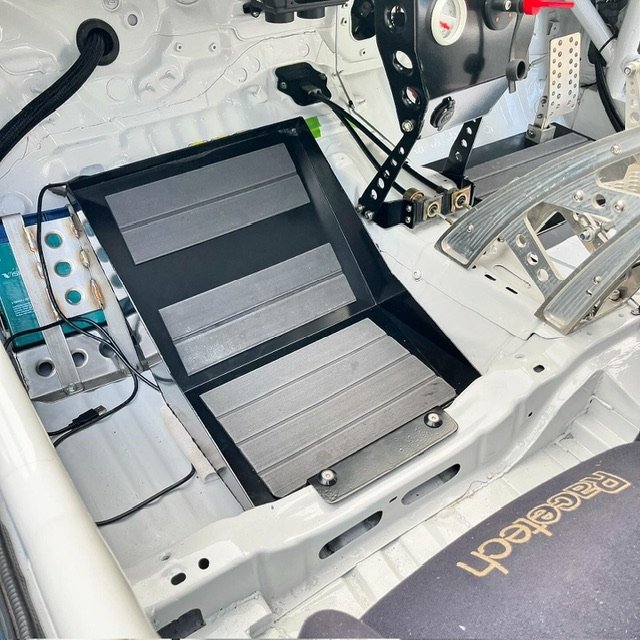
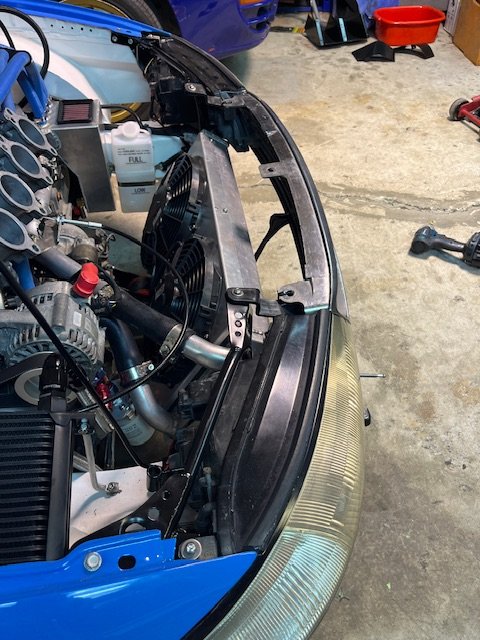
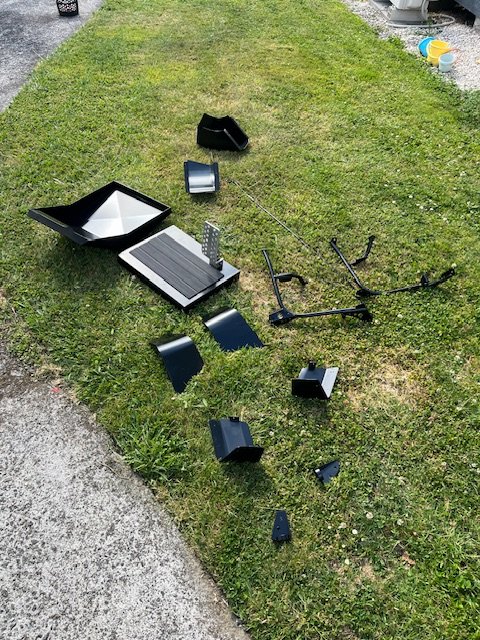
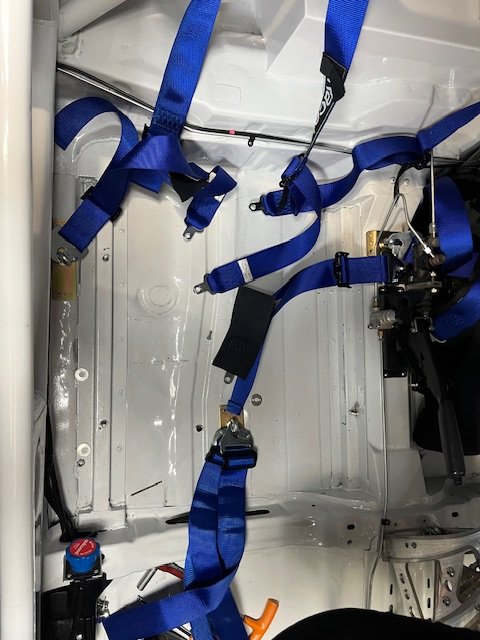
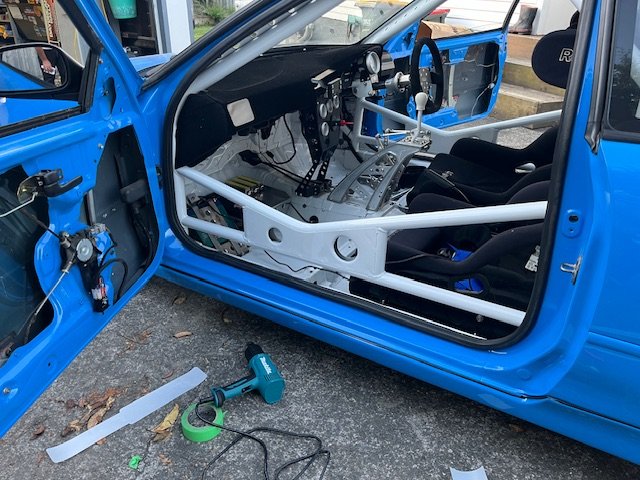
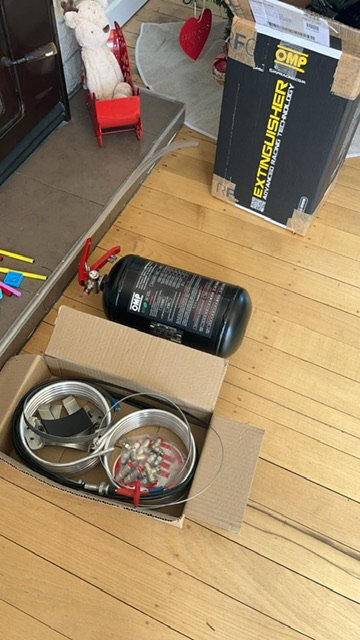
Wow where to start. Lots of little things starting to come together that have been ticking away in the background. First wee job was to apply 3m ppf to all the rollcage members. I knew as soon as I put belts in the car they would be forever chipping the paint. Very satisfying and can hardly notice the film. So next job was to mount seatbelts. I bought a matching set of belts from racetech for passenger seat and started figuring out how to mount these as be schedule A. Was an absolute prick of a job not made any easier by the passenger seat being directly above where the fuel lines run, and the fact that both my seats are slammed so low you can’t even get an eye bolt under them.. because touring car things of course.. Ended up opening a hole in the chassis rail to slide a 40x100mm plate inside for the passenger one. But very stoked to have this done. Have been chipping away at rollcage padding with the hard sfi foam. Quite fiddly to get fitting right and also need to buy some more to finish the job it’s pretty expensive stuff! Sorry no pics because I still haven’t accepted if I’m happy with what I’ve done 😂 Dropped a load of parts off at the powdercoaters. This should hopefully be the last batch and is lots of bits that will make everything look a little more finished. Footplates look sooo good. Used some left over tuff deck EVA foam from a job on the boat. Should be durable and grippy when wet. Headlight support structures look super tidy too and blend into headlight housing well. Also pushed the go button on a plumbed in extinguisher. This will be piece of mind for my over-customised car, particularly around the hot exhaust and fuel systems. It’s a massive job to install these things, so slowly chipping away at it. Last bit of progress has been on the airbox. A friend printed a test piece of my airbox design so I could check geometry and design features. Generally, I’m very happy with it, although I did I get the geometry wrong by 30mm or so. This was an easy way to validate the design so all part of the process. Few changes I want to make to the design; - fix geometry - increase thickness of itb flange to 5-6mm - increase volume. #3 & #4 runners have a lot of extra space underneath. Ideally I’d like to get volume up to 25-30L - incorporate support stays in behind filters to keep shape/hold filters in if I ever create positive pressure in this airbox - Vee the two filter positions maybe 20deg or so to form an air damn in the middle, also encouraging to to flow to the outer corners of the airbox. Should minimise width and maximise filter area. So this is what it looks like currently goddamn it’s going to look sexy once finished, but still a very long way to go!
1 point
-
fuck this thing uses some gas1 point
-
one small sticker for a man, one giant leap for a man with a rotary
1 point
-
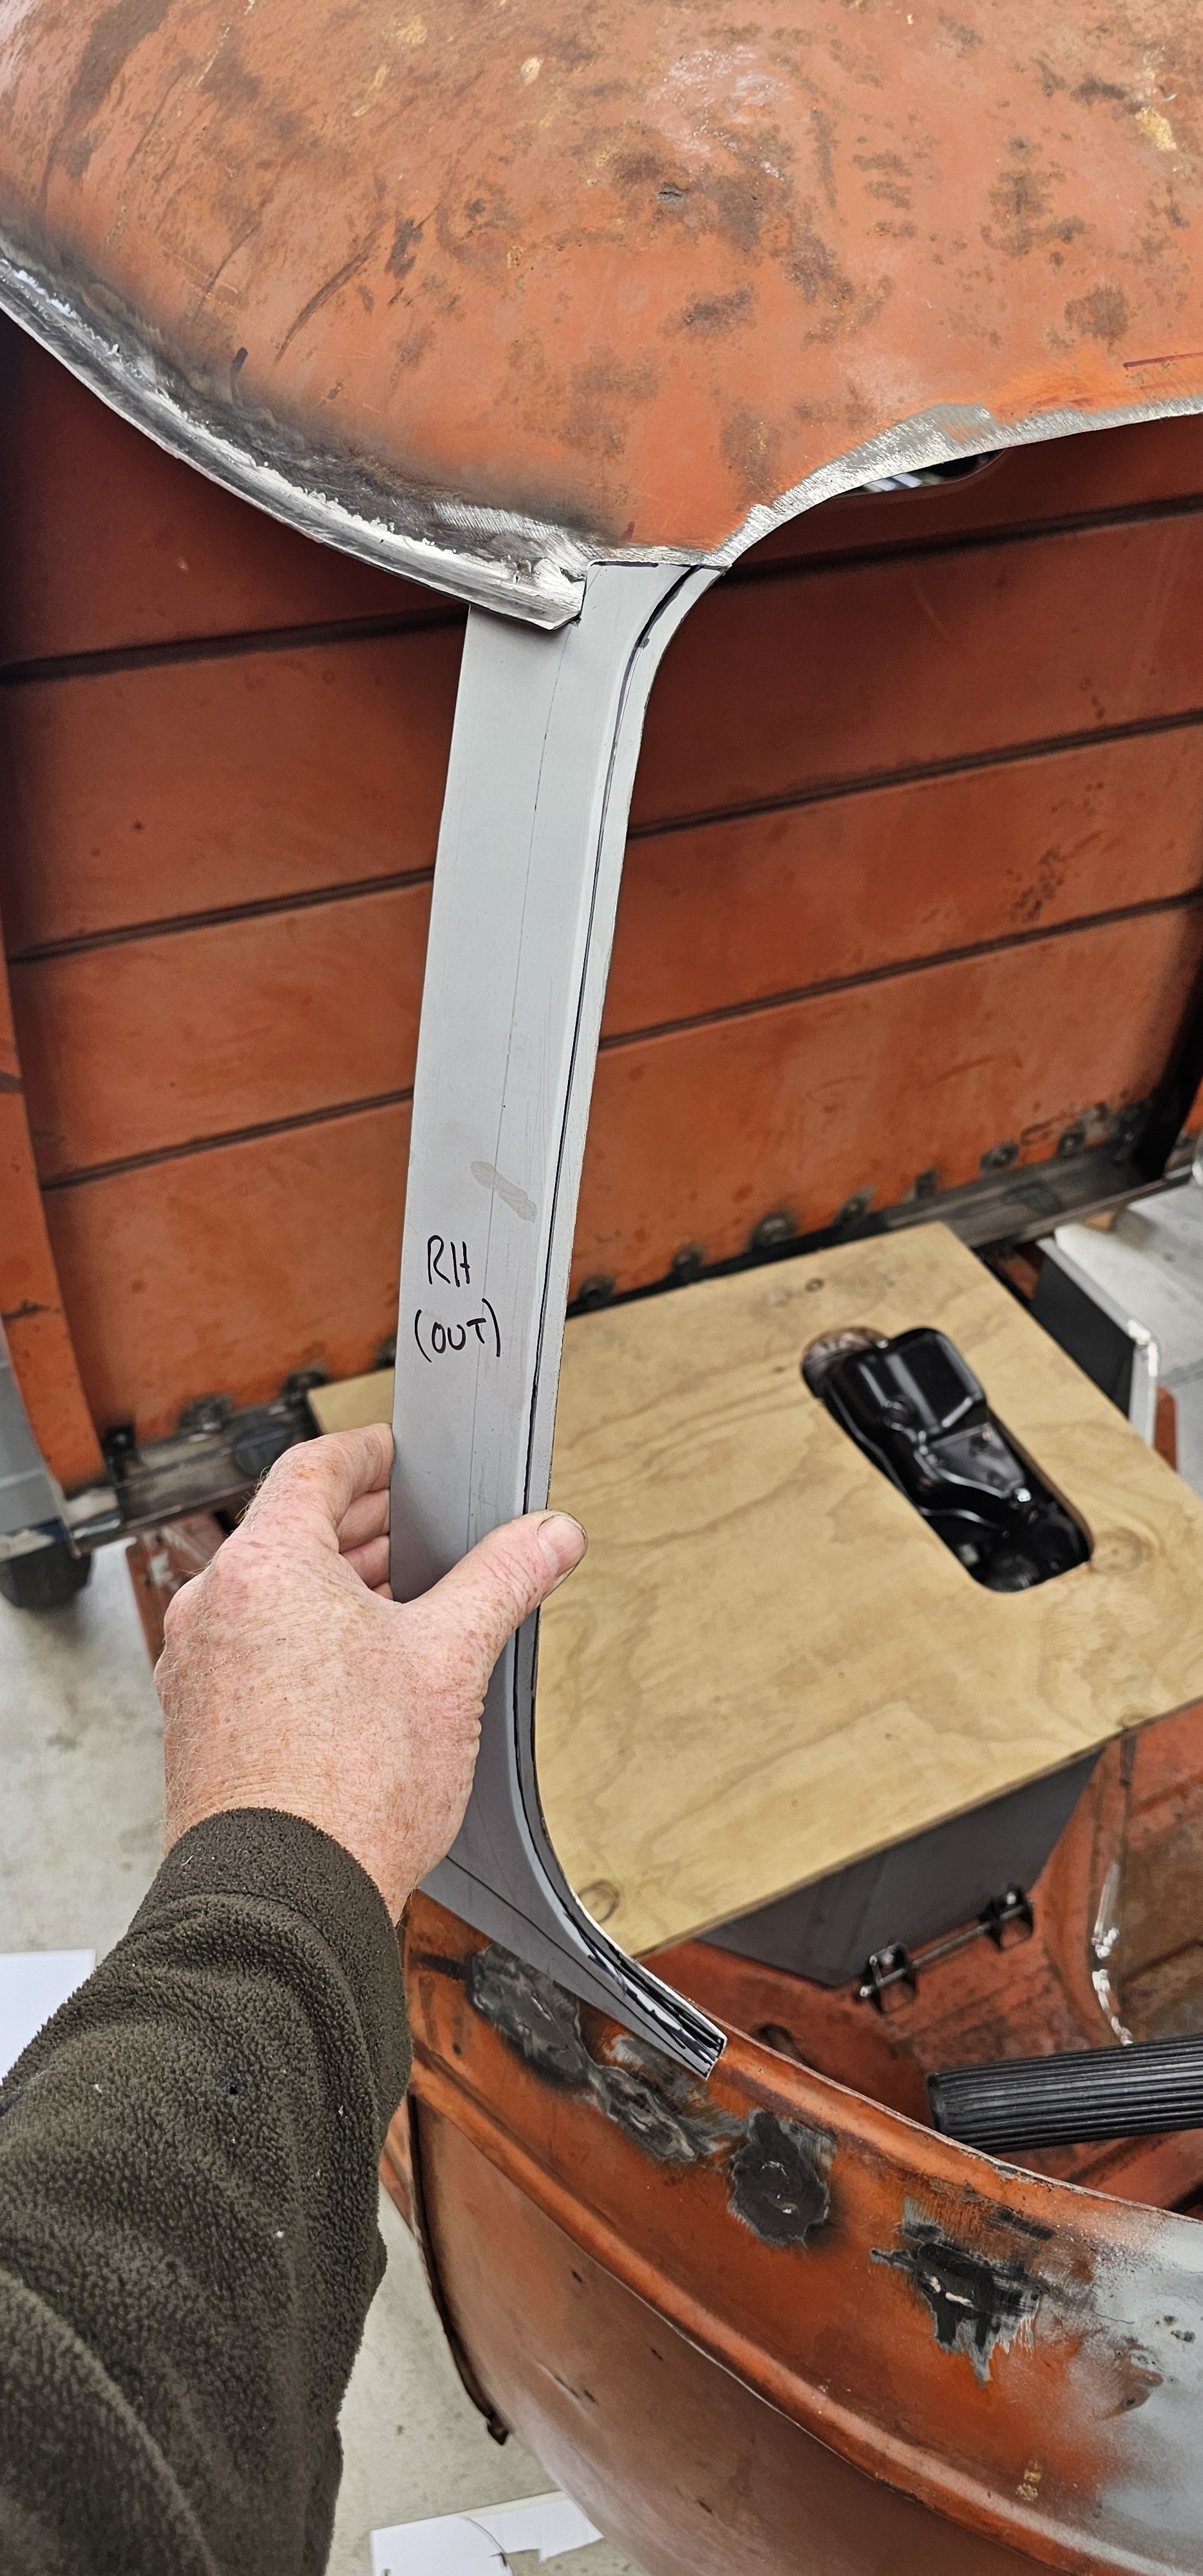
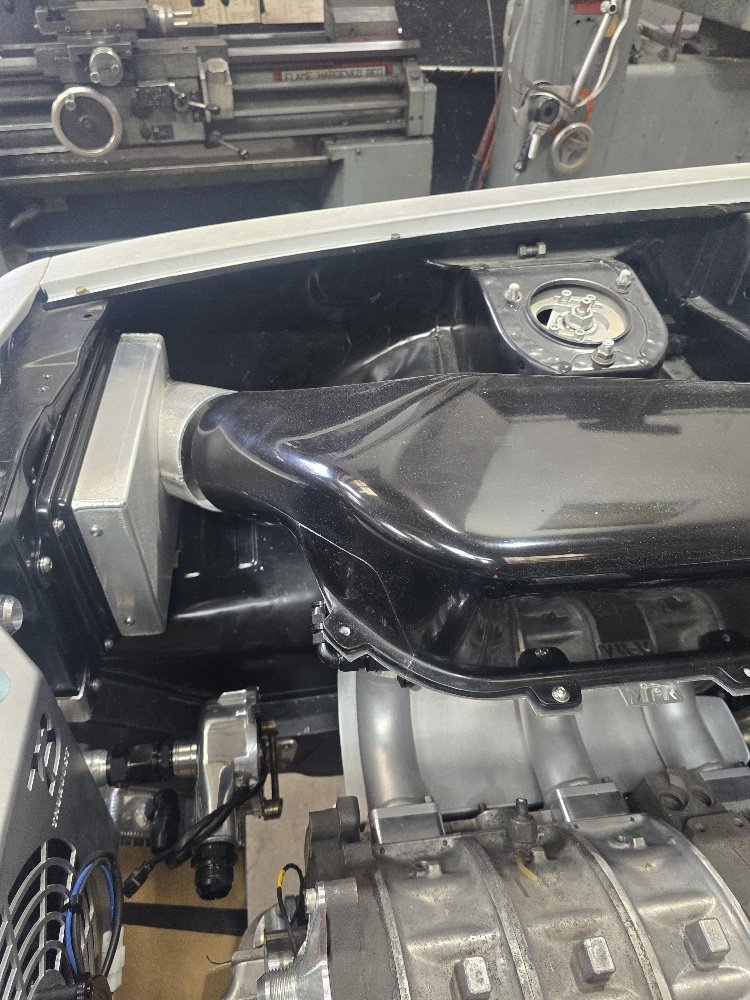
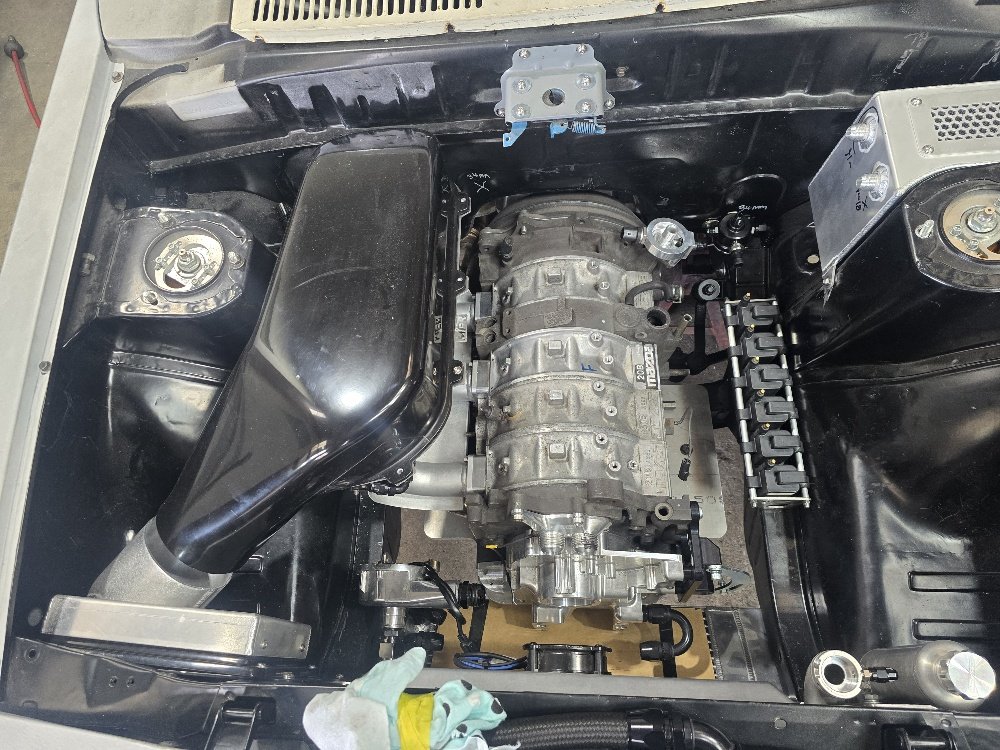
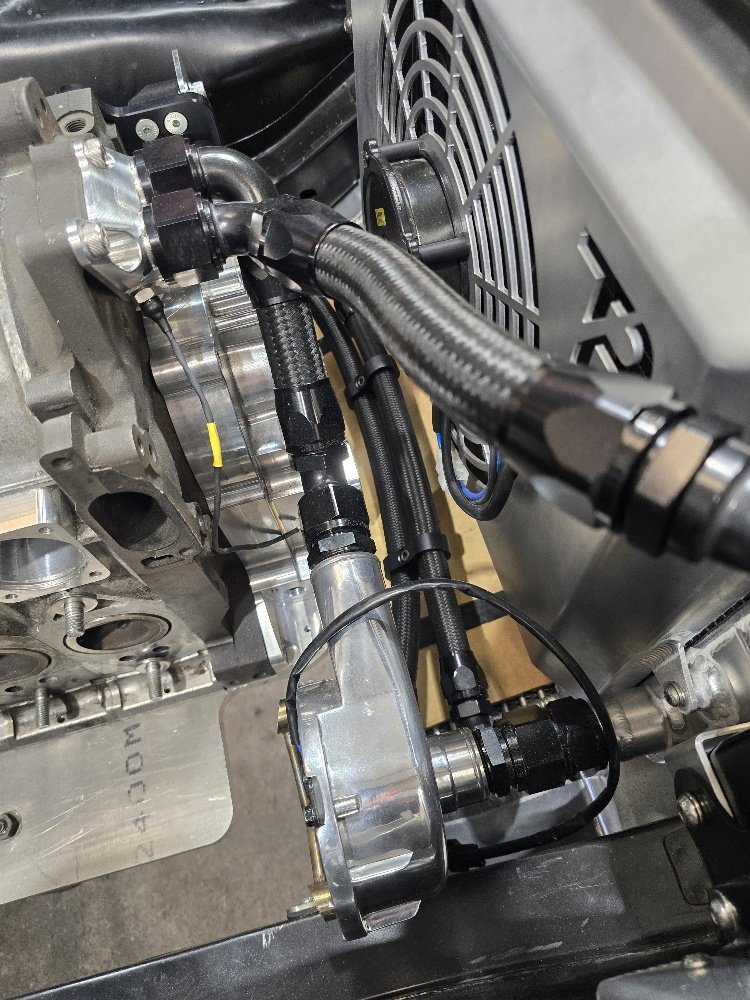
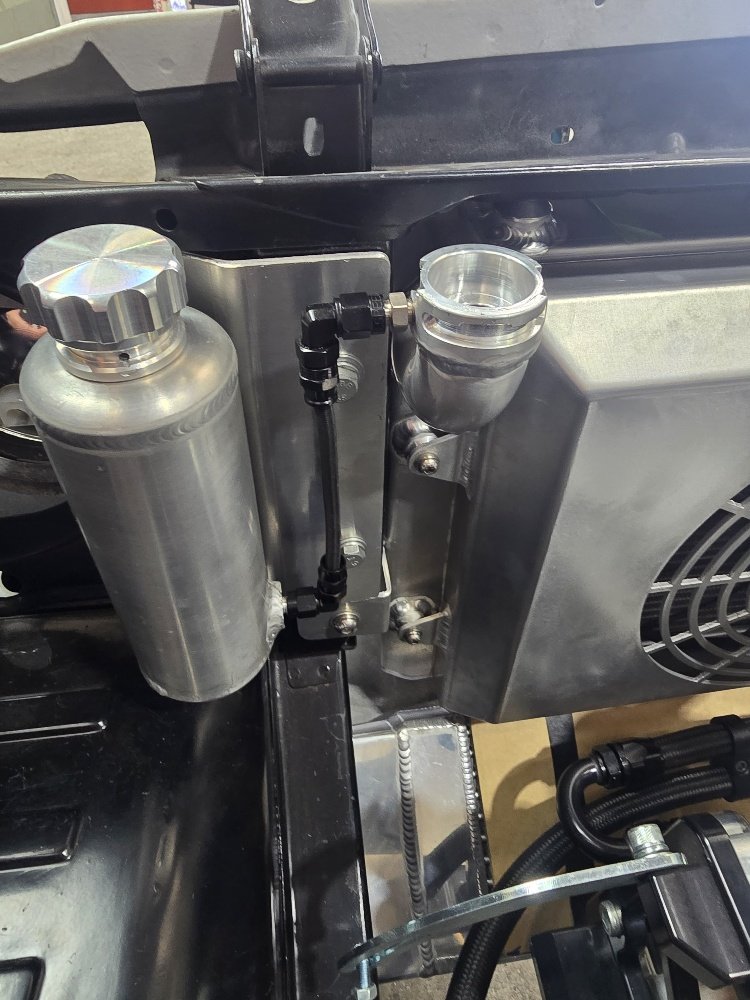
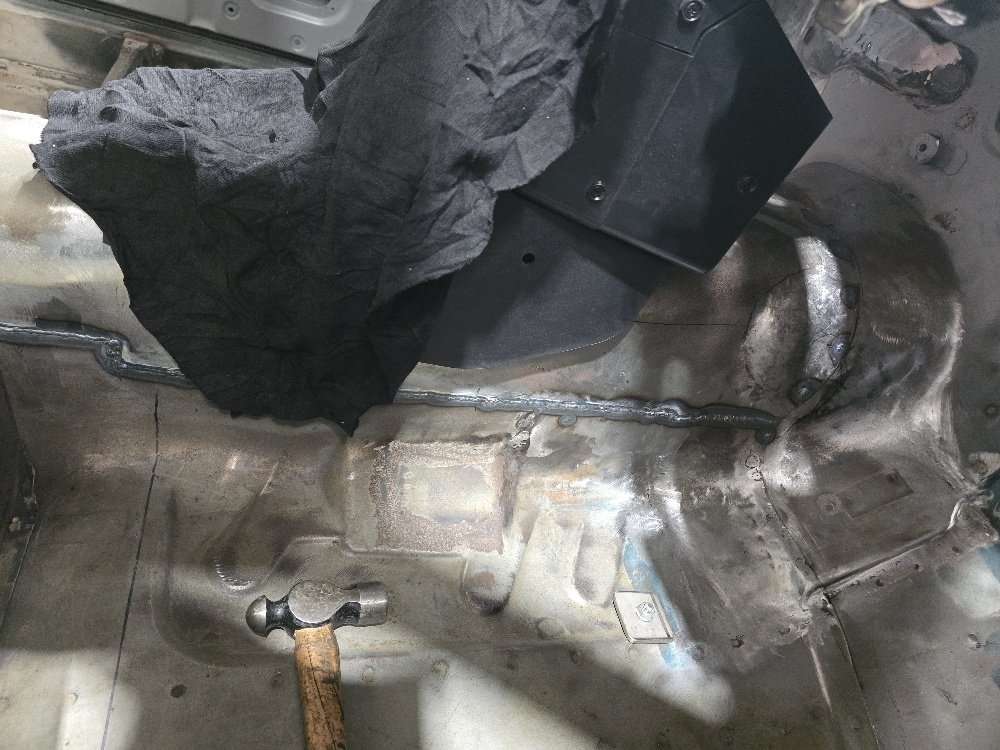
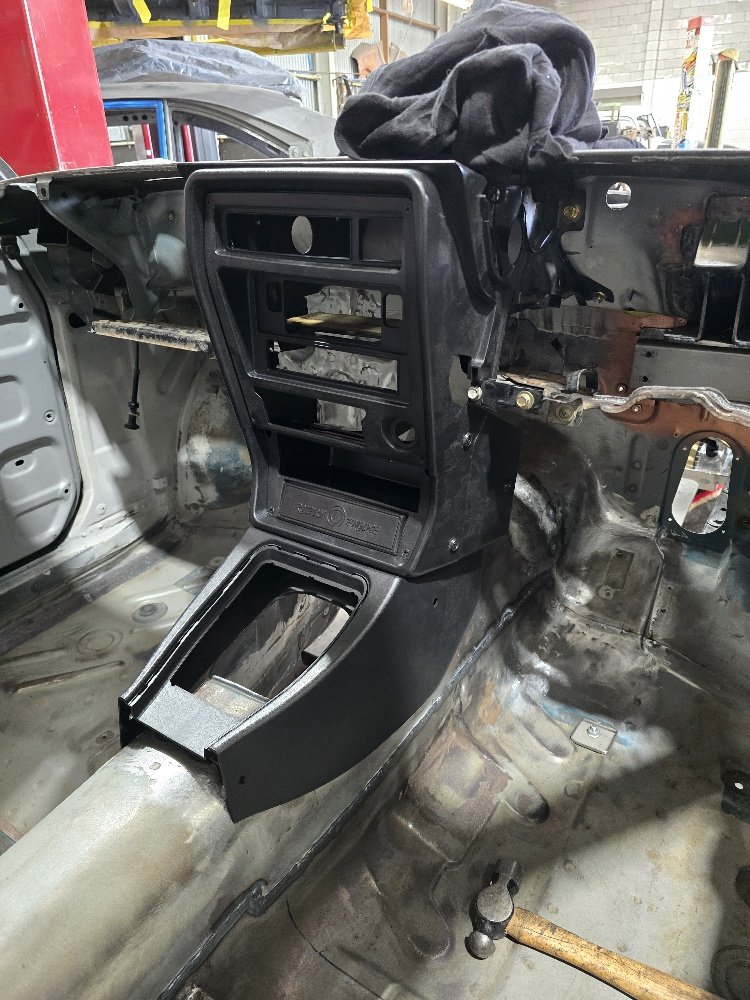
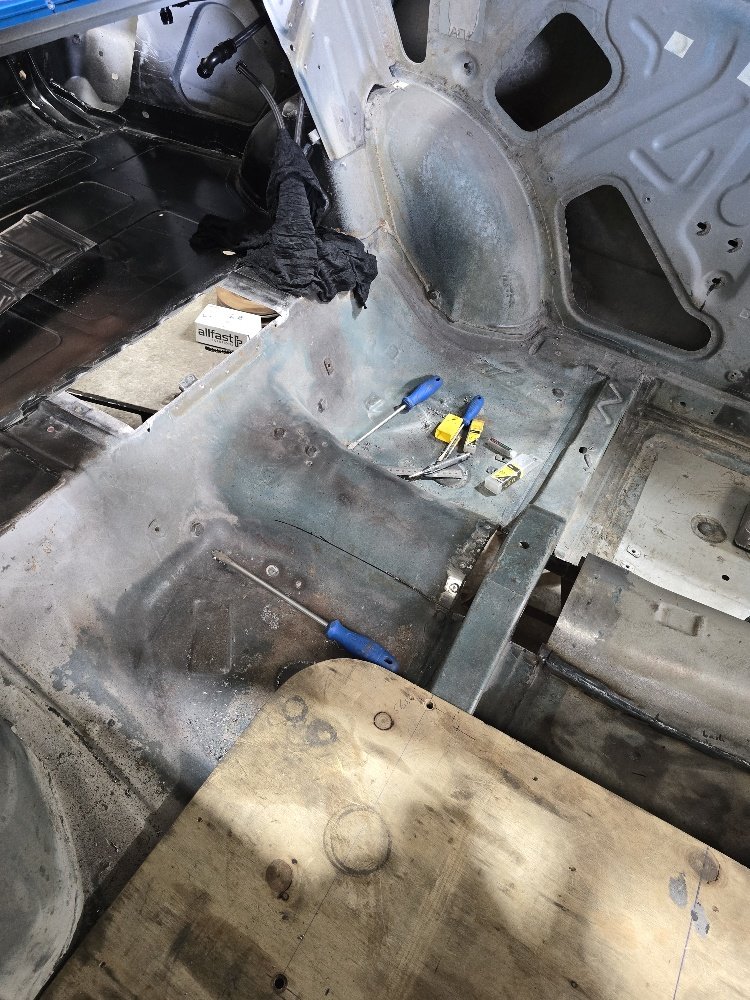
Dan and the team at Rocket down in Hamilton have been busy as! Tunnel raised 30mm and restitched in, did a bit of clearancing around the firewall/merge collector too to give a bit more space. Have plumbed up oil cooler, cooling system, mounted overflow bottle. Modified the MFR intake by cutting the back half off and folding up a new sheetmetal feed so it lines up better with the airbox intake. Modified the exhaust, moved resonater back from under driver to before diff so it can be tucked up into base of tunnel so hangs way higher, also cut exhaust and went under diff instead of over to add clearance. Can still run my centre console which im happy about was a key thing i wanted to keep with the modified tunnel so that worked out well! Few things left - Finish clearancing under rear seat/over diff head, - Brake/hand brake cables/lines - Modify rear tubs and rear rails to allow it to go a bit lower, now we have raised gearbox and d shaft tunnel its the last bit of clearancing thats needed to get a bit of extra slam. [
1 point
-
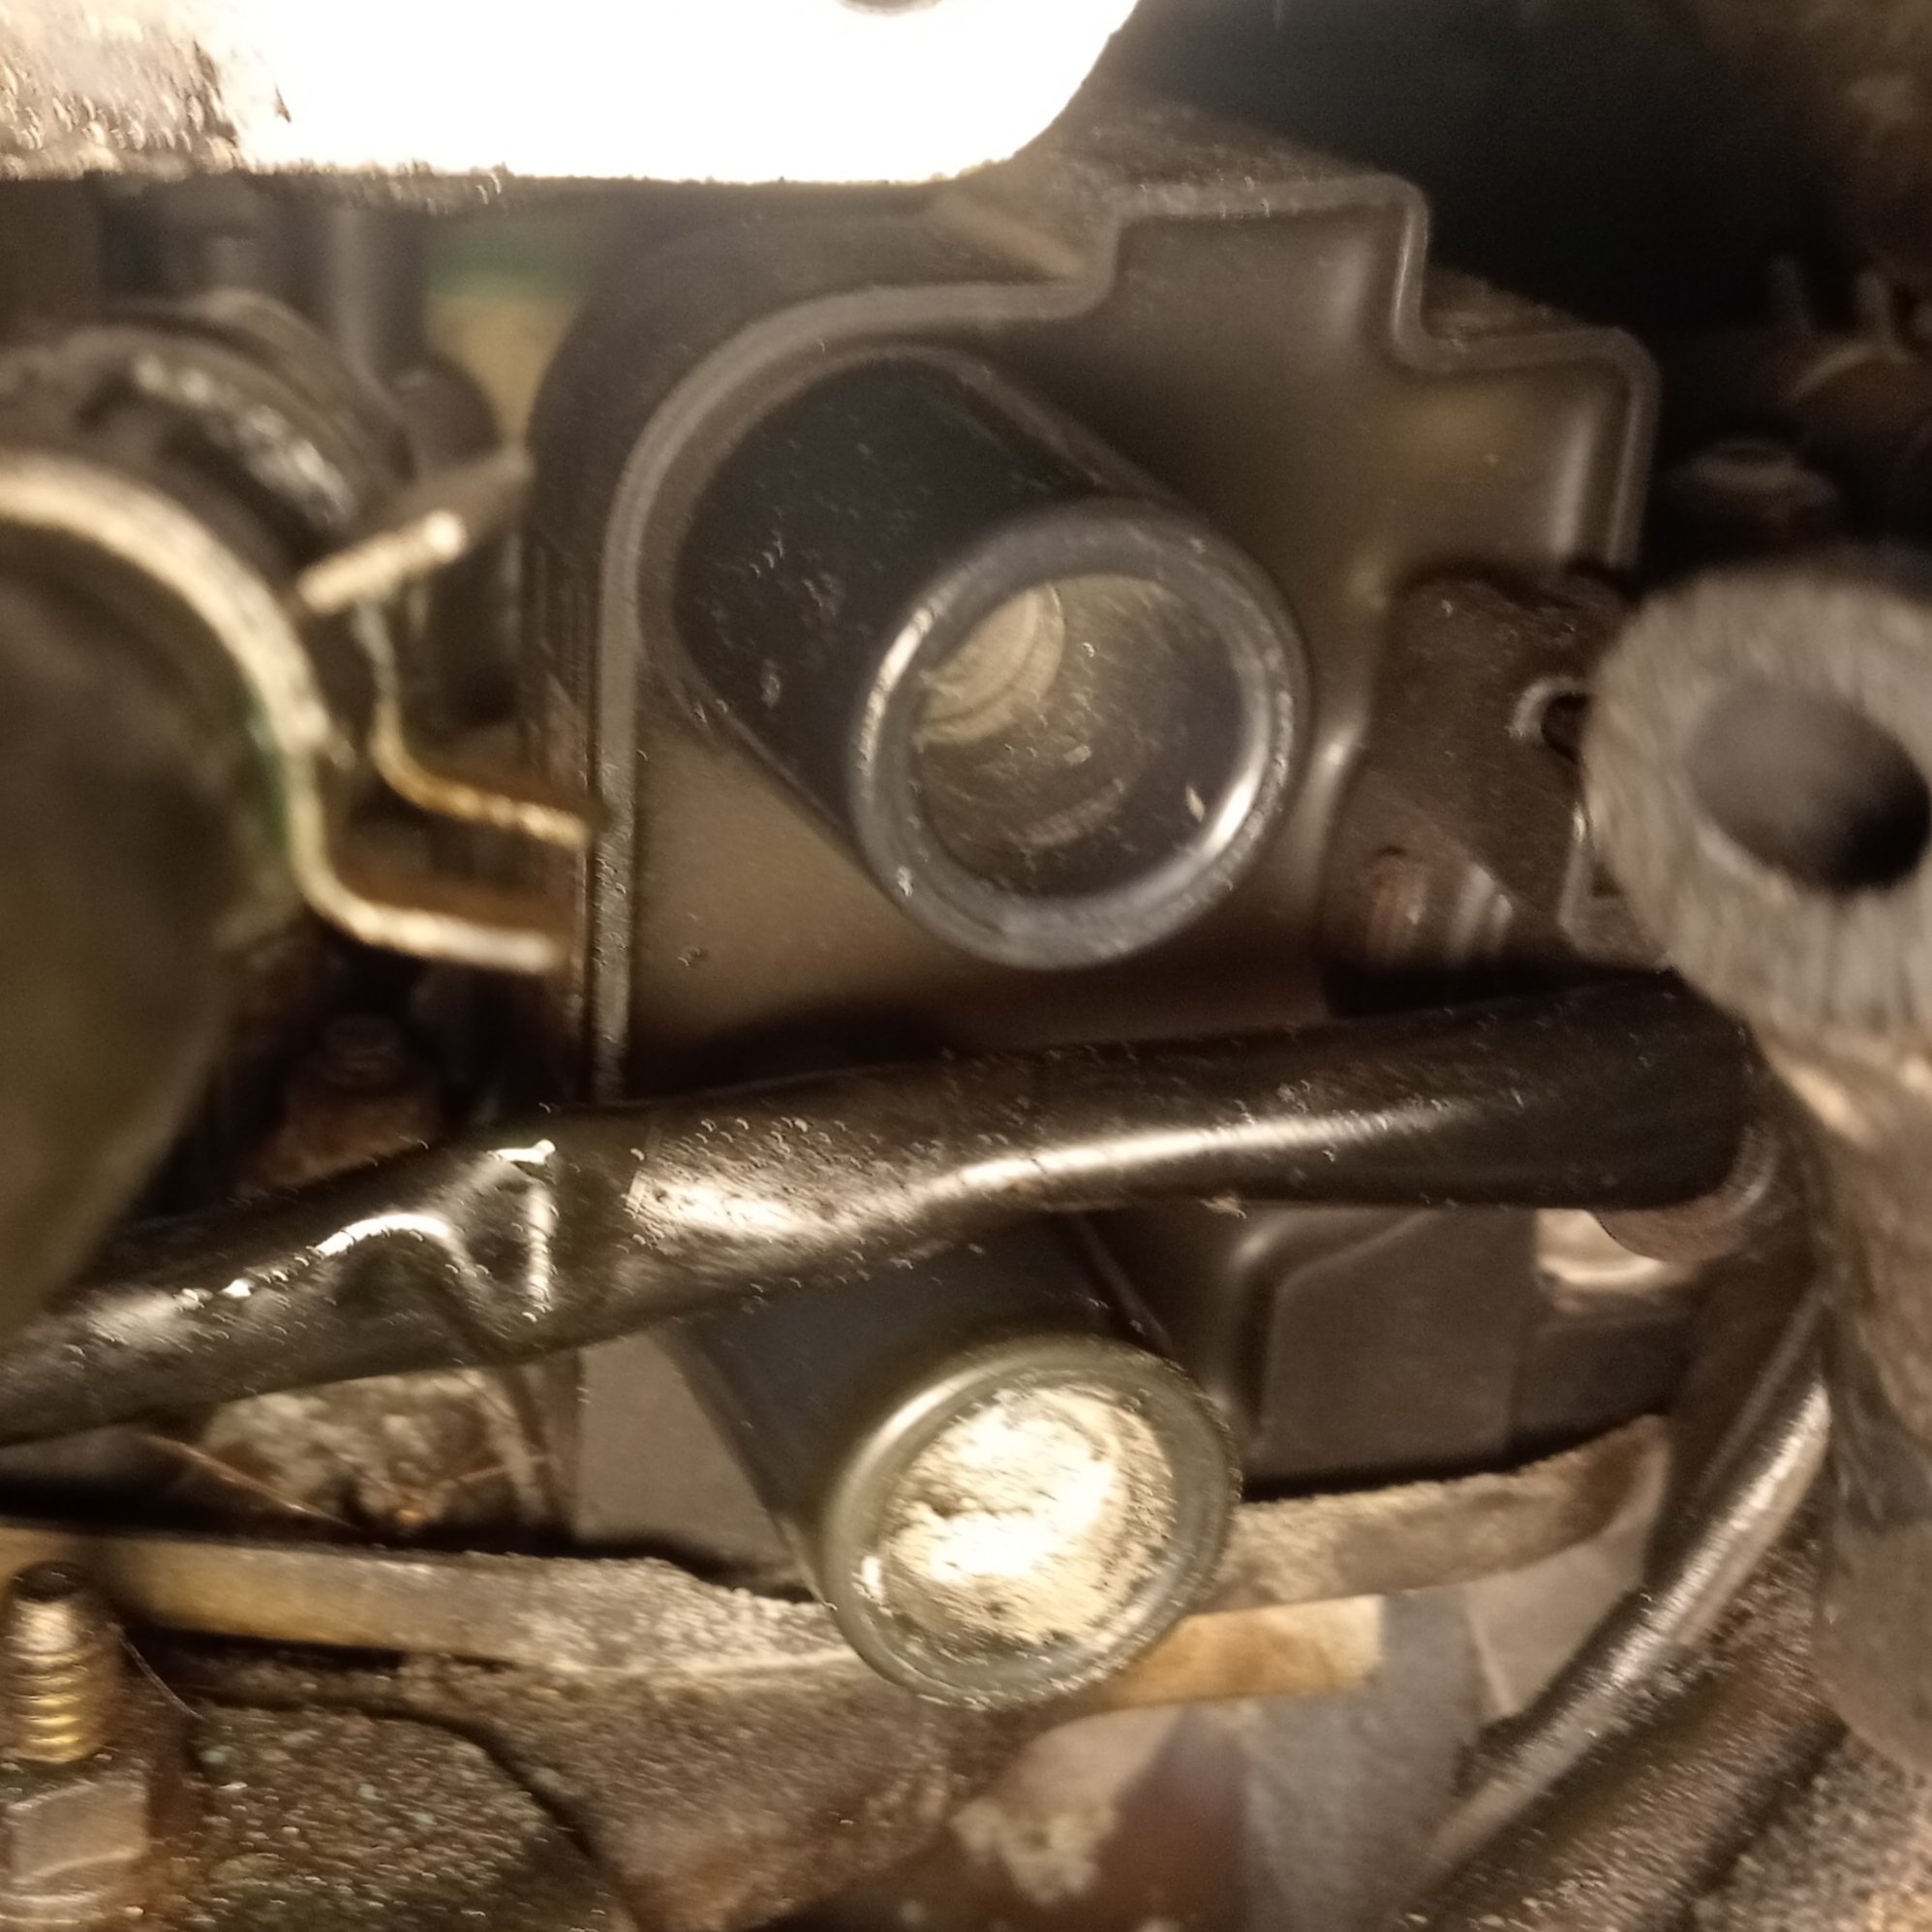
So continuing on with the saga. No one really had any cam bolts in stock including a wrecker locally. As I suspected. I made a call to a wrecker out passed Waingaro hot pools and he said he might have a gsxf650/600 i could rip parts off if they worked and I had put up a post on a local fb page and a guy said he had a bandit1250 with spare bolts, so on the way out to Waingaro i stopped in to check the 1250 bolts he had. 10mm to long but I grabbed them anyway along side some dowel pins I was short of and some spares. continued on to the other wreckers and this is what he had for me. Limited tools and borrowed tools from him we cracked into the job. 20 new/second hand cam bolts the right length for $10 and 6 that were too long from the other guy and I think we were ready. Made a trip to malcolms house and the longer ones were able to be shortened with enough thread on them. He used a left hand thread drill bit to get the broken stud out earlier that afternoon. Made a plan to pop around the following night at 730 to finish it off. To which I turned up at 725 and the cam cover was going on and most of the hard work was already done. So I slapped the rest of it together and we had it running and out the door at 9pm Night speed drag wars here we come! Friday came around and we left Hamilton just after 4pm getting to meremere just on 5pm, qued up for tech and paid our fees and our 1st test runs were made at 630pm My first run felt good. Really good to get it out of the way and kill the nerves. 12:557 @ 111.05 might with a reaction time of 0.160 Very happy with that for my first run ever. My second run was 12.7 and the bike bogged a bunch after leaving the line. I'm number 024 for reference. Third test pass and I was asleep on the tree. Old mate on the Harley red lit haha. We then went into dyo and I set mine at 12:38 thinking if I broke out at that I'd be happy to loose breaking out. First round of dyo I won Second round I won 3rd round I had a by Fourth round I broke out massively and went 12:20 Over all coming 4th position in the bikes. Absolutely stoked for my first night/event of drag racing on a bike. Was really great to see the drag scene alive and thriving last night and cool to see this 39 and a half year old bike still able to get out there and do it while been competitive as well. Got to remember as the night gets later my bike will run faster with colder air so I'll have to button off at the end of the strip so I don't break out as bad. Got home and 12:40 am and my trip planner registered that I done 180kms for the night from home. 10/10 will bang again. Next round is on the 15th of November. Stay tuned for more yarns.1 point
-
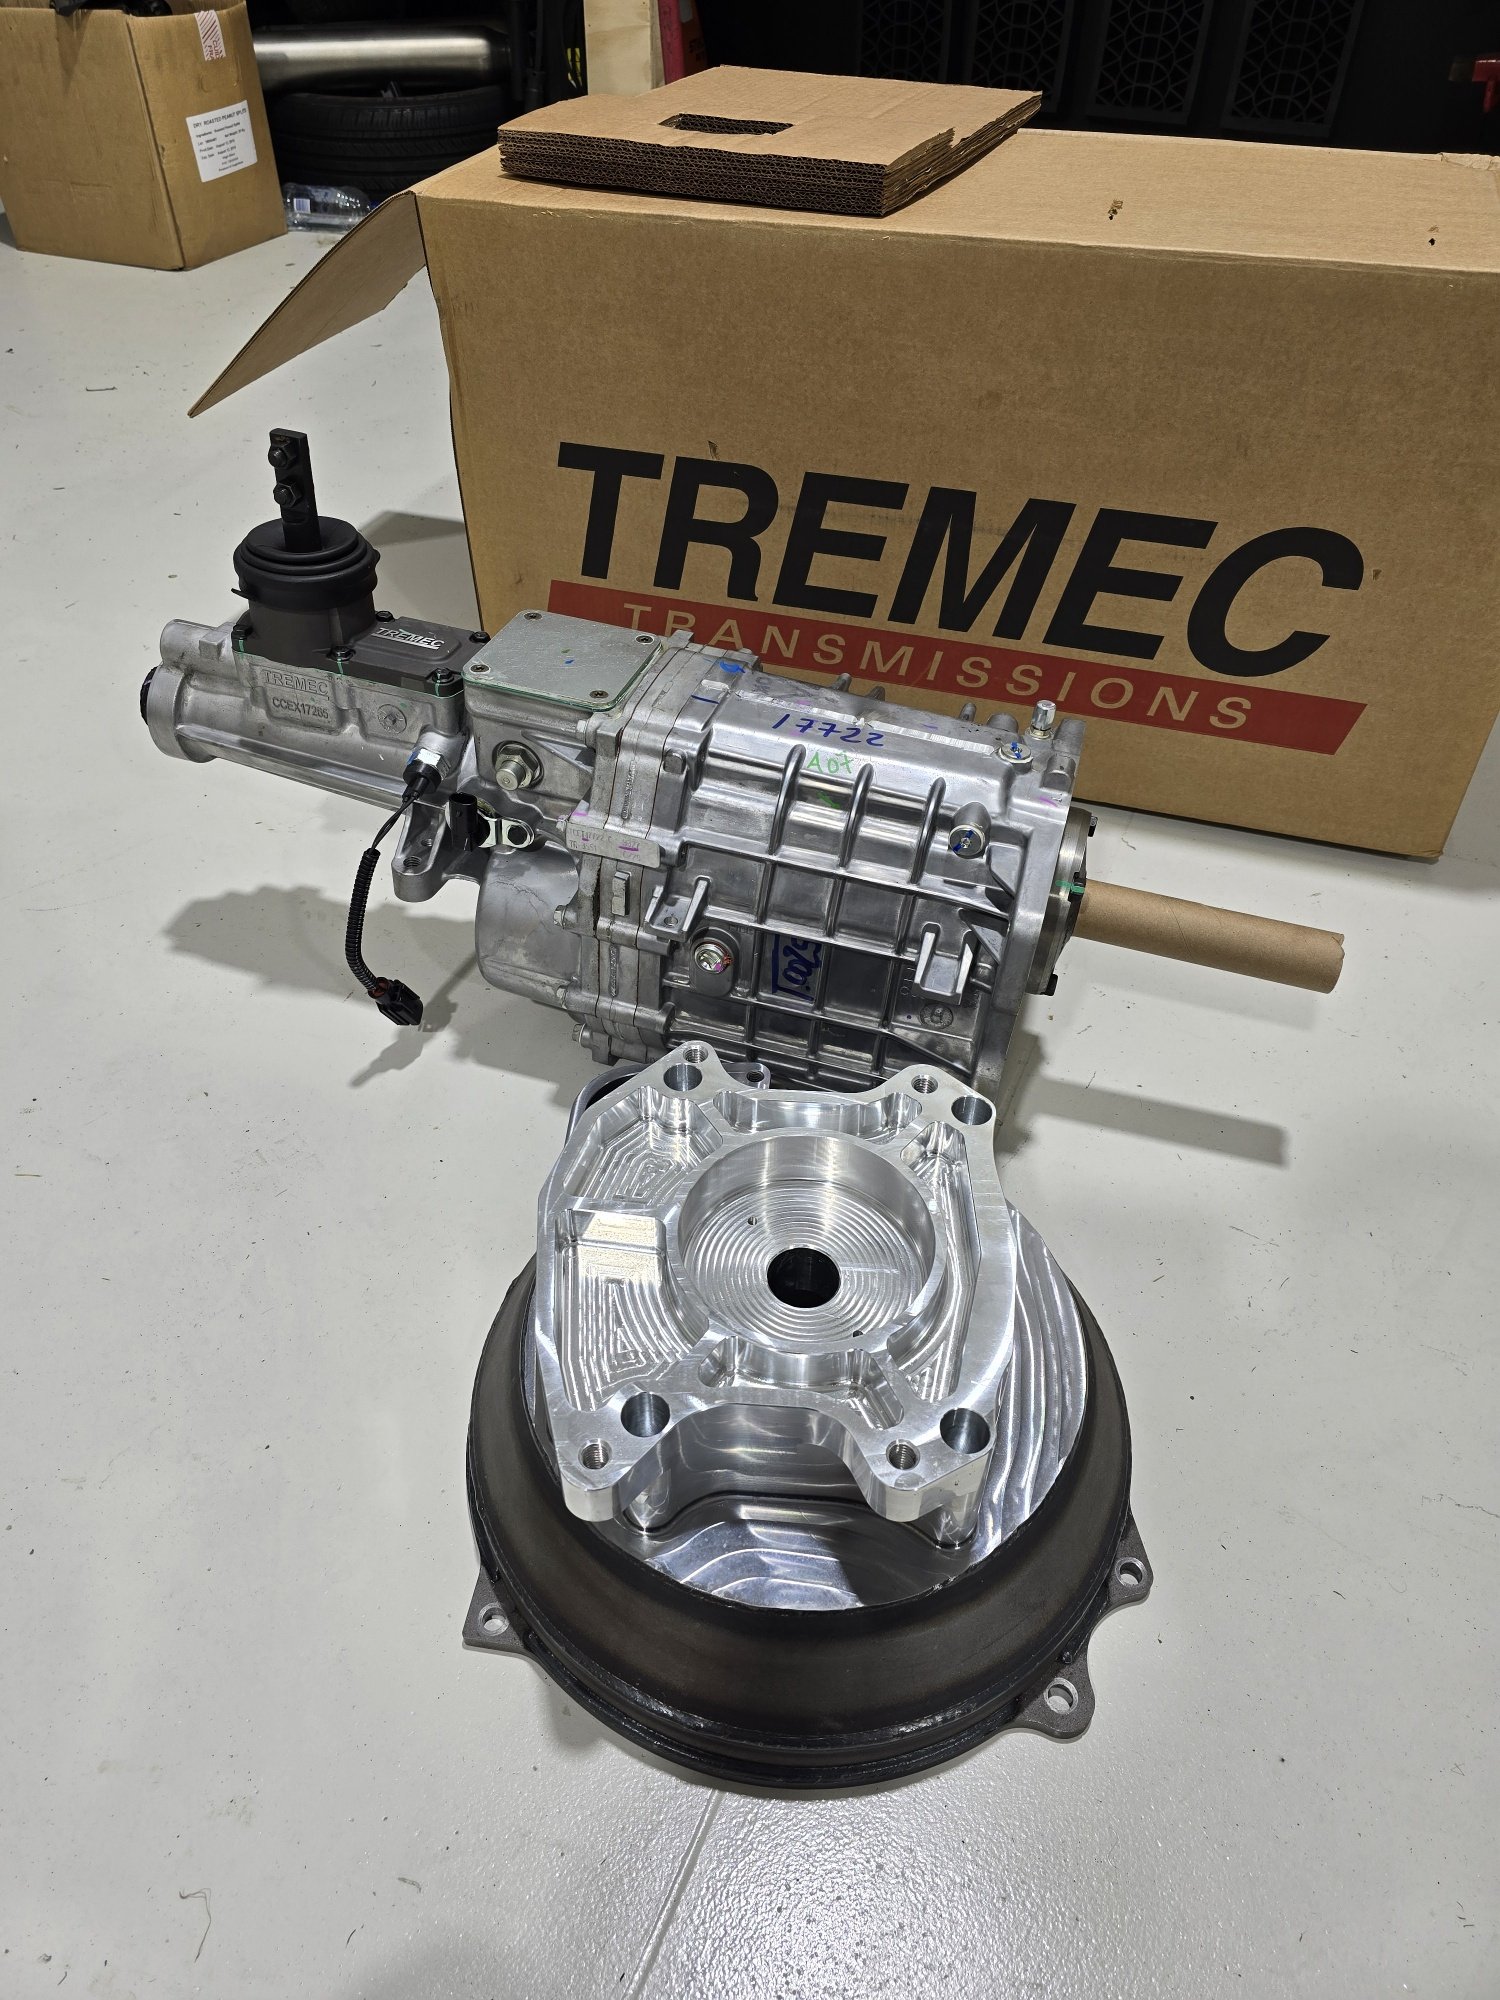
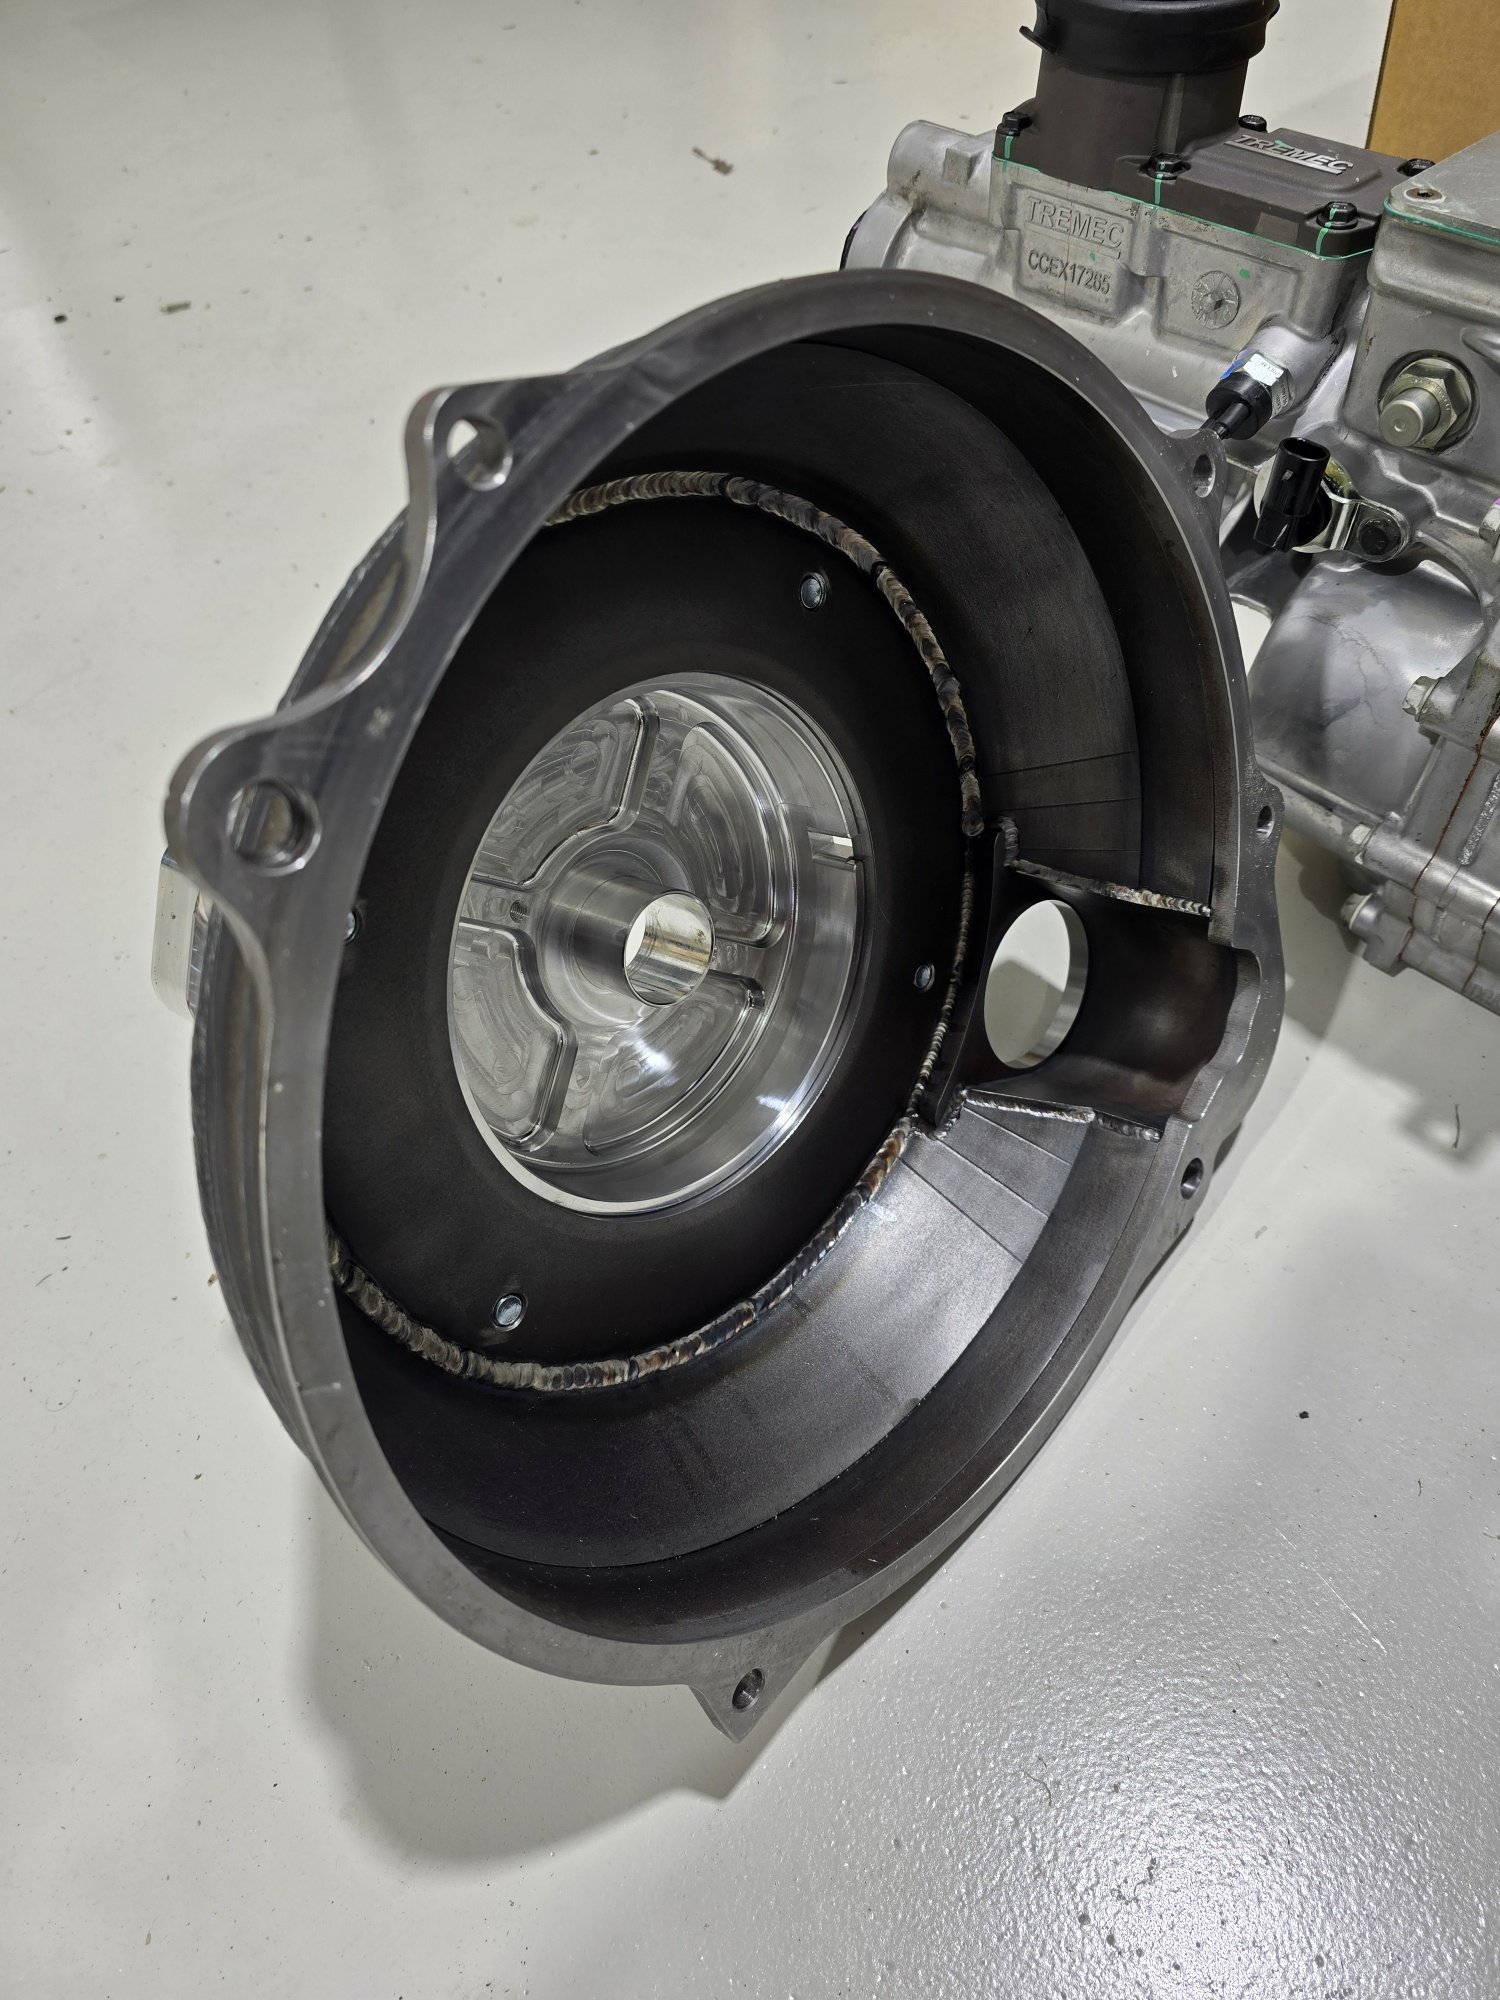
Few more goodies ordered and underway. Have been very slowly chipping away at things like mounting coils, alternator, plumbing routes etc to get everything to fit in the engine bay. Few minor changes of things to make it all work. Decided to bite the bullet and upgrade from the FC S5 RX7 Gearbox that came with the car while its still in one piece, Looked at my options and settled on a Tremac TKX from Greens with billet adaptor and steel bellhousing (which is more slimline than the FC one so gives me more firewall clearance) including a Quartermaster 7.25" twin plate clutch. So will need to get that in, mod the xmember and driveshaft to suit. SHOULD fit without cutting the tunnel fingers crossed Also went a bit overkill on the front cover upgrade haha. Got a Billet Boss billet front cover with bearing support for the crank snout. Very nice looking bit of kit. All in all an expensive few weeks haha but not to many more parts to purchase. Focus on finishing the plumbing and then get pedal box mounted and a couple of other minor fab bits done!
1 point
-
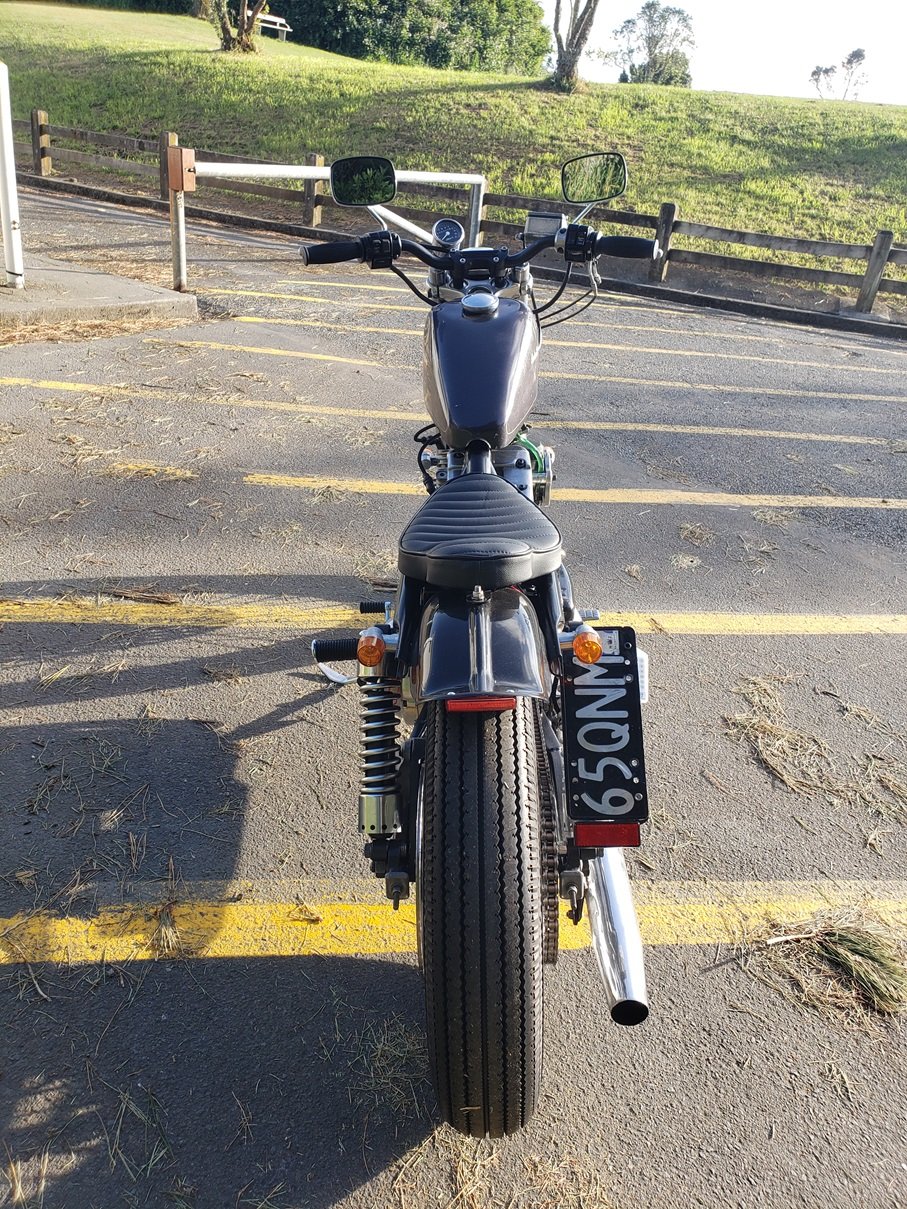
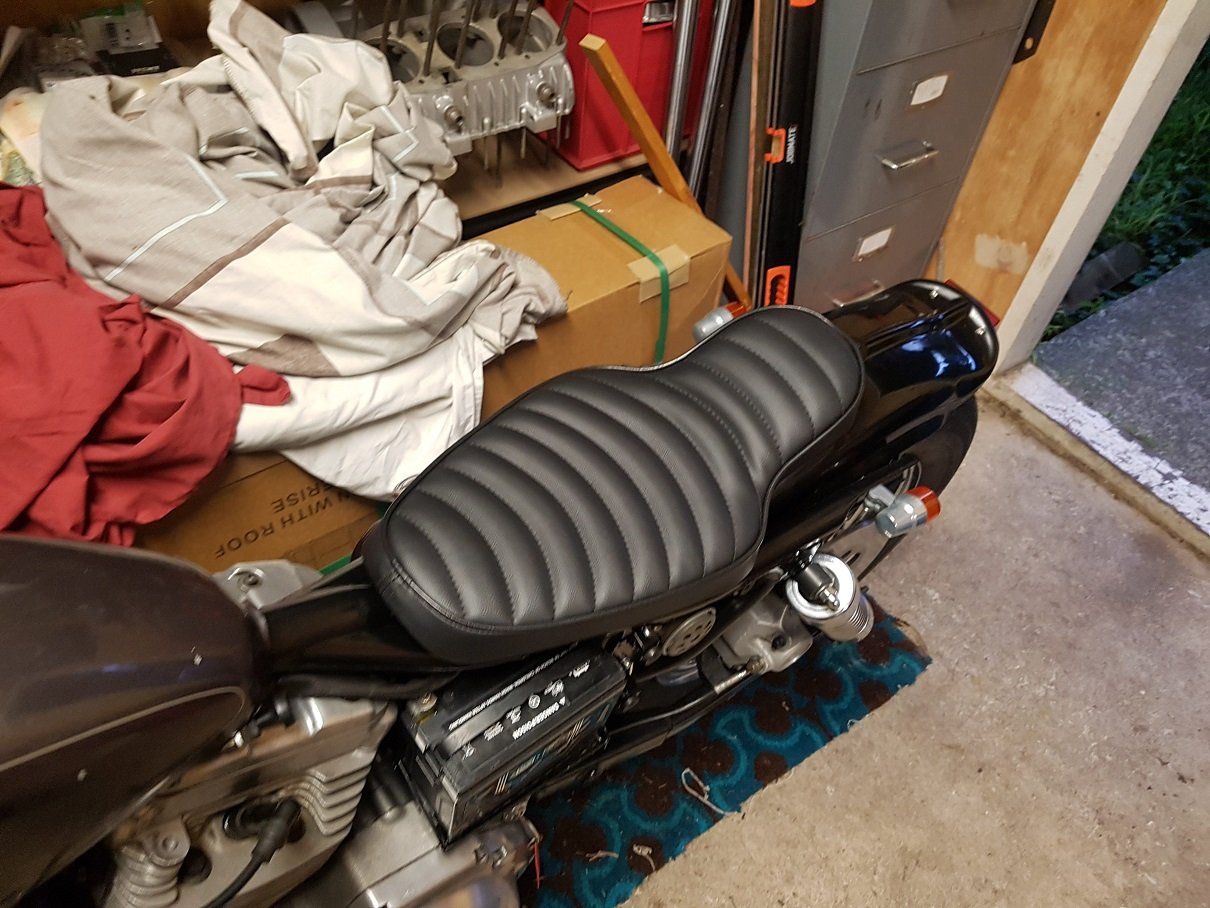
Small update on this. New seat turned up in August. Looks great. Fitted a micro tail light which you can see under the rear ducktail. The bike starts and runs like champ. Starts first pop even after sitting for ages. However the clutch had been stuck. The mechanism works fine, but i assume the plates have stuck/rusted from it sitting for the last 10+ years. I tried freeing it by doing a burnout with the clutch in, but it was proper stuck! So pulled clutch apart. Cleaned, and put back together. Clutch works a charm now! All i need to do now is mount numberplate, and fit a speedo and then its ready for a wof! Just intime for summer. This should be a lot of fun. Its actually a tiny wee bike, should be great for ripping through the wellington hilly streets!
1 point
-
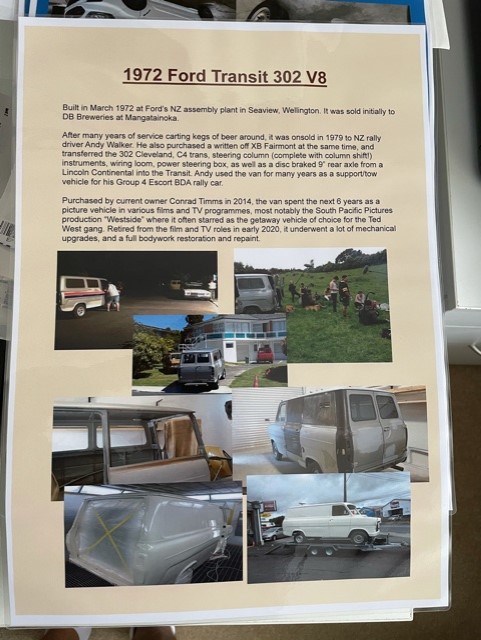
yes it did. I put a little poster on each of the side windows telling its life story, and I think a lot of people enjoy that. I was walking past at one point and overheard one guy say to his friend "it's the Westside van!" World famous in Noo Zulland!
1 point
-
So cool! I never knew any made it over here. have worked with them a bunch in Europe, just the ticket for snow at odd angles. It was pretty much the secret allowing us to build this thing
1 point


This leaderboard is set to Auckland/GMT+12:00