
Leaderboard


Popular Content
Showing content with the highest reputation on 06/12/24 in all areas
-
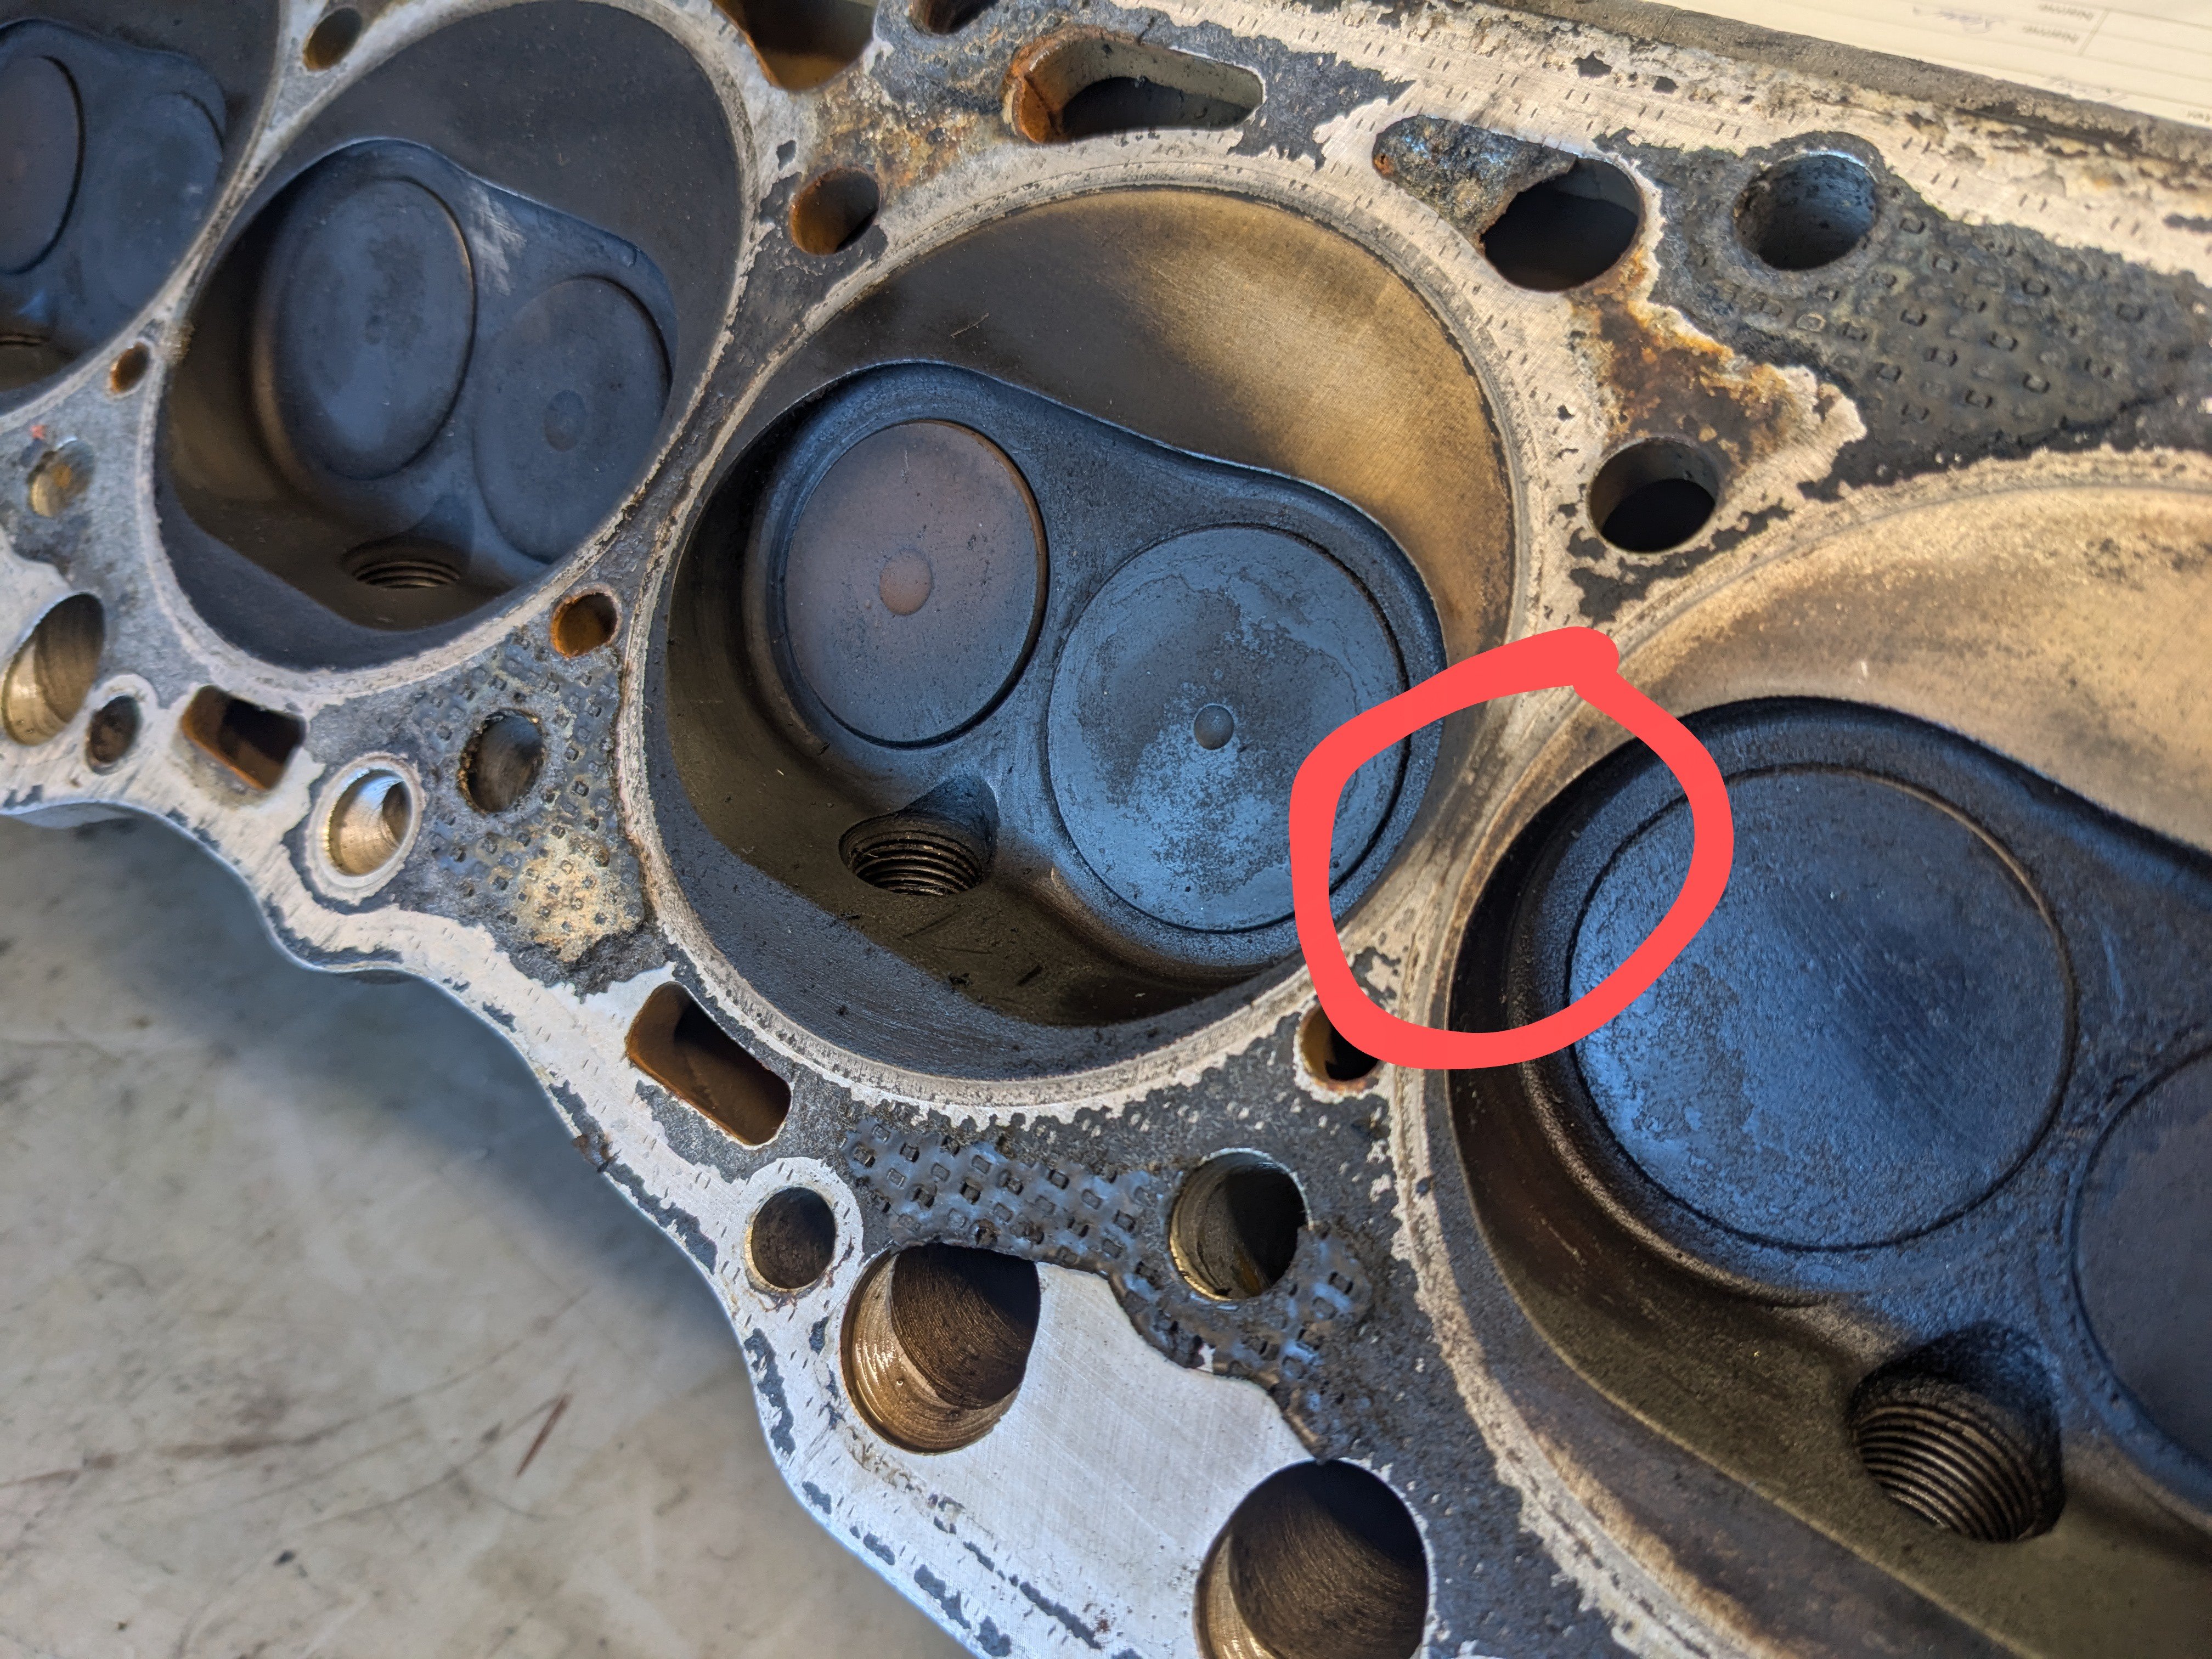
Engine shop mans keen eye pointed this out On the lighter coloured cylinder too, so could well just be the head gasket. They are going to check it and give it a skim. There is a certain amount of scum that forms in the header tank, not much so I thought it was just clag from its long park up getting blown out, but maybe not..
 7 points
 -
7 years later Two house shifts (only one for the car) Not much has been done apart from engine removal and it's own progression back to being rusty 😔 Now I have to move again, maybe not so close to the coast
6 points
-
Ute goes away for paint on Sunday. so why not shit the bed and make changes. cant find a filler neck grommet anywhere. It was bugging me. so I decided to weld over the filler hole. will yeet the tank and fit a fuel cell in the rear below the deck. still waiting on my seat mounts to be made up aswell as the new bumper mount extensions.
4 points
-
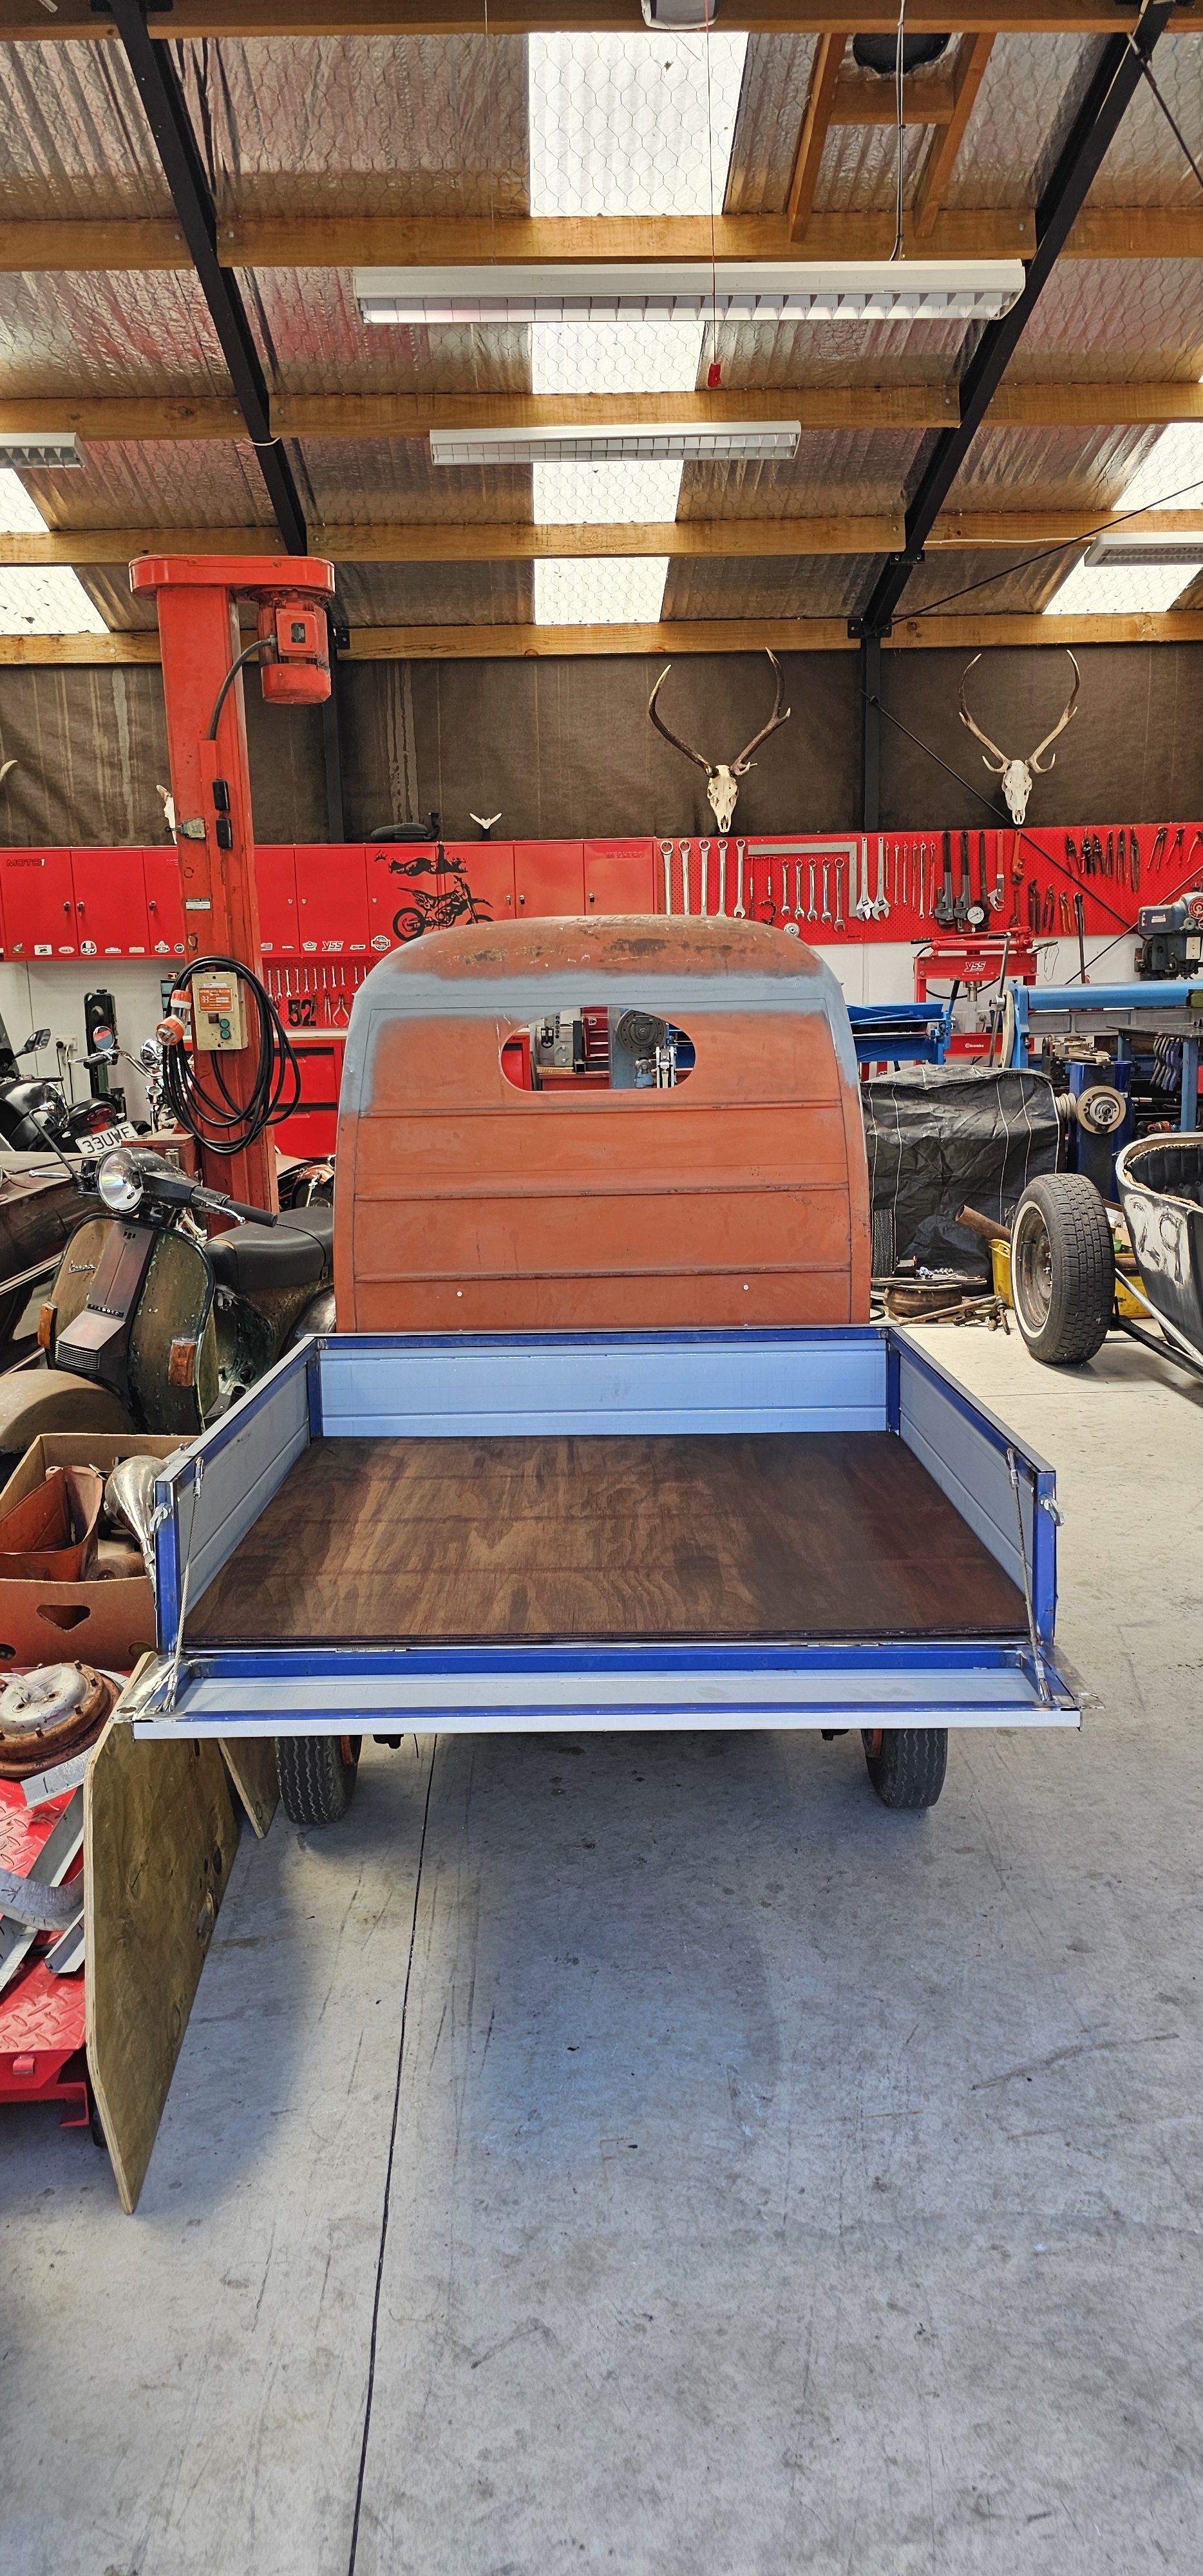
Deck sorted. Once painted, I'll use self tappers to hold it down. I added crimped wire straps to the tailgate. Small steps in the right direction...
3 points
-
Think the 20mm rule is for spacers, 30mm for adaptors2 points
-
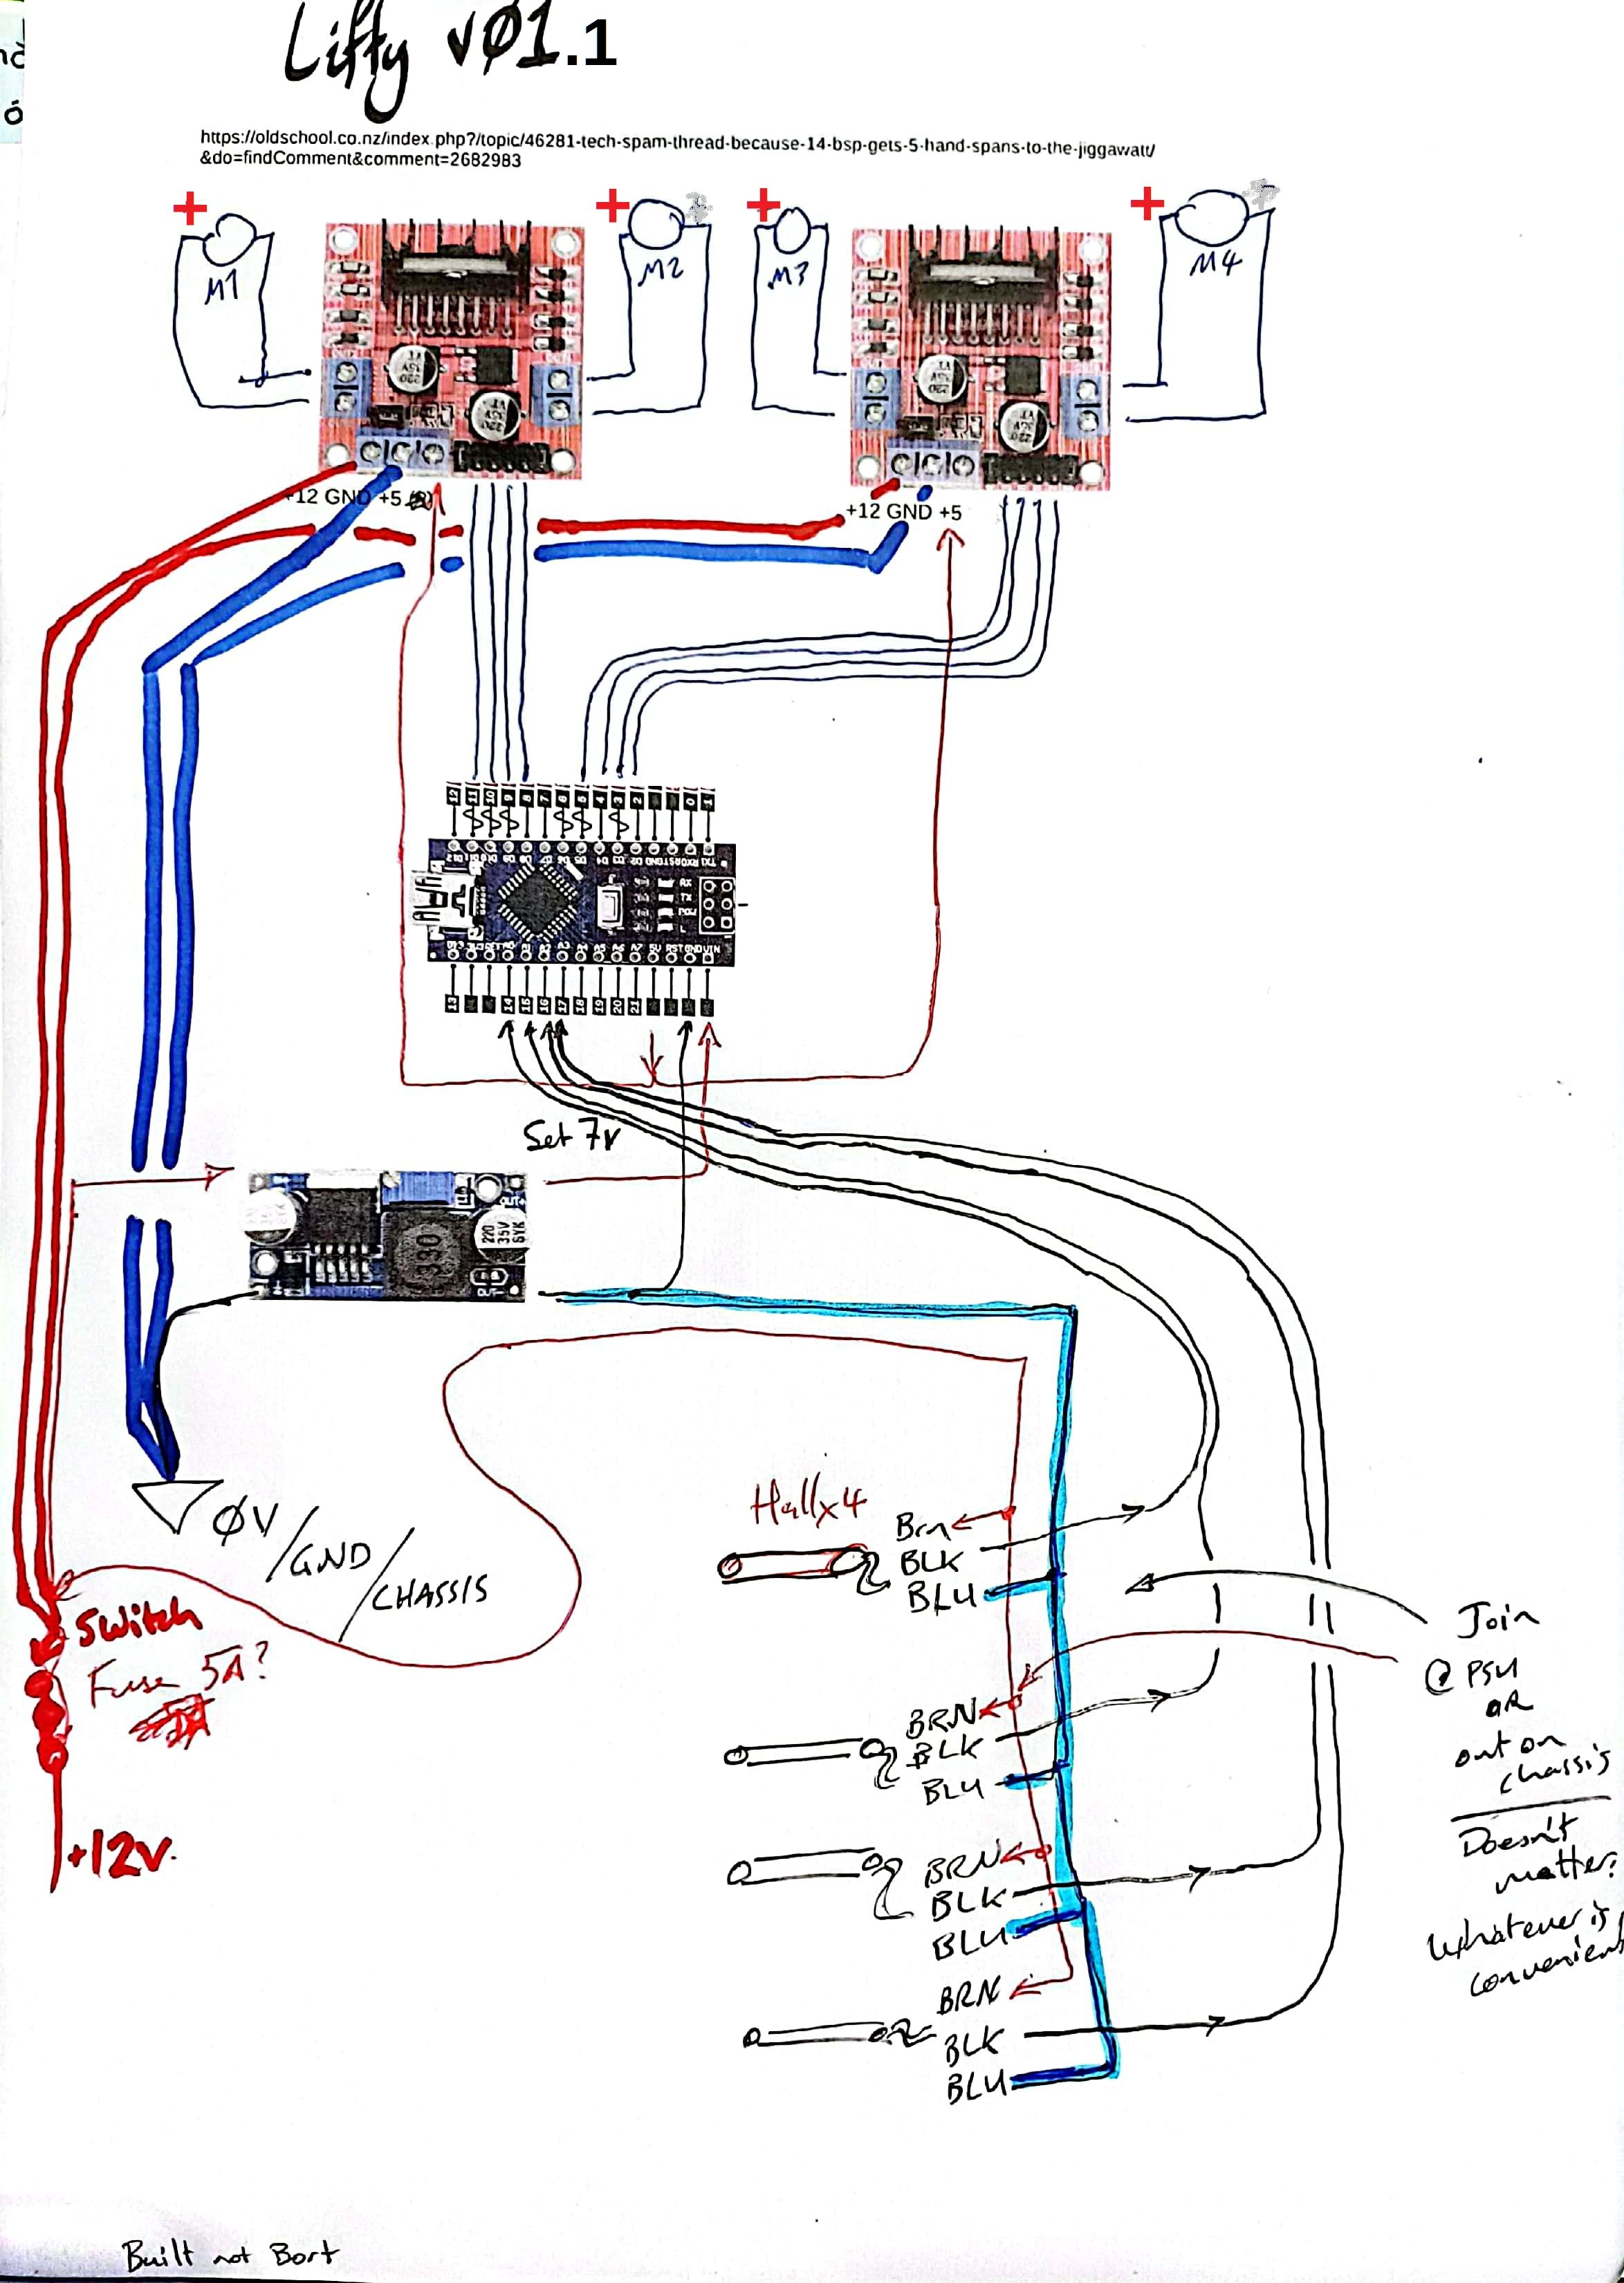
I drew it in CAD: Crap-Ass Design .. and sneaky post edit to fix a polarity faux-parr on the motors.
2 points
-
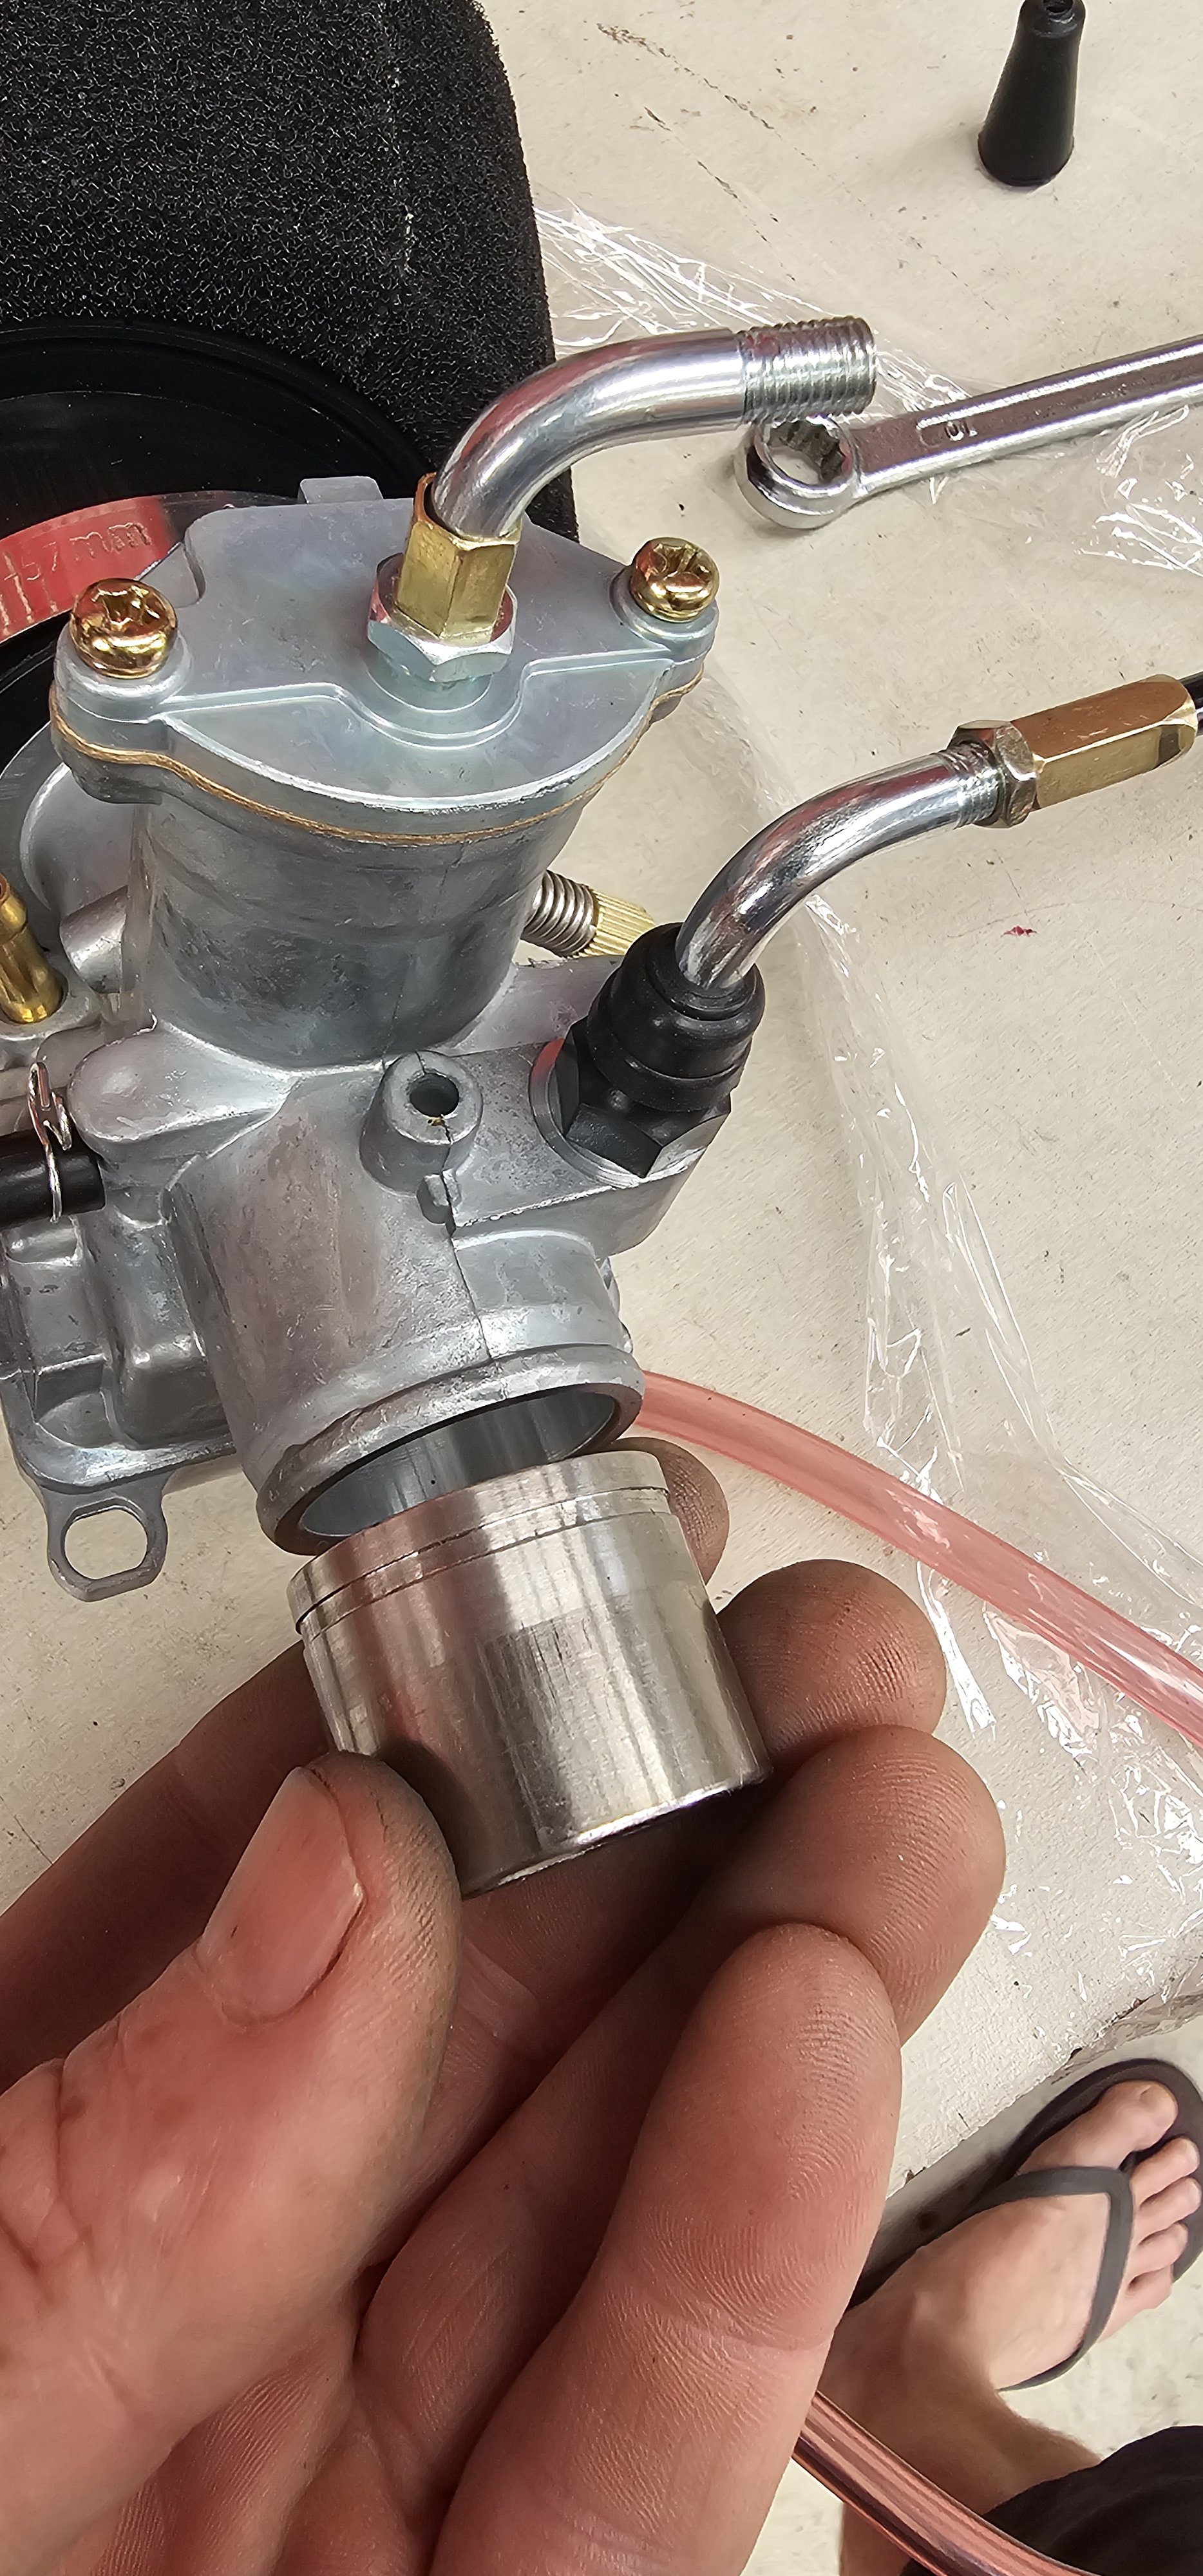
I turned up this thick stainless adapter. Part of the intake puzzle. I'm waiting on Aliexpress mandrel bends for the rest. I also made some custom cables for choke, and made a 90° adapter for the throttle cable, to keep the height down.
2 points
-
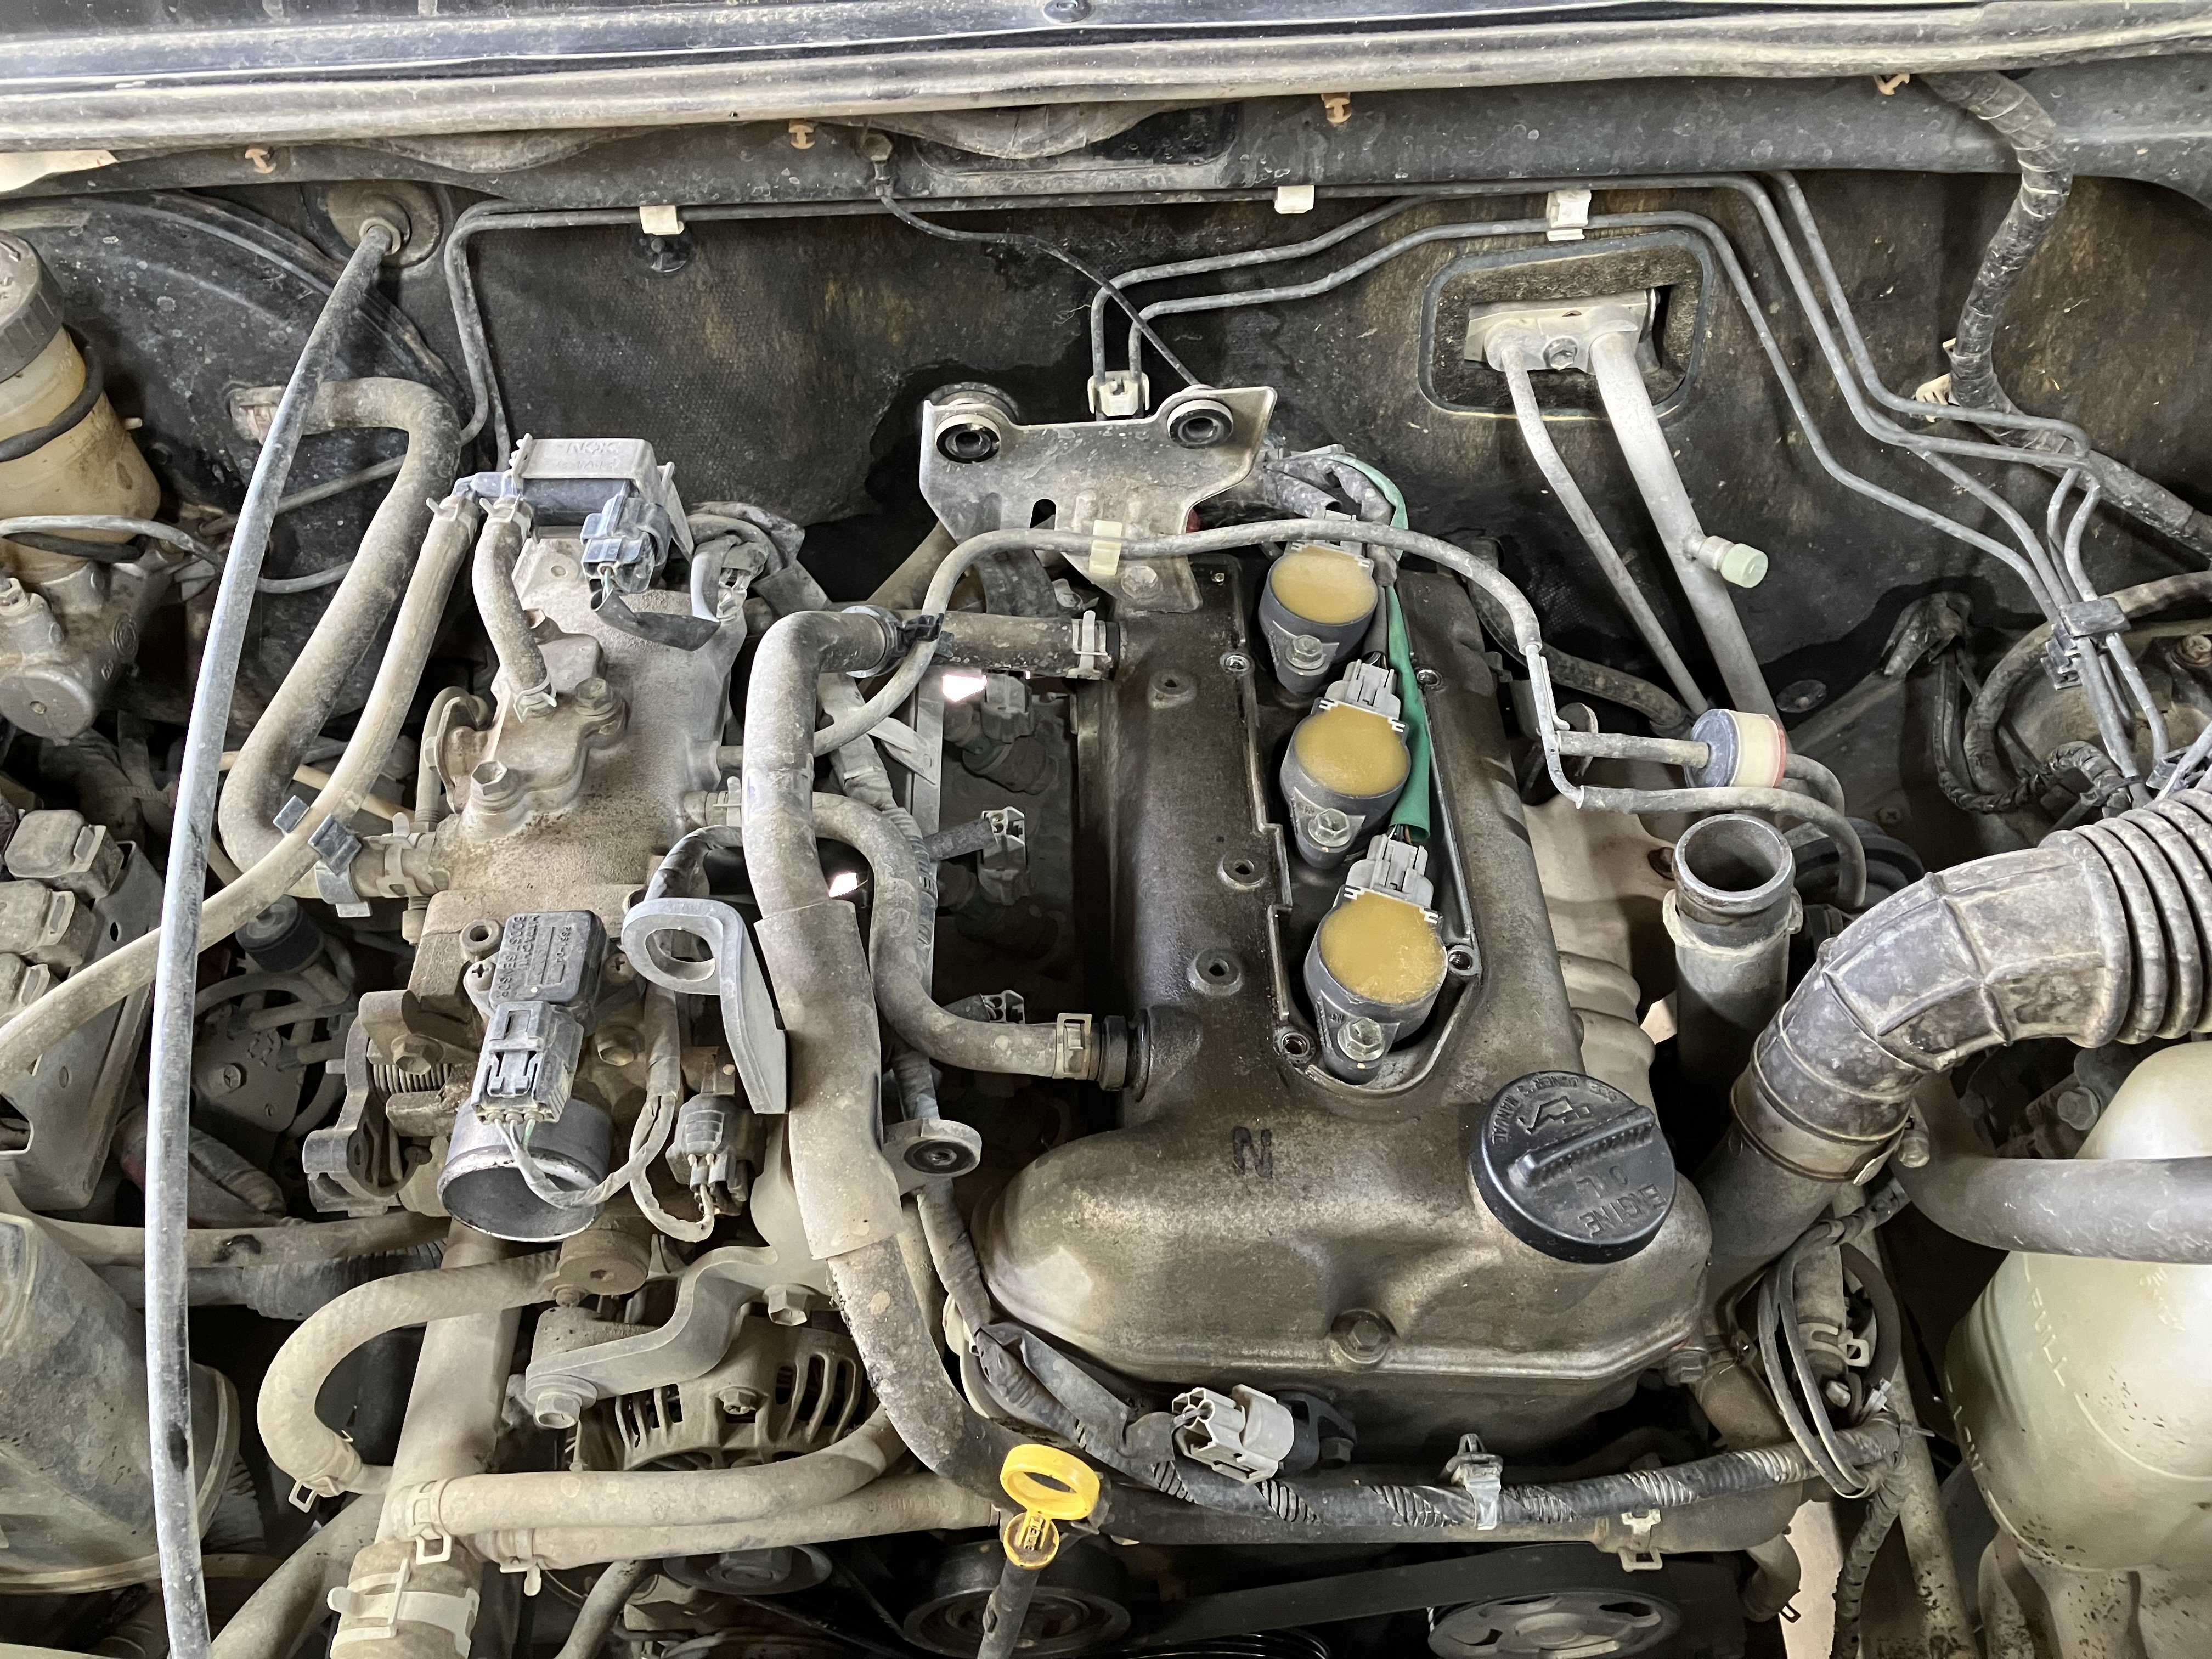
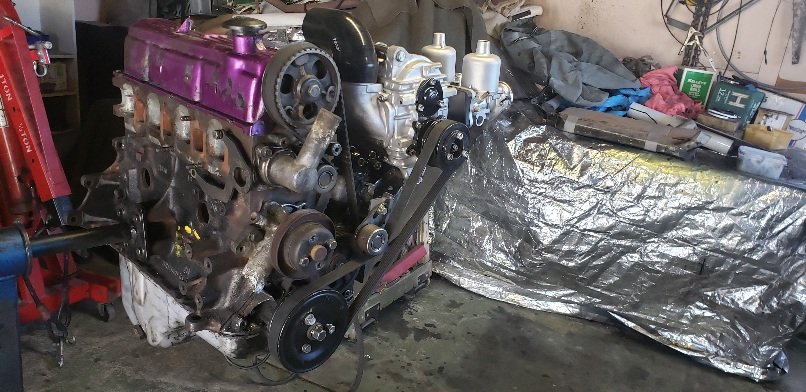
Tried some new coils and managed to drop 2 cylinders at idle, FUCK THESE SPARK PLUGS!! So rolled back all the other nights work and stuck the old Iridium's back in after filing the strap into a better shape as they had to be bent a fair bit to get down to 0.6mm. Also found while in there the v band for crossover pipe was quite loose so at least I fixed that....... Thank fuck its running mint again I'll just do the oil change now and coolant and leave it alone.2 points
-
Did anyone get any pics of the big adventure bikes @johnnyfive smoked 😂2 points
-
Old Merc engine cover porn. Something like these with Honda on it and perhaps with some gold wings would be cool.
2 points
-
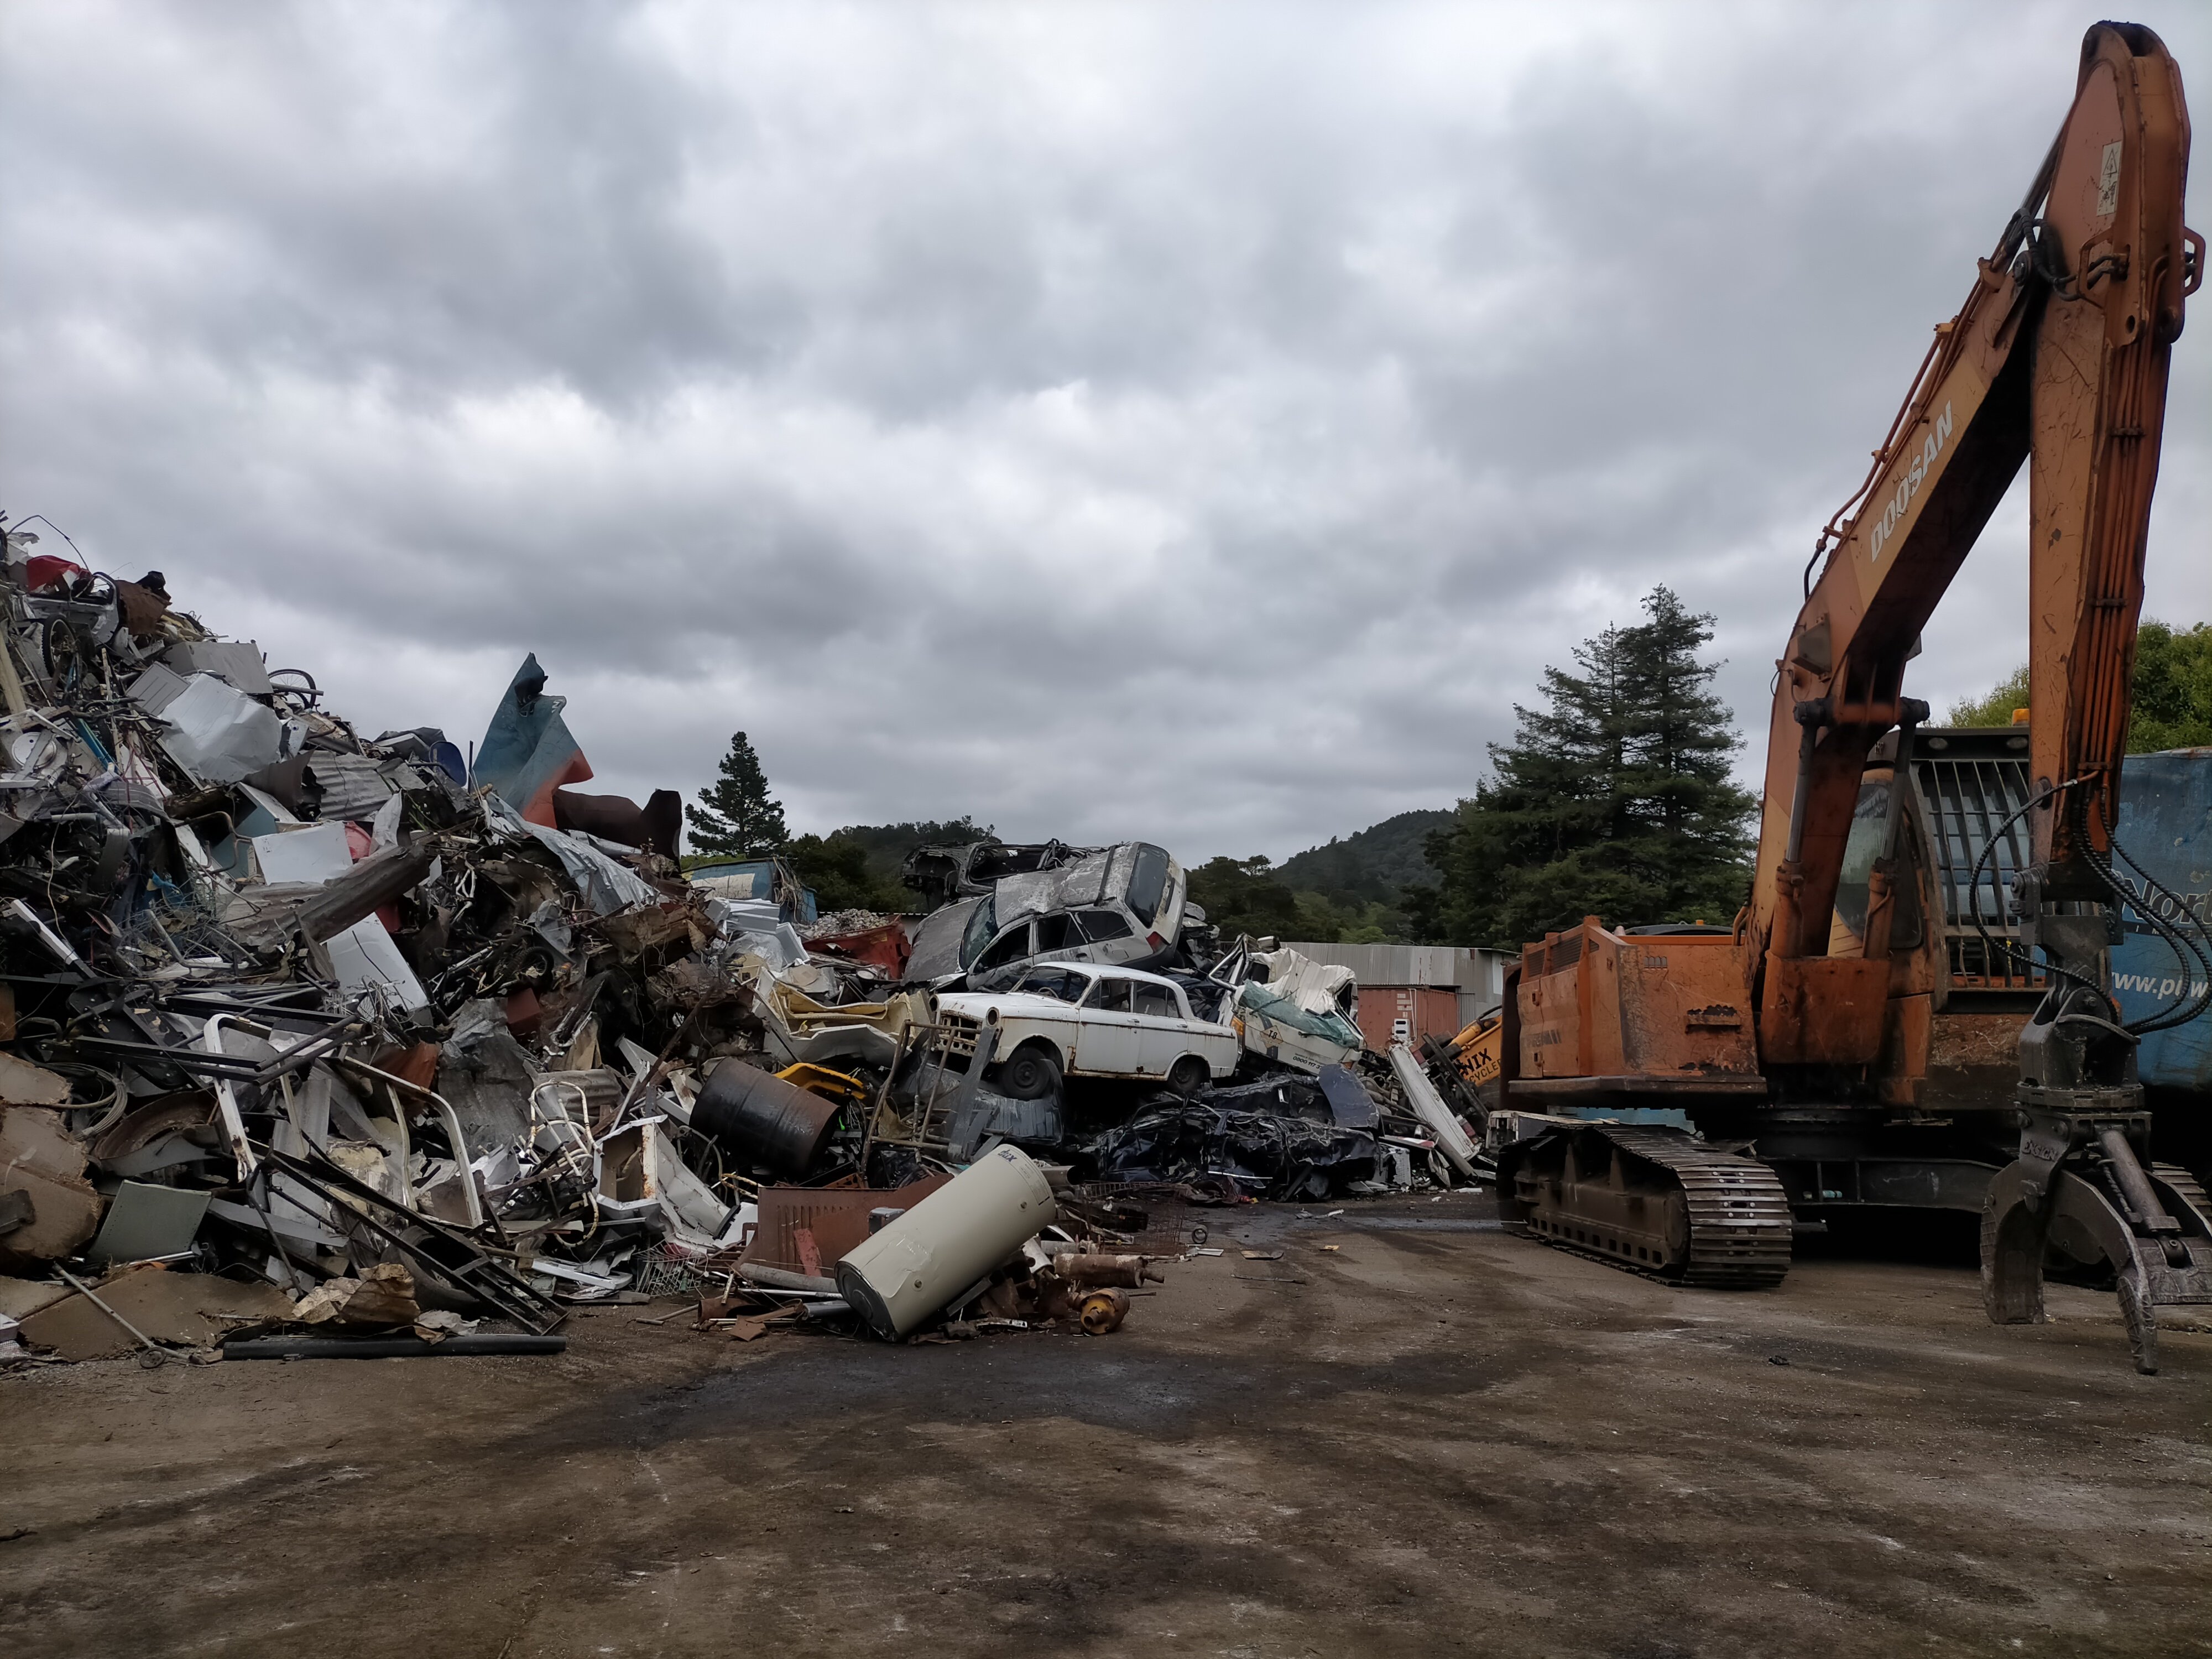
We drilled out the rivets and peeled back the outer layer. Also took out the random screws that Barry only put in one side. (because rivets, and silicone isn't enough). Chisled out the random bracket of which there is only one, that was to hold those side bars on. Cut the box section and peeled everything back and here we are. If you look closely at the pictures you will see a few areas of surface rust that will need some attention. You'll also see the rust hole at the bottom of top of the guard that will need fixing too. It was inevitable with the roof set up the way it was water was going to be trapped somewhere and fester away. But overall, wayyy better than I thought it would be as the rivets didn't make it through to the windscreen frame. From there we turned it into a speedster, as Mokes only have a couple of bolts holding the windscreen on. Means I can sort sandblasting the frame and pulling the window out to shout it a new seal as the old one is pretty cooked (It may even be the original). From there, we got it up on the hoist and had a crack at some of the rust underneath, but that is another story for another day and a whole lot more work. I'm also looking to engage a repair certifier in the South Auckland or Waikato area. As plans have changed a little and I'd like to get this road legal if I could. If anyone has any recommendations of guys that actually answer emails and phones and don't spread themselves thin with too much work and are reasonable when it comes to old cars (not asking for much hey...) Let me know. I can go to them or I have the hoist at the old mans place just out of Pukekohe to get it in the air and have a look etc.2 points
-
Opened things up a bit more, tbh it looks pretty good. Altho number 2 is slightly browner than the rest in the head. The cam spins nice and free so its not that, but the with the head off rotating the crank is still ever so slight weirdly variable in turning force. The bores look basically perfect so maybe that means the crank might be bent? Rings broken?Time will tell I guess.2 points
-
Pulled the drivetrain out tonight and pulled the sump off to take a look. I hope my engine stand won't buckle under the strain lols I can't see any wrong in there, the sump is 100% perfectly clear of debris. And everything looks great, no missing chunks of piston or the like. There is however a noticable variation in turning resistance with the plugs out, I am suspecting a slightly bent valve or broken valve spring. I am waiting for a new head gasket and bolts before I get too carried away. Also: so many gearboxes, this isnt even all of them, I have 2 more.2 points
-
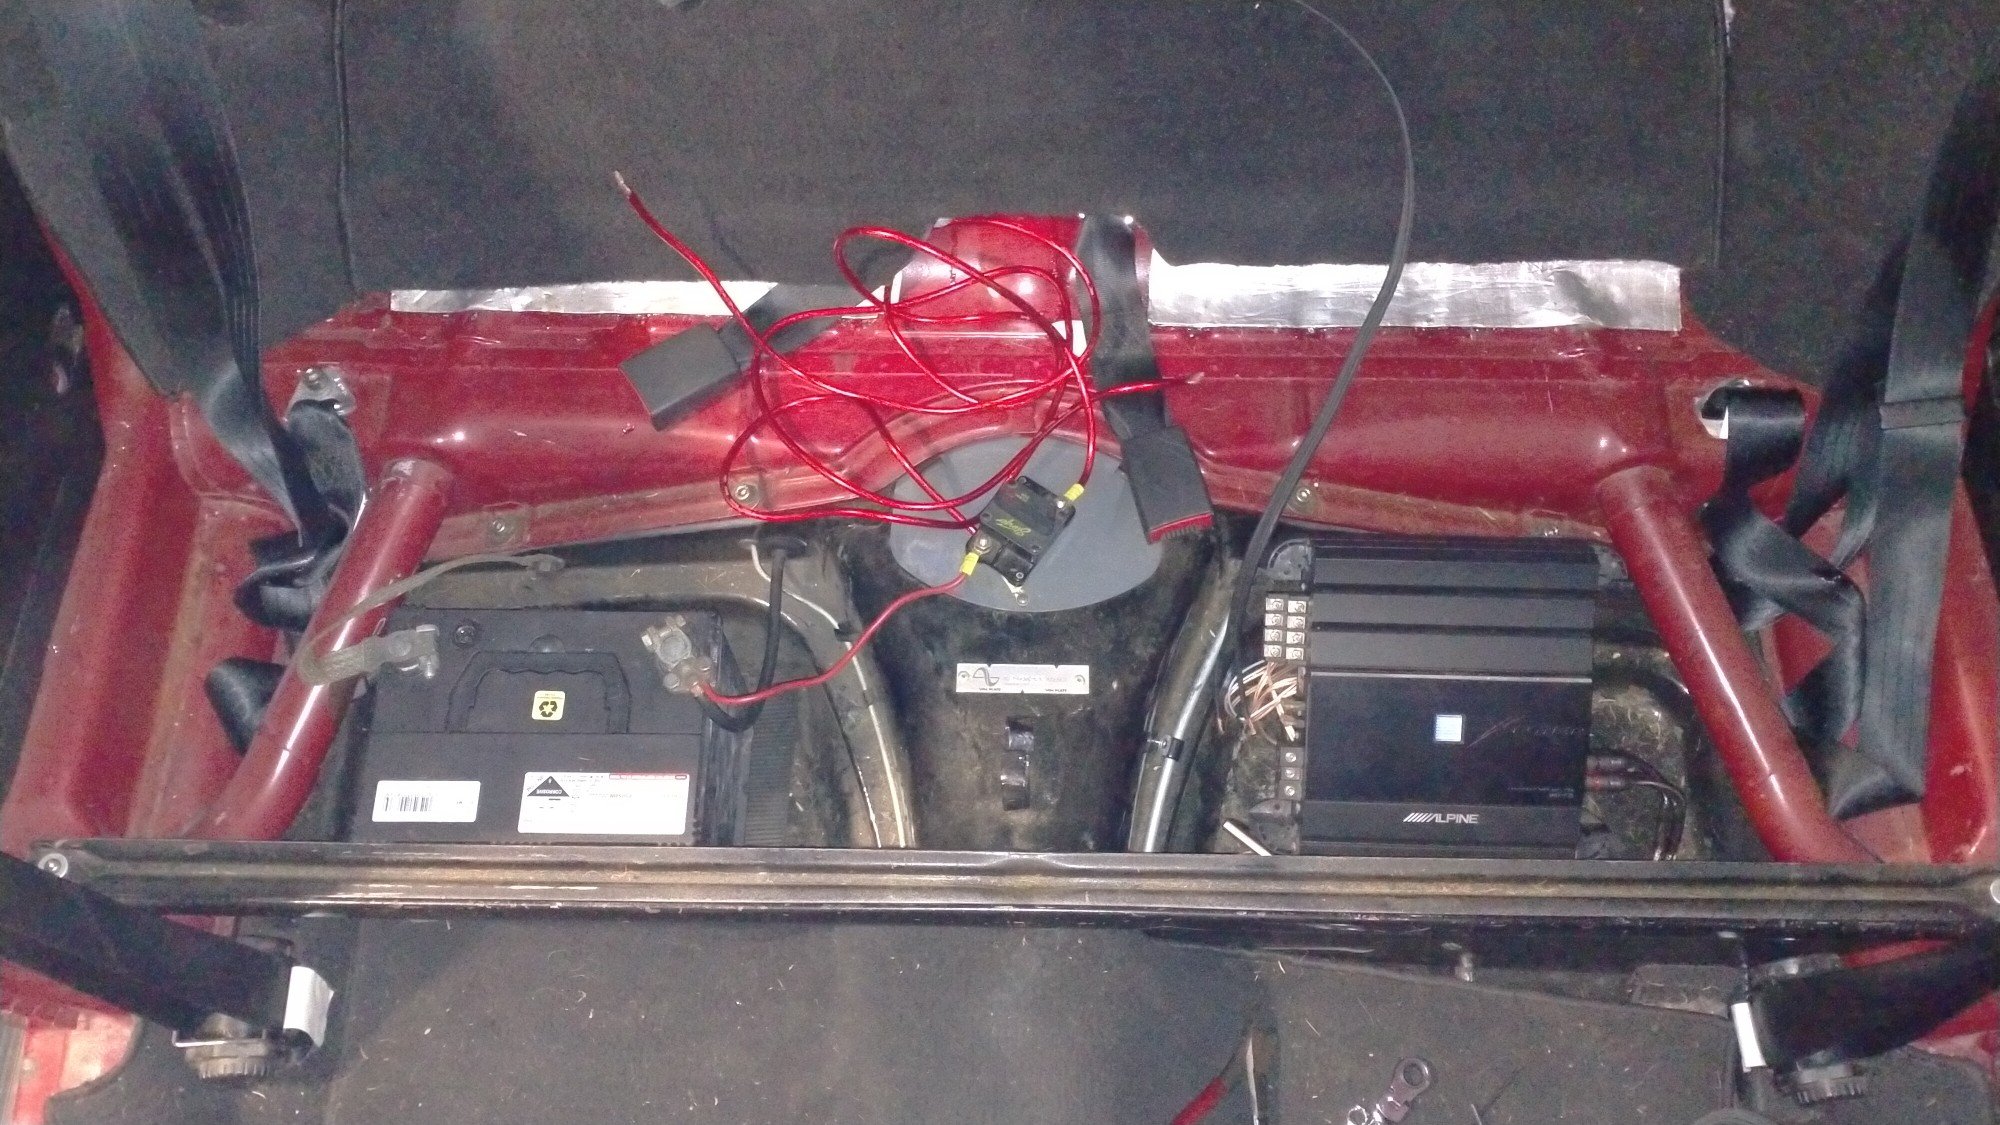
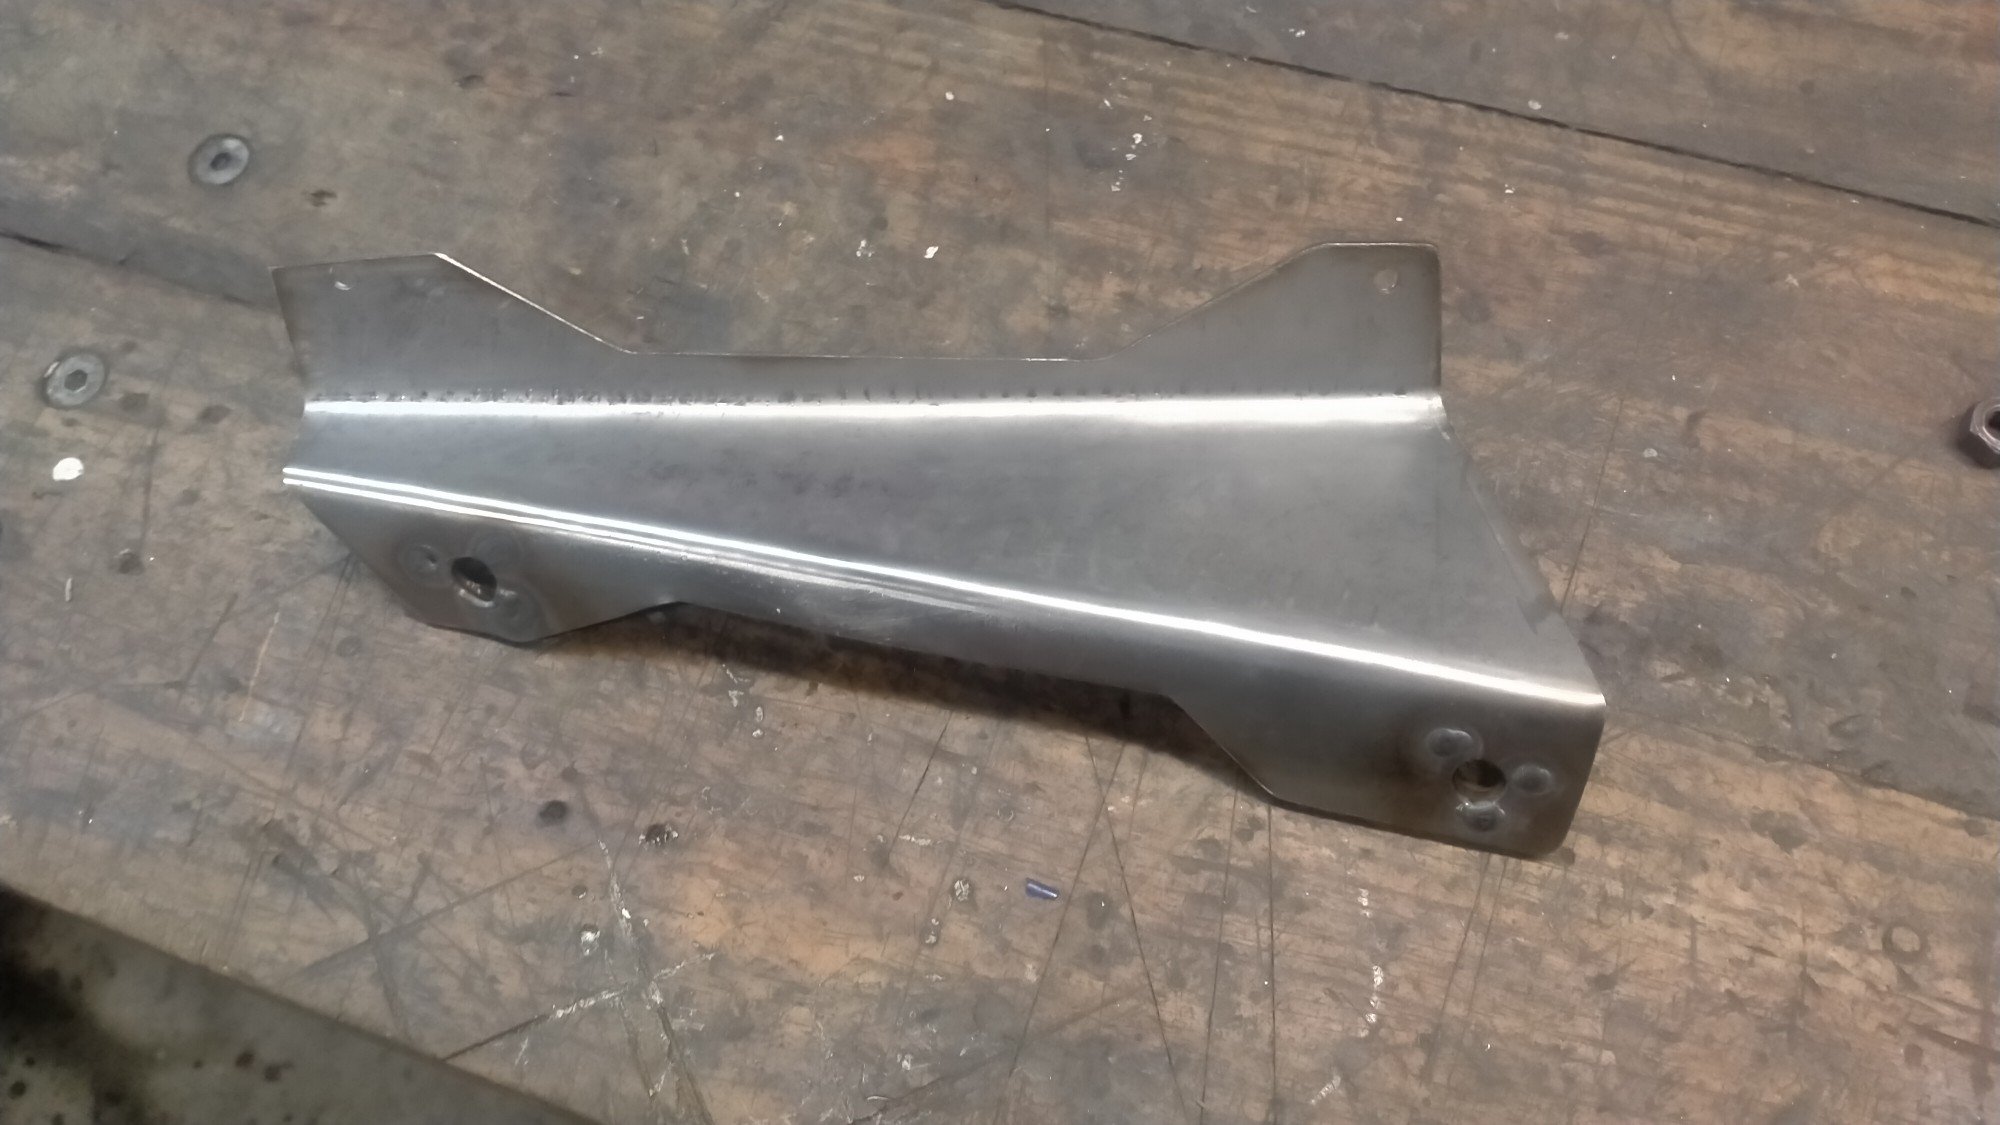
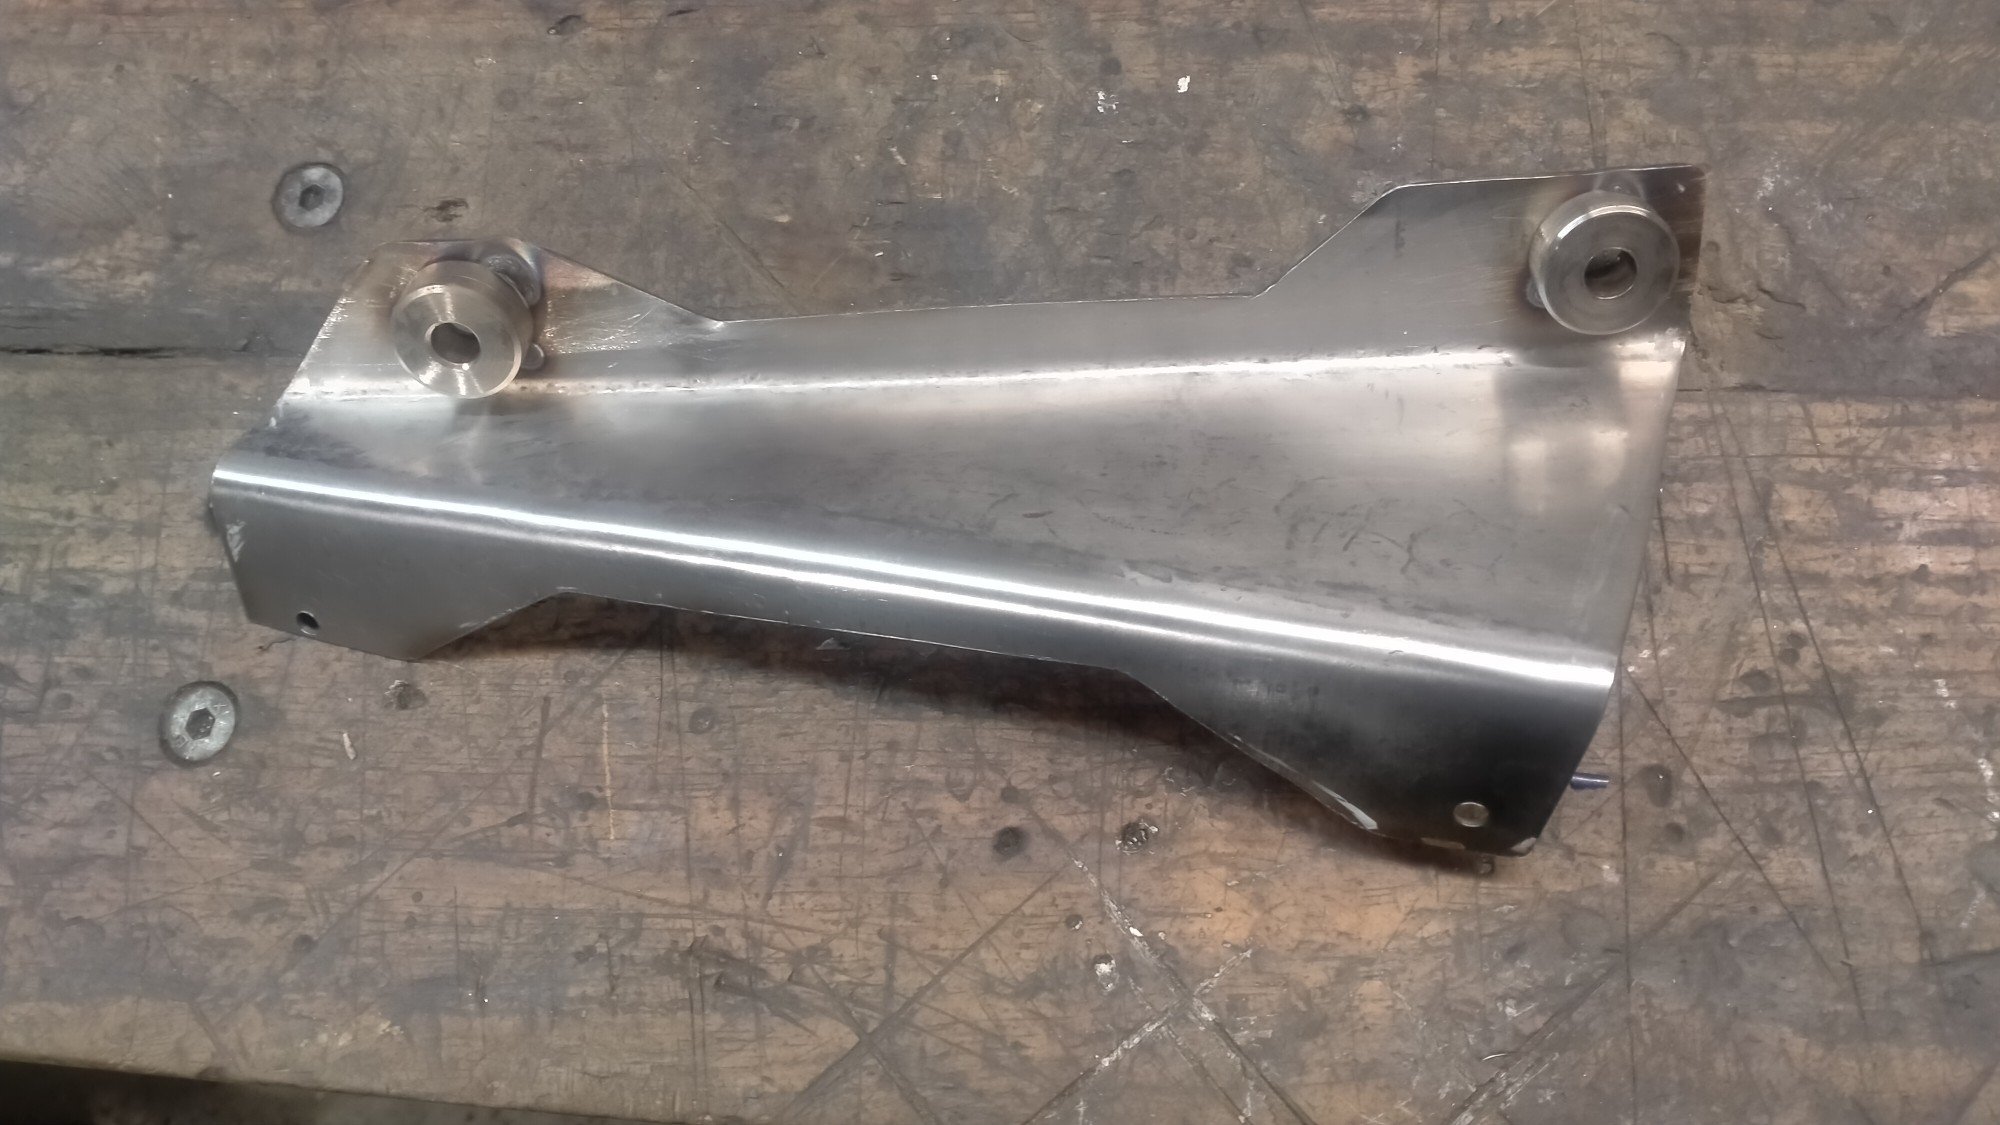
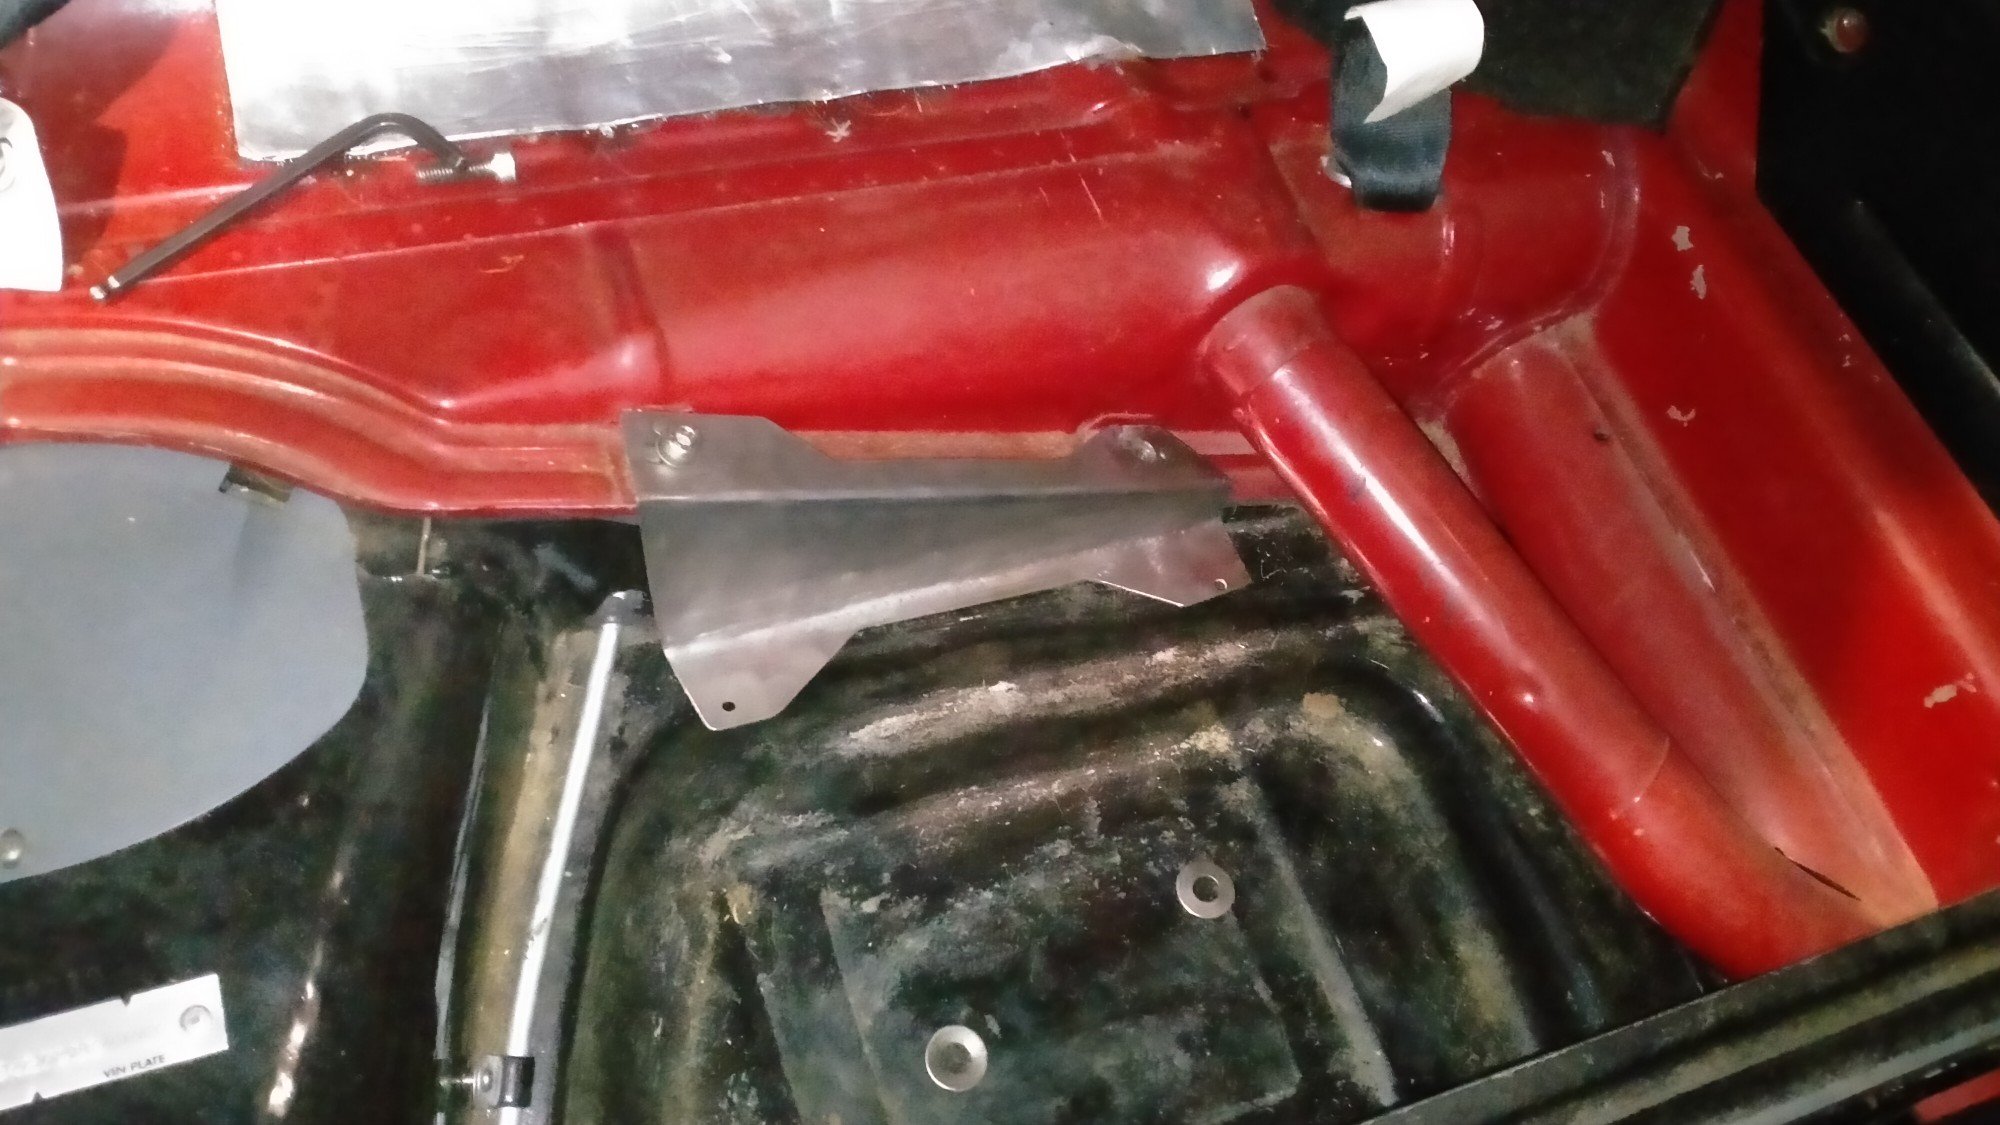
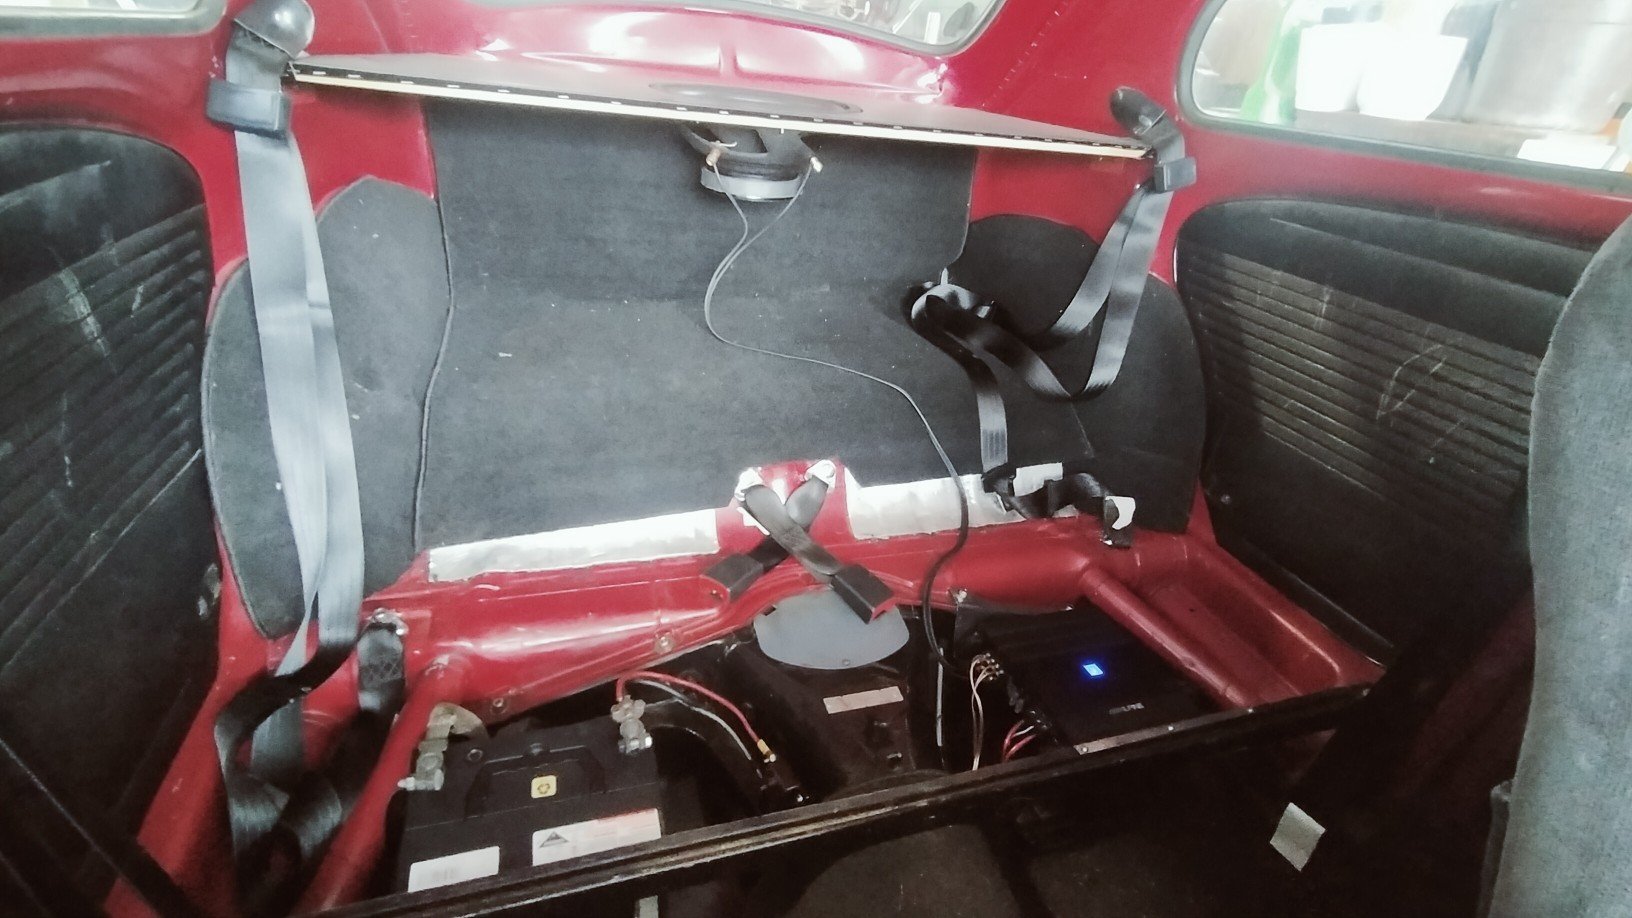
Finally got around to mounting the amp. Great spot for an amp, but there isn't much to actually attach anything to and I was not drilling holes in my floorpan. So I came up with this little arrangement using the body mounts to hang the amp. Spun up some spacers to get over the lip on the body. Was hard work bending 2mm stainless like this. front was a little simpler and just hangs from the seat brace. Also added some rubber feet under the amp to isolate it. Drilled and tapped the tunnel for the earth and mounted the stinger circuit breaker, also hooked up the Bluetooth adapter, seems to work well for $20. Also gave the whole area a good clean, found a couple rust spots in the corners so sorted that. The reason for the dirt is the horse hair stuff under the back seat, shit rains down on everything and seems to have some kind of resin that sticks. Not anymore! So chucked everything back together, all looks exactly the same, had a play with the amp settings, seems okay but Bluetooth is cool, seems to have heaps of range to, was controlling the music from across the street!
2 points
-
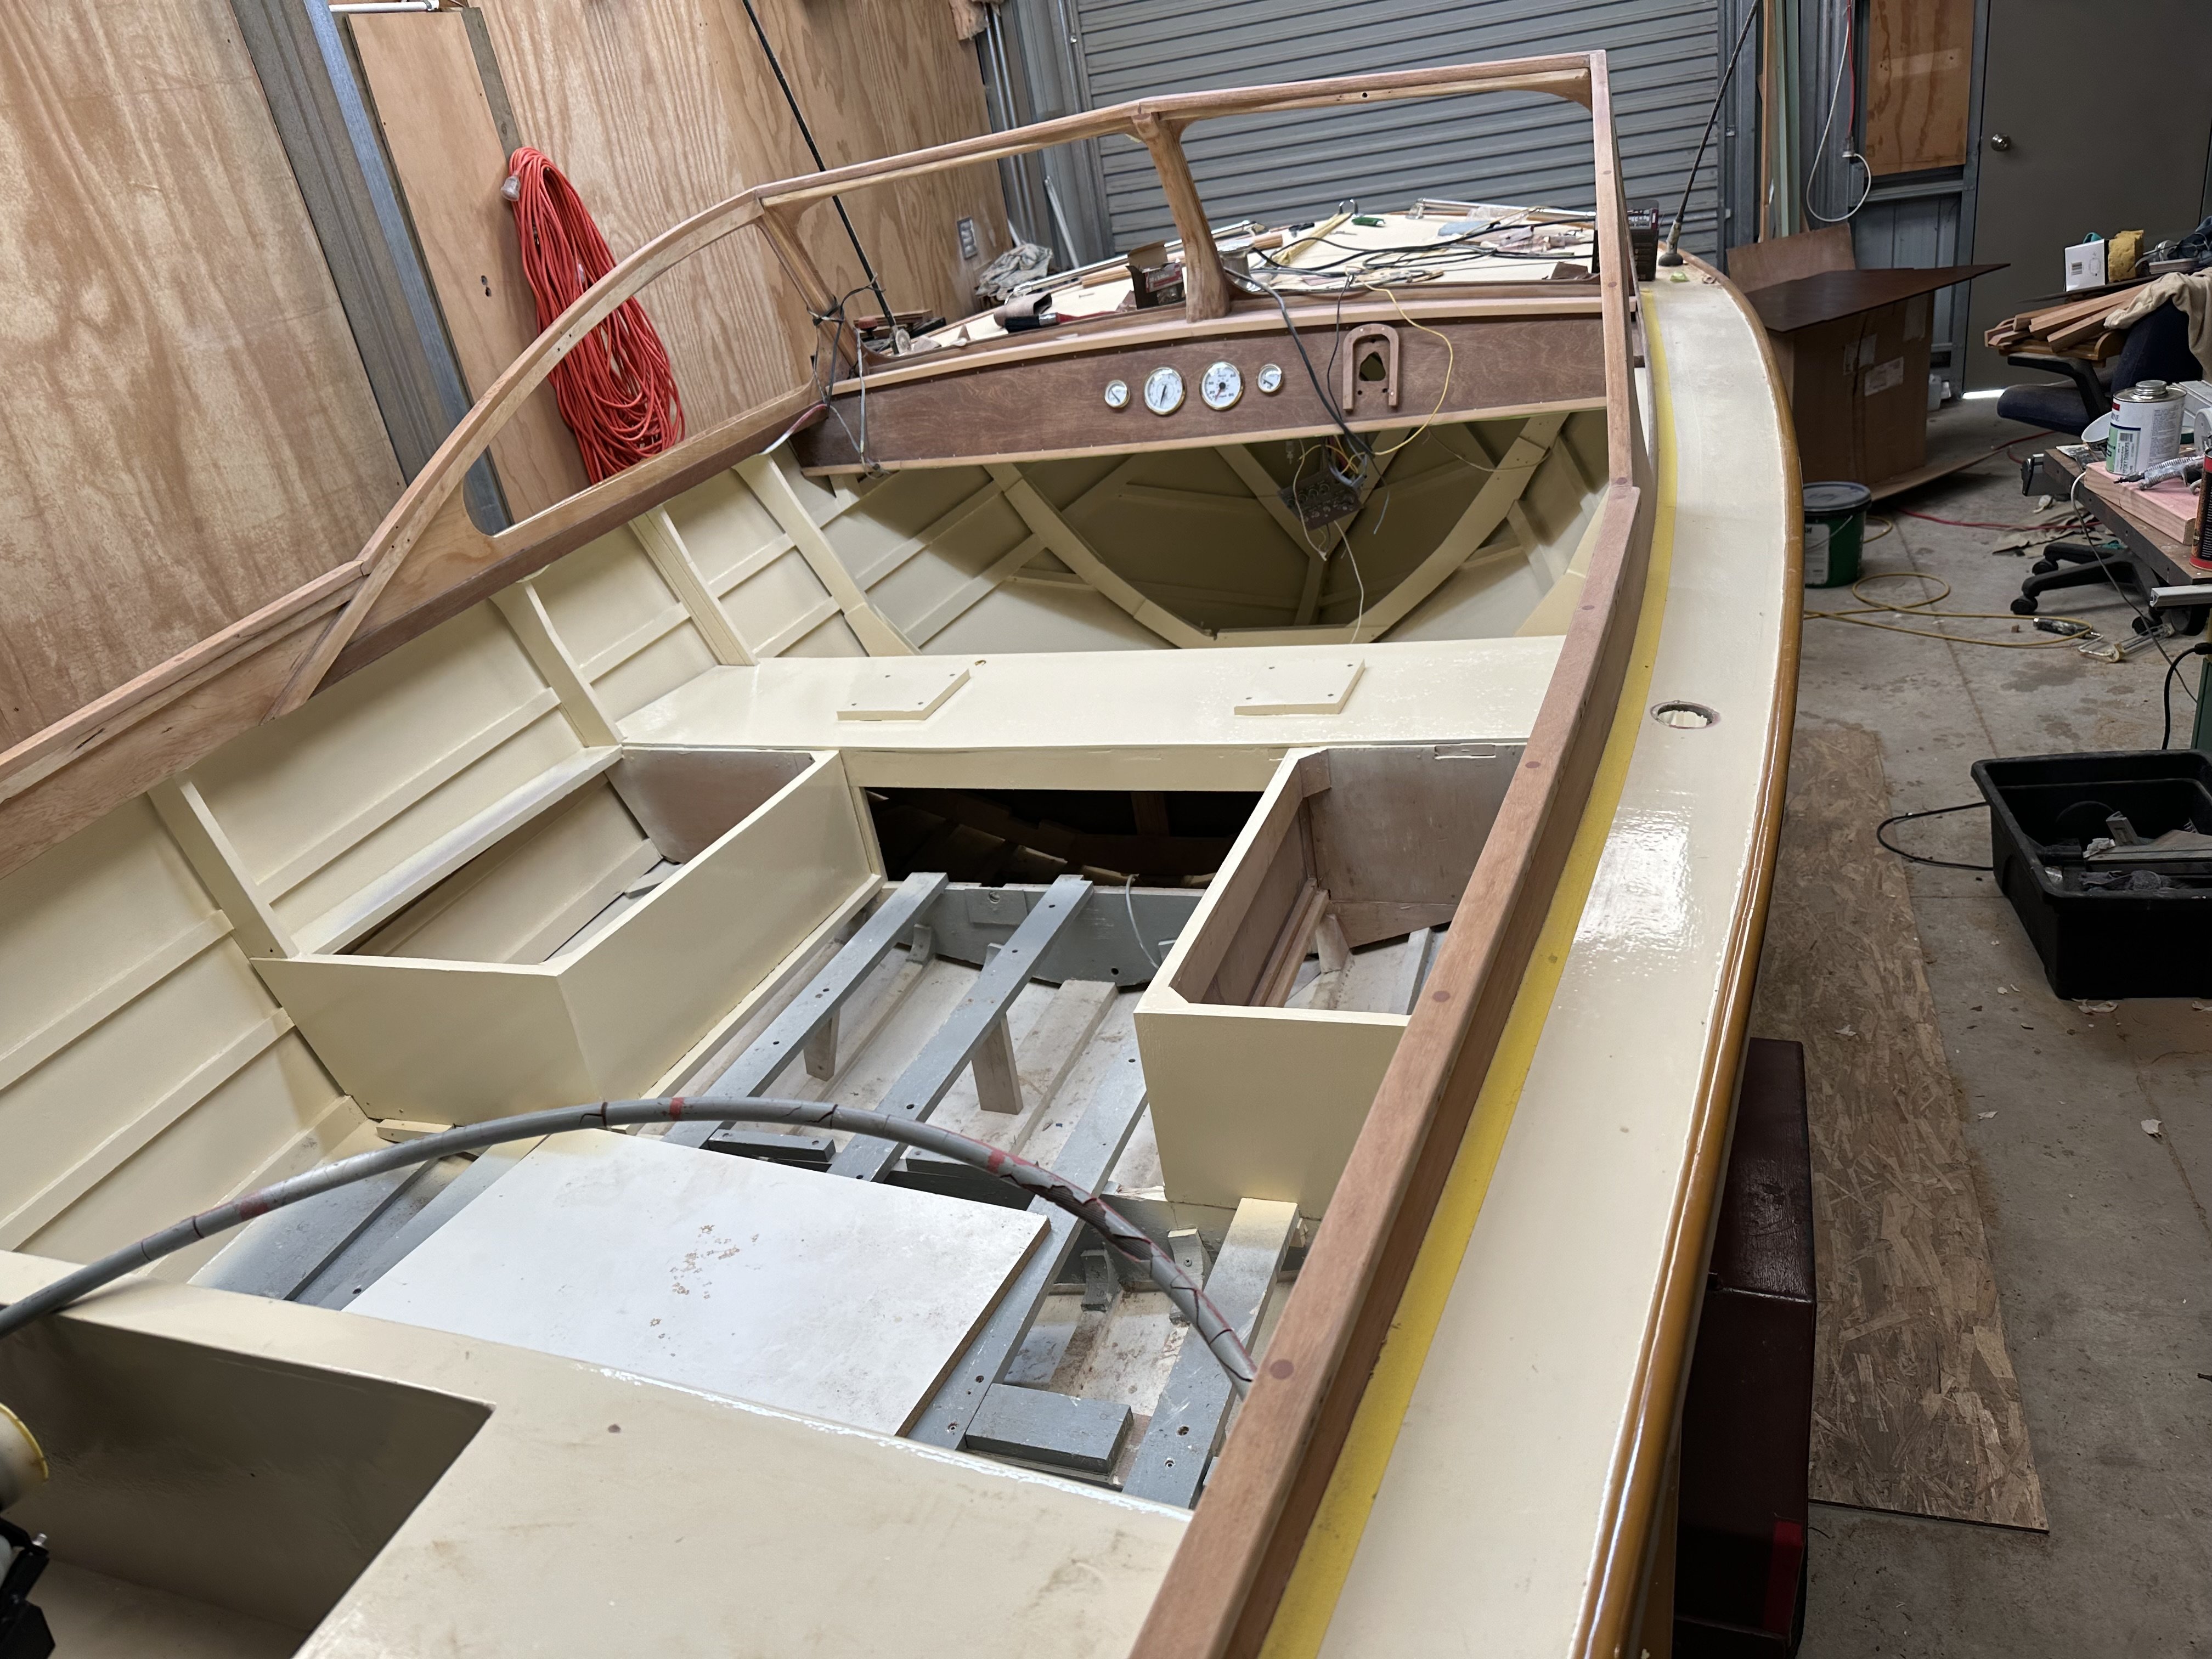
I have the varnish work done now, the floor fitted and seats mounted. The wiring needs sorting so I will get them to sort it out when they fit the engine. I was hoping to fit the windows but ran out of steam. I had my first acquaintance with Covid so I had a couple of days of not being able to do anything. It goes in for it’s engine fit tomorrow.
2 points
-
Now it was inside I could muck around with it. First job. I noticed the radio didn't work and the pocket in the second DIN slot wasn't mounted so that should be a quick fix. A loose wire was culprit as to why it wouldn't work. I found two screws to mount the storage pocket properly and reassembled. It's a JDM headunit so only receives one local station and doesn't have bluetooth - but plays CDs okay and also has iPod connectivity via USB so can play Spotify off my iPhone. Second job - while pondering and procrastinating I thought I'd quickly clean up the headlights which were very yellow. Here's the job 50% done for comparison. Last job of the day - why doesn't it start? Intercooler off, coils out, plugs out. Everything is so tiny. Turned it over with plugs out and it was like a water pump - a lot more came out of the bores than I had imagined and I forgot how far it goes under pressure. What's that smell? Petrol. That ain't water. Not sure what was going on but it was a mix with a lot of petrol in it, and it evaporated/flashed off pretty quickly. When I've got it apart I'll clean and check the injectors as well to make sure there isn't a sticky one or some other reason why it may have flooded with petrol. After all that I rewarded myself with a cold beer and thought about what next. Engine out over the holiday break (if not before) and see what is needed. Parts will need to come from Japan but they appear to be readily available. It can sit and wait for now.
2 points
-
Got bored the other night and went looking on Aliexpress for random things that might be of use to me. $16 later Don't think I could have them posted for that let alone 3d printed in nz. Off with these Quick modification on the outer one. Like a glove Time to duplicate this on the other side Job done Happy with that.2 points
-
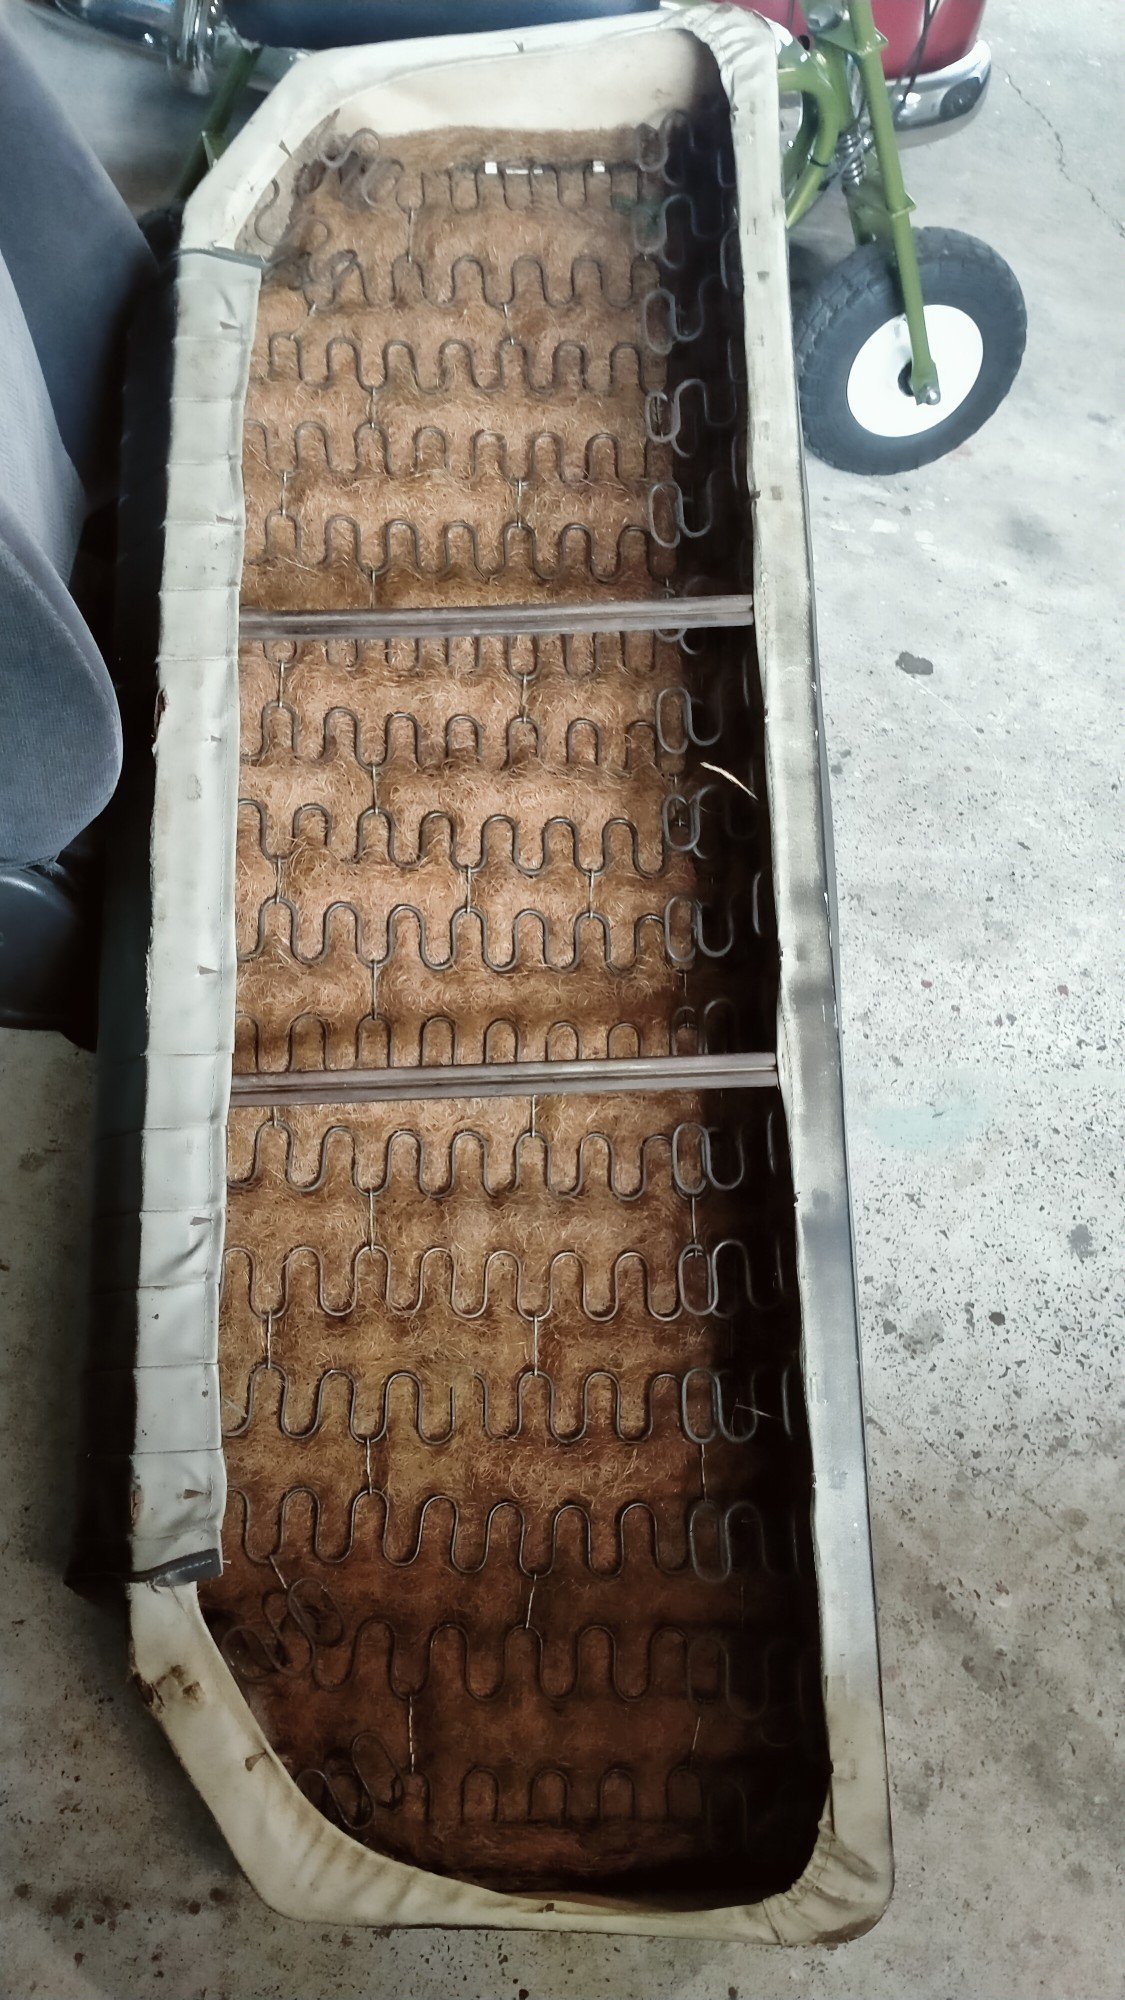
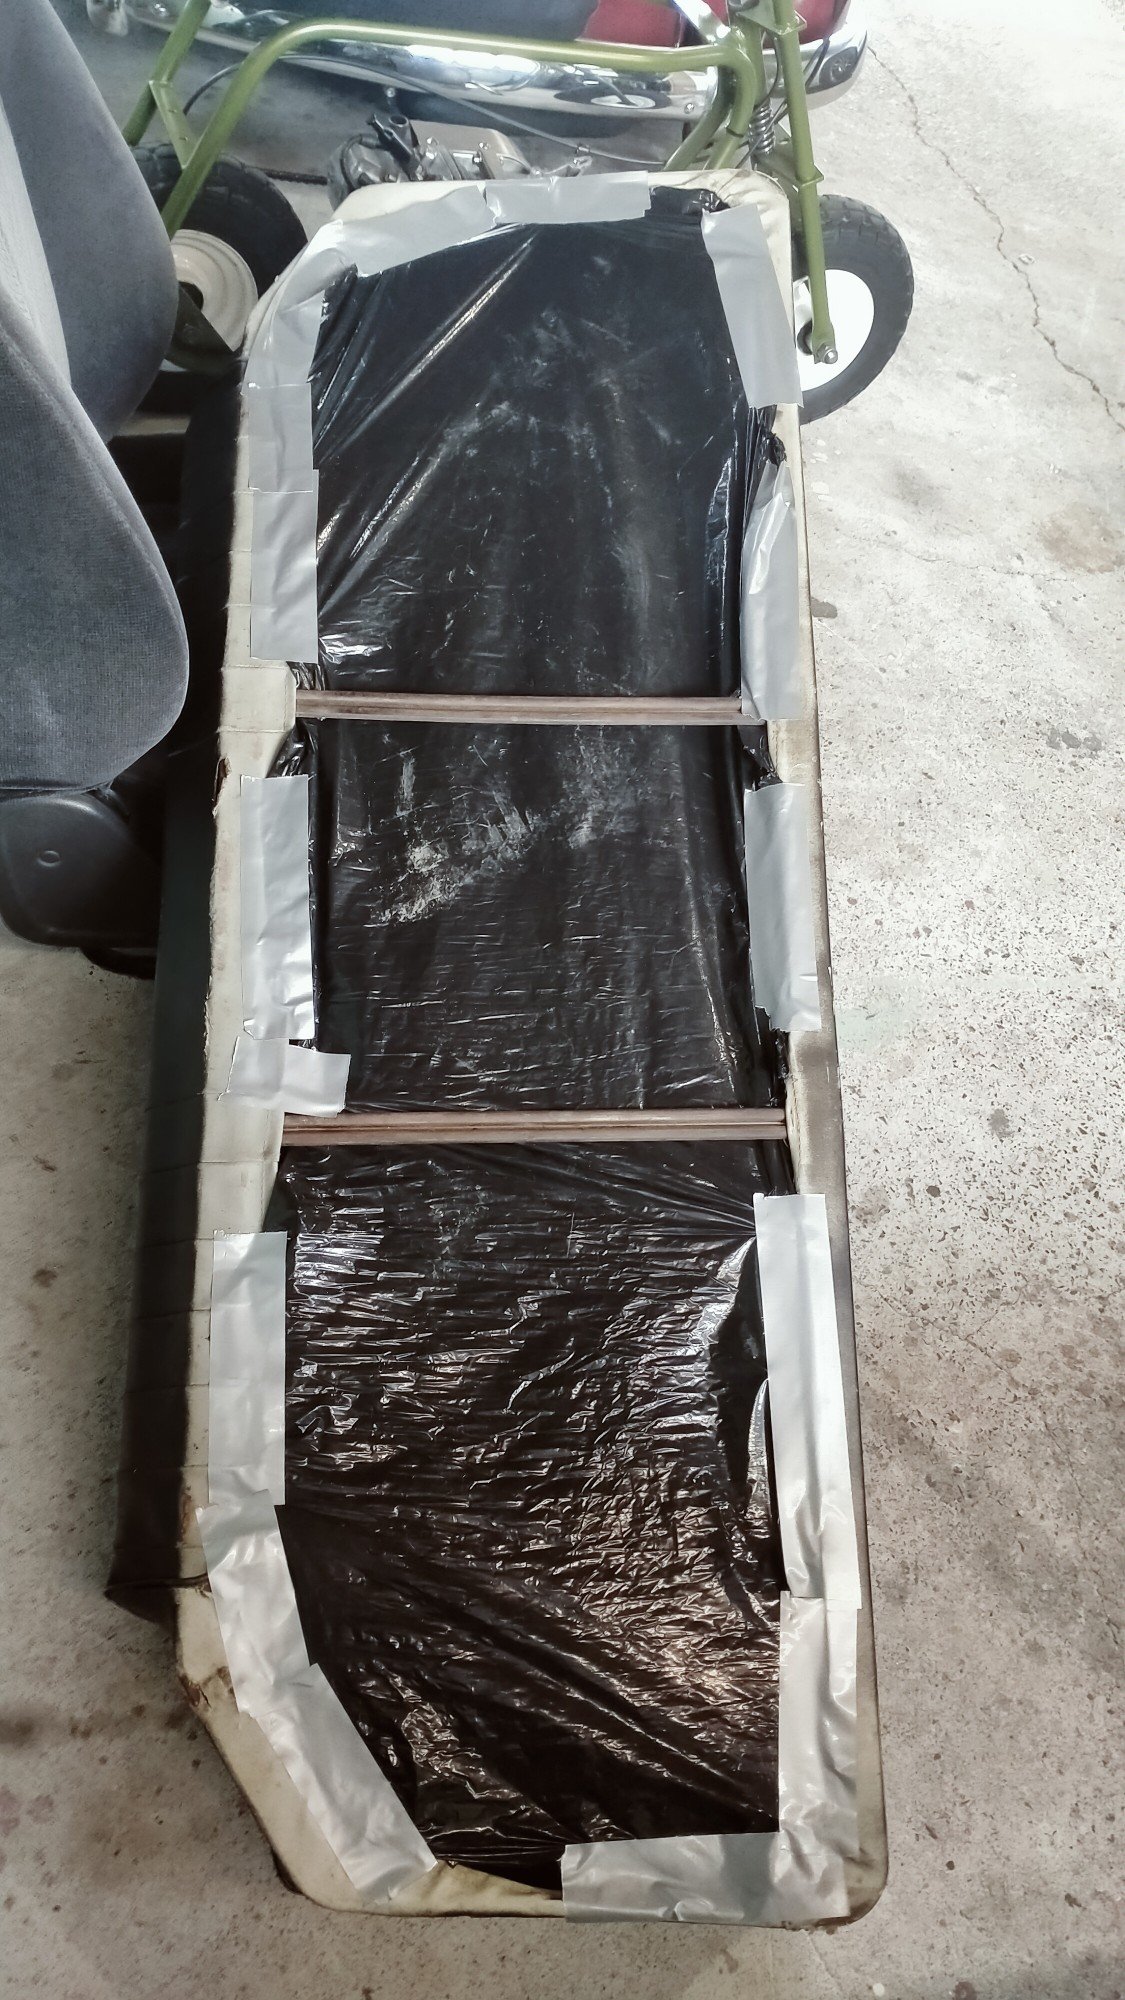
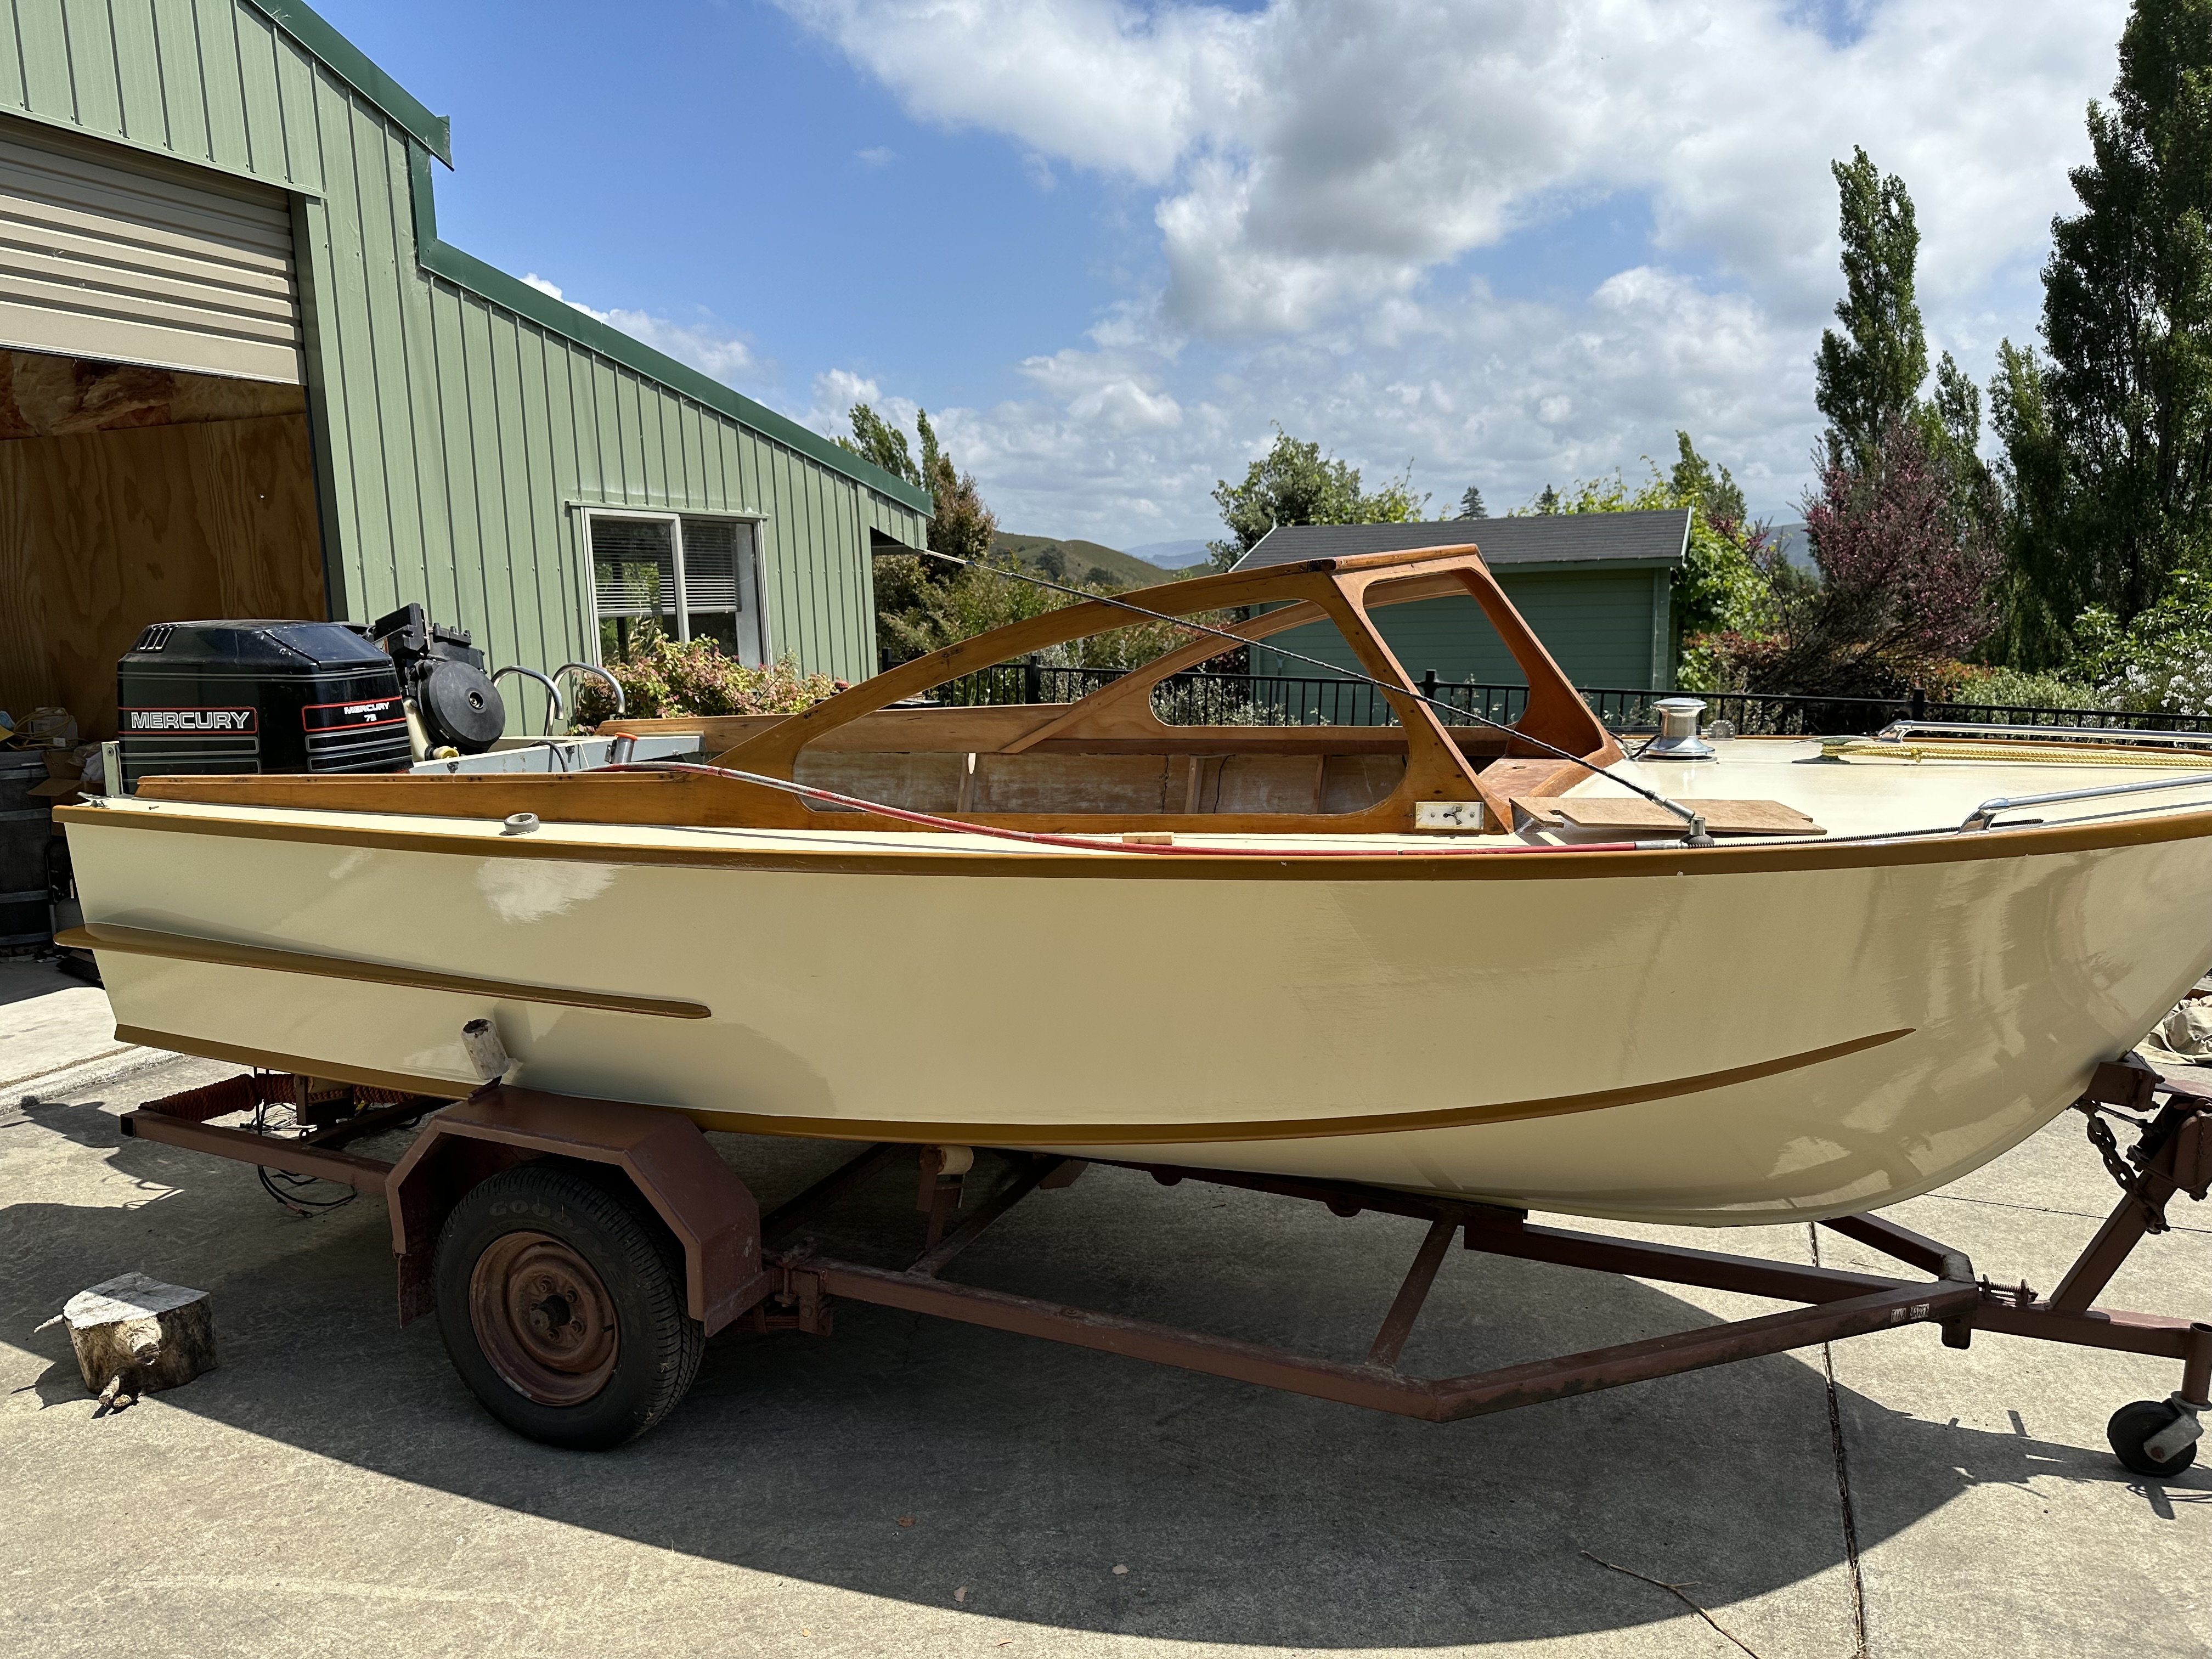
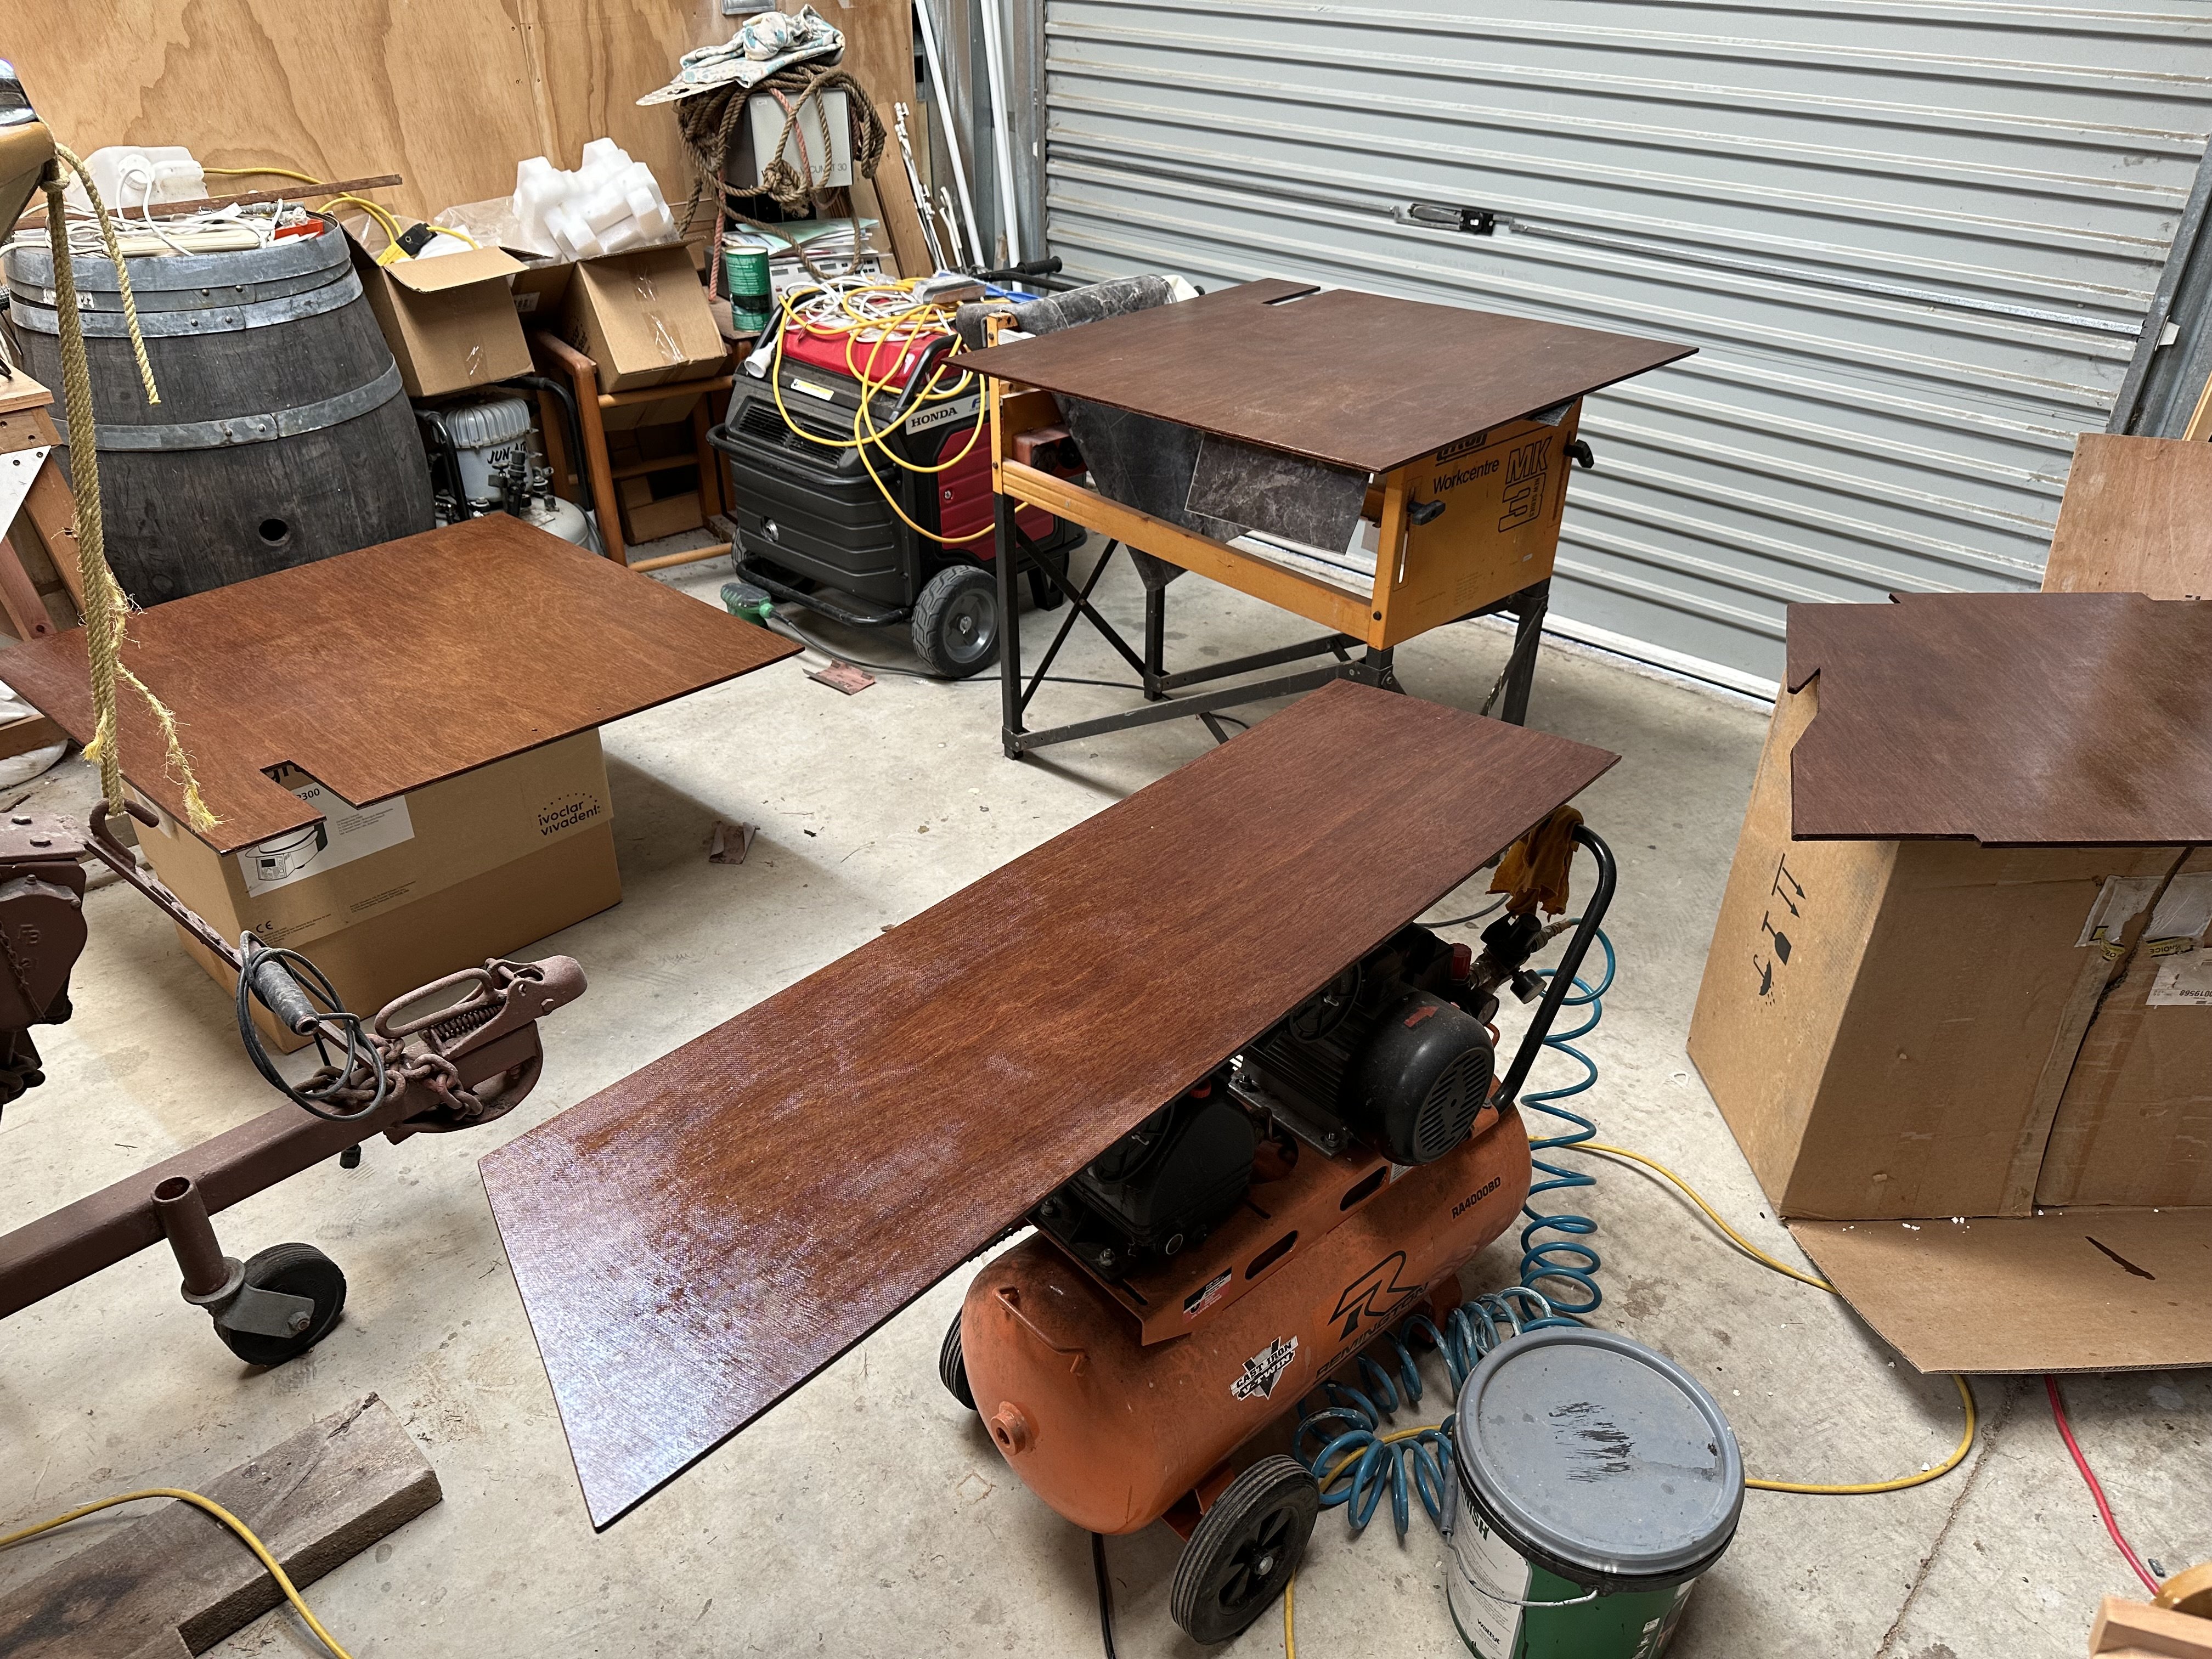
I bought this boat 10 years ago and have never put it in the water. It's still is on its original trailer and has the number 59 on it which I am thinking was when it was built, which seems about right. I bought it from Whitianga, and they had bought it from Gisborne. It had a reasonably new outboard fitted to it at the time which is what they were after. Then I picked up a second hand 75 Merc for it from Gisborne of all places. The exterior of the hull has fresh paint on but the interior was in need of a tidy up so I set about redoing the interior. I got most of the construction done but life got too busy so it sat until now. Anyway, we have decided since the engine has been sitting without use and will probably need a fair bit of work, we will buy a new engine. So, I went down to the local marine dealer who sells Honda outboards and have ordered a 4 stroke 75hp for it. They tell me it doesn't take that much to get these small ply boats to get up and go. I will post up more pics as I go.
1 point
-
There is also the added difficulty that I am a MechEng so inherently unable to understand coding. The sketch is mint tho. Plus I ordered spares of all the wee boards for when the magic smoke comes out.1 point
-
Oh, L298N motor controller, plenty around, cheap. The datasheet even has a sample PCB design. Done with tape and donut! OG!1 point
-
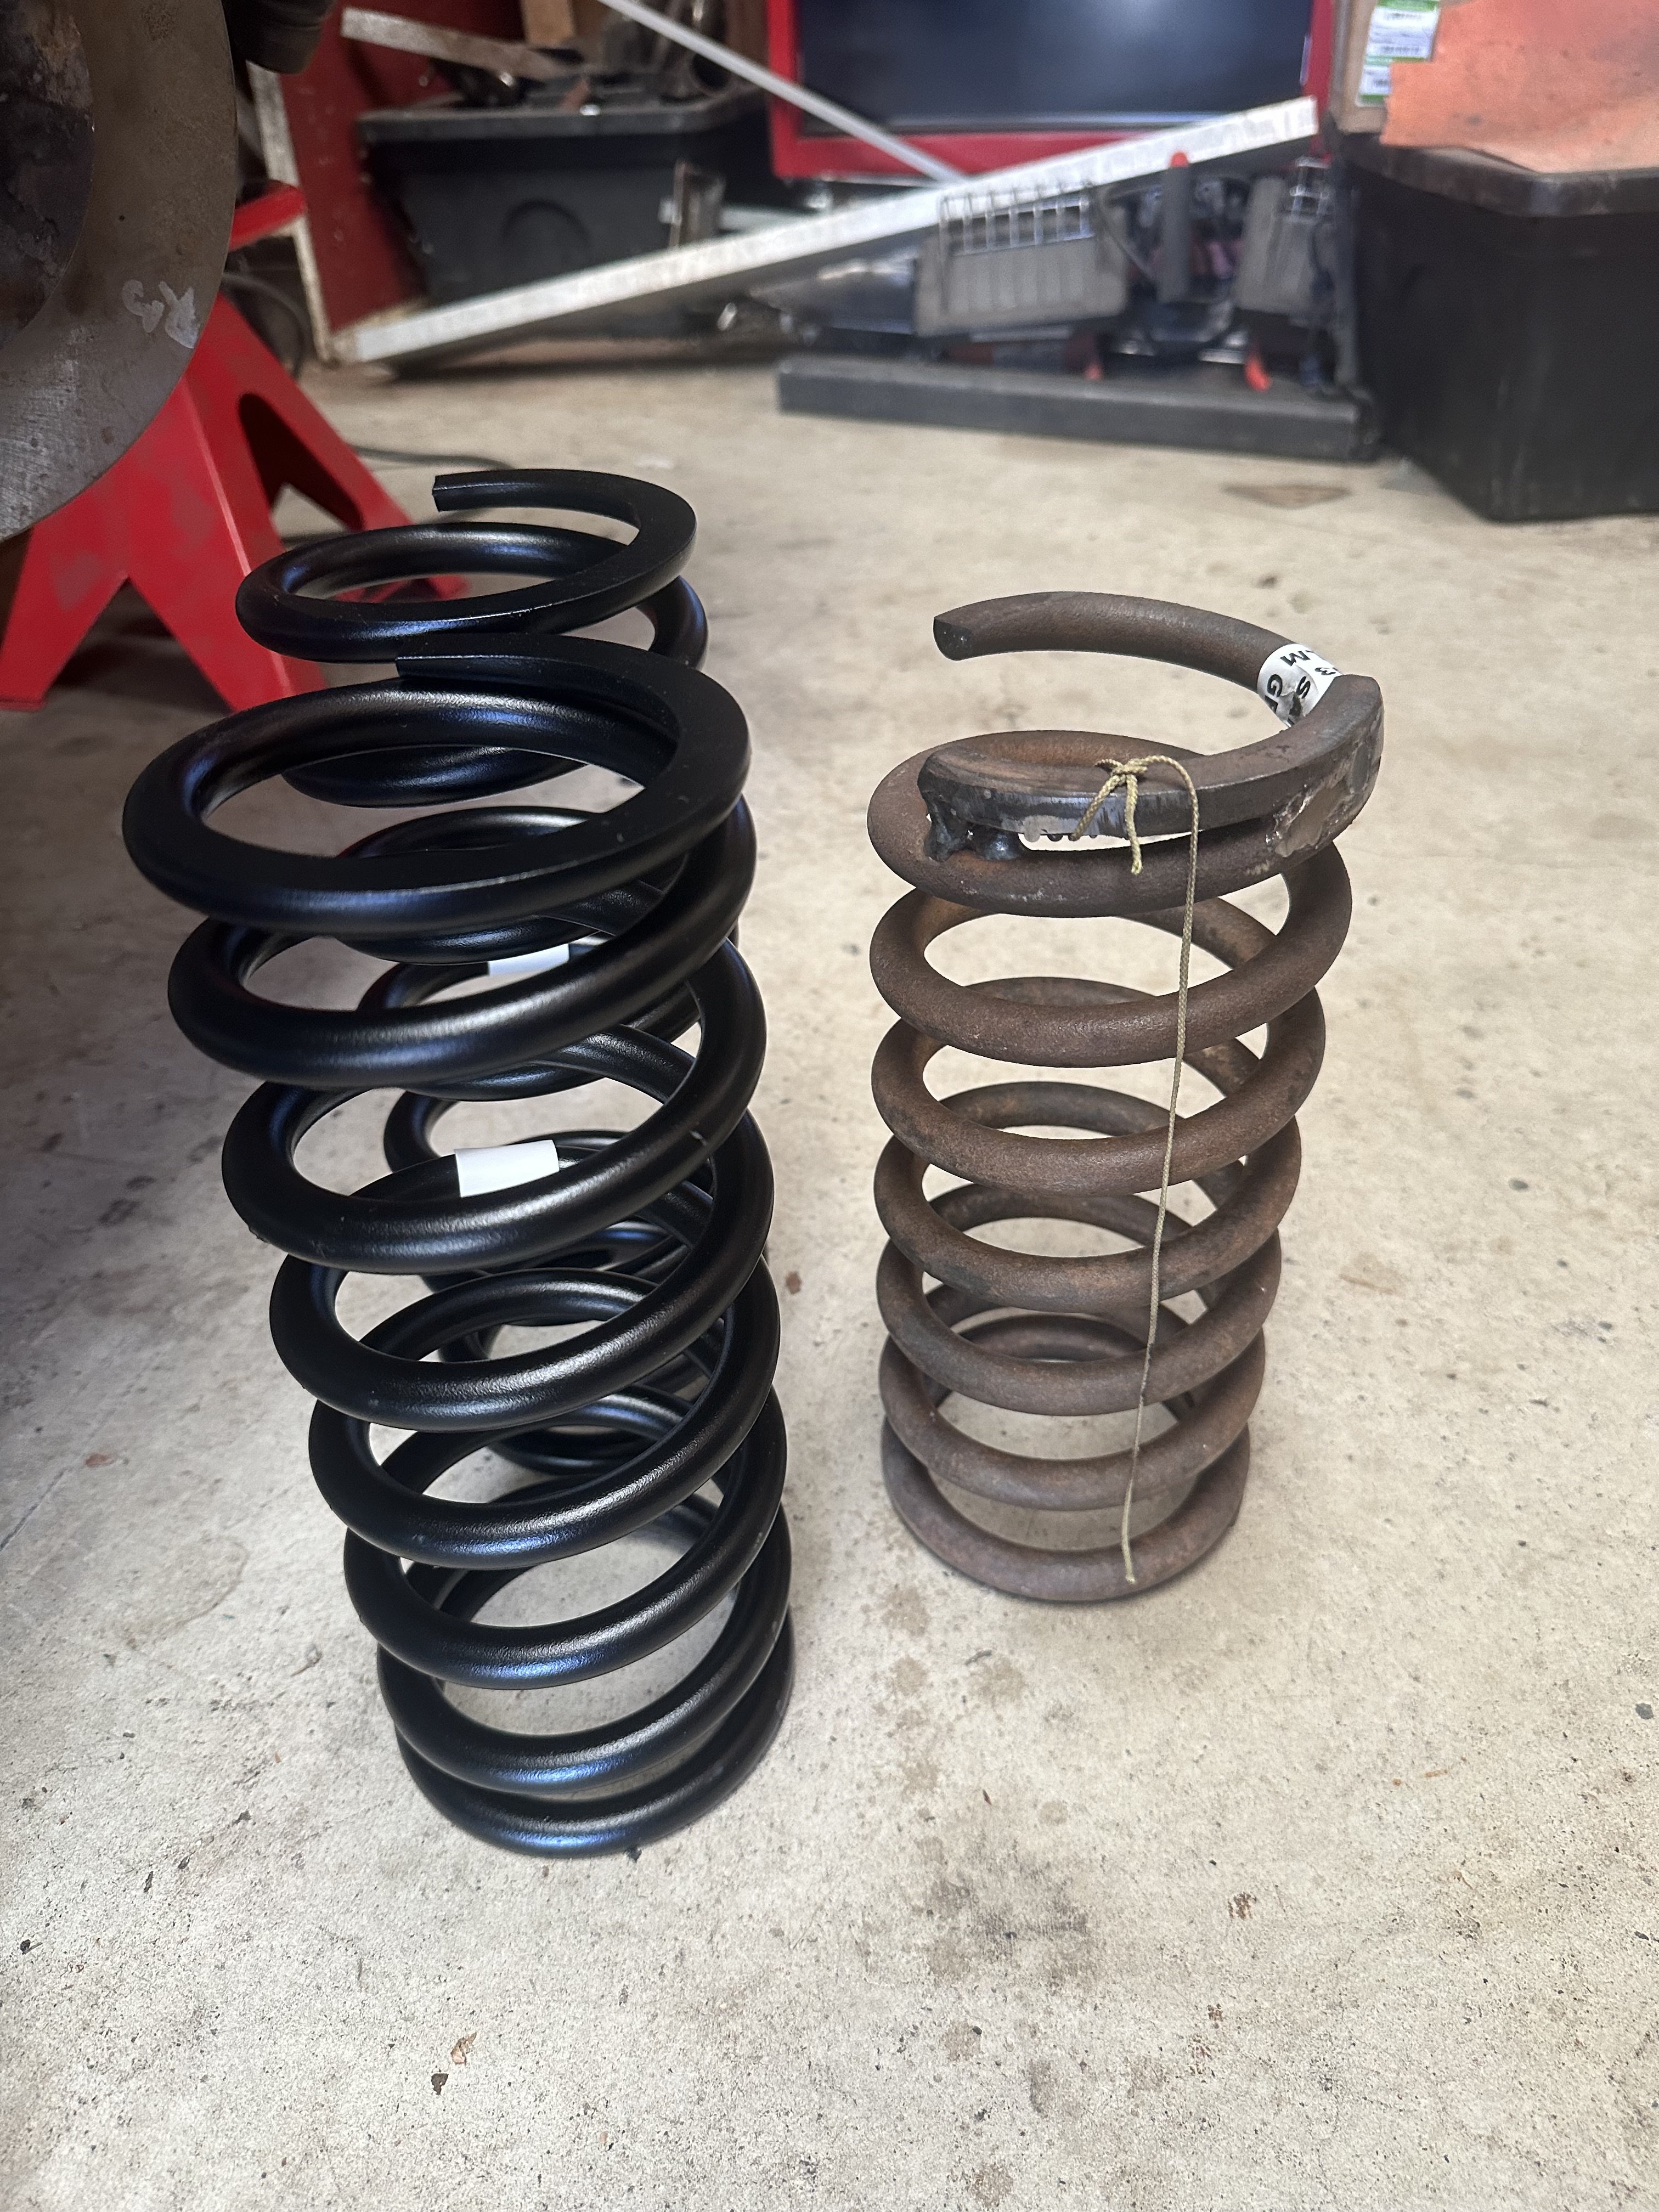
The new front springs turned up today. I had cut 50mm off the original springs and welded the flat bit back on top of the coil so it sat in the perch reasonably well. I wasn’t going to increase the spring rate so all I had to do is give them the compressed height of the spring. Anyway I will fit them tomorrow and see how the car sits.
1 point
-
Fuck those things looked ridiculous next to Shannons C50.1 point
-
Spark plugs ive fitted are just plain copper plugs which according to the Turbo community are a bit more forgiving when running boost at higher levels than stock giving a fatter spark across the bigger electrode surface. This bigger electrode may be the issue in my head as it probably takes more energy to make that spark jump which my coils could be struggling to produce over 4000rpm. I'm only dropping 1 or 2 cylinders my bet I've got a sad coil so I'll try my box of spares before committing to ripping plugs out again if the plugs come out ill go straight back to iridium as they were working fine even with been torched and a bit fouled. Hope that's the problem as I'm getting short on time. Oil change and coolant to go in as well. Hope that's all.1 point
-
Oooooh info on your Bluetooth adaptor please1 point
-
As for the spare car sadly I had to make a call
1 point
-
Bottom end is mint, bearings are perfect still and without the pistons in the crank spins freely. Ill take the head to Mean Machine tomorrow to get it looked over, see what they have to say.1 point
-
My grandad had a old straight 6 mariner. Was good when it was going but it also broke down lots. Sounded pretty good at WOT!1 point
-
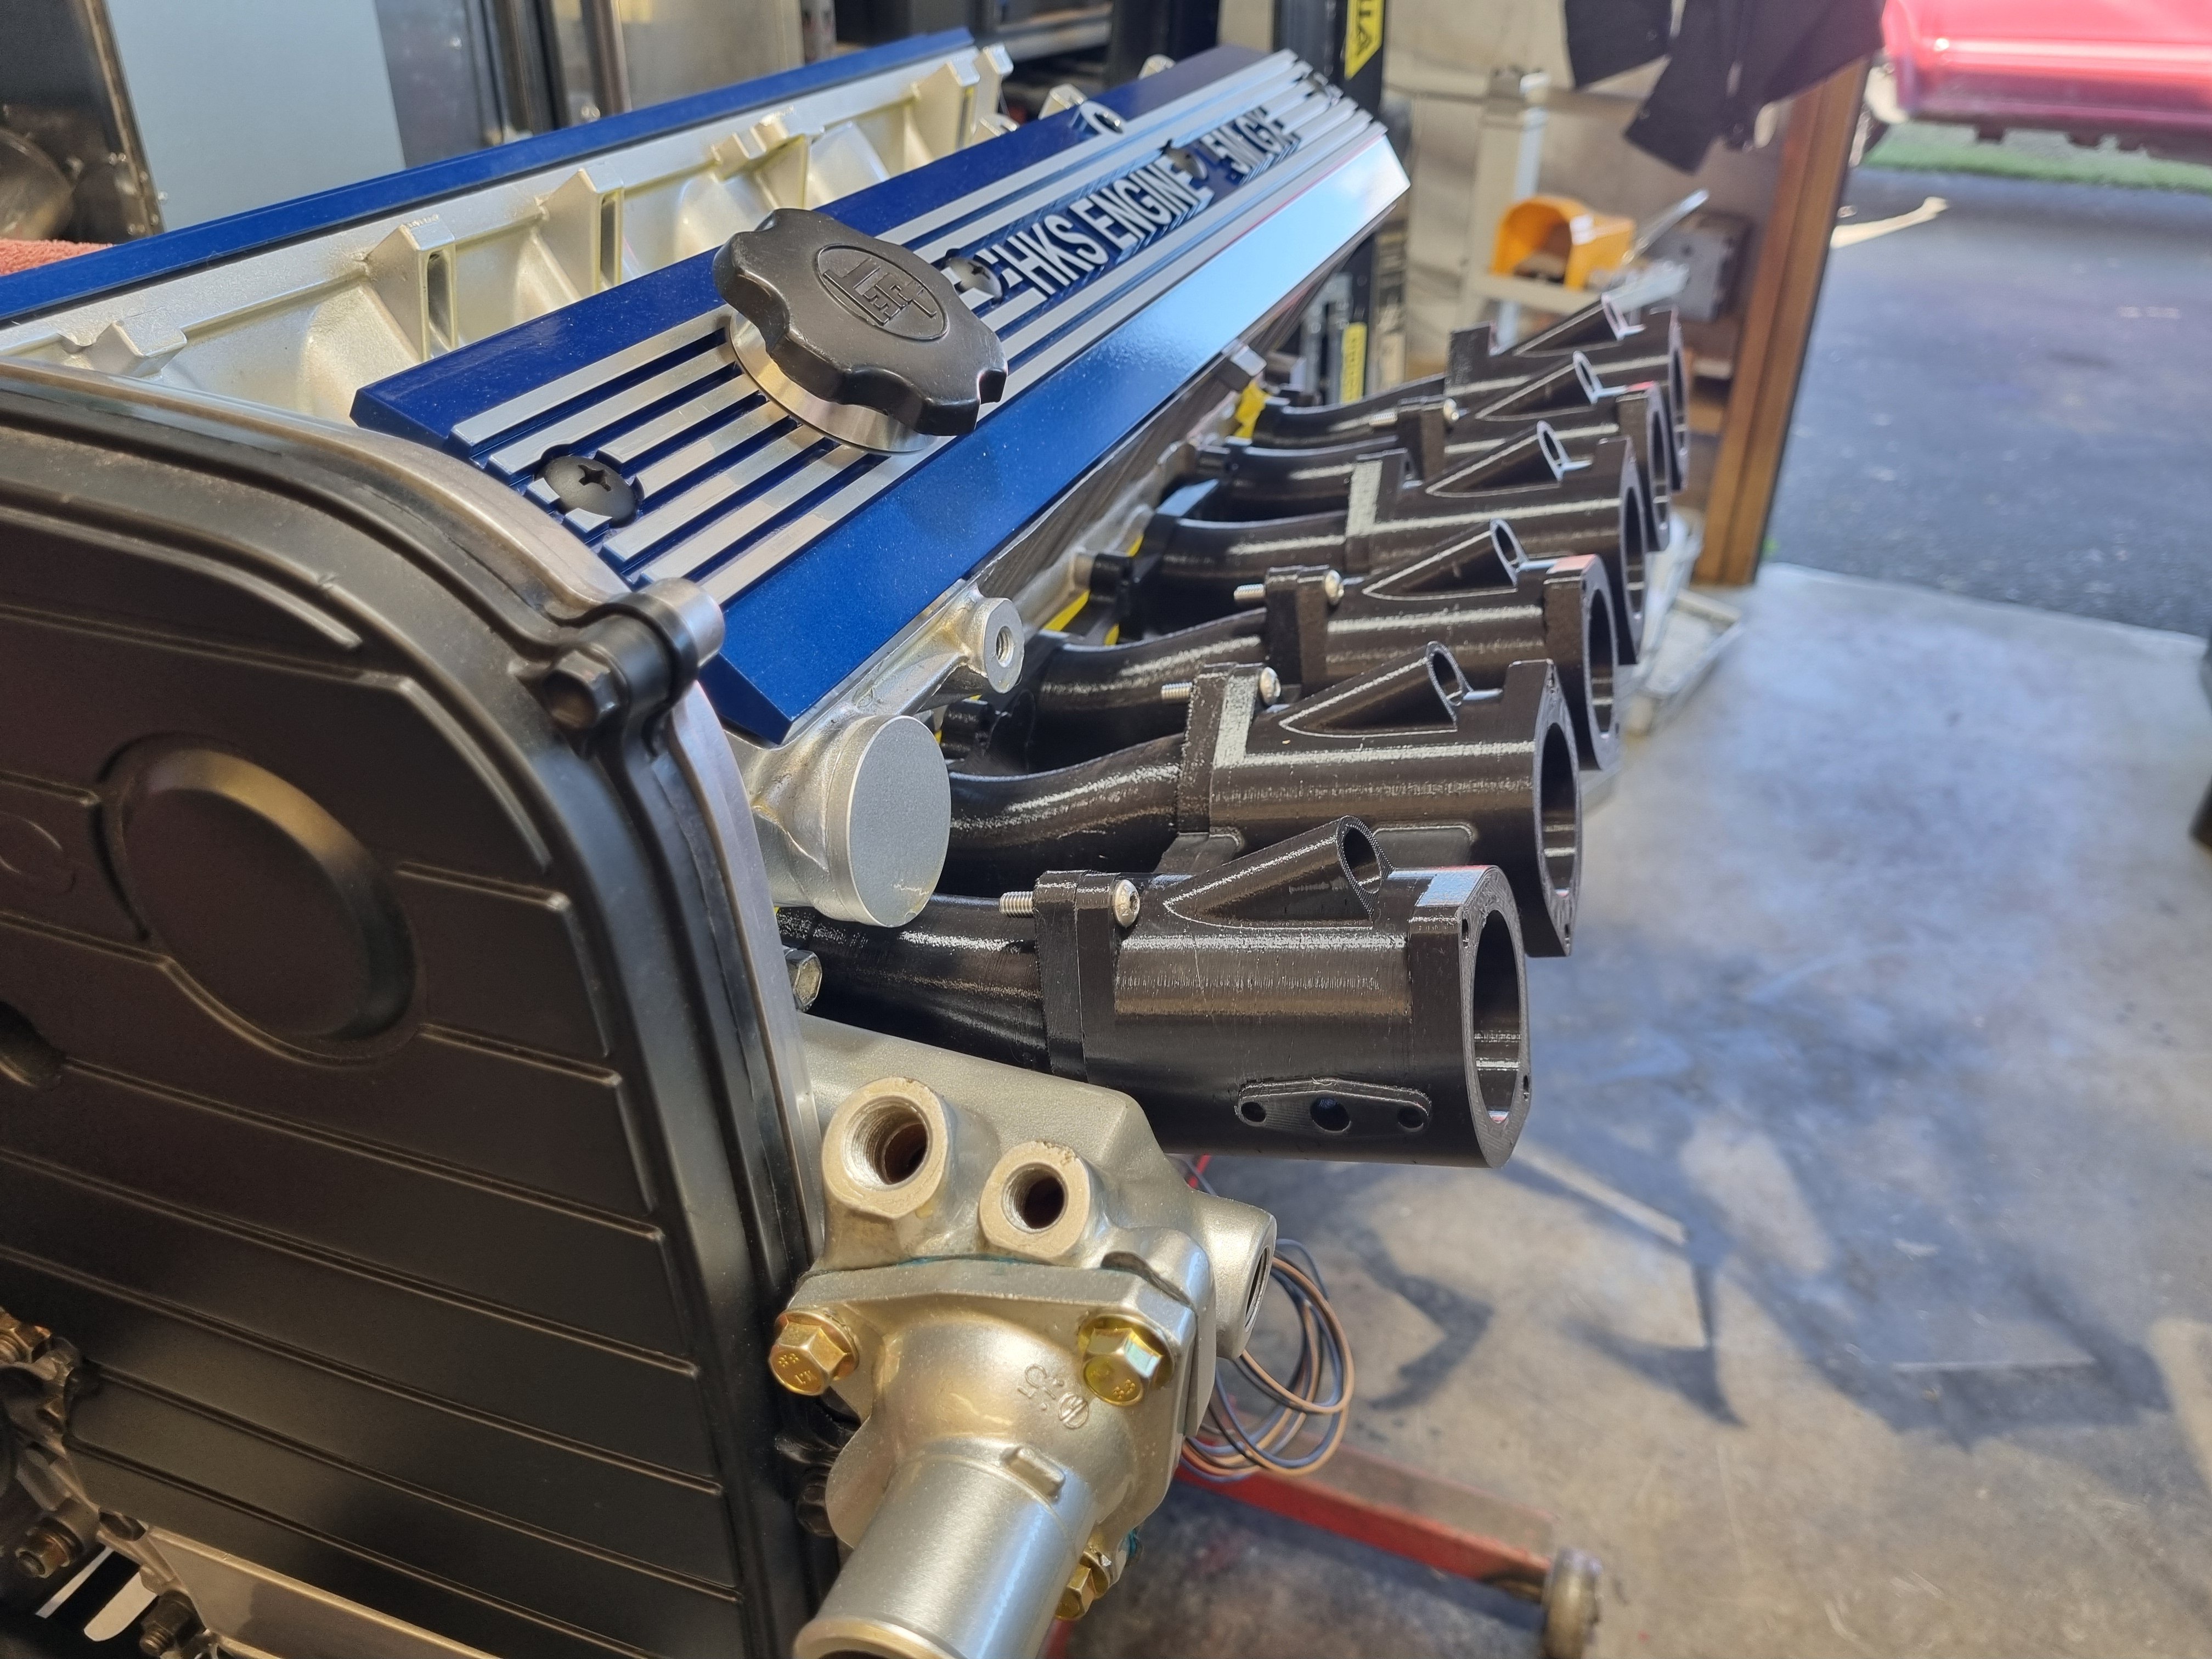
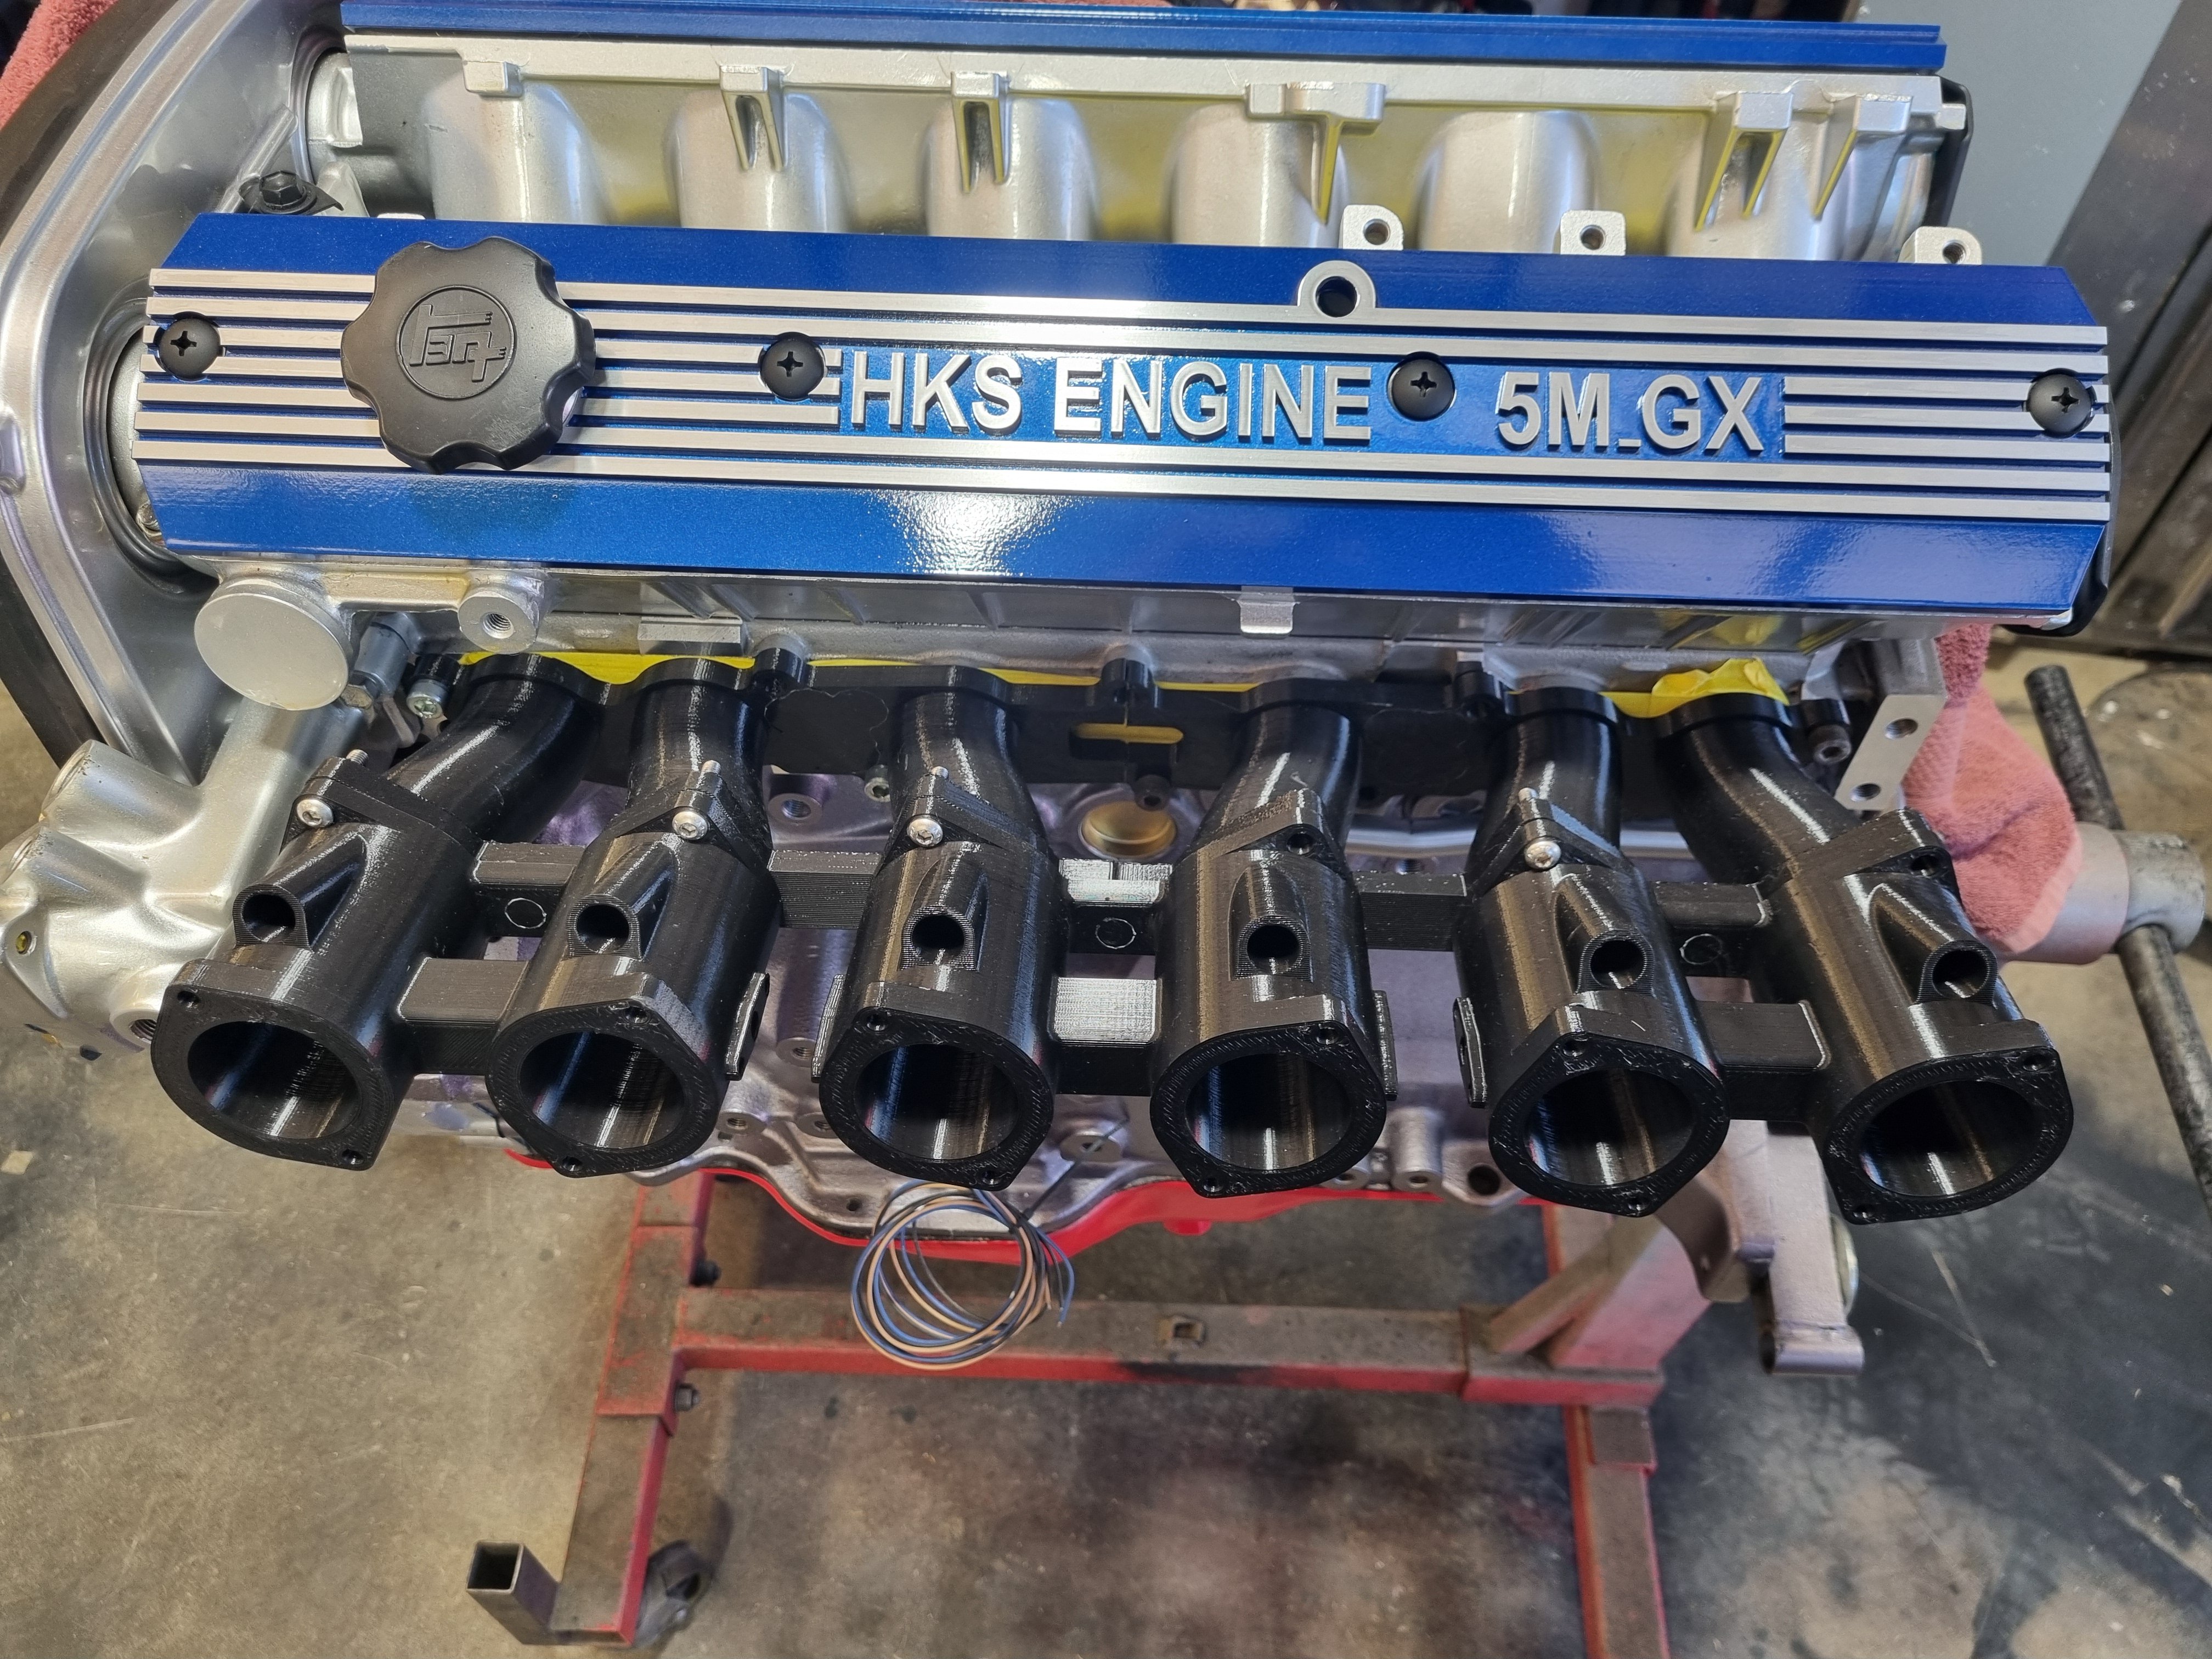
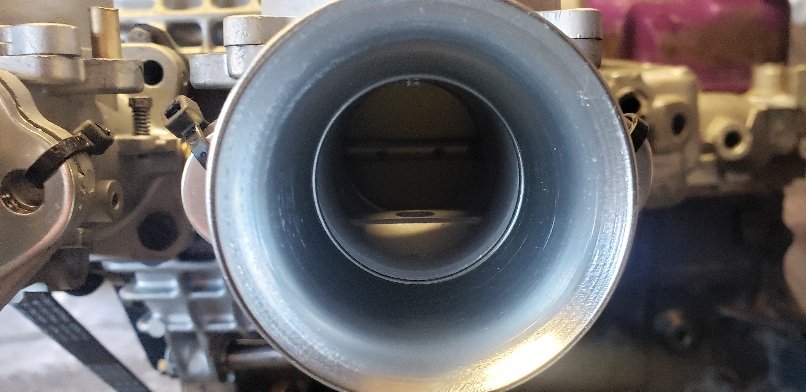
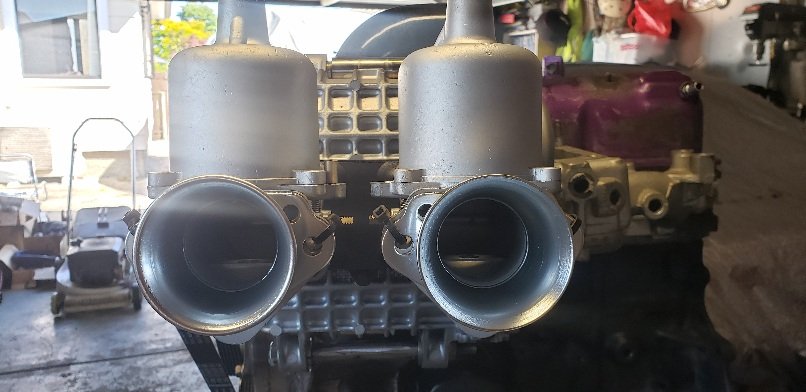
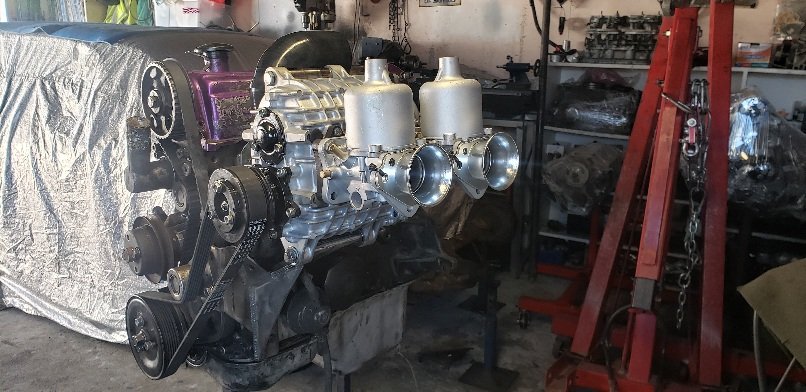
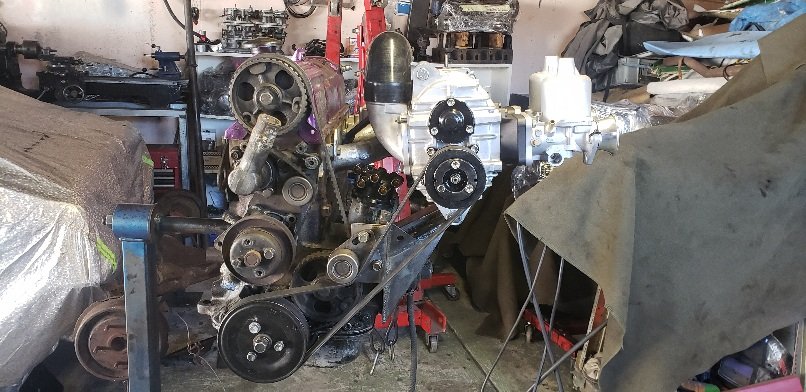
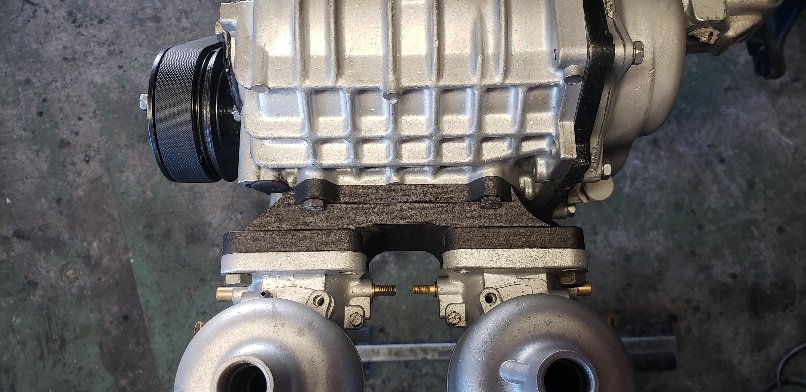
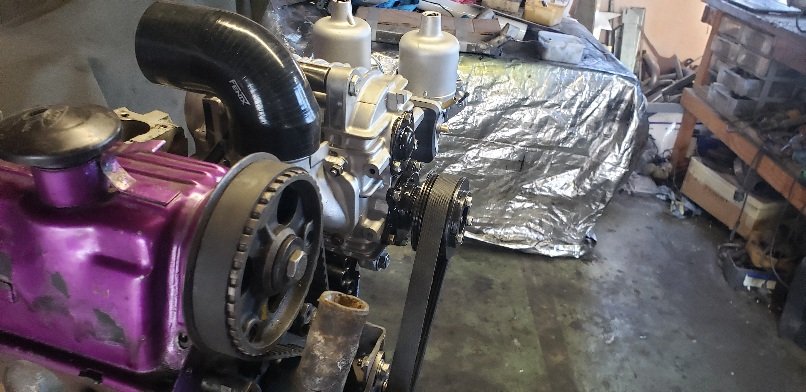
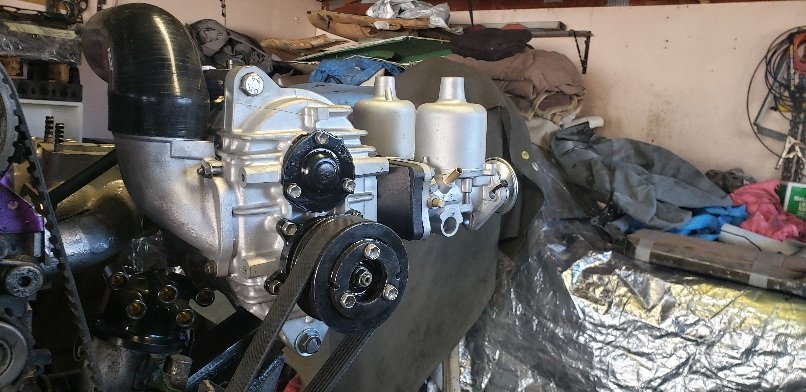
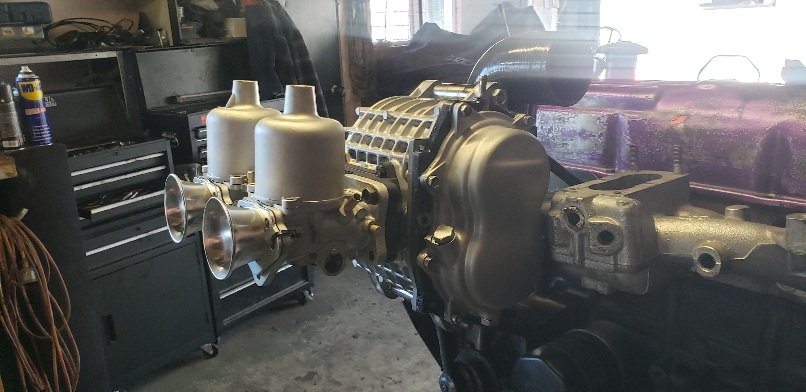
hey, also it should be made very clear that i have no idea what I'm doing. I'm literally just doing whatever looks good, there is no science in anything here, diameter of the throttle? - fuck knows, whatever will kind of match up with the head and still be big so it looks cool. length of the runner? - 80ish mm because that the number that i pulled out of my arse. angle of the throttles in relation to the motor? - 15 degrees because i have no idea why. if there's something that seems fucky please speak up, like i say these is no science in this at all it should also be noted that this engine isn't really destined for great horsepowers, its a fucking 5m, if i wanted max powerz i wouldn't have started out with such a turd. any input would be appreciated, unless your a shitposting dickhead, then its not.1 point
-
3d print a retro cover for modern engine1 point
-
In my last update I mentioned that I was battling with my a/c belts which seem to stretch to the point where I run out of adjustment. I popped one of my usual "advice needed" posts under general car chat and @440bbm suggested that I replace the notched belts that I have been using with a solid belt. I've got one on order which will hopefully pitch up sometime over the next few days. Hopefully that will solve my issue. In other news I've just sold the last of my HiAce automatic gearboxes to a guy in Tassie. Gave it a clean before I wrapped and strapped it and I'll be dropping it off at my local courier depot tomorrow morning. I originally had two autos in stock in case I wanted to go down that path, but I'm happy with my 5 speed manual and these were just taking up valuable storage space. The last one went to Western Australia, so looks like these boxes are sought after items.
1 point
-
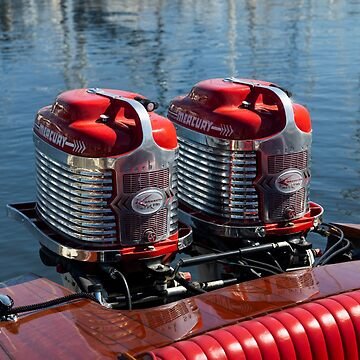
Needs one of those tower of power mercs with an engine cowling that looks like a 1950s fridge1 point
-
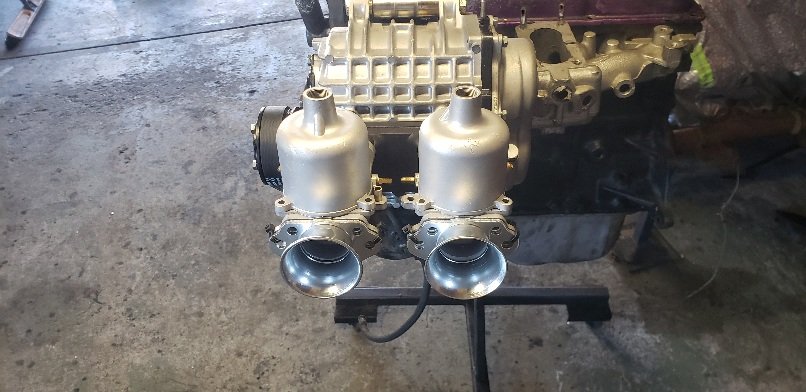
Printed some throttles to get a better idea. It's pretty good, I'll guesstimate how it might work in the engine bay and take it from there.
1 point
-
Alright, so another update. Again longer than we thought inbetween updates. Anywho, where I left off last time was at the start of October. I was on the hunt for a shifter and slowly plodding away getting the Mini ready for Mini Nationals in Cambridge over Labour weekend. I managed to pick up a shifter from a guy locally. I also had the guy who built my last engine and gearbox (in the Mini) have a look at my bottom end and gearbox. He said the gearbox is sweet. But the block is junk as a heat mark where the piston melted has gone through to the next bore. Good thing I picked up some spares. But I'll use the crank and rods out of the melted one. So Mini Nationals went well. I think my car was well received. Its my 2nd time entering with me doing the one in Auckland a few years back. Left 6am from Auckland and trundled down. Parked up for the morning for the show. The theme was display from the period of your vehicle. Since most Mini owners are stuck in the 70s, maybe they didn't quite appreciate the 90s decor lol (See also my finished rocker cover racer, which needs a bit more development...) And did the Motorkhana in the afternoon. Managed to muster up a 2nd after some pretty average and rusty driving. It's always slightly intimidating doing a Motorkhana where the only cars are Minis, as its all on the driver and no advantage from having a small, agile car. Time to head back home The next day Mini nationals carried on. But I skipped it and went to the annual Pukekohe Car Club Motorkhana and Autocross at Limestone downs in Port Waikato. I forgot to grab any photos. Managed a 4th overall in the Motorkhana with a pretty soft, peat/sand surface under the grass that cut up super quickly. I also competed in one of the Sports Car Club of Nz Motorkhanas on Tarmac a few weeks back, held over in Glenfield. Where I managed to snag a 3rd overall with the top 6 or so places being Minis both new and old. The reason why I bring up these results, is not to brag. But hopefully once the Moke is done I'll be hunting 1sts. Anyways Back to our scheduled programming.... I met a guy at Mini Nationals who was selling some bits after his build. One of these items was a lightly used Alloy Rad from MED in the UK. They make super nice bits (I have some on the Mini) and the price was right so I took a trip down to Hamilton and grabbed it with some other stuff. The eventual plan is to run this with an e fan on the other side to pull some air through. And last weekend we cracked on with some rust work. I wanted to get rid of the stupid barry spec side window panels that were riveted to the windscreen. I was slightly worried what was underneath as this car has had a few surprises so far.1 point
-
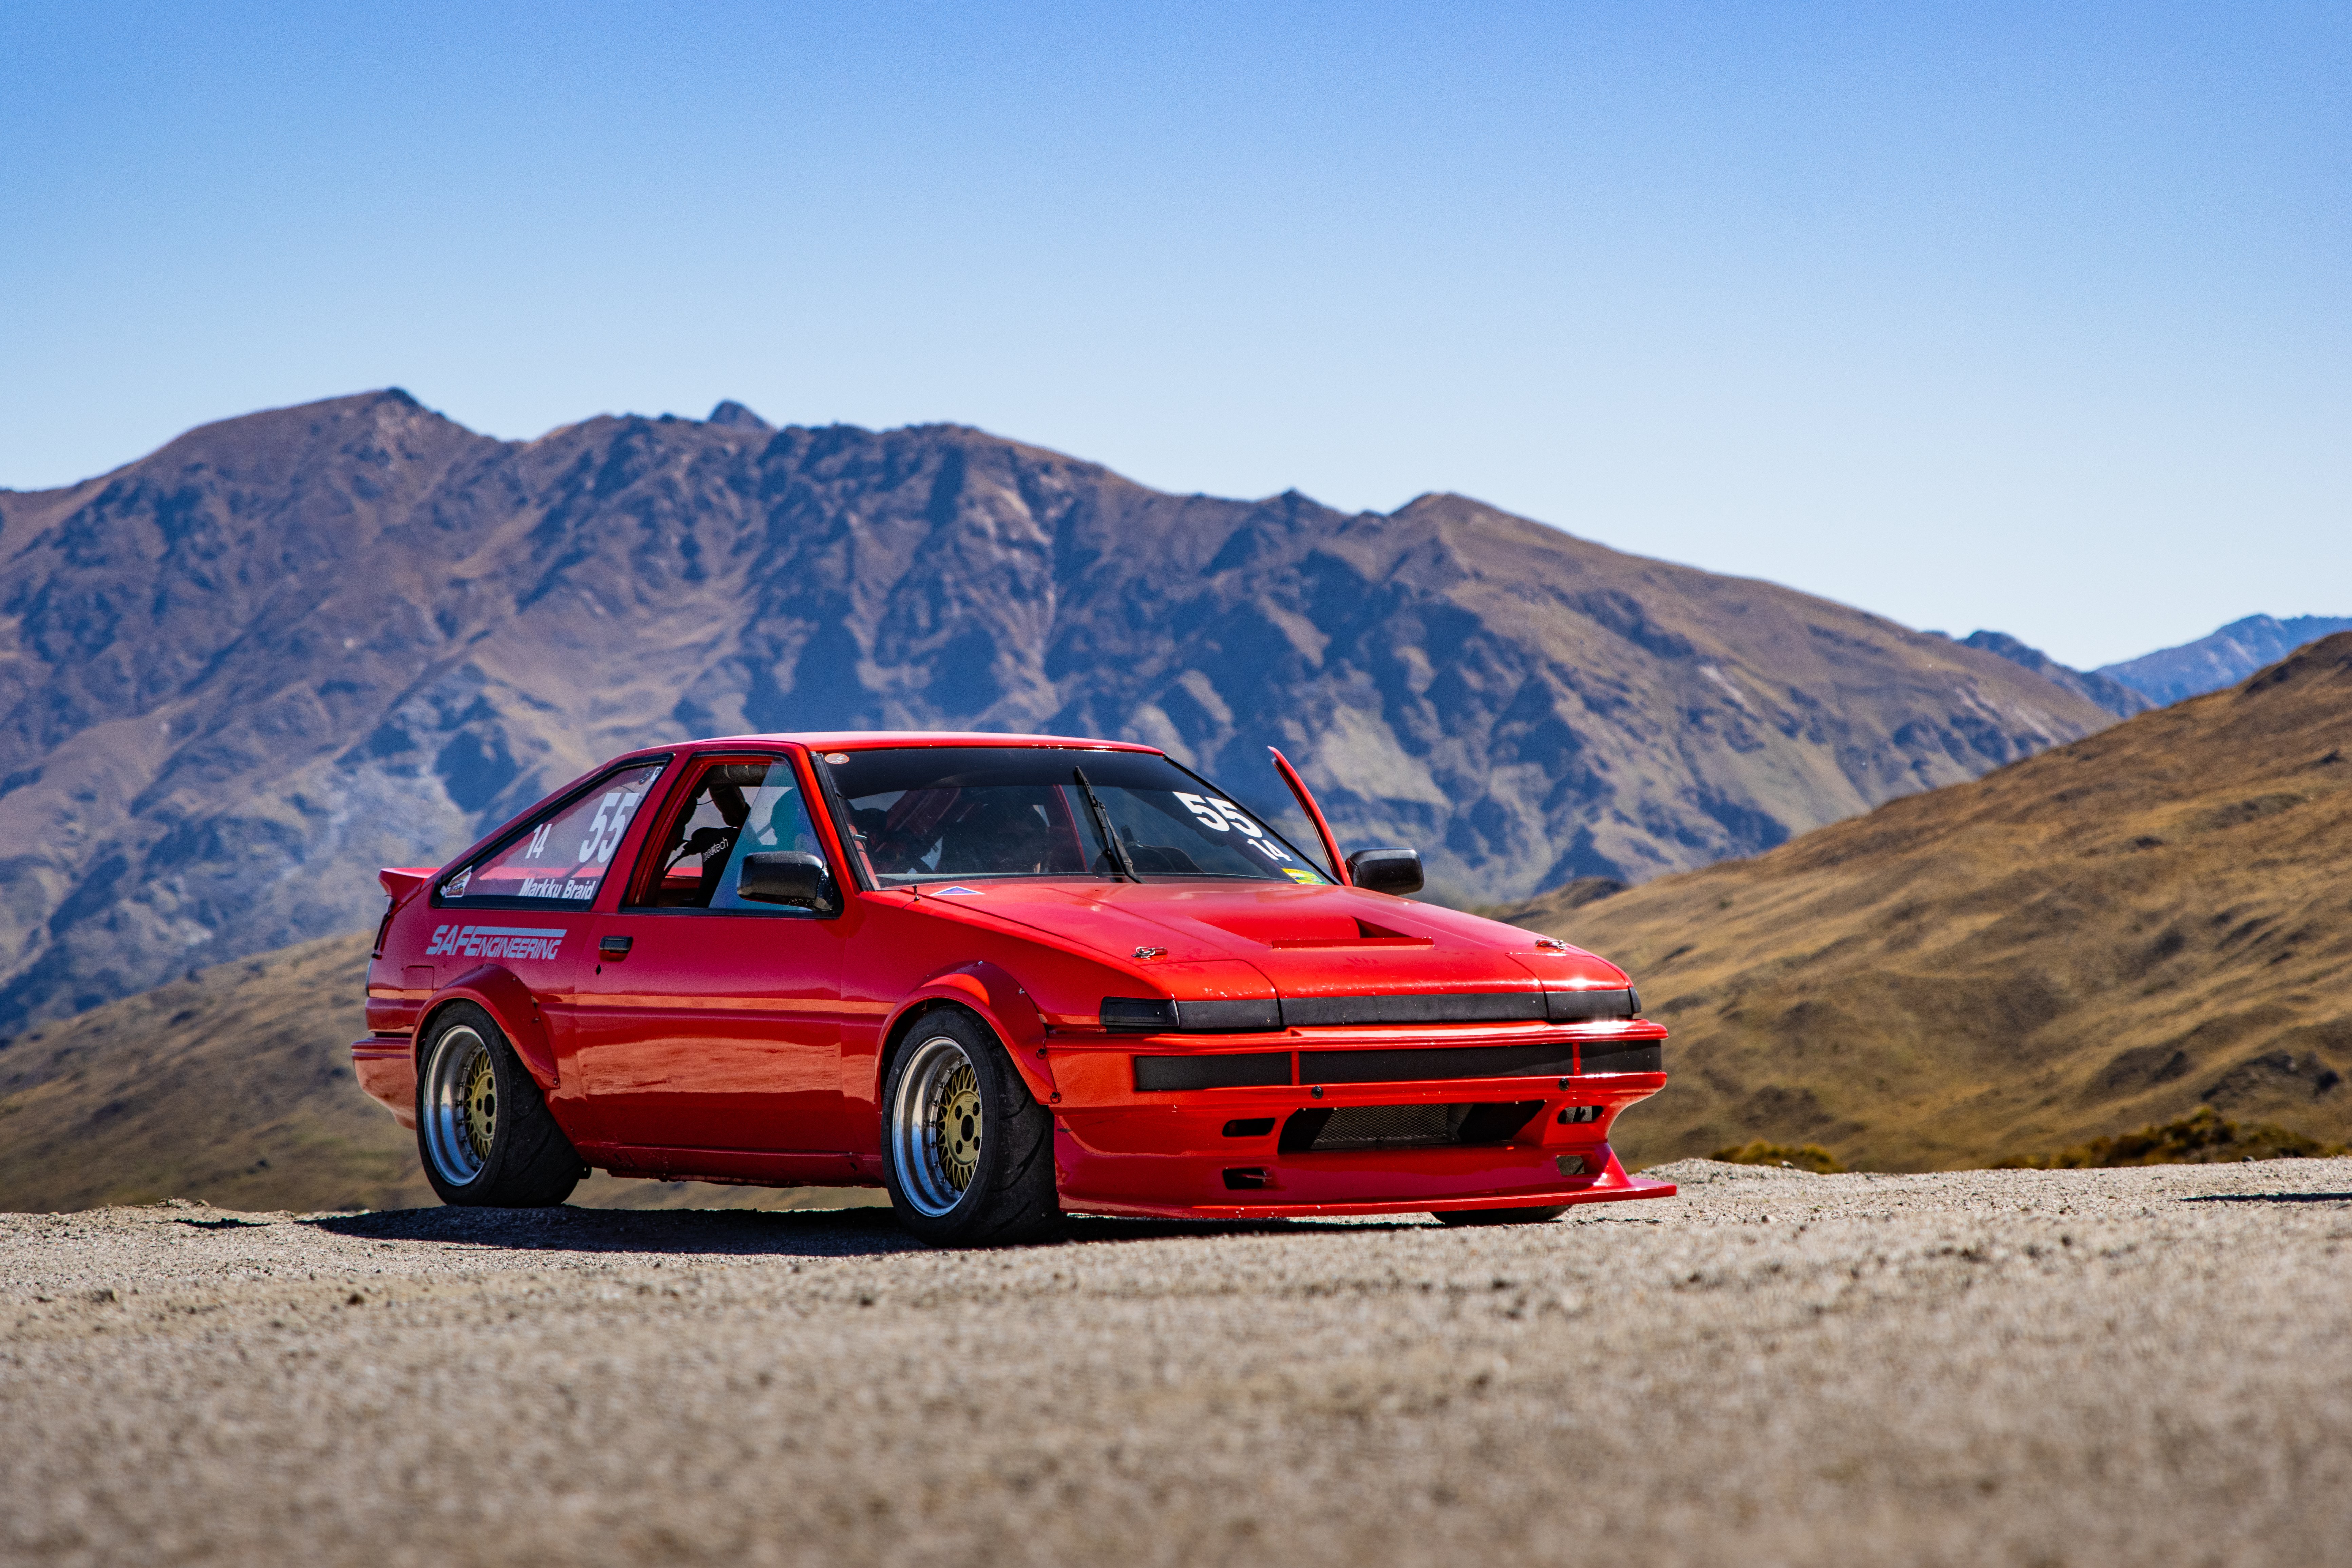
Entered a hillclimb in the weekend. I'll come back to tell the story soon... for now, here's some eye candy.
1 point
-
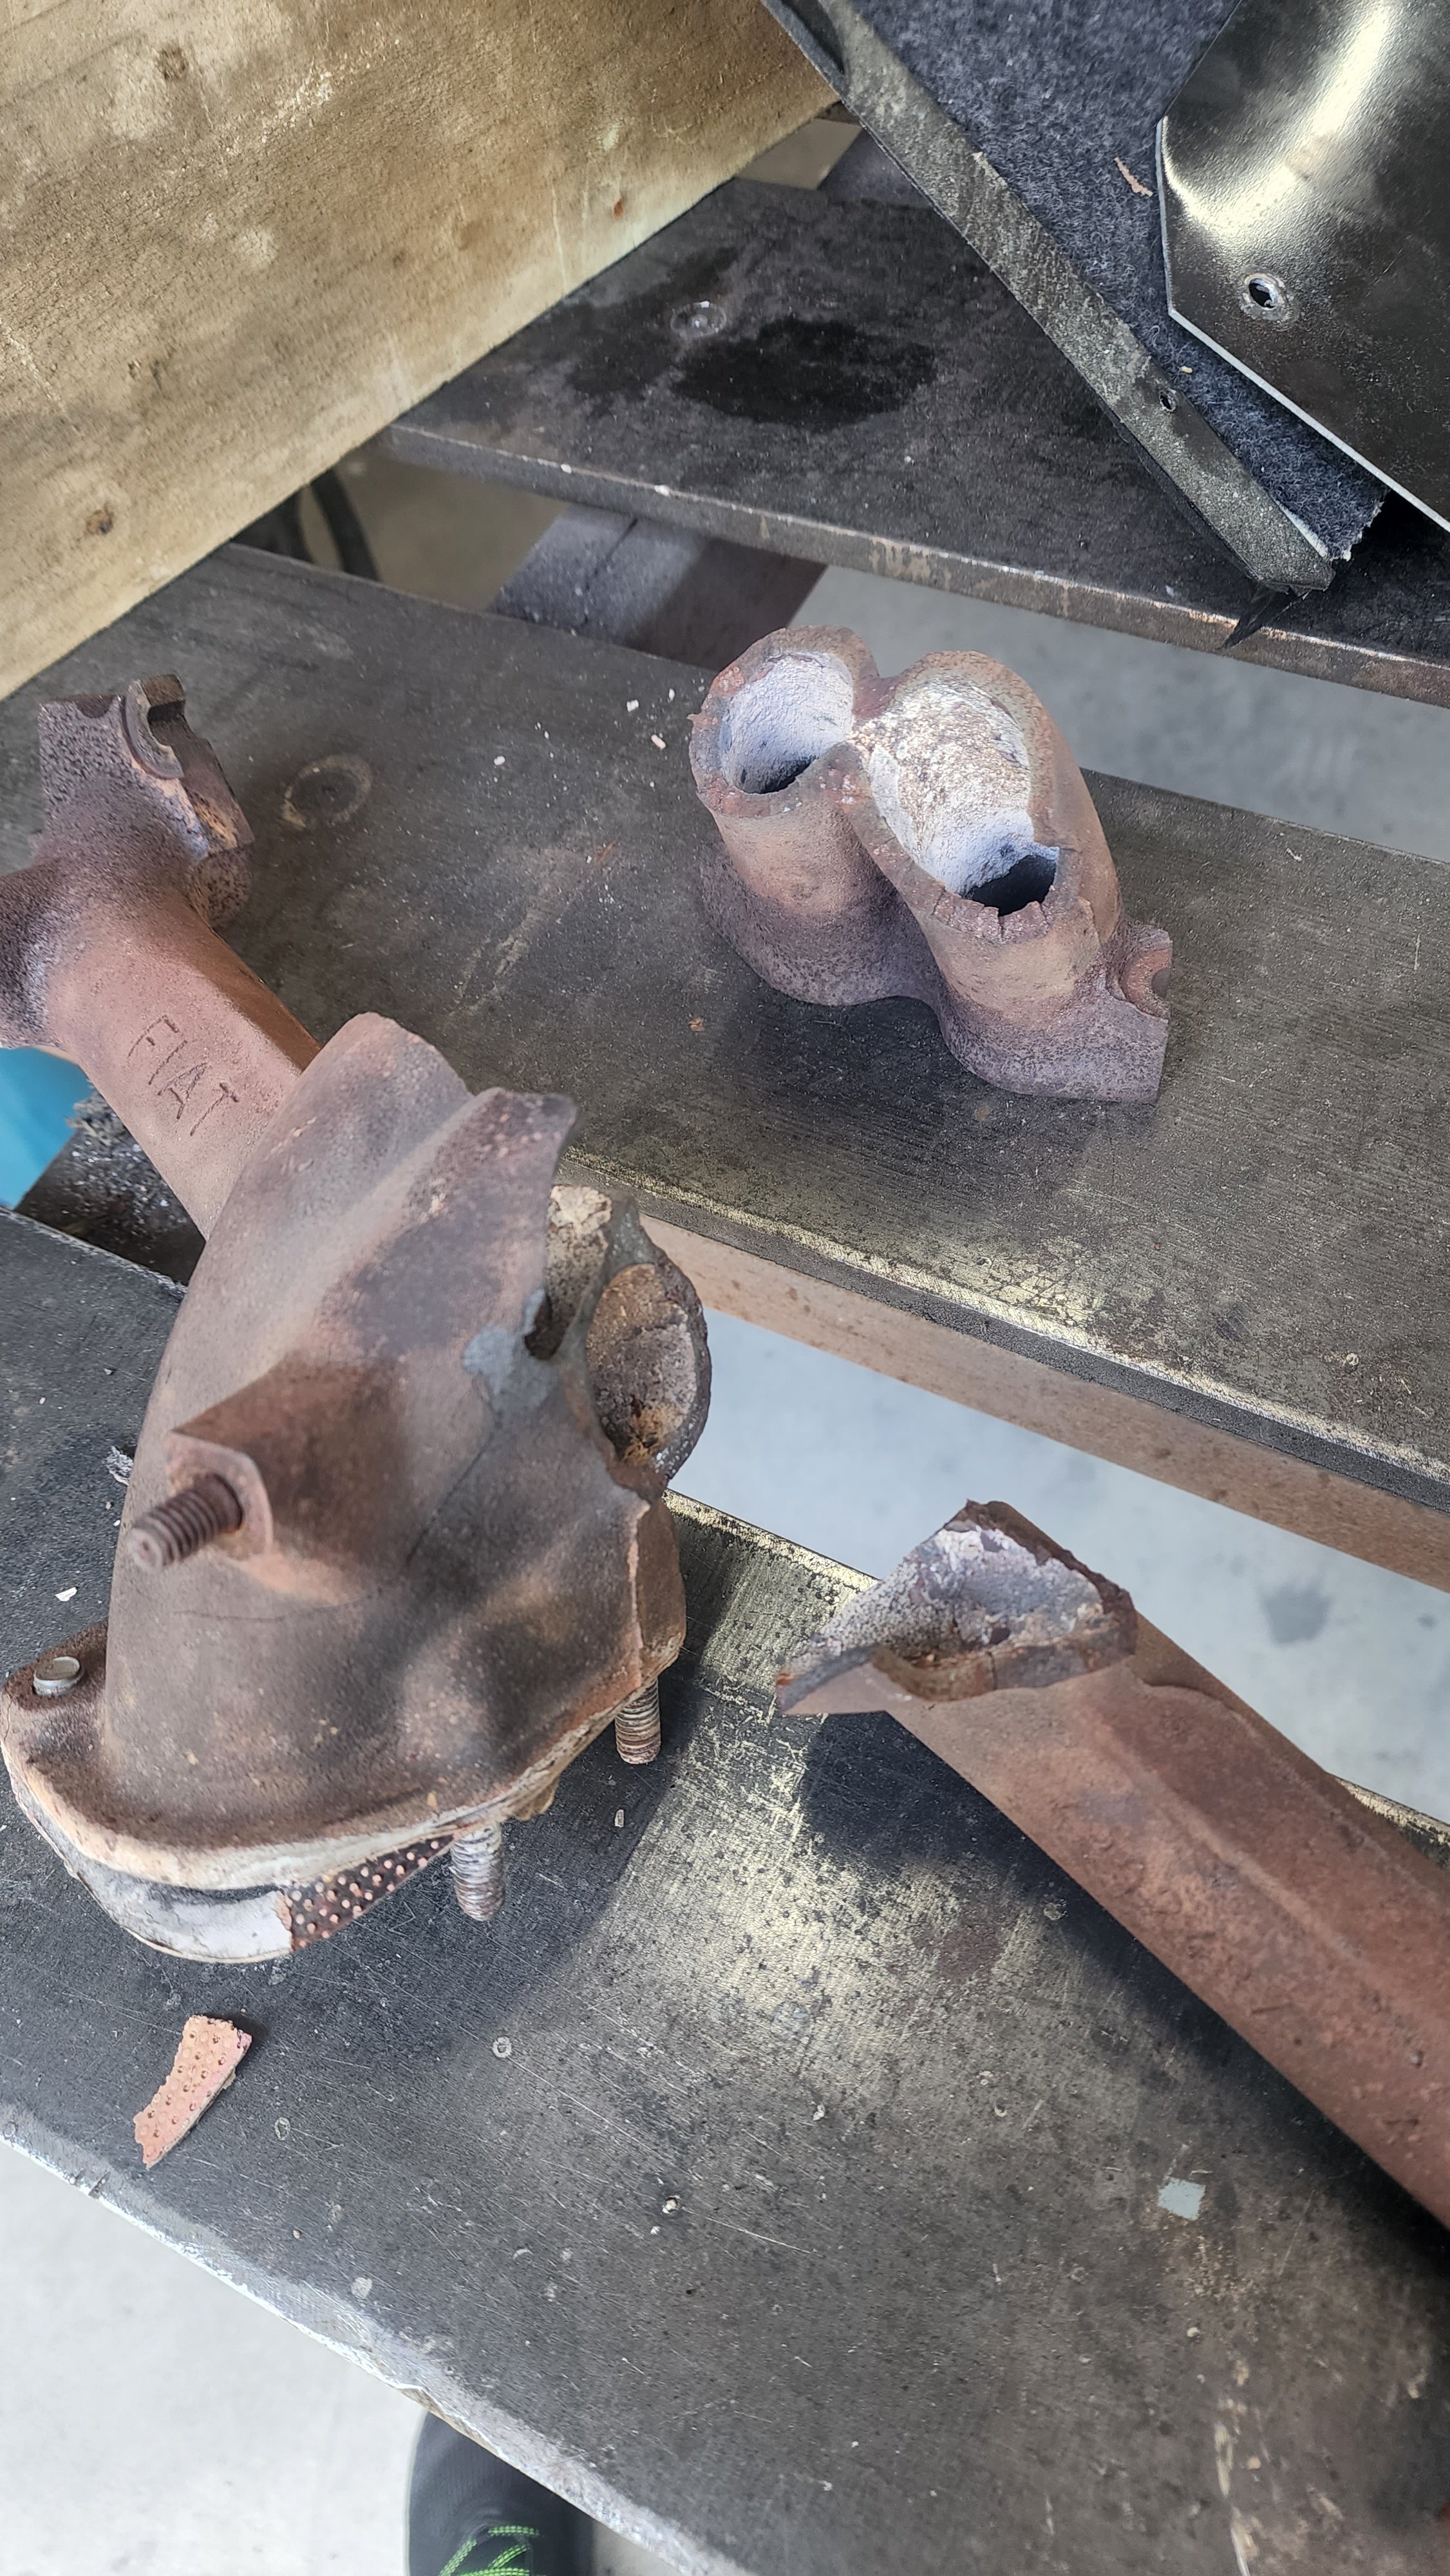
Well thanks to the awesome Dylan I got a new header for Filo, also taking the old one off it pretty much desintigrated into multiple bits and was only being semi held together because it was bolted to the motor check the pics, shit was turbo fucked
1 point
-
Well I'm making progress towards getting things going. Firewall isnt finished, or pretty, but if it stops my face catching fire for now, that's a win. Has got a severe case of myspace photo angles here, looks fairly rubbish in person. Posting here before it ends up on @cletus's wall of shame instagram story for being crappy things brought in for cert. Also welded up the engine mounts properly, and reshaped the front of the mounts so they look a bit nicer. Then a few coats of only the finest rattle can black. I'm out of town for work for most of next week, but I'm hoping to get the engine back in and fired up by next weekend.
1 point
-
made some new Top Hats for the rear. As it went too low and wouldn't raise up high enough. Was a right pain trying to get into driveways without smashing the bumper on the ground. Was a lovely day in Whanganui for their annual show at the high school. Same at Levin's show. Taking a brake from this for a while. We did get a commercial sewing machine, so going to give Upholstery a go. Also needs Painting. But in the mean time ive brought an 84 C10 to try and get just as low. So will just keep driving this.
1 point
-
This could be the electric parking brake of beds.1 point
-
I do play with pinto stuff as well. And this setup if you havnt read some old posts is a setup I qas making for my nephews mk5 before we decided efi and turbo is much better... the process the bits were all siting around and I would like to see if it worked.. ....so I bought the bits off him. I had the 50+ years old carbs and the supercharger vapour blasted . Had a mate 3d print me a manifold to bolt 2 SU HS6 carbs from a p5b rover to the toyota sc14.... once we had it finalized we sent it off to a company in aussie to be made out or appropriate material that isolates the carbs from the SC and is fuel,oil,heat resistant. Swapped a smaller pulley on (thanks again @BlownCorona for that) And a pulley the right size i got at pick a part bolted to a sierra crank pulley and a 6pk belt. I do have a carb rebuild kit turning up this week hopefully... Side entry dizzy cap The cool weeee manifold I jave a test bed I've made to run a pinto on (as I say I enjoy playing with them) so ill be able toasleep if I can get it all running... It woild only ever fit in a mk3 4 5 cortina or rat rod... so i might just sell it all once working or just keep it as an ornament 😆.
1 point
-
4 years later..... welcome home old friend Those years in a shed haven't been kind, I have some work to do.
1 point
-
Had a spare minute so I thought I would have a hack at a fuel return/restrictor. Found some brass hex, put some detail into it including a 1.5mm hole and some probably correctly tapped holes, surely BSP and NPT are the same? I checked the resulting pressure but the needle wobbles all over the place from the pulsing of the pump, averaged out it looks like 3.5 or 4 psi, vs 4.5 to 5psi previously. Ill take it for a spin later and see what the AFR's are doing, then maybe start opening up that hole. I kindof need a way to damp the pressure fluctuations first to get an accurate reading.1 point
-
Well, Ive done exactly nothing with 86 in well over a year, but life has been pretty full on so it only seems like a few months. The car itself is still under its cover, but things have been ticking away in the background on a new engine for it. Sooo I can't actually remember if it was peer pressure from @kpr or from me peer pressuring him (probably this option), but a couple of years ago the idea of a building a dream engine was born. From memory the now somewhat famous Garage4age Turd short stroke engine was being punished to all the rpm on the dyno with great results, so the new build is based on that concept but with a hair dryer bolted to the side for max rpm and max boost lols. Base of the recipe was a 7a block so found one eventually: This was stripped down and pistons, rods and crank etc were junked: A brand new crank from Toyota made its way into the mix: Along with some 81.5mm 9.0:1 Carillo forged pistons: Some custom length Garage4age designed rods: All the usual ARP bolts etc were aquired, and a MPR crank girdle, and this went off to the machine shop where it sat in a corner for a year or so. The block was washed and resufaced, torque plate honed and bored, the tops of the main bearing caps were machined, the MRP never again girdle was remachined as it wasn't flat which was a major piss off, refaced sump surface, bored main bearing tunnels, rewashed, everything was balanced and polished etc. Here it is being picked up: New oil pump which got Toda gears, some relief porting and matching to the 7a block: KPR then applied his wizardry and put the whole thing together using ARP main studs, ACL race main bearings, King XP big end brearings, the balanced rods and pistions which were skimmed to 0 deck, SS works oil pickup, oil restrictor mod in head feed, and a TRD 0.8mm headgasket. So thats the bottom end done and I can't thank KPR enough for all his r&d and time put into this engine. The head is next level again and I will post on this soon as its actually 99% done bar a few small things. Till next time...1 point
-
Youre not wrong, the noise to power ratio of the A12 is incredible1 point
-
1 point
-
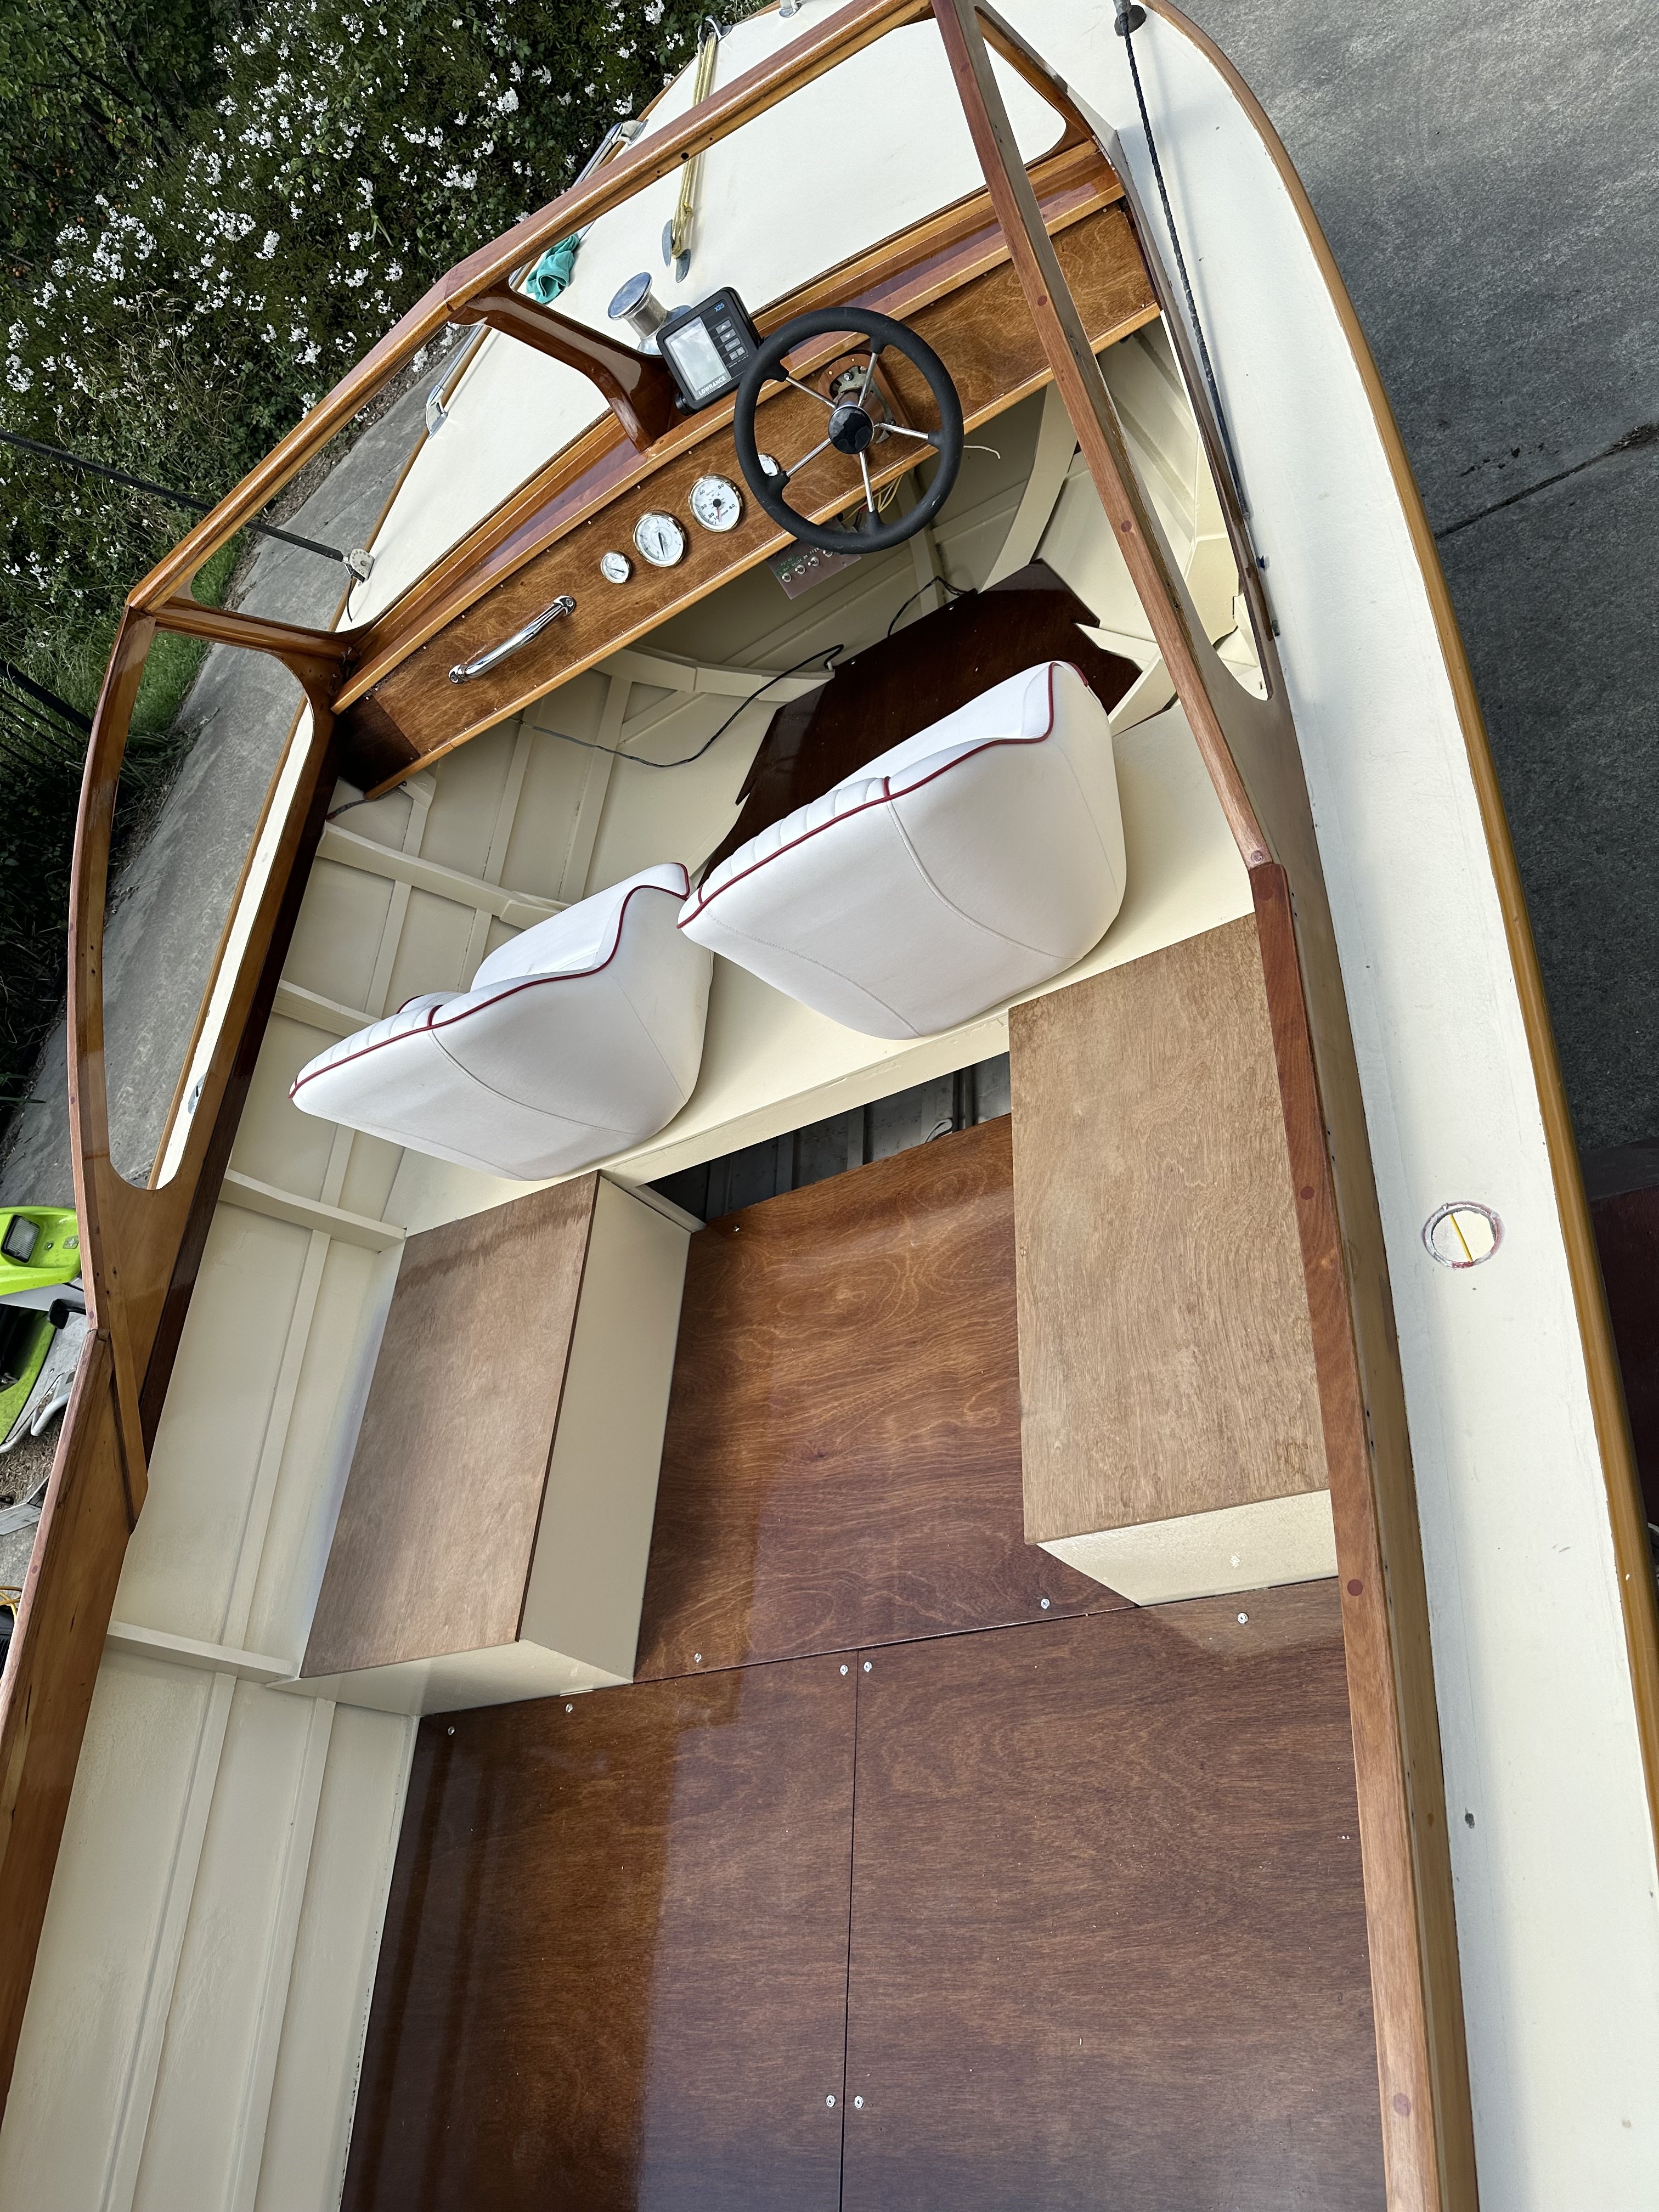
Colour on. I did the first yesterday evening and the second this morning. Turned out okay so happy with the result. I also sanded the floor boards and they got the first coat of six marine varnish.
1 point
-
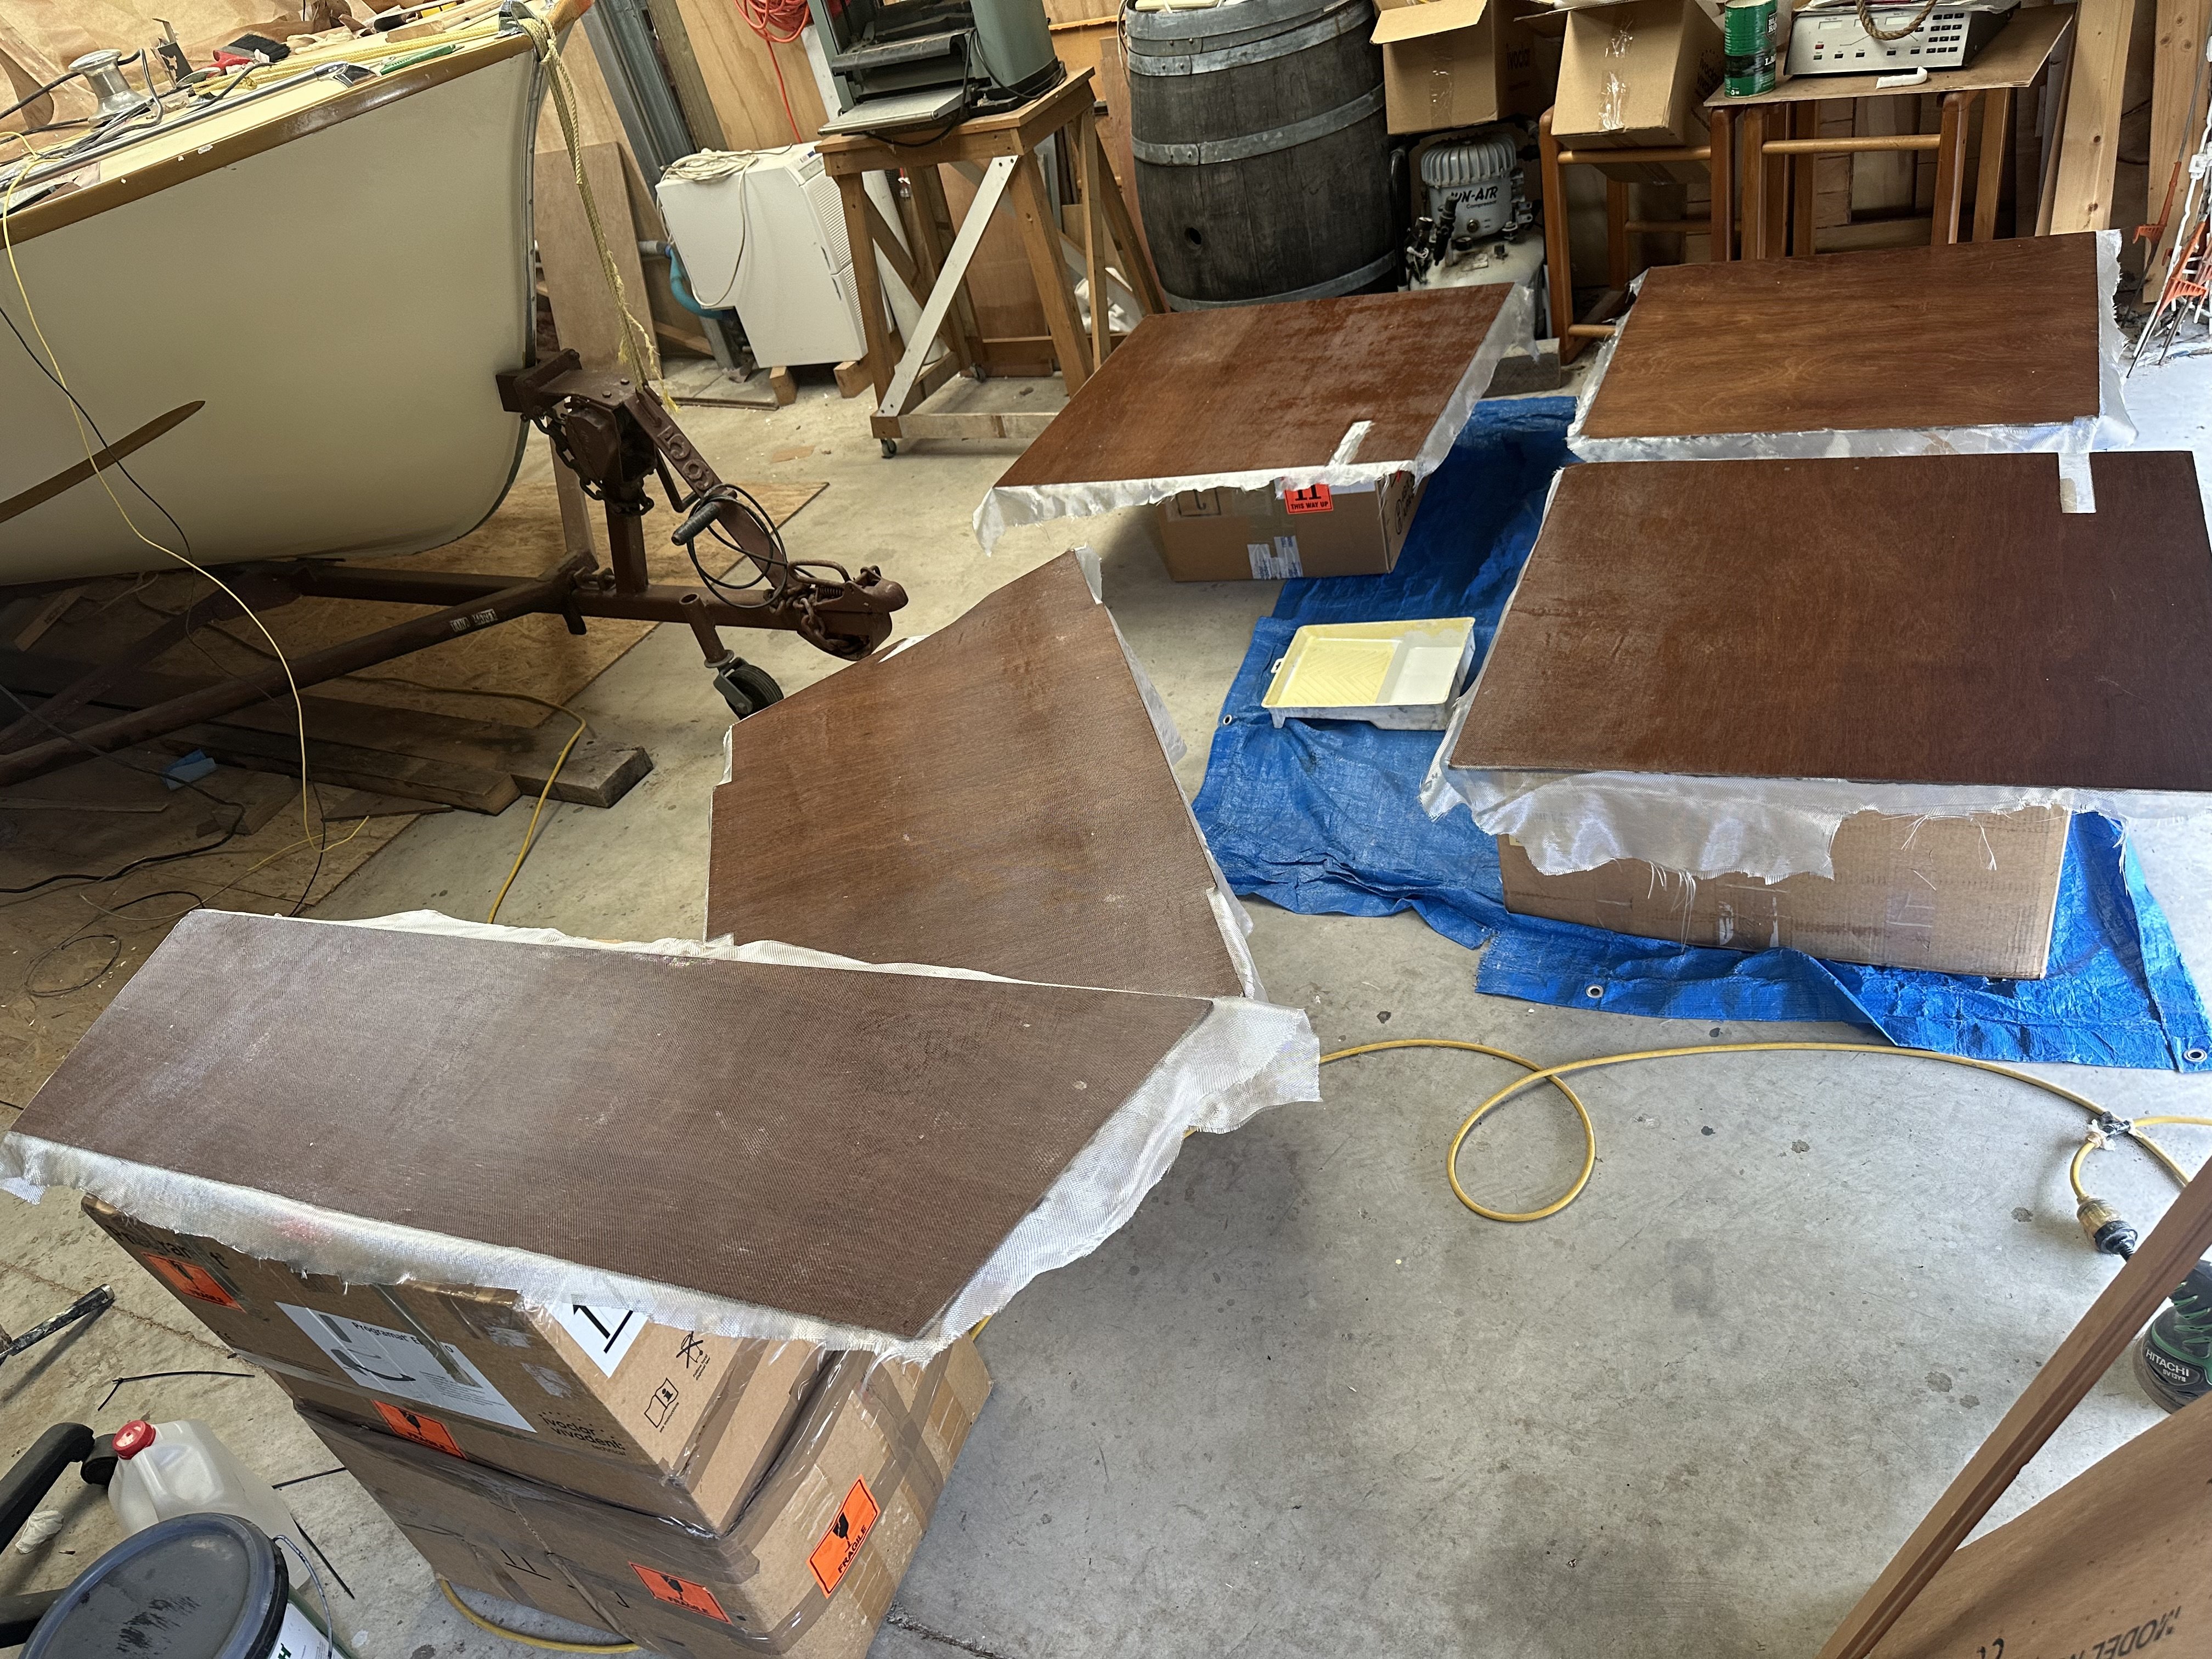
A second coat of primer is now on and looking much better. First top coat in the morning and maybe a second in the afternoon depending on recoat time. I have applied epoxy resin to the underside of the floor boards to seal them. On the top side of the floor I have used cloth and epoxied through it. Tomorrow I will be able to sand it smooth and varnish them. You won’t really see the cloth when varnished.
1 point
-
I made up a new ply panel for the dash and glued it on. A bit more finishing work to do then on with the varnish.
1 point
-
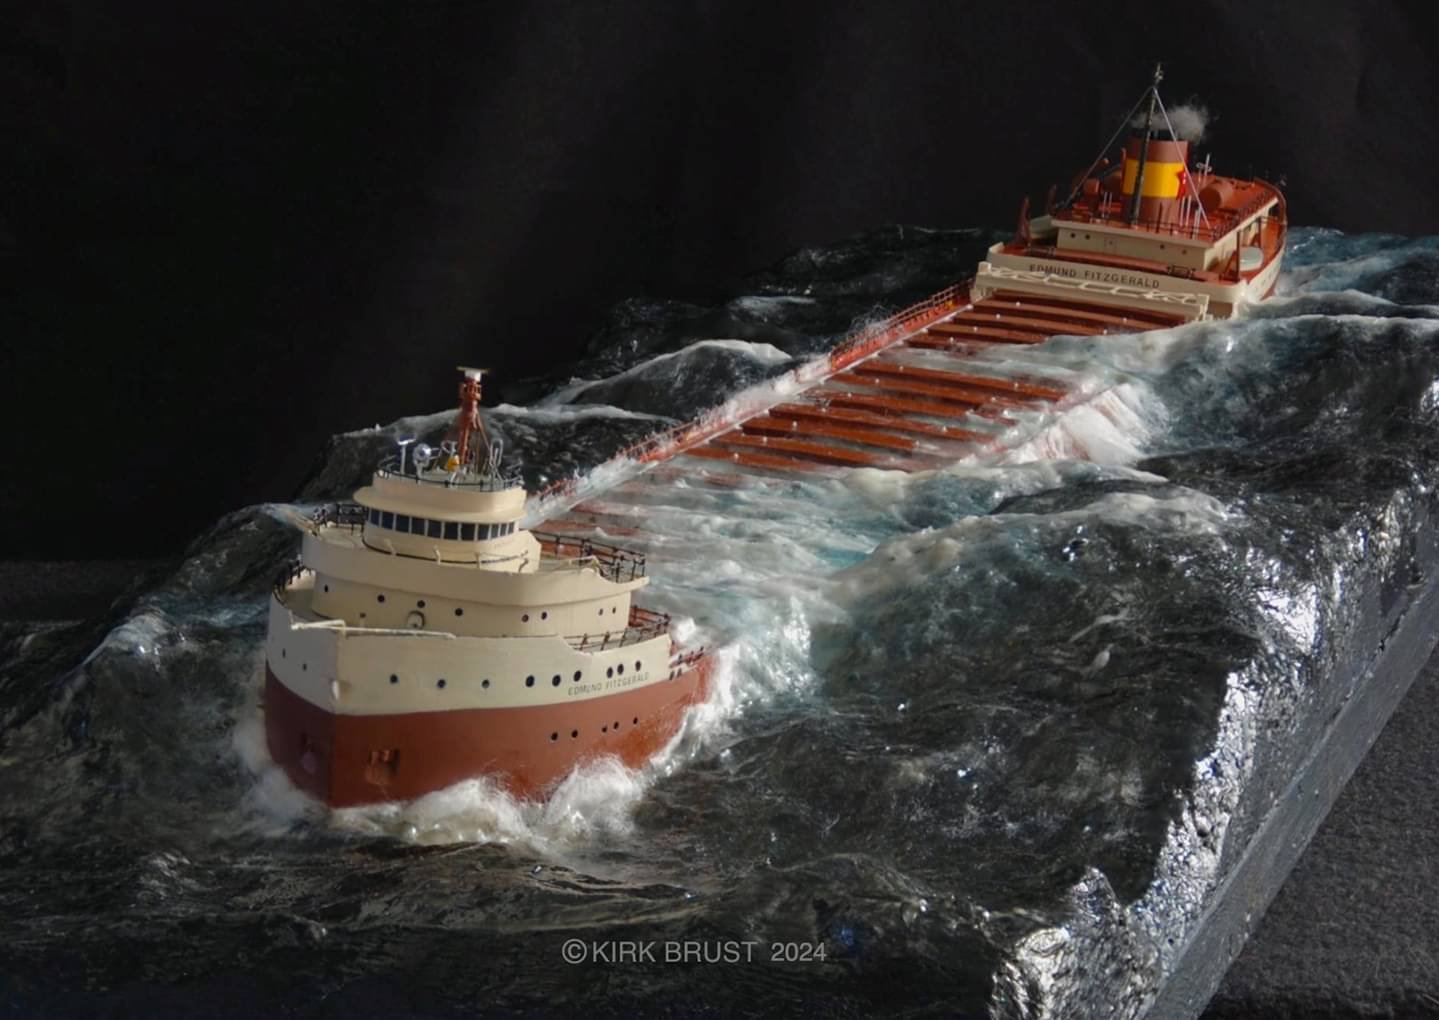
Some incredibly talented people out there. The ill-fated Edmund Fitzgerald - Presumably appearing somewhat as she did before she went under and was immortalized in Gordon Lightfoot's song.
1 point
-
Just wanna say it's good to see the ongoing updates on your project thread. Good to see the issues, minor tweaks and improvements (and foibles) involved in owning an old car. Nice to see it being used too...1 point
-
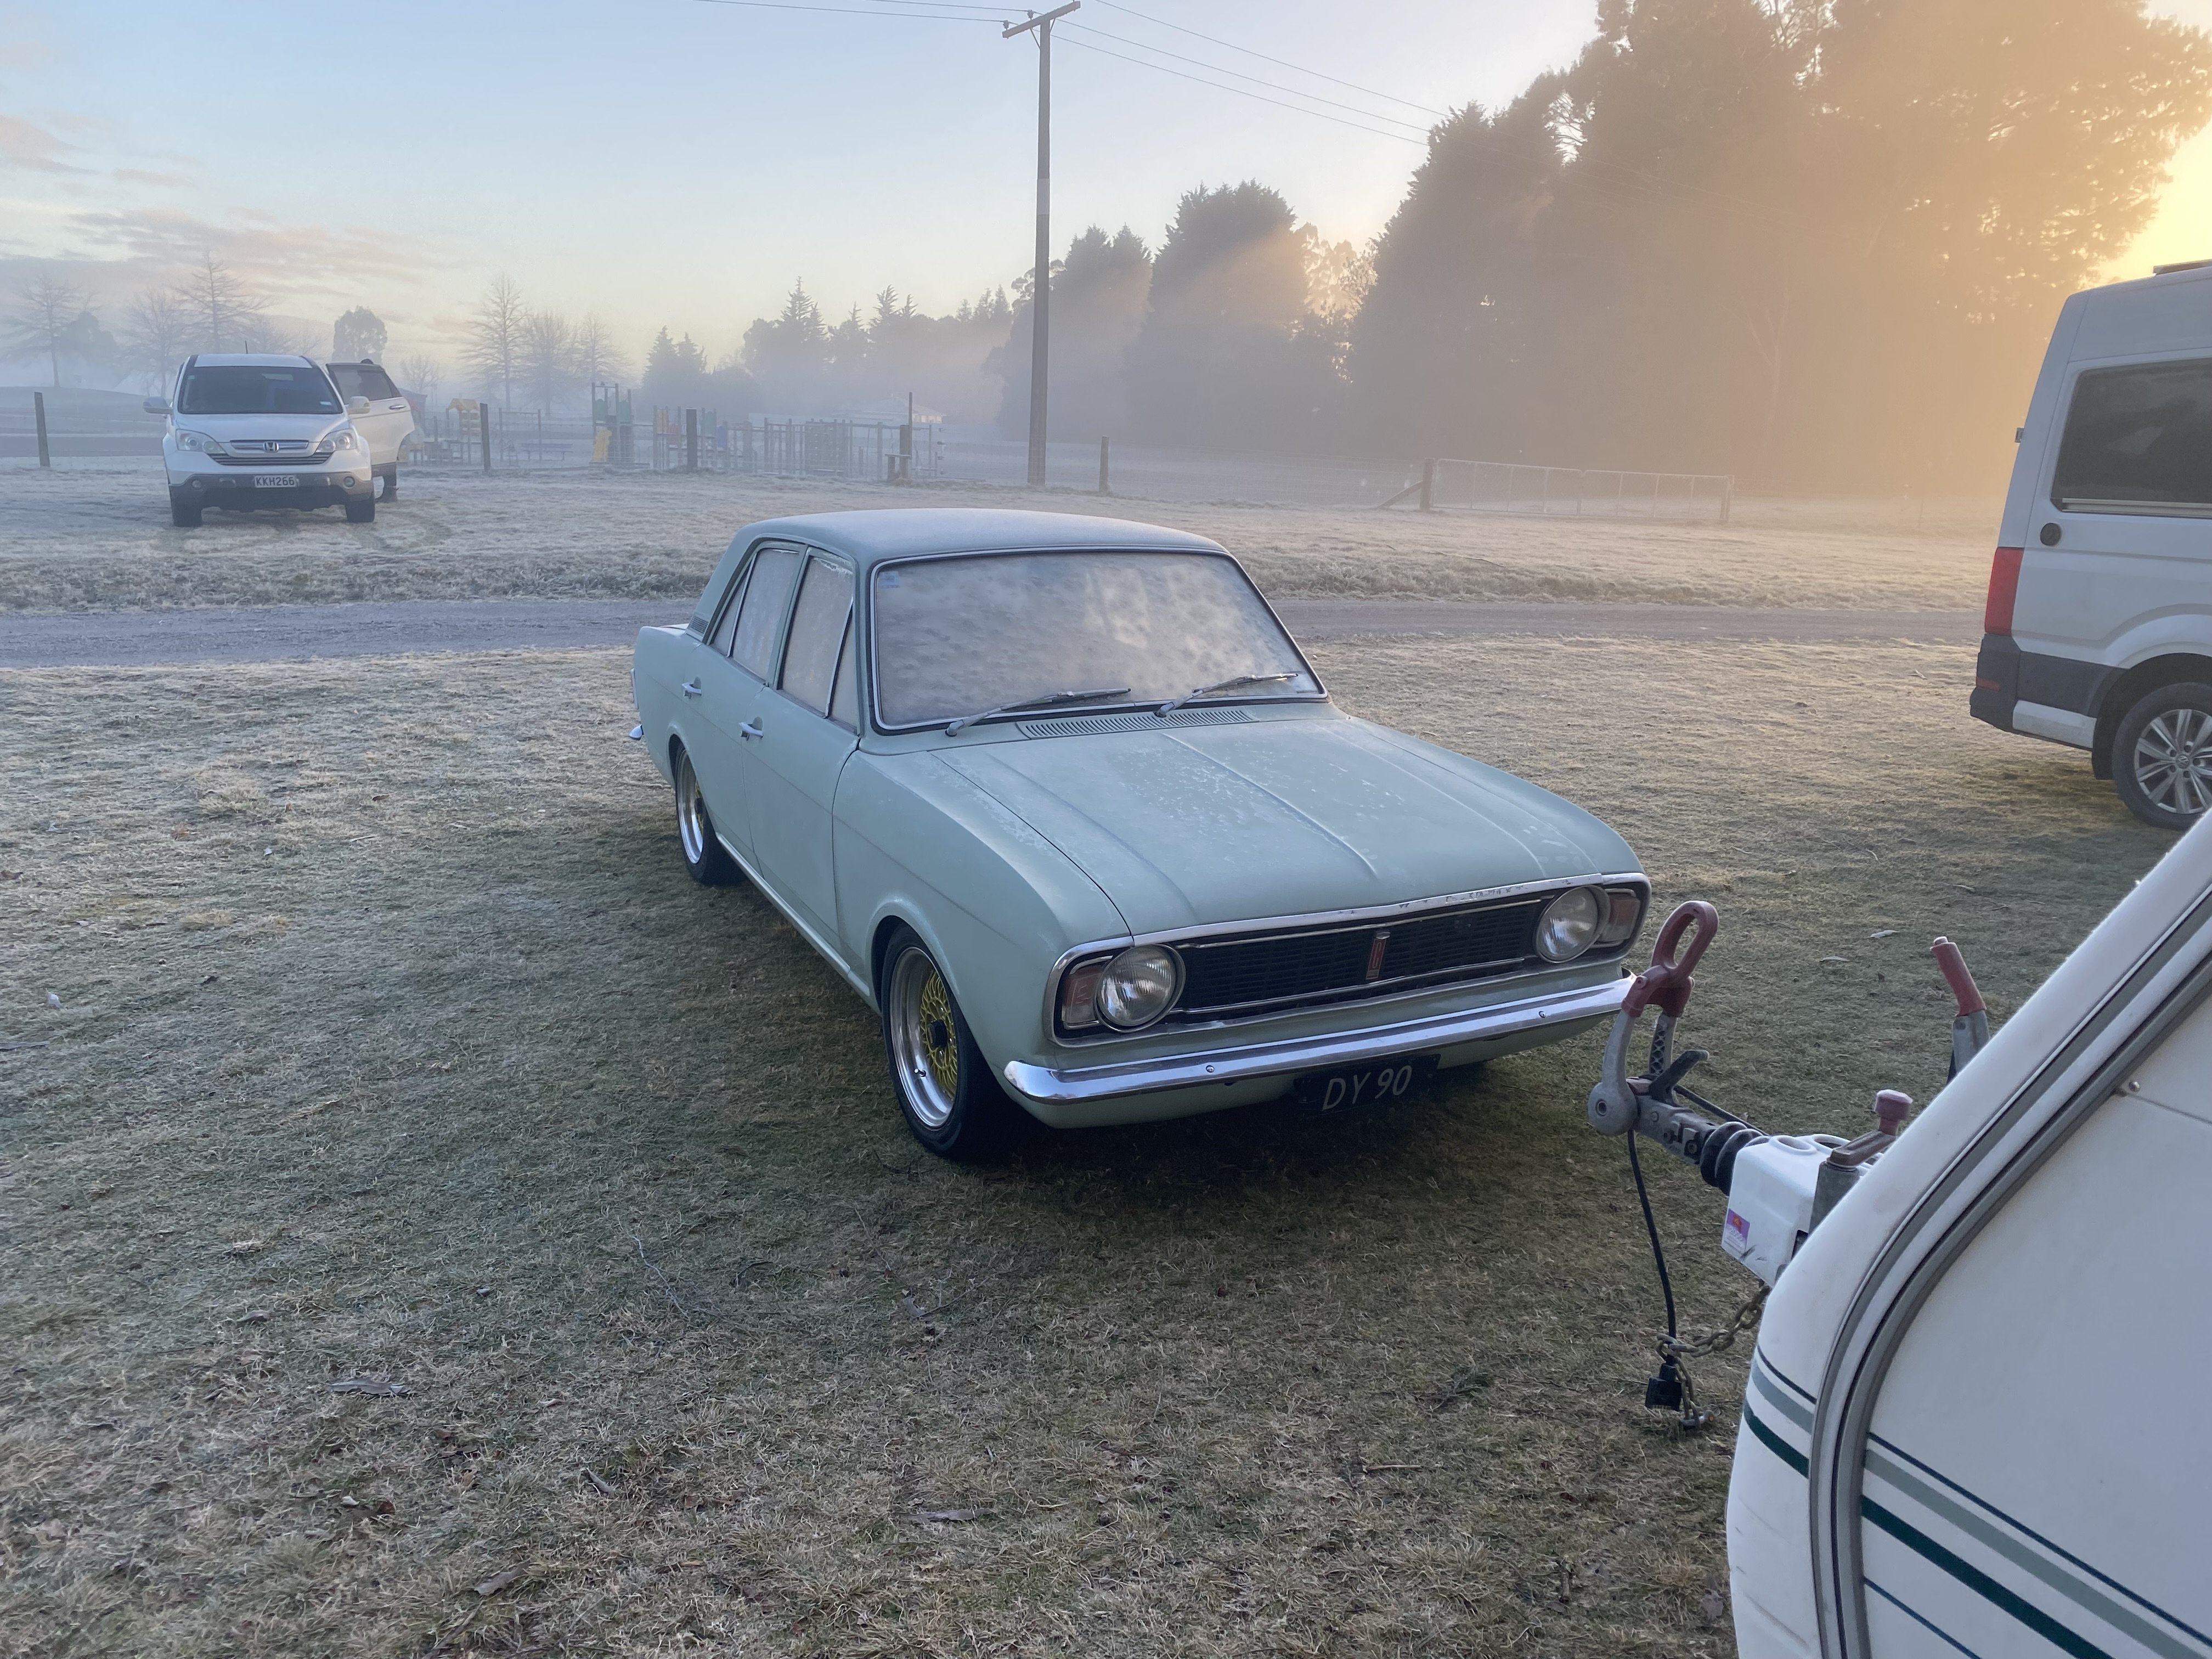
Bit of a drive over to Napier with Cortina club over the weekend, she was a cold start in Taupo on Saturday morning -1c and she fired up with no issues at all.
1 point


.thumb.jpg.570970b401ac8d26ce9af7c1bf2bd8cd.jpg)


.jpg.6788c72cbbf8d8b8d3ef7034010dbfd7.jpg)


This leaderboard is set to Auckland/GMT+12:00