
Leaderboard


Popular Content
Showing content with the highest reputation on 04/05/24 in Posts
-
Modification threshold specifies guard rolling as not needing cert. That fb lvv unofficial questions page is full of misinformation and people who will do anything but read what the rules are
 7 points
 -
I'm in... but you didn't feel a thing did you?7 points
-
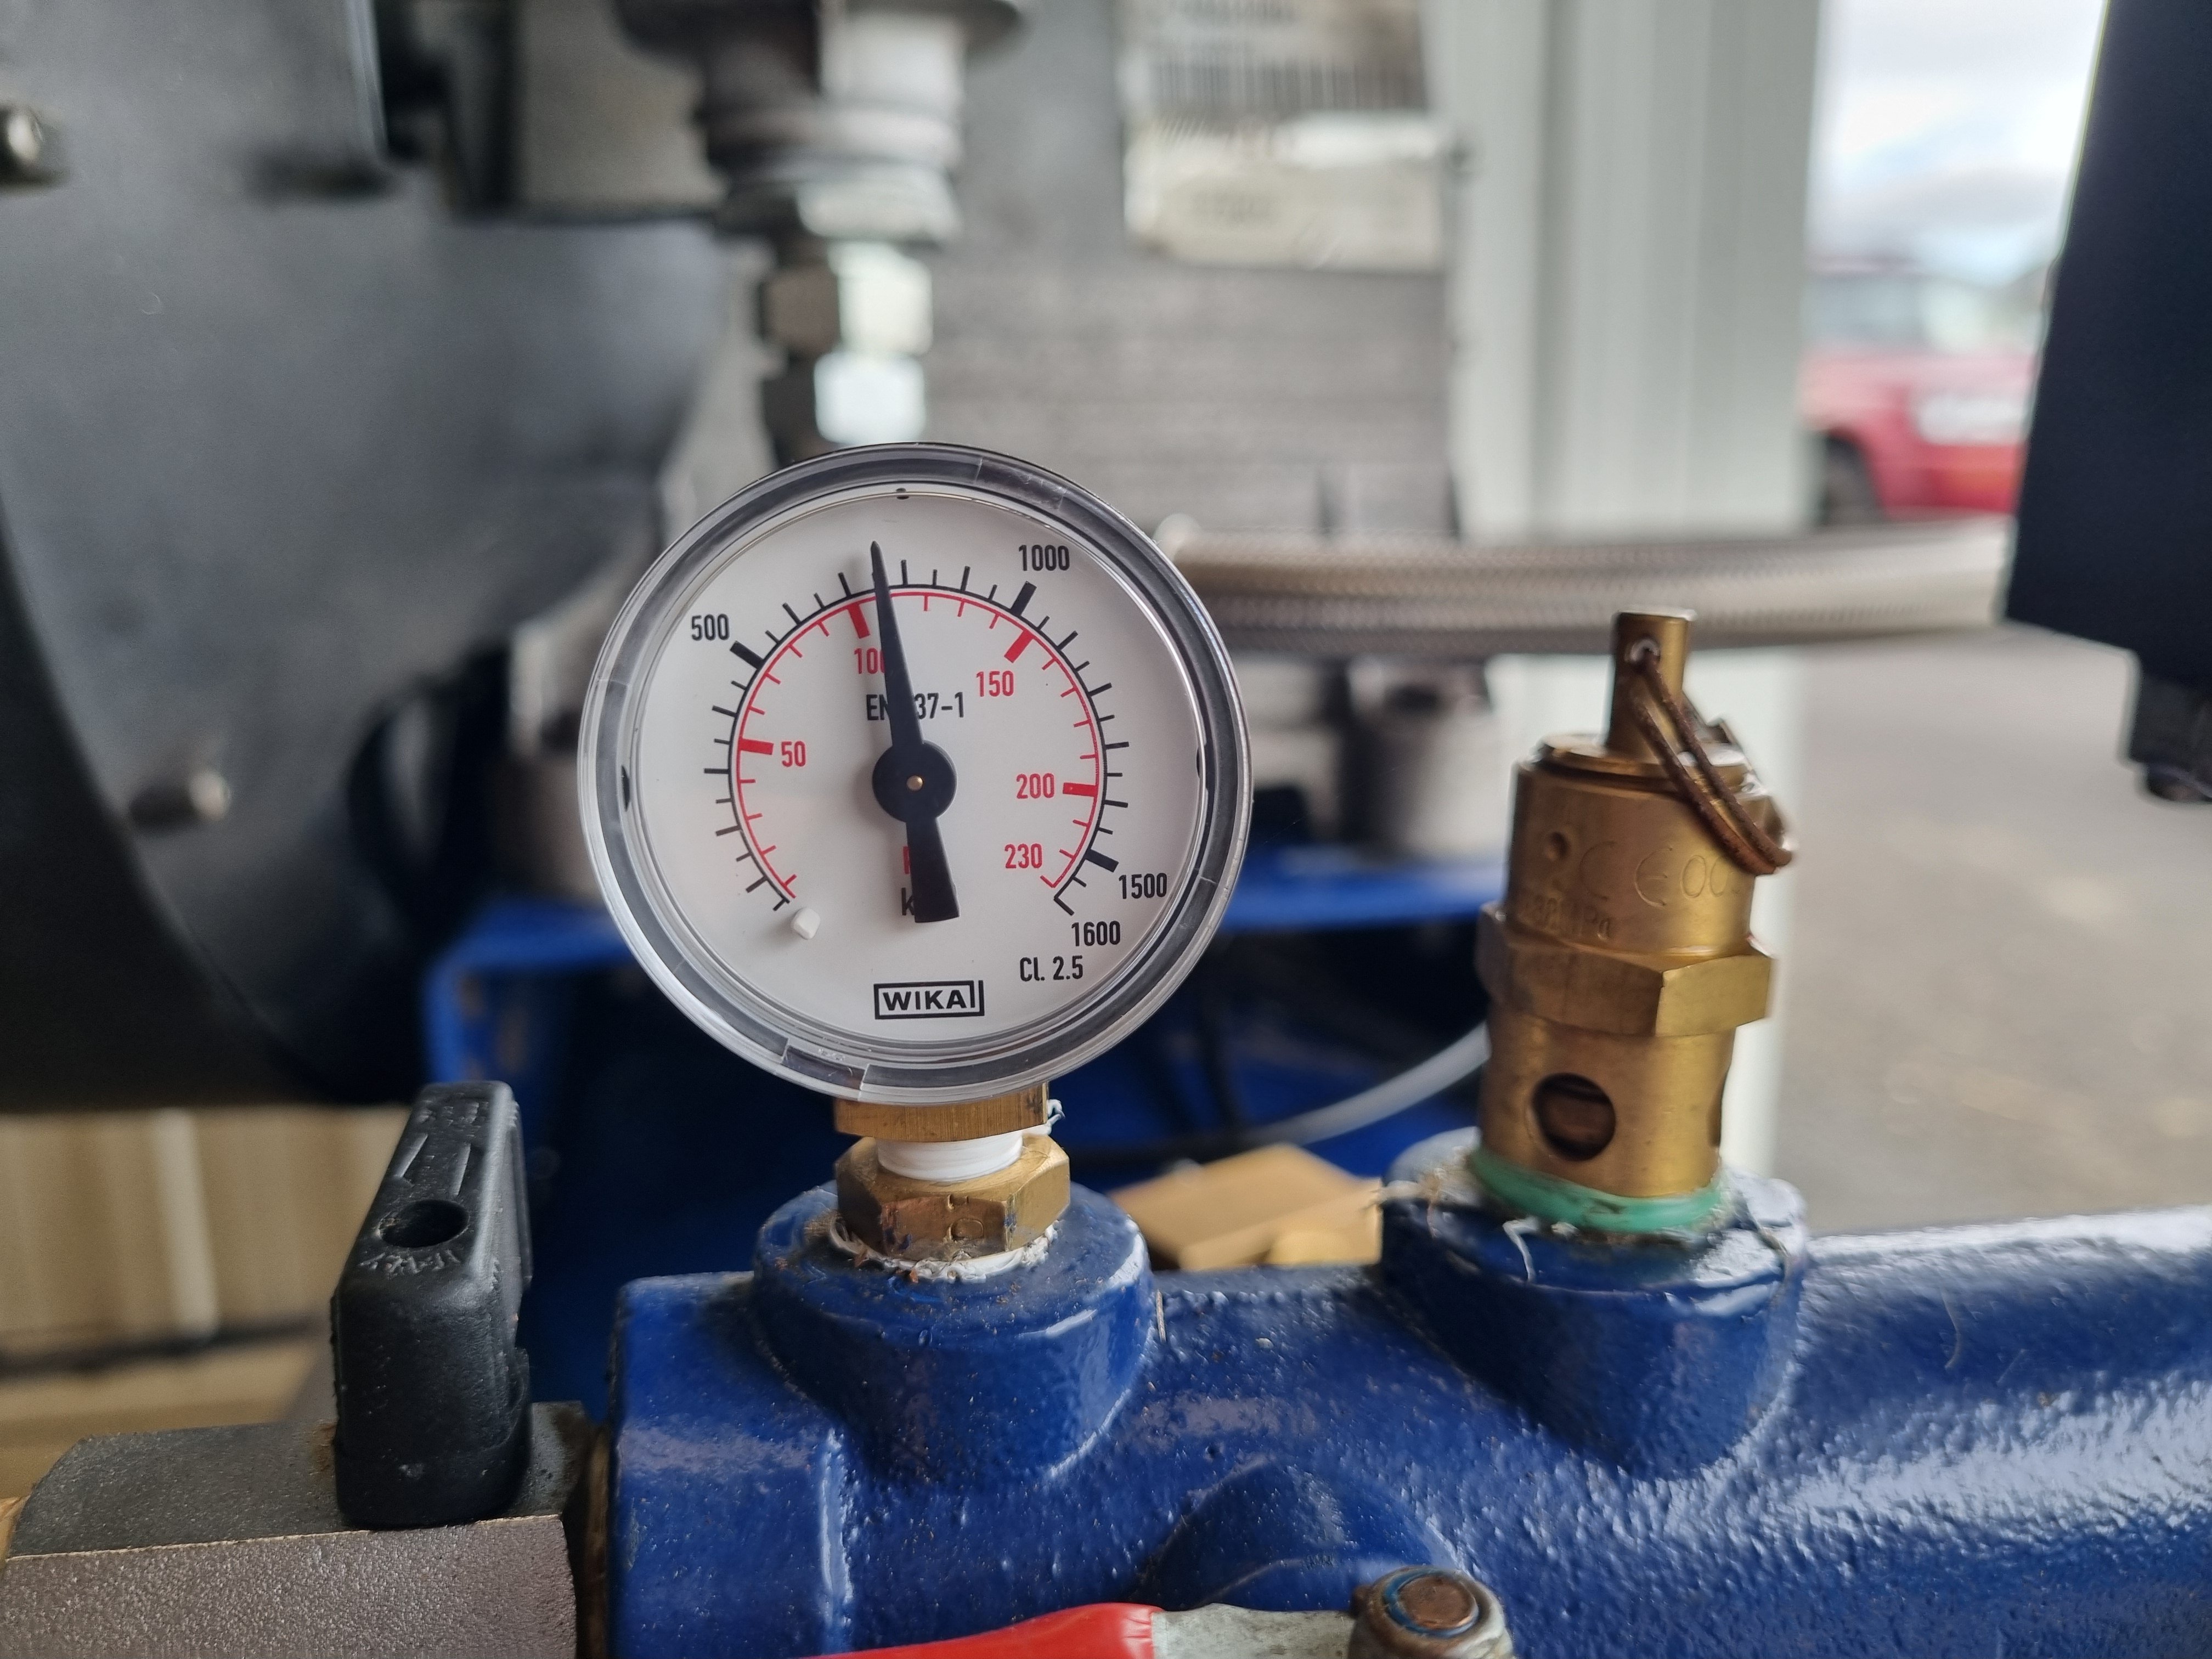
I increased the pressure a bit then left it over night It has lost exactly 0 psi which I'm quite happy about. Now the next thing I need to set up is a drier type thing and some decent air feeds in the shed but I think I'll wait to plumb it into the new workshop when it gets built
6 points
-
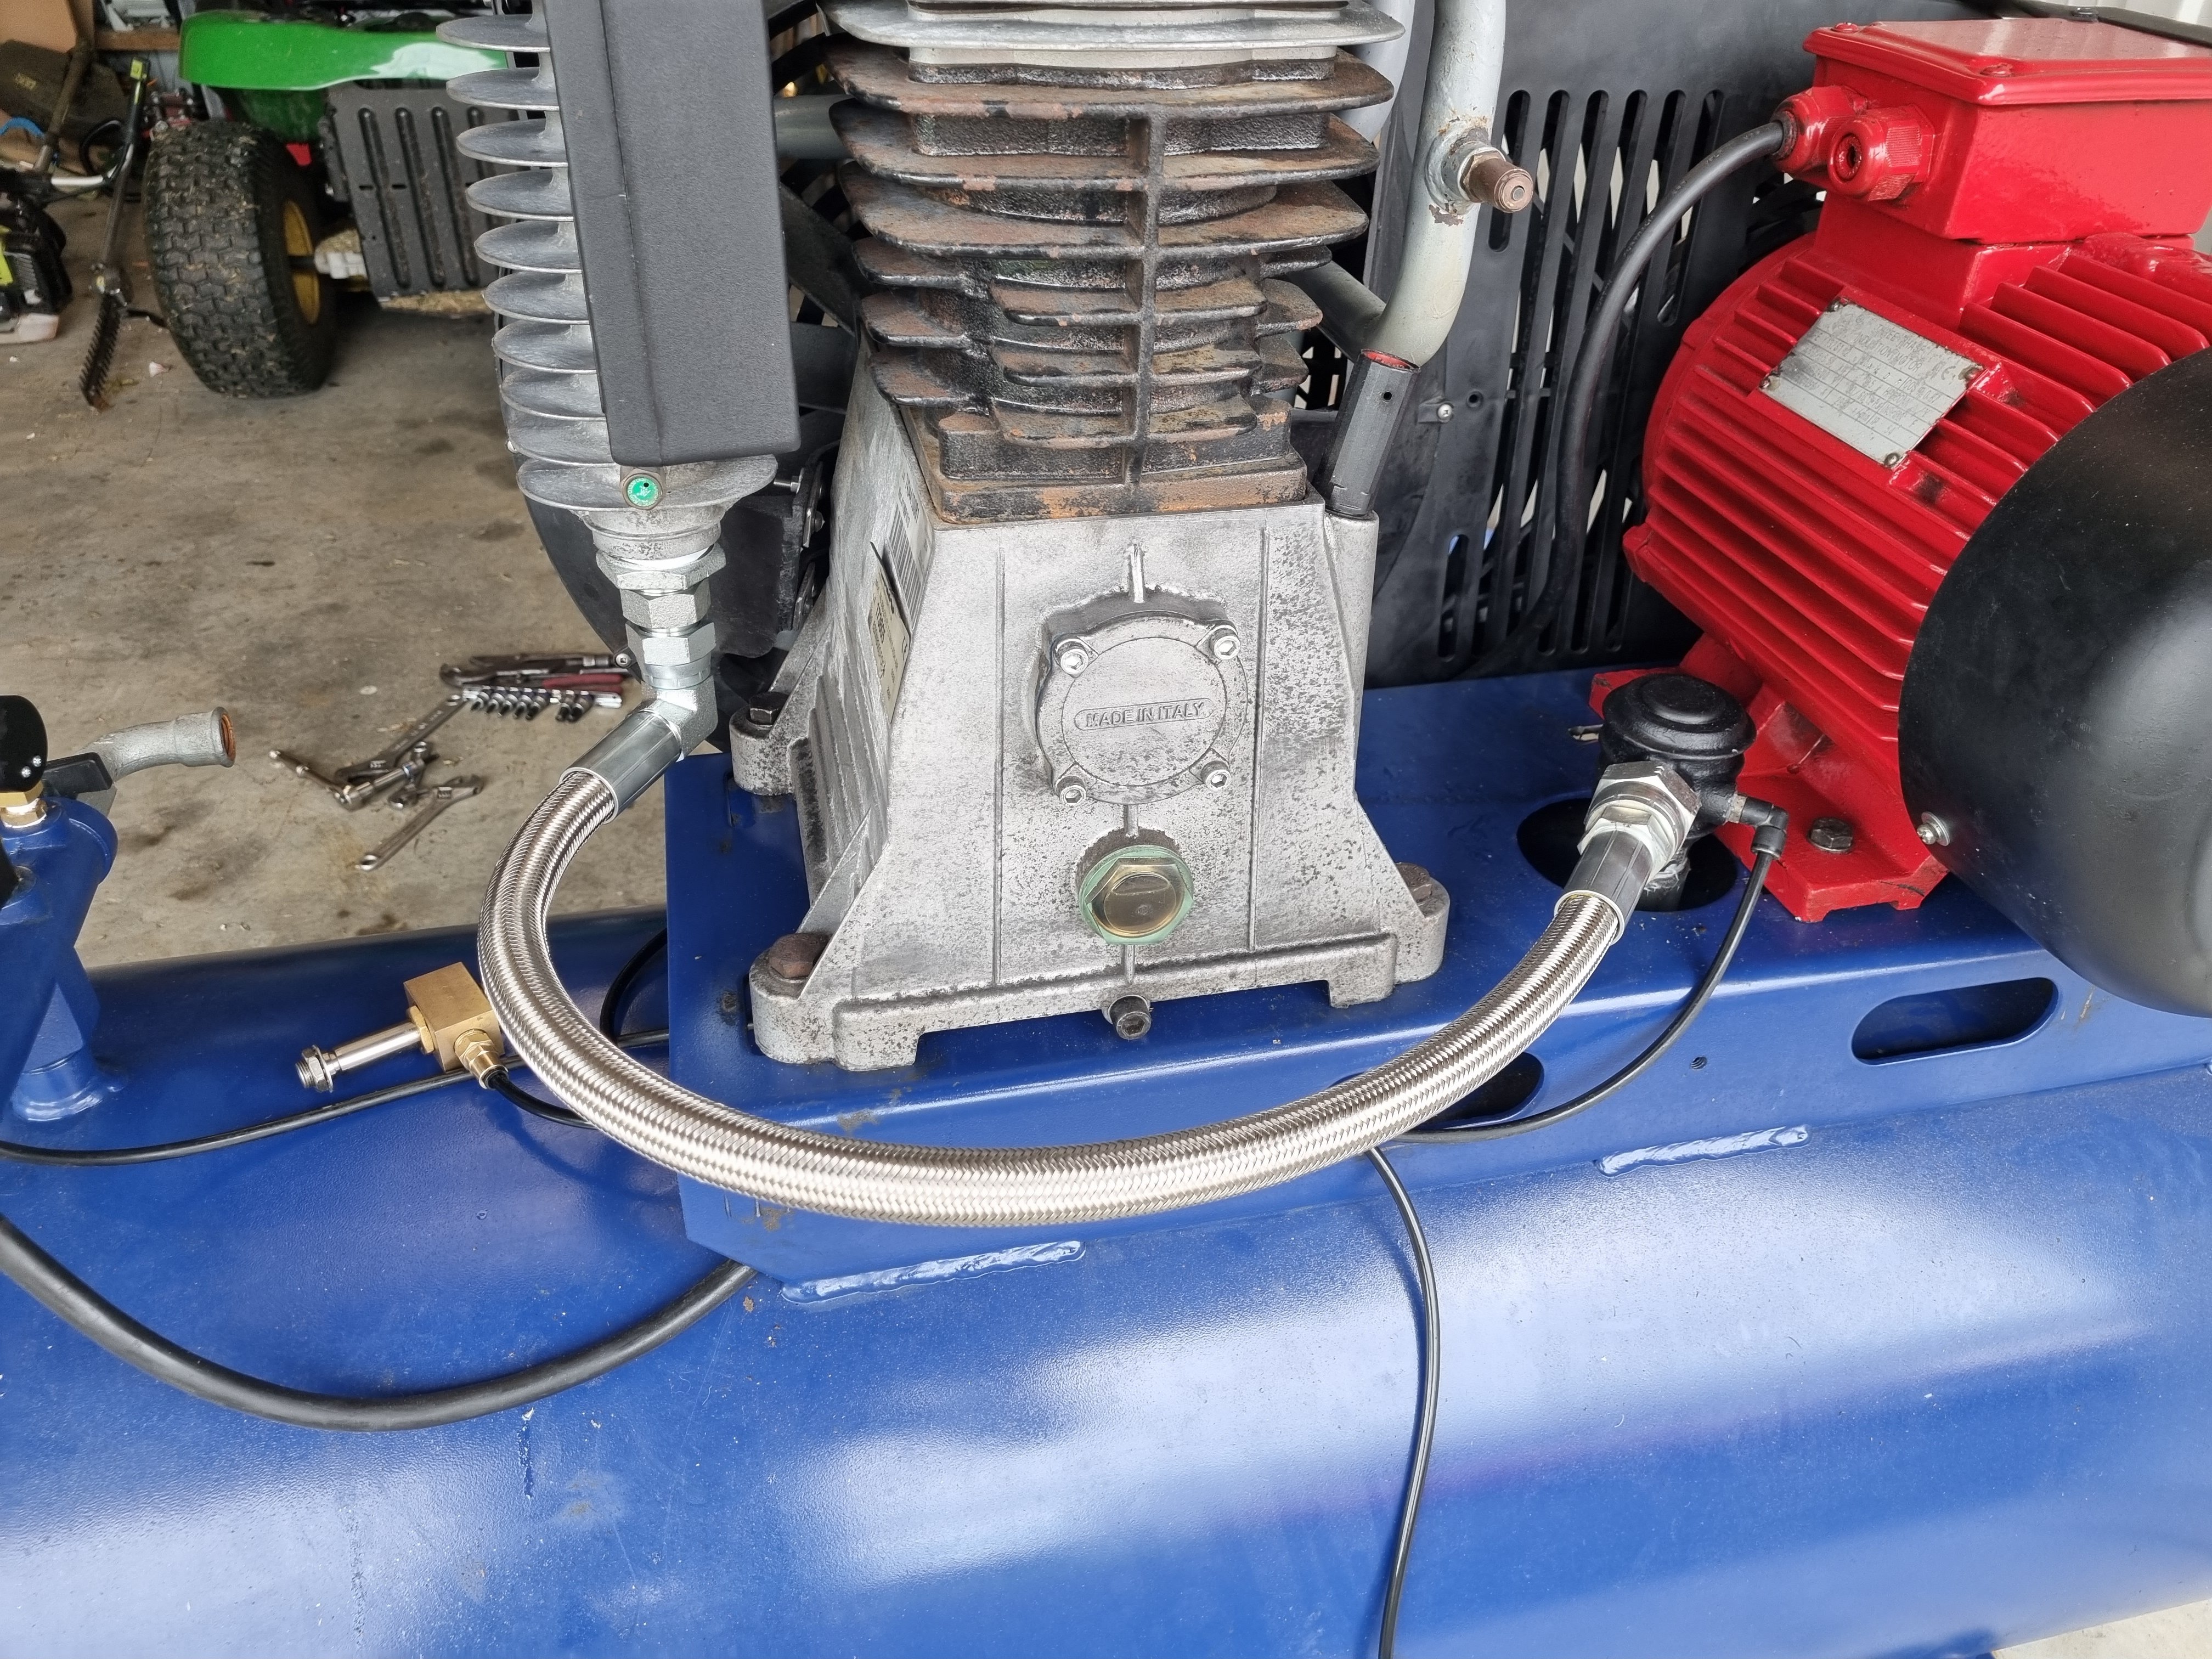
I got a Teflon lined hose and plumbed everything up. It works. The switch turns it off at 110 psi so I'm going to up that a bit because why have something explode at 110psi when your could have it explode at 140psi. The thing I haven't finished yet is the purge valve. I have a bracket for it I just need to wire it in, I'll probably do that now. Anywho, it works.
6 points
-
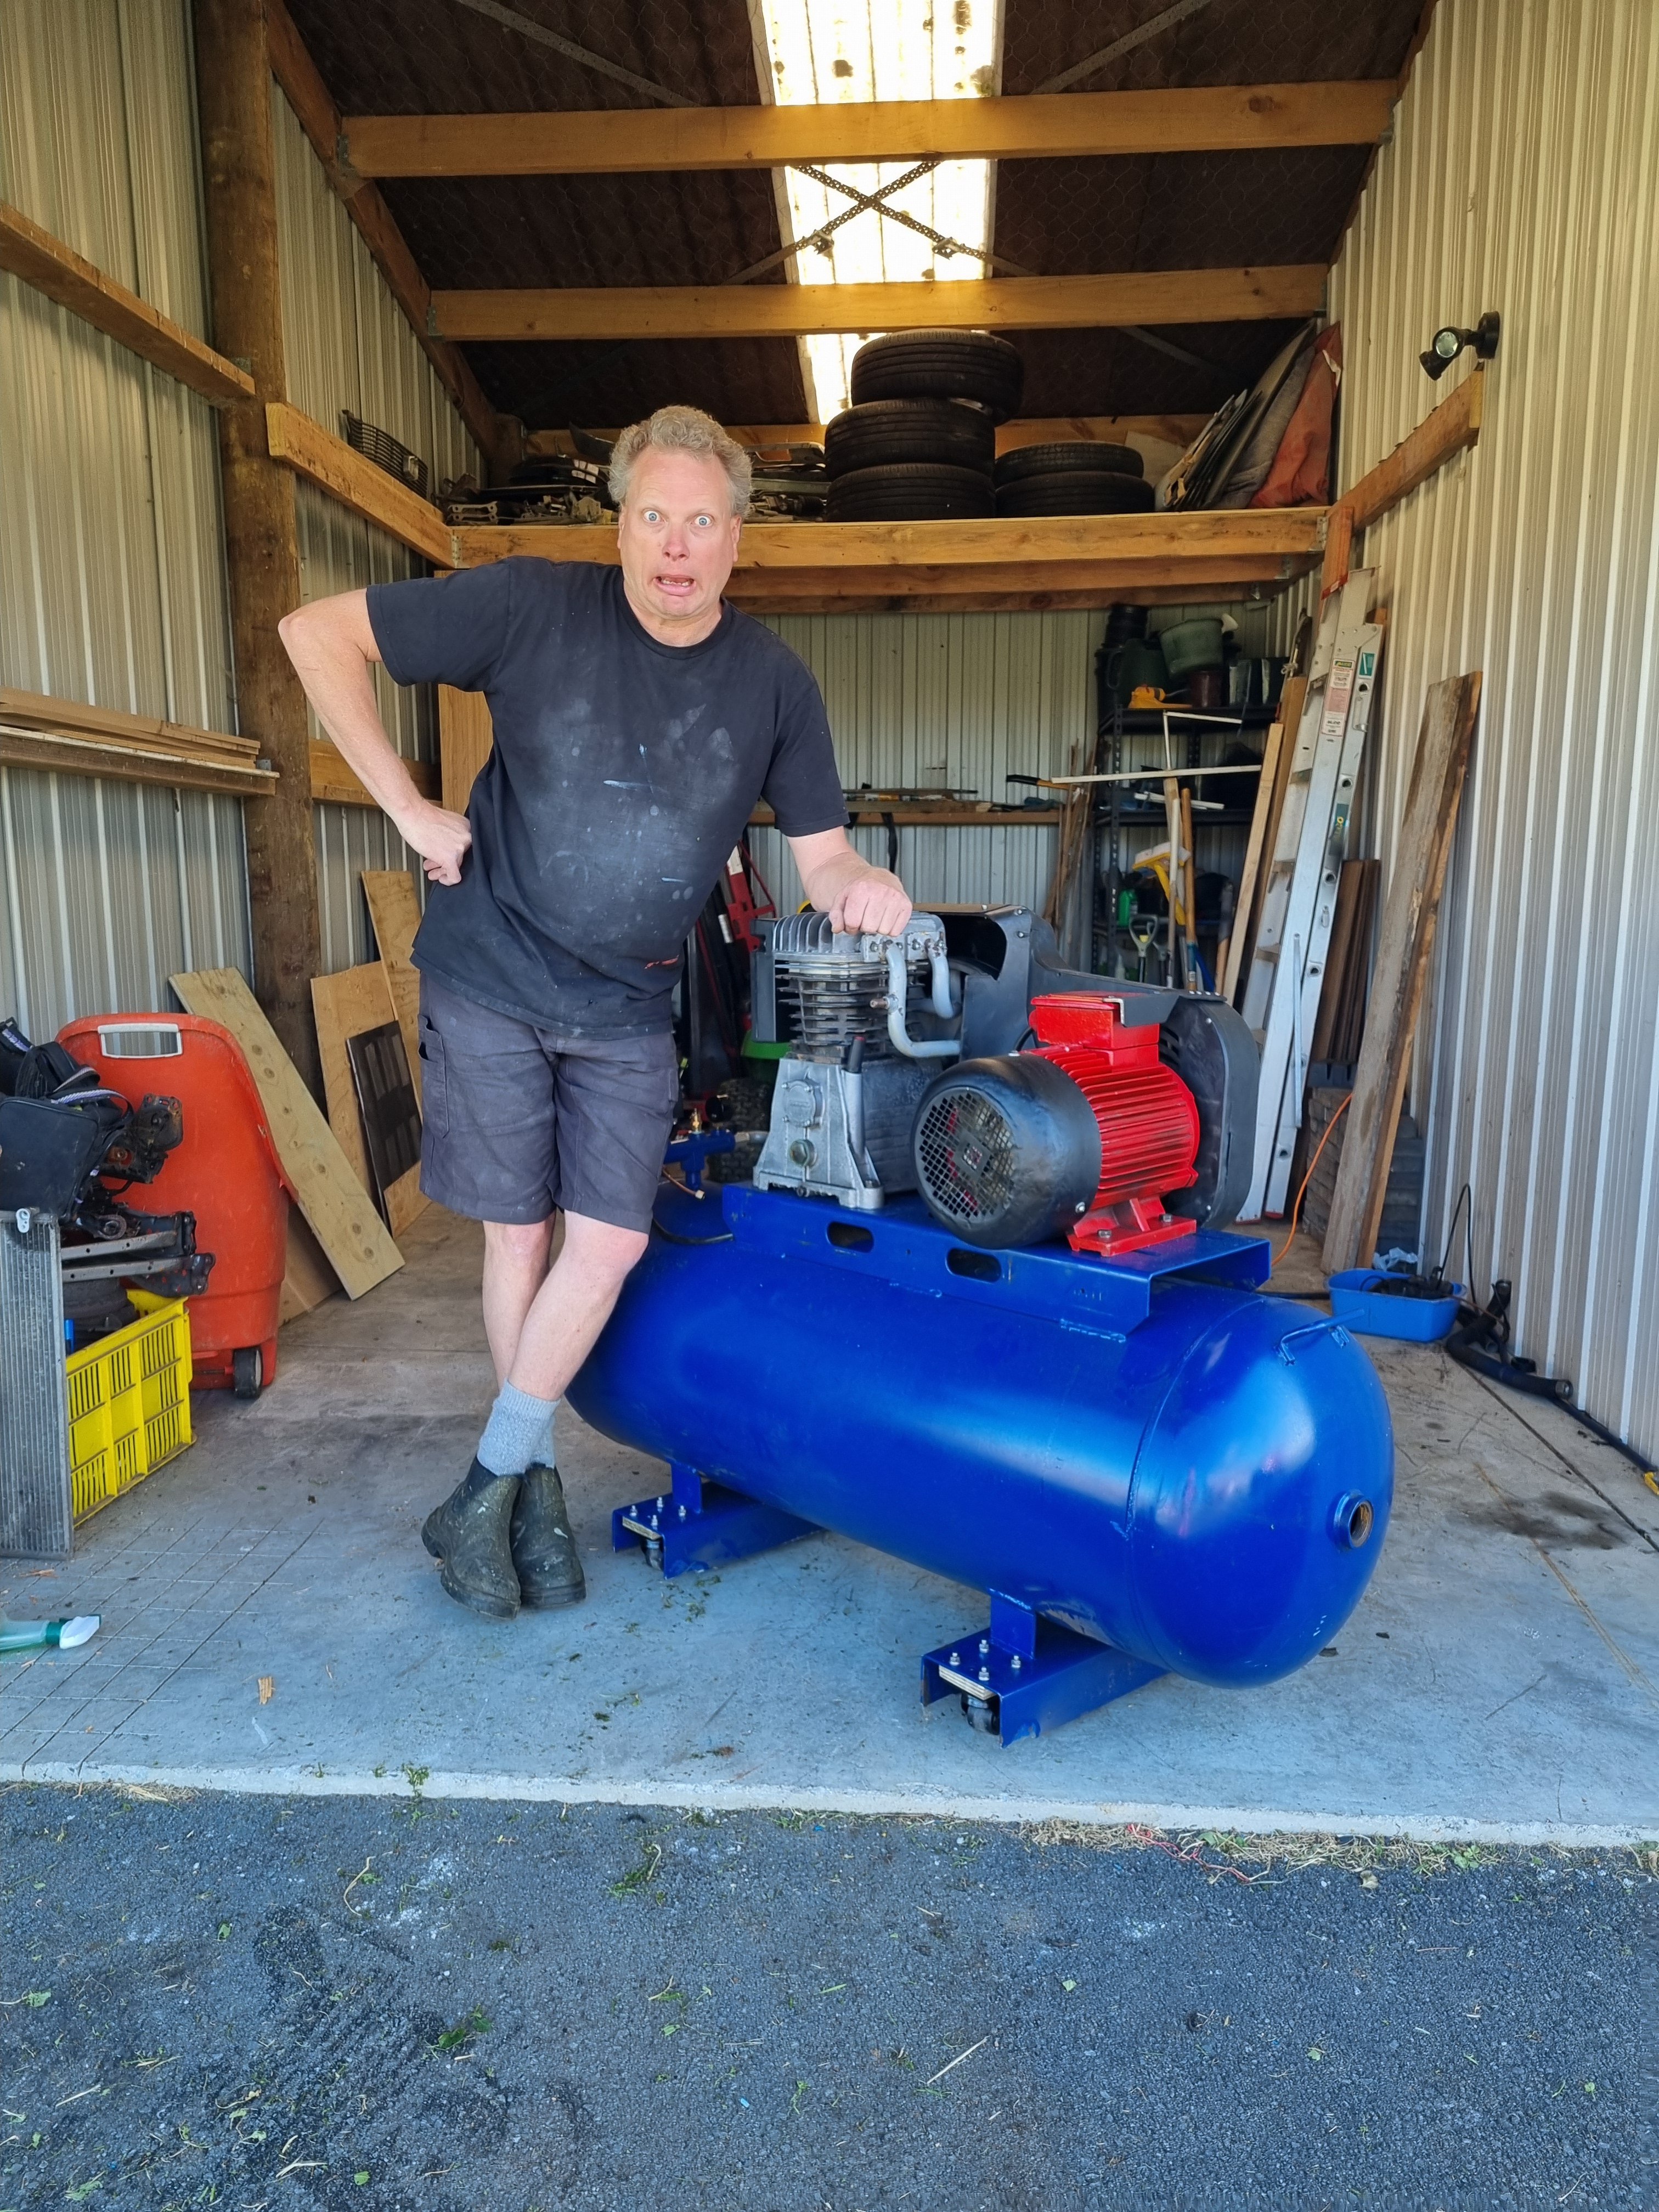
@cletus came over yesterday for a visit and remarked how the compressor looked bigger in real life than on the Internet so I commissioned this portrait with the hope of conveying the size of the compressor accurately.
5 points
-
Please count my vote as 2. Mr Swayblack doesn't have an OS account4 points
-
4 points
-
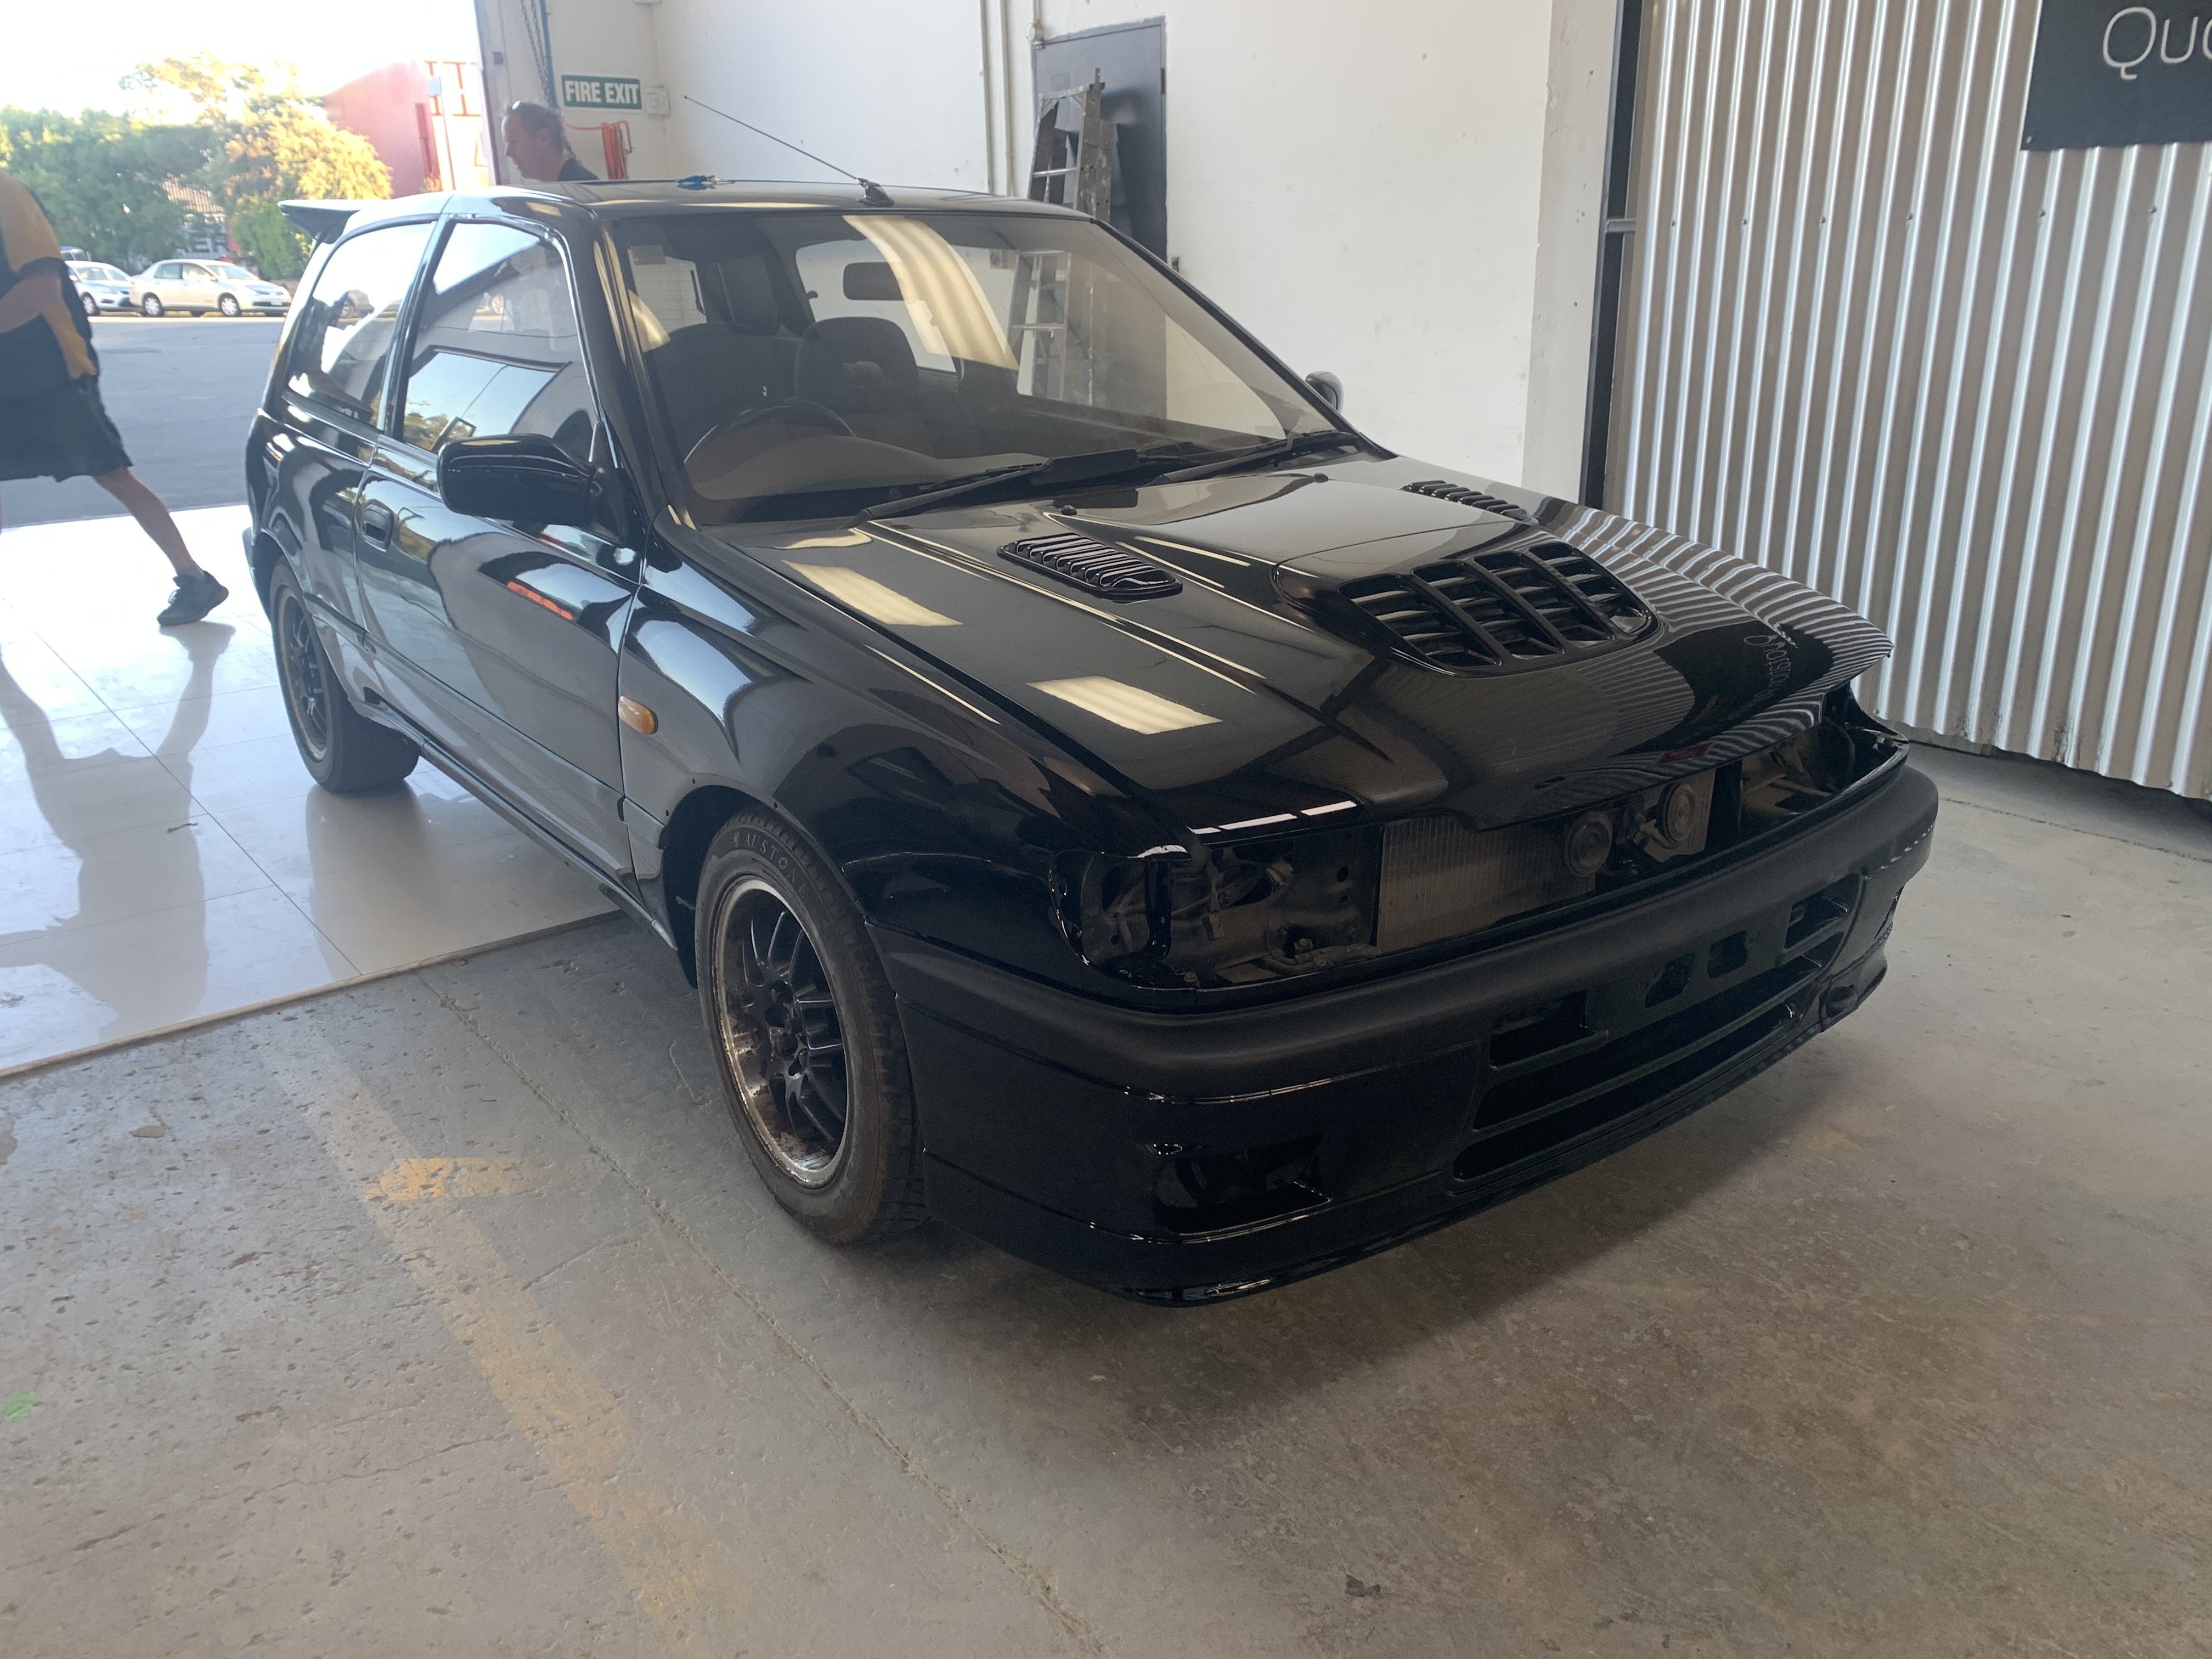
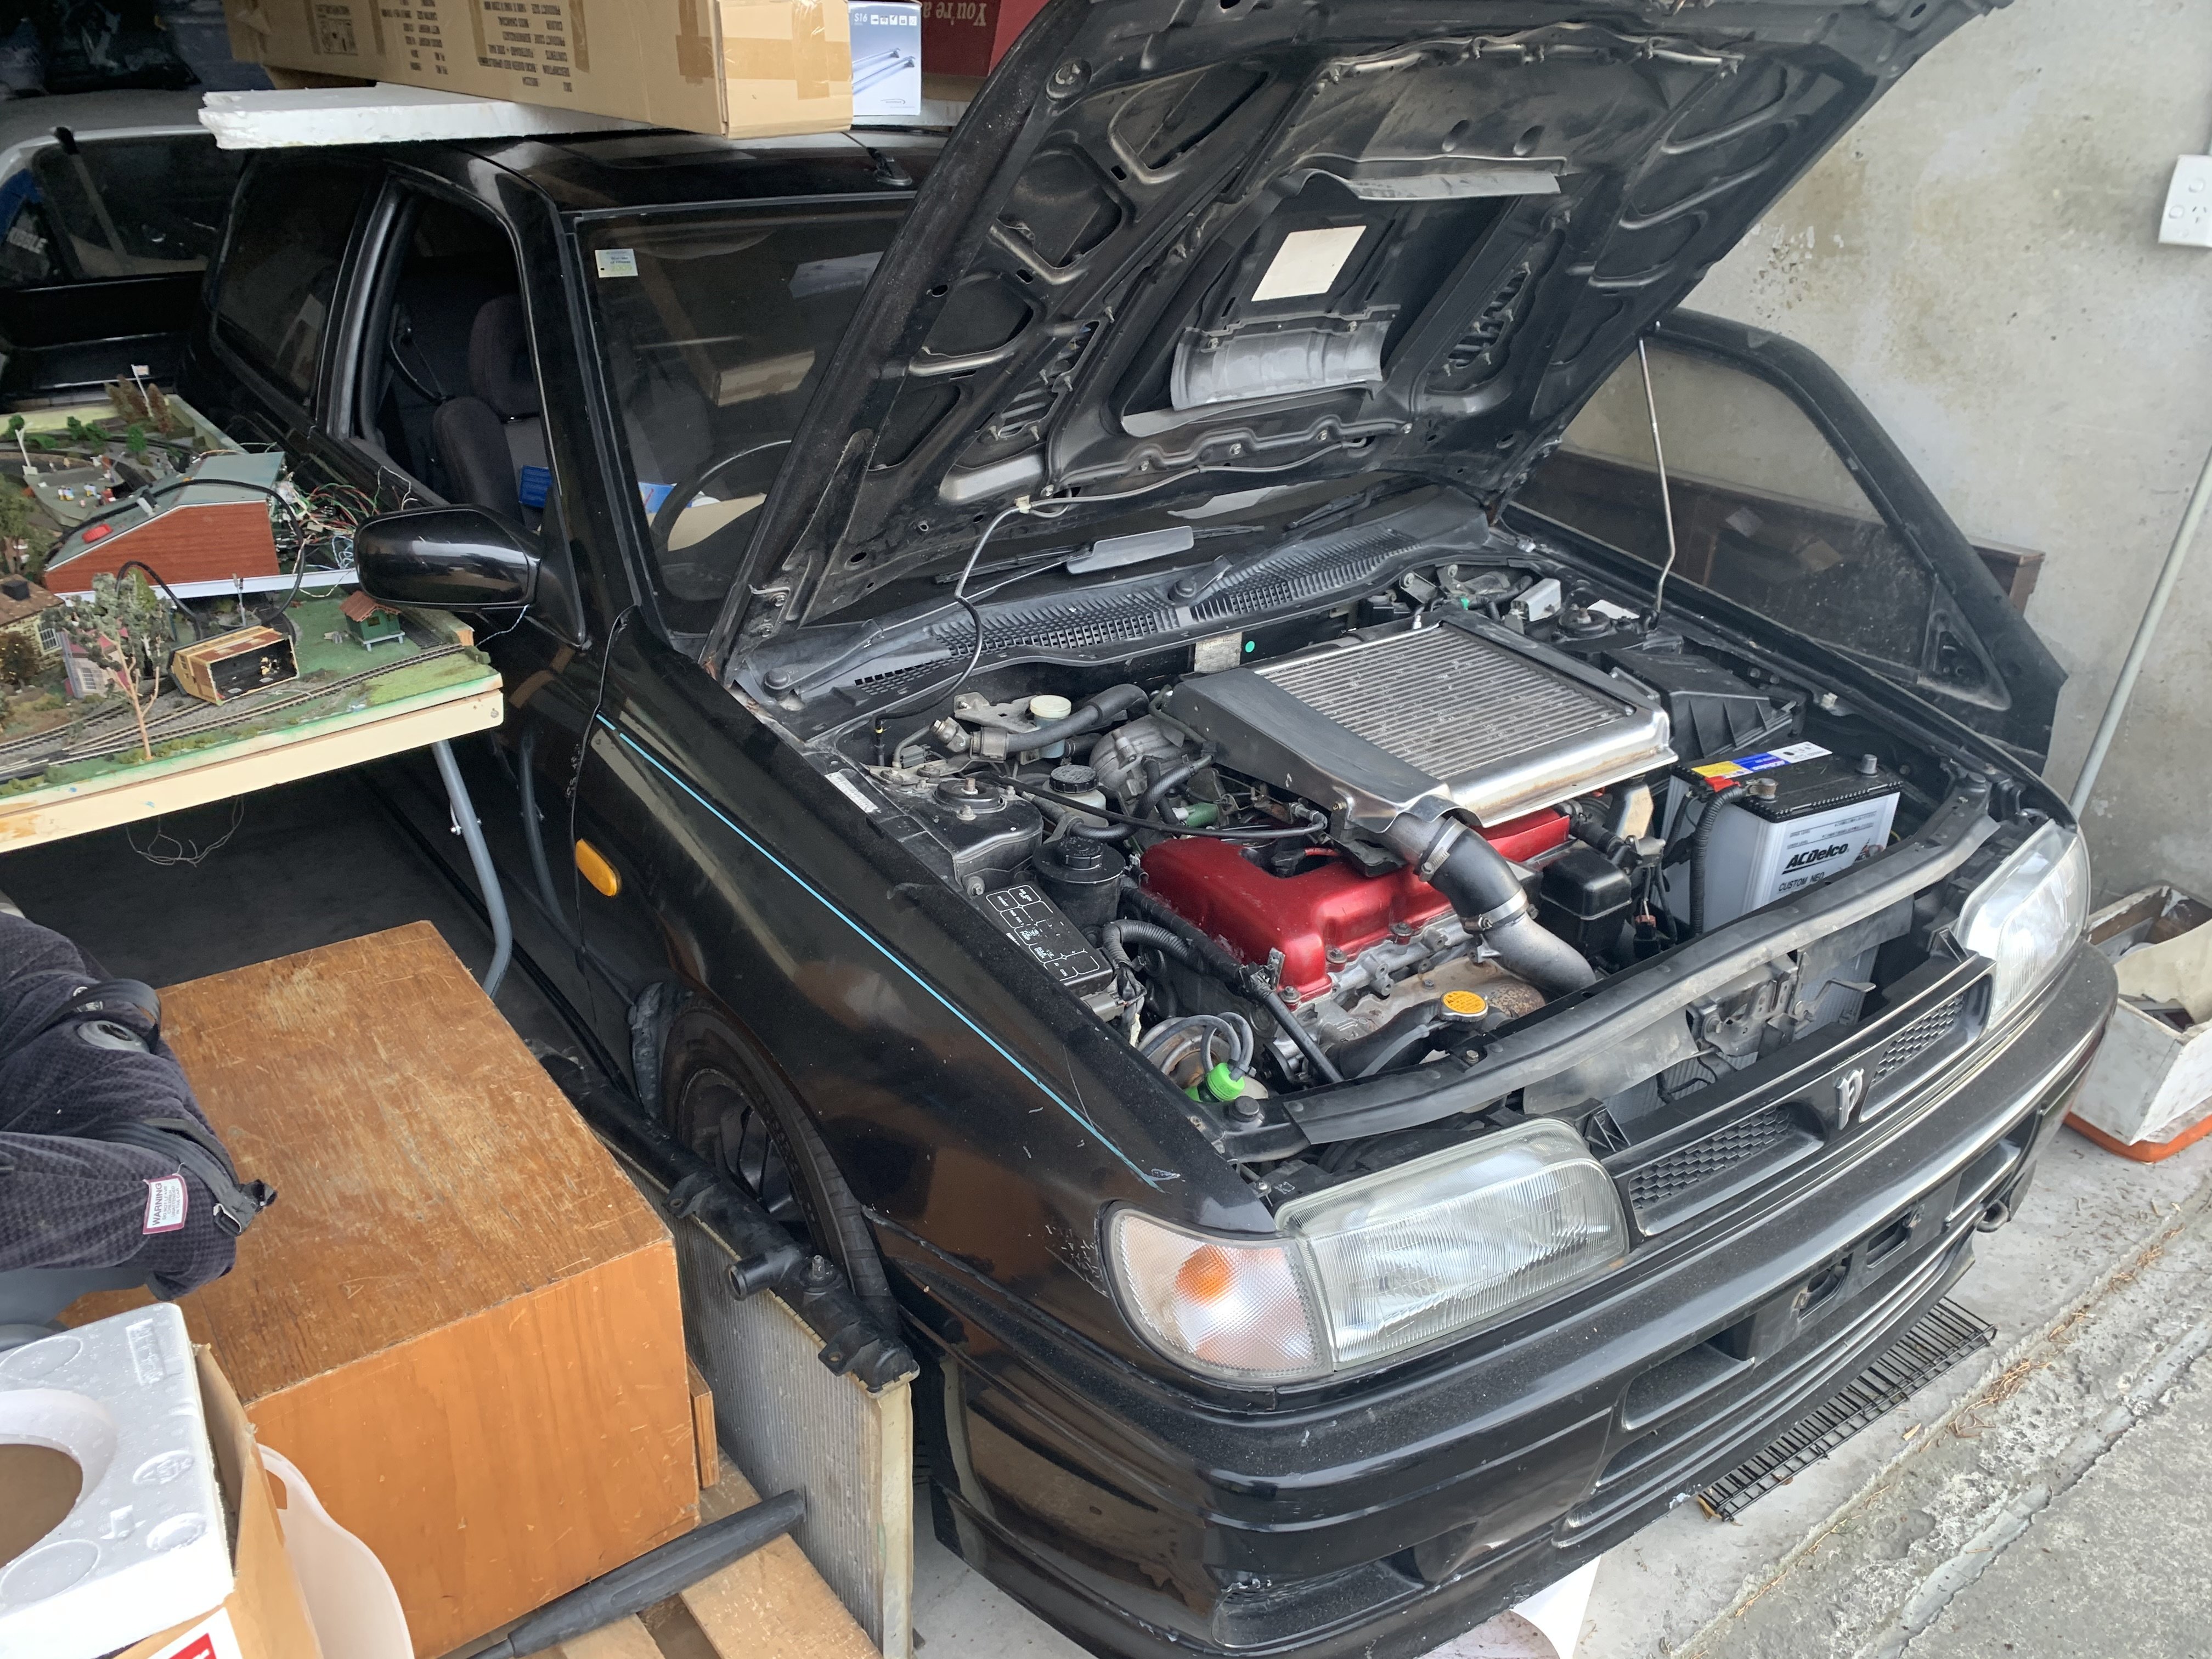
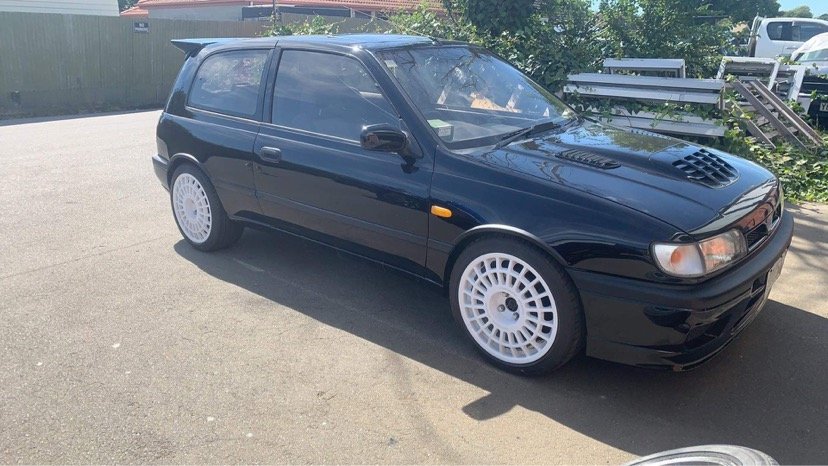
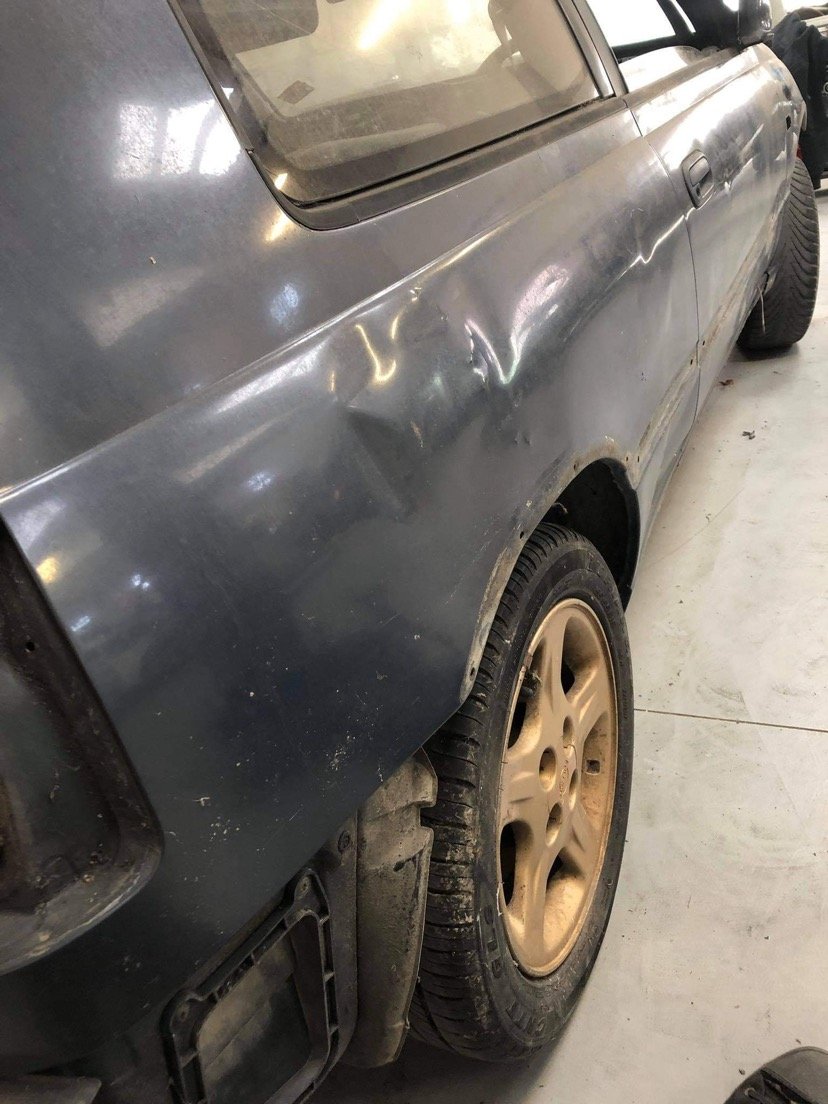
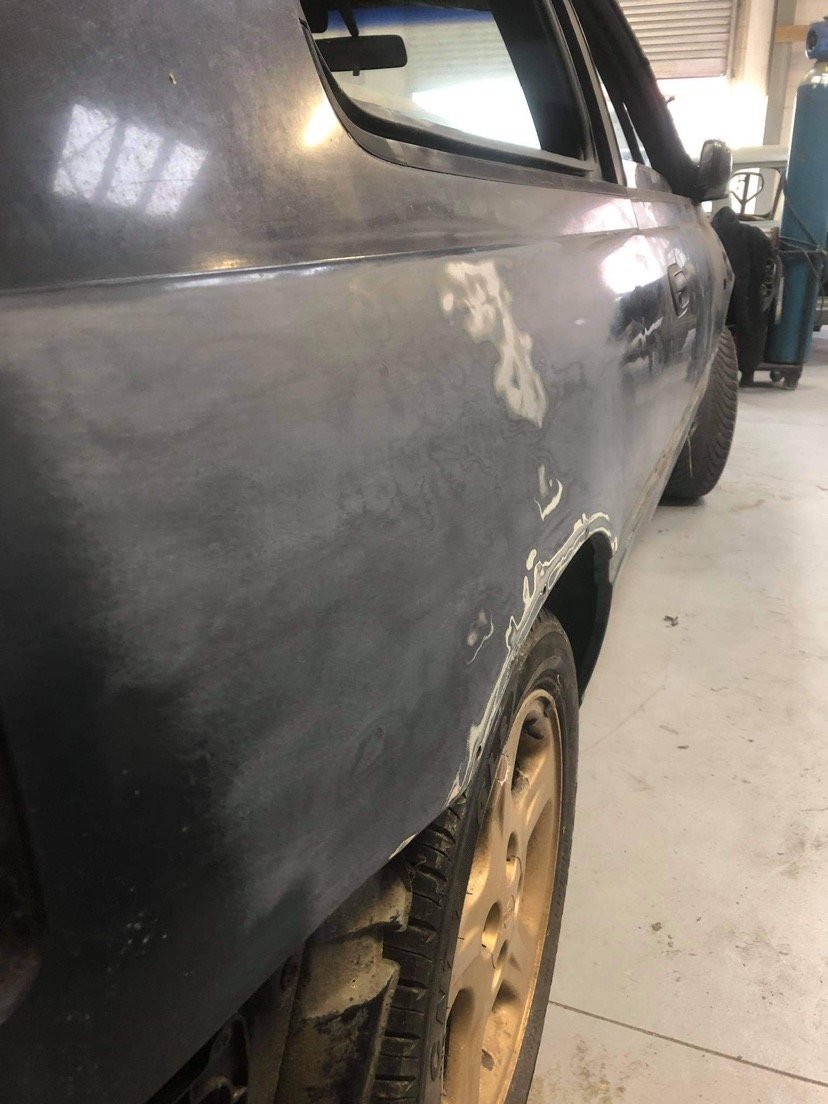
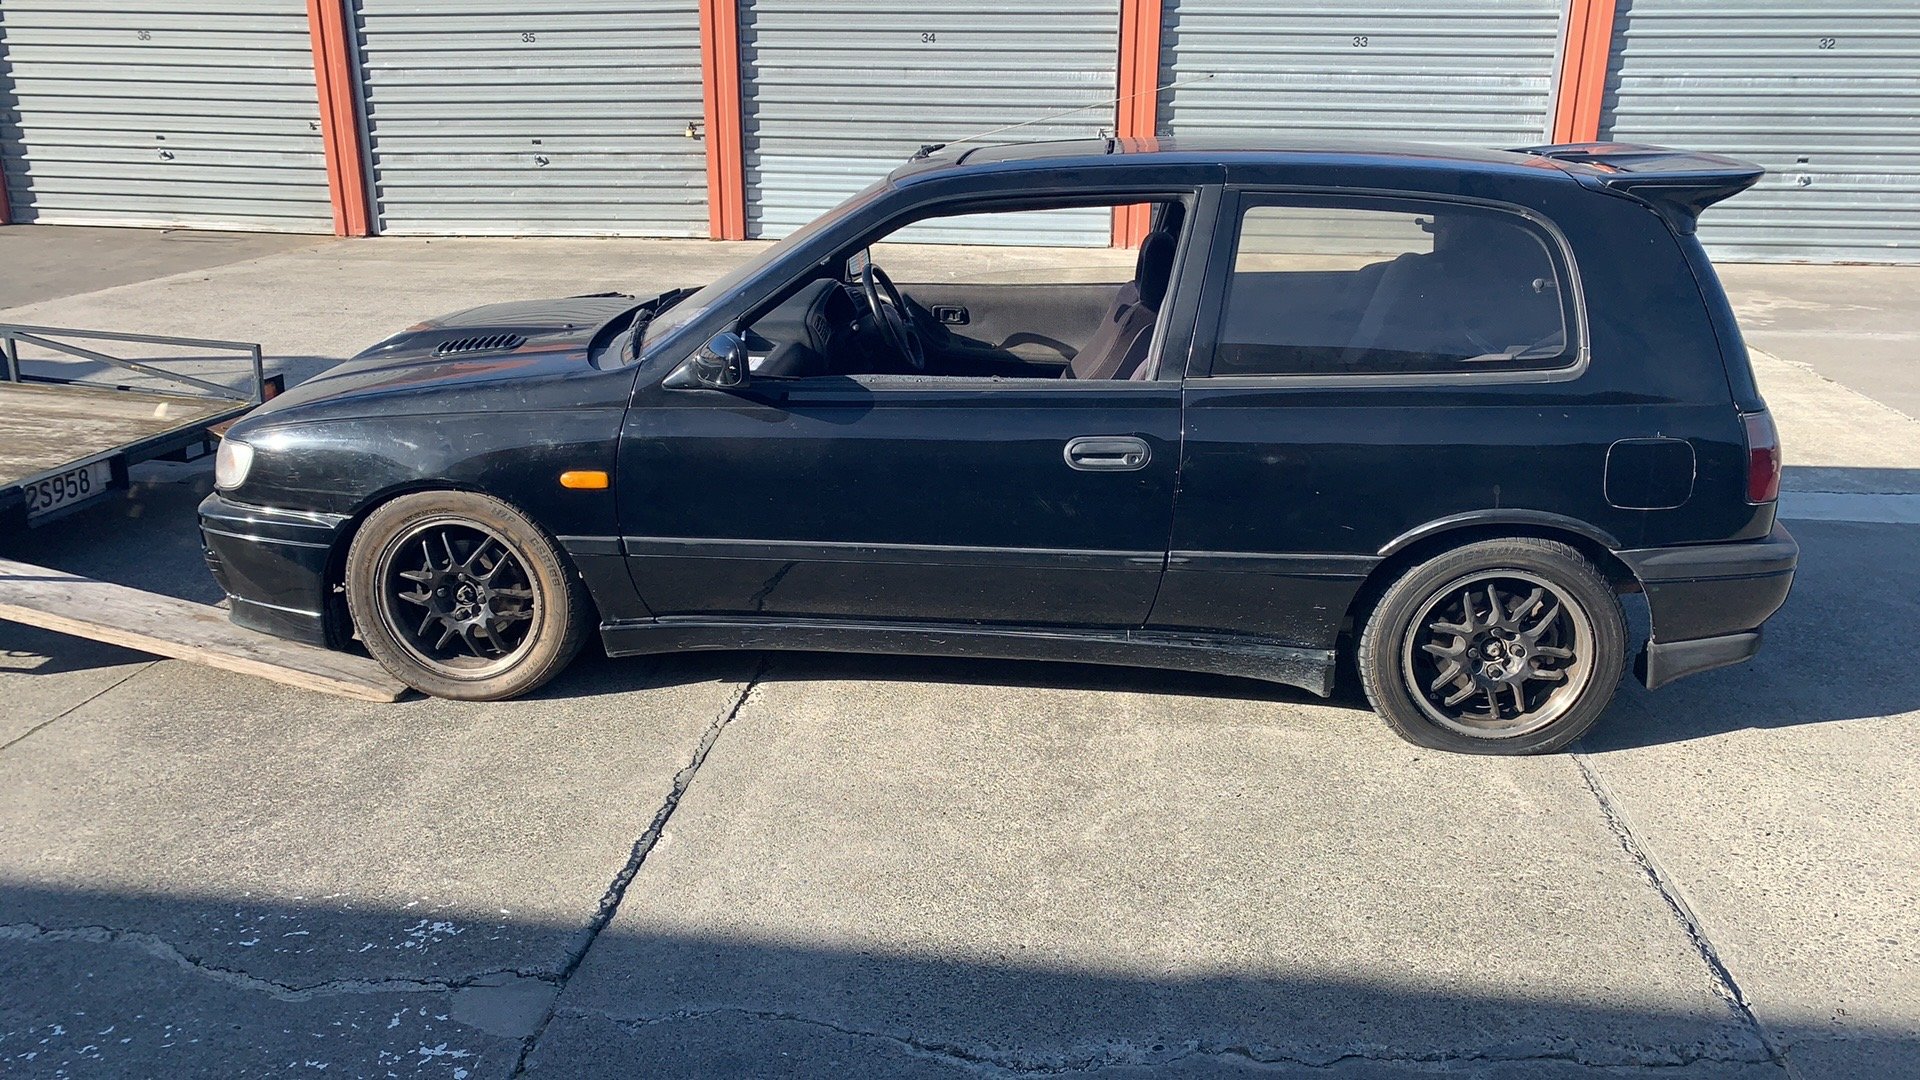
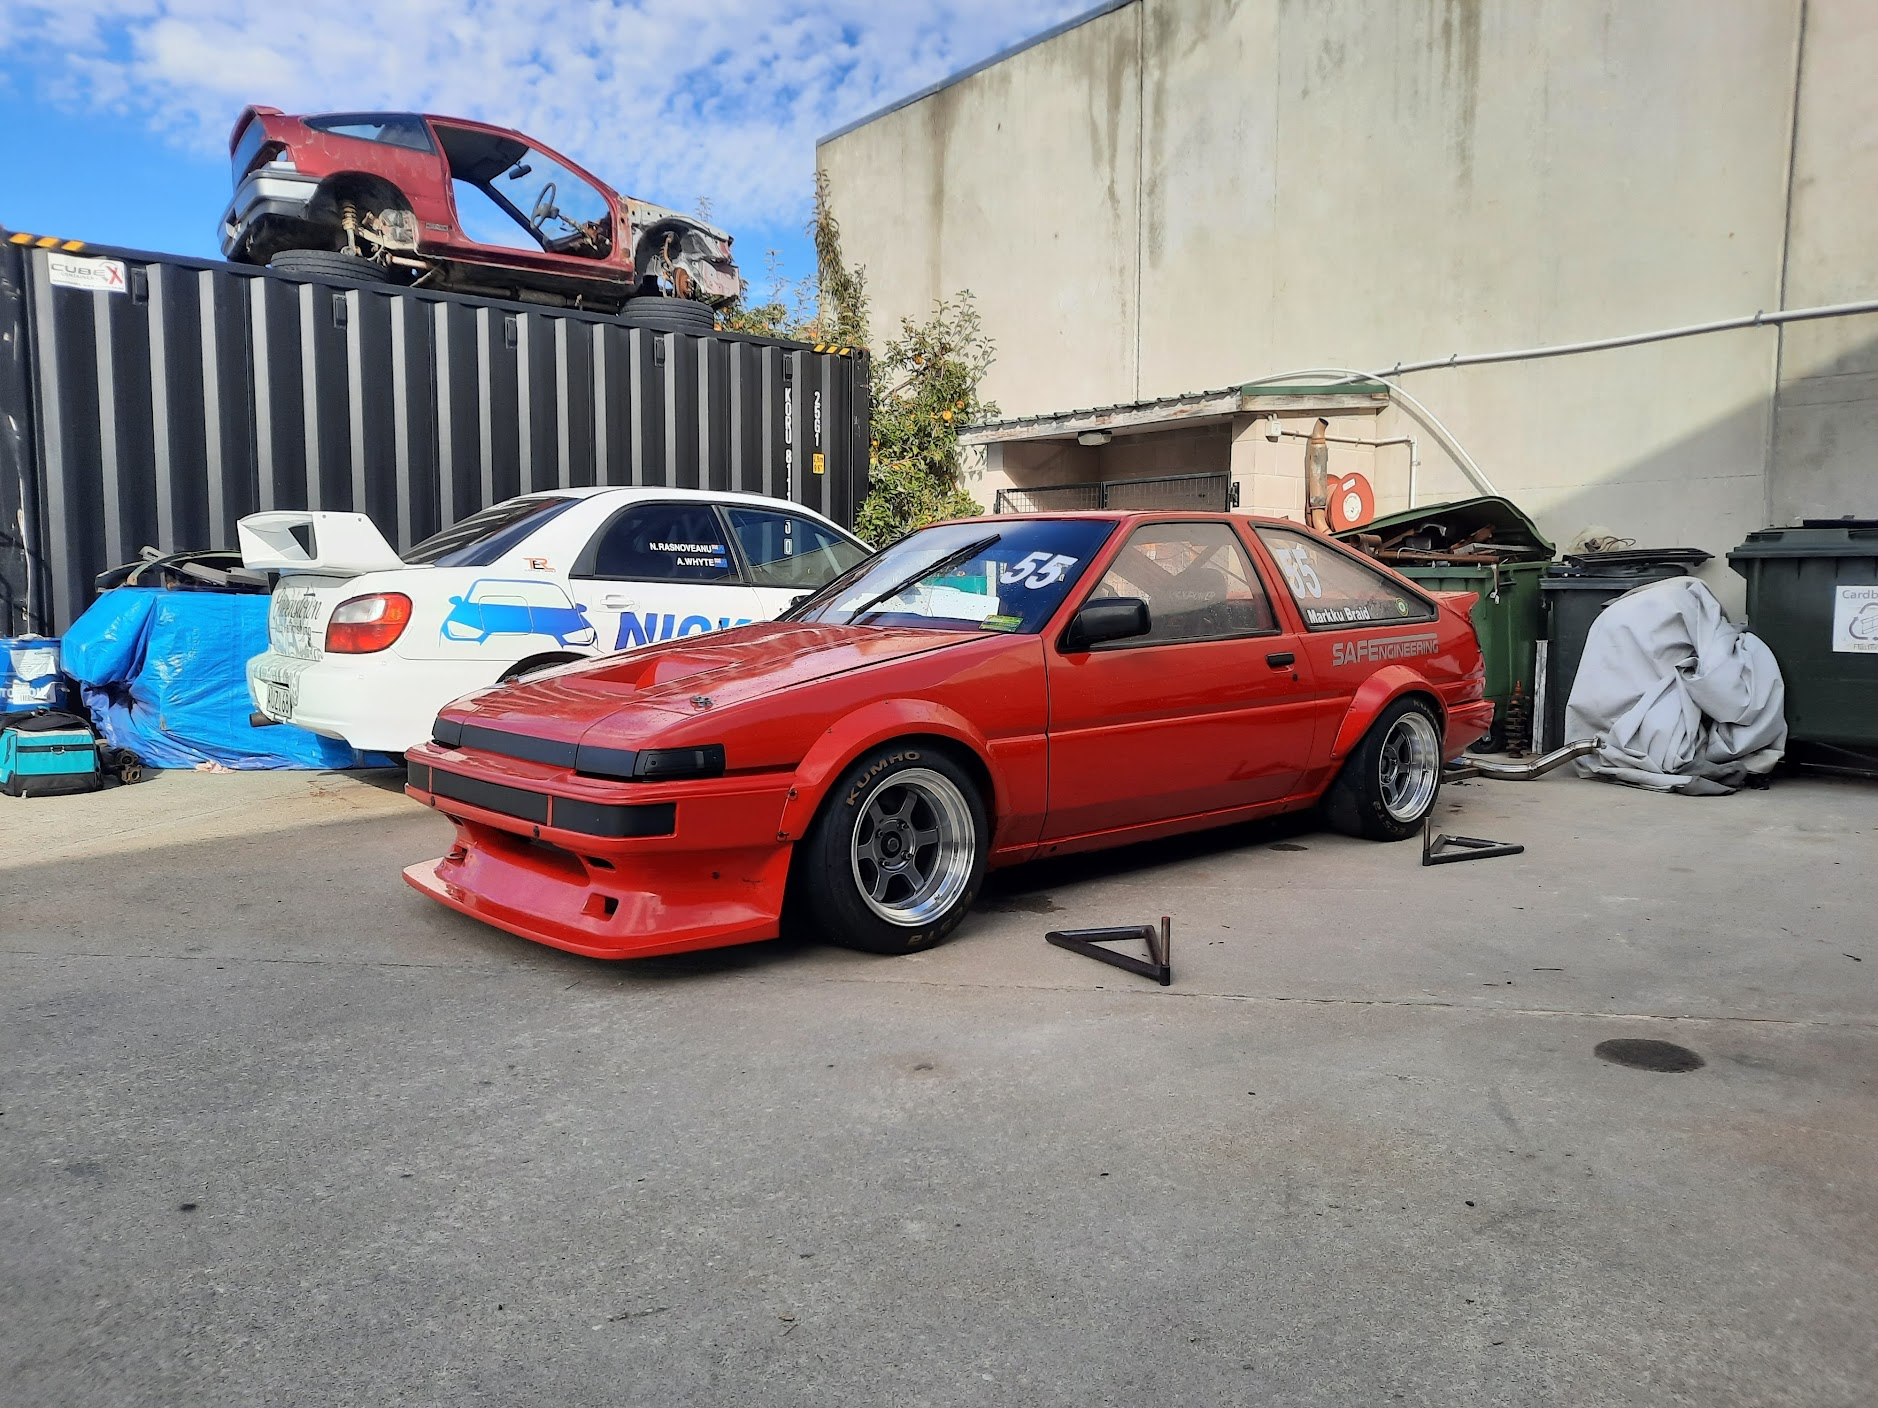
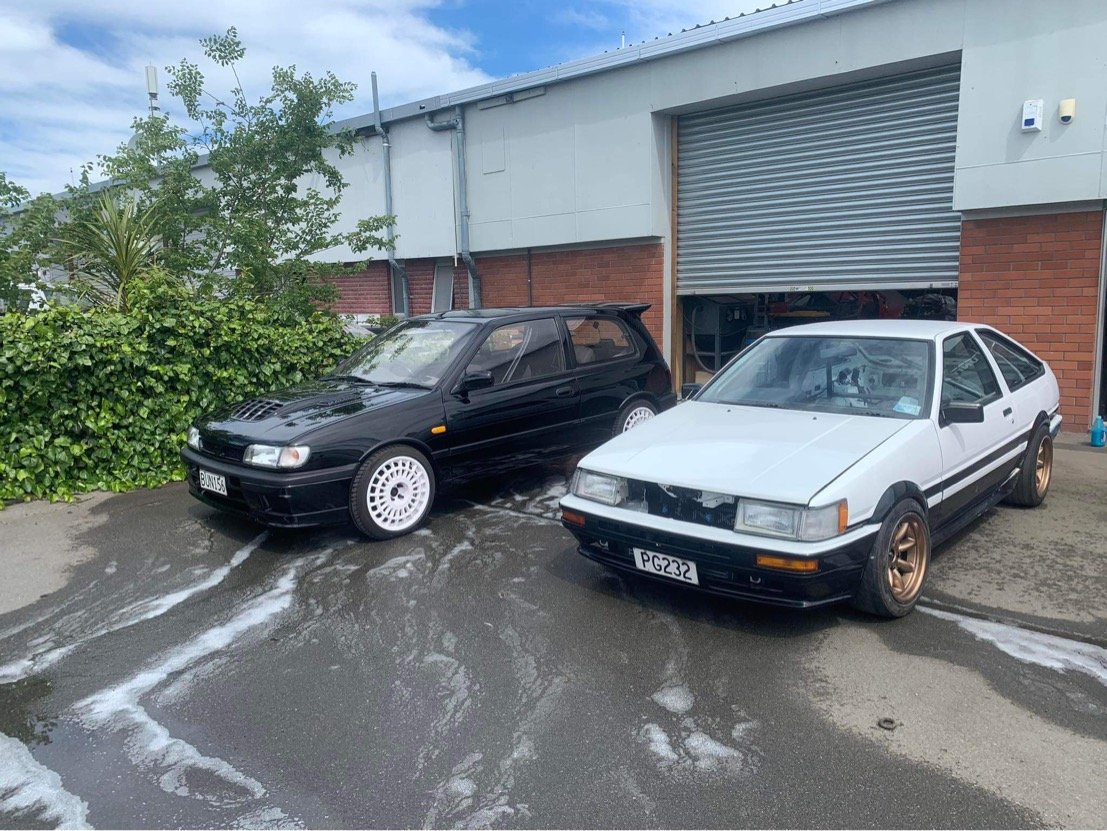
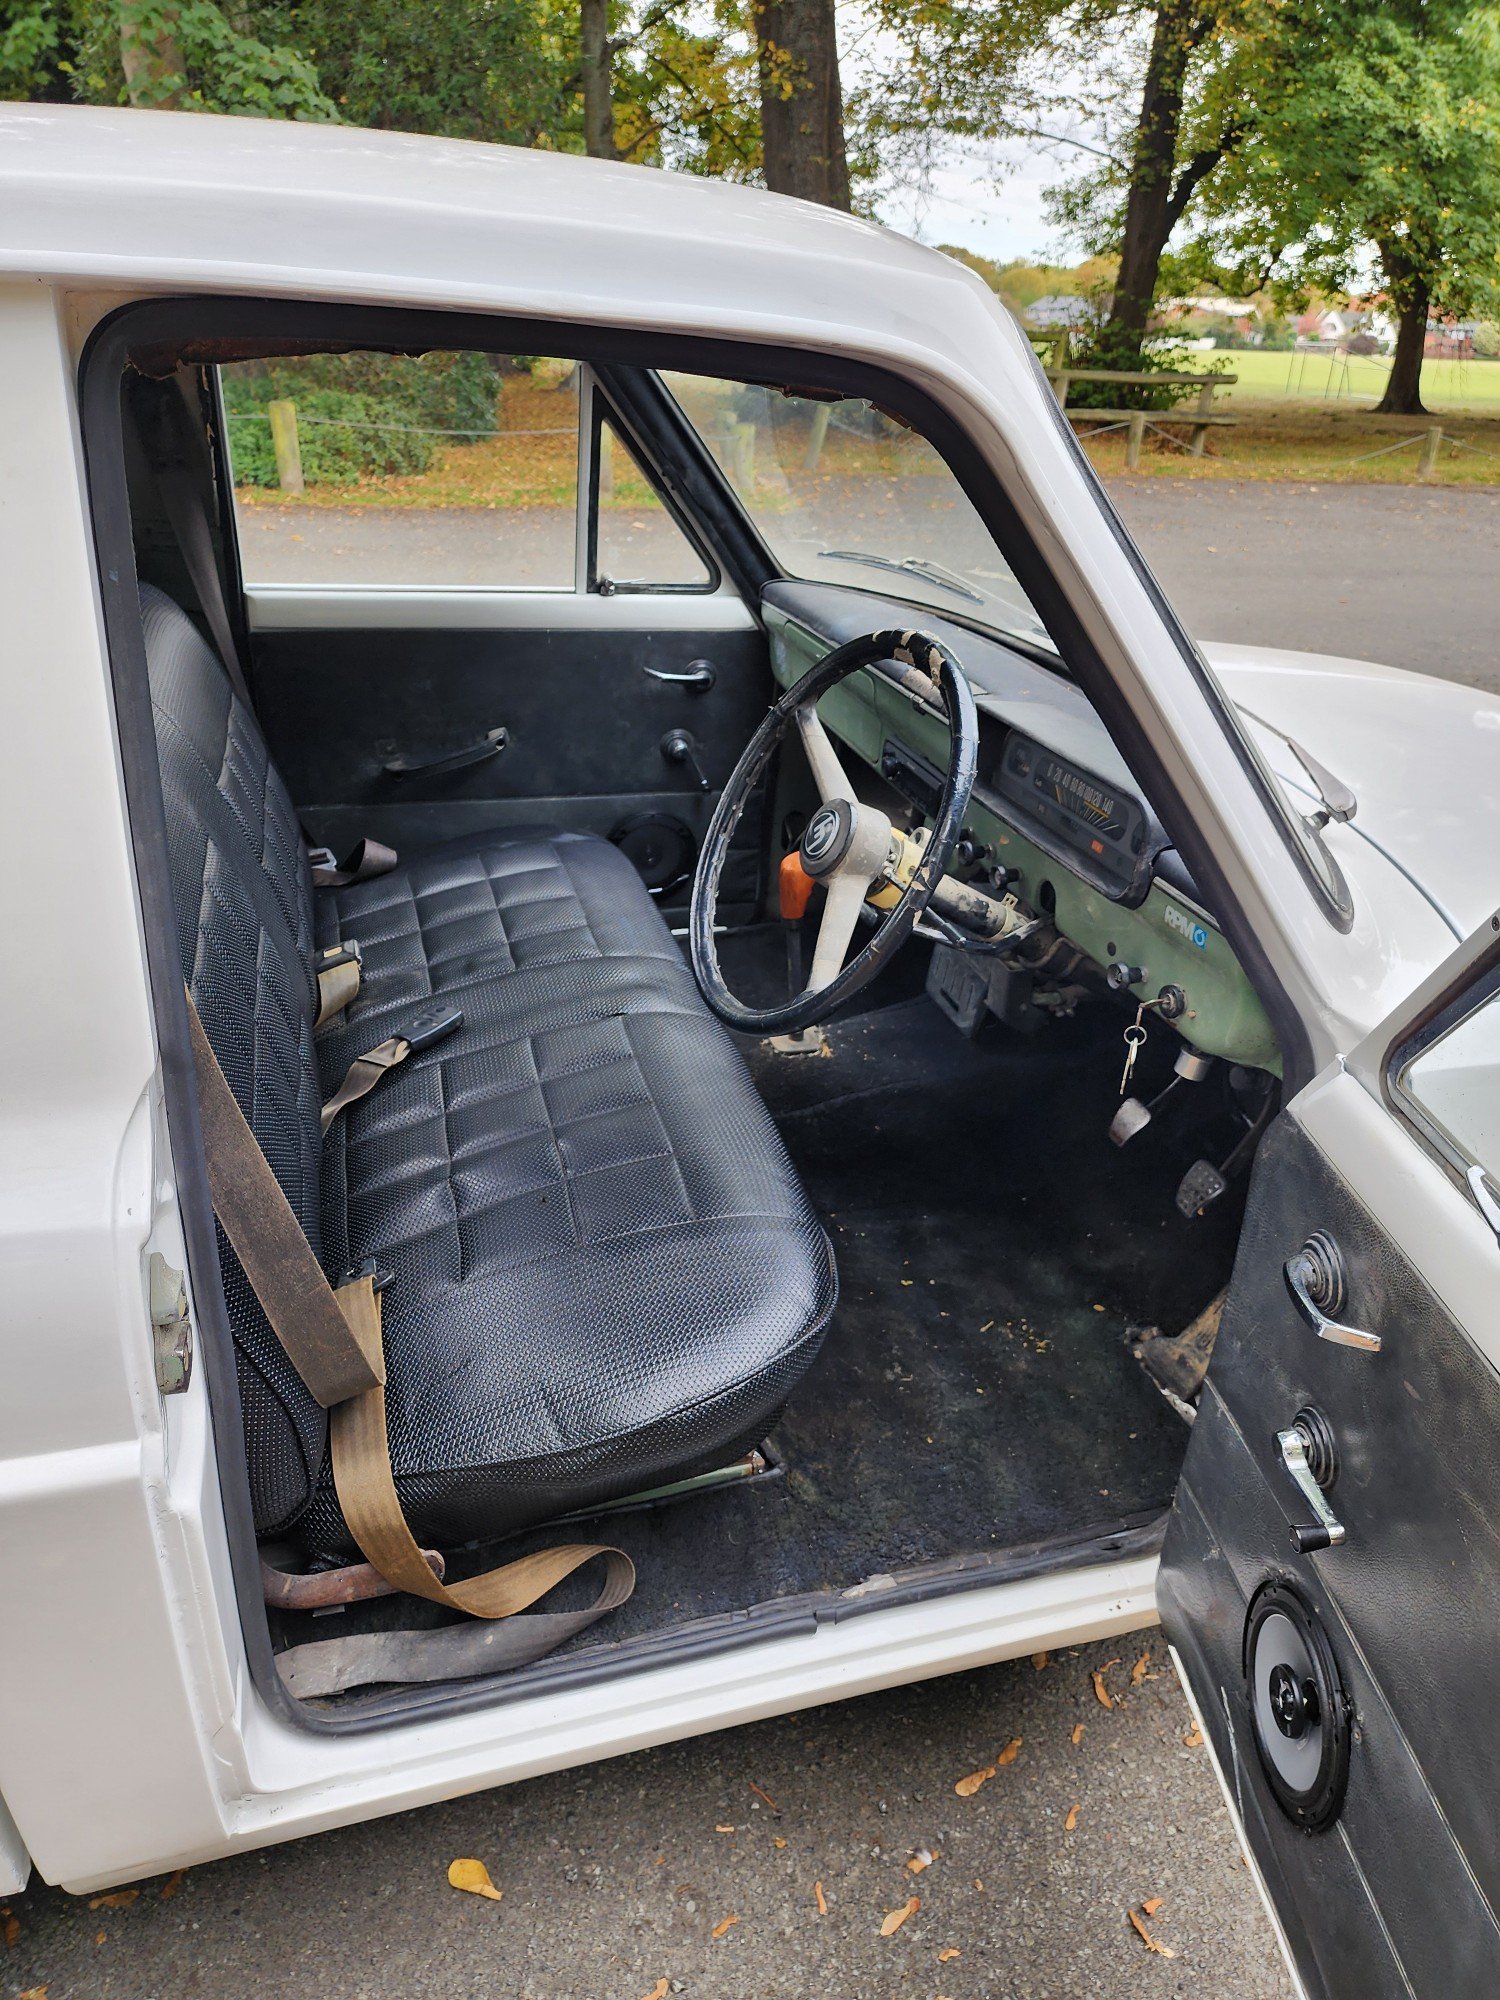
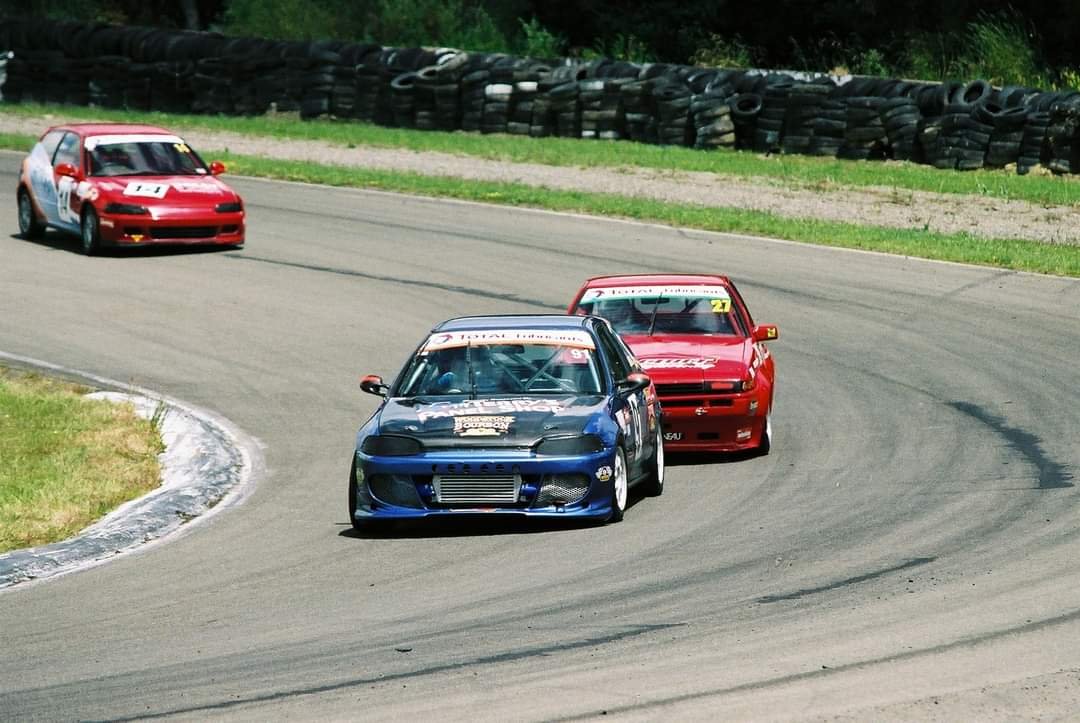
Couple of pics of black car at different stages
4 points
-
Dads finished up a radiator shell. Looking great. The original cores are made from hex flared tube to make a honey comb bundle which is all soldered together. There are about 5000 tubes! The plan is to make a false tube core /front but use a custom aluminium multi pass radiator to work as the real radiator. It will be nickel plated once the core brackets are figured out and any other tweaks.4 points
-
After a couple of failed race car projects over the last decade decided it was time for a more simple road car project. Being of that age where you start to reminisce your youth I decided a 90s turbo car would be the ticket. And had always wanted a gtir as a young fella I just so happened to know of an abandoned Gtir project in a paddock and after a quick phone call a deal was done It had been sitting in the paddock approx 7 years. It ran but had a blown gearbox (of course) some rust and dents and every rubber part was perished and dash cracked etc. I immediately brought up on parts blew it to bits fixed the dents and rust and was ready to send it off to the paint shop, then……. I bought another one its about that point things escalated
3 points
-
I can’t vote because there’s no option for Sh*t Cun*s to say yes.3 points
-
Measured from top of arch as far as I know. Won't be many arches that don't curve inward. This part of the PDF covers bolt on flares, but if if you just have unmodified body, then measure the same way and should be good. I'm sure Clint will confirm yeah / nah. https://www.lvvta.org.nz/documents/infosheets/LVVTA_Info_05-2020_Tyre_Track_Protrusion.pdf this one shows factory body better vs tyre tread, only shows front/back profile with top of arch used as reference https://vehicleinspection.nzta.govt.nz/virms/in-service-wof-and-cof/general/tyres,-wheels-and-hubs/tyres-and-wheels#tab2 Unless it was posted by someone you know isn't an idiot... then take with salt. Front guards for example tend to just bolt on, so I can't see how they would link that to being structural. That said, people will probably ruin guard rolling too, by taking the piss and they will have to bring in rules. Had to flare mine to get enough clearance through full suspension travel for my cert. Didn't even come up as a mention when I explained how I got the clearance. Double skin in rear of mine so fold it over doesn't really change much. Front couldn't do much as bolt on single skin so weak as fuck arch.3 points
-
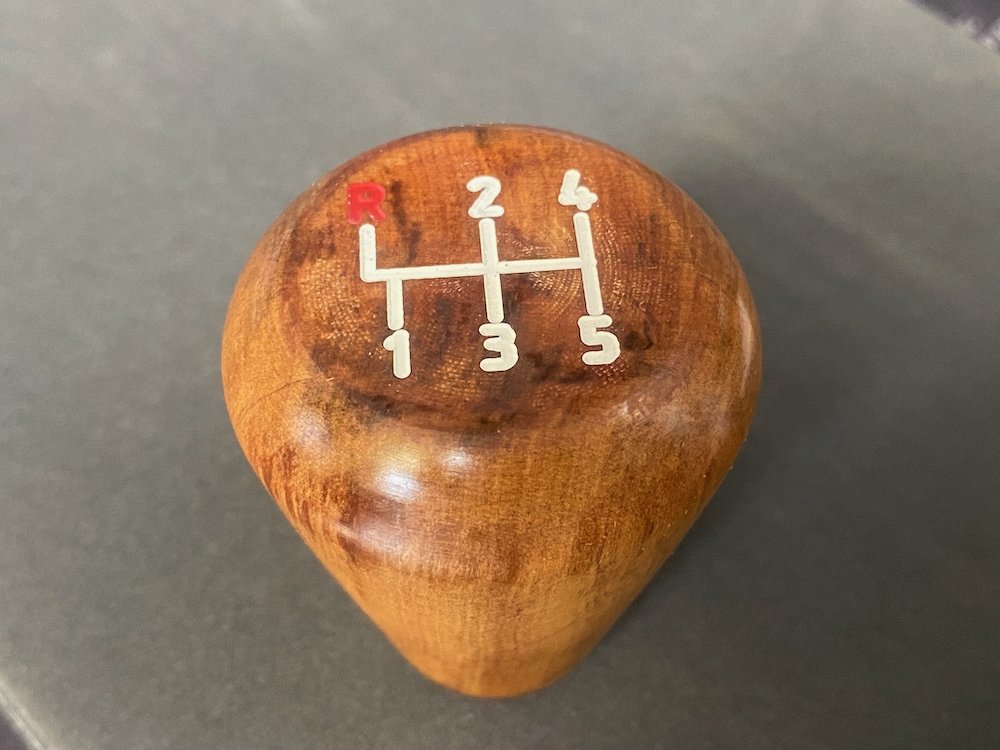
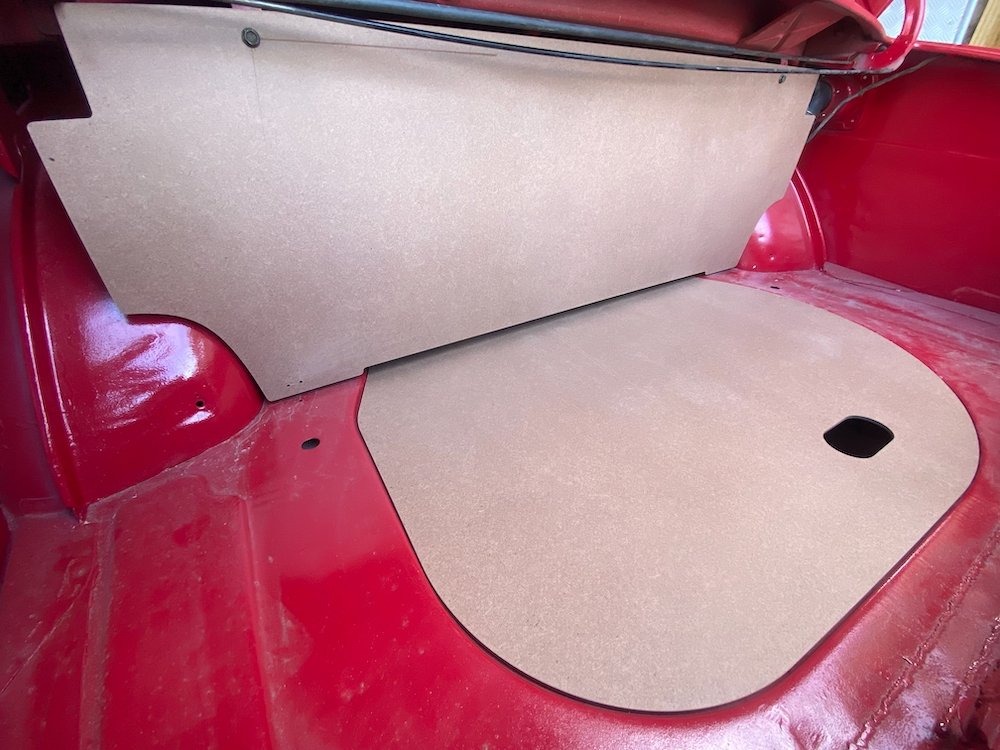
After guessing the shape, dad provided me with dimensions and photos of original boot panels, gave the CAD model an update, grabbed a sheet of 4.75mm hardboard and set about probably the most to factory spec part of the rebuild! Also carved up a gear knob from scrap rimu with the correct shift pattern, scrubbed up real nice with linseed oil too.
3 points
-
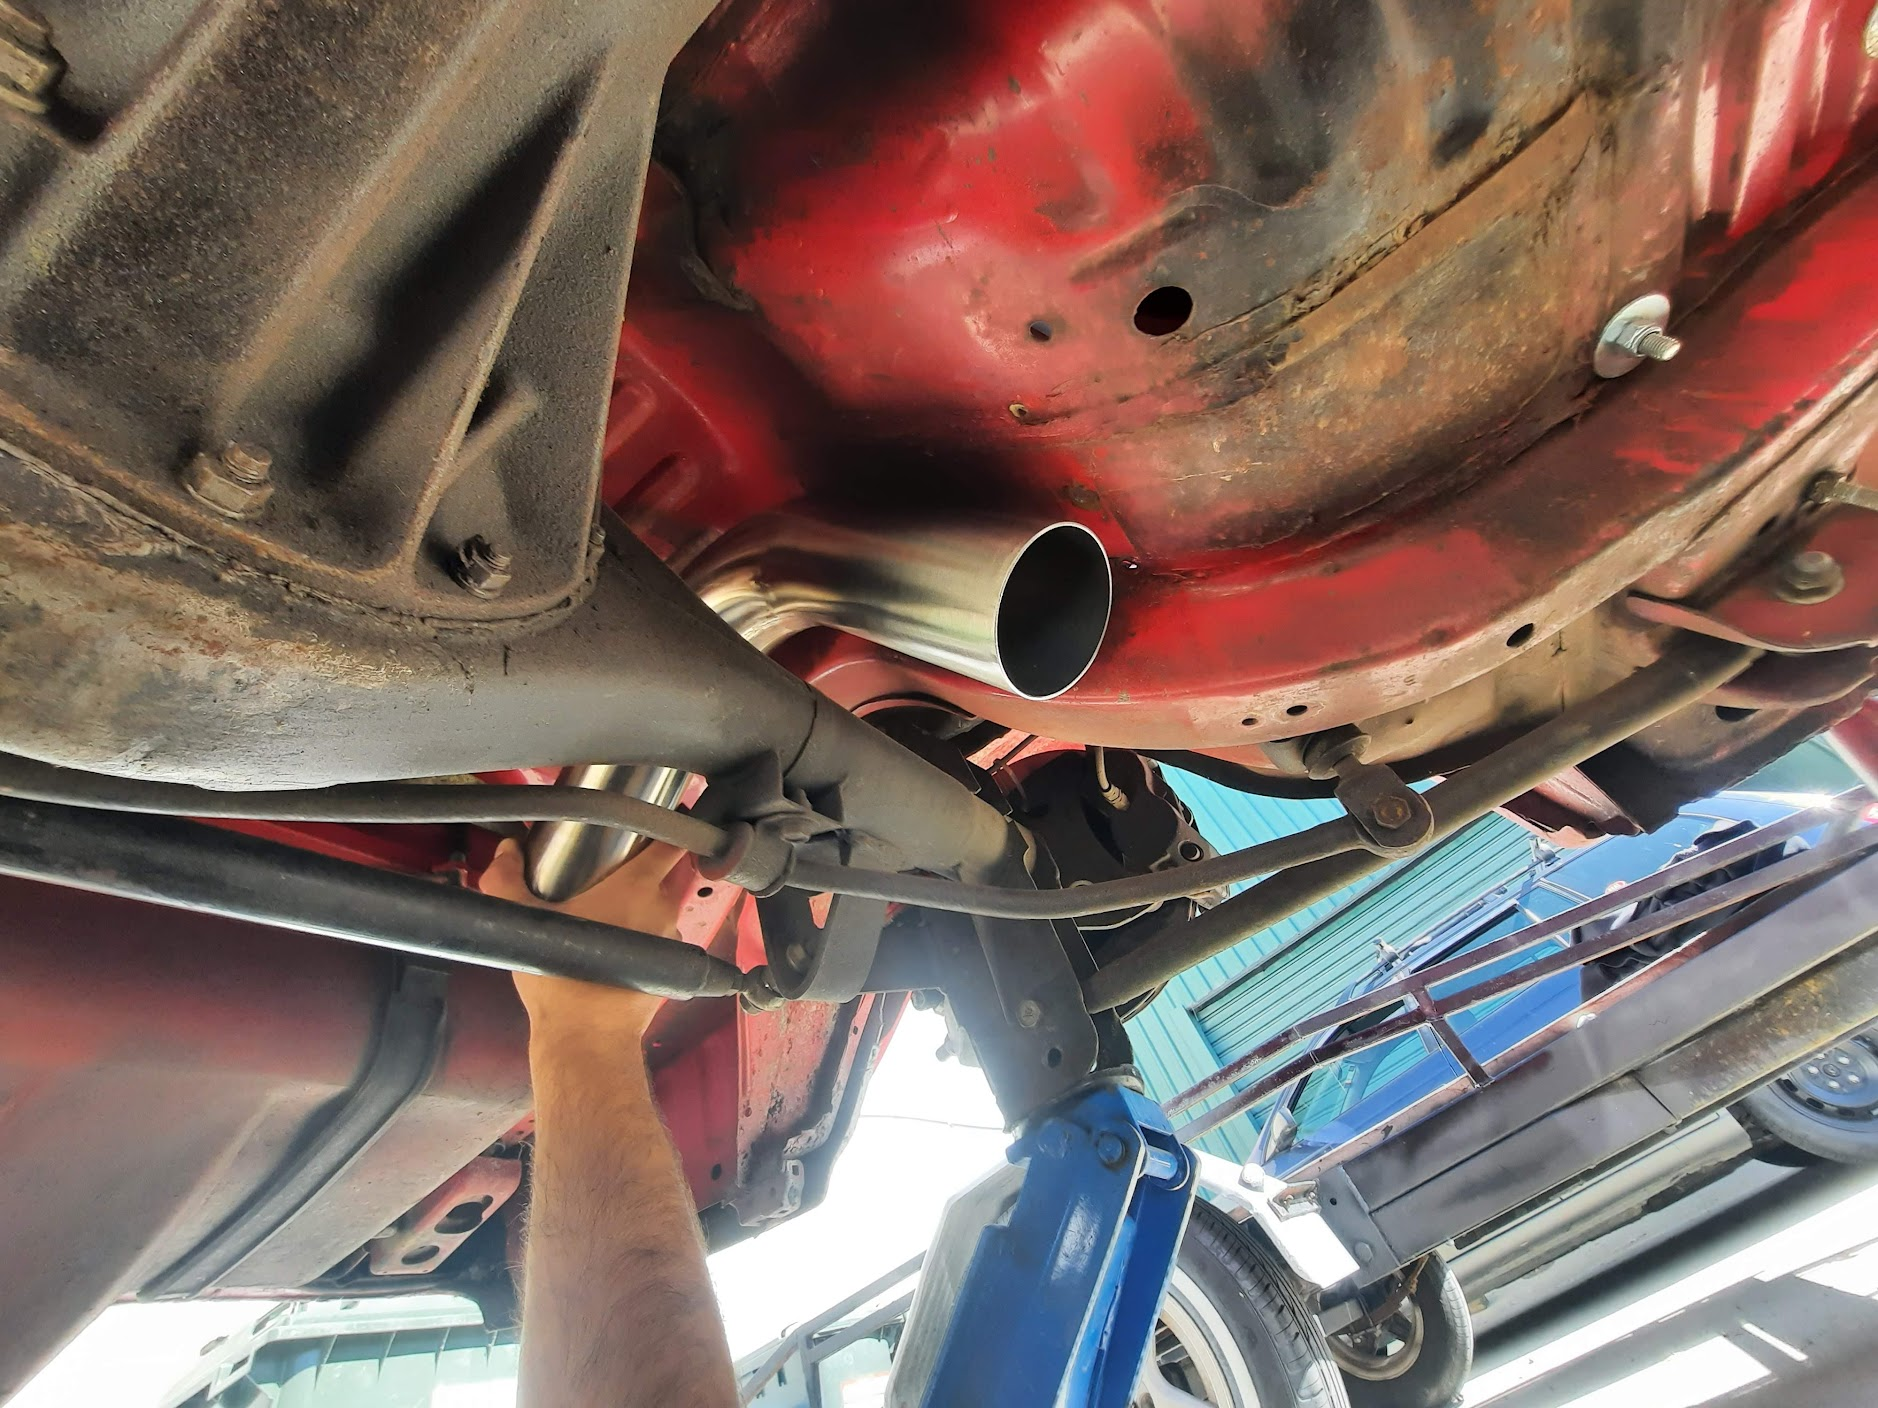
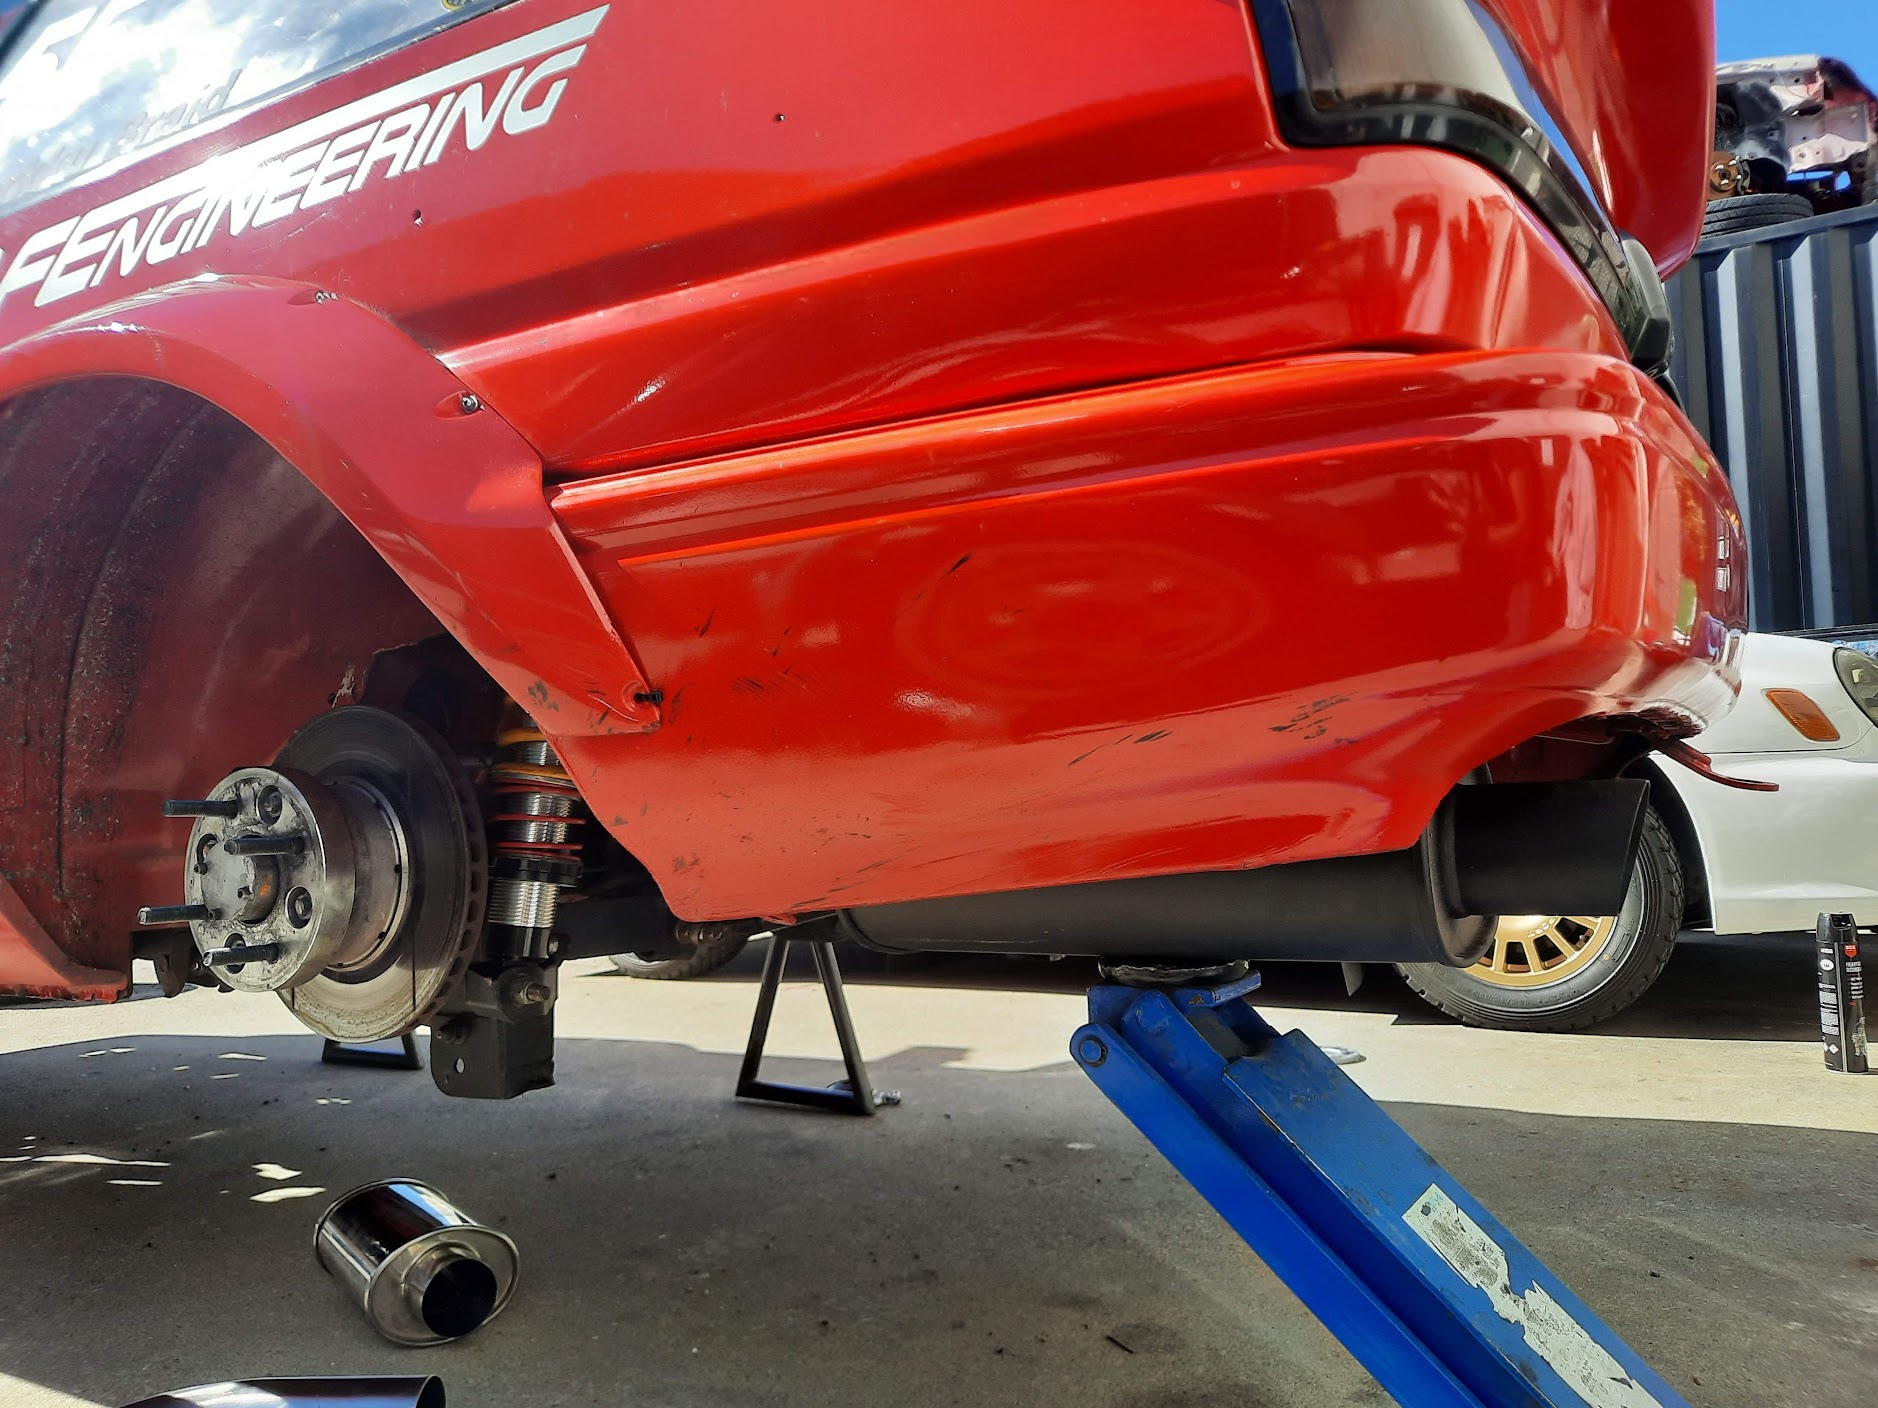
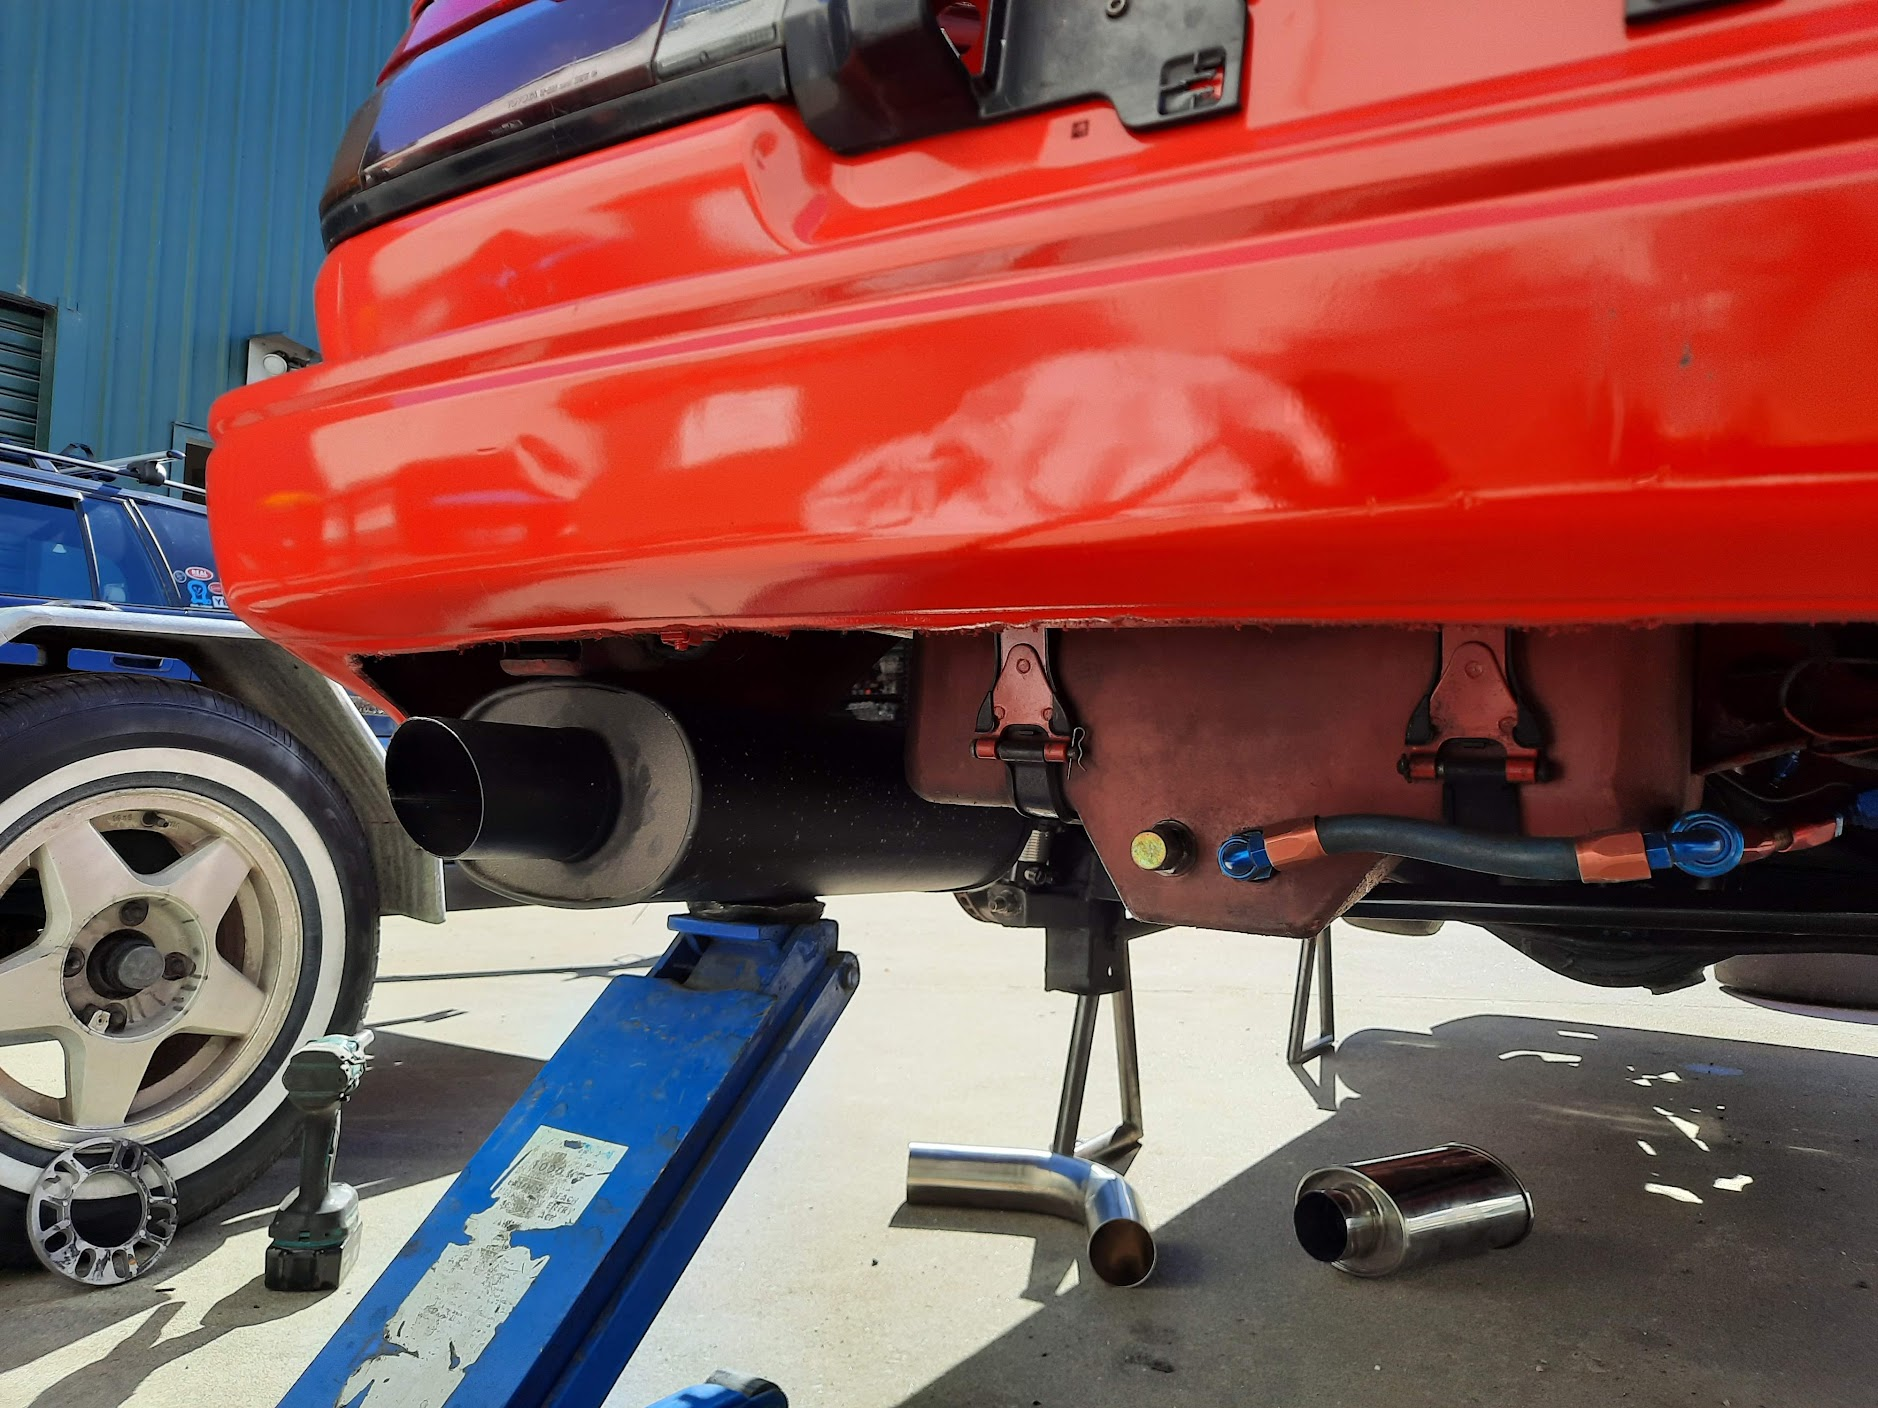
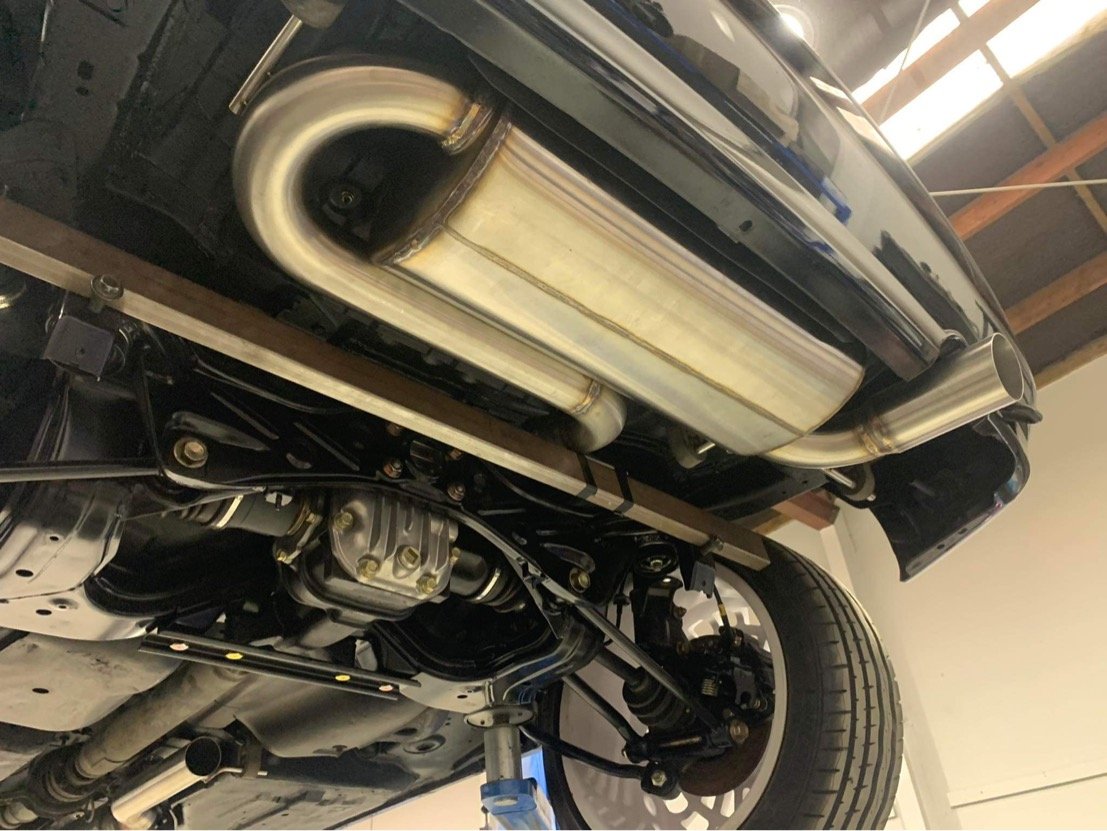
About 2 weeks after I brought the car to Queenstown, I broke my shoulder riding the XR250... So for the last 8 weeks I've been staring at this in my garage without being able to touch it. The sling came off last week. I'm still a one armed bandit for anything heavier than washing dishes, but I still wanted to feel like I was making progress. A couple of mates helped me get the car to work over Easter weekend so I could wash it and start on a few small jobs. Much better. One job I really want to do is update the exhaust. The old side pipe has cracked and it had a bad habit of hitting the ground over ripple strips etc. This time I'd like to go full stainless and exit out the back of the car, with two mufflers. Going under the diff will be tricky because of my droop travel and lowered panhard rod mount, so I'm thinking of heading over the diff instead. It looks like it'll work - this is with the LR shock at close to full compression: Rear muffler location will look something like this: I'll run the smaller reso/muffler just before the diff and might run a V band up the front because the old flanges I've been using are pretty tired now! Taking the exhaust out the back makes me feel old. My ear drums will love me for it though
3 points
-
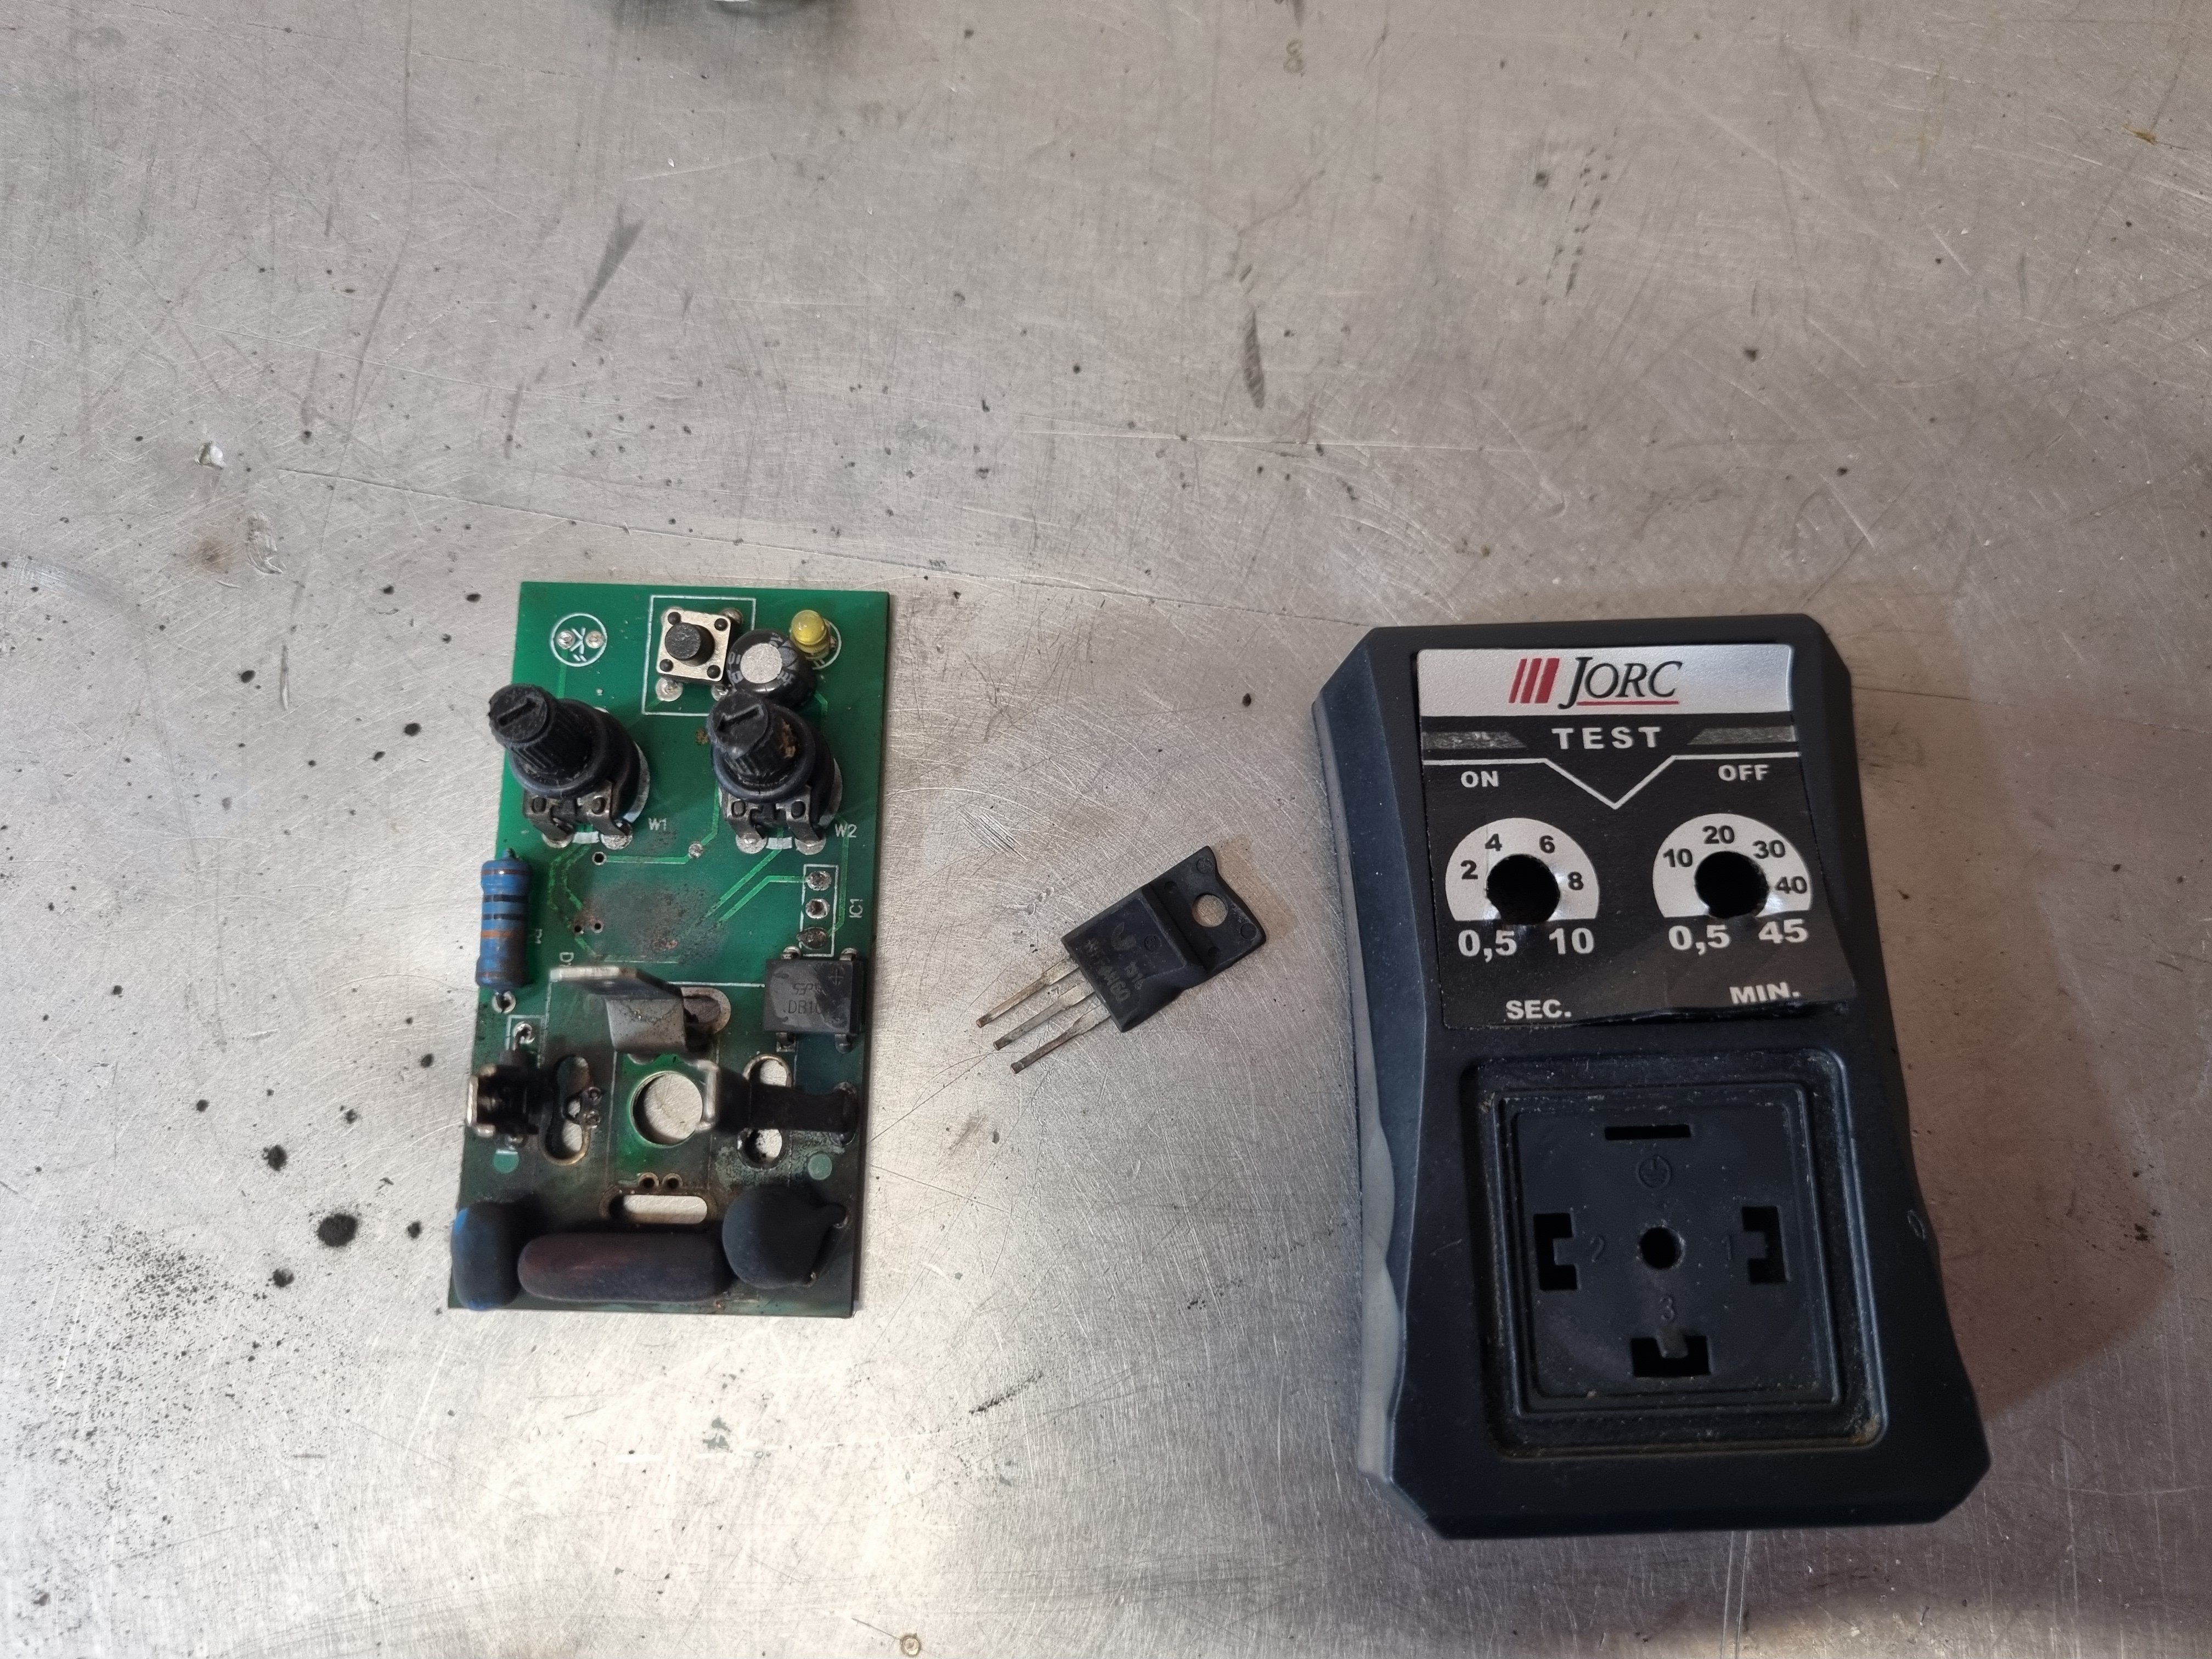
I think I figured out why the air bleed timer wasn't working. Transistors are supposed to explode yes?
2 points
-
Even in 2014 it was hard to find some parts, this car came with no rear interior, had top mount but no surround which is crucial to make top mount work. Factory airbox for a GTIR is like rocking horse poo as they all had pod filters fitted and are bespoke for GTIR. Got the spot light grill on tardme for $150, was another GTIR collector planning on bidding but forgot, he said he would have paid up to 1k for it at the time. Then I sold the car with the grill on it. Last rego and wof was 2014 so no idea what became of it. Didnt get another wof after i sold it.2 points
-
(Sponsored by Woolrest Biomag)2 points
-
Voted. I'm comin. @SunnyCoupe you keen??2 points
-
Yes! I do enjoy the story behind them. A literal bone-zone mobile. The purpose built shaggin' wagon. I was looking at picking up an S-MX long before this came into my life as I'd always wanted a 4WD version but life decided to make me experience the 2WD VTEC version instead and I'm not complaining. Epic thank you! I've trawled through the S-MX owners group on FB to see the old owners posts and see if I can drum up any more info. Not a huge amount more but did find it's running a P72 ECU - had originally been running a chipped P28 but that wouldn't shift the auto box. I look forward to getting deeper into things soon.2 points
-
Your dad has some skills.. Nice work.2 points
-
Cool little car, and awesome that it's been vtec converted, i bet it'll go like throwing a brick really hard. They rusted really badly in the UK, so hopefully yours isn't too much worse than what you have found. Has anyone linked you to this yet? i found it when i was looking into the SMX myself https://www.motoroids.com/features/with-a-cabin-that-encouraged-love-making-the-honda-s-mx-wanted-you-to-see-the-letter-m-as-an-e/2 points
-
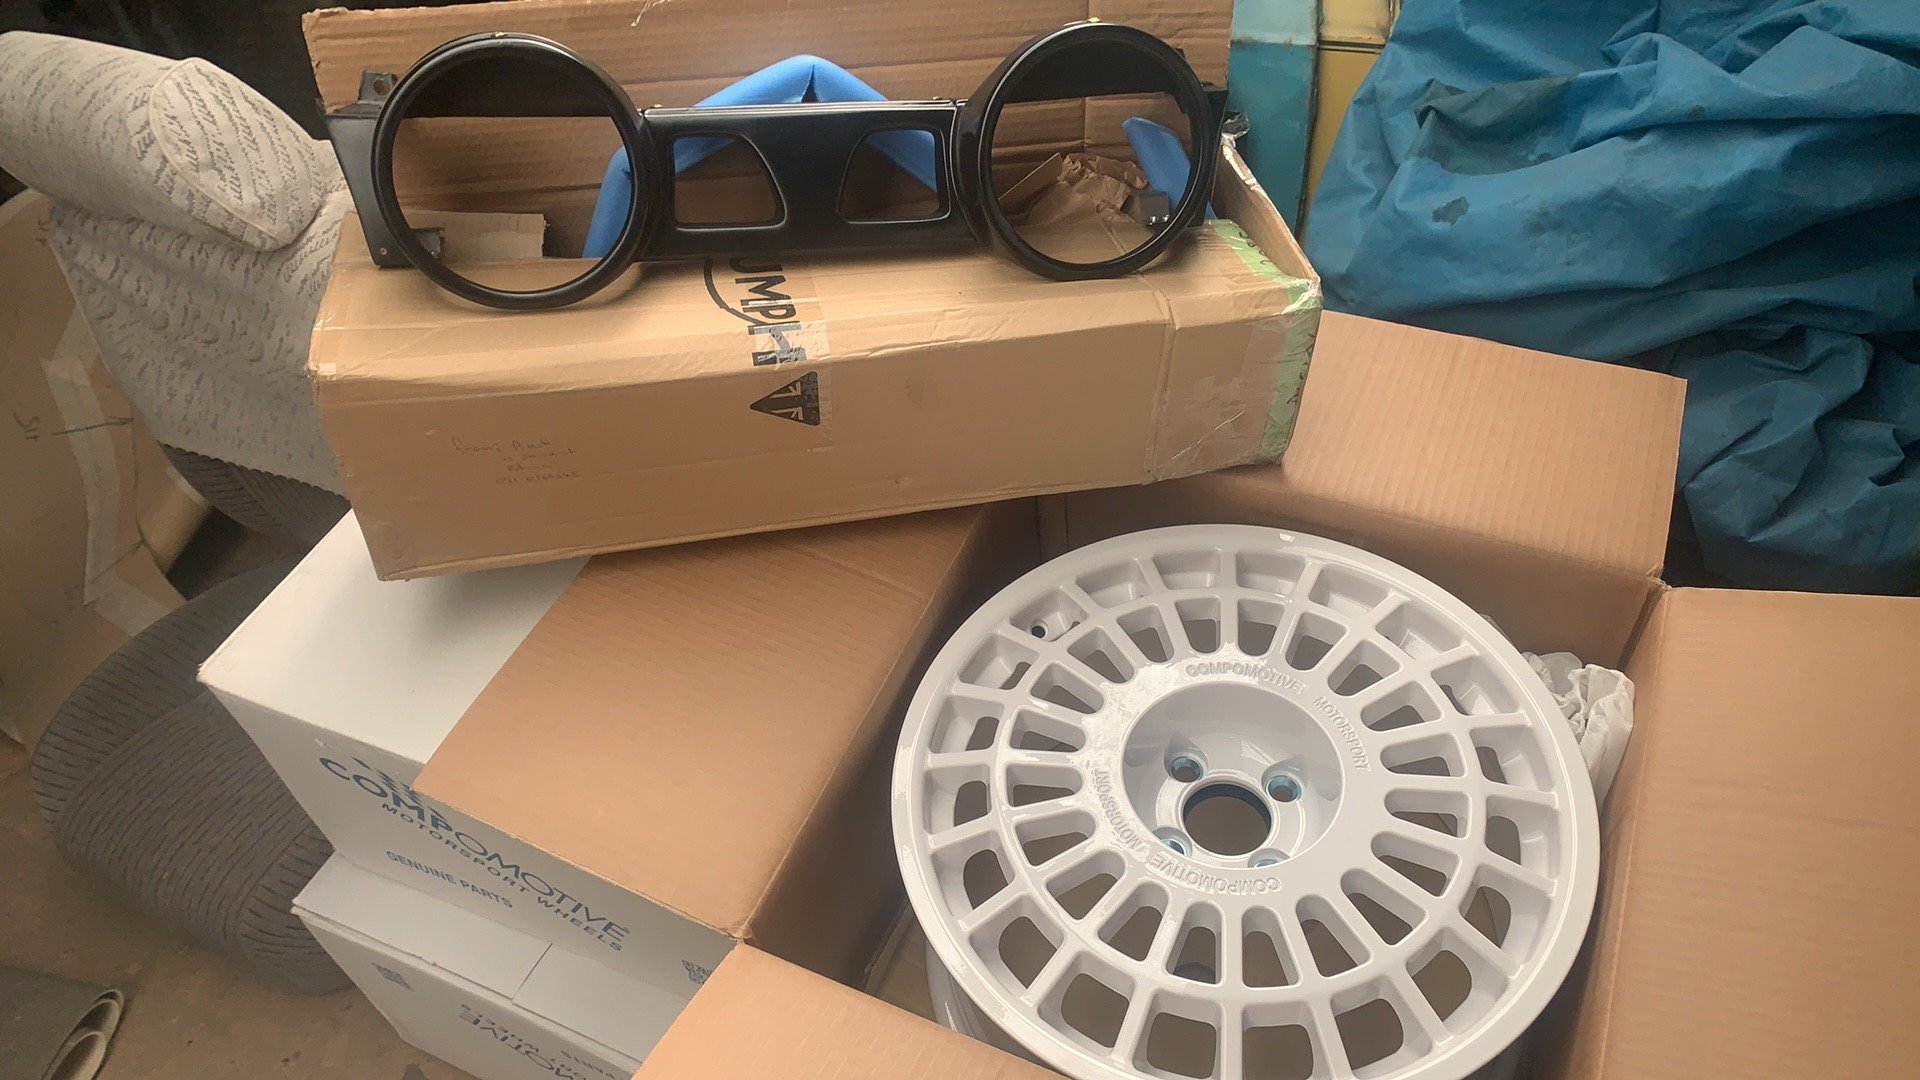
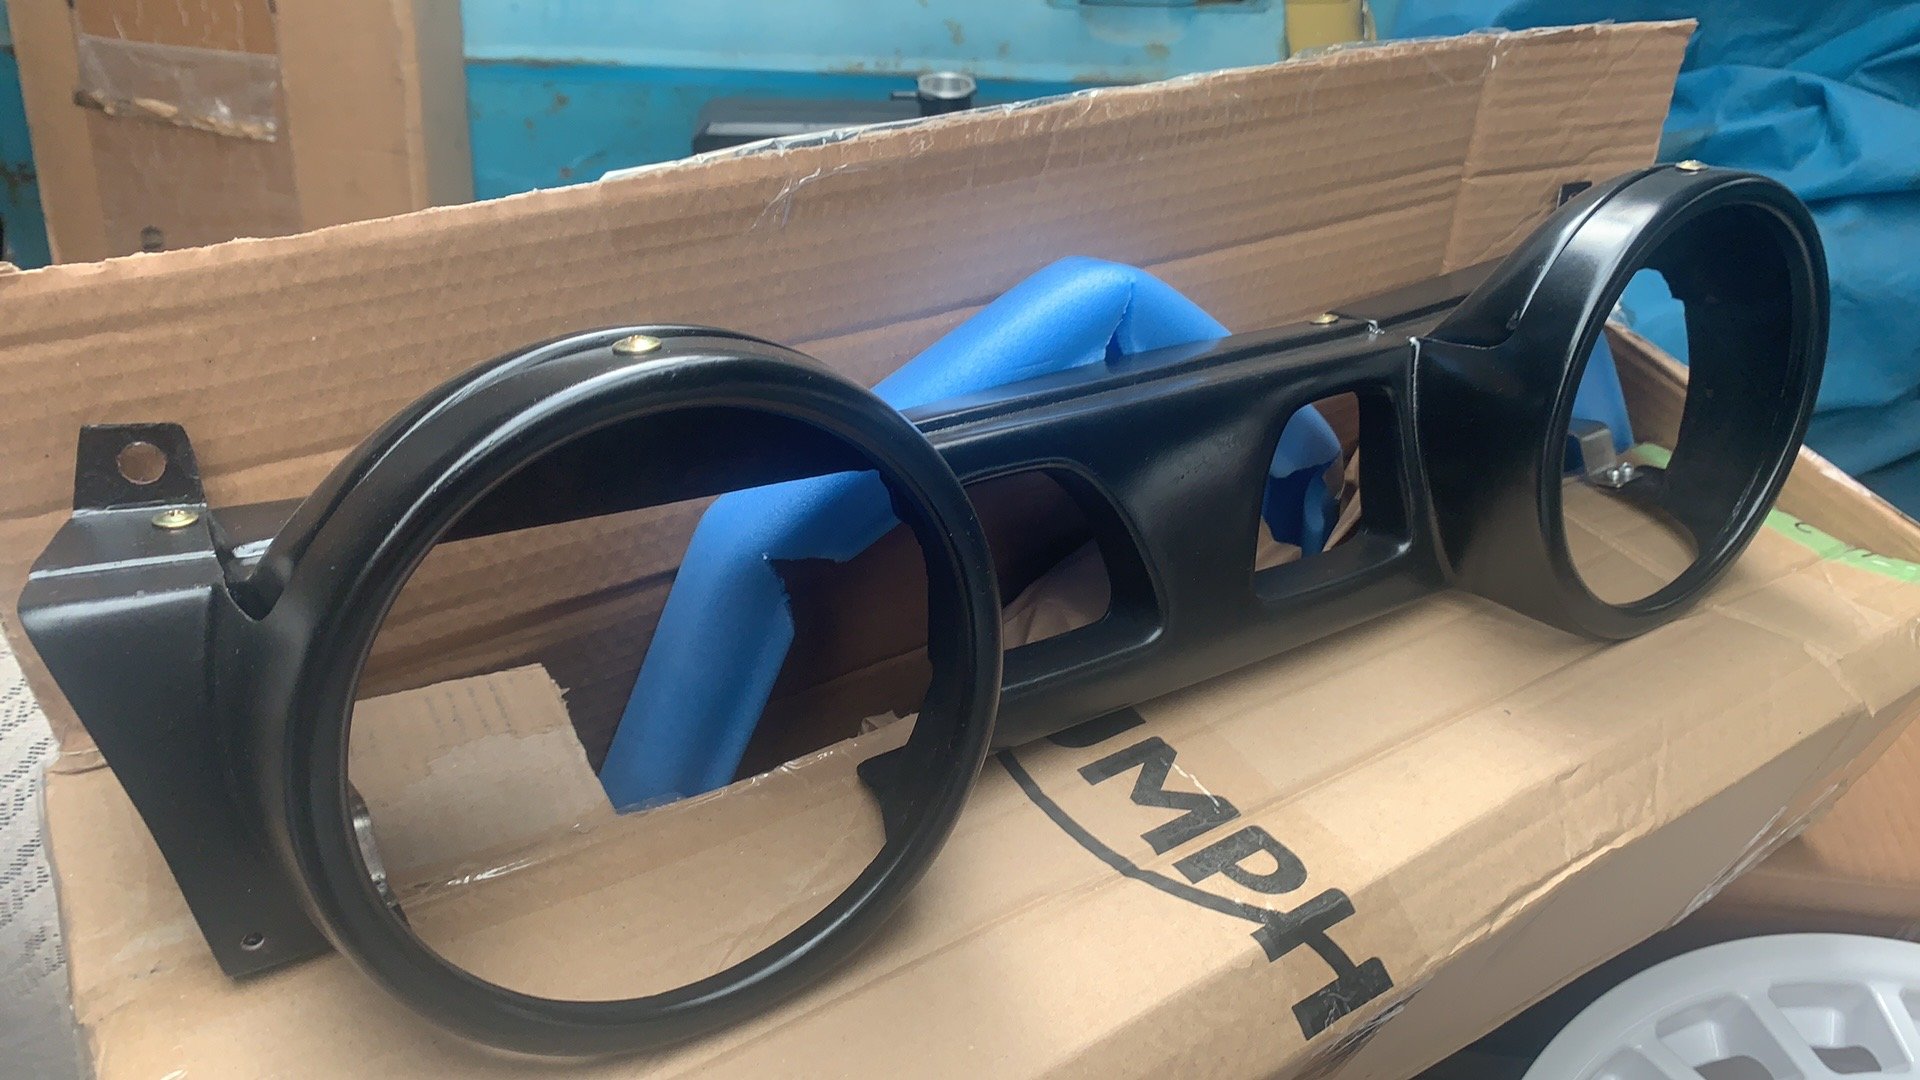
Some goodies arrived from across the ditch. thought I’d give them a looksy
2 points
-
Whatever you do, do not accept an airport pickup from this man ^^ Bort kindly offered me a ride one time, which I was happy to take, but then at several points on the trip I seriously feared for my safety and death flashed before my eyes. Sliding around the back seat of the angry V8 Valiant coupe (2 door sedan?) with no rear seatbelts as he did the imperial ton passing slower traffic on twisty roads. I was not entirely comfortable with that situation. Drive it like you stole it comes to mind. Then we were regaled with stories of how he rolled a car while younger, and other interesting motoring calamities he had encountered - whilst entertaining, did not add to the feeling of safety. Then we were relieved of the near-death experience when he decided to do some road levelling with the sump of the aforementioned car, and it decided to drain the lubricating fluids, rendering it inoperable for the remainder of the event. Hence the nickname "Sumpson" was acquired. Then IIRC @yetchh gave me a ride back to Christchurch in his 121 which seemed to have an intermittent fueling problem and so it wasn't being super reliable either, but we made it. Such memories. TL;DR - if you don't want to die, don't travel to Hanmer with @RUNAMUCK2 points
-
End goal pretty much this
2 points
-
Few random snaps
2 points
-
The wof this week is off the cards. I thought I had better check why the handbrake was so pathetic and discovered that both rear calipers were basically seized. I thought the brakes were not as good, now I know why. I may as well rebuild all the calipers and if my visa can take the punishment I might get new discs and pads as well, I might have to sell some shit So I to feel like I had achieved something I messed with wiring of the fuel sensing relay to try to make it work. @h4nd had given me a dose of RTFM so I reworked the wiring to suit, but now it doesn't work at all. I checked many things but no go. There is a good chance I toasted it when I wired it up wrong. I might just wire a normal relay up to and use the alternator as the signal wire. I also poo'd up the washer tank some more as it was still leaking, tomorrow morning may tell me some things; Then I decided to move the afr meter to somewhere where I could actually see it when driving. Basically lots of tinkering with shit and avoiding jobs around the house that I should be doing. Oh and yesterday I tuned/balanced the carbs a bit, hopefully it will run a little better. And also I noticed the gearbox drain plug was leaking.... Cool cool2 points
-
Beem working on this thing pretty flat out. Done a bunch of interior work and just rebuilt all the steering components. Everything feels a lot tighter now . Not too far away being ready for a warrant
2 points
-
Mate doing his Commer was advised by the cert man to get his rear guards rolled a couple weeks ago.1 point
-
Here's some info to help id the cams https://www.ff-squad.com/tech/temp/VtecCams.htm B16a and type r cams go good in the B20s It'll go way harder if you can get it tuned, some accords (and us market integras) have a separate auto trans computer so you can get a tunable ecu (chipped if you want to call it that)1 point
-
While this meet is an OS.co.ng meet (because new cars are shit) its 100% about the OSGCs too. So if its beyond your means to travel a day and a half each way in your old school whip, (which has been on blocks so long itll probably never see the road again, stop kidding yourself) theres a perfectly good plane station down the road in quakechurch, so dont be shy about piping up, and im sure the local crowd can arrange pick up/ a ride to Hanmer. The people running the camp atm have it on the market too. So this could be the very last one. (Karl and i spent ages sharning up a storm getting to know the present people over a few visits)1 point
-
Redone the high pressure hardline to the receiver drier. Few more joins that I'd initially hoped for but they brazed up much nicer than the block did Cut some bends out of the selection of hardline I had. Needed to drill one out to suit the hose Lined everything up Brazed each section individually so only one thing would move I decided it'd be better to have a flexible hose both in and out of the condenser, less risk of my brazing fatiguing and cracking. Drilled out the compressor adaptor fitting to suit the hardline and brazed it on I'll make a little plate and bolt the fitting so it's secured1 point
-
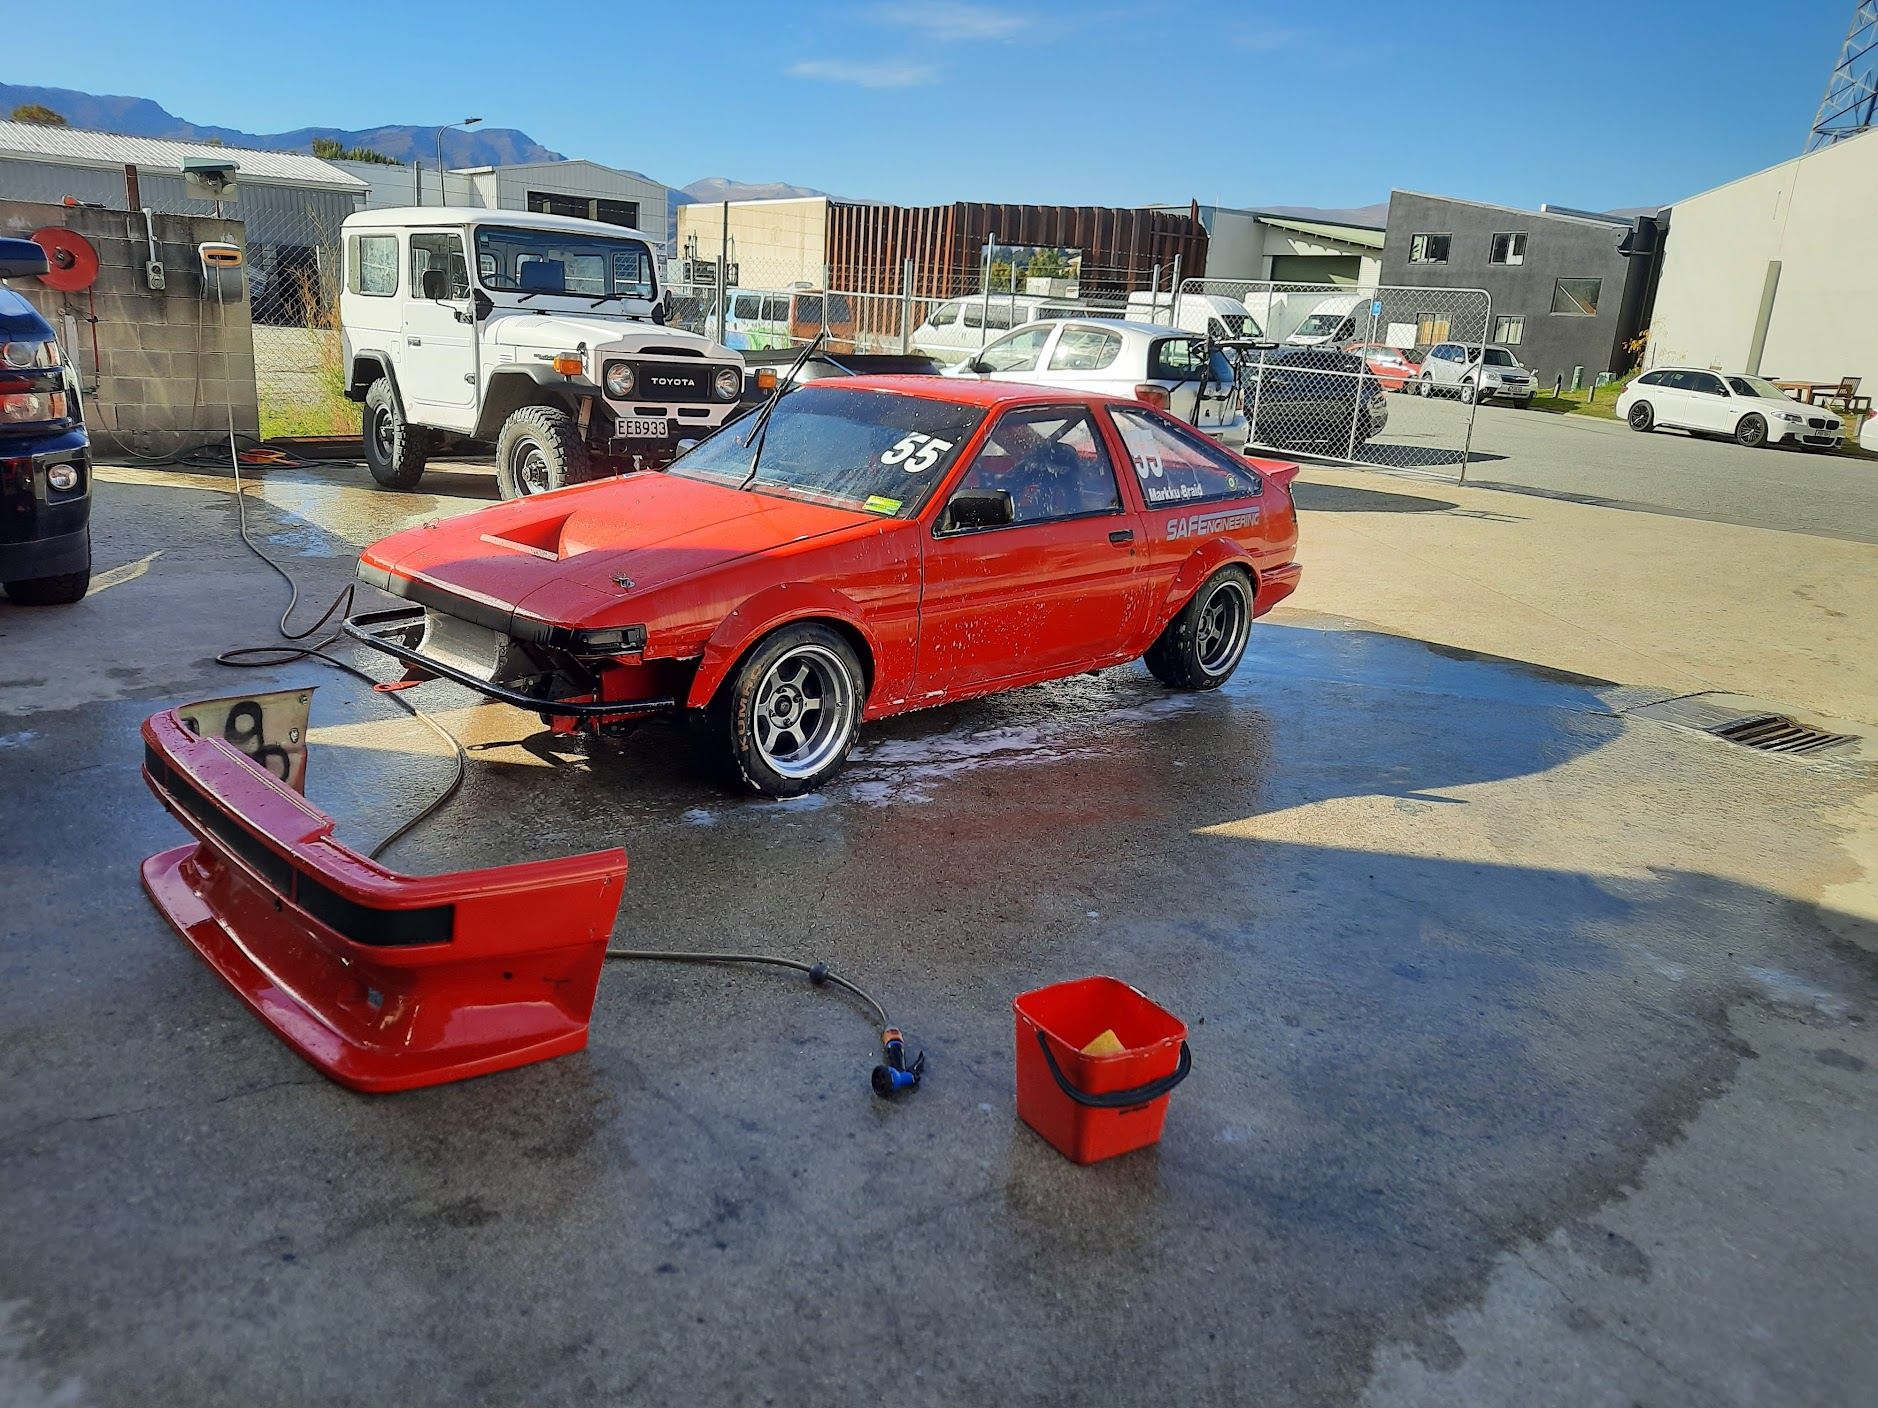
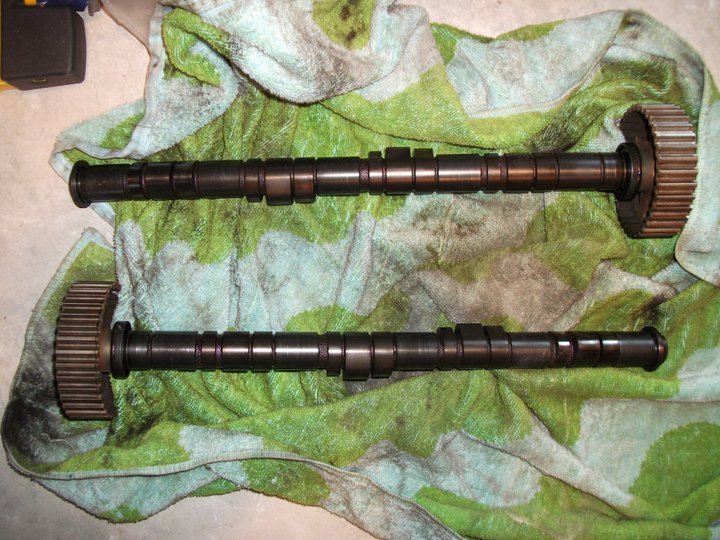
My lord this is a large rabbit hole to go down. So, the head says PR3-1. Date stamping says '95. Looks like the -1 denotes where the head was cast as there are PR3-1, -2, -3 and -4. I've spent 15 minutes reading the internet and I either definitely have a B16 head or it's an ITR head which supposedly was a factory ported head. Depending on where I read I definitely have the first one or definitely have the second. I'm a bit too smooth brain with Honda's to really know otherwise yet and searching through 14 year old forum posts gets tedious. I did find a picture of the cams that went into it. This post has been open for another 25 minutes since I wrote the last bit and from what I can tell one of the main differences between B16 and ITR is dual valve springs on the exhaust side, which from another potato 00's photo (bare in mind I haven't ever been inside one of these engines) it seems to have. At the end of the day it runs and is staying in there so I'm not sure it matters entirely but either way it's always nice to be sure of things when it's not a build you watched happen. Official summary is it's definitely not the head it came with from the factory and it makes the car nang hard. Anyway - time to finish sorting the wheels out so it can get back on it's own feet again and some basic maintenance can begin.
1 point
-
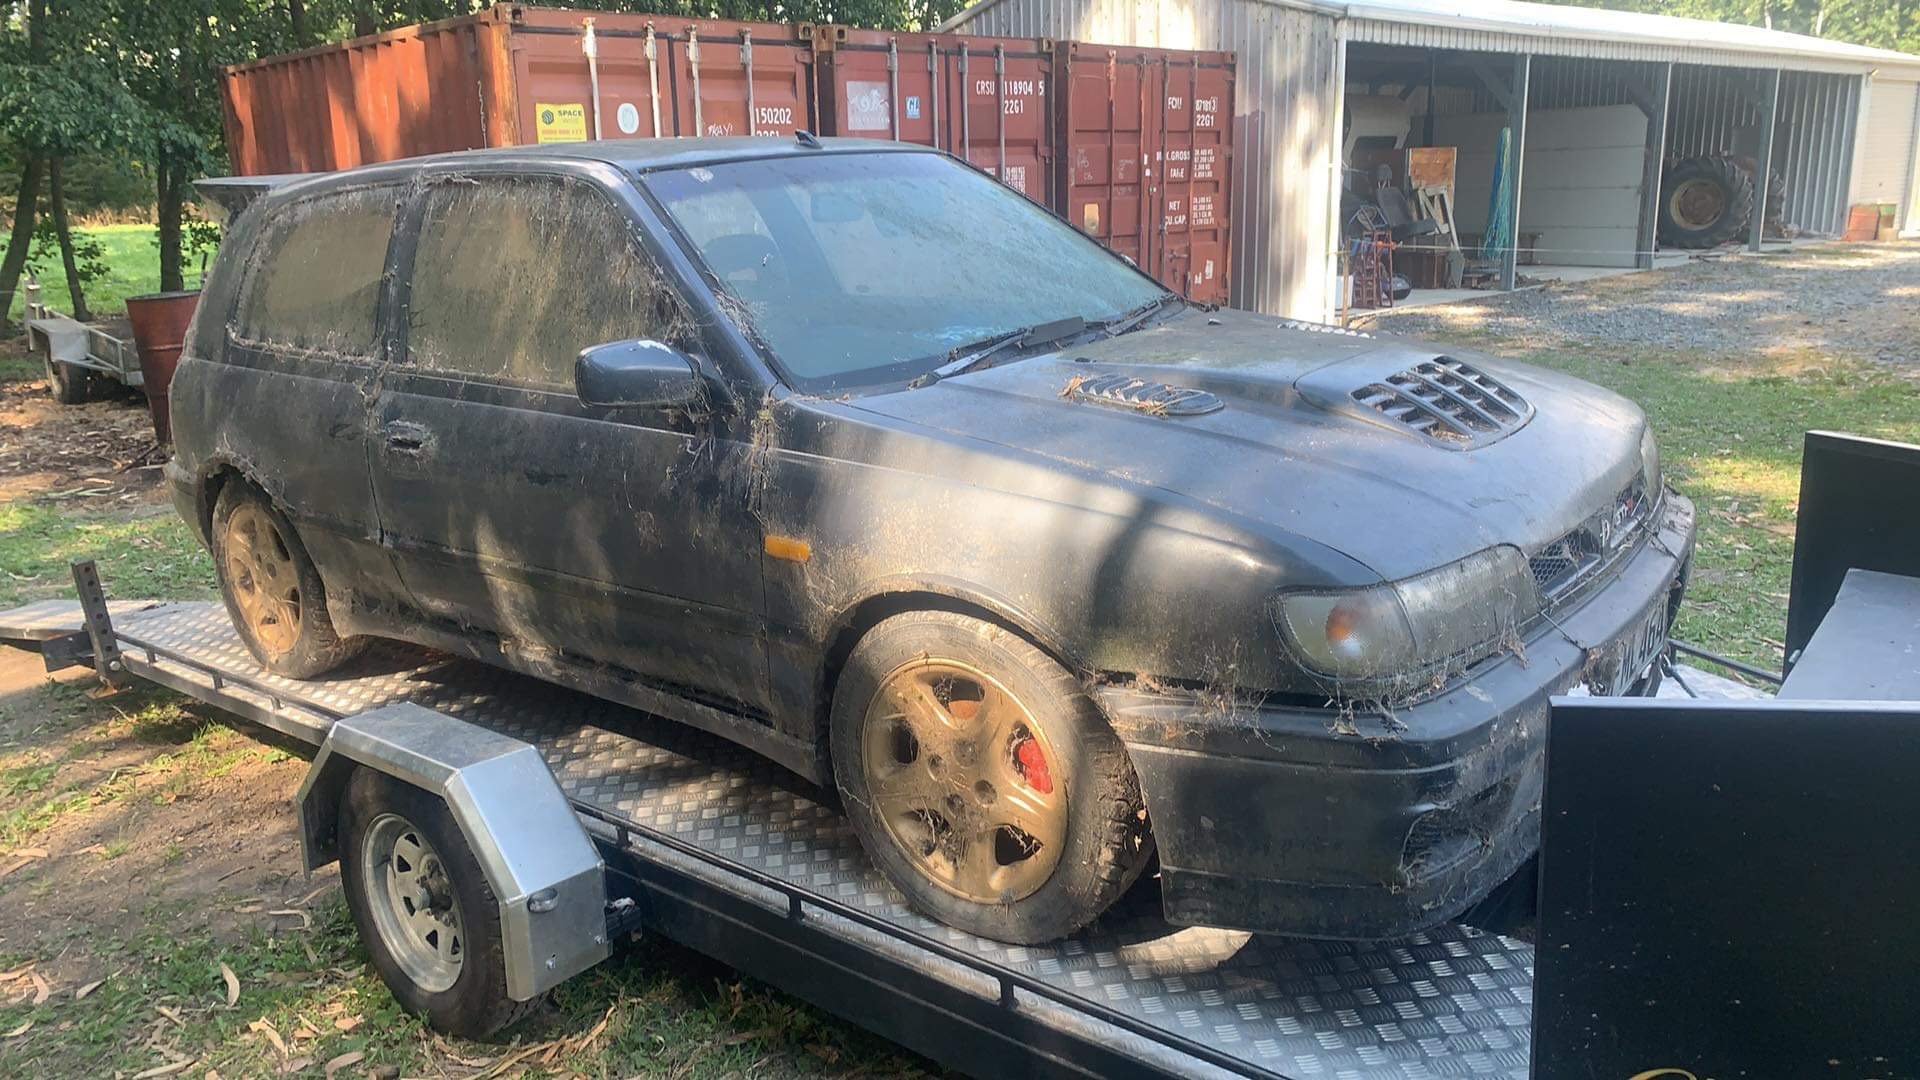
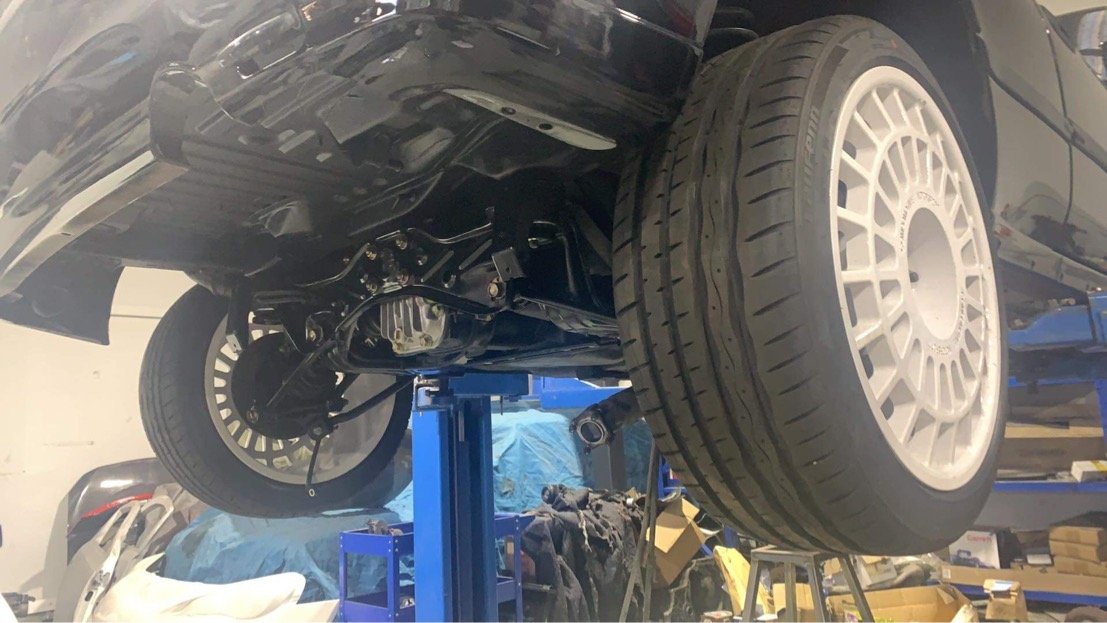
So collected the black car. Much better base. Driven to Dry storage 8 years earlier. Fuel pump seized from sitting. Has all the factory bits. Pretty unmolested as far as these things go. I assumed it was fairly straight forward from here. I replaced the fuel pump and fired the old girl up. It promptly pissed fuel from every rubber hose it had. Fuck on the hoist fuel tank out replace all the fuel lines. Get it up and running and blast it round the block. Boost leaks everywhere. while idling the thing in the driveway investigating the boost leaks it spontaneously dropped all its coolant from one of the water lines in the depths of hell under the intake manifold fuck sake repaired this and promptly sent it to the paint shop to sit in the naughty corner for 6 months back track a bit and sometime around 2021 I enquired with Modena in Oz about diffs for these things as they were the only company who didn’t list them as NLAbut really for no other reason than I was interested to see what they costed - quite a lot was the answer. He said he was thinking of making a batch soon and he would email when he was doing them. fast forward 18 months later and I get an email. He has a front and a rear sitting there with my name on it. So I fomo panic brought them. Did I have the money for them. No. Did my road car need LSDs. Also no this started the next unnecessary phase of the build. Full underside rebuild rebuilt subframes diff and transfer box. Brakes. Basically everything mechanically except the engine and gearbox1 point
-
I've fucked around with gas shielded Flux core did around 90 metres worth on a big meatworks shutdown then had the thankless job of laying hard face on top. By middle of job I was as good as the old timers. Been experimenting with 8% co2 argon mix on tig lately mainly because a free G bottle is worth a squirt, no real ill effects thought it would kill the tungsten not really any different though im back about 5 amps from normal settings. Saving my pure argon for the stuff that needs it.1 point
-
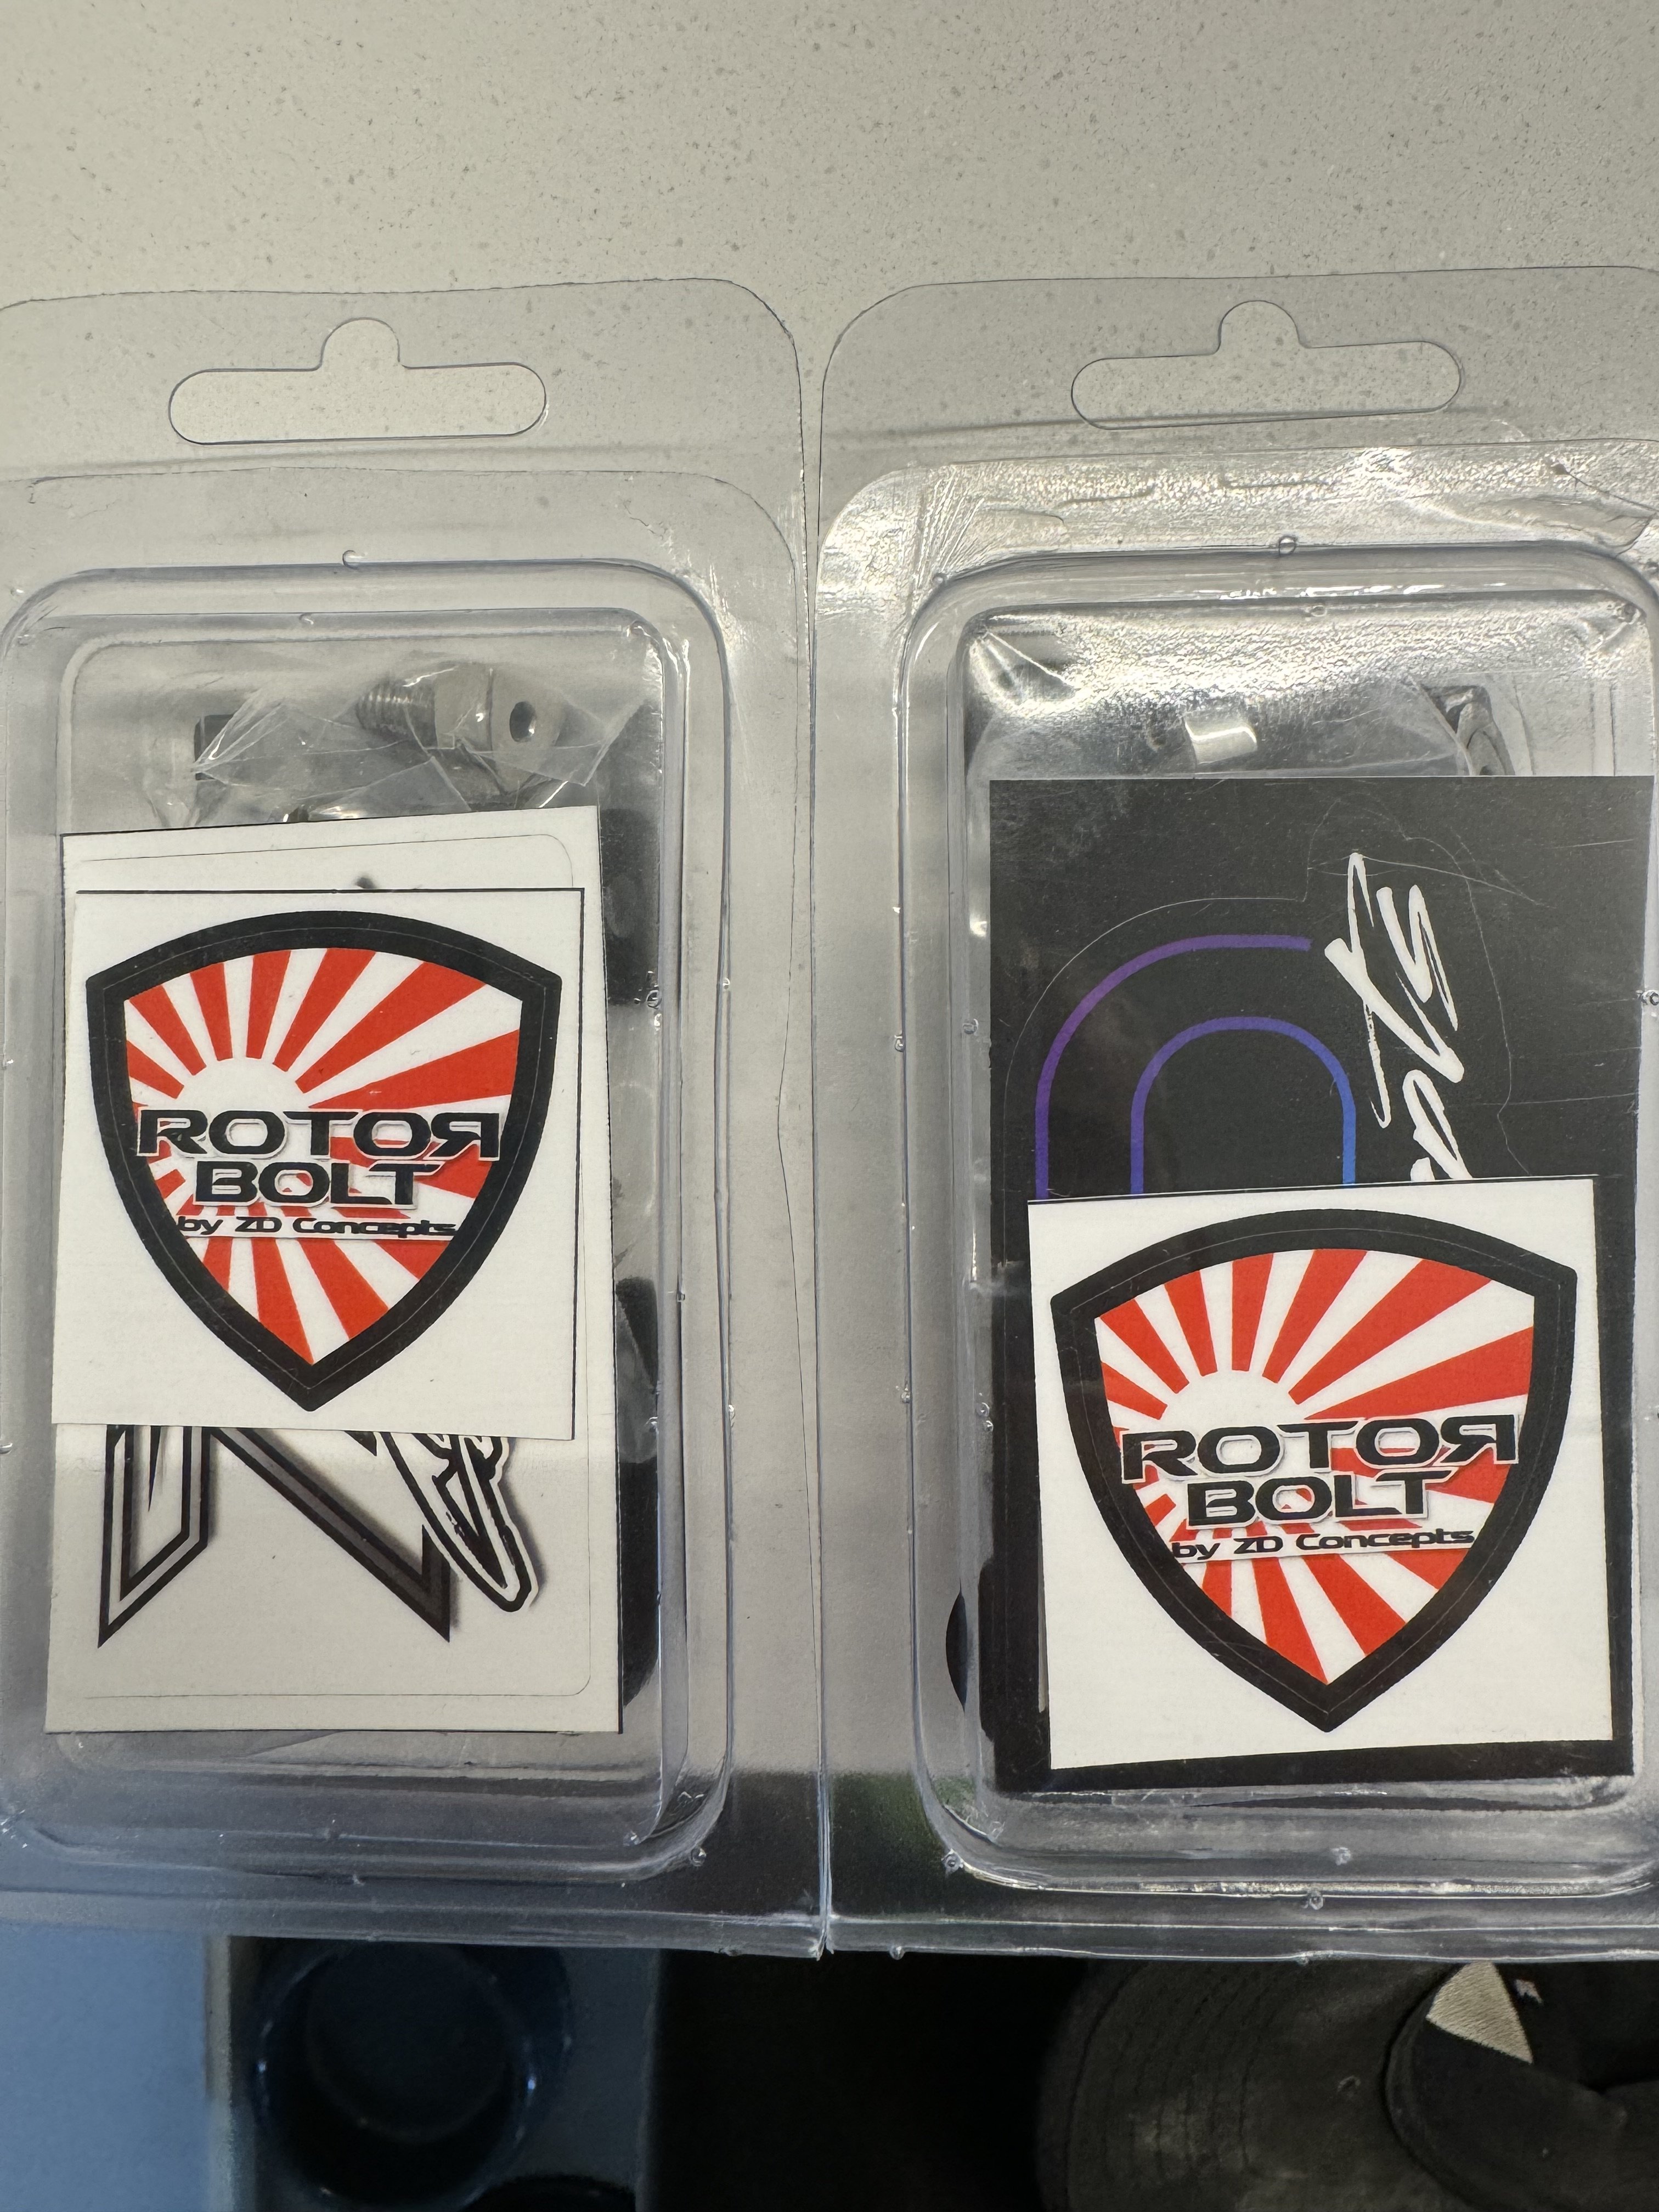
Got home from Low Key Nats to find a nice package had arrived.
1 point
-
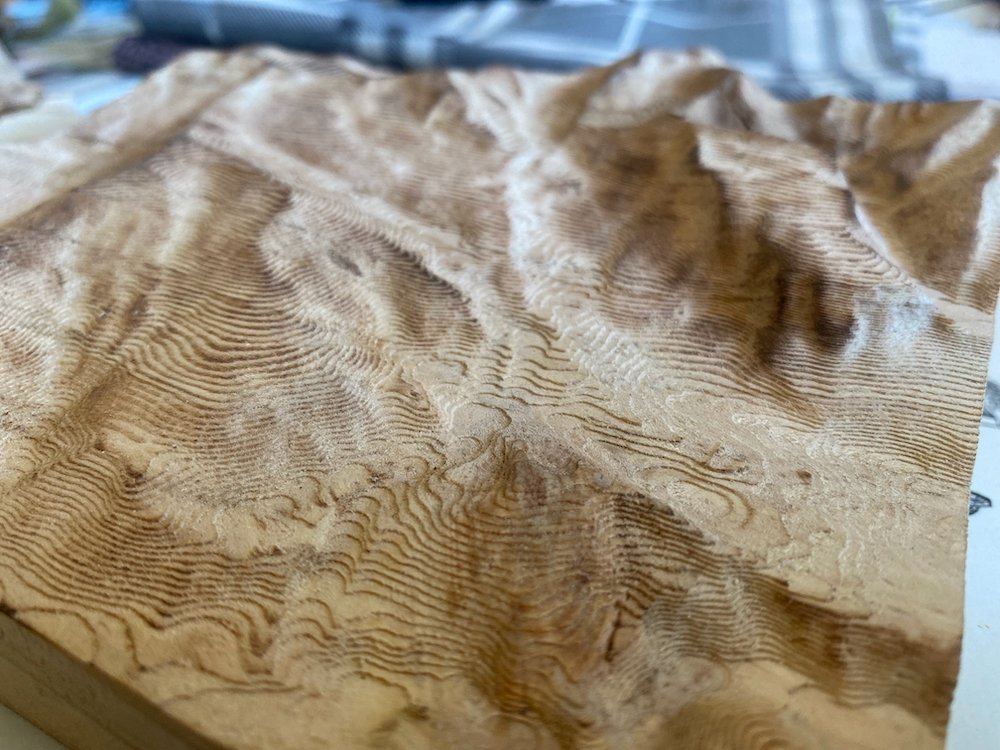
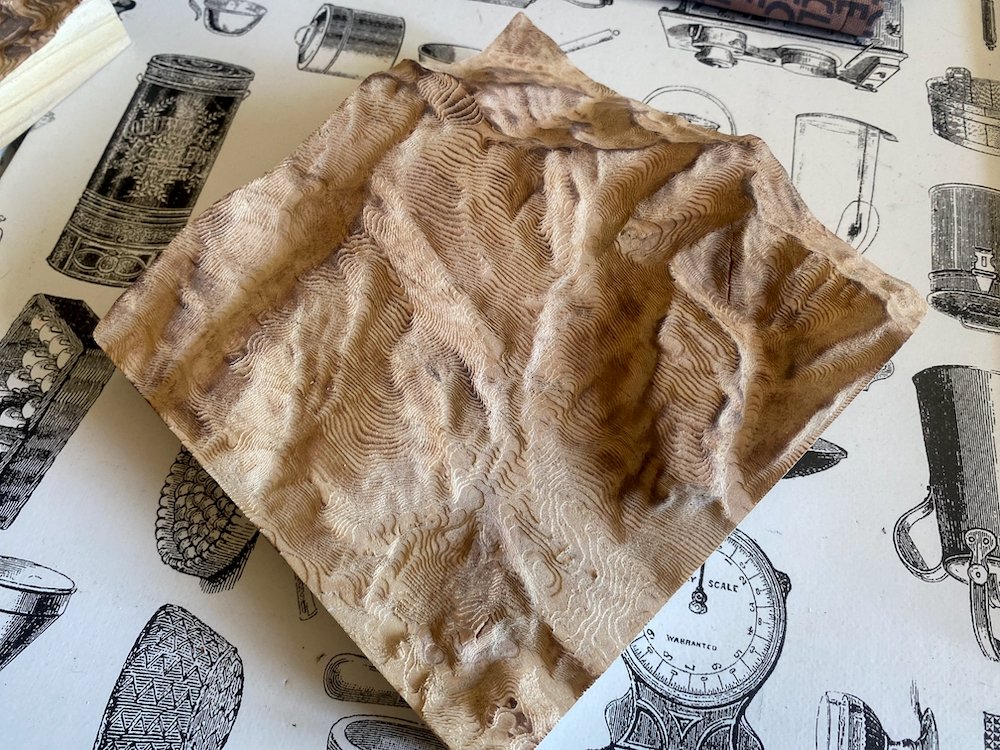
Making some thank you gifts for friends that looked after us on our recent trip overseas, reliefs of the mountains they call home. Carved out with the cnc to replicate contour lines on a map then run over with the gas torch to highlight the ridges.
1 point
-
we need to know how big your missus is first. a pic will do1 point
-
oh, its 1 trillion billion percent welded. i didnt realise you cant weld cast aluminium bits. its fucked in that case.1 point
-
New games console just dropped:
1 point
-
The switches get ahit/corrosion in them. Pull apart and clean and all G for thr next 10 years. Let's power through enough to go down, but too much resistance for the extra work of going up Also I have this for you
1 point
-
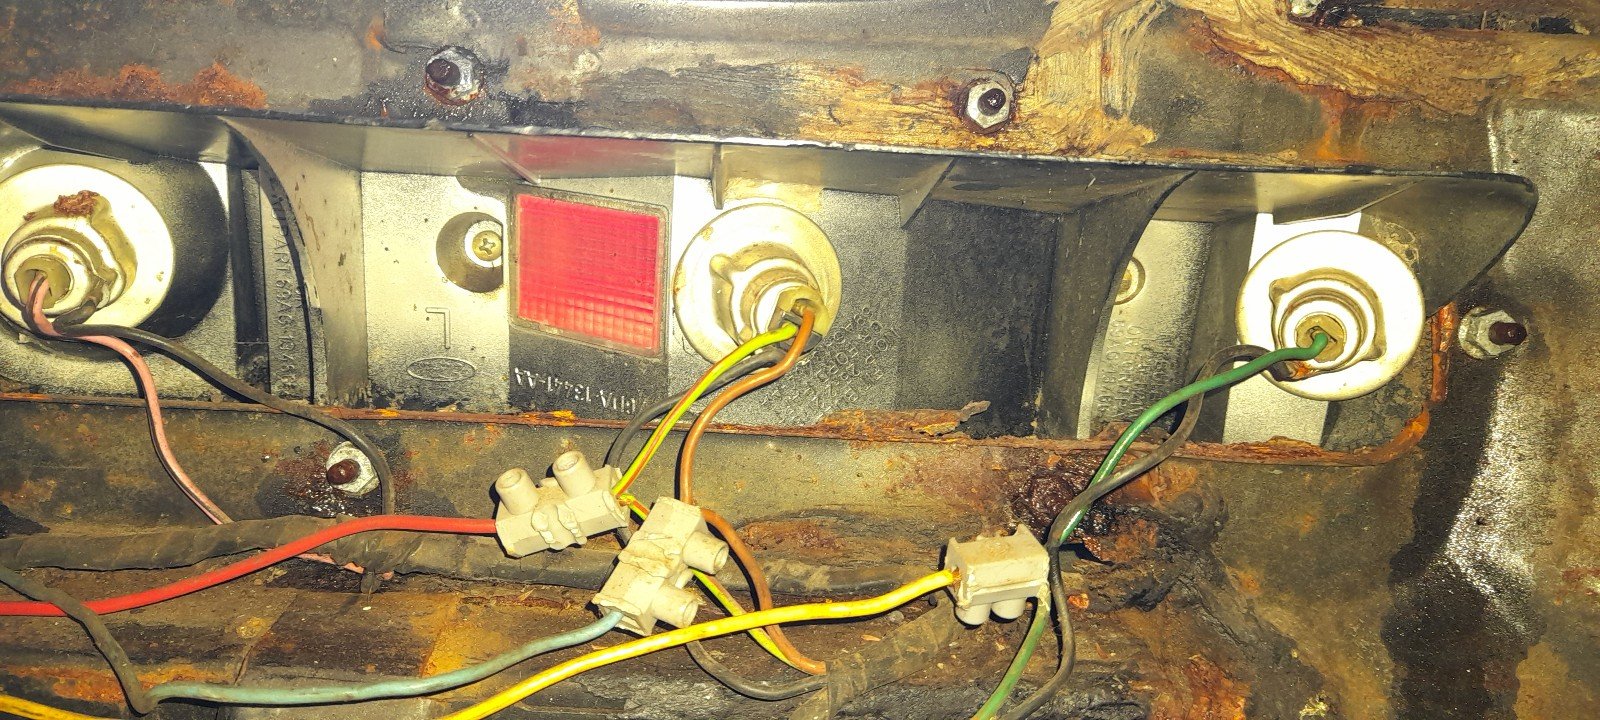
Amayama eventually delivered a genuine RHS light, which included the sub-loom and bulb holders. Quite happy with that.
1 point
-
Chur bowl This was the fix, rotatey bit was not rotating1 point
-
Turns out the had also snapped the wires to the aircon pump instead of unplugging it so now iv got cold air again for summer which will be nice1 point
-
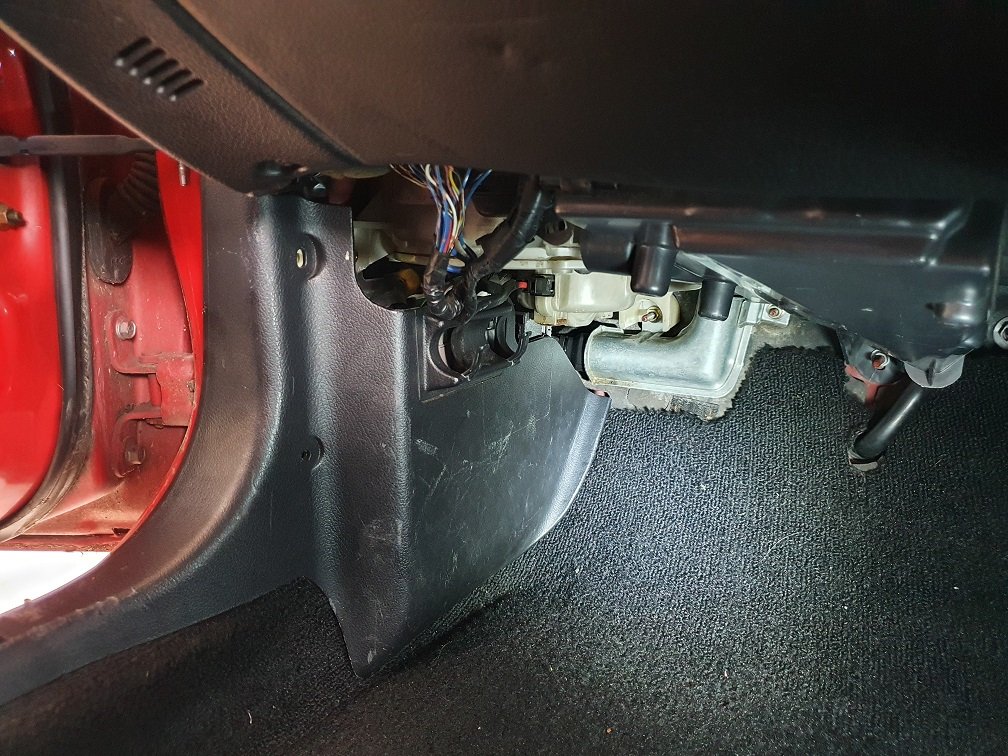
So yeah the problem came back and have had a good chance to look at it. Started by testing the resistance of the cam and crank angle sensor. Cam was sweet but the crank was all over the show hmmm it must be stuffed so started taking the alternator off to get to it. Turns out the auto sparky who replaced the alternator was a massive dick fingerer. Alternator was loose on the main swing bolt and they had snapped the hidden lower mount bolt with the belt tension pulling the alternator in and on an angle slightly. This had squished the wires to the crank sensor and chewed thru one completely with it still sometimes completing the circuit thru the alternator body. Guess the alternator moving slightly sometimes as it loaded up or unloaded would make the circuit or kill it completely which is why it was so intermittent1 point
-
people have shit to say when they see that sort of ingenuity hanging off their aircraft1 point
-
Please don't make me see such things.1 point
-
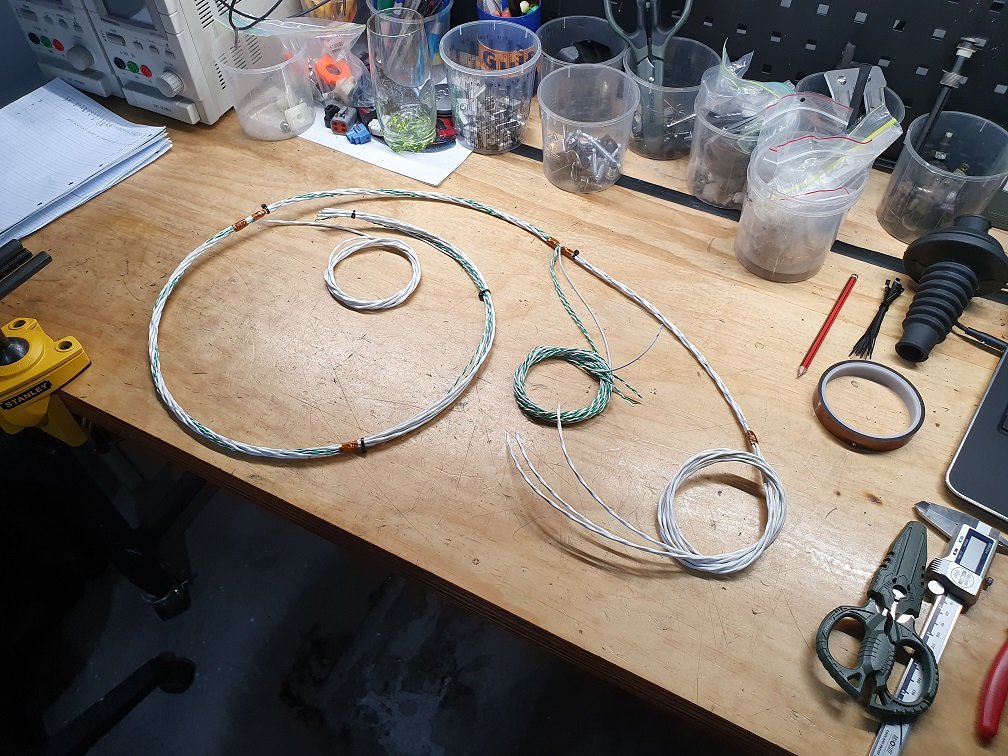
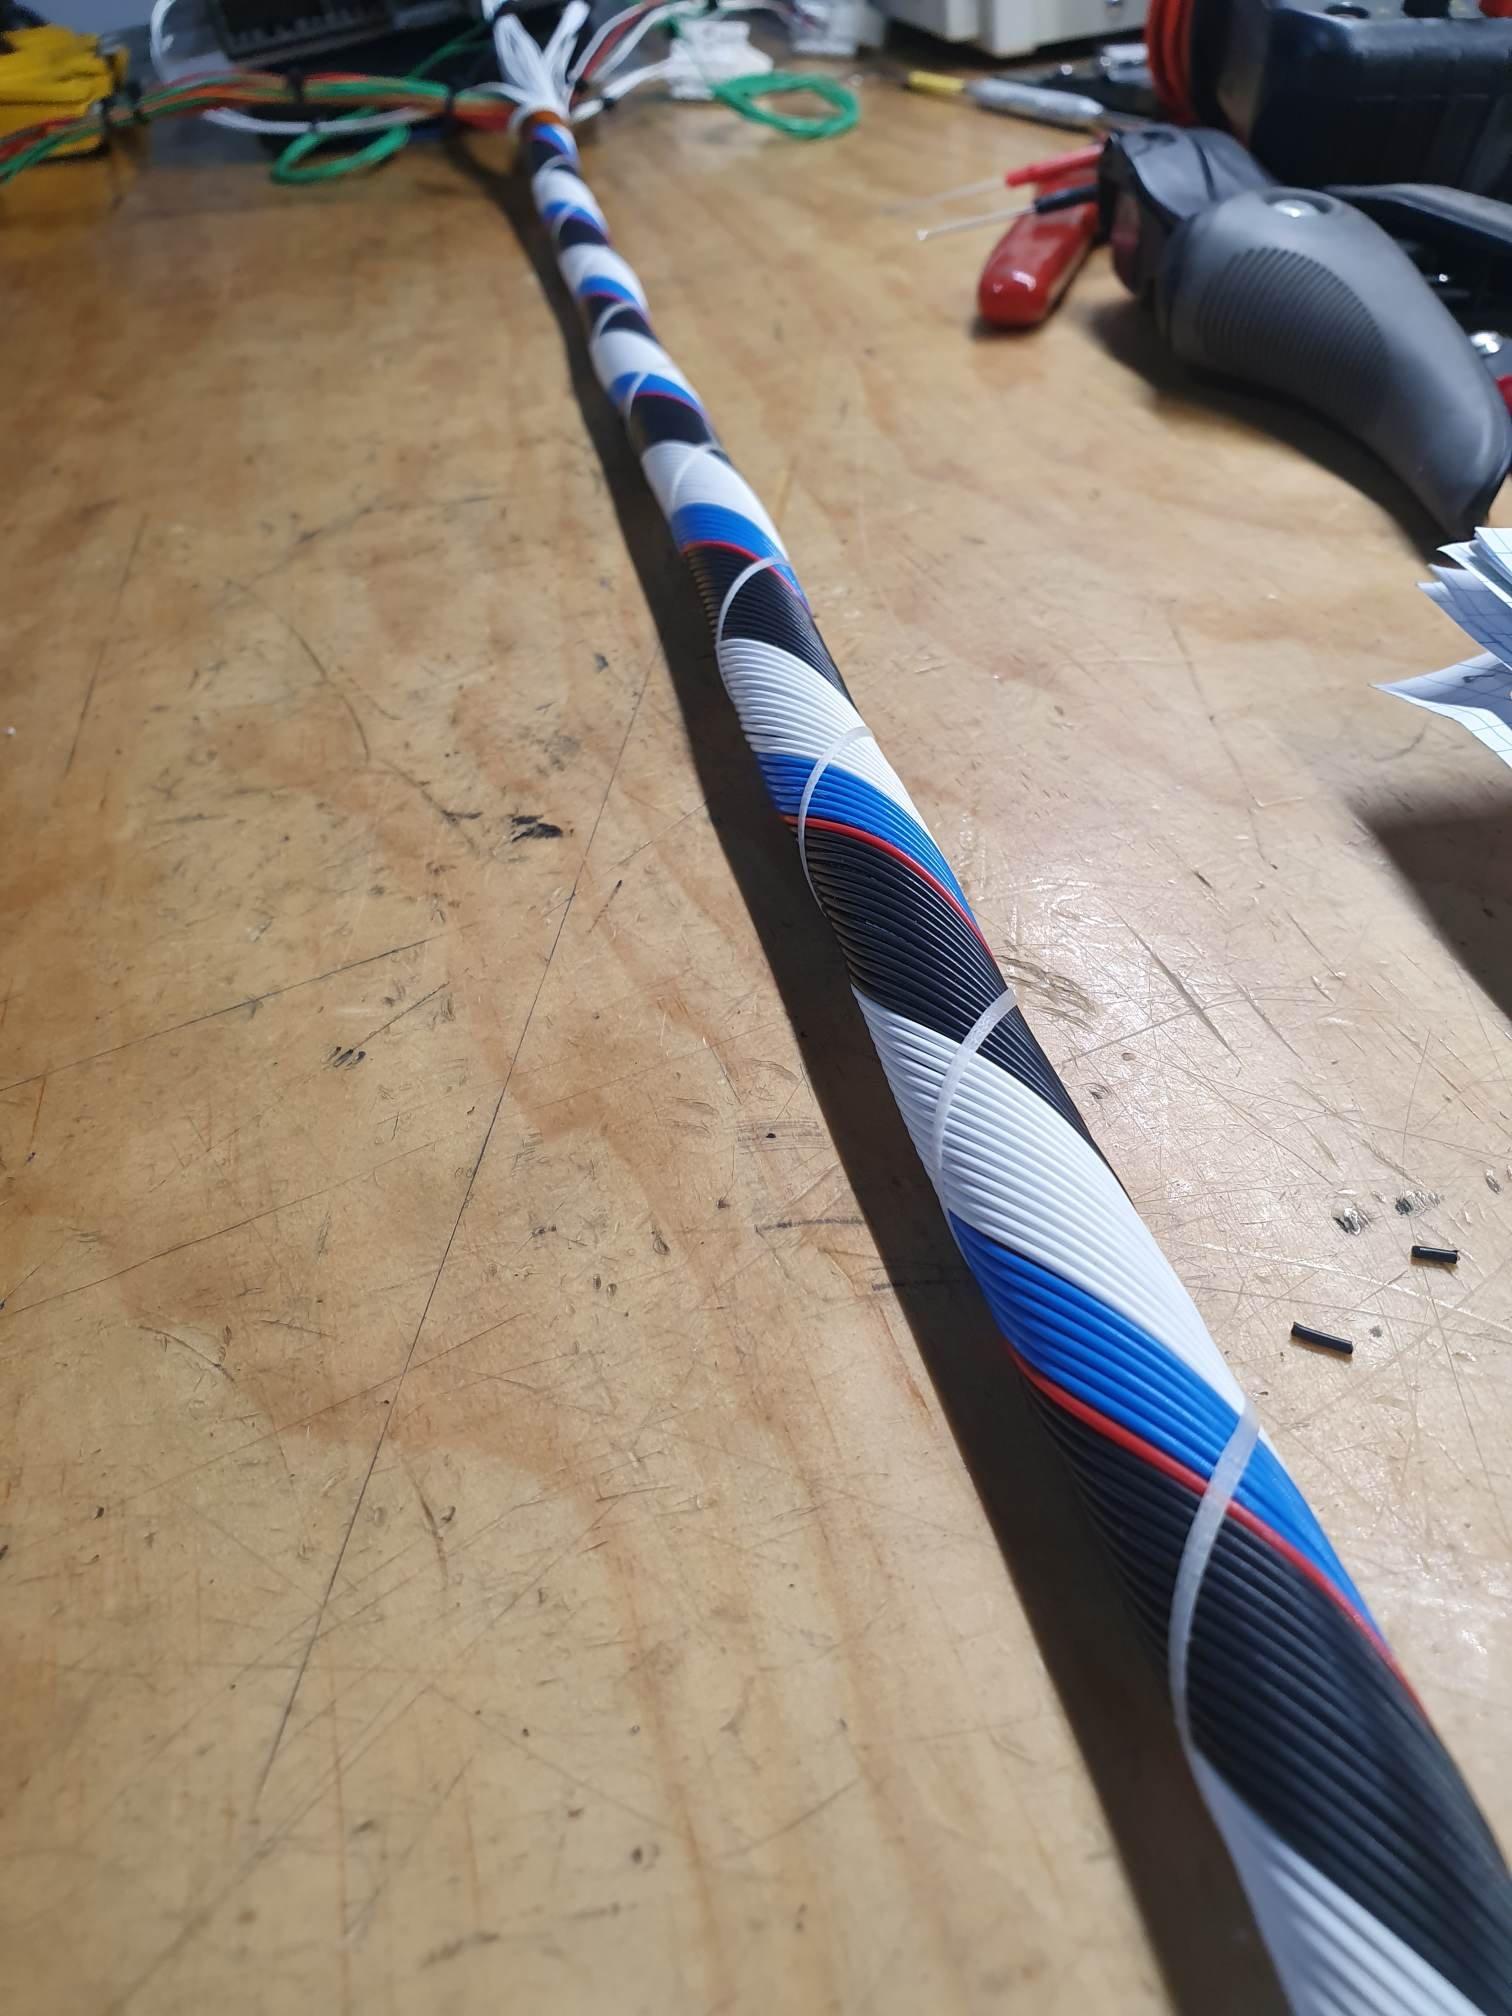
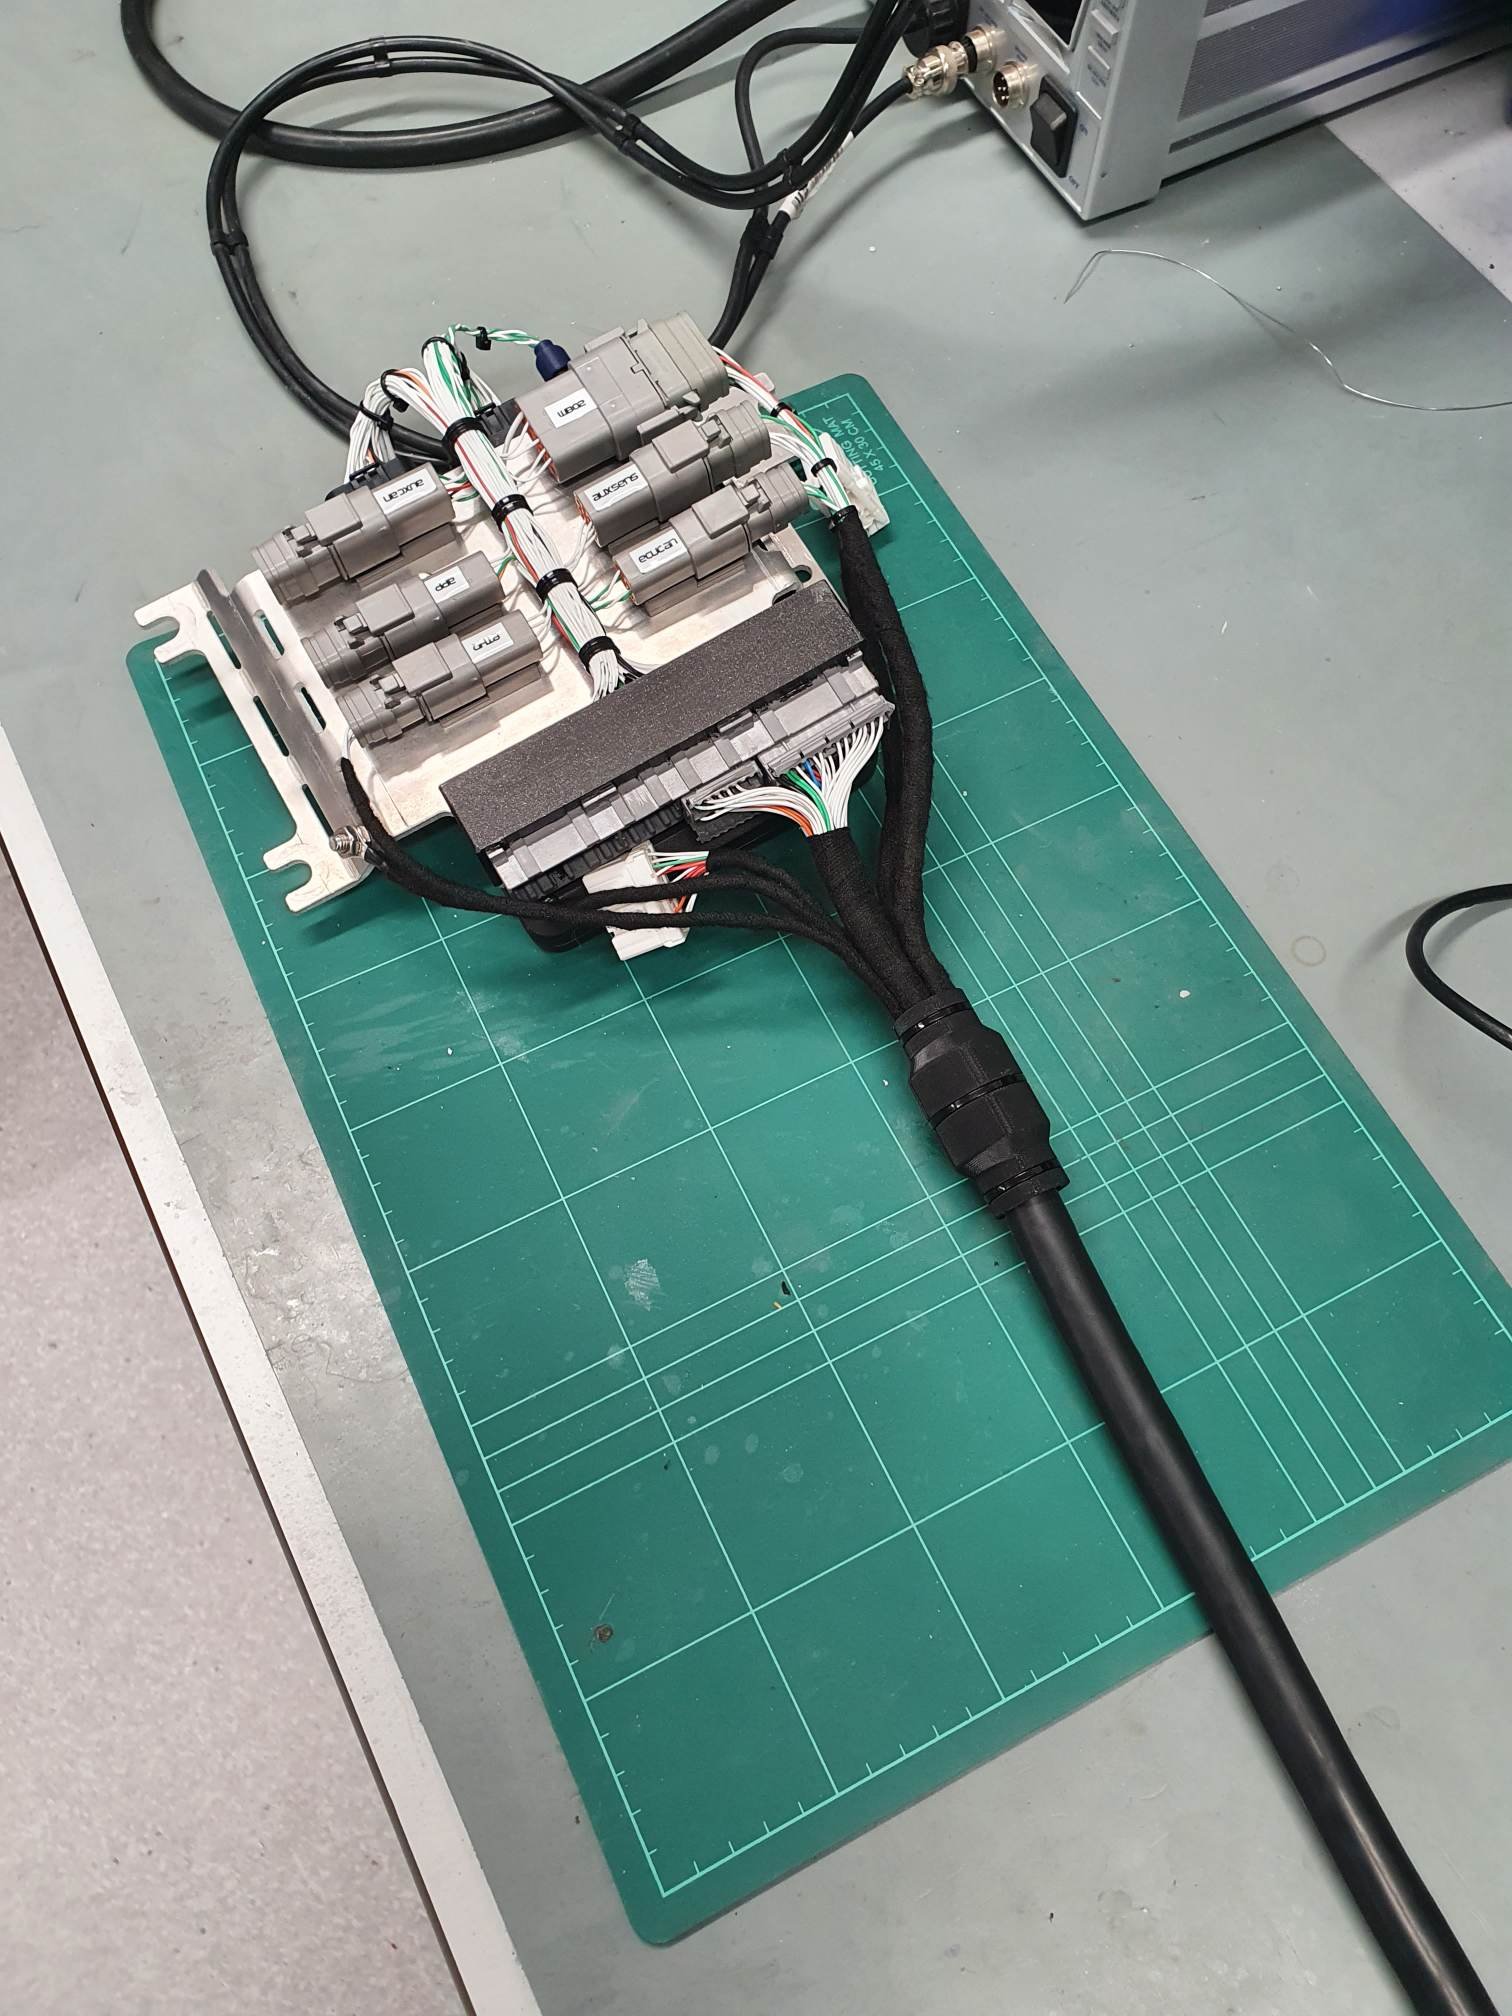
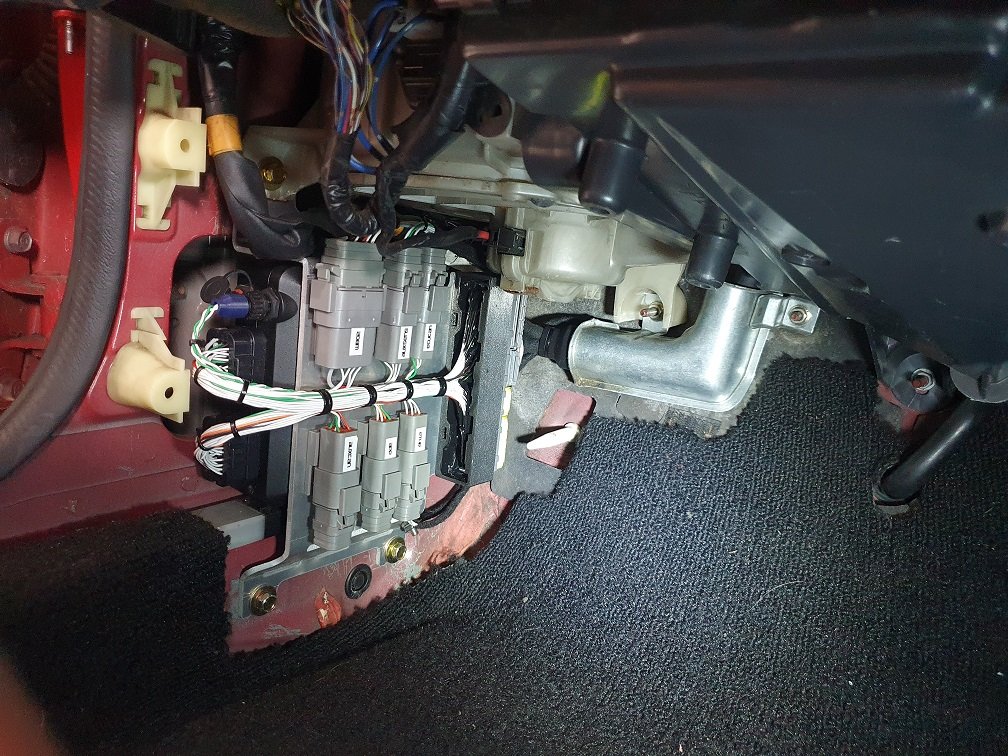
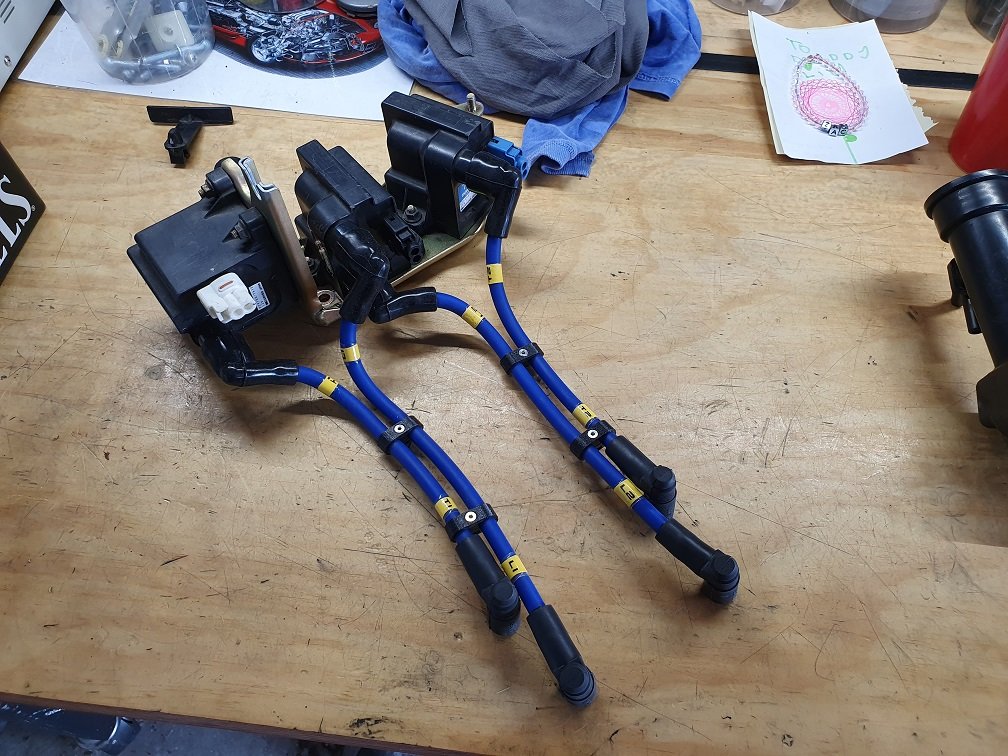
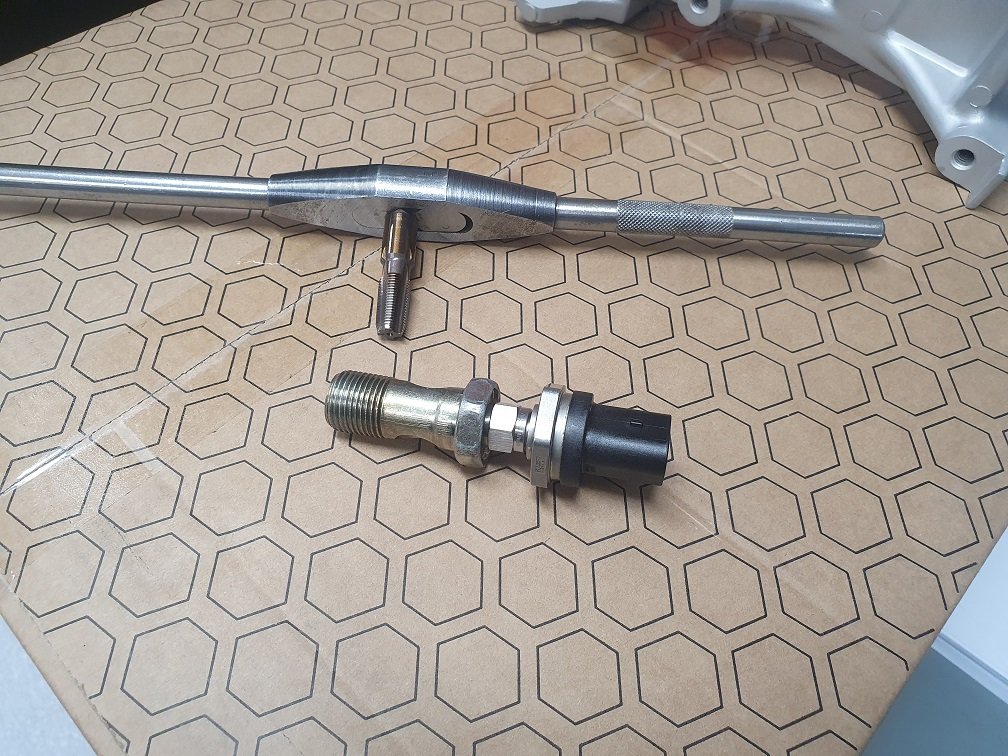
Months go past, and alas little work done on this thing... Lots of family visiting, really busy with work, usual life stuff, you know the drill I'm sure. I have been tinkering away a little though. I've built the starting and charging harness, the two times I've ordered the correct pins for larger contacts in the two grey connectors by the strut tower they haven't shown up, so I gave up and have swapped them to a DTM12 and DTP4. I moved some stuff around a bit so the connectors for the aircon clutch, power steering pressure sensor and oil level switch are now in the main engine harness, so the starting and charging harness interfaces with this by a single DTM6, keeps things a bit cleaner. Now, the main engine harness... I've done a heap of work on this, but there is still a bit to go. It's designed to work with a factory ECU, a power FC, or the link fury I have. Its future proofed for modifications like another turbo control system and e-throttle. Its made out of the good stuff, M22759/32 wire, twisted, DR25 sheathed, etc. I don't want to have to build another one! After some basic measuring and figuring of branch point locations, I put the core together, this is the shielded wiring for the engine position sensors, knock sensor, gearbox output speed sensor and O2 sensor, aswell as a couple of unshielded twisted pair runs for CAN. Many hours of work later, and another three layers of 22AWG: This is the run from the interior breakout by the ECU, through the firewall, to a branch just by the oil filter pedestal, where the UIM interface connector will be, the gearbox wiring, oil pressure and water temp gauge wiring, as well as an aftermarket combined oil pressure and temp sensor. After sheathing this section in DR25, I fabric tap wrapped the breakouts at the ECU end. Fabric tape is awesome in interior sections, as it stops rattles :-). I printed a mid-shell to house the splices and wire turn-arounds, keeping them protected, and making the transition between the DR25 and the fabric wrapped breakouts nice and tidy. No need to boot and pot this interior stuff. Can see the Link ECU mount all finished and wired up there too. There was a bit of test fitting along the way, but got it fully plugged in with the OEM trim and cable protector this morning for the first time. Hmmm, satisfying. And then hide it all away! I still have all the engine bay side to do, organising the other three branch points, sheathing the main runs, putting the boots in place, sheathing the branches terming and then potting it all up... You know, not much work at all! Total overkill for a mildly modified street car, but its work I'm familiar with and enjoy, and I've never actually built a ham-spec harness for one of my own projects before, so it'll be nice to have one. Most of the materials are left-over from projects over the last few years, so its not been a massive financial burden... time wise though? yikes. For the aftermarket oil pressure and temp sensor, I drilled and tapped the banjo bolt that connects the oil coolers to the filter pedestal. This should work well, and means I don't need to buy an aftermarket pedestal or anything, but it does put the connector for the sensor annoyingly close to the heater pip in that area. Clears, but not by as much as I'd like. Tapped it to 1/8NPT, and used a M10x1 adaptor with the correct seat for the sensor. About as compact as I could get it. Even did it on a lathe so its nice and straight :-). When building the starting and charging harness I made up some ignition leads as well They're tight to the oil filler neck, but everything clears and they're a bit tidier than then OEM ones. Separators are printed in PETG, will see how they hold up. Might have it running by Christmas? Yeah, nah, probably not, but no rush eh? :-).
1 point
-
A few old pics of my car surfaced last year. These are from from ~2001-2003 and show the old N2 look. This is a bit of inspiration during the tidy up.
1 point
-
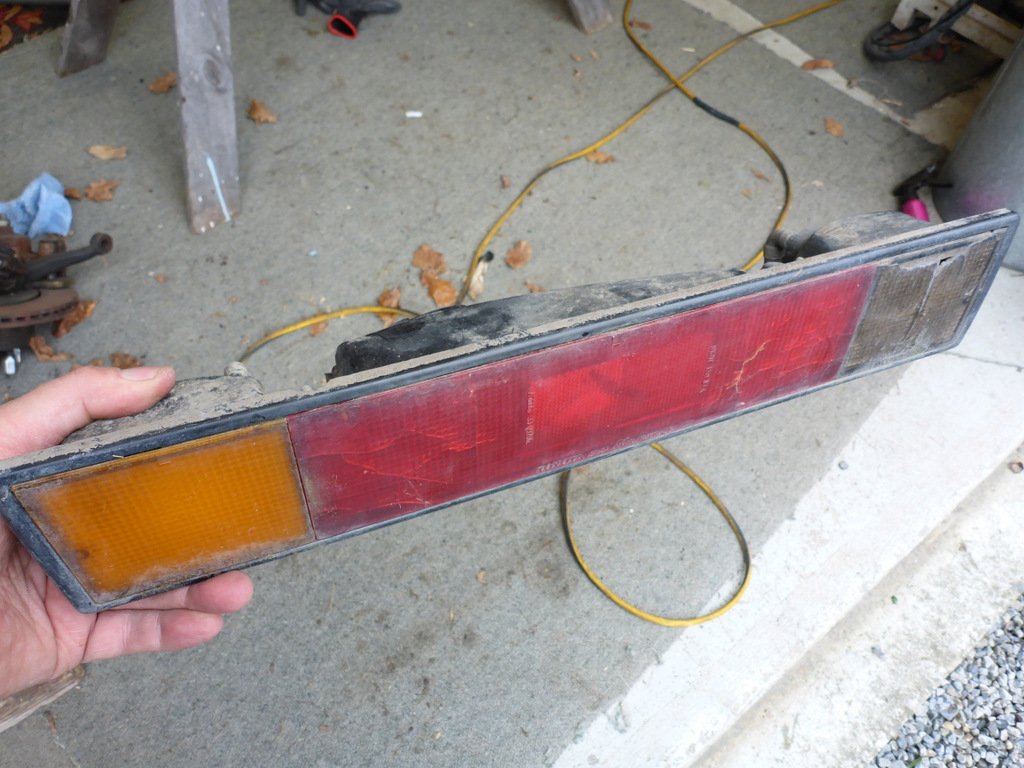
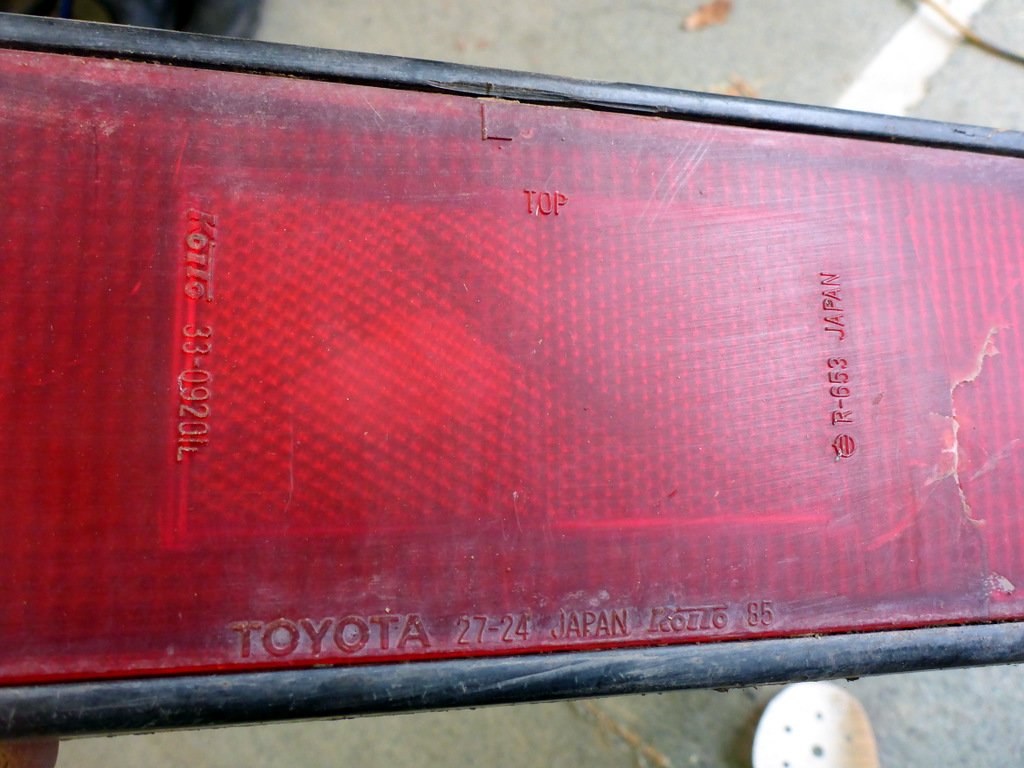
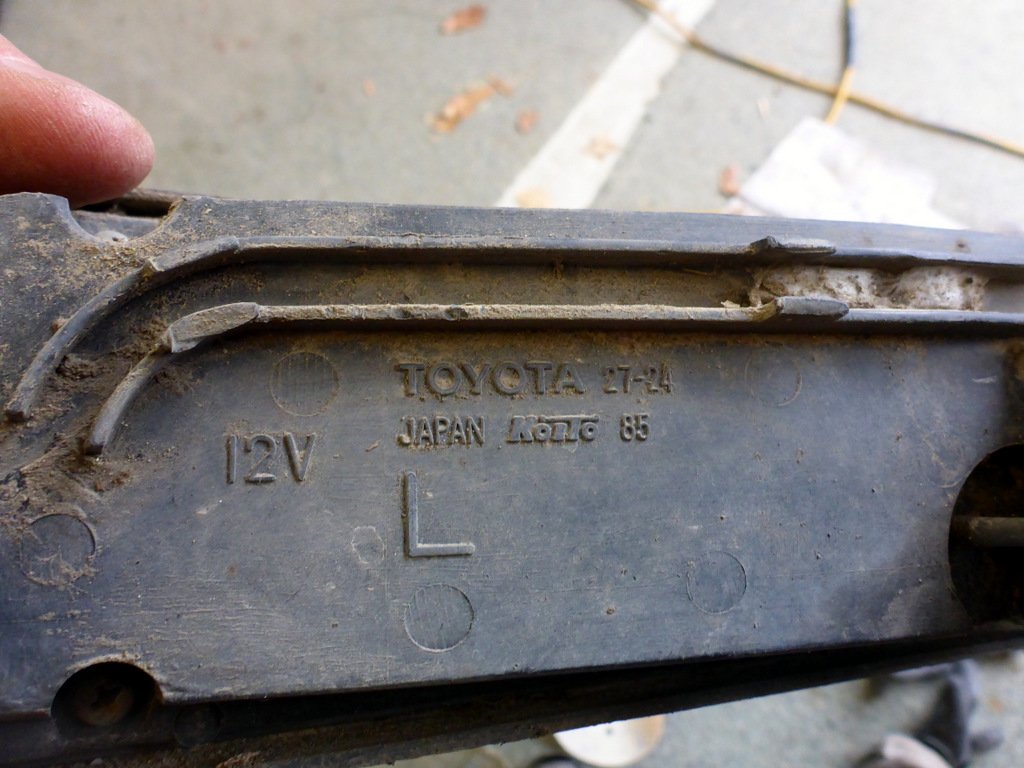
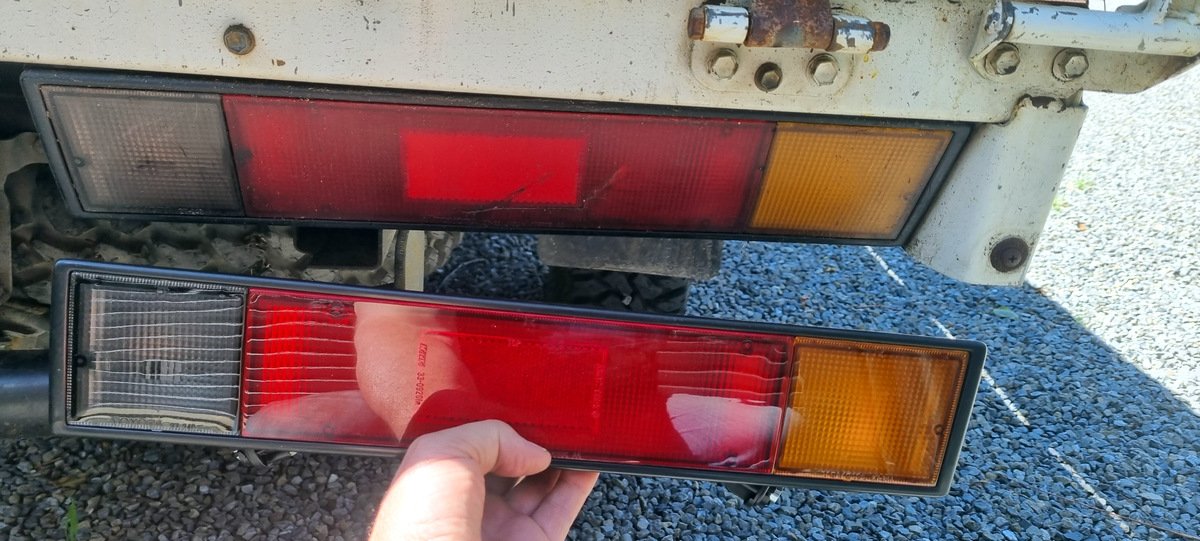
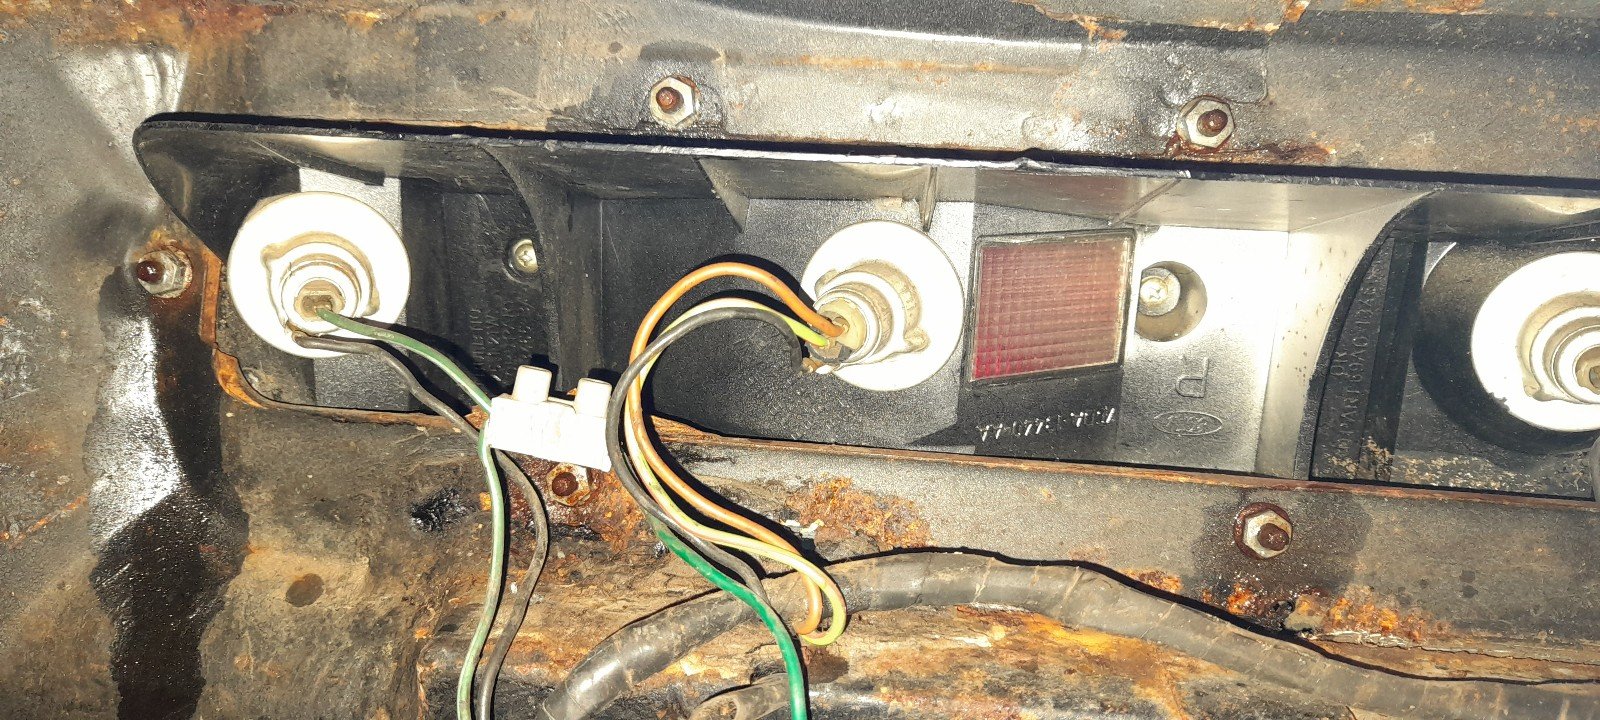
Tail light panel.
1 point
-
Hi Peter; Your project was brought to my notice by a fellow member of Bugatti Club Australia, where I'm Editor of the Bugatti Bulletin, a twice-yearly journal which is distributed world-wide, having been published since 1960s. It's one of the most highly-regarded single-marque historical car journals around, and actively seeks to capture NZ Bugatti activity as well as whatever happens in Australia. Fair to say, I'm pretty-much gob-smacked by what you've been doing, and I've spent hours looking through your posts, and those of the many followers who have been tracking and responding to your project. I would love to devote a significant section of our next edition to coverage of your project and the processes you have been pushing through, and I was wondering (a) if this would be agreeable to you, and (b) if you'd be prepared to co-operate with an interview for the Bugatti Bulletin? The latter need not be a "live" interview necessarily, as I could send through a list of questions for you to respond to... I understand that you are in a high-pressure professional situation, and that you'd prefer to be working on your T59 project rather than waiting for a bloody phone call from some dick in Australia... So, yeah, please let me know if you would like to proceed with the above, in some form. I respect that you've been doing this on the down-low, somewhat, but I figure that if the wider Bugatti community gets wind of this extraordinary project, you may find a lot of support that you had not previously anticipated. And if it takes a Village to raise a child, it takes a Community of Artisans to create a Bugatti! Kudos to you and your immense talent. Cheers, Michael Anderson (editor@bugatticlubaustralia.com.au)1 point


.thumb.png.b2aee08688778d18bdc7b3e3c1852d9c.png)


This leaderboard is set to Auckland/GMT+12:00