
Leaderboard


Popular Content
Showing content with the highest reputation on 07/21/23 in all areas
-
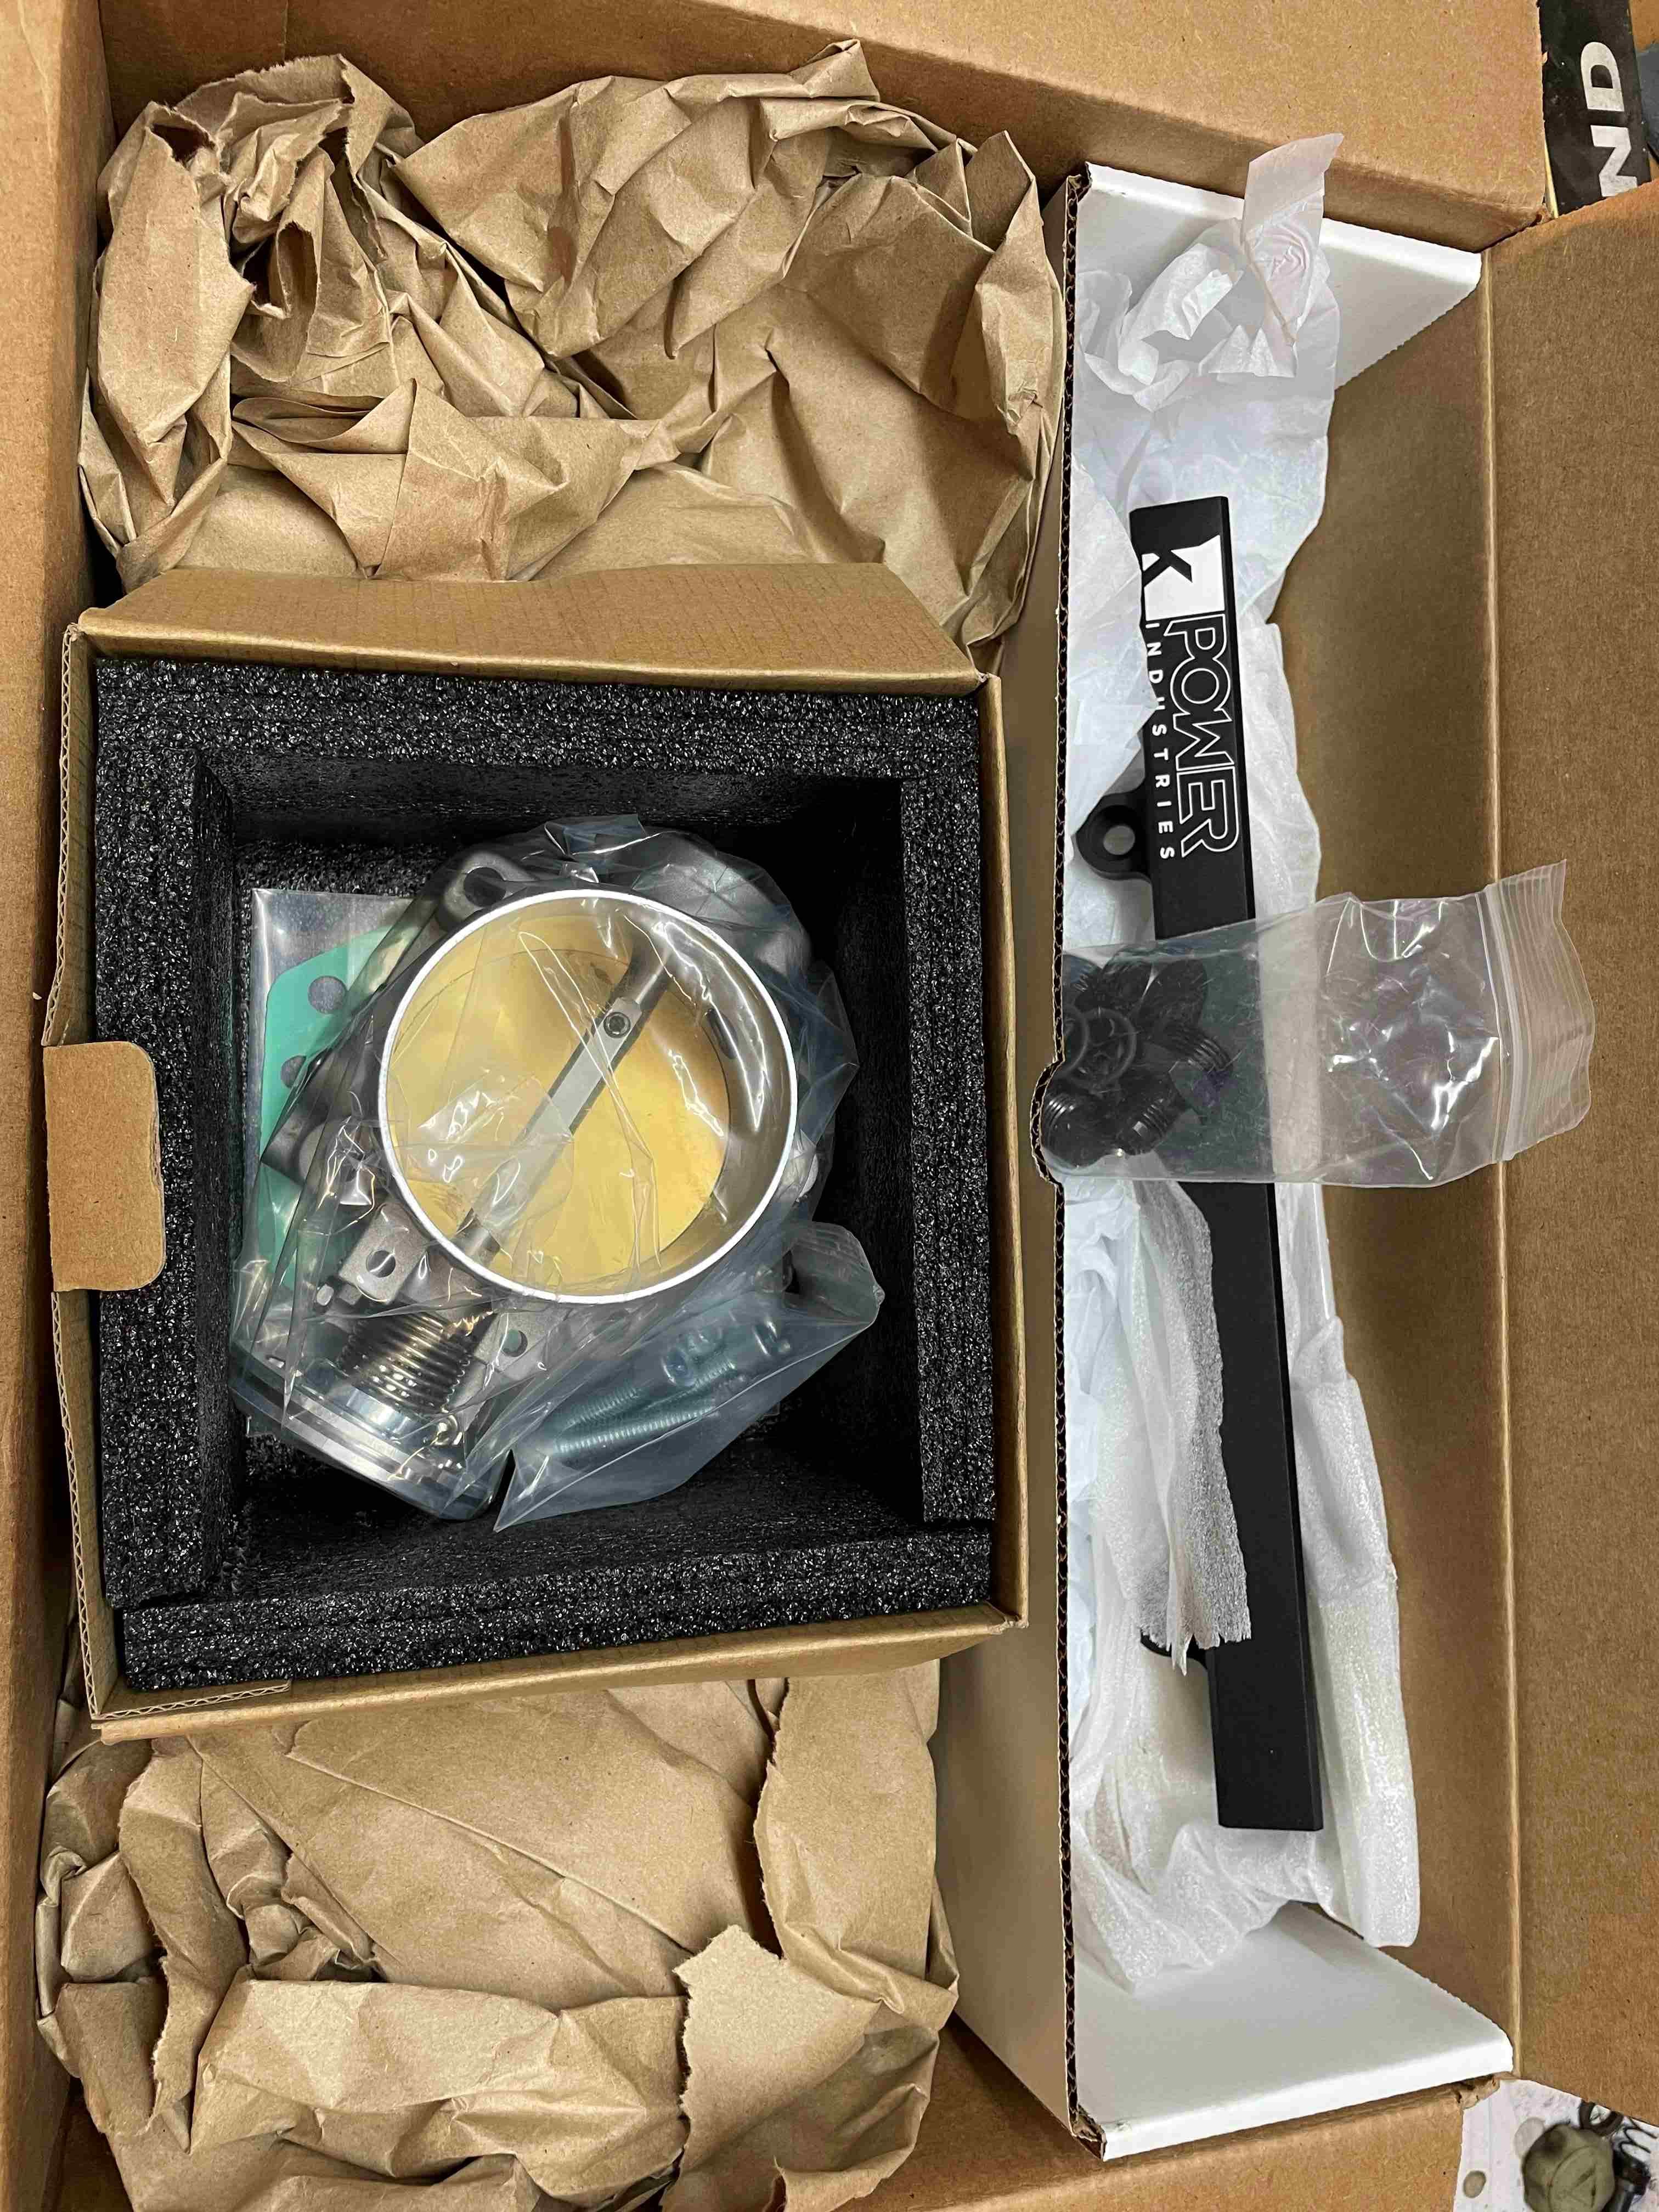
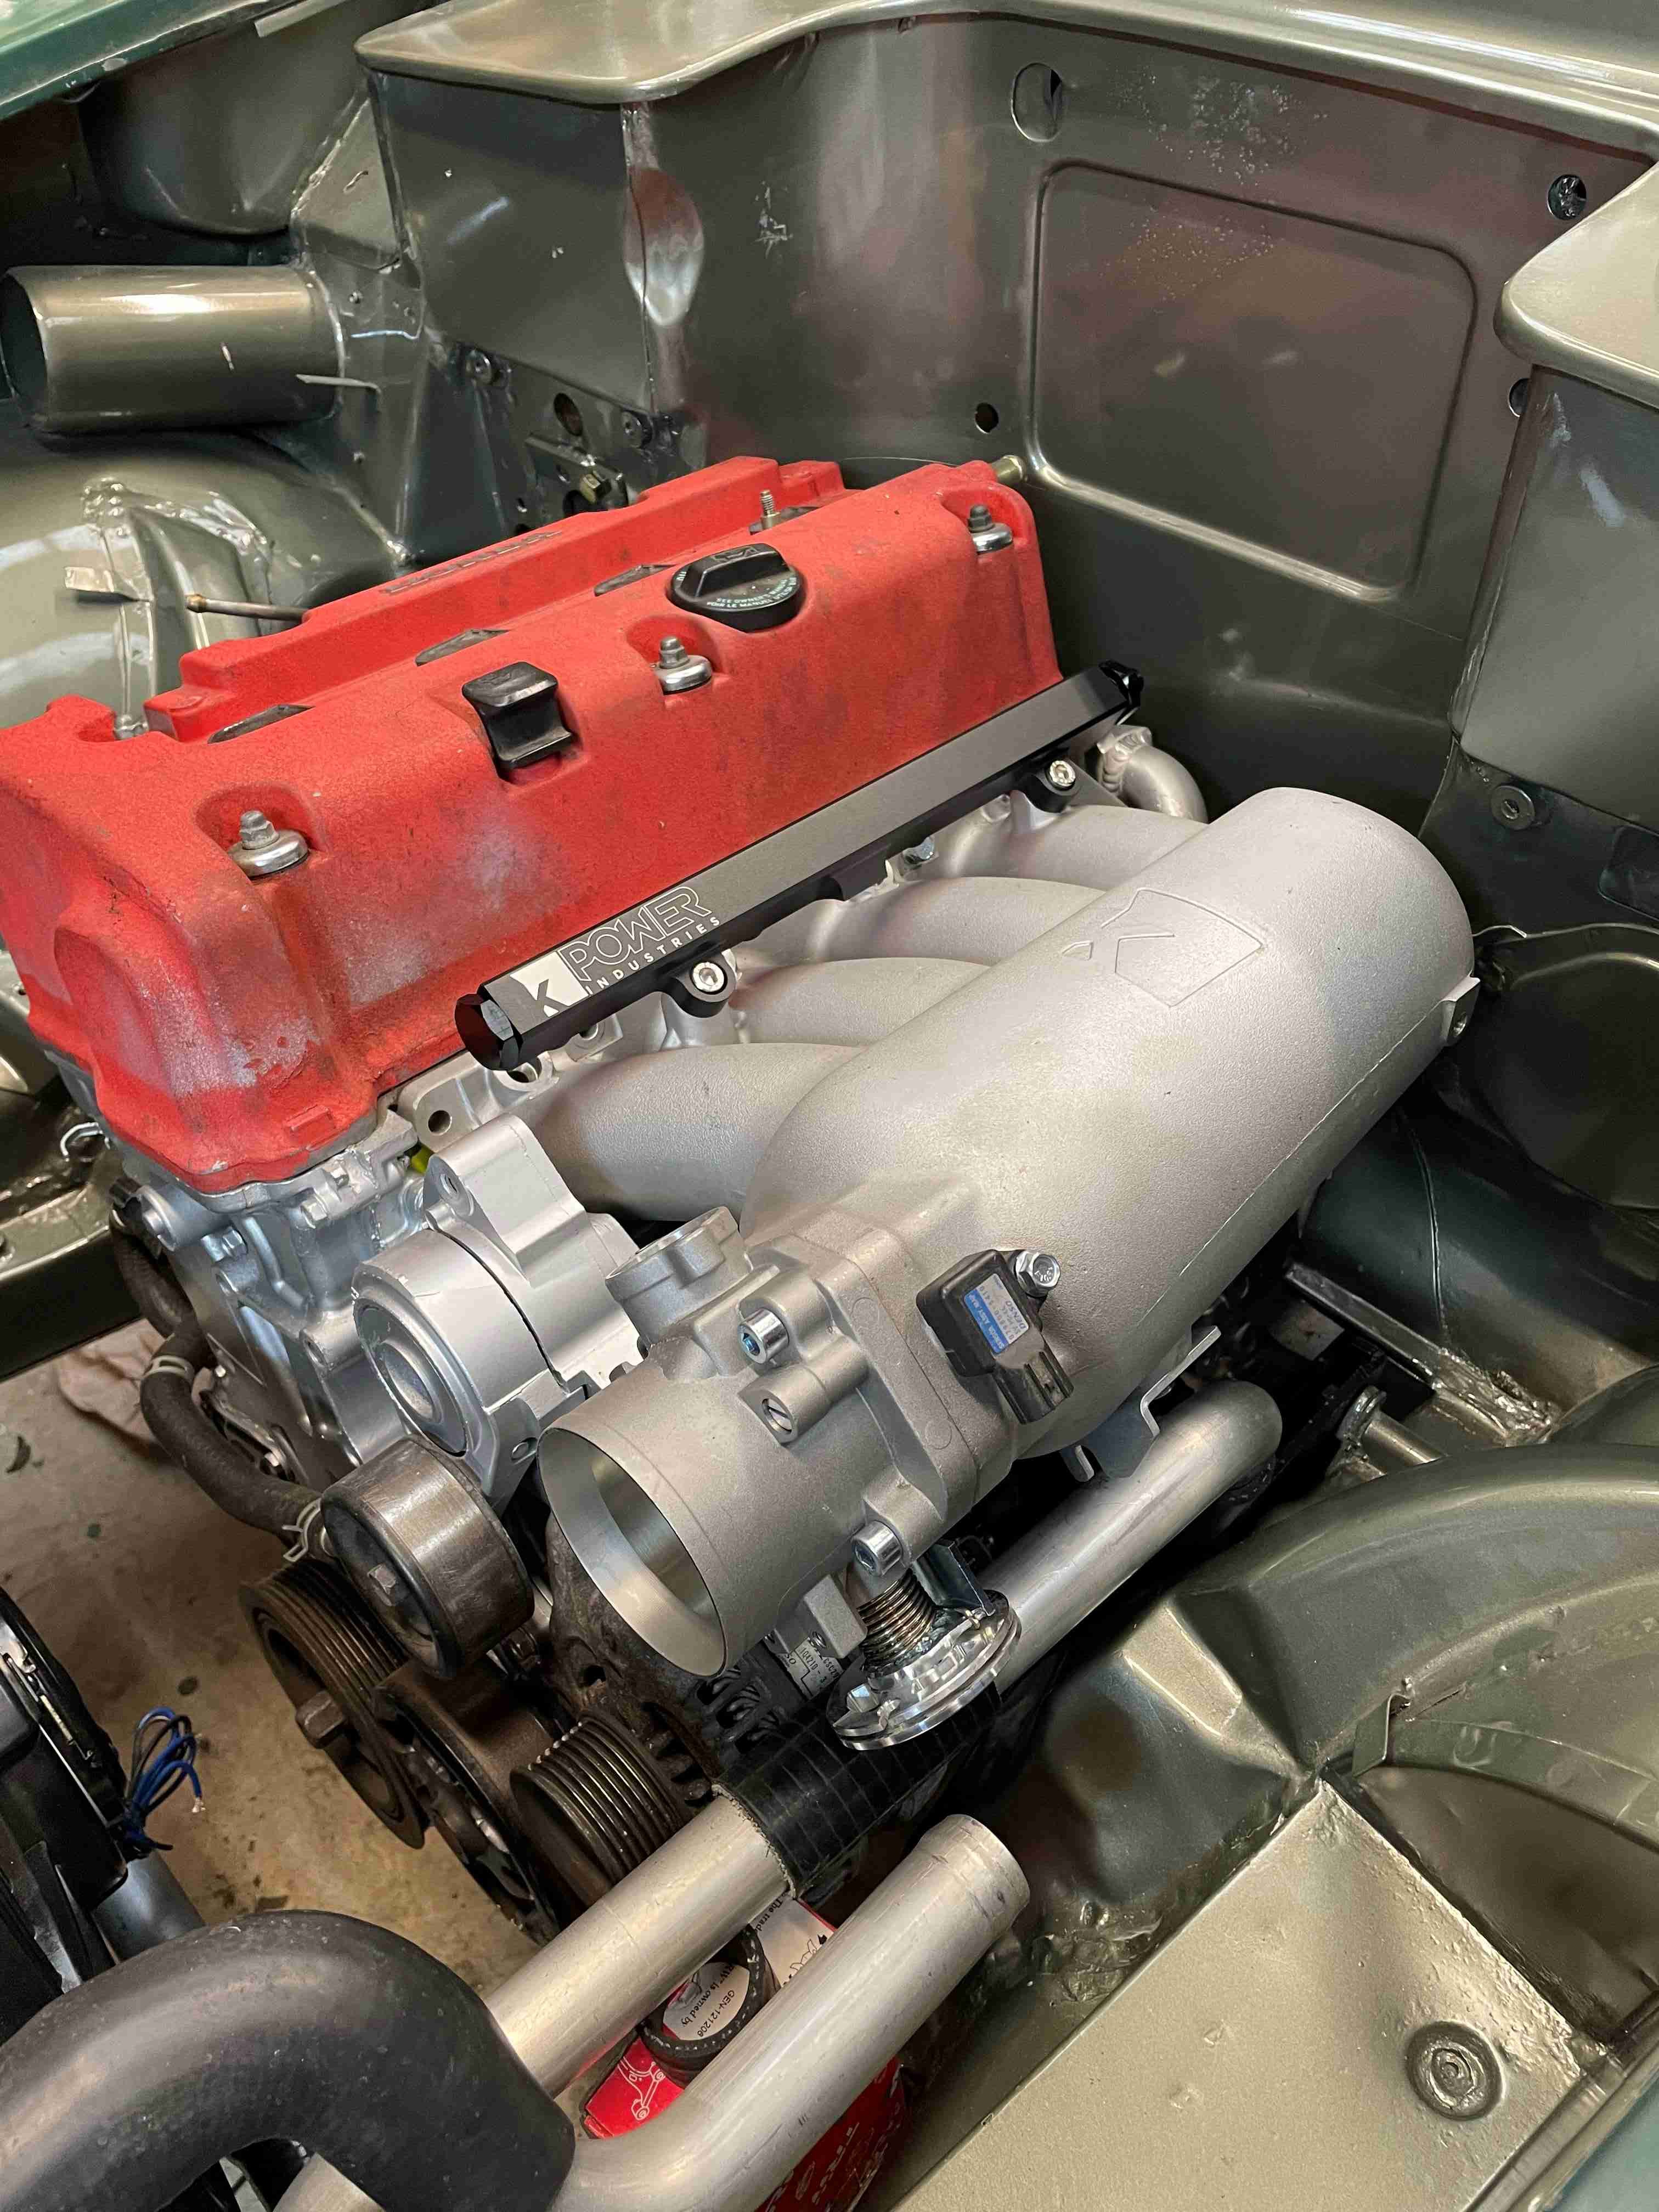
A small update. The throttle body and fuel rail to match the intake from K power arrived yesterday. A quick trial fit to see what fits from the OEM manifold. Injectors are supposed to fit, once I figure out how to get them out. I have the nuts holding the rail off and the clips pushed off which hold each one. I can move it a bit but the fuel rail still doesn't want to let go. May just need a bit more force but I will find out before I try again.
 6 points
 -
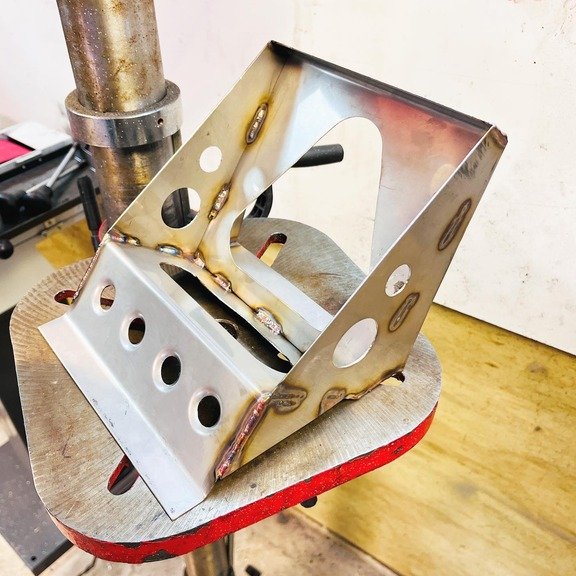
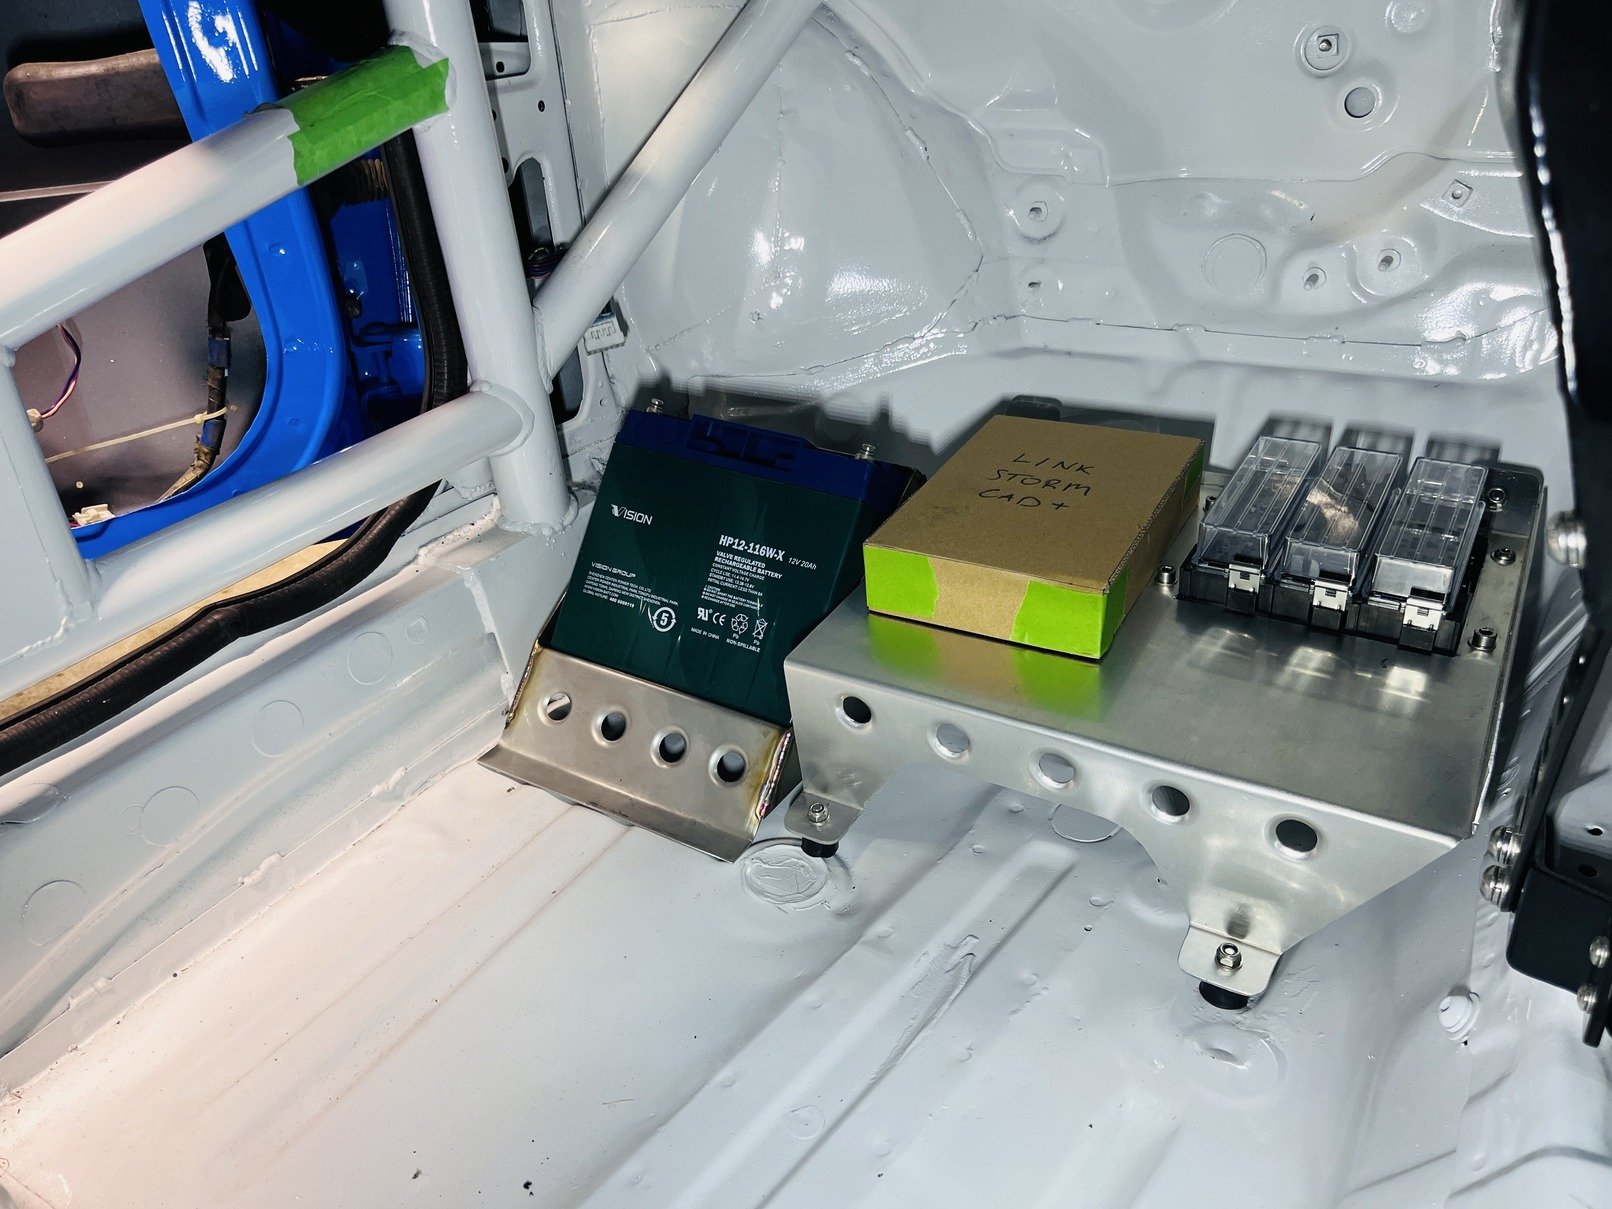
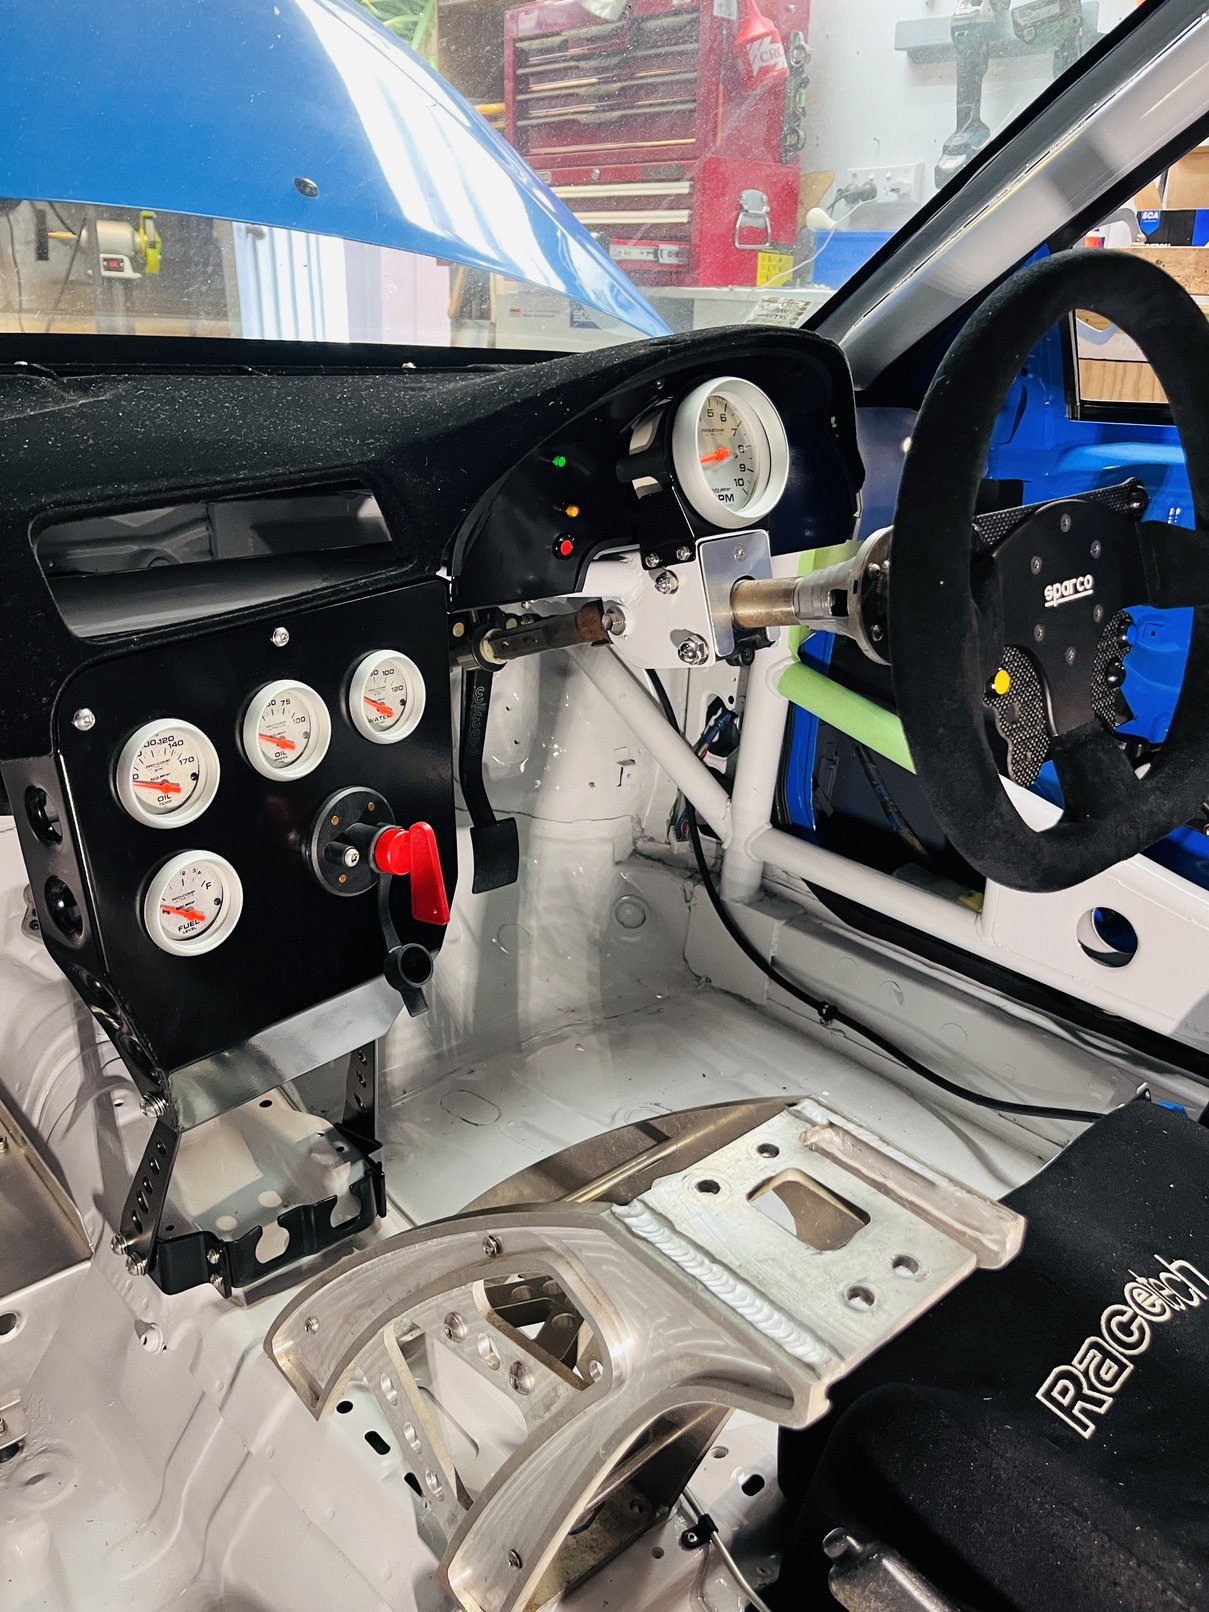
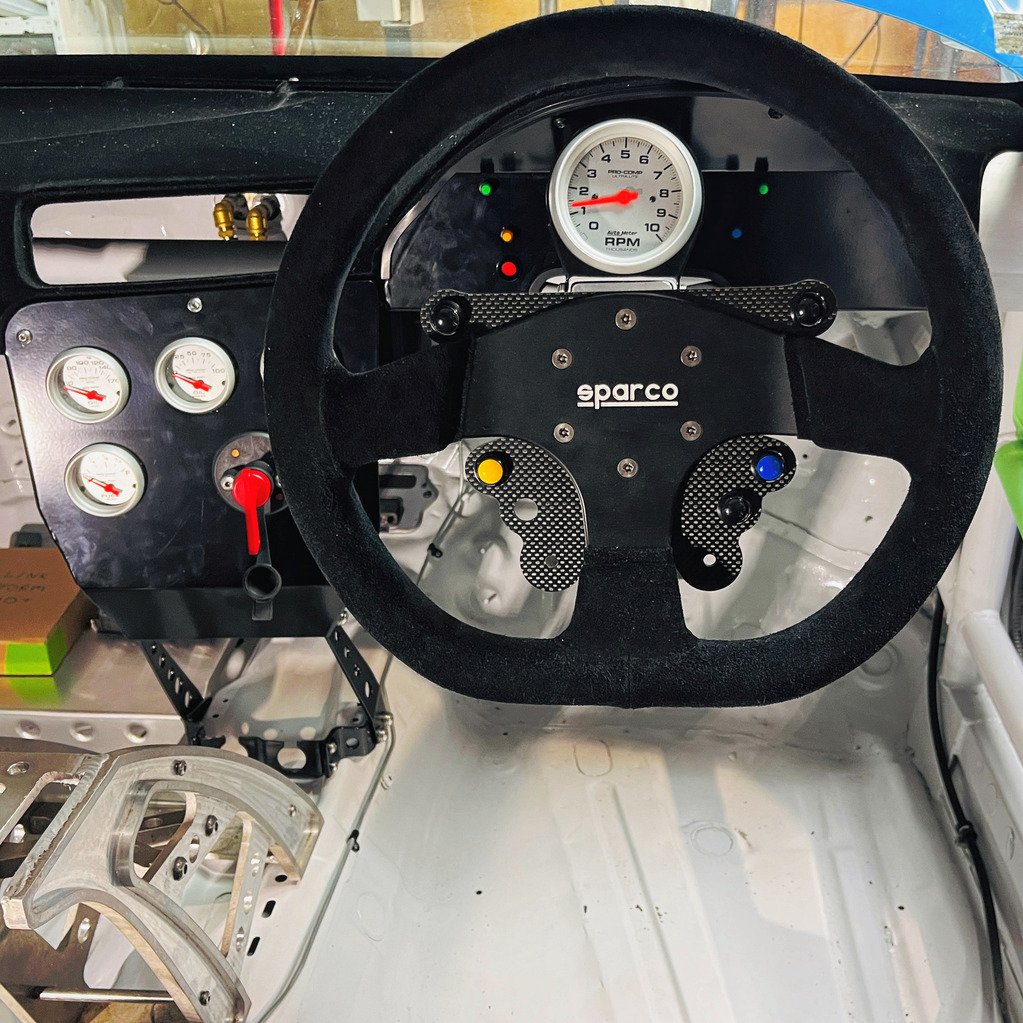
Made some stuff, mounted some stuff. Lots of careful thought and consideration went into all these things. Let's hope it pays off! ECU/fuse box mounted using rubber feet for vibrations. Should keep all this tidy and hidden behind the passenger footplate (work in progress). Added a reclined battery mount also for packing and short cables. If I was to do it again I'd swap which side battery is on. I'd originally planned to slot battery in under the ECU but it got too complicated as fuel lines run under the floor there. Blew the cobwebs off the tig. Still pretty rusty. Was trying a new Furrick cup and don't think I got enough stick out/too much gas flow for welding in the corners. Something to work on at least. Steering wheel buttons, lights and isolator switch in place. Trying to keep dash simple with minimal things to look at. Plan to run a Monit display in centre for speedo (driven from rear hub) which should meet WOF requirements. Also handy for rallying. Got a massive pile of parts ready to go to the powdercoaters so should be some tidy looking progress coming soon.
6 points
-
Damn now you made me go watch videos of Peurto Rico NA drag racing, pretty sure there was a 9.9 second NA 3TC so the 2ZZ must be junk. Man do they have the coolest drag racing scene or what.5 points
-
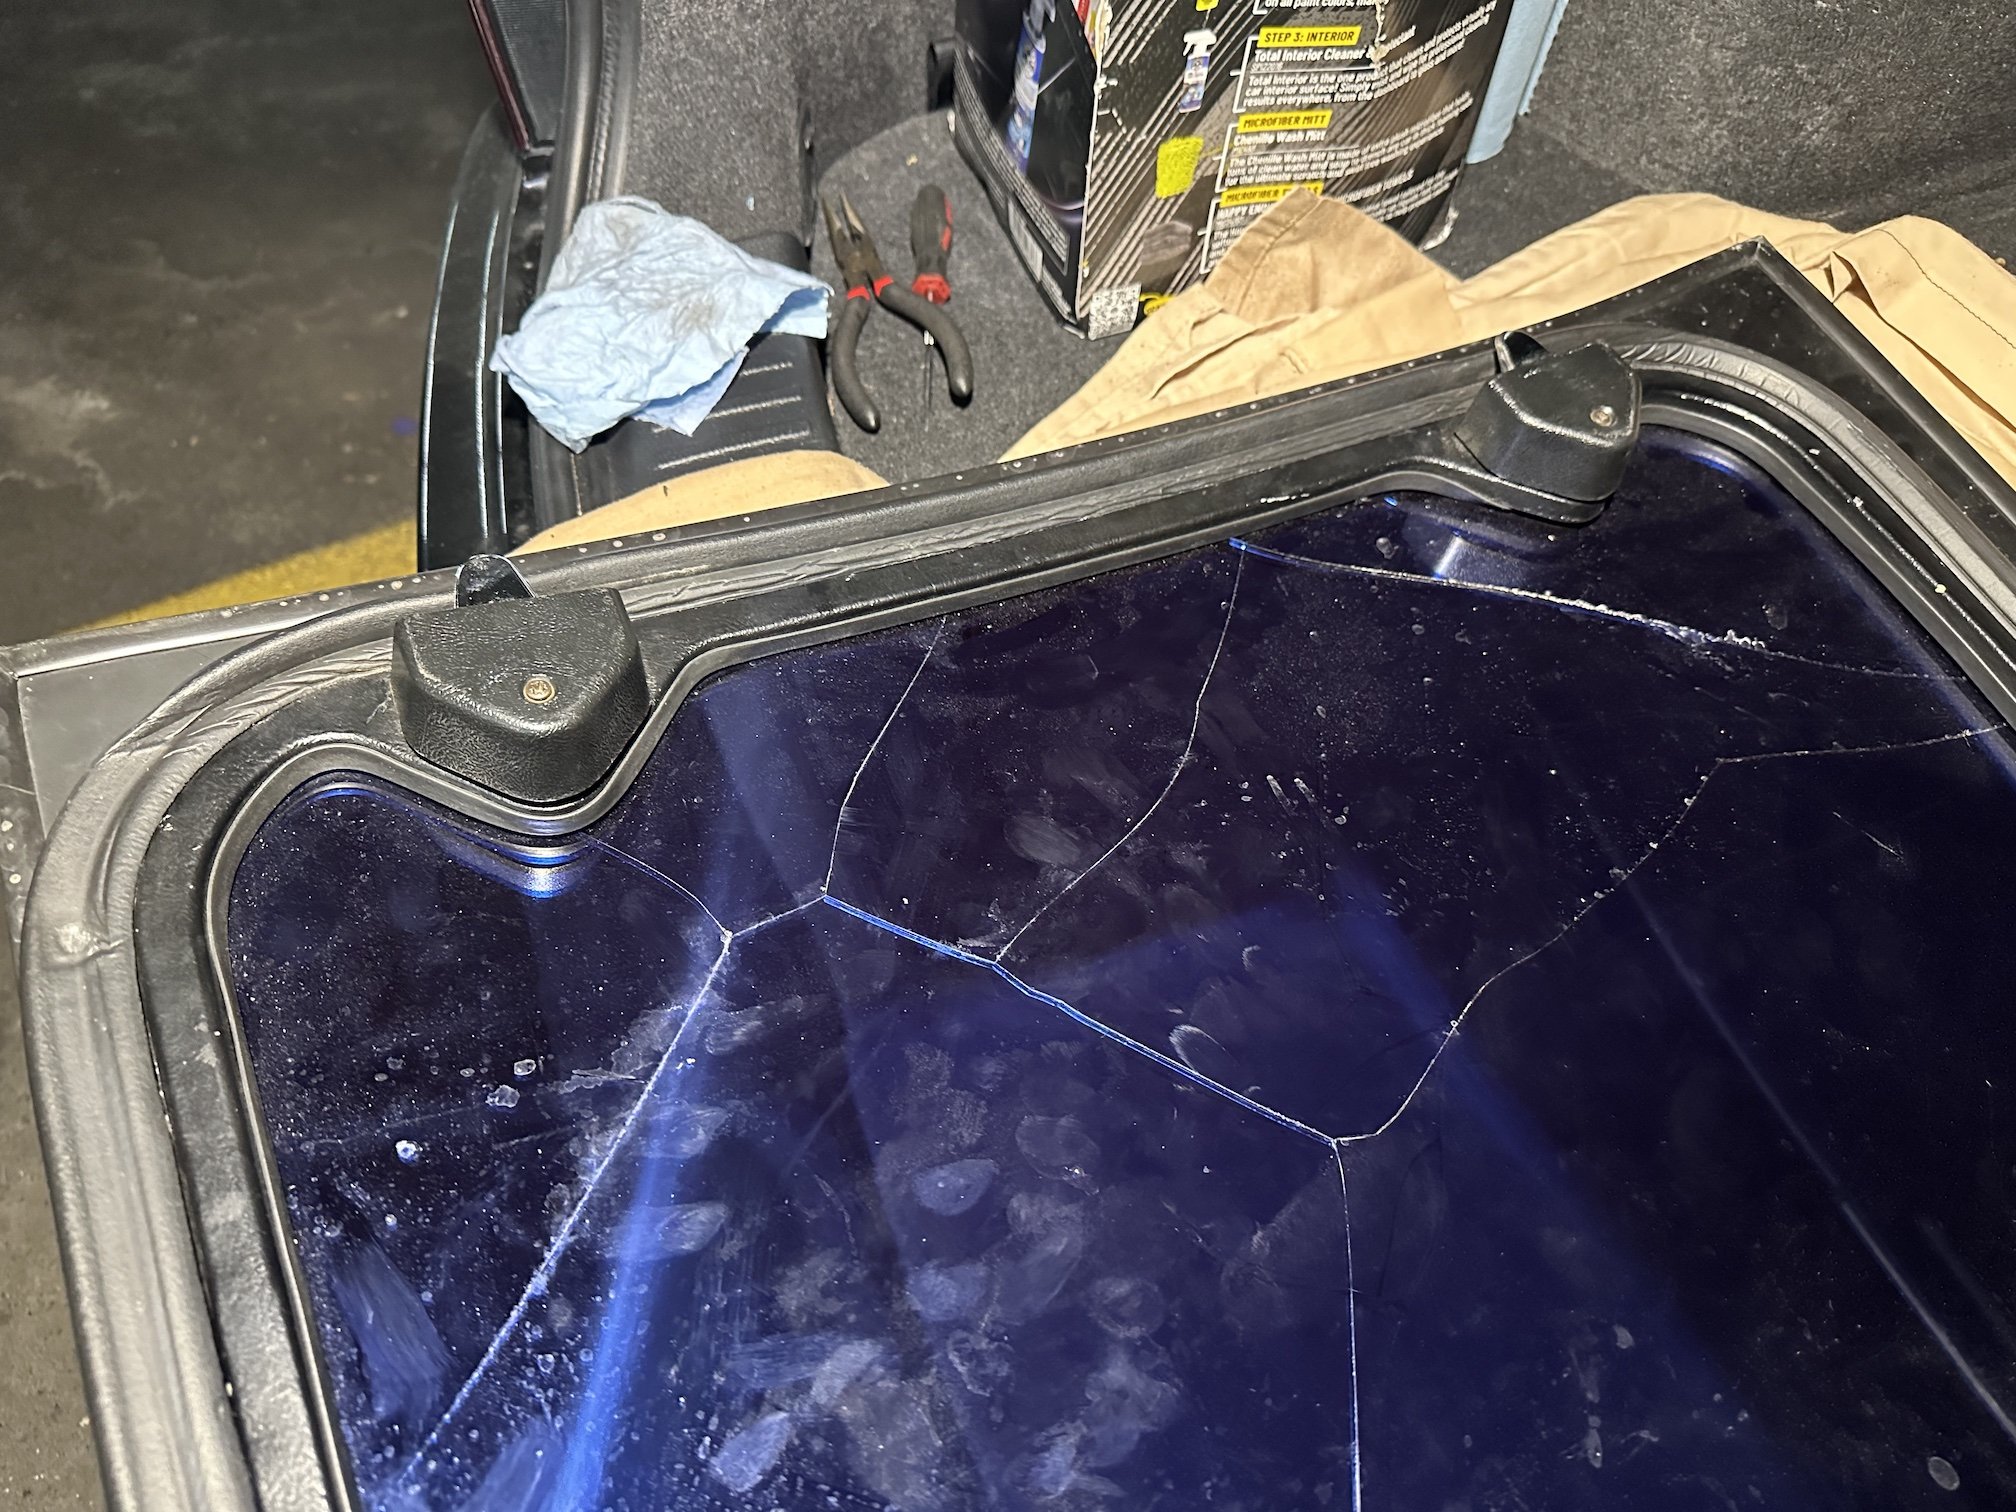
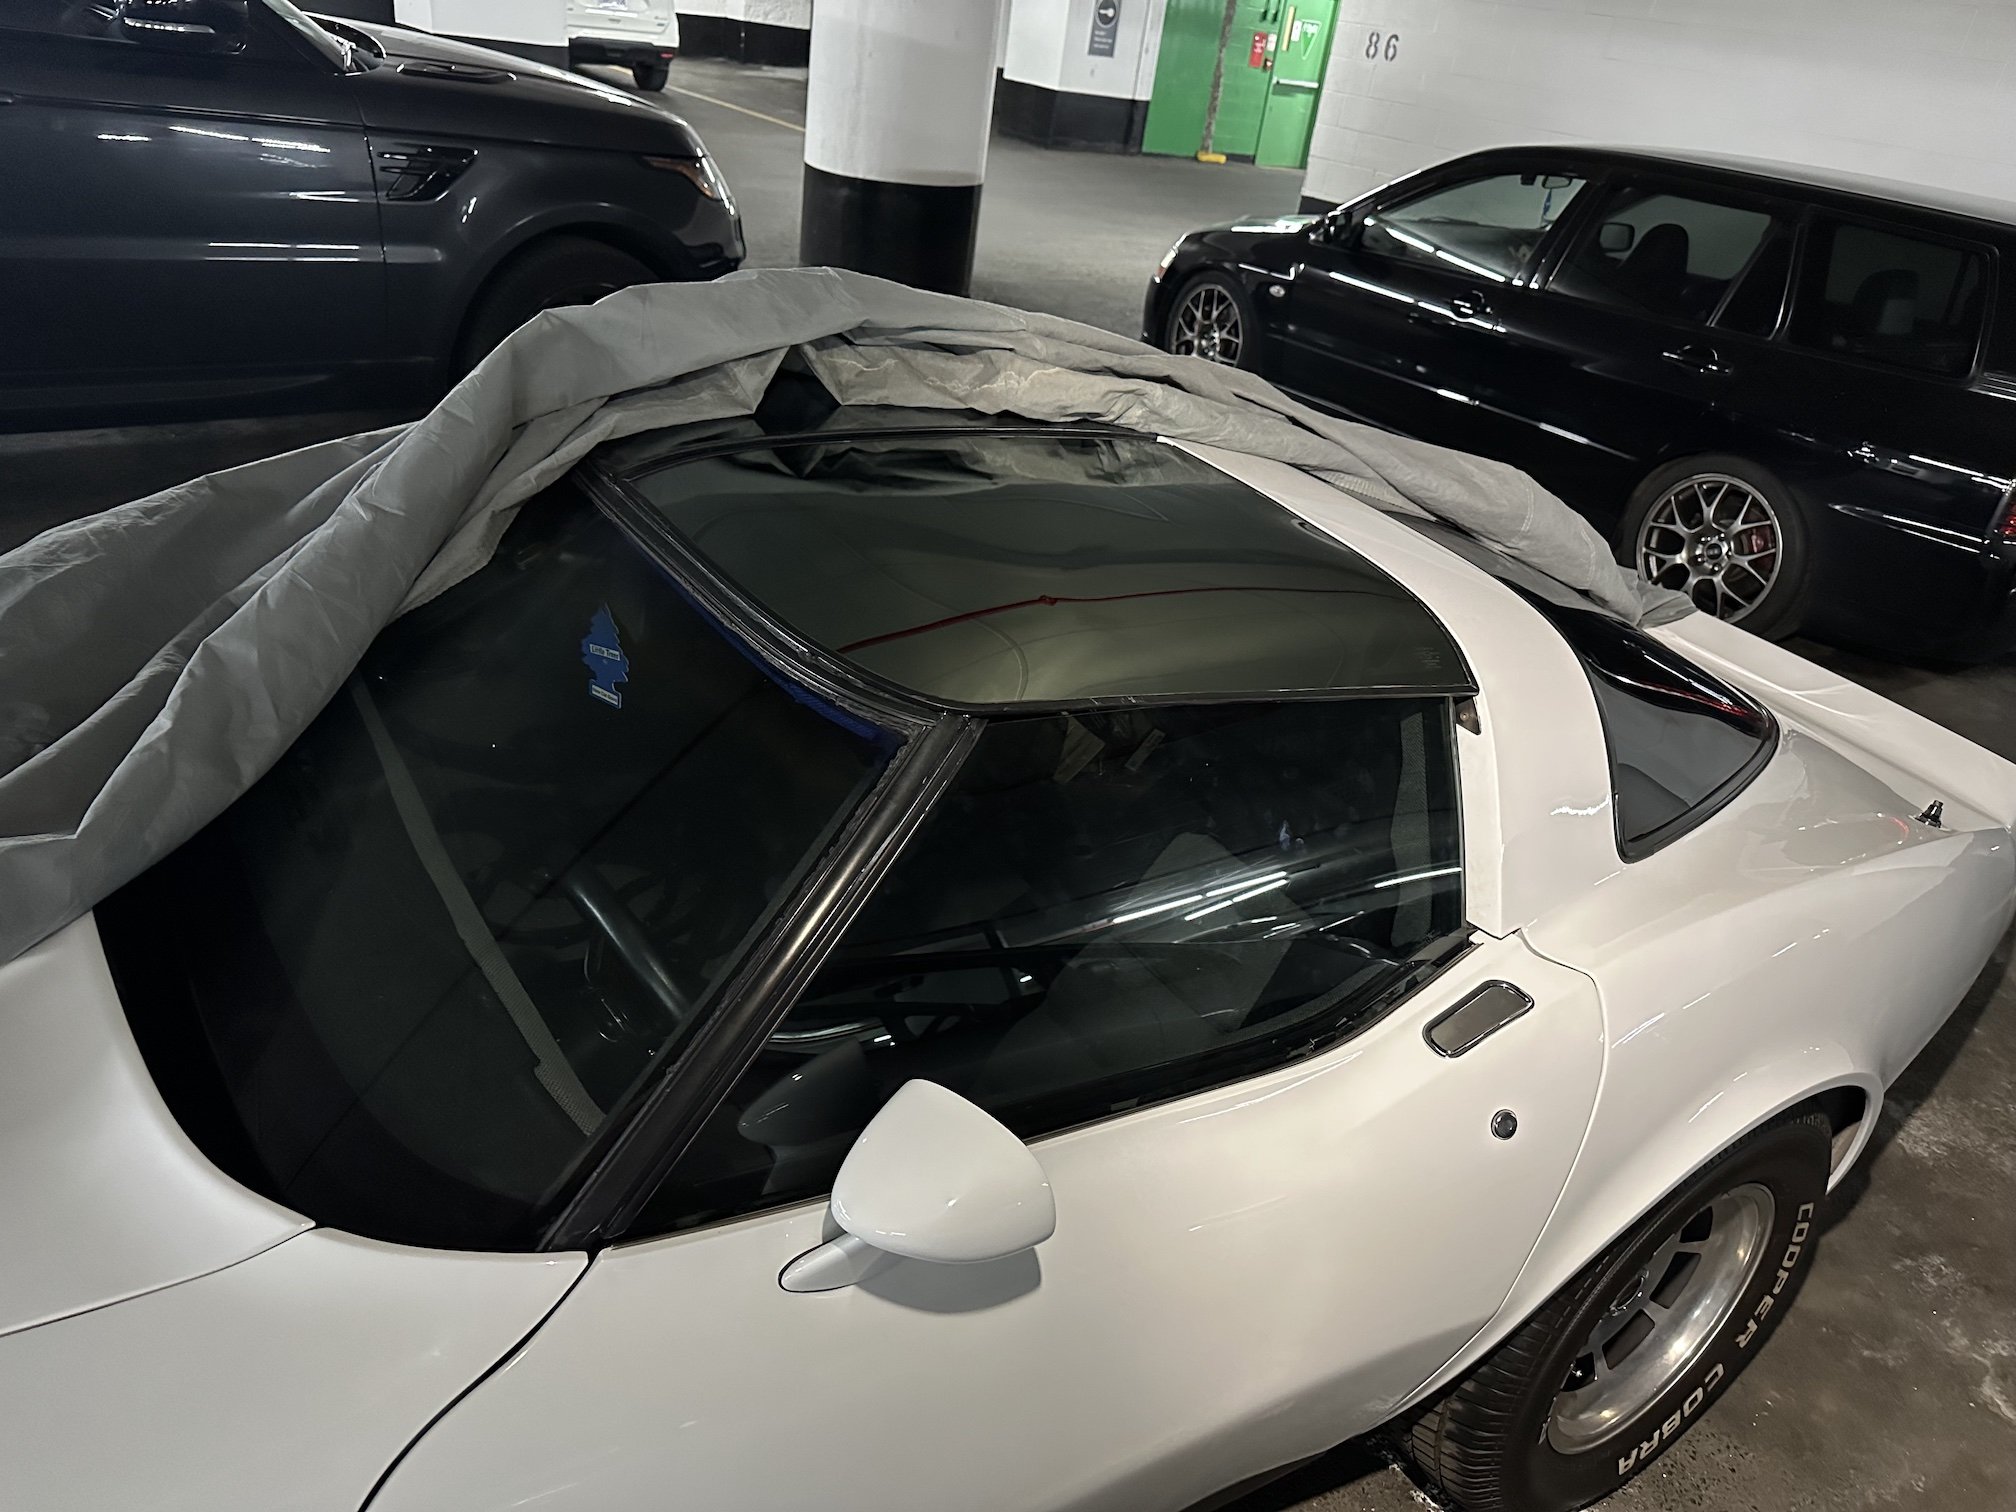
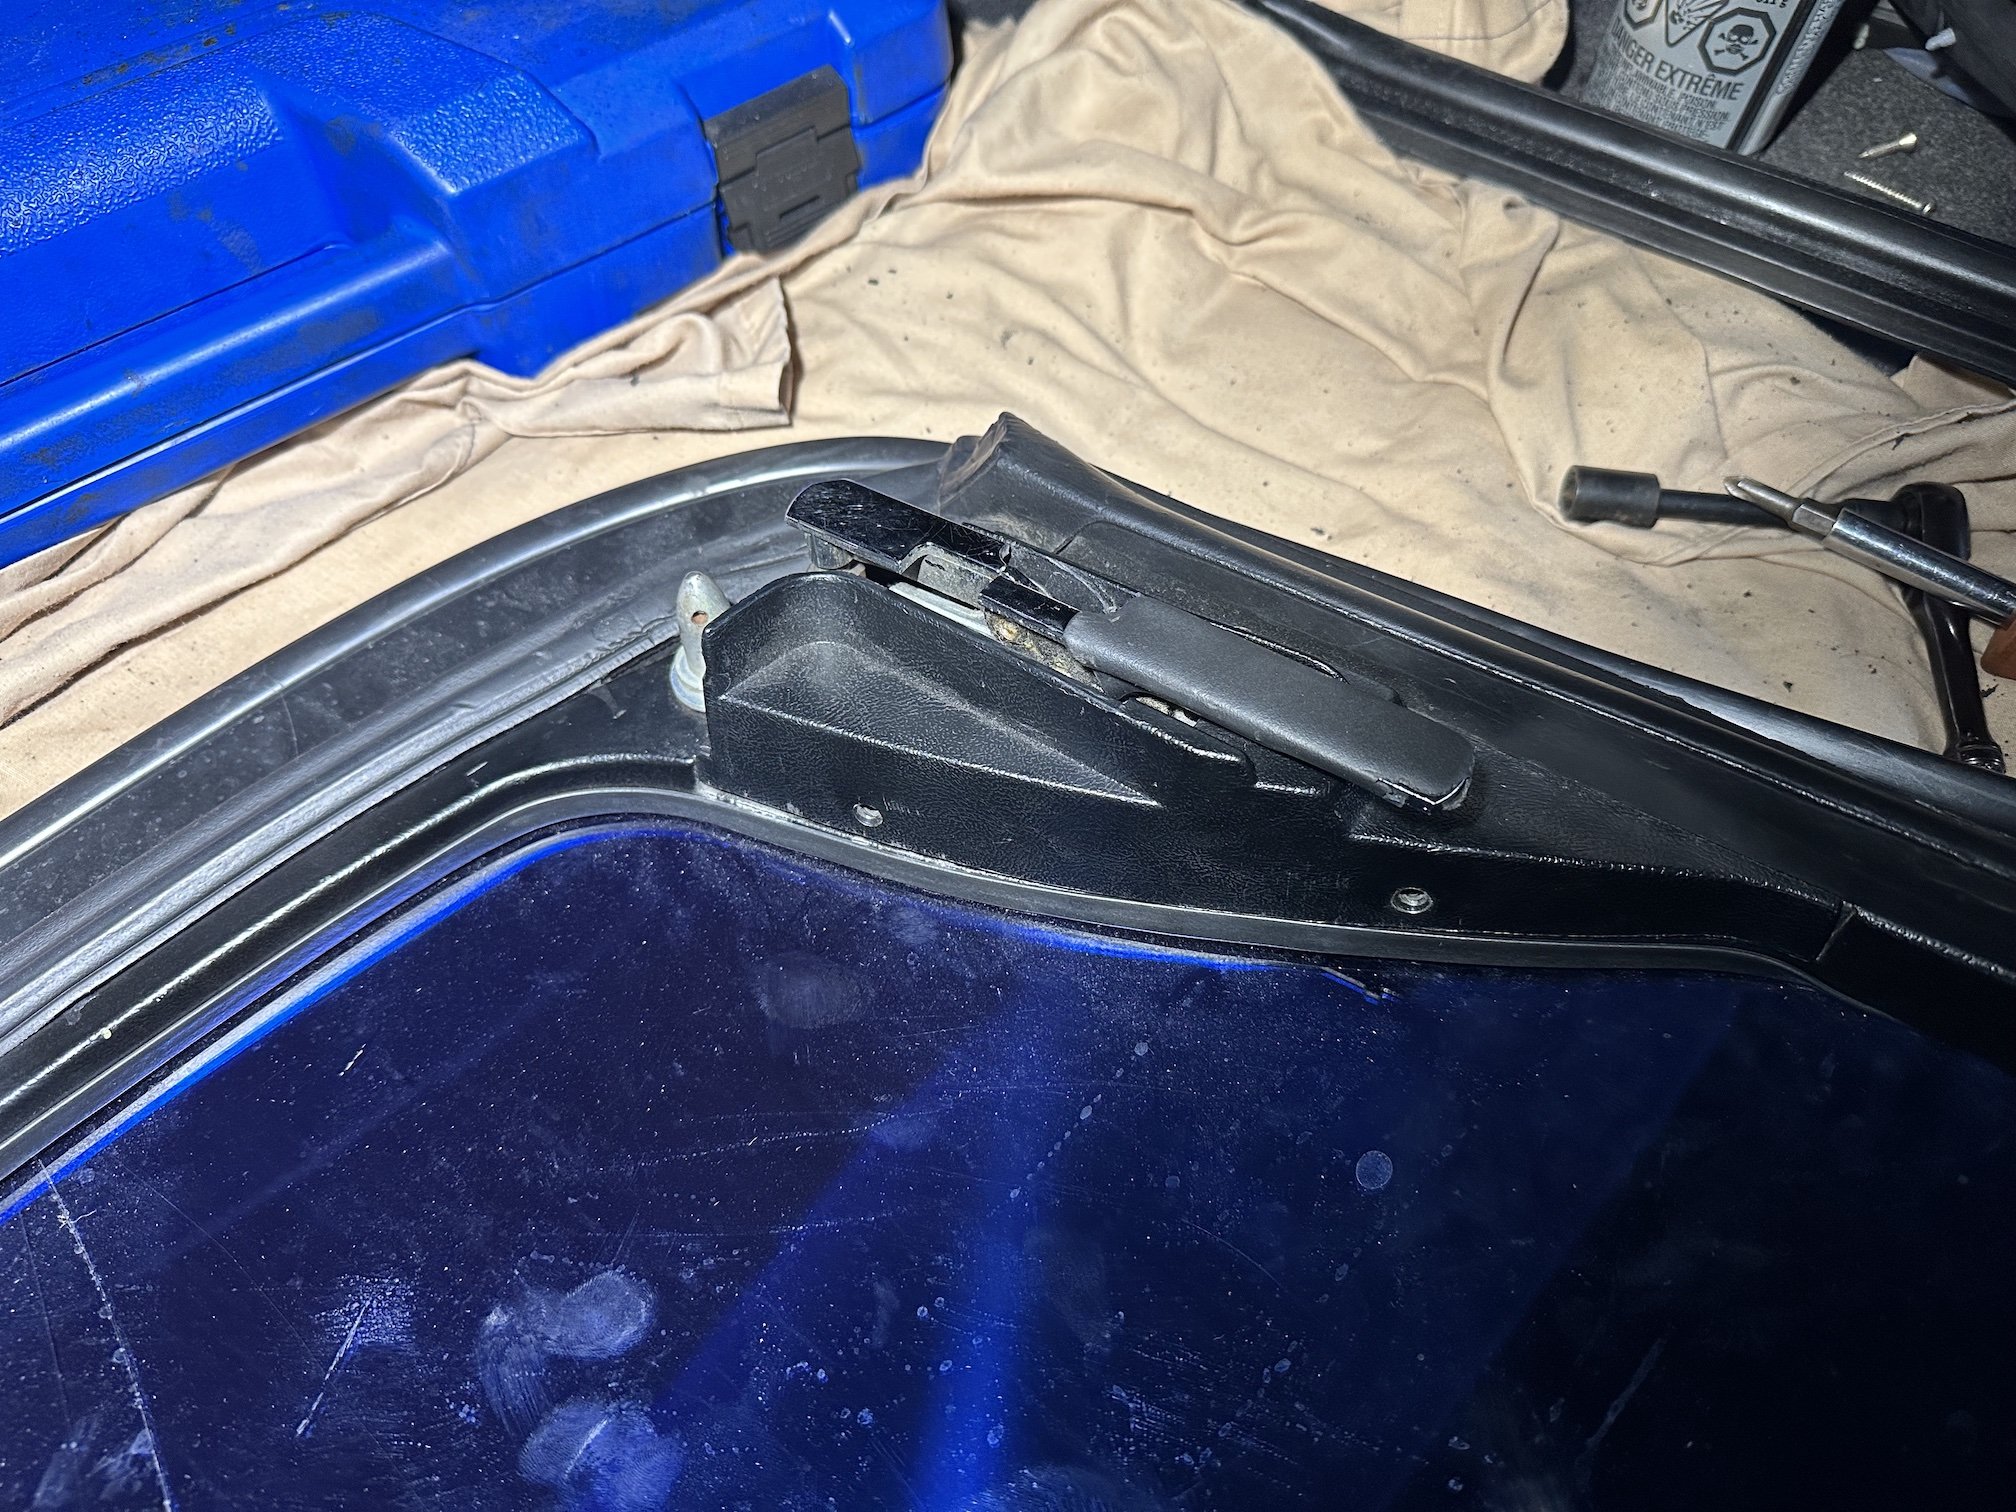
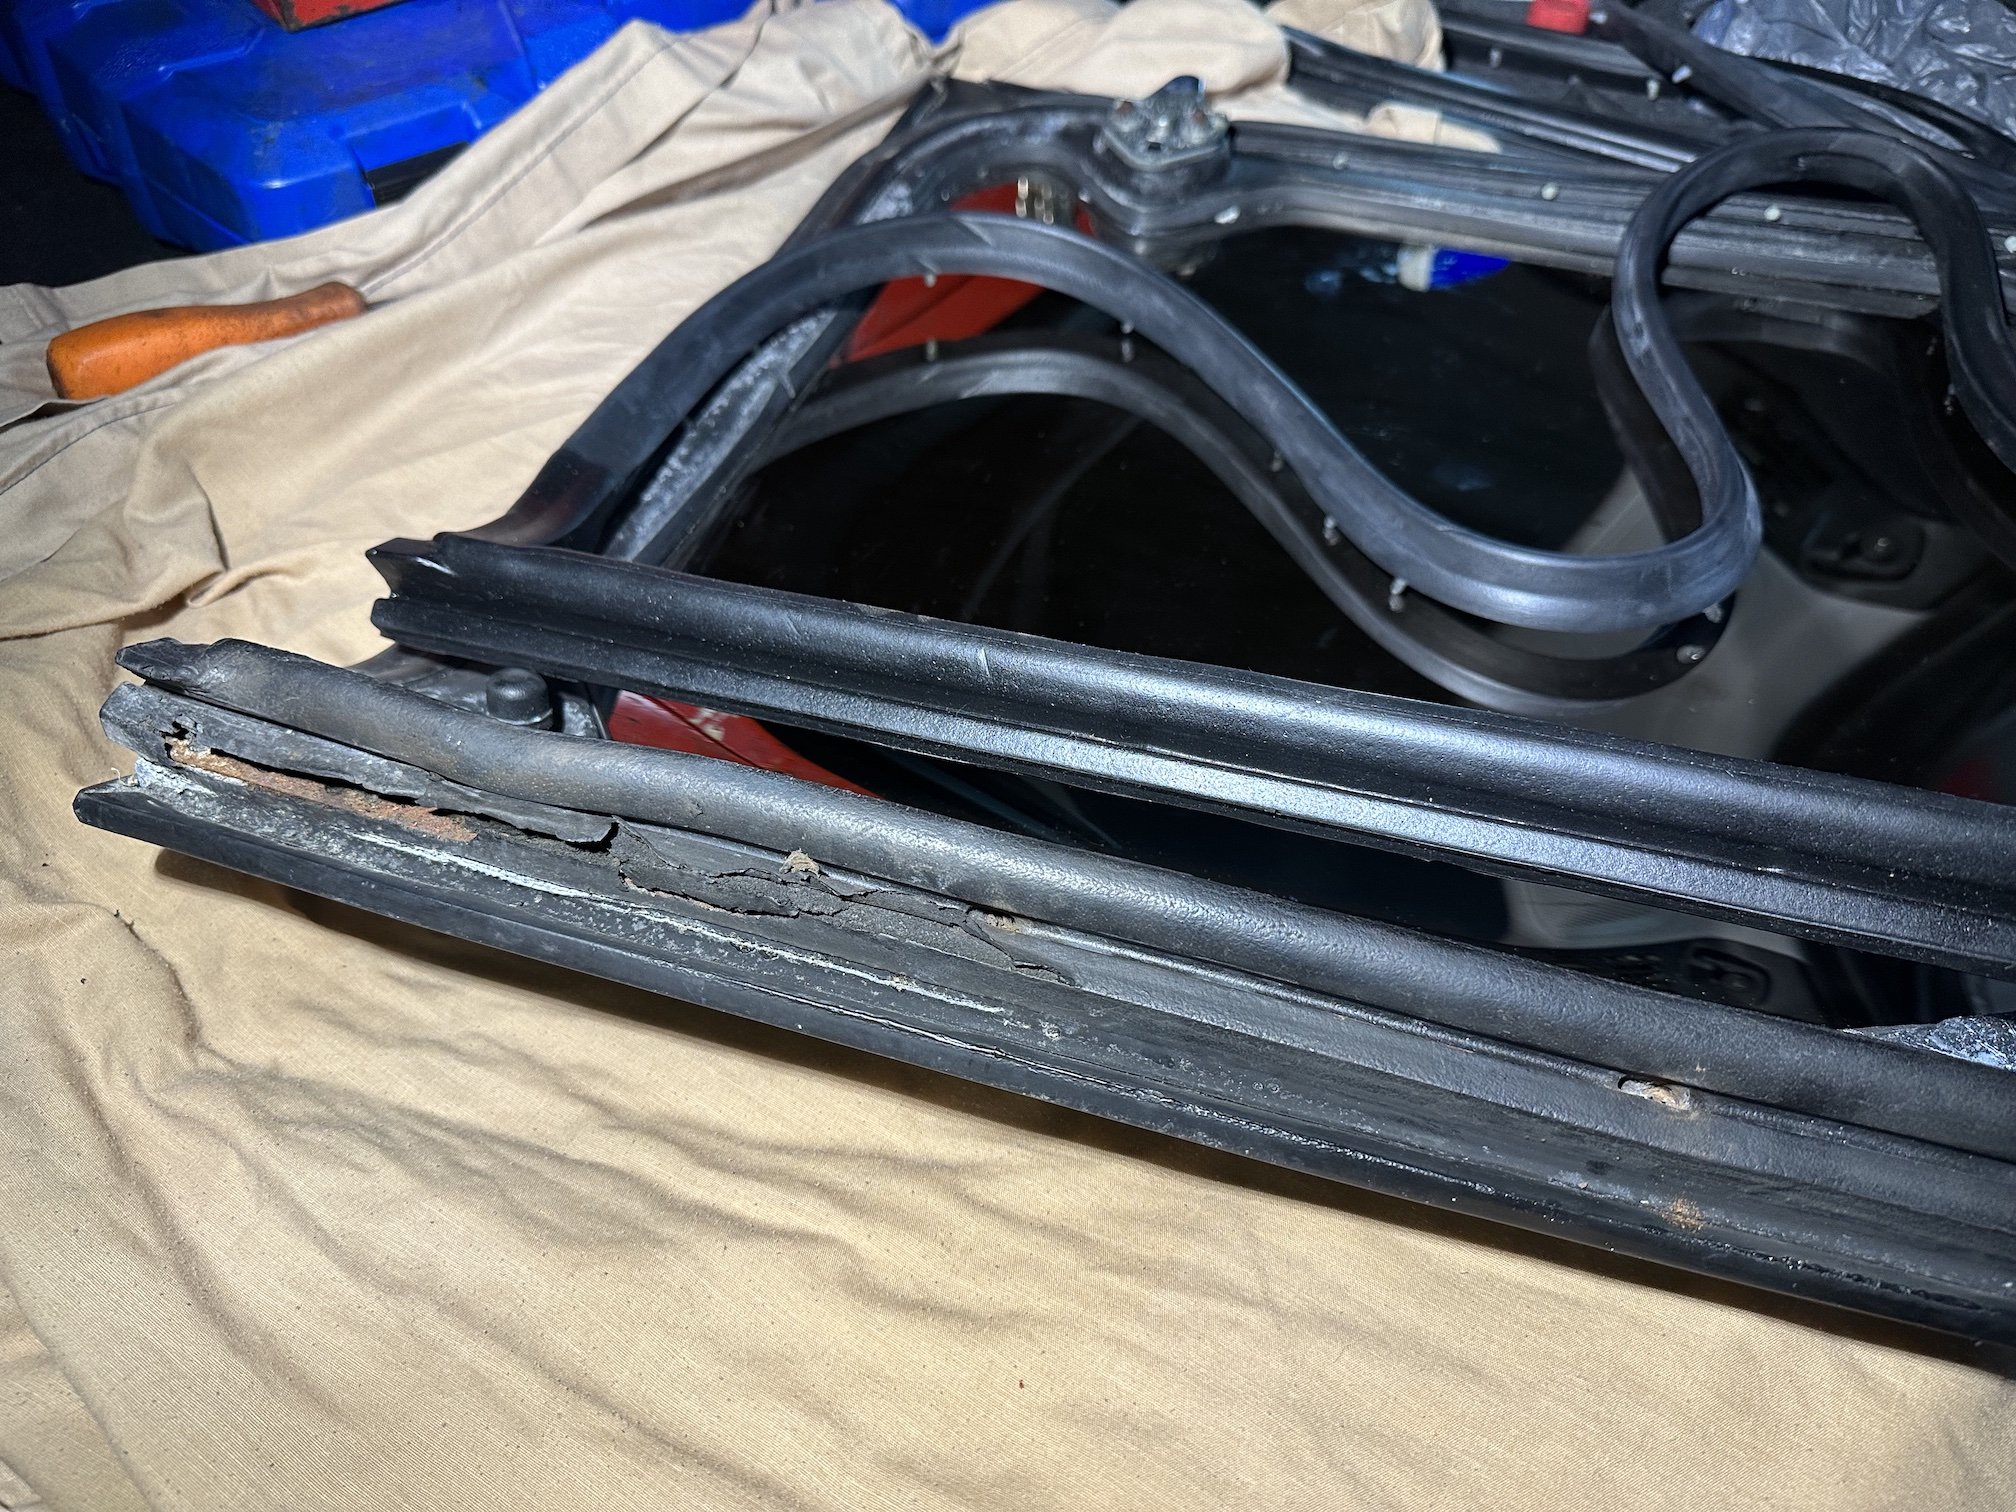
The seals aren't actually in bad condition on the cracked tops, maybe someone can reuse the frame/seals with new glass who knows I then placed the driver's side gold top on (without the new seals attached yet) to adjust up the clips and clasps to make sure it sits properly before continuing. It looks like these tops are actually going to sit a lot more flush than the originals which is nice as the way the original tops sat always bugged me. disco -
5 points
-
Yeah that's fine, 4GR chat is a safe space to discuss shitty engines from other manufacturers too4 points
-
Look for "Salinas speedway" on facebook. Some of the shit on there is absolutely wild. Puerto Rico drag racing visit is 100% on the bucket list.4 points
-
@xsspeed these guys are living the dream running 9's in a 3T starlet.4 points
-
2zz- 82mm bore 85mm stroke 3tc - 85mm bore 78 mm stroke 3tc = race car engine4 points
-
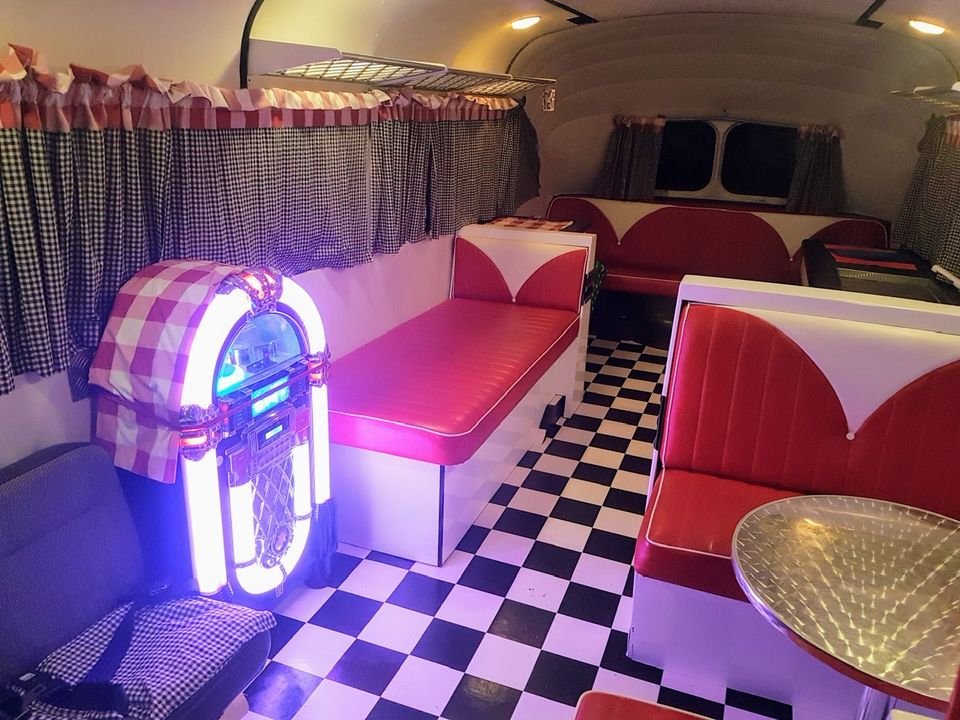
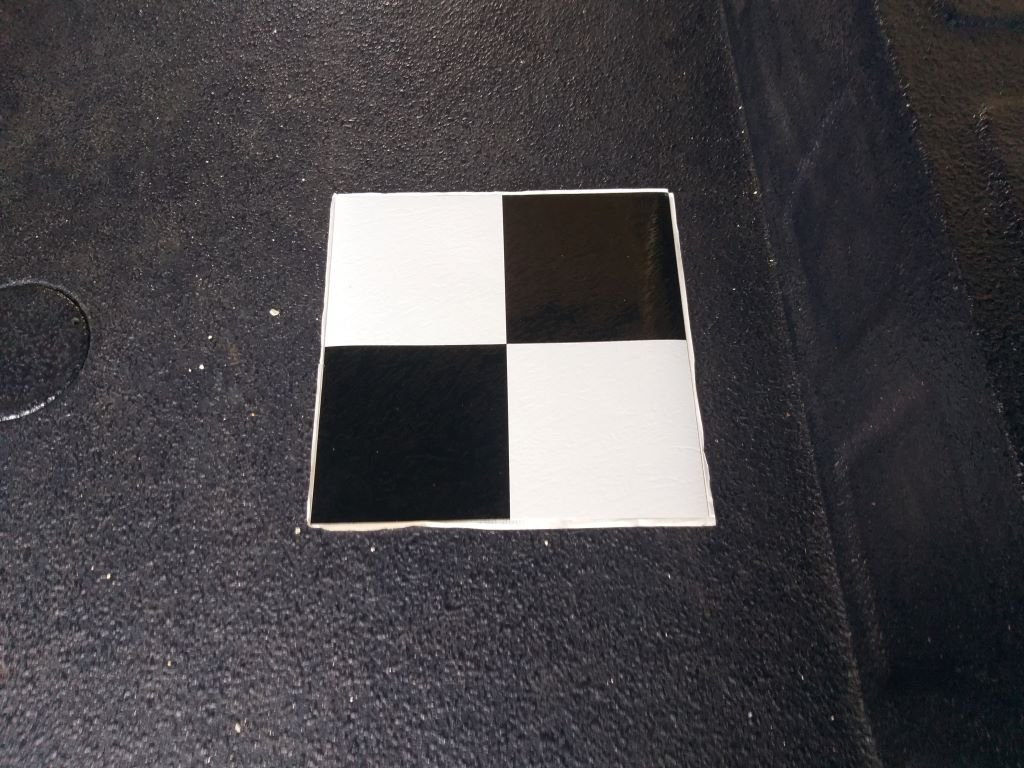
Interior - Chapter 4 Expanding on the overall colour scheme and style as outlined above, we are thinking of incorporating some touches from a typical mid last century American diner and with that in mind you can't really go past the typical checked vinyl floor. Trolling around on the net we couldn't find anyone who supplies the white and black floor tiles in anything smaller than about 300mm x 300mm. At these dimensions our concern was that the checkered pattern would make the inside look absolutely cramped. Then yesterday while I was in Bunnings getting some more resin for the carby hat I happened to stroll down their flooring aisle and stumbled upon nirvana. Its 305mm x 305mm sticky backed vinyl tile but each tile consists of 4 smaller black and white checks. I immediately grabbed one to take home to show Mrs Flash. This morning we laid the sample tile loose in the back of the Thames, just to get the feel. Much excite! So, it's off to Bunnings to grab two dozen more.
4 points
-
Yeah might be a harsh dyno - or car might still need a bit more development. 2zz echos in puerto rico run 10 second quarter miles on a stock bottom end. Power levels of that car are similarish to my 1nz. But my motor was tapped out, that will have lots left in it! If it was staying at that power level though, id take the 1nz instead. Less weight, easier maintenance, much easier to replace a motor if needed. But if they commit to developing that car a bit more. It will be wild.4 points
-
3 points
-
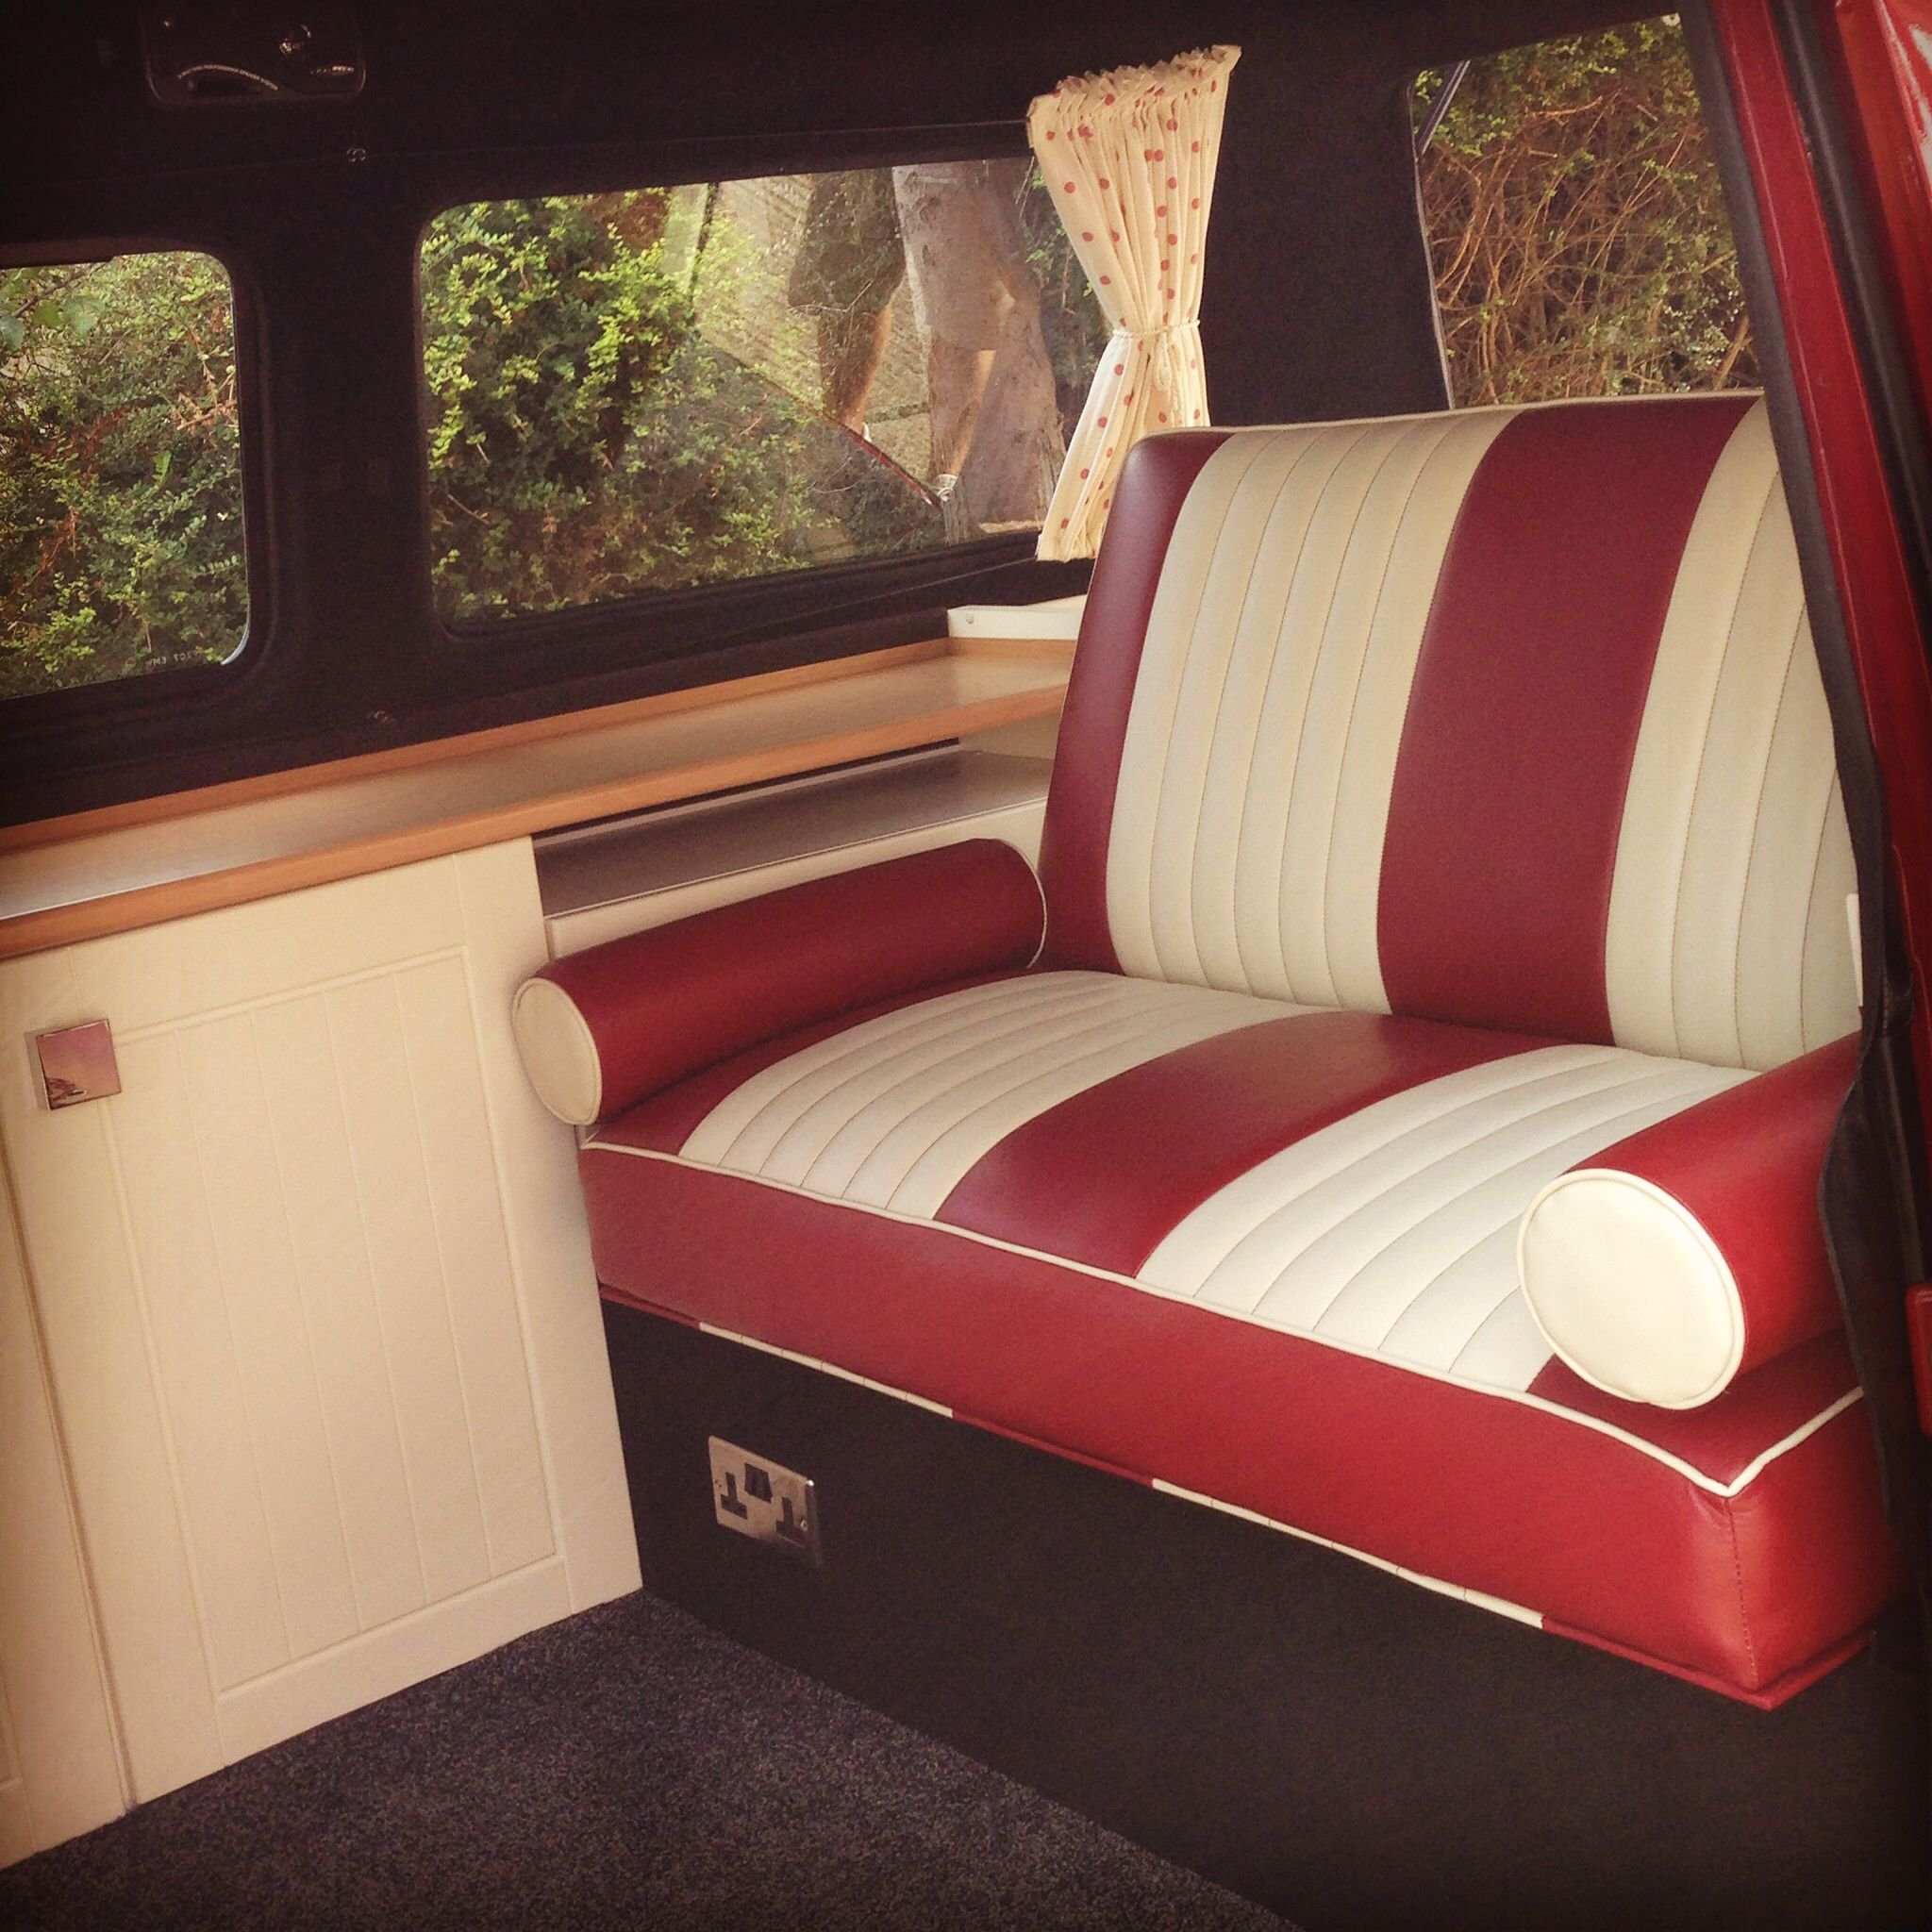
Interior - Chapter 3 So now that we have outlined the general plan layout wise, our focus has turned to aeshetics and the overall theme of the interior. The previous owners chose an internal colour scheme to go with the British heritage of the Thames, hence the red, white and blue. As I've mentioned before I wasn't a fan of the colour scheme, but over time its grown on me and the plan is to continue with this theme. Here is a little sample picture that I stole off the net showing the colour and style of the vinyl coverings for the squabs.
3 points
-
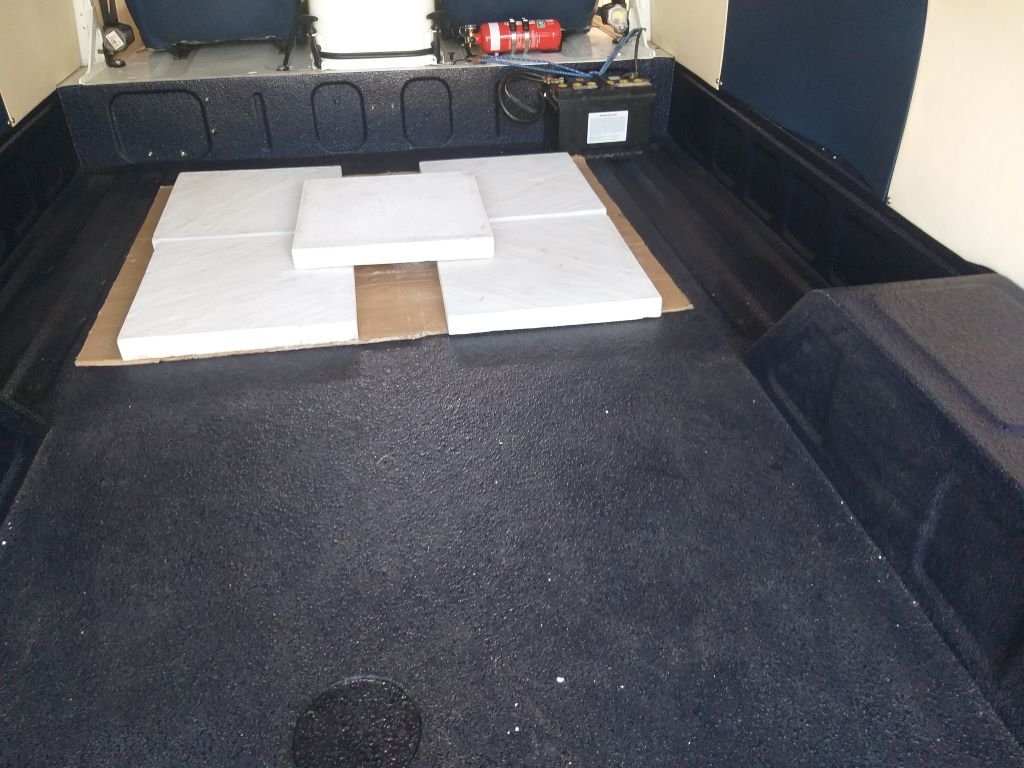
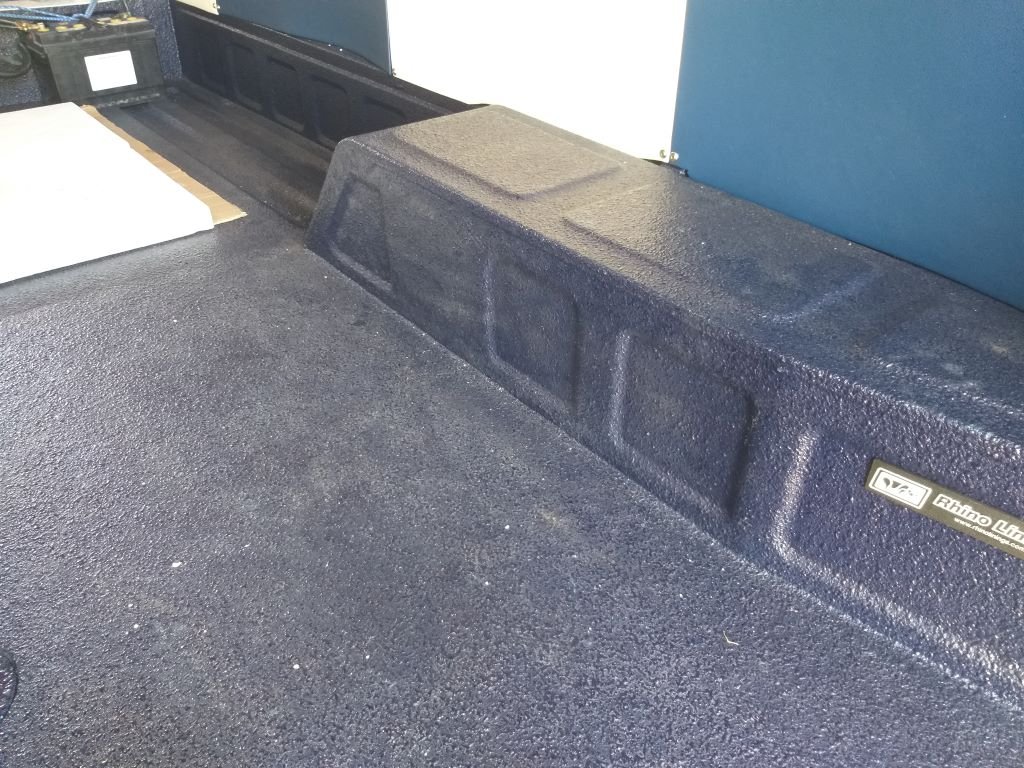
Interior - Chapter 2 As part of the interior fit out, I'm hoping to add some weight so I can get rid of the concrete pavers that I am currently carting around in the back and at the same time give the van a feeling of substance as it currently feels a bit like driving around in a coke can. I'm not sure if I've mentioned this before, but the previous owners restored the van to use as a promotional / delivery vehicle for their florist shop. As they were planning to transport flowers in buckets of water, they wisely had the factory original wooden floor in the rear cargo area professionally waterproofed. It was a good idea, but unfortunately, they gave no thought to any form of insulation or sound deadener. Much as it breaks my heart to cover up the rhino line, our plan is to start off by laying down a second plywood floor with some acoustic material sandwiched between the two floors. I'll stick the sound deadener to the underside of the new ply so that we leave the rhino liner unmolested. I can then fix the timber structure for the couch bases to the new floor thus leaving the original floor untouched.
3 points
-
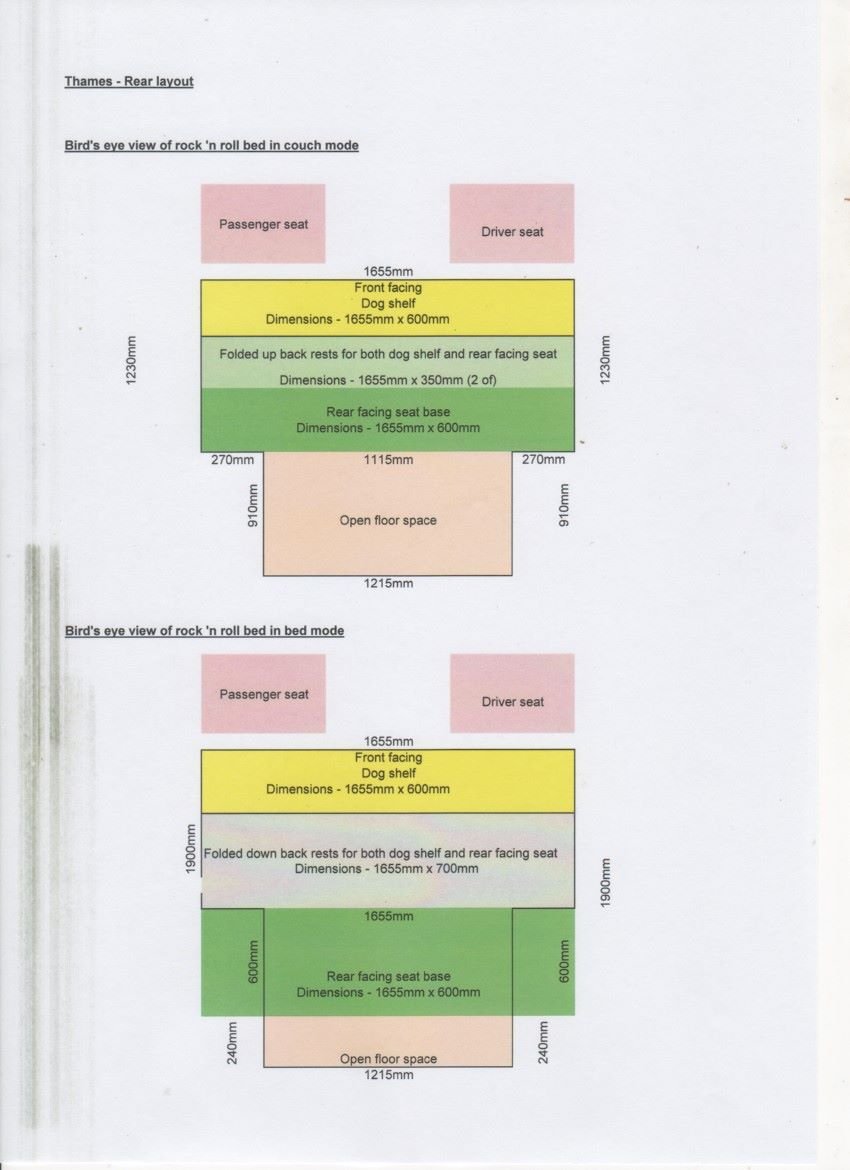
Interior - Chapter 1 I'm still plugging away at my fibreglass carby hat. It's slow going with just a little bit of glass work each morning followed by long periods whilst I wait for things to cure. In between that Mrs Flash and I have commenced the planning of the interior. I've probably mentioned this already, but the plan is to build a double sided couch that will fold down into a queen size bed for overnighting. Something along the lines of the rock 'n roll beds that were popular in the splitty window Kombis back in the day. The forward facing couch will be located directly behind the front seats and will provide a convenient place for our dog to relax during road trips. The storage compartment under the front couch will contain the engine battery, a second house battery, a voltage sensitive relay and a fuse box with associated wiring for all of the ancillaries that will run off the house battery. With a bit of luck I can squeeze in the jack, wheel brace, jumper leads and an emergency tool roll as well. The rearward facing couch will provide a convenient seating place when we pull over for a morning cuppa or a lunch break as well as a chilled-out spot to enjoy sundowners at the end of each day's travel. The storage compartment under this couch will contain folding chairs, our little gas cooker, a jerry can of water and place for towels and togs and a few changes of clothes. As a starting point I've taken some measurements and put together a rough schematic showing a bird's eye view of the layout. Hope the drawing makes sense.
3 points
-
3 points
-
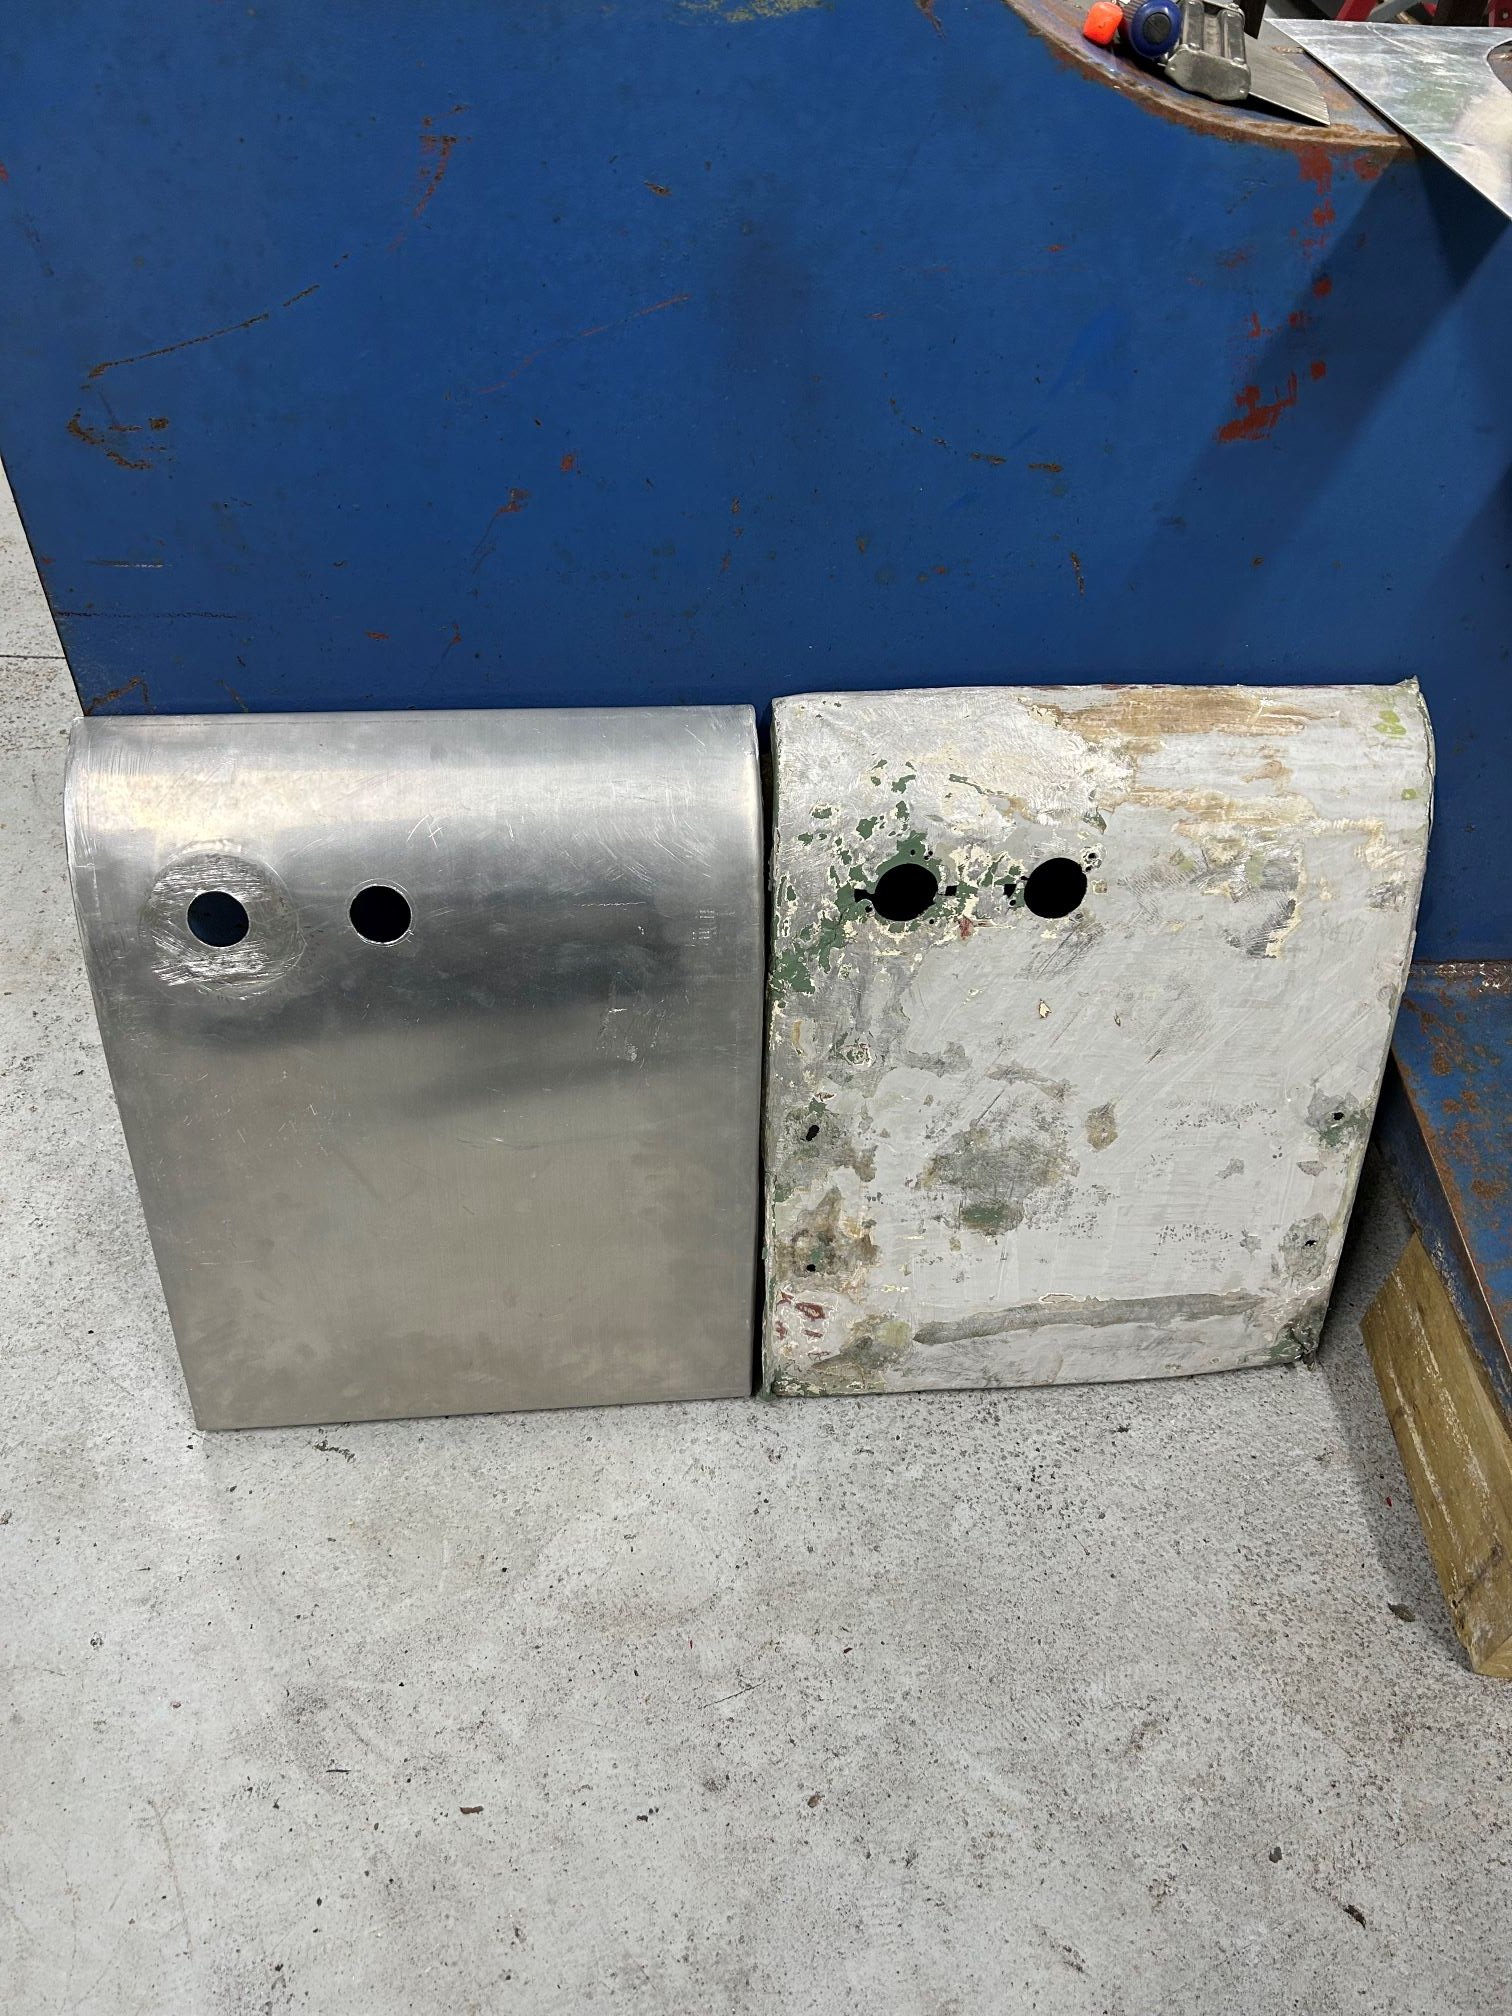
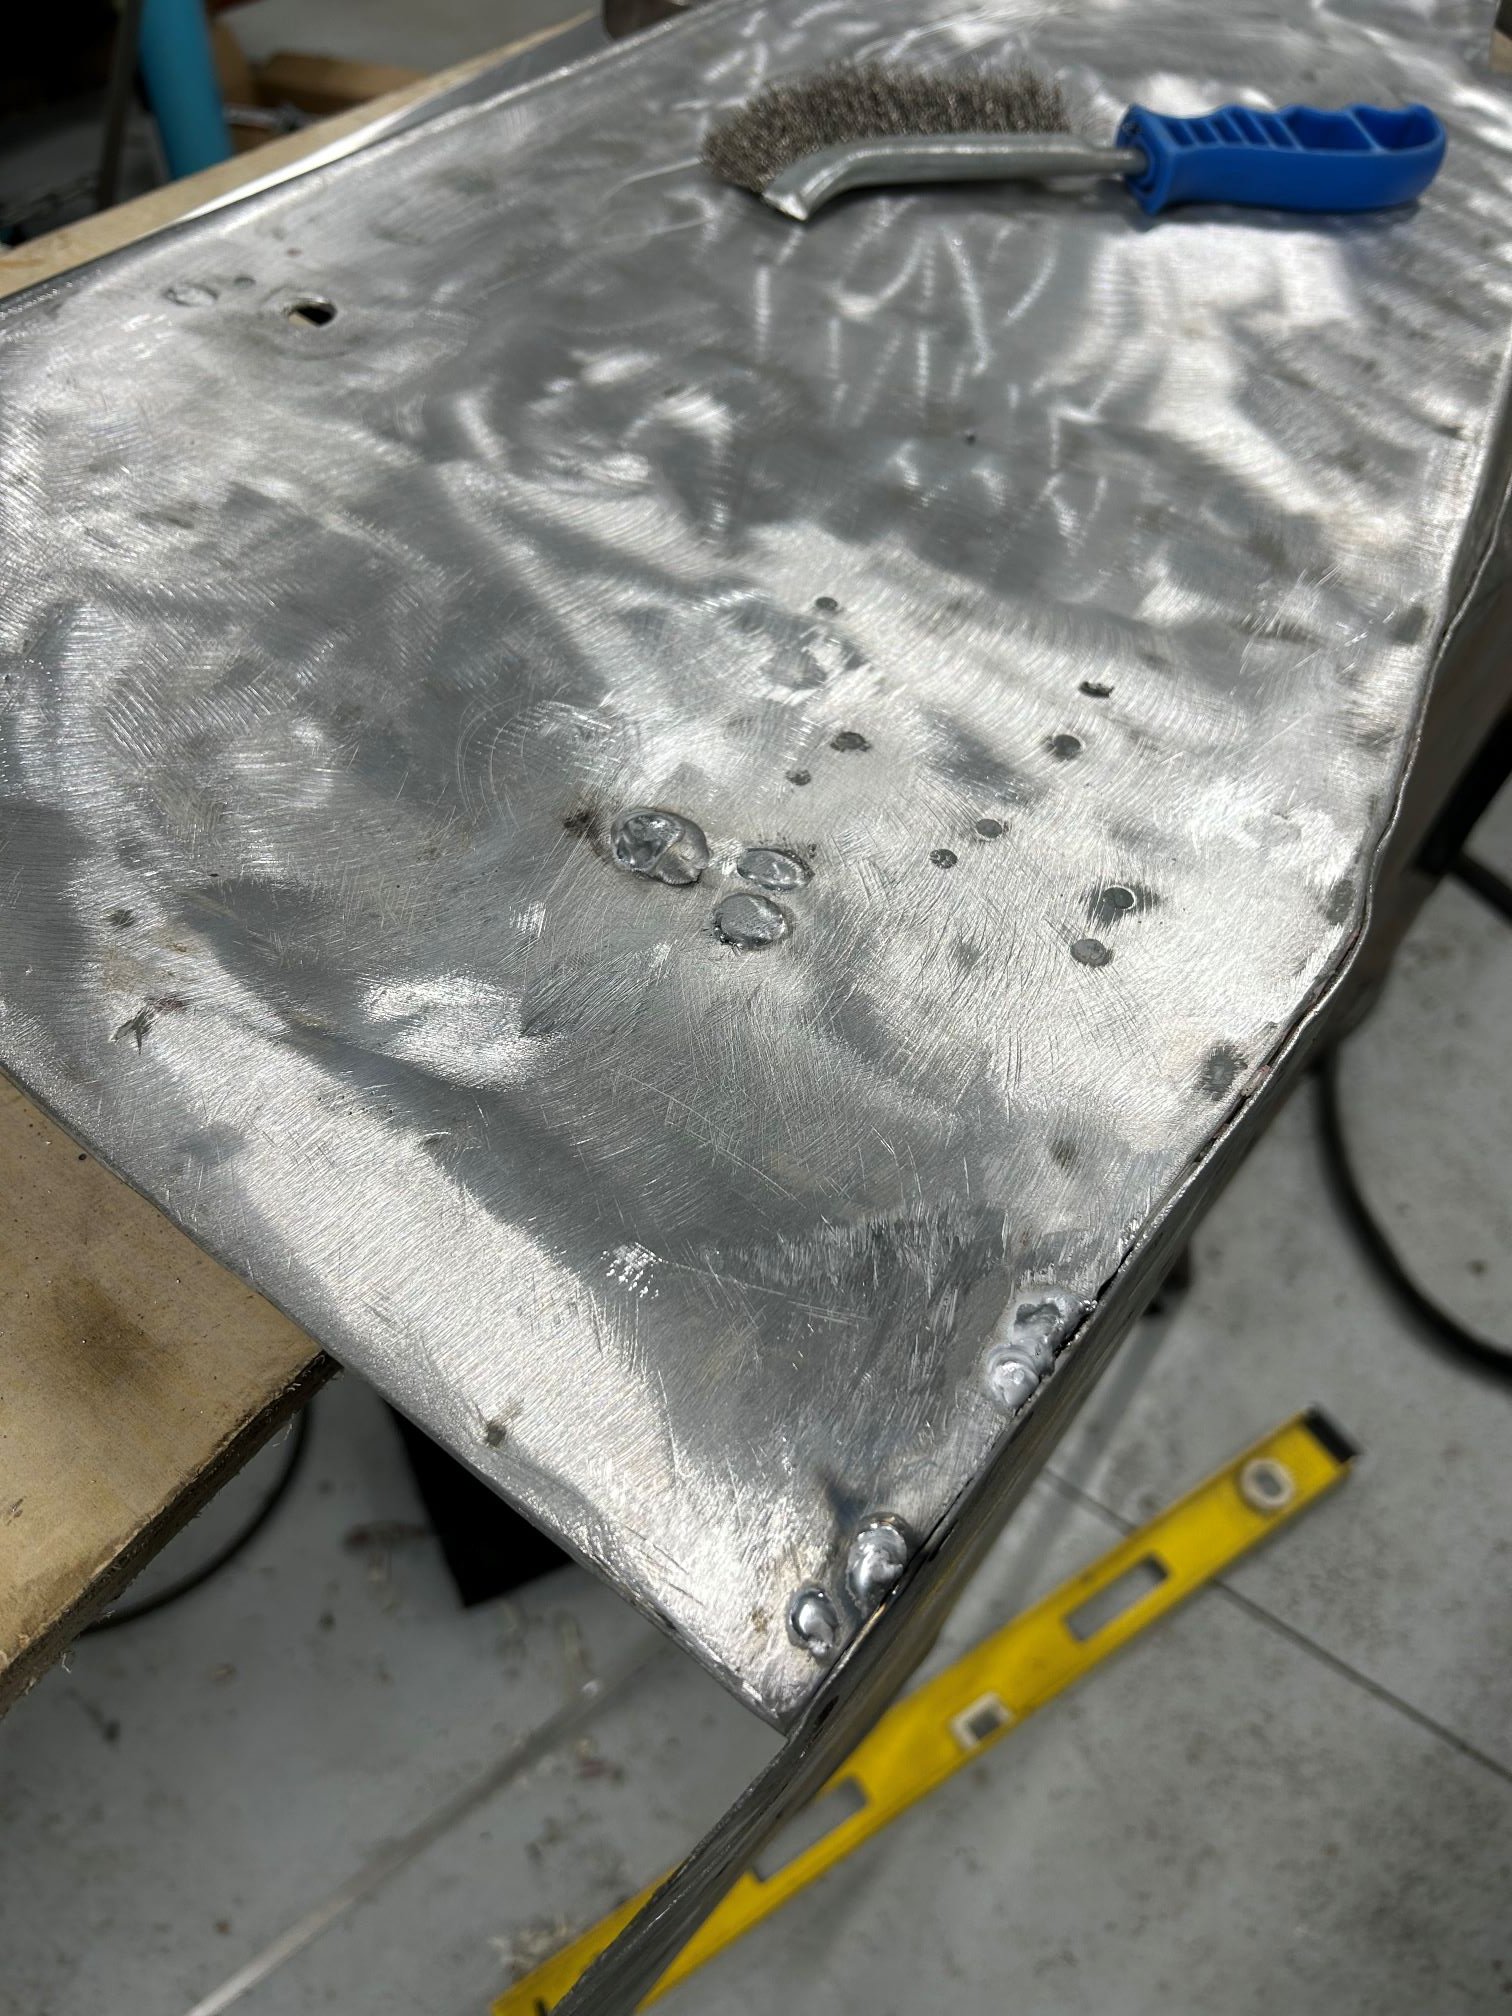
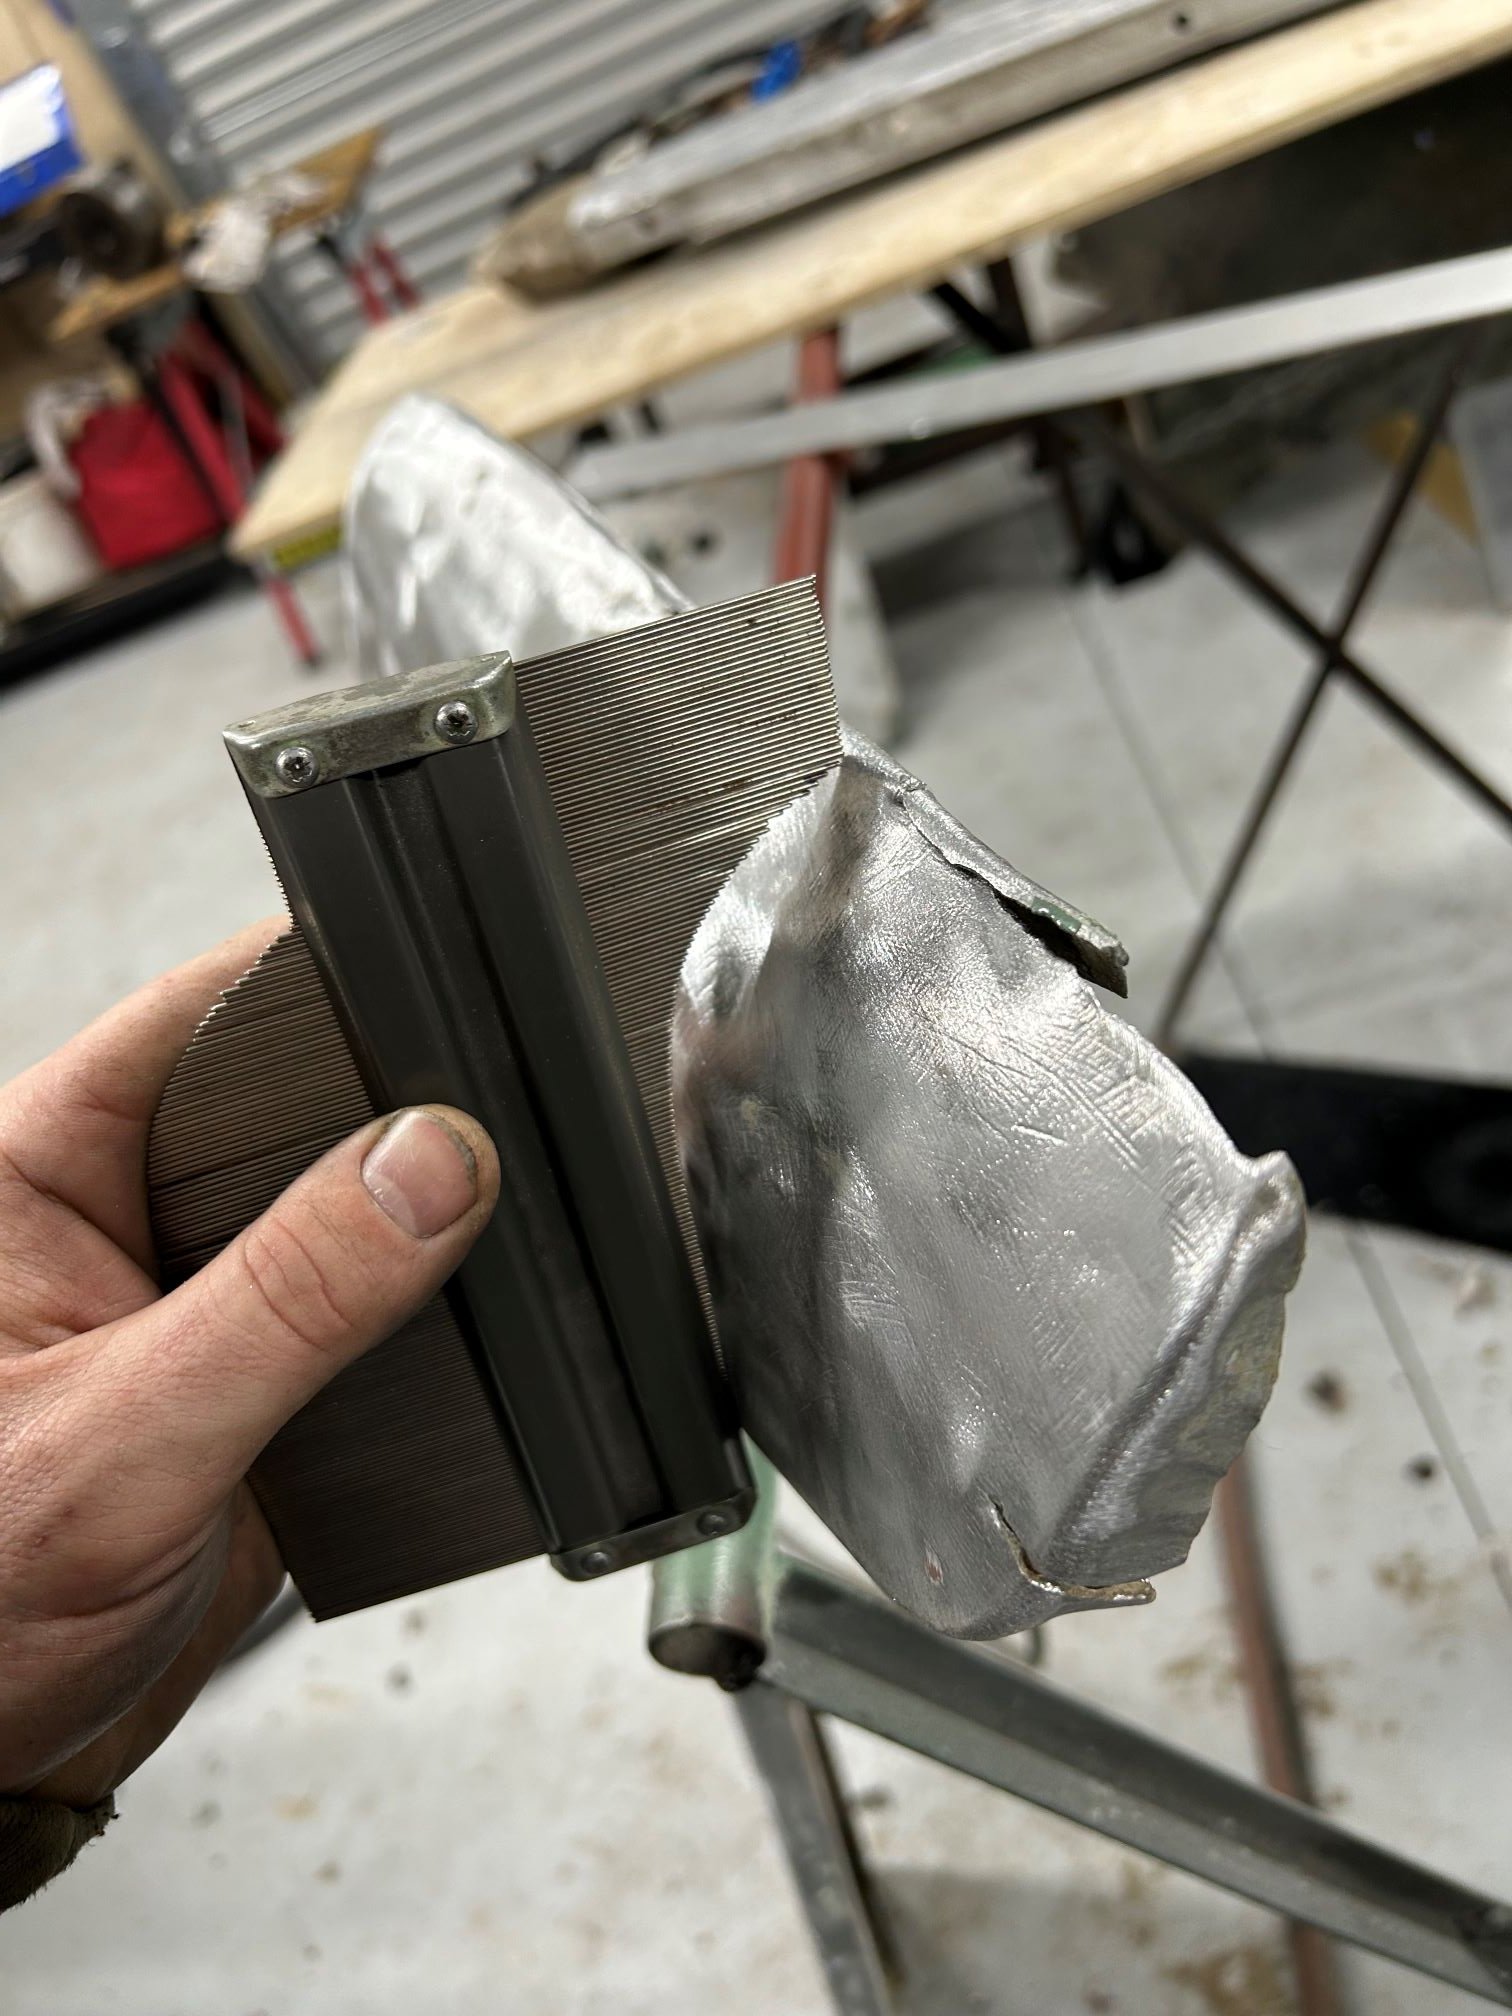
At least I get to go back to the parts I really like - panel work. These front guards are pretty bad but typical for age - fill of dents, bog, cracks, holes etc... There is no point to try and fix what is there, its a pretty simple panel to make from new. Note that there is only a factory pressing for the park like and not the indicator (these were added by local dealers depending on the requirements of the export country. Getting more of the hang of welding alloy, its not easy and filling in holes is a prick. The lower section of this side guard is pretty crumpled, it got most of it out, and about half way through filing it clean. I cut the flange section off as it was pretty thin/bent and in the way, I'll fold up a clean section and weld it in.
3 points
-
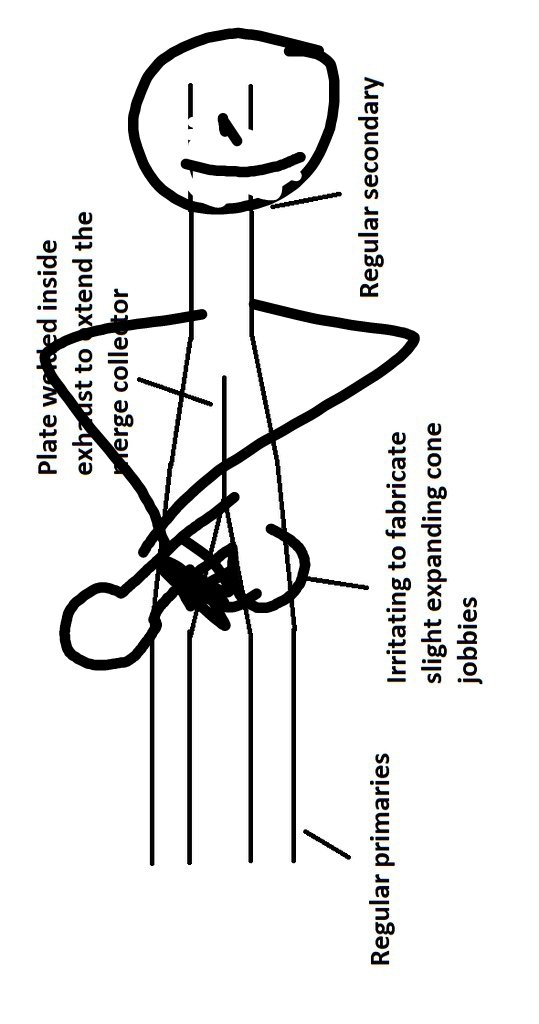
Wow you guys are all really smart. My contribution:
3 points
-
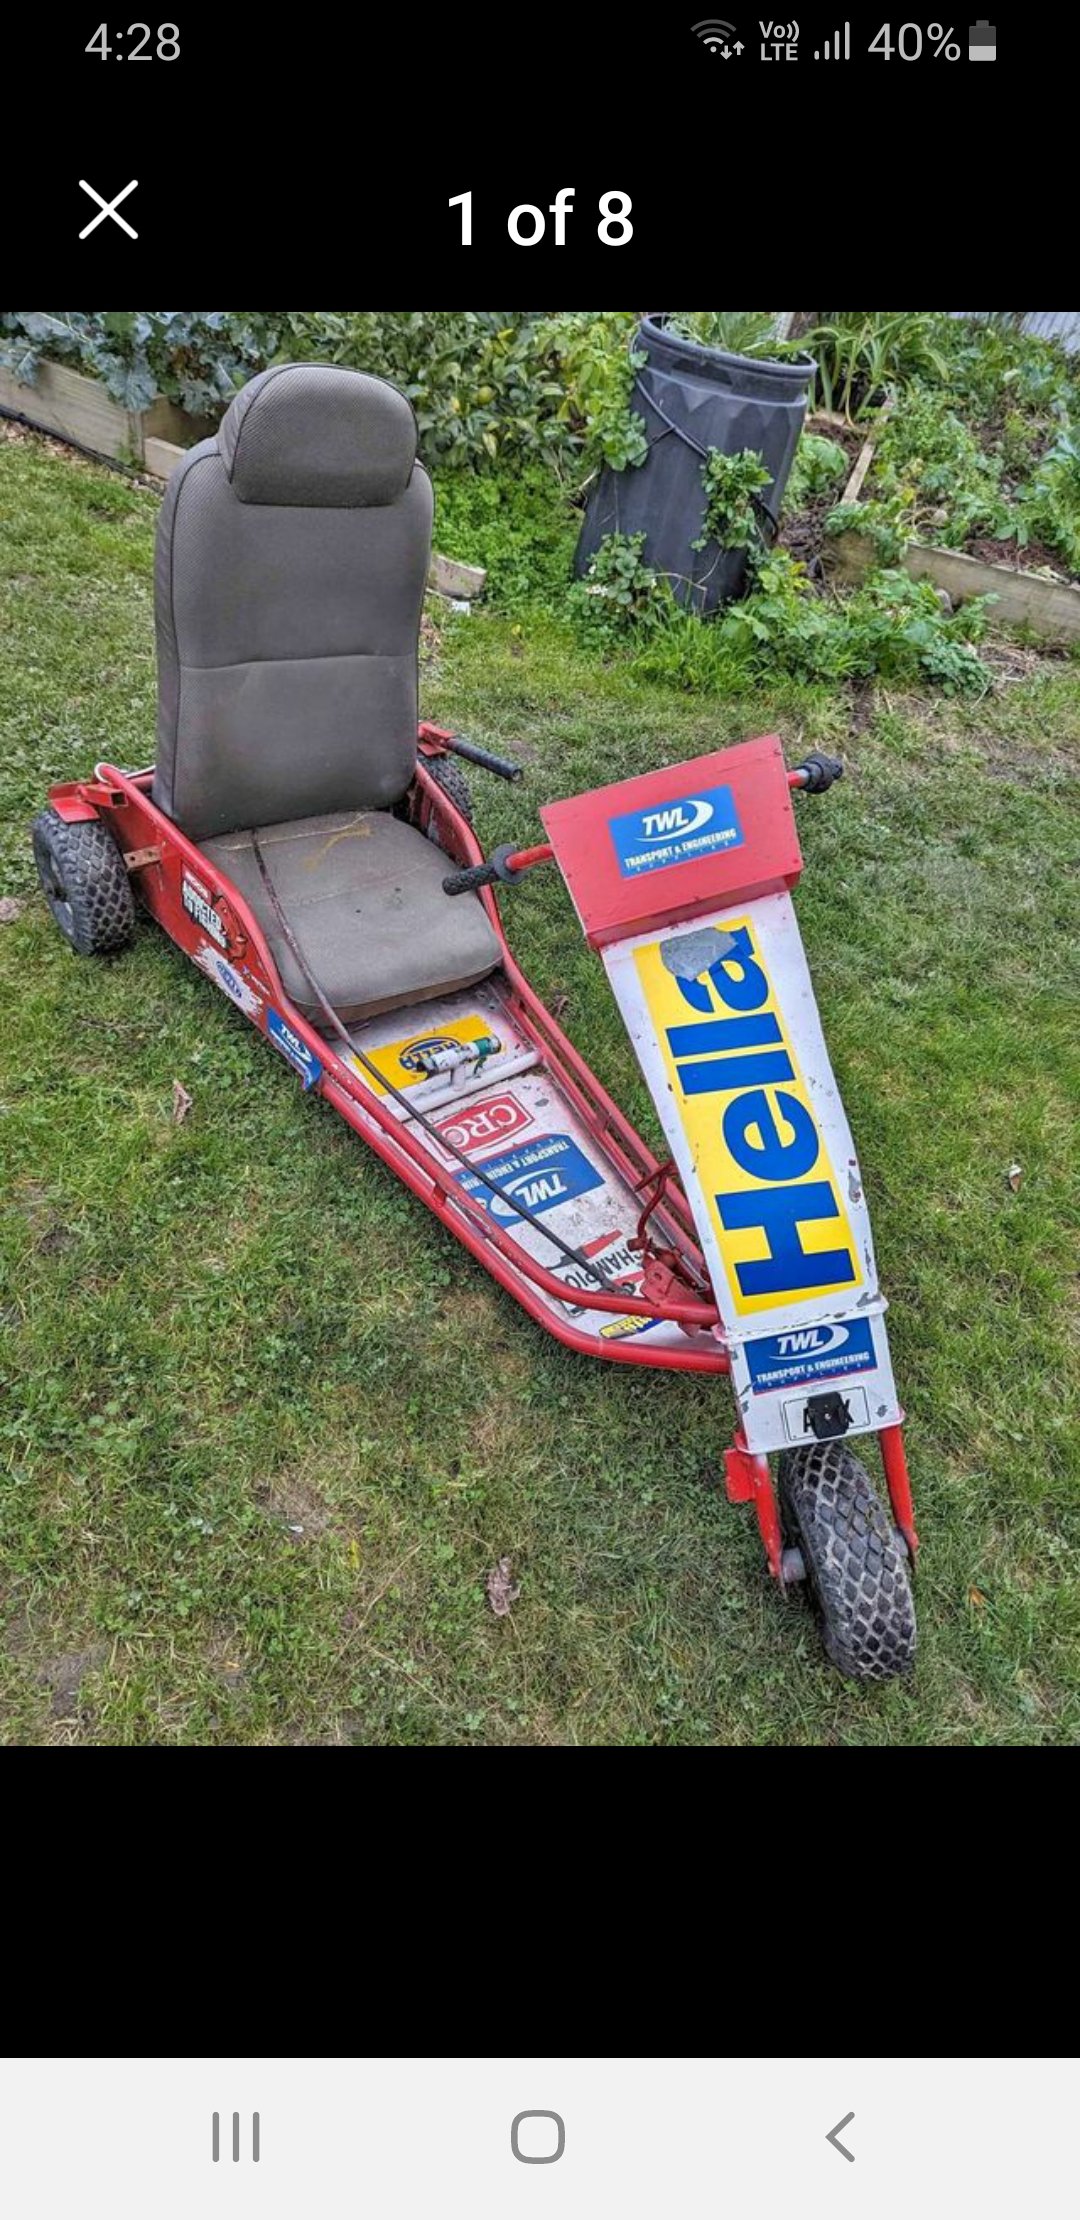
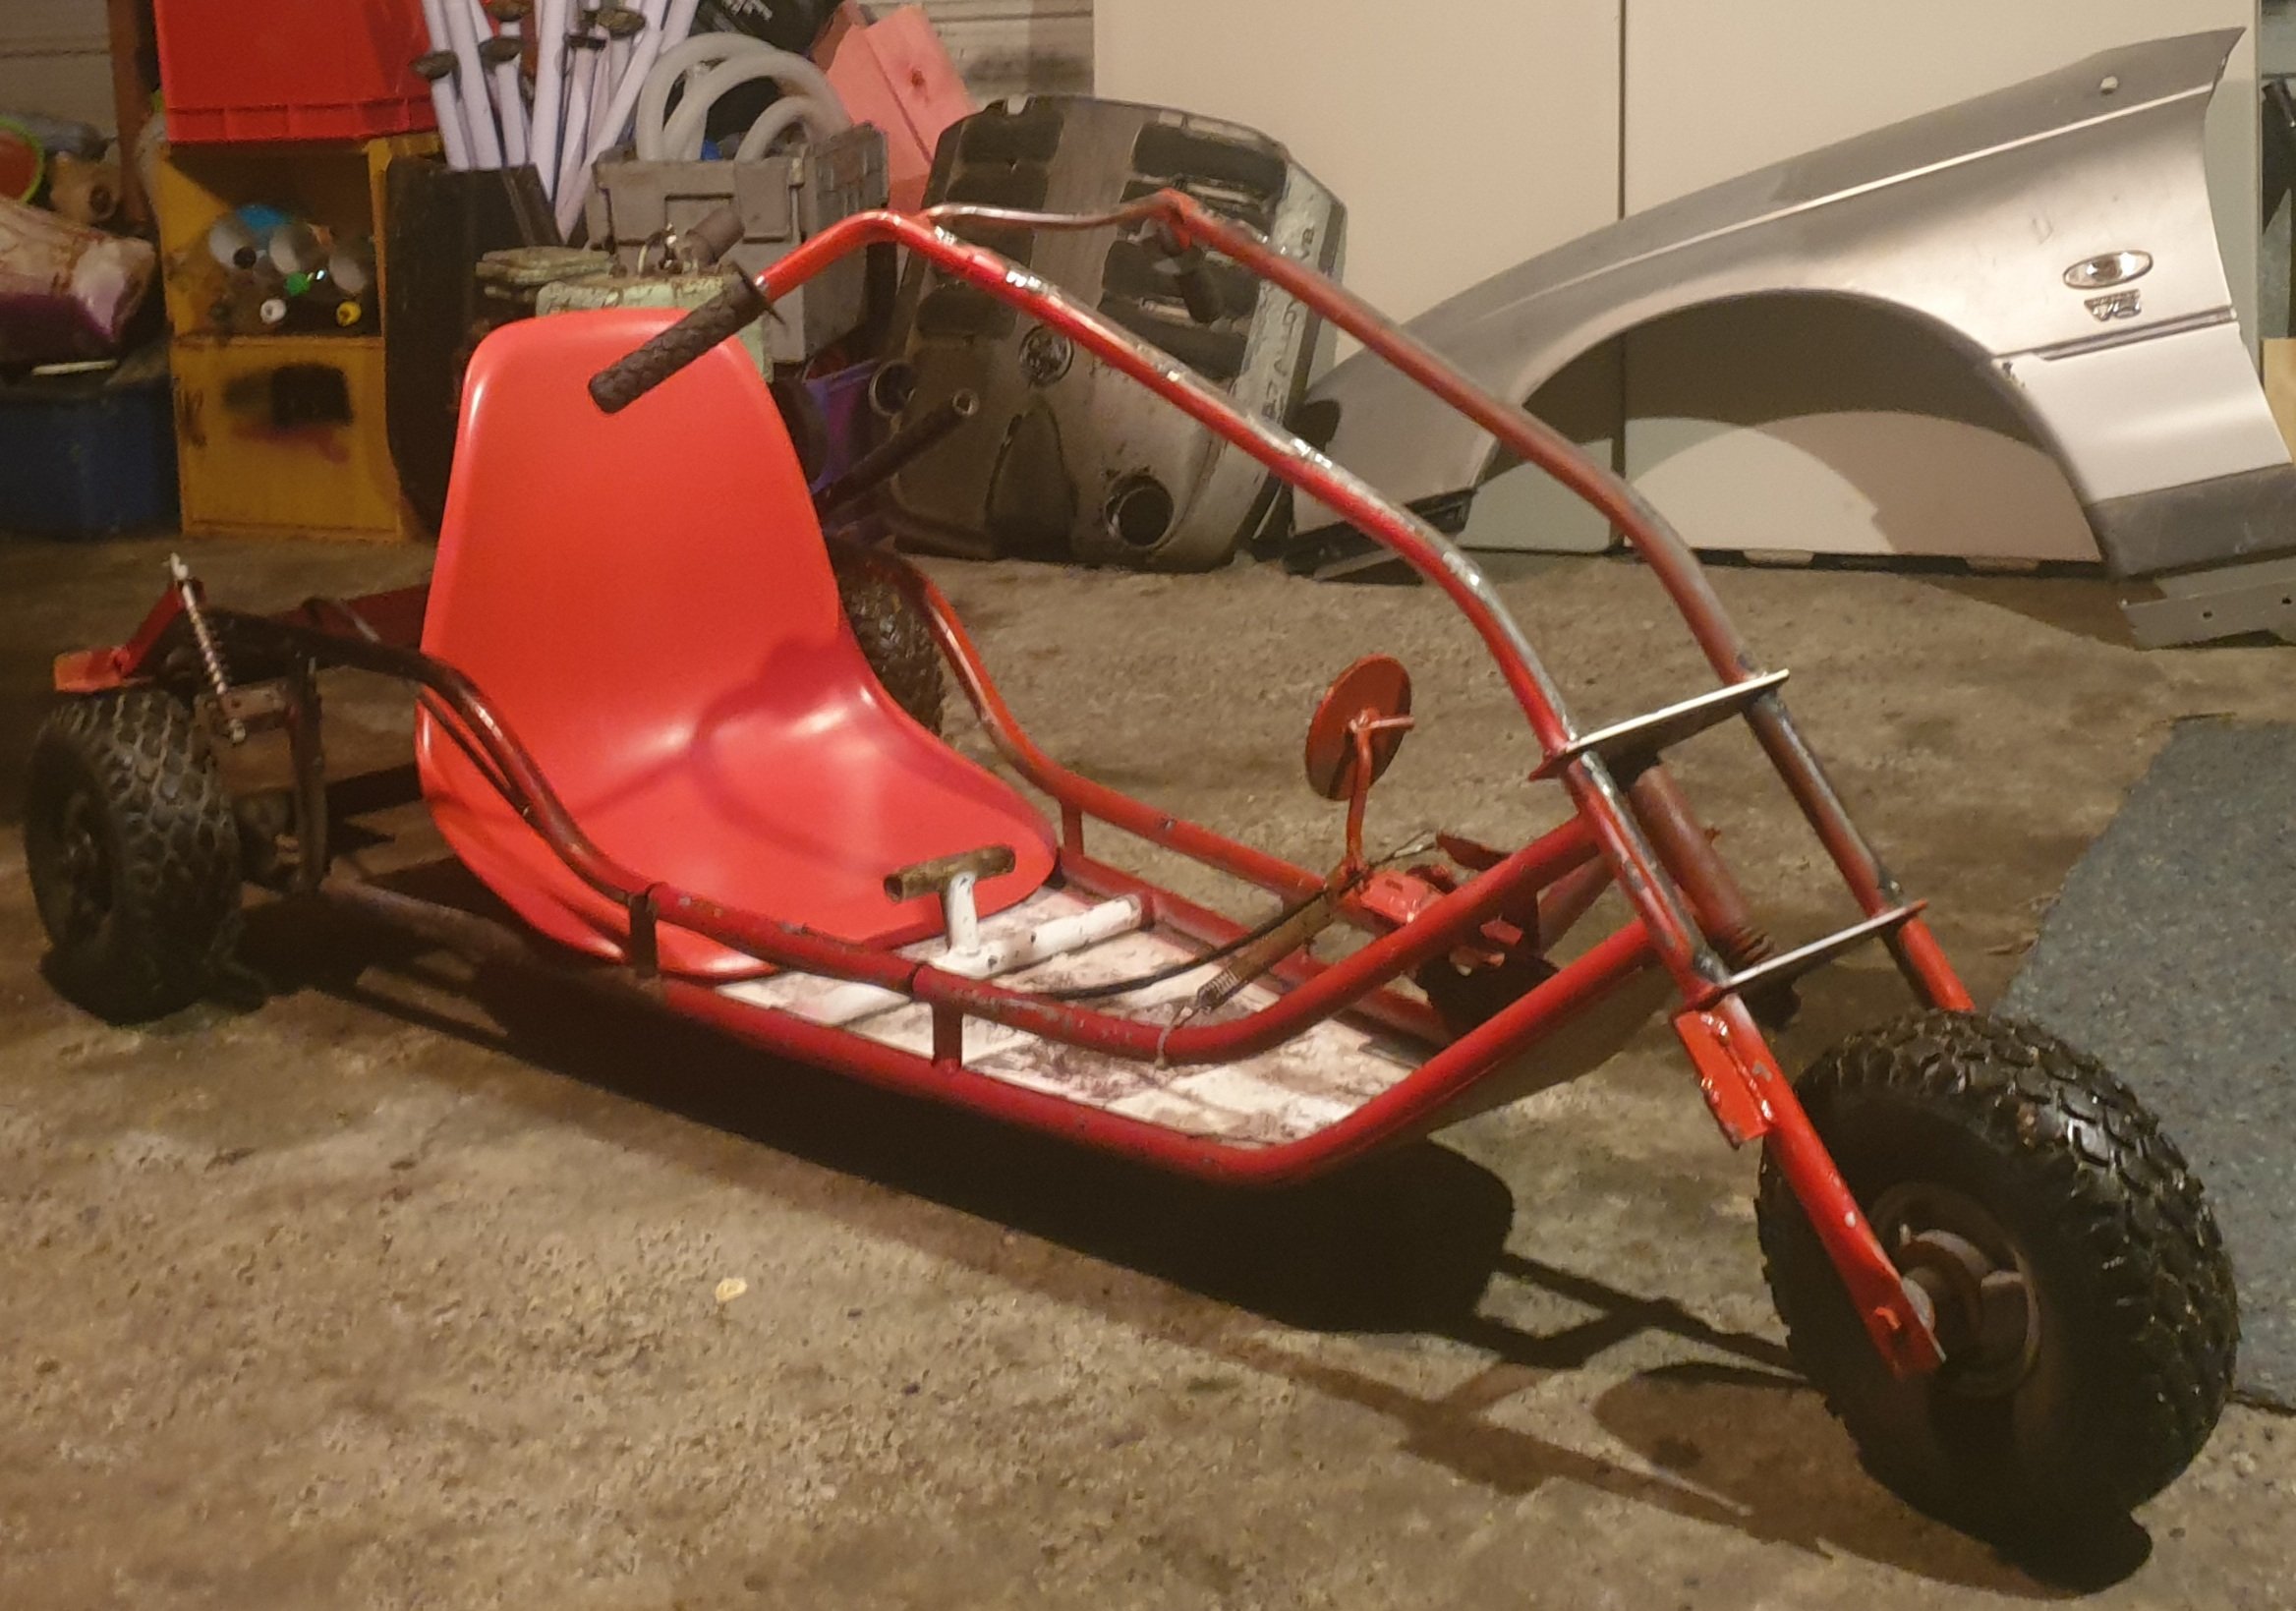
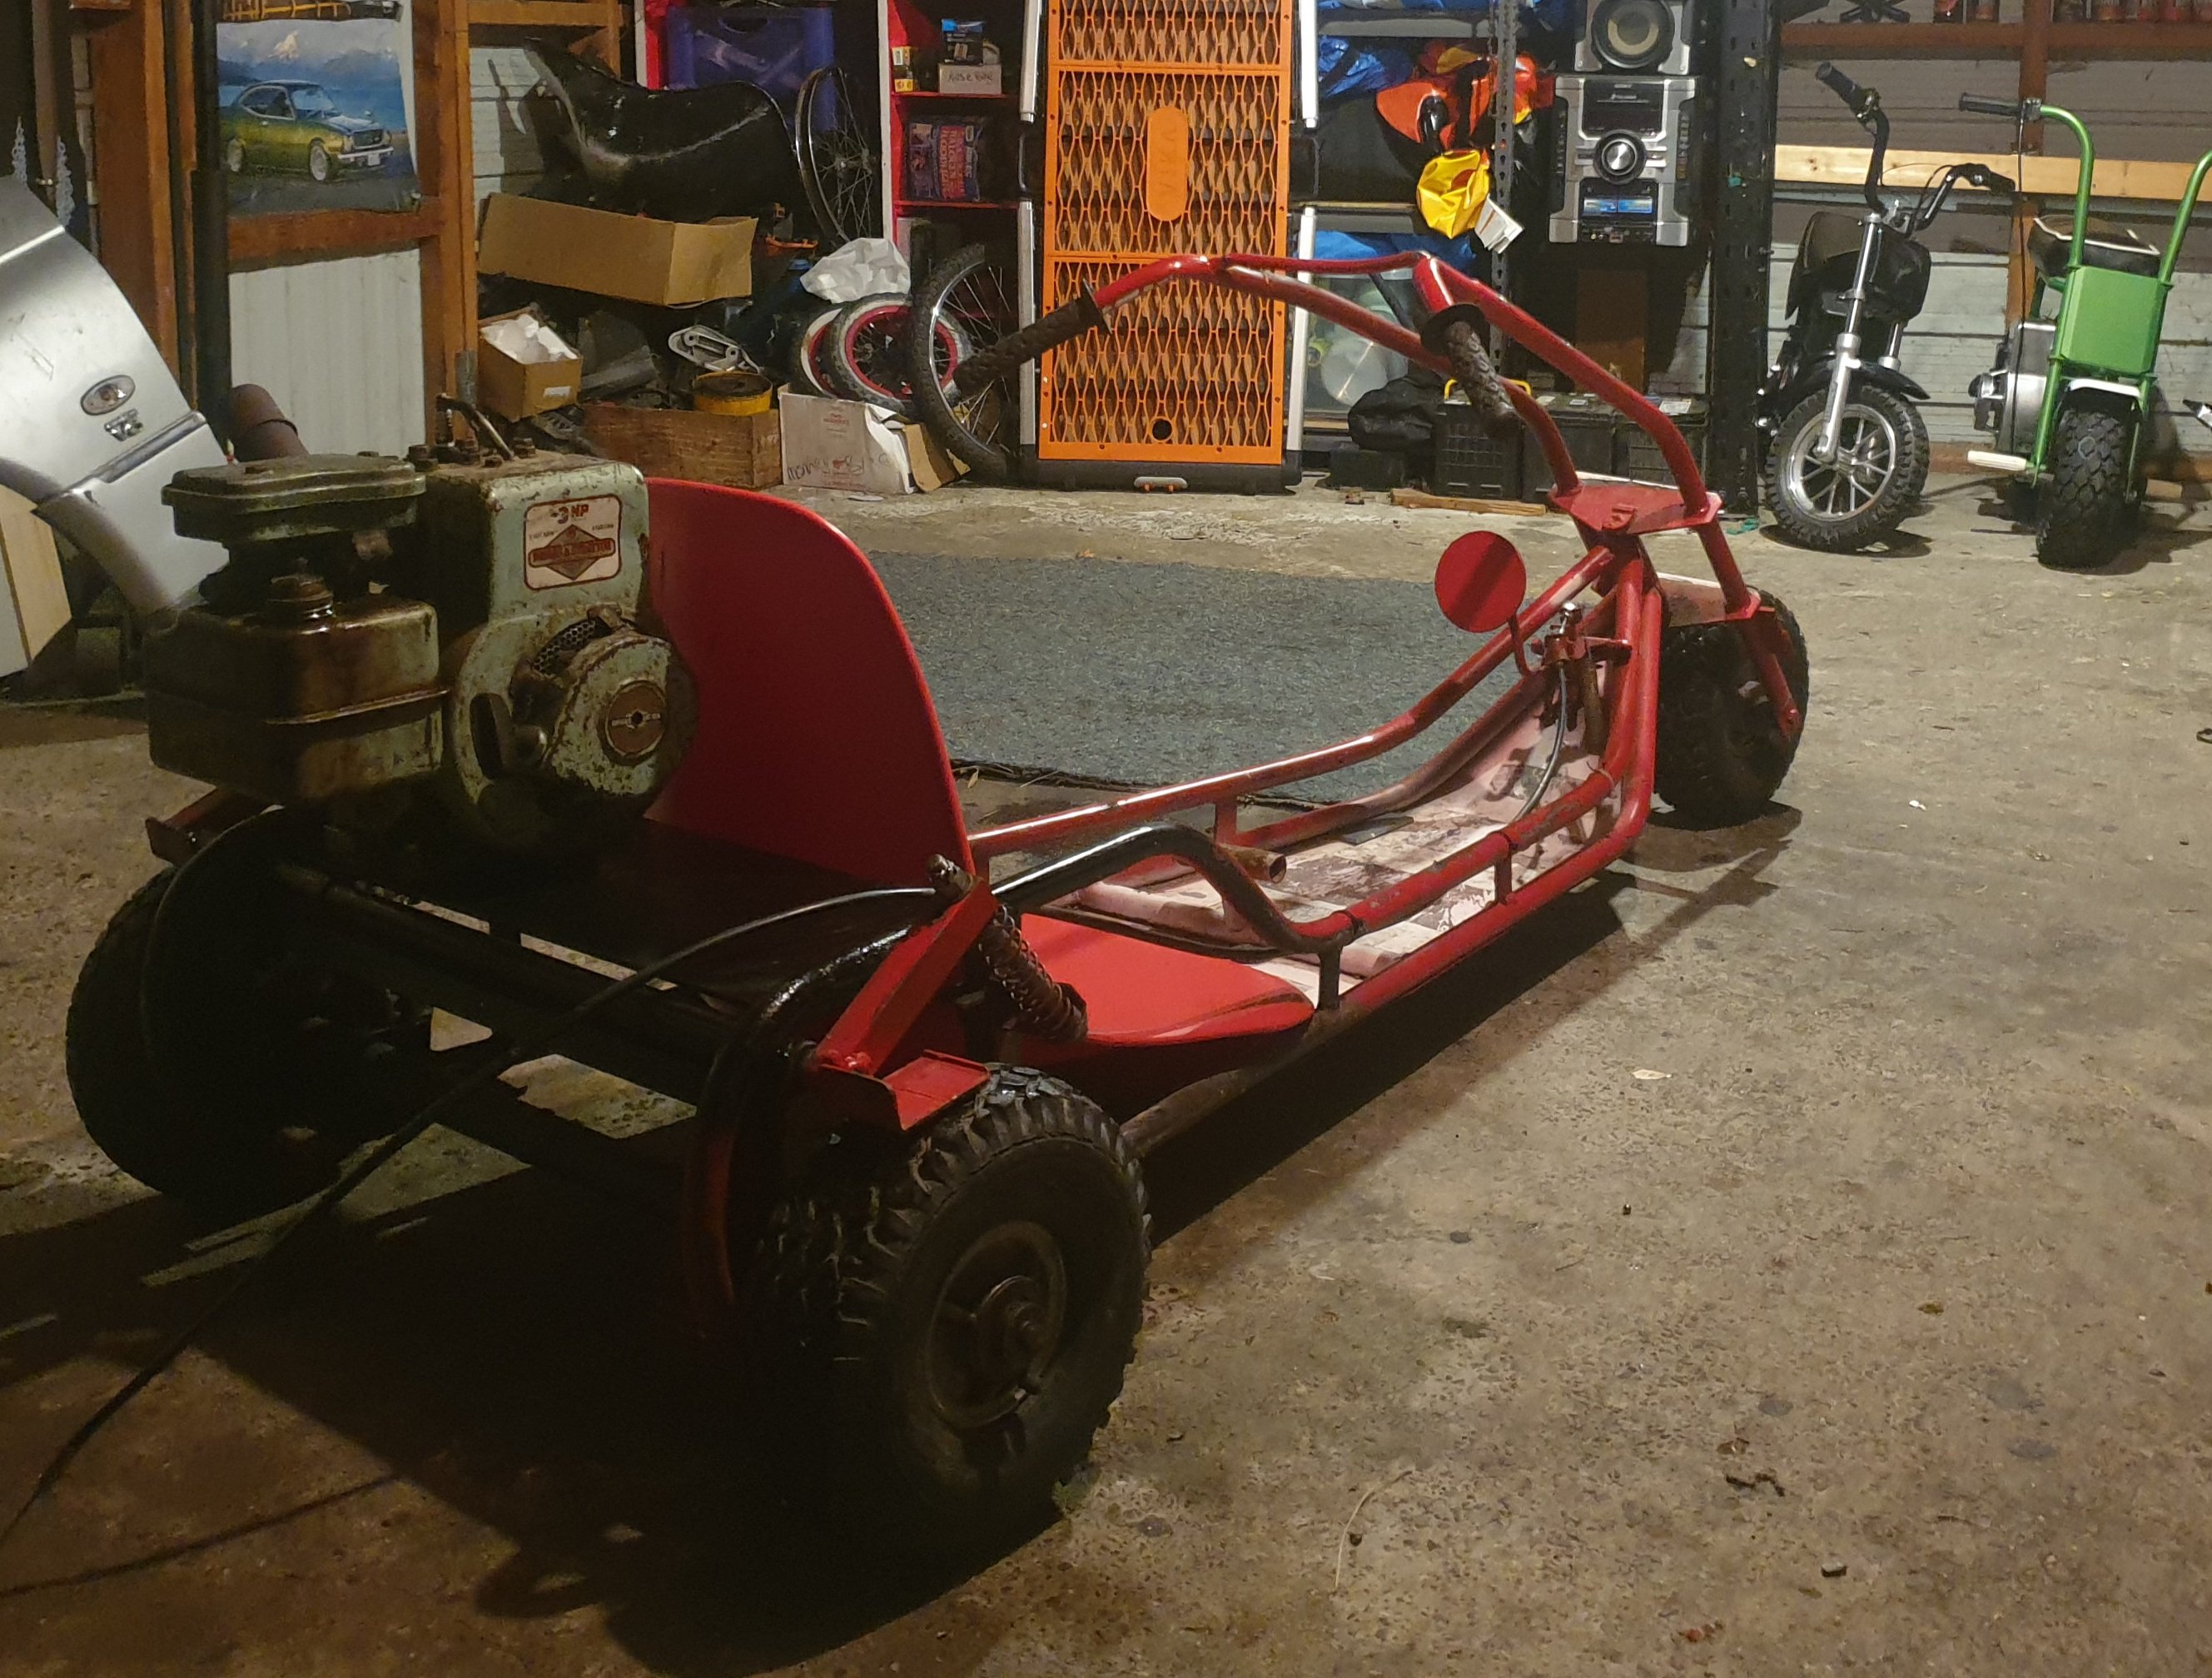
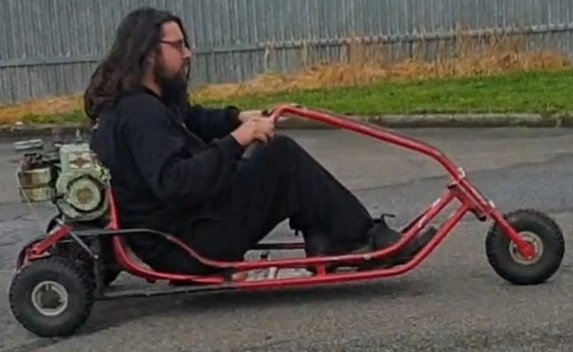
I dont have a problem i dont have a problem. Ohhhh yea now heres one ive had alil while ago. A trutest fun kart got as a frame no motor mounts nothing was in prety sad state. Now has a briggs 3hp with a generic gokart clutch n chain Shes now a rider did her 1st ride today goes ok dose 50kph but all over the place 40 45k not too bad cool trike Not really sure where this builds gona go. Gona finish tidying up and paint. Get rid of some random add ons shes got. 1st pick was how i got it 2nd 3rd last week Last pic me riding down the street
2 points
-
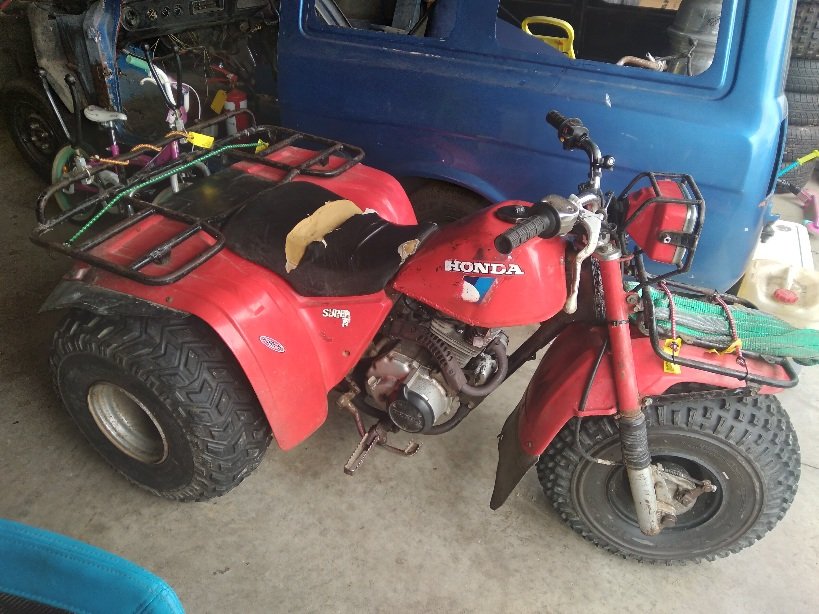
Hey guys and girls. I have two honda ATC's, ones a 84 200es which is up and running. The other is a 85 250es which I have had to do minor repairs and also repair the frame down by the foot pegs as it is completely rotton I fell in love with the trikes and have become slightly addicted to them. Here is a pic of the 84 200es I want to get the 250 up and running then I can pull the 200 to bits and clean it up .
2 points
-
toyota hemi, basically ultimate turd polishing. along with low weight, close ratio box and well setup cars. probably some exotic fuel. Even though only 2 valve, the bigger bore than stroke allows bigger valves to fit in same capacity. one of those engines that have plenty of scope to modify but nothing special in factory config.2 points
-
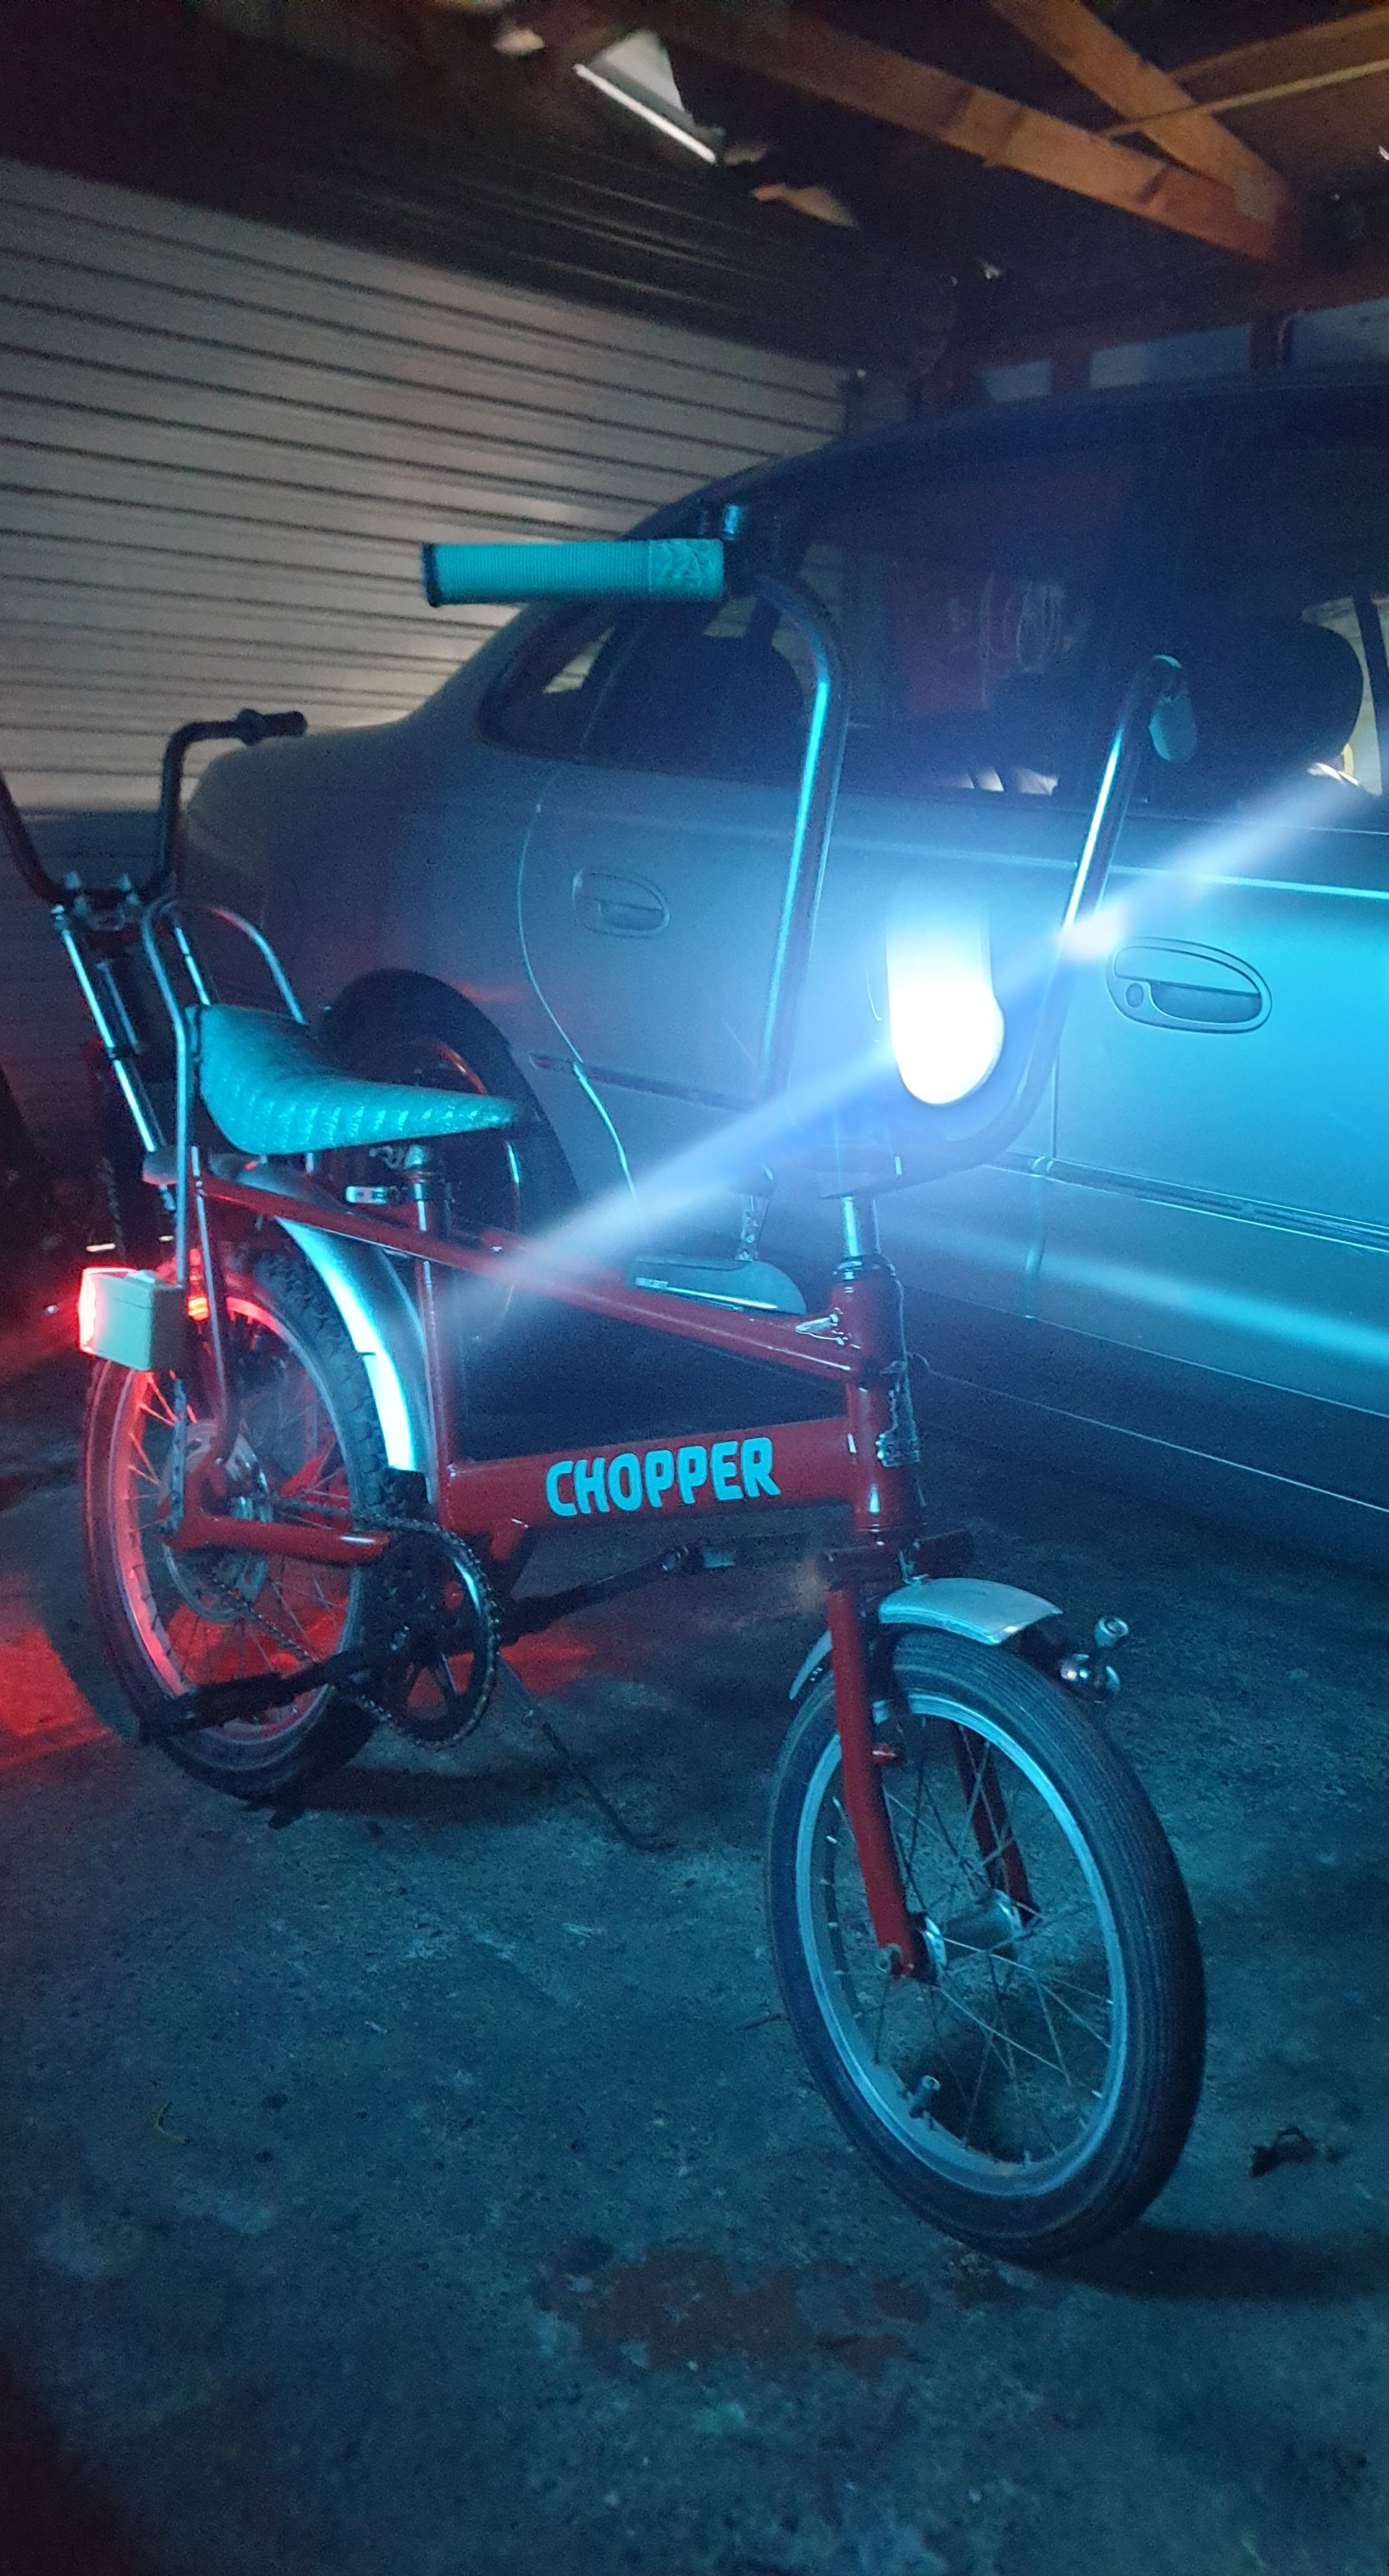
These lights r actually prety bright
2 points
-
I feel like drag racing is the wrong motorsport type for a 1NZ...2 points
-
I'm just super stoked to see that your back on here posting updates. Glad to see this project still moving2 points
-
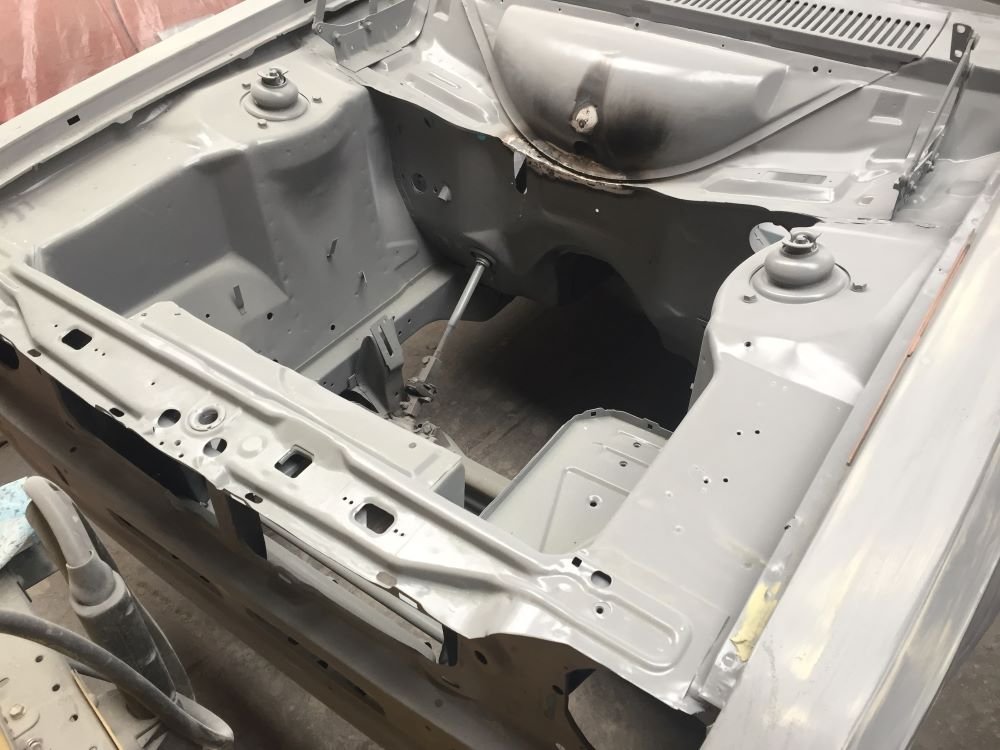
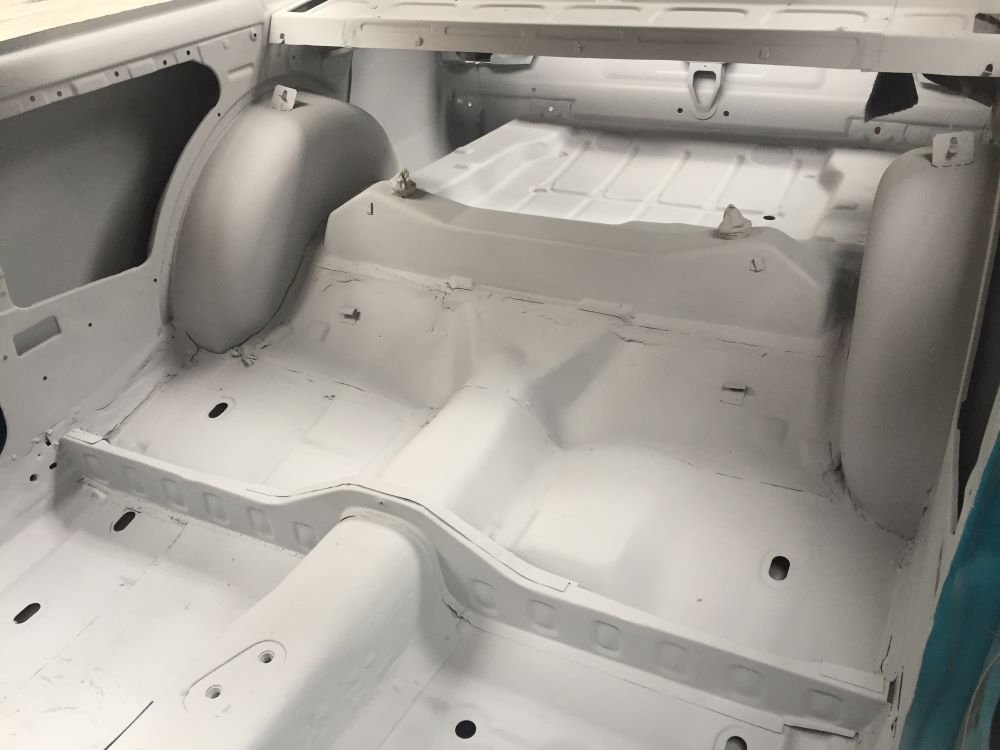
The next detail to think about is the mounting flanges of the quarter. Even though I used an 8mm spot weld drill and was pretty careful about the removal process, it's hard to get away from the fact that an 8mm hole is a pretty big one to fill with a plug weld when it comes to reinstalling it again. To get around that, I've opted to replace any part of the flange that I've had to drill out. I started with the easier shorter sections. Then I went on to tackle the longer section along the back of the door. I made this section by folding one long straight length of steel, then tweaking it and manually stretching and shrinking it in the vice as required to match all the contours of the existing flange. Ended up with a pretty neat fit. But then it was time to go inside to make some tea. And then it started raining Some of my mates from work were posting in our group chat that their streams were rising and they were getting worried. In solidarity of course, I sent them a photo of alarmingly sized puddles on our back pavers at that time. But then it kept raining. And raining. And blow me down it just didn't stop. I jacked the car up as much as I could, lifted everything worth saving onto the work bench, and we retreated back to the house (which is raised ~1m above ground level) to wait out the standoff. We blinked before the water did. Once it got to mid-shin in the kitchen, we decided it might be prudent to find somewhere dryer to sleep for the night. The next morning, we returned to the quote Scene of the Crime unquote. The water got up to the bottom of the bench top. My nice new birthday-present-to-myself welder missed the water by this much. Note the tide line on the tail gate. My daily was totaled, and my partner's Corolla missed out on a similar fate by only a couple of inches and the fortunate placement of Toyota's ECUs on the top of the passenger strut tower. Subaru's incidentally instead put them under the passenger front footwell. So yeah, remember how I mentioned the KBS on all the internal cavities and how two coats was probably overkill for interior panels. Yeah, well, glad I did it now. The immediate triage for the Escort was to pull the seats out and leave them in the sun to dry out as much as possible. I also drilled some drain holes in the lowest points of the floor boards, and mopped up the standing water as much as possible. Everything got doused in CRC 556 (probably not the best idea in hindsight when it comes to painting it, but such is life) and I borrowed some big 5ft floor fans from work to try and get the garage dried out as much as possible. Longer term, we had to move out. The house was toast and almost all our stuff was wrecked. We've managed to find a new place, with a slightly better laid out garage and enough room for our little girl to run around. The car has mostly been on hold since the flood. I've been focusing on all the work around the new house to make it comfortable and setting up the garage to try and make the best of the limited space I have. I think I've got it into a pretty usable state now though. I have the means and motivation so now there's no excuses. We're back to real time now though, so updates will likely return to the more sporadic rate you'll be more accustomed to. Thanks for reading my ramblings to bring it back up to date in the mean time.2 points
-
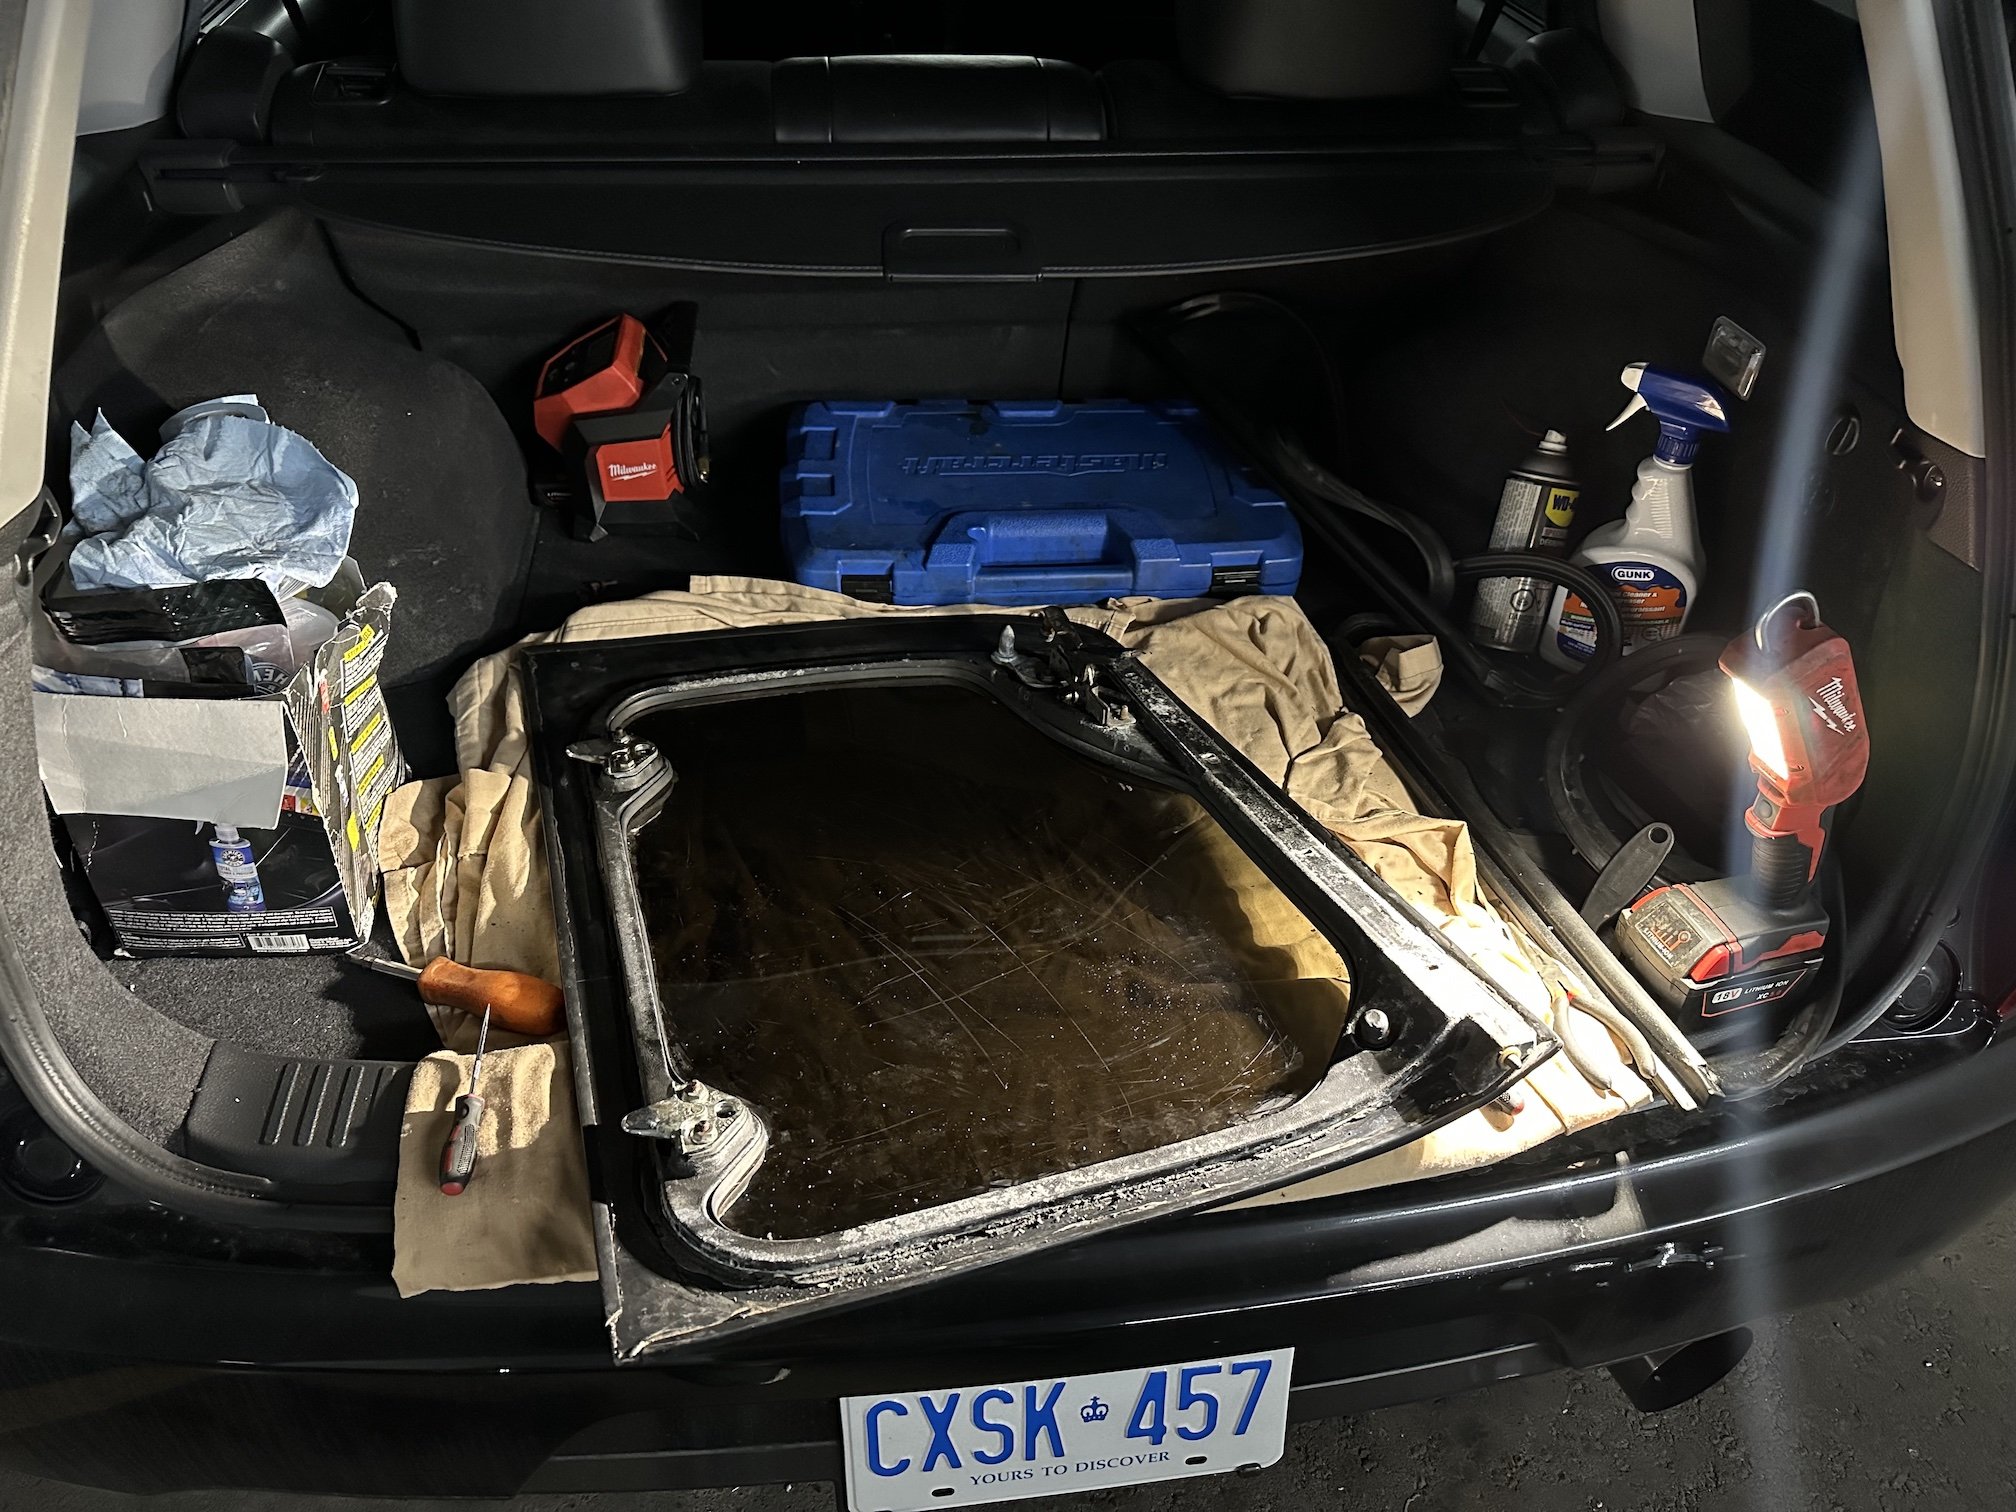
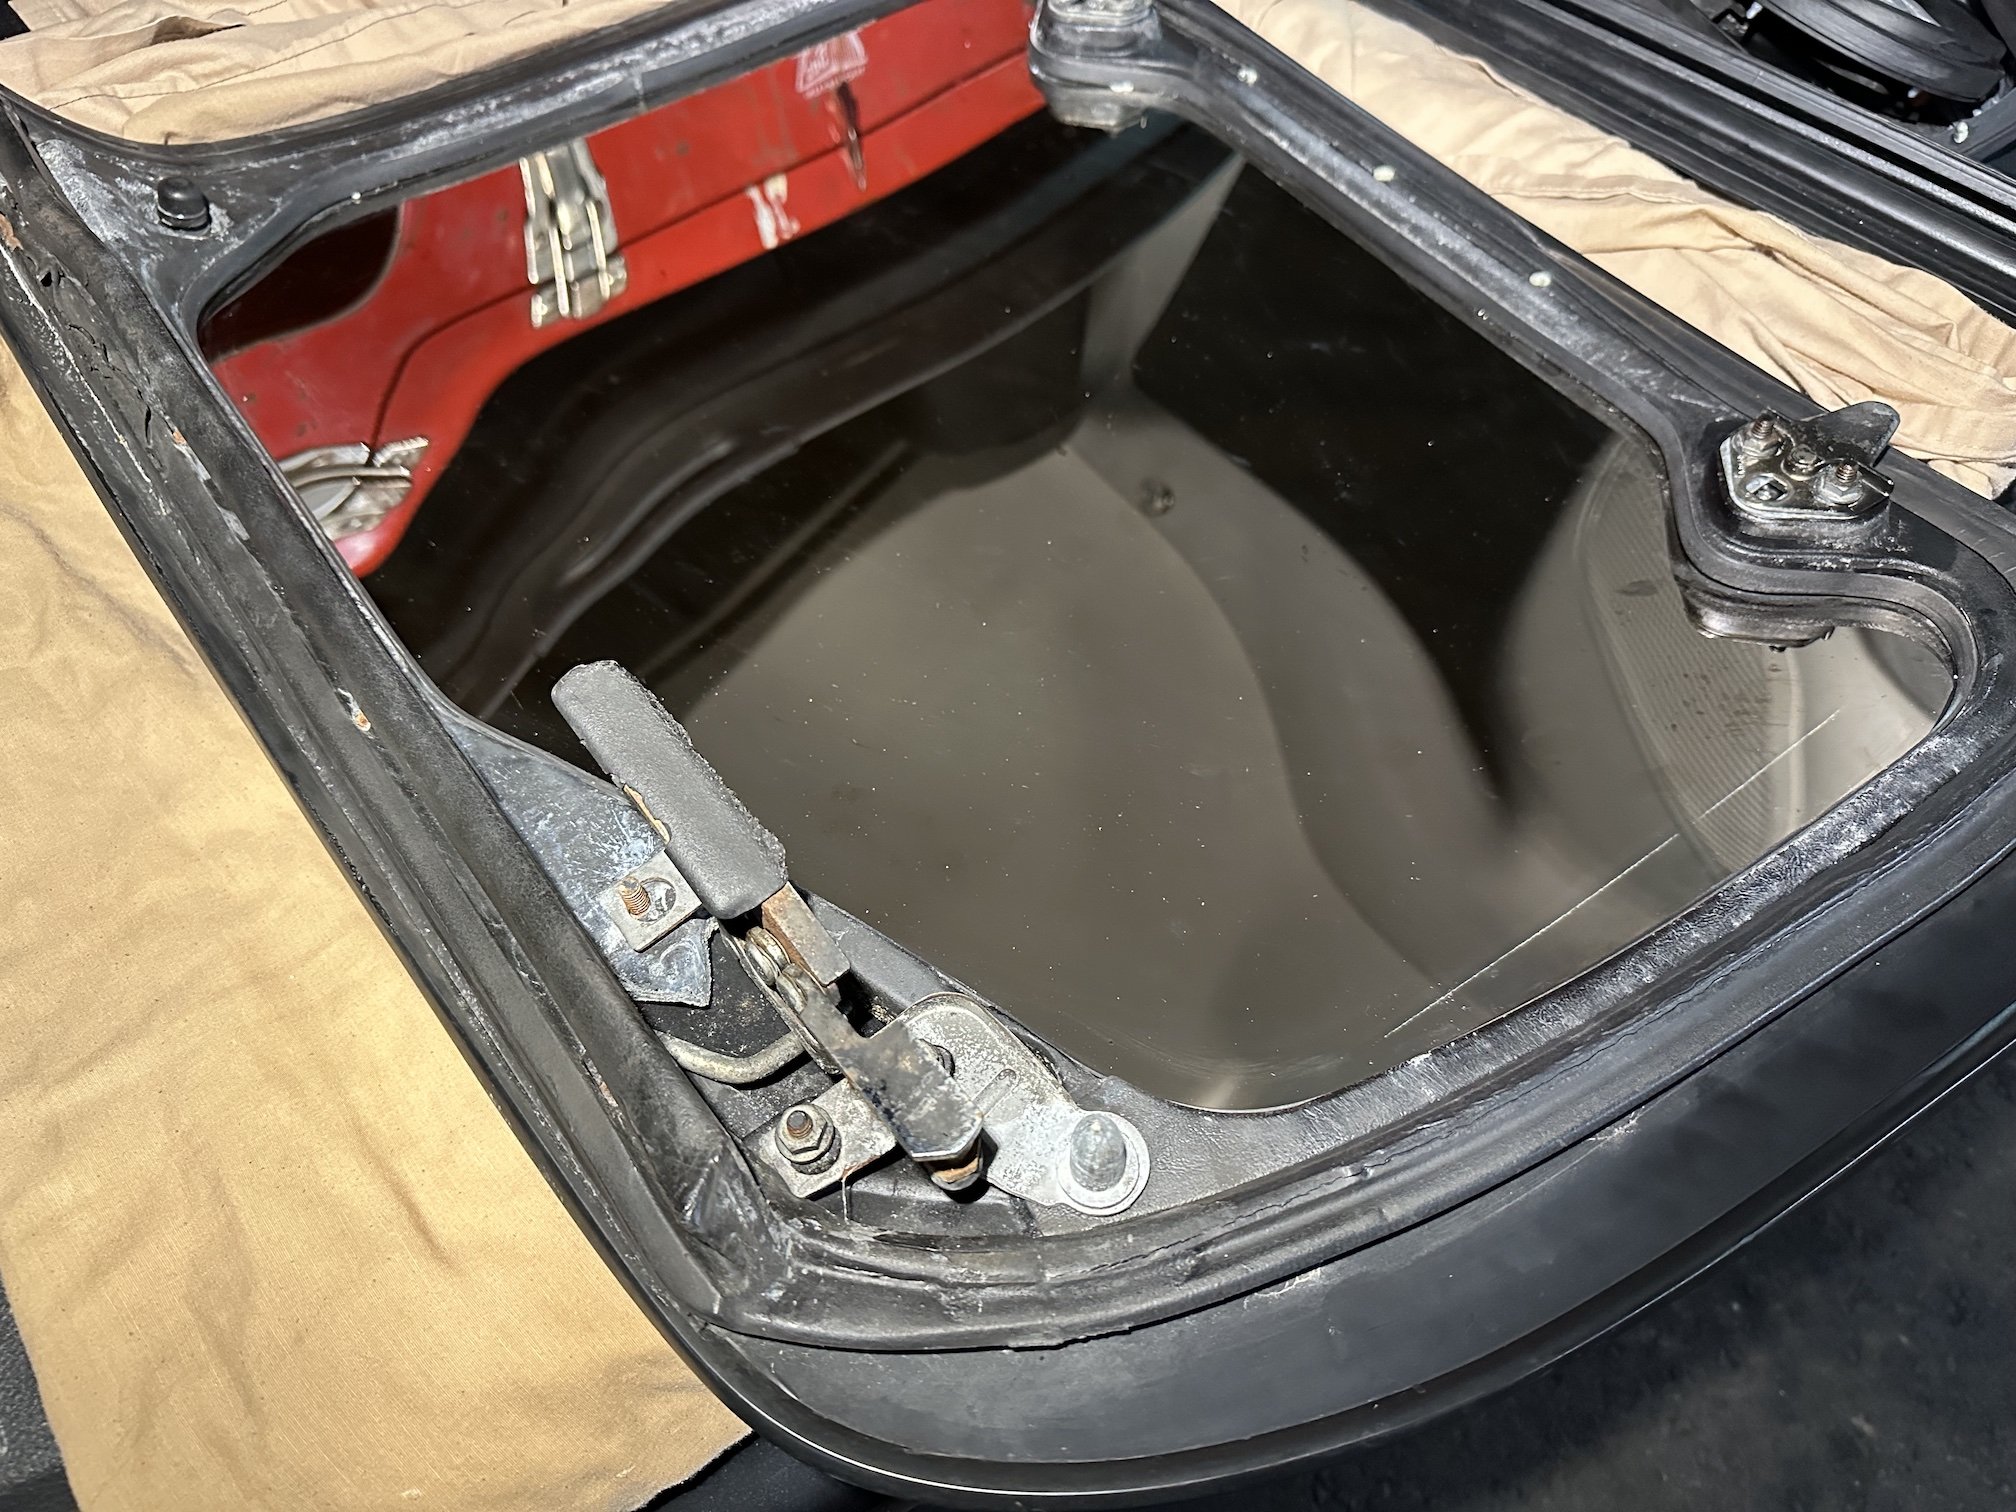
I got to work pulling the old seals off which left part of the old seals stuck to the adhesive behind, definitely a messy job scraping but being careful to not mark the blackened underside portion of the glass The wagon definitely comes in handy to use as an impromptu workbench The hardware on the original blue (cracked) t-tops is definitely in better condition so I am swapping them over
2 points
-
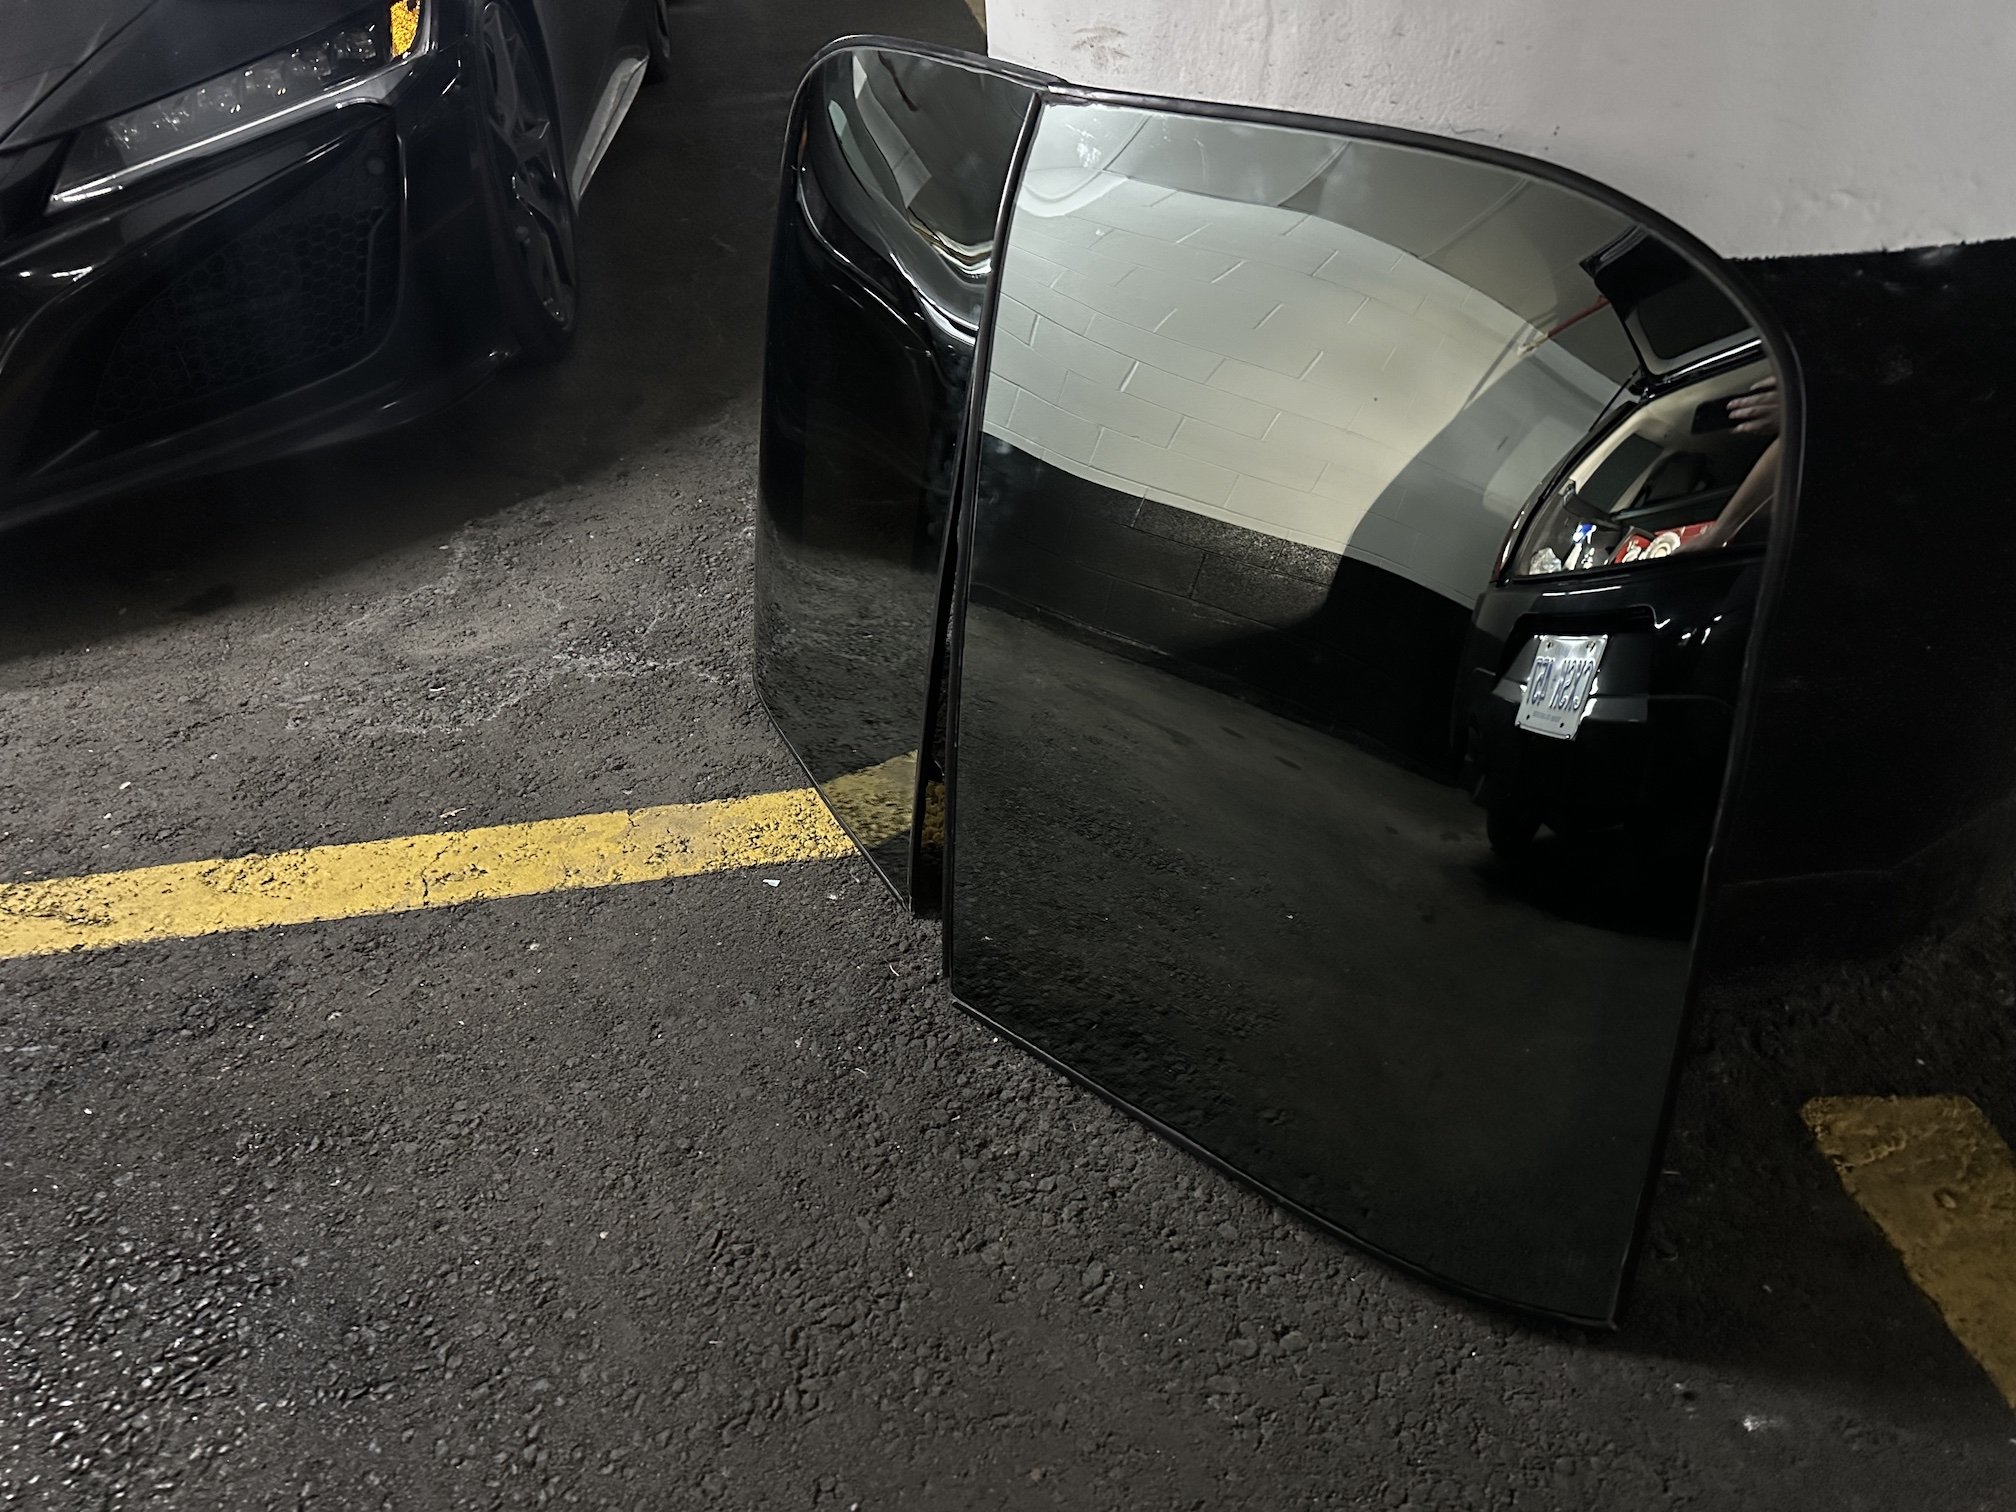
Small update, ended up selling the Astro top as I wasn't sold on how crude the mounting system was. I was in the US again last weekend and was able to pick up some fairly well used gold/bronze tint ones for a reasonable price - think these are off the '82 Collector's edition Corvette but I am not 100% sure of that. As I had some new t-top seals as part of the door/window rubber seal kit I purposely looked for a pair of t tops that needed the seals doing so these seals wouldn't go to waste. You can see the condition of these t-tops aren't the best and the mounting hardware is a bit manky also.
2 points
-
Cheers, yep should have some loose pistons around to measure. I was originally thinking add a couple hundred ccs through a 26 crank and slightly bigger pistons to aid low down torque and boost creation but will be interesting how much of a max rpm penalty that would create Mostly I just wanted to talk about rfbs on Roman's page again2 points
-
Man those are hard engines to find info about! 2MZ-FE looks pretty similar to the 5GR from what I can find out. Same bore and stroke, and the 1MZ is pretty similar to the 2GR (same stroke, similar bore, same conrod length, same bearing diameters). Makes me wonder whether they re-used a lot of the tooling/base components between the engines. I can't find the conrod length for the 2MZ anywhere online for anything further than that. If I could find compression height of the pistons I could work it out as I've got the rod length and compression height of the 1MZ (provided the deck heights are the same). If it's anything like the 5GR then it's probably got a pants rod/stroke ratio as well so might be a bit weak on power. VQ25 I can at least find conrod lengths. 5131g at 10,000rpm and 4156g at 9000rpm, compared to 5449g and 4413g for the 4GR. Slightly bigger piston, but offset by smaller stroke. Main bearings on the VQ are a little smaller so surface speed is better (9.99m/s at 10,000rpm), but big ends are bigger so likely heavier (offset a little by the shorter crank). Rod/stroke is on the high end of acceptable at 2.02. I chucked some ballpark numbers for the piston and rod weights in and if the VQ pistons are 40g heavier than the 4GR with rods the same then they come out with the same figures. So yeah, the 2MZ and VQ25 are probably a little more likely to be able to hit 10,000rpm from a bottom end perspective, but the differences are a set of forged pistons away from each other (if that, depending on how much the stockers actually weigh). If anyone's got a set knocking around then we can get a little further! I've got a decent amount of info on RB26s, but again RB20s are proving a little trickier to find info for. I've got conrod weight from the FIA historic database, but can't find stock piston weight. If you fancy measuring one I'll plug the numbers in! RB26s are an interesting one. People quite happily zing them up to their 8k rpm redline, but then there's been lots of people nuke oil pumps at 7500rpm which says crankshaft resonance to me. If you buzz through resonance quickly enough you can avoid it damaging things, which is easy enough in lower gears with boost. If you loiter around the wrong rpm for too long though then stuff starts going majorly wrong (oil pumps exploding, flywheel bolts backing out, valvetrain damage as motion is transferred through the chain/belt, timing scattering as the trigger wheel is out of sync with cylinder 6). This is much more of an issue for I6s with their long noodley cranks than it is for I4s and V6s (one of the reasons I think the 'I6s are the best engine configuration bar none' crowd need to go do some proper research). But still, 8250rpm is the 'max rated rpm' for the RB26 from Nissan and that's 2.6 tons. I've found weights for supertech pistons and stock rods for the RB20, and at the same 2.6 tons you'd be spinning 9500rpm. Shorter throw crank should be stiffer and lower inertia for resonant frequency too which is good, but I can't find anyone online talking about experiencing issues at a certain rpm that would point towards crank resonance so what rpm that occurs at is a bit of an unknown. Most high-revving I6s seem to top out around 3 tons, for what it's worth. Lower than high revving I4s and V6s, which I assume is thanks to the noodley cranks. You do get some over that on standard cranks, but you start getting comments like 'they start marking bearings' or 'oil pump exploded' which I don't really count as 'being able to rev that high'. Still, suggests the RB20 bottom end might have some headroom above 9500rpm. I've certainly seen some videos of 10k rpm racers, but you never know how stock their cranks actually are when there's been a lot of money thrown at them. Will watch the video when I get back home and see if they hint at how much work's been done.2 points
-
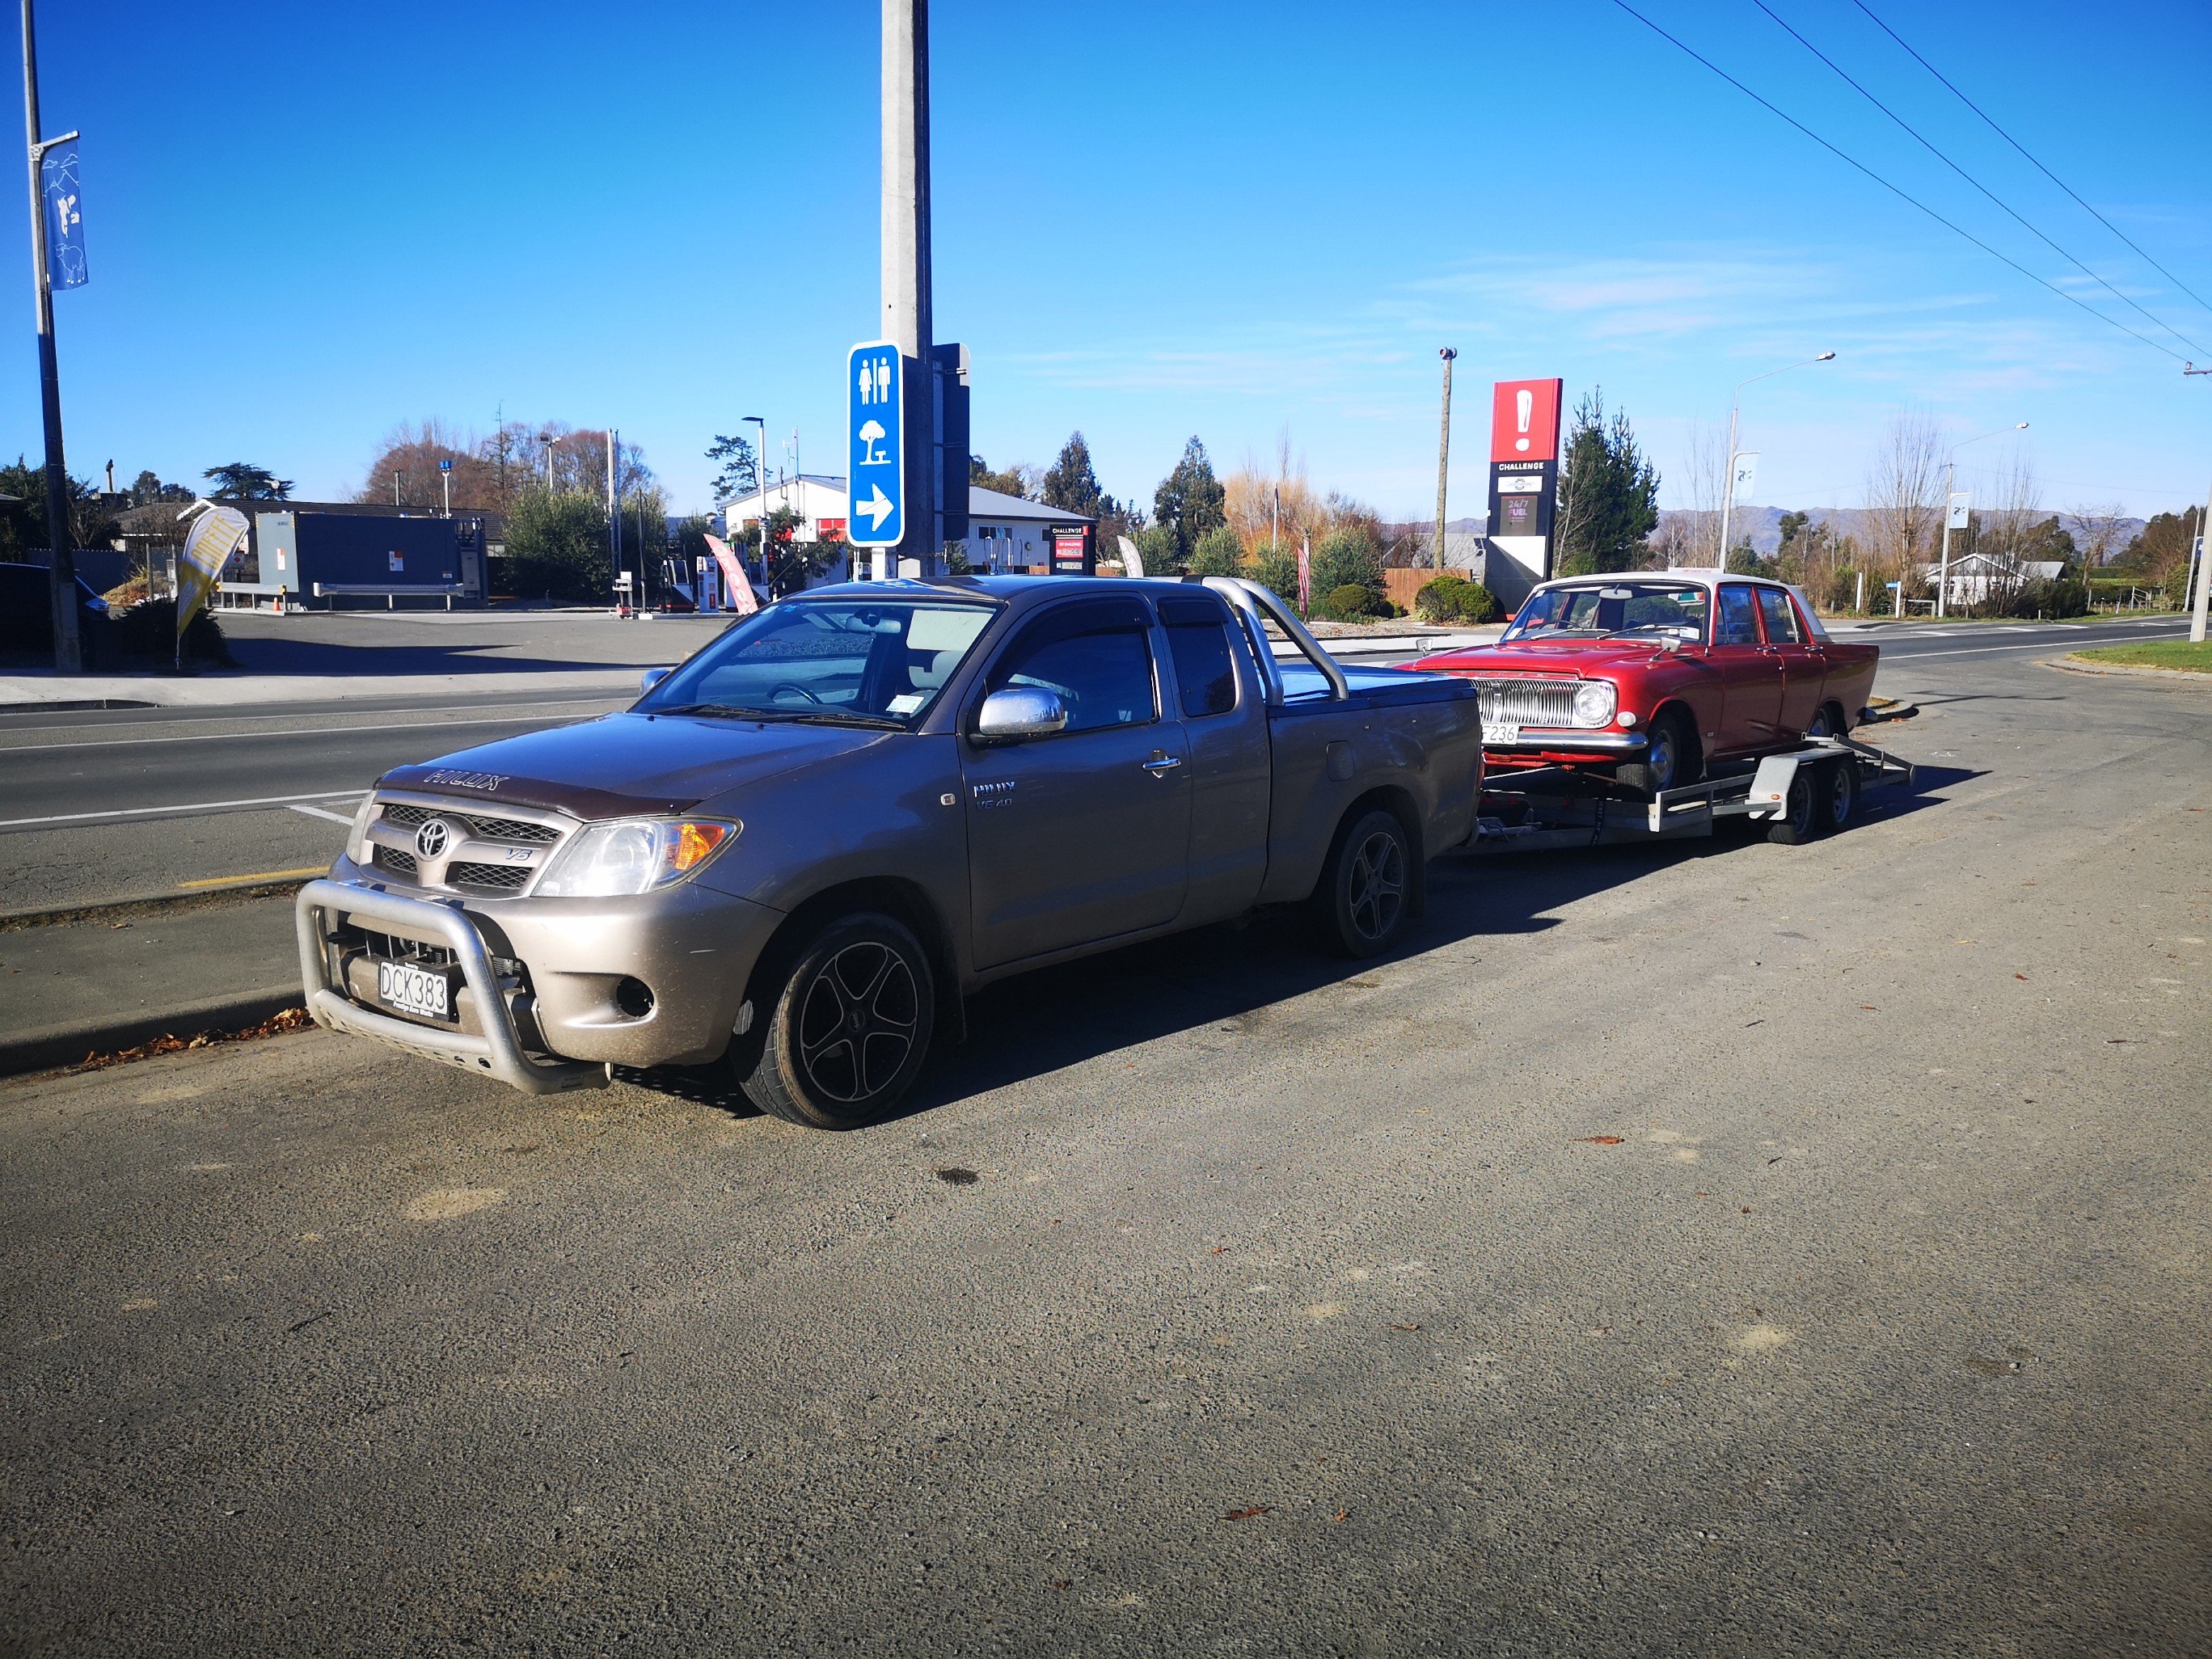
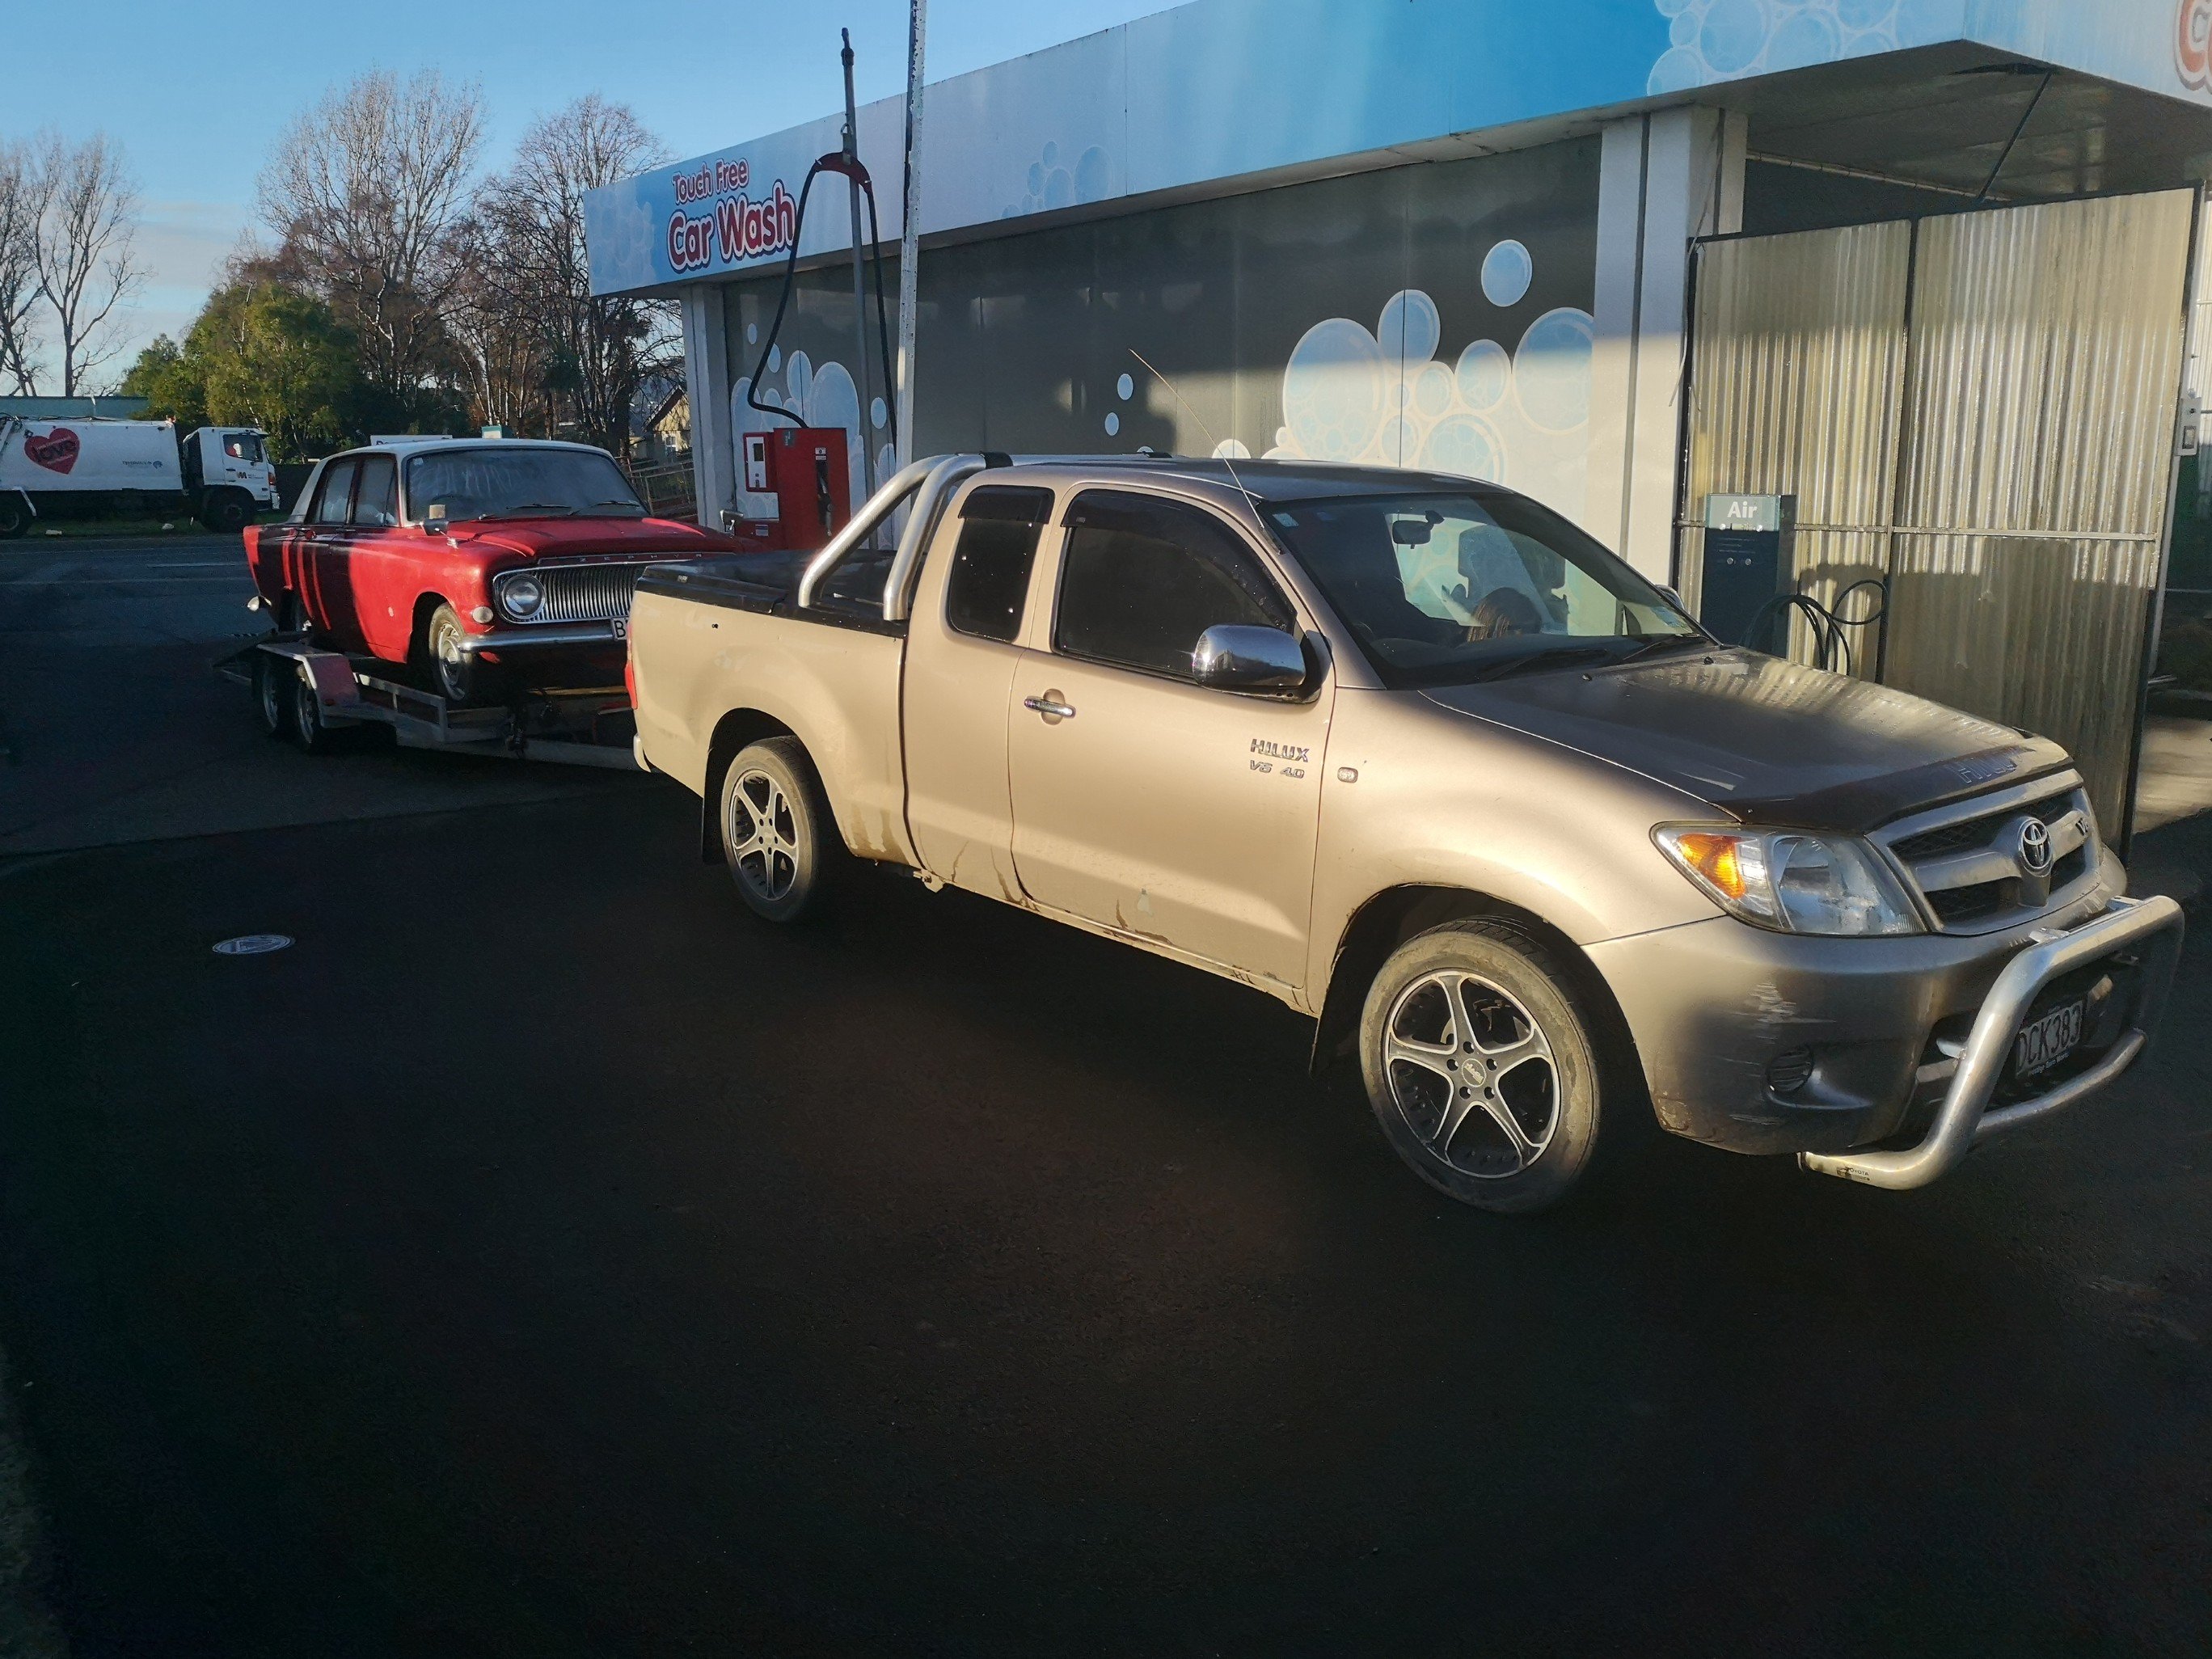
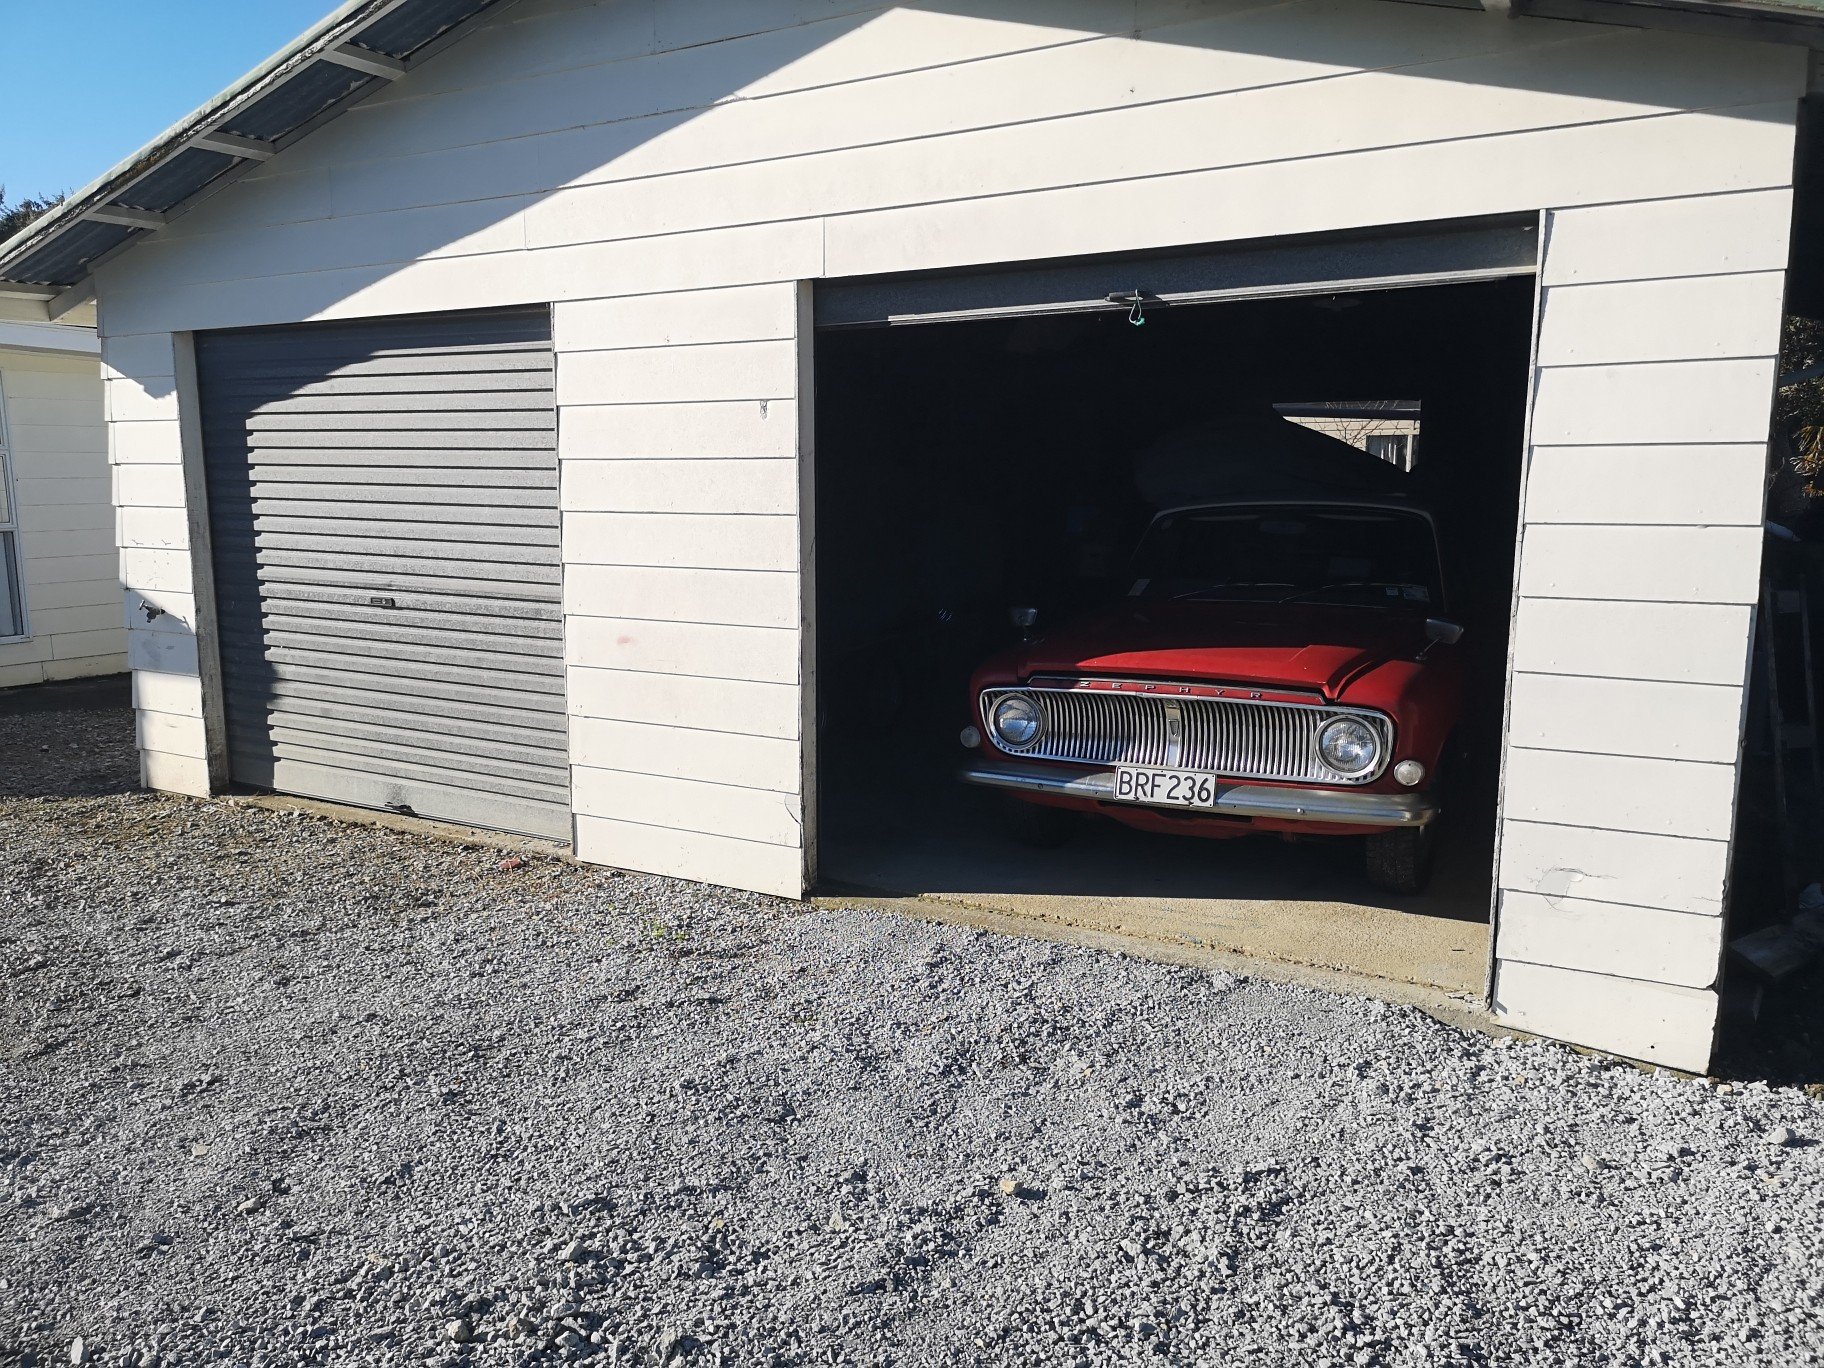
Loaded up the trailer and some tools/car parts and left earlyish on Monday, Used a full tank of gas to get to Ruiwaka from Chch, 14.6l/100 but such a sweet towing rig, barely ever had to put my foot down to get over any hills, thing just purrs over.. between that and the trailer which tows fucken excellent I hardly knew it was on the back. The V6 shits all over the d4d. It's amazing how a zephyr brings out all the barries and stories of yesteryear, had 4 barries out of 5 stops which is a record. In her next place of residence, gonna clean up all the running gear for the next wof as Brighton has dealt to it somewhat. It's also managed to creep under the paint in some spots so will have to fix that to, I don't want it to turn into another creeping project, so will make an effort to do the bare minimum.
2 points
-
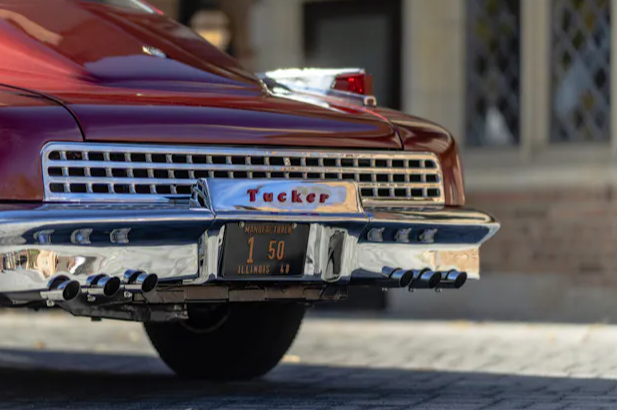
Why not run six pipes out the back?
2 points
-
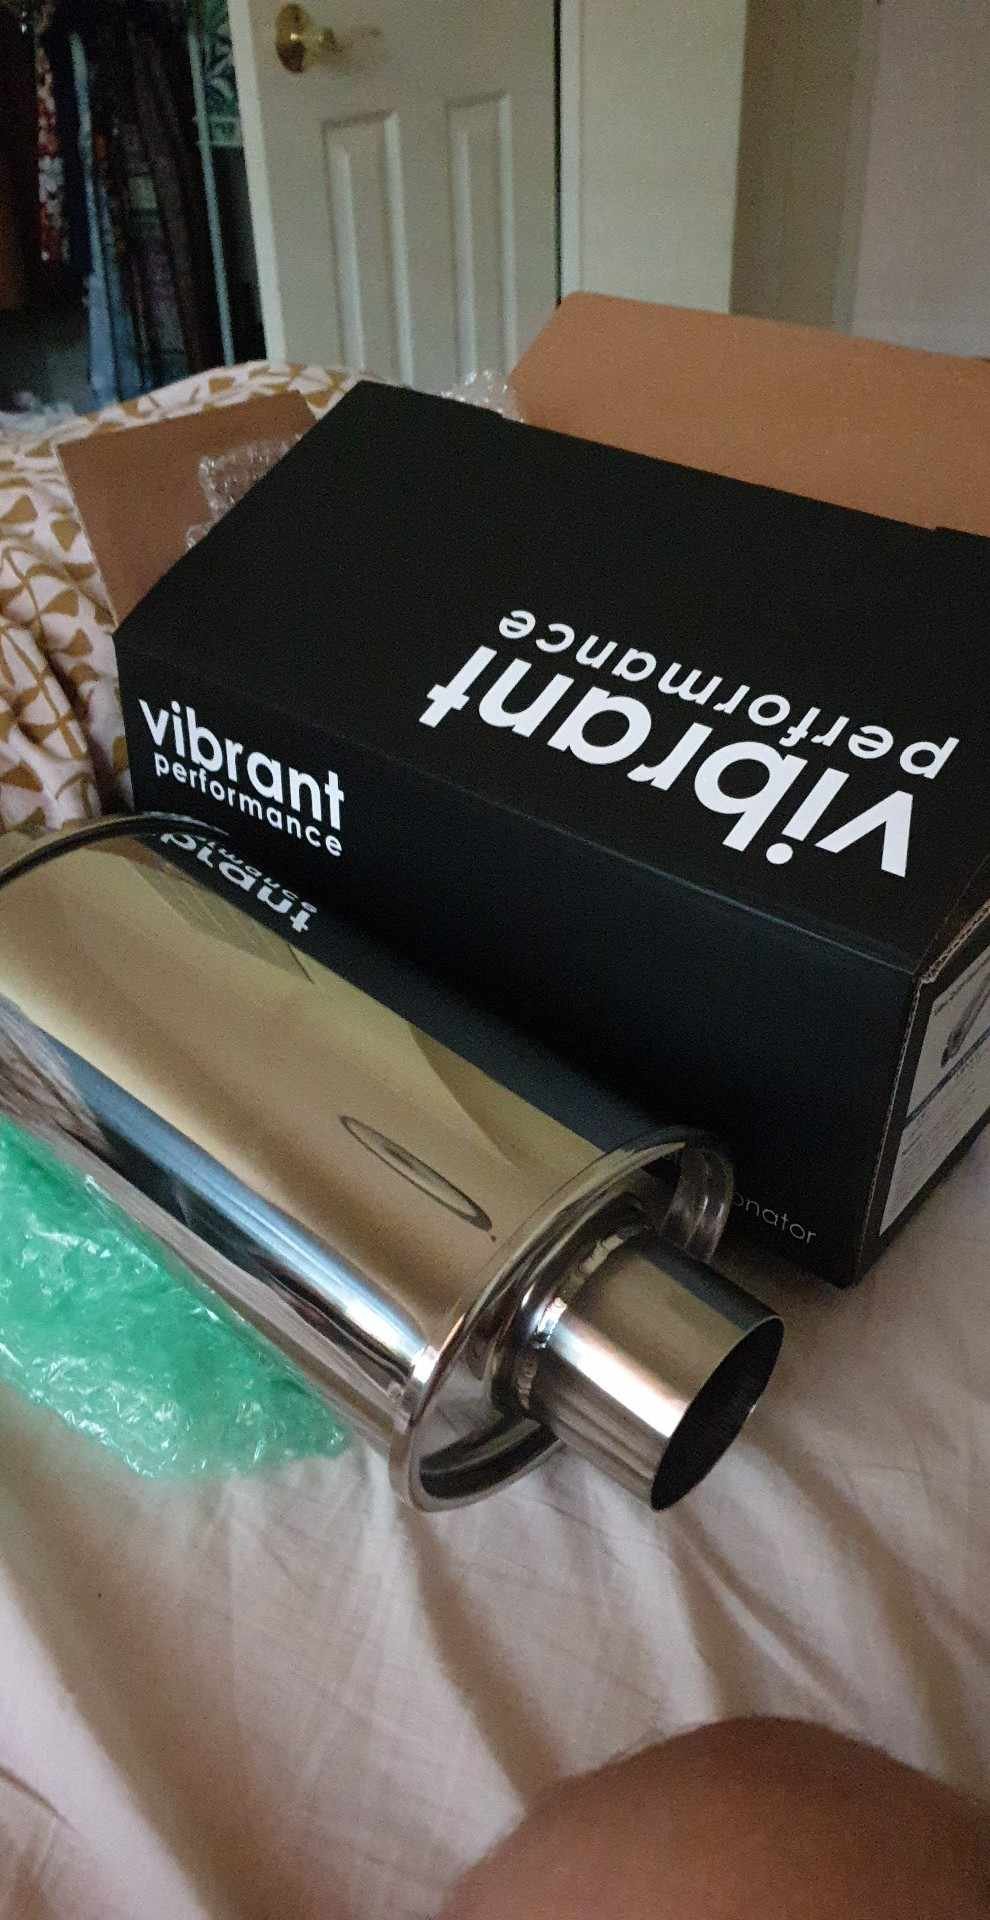
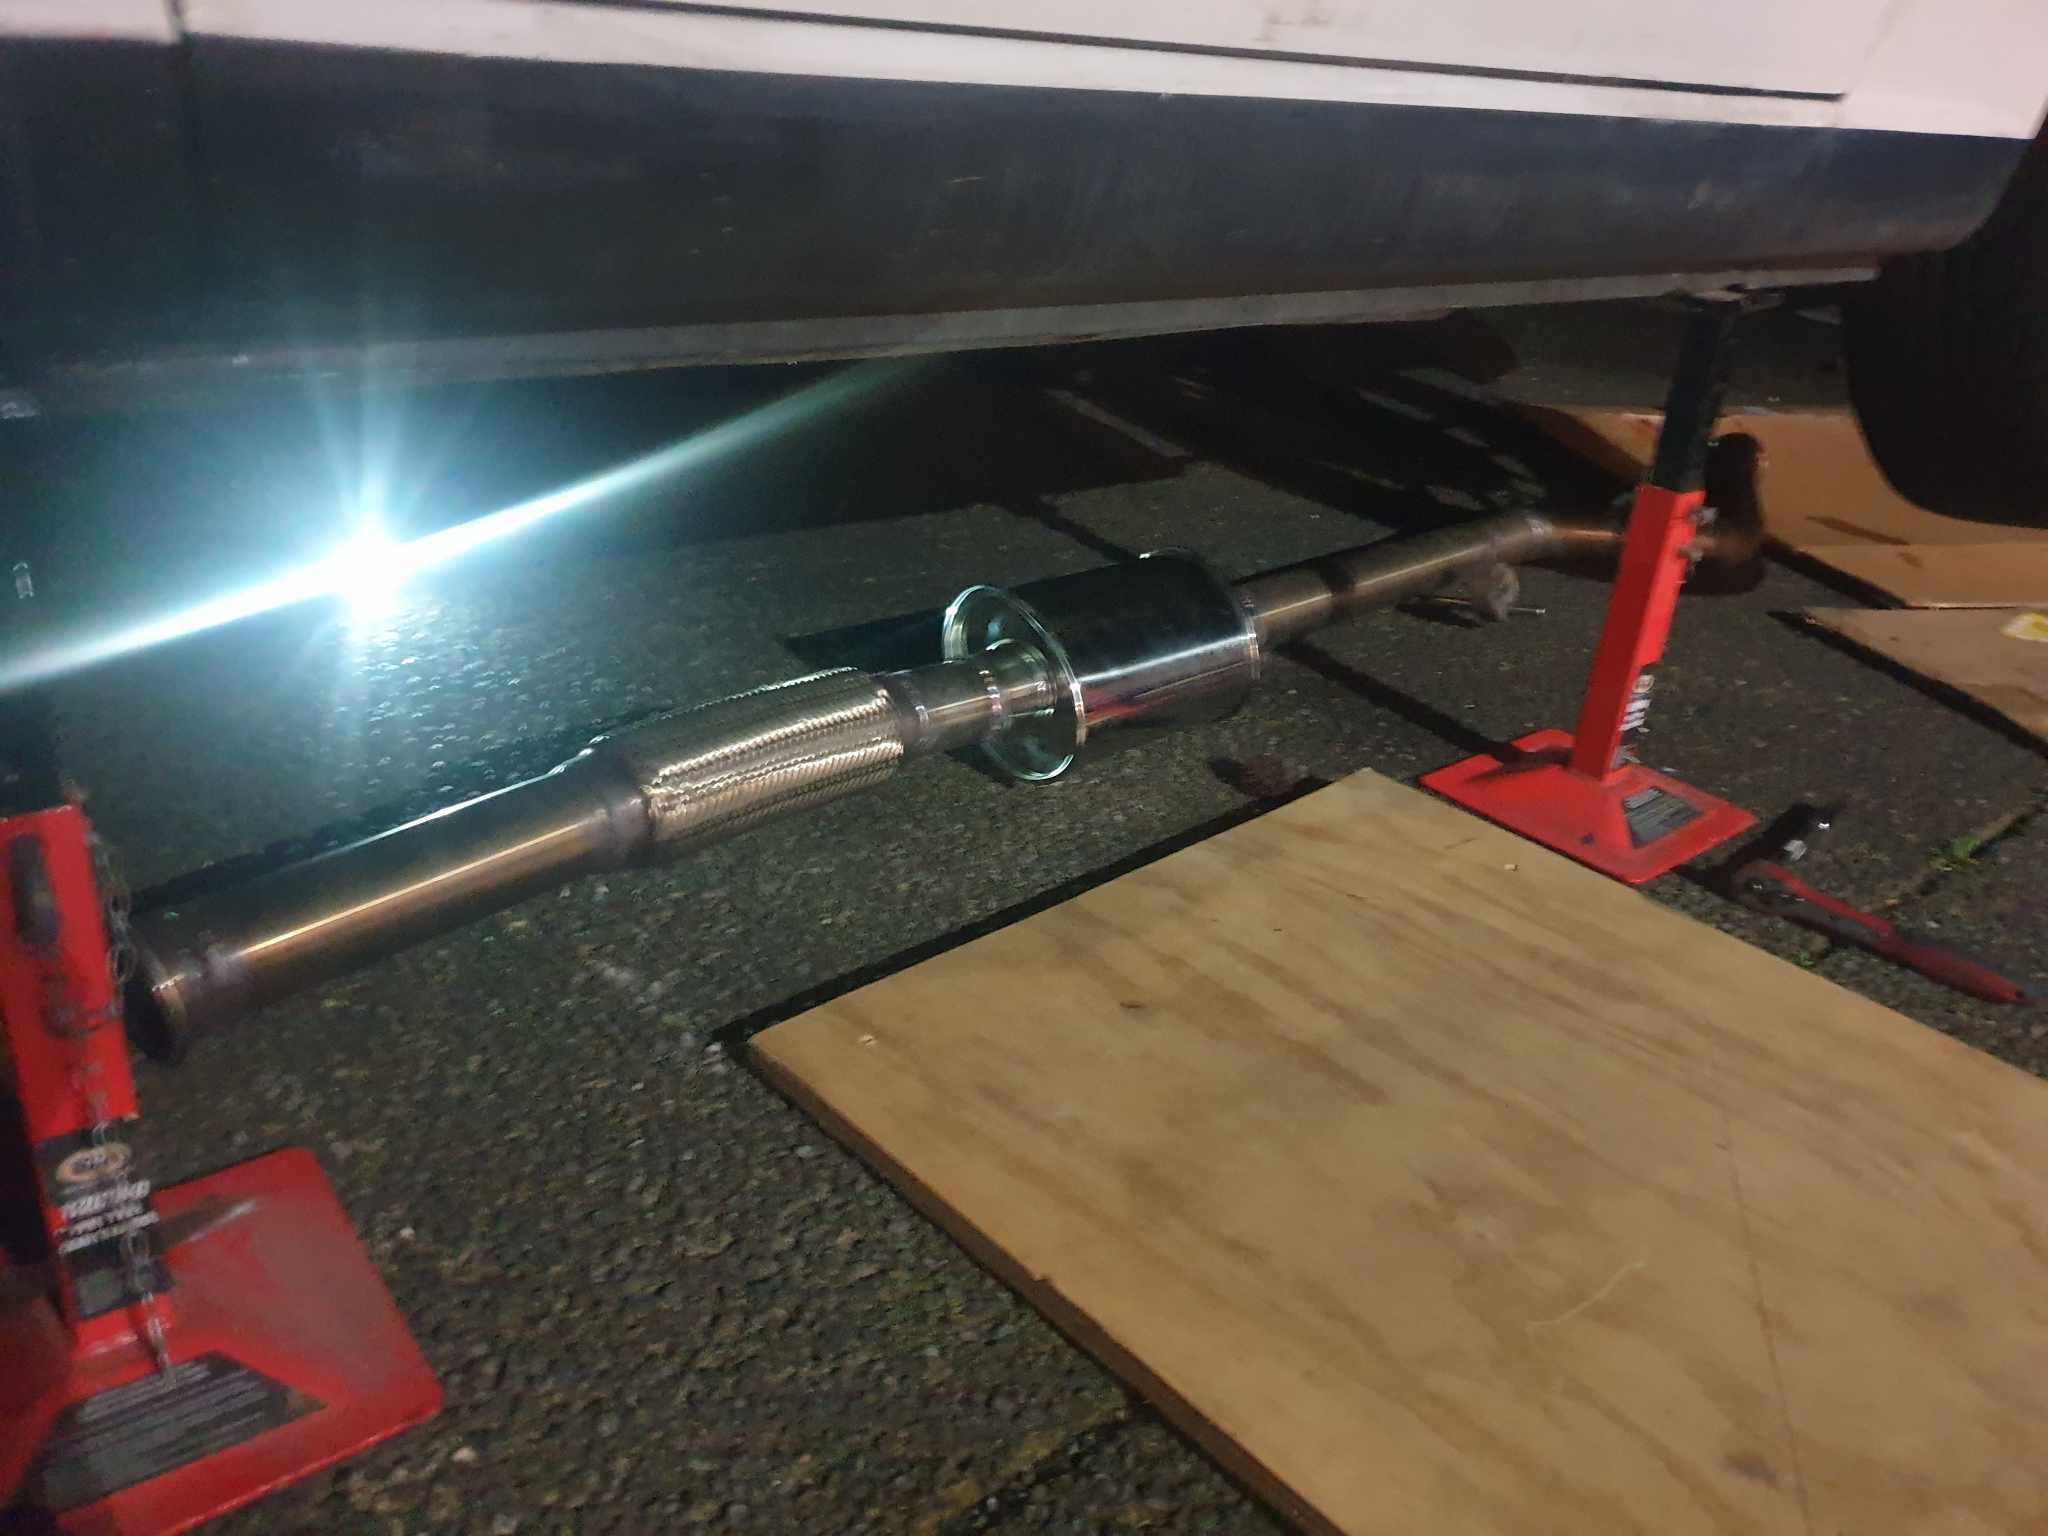
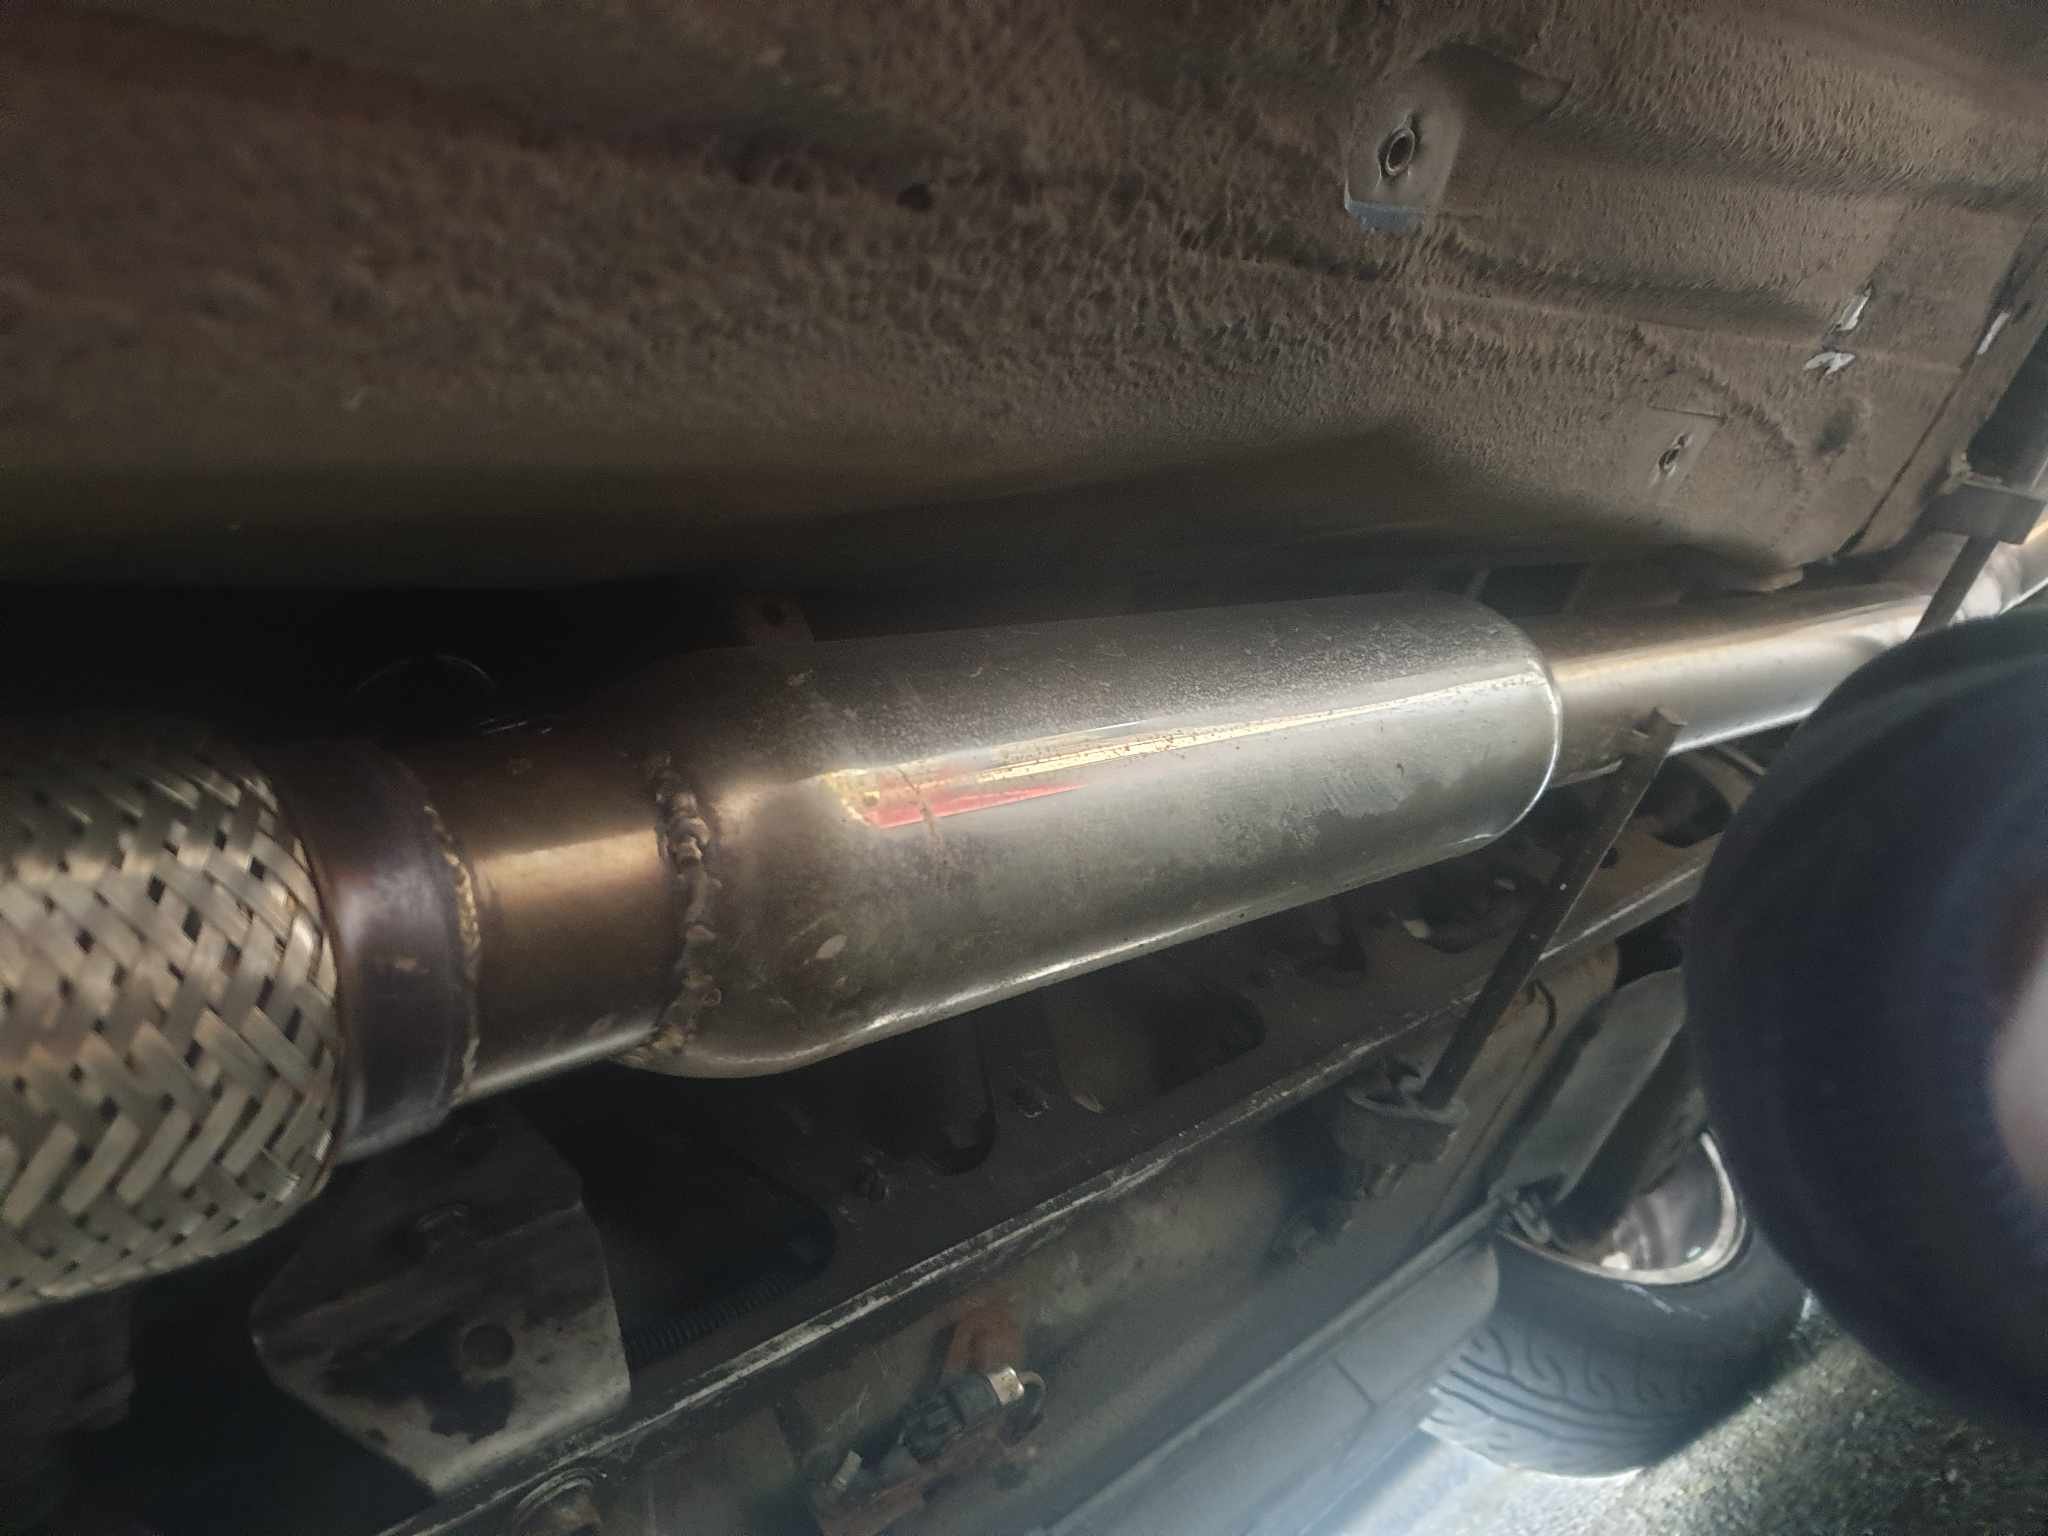
Alright Friday night shenanigans. Im making the drive to Tauranga on Sunday and it's time to remove the drone and rasp from my exhaust. Previously I had the absolute cheapest stainless resonator I could find but I splurged for a Vibrant Ultra Quiet 2.5" resonator to replace that. I ordered it late last night, arrived today and I was very happy (jump scare face reveal included). And yeah. The money shot: Some late night welding: And the old resonator: New one welded on: And the end result... Well it's not ultra quiet, but it has none of the old farty rasp that my exhaust used to have. Finally an NA setup that doesn't sound like trash! I really like the new sound. Growl and bite but no bark. Ready for a good weekend! Oh and I got a wof, with a few minor suggestions...
1 point
-
Is the interfacing not sewn into the cover? I don't know much about upholstery but I guess spotlight would be a good place to try.1 point
-
Para cut foam to order1 point
-
What a fantastic catch up jam packed with news! Was great to see you all!1 point
-
That's quite average power output from a 2zz. By the looks of the dyno curve it must be using factory headers... 140kw is typically what you get with a good tune. But 1NZ is a lot more impressive than a 2zz cause it has 0.5L less capacity!1 point
-
2zz-ge into an echo 122kw and 162nm atw, @Romanwhat was your final dyno number? https://www.facebook.com/100075883510301/posts/288421180363997/?mibextid=Nif5oz1 point
-
Thanks mate. It could have been a lot worse. We were only renting so we had the relative luxury of being able to just bug out and not have to worry about it long term too much. Our landlords were really good about it too and there was no stress between us as we all delt with the clean up afterwards. We are also very lucky to have generous family support so we were safe and dry as soon as we got out the night of. There were people who lost a hell of a lot more than we did so we can't complain at all.1 point
-
Lol nah course not. I don't think I explicitly said so back when I did it, but the deal breaker back in the day that convinced me to cut the quarter panel off was the state of the outer sill. I was considering originally just doing my best to panel beat the quarter on the car, but when I started poking around the sill, I found the typical (for this car) 10mm of bog covering a totally munted panel work. As part of cutting off the quarter, I separated the sill off into a discreet section, which I then also cut off and chucked in the bin. So now the job is getting a good replacement panel in its place. For this, I shelled out for a new replacement panel from Palmside. Pretty cheap and not too far off the correct shape considering the price. Figuring it would be too unwieldy to manage the full sill and quarter panel as one unit, I cut the front section of the sill off in a nice straight cut that would be easy to weld back up later on. That done, I started offering the sill up to the quarter and trimming both to fit. Once I tacked the front of the sill back on and offered it back up to the car, I realised the alignment wasn't quite right and the panel gap between the bottom of the door and the sill was expanding the further forward it went. Being the anal retentive prick I am, I wasn't able to just let that go. I zipped through the tack welds and make up a couple of brackets (jigs? Work holding thingies?) with holes of various distances from a central point. This let me swing them fore and aft and finely adjust the relative position of the front and back of the sill to zero in on the gap I wanted. Once I had my alignment, I was able to tack it all up again, double triple check it all, then start welding it up. I had aimed to run it all in one continuous bead to minimise the differential distortion. Ended up having one stop/start in the middle, but the HAZ stayed relatively uniform and I did manage to keep the warping to a minimum. That done, I spent a day or so hammering it up and filing it back as best I could until I got it well within a coat or two of high build primer. I was right initially, it does make it pretty awkward to handle the whole panel now, but it's not an absolute deal breaker. Still some small tweaks to do on the quarter yet, but it's coming along.1 point
-
Productive day at the Powershed Got the modified sump and pickup onto the GZE, installed spigot bearing flywheel and clutch to engine and offered it up to the engine hole Much fucking around ensued because of the loooongboi crank pulley and SC clutch on the GZE making a small engine rather long so pressure plate and clutch off the engine slide the gearbag back as much as possible rotate the engine 45 degrees in the engine bay while tipping it to precarious angles then scrape swear and twist til its in there Gearbag tunnel needs a slight massage to fit one of the heater hardline/mod the hardline as the engine is sitting not quite center and on a slight angle as the photos show This is minimum clearance on the draglink for steering which I hope is certable @cletus AAAAND I have minimal room for a radiator thanks to looooongboi pulleys but I will get the engine in its final position before measuring where how much room there is to play with. The bonnet closes still which is nice but I dont wanna have to deal with putting wheelbarrow in the firewall as tunnel notch with all the bullshit of having to move everything back shorten the Dshaft etc1 point
-
Ah. Those are some persuasive numbers yeah, let's see how high the 4GR will rev as-is! Found a video of a 9000rpm 2GR Lotus Exige so someone's sorted the valvetrain. Interestingly, if they're using forged pistons about the same weight as the JUBU ones and rods similar to MWR's then 9000rpm is about 3.2 tons as well...1 point
-
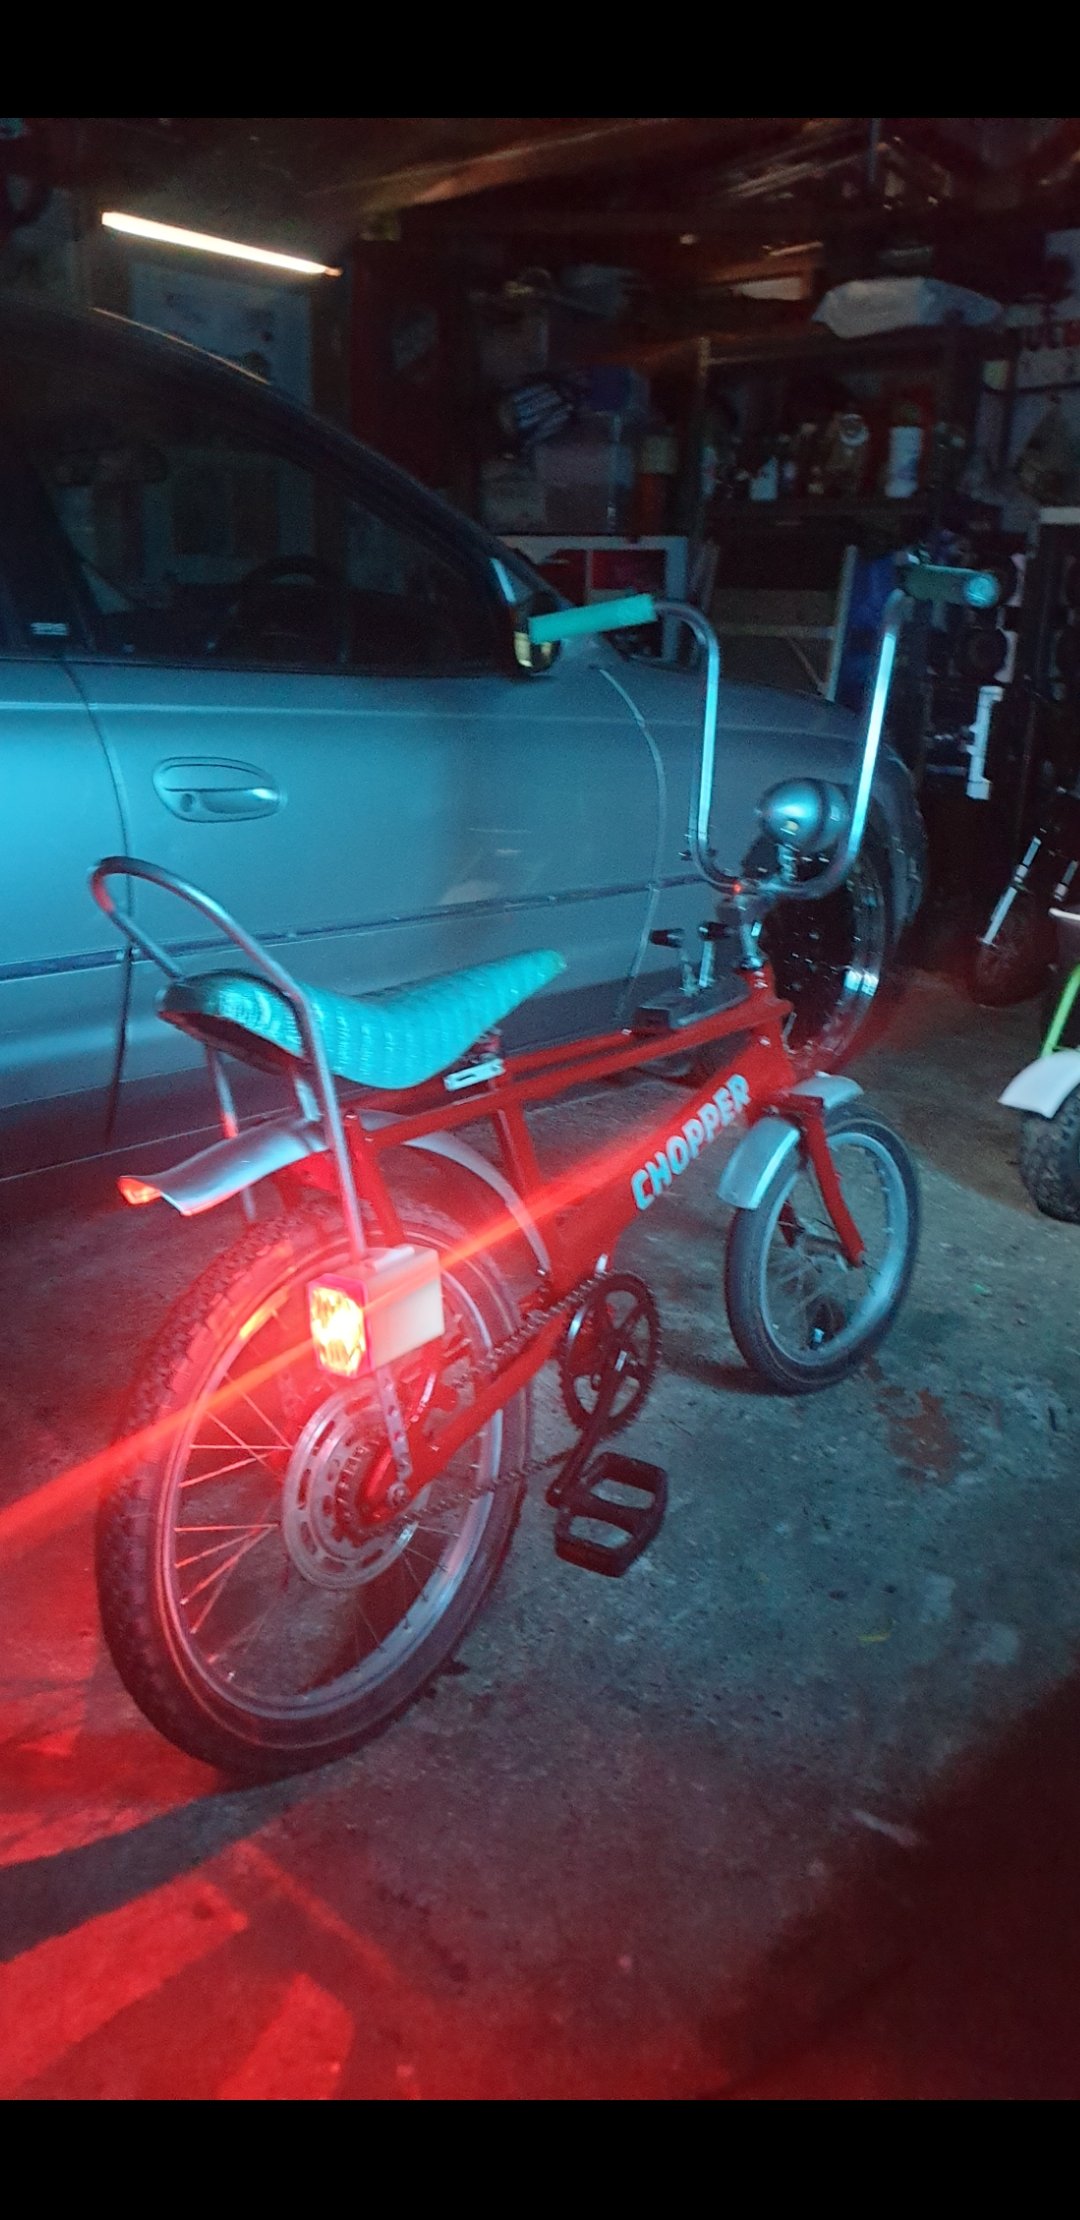
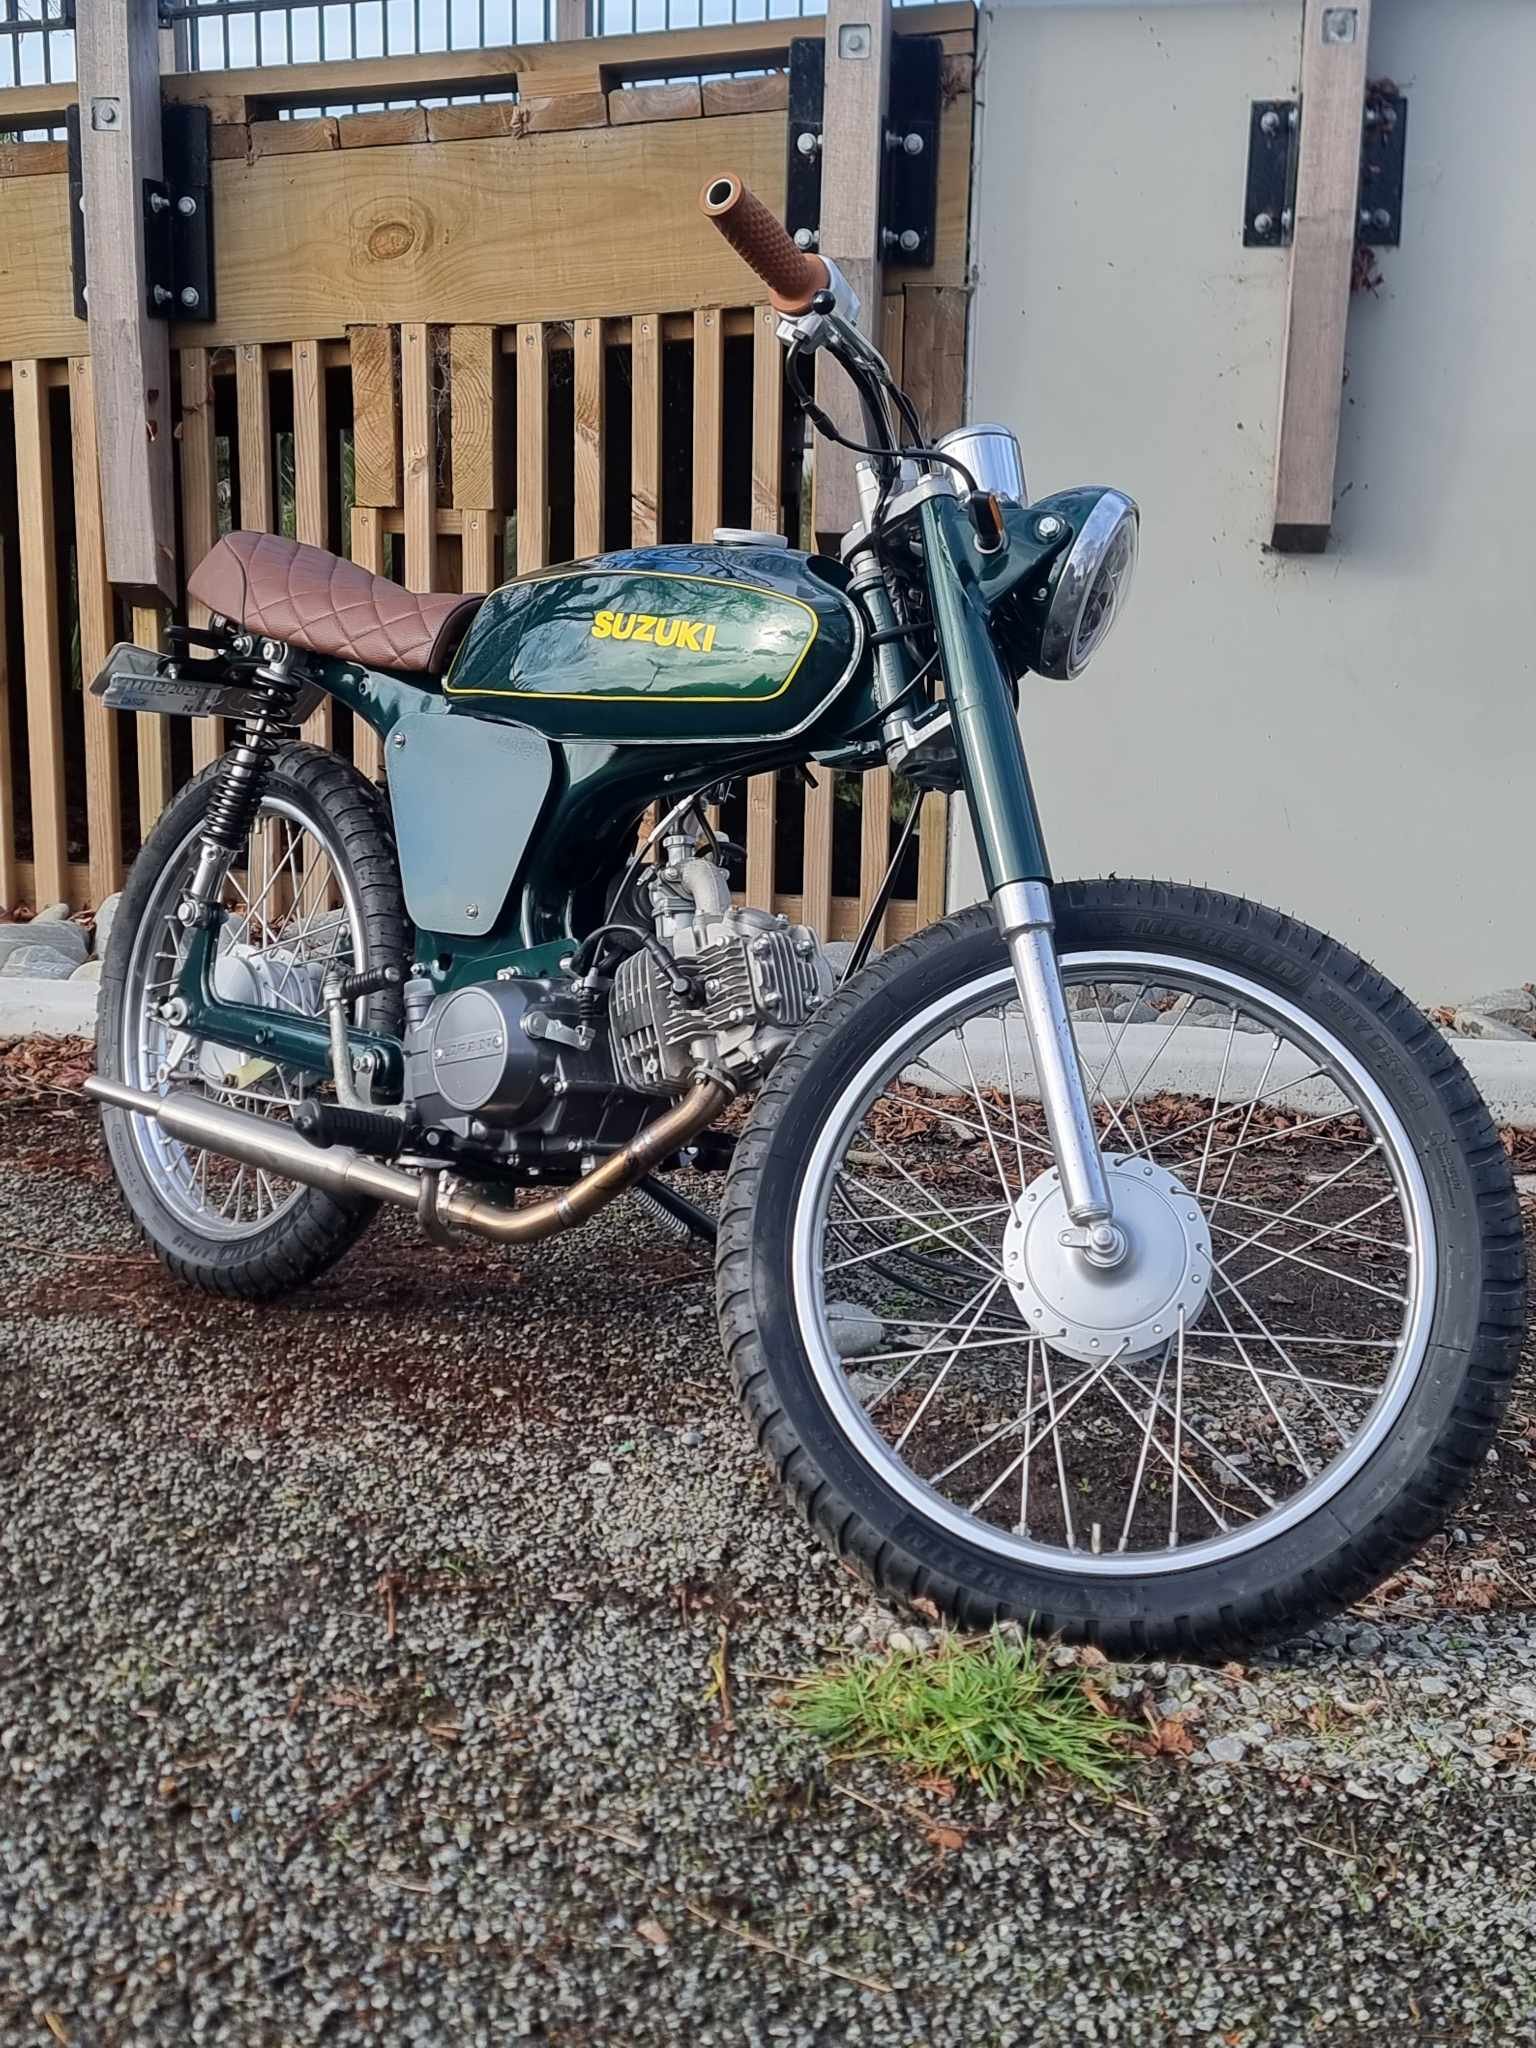
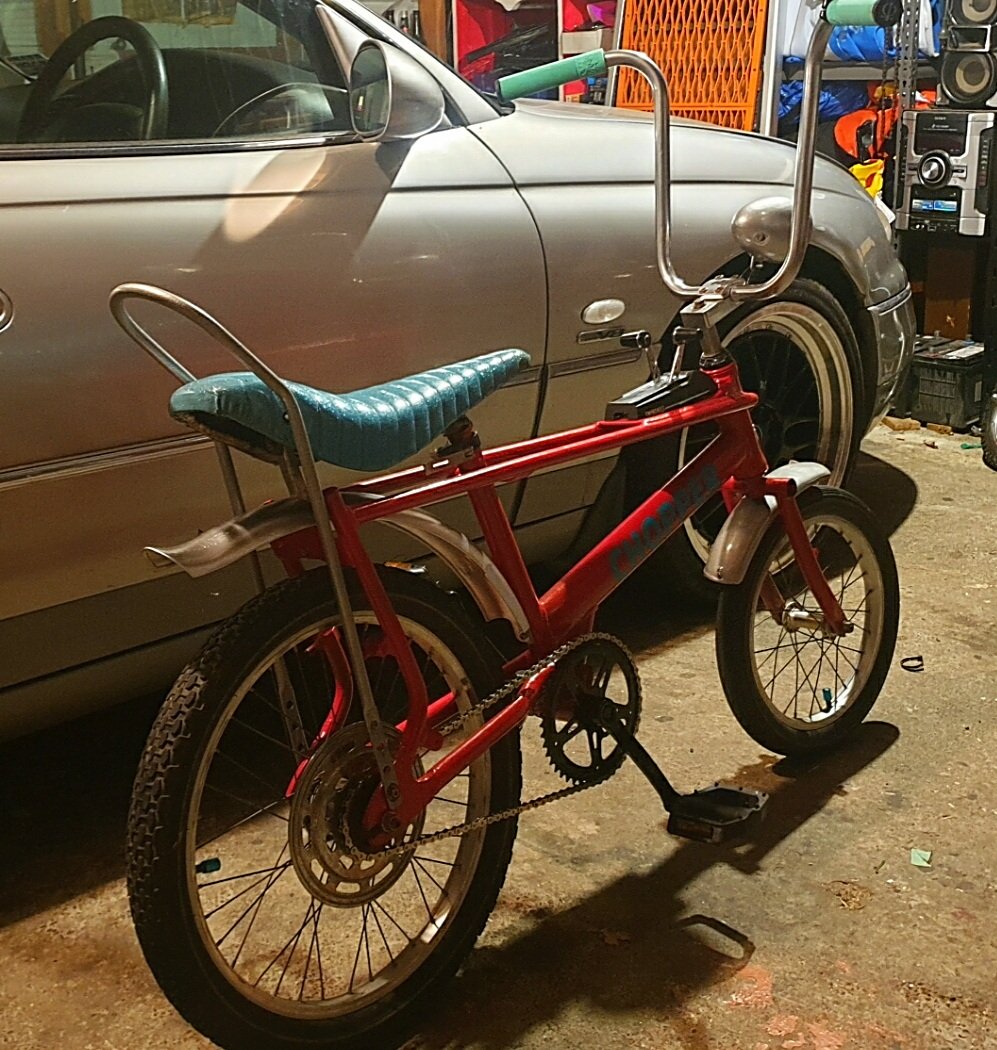
Grand Unveiling! And a very happy owner (and financier for that matter) Now some people might have a go at me here for 'Chequebook Rebuilding", and thats fair enough. But without it this bike would have just sat in the shed to then be passed onto someone else in 5 years time who might also sit on it ad infinitum. Its now complete to a level I'd never even dream of attaining and my girl has a bike which is unique and will be the perfect learners bike for her. And Jeremy @ Kaos Kustoms has won another loyal customer (I might alreay be thinking of that second frame and what to do with it!). So everyone wins. Ive left this thread here hopefully to provide some inspration to others and also to acknowledge those who have inspired me.
1 point
-
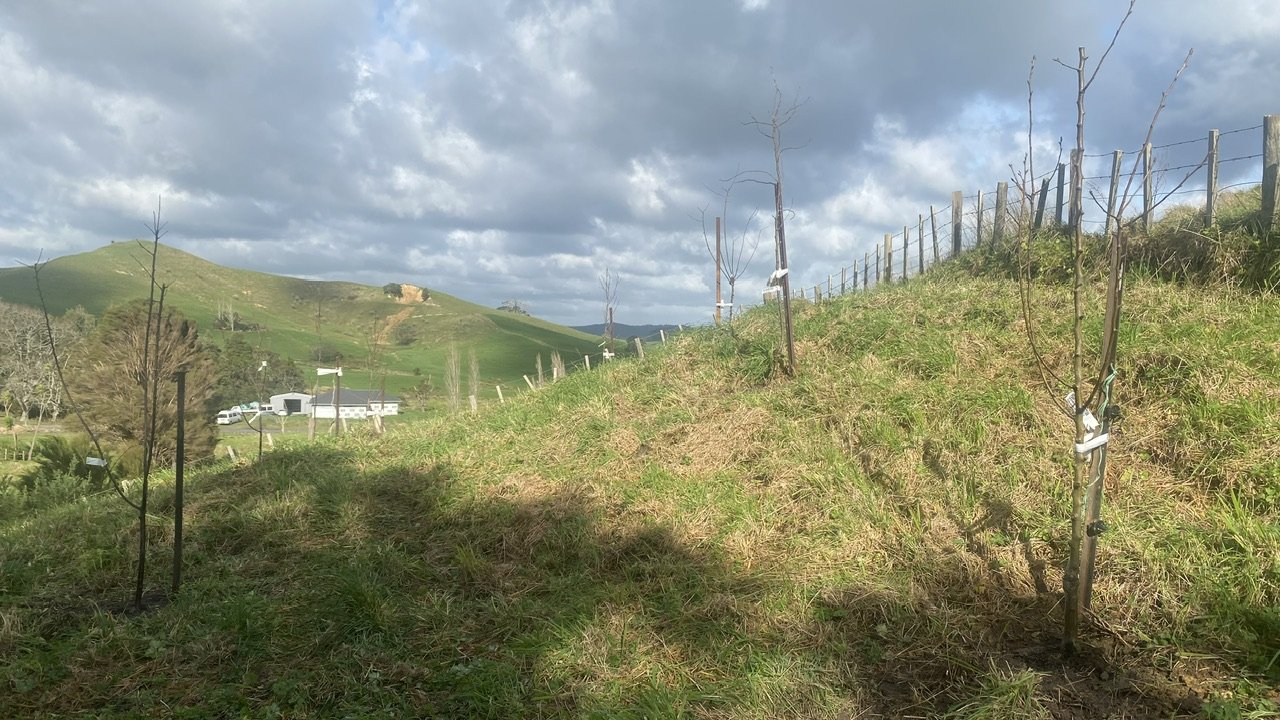
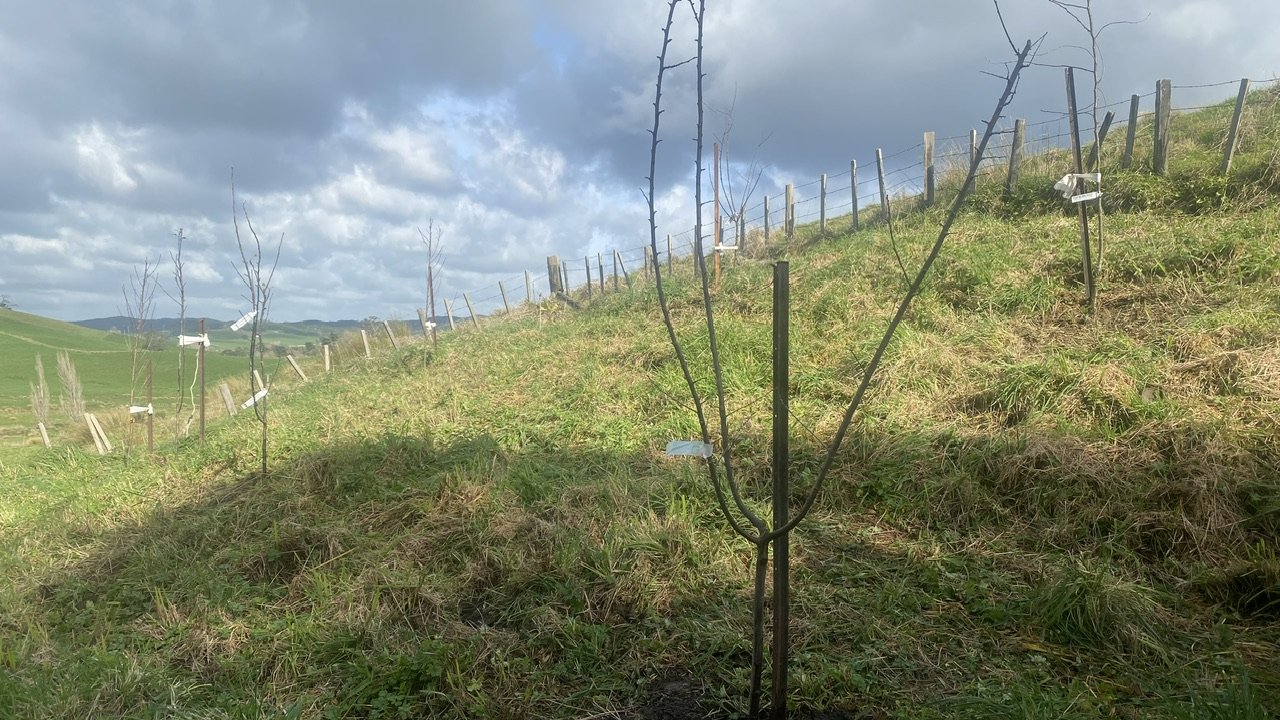
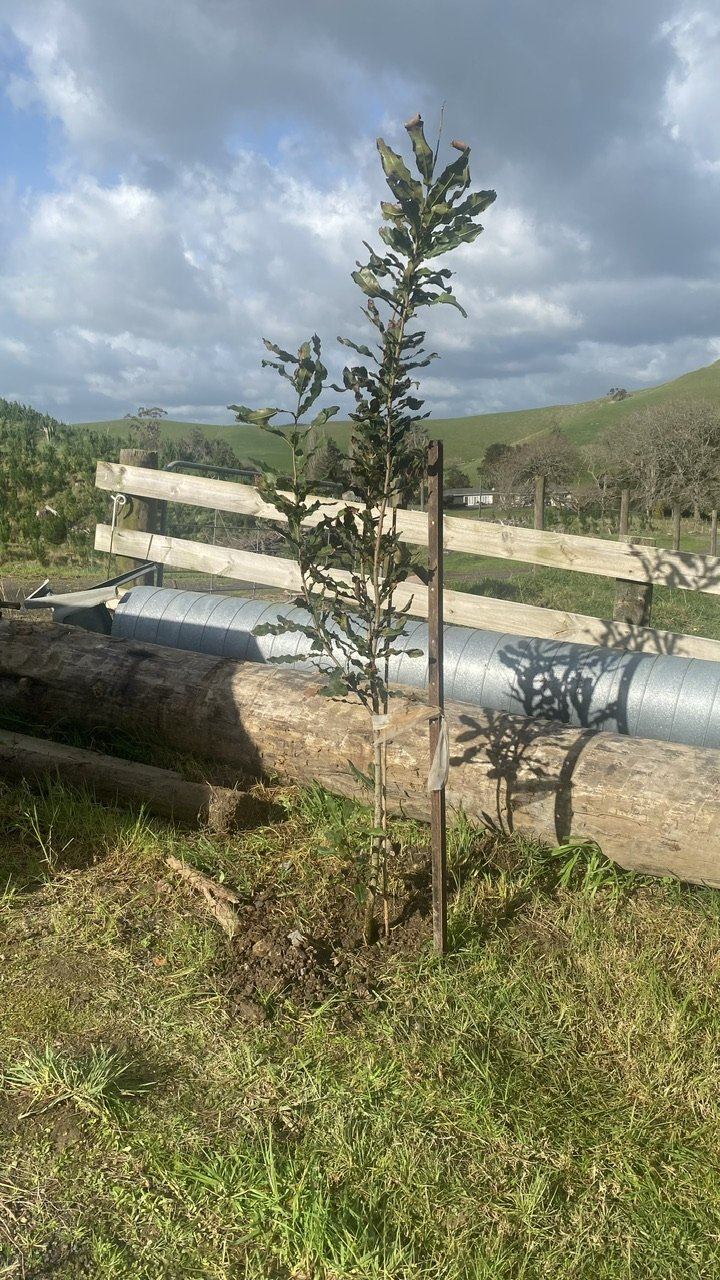
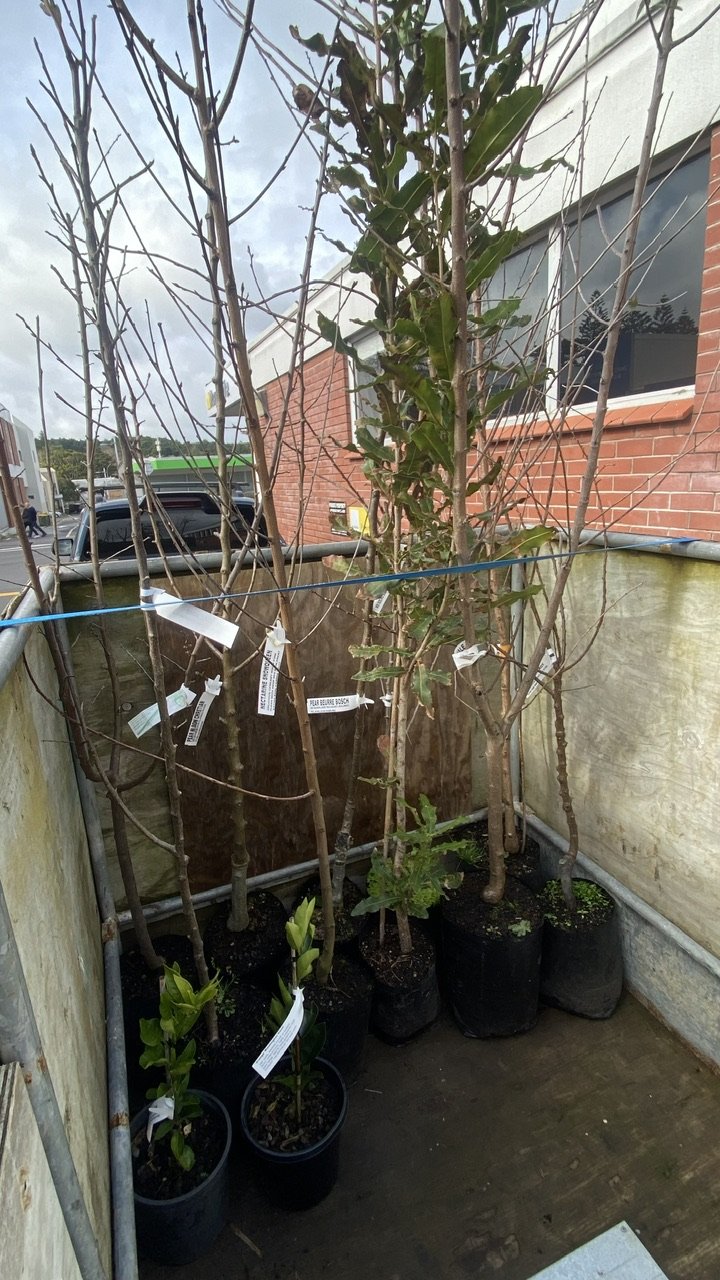
Time to plant some trees for the orchard area.. normally I’m good at buying trees and leaving them in their bags for months on end, but this time bought and planted within the week, so winning there. Picked up 12 trees.. x2 apple, x2 pear, plum, apricot, peach, nectarine, orange and mandarin.. also got a macadamia and an almond tree for something different so will see how those two go. Still to add are a couple of avocado trees my mates mum has for me, a couple of feijoas in my back yard I want to relocate along with a lime tree and a big lemon tree.. I also have a guava but that’s a big old knarly thing I’m not sure if I can get out.. will see how the digger goes with that one.
1 point
-
Thought you'd never ask Yeah I know practically nothing about bearing speeds and oil shear, other than that it happens and this thread mentioned a chappy trying to rev a Mazda K8-DE to 10,000rpm and killing bearings due to oil shear (he'd tapped the block to measure pressure at each main bearing which never dropped, but was still wiping bearings). I'm assuming they meant he killed main bearings, but it's possible he was killing big ends. There's also a thing when you're spinning high rpm that the oil pressure isn't great enough to force itself from the outside of the main bearings 'upwards' towards the centre of the crank, starving the big ends. That's why you get things like nose-fed cranks in high end motorsport. Either way it's caused by the diameter of the main bearings and how fast the crank's spinning. Yeah the trade-off of having big bearings from it being a 2.5l version of an engine designed as 3.5l is that the crank should be pretty strong. Even with the smaller big ends of the 4GR it still has generous crankpin overlap which is a good indicator of rigidity. It might be a big V6, but V6 cranks are inherently short anyway. All bodes well for avoiding torsional resonance and other nastyness. I think I'd got some numbers for kpr's pistons and rods. Not sure if it was from here or just online, but plugging those in to 10k rpm gives roughly 3.2 tons of peak force on the crankpin (fudged a little as I don't actually know the weight of the little end so it's an approximation). That's definitely going some! Although I've just done a cursory look into bike engines and they're something else entirely. Went for a Ducati Panigale V-twin as there's more info out there than the V4 and they've actually got car-sized cylinder volumes. 11k rpm on a 60.8mm stroke and 116mm bore 5272g and 4.2 tons. Highest I've come across for a production engine by some 13%. Very true on the valvetrain! Might be worth running with no bonnet for the first few high rpm pulls1 point
-
I'd daily that!1 point
-
Just catching up on the first posts of your thread, and the 4GR does seem like quite a good base design for high revs (bar the smallish valves). I've plugged the basic dimensions in to my little engine internal forces database to see how different rpm ranges compare to other engines/setups. Mean piston speed is a halfway decent way of working out how high an engine might rev, but the thing that kills rods and pistons is maximum acceleration at TDC (the piston screaming up to the top of the stroke then doing a full 180 in a fraction of a second to come back down the bore). At 10k rpm the 4GR is pulling 5449g which...is up there. No production engines have that high forces, and only a tiny handful of tuned ones. Your 1NZ is one of them at 5016g at 9000rpm. There was a bloke with a billet-cranked stroker S54 that was 5975g at his 9000rpm redline. K20a's at 9000rpm are 5131g. If you take F20a's to 9200rpm which they can do that's 5088g. That's it that I've come across, though I started it to look at long stroke I6s and torsional resonance so it's probably missing a fair few high-revving V6s. If you take the 4GR down to 9000rpm then that's 4413g which is far more common for a lot of high revving stuff. High revving big-bore Alfa V6s hit 4608g at 9k rpm and they're far less built for revs than the 4GR. The factory redline for an S52B32 is 4137g, and are happy up to 4352g. Stock K20a limiter is 4685g, and F20C is 4655g. @kpr's 9k rpm short-rod 4AGE is 4616g. All depends a bit on the piston and rod weight though, which I can't find online for the 4GR. 5000g with a 300g piston is going to be a lot less load than even 3000g with a 600g piston. Journal/bearing surface speeds are up there as well. At 10k rpm they're 10.17m/s for the mains and 8.0 m/s for the big ends. I've only come across folks racing Jag V12s that are higher. 9k rpm again is more acceptable (though still high) at 9.15 and 7.2m/s respectively. The 993 GT3 3.8 is about there at 9.0 and 7.8 m/s, but that's pretty much it that I've come across. Not sure if they like to eat bearings like S54s or if they're ok. Big bearings and small stroke does make for a stiff crank though, so hopefully torsional vibrations would be less of an issue.1 point
-
Probably sound like 6x GN125’s1 point
-
1 point
-
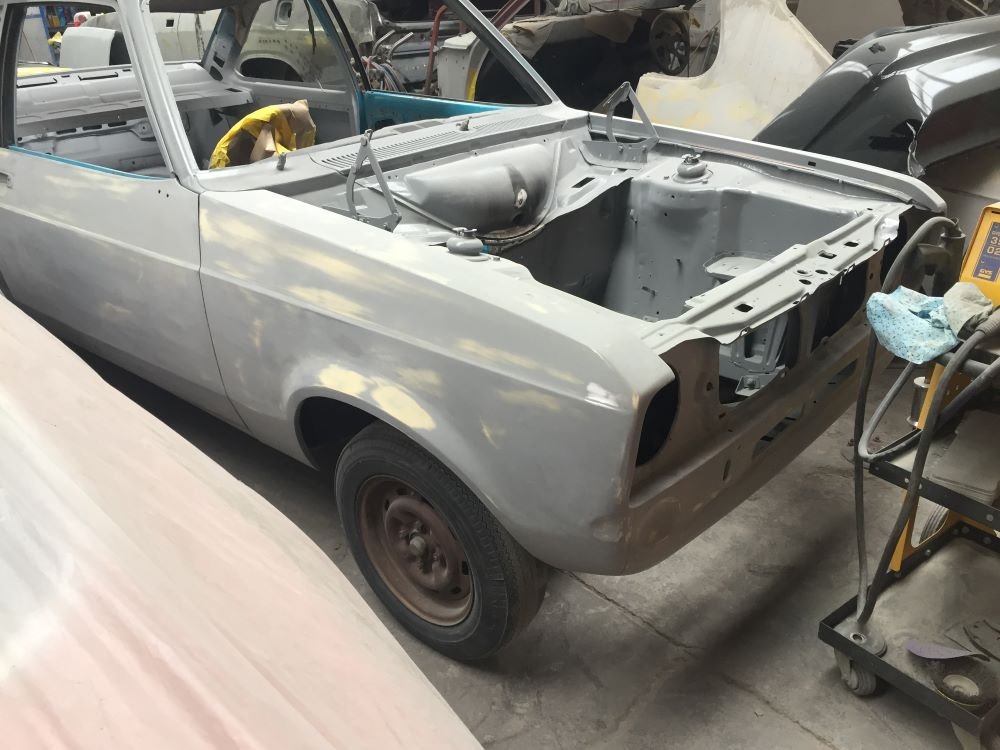
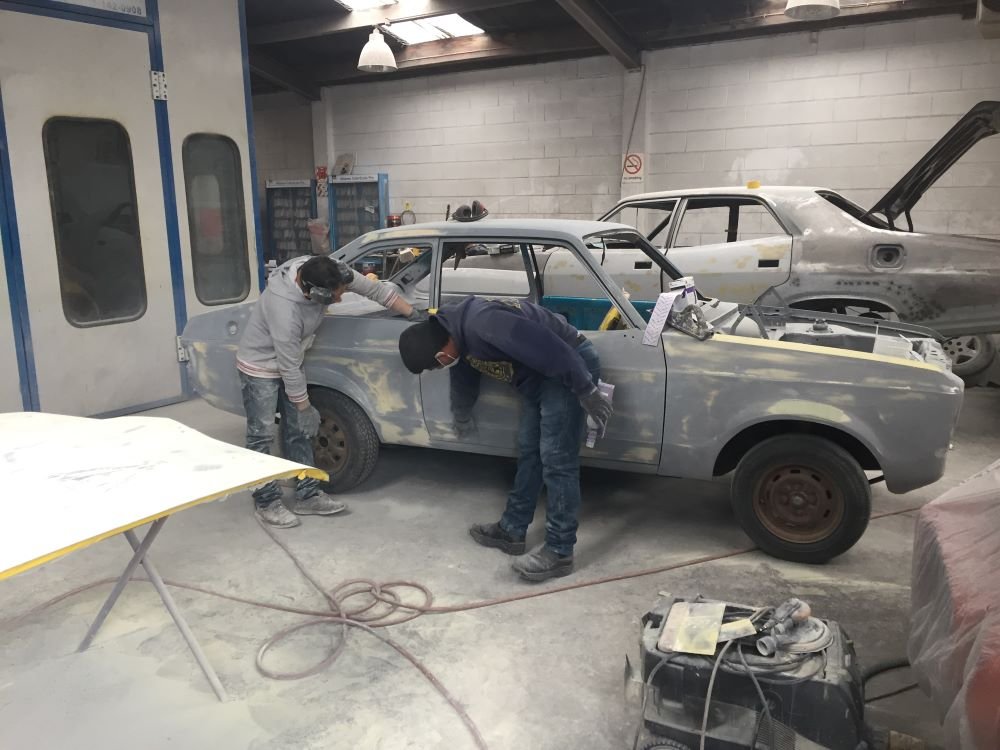
Body work nearly finished. Small repair to heater bowl done. Still some work to do on passenger door which is not closing properly after having roll pins replaced. May have had some impact damage in the past. Have also had the colour matched for final paint colour before all original colour was covered up with primer. Getting closer to paint booth all the time. At home have been going over parts and getting ready for reasembly and also decided that my open shed needed to be closed in for when car comes home so working on that. Project Discussion https://oldschool.co.nz/index.php?/topic/84912-petes-mk2-escort-1600-sports/
1 point
-
(almost) NSFW1 point
-
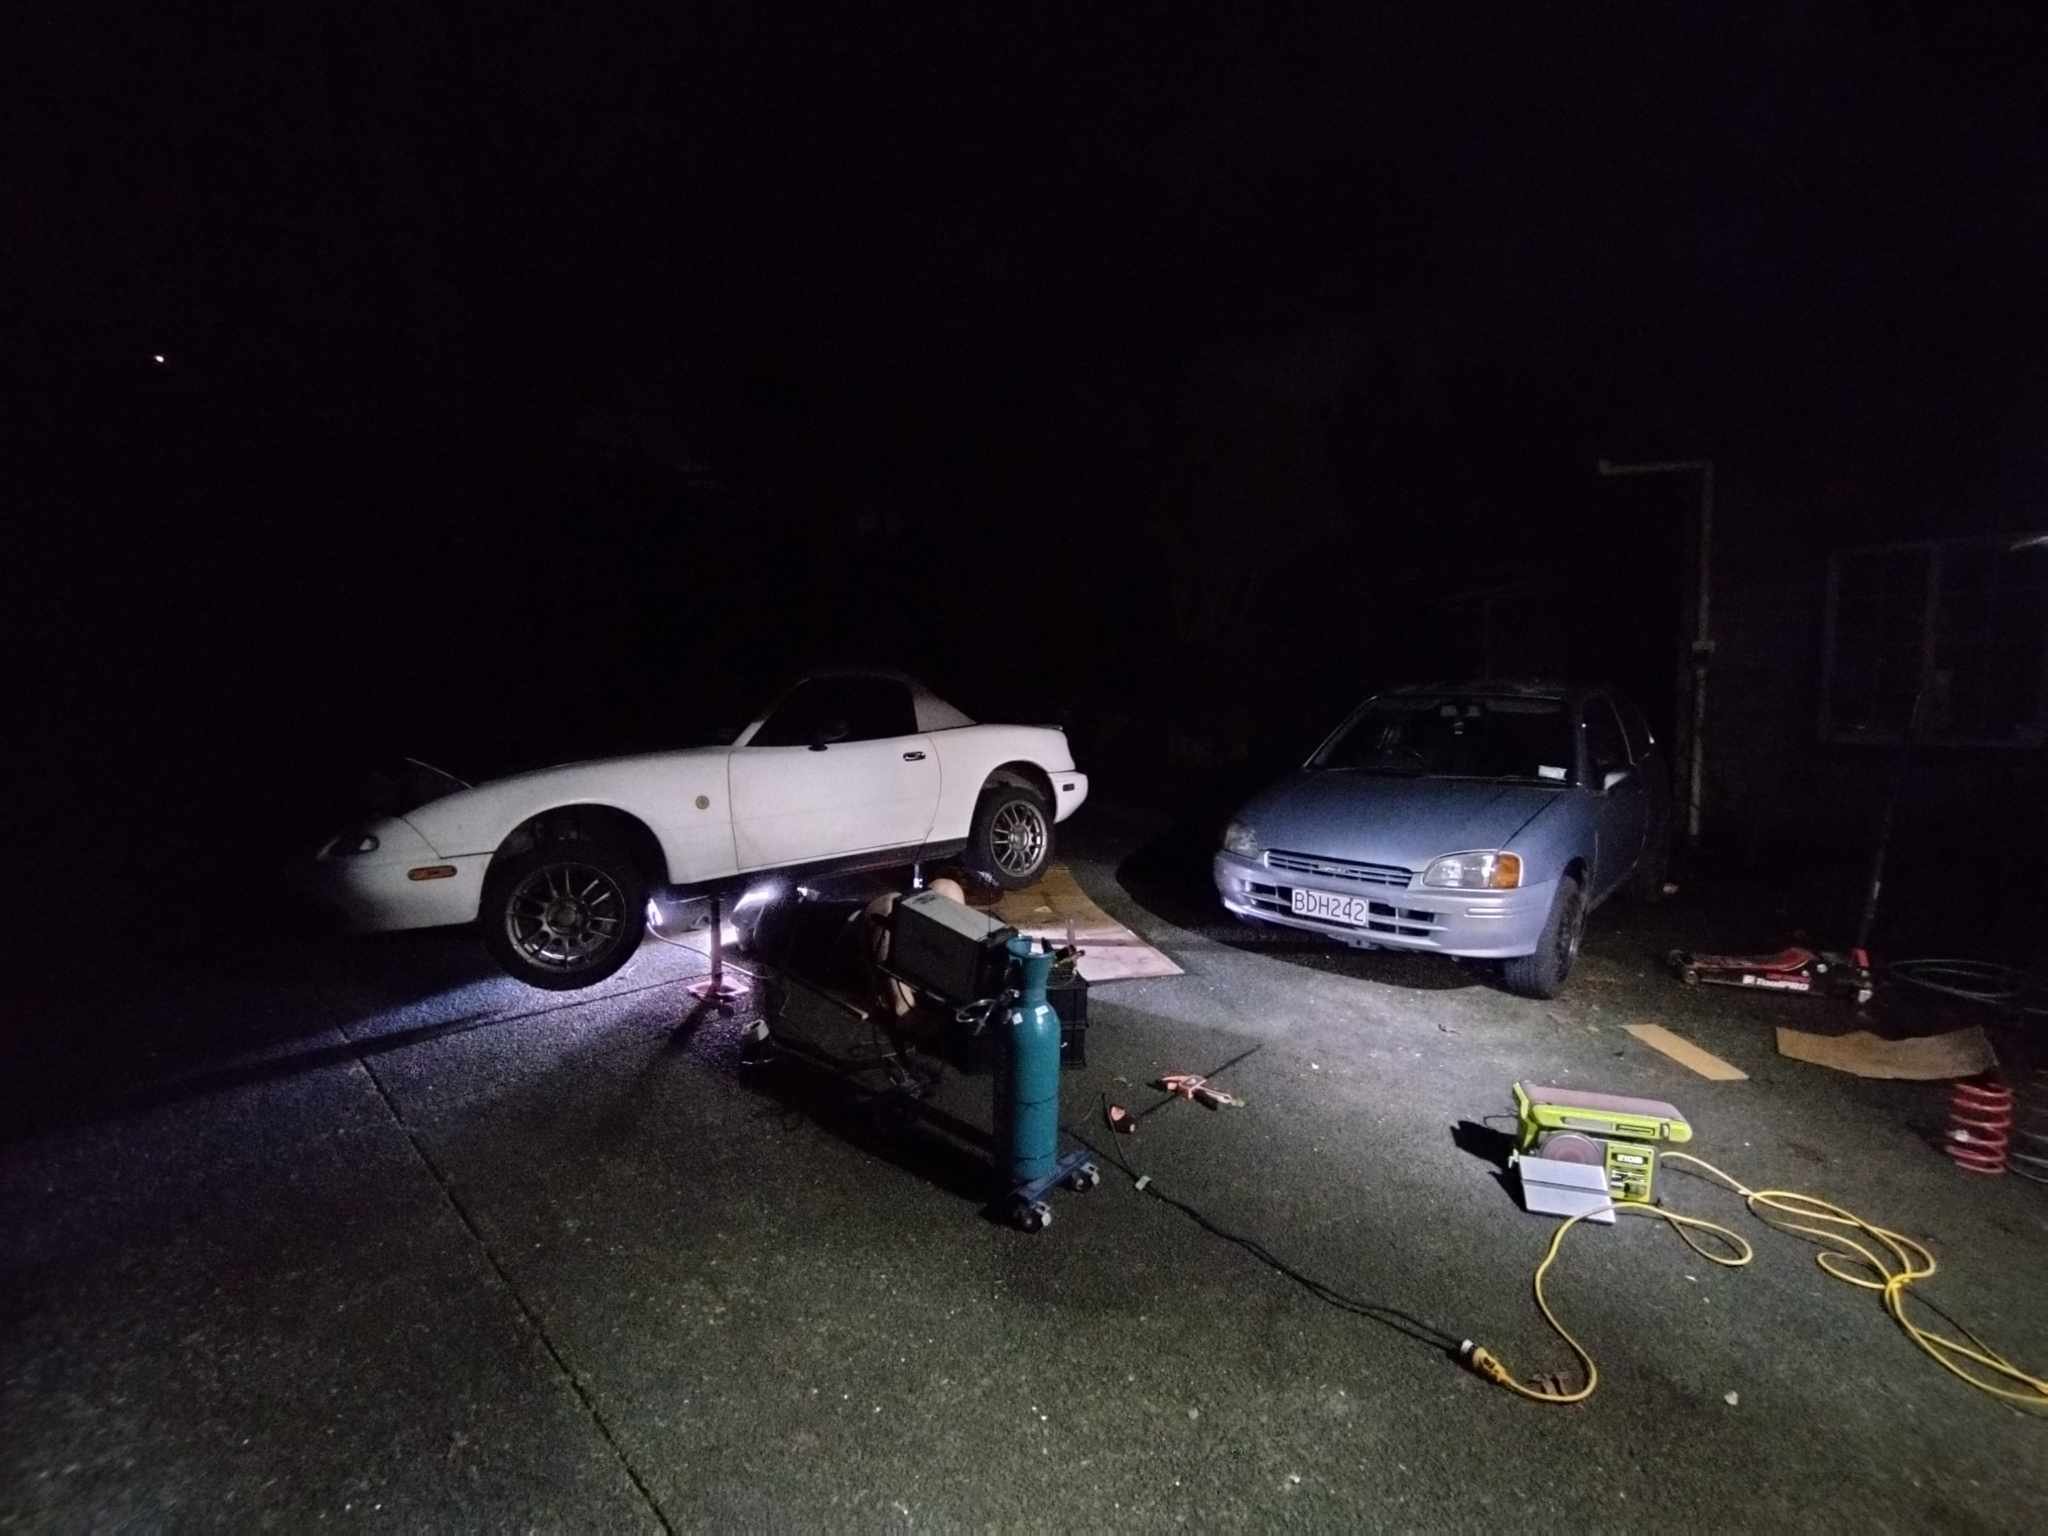
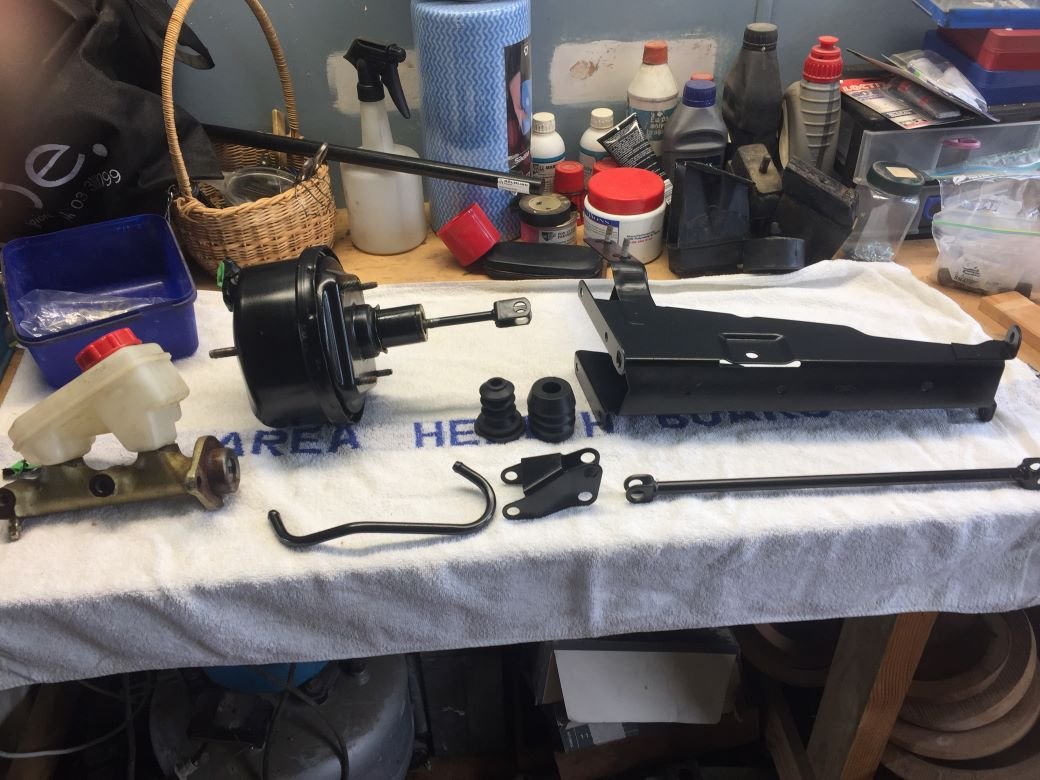
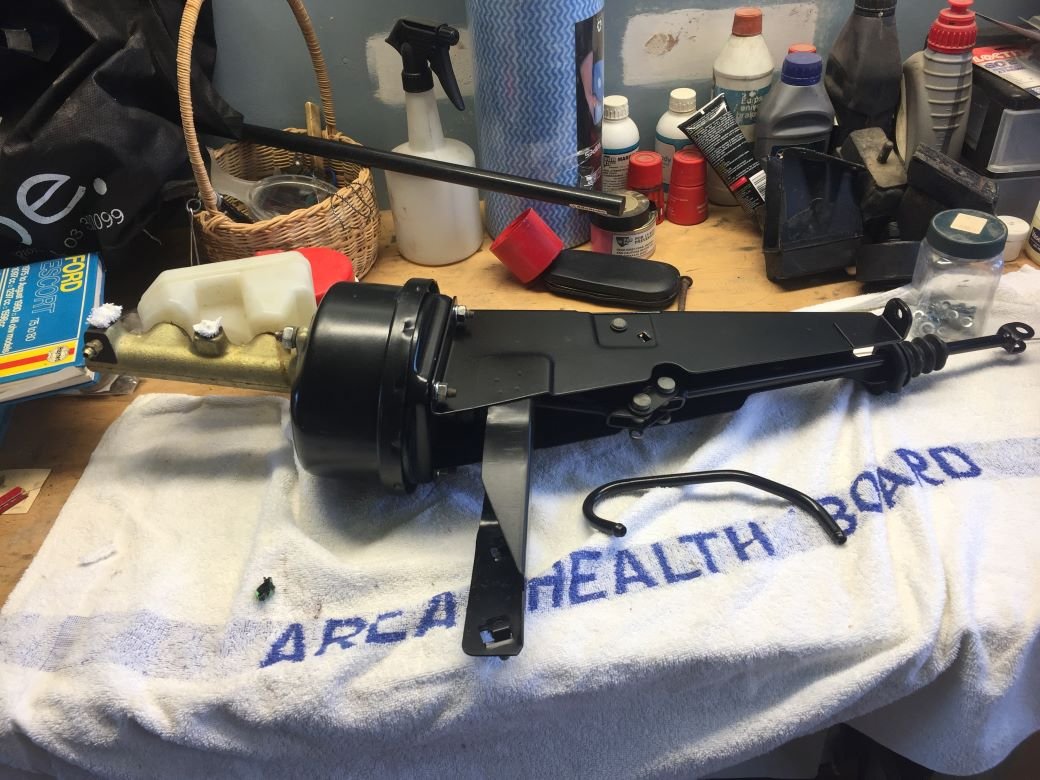
The next day. Backlash was already in spec before and is now a little better Buuuut in my impatience I didnt' let the paint dry to its full hardness. 'Tis what I get. Anyway Girlface and I attached it to the car and started doing up all the steering link bolts. The two in the rebuilt drag link are hole-less bolts w/ nylock nuts so I just trust they'll stick around at torque spec, the other two were castle-and-pinned. One of the nylock nuts just wanted to spin the joint, I fixed by jacking up the weight of the car onto the drag link. I dug the steering column out of the pile and gave it all a quick clean and zhuzh. Some of the boot was mangled so I just cut off the dangly bit, I don't think it's materially important but I may source a new boot down the line (or pilfer red's). The column itself is 96% perfect and 4% random surface rust spots. During proper reassembly I'll likely freshen up those spots but I don't think it's worthy of a full rebuild, there's zero play in anything and seriously that other 96% is perfect. I'd lost the bolts for the steering column and spent hours looking for them. I even went into Red and started disassembling the dash to find out what they looked like, and potentially use them as a fall-back. Fortunately they turned up in the box of bolts in a bag with a cryptic label. Then we snazzed all the wheels on and frolicked her outside... back on her wheels for the first time in... uh... not sure???1 point
.thumb.jpg.570970b401ac8d26ce9af7c1bf2bd8cd.jpg)


.jpg.12069cc4efe8dd2bb4b9c2c4f604f5c3.jpg)

.jpg.c60305341801861e441d71e1a7070f11.jpg)


This leaderboard is set to Auckland/GMT+12:00