
Leaderboard


Popular Content
Showing content with the highest reputation on 03/22/23 in Posts
-
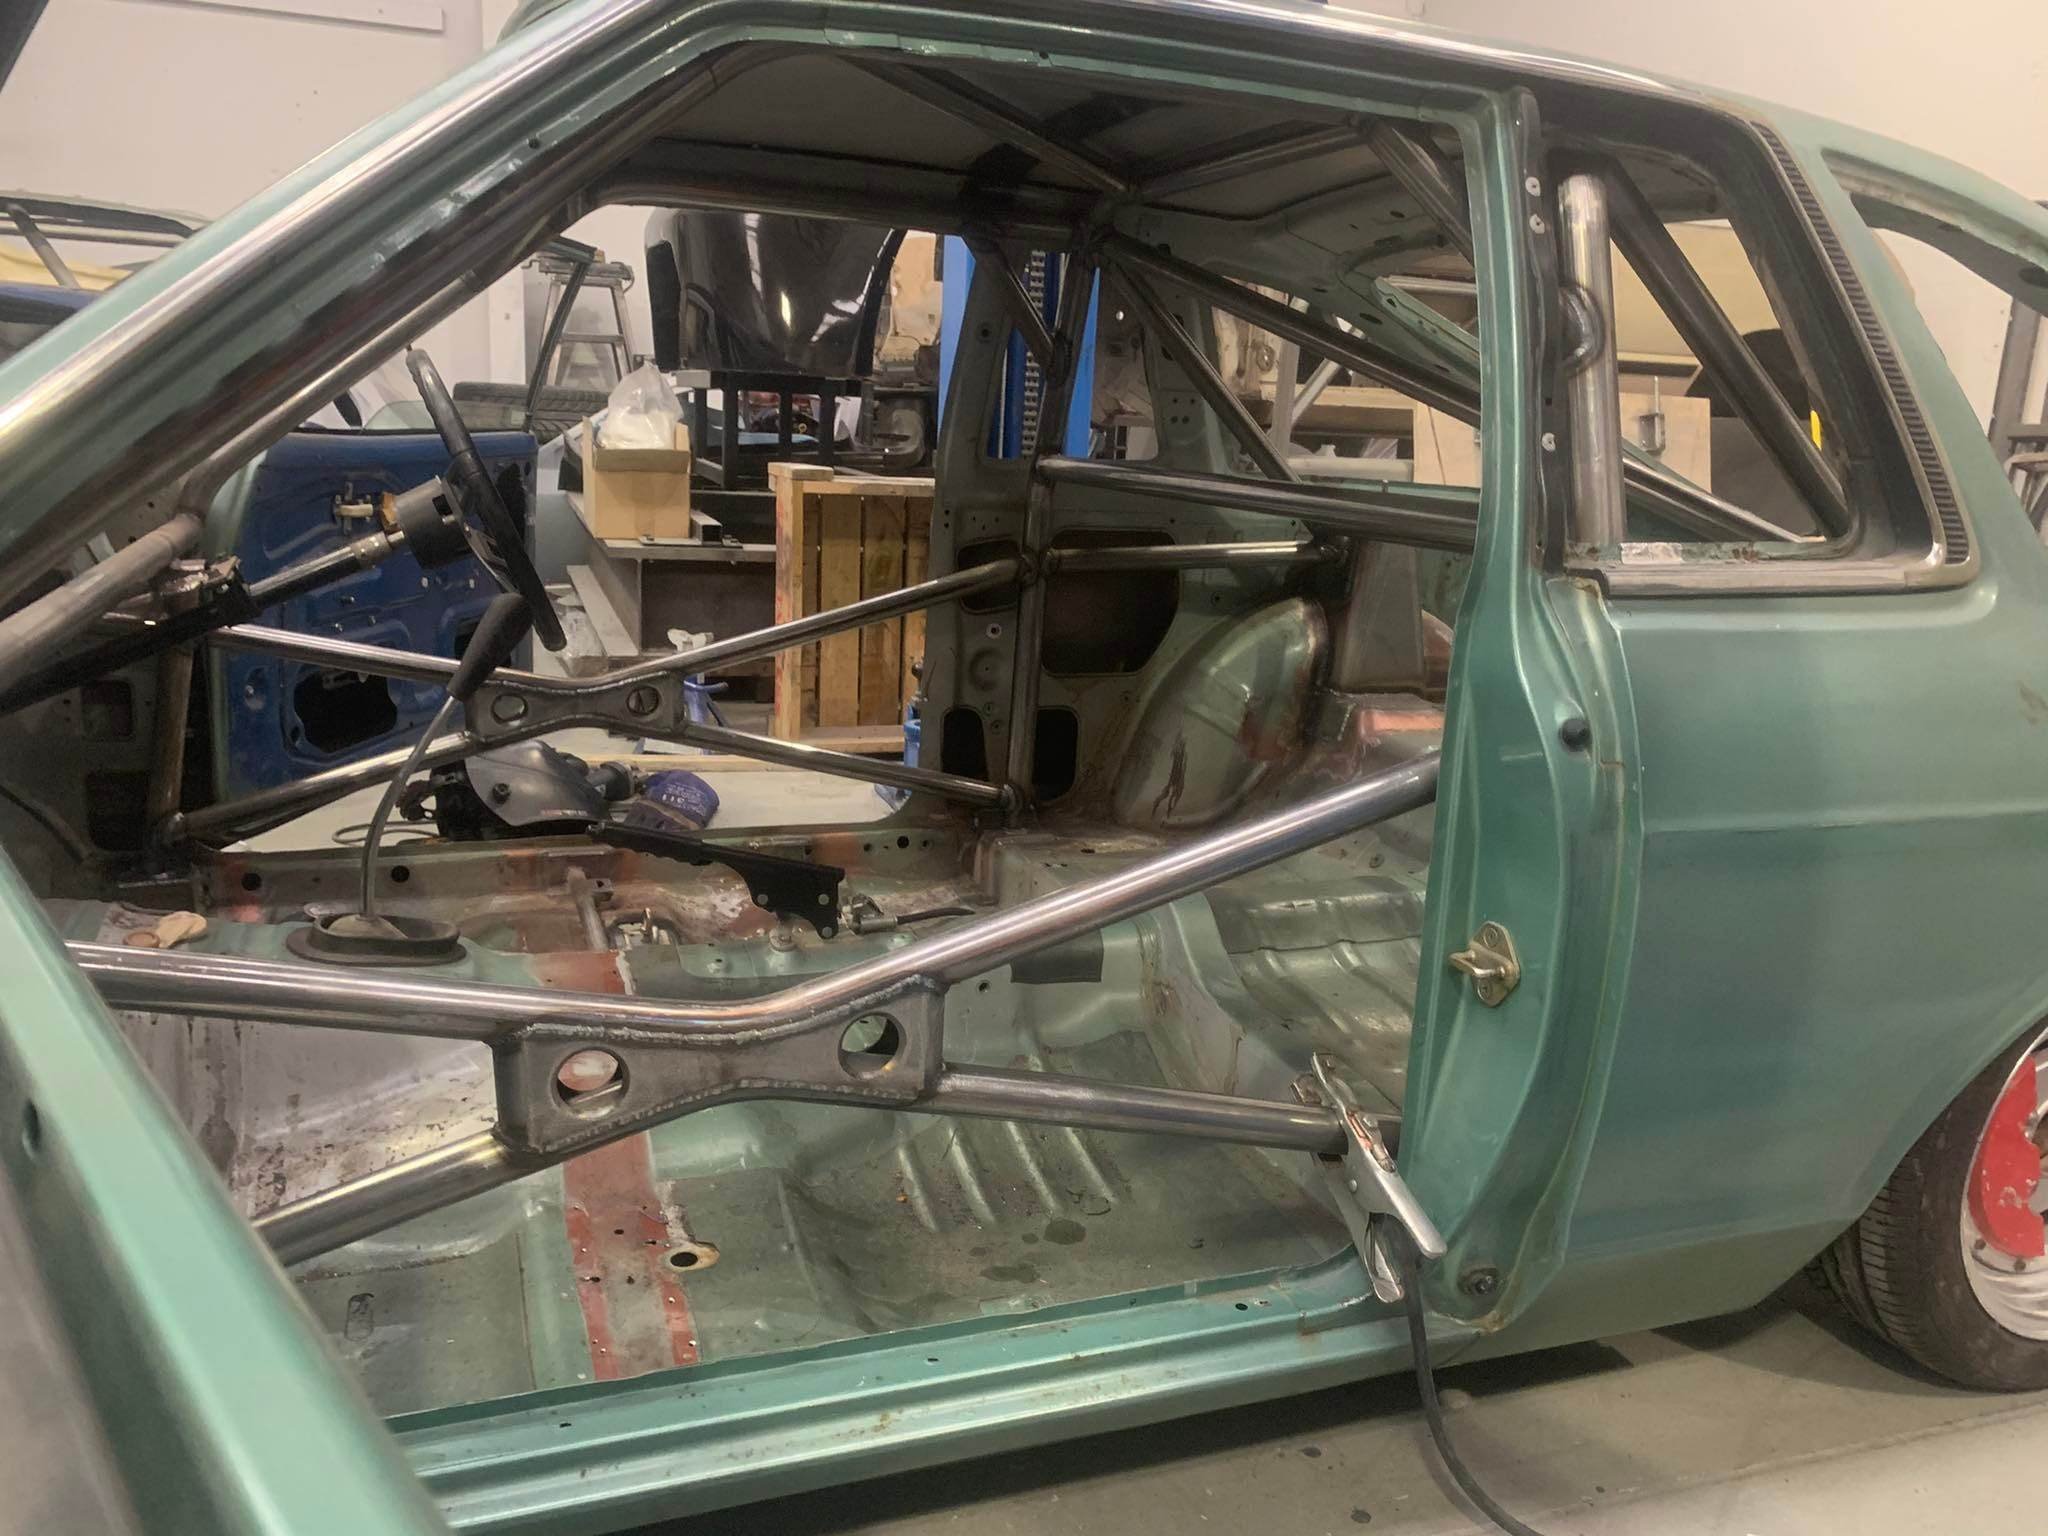
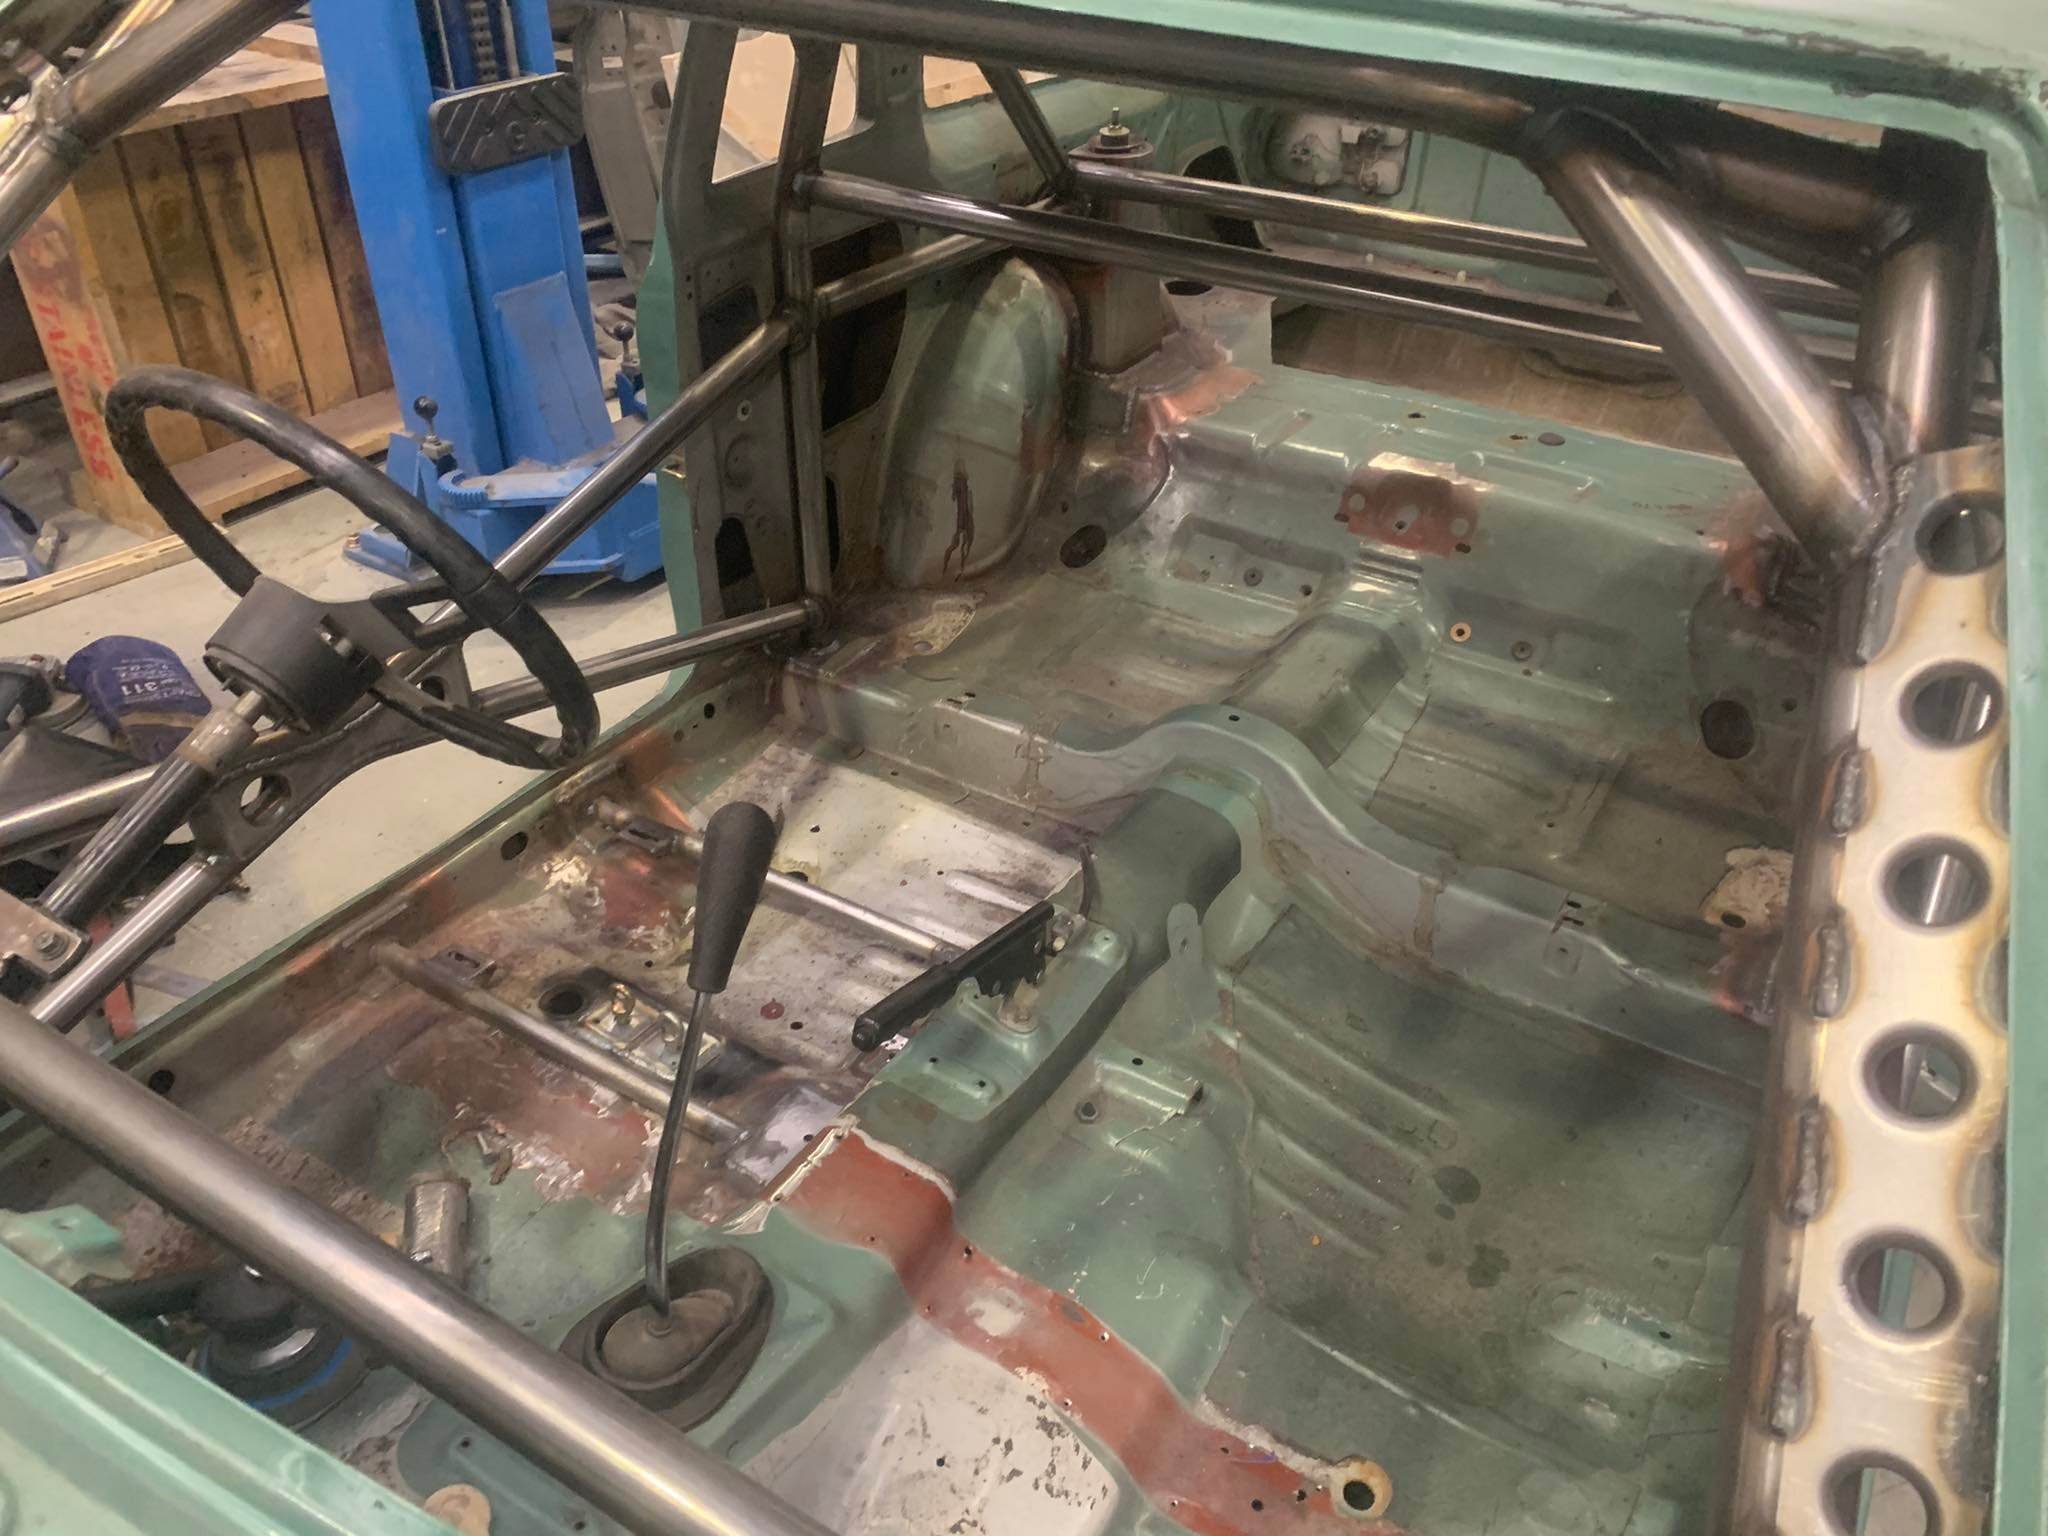
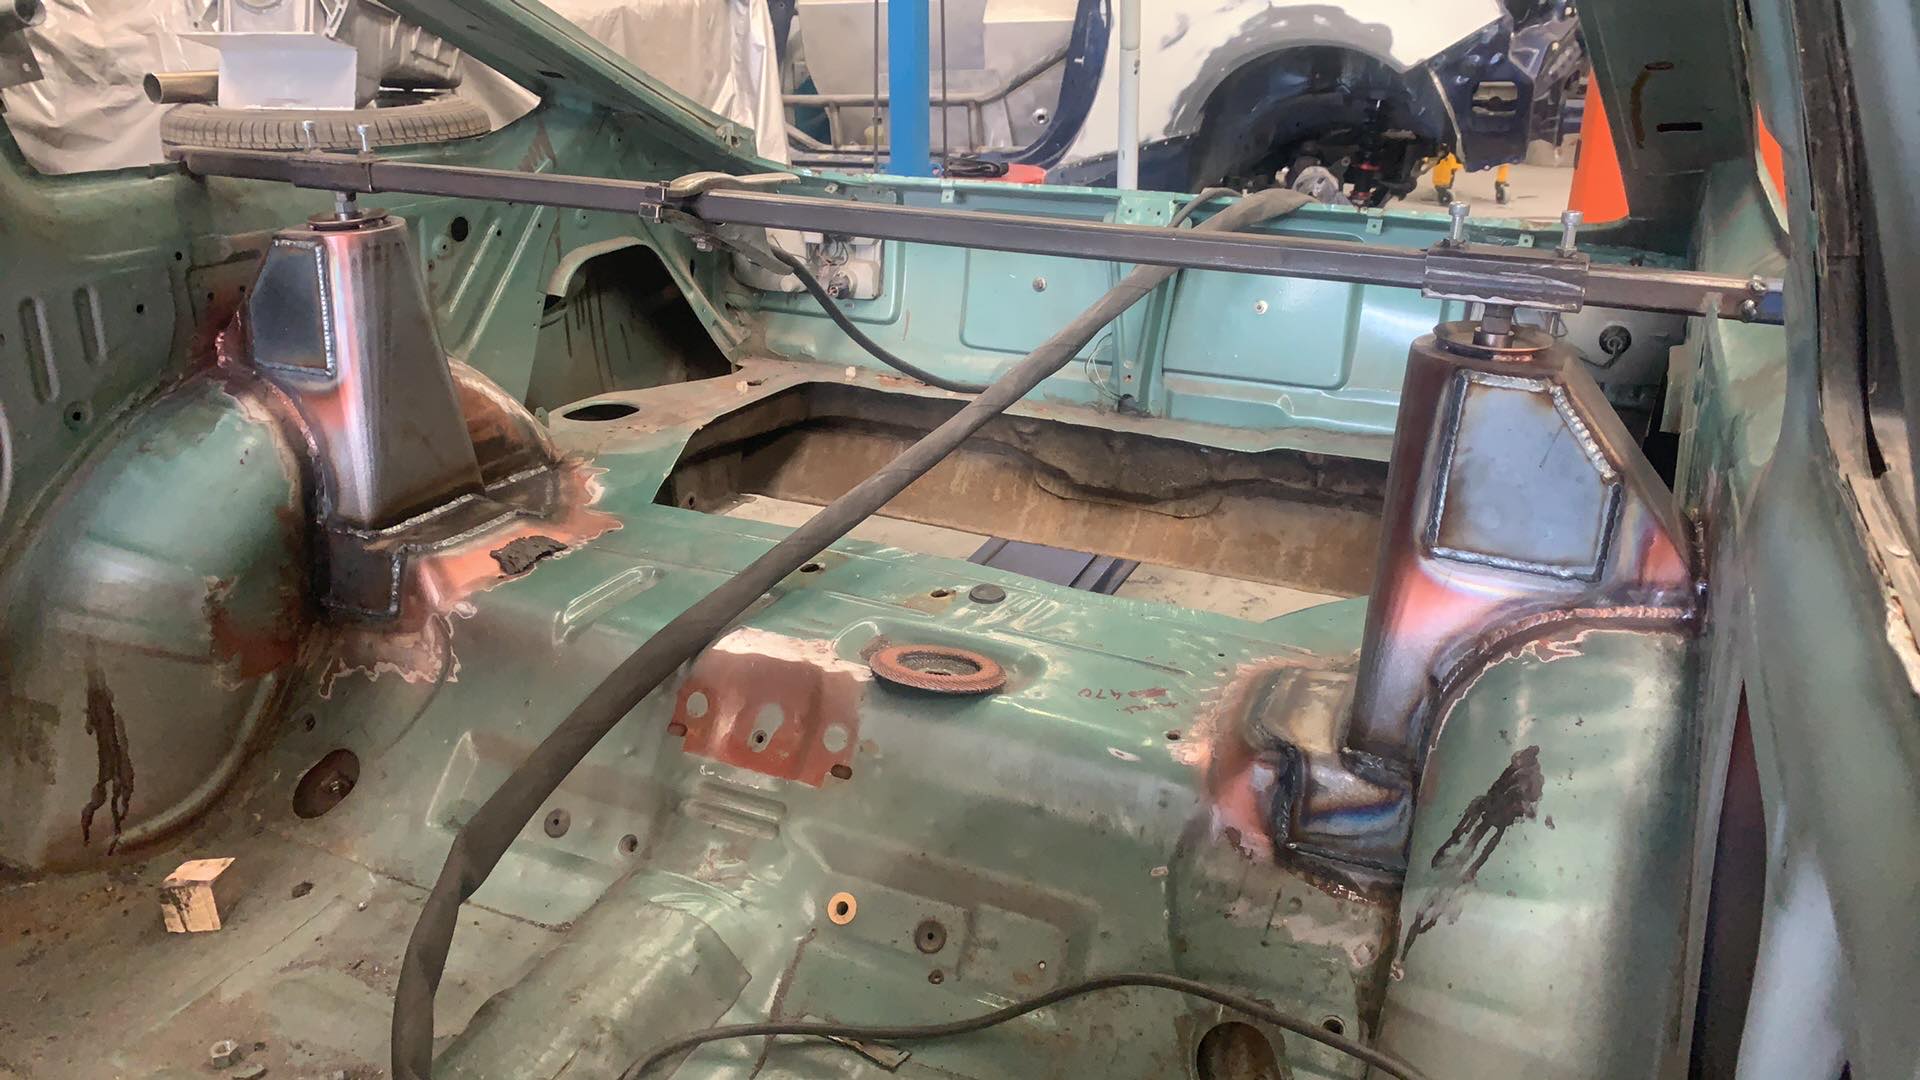
Nick has done a great job. I think we struck a good balance between strength and weight.
 17 points
 -
She's been a while since ive updated this. Have been a bit busy playing with bikes that arent exactly oldschool. A few things have been added to the stable since the last post and a few sold off. The Dommie went to a good home and old mate was super stoked. I purchased this choice old CT125 thats currently in Hogans shed that i need to get further north if anyone is heading up with a ute or trailer. Even to blenhiem will do. I was meant to get it when down for the Dusty Butt, ferry cancellation ruined that. I grabbed an XR100 of @Chris.QCR which is super rad. few wee jobs to get it going and moving and used it at garlic masters which was hella fun. Last winter I added a new DRZ400 to the stable after thinking it was going to be my dream small adventure bike, which it kind of was at the time. Dropped about 5k doing heaps of mods to make it adventure friendly and used it on a 600km "one big day" adv ride in raglan and then appx 2500kms in 4 days for the Dusty Butt down south. Went great and I should be really happy with it but I rode a KTM exc for an hour or so on the ride, and was kinda converted. Oil change frequency goes out of your mind when something can slap a full ear to ear smile like the KTM did, and that was an older model 2013, the new ones are even better, so, when i got home the DRZ got cleaned and slapped onto trademe and I payed AFC motorcycles a vist and came home with this. 2023 500 exc-f. Have ordered bunch of bits to adventurise it, larger acerbis tank, seat concepts seat, fastway footpegs, new plastics to keep the OEM ones fresh, steel sprocket, XRC dampened bar mounts, stiffer fork and shock springs which i already biffed in. Should make a pretty sweet technical trail adventure rig. Already planning out some sweet west coast mining exploration routes which should be sweet.8 points
-
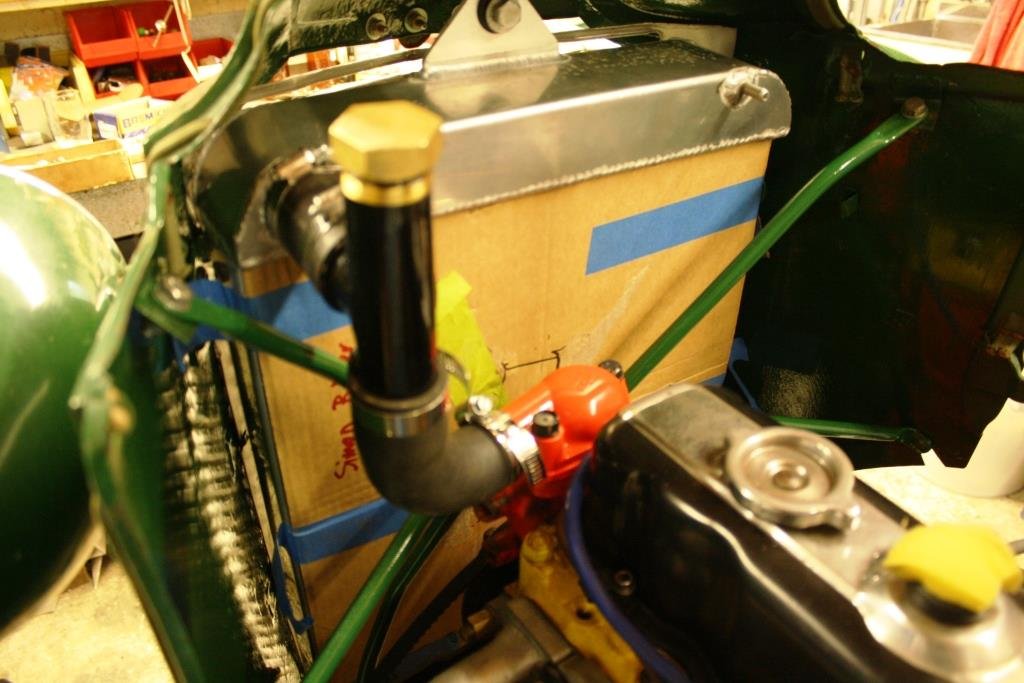
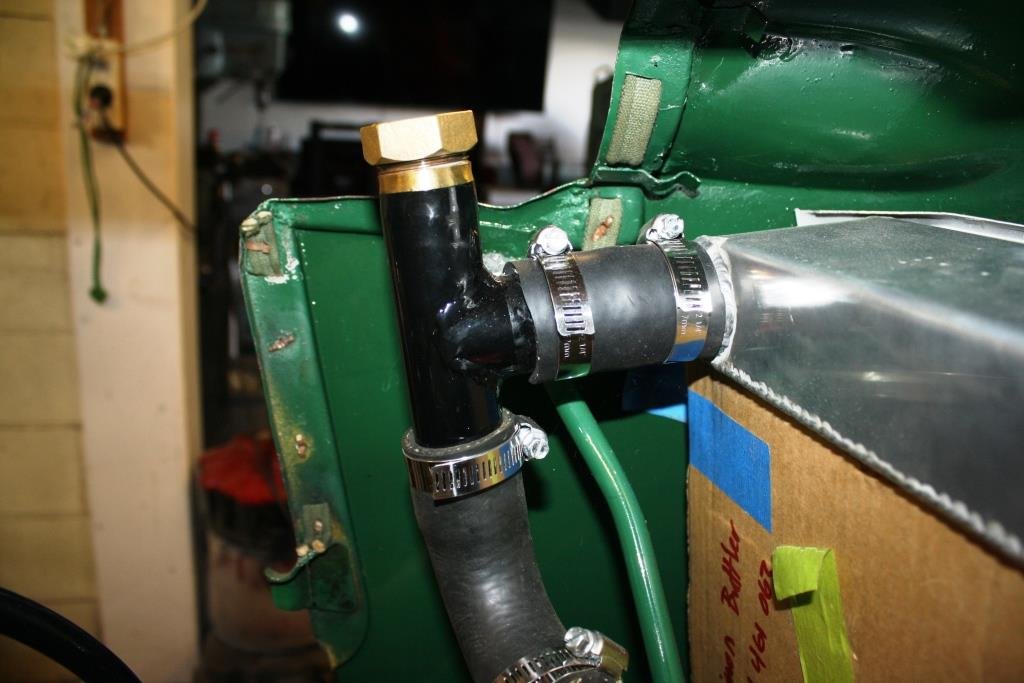
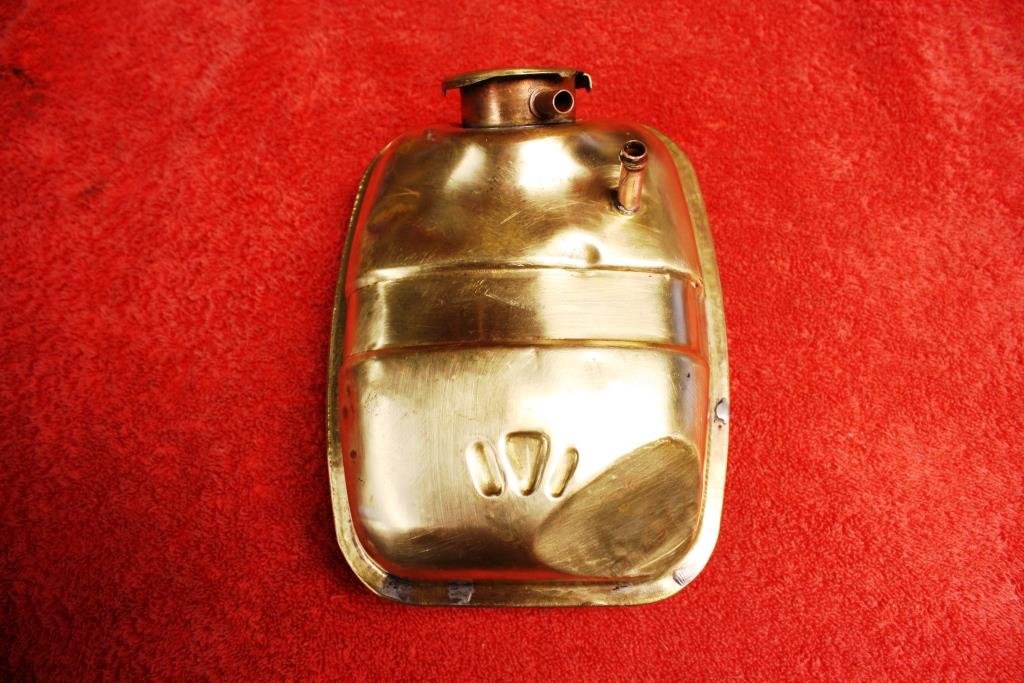
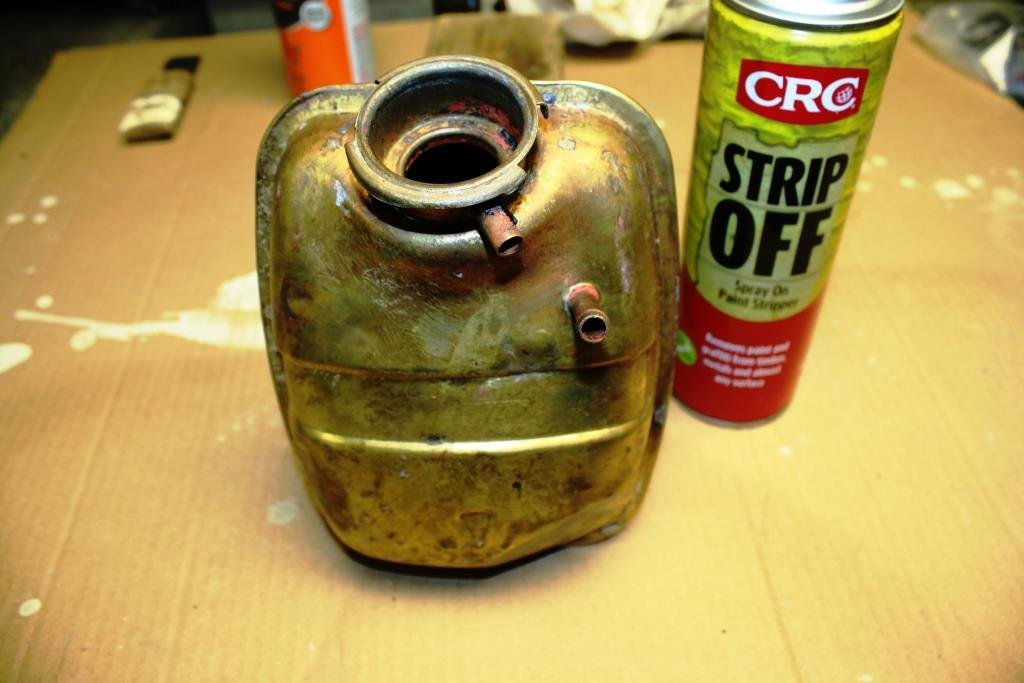
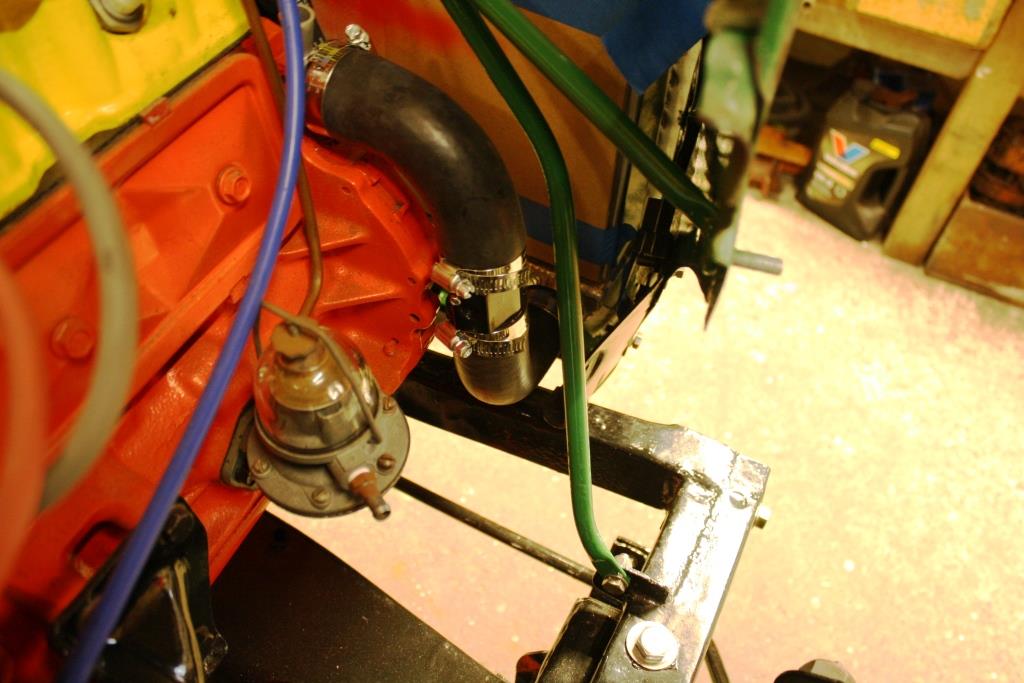
So I took a couple of weeks off for some R&R. Jumped the ditch to help my brother run a Grady White 326 from Mooloolaba to Bundarberg for 5 days of rum and fishing with some Aussie mates. 30 Km off the coast, no land in sight, 35 Knots with 700 hp hanging off the back of the boat. https://youtu.be/M81qba9EON0 Returned home to run the race car in the Targa Bambina, jeez life can be tough! Back home and back to reality. Time for some radiator plumbing. I found an interesting old brass pipe fitting… Cleaned it up a bit…. Did some pipe notching in the mill…. Some Ezyflo for the brass and this will be the radiator filler point. Threw on a bit of paint…. Looks OK to me… Hunted through Supercheap’s collection of radiator hosed for bends I could use… I bought an adaptor with a fitting that takes an electric fan sender and used it to make up a bottom hose with two 90 deg. bends. Final challenge was what to use for a header tank? I had this old tin tank that had been painted with many layers of paint over many years. I forgot to take a before picture but after a can of CRC paint stripper, ½ a bottle of Barossa Valley Pinot Noir, and an evening of elbow grease this really cool brass tank emerged. Talk about bloody stoked!
8 points
-
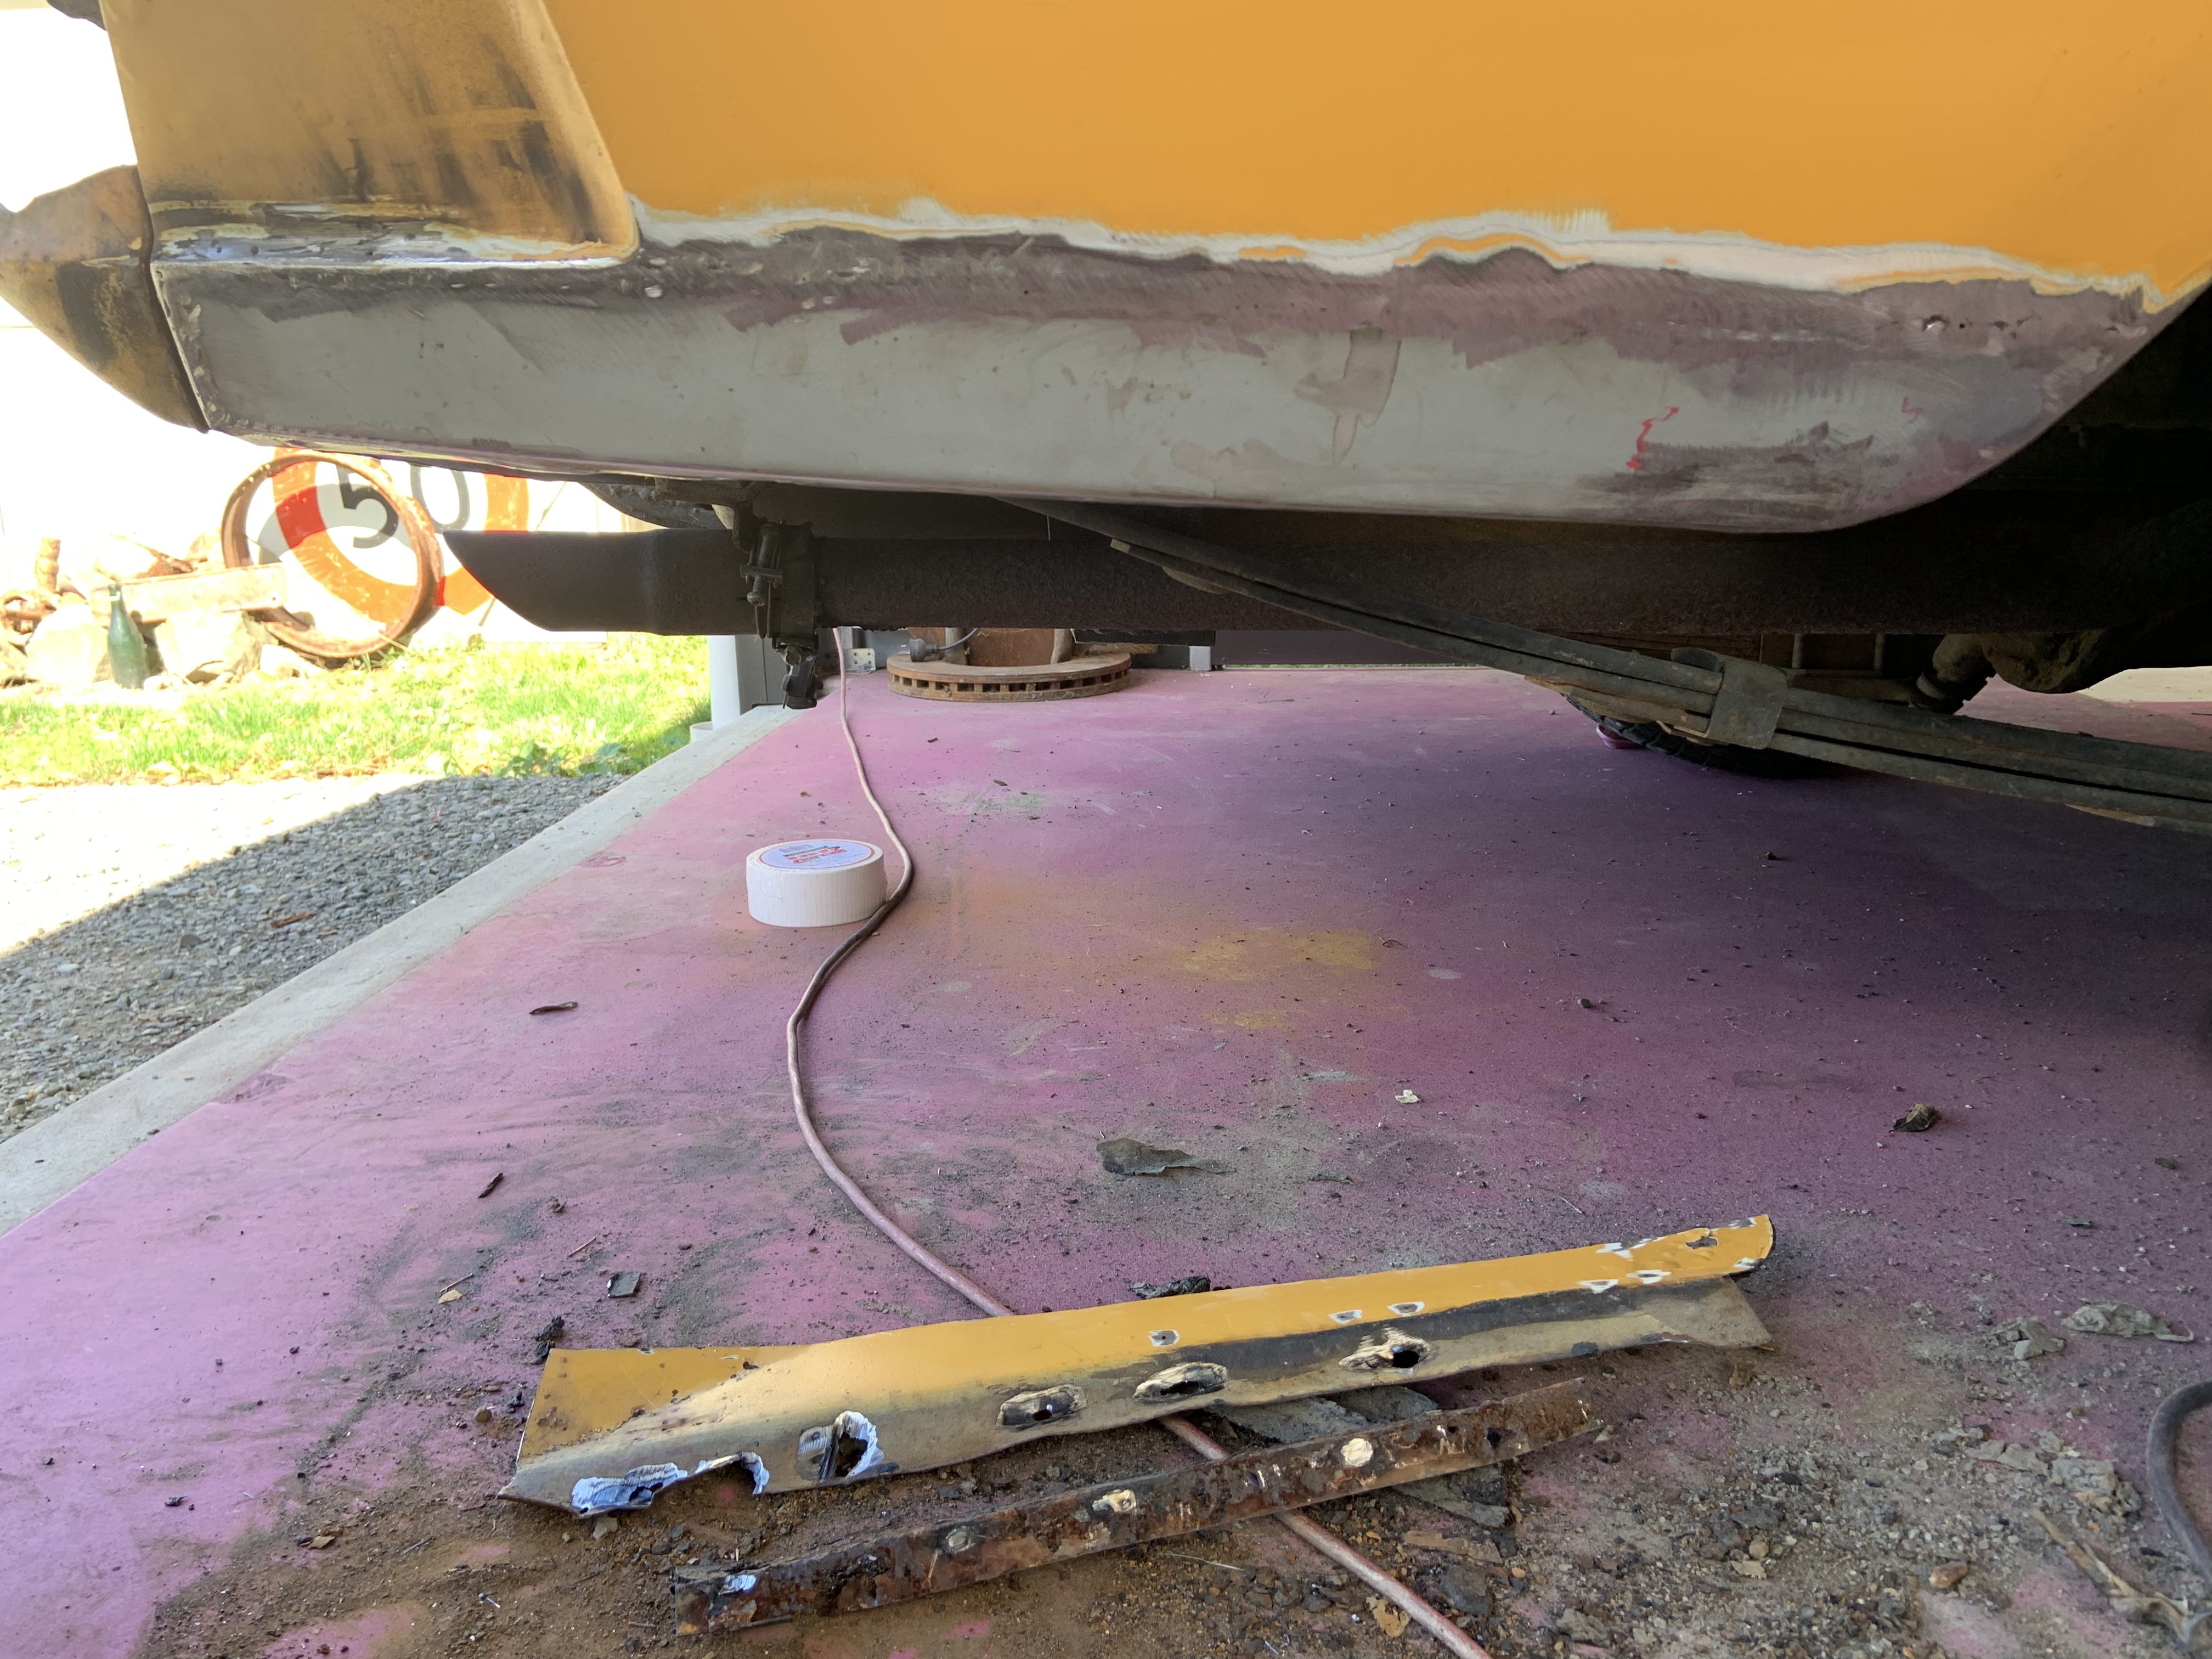
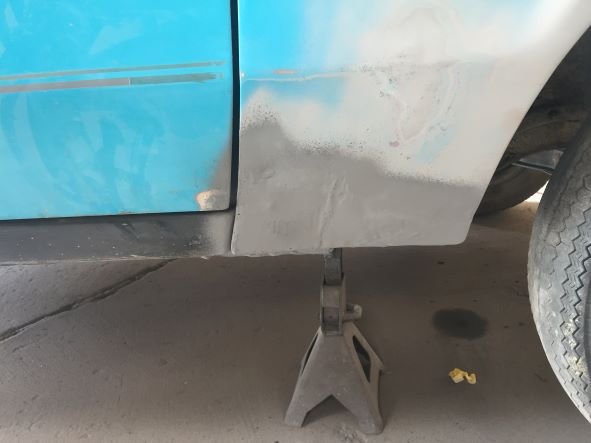
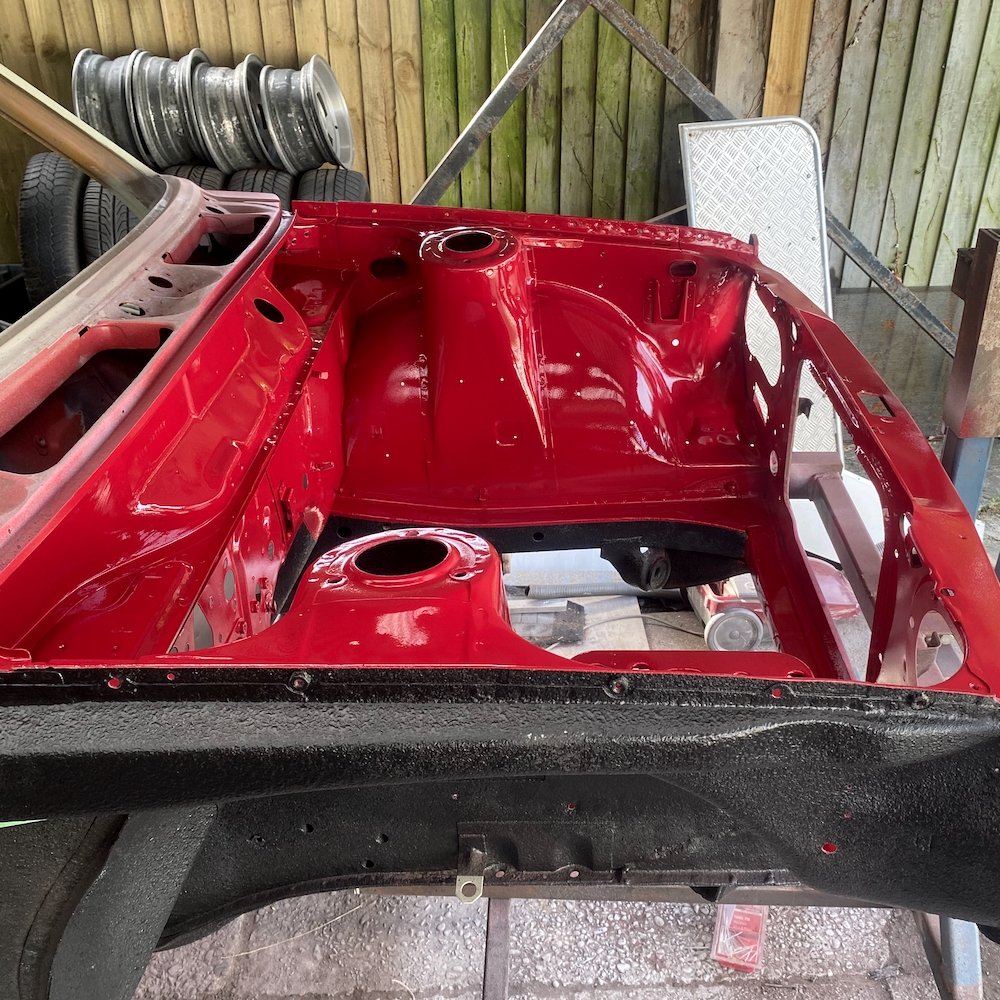
I got Elite wheels to move the centres 30mm outward, bringing the tyre in and away from the wheel arch. We now have clearance and a much better stance! Always a shame to lose max dish, but still plenty there. I’ll risk tangling with the guard if I put lowering blocks in..will let everything settle and re-assess the situation. Have not achieved much else to be fair, the electrical shit has me beaten. I did get some rubber to go between the guards and engine bay (it was dum-dum paste originally but it would stick like buggery and cause damage if I need to take it apart in the future) I haven’t been lazy though, I built a lean-to for the Escort and then tore the Falcon down to finally do a quick panel & more importantly, paint!8 points
-
In modern Deez spam, I ditched the DPF EGR and remapped the Alfa to an estimated 250hp, but it was a bit laggy and pretty smokey. Suspected it was suffering the usual clogged up sticky turbo vanes, but fortunately found it was just a bit of something blocking up the vacuum circuit so it was getting piss all suck on the actuator. Cleared that out and now it fries the tyres a little too easily. No idea on EGT yet as I don't have a probe. Next up is an intercooler improvement as the manifold temp sits around 40°c cruising and easily cranks over 70 when given the jandal. The stock intercooler sits at the bottom behind the AC condenser, which is full of bent fins and moths.7 points
-
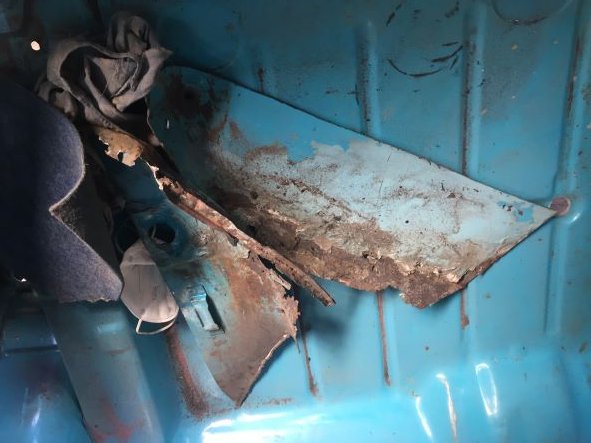
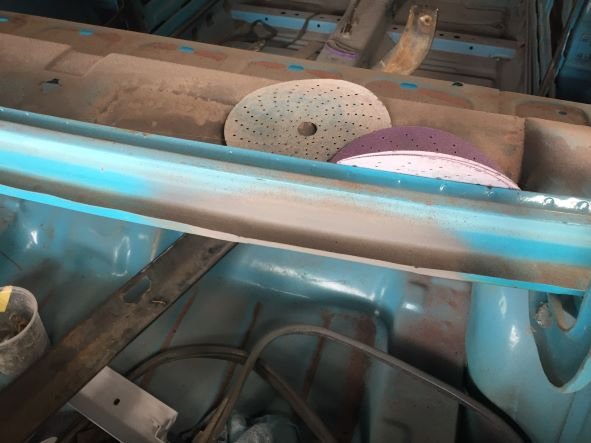
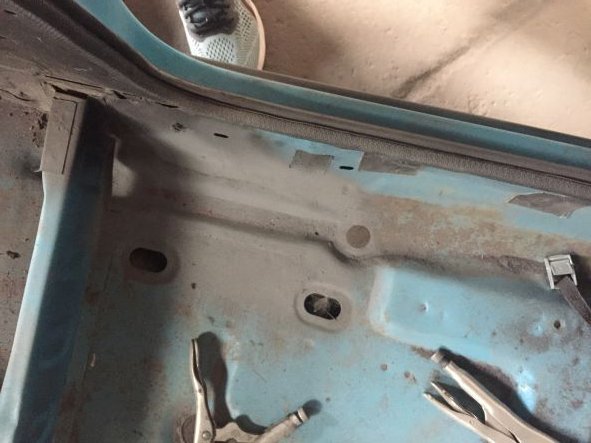
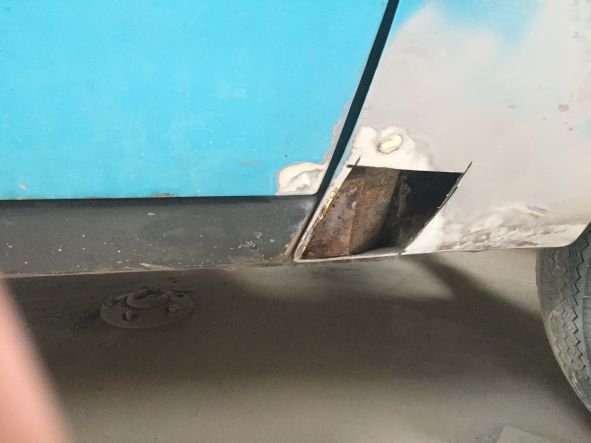
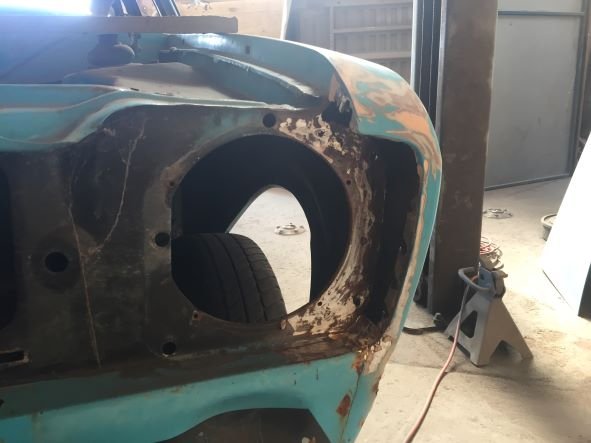
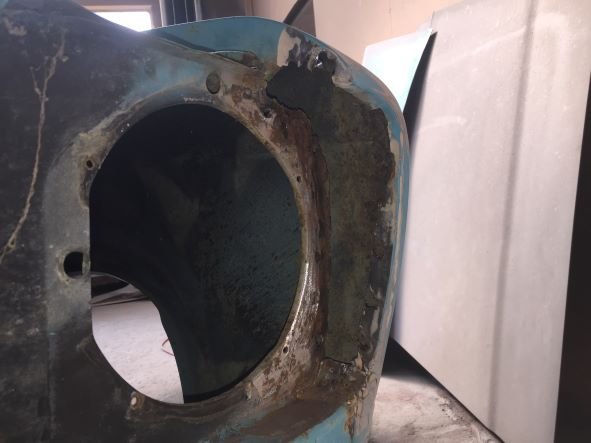
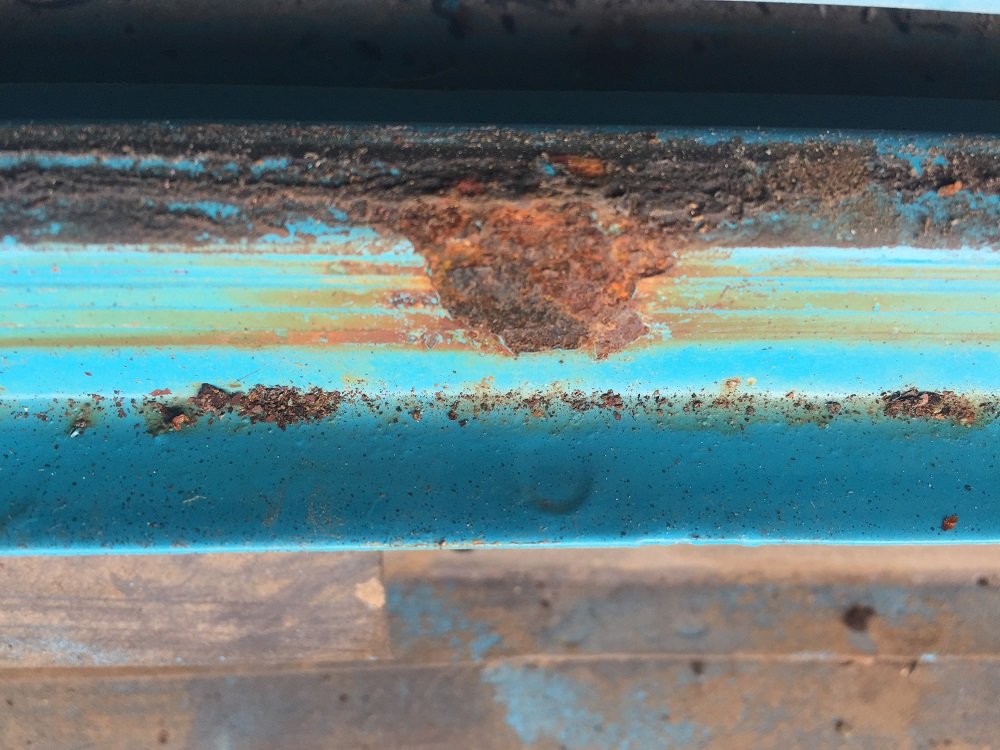
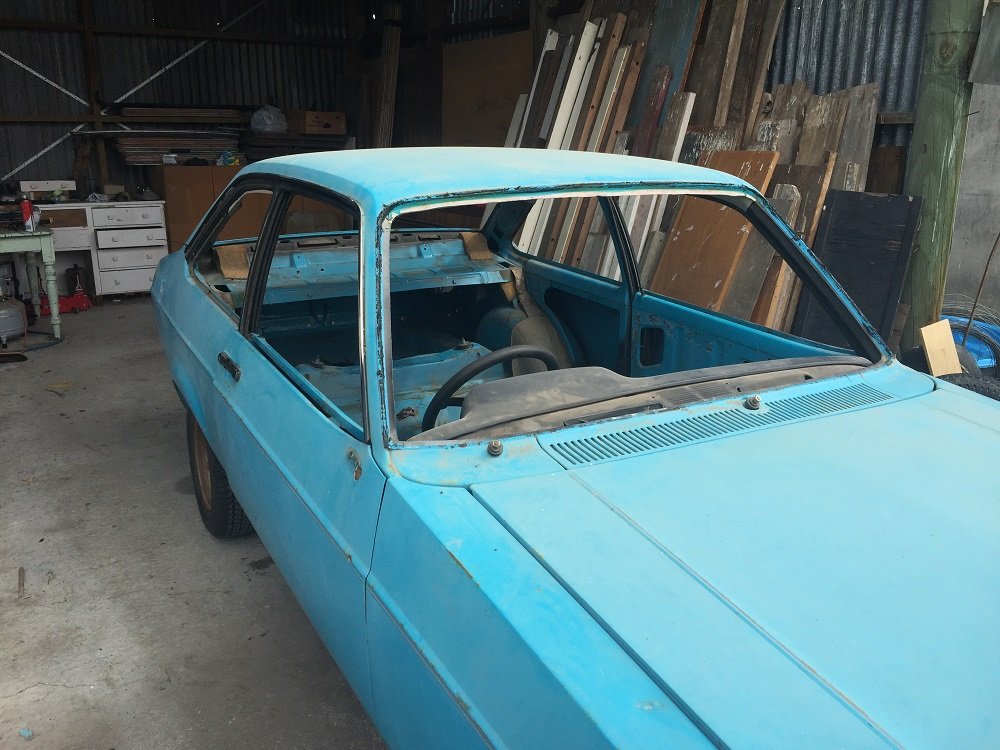
Just taking the last of the exterior rust out of this old slag and giving it a quick spruce up. The bottom foot has been shabby since we got it so it will be a big improvement when it’s all one shade of the same bloody colour! Can put in the new tail lights we found on marketplace, and source some door-to-glass rubbers since they have turned hard as plastic about 20 years ago. Also toying with the idea of using a mk4 cortina rear rubber bumper insert as a lip along the bottom of the front bumper ala XE and ESPs.. they look way way better but are hens teeth nowadays because of that. Shes lived outside a lot of the time we’ve had it, hasn’t done it any favours but I always knew it was getting a birthday and that parts that deteriorated were still available. It’s been in the flash new garage all summer so it’s bones are dry and ready for a new coat!
7 points
-
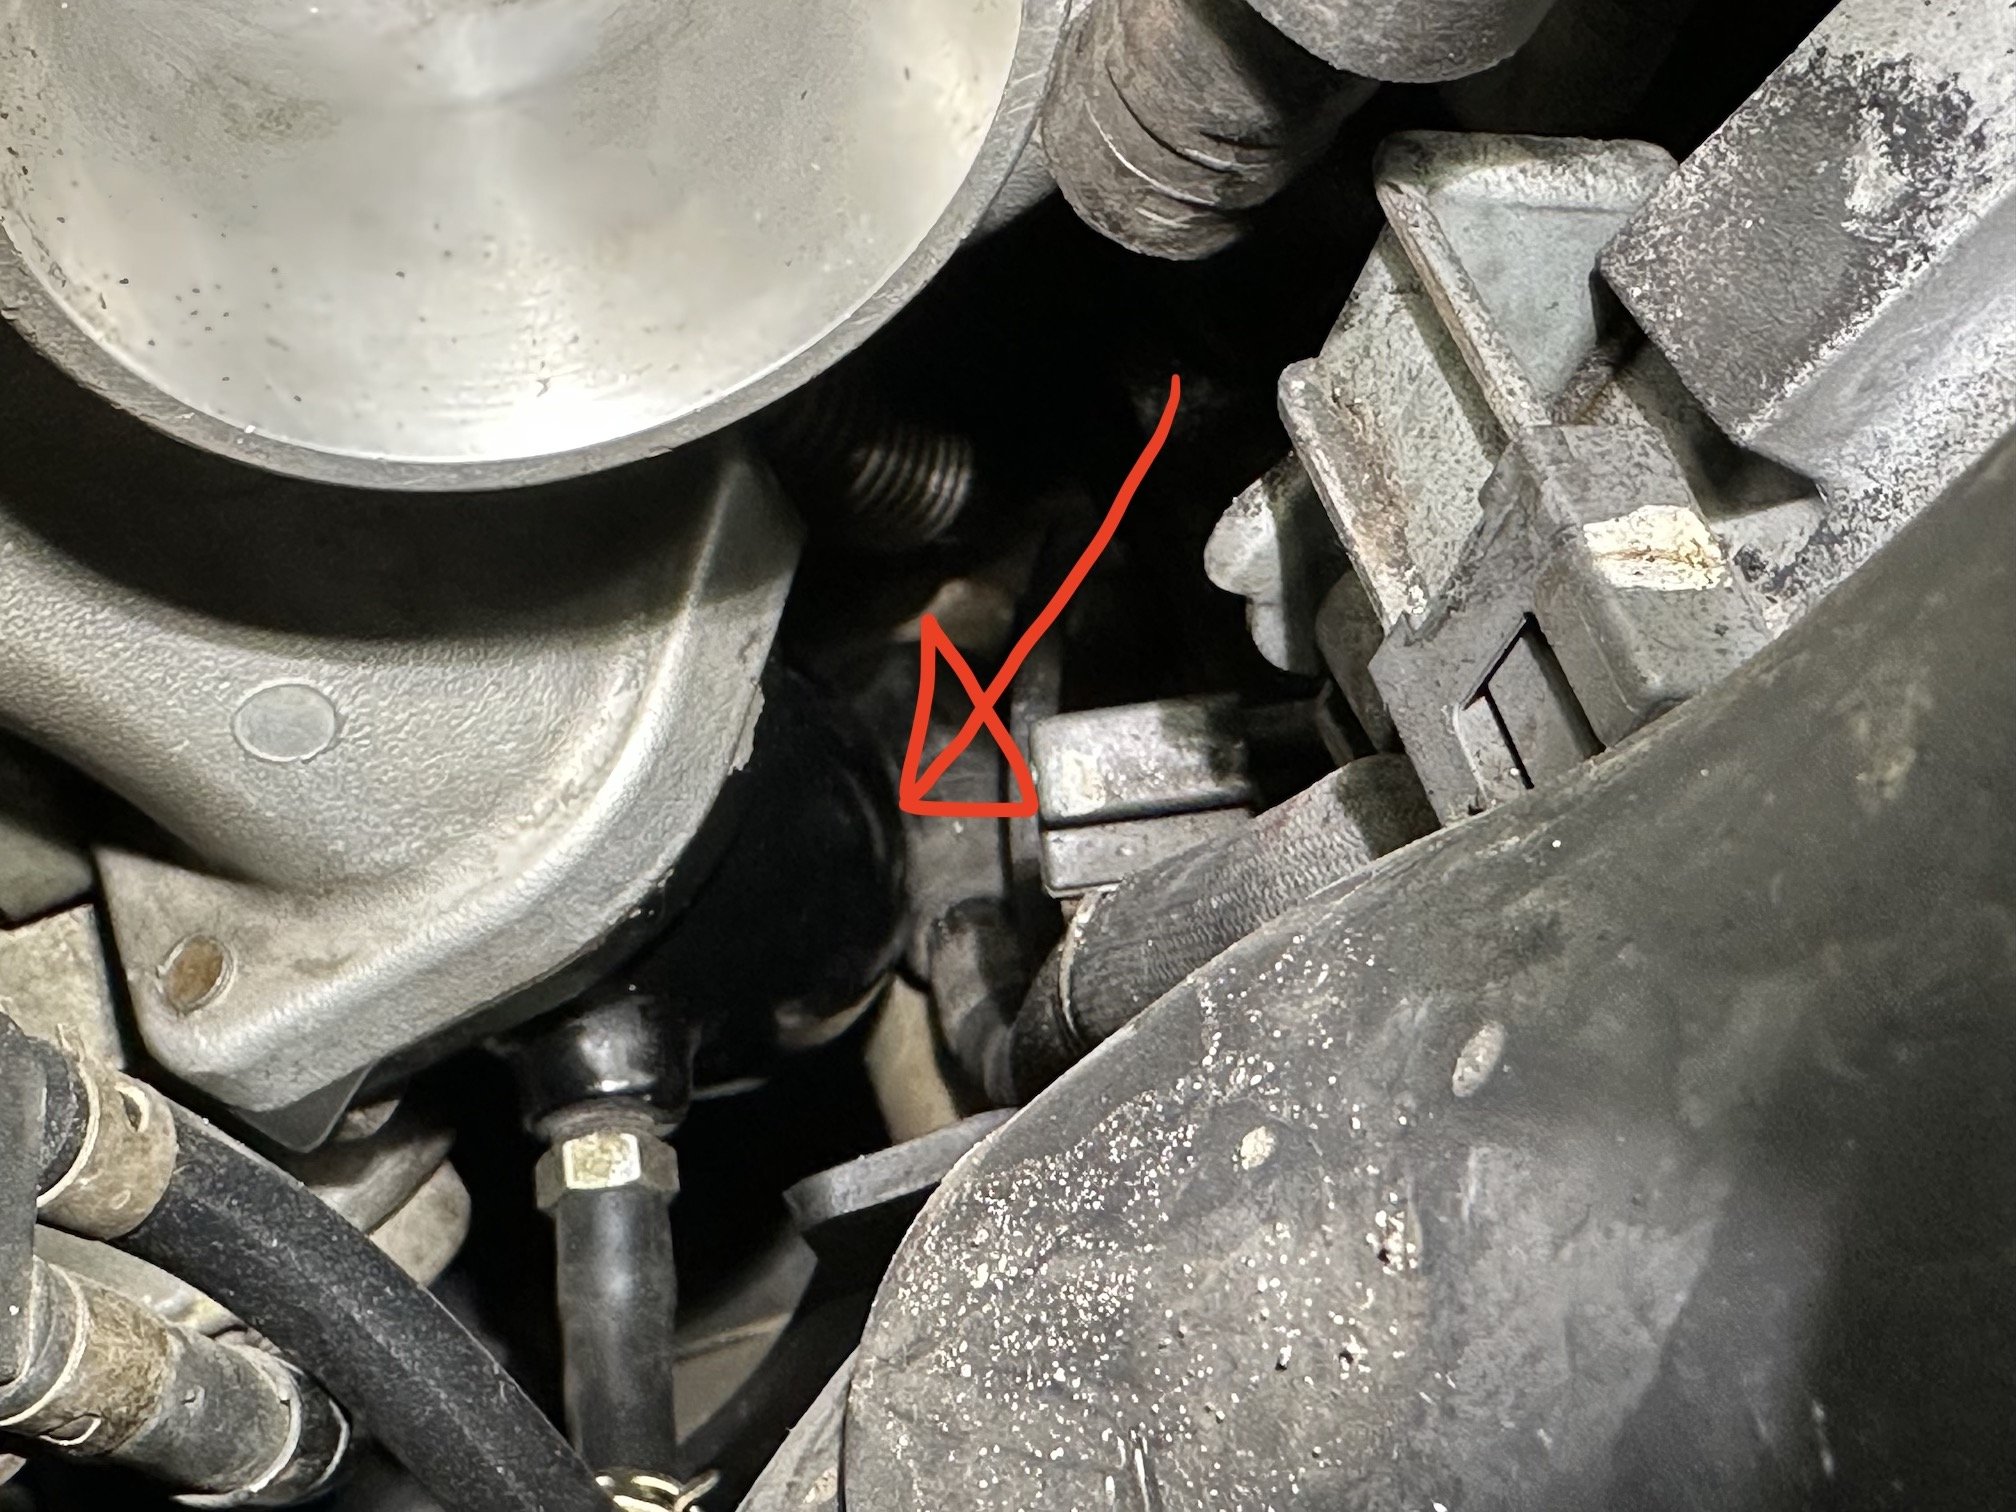
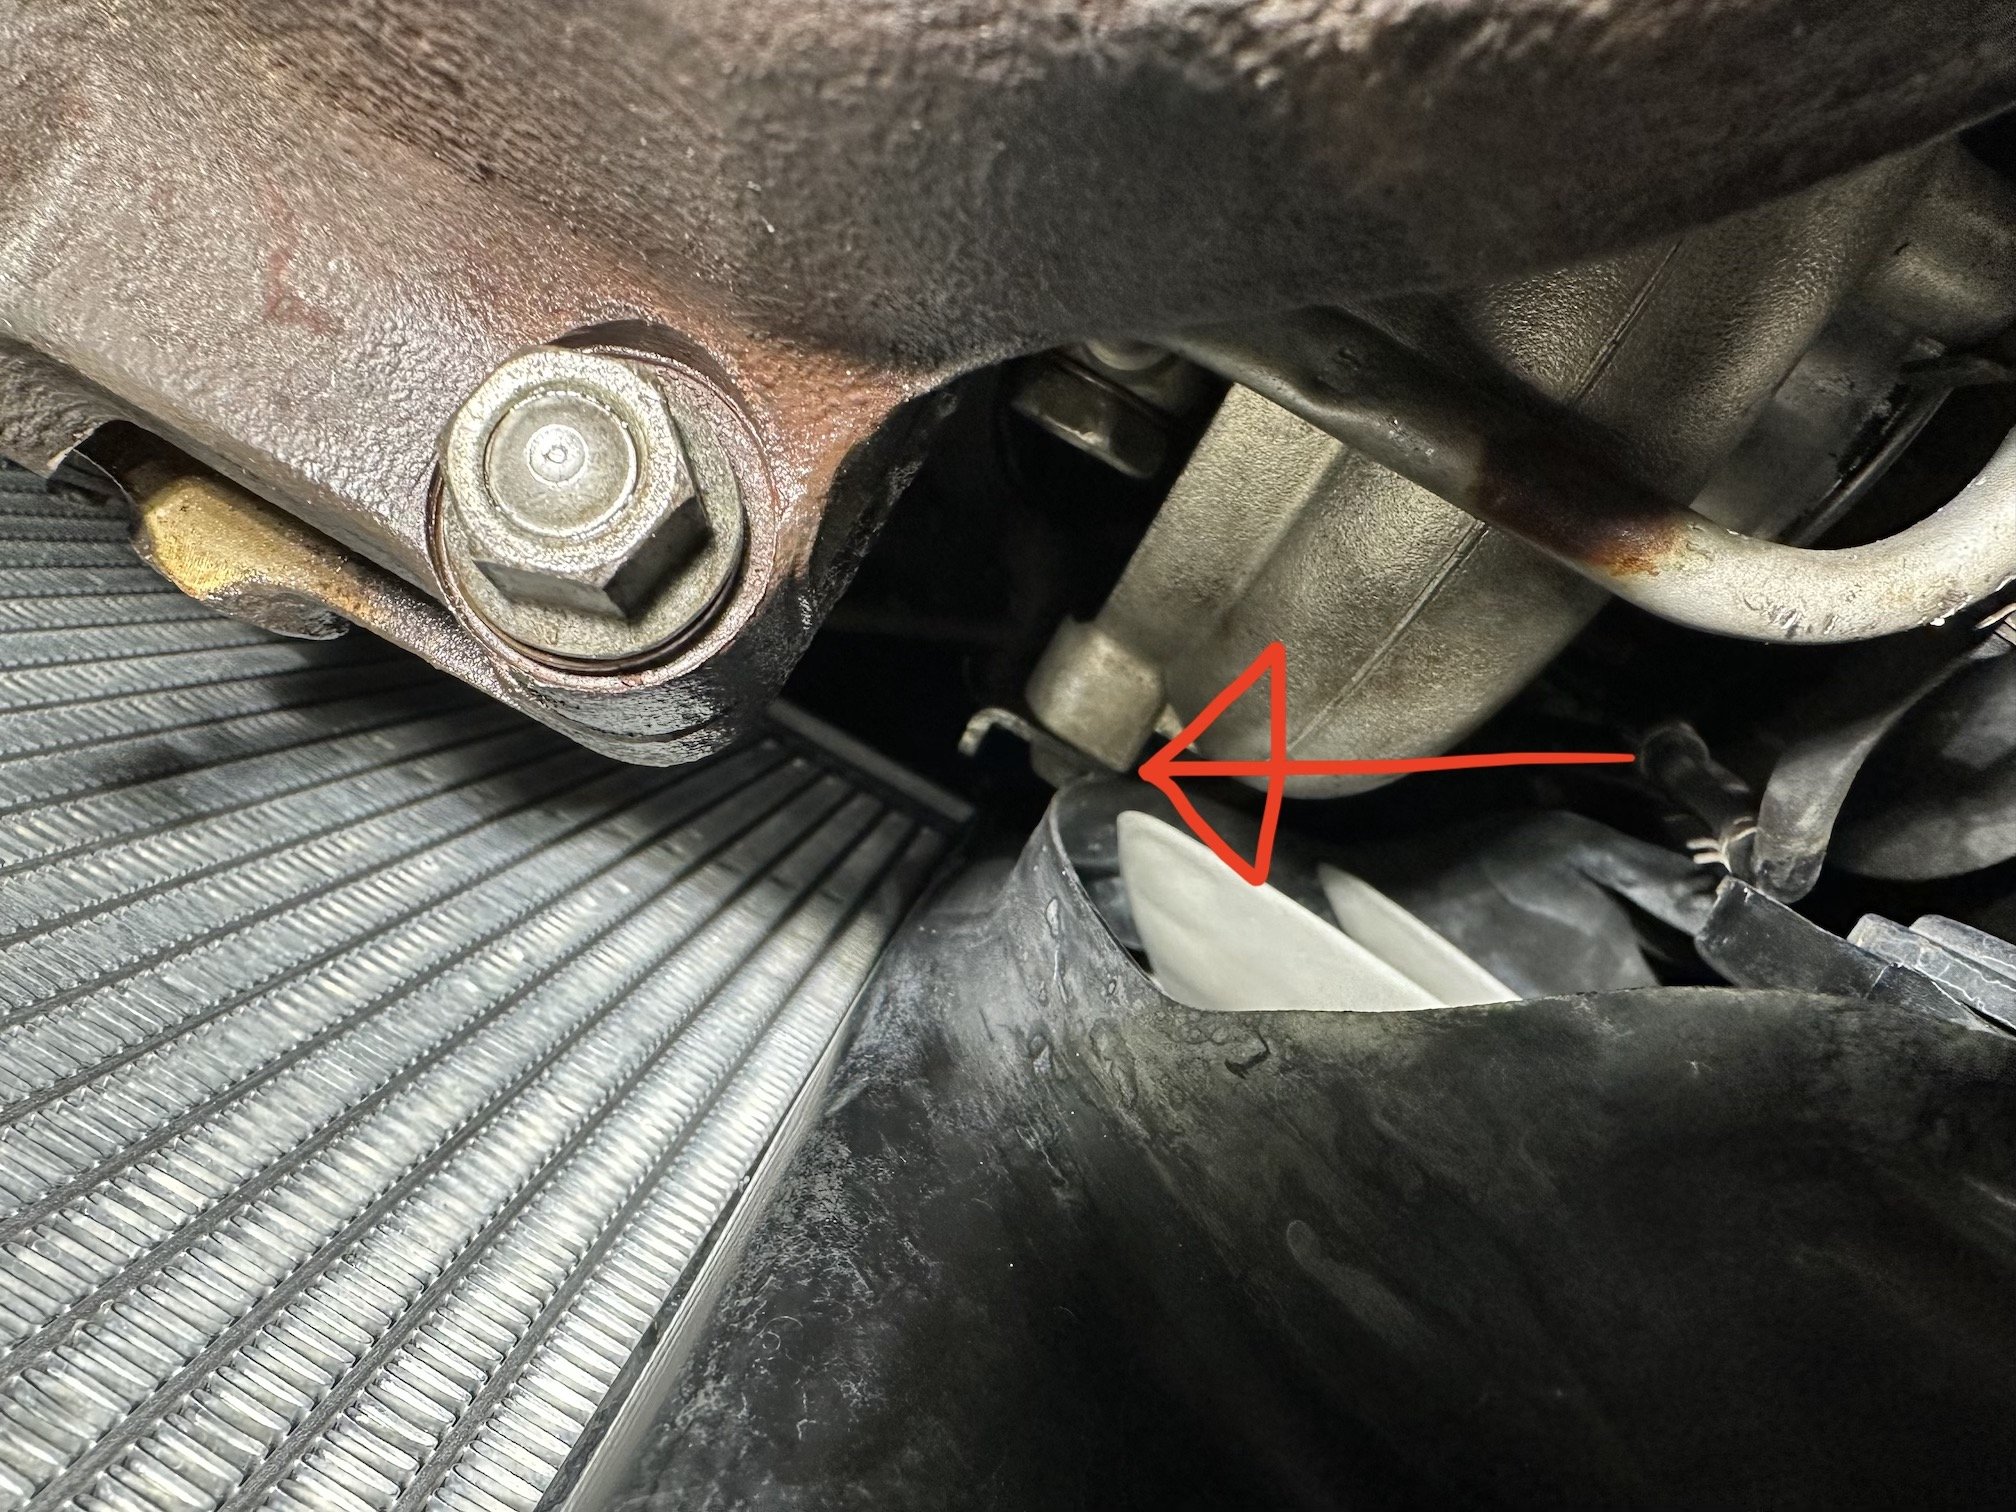
So ran into a snag right before leaving to come to NZ - the manifold to turbo flange bolt threads were trashed and one of the studs was damaged too so needed to find a M10x1.25 tap and some replacement bolts and studs - thankfully had plenty after rummaging through my bucket of nuts and bolts in NZ. Slapped the 16G onto the manifold with new gaskets ... and found that the Meek turbo outlet (J pipe) fouls on the starter motor. Hard to see in the pic but put an arrow where they touch. The problem is the IX compressor housing being larger requires its own specific outlet pipe which is different to the outlet pipe from the stock turbo and it seems while the Meek pipe is meant for both VIII & IX style compressor housings, it doesn't quite clear the starter. I'm going to try slot the mounting bolt holes so I can hopefully rotate the pipe further away from the starter (and exhaust). I want to use the Meek pipe if I can as it's a 2.25" outlet instead of the stock piddly 1.8". I have picked up some aftermarket intercooler piping too to suit the larger diameter of the Meek J pipe outlet. The turbo wastegate bracket is super close to the radiator fan too, but should get about 5mm of clearance once the J pipe to starter clearance is sorted as I can fully slide the turbo onto the exhaust studs.
5 points
-
Software, the EGR hardware is still on the engine at the moment but functionless, the DPF has a pipe shoved through the centre. The car is pre DPF removal threshold (anything registered after May 2010 has to have an emission cert or something or it's a WoF fail if you ditch the DPF) but I left it looking factory just to avoid hassle.5 points
-
Probably wouldn't notice if the trans died, with that much fan it would keep going forwards anyway4 points
-
I towed it out to see how it looked in the light of day, looks about right to me; That was to make room in the shed for this stack of secret stuff, all will be revealed in a later episode.....4 points
-
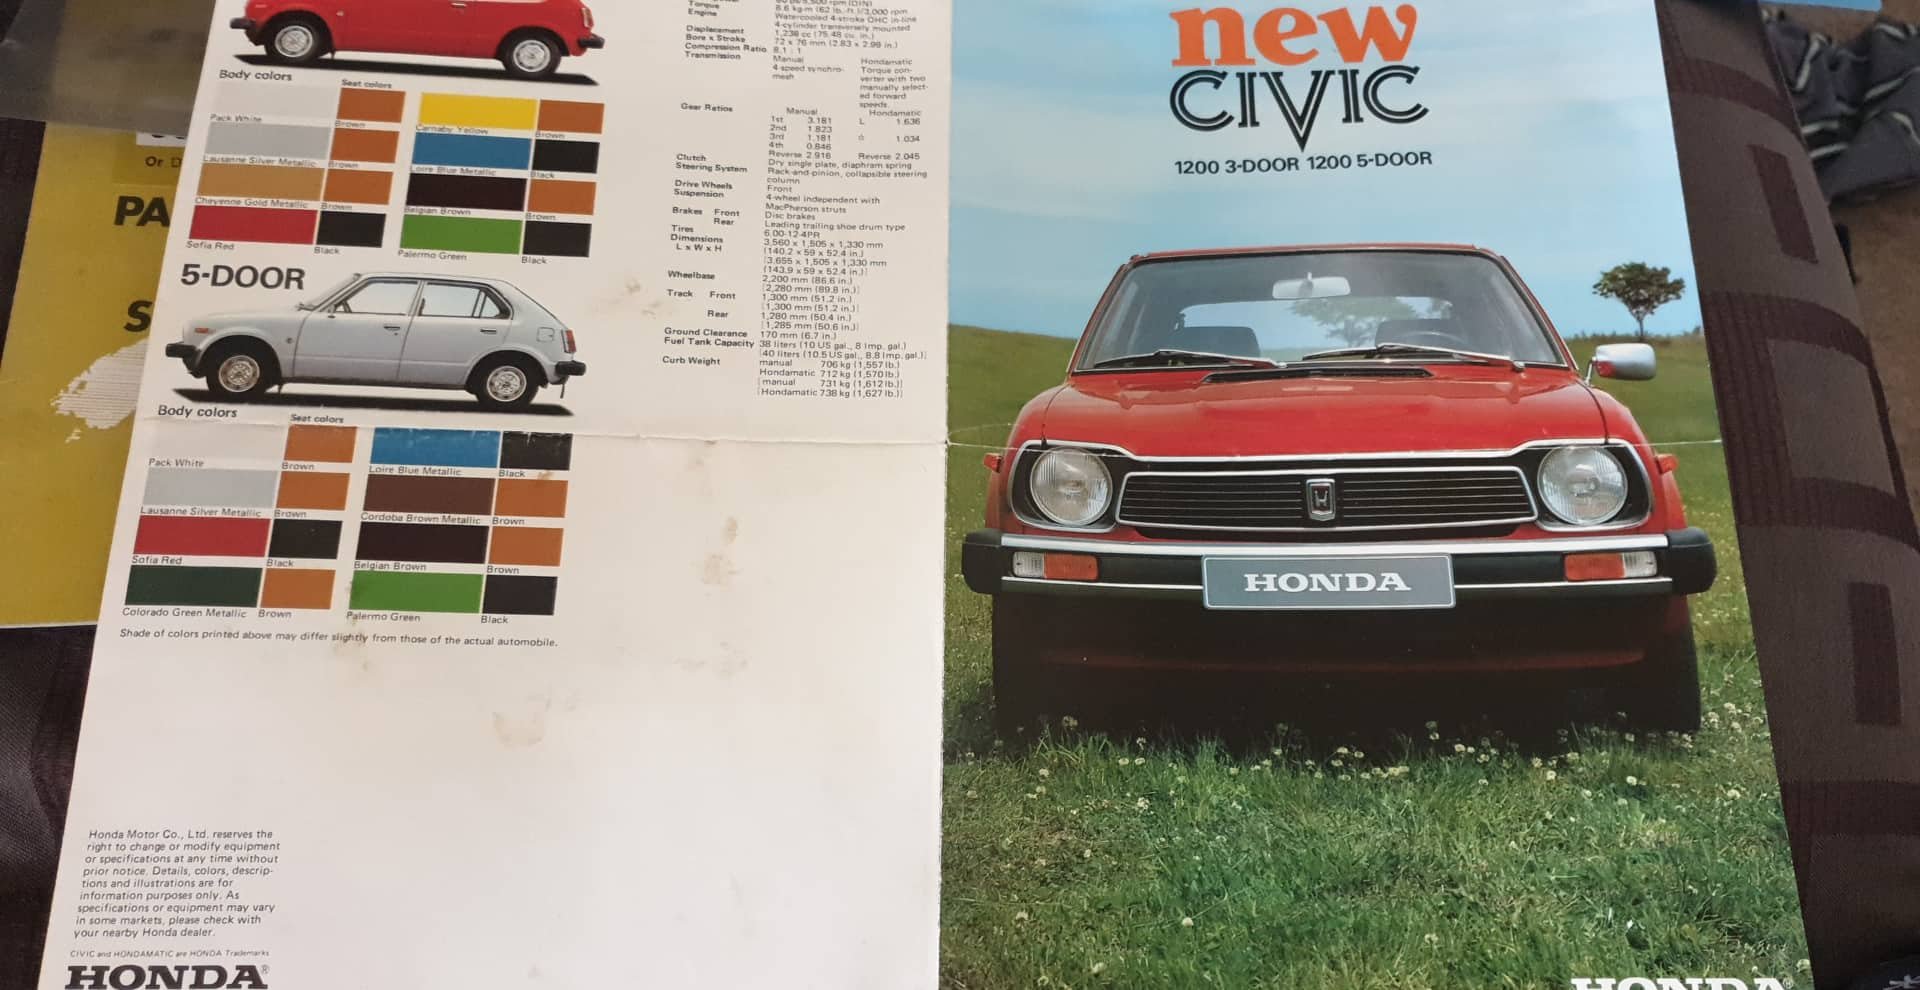
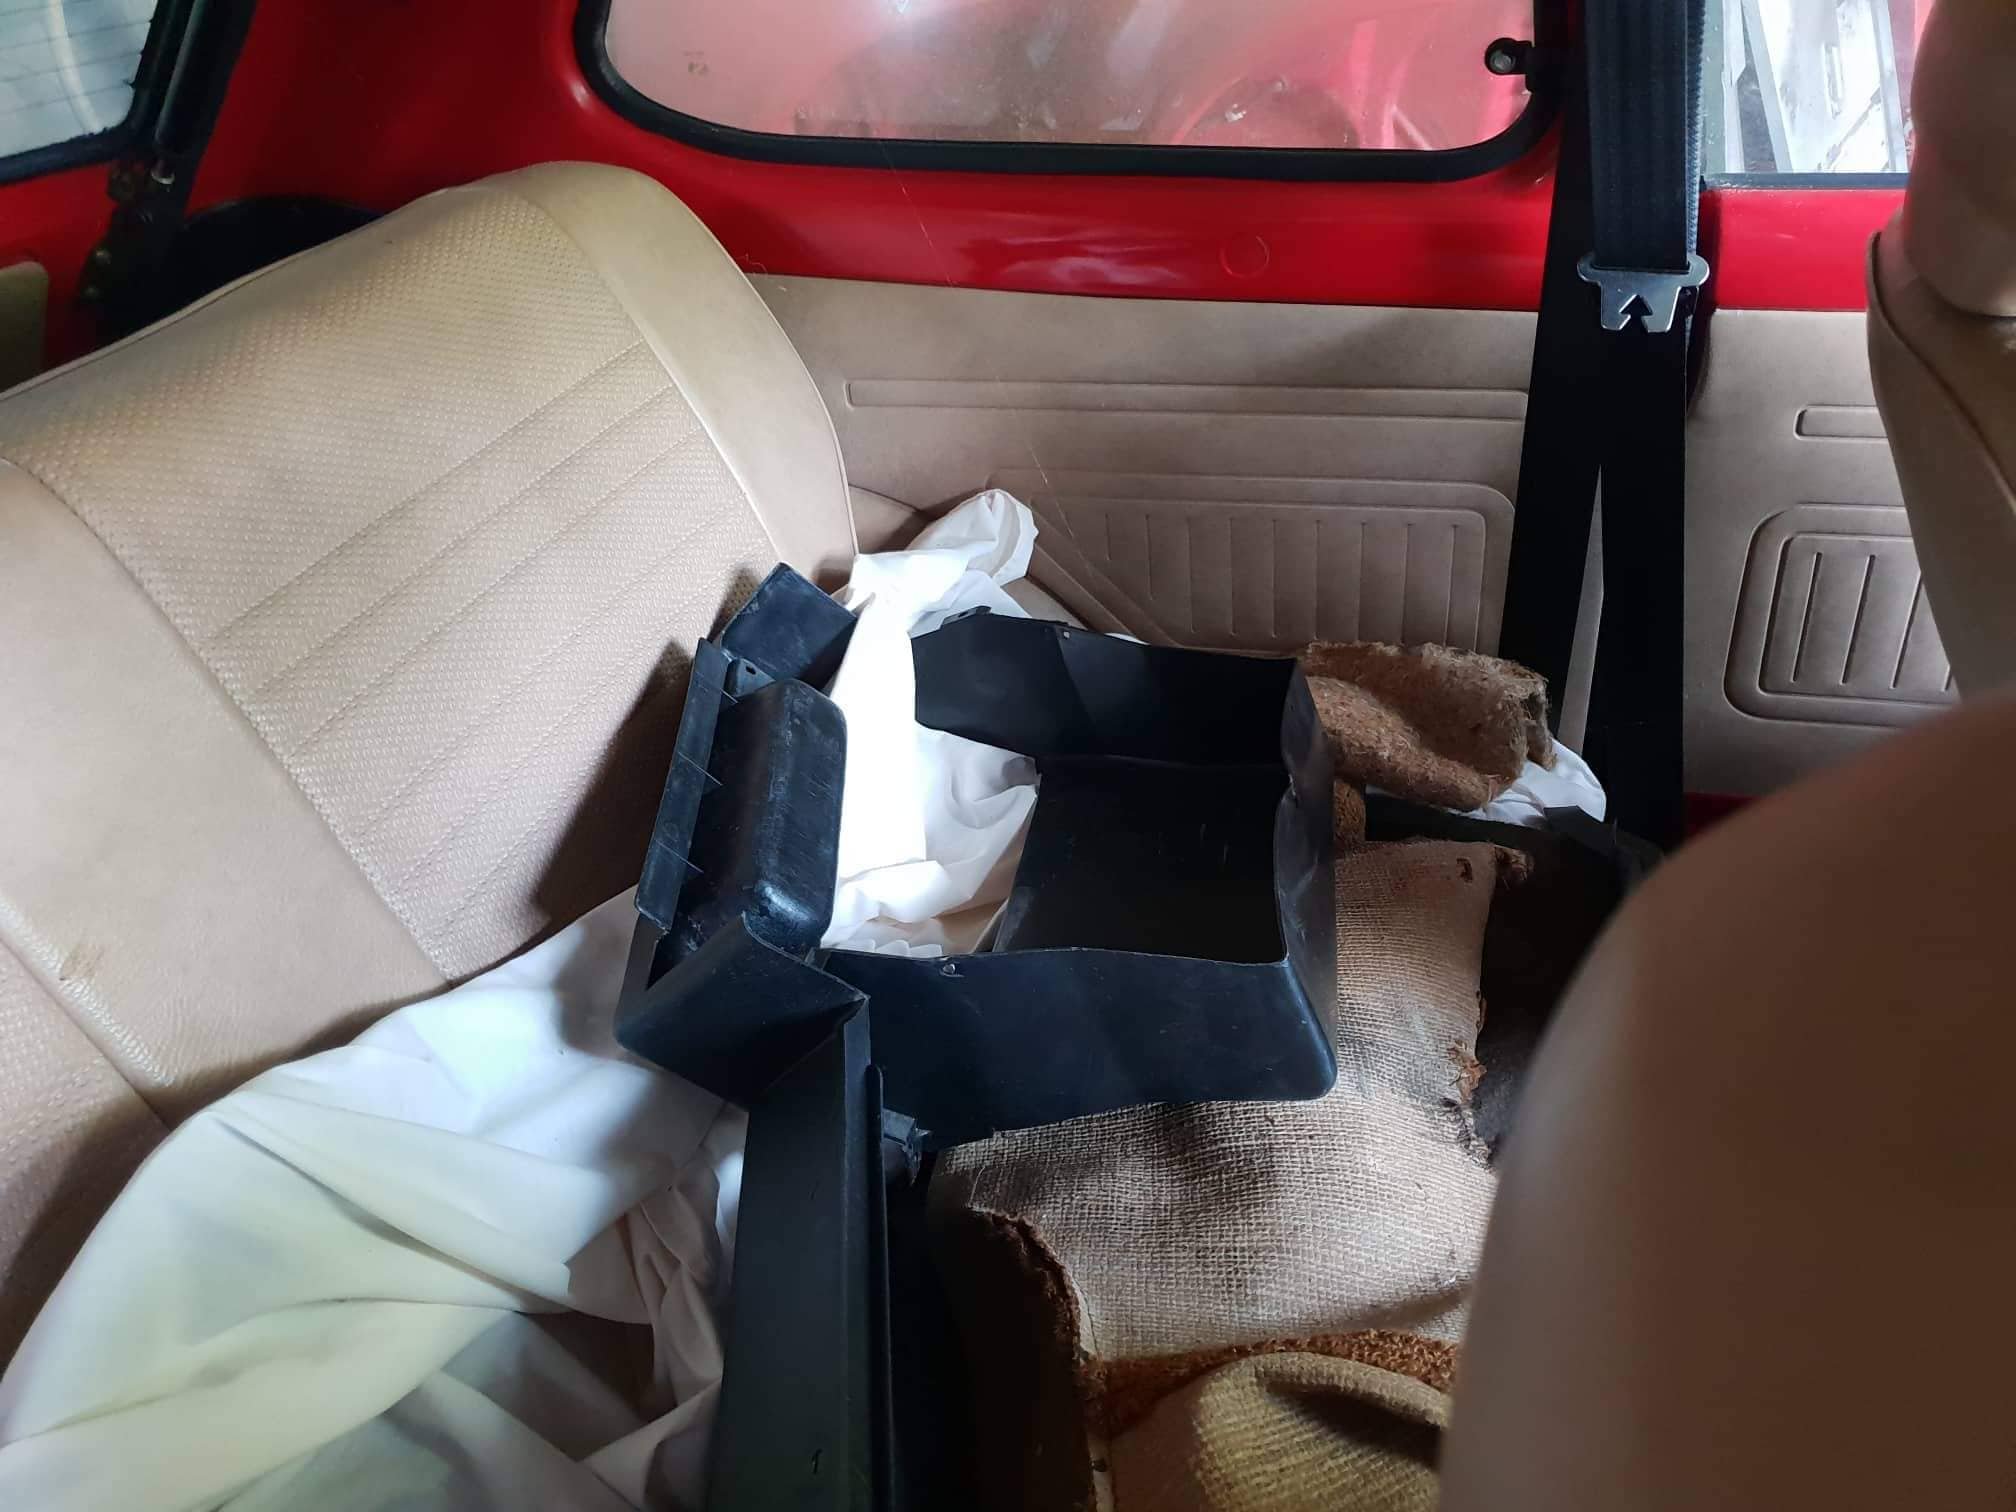
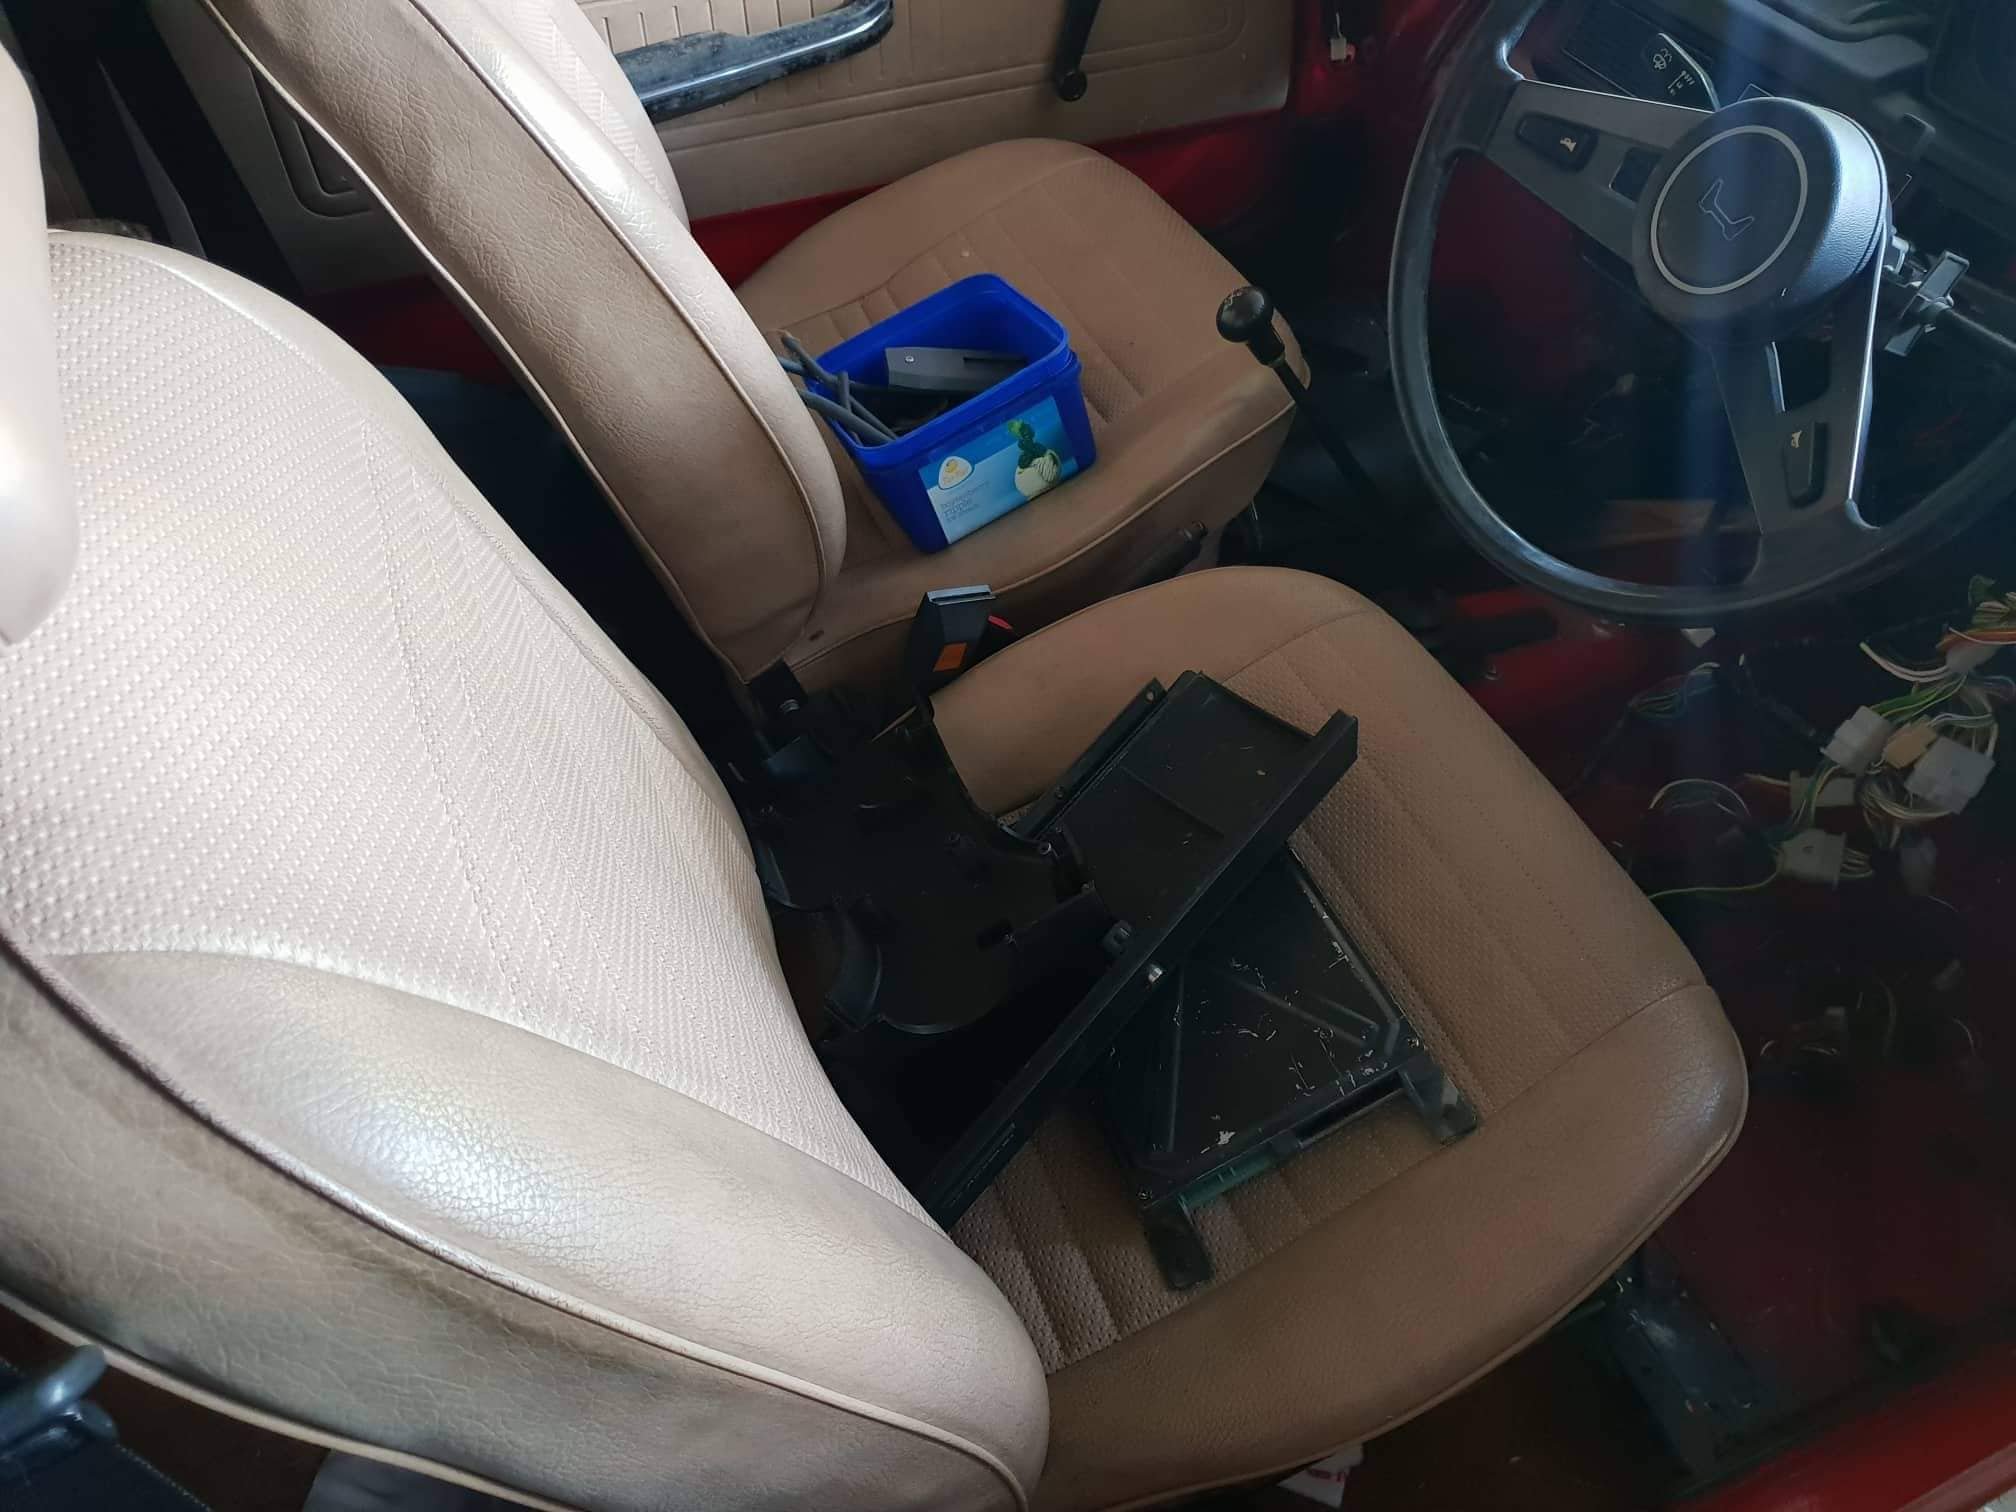
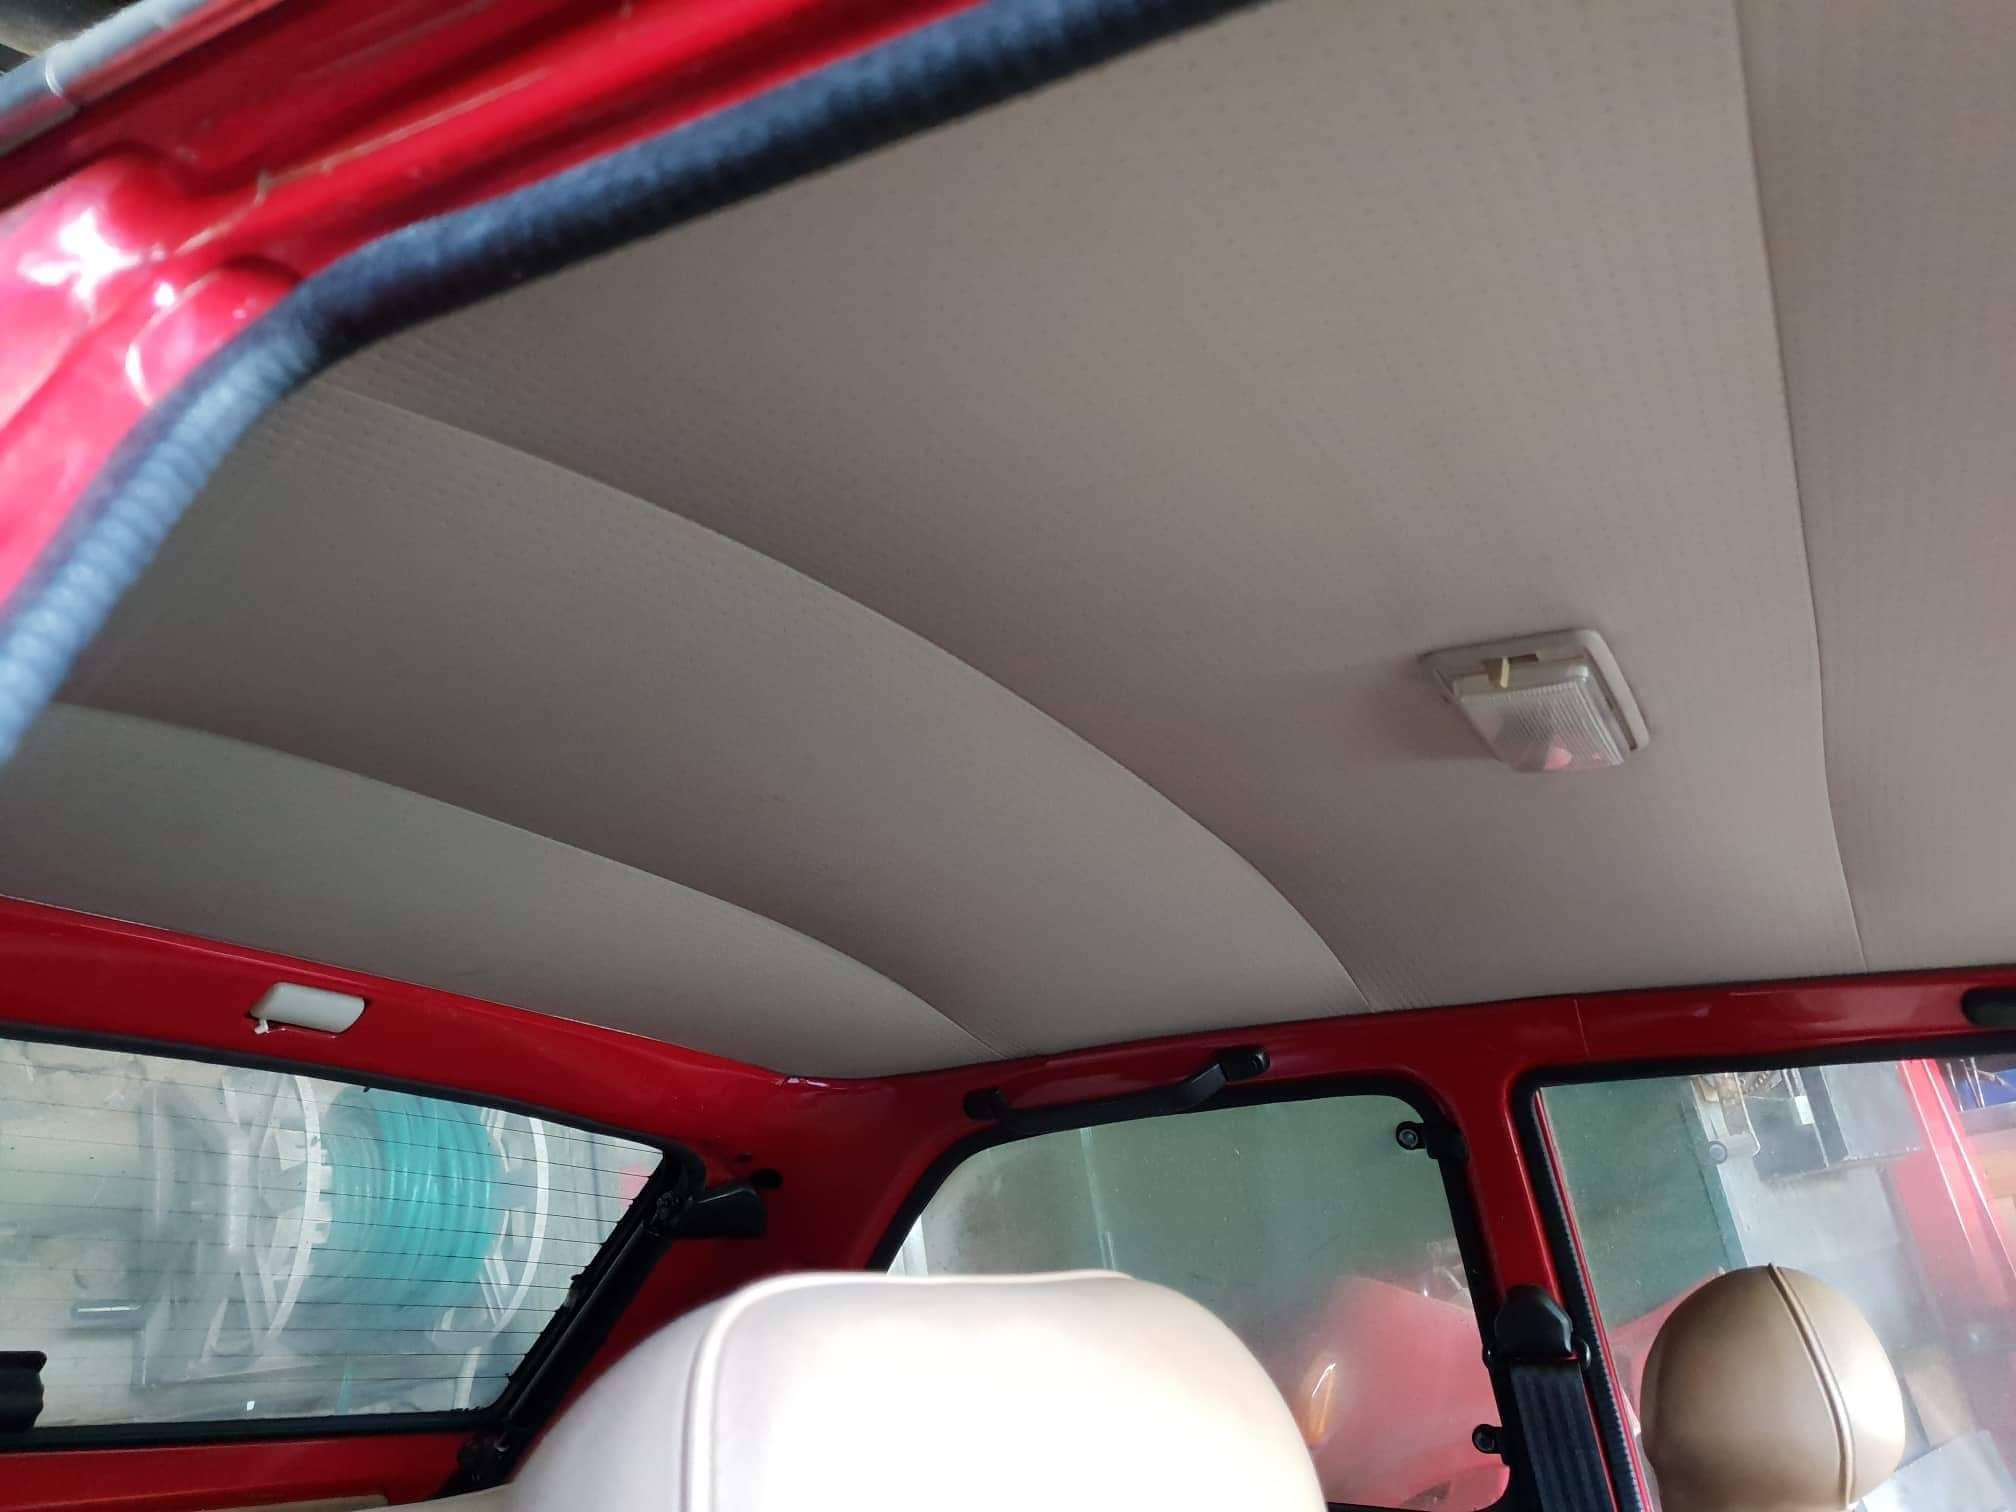
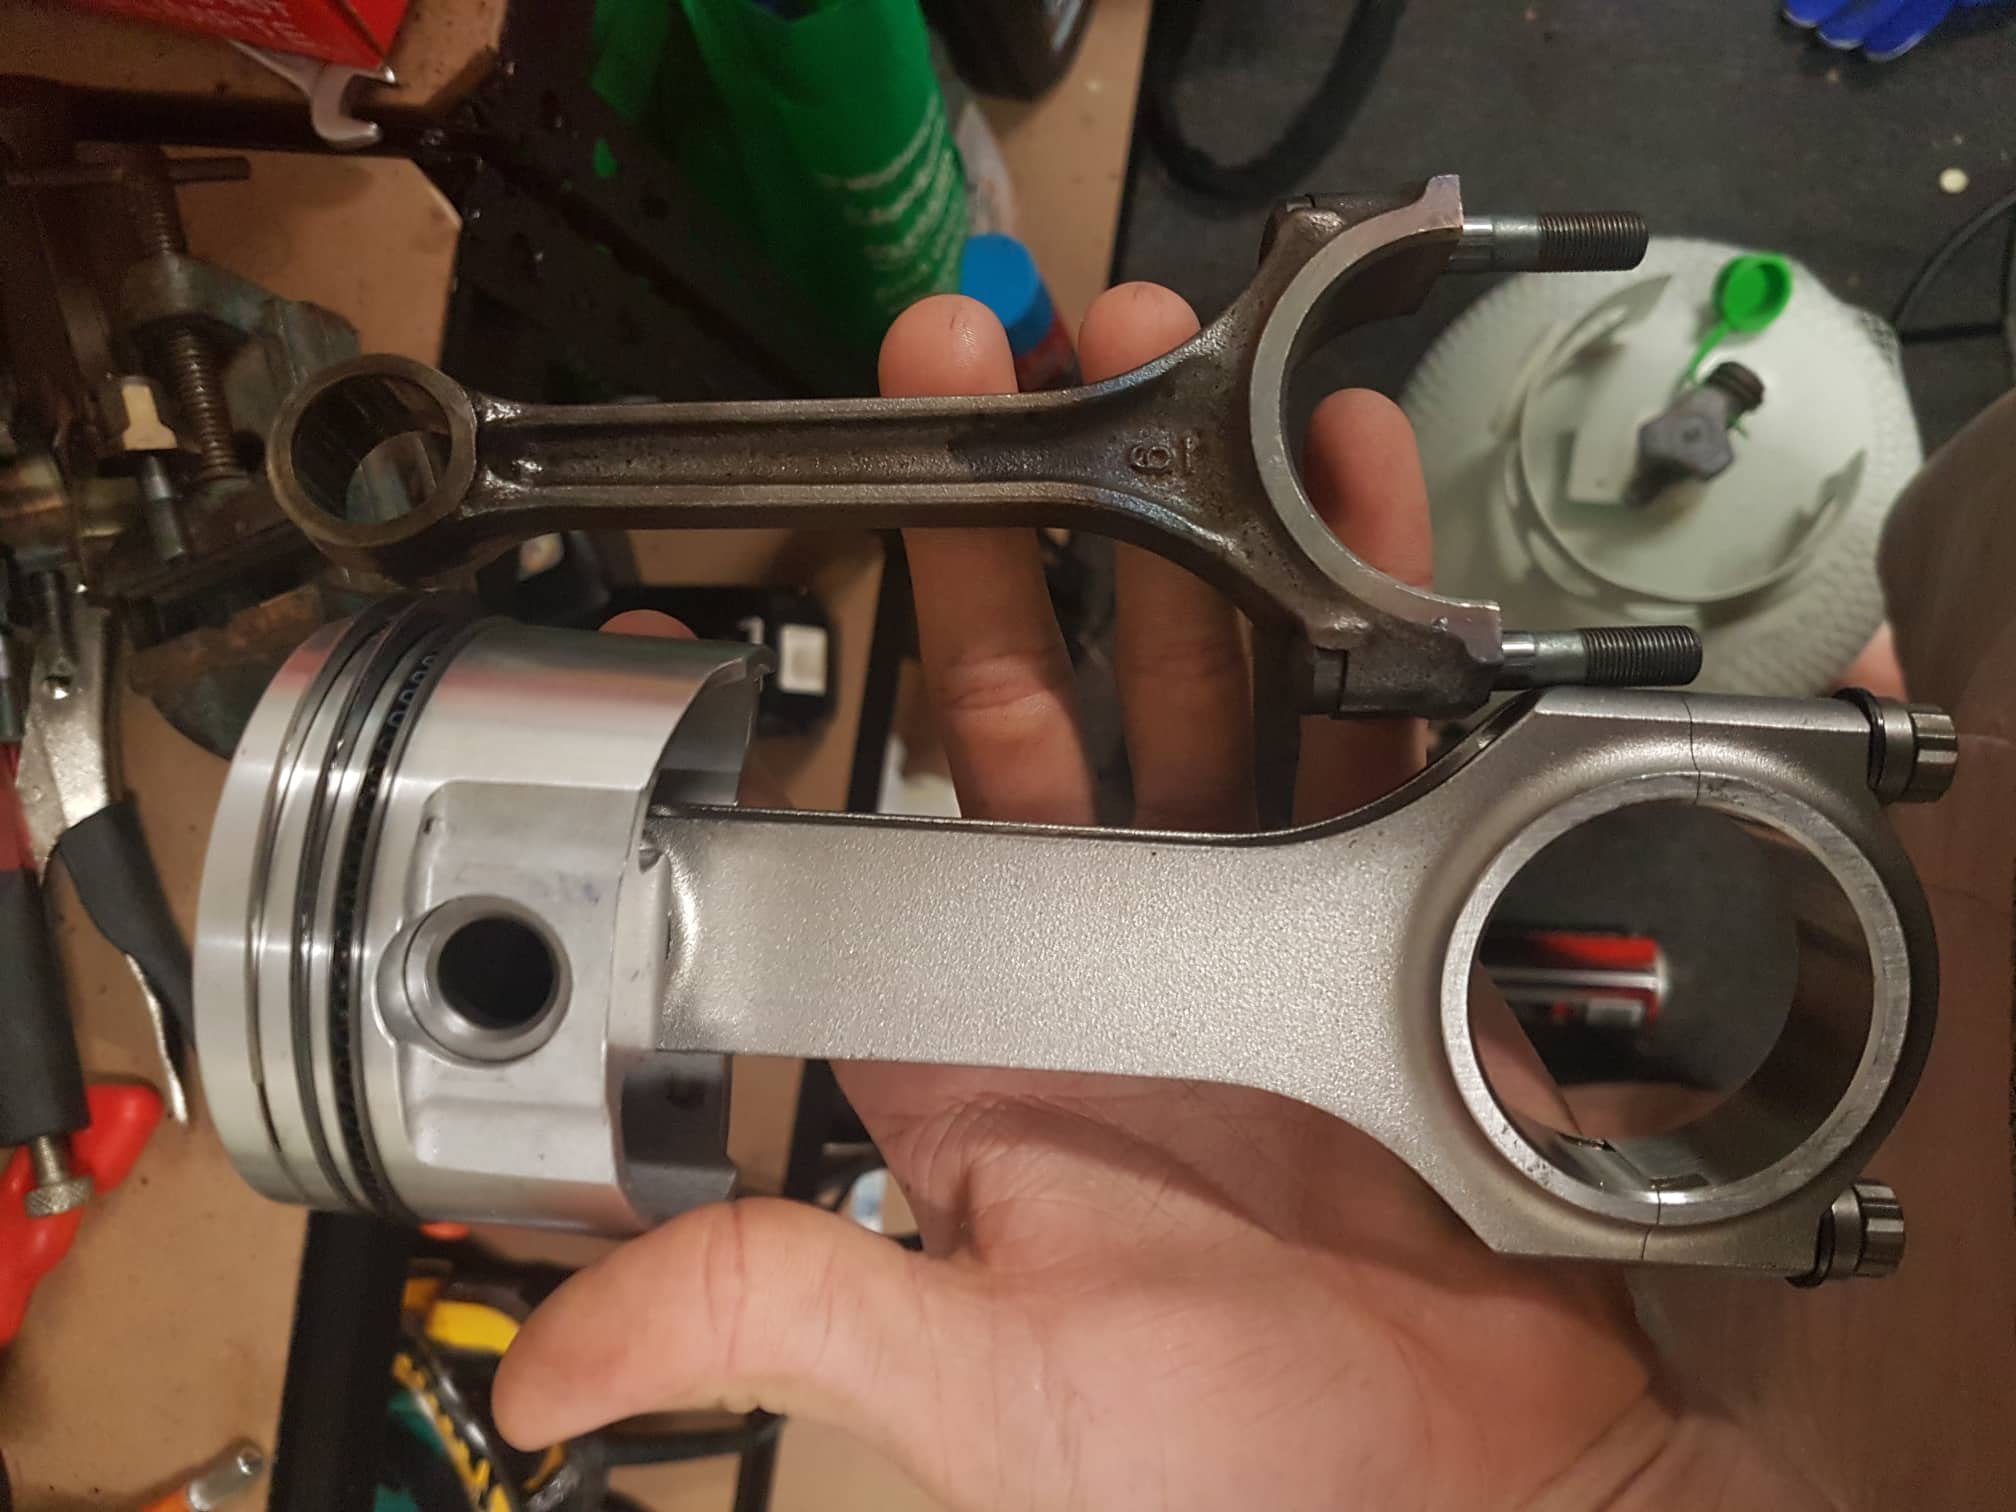
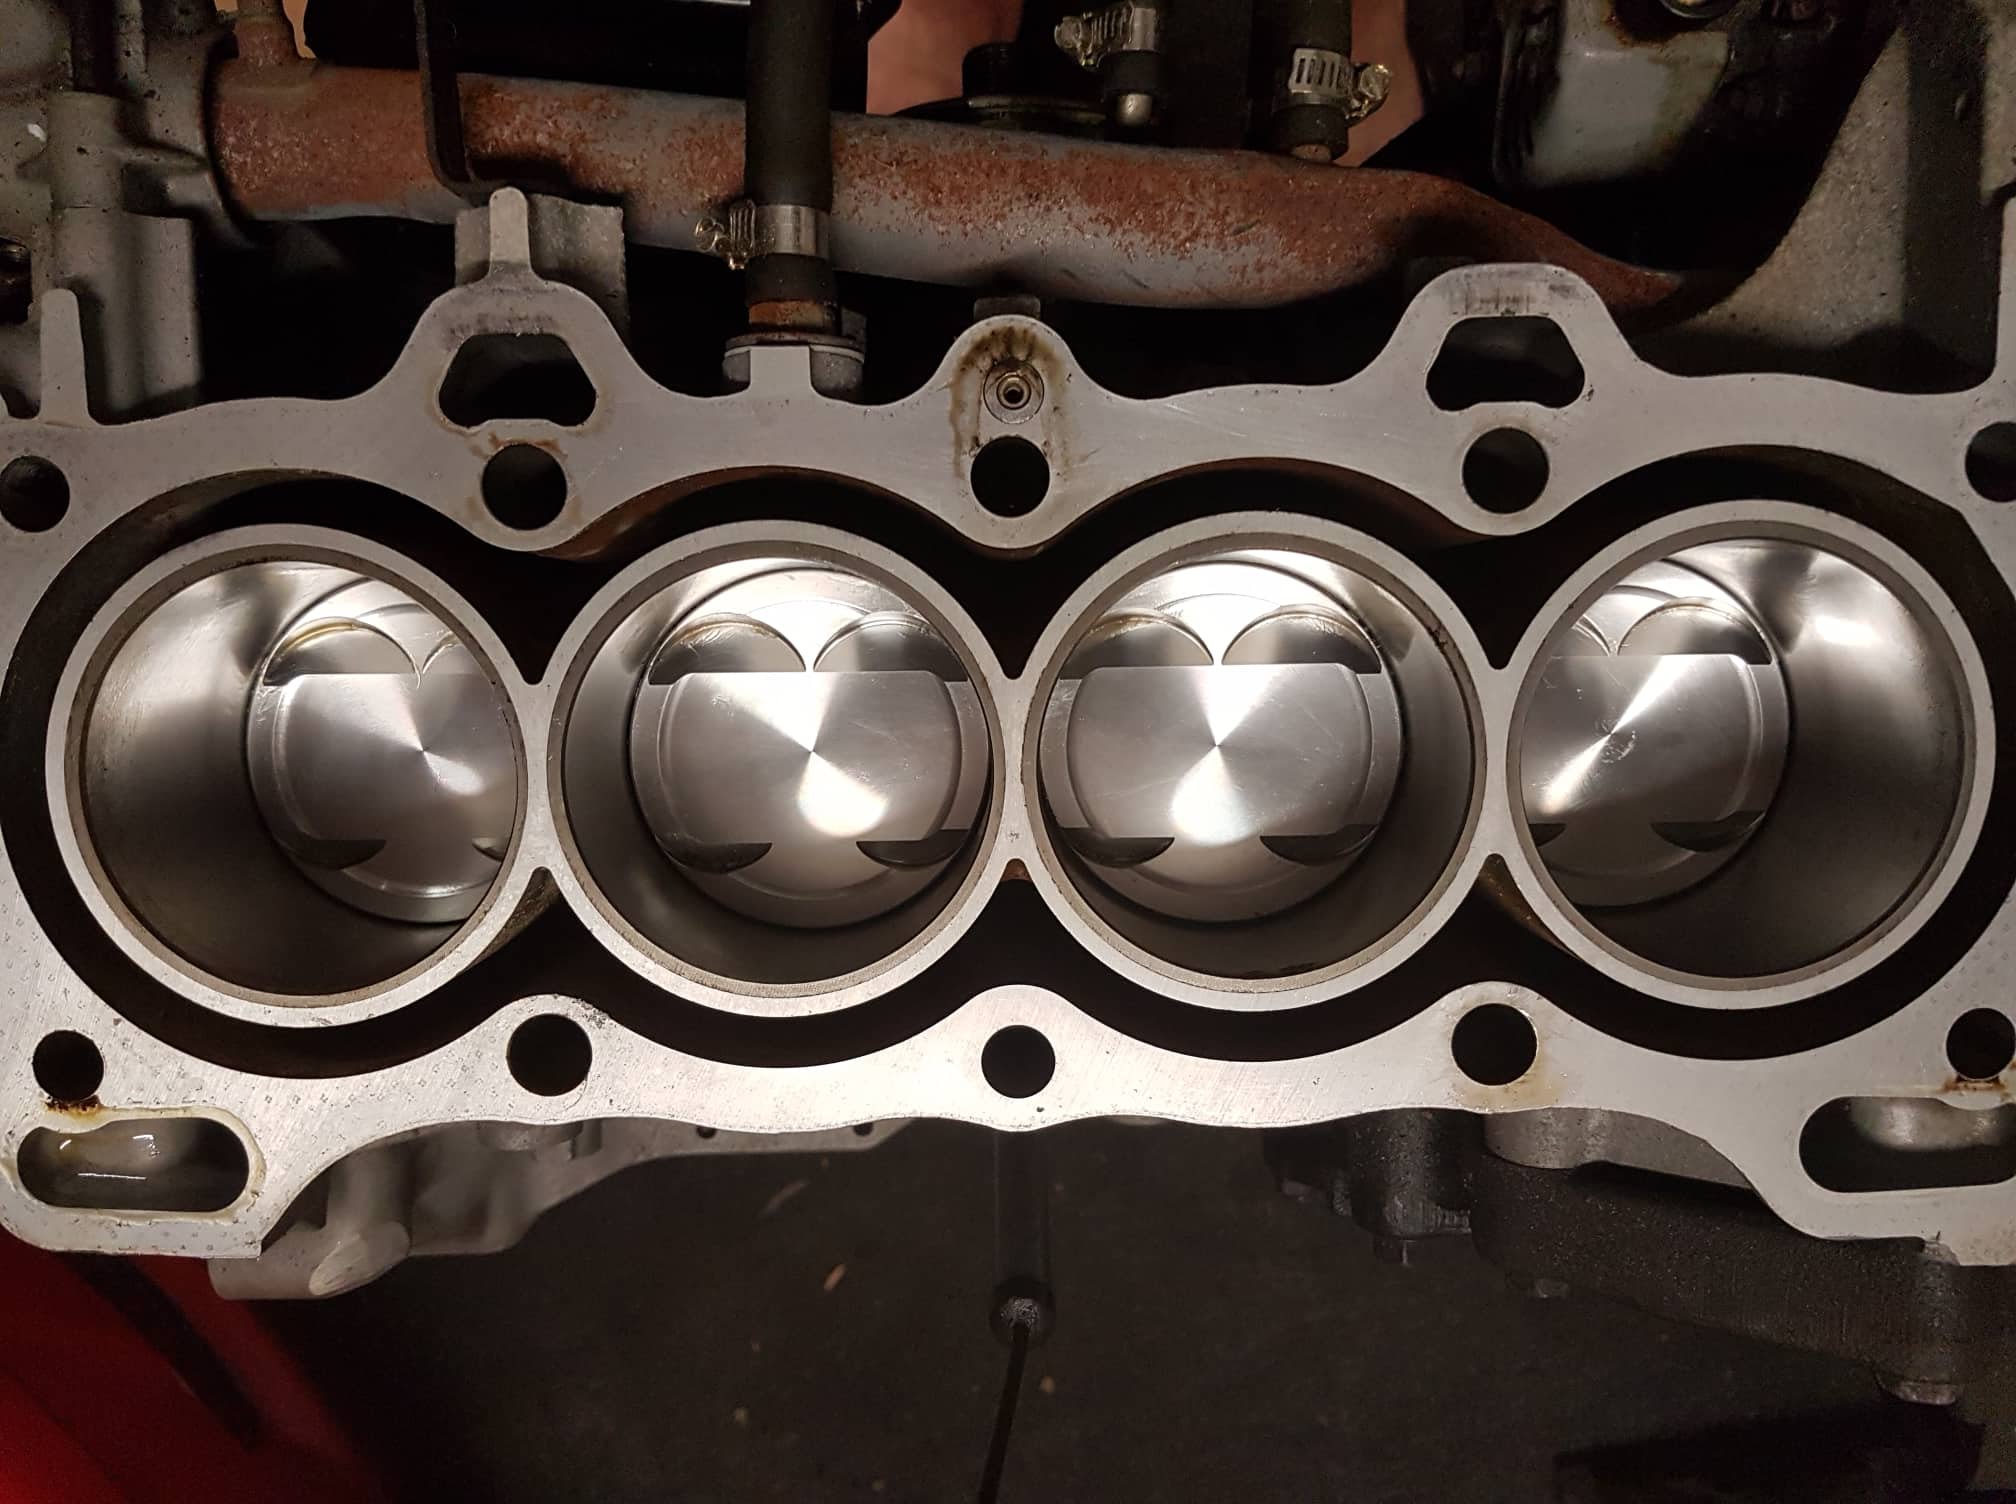
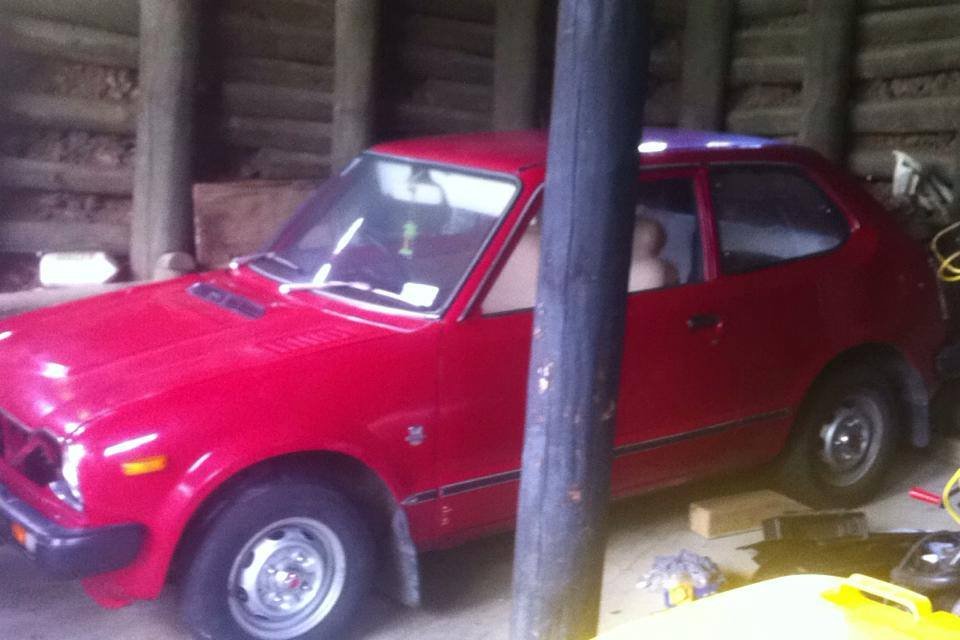
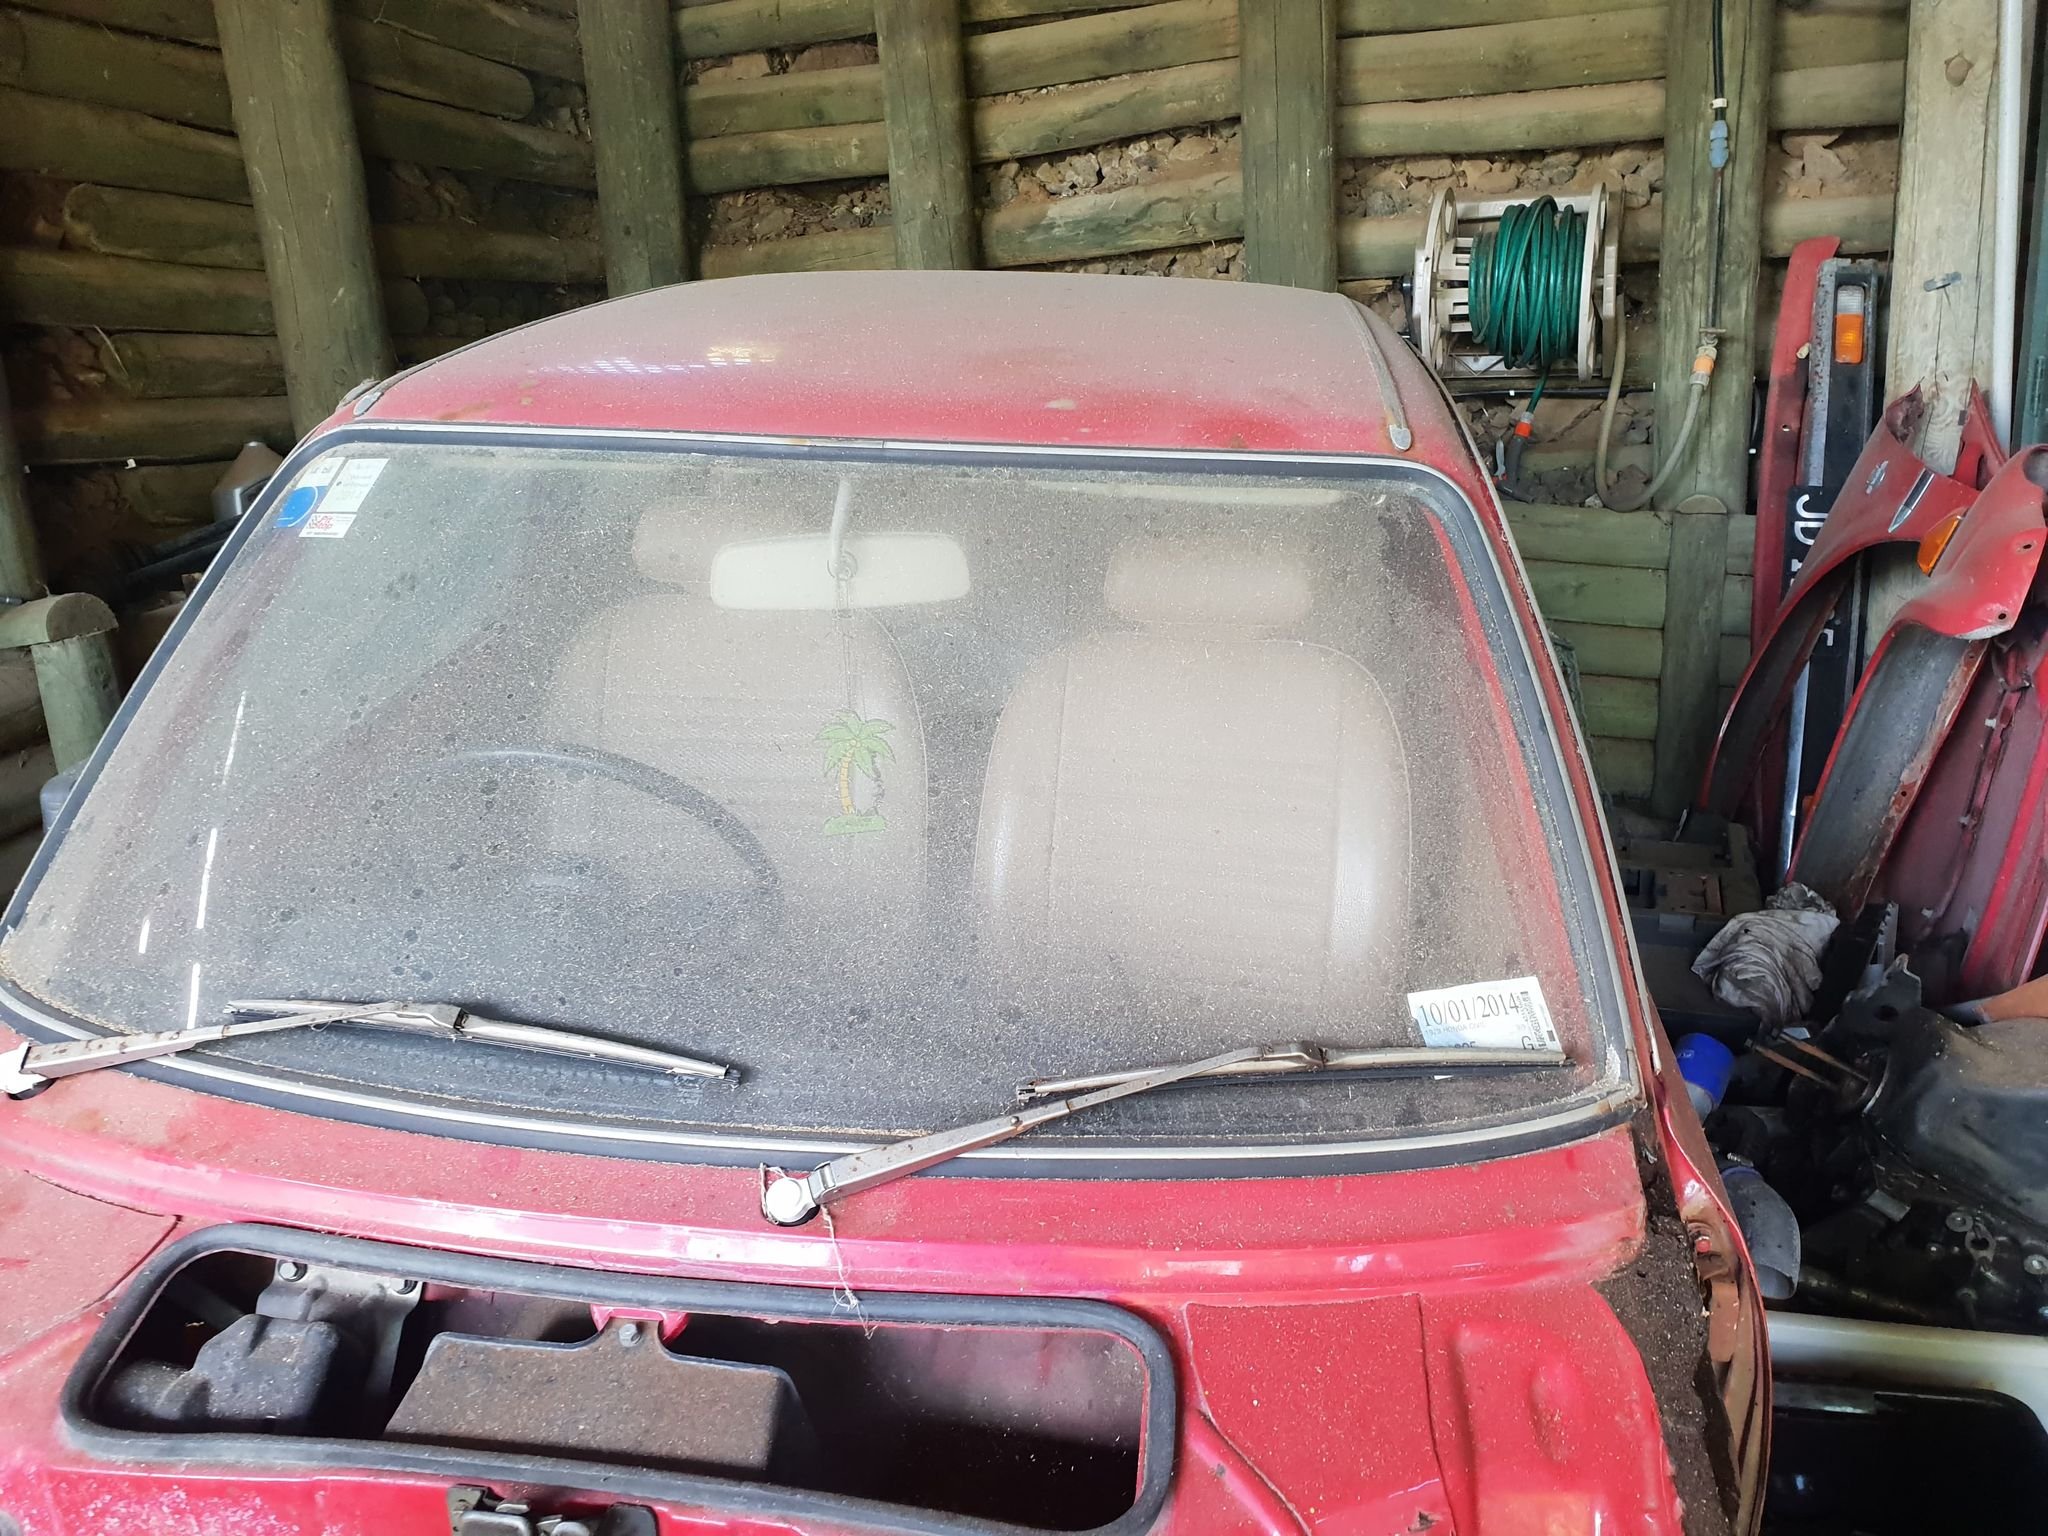
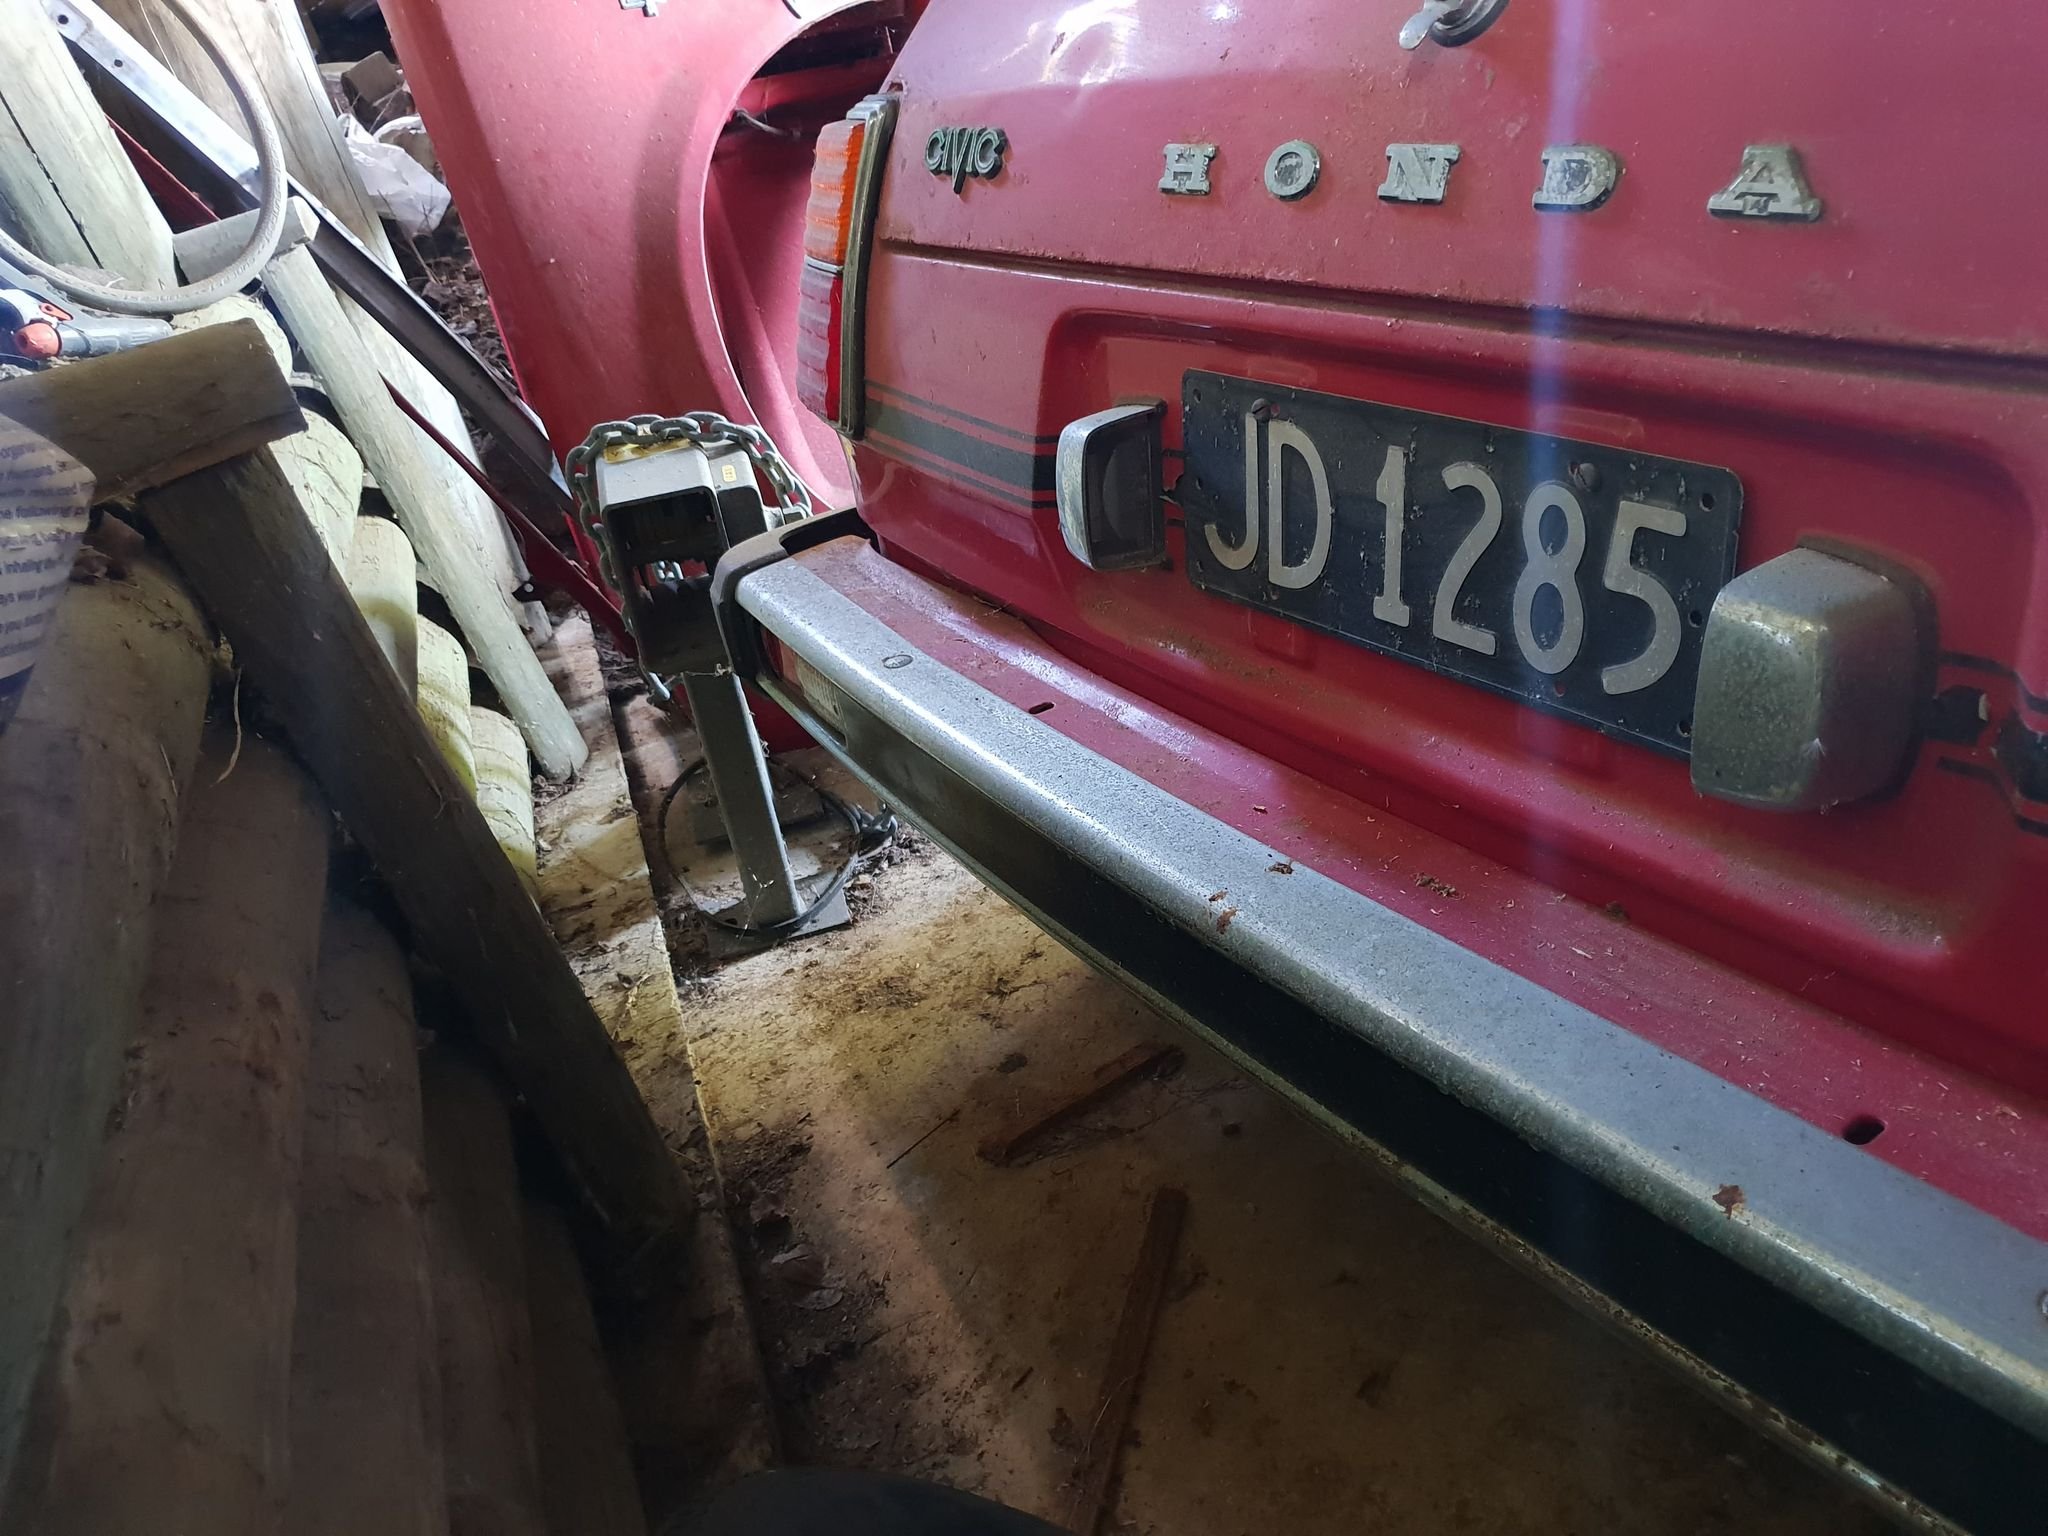
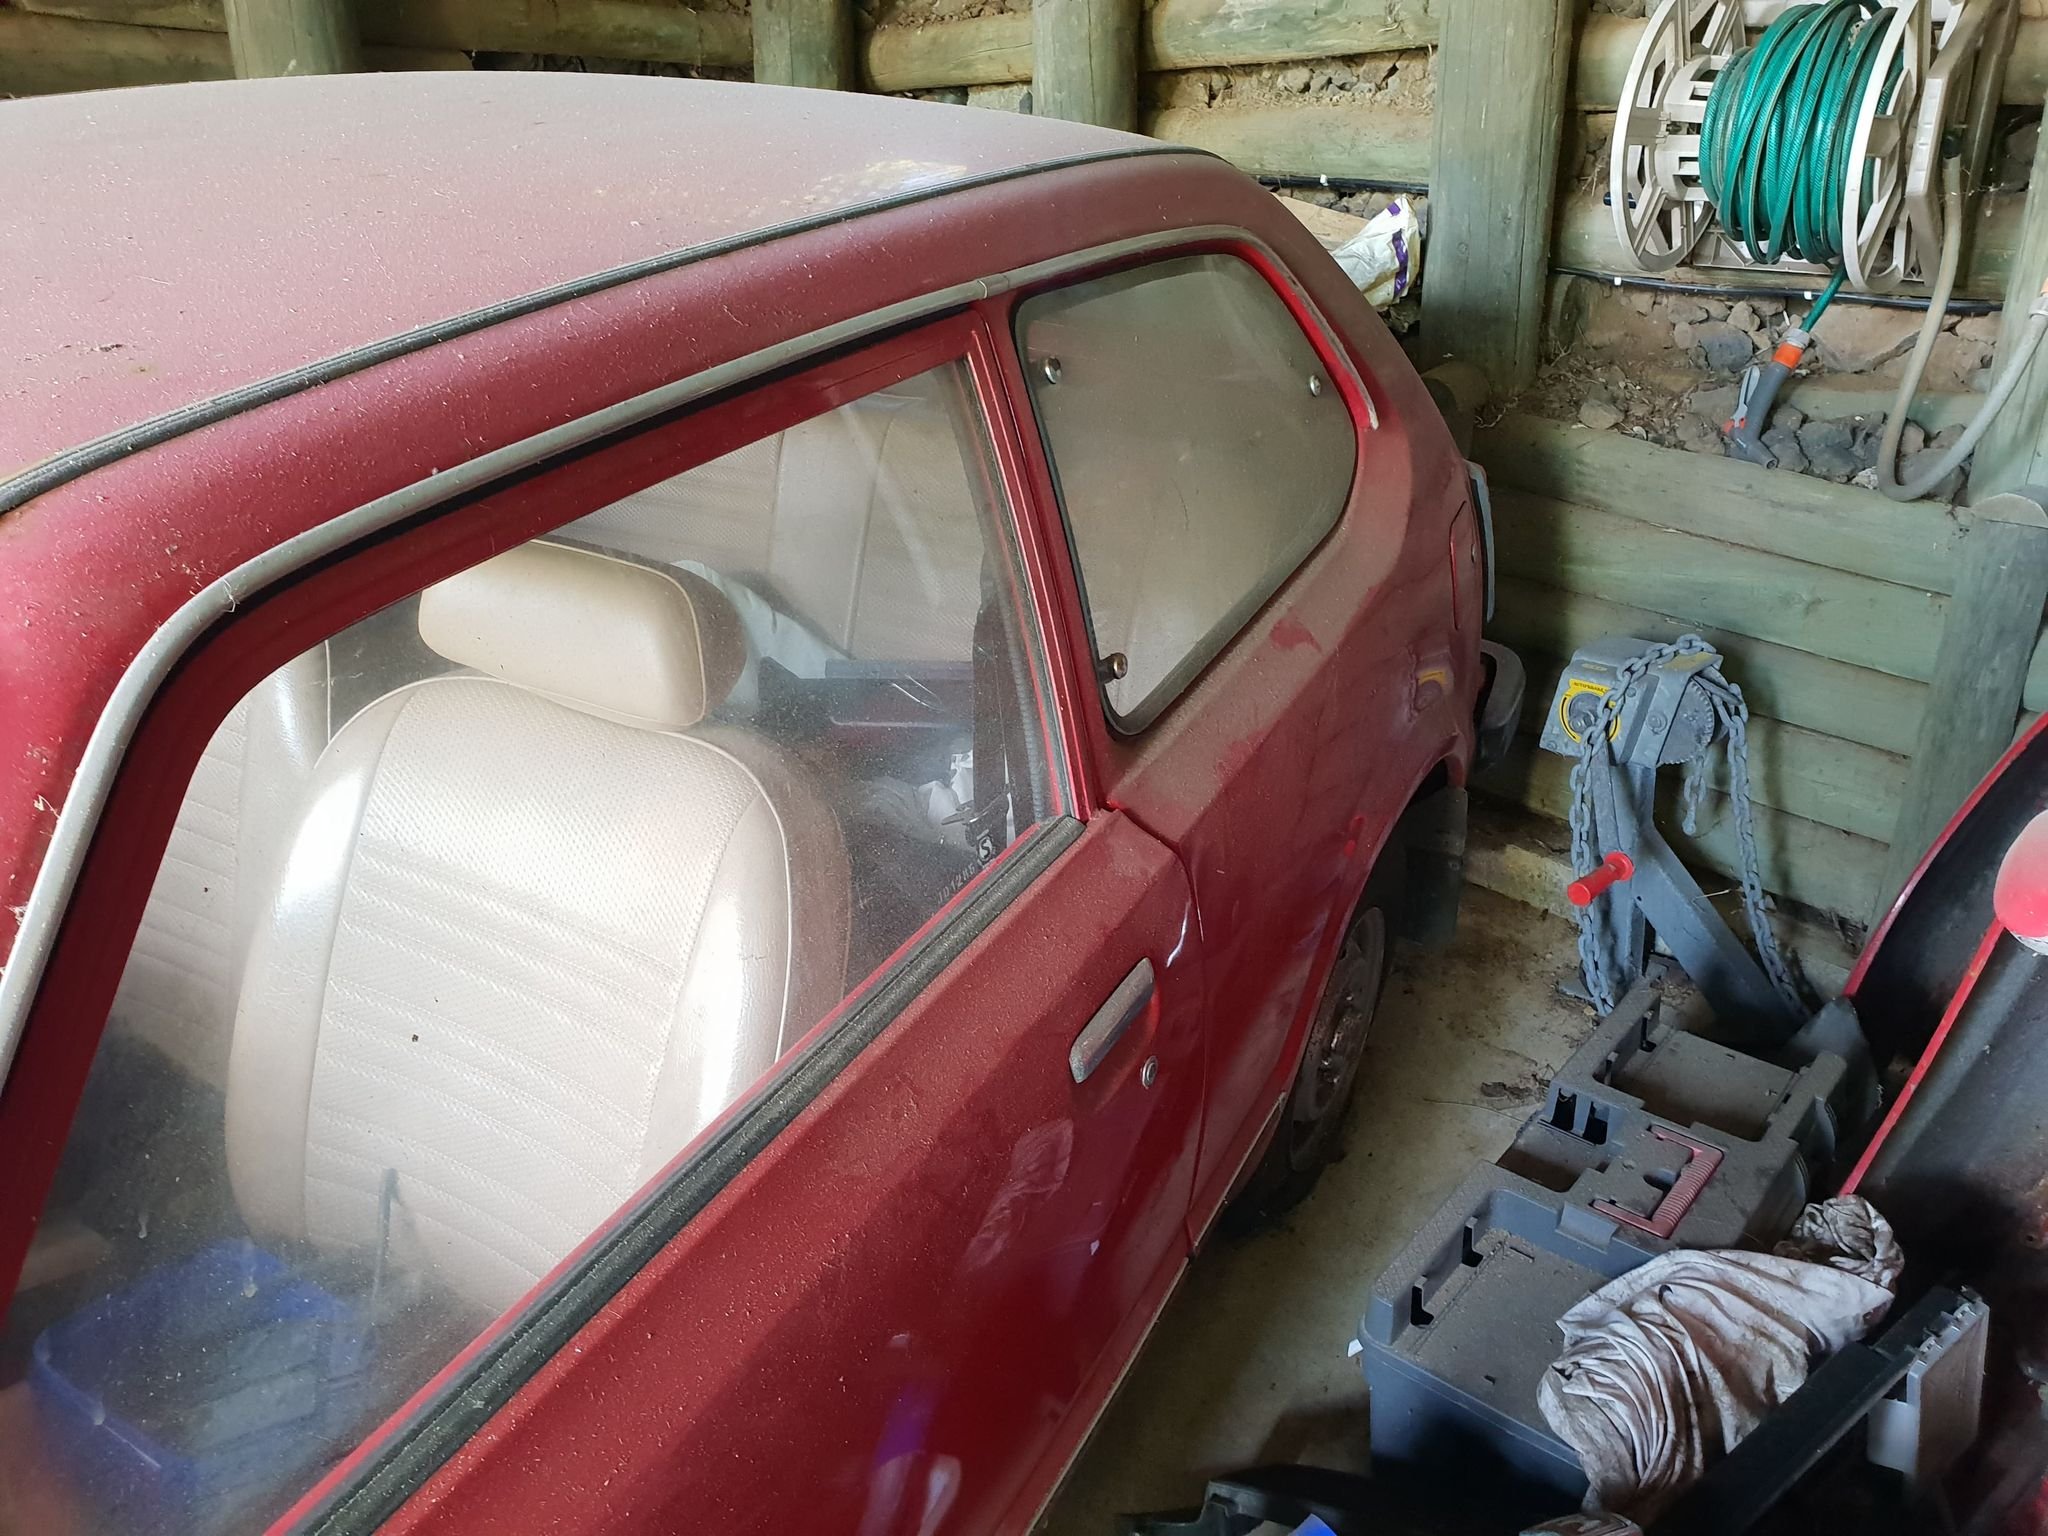
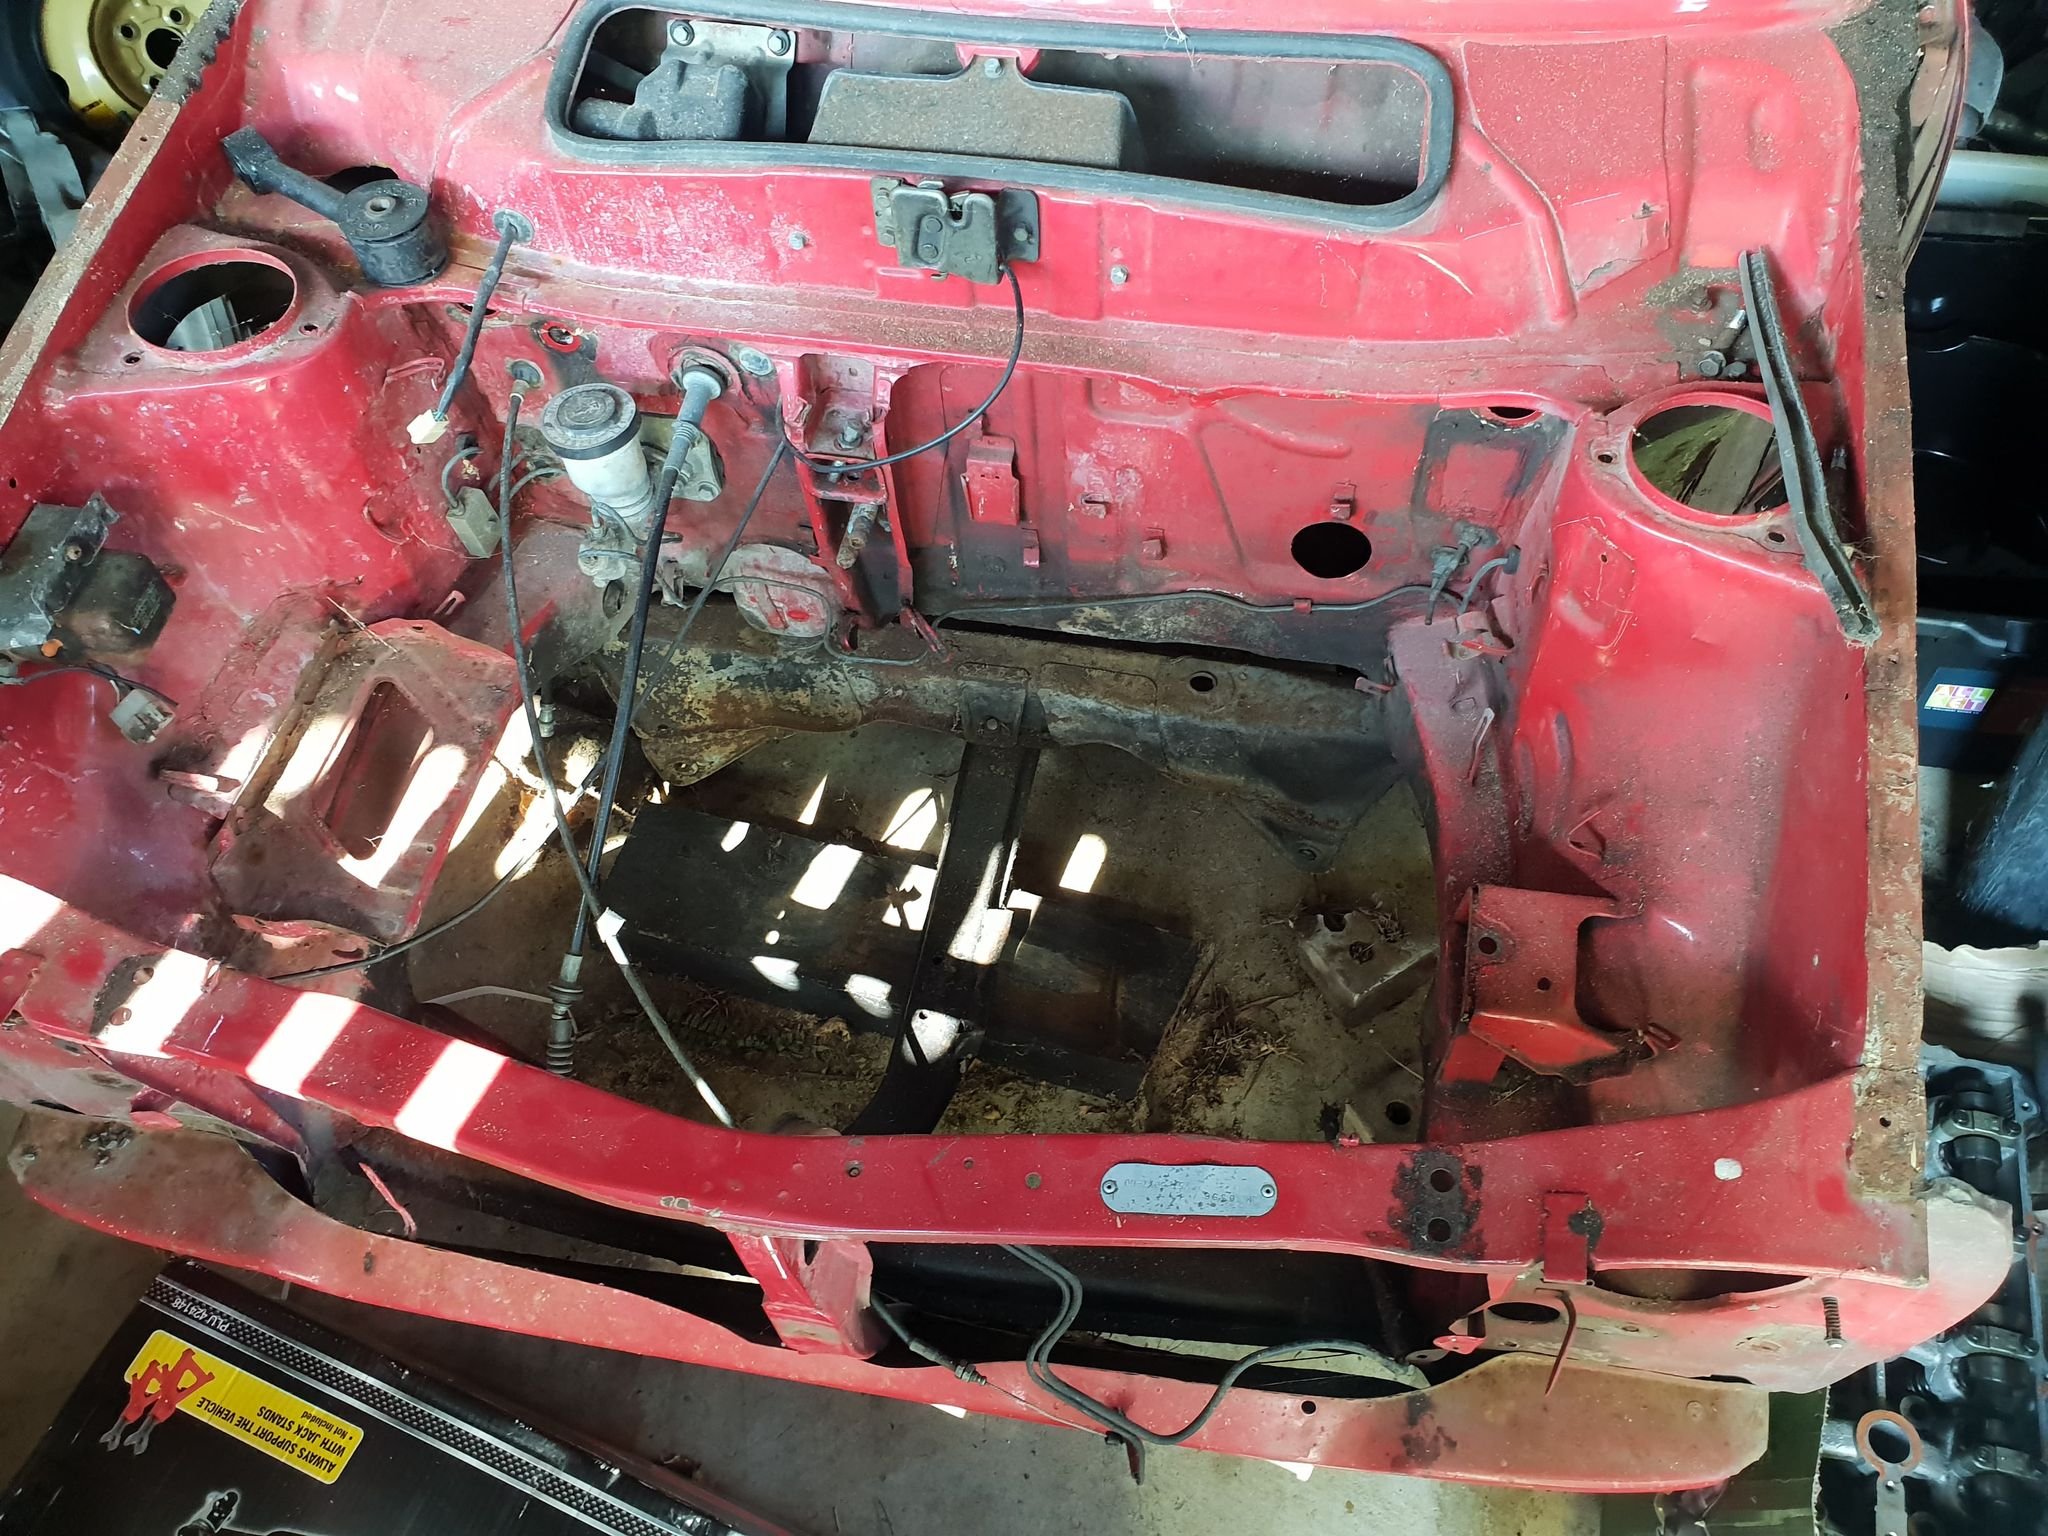
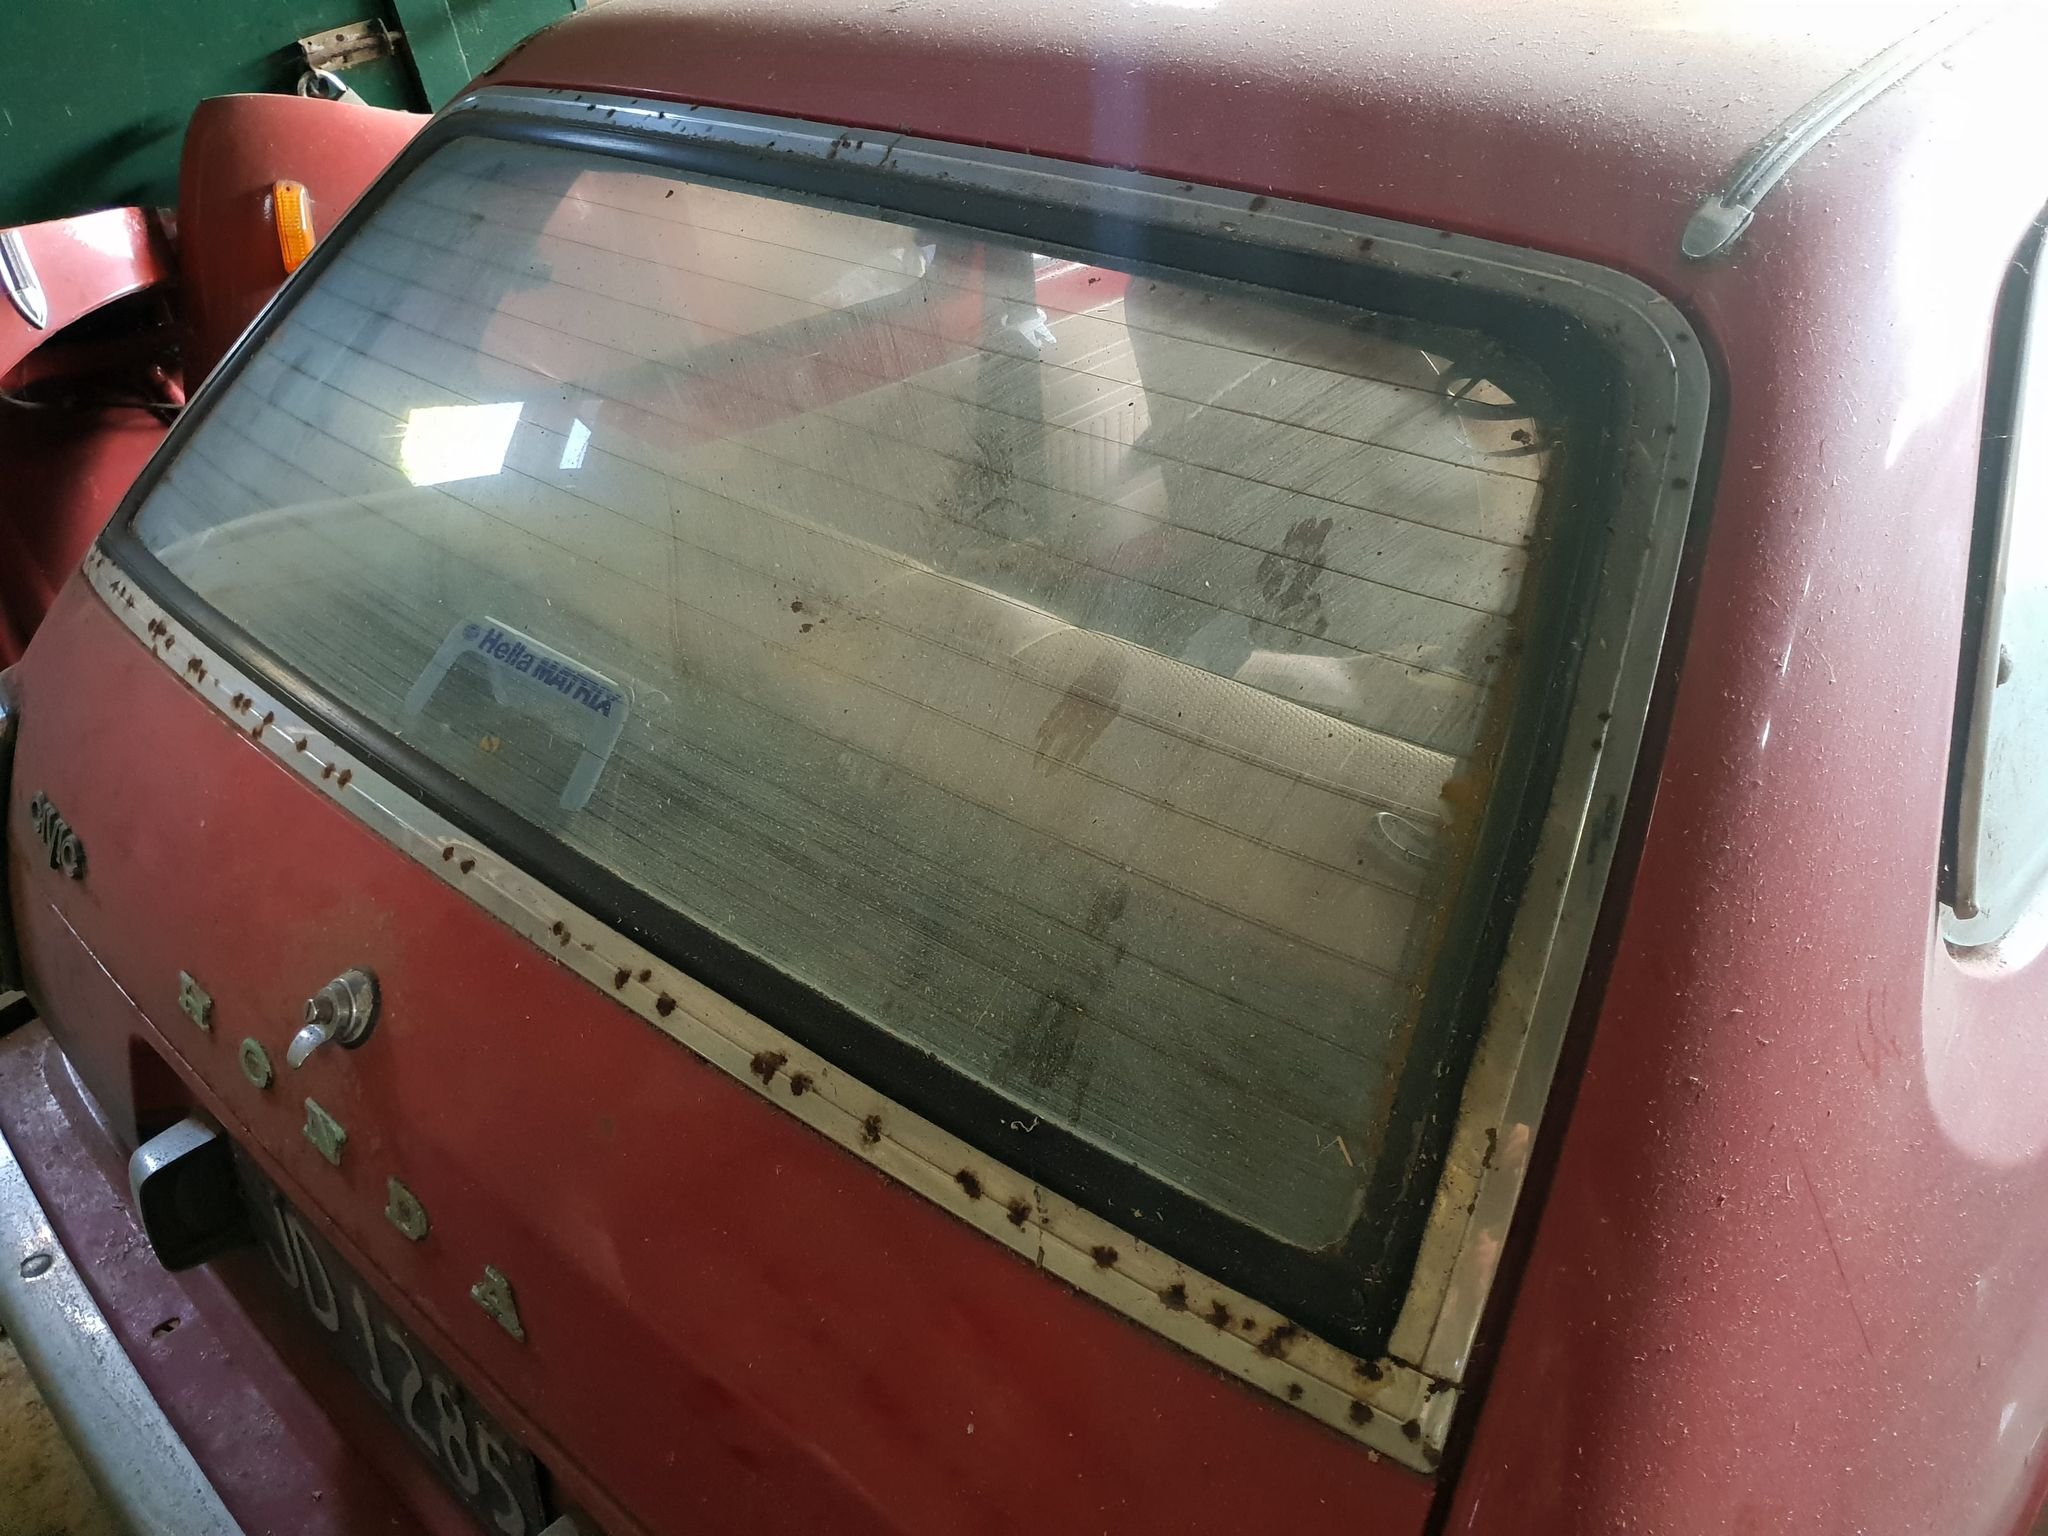
I guess this is just a placeholder first post for this car. It has been sitting under my dads house since maybe 2015, and last had a WOF in 2014. First pic is when it was first "parked". This is the only picture I can find from back then, when it actually looked like a car. It is a 1979 Honda Civic 1200, made in Nelson and originally purchased from Percy Motors Auckland on the 28th of March 1979, approximately 18 years before I was born. It has 8X,000km's on the clock, and service history for the majority of its life indicating it did not roll over. The original documentation said it was in "Signal Red" but I believe the actual colour (from the sales brochure) was Sofia Red, with the brown interior not black. This could have been swapped in, but the head lining matches brown so I'm not so sure. I purchased it with a half-complete City Turbo 2 engine swapped in, which was seized from sitting for too long so I gave up on it and pulled it out. I sold that with all of the (many!) city turbo bits that came with the car. The exterior of the car is now in pretty poor shape, with quite a bit of surface rust coming through under the paint, and some areas (like below the A-pillars) with really quite bad rust holes. I'm not sure what it is like under the car, but it was fine when I got it! The interior was pretty much immaculate, except for some minor damage to the wood veneer on the dashboard and the carpet had been stripped. I managed to acquire a DOHC ZC engine (d16a8/9) from a CRX, with forged pistons and H-beam rods. The details of the me purchasing this engine in ~2018/2019 are fuzzy, but I believe it was built for a turbo in a track car. Here you can see the new rods compared to the stock ones. The plan is to have the engine swapped in as soon as I get the car moved, with basically a hack-job of motor mounts just to get it in roughly the right place. Then I will worry about axles, suspension and chassis. I intend on using a GTX2860r Gen2 on a log-style manifold to suit the space restrictions, and modify either a 2zz-ge intake manifold or K24 RBB intake manifold to mate up to the ZC head. The intake manifold is about 1/2 the length of the engine bay in its stock form. While people have made this engine fit with a small-ish turbo, I don't want to modify the firewall at all just for an intake manifold. This will not be a fast project, I don't even have the car yet! But hopefully the end result will be a fast project. Link to discussion here:
3 points
-
They can crack into the oil gallery and things like that. New head reckon injectors new radiator new viscous fan flush the fuck out of the block mechanical pump conversion wind up the boost and fuel three inch zorst no muffler loosely fitted poddy off the front of the blower and send it3 points
-
Been cracking through this as my main project since Feb, its been a good time. Background; I have been designing this with some friends for a long time now after I built them a caravan a few years ago that was good but had a couple of limitations, mainly size and weight. This is the 547th design iteration since then, it is just time to crack on. It is a hard side lifting roof, and the methodology will become apparent with the pics. The reason is that it gives plenty of standing height while remaining reasonably compact, plus way less frontal area when packed down for towing, and hopefully some smart packaging will allow nice space usage. Firstly I went to Chch and grabbed this kit while I was there, altho the steel bits you see have been laser cut and folded locally; I ordered some steel and cracked on; Stand by for Part II....2 points
-
I thought I had photos of the harness but didn't. I decided to try swapping the ecu plug on the adaptor harness to the genuine as its less work and soldering everything. The pins were quite loose in the Chinese connectors so there might have been something dodgy there. But when putting it back in I noticed that Then wire might have snapped when I was rough and pulled the twist and tape out or it was damaged internally after the big swap/surgery. Seems to be fixed for now. Let's hope it stays that way2 points
-
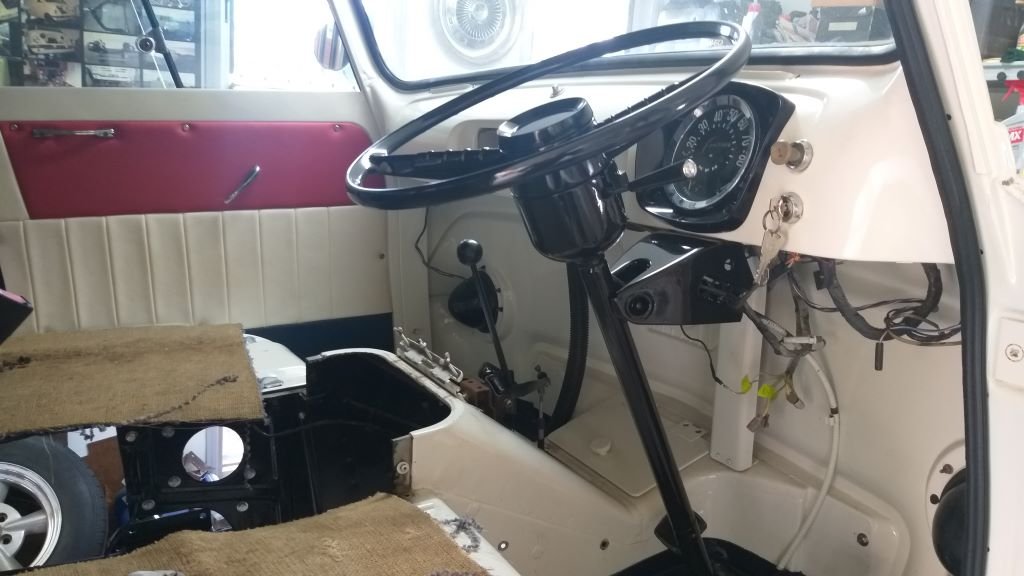
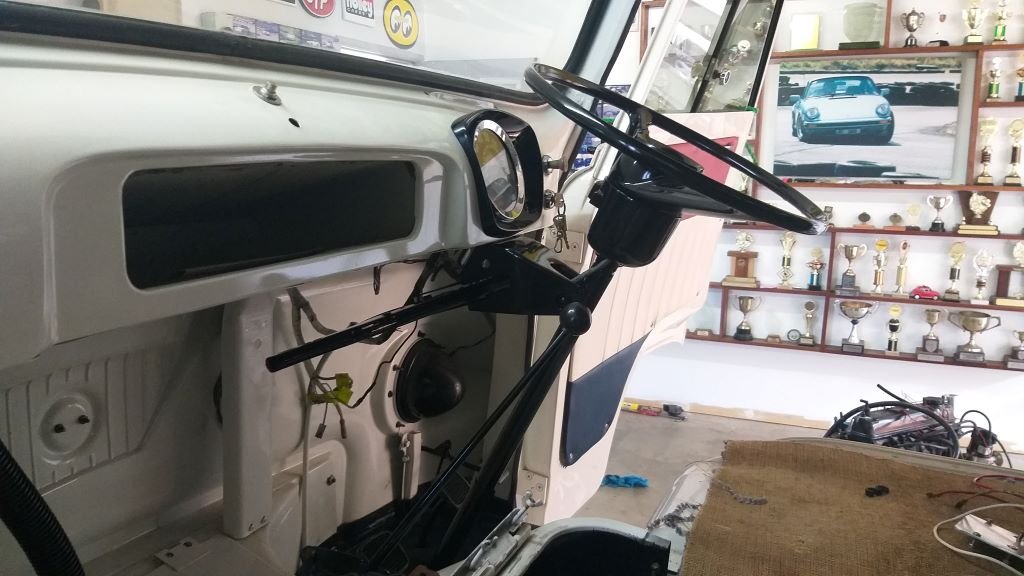
I spent the morning putting in the freshly painted steering column and wheel for the very last time. Fitted my NOS indicator mechanism at the same time so everything is nice and fresh. With the column firmly bolted in place I was finally able to connect up the handbrake mechanism and give it a go for the very first time. Works like an absolute charm which is a relief as it's a real mishmash of Thames and Toyota bits, so I had my doubts about it. Anyhoo, pictures of the fresh install looking rather bling:
2 points
-
Took the hunter out to Waiuku mufflers today to get the system lifted as high as possible. on the way out there it removed a few catseyes. I’ve noticed our roads have stupid crowns at the moment that raise around 50mm. So the flange and one resonator were getting a hiding. plus it’s garked up my driveway and doorway in the workshop. much friendlier to drive now without throwing sparks2 points
-
Some hiluxs had an Lspv, some didn't. Some systems are just proportioned through the master cyl sizing. If he drove it, and the rear locked up, or he had it on rollers and the rear was too harsh and you can't adjust it out at the drums, then you'll have to fit a prop valve to dial it them in. If brakes are fine without, nicely balanced front to back, then hes just being a retard.2 points
-
Since Quatro is no longer here.. 1KZs suck.2 points
-
So you want a lightweight, low drag caravan for yourself then....?2 points
-
Much fizz for this. I have a project I want a student to do involving making a lightweight, low drag caravan. But they don't seem as excited by the prospect as me...2 points
-
This is where it gets tricksy, I have various things that make using a timing belt for the lift a sensible option, mostly availability and prior use in various designs I have done. That main driveshaft lifts all 4 corners at exactly the same rate, it works well so far. Then there is much random shite I have added A doorway Stabilisers Towing accoutrements Tail lights Flooring A modified ATV winch for the lift mech that works perfectly but is pretty noisy, I may replace this if it is a problem. Many thanks to @datlow for that sweet idea. Some water tanks, 120L - set low and central so as to not screw up the weight balance too much A pressure activated water pump to suit The bed needs to lift away from the seating area during the day, this is my first cut at it which was a hilarious failure as at the horizontal transition point it went terribly wrong. I have found a better way now, more of this in future episodes.2 points
-
man I dunno why people go so wild about 1kz being some kind of GOAT precomp diesels.... what the hell eh.2 points
-
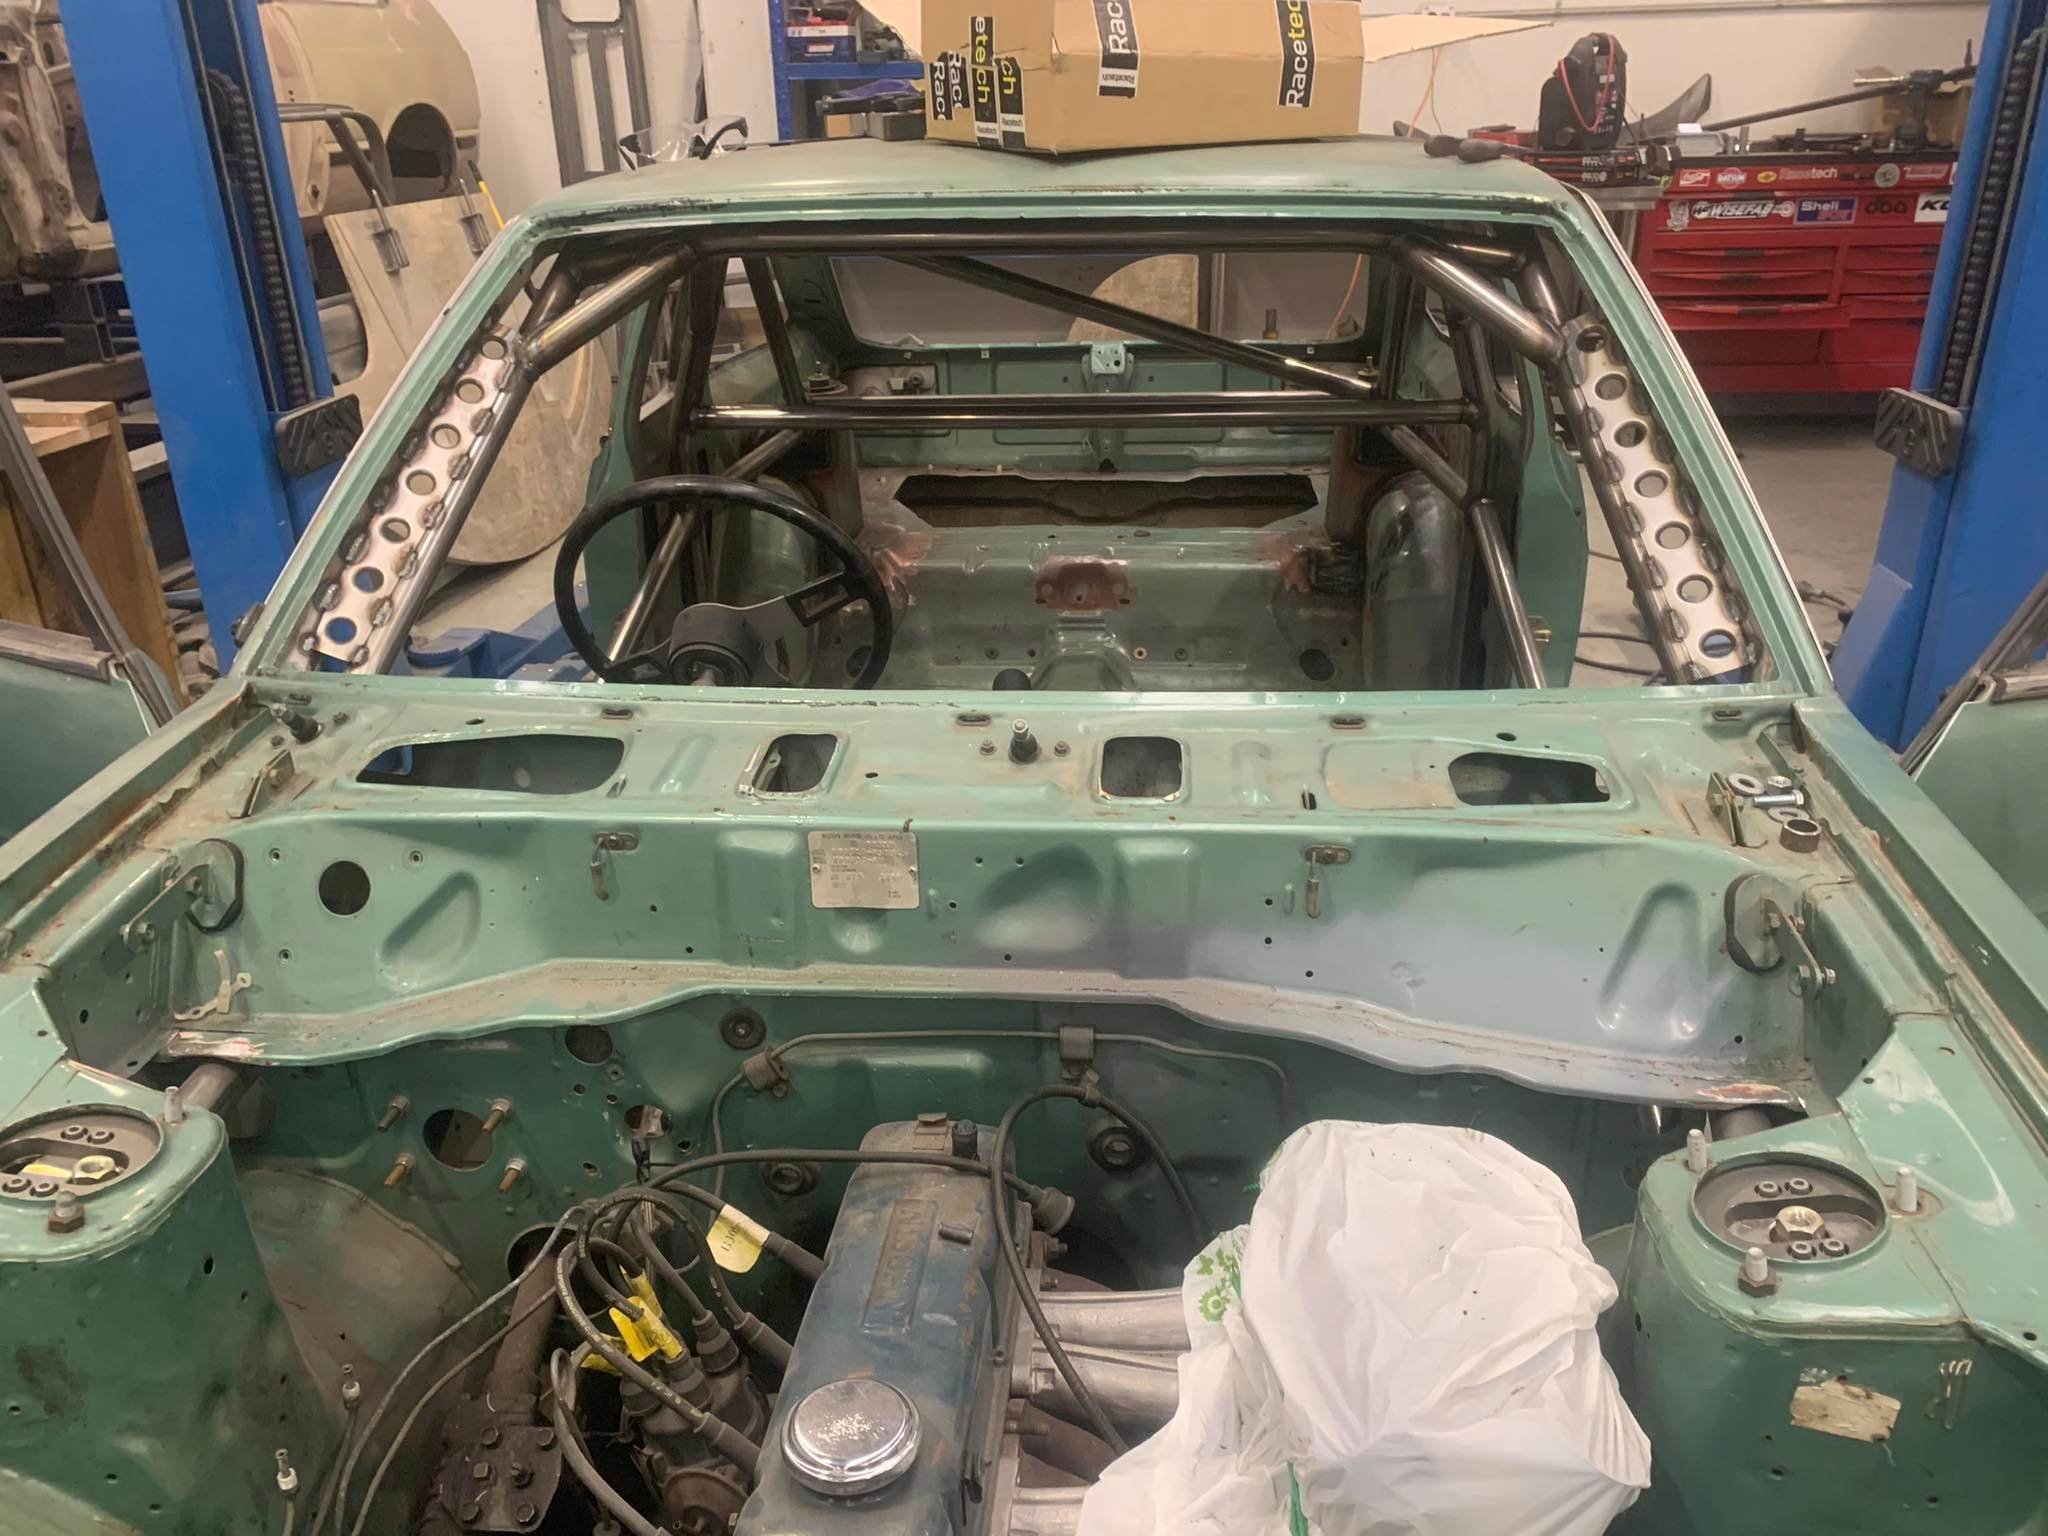
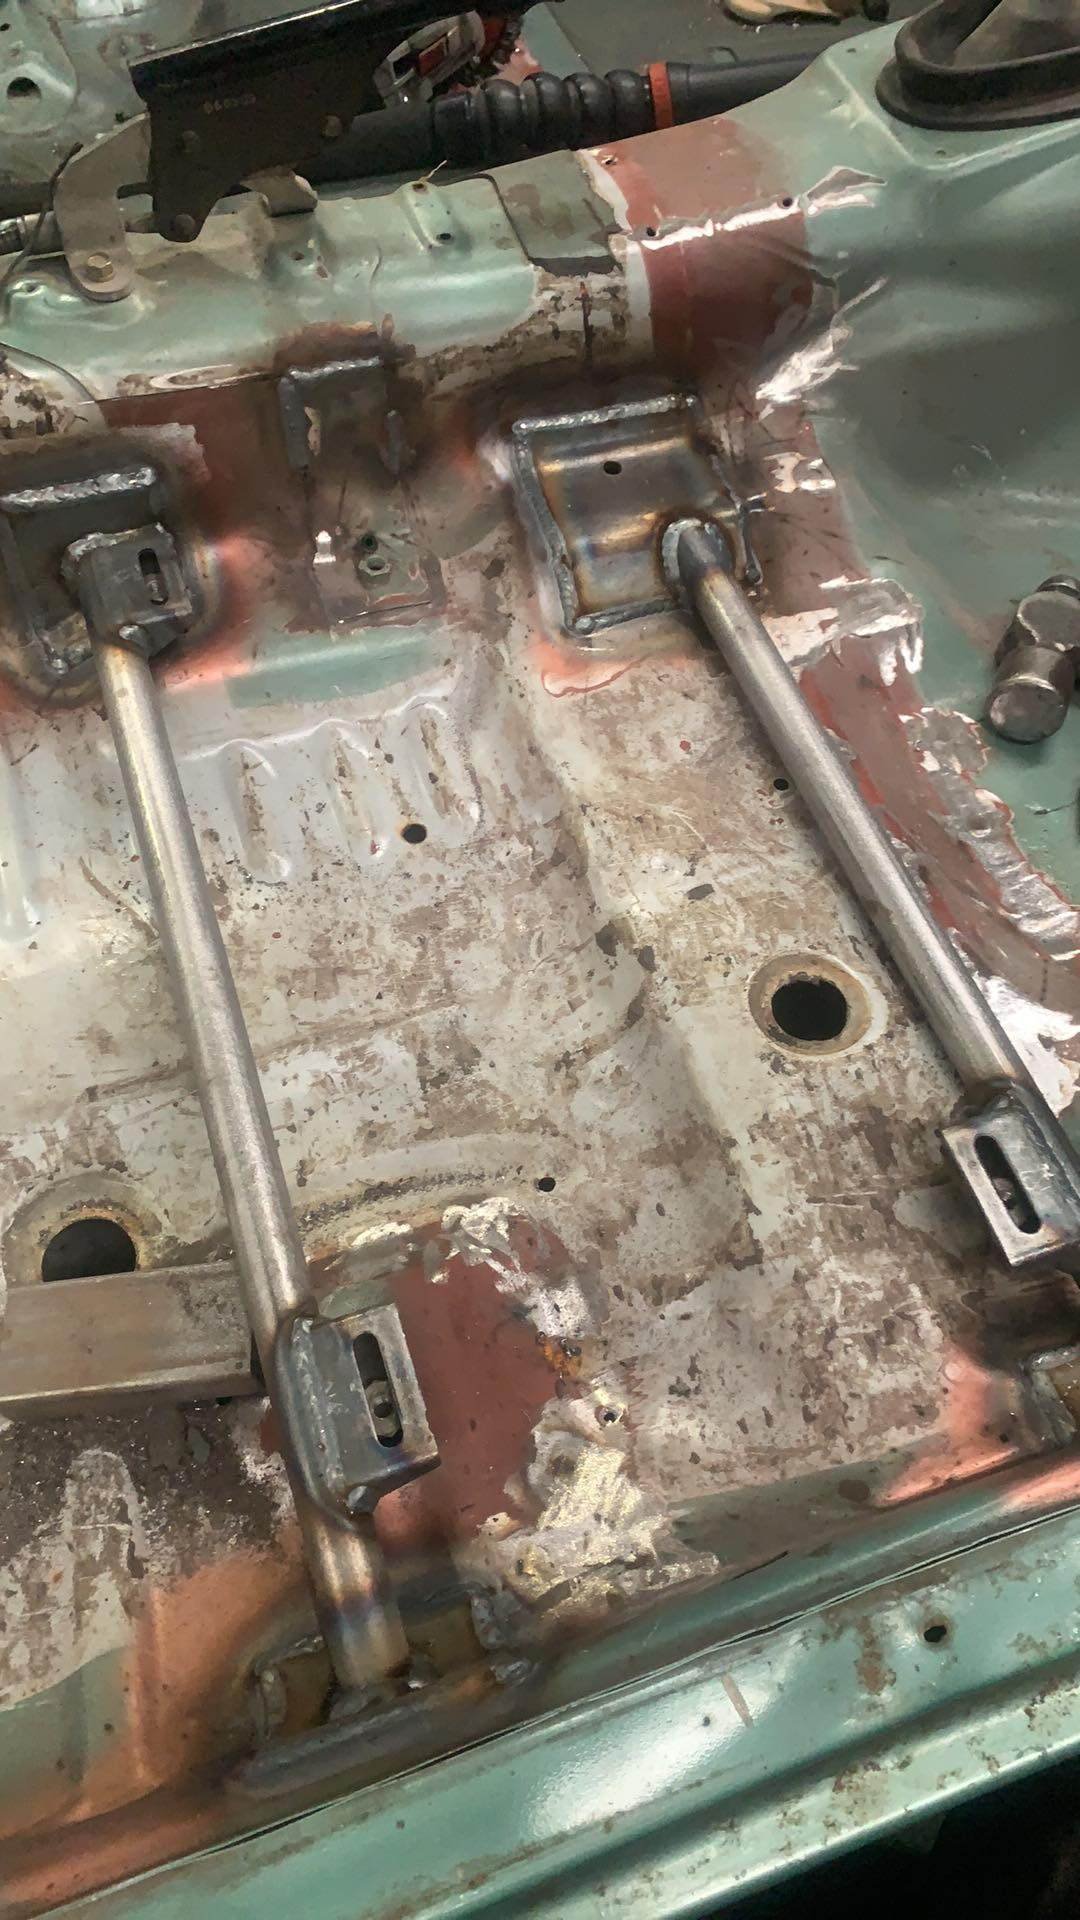
Seat mounts in, cage is all tacked up ready for dropping down and welding.
2 points
-
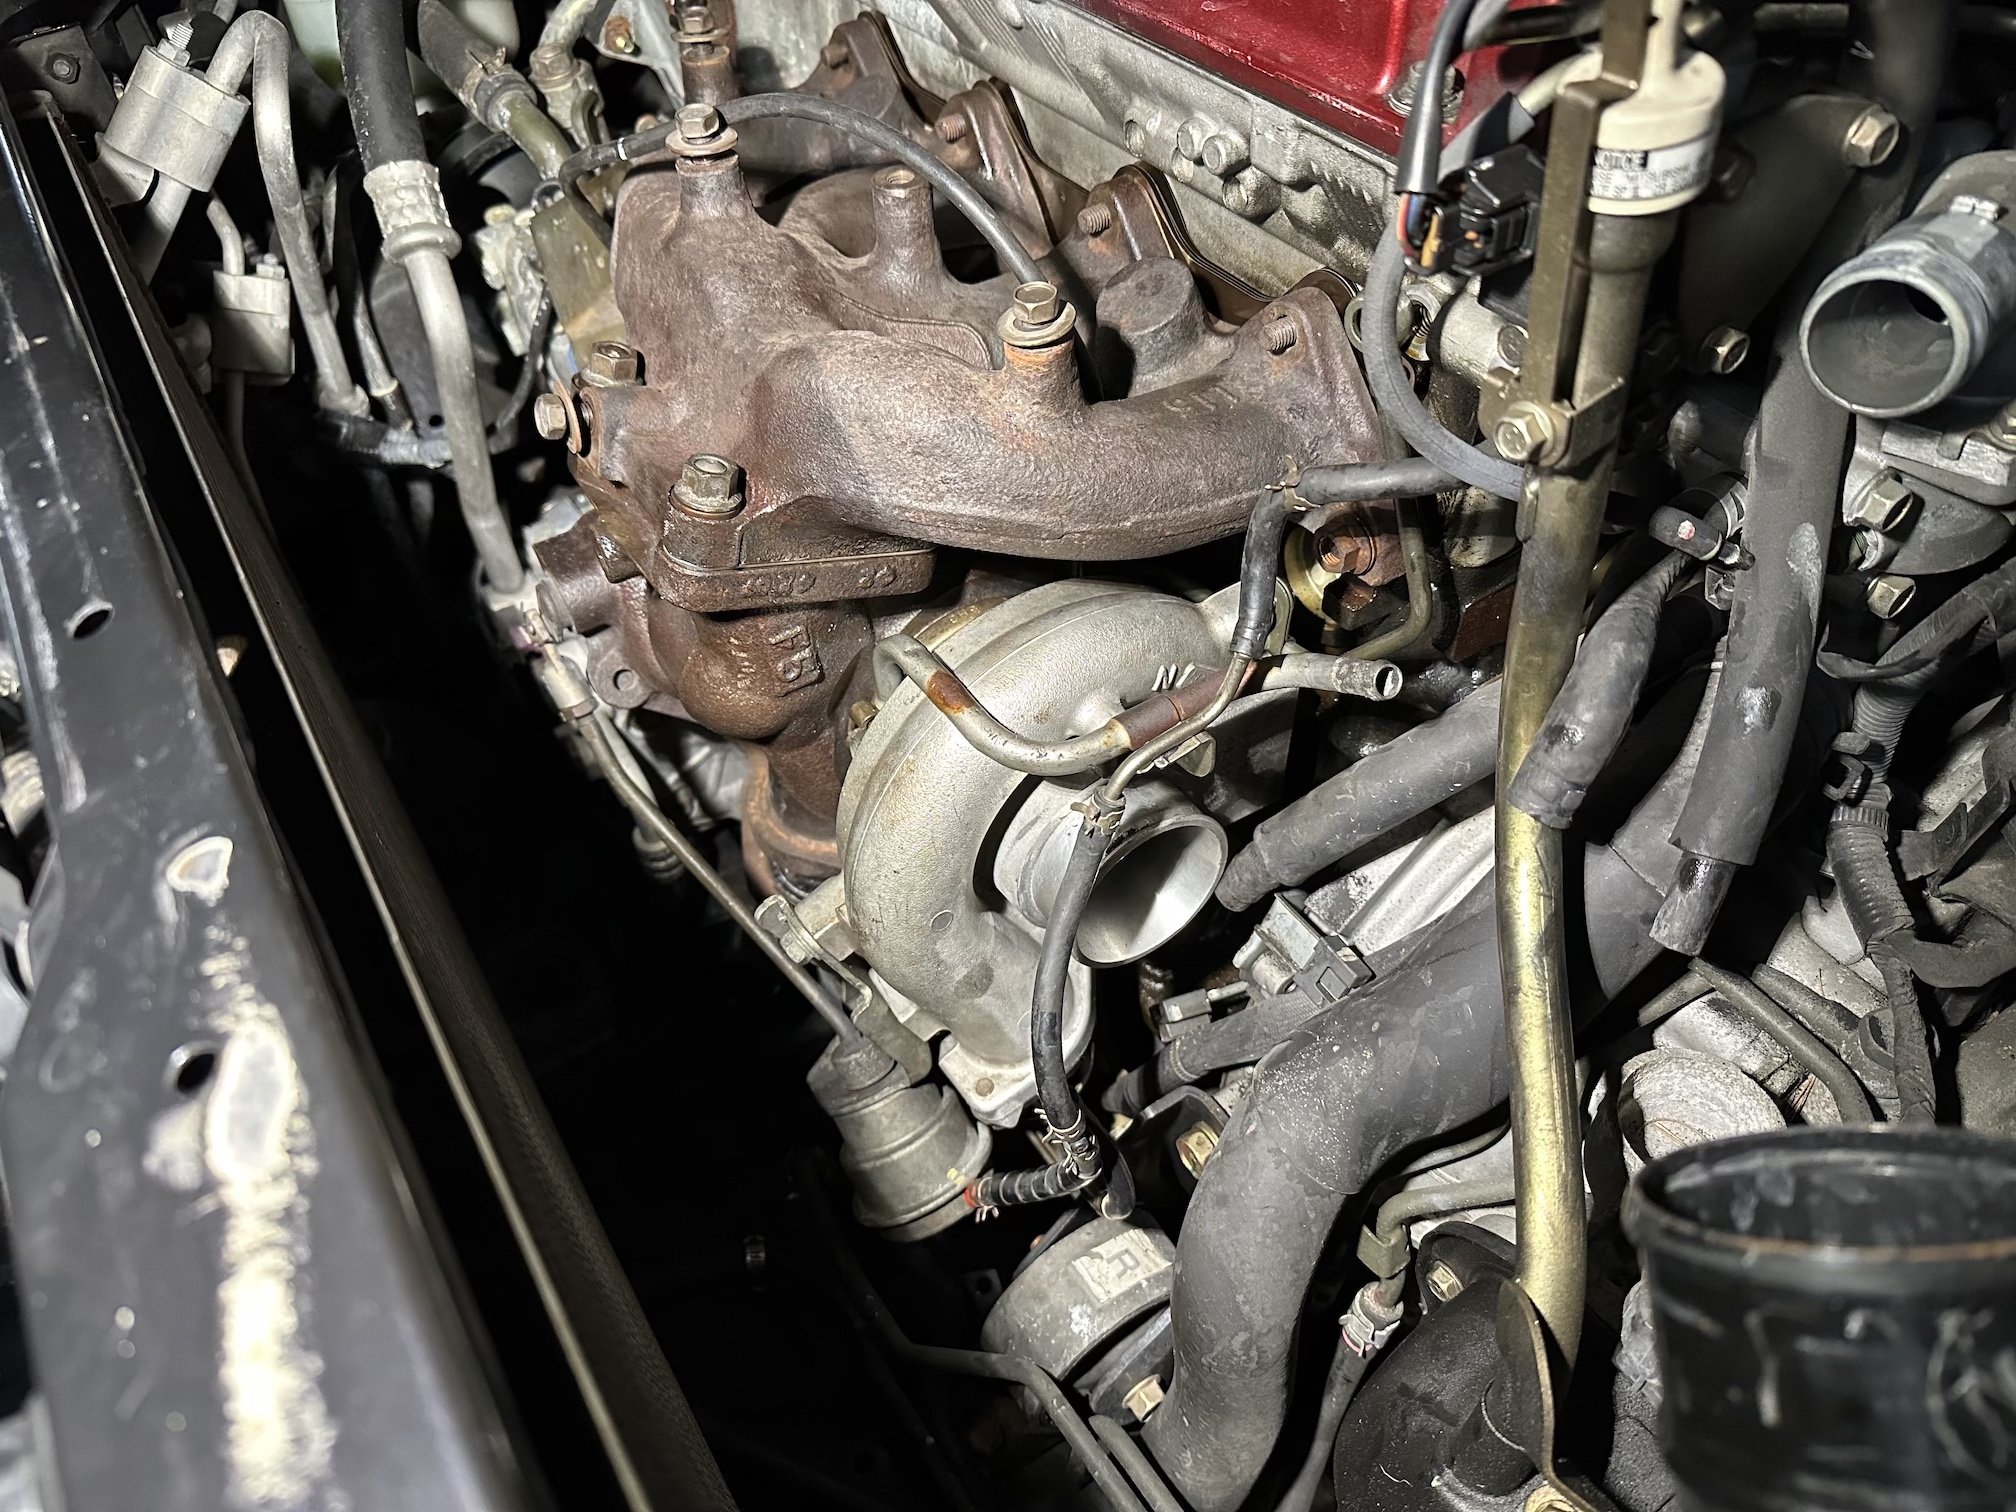
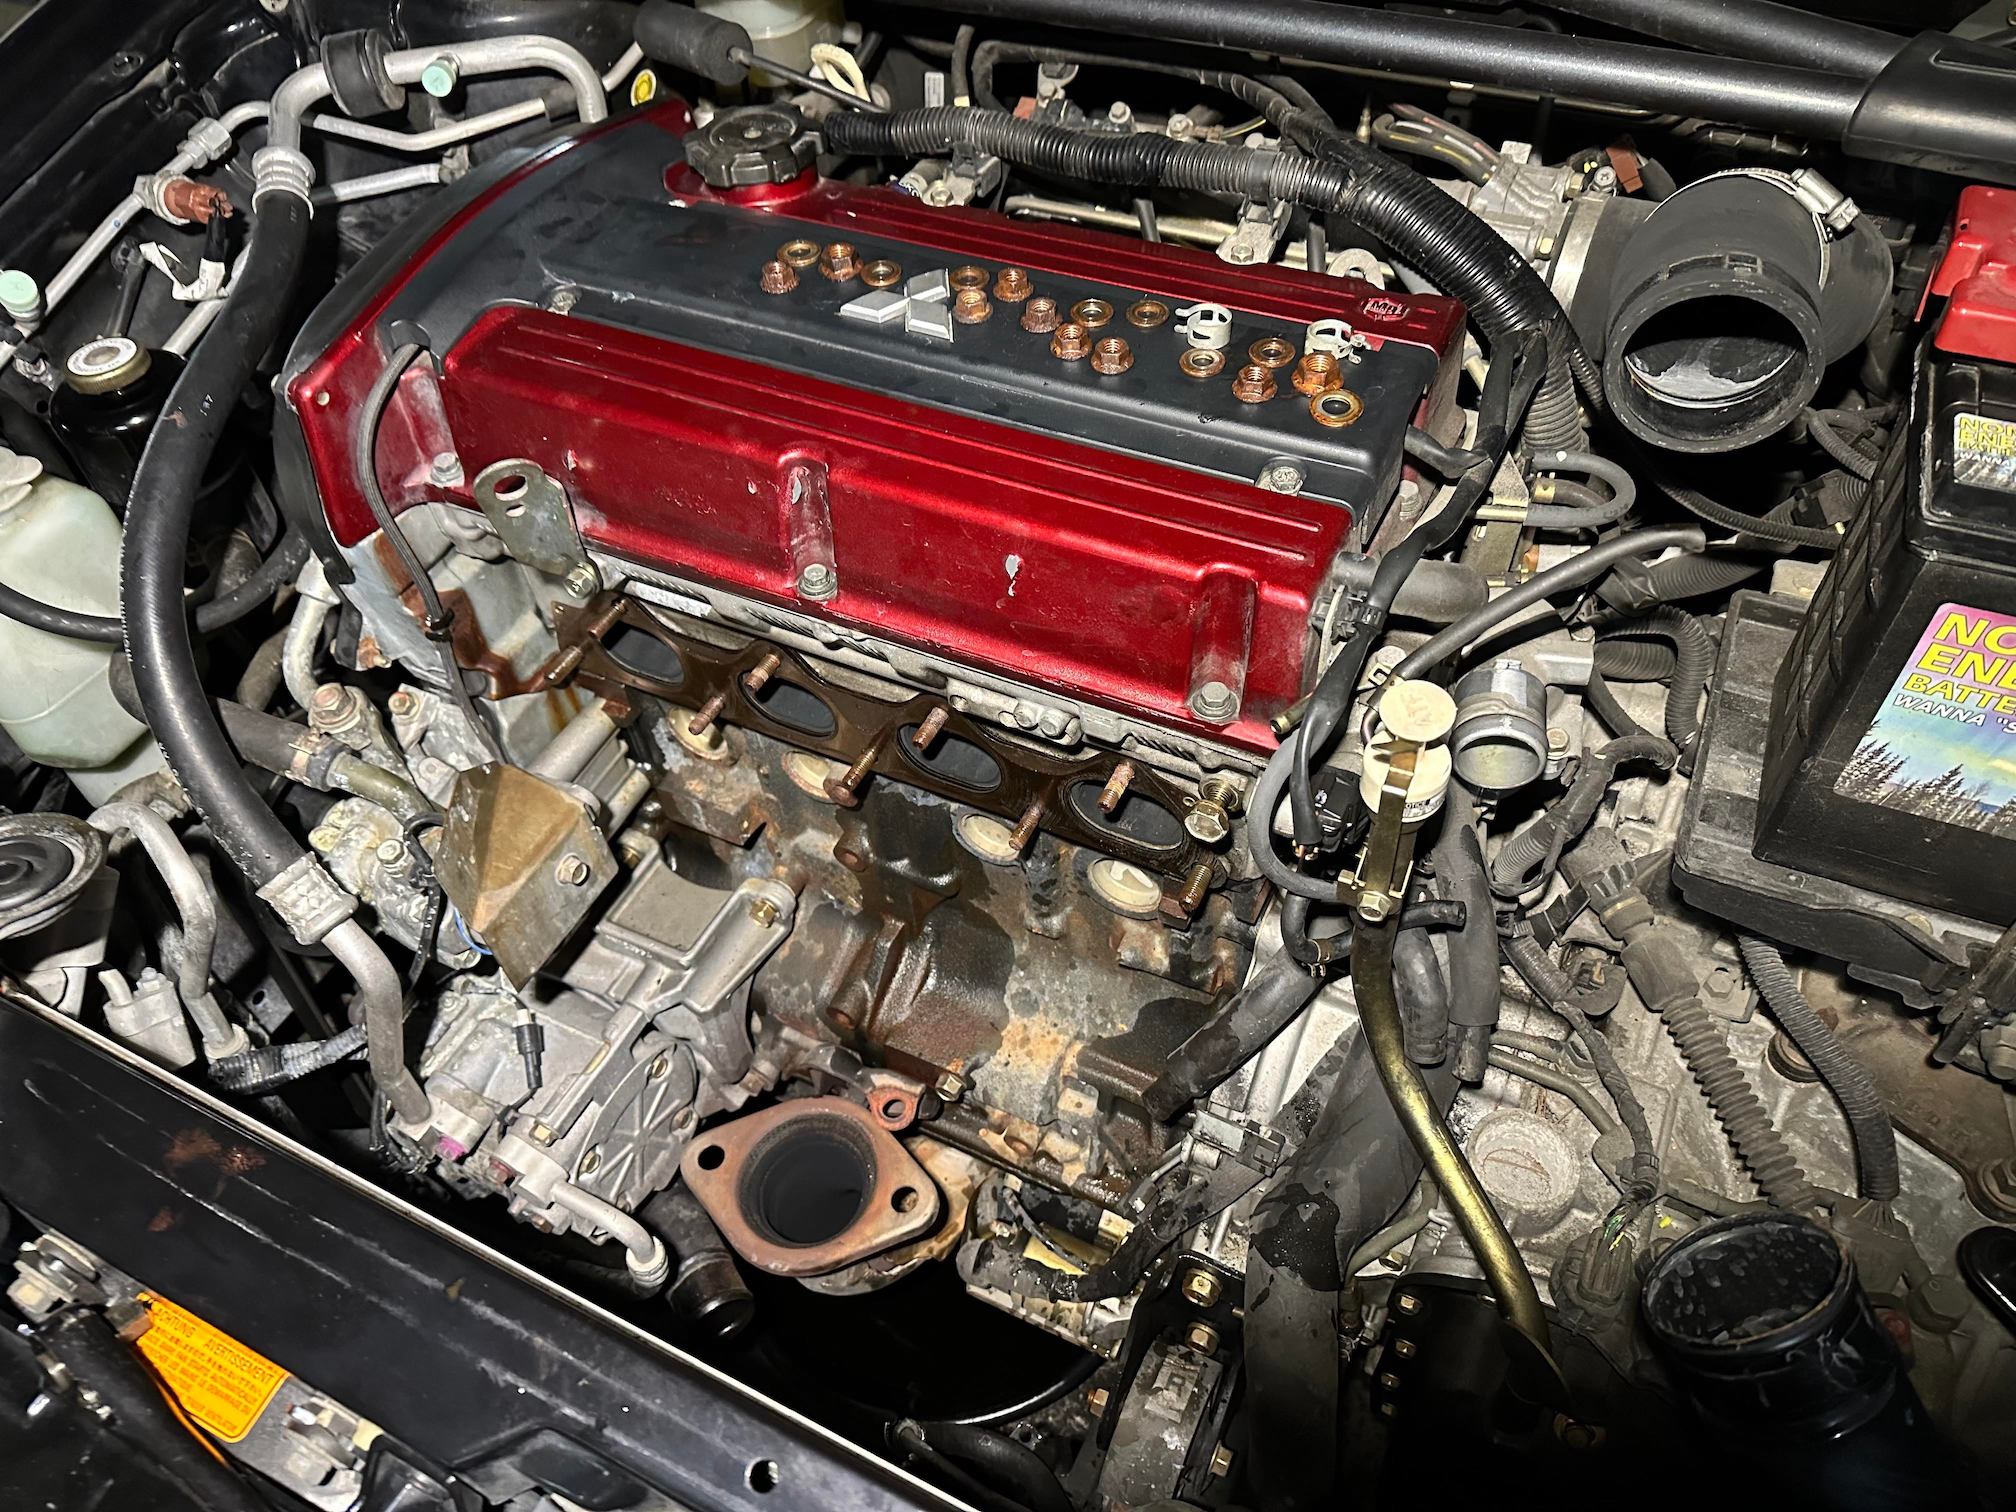
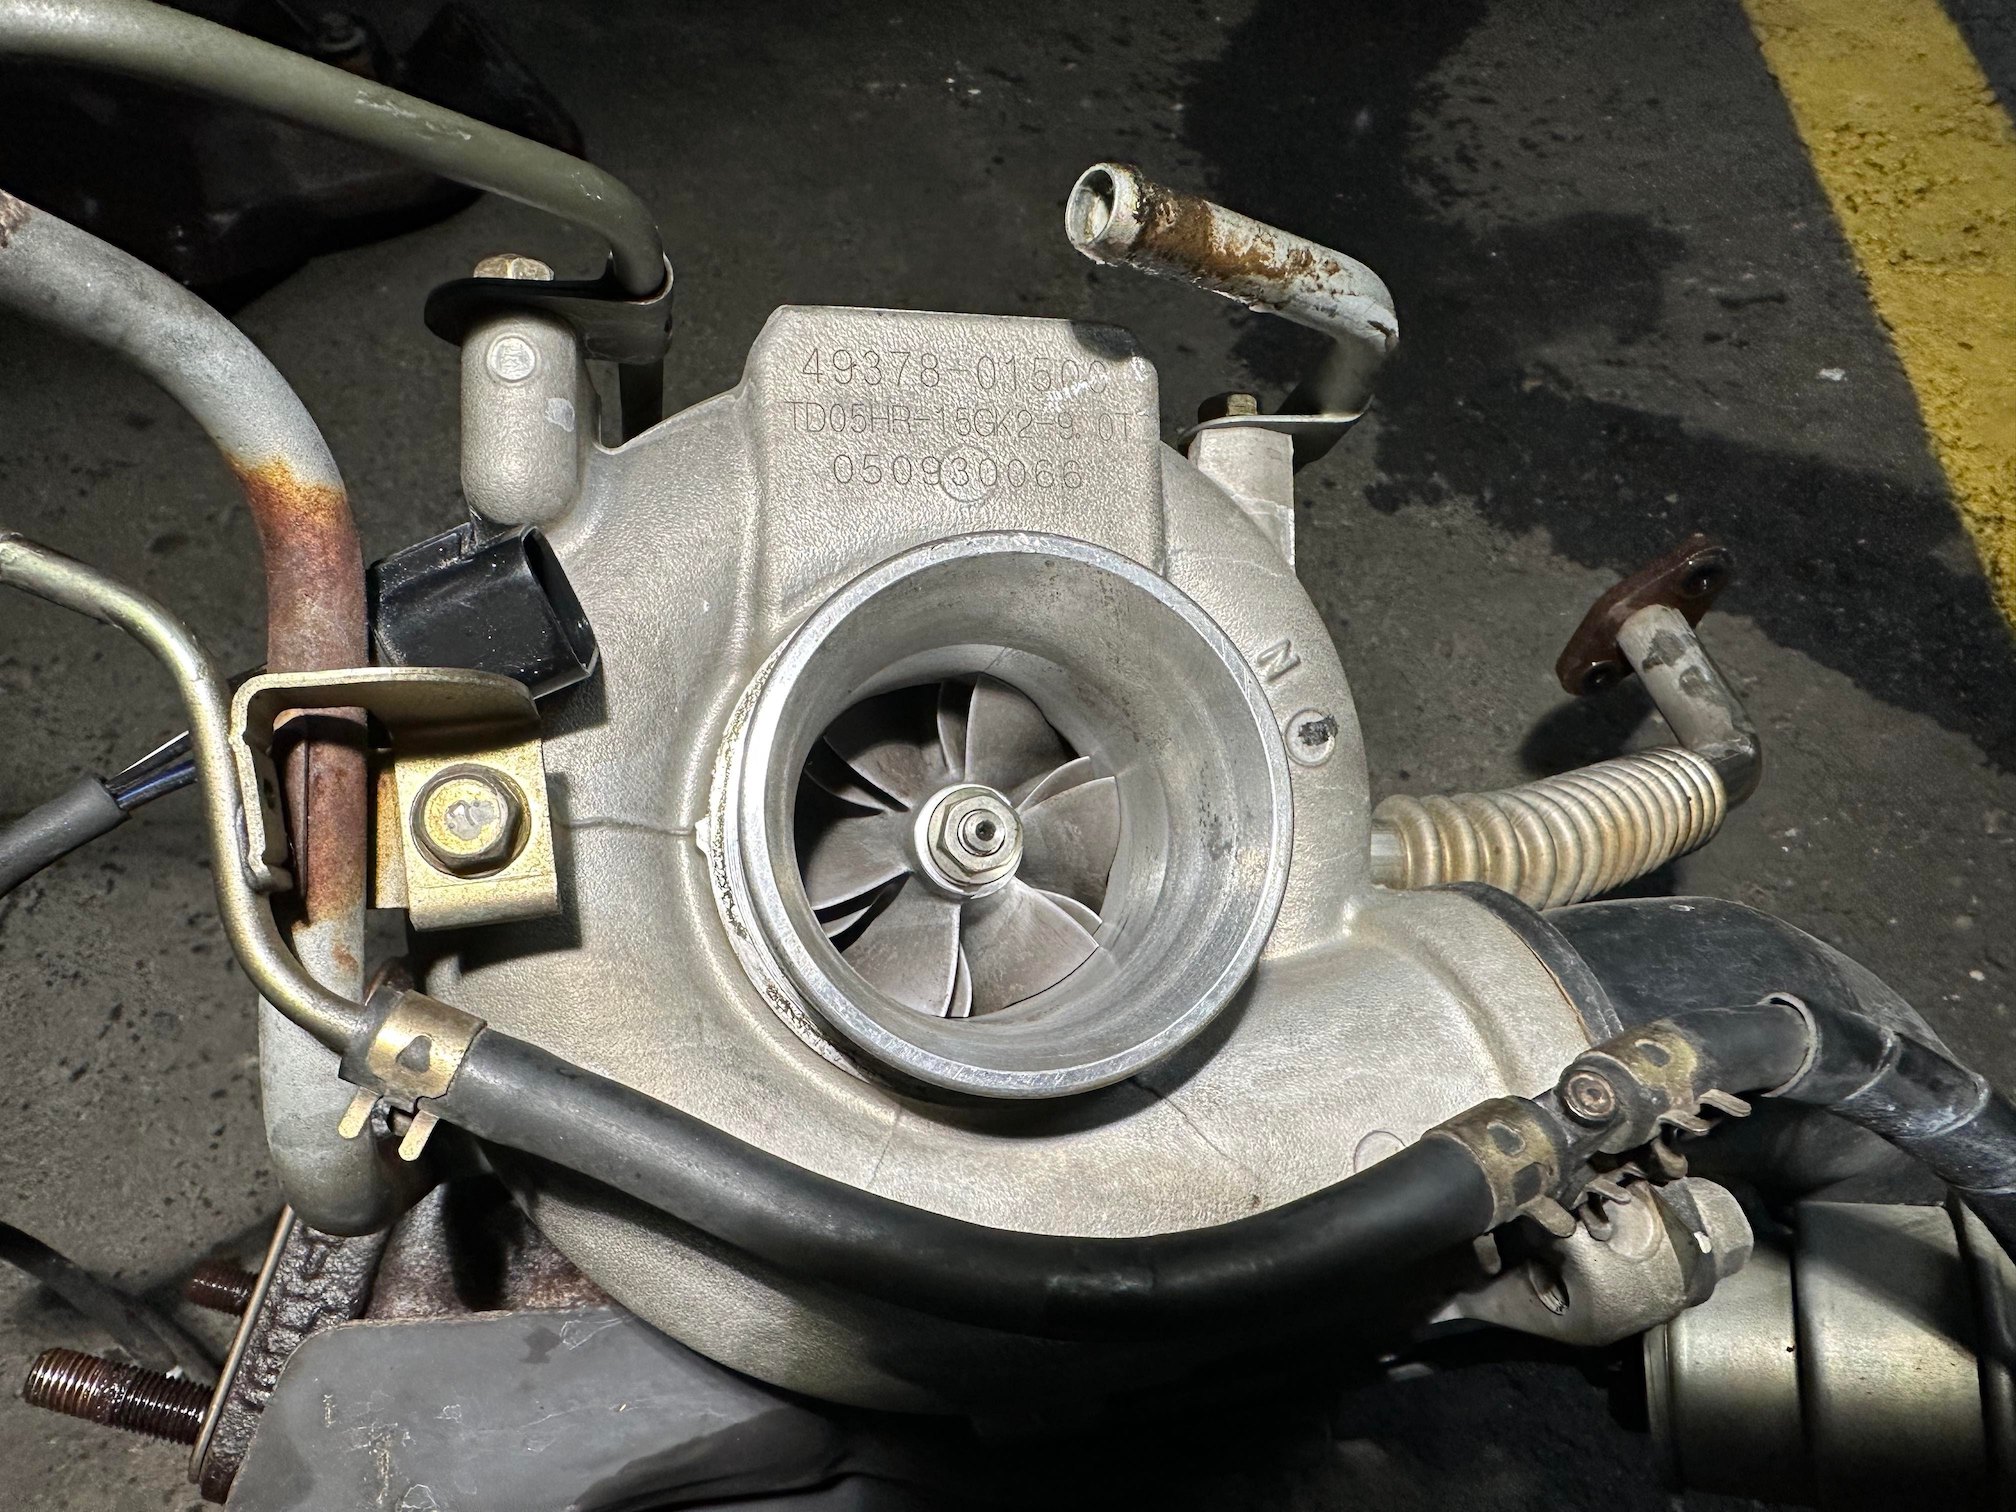
Making a start on swapping out the original TD05HR-15GK2-9T turbo with the TD05HR-16G6C-10.5T turbo Original turbo in good clean condition, just the compressor and turbine housing is slightly smaller than the M/T counterpart.
2 points
-
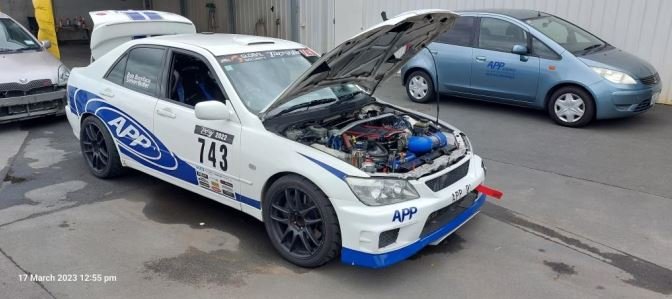
Well, I made the fucking deadline! I didn’t have time to tune it properly, the rear tyres rub and the brakes need bedded in but those arefuture problems2 points
-
second event for the year smacked out on the weekend. This time a short 2km there and back shootout sprint similar in style to the ashley forest rally sprint. I was a bit hazed after 2 weeks of drinking baiju / soju in china / korea on a business trip so didnt think i would preform well, that all soon disappeared after a coffee and a redbull. I took the first run pretty casually and then started feeding it. the official results aren't out yet but looking at them on the end of the day I was fastes (only) A class car, i beat all B class (0-1600) cars other than a motorbike engined hillman imp. Which i was pretty stoked with as there was a very flash starlet with a 1300cc 2age and some pretty serious suspension mods (equal length 3 link with watts link, motor set right back into firewall etc. I was 3rd overall 2wd behind the imp and Peter in his BMW. I even managed to beat 2 imprezas. All because of the road really, the starlet loves tight twisty shit being light and short wheelbase, and with my 5.1 final drive it just loves second gear stuff and puts the power down really well, once to get to more open 3rd - 4th gear roads i drops right back in the pack. Anyway here's a video and some choice photos from Jeff wells and Gayle.2 points
-
I've been wanting to get my bike license for a decade, easily. I've just been super terrible about it, lazy, busy, unmotivated, you name it, I found an excuse. Usually i just forgot, but yeah anyway. Since both of my cars are in great shape (gone and jinxed that one...) and essentially just need servicing, washing, and WOF-ing I figured I should do something about this long-delayed motorbike license and get it done. So I did. The basic handling was easy, and the written test even easier. Not bad for a bloke who hasn't thrown a leg over a bike in 20 years or so. The other motivation was the rides @BLIZZO etc have been fanging, I had a bit of a hunger to go out exploring and an adventure bike was the most likely candidate. Although I probably wussed out a bit on the seriousness of it all, as you'll soon see. So I researched a bunch of options, KLR650, DR650, DRZ400, even toyed with the idea of buying a brand spankers CRF300, but instead a chance Facebook marketplace find led me to this thing, a Yamaha XT660R. Here's how the purchase went down, it's a bit of an interesting yarn I think. I spied this bike while browsing marketplace (during work hours, natch) and it looked pretty tidy. Details were scarce, and it was allegedly in Cambridge. But the info seemed good, km were low at 33000 so I fired a message. "Oh it's my dads bike, here's his number" was the response I received. No big deal, I dialed the number and got the seller/owner on the phone. "So those pics aren't actually the bike I'm selling," was the first thing this joker said, literally. "It's a bit hard to get to at the moment, and my son saw this bike just like it so I told him to take some pictures of it so we could list mine. Oh yeah it's actually in Tokoroa, not Cambridge, too." Still, no big deal, I've gotten this far so I might as well find out a bit more. Aaaanyway. Here's where the plot thickened. "I bought it 9 years ago, I never rode it and I just put it in my spare room, it's really mint though, looks like it just rolled out of a showroom." Interesting, and surely, the bloke's talking shit, right? The phone conversation would go on for a full FORTY SEVEN minutes, I thought I loved a yarn but this chap was the GOAT. Everything from working in the mines. How good is Thailand? Oh the time I owned a Porsche, I just had a big target on my back. And more. It turned out he'd gone to Wellington for some reason or another, and this bike took his fancy, so he bought it, but then he needed to get it home so he bought a Hiace to transport it back North. How good? As it turned out I was due a trip up that weekend anyway, to go and ride bikes (the kind with pedals) at Redwoods in Rotorua so I figured I could make a detour and check this thing out. I rolled in the driveway at about midday, and the place looked a little sketchy - you know, the kind with the fence made out of longrun roofing because they sure as hell don't want you to see in. Really, it was obscuring a yard chock full of treasure, and when I got to meet Brent, the owner, it was whilst dodging a a dog that was fairly vocal and upset about my being there. A great start, then. Brent had obviously been working quite hard that morning, to get the bike to a point where I could actually view it. So like, cleaning it up, or maybe getting it ready for a start-up or something? No. Brent had just been CLEARING OUT the tonnes of crap that had hemmed this thing inside his spare room for some years. "I like to collect stuff," he explained, "I'd rather put my money into things, you know?" Well, he sure had a LOT of things. Enough things, that meant we had to traverse a perilous path carved through the labyrinth of 'things' (oh, theres a couple of postie bikes under all that, and a brand new scooter somewhere under there *gesticulates at pile of stuff*) populating the hallway and entrance of his old mill house, before we entered the cavern of XT660, and the sight below greeted my eyes. Just to the left of this shot is a stack of bric-a-brac and assorted appliances that reaches the ceiling, I almost considered confined space entry gear to deal with this situation. 2023-03-21_11-00-29 by Richard Opie, on Flickr Remember how I was optimistic about it's condition? Well it sure wasn't showroom, but holy shit it was pretty good, especially considering the relatively meagre bucks this thing was listed for. No major paint wear on the pegs or engine cases, all the plastics still glossy and unmarked, it even had it's original graphics still present. Looked like it had never seen any dirt, no major oxidisation on the alloy components, no fluids where they shouldn't be - but I wasn't allowed to fire it up. Whipping off the fuel tank, it had been BRIMMED before it was stored, but Christ it was whiffy in there, and didn't look like it was going to be a great time in steel fuel tank-ville... but I figured this thing seemed a pretty good starting point, it was tidy (and you all know I love my vehicles clean and tidy), had done minimal work and seemed to offer the goods for a capable enough dualsport bike. Reg on hold was a decent cherry on the top, too. So I made an offer, and we made a deal. The Monday night after that, Markku and I drove up to Tokoroa after work with a trailer in tow, to pick the thing up. The trip was swift but largely uneventful, and we arrived around 8:30pm to find the bike sitting outside, and Brent waiting with a stack of pre-selected yarns. We got the bike loaded, had a quick feed of fresh KFC and hit the road, arriving home at 1:30am, and loading, where Jarvis quickly meowed his approval at my latest folly. 2023-03-21_11-02-35 by Richard Opie, on Flickr 20230307_021343 by Richard Opie, on Flickr 20230307_020302 by Richard Opie, on Flickr Next chapter. Wil it run?!1 point
-
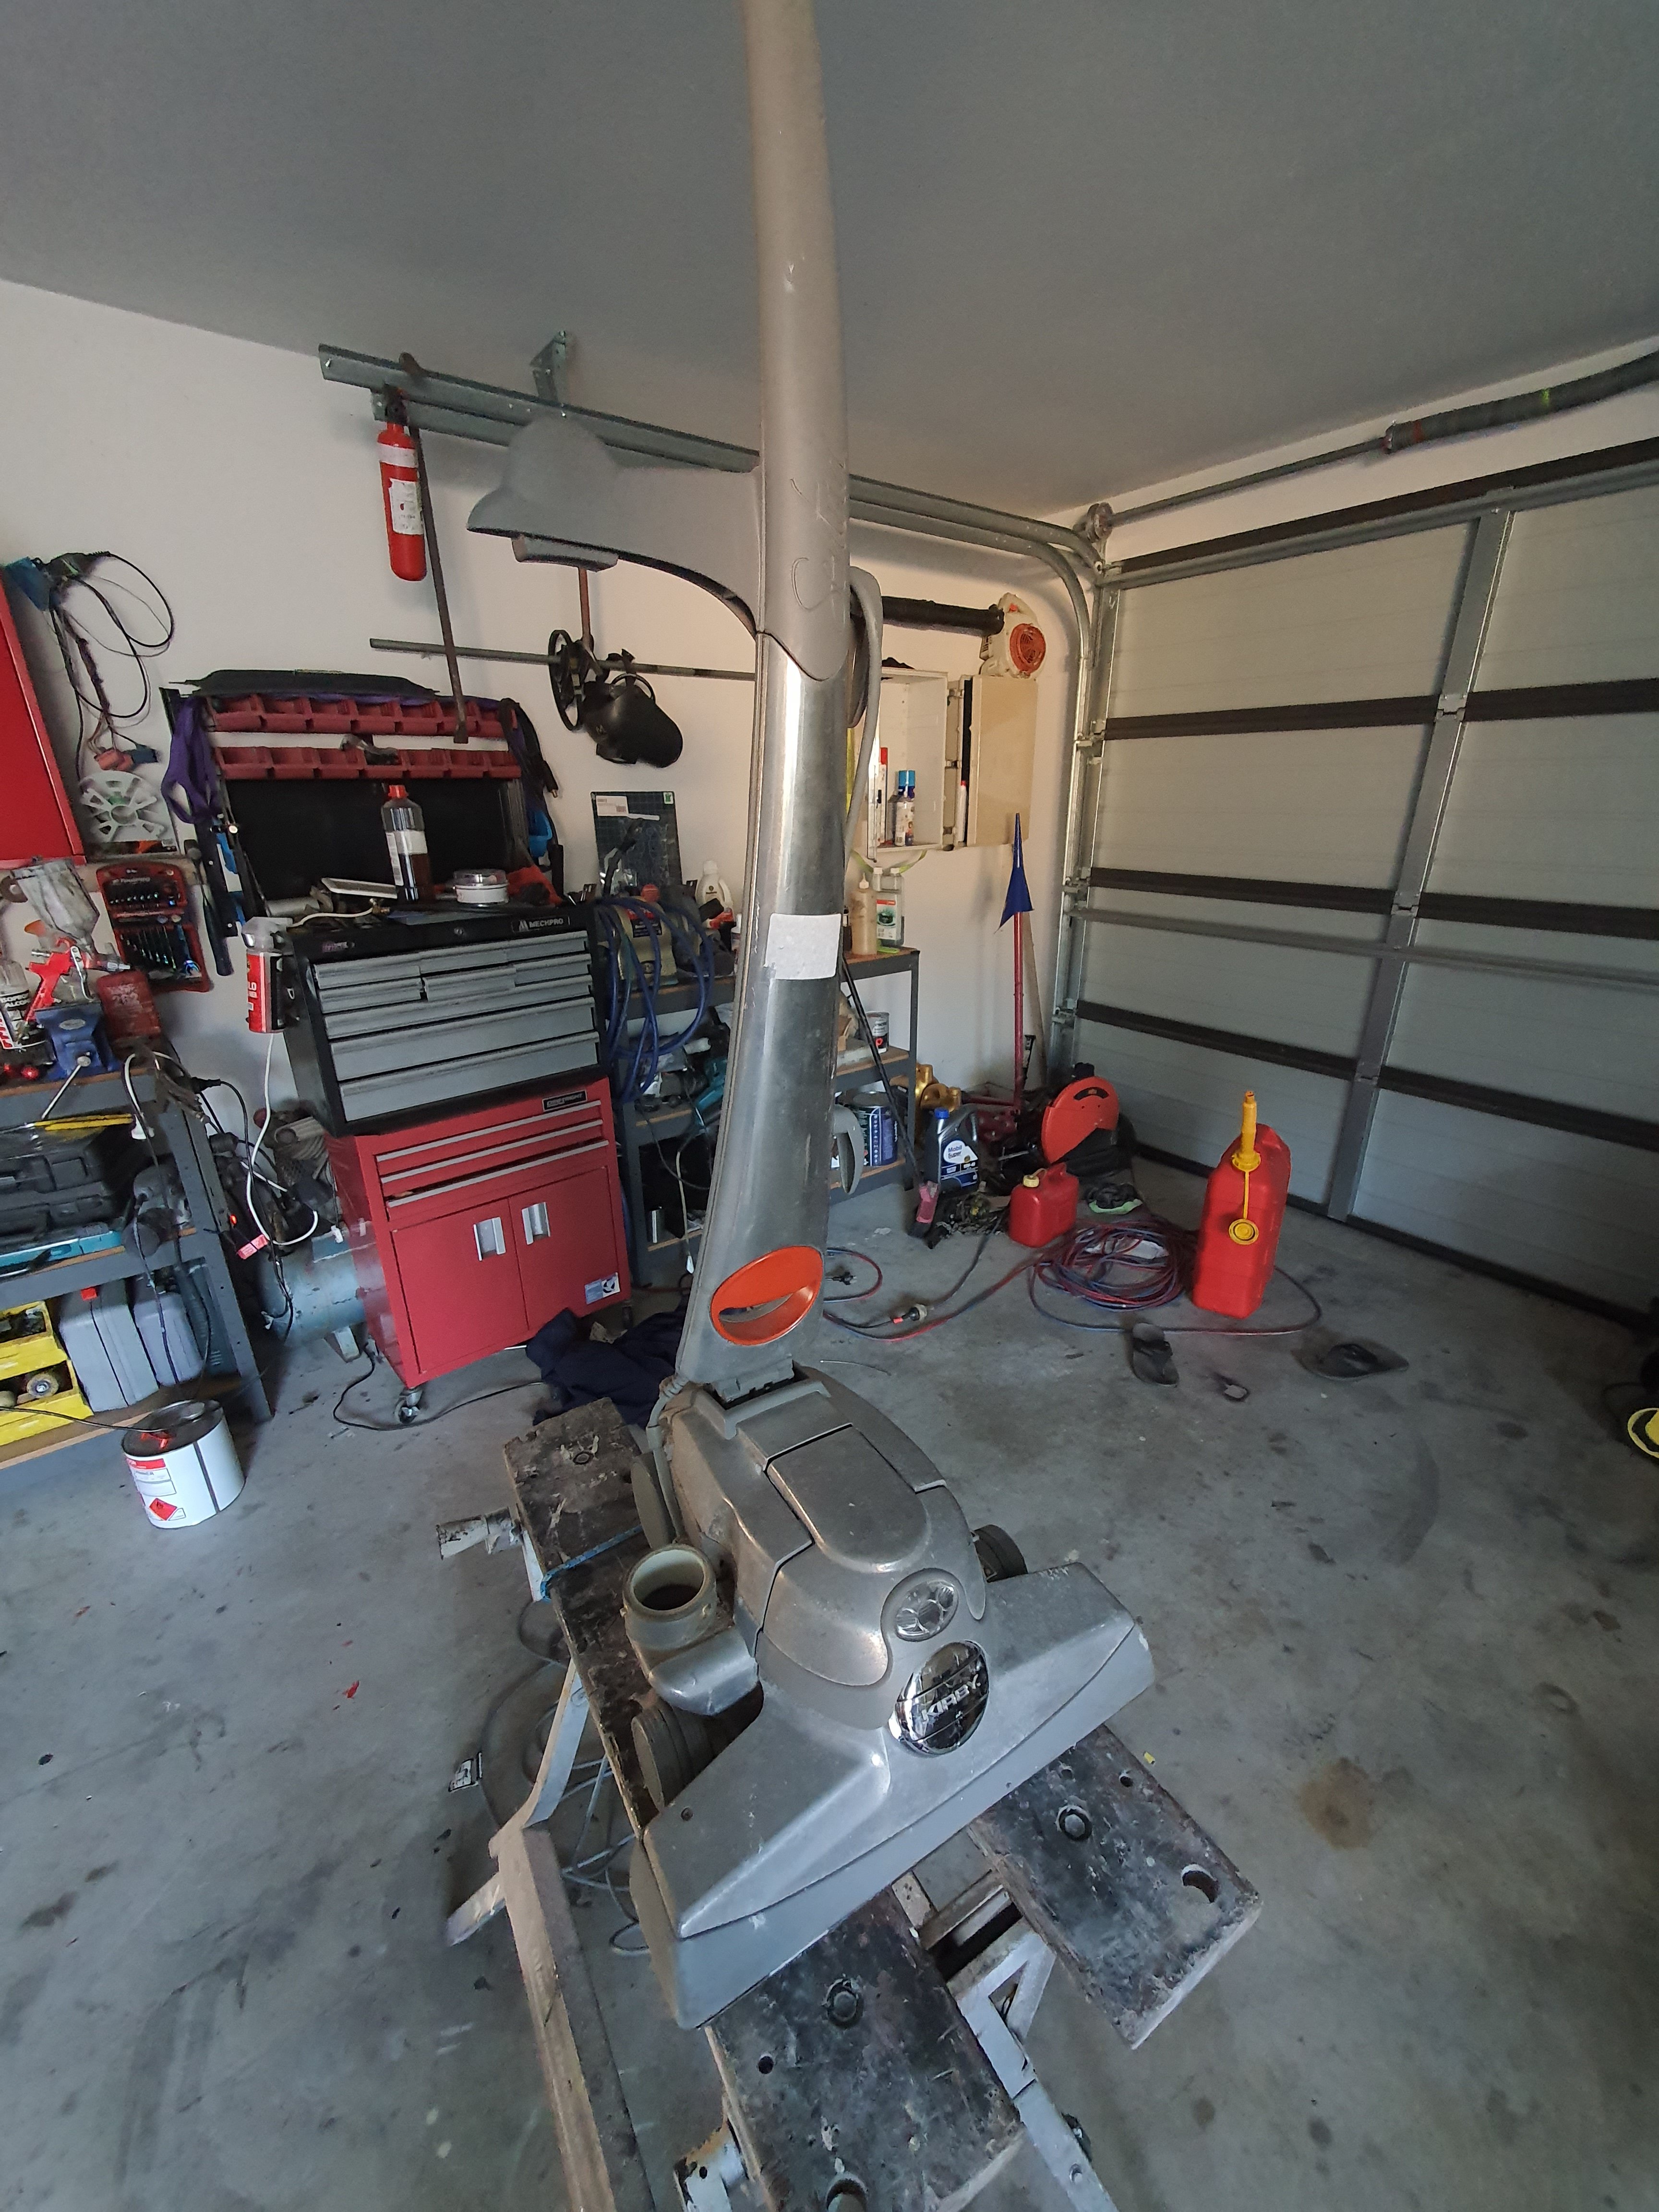
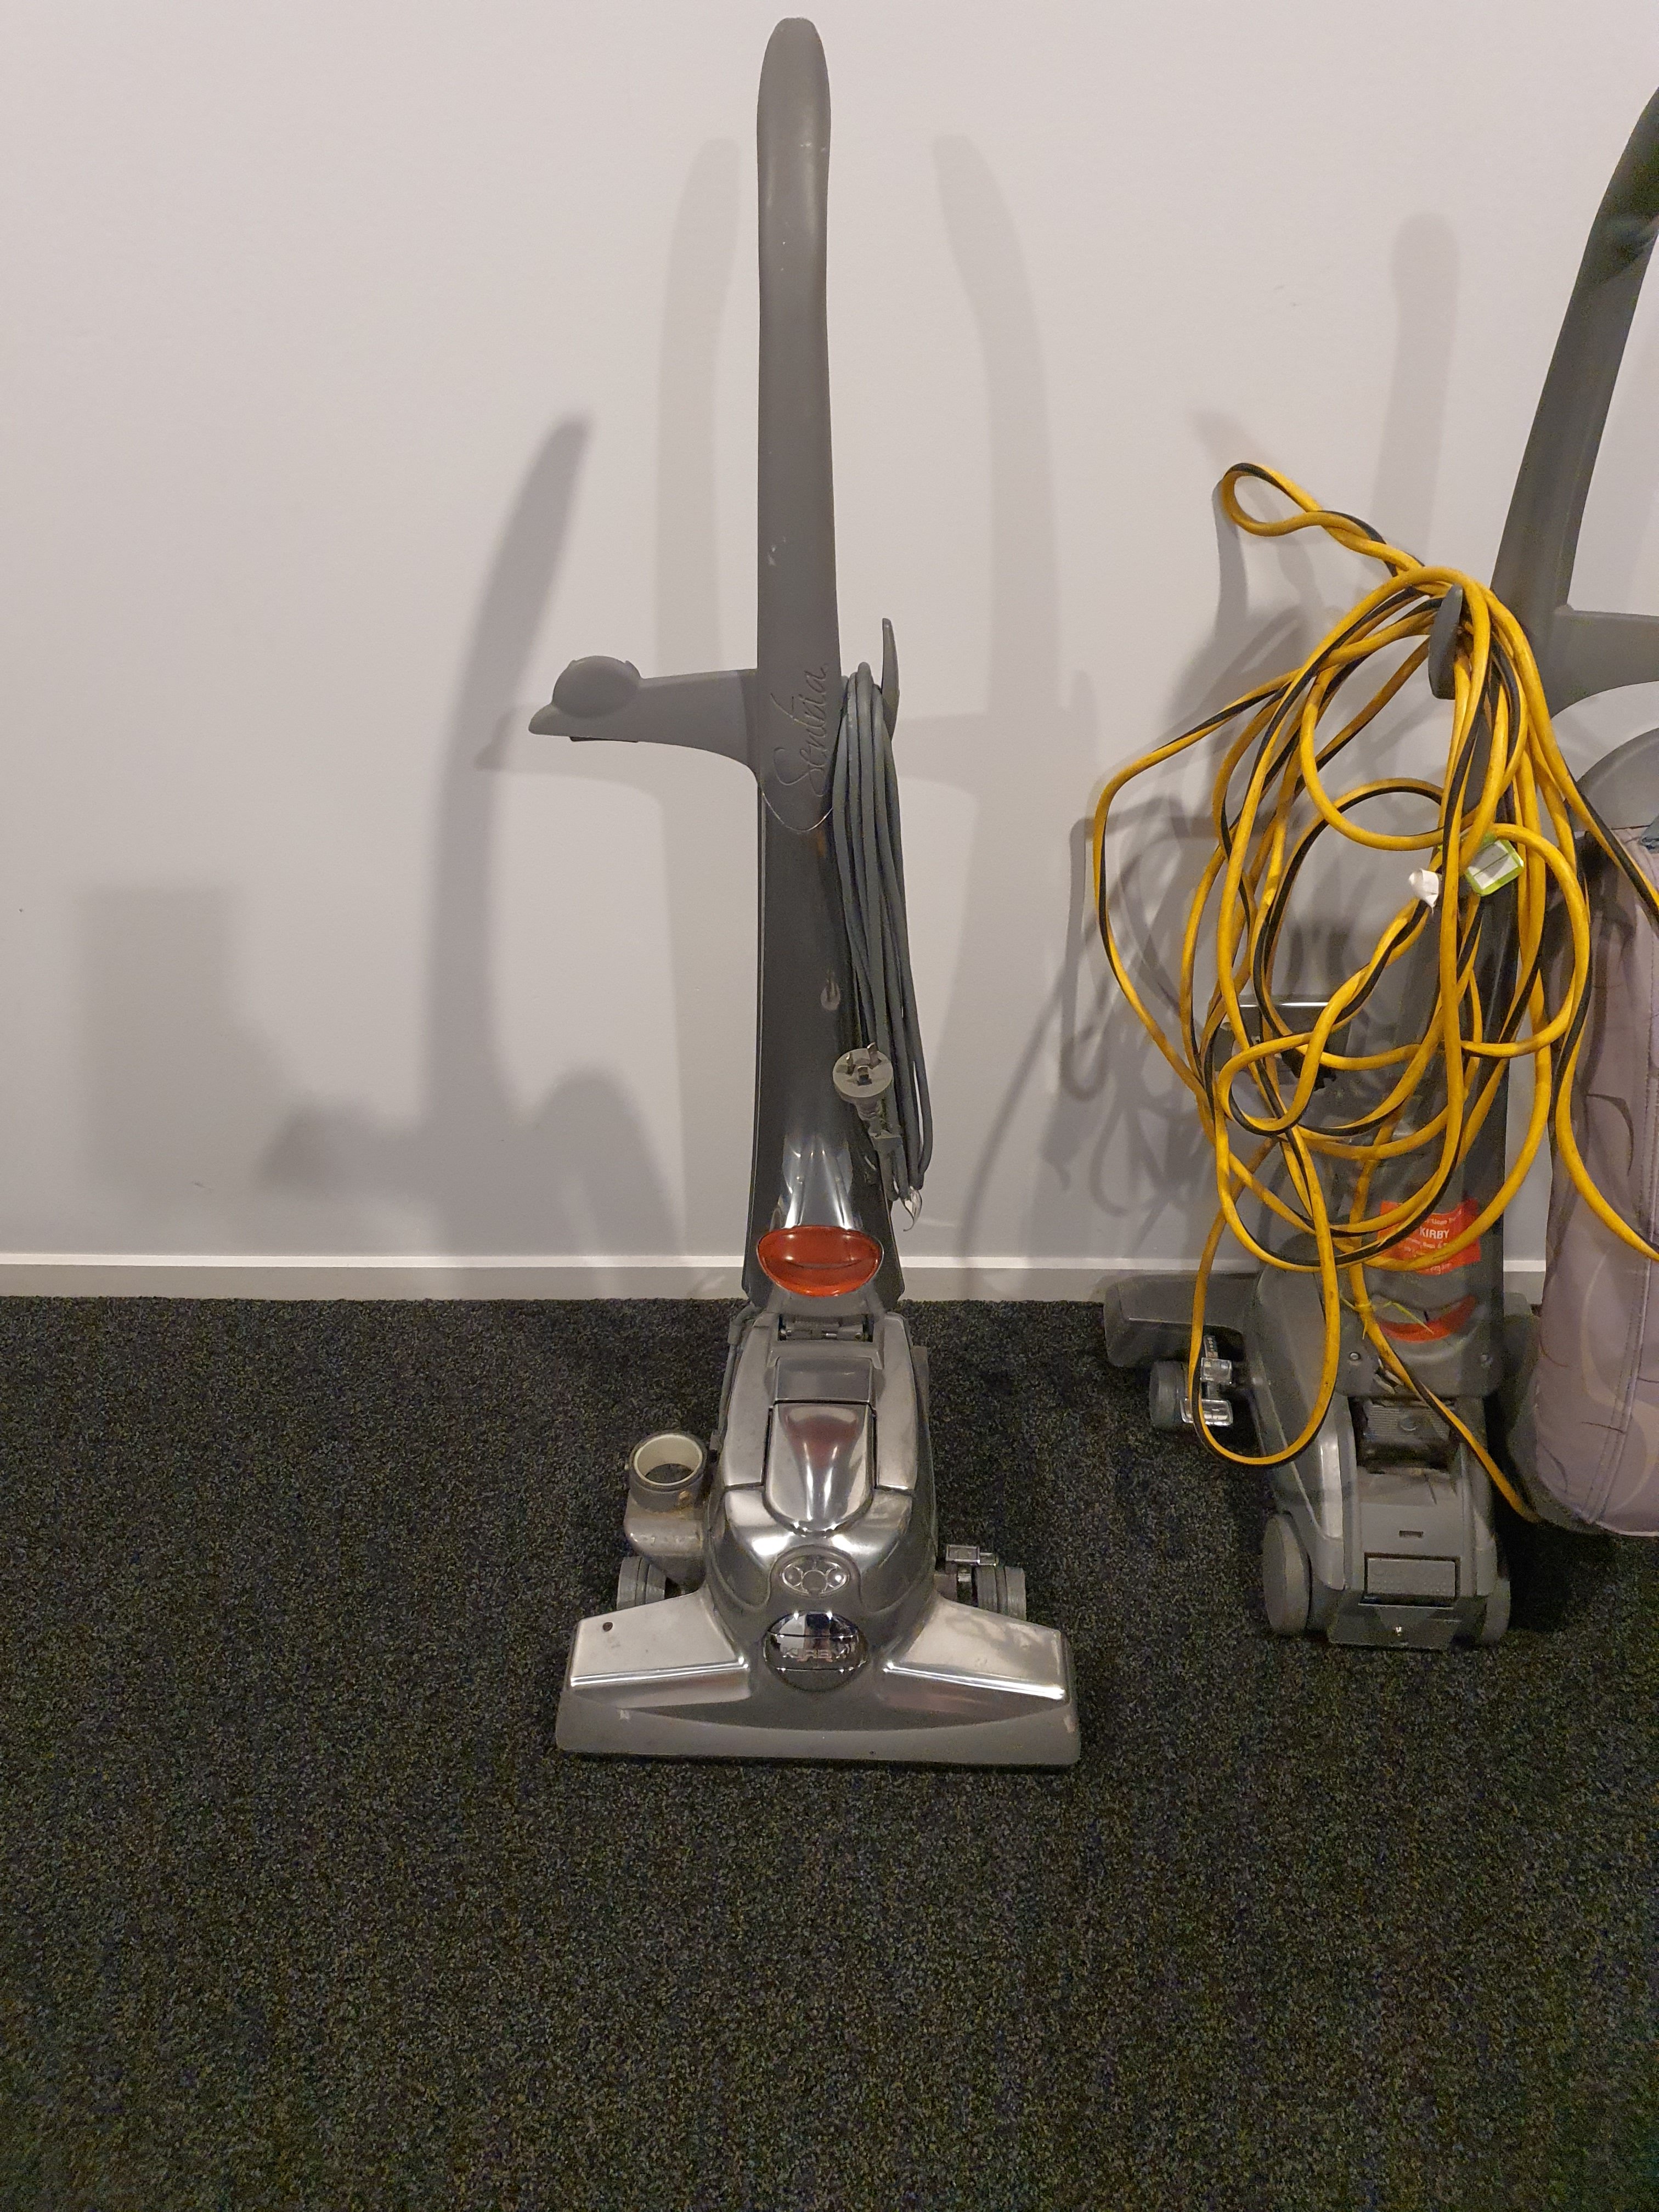
So every now and then I find my self buying and restoring kirby vacuum cleaners.... I just find them cool mechanicly they are a throw back to when things lasted and haven't changed fuck all in 60 years. I found this particular one at cash converters and bargained them down because I knew it had been there a while. If you have no idea what these things are think Morrison reel mower but for your carpet they have a spinning brush that basically combs your carpet up all poofy like an 80's women's hair. Just like a Hillman hunter rather than a Rolls Royce they just seem to survive. Tonight I ripped it to bits and polished the housings up to get it looking loved again. Will fit new drive belts tomorrow and fit the cleaned up bag and see how it goes.
1 point
-
I don't have a dyno sheet as never bothered to ask for one, my motor is totally stock unopened 230,000km B16a The biggest weakness with Honda motors and boost is the RODS they bend if there to much torque - so as far as im aware my car has been set up to run on gate pressure (3pis spring) until its make maximum torque we then feed it boost up to 7.5psi in 3rd and above I was originally going to go with a 2871r however my tuner told me the car would run out of puff about 6k as the a t28 spec turbos should only be used on asthmatic shitbox like SR20s and B6/bpts1 point
-
I'm at new head, recon injectors, new radiators (waiting for the main one to arrive from CHCH now), new water pump, new thermostat, fresh silicon oil in the hub, new throttle spindle seals to fix boost leak, new map sensor filter to again fix boost leak, new diesel hard lines, new temp sensor etc etc. Already full 3" exhaust, EGR deleted, catch can, but no poddy though ha. Manual pump would be nice, need a manual gearbox swap first though.1 point
-
Don’t need a lift. Haha! Have done maybe 10+ gearbox swaps in the driveway (hard driven turbo suby life) but hell for the cost of paying someone it sure saves a lot of mucking around I also recommend Pitstop. I take my bmw there and nothing but fantastic although they are super busy so will need to book in advance1 point
-
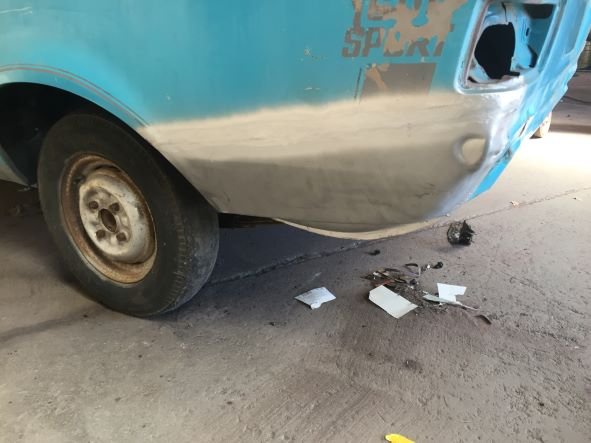
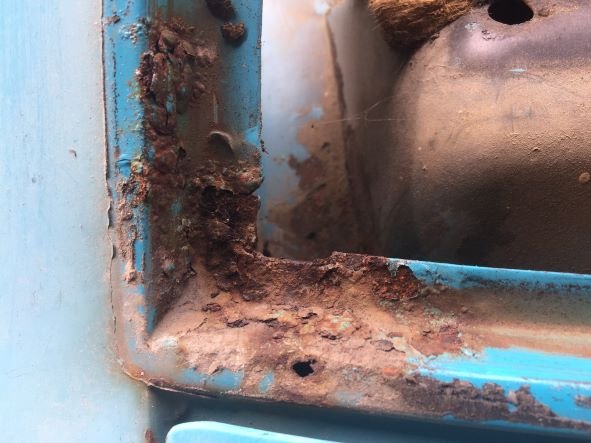
Called into the panel beaters for the first time afher droping car off to see what progress had been made. He has fitted the two patch panel i supplied to fix the wheel well area which was badly rusted. Panels didn't quite cover area of rust so had to do a bit work. Has repaired areas of rust around window edges and also ends of sills plus floor pans. Has removed rusted section from front guard, headlight area. Will be intersting to see how he repairs this area as there is quite a bit of rust. Project Discussion https://oldschool.co.nz/index.php?/topic/84912-petes-mk2-escort-1600-sports/
1 point
-
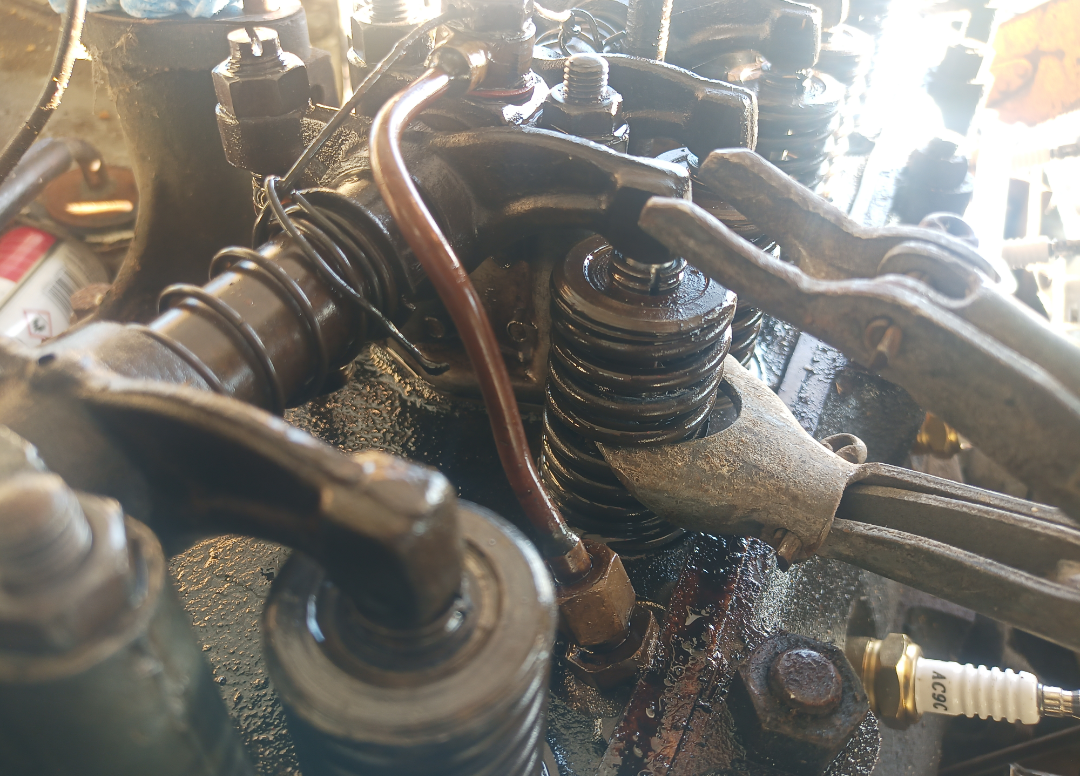
I'm really happy with this result. Daily oiling the stem seemed to have finally worked. This morning I gave it the slightest nudge with a spring lifter and it popped up with a satisfying click. Now I need to find my compression tester and see what I'm working with.
1 point
-
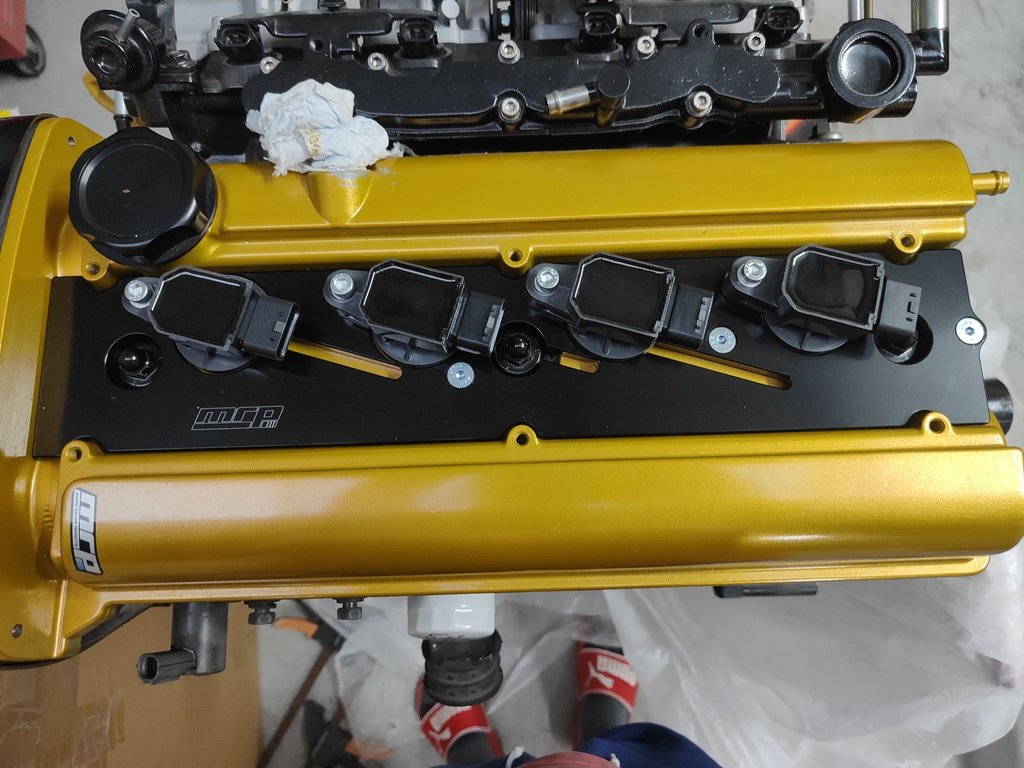
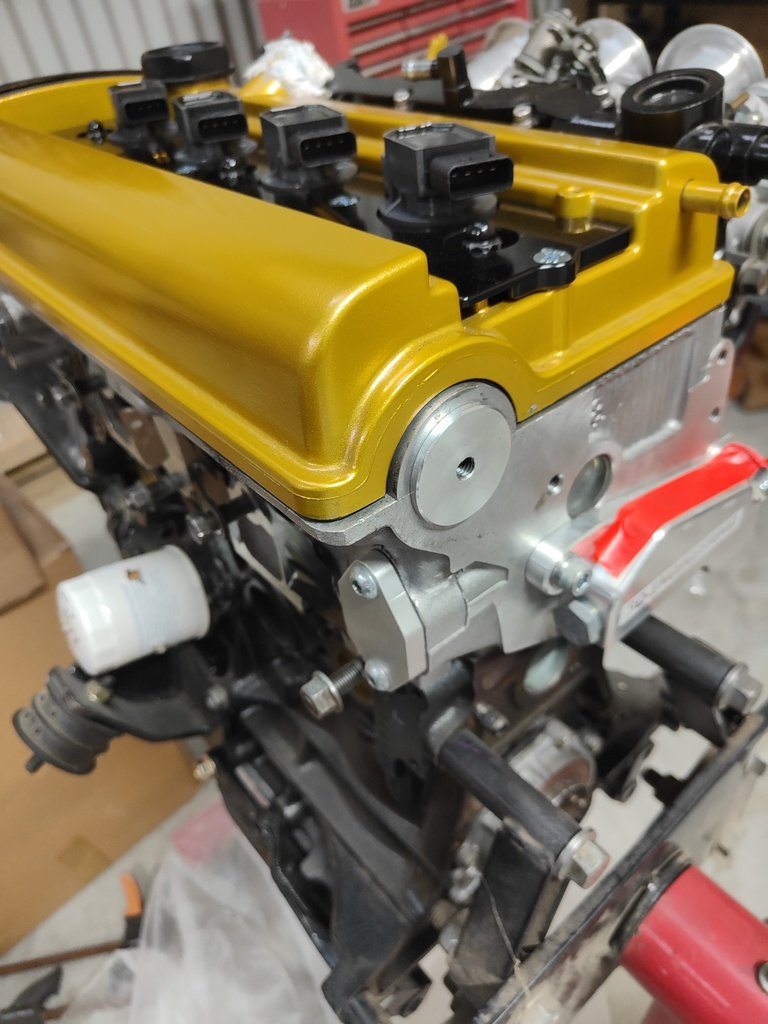
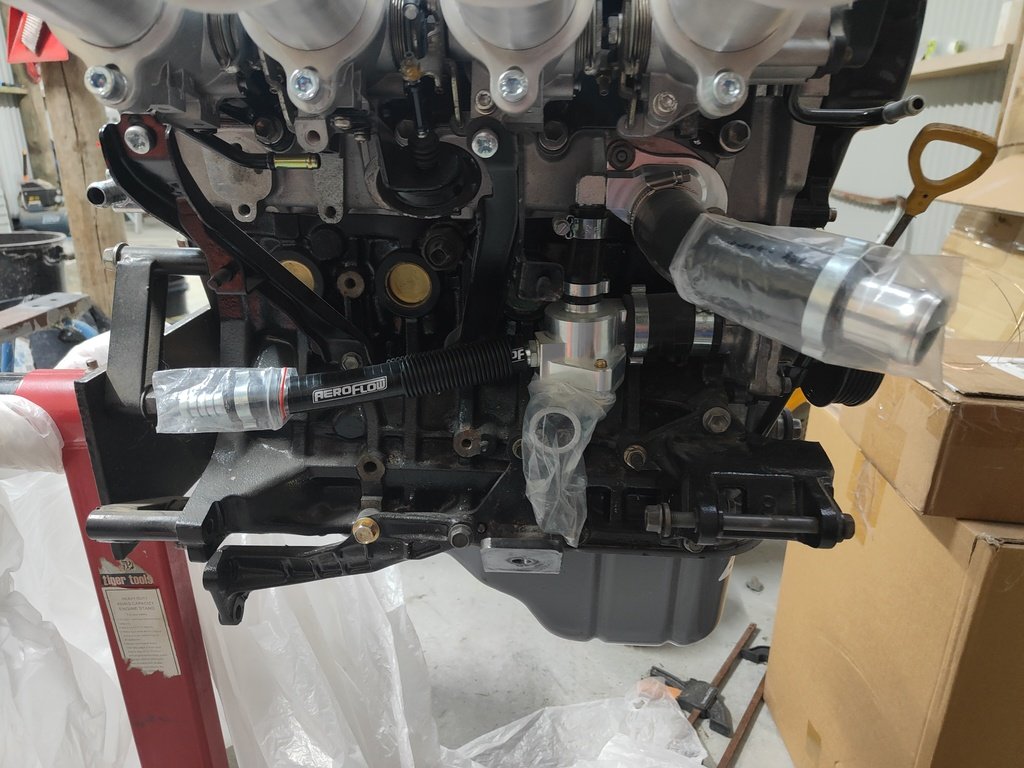
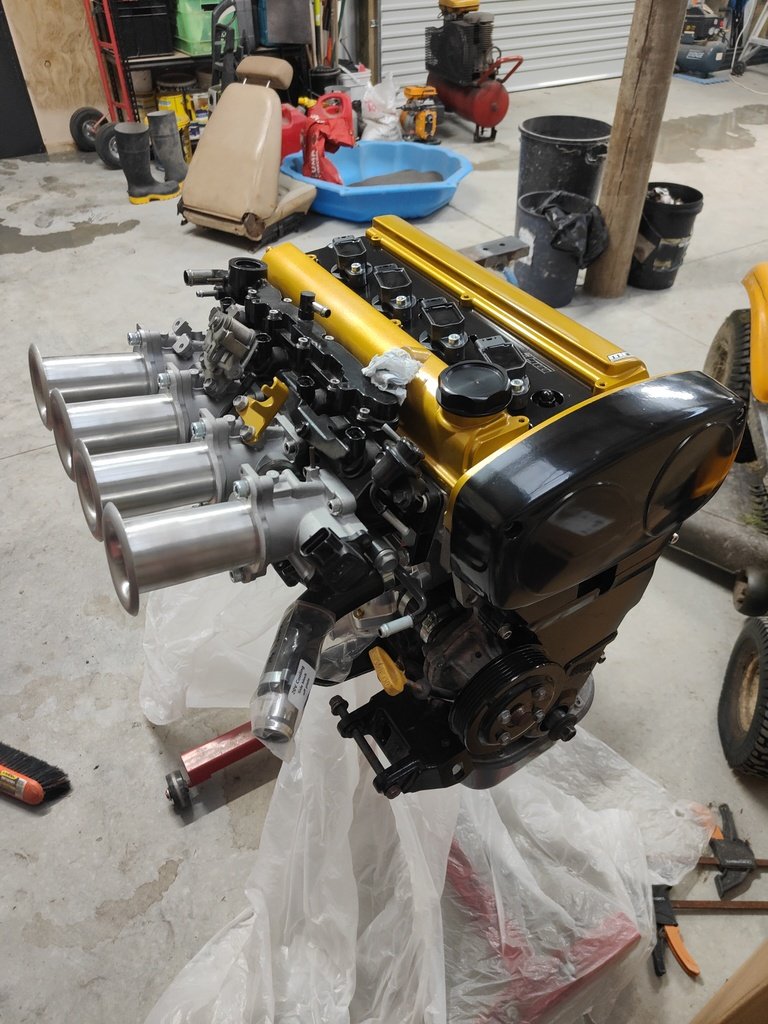
The 20v long block is now all done, with some extras from SQ engineering and MRP. I had a mate turn up a small pug for the dizzy block off as having the dizzy in place with the MRP cover would hit the firewall. The head got a light porting and some polishing which turned out pretty nice. I scored a 22 spline T50 for a good price with an S series bellhousing but scored a cheap T series bell housing for it. I got the trumpets from guy in Tauranga, they are hand spun and a really nice bit of kit. Next on the cards for the engine is a trigger wheel setup and single row pulley.
1 point
-
I have no disposable income for such a venture at the moment (maybe 2024...). I'd like to design one for my folks as sleeping in the backseat/boot of a sedan seems like something you shouldn't do in retirement1 point
-
What a right pain in the arse, no where near perfect and I can confirm, I do not enjoy spraying engine bays.
1 point
-
Gotta make sure your viscous hub is working properly too as they don't use forwards momentum for cooling, it's all down to the fan, can also get a cooler 72deg (I think) prado thermostat which gives you a bit more time.1 point
-
I've had issues with my down pipe cracking too. Have welded flat bar down it to hopefully hold it together. I also see over 700 degrees pretty regularly. I also cant get a flexi until it's near the chassis due to space constraints witch will be half my problem as there is a lot of weight hanging off it1 point
-
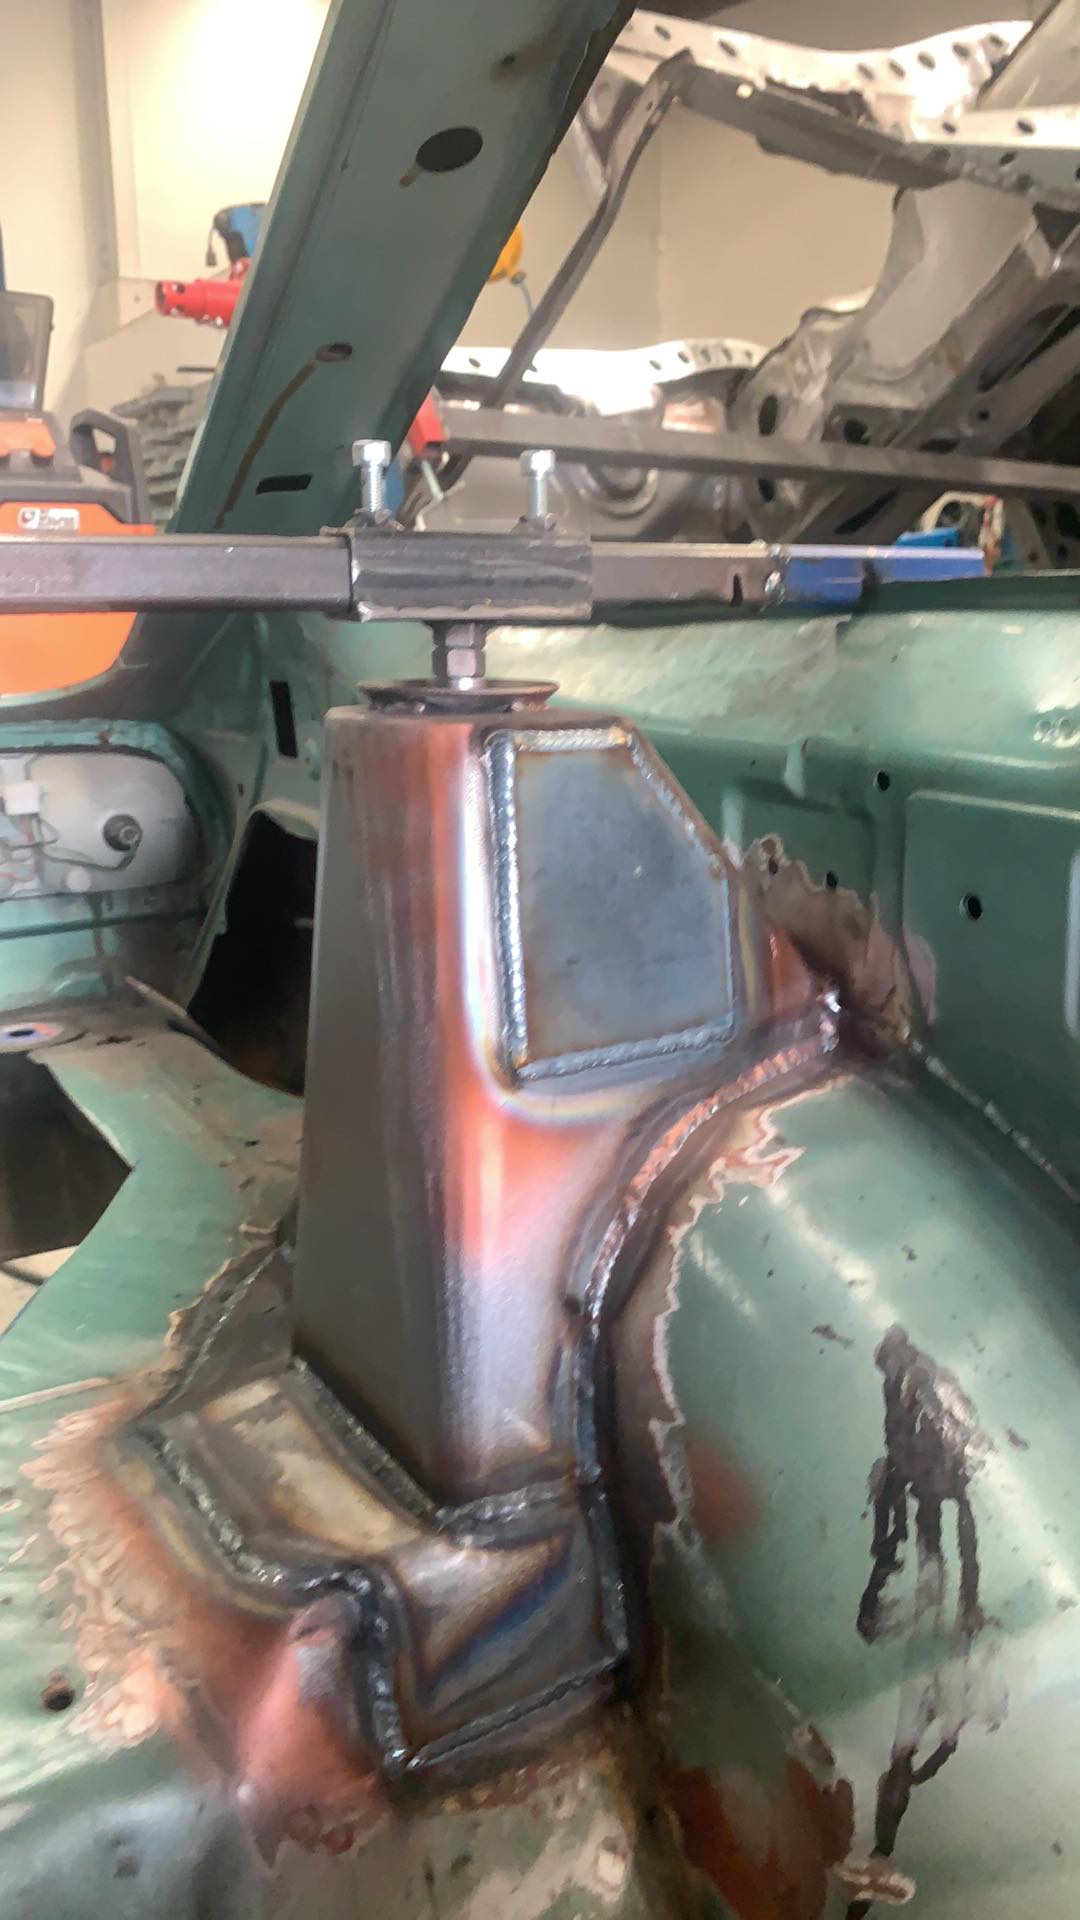
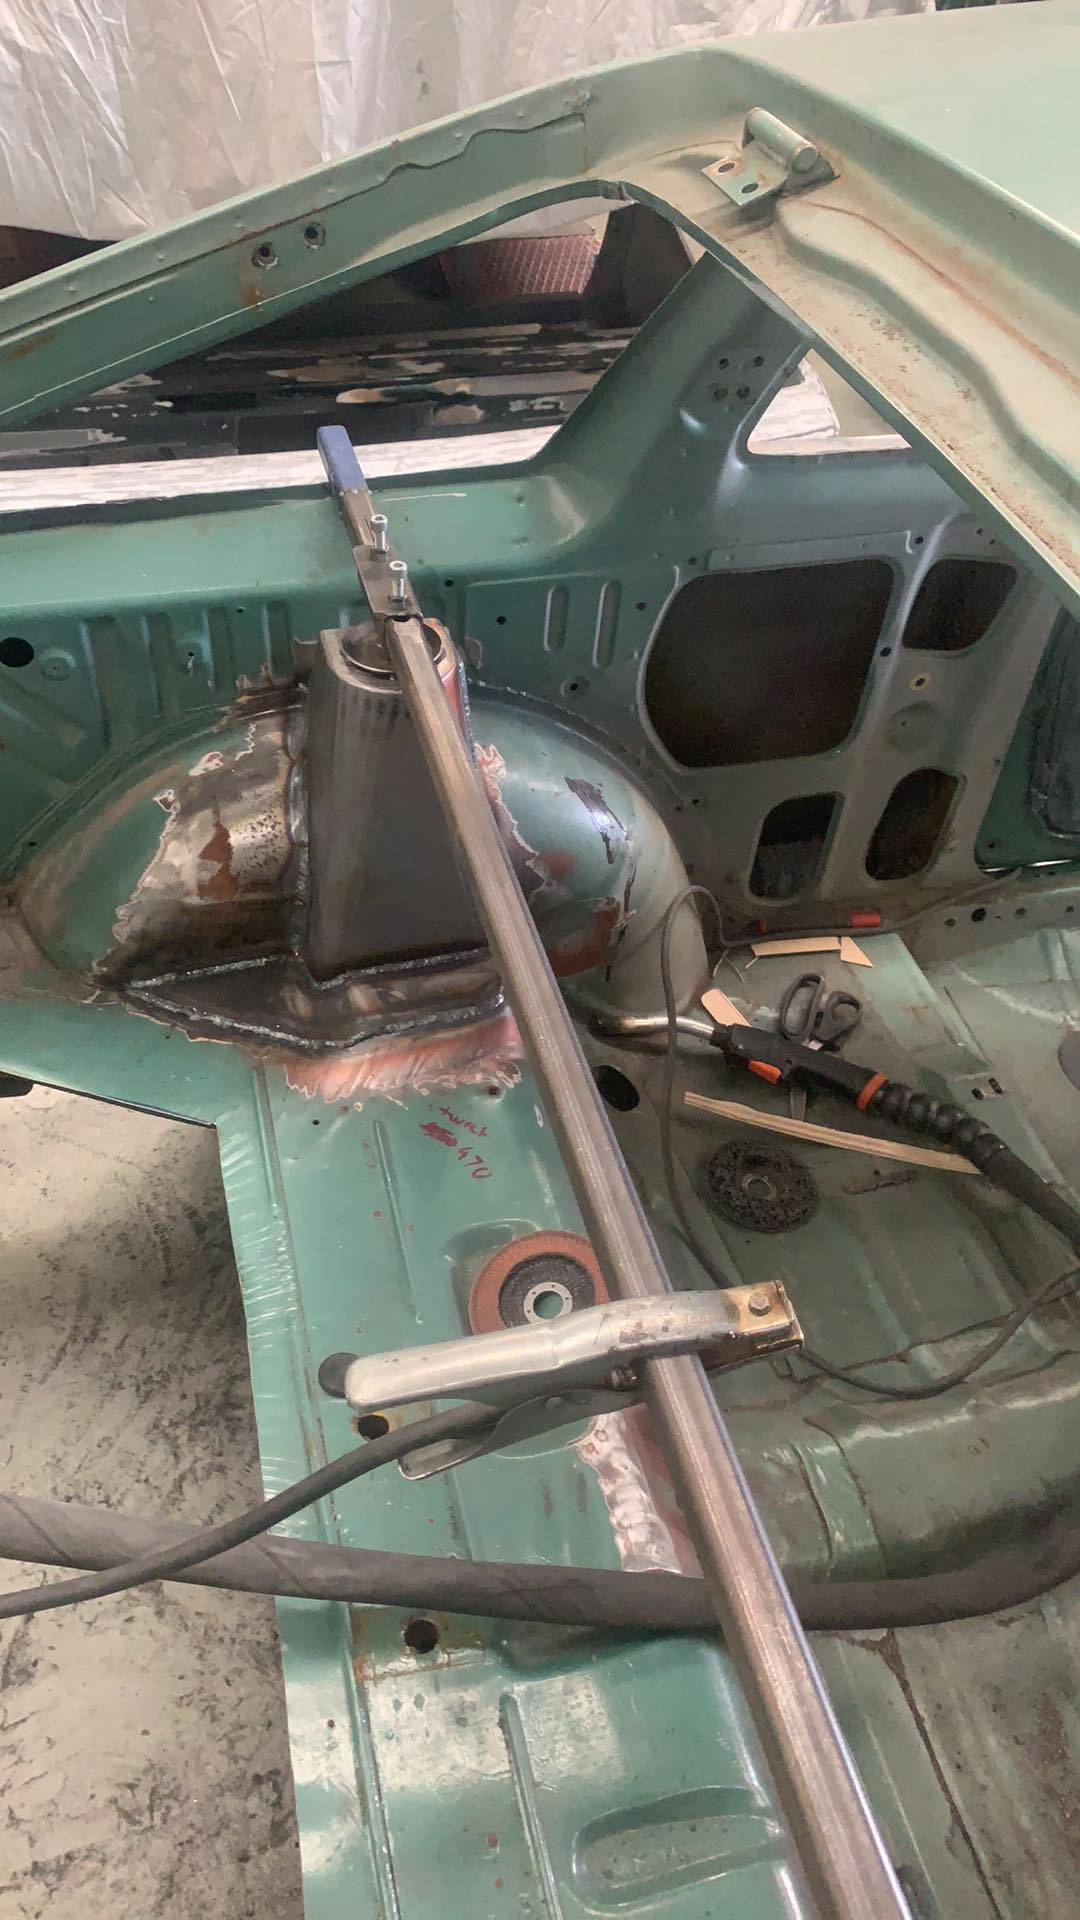
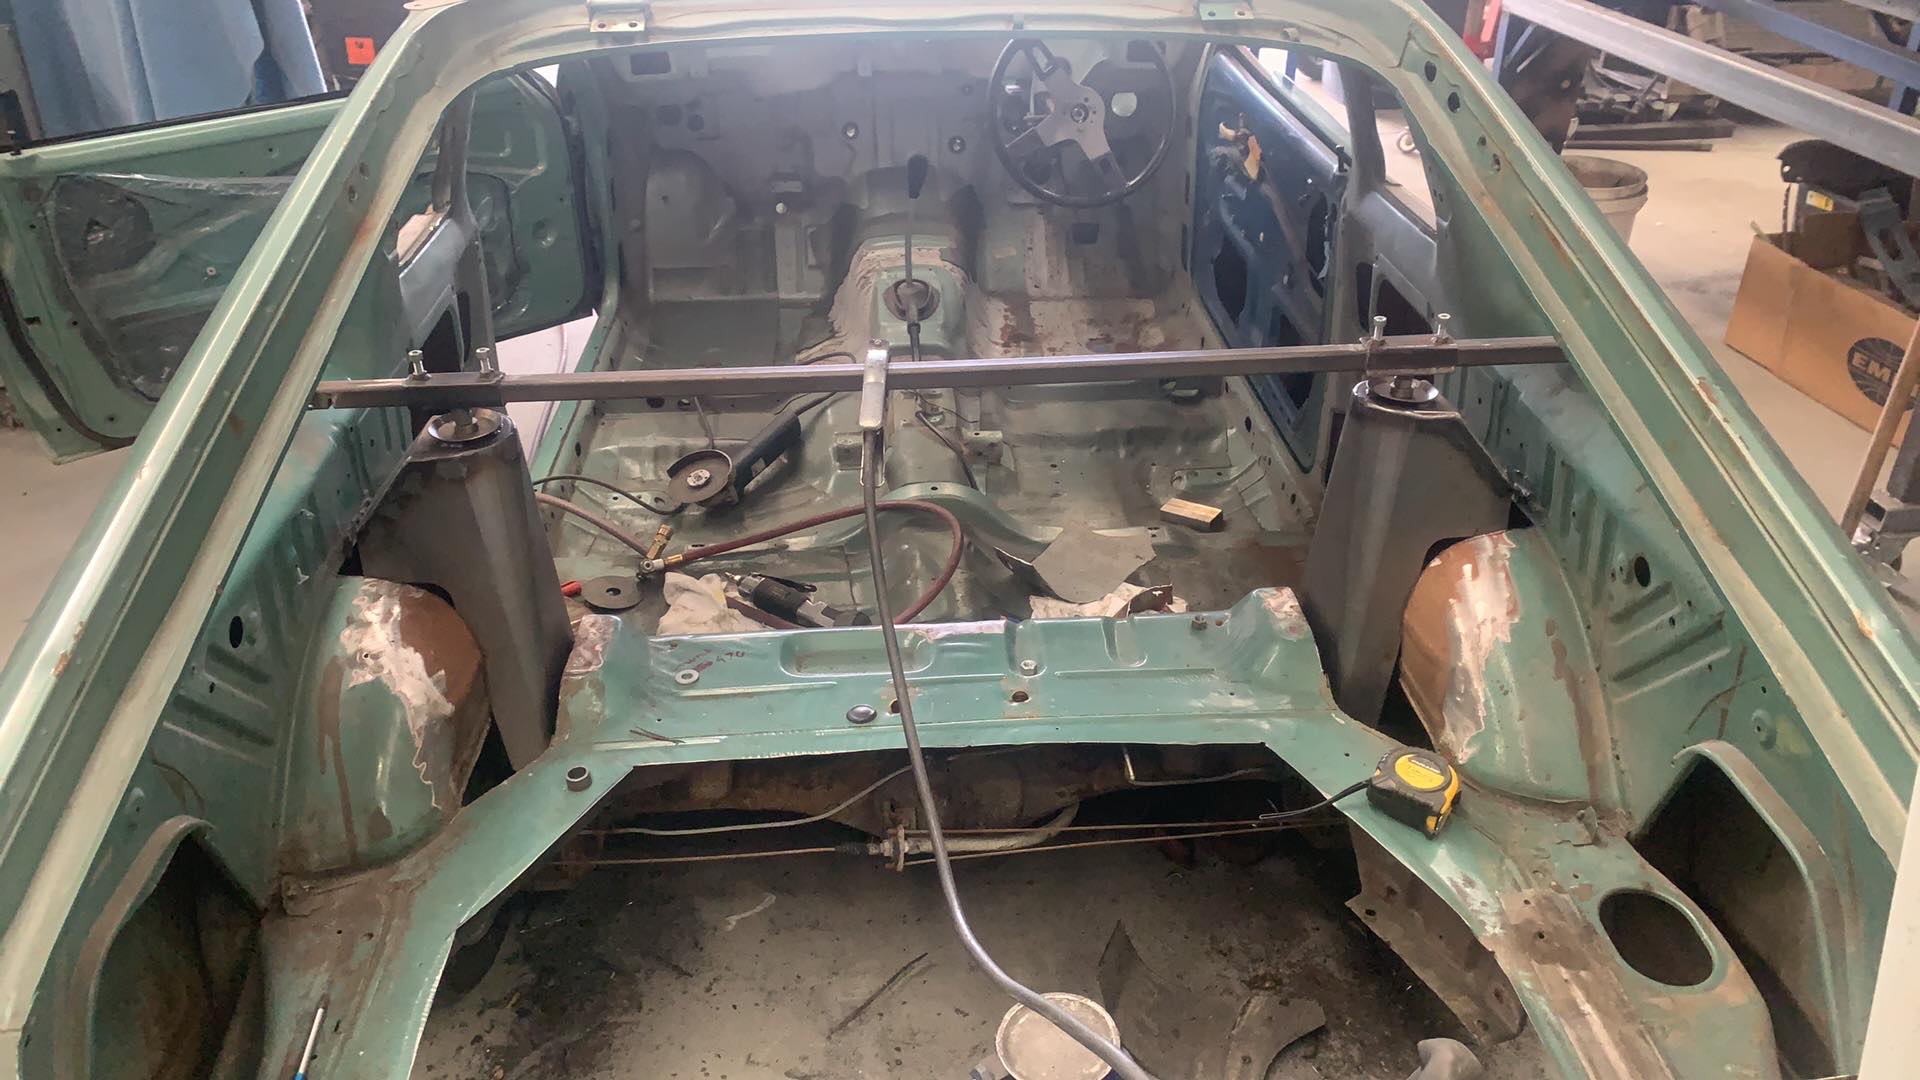
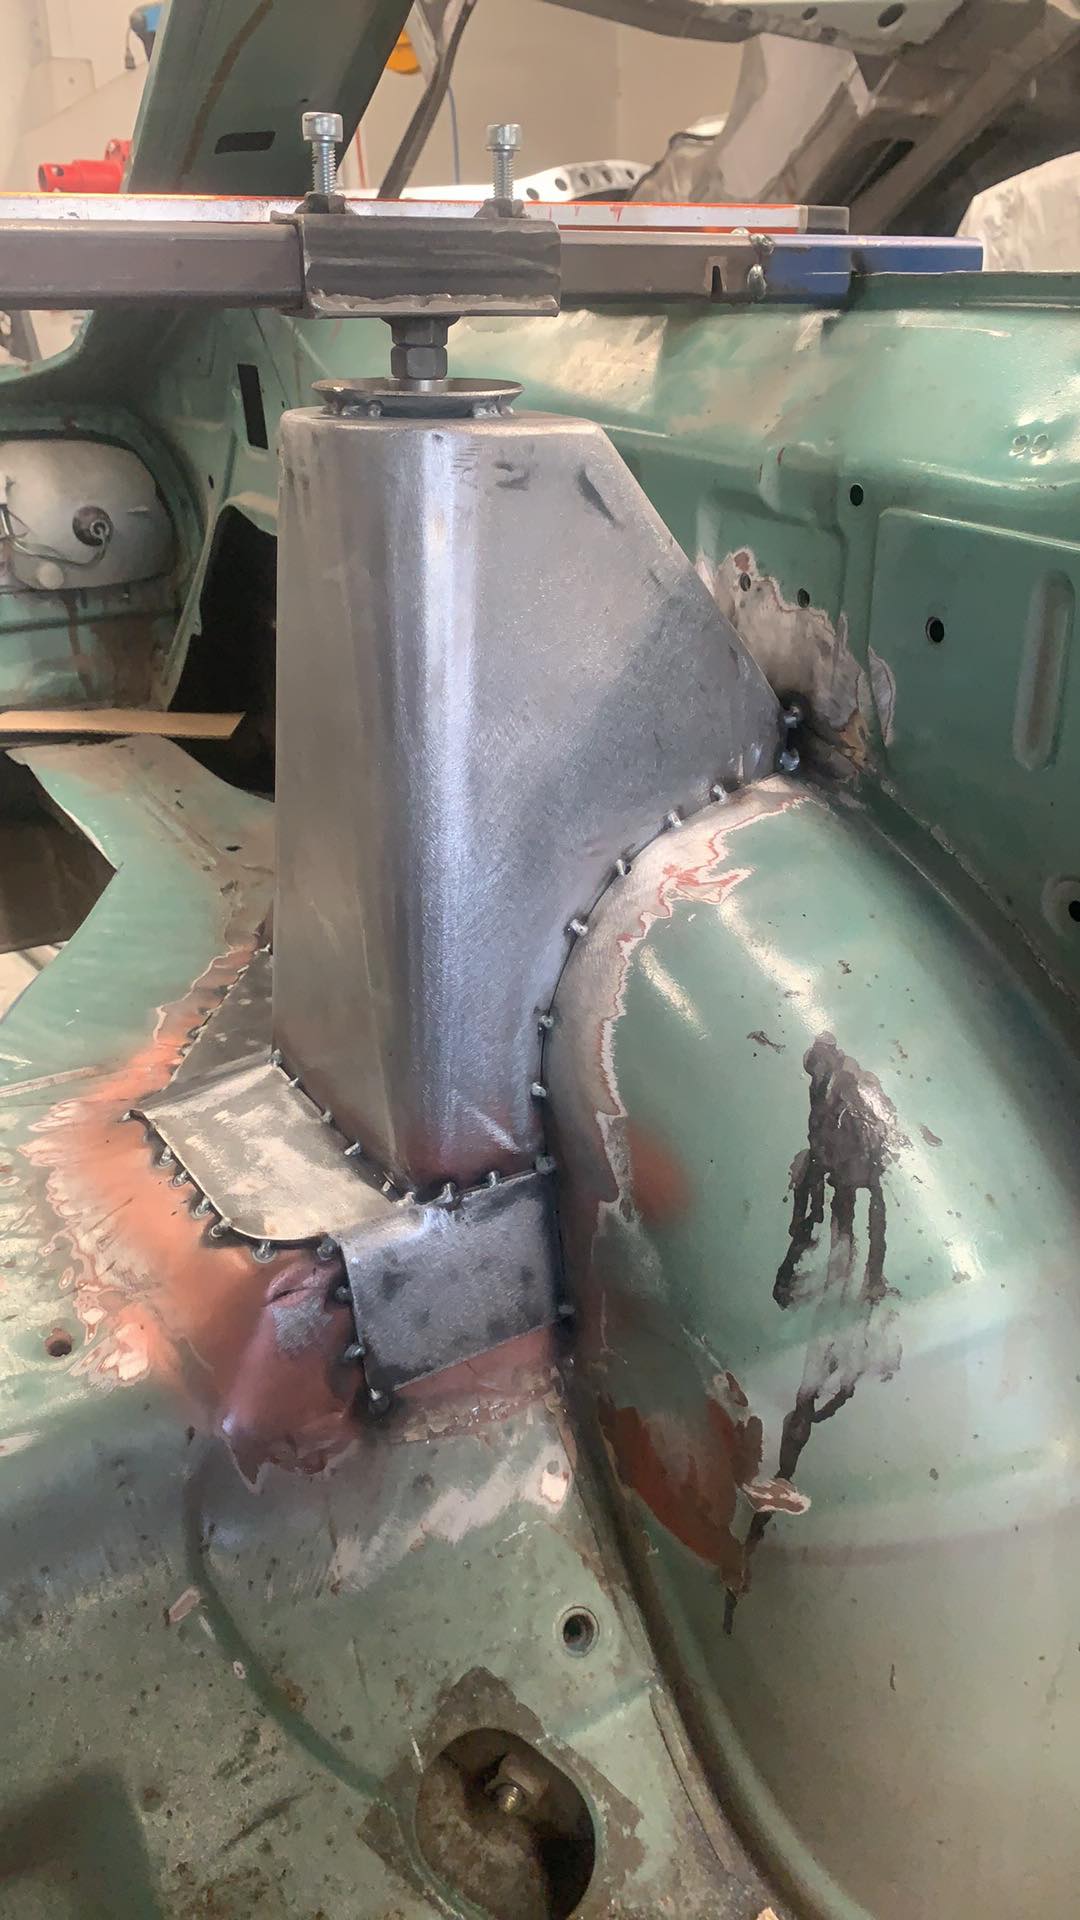
Turrets all welded in now, looking great.
1 point
-
First up, turrets. Using some Group 4 Escort ones, though Nick has had to do quite a bit of work to get them to fit due to my required belly scraping ride height.
1 point
-
This is a really old sign! Clearlite was waaaaaay back in the day before they became Supalite. Throw some edge light LED's around the outside and it should light up mint Hit me up if you need anything as my business wholesale manufactures signs.1 point
-
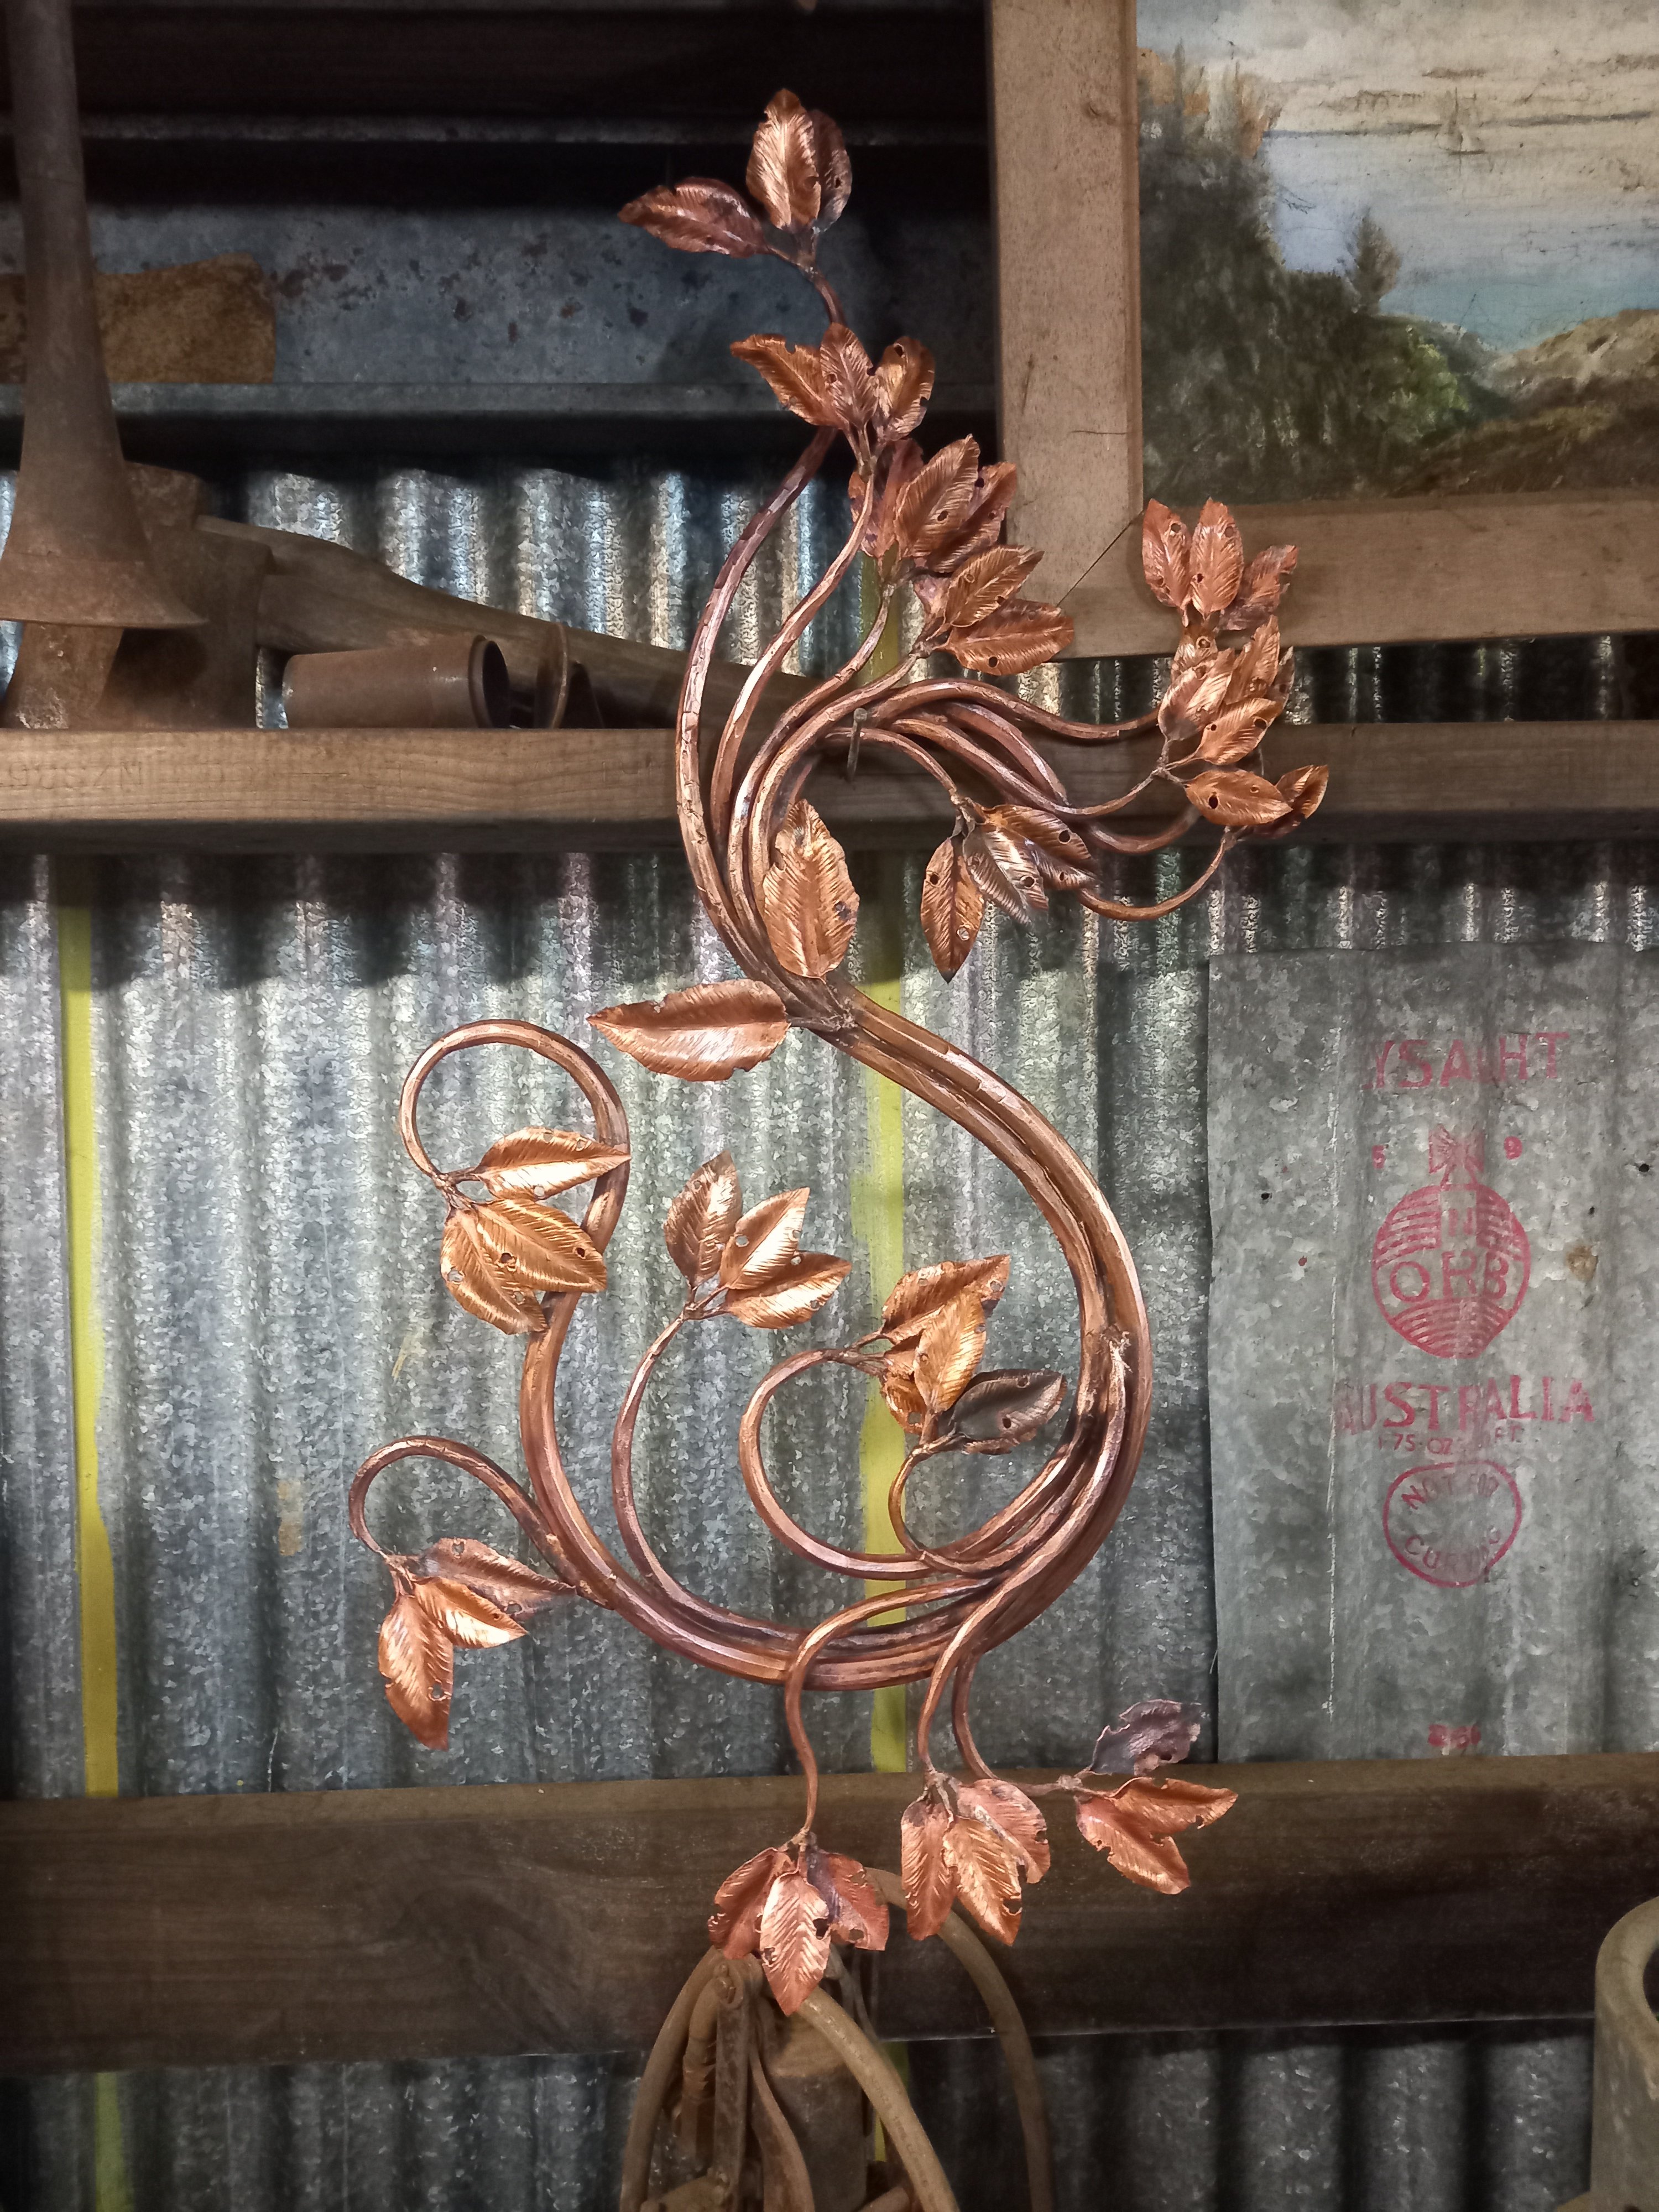
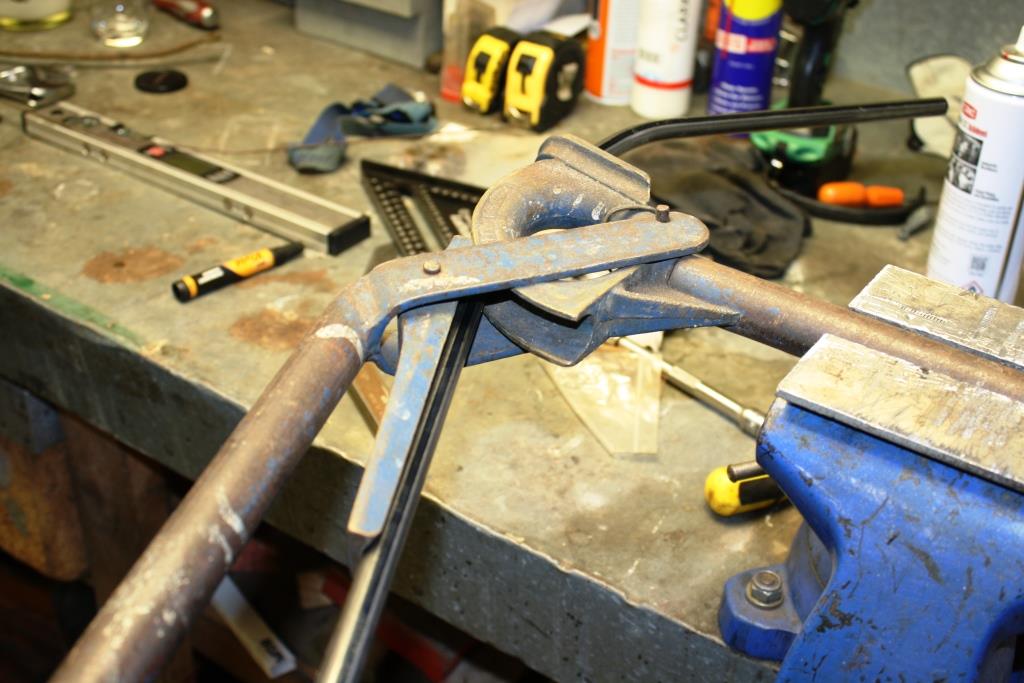
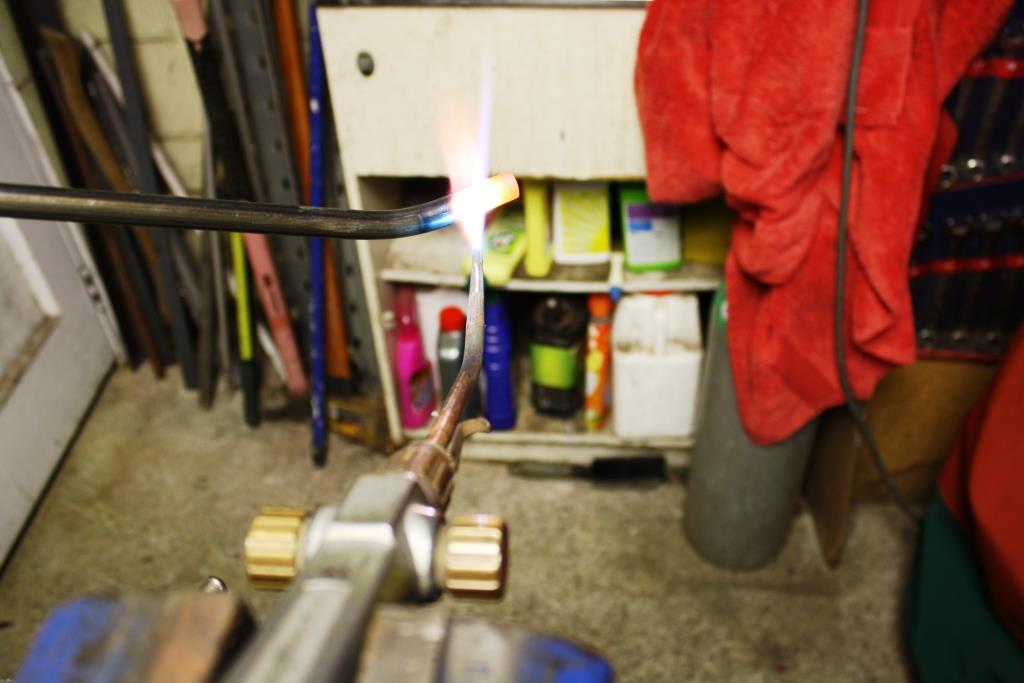
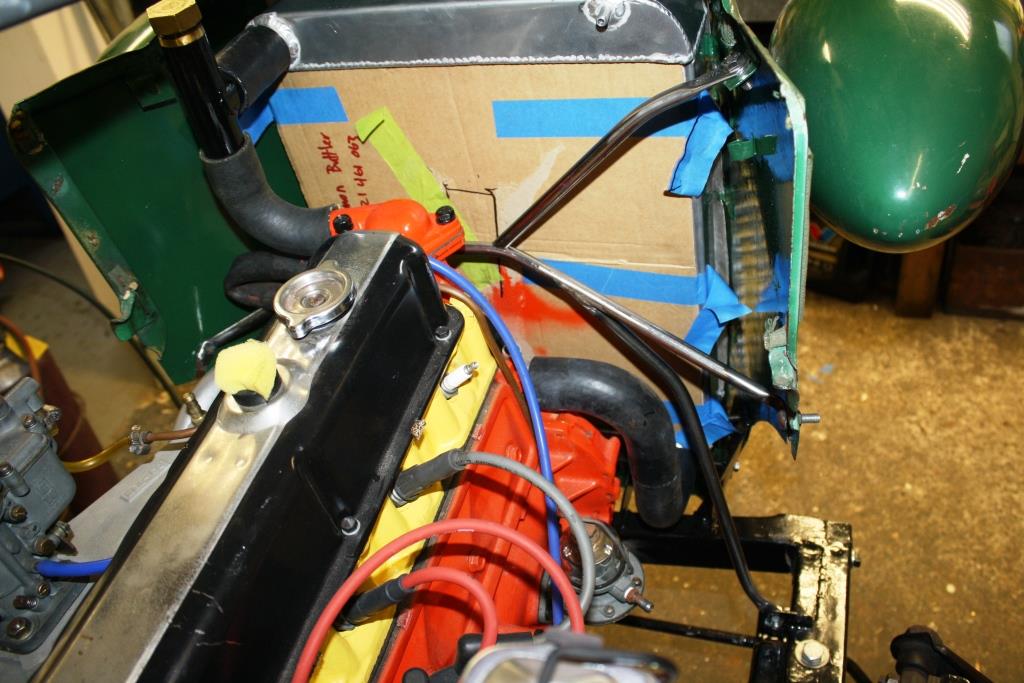
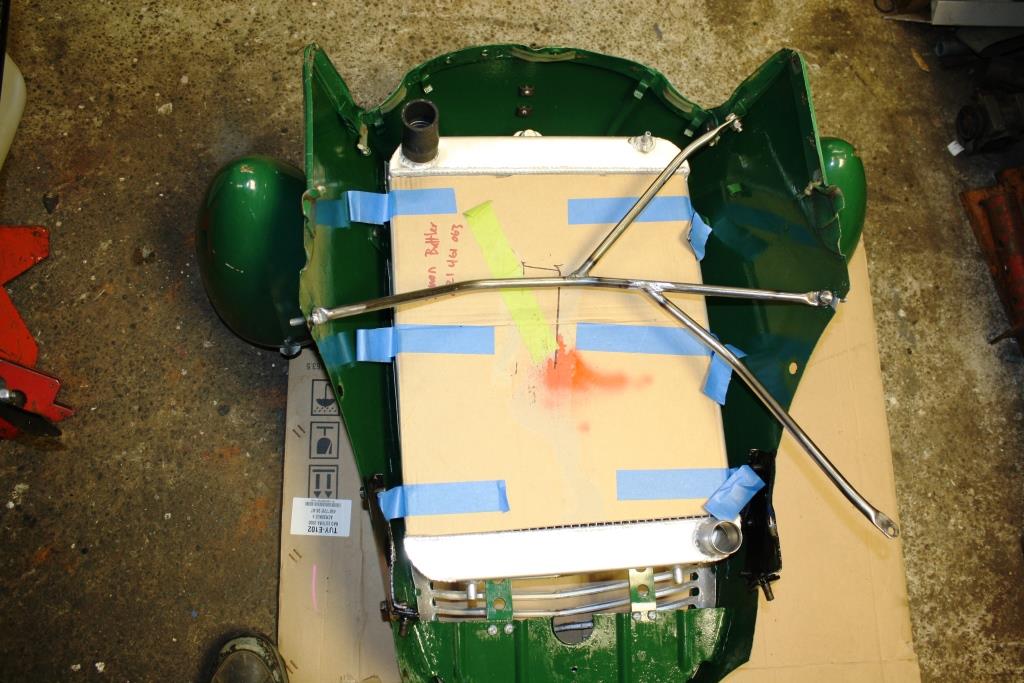
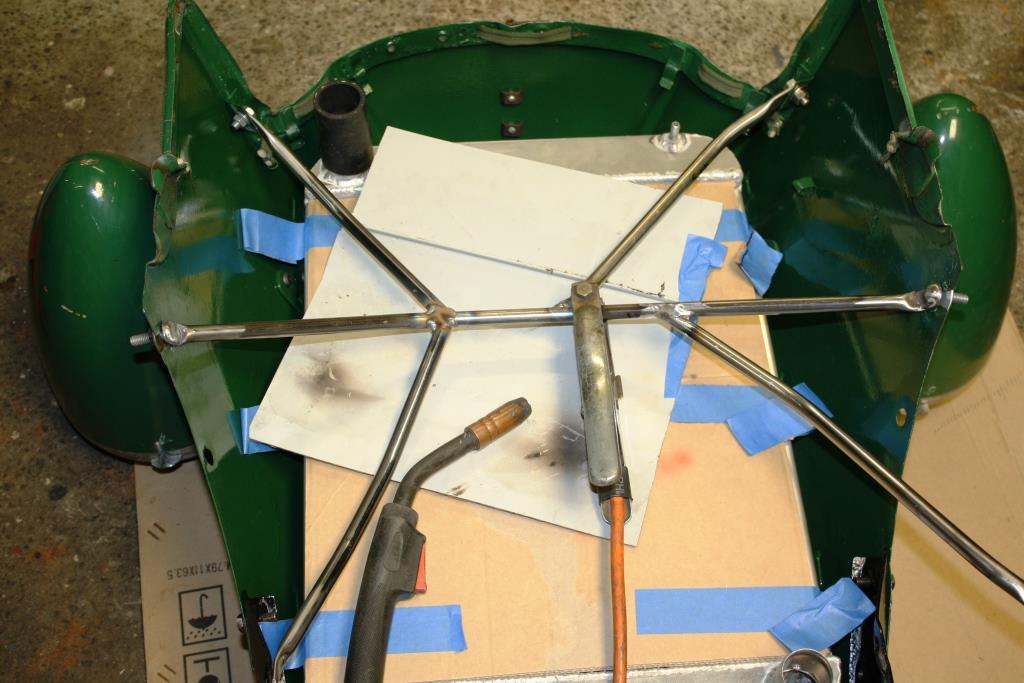
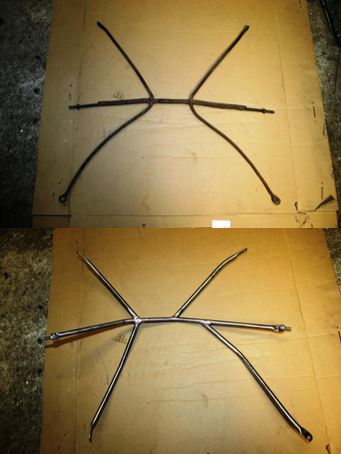
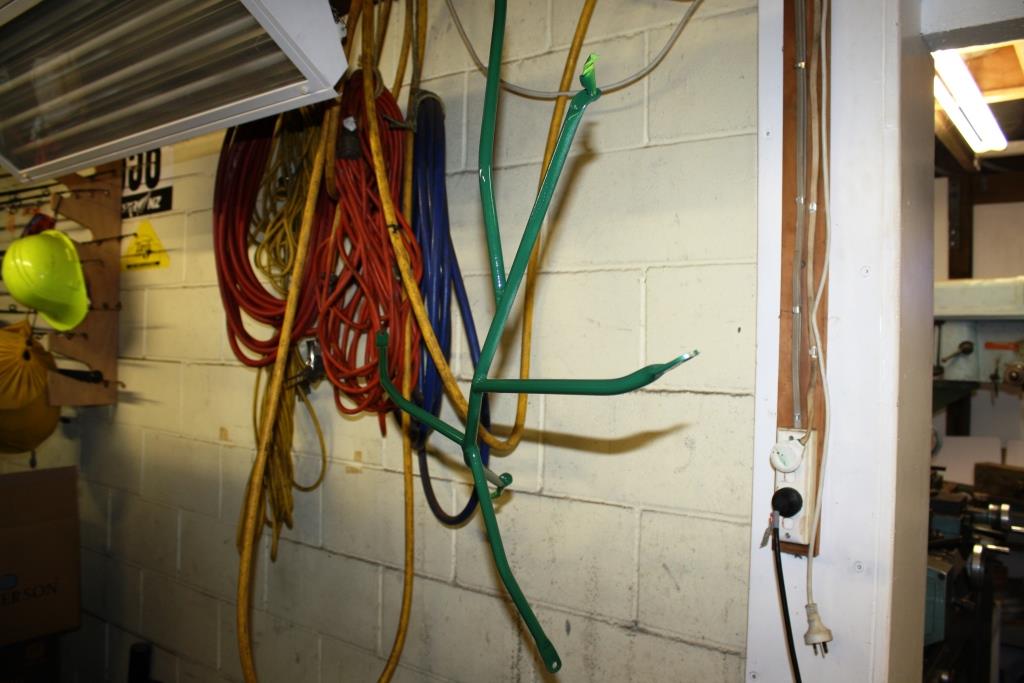
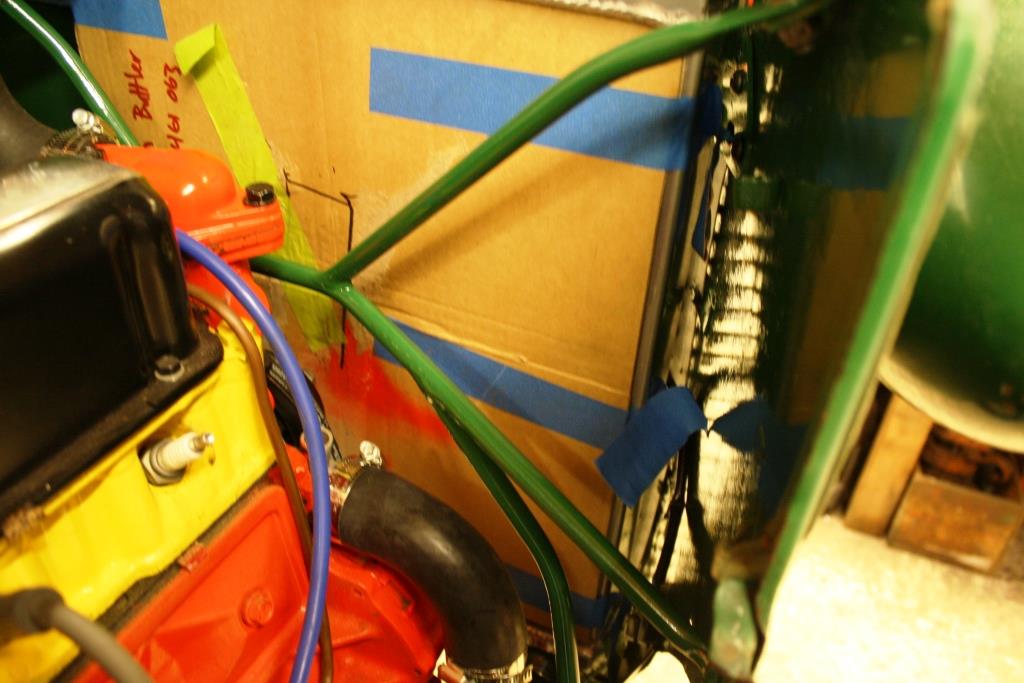
Time to figure out how to make a nose cone brace…… help - I’m running out of room! Started with some 12mm EWS tube. Welding wire templates….. Out with the world’s oldest pipe bender….. It still works…. Heated the ends up with the oxy and hit it with a very old hammer on a very old vise. For some perverse reason I love doing this shit! Decided the top brace was too high… I’m just cutting freehand and notching with a rat-tail file. Interesting challenge needing some interesting bends to make things fit. Dropped the nose cone off to tack it all together. The original support Vs the new apparition... Some ‘insipid green’ paint…… Does the job and looks neat and tidy…..
1 point
-
Sat together after a thorough autosol polish. Next to my current one I've been using for 9 or so years.
1 point
-
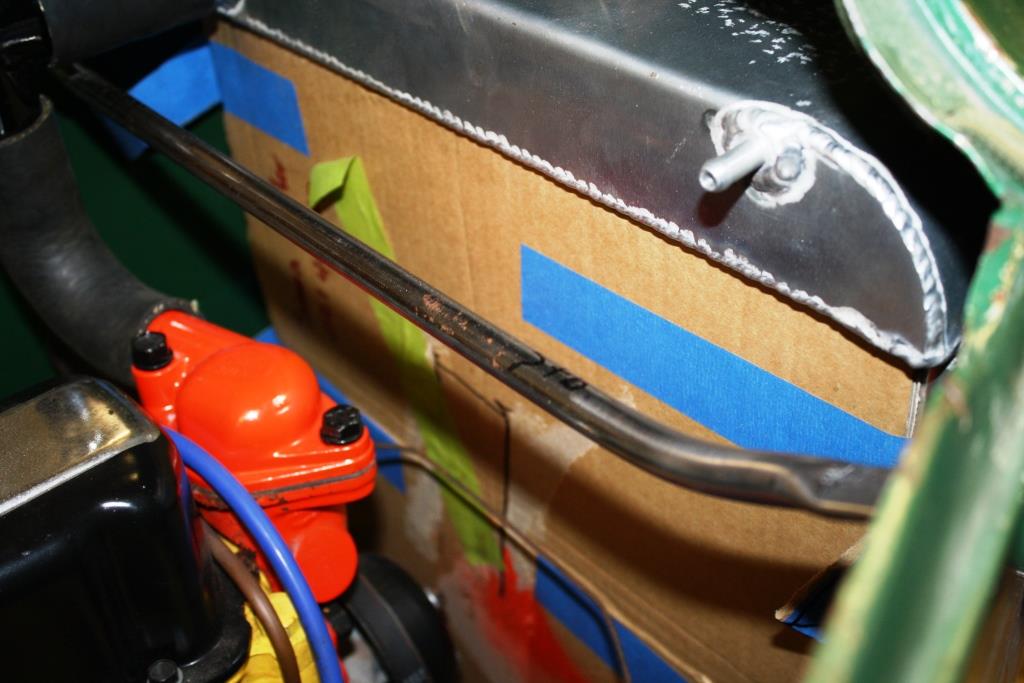
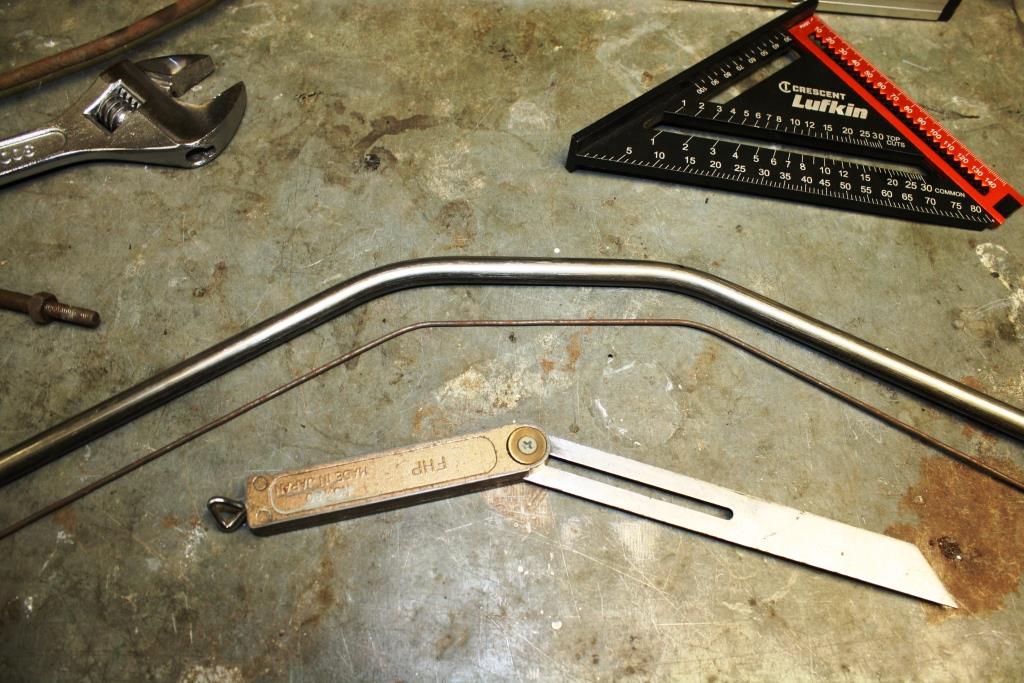
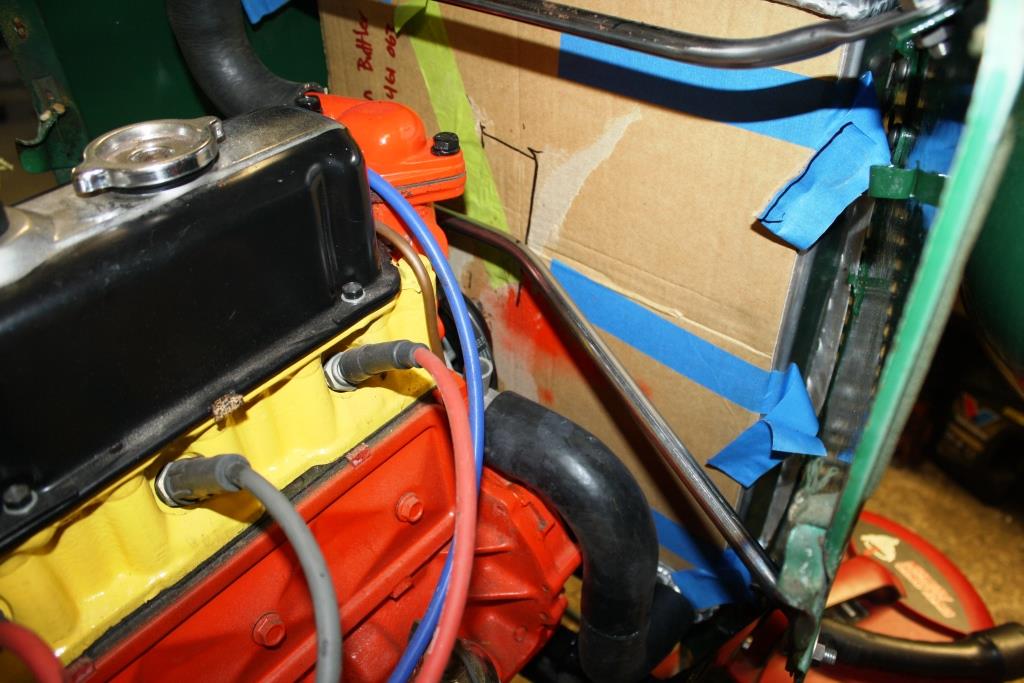
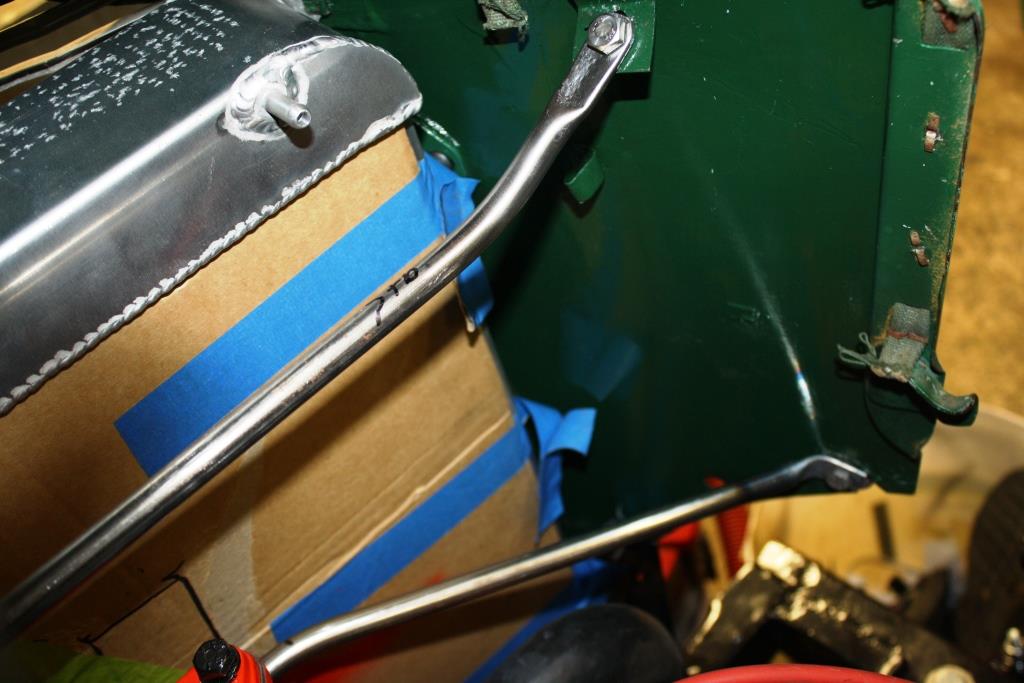
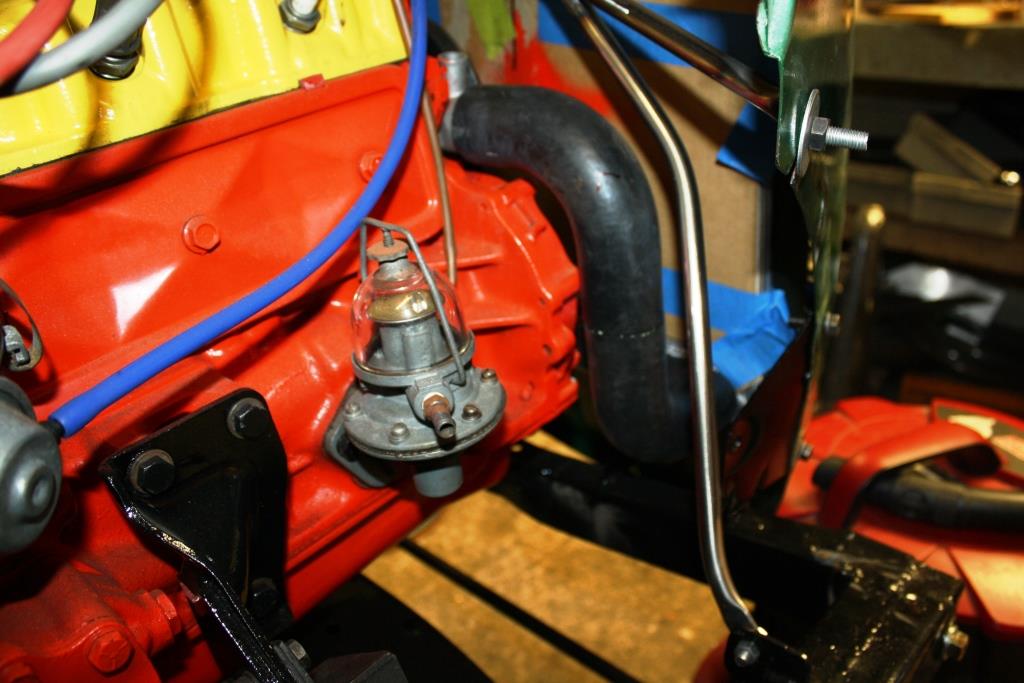
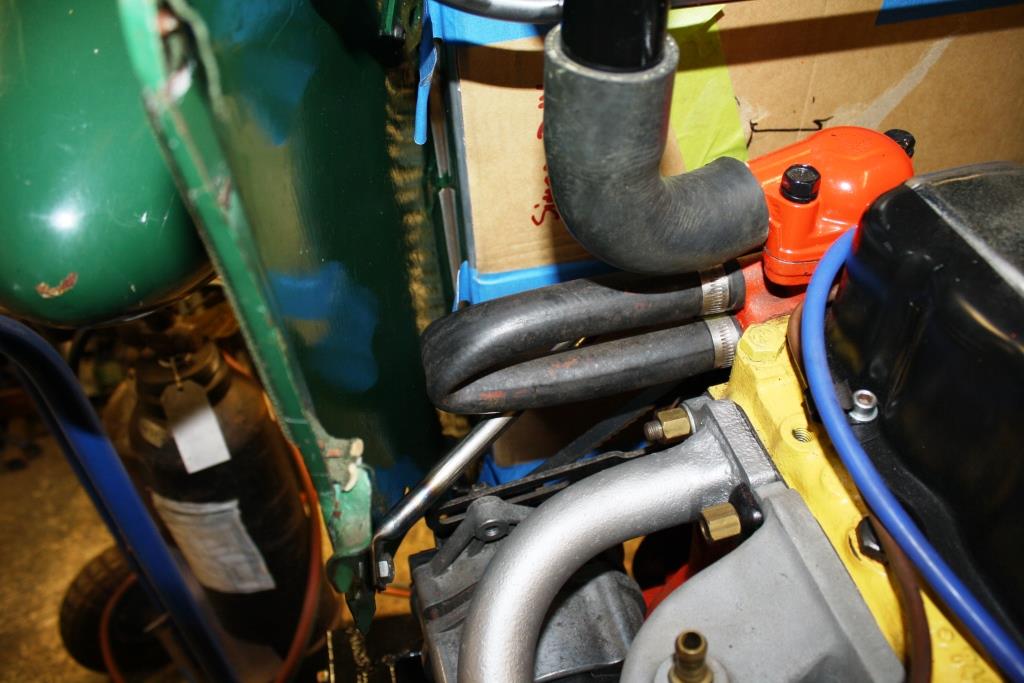
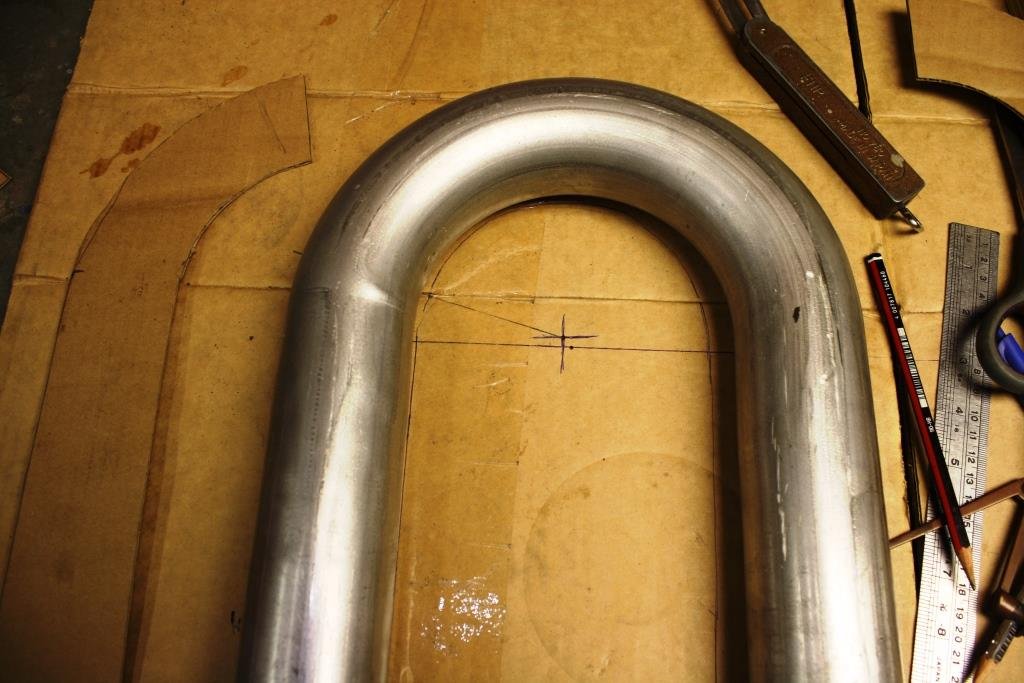
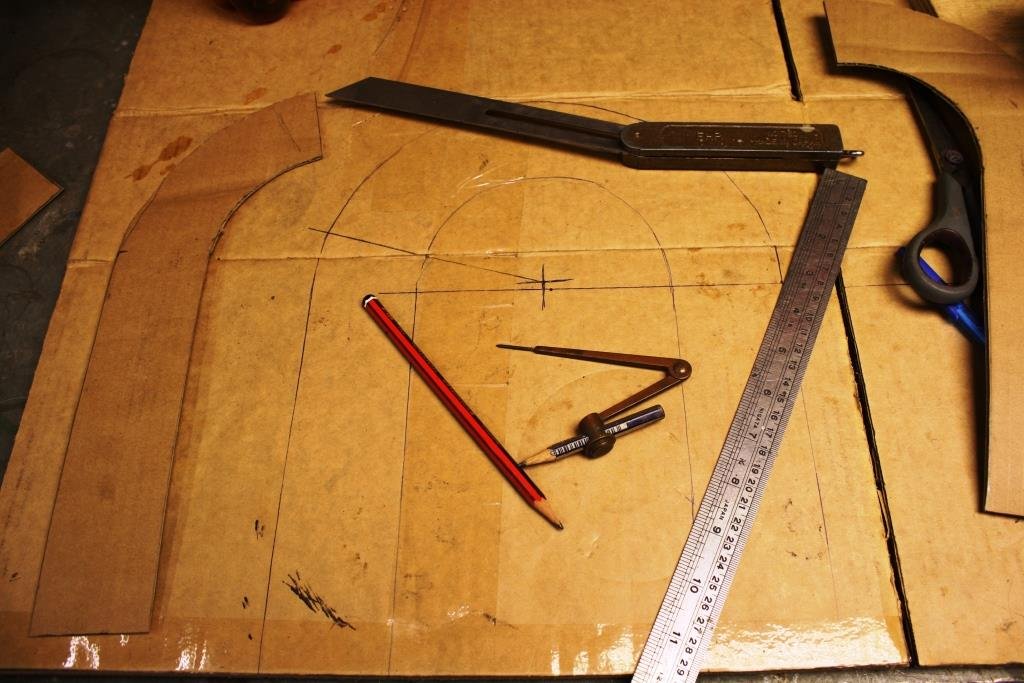
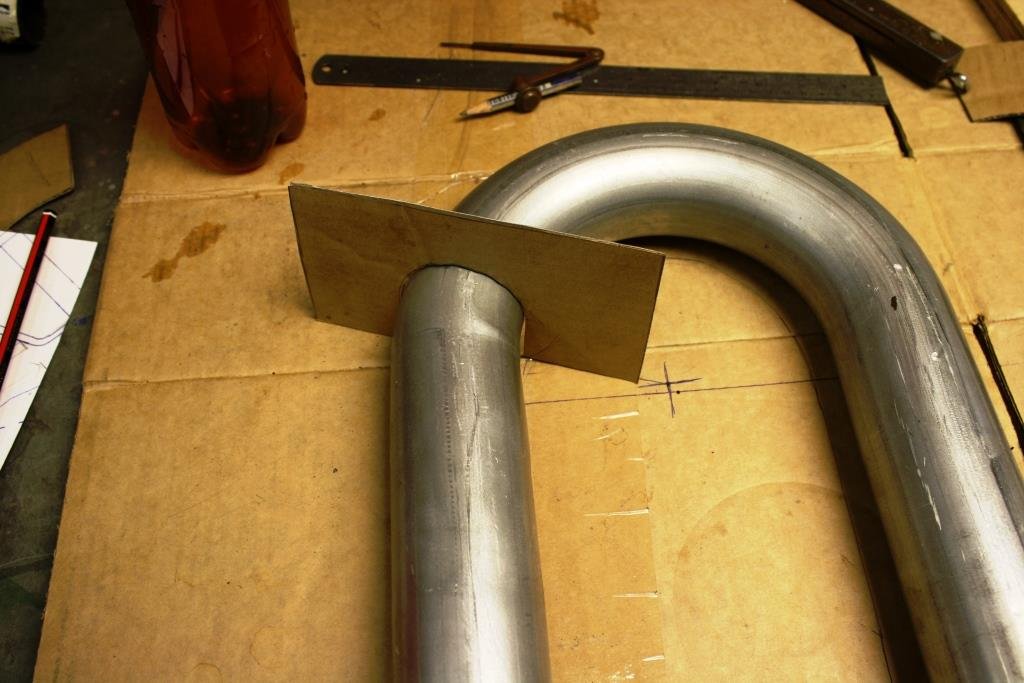
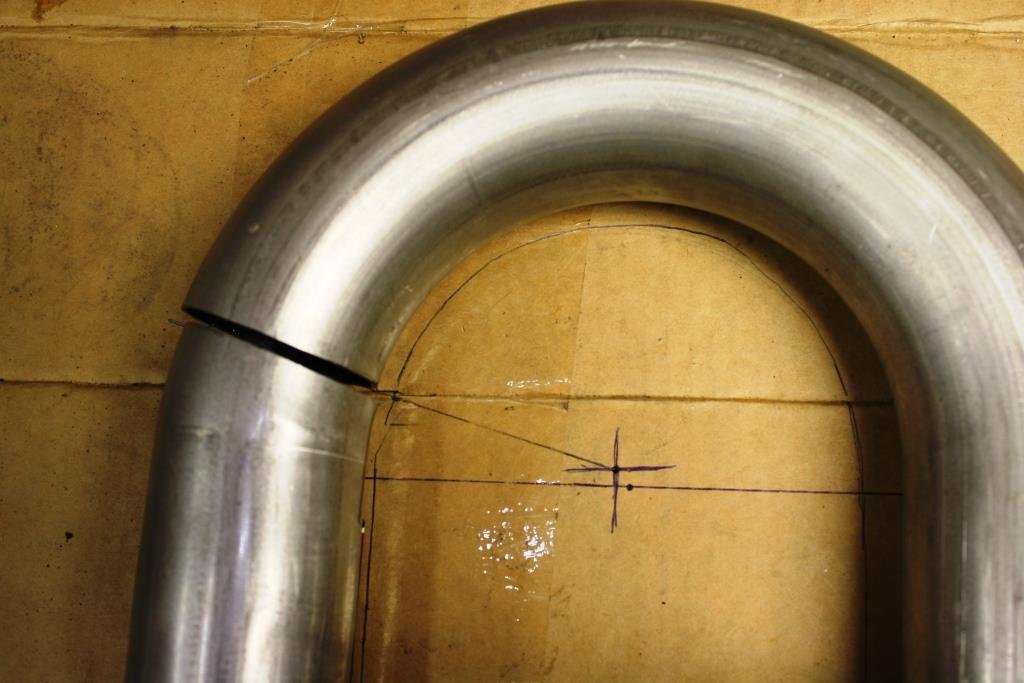
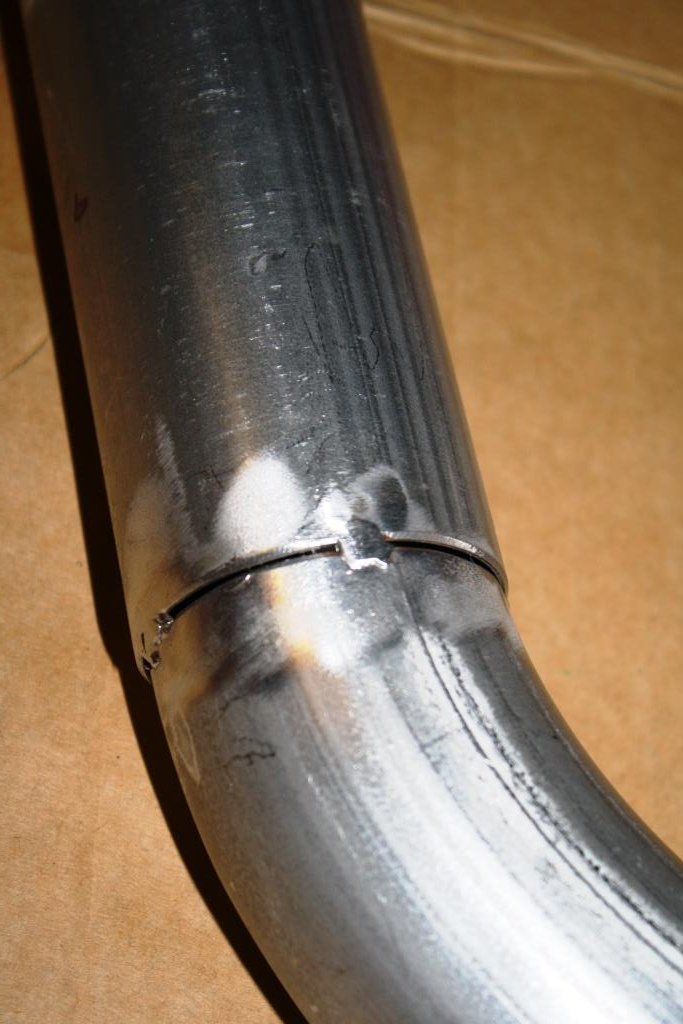
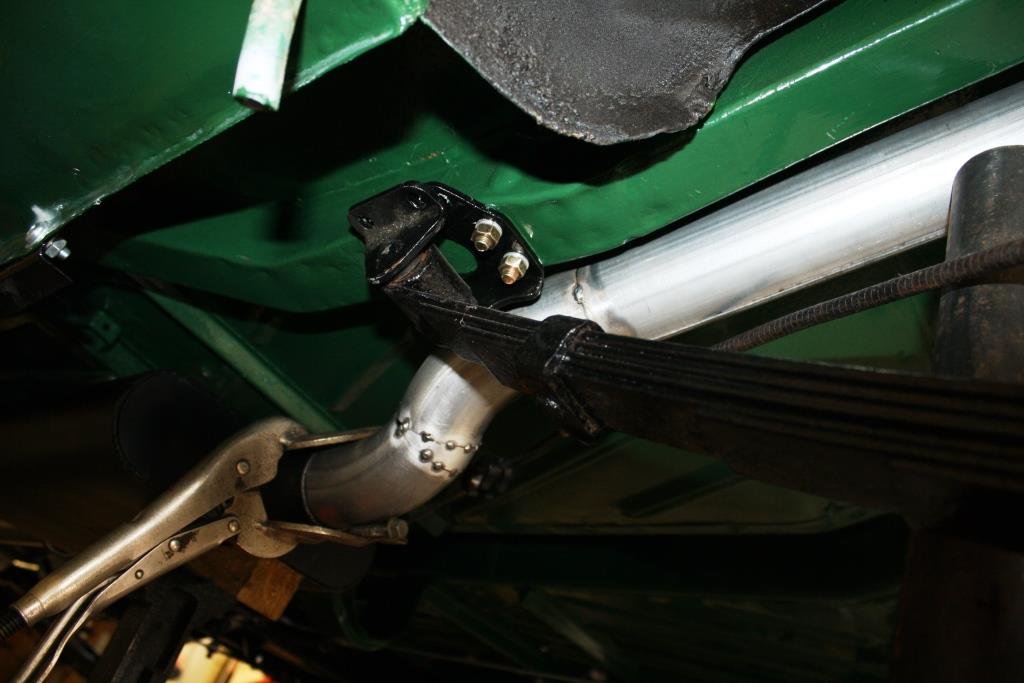
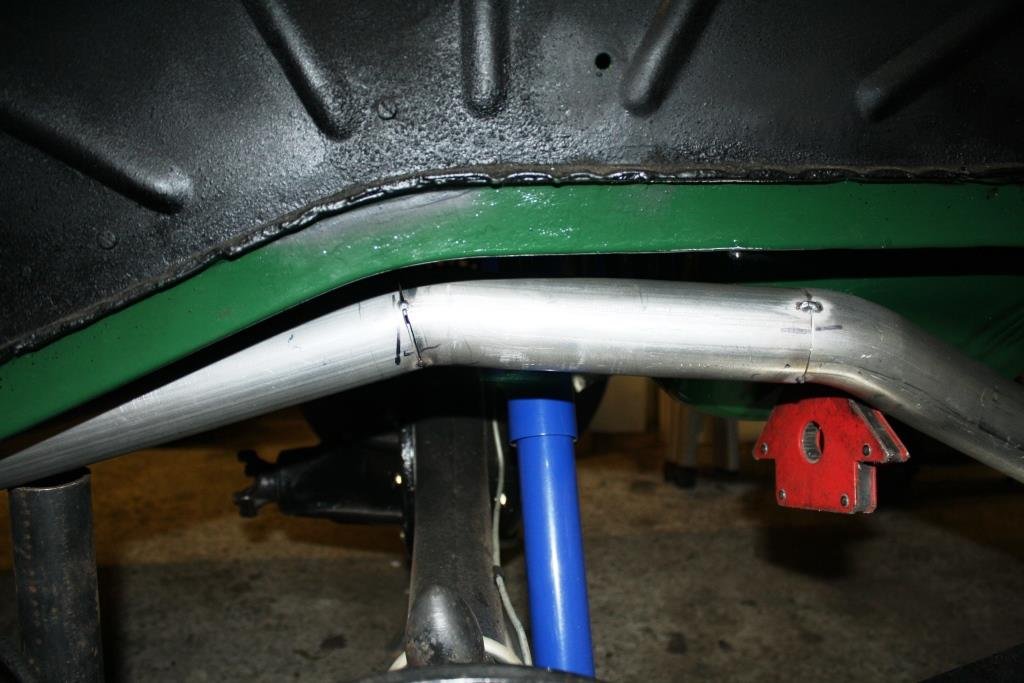
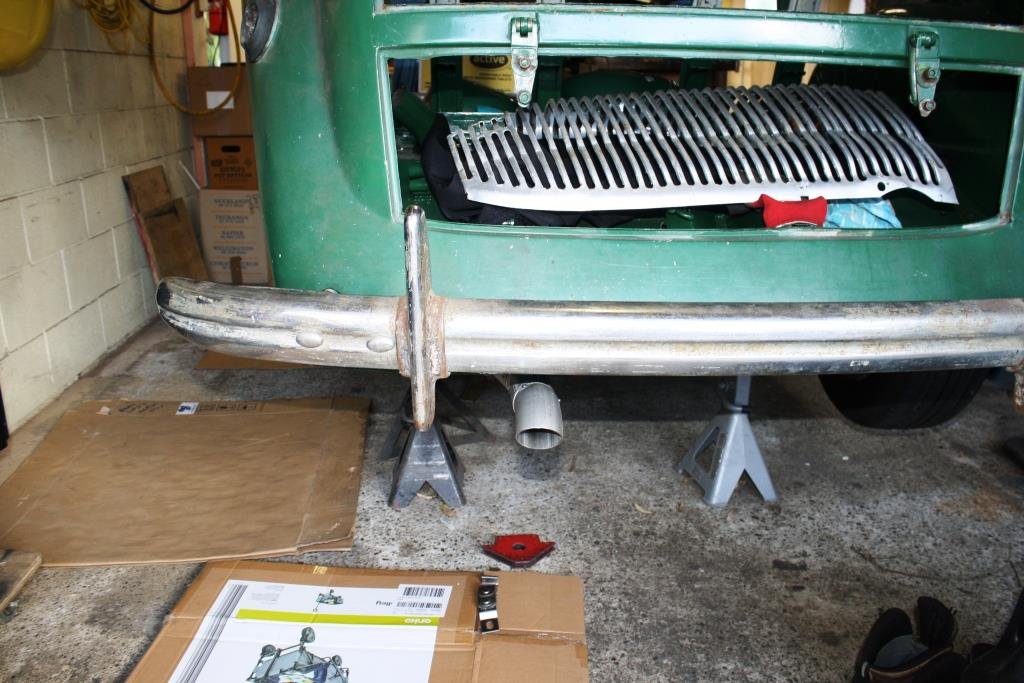
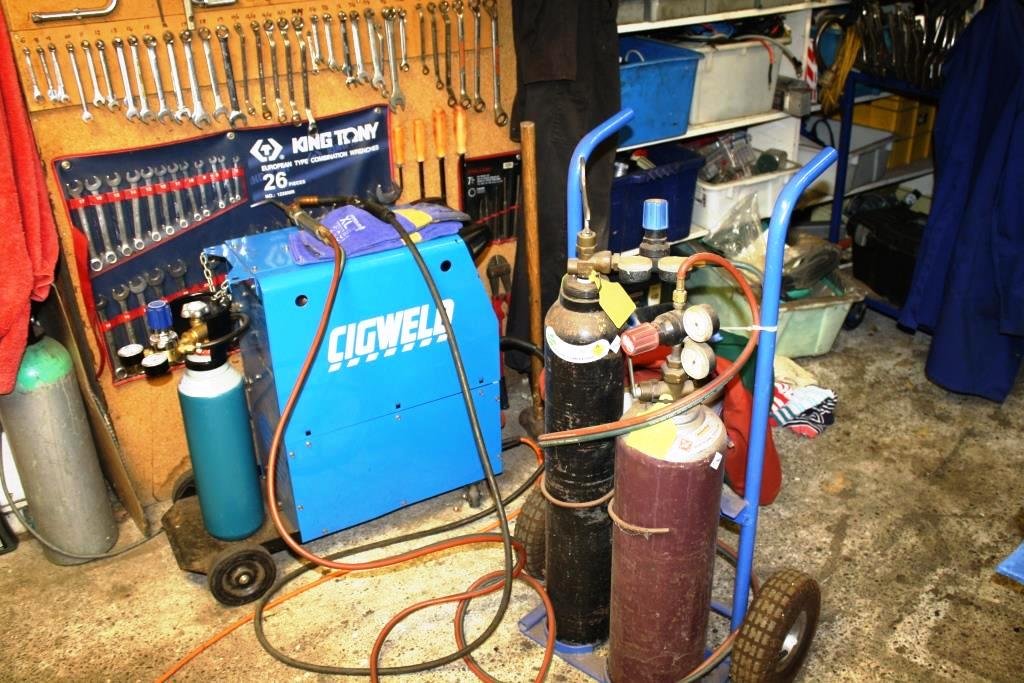
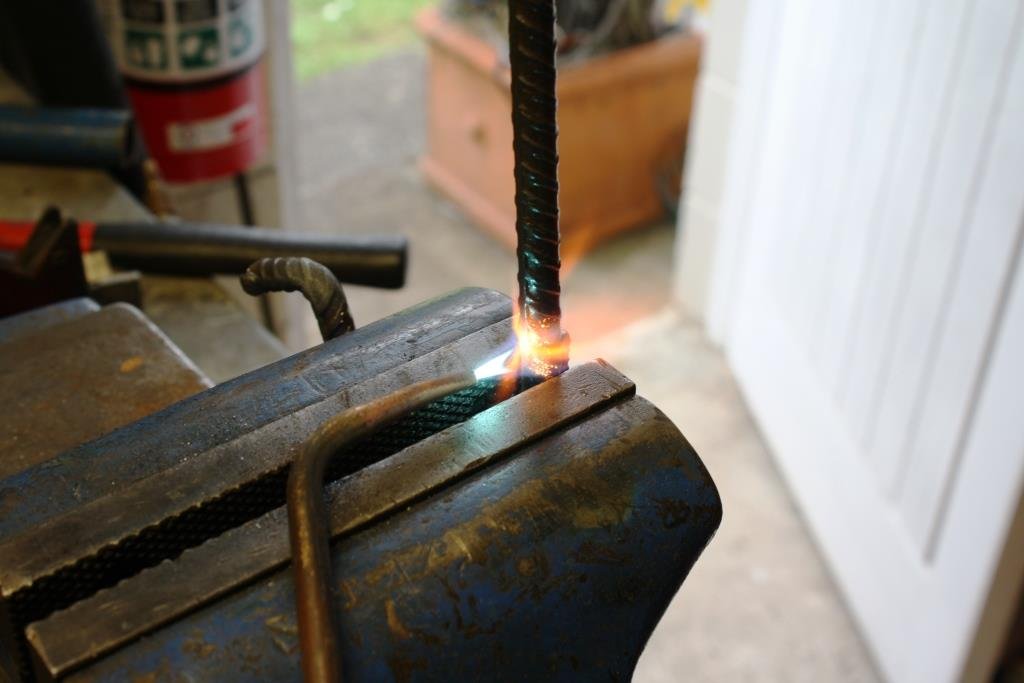
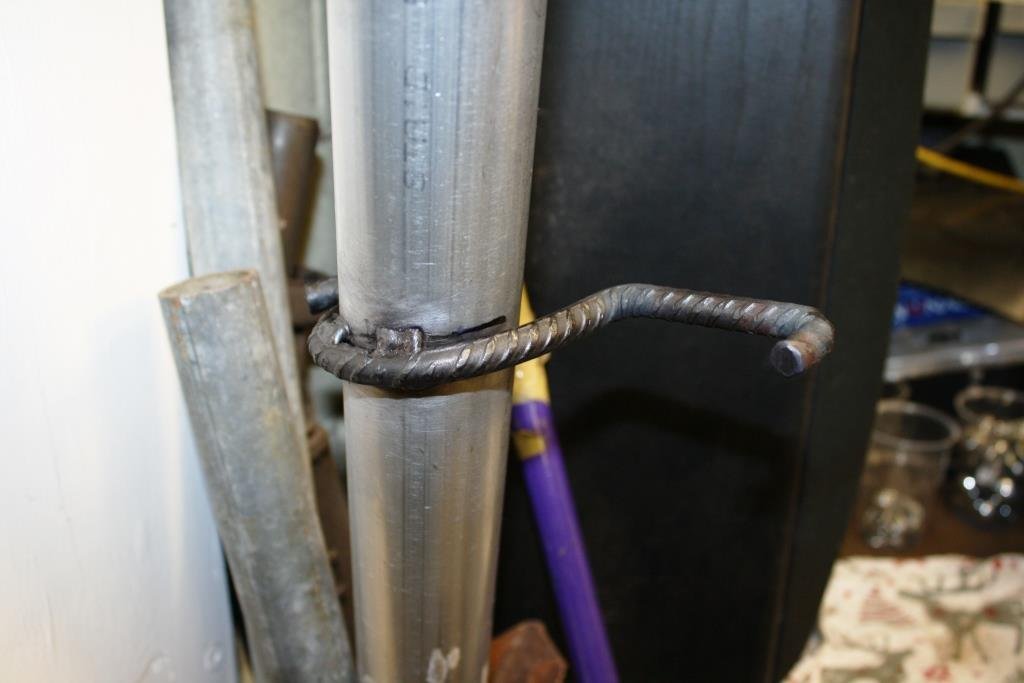
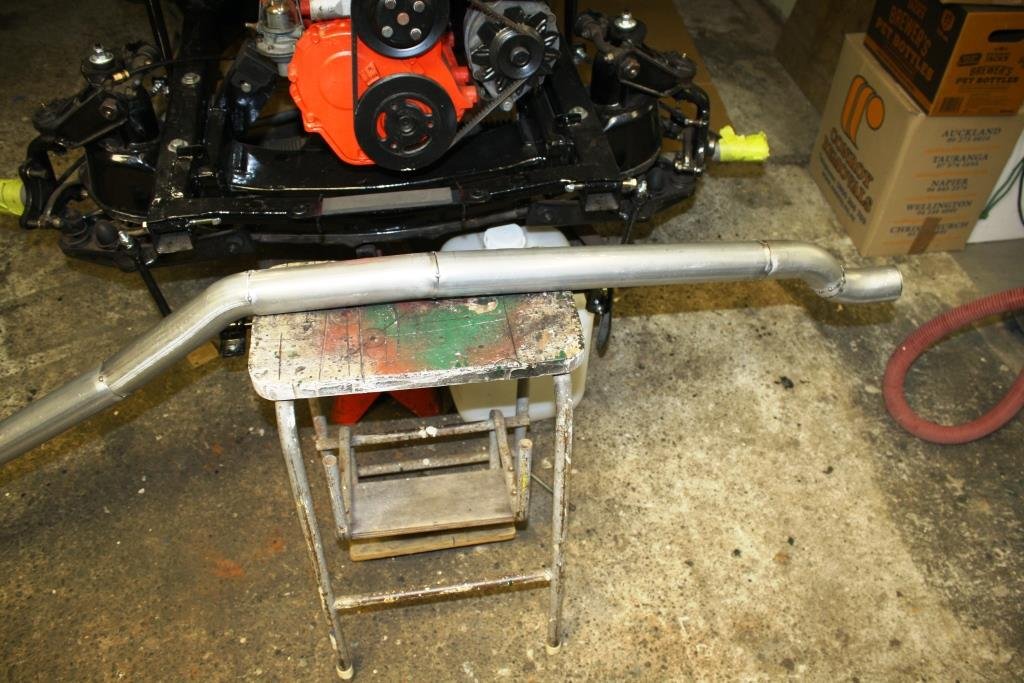
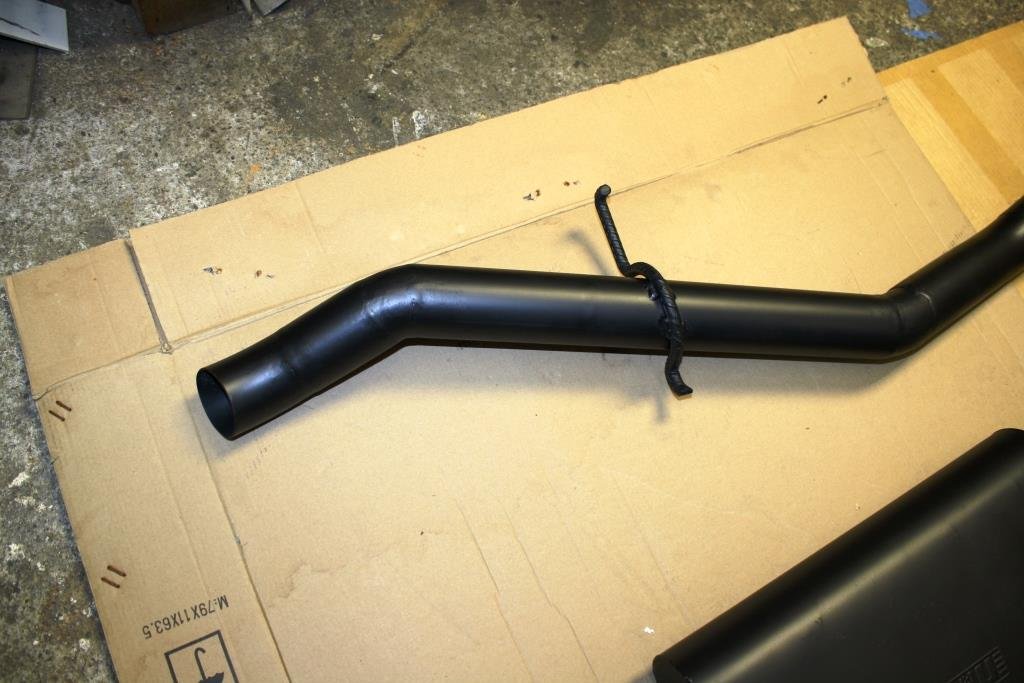
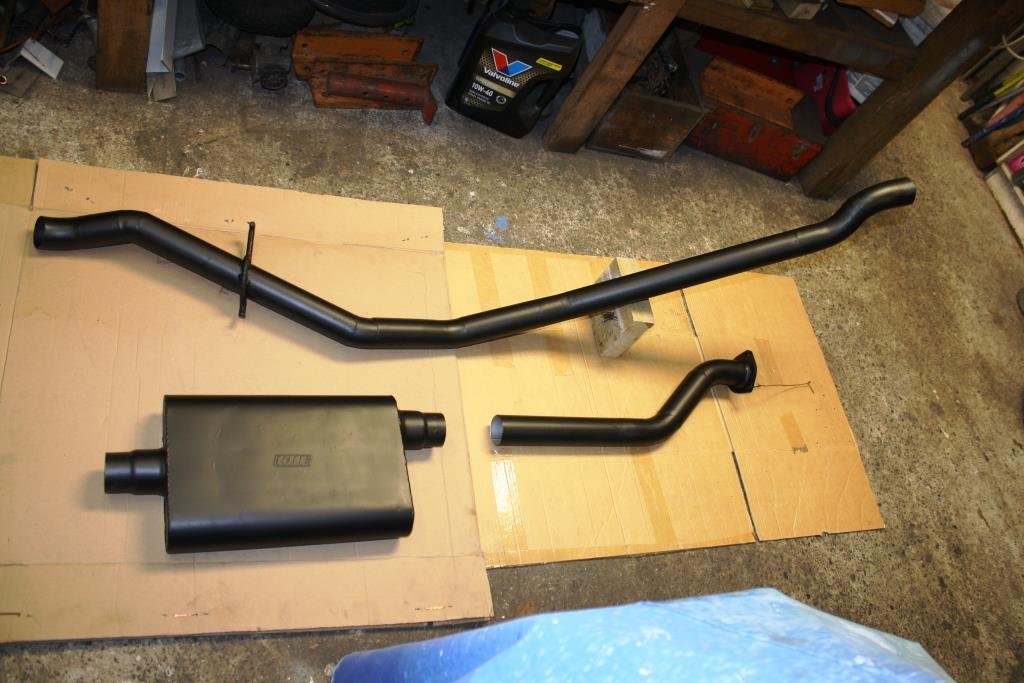
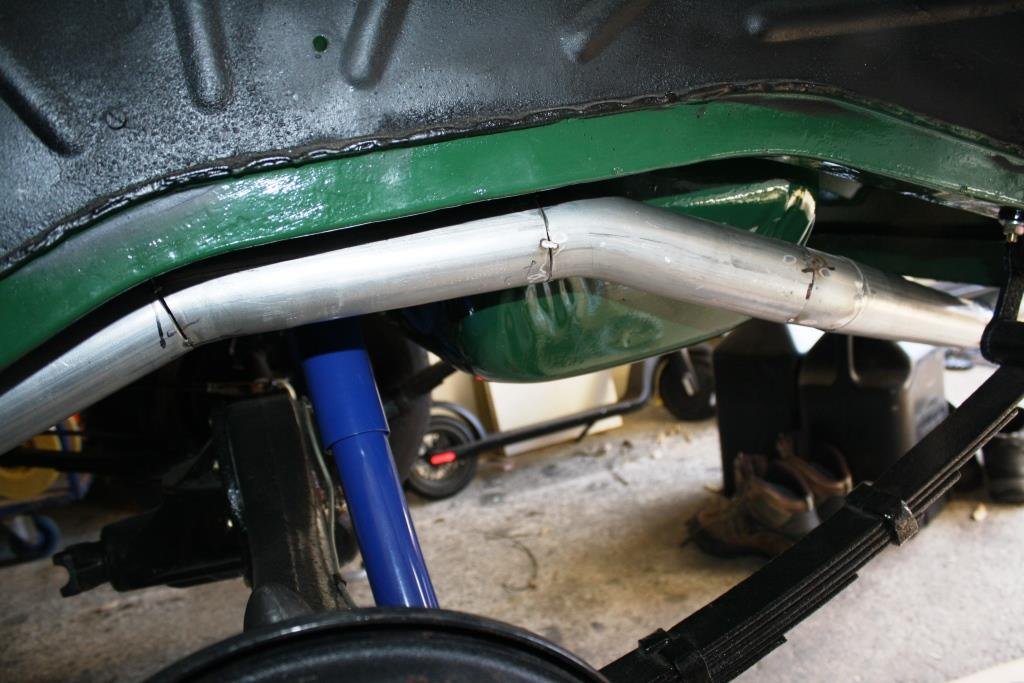
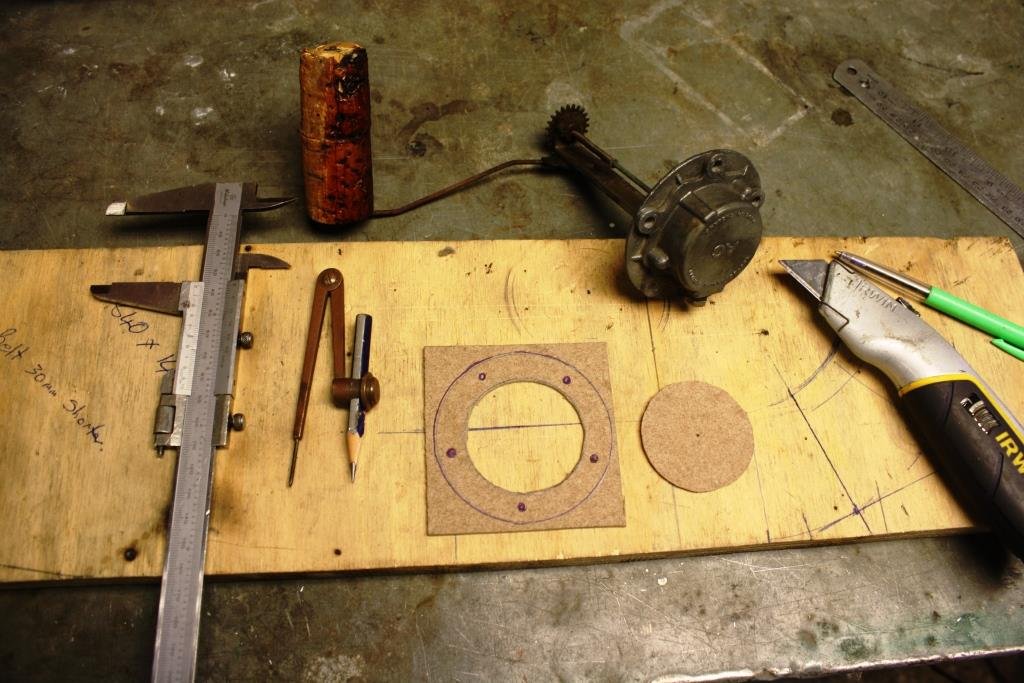
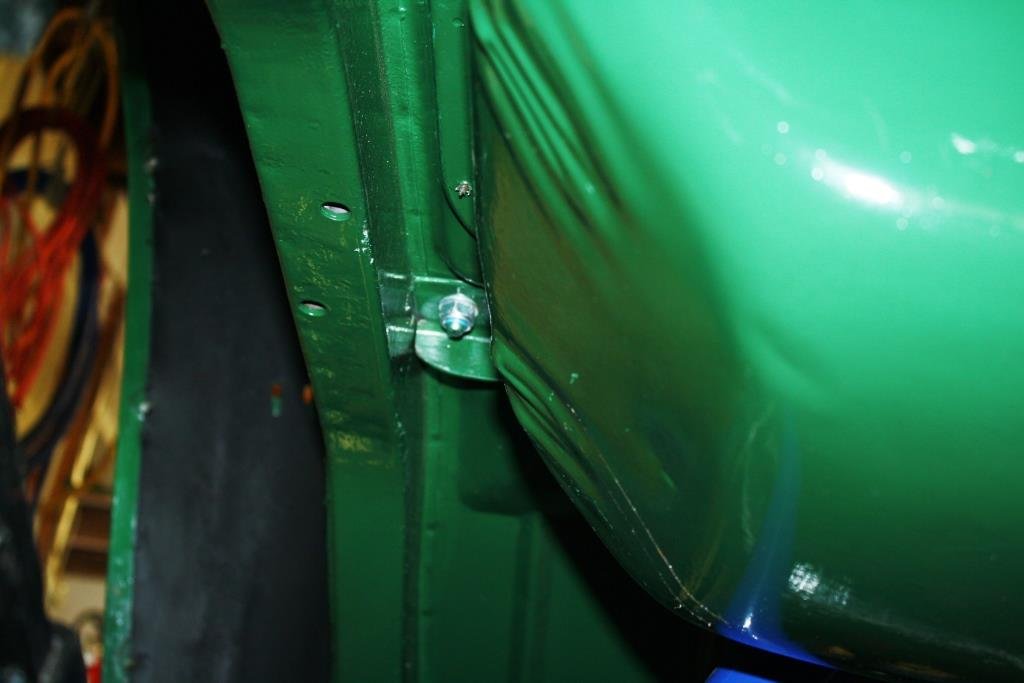
At the risk of preaching to the converted, (there are people on this site who’s fabrication/construction skills make my meager ham-fisted attempts at stitching metal together fade into insignificance); here’s my approach to cutting up pre-bent bends. First I trace the bend onto a piece of cardboard - yes it’s CAD all over again! I then find the center of the bend with the trusty dividers (or a compass). I can then draw my desired angle (from a protractor, an adjustable square or cardboard template). Then it’s easy to mark the cut with a stiff piece of cardboard cut to neatly fit over the tube. Yes it’s a simple and rudimentary method but it works. I knew getting over the diff and past the gas tank was going to be a pain in the proverbial and I wasn’t wrong. The gas tank was close to the chassis rail for even the original 1 ¼ inch pea shooter exhaust - with 2 ½” things started to get interesting. Managed to sneak past the spring hanger on the inside It’s close but I’m confident the bump stops will hit before the rear end hits the exhaust Made it over the top…… And then a squeeze past the newly fitted gas tank Had to fit the rear bumper to make sure I had clearance - if that’s not a sexy arse end I don’t know what is? (On re-reading this I think I may need to get a life!). Time for a rear tail pipe mount. Because it’s so close to the chassis rail and gas tank I decided on a double hanger. Dusted off the old gas set - hasn’t seen much use of late. Just couldn’t resist using a piece of re-bar, i.e. this is a real jokers car with a real jokers Aussie engine - To quote Monty Python “rule one, no poofters”. https://www.youtube.com/watch?v=L220PFMkunI Heated it up in an old vise and hit it with an even older hammer…. And made this….. Stitched it all up…. And hit it with some HT paint. Couldn’t believe how much time and effort had gone into making two bent bits of pipe.
1 point
-
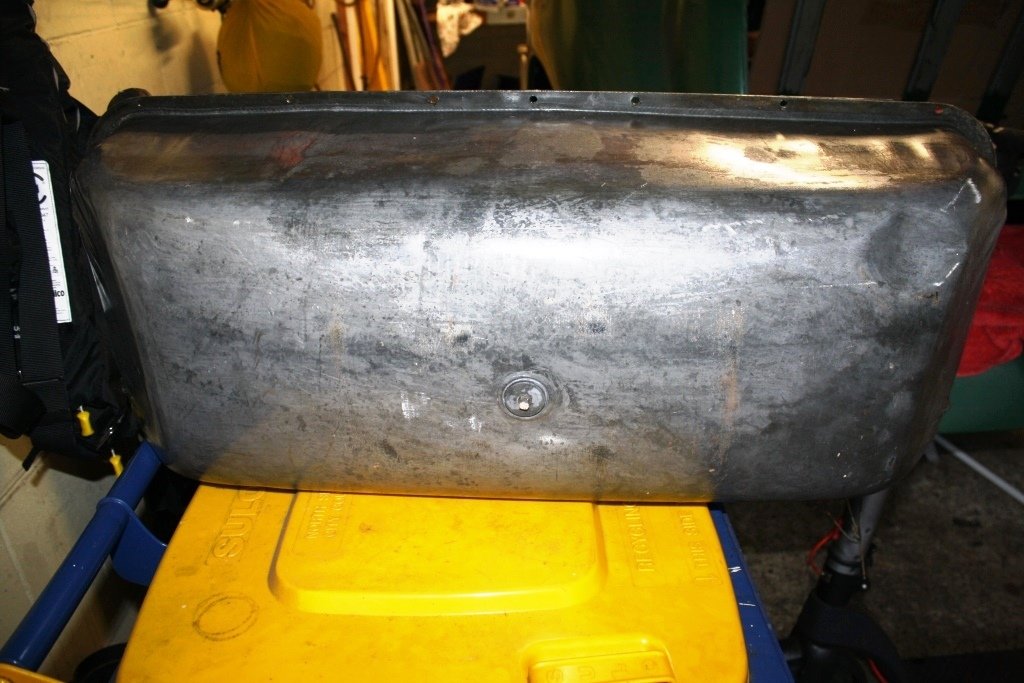
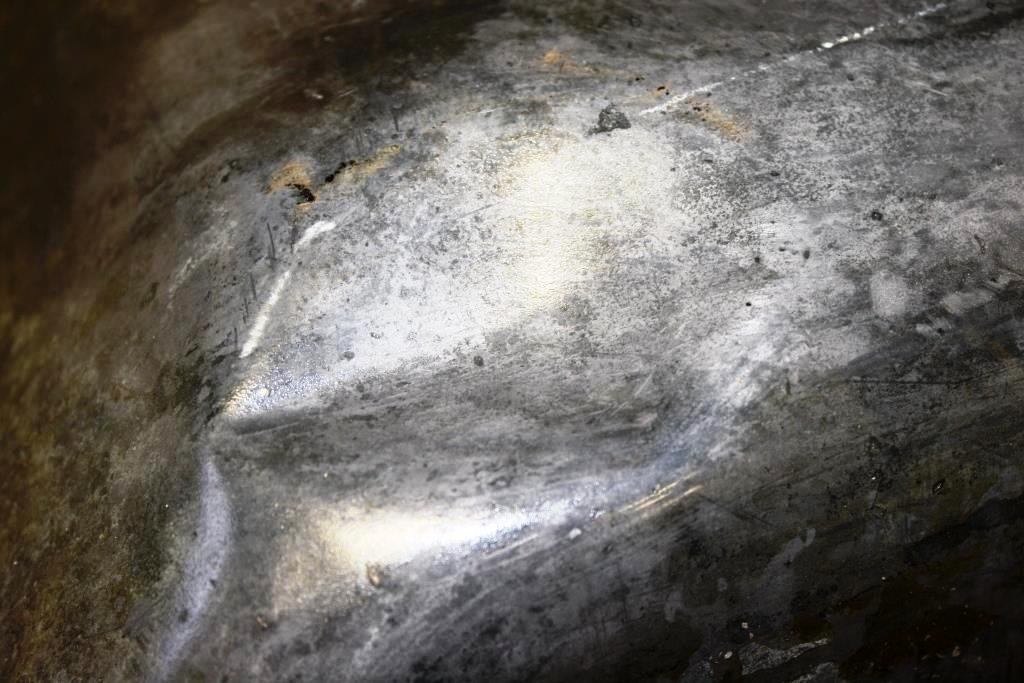
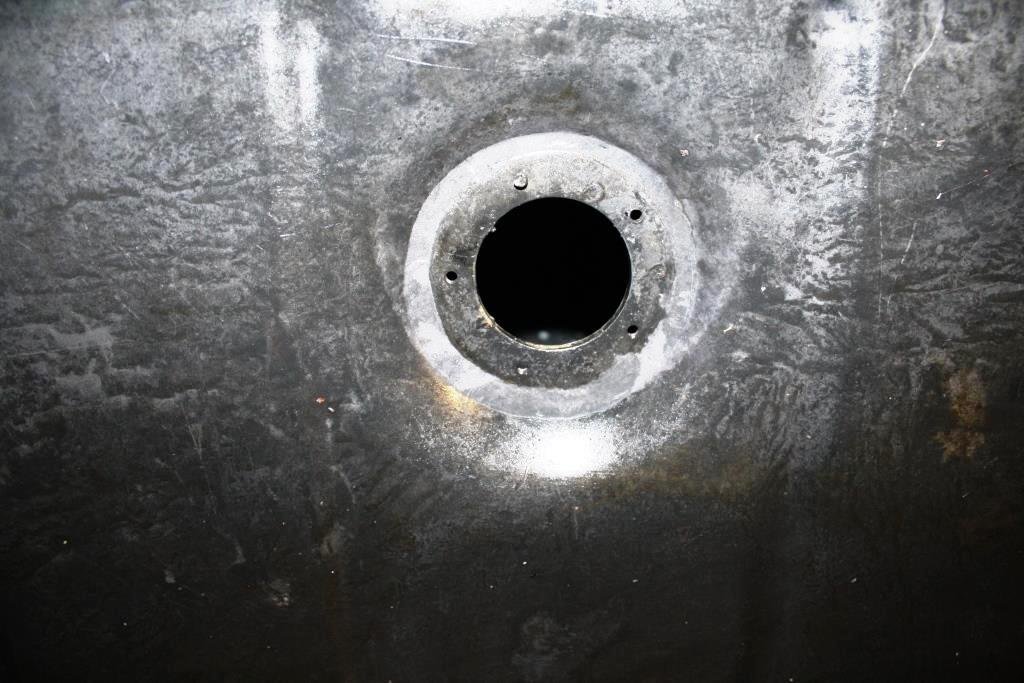
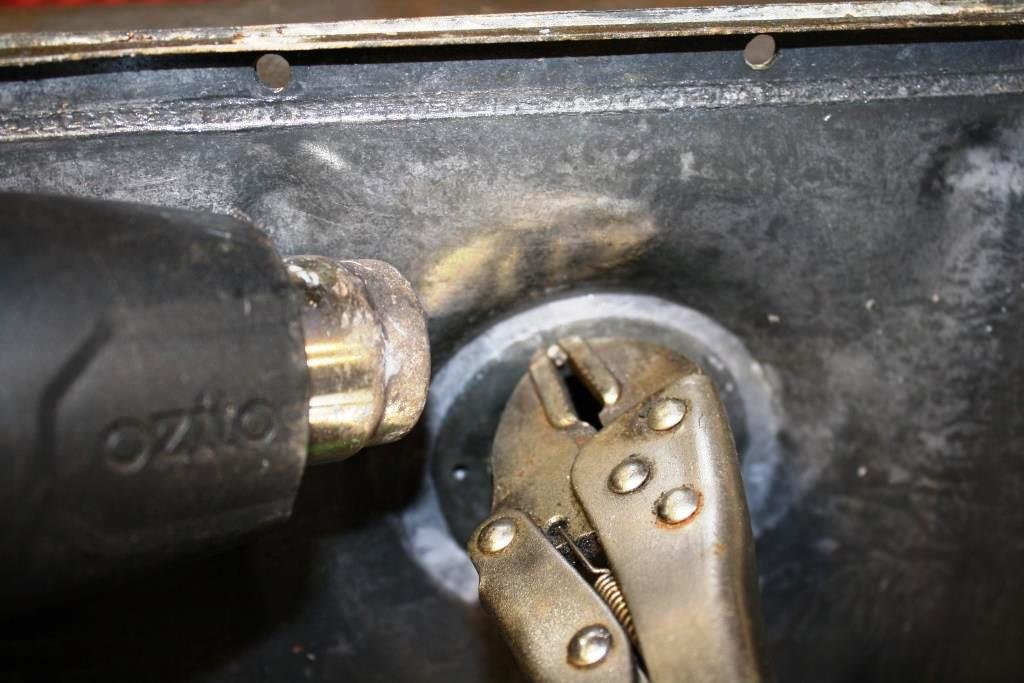
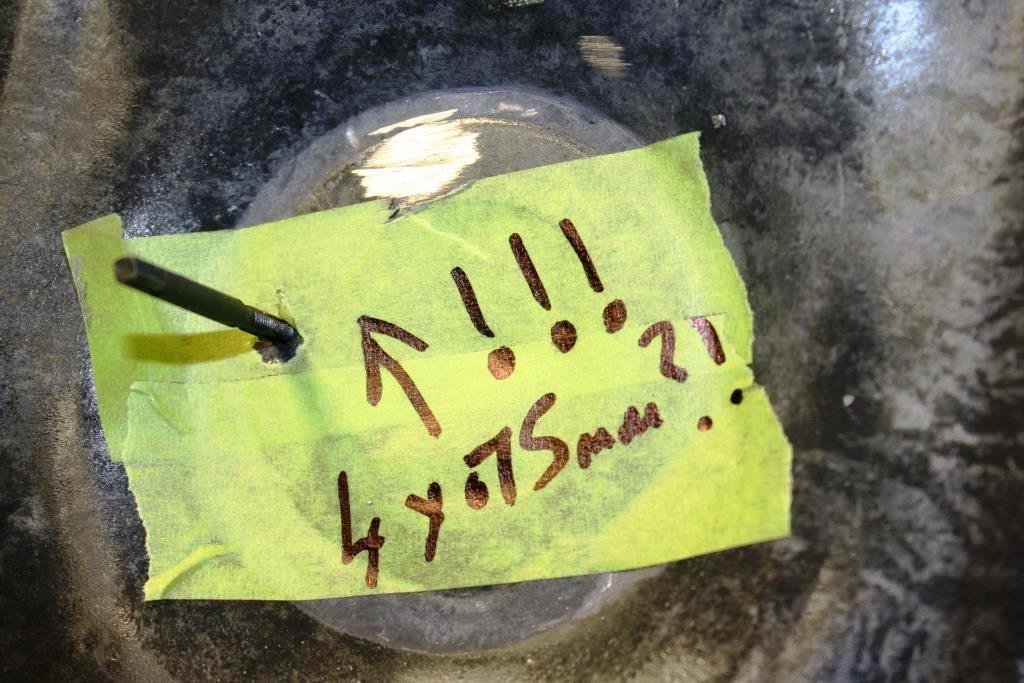
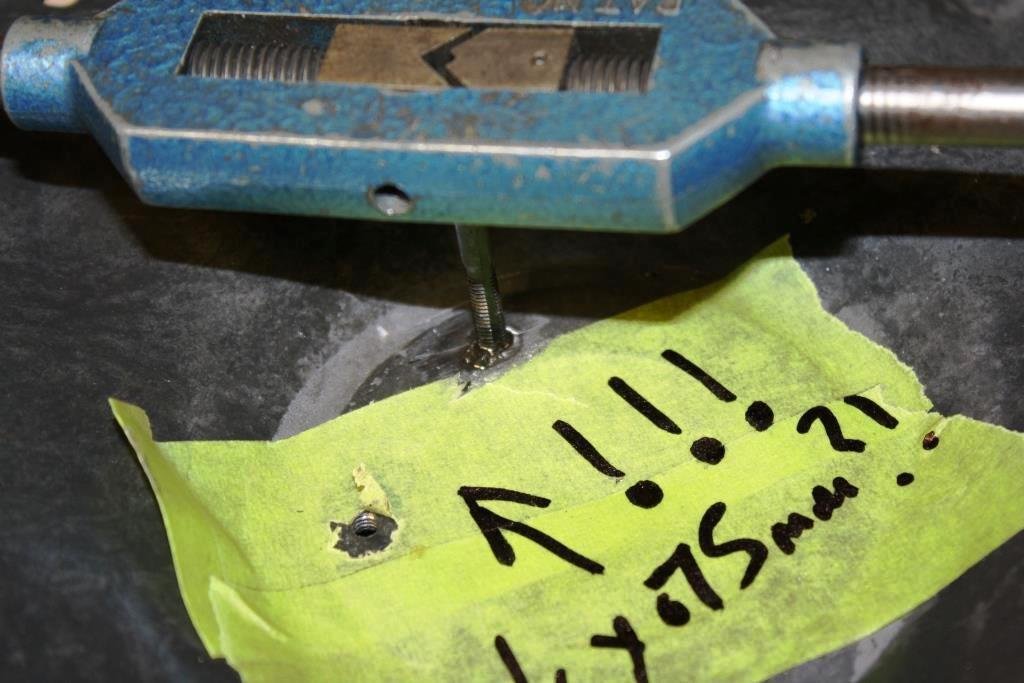
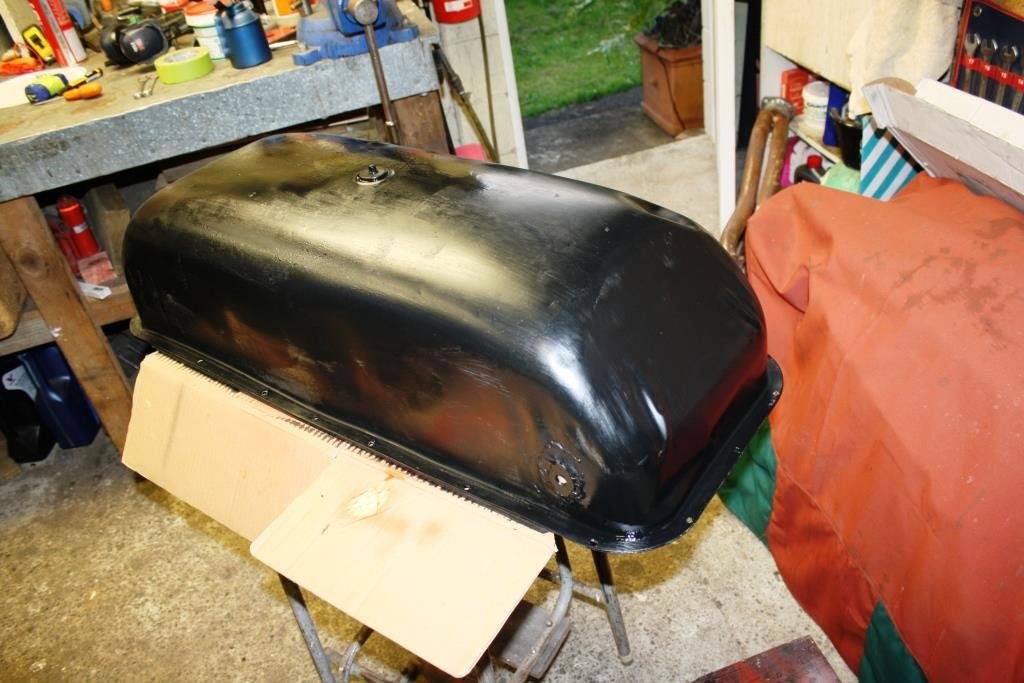
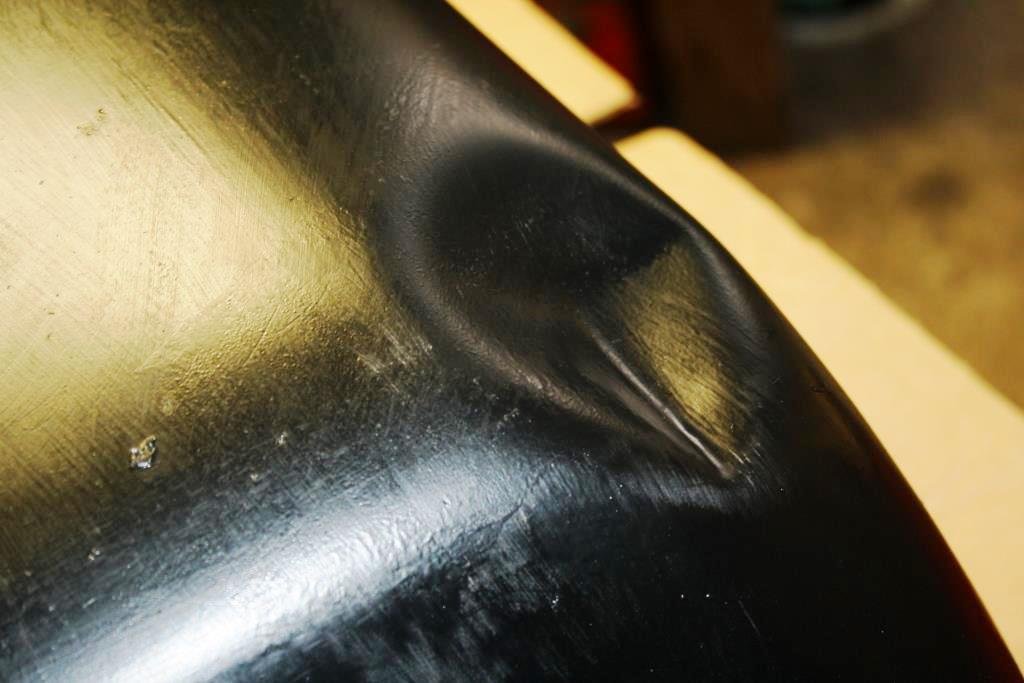
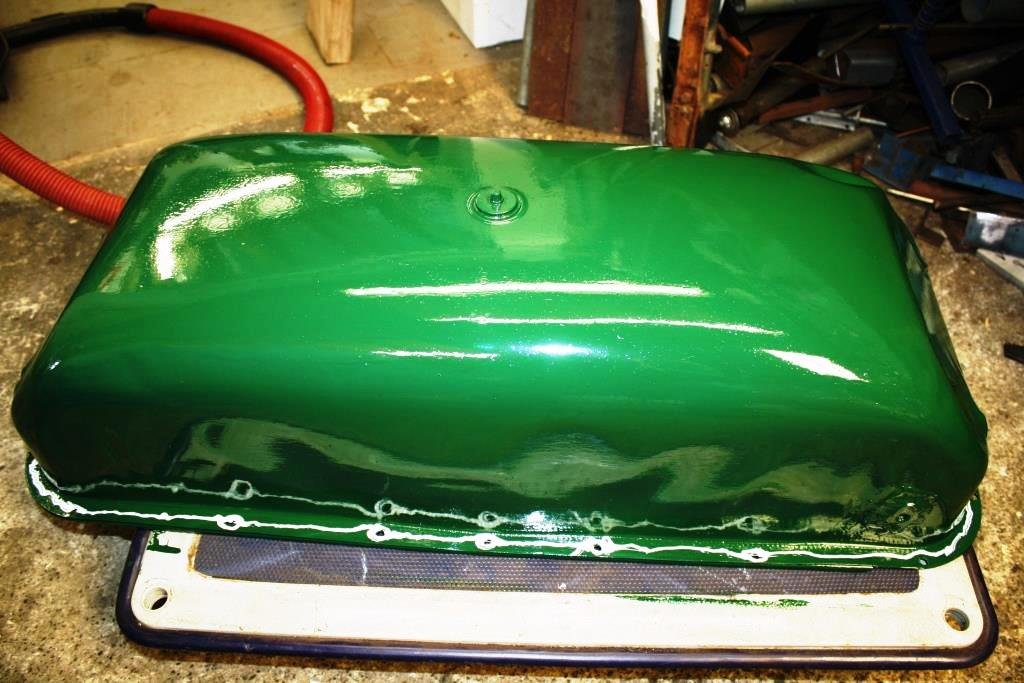
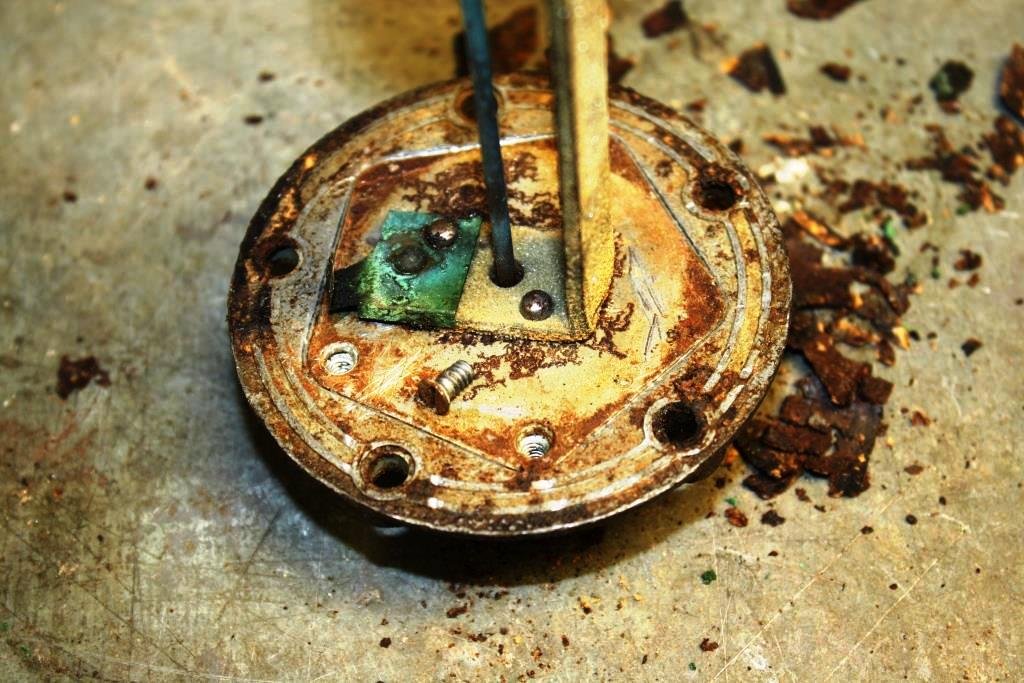
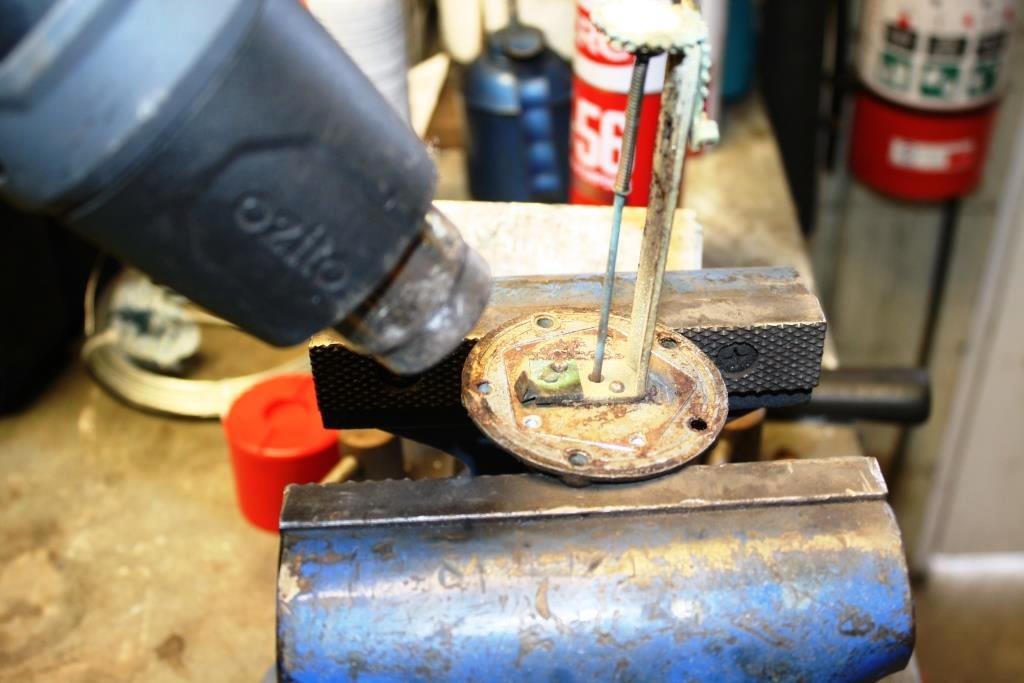
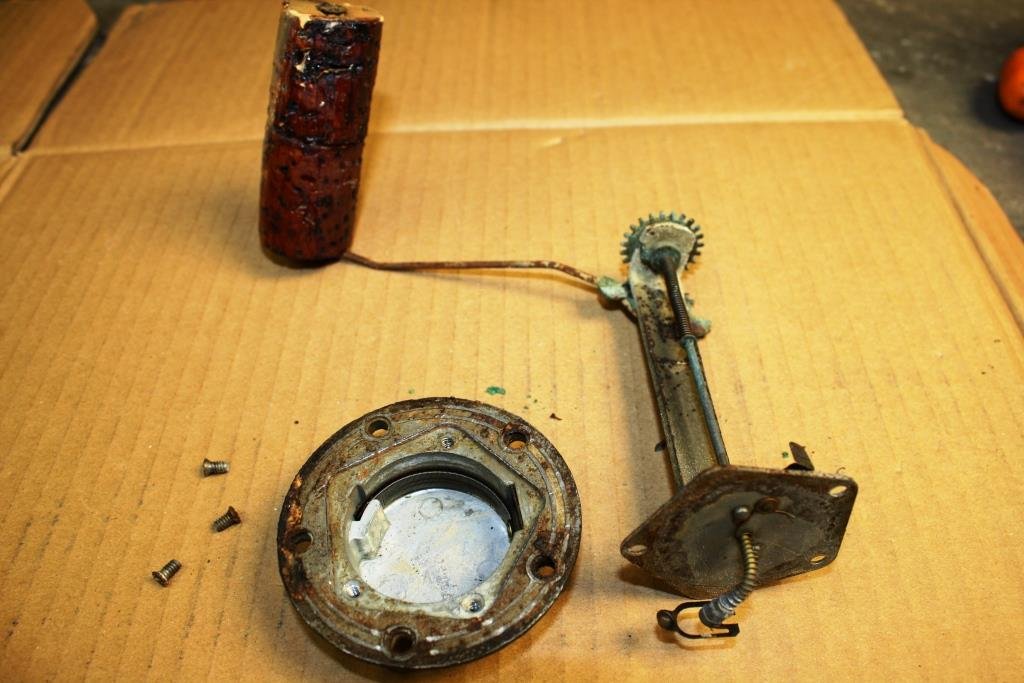
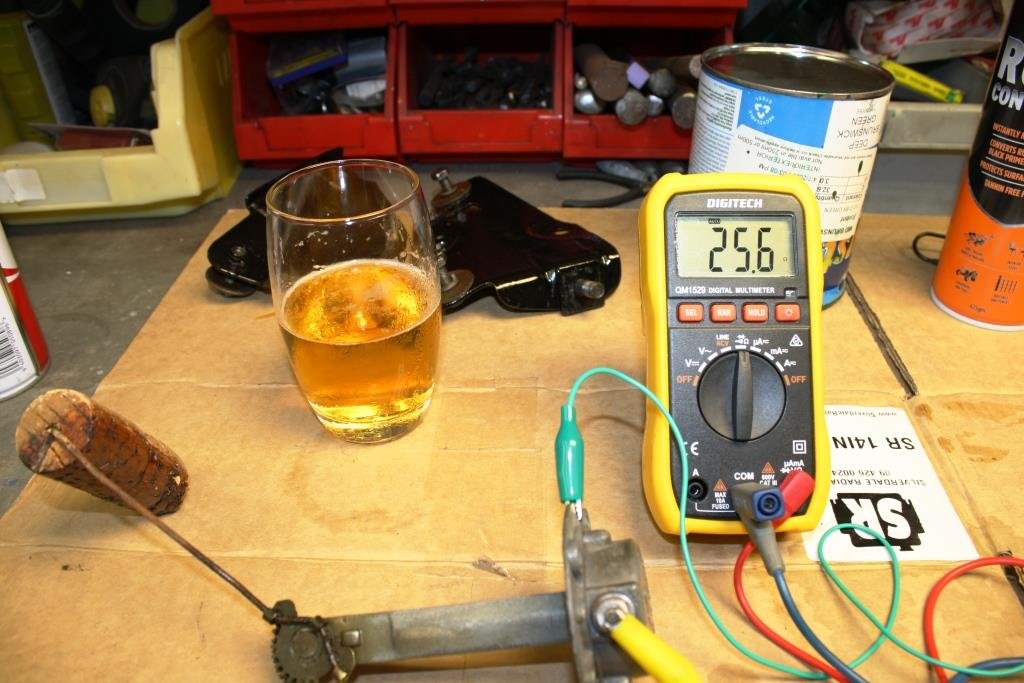
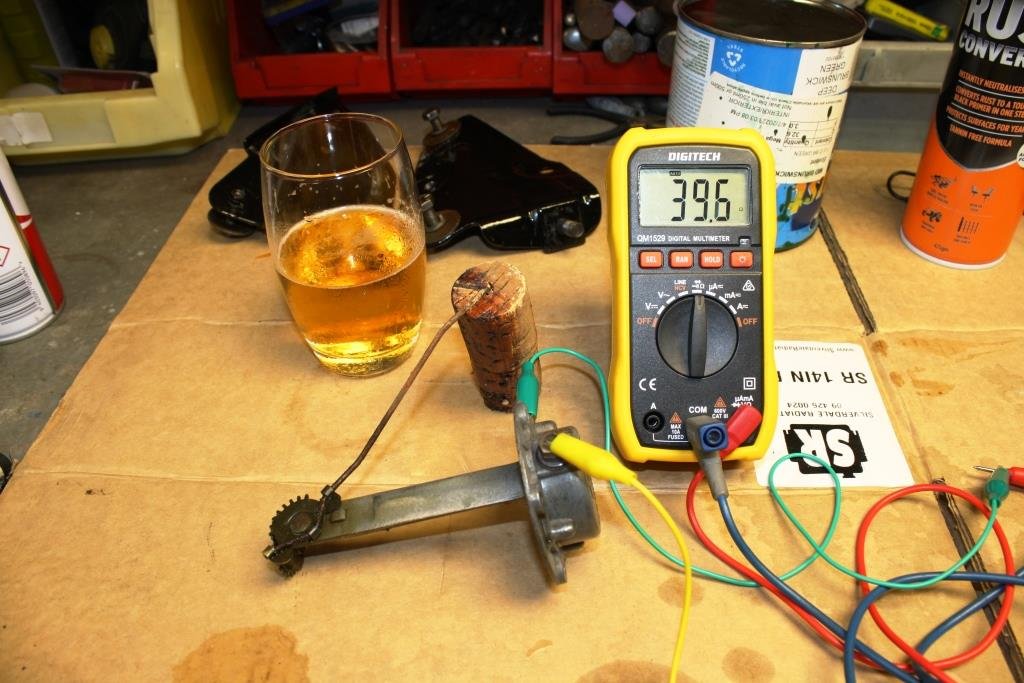
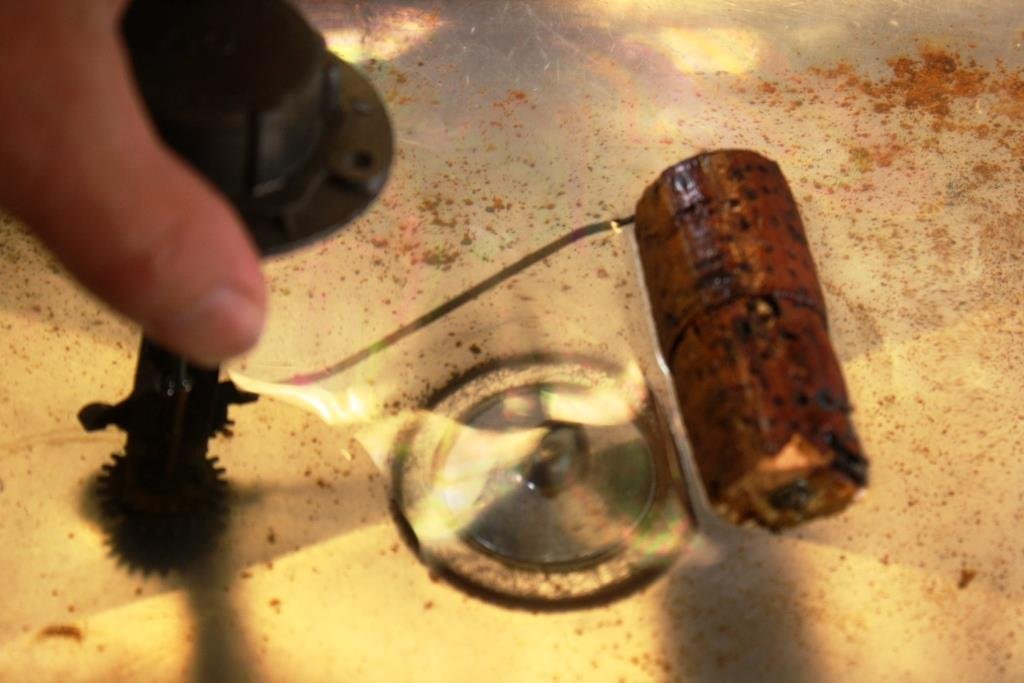
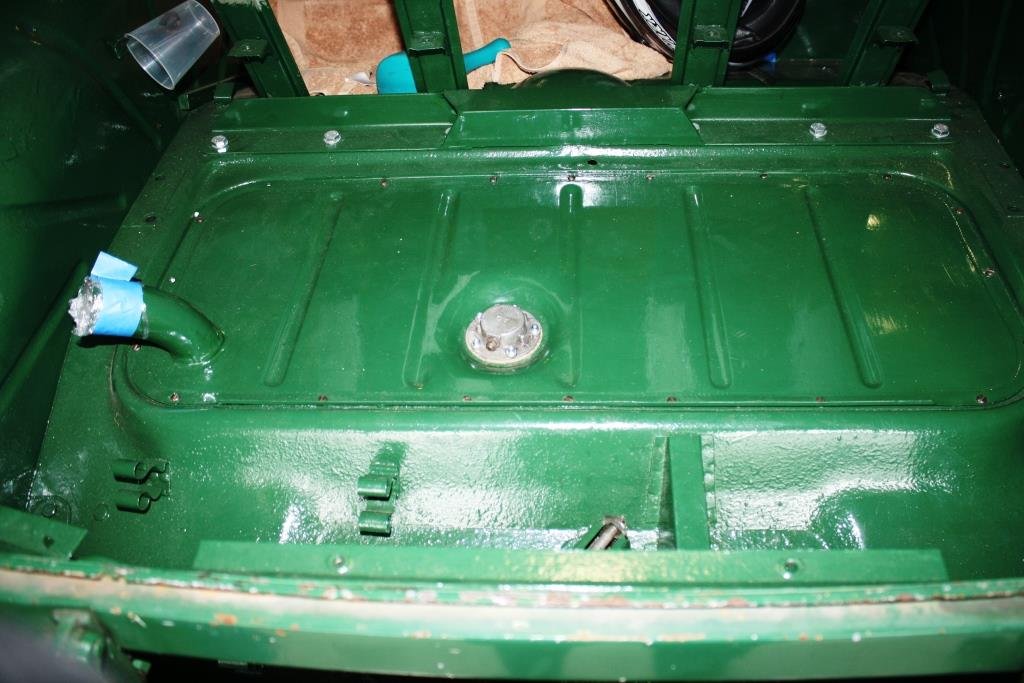
Gas tank arrived back from the good old boys at Kwikstrip. The usual great job, all paint and rust gone. I was going to use a lining compound but it looks good inside. Thought I’d leave my favorite gas tank ding. Despite numerous attempts and intense interrogation techniques Rigamortice has so far refused to divulge the story behind it. Only sheared off one bolt removing the sender…. Applied some gentle heat but when I saw solder starting to melt I backed off quick. - Yes in those days they soldered gas tanks together. Shock, horror and panic! On drilling out the errant bolt I discovered my old friend Rigamortice, the last bastion of all things Imperial was harboring an embarrassing skeleton in her closet. Oh the pain and humiliation when I discovered a metric thread. With any remaining vestige of authenticity and moral fortitude thrown out to the dogs Rigamortice hung her head in shame as I lowered my standards and defiled the rebuild with a metric tap. “Oh the humanity”. Numerous Wild Turkeys and extensive counseling later, I slunk into the now desecrated sr2 man cave and pulled out the favored CRC rust converter... Love that little ding….. Applied the obligatory coat of insipid green…. And it was time to attack the sender. A small amount of heat….. And it fell to bits with a little tap. You have to love this old shit. What we have here is simply a 75 year old rheostat (or potentiometer - for those who love big words or suffer from bouts of verbosity) that needed no more than a quick dip in the cleaning bath and a spray with CRC contact cleaner to be restored to its former glory. Try that with a bloody Corolla’s gas gauge sender in 75 years’ time! Gas tank Empty….. Gas tank full…. Cut out a cork gasket…. Gave the crusty old cork float one more chance with a water test and considering the specific gravity (or relative density) of water is higher than that of petrol it passed with flying colors. One 75 year old piece of history just got a reprieve. I assembled it all and dropped it into the old girls boot. (Complete with the original PK screws to hold the tank in place. in place!). The lack of room between the tank and the chassis rail will be a challenge for the exhaust……..
1 point
-
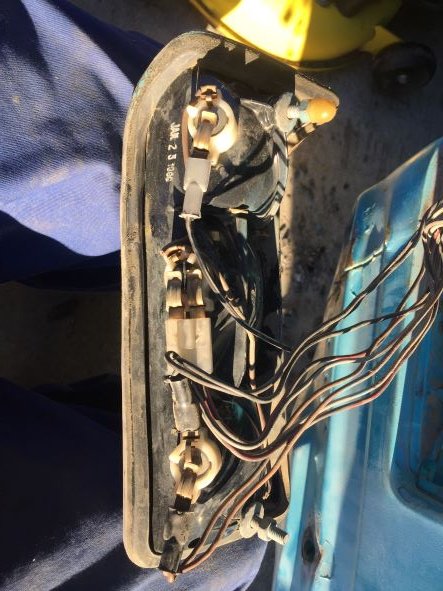
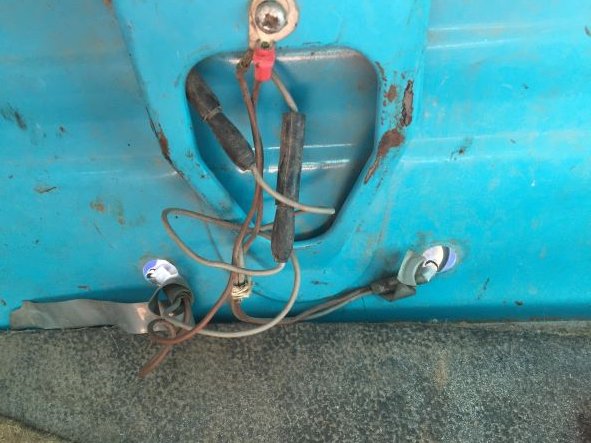
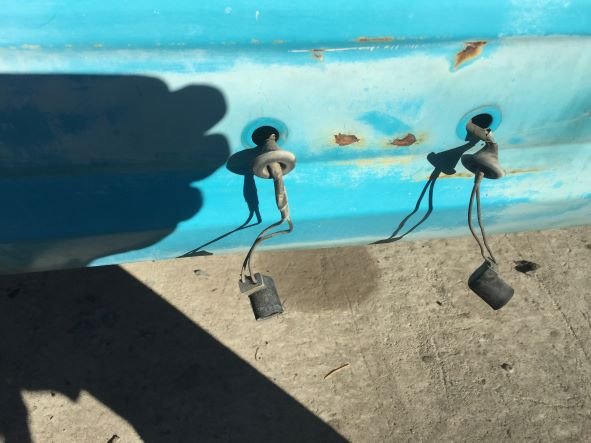
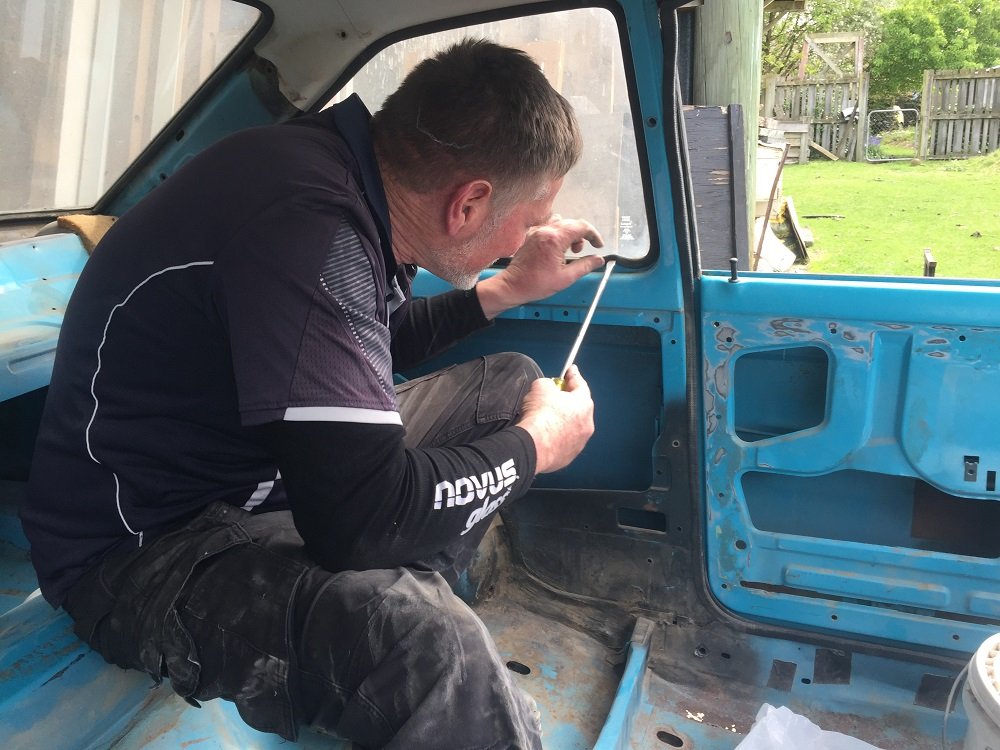
Its been a while since I last posted so have managged to get a few things done. Have removed tail lights and number plate lights and labeled all wires. Also taken pictures to help me put back together. Next remove that part of the loom up to where it conects with main loom. Also removed all the remaining glass without breaking any. Rubbers for side windows look to be in good shape but the front and back ones will need to be replaced. Found a few rust spots around the window edges. Hopefully not to hard to repair.
1 point
-
Dude that owned it has had it for 16 years. Road it all around the north island commuting for work. it was lightly dropped prior to his ownership hence the repaint of the fairings. it has been painted very well though and has stood up perfectly to 16 years of his ownership. 5 years ago it "developed a carb issue" so he took it to the stealership who cleaned the carb and gave it back and it was no better, being non mechanically minded and strapped for crash he parked it in a shed. 5 years later I know own it. It popped up on the tard for a super cheap asking price and i must have caught it right after listing as i just emailed saying ill take it and then the popped through a bank account, cash transferred i went to waipawa the next morning to collect. Luckily these things have a colt like following especially in europe where they sold in pretty big numbers, there is heaps of bits available and a plethora of information available. i soon found out that they are notorious for poor solder joins in the CDI which crack and give weird "carb like" intermittent spark issues. They don't typically die, just run like crap. I figured this was enough of a lead to bust out the craft knife and open up the CDI. after spending an hour peeling off all the silicone then using my sons kathmandu explorers kit magnifying glass i noticed 3 joins with cracked solder. I gave the CDI to Winny who is good with such electrical things and he reflowed it for me. i then slathered it in black RTV and gooed the cover back on. before trying to start it i thought id clean the carb as it was sitting for so long. Ive pulled apart a lot of carbs over the last few years, and this is hands down the dankest of dank. why the hell is it green! a good soak in degreaser cleaned everything up. I will run it through @Flauskis ultrasonic cleaner to make sure. I have ordered a new carb kit off wemoto and will do some common airbox / jetting mods for more hunu's while im at it. Fingers crossed the kit arrives soon and it will purr like a kitten. While apart i did some other boring jobs such as new battery, reset tappets and other general maintenance. keen as to get it re-vinned and hoon. Also, check out the old main jet after it was cleaned, were they running this thing on acid? Bliz1 point
-
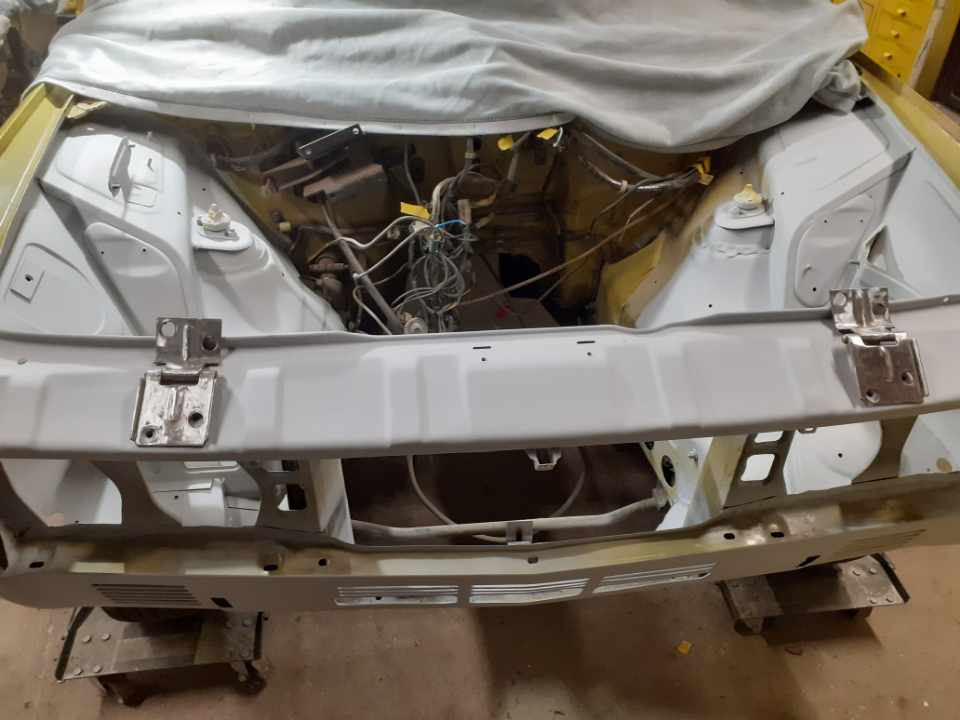
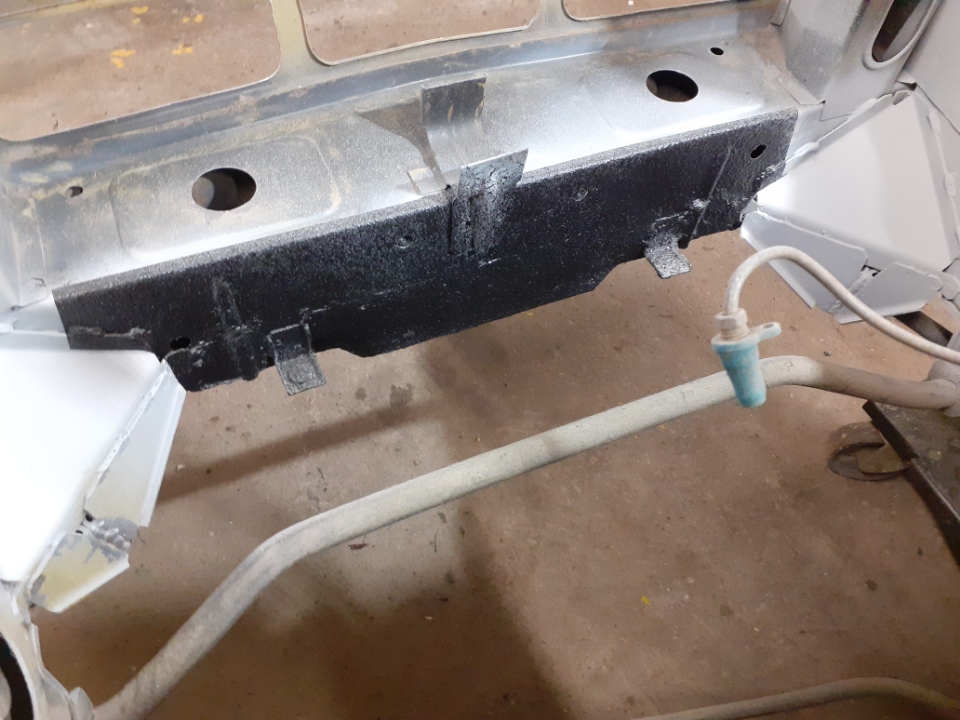
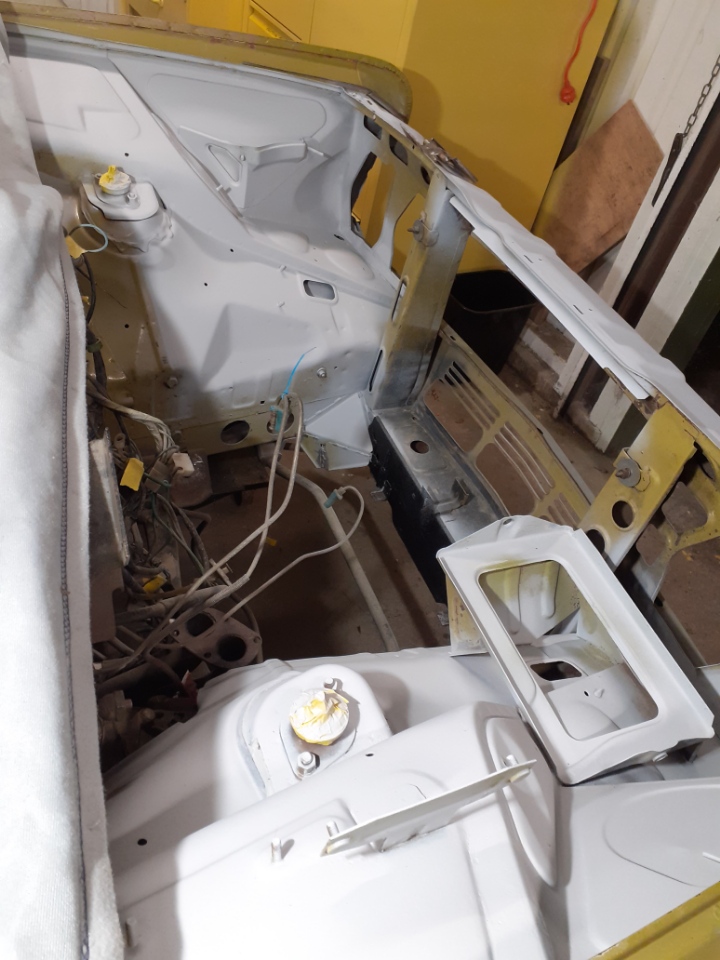
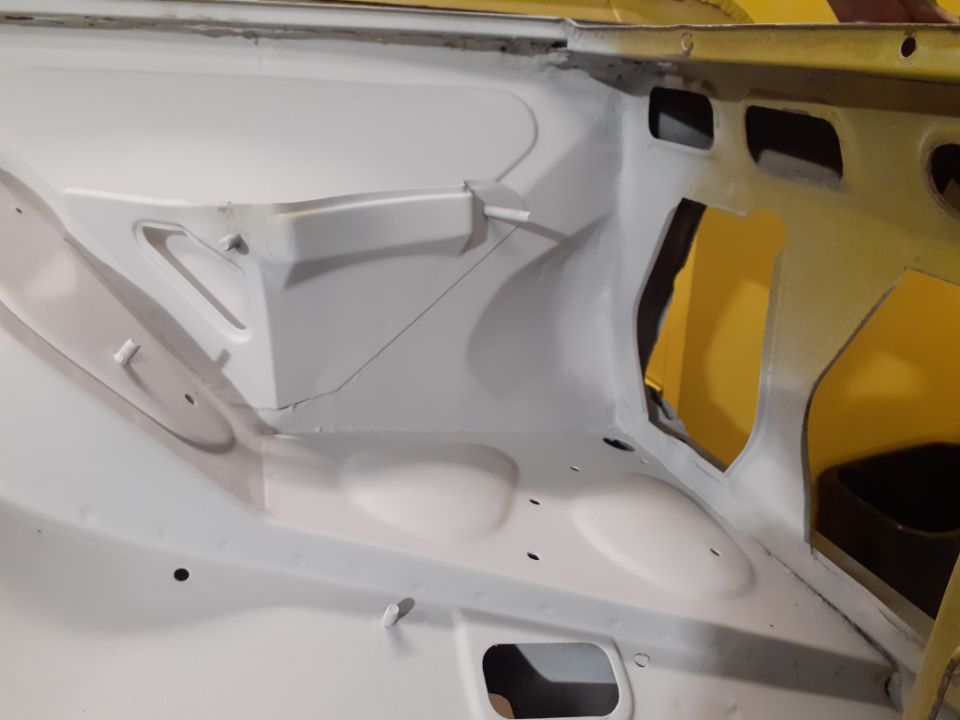
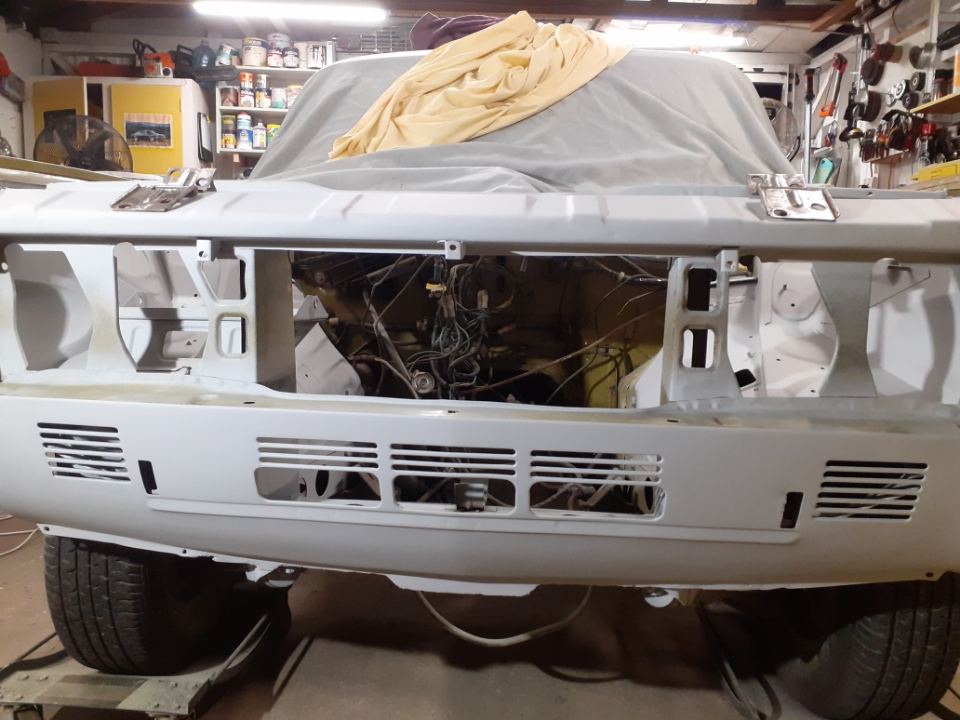
Another month passed and I get a text to say the fuel flap has been sent to the big smoke for a paint match, and hopefully painting can start next week! Clean slam panel Radiator support panel repaired Behind the left headlight done. New smile
1 point
-
well the bad news was that the above "TRD close ratio gearkit" turned out to actually be just a standard K50 gearkit so that went back and i got my money back, wasn't the sellers fault as he was misinformed when he received it etc, cheers Stu for being an honest chap and taking it back. So last week i was quite busy on the car and as a result didnt get many photos but i got the coilovers finished, guesstimated the springs to be about 150-160kg so about right for the starlet. Becuase the struts are longer they gave the car some positive camber so some bug eye steering knuckles courtesy of Andy C sorted that out and they are now neutral, at some stage ill do longer bottom arms to get a wee bit more negative but probs not as it handles and turns in really well now. They other thing i did the night before my event on saturday was put in a quaife quick rack, this is one of the coolest mods i have done so far and makes such a huge difference, the steering is now 2 turns lock to lock rather than the standard 3.5 and it drives like an absolute go kart, check out the video below and see the minimal steering input compared to my previous videos, it is much much safer to drive hard. The rack is a AE86 quaife quick rack and pinion from palmside.co.nz and was very easy to modify to go into the starlet rack, its very obvious when you put them next to each other but all it needs was i think 32mm off the long side of the rack to make it the same length as the starlet rack, then drill a new hole and tap it in the end for the rack end to screw into and your sorted.org.nz. I got a new bearing for the pinion rather that try deal with swapping the old one over. So for the event on saturday just been i have new suspension, 15mm castor, slight neg camber and a quick rack and the car is now much easier and very fun to drive, particularly on the tight flowing sections of road. Saturdays sprint was a 4.9km gravel sprint on Tararua road, run by the Danniverke car club. It was good to have Rhys there in the KE20 to have something to aim for and bench mark myself against. The car was struggling with gearing again, 2nd gear was to slow in road speed and high in the revs for a lot of the flowing stuff but the car was bogging and not revving in 3rd, it needs either a 5.1 diff and ignore first gear or a close ratio box quite bad, watching rhys's video i can see how the box helps so much (apart from getting off the line). I was super stoked to be close to him in my first run, then actually got about 2 seconds on him in the second run but he put down a solid 3rd run and got me by 3 seconds. Im really happy to be close to him like that tho and it shows the changes to the car have helped, also stoked that the both of us took down a couple of 4age powered cars in our little 4K's. well here's a few photos courtesy of Jeff Wells, ill buy some final res shots off him at some stage. And a video i banged together of run 2 (outcar) and run 3 (incar), bloody youtube decreased the quality heaps tho which sucks a bum.1 point


.thumb.jpeg.cba3dbd83fd850104bccdf9537a099b9.jpeg)


.thumb.jpeg.e0a4bff61111e0c8c7396950fcc94da1.jpeg)


This leaderboard is set to Auckland/GMT+12:00