
Leaderboard


Popular Content
Showing content with the highest reputation on 01/27/23 in all areas
-
Well, I made the fucking deadline! I didn’t have time to tune it properly, the rear tyres rub and the brakes need bedded in but those arefuture problems39 points
-
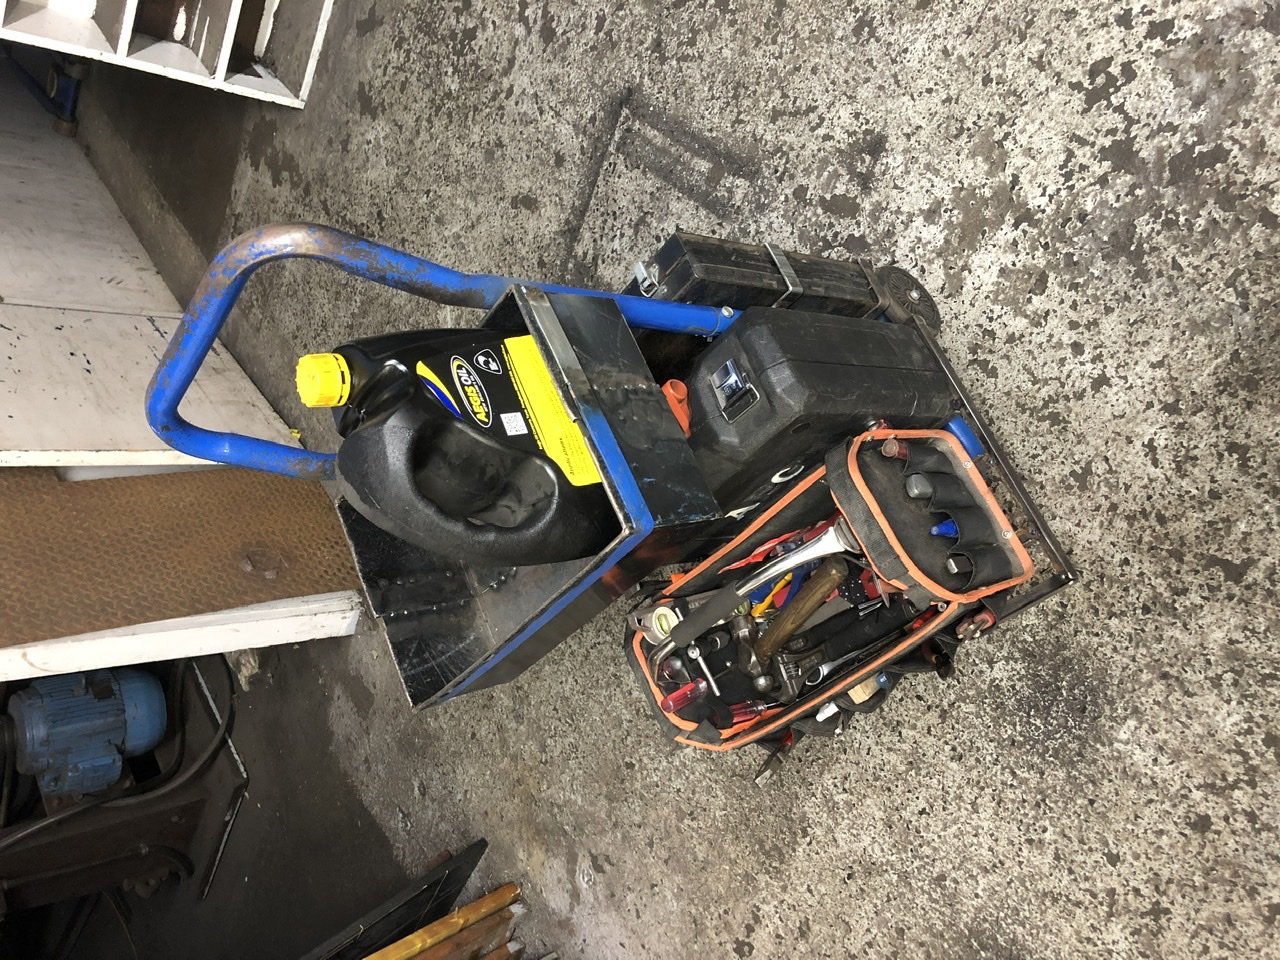
Wife and kids went to the chilly peppers so I popped into work and made some things. A tool trolley for site work and a towball mounted vice.
 13 points
 -
At times it feels like I'm playing Whack-A-Mole with the rust, but I am steadily knocking rust on the head and putting new steel in. I know it's probably not particularly interesting to most, but it is what it is. Once the bodywork is done, I can return to the fun mechanical stuff. I left off the last post with the no sill, and a blimmin' great hole in the quarter panel. The first step was to get the new sill on and return some strength to the car. A quick test fit of the sill, with the door on, showed that it fit nicely It sits a little high with it only clamped at the bottom, so should pull down a bit when welded. The door is adjustable if I need to tweak the gaps. Next was to spend the next few minutes punching holes in the flanges. There were dozens of holes, and all of them needed to be punched out and welded. I'm glad I have a proper punch, and I wasn't drilling these one by one. And finally, after some tweaking of the placement, it was all welded into place. I ended up using a jack under the lower flange of the sill to help align it with the inner sill, since it appears that wasn't welded straight from the factory (which explains why the old sill I removed was barely spot welded along the bottom) A quick skim of filler along the top edge should make the repair invisible And some filler to shape the front edge too. In hindsight I should have angled the edge so it matched the guard line, but oh well. This is where I took a bit of a break from the sill/guard area, as I had found a donor arch section for the rear (from a sedan), and was waiting for it to arrive. Instead, I moved on to one other area that needed attention; the window frame. Before venturing further into the story, it occurred to me that I completely forgot to mention that a few months ago I removed the rear QTR glass, because I knew there was a rust hole in the B pillar. This was a bit of a faff. Being a Deluxe, it didn't get the pop-out windows the TC did, which are easy to remove, so I had to lever the old, hard, rubber seal off and try not to break the irreplaceable window glass. I started with getting just that section over the lip, and one by one moved the screwdrivers further along until the window finally started to pop out. Once it started to come out it was quite easy to remove. This revealed the horrors hiding under the seal This is the hole I knew about But there was also rust at the rear of the window Interestingly, this also confirmed that the B pillars of the lower spec models are already provisioned with the holes for the hinge blocks for the TC pop out windows, albeit with the top one covered in tape I cleaned the B pillar hole up and bit, and its quite sizeable So yes, that's been like that for a few months. Moving along, I wanted to repair both of the holes. I started with the one in the B pillar, as it was more straightforward. I stripped it back until I found good metal, and then using my best friend, the air body saw, I cut a nice square hole Made up a nice patch for it Welded it in, and ground it back. I did have one shocking surprise when welding that in. I didn't realise, but the joint with the quarter panel had been lead loaded, which is where they fill and shape the joint with lead, instead of bog/filler. I only found this out when the lead got superheated by my welding near it, and blew molten lead all over me when I used the air gun to cool the welds. Thankfully I had my welding mask down, and the rest of the lead just peeled off my clothes. The same was also present near the rust at the rear of the window, so I made sure to grind it all back to bare steel (wearing appropriate PPE, of course; powered lead cant be good to breathe). The rear rust was much harder to do. I cut it back until I had solid metal, revealing a large hole And welded in a couple of patches (one for the flange, the other for the curve). It was really hard to grind the welds back, so it's not pretty, but nothing a skim of filler won't fix. I was laughing with my wife about how hard it was to weld this, as previously all my welding had been low down and I could just put the light I use to see what I'm welding, on the floor or wedge it against something. Because this was up high, and my light is massive and heavy (cordless Ryobi foldable light) there was nowhere to put the light. I mentioned I had been holding the light between my legs, or pressed against the side of the car. My wife looks at me, and asks "why don't you get a little magnetic light?". It's so simple. I bought one the next day and life has been better since. Another tool that has improved my life is this power file/finger sander. It's amazing. Way better access than my grinder, and grinds welds down like butter. I took the recommendation of a local forum to get some "green zirconia" belts for it. I had been using the ones that came with it and they were good, but sure enough, the green ones tear through anything and will wear out before they snap (which is a common issue; The other spares I bought with the tool snap within seconds of trying to grind welds down. They were cheap, but they're useless). The next day the arch section arrived. I bought this from a seller that was wrecking a sedan. The coupe shares the same basic arch profile with the sedan, even if the quarter in front of it is different, because there is a door where the coupe doesn't have one. I started by drilling out the spot welds, to separate the inner and outer arch sections, as all I needed was the lower outer arch I finally got the spot weld cutter to work. I used a 2.5mm drill bit to drill through the middle of the spot weld, and this pilot hole holds the cutter in place and stops it from slipping around. I did go right through on a couple, but I wasn't trying to save the inner arch anyway Unfortunately, I did find this arch also had filler in it. Not as bad as my old one, but enough that it was annoying. I only really needed the very bottom of the arch, so I kept going anyway After some tidying up, and lots of measuring and tweaking, I welded the arch section in. I trimmed down the end of the sill, and pulled the top edge outwards, to match the shape of the arch This meant I could cap the end of the sill. I used the donor sill to get a basic template, and made the panel Welded into place After grinding everything down Next was the hard part, making the filler panel to fix the large square hole. I measured and cut this a few times, and I'm still not 100% happy with how it turned out. Next, I made the last patch. I had originally planned to reuse the section I cut from the guard, but it was easier to just make a nice fresh new section. I also plug welded these new patches to the top of the sill, from the inside of the car. And there we have it, all welded in. I had agonised about the damage, and how hard it was going to be to fix, but at the end of the day, although the donor arch helped massively, the rest of the job went quite smoothly. The only issues I have are that the bottom folded edge of the two patches don't line up (filler will fix this), and there was a raised high point where the panels joined It is hard to see in photos, but was really obvious in person; it looked like a big raised peak. I wasn't sure how to fix it, so I just took a hammer and dolly to it and now it's about 80% better The main thing is that I have retained the seam between the sill and quarter, and the swage line above that seam is somewhat straight. I spent ages with tape measures and straight edges making sure that the swage line would be near straight. That's it, other than some filler and paint, the sill is finally done. Next on the chopping block was this rust But on the way there, I poked at the inner guard, behind the wheel... Yes, I should know better. Well now, I couldn't just leave that as it is. I also poked around at the rust I was meant to be doing, and made it much worse Looking at the inner guard, the only option I could think of to fix it properly, was to unfortunately cut the lower edge of the arch off, so I could access the full section Remember, measure once, cut thrice But now I could see the whole thing Which made slicing and dicing it much better I barely had to cut down the sides, it was that rusty I cleaned it up And used the old rusty section as a template to make a patch The only thing left was to weld in the section of arch I cut out. This was a real mission as the metal was super thin here. Beware, it's ugly. Awesome folding magnetic light that has made life better. It's wearing a little nappy to stop metal shavings from getting jammed around the magnet on the base Much better. Just needs some sealer down the side (as it was from the factory) Now it was time to finally deal with the rust I came here to fix I did some poking around, and made the target area bigger Using the air saw I cut the area back to good metal, and carefully split the seam where it was spot welded to the outer quarter. I made another patch, and clamped it into place for test fitting And then welded it in. I welded it in from the top as it was easier than welding on my back. Look at that penetration though, and not a single blown hole. I plug welded the new seam to the old one to make a nice solid flange. I also plug welded a right angle into place to support the spare wheel Job done. Probably one of the quickest and easiest repairs on the car so far. While I was there, I wanted to weld up the surplus holes in the rear panel. The car had previously had towbar wiring bodged onto the rear panel, via a couple of holes drilled into it. There were also three misc vertical holes on the RH side by the light I got rid of the plug ages ago, so it was only the holes left to fill. The towbar might stay, I'm not sure yet, but I don't really intend to tow anything with the car, so I won't be reinstating the wiring for now. I ground all the paint around the holes back (using spare welding gloves to protect the chrome bumper from weld spatter) I made a small "round" filler for the big hole from scrap and held it in place with a magnet A few presses of the trigger later, all the nasty holes are gone The three remaining holes above the big hole are for the Morris badge. A quick squirt of some epoxy primer to keep it happy in the meantime, and we are done for the day. Speaking of, I recently found out that painting over zinc-based weld through primer can be problematic and not recommended. This is a pain, as I have painted over EVERYTHING I have done with zinc-based primer, to protect it. Now I will need to go back and strip it all to bare steel again and paint it with epoxy primer. The zinc primer is good for inside spaces, or between two bits of steel, and that's really all it should be used for. Oh well. I'm getting really close now. I have to cut out and fix the rear valance, which is very rusty, and then the major rust work is done. After that, it's the boot seal flange, and a couple of "cosmetic" areas that need work, but they can be done at any time, even after a WOF check. Lucas will be at British Car Day on the 12th Feb, but unfortunately the Marina just isn't quite there yet as I'm a couple of months behind where I wanted to be. Such is life, but I'm happy I'm finally making progress again.6 points
-
5 points
-
4 points
-
Well done, great work and fast too! Aug 2021 Jan 20234 points
-
New wheel time! I have had my eye out for a while, trawling yahoo for something wide and 4x110, spotted these Mk2's for a decent price so pulled the trigger. 10x5 lol3 points
-
Shitchea I'm stoked to see it done! This has to be the biggest turn around from holy-shit-that-is-turbo-rustfucked, to mint, in the history of OS Great work!3 points
-
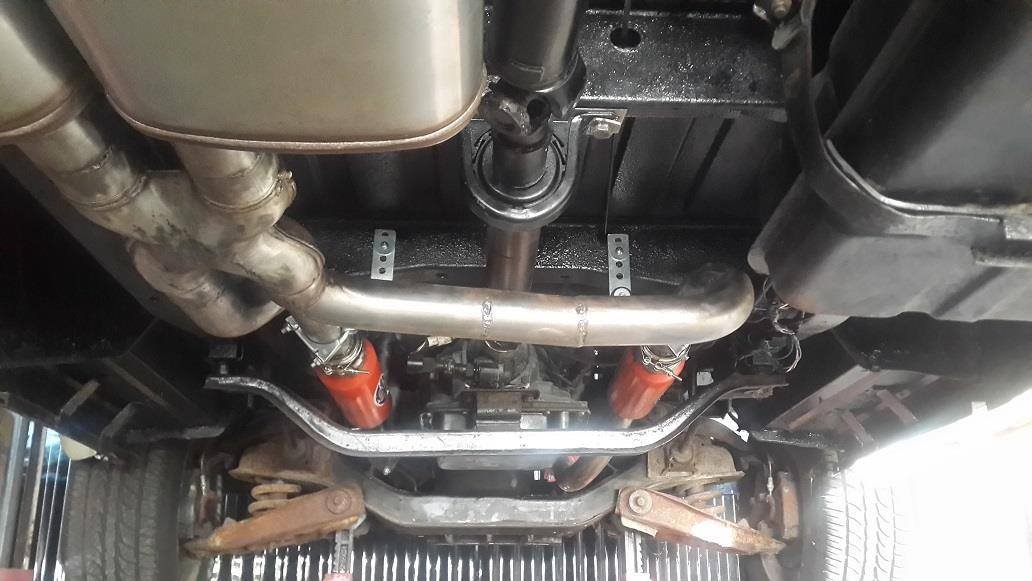
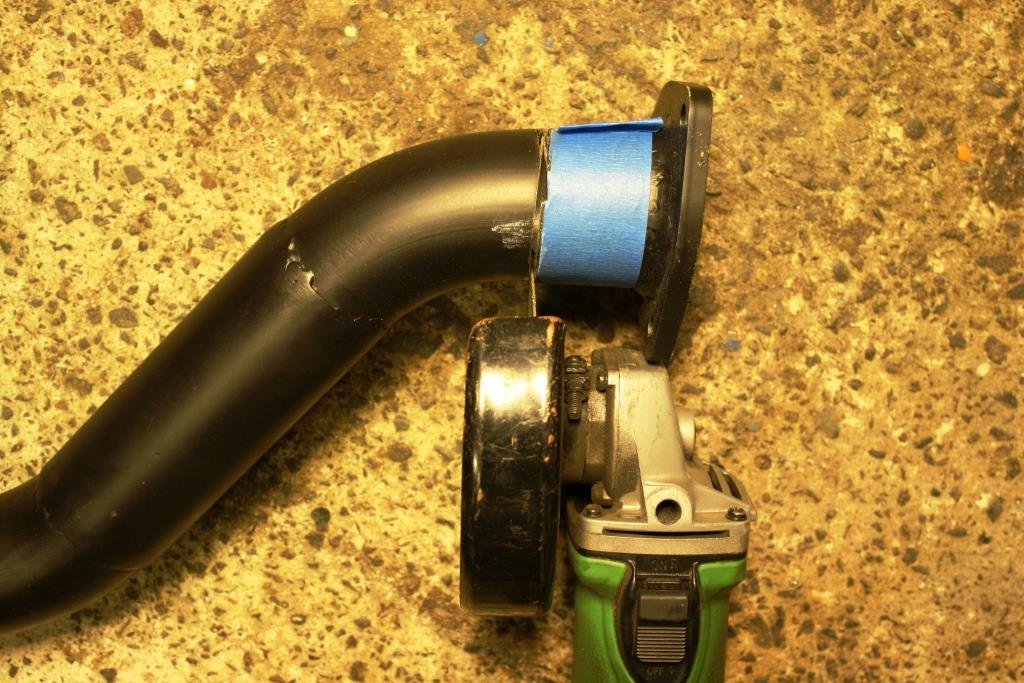
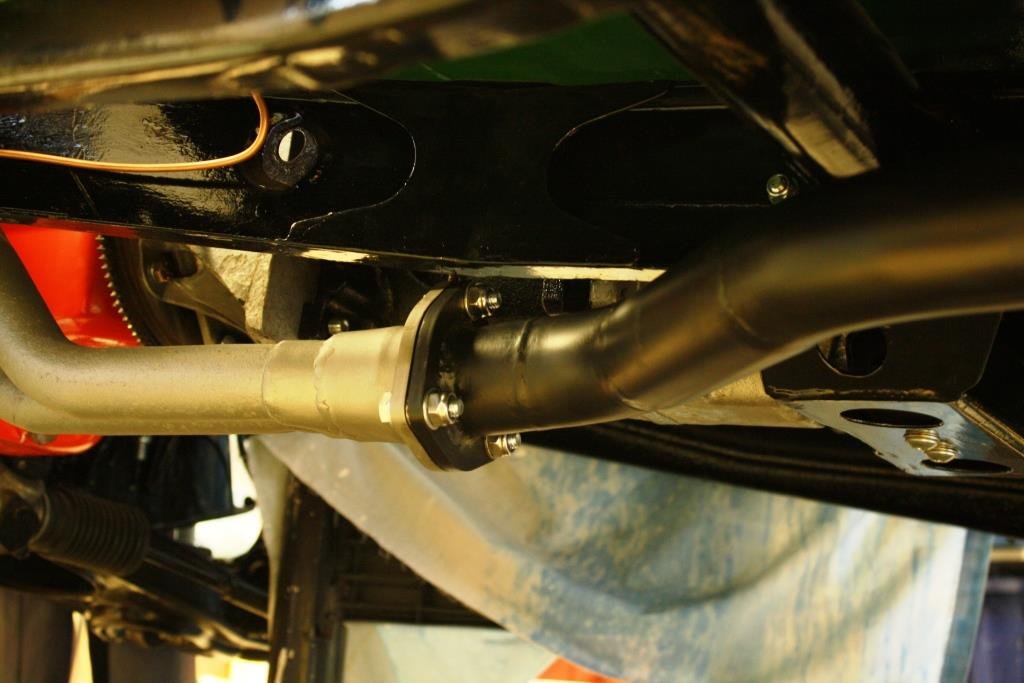
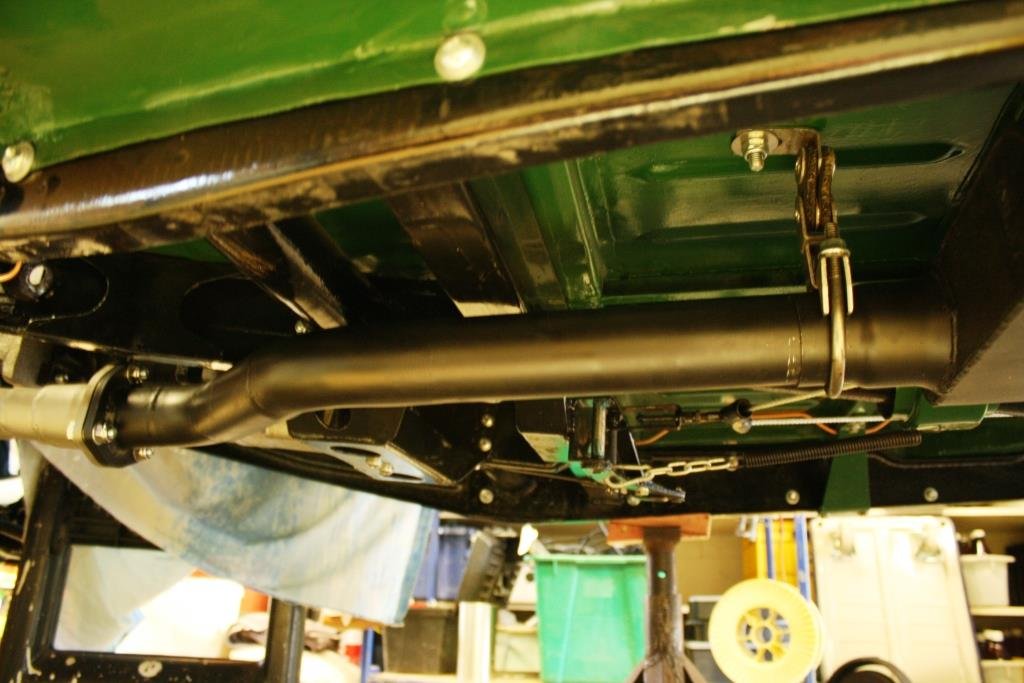
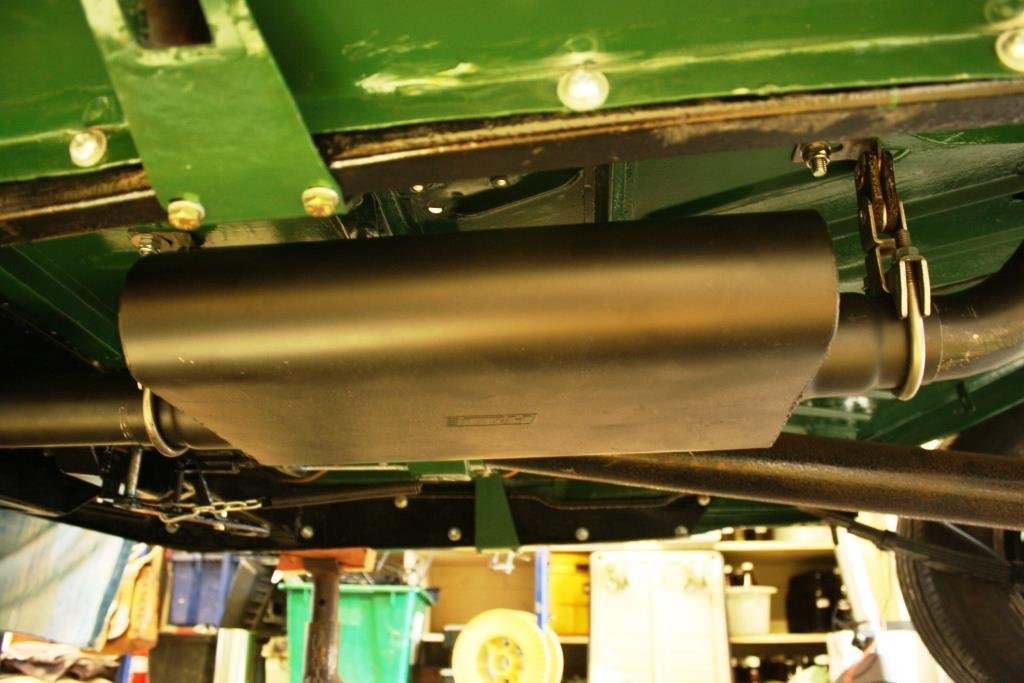
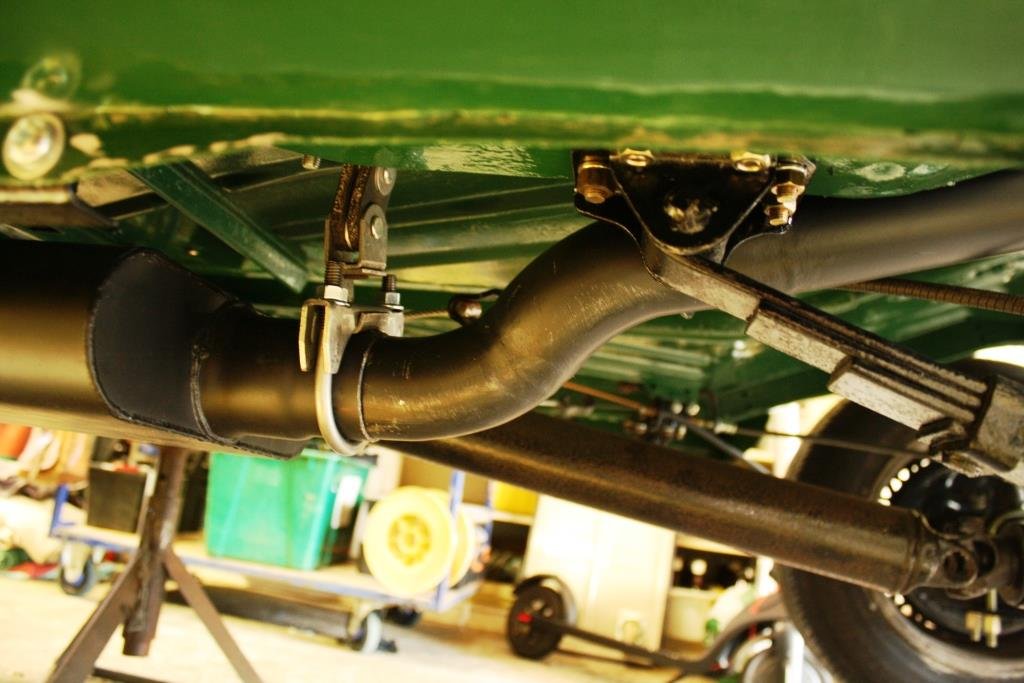
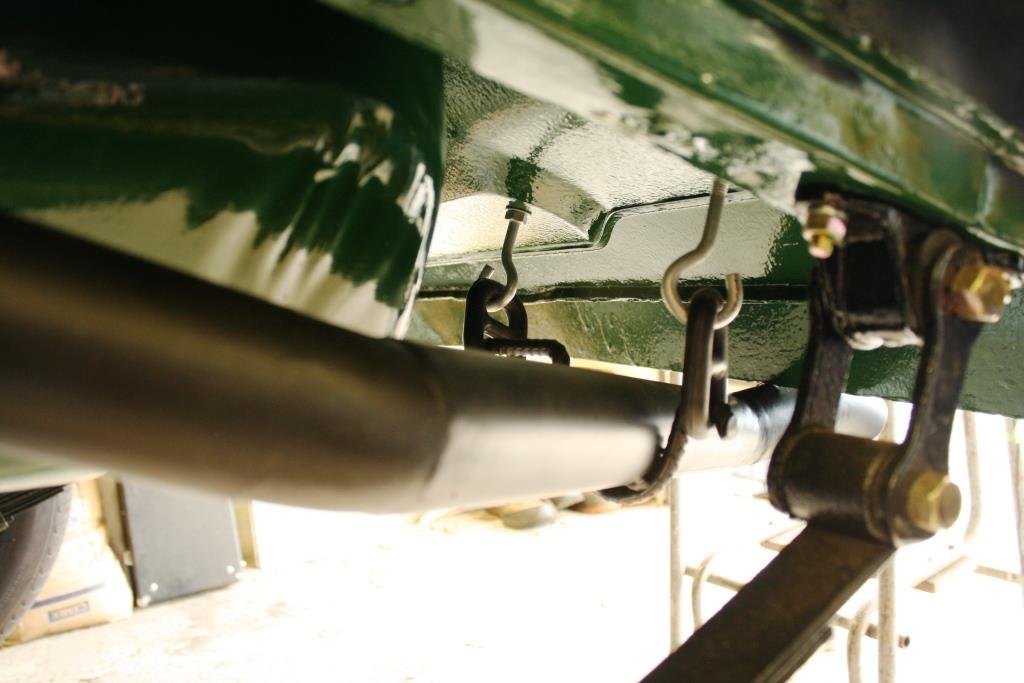
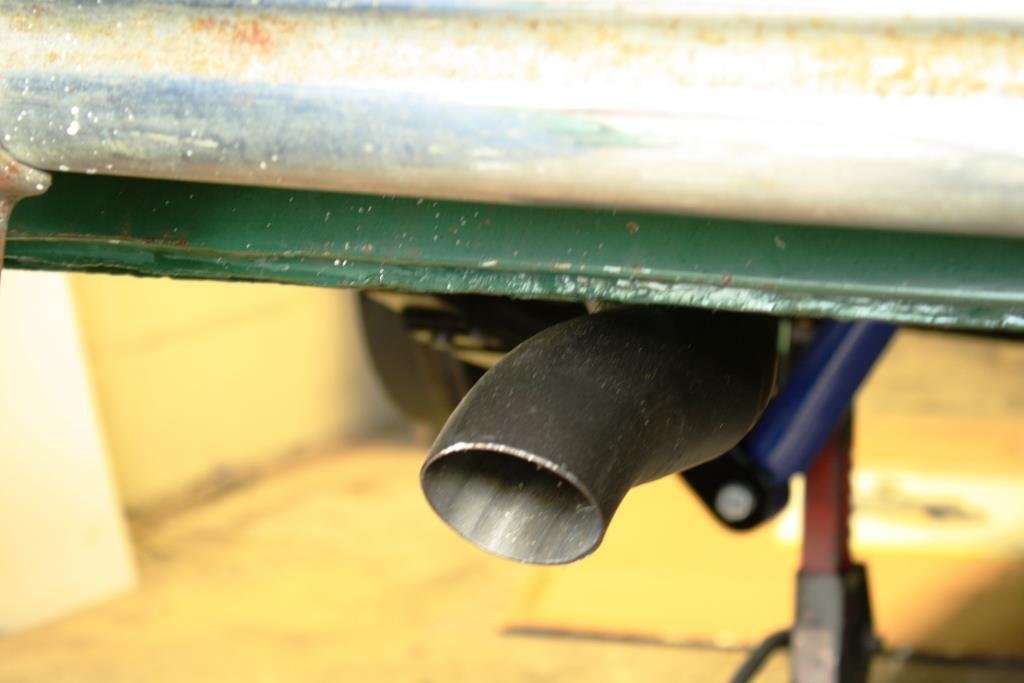
Bugger………suddenly remembered over the weekend I’d been tweaking the gearbox mount up a little for better driveshaft clearance…….which had raised the height of the exhaust collector…. which meant my new front pipe wouldn’t fit………i.e. "fiddent dit".......duh! Out with the angle grinder, a bit of bending and welding…… And it fits like a glove. Front & rear hangers on the muffler…….. Adjustable rear hanger…… Another job ticked off the list.
3 points
-
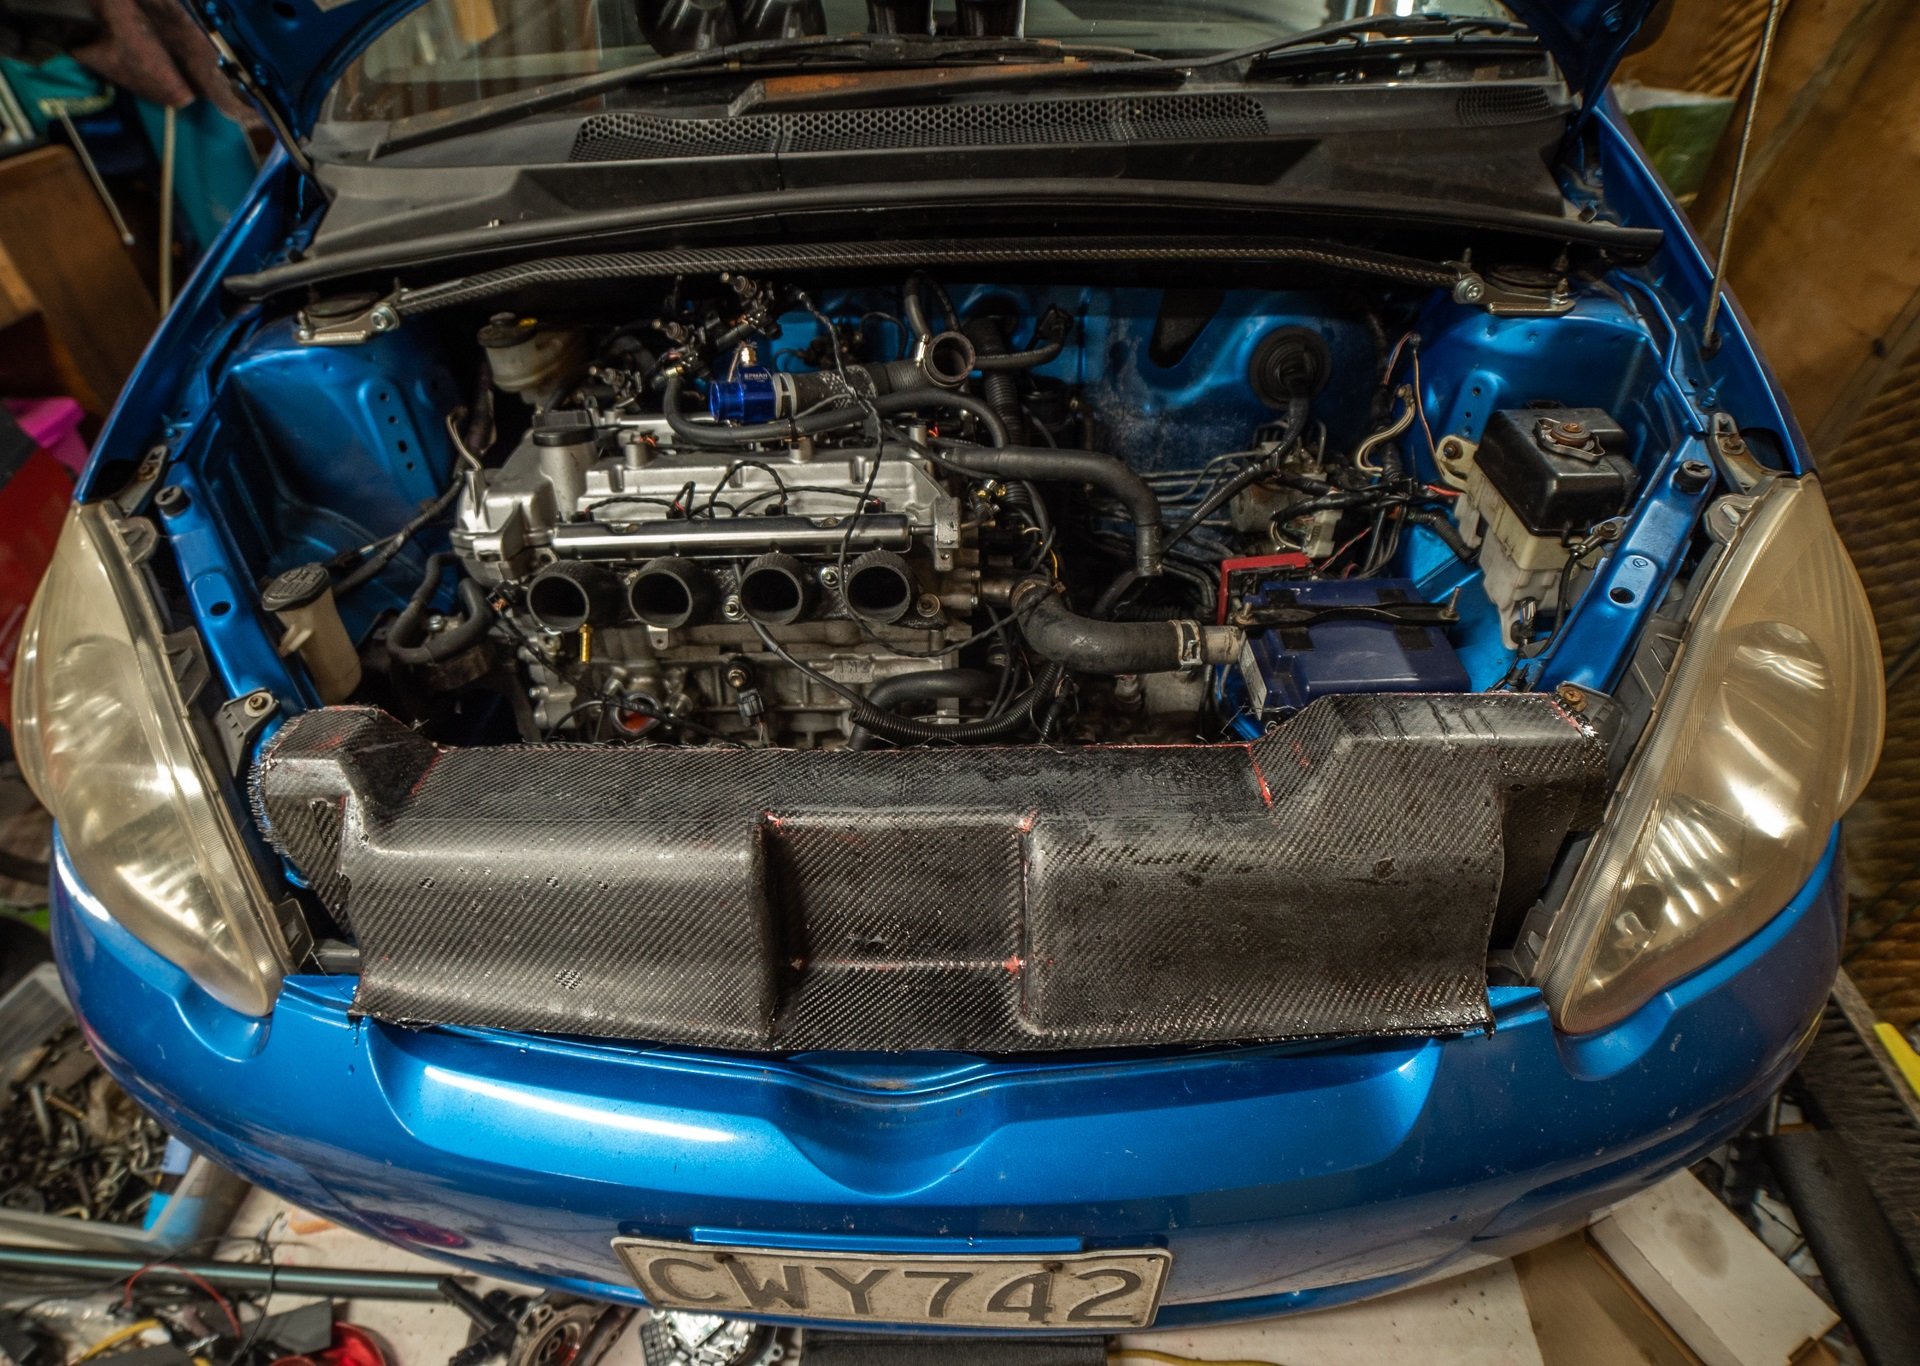
I've had some stuff out of the engine bay because of waterpump situation. My radiator crossmember, when it's got the 3d printed bits on it... Bit heavy. Scales say nearly 3kg. Now considering that doing something stupidly major like losing the power steering or fitting mega light wheels can only make that much difference. Figure I should try do something a bit lighter. The aluminium part isnt that heavy, but my plastic shrouds are a fair bit of the weight. (Thanks again @Stu ) So I thought maybe I should just redo the shroud parts in carbon. But then ahhh what the hell, try make the whole thing. So drew up an inverse model of the radiator panel, this was a mission because it hated nearly all of the geometry so needed to redraw. Then printed in halves as total length was about 850mm. I've found that its a waste of effort trying to sand out layer lines, just build up with filler primer instead. Then sanding smoothing etc etc Stick halves together paint A few layers of release wax and then get some layers on. I used mostly one continous sheet on the front side, so should hopefully look okay once it's sanded etc. Then used up some scrappy bits on the back. Then much to my surprise, many hours later it actually came back off the mould. I still need to trim up the edges, then give it a sand etc, drill some holes etc etc. But pretty happy with it, it's real strong. I was originally thinking of painting it blue but it might actually be good enough to keep as carbon finish after some sanding and a clear coat. See how it goes.
3 points
-
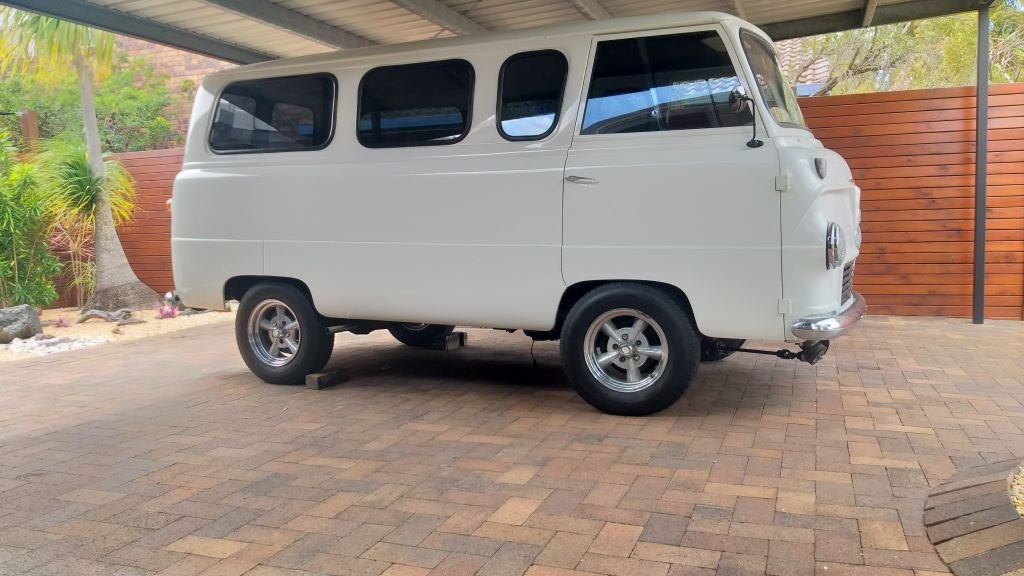
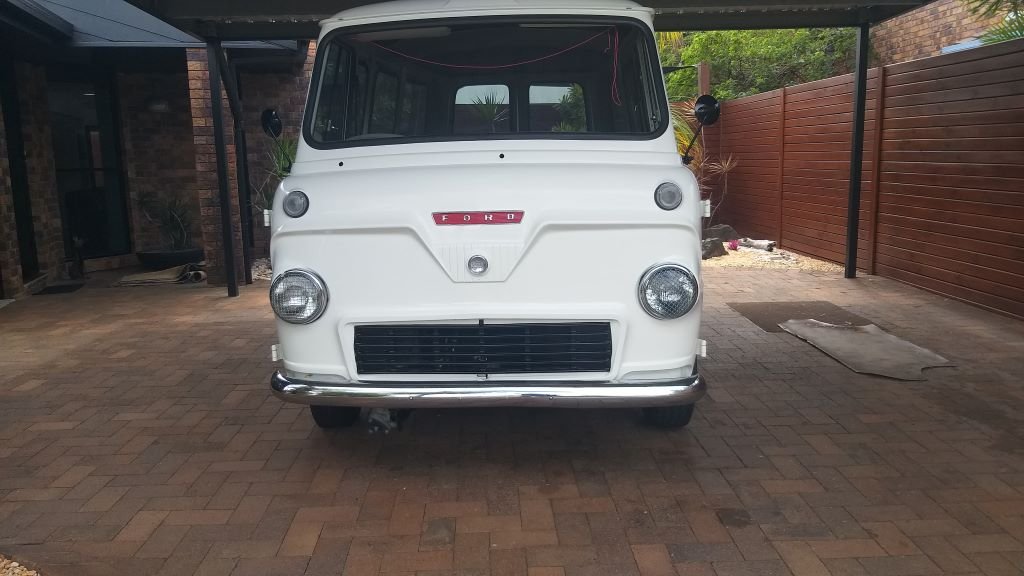
Holy heck! I've been mucking around on the Mustang for well over a year now and all this time the poor old Thames van has been patiently waiting in the corner of the shed. So, while I'm waiting for some more Mustang parts to arrive, I thought I'd give the Thames a bit of loving. Pushed it out into the sunlight for a quick bath and whilst I had it outside, I managed to sweep up a year's worth of dust bunnies that had covered the shed floor. Tomorrow I'll get back on the next iteration of the gearshift mechanism. Hope I can remember what I was planning to do.
3 points
-
Loving this build mate, nothing but respect for soldiering on with it, the finished product is gonna look awesome.2 points
-
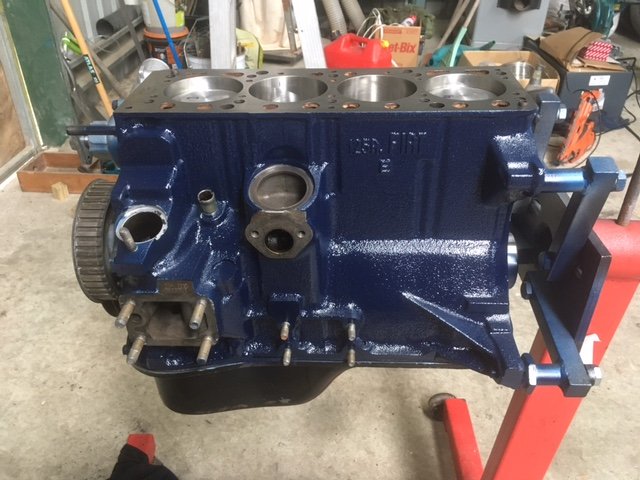
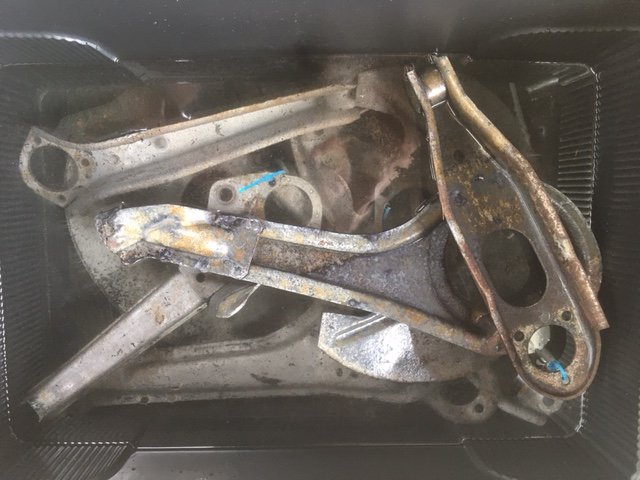
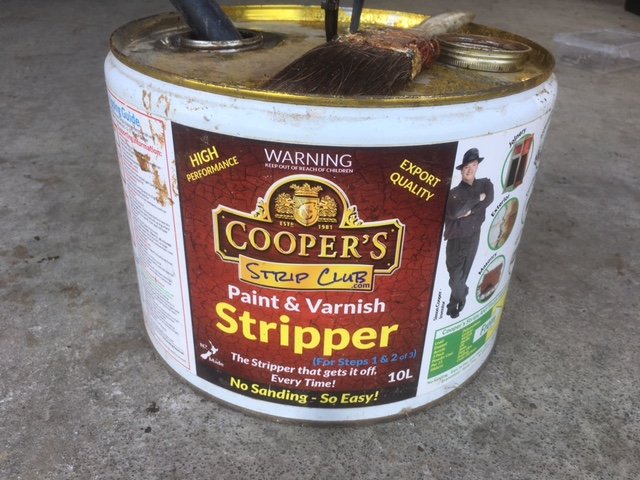
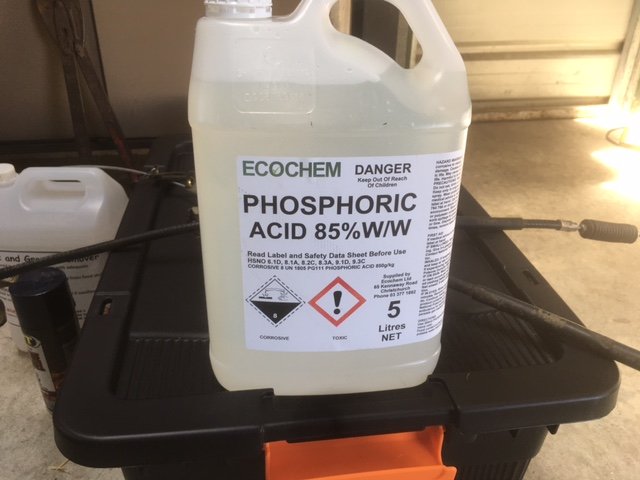
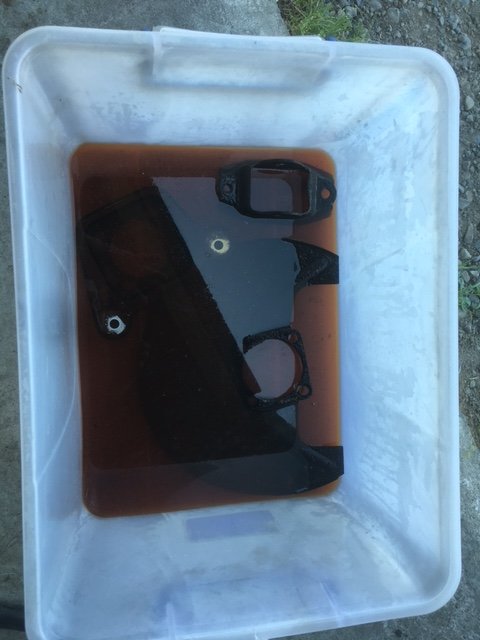
With the bushes removed, it’s cleanup time. Degreaser, scotchbrite, water blaster. Then I found this under the workbench, I have had it leftover for about 14 years from a bungalow renovation… Which went into a plastic tub where all the suspension arms and bits and pieces had a bath. The stripper still works! Out of the bath and another water blast… Soooo much rust under the old paint. I’m glad I’m making the effort. I also bought this with which I made a 20 litre bath for all the bits to fizz for a day or so While all this was happening, remember the engine paint saga? Well, over a month later I still can’t get any Ford Grey, so I went blue instead! Good from far but due to catastrophically lazy masking I shall need to rub a bit off here and there once it’s cured, but 100% better than silver.
2 points
-
John had the car today and ended up talking me into a new exhaust, the other one was cactus anyway and I'm surprised it didn't completely fail. I was waiting till I bang the turbo back on but that could be ages away.. He's a good bloke, recommend.2 points
-
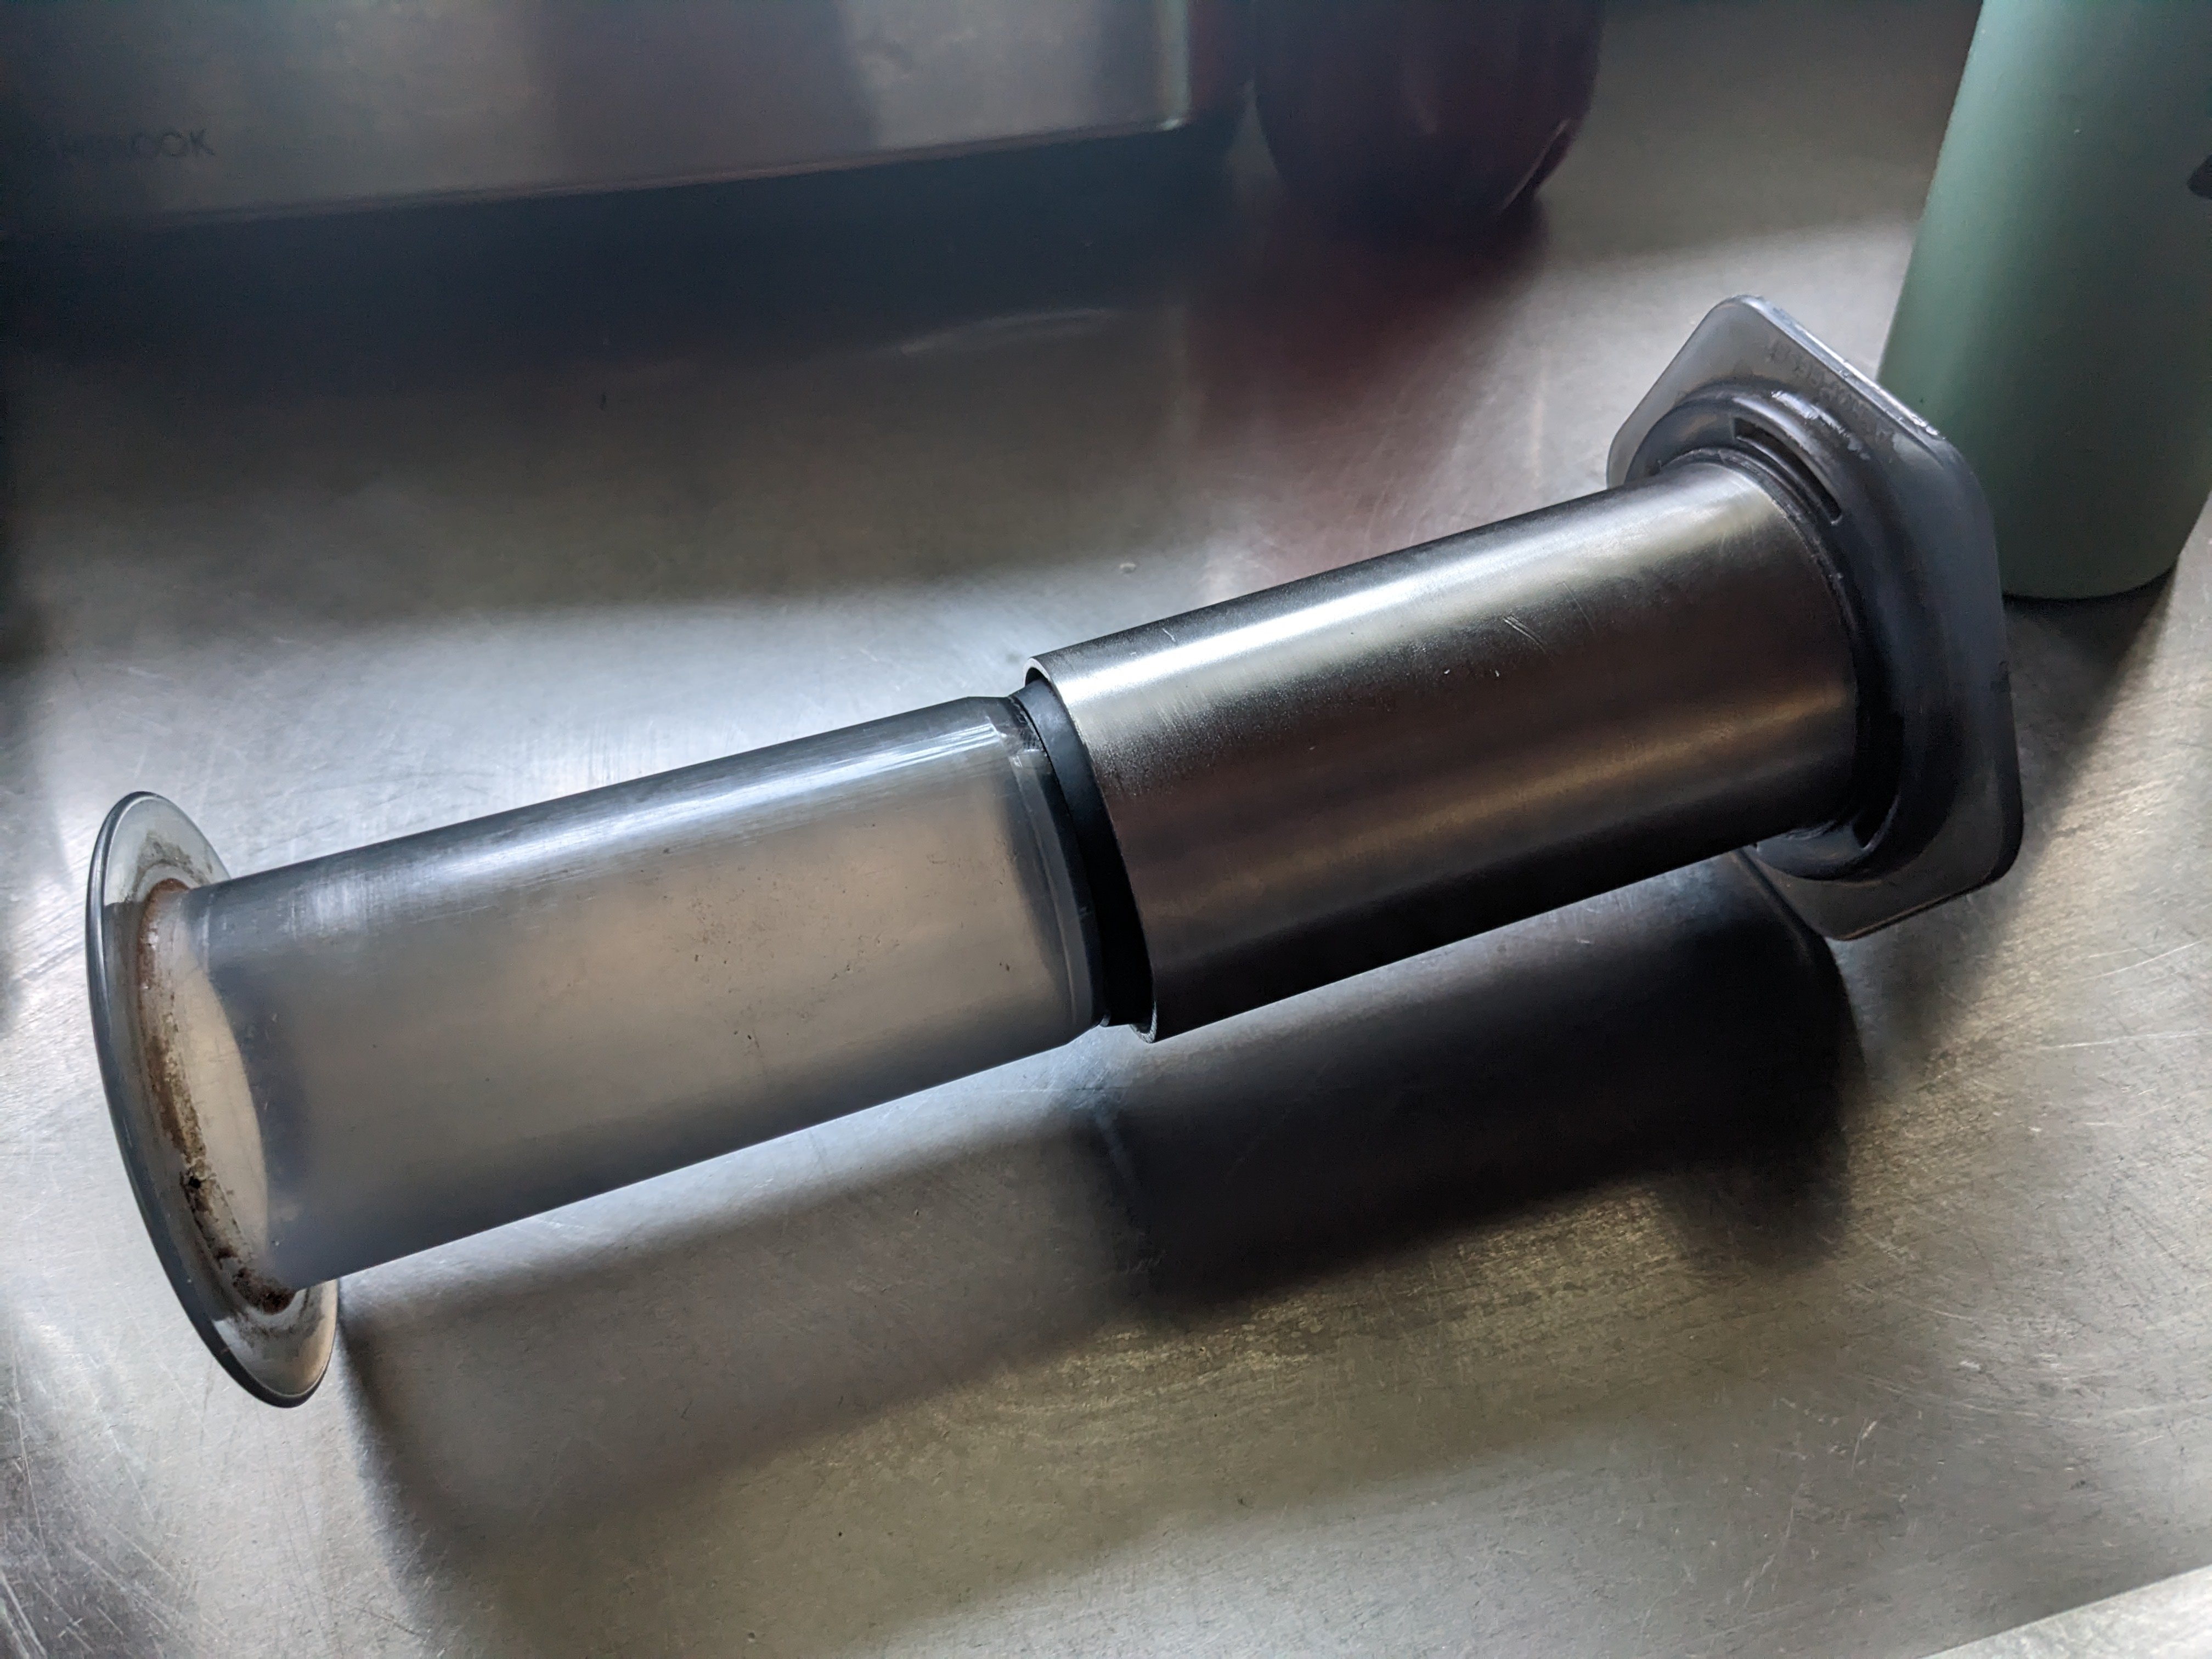
So I use an Aeropress for my coffee mostly, cos I am a purist and snob. But I noticed that the sleeve of the unit had developed tiny little bubbly lumps that were lined up along the length, this means the hot water was affecting the plastic and in my mind releasing all of the nasty BPA's into my coffee, which the plunger was scraping off into the brew. This displeased me, so today i bought a bit of 304 thick walled pipe and bored it out to 57mm on my lathe, polished it up a bit and mounted a cut down and trimmed Aeropress sleeve onto it. So now I have potentially the only stainless aeropress on the planet.
2 points
-
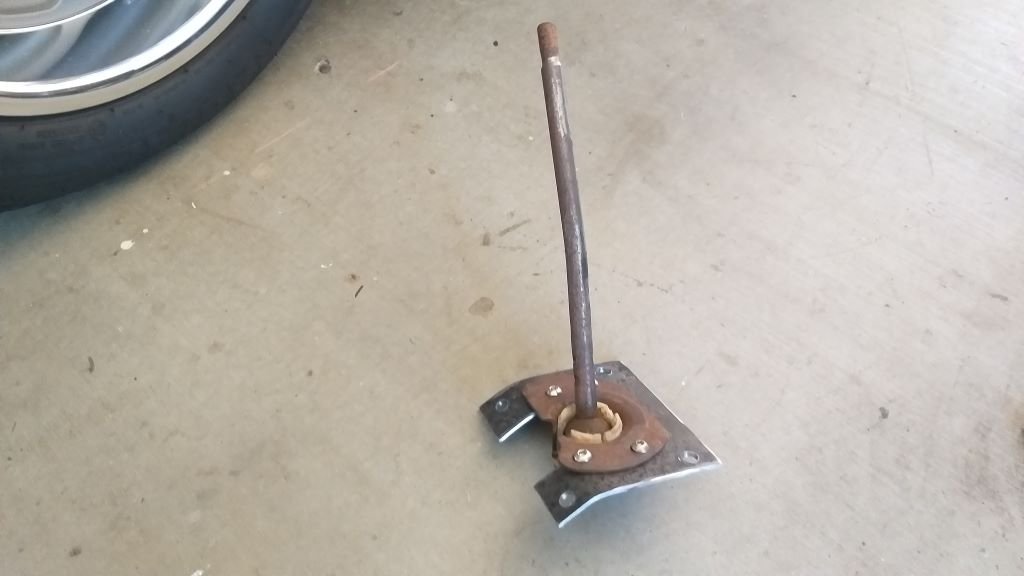
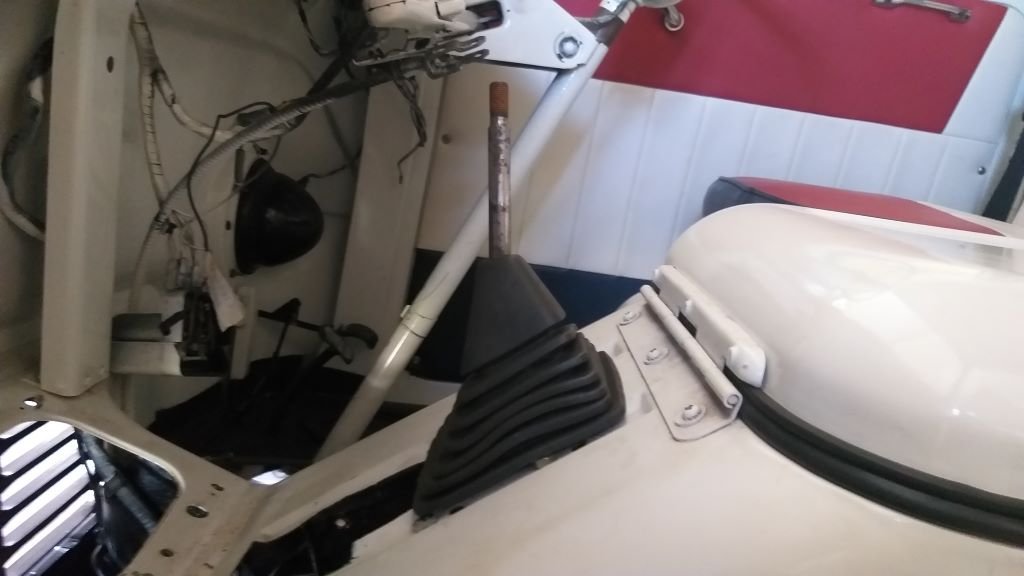
Bit of fine tuning and a few nuts and bolts later and she was ready for mounting. Bolted my handiwork into position and chucked on an old rubber boot from the L300 donor van just to get the feel. Once I've plated over the ruddy great hole in the tunnel and sourced a "period correct" gear stick boot and knob it should end up looking fairly okay. Next step is to work out the best way to connect the remote stick to the main selector mechanism, but that's tomorrow's headache. Thanks for looking.
2 points
-
My tyre situation was: Factory wheels: 3 x sketchy 10-year-old Linglongs which would probably never wear out, 1 x unrepairable Linglong, 1 x unusable spare Aftermarket wheels: 2 x good Potenza RE003s, 2 x cracking 10-year-old Potenza RE002s, no 5th wheel to use as a spare, rolling radius does not match factory wheels. Swapping between sets of wheels confirmed that the car doesn't drive as well on the 1-inch-wider aftermarket wheels and their lower-profile tyres. I think these wheels are at least partly responsible for the car wanting to fight you and to swerve drunkenly at speed. Maybe their offset isn't right. So I decided to go with the factory mags for Nats, and to get four new retro bogan tyres with raised white lettering for them. As mentioned previously, the only tyre choices in this size are of the harder-than-a-whore's-heart / real-men-smoke-Eagers variety. On the plus side, this gives me a viable spare tyre in the form of one of the Linglongs. +1 to motorway smoothness, now up to an unbelievable 9/10. +1 to annoying the classic car snobs, because raised-white-lettering tyres on an XJ-S look like this: The Gingerbeard Man is more photogenic than me, and his car's tidier, so just imagine the discount version of this photo.2 points
-
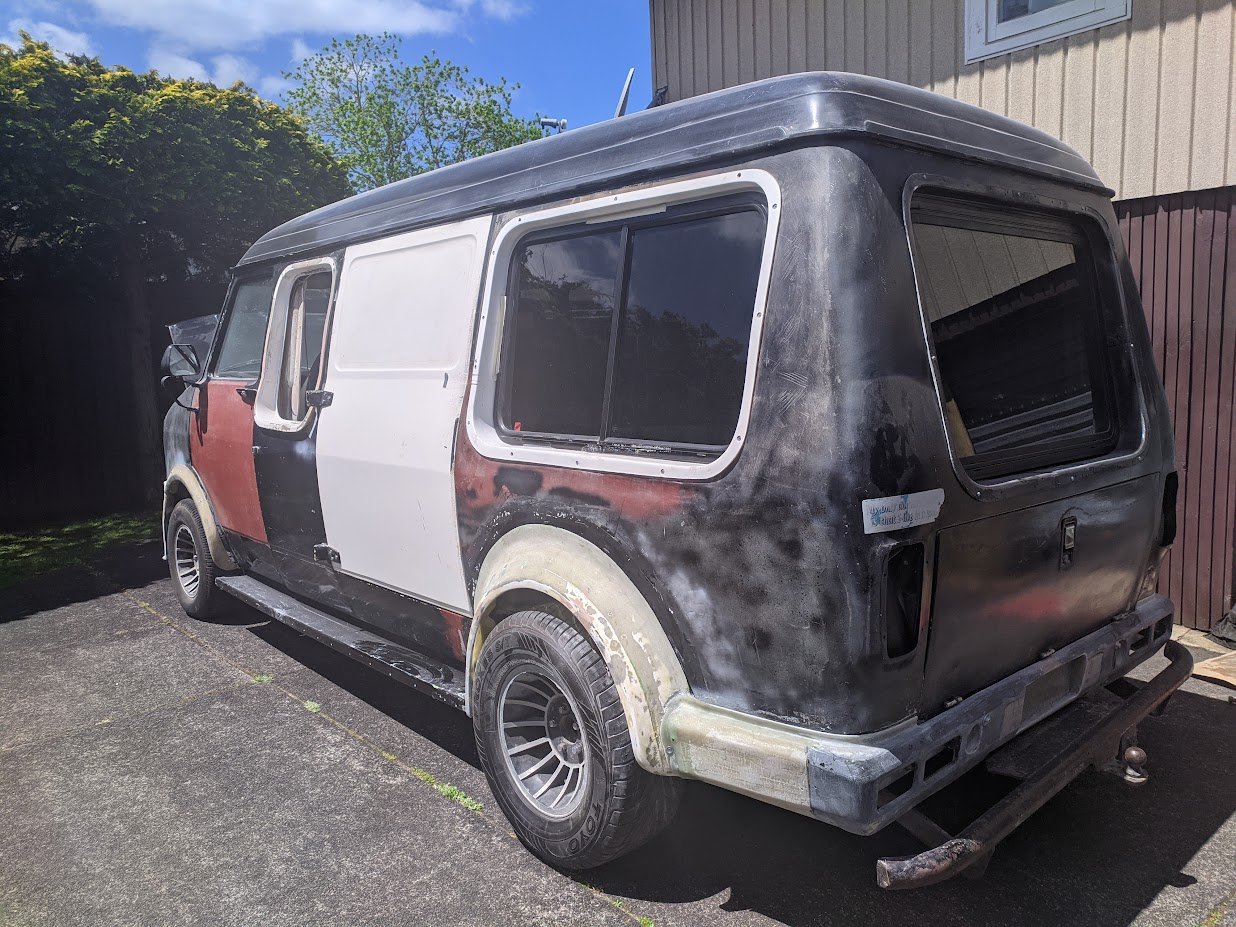
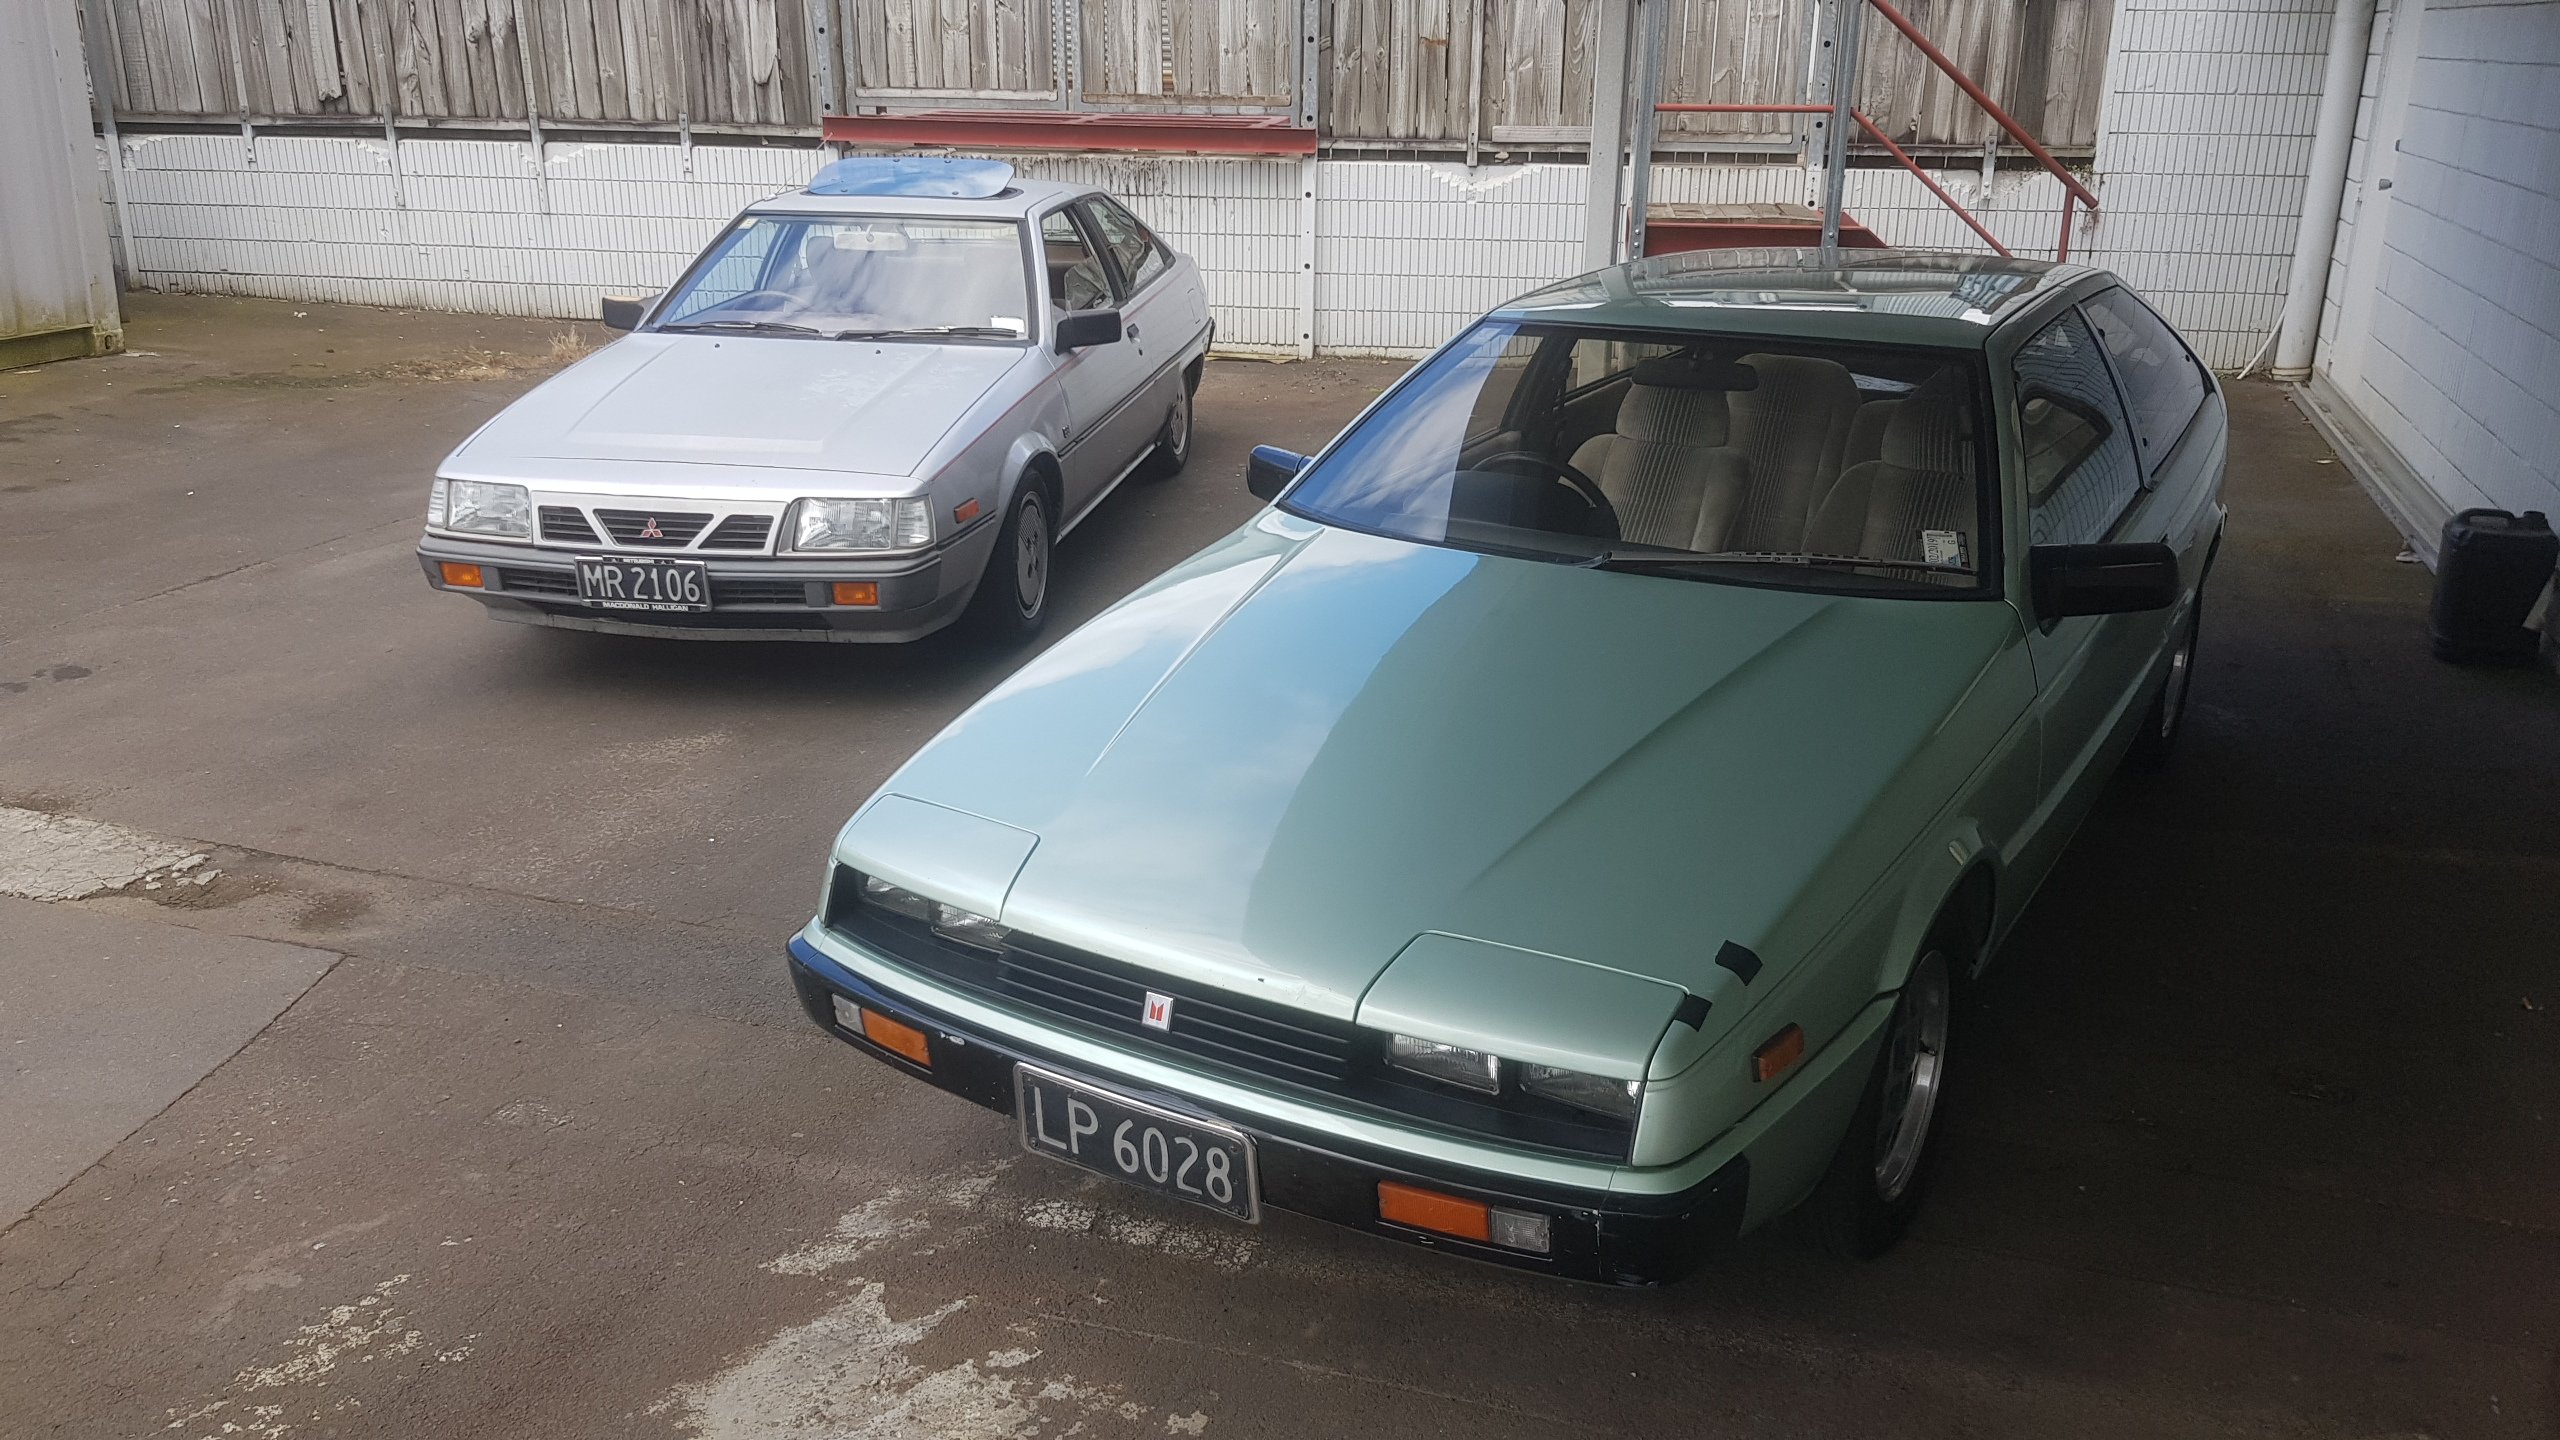
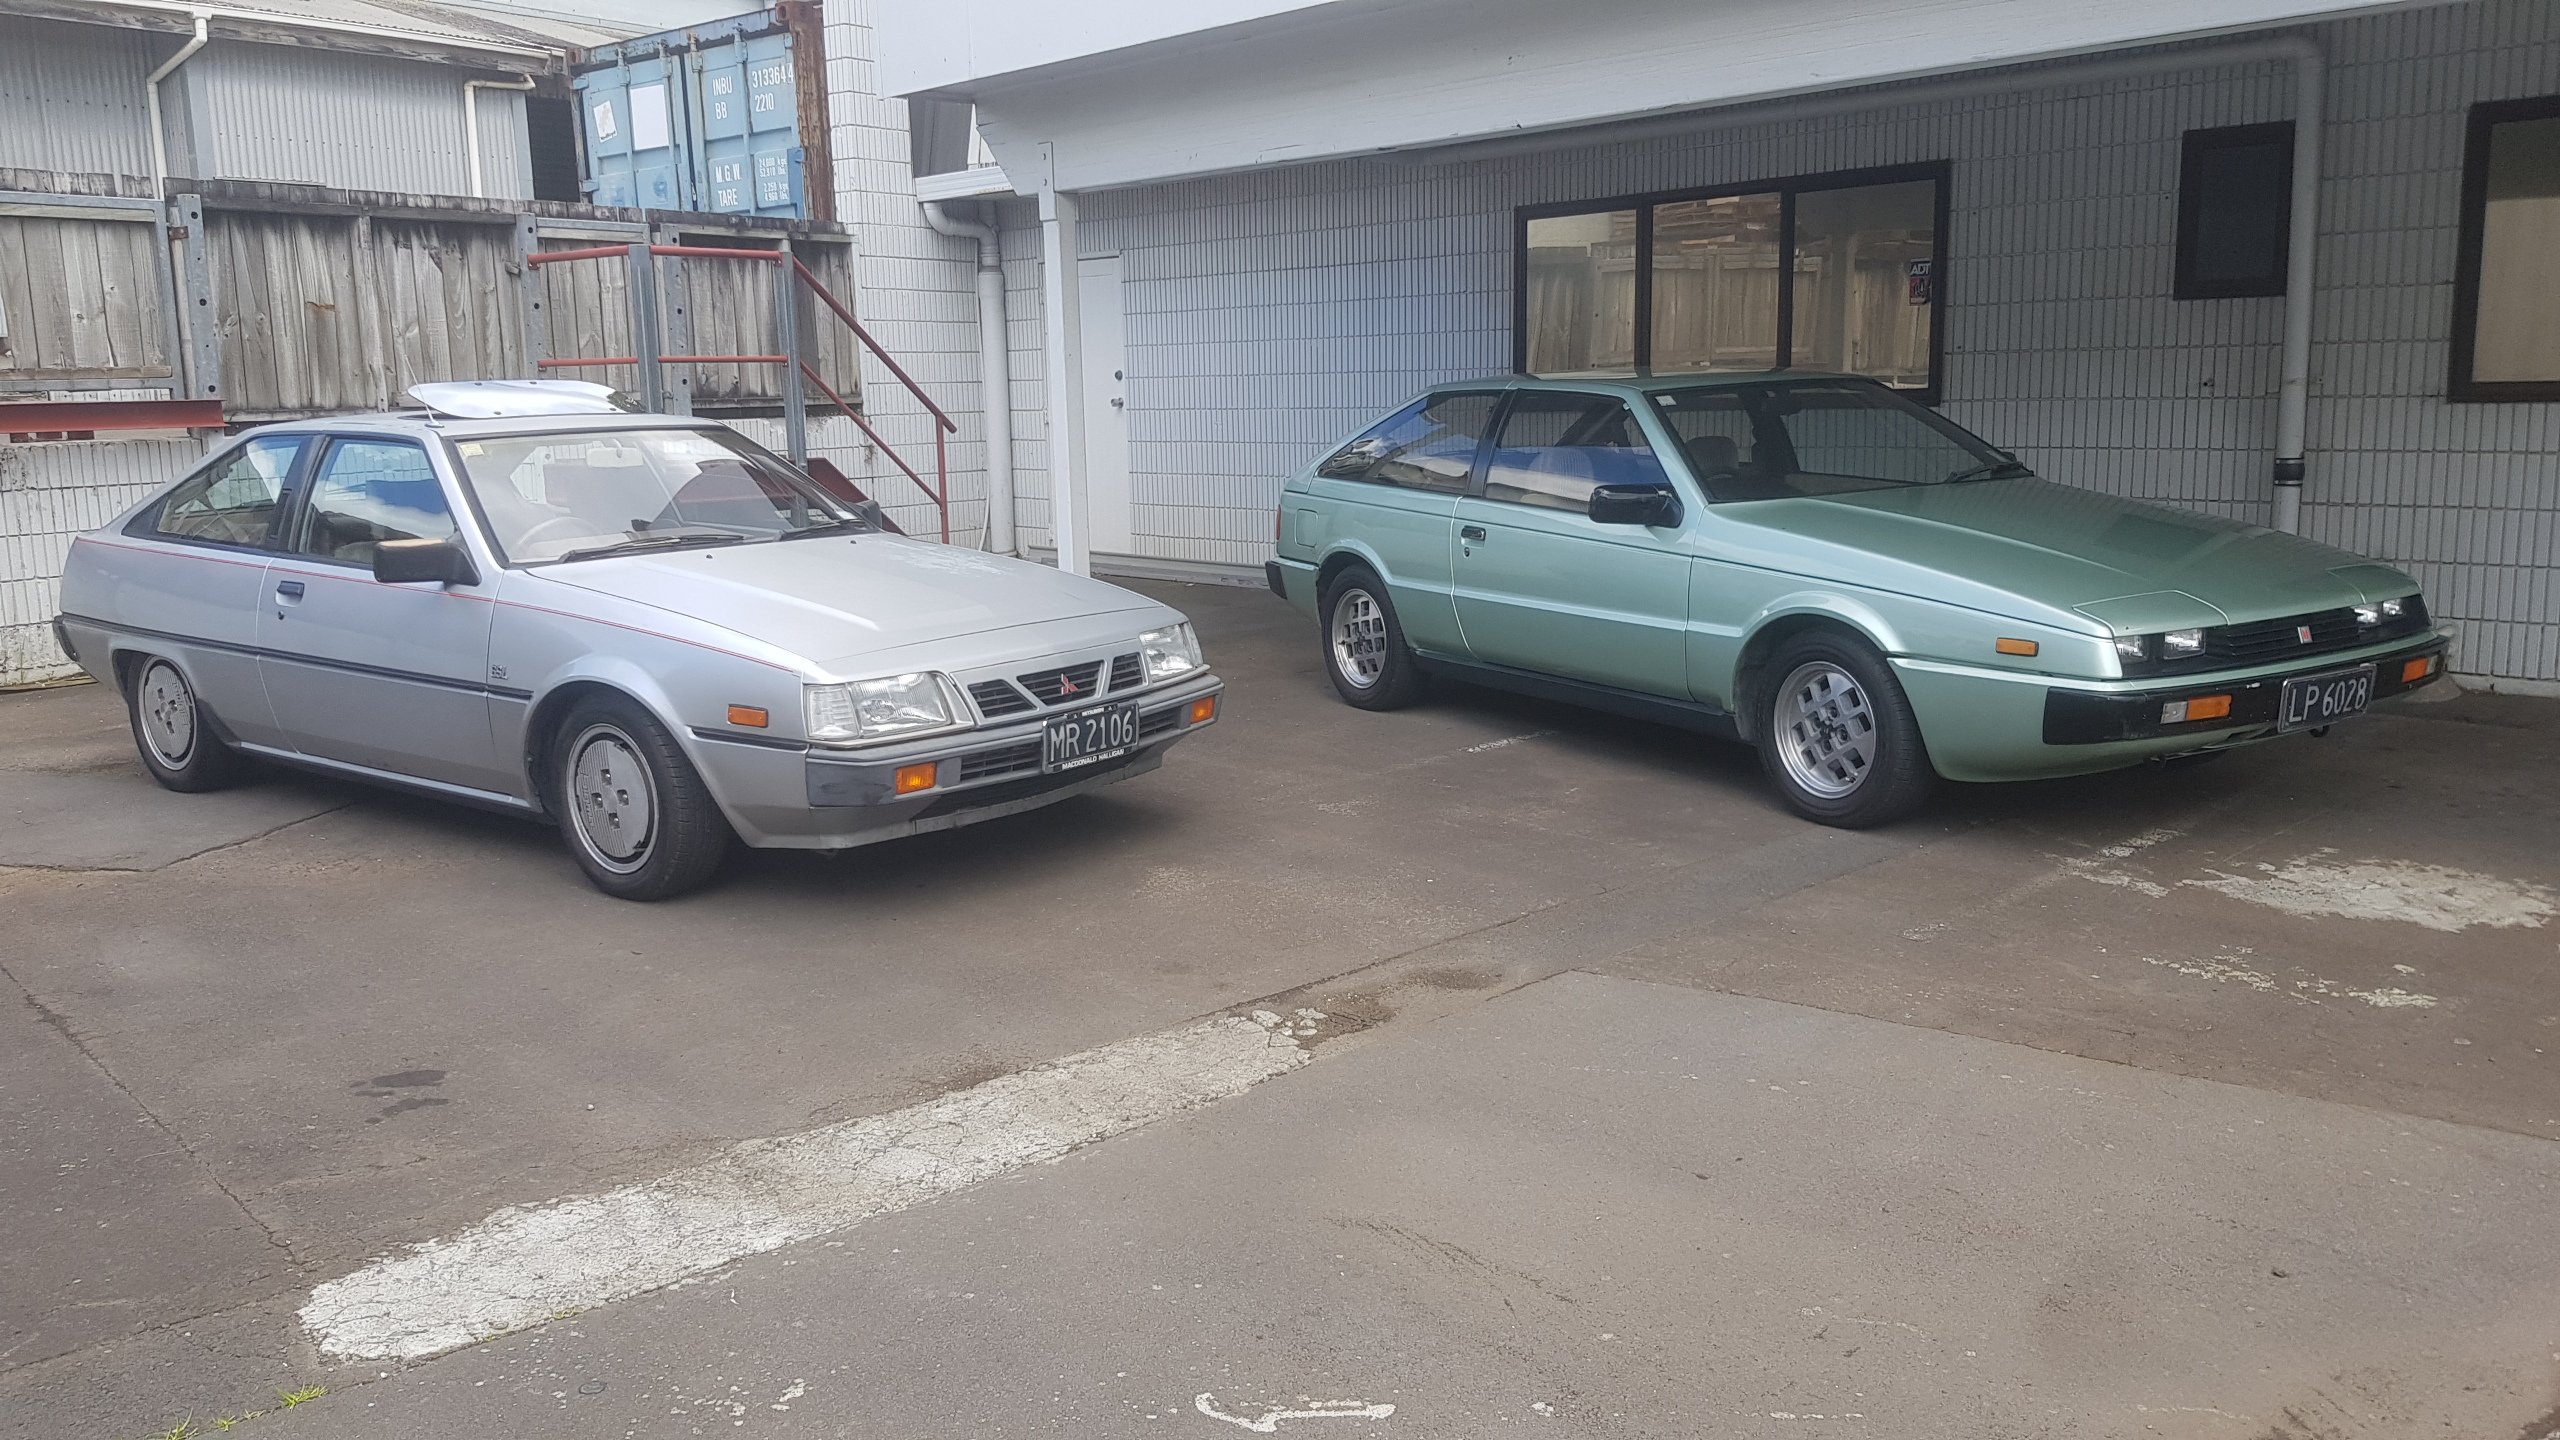
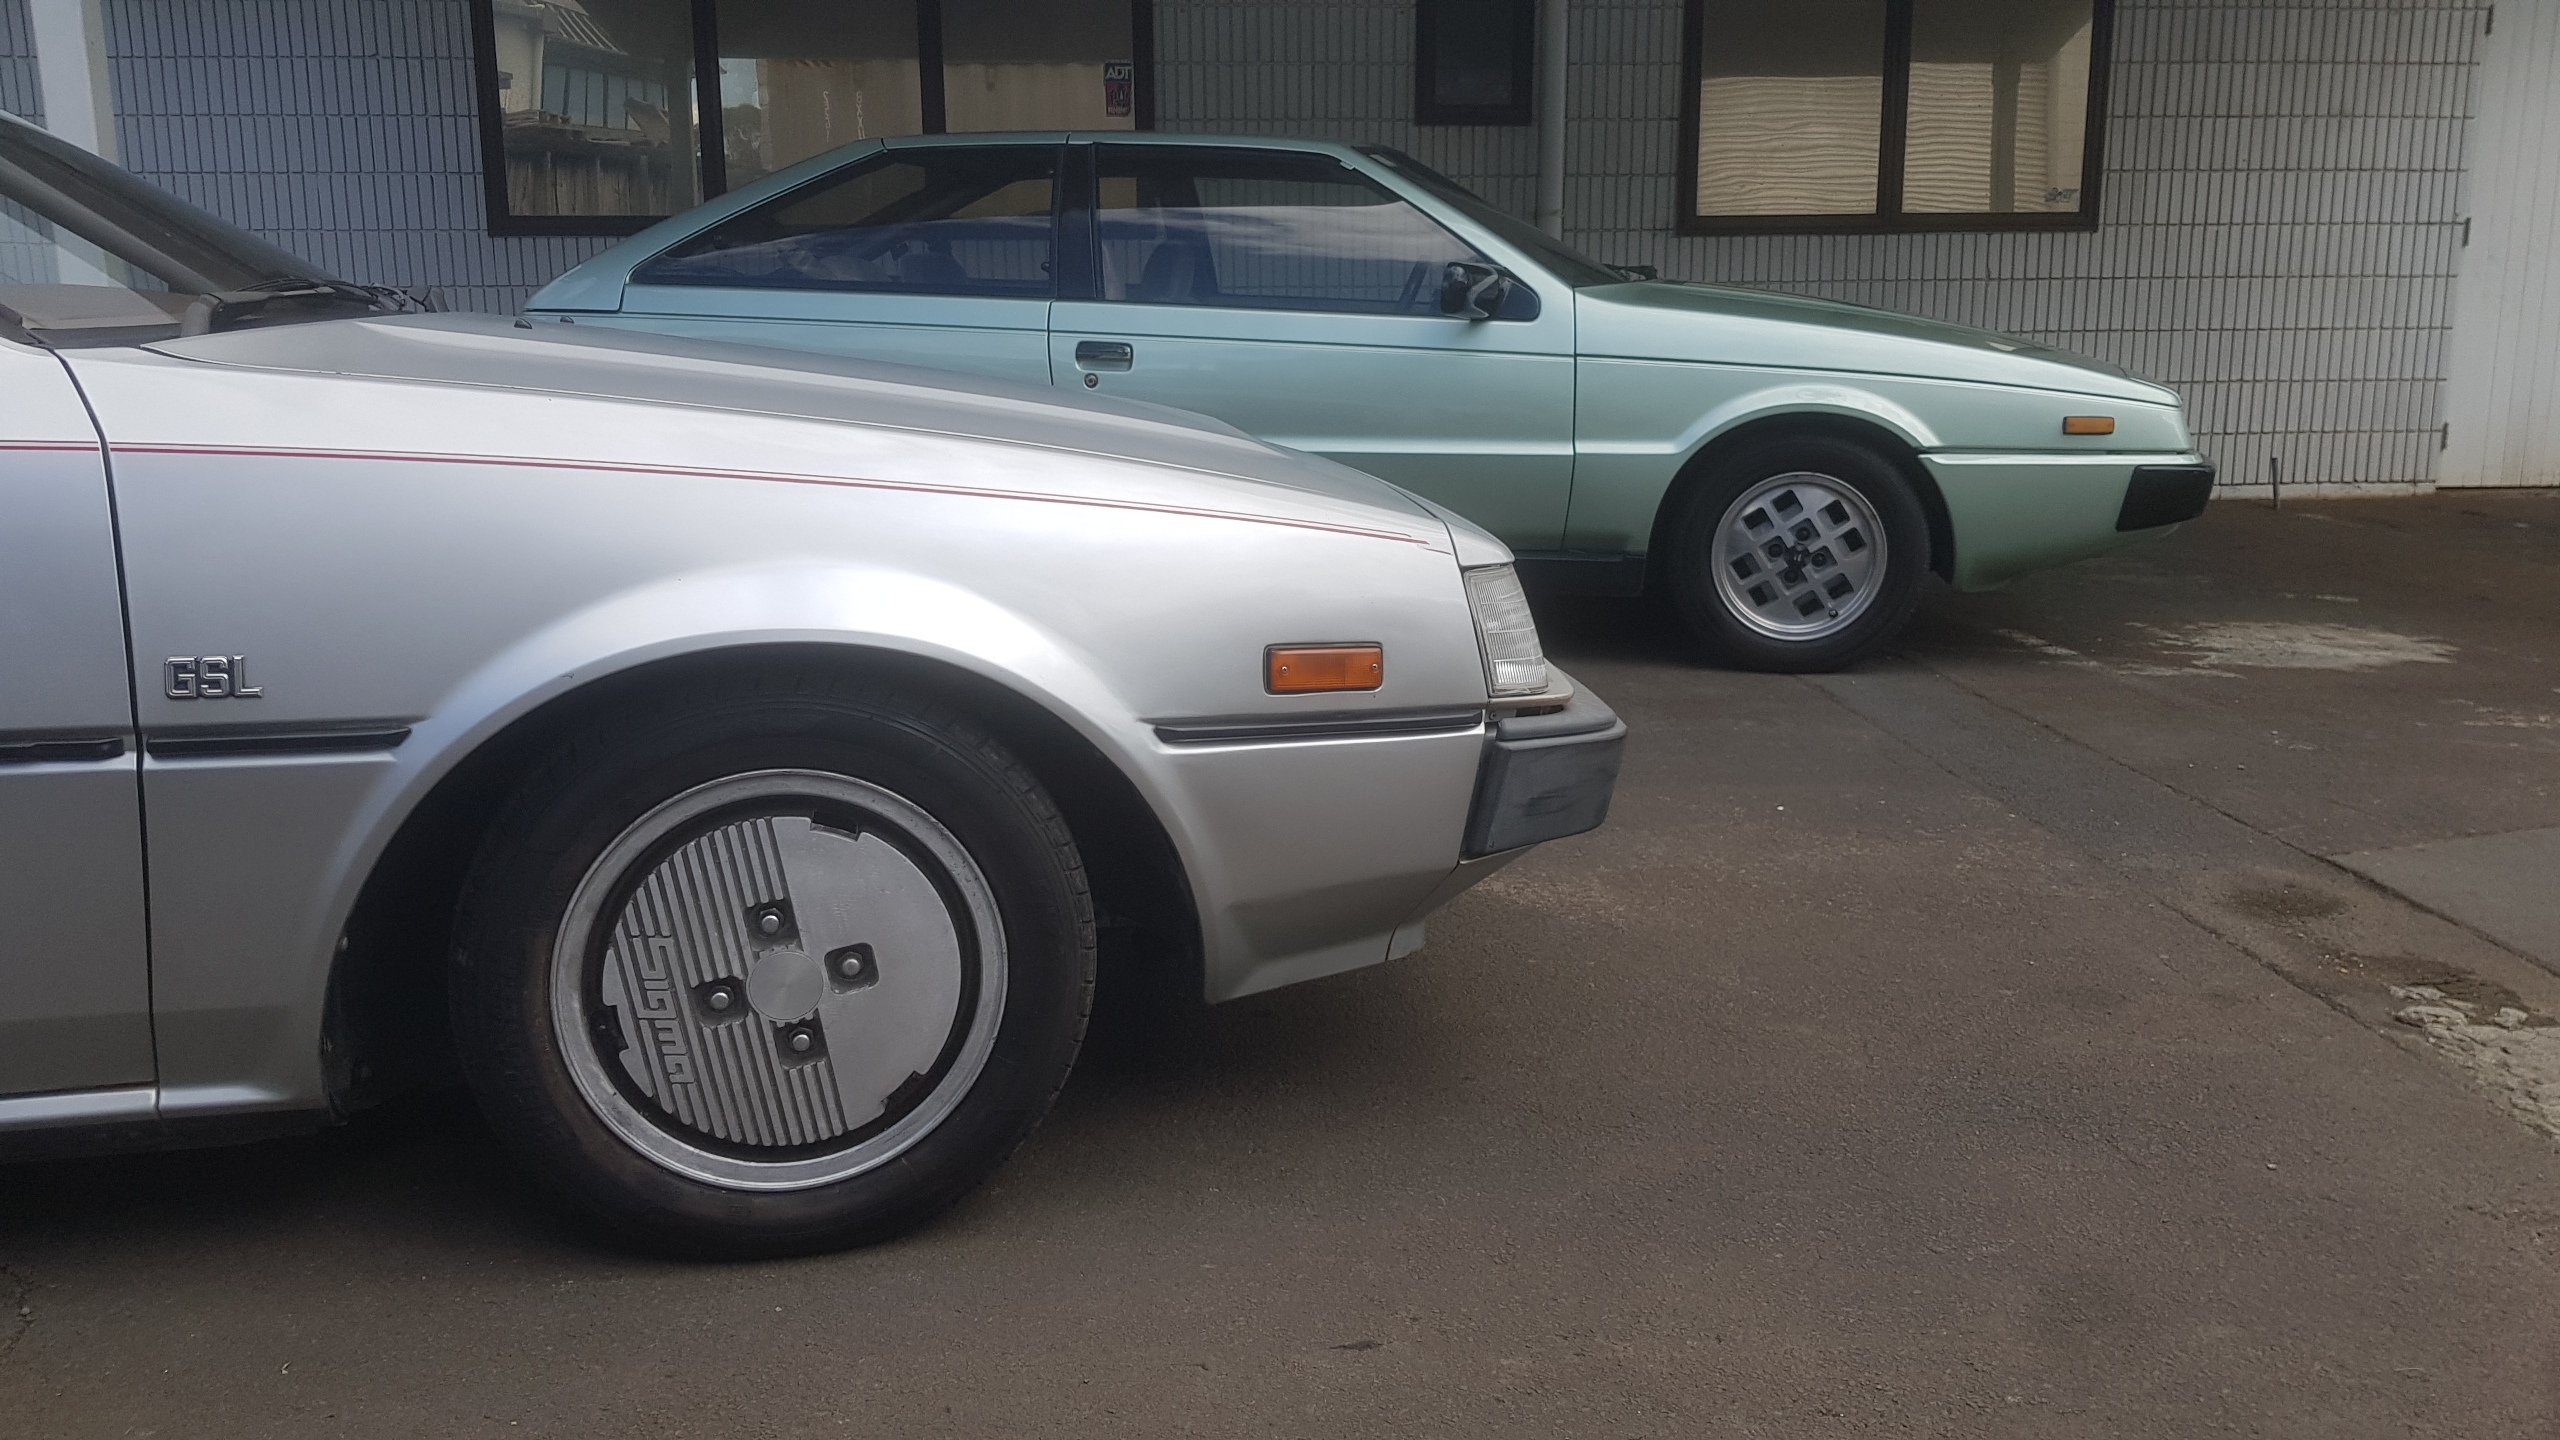
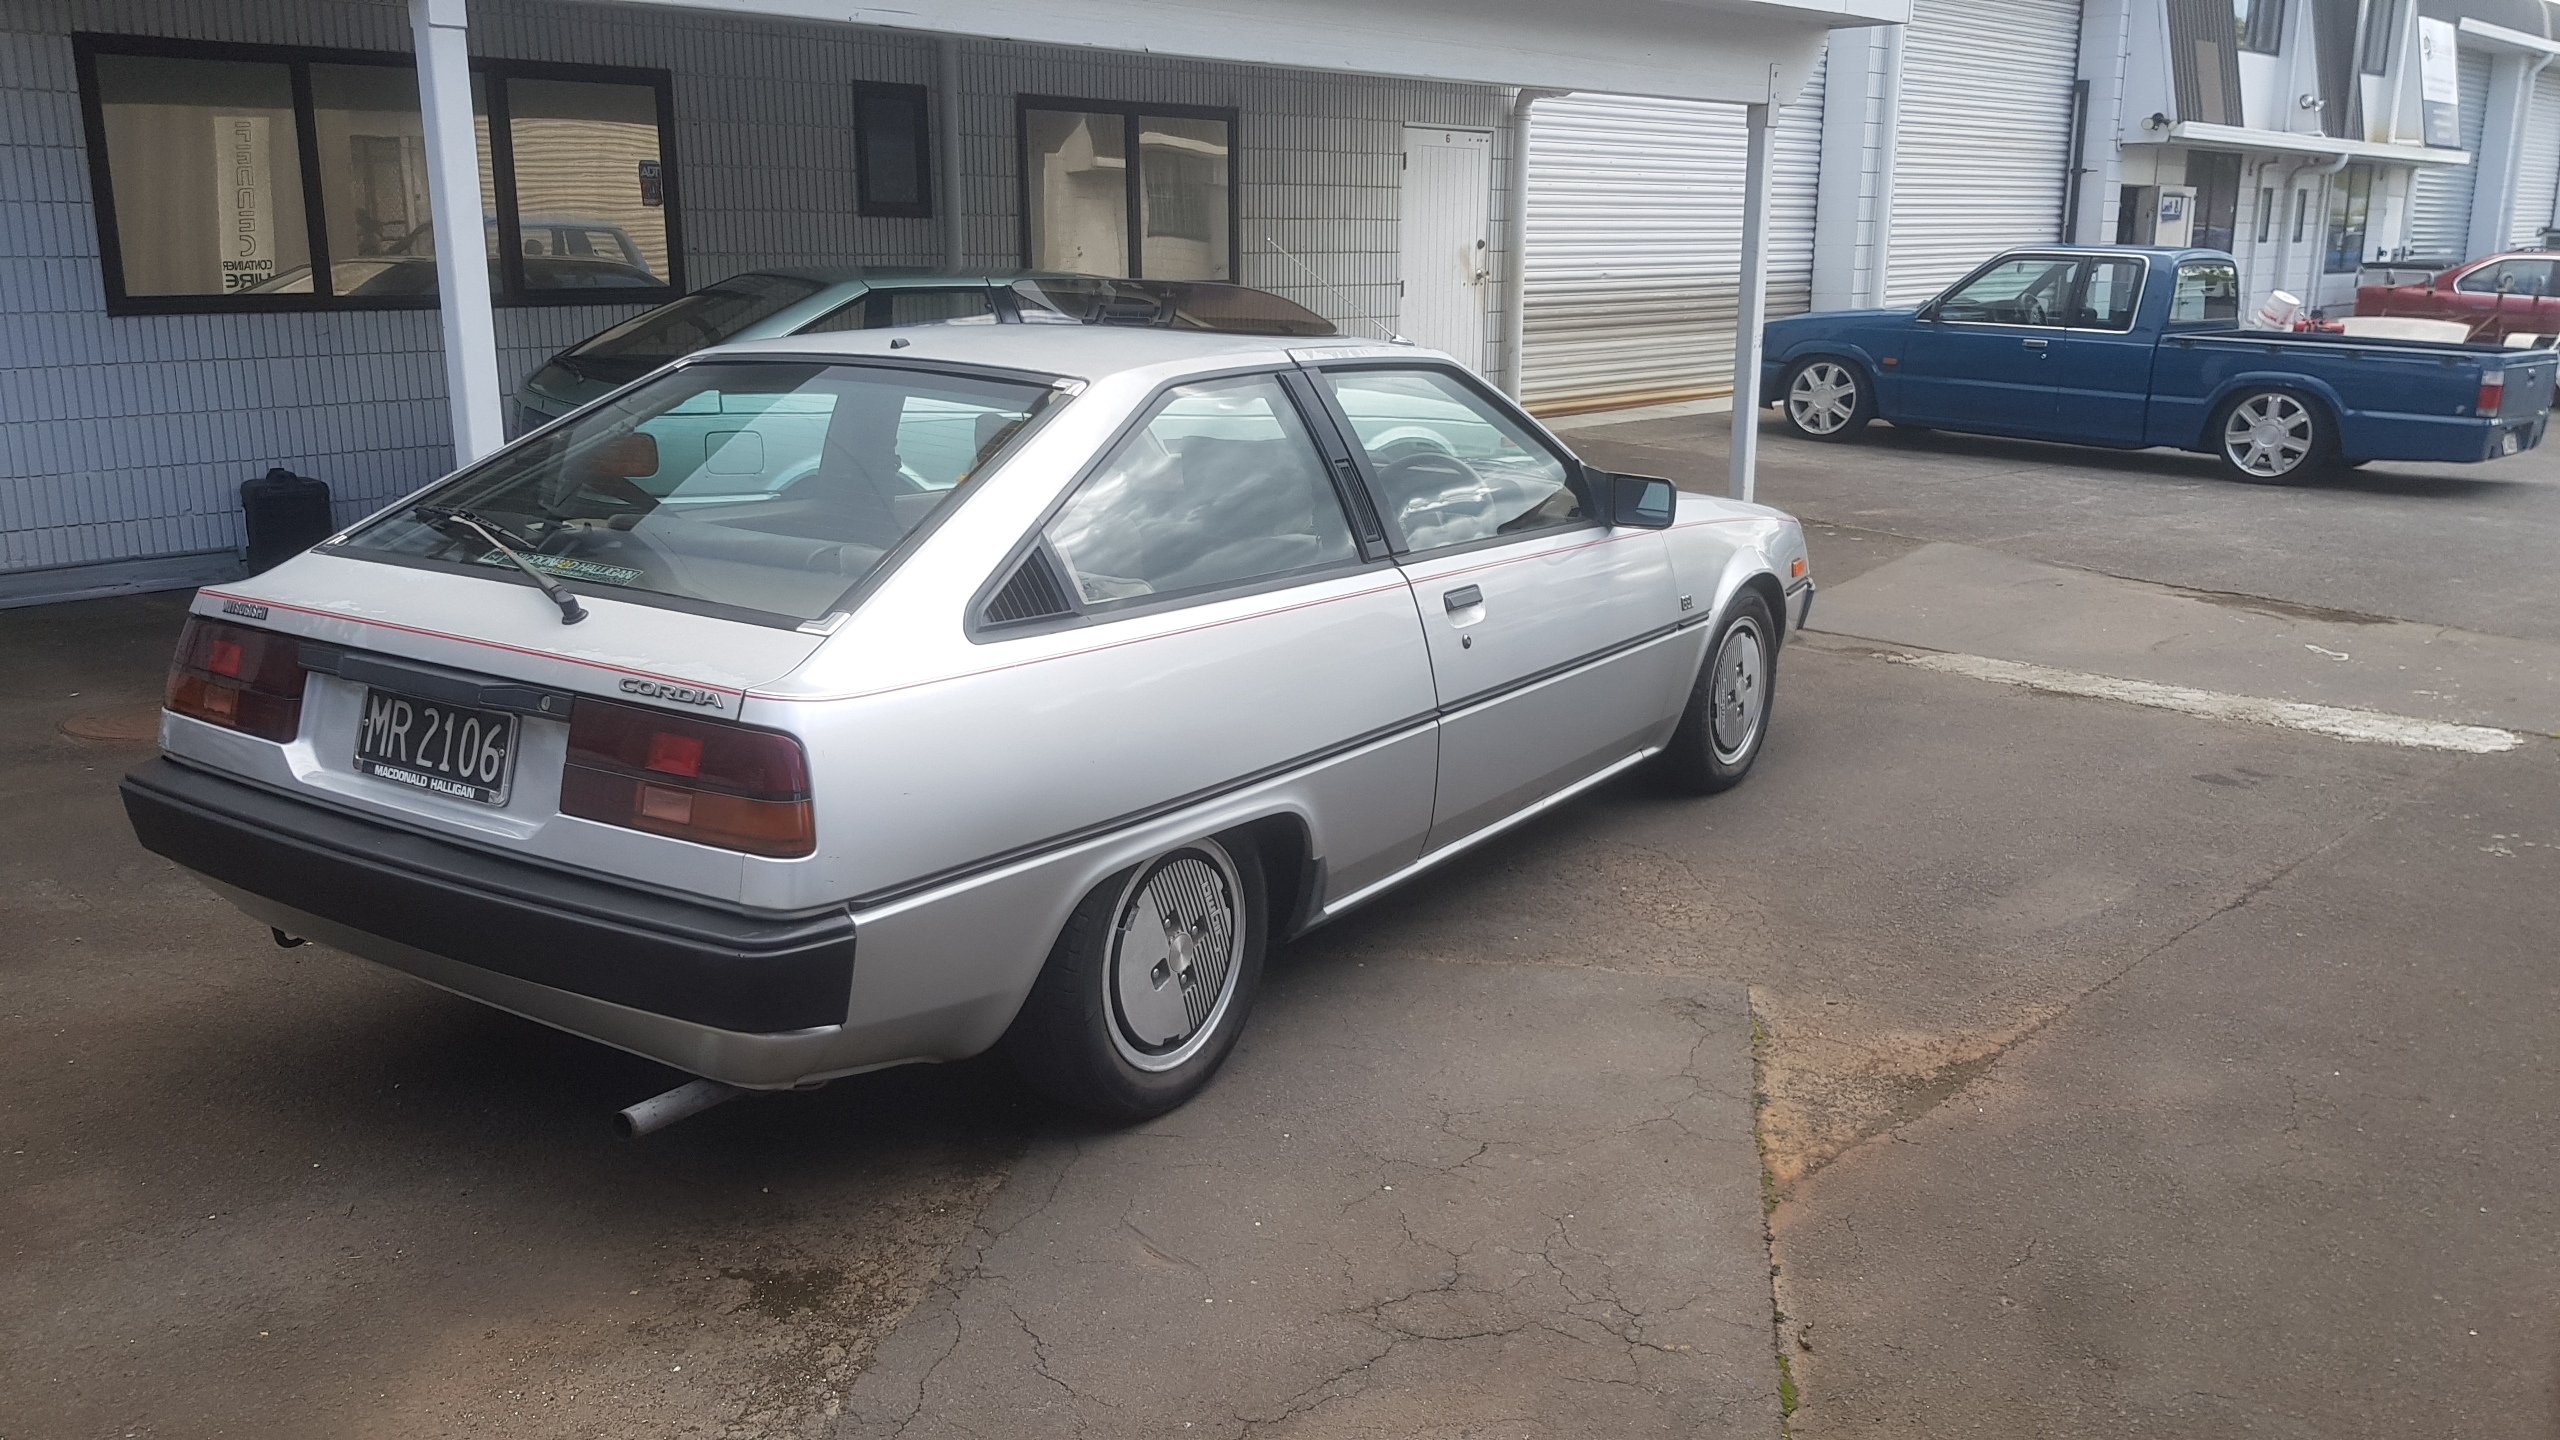
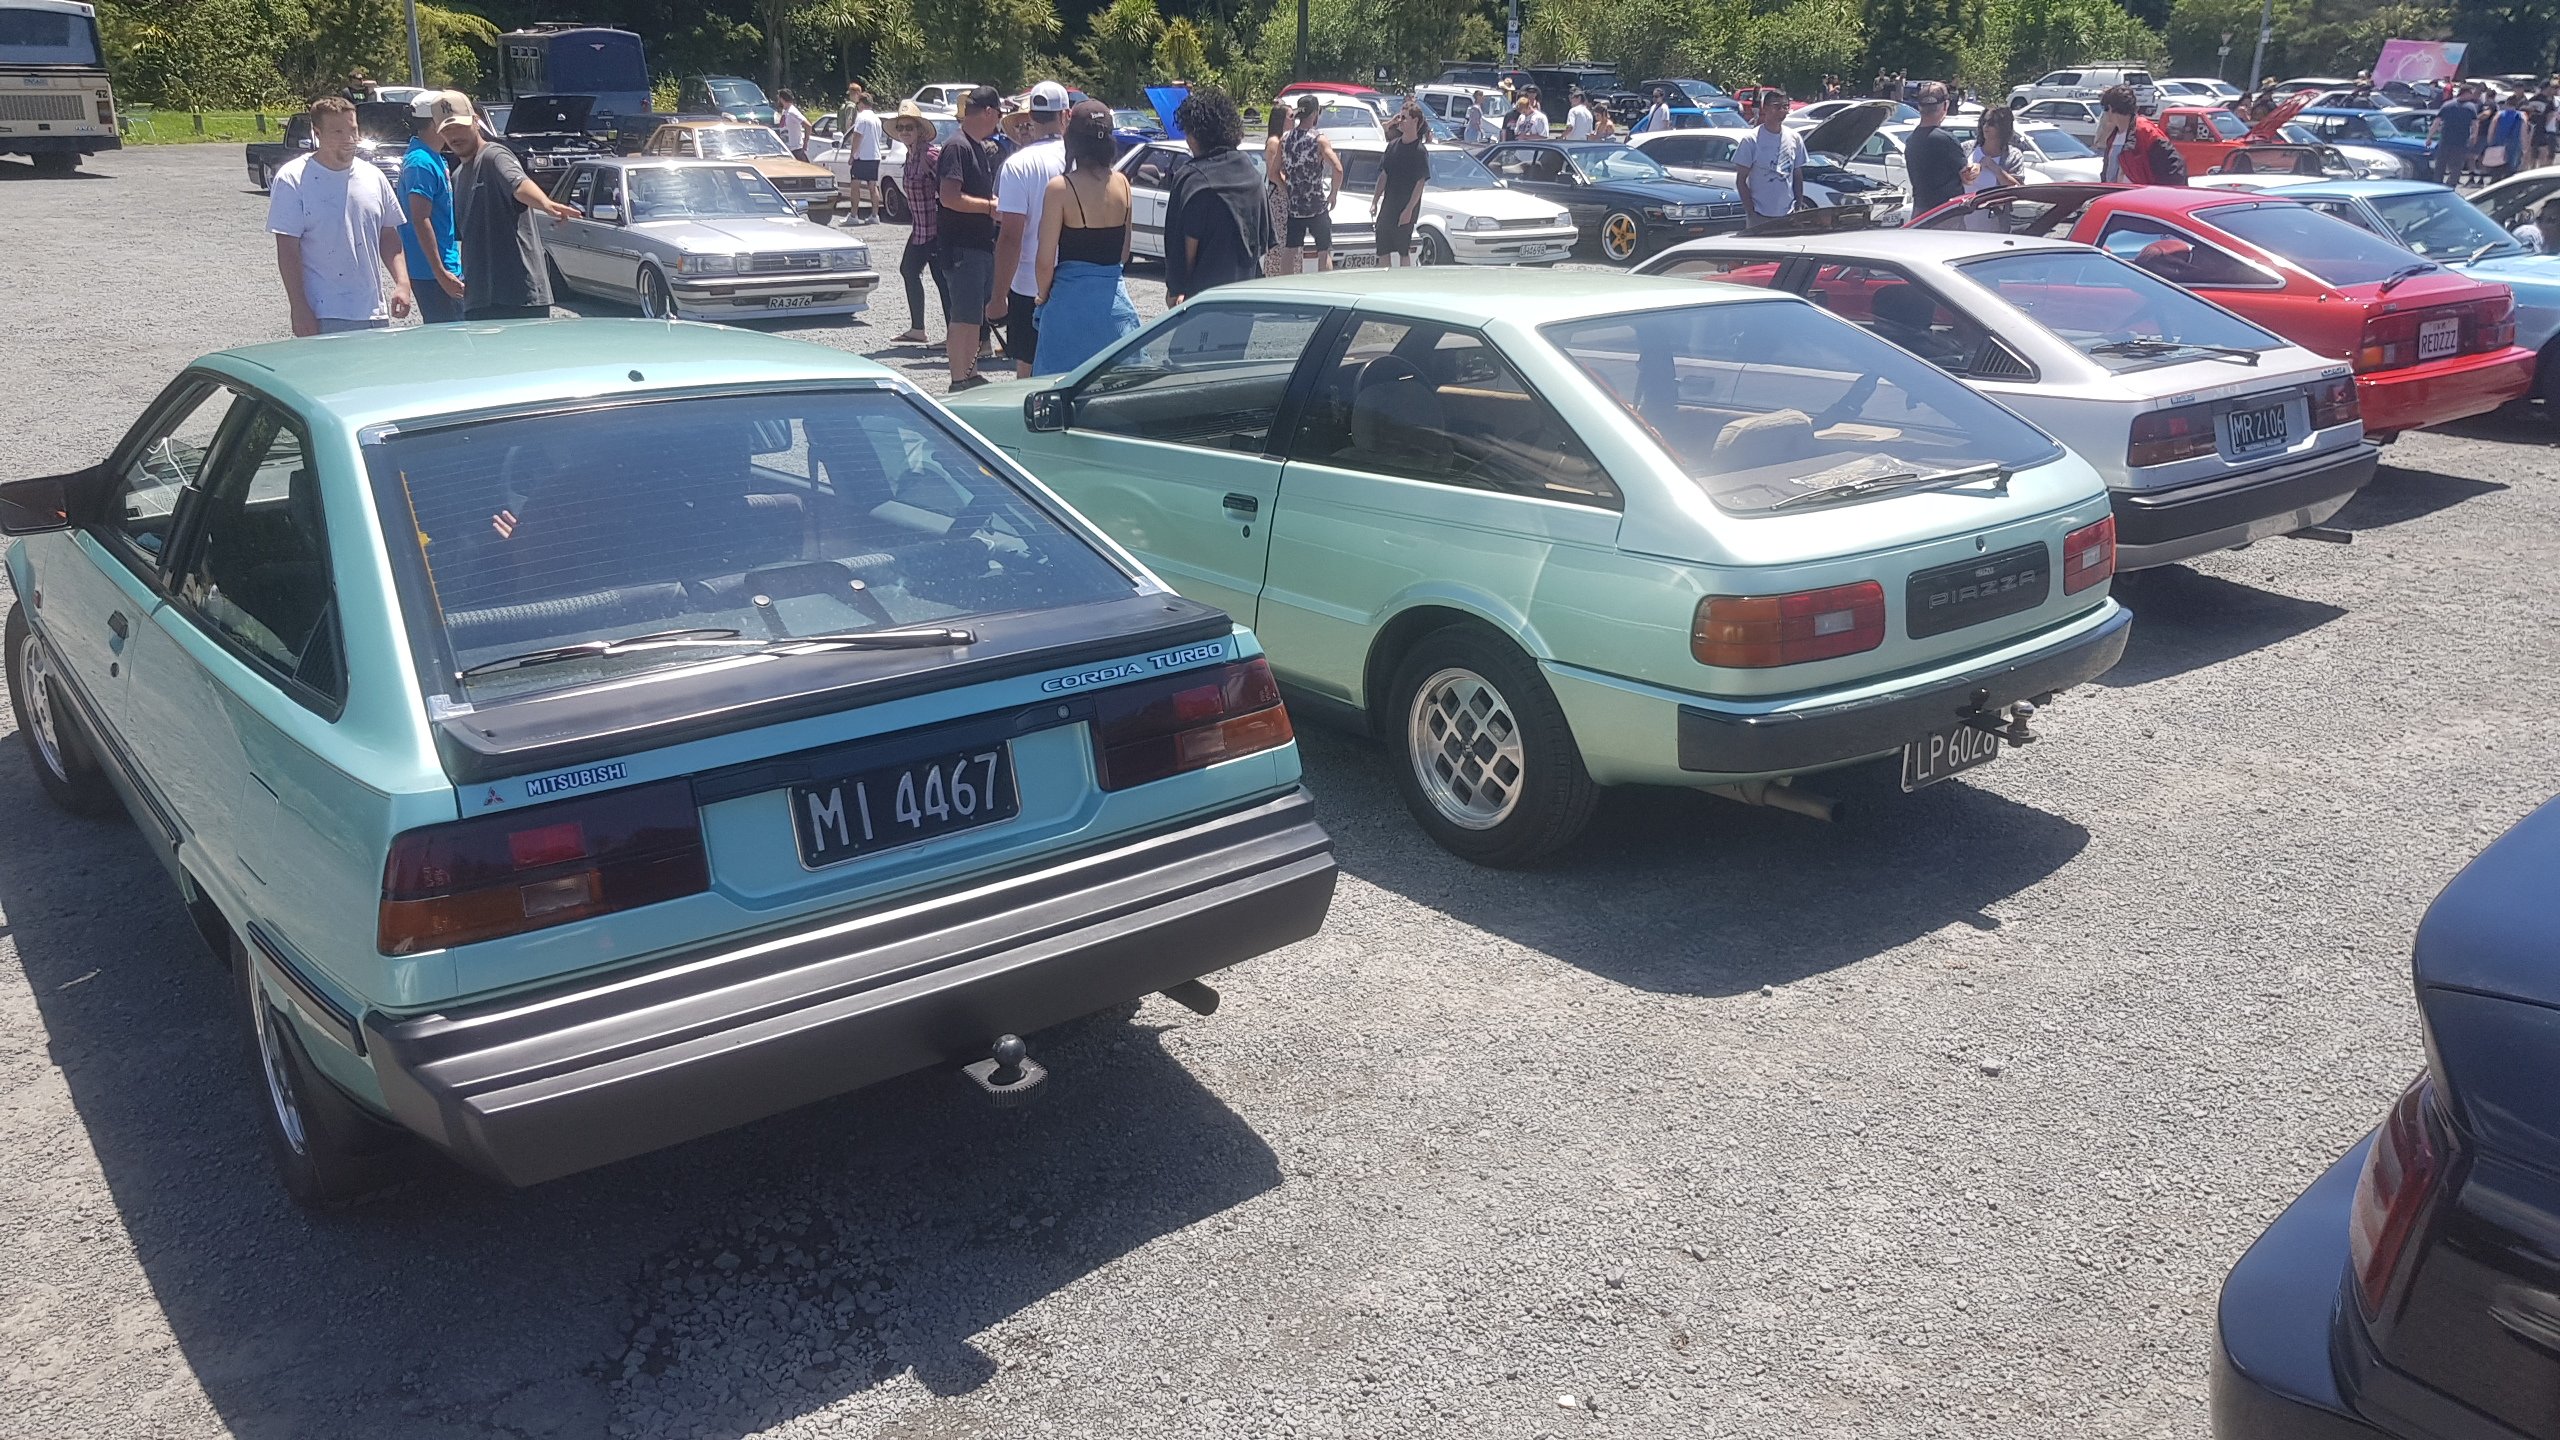
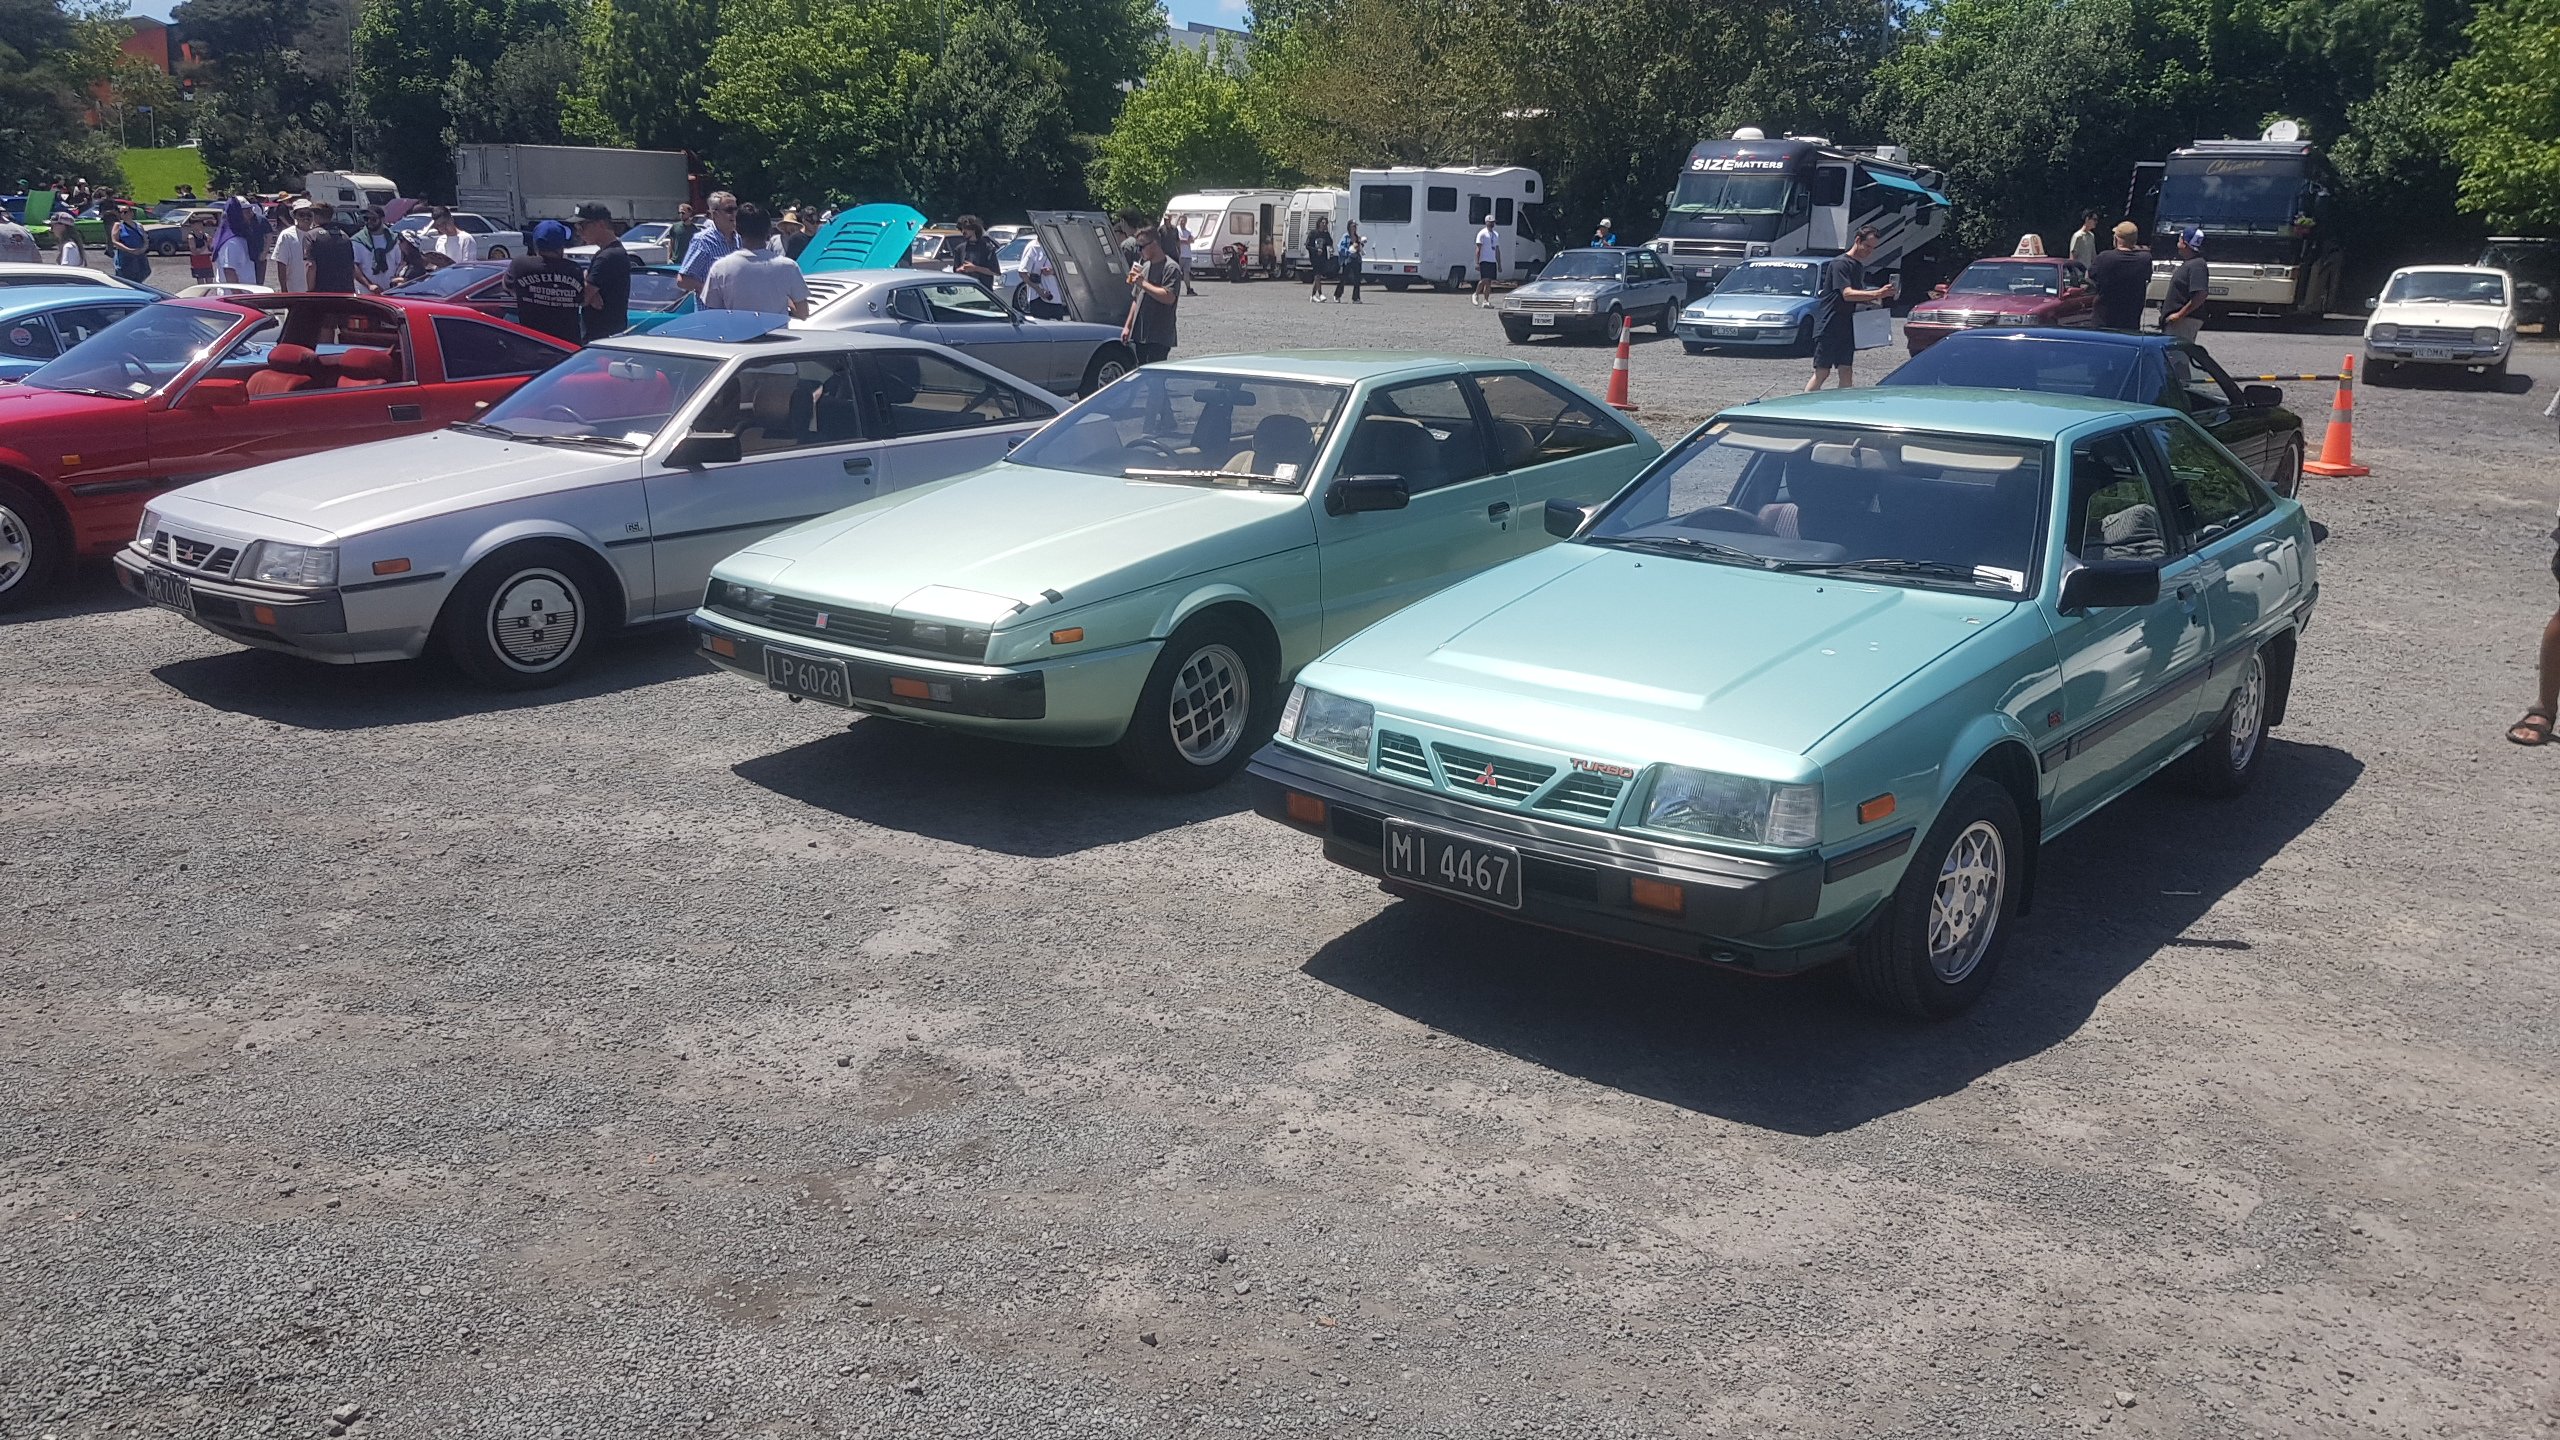
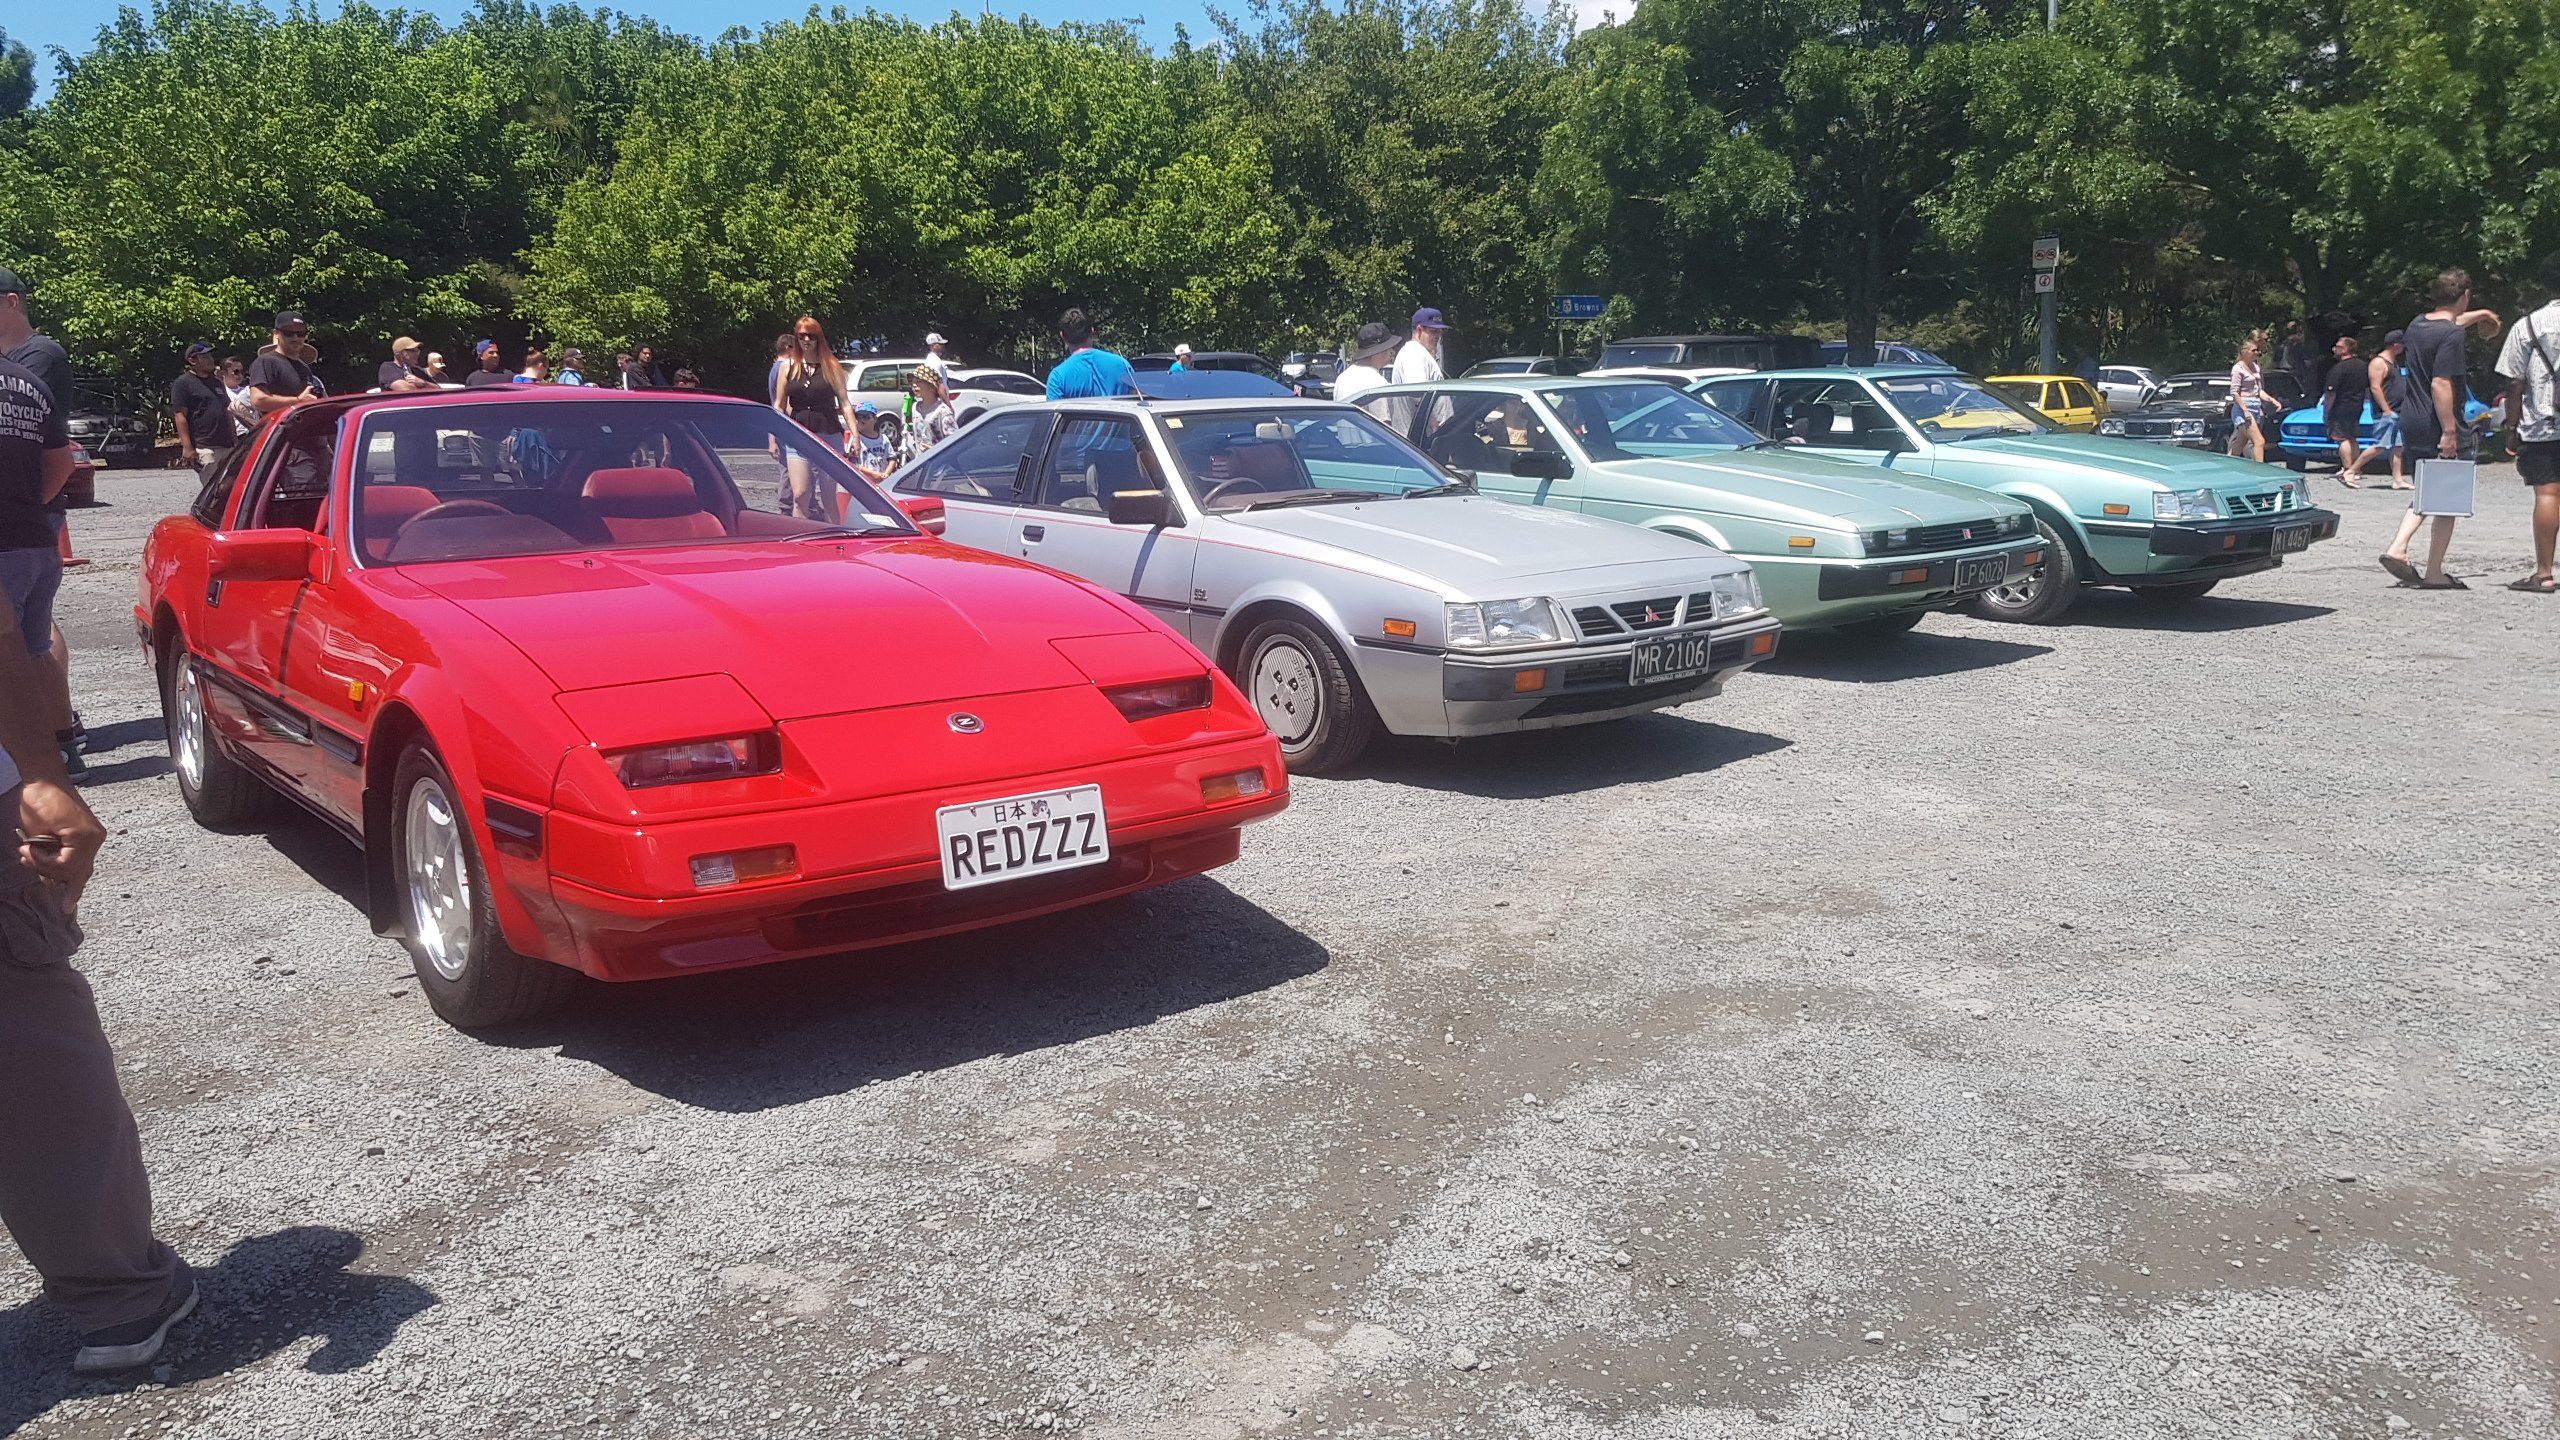
The cheese wedge cars.
2 points
-
2 points
-
2 points
-
2 points
-
Long weekend, lots of work. Pulled all the yucky bits of trim out of the stack and cleaned off 7 years of storage grime. It was pretty gross, now its just pretty. Will still need to armorall it or something when it is installed, but for now its as good as it gets. Oh yeah I installed the top half of the dash and the windscreen magically installed itself too. At the point where the only things I can do before the sparky gets his hands on it is check the diff oil and plumb up the fuel pump which are this weeks jobs.2 points
-
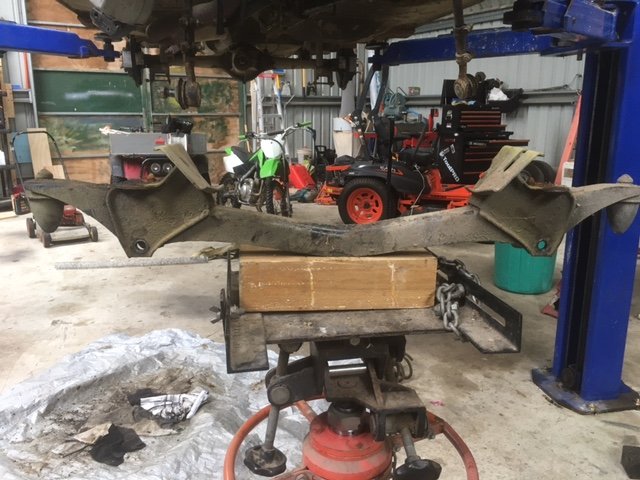
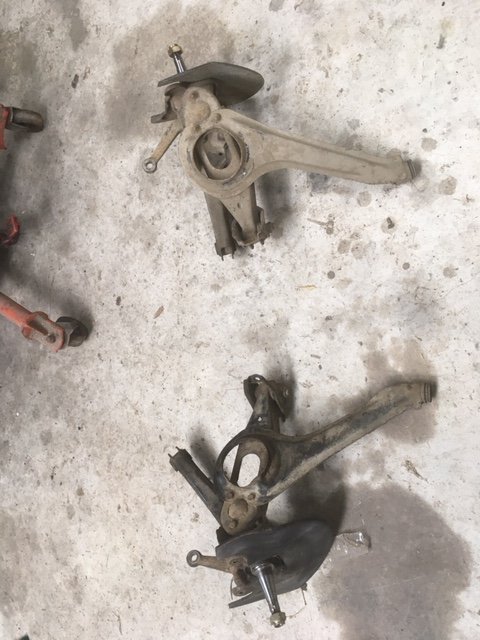
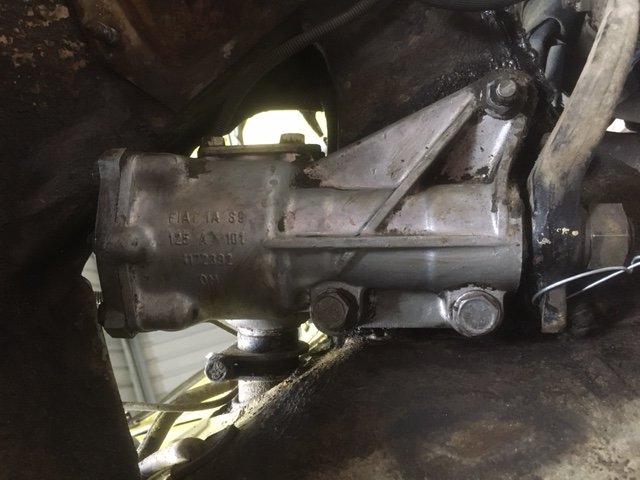
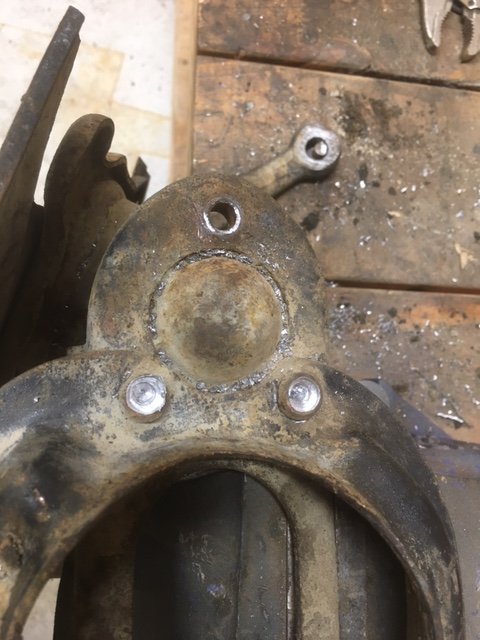
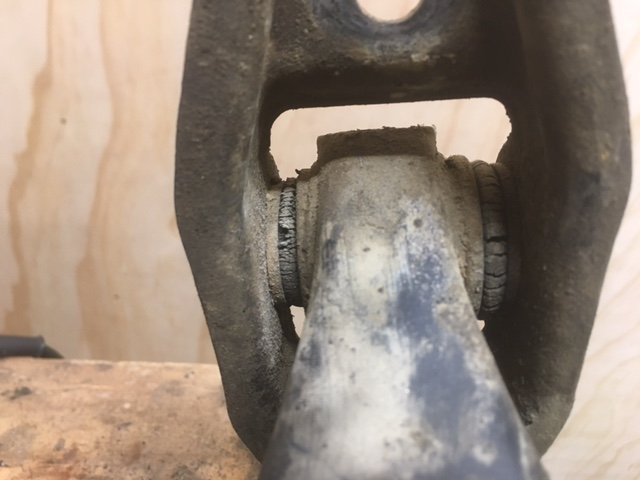
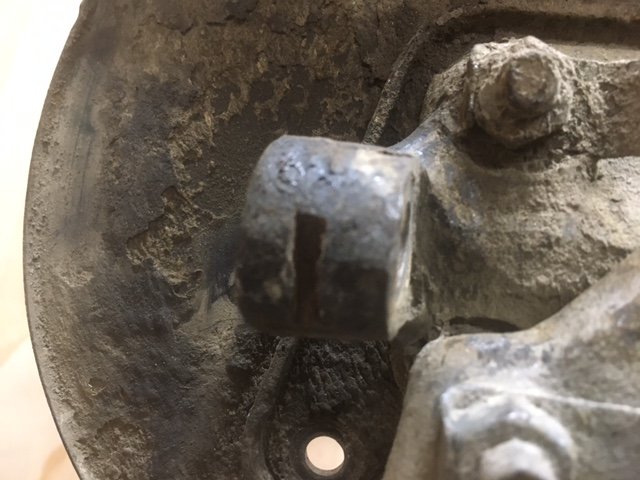
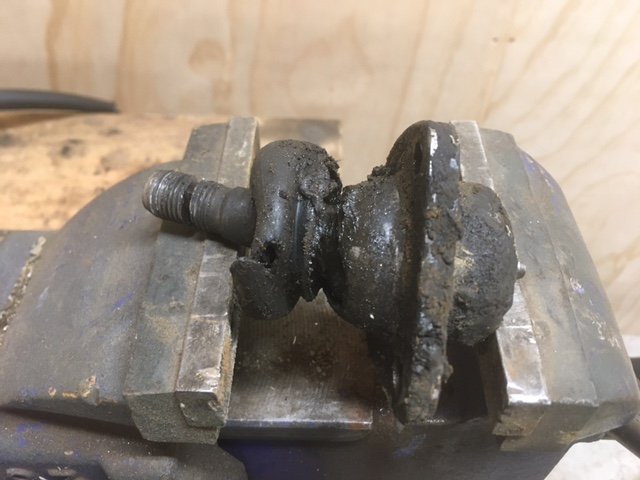
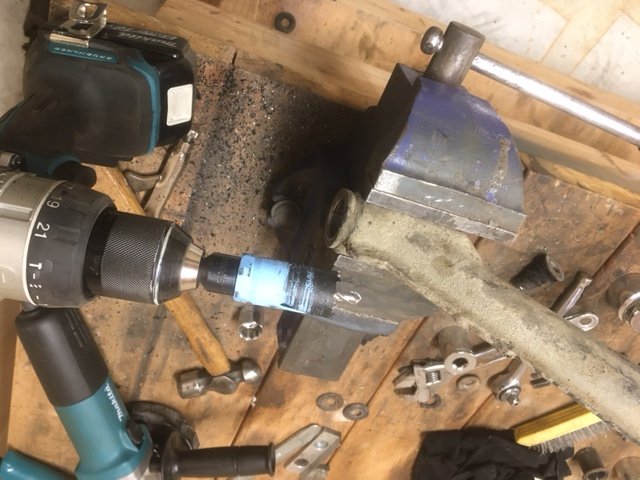
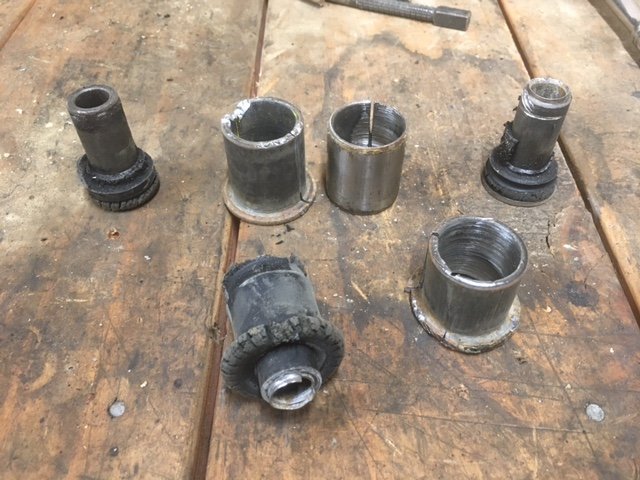
Scope creep. It happens to the best of us. I was going to run the steering and front suspension as is with just some new bottom ball joints, but after a close inspection I just couldn’t do it. Also, you couldn’t even see the shape of the steering box under all the crud and filth, but you can now! To get it all apart was a mission. I decided to remove all the bushes as they looked yuck. This took spanners, a heat gun, hole saw, hack saw, sabre saw, hammer and punches and about 5 hours! And this is a bit baffling, it looks as though some creature has cut into the lower ball joint spindle on the upright…
1 point
-
Yup goon local available for pickup. Giz a message and we'll tee it up.1 point
-
Aaaand a new shed build in the middle of it. Holy fuck. What are the rest of us even doing!? That looks epic all stickered up.1 point
-
That rules so fucking hard!! Excellent work man, fucking well done!1 point
-
Few anorak questions here, regular spray gloss spray paint for the mould? And what resin/Epoxy are you using for the carbon fibre? Love the result too! Will look amazing when shined up a bit1 point
-
I have been toying with making an aeropress sipper cup, ie a taller cup that works like a french press but the push bit of the press ends up as the lid with drinking holes in it and that uses a paper filter rather than a stainless mesh.....1 point
-
Young Daniel from Govs pub has entered as have I. fizzing with excitement1 point
-
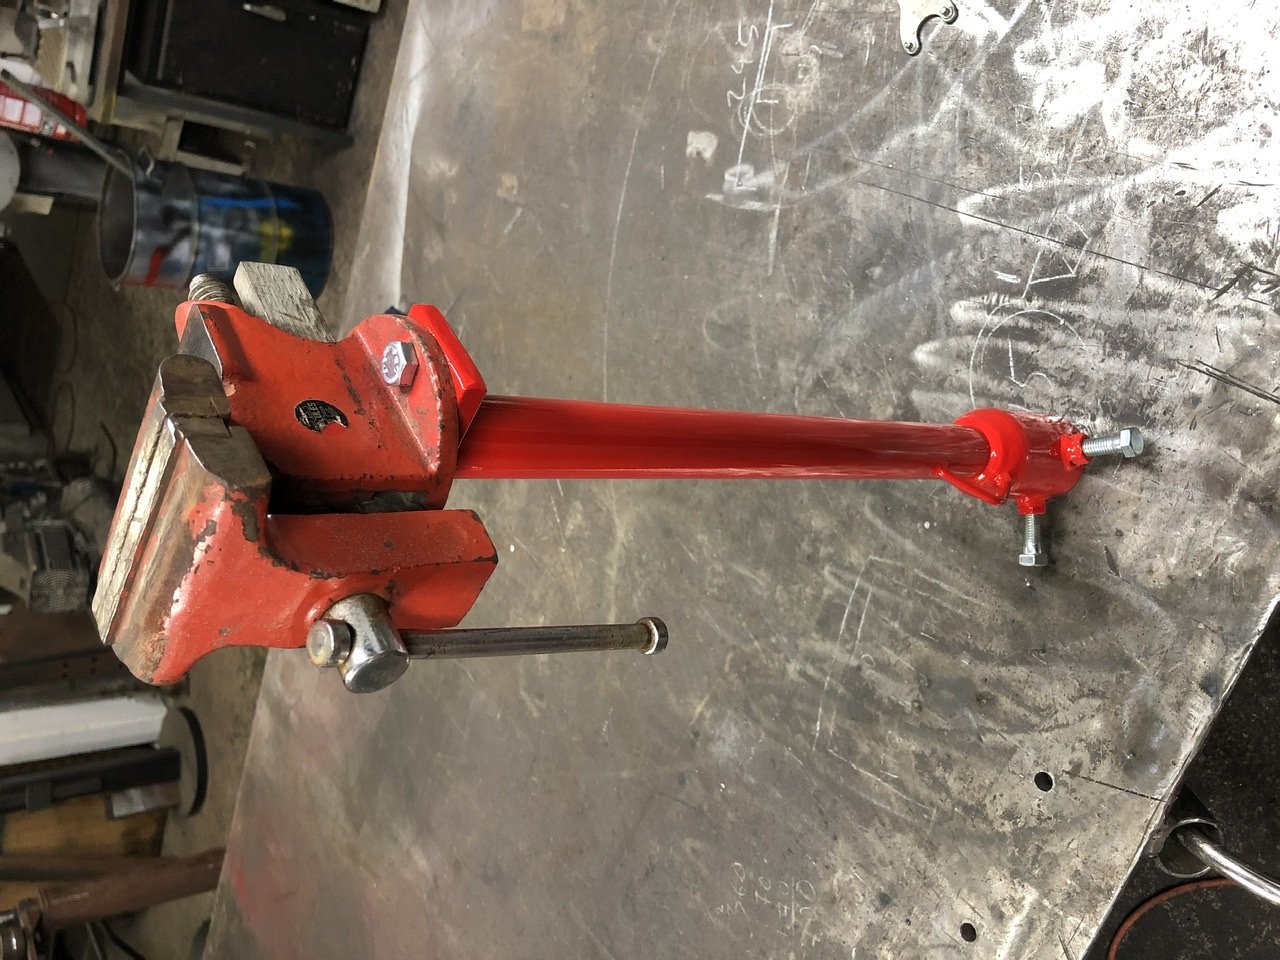
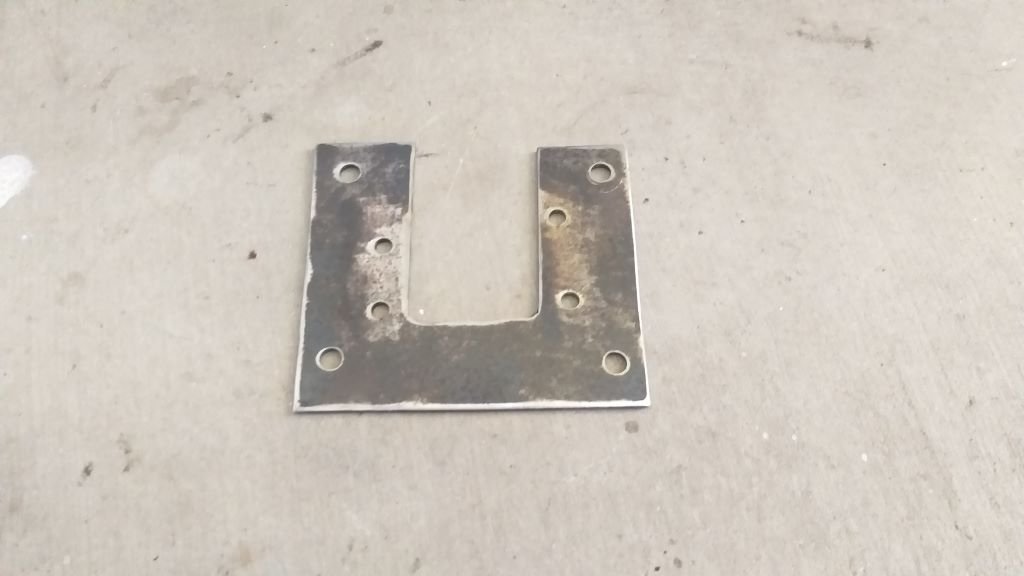
Grabbed a bit of scrap plate and took to it with my grinder of angles and my hole poker and I ended up with this fine bit of kit:
1 point
-
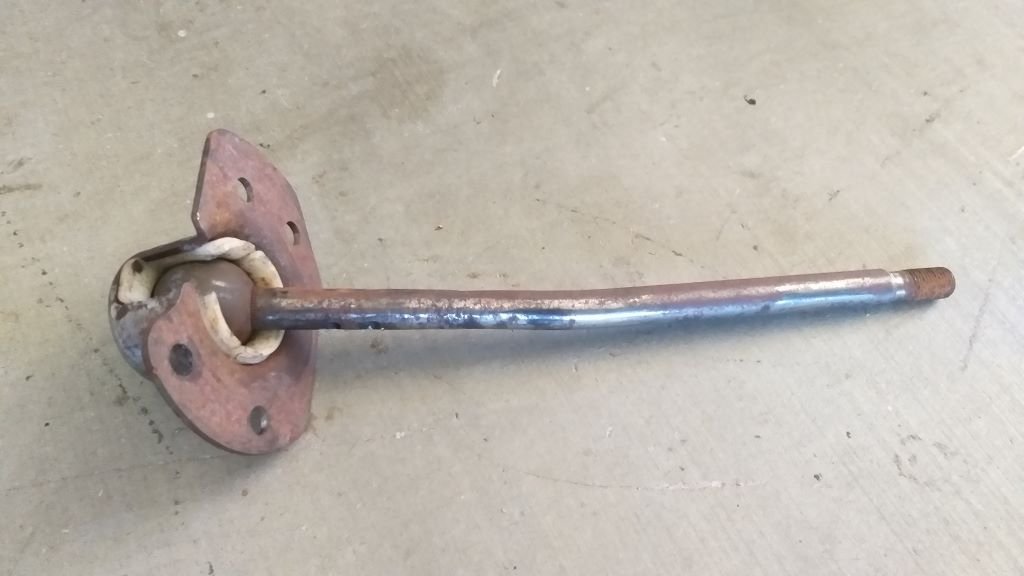
Okay, so with the gear shift mechanism in what is hopefully it's forever home, my attention has now turned to the remote gear stick. First up was to figure a way to mount this pared down gear stick to the radiator tunnel:
1 point
-
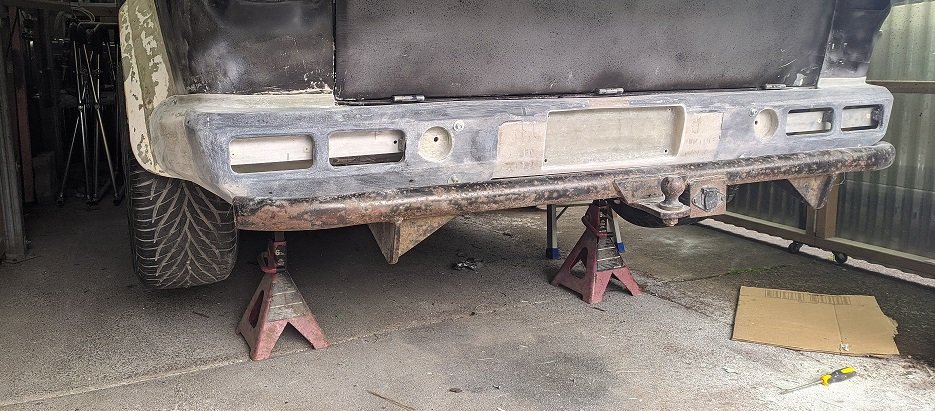
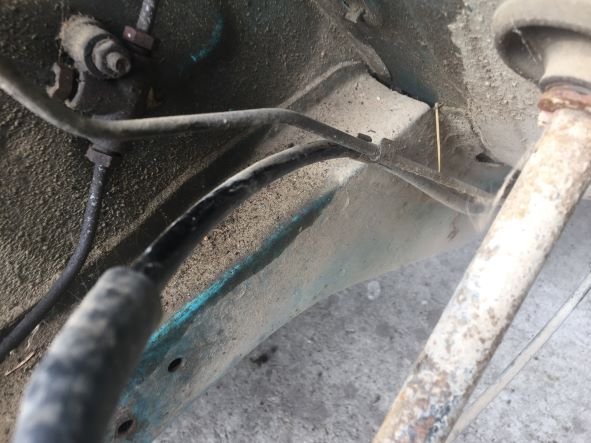
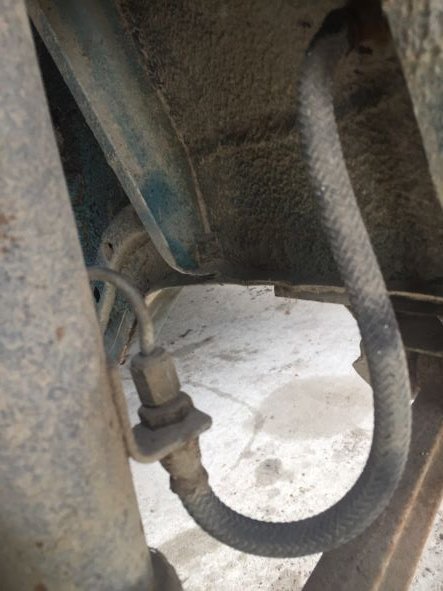
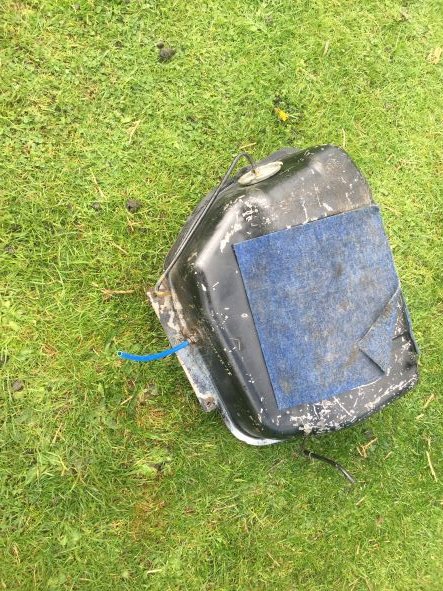
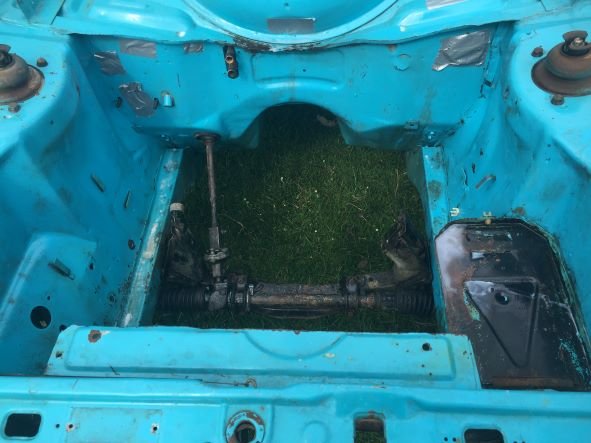
Still on the job just taking a bit longer due to other projects. Have removed all the brake lines and calipers along with the dual fuel lines, one return line. Documented all attachment points. Will replace as a bit smashed up.Thinking of using 10 mm truck air hose which is a similar type of hard plastic. Will have to check if can be used with fuel. Remove fuel tank on which you can see blue truck air line which I used for a repair when I cleaned out tank. Had great trouble getting old fuel line out of tank when I cleaned it. Degreased and cleaned engine bay. Not looking to bad
1 point
-
I have a unit booked in Nelson (same place as last time), 2 bunks available I think (more space than the little porta cabin) - you’re welcome to jump in with me if you want, $30 pp.1 point
-
(almost) NSFW1 point
-
The next day. Backlash was already in spec before and is now a little better Buuuut in my impatience I didnt' let the paint dry to its full hardness. 'Tis what I get. Anyway Girlface and I attached it to the car and started doing up all the steering link bolts. The two in the rebuilt drag link are hole-less bolts w/ nylock nuts so I just trust they'll stick around at torque spec, the other two were castle-and-pinned. One of the nylock nuts just wanted to spin the joint, I fixed by jacking up the weight of the car onto the drag link. I dug the steering column out of the pile and gave it all a quick clean and zhuzh. Some of the boot was mangled so I just cut off the dangly bit, I don't think it's materially important but I may source a new boot down the line (or pilfer red's). The column itself is 96% perfect and 4% random surface rust spots. During proper reassembly I'll likely freshen up those spots but I don't think it's worthy of a full rebuild, there's zero play in anything and seriously that other 96% is perfect. I'd lost the bolts for the steering column and spent hours looking for them. I even went into Red and started disassembling the dash to find out what they looked like, and potentially use them as a fall-back. Fortunately they turned up in the box of bolts in a bag with a cryptic label. Then we snazzed all the wheels on and frolicked her outside... back on her wheels for the first time in... uh... not sure???1 point
-
The Jag still hasn't dropped a valve seat after I overheated it, so I guess I got away with that little incident. I have been driving it around more often to try to find issues ahead of the epic quest to the South Island, and so I can spend my credits on various power-ups to help me on that journey. I got a transmission service, which did not help the auto's whining/scraping noise or the rough shifting in and out of 1st gear. The tech said there were no filings in the transmission drain pan, and I should expect this noise to gradually worsen rather than to result in a sudden failure. Meanwhile the tingling sensation in the steering from 80kph had been getting worse. I ordered front wheel bearing kits and they sat on my desk for ages until the noise and vibration became a bit scary, at which point I forced myself to have a go at actually installing them. This was the first time I've done front wheel bearings, and I don't have much in the way of proper tools. I used a piece of deckchair framing as a breaker bar extension, vice grips instead of a brake pad spreader, a claw hammer instead of a seal puller etc. When I removed the first bolts which go through the steering arm and the brake caliper into the hub, two 'washers' fell out from somewhere unknown. This is relevant later. The bearings were pretty worn, which was encouraging. Unfortunately it started looking like this task was not straightforward: The front discs have pronounced lips on them (I got a warning last WOF), so I guess they need machining or replacing. I couldn't get the old bearing races out (they were too stubborn for the hammer-and-screwdriver method which I'd previously used on my Alfa's rear drums), so I just reused them. At least one of them is looking a bit dodgy. This (see photo): Apparently the wheel bearings like to spin on the stub axles and wear grooves into the undersides, as seen here. The XJ-S Barry Bible recommends getting new stub axles and loctiting the bearings onto them so this doesn't happen. By this point I'd decided I was just doing a temporary fix and that I'd get someone else to do it properly later. I slapped the new bearings in and put it all back together. I put the random mystery washers under the bolt heads. When I went to put the factory wheels back on and go for a test drive, I noticed one of the Linglong tyres had a rivet embedded in the shoulder. I pulled the rivet out of the tyre and aaaall the air escaped. I got out the factory spare tyre and discovered it was undersized (215/60 instead of 235/60), so I swapped all the aftermarket wheels back on instead. This produced motorway smoothness of perhaps 8/10 - a new record during my ownership! Unfortunately my bearing change had clearly thrown the wheel alignment out. It turns out that the random mystery washers were actually spacers for the steering arms, and that I'd put them back in the wrong spot causing toe out. I reluctantly spent the time to jam them back in the right positions. Now it's good again. So after a few days getting greasy, I achieved: uncovering problems I'm unable to deal with wasting my new bearings on a dodgy repair that won't last puncturing a Linglong tyre so I can't use the factory wheels wasting valuable time to get professional work done on the car before Nats Fun and games.
1 point
-
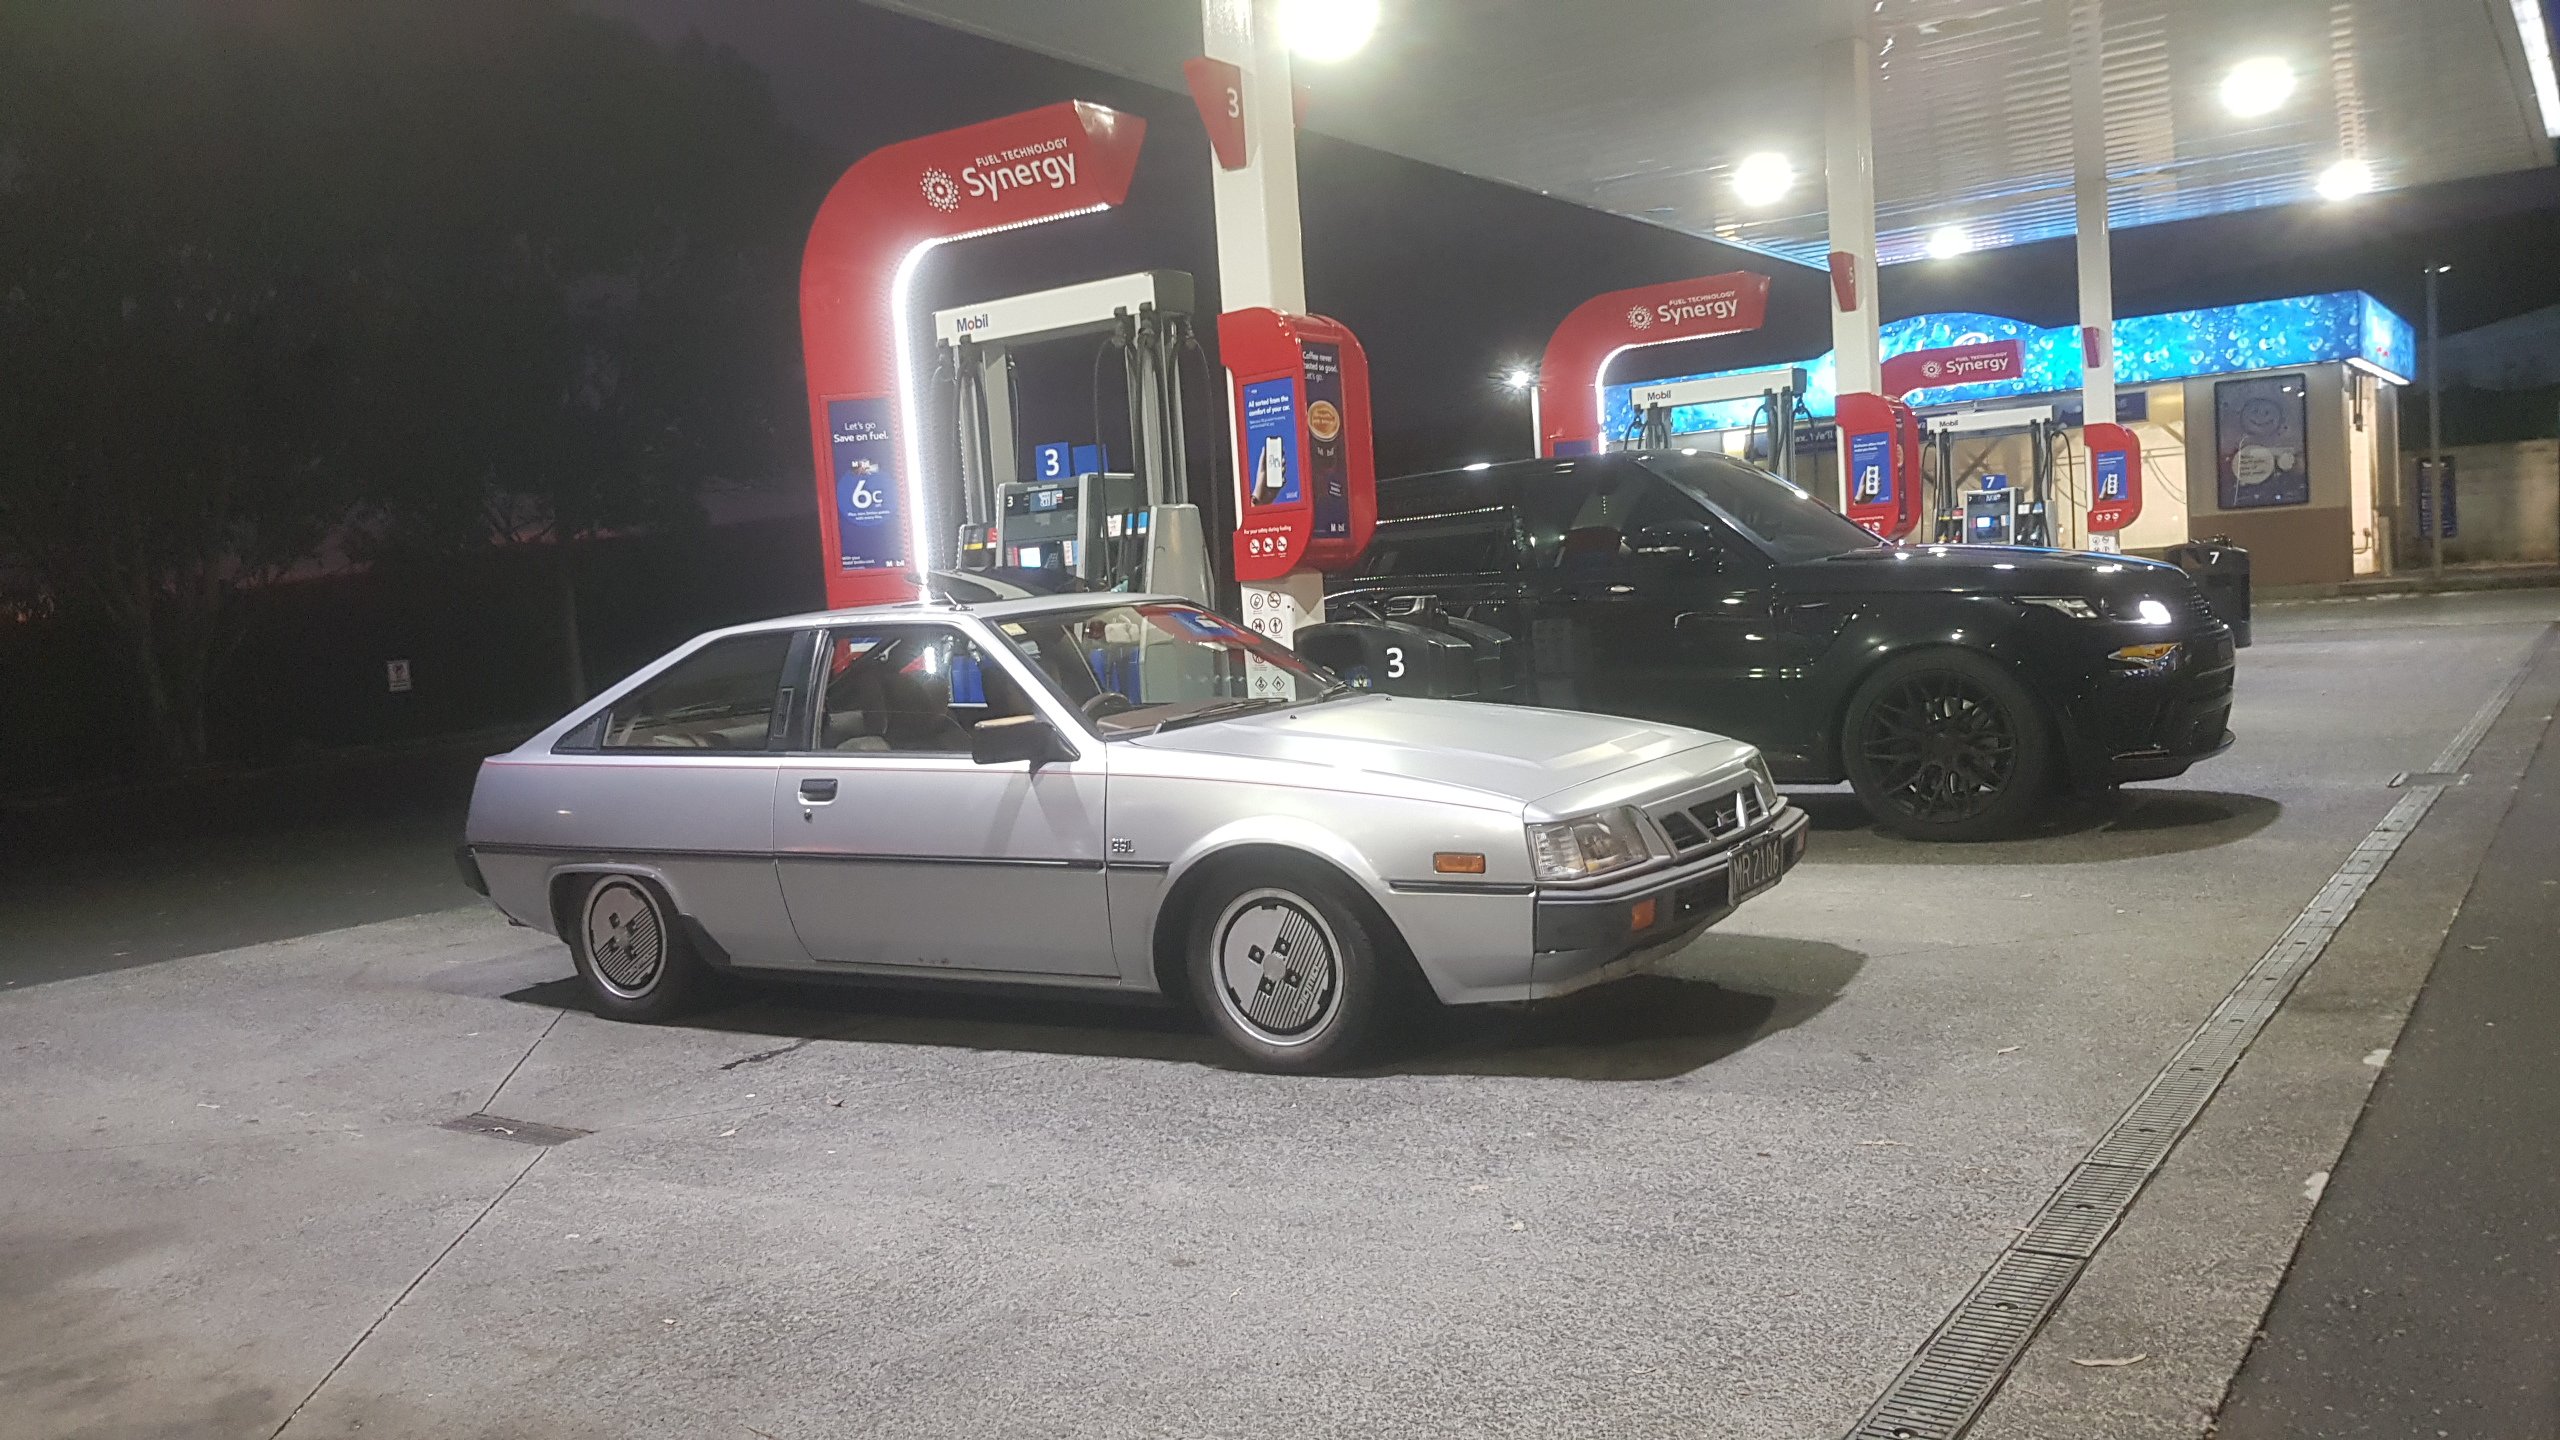
80s hatch park up.
1 point
-
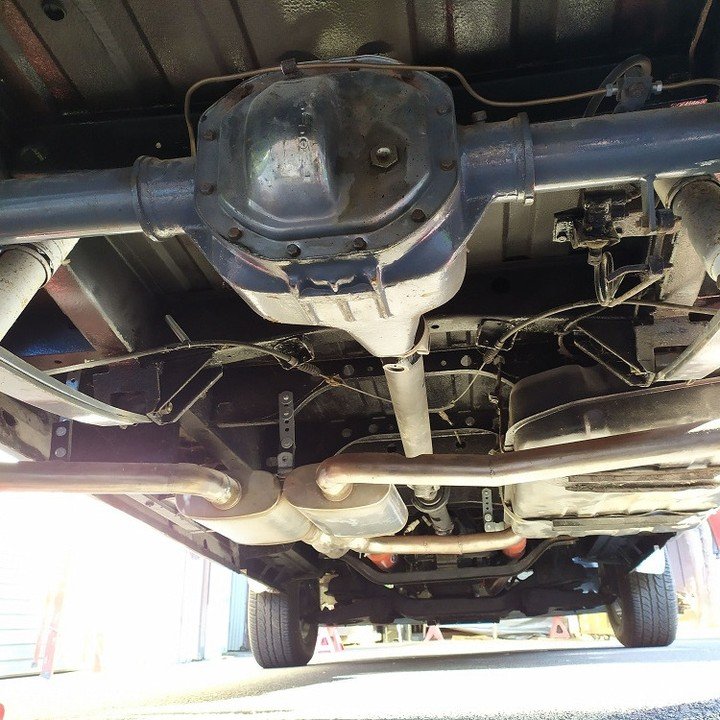
Checked the diff and rear suspension when fitting the rear cylinders and found the shocks stuffed and the springs chronically squeaking. so pulled it out cleaned all the crud/dust/rust/oil and added paint. Awaiting an oil seal for the diff and it will all go back in soon with new brakes. new drums have arrived too - they need machining but from all measurements will fit
1 point
-
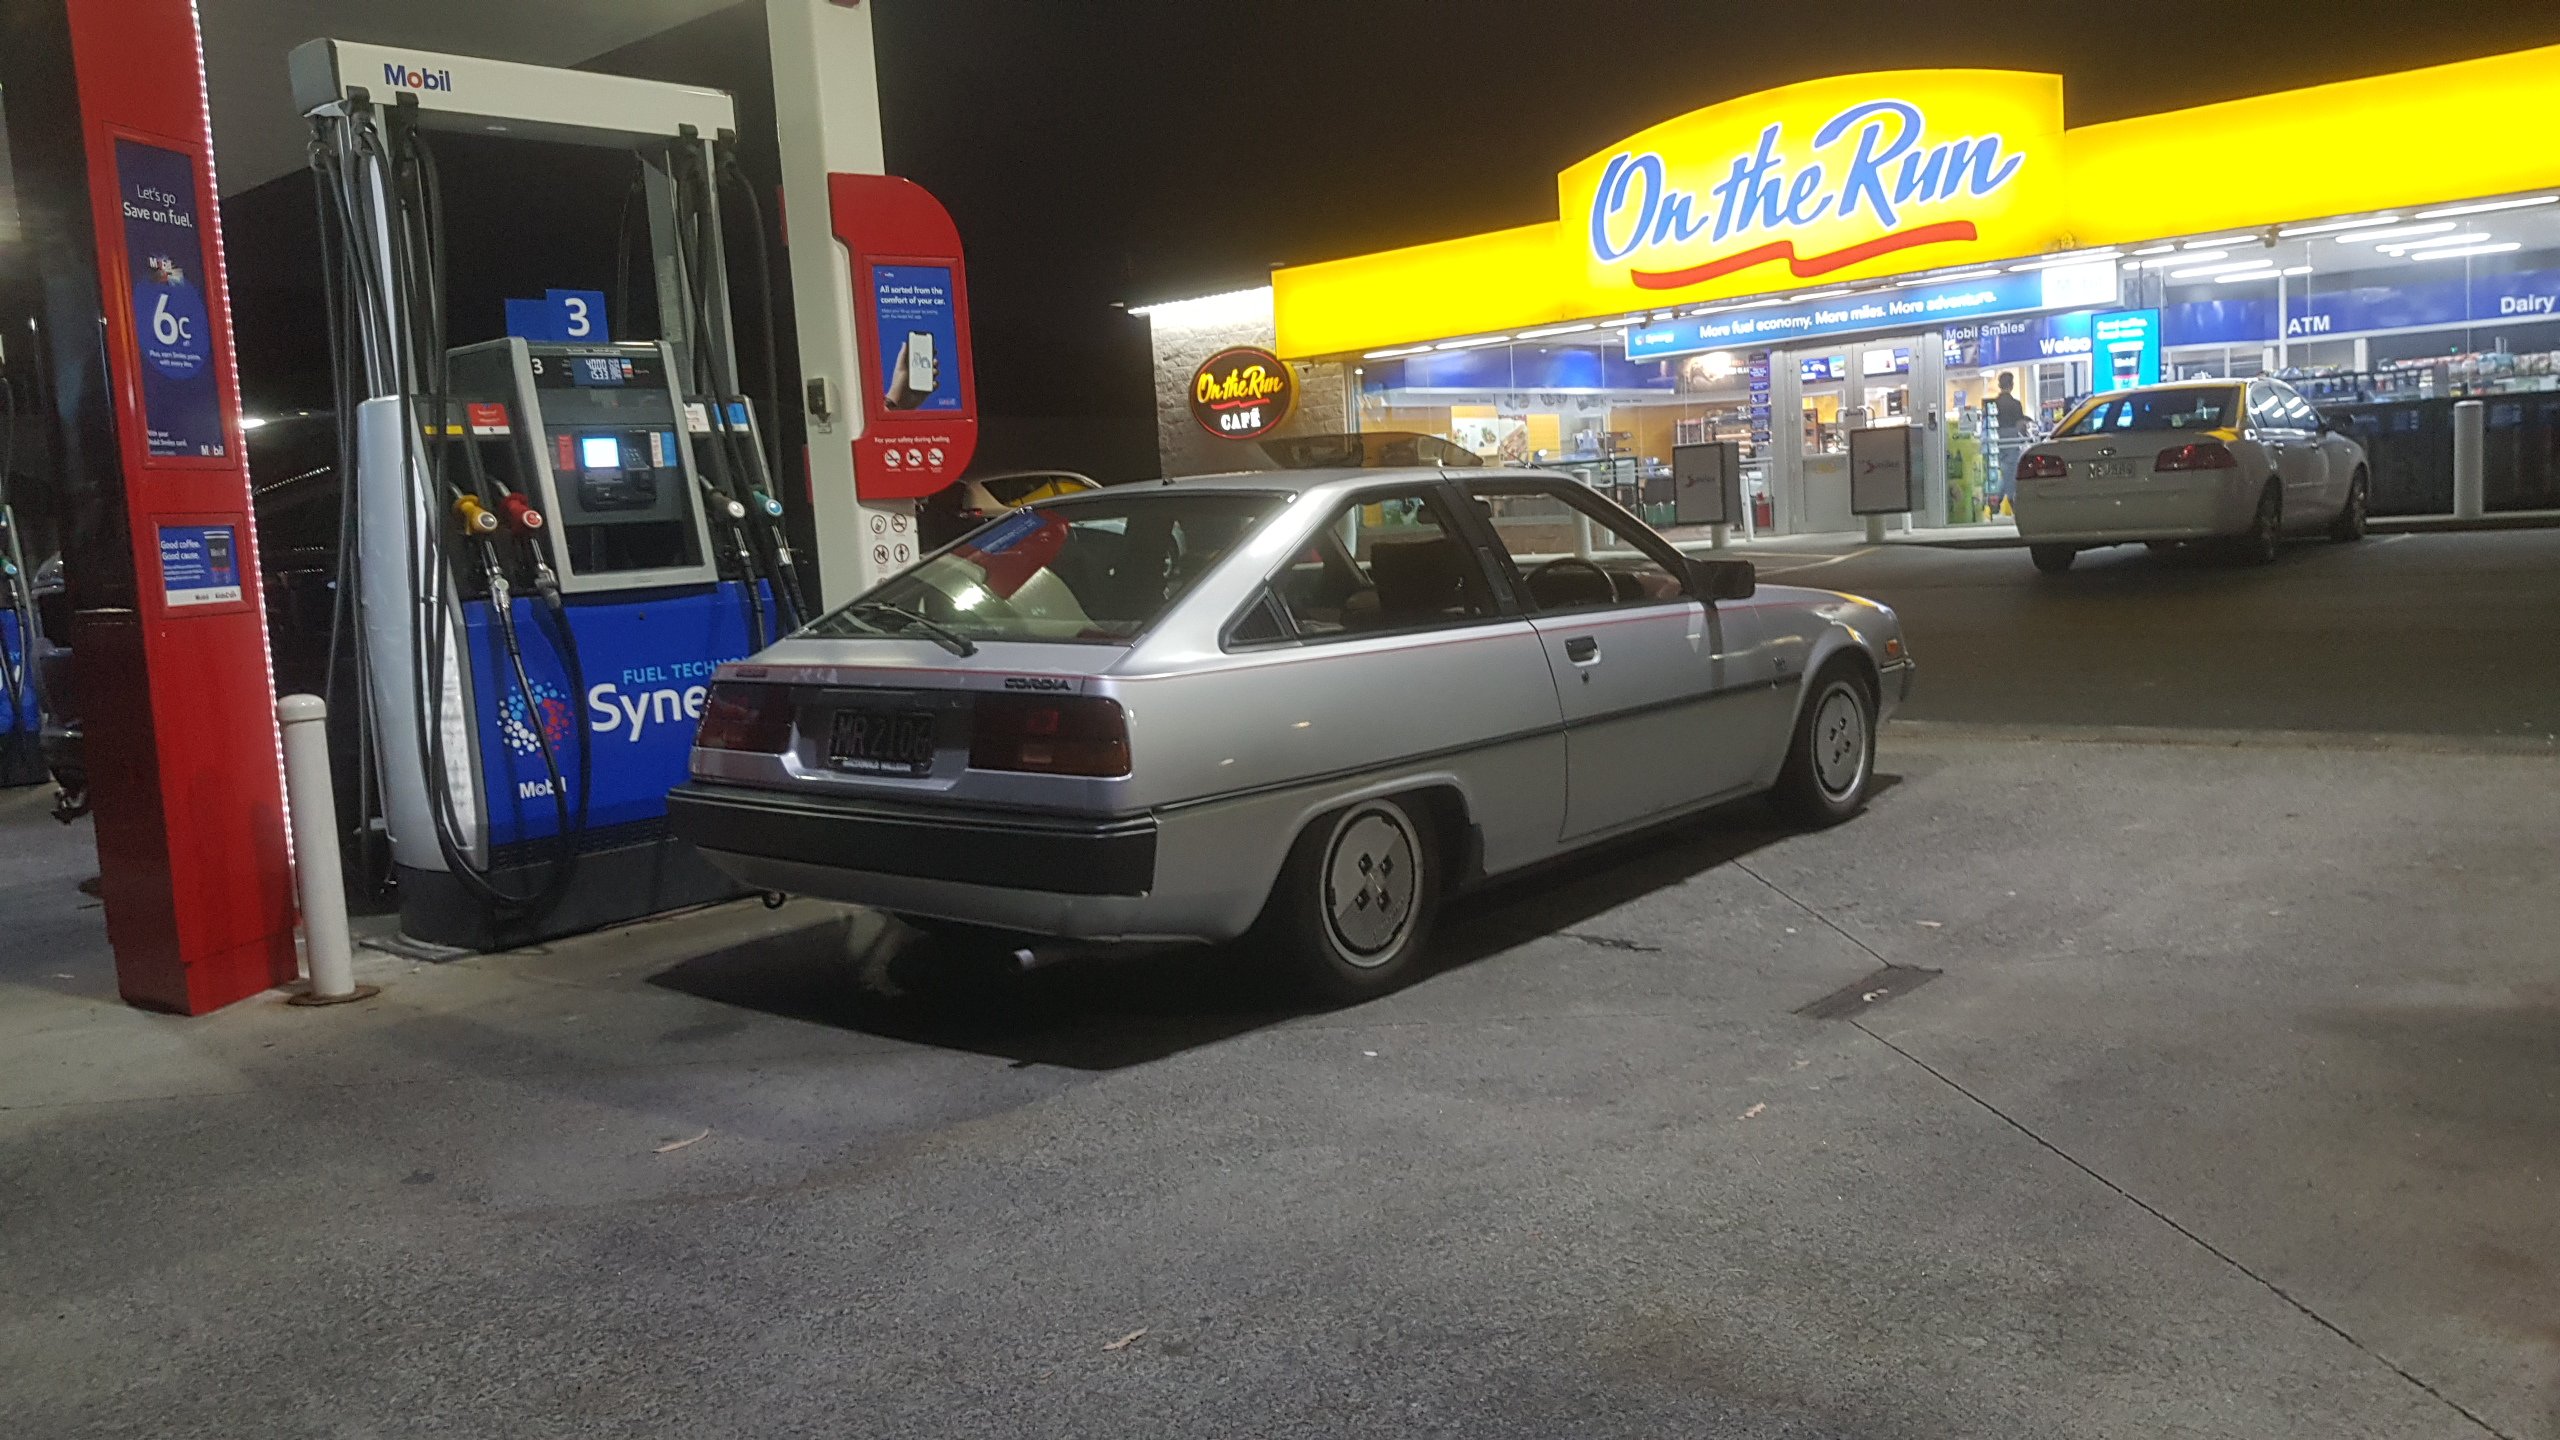
Got my wof a couple weeks back, just in time for the New Years Jap meet. Did some not very sensible things to the suspension on the Friday night, gave the paint a quick hand polish and the glass a clean Sat and took it for its first fuel up in a couple years.
1 point
-
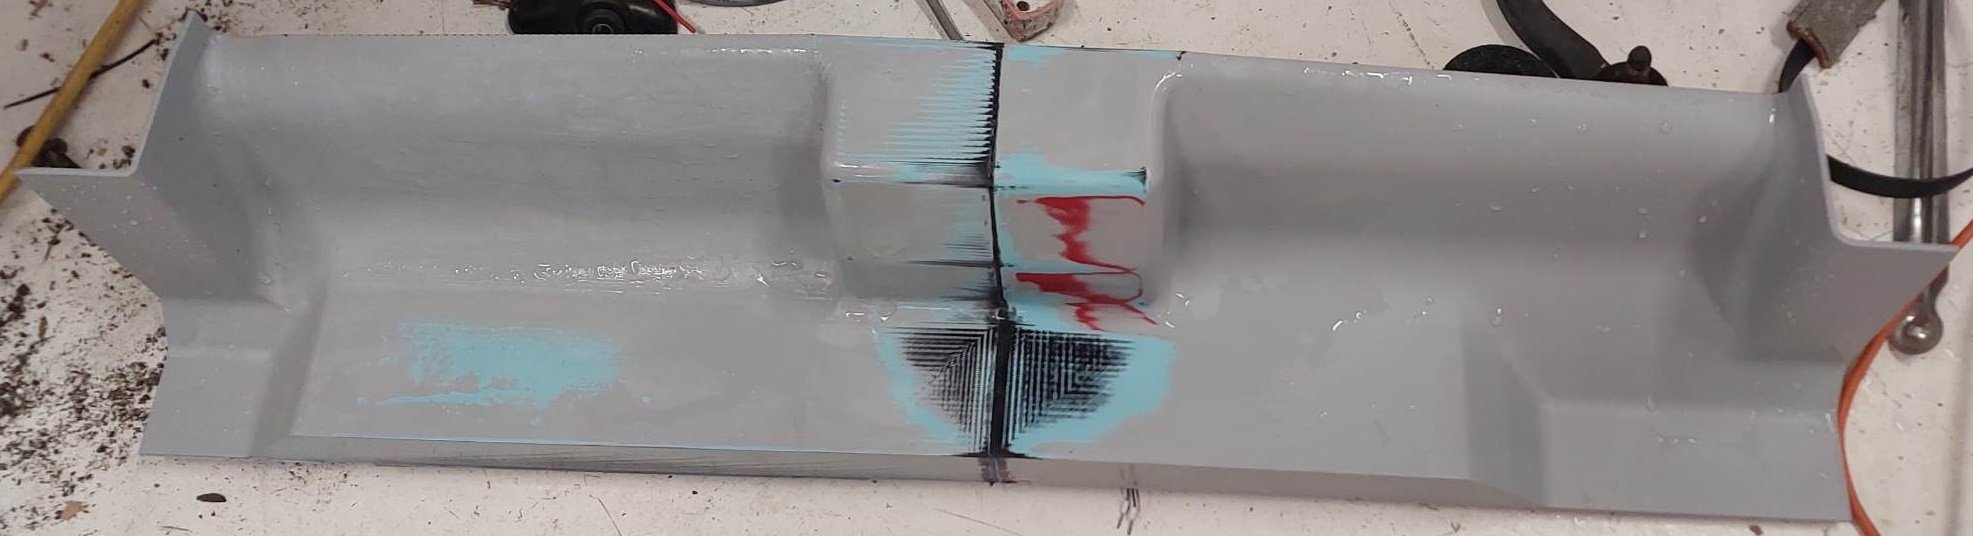
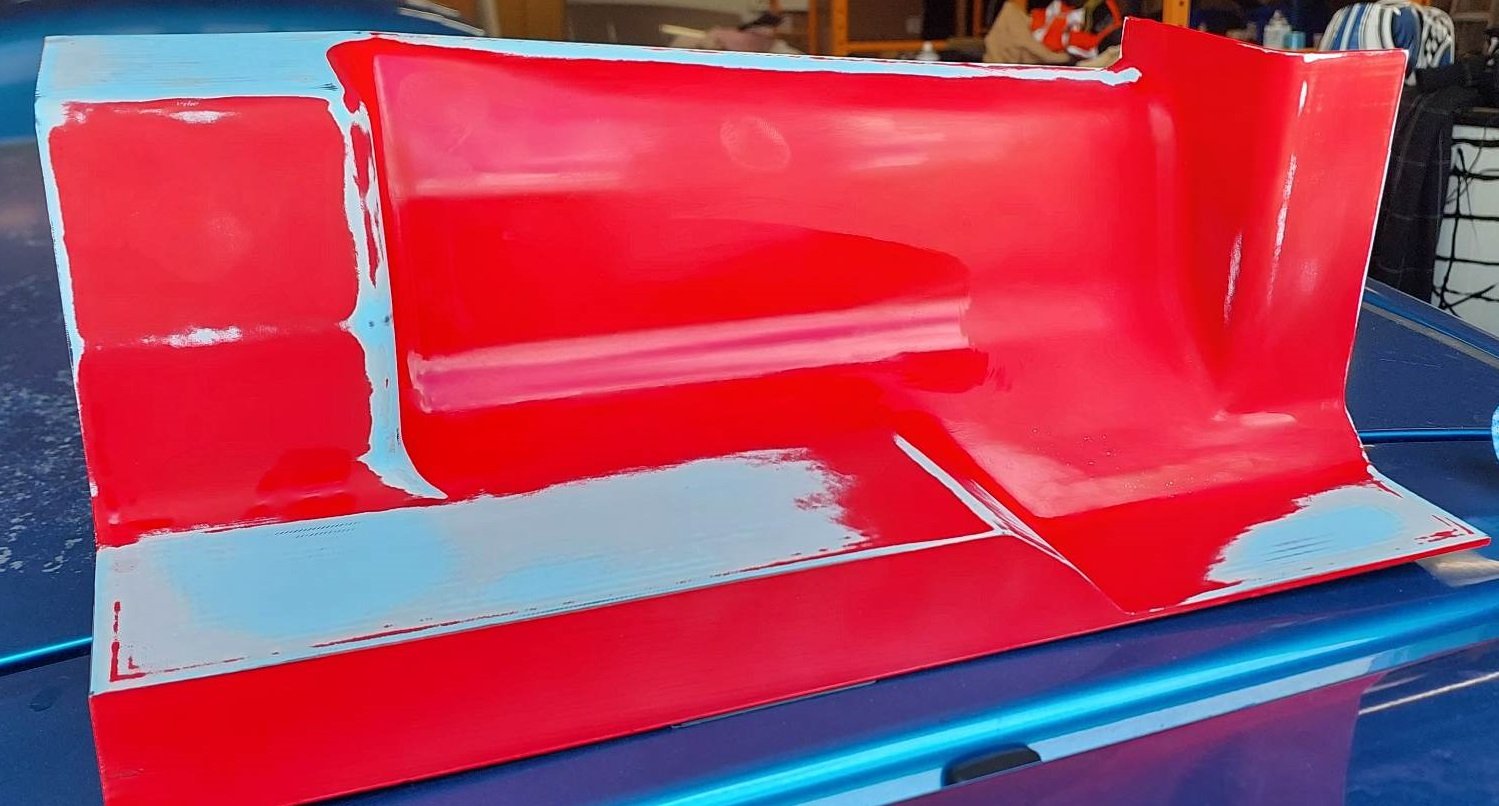
Think they're actually called a nibbler. The upper die reciprocates up and down very fast. The one we have at work pretty much looks like this. I made some bog and wood patterns to get the profile of the original swages right. Dies I made out of steel. Just 6mm welded and shaped. They had to be slightly modified to press the ends flat after going through the pullmax (bottom one has the modification cut off again). I cleco'd some angle to the panel to use as guides and then you just push the sheet through the dies. I did two passes as the cleco's kept popping out, as one pass was a bit aggressive. The next one I have to make. Don't forget to put some sort of release agent on before the bog haha. This one I have drawn the profile up as a DXF and going to plasma cut the dies to get them close and then hand finish them the rest of the way.1 point
-
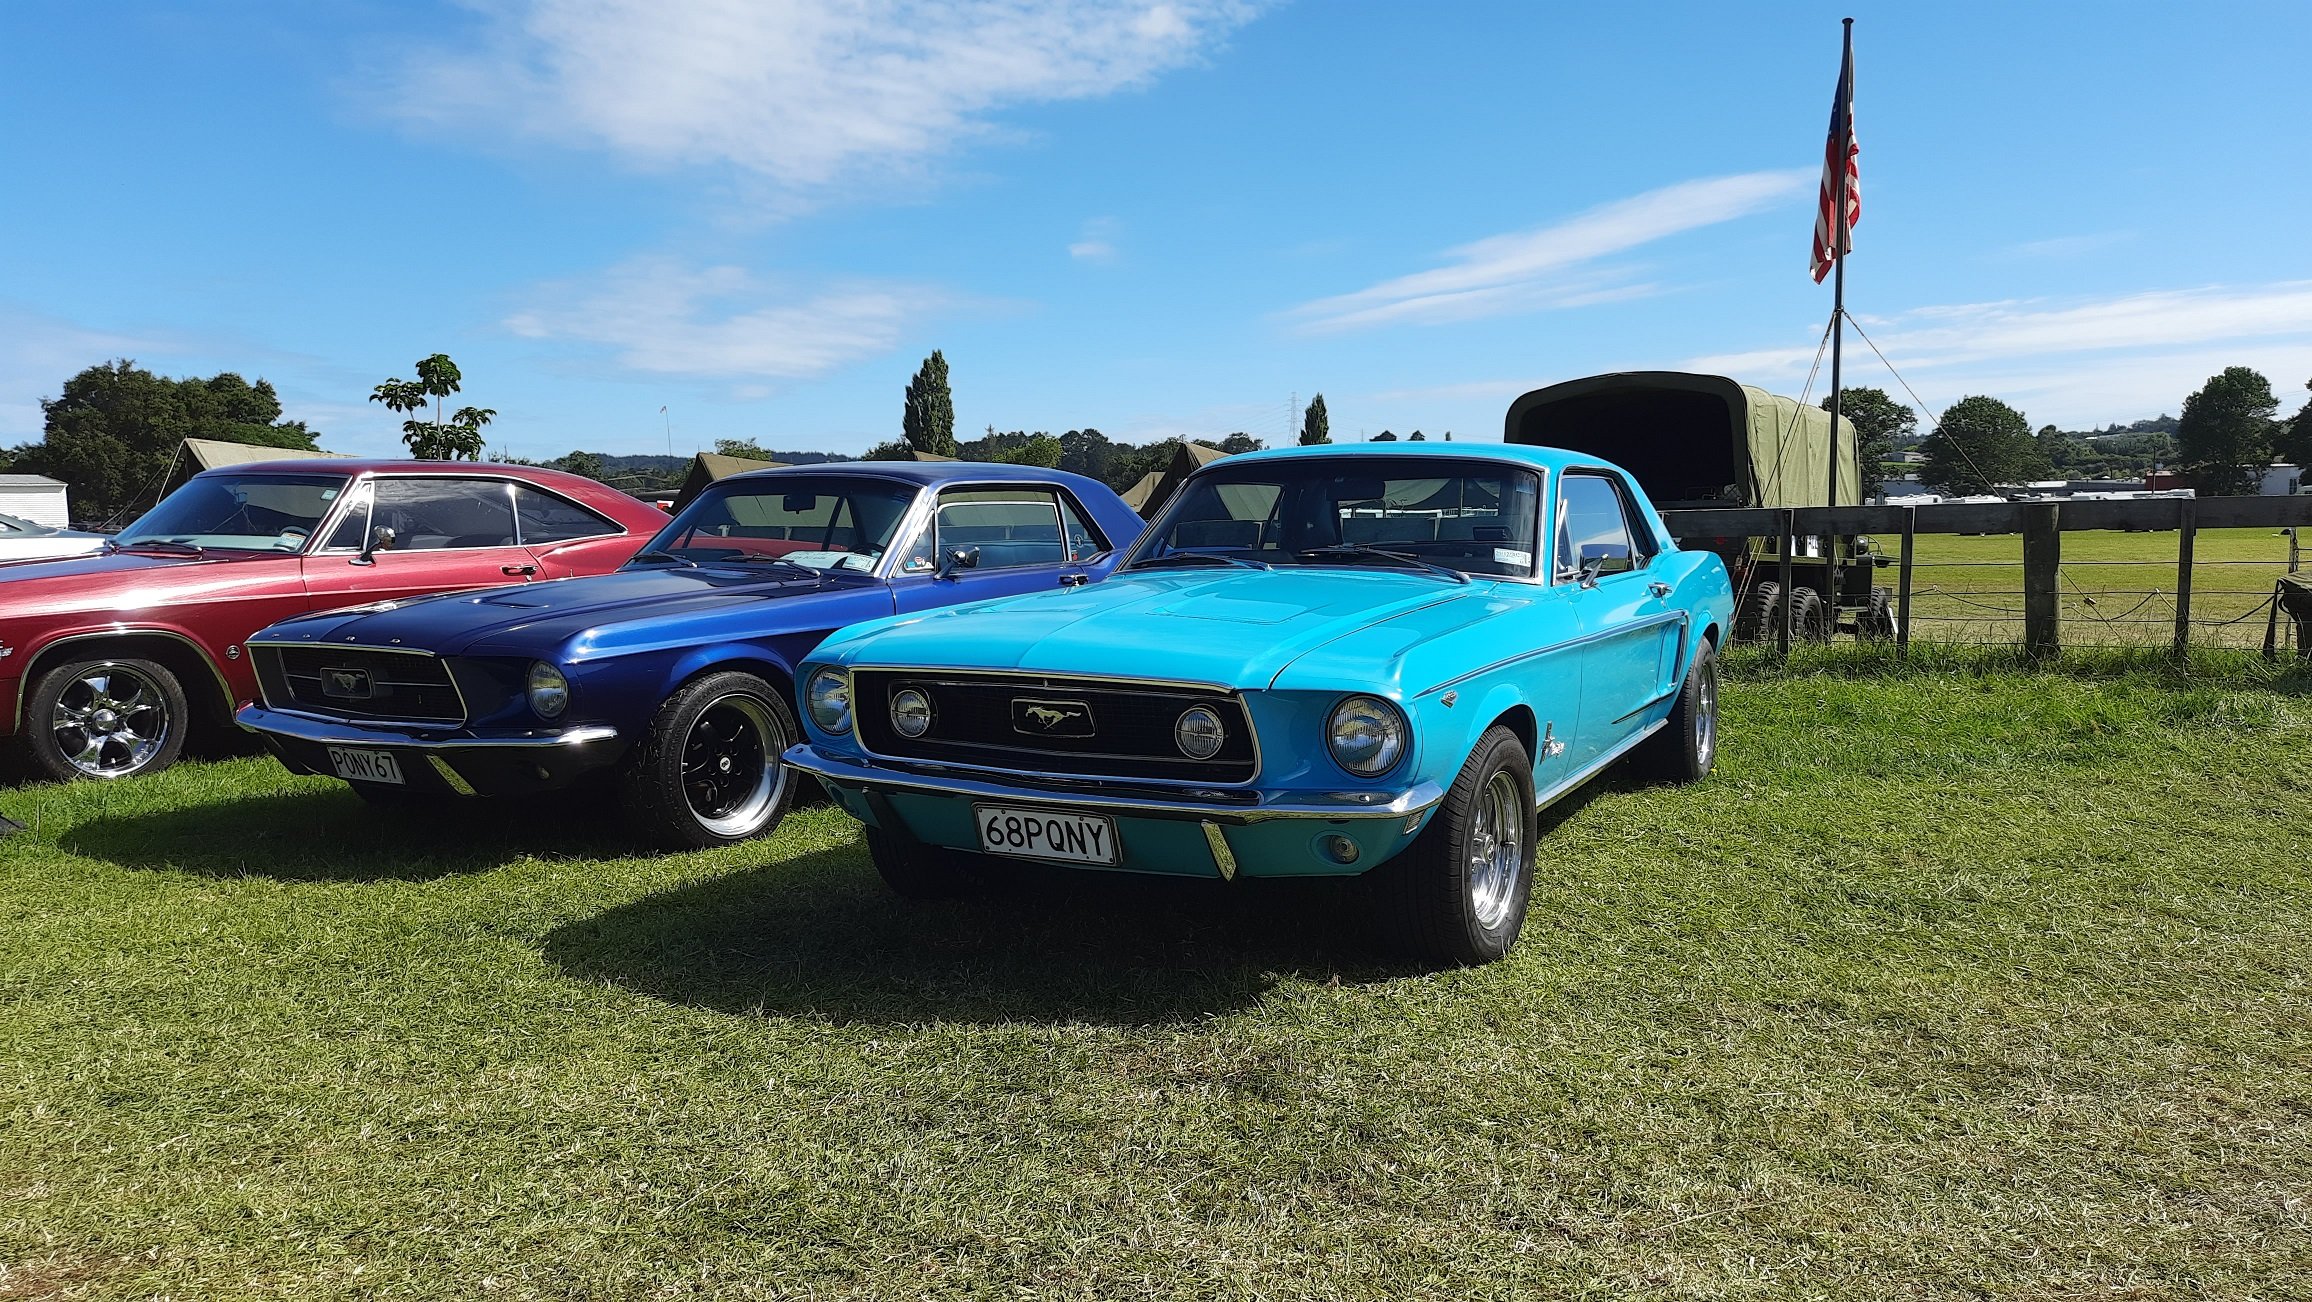
Made it to Kumeu on Sunday. Light turnout compared to Saturday but did manage to find the Mustang's older brother.
1 point
-
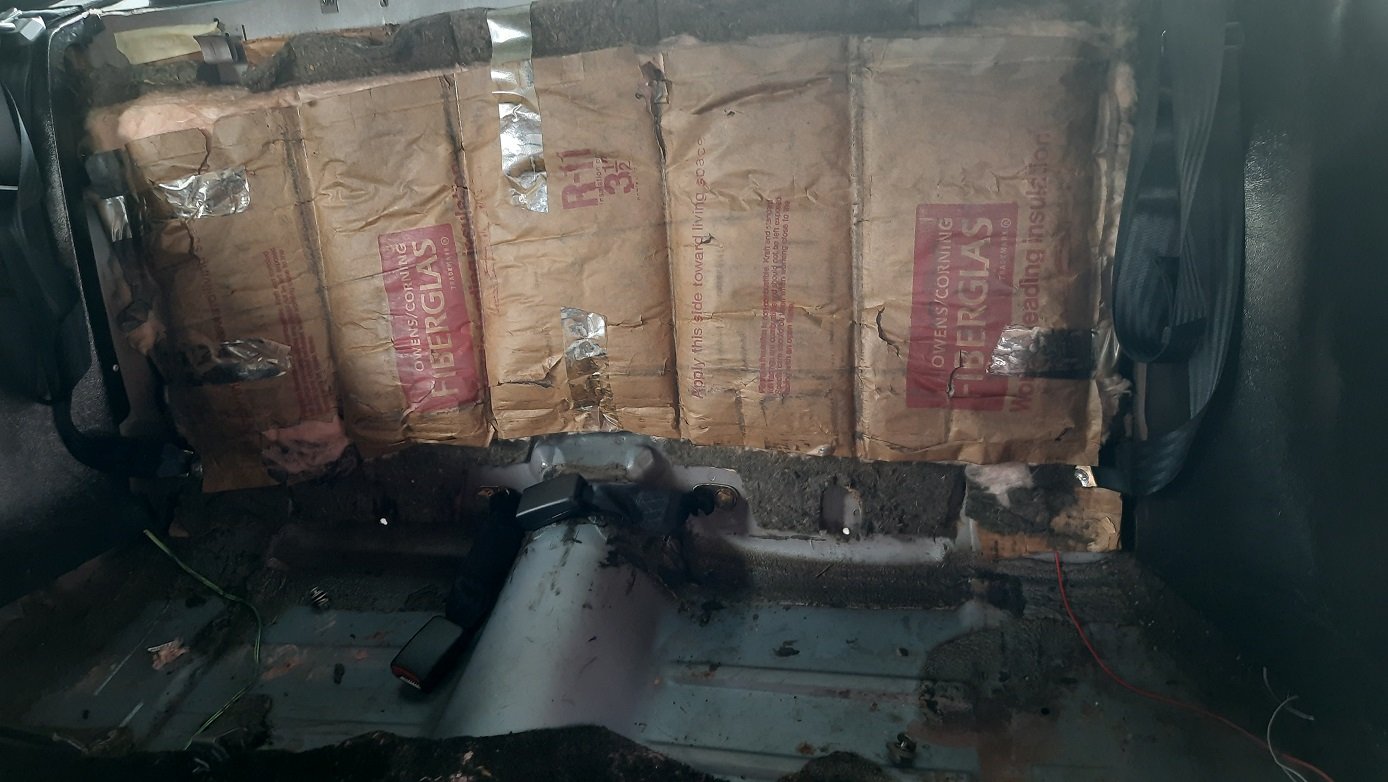
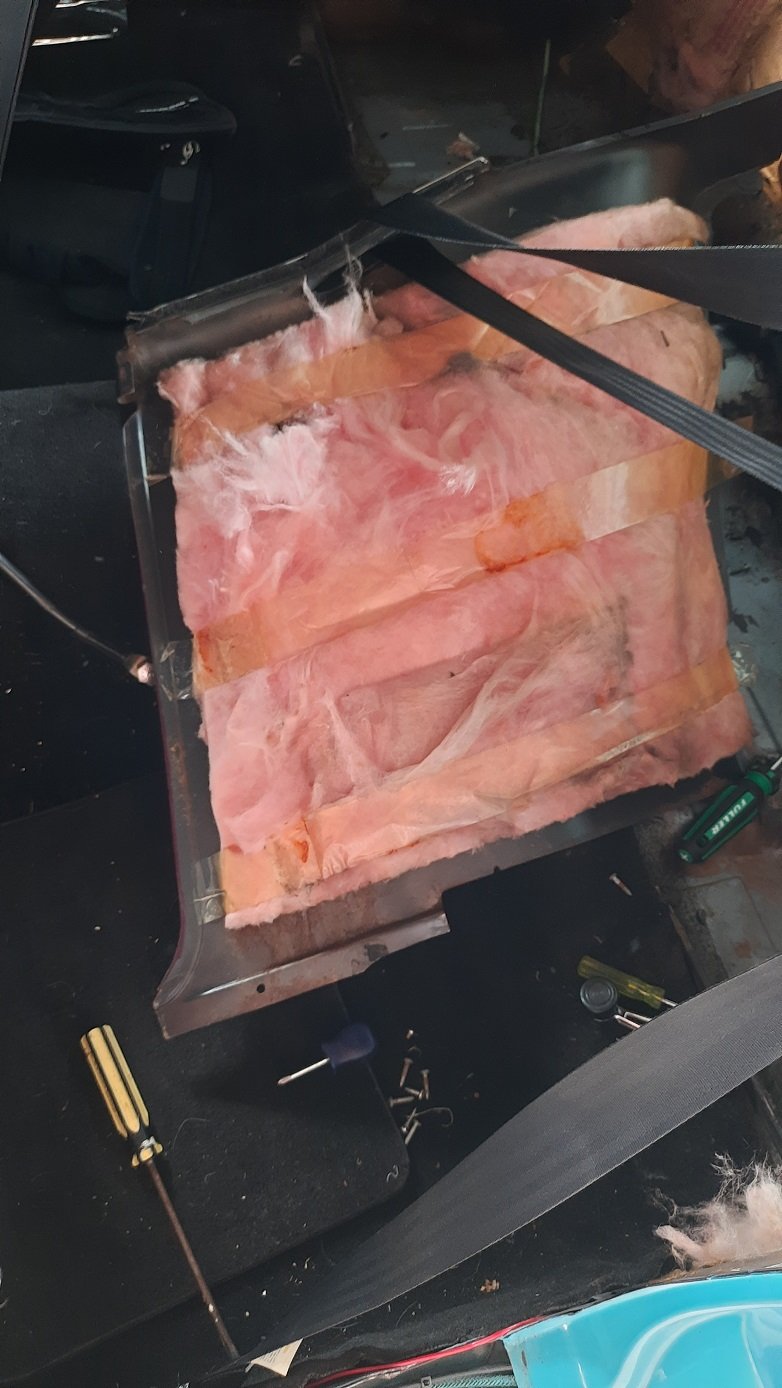
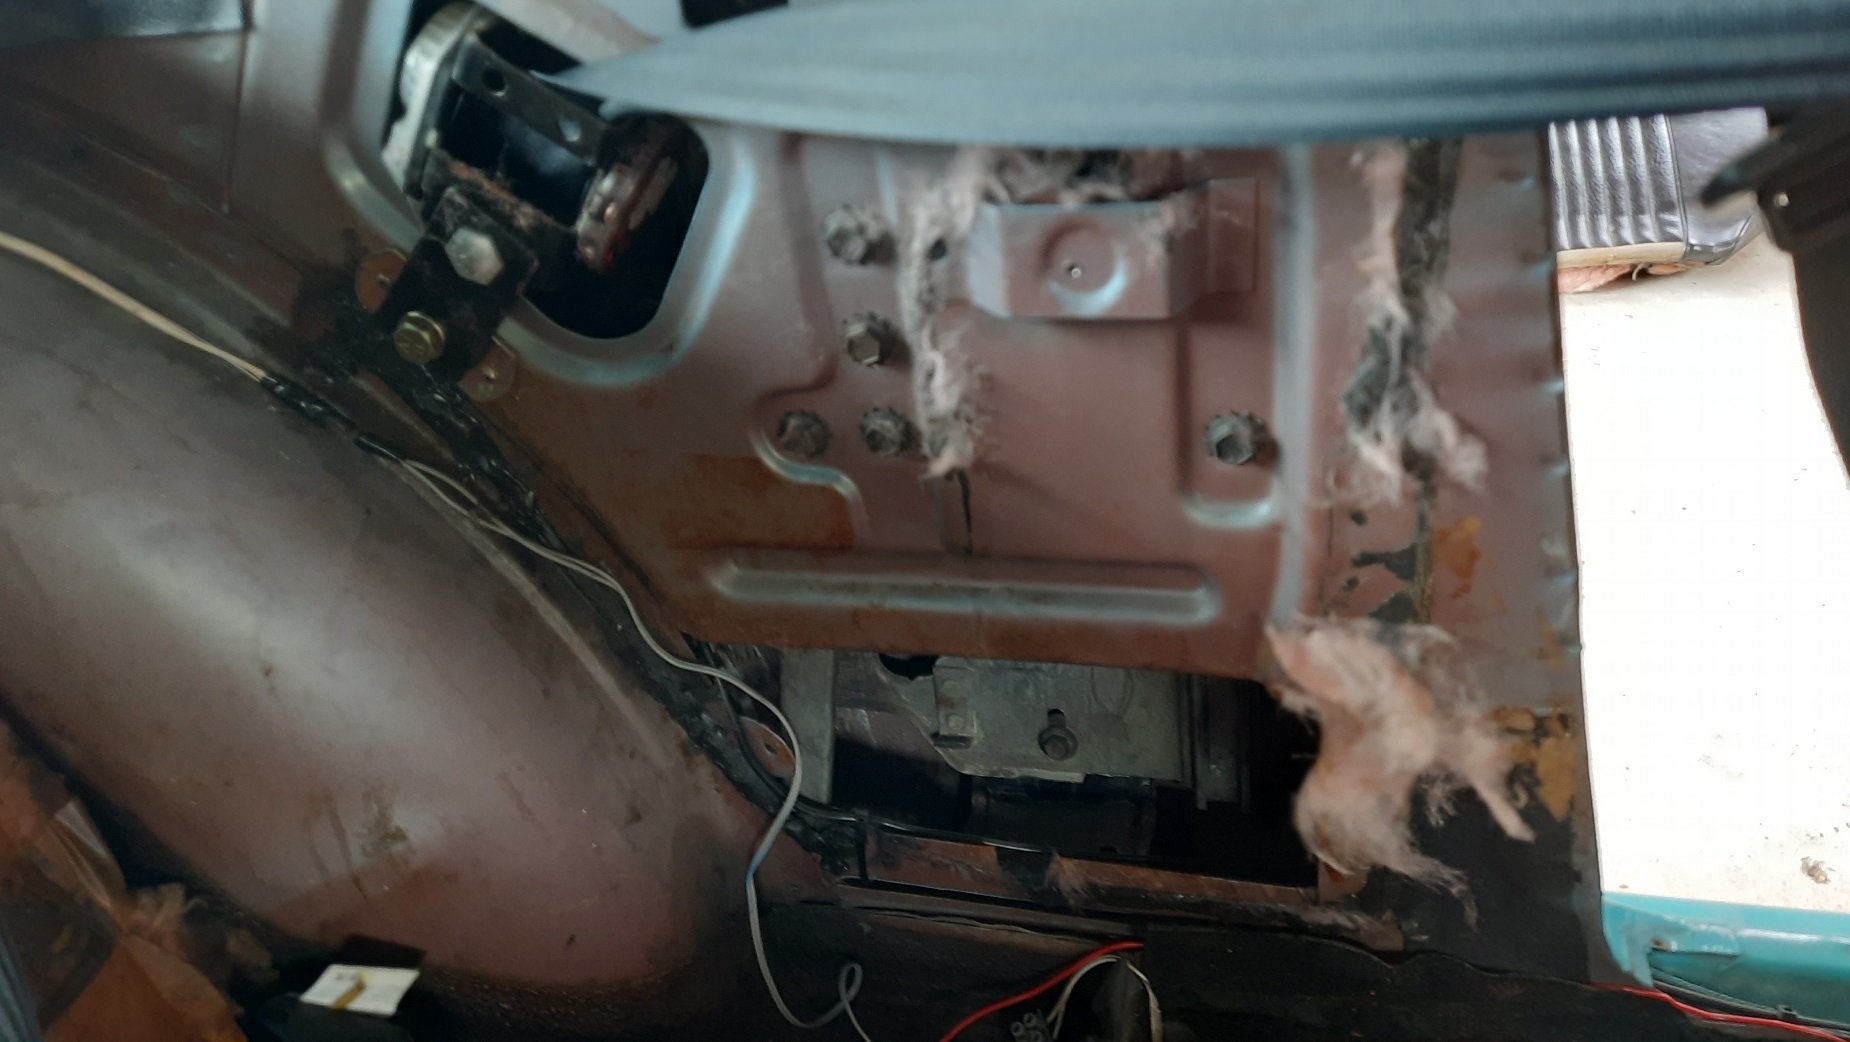
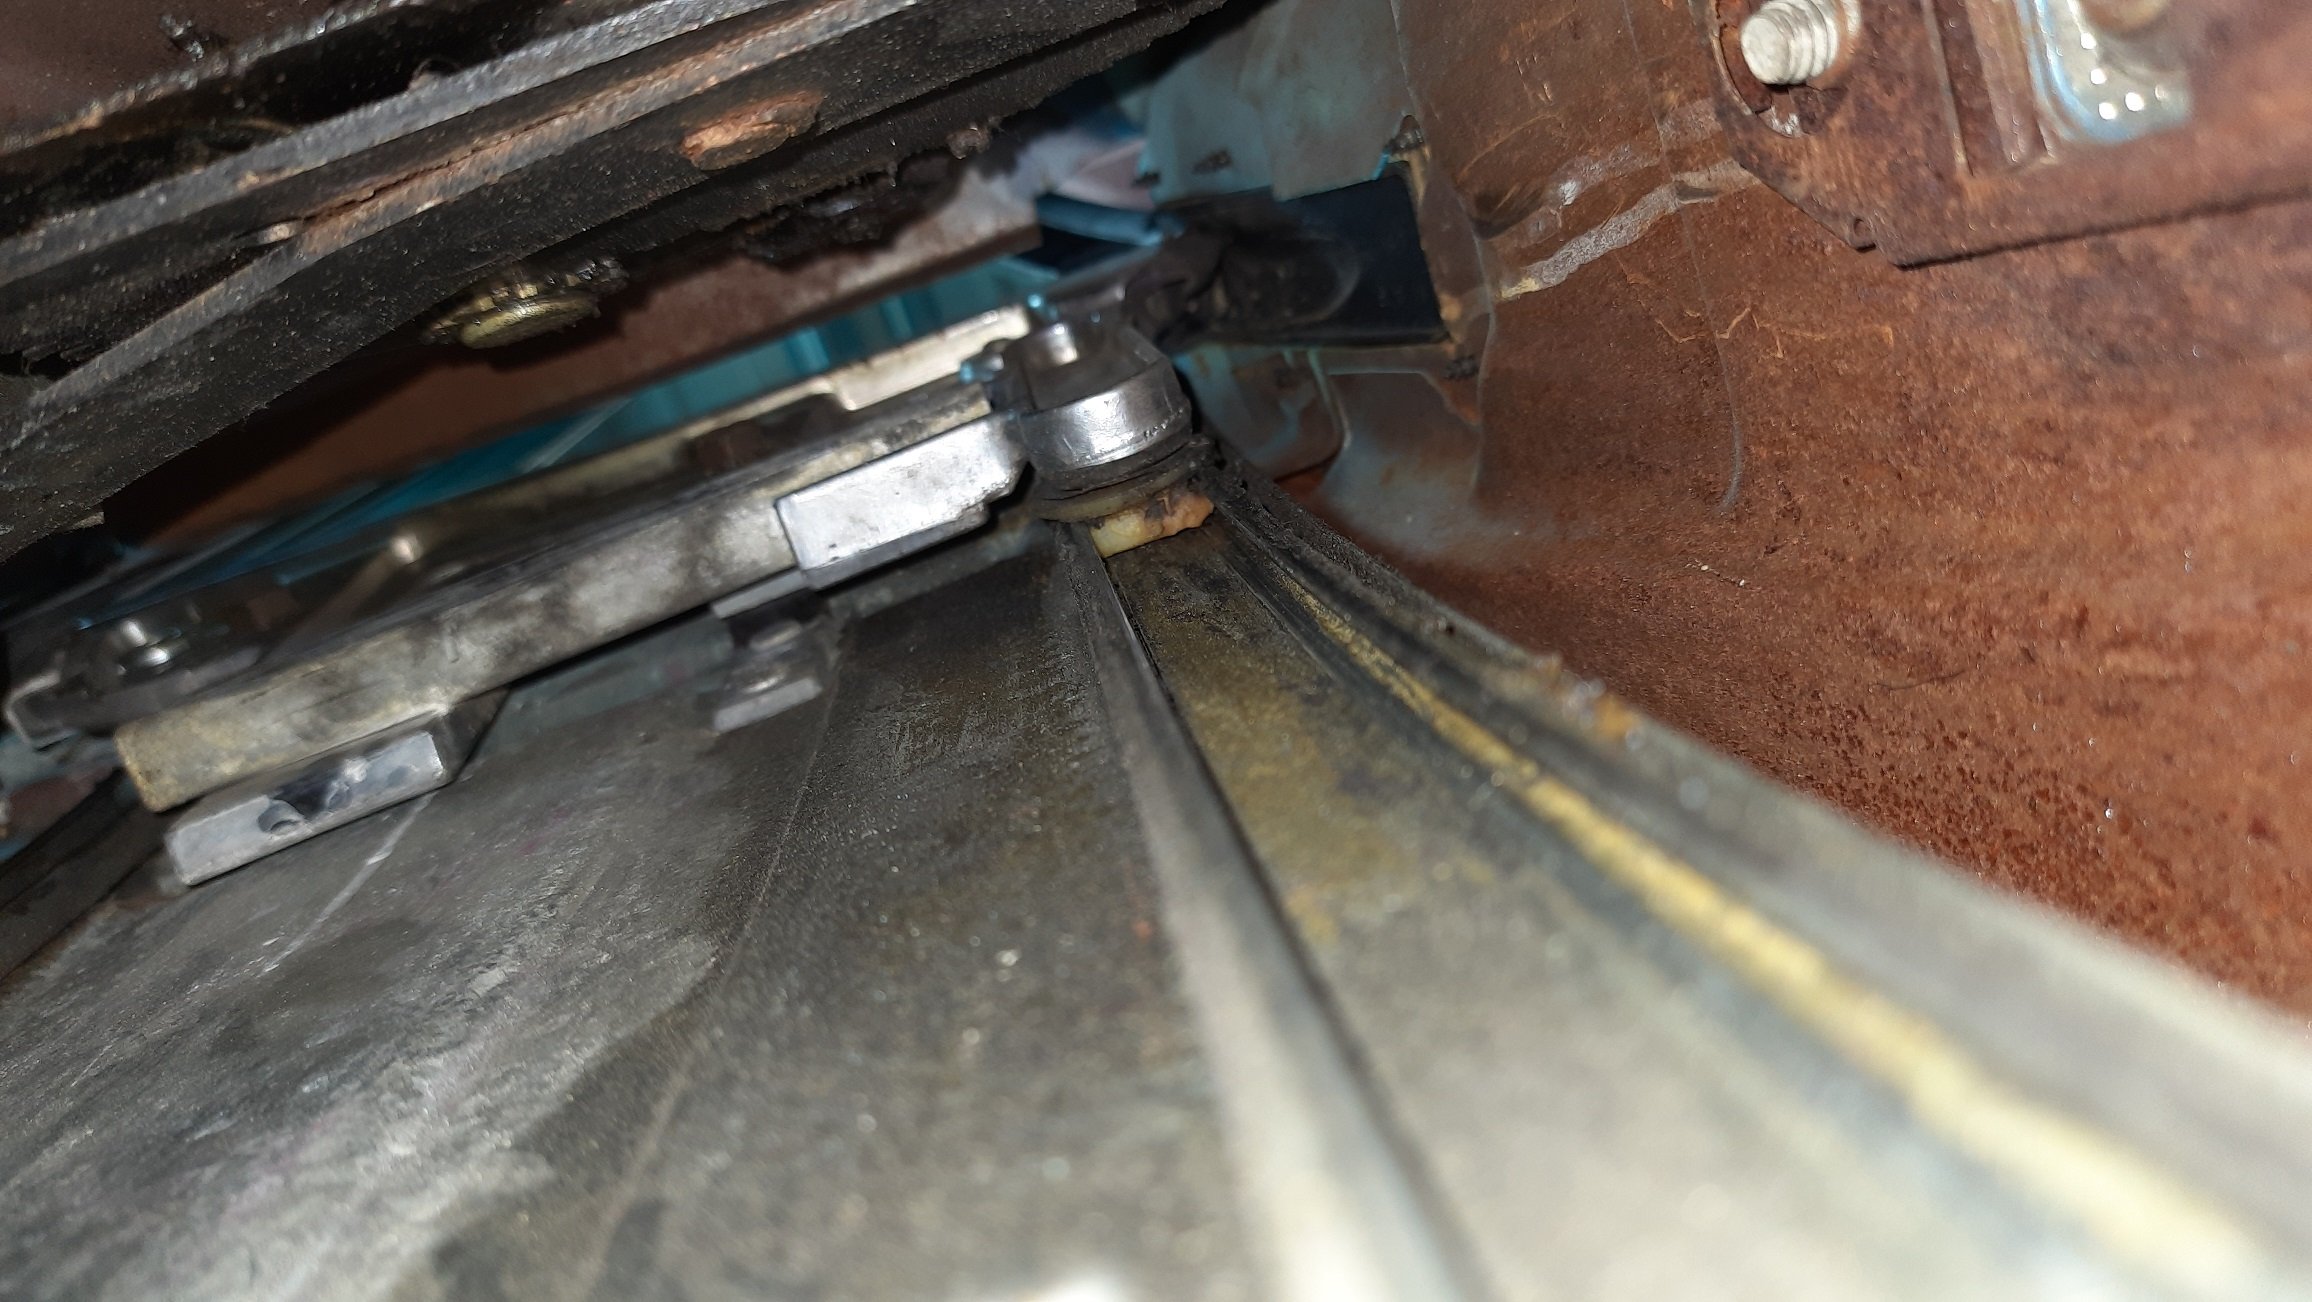
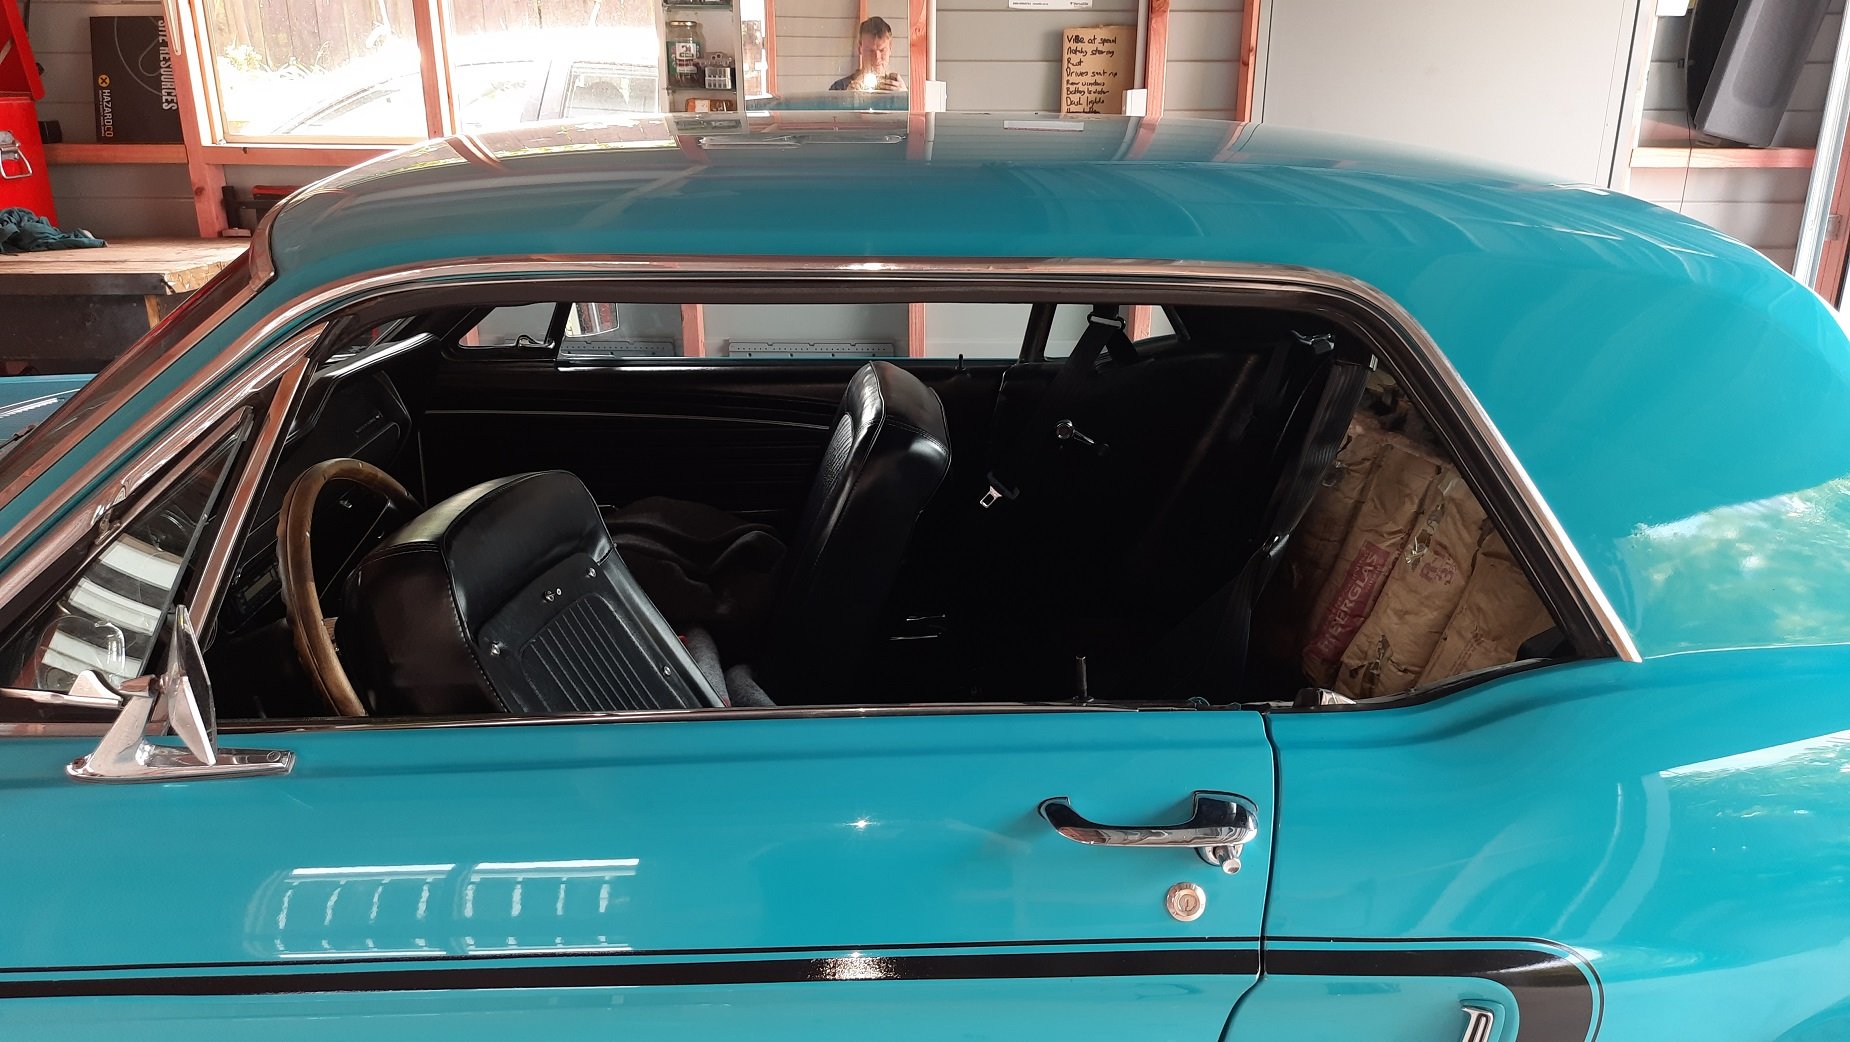
Decided to have a quick look at why the rear windows don't go down. Started by pulling out the seats and then side trim The previous owner really liked house insulation, not sure if it is achieving much The side panels are actually metal. Mustang guys probably knew that but news to me. I can see why you'd insulate it but dynomat or similar would be better. Later project. Can see how the window system bolts in and also (badly focused) the inertia reel. What you can't see is the rollers on the bell crank came off the fixed and moving sliders. Still can't see it here but it was wedged at the top behind the inertia reel. I think the belts were probably fixed and inertia reels added and there may be an interference problem but getting the rollers back on proved to be a bitch. I got one back on the window but not the fixed slider and then removed the roller to see if I could set that first and probably made things worse. I probably need new rollers and to actually remove the system and clean it all up. I could then also clean up the red stuff inside the panel while I'm at it and cavity wax it all. I think there will need to be a take two. Did manage to slide the window down by hand though. Secure as.
1 point
-
I tried some finessing with a hammer and dolly, and got it around 10x better than it was1 point
-
Come to old-school, suggestions on best 4cyl include rotary, V6 Mazda, and Barra.1 point
-
Have you considered 2zz?1 point
-
So, a story. Near the start of this thread I mentioned how I'd found a solution for getting drive to the wheels which encouraged me to carry on with the project. Well, I had been in contact with the company and all was looking good until I finally tried to order the unit and found out that due to a materials shortage they were no longer available and no eta on when they would be again. Bums. Anyway, I wanted to carry on so started down the path of having one custom made, this was looking good until I tried sourcing the gearset. I wanted a certain size, ratio and strength but couldn't get much help from local companies so I parked it for a bit. Then out of the blue I get an email from the first company saying they had a customer who was trying to sell their unit AND they were in Australia so maybe I could save some clams on shipping. So I fire off an email, the guy is a good sort, had a project but now wants to move the parts on. Things are looking promising, the diff is unused, price is two thirds of retail and I happen to be visiting his town over New Years. So a deal was done and I bought this back on the plane with me today. Other than the extra shaft it's all Mini internals so should have some options with ratios and an LSD if needed.1 point
-
I haven't done much lately but worked up some motivation to sort this mess. I did a bit more to the template I had started earlier, cut some wood, cut some metal, bent some edges and ended up with something better looking. The curvy bits are the lugs for the ECU tray to bolt to. I tried to keep it as open as I could so as not to restrict airflow too much. There is still a bit more to add to it like some holes and captive nuts plus the oil cooler sub-bracket. Old and new I also fit the water pump controller and tidied all the wiring. There is not much space for extras but the wheel tub gives a nice clear view.1 point
-
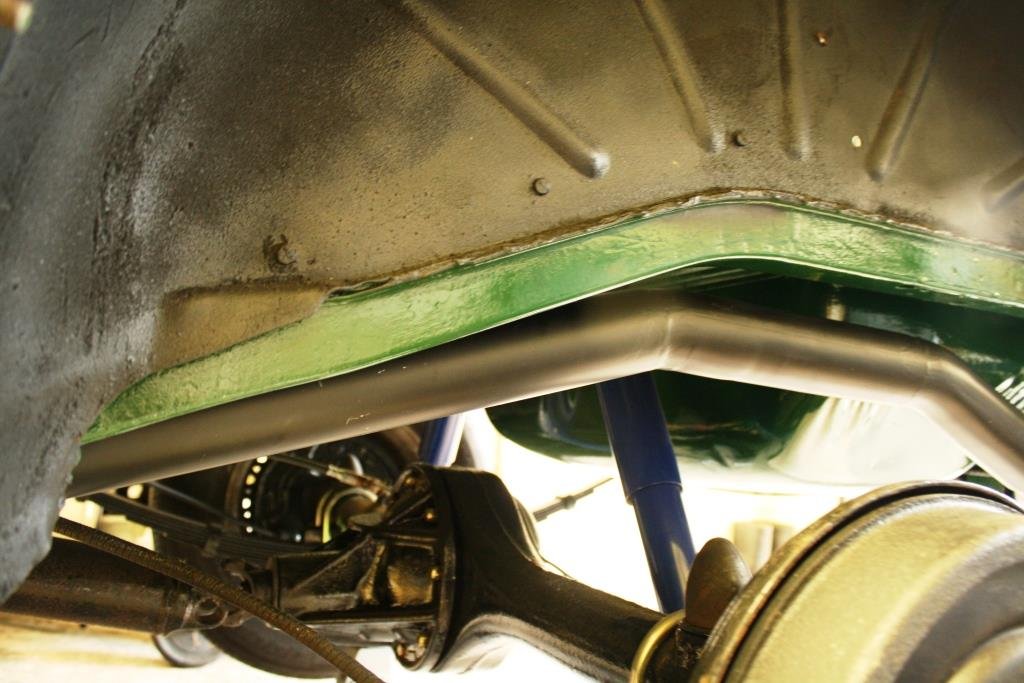
The time has finally come. I couldn't put it off anymore. I needed to cut out the rust. I have really been procrastinating on this work, as I have never really done bodywork like this before. The closest was fixing the rust on the Corolla, which was minor compared to the scope of this work. The main goal was to cut out and replace the steel on any rust that could cause an issue come WOF time. There will still be some more bodywork to do down the track, but once the car is on the road that will be easier to do. So that means I need to cut out the rust in the two front floor pans, the LH B pillar and LH outer sill. When you consider the car has been off the road for 26 odd years, and most of that stored outside, that's not bad! The front floor pans had been badly patched years ago by a previous owner, using rivets, sealant and some tin. The B pillar has a hole in it, behind the window seal, which means that the quarter window needs to come out. And the outer sill is perforated the whole way along, especially toward the rear. I started with the floor pans, as in theory, it should've been the easiest place to start and then build up to the harder sections. The first job was to grab a hammer, screwdriver and chisel, tear off the patches that had been riveted on and see what they were hiding. This big one on the RH side was the first to go. Instead of drilling the rivets out, I used the chisel to just cut through them So, it was covering a patch of very thin metal, with a drain hole that has rusted out. The circle hole is meant to be there, as it is used during the manufacturing process but usually has a steel "paint tin lid" plugging it. Obviously, the hole rusted out, the plug fell out, and it was covered over from there. There is also a recess pressed into the steel, which just acted as a rust trap over the years There are a lot of other small holes and thin metal on this side, so I originally marked it out to cut the whole lot out, but I'm a bit hesitant as finding the spot welds is proving hard due to the rusty metal (and it's spot welded to a couple of different reinforcers under the car). The LH side was a similar deal. A few patches... This one up against the inner sill gave me some concern as it has a big bead of sealant running down along the sill. Sure enough, the steel under the plate is ruined, as is the section of the inner sill where it met the floor. Another rusty drain hole, as well as a couple of screwdriver sized holes next to it (which had their own patch) Toward the tunnel, there was a large patch made up of a couple of smaller ones, which was shaped to fit the indent in the floor panel That one was bad. Big hole under it, and lots of holes poked in thin metal with a screwdriver. There are also a couple of other smaller holes I undercovered. Out came the paint pen, highlighting the extent of the damage. The only thing to do next was to grab the grinder and cutting disc This little brace for the gearbox support was a bit of a surprise. It was also full of rusty chunks from the floor disintegrating. The inner sill needed to be cut out too as that was barely holding together and was full of sealant. To access this better, I cut a hole in the outer sill (which is stuffed anyway) It was pretty ugly in there I carefully removed the inner sill section and peeled it off the jacking point brace Now, a warning. I'm not a professional, heck, I'm barely a beginner at bodywork. I know the basics thanks to a course I took a couple of years ago, but that only covered the basics of welding, not cutting out rust, making patch panels and working with less than perfect steel. I am winging this. I have a semi-decent welder, but had previously been using flux-cored wire, which I swore after welding the Corolla, I would not bother with again (it did the job, and it has a place, but it's just more work for the same result). This time I converted the welder to take a standard 0.6mm (as recommended to me for bodywork) solid wire, and shielding gas. Anyway, so I bought the steel that was recommended to me for this sort of work, which turned out to be thicker than I really should be using; 1.2mm. The original steel is about 0.8 to 1mm. I figure the thicker steel cant hurt in the floor and sill areas, and I will use some thinner steel for other panelwork as needed. The first patch I needed to make up was for the inner sill, as everything attaches to this. I did some CAD (Cardboard Aided Design) and cut the panel out so it was a reasonable fit. I left the bottom a bit longer, as that will get trimmed later when I do the outer sill. I'm embarrassed to show these initial welds, but it's all part of the process. I had been having serious issues with my wire feed, which I fixed after this section was done. I went over this a couple of times to make sure it had penetration and then ended up welding both sides. It needed to be strong. I know, I know, I needed to clean the surrounding metal better. The other issue I had was my gas regulator was DOA and the flow meter didn't work, so I just turned the gas up a bit and ran with it. The welding on the inside was marginally better. I plug welded the brace to the new inner sill section, but also later went around and welded the edges right onto the panel too. The front section of the inner sill is where I started to work out the issues with my machine, and more importantly, technique. There are some better welds here, but far from perfect. Due to the weird shape, I chose to lap weld this patch instead of butt welding it in. Once the inner sill section was in place, the first floor section went down. More CAD, but this took a couple of tries to get a nice tight fit. This has a 90 degree bend on the side to meet the sill. The welding is still a bit ugly, but it's strong and has decent penetration. As the saying goes, "A grinder and paint make me the welder I ain't" I carried on again today, and really started to get into the swing of things. The first patch was to join the previous one, up toward the rear of the car. This is a weird one, as it has to start off flat but curve swiftly up to join the existing floor. I made this section slightly oversize with CAD, bent the flange on the side and then notched it The notches allowed me to gently bend the panel in the vice. Once I was happy with the curve, it got welded in place. The next patch, the one that joins on next to it, was a real pain to make. This had to match the curve of the new patch I just welded in, but also match the curve of the existing floor both on the other side and above it. The easiest way to shape this was to make the biggest bends in the vice and then using a hammer and dolly, fine tune it into place. Some additional finessing was done once the panel was tacked in. This welded in a lot better. I'm reasonably happy with it. There is a small patch welded on next to these, which is just covering the small hole I cut out. Finally, I made a large patch to start filling the area above the exhaust and torsion bar. This is plug welded to that gearbox brace, and then butt welded all around the edges. Unfortunately my poor cordless grinder ran out of batteries as I was cleaning up the welds on this patch, but some weld through zinc primer and that was me done for the day too. I still have that one hole to fill, and then I'll move onto the RH side. I've learned a lot doing this side, so hopefully it will go a bit smoother, and quicker. A second grinder will be added to the collection soon, as using the one grinder for everything is just a real pain in the bum and it's chewing through the batteries. Having a corded one at the workbench for just cutting will help immensely. Having dialled the welder in a bit better, and ironing out some of my issues with that and my own technique, my welds are getting better. That last patch needed minimal cleanup with the grinder. Once that floor is completely welded I'll scuff the whole thing up, seam seal the welds and coat it in a zinc rich epoxy. Everything will be covered by carpet eventually. It will need undersealing under the car again too, but that will come once I have both sides done and can jack the car up to get under it.1 point
-
So, riding the high of driving the car, now its time to hit the low of the inevitable.... the rust repairs. I kinda wish I didn't start poking and prying at the plates of tin riveted to the floor, but it had to be done. I've cut it all out now and started to weld some areas back in. I wont post photos of that until the grinder and paint have been along to fix things.1 point


Instagramphotosandvideos.png.12fae0931b66acf326940efaf74bf593.png)


This leaderboard is set to Auckland/GMT+12:00