
Leaderboard


Popular Content
Showing content with the highest reputation on 09/16/20 in all areas
-
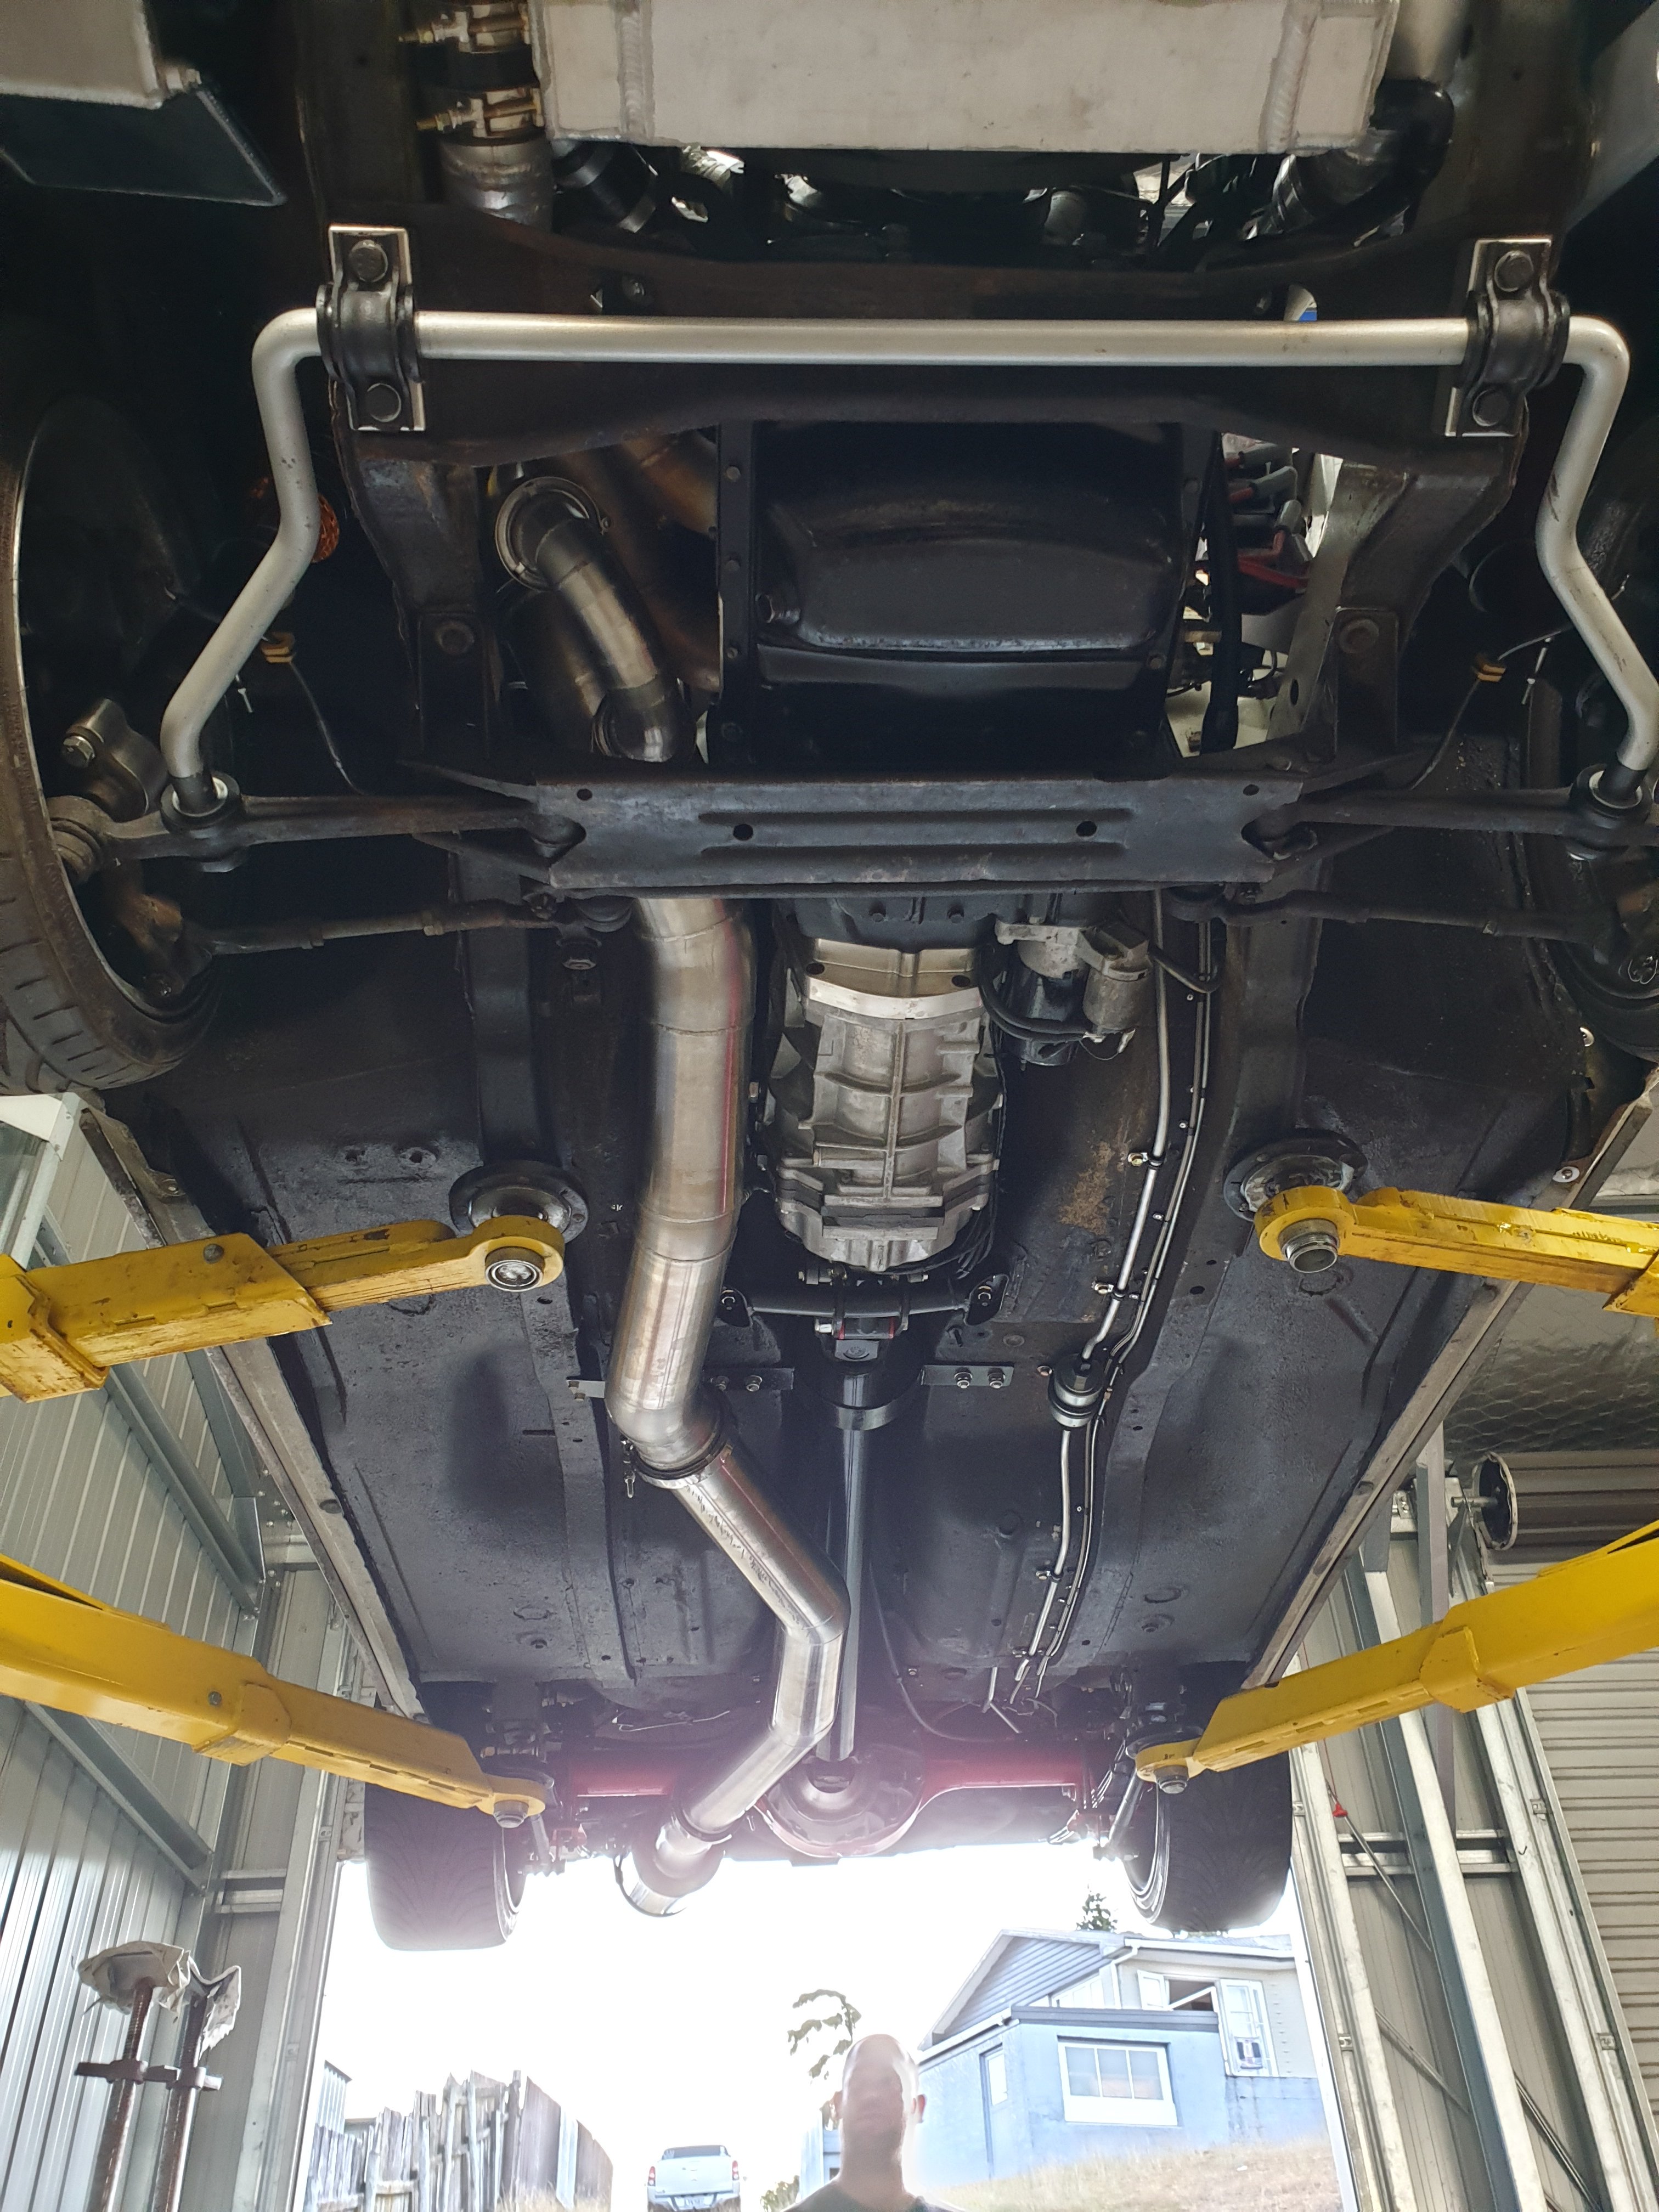
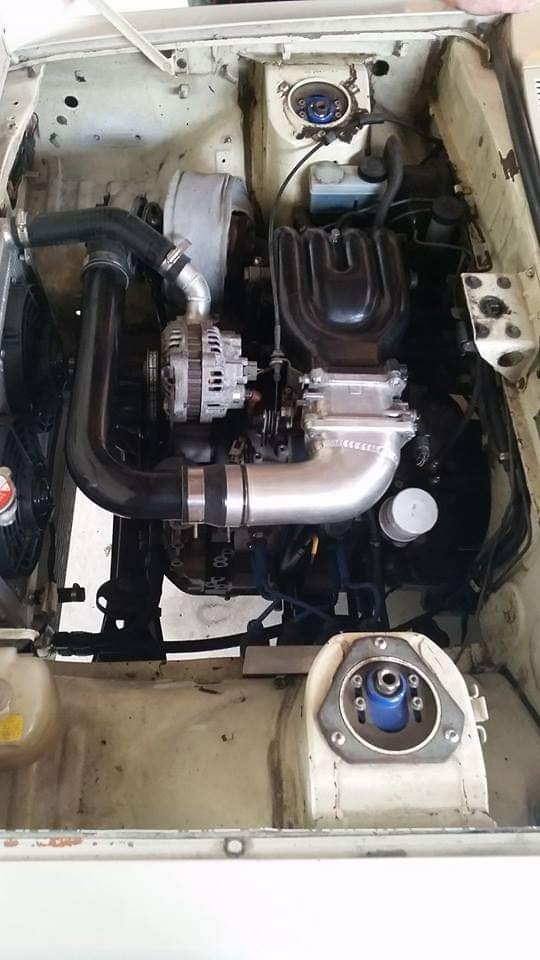
So rust all repaired and on to fitting everything back together, a much more fun job. Rear diff painted, and new brake lines run. With the diff moved back, brake line won't reach chassis, so moved it to exit internally (all lines will be running inside the car) New feed and return lines run through to cabin from surge tank, using hardlines for as much as possible due to cost/weight savings. Tapped the head for the water fitting and blanked it off as I don't need it for my setup, saved 120g by chopping it in half...12 points
-
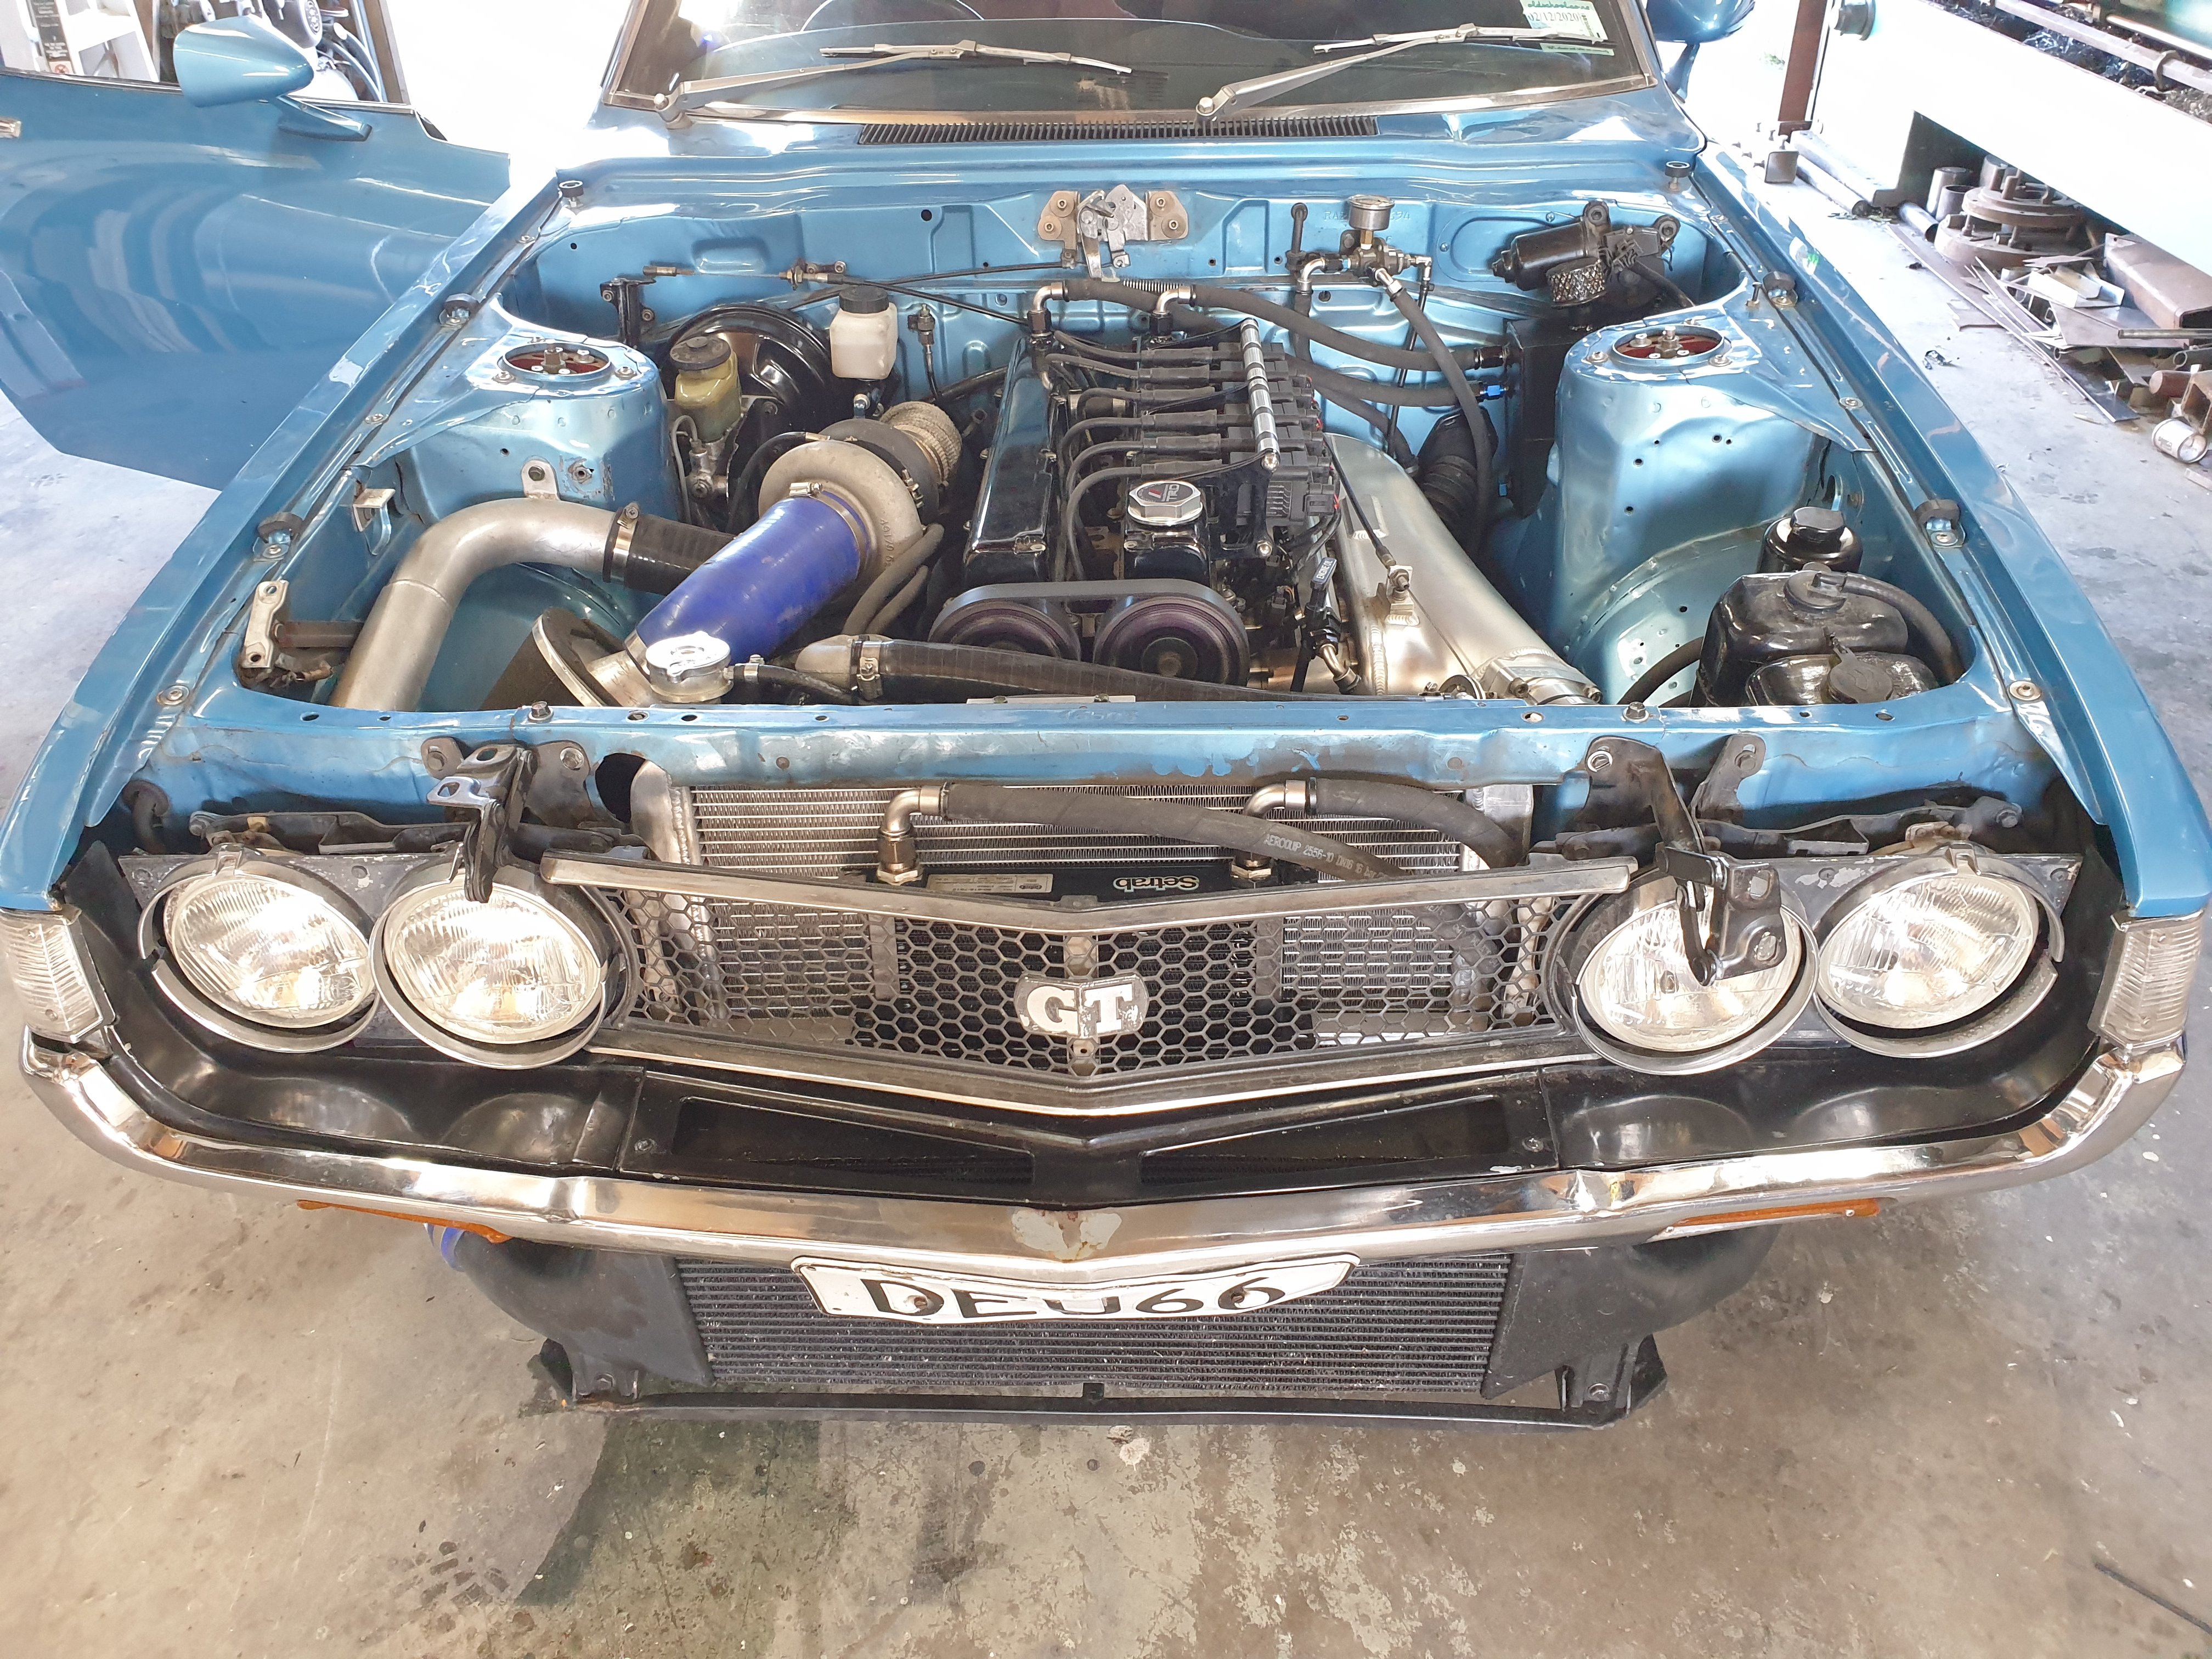
Got it on the dyno made 305kw @14psi . https://youtu.be/zg2lvkEhofM11 points
-
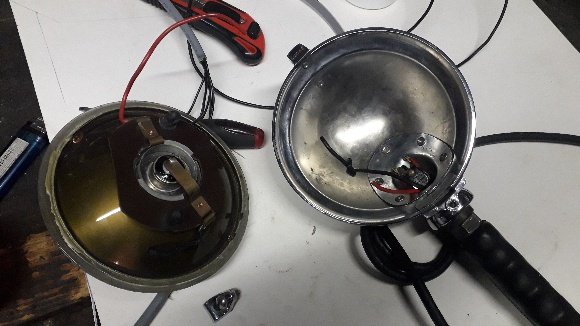
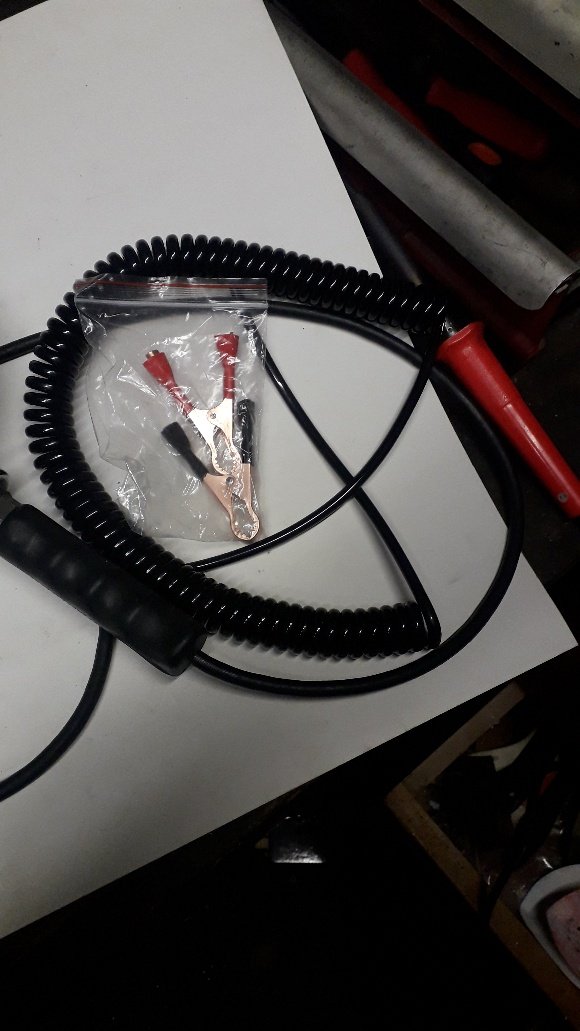
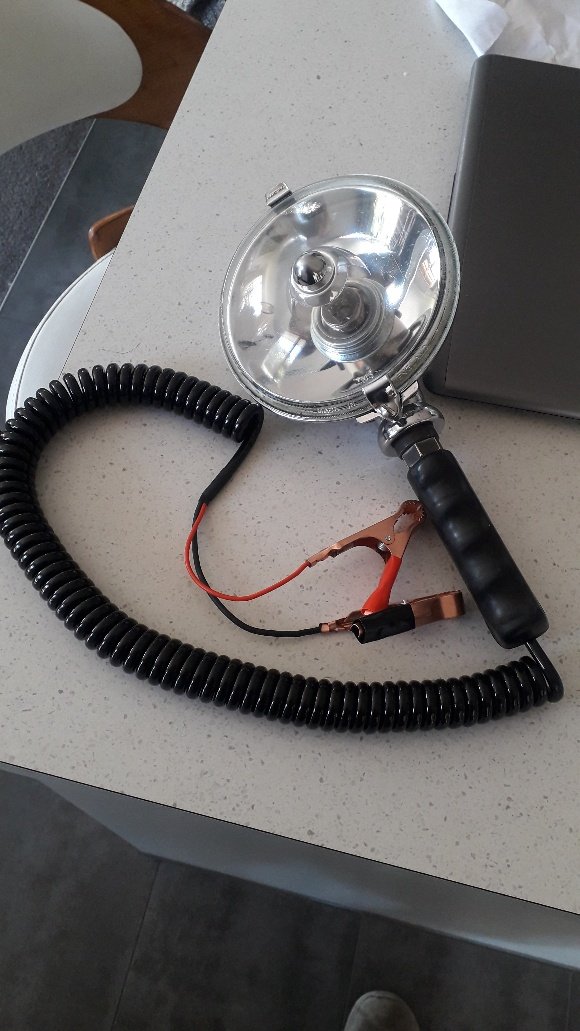
One classic lucas workshop light bought at a swap meet for $20. Blown to hell, I think someone put 240v in it or something, everything was melted. Some ali express goodness and a very expensive bulb. Seriously. The bulb was more than the lamp lol. Done. And it works.
 8 points
 -
Whilst I give the push rod modification a bit of thought I turned my attention to the pipework for the brakes. For cert I need to fit a load sensing proportioning valve because the Thames is classed as a light commercial vehicle. I'm not really keen as I don't plan to carry loads and I figure its just one more complication, but I don't have a choice, so I just need to suck it up. I'll use the valve from the donor HiAce as it already bolts up to the rear axle and I just need to fabricate a chassis mounting bracket. I wasn't sure how the pipework for this valve works, so I spent the morning under the HiAce pulling all of the brake lines out and I now have a clearer idea of how the valve is plumbed. Thanks for reading.
6 points
-
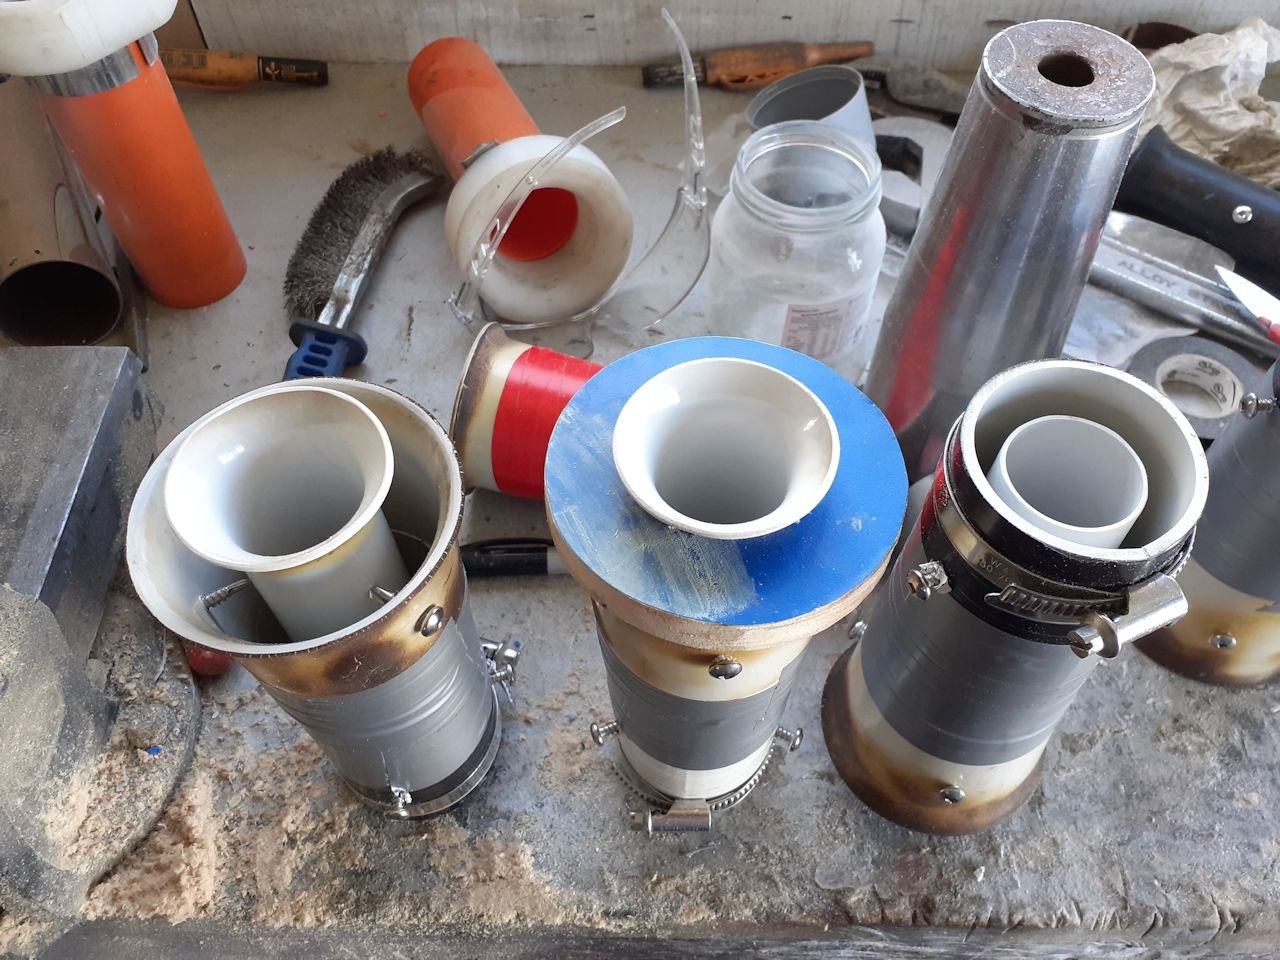
These are up next for some testing. maybe this weekend.
6 points
-
I made this 2x18w for the top of my driveway, it’s fabricated from steel and arc welded, and has an acrylic bowl, all the insides are made by me to, made a post for it to witch is made from heavy DOM tube
4 points
-
Finished up 2 more. Added chill blocks to the bigger top bosses and also a bigger flat one to the middle (instead of the tapered one). Still have the same risers.4 points
-
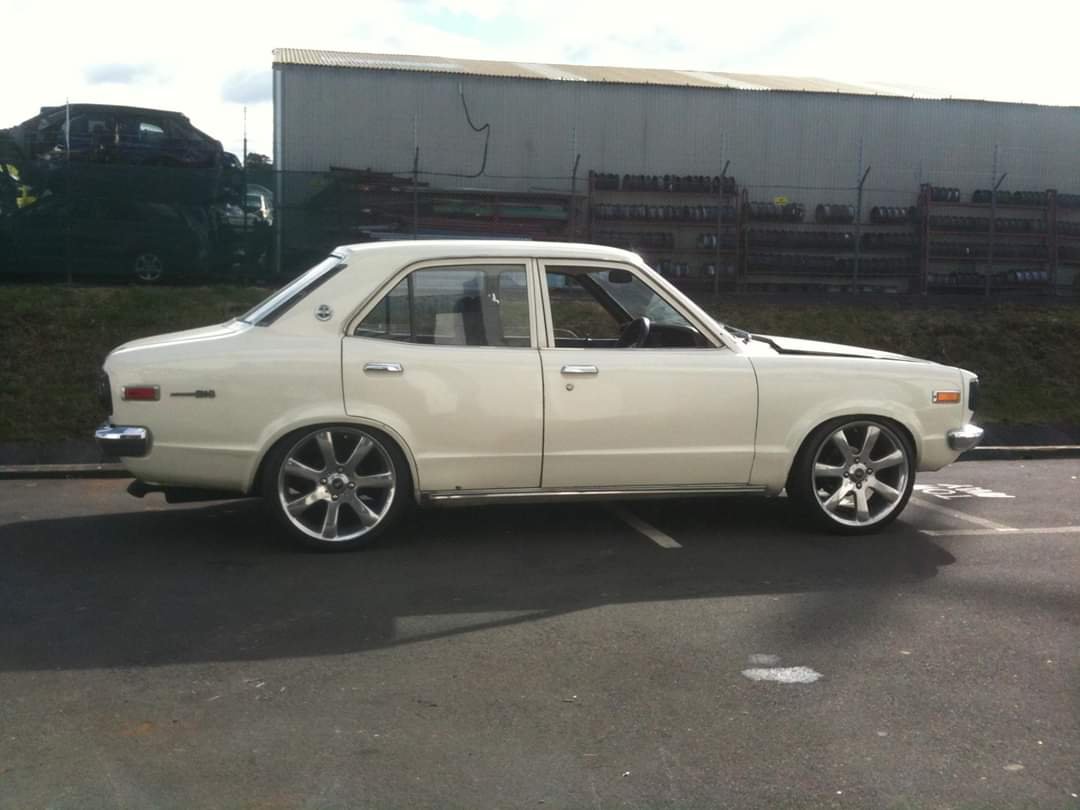
I’m in town again this week. Might try to find my way out to this place to show off my white automatic Toyota Corolla.3 points
-
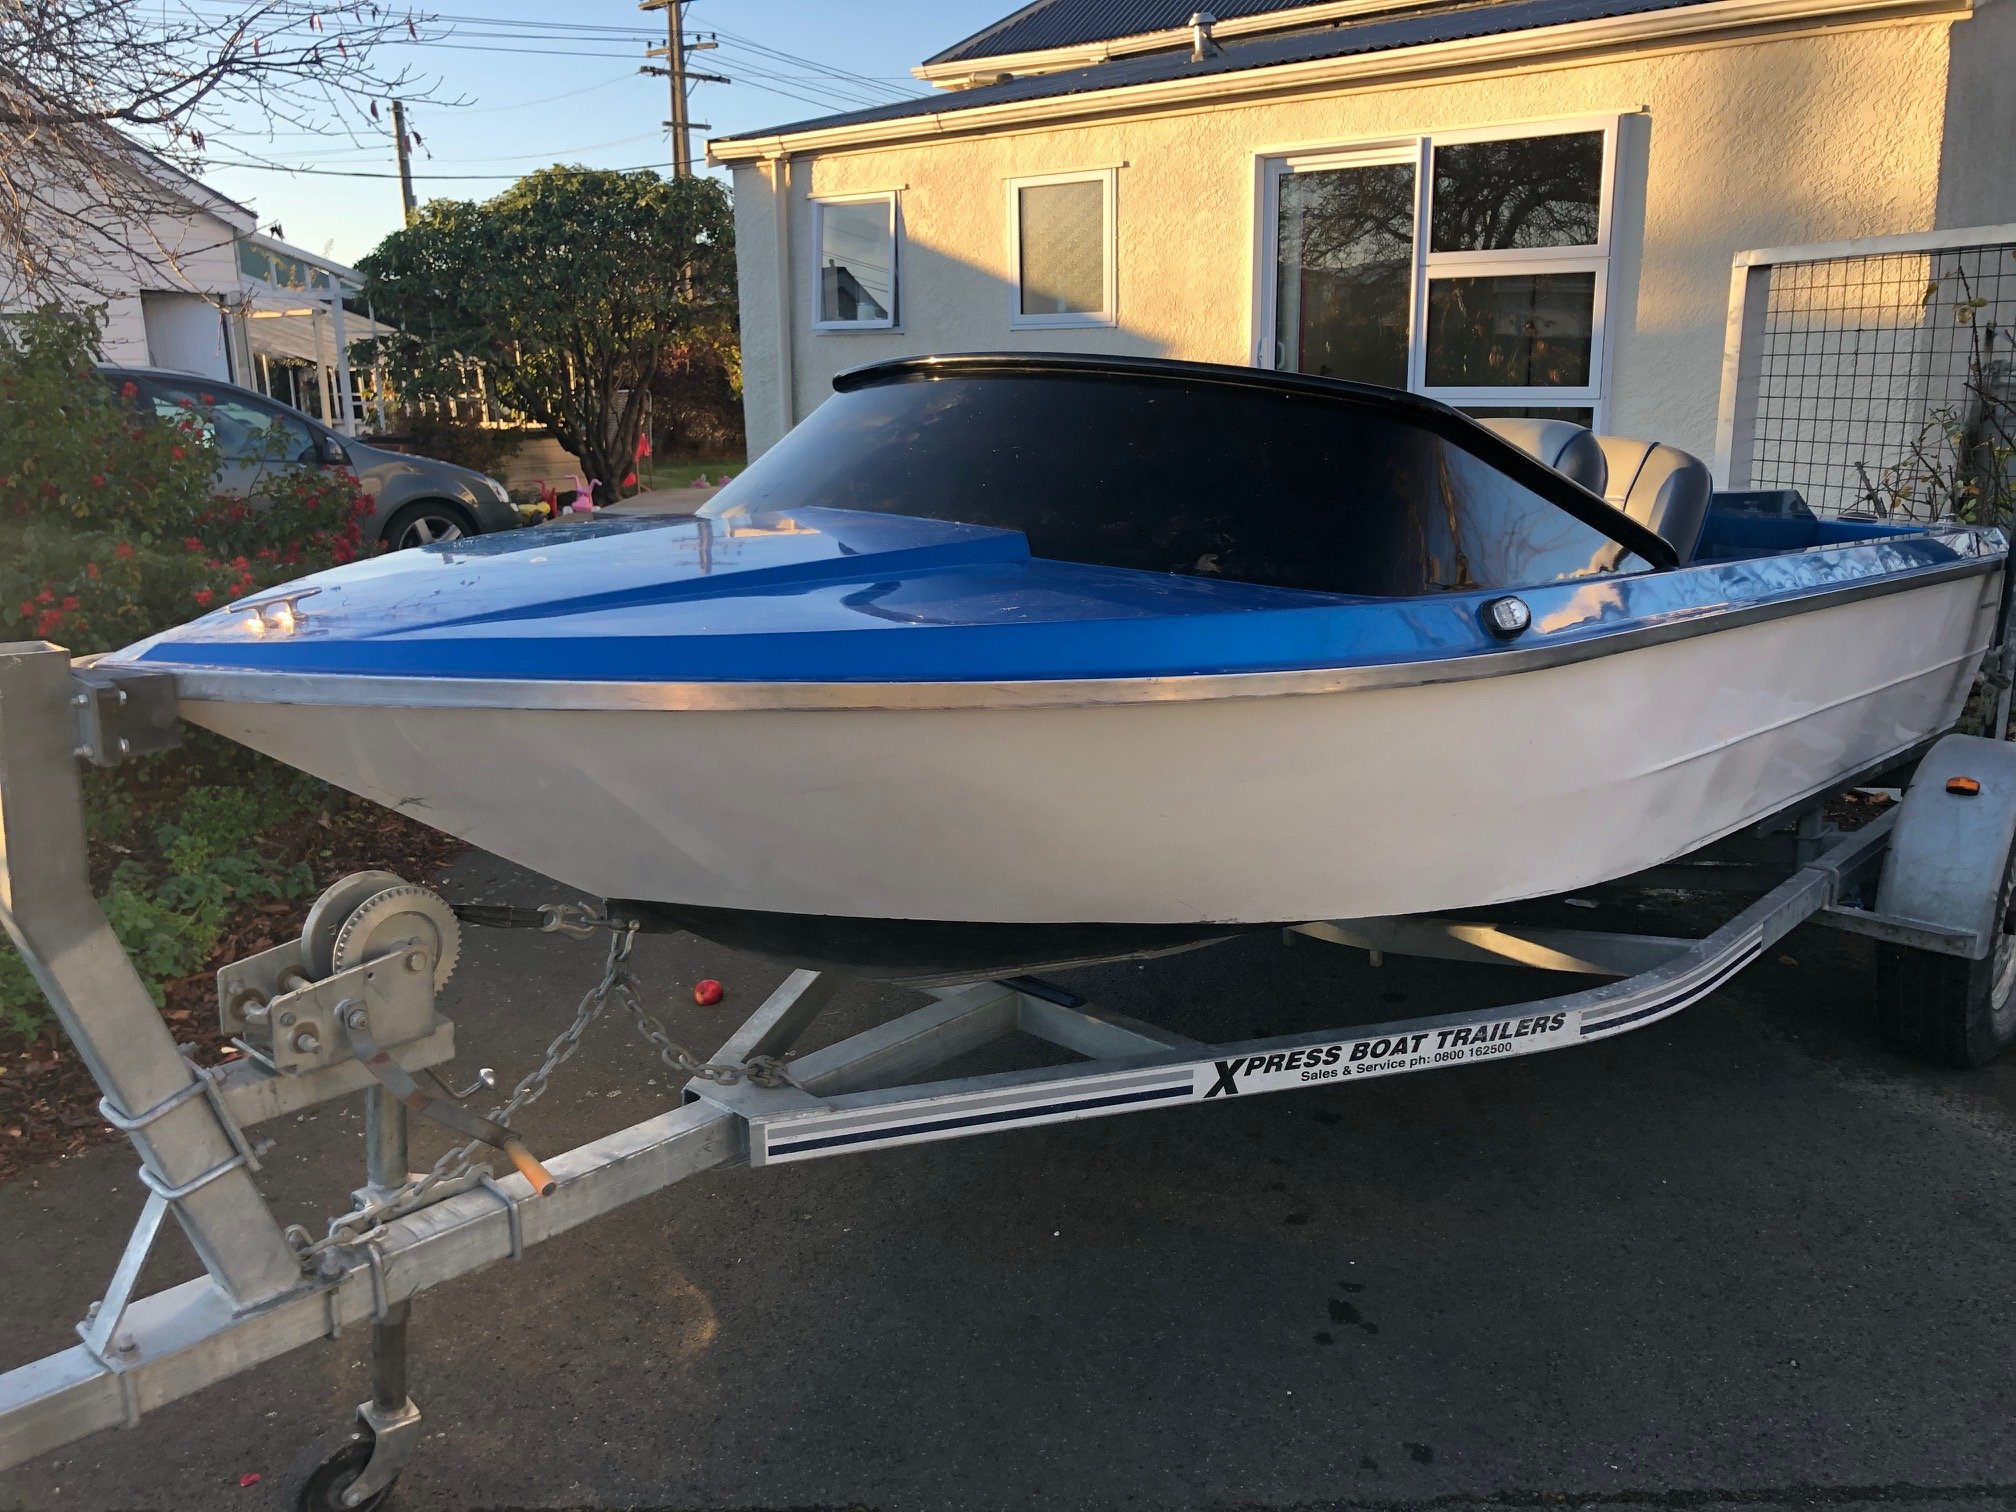
Vid isnt the greatest and my dad didn't learn to hold it landscape but here is a quick blat up the Taieri river. You can only go ~6km up the gorge and it quickly goes from placid to some heavy lifts to completely un boatable - didn't go as far to show those parts.2 points
-
All done. Handed it over, now in good hands and being driven like a rental car!!!
2 points
-
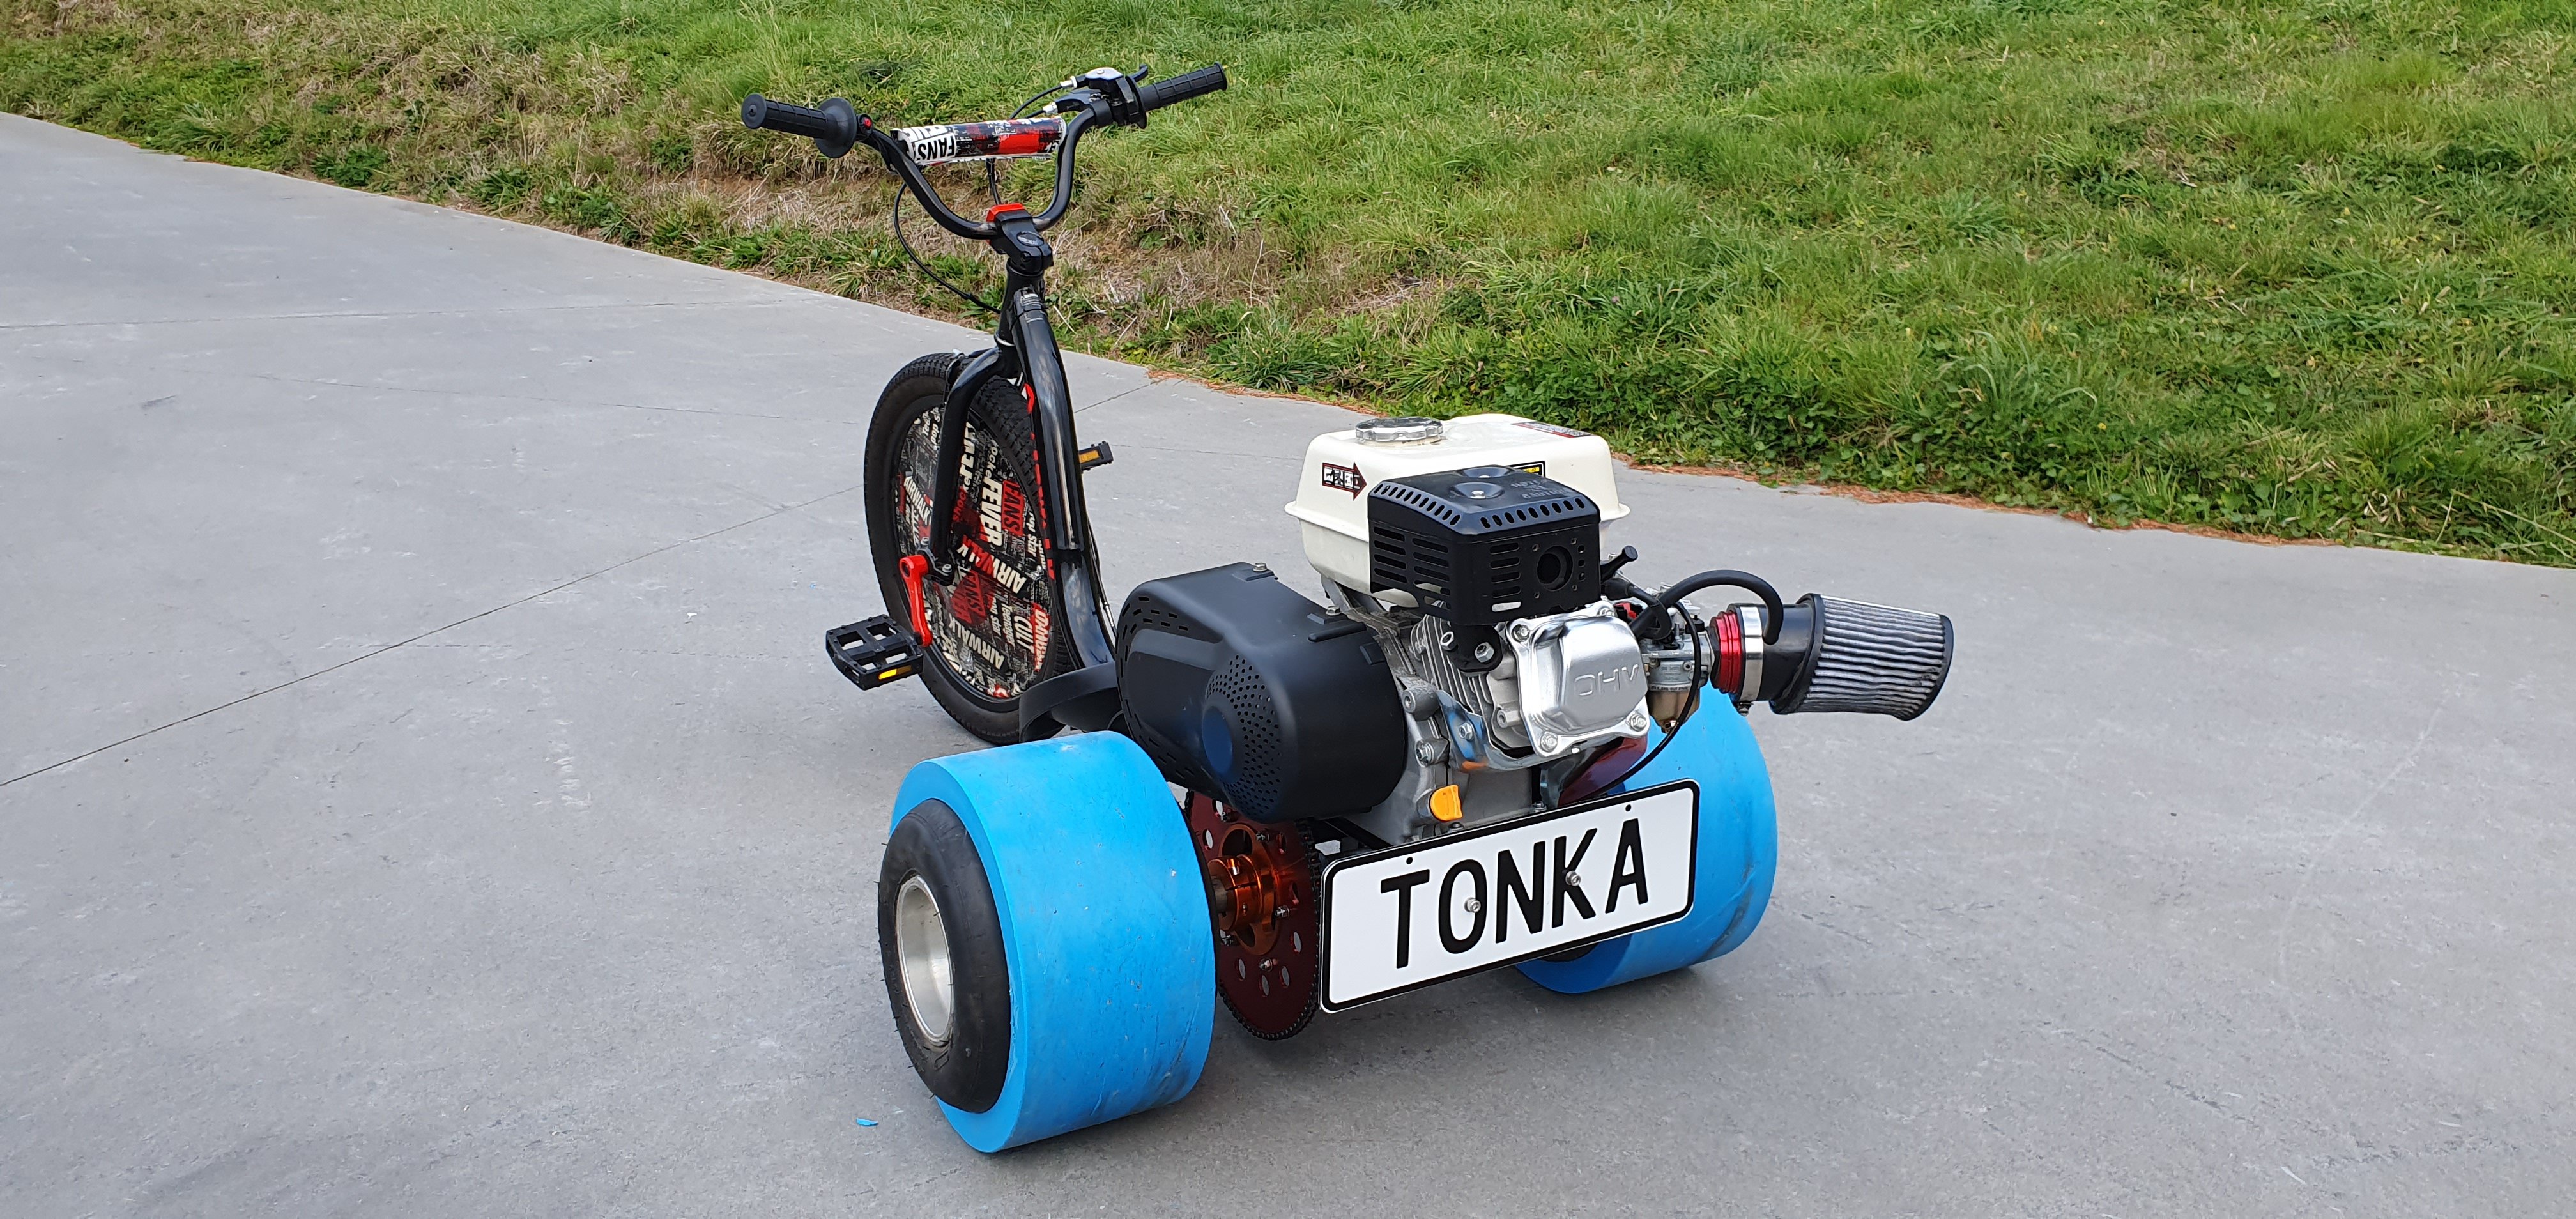
When it comes to motorbike tires and hair cuts you should always have business in the front and party in the back.2 points
-
4 years old. Hard as fuck. Made by some company I've never seen before. Should be a laugh.2 points
-
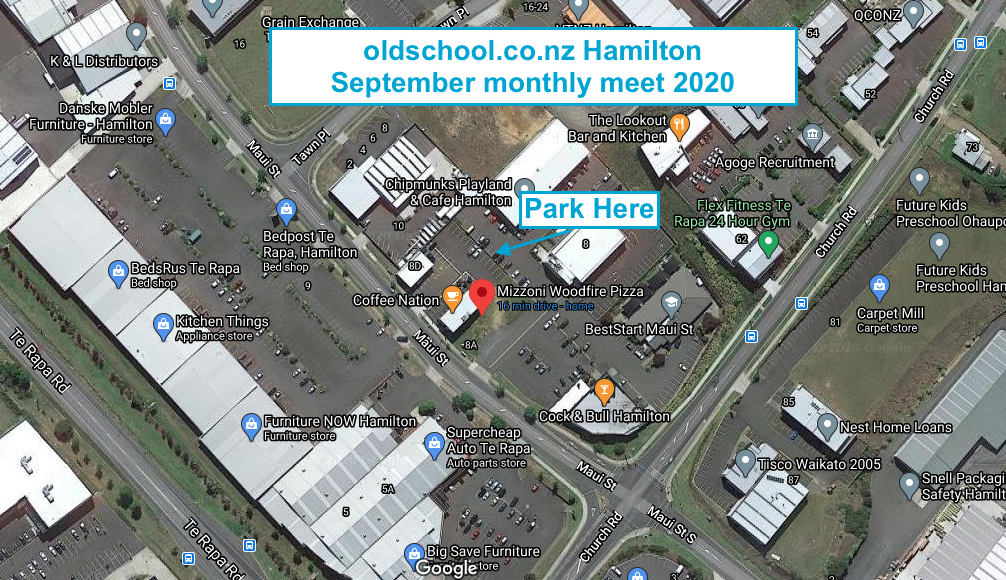
Staying true to form, putting this up the day before the meet! 7pm Tomorrow (Thursday 17th Sept) at Whitby Co-op. Come on down for a chin wag. Looking to start doing outdoor/beach meets again from next month, weather permitting! MAP!2 points
-
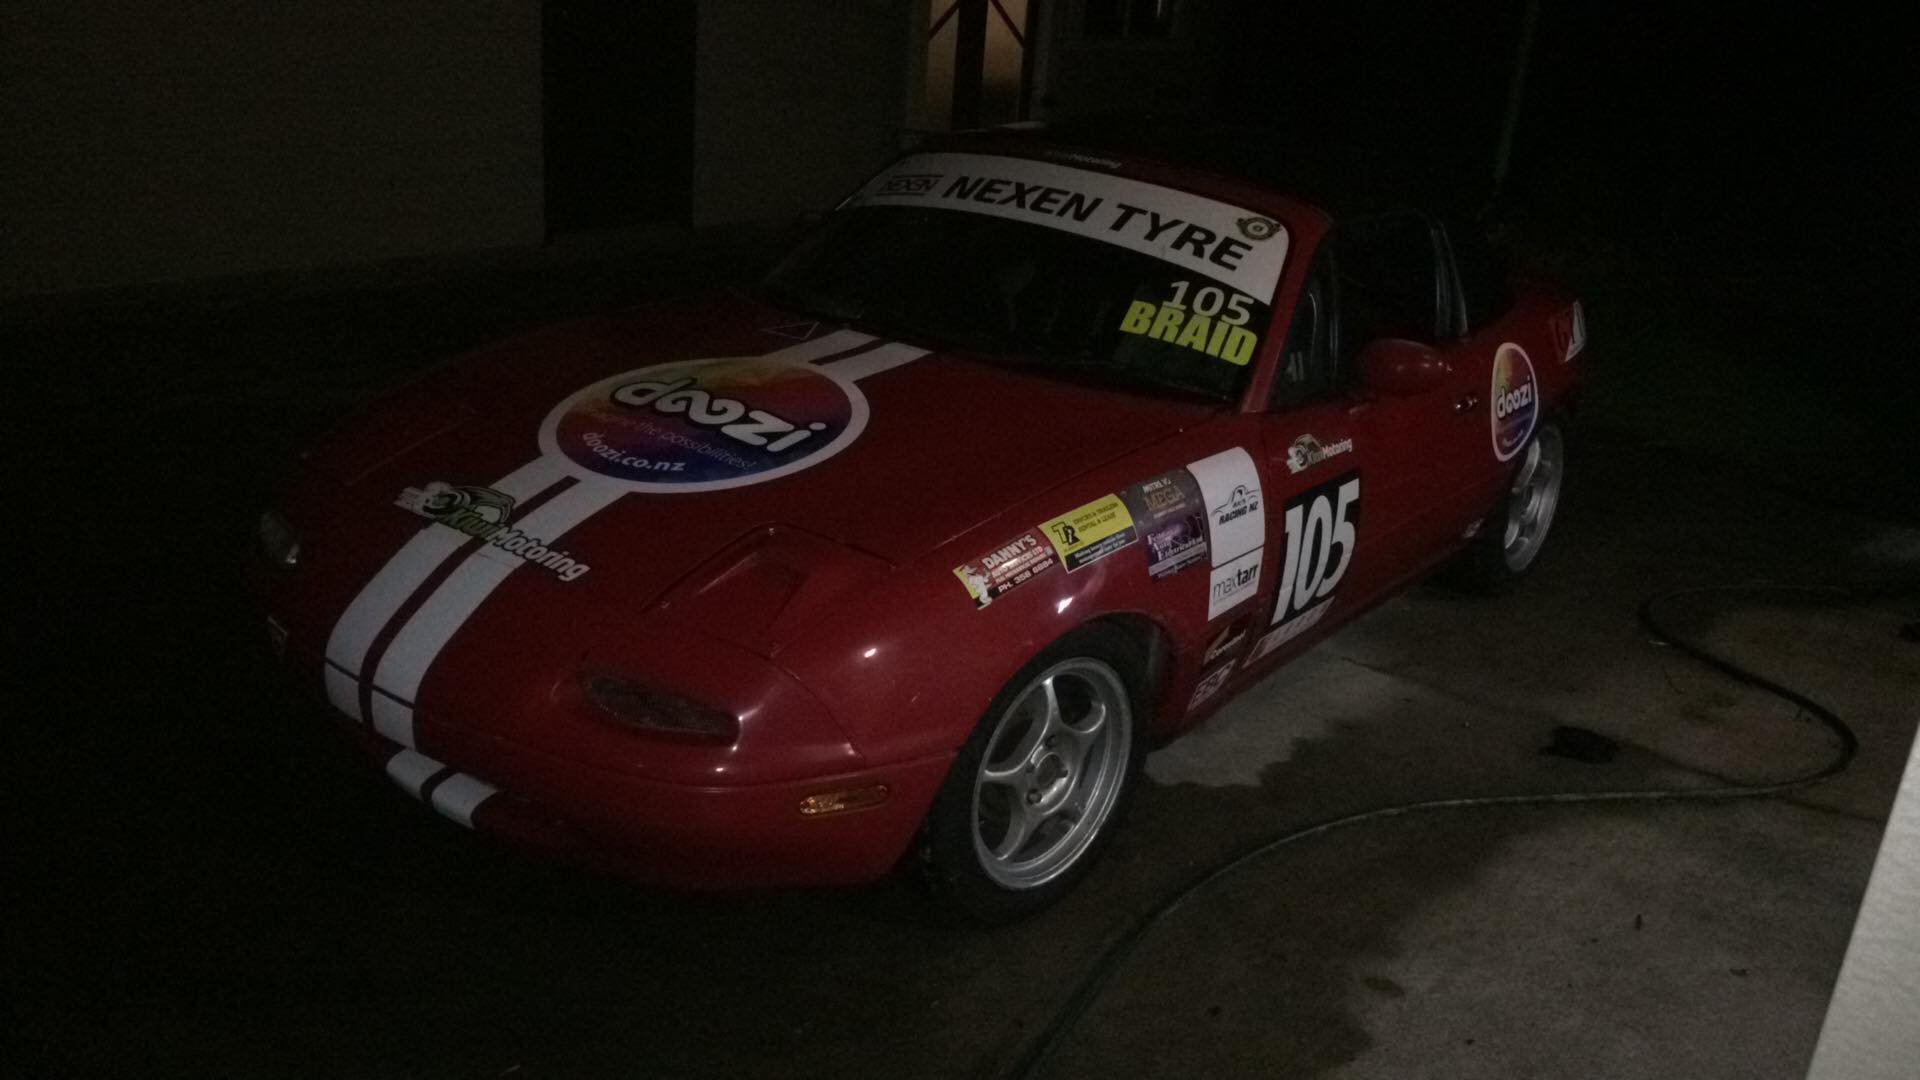
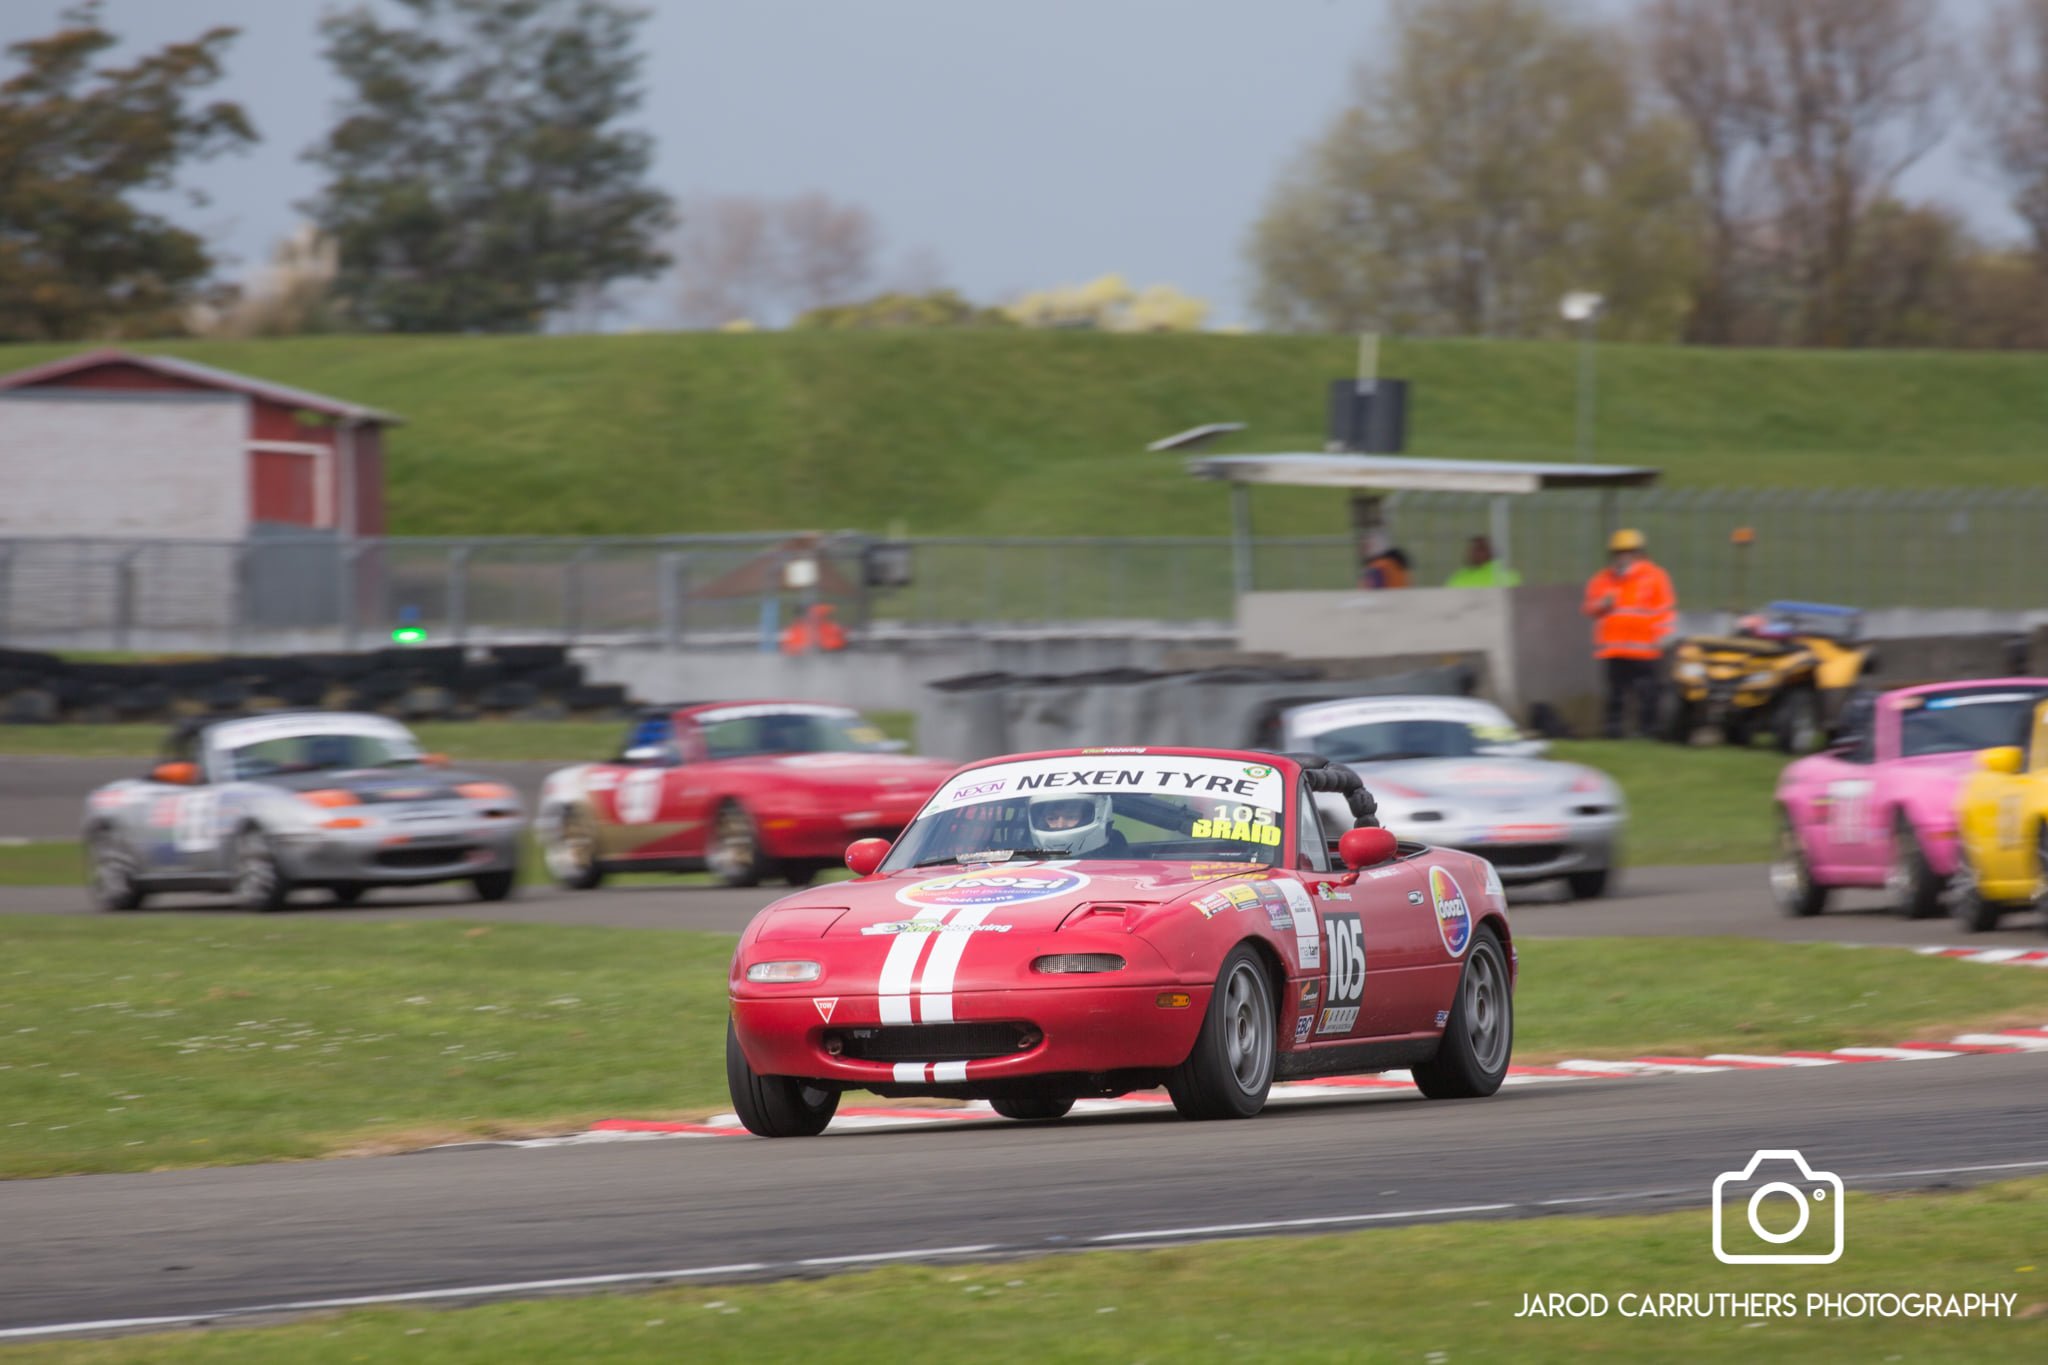
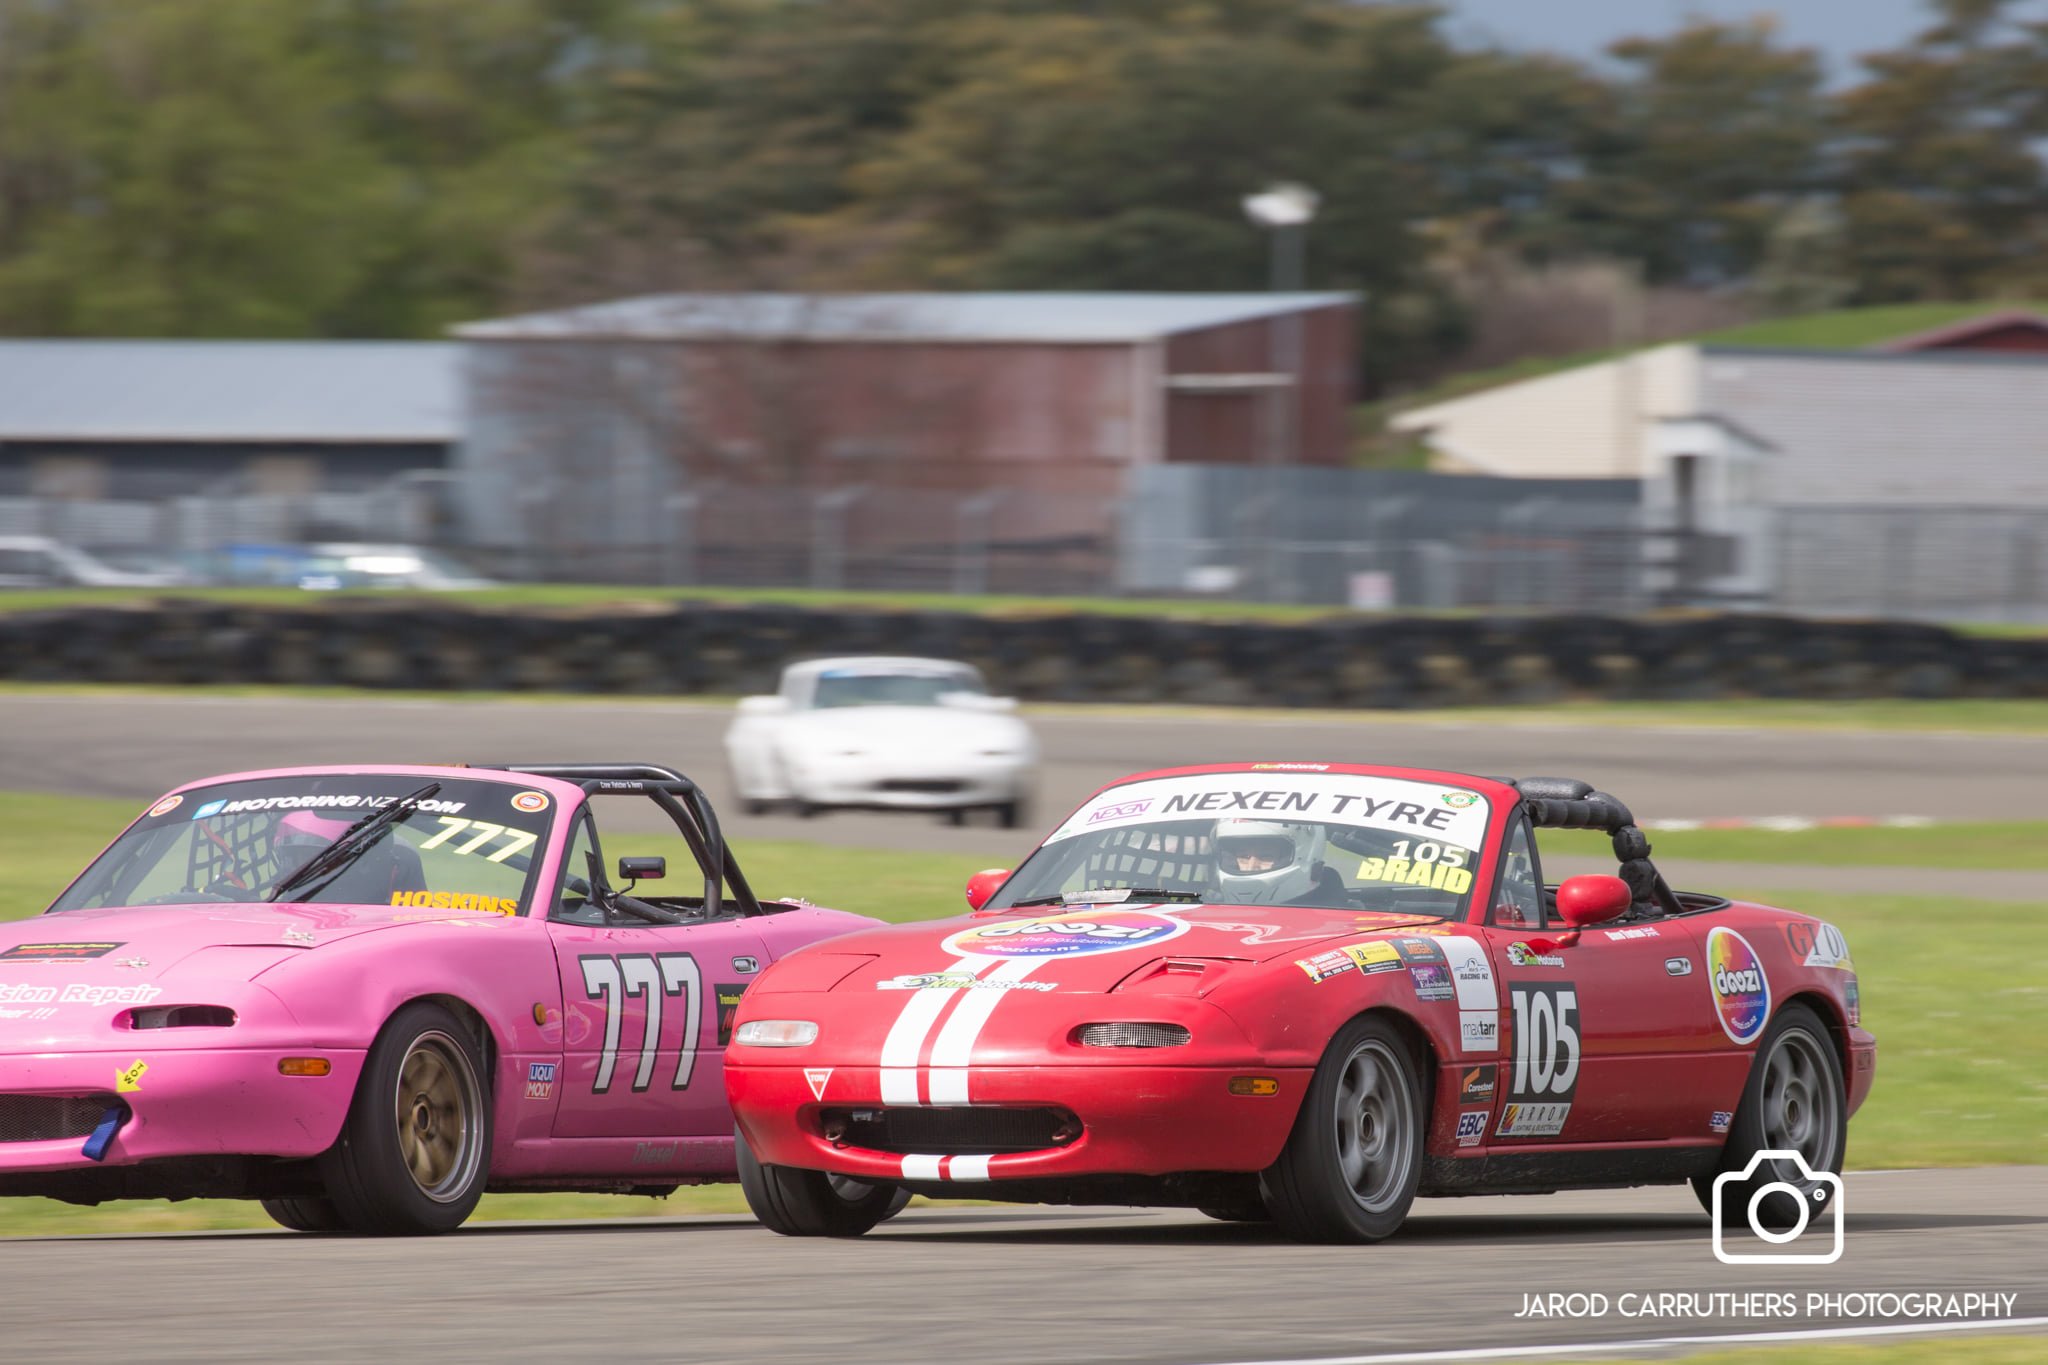
Jumped back in this car over the weekend after a year out of the saddle. We fitted a set of the new class tyres, Hankook Ventus RS4. These are more of a road tyre than the Toyo R888R tyres that we previously ran on. They're around half the cost of a set of Toyos and I wasn't sure what to expect from them. This weekend had the meeting split over two days, with 4 classes on Saturday and 4 classes on Sunday and a 30 minute test session for each class in the morning. I entered the SF Cup on Saturday (open clubmans type racing) and the MX5 cup on Sunday. Straight out of the box, the tyres were proving to be quick. I set a lap time of a 1.24.6 in testing, which is right in line with the times we were doing on the old tyres. I didn't get any photos or video from Saturday as I was busy getting back into the groove of racing. Had loads of good battles with a bunch of drivers I wouldn't normally be on track with. It's fun racing against all types of cars! Turns out MX5s, VT SS Commodores and BA XR8 Falcons are all similar pace, but they develop their speed in very different ways. My fastest lap for the day was a 1.24.2 in the first race and Jerry did a 1.24.1 in his pink #777 - the quickest I've been on Toyos is 1.24.0, so these Hankooks have potential! Sunday was another intense day of racing with variable weather to add to the excitement. We were greeted by showers and a greasy track. A good chance to test the new tyres in the rain! They were much more predictable in the rain than the old tyres and I was able to hold the car VERY sideways without spinning out. Good news from a drivers and spectators perspective. I qualified on pole in the greasy conditions, but didn't quite have the pace in the first race, dropping back to third. My camera battery was flat, so I didn't get any footage. The second race was reverse grid, so I was starting third to last in position 12. After a hectic couple of laps in traffic, I managed to pop out in the lead and hold that to the end. This was the first win I've had for a couple of years and the chocolate fish tasted sweet! Onboard footage from Race 2: Race 3 was a staggered start race with the slower cars to the front. Jerry Hoskins in the pink car 777 was right with me through the whole race. We traded positions a few times and then attempted to make our way through the traffic. We didn't quite make it to the front, but I managed to get up to 6th which gave me an overall round win for the weekend. Onboard footage from race 3: It felt good to be back in the car and was great to get a win! I'm moving back to Palmerston North very soon, so will be doing as much motorsport as I can.
2 points
-
2 points
-
Well it worked pretty good! Only real defects are on the face with machine allowance. The volume of the chill block didnt really seem to matter so I think going forward I'll size them to at least 100% of the volume that needs chilling.2 points
-
2 points
-
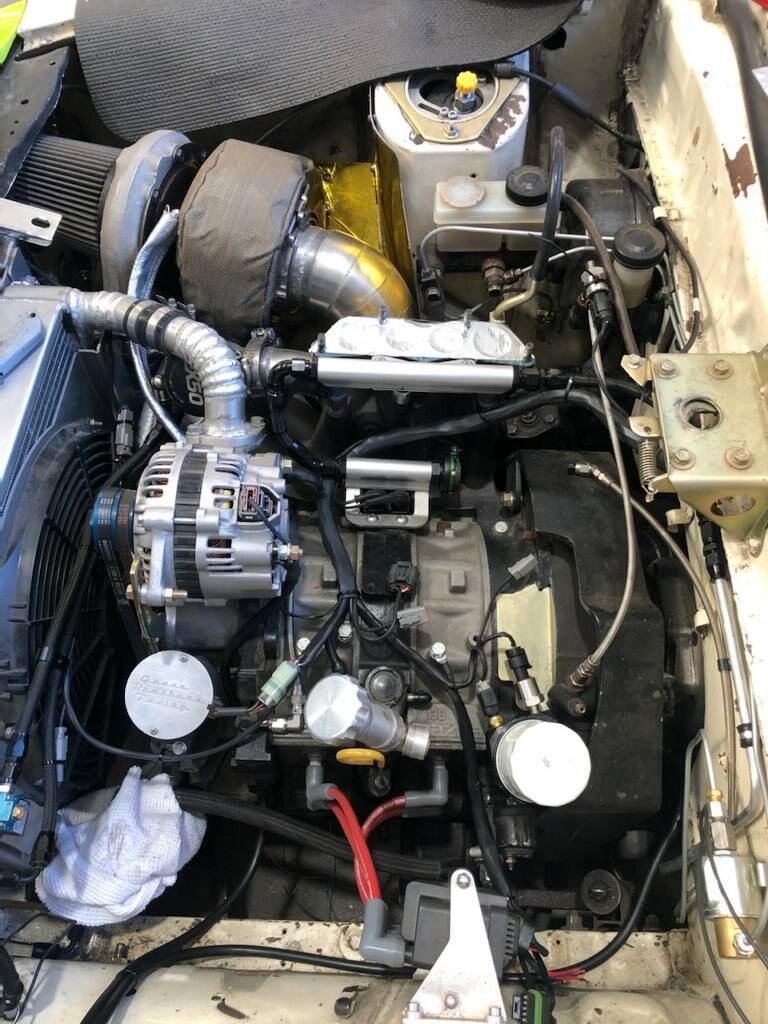
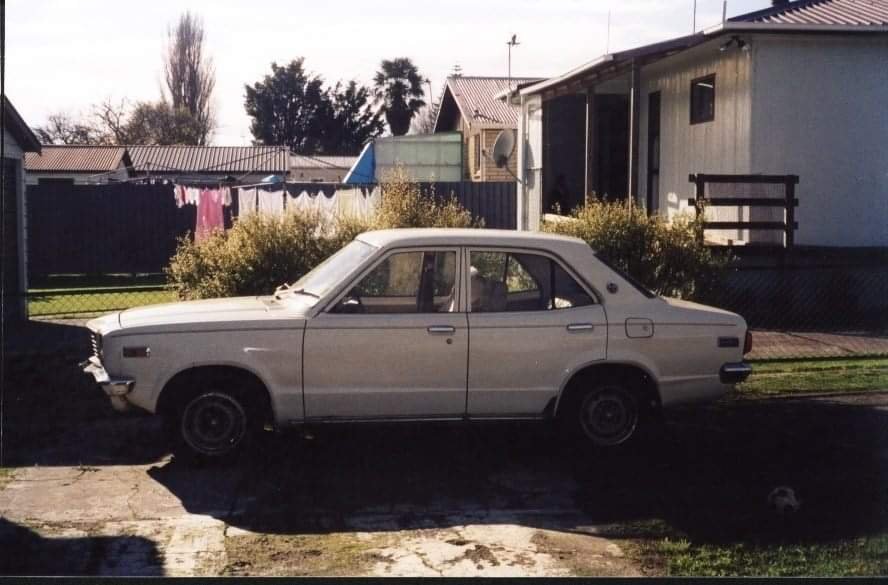
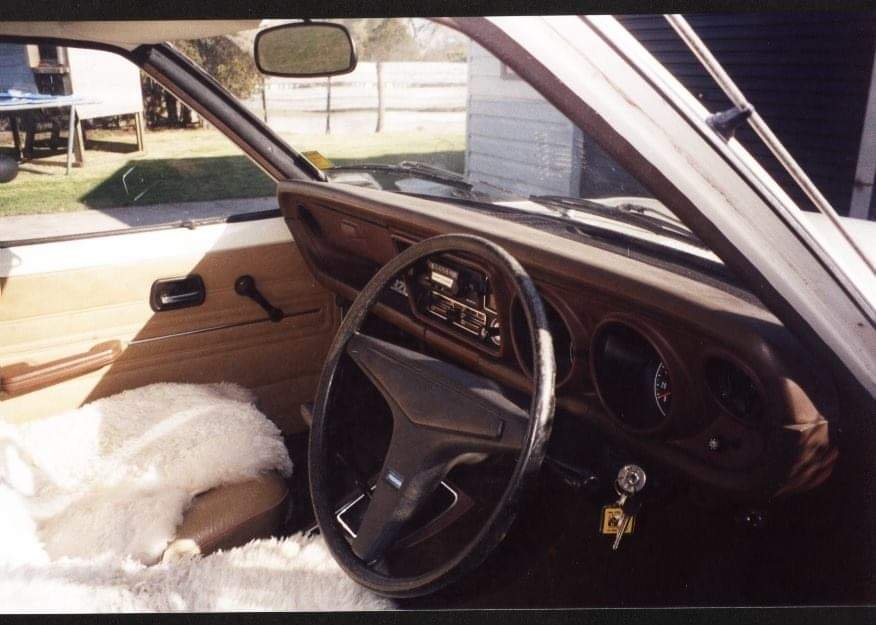
Hi thought id share my project even tho its nearing completion. I brought this 808 from a nana from ohope when i was 19 for a sum of $900 . I didnt really do much i owned for a bout 8months and when i got a chance to buy my repu i sold it to pay for the shipping of the repu . Fast forward the best part of 8 years i was in the middle of western Australia working in construction there wasnt a heap to do so i thought id buy another rx as the repu was done . I was scrolling on trademe most nights and i noticed a 808 with the same drivers side rear 1/4 damage the nana had done same plate but had a 13bt and dressed up as a rx3 . So i struck a deal with the owner kirk who i had originally sold it to so i put a deposit in his account and signed a contract to give the balance on pick up so i wired my mate the cash and he went and picked it up drove it back to his where it sat for 6months before i flew home for summer holidays . It had a basic 13bt set up no intercooler or bov a s5 turbo 2.5" exhaust an mint s4/5 5speed open rx3 diff the engine had been rebuilt and mildly ported that set up made 265hp on 5psi and showed promise with the right set up . Also the immaculate brown 808 interior had been swapped out with shit rx3 dash and gtx familar seats the door cards are rx3 and not too bad. I drove it around no cert for the summer . Then decided when i come back from perth ill hook into it so started collecting parts to update it and make it mine . I moved back in 2014 and pulled motor out and started working on upgrading it . And from there it all snowballed into what you see now . So the engine hasnt changed just swapped out the fd upper for a s4 and put a rotary works 80mm billet throttle body on and some green brothers rails with 1680cc bosch indy blues and 900cc bosch injectors and a radium pulsation dampener. The fuel system got changed about 3 times current set up has a jaz 40L plastic cell a Carter lift pump -8 to surge tank then a single bosch 044 feeding a -6 hardline theres 2 x filters as well which is dead head so we run the tomi reg in the boot and ive drilled and tapped a hole in the manifold run a -3 teflon s/s braide line to reg so its rising rate. Turbo is 60mm borg warner 300sx wastegate gfb ex50 tial plumb back bov and 2.5"alloy plumbing . 4" stainless steel exhaust with adrenaline r muffler vee bands ect , using a k&n with a greens water/meth kit as well. Cooling system is a green brothers set up and put together by us fab wise . Its 3" intercooler and oil cooler with a griffin radiator. Had a e & j electric water pump but due to room restraints i end up finding a billet mechanical pump from promaz heaps of room for the spal 16" fan . My mate todd has helped out alot with ideas and fab work he made the over flow and catch tanks Drive line got upgraded as well put a 12LB flywheel and single disk exedy clutch and auto counter weight. We used the fc bellhousing and got a greens bros r154 adapter as i scored a brand new box off my flatmates cousin as he went to tko magum box , i brought billet selectors and retaining plate, chromoly slip yoke 1350 ujs from driftmotion in the states so hopefully its a strong box then got greens to order in a slightly shorter 9" housing from quick performance and a yukon alloy diff head and full spool with 4.6:1 ratio and 31 spline moser axles,3" driveshaft with strange and spicer yokes . Suspension is xyz adjustable get up on s1 rx7 struts toyshop rca's and whiteline rx2 24mm sway bar on billet pro blocks and new superpro bushes back is stock leafs with one way adjustable ranchero shocks with caltrac bars. Wheels on it are simmons b45 16" 7s on front 8.5s on back , drag wheels are preformance challengers 15x4 front back 14x7s 24x8 tyre. Brakes are stock s1 up front with hawk pads and rear are u13 discs and s13 caliper . Electronics are pretty fancy run a link extreme and a blackbox pdm, sensors on everything fuel temp fuel pressure oil temp pressure water temp lambda run a pressure sensor on clutch to activate 2step . Have some autometer sport comp gauages and a microtech dash that is for speedo and tach shift lights ect will be set up for boost by gear ect its all running but yet to dyno due to the lockdown .smart coils and msd leads . Interior has a alloy center console with tin holder and drain , racetech seats momo wheel. Will do carpet and hoodlining black later on . Body is still as is from when the nana owned the green nose cone was nos from Melbourne ive got a nos set of door skins and sill chrome for when body work gets done along with window frame chrome and Savannah tail lights genuine not repos . A friends guna do the rust work ect but that will be further down the track . Alot of fab work and re-engineering had gone into the car The aim is to be reliable and run consistent times low 11s and maybe dip into the 10s and keep it fun, if it makes a 400hp ill be stoked . Will get it all legal at some point . Cheers
1 point
-
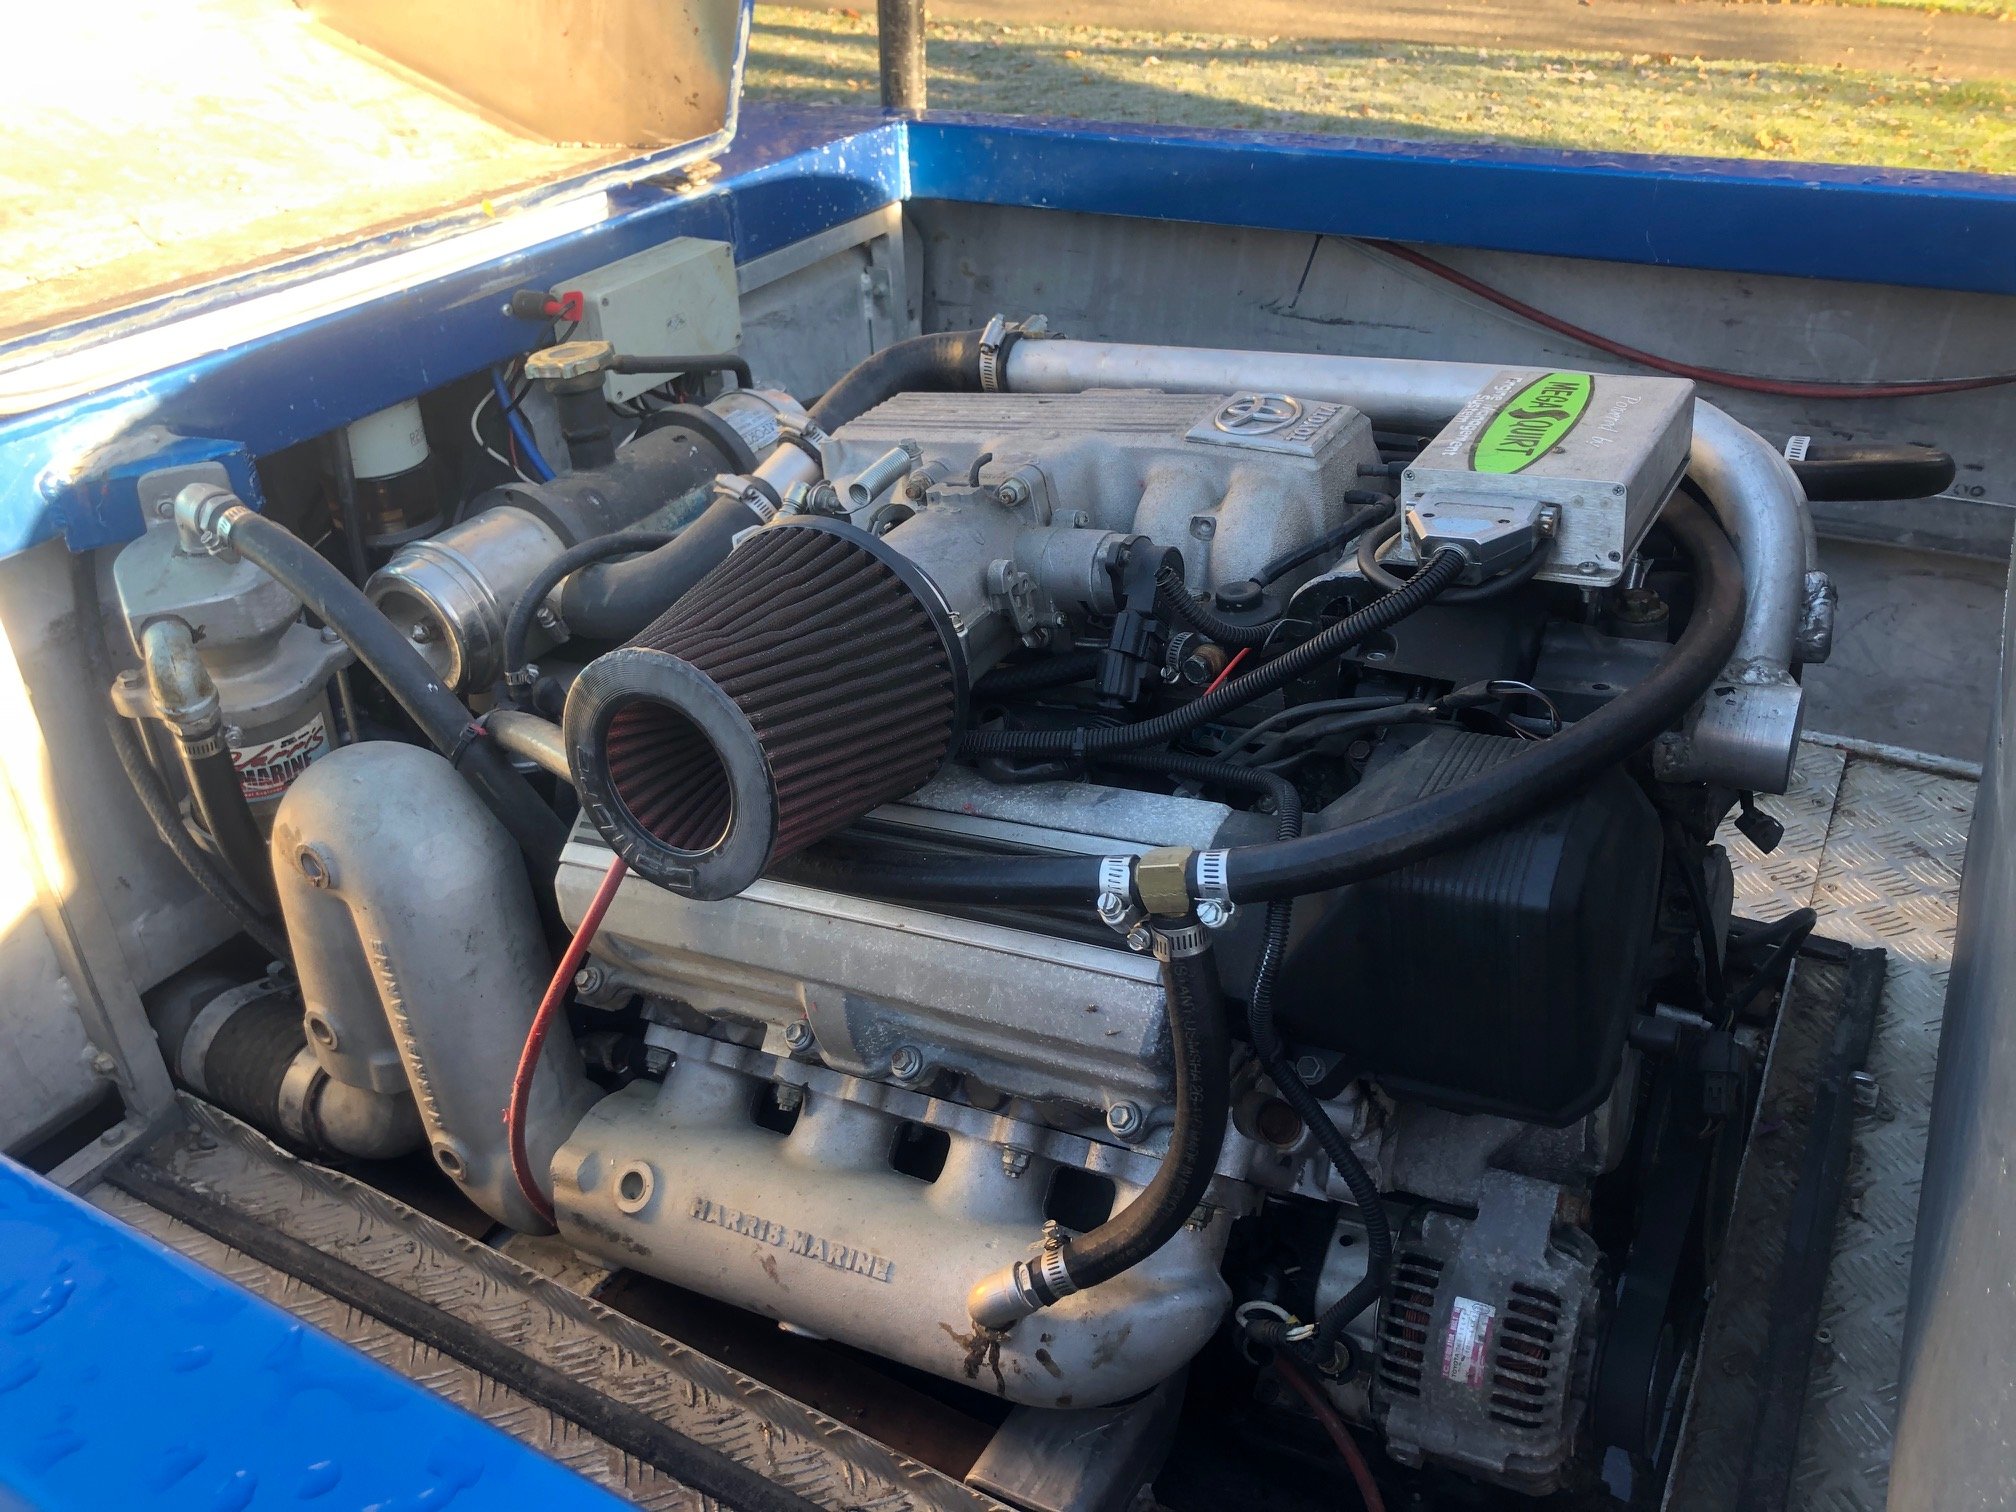
Since I cant help my self and started pulling it to bits within 20min of having it home, this is going to have its own built thread.... I don't yet know who built the hull, the design/manufacture of it makes me think it was done by a firm rather than at home (unless that builder was quite good at alloy). Its got quite a unique dash layout so hopefully if I post it a few other places then someone will ID it... Either way this thing has done some work... plenty of gravel rash and quite a few hits in the hull. It has plastic covering the centre keel but it ripped around the intake so that will need to be done in time.... Running gear wise we have gen1 1UZ with an old MS1 running it (more on that later...), the jet unit is a 2 stage 'ProFlo' which is essentially a modern remake of the Hamilton 770. Someone has run some of the cooling pipes wrong. It has a heat exchanger so the exit water needs to only flow out of the risers, someone has added a 'tee' for it to go into the front of the manifold heater, with no where to go that water is going to get very hot after a while.... Found out that the fuel pump is wired directly to the key (not happy about that), but it has some other pluses.... two ~45L tanks into a centre filter/sight bowl and a decent gravel trap so someone knew enough how to set it up.
1 point
-
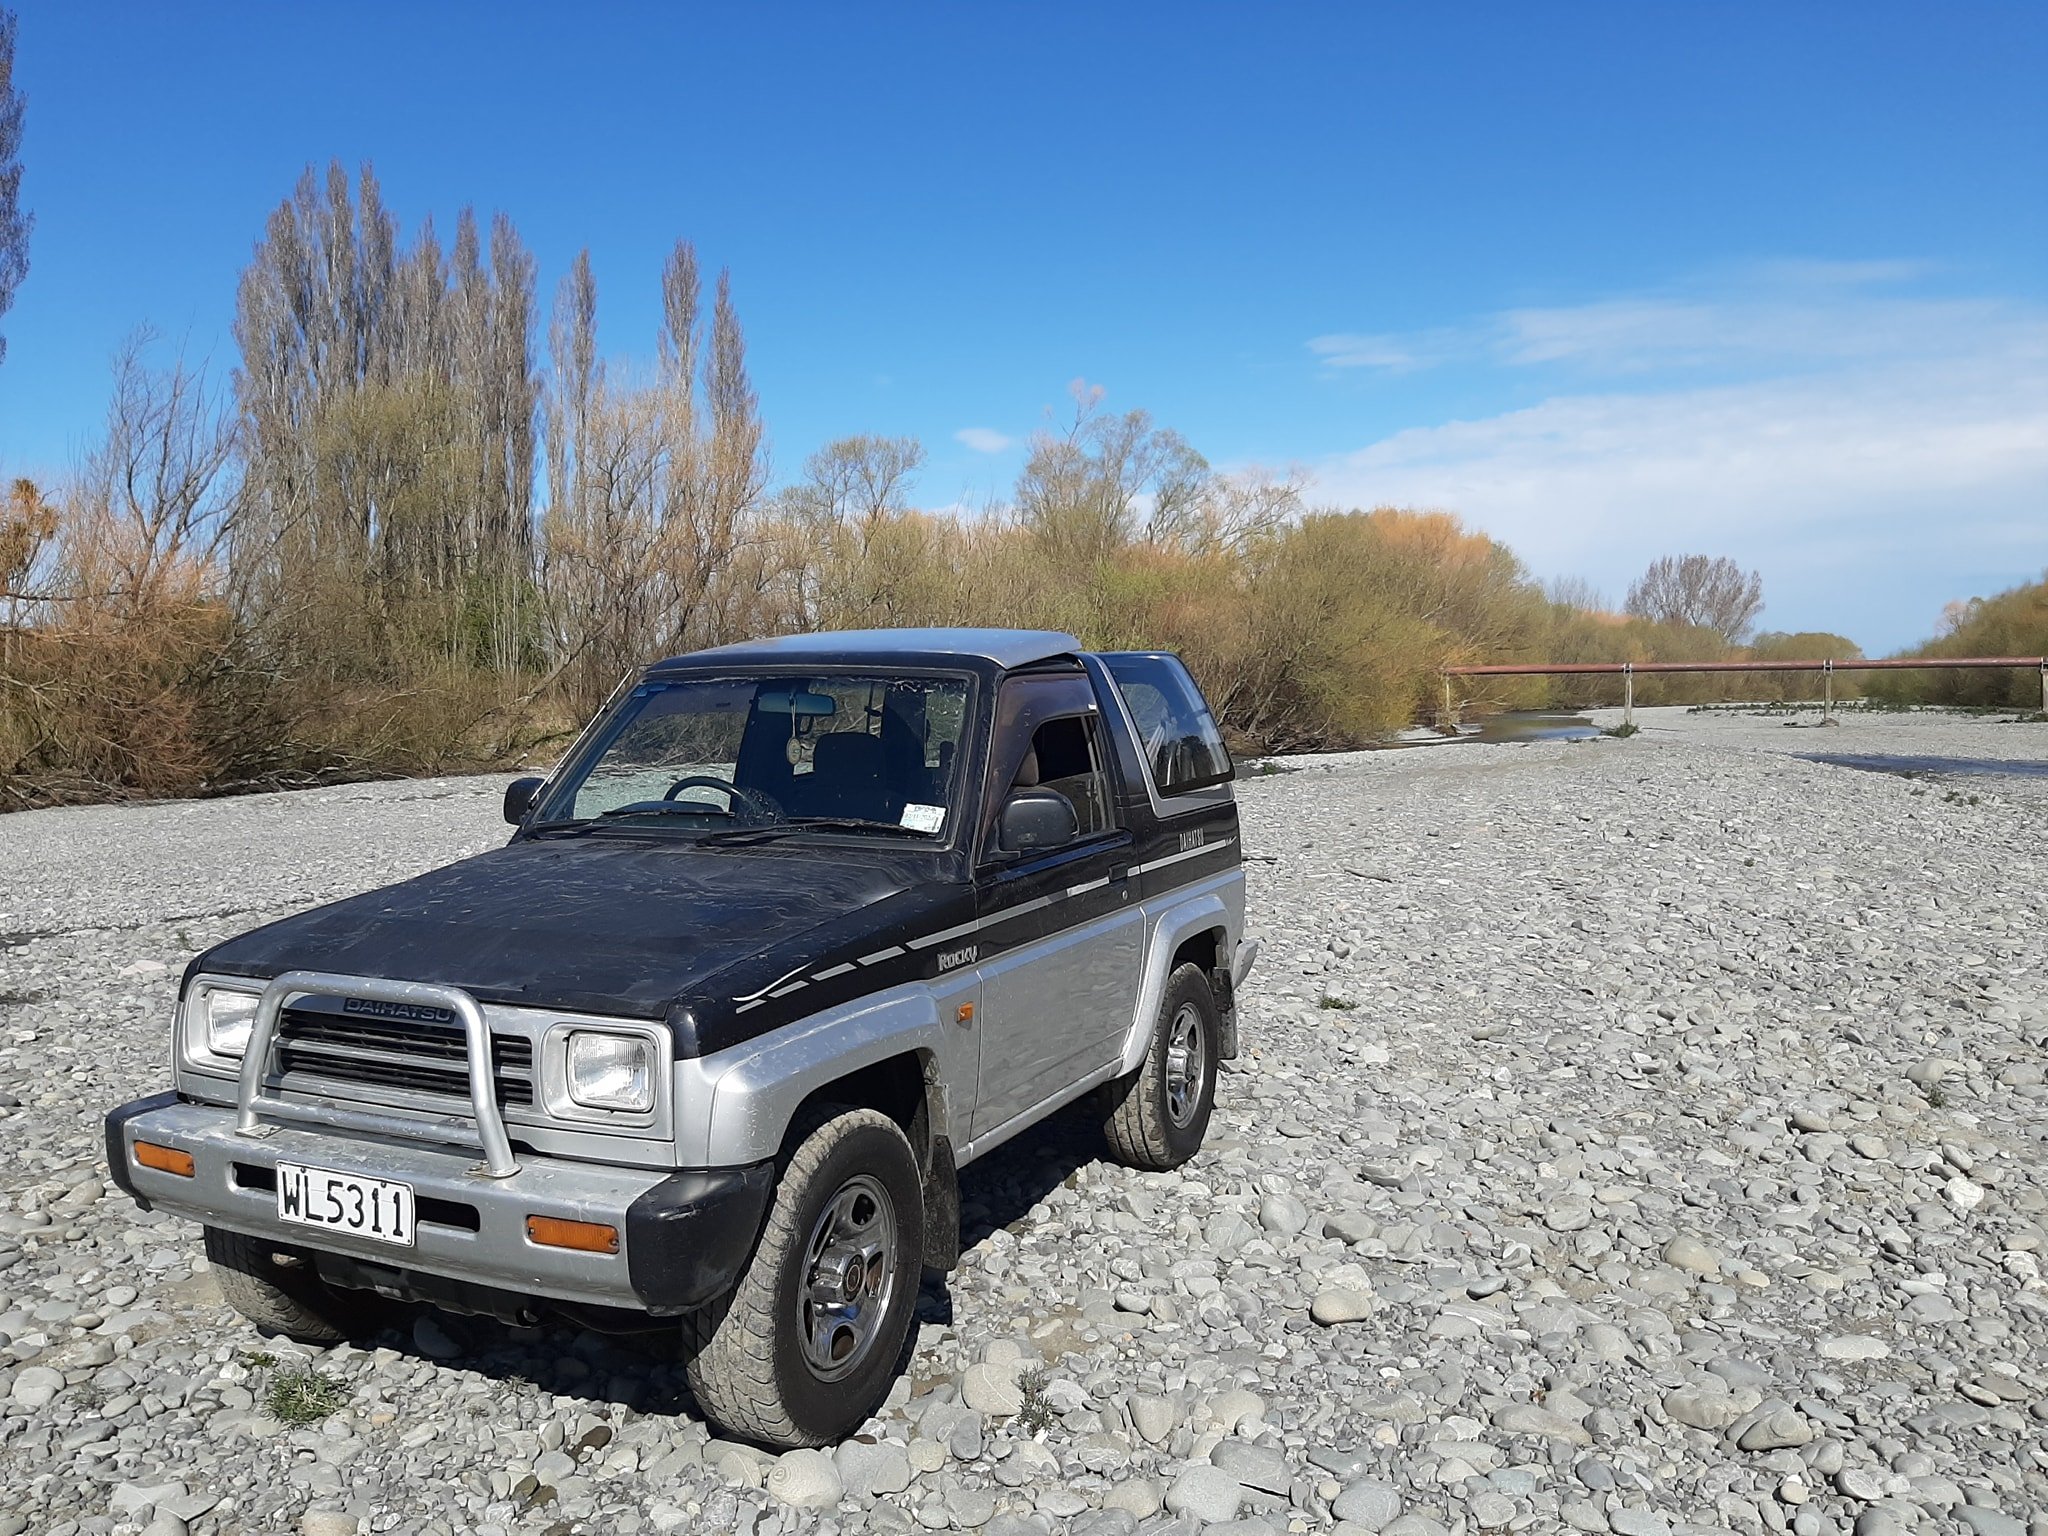
Hi all, I thought being a 1990 that this will go here in other projects. Picked up this tidy little beast over the weekend, Plan is for it to be a daily/some 4x4 duties, It requires some rear wheel bearings, I will get rid of the auto hubs before I blow them and put in manual hubs, probably modify the drivers seat so my lanky ass will fit in it better and maybe a new window switch but otherwise everything works as it should, Fuel injected 1600 runs bloody well!
1 point
-
Me and a mate are going to be in Chch on 1st October driving my new car up the country if anybody wants to organise something1 point
-
sorry family life got in the way tonight and I didn't organize anything. keen for next month?1 point
-
@Roman - its running a Link Atom G4+ with a turbosmart electronic boost solenoid, believe it or not its actually got a 3D controlled boost map on it at the moment which is pretty trick. I think its probably just the input from the driver No idea on times @ taupo in clear traffic as i never really got a good run. All i know is that i was running mid-pack for times in the Trofeo group. I'm hoping to get back down before the end of the year for another run. @Abarth - i bought it direct from Demon Tweaks. It was $1200 NZD inc freight for the Quaife, but then i got hammered by NZ Customs for another $550 on arrival. It looks like there is a few options for LSD's for the fiat gearbox's but the Quaife was best value for money. KAAZ i think do one, as do Wavetrac, and then Bacci Romani do a plate type, then there is Phil @ Bits Of Italy (BOI) in australia who can do a phantom grip style one with springs and plates which is significantly cheaper.1 point
-
Yeah you cant just switch between one and the other, or you get a big lean spot. Every time it switches from inner to outer, the car will bog and turns to shit. It's very unsettling. Even if you blend it across it still makes engine response suck. You need to keep running the inners for a few extra cycles, or run outers richer for a few engine cycles at the start for wall wetting to stabilize. I think it's a situation similar to ITB installations - the better your injectors are at atomizing the fuel, the more it's fine to keep them right at the ports. If your injectors suck, then you'll see bigger advantage of having them further from the head. Even if you get it all working right, atmospheric conditions change or your manifold temp changes and then it turns to shit again! When I went back to just fully port injection the engine was a zillion times punchier. Like night and day difference. Maybe with more setup and a bit more experience with tuning these days I could get it working better. Might try it again one day.1 point
-
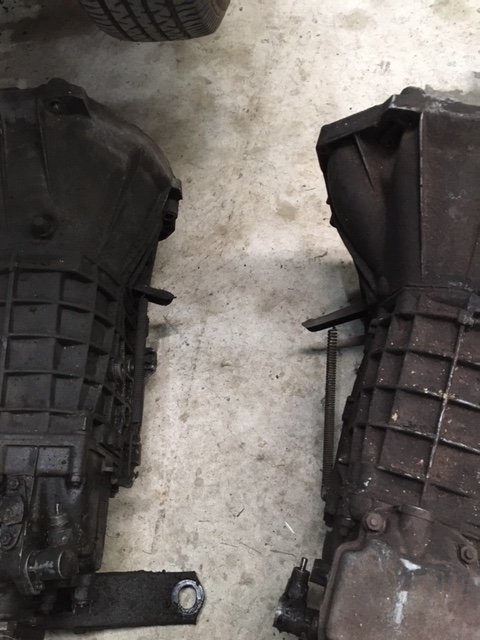
Cleaning up some tools today, I couldn’t resist playing compare the gearbox. 4 speed on the left, 5 on the right. Speedo drives are on opposite sides, and clutch mechanisms are also reversed, but that’s just a bell housing swap away from happiness. I did notice something a bit off about the crossmember still attached to the 4 speeder... look at the left of the pic... it’s bent! Further investigation revealed a corresponding ding in the chassis, so that will need fixing too.
1 point
-
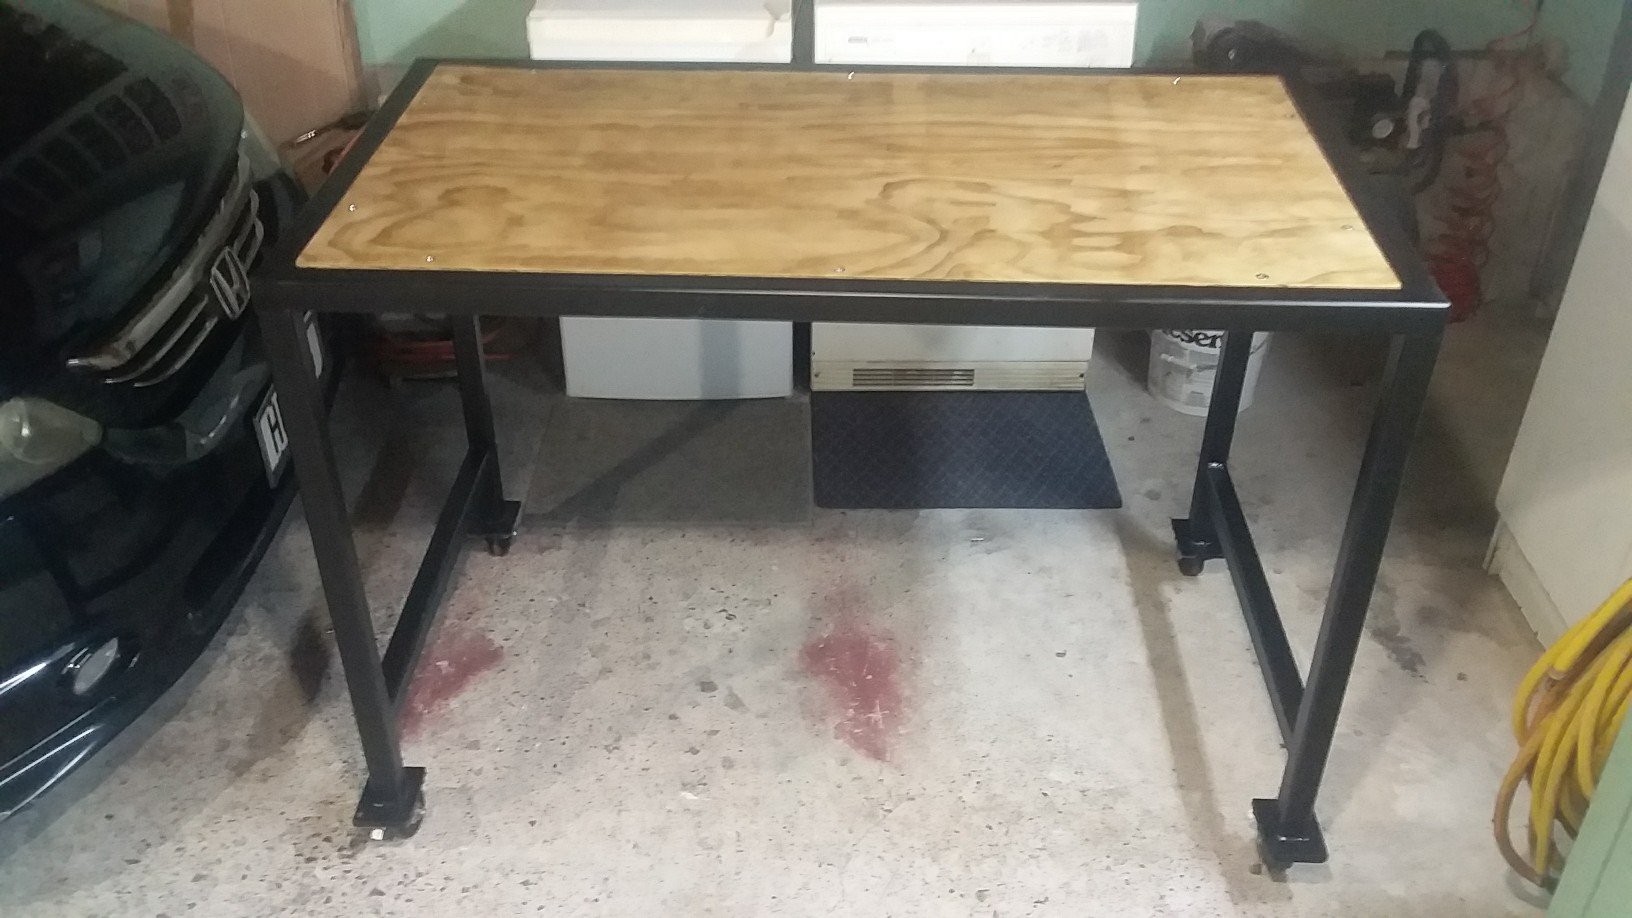
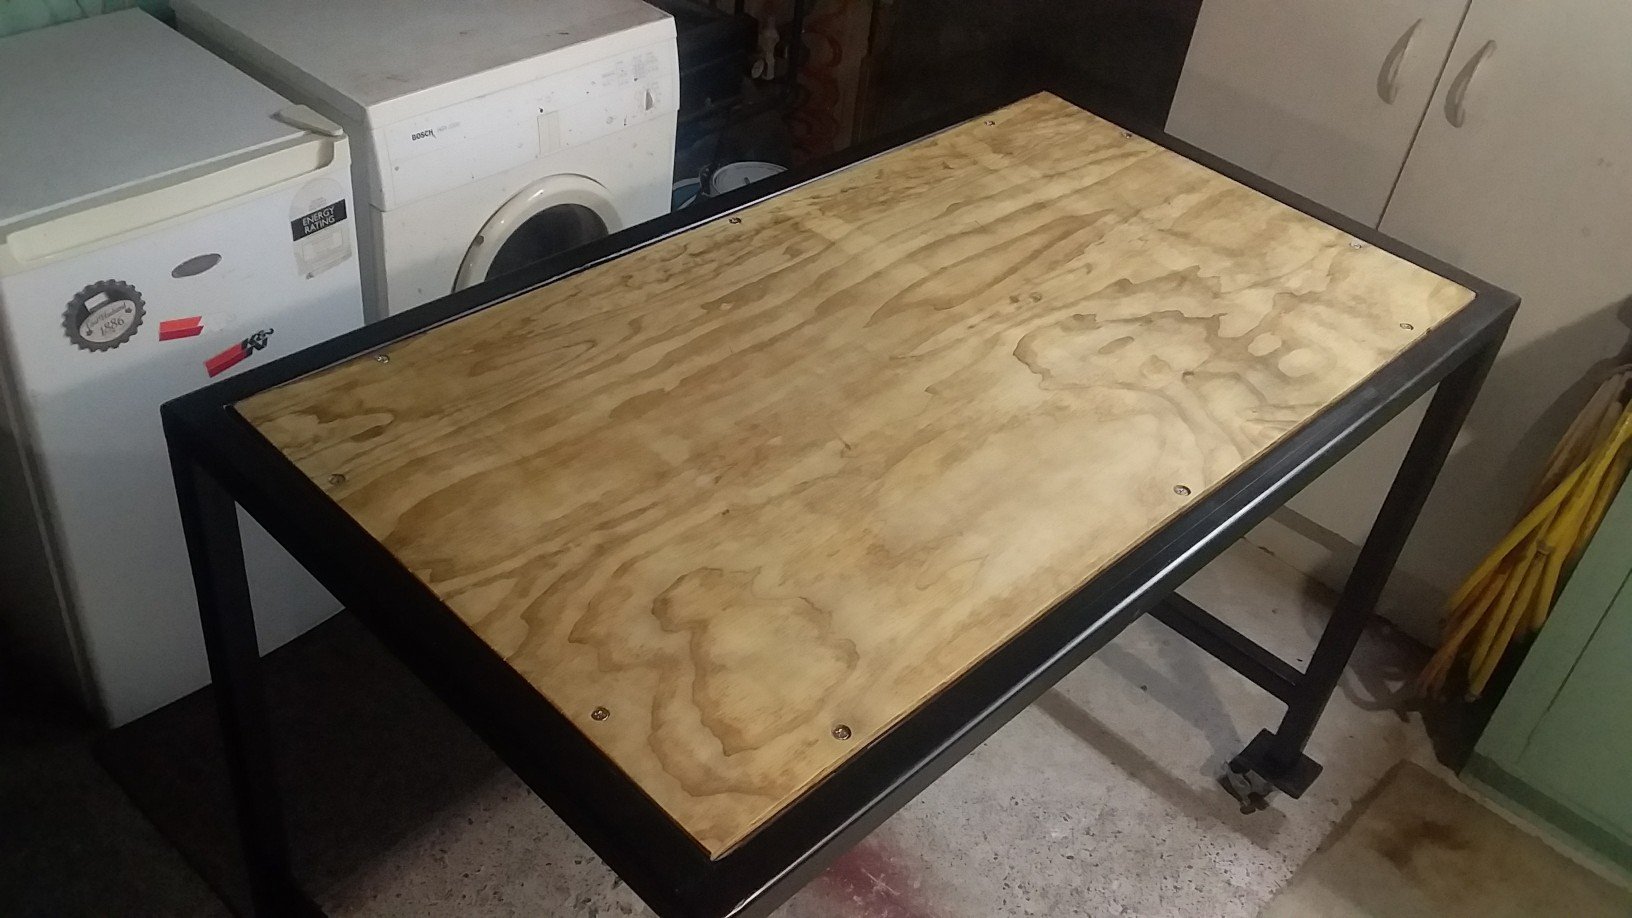
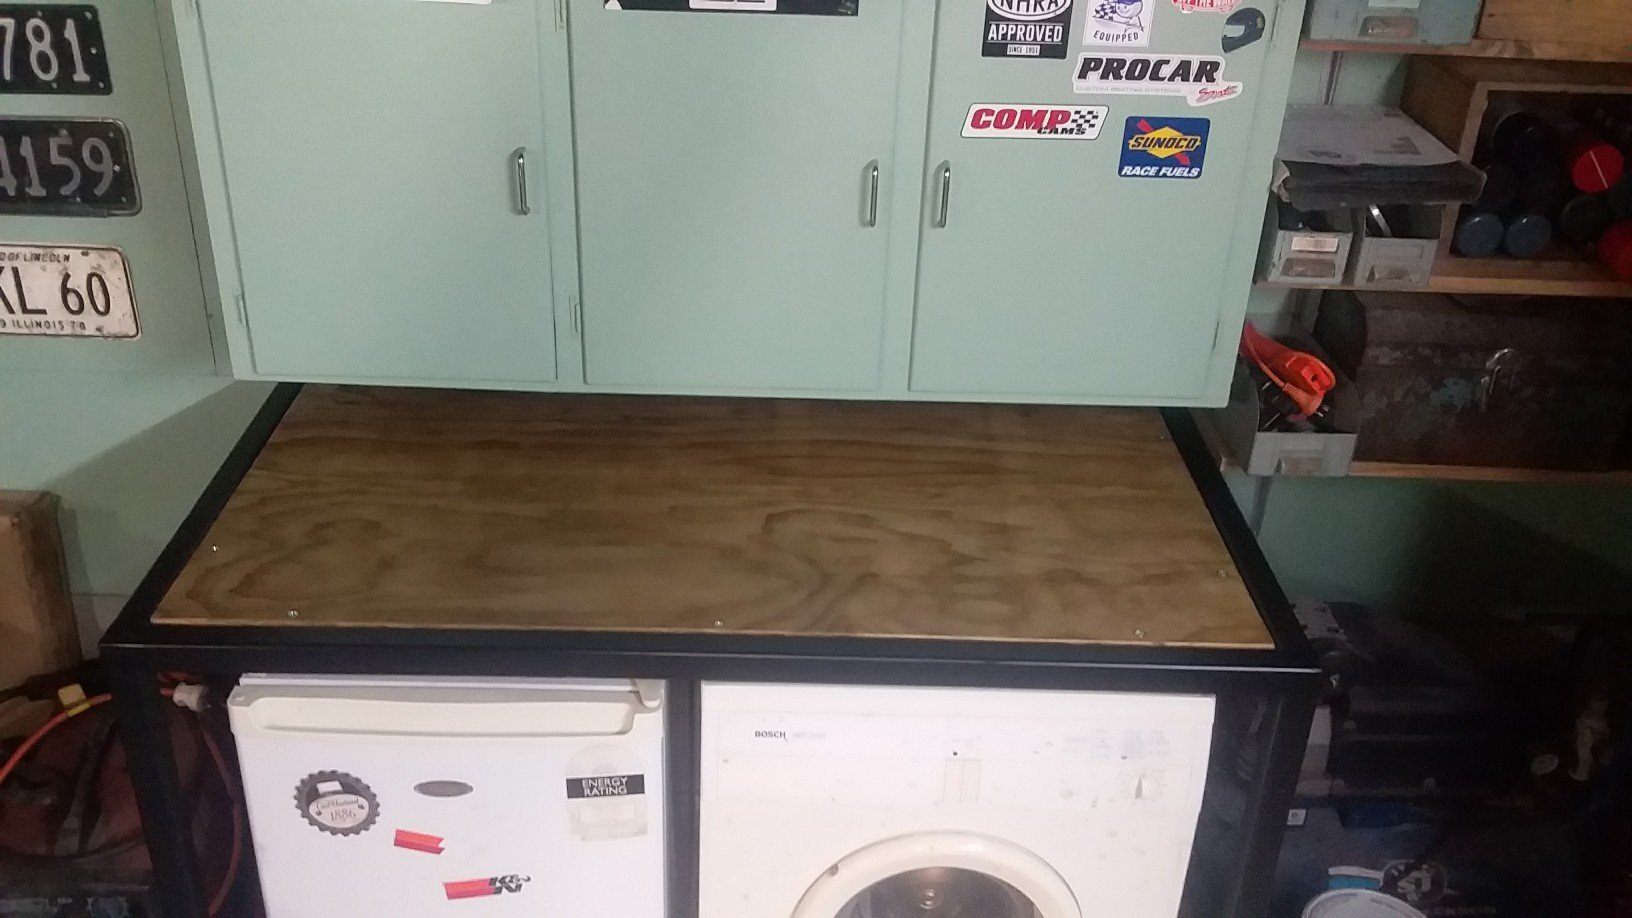
Finished this bench to sit over the ugly whiteware and provide some extra bench space. I started it last lockdown, so I'm glad to finish it! Except for the screws to hold the ply on its all recycled materials. Sanded the old ply down and coated in boiled linseed oil. Silky smooth. And black zinc it for the frame. Turned out better than I expected, the plan was to mount a bench grinder to it but the wife thinks it's nice enough to be extra outdoor furniture!
1 point
-
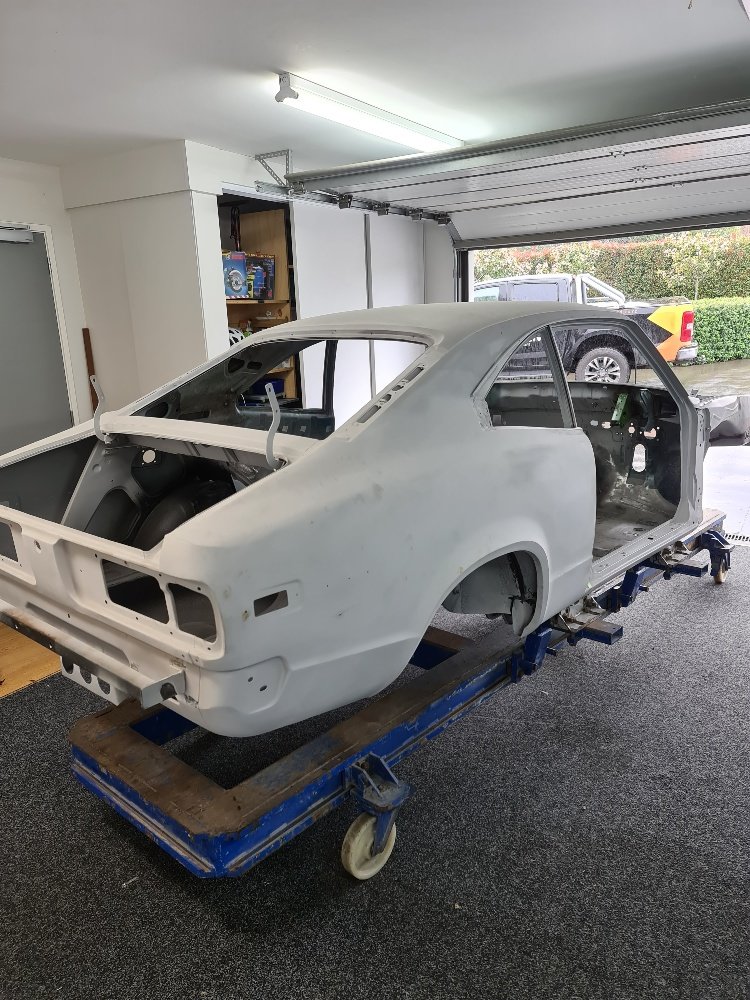
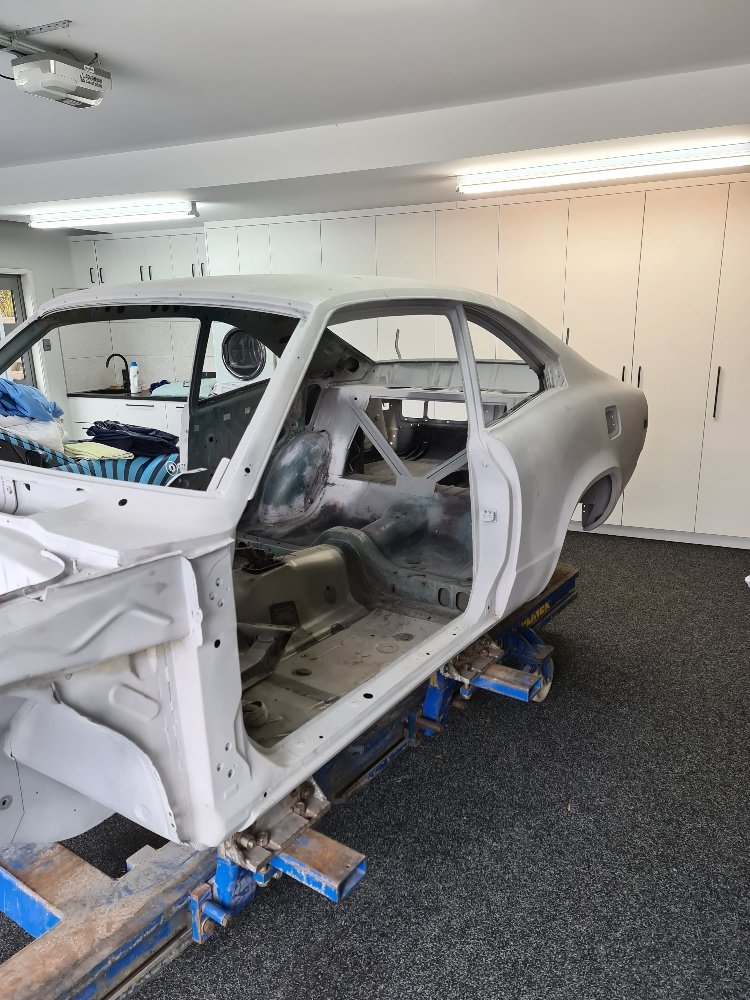
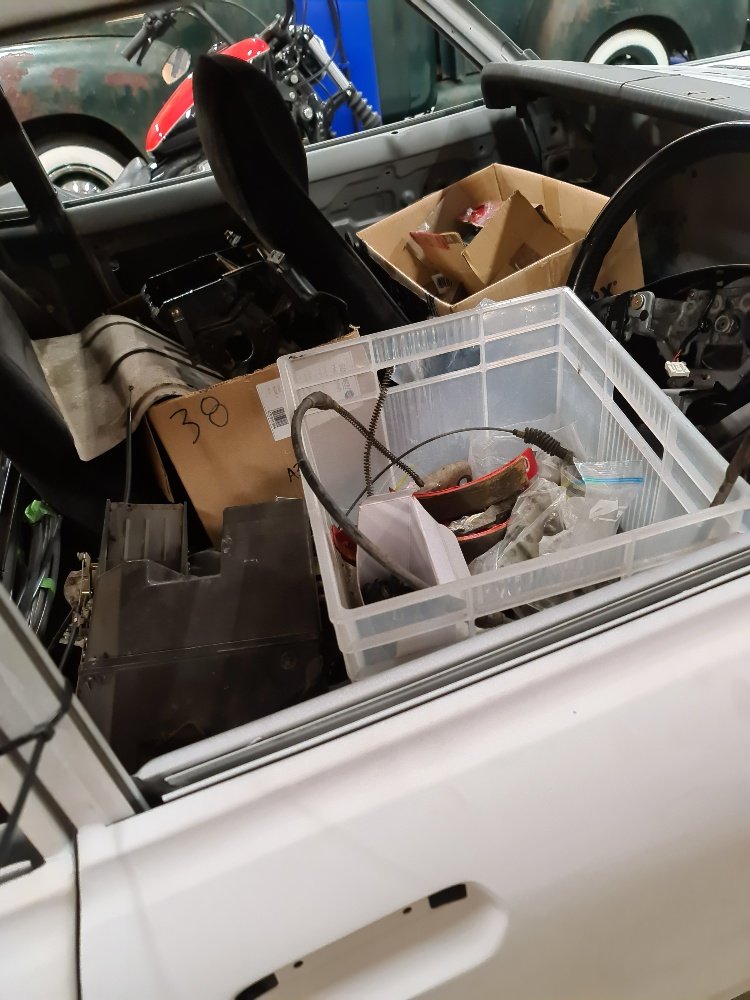
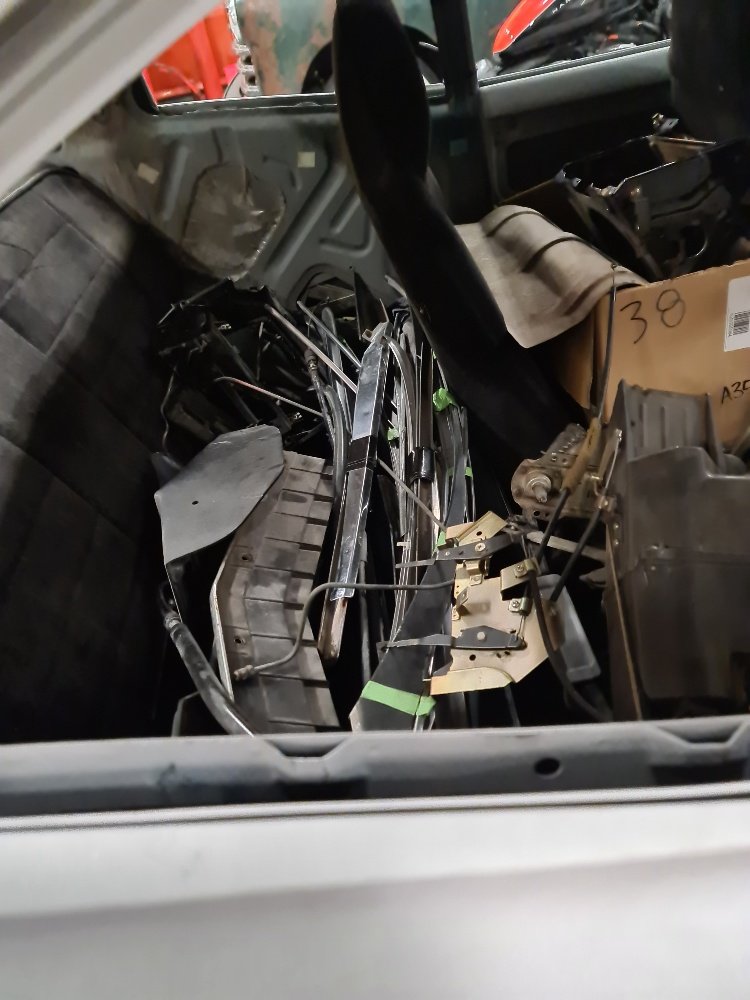
So when i first looked at the car right before Auckland Lockdown V2 it was a bare shell on a chassis dolly, The previous owner spent a bit of time during lockdown and put the panels back on, factory suspension and steering and diff in and got it mobile again for me. He packed the car with as much as he could then when I picked it up the ute tray and back seat was chocka with bits as well for the trip home!
1 point
-
All back together now. Had a turbo shit off a time getting the heater hoses back on because some idiot stuffed a huge motor right in the way. New clutch (remember that, the reason we pulled it apart in the first place) is really good, it's a tiny bit grabby at take off but it's not really bedded in at all so I don't know if this will get better or worse. Also i have connected the boost control pipes around the wrong way so it's free boosting up to about 30psi. Easy fix that. I drove it to work.
1 point
-
New switch in and wheel back together Had a bit of a poke on the passengers side a pillar. My great aunty said she had some rust taken out at some point. I'm picking they did the industry standard bog over it and paint it I could attempt to do the rust myself but it'll end up taking longer than it should and be a bit shit. I'll have a chat with the panel beater and see what they say1 point
-
I just use a bit of speaker magnet1 point
-
Progress. The driveshaft was the first thing to come out. I managed to achieve this without compressing the donut. The UJ’s are good, the hanger bearing itself is good, but the rubber support is chooched. Once the driveshaft is out, it becomes very obvious how to get the gear stick out. 4x 10mm nuts, and it drops out underneath the car. The exhaust downpipe bolts came out willingly (phew) and then by a series of contortions I got the starter motor bolts out. I don’t know if the starter is supposed to be able to come out of the engine bay at this point but I certainly couldn’t. Next was the lower flywheel cover and the two bottom bellhousing bolts (easy as), and then I wrangled the clutch cable out before psyching myself up for the top bellhousing bolts. I’m glad there are only 2 up there. I couldn’t find the right spanner angle to get them from the top, so I took @azzurro‘s advice and used all my half inch extensions and universal joint with tape on it and you can just get to them from underneath. One of the trickier operations was releasing the speedo cable. I couldn’t unscrew the cable because I physically couldn’t get my fingers on it, so I undid the nut and wangled the whole speedo drive out. Lucky the gearbox is light, since I’m working alone lying on the floor, so it was fairly simple to pop it off and onto the floor. The engine came out next, I cannot believe how little clearance there is. With the fan clutch touching the slam panel, there is maybe an inch between the clutch and the firewall. I think I’m going to lose the fan clutch as it’s quite noisy. Other observations are...it’s filthy. No oil drips but lots of seeps, from both engine and box. Also, I will need a new gearbox mount, and I’ll get a new hanger bearing for the driveshaft.
1 point
-
No problem. I nicked it off someone else on the internet.1 point
-
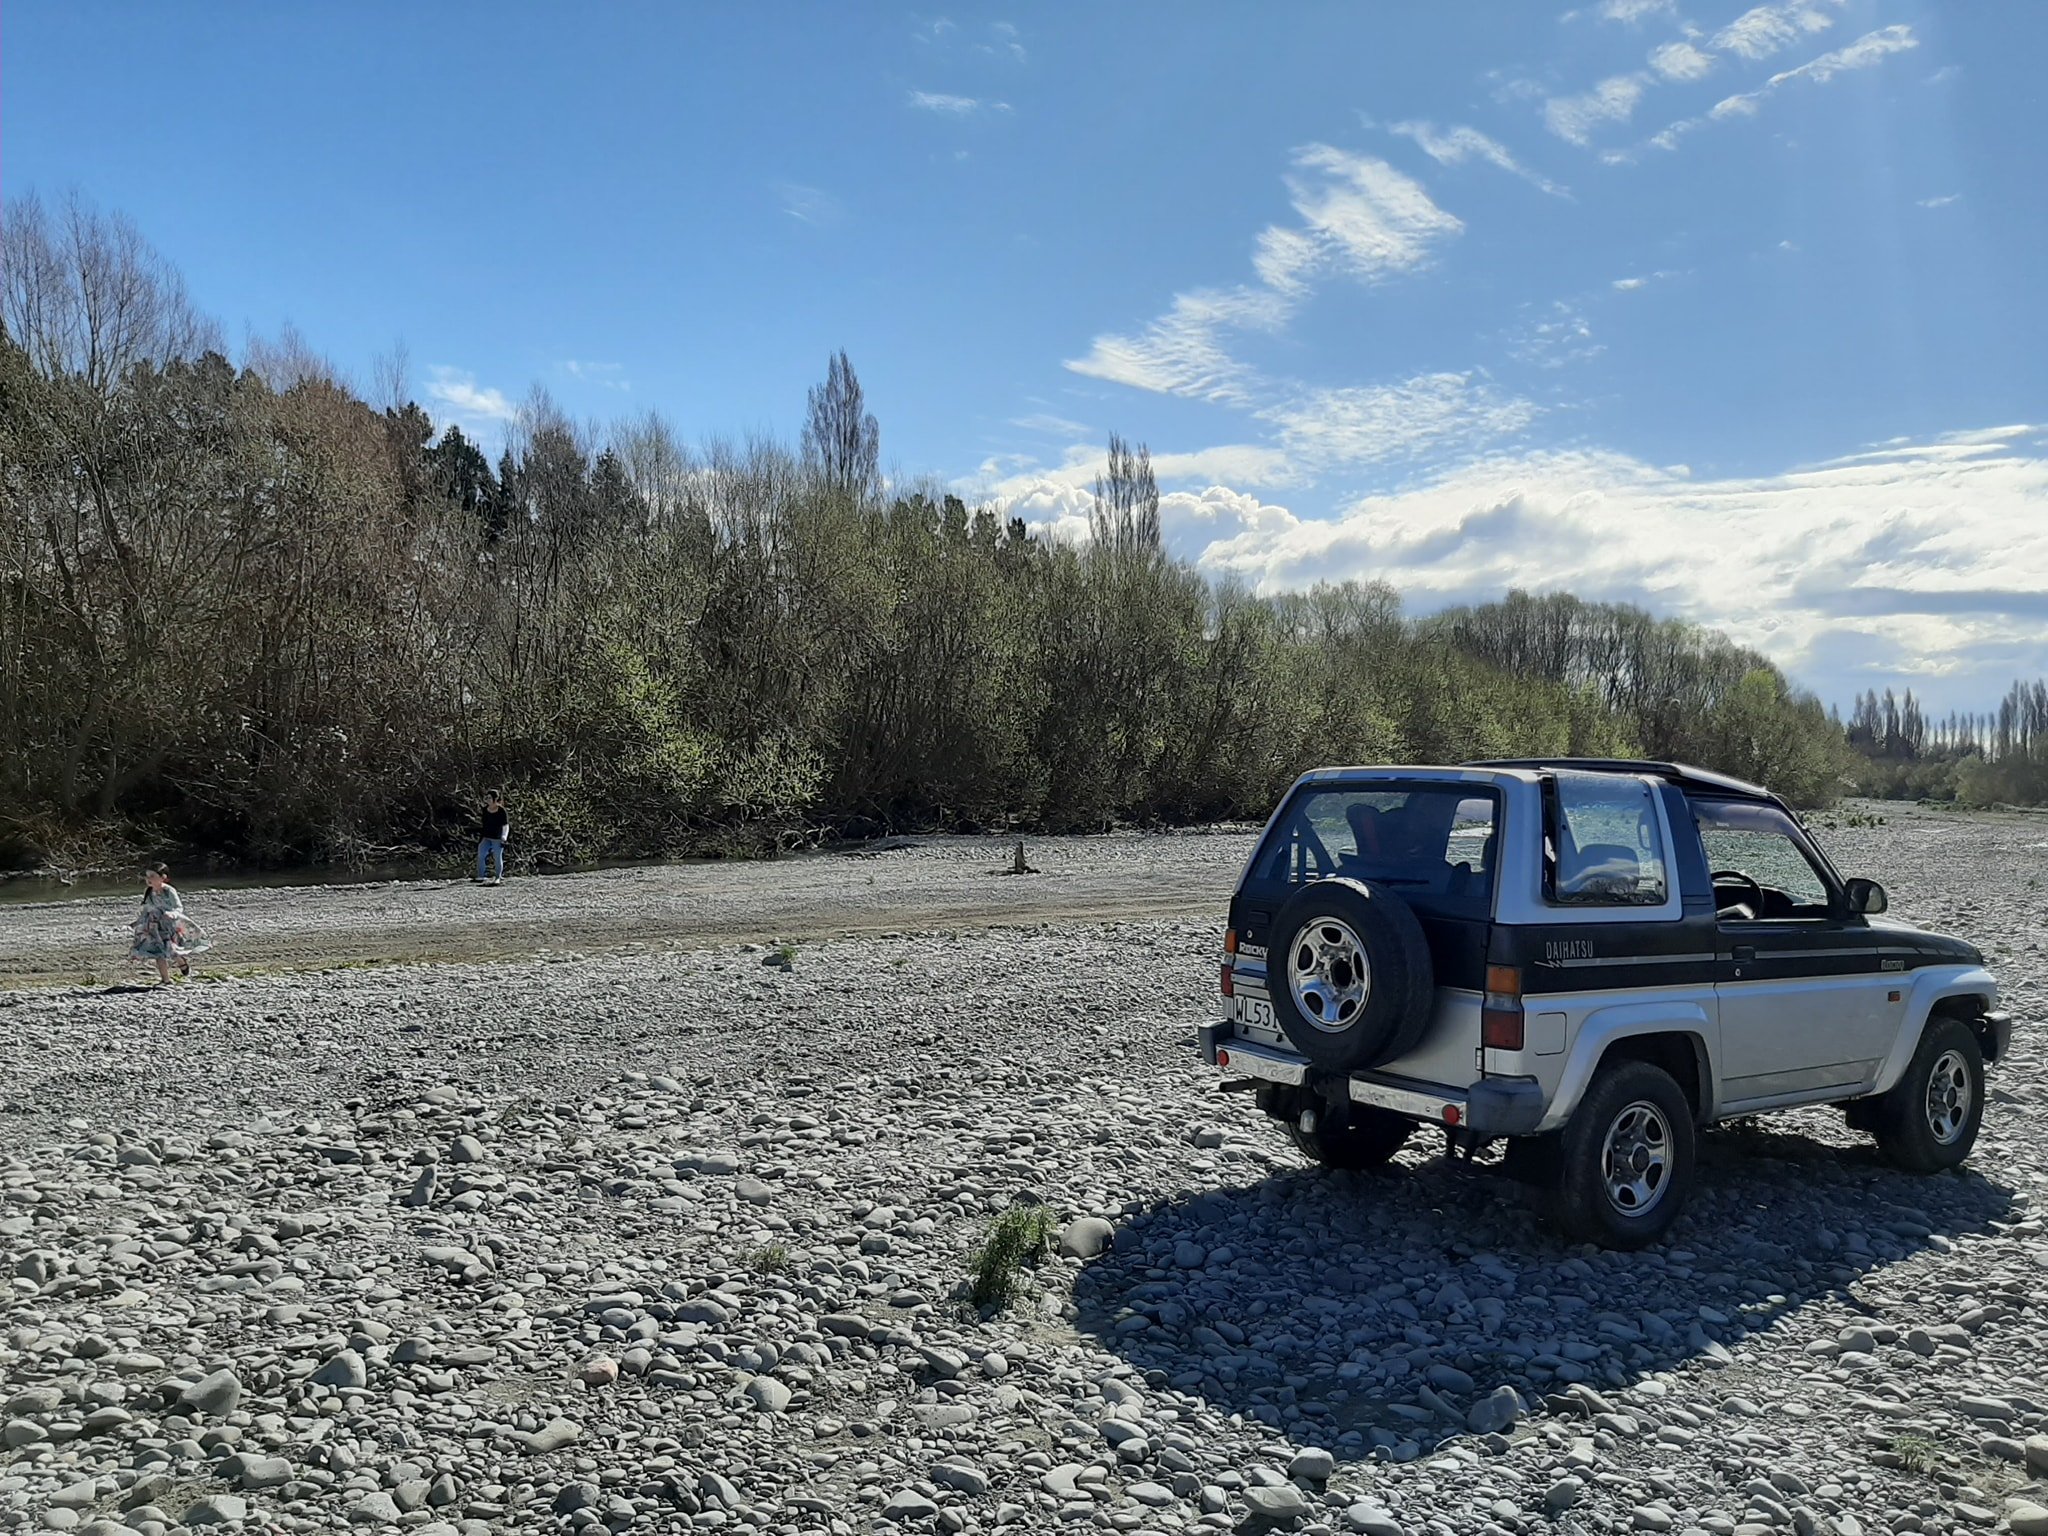
Nanged it up to Hanmer for the official unofficial Hanmer meet, was a laugh going up Jack's pass 4 up in it, spent a lot of time dodging potholes and other rough road issues haha. Didn't skip a beat all weekend! Such a great little car, love this thing much more than I should haha.1 point
-
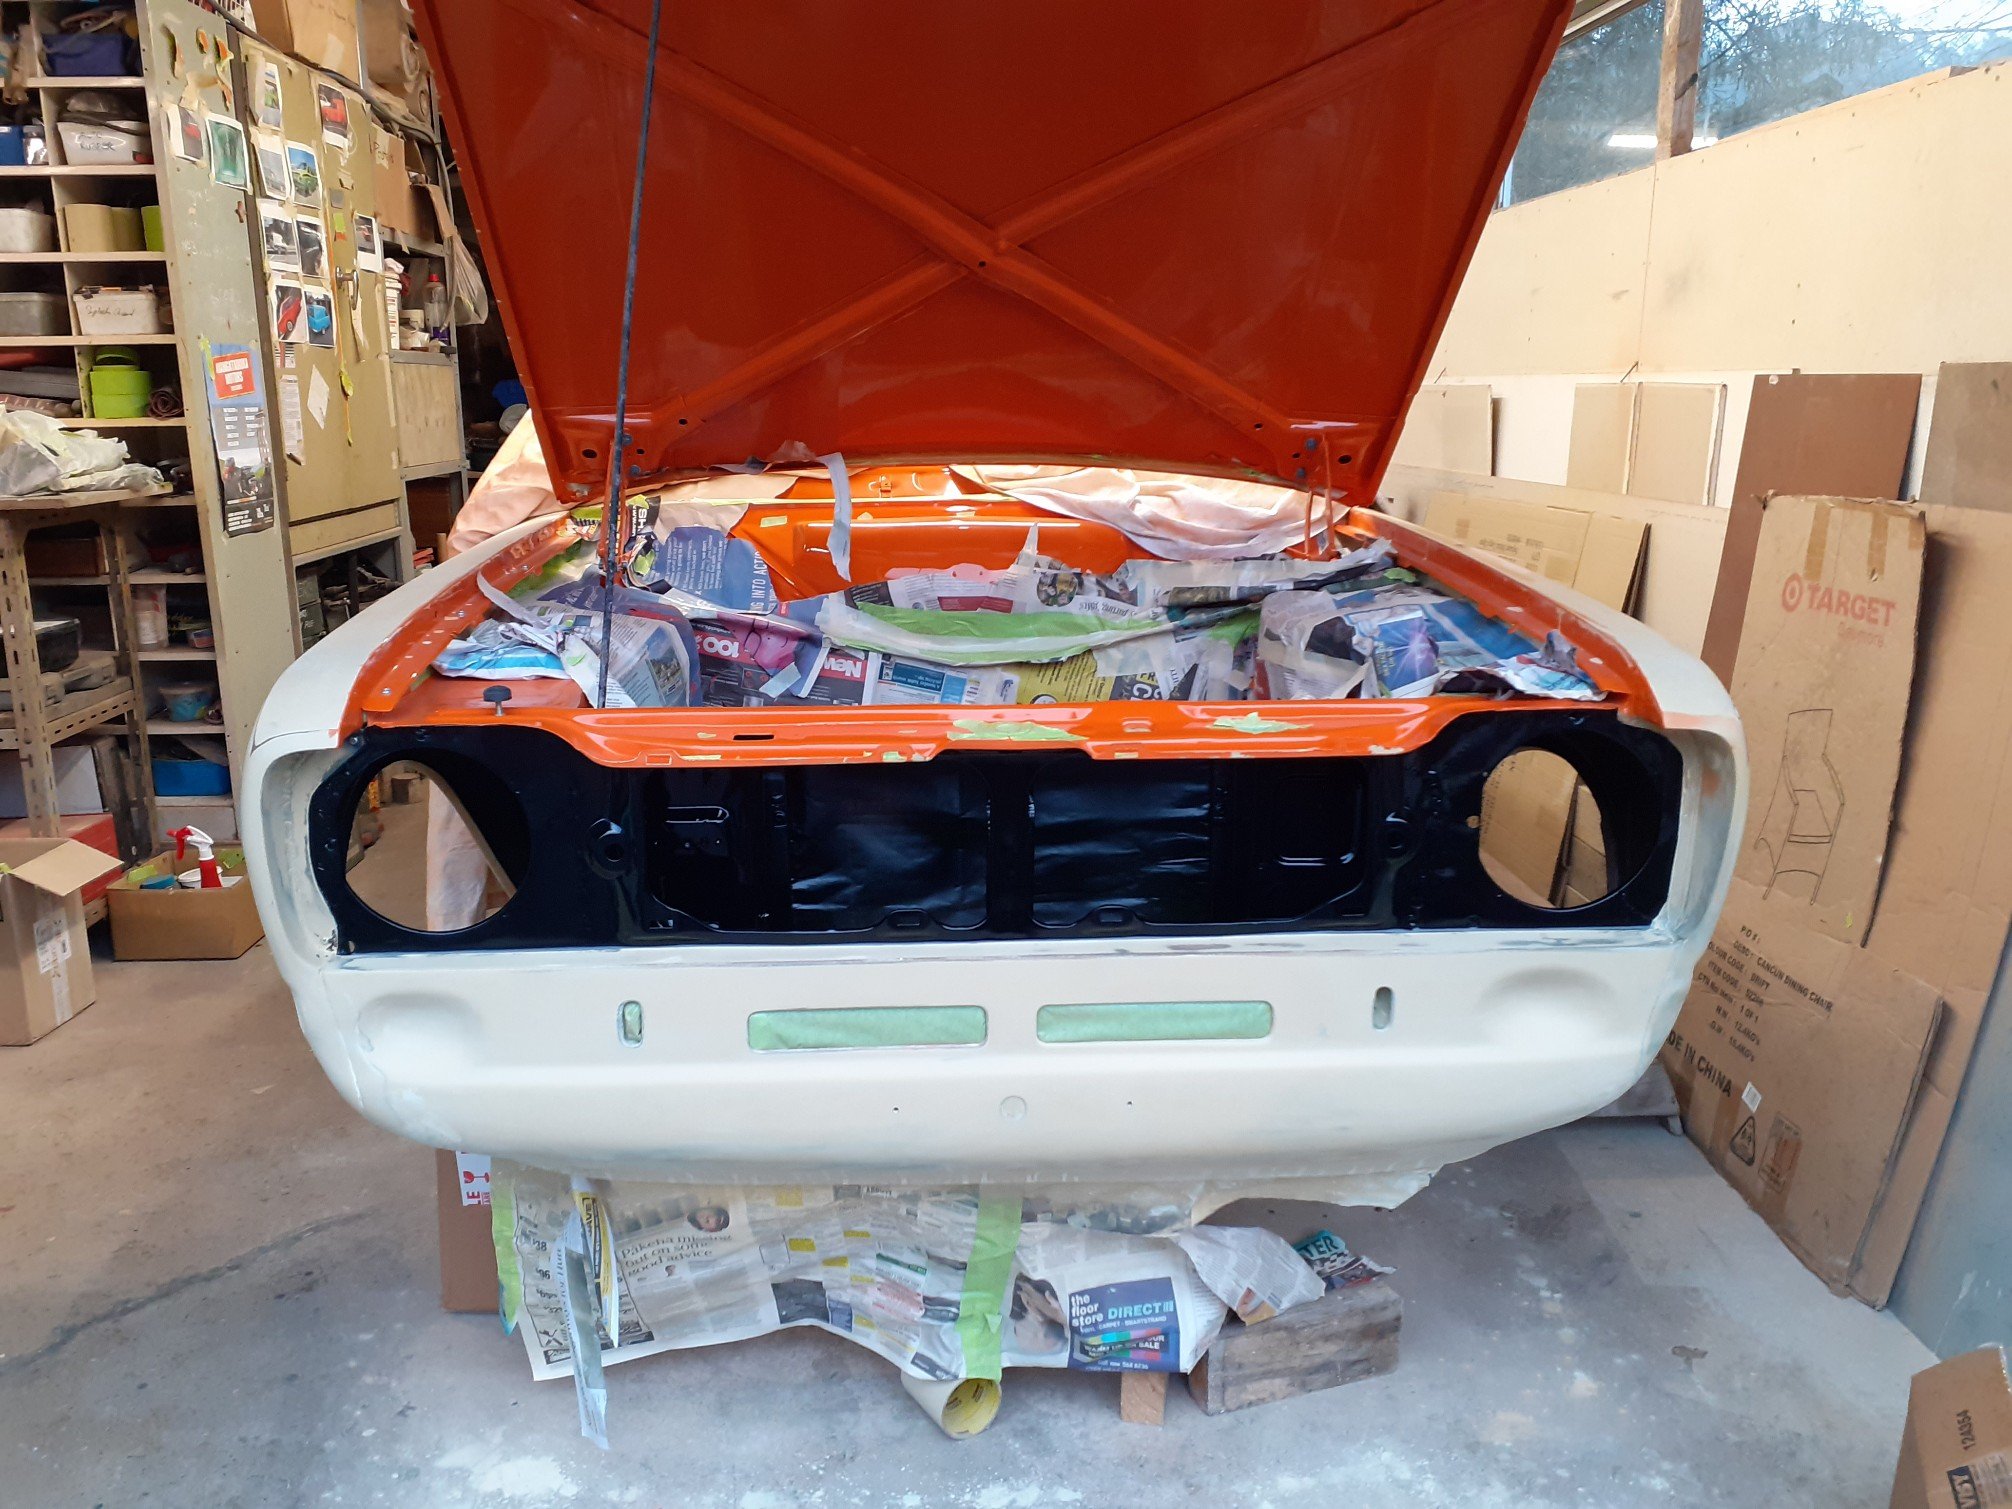
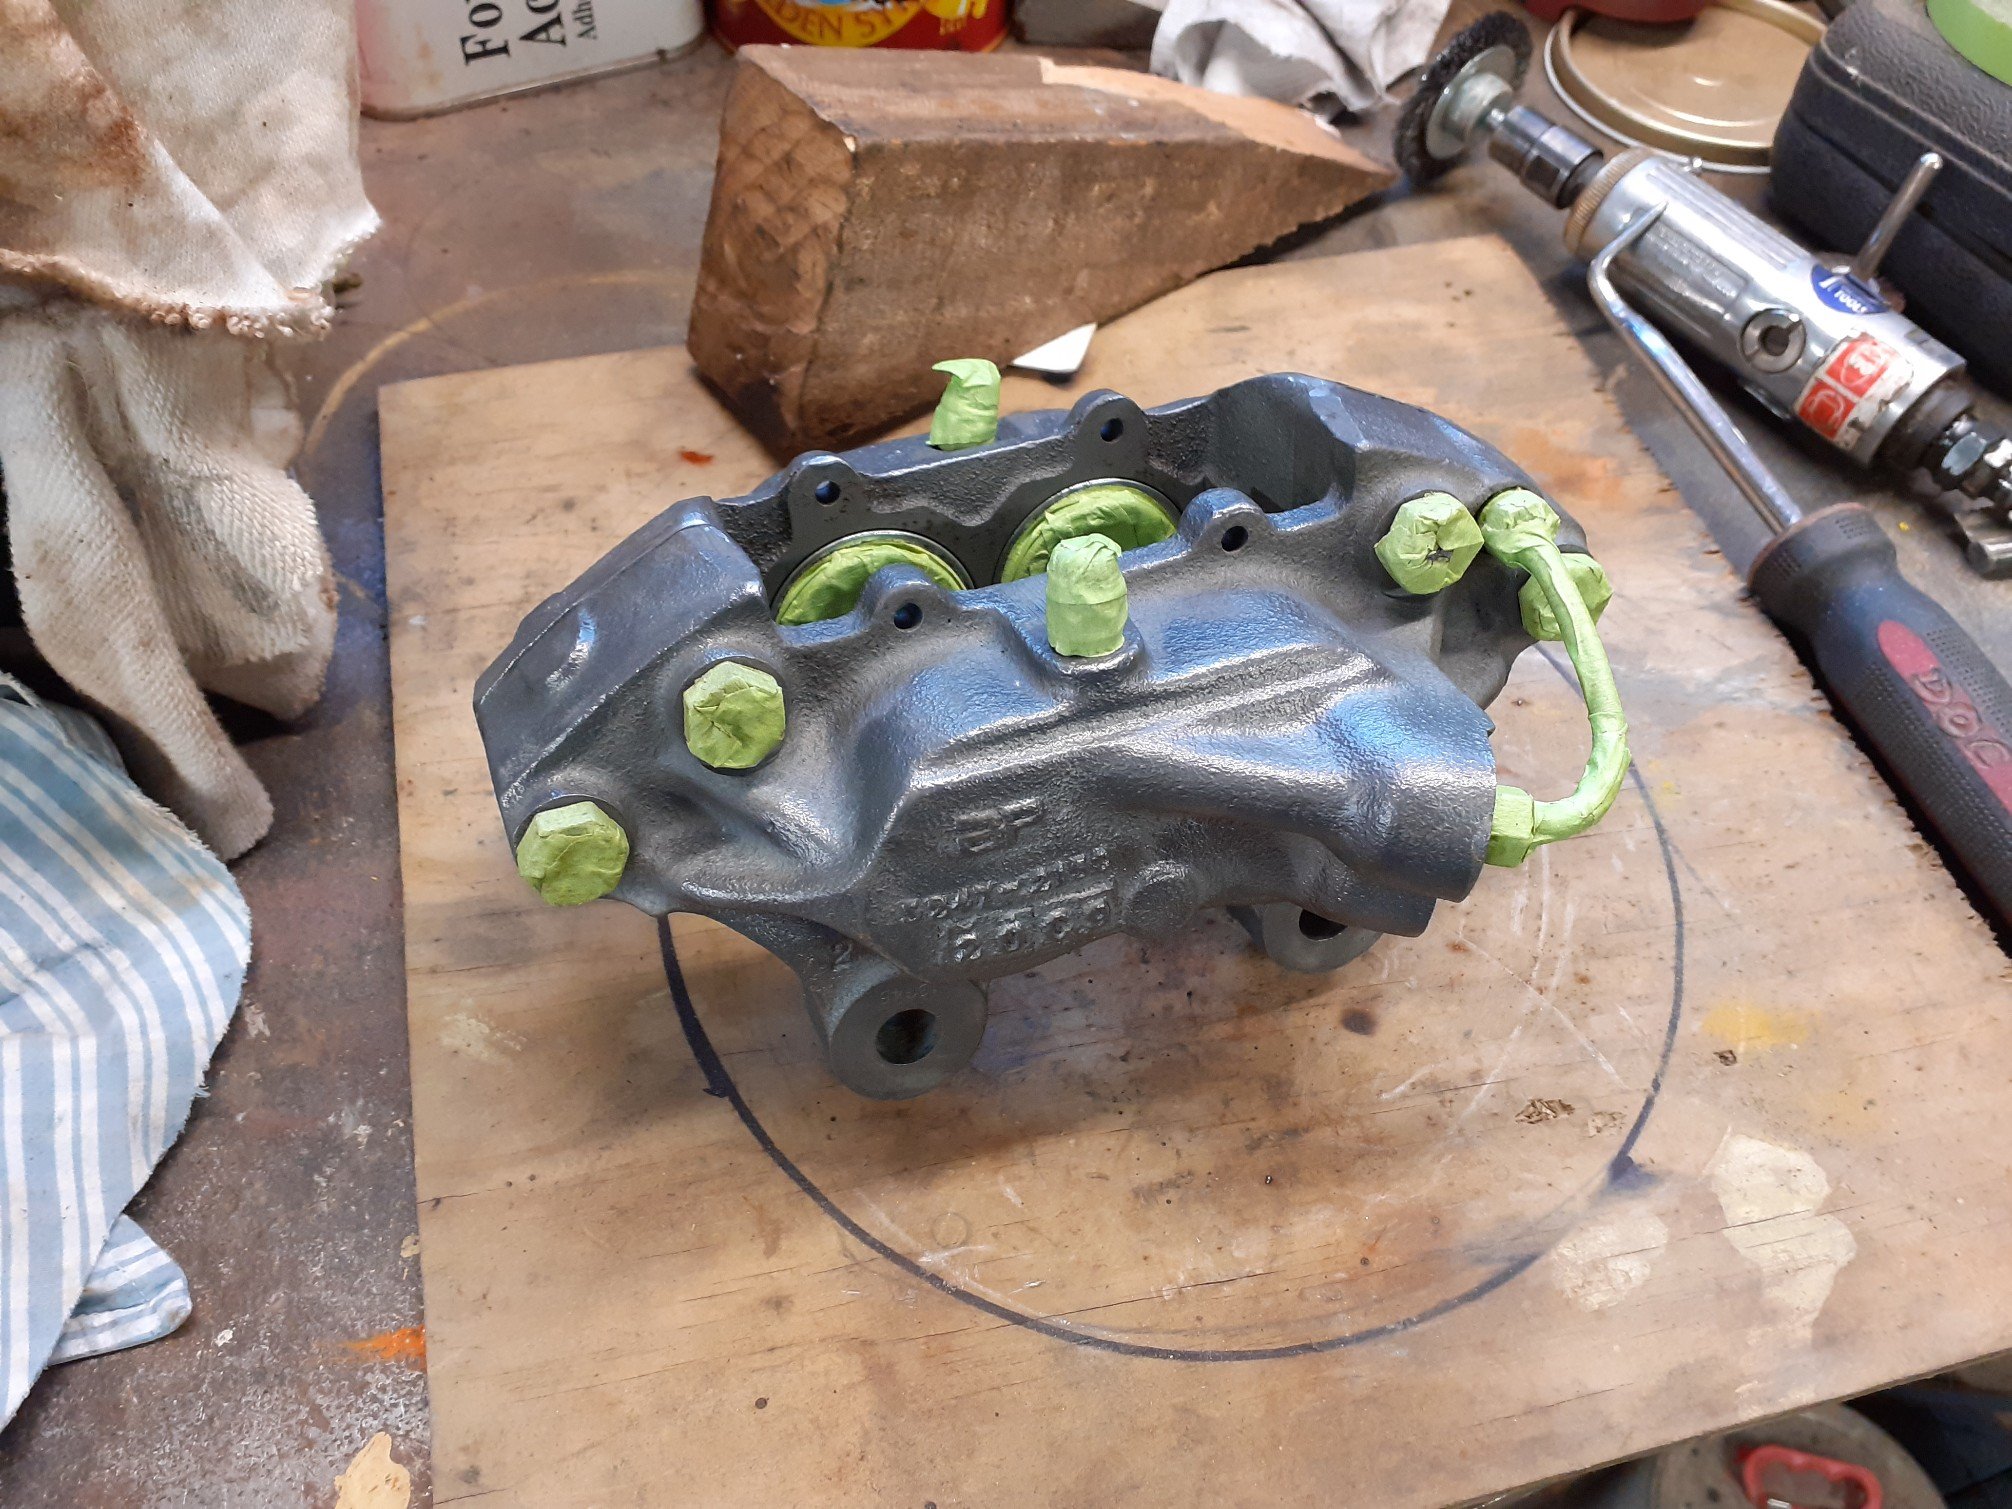
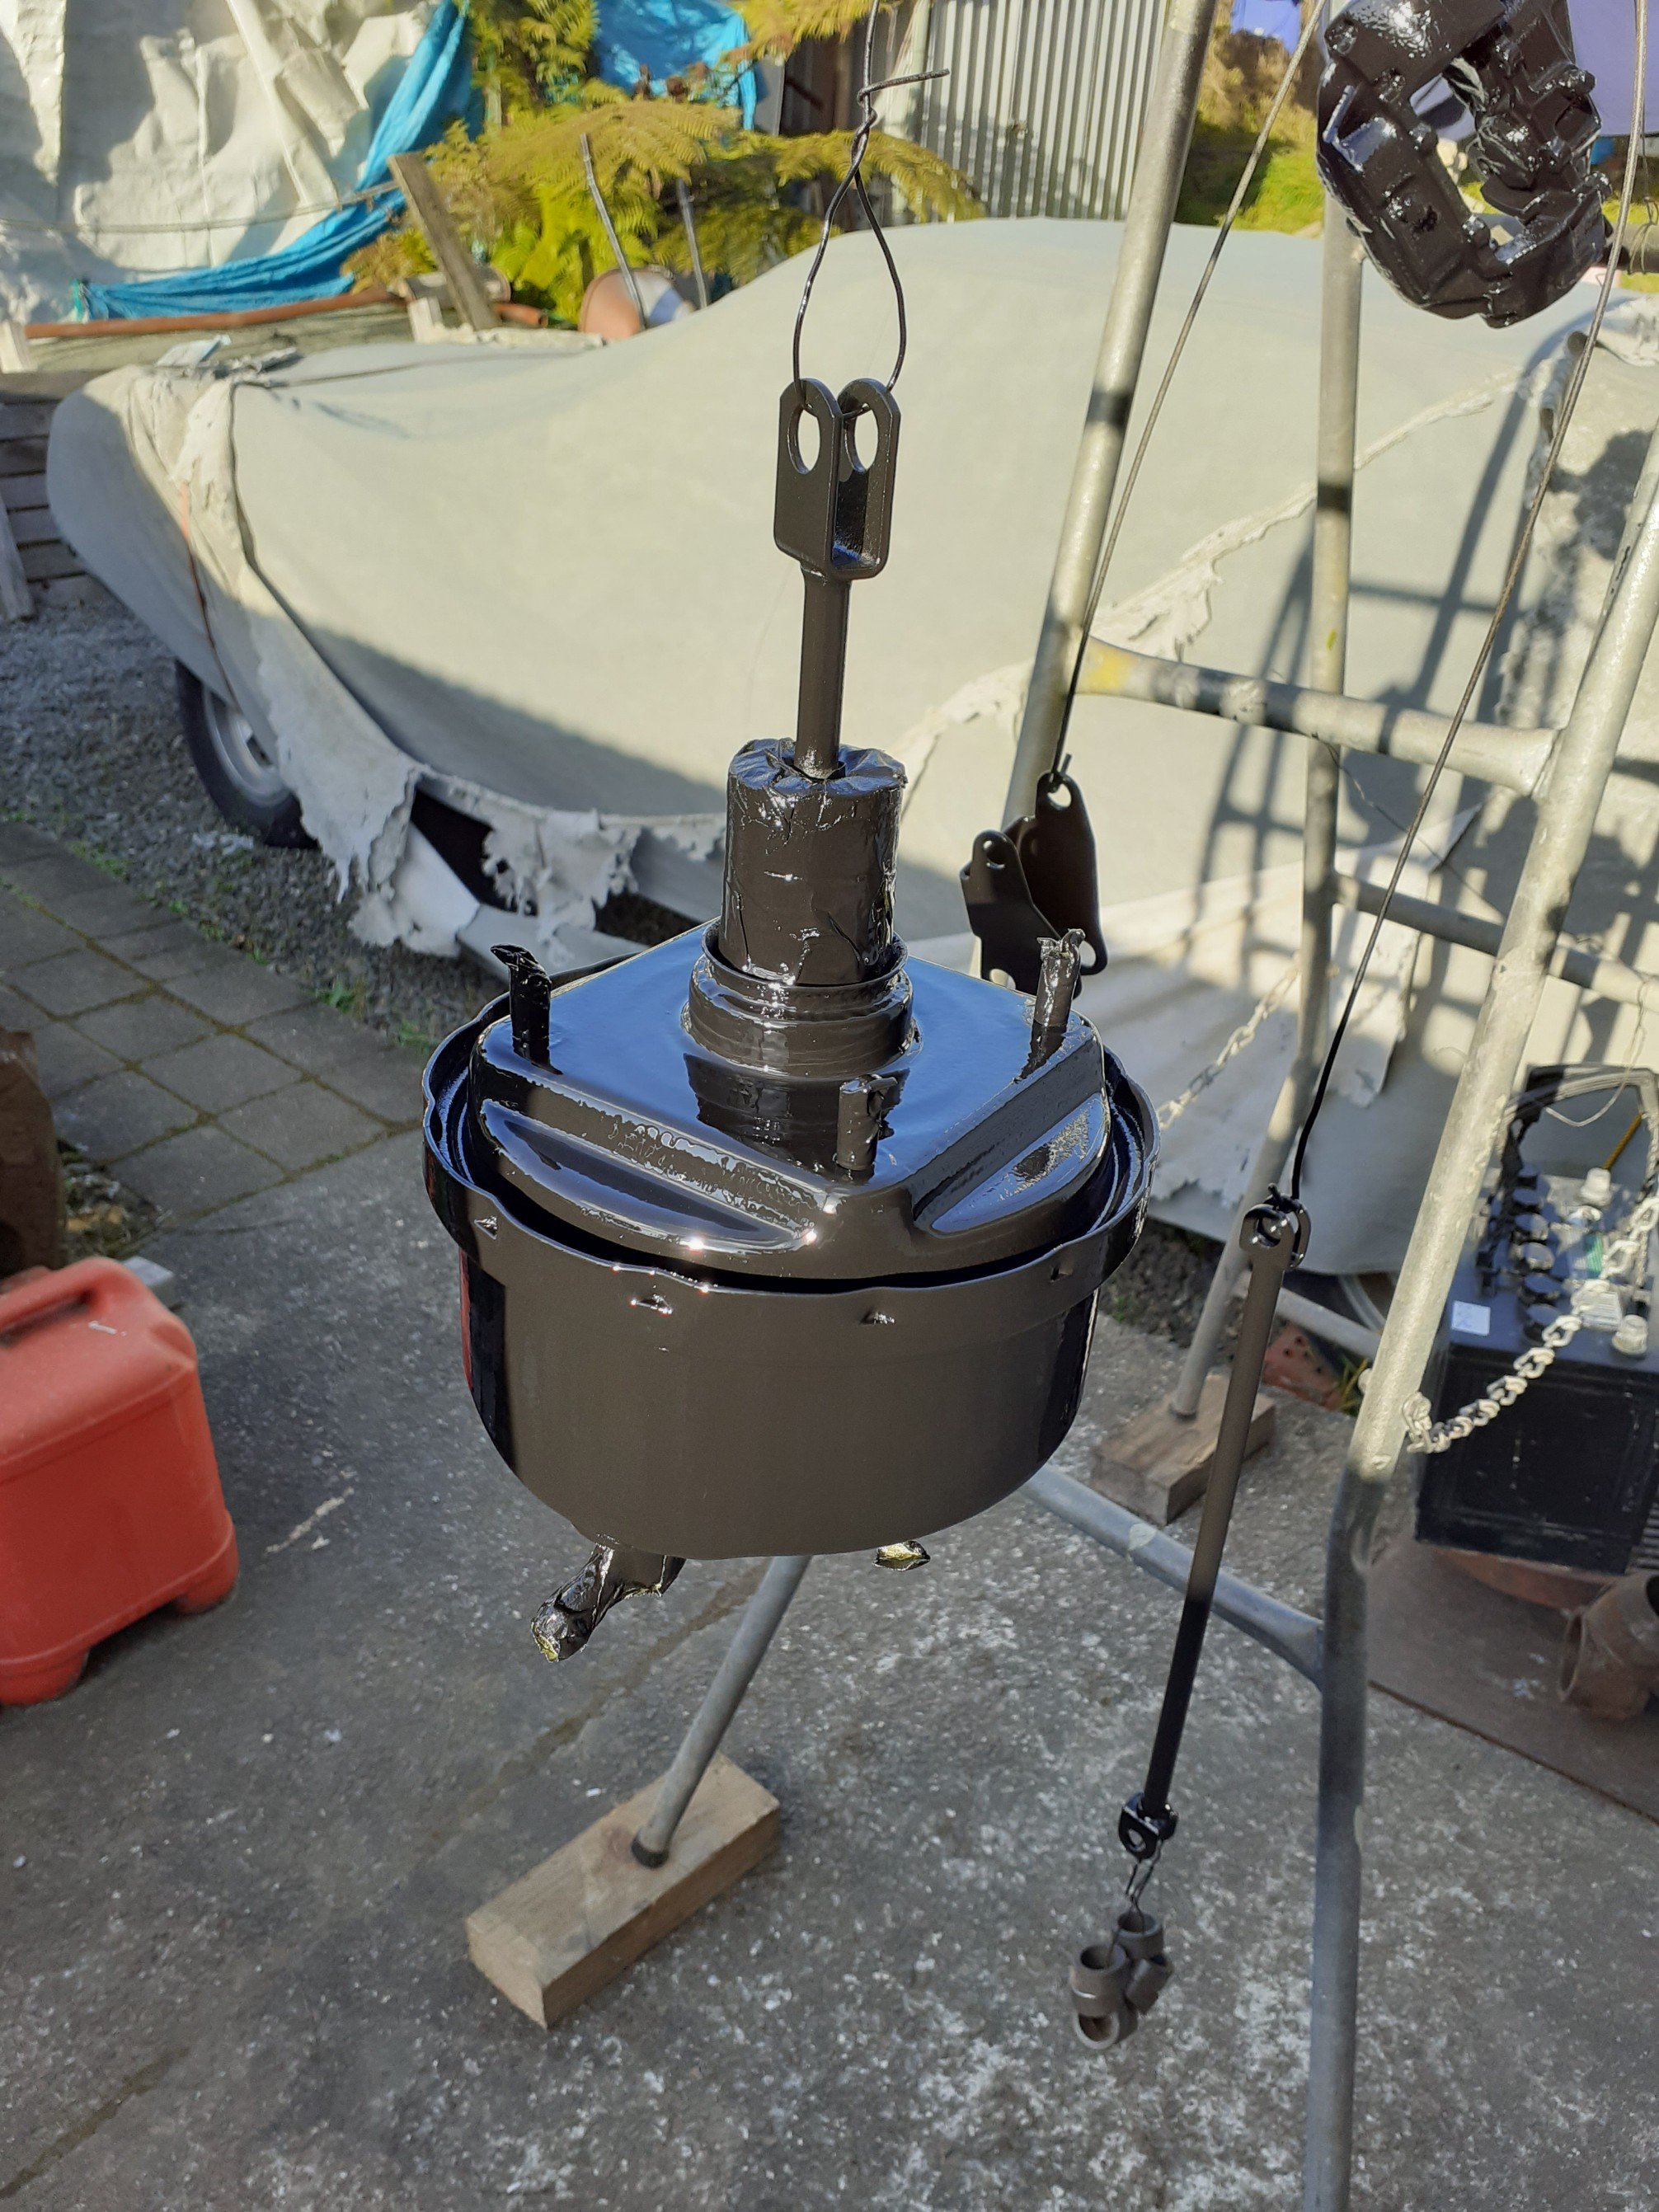
More sanding and prep work. Picked up some rebuilt princess 4pot calipers and fiesta side mirrors. I was originally going to run chrome bullet mirrors but these provide a greater surface area and will match all the black trim. Painted behind the grill black and painted the calipers and brake parts. Is there any performance advantage to ditching the brake booster?
1 point
-
The September meet will be a little different. Thanks to @Beaver and @macabre for the future of our monthly meets. Copy/paste of the first post:
1 point
-
Got the next one ready. Now have 4 chill blocks, 4 risers, 2 main in-gates and 2 small gates. One of the chill blocks didnt pack very well so we'll see what happens there. The sand around that area is pretty thin so theres a chance itll get super hot and fall apart. Bigger problem is I had an issue with the sand strength for some reason and it cracked when bolting up. Hopefully it doesnt fall apart when filled!1 point
-
Made a cool paper weight! As I thought, the in gate was too small and it filled too slowly causing some cold shuts/holes. Also the thicker sections in the middle shrunk and caused some tears. Other than that it looks reasonable. So the plan is to increase the ingate area (maybe add another gate on the front) Then to sort the shrinkage I need to learn about adding heat sinks into the sand mould.1 point
-
Putting the sand in the freezer before adding the catalyst has given me a good 15-20minutes work time (instead of 5!) Did the outer mould today with 30kg of sand no issues.1 point
-
Soldered stuff on Made a less ugly Lead Quickly connected for testing/setup Wired it up and set the dwell/made sure it worked Quickly cobbled together a throttle bracket (it's shit, flexes and doesn't put the cable in the right place)1 point
-
Tacked up the tailpipe and am fairly happy with where it's sitting. It's interesting how a couple of bends after the muffler really quietens stuff down! That sums my current feelings up. It was pouring fuel in again, it was my fault for not tightening the base screws enough. Put the carb back on and it's still running poorly (un surprising as I didn't really fix anything) I dropped my brake hoses off at sterling brake and clutch. I ended up needing some custom ones made up as for whatever reason my originals were 20mm longer than every other tonner/hz listing. I'll go grab some washers tomorrow as I lost my other ones1 point
-
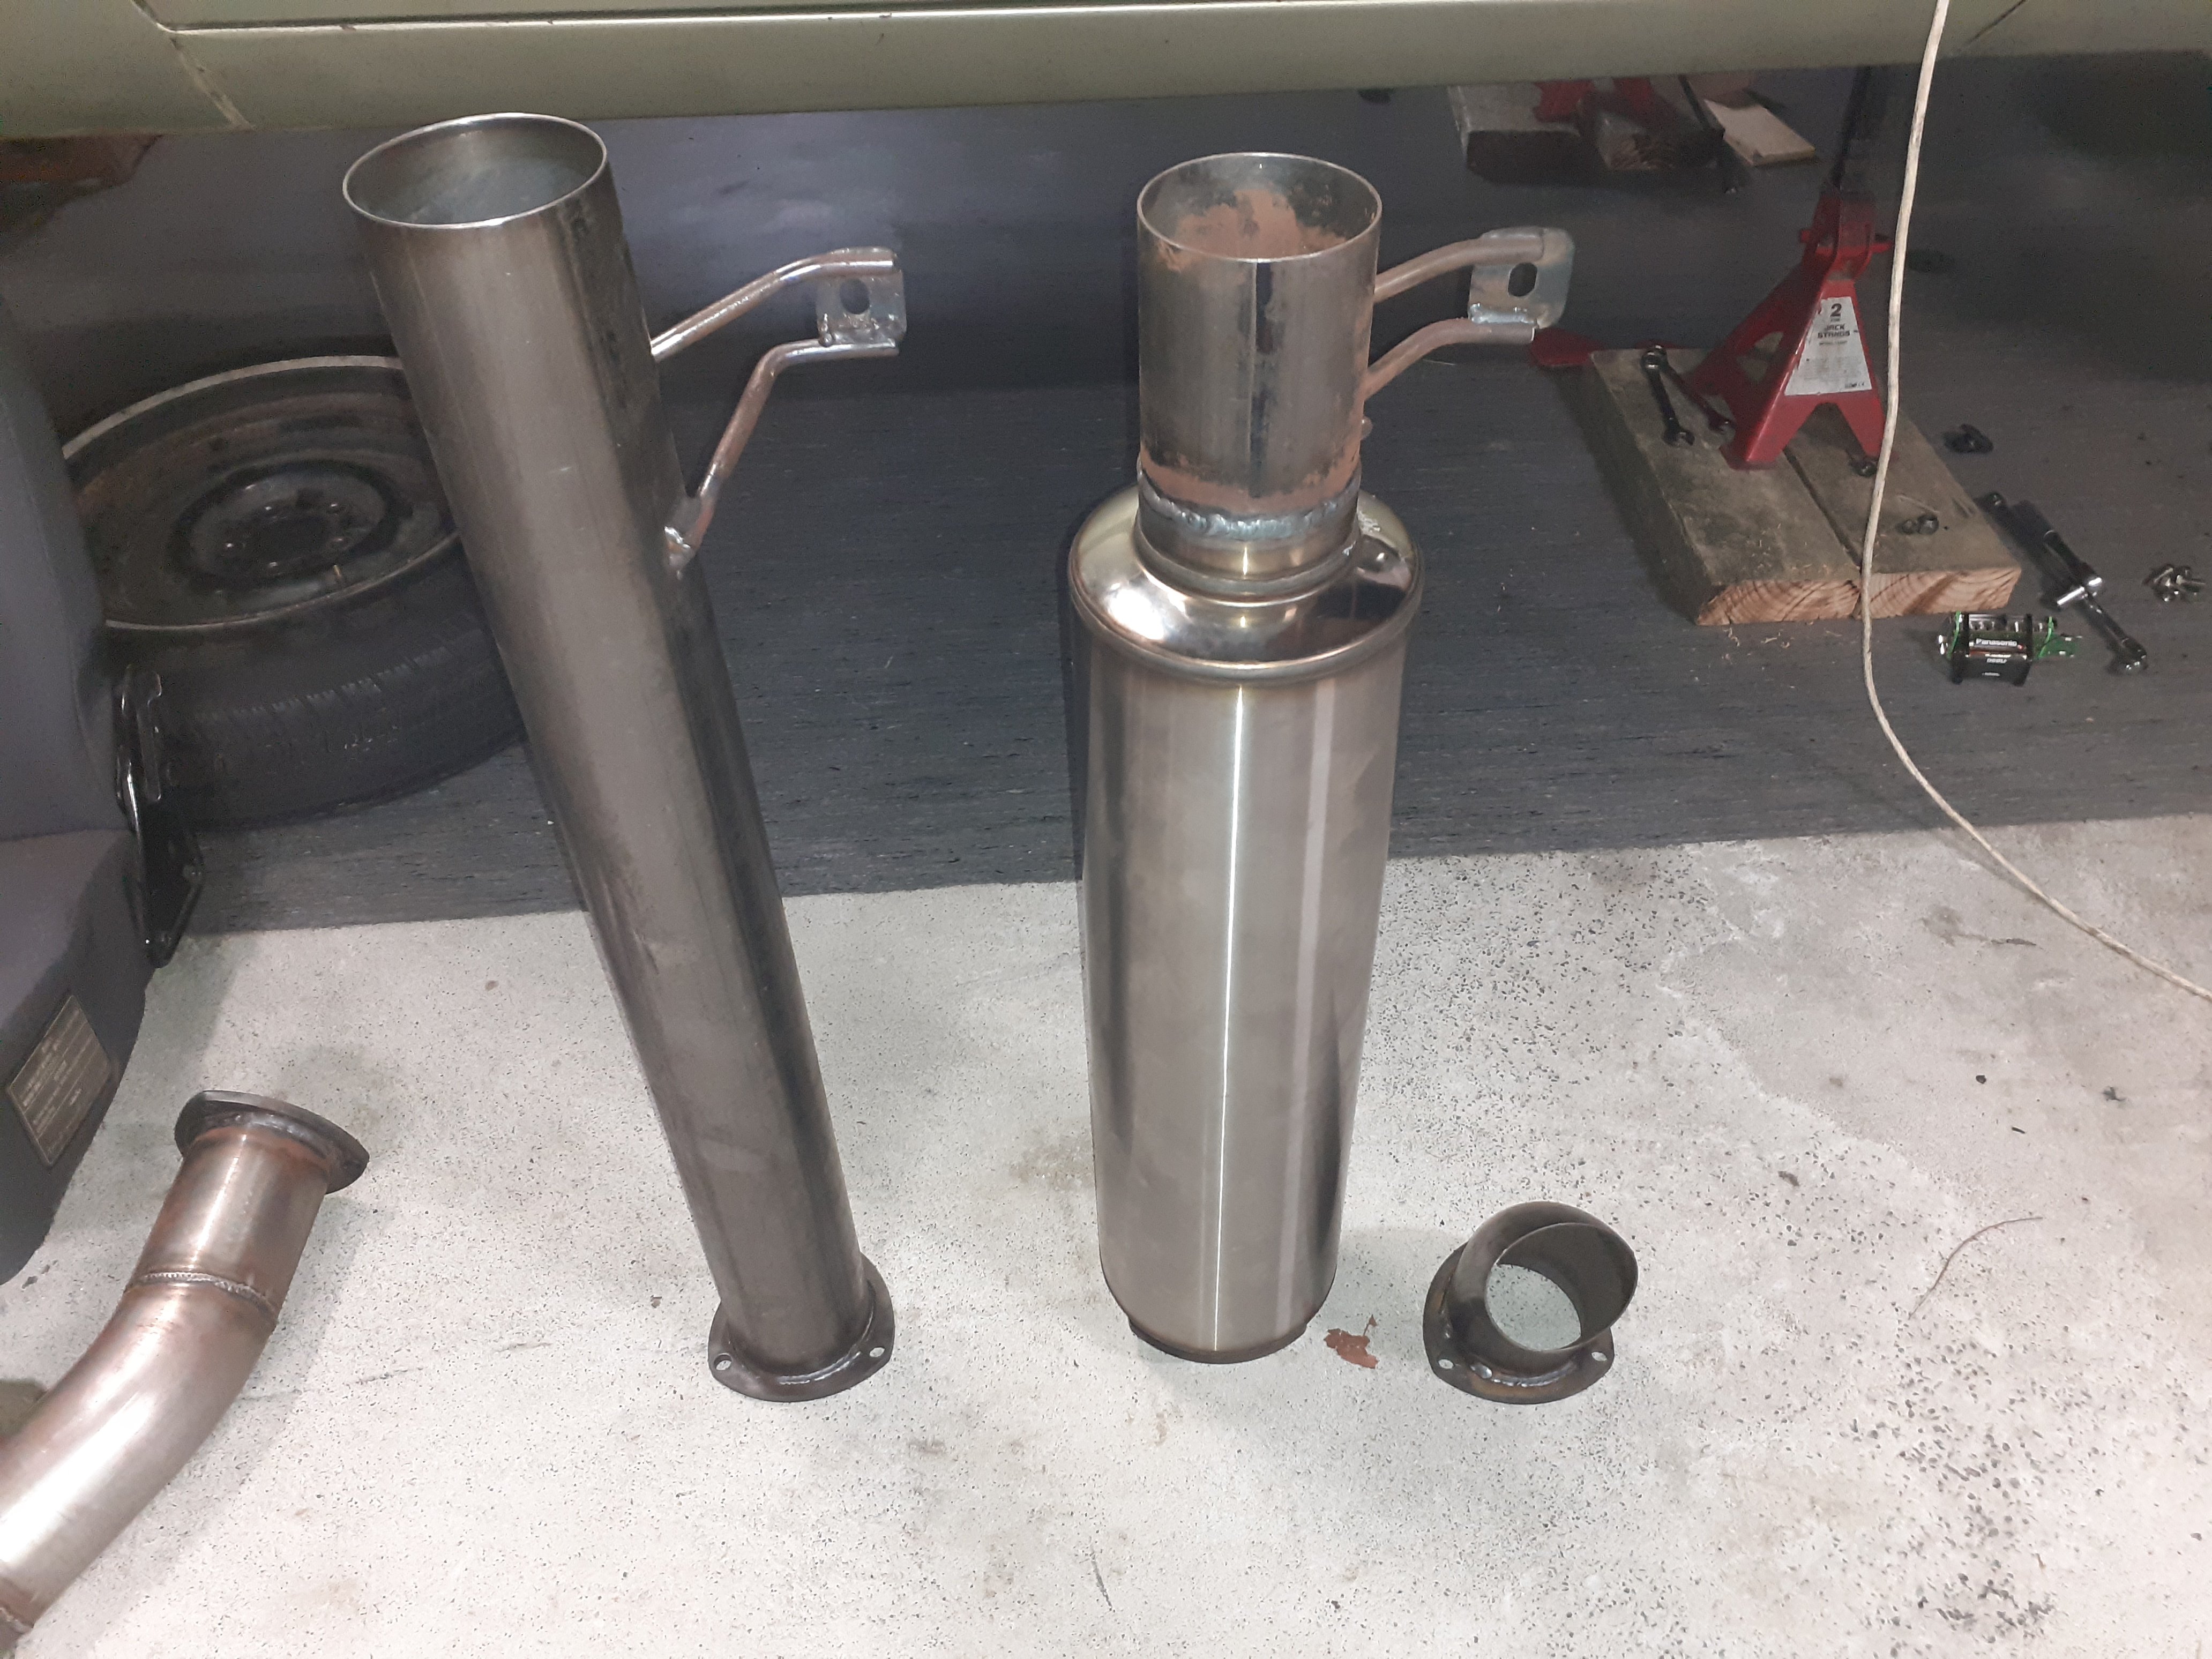
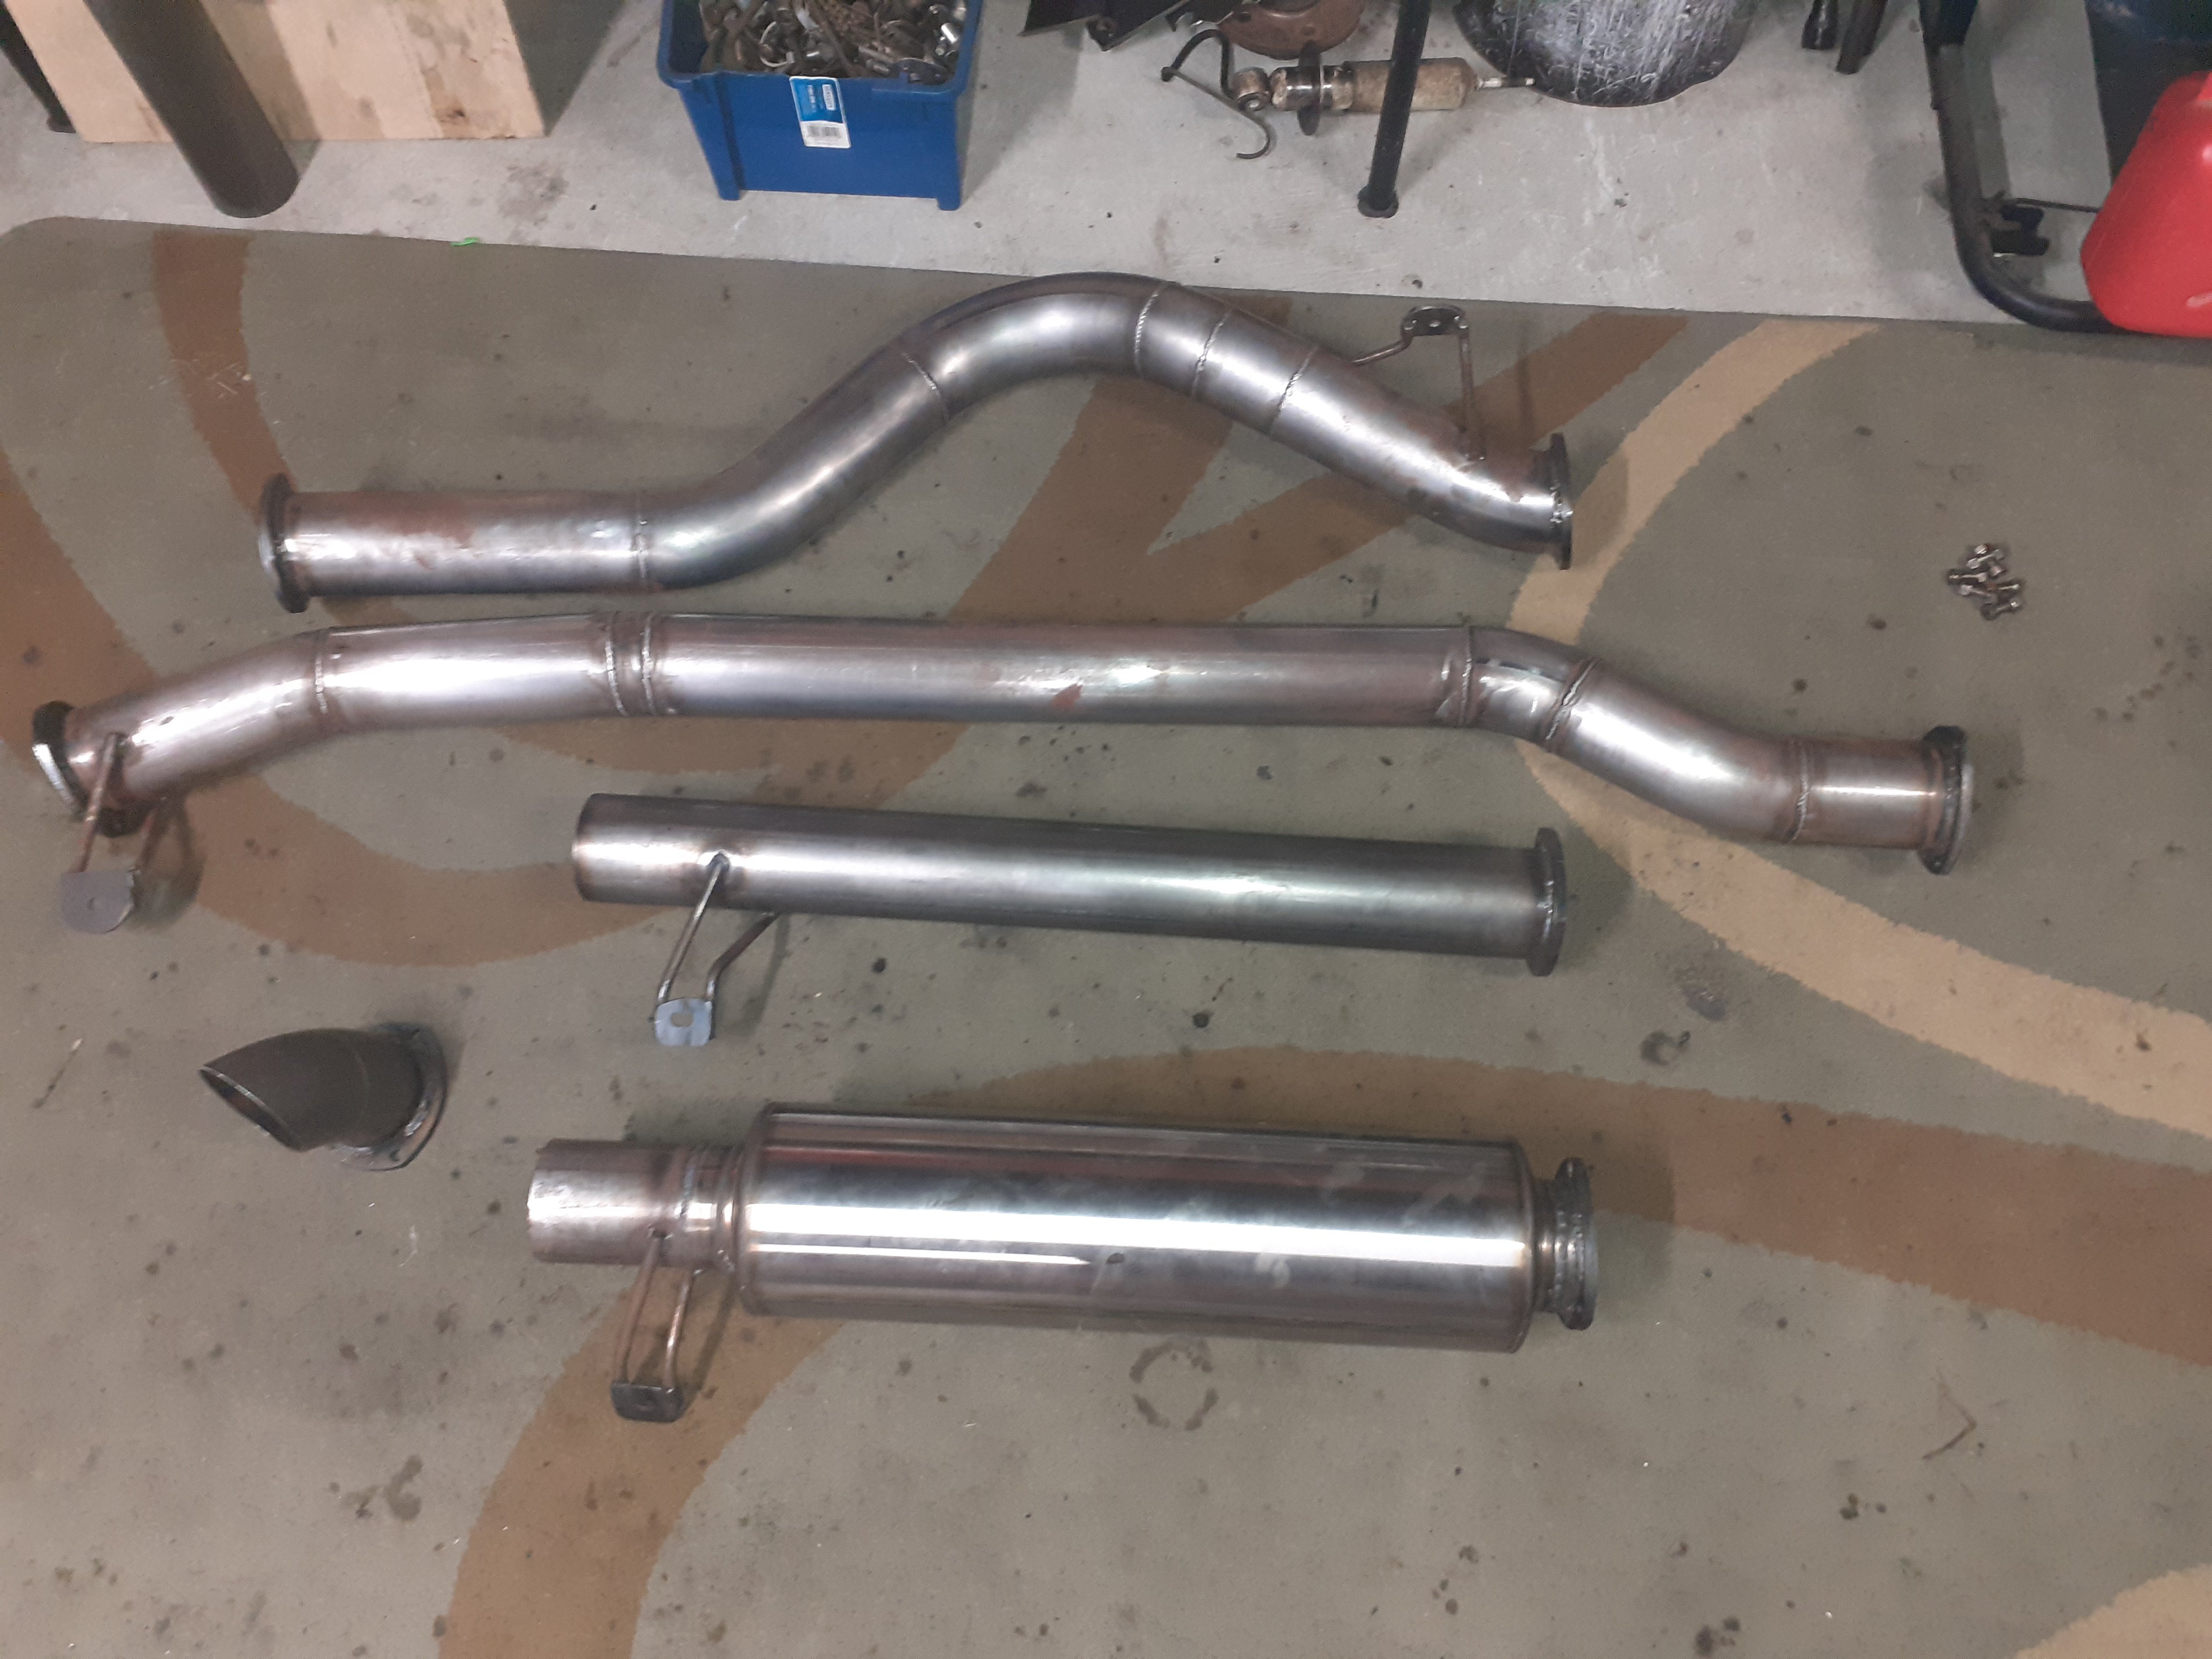
Because I'm a wanker, i made some other exhaust options, a mufflerless tail pipe that bolts on in place of the muffler, and a turn down that can bolt on to the 3 flanged sections, so behind the diff, in front of it, or at the front pipe, so I can have varying levels of loud Exhaust is ready for paint now. I'll probably get the front pipes HPC coated again
1 point
-
I'm still working on this. Havent had as much time as others, as I've been working from home during lockdown. I sanded back all the guide coat and spot printed areas where I hit metal. Will give this a final sand and then its onto color. Pretty keen to get this done. Well and truly over block sanding.
1 point
-
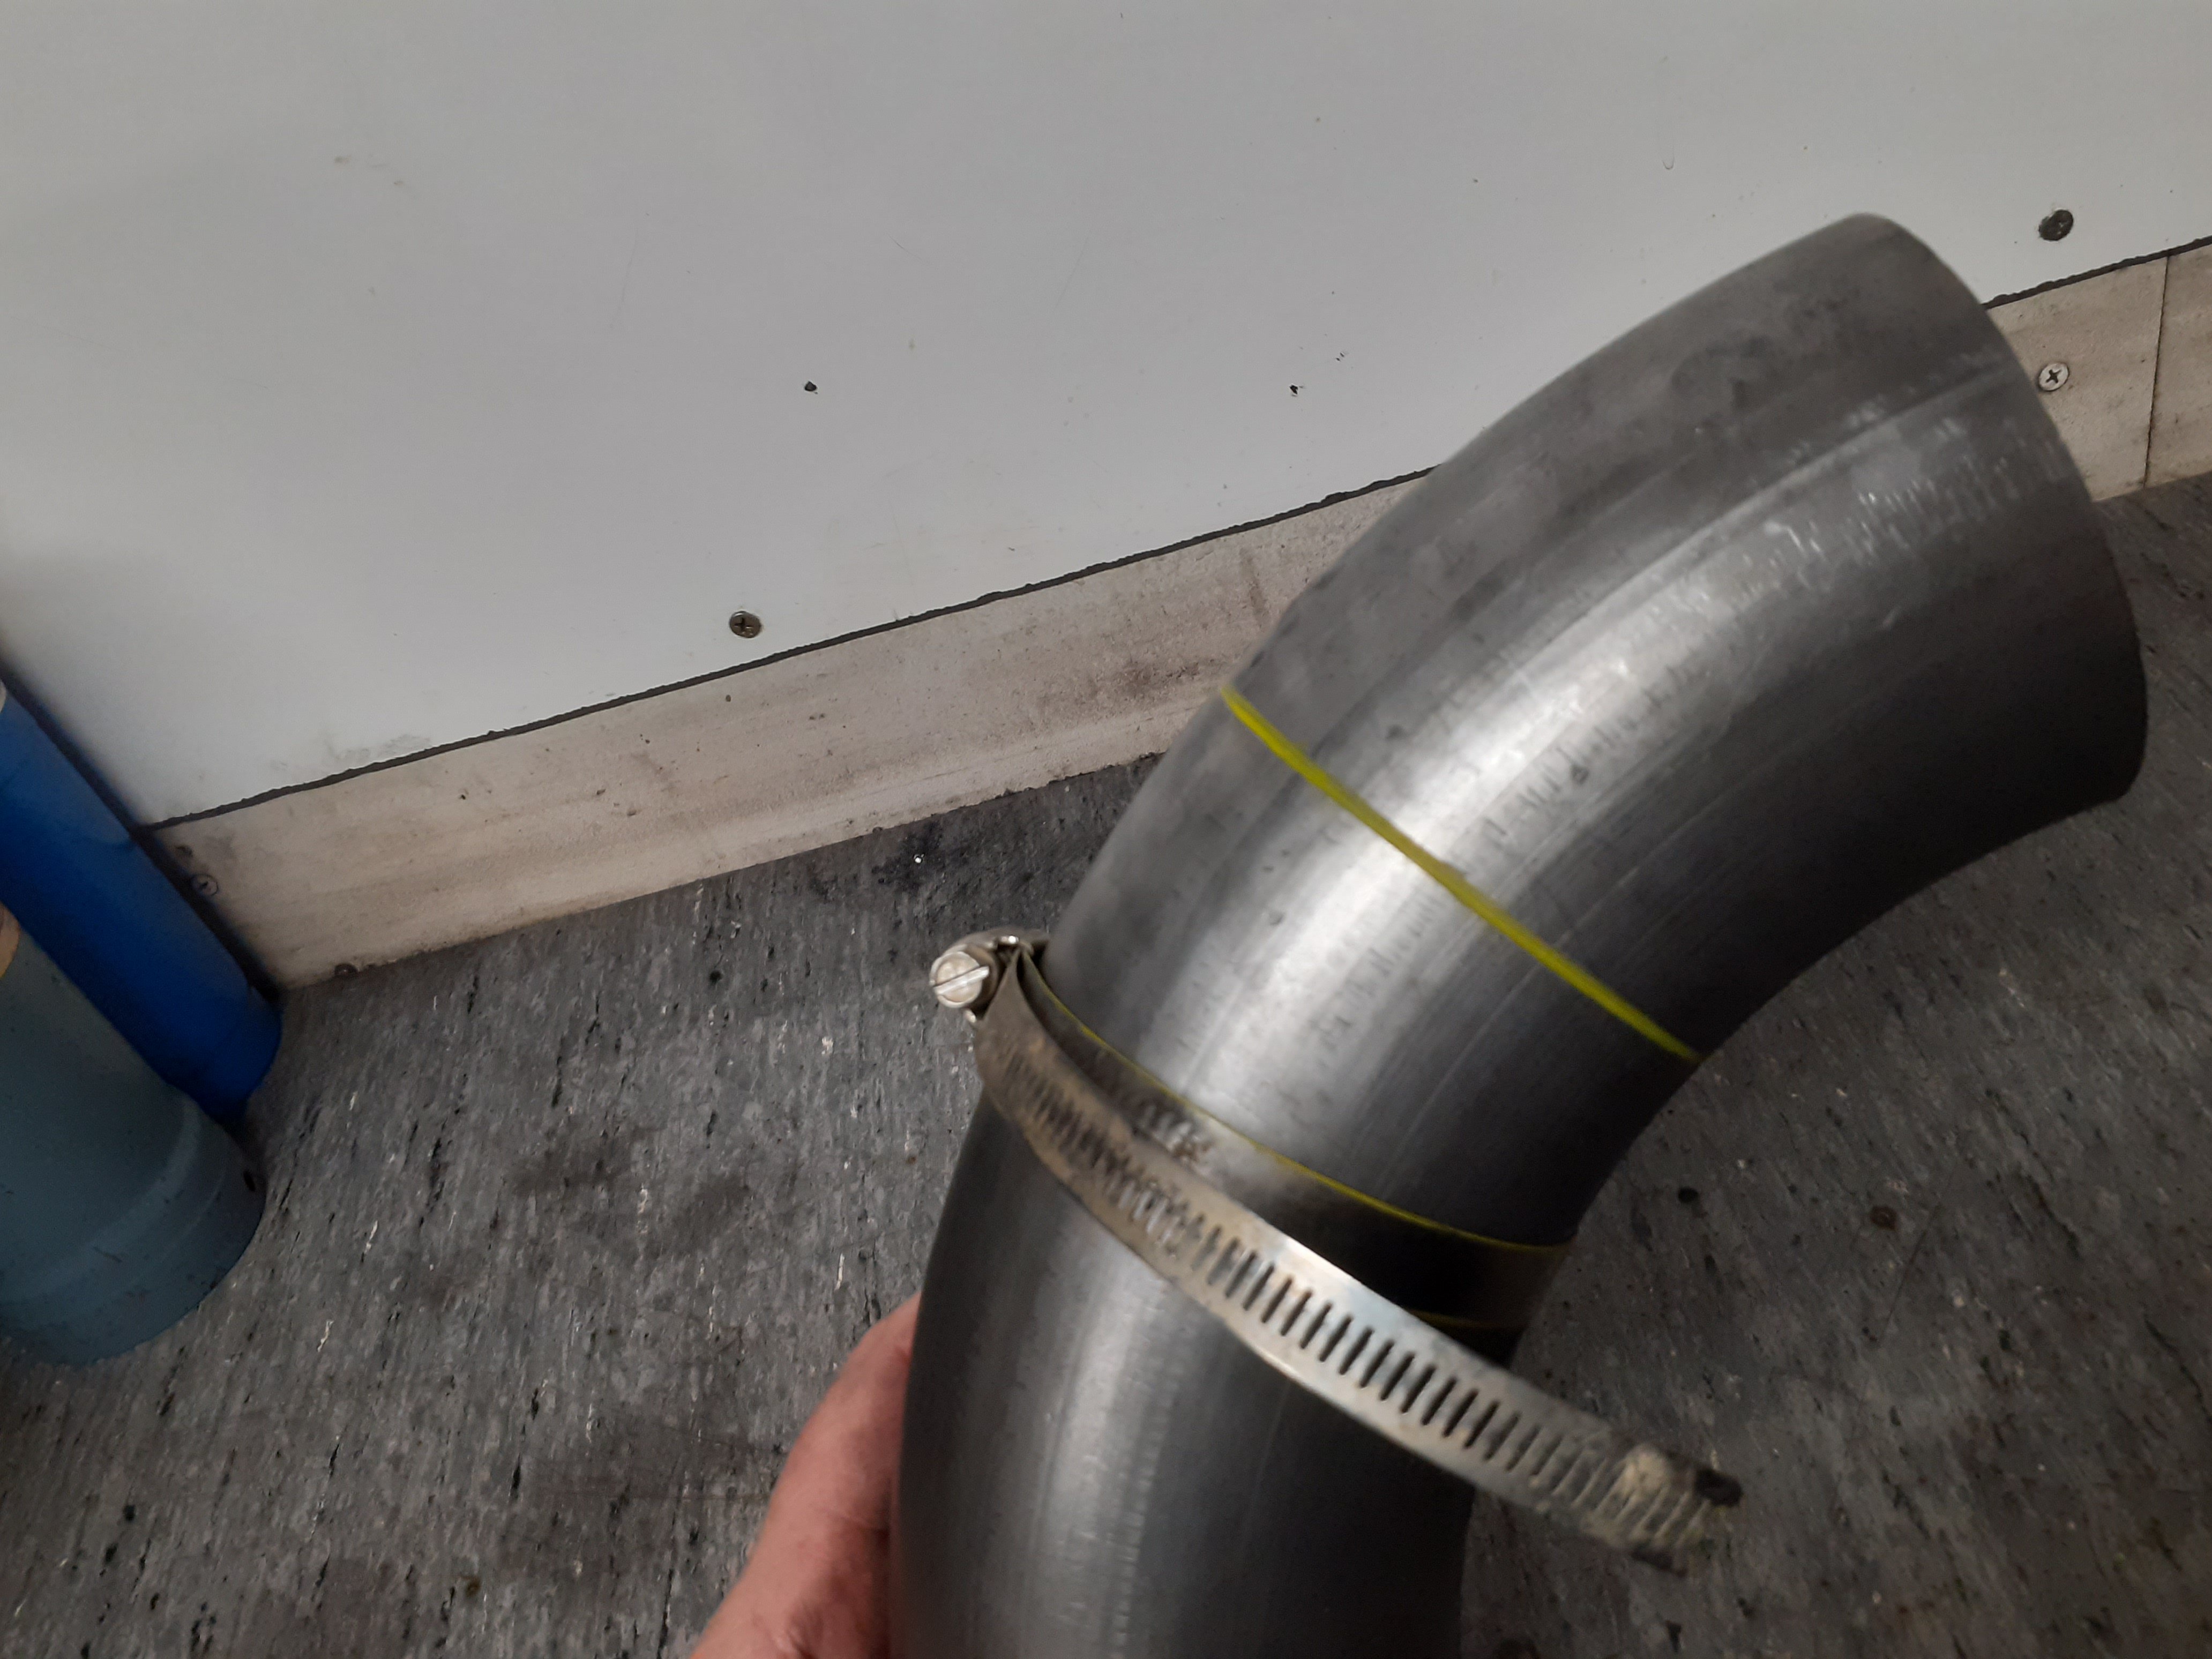
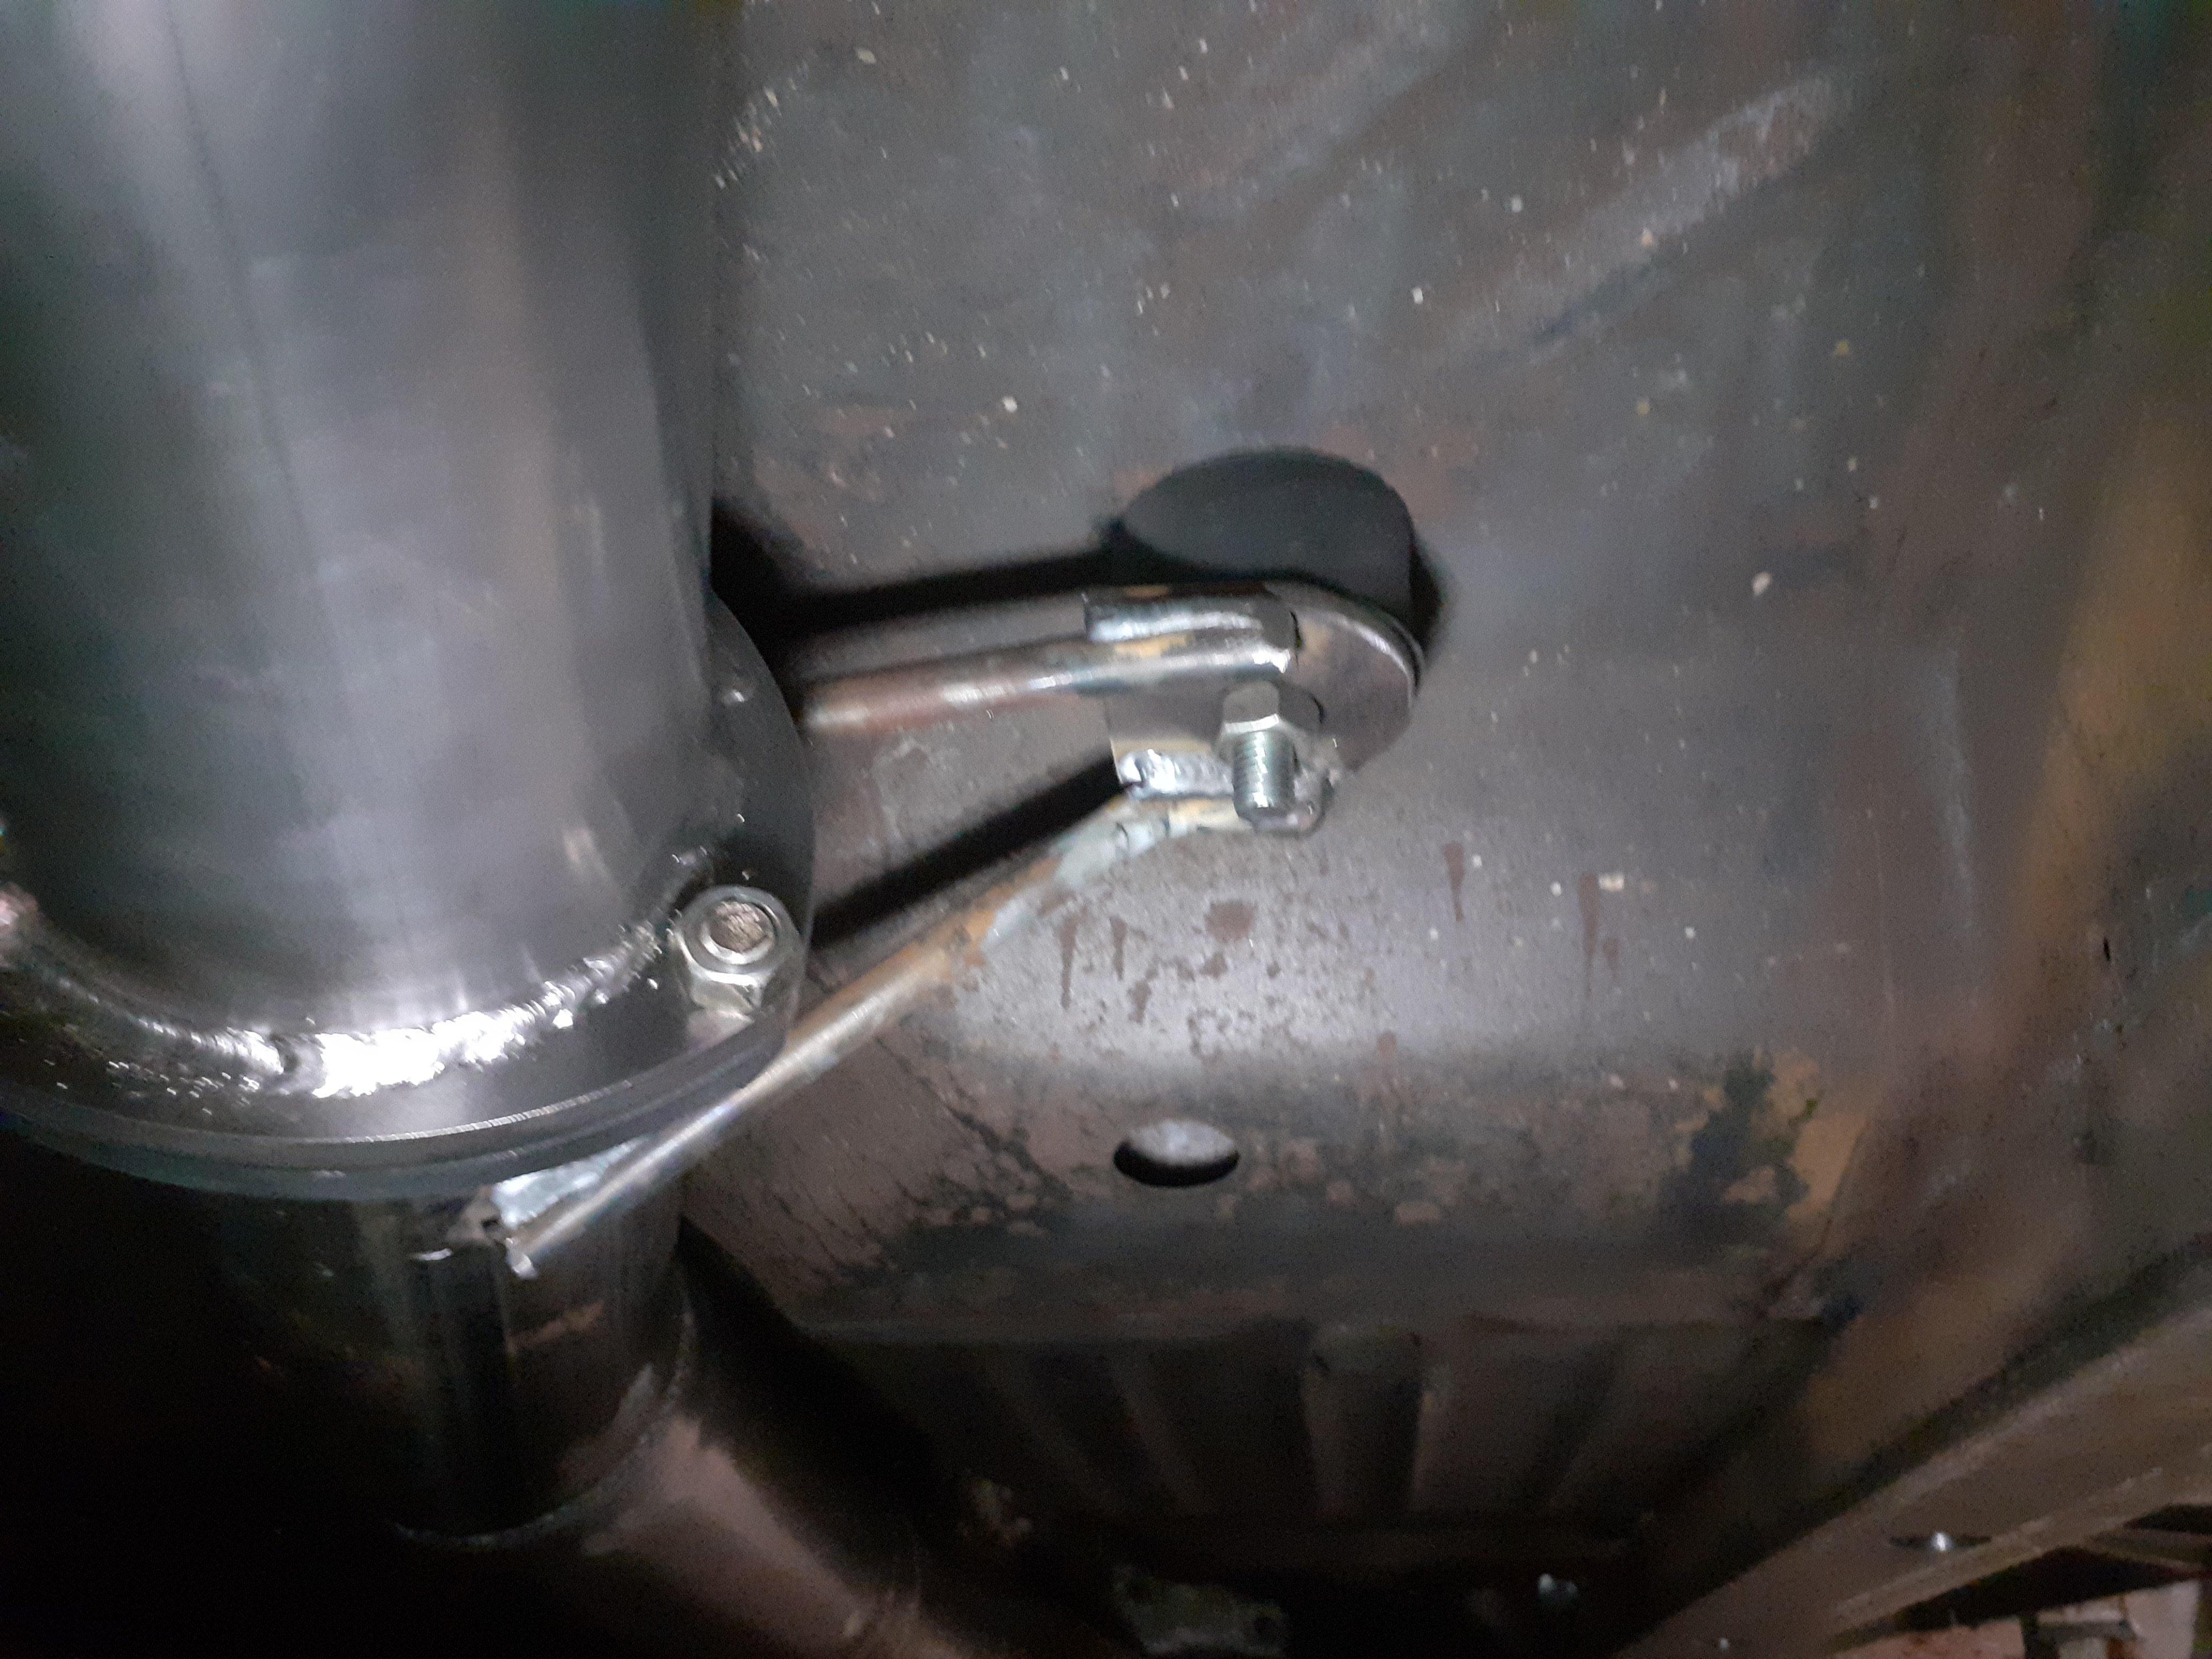
Some handy hints from doing exhaust pipes 1. I always use cotton reel style mounts, and I mount them the wrong way so they are in tension. I've done a few this way and never had one fail, the ones in the VG have been there for 9 years now. I use 50mm diameter mounts with a 10mm thread. This makes it easy to remove the exhaust, and gives you some adjustability via packers if you need to 2. Cutting u bends can be a bit of a prick, my cut off saw cant do a nice cut on this size pipe, I use a big hose clamp around the pipe to mark a cut line 3. I use pot belly paint from bunnings to paint exhausts and it lasts better than hi temp stuff from a can
1 point
-
1 point
-
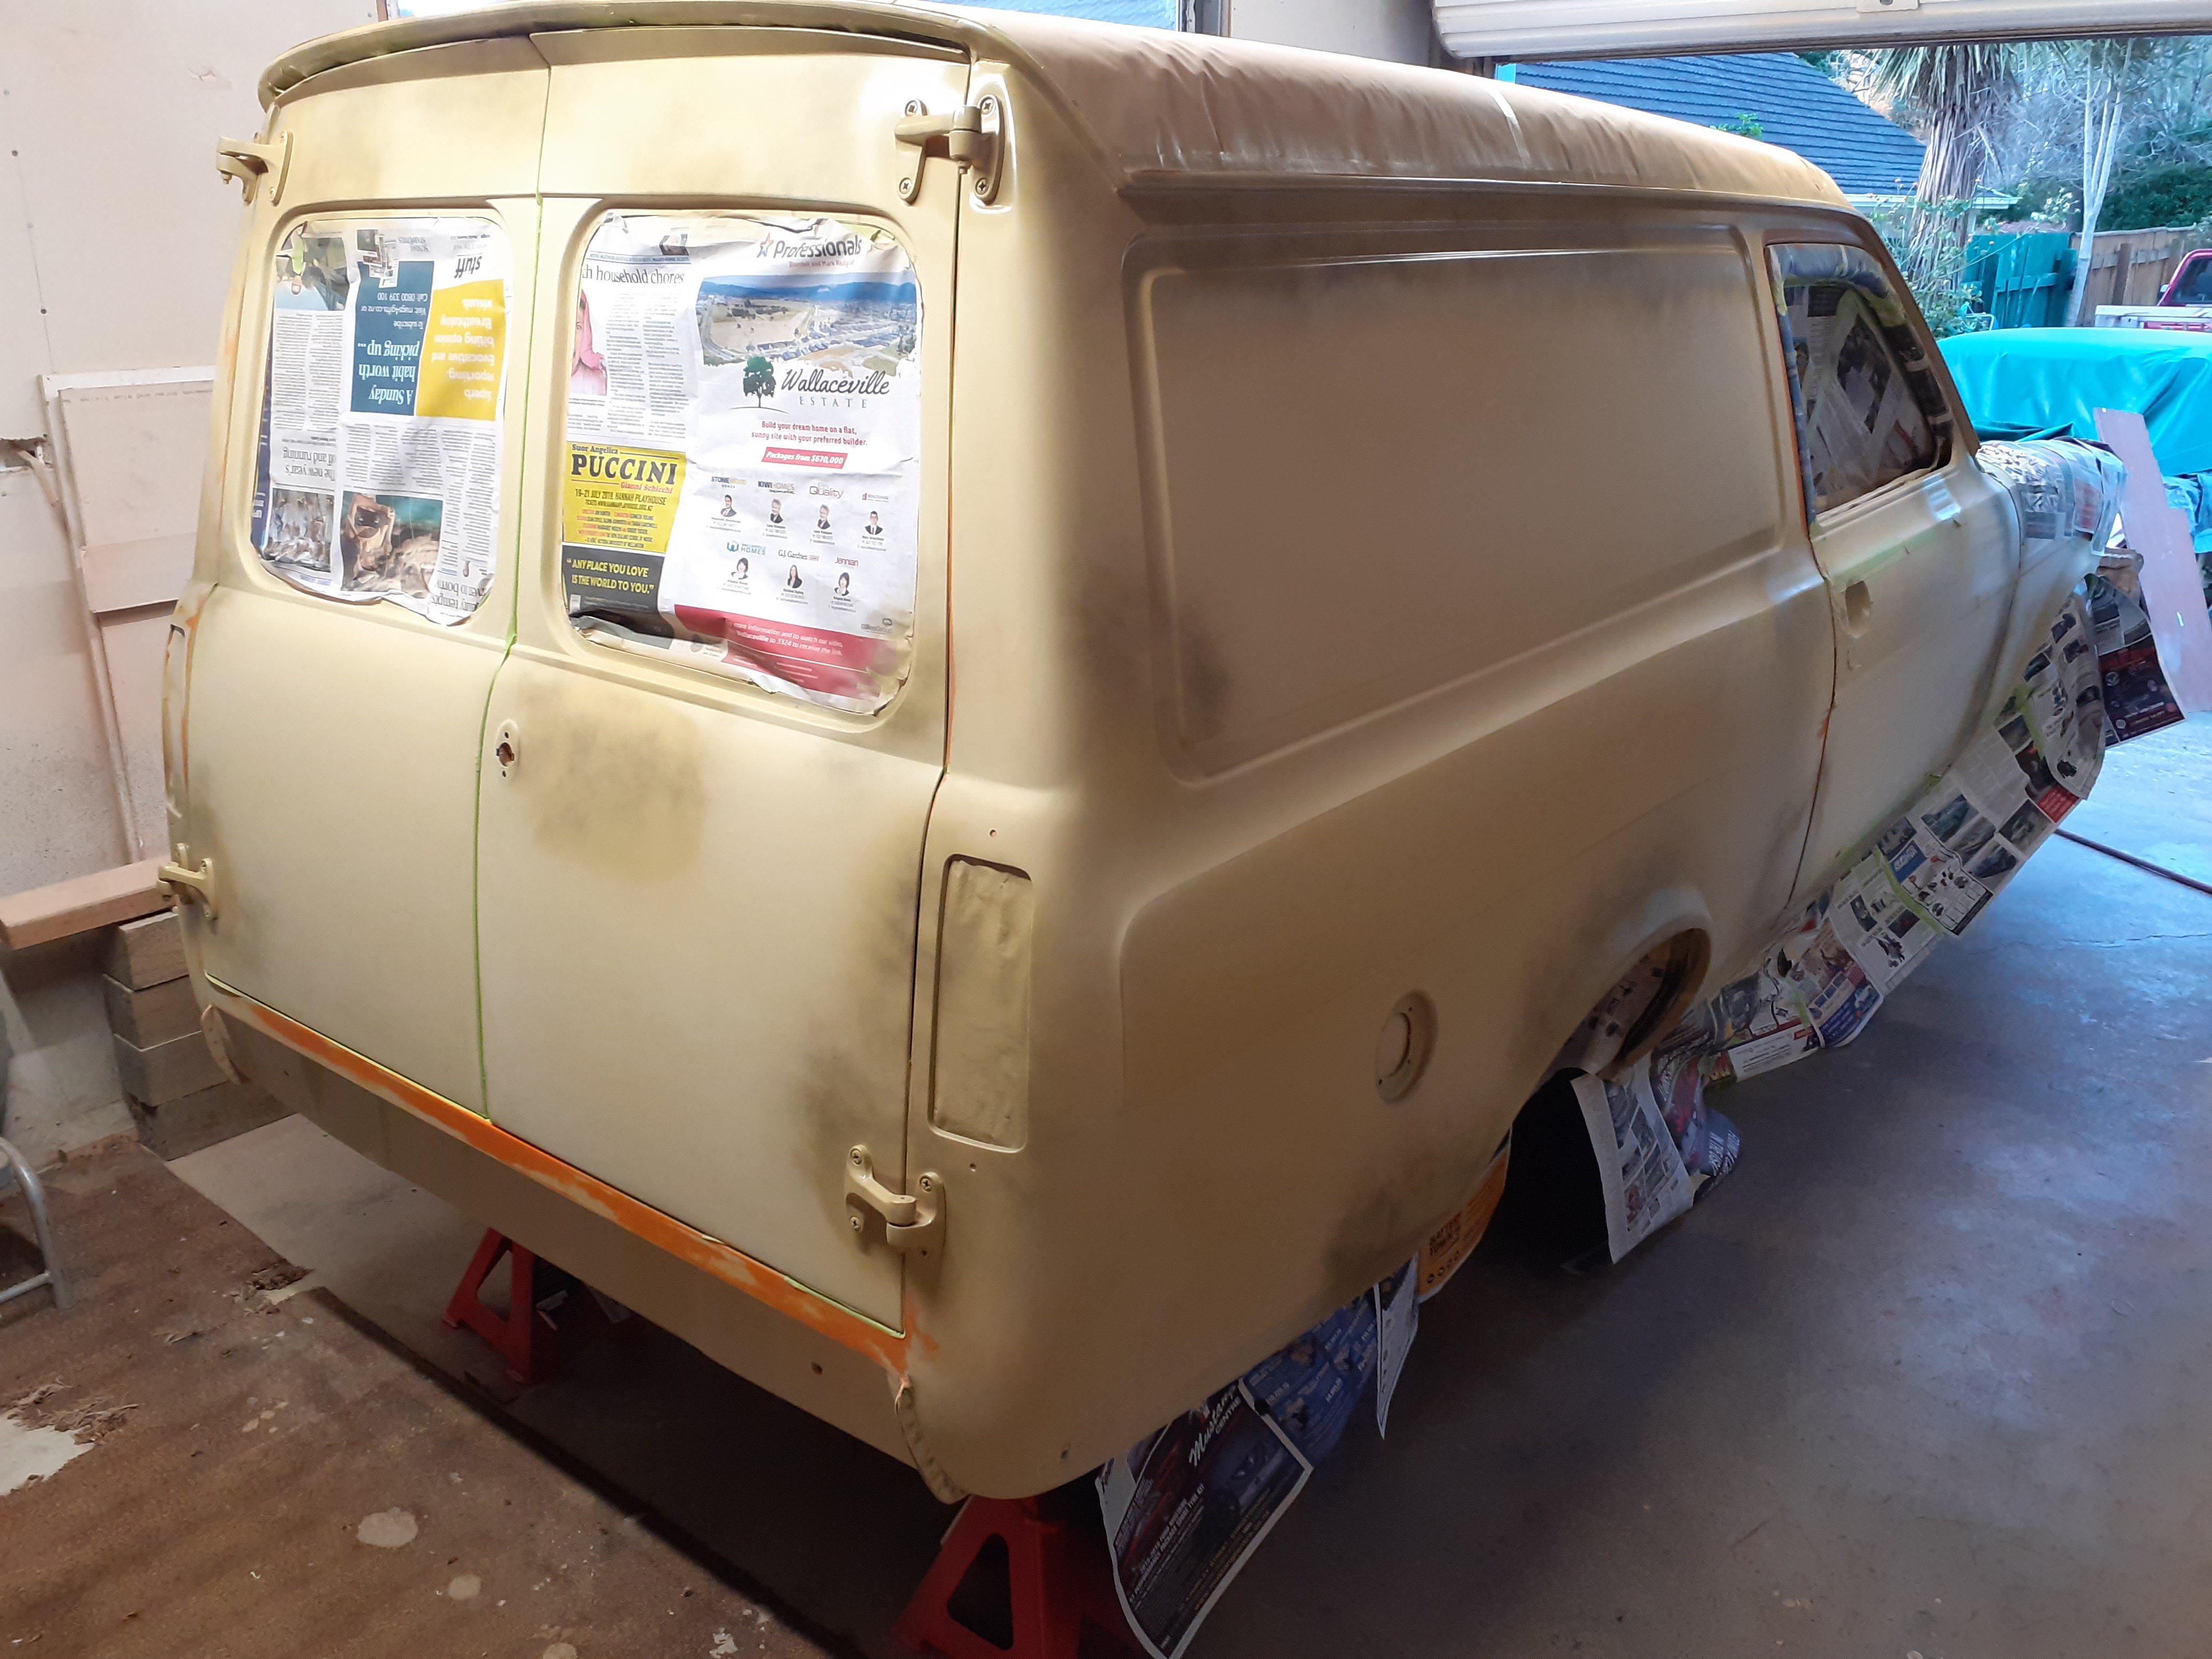
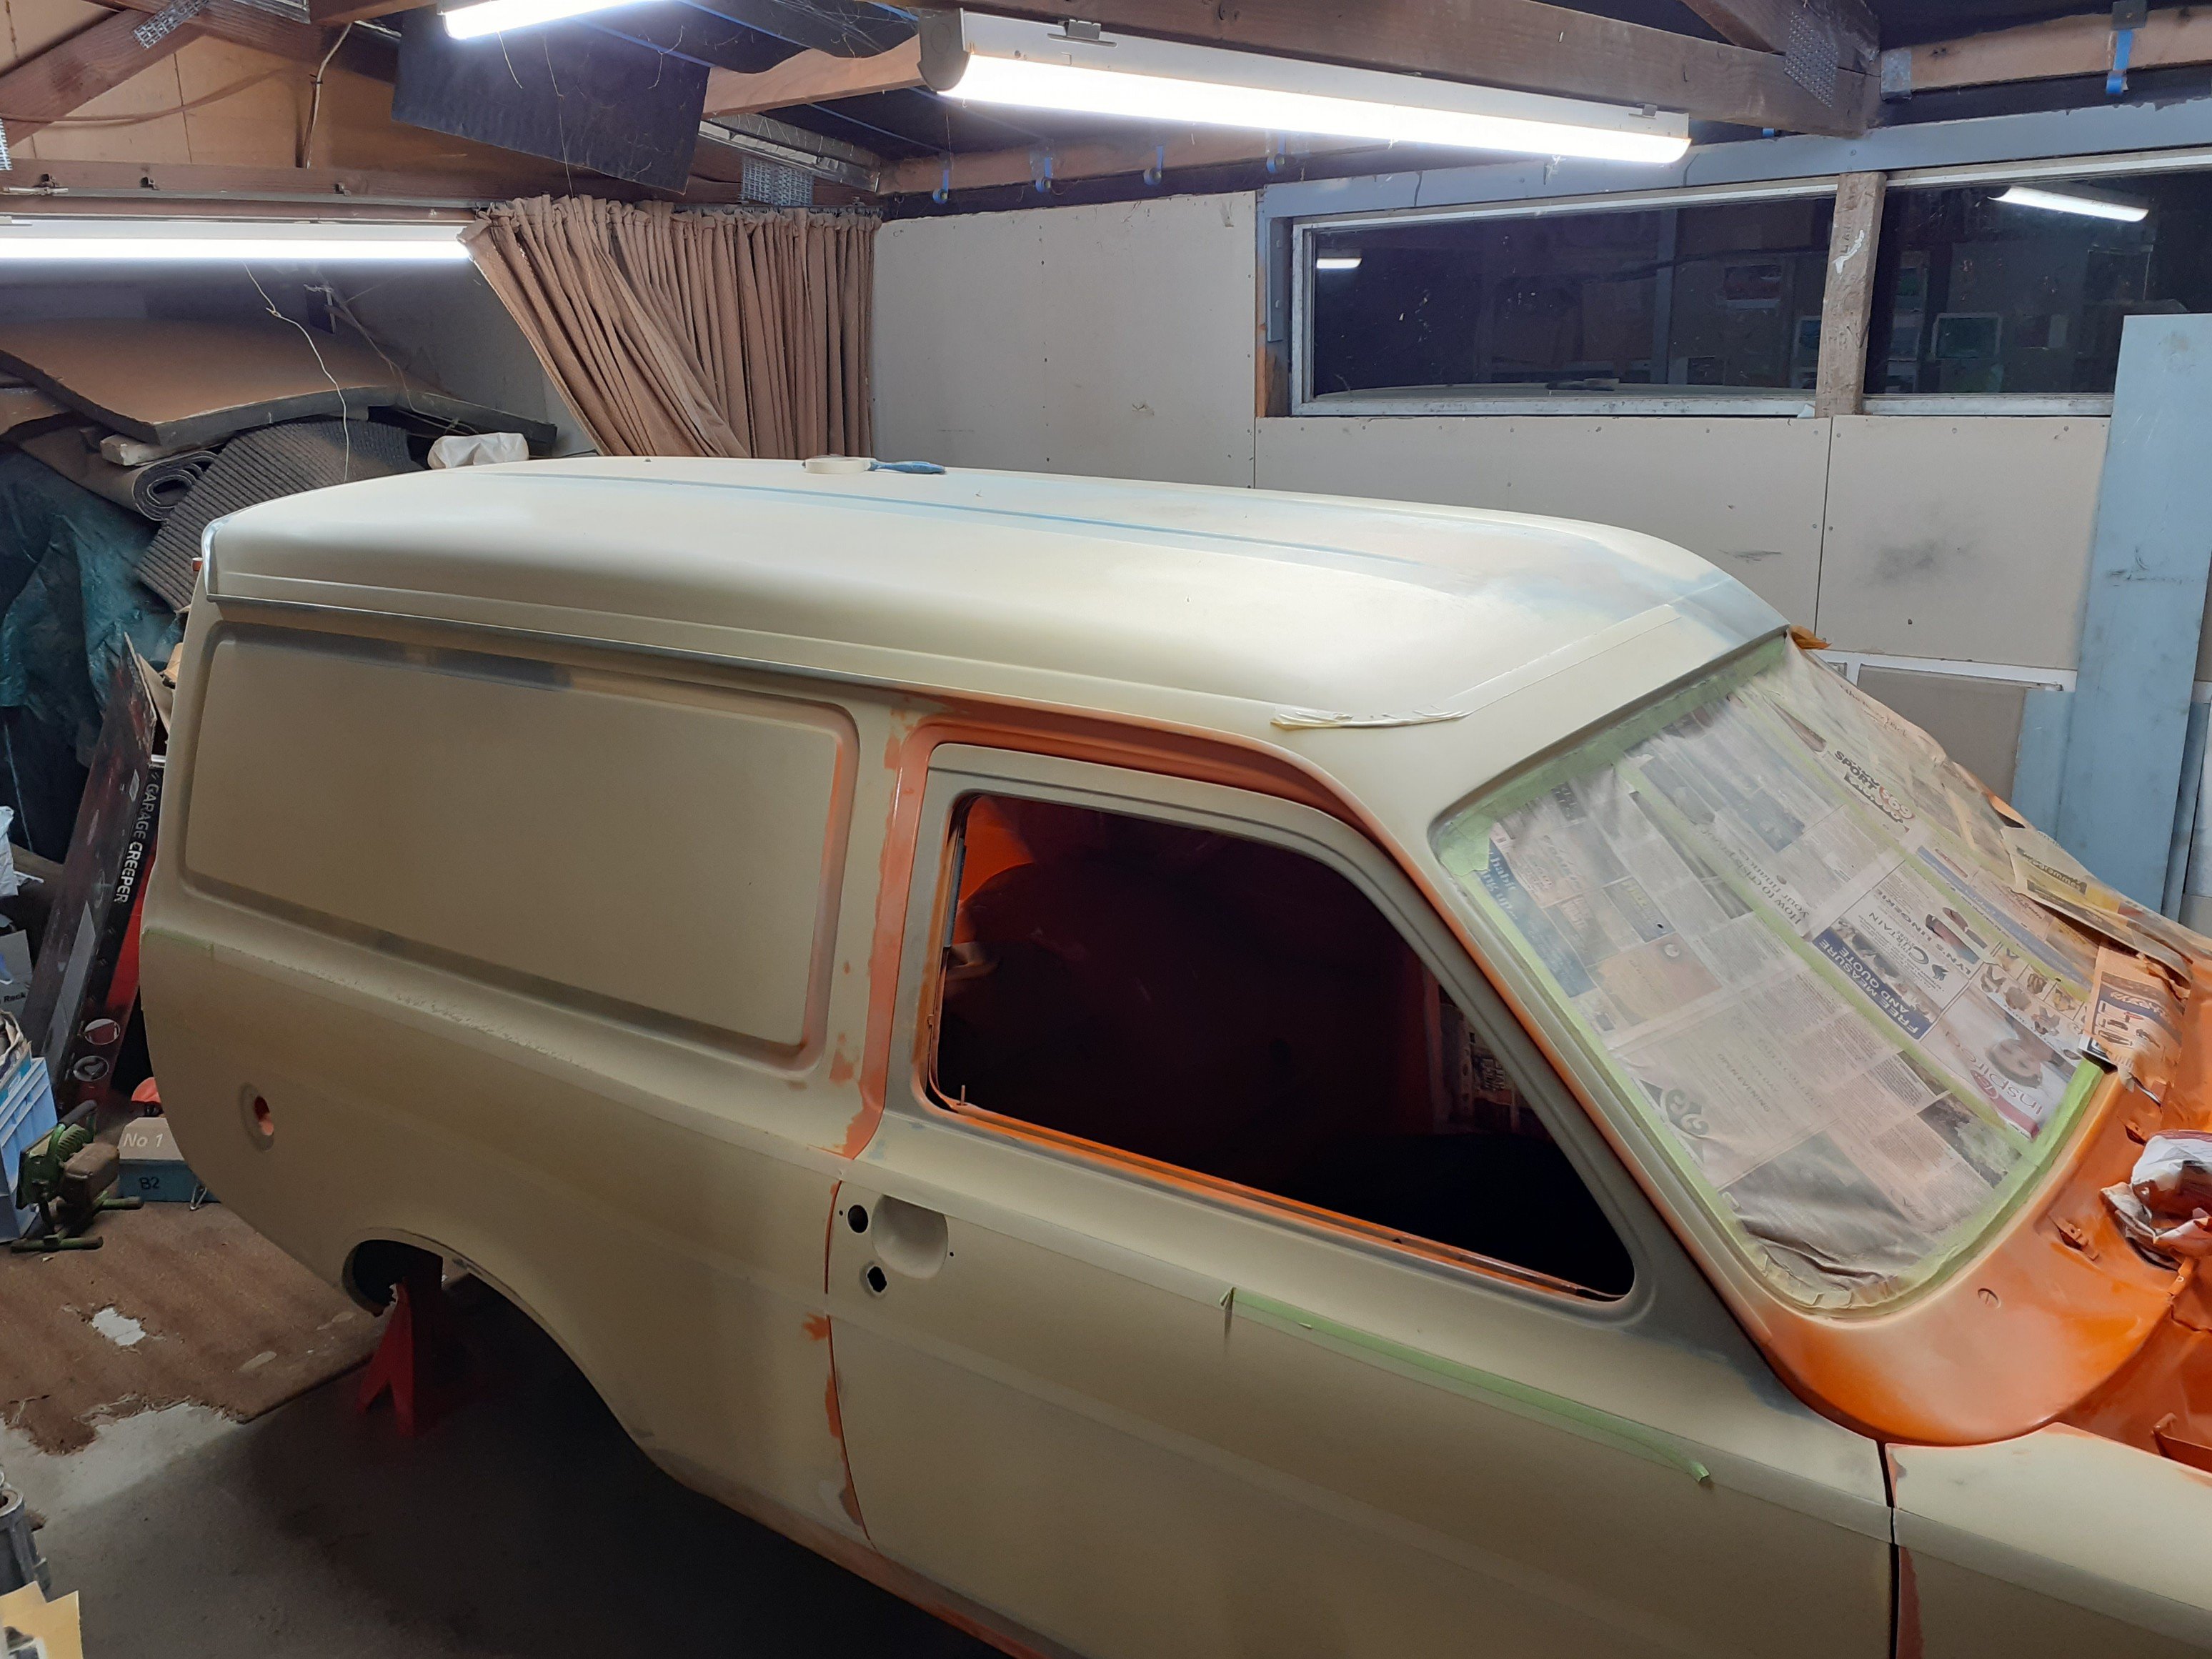
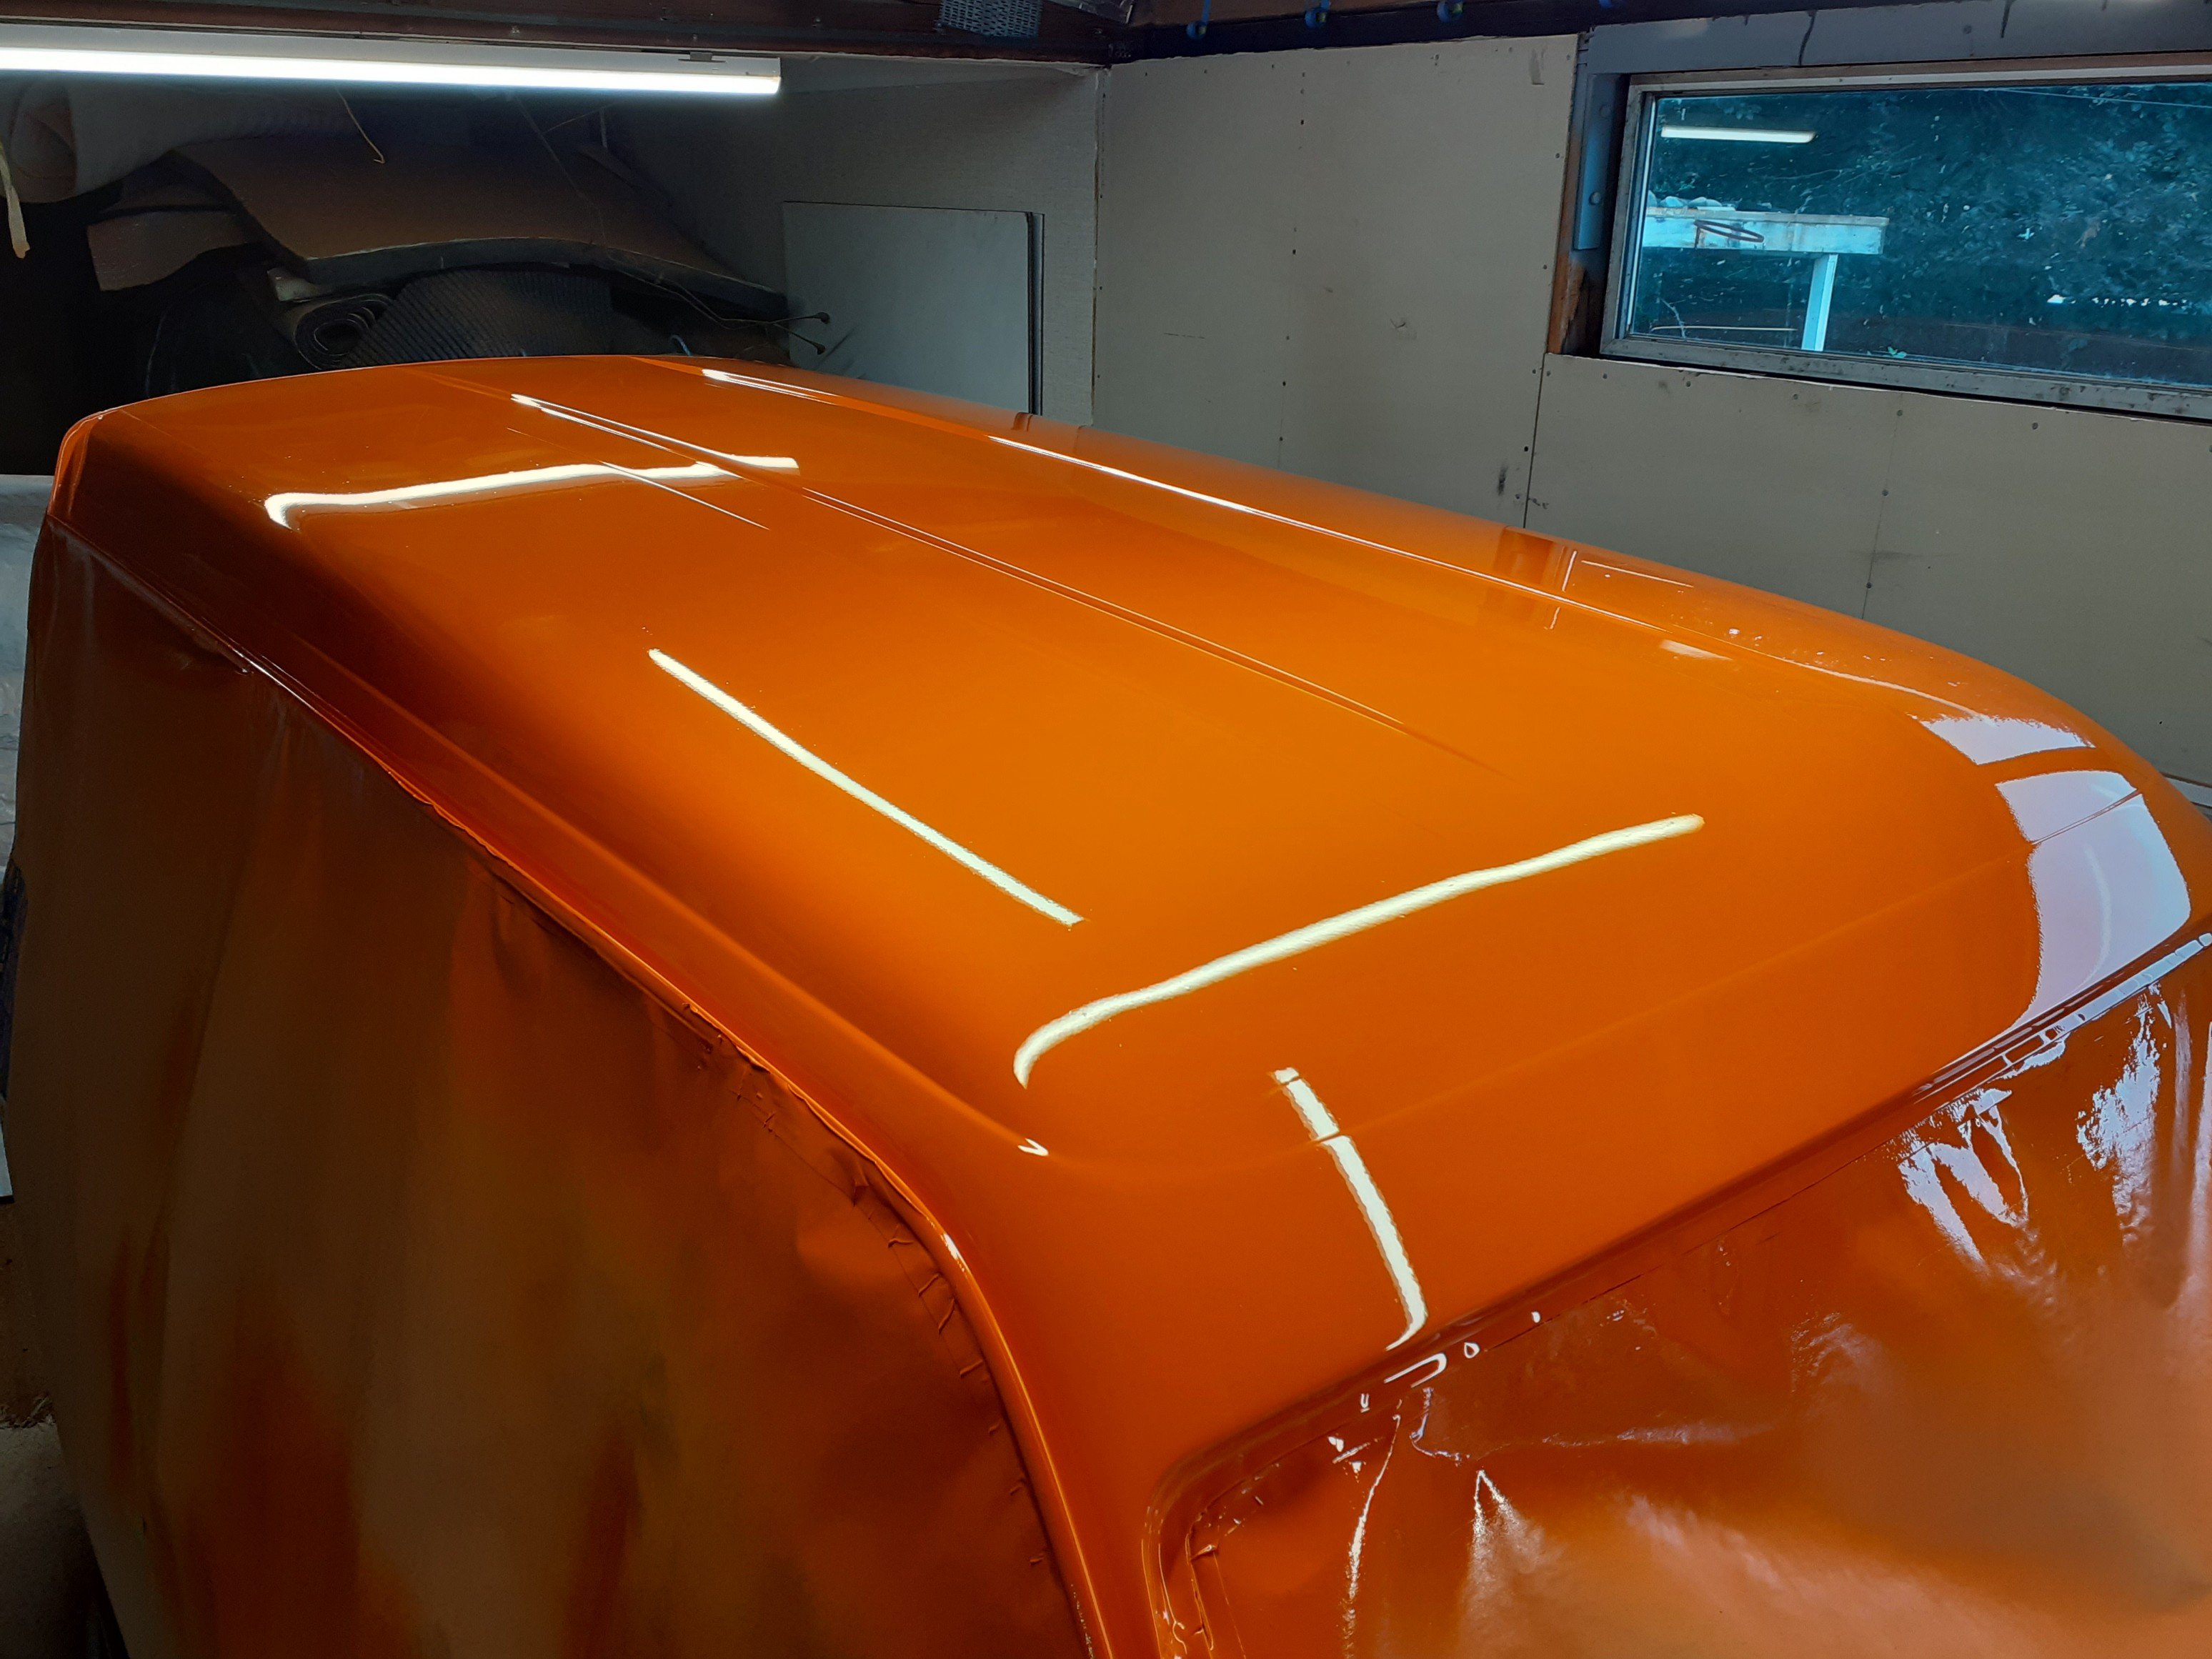
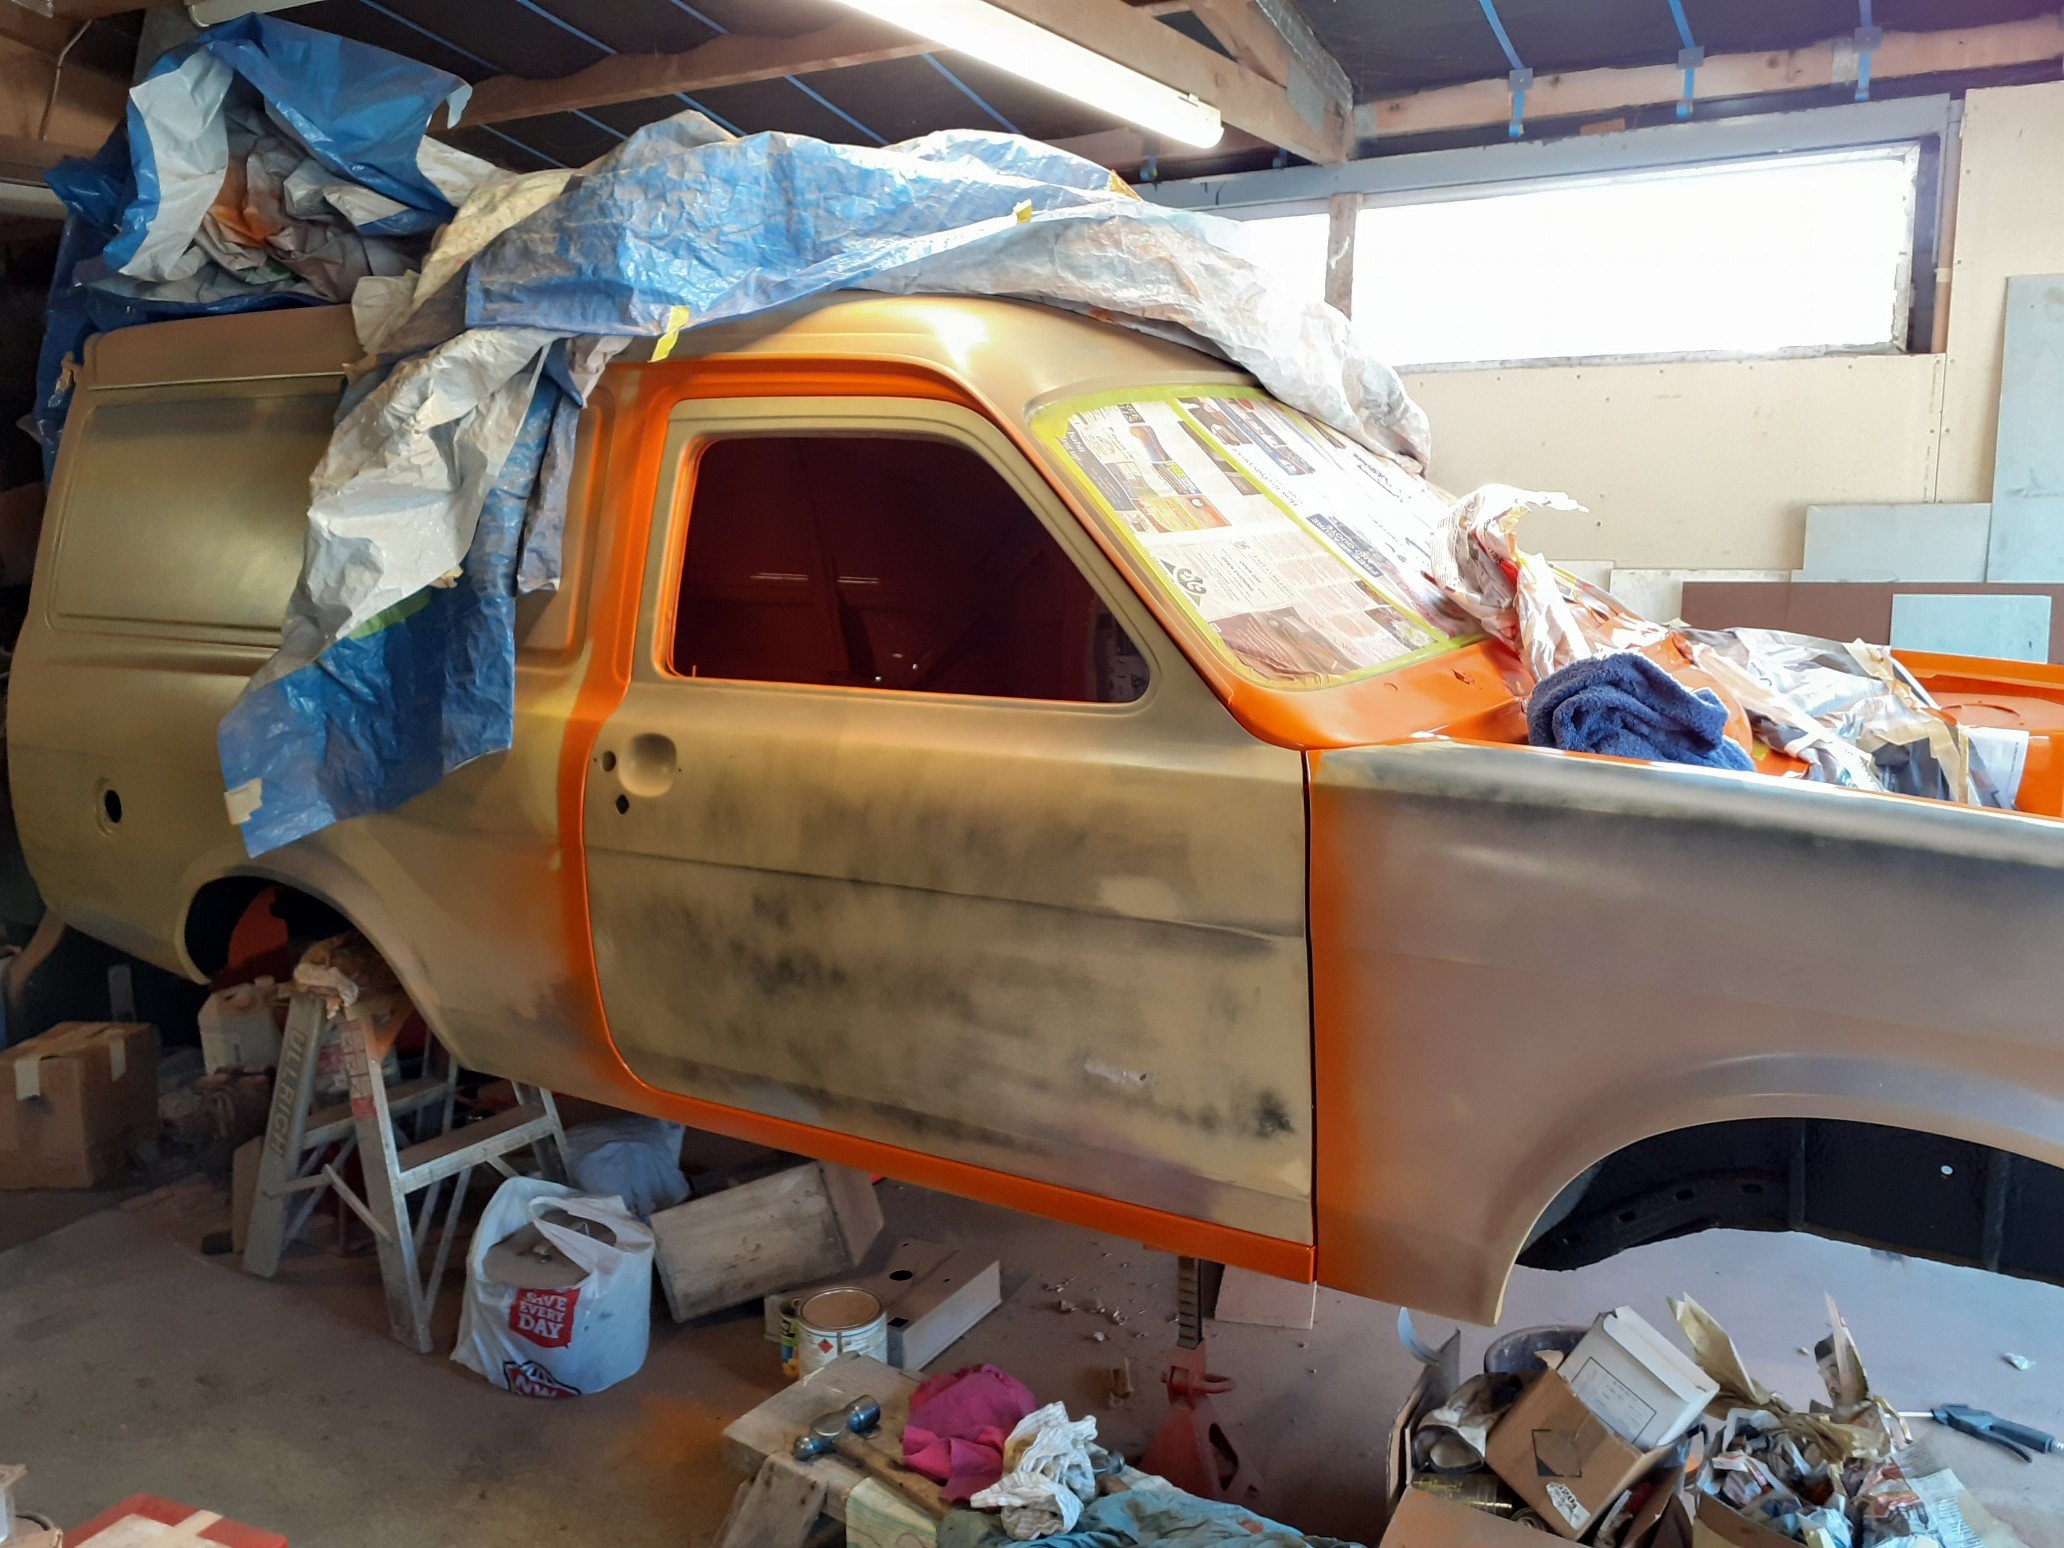
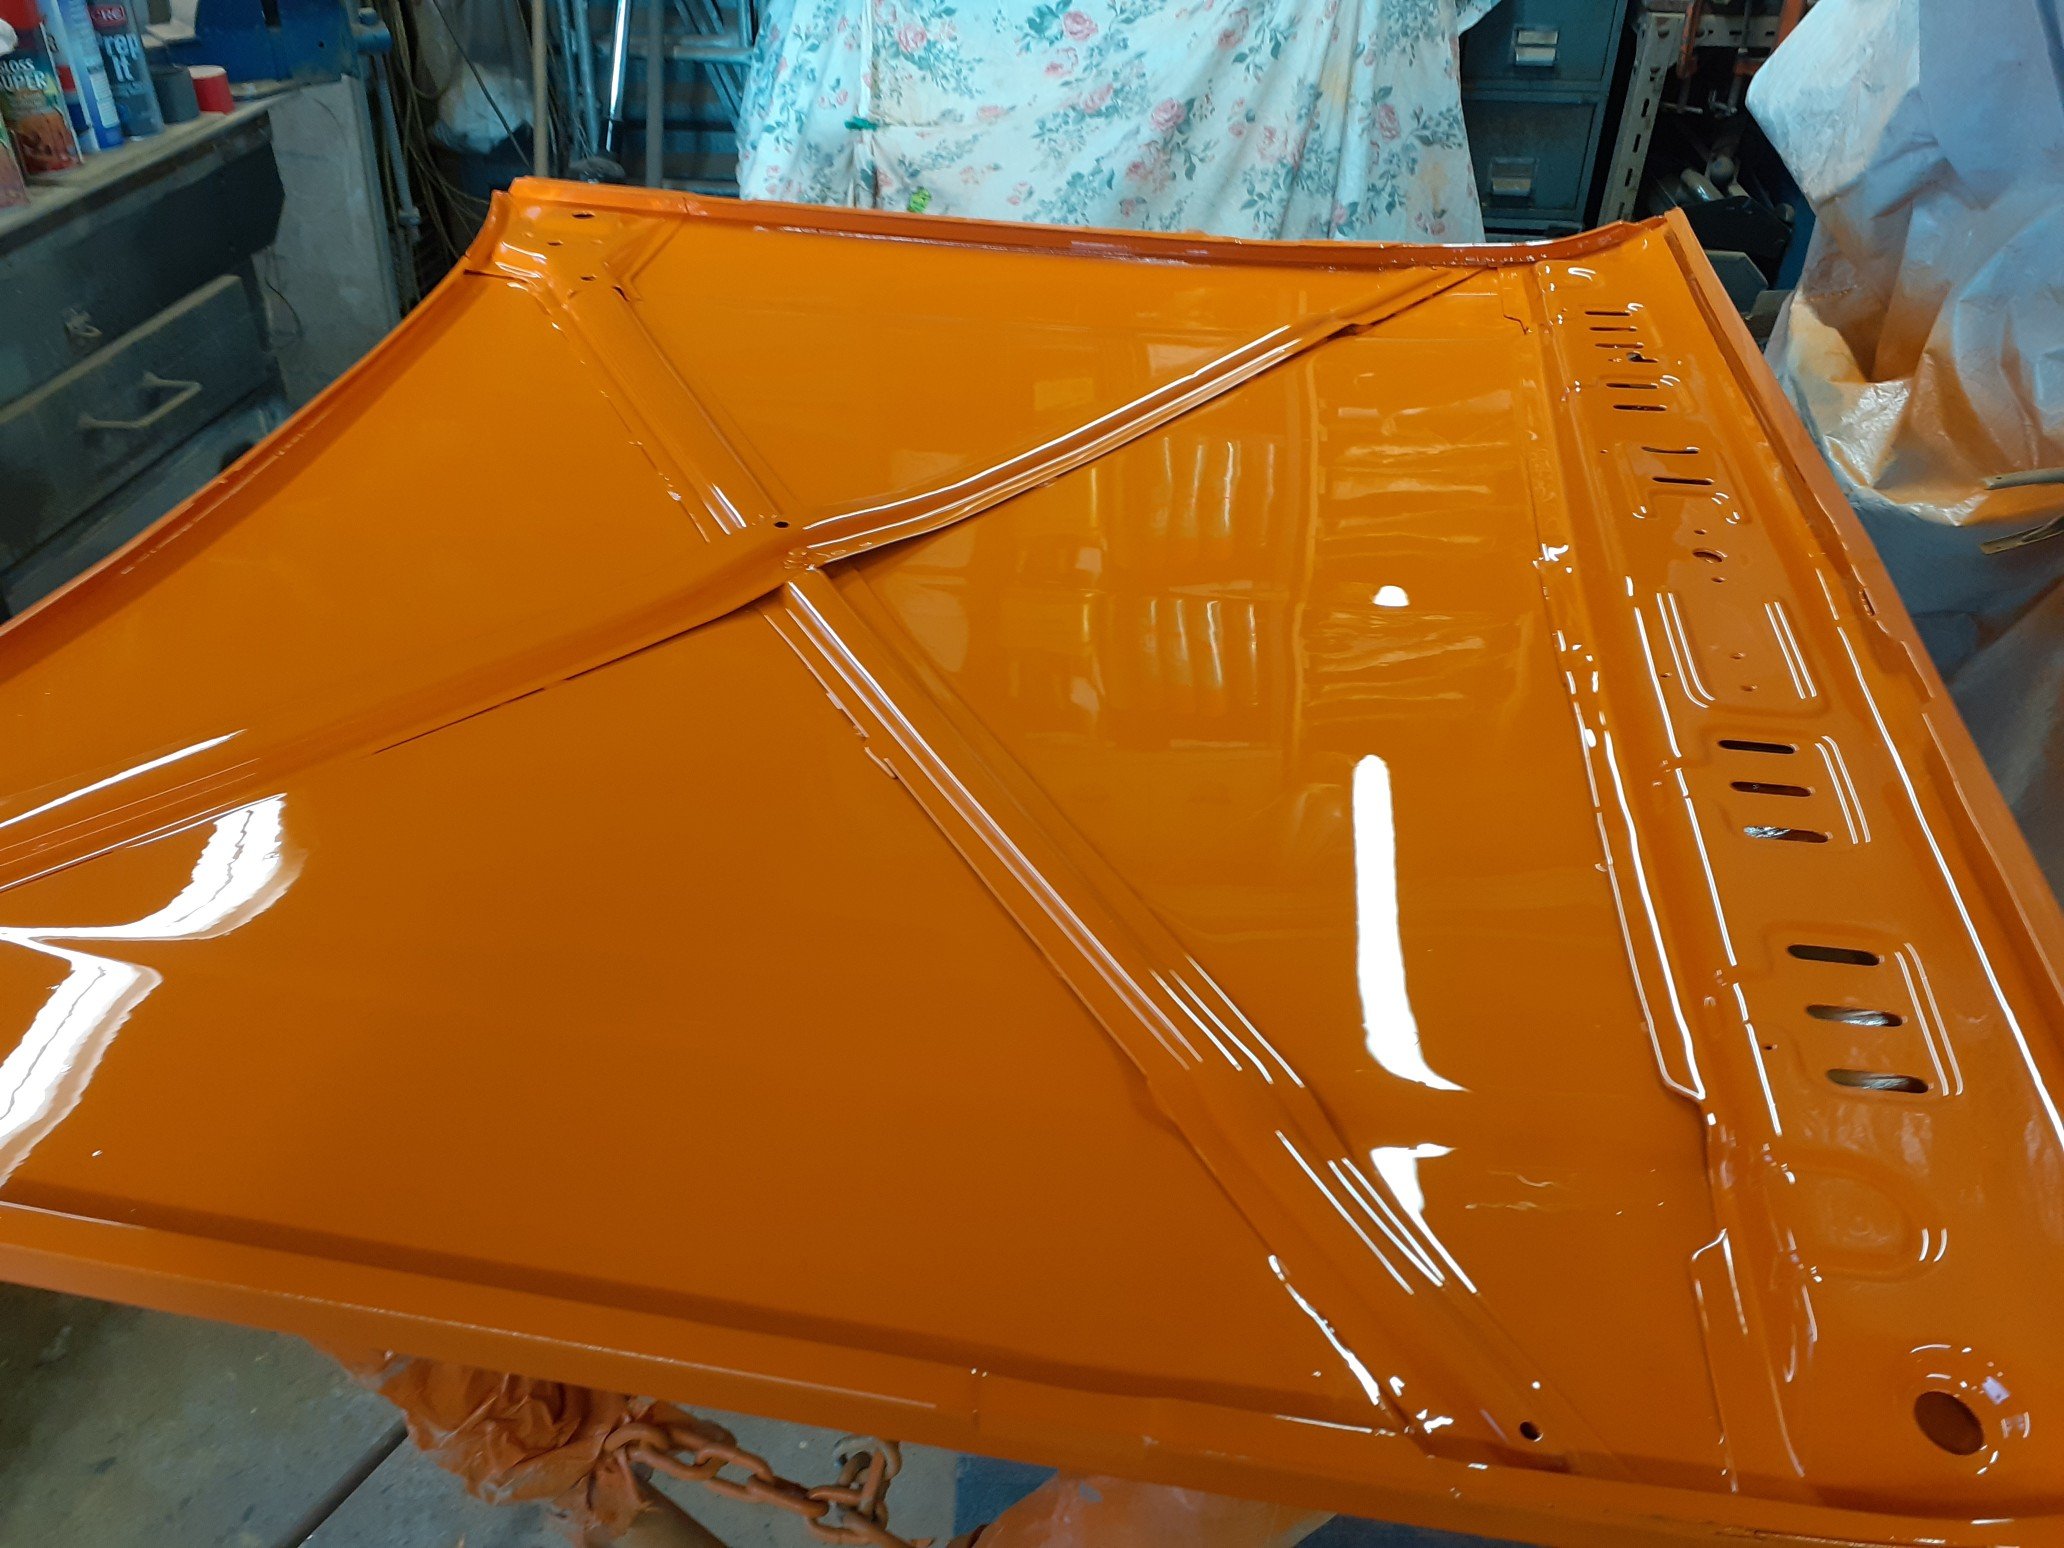
Finally getting back into this after a few months away. Have decided to paint the outside in two sections which hopefully makes it a bit more manageable. The obvious way was to section off the roof. The other reason for doing it this way is to ensure there is plenty of paint in the gutters which are prone to rust. By sectioning it off, it gets painted when the roof is done, and again when the sides get done. This ensures maximum paint without making a mess. Have been sanding for the last couple weeks. My weak little office arms really struggled with painting the roof today but I'm pretty happy with the outcome.
1 point
-
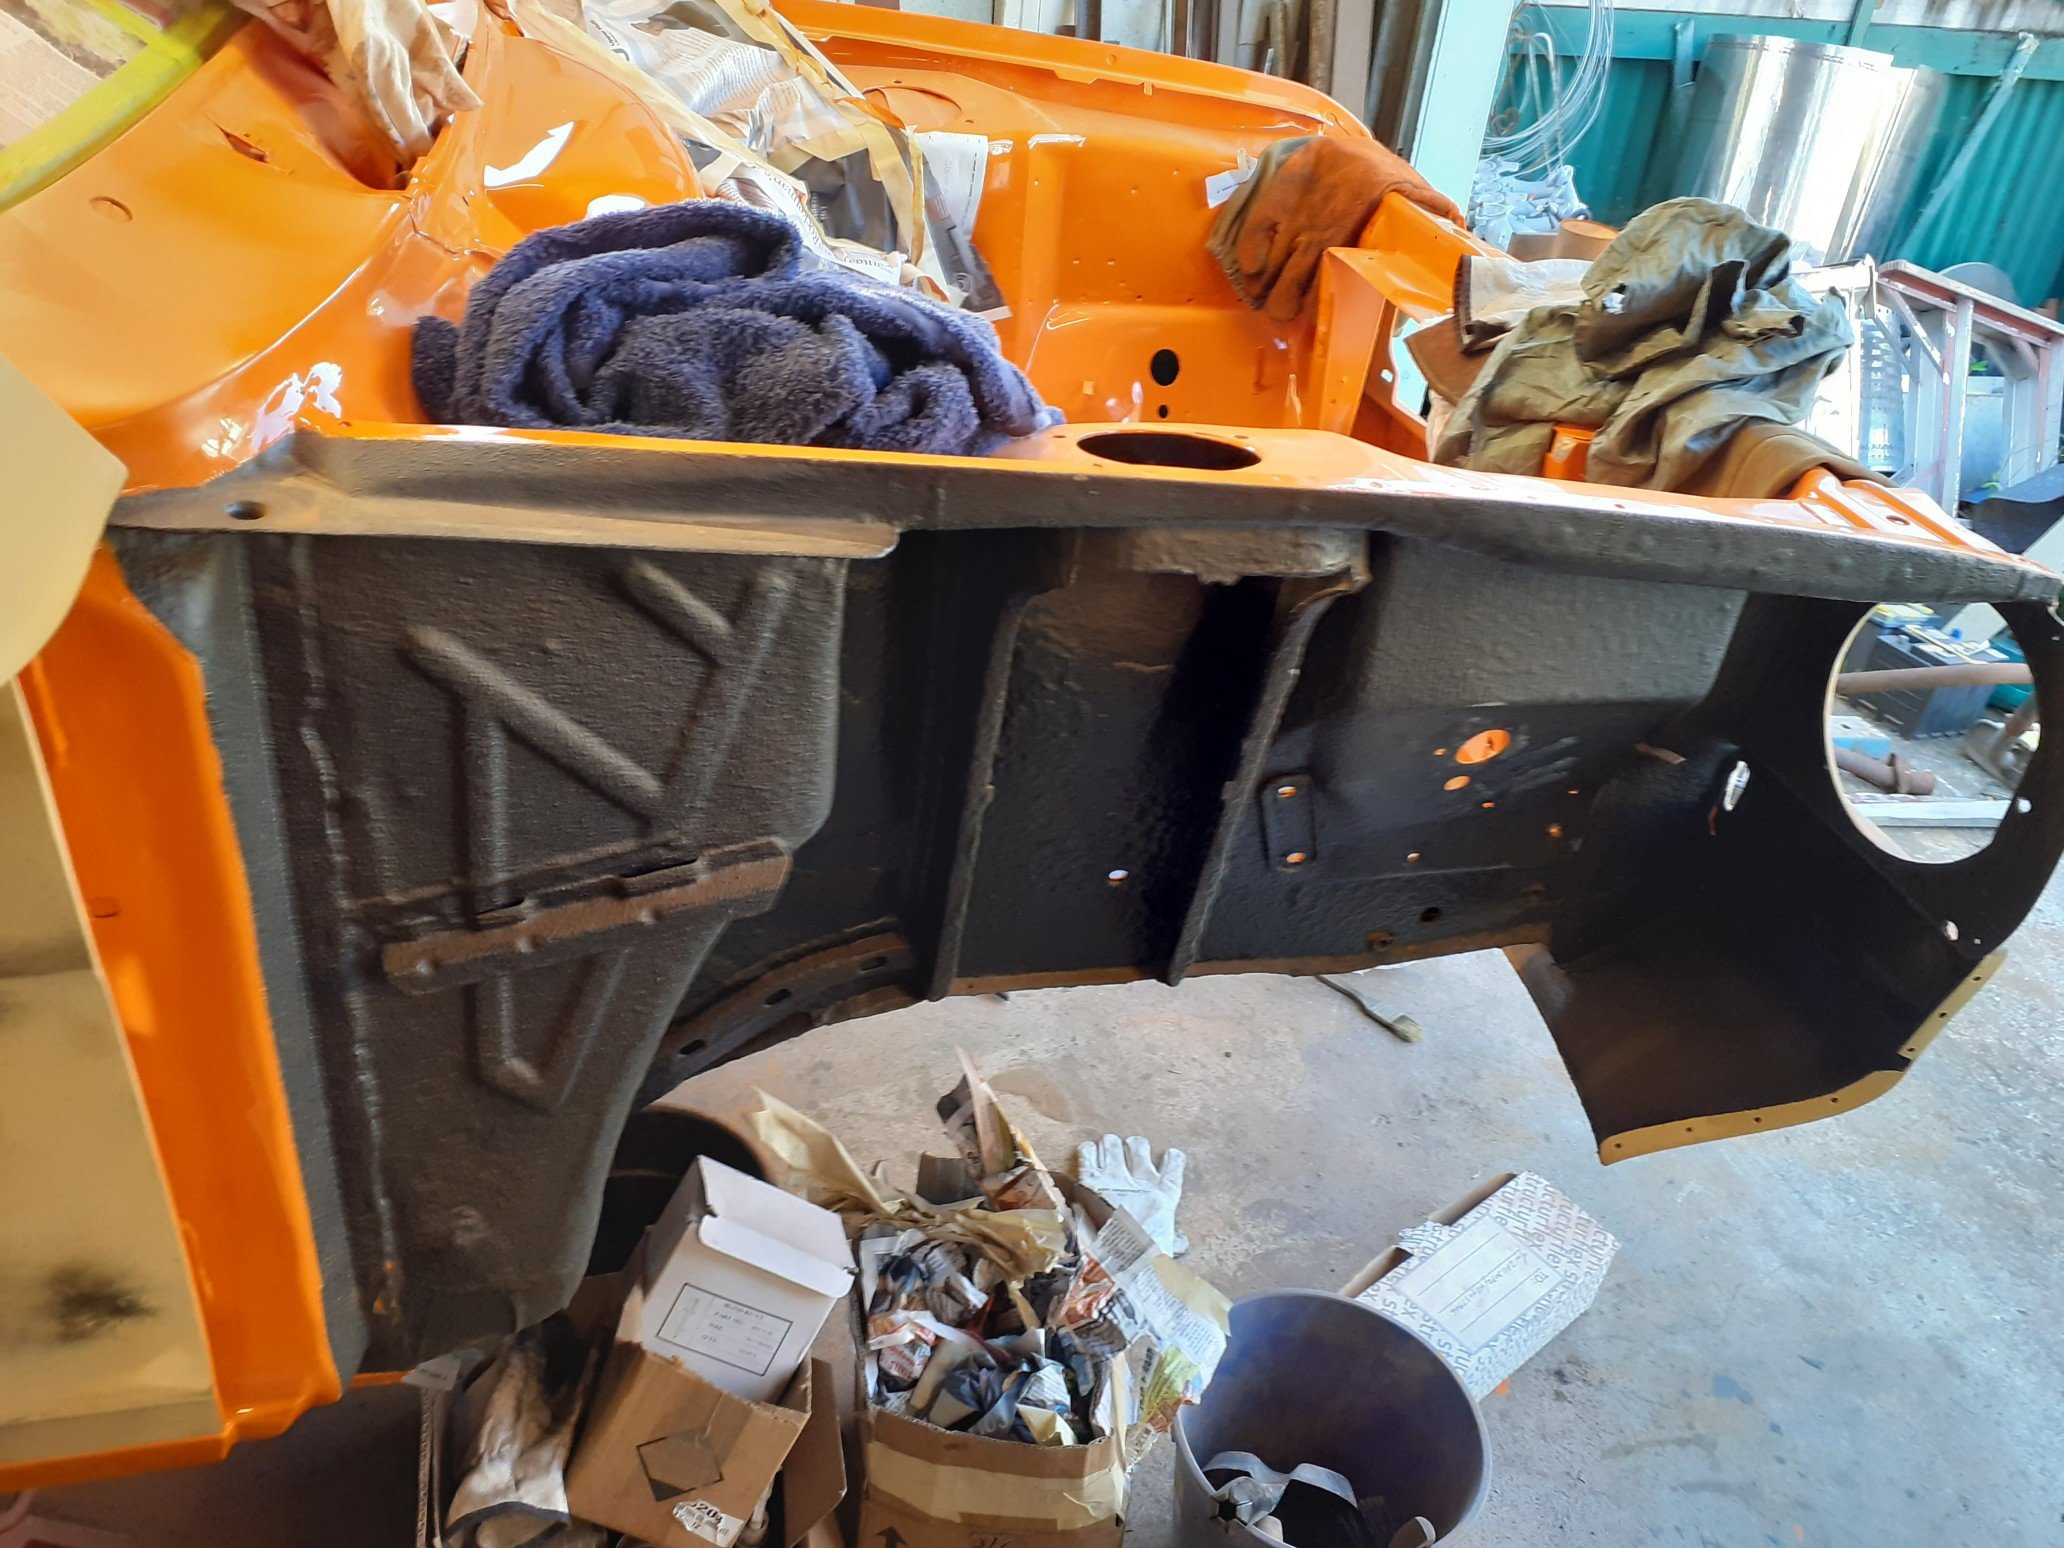
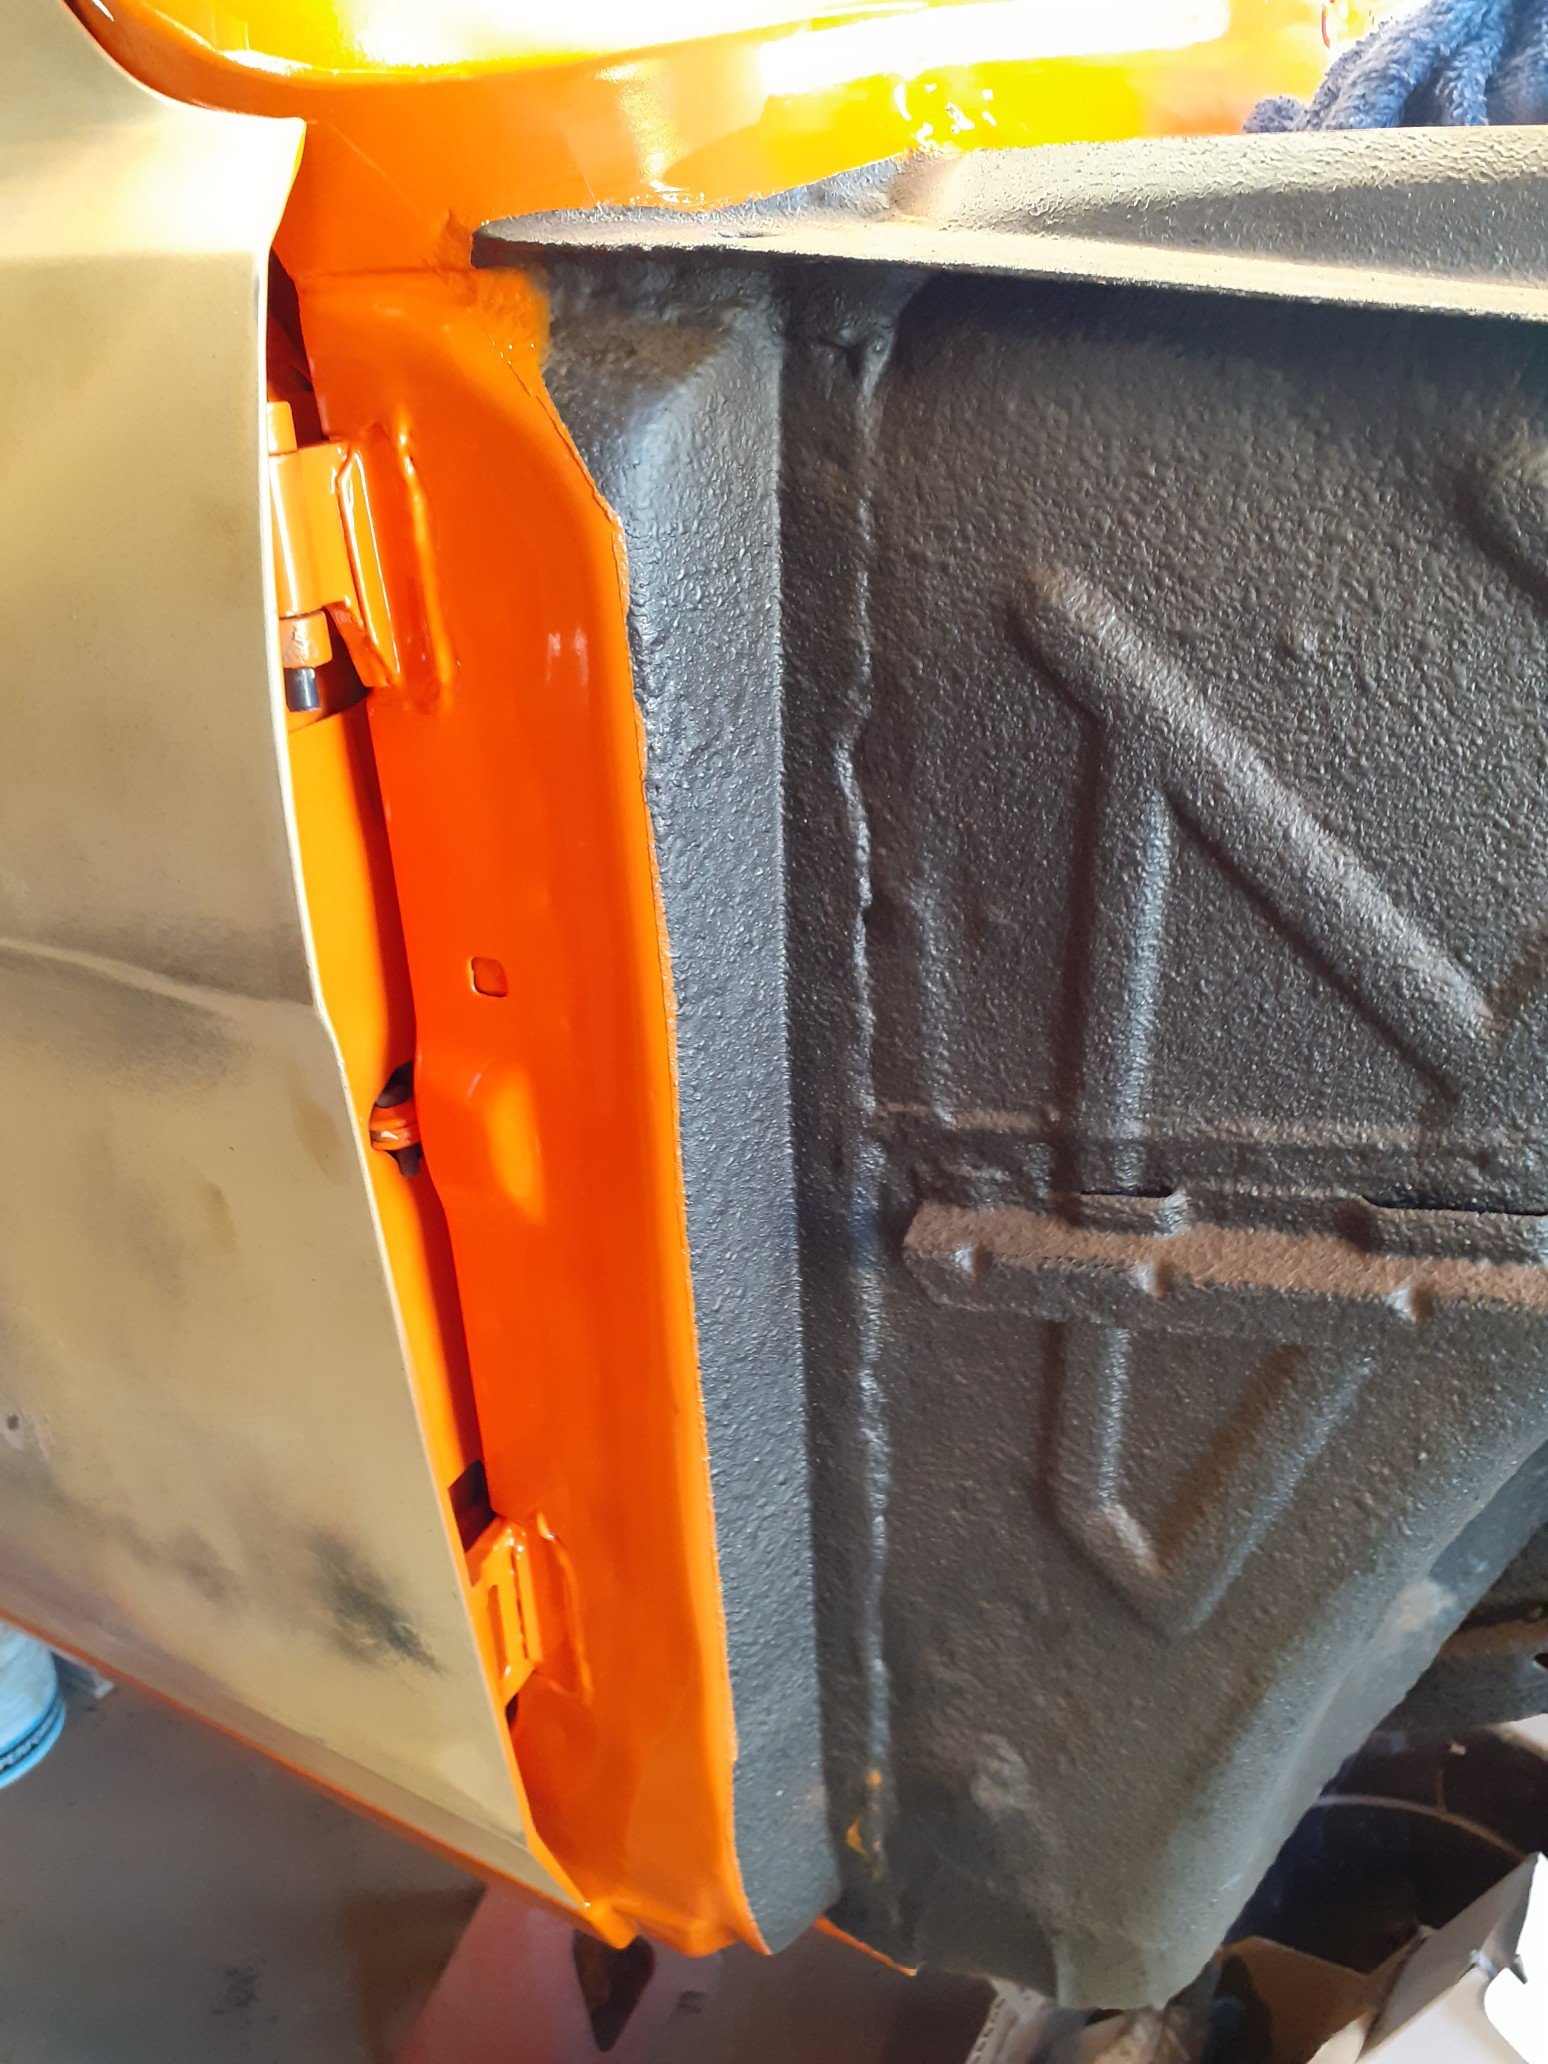
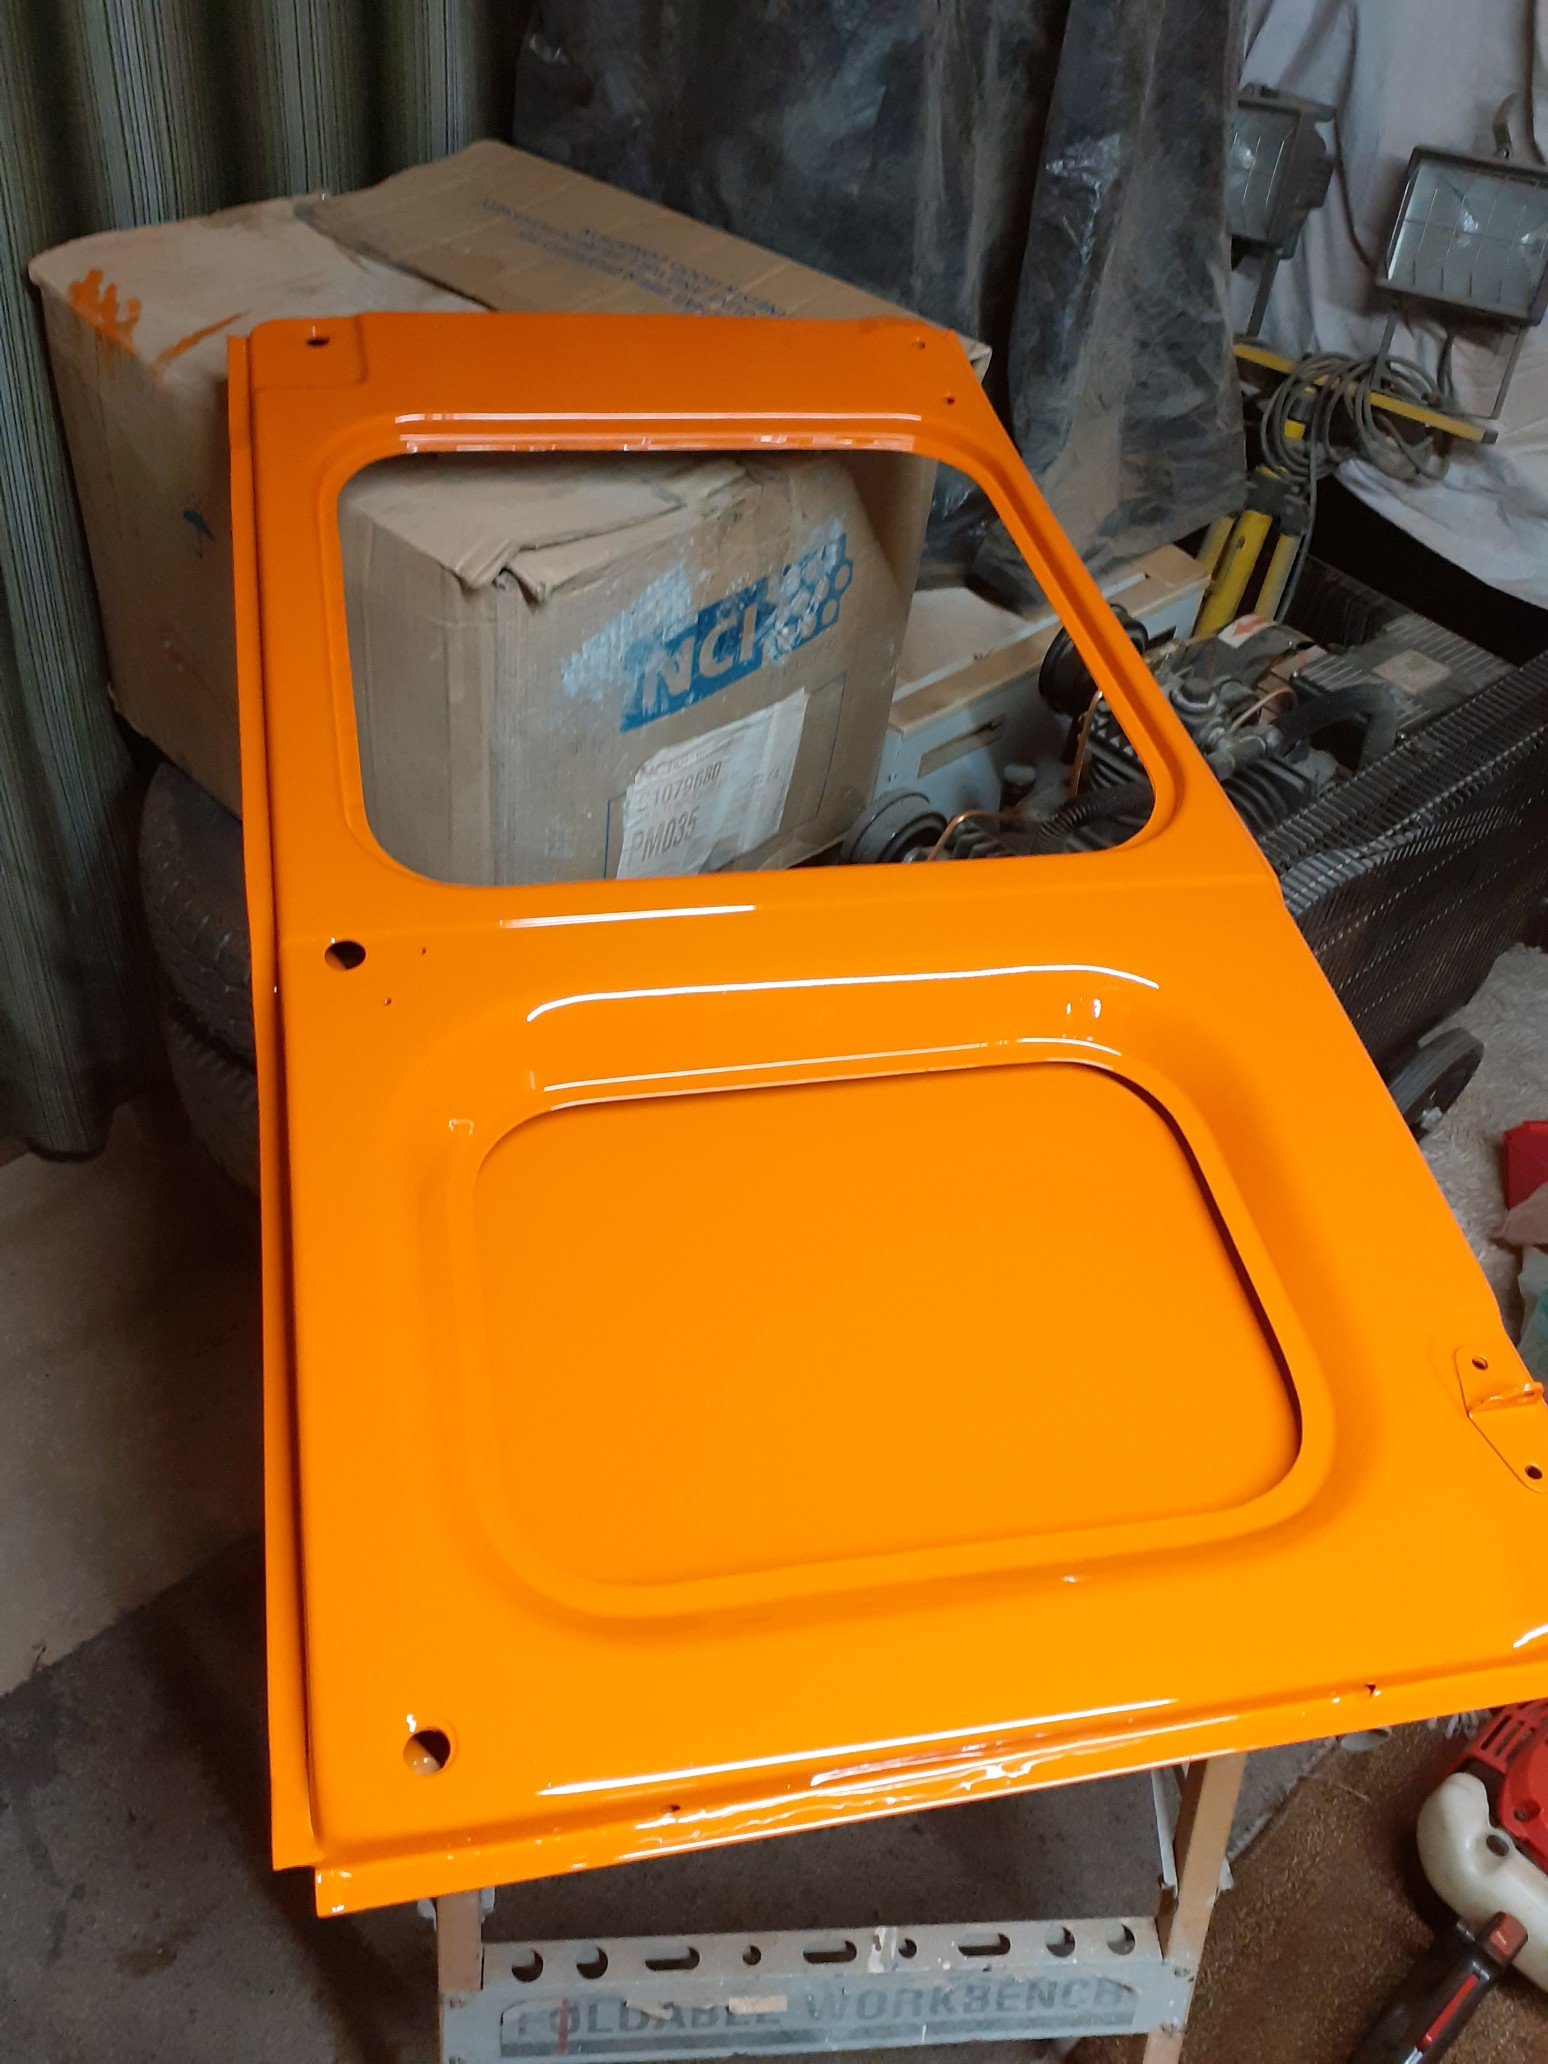
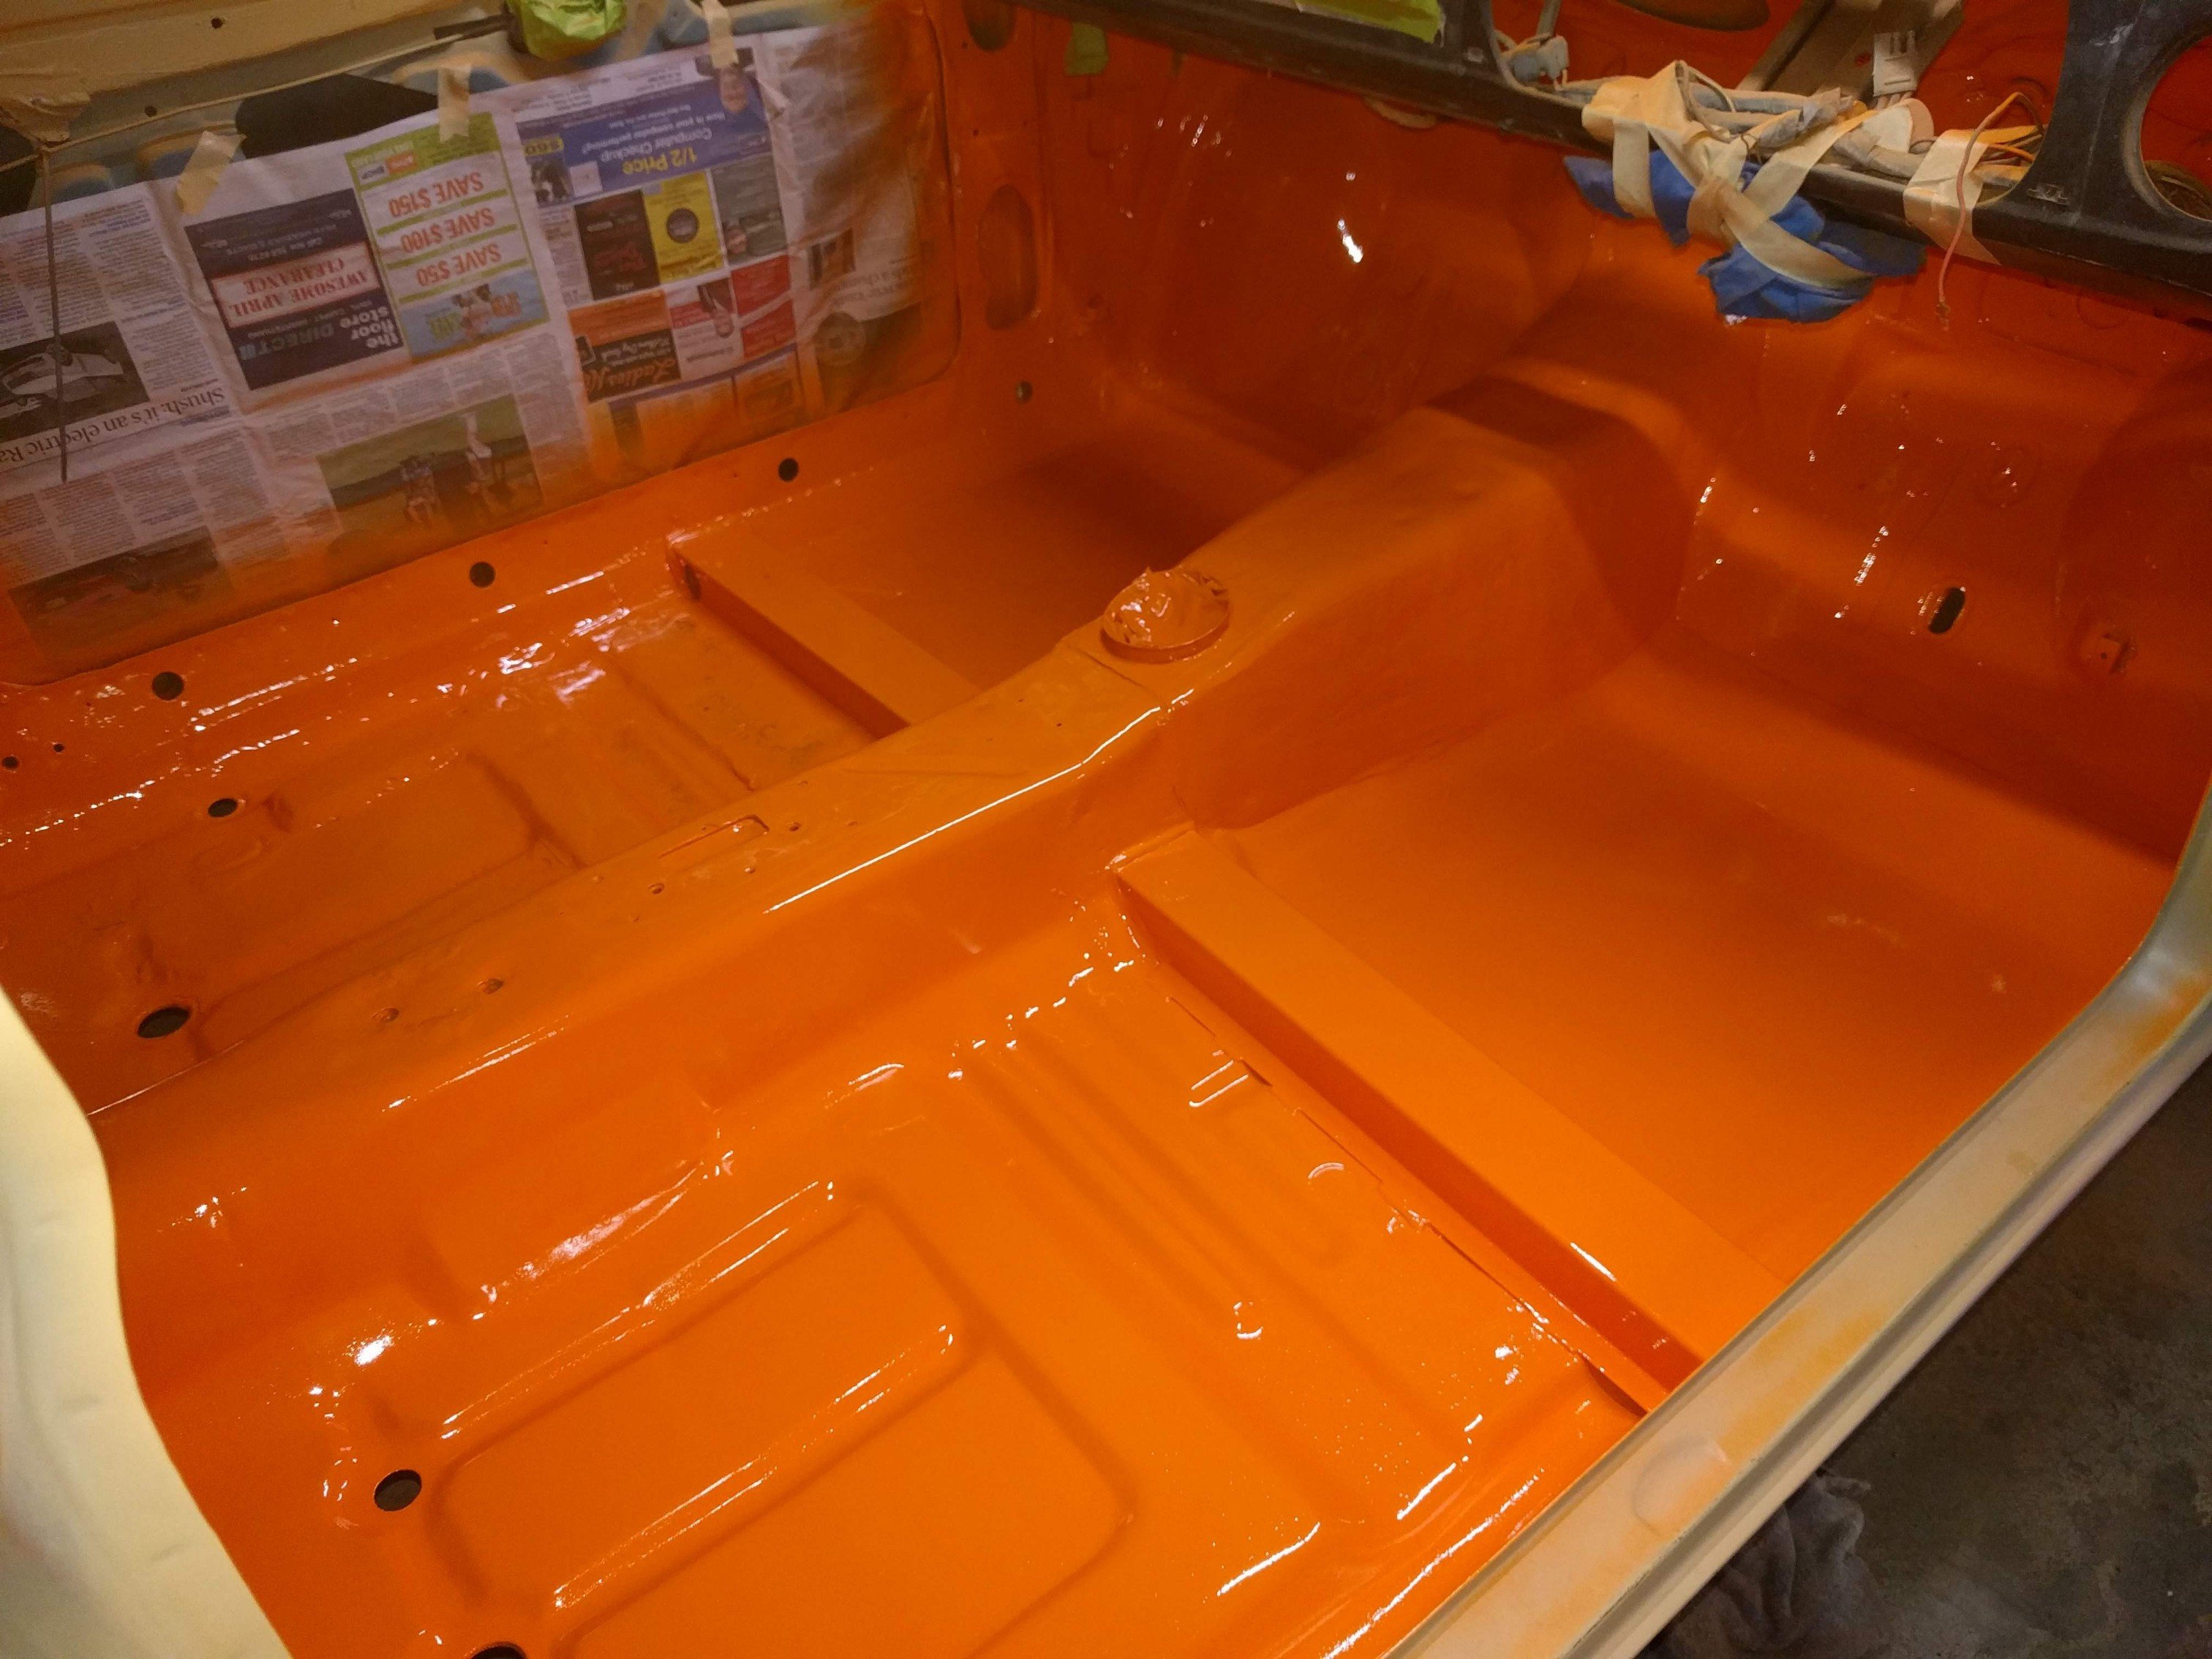
Have sprayed a few more items. Battery tray, all door jams, bonnet and had redone the engine bay 'bubble' because it was easier to do the whole thing then to fix a couple of runs. Couple of areas had to be touched up as I didnt wait long enough between coats and had solvent boil. Aligned the rear doors for final assembly before paint. Will put some seam sealer around the hinges to lock out any water. Put in the new door pins on the drivers door and sealed in the drivers guard. The sealer is a soft material that will provide protection from the wheel well but wont 'glue' the guard on permanently. Originally the guards are welded on but I've decided to reattach it with sealant and bolts. Will align the passenger door with new pins then I can start prepping the body for paint. Also made up a new base plate for the subframe and welded that on.
1 point
-
Ended up going with signal orange 79. It's an original color for an escort, but not this van. Sampled a blue and a different signal 77 orange but settled on this. Have been spraying it in sections. Engine bay, interior and inside of the doors. Still a while to go before I can spray the outside but its certainly progress!
1 point


_sedan_(23230030334)(1).thumb.jpg.34d765361d66c78db614bae6ea2c156a.jpg)


This leaderboard is set to Auckland/GMT+12:00