
Leaderboard


Popular Content
Showing content with the highest reputation on 01/09/20 in all areas
-
More goodness underway!
 13 points
 -
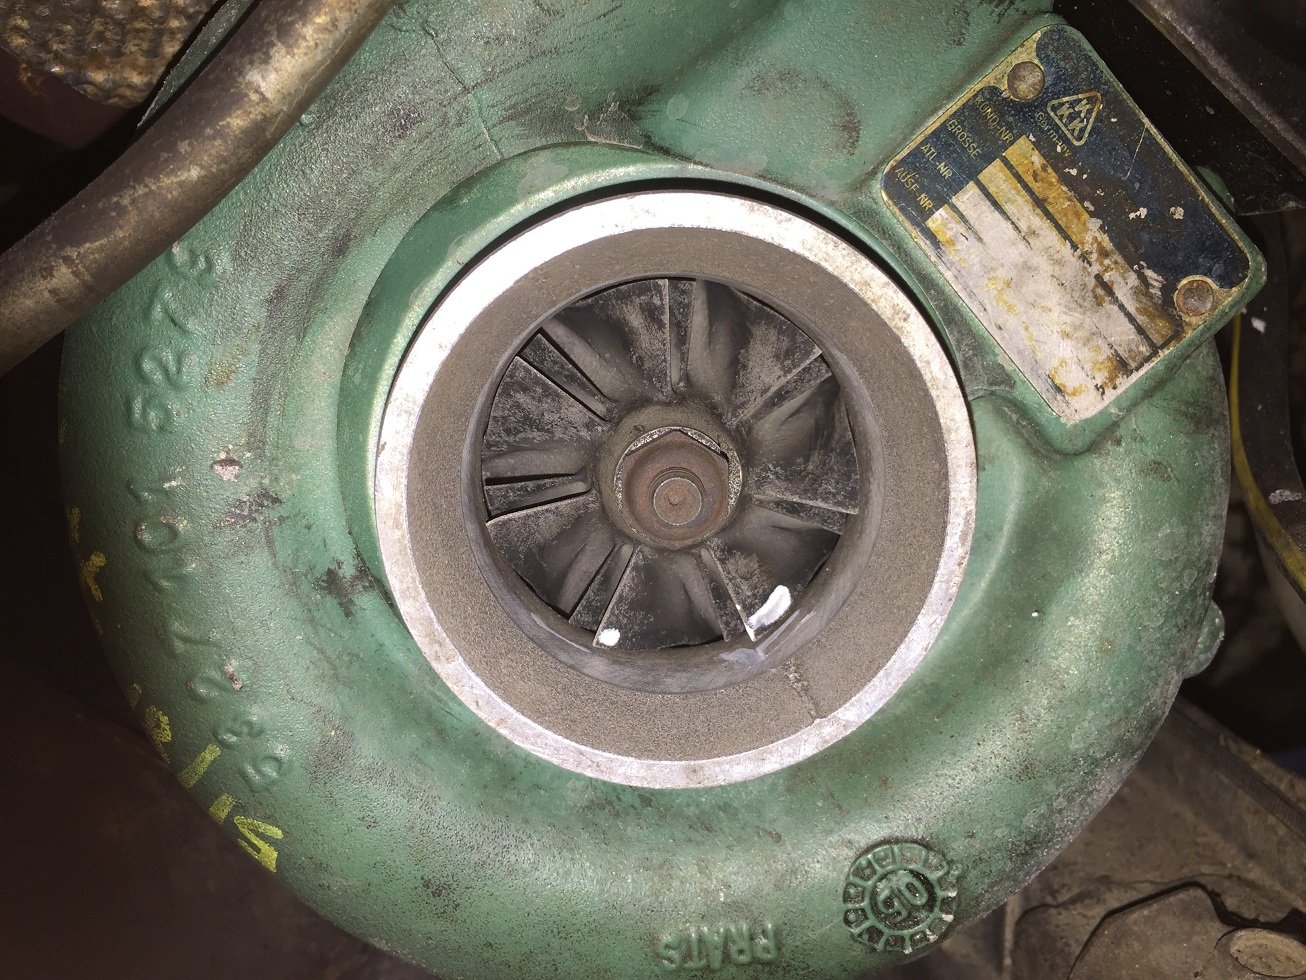
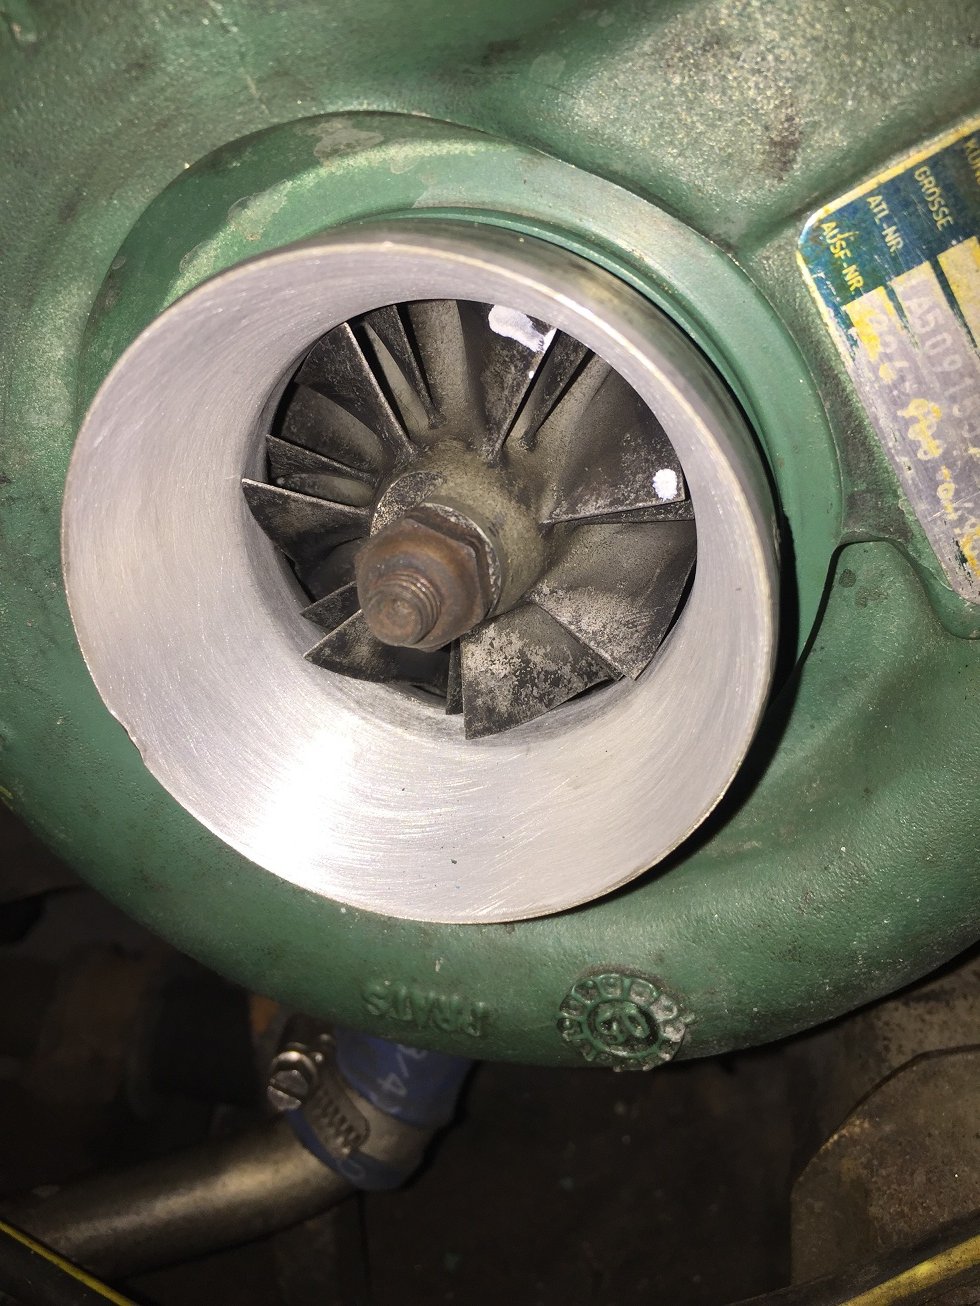
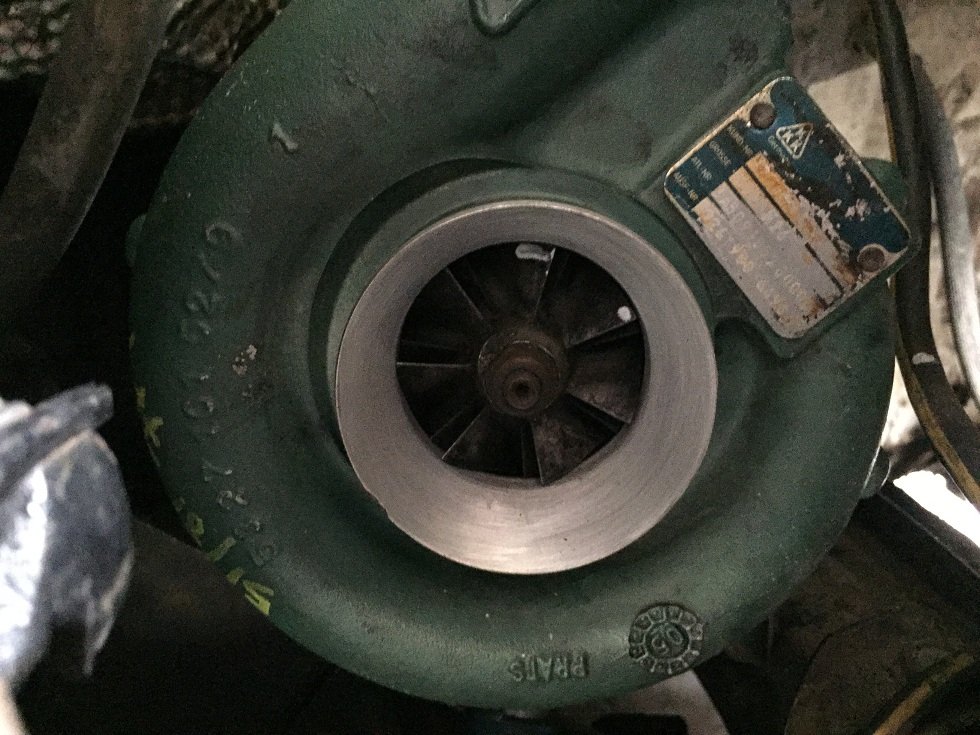
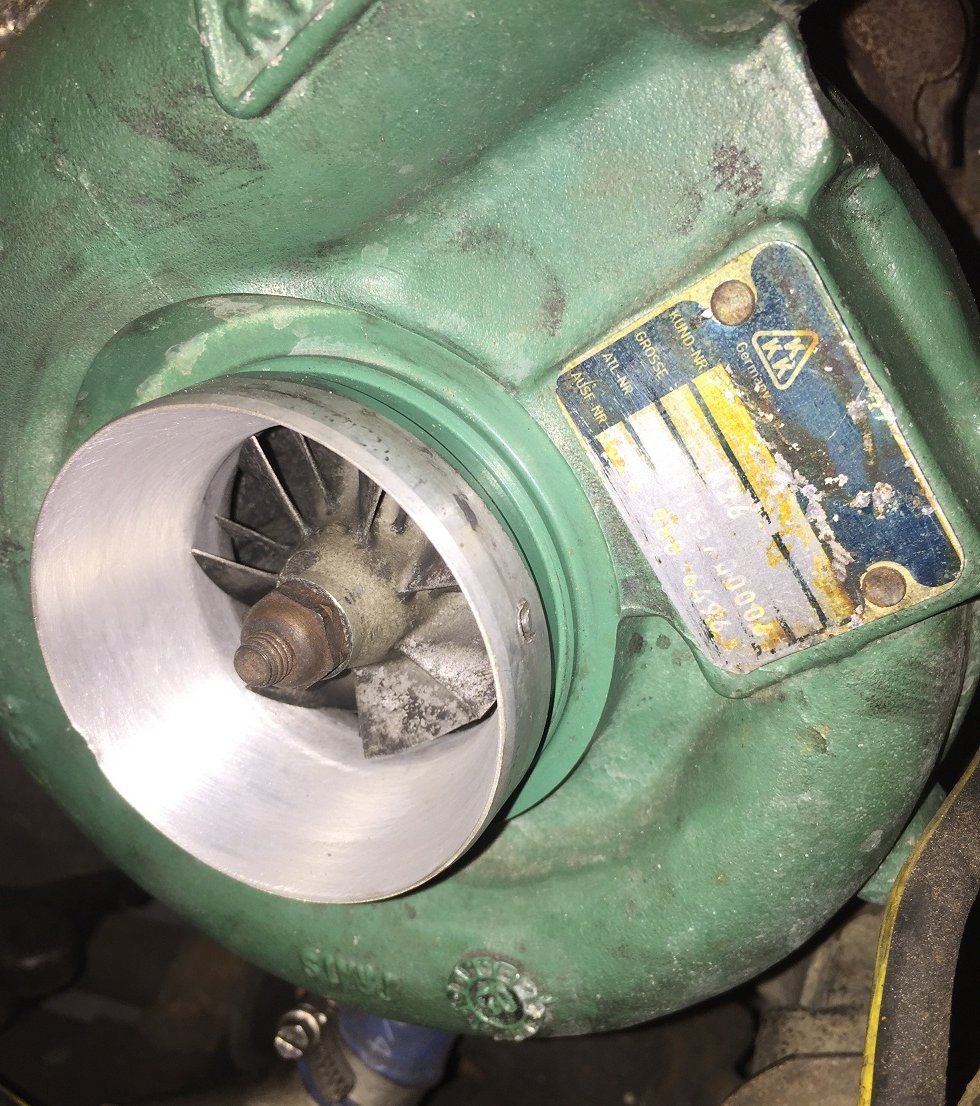
Next up I got some time to work on the drift car, poor thing hasn't been driven in over a year now... so while I was under the bonnet I thought I should tickle up turbo, It's a KKK K26 from volvo penta, (the marine series of volvo, hence the awesome green you see on alot of my turbos) specs just in case anyone cares is the common 53/64mm turbine(s200 to kids these days) and the comp is 51.7/81mm, not the best match for a sr20de and not the turbo I originally choose and fitted but it's on there and working. (it's a long story) Here's what the turbo housing looks like factory, they cast a ~25degree taper in and the machine the throat from the other side because this cover is used from 42-57mm inducers. | I marked it up and then removed, measured and worked out a 18.4degree angle will make the inlet 68mm and taper all the way to 1mm from the tips of compressor, I then hand finished it, which makes photo's look rubbish, and also dented it on install because it's rather thin at the edge now ## If anyone wants there turbo machined for cheap then hit me up, as long as I can fit it in my lathe then i'm happy to help.
4 points
-
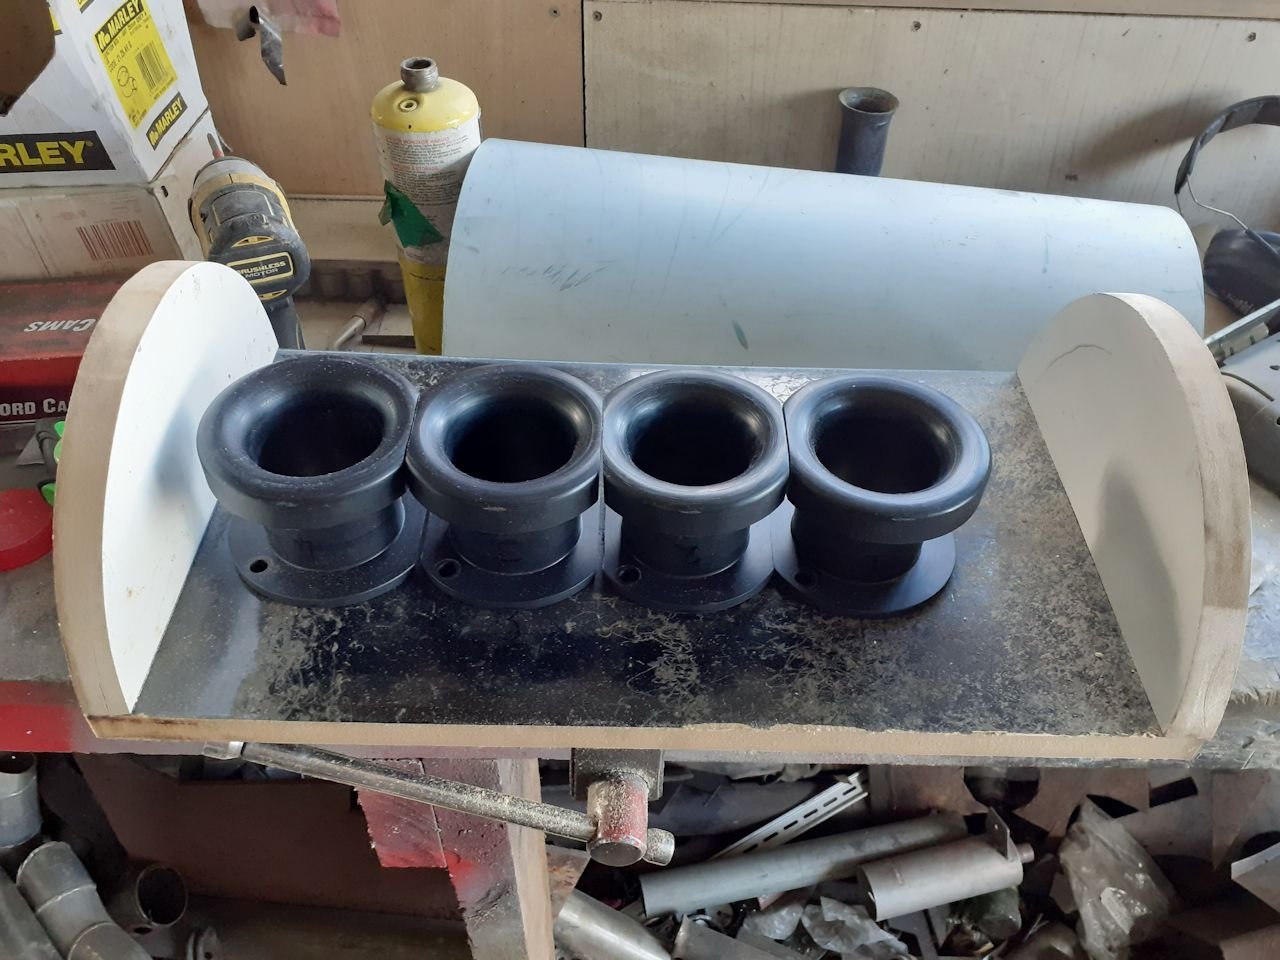
I've got a new scheme I might print for you to try. Basically a runner with a smaller inner entrance but then a chamber area around the perimeter to see if you can amplify a reflected wave back down with minimal energy loss / max doorts4 points
-
Here's a couple of videos from the last 2 events. All of this seat time is starting to pay off now and I am super stoked with how my driving is improving. Had the best day ever on Sunday with a few attempts to link track 2 reverse Matsuri video from last month. Drift Antics from Sunday. (Probably made this a bit long)3 points
-
Morgan cycle-car...3 points
-
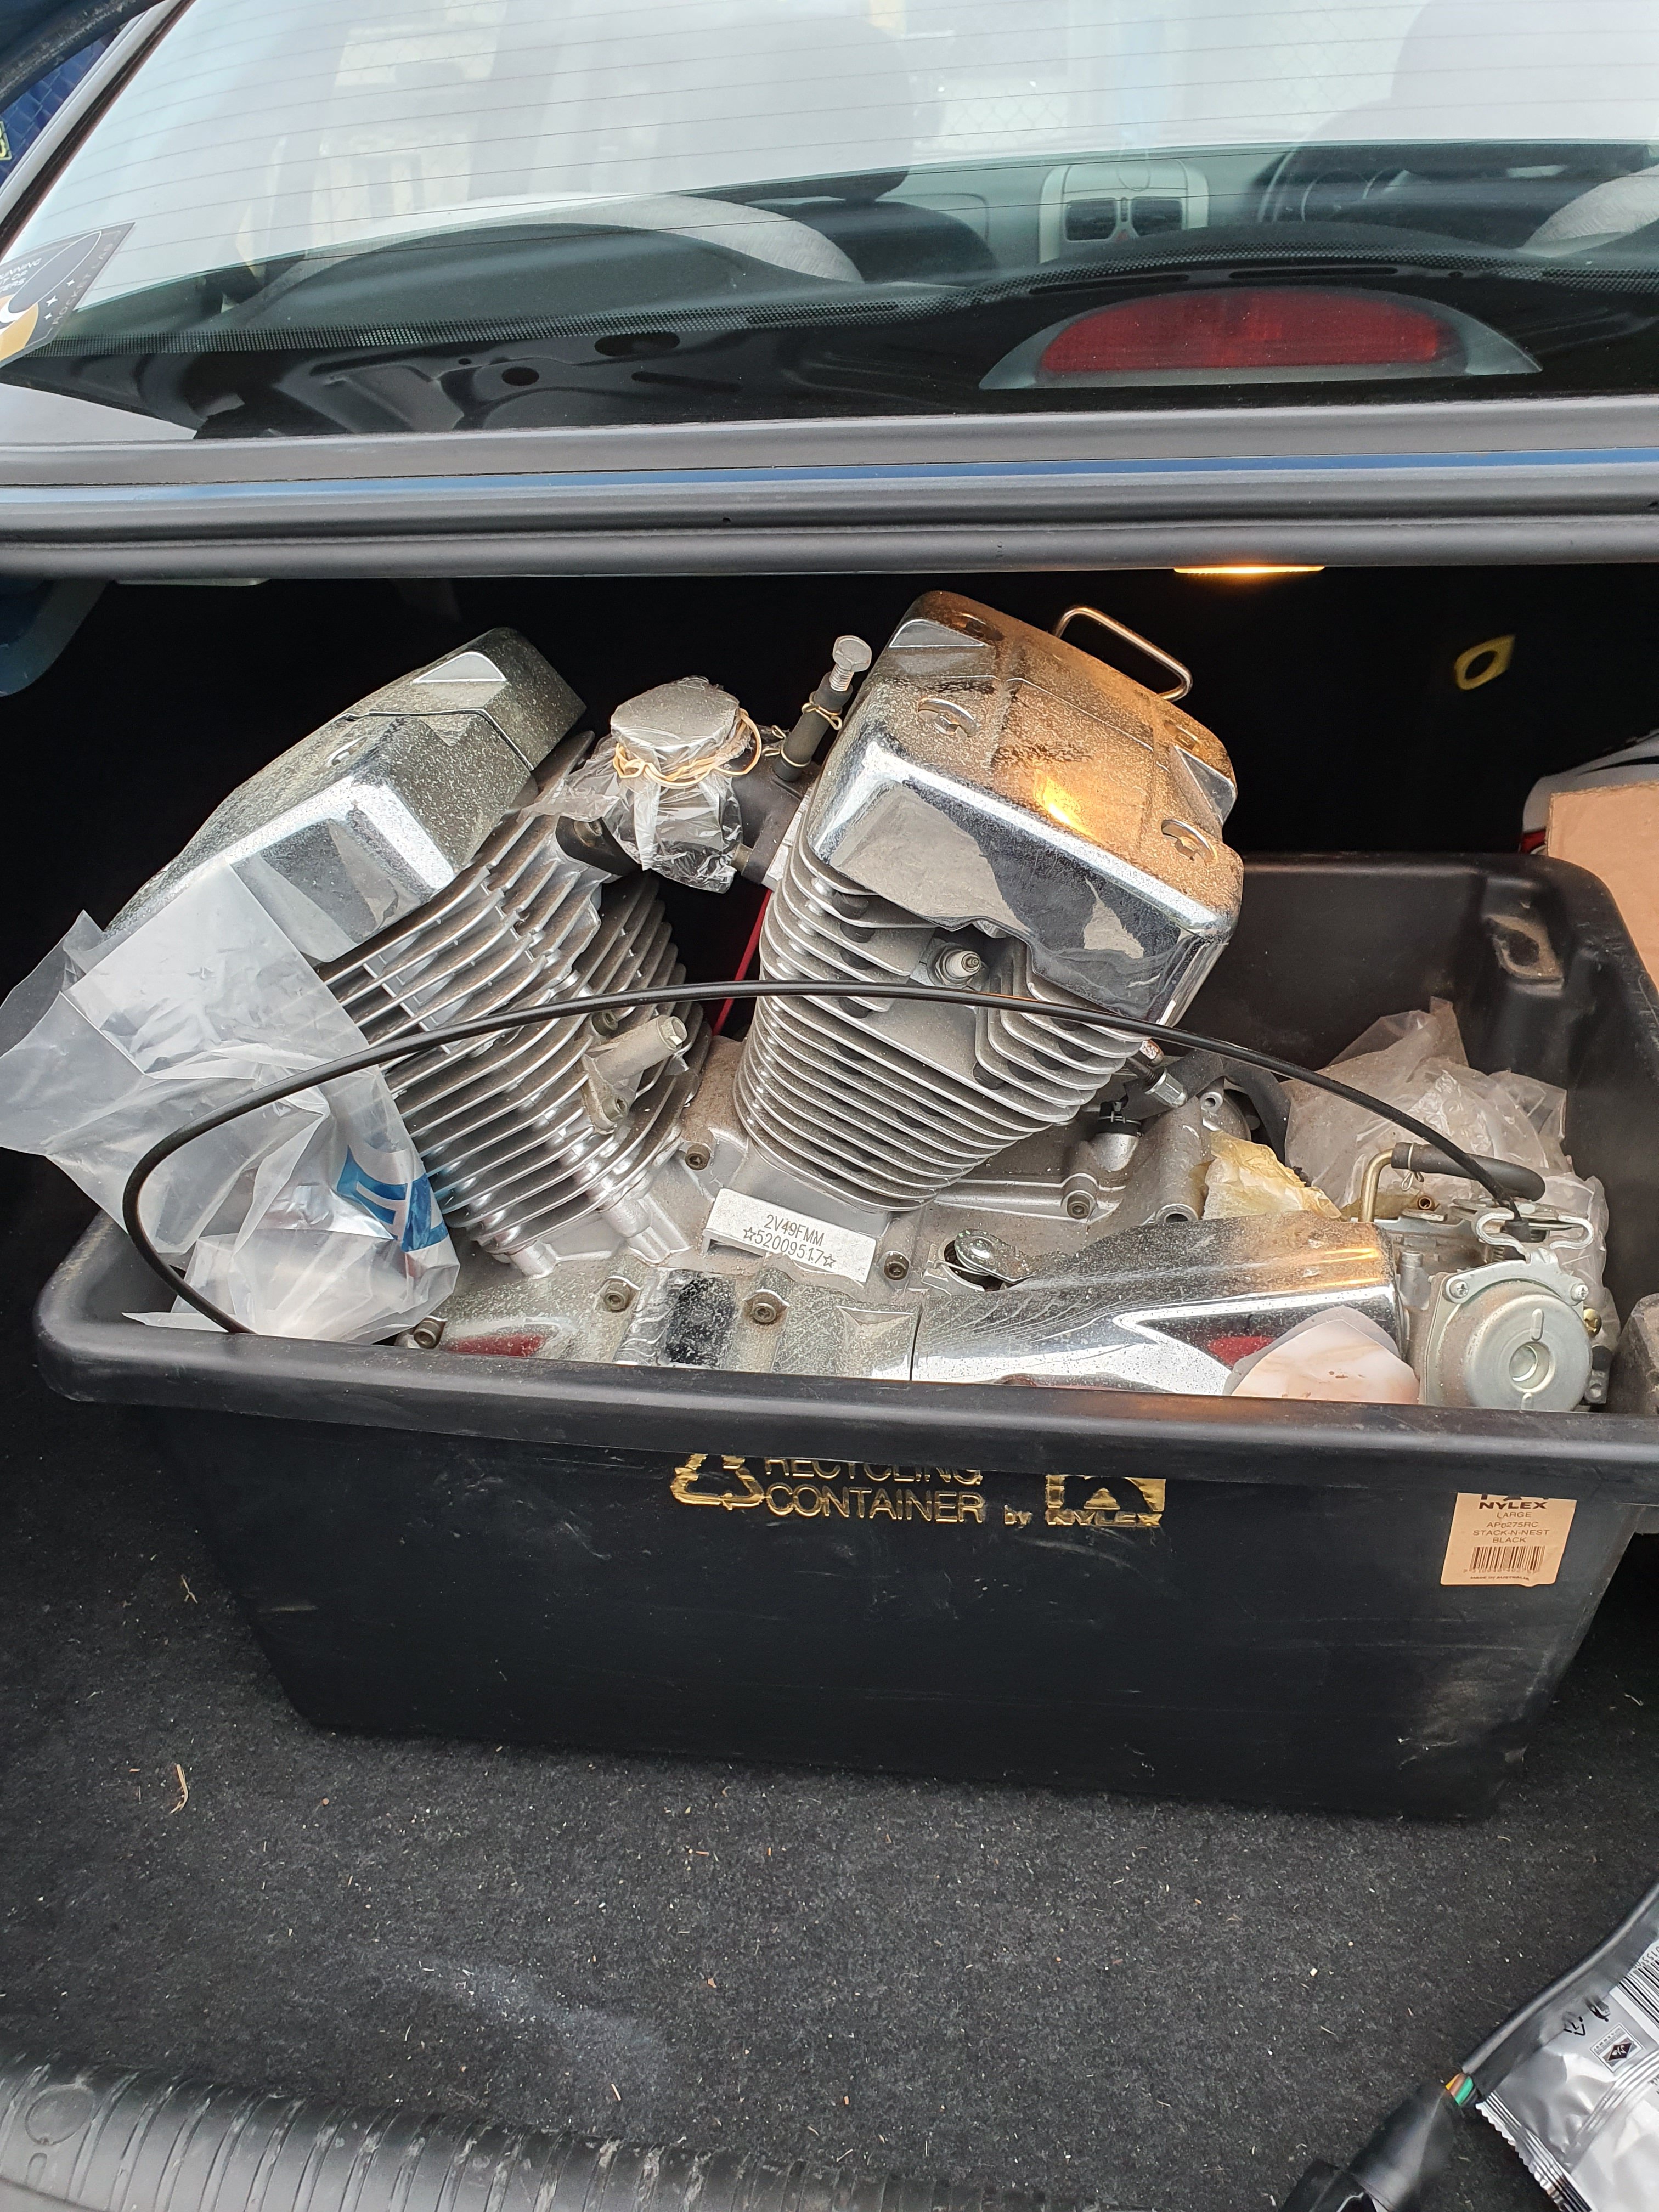
Well this just got placed in my boot its brand spanking new all the parts are still in boxes for my favourite price of nothing. I have no idea what I'll do with it yet suggestions welcome.
2 points
-
I have half a mini chopper and a v-twin........ all i need is half a quad and i have a trike been a pretty logical easy build. Will make it run and properly assess the situation as this would bolt into my drift quad but not so keen on 5 gears and my kids hitting triple digit speeds.2 points
-
Nanged it up to Hanmer for the official unofficial Hanmer meet, was a laugh going up Jack's pass 4 up in it, spent a lot of time dodging potholes and other rough road issues haha. Didn't skip a beat all weekend! Such a great little car, love this thing much more than I should haha.2 points
-
The people who design this stuff for a living are mathematicians/scientists/wizards/witch doctors. But the "guys at home" like yourself who dream up stuff like this will on a good day put the aforementioned group to shame. I look forward to the results!2 points
-
also have a look at the superbikes ram tube set ups a ramtube in a ram tube2 points
-
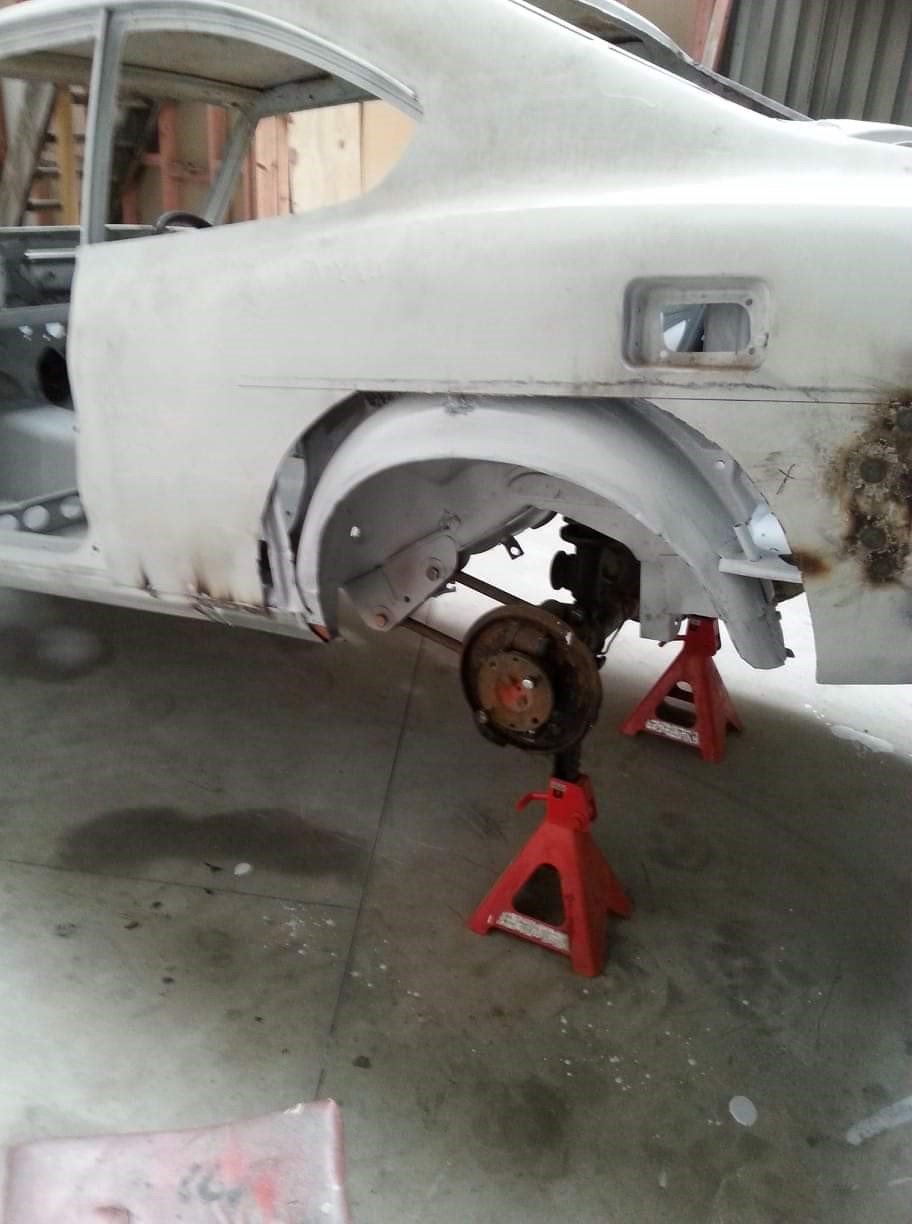
so now my list of keeping wifey happy jobs is nearly done, It is time to get this thing on blocks and actually rebuild the brakes Summer is coming and there is no RUC on an Anglia (500km a week in the deez is getting a bit old)2 points
-
I got the replacement clutch in and working but there's still something a little awry there that will have to wait until I get back from a couple of weeks holiday. I also discovered that I have a fairly common wobbly crank pulley issue so I should look into that before I get too carried away thrashing it. That said, I did enjoy taking it for a wee hoon after I got the clutch working and the hardtop on. More to come in the future but this is where we are at the minute: Once that was sorted I took it for a hoon to see my other white coupe...2 points
-
For those of you who know me, know I'm a mitsubishi pest. For those who know me even better, know I'm an absolute sucker for mk2 mirage wagons. Spotted this wee duck when we first moved to chch about 3 and a half years ago parked at muscle car madness. Shat my daks tbh, JDM spec twin sunroof wagon. First one of them I'd ever seen. Having seen it around a few times since then and pining hard everytime I knew I needed to acquire it at some point. Fast forward to a couple months back and @azzar found out that it resided only a couple blocks away from me. So of course I did what had to be done and left a note on old m9s window. I then get a call from him in the afternoon and he yarns to me about it, calls it the "mitsuferrari" and tells me the motor is buggered in it, perfect, I'm thinking as this is bargaining power. We agree on a very reasonable price for it. And we pick it up the next day. Combing over it once we got it back to the workshop it's actually a really tidy, rust free little car. Promptly fucked off the ugly mesh grille and hubcaps, replaced the starter motor, as that was all that was "buggered" about it. And she runs smooth as silk. He had put a catch can in as he reckoned the motor was very tired and kept filling it up with oil. Nothing wrong with the motor per say aside from when it's cold, the head drains very poorly so oil fills up in the rocker cover then globs it out into the catch can. Hence it filling up so fast. Took it for a fang once I'd got it running.1 point
-
RE engine and box out together. It can be done, but its tight. as you say a short engine bay, and the radiator/slam panel is a key part of the front end structure so no cutty cutty. The 4 speed/1608 combo is the easiest as the block is a wee bit smaller and shorter and on the 4 speed the end of the box is both smaller and the lever bits gets left attached to the tunnel. It needs to come out nearly vertically so need the car up high and a engine crane with a load adjuster thingee. I found it easier to take the engine out first, but put them back in together. need to remove the starter tho.... best way is all of the extensions and a couple of universal joints with tape around them to get those mummajumma starter bolts from the back of the gearbox. Also if you disconnect the propshaft and tilt the engine back there's a bit more room/visibility. I need to update my 125 thread too!1 point
-
If this pic had boobs it'd be damn near perfect...1 point
-
Plugged some shit in and fired it up.. Didn't go hard cos it's not time yet so this is just jogging things in the setup program for LinuxCNC. The cable lengths are all wrong, will need to sort that. Need cable trays quite badly too. X axis needs the belt tension backing off. Still, pretty stoked with how promising that looks.1 point
-
Some more
1 point
-
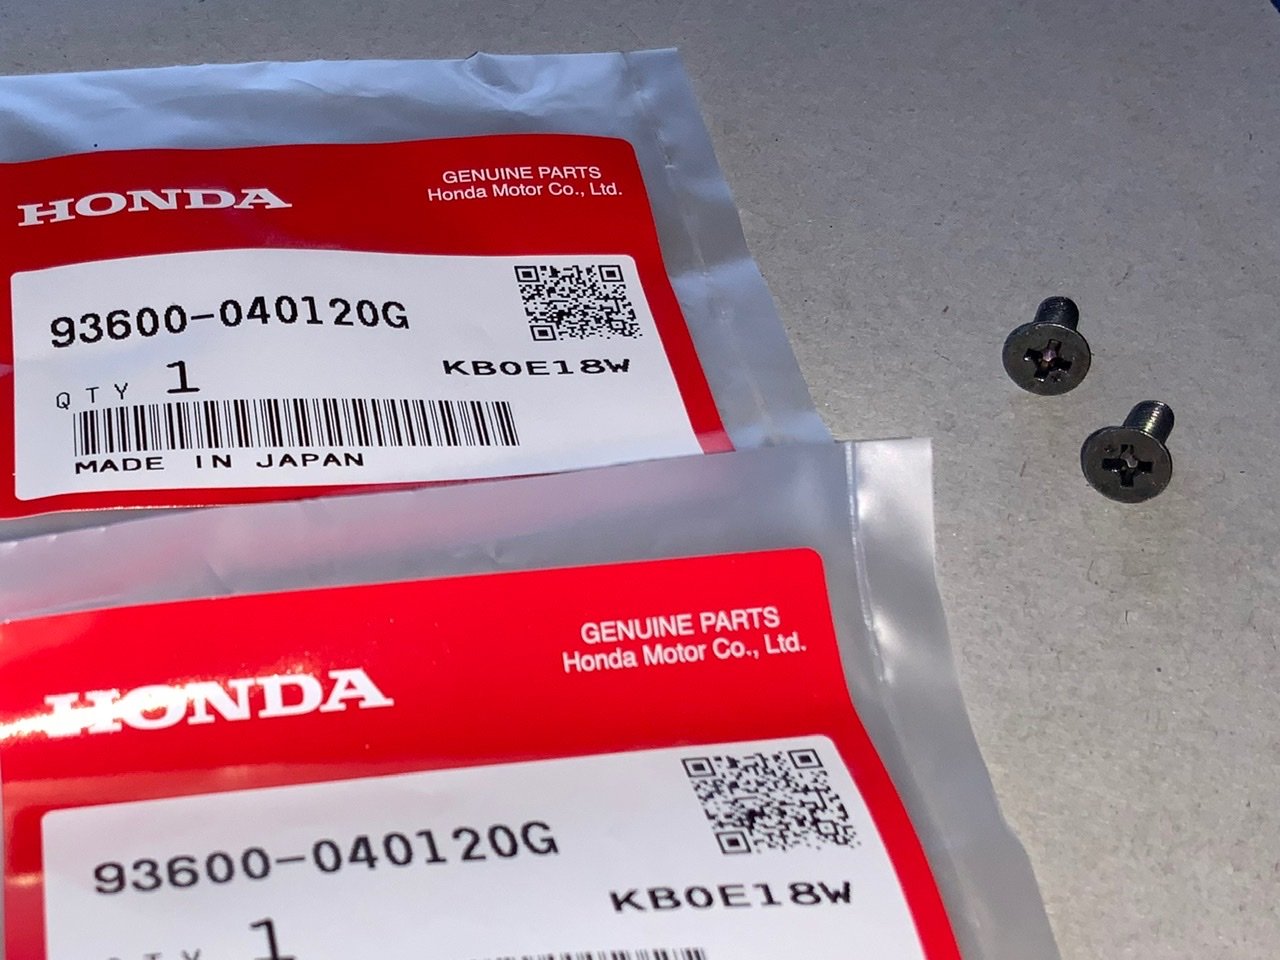
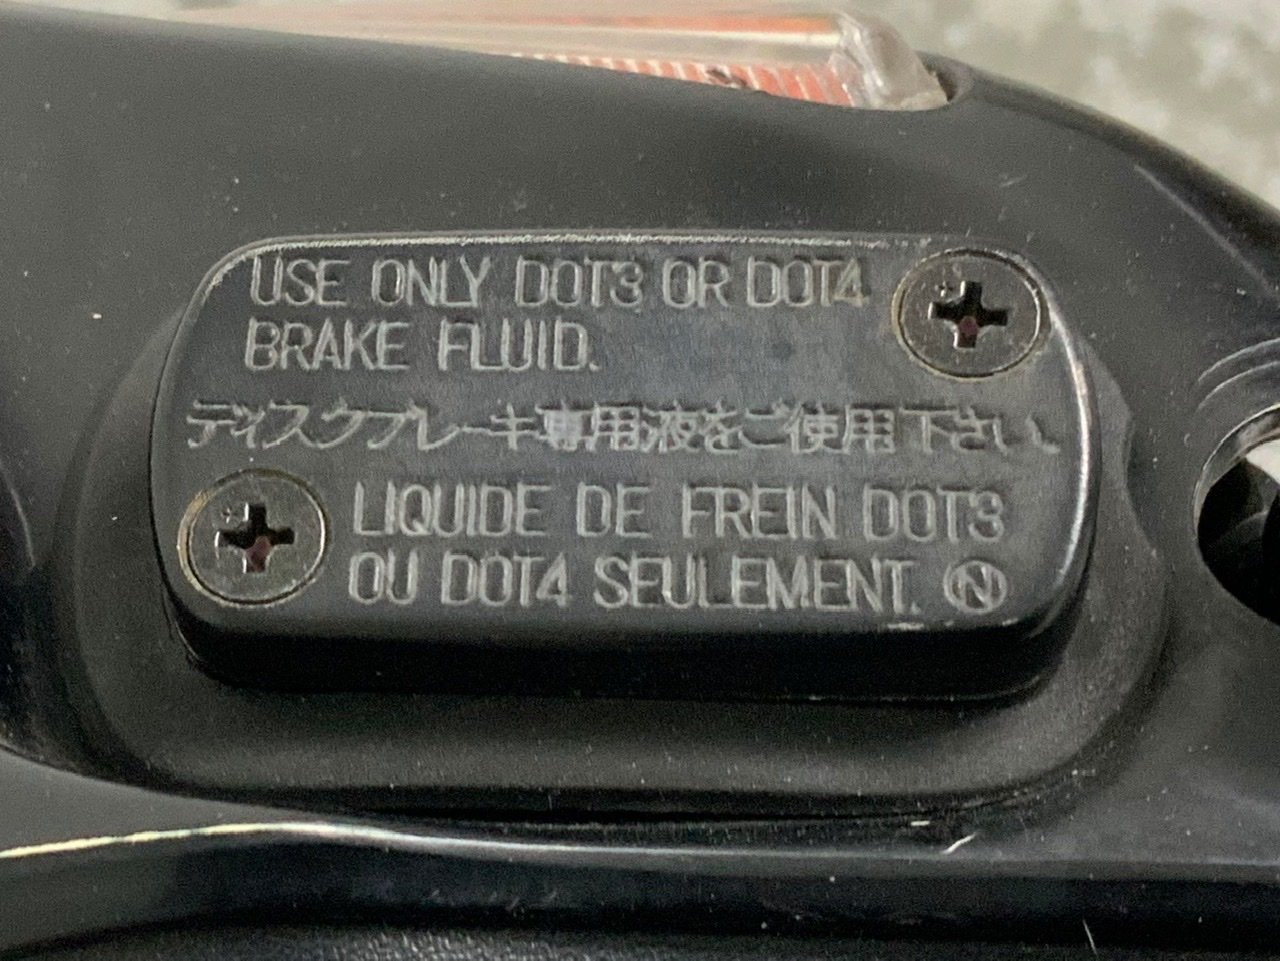
Only a small thing but makes difference. the screws have been replaced. Please see the photo NO.4 and you can confirm that the screw head and master cylinder case are at the same level which means the cover doesn’t hold water and prevents getting rusted.
1 point
-
Reassembled carb. Went well until I went to put the base plate on. FUCK!!! 2 bolts short. Tore shed apart looking for them. No dice. Was googling what thread they were and found this NO wonder I couldn't find them, they were never there. So.... Try again on weekend
1 point
-
I'll need to fabricate a holding bracket for both ends of the cable and the cable itself may need to be shortened a bit, but its worth a try. The Certifier has confirmed that I can elongate the existing hole in the chassis rail where the gearbox selector needs to poke through as long as I attach a strengthening plate to the rail, so once I've done that I can put the cable through its paces. But that will have to move to the back burner for now as the steering column fabrication has become top priority . Thanks for reading.1 point
-
First things first, was to strip the horrid interior, and remove the front end to see what I was facing. It's been off the road since '03, where it appears someone had begun a teardown of the front suspension for a rebuild, but instead gave up, lost some important nuts, and roughly bolted it back together. Front steering joints had been unbolted, which made transporting it a mission. However this problem is fixed, and it only needs some new bushes/brake bleed to be operational. I sourced a brown ute bench seat (ute's have headrests and sedans/wags don't). Much harder to do than I had anticipated! But it's improved it 100%. I also found a premier wood dash facia, and a nice black dashpad that needs some straightening. I took the column apart and have restored all that, ready for reinstallation once my interior is black. Should give a much nicer feeling once I get it back together than mouldy, faded and split brown! Next up, I installed a 202/trimatic that came from an HZ ute. Runs nicely, and didn't take long at all to swap in as most of the engine mount bolts had been lost. The car didn't come with a driveshaft but I've managed to find one which is great. I took a look at my rad support panel to find that rust had gotten the better of the lower section, as they so commonly do with these. A replacement rare spares panel and a few hours later and it's as new. Spent today chopping away at the body, but also got keen to tackle the exhaust and get that setup. @MACKAZ did me a deal on a 2 barrel inlet/headers which is awesome, for now the 2 barrel setup will wait for the future but I thought to fit the headers as a start. However I didn't consider that these (probably commodore) headers may have fitment issues and found that they hit the firewall when I tried bolting them on. Some cutting and welding later and they fit and the exhaust is done. Fuel tank is full of 17 years of water/varnish mix and to be honest I'm not sure the engine enjoys running on it but nonetheless goes. Need to pull tank and drain, the lovely folk at holden didn't install a drain bung for me. The car as it sits. These come apart so easy, it's super good. Painted my steering wheel up and came out better than I thought. Hopefully it doesn't wear too bad.1 point
-
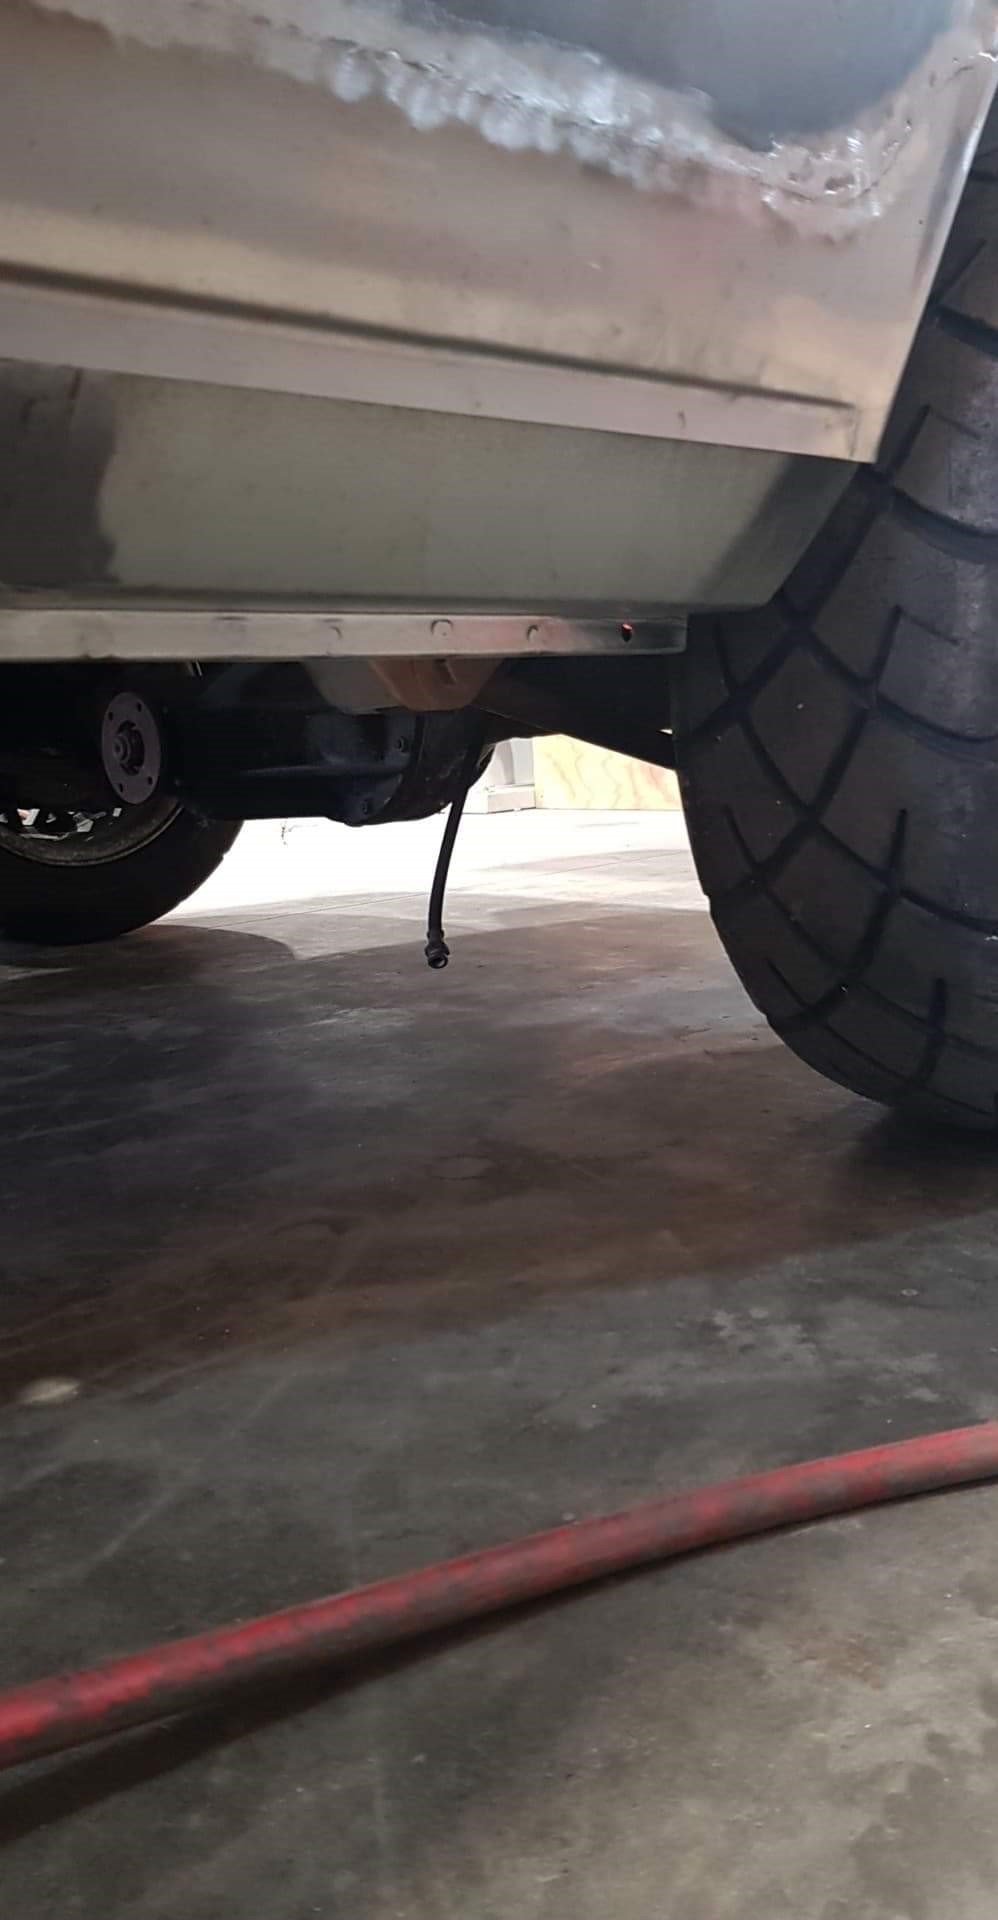
Looks far less weak in the back too with a meaty tyre.
1 point
-
Had my little helper today1 point
-
Nah this is Old School. Doing dumb things with old gear is great. I reckon you're way overcarbed but interested to see how you get on...1 point
-
So I’ve been chipping away over the past weeks. So much done but still so much to do! Managed to get the whole rear end dialed Just need to cap the upper arm boxes (can’t decide if I should make removable or just weld them on) Caliper brackets made and calipers mounted Made a start on the sump as the factory lower pan would have sat 40mm lower than the crossmember made an intake pipe by stretching a 3” tube over a 3”-5” sch40 reducer. Bit of grease and the press did the job Trying to decide header layout also Fixing up some back yard rust repairs, it’s only a seat time car but you gott make it look good atleast once So I’m getting there slowly. Going to try get fuel tank/lines in and dump done by next week as the loom should be ready to put in then. Will be good to fire it up. with only 5 days left of regular employment, the aim is to get this completed before my nomadic stint in the bush over summer1 point
-
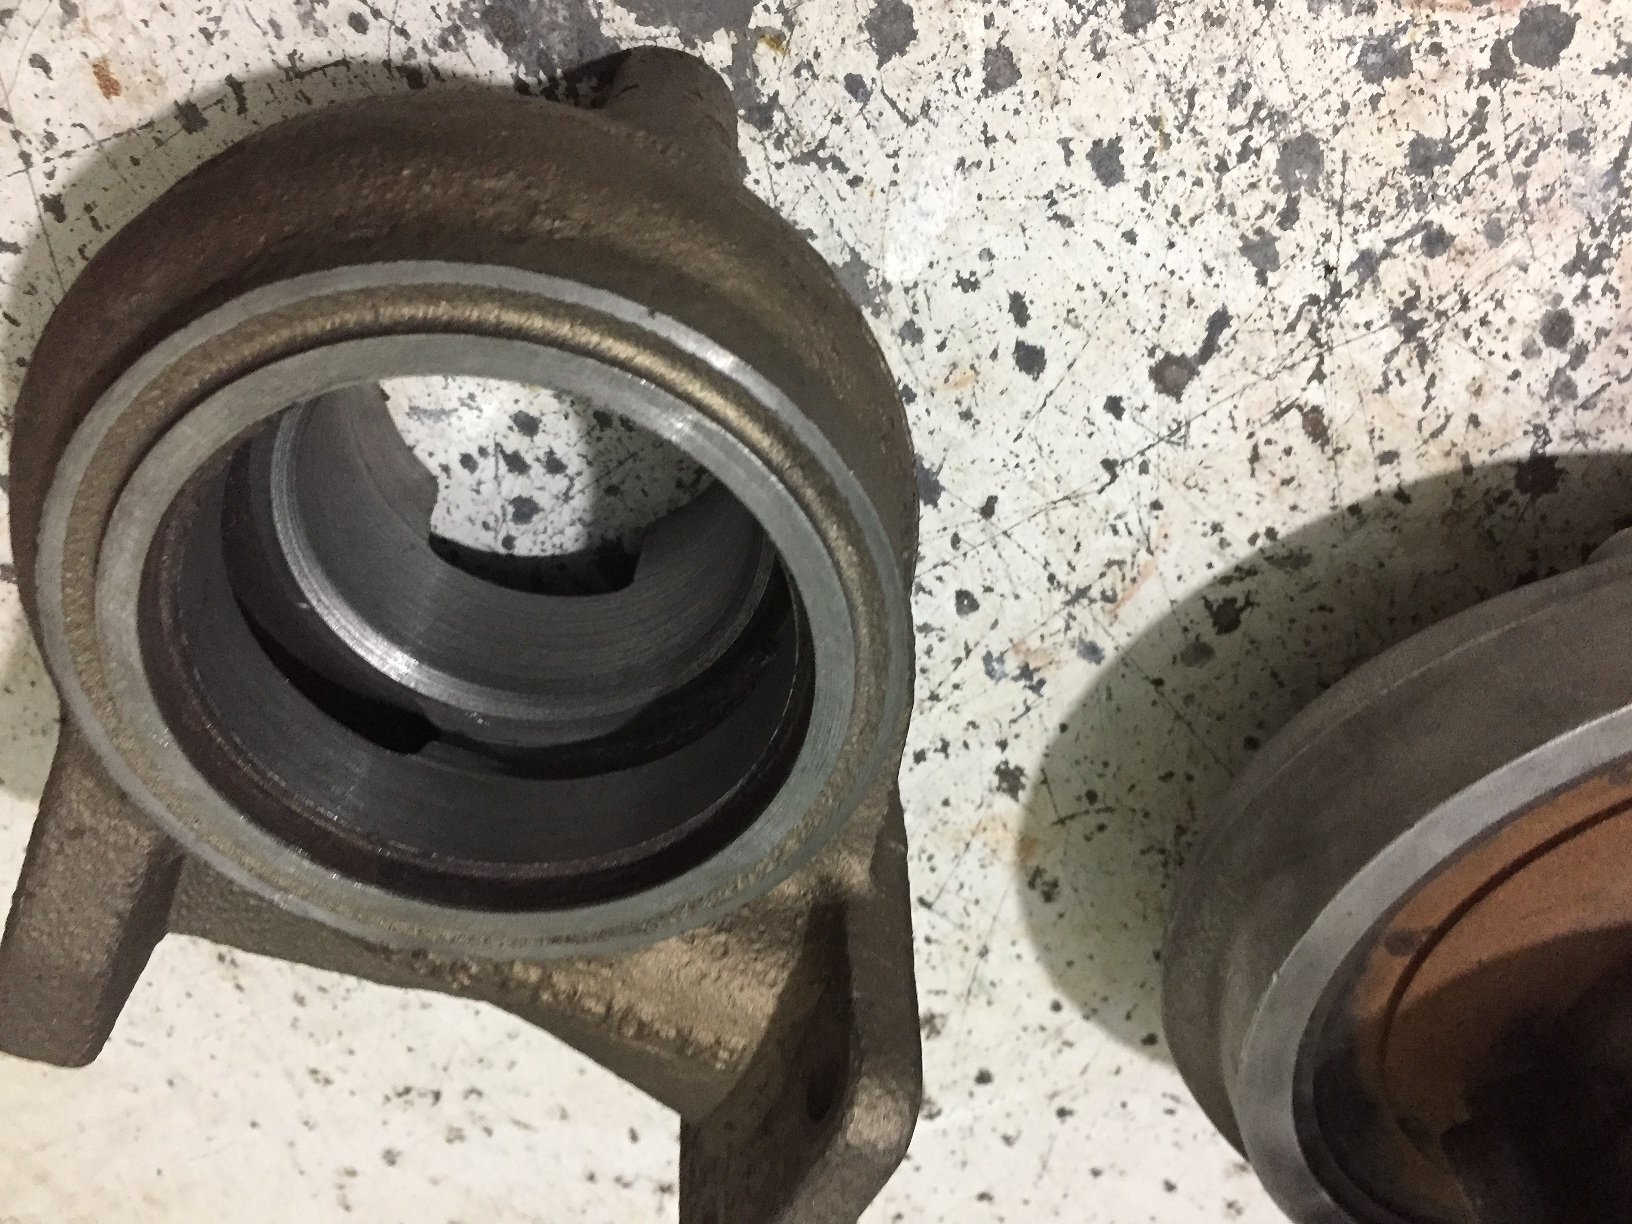
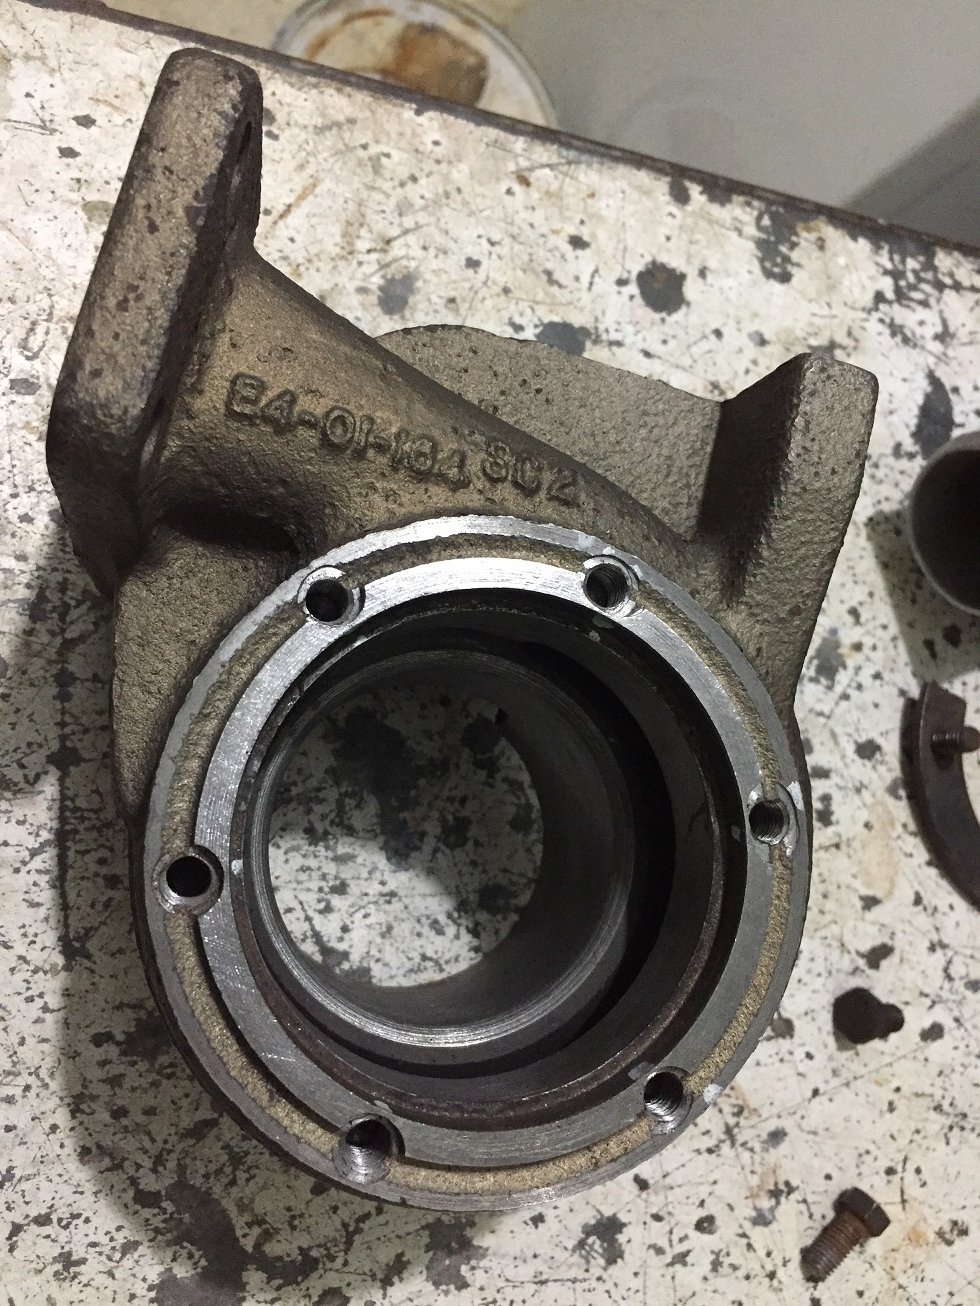
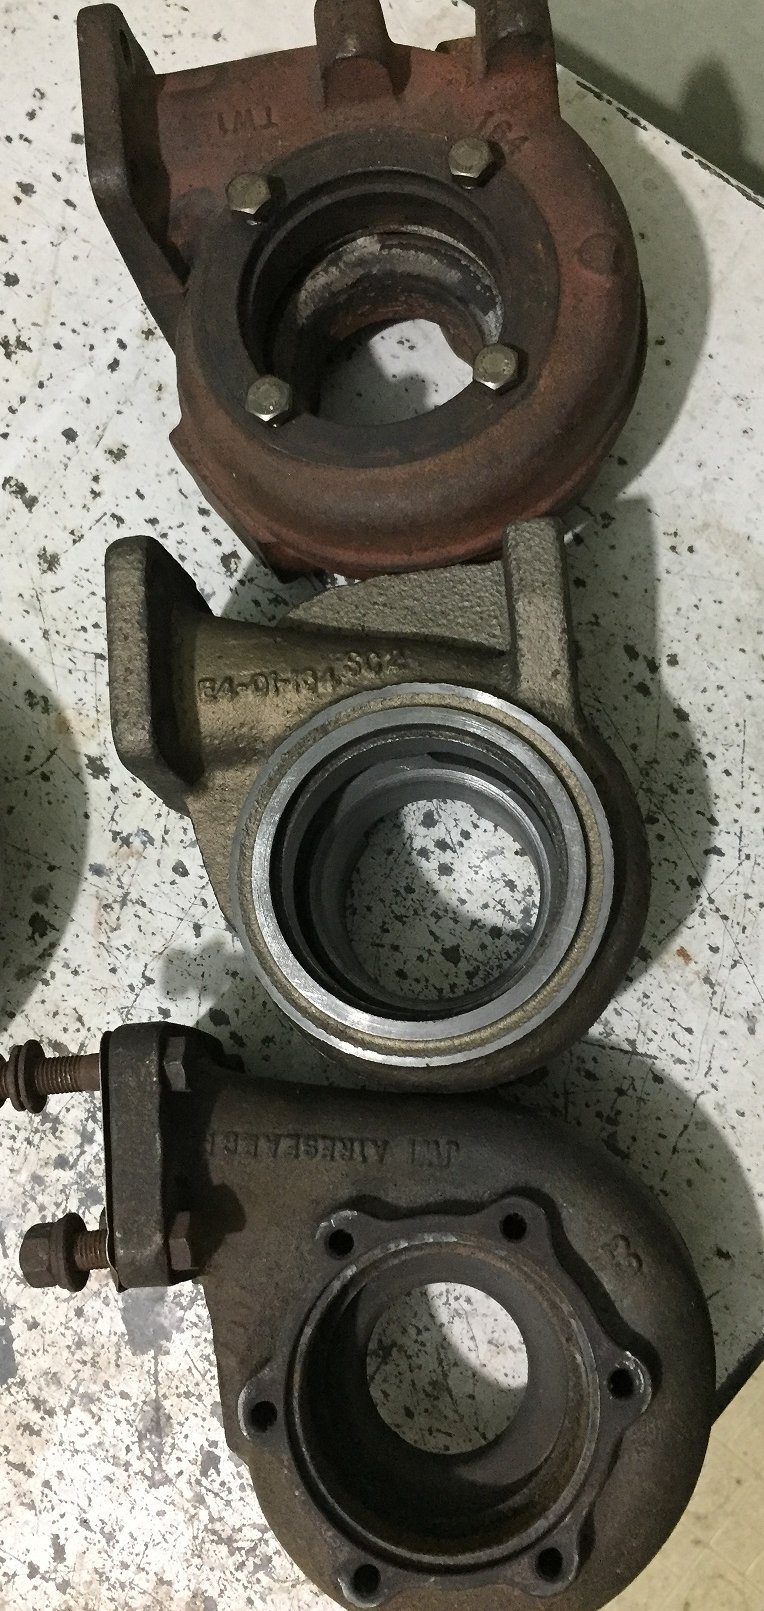
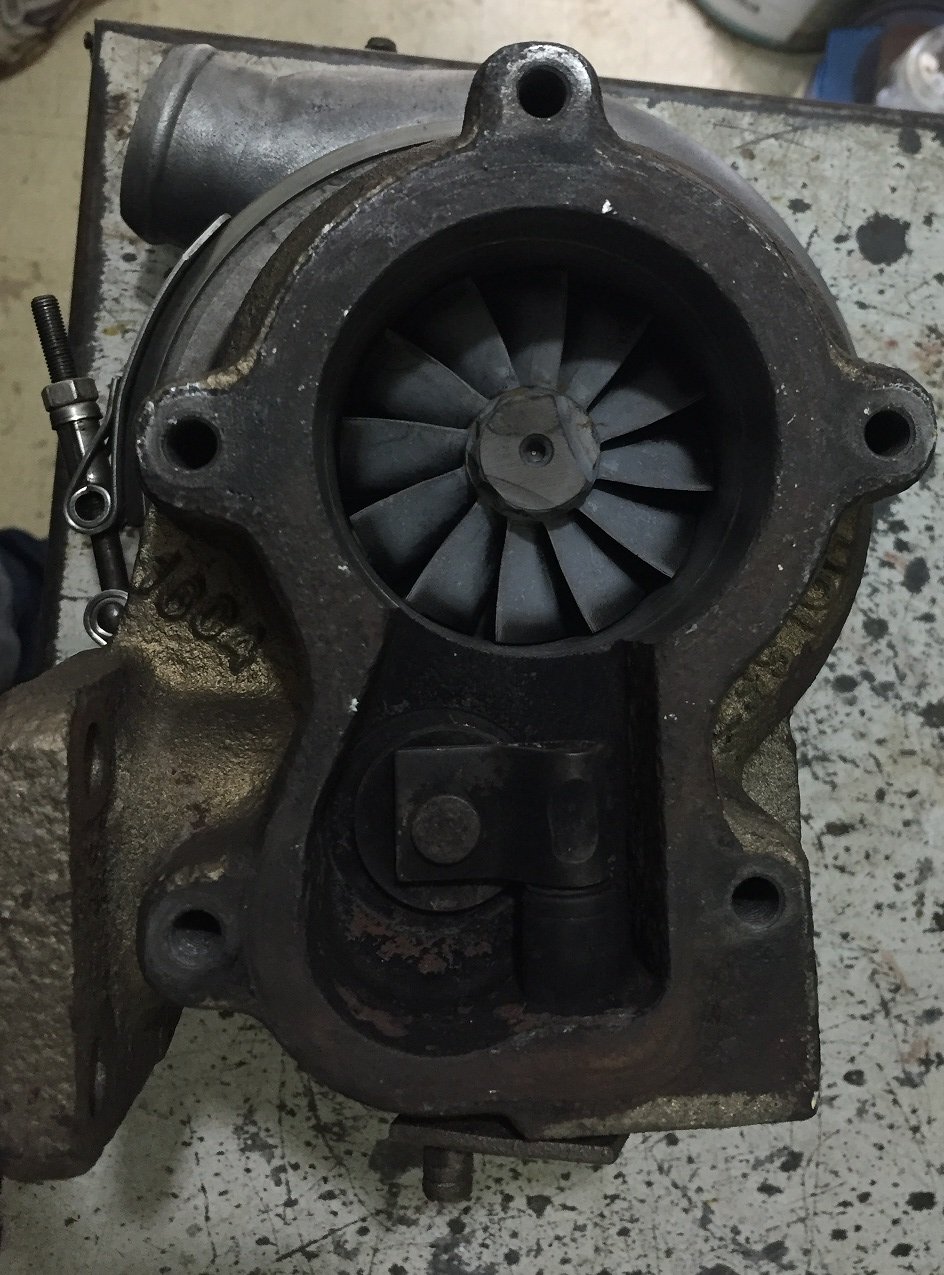
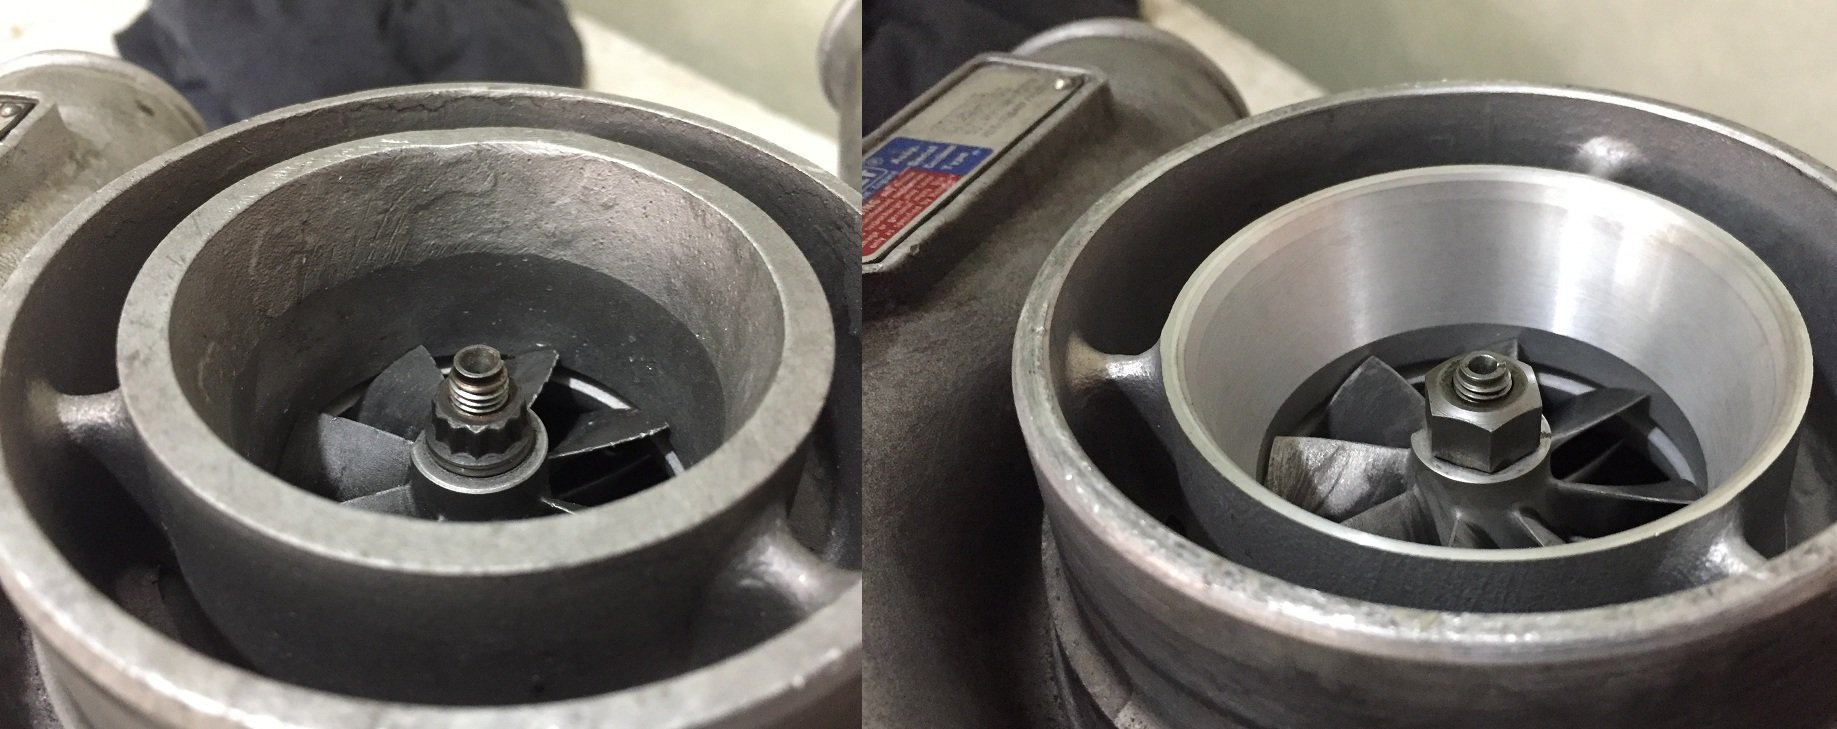
I wanted to put a hx40 into a smaller housing for use on a diesel, hunted through all my garrett housings and only found one that was suitable(saab 900 t3 0.63), but I wanted to save that housing for something else, all the 0.48's i had didn't really have enough meat on the sealing surface on the dump pipe... So I'd sorta given up until I remembered I had a Chinese hx30 on the shelf, it could be genuine but due to the fact the compressor snapped off the shaft and other small things I'm pretty sure it's from china Now those of you that know turbos will know hx30 is alot smaller than the hx40 and the turbine housing uses a V-band connection to the center, and a hx40 uses the traditional 6 bolts (like garrett etc) SO i thought this wasn't a possible combo, but after many measurements and checking I decided to give it a hoon... top is 14cm TS holset housing, middle is partly machined 8cm hx30 housing, bottom is 0.63 garrett t3 Here is the hx30 after the first lot of lathe work, v-band turned down, and inside from a 52/65mm wheel to 64/76mm turbine, The housing is clearly designed to take upto the 67/76mm wheel but machined to suit any size at the factory Next up it went to see Emily and had the 6 flat areas machined and then milled and tapped to suit the normal hx40 spacing+retainer plate, It will also require a spacer/clamp plate but I don't have right size steel for that and it's too hard to buy anything in auckland during lockdown And I thought it best to update the front housing while I was here, this is one of the smaller hx40 compressors, 54/82mm, more often this turbine would use the 60/82mm comp wheel. ,,
1 point
-
Also, I built this abortion today
1 point
-
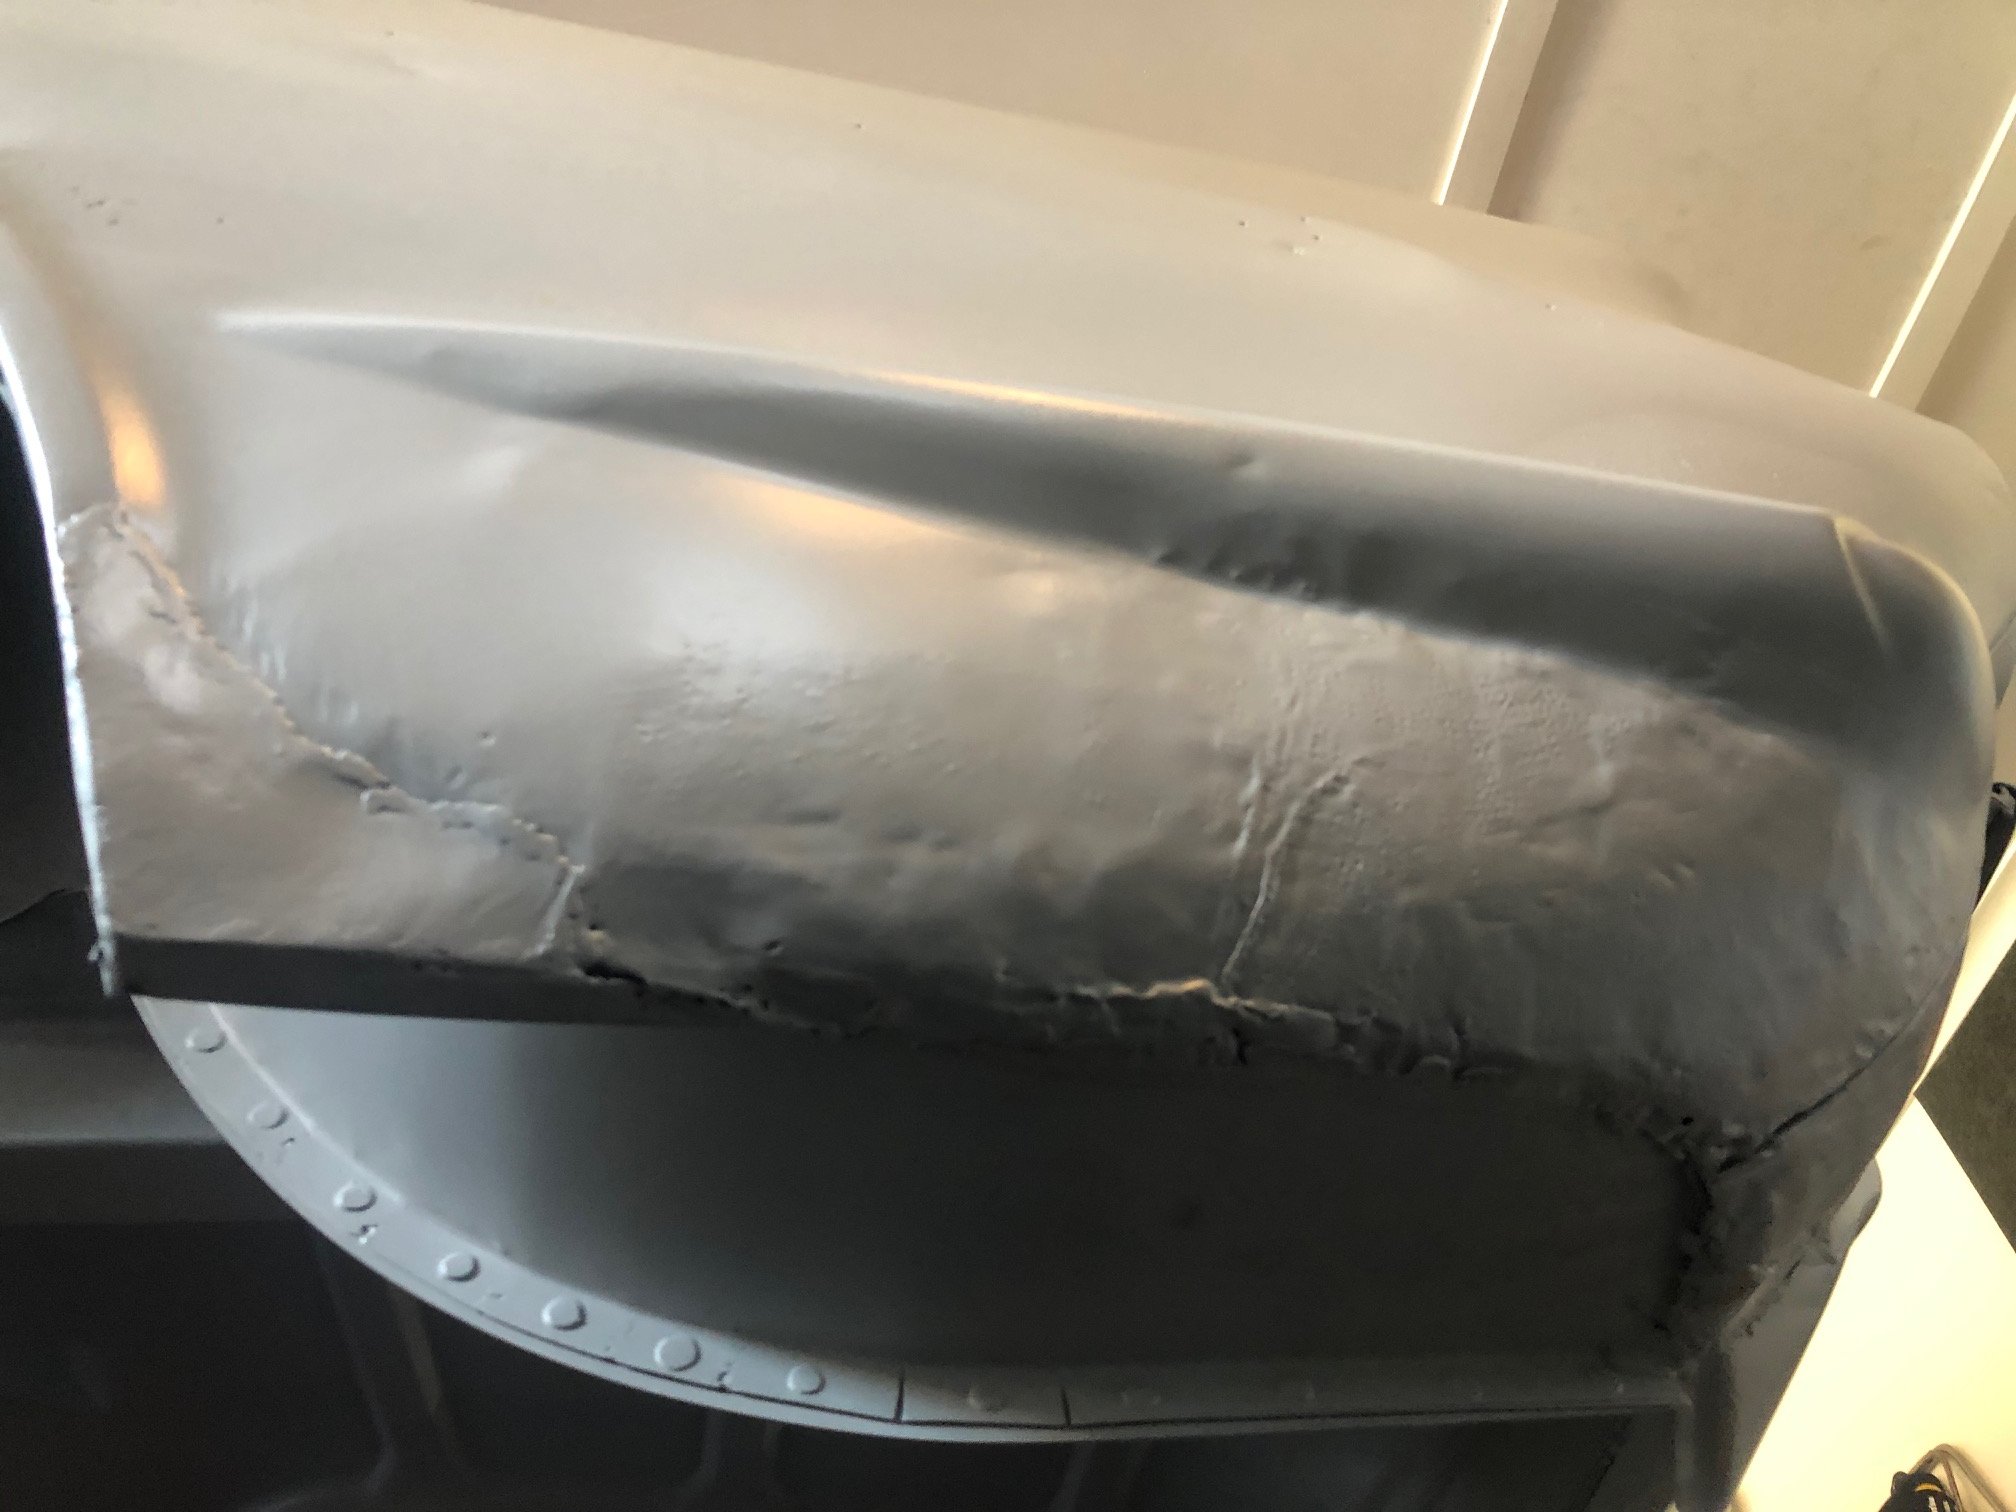
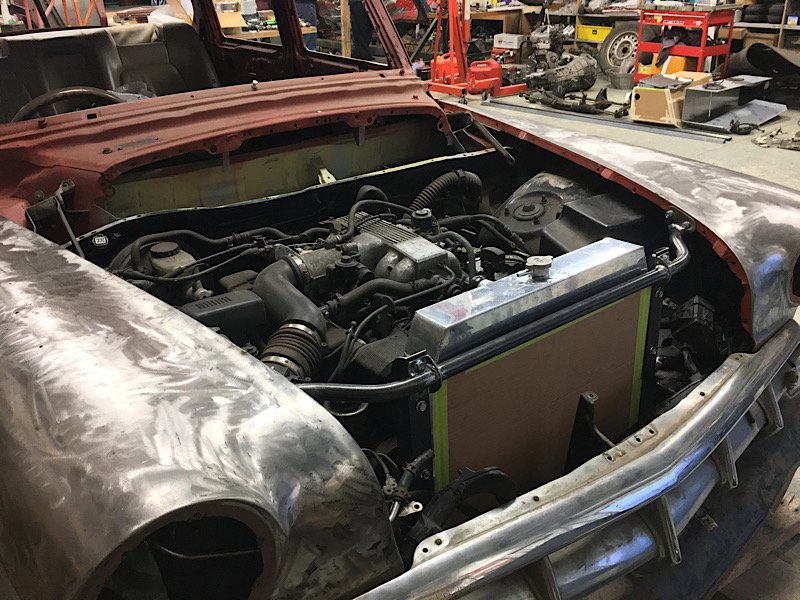
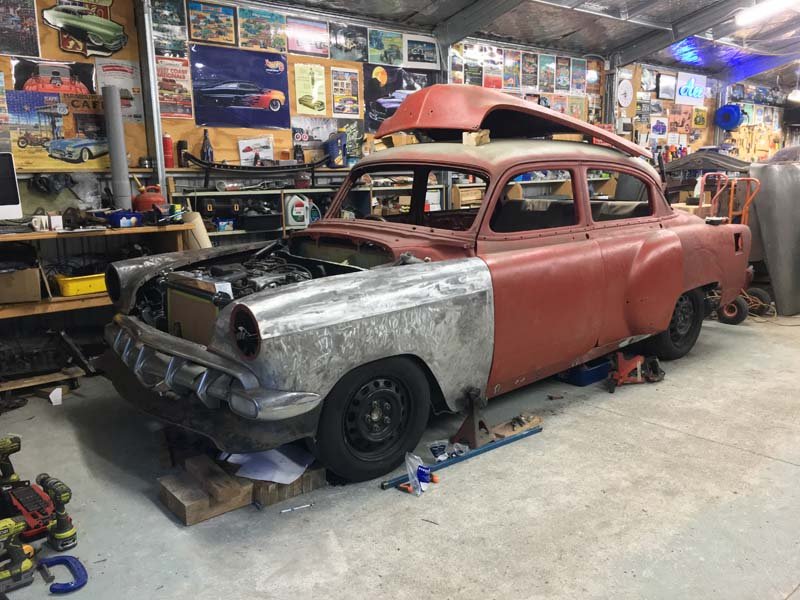
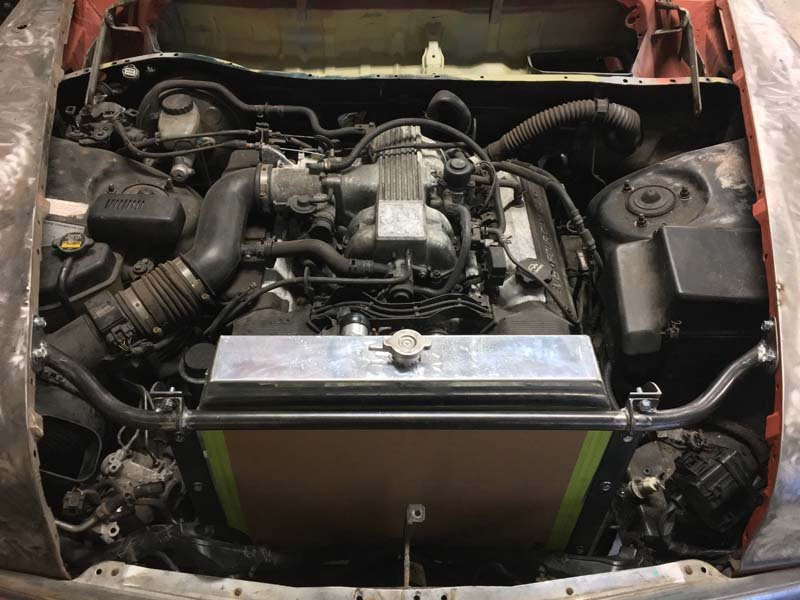
Spent the last few Weekends making a new front lower cross member and Radiator support bracketry. Radiator is a 1954 Chevrolet style aluminium one. It is 2-3 inches further forward now, and now the bonnet doesn't quite close. Should be easy enough to fix with some light trimming. Fitting a transmission cooler and a large enough battery is going to be fun.
1 point
-
Results are in on the downsized runners.1 point
-
If the idle mixture screws have no effect, then you've got a blown powervalve diaphram. That will make it fearsome rich too.1 point
-
1 point
-
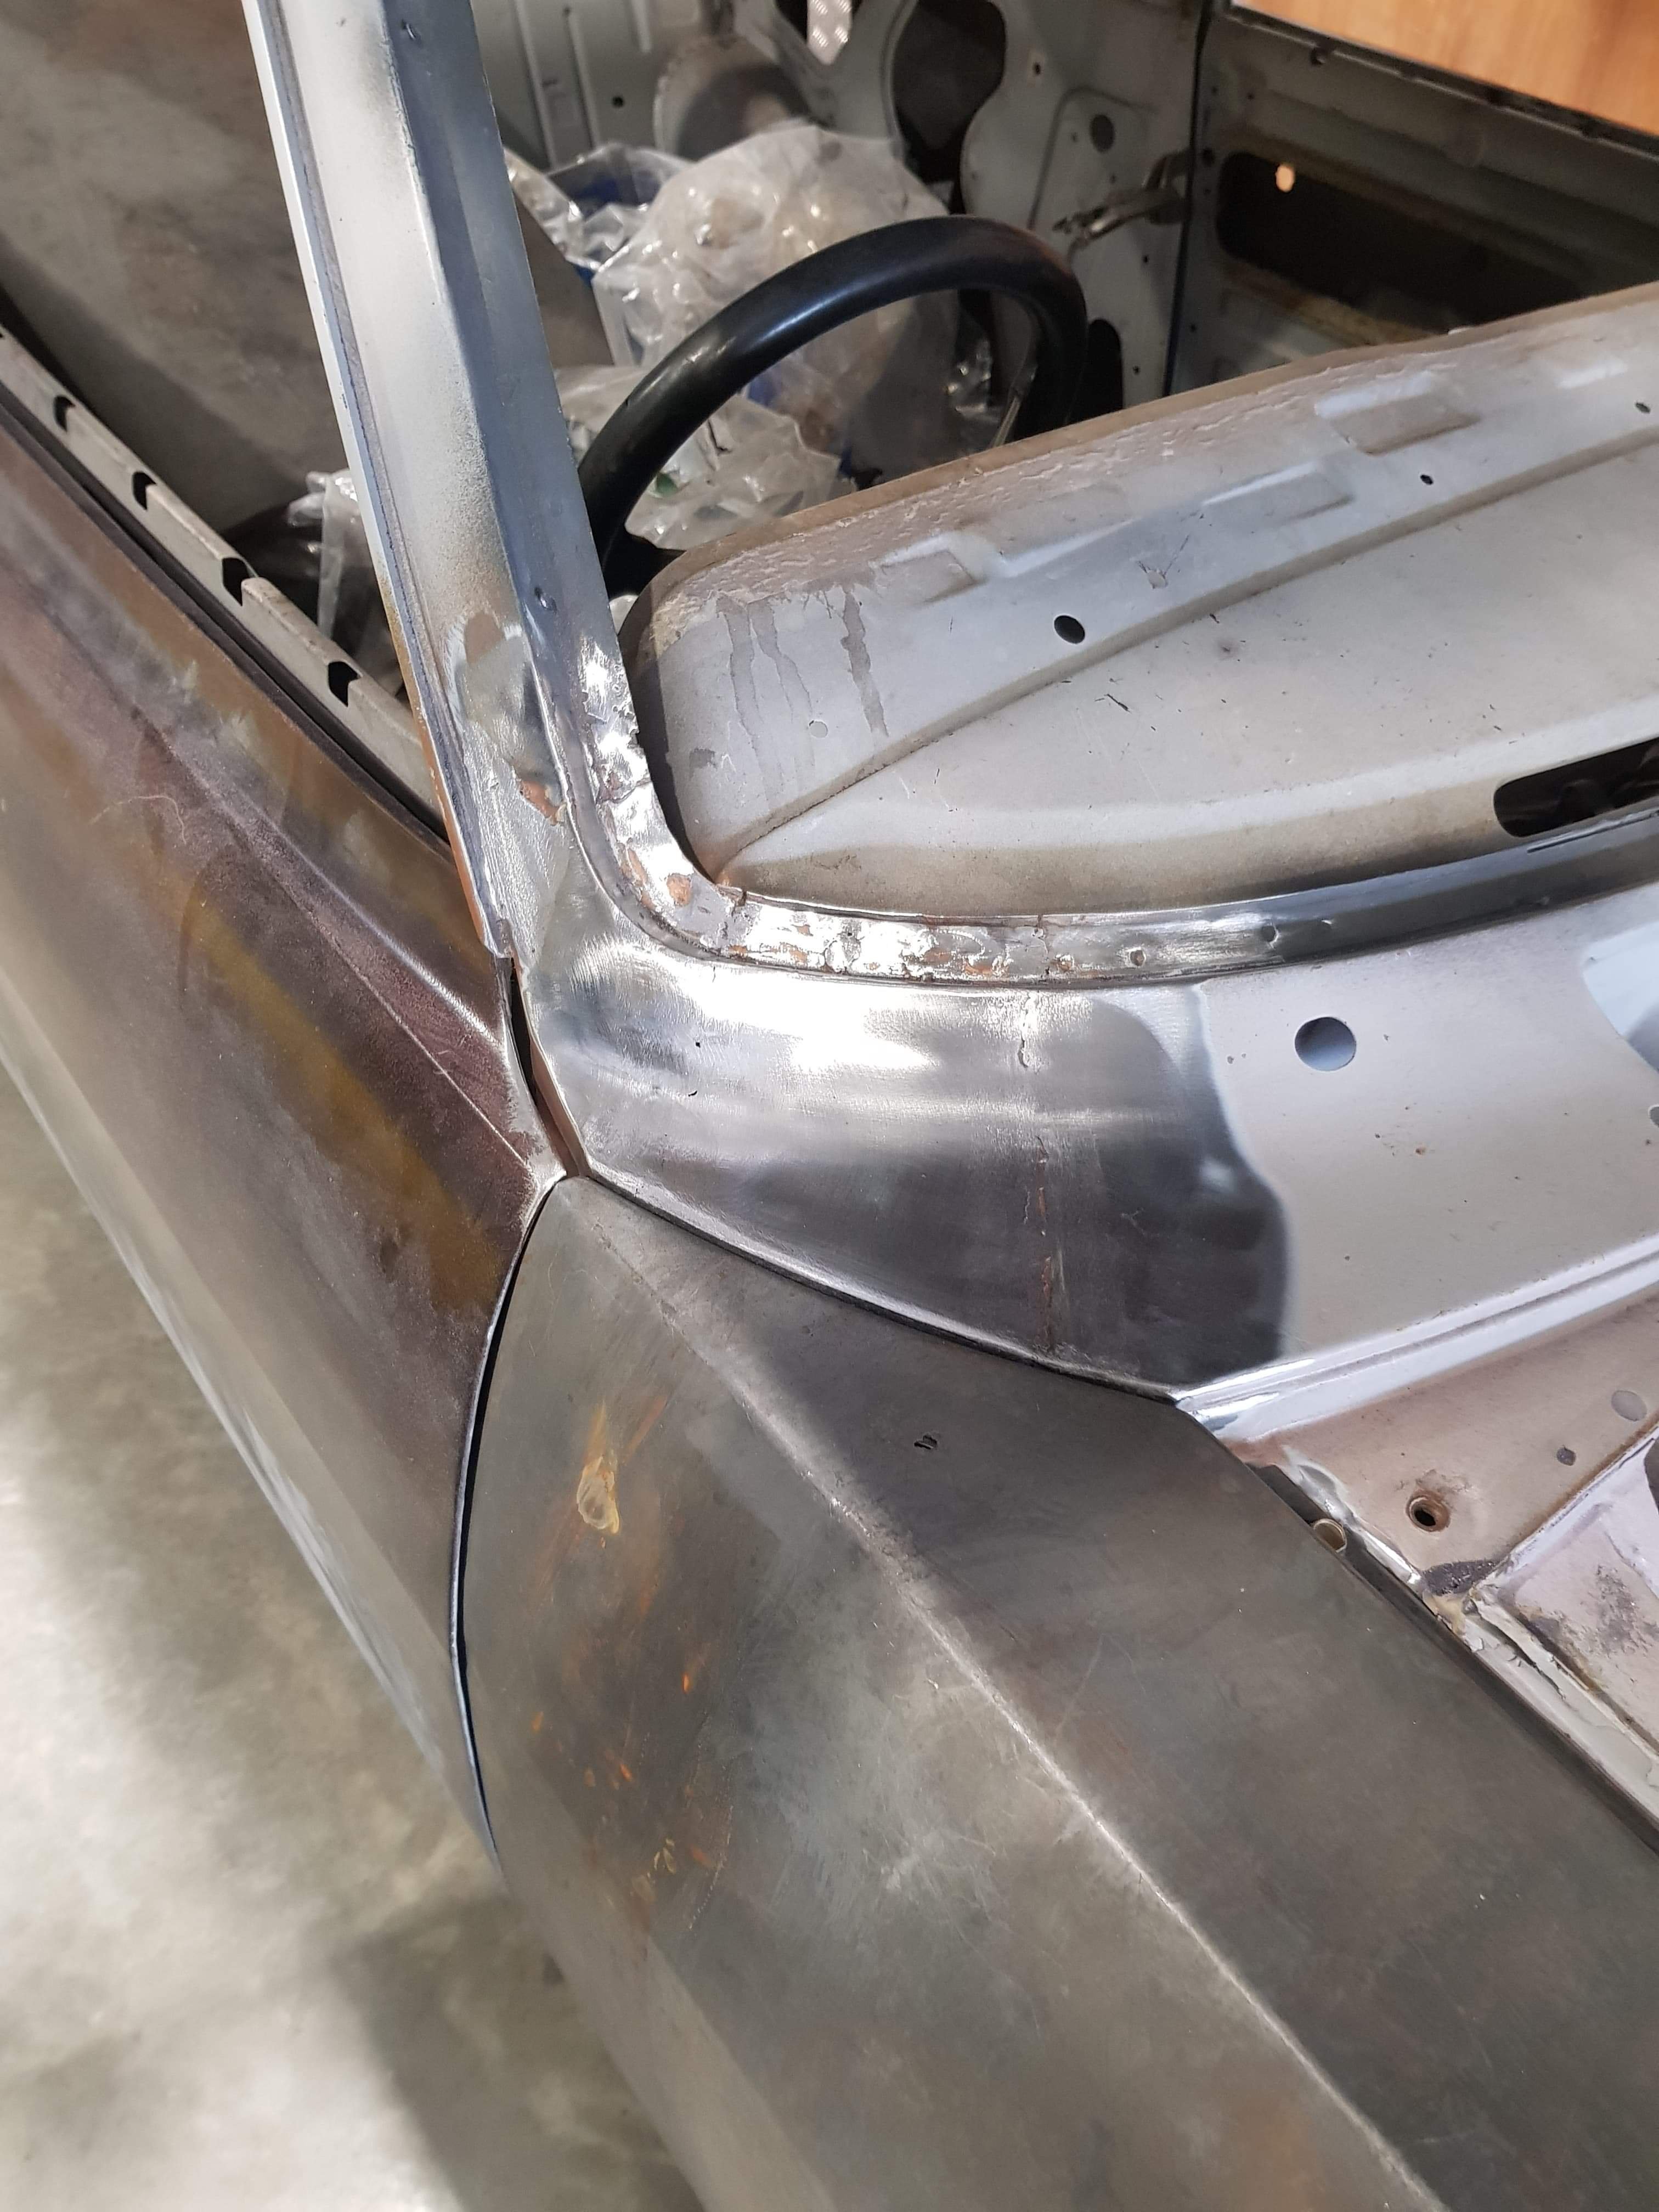
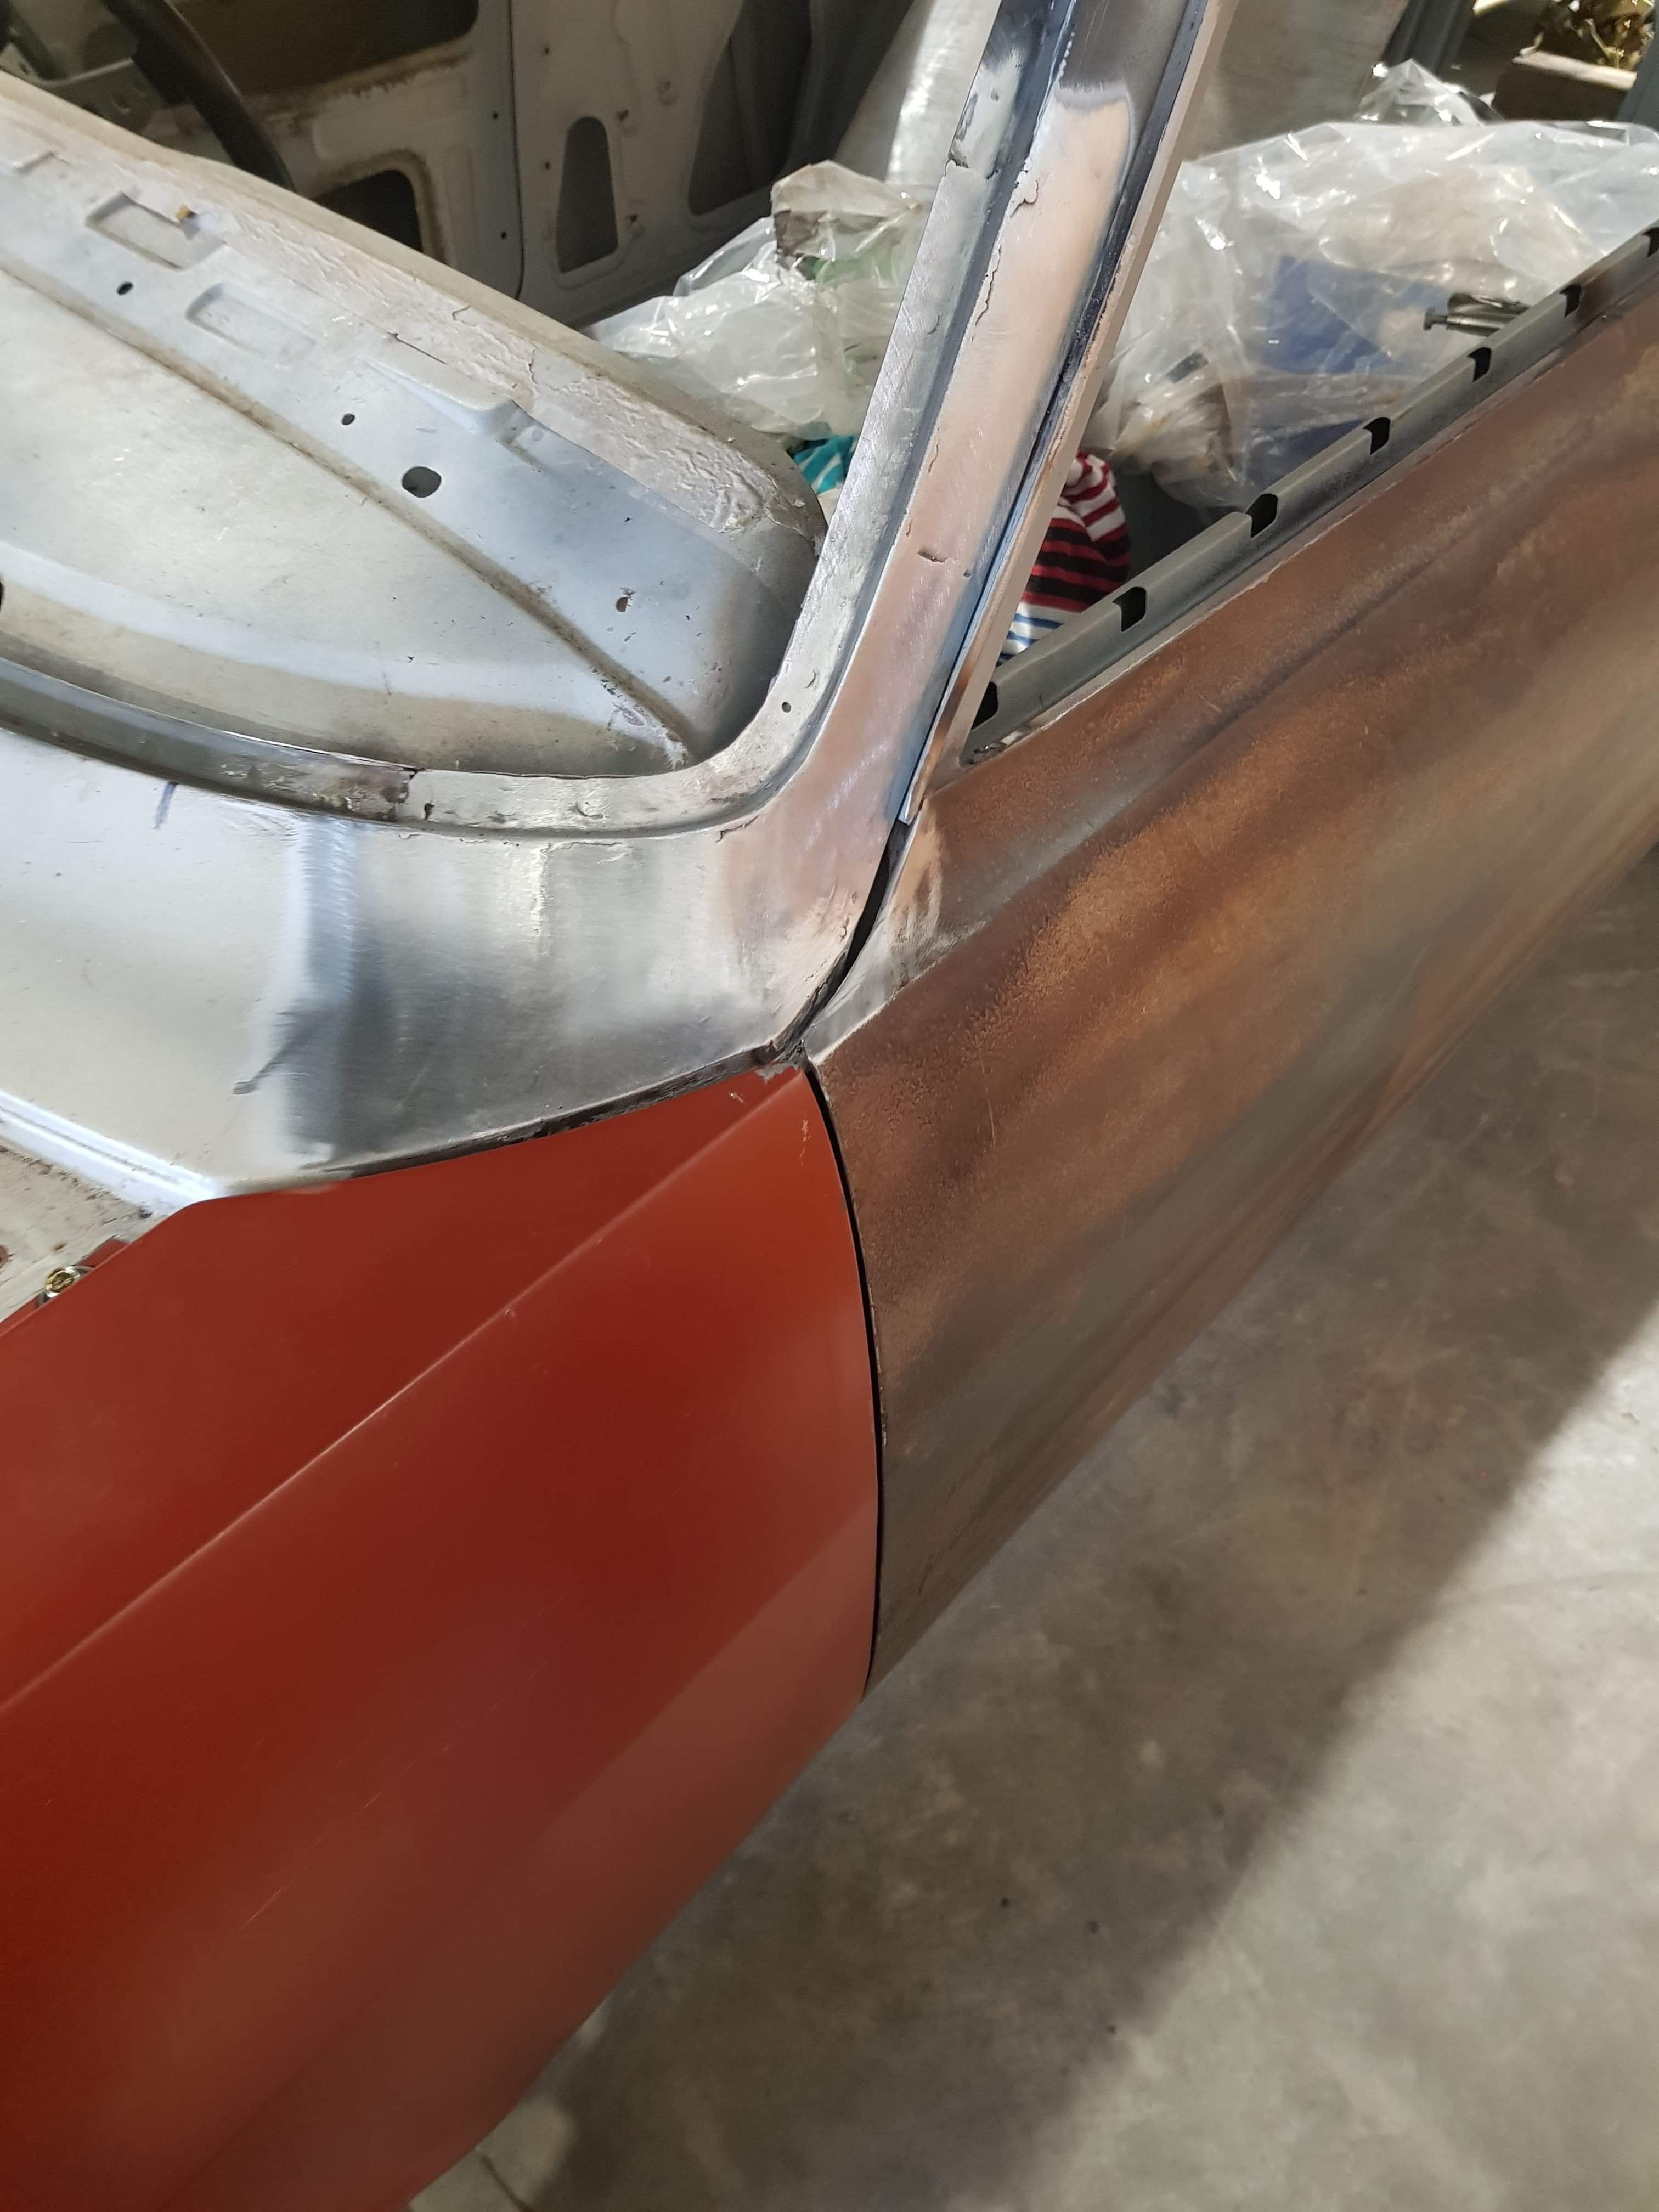
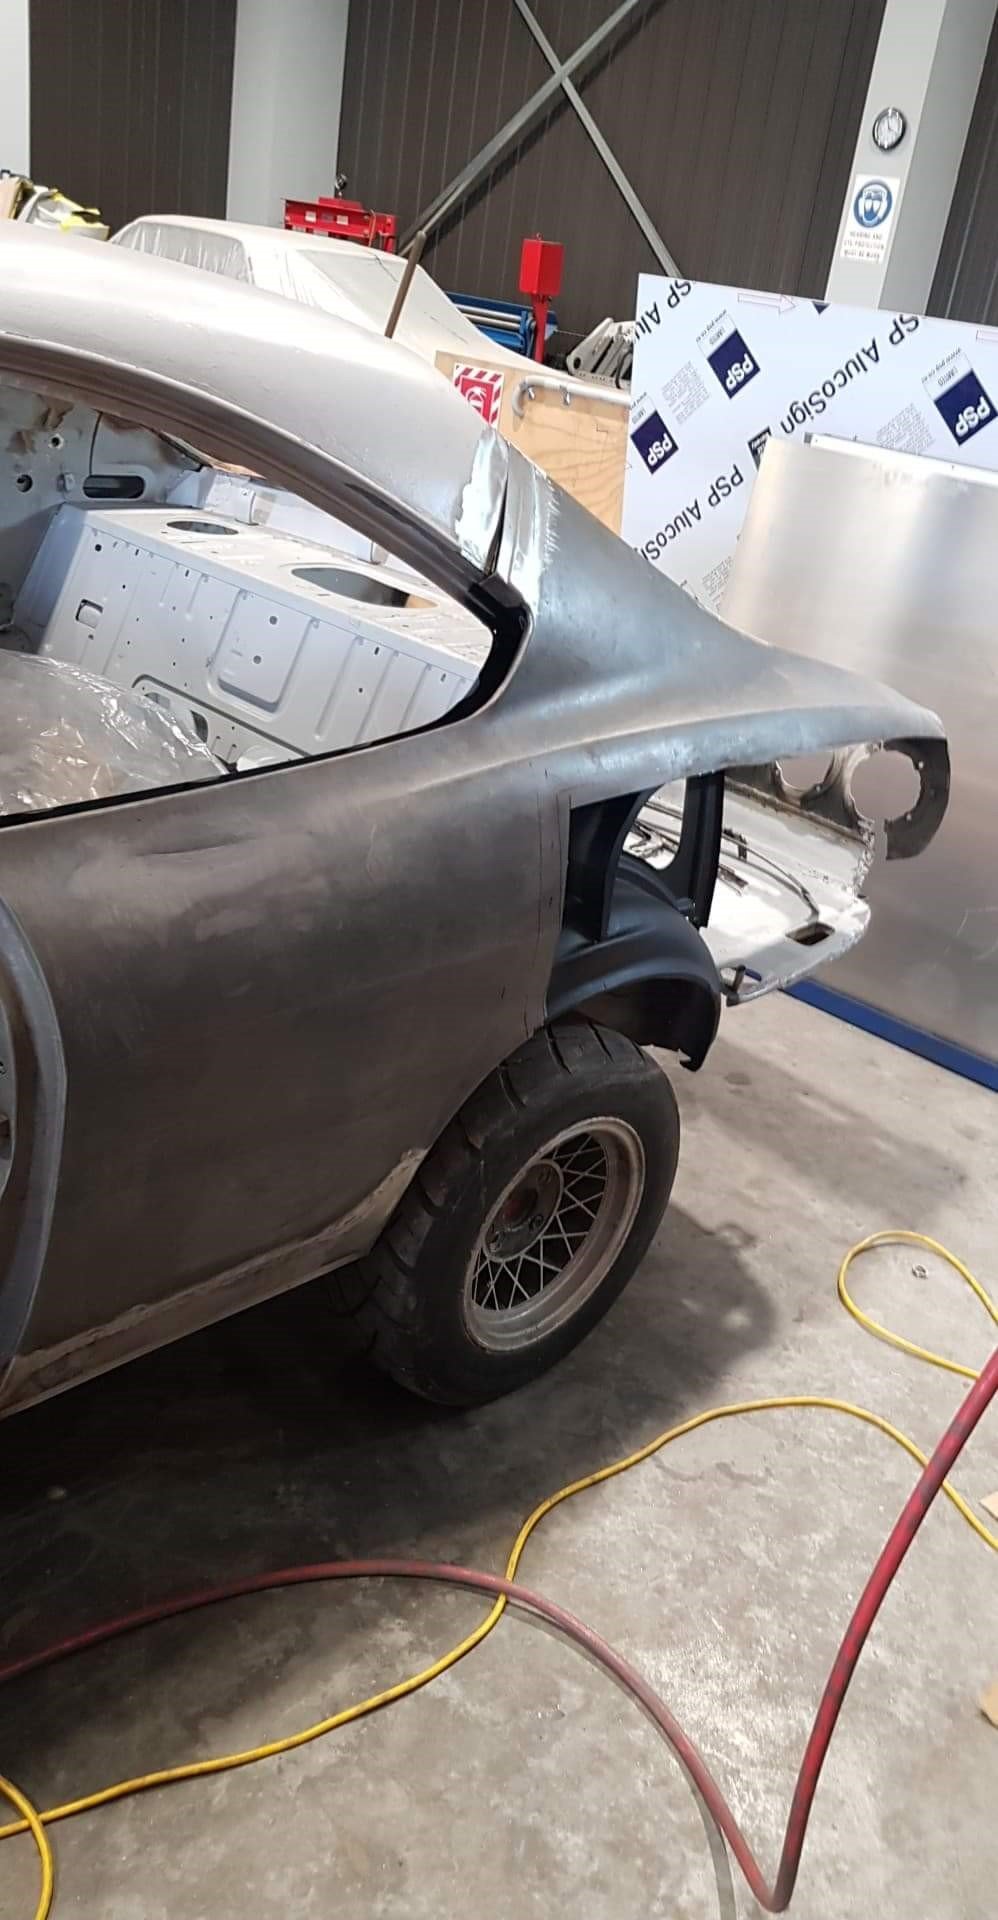
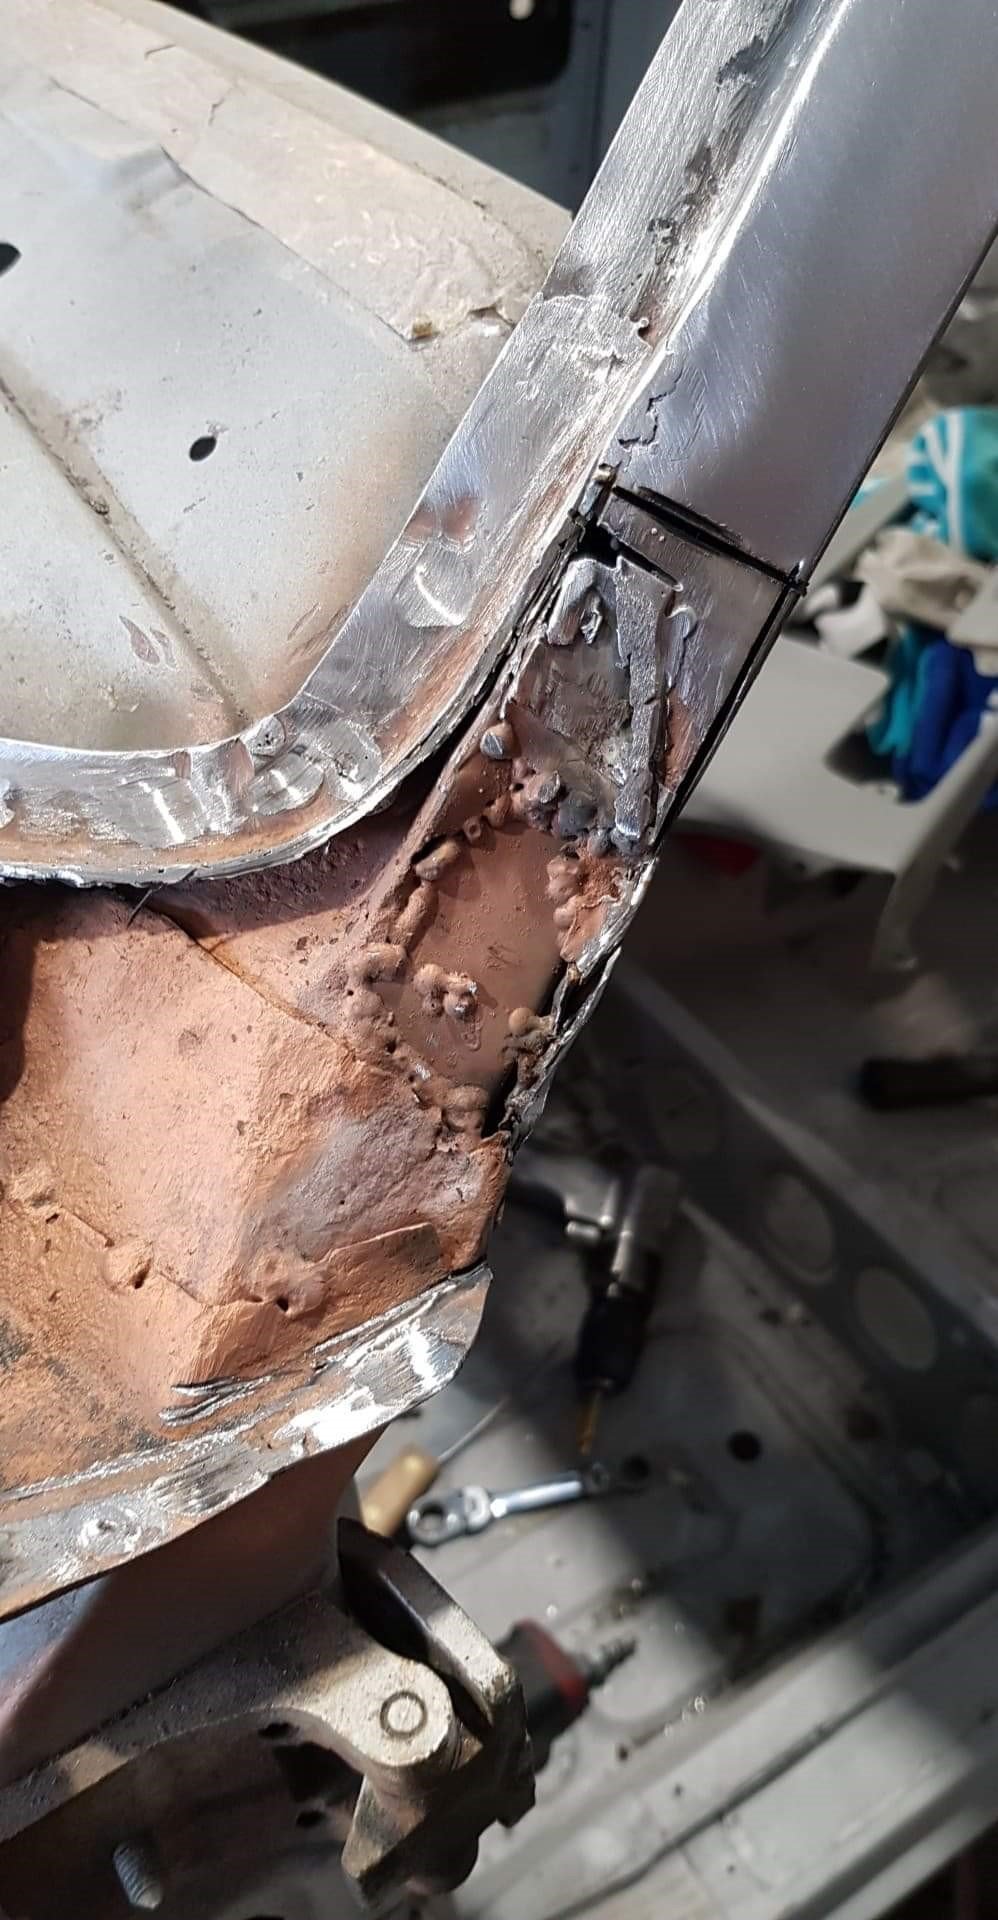
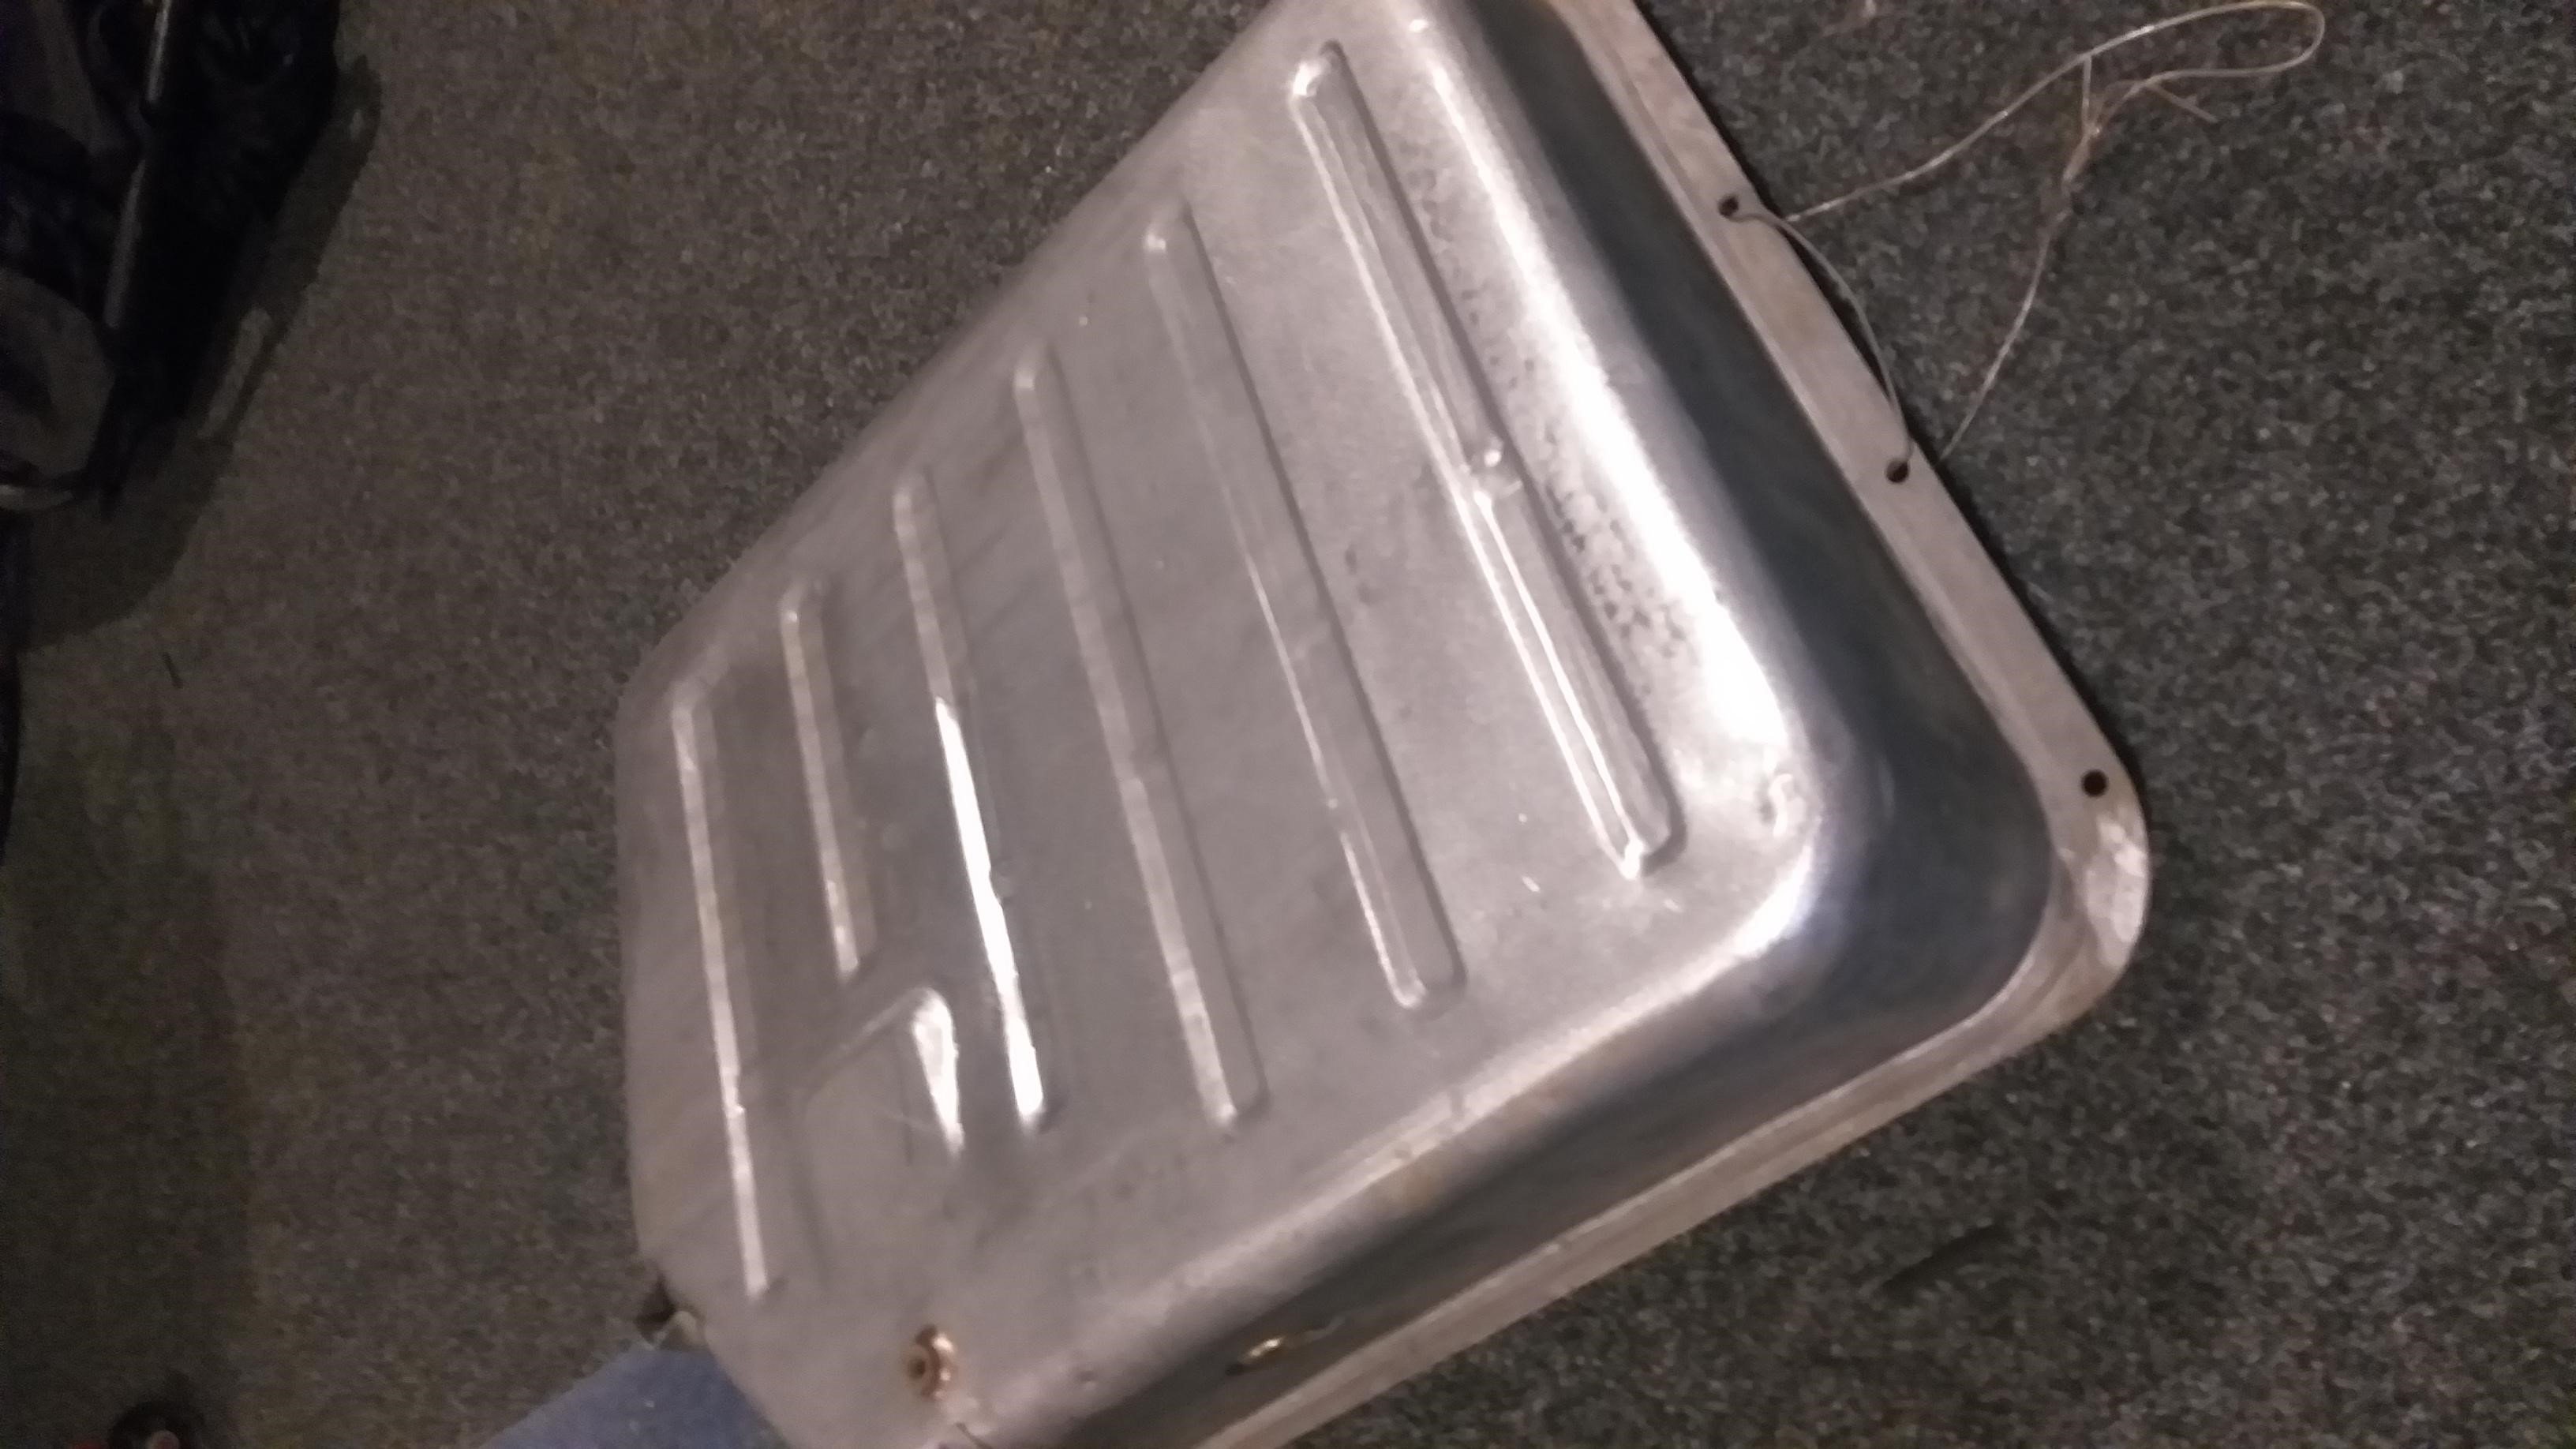
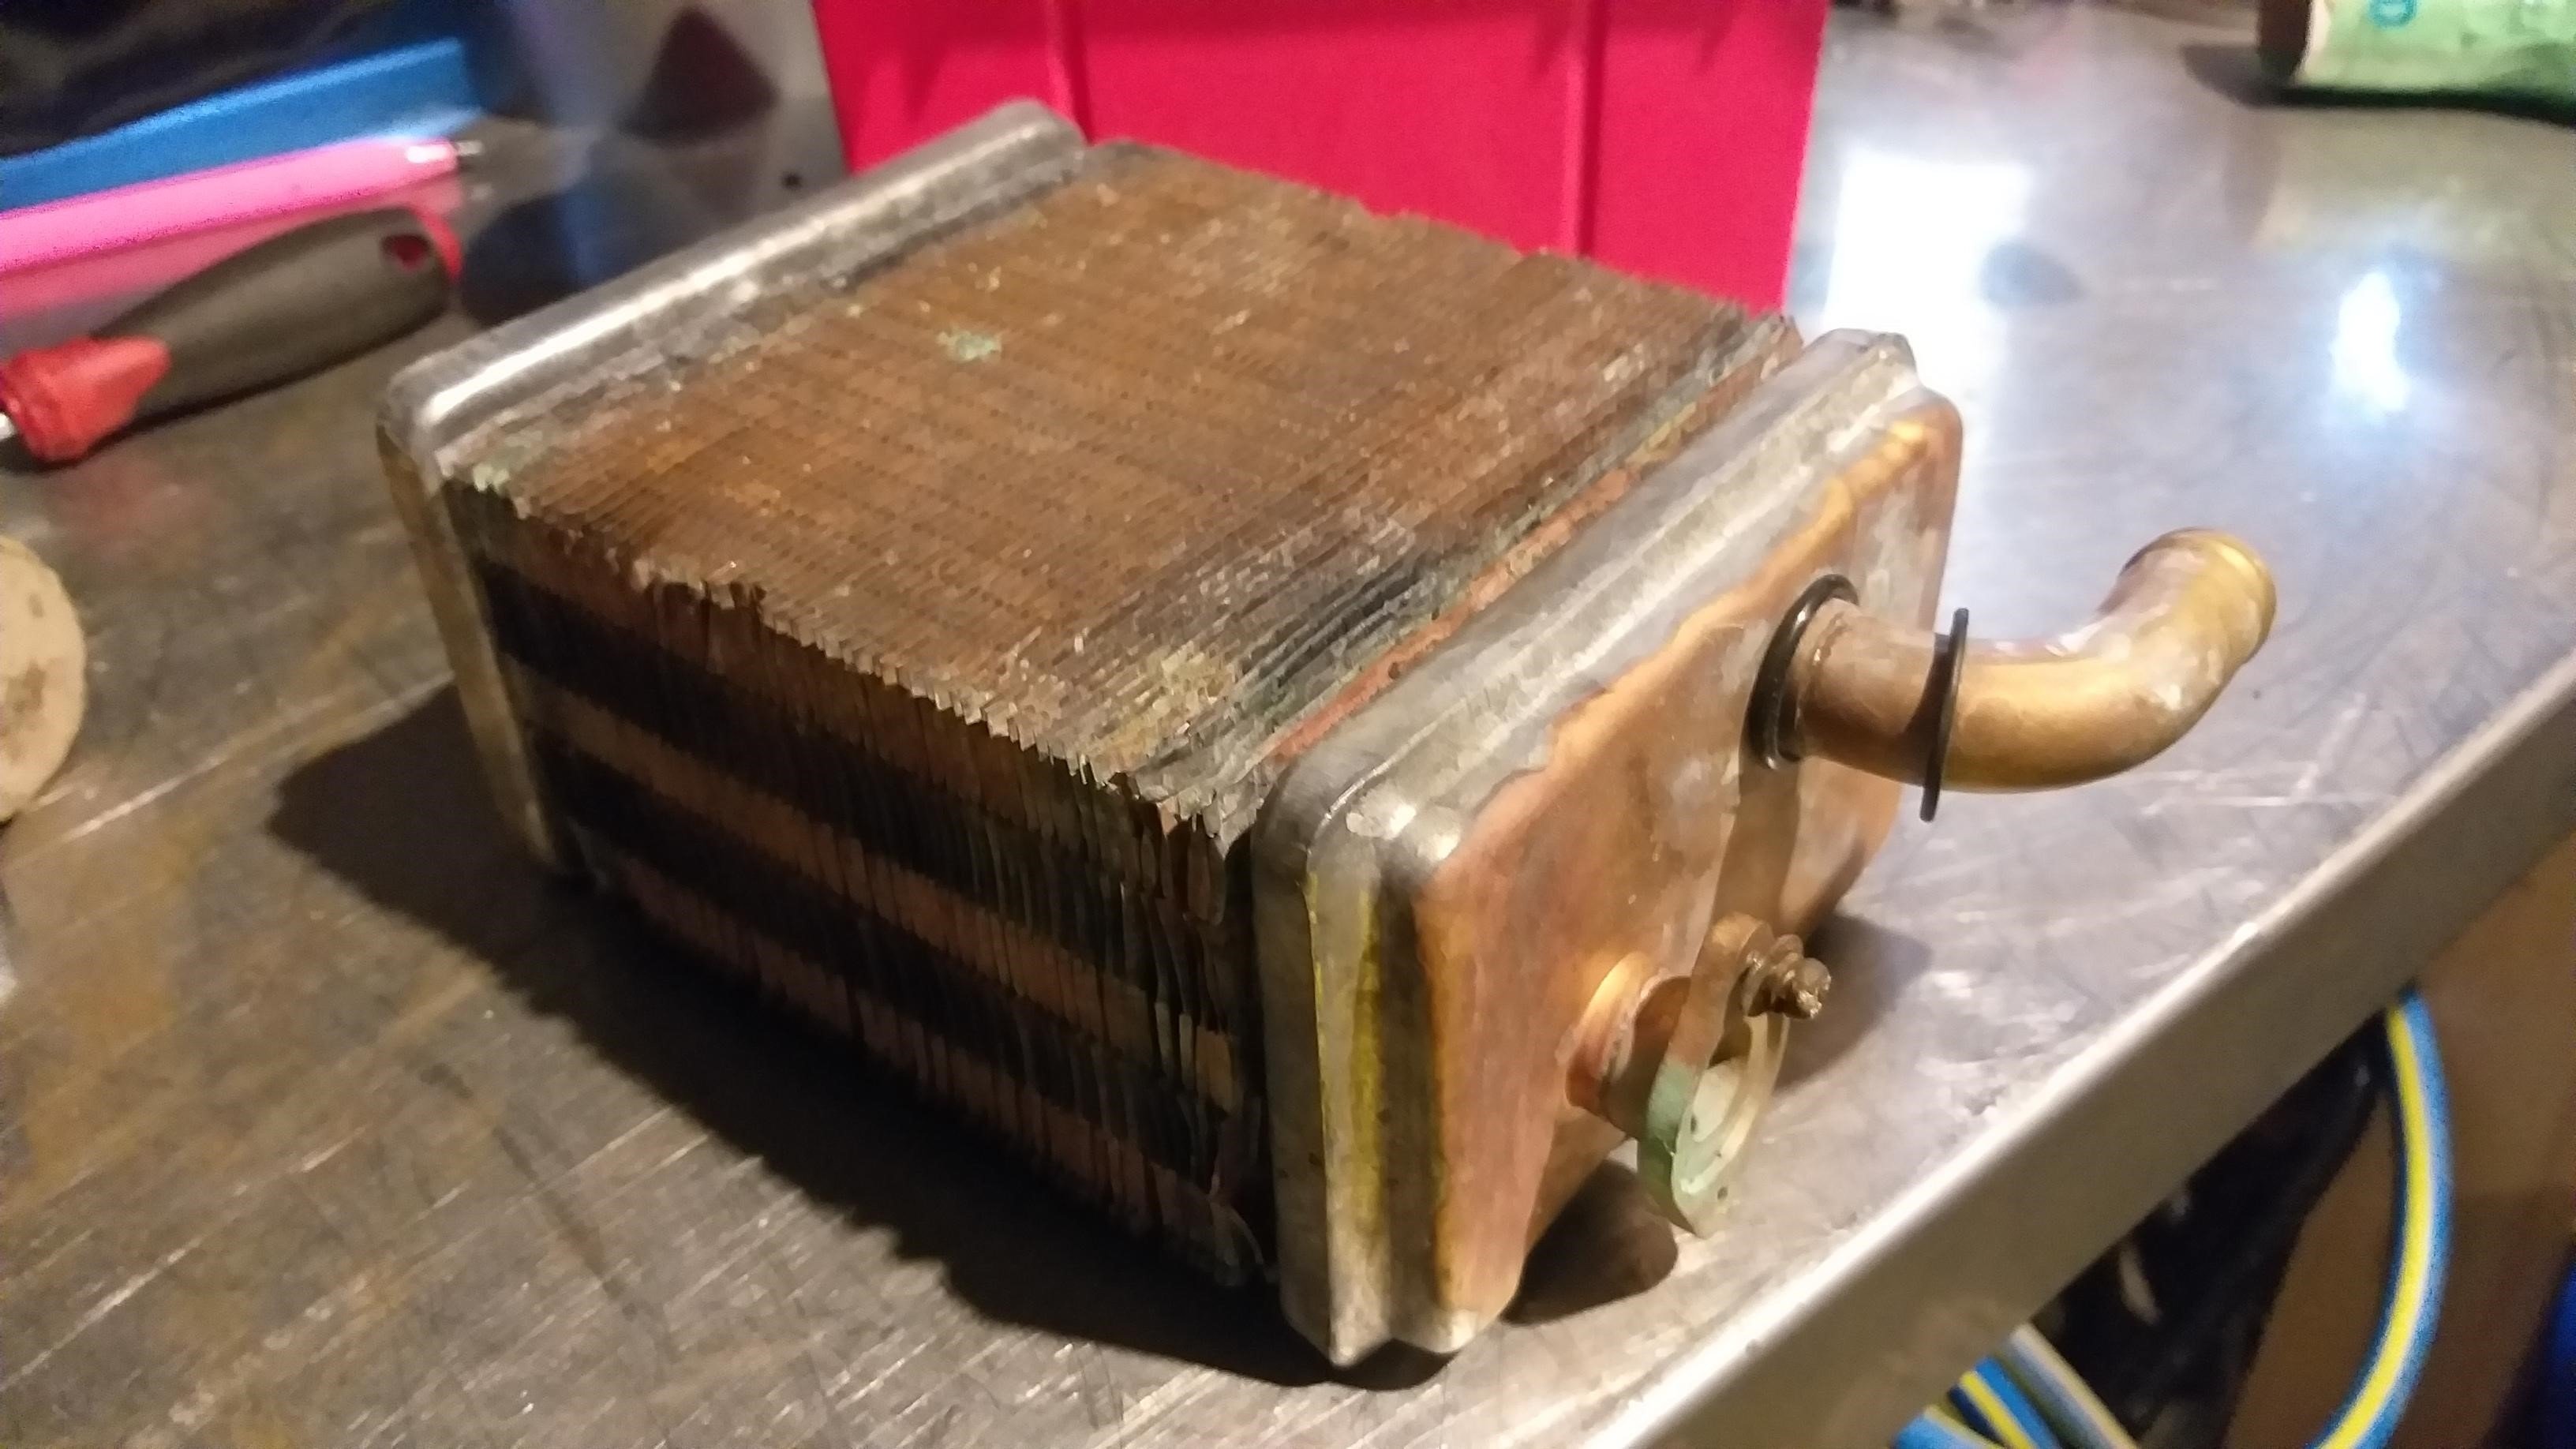
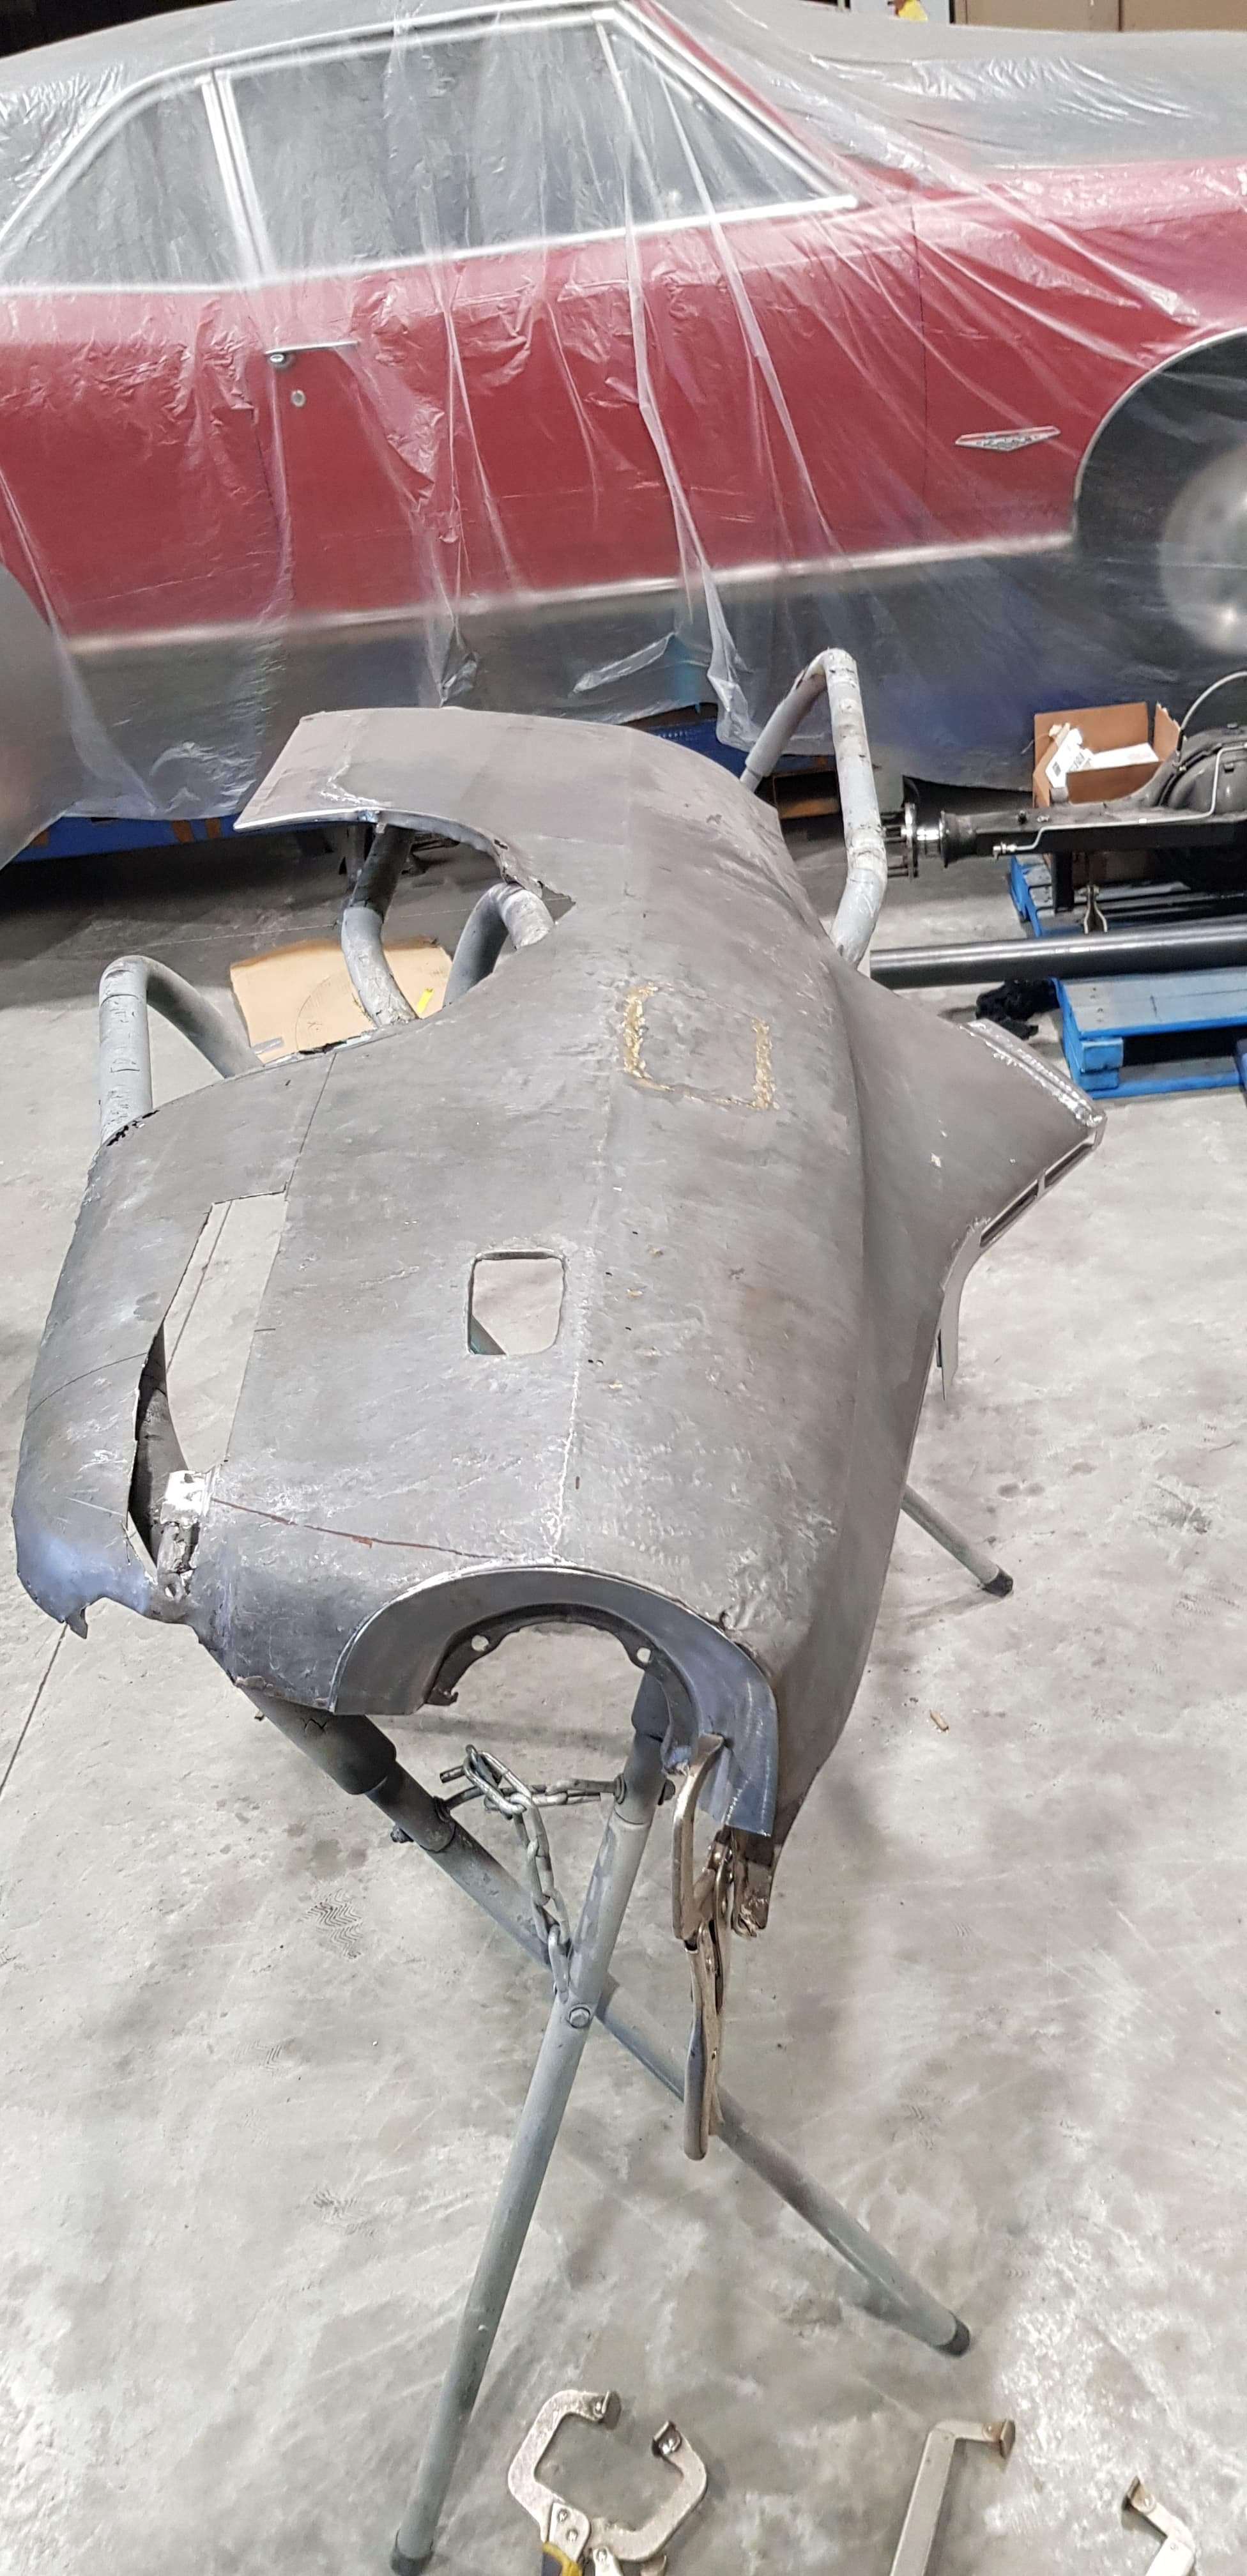
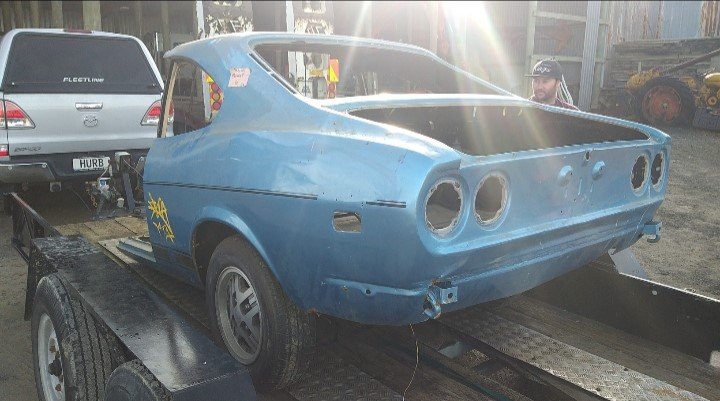
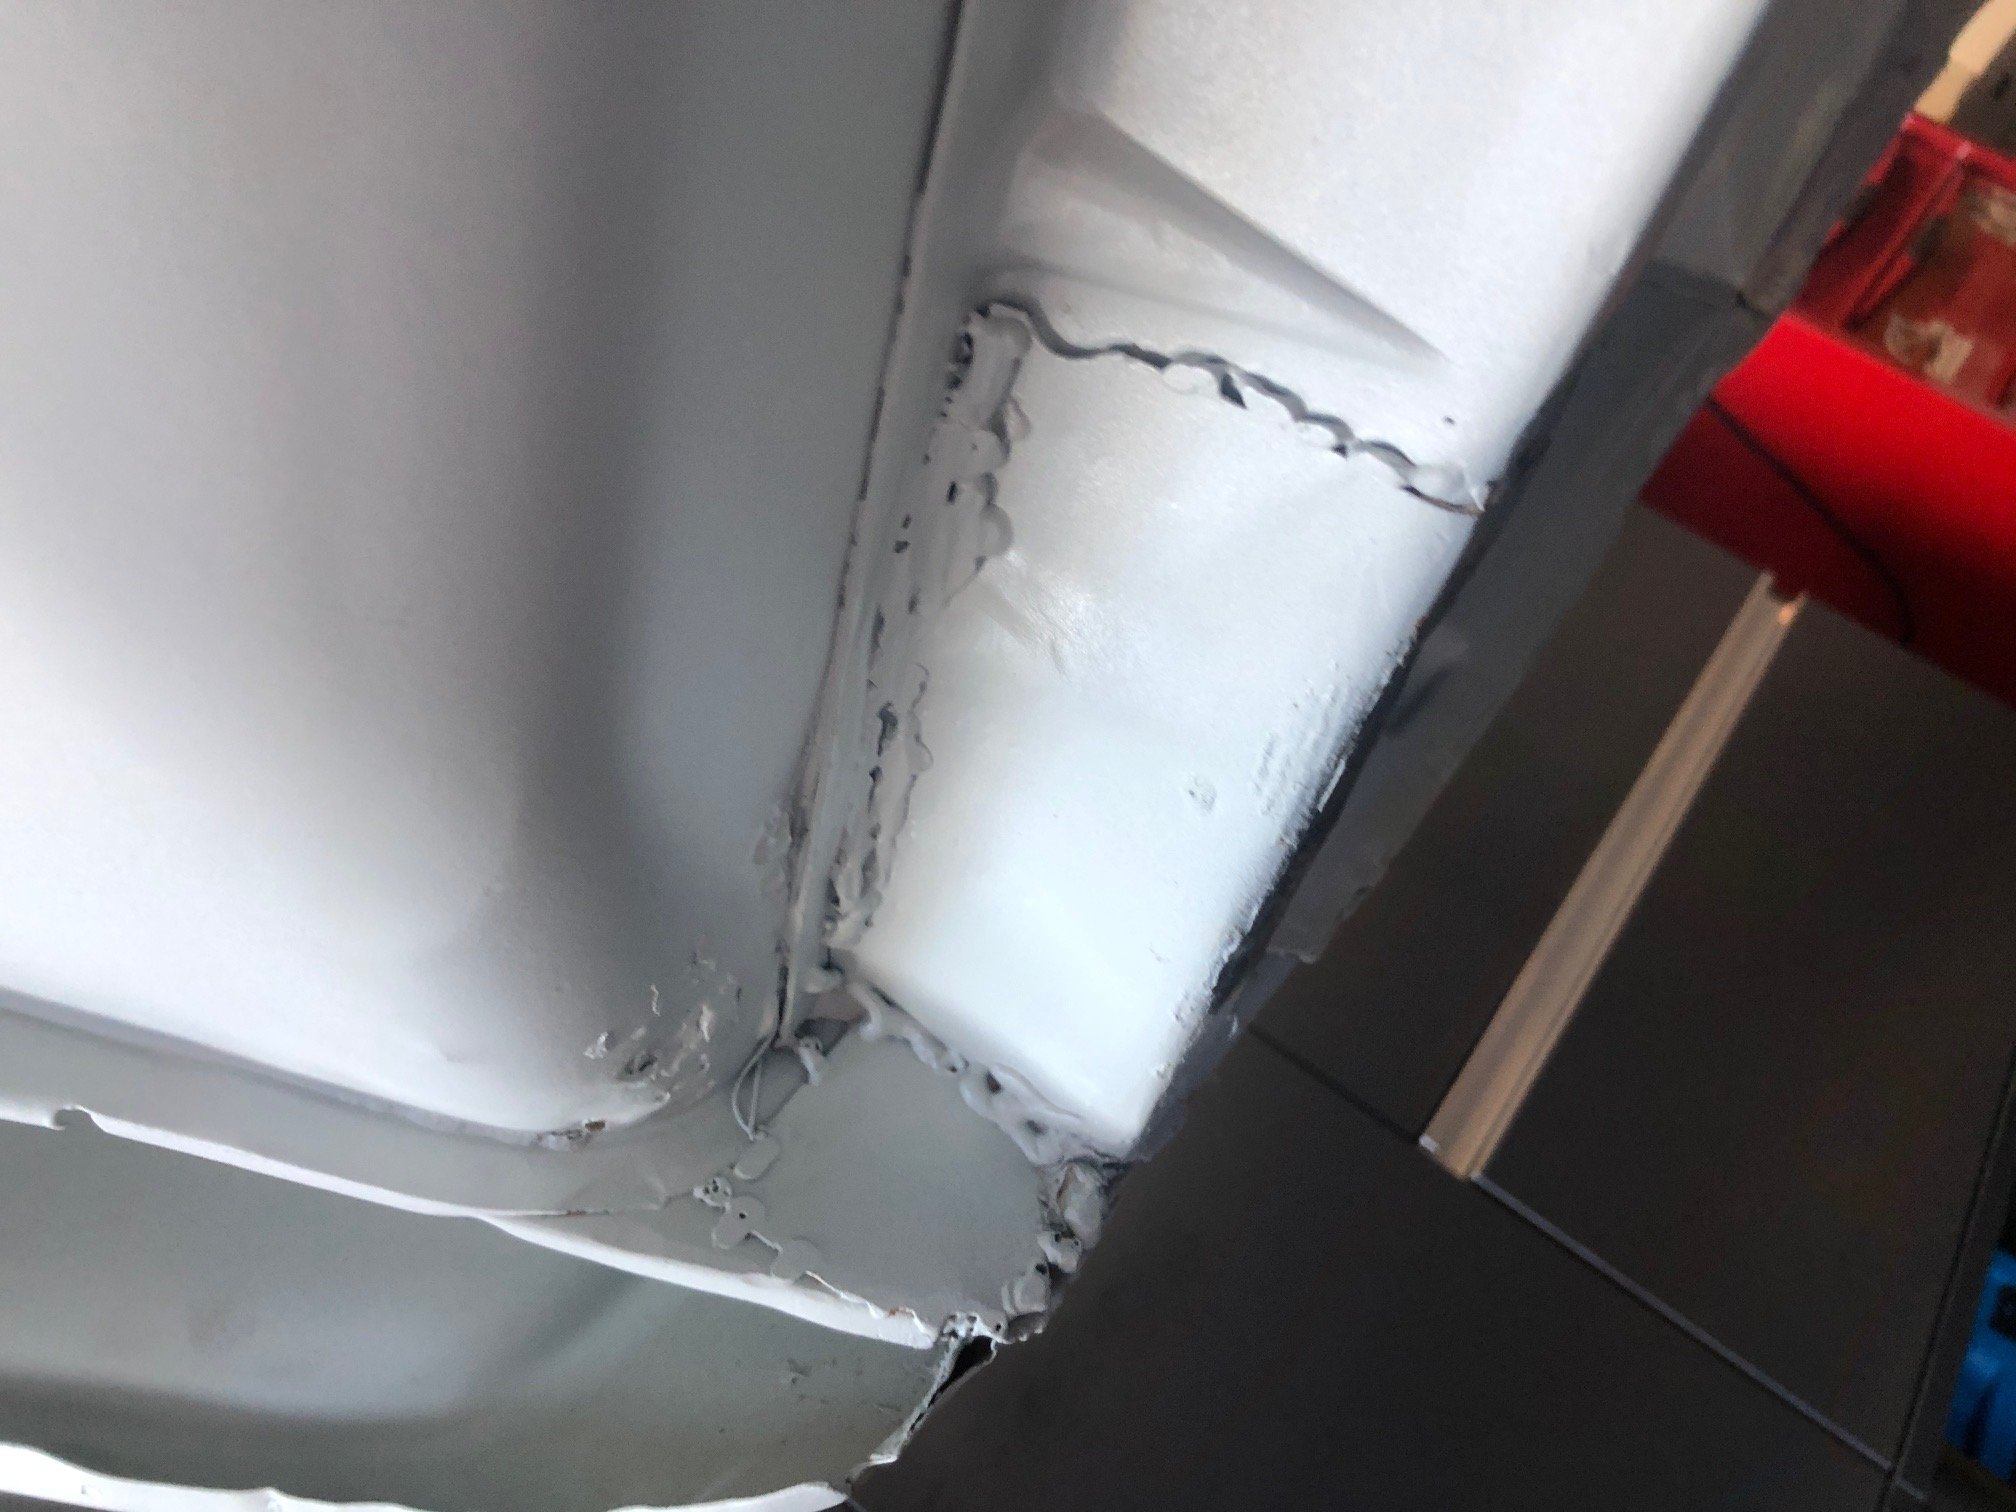
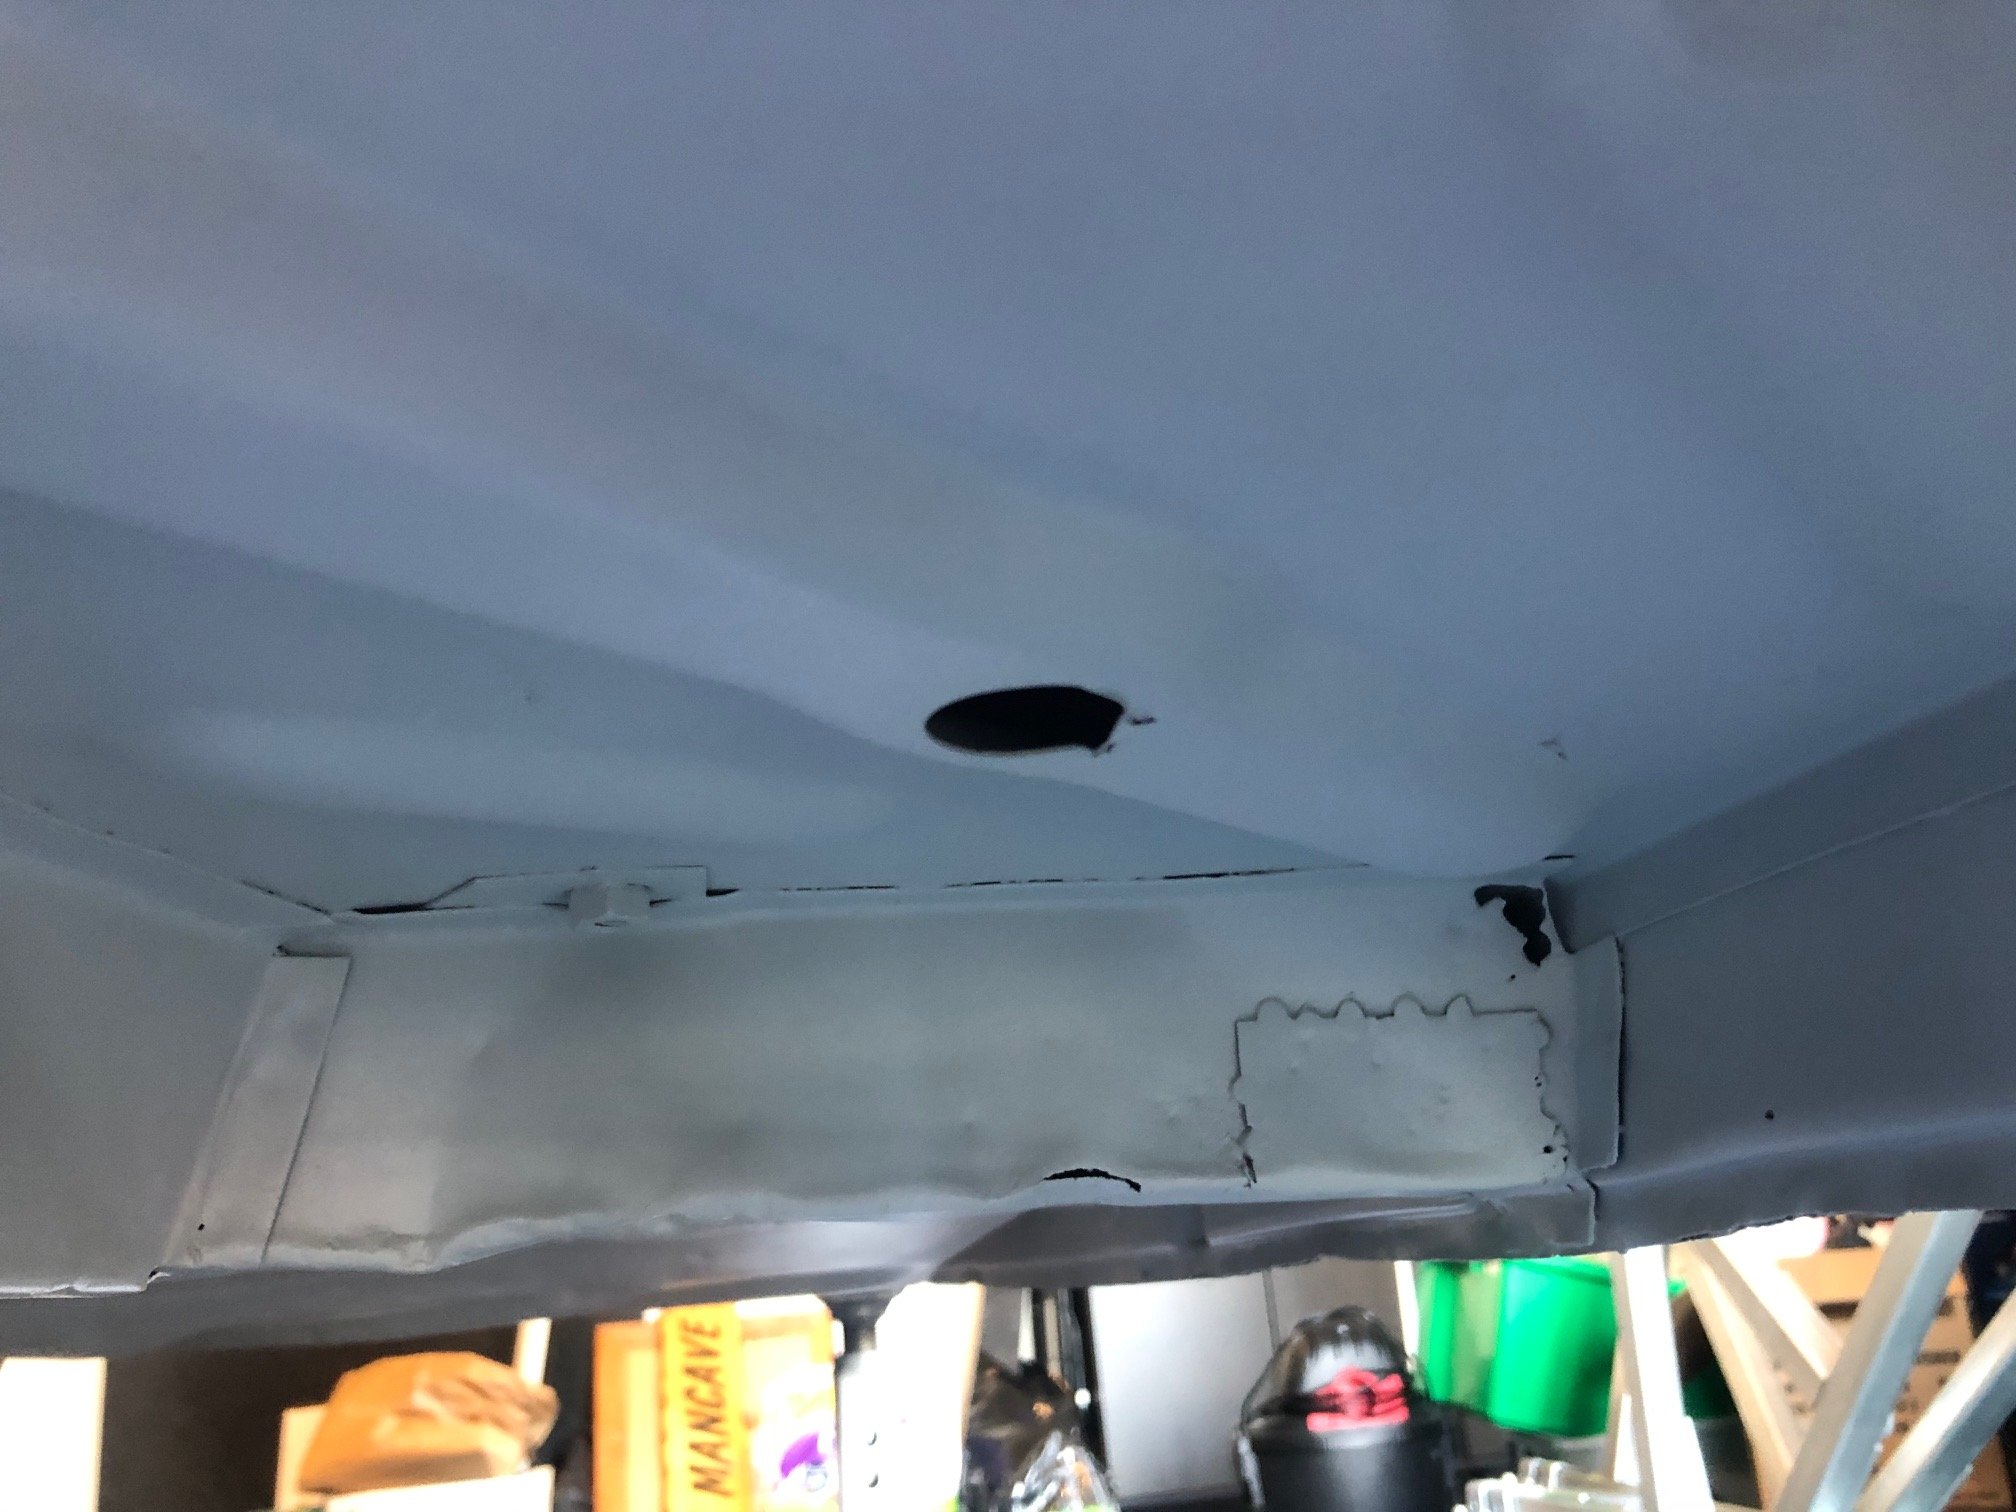
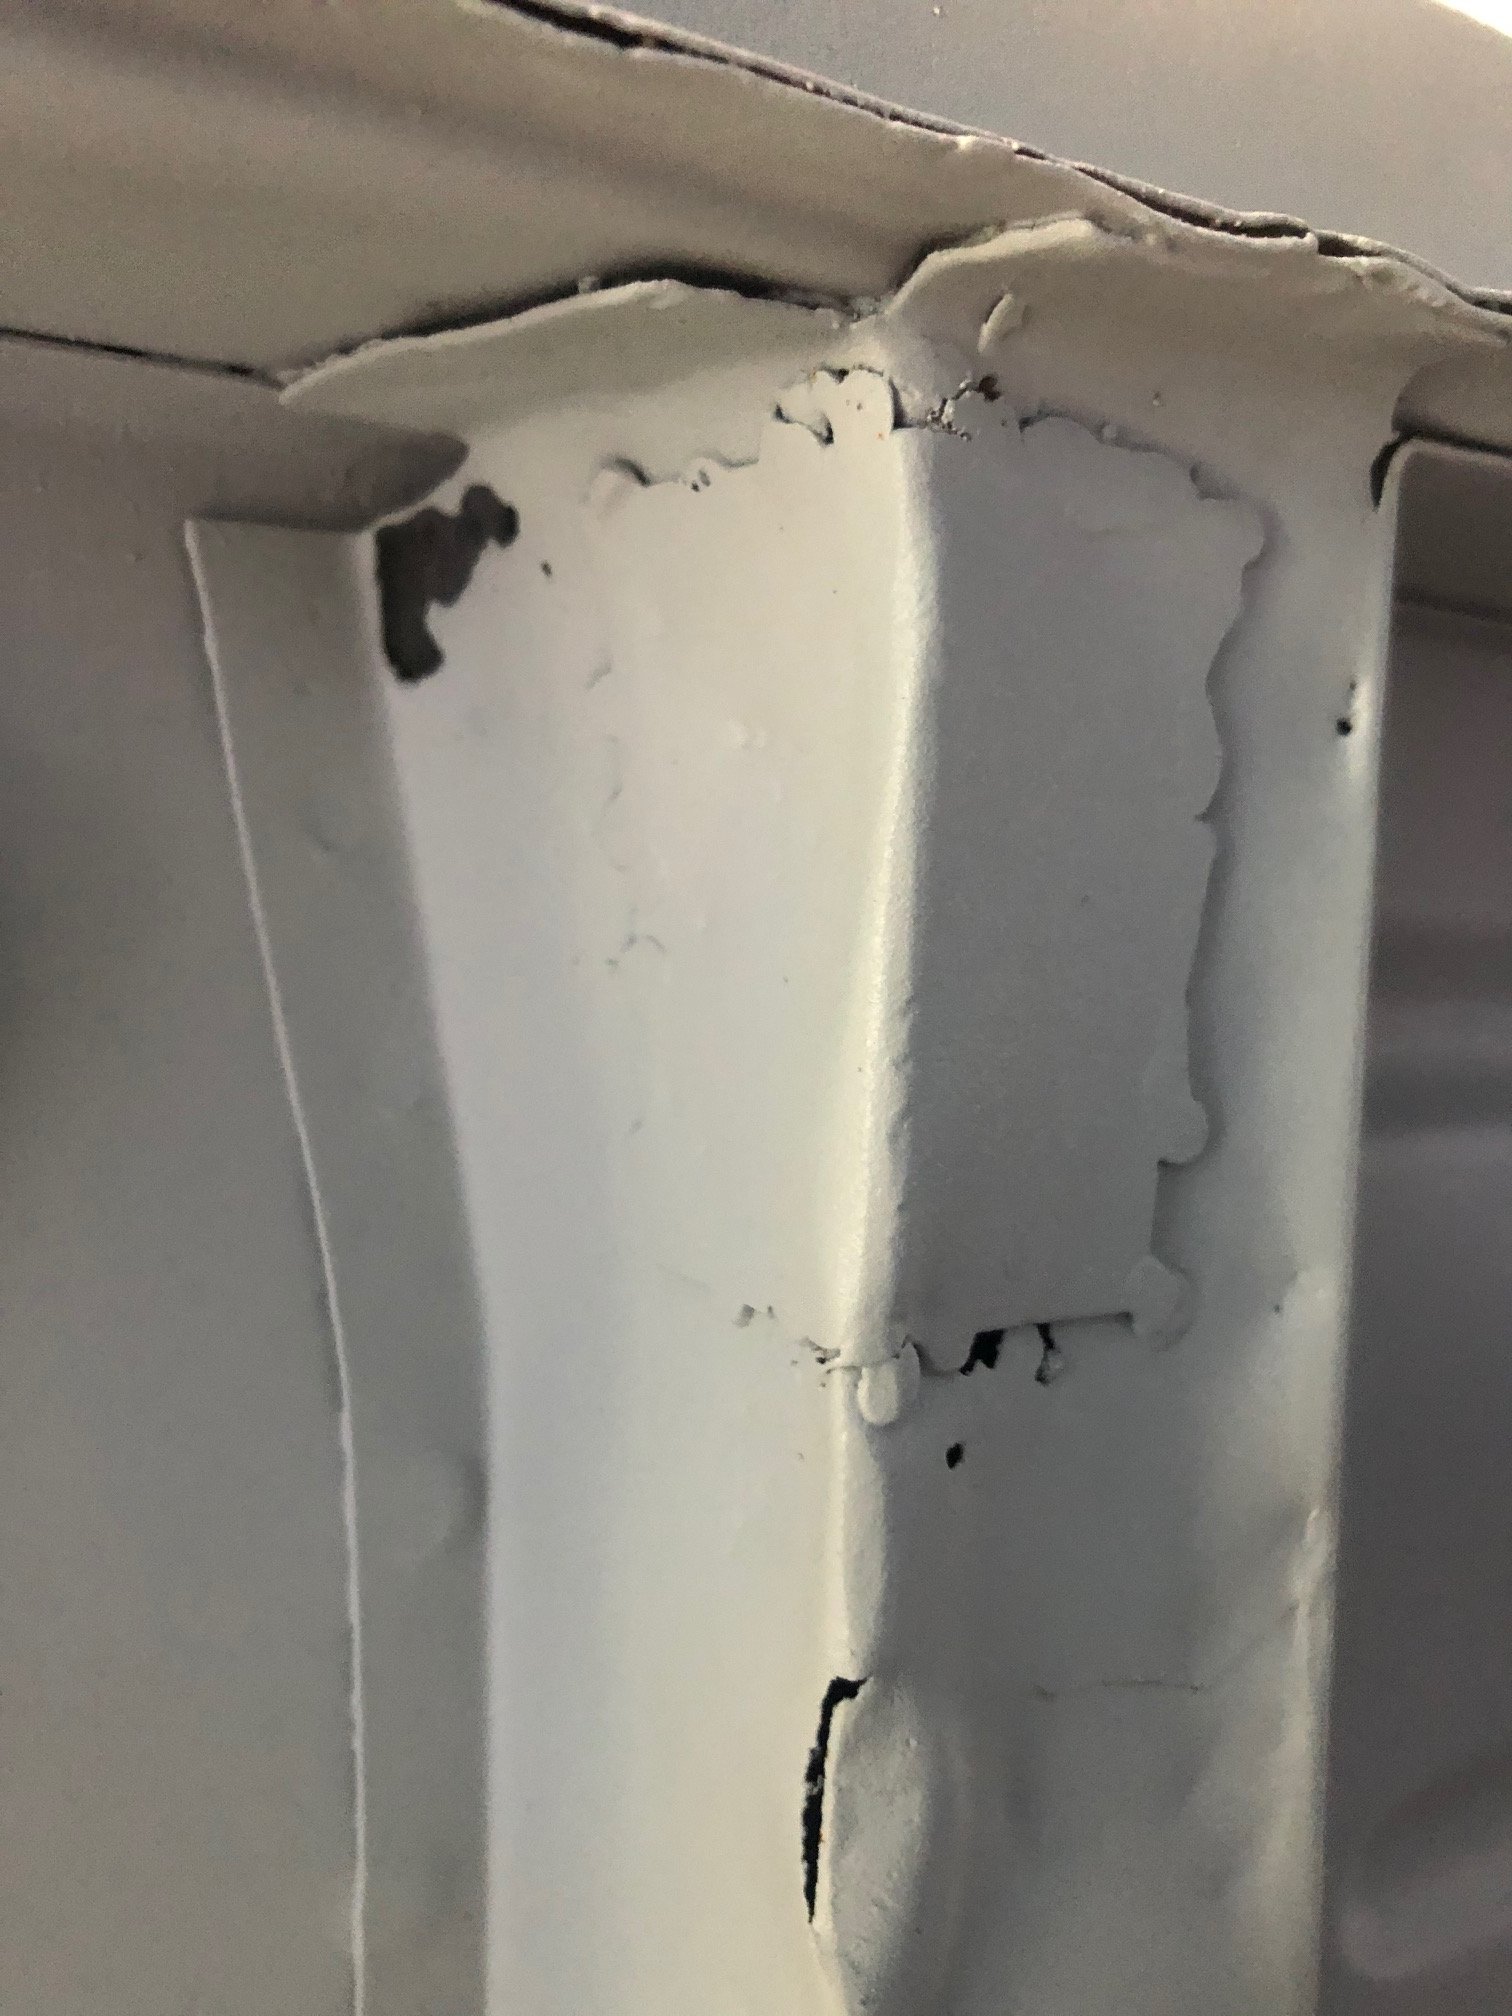
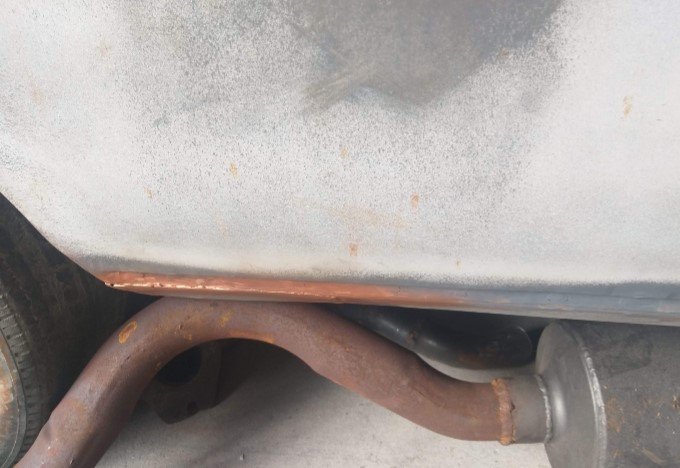
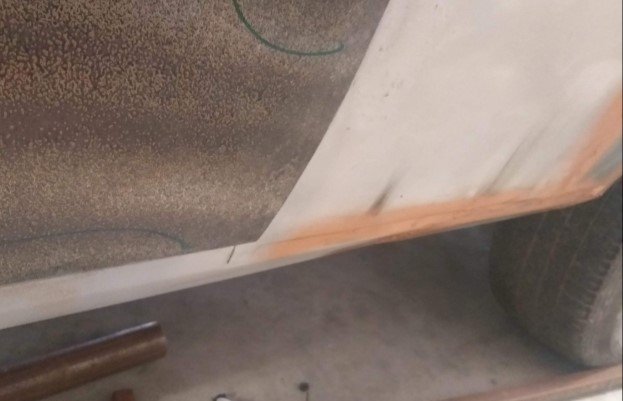
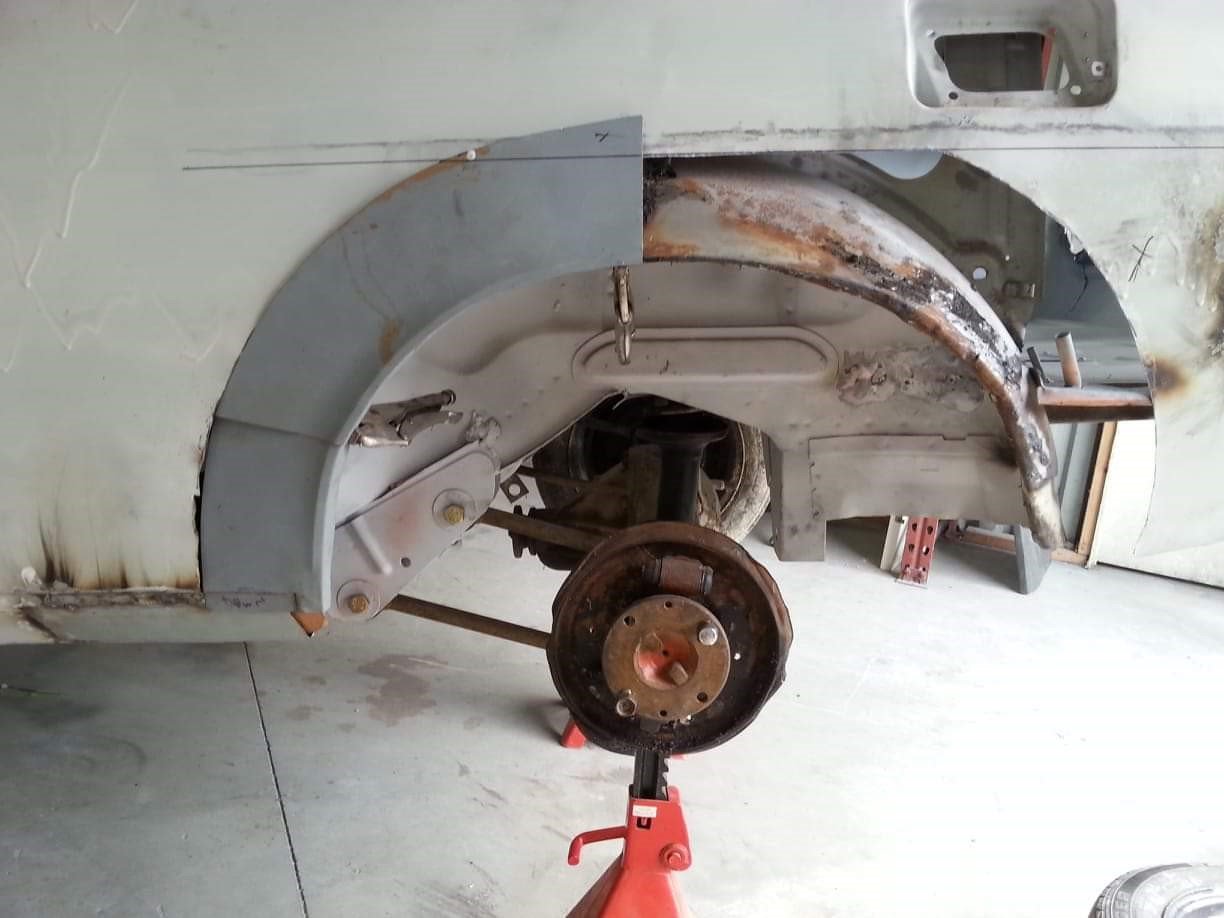
Some big jobs are underway, sills have been repaired. rear 1/4 removed and the fabricated replacement is taking shape. Also another shit attempt by the last panel beater uncovered and had to be rectified on the A pillar/cowl area. Smaller jobs include, Fuel tank has had the dents pulled out. I discovered that while I was looking through my dash parts, (as that will be one of the first areas i will be starting to assemble), I found the heater core was blown out, and leaking. Have had a new core made, and had to locate a NOS heater tap, which I have luckily found but cant be sent to me just yet - lockdown woes.
1 point
-
" Shimano? " you say... Well its not really that exciting. Please don't expect a Heath Robinson like contraption using XTR derailleurs, in the lovely pewter colour that the 965 series came in. Or better yet - some mint deore XT thumbshifters used as tensioners. Oh yes- the bike geek is strong in this one! But I'm jumping ahead again. First off - I needed a way to take drive from the crank while at the same time beef up a problem area. Now have a look at this next photo... See that big splined shaft sticking out. That was the main drive to the original clutch setup that resided in the removed rear casing. It had to go. So I chopped it off. I did have a photo that Hannah took of me chopping it off with a cutting disc (there was no way our bandsaw would have touched it) but I cant find the photo. However- here is a photo of that bit removed and now residing on our shelf of random bits.. Now luckily there is actually a flange on the crank. This was one item I had been trying to check before committing to buy an engine ages ago. I didn't know how think it was though, nor had I confirmed what the size of the six bolts were although I was fairly sure they were 8mm (but really hoping for 10mm). I was not going to be happy taking power off the crank, albeit its only 100 bhp propelling a little Imp and so I had a little think about it. I needed three things here. 1: a decent flange with 10mm bolts for the flywheel 2: a surface to run a main crank seal against because my engine design was going to have a sealed up oil bath for the oil pump drive 3: a larger flange to put a sprocket on. The design I came up with was an adaptor hub to bolt onto the existing flange using the six m8 bolts. But instead of just relying on the bolts to hold it I would machine it to a shrink fit and really make sure it wasn't going to move. Probably a bit overkill but why not. So I machined up this out of a rather large lump of steel (so filling my steel bin with a lot of swarf) It has two axial surfaces to shrink onto the crank- the flange outer and the stub I left over from the original splined sticky outy bit and clamped in place while it cools with nice new stront cap screws. Here I am tapping the threads for the flywheel hub.. Here's a small benchtop oven making things grow in size with heat and in the back ground is a crank just having recieved its new hub... In place and cooling down. Would be a bugger to remove now.. You can see the larger flange to which a sprocket will attach to. Now I needed to sort out a nice flat, removable surface to mount a potential idler sprocket and tensioners on plus an square surface to mount the oil pump driveshaft support on. I cut a piece of 6mm alloy plate in the faithful ( and noisy) tablesaw. I had several useful threaded bolt holes left over from a variety of the original transmission bearing holders, shafts gubbins and shifter wotsits. I machined up a little pointy bit of steel with an offset slot. Then I was able to screw it into a hole leaving the pointy end just proud. With my plate lined up where I needed it I gave the plate a smack with a hammer just over the pointy thing below, thus leaving an indent I could drill through. Repeat for the others and I had perfectly lined up holes... Cool. I could now support the oil pump shaft. I machined the end of it and tapped a new hole. Then machined up a bearing holder like so... Next little thing was to join the cranks rotating motion to the oil pump and make that rotate.... Hmmmm. I had to really think about this one. There was not a lot of room for industrial chains and sprockets. I thought about using a toothed belt that can run in oil like some of the later cars. But apart from the prices (!) they are not available in many sizes and are apparently prone to throwing their toys from the cot. I couldn't run a dry belt due to the bottom half of this area being part of my new allocated sump capacity, not to mention sealing it would be very tricky. So really- chains and sprockets were the best choice. Why 'chains' and sprockets? Not just one chain?... Because I wanted to drive the Honda pump at or as close to the original speed- which is slightly under driven. This way I would be sure that the pressure and volume would be about right. No ifs or buts. I didn't mind going slightly faster because the stock goldwing has a low oil pressure at an idle of 11 psi at 800-900 rpm. I'd be happier if that was a bit higher. With this in mind I had already worked out roughly what gearing I would need to be in a certain range. I had worked out the original gear ratios and then used a gear calculator to play around with ideas... But what chain and sprockets to use? I enquired with so many places and had done loads of internet searches but the answer came to me when I lifted one of my bikes down from the wall before going for a ride. Of course! Bike chain, chain rings and sprockets! At first I worried about the strength and durability but thought about the abuse my chains go through, especially on my singlespeed MTB. I have only broken one chain and it was after it had been jammed. Over about 15 years of being a bike mechanic in several different shops almost all chain failures I had seen were due to something else cause them- unless they were a cheap unsuitable chain. So I went through my varied collection of chainrings and cassettes (I have many) and selected out the ones with a tooth count that would work and fit. I machined up a spare shimano freehub to take bearings like this... Machined out a Shimano mtb chainring and cobbled together a mock up to see if it might just work... It looked good but I was not happy with the 3/32 width ring and sprockets. Even though they will be in a oil bath there was still not a lot of thickness to the teeth. I was not expecting this engine build to do Lexus levels of mileage but I wanted it to last long enough to do some good hoons for a few years at least. I had enough room to go up to 1/8th width chain but no more. I looked into BMX chainrings but very hard to get the toothcount I needed and sprockets were much the same- plus bloody expensive when going odd sizes. So a mate at a local engineering suppliers priced up some american sprockets that I could grind/machine down. Wow- cheaper then shimano stuff and tough as. I bought a set of four and set to turning them down. Not easy- in fact it took ages as they are induction hardened teeth. But I finally took them down from 5mm to 3.3 and they fitted a spare bmx chain I had perfectly. Much more sturdy... I have now got a very durable bmx/e bike chain that has flat straight outer edges on its plates- this will suit my tensioners. I have a couple of tensioner ideas to try and think I have nailed how to make them easy to fit and effective. Remember- I want all of this lots to be super easy to unbolt and swap out. Its all a totally unknown design with regards to longevity so it needs to be easily serviceable. More soon ...... Alex1 point
-
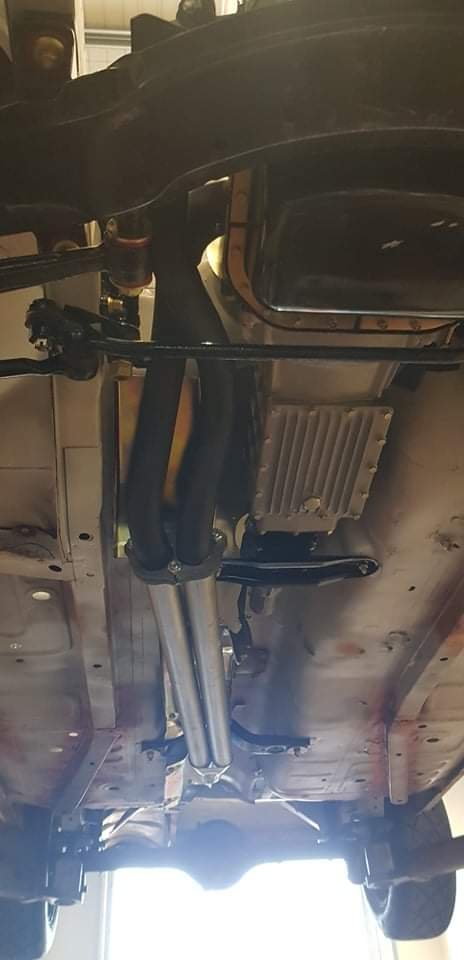
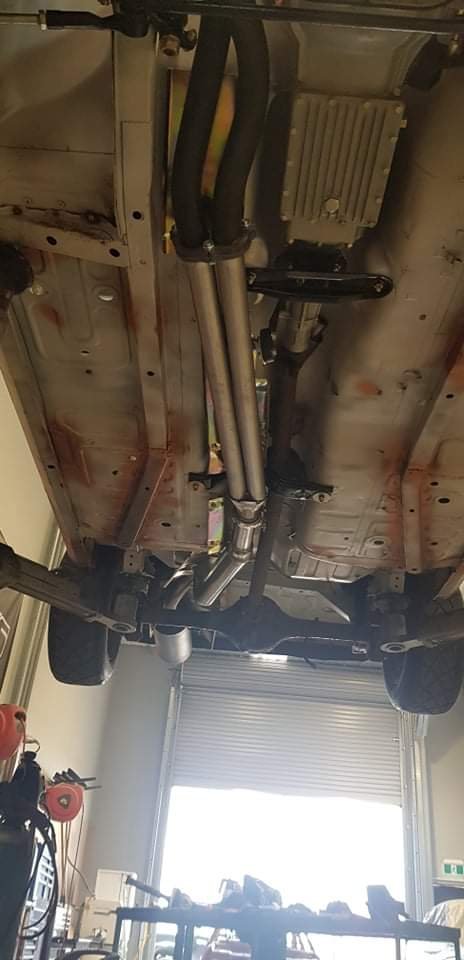
Exhaust nearly finished, twin 2 inch, into 2.5 resonator, over diff into AES/PAC boiler. Brief was I had to retain factory heat shields, top job!
1 point
-
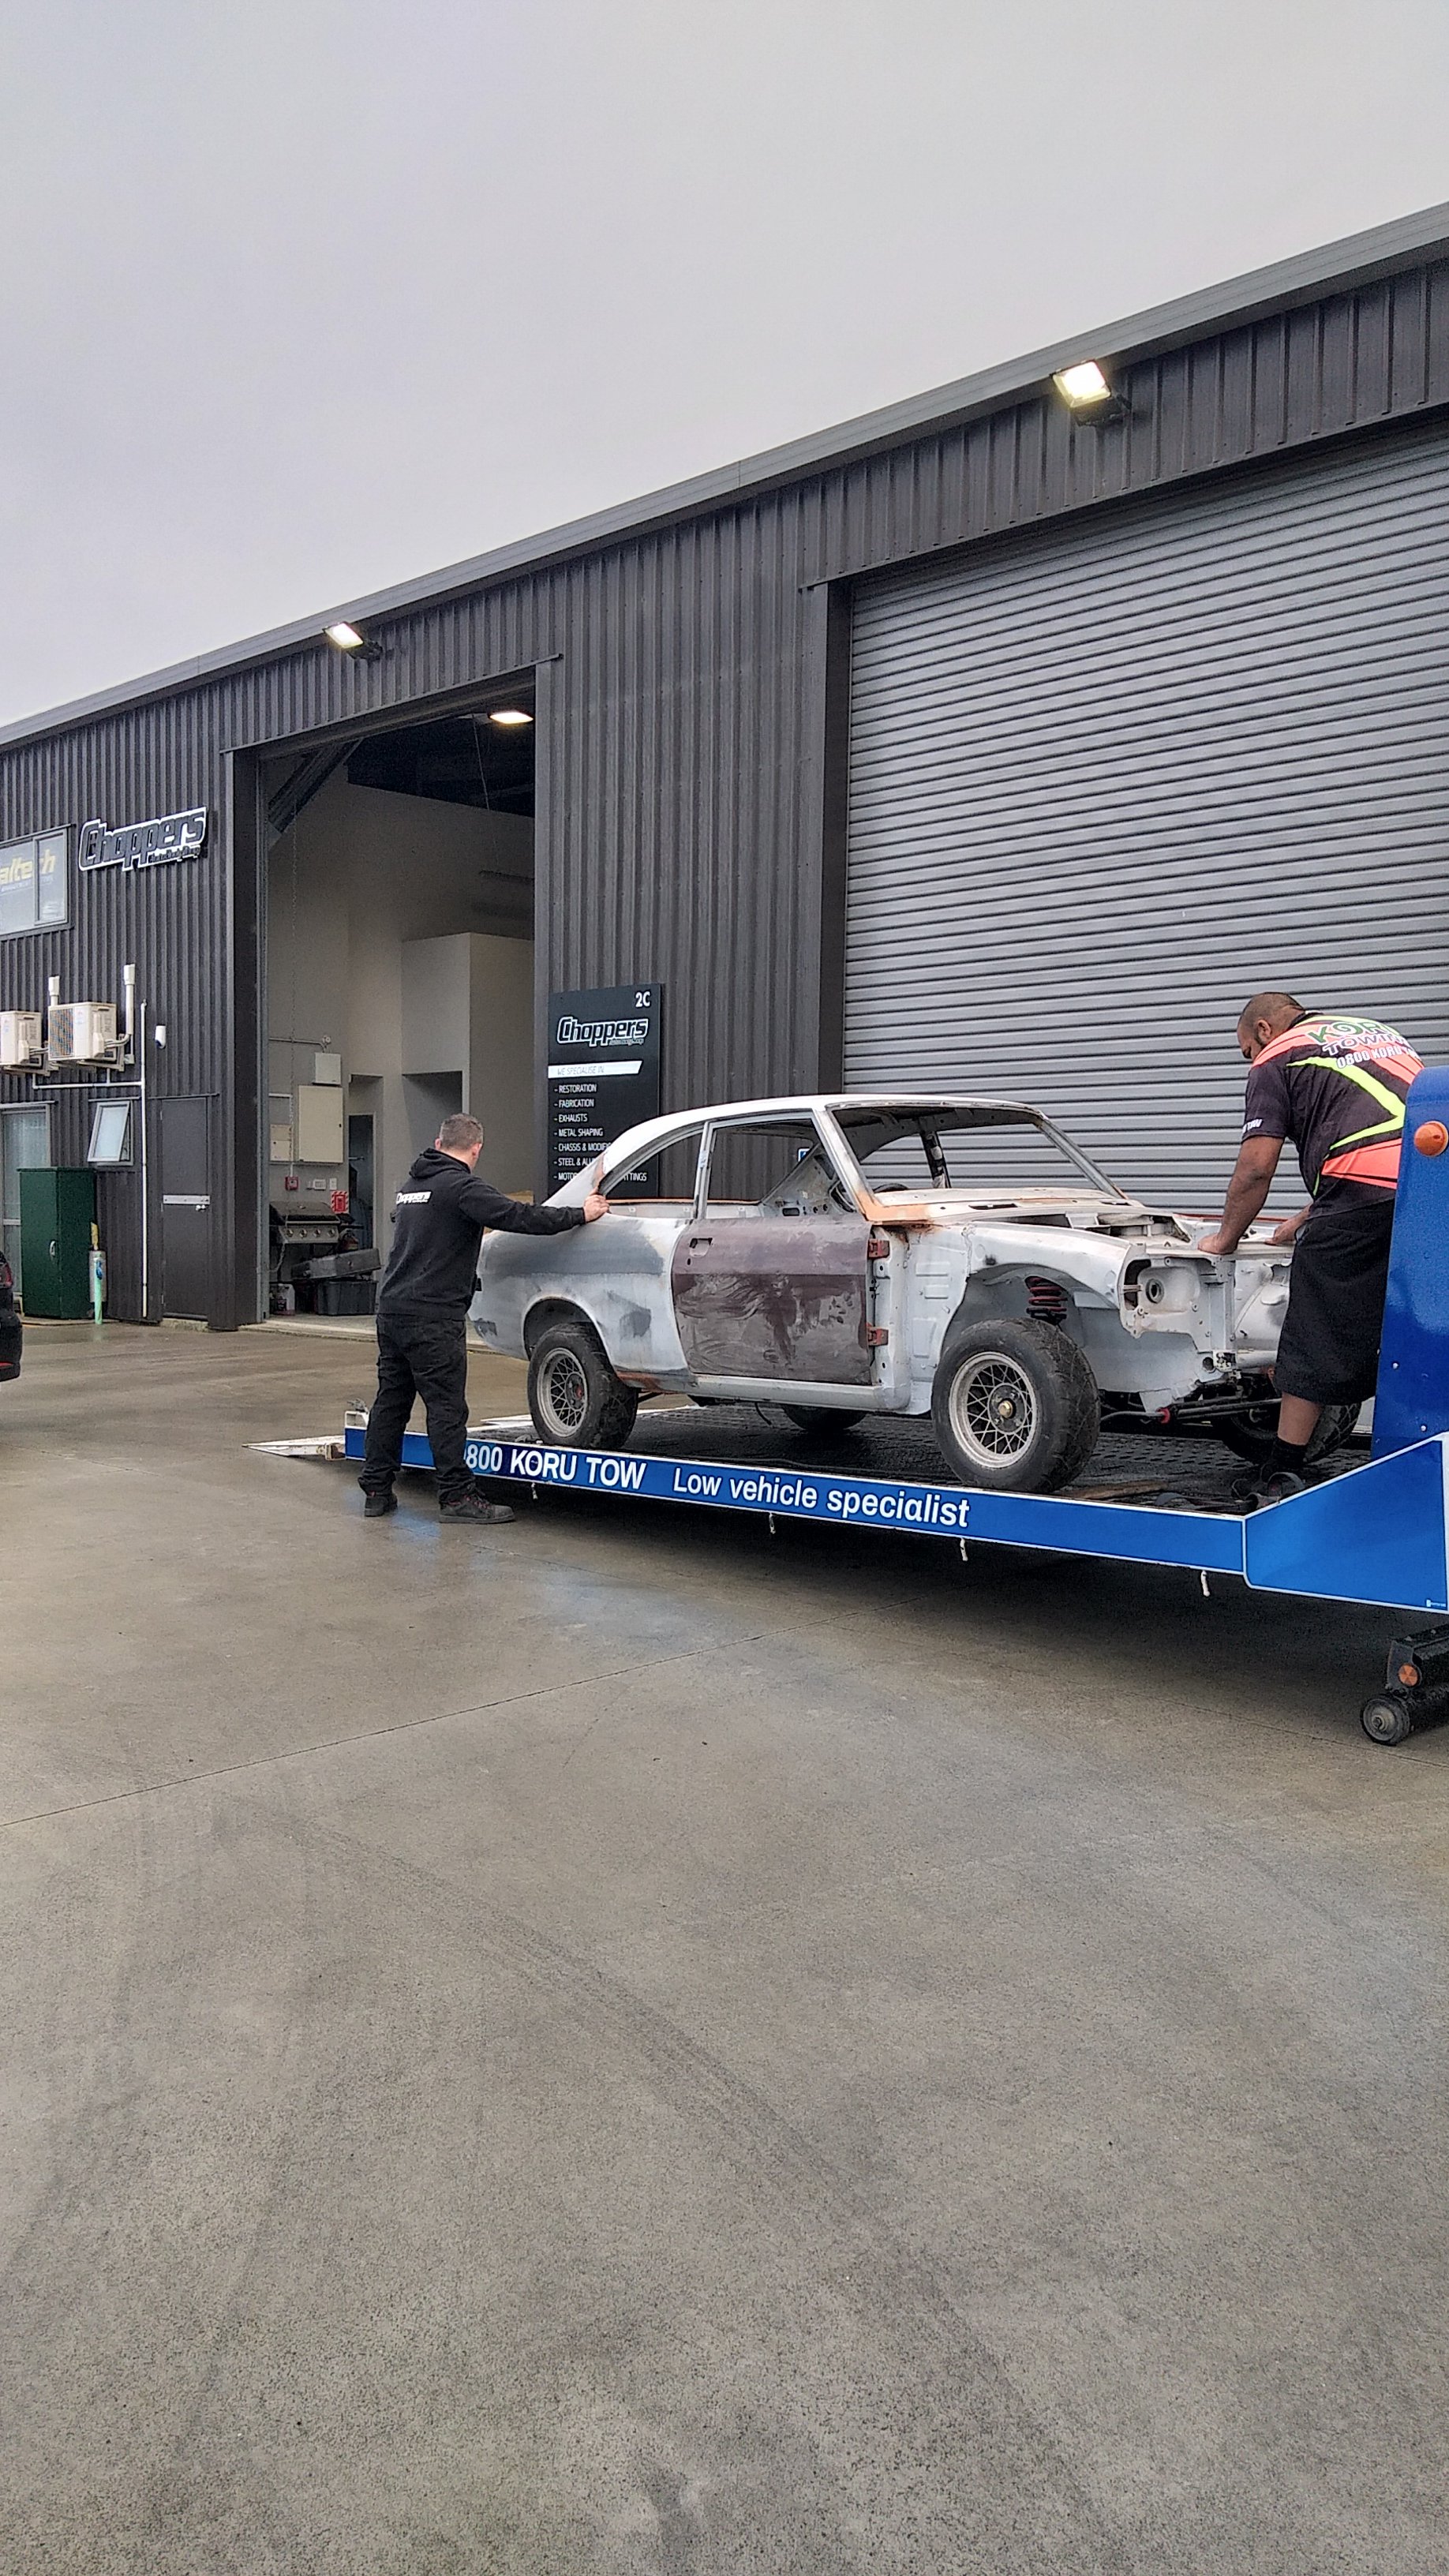
Dropped off the old money pit to choppers, instructions to build exhaust and get through repair cert, maybe skim her up if $ allow ready for paint
1 point
-
Took the Imp for a hoon on Saturday. Went to visit a mechanic who works from home up a valley not far from us because he has fields of cars and I had spotted some Subaru Leones. Sadly he doesn't have an front wheel drive models because I wanted to nab any gear boxes that I can just as spares in case my decides to detonate. Top bloke though- he knows his scooby stuff having been a mechanic for Subaru NZ. He's given me a contact to try for boxes. So since it was a very lourverly sunny spring day indeed we thought we'd continue our drive further up the valley and check out a load of nice roads we normally cycle on. It was so much fun. I didn't drive super quick. Just enjoyed the nice handling and it feels quick anyway when you sit so low. I took this pic along the way. (some fellow oldschoolers might know the area because it was part of a circuit I lead folks on for a friday cruise on the weekend of the oldschool nats, Marahau 2014. We went to Mapua for lunch and hung out with all the posh people there. Then home via the supermarket to end a nice day out in the Imp. The day before I had picked up some carpet that local lady who makes funky cushions had sorted me out with for cheaps. Proper auto carpet, same as what I had used in my Viva... The workshop is finally a fair bit emptier having smashed out a few other jobs and got them picked up/delivered. One job we just did was build some hefty steel art deco styled gates and a large set of doors for under an outdoor cooking area for a customer in Nelson. We reckon the gates look really neat so I have to share ... Now going back in time to where I had finished off in the last post. The oil pump was now mounted and I had a oil filter mount in place. I had forgotten to take a photo of the inlet/outlet off the mount but picture two tubes coming out of its base and going through the wall of the engine block. I now had to link those two pipes with things. One had to make it way to the oil pump and the other had to work its way to the back of the engine (as positioned in the Imp) and link up to the main oil gallery into the block. I had to have a good think about this. Whatever I do to make it work has to be easy to assemble, through the bottom of the engine with the sump cover removed. Once the engines two clamshells are placed together I don't want to ever separate them again for two main reasons... 1 : Because that involves removing the heads so new gaskets required and that costs money and I dont like spending money. 2 : It also involves a tricky little system to fit three pistons into the bores, from the bottom of the bores, using removable piston ring compressors through a gap of about an inch inside. You'll see more on that later. I am NOT looking forward to that bit. Originally the Honda oil feed system used pipes and sealed everything with O rings. It works well and makes sense. I could work with that. I did entertain using lots of AN fittings and hose etc. However there was a few reasons why not. They are a bit pricey. They were not easily available locally, especially during lockdown. It is not at all easy to swing spanners inside this engine block. Did I mention they are pricey ? Ultimately if money was not really an issue for me I would dry sump the engine and run a external pump. But ugly, expensive, external oil tank in the way somewhere, driving the pump off a currently non existent belt drive pulley (not even got to that point yet for an alternator but I have an idea) So keep it simple with stuff I have to hand! With that I rummaged through the pile of alloy stock I had and found a few bits that would work... But O rings were going to be a bit trickier. The size used by Honda didn't match anything I had nor anything I could find on my suppliers website. They were odd. I looked through a Honda parts diagram online and found the Honda part number along with the exact size of the O rings. Nice of Honda to do that! Looked up sizes online and it turns out that they are a JIS standard Oring. I never knew of such things. Actually very common among many Japanese cars. Even better - when I searched through my suppliers website they actually had them! But wait - there's more!!! They were cheaper than all the other O rings close in size. Yay! But the shop was shut to public and I couldn't visit it anyway. Boo! Thanks Covid However- the shop was open for supplying engineering places that were considered essential services. It happened that one of the employees lived not far from me. He delivered some and left them in my mail box. Yay! So now I could start what Hannah refers to as the London underground of oil tubes. I worked my way from the oil filter and made various blocks with holes and tubes with grooves. All very carefully measured to fit just right and tight but constructed in a way that it could be taken apart from the sump opening. I was lucky that I happened to have a large drill bit that was spot on for the final pass on the bores to suit the pipes and O rings for exactly the same amount of 'squish' that the Honda factory pipes and fittings have. I made sure that all the bores were as big if not bigger than the Honda setup so not to increase restriction on the oil paths. You'll see later that I will be over driving the pump in speed by a notch but that's another story. I must add that the job of planning, measuring and machining up all these little bits was a super fun way of spending time during lockdown (in between going for heaps of bike rides on super quiet roads!) Here's some pics of my subway tube network. These are the two blocks that seal onto the in and out pipes for the oil filter... The closest hole will feed a pipe heading back to link to the oil gallery. The further most block has a hole that takes a connecting pipe from the pump. Here's a view from the side... Lets zoom out a bit so you can see where they are in relation to the pump... You can also see how the pump is bolted to an adaptor plate which is bolted to the inside of the block. My connecting pipe that goes between pump station and filter station is in two parts so it can be fitted easily from below... Together its like this (lighter for scale... because all the cool kids measure the dish of their hand machined oil pump pipes with lighters like this)... Then fitted in place... Connections man! So I had the pump to filter sorted. The filter to main gallery looks like this... That pipe sticks out through a hole that was originally for the shifter mechanism ( I think. But whatever... thanks Honda for your convenient hole) You can see the oil gallery below. I will make a bolt on block with oil ways to connect them. I will also design it so I have the potential to take off from there and add an oil cooler. I would rather run the engine without one. It never had one as a bike but the engine did have more air flow over the engine though. But my engine will have a well finned sump cover to pull off heat plus be free to radiate heat better than on the bike. I shall run it and see. Its not a race car so I suspect that with really good synthetic oil I'll be fine. Its a pretty understressed engine anyway. Maybe I can add an oil temp sender to my filter block and run that through the ECU so I can have it show up on Tunerstudio for evaluation? Hmmmm - I like little things like that. But either way- keeping it as an option is good. I have yet to make the cover plate (some alloy plate is under my bench for it) that will go over that end. All simple stuff that. Once that's in place I can make a union block to suit the pipes. That cover plate will also have the oil filler and possibly a centre engine mount to suit a cross member but I have not yet decided on that. Moving around to the flywheel end of the engine you can see where the oil pump drive shaft hangs out, waving about like an unsupported shaft with no attachments... That shaft needs some motorvation and that is going to be part of the next exciting instalment. It involves Shimano....1 point
-
Went hard today.1 point
-
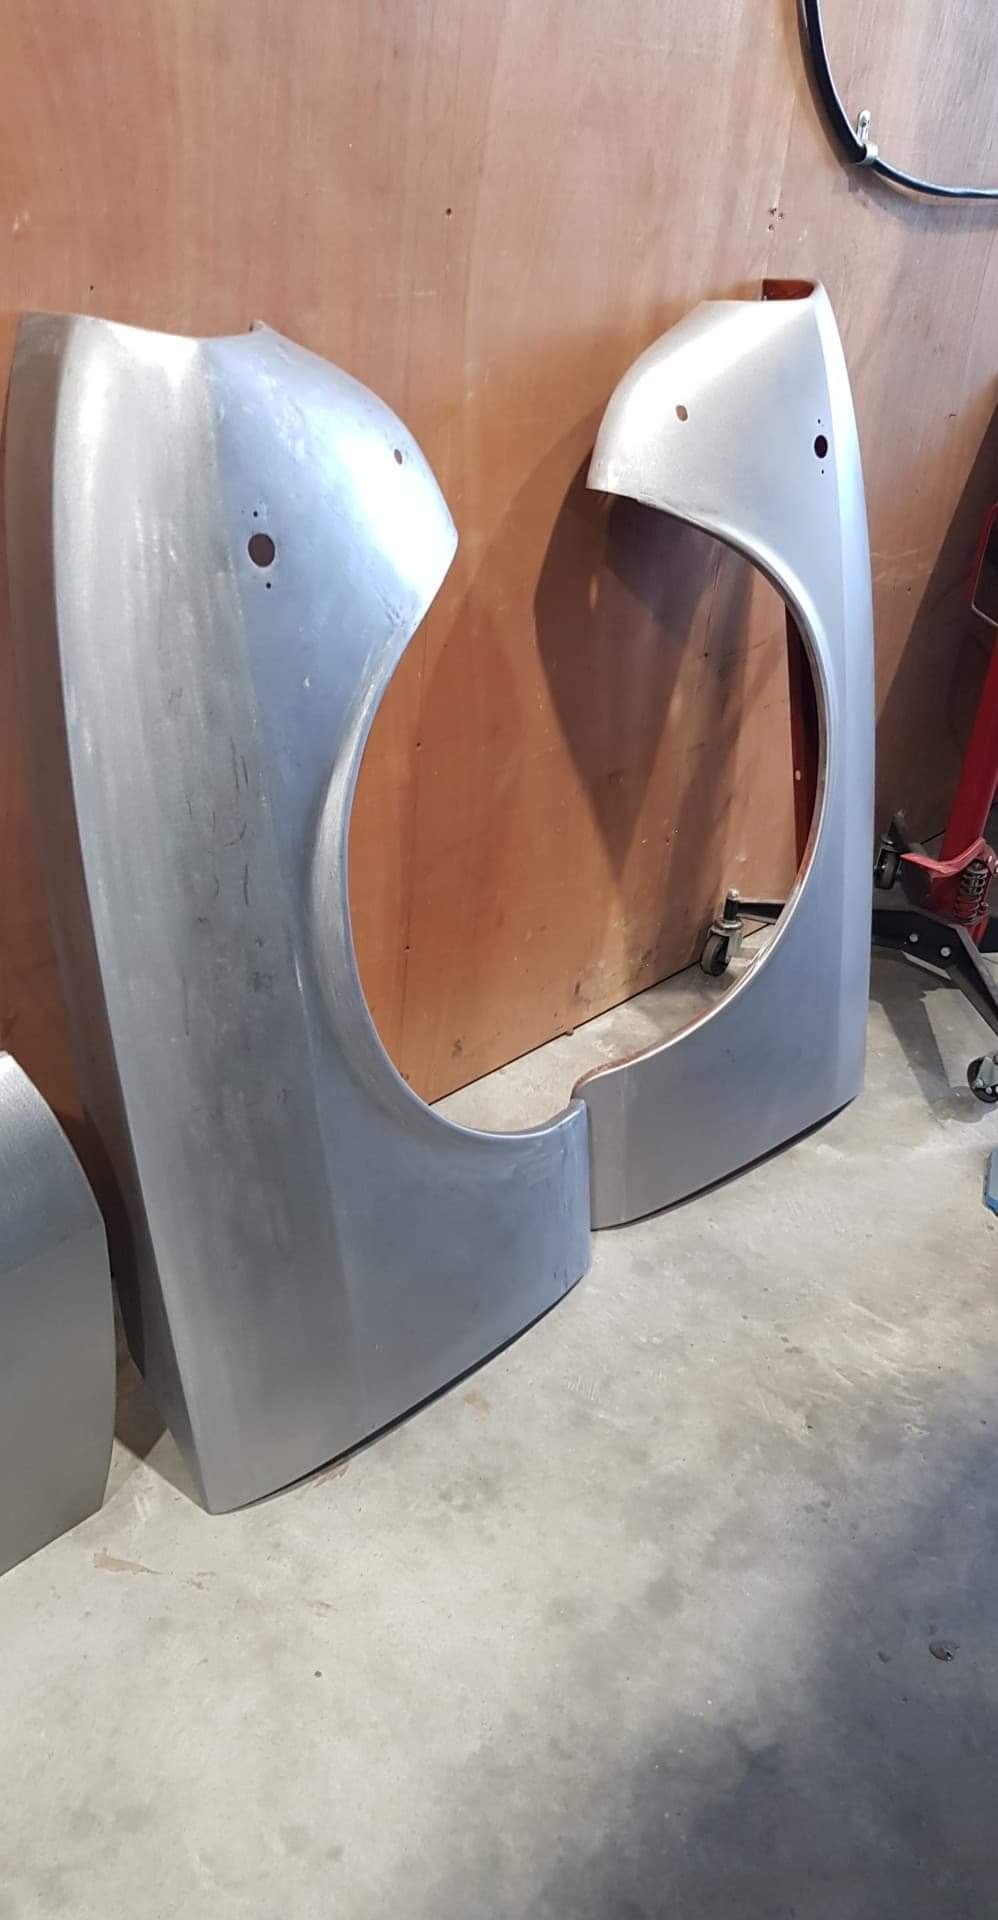
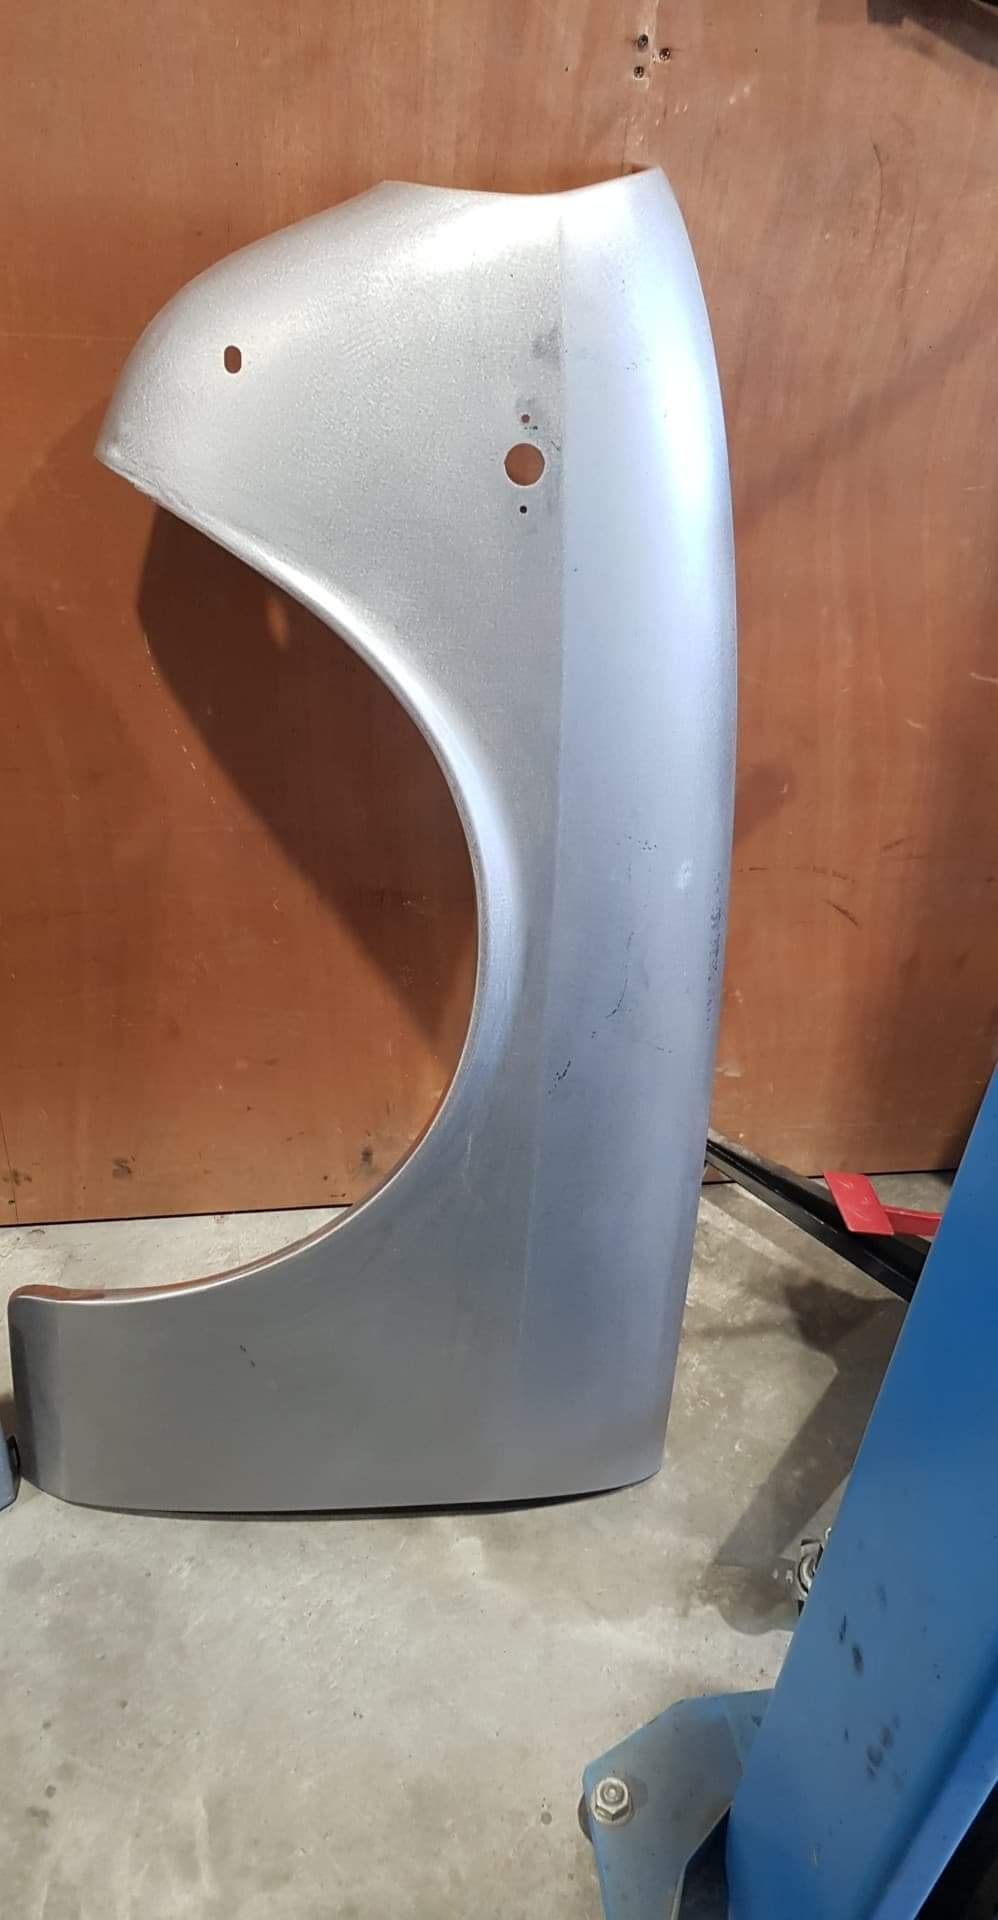
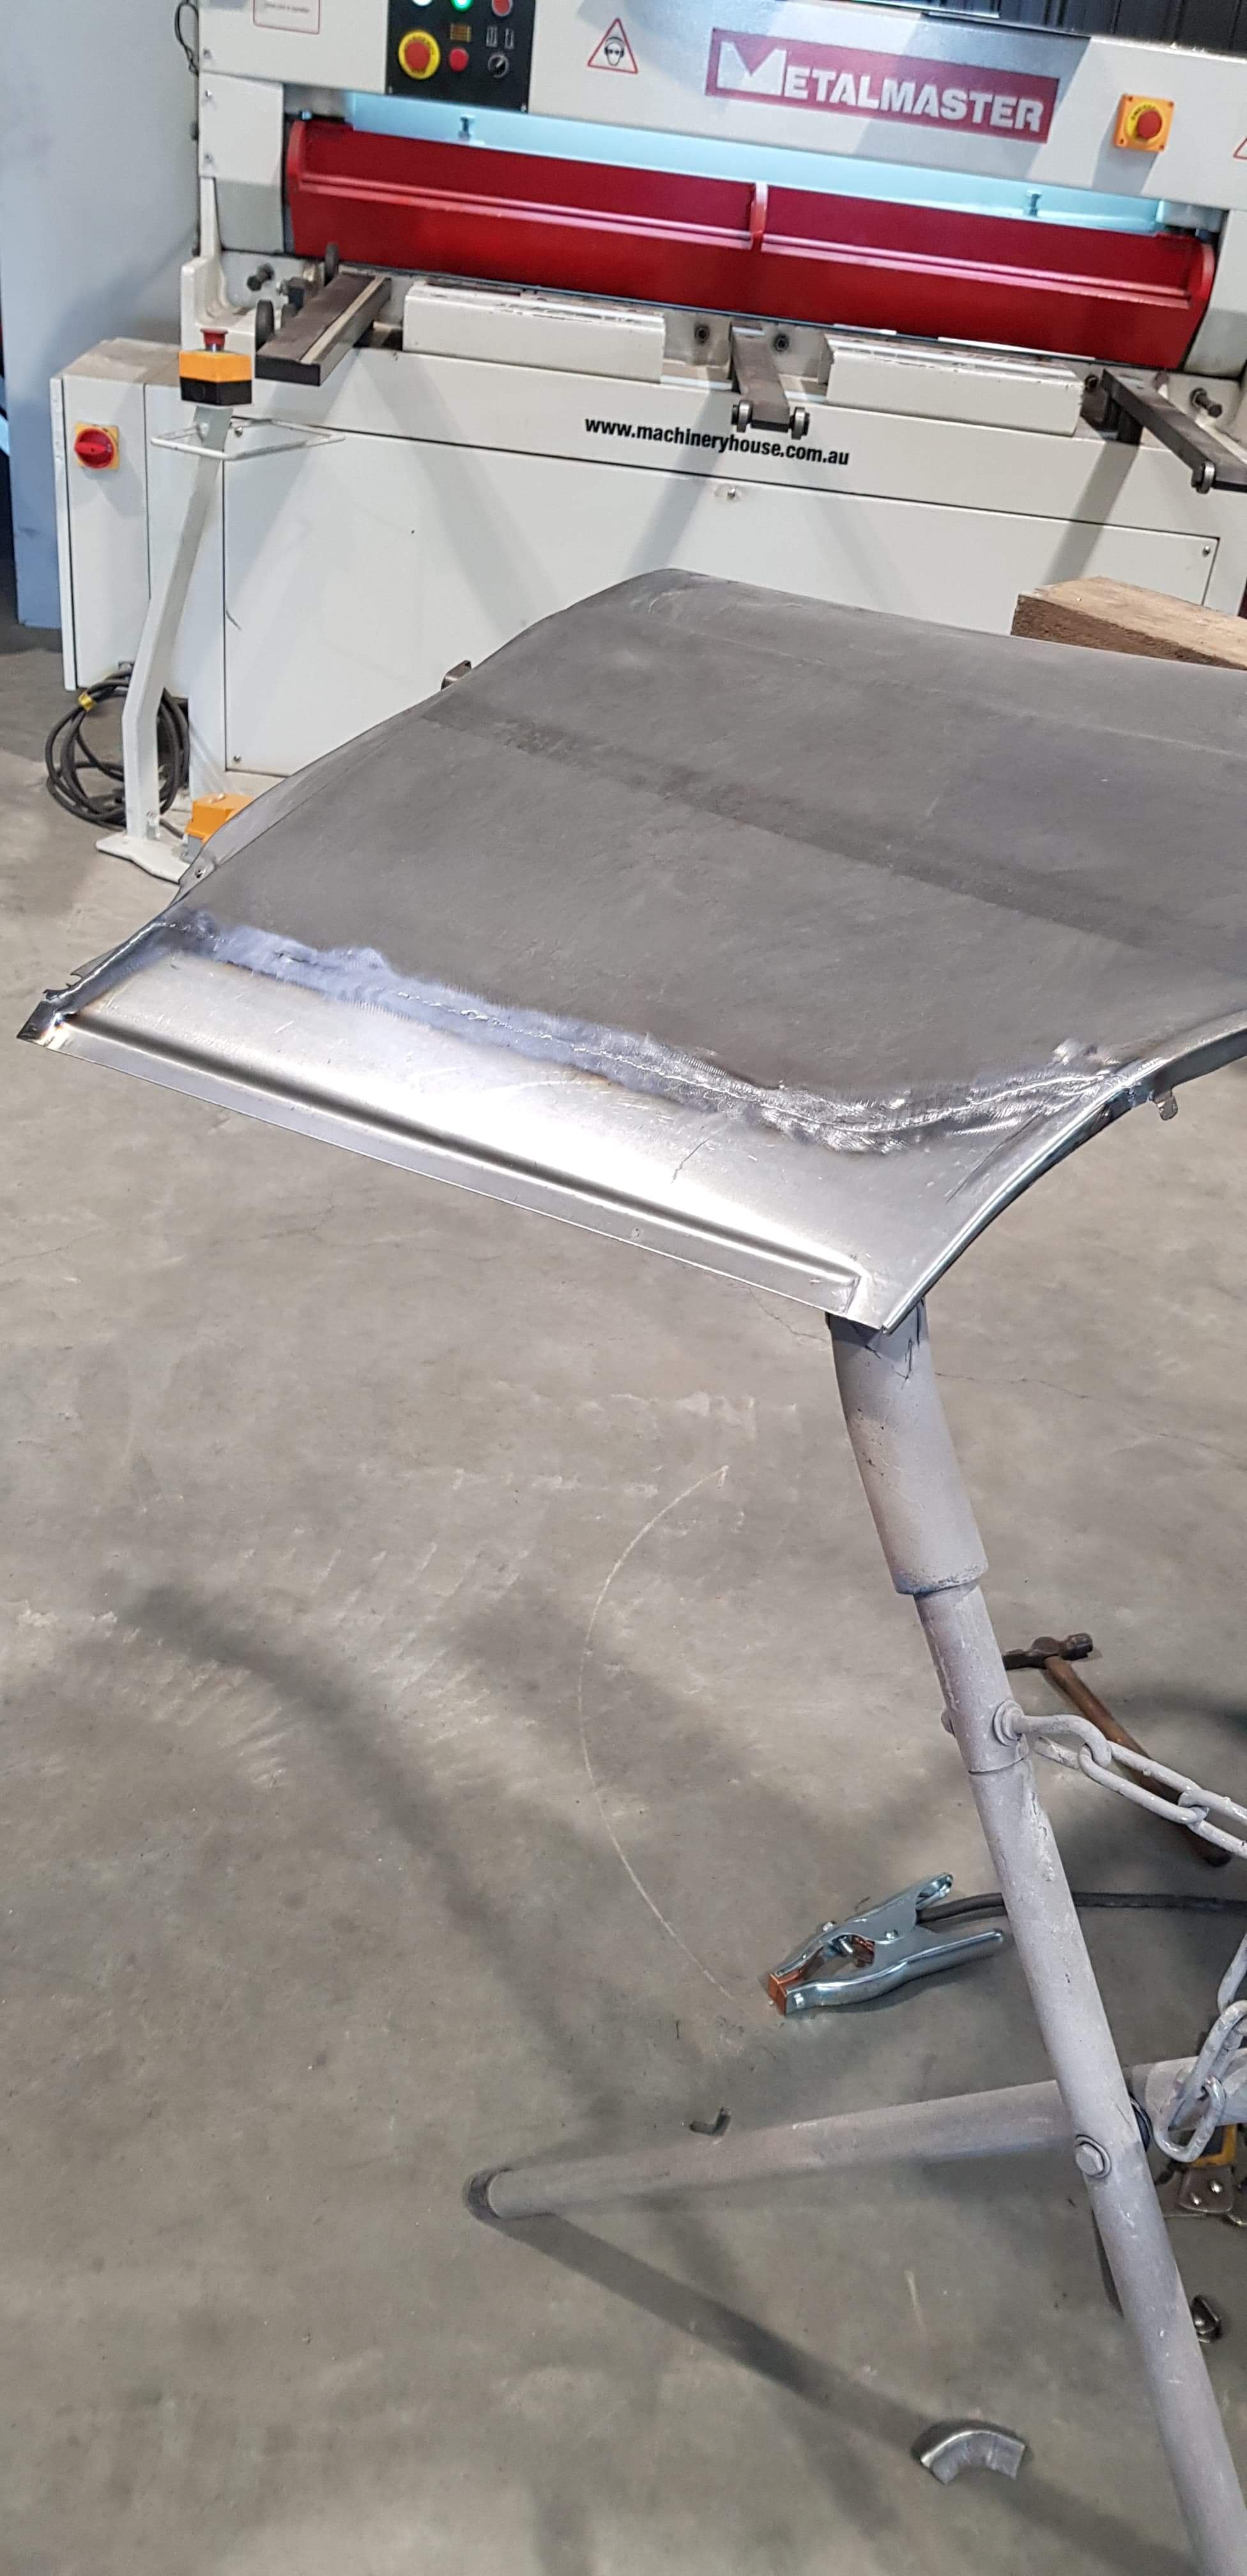
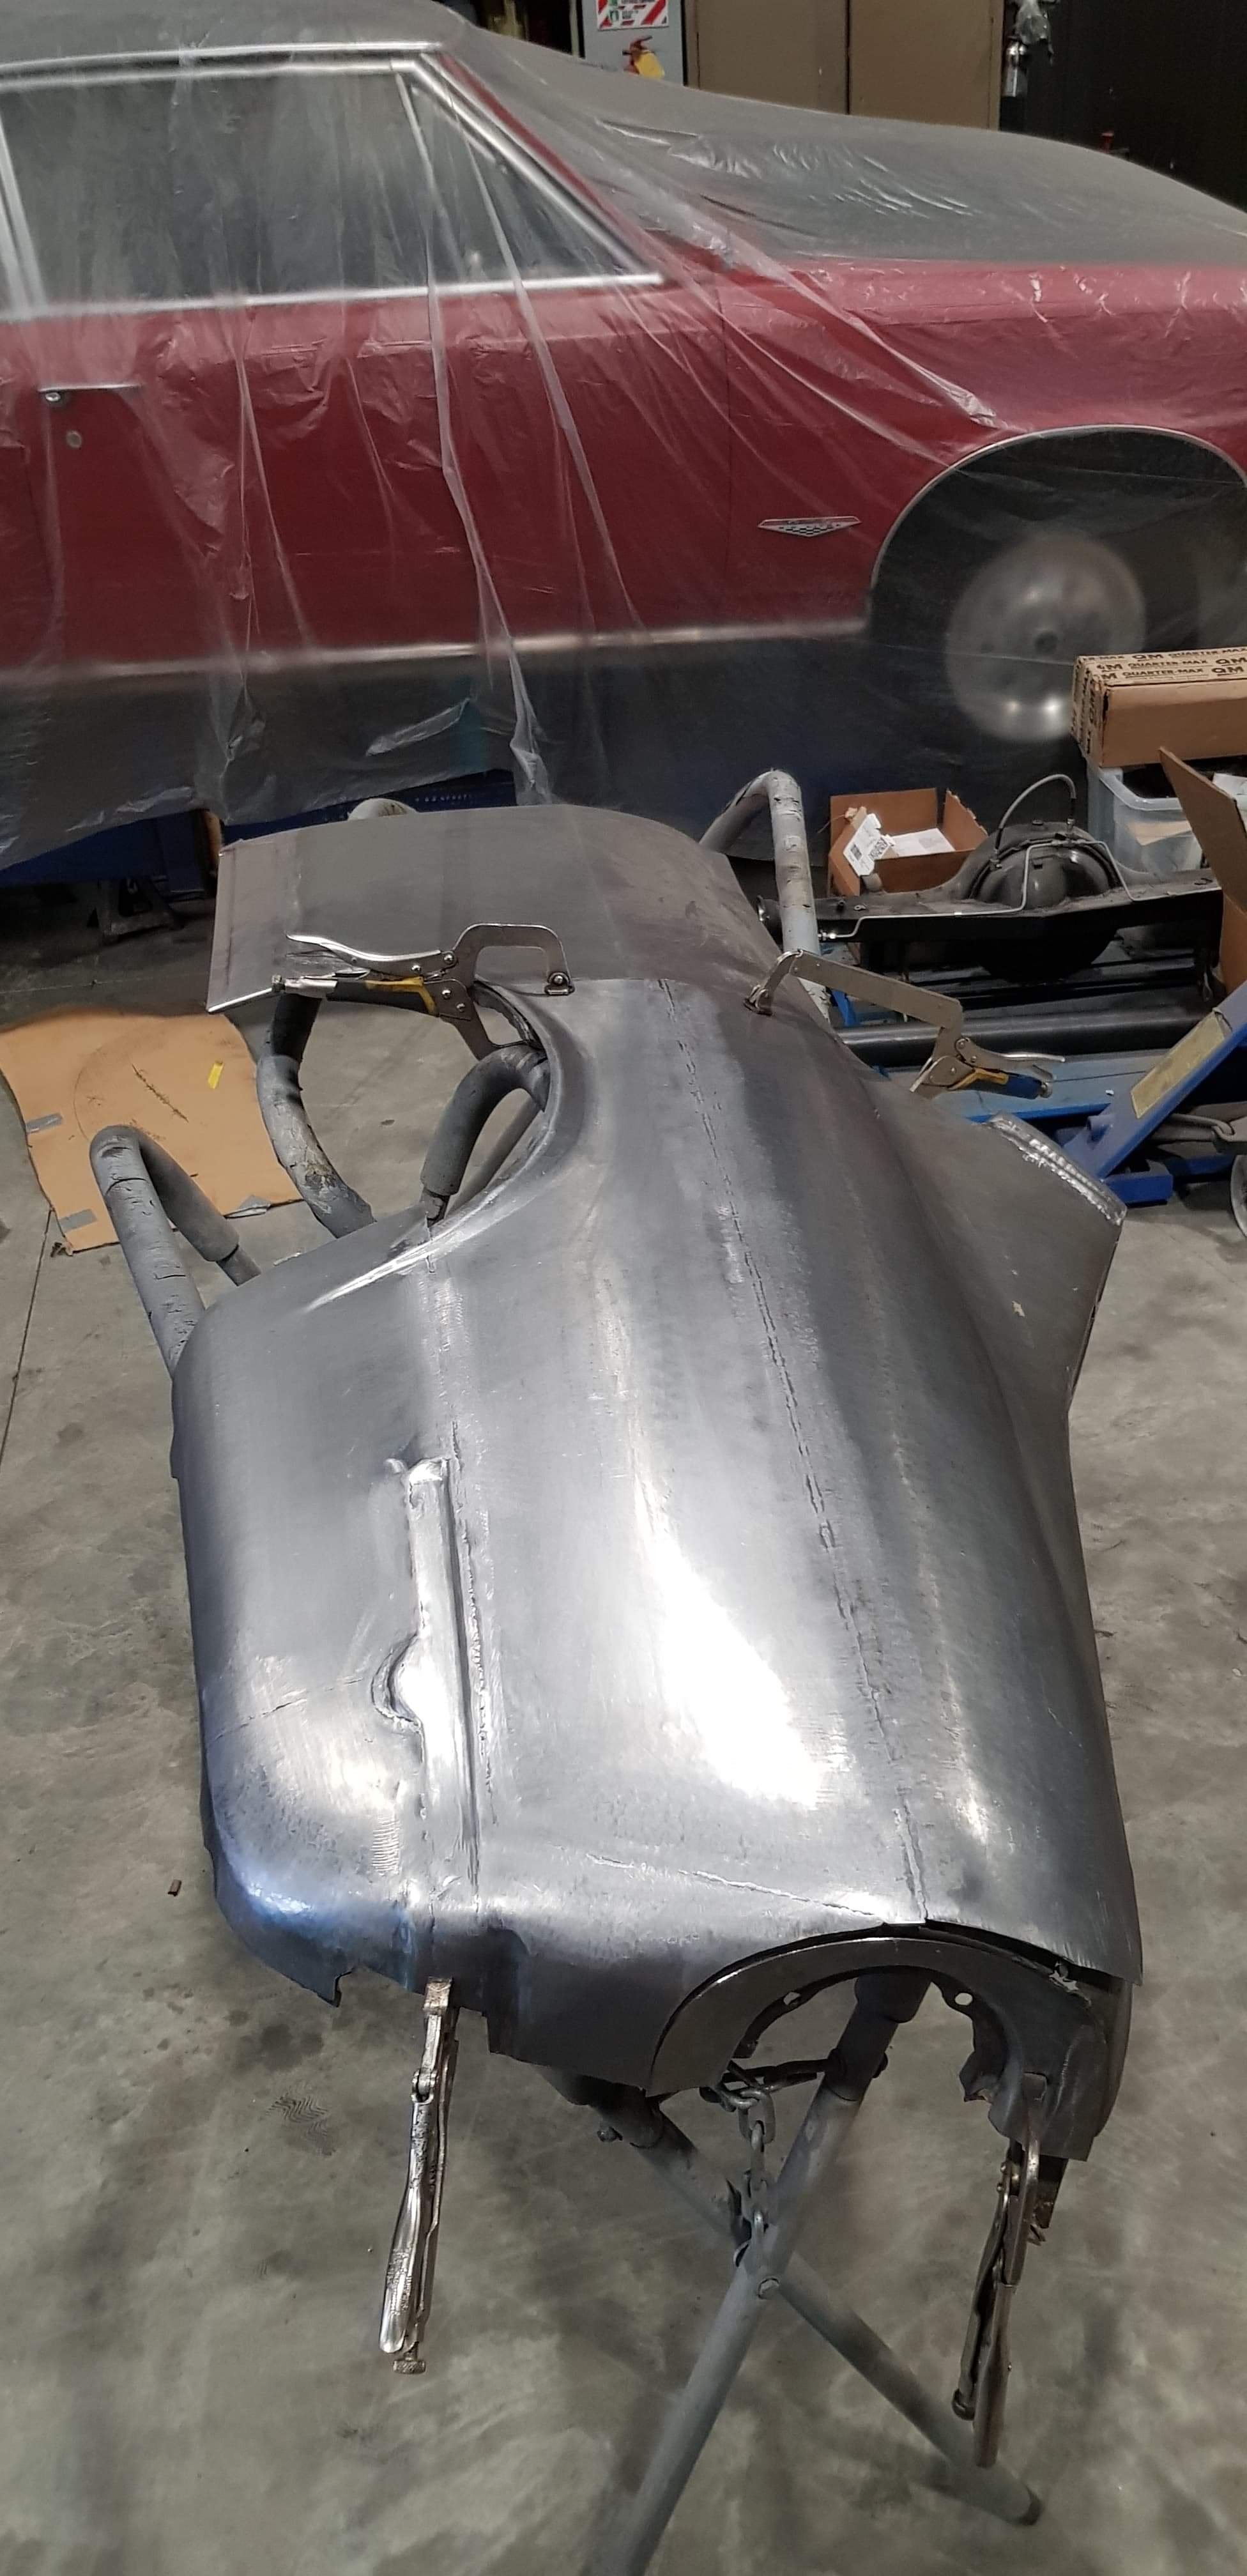
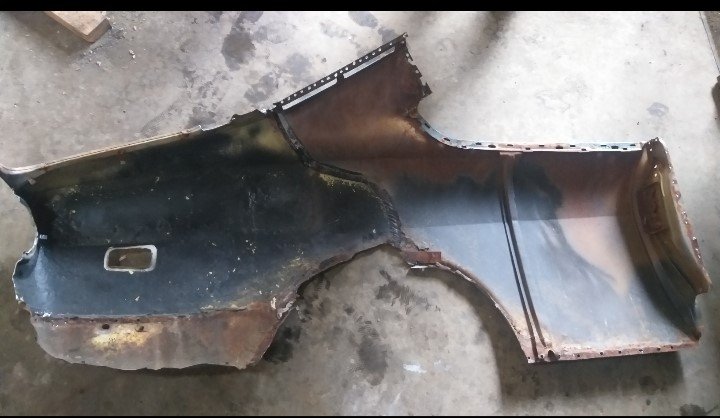
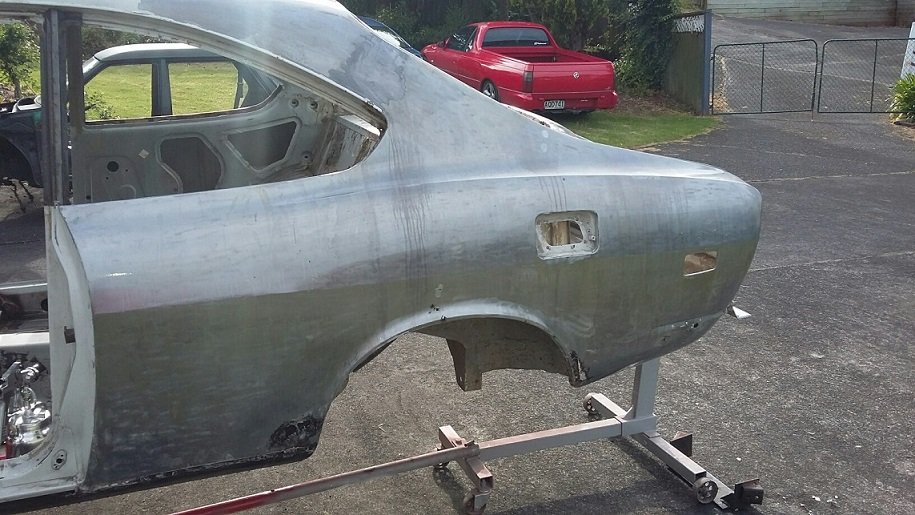
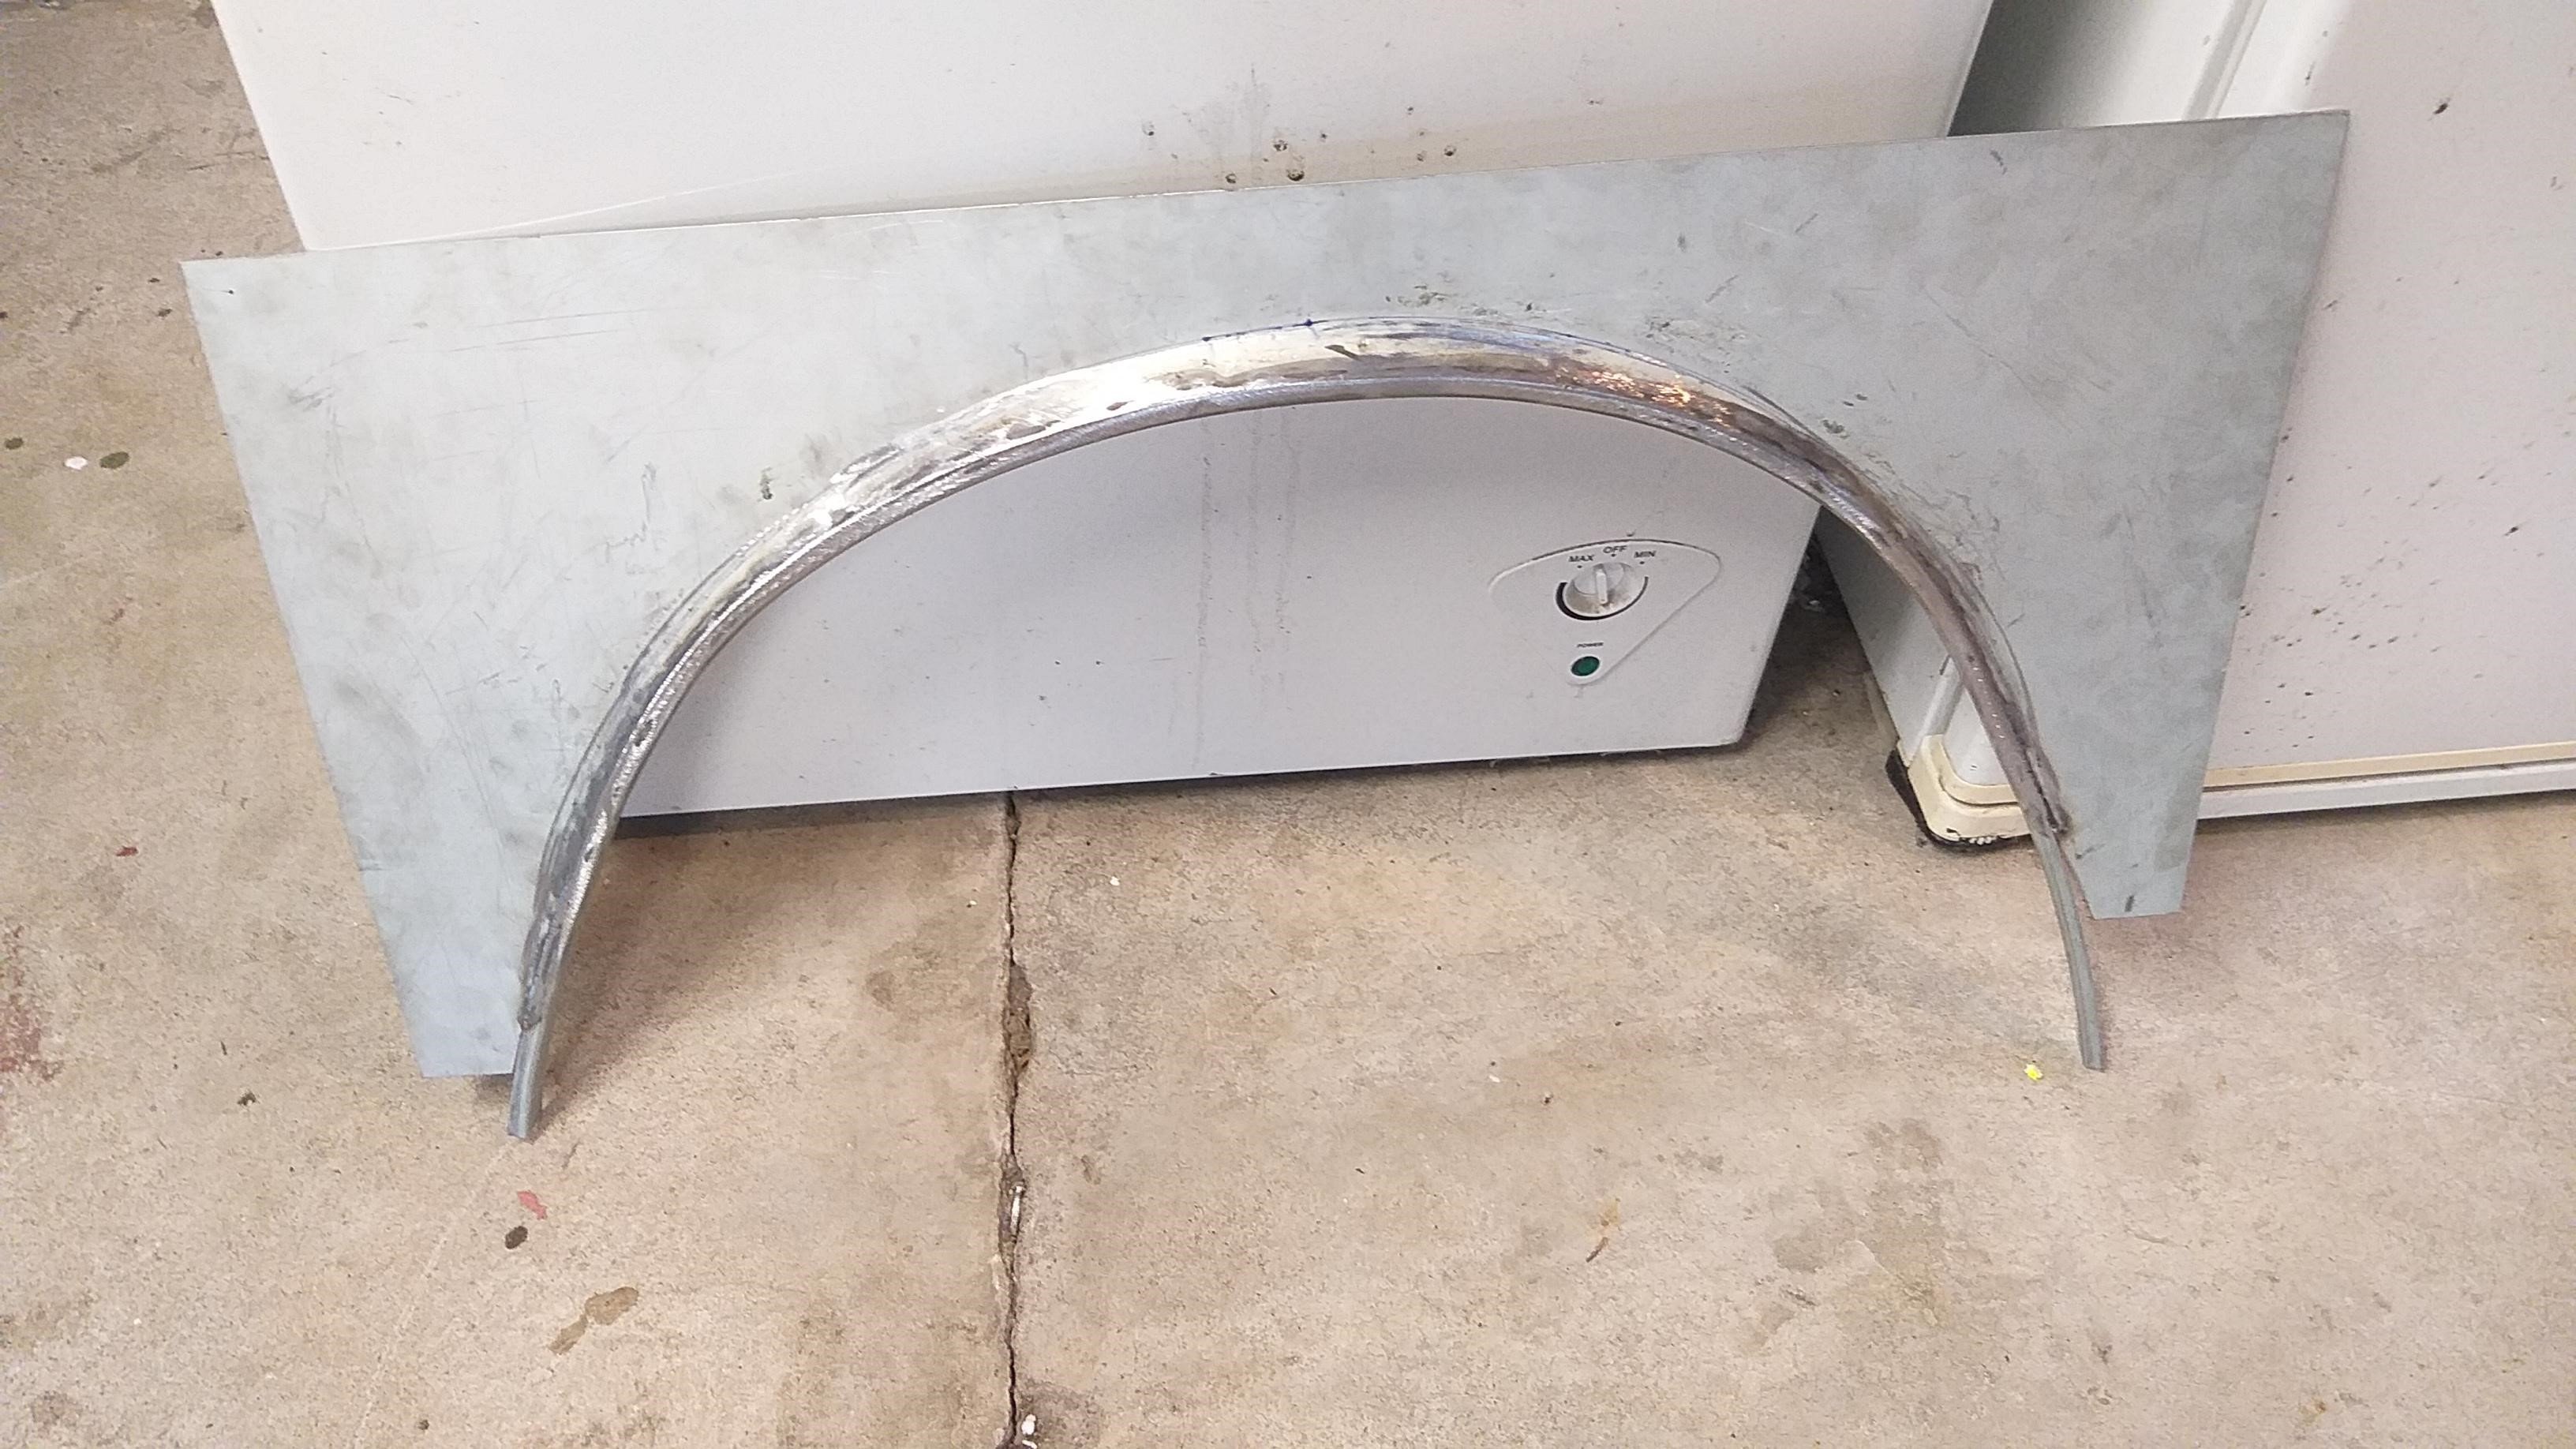
Choppers halfway through fab on the 1/4, shaping up nicely tho. Also scored a rare asf NOS front guard! *pics out of order
1 point
-
This isn't cranking along as fast as I want, so much other shit is getting in the way. I have also done some redesign on the table, I'm thinking of using T slot to mount the rails. This will save some hole drilling and allow for much easier adjustment. However bits are slowly trickling in, a 2.2Kw water cooled spindle and VFD;1 point
-
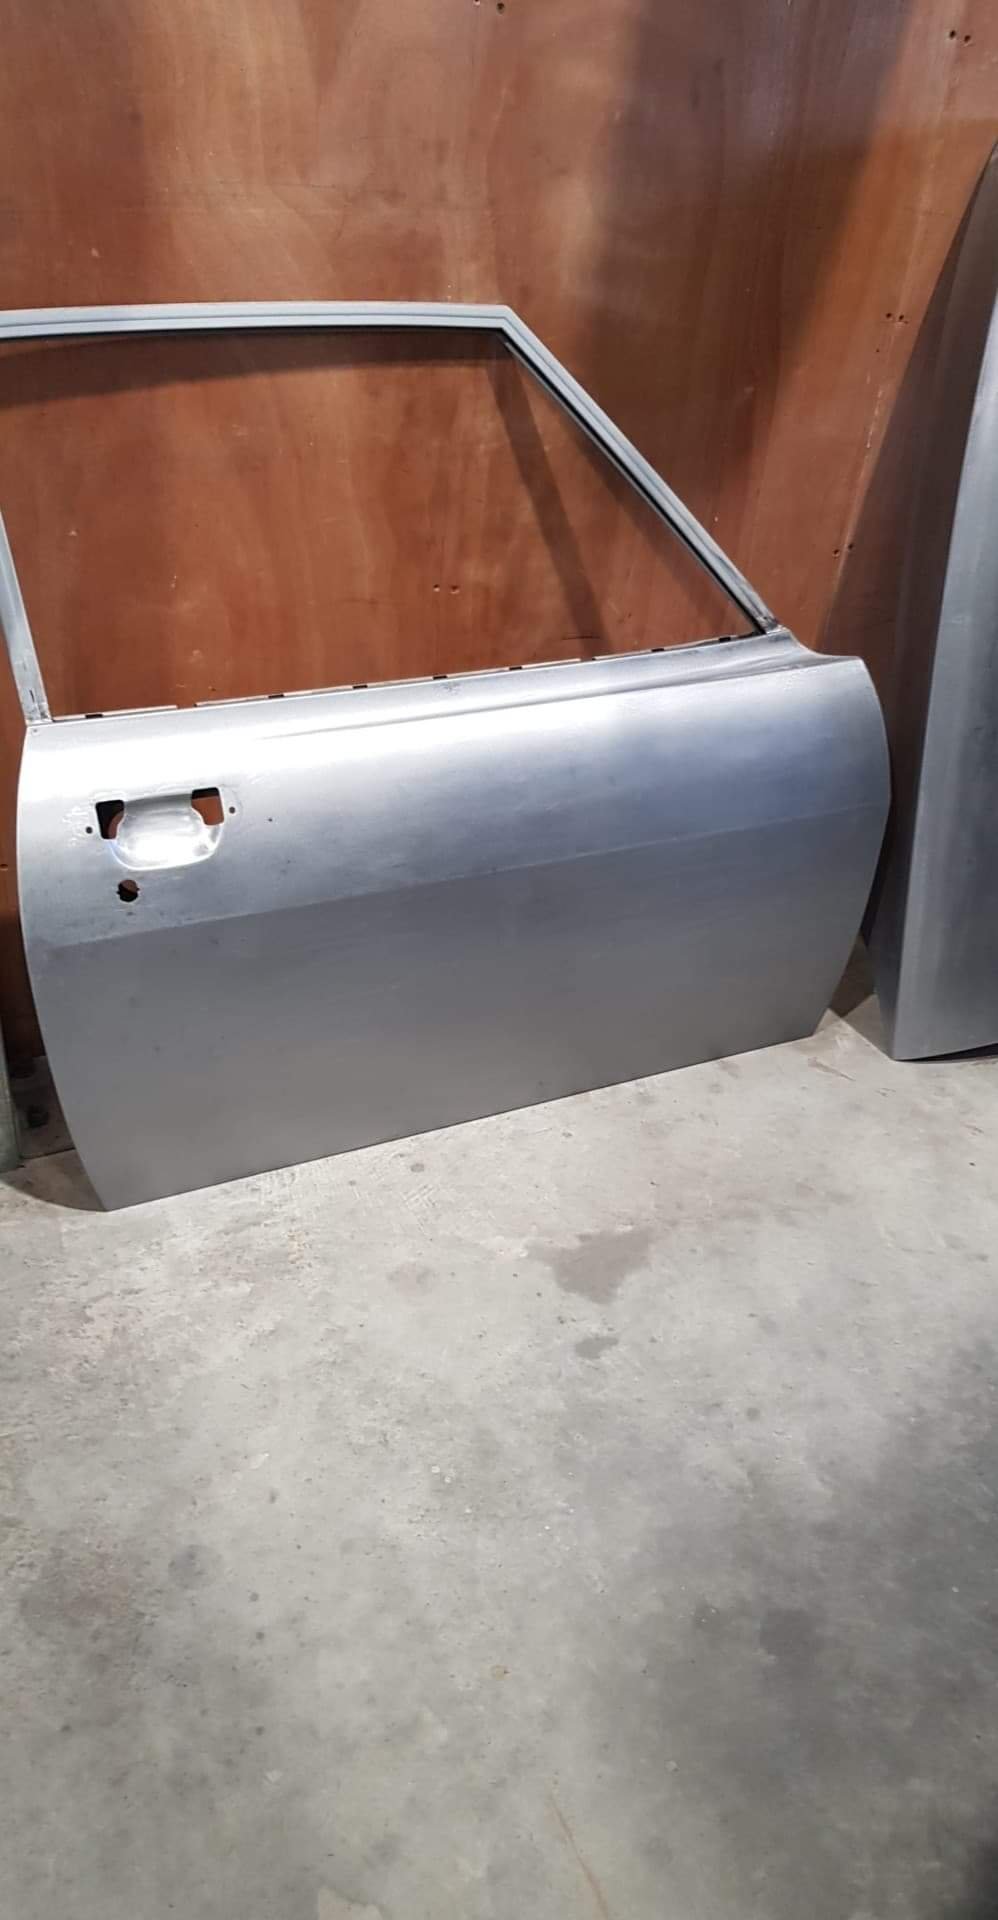
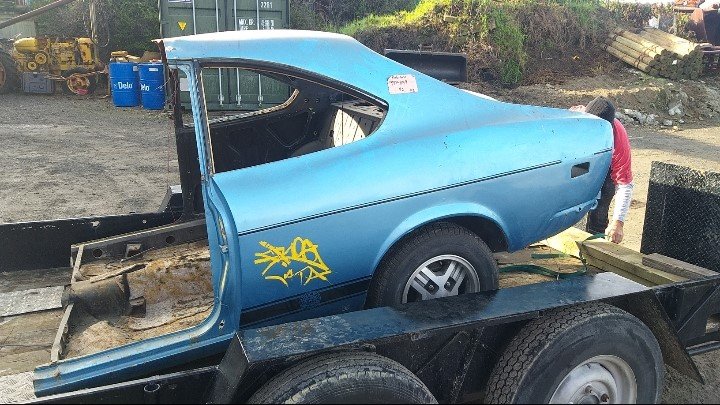
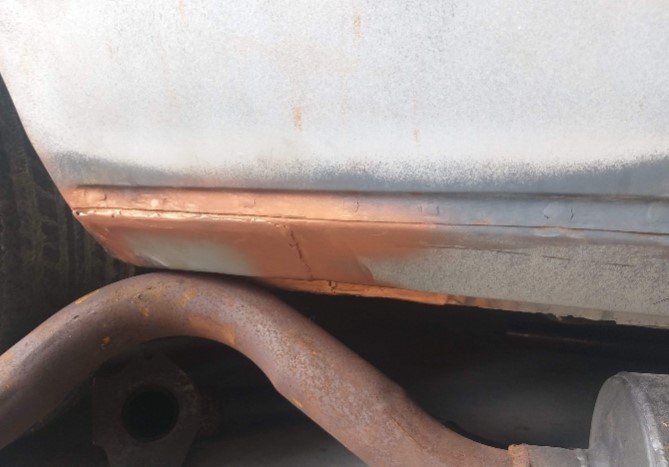
Tried to find a new 1/4, found a NOS one, but by the time it got to me it was nearly $5k! - pass. otherwise options are very limited for these coupes now Have ended up taking the 1/4 off this half cut a mate had stashed (ill weld my shitty one back on the half cut), once removed it had plenty of Mexican repairs, it wasn't great, but still better than what I had, Choppers Auto Body says hes far happier repairing this so its currently at the dippers awaiting a full strip.
1 point
-
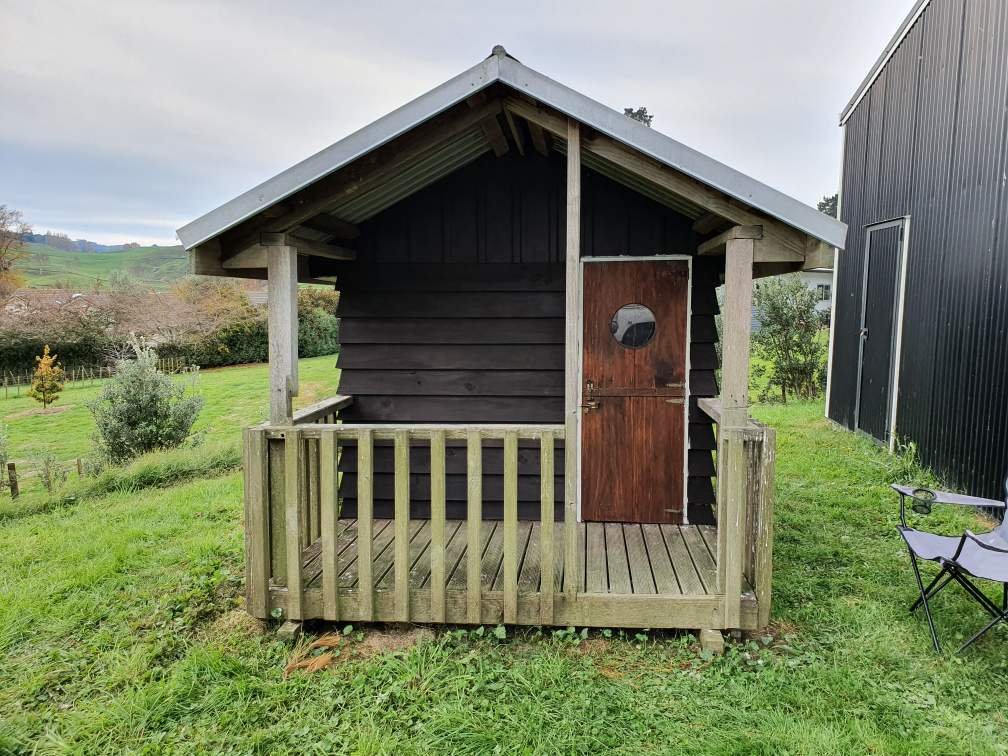
Kids now have a matching tiny house, that they'll never use (along with all the other shit I've made them that they never use). Finally finished it today.
1 point
-
lockdown has kept me busy. Transferred all the suspension from 1vaknd Kp across to the hack rack pushed foward 24mm, drivers mount moved in to better accommodate the 3s engine mounts (solid) Ke70 rack and pinion fitted to the Kp housing and trimmed the rack side flanges for boot clearance need to re build inner tubs for clearance building clearance for max low and can adjust height according to spring rates and travel Waiting for laser cutters to open up so I can get the upper link mounts cut and finalise the driveshaft tunnel So many wires, sorting loom arrangement so it can be all sent away and made to work, gearbox tunnel and firewall waiting on sheet metal to complete1 point
-
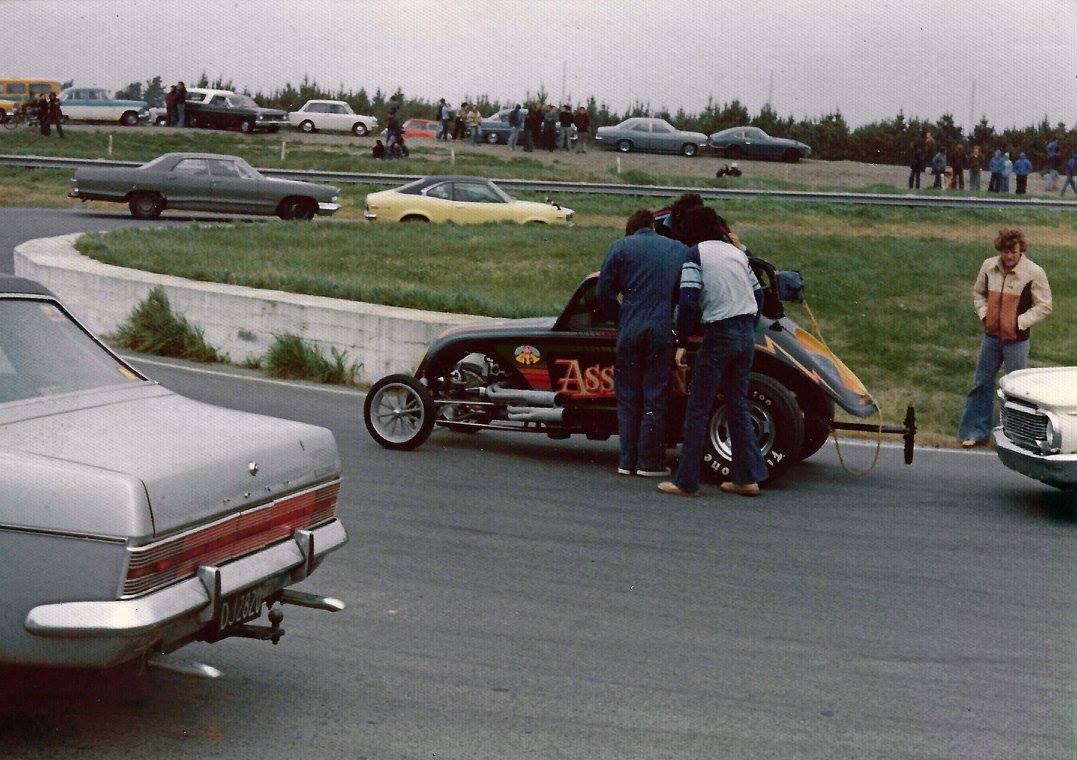
Though you may like this. Drag racing in 79 wee yellow rx3 coupe in background just off the line a ruapuna racetrack
1 point
-
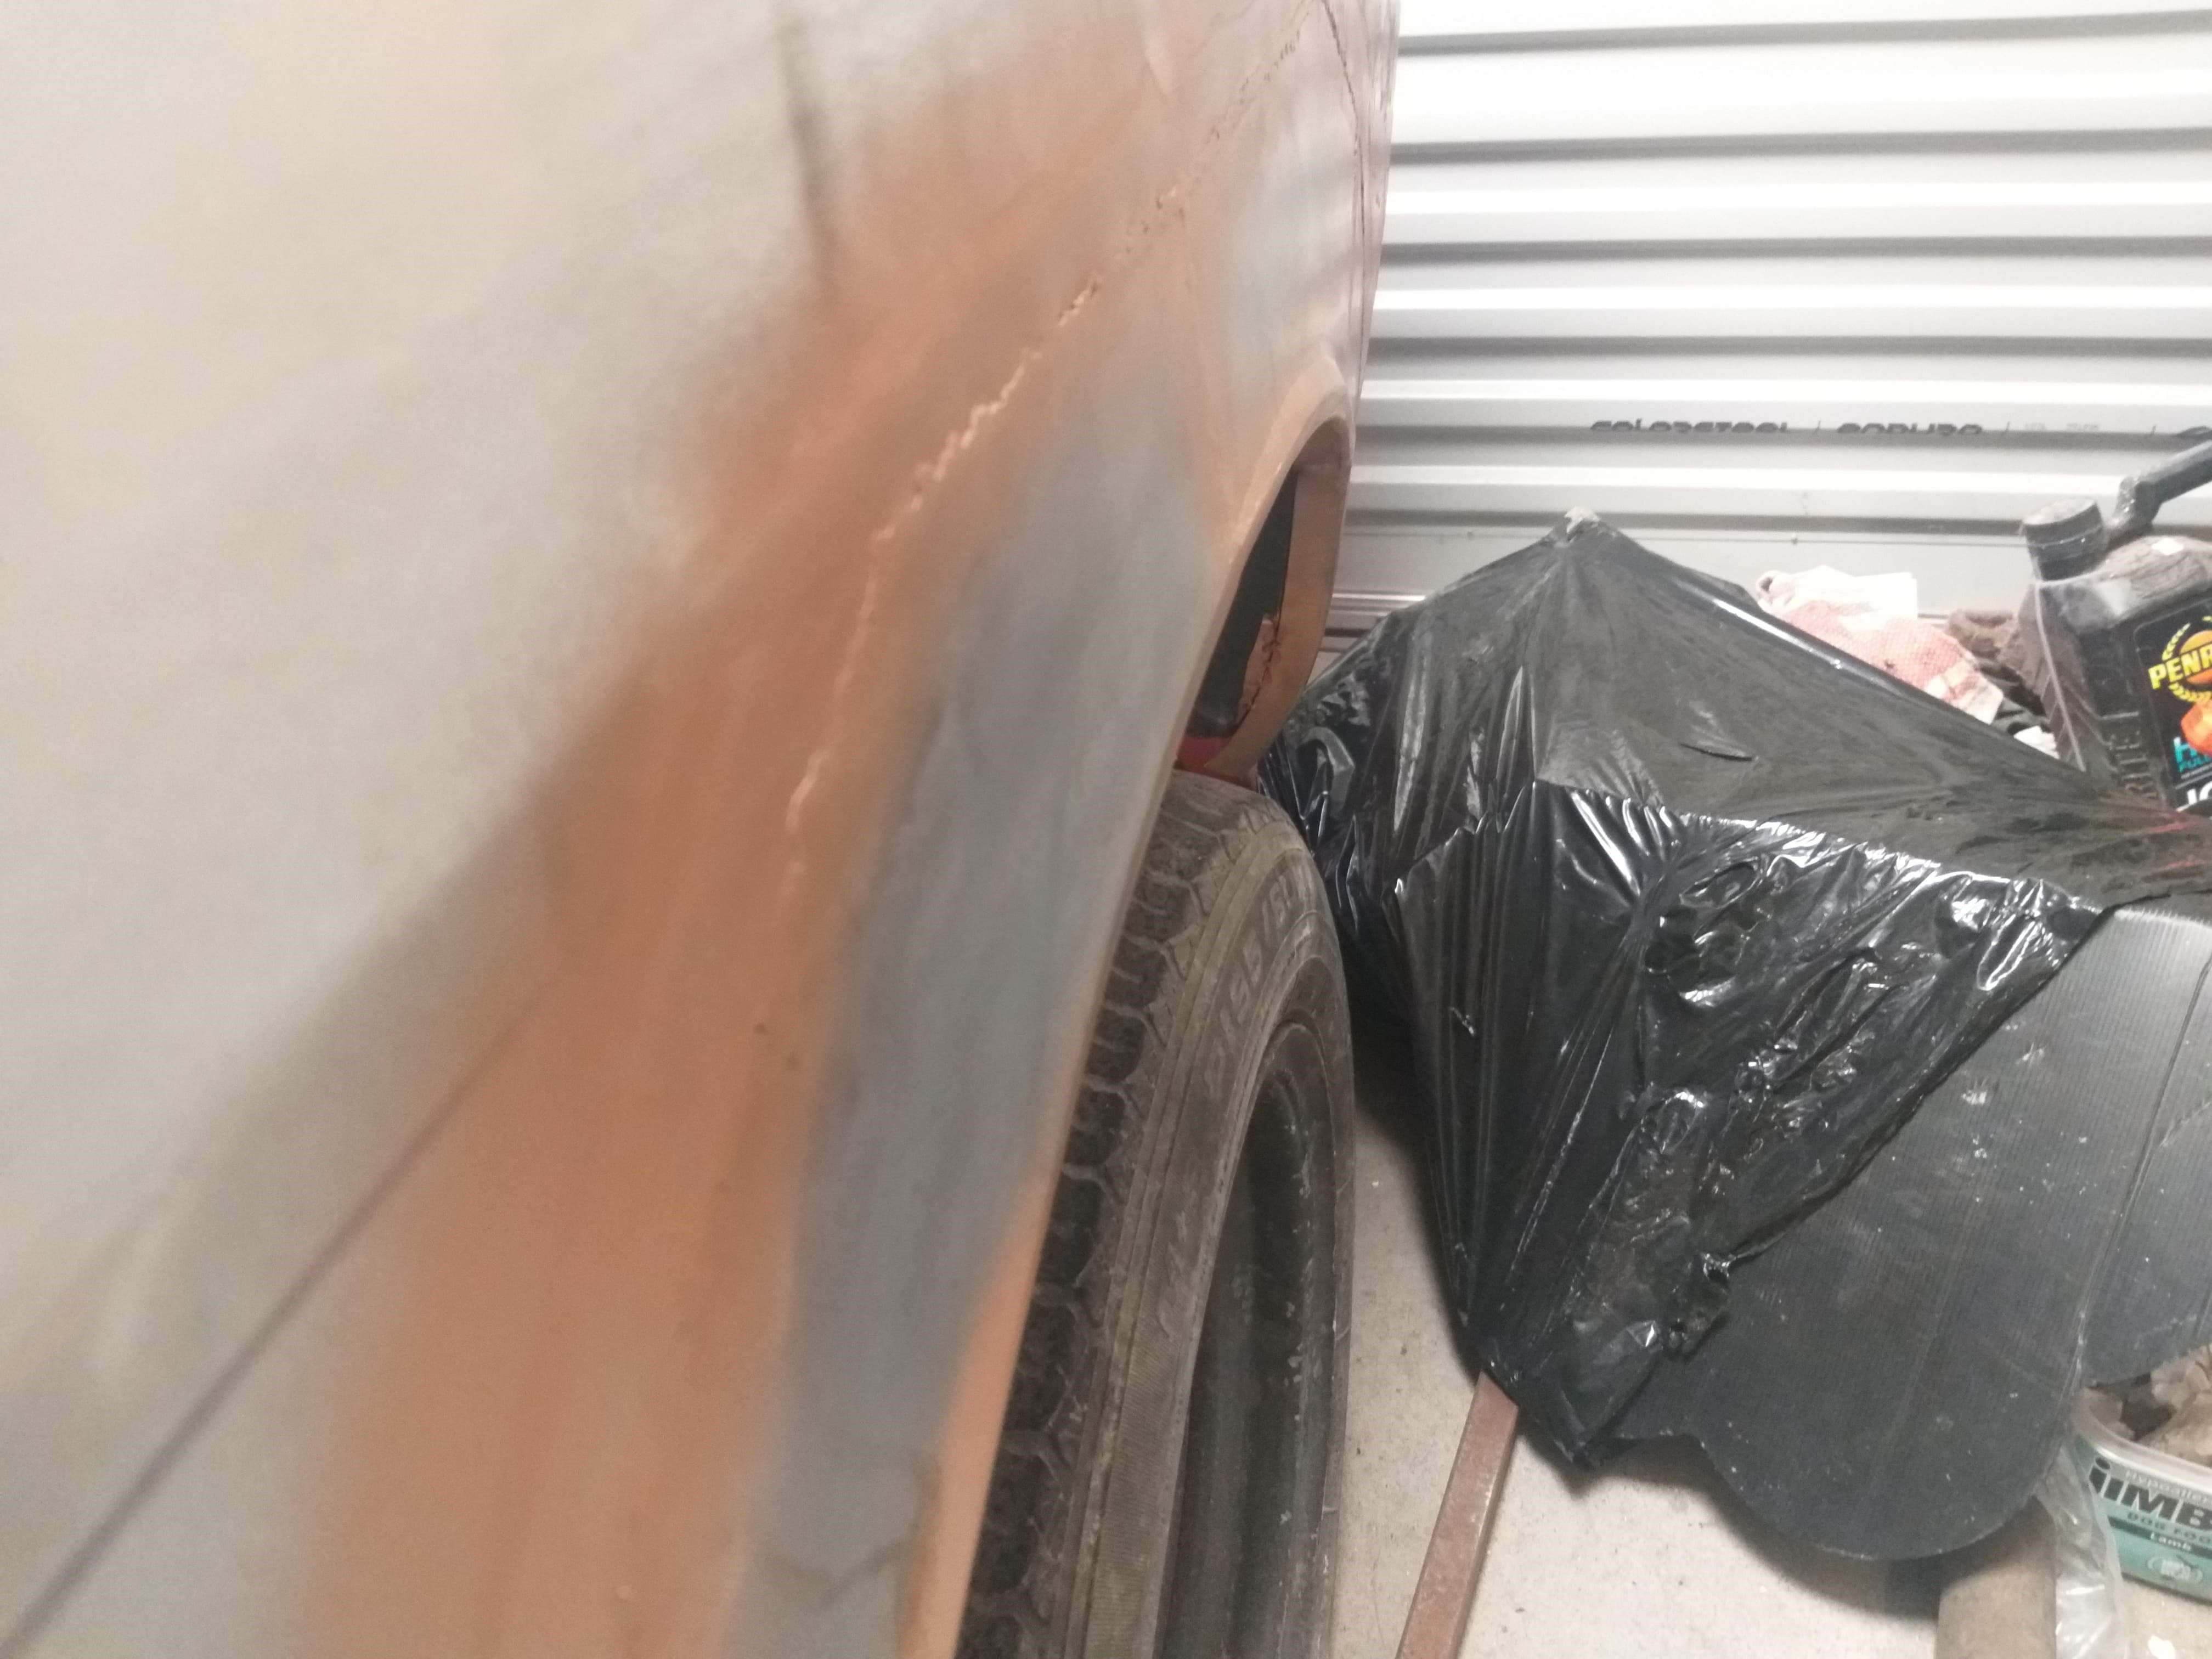
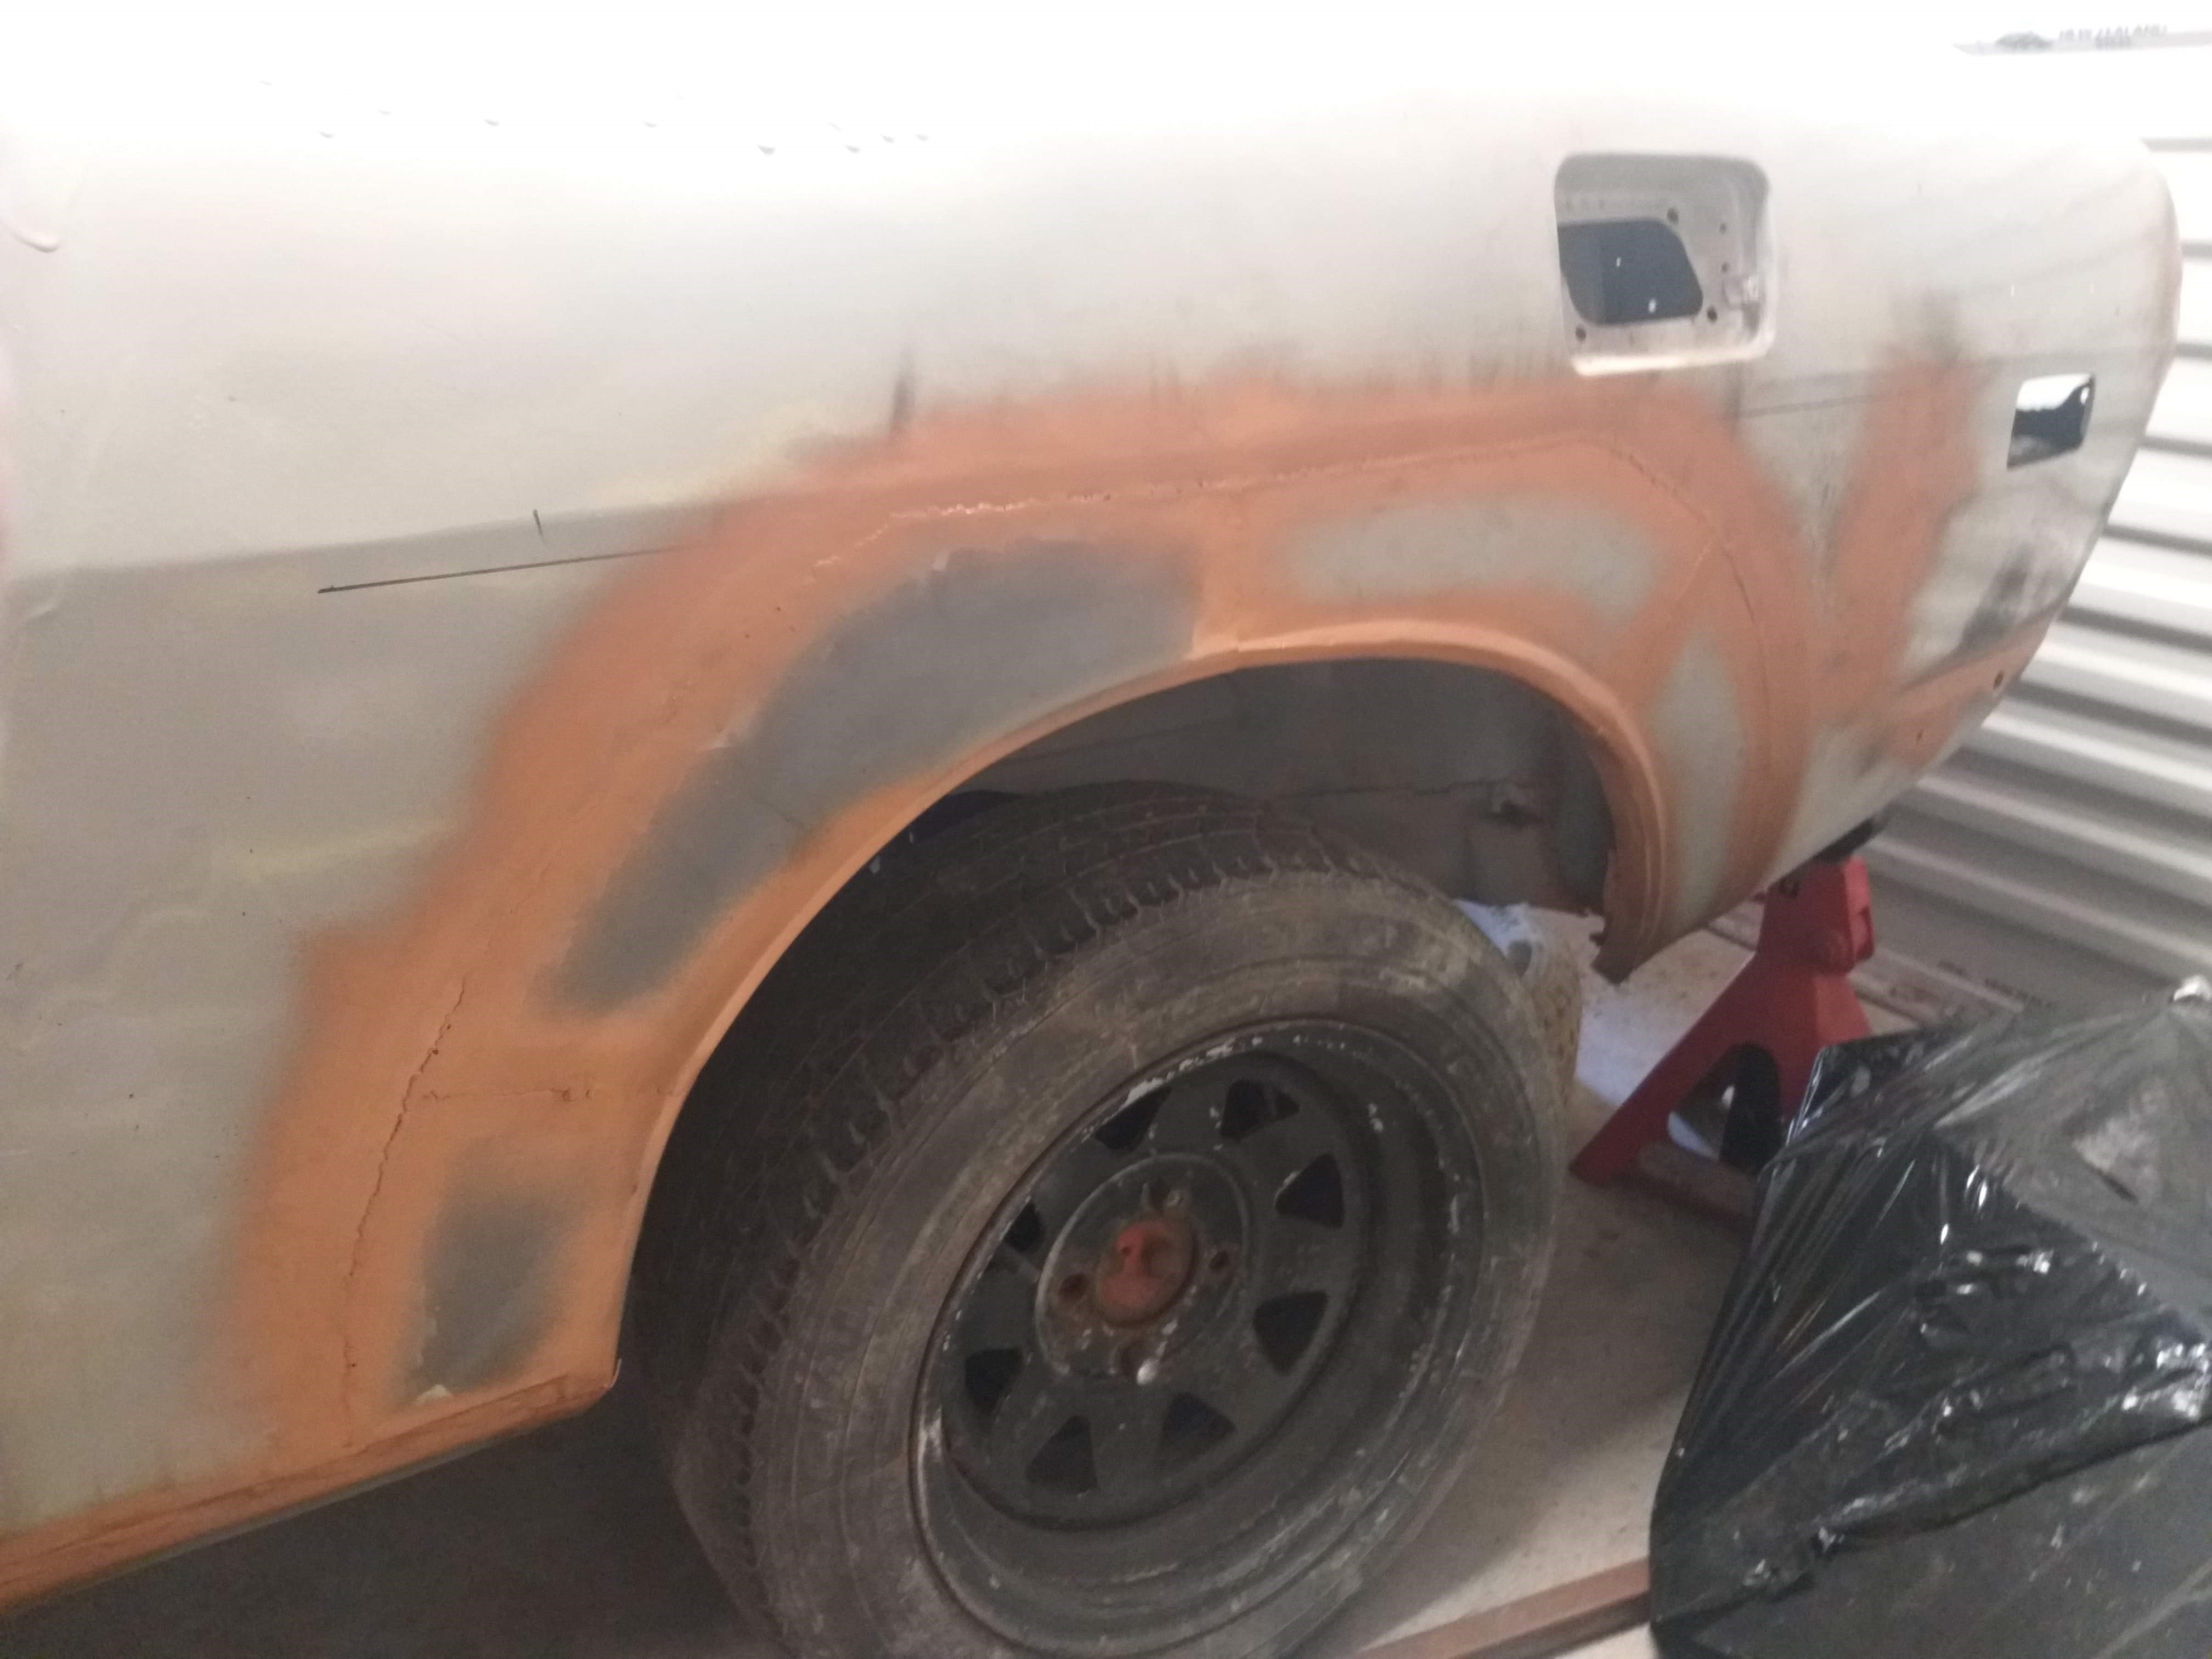
All the previous botched repairs
0 points
-
Very sad to hear this. RIP Darryl / Sumo.0 points
-
Just to let people here know that Darryl (aka RXSUMO) passed away 7:30 Saturday morning, after a long illness. Condolences to Sandra, familiy and friends. (if anyone wants to post up any messages here, I am sure Admin won't worry)0 points
-
The sills are not straight, one of the sills had a small crease it it, so instead of pulling out the crease, and making a new rear section to suit, he made the new section with a crease it it to match - wtf
0 points
-
Ok, so now I'm (mostly) over the mess the last panel guy carried out, i have been setting some plans in motion to start the next stage make some $ and get panels repaired properly. So as its part of the story, ill now share pics - the pics Tbh, dont really show how bad it all is, the rear 1/4 is very buckled, and the wheel arch flare, i cant even comprehend. You can sort of see in the first pic, where the rust was, at the very top of the flare, and at both lower corners. panel beater suggested, that there would be more rust between the inner and outer skins, and that a whole new section should be made, and installed, that way the inner can be treated properly, this all made sense, and i agreed. panel guy - lets call him Noddy had a new arch section made off a sample i gave him, when I gave him the sample I expressly said make new section a mirror image as sample was for RHS. this is where it turned to shit...... Noddy forgot to tell fabricator, and made as per sample, not mirrored, so profile was different. I said lets remake the correct profile, Noddy said, nah mate, ill make it work.......
0 points


.thumb.jpeg.e0a4bff61111e0c8c7396950fcc94da1.jpeg)


This leaderboard is set to Auckland/GMT+12:00