
Leaderboard


.thumb.jpeg.384ff72c8d2b0ee0d34a7bdedb55bdcf.jpeg)

Popular Content
Showing content with the highest reputation on 01/14/20 in all areas
-
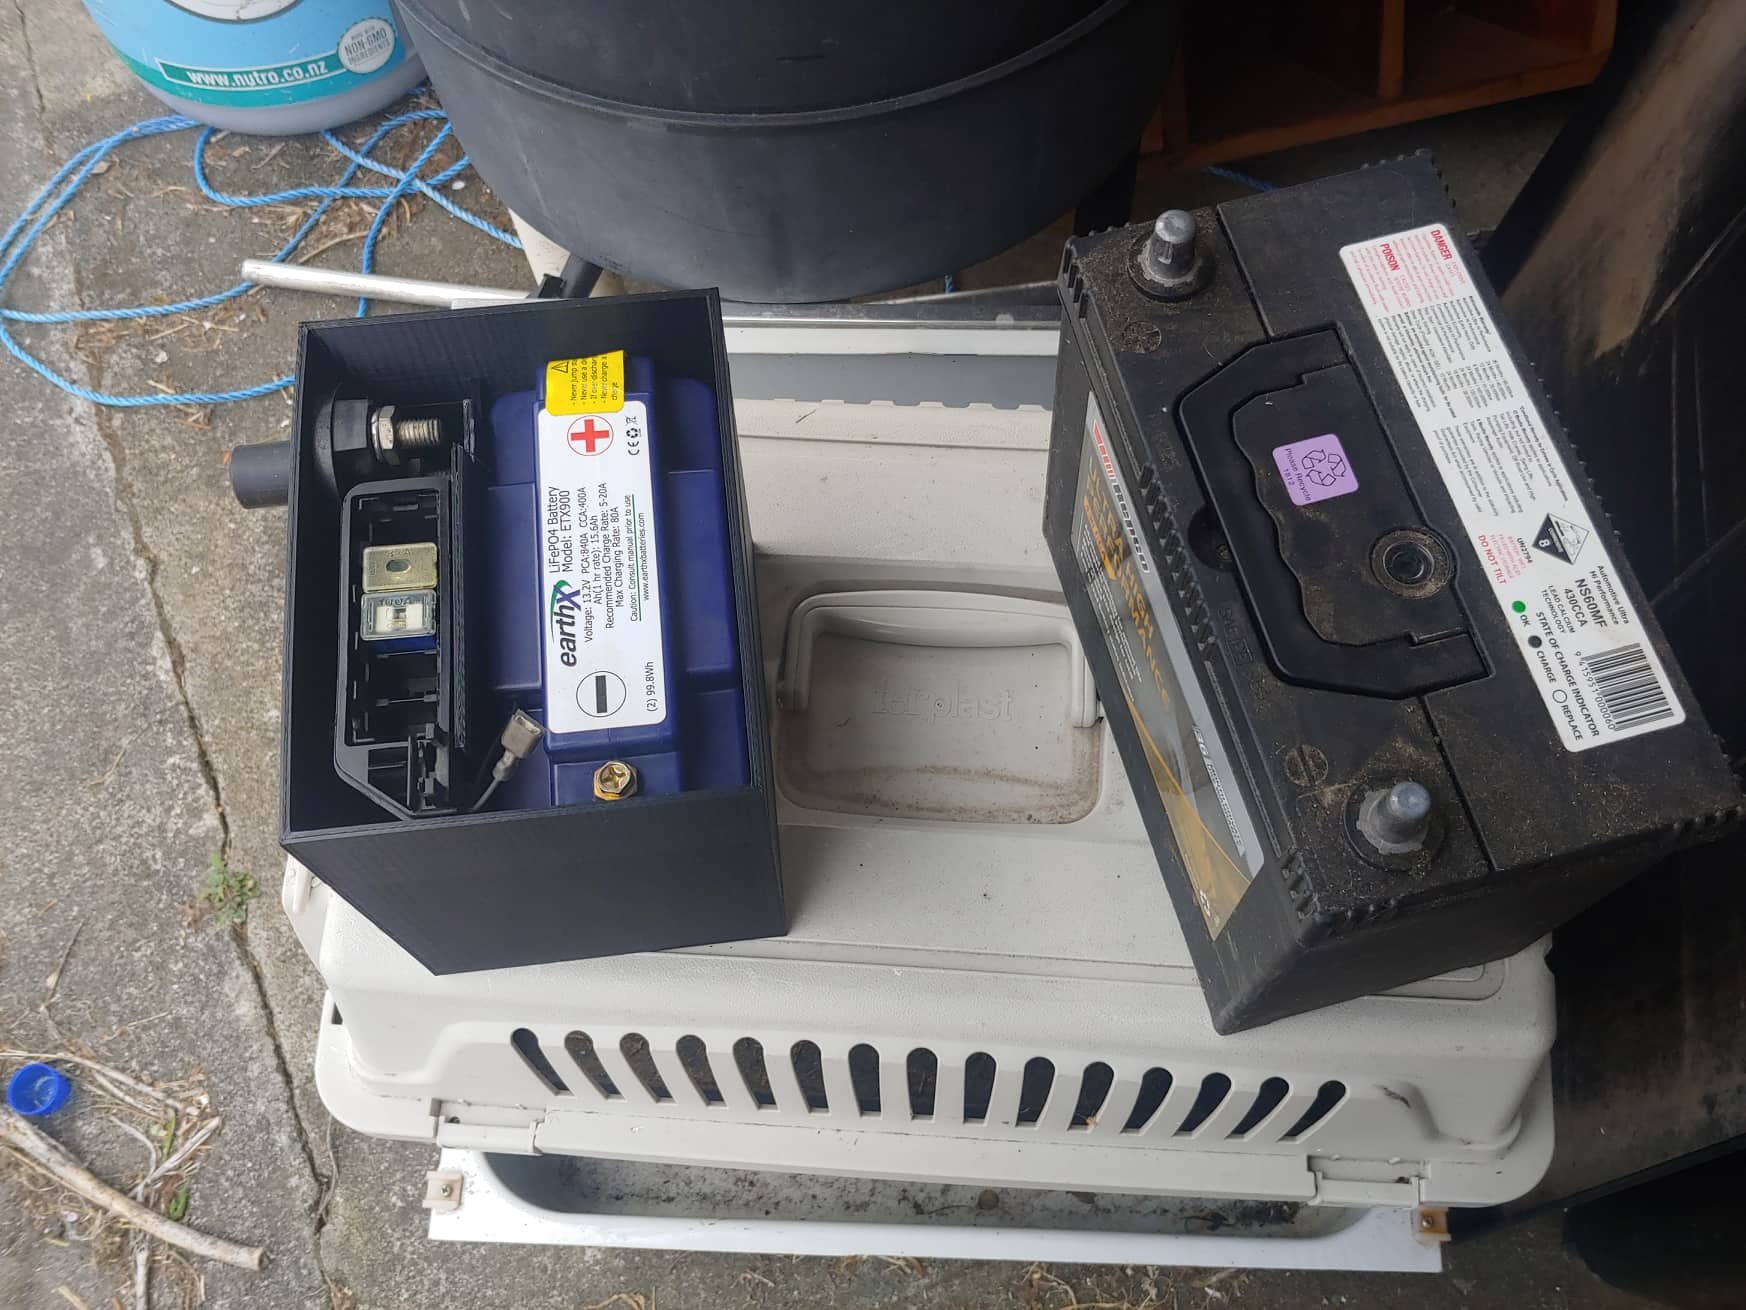
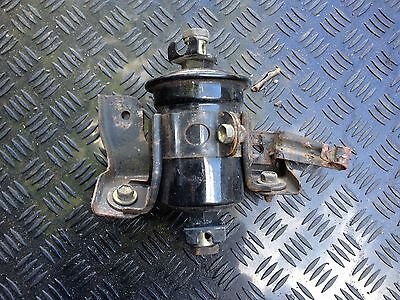
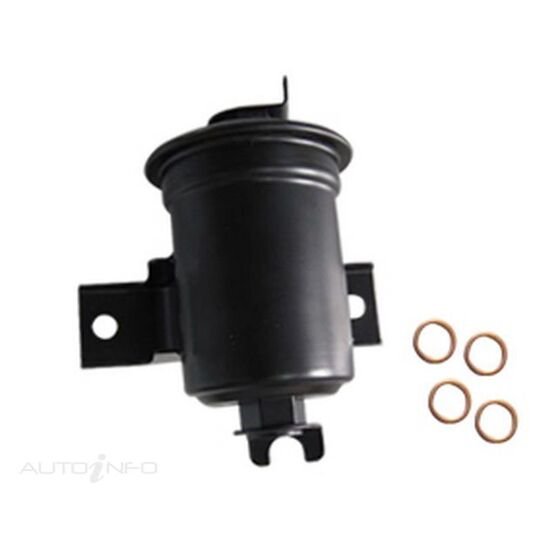
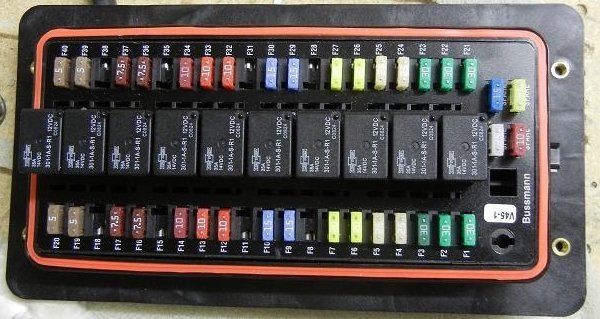
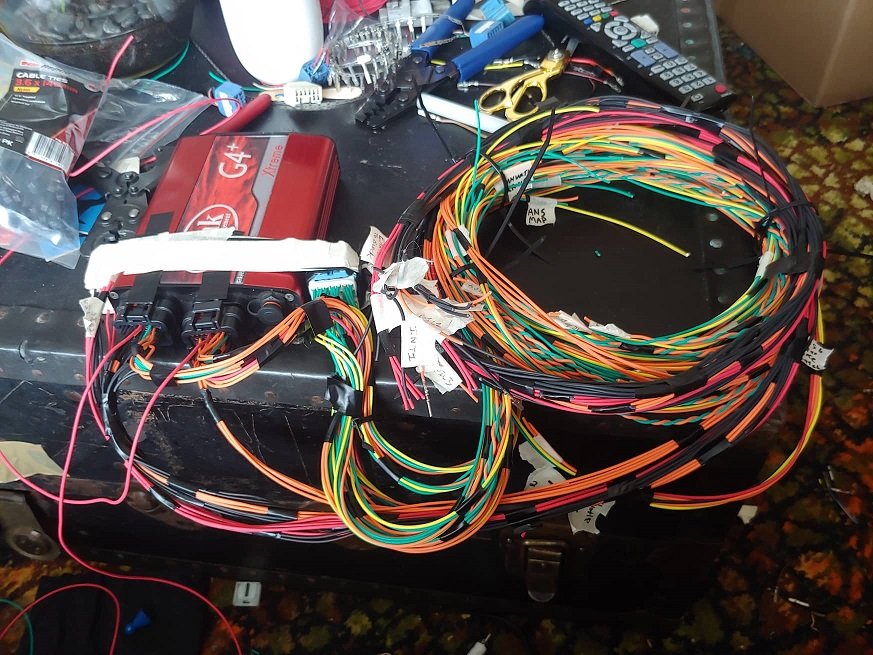
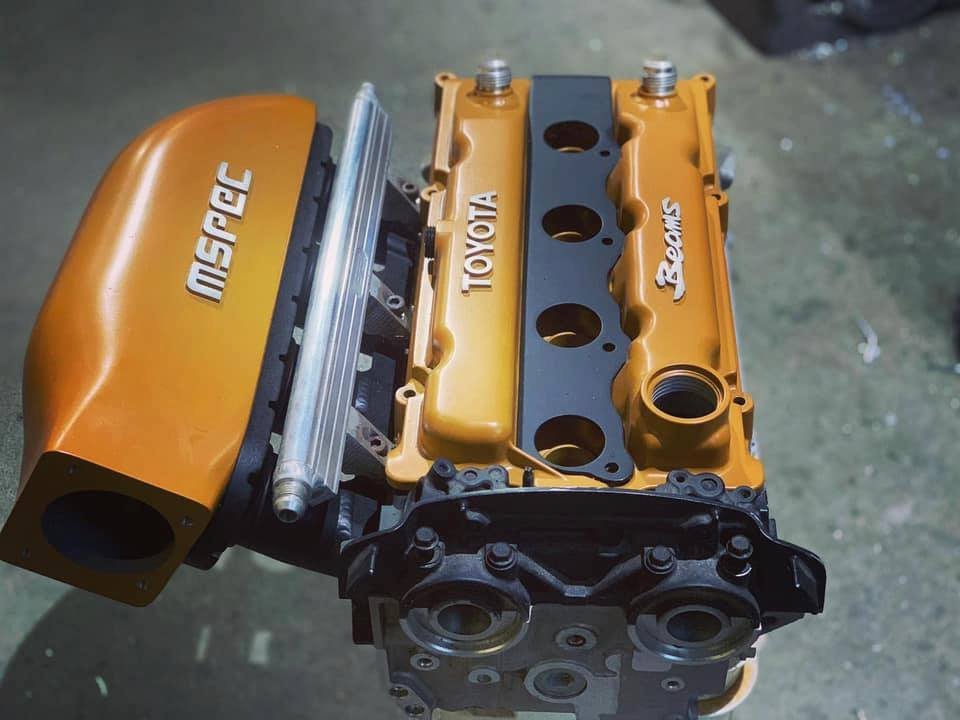
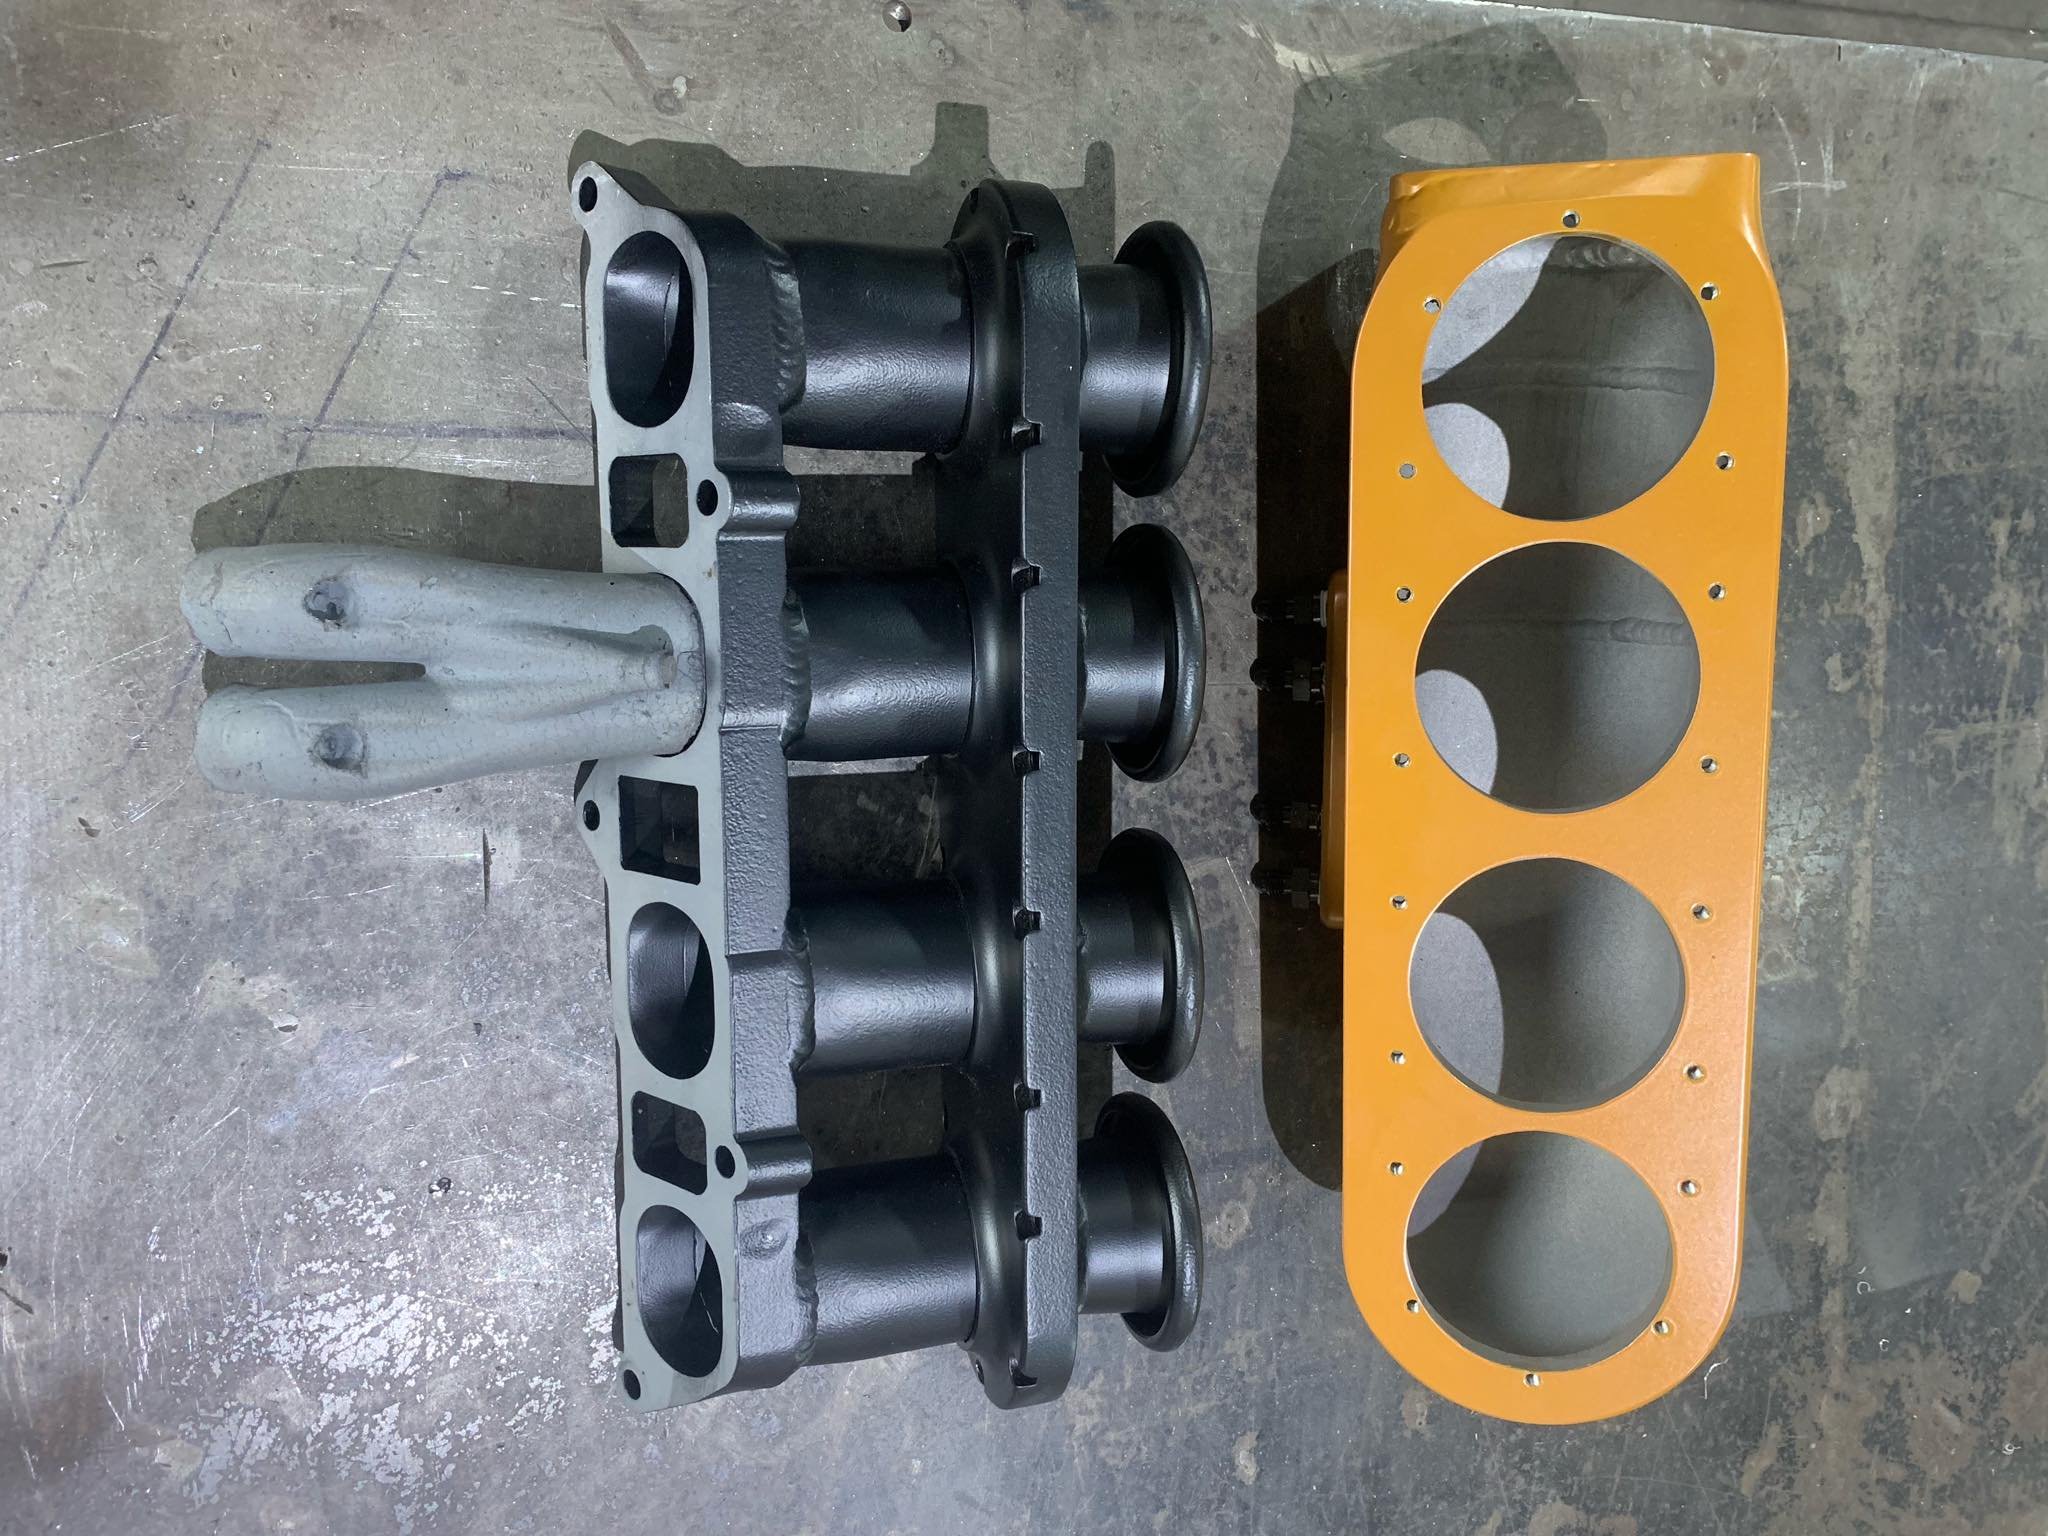
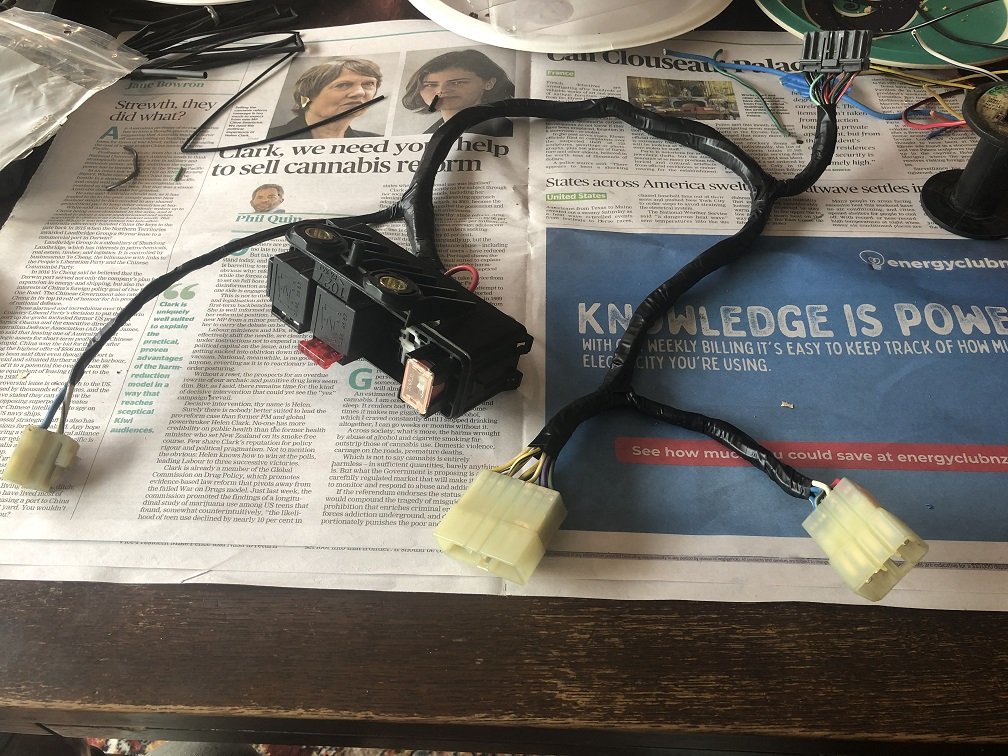
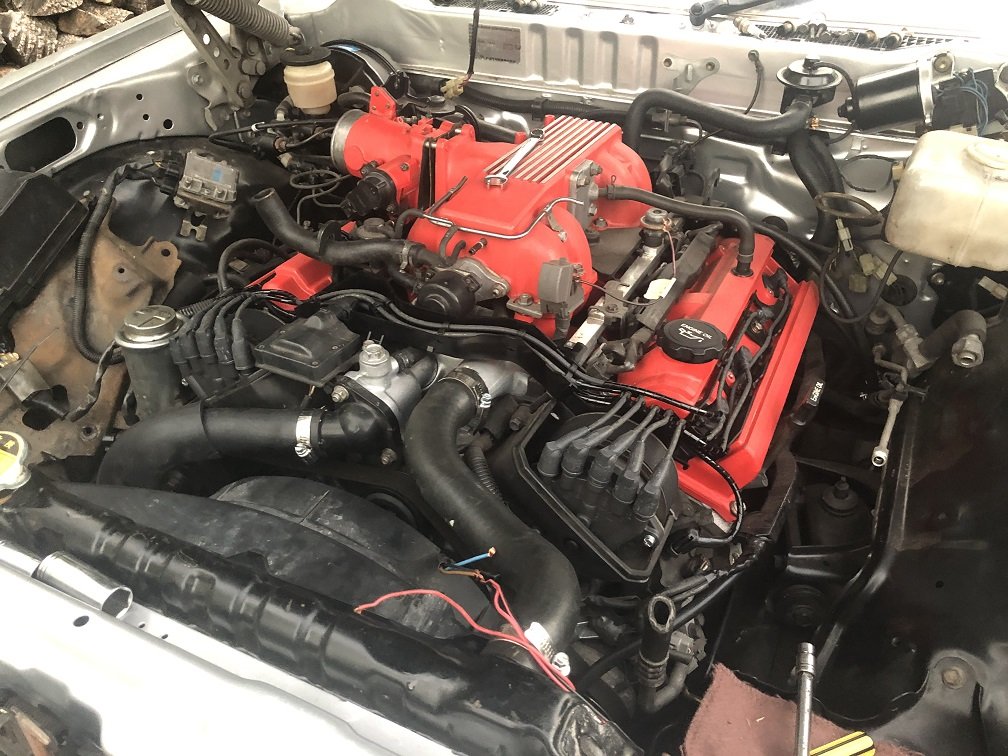
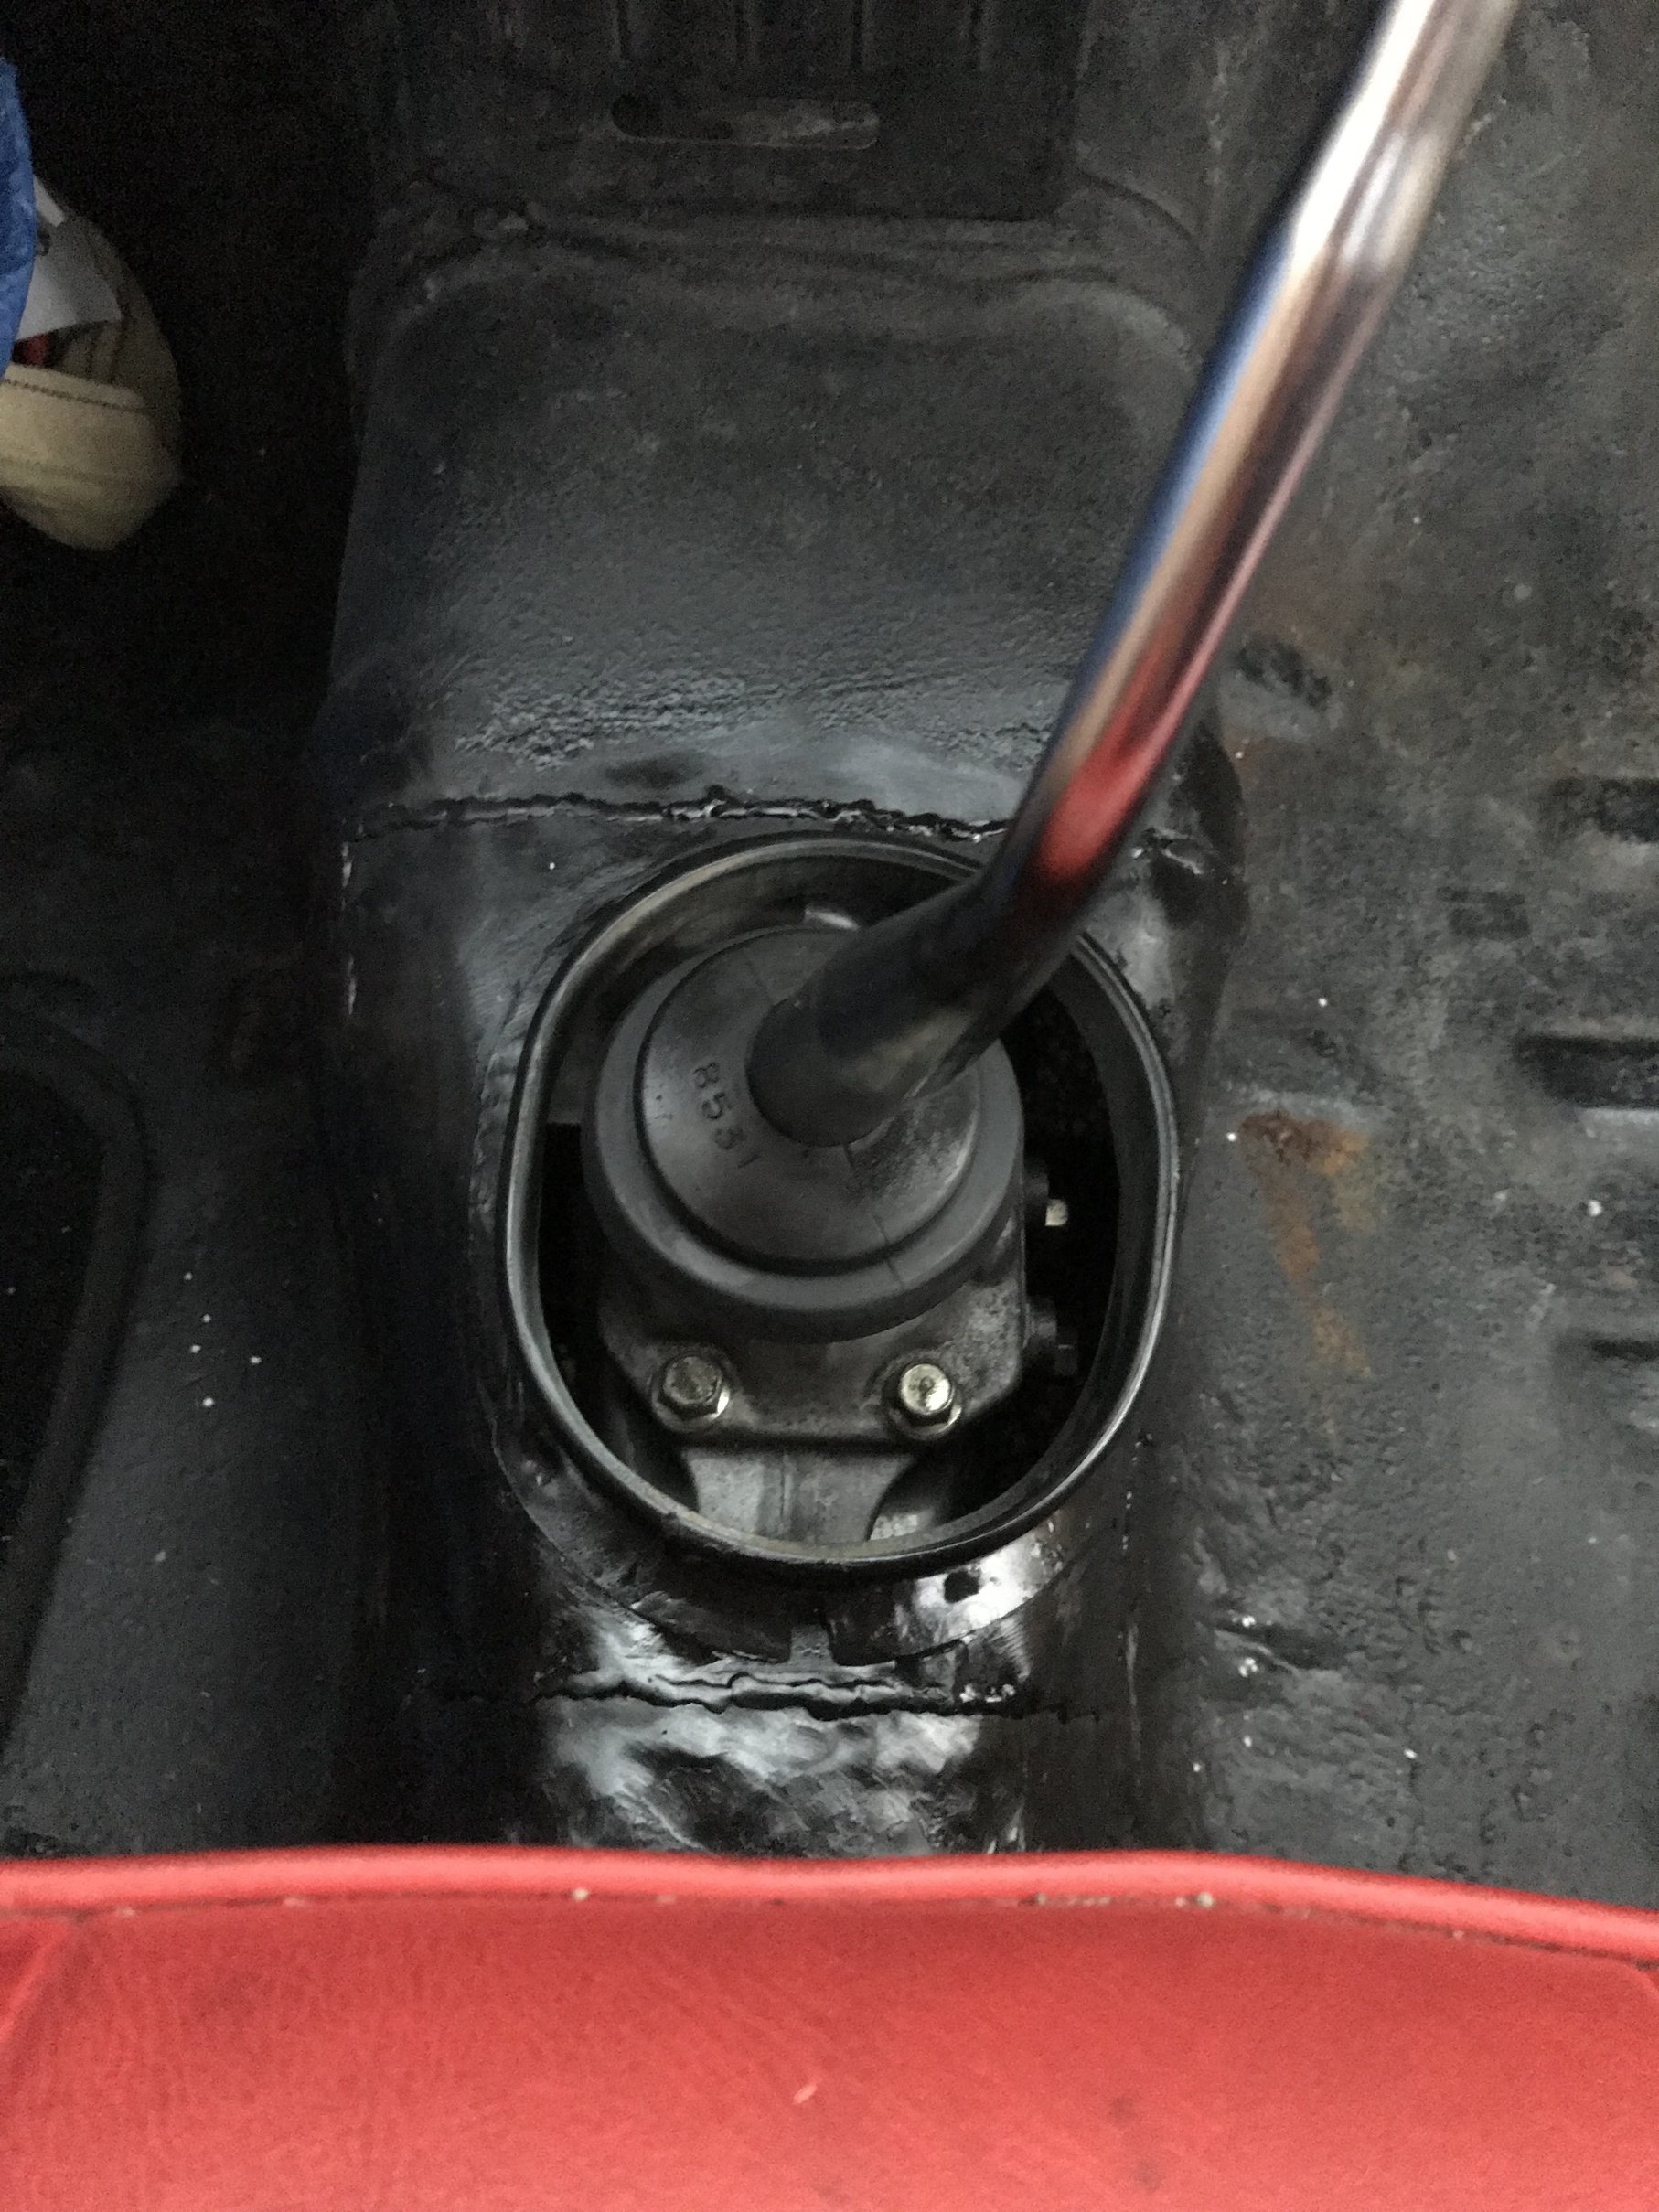
Aahhhhhhhhh eeeeeeeeeeeeeeeeeeeeeeeeeeeeeeeee aaaaaaaaaaaaaaaaaaaaaaaaaaaaaaaaaaaaa the sounds of stress of feeling like making no progress / too many things going on at once and being overwhelmed. I'm trying to put some effort into making the engine bay and wiring look tidy this time around. Its an extra layer of effort that makes things feel a lot harder. Like, there are 20 ways to do something functionally that works. Previously I'd take the path of most convenience and call it a day. But then trying to make it look good - It feels like you need to explore 10 of the options that look like shit to find 1 option that looks okay. Then you find an option that looks good but then it's impractical for working on, and you know you're gonna hate it later. Gotta find that balance. Anyway, after much deliberation I settled on a brand of lithium battery to get. Bought an EarthX unit for a few different reasons. It has a 2 year warranty where as others were only 6 months. Gives me a bit more confidence that they themselves are confident in the product. It also has a built in battery management thingy which will protect it from over/under voltage, short circuiting and a few other safety things. Since it's going back in the engine bay and I'm trying to make things look nice I've been scheming a battery box for it. So it's got a battery switch, a 100 amp fuse to run the alternator and general power circuit. Then was thinking about having a few fuses and relays in there for high current items that are close to the front of the car, like the radiator fan. But not sure on that one yet. Including battery, should be somewhere around 3kg when finished. Thinking a thin PETG printed box, so its non conductive. With an outer layer of CF for strength/heat protection/peace of mind. To go with this, trying to push all of my relays and fans to a single center mounted box. So bought one of the big sized bussmann boxes like so. Hoping to have it somewhere easy to access in the cabin, without looking obnoxious. Center console area is seeming like best choice at the minute. But it will be nice to tidy up random half empty fuse boxes and relays around the place. I bought a few kilometers of TXL wire in different gauges and colours so I've been making a new engine and body loom from scratch. It's a bit of work, but considerably easier than last time. Having all of the right tools and crimp terminals etc makes life a whole lot easier. I have learned heaps from my first time making a loom from scratch, some things I'd do differently next time for sure. I'd imagine it's considerably easier making an engine for a person that isnt obsessed with having sensors on every friggen thing. But it's been fun. Hopefully it all works without any major issues. The only problem I've had is with the Bosch e-throttle, the pins are so small and you only get 6 terminals to crimp, no spares... I overcrimped some so it pinched the wire off. So think I'll buy one with a pigtail loom and splice it on, as I'm not confident I'll be able to get 6 out of 6 on next try either if I just buy another unterminated plug. The fuel lines are easy to tidy up. As it's easy to reroute them to hide under other stuff. I wasnt happy with how heavy and yuck looking the existing fuel filter bracket is/was, which is a 2 piece metal crapola from an SW20 like so: Look at all of those wasteful 10s of grams of ugly metal bracket! Disgusting. So some internet research came up with this fella, which has a light bracket spot welded directly to the filter. God damn look at that minimalist efficiency. Scales say previously 497 grams vs 255 grams. That means another 1/4 kg of pies that I can eat. Excellent. I also impulse purchased a plenum and shaved down engine cover, because, reasons. The plenum is likely not much use on an NA setup but it was going for a steal and looked awesome. Made by Mike at MSPEC who is a maximum GC does some amazing work. To be honest I dont think I'll use any of it, apart from testing to see how it goes. But genuinely decently made parts for a beams engine are hard to come by, outside of exhaust manifolds and ITB adapters. So, hoarder reasons basically. Might sell it on after I've had a play around with it. No doubt there will be someone with a turbo setup who could give it a good home at some point. Also got Bosch e-throttle which is a nice unit. and Spartan 3 wideband with the LSU-ADV sensor. Looking forward to seeing how much difference the fast response sensor makes. Hopefully doesnt blow up either like 4.8s do. I think that sums up my "cant draw graphs with car because it doesnt go" existential crisis for now. Thanks for reading
 11 points
 -
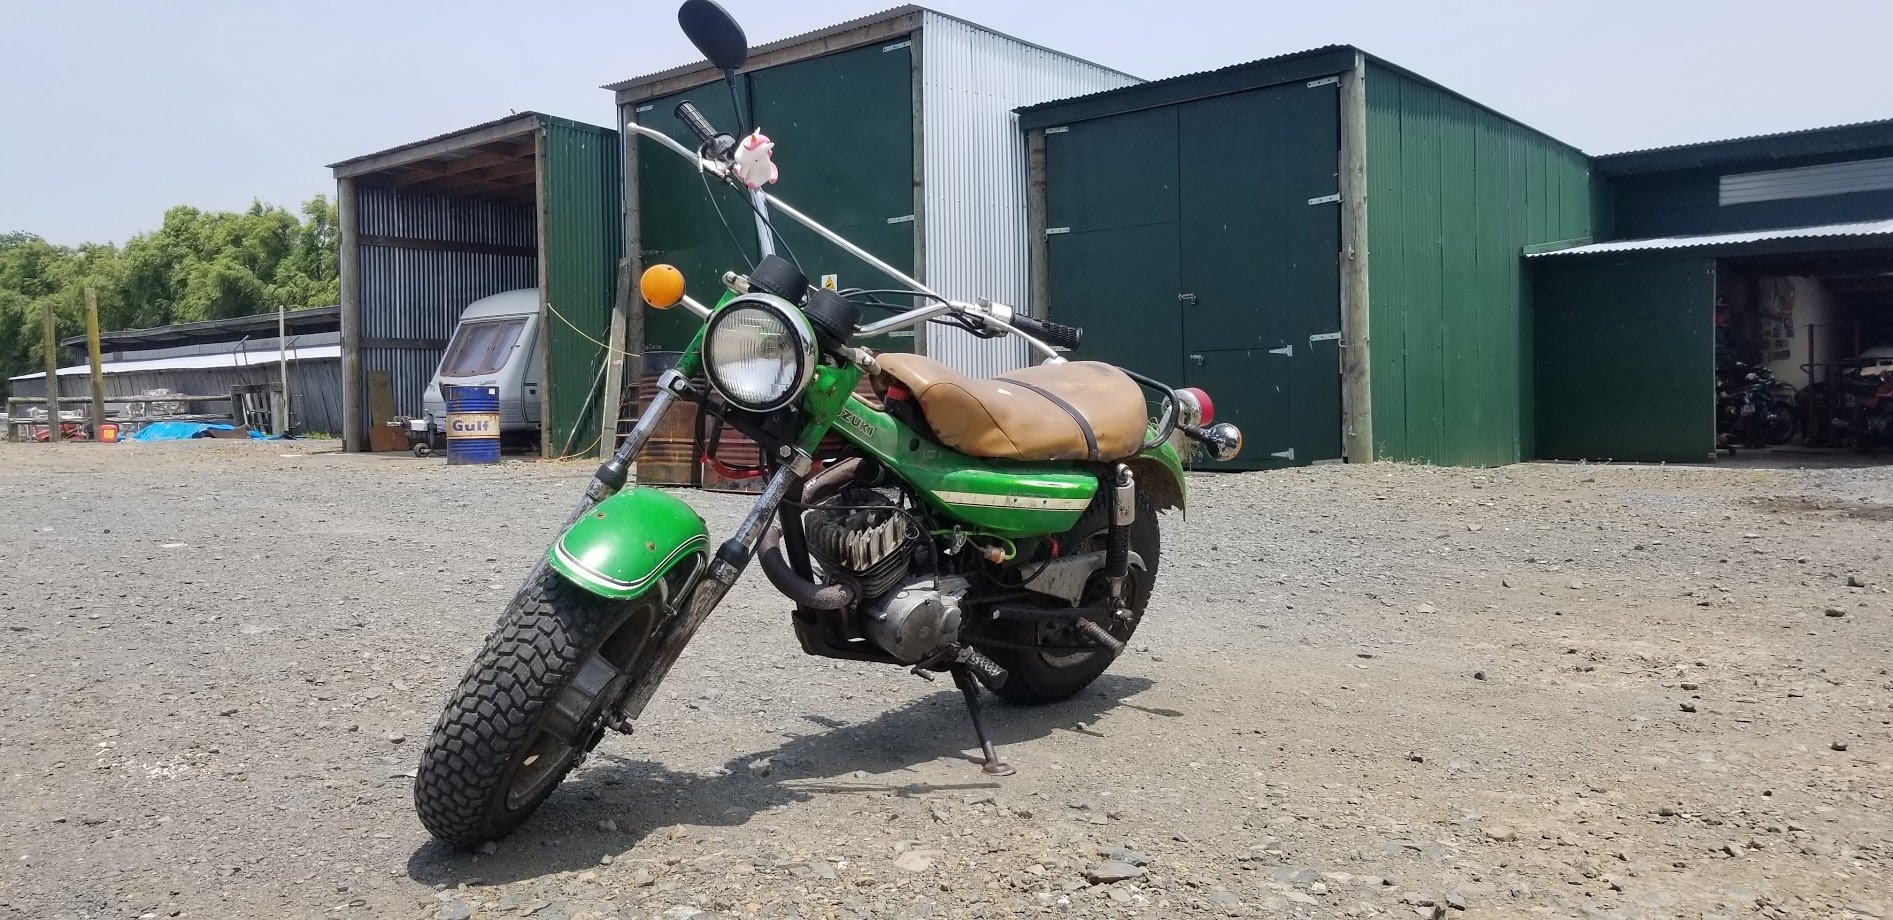
Because everyone else has a CT110 CT50 and @UTERUS says they are good, I grabbed this low mileage example from Turners auctions. These have been going for stupid money lately, however when an auction ends on new years day and everyone is still too dusty to bid, some bargains are there to be had. It's blue due to ex contractor and has only just been run in at 103k. Rack box has since been removed and seems to go pretty well. A+
11 points
-
I'm still firmly in the "hunting and gathering" phase of my Thames resto mod project. So the newer L300 is a definite fail if you are looking for a straight forward front suspension swap into something else, but having said that the forward facing steering rack and angle box look promising as an alternative to the archaic steering box setup on the Thames. Getting back to the front suspension it was pointed out to me by Cletus that the way to go is the older mid '80s L300 vans as they have the fully detachable front beam. So for the past few weeks I've been hunting for one of these older vans. Here in OZ there seem to be still a few of the 4 wheel drive older vans around, but the 2 wheel drive versions are pretty thin on the ground. I managed to eventually track down a 1984 Starwagon, only snag was it was located almost 600km away and was a non runner. Did a deal on the van for $250 and managed to snag a cheap return trip on an empty transporter that was coming back our way if I was happy to wait. Van arrived home earlier today. I chucked a battery in it, primed the carb and she started first go. Hasn't been run since 2017 so she is a bit smokey, but I don't plan on using the motor so I'm not too fussed. Shoved the van on my ramps and had a bit of a nosey around underneath. Initial measurements of the Starwagon mounting points are pretty close to the distance between the Thames chassis rails so looks like a relatively straight forward swap. I've now got my own private "pick a part" stash of 4 Japper vans when I eventually start the conversion. So the loose plan thus far is: Complete front suspension and brakes from a 1984 L300 Starwagon. Steering column, angle box and power steering rack from a 1996 L300 Express Toyota 4Y engine and 5 speed column shift gearbox, drive shaft and rear axle from a 1986 HiAce Picture of the mighty Starwagon for you to perv over. Thanks for reading.
10 points
-
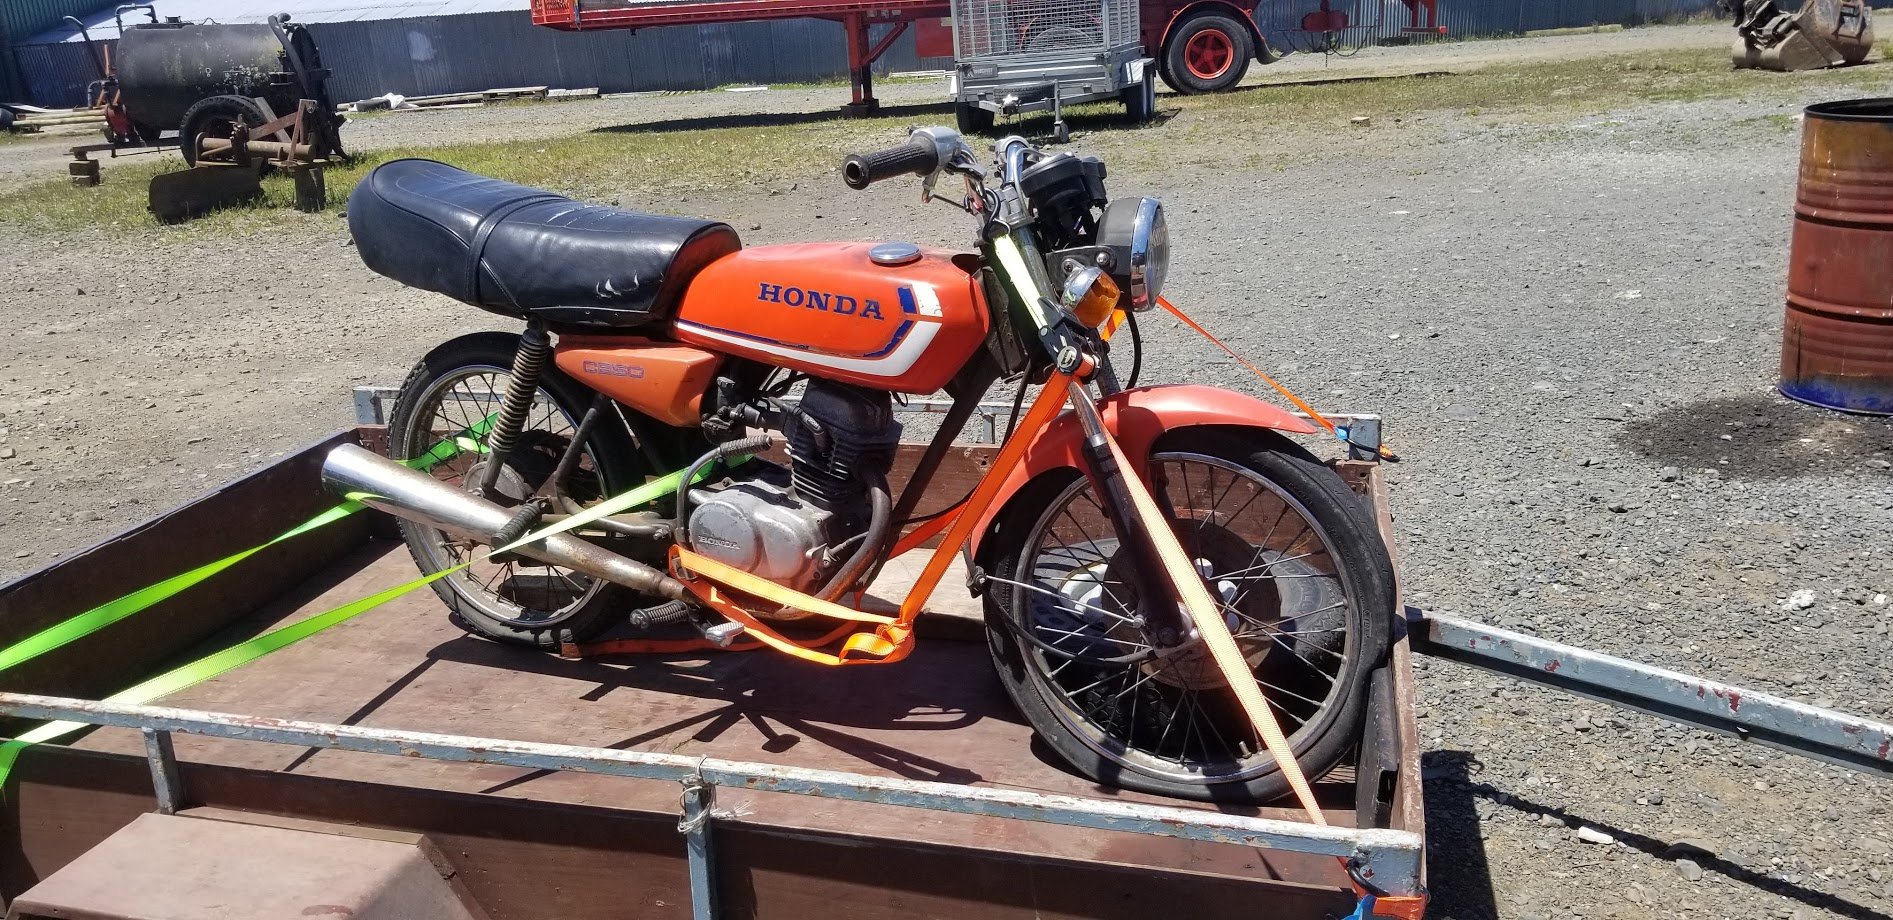
This is a CB50 that needs all the things - namely brakes, less rattle, more ali-express seats etc. I swapped it for one of my CountryCalender.mp3 bikes. Will probably build this one up in the near future with some hydraulic disc front end and some XR100 goodness.
6 points
-
Make sure you get a big light bar and a 'fuck 1080' sticker5 points
-
This one also has a flashing orange light on the back to alert other road users that you've stopped to have a piss / roll a durrie / sharn the benefits of 2 extra strokes.4 points
-
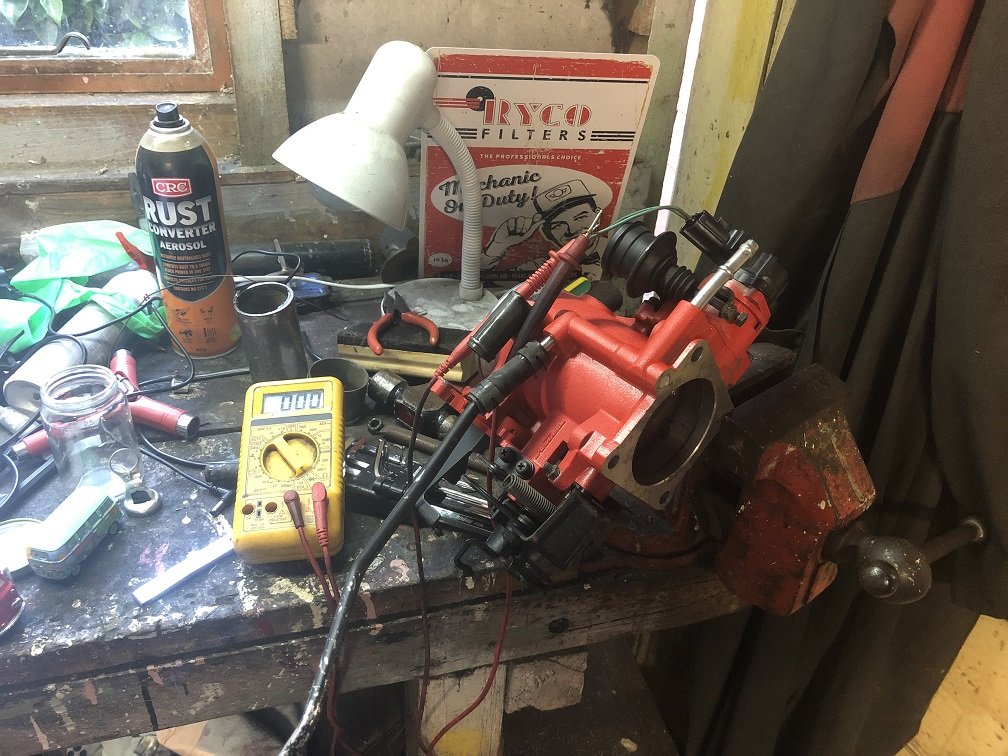
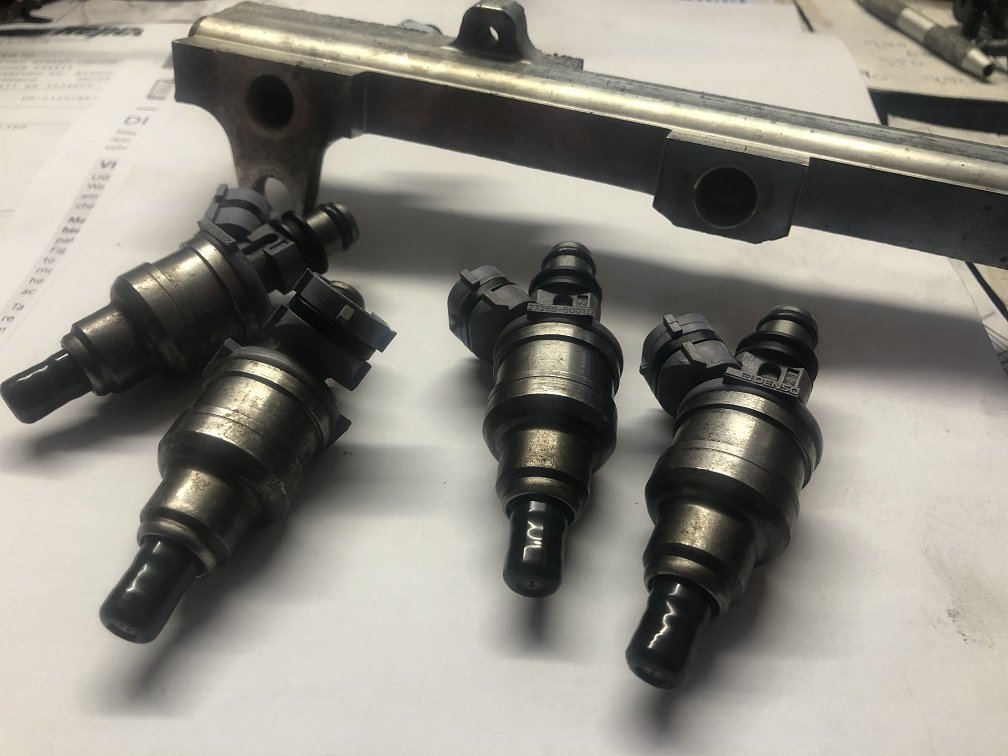
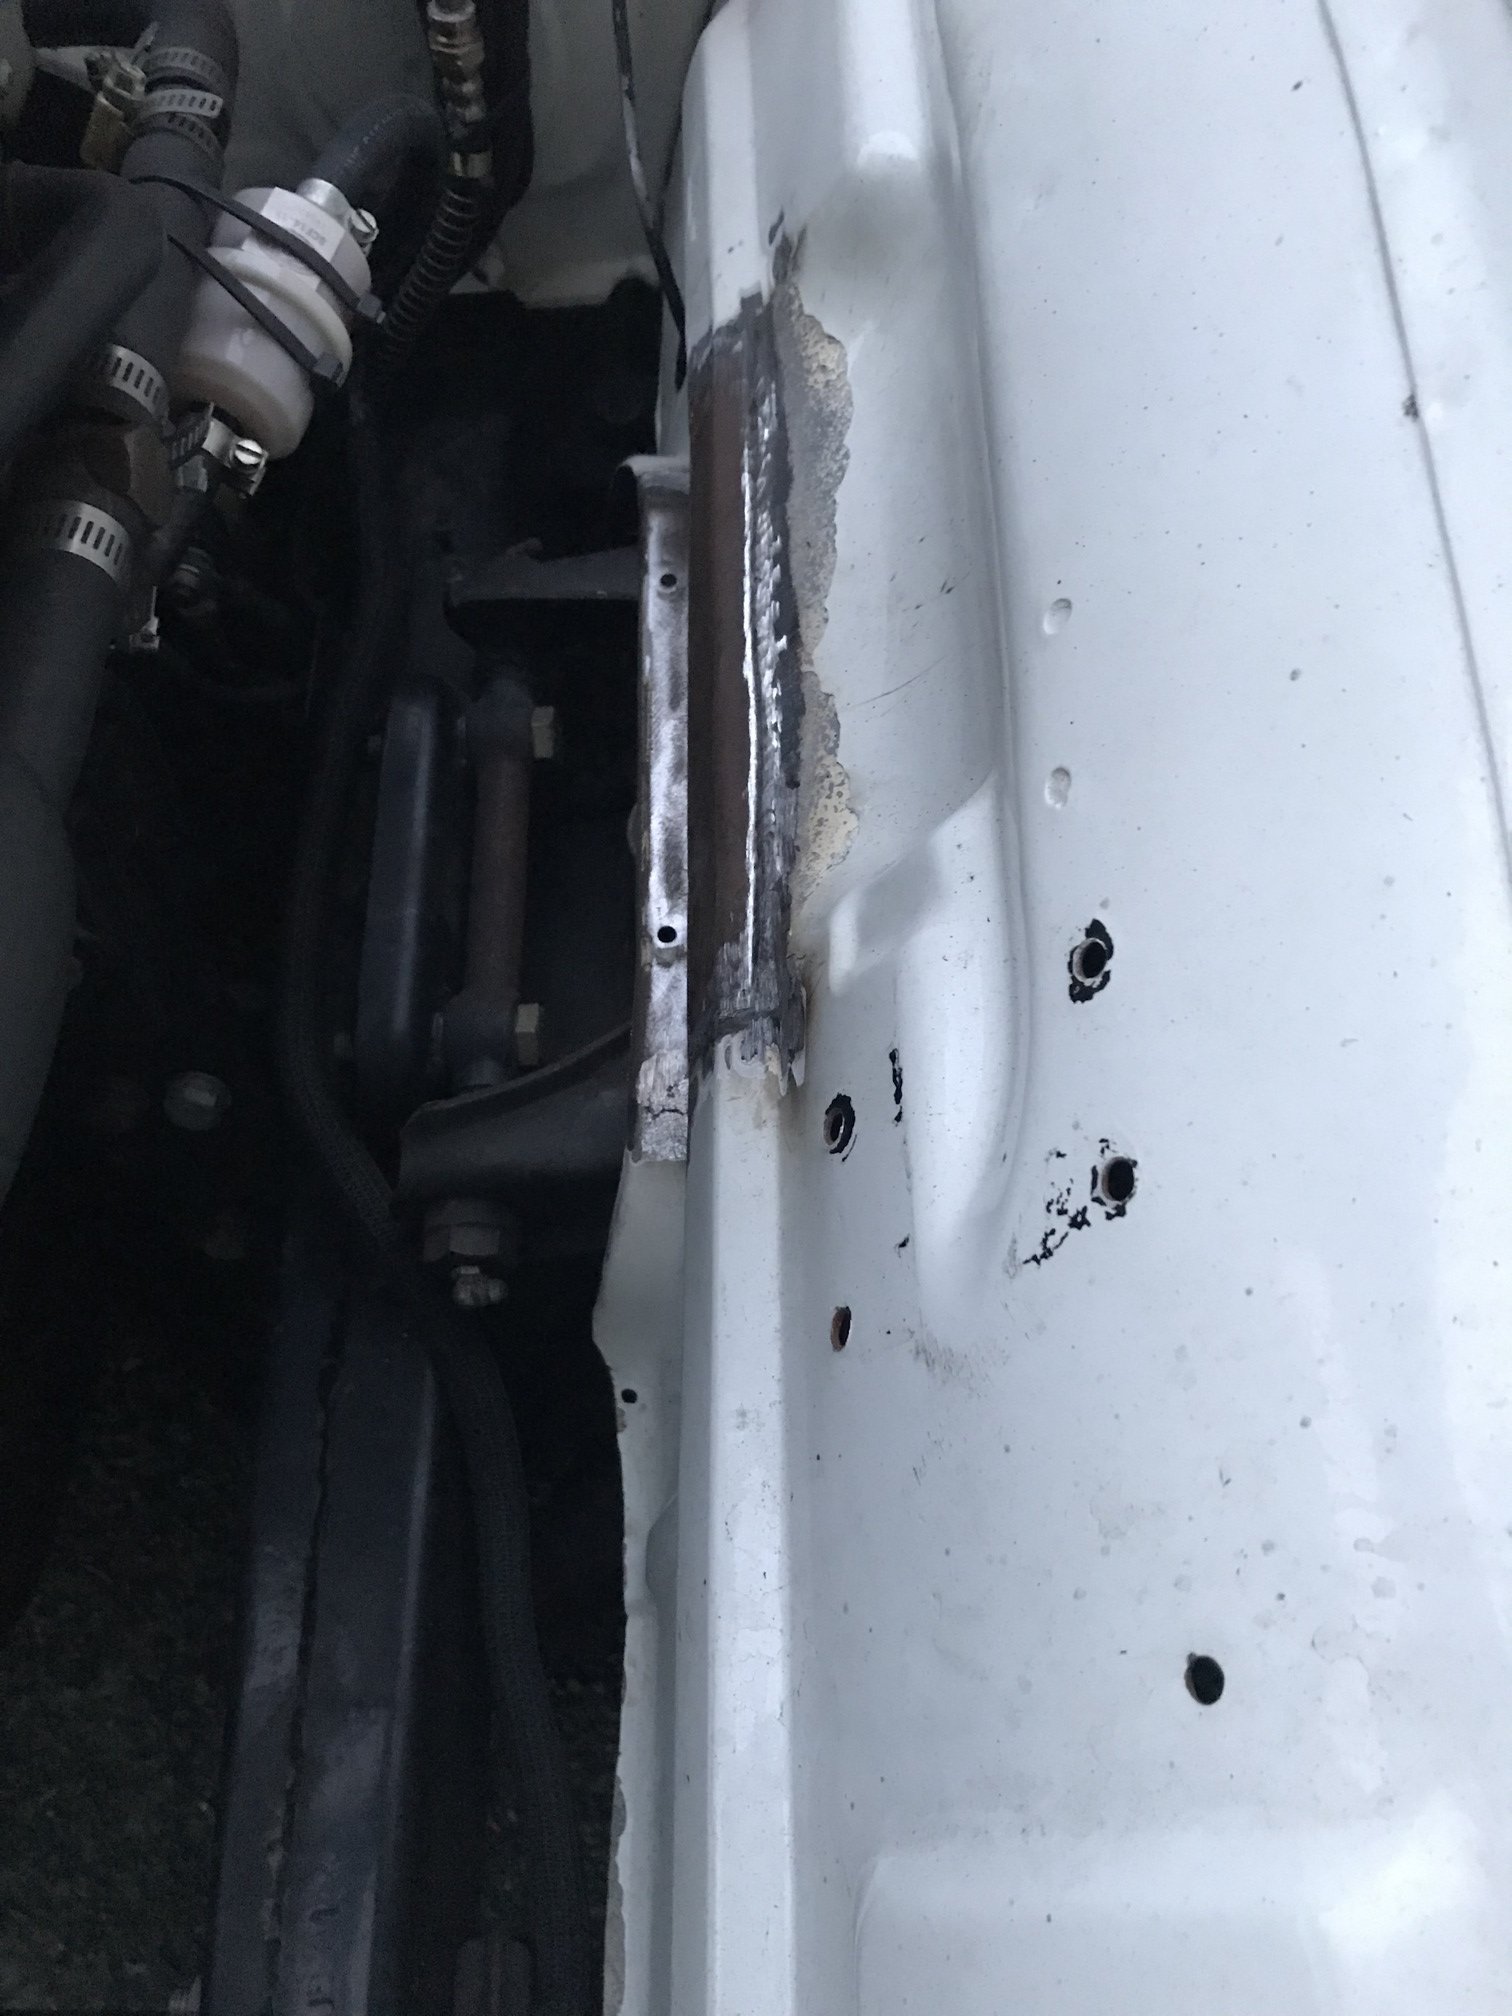
Wow, this got buried quick! Everyone is working hard on their projects obviously. Relay loom is done & working well, although I'm getting a code for speed sensor if I rev it too much. I might see if I can trigger the ECU neutral wire or feed the speed signal from the dash speed output before I put it in permanently. I've calibrated the throttle plate & TPS. The TPS had a fluctuating resistance curve off idle, after pulling it apart & cleaning it came up like new. The hesitation around 1500rpm is gone now, but it is still running rich and feels like it's running on 7. The leads had a few that were open circuit which doesn't help and the plugs were fairly old. Miles Toyota had the cheapest lead set I could find and it came with a lot of the plastic guides, sweet! Even better, but still running rich and a hairy idle. Maybe the compressed air and brake clean wasn't the best method for cleaning the injectors. After pulling them and pressurising the rail - yup, most are leaking a bit. A refurbished genuine set off eBay was half the price of cleaning locally, so they are on the way for next month. While I'm waiting I'll get the radiator fan sorted & try and make up some kind of air filter/cold air intake setup. All these small details feel like wading through mud! I guess that's why most projects end up getting "95%" complete.
4 points
-
3 points
-
Yeah, but when the doc hut is 8 hours walk in, it doesn't see much traffic, i'll still be camping though. The gate is locked to vehicles as the track is across private land, just have to book the key in advance from the station owners.2 points
-
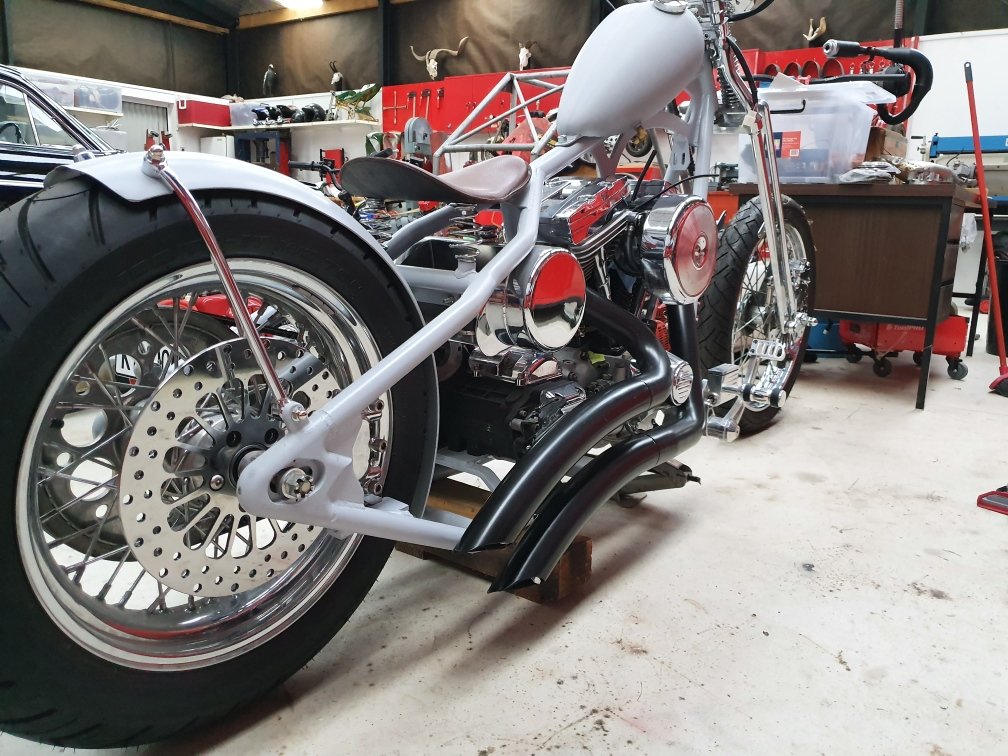
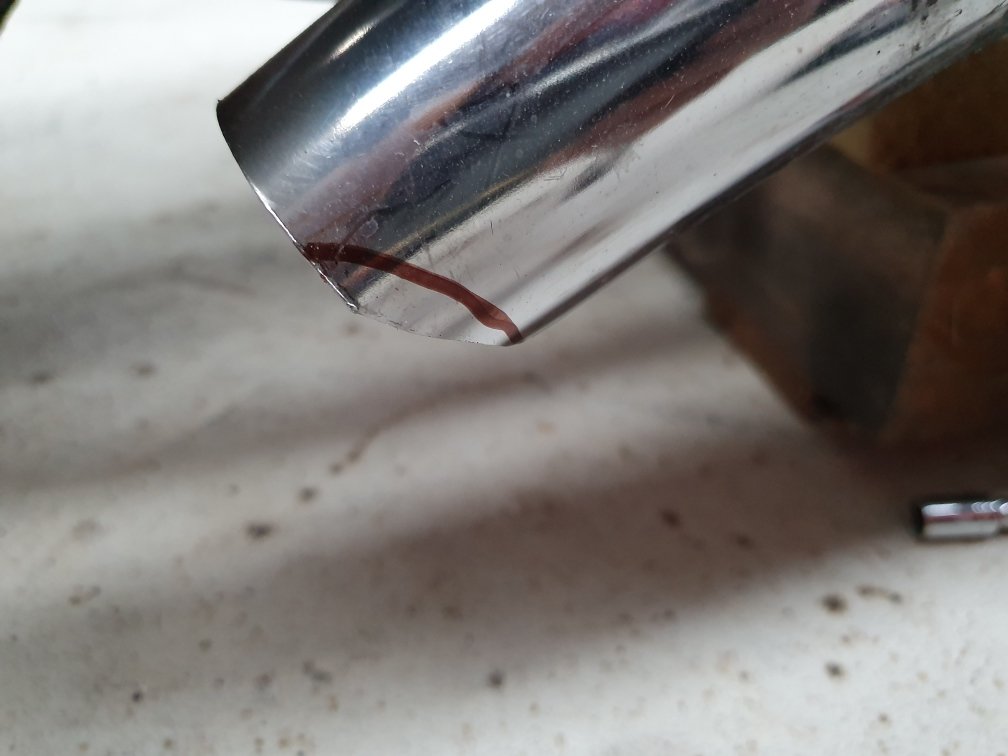
Fucking around with my exhausts. They are the lowest part of my bike, so I trimmed as much off as possible without ruining the ceramic coated heat shields. The bit sticking out the lower pipe (marked by vivid line in photo above) is now gone. I then measured how much the bike could lean before touching and its approaching 30° from vertical. Doesn't sound much, but then I Google searched a few images and noticed something. This superbike is hard out cornering with a knee down, but the bike itself is probably 45° max from vertical, maybe not even that much? So 30° doesn't seem too bad for a cruiser. But when I do my final assembly I'll look at it again and may get a bit more aggressive with the angle grinder if need be.
2 points
-
Probably? Although the key-tag says Telecom, so who knows. Doesn't have low-range like farm-spec CTs which I'm not too worried about. Seems well serviced too.2 points
-
This is one of my RV-125 Van Van things. I had 2 1/2 of them. Bit of a pointless bike, but do have a tacho and 5 speeds. Balloon tyres were designed for sand dunes, but not that usefull otherwise. All a bit rugged so have been selling them off in true Penny Pincher style lately.
2 points
-
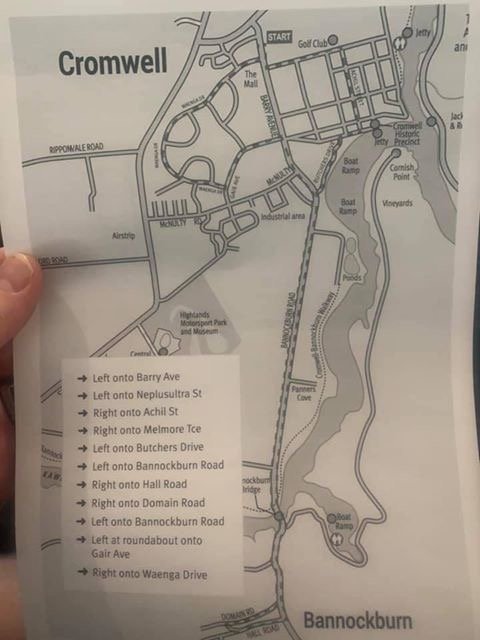
Route map for Friday cruising
2 points
-
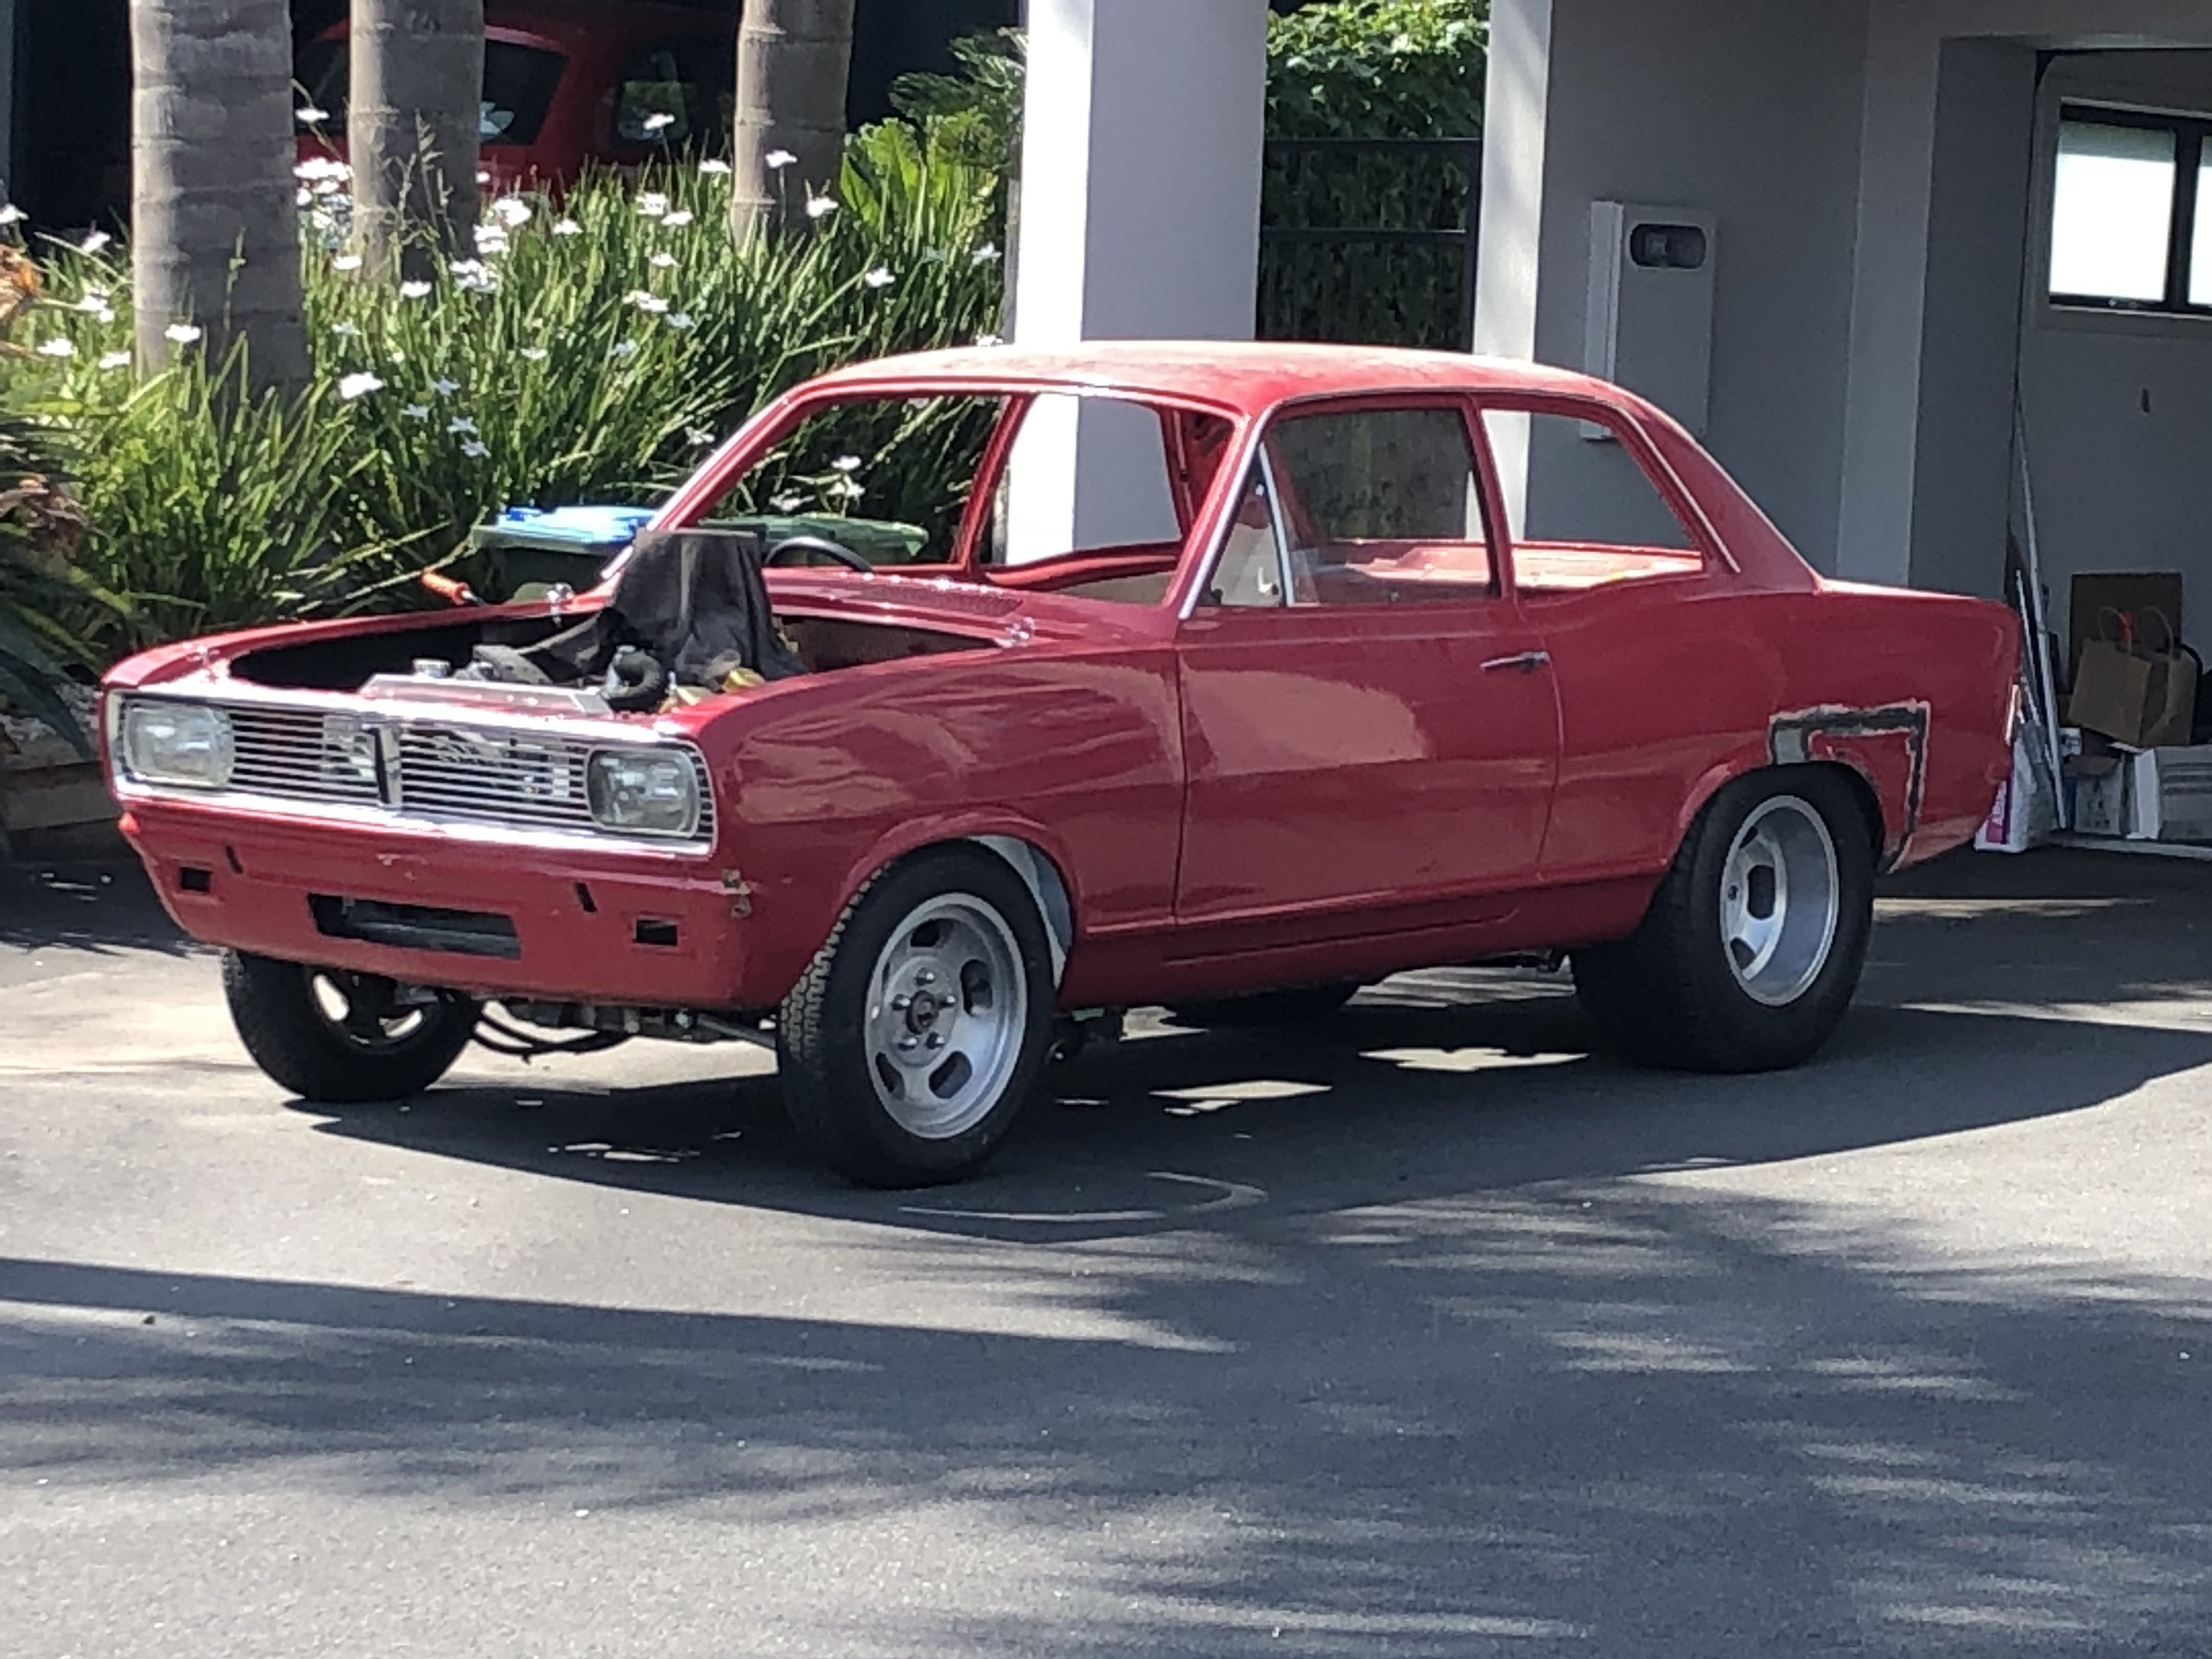
I did the black cover sanded fin look on my Camaro.. I liked it a lot
2 points
-
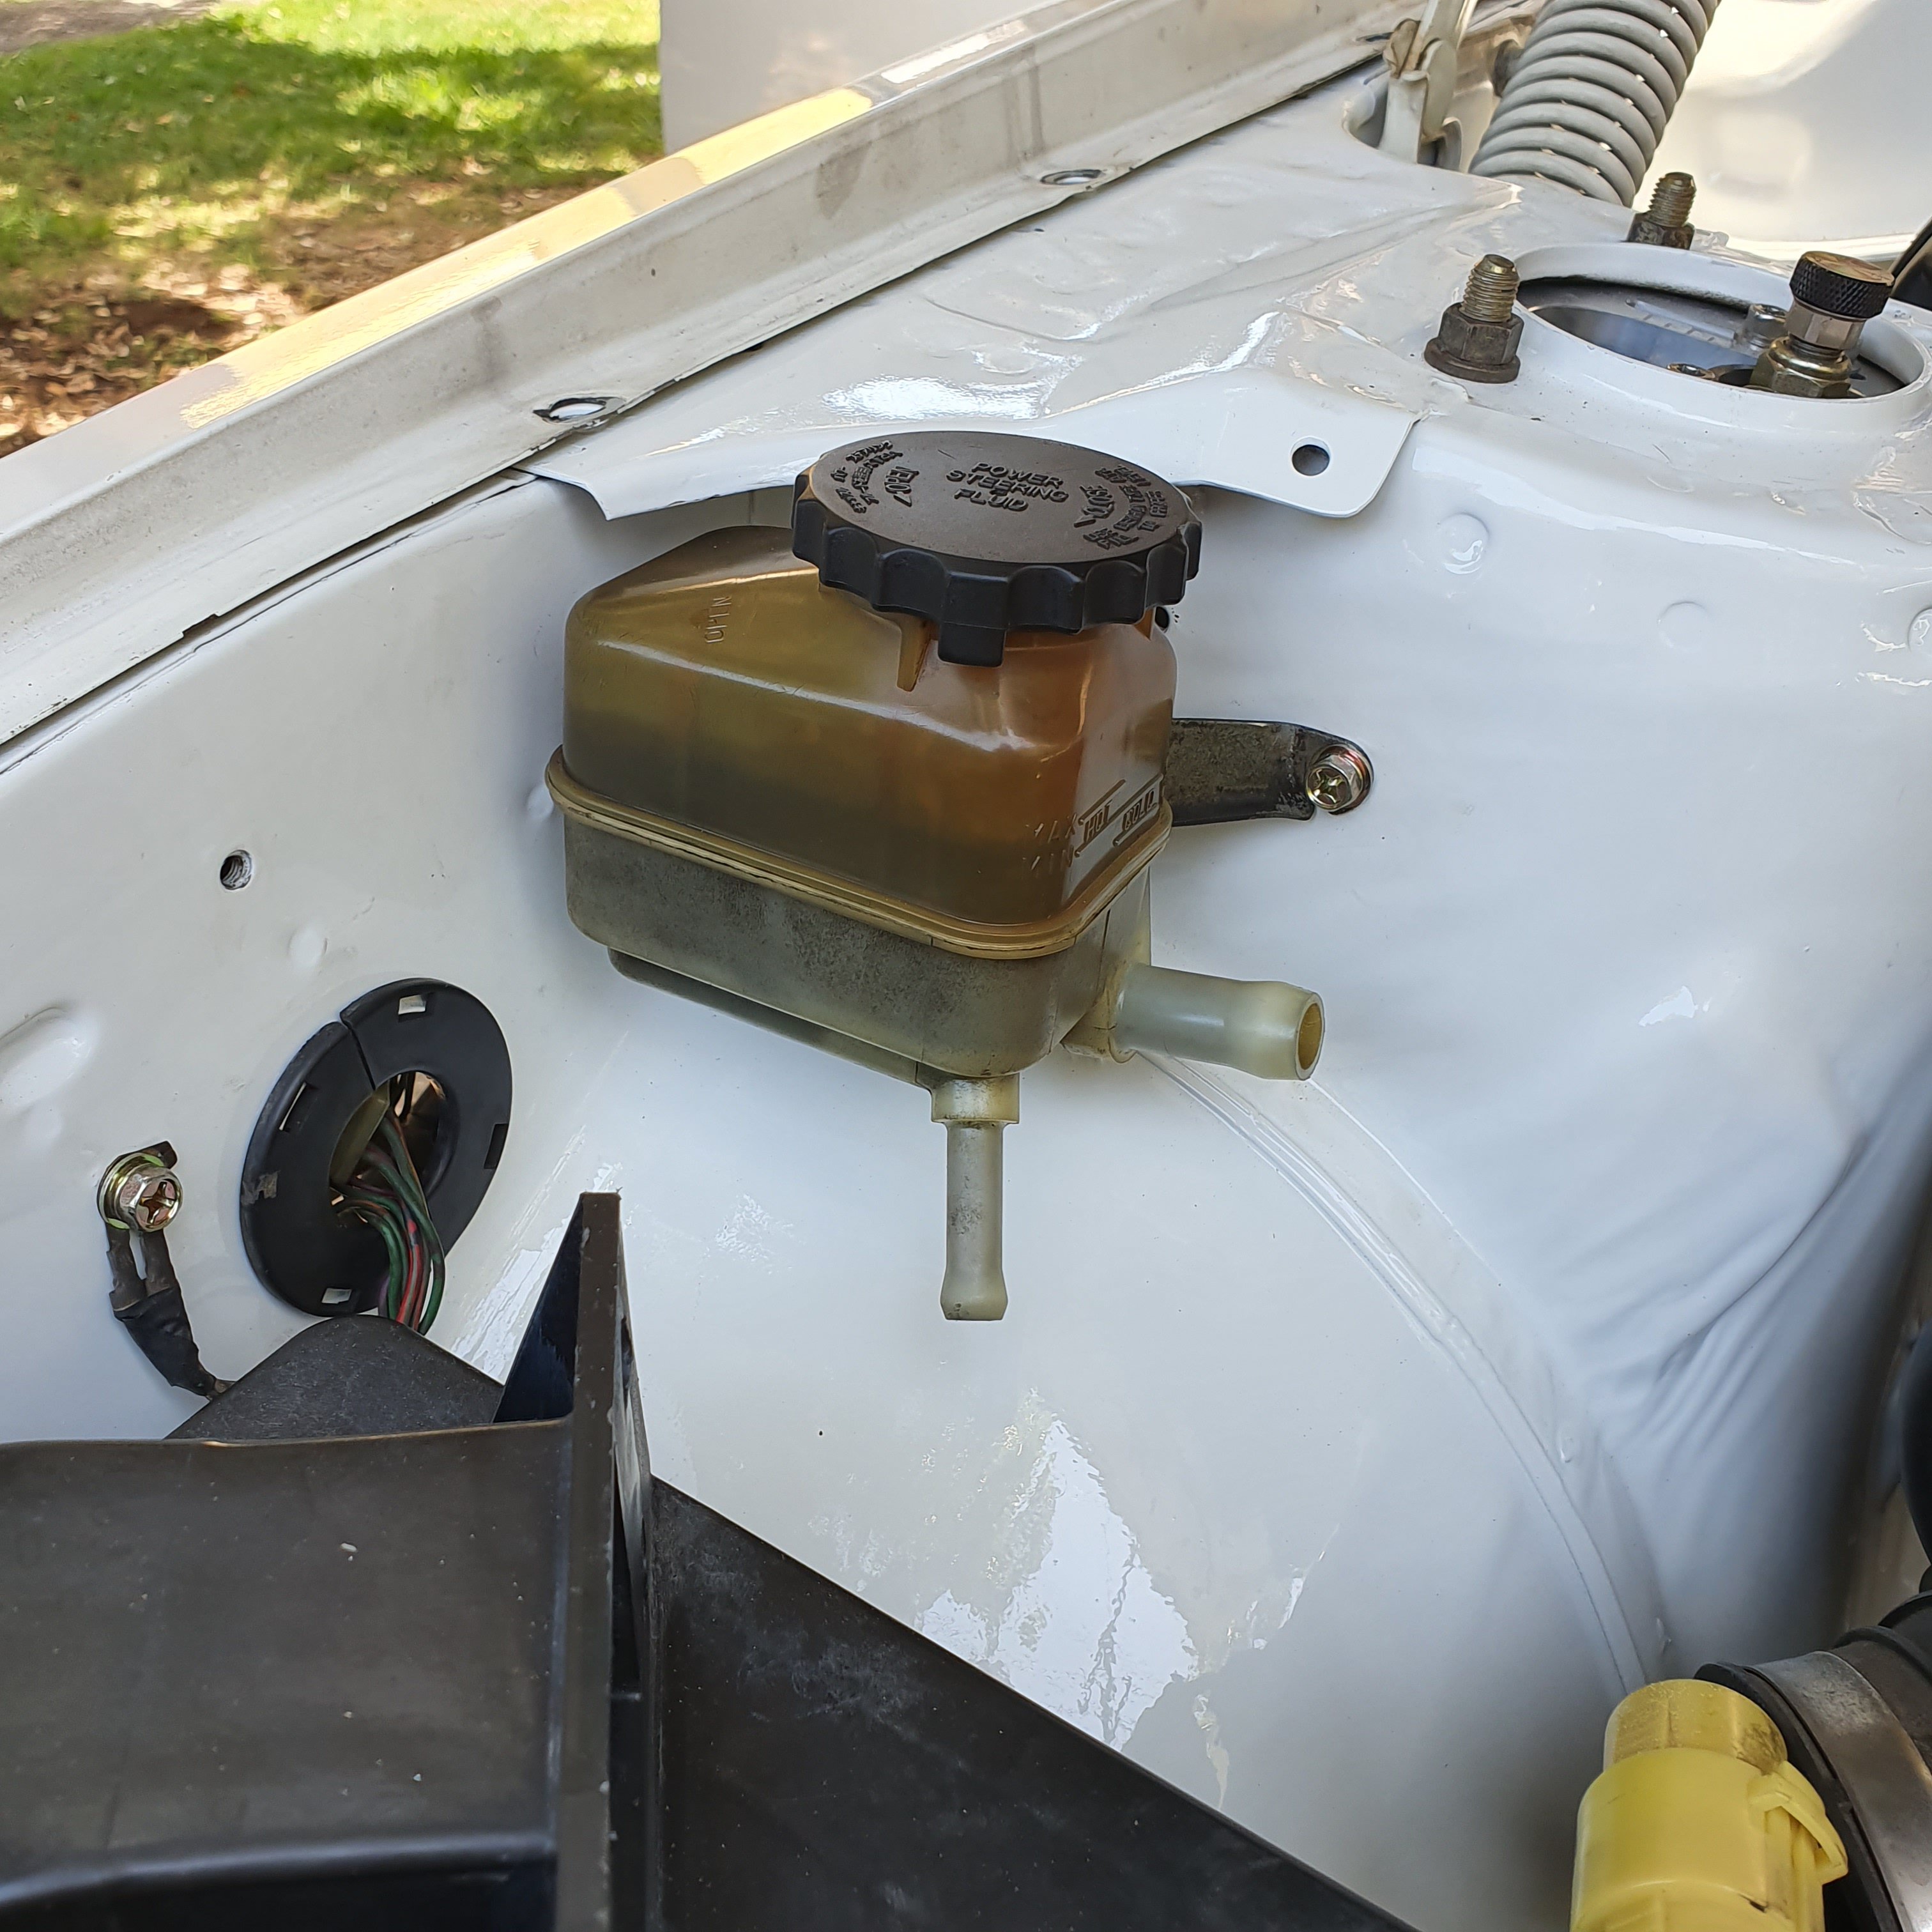
St191 caldina powersteering reservoir and bracket as 1gge are remote reservoir
2 points
-
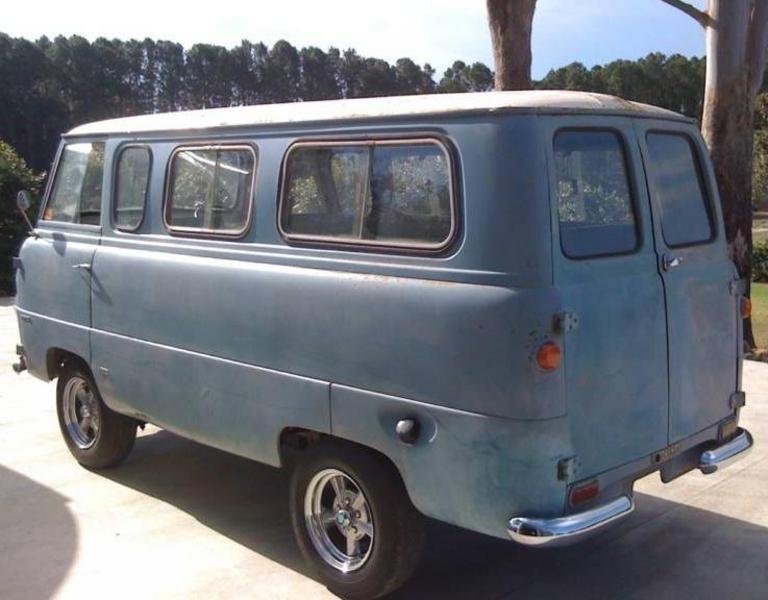
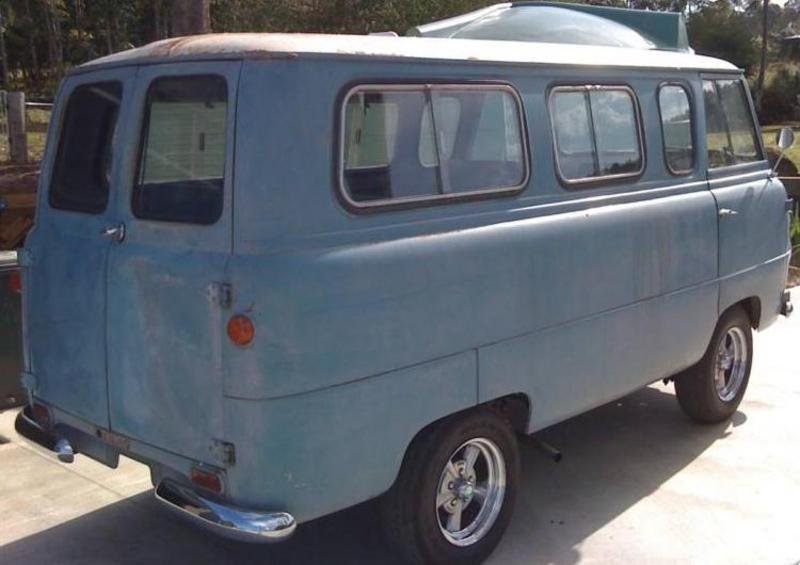
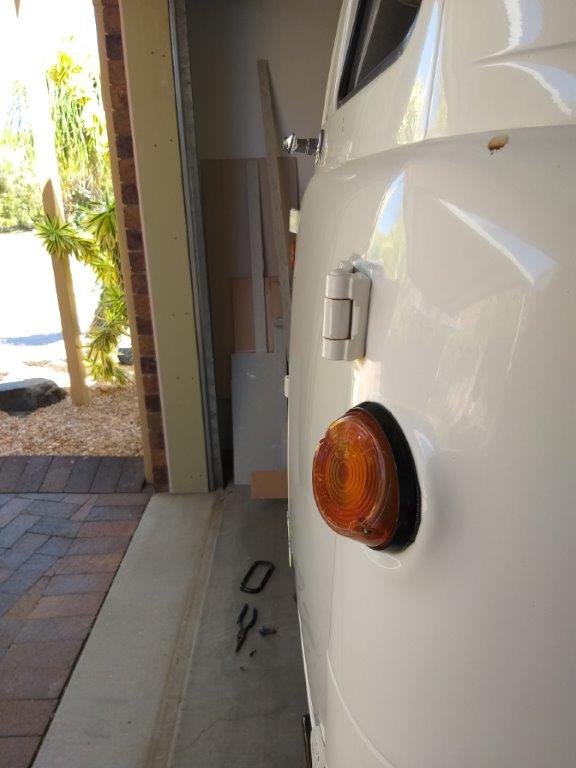
Having sold my Bedford van a few years back to fund an Australian Adventure, around the middle of last year the desire to own another crappy old British commercial vehicle returned with a vengeance. So the search began. Then one day last November whilst trolling the net I came across a listing for this. Hardly Ford's finest achievement, but quirky enough to pique my interest. In chatting to the owner I discovered that the van had already been through a bare metal restoration so the body is relatively mint with new rubbers fitted throughout. The upholstery has also been redone, the floor rhino lined and some tints chucked on the side windows. Mechanically it is still a virgin, running the original 1700 pre-crossflow motor that Ford borrowed from a late 50's Ford Consul. So basically a blank canvas and a really good starting point. After a bit of negotiation a deal was struck that culminated in a road trip yesterday to pick it up. Following an 11 hour road trip with a borrowed transporter and a short 15km drive under it's own steam it is now safely tucked up in my shed.
1 point
-
It’s a big park up before the cruise starts too. Most arrive around 6 and the cruise starts at 7 from memory.1 point
-
I held out for an ag one and tbh have never NEEDED to use it. 12v of a post spec one is much better than low range IMO also post ones have better forks, apparently more robust frames and bigger rear brake from what my eyecrometer tells me. And a rev limiter. Which only slows ya down. Enjoy1 point
-
Light stays on, doesn't sound like the problem because usually they just won't start. Normally if it is the fault you can just hard wire the plug to immobiliser and it solves it, if it doesn't you don't want to know what Hyundai want for a new module and keys programmed.1 point
-
Correct, any change to the brake system needs cert1 point
-
I'll be a bit late, but I'll be there!1 point
-
The teflon lined high pressure stuff. the fittings use an olive / compression set up, I have used them/am using them, work sweet. I generally buy the aeroflow stuff from engine parts in silverdale akl. Great to deal with and you dont feel like you have been overly rogered on the price1 point
-
I'm going on Saturday. Finally going to get my shit together and fill the tray of the Chev with a Chilly bin full of refreshing beverages and snags, BBQ, Sun Shade and folding chairs. When it gets hot and dusty a tailgate party can happen.1 point
-
1 point
-
Over the Christmas break I dropped this old girl out to Alex @yoeddynz, really stoked with his work, he rectified the holes that had been cut in my inner guards, blanked the stereo hole that had been butchered and added the floor shift tunnel I had cut from the courier. It was a long drive out to the Abel Tasman ringing its guts out trying to do 100kph so next on the list is putting the courier diff nugget in, fingers crossed it should be a 3.3 or 3.5 so should make a huge difference from 4.8 hopefully. Also the gearbox is really noisey so will swap that out at the same time.
1 point
-
So I was home over the Chistmas period and gave it a clean up inside & out, ripped off the crap aftermarket whistling roof-racks, replaced broken radio antenna mast, replaced the sagging roof lining, re-glued up some of the door seals, replaced speakers, refurb'd/tinted rear tail lamps, replaced rocker cover gaskets and slapped on my Mk1 GTO 16" wheels with new tyres. I still need to replace some broken interior plastics and sort out the sloppy automatic shifter.1 point
-
I put this outrigger on. I think for certification I need to guard the belt drive? Then, I rolled it outside and it stood for the first time in its life on it's own. As a father of 3, I can say that this emotional experience far eclipsed watching my own kids takes their first steps. So close, yet so far away for starting it up.
1 point
-
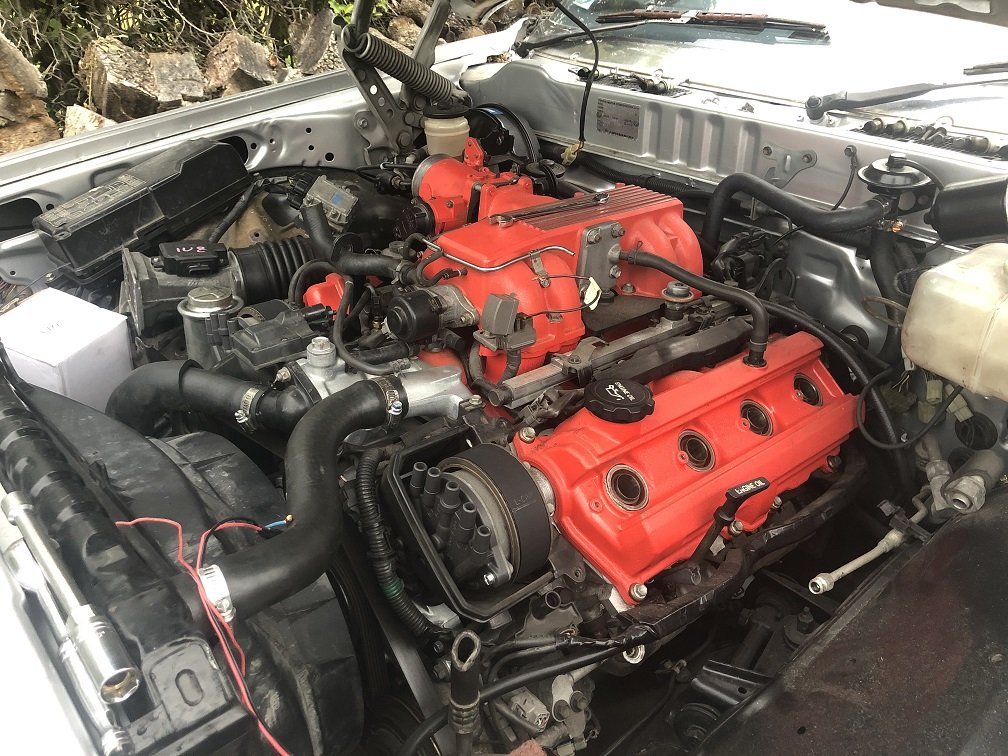
I had to turn the car around to do the other side so thought it was time to give it some sun.
1 point
-
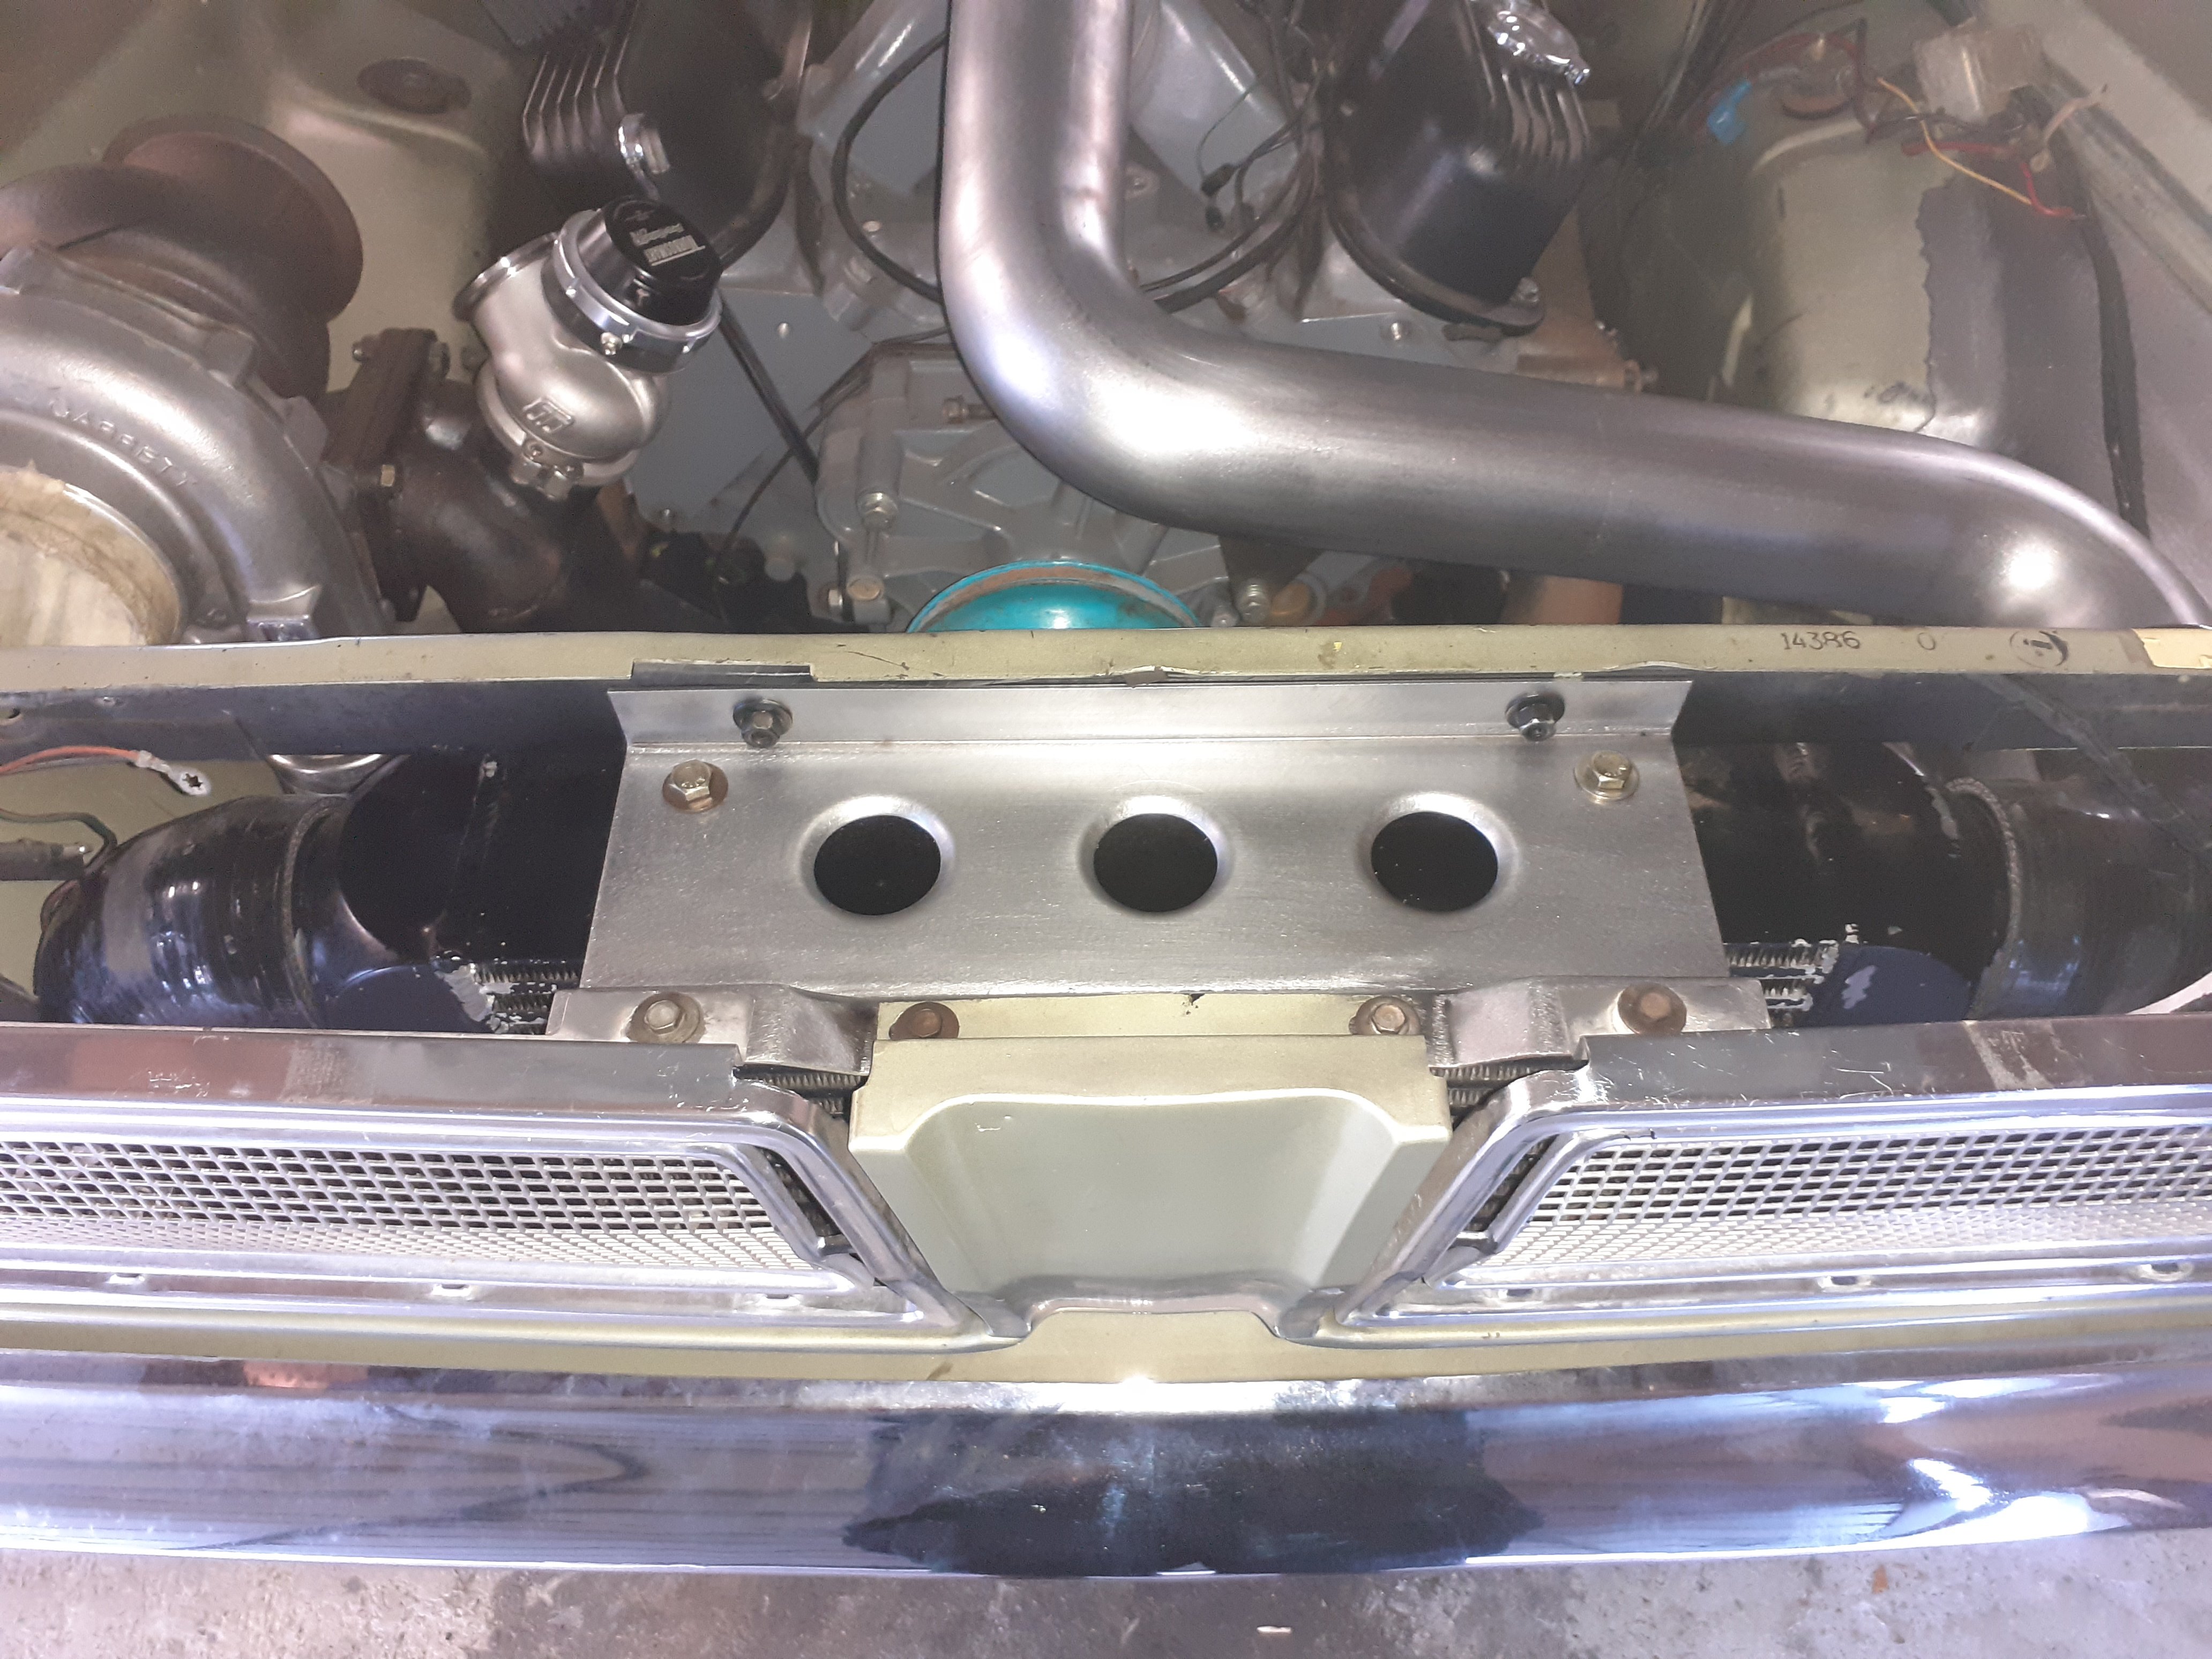
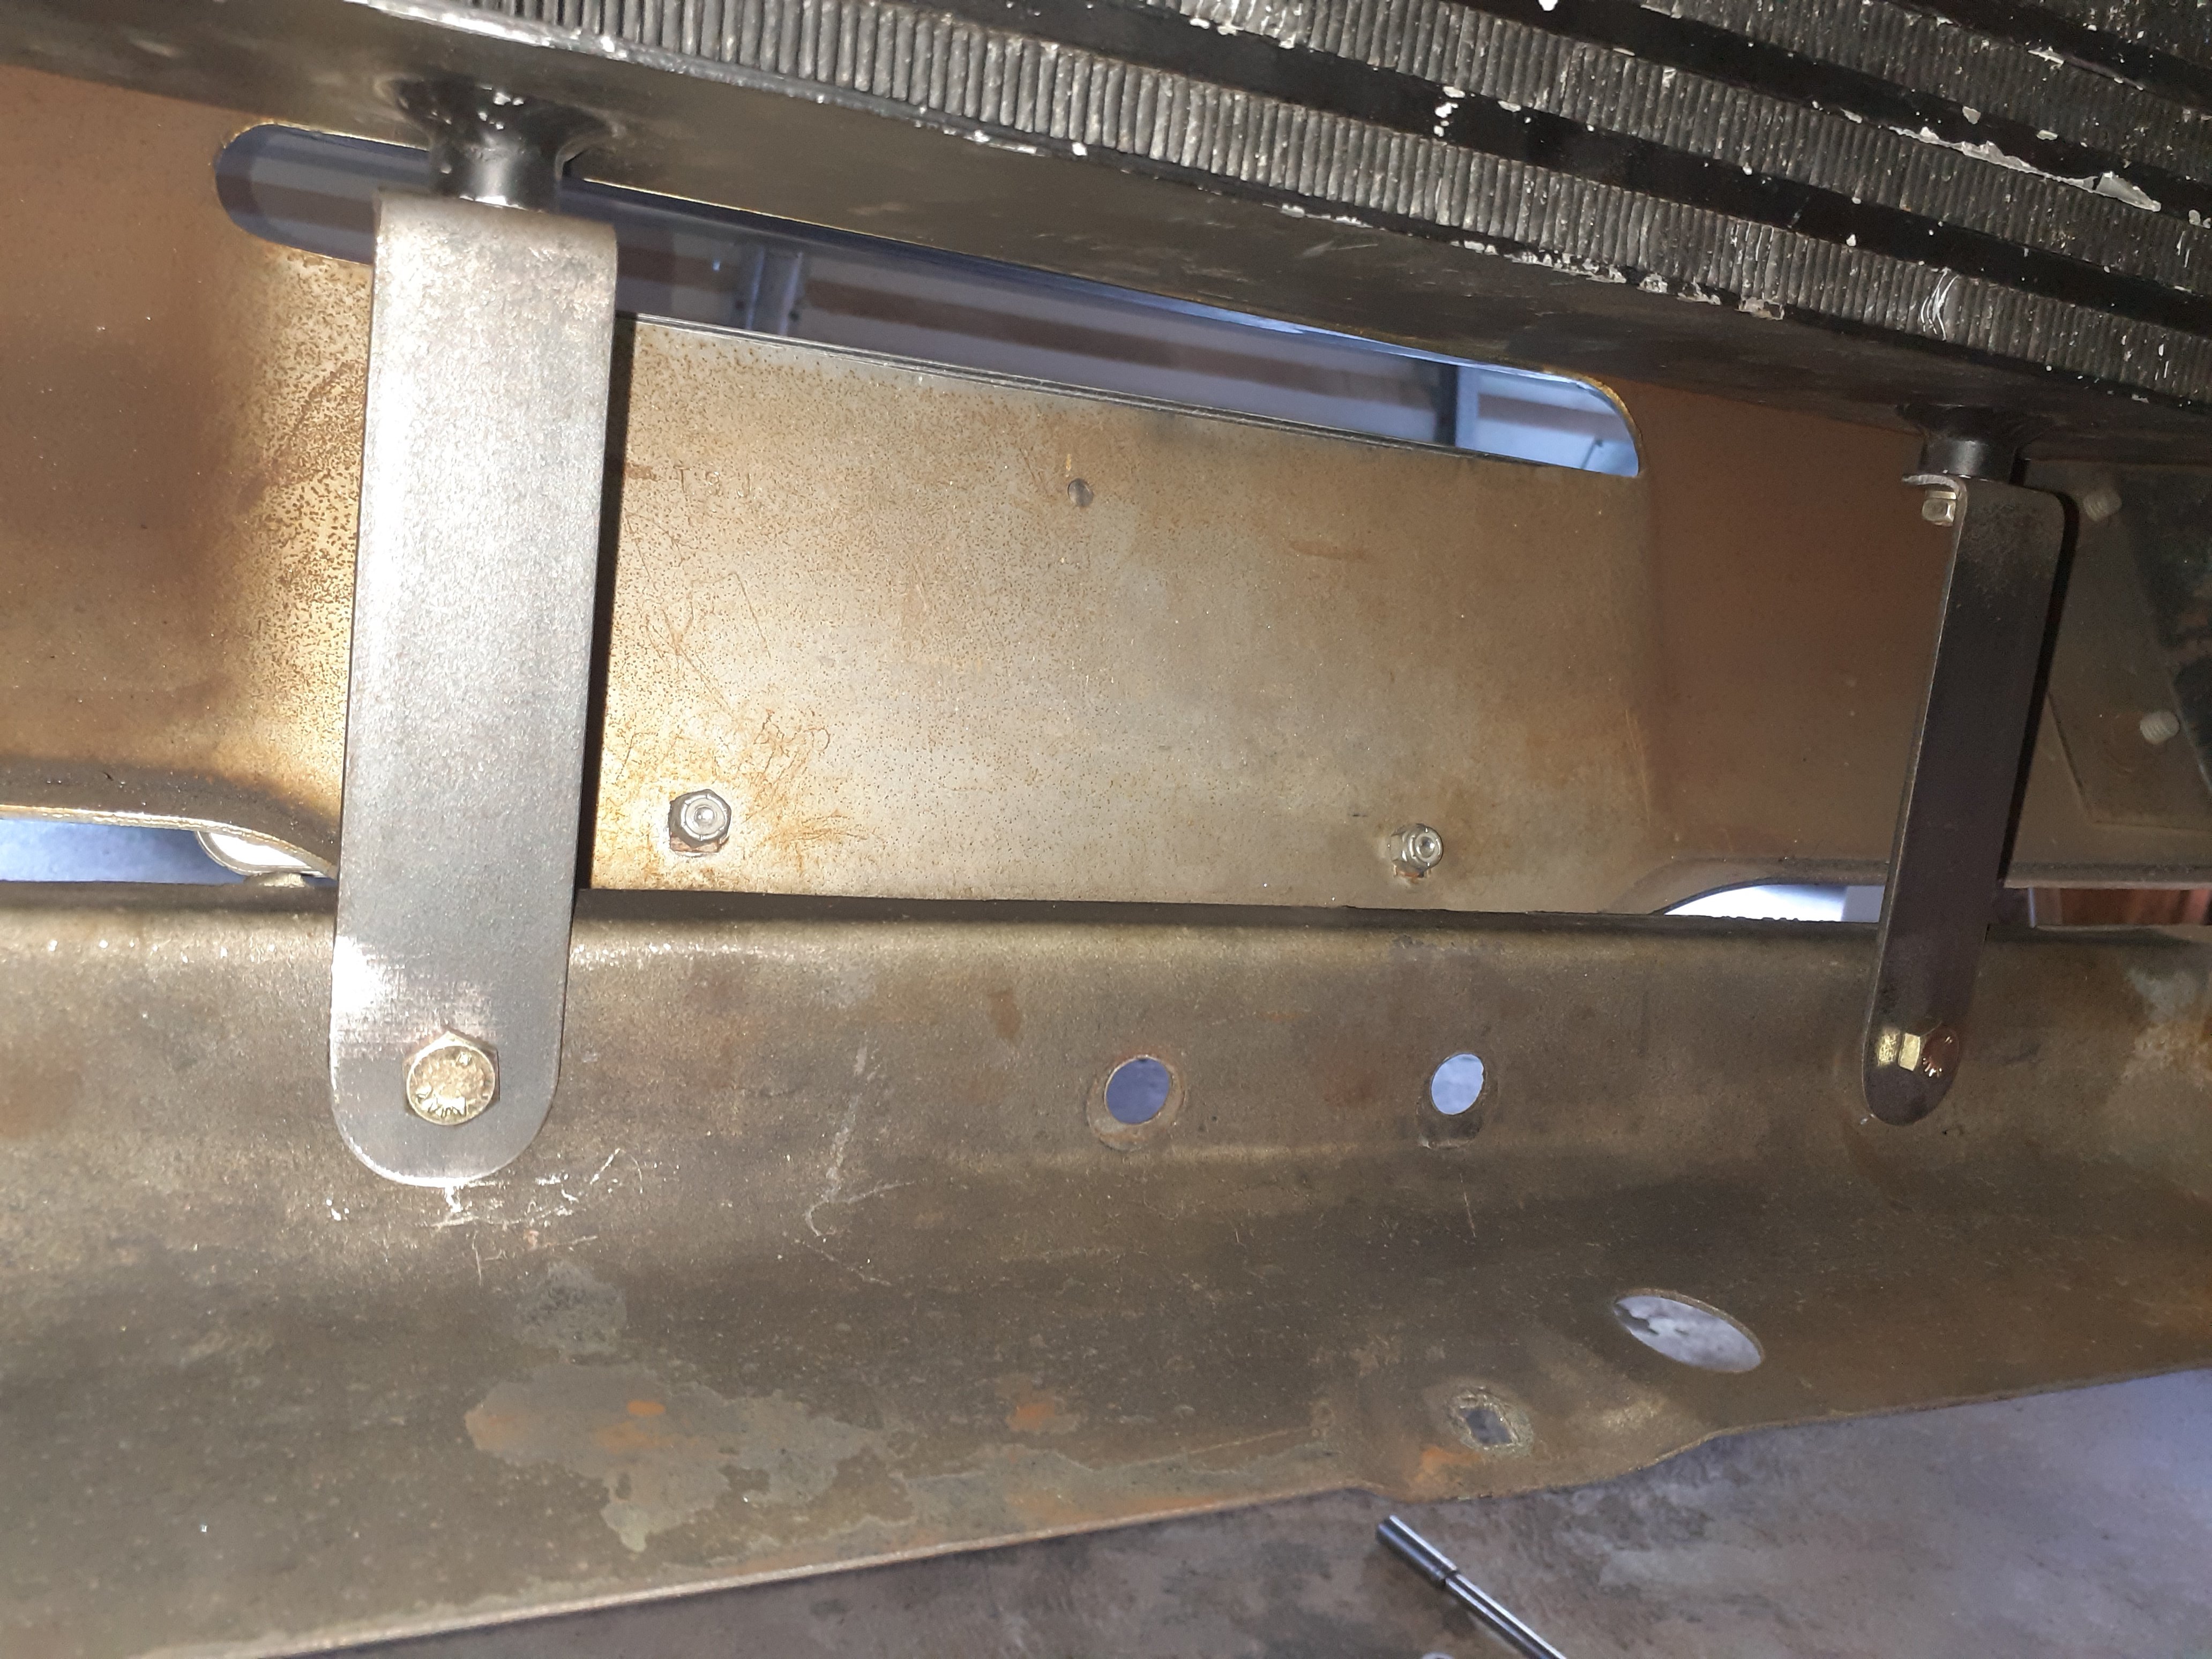
@RXFORD /Matt at tin tricks helped me out again making this fancy bracket which gets rid of the bonnet catch stuff and mounts the top of the intercooler, grilles etc and I made some brackets for the bottom of the i/c Also spent a while making the engine fit under the bonnet, cut a bit out of the mounts and spacers under the front subframe, now it has 1x bees dick of clearance
1 point
-
well, that was fucking stressful. first time ever laying a candy/3 coat colour and it so very nearly went very very wrong. i completely fluked it and managed to get it looking right but i was seconds away from disaster on more than one occasion. im fucking turbo stoked with how it looks, its got some dust in it but i couldn't give a fuck, theres way more right than there is wrong and thats a fucking win. 2020-01-09_06-20-37 by sheepers, on Flickr 2020-01-10_07-39-39 by sheepers, on Flickr 2020-01-10_07-39-48 by sheepers, on Flickr 2020-01-10_07-39-58 by sheepers, on Flickr 2020-01-10_07-40-05 by sheepers, on Flickr1 point
-
1 point
-
Didn't meet anyone last year, will make a point of it this year if there is a spot/group park up. Also still don't have a KE70/Hiace is toast now (roly poly bad times), will be making the trip in the Lexus. One day i will come up with a clever name and change it, but it is not this day. But yeah, same as last year, will be there just for the day on Saturday. Always a good time.1 point
-
15th then? it being the 3rd Wednesday so staying true to tradition?1 point
-
I'll be going to Kumeu1 point
-
W.T.F. no 2020 thread yet? You're too busy now?1 point
-
This is nearly working. Lots has been done since ^^1 point
-
1 point
-
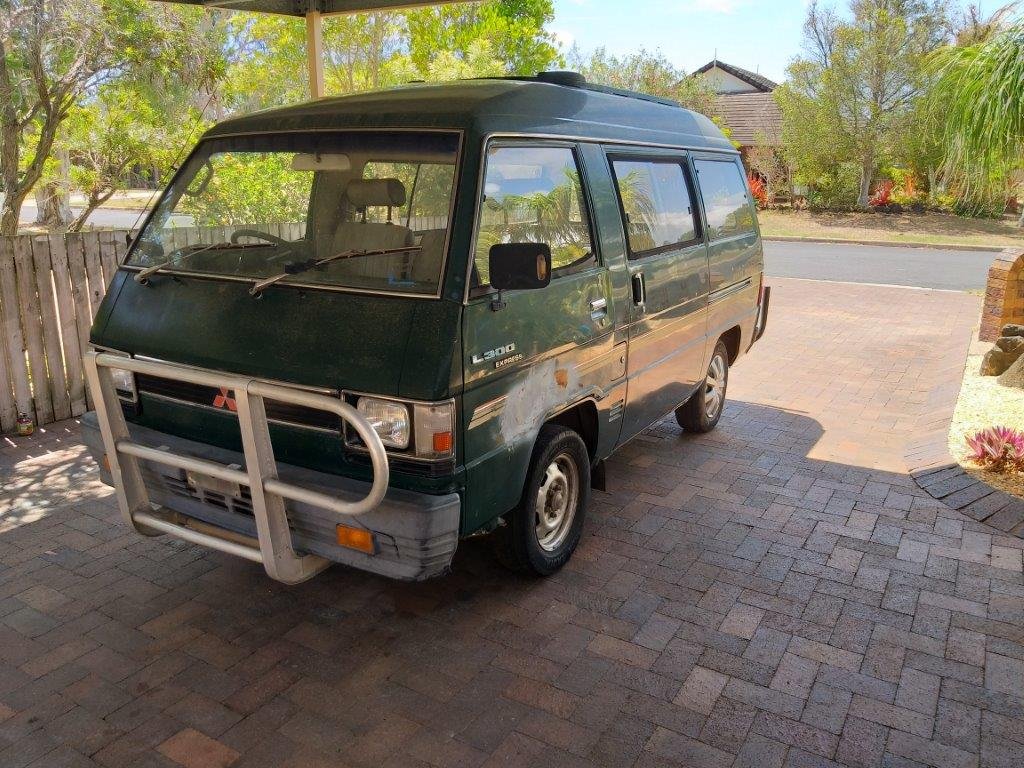
So after swapping a few yarns with a local rod builder I've changed direction on my front suspension for the Thames. Original plan was to stick with the standard cross member - there are actually two cross members, one for the front pivot of each A arm and one for the back pivot of each A arm - go figure. Anyway this was causing me headaches with the oil sump setup and I also wasn't keen on keeping the standard steering arms with the joints that need greased every 1000 miles. I figured if I was going to have to throw money at a steering rack and disc brake conversion I may as well bite the bullet and look at changing the entire front end. Back in the day L300 front ends were popular with the street rod fraternity and many L300 front ends are still used today. Did a bit of research myself and also got some guidance from Cletus and MaxPower and figured if I could pick up a cheap enough L300 I'd give it a go. Started to watch FB and sure enough a real cheapie came up yesterday. Only located 50km away, so hooked a hire trailer up to my mates Landcruiser and we headed down earlier today. Van is now home and since it would be rude to fire up my drop saw on Chrissy Day I'm going to take the day off deck building tomorrow and will spend a bit of time under the Mitsi with a measuring tape plotting and scheming . Added bonus is that the Mitsi has an aftermarket AC setup fitted which I'm hoping I can also move across to the Thames. Being a forward control van the steering setup is also perfectly suited to the Thames. Anyway, here's a picture of Mitsubishi's finest. Happy Christmas everyone.
1 point
-
So a few months back a hotrodder on the book of faces had stripped a Thames van that he is turning into a rod and had offered the standard front and rear ends "free to a good home". The van has been sitting in a paddock for a good few years so everything is covered in a good deal of surface rust but otherwise seems fairly solid. Since my current plans are to keep the stock upper and lower wishbones and stub axles I figured it was worth having spares. Only problem was that he was based in New South Wales. Anyway, beggars can't be choosers, so yesterday I completed a 1,200 km round trip and am now the proud owner of a bunch of manky looking Thames bits. Gotta read up a bit on setting up a "pickling bath" so I can start to get things cleaned up, so keen to hear how others have gone about this. Anyway picture time or it didn't happen.
1 point
-
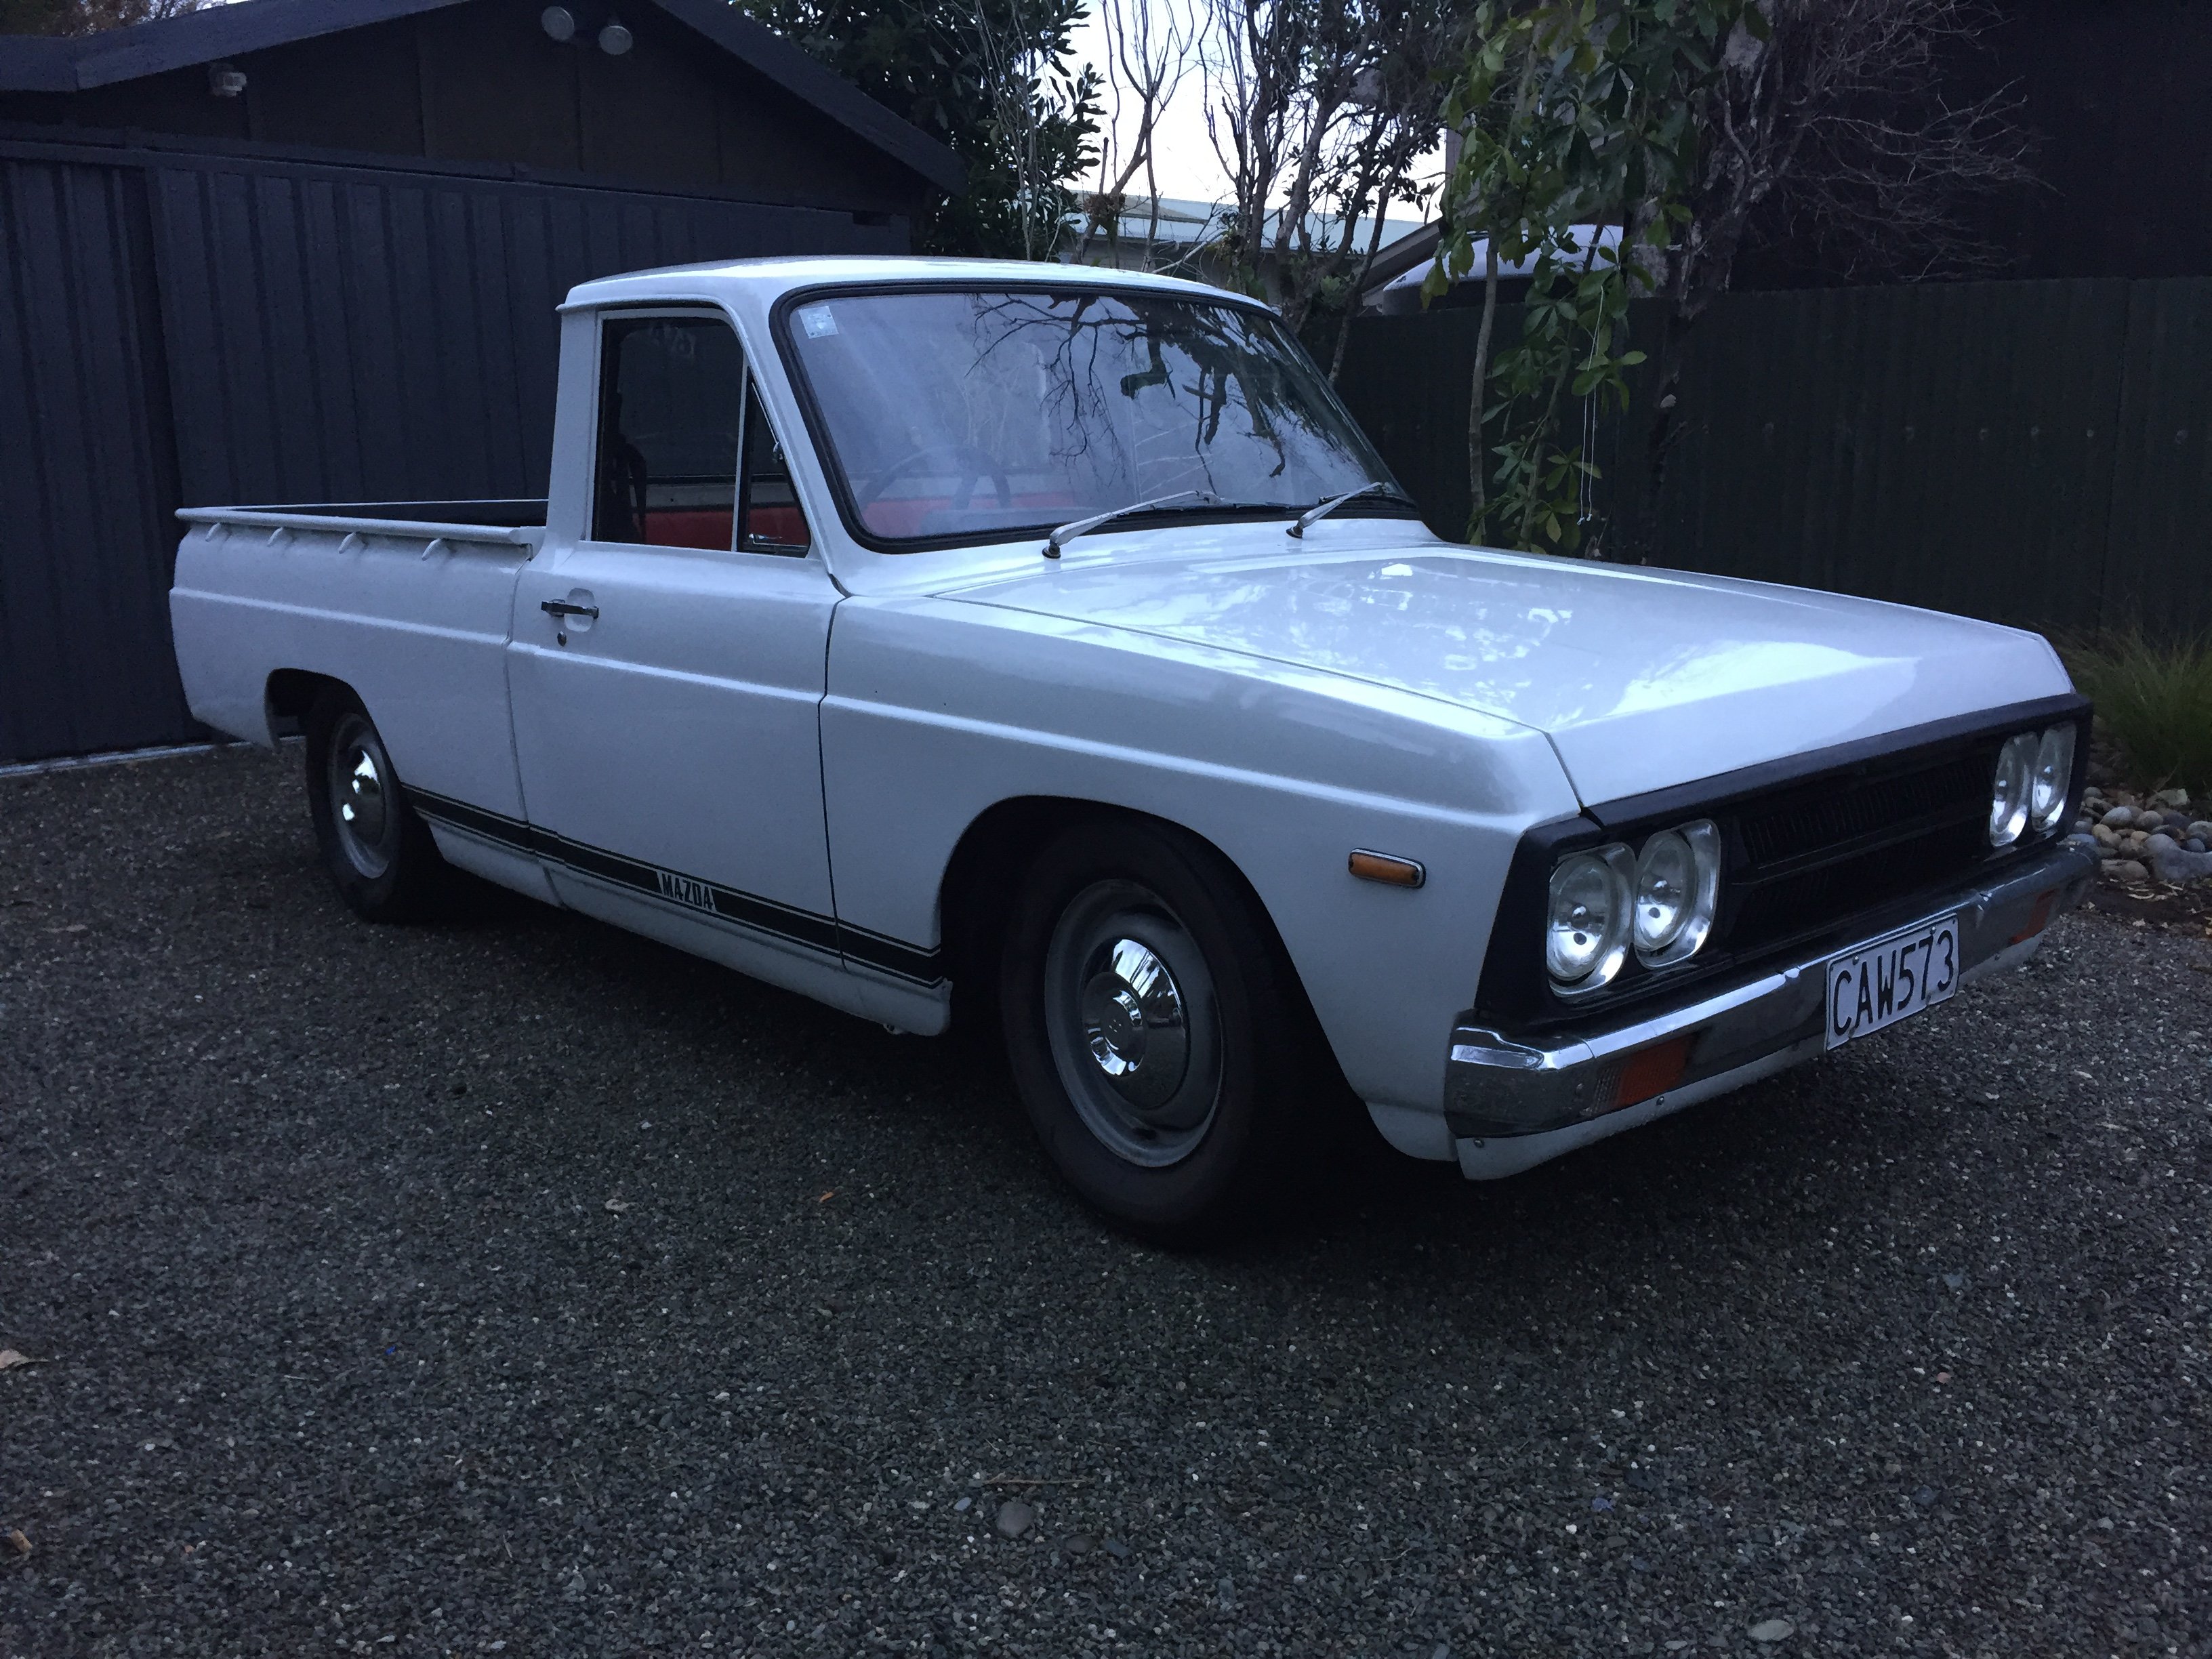
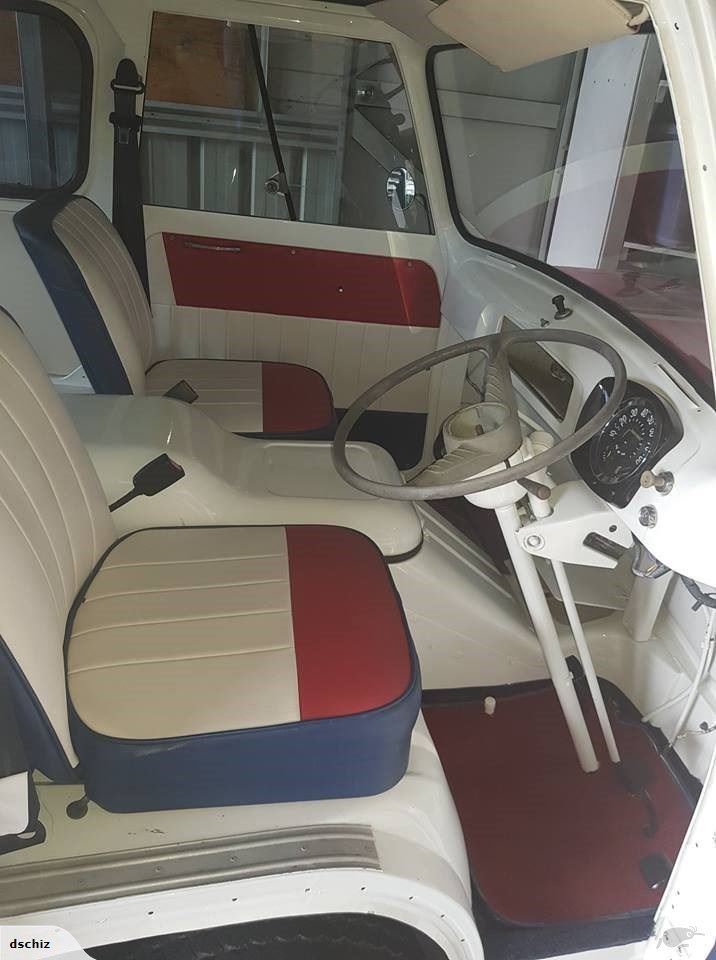
Thanks for supporting my HiAce drive-train direction sr2. Nirvana for me would be using the Thames as my daily driver whilst retaining the minimalist interior look and I can only achieve that goal if I stick to a column shift gearbox and a narrow enough engine to fit in the existing engine box. My HiAce donor has a 5 speed column shift which I am hoping to use as well as the Toyota rear axle. Engine wise I'm thinking of giving the 4Y a go. Sure it was originally designed as a forklift motor, so is unlikely to win any races, but like you say they go forever and parts are cheap and plentiful. The existing Consul derived motor runs okay for what it is, but parts are getting hard to find. Shot of the interior to show how minimalist it is.
1 point
-
Whilst digging around the internet a few months back I came across a listing for my Thames dated around the end of 2010. This was just before the PO bought it and embarked on the bare metal restoration. At that stage the van was still in its original blue paintwork with heaps of patina. The wording for the listing is in pdf format so I'm unable to upload it, but it makes for interesting reading so I'll transcribe it into a posting when I get a chance. In the mean time here are some pics of the van as it looked back in 2010.
1 point
-
The van furthest away in the pic has the motor and gearbox still fitted. The gearbox is a 5 speed column shift that looks like it has had a rattle can reco. The engine is a 4Y that according to the previous owner has been reconditioned. Both engine and gearbox are bolted up in the hole, but nothing else has been connected up. On the gearbox side of things the linkages are there but not connected, the drive shaft is sitting in the back of the van and the clutch slave cylinder is missing. The speedo drive is also AWOL with the speedo cable just hanging in space. On the engine side the radiator and exhaust are sitting in the back of the van and most of the electrical wiring and fuel pipes are all disconnected. So looks like previous owner lost interest mid job. Makes for an interesting time ahead for me. Anyhow I got today off as we are in limbo at the moment waiting a visit from the building inspector before we can carry on with the house, so thought I would spend a few hours trying to get the donor van running. Managed to find and connect up the wiring on the starter motor and the coil and fiddled around with the connections on the distributor until I successfully got spark at the points. Not getting spark at the plugs yet, but hoping to get some time on it tomorrow. First prize would be to get the engine running to assess it's condition. Thanks for reading.1 point
-
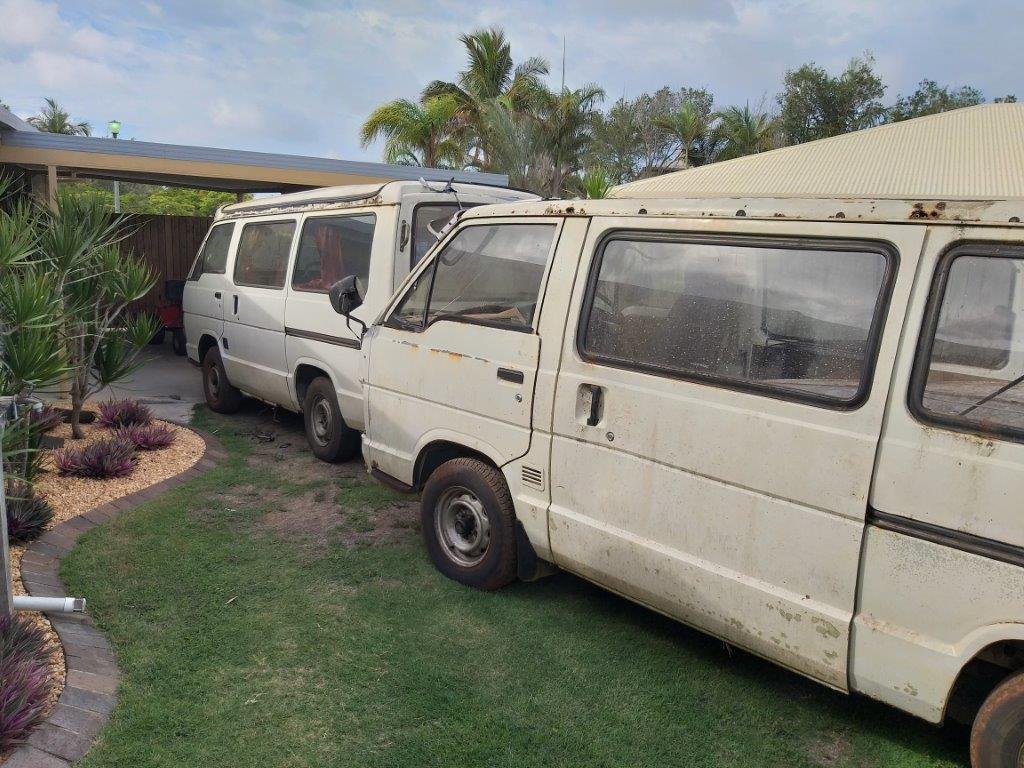
Yikes time flies. Can't believe its almost 10 months since my last post. Our house reno has taken up all of my free time this year, but I did manage to spend some time thinking about the direction I want to take on mechanical upgrades for the old Thames in between and also did a bit of pesting on the tech forum seeking some advice from those more knowledgeable than I am. Result is that I have kind of set my mind on going with some form of Toyota running gear to replace the rather dated original kit. Main reason for this is that the engine box has very limited space so I will need to stick with a non cross flow motor if I want to keep the floor pan stock. Also first prize would be to retain a column shift but go for a 5 speed gearbox. With this in mind I set a target on a mid '80s Toyota HiAce van as these came out with a 5 speed column shift manual box. As luck would have it back in march I tracked down a 5 speed column shift gearbox. Only snag was that the seller wouldn't sell the gearbox on it's own, so I had to take the whole van. To make matters more interesting he offered me a second spares van for free if I took it away. So I ended up with these two beauties sitting in our back garden.
1 point
-
Suzuki GT-185 This is my Suzuki GT185. It has more pistons than my other bikes. This is the inside of my GT185 after I exploded it. This is the GT185 after I fixed it again.1 point
-
dragged it out of storage got a wof and some rego, and a well needed clean
1 point
-
Got a few minutes in the shed yesterday arvo and spotted a few things that need doing. Looks like the rear indicator lights have been fitted incorrectly. The van looks cross eyed at the moment. Sun visors are flopping about and only have a single self tapper holding them in. I found the other self tappers in a clearly marked zip lock bag in the box of bits and pieces that came with the van. There must be a reason why these haven't been installed. Also in the box of spares are the original back bumperettes which I'm keen to fit. Will get on to these when I next get a gap. Many other things still to add to the list.
1 point
-
So short term plan is to tidy up a few small cosmetic bits and pieces. Longer term plan is to replace the ageing engine, gearbox and diff with something more modern and reliable. A disc brake conversion on the front is also on the cards. The engine box is pretty compact and the standard column gear shift is still in place.
1 point
-
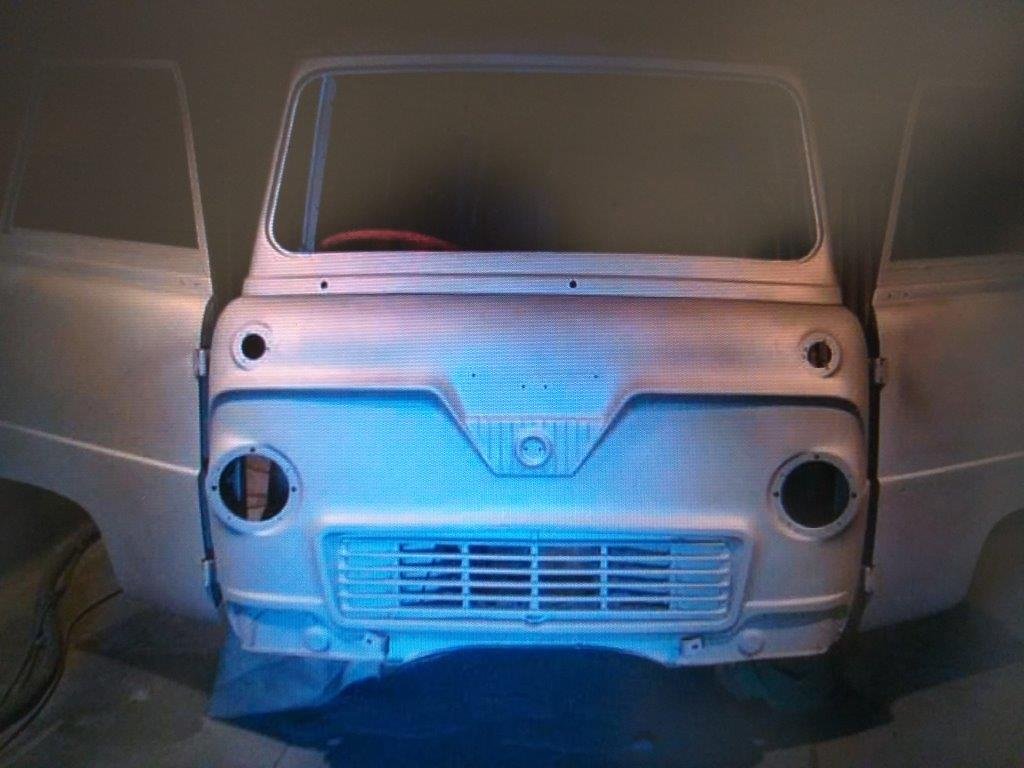
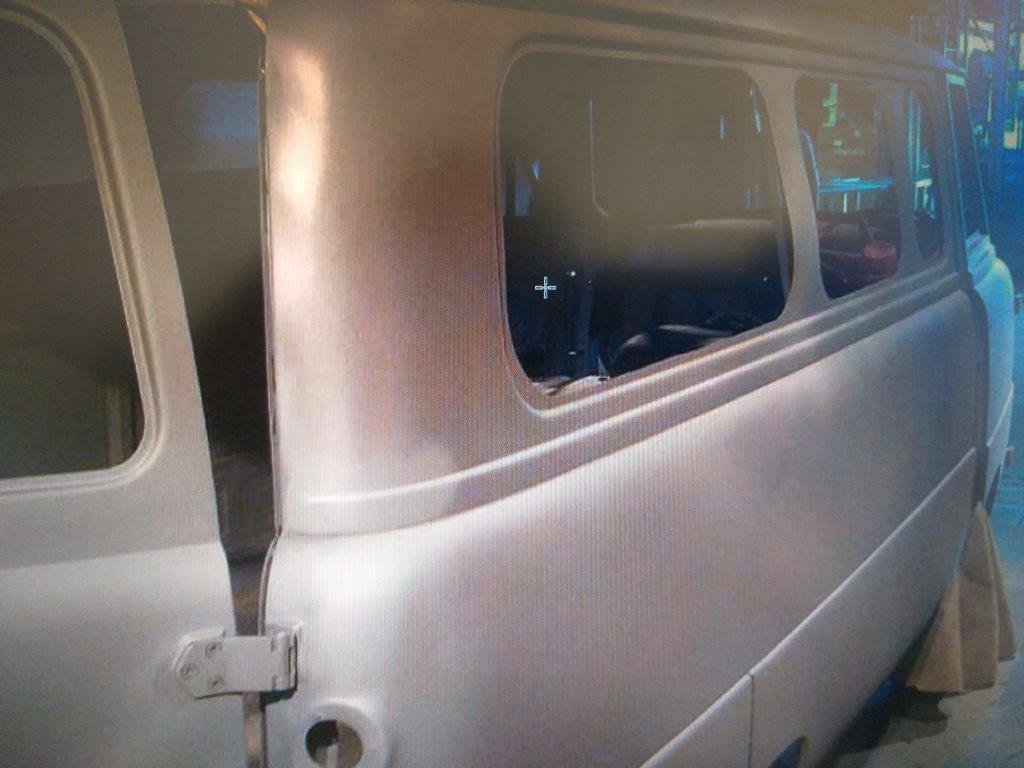
Previous owner provided me with a few snaps taken of the van after it had been blasted. Apologies for the grainy quality. The body was amazingly solid for an old British van. Zero rust holes and just a patch of bog in the back door from a previous repair. The bog was removed and the door was beaten back into shape.
1 point
-
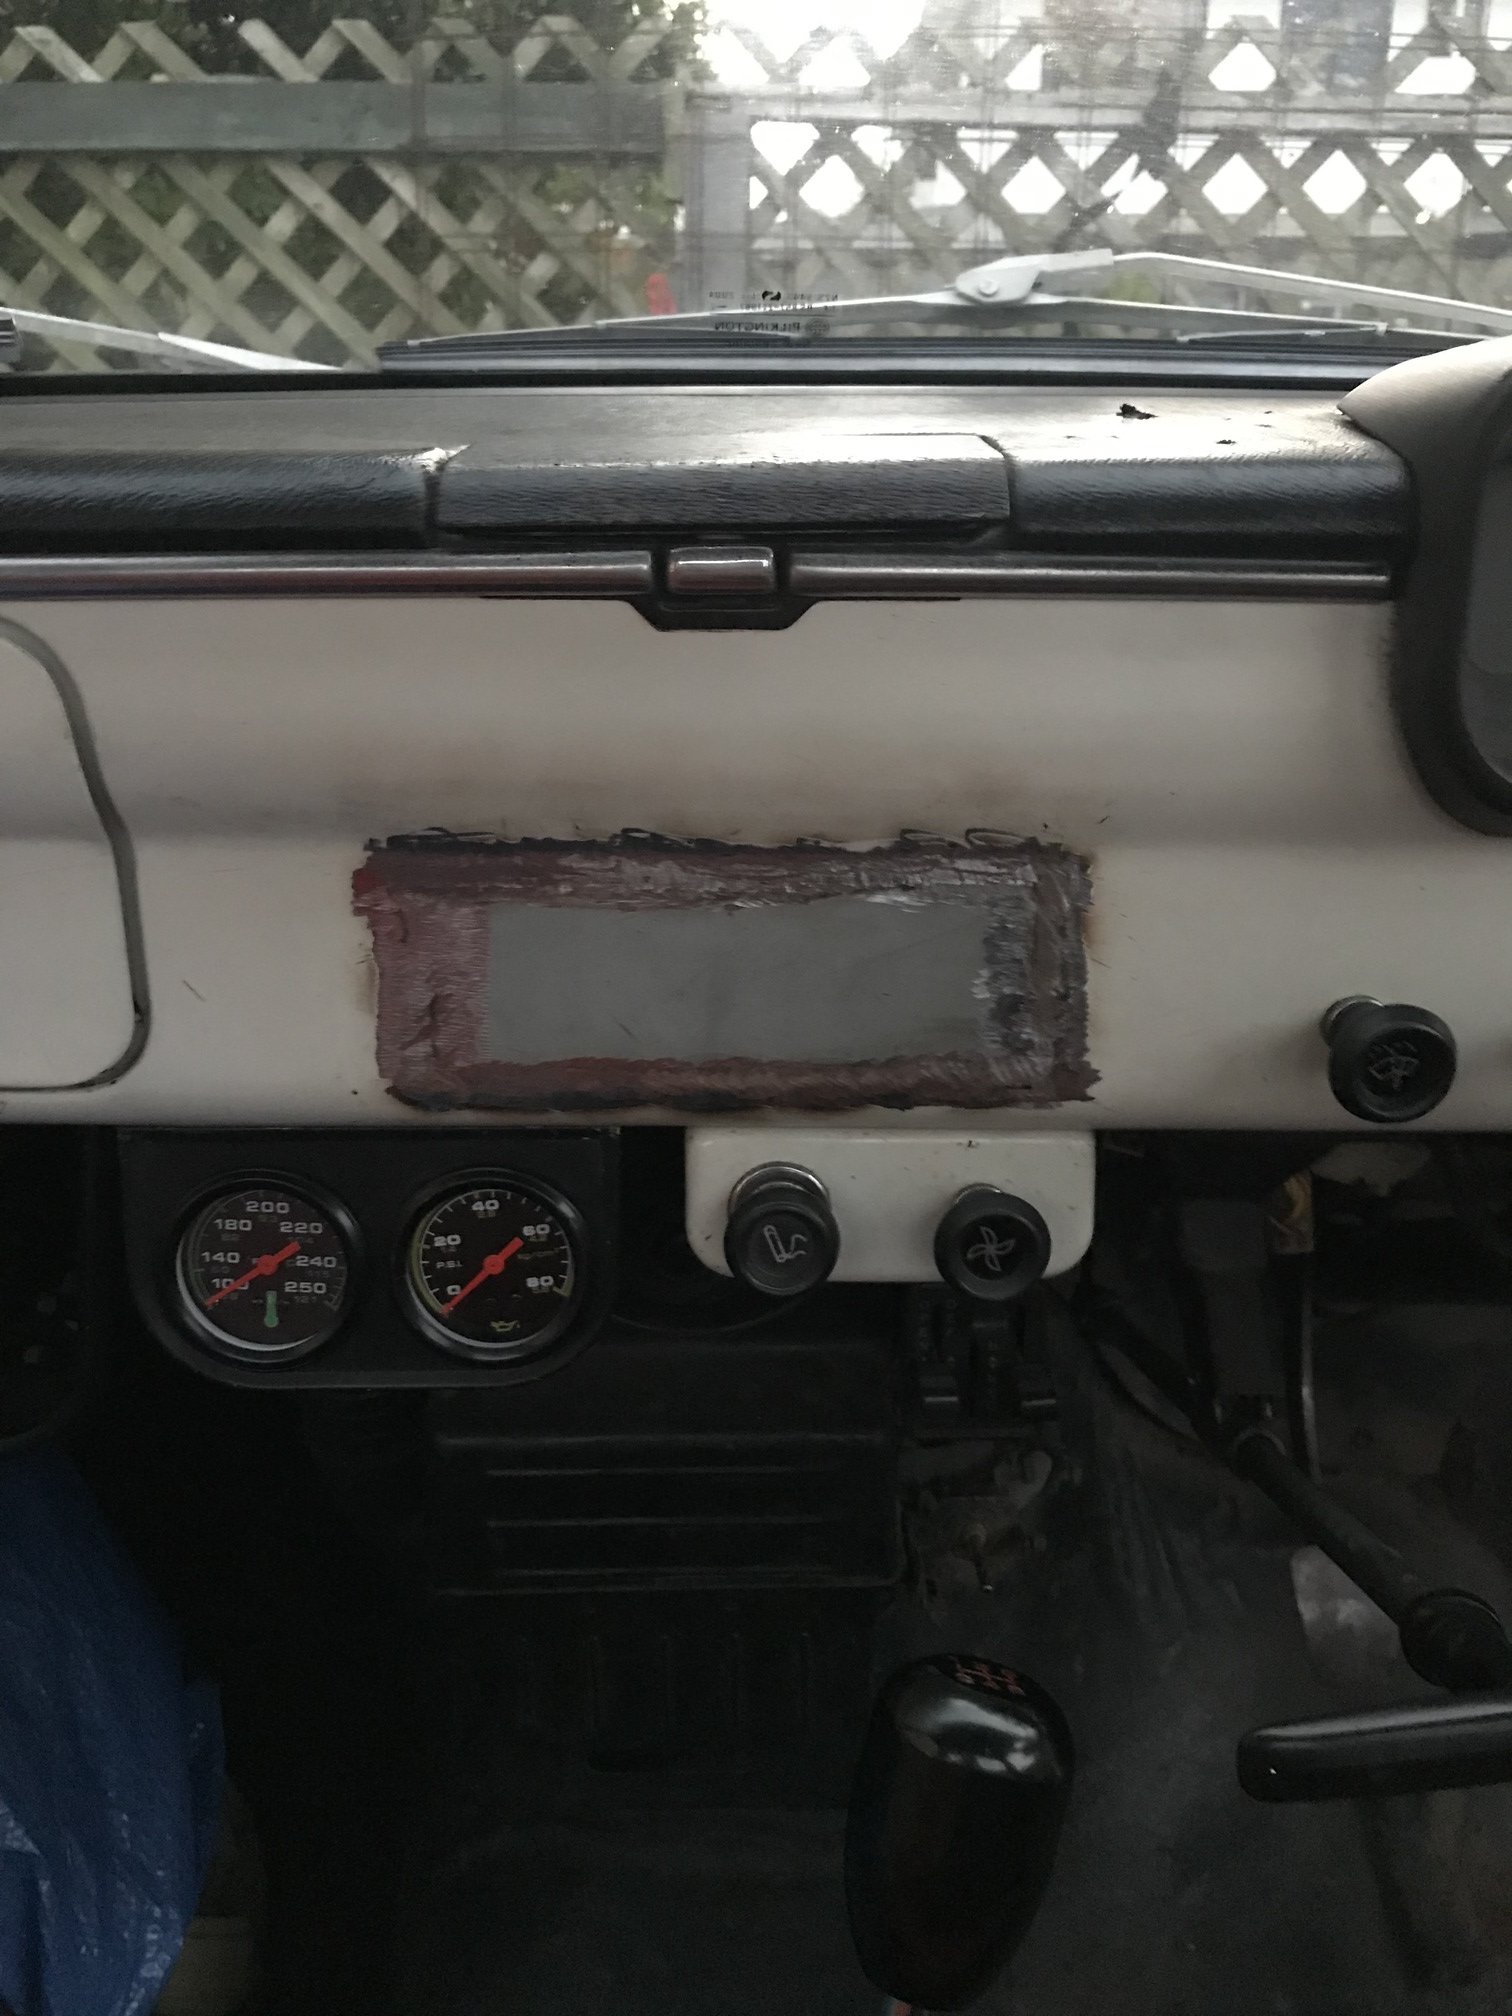
After a few iterations my bellmouth turned out pretty sweet! Had heaps of trouble trying to get any of the dissolvable filament options working though, so I still havent made second part of the pipe. The next thing to do is buy an all alloy radiator so I can chop it up and have a front facing air intake, so no 90 degree bend just before the throttle. In unrelated news I found this 90 degree oil filter adapter which is an absolute bloody gem: https://www.summitracing.com/int/parts/fms-m-6880-a50/overview/make/ford My remote oil filter setup has been an absolute dick punch right from day 1 and I've always battled leaks with it. This uses same threadpitch etc as the Toyota filter so works with 3S or 4AGE or similar. Lush! This will now clear my swaybar so I can get rid of the AN lines and so on. I've been making a bit more progress on my digidash thingy, 3d printed a rear housing that accepts the factory loom plugs: And I thought about using 2 screens side by side like this but in practice all of the writing is too small and it sucks looking at just numbers instead of gauges etc. But either way I'm learning a lot about electronics so I'll keep at it. I've nearly finished writing the code for my cruise control based closed loop ignition trim computer which this all ties in with. Will be interesting to see if it works. Once I've got my mish mash of parts together I'll design a circuit board that incorporates everything and then get a company to etch it or whatever they do. I've been lazy and havent had a wof or reg on this car since summer time. I signed up to a trackday in another 2 months so I've been putting in some work to fix up some shit to get it all sorted again. Cant wait!1 point


.thumb.jpeg.e0a4bff61111e0c8c7396950fcc94da1.jpeg)


.jpeg.3359f7aabfbb3db3fa43b14ab4b55c66.jpeg)


.jpeg.7dbde483b963e88ca5bb2c4549d1ecec.jpeg)


This leaderboard is set to Auckland/GMT+12:00