
Leaderboard


Popular Content
Showing content with the highest reputation on 07/21/19 in all areas
-
18 points
-
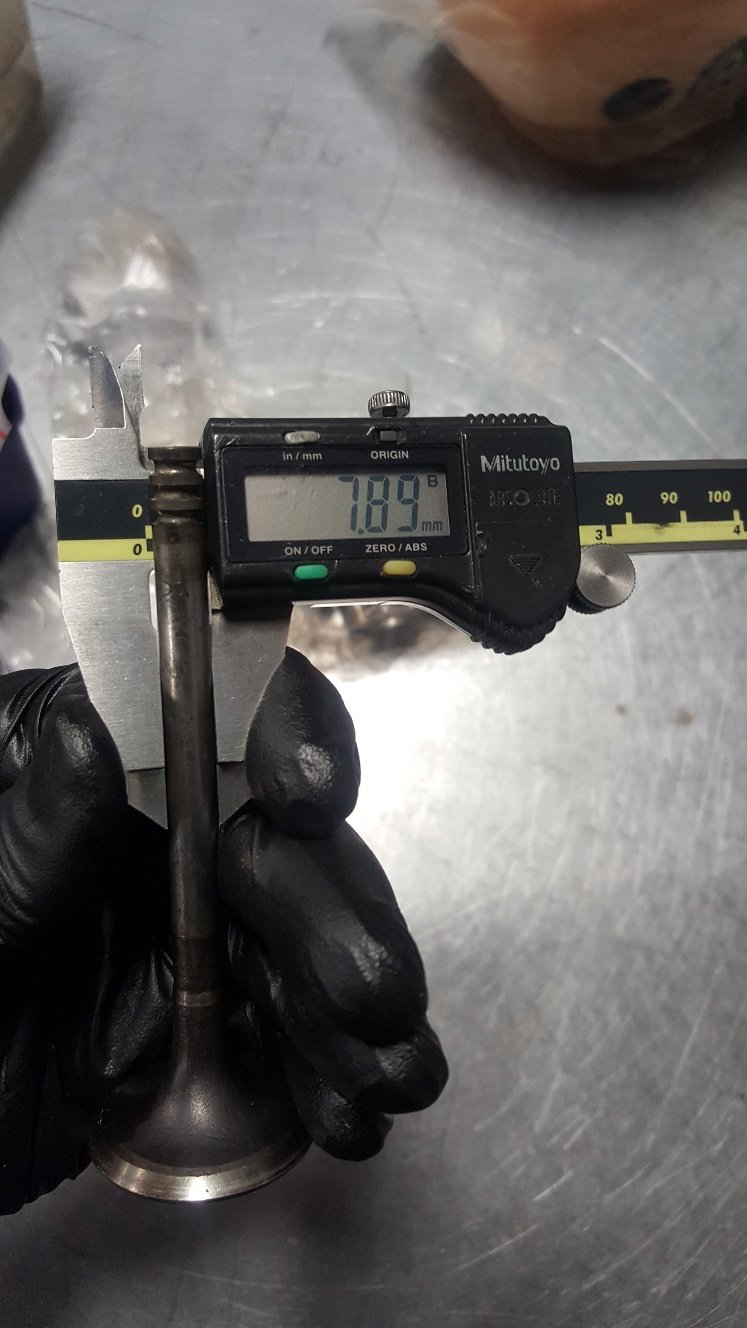
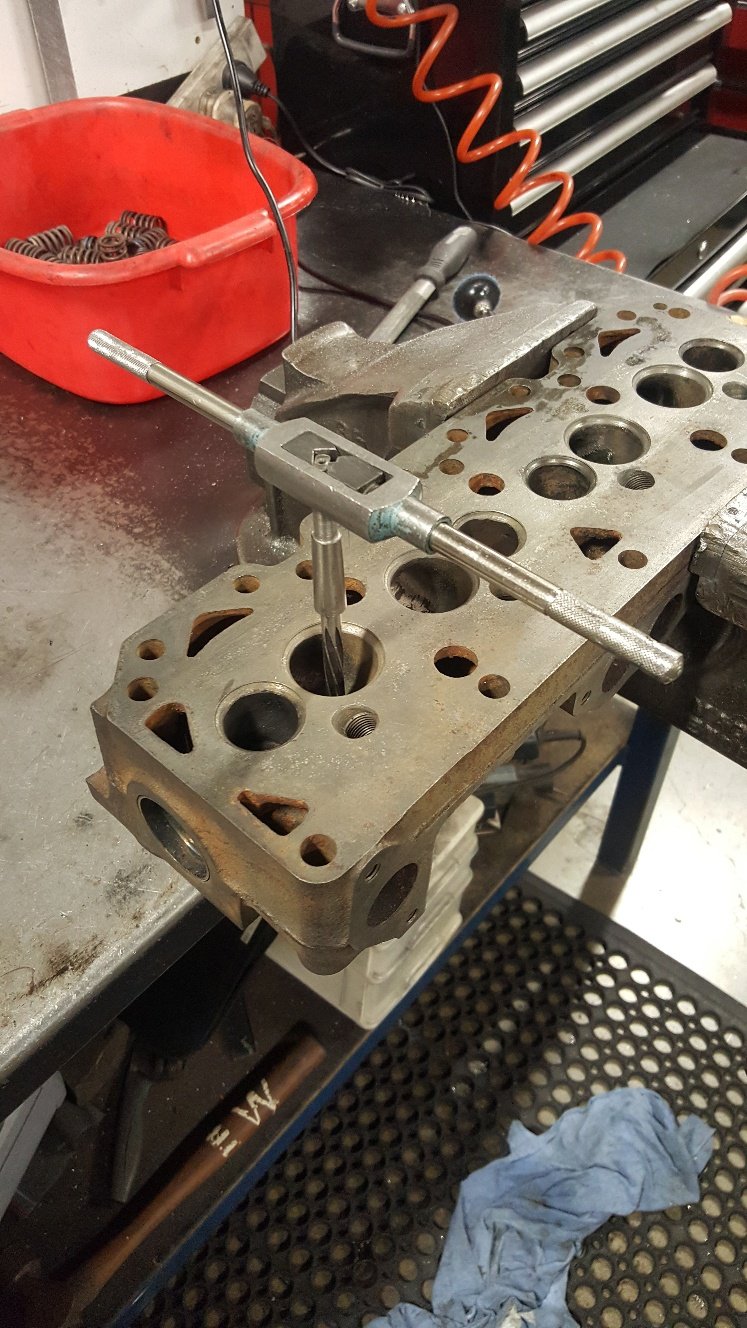
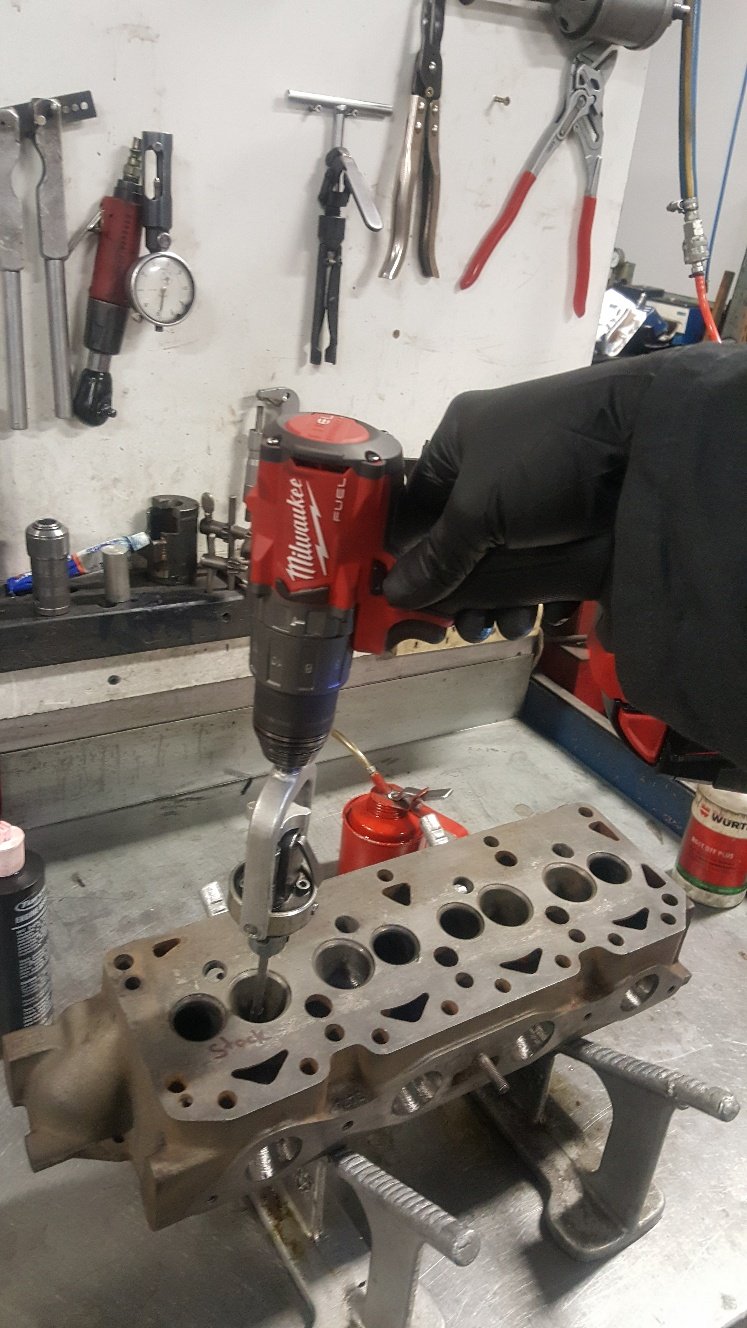
Here's a picture of the standard valve stem size Here's the Mazda FE valve stem size. So I need to open the guides up to accept the bigger stem size. This is also good because it means I don't need to fit a new valve guide. Its just a matter of reaming the guide hole the honing to finished size And now the guides are big enough to get the valves in. I will be machining these down to 42mm for the intake and 34.5mm for the exhaust.
 10 points
 -
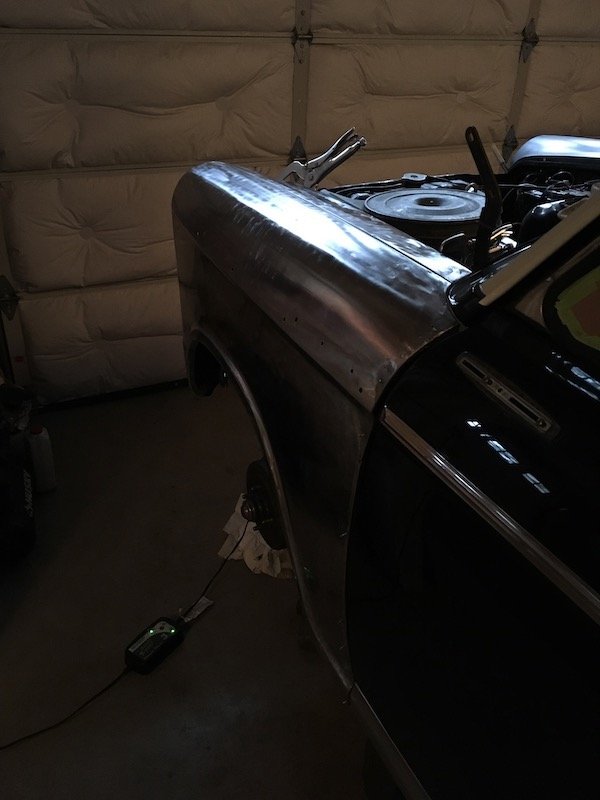
Mostly finished the engine cover. Not a heap of legroom, but not too bad. I then made a cover for all those electrical gubbins. I then debated about having that whole cover hinge up, but decided that some access holes to get to the important things was a better solution. I have since hinged and latched those. Do I win a prize? Then I fucked around with the surprisingly sweet little stereo that arrived from our Chinese friends. I fucked up but not realising that the Bluetooth on the stereo did not deal with phone calls, so I found a panel mount hands free kit from jaycar for $10 and used the amps aux input. It didn't work at first, then I realised the amp was still connecting to the tablet I use for shed sounds that I hooked up for testing, duh. I mounted it all on some ally, the switch is so I can turn it on without the key if needed. Up is normal acc power, down is always on power, and mid position is fully off. This will be useful for the times the bt does not connect properly and you usually have to turn the key off to restart the lil bitch. It needs some filtering though as a lot of noise from the electronic flasher units comes through, plus the amp has enough capacitance to keep the acc circuit going for 10 seconds after it has switched off. And it has a sweet clunk through the speakers. Cool.9 points
-
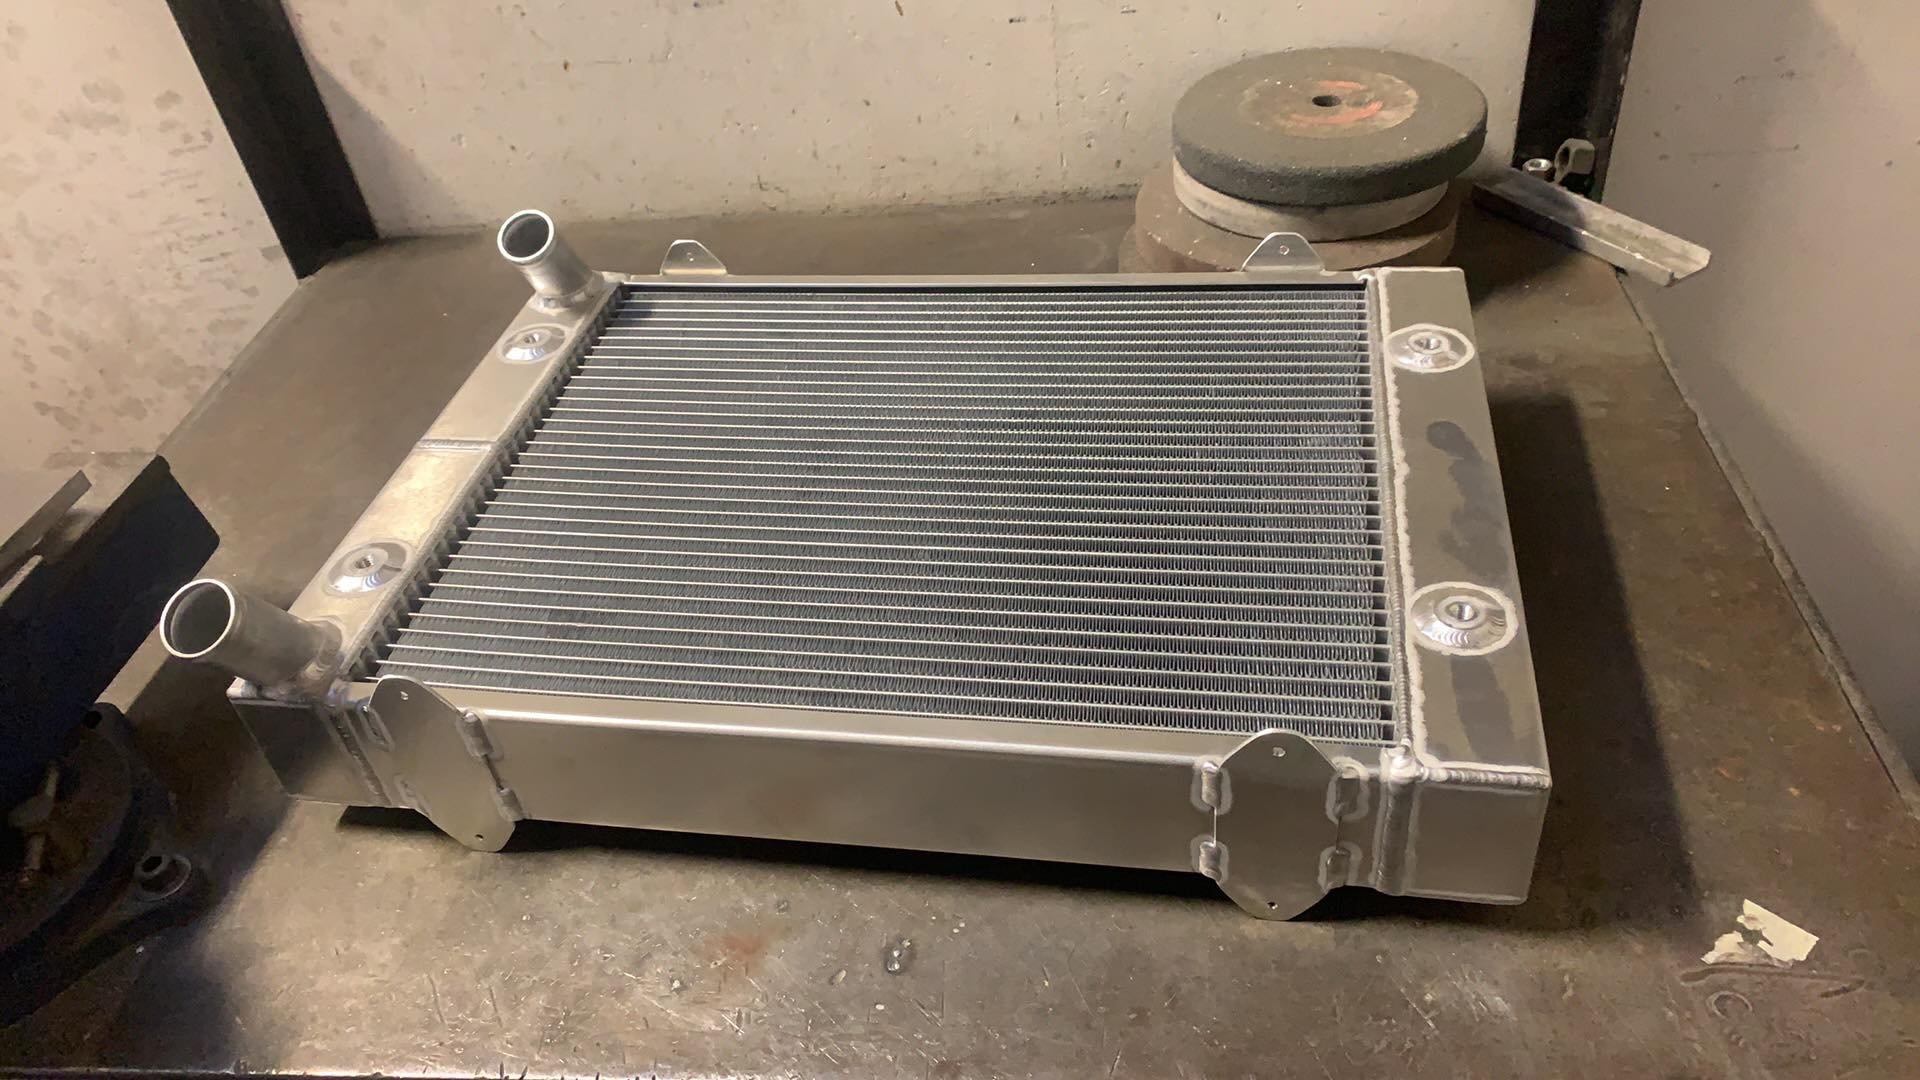
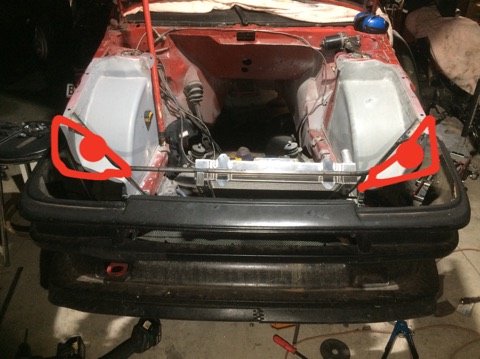
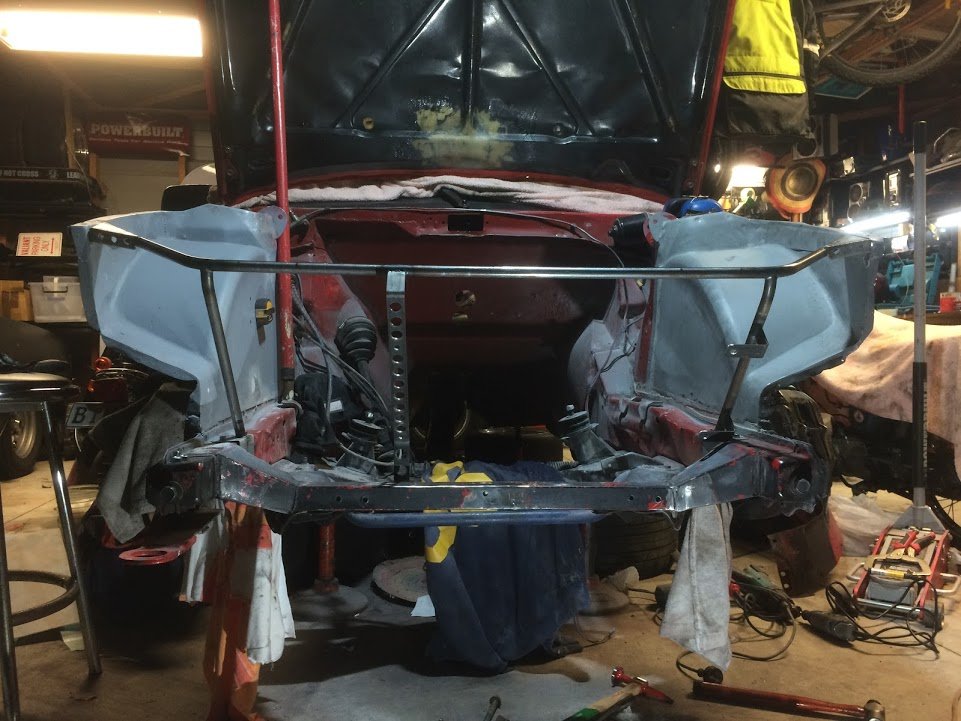
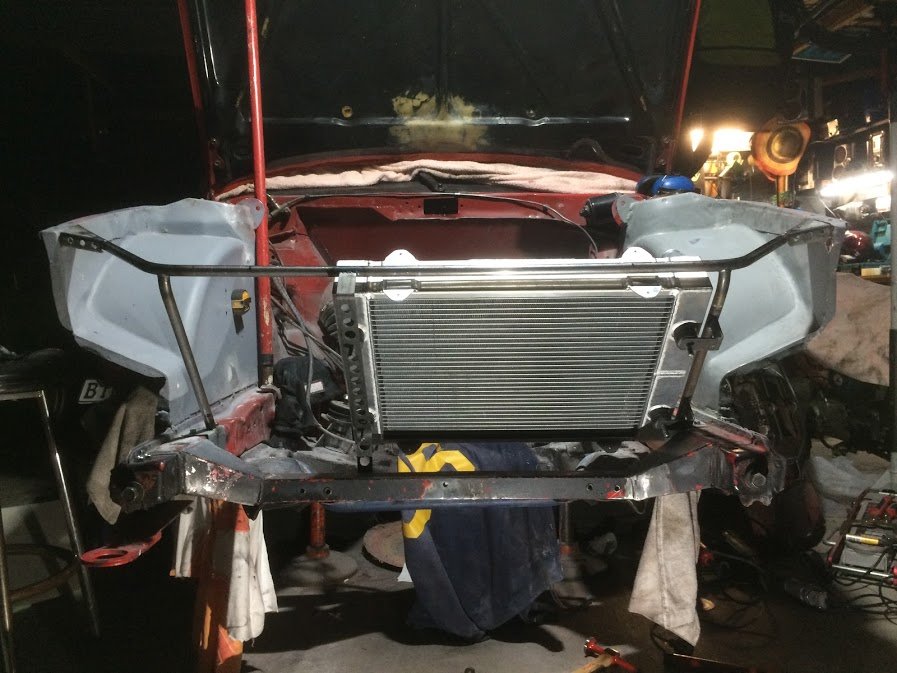
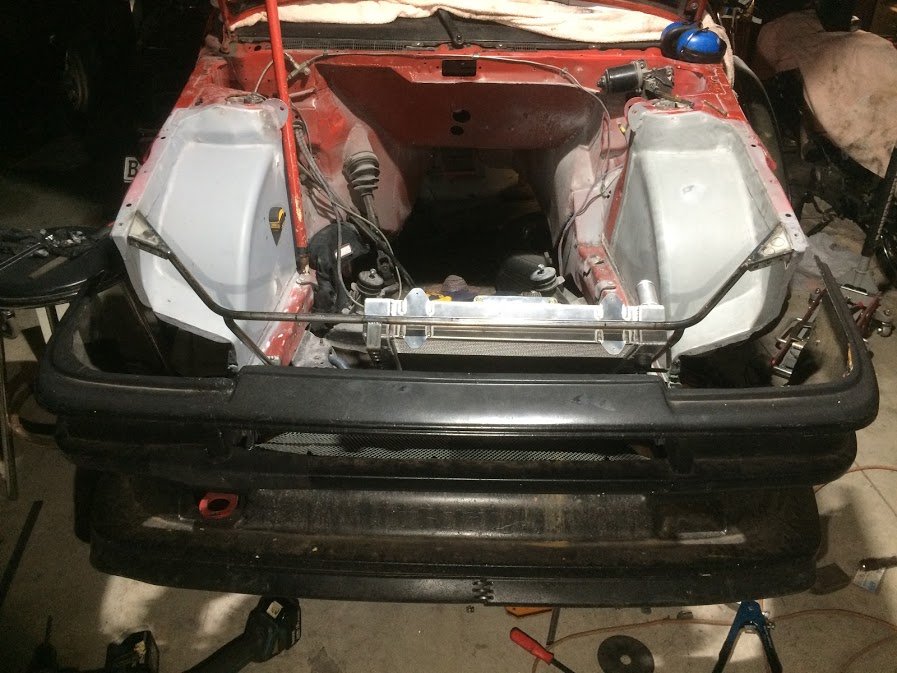
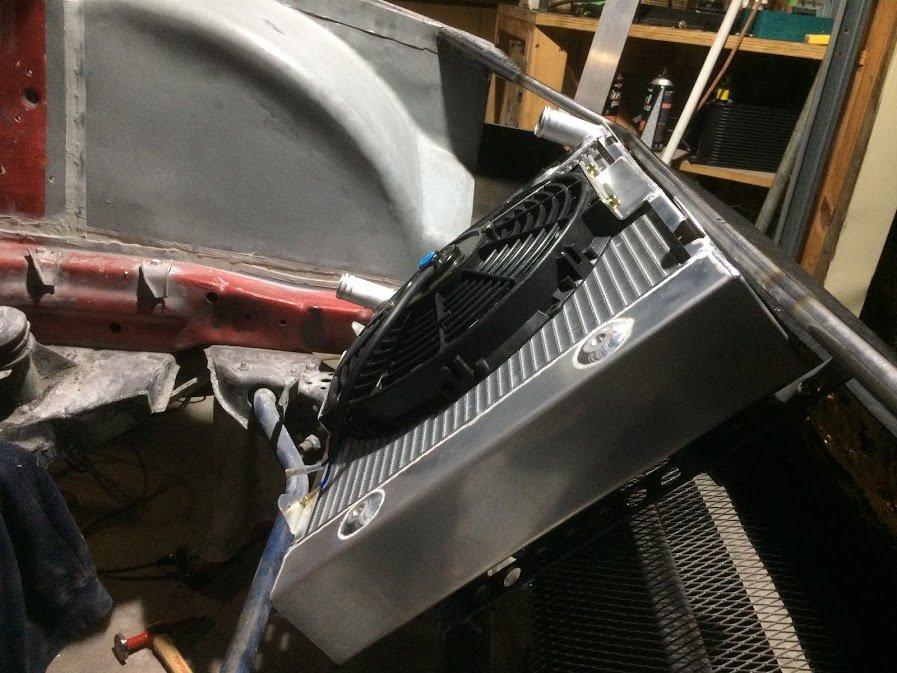
My new radiator turned up on friday from @nick_m at Motorsport Fabrication Services in Christchurch. He made this to custom measurements with custom mount bosses, tags to attach ducting, angled inlet/outlets and a 12" fan mounted in place (not pictured). It's a really nice bit of kit! I highly recommend MFS if you're in need of a radiator or intercooler. We got to work mounting it this weekend. This is what we came up with: And with the radiator in place: The angle of the outlets worked out almost perfect: I think it's starting to look pretty good: .... Hmm, looks like it has angry eyes? Again, huge thanks to @Rhyscar for the fab work and extra brain. I wouldn't have achieved much without him. Next up for fab work is to figure out how to mount the oil cooler and to start thinking about ducting.... But for now it's back to sanding .
8 points
-
Thats right, far overdue is an entry form. Please could everyone that is 100% committed fill in one of these, need to get a grasp on numbers. Don't fill one in if you don't have accommodation figure out, cause I don't believe there is much left on night 1. Also, not mad or anything, discussion is cool, just for those trying to find info in here5 points
-
Made a nice job of it too.5 points
-
Ive fixed a few small job on the starlet and took it for a hoon and goes bloody well for a 1300 with 300,000km on the clock.So i im going to keep it. The wee hoon that made me want to keep it It looks a bit ruff but almost rust free Frist get the wof sorted .Roll cage and as its efi maybe getting a turbo.4 points
-
Ok so I'm still chipping away at this. Kinda slow... what have I done...? - Stripped the blue clubman for anything useable and took the shell for scrap (It practically folded in half from rust when they lifted it off the trailer). - Using the front subframe out of the clubman which is the one I need (earlier type), pulled apart that running gear but the bores are rusted out... - Pulled the drivetrain from the yellow mk3 and stripped that one, bores are ok and should come up with a hone. - Took the interior out of the mk3 and started fitting that to the mk2, kinda digging the brown/green combo. - Realised that the hoodlining is different between mk2/3 so am thinking of trying to mod the body to make the mk3 one fit (I 'think' it will)
4 points
-
Hard to get motivated when its winter and the shed is cold and wet. Did a bit of welding today though... Been eyeing up twin turbo intercoolers and the one that I wanted is only available out of the US, so was going to be spenny to buy and then get it here. Then miraculously one came up on trademe so snapped it up. Is 3.5" thick and fits well width wise, though most of it is gonna sit behind the bumper with only about 1/3rd of the core in direct airflow. Hopefully will still work OK given its supposed to flow up to 1300hp. Needed to change the outlet position to point directly at TB, bought a 3.5" cast elbrow (aliexpress special) and managed to get the old one cutoff and new outlet grafted on there. Anyone ever experimented with fans for intercoolers? Could potentially get a few small fans on the back side of the intercooler for the bit thats behind the bumper, wondering if itd make much difference tho4 points
-
First mod on Gran Turismo 1 weight reduction! Theres is alot of surface rust as the old owner started to sand it back and was left outside Wire brash on a grinder should take care of most of it. the worst of the rust in the floor im hoping its not to bad .Ill get the car in the garage this week sometime and dry the car out. And the mighty 4K-EU.im sure theres room for a turbo.4 points
-
I feel mislead, where is the lego themed fabric?4 points
-
4 points
-
4 points
-
Looks like euro gn125's are geared to do max 80kph. I guess that's why so many posts are about them being too slow This one does an indicated 110km at 9000rpm with a full tank of gas, 2 loaded panniers and a duffle bag on the back, and me. That's pretty legit tbh. Now that I have a 12v socket and a 300kg hanging scale I'll swing it off my engine crane to get a weight and do some gtech runs. Also have an O2 sensor I may put on the exhaust to see if I can squeeze a little more from it3 points
-
That new spike looks like it could be a pain in the arse3 points
-
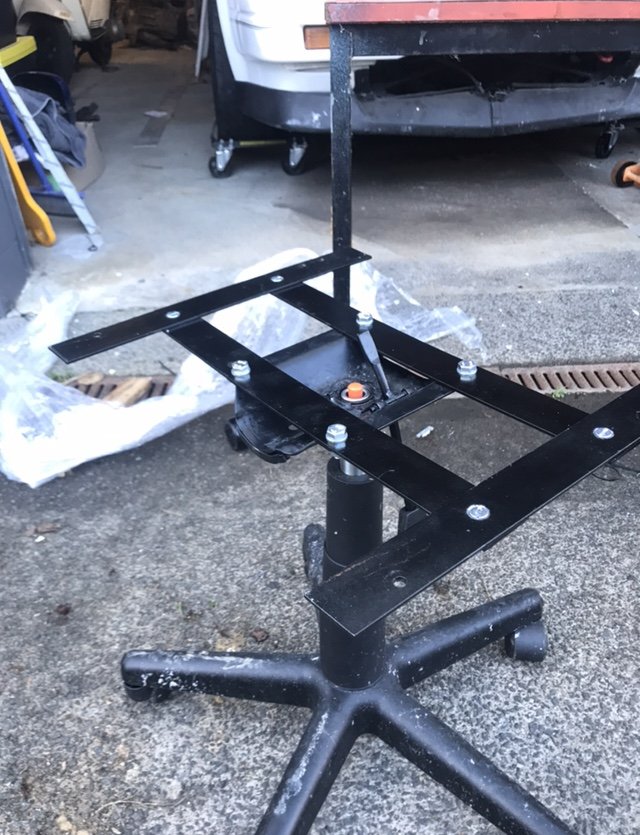
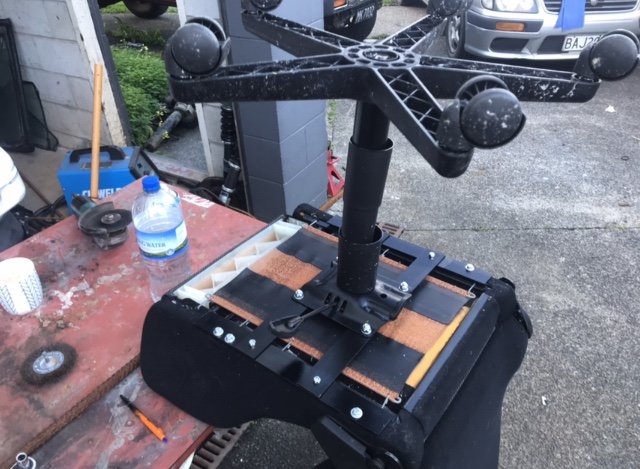
Needed a chair in the garage. old recaro + $30 warehouse office chair + flat bar
3 points
-
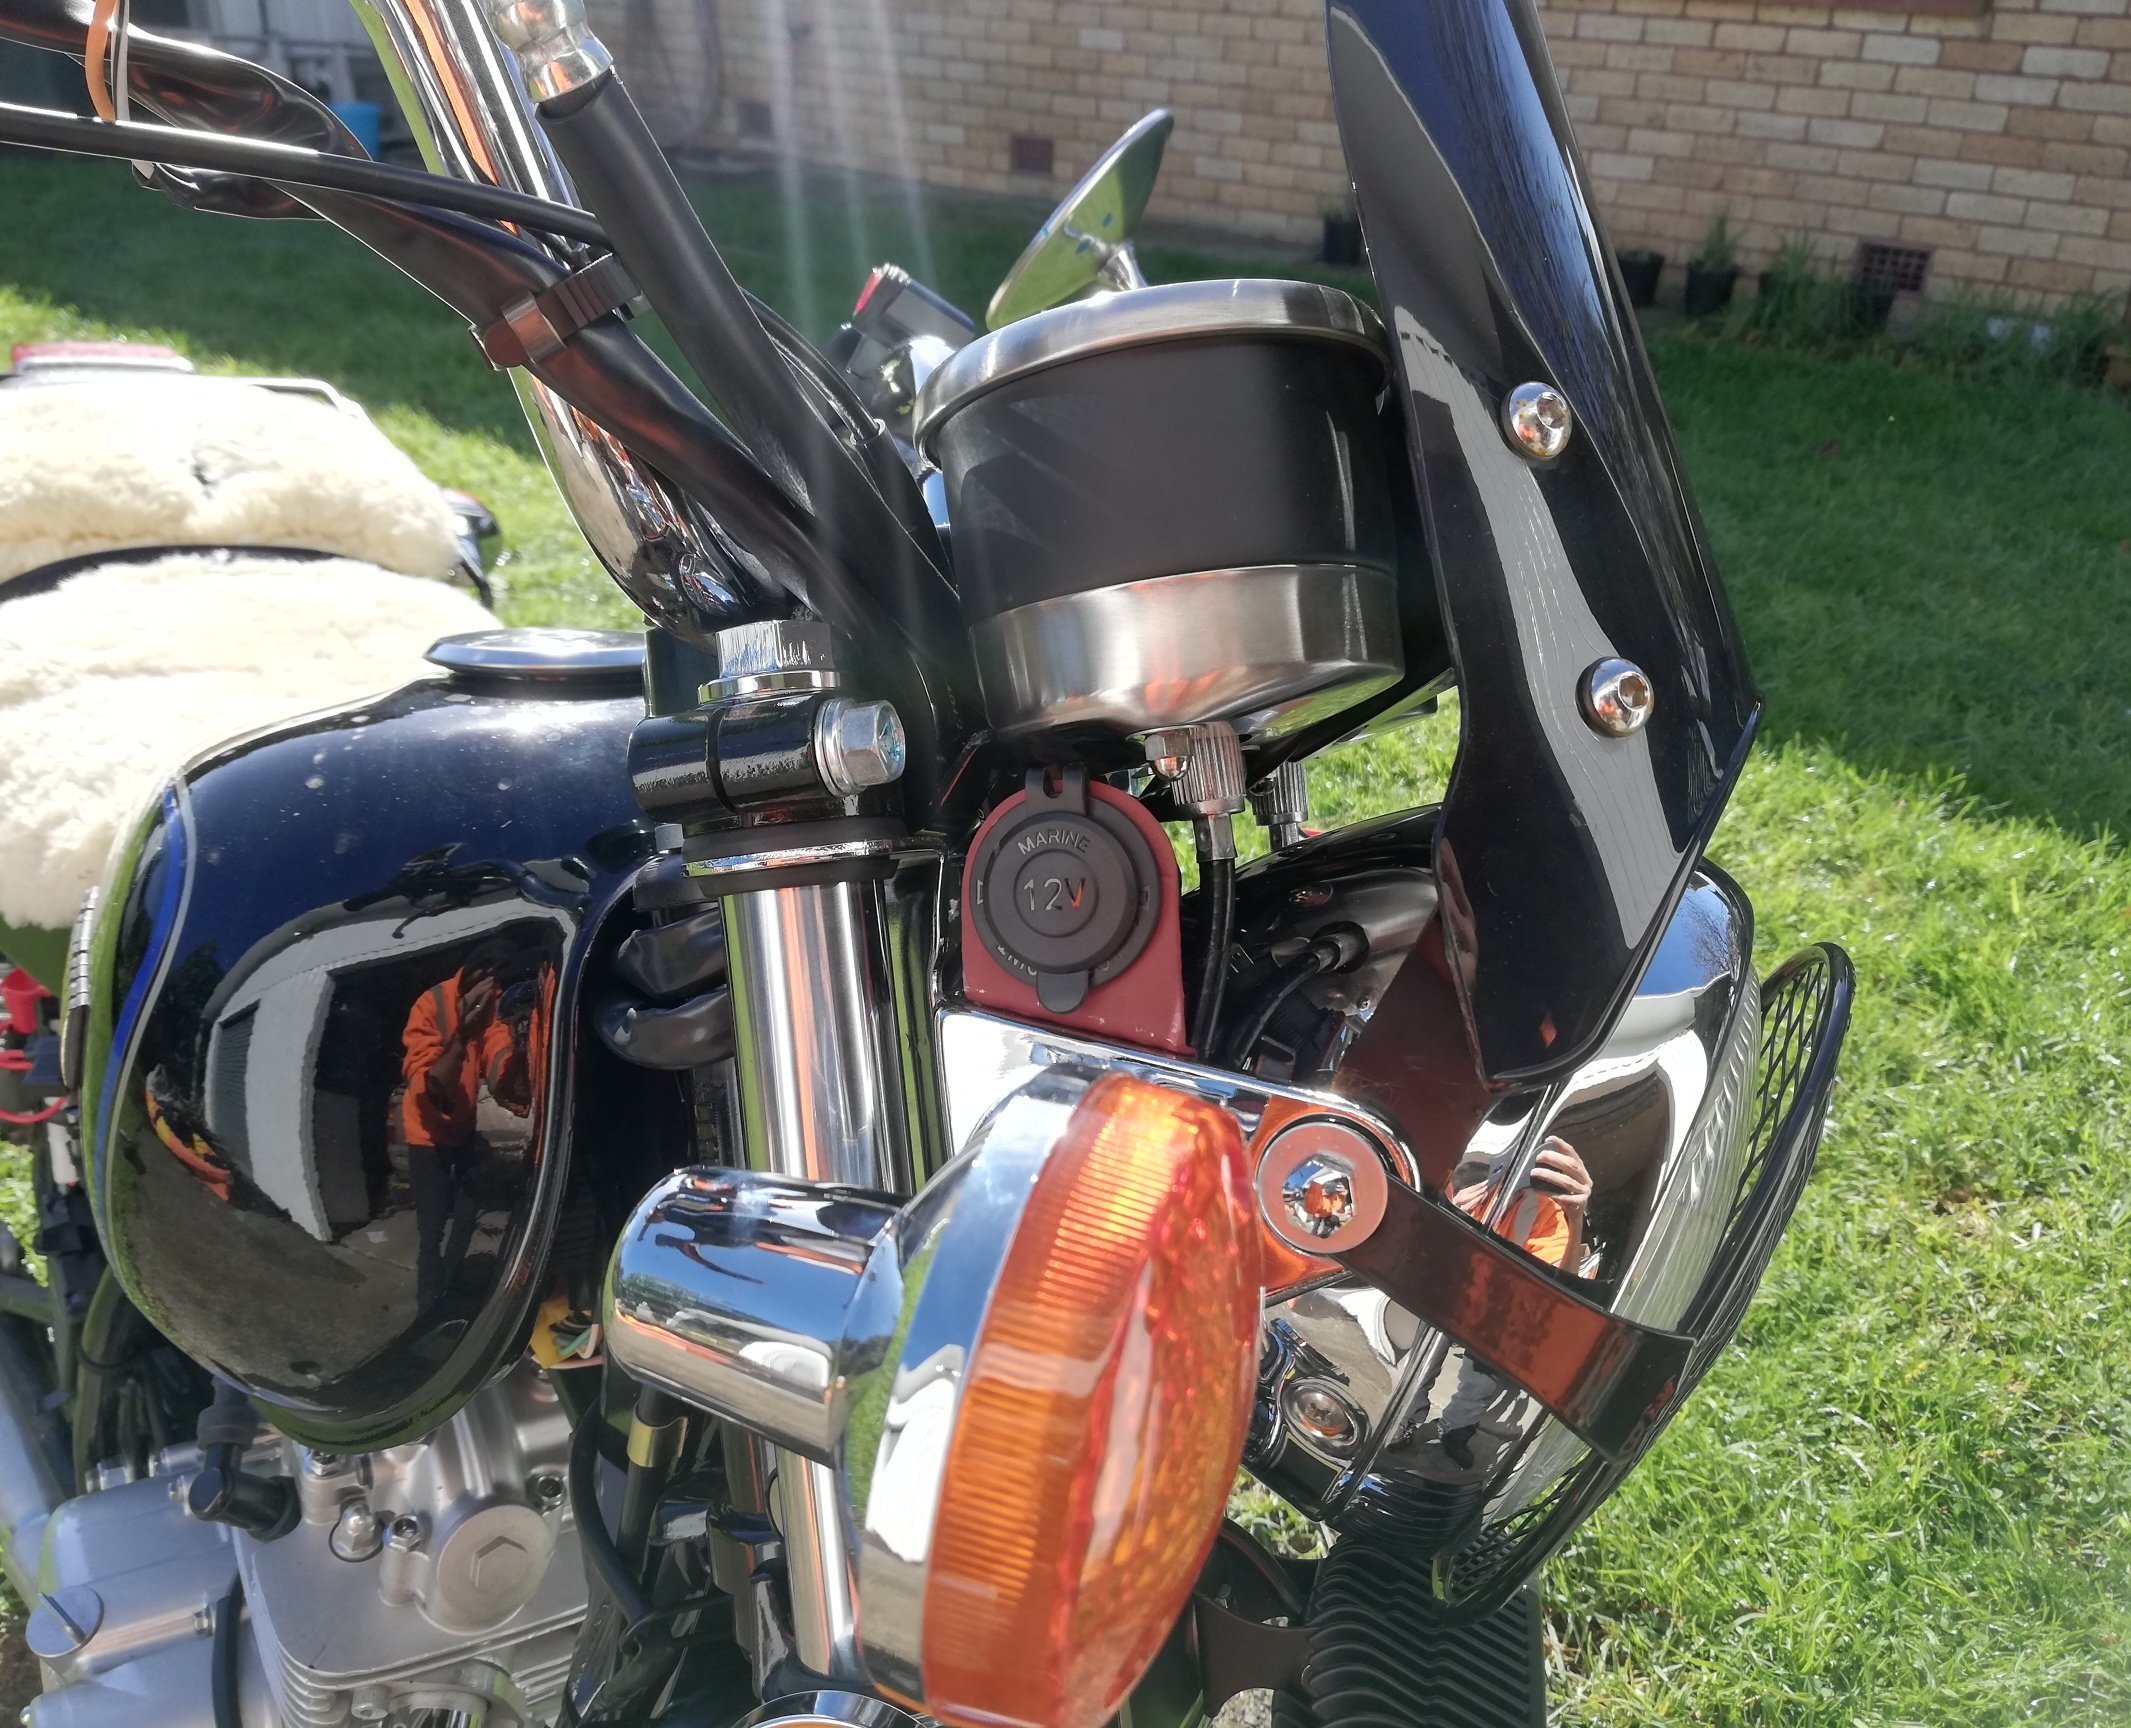
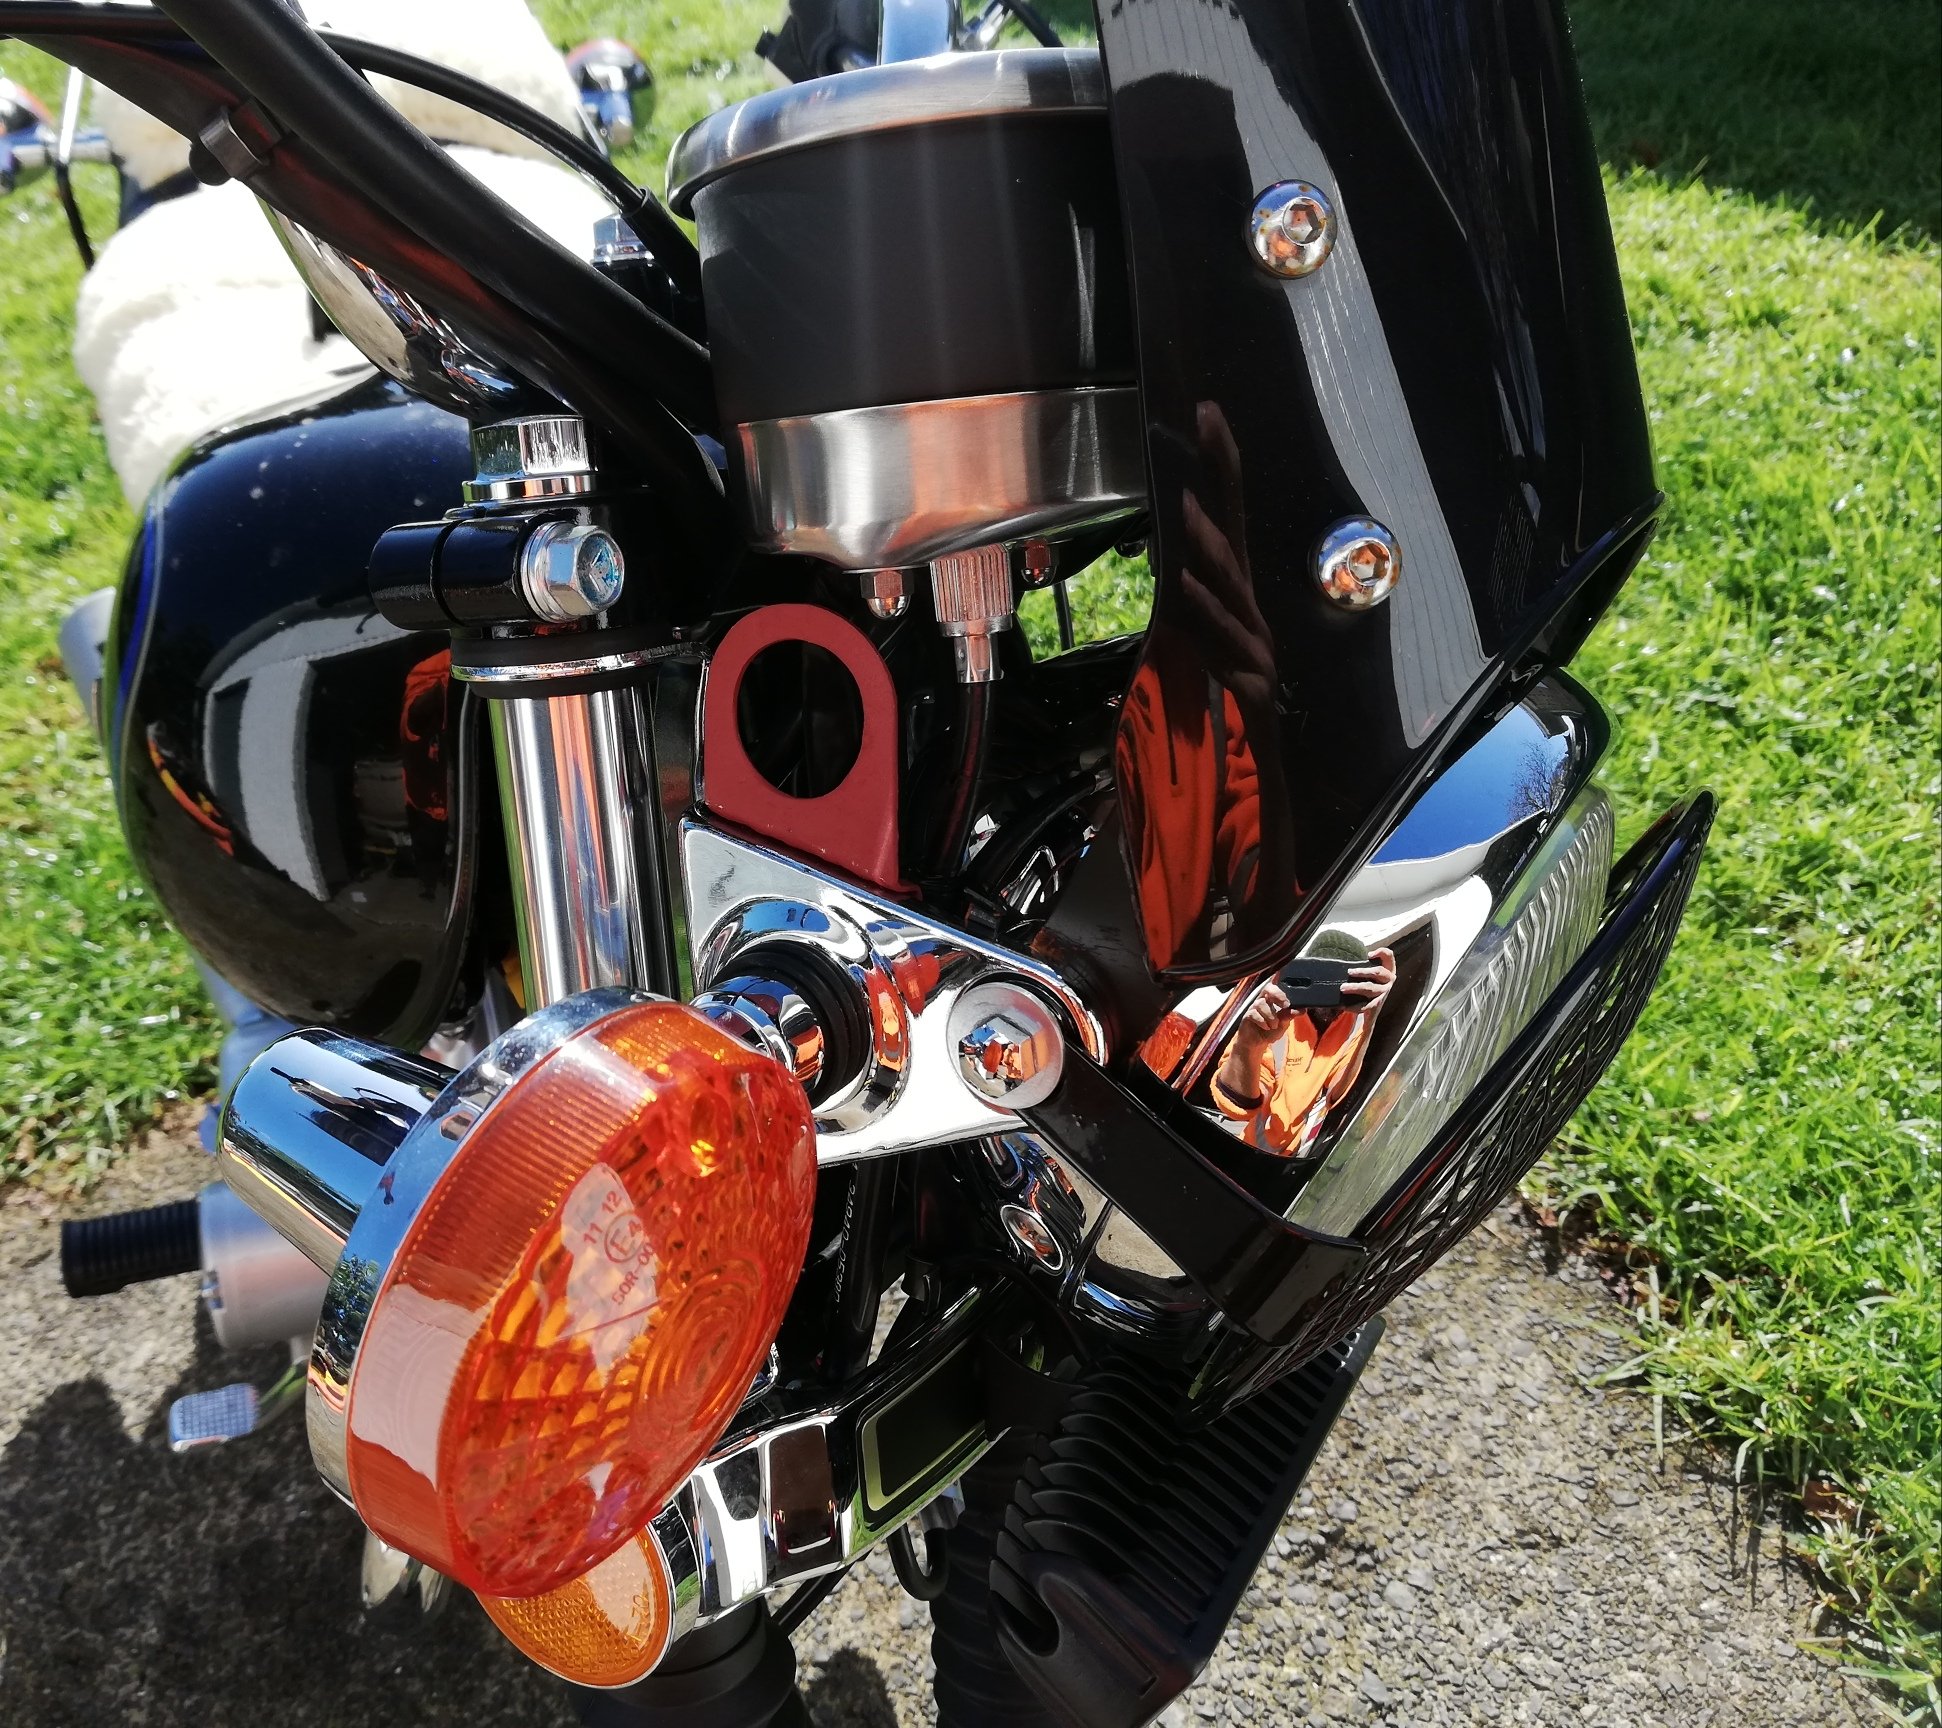
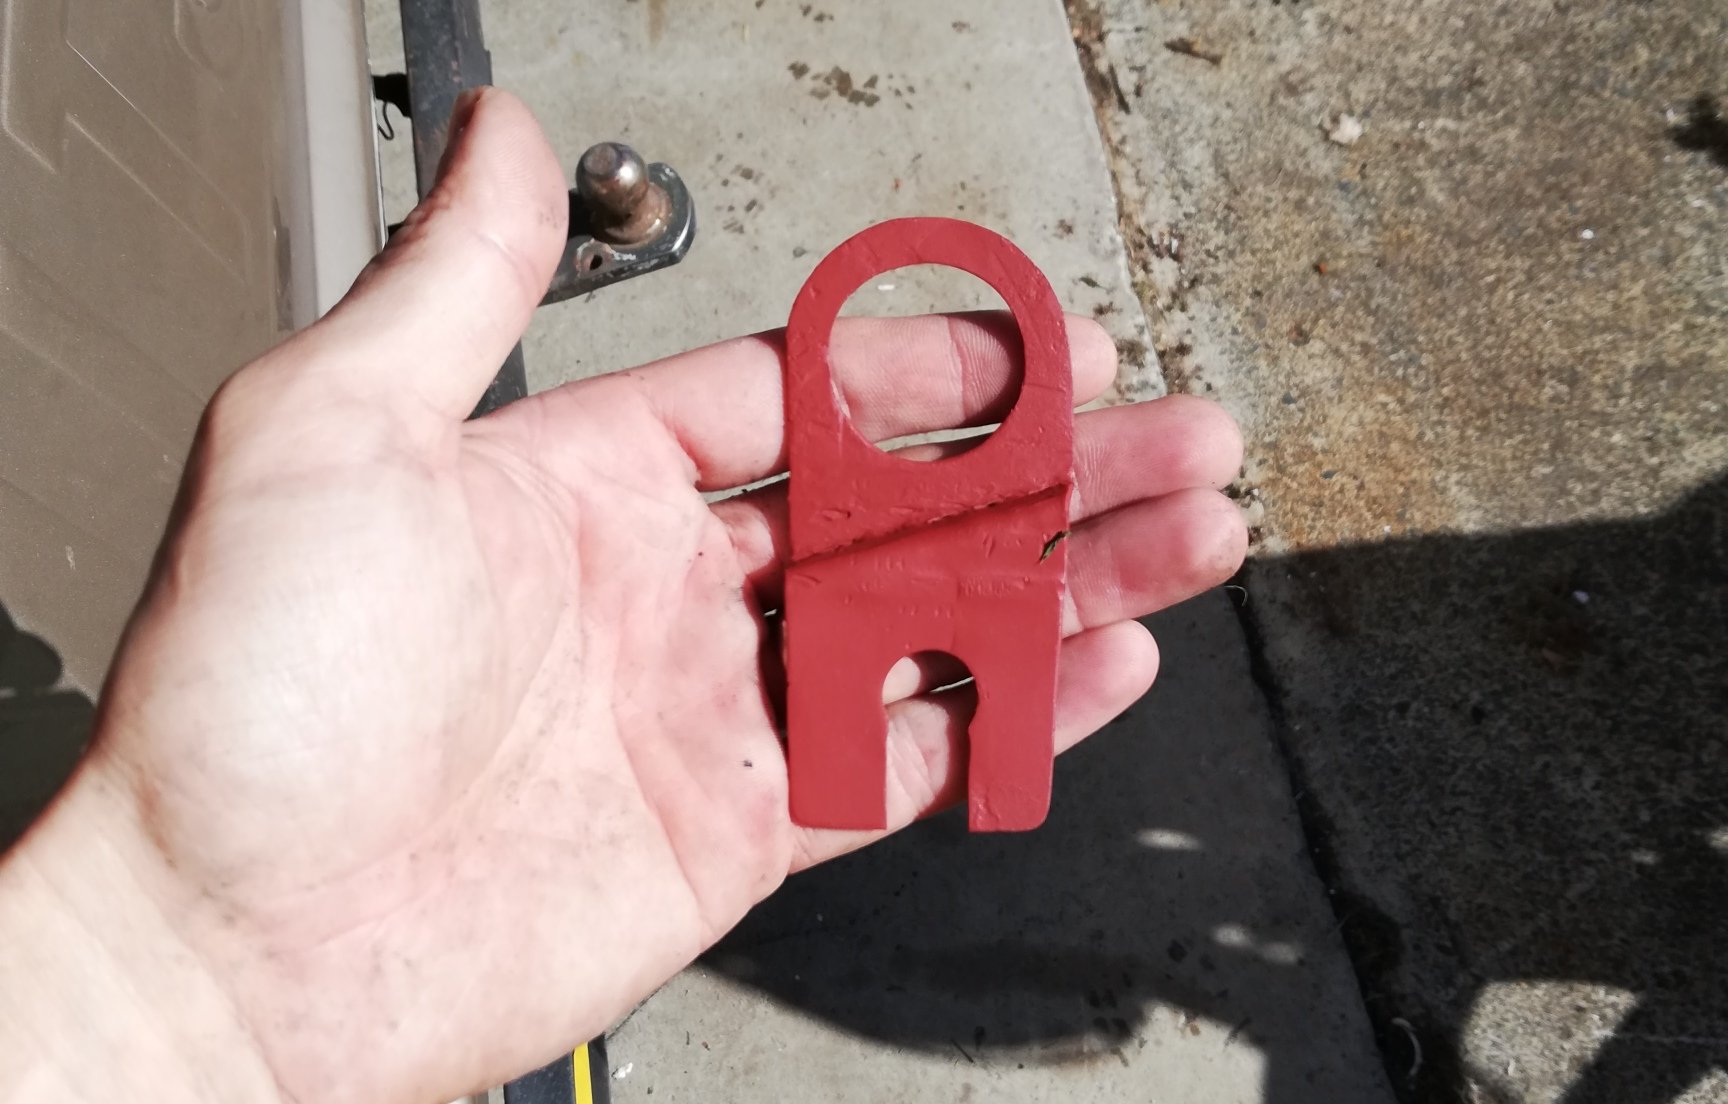
Aaaaannnndddd we're done another relay circuit, switched on the ign and another on off switch mounted behind the battery cover. A ciggy socket this side, and I will do a double USB with volt meter one on the other side. A third one in the rear could be nice for charging stuff in a pannier, but I don't carry much electronics. A cable into a tank bag may be more likely.
3 points
-
That's going to be too nice to park scooters in now! Won't be safe to parK them in there freshly dripping with motu road mud and dust3 points
-
3 points
-
made a little progress. cut all the plugs off the loom and ran it directly through the firewall instead of around. as the picture shows i can trim allot of fat off it now. measured it up, pulled it back out and added the plugs for everything in the engine bay. it has been simplified allot and will hopefully be more reliable. and also have much less of a presence in the engine bay. So i can put the loom back in, do a final check and tape it up nice and neatly. I also have to finalize the coil position and wiring. I will also add some fuses as i found i had a few unfused feeds for coil, injectors and so on. Then a few other little things to tidy up and hopefully it will be a runner.3 points
-
Nah they masked around it. If I did it again I'd strip more out I think Chur. I have a bit of a thing for povo spec Japanese cars with unpainted bumpers and door handles etc. I don't know why I covered the rear interior panels today, stole an idea from someone else's build thread. Went to the warehouse, got 2 $5 blankets and a can of ados, got glue all over my fingers, done.
3 points
-
Last night I had been in the shed working on one of my bikes, finished and packed up but still had half a bottle of beer left before I could leave. So I wandered over to the little 7, which has been sitting with the pistons soaking in CRC for a couple of weeks now, and as expected, I lifted it off the stands by the crank handle Had a couple more mouthfuls of my beer, lifted the head back off and gave the pistons a fairly gentle tap with a hammer and block of wood. nek minit NO FUCKING WAY! i’m chuffed to bits, it turns over beautifully smooth, and has no real marks in the bores that I’ve seen yet. We pulled the dipstick and it’s full of oil that looks better than the stuff in my daily. The original goal of “get the wheels to turn” has crept now into “let’s see if we can drive it out of the shed”3 points
-
Hoping to setup a YouTube account soon and put up videos of me gapping Busa’s at the lights etc. In the meantime, here is my solution to a problem that plagues all of us: where to store all my damn helmets. On a damn handsome helmet rack.
3 points
-
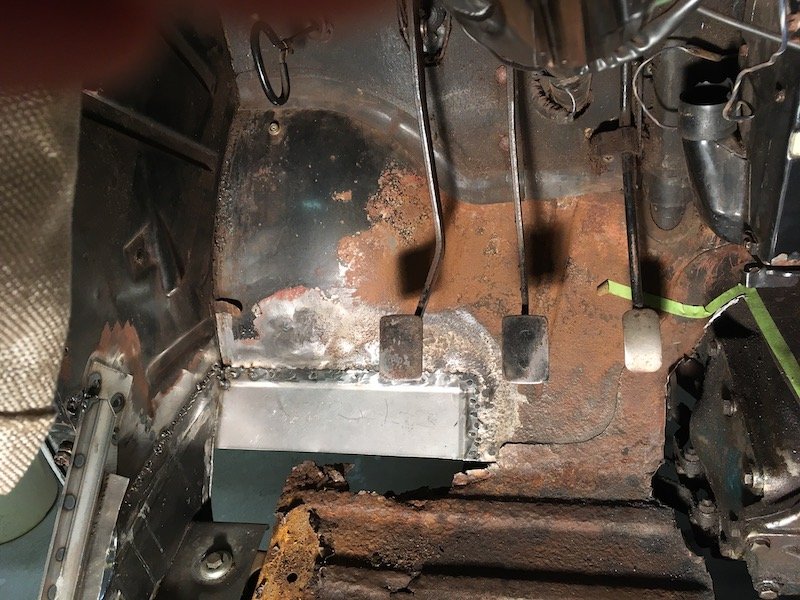
Proof that I am now an auto sparky and fuck anyone who says otherwise; Should have cleaned the smeg off my lens for that last one. Then on to the engine cover, but first I had to build a bit of the intake to make sure I could get it all to clear. There is a sweet spot just behind the cab that will fit a 600x 300 intercooler, I am hoping I can get to that area without modifying my gear linkage too much. Made a rim for the cut sheet metal so the floor was stiffer and the cover had something to bolt to. The intake had to be low otherwise the folding rear seats would hit it. Welded and cleaned up. Looks kinda cool. Then some time honoured 'frame it up in solid round then smash sheet metal onto it' fabrication. It's tight. There was a wee bracket thing that hit the cover when the seat was down so I whipped it off with the grinder only to immediately realise it was the hook to keep the seats up. So now I need to replicate it. Like a cunt. I initially used some real thin galv sheet I had but it was clear I was never going to be able to fully weld it without chasing holes all over the place, plus it already sounded clangy and tinny, so I found some 1.5mm mild steel in the rack and used the thin shit as a template. This meant I could get a nice fold where I needed it using the finger bender. Still yet to do the other side and fill in those gaps, but good progress. Front driveshaft assembly is in getting shortened and balanced at considerable expense. Still yet to hear from engine man. I might have to spend that money on coating the chassis etc and hope I can find some more later on. Or find some more shit to sell. As you were.3 points
-
You just described me after a shave ffs2 points
-
the seem to go alright, not over quick in the truck, and who knows what the economy is like. dont suppose you have any contacts in the mopar world with access to wiring diagrams? Armstrong prestige told me they have then but wouldn't give them to me. cunts, i used to dish that info out no problem when i was at bmw.2 points
-
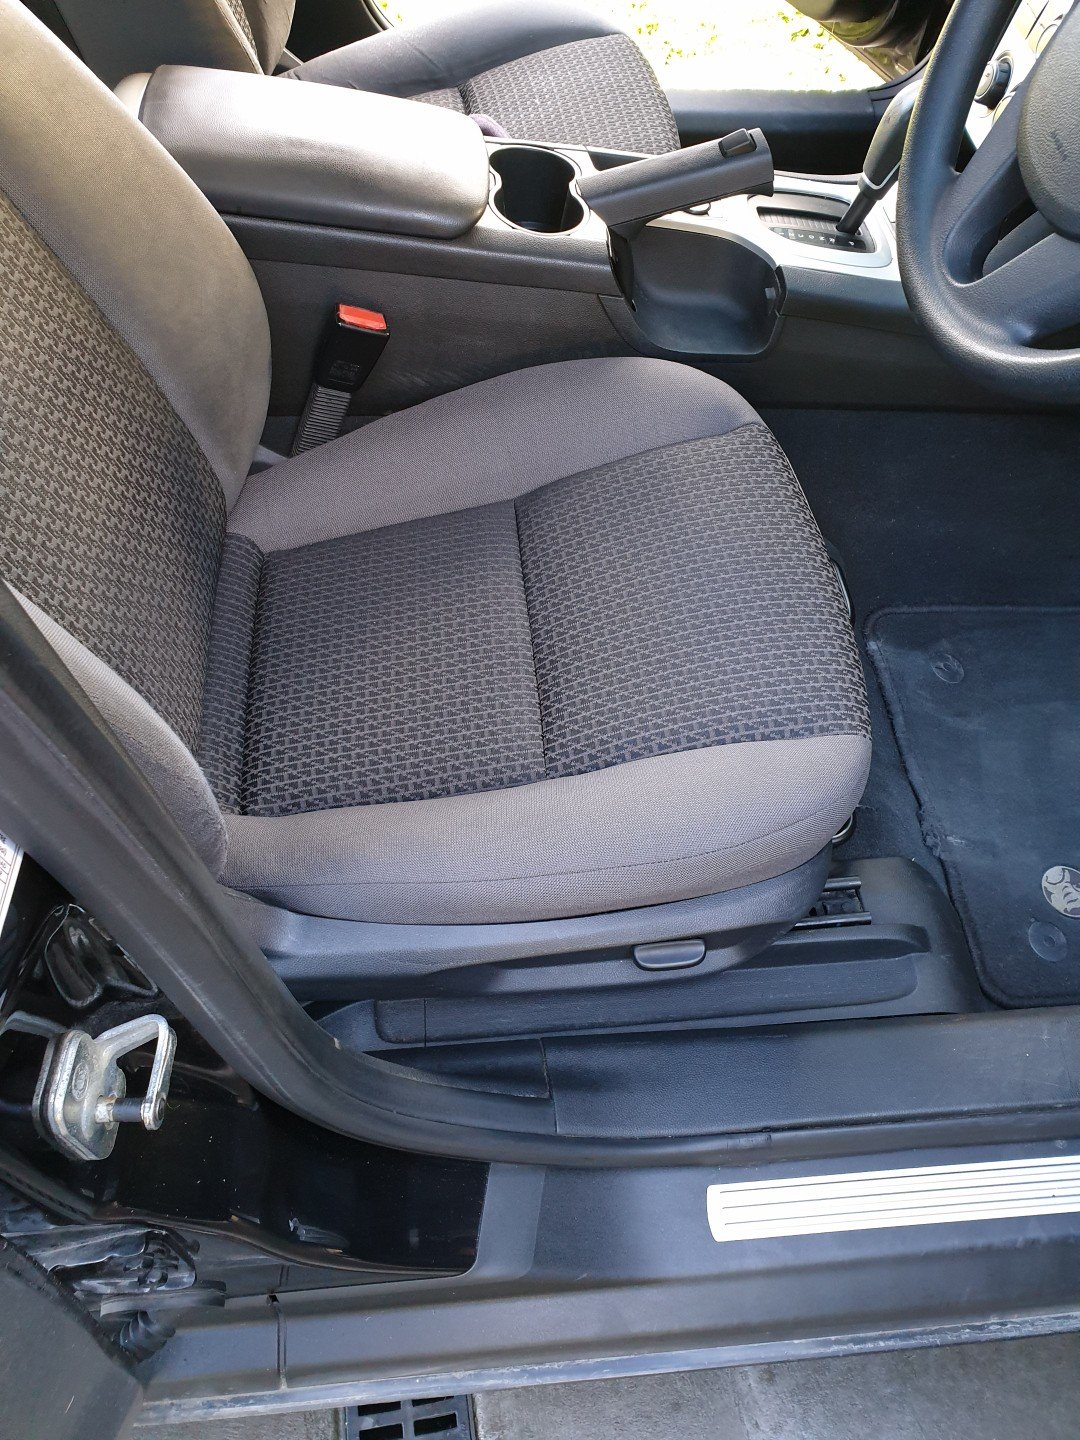
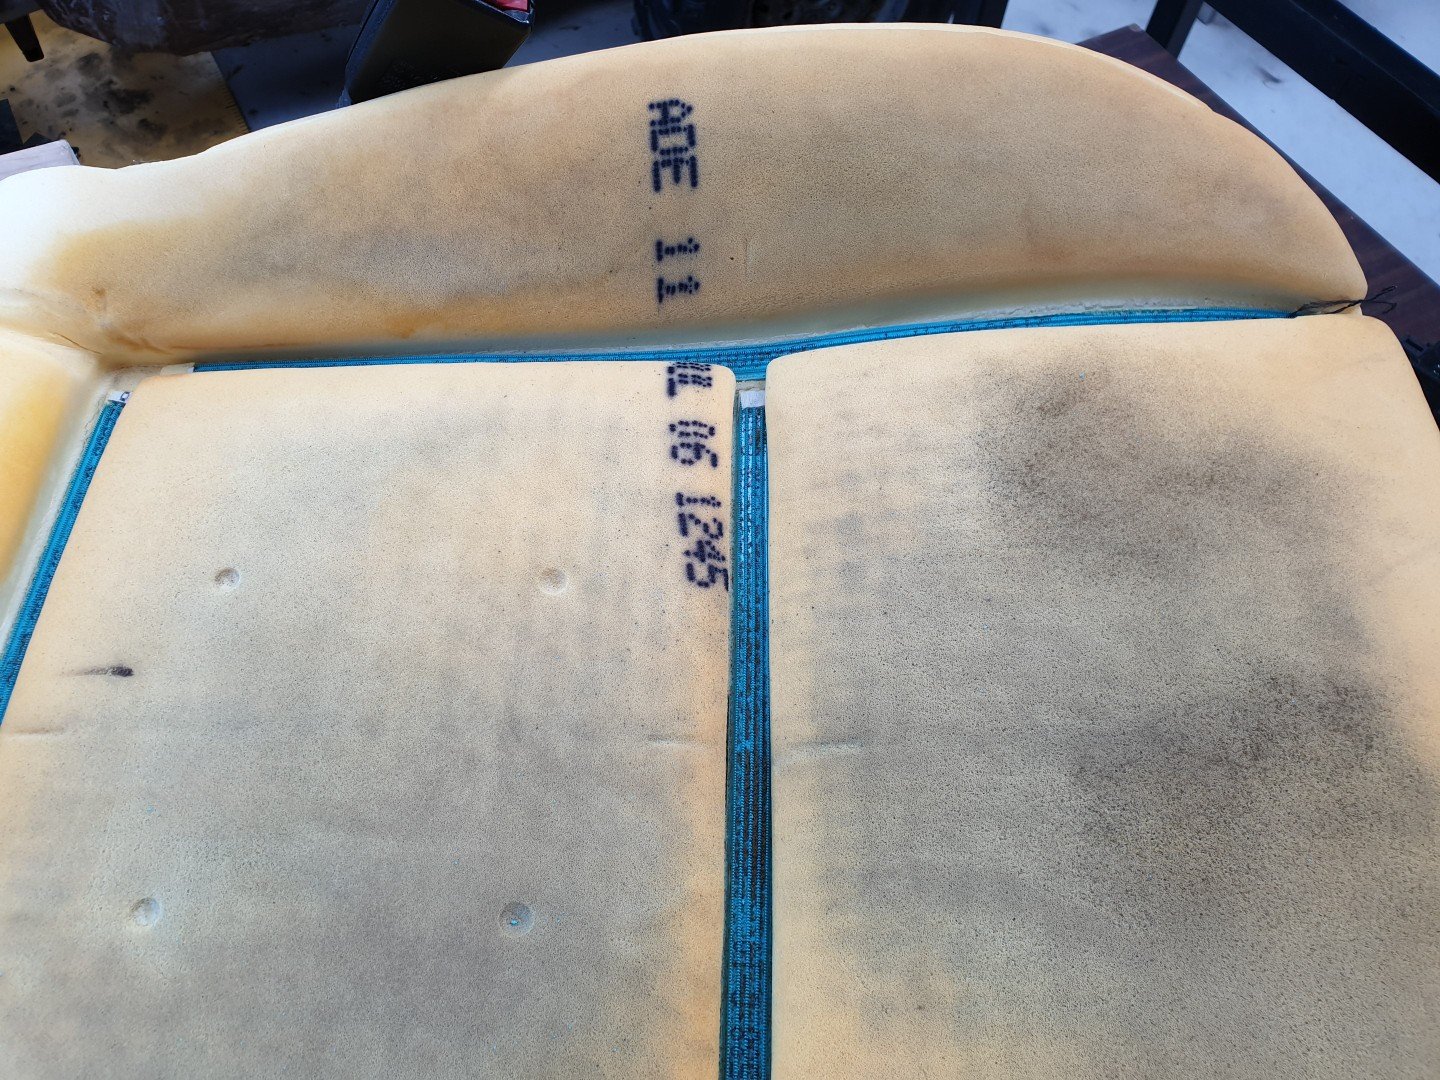
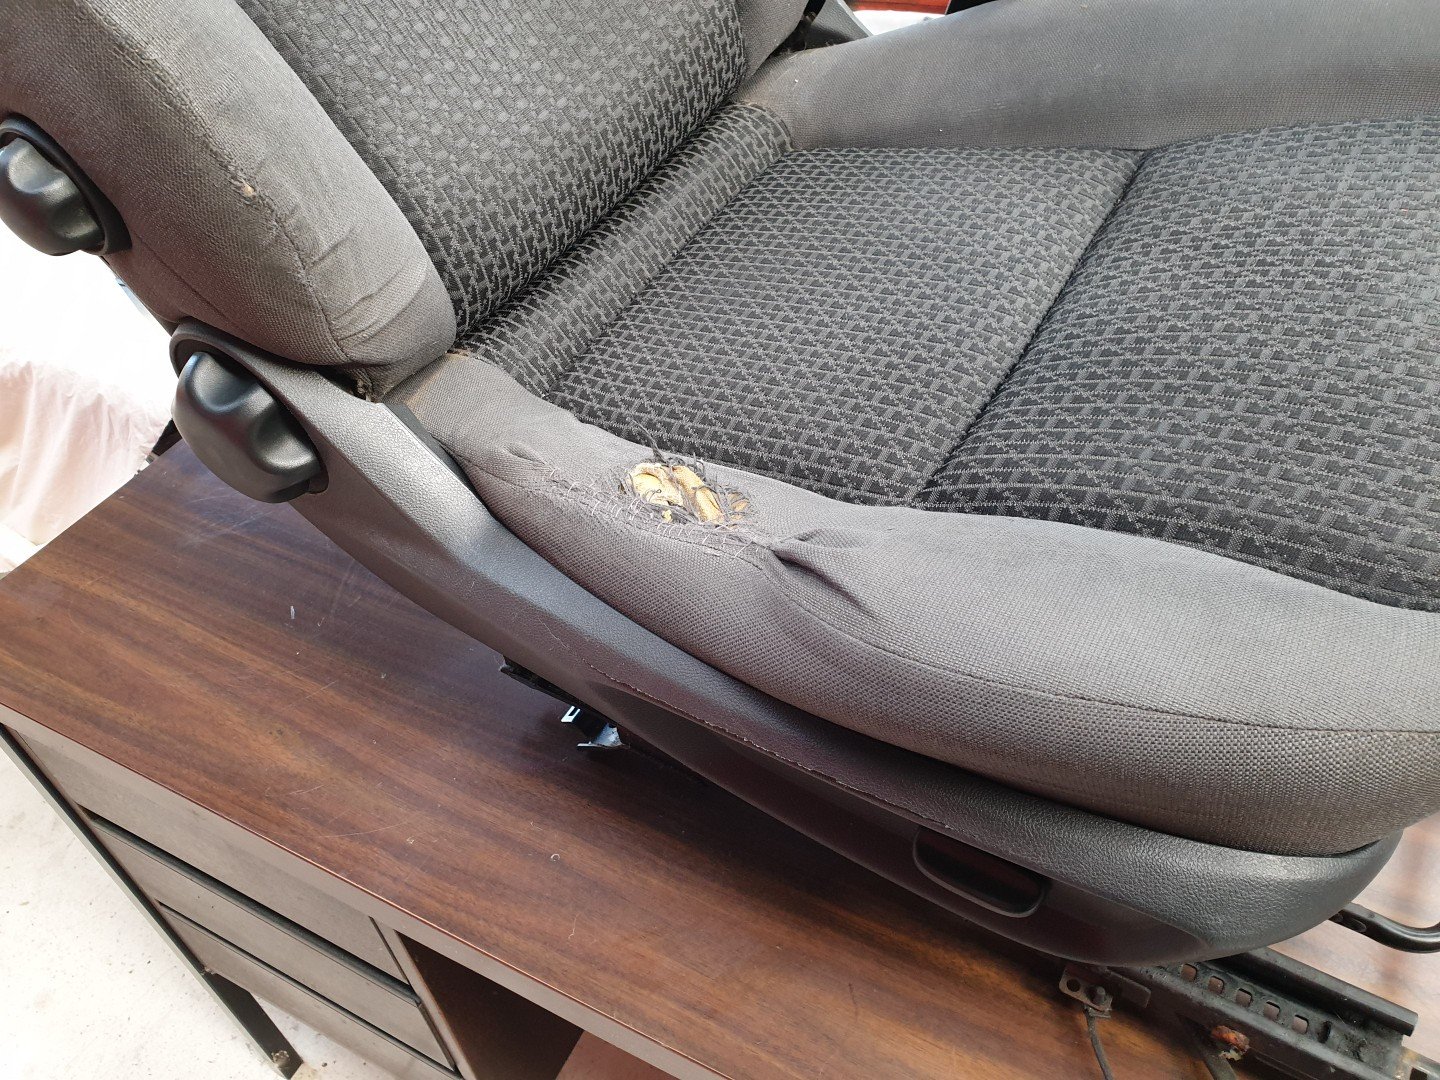
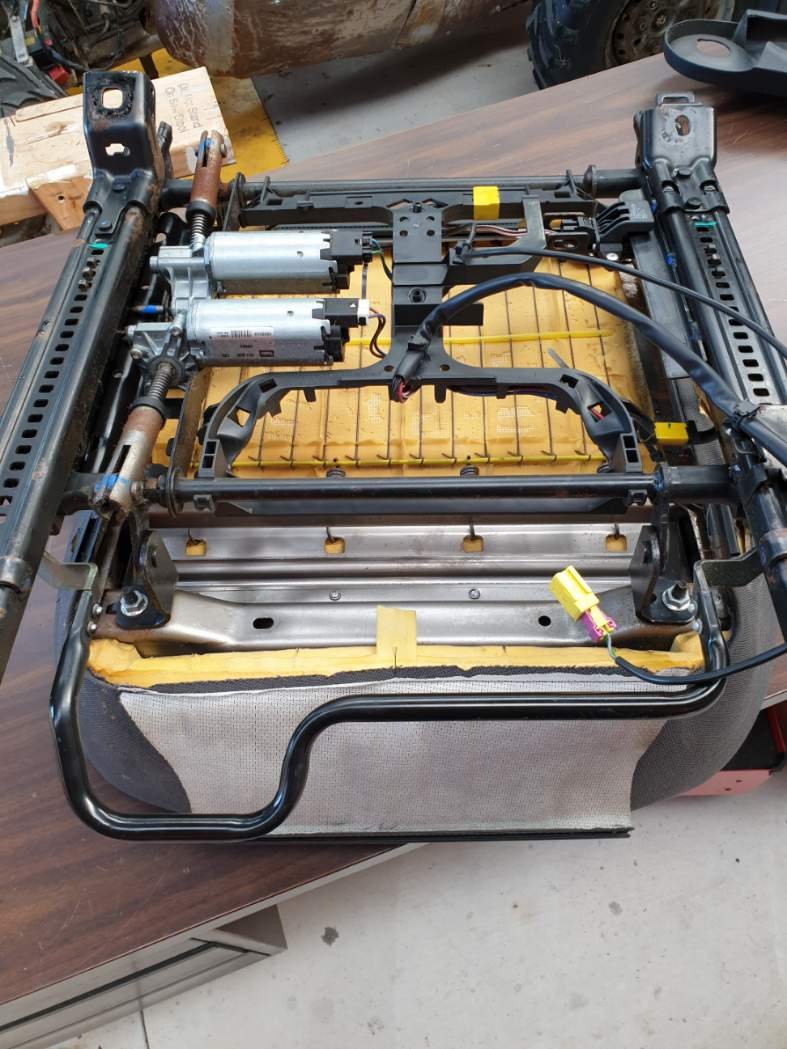
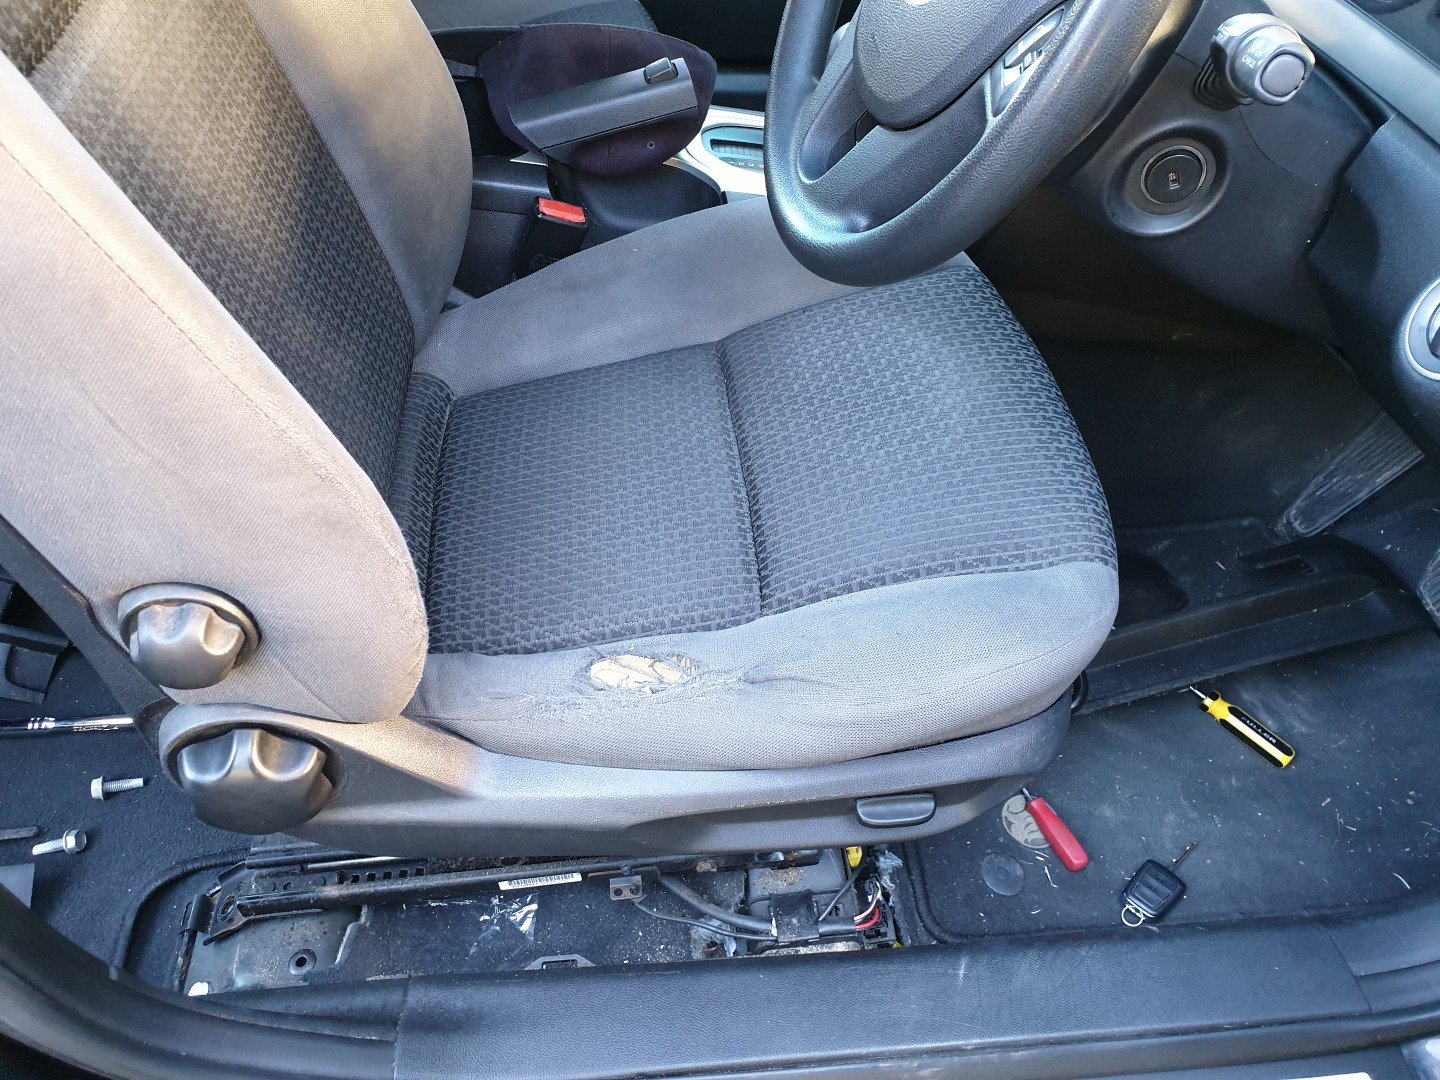
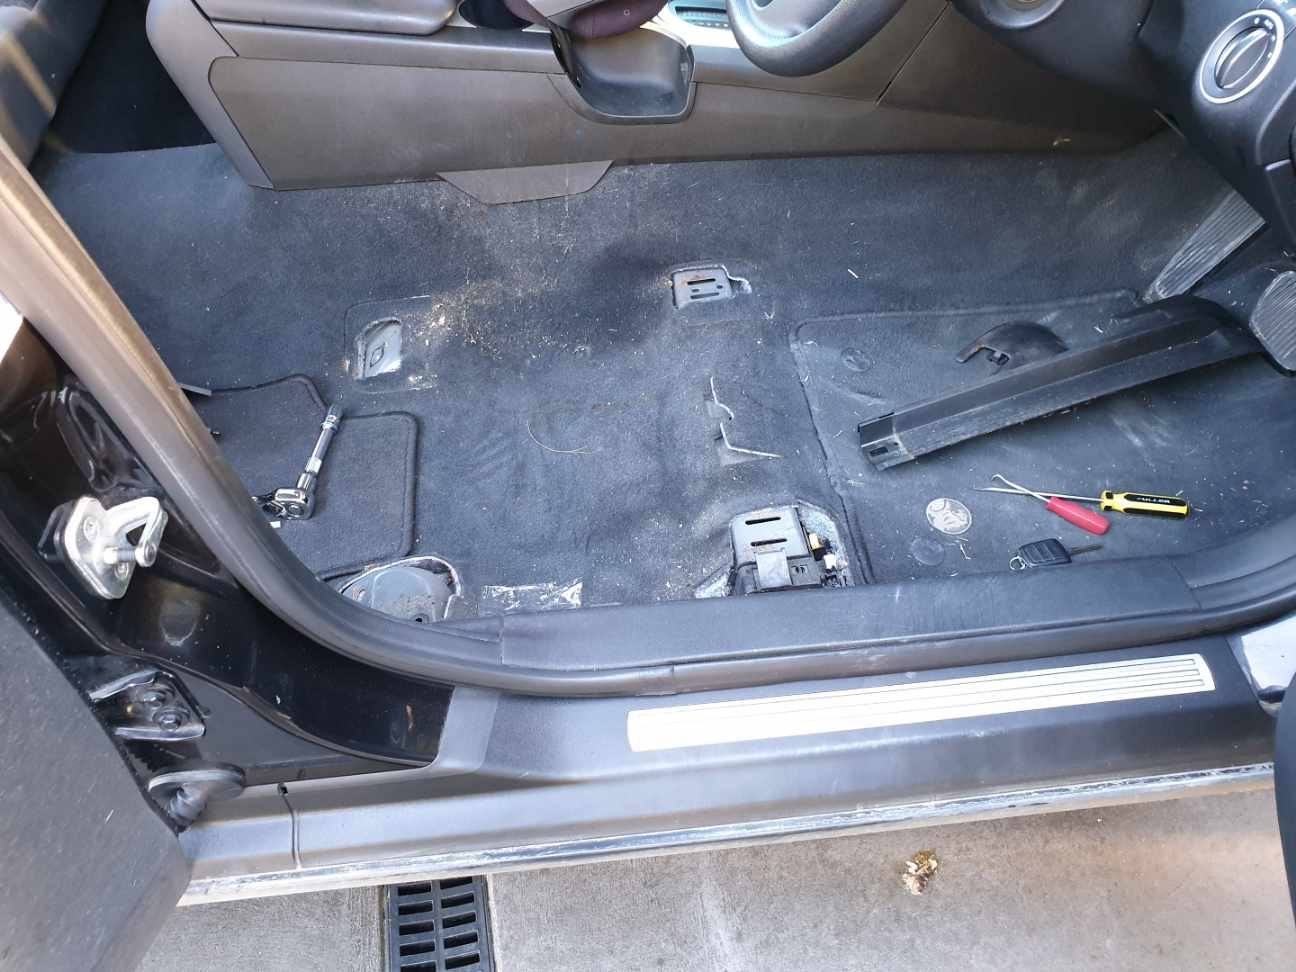
Okay; it's not old school by any stretch of the imagination, but I'm actually enjoying doing bits and bobs to improve this car. And not a spot of rust to be seen in the body. Anyways...due to its age, the seat had worn through in the usual place. And the handbrake lever had broken, both made the car look a bit shit/rough inside. Ebay to the rescue and parts arrived within the week! So: Seat out of car so I can work on it. The foam has a strong velcro that holds the cover in place. Easy...just match it up and away you go. Under the seat it has plastic clips that clip into folded sheetmetal, its pretty obvious once you're at this stage what to do. And boom!!! All done, just like a brought one! Totally transformed the homeless chic interior into something, um, well, um less likely to have a homeless person living in it.
2 points
-
As long as the keys out of the ignition it should be all g, g2 points
-
Hey all can you help me and maybe I can help you all.. Not sure if this is the correct section but here goes.. I am looking at saving anything and everything old school before you decide to send it to doctor death.. aka scrap metal.. I will remove in anyway possible rusty/crashed/incomplete and or unwanted vehicles and will give your scrap metal price for them! Or take them free if you would just like them gone or if your out of my 100km Radius.. Basically way too many cars are going to scrap metal dealers with salvageable parts still attached.. Once they go there they don't come back and we all miss out on precious parts weather they be rust cuts/chrome/panels etc and what a fucking waste that is.. I would like to offer people local to Tauranga and up to "for now" a 100km Radius to Tauranga another option.. Me lol There is a waiting list if your happy to wait.. Eventually I will have a stock list but not available yet.. Feel free to send me a private message with pics and I will get back to you within a few days at the latest. Thanks for looking and I hope to hear from some of you soon.. Fiat 500 is long gone btw sorry it's just an example of the shit I'm willing to take..
2 points
-
chariot is ready to be picked up if you want the shame of owing it, free of course2 points
-
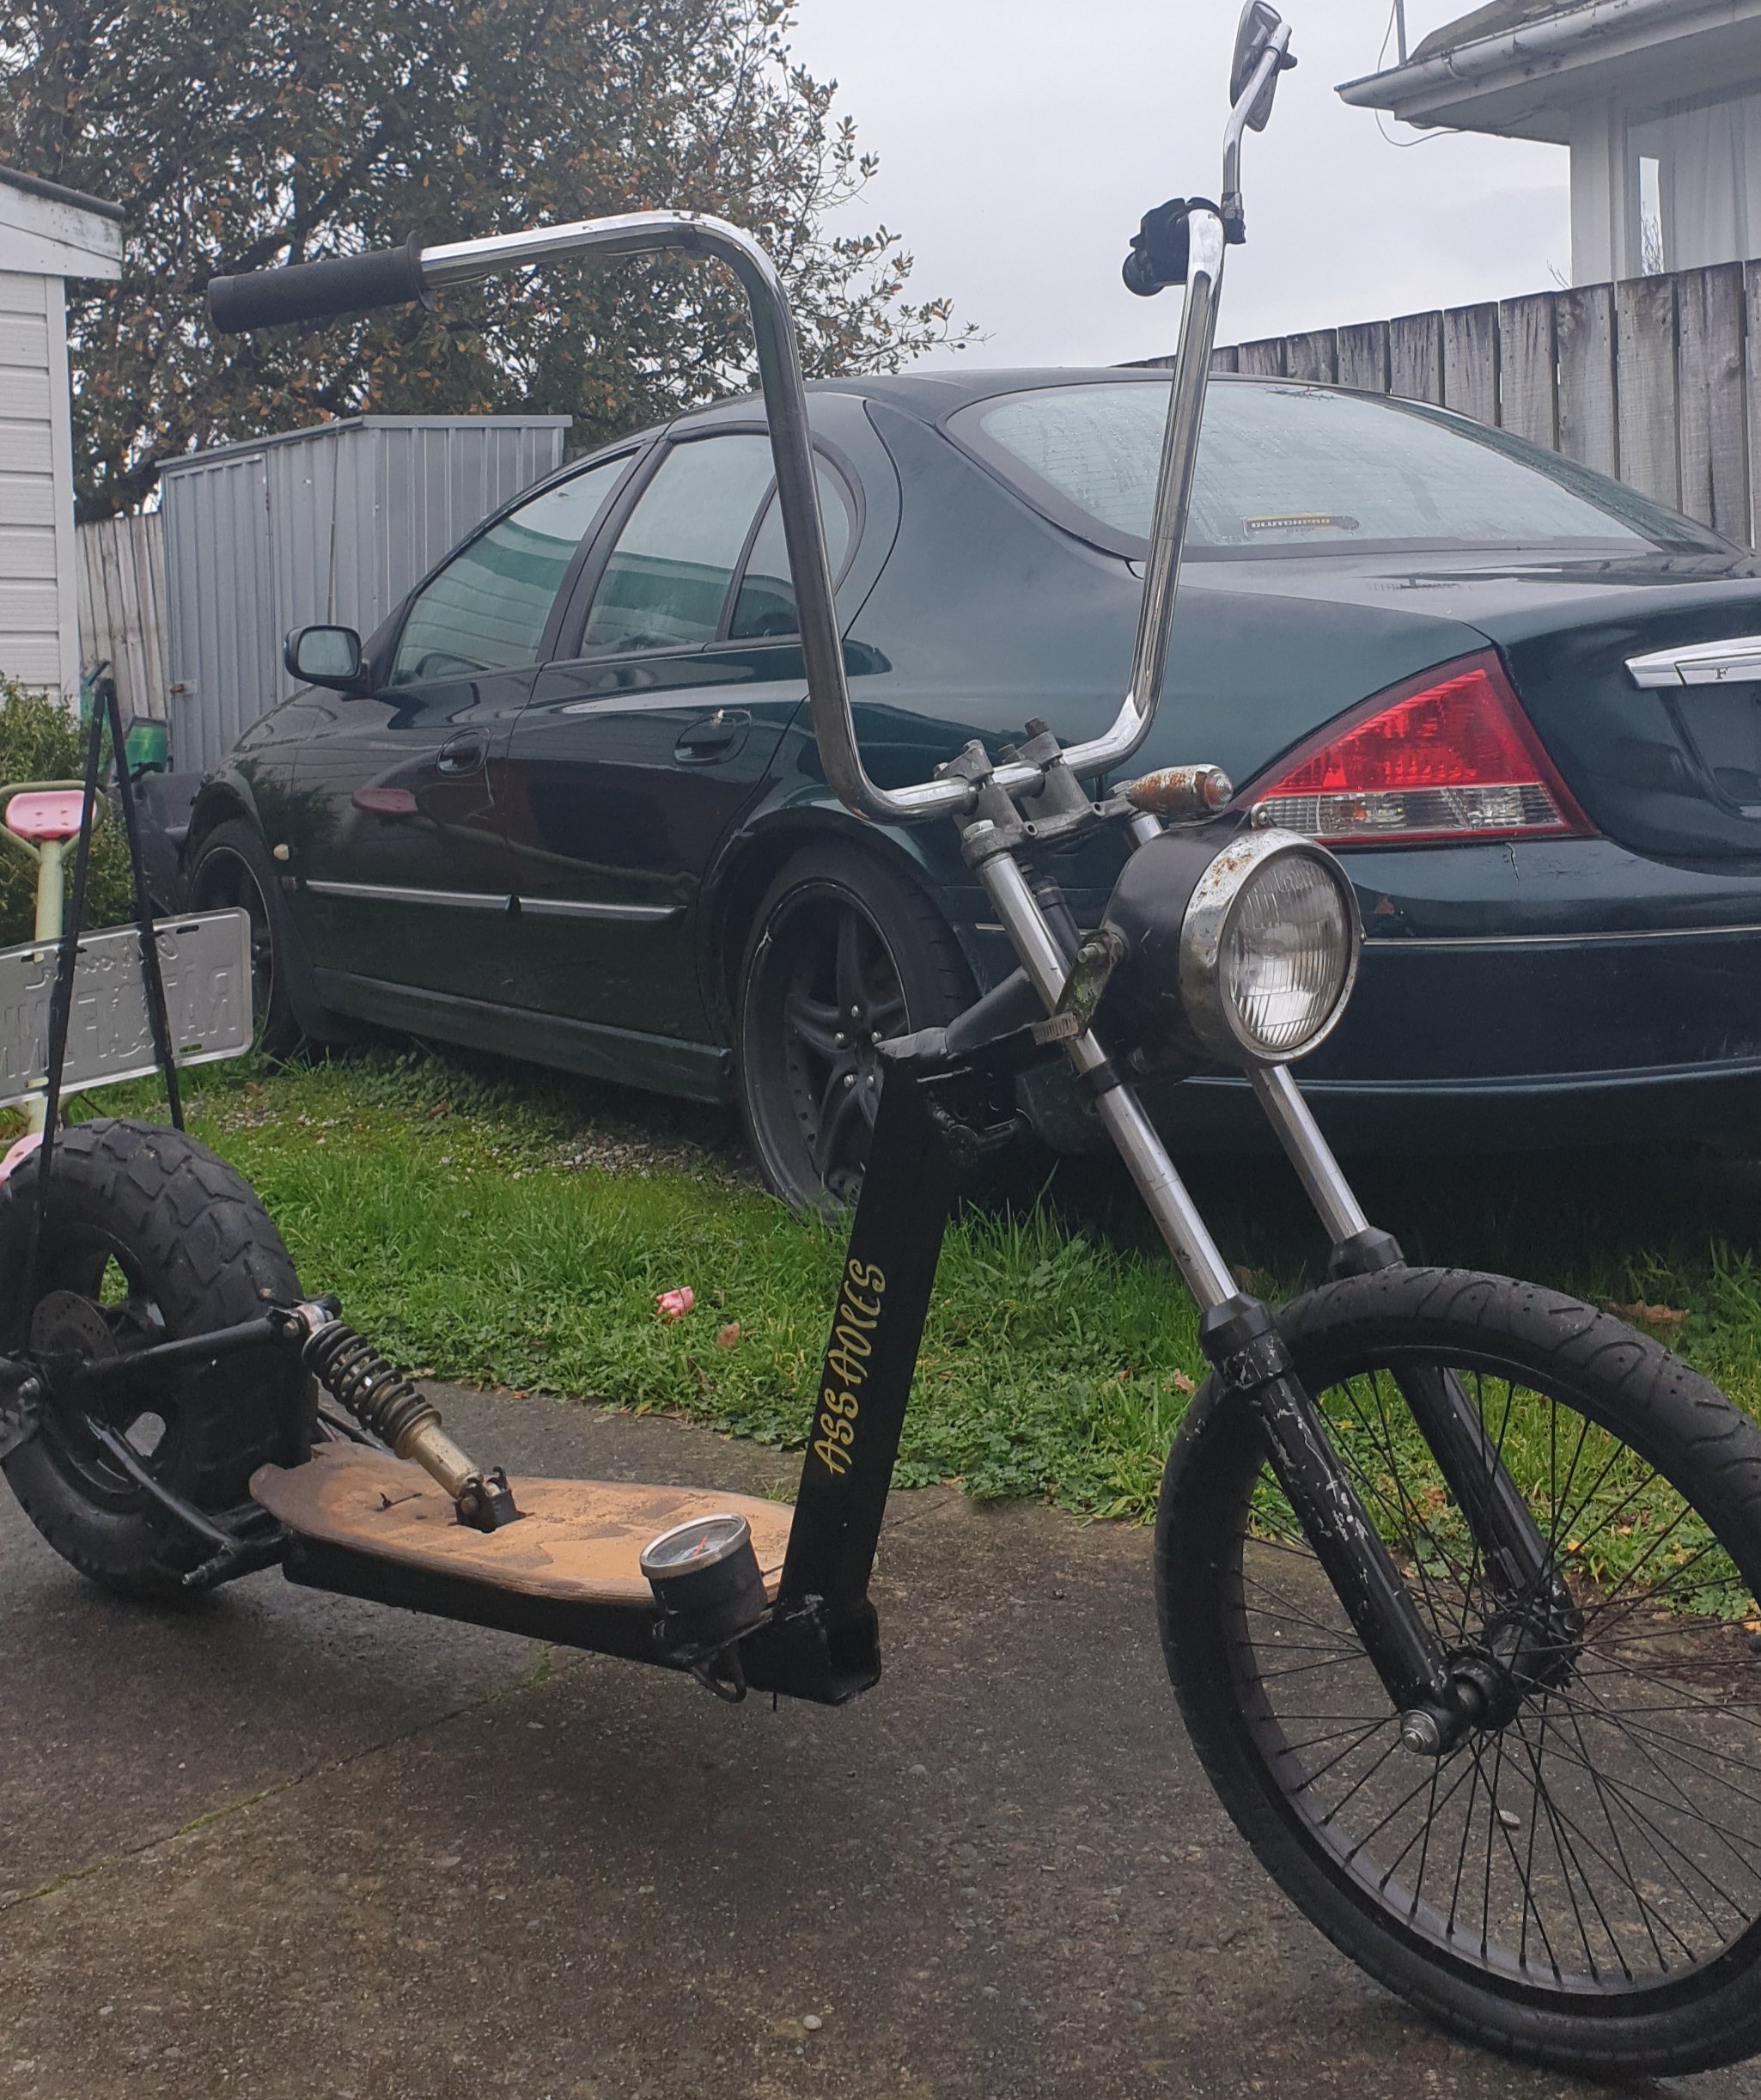
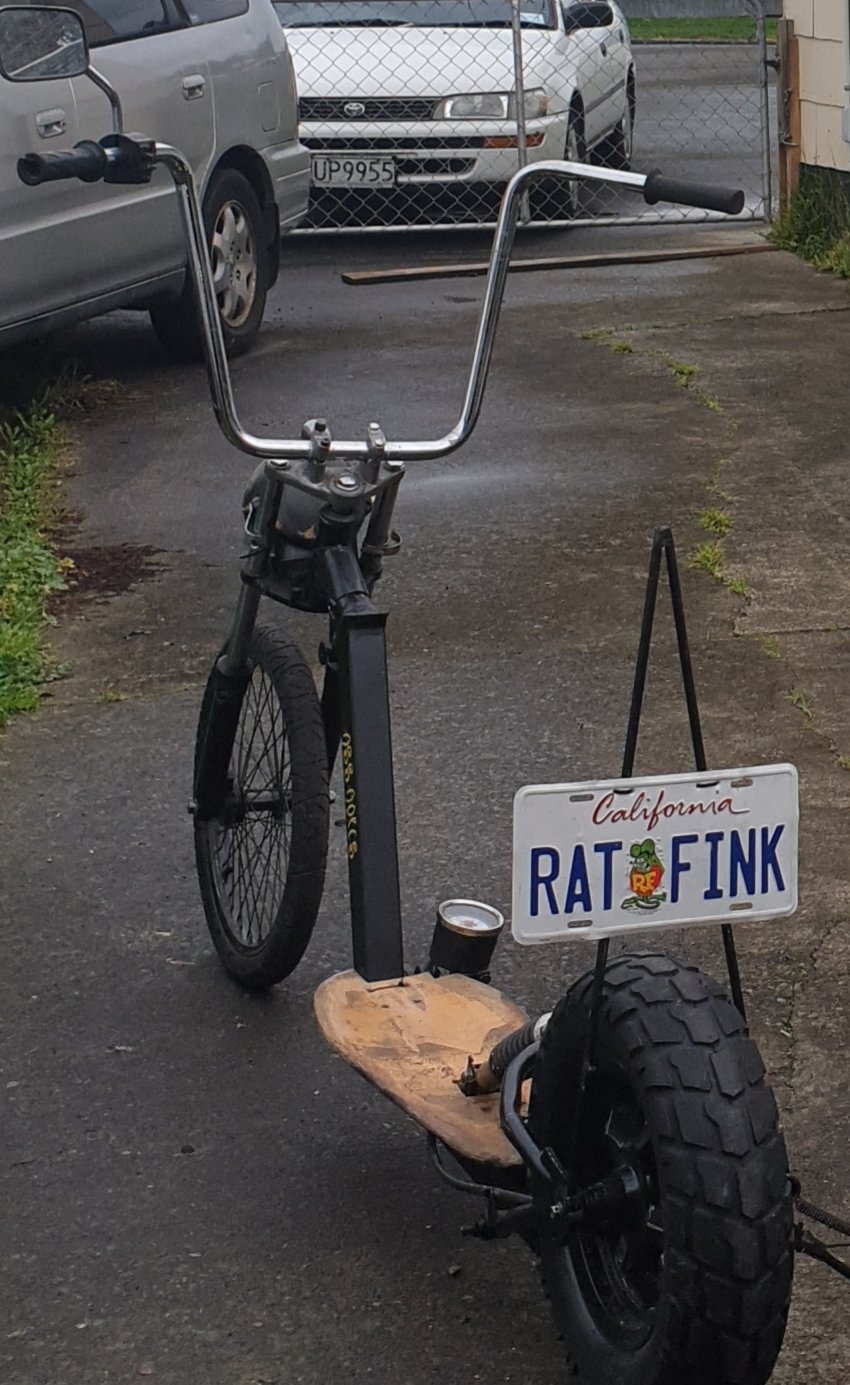
So made my xv1000 a new sisy bar why not put on my mini me chopper scotter thing
2 points
-
Thanks mate, I’ll get in contact Frame is back from the welders, stoked with how it’s turned out. Fitted the rear wheel and took some measurements, fitment clears the frame even with the big tyre. Added in a bracket to mount the seat latch mechanism too, also doubles as frame strength. Continued on with the engine build today, got the piston and rings in, everything was going great until we noticed small cracks on the camshaft where the timing chain cog fits on. Turned out to be cracked right through on both sides. Yip that’s game over for that cam.
2 points
-
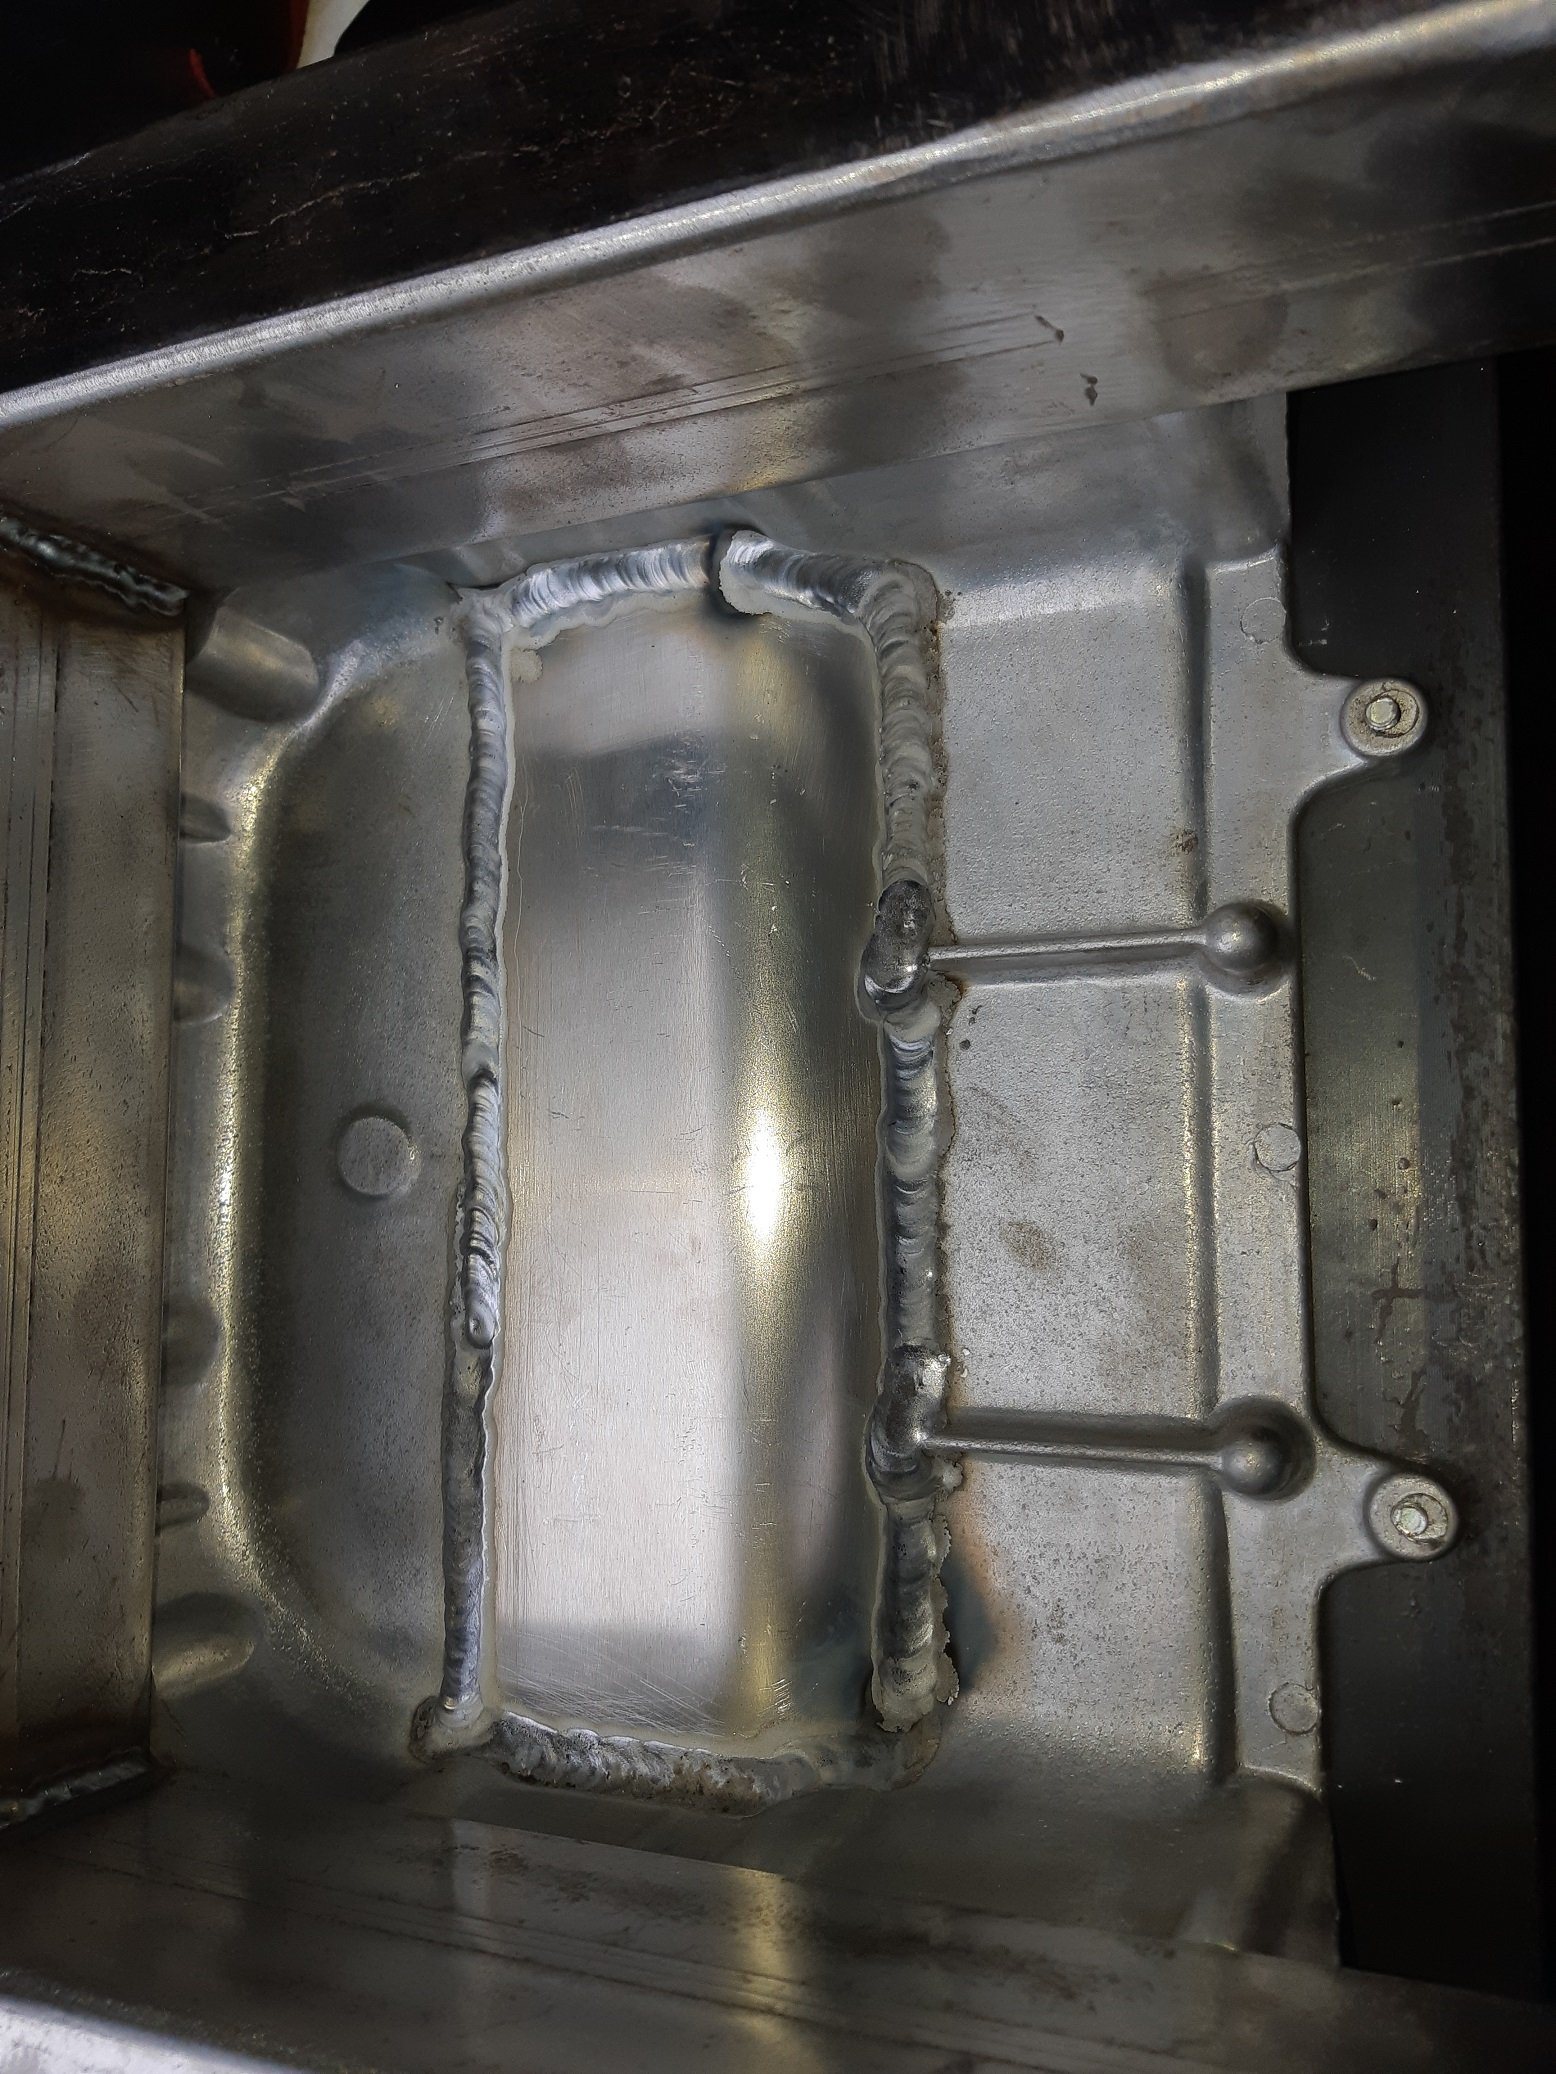
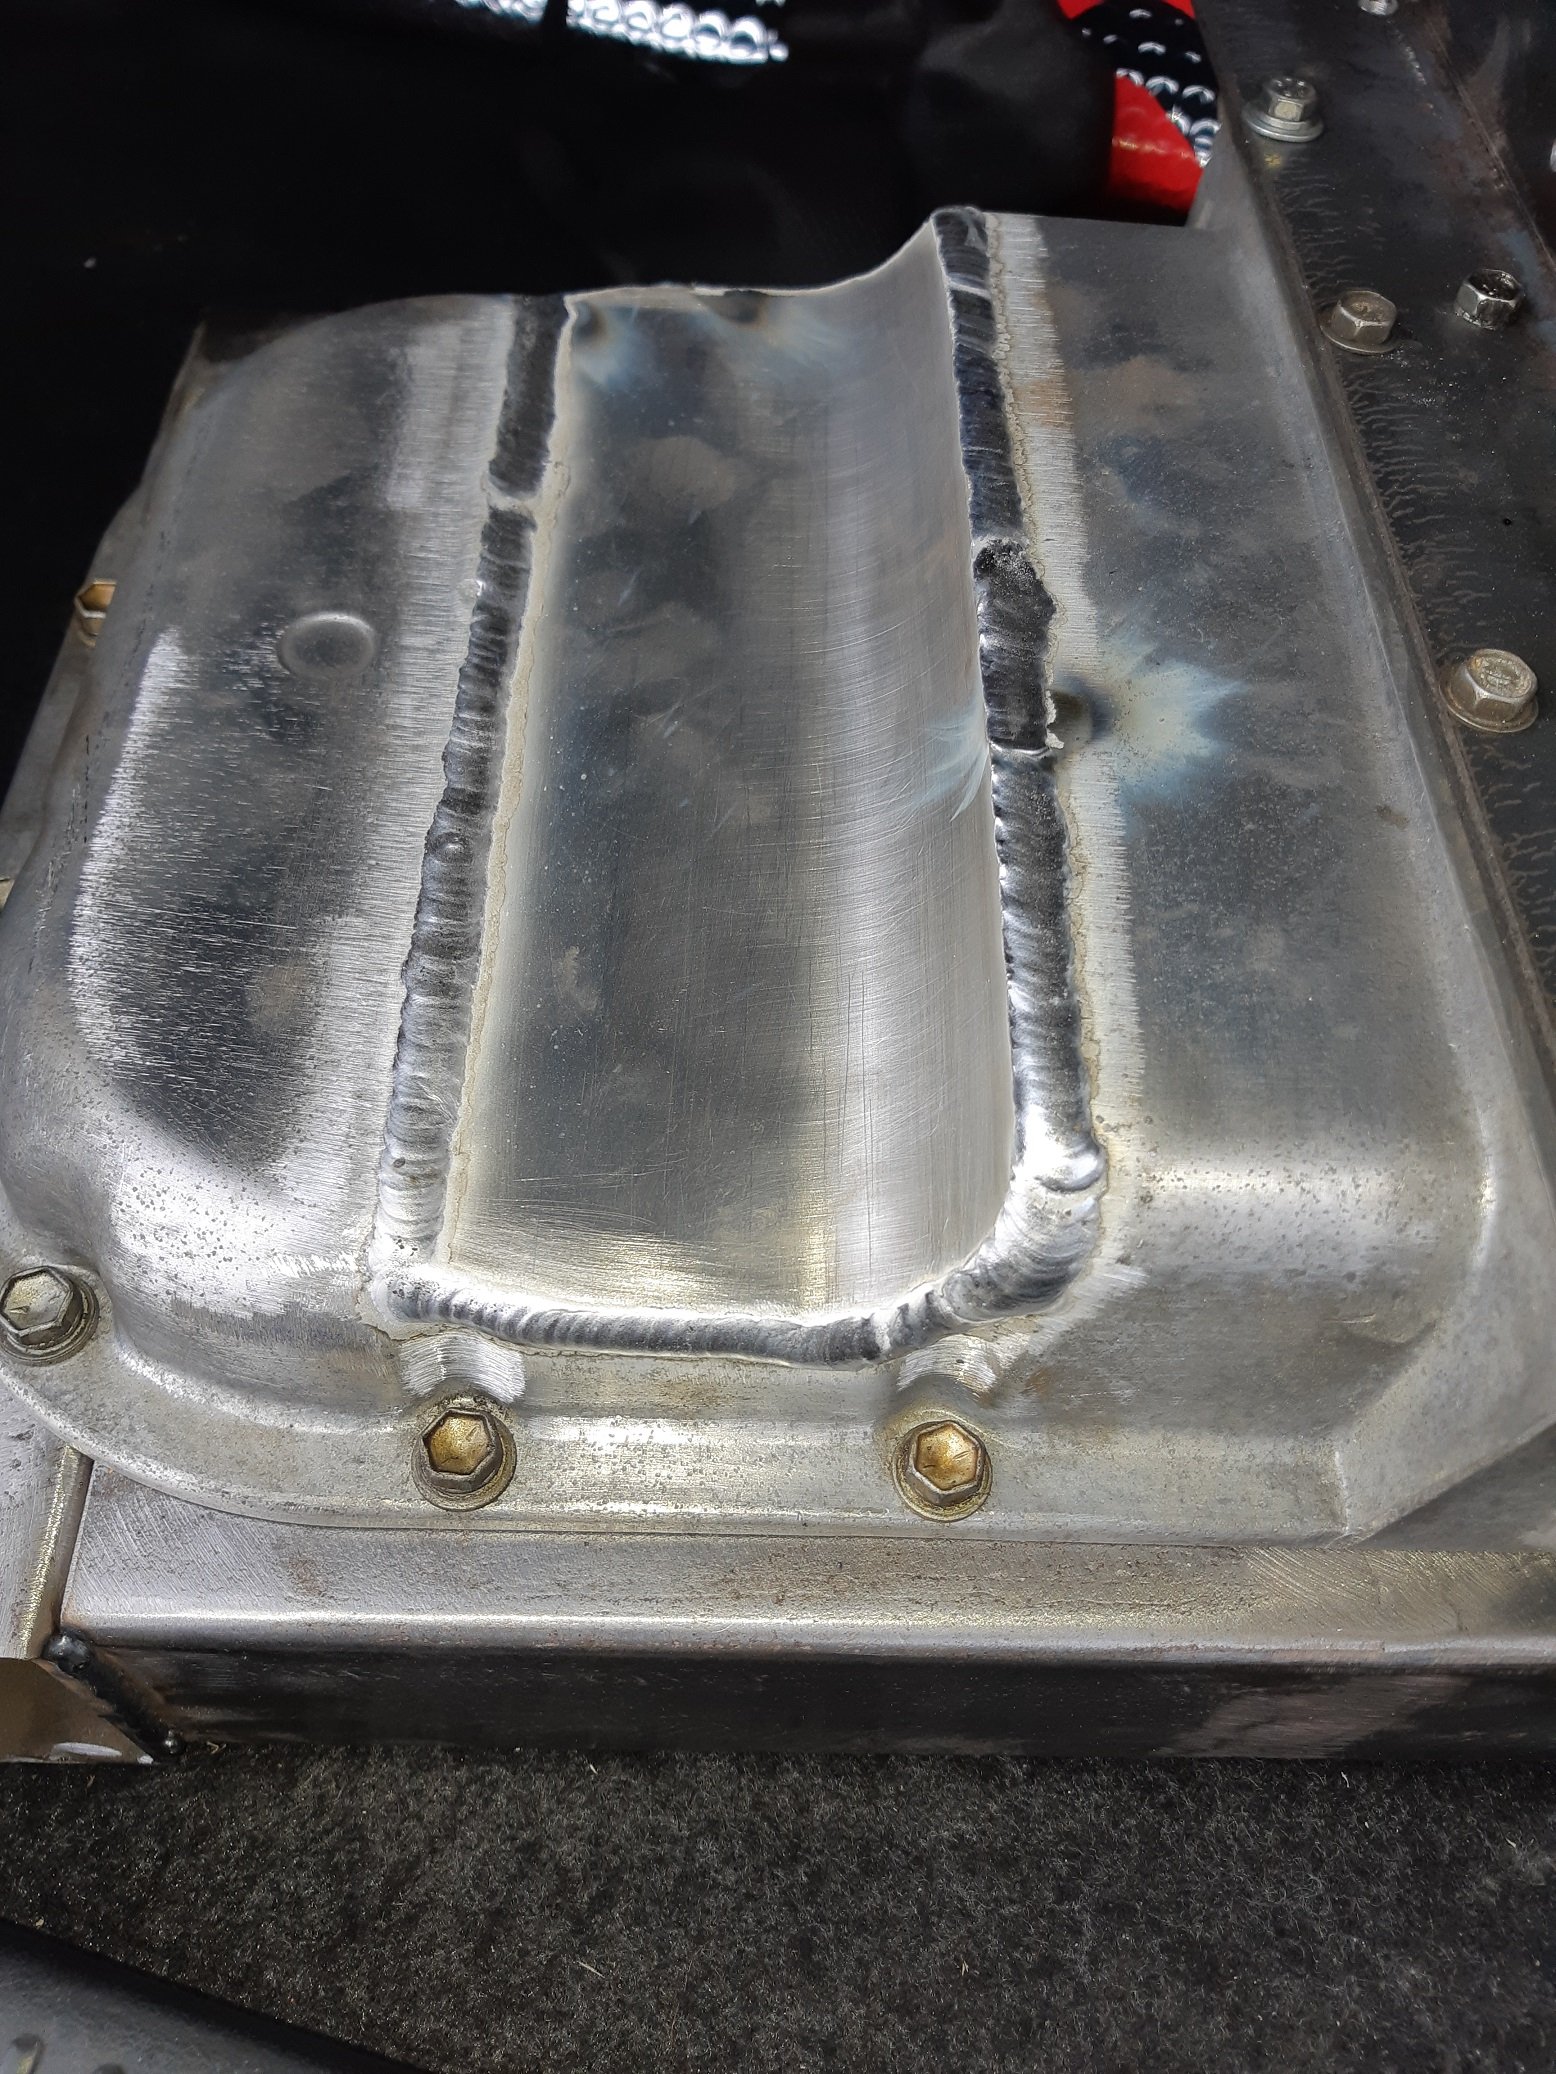
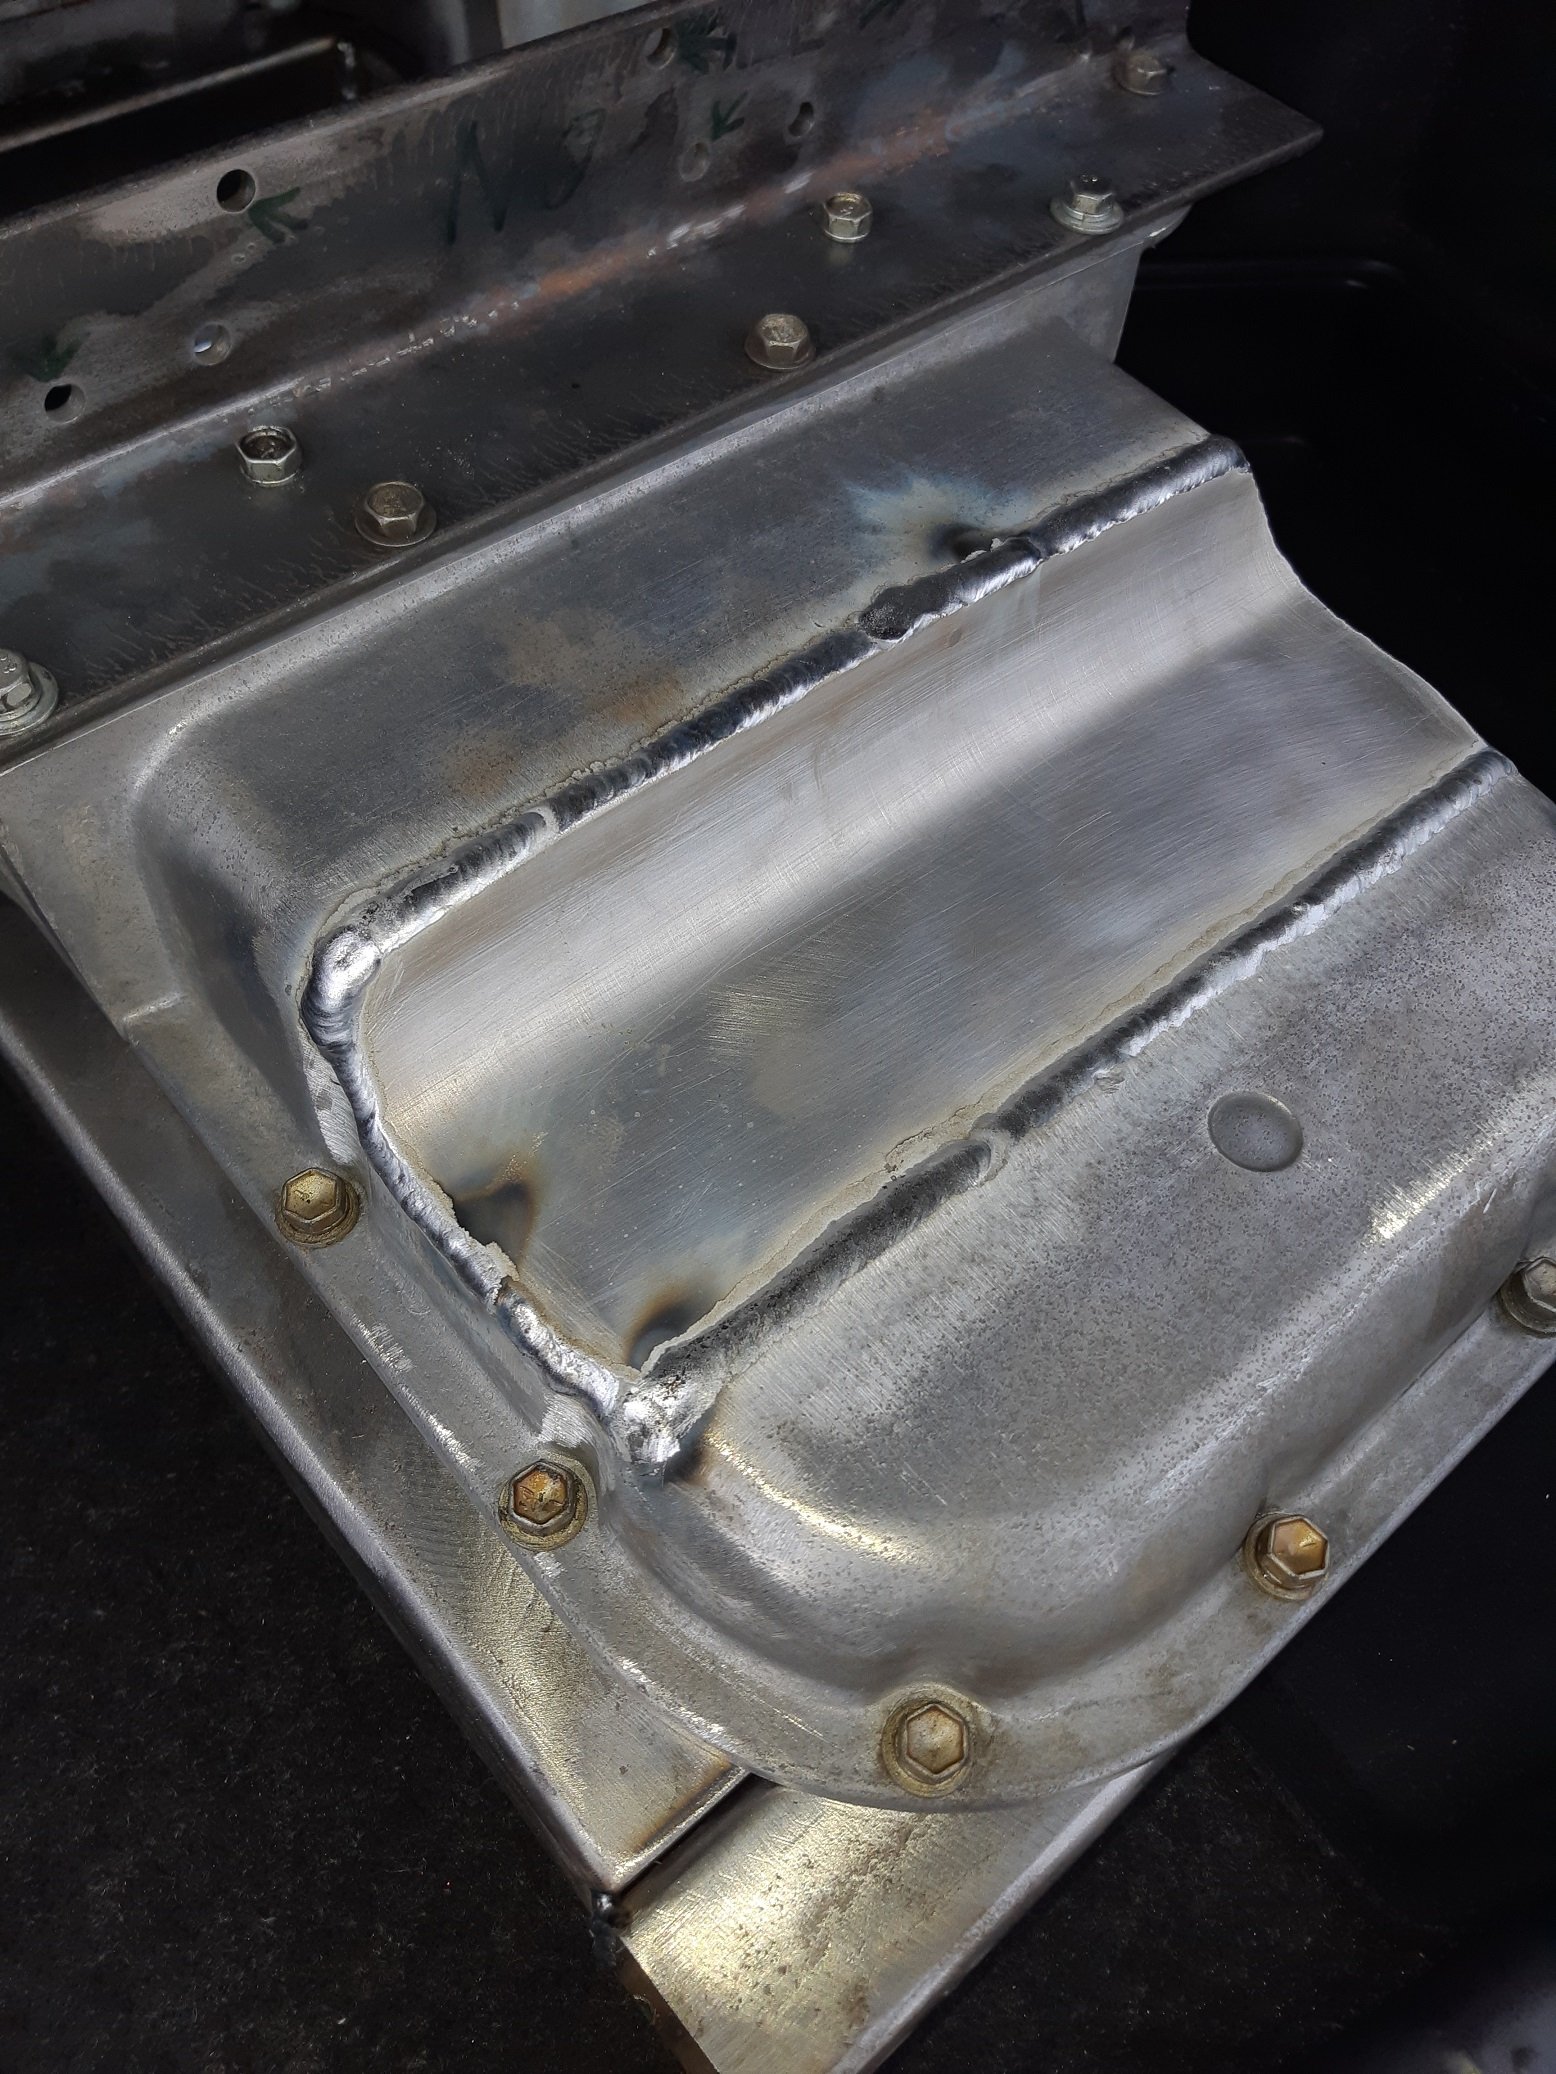
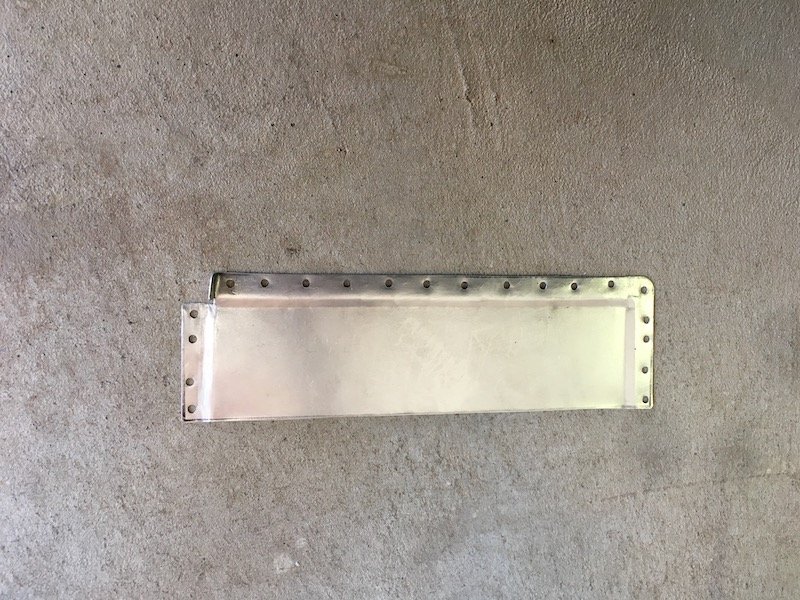
Jut picked the sump up from Brian. Welds look good. He said it would be okay to linish the outside welds so it looks prettier.
2 points
-
Better make sure you're there with him when he lights it up!2 points
-
Update time. Firstly there will be no more juggling around shuffling stuff to get the Imp on the hoist, or having to drive it down the slippery grass drive that heads to the back of the workshop to get it onto the hoist. We have the workshop back after having finished building this cabin on wheels. We delivered it to its new home where the owner will continue with the build , fitting windows, door and lining it out. It was a fun job but took up a big chunk of space. Well until we start the next build. We will have a 8 metre trailer to build for ourselves soon once we sell the housetruck. So we could now relax and enjoy the Imp. A few little jobs completed and a fair few miles clocked up. Most important thing to sort out was a leak from the nearside transaxle output shaft. After getting back from the trip to Blenheim it was discovered that oil was coming out from what I thought was the seal and getting spun out off the coupling, marking a perfect line of oil inside the engine bay. So the car ended up in this position getting its trans fluid drained. I removed the shaft, doubled checked the seal land which was fine, checked and tightened the seal by cutting a few mm from its spring because it just didn't feel quite tight enough on the shaft. I also checked the shaft too. The early Imps have a splined shaft that the output spider slides onto and is held on by a large nut. The design went through two revisions ending up with the later shafts being a factory press fit and no nut. I was sure that my late type was fine and solid but just to be sure I cleaned and siliconed the end of the shaft visible from outside. Just in case... Put it all back together, a few drives and the leak was still there. After some advice from a fella on the Imp forum I took the shaft out again and checked it in the vice. It was indeed loose. Loose enough that it could move in and out slightly and had broken the silicone bond so allowing oil to creep past the splines and out. It must have been getting worse as the oil was essentially lubricating the once tight fit of the splines. It knocked apart easily, showing the factory O ring fitted before they press them together. Once clean and dry I tried the fit. It was a touch too loose for my liking so out with the JB weld epoxy. It'll never leak again Yesterday we drove to Nelson and back and I'm happy to report that the leak has stopped ! Yay. Now the only real leak is a dribble from the rear main seal on the engine. I'll change that when I change the worn ring gear in the future. Another job was to sort out some sounds. I like my music and not having a sounds system in a car on long trips is annoying. I had already eyed up and sussed where I would mount some speakers. It seems a fairly common place after having looked at other setups out there on Imps. We had scored a JVC headunit from a customer after upgrading their setup. Then we had scored some speakers from a Nissan Bluebird SSS we had been given and passed on but not before robbing its sounds. I also had some ply left over from lining the rear of the Viva wagon floor. So sorted for a cheap as setup. We made some boxes in the sunshine on what was a cold day.... Later on the sun hid behind clouds so all three of us moved over to the warmth of the log fire.... After Hannah covered the boxes in black vinyl I mounted them under the parcel shelves and wired in the head unit, a neat little unit that due to not playing cds is shorter in depth so fitting under the shelf nicely. It all looks neat enough and sounds fine for the size. Just need to find some protective grills to suit those speakers. Next on the list is to get and active sub and mount it under a seat so we can have some fuller, deeper sound. Another job I had planned to do but kept being put off was to hinge the front number plate. I don't want to mount it any higher and block the grill so where it is makes for a great driveway crown sweeper. Driving along our 500m long stone driveway in a lowered Imp with an even lower number plate gets tiring! So I did this... I'll report back with whether it also swings back at 170mph so avoiding speed camera tickets. The other night we had a lovely sunset and the Imp was looking resplendent in the light. I took a photo.. Next jobs to do are fit some carpet and I'm still really keen on pursuing building a full EFI setup. But its going to be a very busy summer for us so that will have to be a project I pursue in the evenings. Alex2 points
-
2 points
-
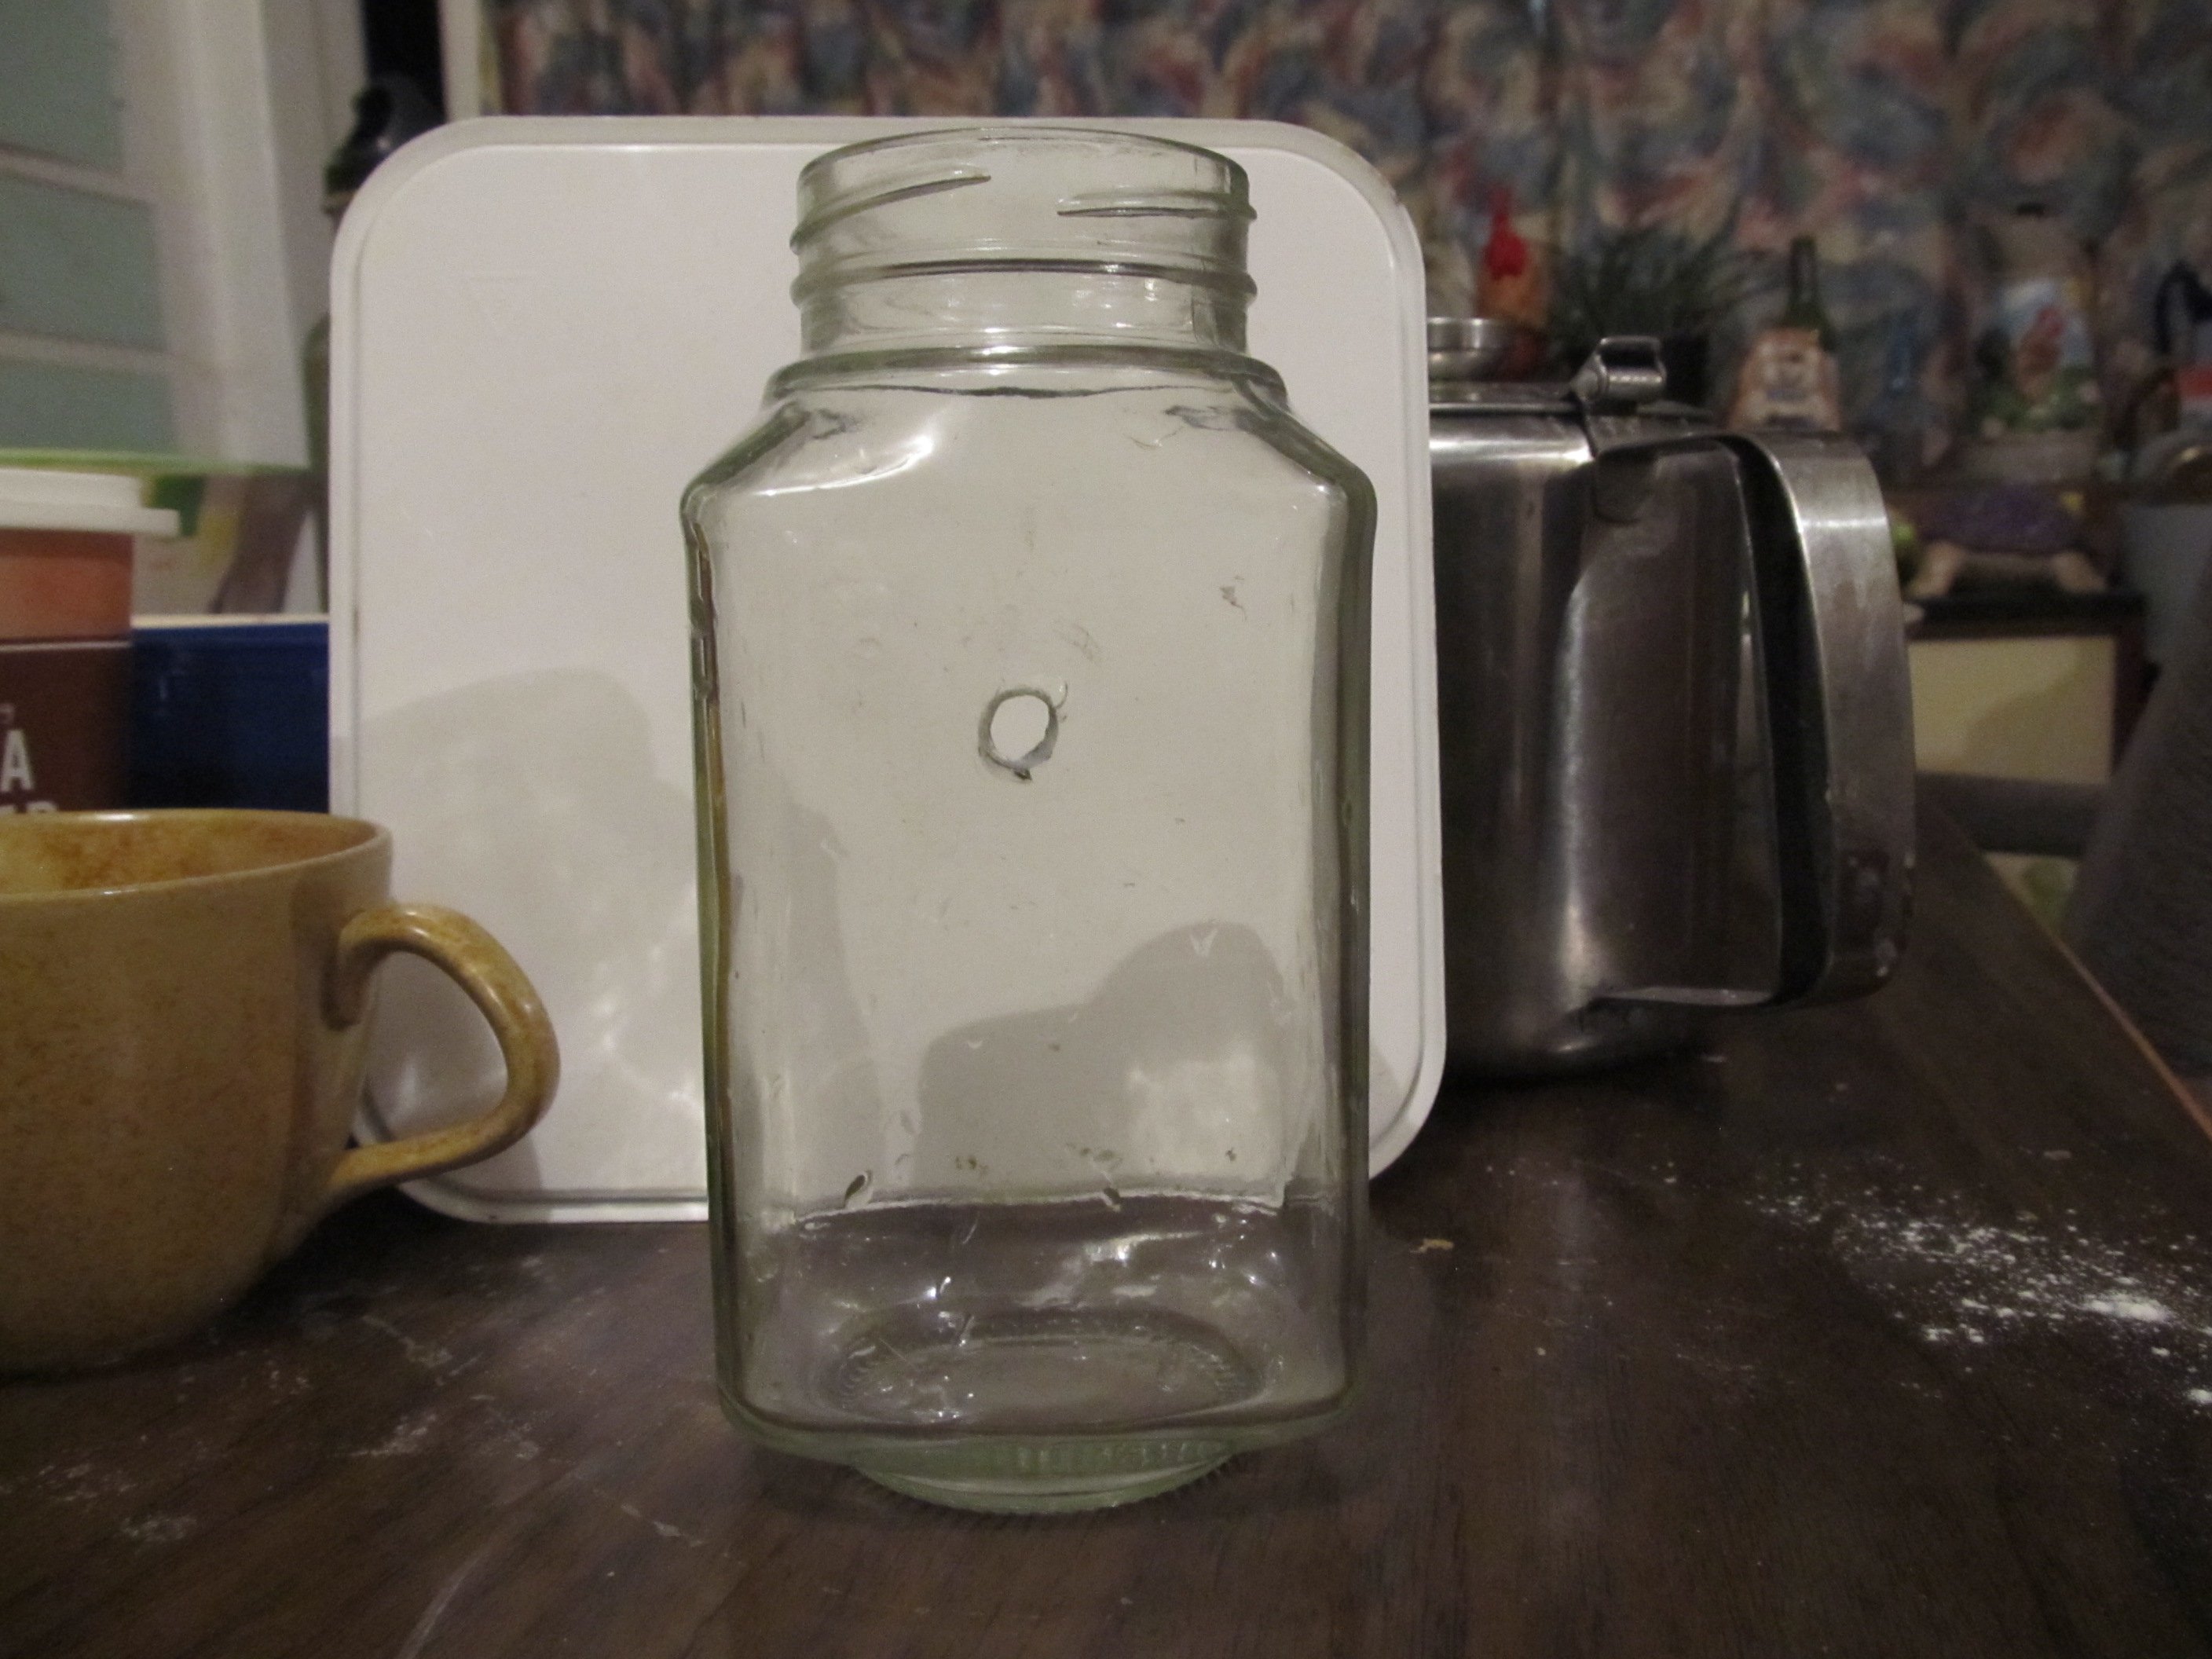
The boy is making a lamp. Today he somehow managed to drill a hole in a glass jar with an egg-beater drill.
2 points
-
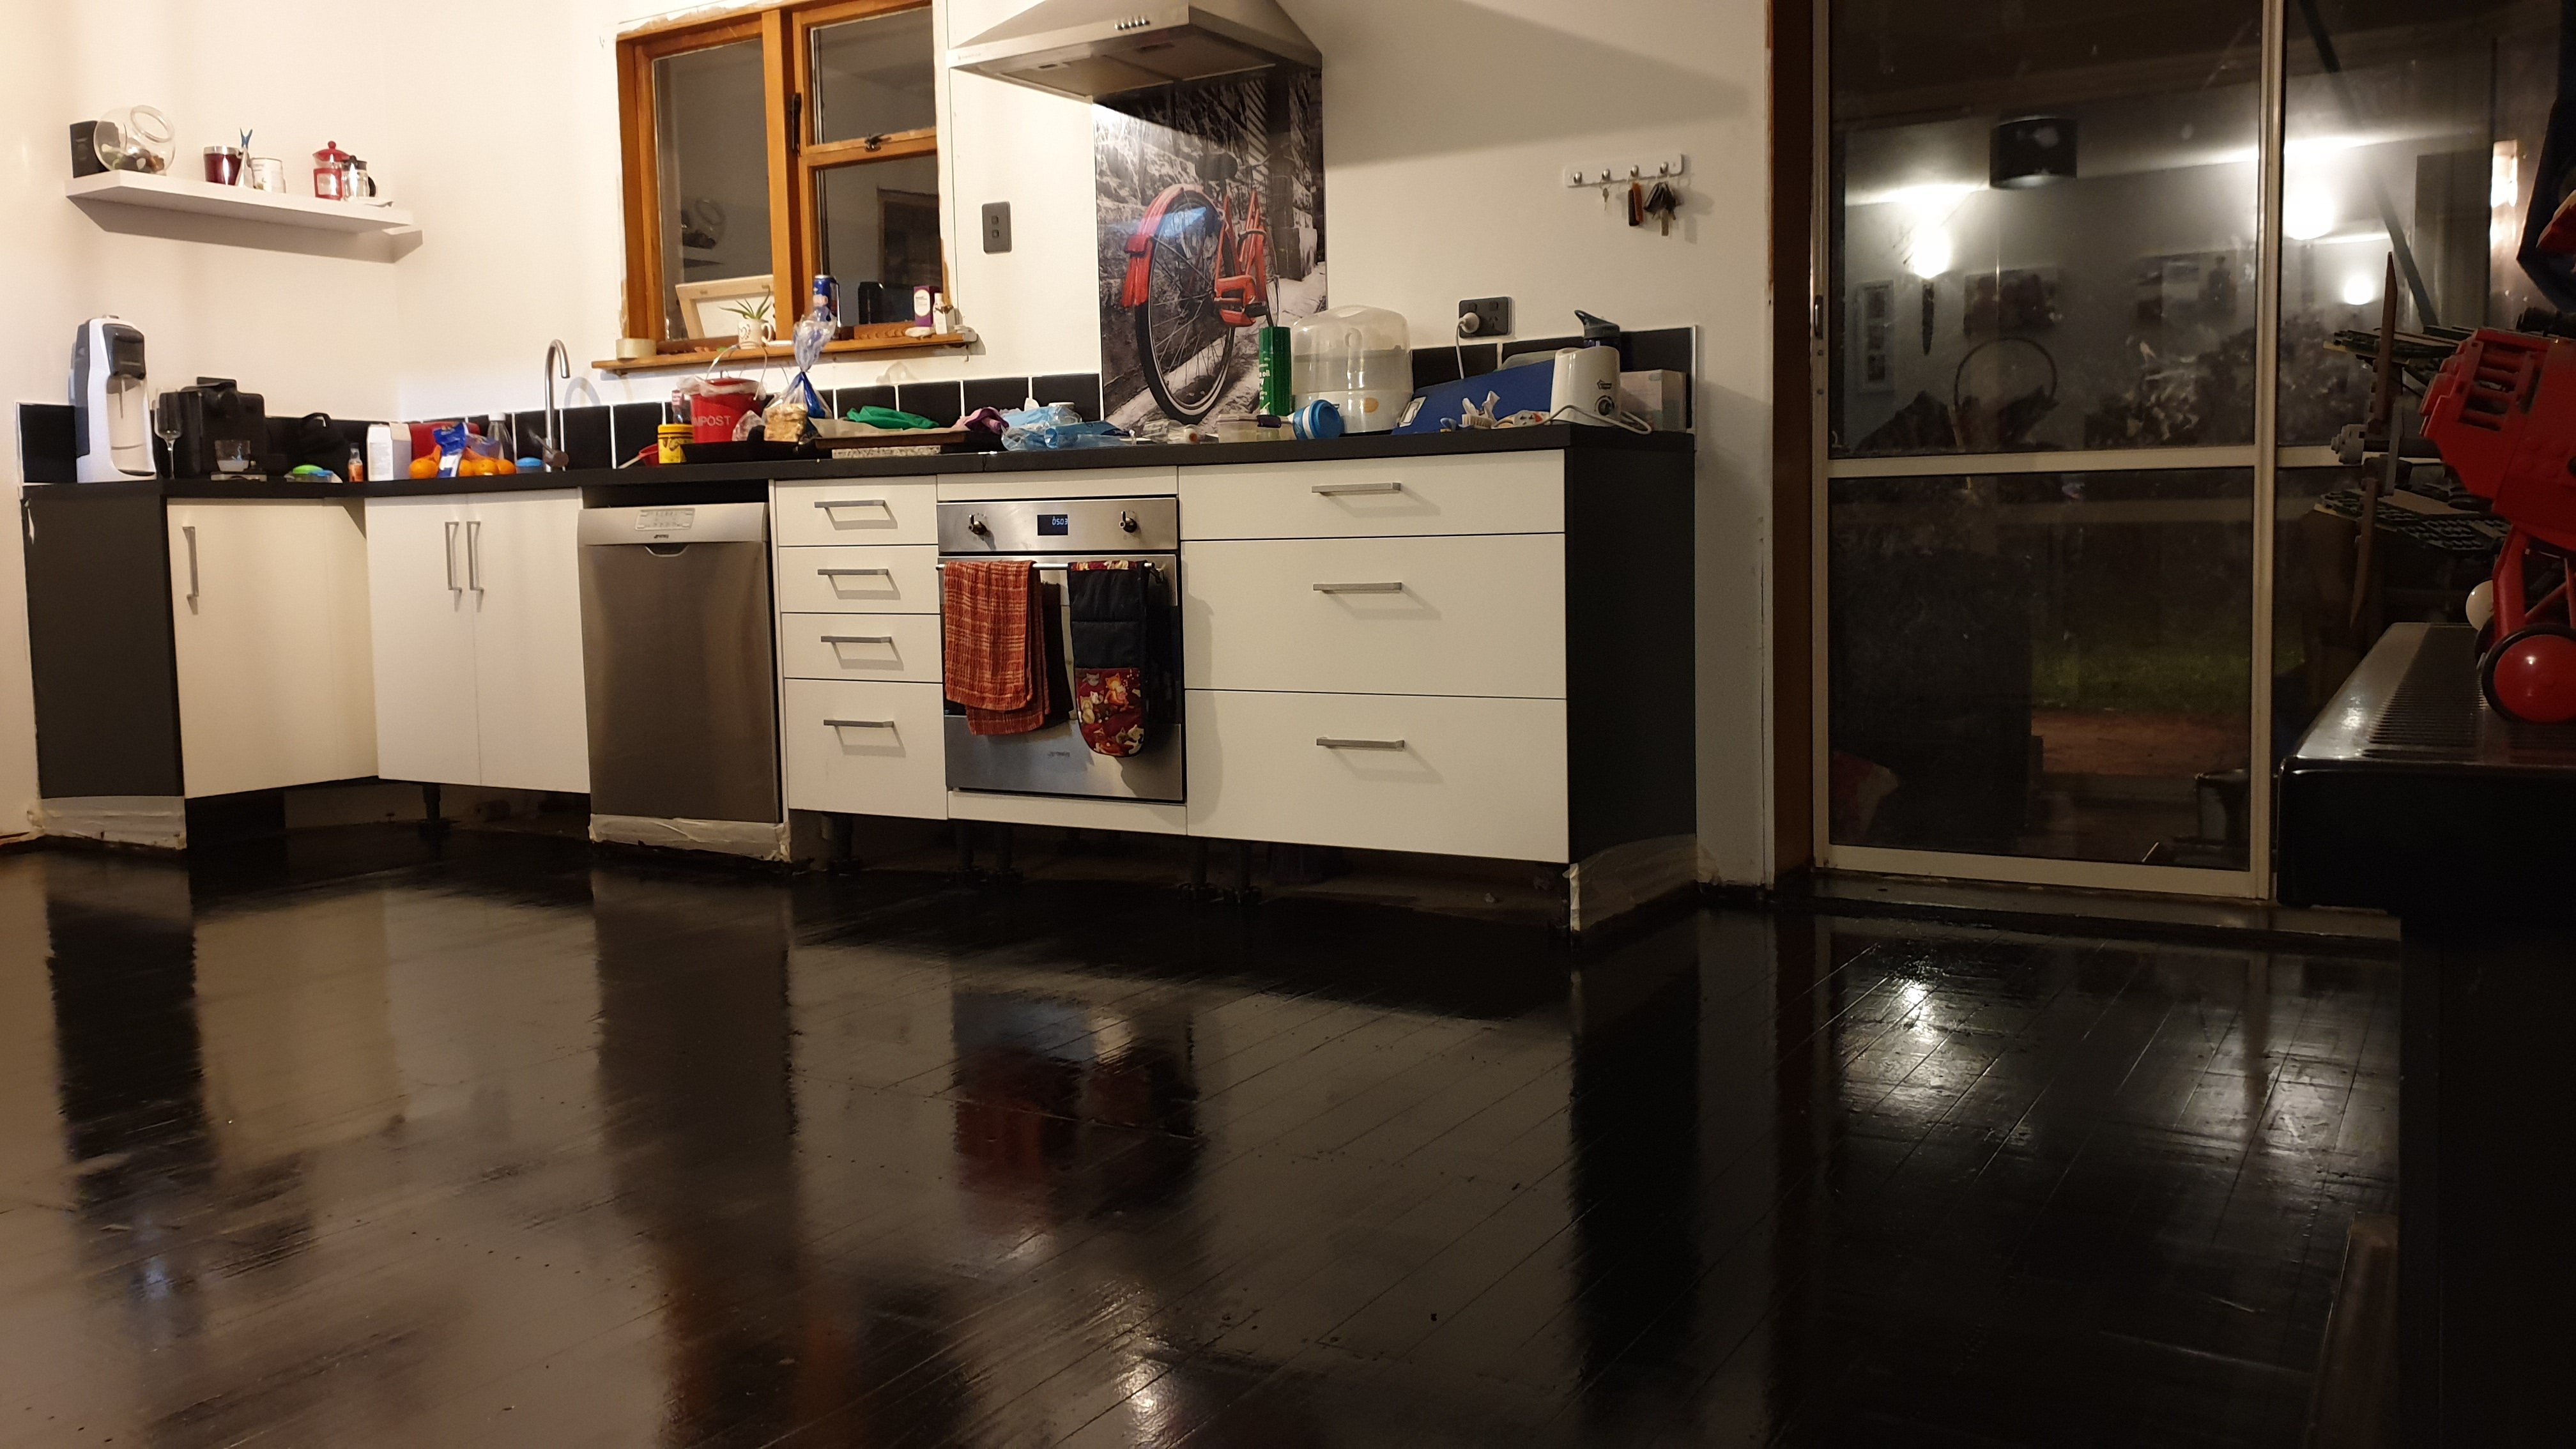
Thinning it out made all the difference, rolled on with a foam roller like a dream. Now to paint that window frame black and fit the kick boards!
2 points
-
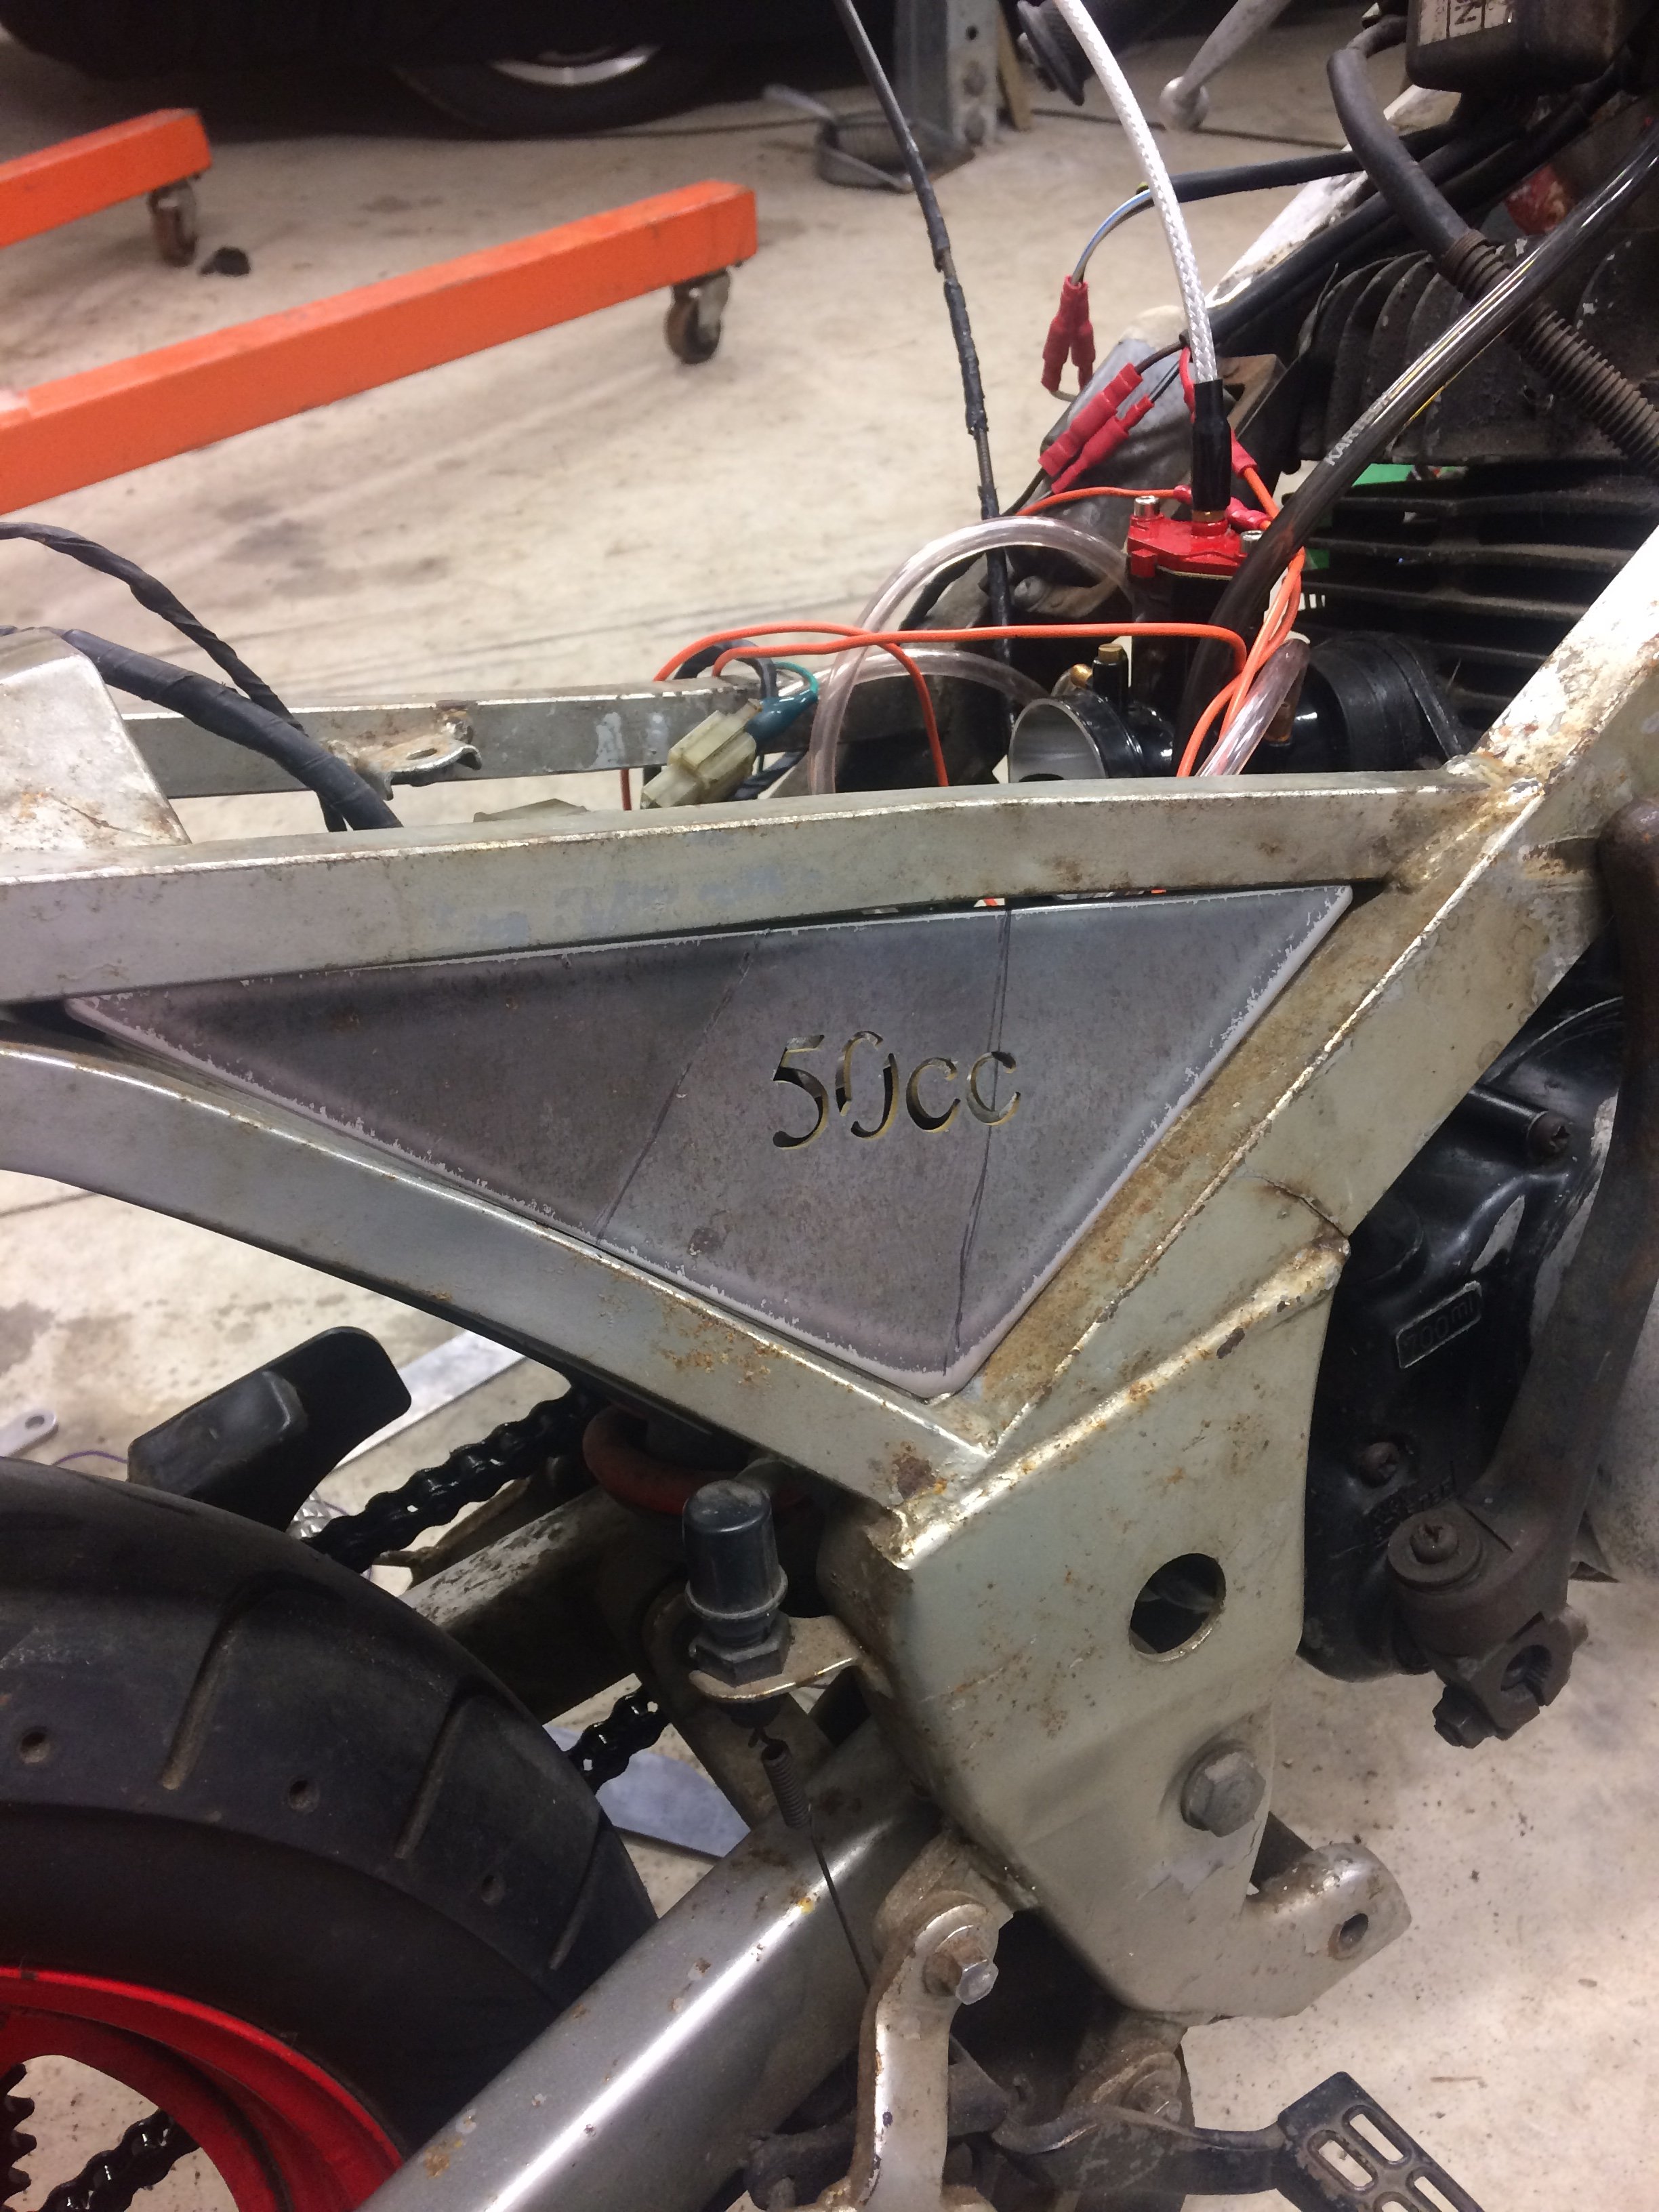
Sorry officer, you must be mistaken, I can't have been doing a 70kmh rolling burnout.... it's only 50cc? Look at the frame....
2 points
-
A couple of years back I bought a YSR50 with a TS185 engine transplant, half complete, from an estate garage sale; it may be the best value purchase of my life. I haven't touched it, never got it running. After reading about the upcoming Urewera Undertaking, I knew it was time. The factory YSR frame is only rated for 65kgs and I weigh more than that... I'm also looking at a horsepower increase of something like 240%... and I should probably make some kind of concession for the gravel. So there's a bit to be done. Step one, amalgamate the looms and achieve stable idle voltage. Step B, celebratory burnout. Watch this space.
2 points
-
The more I work on this thing, the less insane I feel for having taken it on as a project. Can't wait for the day when I can drive this to the dairy to get milk.1 point
-
1 point
-
I like working on hover bikes because the swinging reminds me of Mad Max 2, beyond thunder dome, and that fight scene with master blaster (how hot was Janet Jackson...). Anyway, wheel bearings are all so chooched I can't believe they spun, steering head bearings the same, lock washer comically fucked, larger drive sprocket has been beaver chewing the shifter shaft.. fork seals shagged... top triple tree is tinfoil... front tyre split like a piece of old timber. But in positive news, big carb from China fits good, and the new pads and shoes look to be a good fit too.
1 point
-
My plan was to buy a Ural in the UK and ride it back here1 point
-
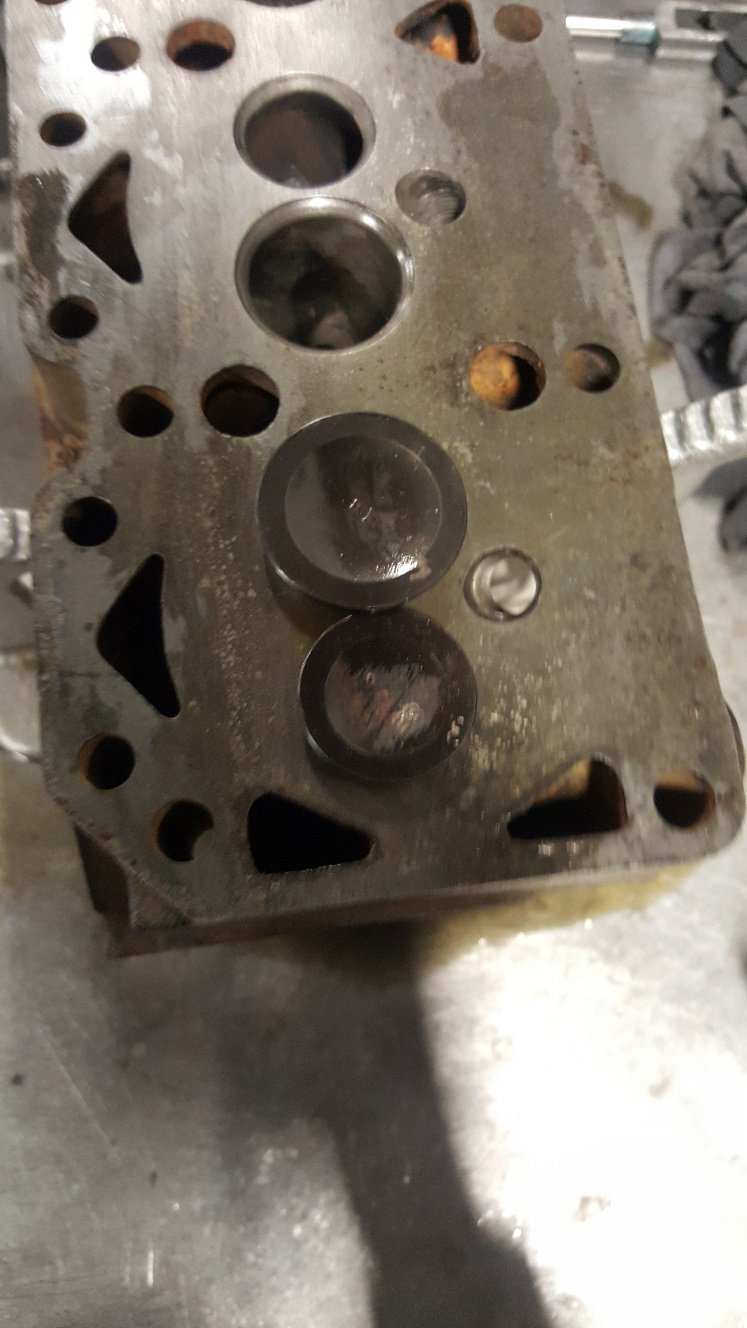
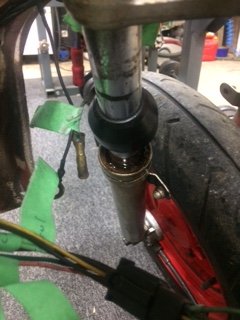
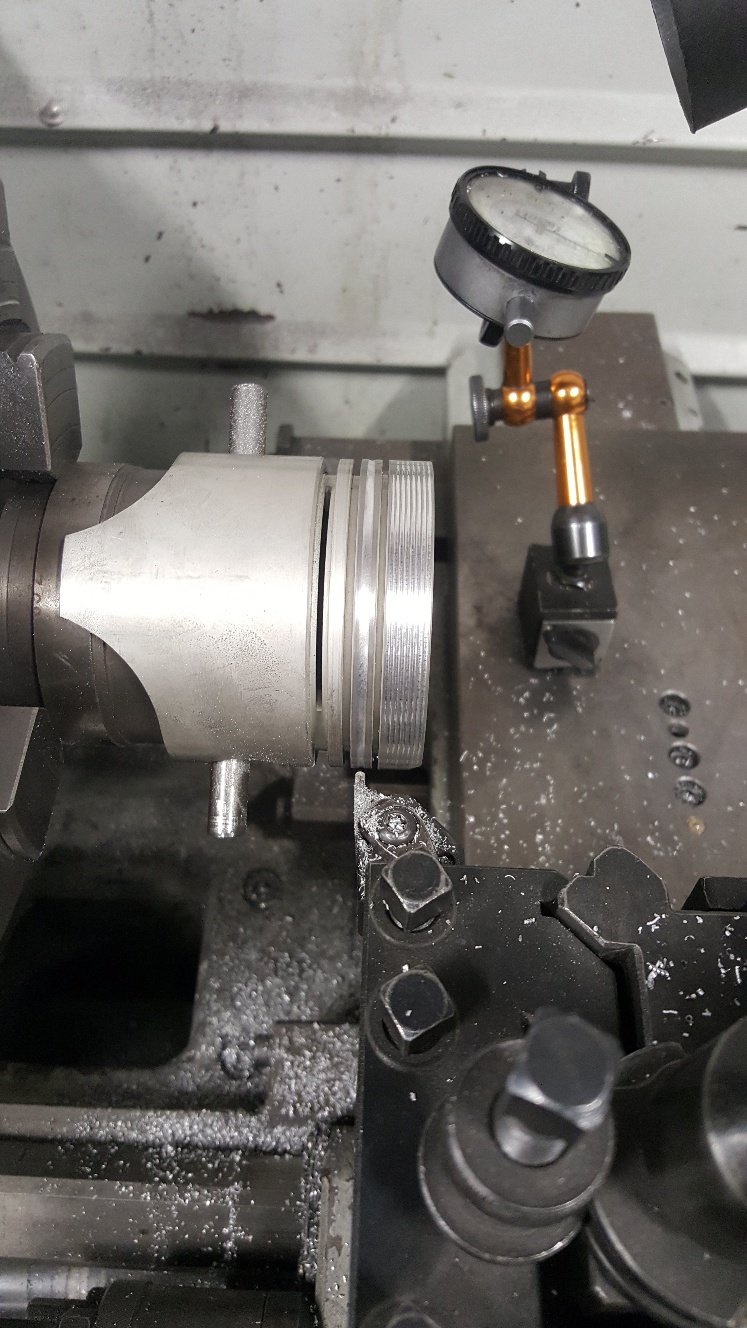
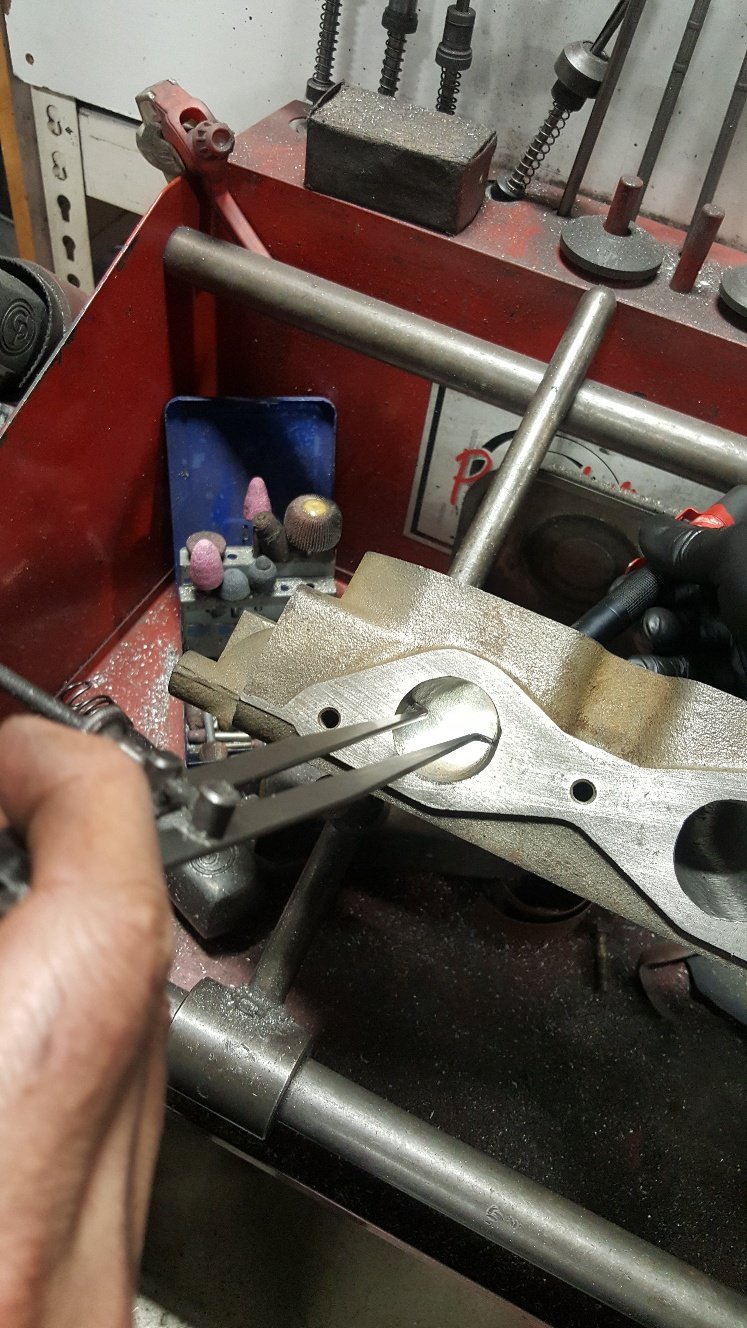
So I turned a Accumulator groove into my pistons. Its a groove machined into the ring land between the top and second ring. This groove accumulates residual gasses from combustion to stop ring flutter improving ring seal. I also added some Contact Reduction Grooves in the top land these limit piston to cylinder contact during high rpm and high temperature. They also disrupt detonation waves. Now I've pretty much got most of the bottom end machined except for the valve reliefs. But to machine these I need to figure out what size I want to make my valves. Here's a picture of standard valves vs some oversize valves. I won't be useing these particular valves. I will make some valves out of Mazda/Ford FE 8v valves. While the head was lying around my work mate Al decided he would do a little porting to open up the intake runner where it pinches down at the intake manifold face. You can see he has opened it up enough to be able to run the calipers down the runner to the bowl area without it pinching the calipers this tells him he's got it pretty evenly round. This should give good even area volume. So the intake flow stays at a even speed. Before hand you would expect the intake flow was speeding up through this area then slowing down before getting to the back of the valve. Hopefully I explained this ok. I'm no guru on porting. This is just rough cut off the burr. We will probably leave it that way as it can help in atomization.
1 point
-
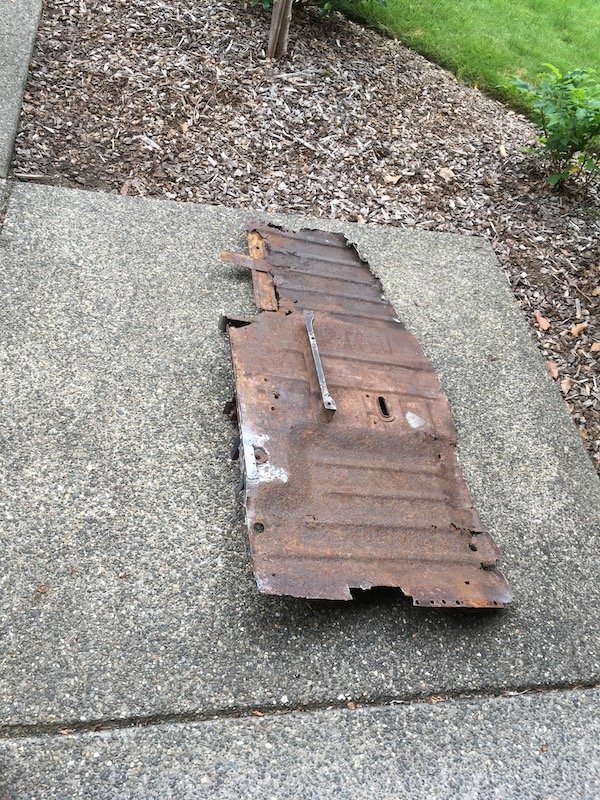
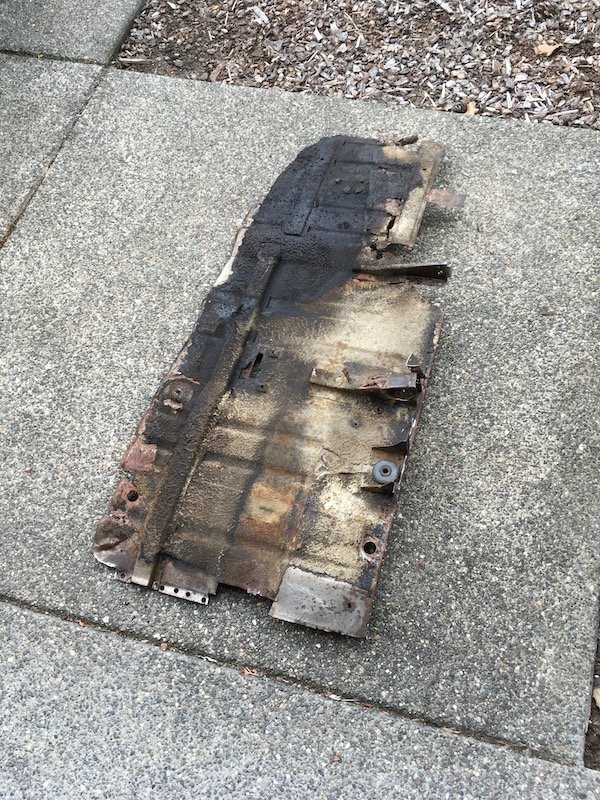
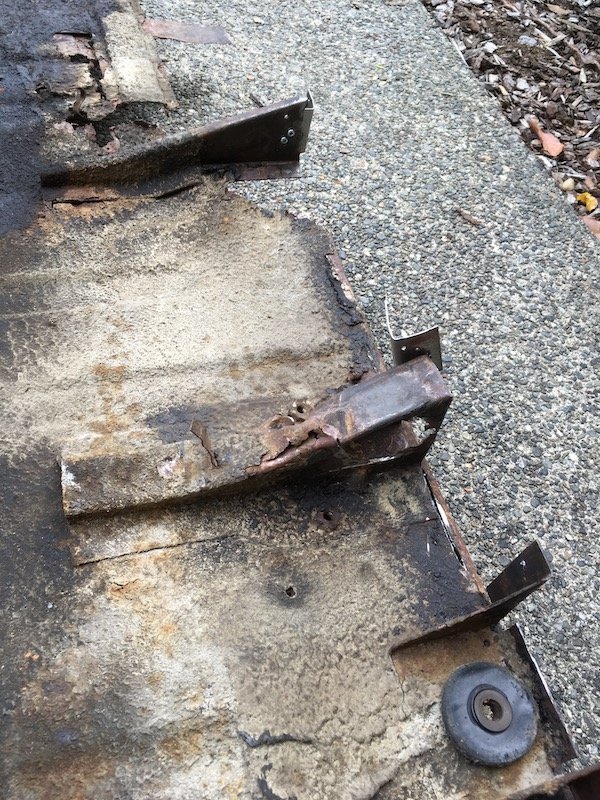
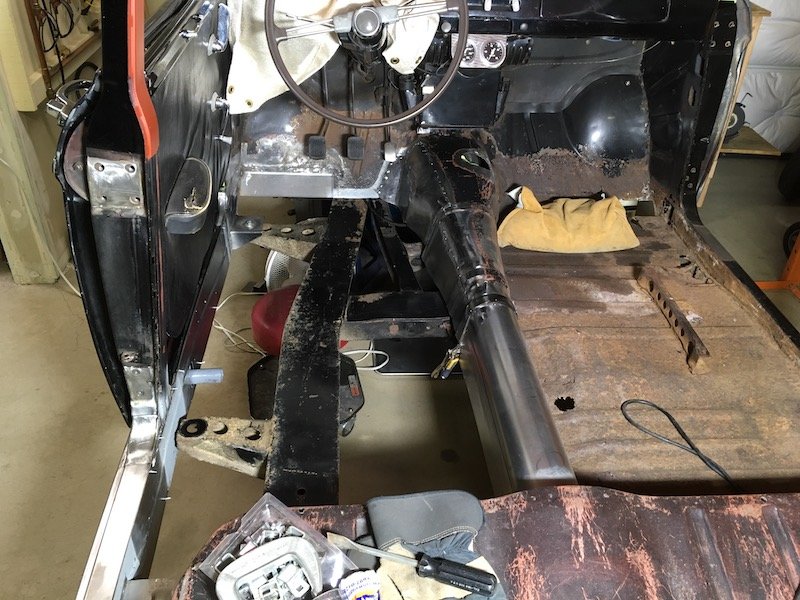
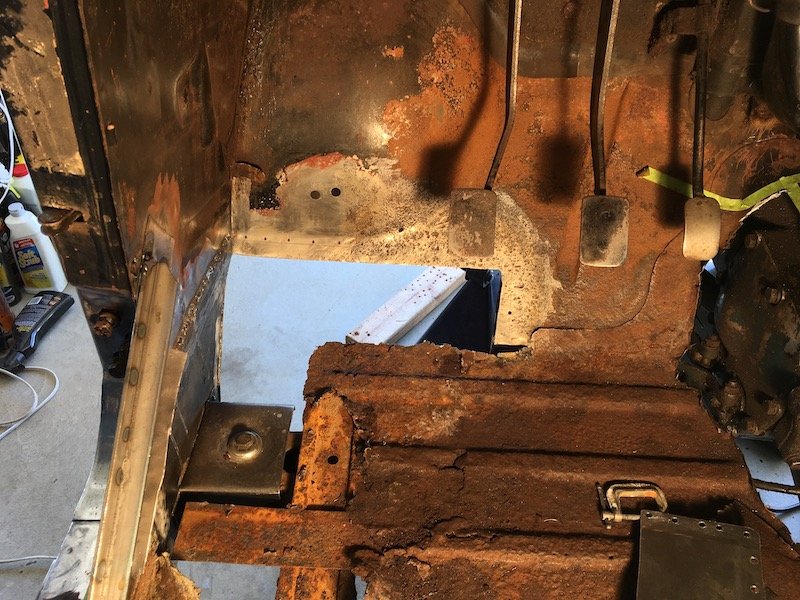
Continuation of the previous post with several more pics. The left middle/side patching of the rusted trans tunnel. As it started out with the fore and aft sections already tacked in. Made a patch to try and duplicate the existing contours and set an upper tape trim line. The black sharpie line was only a guide for torch heating the metal and asphalt undersealant on the other side to get it soft and scraped off. I didn't want my cutting tools getting gummed up. Cut the rotten metal out. Rubbish now. It would have been difficult to get a good weld against it. Cleaned up the surrounding metal. Did some test fitting to determine the trim of excess material on both ends. Final fit and ready for tack welds. Initial tack welds completed. With all the surrounding metalwork taken care of, I proceeded to cut the left hand side floor out. The seat mounting bracket will be salvaged. Same for the reveal or surround for the hand brake penetration. The underside. Planned underside salvage items include the long fore and aft 'Hat" section and body mount bracket. Other brackets are too badly bent, battered or rusted to be salvaged. There are four other simple flat or nearly flat parts that will be duplicated. I'll double up on whatever details are made to be ready for building the right hand side of the car. Never made a scratch built floor before, only patches and brackets. It's going to be challenge with the wide stiffening beads, elevation changes and 3D shape near the mid-body mount and rear footwell. No guarantee of success. Some random extra pics. Sleeping Bluebird with dreams of many road trips past and to come. I've now completely used up a four foot by eight foot piece of 0.9 mil thick sheet metal and need to buy more. Still got a long ways to go just to get the left side of the car finished. I'll post again later with more progress when I get the left side finished. It could be three, maybe four months or more. Discussion: https://oldschool.co.nz/index.php?/topic/60267-marts-pl310-61-datsun-bluebird-sedan/
1 point
-
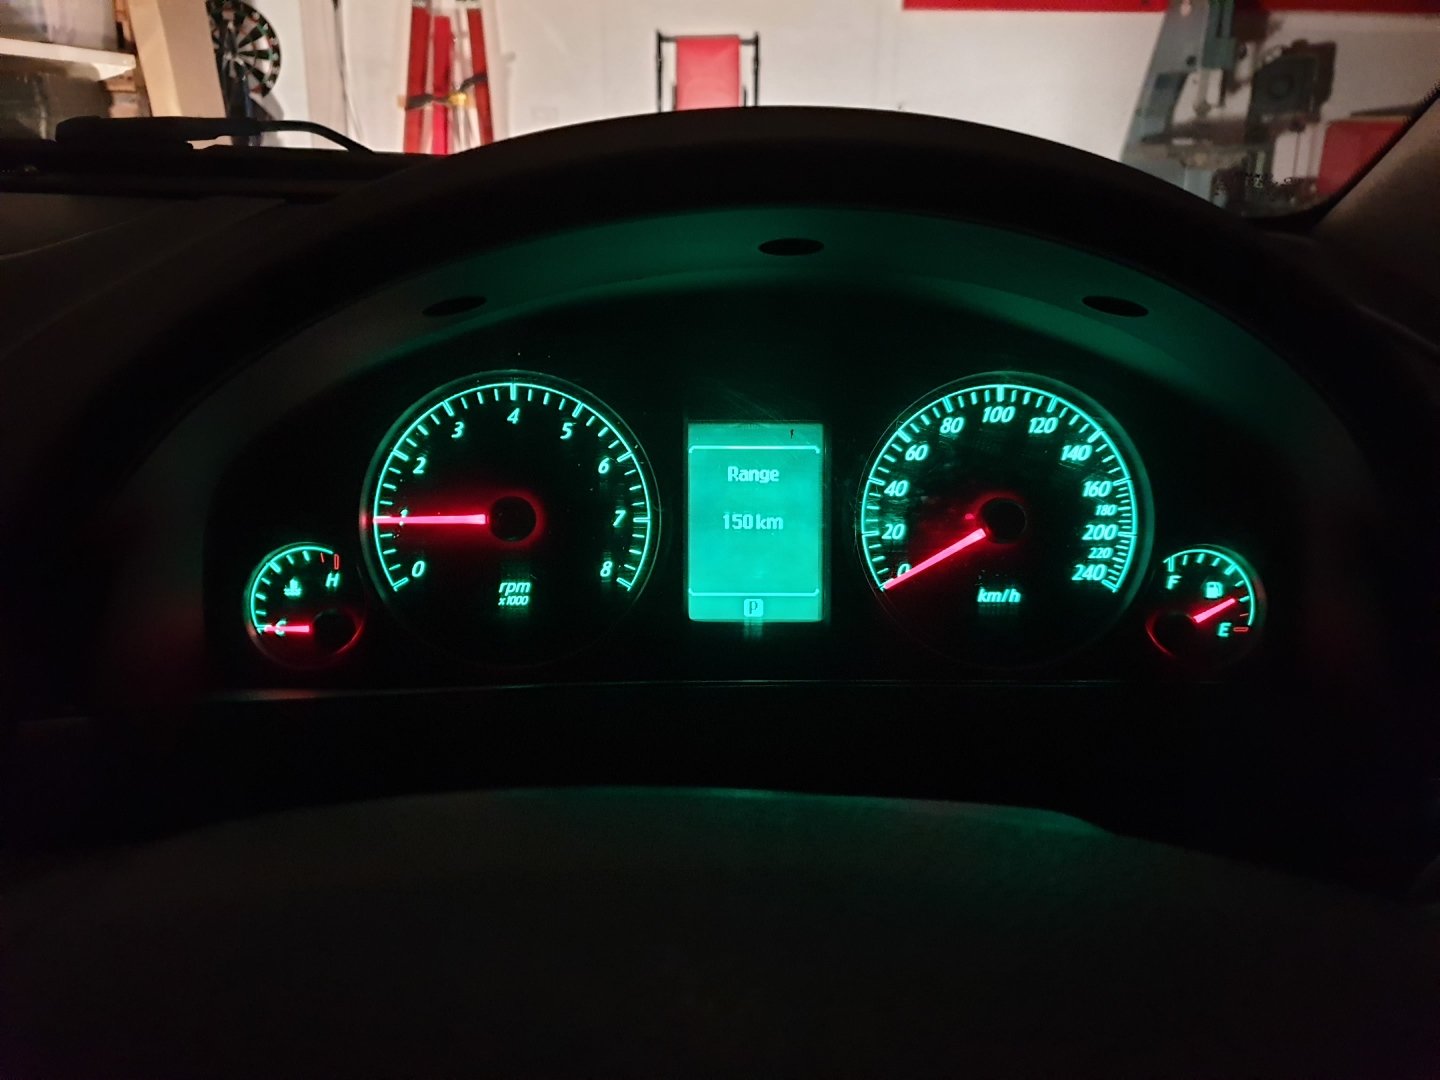
Been on hols, got back today and had a couple of hours in the shed tonight so I mounted the Safari cluster in the Dyna dash. I had mostly fitted the dash before we went away. Shit will fit ok I reckon, I had to trim the cluster hole quite a bit bigger. Factory looking eh. It's all 1992 So no stylistic clashes happening.1 point
-
Here’s some better photos of the finish. probably used more clear on it then the black. sanded it with 600gr between the final coats and thinned it right down
1 point
-
Congratulations! You have clocked oldschool.co.ng.1 point
-
Bit more progress, have built the intake pipes and mounts to get the filters where I want them. The filters replace the fog lights and sit in the front bumper so should give nice cold air, but building the brackets to get them to sit in the right place was super fiddly, hope I never prang the front end as everything is just so... Being low to the ground I also wanted to shield the filters from dust/splash back from the front wheels so I picked up a couple of $10 mini rubbish bins and cut to suit, they made nice little cowls and there are decently strong with three anchorage points to the old fog light mounts. 3" intake pipes come directly off the turbos, are mild steel so will coat with something, maybe the same coating used for the headers (Cermakrome). I plastidipped the chrome ring of these filters but forgot to do the chrome button inside, may yet do that also as wanted these to only be noticeable to the trained eye... Mounted the pipes and rolled the ute outa the shed for the first time in a year to take some glamour pics, hoping it will help with motivation (which is pretty low). See what I mean re chrome 'button'? Whaddya reckon leave as contrast or black out? This pic shows there is progress at least, can also see the new rad I bought for it. Bought the radiator based on being the right width, and relatively short as will be using a dual in single centre out intercooler so the TB pipe will need to go over the top of the radiator. Rad is supposedly for JZ converted S13s so Im hoping its gonna cool OK, either way is definitely shiny enough... EDIT > Filter pic with BJ for more Oldschool love1 point


This leaderboard is set to Auckland/GMT+12:00