
Leaderboard


Popular Content
Showing content with the highest reputation on 07/14/19 in all areas
-
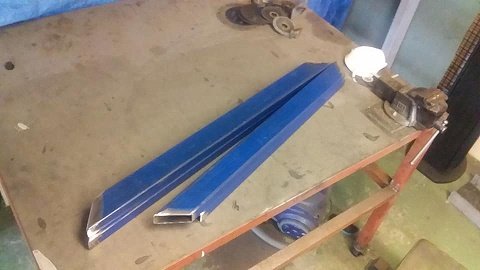
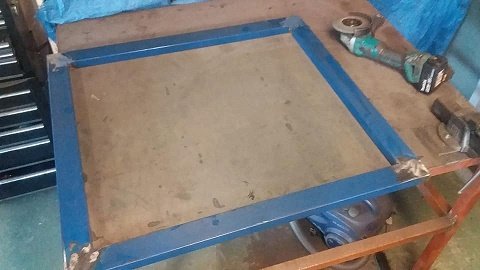
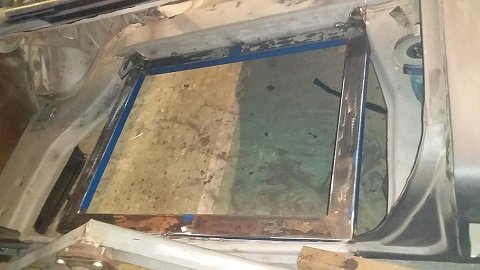
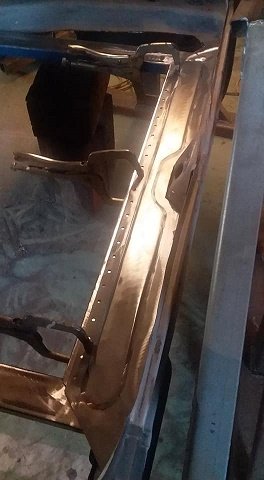
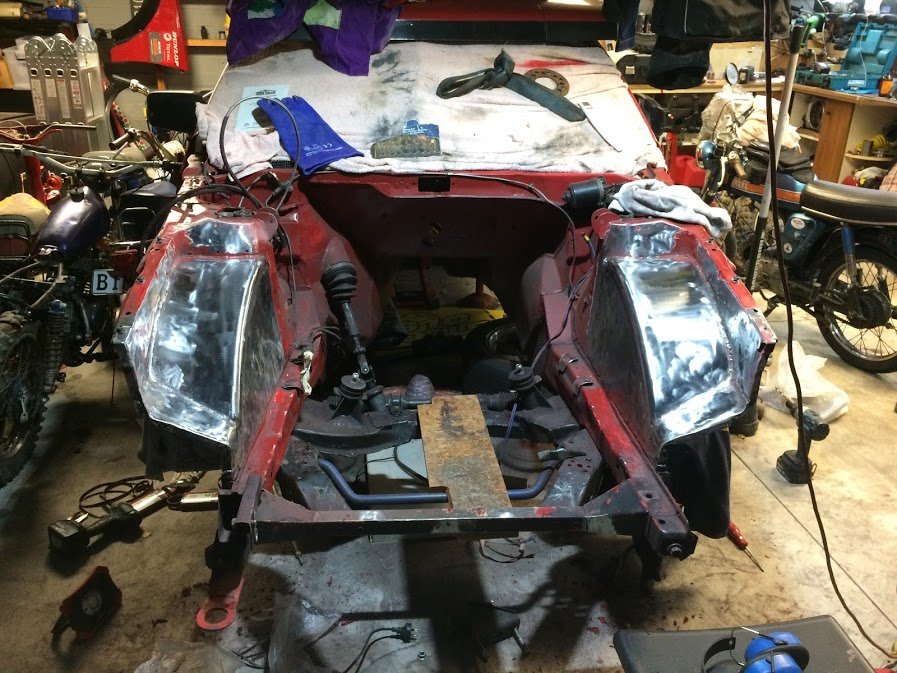
Proof that I am now an auto sparky and fuck anyone who says otherwise; Should have cleaned the smeg off my lens for that last one. Then on to the engine cover, but first I had to build a bit of the intake to make sure I could get it all to clear. There is a sweet spot just behind the cab that will fit a 600x 300 intercooler, I am hoping I can get to that area without modifying my gear linkage too much. Made a rim for the cut sheet metal so the floor was stiffer and the cover had something to bolt to. The intake had to be low otherwise the folding rear seats would hit it. Welded and cleaned up. Looks kinda cool. Then some time honoured 'frame it up in solid round then smash sheet metal onto it' fabrication. It's tight. There was a wee bracket thing that hit the cover when the seat was down so I whipped it off with the grinder only to immediately realise it was the hook to keep the seats up. So now I need to replicate it. Like a cunt. I initially used some real thin galv sheet I had but it was clear I was never going to be able to fully weld it without chasing holes all over the place, plus it already sounded clangy and tinny, so I found some 1.5mm mild steel in the rack and used the thin shit as a template. This meant I could get a nice fold where I needed it using the finger bender. Still yet to do the other side and fill in those gaps, but good progress. Front driveshaft assembly is in getting shortened and balanced at considerable expense. Still yet to hear from engine man. I might have to spend that money on coating the chassis etc and hope I can find some more later on. Or find some more shit to sell. As you were.10 points
-
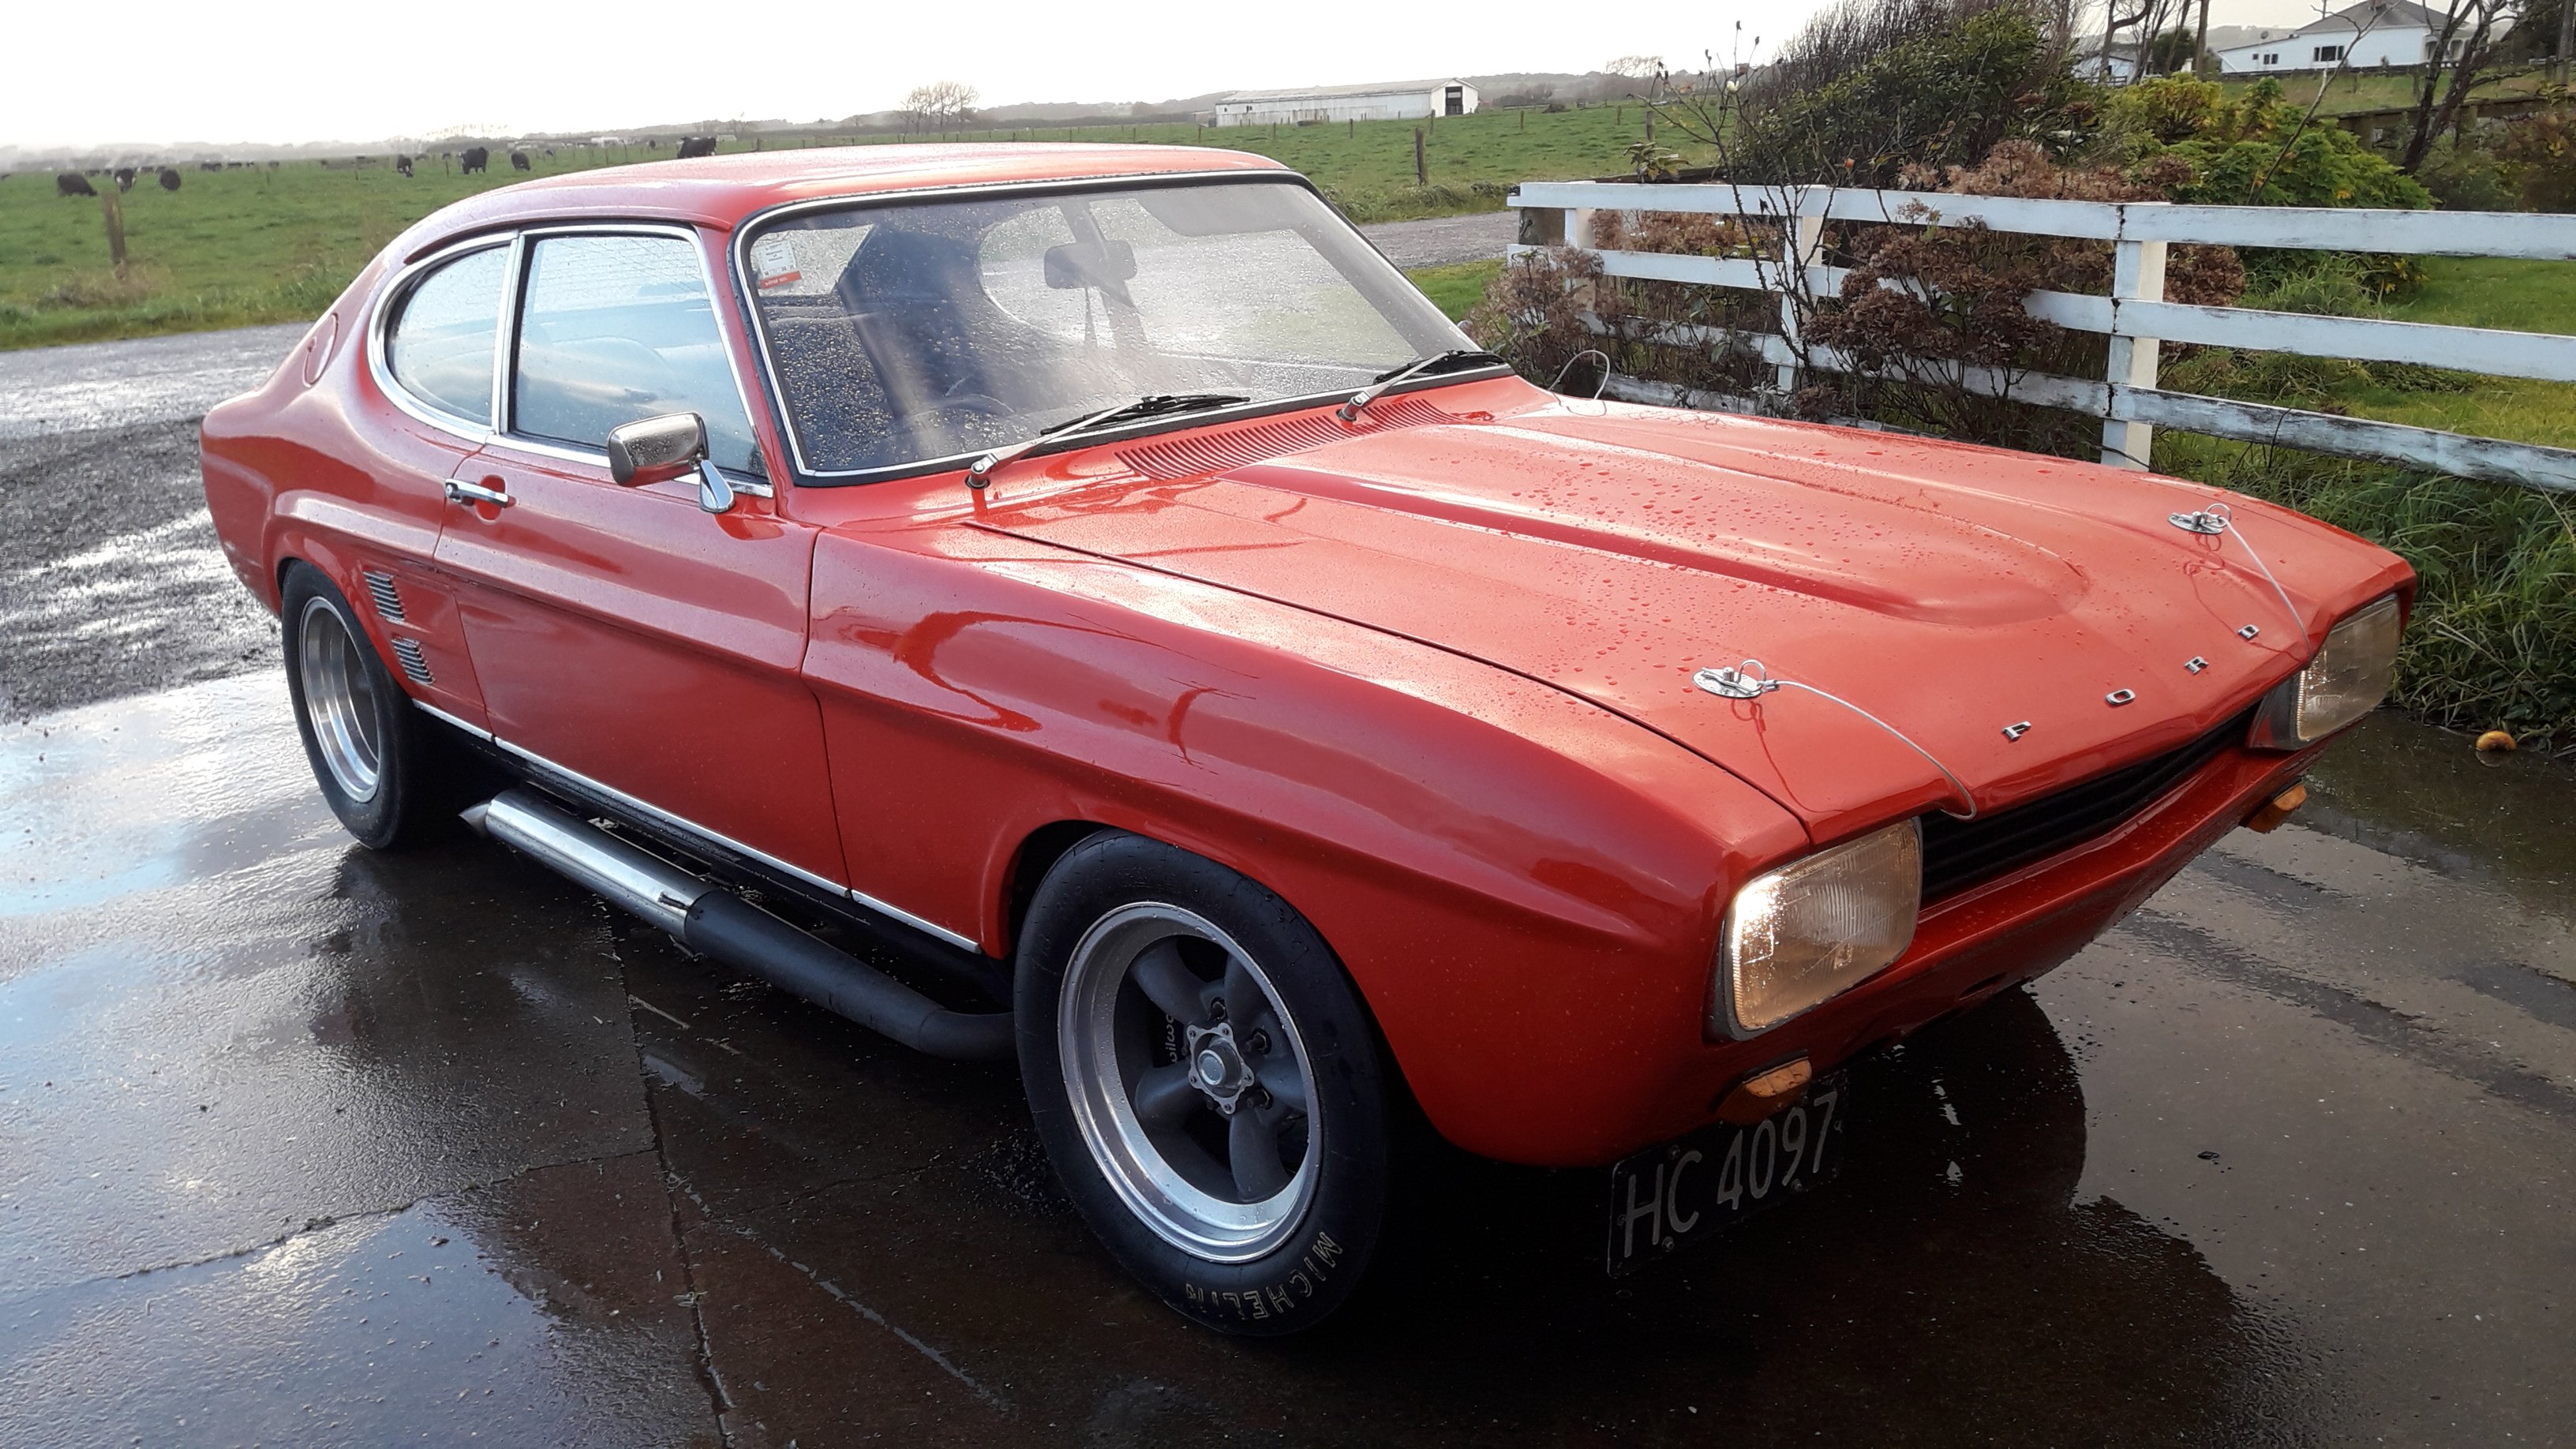
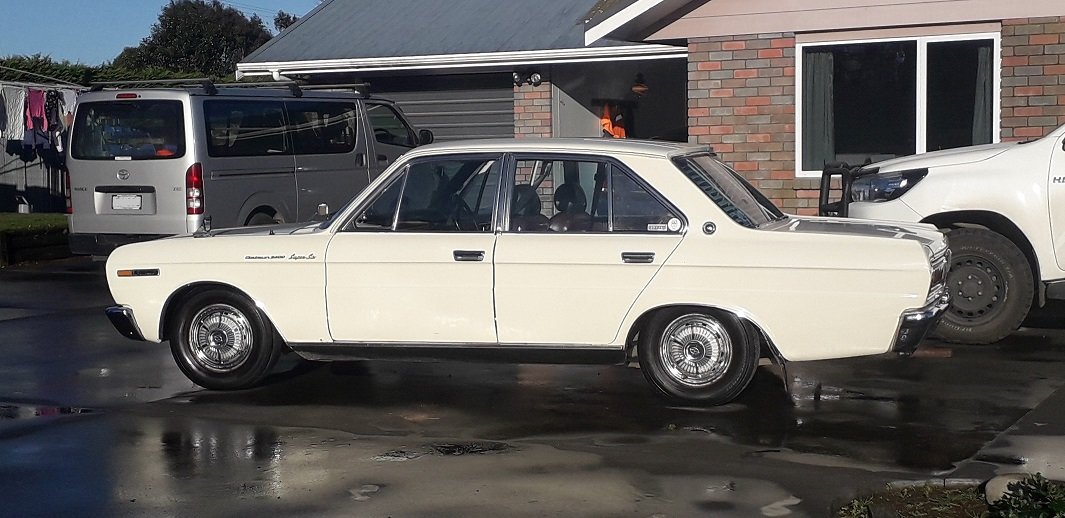
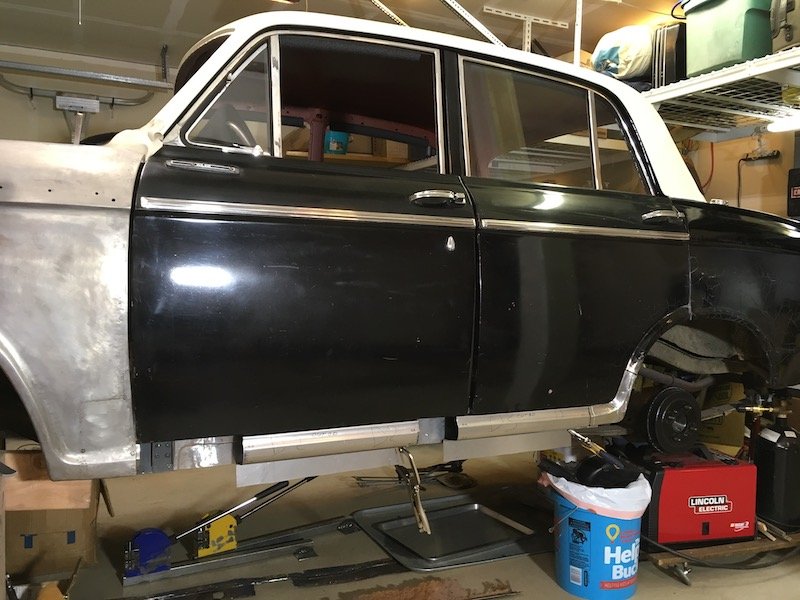
She's all up and running with the new paint job and brand new engine now. All certified and legal. The engine that was in it had a cracked deck and was bored 60 thou over so was replaced with a brand new Ford racing 345 hp 302.
 9 points
 -
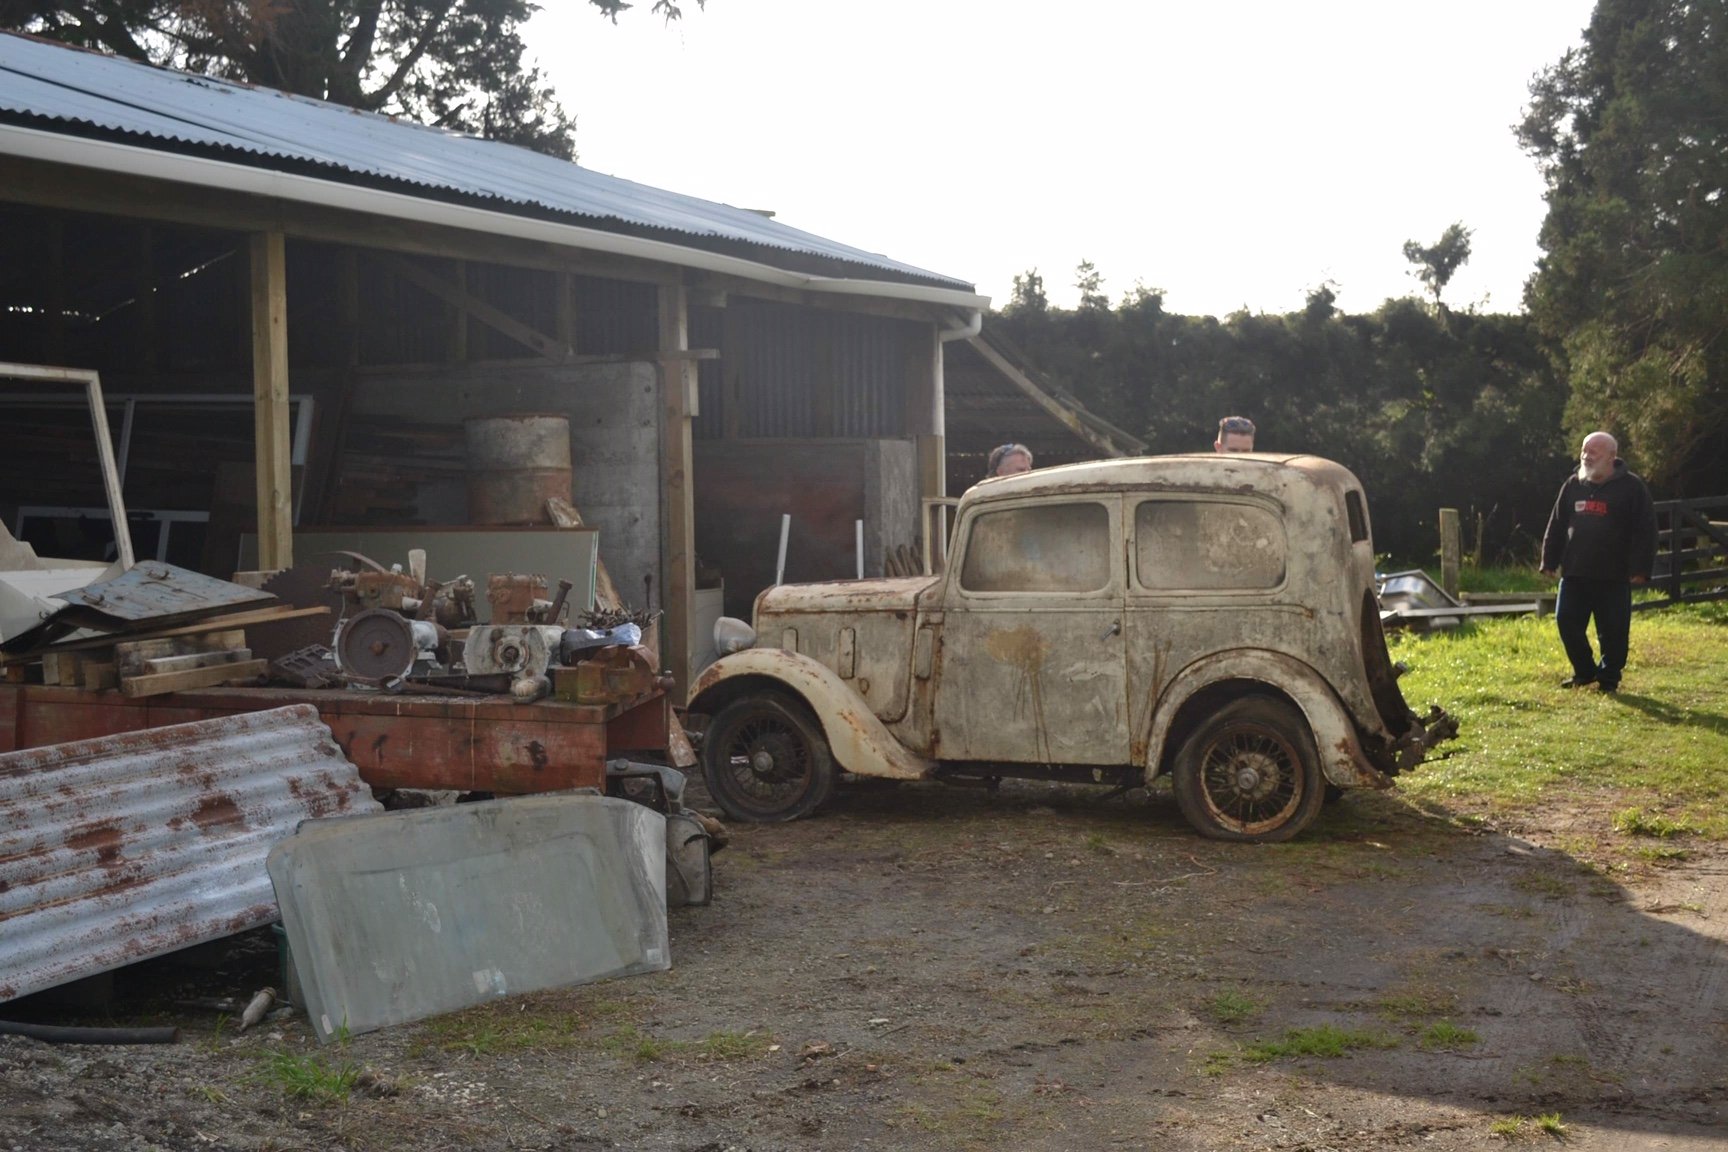
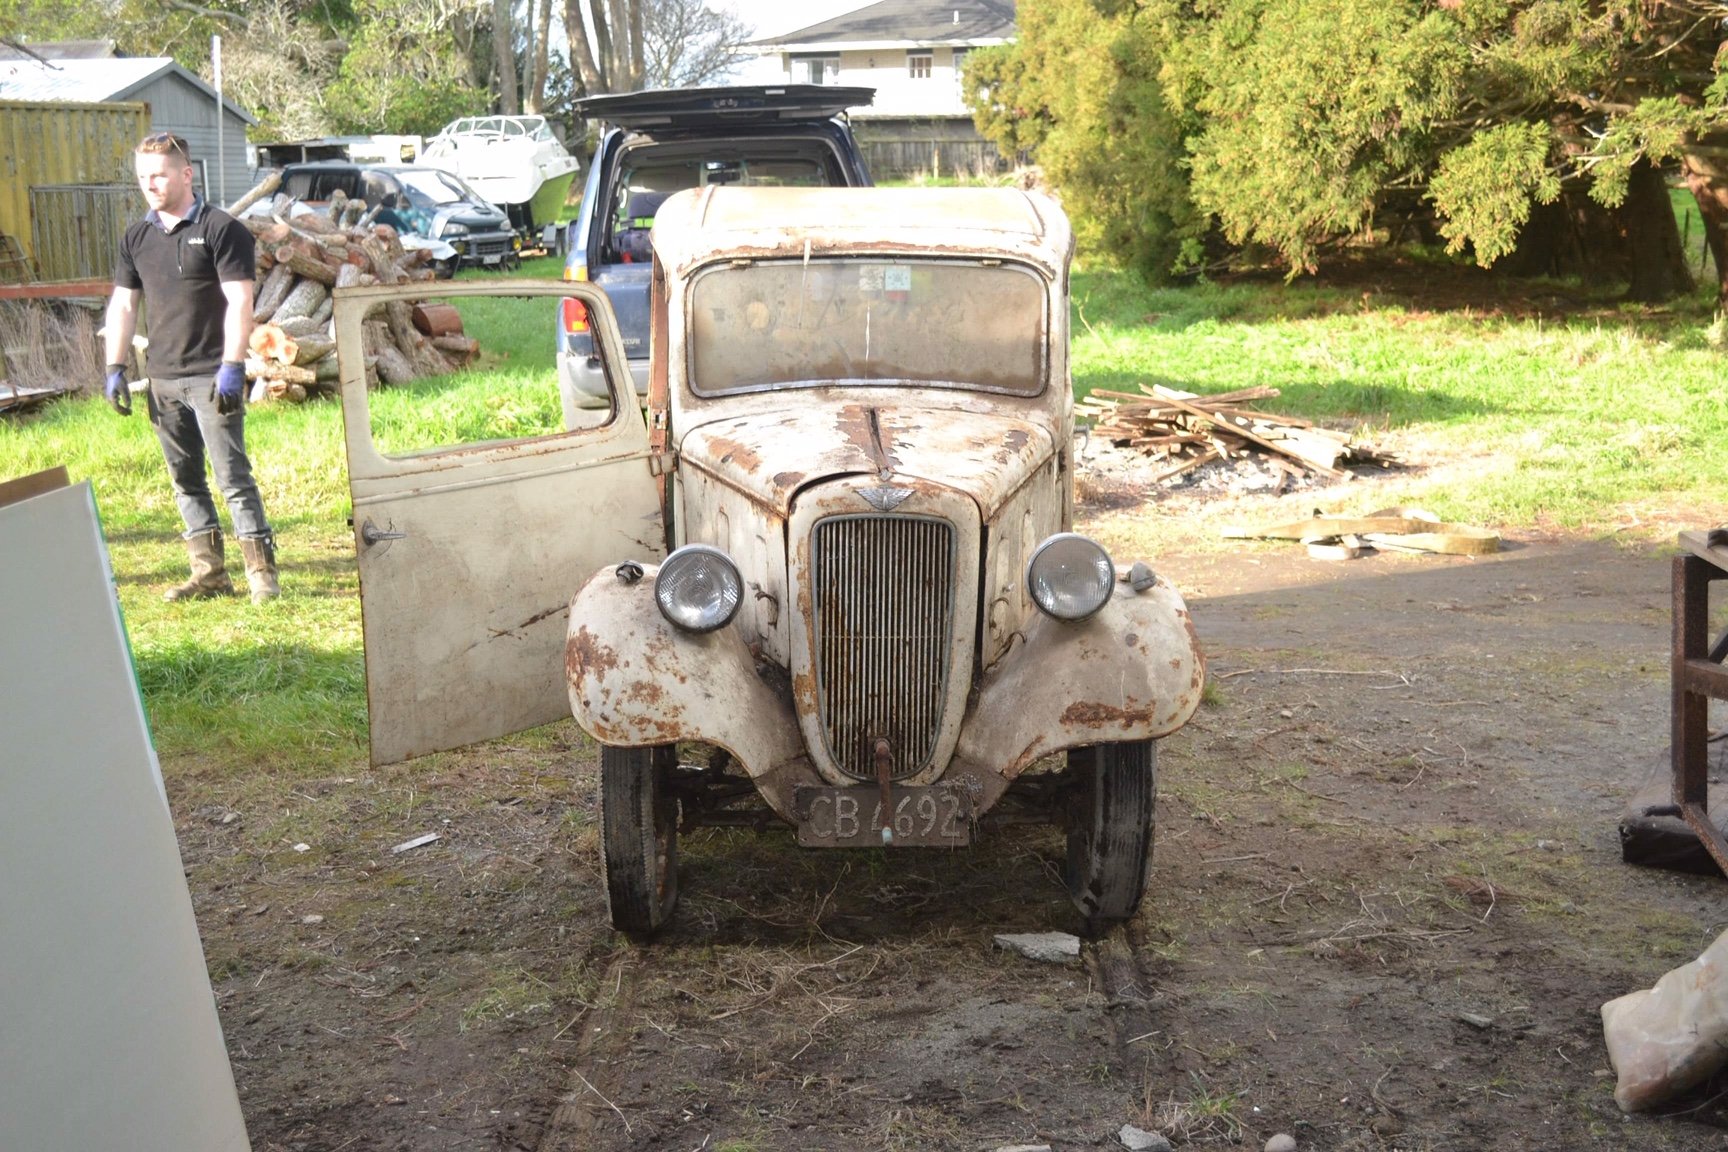
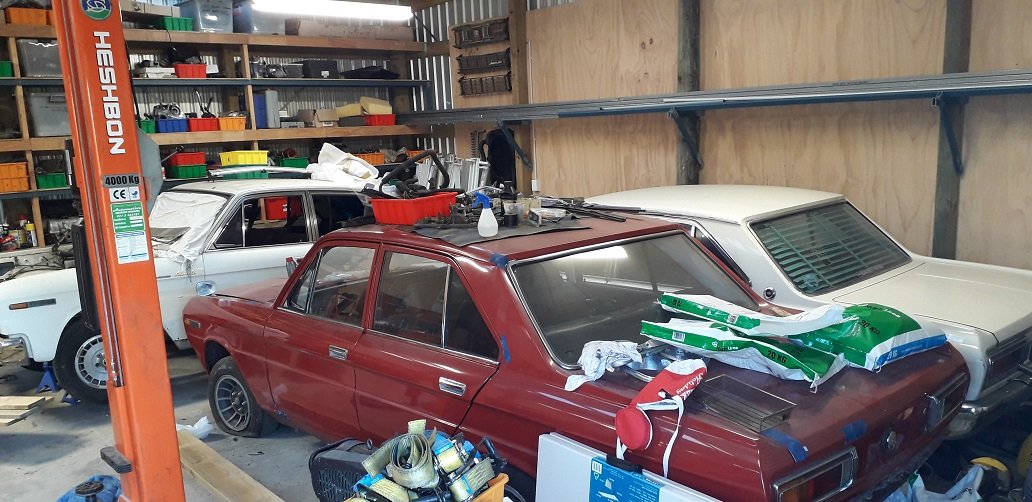
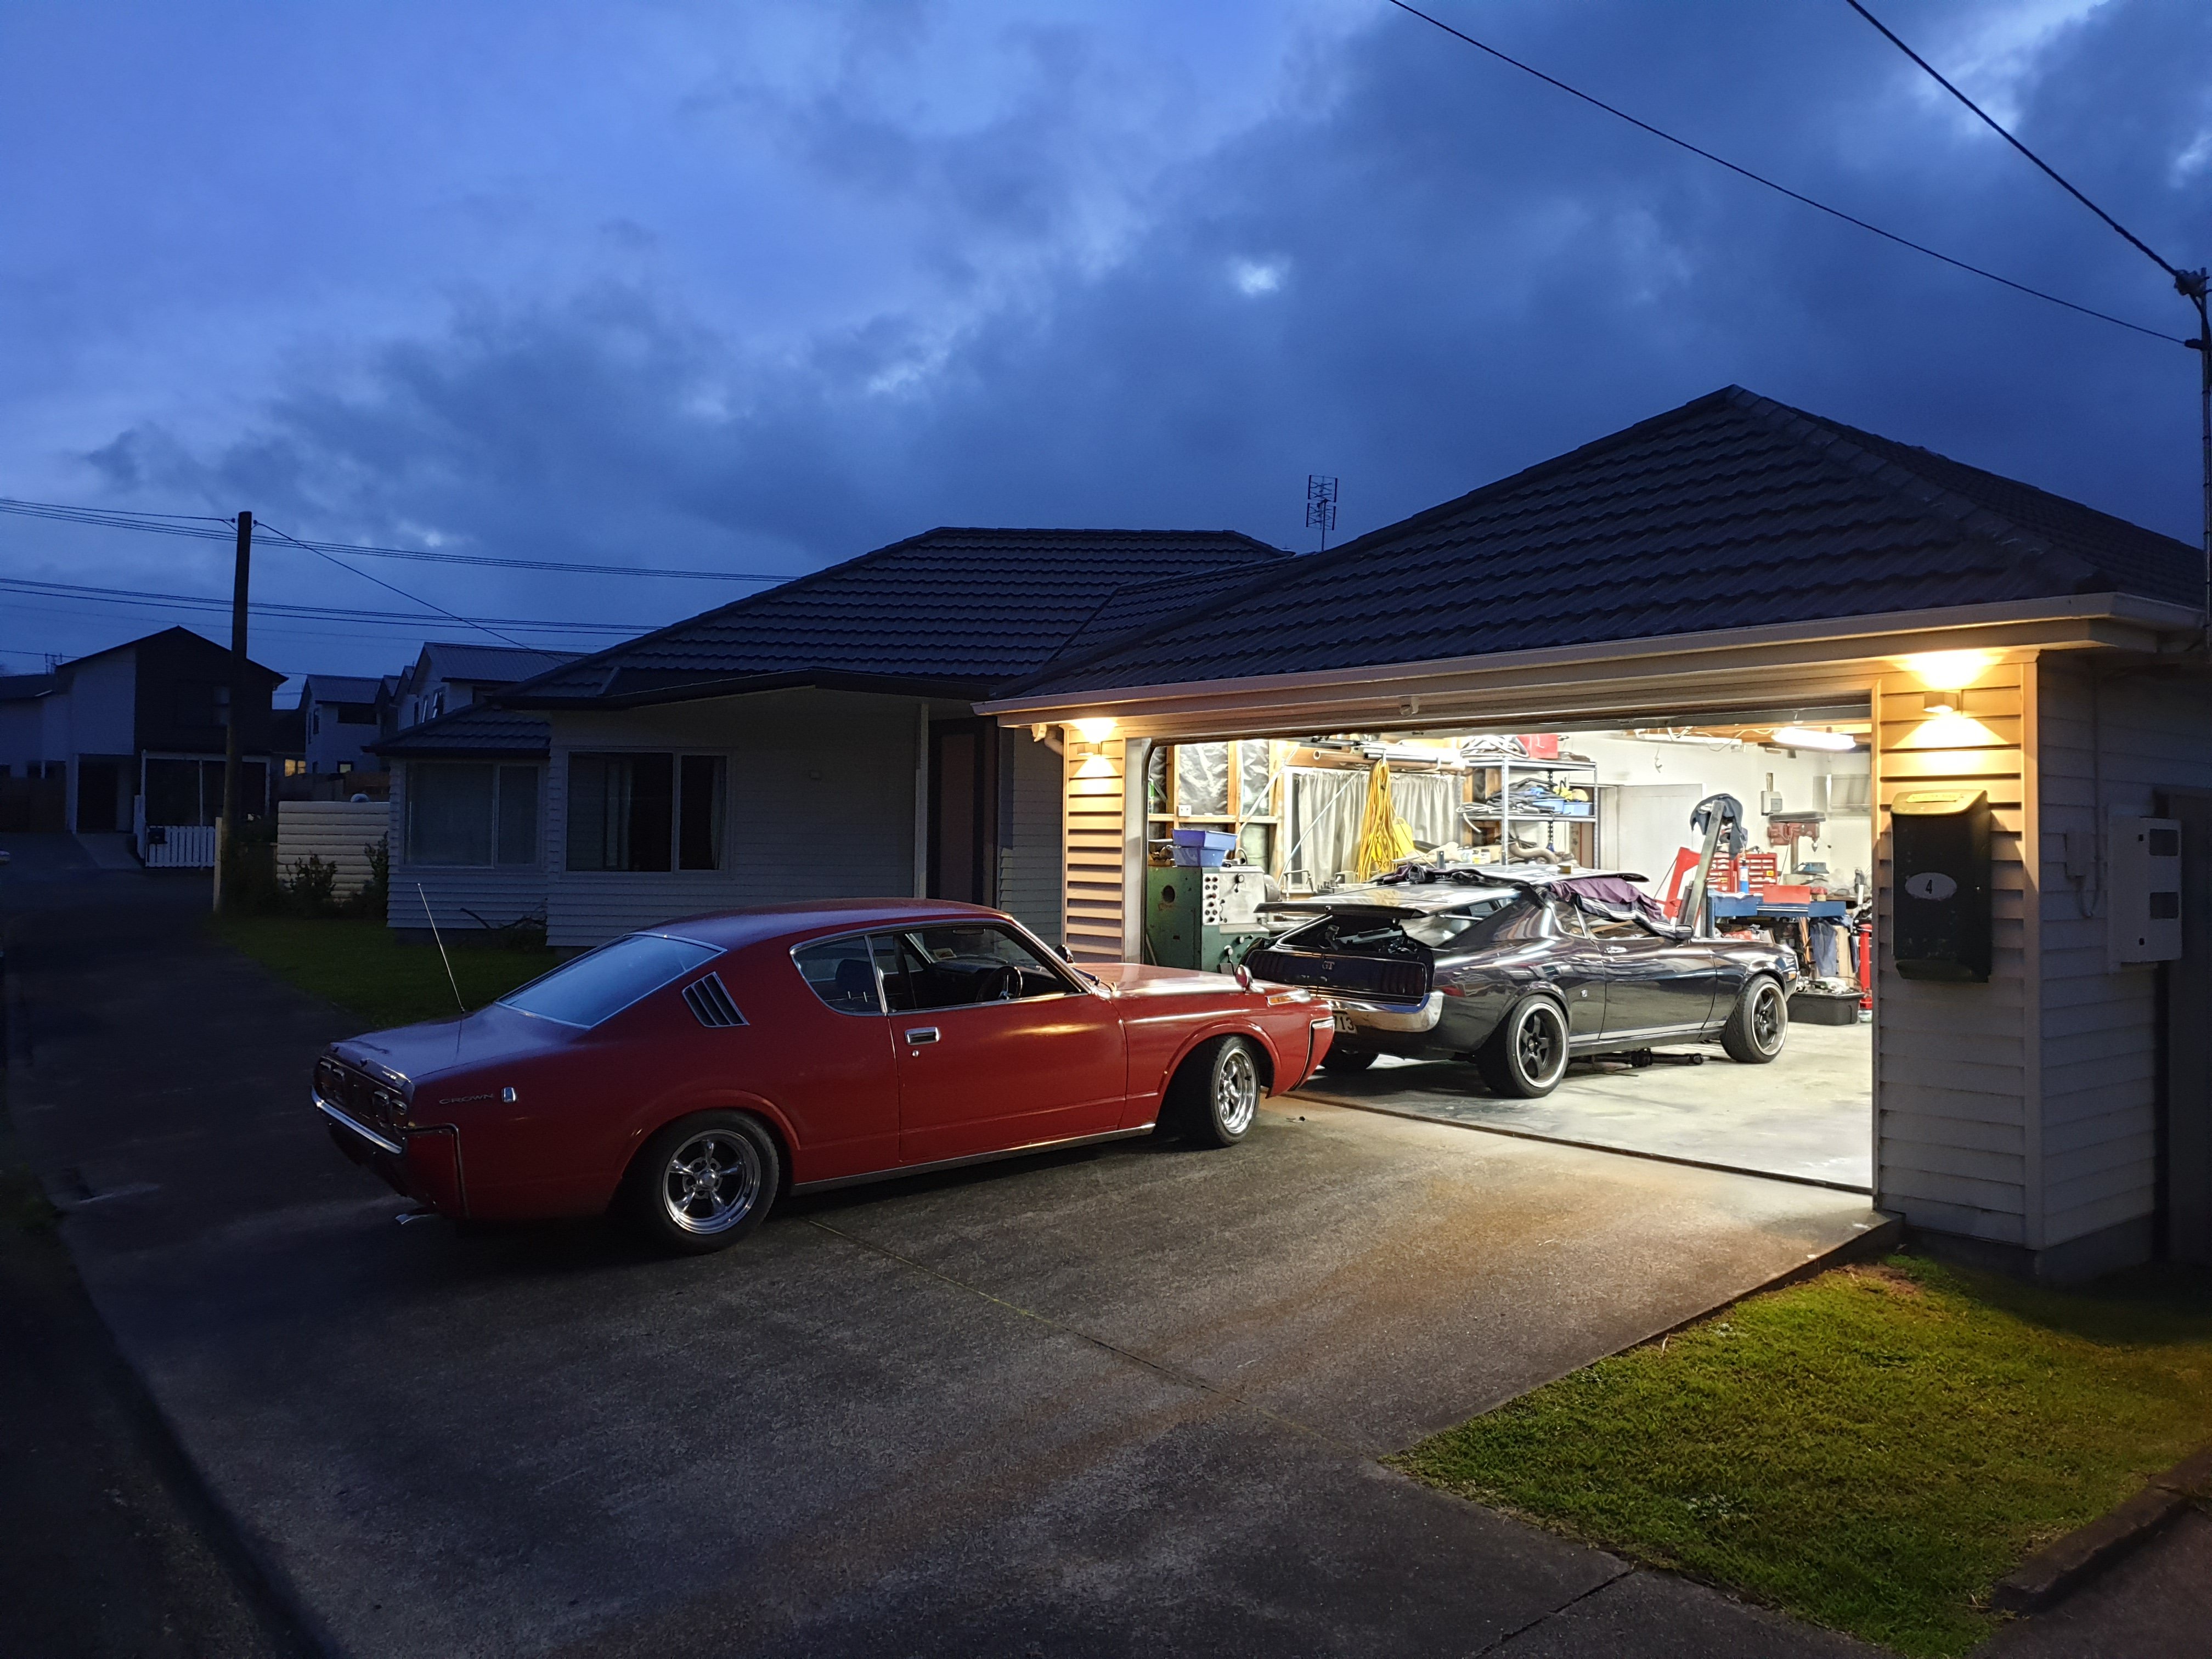
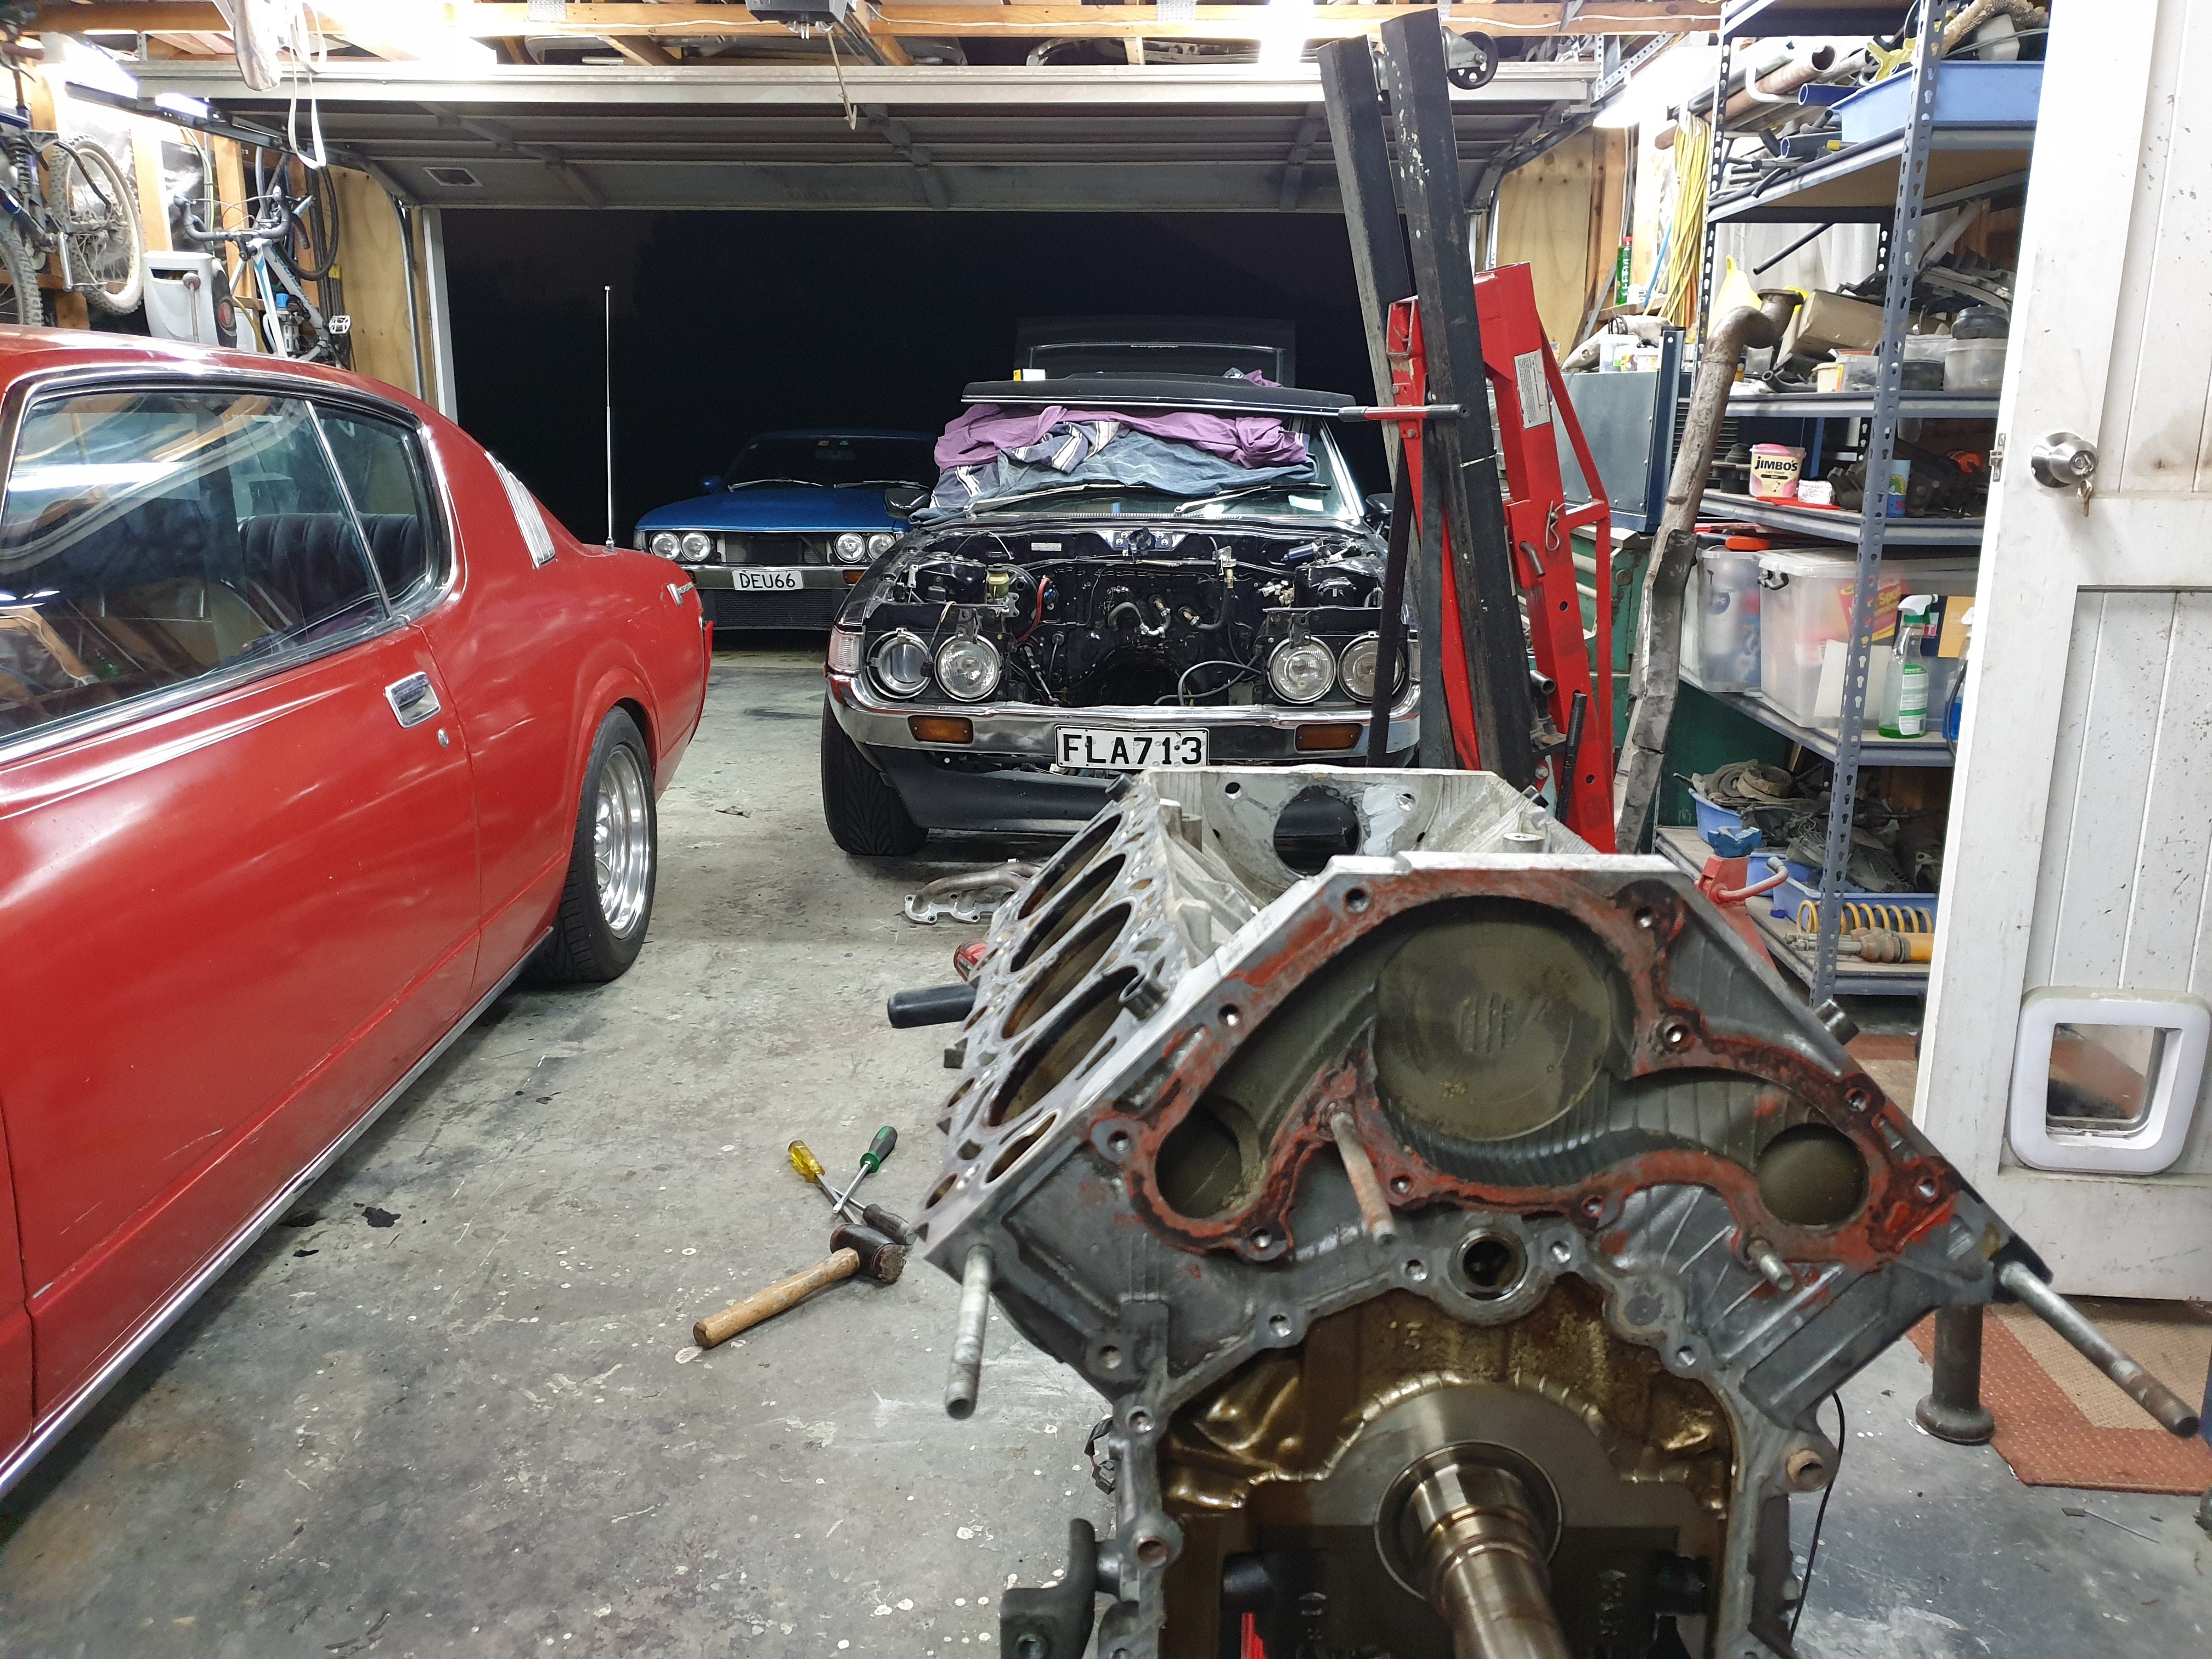
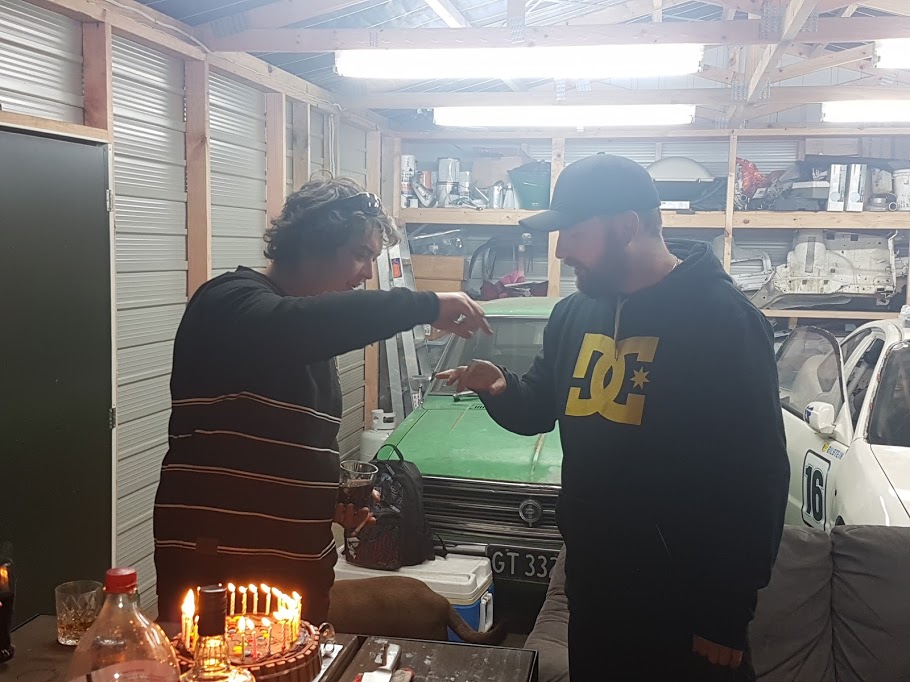
I need a bigger garage.9 points
-
A few photos were taken and then onto the trailer and off to the workshop. Yes it fits on a fairly standard size trailer!
9 points
-
and ended up with me getting to do this. https://www.youtube.com/watch?v=ddwY1EinaO88 points
-
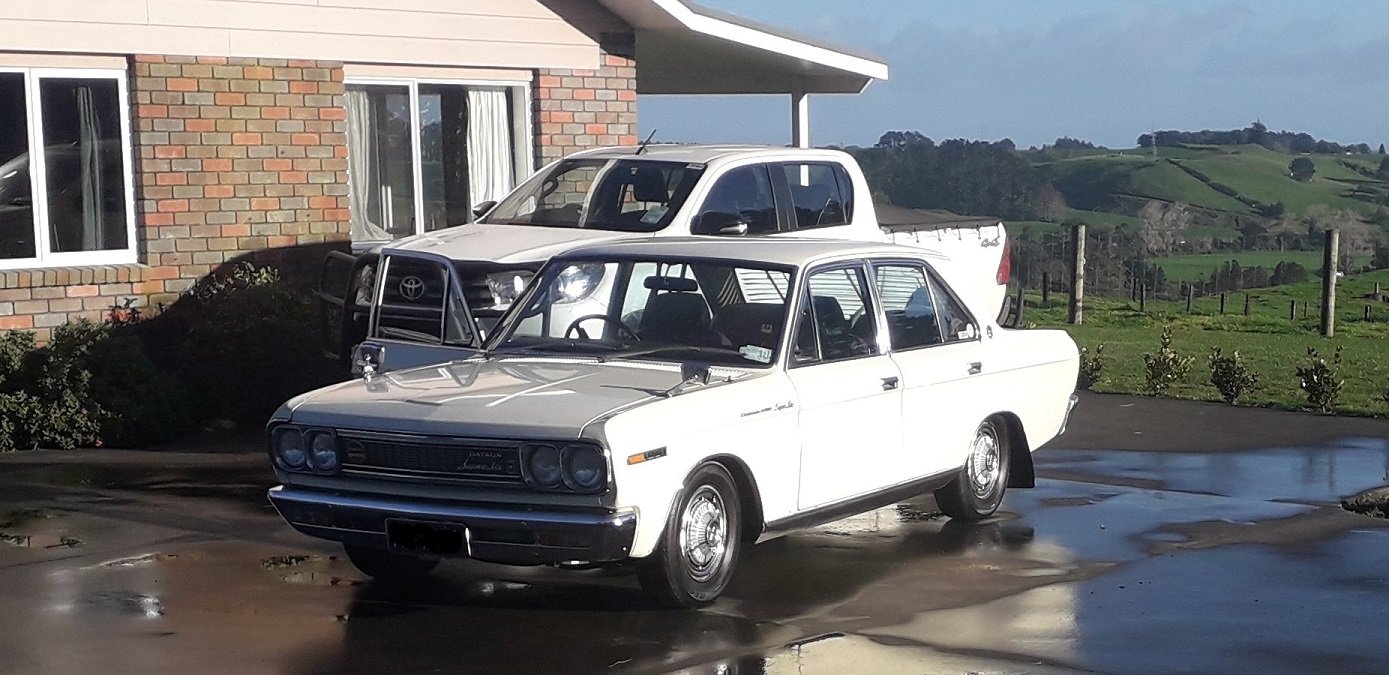
I also got a new friend for the wagon! just need a coupe now right? Its the best starting L series i have ever seen, low kays, been in a shed 15 years, immaculate interior. Undecided if i will keep it. might start a build thread7 points
-
- made up an exhaust support from the gear box to the bit before the flexis, similar to how the 125 is set up - put a blob of weld on one holey weld (one! ) - took it for a hoon. Sounds great from inside, very quiet on cruise but a bark on the throttle and right at 2000 rpm and 4000rpm - rear pipe was touching the tow bar so adjusted the donut joint. - You can see the Y joiner at the rear seat, thought i may have needed a muffler in this section but it will hopefully be fine Only one sunny day this weekend, so did a few other little jobs, - after coil and resistance chat earlier in the week i checked the voltage at mine, it was about 10v. Based on googling its number to find out its specs, i think its a Ferrari or 6 cylinder Alfa ? came in a job lot so iunno) its quite a big larger diameter than usual anyway. Didnt even get warm on full 14V checked it after a exhaust sound test run . Si used the power from the fuel pump relay (already triggered by the factory coil feed) to power the coil and it seems a bit less missy when cold. Which reminds me I need to get a new Magnetti Marelli dizzy cap - there are cheaper versions out there but they are not very good. - also adjusted the idle mix on the carb a smidge richer, and i could slowed the idle speed a little more too. Engine now ticks away lovely, with a nice burble that you can only hear from the end of the exhaust, i think that the old one had quite a few more holes i didnt spot. - gave the headlining a scrub, and pulled out carpets, removed rubbish etc. - Put in a pretty subtle magnetic phone holder. - Gave it another wash, and then a wipe with an old polishy towel. Needs some more protection. I reckon its ready for a run to the WoF man one day soon.7 points
-
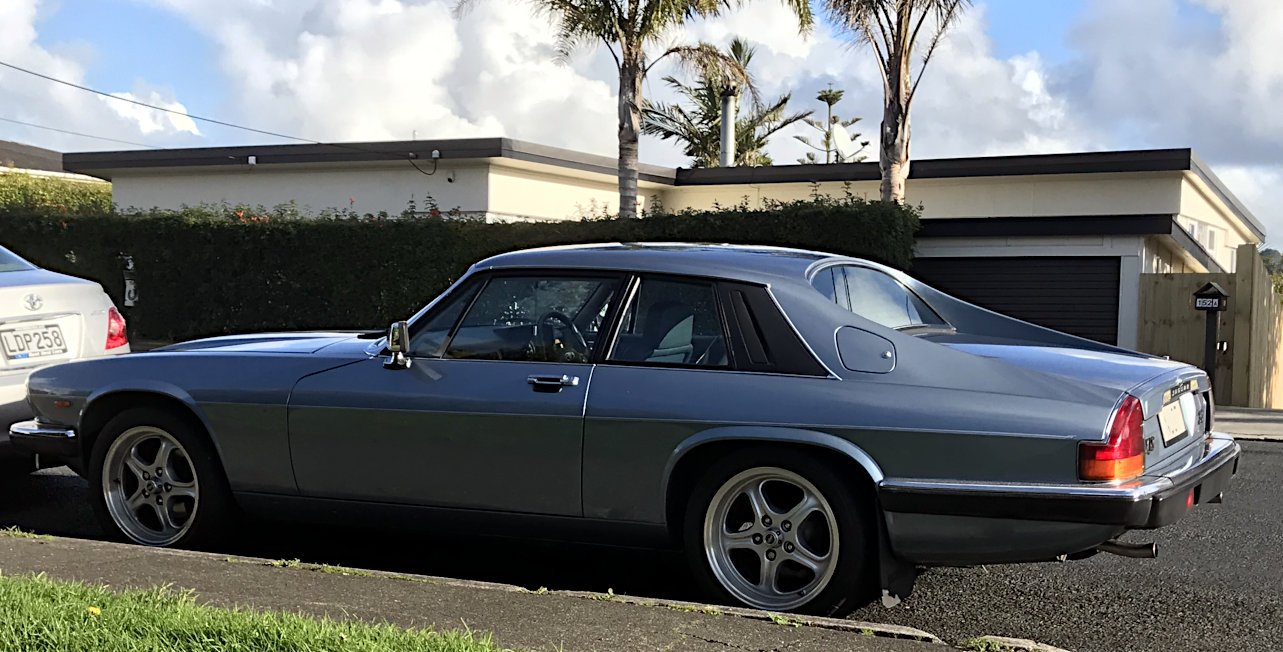
These new wheels have a tyre diameter 3% smaller than stock, so my speedo is even further out than before. It now seems to under-read by around 10%, officer. I went looking for more reasons for the vibration at 80kph, and found the diff seems to leak oil from the input seal. Probably explains its woooo noises on deceleration. So many things to fix! This car will keep me entertained for many years. I found a bit of play in the front wheels when rocking them at 12 and 6 o'clock, but not at 9 and 3 o'clock. I ordered some lower ball joints (an unscientific guess) and installed them this weekend... While doing this, I found the shock absorber top mounts were loose, one by a reasonable amount. After replacing the ball joints there was still some play in the wheels, so I think I guessed wrong. The vibration situation seemed to have improved for some reason though. Maybe I need to do the upper ball joints too / I don't know what I'm doing.
7 points
-
So given this complete bombshell of how easy this was looking like being, we put a strop around the diff. Put the VX landcruiser in low ratio, and gently towed it out of the shed. To blow my mind even more, I think I jokingly said, "wouldn't it be easy to steer if I could wind the window down" at which point I grabbed the window winder and wound down the bloody window! This little car blowing my mind with how much of it still works is kind of becoming a theme.
6 points
-
6 points
-
6 points
-
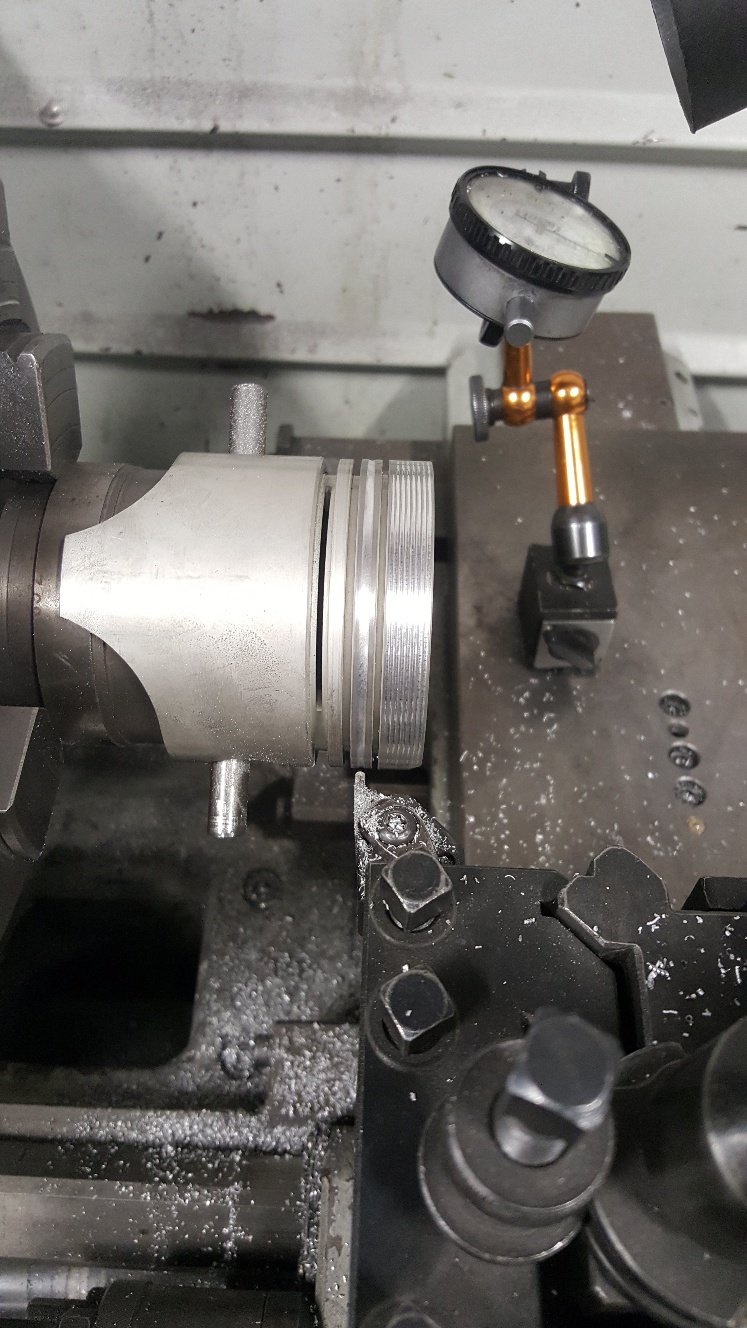
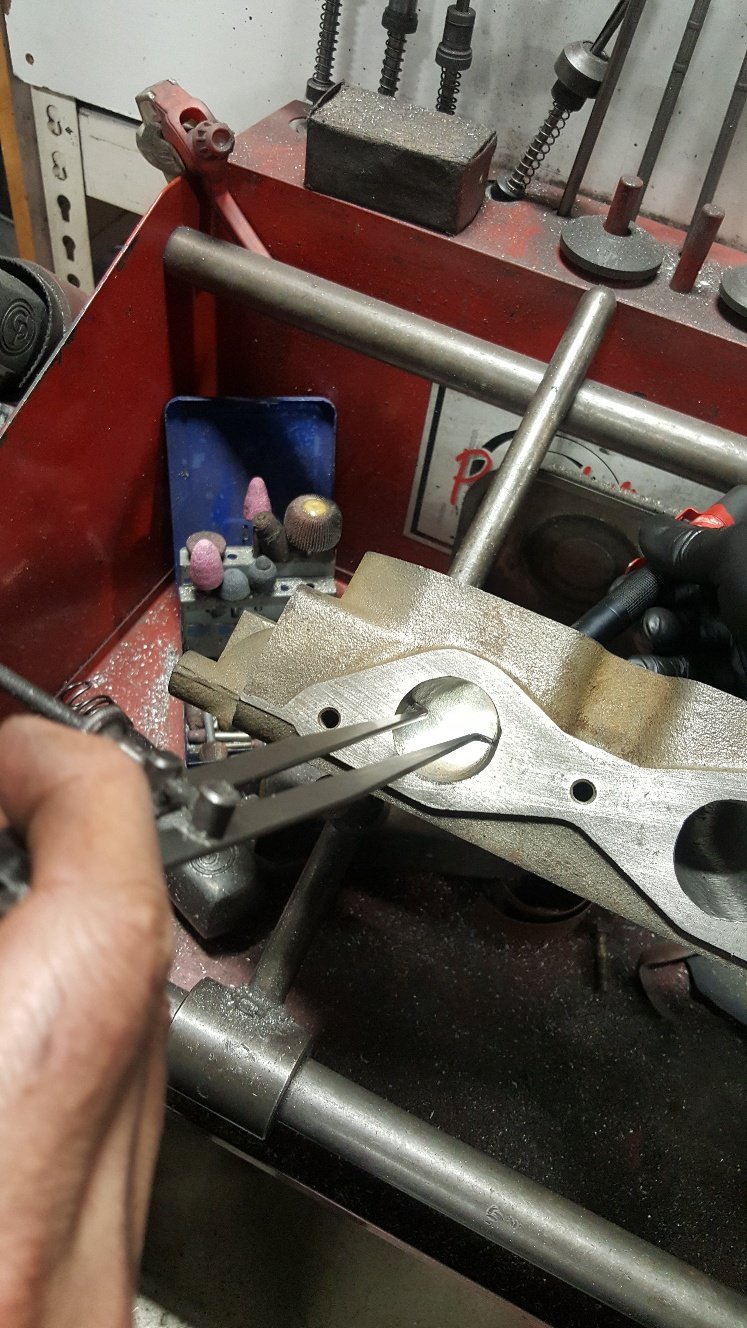
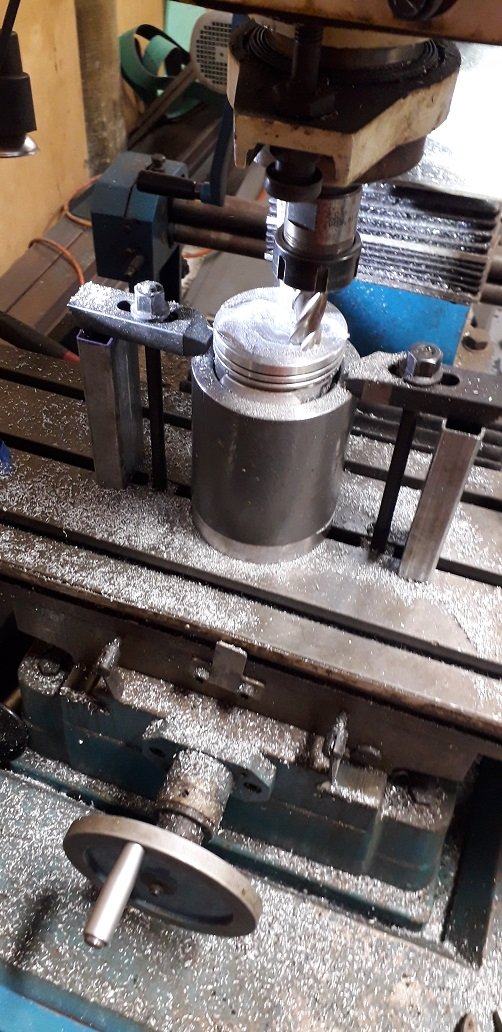
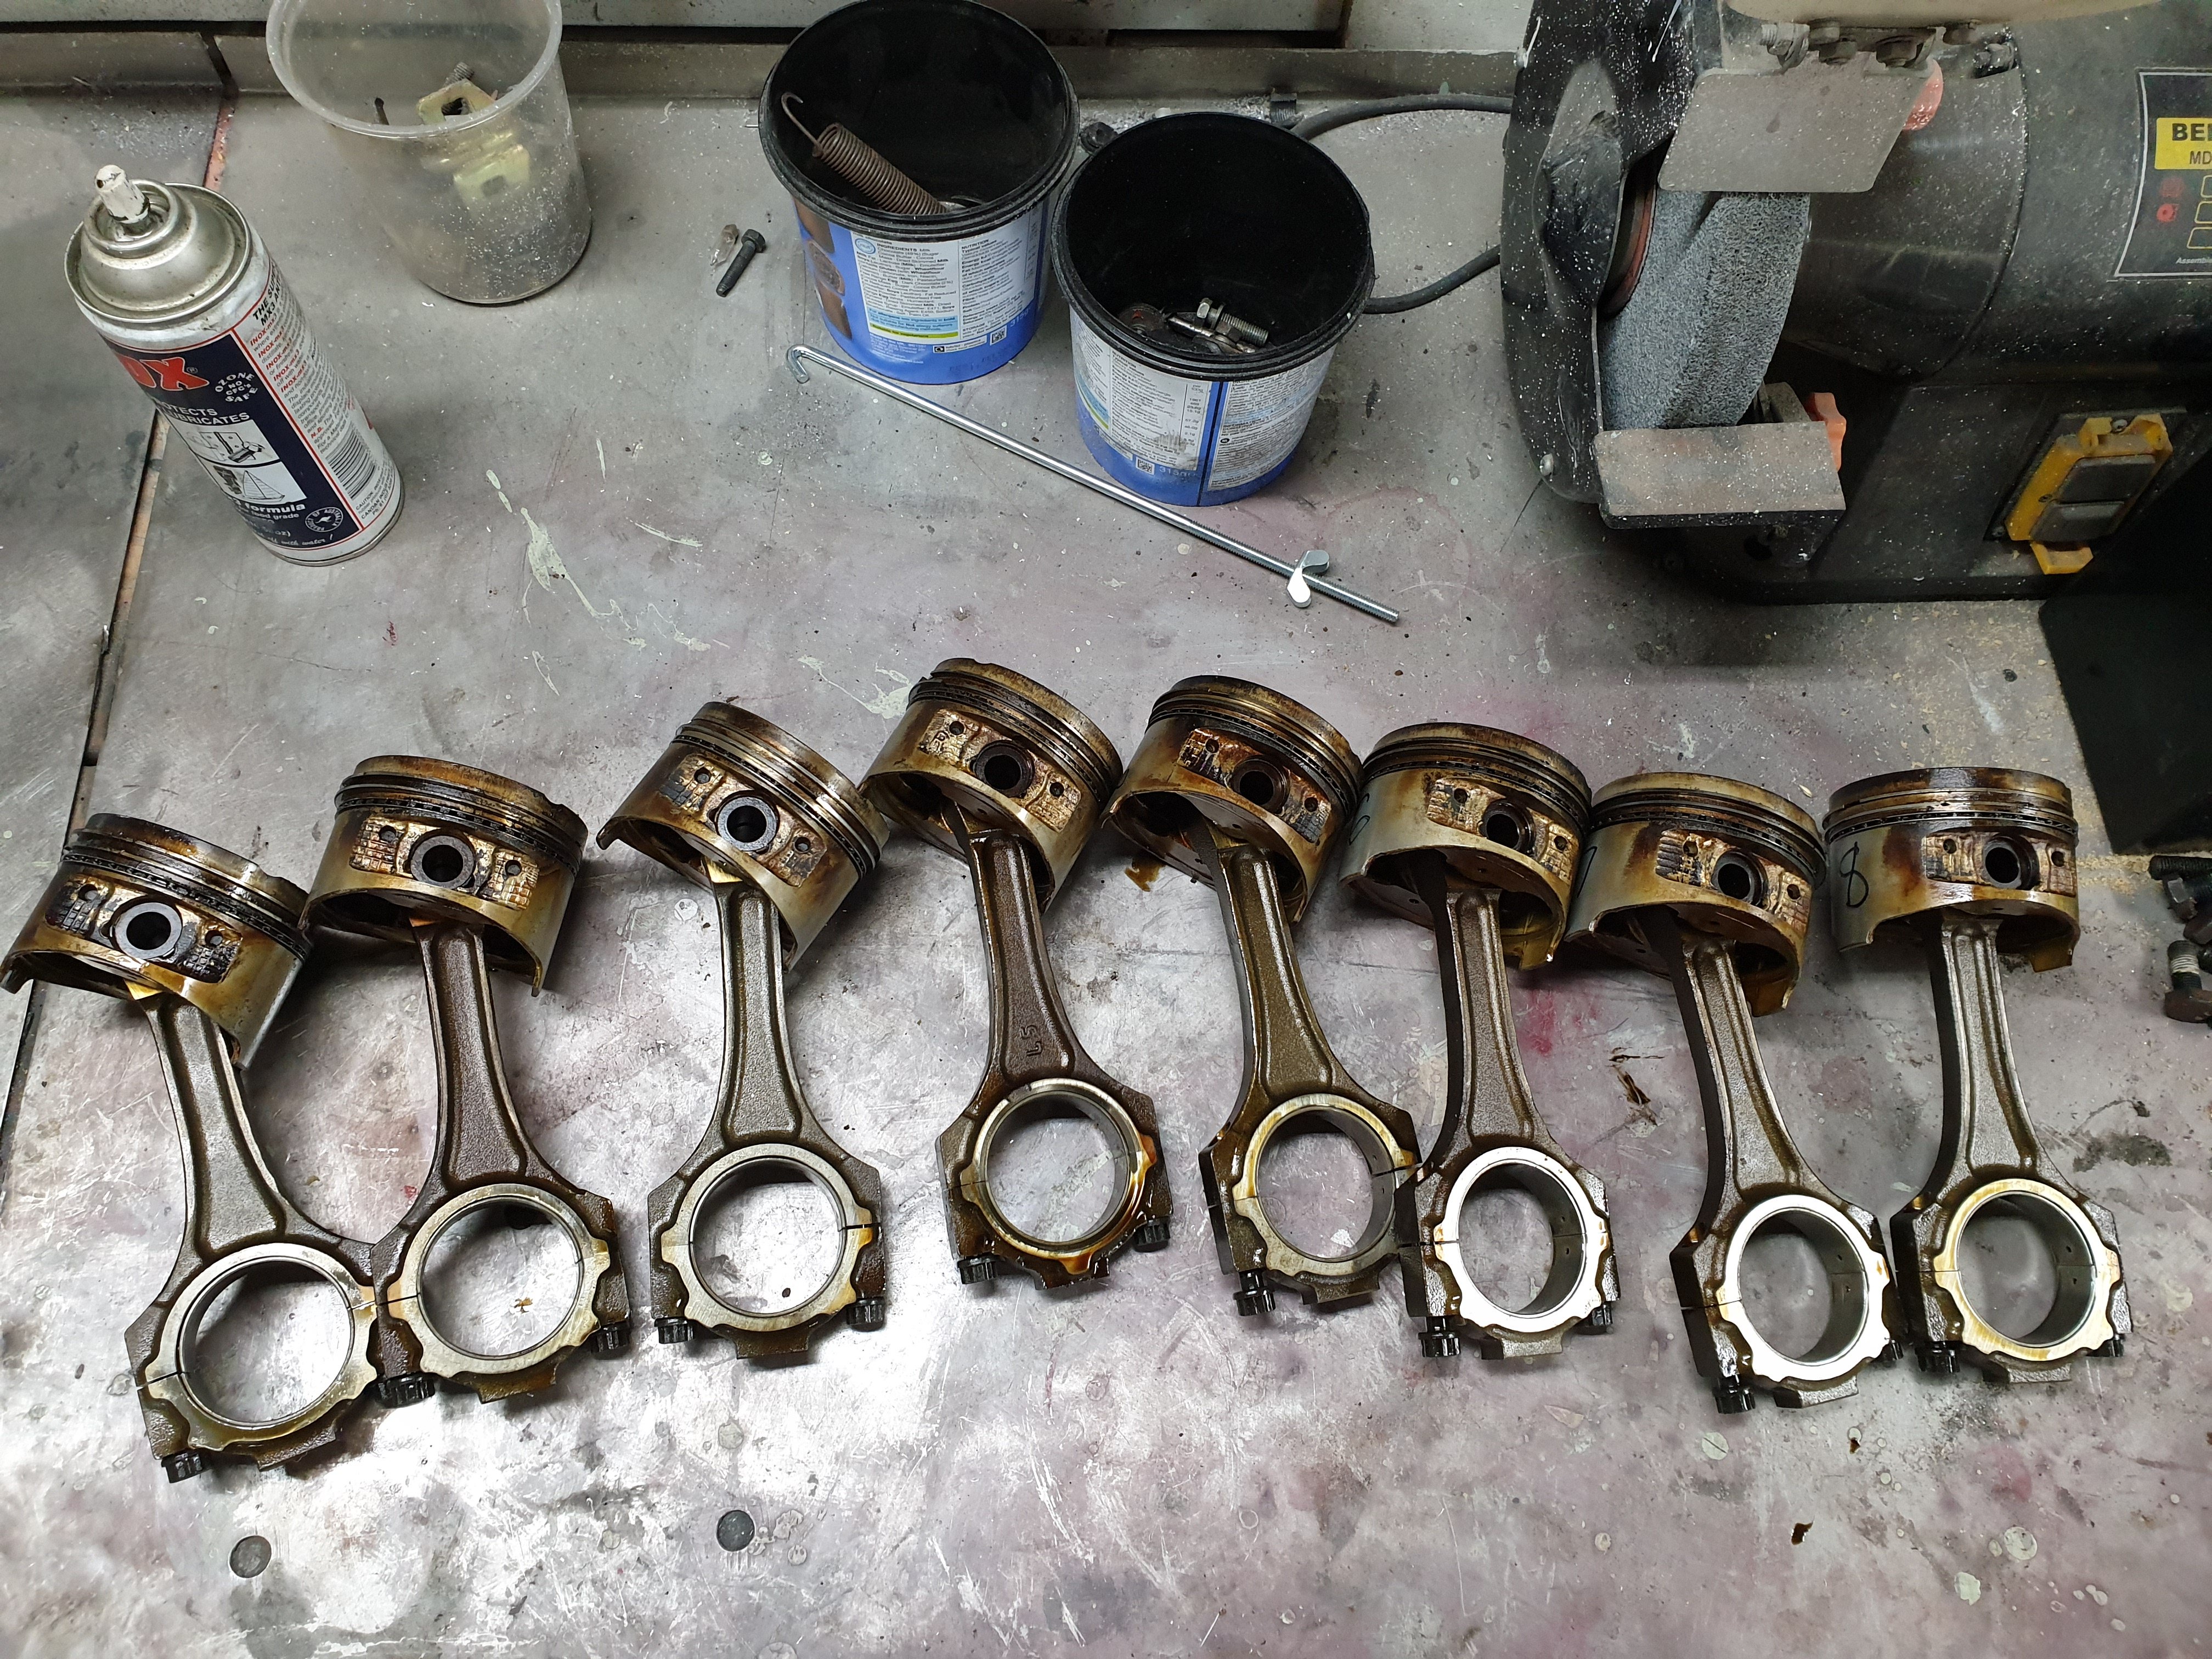
So I turned a Accumulator groove into my pistons. Its a groove machined into the ring land between the top and second ring. This groove accumulates residual gasses from combustion to stop ring flutter improving ring seal. I also added some Contact Reduction Grooves in the top land these limit piston to cylinder contact during high rpm and high temperature. They also disrupt detonation waves. Now I've pretty much got most of the bottom end machined except for the valve reliefs. But to machine these I need to figure out what size I want to make my valves. Here's a picture of standard valves vs some oversize valves. I won't be useing these particular valves. I will make some valves out of Mazda/Ford FE 8v valves. While the head was lying around my work mate Al decided he would do a little porting to open up the intake runner where it pinches down at the intake manifold face. You can see he has opened it up enough to be able to run the calipers down the runner to the bowl area without it pinching the calipers this tells him he's got it pretty evenly round. This should give good even area volume. So the intake flow stays at a even speed. Before hand you would expect the intake flow was speeding up through this area then slowing down before getting to the back of the valve. Hopefully I explained this ok. I'm no guru on porting. This is just rough cut off the burr. We will probably leave it that way as it can help in atomization.
6 points
-
Gave it a wash and drove up to auckland a few weeks back. Came up pretty shiny. Fitted some new shocks to go with the reduced suspension travel and its lush again. Had a few funny issues at first and stopped and gave all the spade terminals on the coil/ballast resistor and away she went. Sat on 70mph the whole way, even passed a car up the mahoenui hill at more than 70 Also, gotta catch em all!
5 points
-
5 points
-
Seems im overdue for another update. Best remedy that I guess and spew forth more pics.To keep all the electricals ticking im using a Powermaster 150amp 1 or 3 wire alternator. As i stated above I wanted all the brackets as low as possible. unfortunitly cooling hoses got in the way in the middle positions and the powerstearing rack when it was really low. So its had to go up higher but is still low as we could get it. Still its not to bad I guess.Also mounted up the radiators overflow seen above.On the other side of the rad we mounted up the PS/hydroboost reservoir. Three port jobbie.Under the car a fly wheel cover was fabbed up. Stock would not work due to the trans adapter. Bit of split pipe was used for the notches to clear the torque converters covers ridges.Car is off the jack stands and front panels are bolted on. not all the bots etc are in but enough to keep it together until I get new bolts for it all and get it done right. Old Nailhead sits in there nicely.Steering wheel thrown on just so we can roll it about easier. GT Performance 9 bolt hub, 15.5" wheel and horn. Really wanted a wheel with a horn ring cus I love those things but ones that suit smaller wheels are bleeping expensive so it can wait.Car is sitting pretty darn low. Like the lowest part is the brace that joins/strengthens the front sub side to side much like the original Hudson setup. I haven't measured it but I guess we have 30-40mm clearance to the road. As you can see with the good old beer bottle next to the car... it low.keep in mind we still have to add side pipes - its that big ol hole you may of spotted in the above pic. You will see also that we will have a heap of room for them under the rockers. They also have a bit of a curve whats a bonus as it will (with luck) keep them out of ankle range whilst keeping them nicely tucked up so we dont rip em off.and moving right along... side shot just cus I like it. yes I know the car is dirty but so is my mind and I like it that way.Now talking about burning ankles on side pipes a subject by gal has mentioned most times I bring up lake pipes. My answer generally goes along the lines of "wear heels" below pic proves it. Ankle out of burn range.. toes on the other hand she has never mentioned.But seriously - like the back tire viewed air out side on.Enough farting around talking about air out this and that. Throw a battery in and test that shiz. Yip yours truly testing it out. We left it air up for a few days and I was pleasantly surprised to find it stayed there with only a few psi drop from what I left it at uniformly across each wheel. I will mark that to atmosphere and not any slow leak due to it being across all four wheels not just one.yeah i know the front could be bolted on a bit better but ahh stuff it it will be off again anyway.And just cus im feeling all gangsta...i know it aint hydraulics but it will do me. When air up we must be around 150mm at that one low point in the middle just behind the wheels. Ass end that has larger bags naturally goes much higher.5 points
-
Made a start on the plenum I tested the trumpets on the starlet. red line is straight pipe the same length as the bellmouths (blue). Pretty much no difference till airflow demand is high. after that the bellmouths win. Down on power about 10kw to what starlet makes due to runner length. Some goose put a massive suspension tower in the way, so stuck with this length on the hilux4 points
-
The interior has this lovely shade of green everywhere, which somehow looked quite familiar. I asked dad if it was in fact the same shade as the benching in the kitchen at my grandparents house when I was little. The very same. Jeez grandad was resourceful.
4 points
-
4 points
-
Just hanging out, being cool.
4 points
-
wow. Been a while! this car still goes, and is actually the only car i own these days... Since the last updates, it has run 2 or 3 OS Drag Days, where it would just do run after run after run! like 30 runs in a day, and is just sooo much fun! slow... but fun! It has also been on a number of fun trips that im going to share with you now, and has proven to be a capable trow beast! BUT It also has done a lot of not-driving. 2 diffs and 2 gearboxes in 12 months? so we're pretty good friends with AA (plus) and theres been a fair bit of this But, it's all worth it! because days like this are hard to beat! We have some plans though... Great plans! And the 'final' piece fell into place today.... I have in my garage a shortened Hilux LSD with disk brakes, buying, today, a K-T bell housing, and in slackercams shed is a T50 with my name on it... Plan is to install all of that before drag day, and hopefully i wont smash all my driveline gear again which is great, because then i have no excuse to do other things to this car maybe one day... as i never wanted to do more mods as i was breaking diffs and gearbags already, so didnt wanna put any more power into it... Plus, i kinda like how fast/slow it is... its the right amount of fast you can beat on it on a daily drive around the block, and not get into too much trouble! but at the same time, triple digit HP numbers would be nice... Anyway, thats what we're up to. This car is my ONLY car, so that makes mods more fun... but i live in Taupo now, so cars are optional... plus partner has a car and i have a scooter, so she'll be right.4 points
-
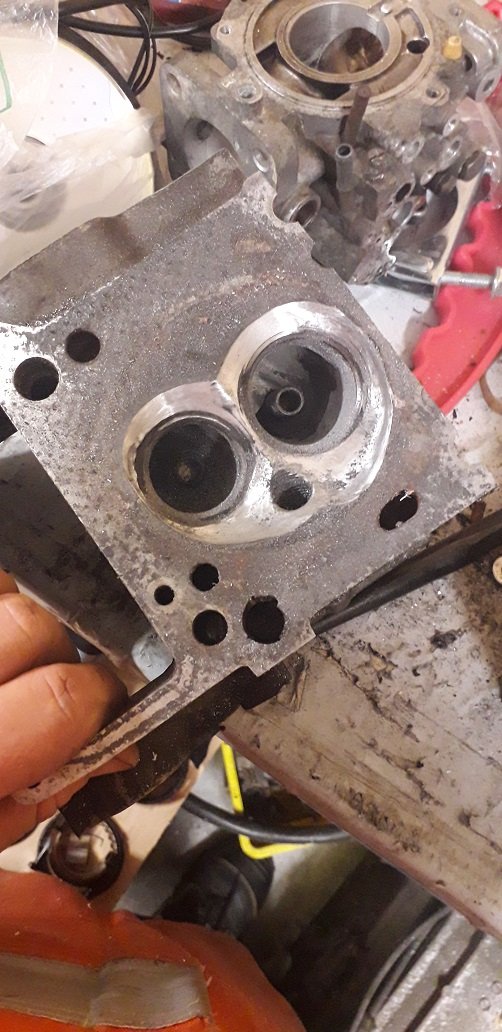
next step is the head. i have been gathering up parts for a while. some manifolds and carbs etc here chose a manifold to run and started matching up the ports and chambers Got a couple sets of carbs and rebuild kits, but decided that efi was the way to go, so gutted a pair of them, pressed in some aluminum and bored the centre out. Have fitted some injectors but havent taken pics yet. hope to finish the head in the next week, and get it to the shop for a skim. I got to get my act together, the family is coming with me to chch for nzdatsun nats in october!3 points
-
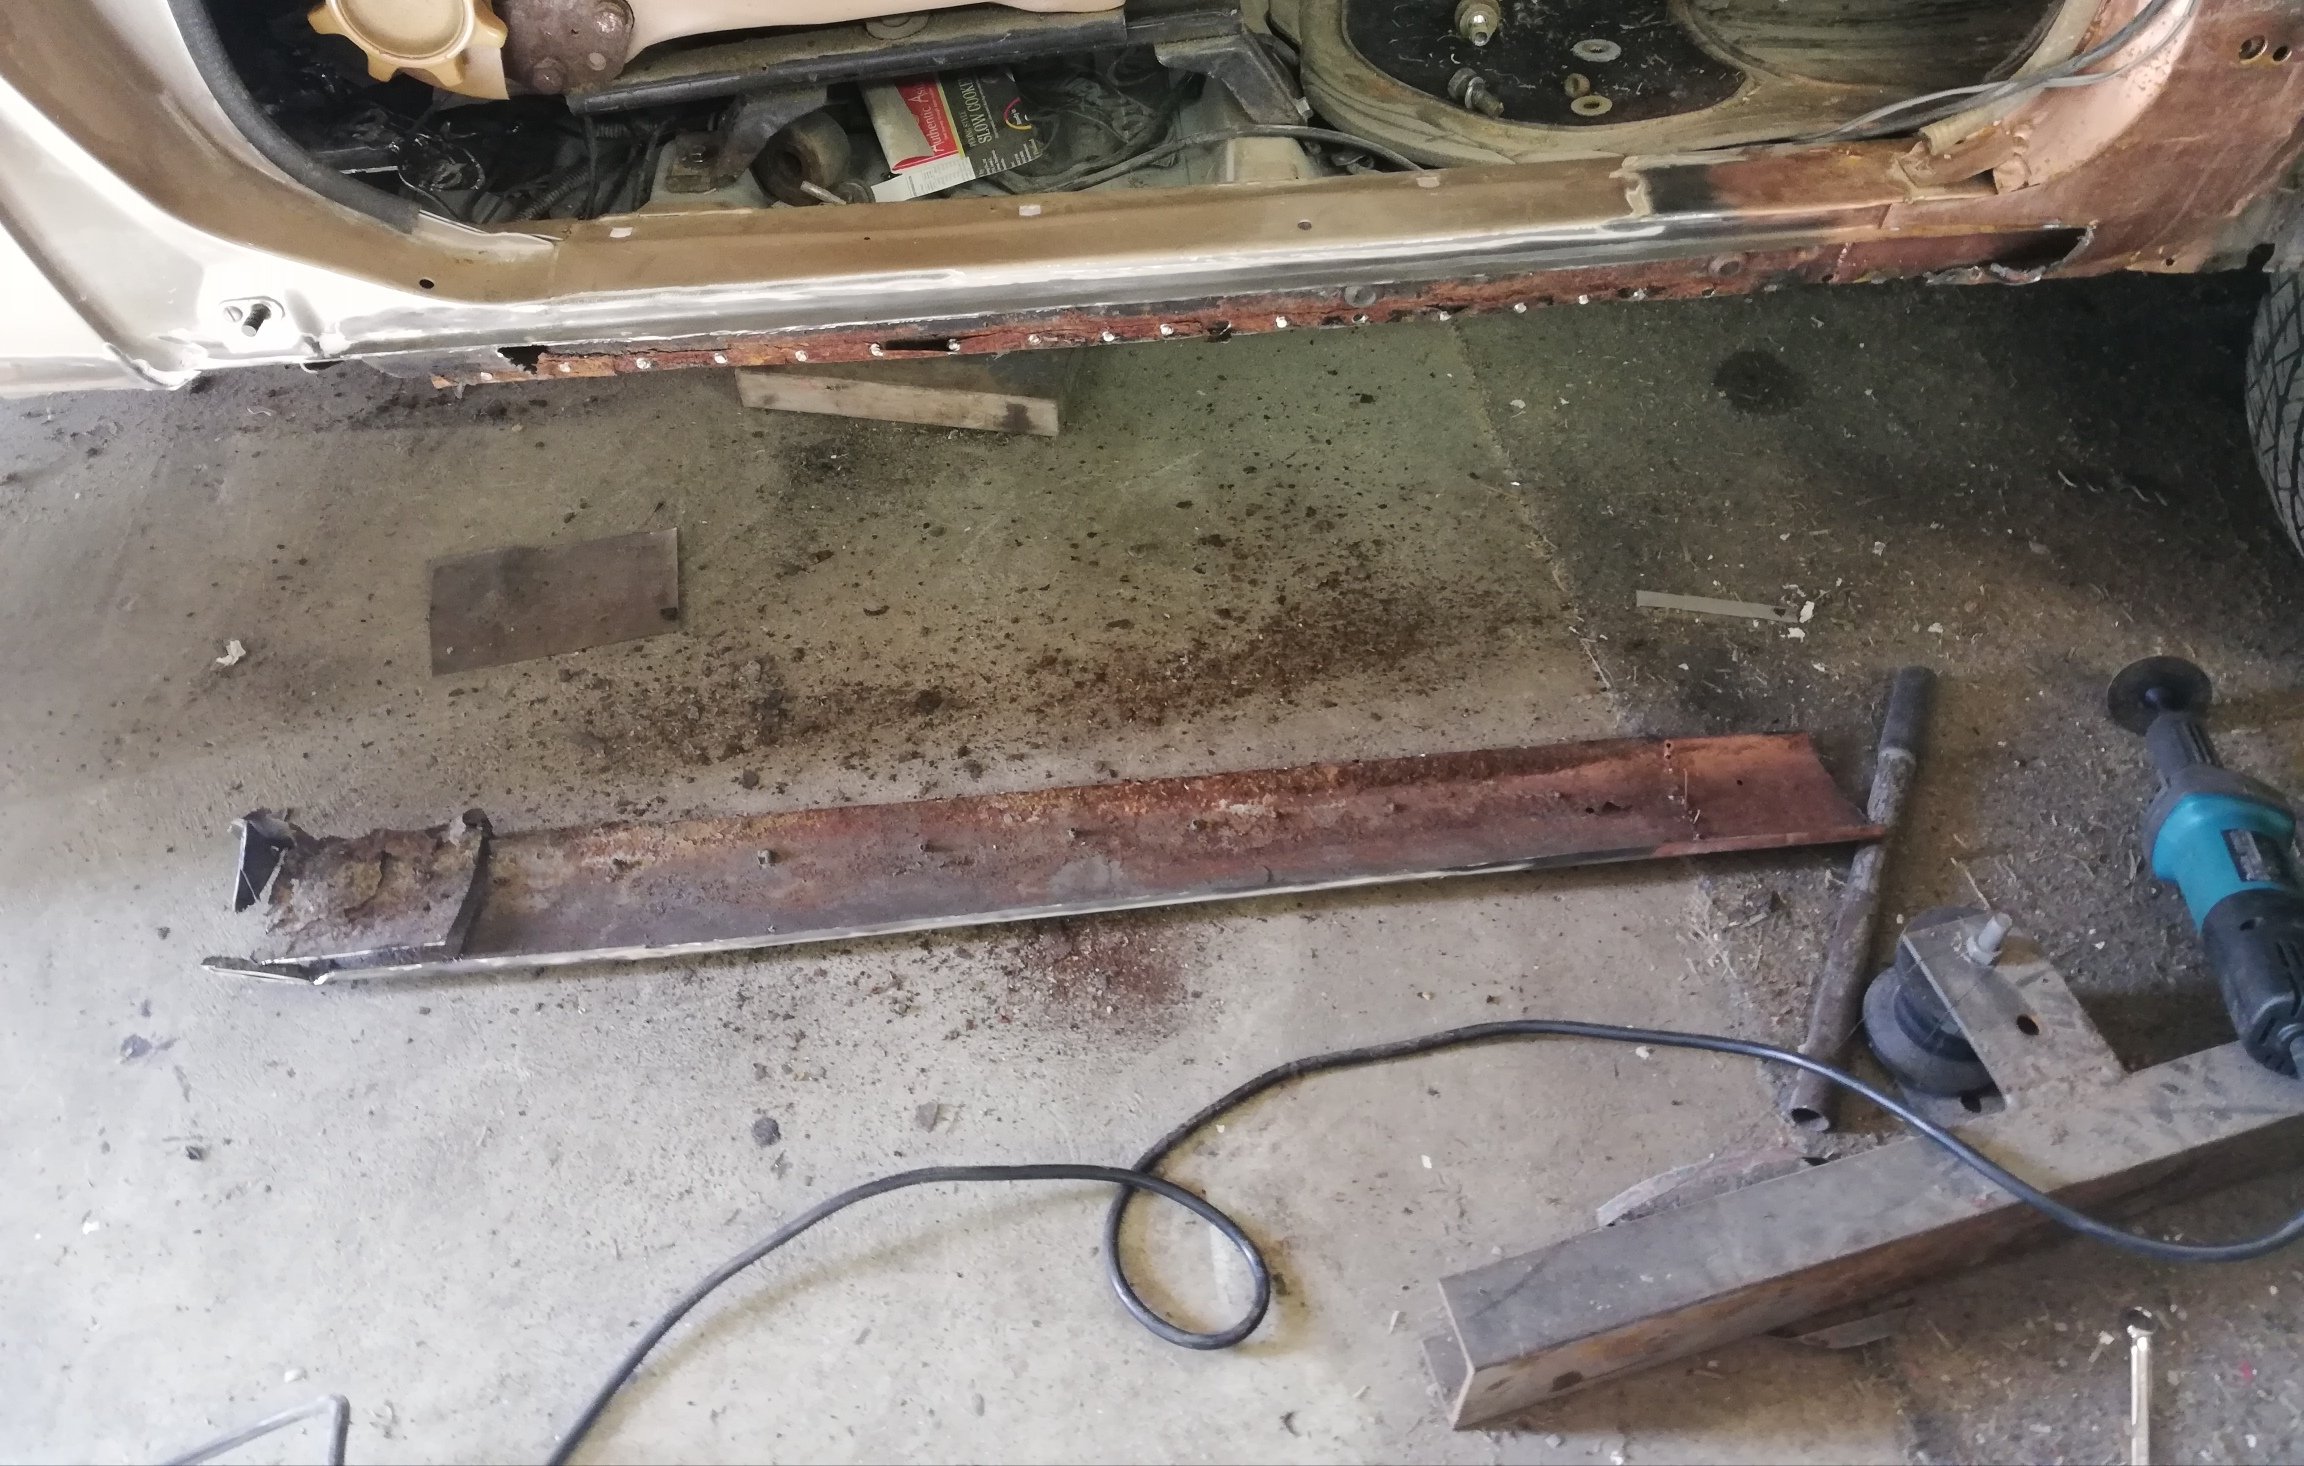
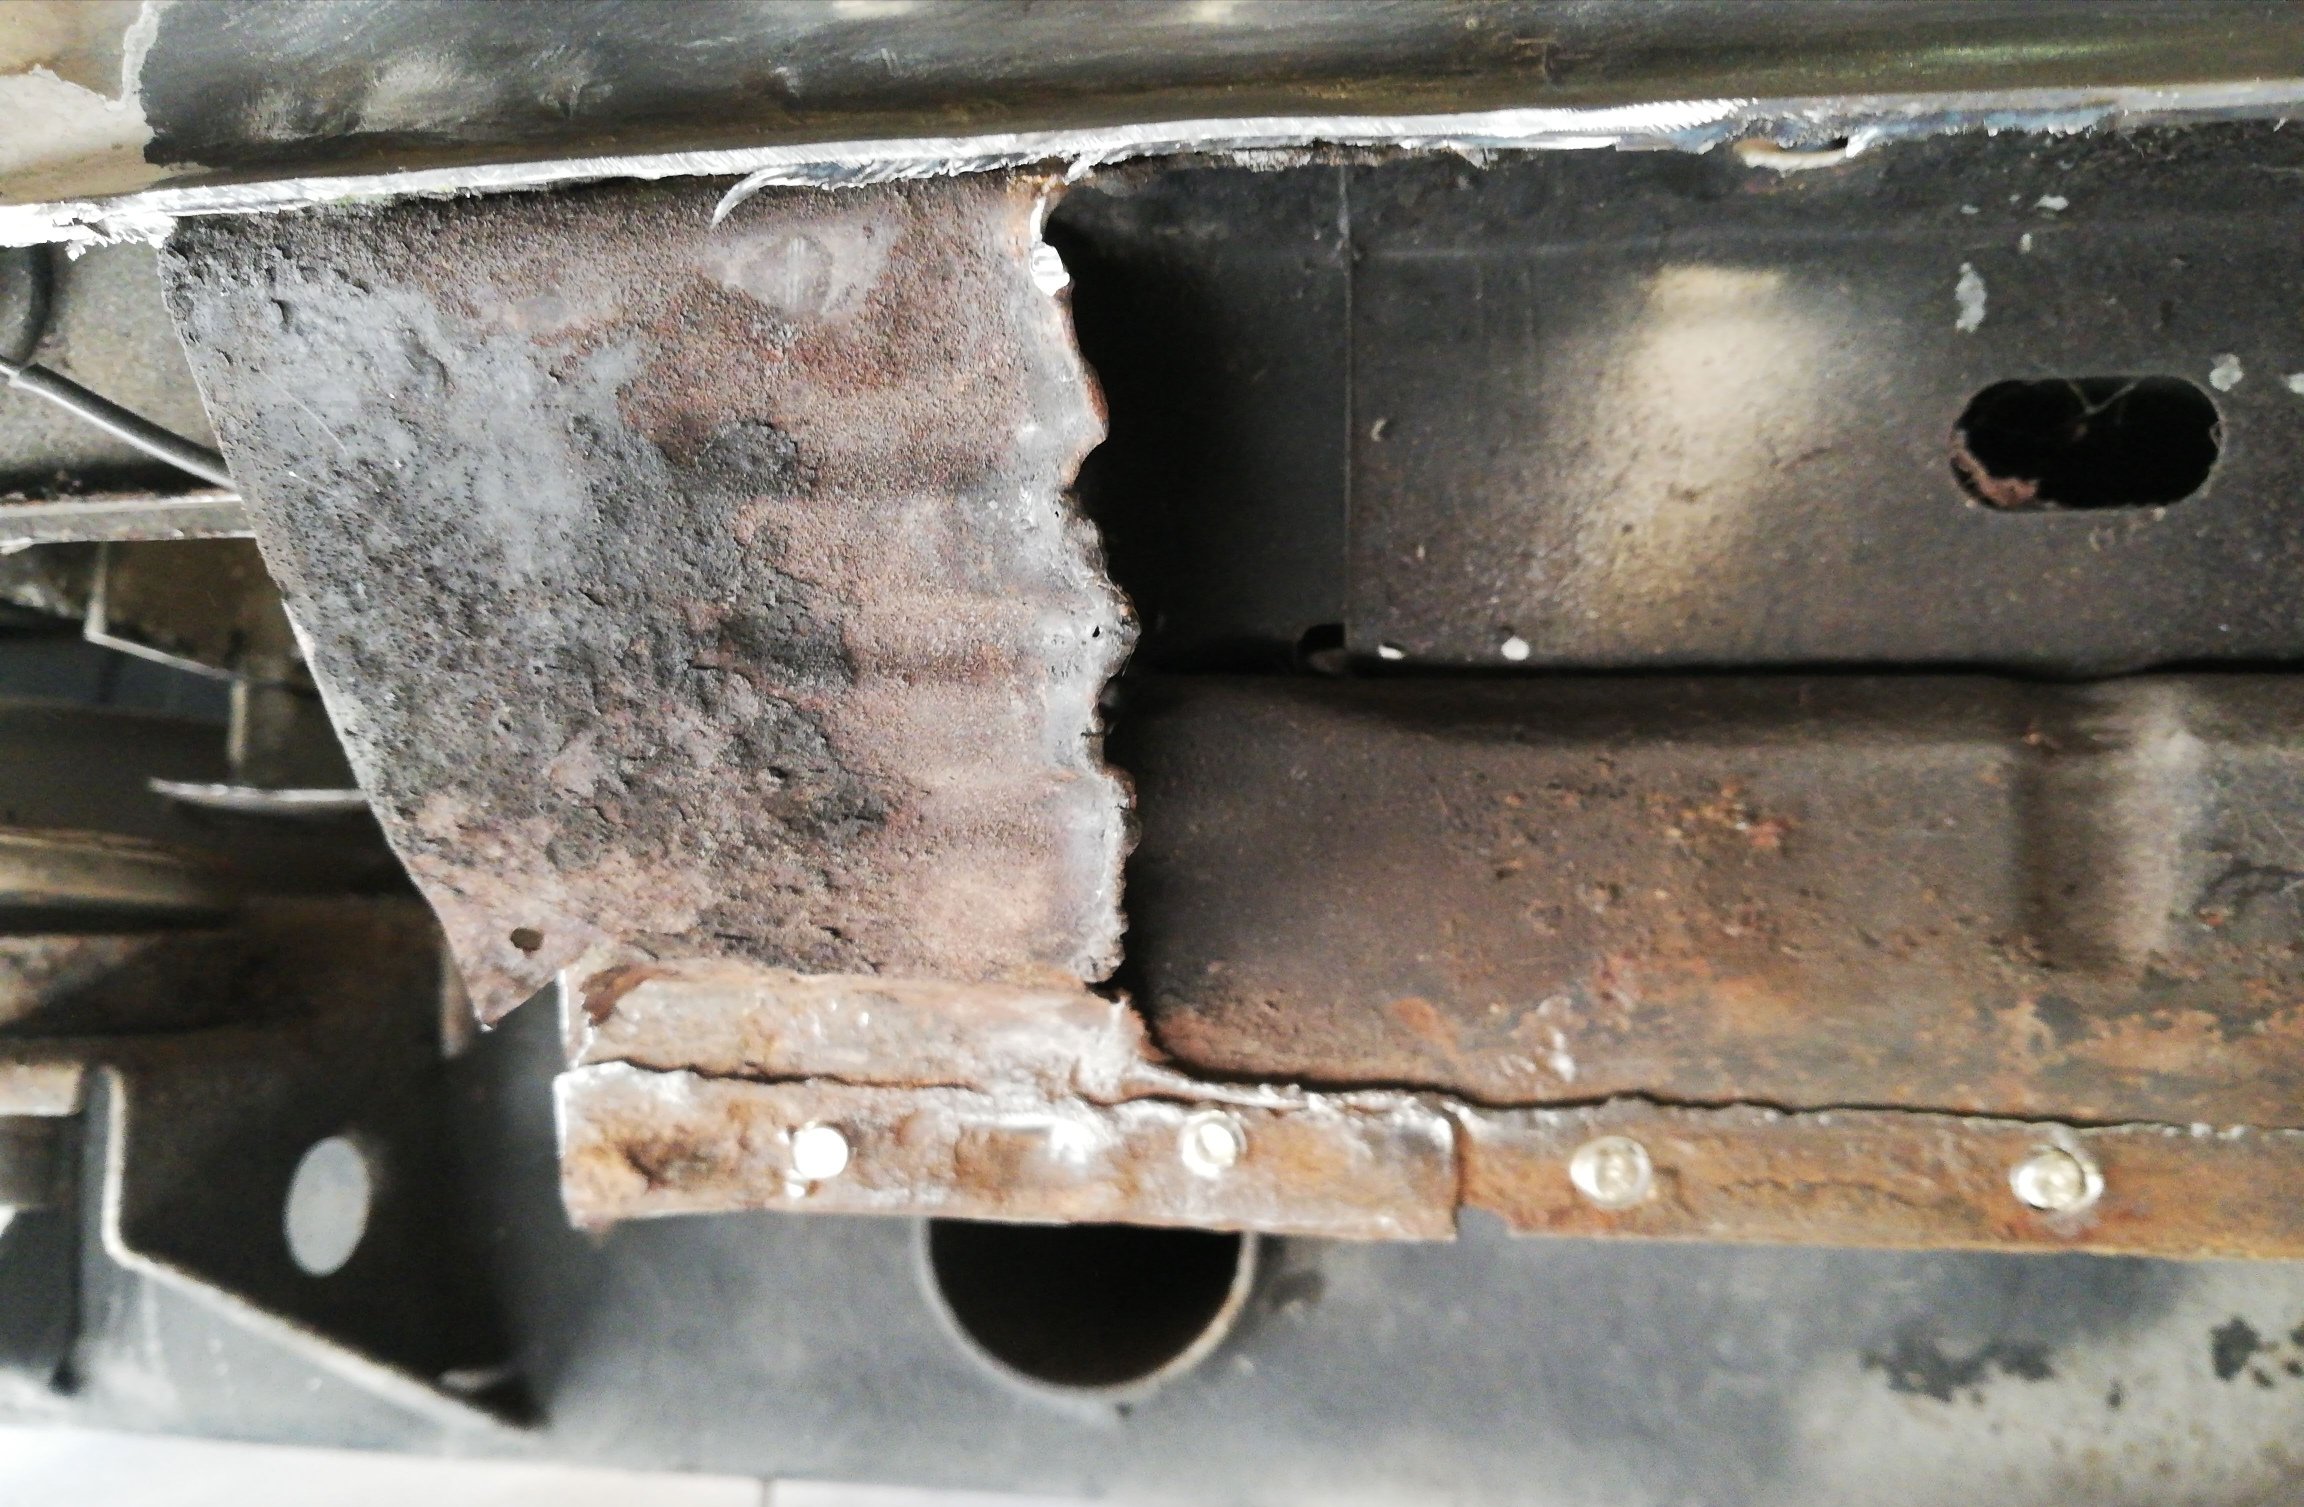
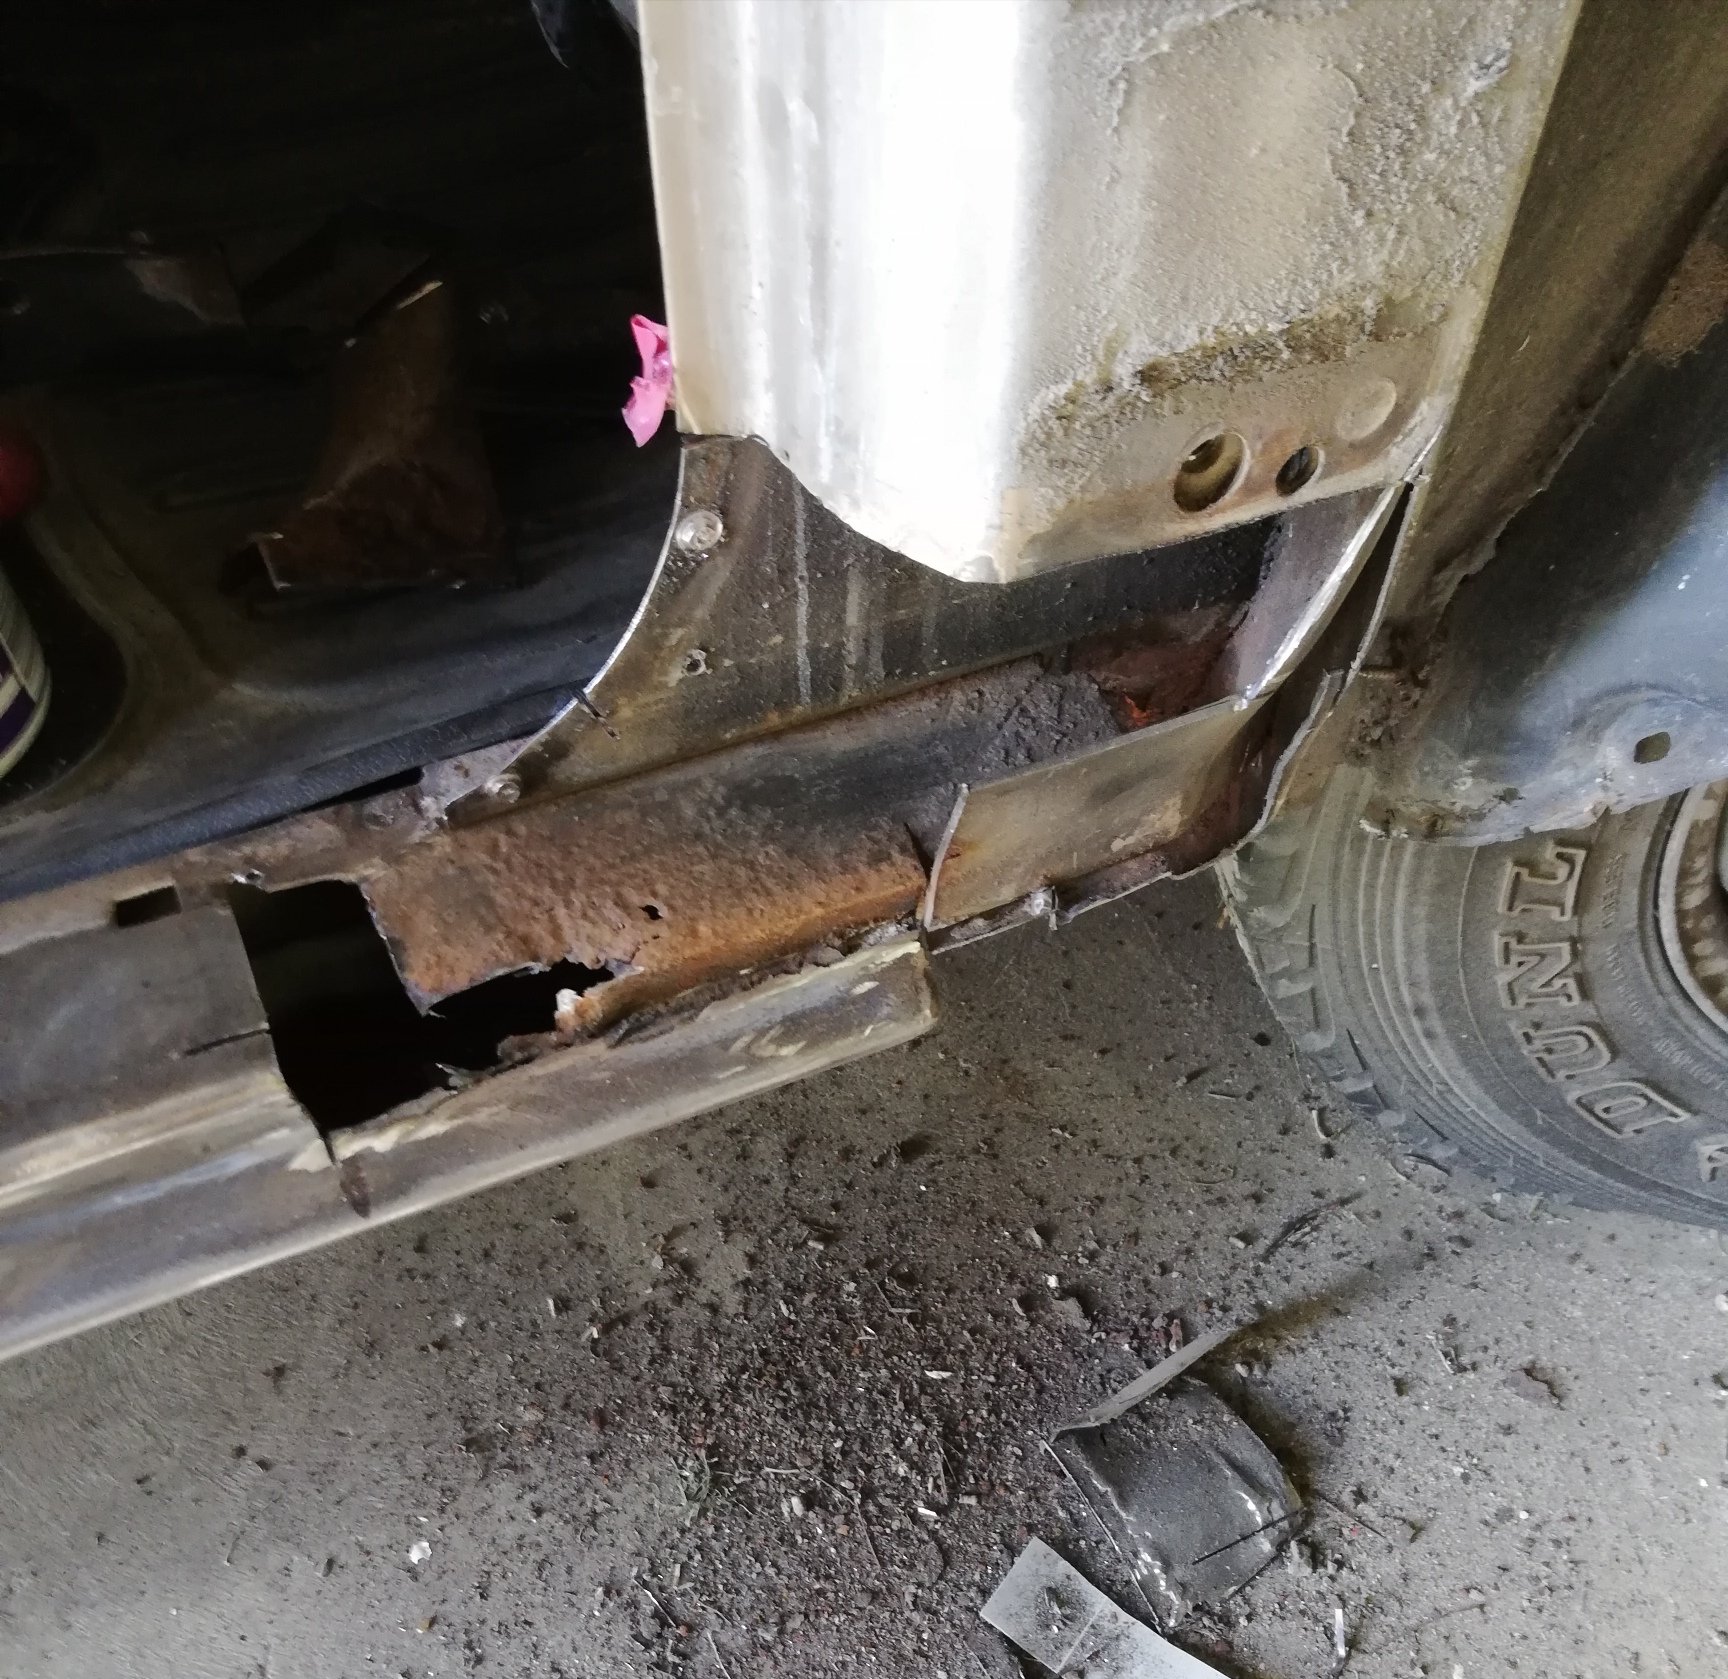
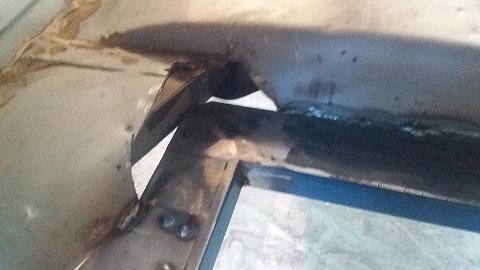
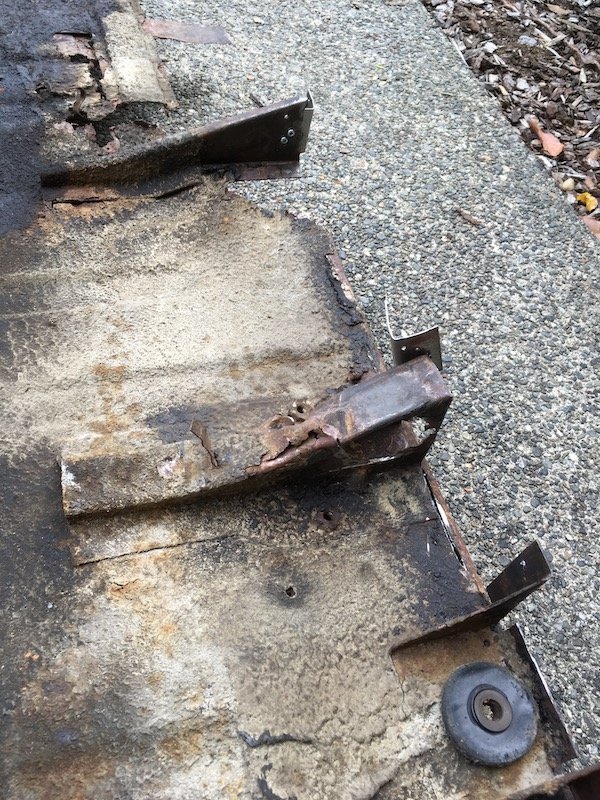
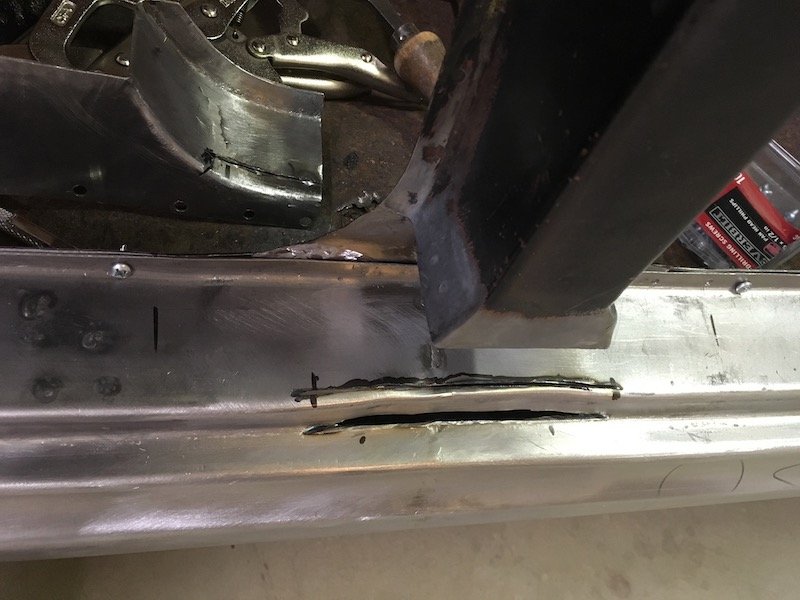
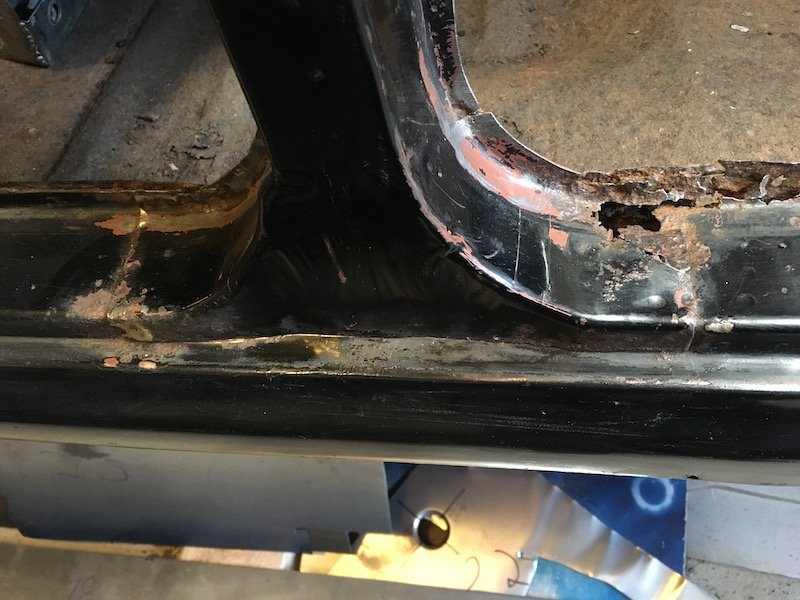
Yeah not sure what's going on here apprentice was let loose with the gas axe in here somehow. Guessing the sills were replaced at some stage. I think that strip of steel at the bottom is the remains of the original sill. For some reason the new one has a line of rivets. New every thing I guess Already done the front a while ago
3 points
-
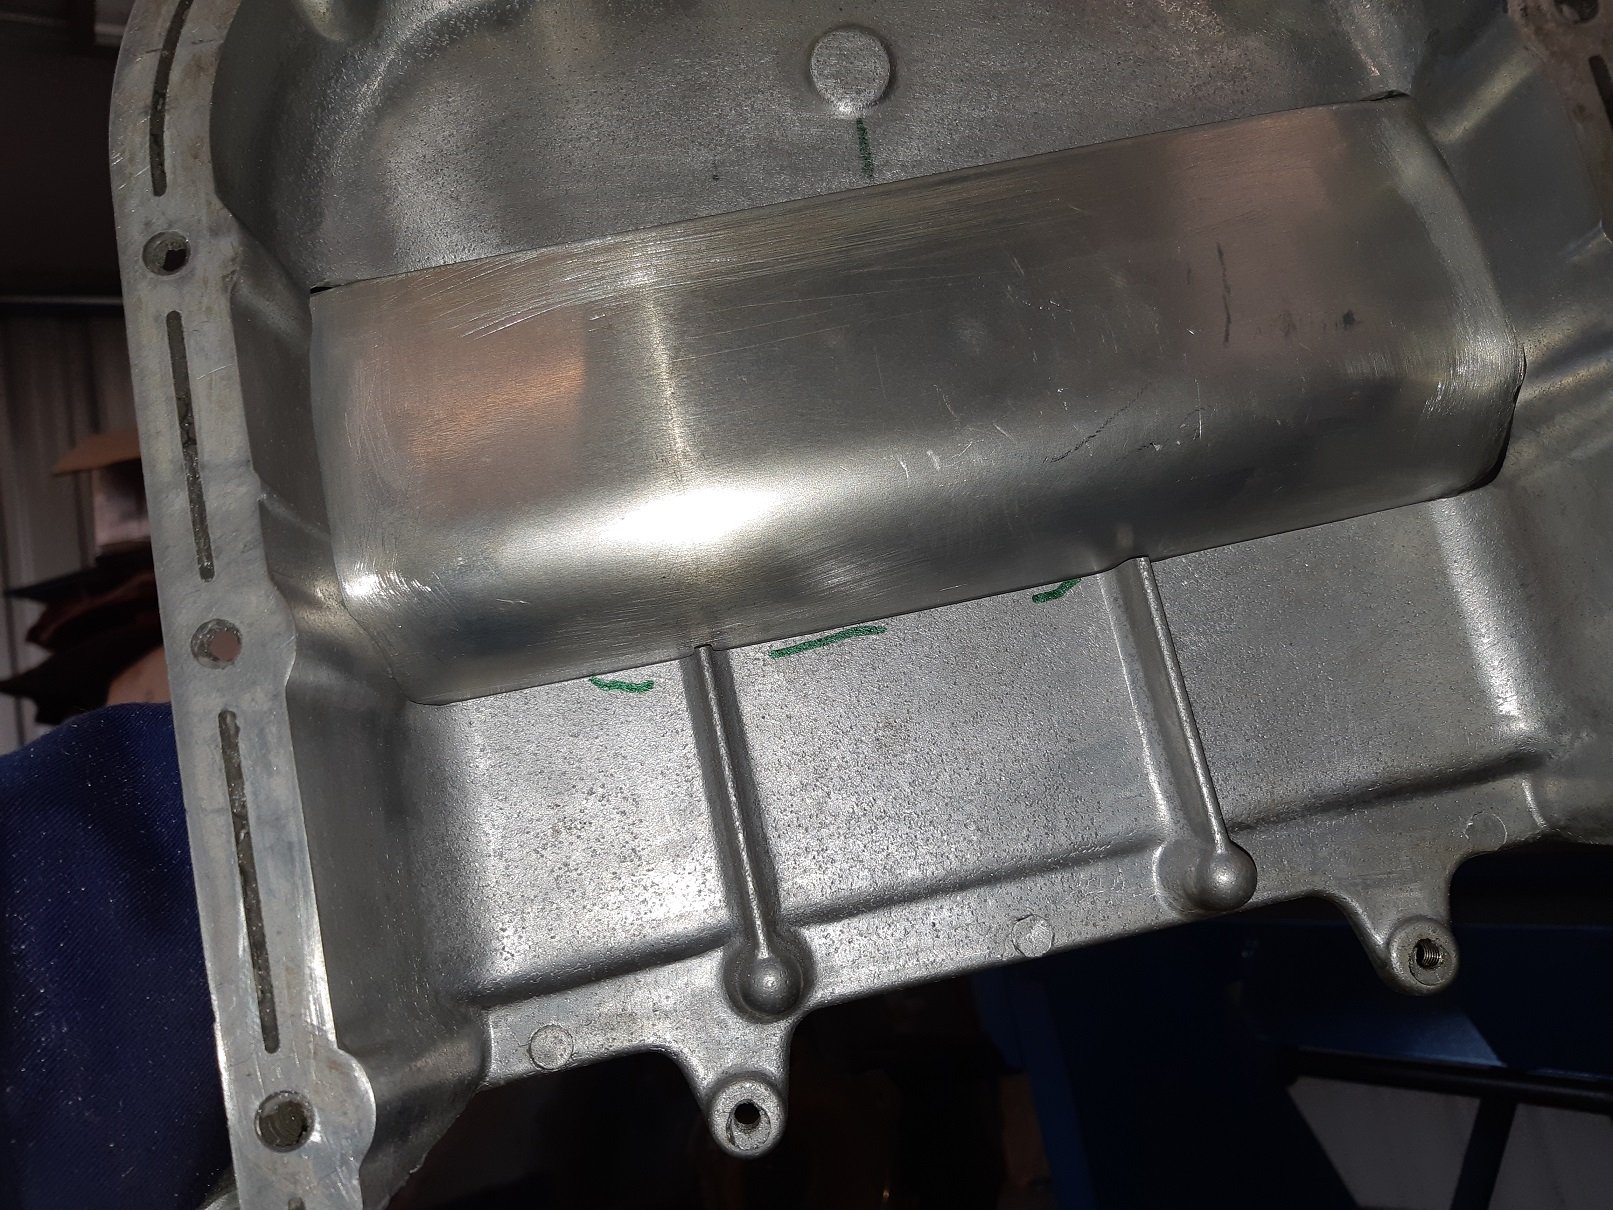
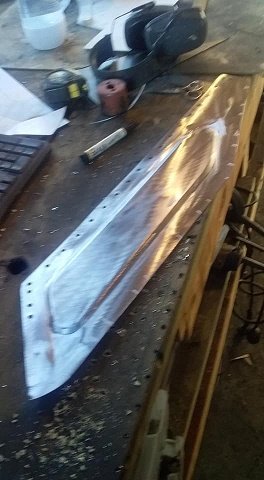
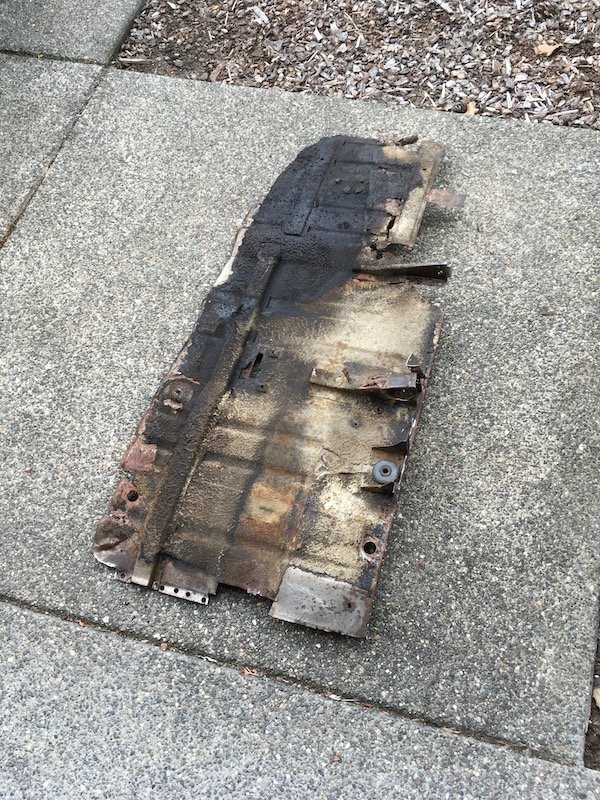
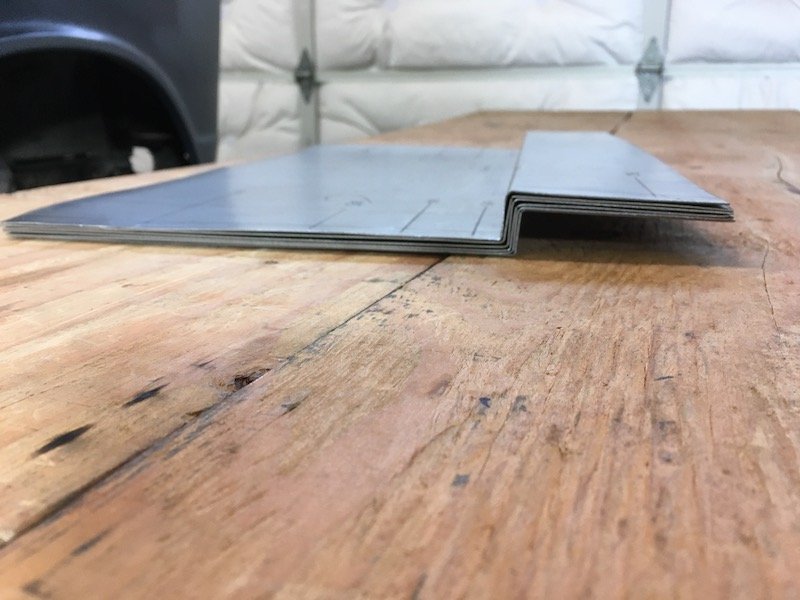
File file file file file file file file file file file file file file file file file file file file file file file file file file file file file file file file file file file file file file file file file file file file file file file file file file file file file file file file file file file file file file file file file file file file file file file file file file file file file file file file file file file file file file file file file file file file file file file file file file file file file file file file file file file file file file file file file file file file file file file file file file file file file file file file file file file file file file file file file file file file file file file file file file file file file file file file file file file file file file file file file file file file file file file file file file file file file file file file file file file file file file file file file file file file file file file file file file file file file file file file file file file file file file file file file file file file file file file file file file file file file file file file file file file file file file file file file file file file file file file file file file file file file file file file file file file file file file file file file file file file file file file file file file file file file file file file file file file file file file file file file file file file file file file file file file file file file file file file file file file file file file file file file file file file file file file file file file file file file file file file file file file file file file file file file file file file file file file file file file file file file file file file file file file file file file file file file file file file file file file file file file file file file file file file file file file file file file file file file file file file file file file file file file file file file file file file file file file file file file file file file file file file file file file file file file file file file file file file file file file file file file file file file file file file file file file file file file file file file file file file file file file file file file file file file file file file file file file file file file file file file file file file file file file file file file file file file file file file file file file file file file file file file file file file file file file file file file file file file file file file file file file file file file file file file file file file file file file file file file file file file file file file file file file file file file file file file file file file file file file file file file file file file file file file file file file file file file file file file file file file file file file file file file file file file file file file file file file file file file file file file file file file file file file file file file file file file file file file file file file file file file file file file file file file file file file file file file file file file file file file file file file file file file file file file file file file file file file file file file file file file file file file file file file file file file file file file file file file file file file file file file file file file file file file file file file file file file file file file file file file file file file file file file file file file file file file file file file file file file file file file file file file file file file file file file file file file file file file file file file file file file file file file file file file file file file file file file file file file file file file file file file file file file file file file file file file file file file file file file file file file file file file file file file file file file file file file file file file file file file file file file file file file file file file file file file file file file file file file file file file file file file file file file file file file file file file file file file file file file etc... Unfortunately I cut the hole too big so there are some large gaps. I didn't want to push the patch in further to close up those gaps because it would create an area where the oil would not drain from. Hopefully the guy I get to weld it can deal with those gaps. I'll be making a jig to bolt the whole thing to so it doesn't turn into a banana.
3 points
-
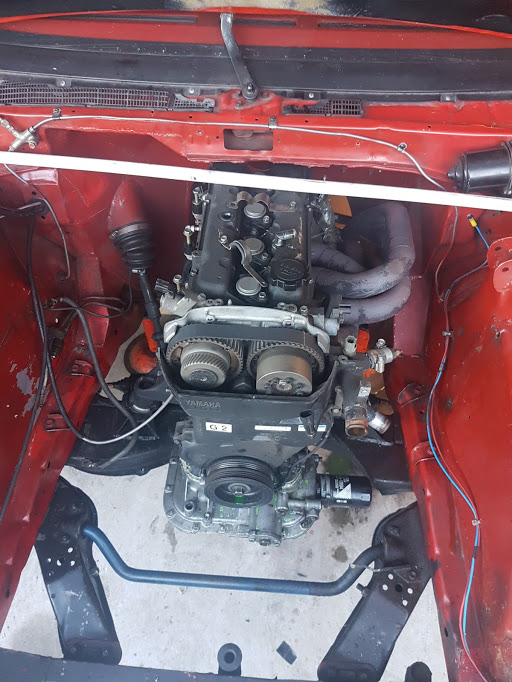
whoa, a year later... so i got the bottom end together But to get to this point took a few steps back and forward. I opened up the combustion chamber a bit and it turned out i would be around 12.5:1 comp which is not daily driver material. The bore spacing of the head chambers to the bores is lol so i had to mark each one to the head. The head gasket is also terrible spacing, but some guy in the us is getting cometic to make him a custom one to his design so ill try and buy one of them Gave the piston a bit of dish to drop the comp a little. Not sure if we did it the right way, but it worked out sweet
2 points
-
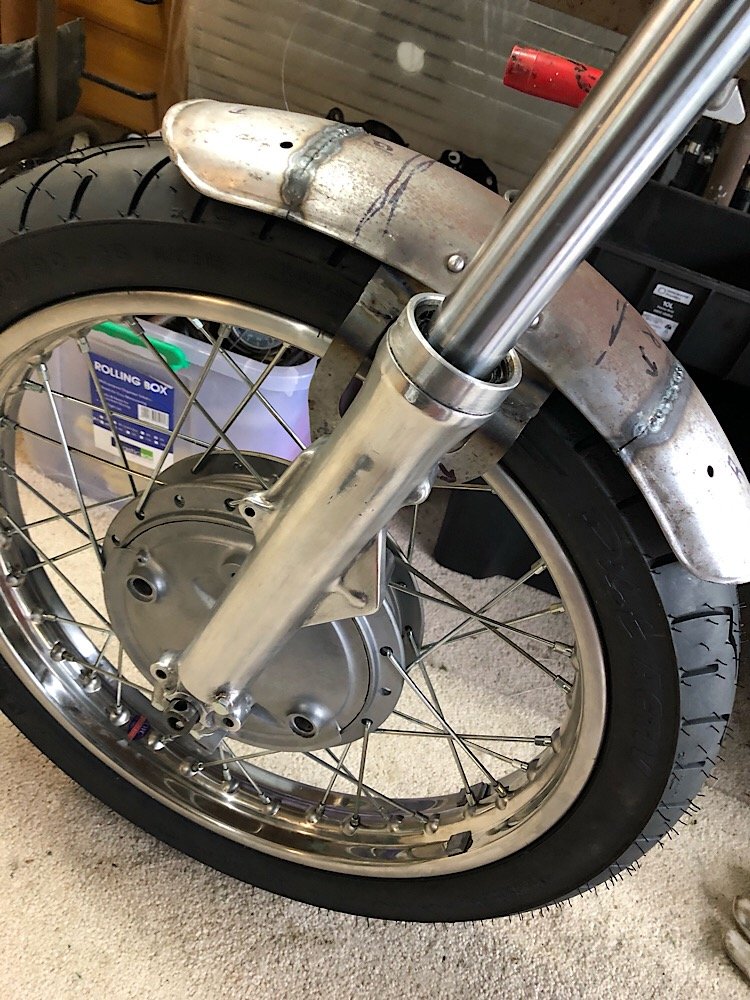
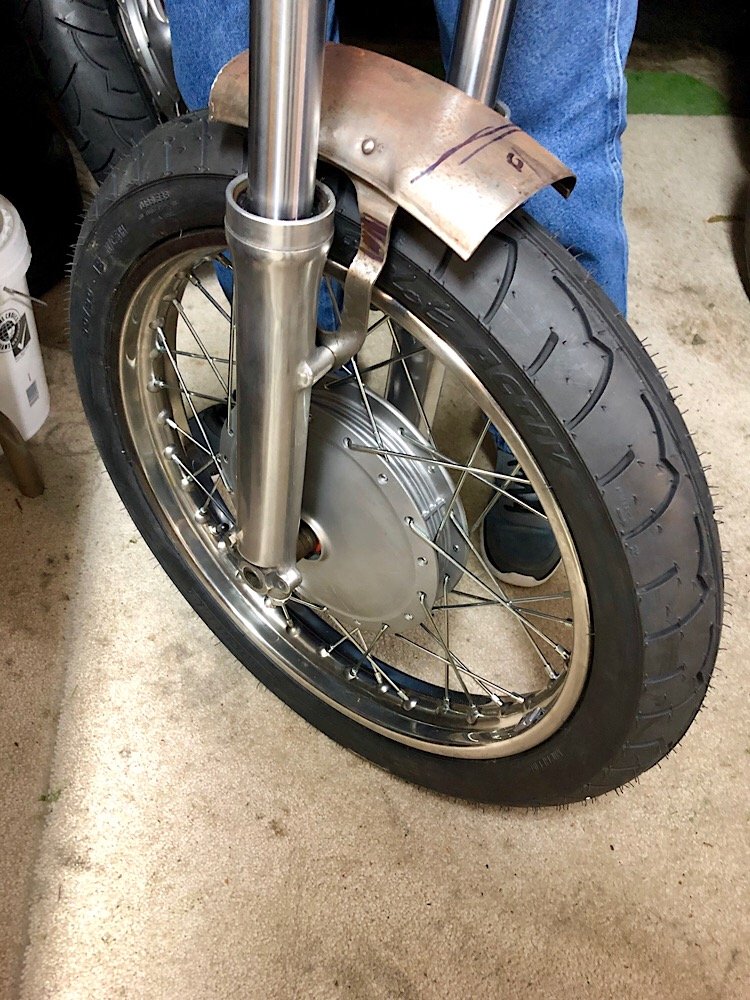
Spent the arvo shaping the mudguard after cutting it. Spot welded the ends back on and filled in the holes from the guard supports. Then cut 15mm out of the mounts to get the guard sitting closer to the tyre. Had to pre heat the metal before welding to get the MIGs weld to fully penetrate into the steel. Happy with how it’s all sitting now
2 points
-
I wouldn't be getting the discs machined on a car that I gave a shit about.2 points
-
I got quoted $40 ea removed from the car. Just bought new ones instead2 points
-
gotta say. over the fucking moon to drive it again, after so long.2 points
-
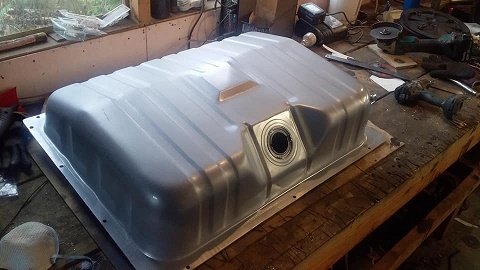
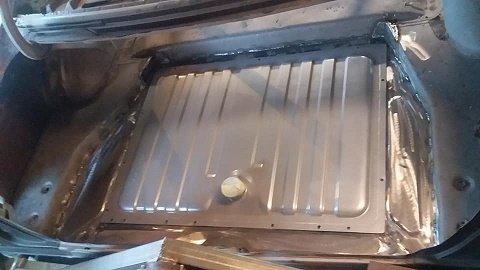
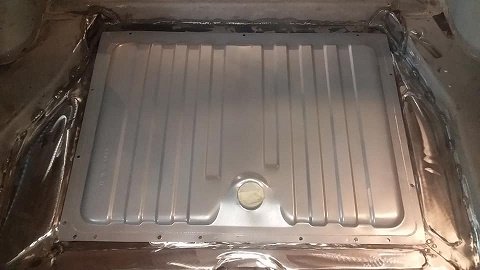
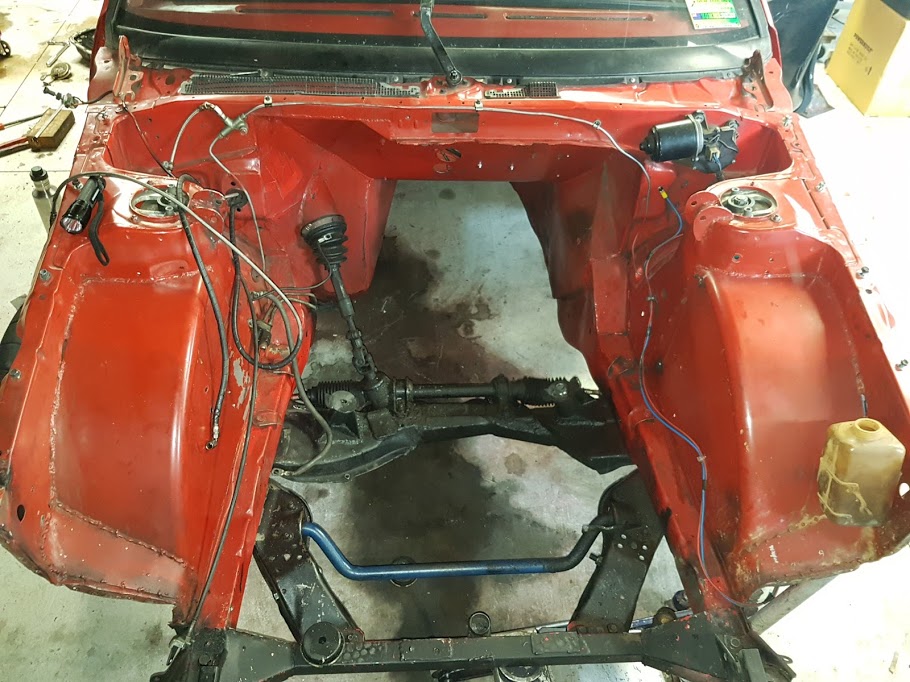
fuel tank boot floor time.... i wanted to change the tank as the cortina one was stuffed so i looked around and decide on a 68 mustang brand new was $210 landed..and that meant losing the boot floor wheel well (didn't like that anyway) it was in good condition and got blasted with the shell so i advertised it and donated it to another build. so i started with a massive hole in the boot and decided to use some box section and the main brace after i welded it up i measured again and found out i stuffed it up hahaha.....measure 6 million times kids and cut once..so after i cut 100mm out of it i welded it back up again so after getting it right i tried it in the hole...apart from having to cut a 45* off the back corners for the chassis rail it fitted. and i welded as much of it in as i could. then it was time to make new floor parts....starting with the rear part. then the passenger side then the drivers side. then made the 2 caps for the back corners from where i had to trim it for the chassis rails. then a quick clean up throw the tank in to see if it fits
2 points
-
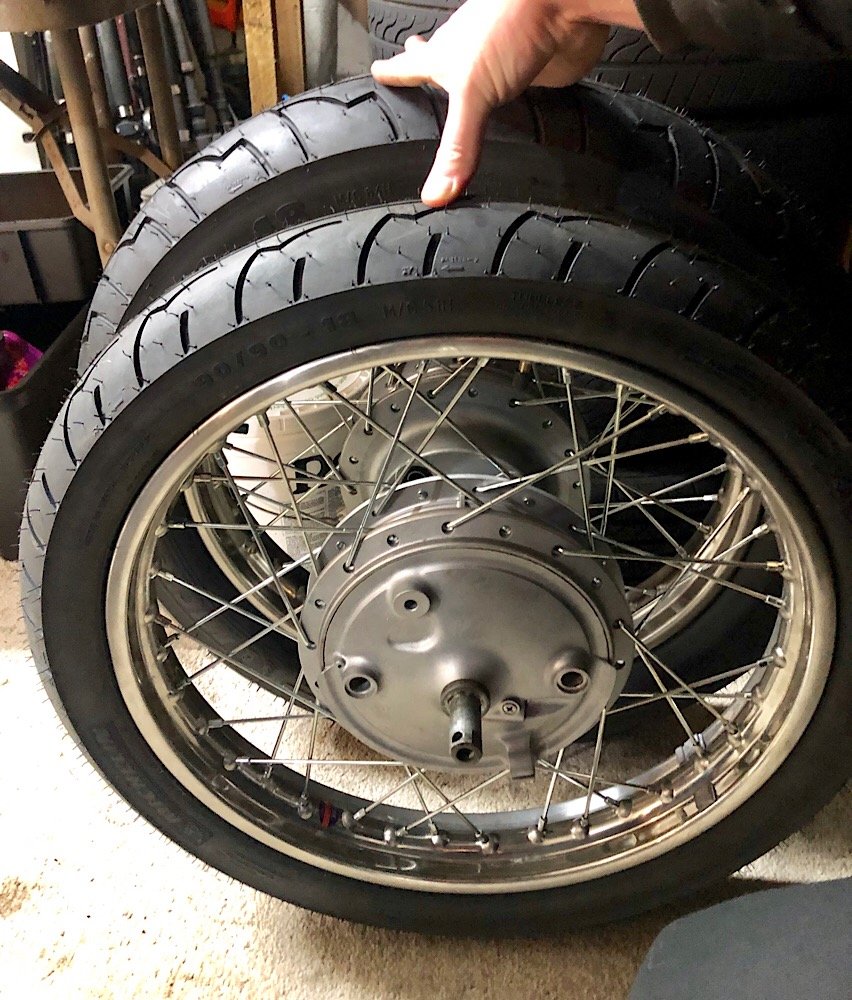
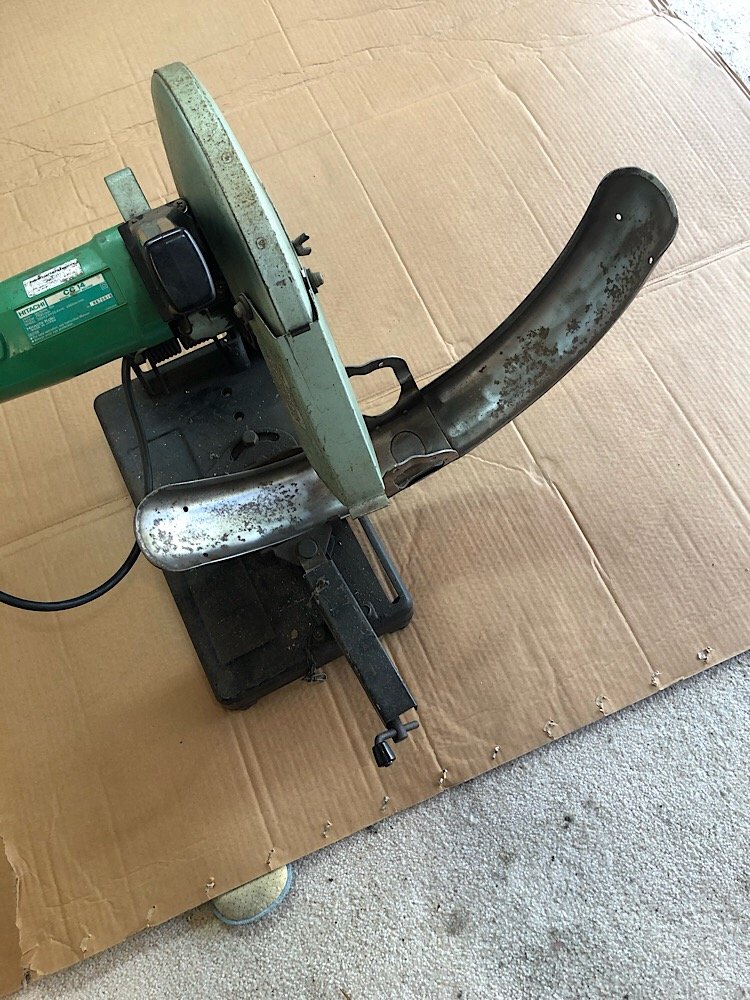
Got the tyres fitted to the rims. Went with Michelin Pilot Activ, 90/90r18 on the front and a big ol 4.00 on the back. Remember the 90/90r18 is pretty much the factory rear size which is now on the front. Looks tiny compared to the 4.00. The 4.00 has a 102mm tyre wall height while the factory 81mm. May swap out the rear for a Michelin Sirac as they have a 110/80r18 rear size which may suit the frame clearances better. Plus they have a sweet semi trail blocky tread pattern. With the 90 on the front it’s a squeeze to fit them under the factory guard but it’ll go. Got chopping with a drop saw, almost felt guilty as it was a mint guard. Will re weld on the ends to keep the nice factory curves. and lower the mounting brackets so it’s more flush with the tyre.
2 points
-
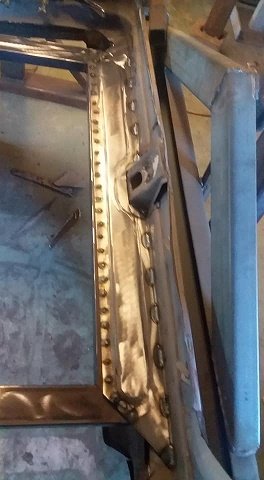
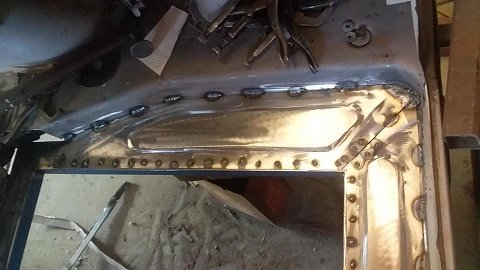
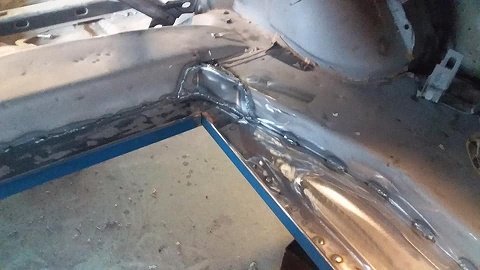
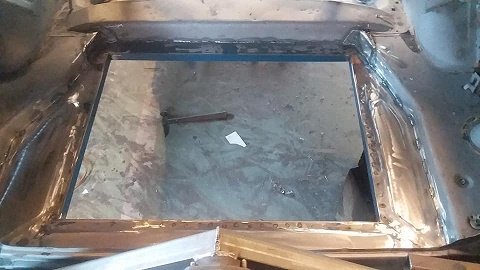
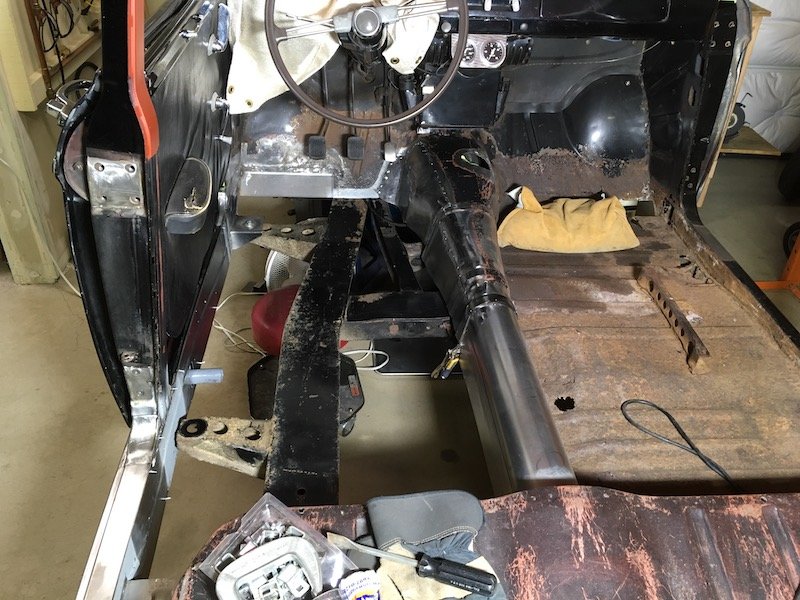
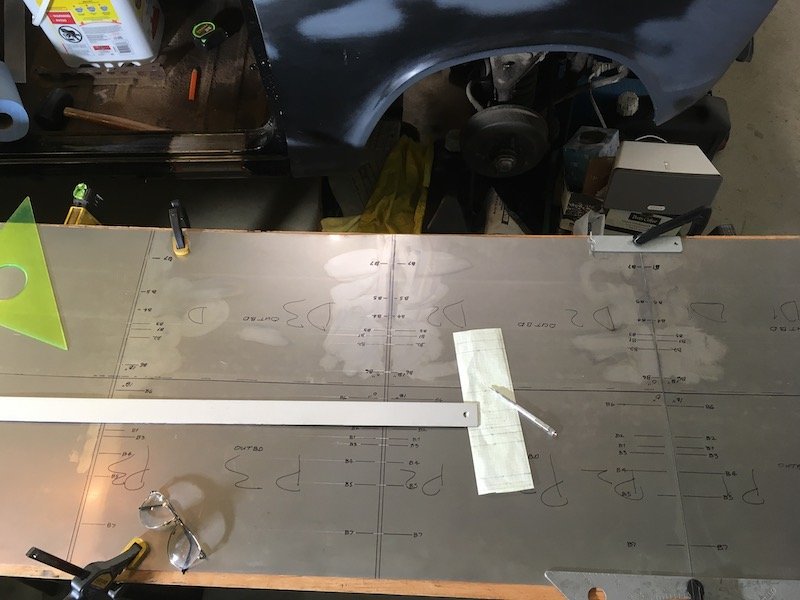
Continuation of the previous post with several more pics. The left middle/side patching of the rusted trans tunnel. As it started out with the fore and aft sections already tacked in. Made a patch to try and duplicate the existing contours and set an upper tape trim line. The black sharpie line was only a guide for torch heating the metal and asphalt undersealant on the other side to get it soft and scraped off. I didn't want my cutting tools getting gummed up. Cut the rotten metal out. Rubbish now. It would have been difficult to get a good weld against it. Cleaned up the surrounding metal. Did some test fitting to determine the trim of excess material on both ends. Final fit and ready for tack welds. Initial tack welds completed. With all the surrounding metalwork taken care of, I proceeded to cut the left hand side floor out. The seat mounting bracket will be salvaged. Same for the reveal or surround for the hand brake penetration. The underside. Planned underside salvage items include the long fore and aft 'Hat" section and body mount bracket. Other brackets are too badly bent, battered or rusted to be salvaged. There are four other simple flat or nearly flat parts that will be duplicated. I'll double up on whatever details are made to be ready for building the right hand side of the car. Never made a scratch built floor before, only patches and brackets. It's going to be challenge with the wide stiffening beads, elevation changes and 3D shape near the mid-body mount and rear footwell. No guarantee of success. Some random extra pics. Sleeping Bluebird with dreams of many road trips past and to come. I've now completely used up a four foot by eight foot piece of 0.9 mil thick sheet metal and need to buy more. Still got a long ways to go just to get the left side of the car finished. I'll post again later with more progress when I get the left side finished. It could be three, maybe four months or more. Discussion: https://oldschool.co.nz/index.php?/topic/60267-marts-pl310-61-datsun-bluebird-sedan/
2 points
-
Looking good, recommend learning how to use a router and giving laminated ply a go. very on trend lol. about $120 for a sheet, not bad IMO. Flip with a router you can make so many things! I just made this from scratch (Stripped the room bare), learning how to router on the job. Don't recommend Bunnings ply! GIB plastering isn't all that difficult either. (handles still to be fitting to all draws)2 points
-
Whaddup OS! Foremost, it's been a while.. Since my last old(ish) car, I've been pretty absent from OSNZ due to new car life. Turns out that new car life is actually not what I had hoped and JZXs aren't really my thing. I'll skip the sentimental shit so tl;dr, I wanted an old car again for the last year or so. Two years of JZX ownership was cool, but I was fiending for a 1G-G again.. Well around a month ago, I began looking for a GX61 as thats what I've always wanted. It's a shame that I'm a picky bastard as limiting myself to factory twincam24 models (yikes) meant that I was unlikely to find what I wanted easily. I had a few leads to follow and quickly learnt that what I wanted in the GX61 scene was going to cost me quite a bit. Acknowledging that, a couple of weeks ago I opened up to this idea: What if, instead of getting something familiar and "dream car tier", I wing it and get something completely new. So putting this into practice, I decided to view a Y30 Gloria hardtop located in Dunedin. Some of you may know the car. It came up a week before the hand-in date for my thesis, so I chucked a deposit on it (oops) and booked flights for the day after uni finished for me. From pics and description, I thought I knew what to expect. Well Saturday morning came around and Zeb picked us up from Dunedin airport. The mini-tour of Dunedin was great and it was a pretty good way to fill in the morning before Y30 viewing. We drove past where the Y30 was located before viewing for a quick sneak peak.. Well it was apparent right then that it wasn't what I was expecting. For the money I was looking at paying, it was too much work to get it to a good 'base' type spot. It was this point when I realised that I'd be doing my South Island trip via bus or rental instead of in my own old car. Pretty sad, but I remembered I had a back up. An MS112 Crown hardtop in 033 white located in Nelson. To keep it short, it belonged to OS user: Slacker_Sam and from the pictures, it appeared just what I was after: Clean & Tidy; 80s; sedan body. To summarise, I managed to coordinate the trip to Nelson where I'd view and then buy if it was right. Turns out it was what I was after as I was heading to Picton in it later that evening. The trip back home wasn't completely without fault. A suspected dicky alternator killed the battery 45 mins before ferry boarding. Bluebridge moved us to the next ferry for free and a replacement battery had the Crown roaring again. In the North Island, Google Maps directed us through the Tararua Forrest Park via Akatarawa Road.. Holy shit, what a road.. The poor 5M felt it and developed that 'hot' smell that M series seem to produce. These fucking things have the thermal stability of an RBMK-1000 in heat... A coolant drip in two places which I was aware of in the South Island was likely the culprit, however I was loaded up with some extra water and i banged on a couple of extra clamps to put my mind at ease. I kept my eyes on the temp gauge like a hawk despite its potential inaccuracy. Thankfully the road didn't induce a 5-MRBMK meltdown and we made it back to nice open roads where the M could bask in cool fast moving air. Other notable moments include: The AC belt lunched itself on Desert Road, however, I brought tools with me including a socket set which allowed me to remove the belt in a minute and keep on our way; The trans began slipping from Taupo onward. I felt it earlier but its here where it became pretty clear. As of now, I'd say the trans needs attention. I'll flush it and see what that yields, but my sparse knowledge of torque converter automatics leads me to believe its likely lunched. Not an issue though as I'll later explain.. For now, here are some pics: Some things pertinent to the car which I really enjoy: It's untouched. No shitty headunit, no "mods", NOTHING. It has a towbar and some Bridgestone Texas alloys which I consider a cool bonus; Blue interior. 033 white and blue interior go together perfectly; OEM floor mats, need I say more; Dealer sticker and plate frame, a WOF sticker from 1997 and some ancient JAF sticker on the door; Blue glass all around. There is more, but I really don't want to ramble more than I am. I'll make a new post outlining my first impressions and initial "going over" of some bits. Discuss here: https://oldschool.co.nz/index.php?/topic/60957-michaels-ms112-crown-hardtop-discussion/1 point
-
Well she's back up and running again. Head went back to engine builders to get some shims installed al align the adjusters more to the center of the valves, added more of a radius on the adjuster, changed the type of oil I am running. Found the new valves have more of a contact patch on the valve also as the original set had a large chamfer but the new set is much much smaller. Hoping with the above modifications it will not happen again. Engine builder seems to think the oil I was running could have contributed to the issue.1 point
-
i wish I had better pics of the R32 to be honest.. I put a lot more work into that one, especially the doors, they swung open and you could move the windows to fully down or click it back up into the raised position. modified the factory engine detail to make the turbos bigger. made individual intakes and filters instead of the plastic airbox arrangement, intercooler and piping, full exhaust etc. the paint was like 3 different layers to and weathered to give it the appearance of a drift missile thats been resprayed in the past but skimmed a few walls at the track. you can actually see the different colours showing through in some spots. I just remembered it originally came with a clear bonnet, probably should have left it clear but it just looked too fake so it got a paintjob too.. the AE86 never got finished, I just ran out of enthusiasm. Just had a quick look at it before and it looks soo bad now, the paint is all filthy and coated in dust poor thing...1 point
-
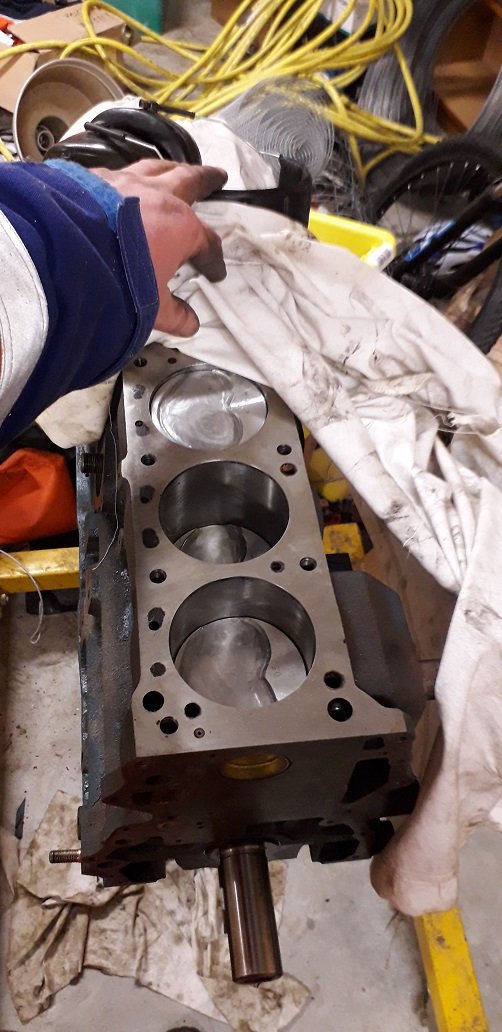
Pistons out of the block. Bores should clean up with a hone but we'll see and the crank looks like it just needs a polish. New eagle rods and Ross pistons to go back in.
1 point
-
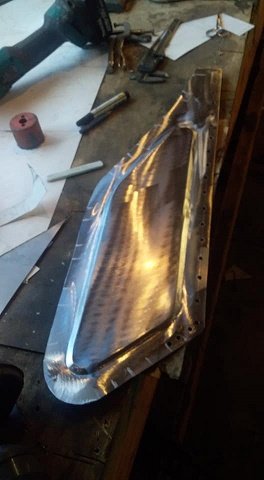
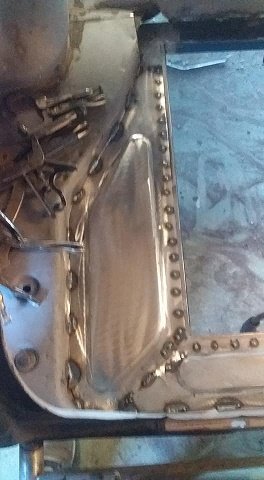
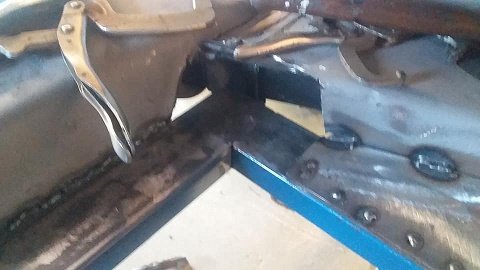
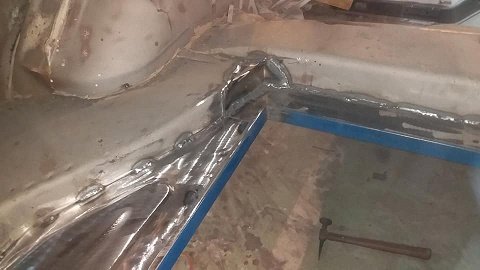
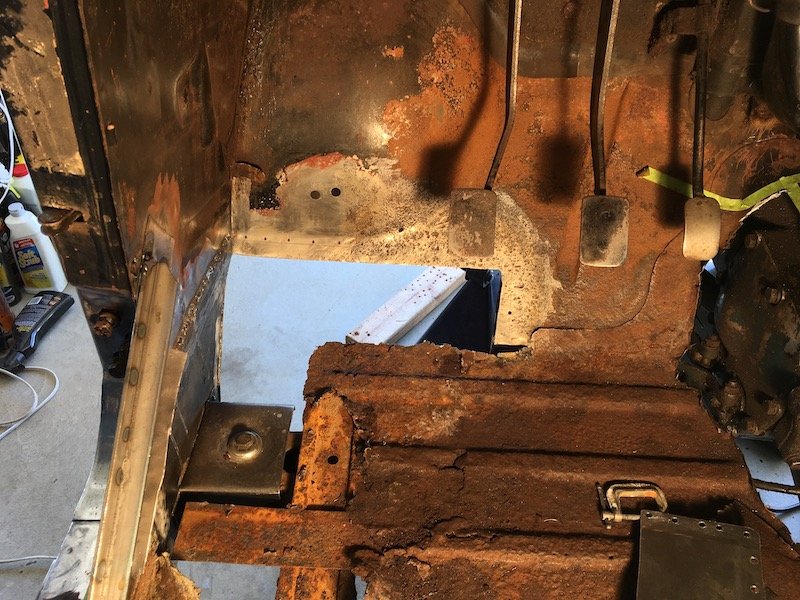
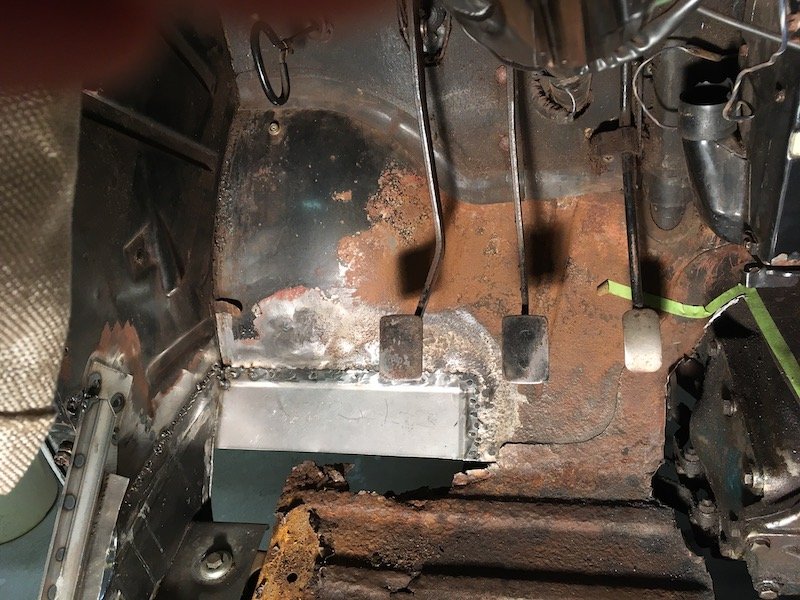
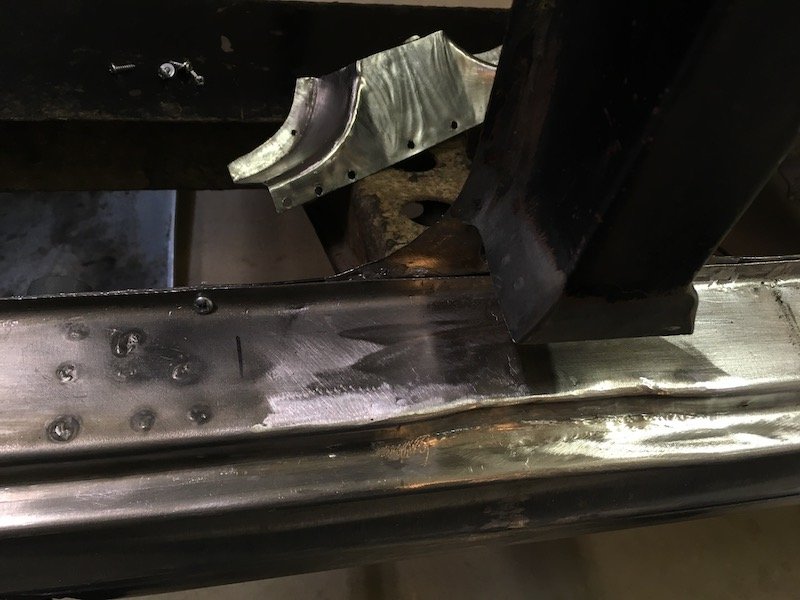
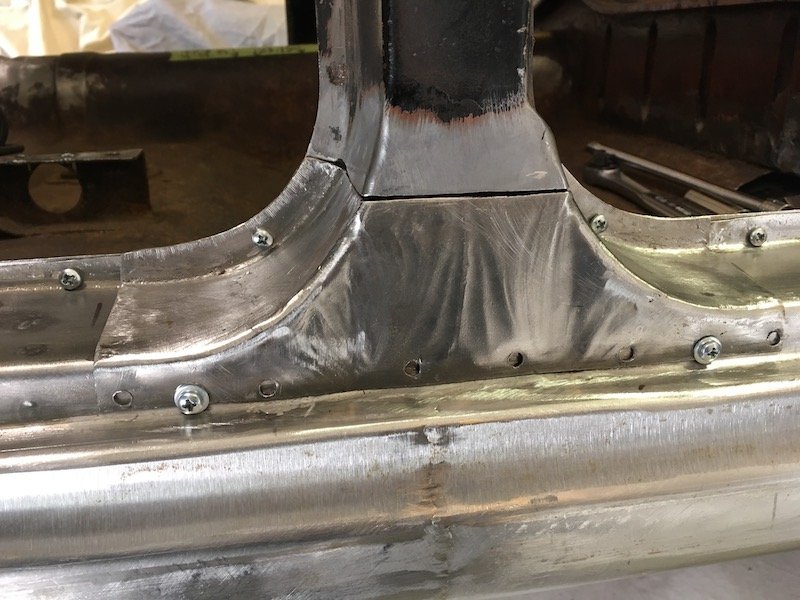
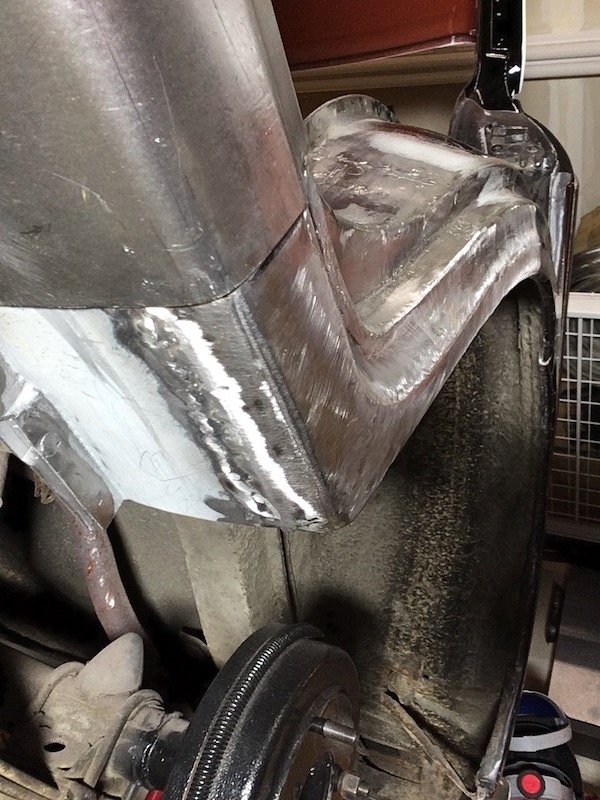
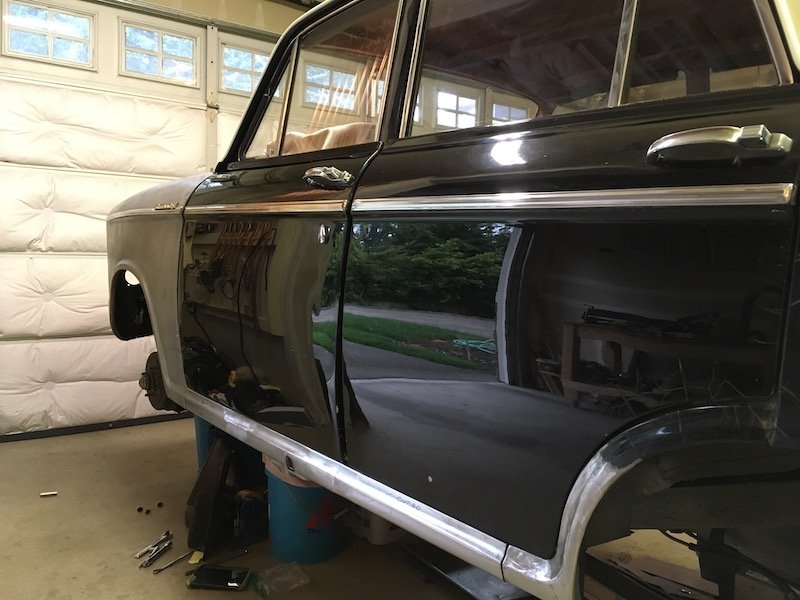
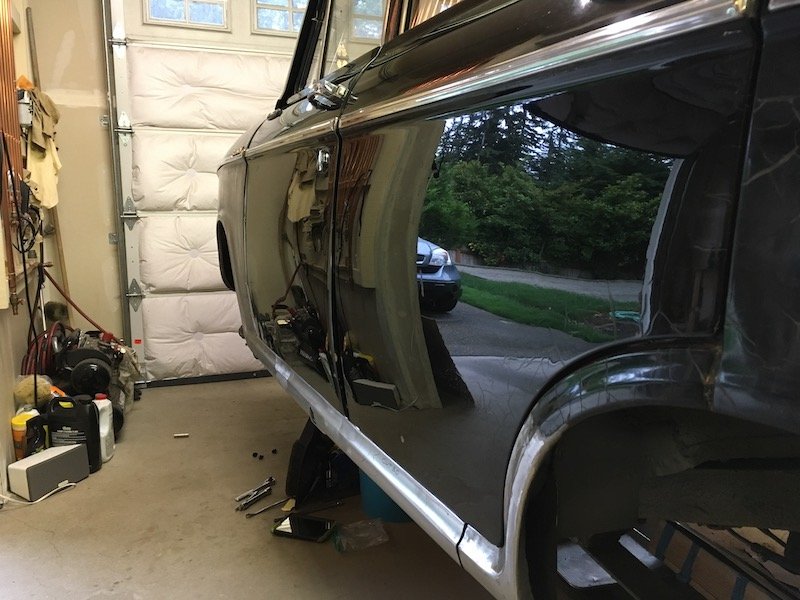
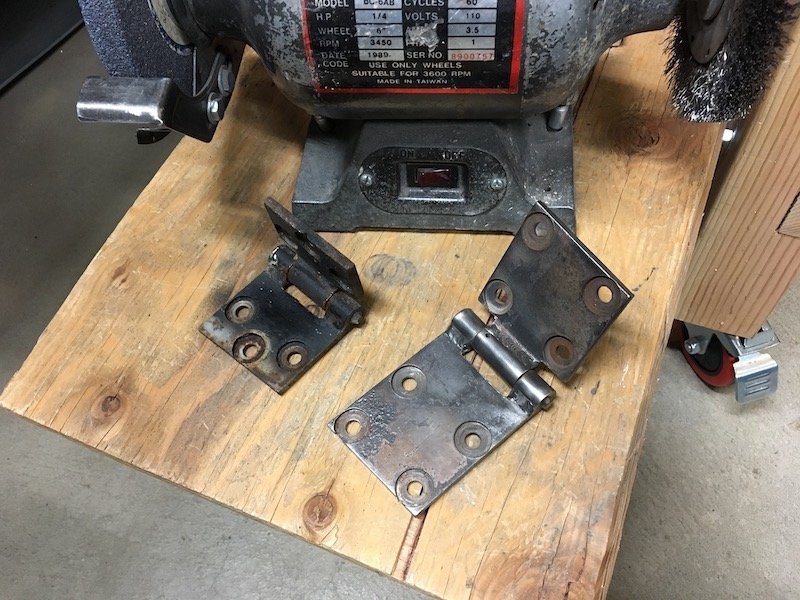
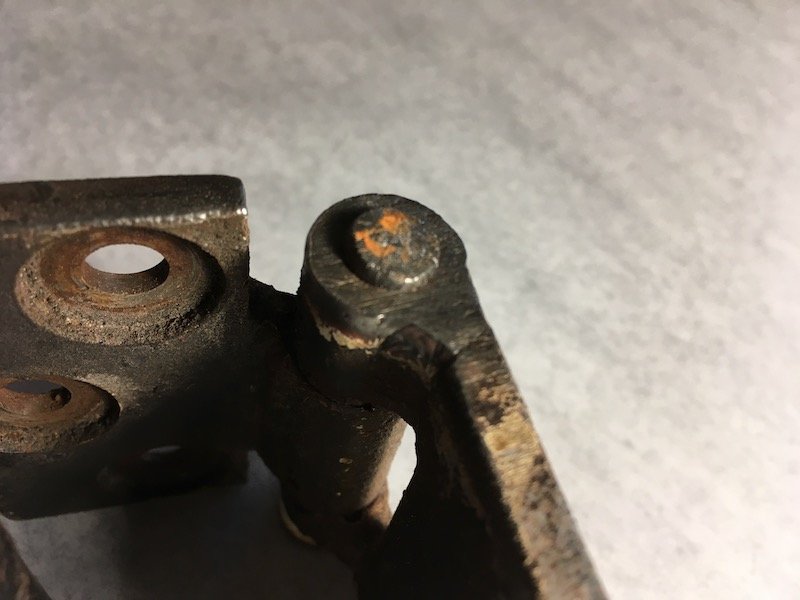
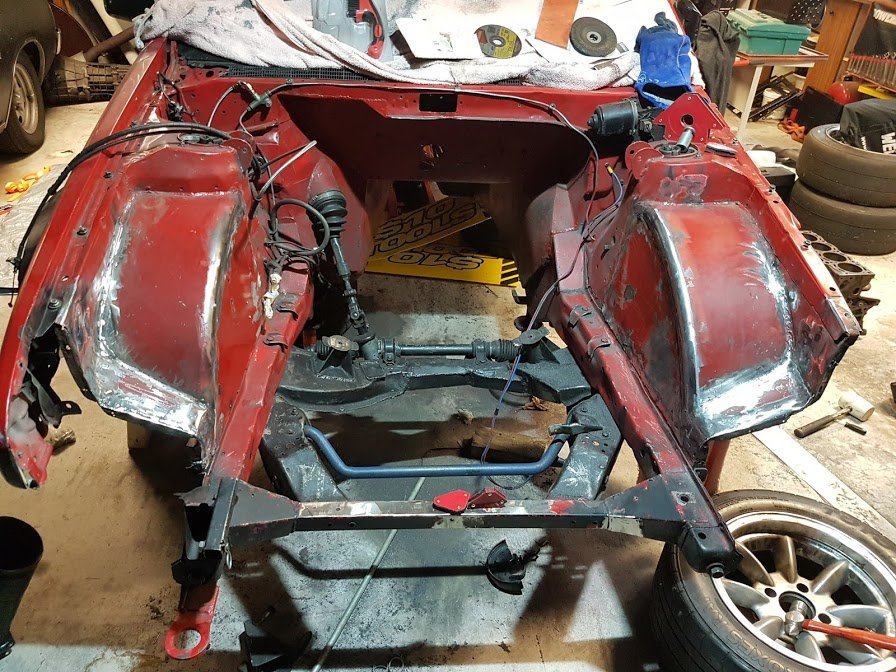
Catching up with progress today. Beware of this, my favorite tool over the last 26 years, the good old knotted wire wheel and angle grinder. Very handy but dangerous. Took a nip out of my flesh the other day. Ripped right through the glove. I should reinstall the guard of course. So I went to work by finessing the fit of the forward end on the outer sill by forming a lip on the end, making pie cuts and welding up the gaps. The objective to set it up for a flush contact with the A-pillar stub. Btw, the outer sill assembly will not be welded to the body until the floor is fabricated and installed so I can get a coat of epoxy primer over the resulting welds on the inside of the sill box. I've got it fastened with screws temporarily. Next, I had to make adjustments at the base of the B-pillar by joggling the upper surface of the sill inboard. Did this with some cuts, pushed metal in and welded shut. The top flange of the sill was originally joggled as shown in these left and right B-pillar base pics. Next I adjusted the C-pillar or dogleg. The bottom of which was tucked in way too far inboard. This resulted in an unacceptable mismatch with the outer sill profile. So I cut a slot in the bottom plate and welded in a 1/4 inch strip. Then had some fun time buffing out and polishing the now 42 year old repaint job on the doors. Don't ask why, I just did it on impulse. The doors do need repainting but it does not show that in the pics. I wanted to rebuild the hinges to make sure thing are fitting correctly. I grabbed the hinges off the right front door to experiment with. It did not go well with my attempted pin removal methods. First I tried pressing the pins out with a hydraulic press but it just began mushrooming the pin. Same for the big hammer and drift pin technique. And yes, I was pushing on the correct (not splined) end and supported the hinge properly on the other side. It looks like the pins will have to be drilled out. I'm not going to do that with a hand drill and not without sourcing new pins and bushings first. It appears I'll have to send them in for rebuild at a shop somewhere. Before I pushed against this end of pin Fail Fail Then worked on the left front fender some more. Welded the two halves of the aft inner vertical structure together with a lap joint for a rigidity. Cleaned, acid etched and painted rust scarred and pitted areas on the inside with POR-15 gray. Polished the outer surface with 3M scuff pads on the angle grinder to help see the waves and indentations better and work it smooth with hammer, dolly, rubber hammer, etc. I'll weld the inner structure to the fender once everything is coated with epoxy primer. And finally I set about repairing a bunch of damage on the trans/driveshaft tunnel. This 310 Bluebird has had the wrong transmission swapped into it back in the early 80s. The original trans wore out the 2-3 shift fork and this spare unit was installed but would not fit. So the side of the tunnel got torched out and it was made to fit. There is a huge difference in size between the two trans. The all synchro trans is a side loader, which is not only much wider but also longer. The original 310 trans is a top loader. Anyways I had to fix the gapping hole and make it adaptable to either trans since I still have the original and it is repairable. Then I went on to replace the aft section the covers the driveshaft. Then patched the rusty area midway between the other patches. All is just tack welded for the moment. Pics below tell the rest of the story. Below pic is looking up at side loader. The original 310 top loader trans. Above pic. It was no fun trying to do those three plug welds upside down. Notice the parallel hat section reinforcement structure or beams running fore and aft, I don't think these were installed on later 312 Bluebirds? Looks like I hit my maximum upload limit here for this post, and it is a late work night. Plan to catch up on the remainder tomorrow. Discussion: https://oldschool.co.nz/index.php?/topic/60267-marts-pl310-61-datsun-bluebird-sedan/
1 point
-
So plan is - twin 45mm (or 1 3/4") for most of the length, which matches the existing twin pipe from the manifold to the Y that is a muffler shop replacement that i will keep a very small part of, - into a single 57mm (or 2 1/4") pipe to match the existing rear muffler, that i cribbed from bits from the Croma Turbo i wrecked This was way more expensive than i thought, especially as a bought a nice new welder to do it with. Even my man-math was struggling. After watching some youtube and doing some actual math i started with making the new Y section from which everything else will be built from. and went forwards from there. The Y is right at the back of the floor pan and actually has a kick up towards the diff. Shiny stuff to the ex croma over the diff section And painted with some BBQ paint Pretty flash for a driveway job! Ended up using only the first 50cm or so of the old secondaries but turned out nice in the end. Shit is tight getting in and out. This is the new front section against the old part, the new Y joint ends adjacent to the white bit on old pipe so ive extended the primaries by like 2 meters. Unfortunately didnt take any photos of the whole thing as the rear half was installed so i could ensure the front half lined up Buttoned it all up just before dark and its surprisingly quiet, probably because i was used to the old blowing exhaust, but has a proper FIat rasp at around 2000 rpm or stabbing the throttle and seems to free rev a wee bit better. Tightening it all up properly means it now has no leaks, but it rattles on the cross member, i want to put a support off the gear box and I remembered that i forgot to weld in a O2 sensor bug so another couple evenings tweaking and upside down welding before a road test and butt dyno.1 point
-
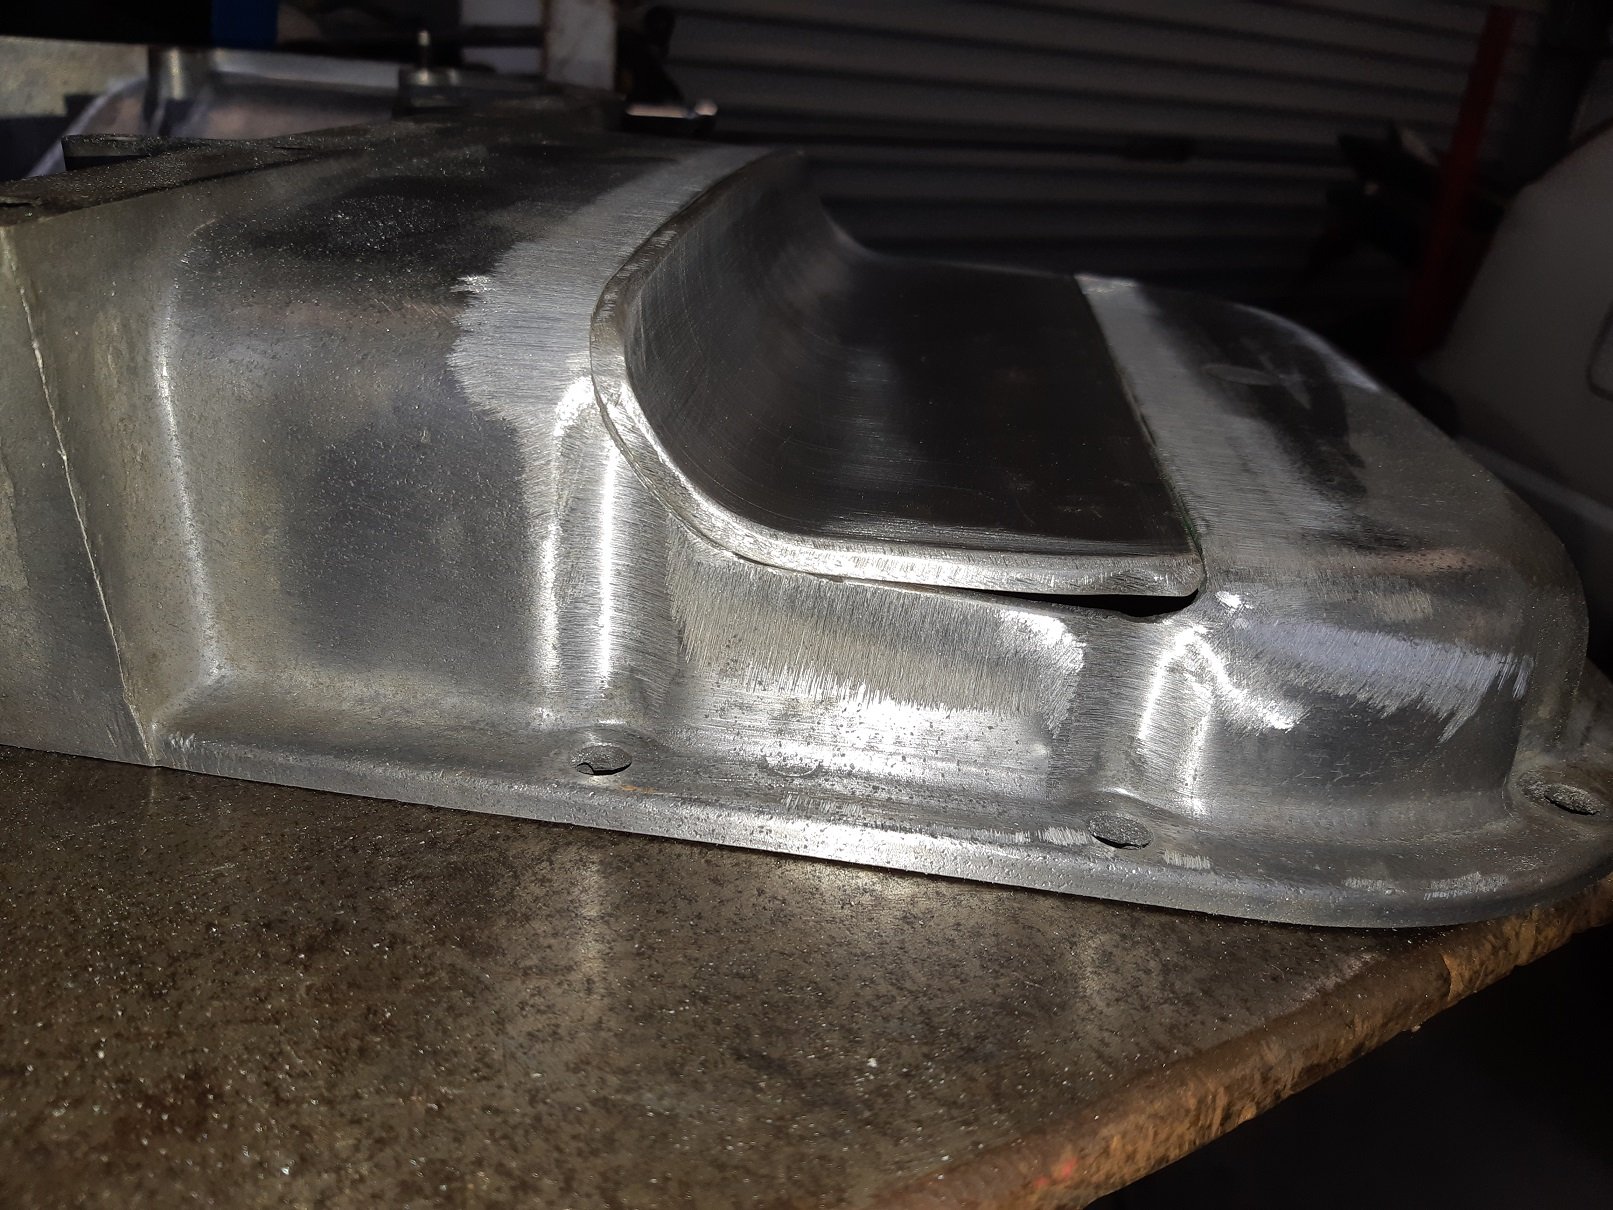
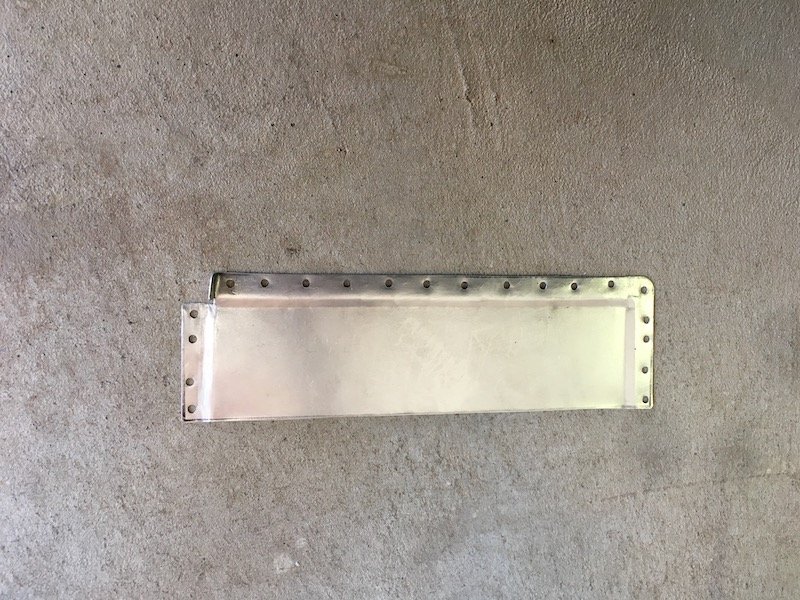
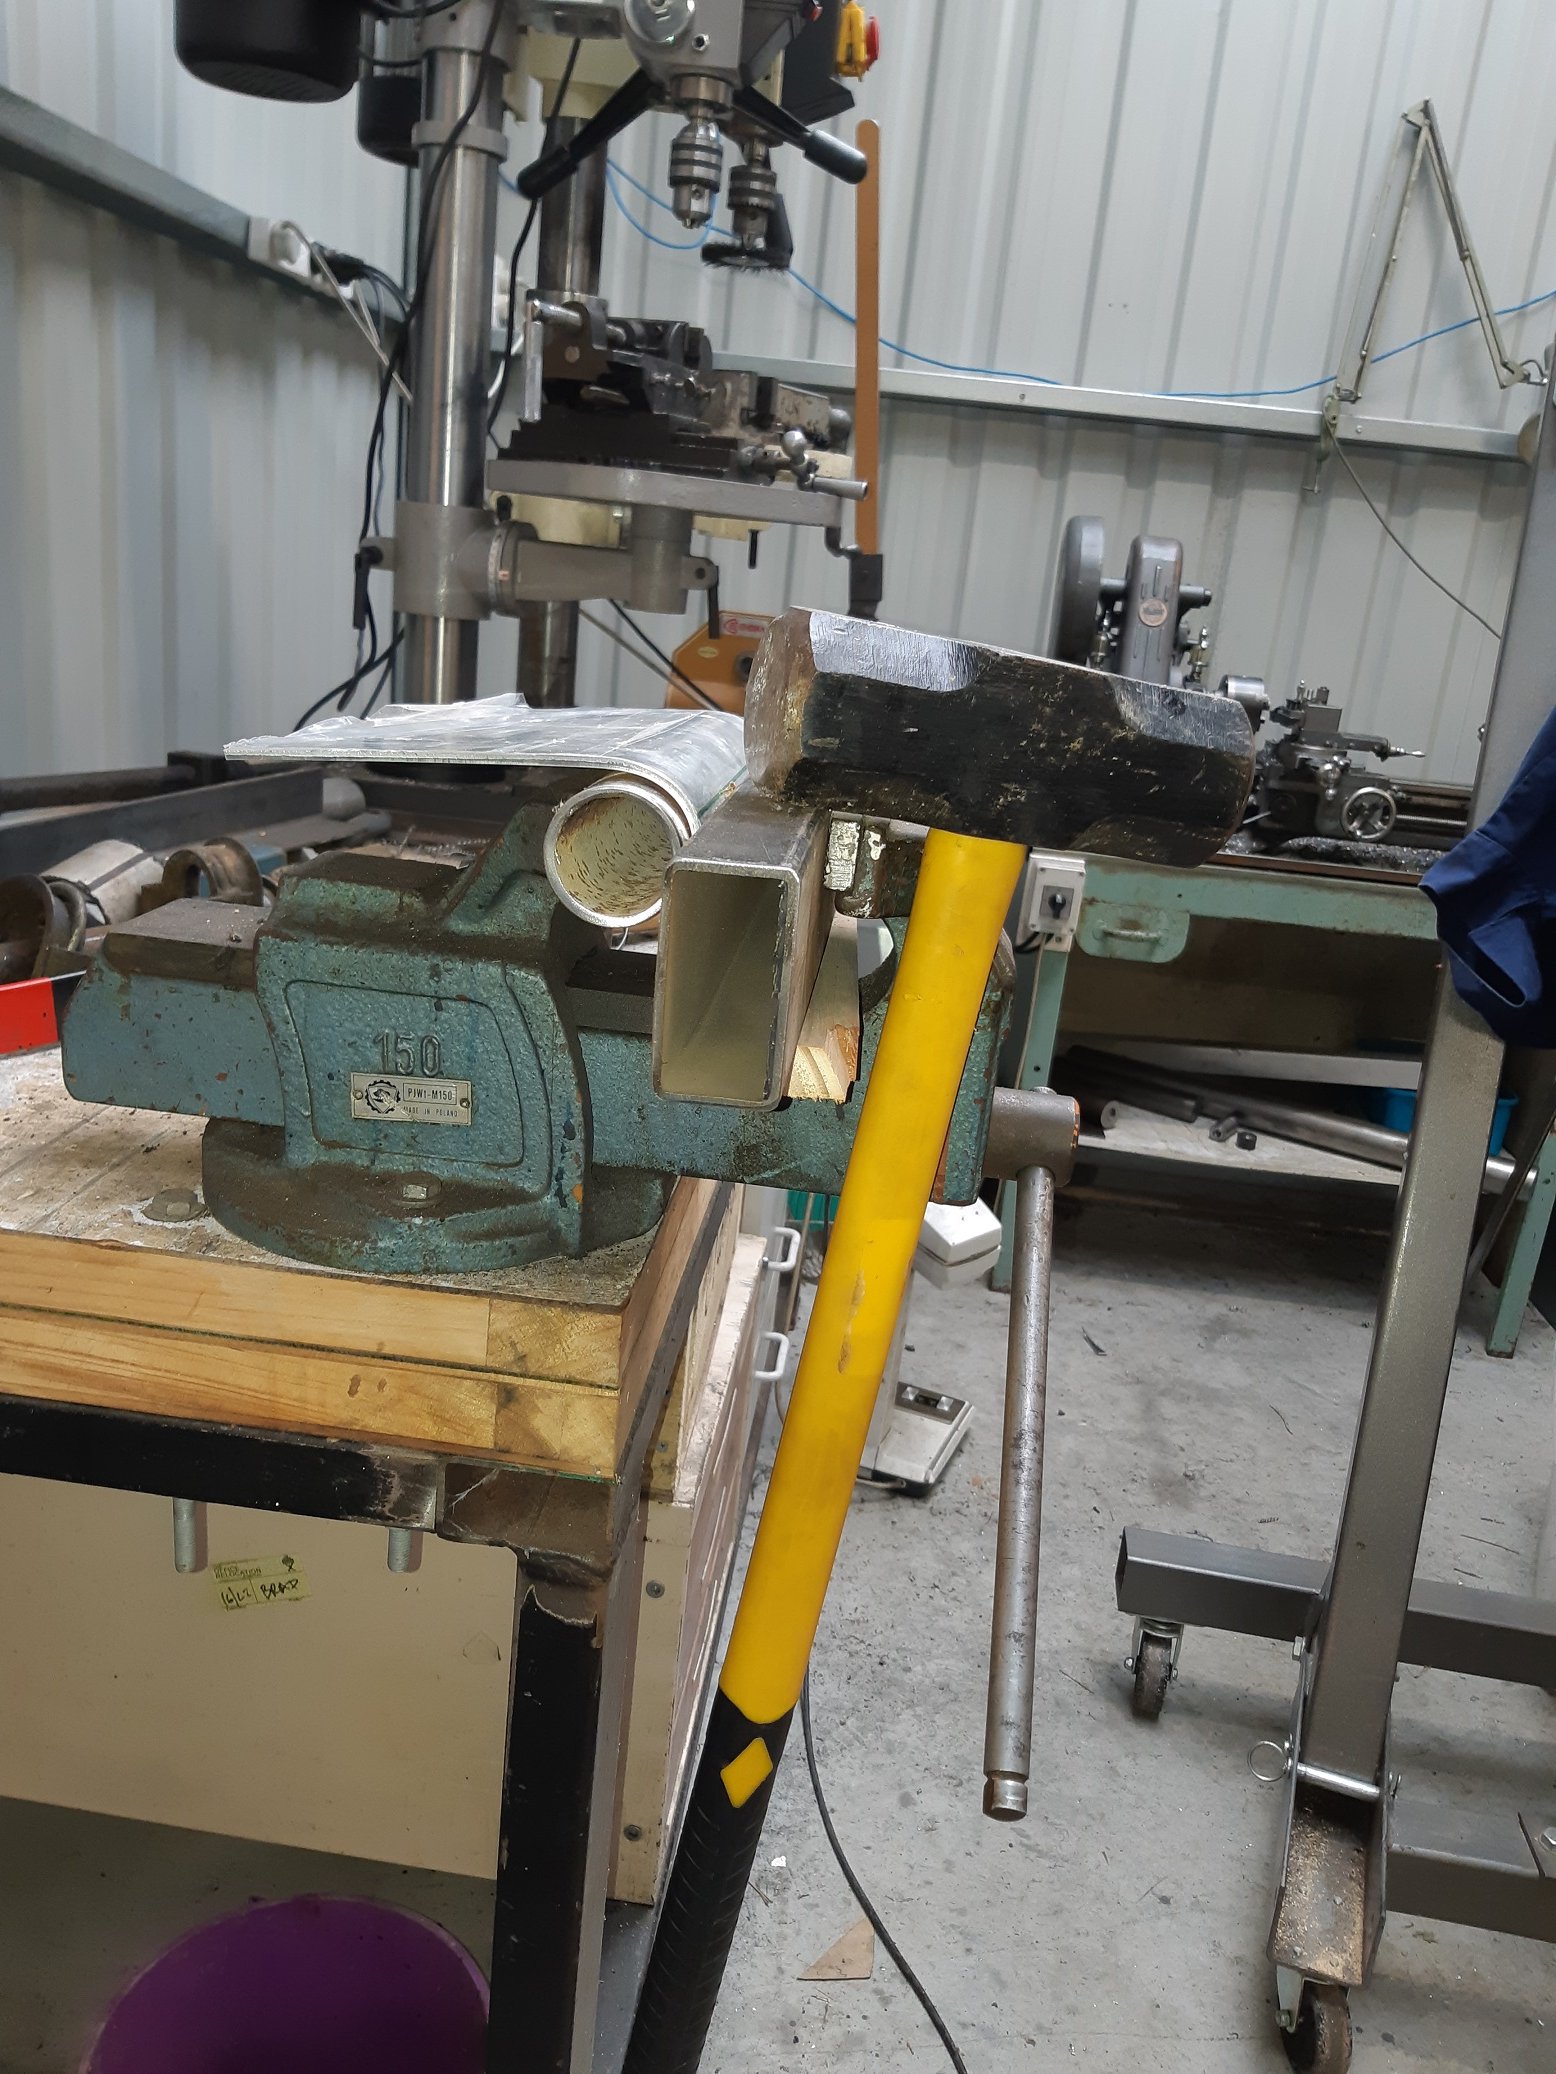
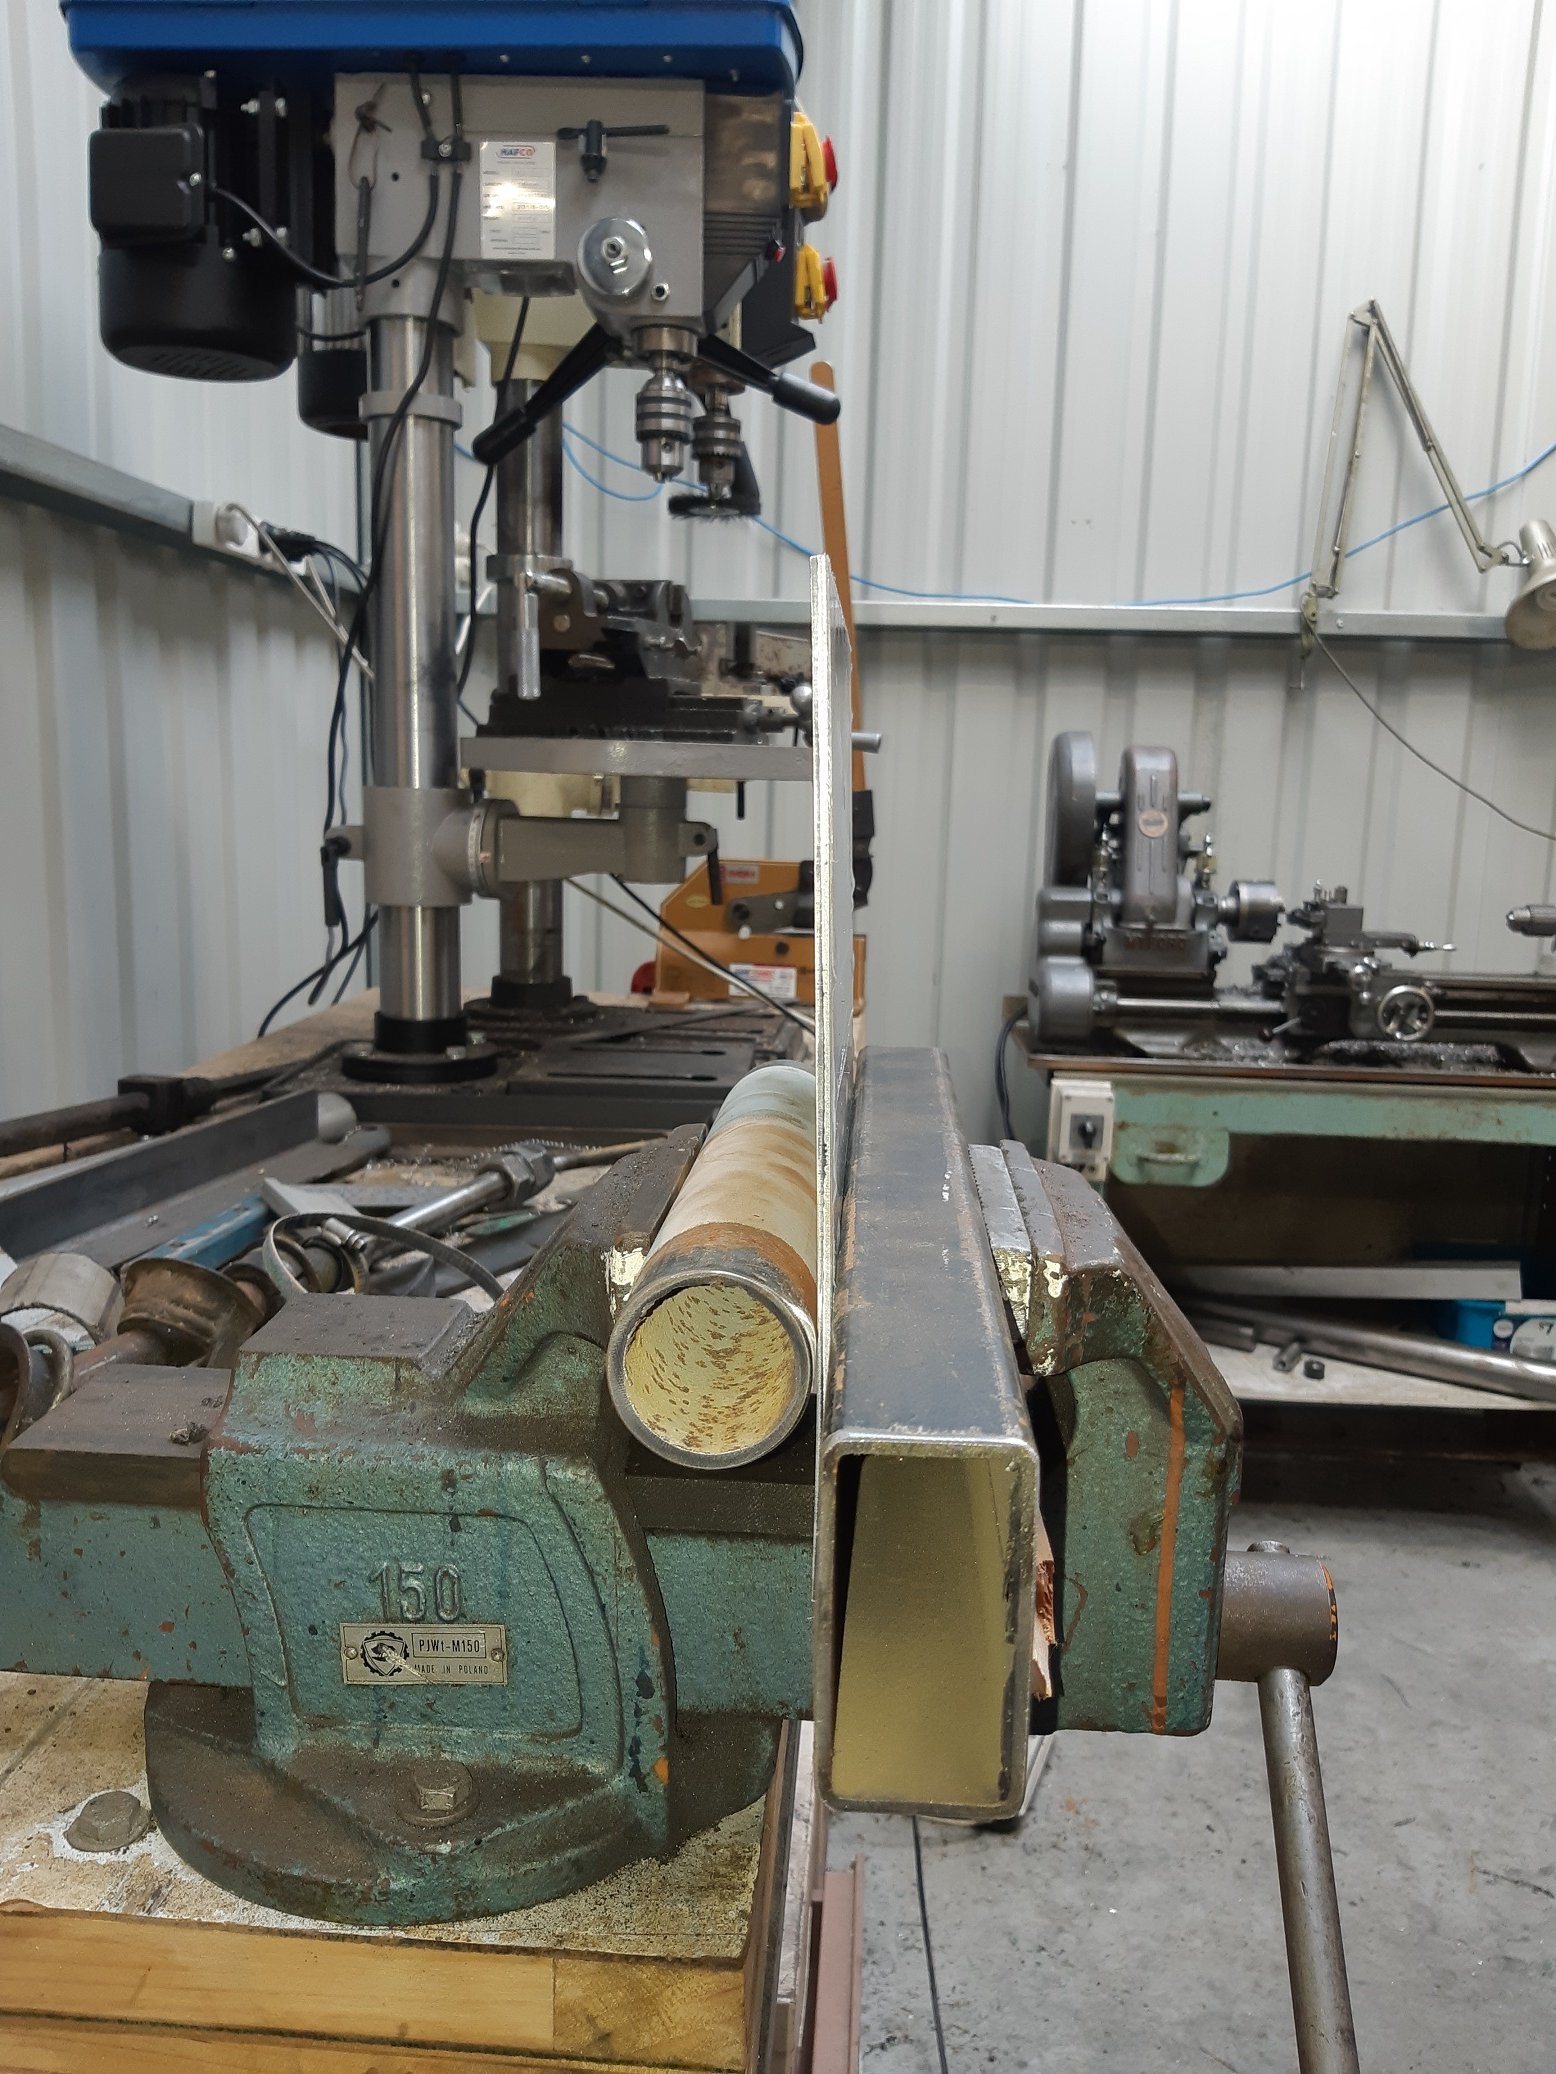
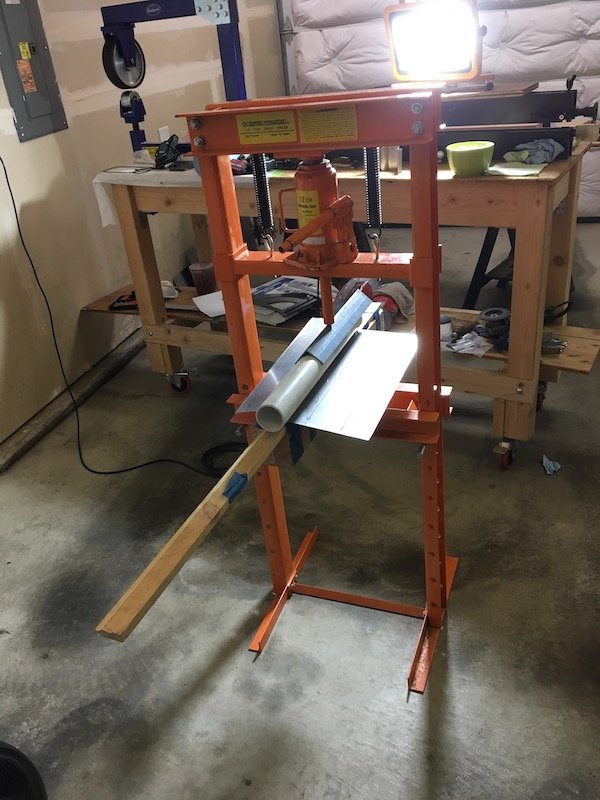
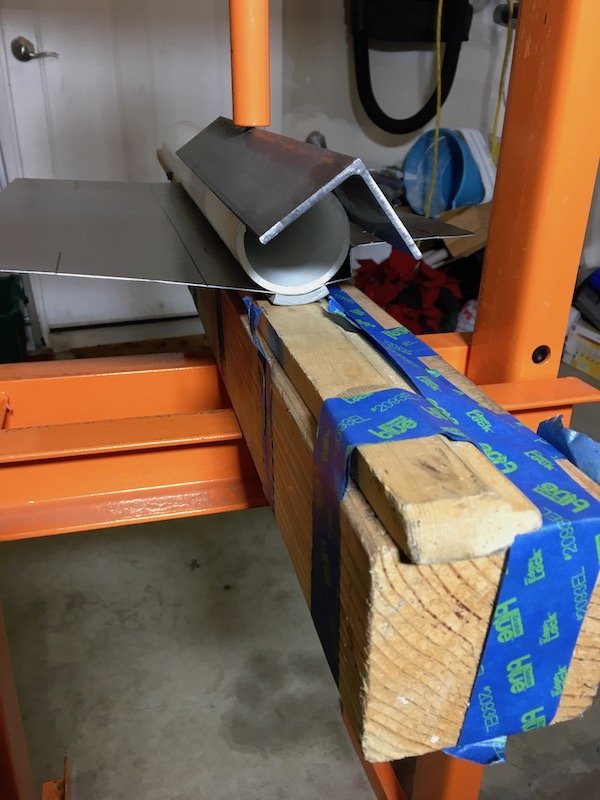
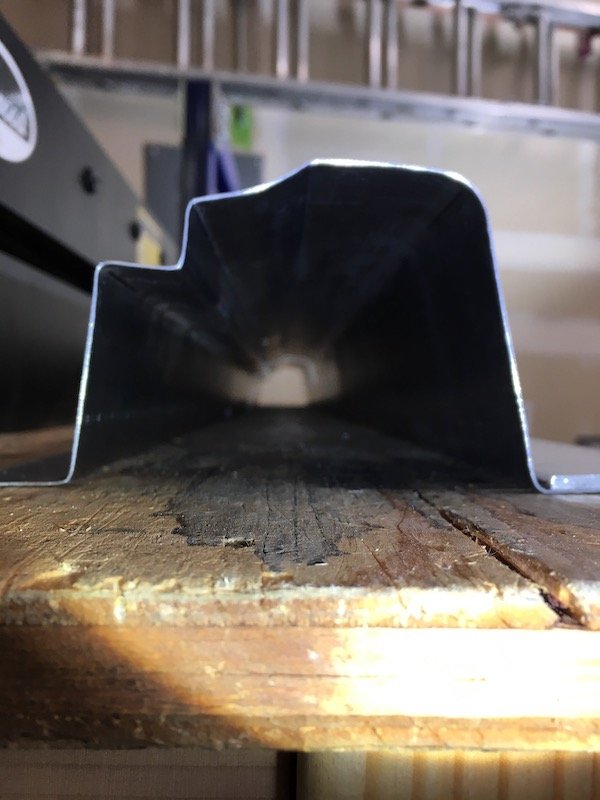
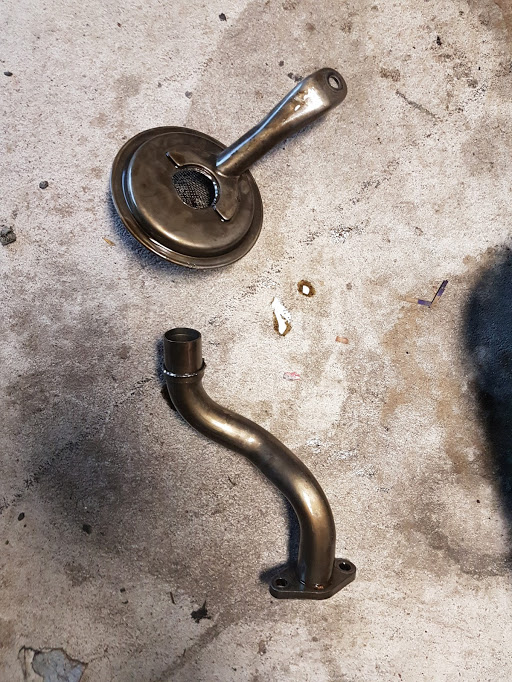
How to put a curve in a 4mm thick aluminium sheet to fill the hole you cut in the sump. Get a random bit of thick wall rusty pipe about the right diameter. Wrap it in card so you don't mash rust into the aluminium. Then, using another bit of square section, clamp it in the vice along the bend line. Put a big bit of wood against it and hit it with a mallet. Pick the wood up off the floor and put it back. Hit it again. Pick the wood up off the floor and put it back. Hit it as hard as you can. Pick the wood up off the floor and put it back. Wail on it like a crazy person. Each time, picking the wood up off the floor and put it back. Observe how much it HASN'T FUCKING MOVED AT ALL. Switch to sledge hammer, hit it literally five times. Done.
1 point
-
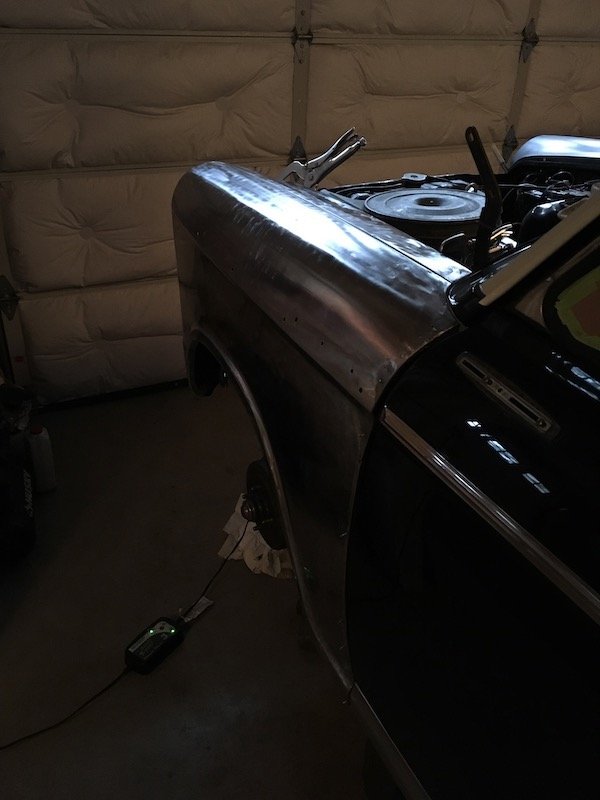
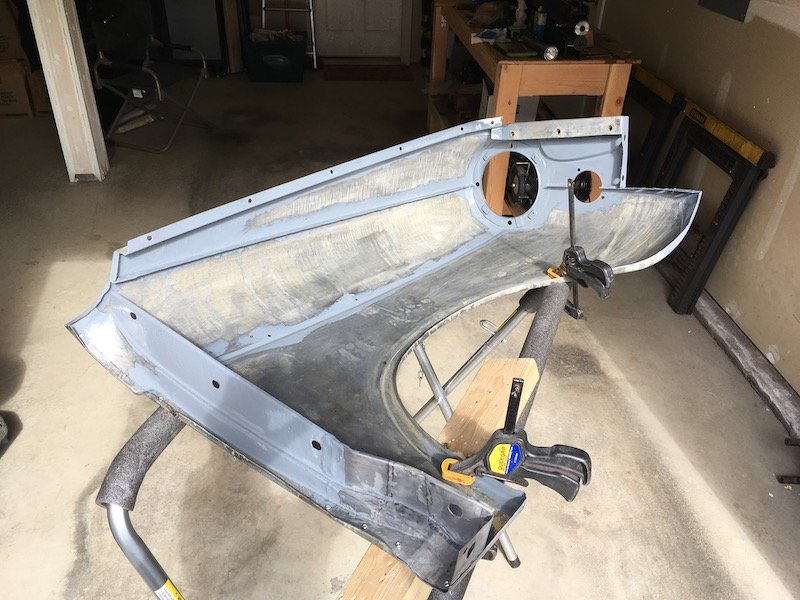
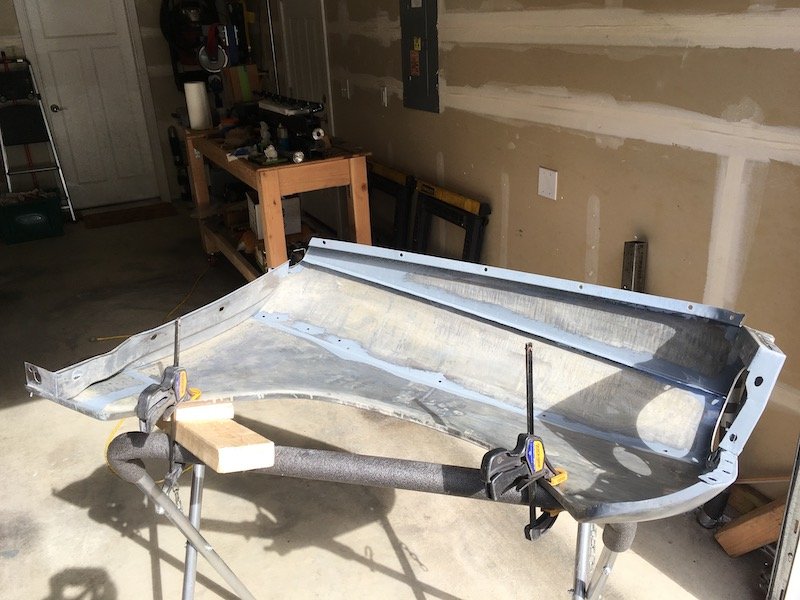
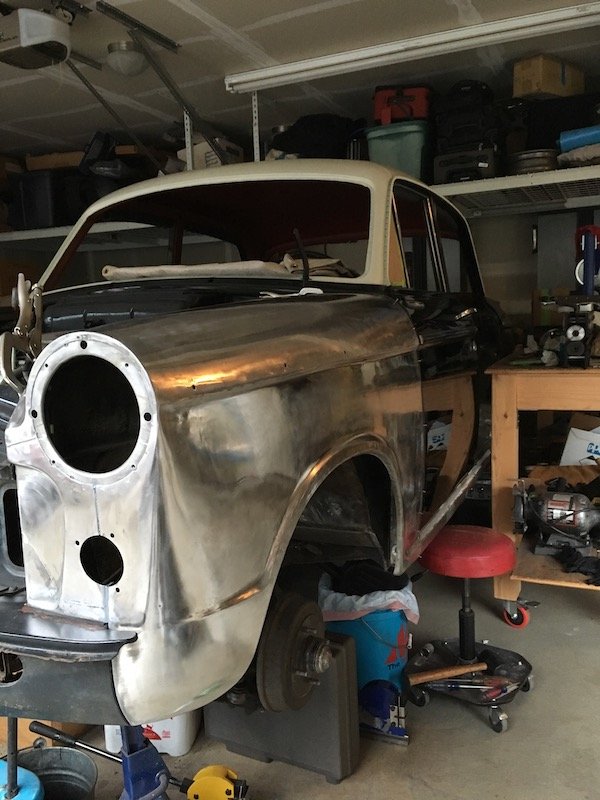
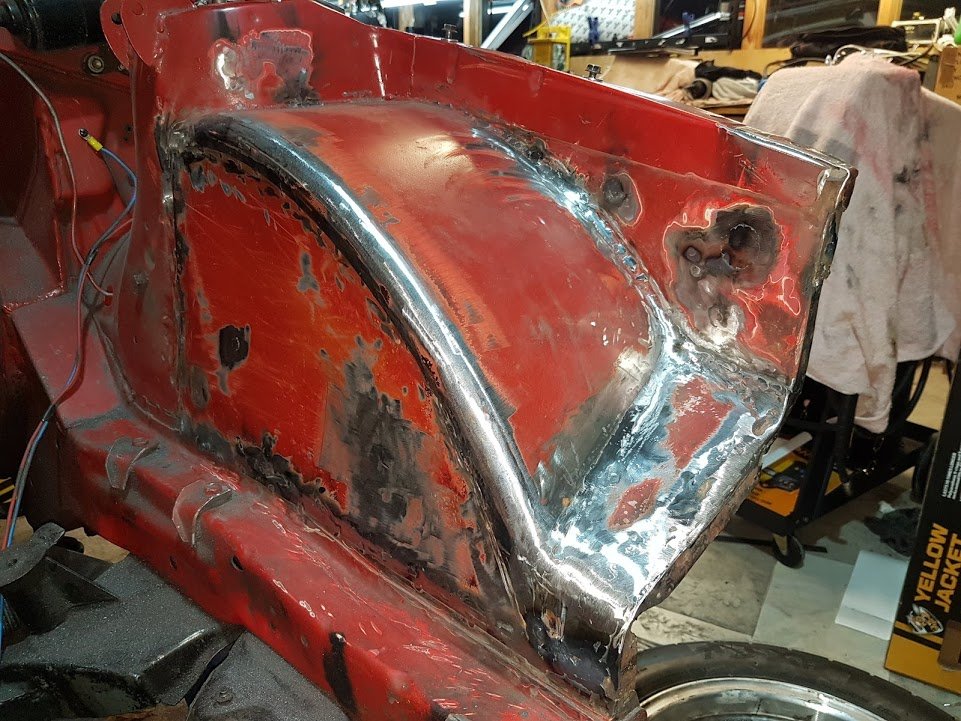
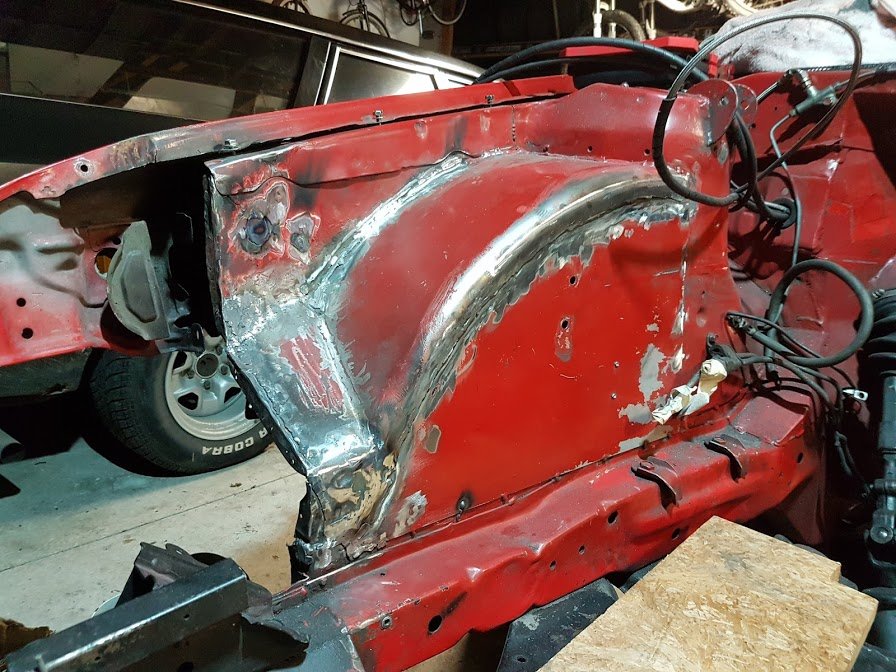
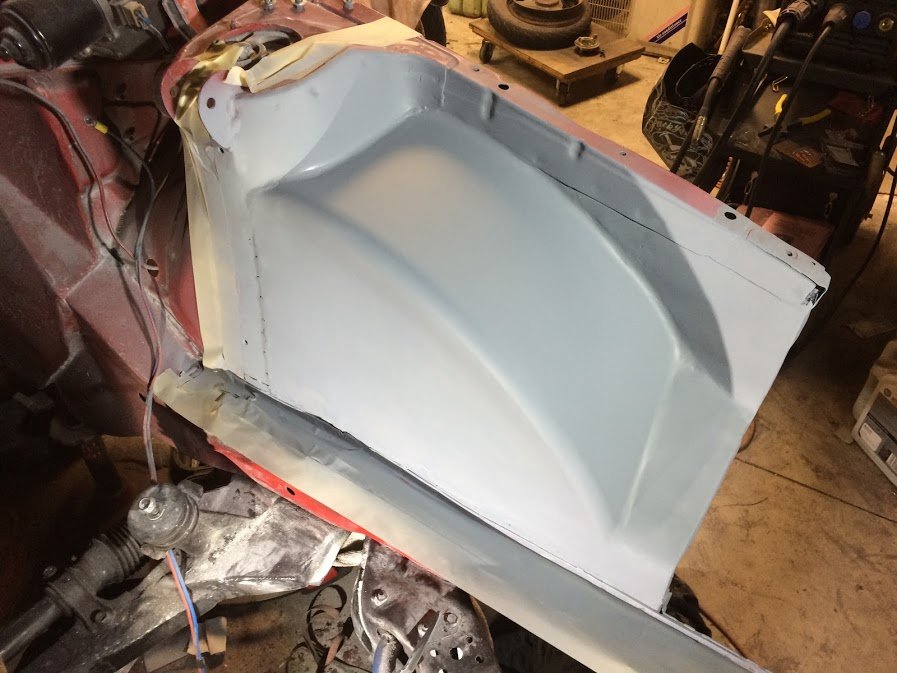
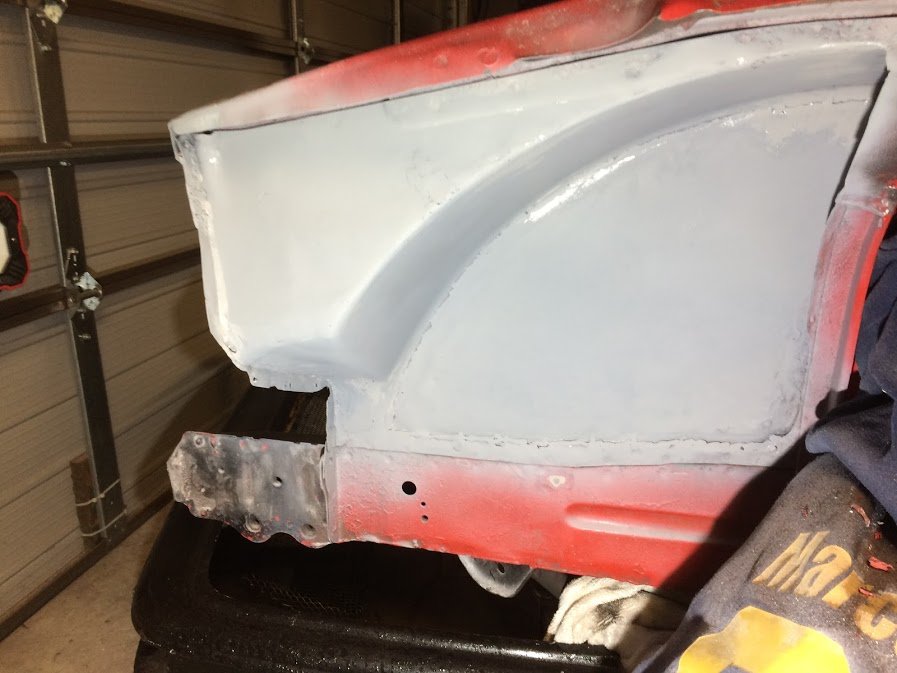
September will be two years since I've driven this car... So I've decided that I should get it going and try to race it at the final round of the Manfeild winter series. I've not done a whole lot since 2017 due to general slackness, but have cleaned up a bunch of welds around the tubs. This was about a year ago: Fast forward to this week and I've started doing things again. More weld removal, a few holes welded up, paint removal etc. A bit of filler and the first coat of etch this evening to see how it looks: The underside is still a bit wrinkly, but it's good enough for an inner arch. Now to get the other side. to this level.. I always forget how long it takes to sand filler! It's a pretty painful job . Once both sides are in primer I can give the rest of the bay a good clean up, sand and start thinking about paint.
1 point
-
The wiring is pretty much there now bar the speedo cluster, a bit more tidying in the cab and adding some Deutsch connectors in the rear. And a licence plate light. Now I am a difficult bastard at the best of times, and part of this is that I hate car stereos with all their bullshit inputs, eq settings and animated screens, another part is that I have not willingly listened to the radio or watched television for more than two decades, a small and ineffectual rebellion against capitalism. I only listen to talking books over Bluetooth when driving and fucking hate it when I get into a car after someone has been used it (Shane you dick) and has fucked about with the stereo and turned on the radio. So to prevent this occurrence I have bought a top quality Bluetooth mini amp off Ali express for $54, this has two tone knobs and a volume knob, and no display. Perfect. It is a nobsound brand lol, right up my street https://s.click.aliexpress.com/e/u5tcaeM In other news I have had some front driveshaft adaptors made so I will be sorting that out shortly. I will hopefully have enough cash for a radiator in the next few days as well. In the realm of actual work I have mounted the rear seats. Not masses of legroom but they work well and pack away nice and tidy; It will be tight for the engine cover but do able.1 point
-
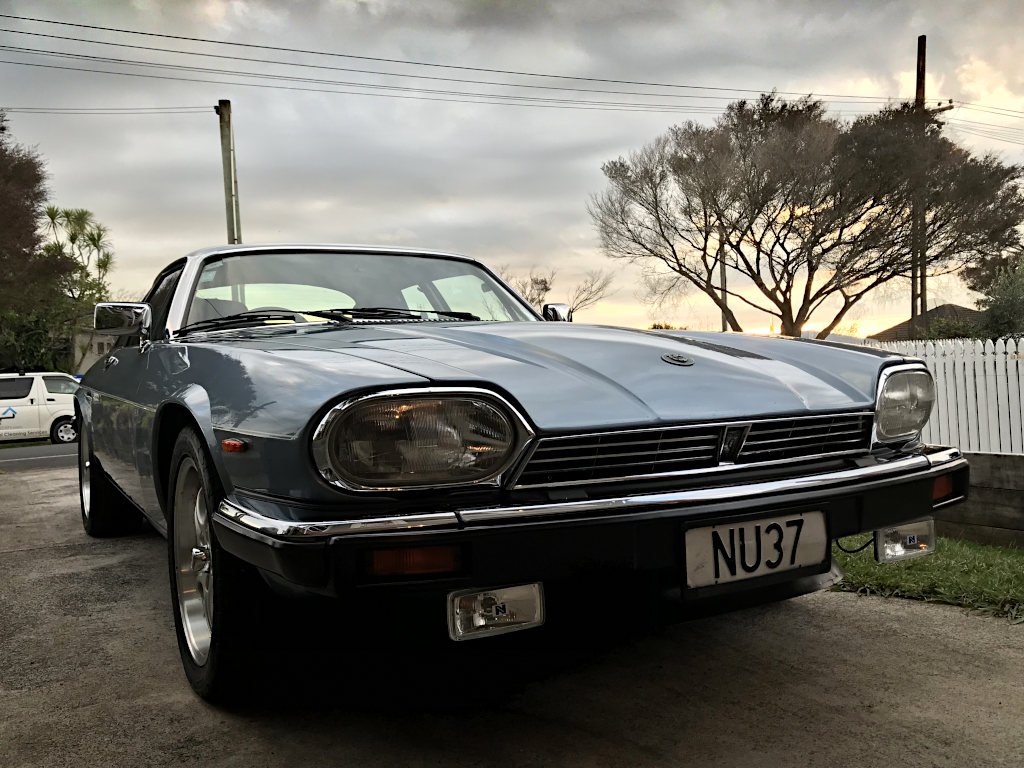
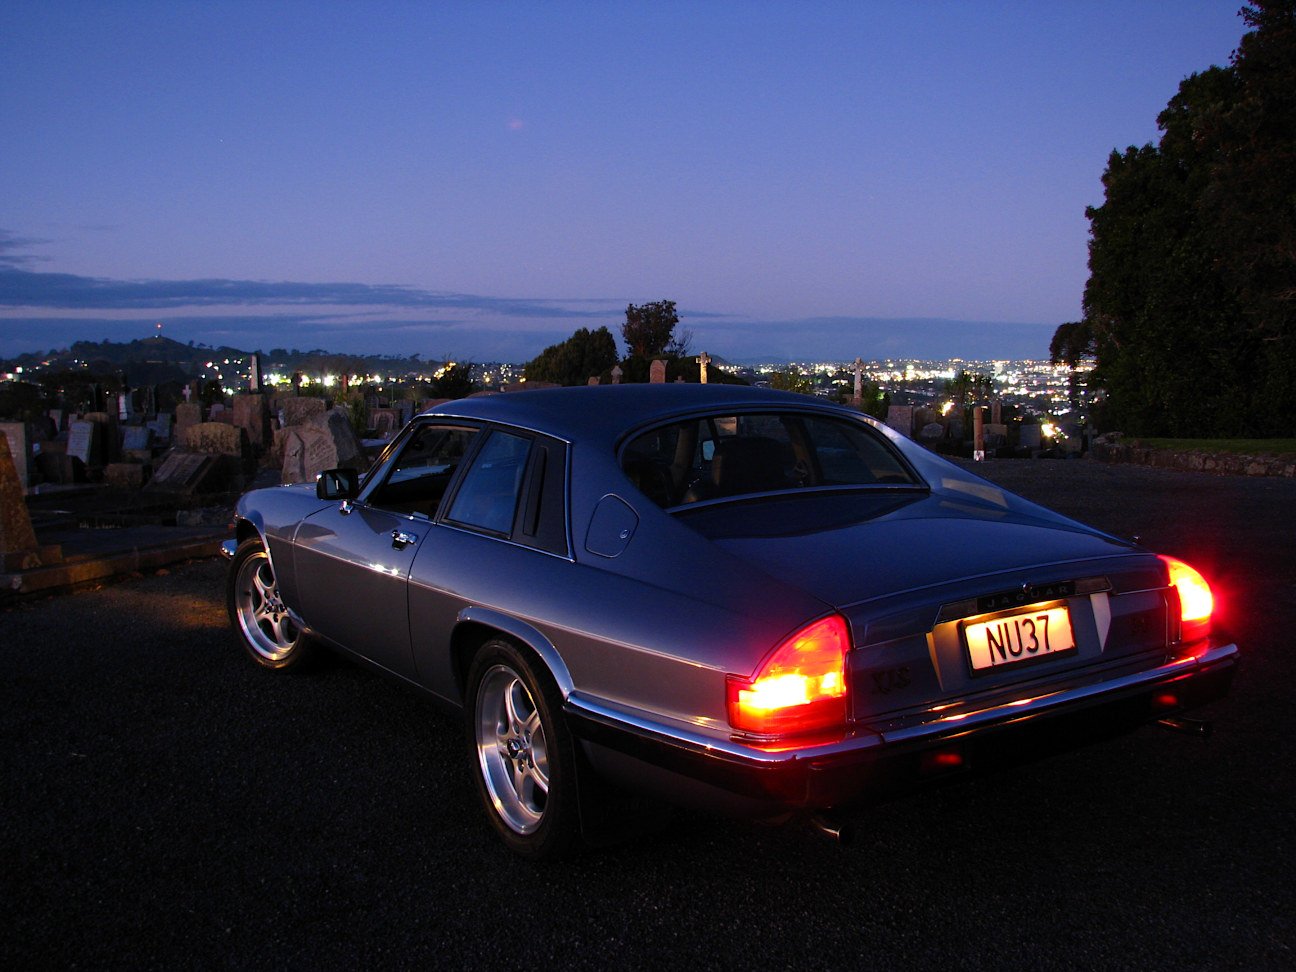
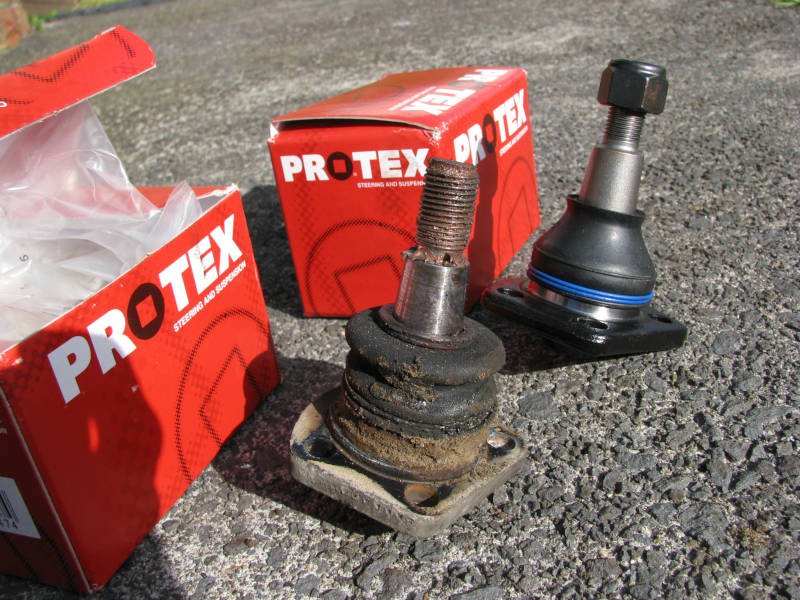
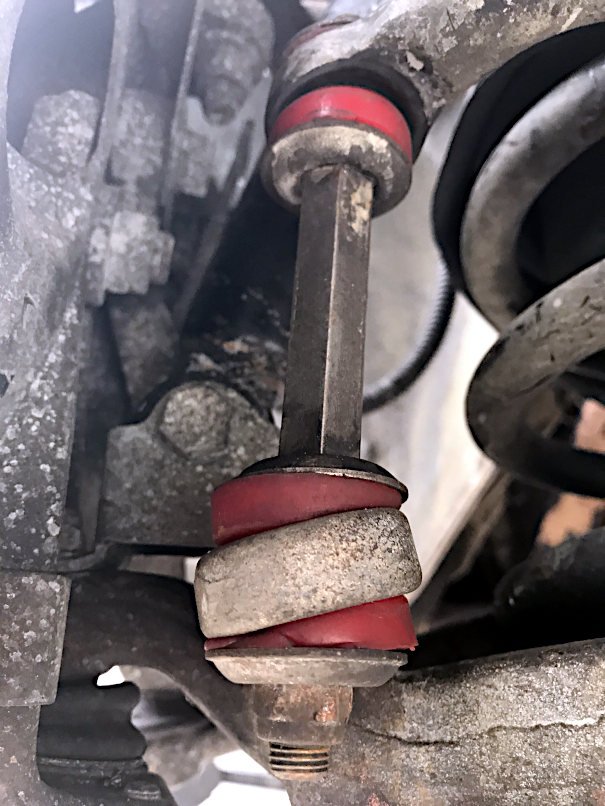
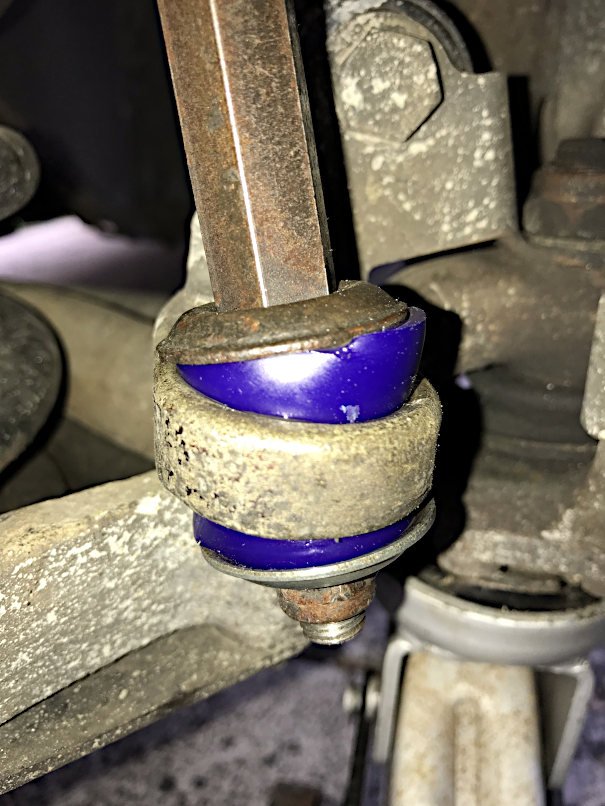
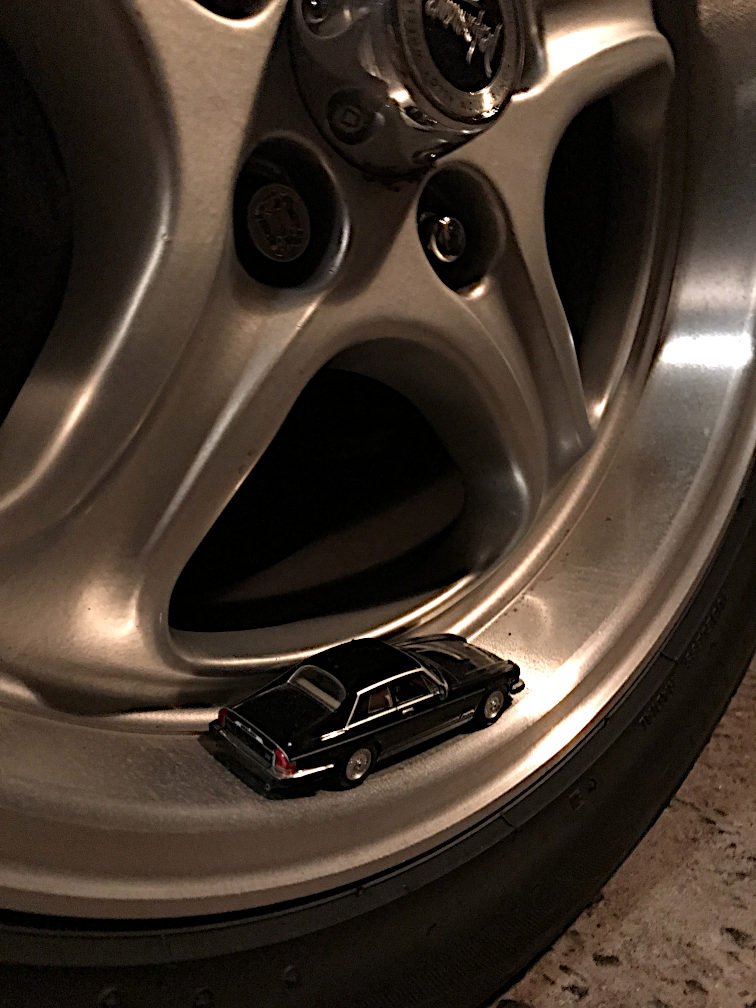
I took the car to the specialists where they rebuilt the power steering pump and rack (which was also leaking). This was not very cheap, but now the pump leak will not damage any more suspension bushes and the rack leak won't risk me failing WOFs. The specialist told me that some of my whines and clunks were the auto transmission (ZF 4HP22), which had good fluid so wouldn't improve without money being thrown at it. One of my rattles was the clips on the airbox - some idiot had taken the front cover of the airbox off for extra induction noise and hadn't figured that the resulting loose cover clips would rattle at certain engine rpm. Another rattle is either the engine fan clutch or the water pump, so I'll look into that myself at some point. I got new bushes for the front sway bar drop links. Here are the old bodged ones which are too thin and too large in diameter: And here are the new ones which don't really look any better! Oh well. Apparently you can get spherical bearings to replace these bushes if you're hardcore, but I think I'll pass. Anyway, the Jag specialists got someone to do my wheel alignment after they'd rebuilt the steering rack. This resulted in improved steering self centring, but the feeling of square wheels at 40kph and the vibration at 80kph did not go away. So I started looking at replacements for the Linglong directional tyres which were on my car when I got it. Other than more Linglongs, the only other tyres available in the right size are reproduction retro hotrod stuff - BF Goodrich Radial T/A, Cooper Cobra Radial G/T, Hercules H/P 4000, Galaxy Radial G/T... all tyres that OS report as being a bit average ("harder than a whore's heart"). I looked at going to wrong-sized tyres on the stock 15-inch mags, but this doesn't expand the tyre selection much. Jags of this era have a bolt pattern of 5x4.75" / 5x120.65, which is what a lot of old GM cars used. This means most aftermarket wheel choices are stuff like Cragar SS / Torq Thrusts which look wrong and/or only come in small diameters. But then some 17-inch "Performance" brand wheels came up on TradeMe, so I grabbed them. The seller had taken them off his old Jag to upgrade to 18s, so I knew they were gonna fit my car. Surprisingly, I could buy wheel nuts off the shelf at Repco with the right imperial 1/2" UNF thread pitch and tapered seats. I just threw the wheels straight on with no issues. I didn't have to take the dust caps off the front hubs to allow the wheels to fit as the seller said I might. I haven't even noticed the wheels rubbing so far. The fronts will be easier to clean than the original lattice design, even if the rears look a bit weird with no brake discs visible between the spokes. Dish photo! The improvements and compromises are all as you'd expect. The Potenza RE002 tyres on the new mags are obviously an improvement. Their lower profile doesn't magically give the XJ-S any steering feel though. I can't benchmark the lateral grip against other cars I've owned - when going around my 180-degree test curve, the Jag's speedometer reading decreases significantly for some British reason, only to increase once I straighten up again. Also, the vibration at 40kph may be gone but the one at 80 remains. Back to the drawing board.
1 point
-
This was on TM a while ago; but i already had drawn some inspiration from the internets;1 point
-
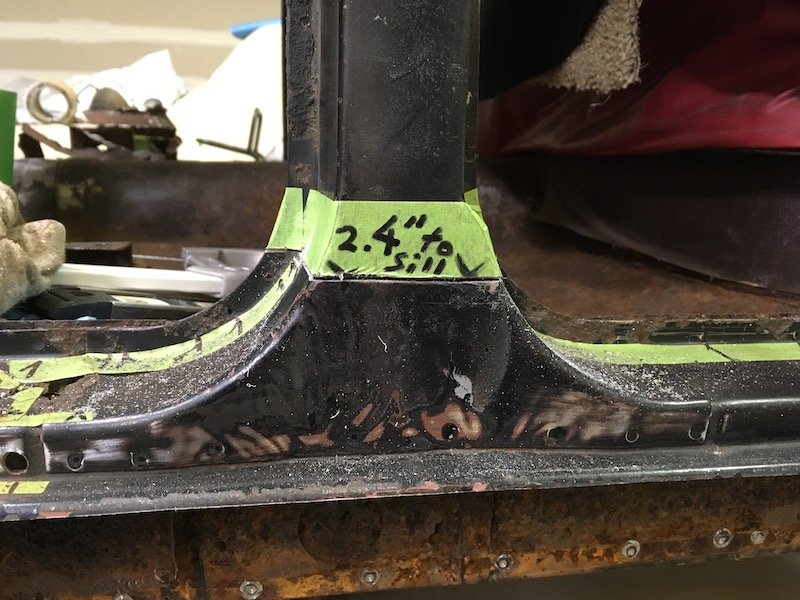
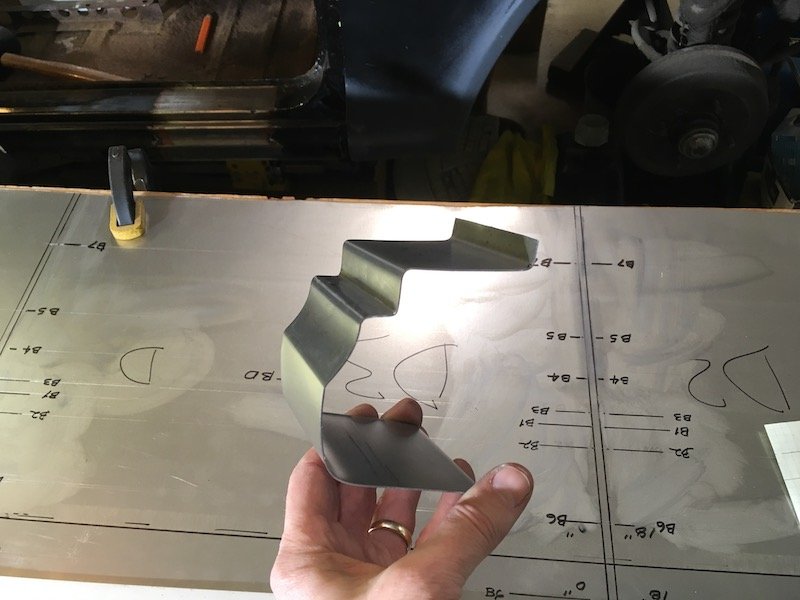
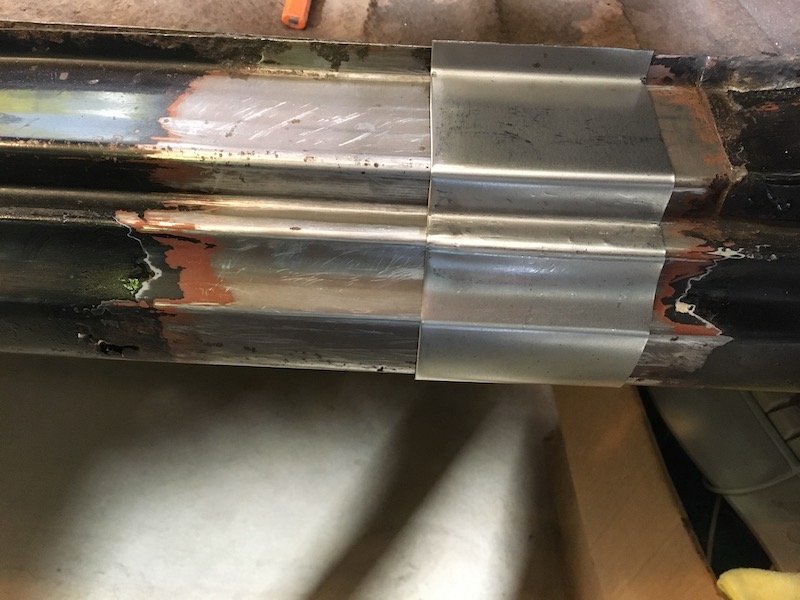
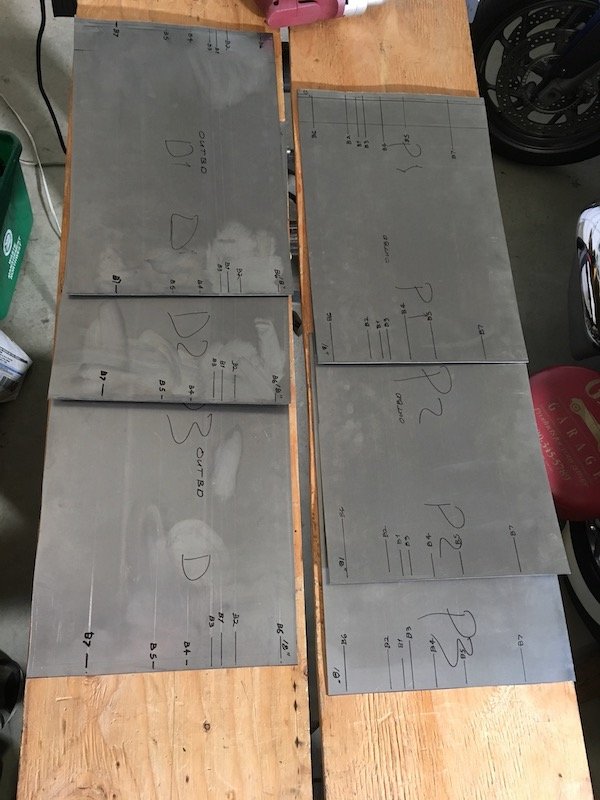
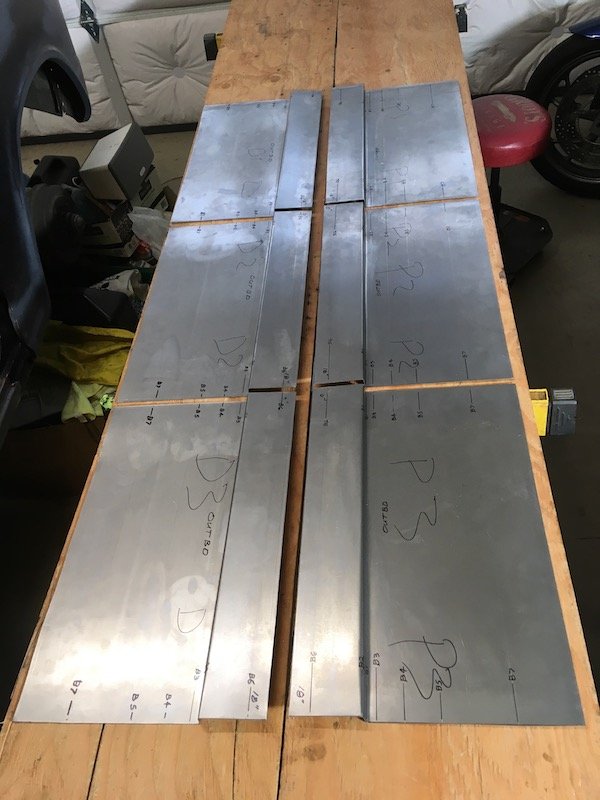
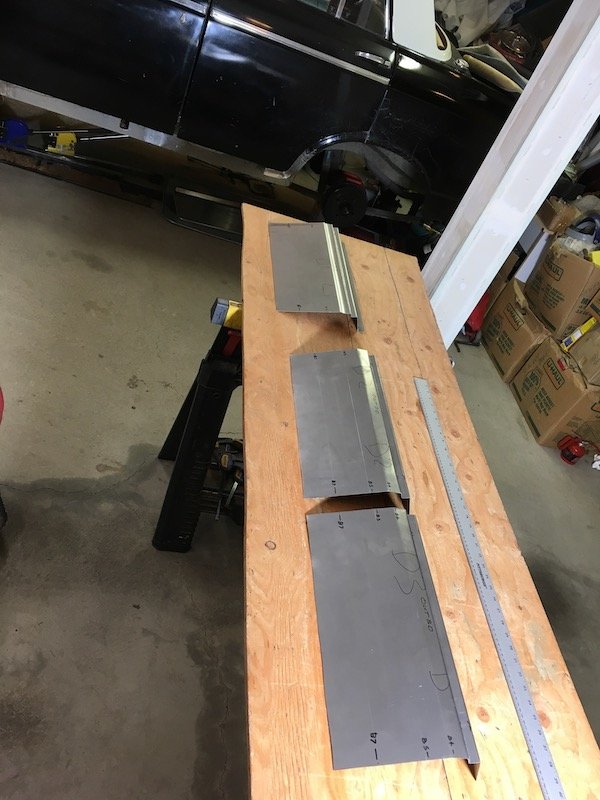
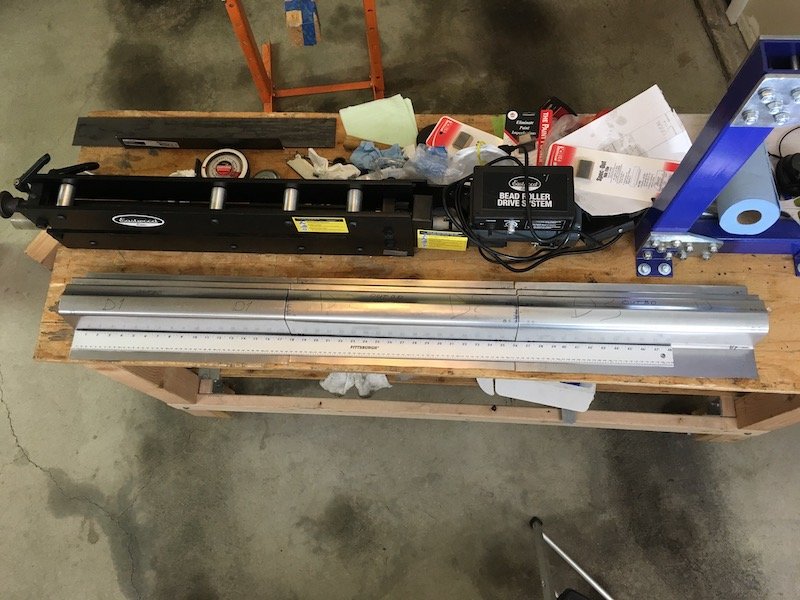
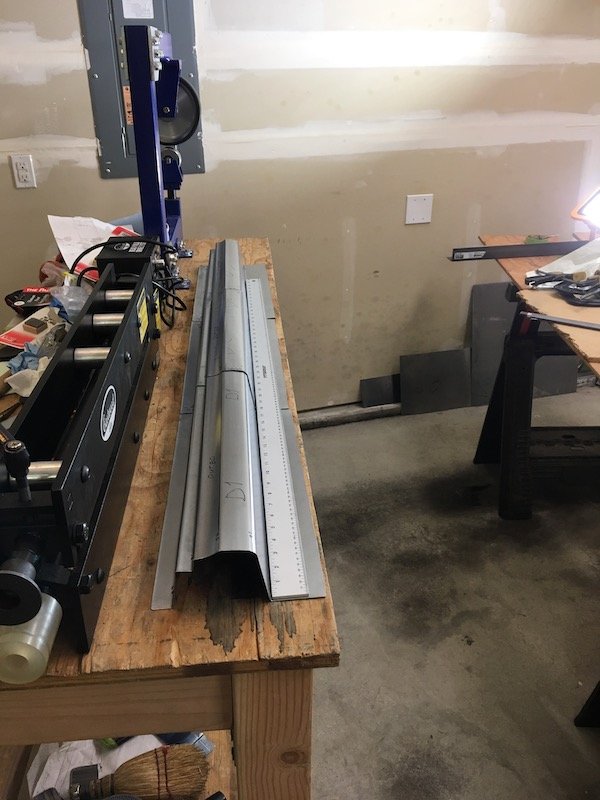
I got a little out of sequence. I should back up a little and show the making of the three outer sill segments that began about six months ago. Three segments because the metal folder tool only can do a 20 inch length maximum whereas I need about 54 inches total length. I also need to make offset bends. So there are a lot of challenges to make the sill. Makes it all the more interesting to have a go at it. Anyway, I have run into difficulties in duplicating the exact profile but it's good enough for usable parts on the left side. Maybe the technique can be improved upon for the right side. On the righthand side of the car I carefully measured and made a card template of the least rust damaged profile. Then began experimenting with and adjusting the seven bend line locations to figure out a way to make a sill. This is unlike a usual and simple sill that just wraps under the door more or less. The Bluebird has several visible body lines and a concave shape in-between. Plus there is the side of sill penetration for the jack lifting structure shown previously. This Bluebird outer sill is made of 20g sheet. Layout of bend lines The prototype profile Fits like a glove on sanitized right hand side Cut out six 18 inch long panels of 20g for left and right (D for driver's side or left, P for passenger side or right). Bend lines are marked more sharply by scribe marks so I can get good alignment when it comes to joining the segments together. B1 and B3 bends are offset bends and very close. This proves to be a problem Made the offset 3/4 inch bends for all panels (B1 and B2). Not perfectly uniform but close enough So far so good! As mentioned above, now I start having a problem at bend 3. This needed to be a tight offset bend from B1 at just over 1/2 width. The folder will only do 5/8 minimum (yet it was advertised as capable of 1/2 inch offset). Not good. I have to start compensating by moving the other bend lines to keep the visible body lines on target. The plan is to adjust the pillar bottoms to fit the adjusted sill profile, at least on the left side. I'd like a better plan for right side to get the true profile so I can leave the pillars unaltered. I'm considering having the folder plate milled down to get a true 1/2 inch offset bend, but that still leaves me with three separate segments to weld together. Either that or start over and make the whole thing as one hand formed piece by hammer forming each bend over a solid 90 degree edge of some sort. That might be wishful thinking. My crude setup for making the concave curvature between bends 3 and 4 Sandwich the sheet between plastic pipe, angle iron and squash it Checked out the fit of a couple of segments relative to the doors and the lower edge. Checked out as good. Three completed sill left side segments lined up on the rollaway workbench. Decent alignment of three segments. Looks like I can make it work when it comes time to join them End profile view of three outer sill segments all in line, just for kicks Discussion: https://oldschool.co.nz/index.php?/topic/60267-marts-pl310-61-datsun-bluebird-sedan/
1 point
-
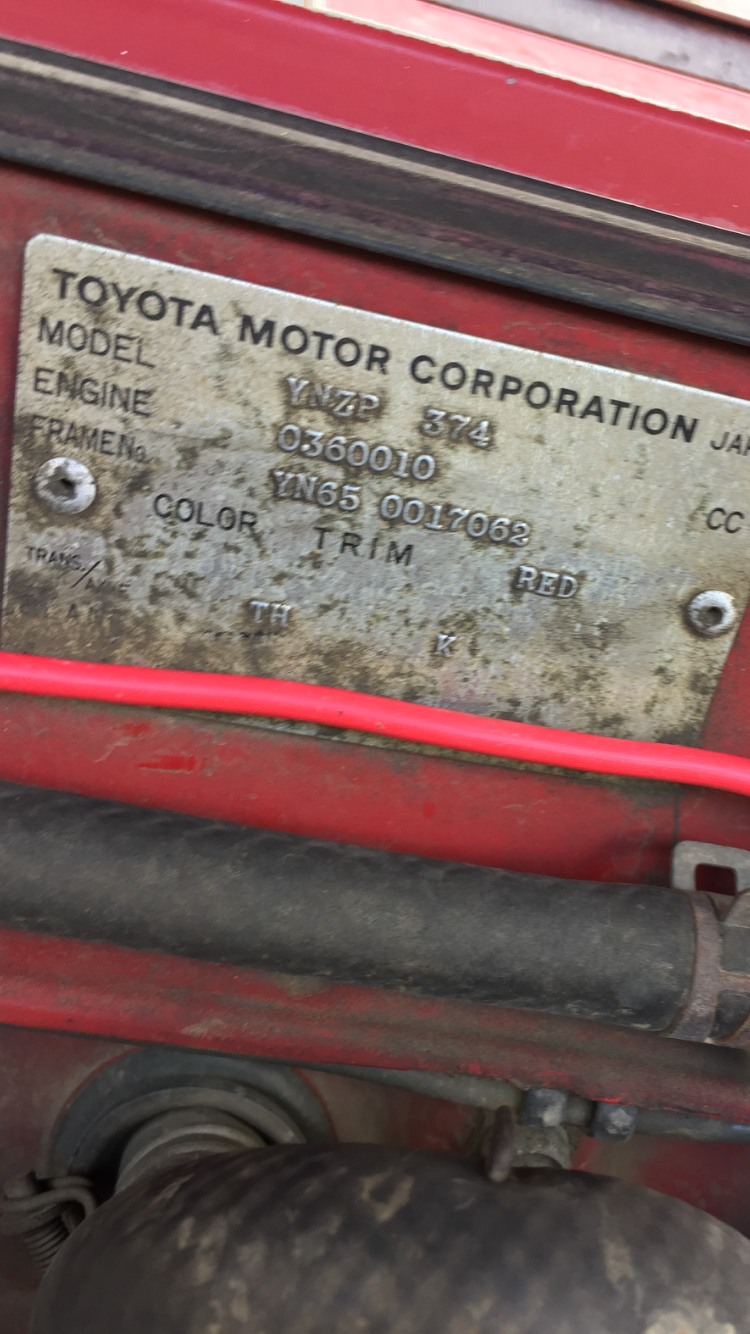
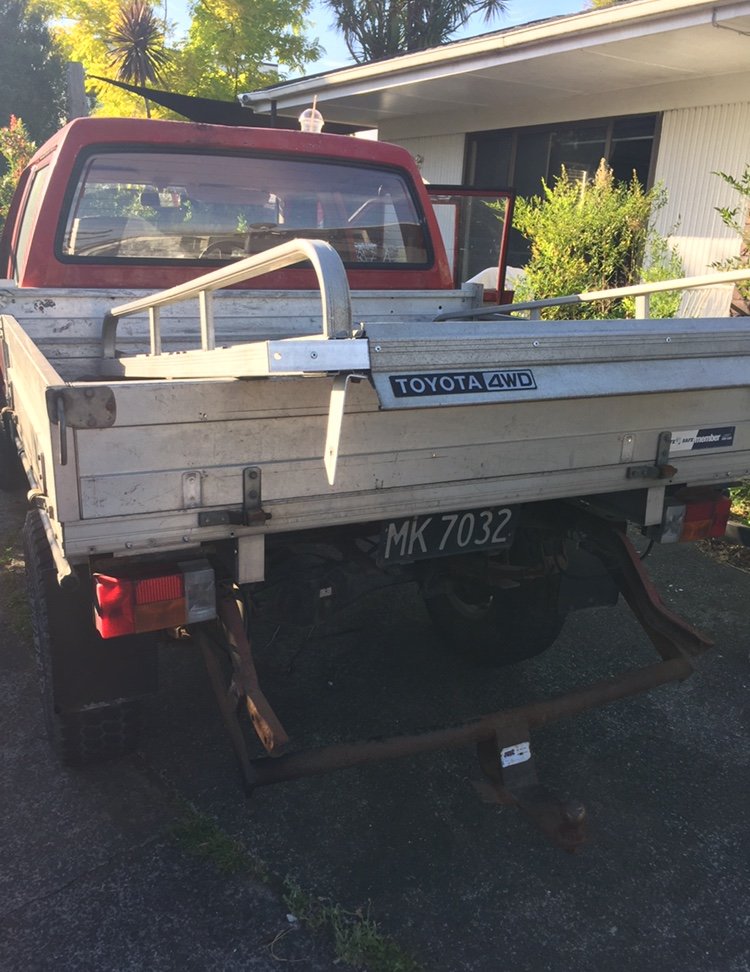
Cabs got some rust and dent from people putting stuff on the roof. Not really fussed on what it looks like but I need to look after the cab against rust at least for wof’s. took the worst back to bare metal and acid washed it then sealed it with some epoxi primer. still need to do rear behind the tray but that can’t wait till I’ve got my workshop setup. went to car colour and picked up paint for the cab. he asked how he could help when I walked in, said I wanted some red paint. Looked at me like I was some pleb. he had a look at the chassis tag, and sure enough it just says red. He looked it up in the system and it was just listed as red.. looked at me and laughed and said “ya weren’t joking were ya” its NZ new 1985 and for some reason the tag dosent have much on it aside from vin and red haha picked up full EFS kit as well. Gotta measure and change the mounts for the front shocks so it’s good I got the +50mm ones off Kris I can run till I get that sorted
1 point
-
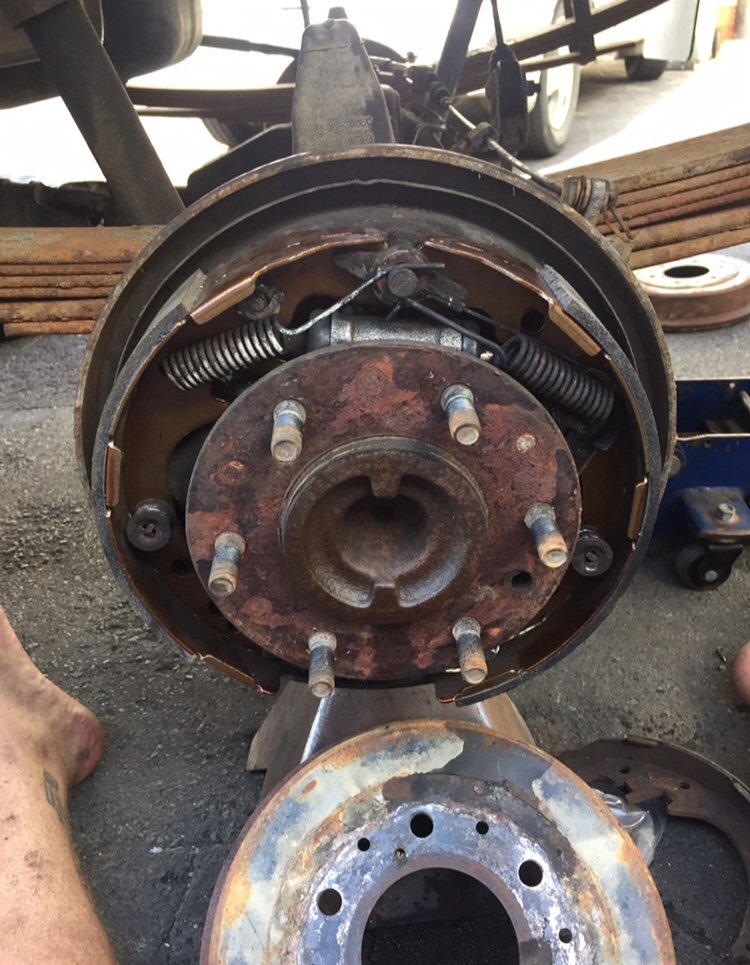
Things to do... welds on the cross support on the front seat have broken so need to weld that up. the spring wire thing under the front seat are snapped as well so I’m pretty much just sitting on the floor so need to sort that out. No idea where to get old school seat springs??? go a workshop manual too so can start getting it running better, think is just the timing. get steel and start making rear tow bar and front bar, both with built in recovery points. i replaces the rear brake cyl and shoes as well so my hand brake now works again, hopefully it won’t roll down the hill away from me again. hand brake leavers on the side of the drums are still from dirt etc so I’ll pull them apart and regrease it all. also snapped you this OS OEM roof basket witch is sweet. Alloy too in keeping with the light weight theme. think it’s factory option for a 60 series landy but it all bolts/rivers the same as the tray so can make it fit and now update my JDM fuck boy status up another notch once I get some racks to mount it on
1 point
-
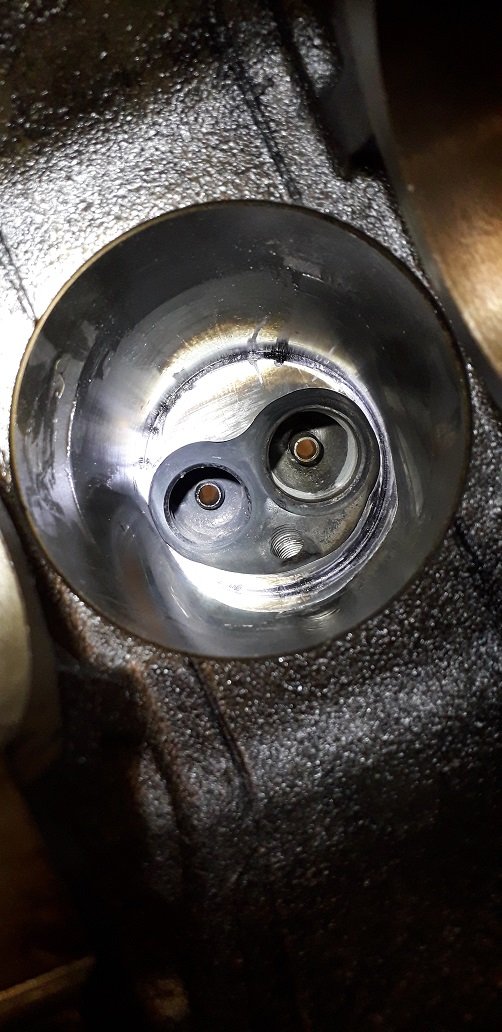
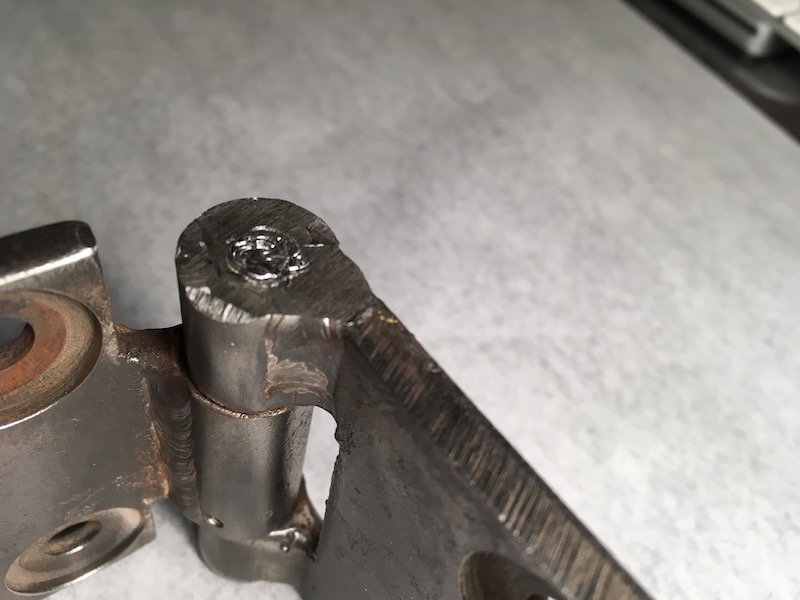
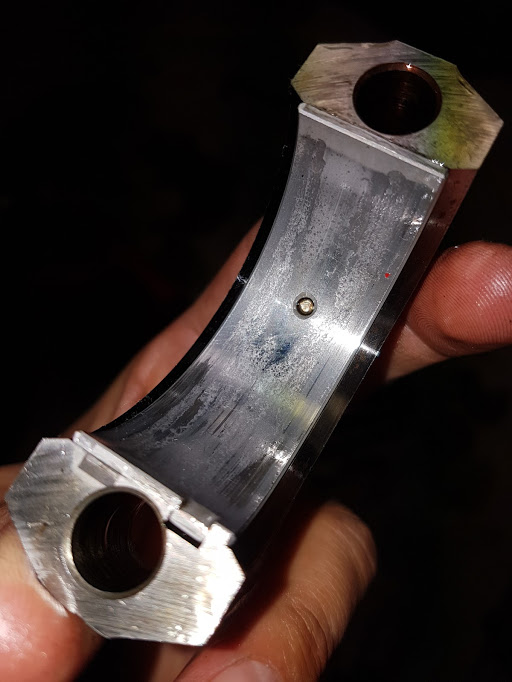
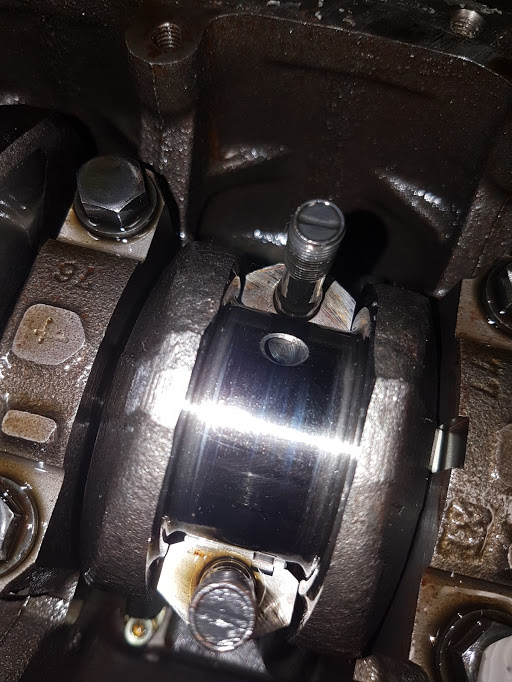
If I could go back and talk to 23 year old Markku I'd give myself a good clip around the ears. There's untold amounts of messy work that I did whilst in a rush, half cut and on a university budget... Credit where credit's due - I managed to go racing with almost no income (thanks Studylink!), but I'm about to pay the price for it now. More on that later... Last Friday after work @Rhyscar, @mark105, @japawagons and I bombed down to Palmy for the weekend to go racing and celebrate a friend's 30th. It's been a while since I last raced this car at Manfeild, so I was pumped for a good weekend. I'm happy with the look of the red bonnet too - in the right light you don't notice that it's a different shade of red... It'll look really good when we re-wrap it with the right colour! Got the car out onto the track on Saturday and it was going REALLY well. It felt peppy and was turning well. The rebuilt front shocks have made a difference! The rear felt OK, but Rhys noticed it was hitting the bump stops on the way out of some corners which was unsettling the rear - big skids ensued! I played with the rear compression settings and it got much better - good bump compliance, good turn and fast corner speeds. It felt faster than ever through the Turn 2 sweeper and was easy to point around the last corner which is a great sign. I still had a few issues with it being a bit twitchy, so now it's time to play with rebound settings and get it dialled in nicely. I left on Saturday pretty happy with the car and was looking forward to Sunday. We headed off to do some drinking with the birthday boy: Started the car on Sunday morning to warm it up and there was a ticking sound. After a bit of revving and diagnosis it became apparent that the noise was big end knock. Bugger! We drained the oil and saw evidence of glitter - Sunday was done before it even started. Turns out I could have had more to drink on Saturday night after all! Pulled the engine out yesterday and dropped the sump to inspect. First thing I noticed was this: And there was some crap in the strainer. Inspected further - all 4 big ends look like this: And all 4 mains look like this: Crank: Took the crank to ST Automotive in Cambridge today to get the crank measured and inspected. Shane said I'd got away with murder! The crank measured up perfectly and there's no grooves. Win! He looked at the big end bearings and told me that the wear didn't look like oil starvation. Most likely cause? Not enough clearance on the bearings. He's suggested that I take the block out to him and he'll get everything right and reassemble it with ACL race bearings. Now that the engine's out I've got a front row seat to see all the terrible panel work I did 5 years ago.... So back to that conversation about 23 year old Markku's bad decisions....
1 point
-
In the booth The colour is a bit of a custom blend and I got the painter to flow coat the clear, giving it a very deep look to the paint We even got a bit carried away and did the underside First time on her own feet in a few years After a long wait my engine was finished And in it's home I got it home after a year or so of going around town to work on it and started to put all the bits back together1 point
-
Got the dash done by dashboard restorations, couldn't ask for a better job, looks better than new Got the last 2 12a housings from mazda, and then had holes drilled in them The start of my 12app Now nice and shiney As I can only do so much and I expect so much I had to hand the prep and painting over to someone else The car spent a few months getting made perfect, my painter turned out to be even nutter about things being perfect than me.1 point
-
The car sat like that for about a year as I waited for a mate to find some time to stat helping with the panel work. So while the car sat and I waited, I started to get some of the brightwork brought back to new. And then because I'm from a V8 family I got a bit carried away with the chrome. Yeah, ya get the hint, I like chrome1 point


_sedan_(23230030334)(1).thumb.jpg.34d765361d66c78db614bae6ea2c156a.jpg)


This leaderboard is set to Auckland/GMT+12:00