
Leaderboard


Popular Content
Showing content with the highest reputation on 04/16/19 in Posts
-
The wheels went out to Pine engineering. I was not stoked with the old fasteners. One lip was suspect. Actually a lot of stuff not real flash. I was not disappointed I had them done by Pine either.12 points
-
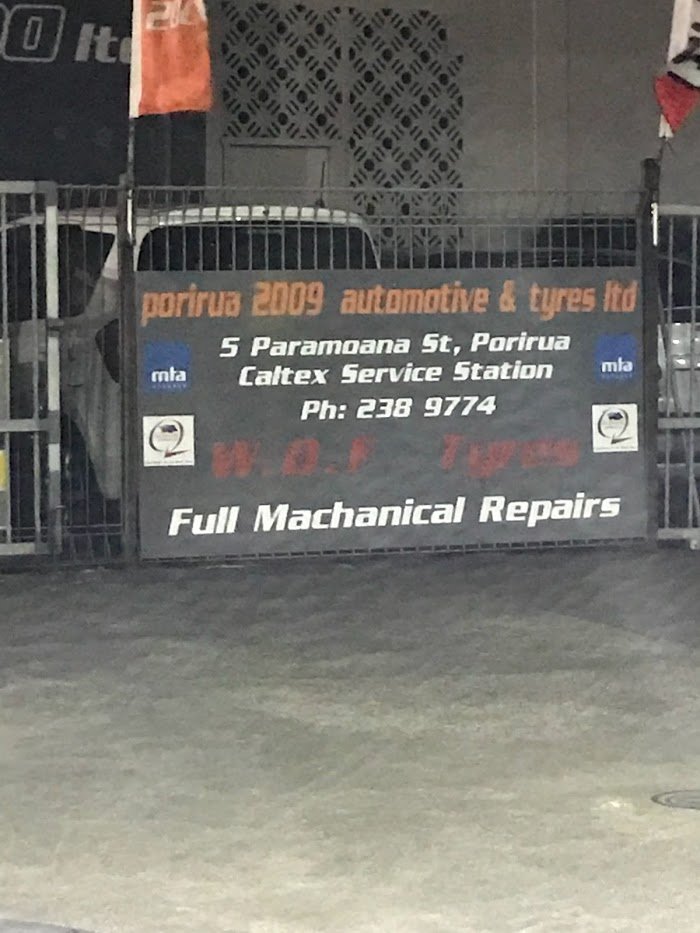
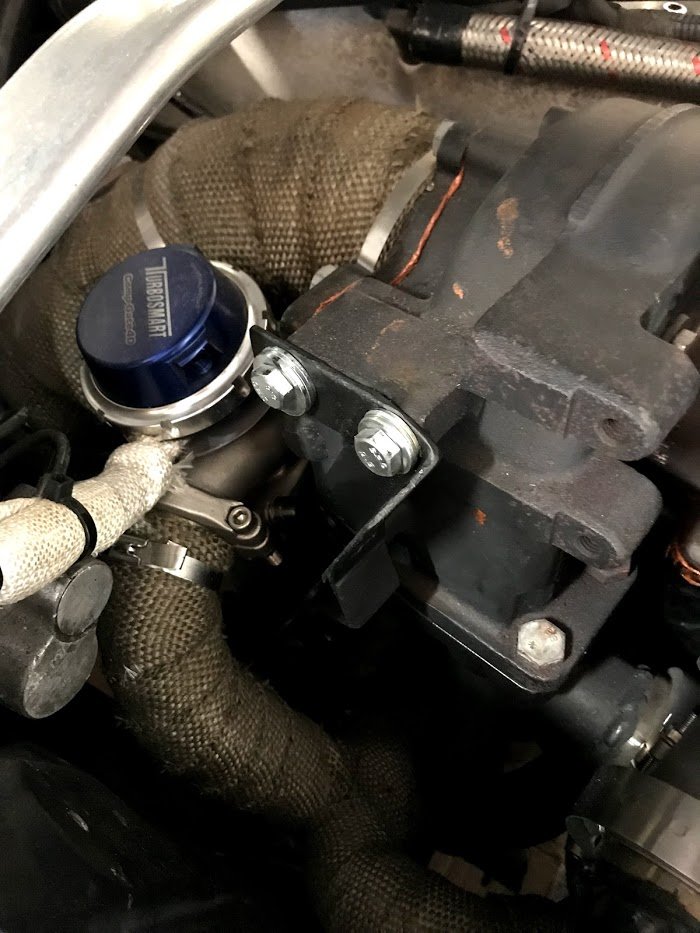
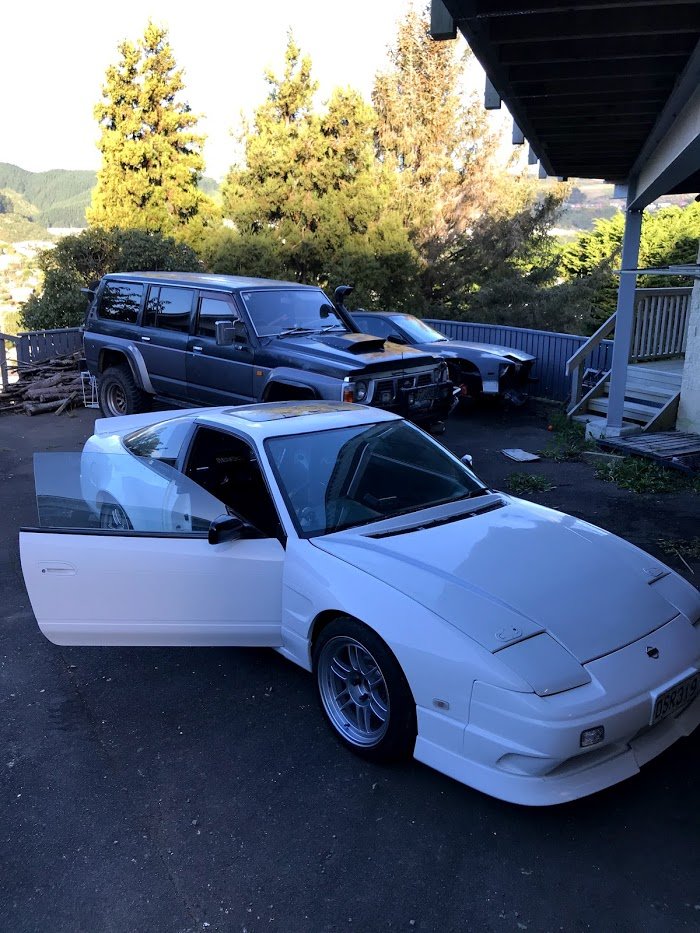
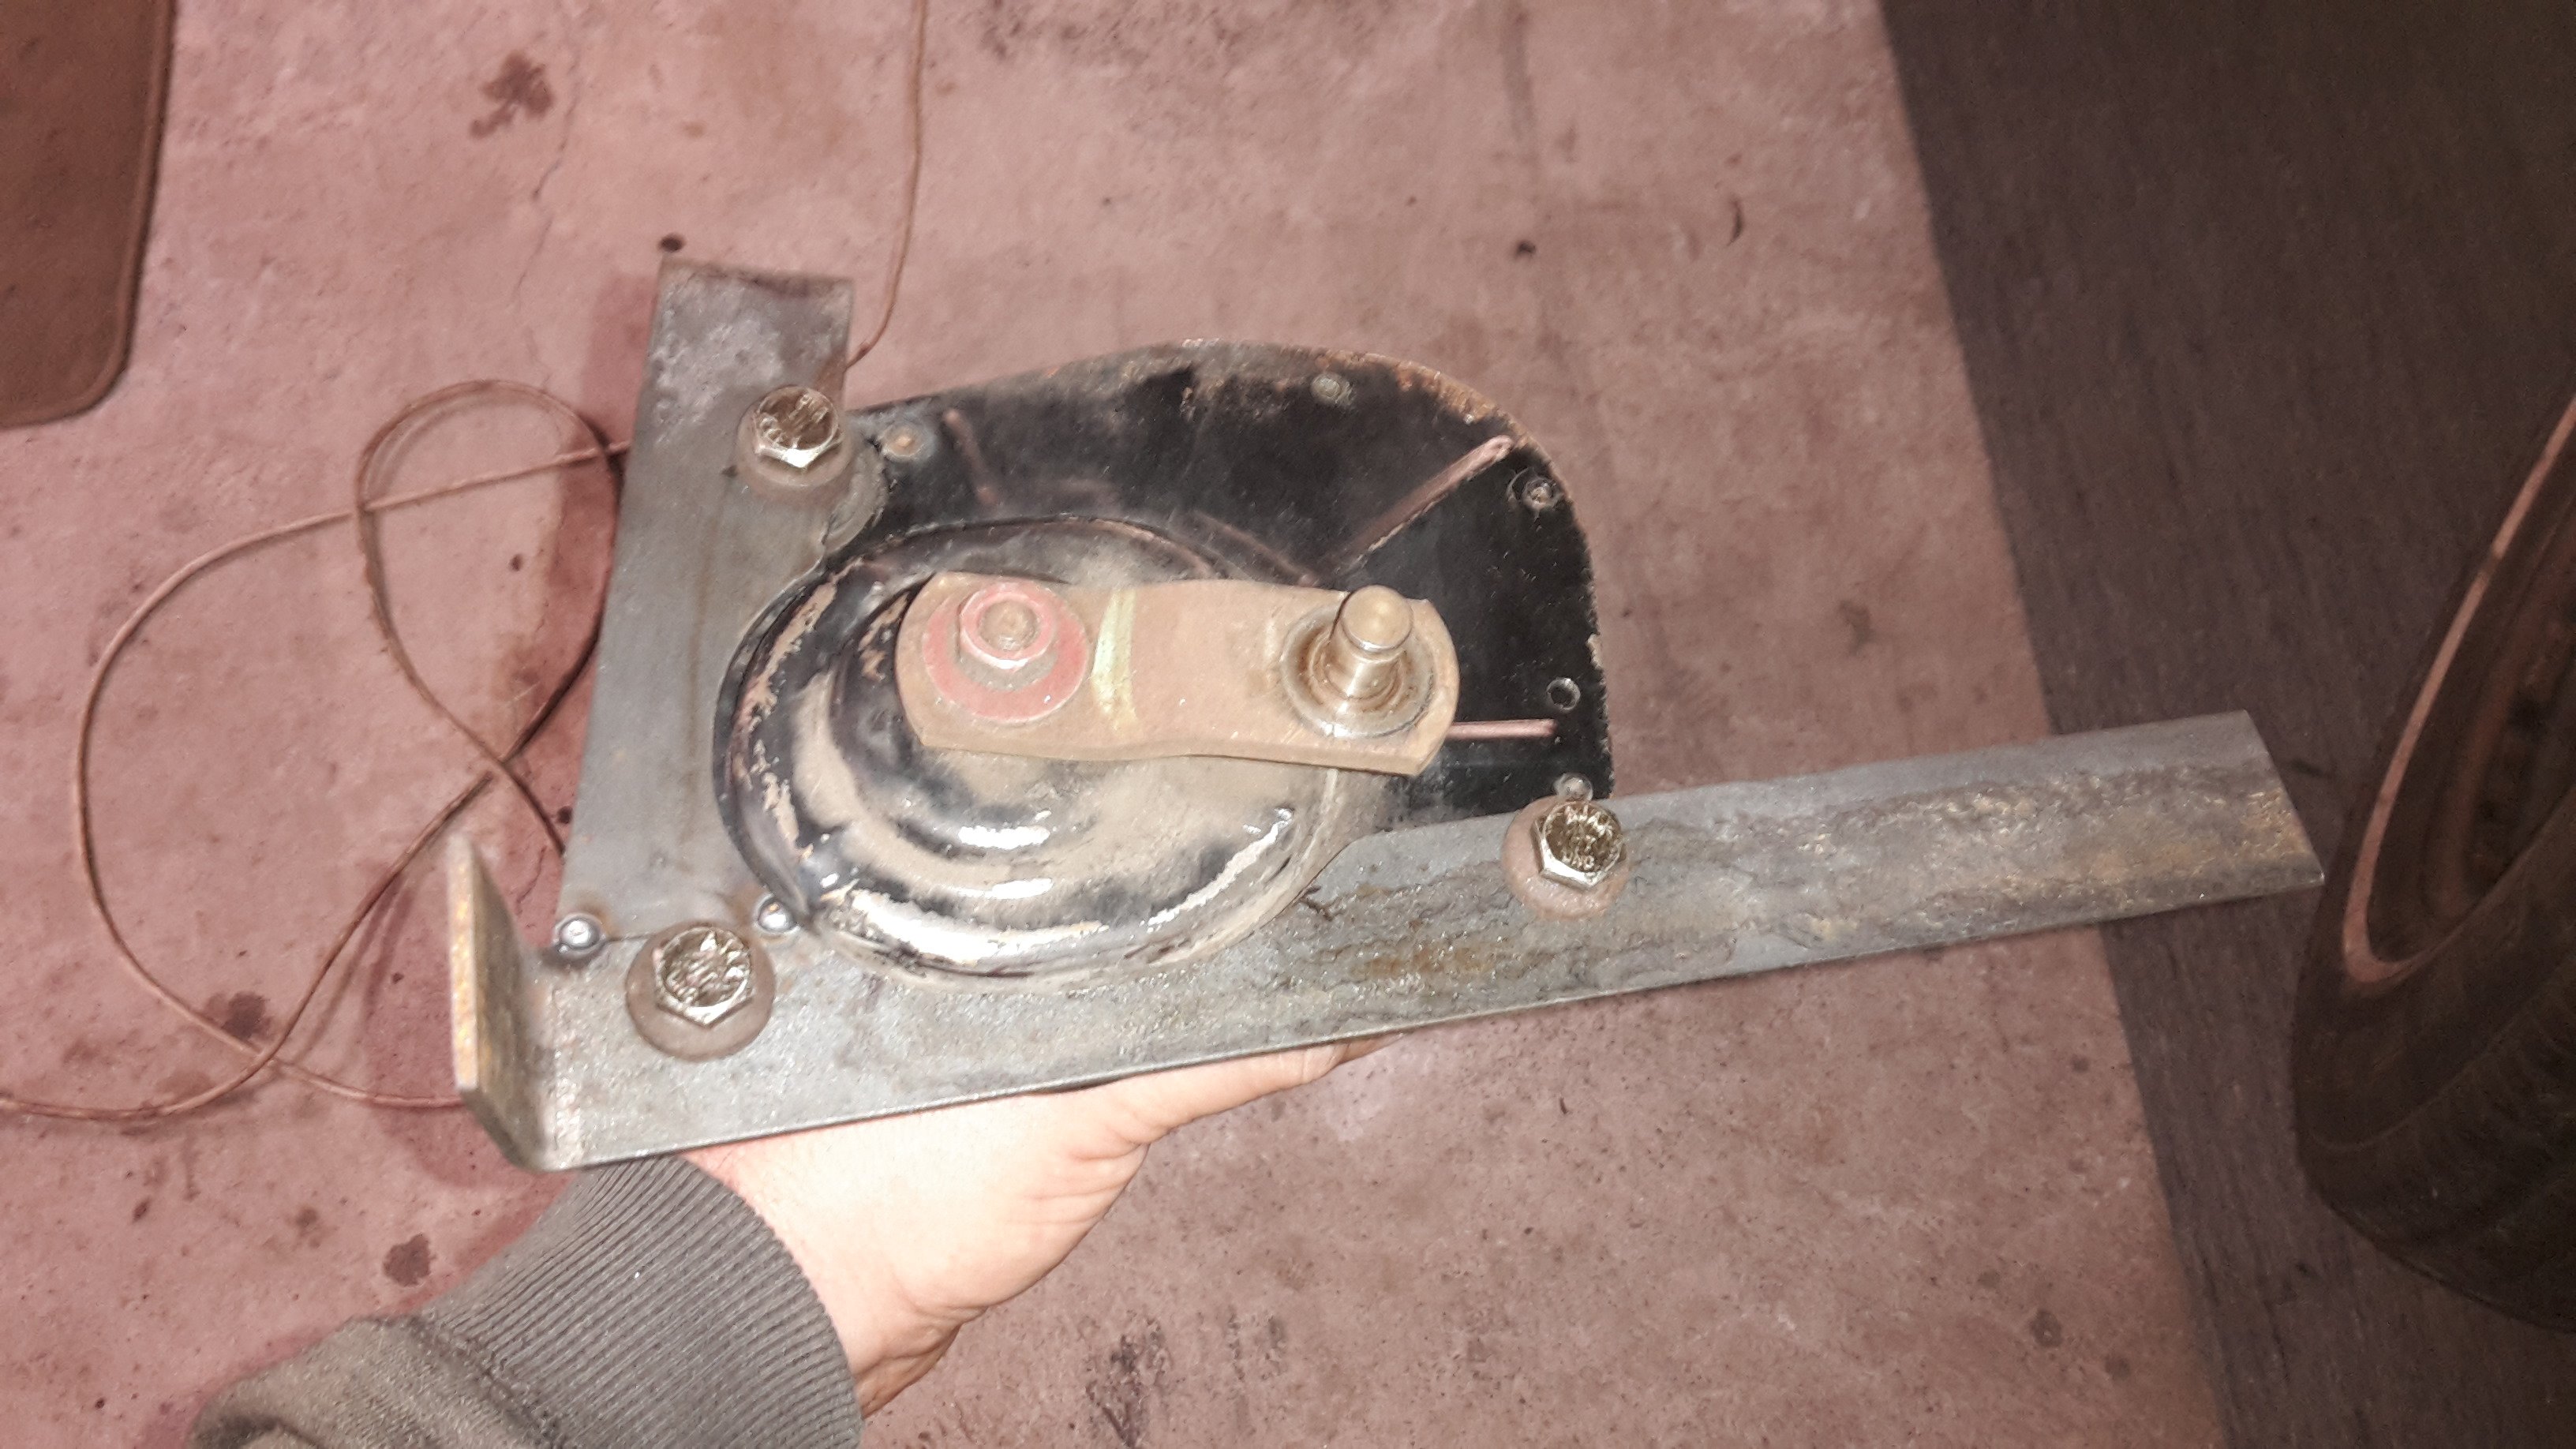
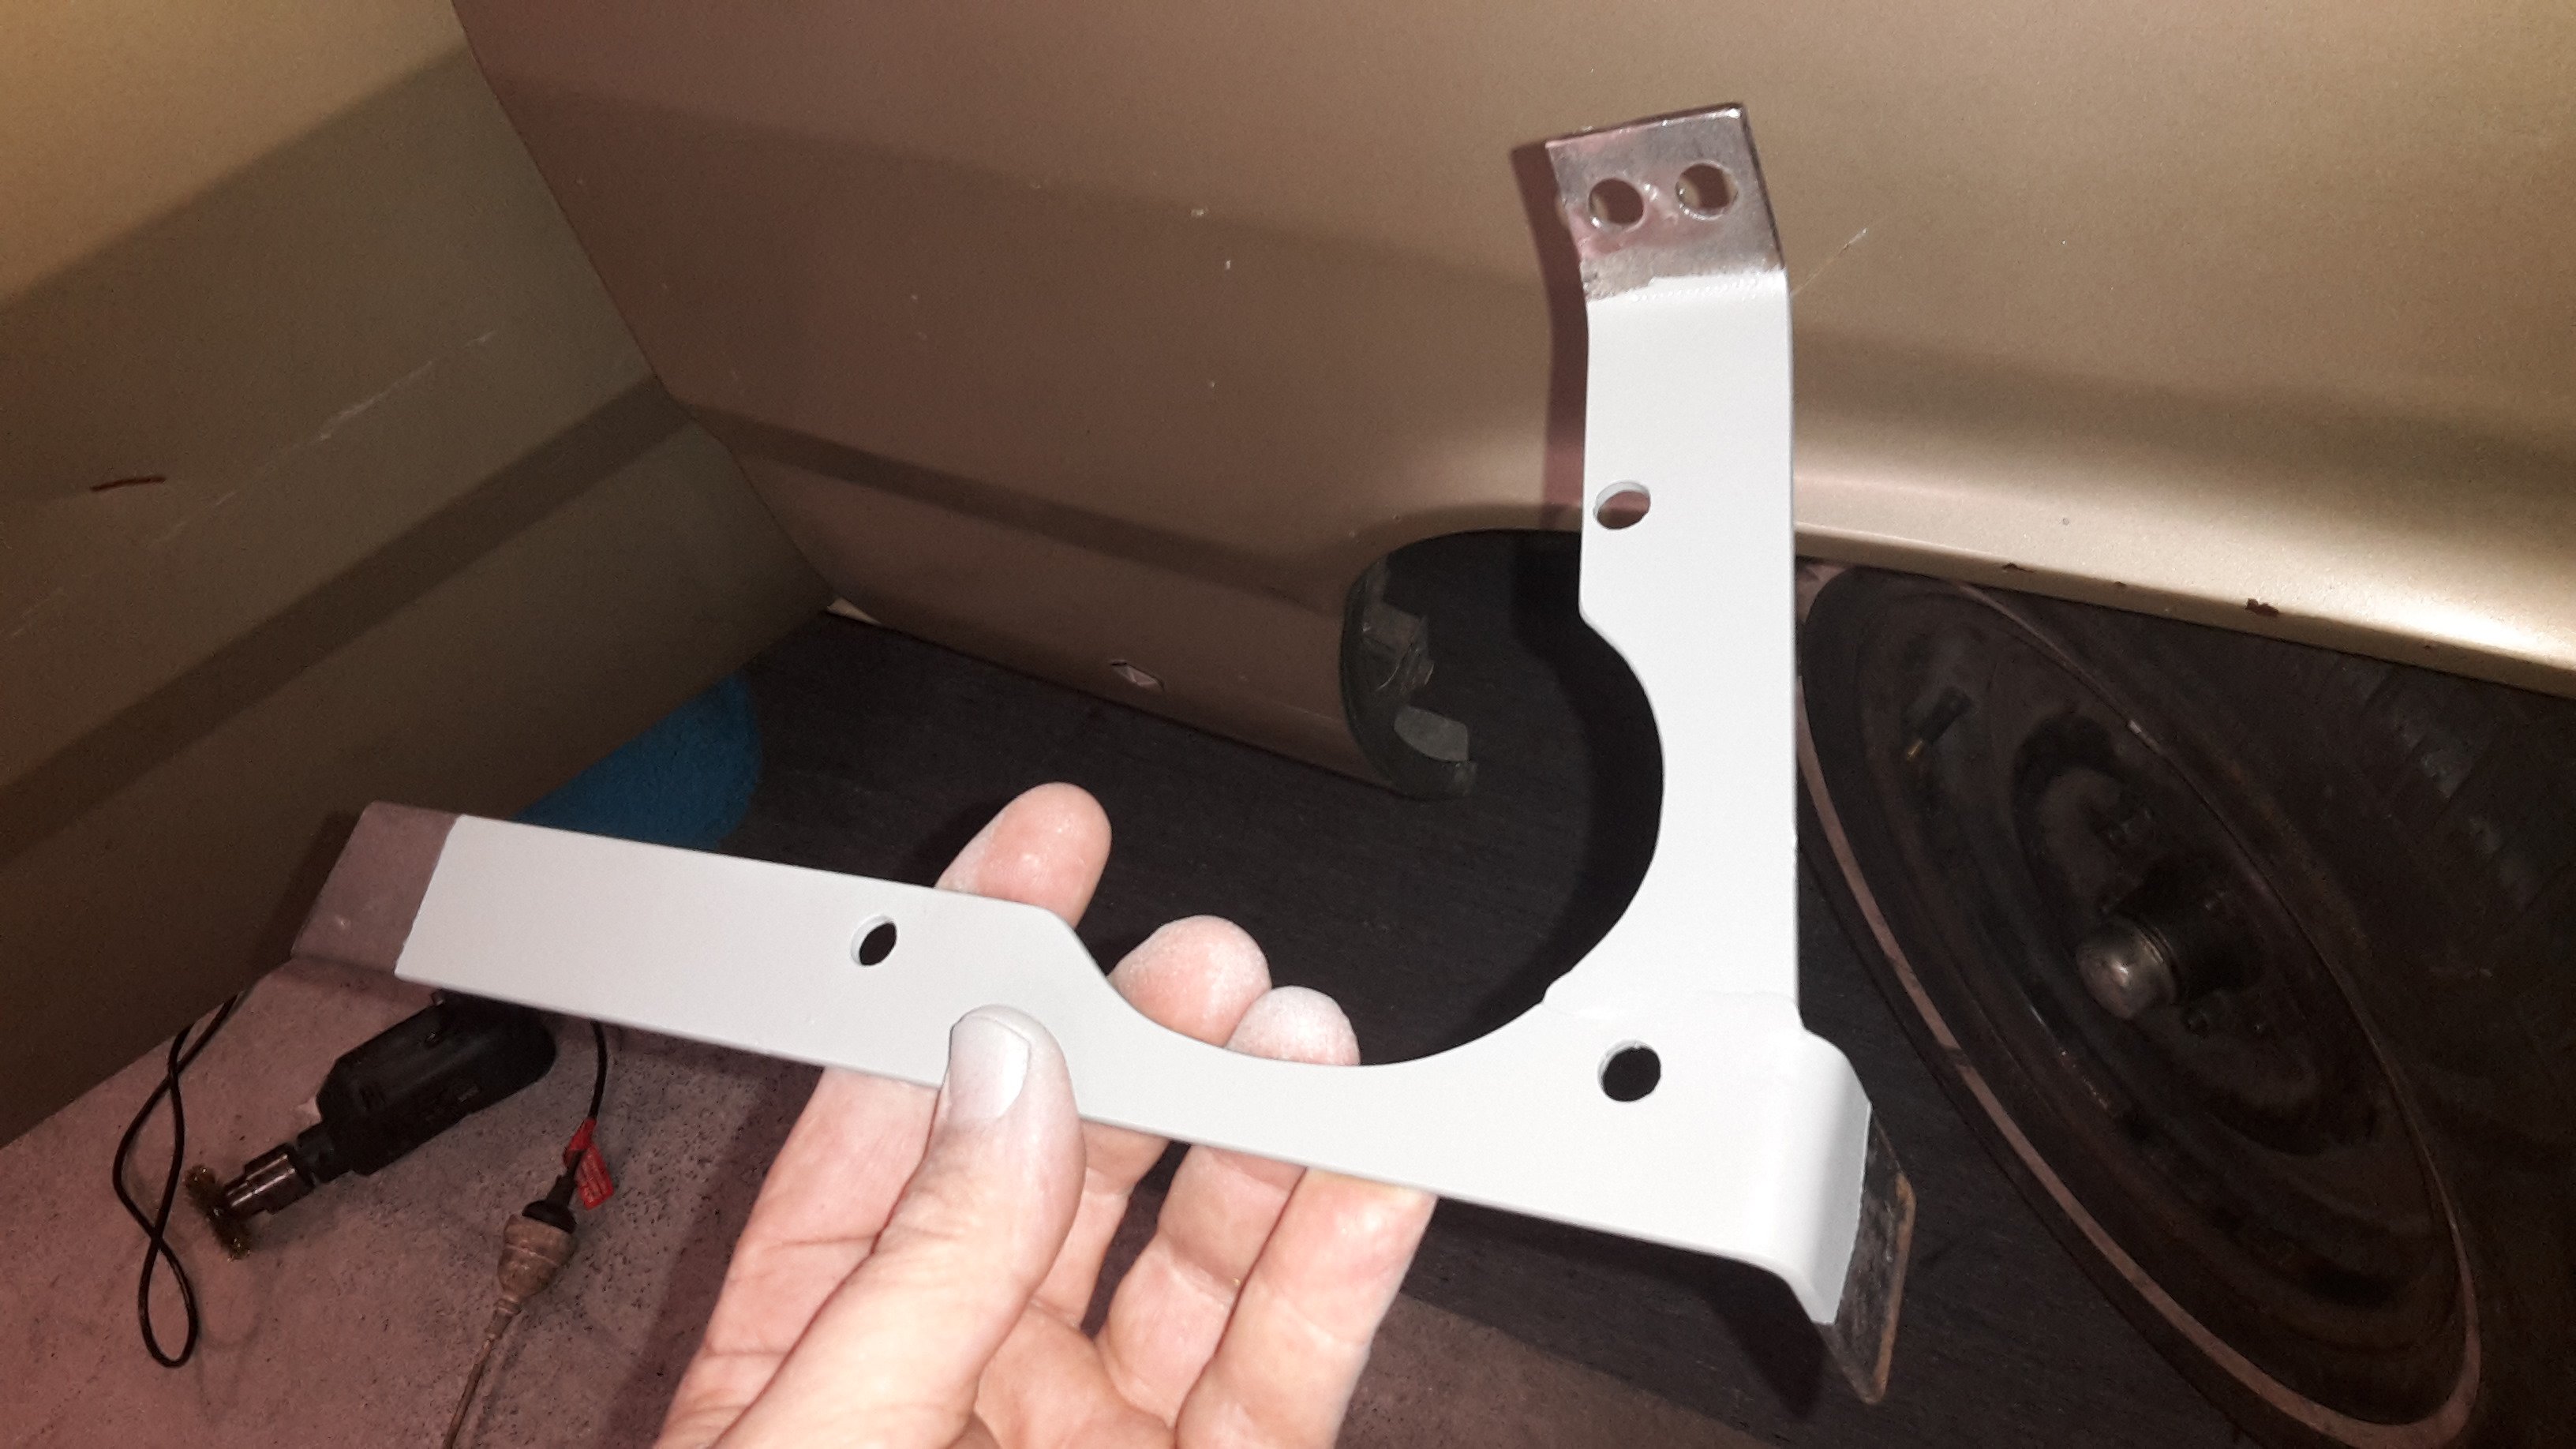
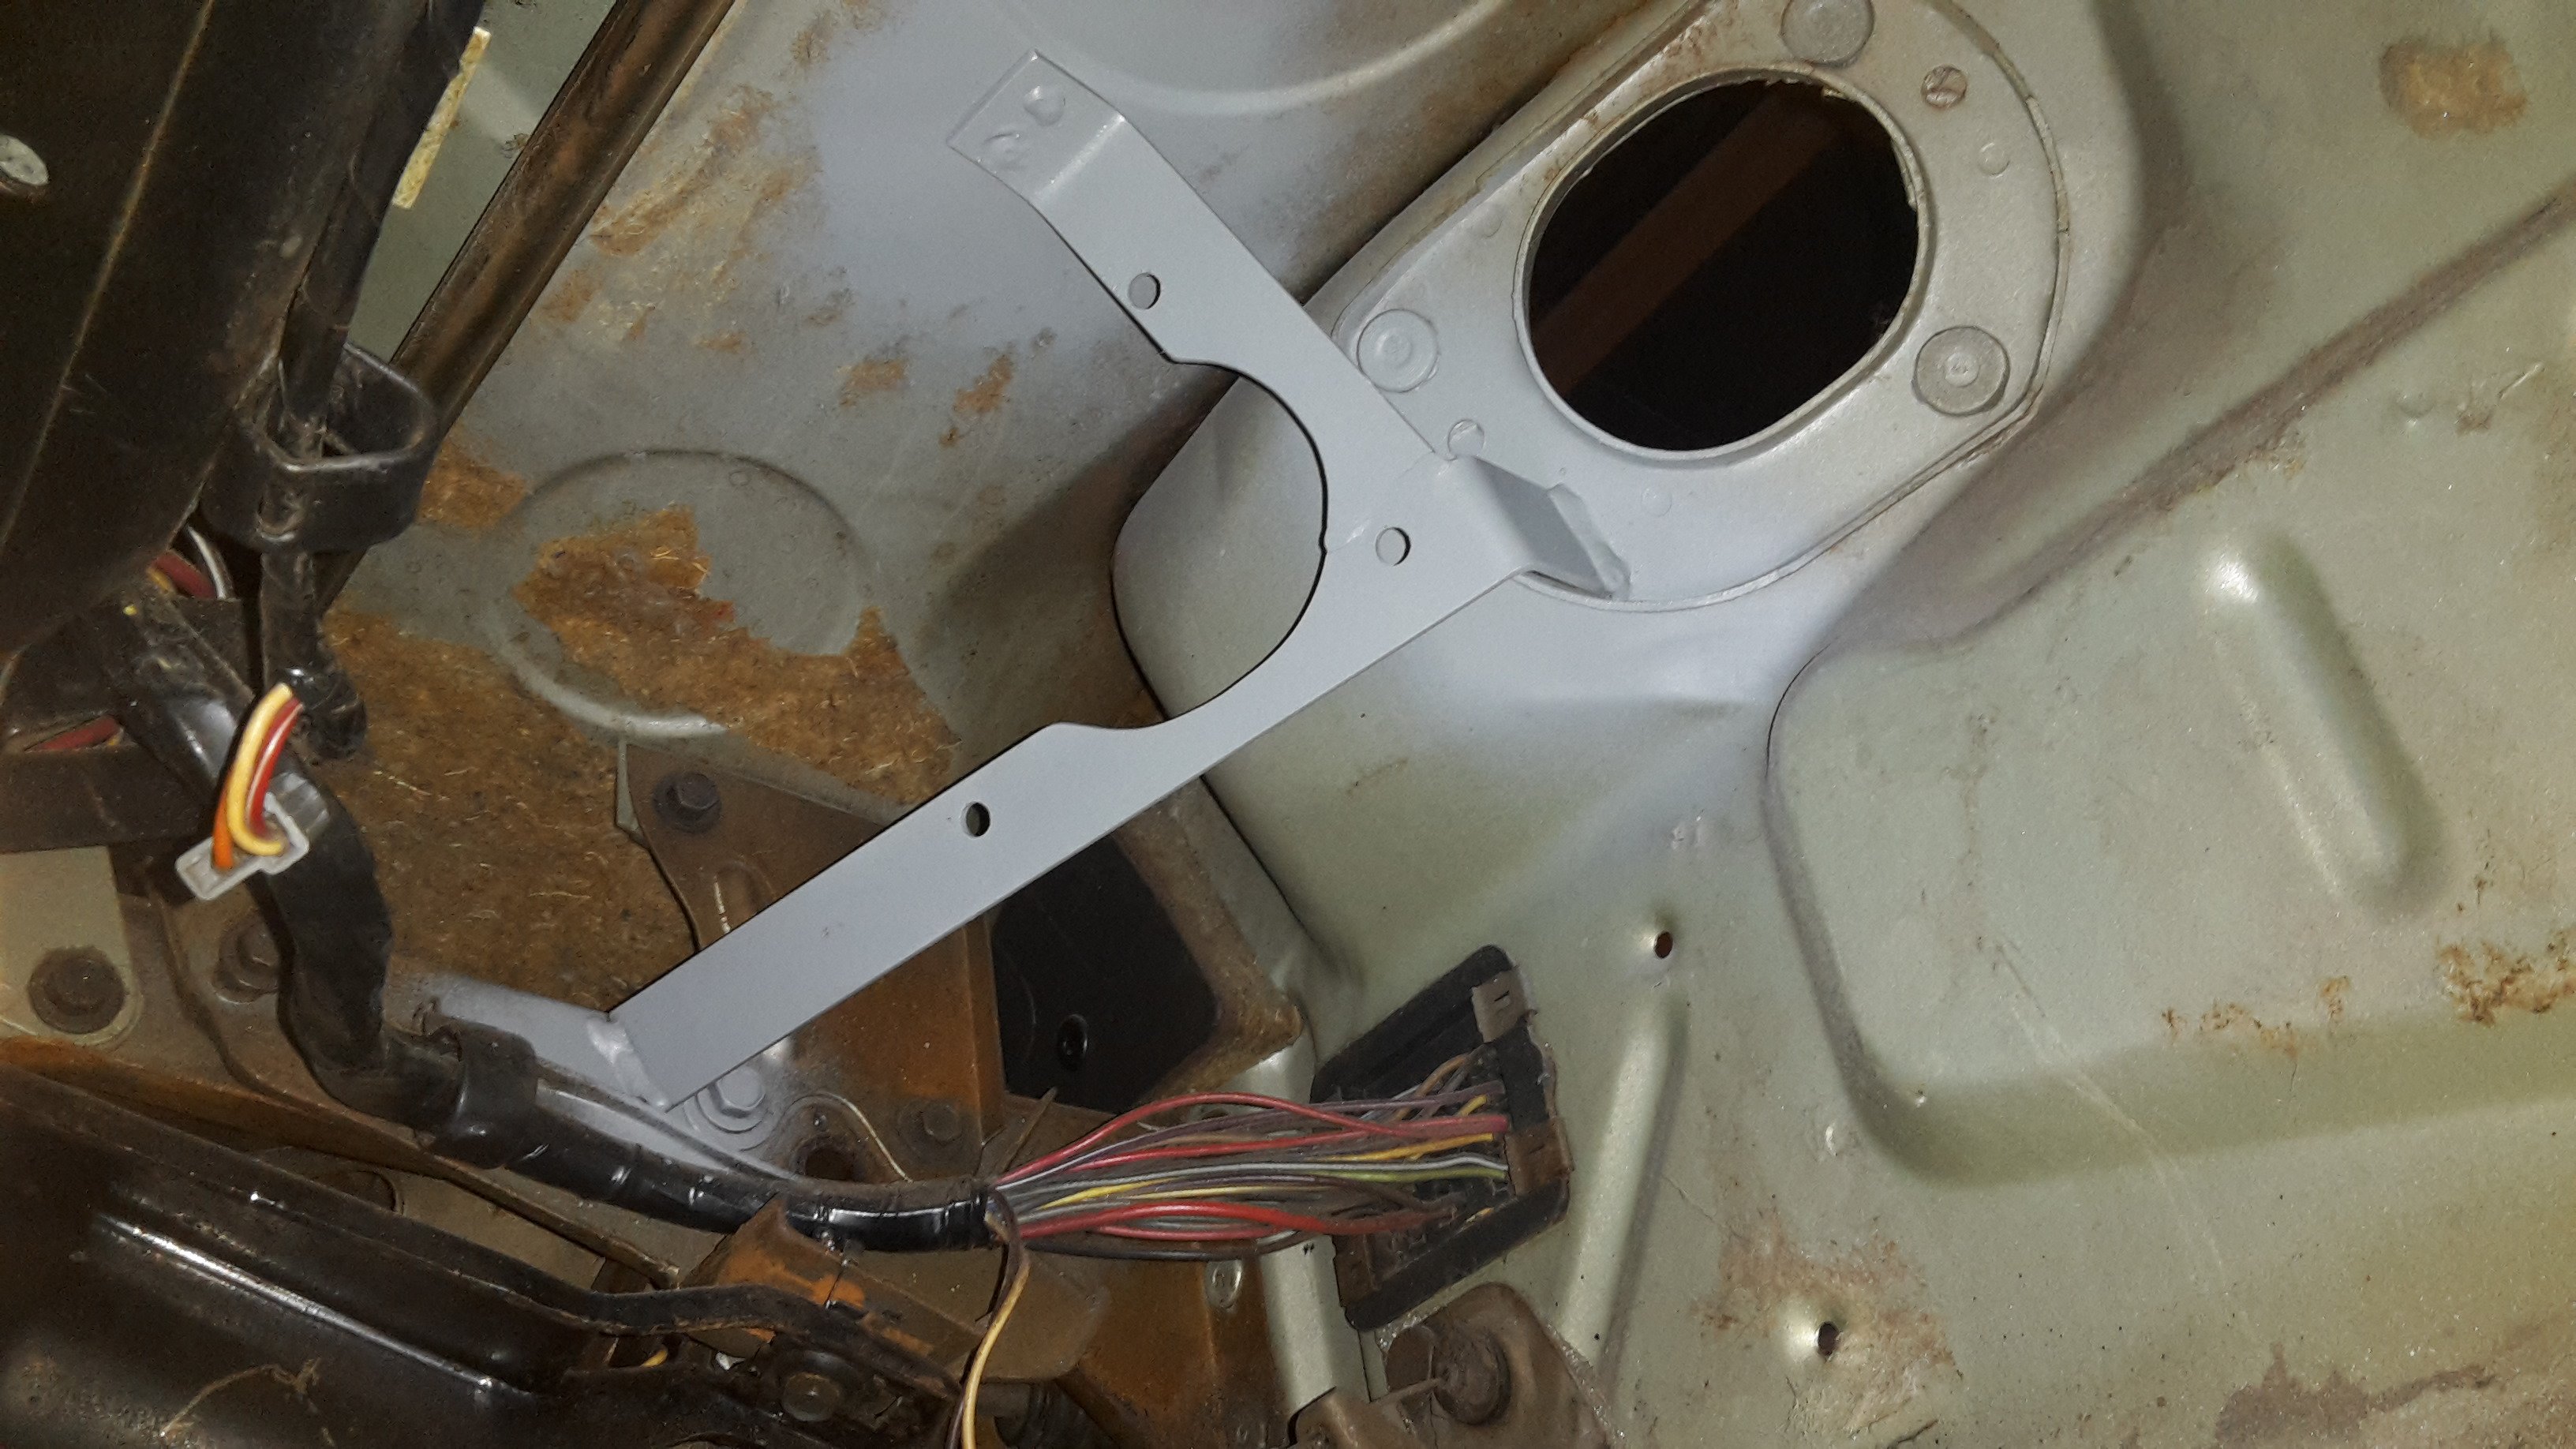
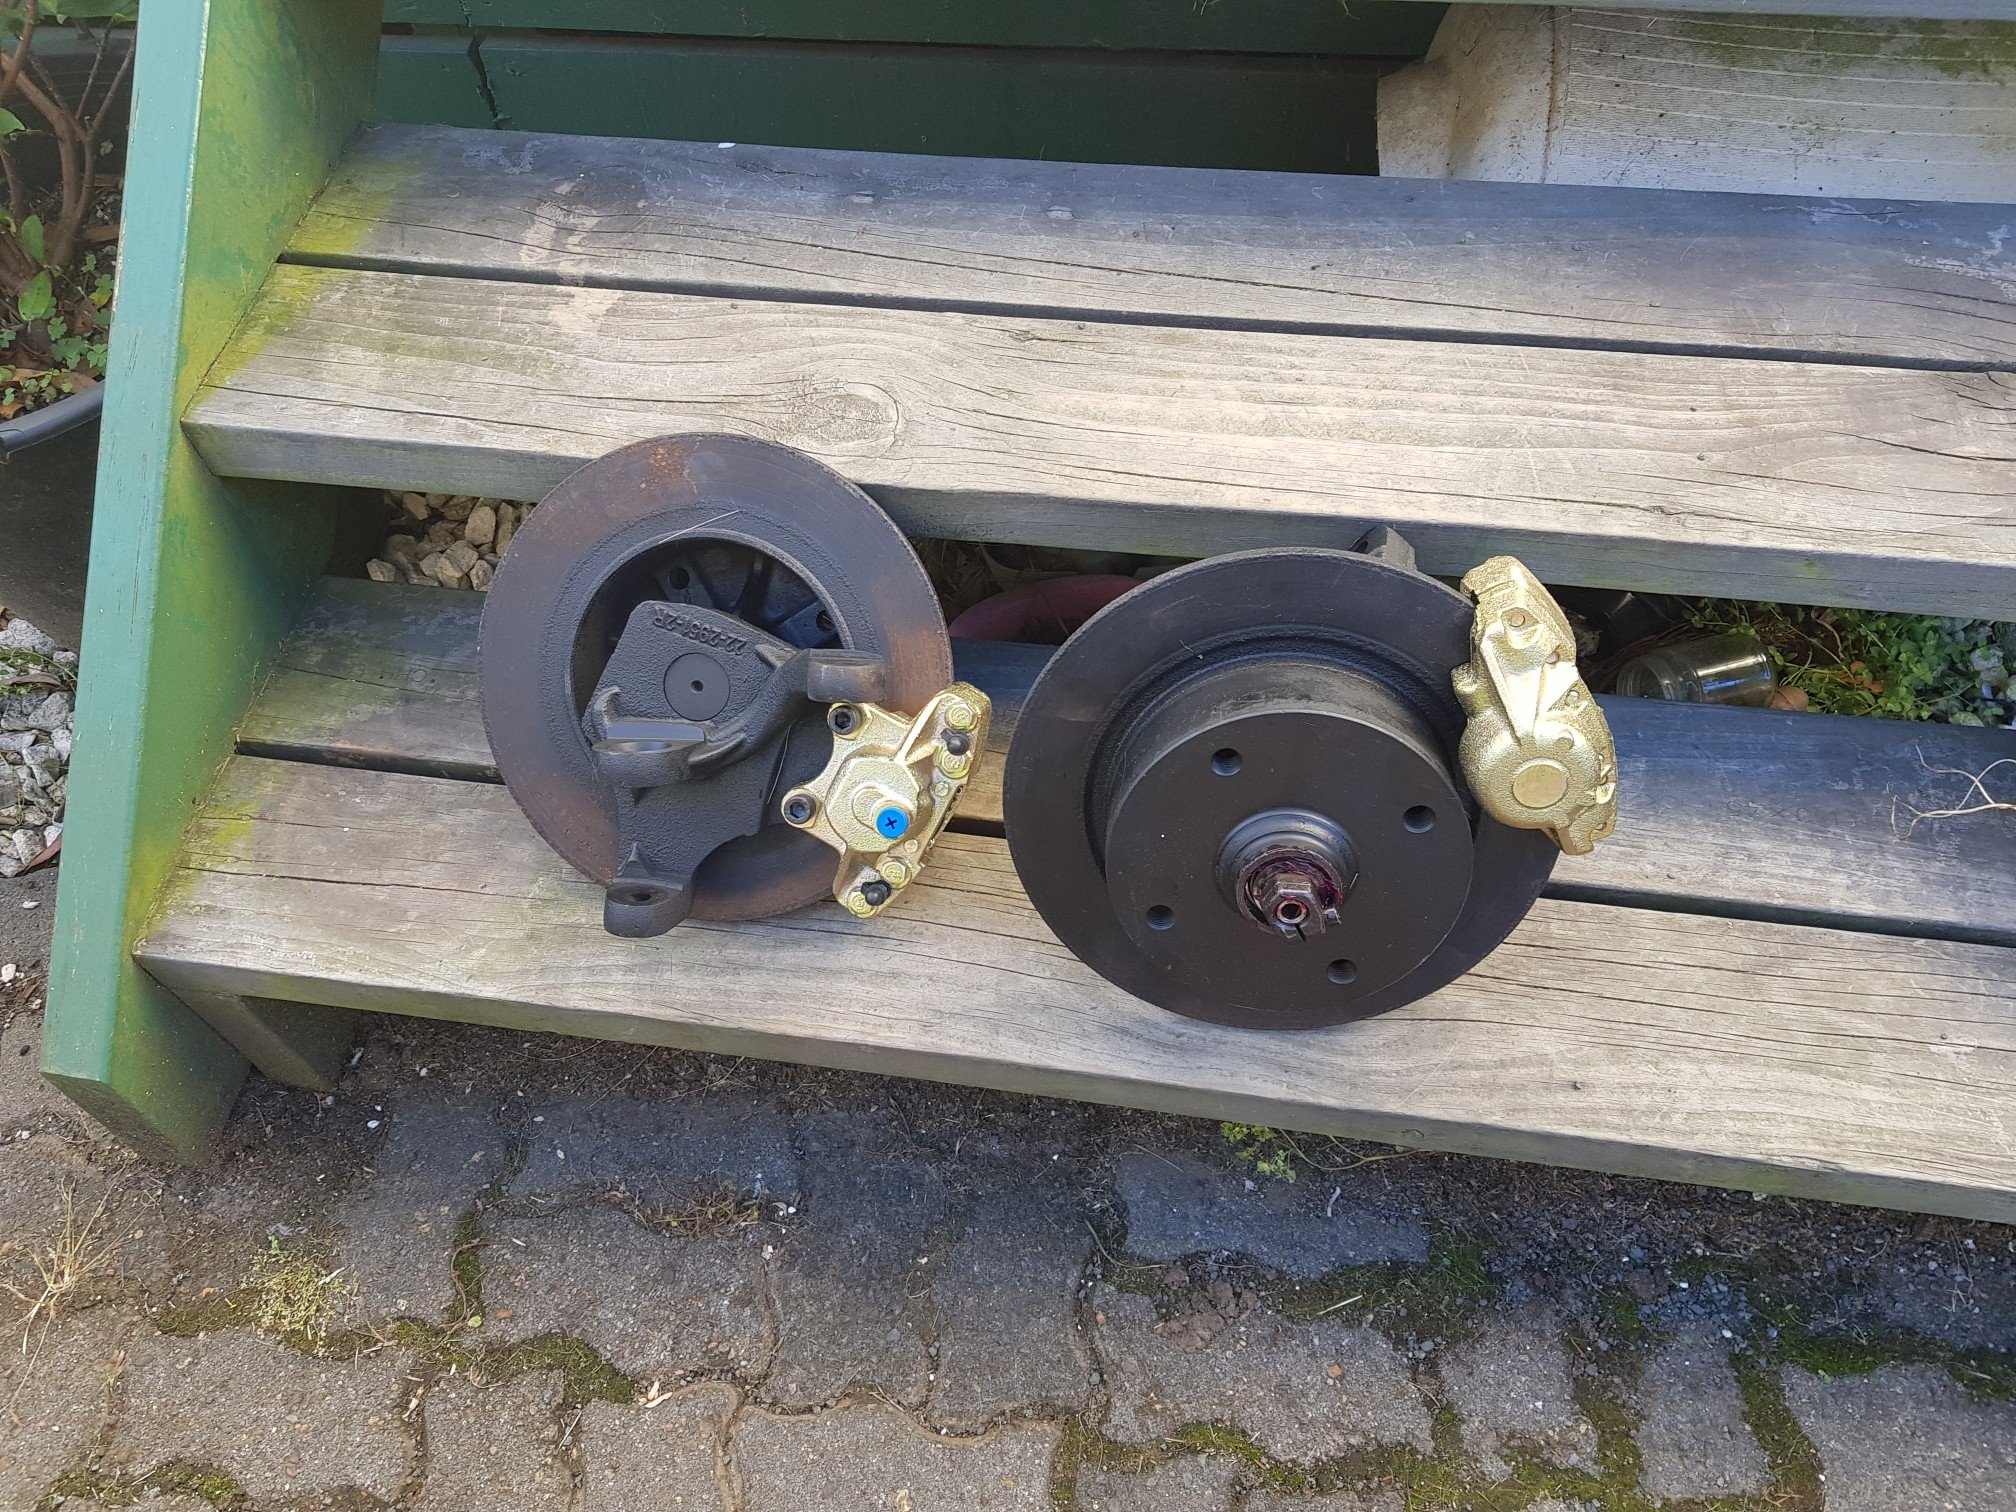
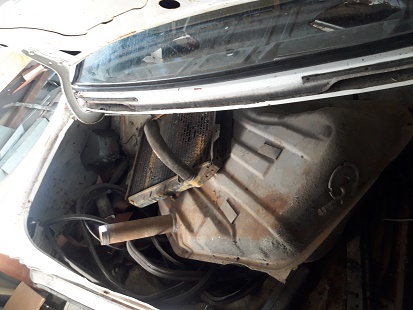
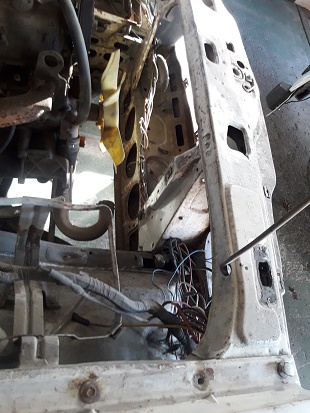
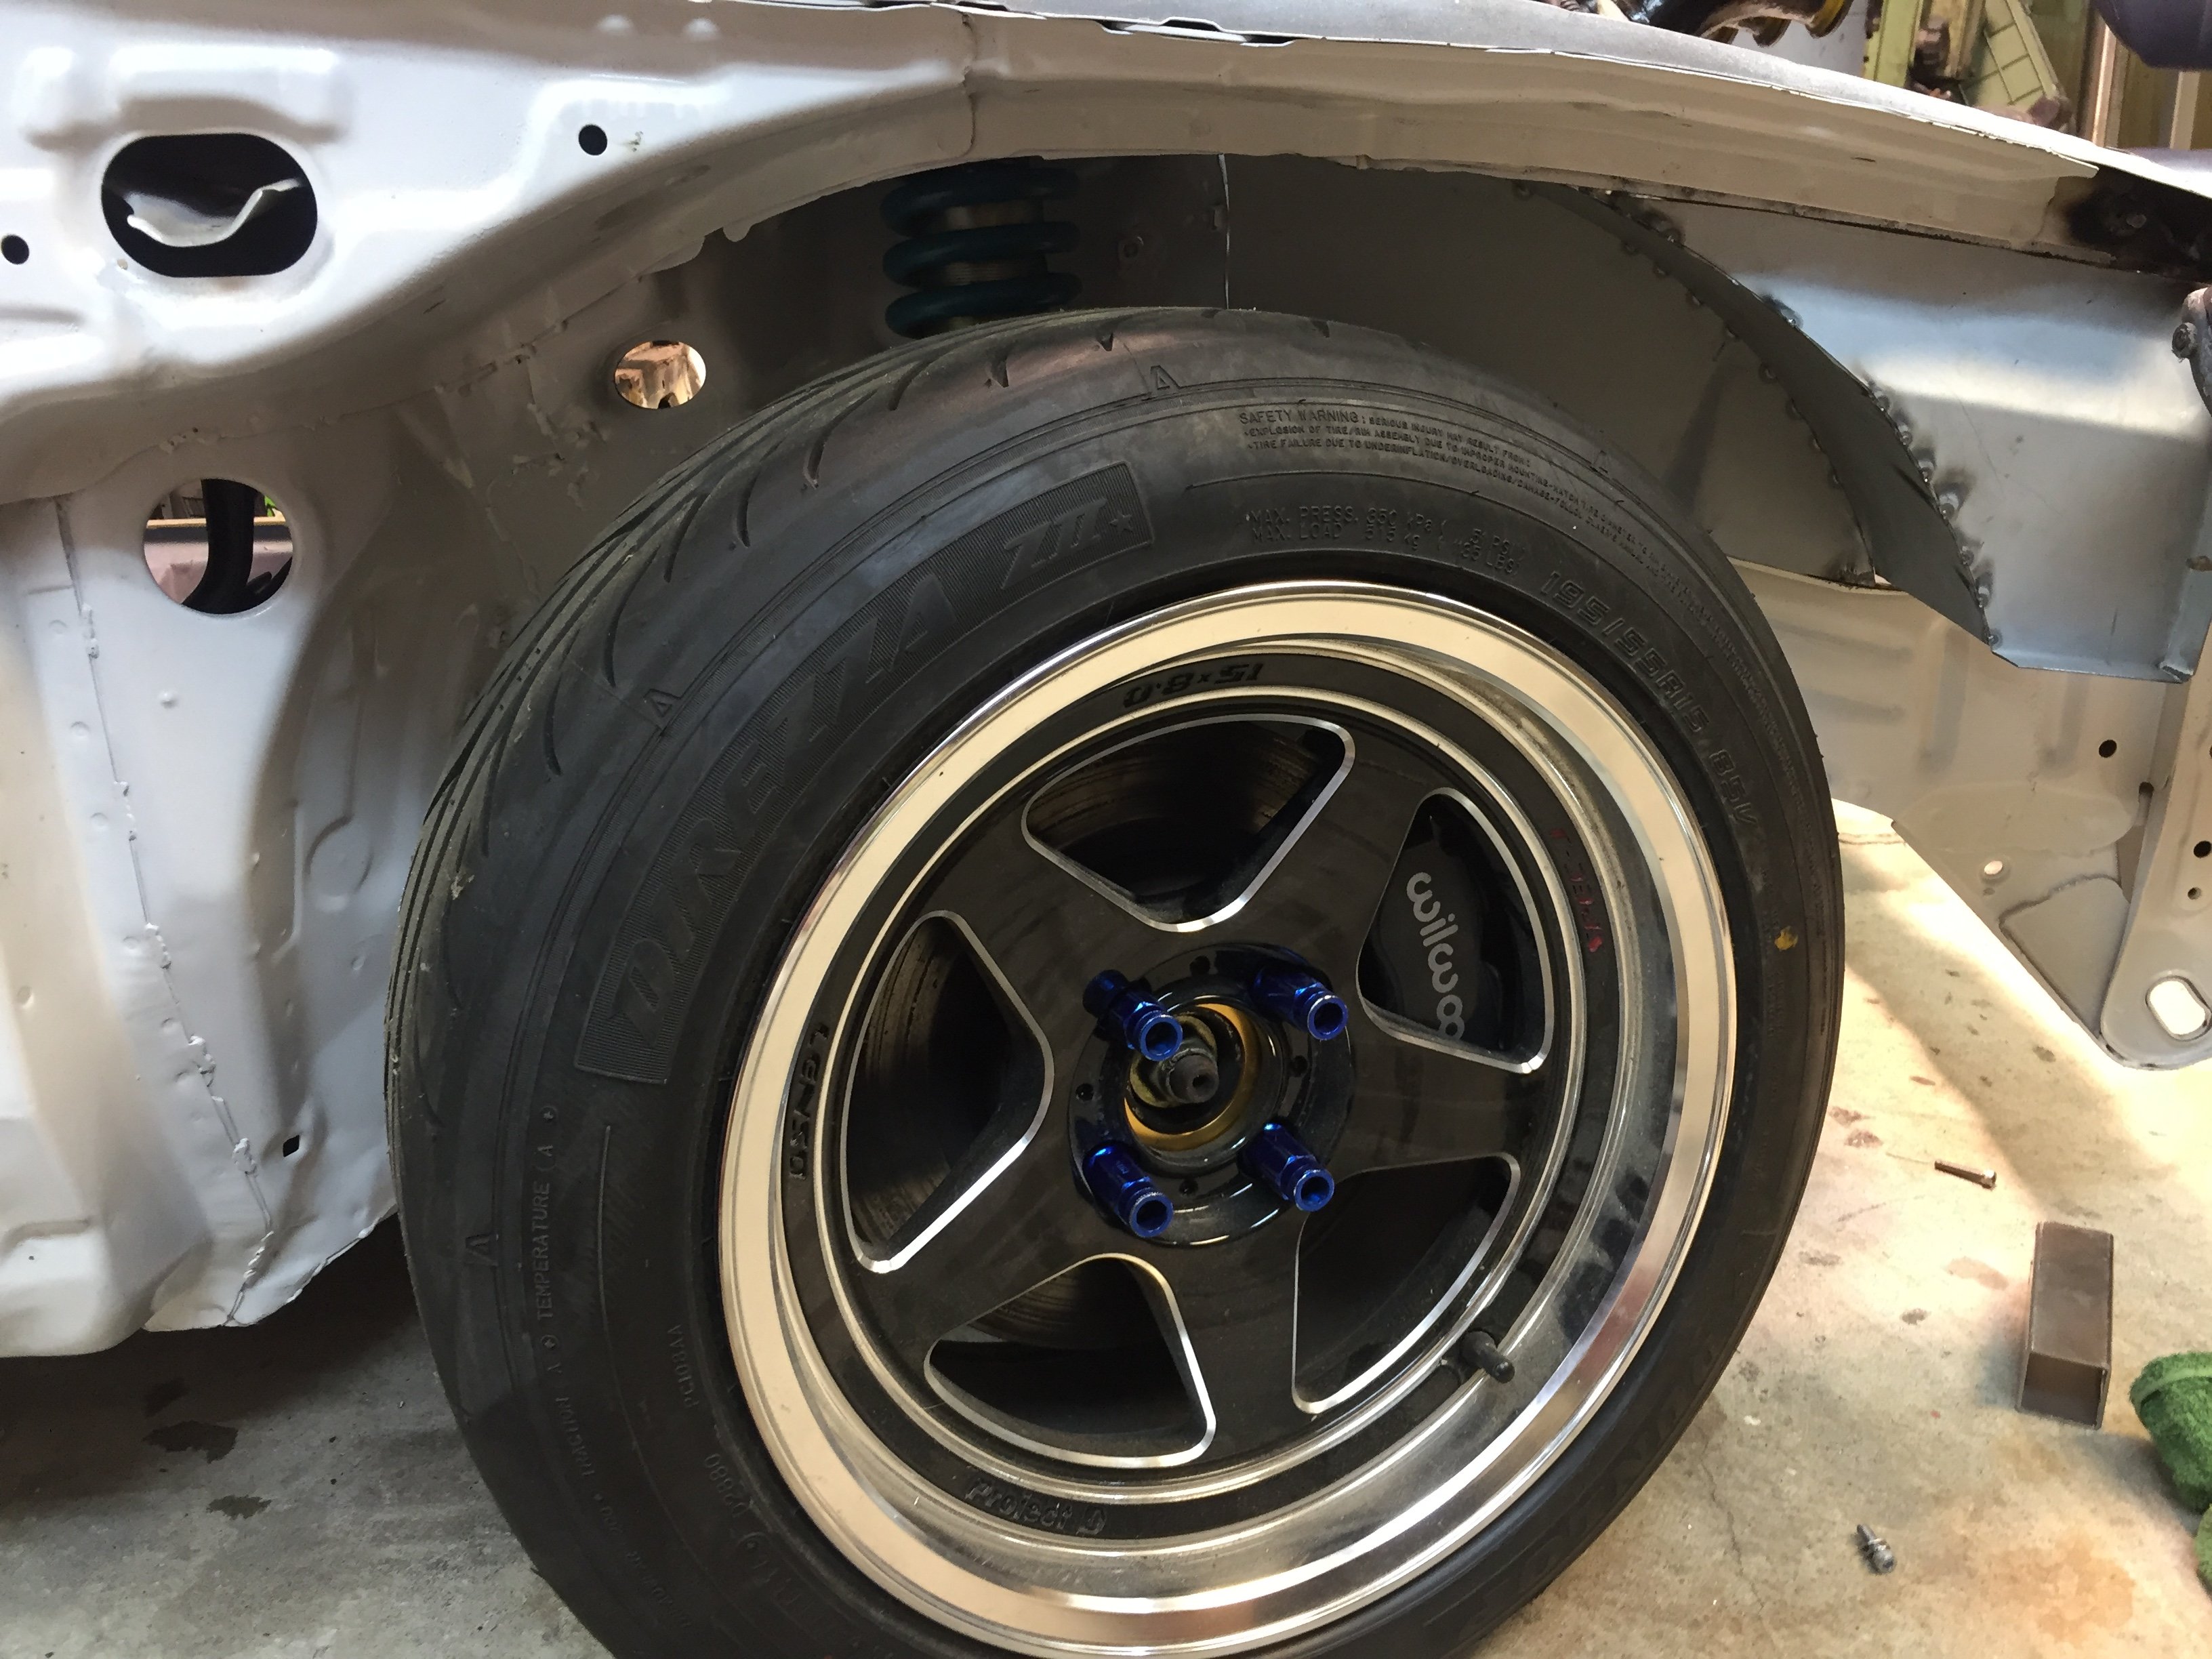
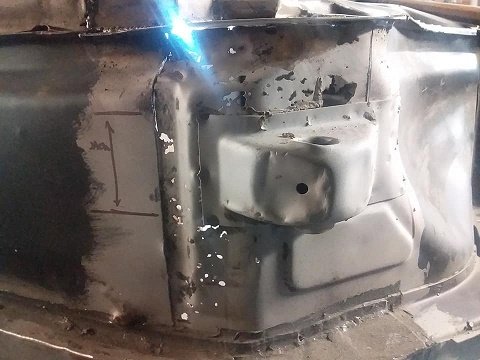
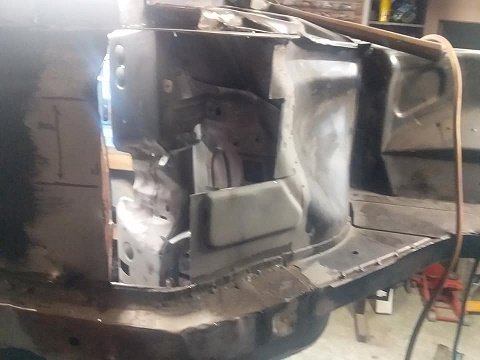
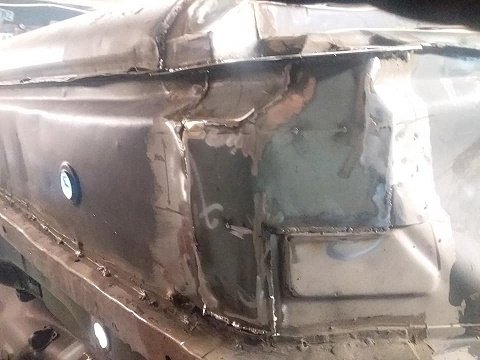
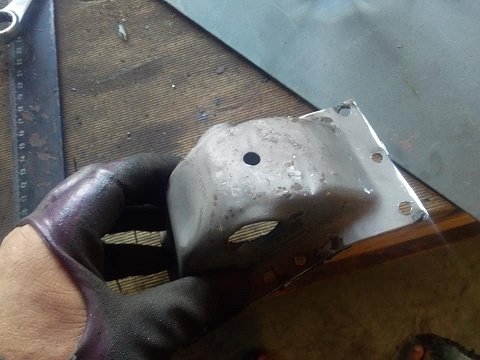
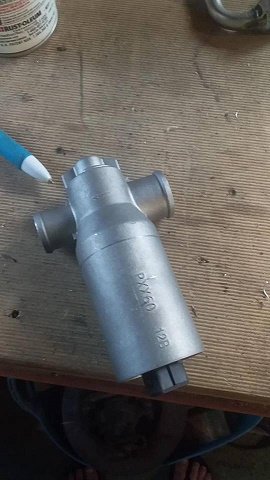
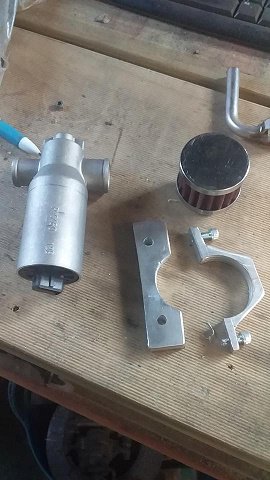
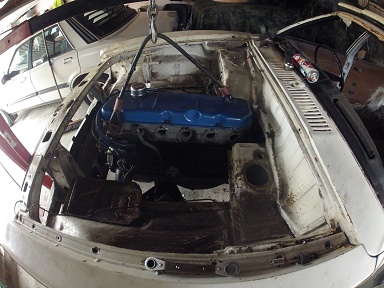
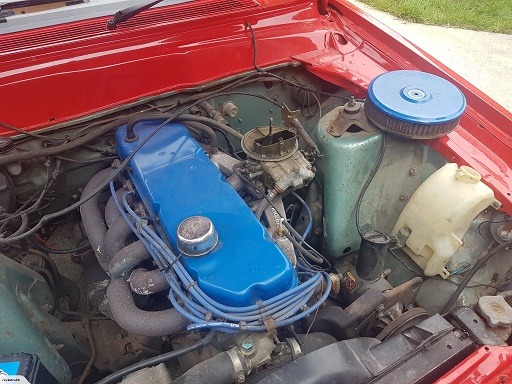
Test drove it to check the brakes, holy crap what a difference. I knew bigger rotors would mean more leverage but again, holy crap. Easy upgrade for lots more braking power. The original pads had a 2mm over hang (DB1170) so I changed to DB1346's which are for some kind of 4wd, possibly a Landcruiser. Exactly the same mounting holes but the pad material is a little lower. Also, after that test drive I realised that all the testing I did for the gauges meant the low fuel light wasn't lying. Filled up a couple of fuel containers with BP 98 and saw this sign and thought it was funny. Someone MUST have noticed when it was being made and just thought fck it, right? I've now fixed the turbo brace by welding on a tab to reach another bolt hole since the other bastard bolt snapped. This time I made sure to use new 8.8 bolts. Another cert thing is the bonnet never had windscreen sprayers. See: Drilled, filed and stole from the other 200sx to now have sprayers. The hole isn't as ugly as the photo suggests: Next I need to make some heat shields between the fuel line and downpipe. I am tempted to run braided line on the passenger side to get rid of the pointless hard lines along the firewall and get it away from the exhaust side. But S13's are weird and have a section of chassis rail missing on the passenger side so the fuel line wouldn't be protected for about 30cm, the only other option is the go through the trans tunnel but I'm not sure the certifier would like that. EDIT: man it feels good to drive! Sounds fcking awesome, much more aggressive idle than my old Chaser had (same engine). I think the exhaust manifold I made might help there, versus the stock log manifold design. The gearshift CUBE thingy feels so nice, the steering feels great the brakes are awesome. Big smile on my face putting it back in the garage, the way it should be. Will be interesting to see what happens with the cert which I will hopefully be able to do soon.
 9 points
 -
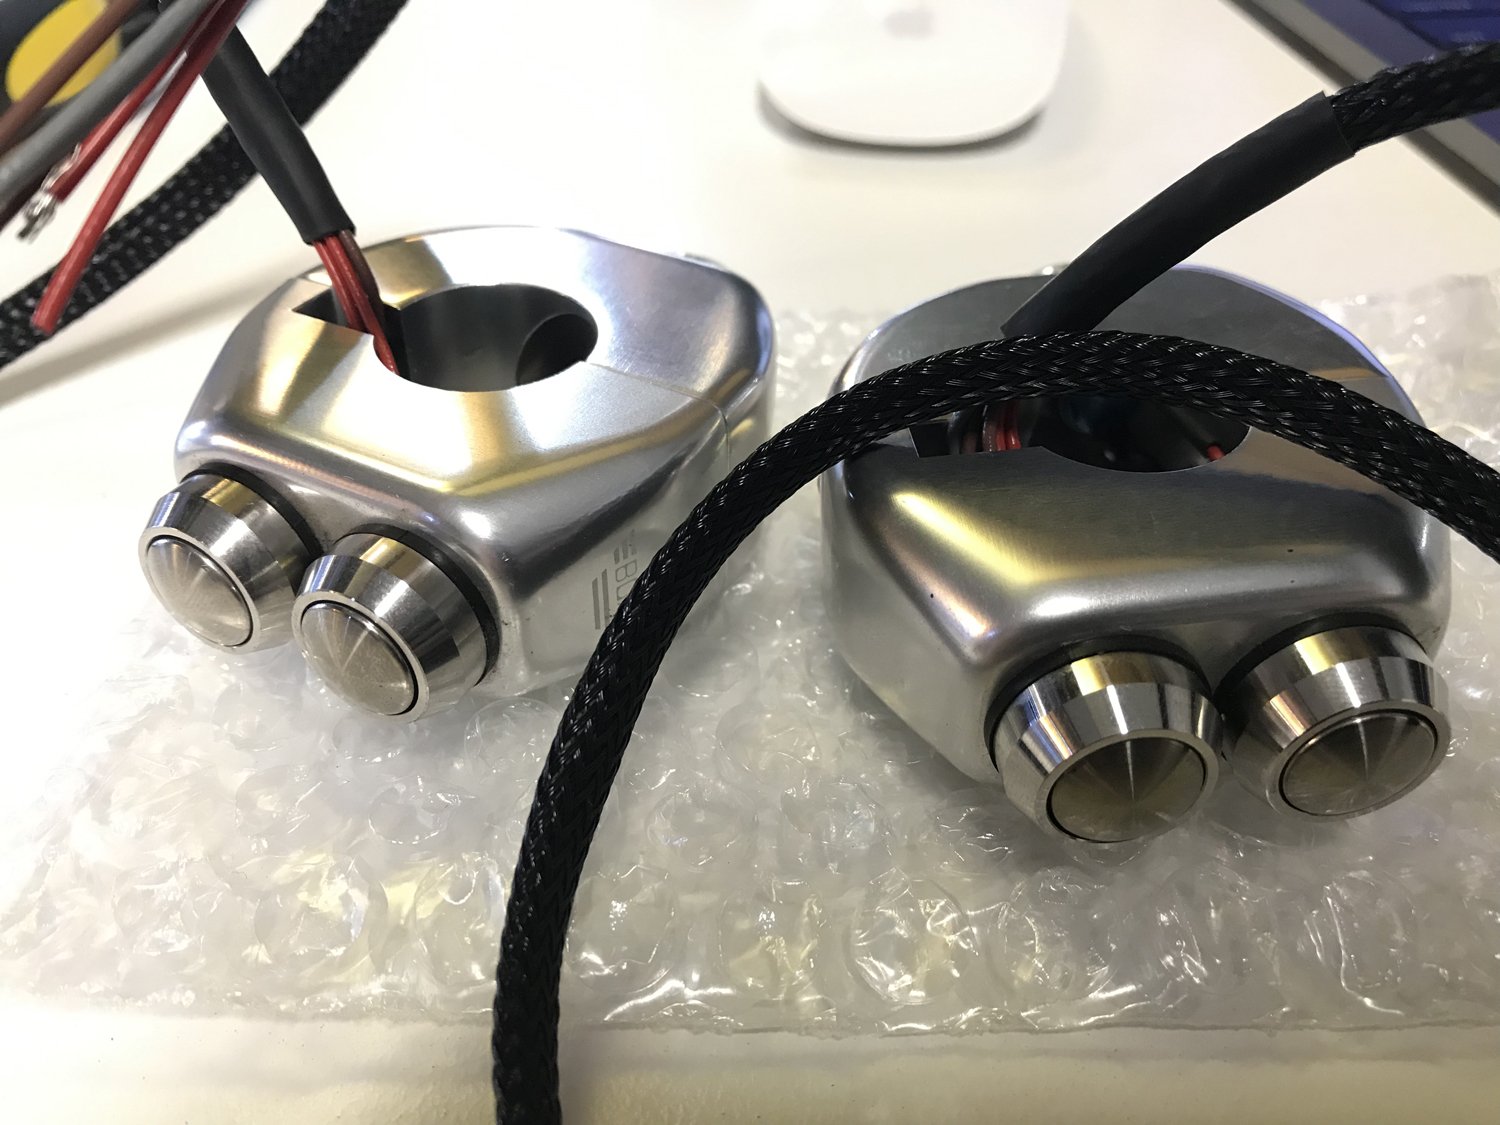
New cables arrived and seem to fit all good. Also got a set of these badboys. Essentially Motogadget knockoffs - definitely the nicest made product I've ever purchased off Ali!
7 points
-
Interesting. I use KY jelly when pulling cables thru bars etc, cos it's water based and doesn't affect insulation. Have also used hair spray to install grips, as slides on wet and it dries tacky. Just had vision of burly blokes buying talcum powder, hair spray and KY at supermarket for their bike projects...5 points
-
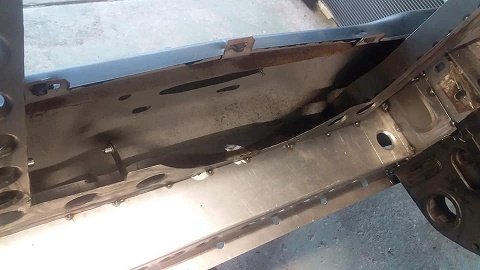
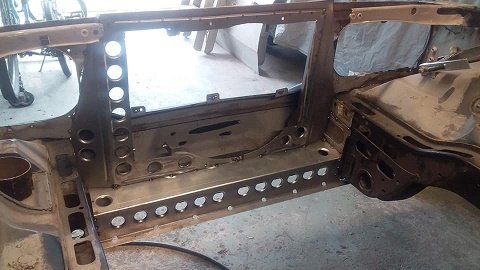
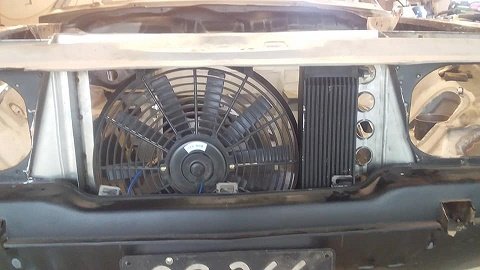
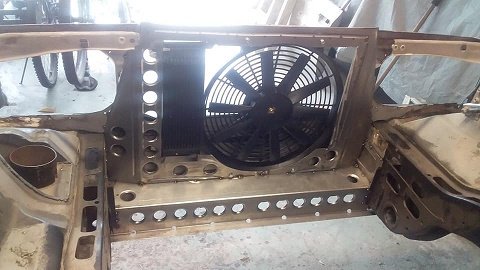
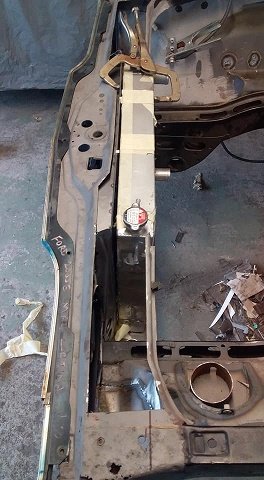
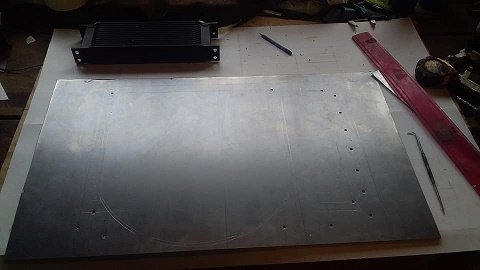
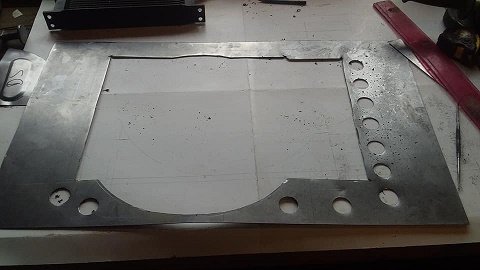
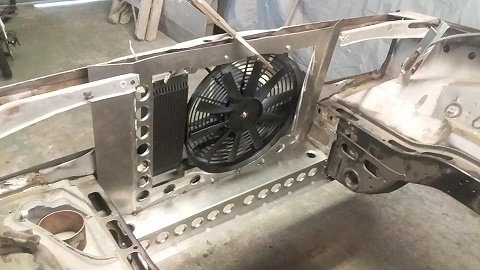
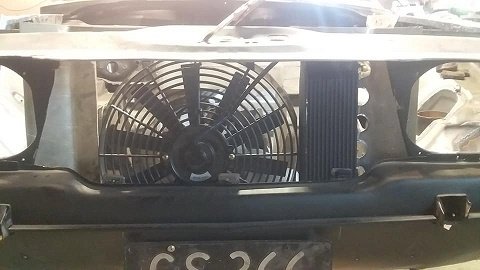
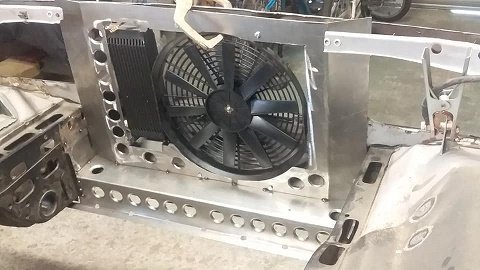
well thats the fan,oil cooler and front suppprt panel done. Had to cut more oit of the front.(fuck all between the lights now) Added some strengthening to the panel Even just tacked in the front feels stronger and still more to go. Its a bit tight behind it but i can still get the gan and oil cooler in and out fine. Can still get ghe grill on and a 70mm rad in and still have all the engine bay left.
4 points
-
https://www.aliexpress.com/item/CNC-Momentary-Latching-Switch-Aluminium-Alloy-Switch-Motorcycle-Cafe-Race-Handle-Grips-Reset-Buttons-For-Honda/32844235133.html?spm=a2g0s.9042311.0.0.5fb84c4dskXaG1 They're not cheap! You can also choose latching or momentary buttons when you purchase. I'm using momentary to work alongside an M-Unit. And good question. I will be using a Motogadget M-Unit to wire the motorcycle which takes care of most of the below functions. Here's an idea on how I think will run them. Left side Top button: Left indicator. Press to start, press to stop. Will time out after 30sec. Bottom button: Horn. Back button: M-Unit Config. Right side Top button: Right indicator. Press to start, press to stop. Will time out after 30sec. Bottom button: Headlight. Always on. Tap to flash highbeam, hold down to turn on highbeam. Hold down longer to turn headlight off. Back button: Not assigned as of yet. Maybe electric starter if I decide to get that working or a momentary kill switch. Hope that all makes sense!4 points
-
shit update but picking up my new wheels on thursday. Super happy as somehow managed to find exactly what i wanted, with tires and for an affordable price. Hopefully I can get this thing rolling over easter MANY EXCITE.4 points
-
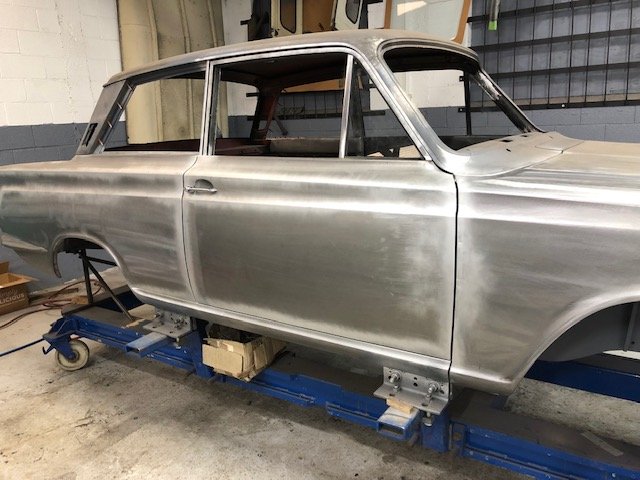
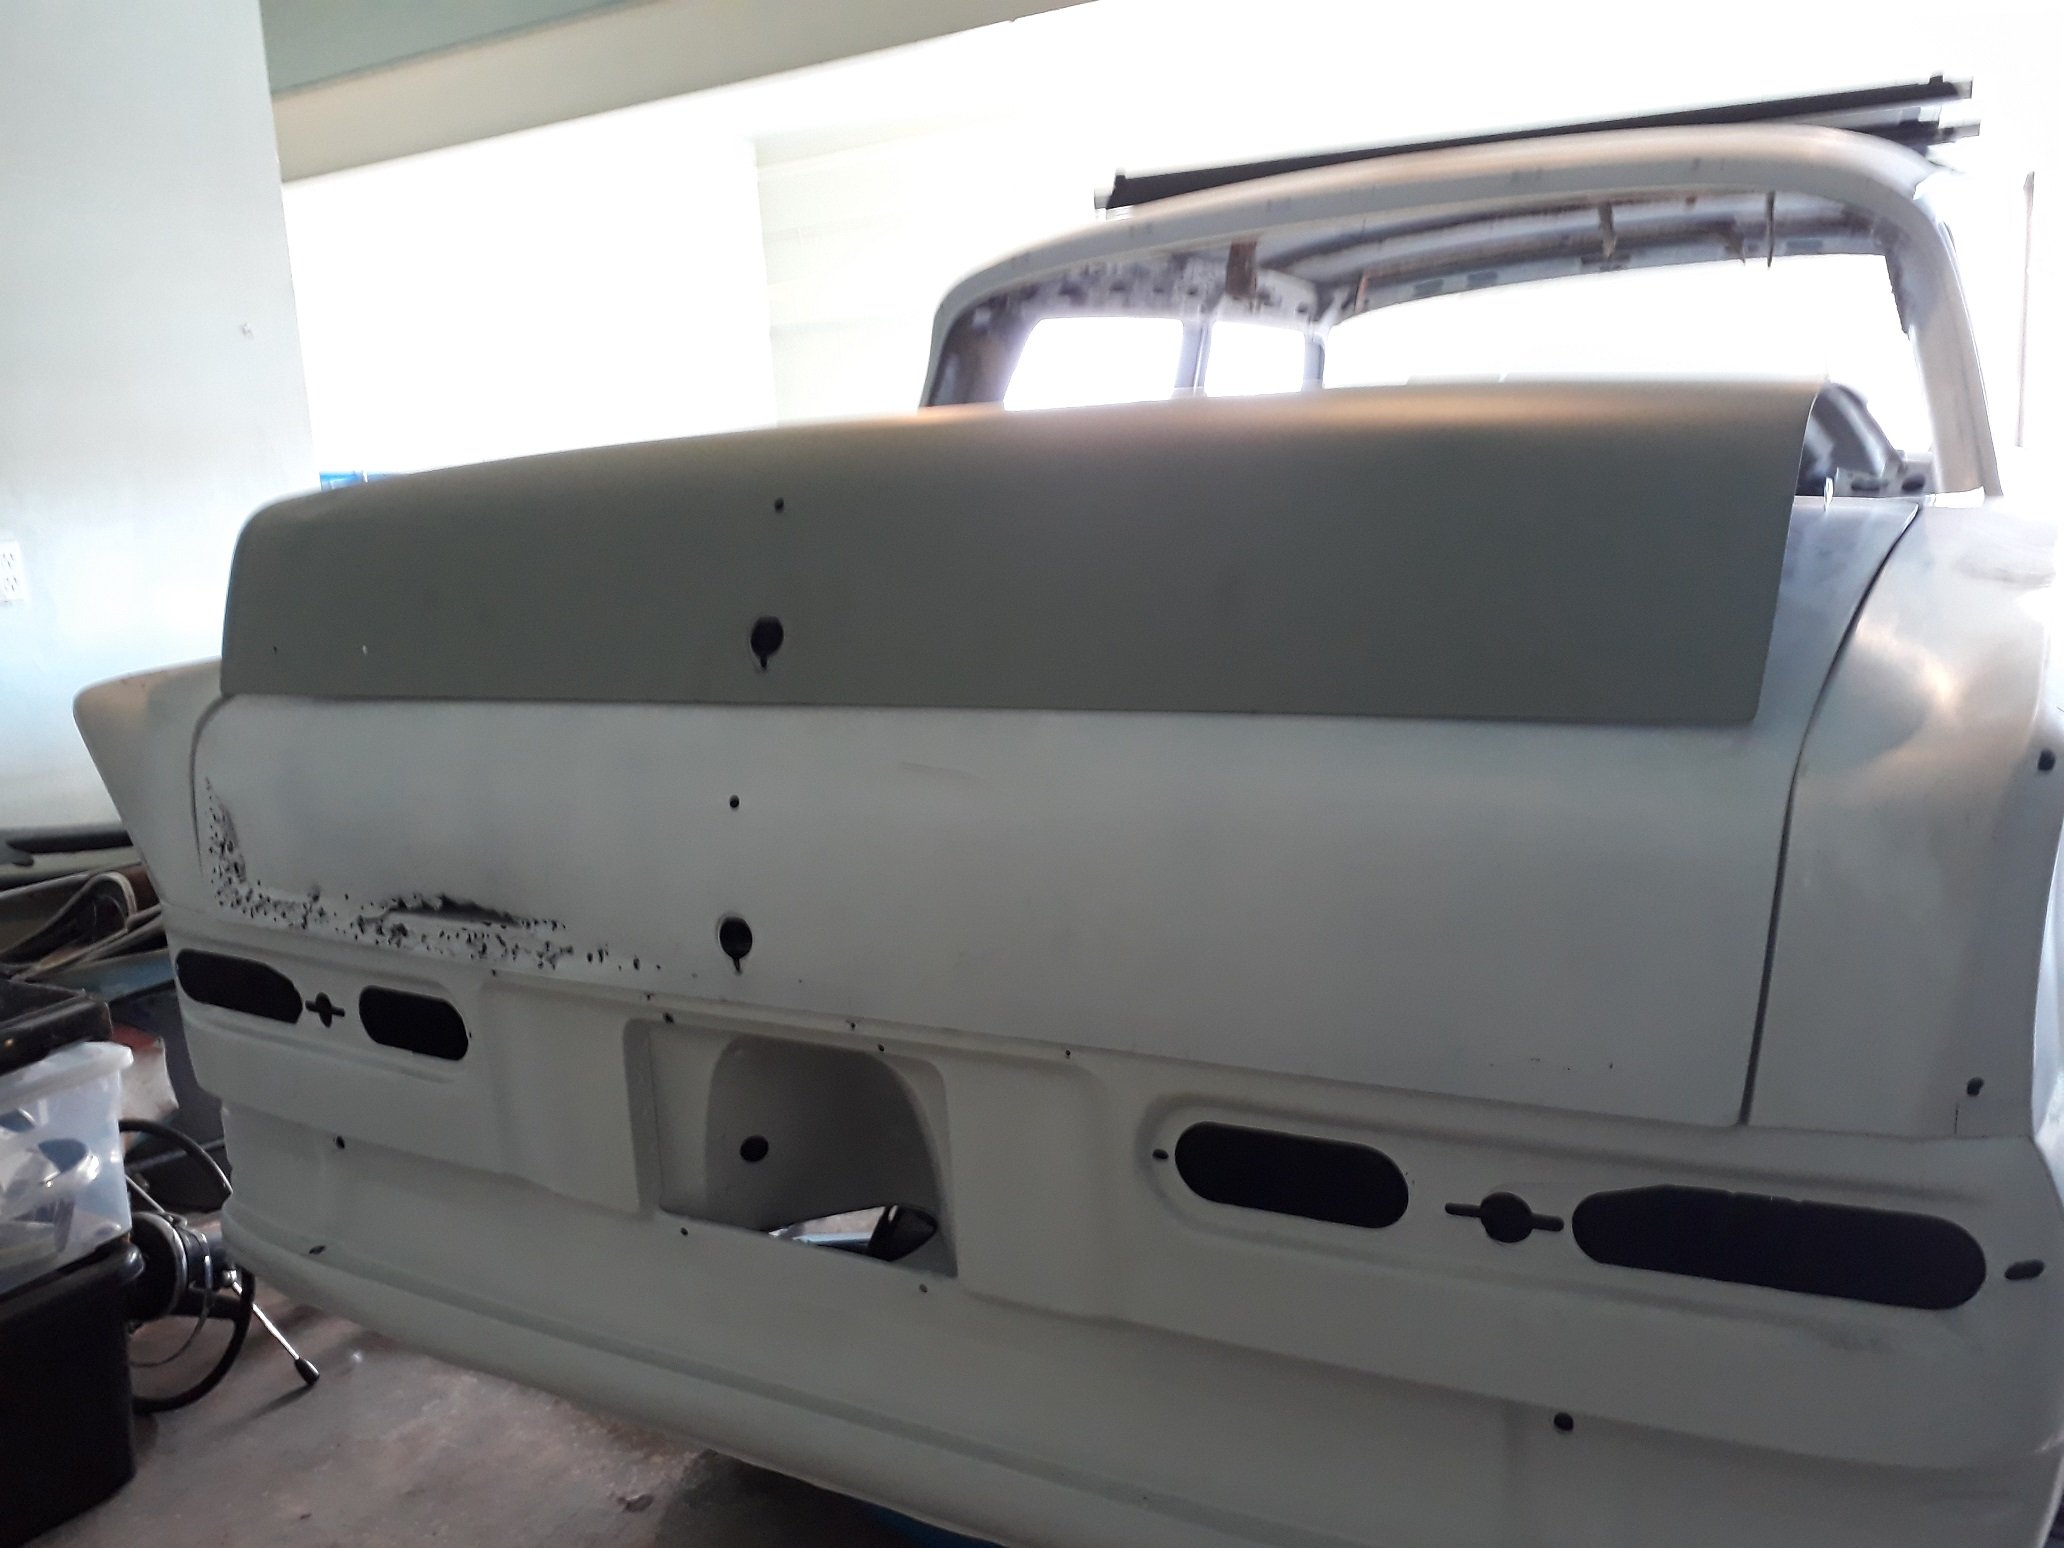
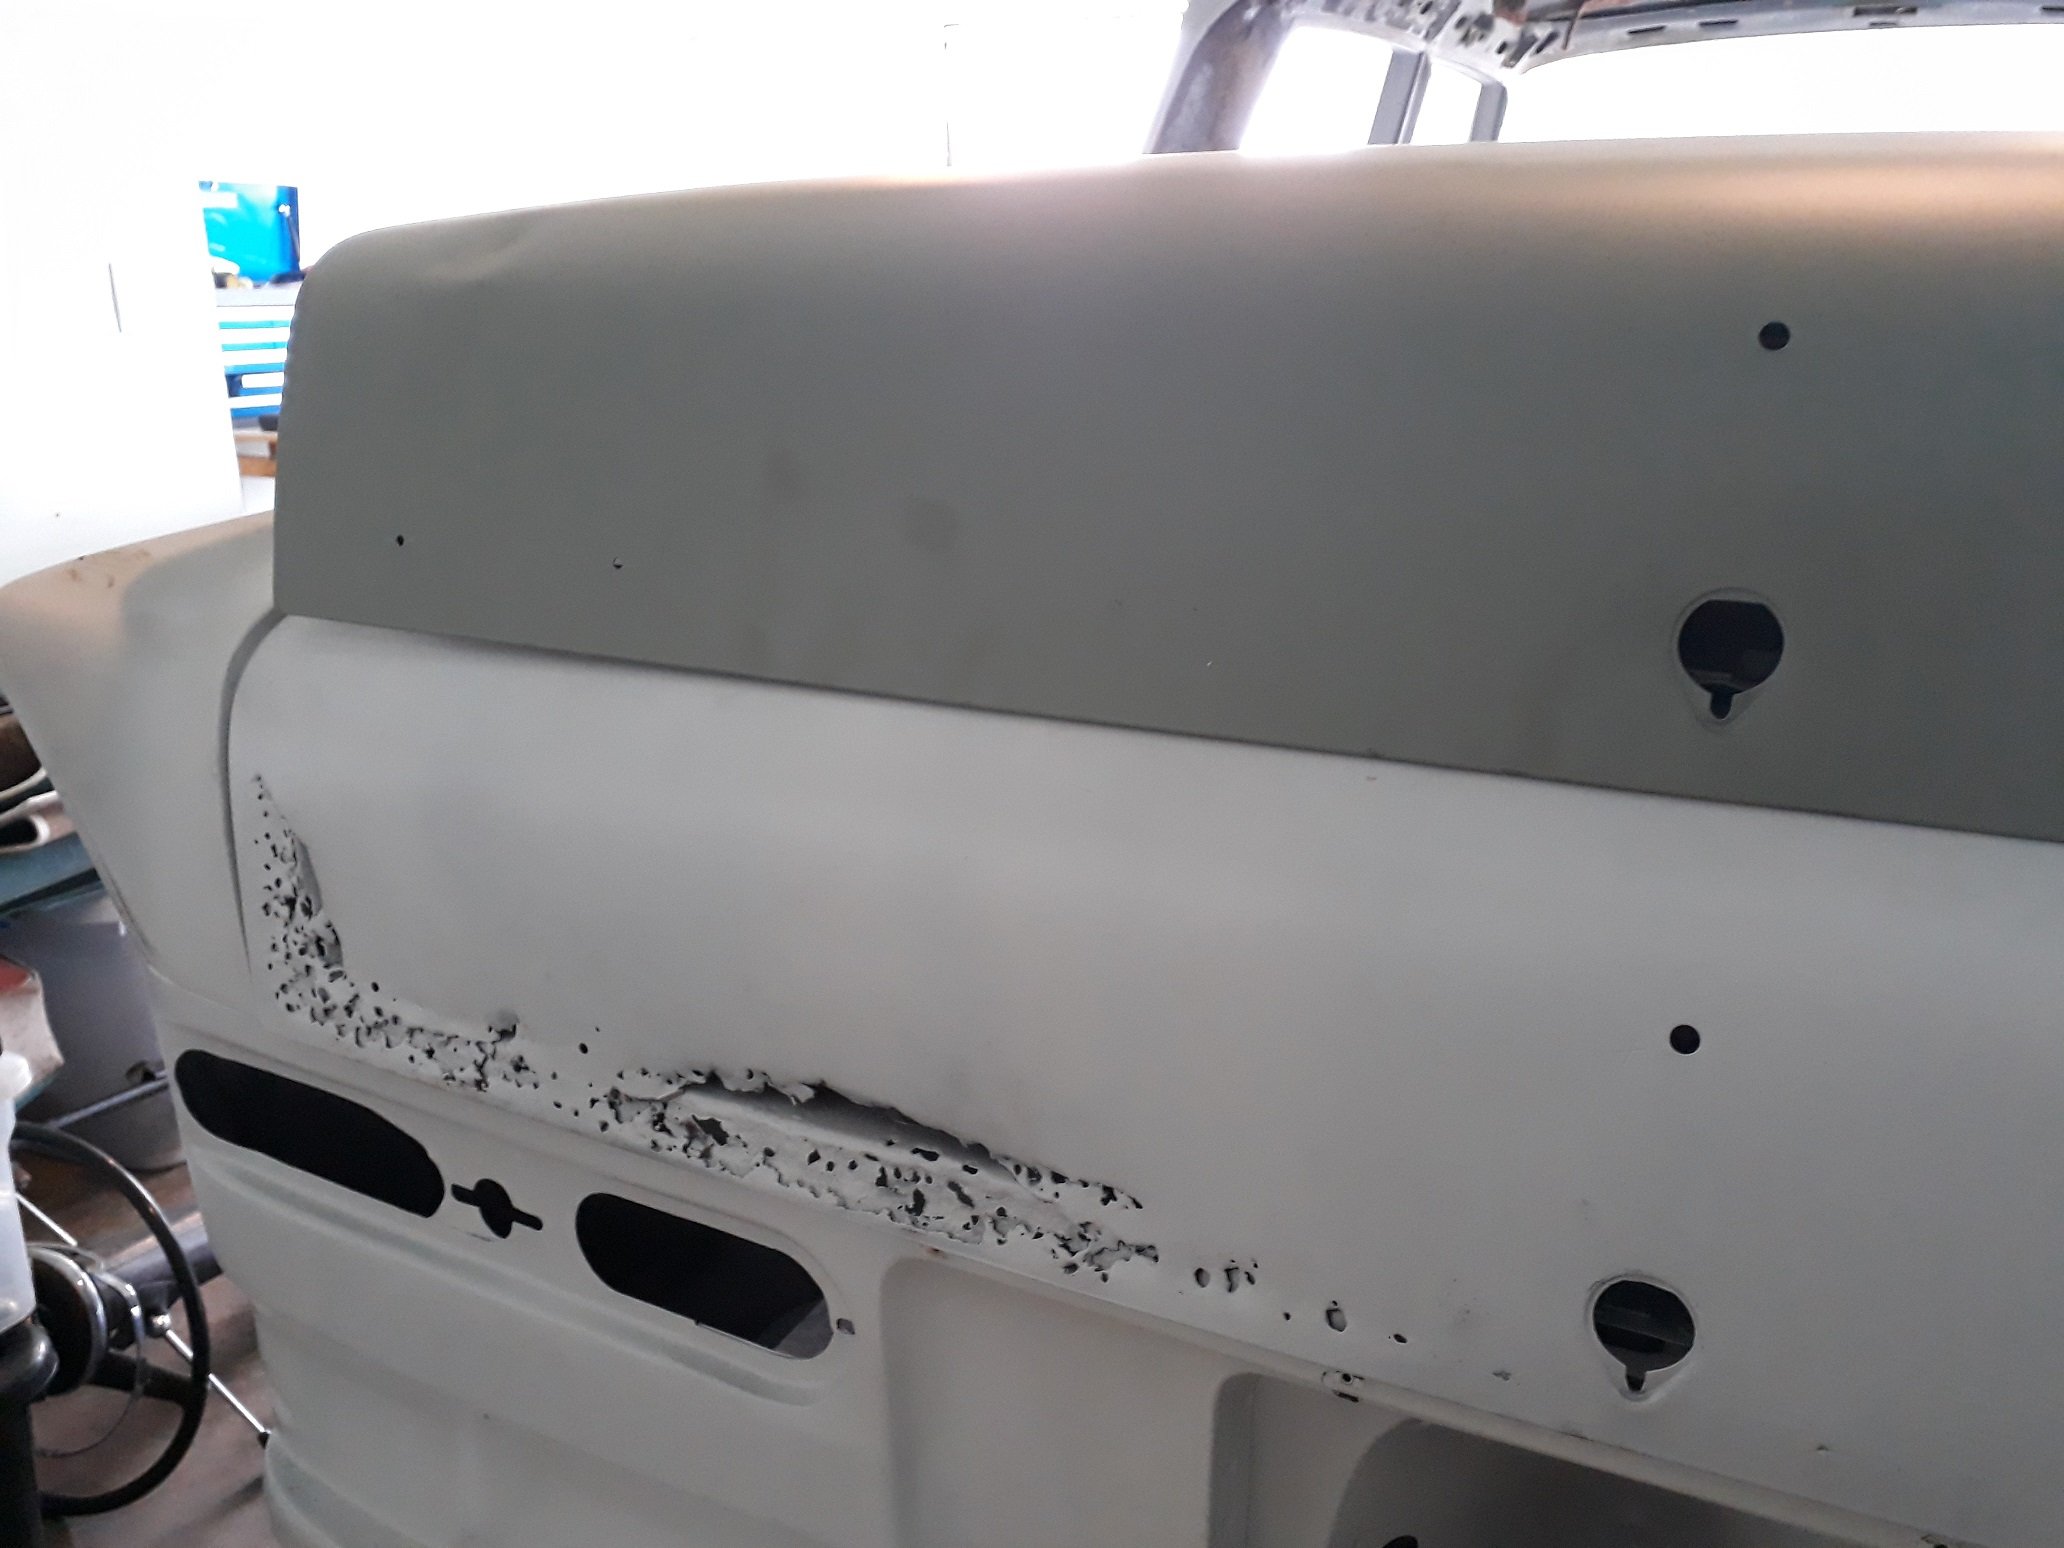
Drivers door complete and only the boot lid to go and body work finished. Still trial fitting parts etc and once done it is off for the final blast and prime then off to paint.
3 points
-
I'm running a Badlands flasher module on the ironhead that times out after 11 secs. This is fine for normal turns but sucks when you're at an intersection and you have to keep hitting button. I'd rather have no timer but 30 seems a good compromise, long enough to let you sit a while, yet turns off if you forget...3 points
-
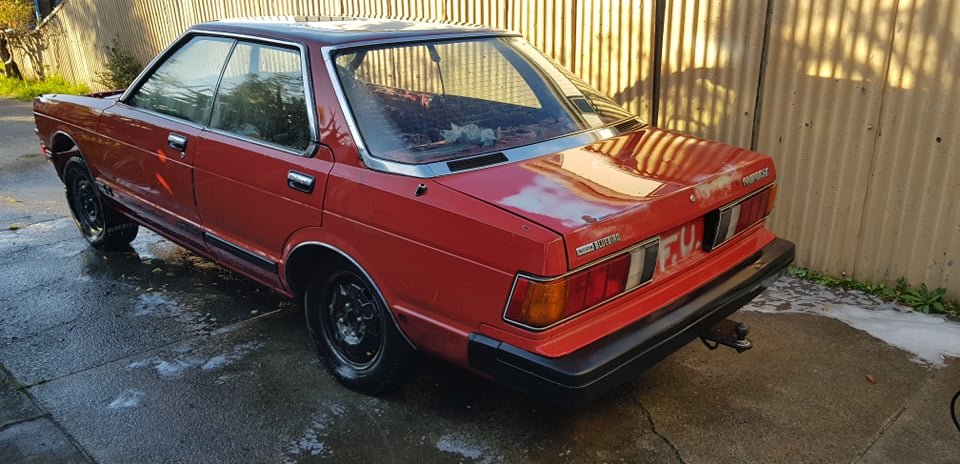
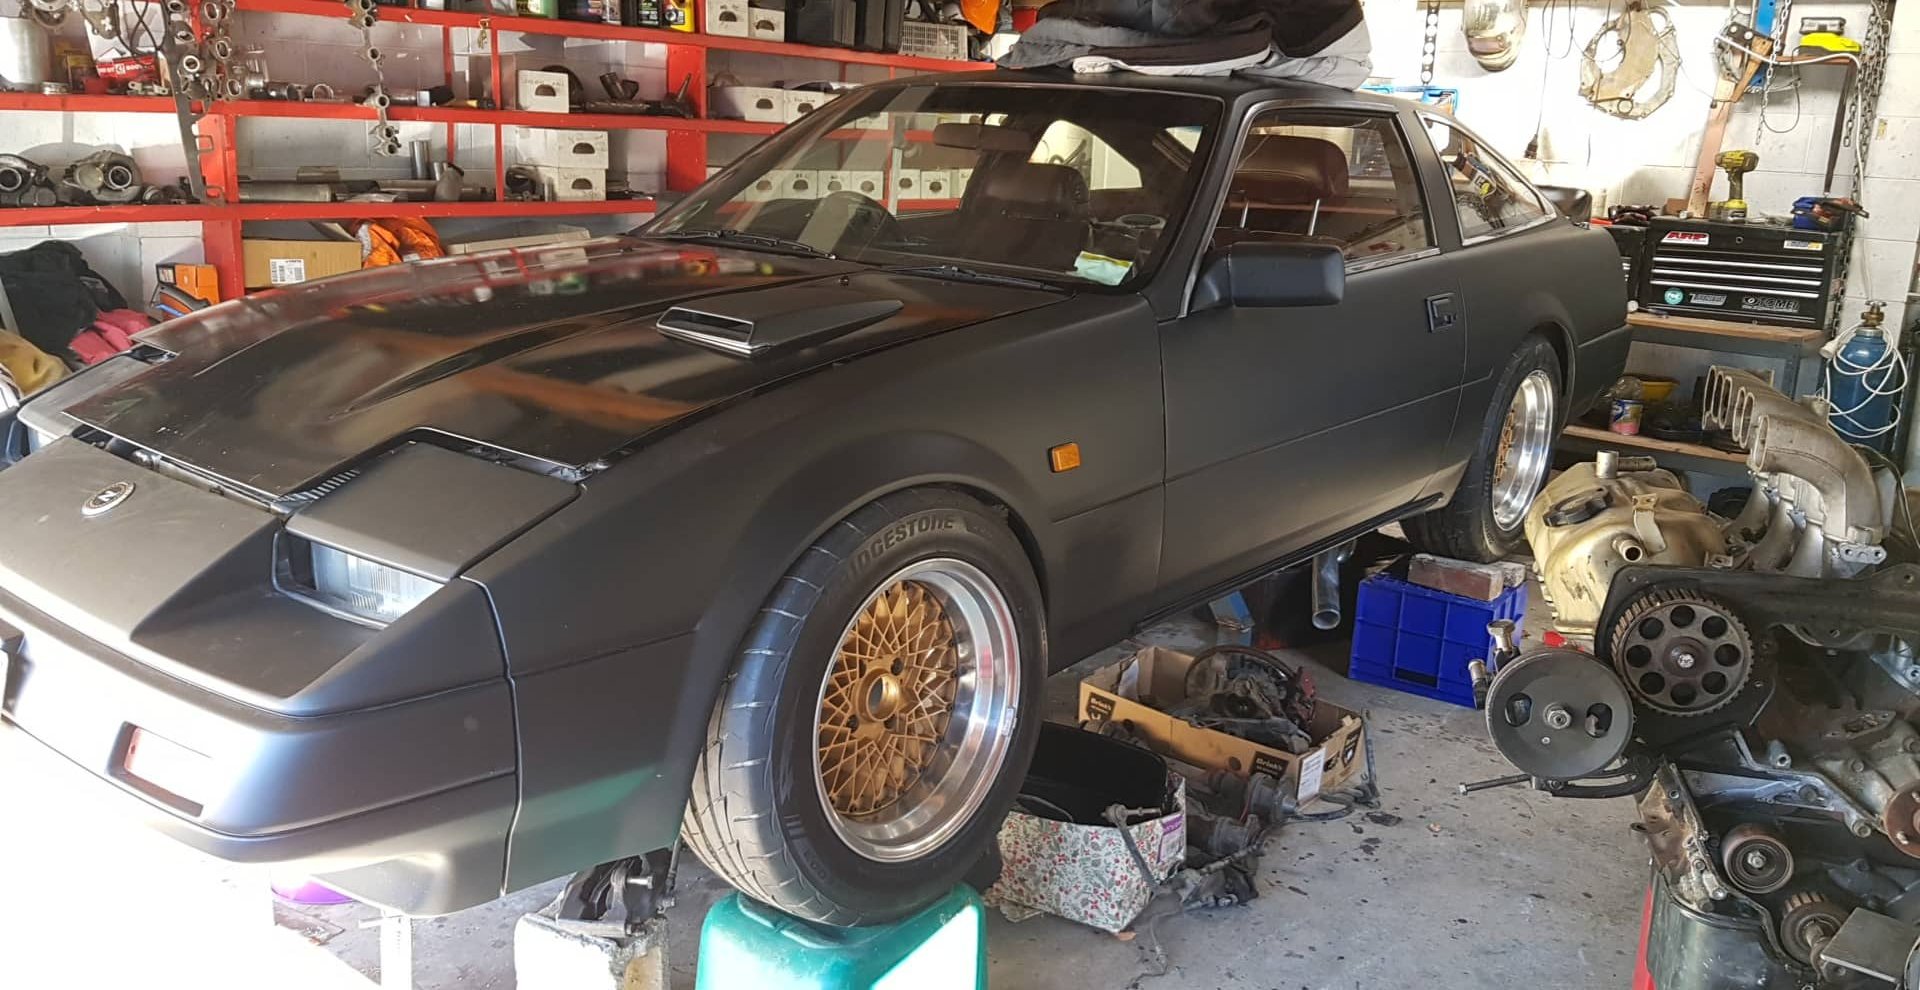
Woah....been awhile since I updated this. Got some notifications.... This has been sold onto a dude in Auckland, reluctantly. . .Been building a Z31 300zx turbo since and recently acquired a 910 hardtop 4 door. I'll be creating build threads for these at some stage
3 points
-
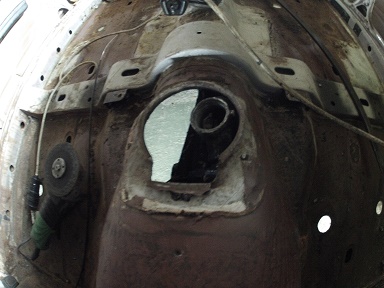
Have decided to use a water air intercooler this time , I'm going to mount it in the passenger side footwell/ up against the firewall where the heater was This means the intercooler pipes can be somewhat hidden. I'll run a pipe from the turbo under the rh guard thru the firewall . Out of the intercooler there will be a pipe thru the hole where the wiper motor was, straight into the carb hat This meant I had to shift the wiper motor to inside the car under the dash which is also a bonus cause it's very ugly. So I mucked around for ages getting the position right and made this thing. Shit update but it's progress at least...
3 points
-
Did front wheel bearings, bought new front beam bearings, some other random stuff, new front calipers, greg has some new front brake hoses for me and so once i get some wheels and a new front spring pack (some of my leafs were broken) i can get it on the ground and rolling. A few things before its drive time but lists getting shorter Wheels, steering box, rear side windows, window seals, motor off @64valiant and be sweet for a drive i think i also bought a turbo legacy as a donor for a one-day engine swap dream project. Thw legacy was being sold by a mate for $750 with blown trans and 140,000km, seemed like a bargain and couldn't help it.
3 points
-
And you know crowbars are the v.i.p supercharger tensioner2 points
-
all working now. 2019-04-15_08-43-48 by sheepers, on Flickr2 points
-
Crx is back together, only needed a small shave off the mount and the headers fitted. The radiator fan needed lots of trimming but it's in for now. I took it for a drive and everything worked like it should. I've managed to squash a heater core pipe a bit so Its doing green wees at the moment. I'll try and reshape the pipe and see if that'll fix it2 points
-
So last Saturday i headed out to the v-dub shoppe to make a start on my engine. Paul was kind enough to work late and help me out. This is my engine and everything that is ment to go with it. inc the two boxes on the floor. I get all the bitch type jobs, clean this, clean that, and yeah clean that as well. so start with cleaning the crank. a little scotch in the cleaning tub and then we rinse it off with hot water. want to know why we use hot water? well hot water evaporates and doesn't leave any residue and wont rust. unlike cold water. now that that's done onto the casing. his has been machined out to fit the larger barrels and pistons to make it a 1776 so yeah lets crack it open see how many peaces of raw material i can find. oh hello. this stuff has gone everywhere. see if you can spot the peace tucked away here. that little peace of silver on the oil pick up is what you are looking for, well now that they are all cleaned up out side to wash these down with cold water. cause these are not steel and they wont rust away. hey presto we looking good now. 1st things 1st. dizzy gear in. i didn't snap a photo of this but here is one off the net. with that lubed up and in place the dizzy goes in over top. while i was putting that in Paul was putting the bearings in and making sure they lined up and marking them to make our life easier for when the crank slides in. i have also slid on 6 little rubber gaskets over the main bolts. bearing 1st. cam gear next, with some heat slid on over and sitting in place with its key way in next is distributor drive gear. my key way was a little lose, luckily we were in the right place and a few steps to the left was a container with a bunch of them in, found one that fitted better. some heat on this and on it went. bearings for the rods and on they go now. no photo of this stage my hands fill and doing other things but lets drop that on in in she goes and lined up Pauls pink dots and dropped the cam in as well.so far the only things out of the old engine are the gear peaces on the crank and the dizzy, even the dizzy drive was in a pile of other parts to the left of me that Paul just pulled out of old stuff. The rods and cam are from another purchase of parts i ended up with including the bearings and all the gaskets.Next Paul swears at his employees for leaving his gasket goo with out a lid and we put some goo on the casing and he drops the other side of the block on. finds some nuts that should come with the casing and he torques them up. its bloody handy having a store room the size he has, off i went find myself some lock nuts, re stock the draw in the engine build section. they get thrown at the engine and torqued up but to a smaller amount. sump on and well bake to the store room to find some dome nuts for the sump plug and the mesh for in side that, and a stud kit for the fuel pump, oil pump and a few other things. actually here is a photo of the kit, thanks google ahh while this was up side down we also dropped these in. which i learnt the other day is a duel pressure relief, vw casings come out duel and single, only early ones come out single. ended up watching a YouTube video of how it works and where they are. if you want to learn here is the video i watched it was a pretty good Saturday learning and building the new engine. last night i headed in and done some more work. removed all the head studs while Paul was on the phone and cleaned them up, he then came down and gave me some shit about how i didn't get the fly wheel and shims ready for him, few seconds later he had them, he worked out the end float and put some shims in allowing some small amount of thou. he was also trying to calculate out loud and man that shit was confusing as fuck to me. with that all sorted i now have the fly wheel and we are off to get skimmed and it has a really nasty lip where the rear main seal would usually sit so ill take that to geophfey and get him to take the lip off that. all in all shes been a great few days so far.2 points
-
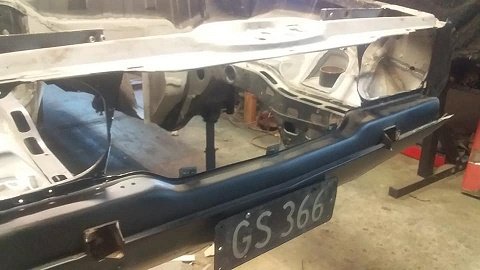
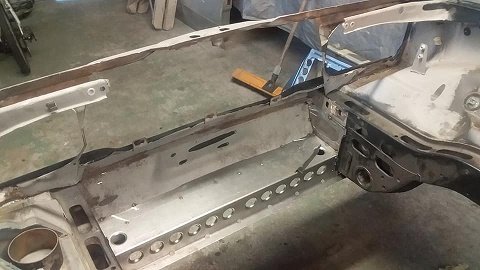
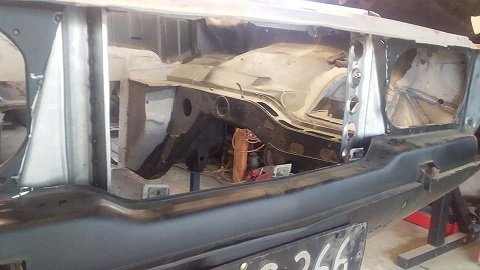
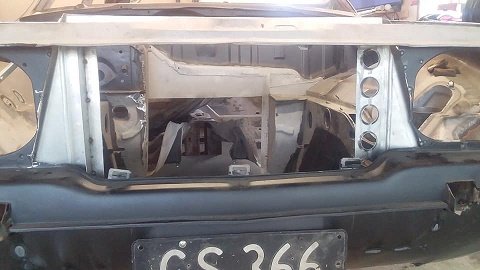
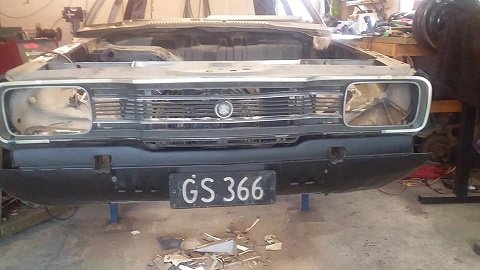
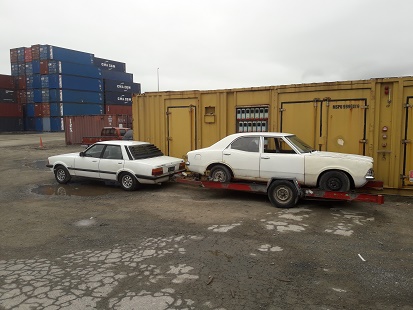
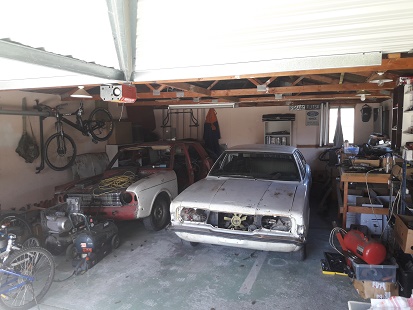
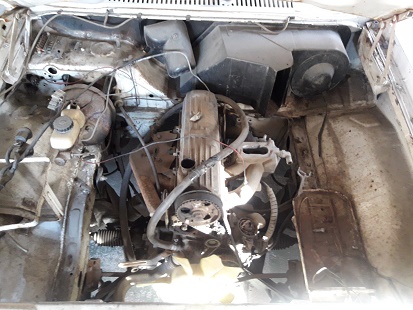
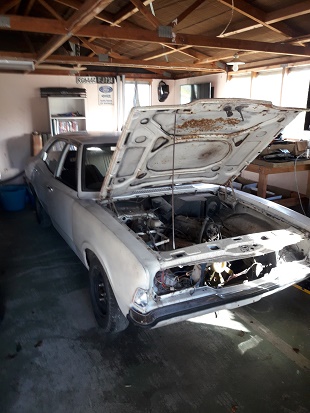
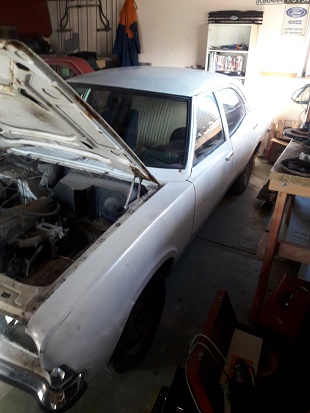
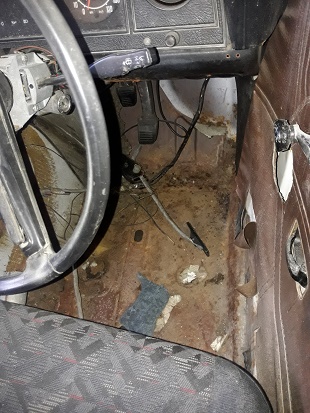
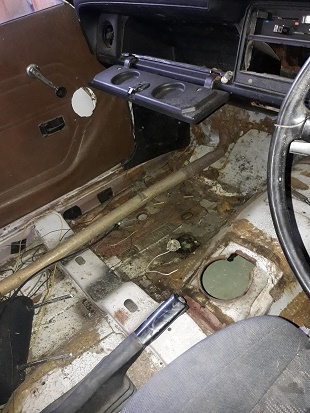
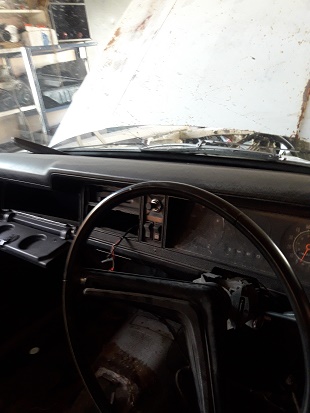
discussion https://oldschool.co.nz/index.php?/topic/57595-dpns-mk3-discussion/ so ive known about this car for a while now..pretty sure its been sitting in a container at work for close to 2 years and in a store room before that. i have thought about buying it a few time (as the mk3 is possibly my favorite shape... ) but never had the room ..we have since bought a house with a 4 car garage so its only human to full it. so i was at work last week and was asked if i wanted it (for a very very very cheap price) or its of to the scappy . i didnt want to see that happen and i thought worse case build a purpose build burnout car. havnt never really seen it apart from the front end . well to be honest now i have it home its very fixable it does have the origanal plates and tags (died 20 years ago) and is a factory 73 with a 2.0 pinthoe .the dash is mint....fuck all rust apart from the back end. so i am thinking of sripping it back to metal panel by panel and sorting them as i go till have a mint straight rust free shell and go from there. i do want to get my mk2 done next year but while i wait for parts the mk3 is just my time for now.. so heres some pics.
1 point
-
Oops totally forgot to arrange something. Is anyone keen for a burger at spitfire square tomorrow?1 point
-
Crystal clear. I did wonder if you were going to run the m-unit along side the buttons. I love the simplicity of their stuff. Not in terms of wiring cause fook dat, but such a smart simple device. I like the time out of the indicators but 30 seconds might feel like a lifetime? Those buttons aren't too bad, especially concidering the OG motogadget ones have a heavier price tag. I love the M-Lock. I saw a bloke put the little cylinder thing inside a guitar AUX type plug and then the female side on the top yoke. He would push in the plug into the female side and that would effectively be his key. Does that make sense? So genius and such a cool little custom modification Im eager/excited to see the whole process with the wiring and all Keep us posted1 point
-
Do you have the link available for these? Out of curiosity - how will you run the buttons? Lets say for example, the left side.. Top button = left indicator - press again and it's off Bottom button = Right indicator - pretty again for off What about the other side? You will need high beam, pass, horn, engine on, engine start So much cleaner with the small controls but keen to hear the logistics of running these chur1 point
-
Def white engine bay i reckon.1 point
-
I reckon white /white or white engine bay with gunmetal steel tube.1 point
-
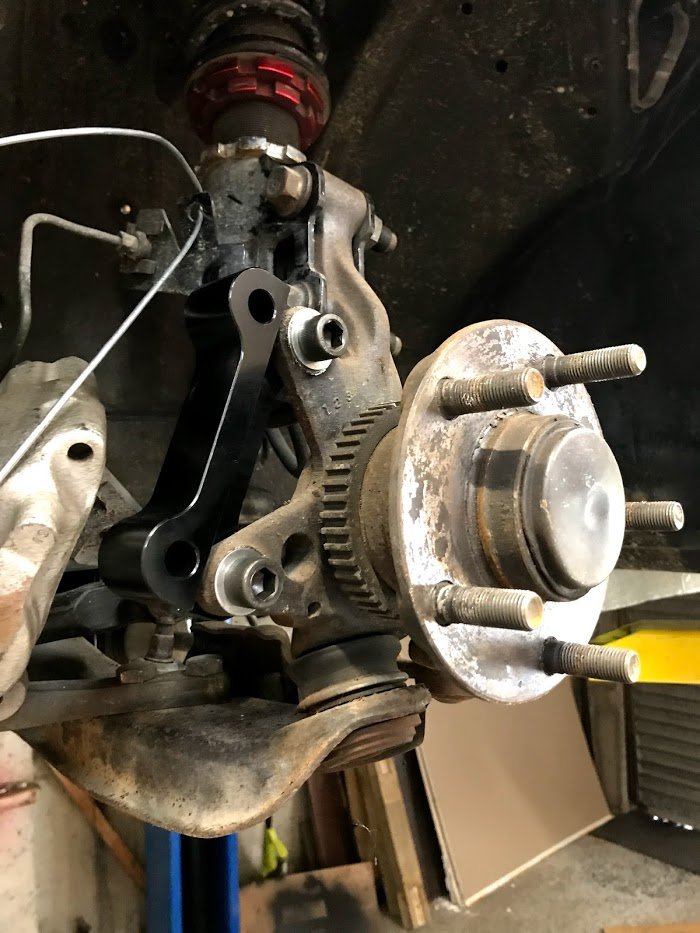
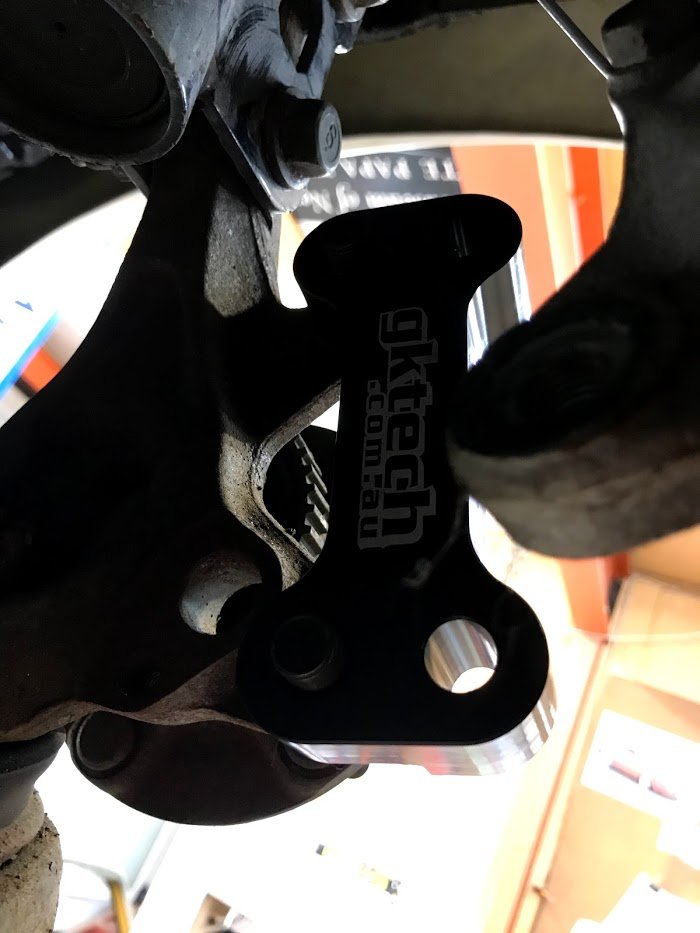
oh these are the gktech adaptors I used, dark photo but they are there:
1 point
-
We were going to use Iron head sportster flywheels with custom knife and fork rods but ended up using what it came with as it was ok, it has side by side rods and the drive side main shaft is very very small1 point
-
Here is the engine, it was built at Mcintosh racing, it runs well, its around 1100cc, it dropped a valve when the retainer snapped in half but it was ok, I made the exhausts and oils lines, engine plates, mudguards, and half the shit on this bike. it has Hemmings heads, I know a guy who has a KTOR engine on the floor in his shed, I can put you in contact with people but you probable already know them?1 point
-
It's pretty cool when your 33 year old bike beats modern machines1 point
-
so much room for activity at full lock. Time for some caster you say?? I’m really trying not to talk myself into making some bottom arms for this...
1 point
-
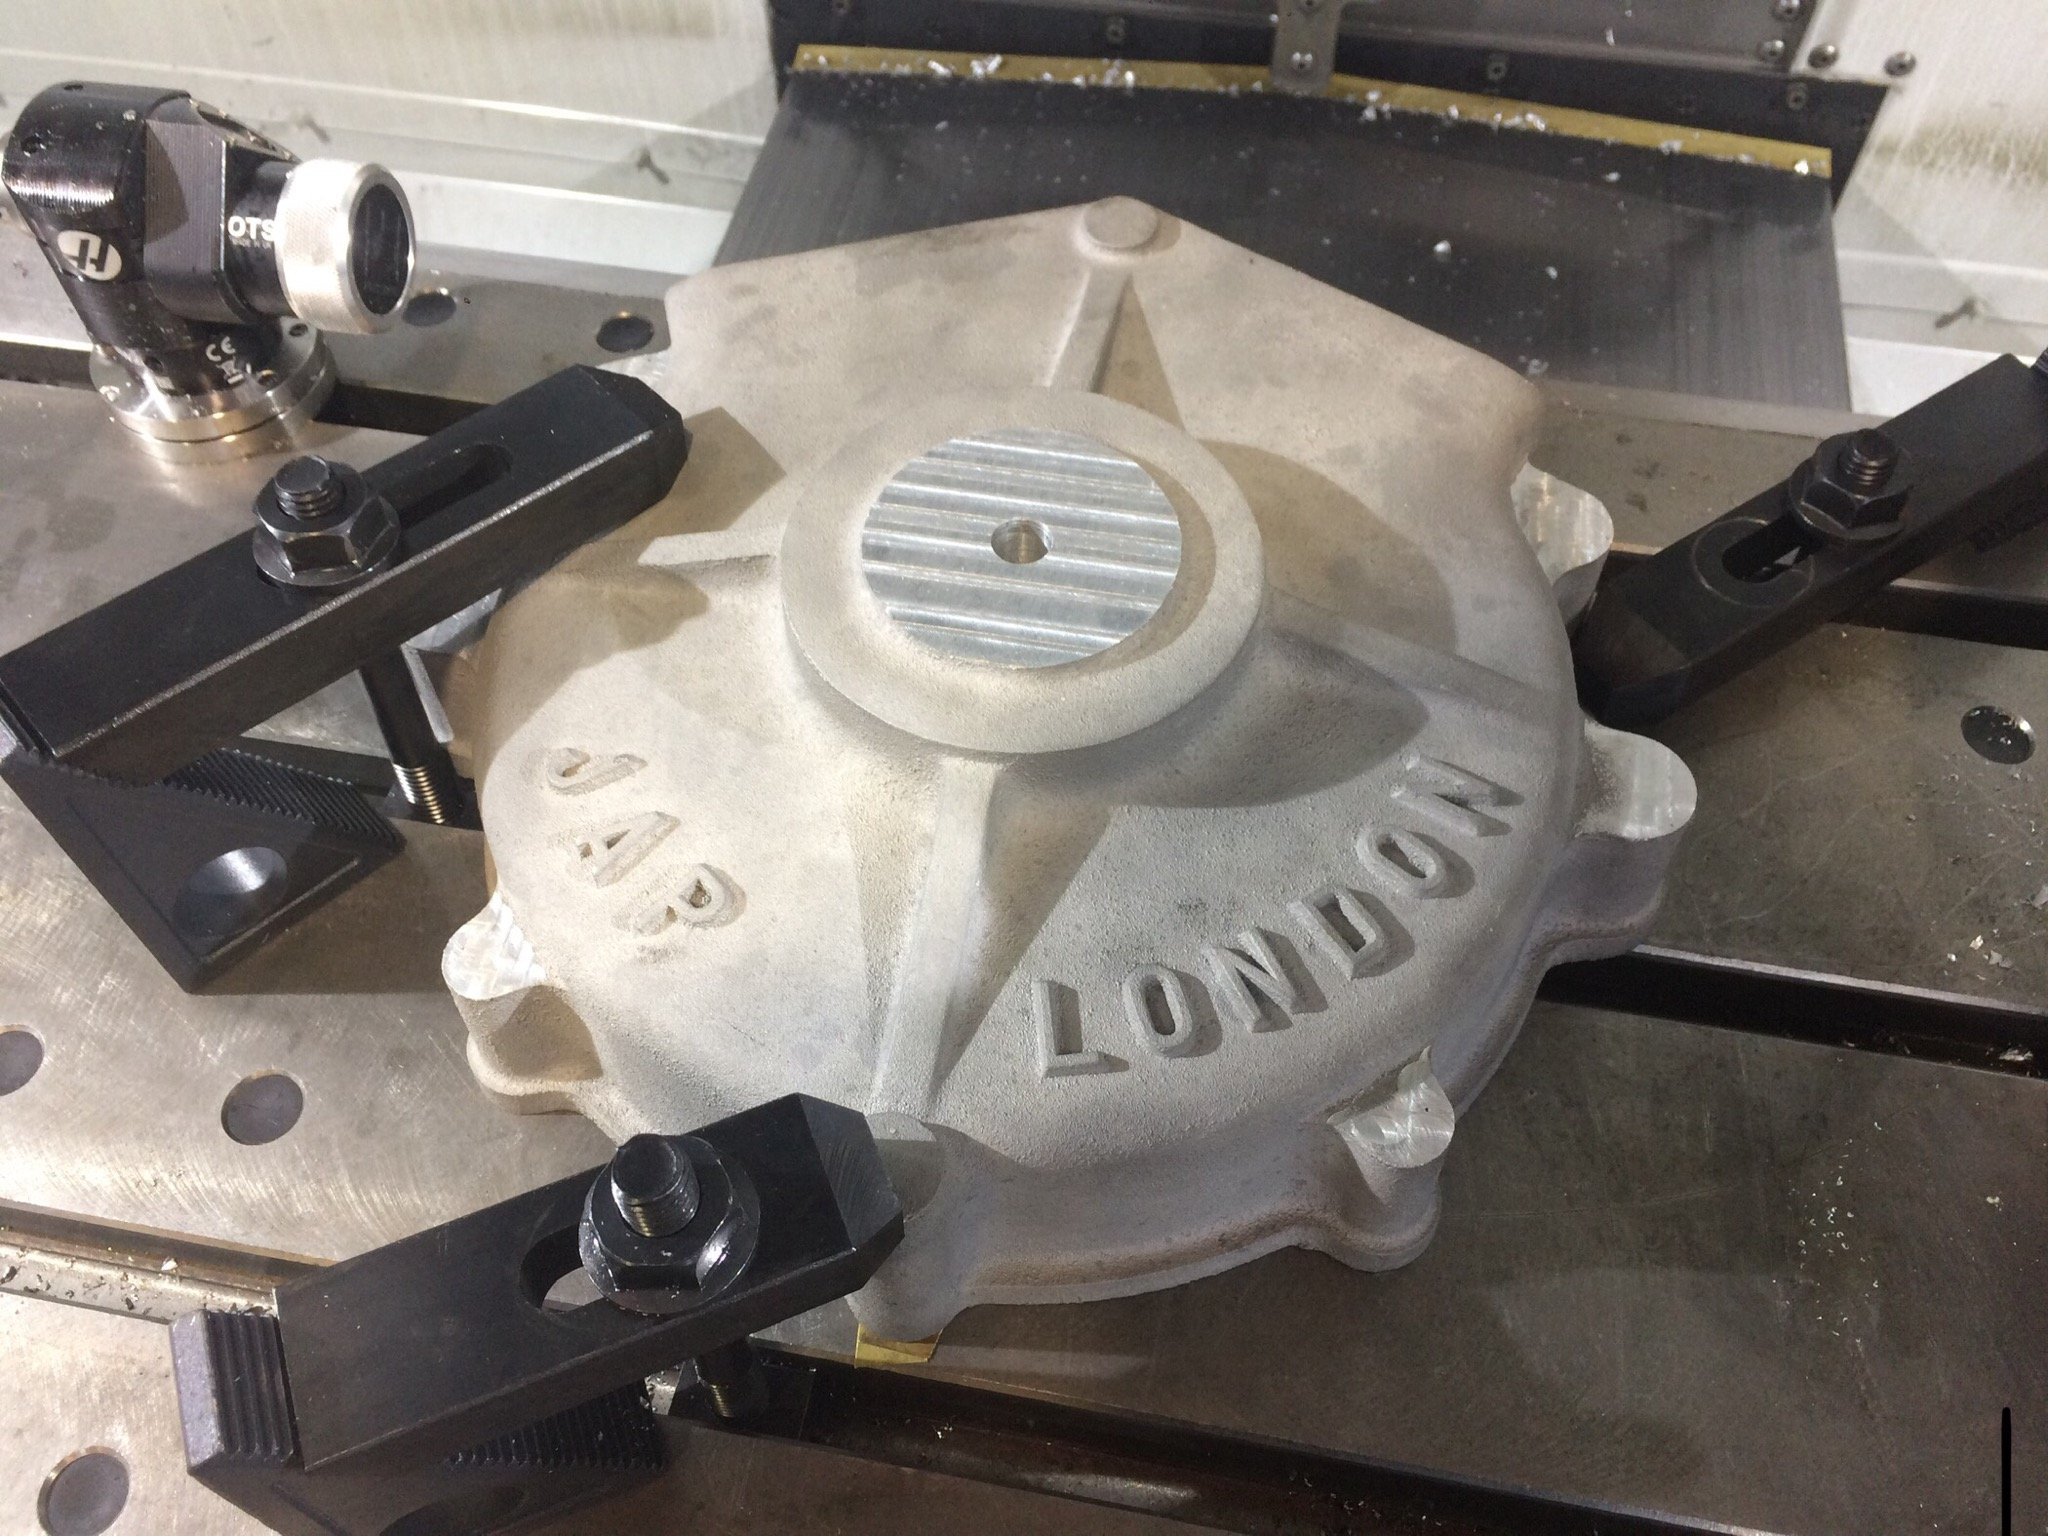
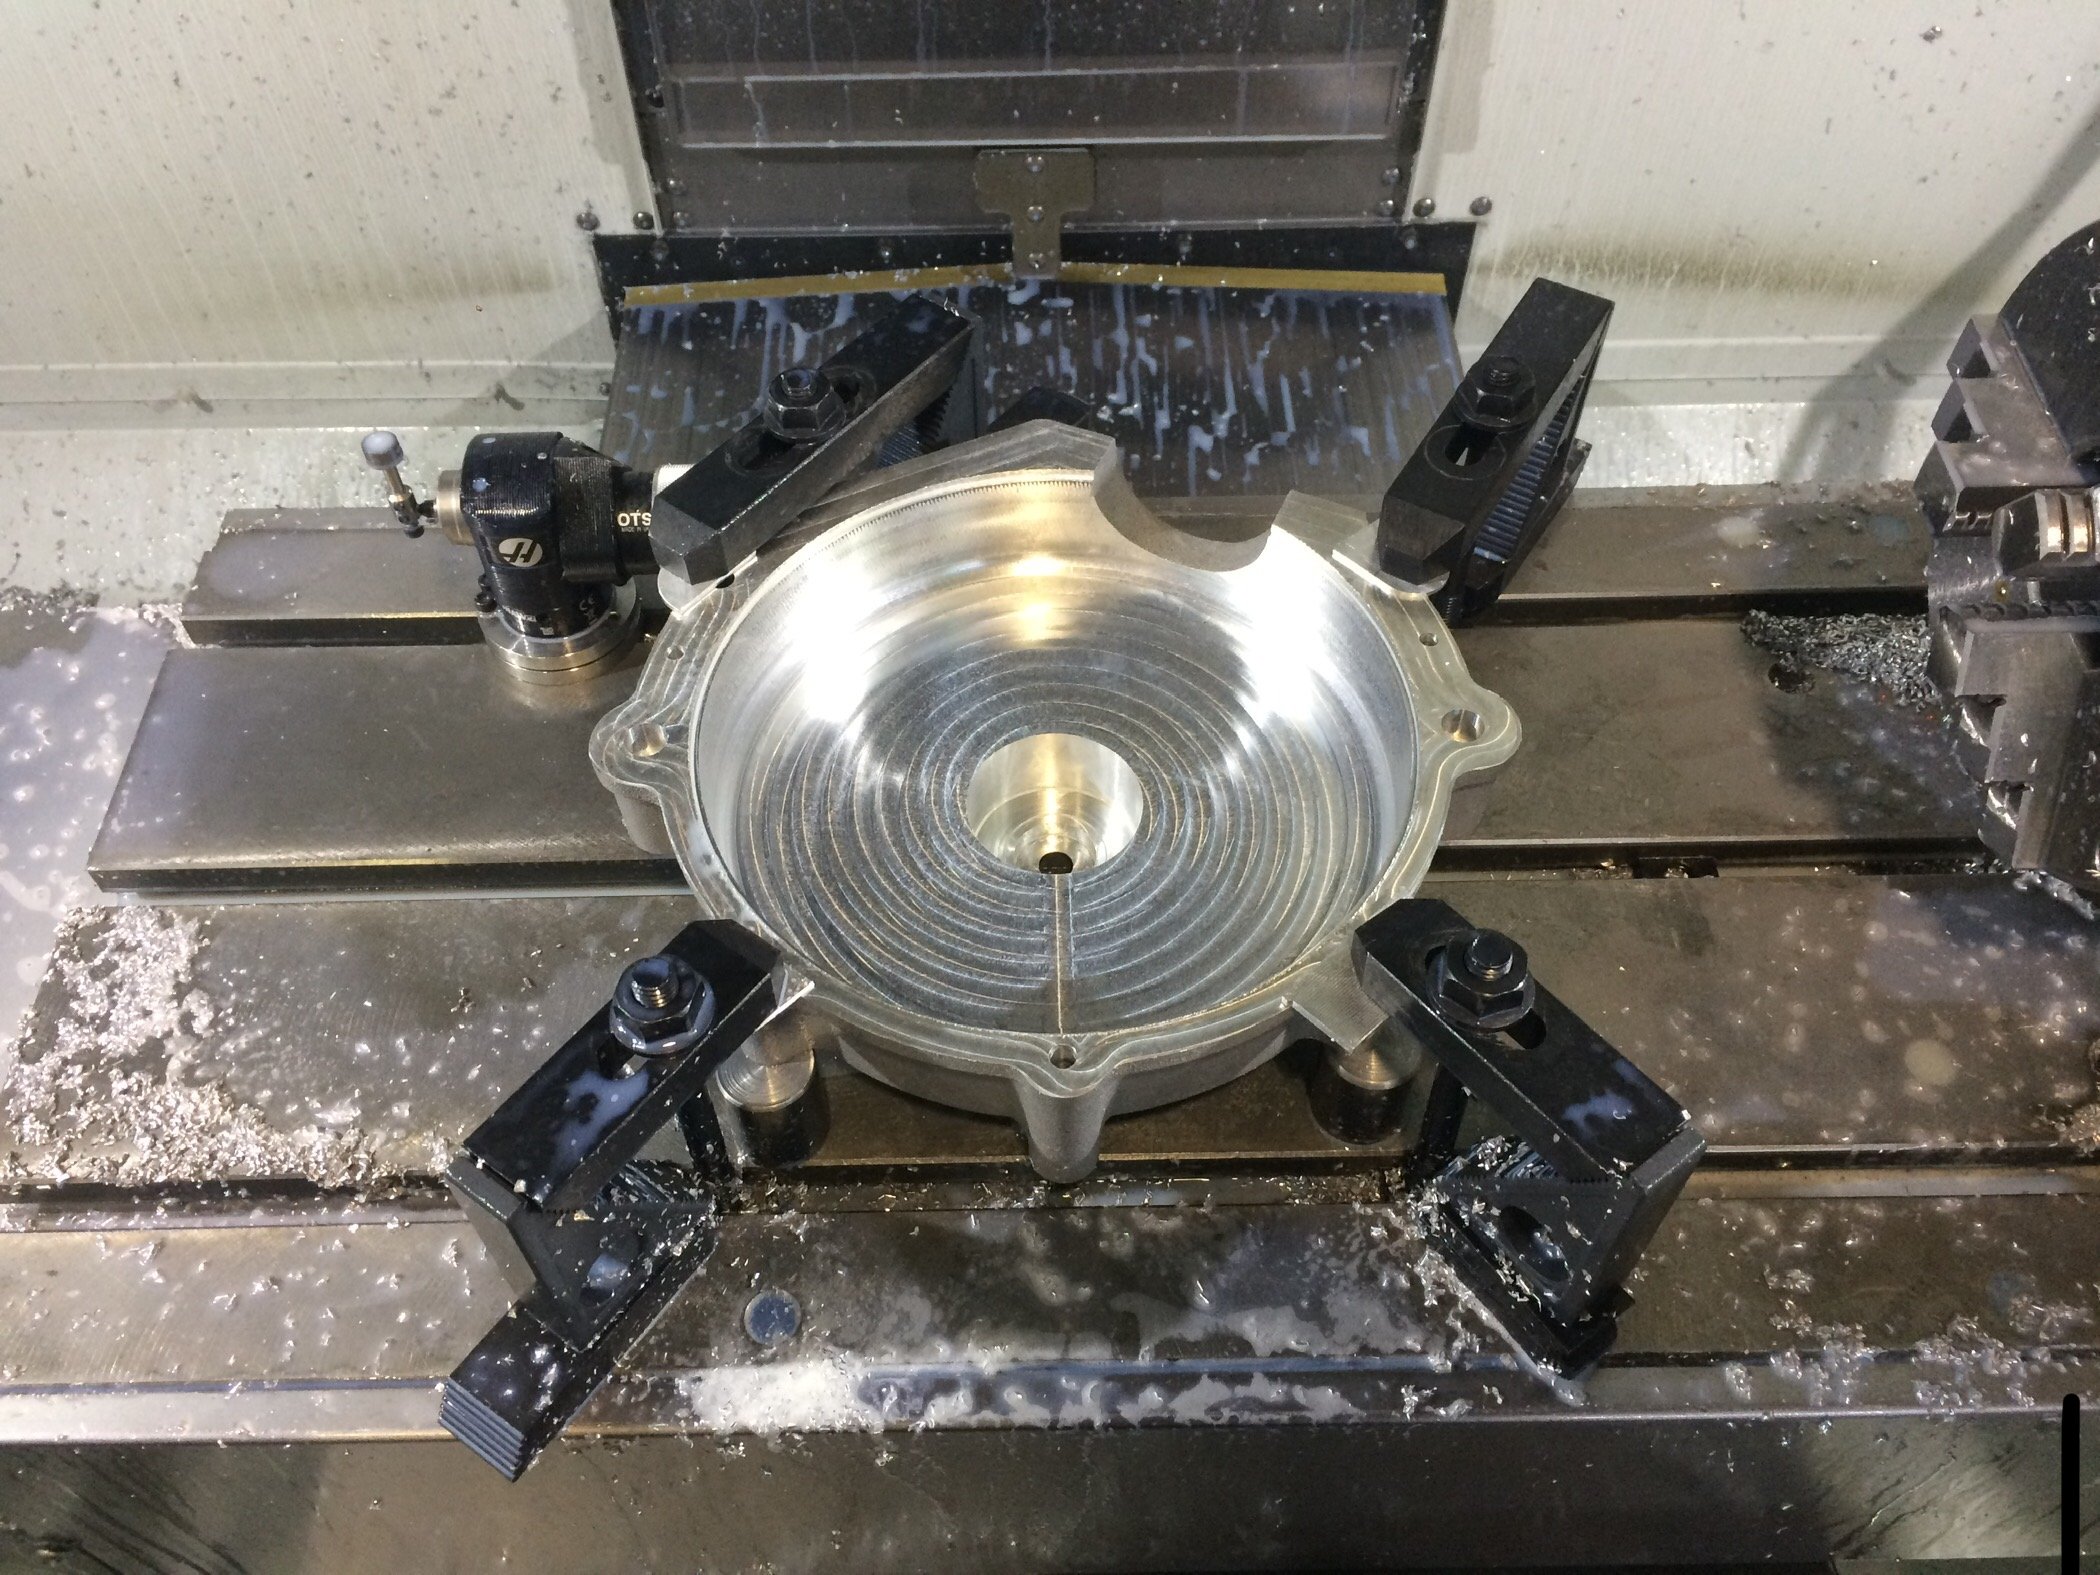
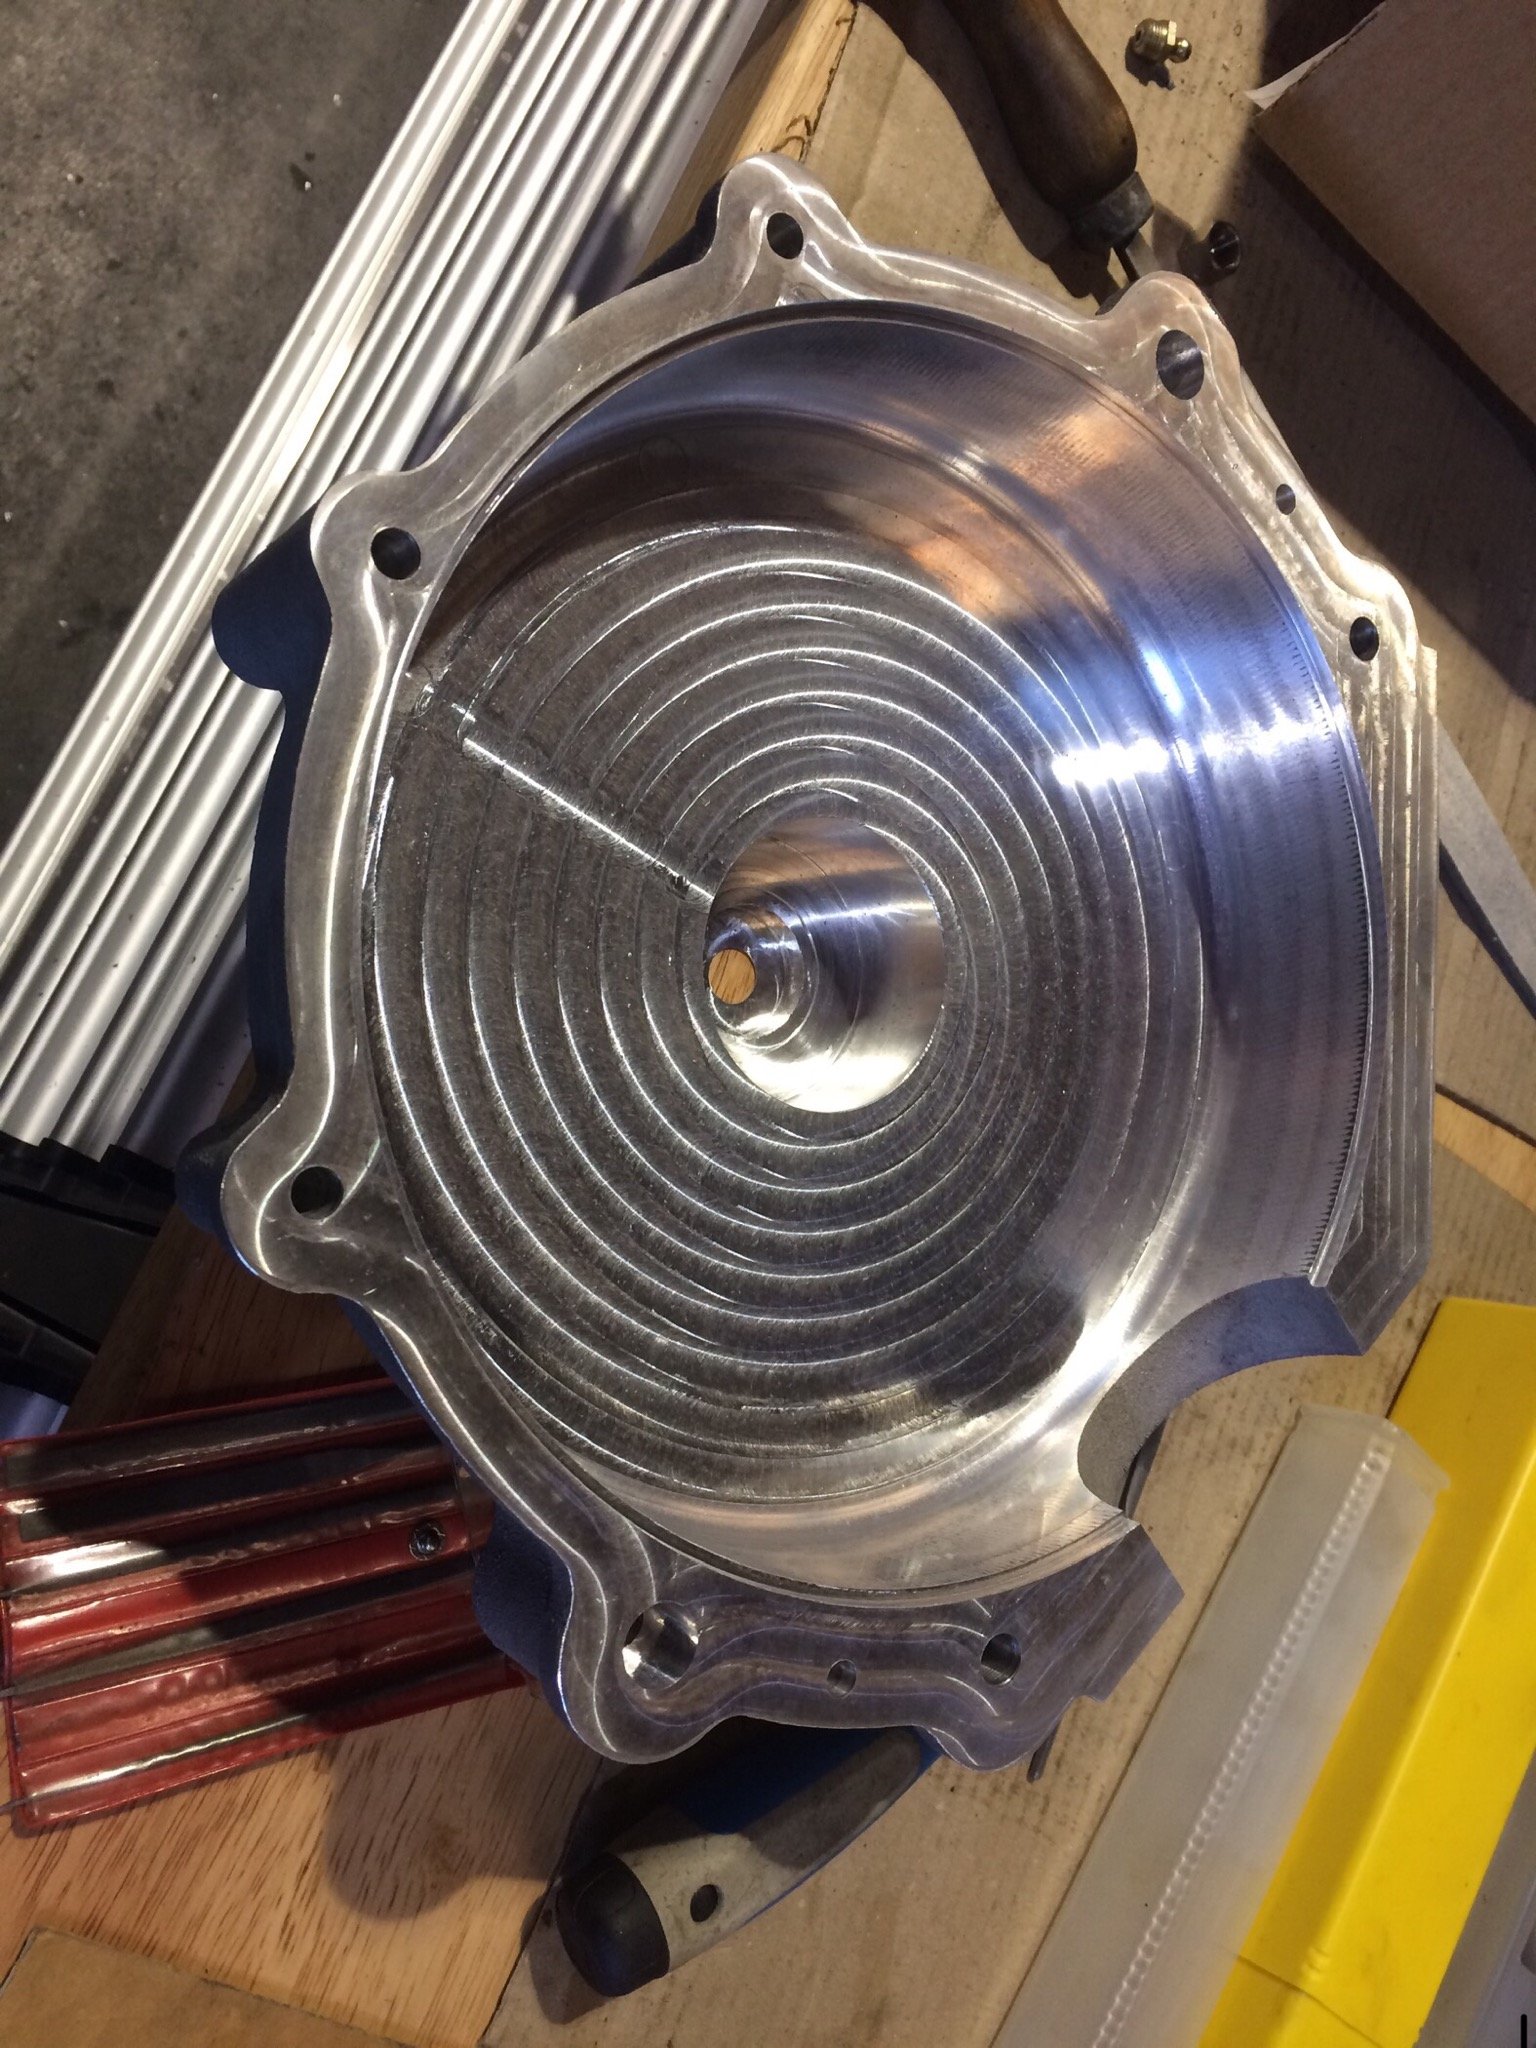
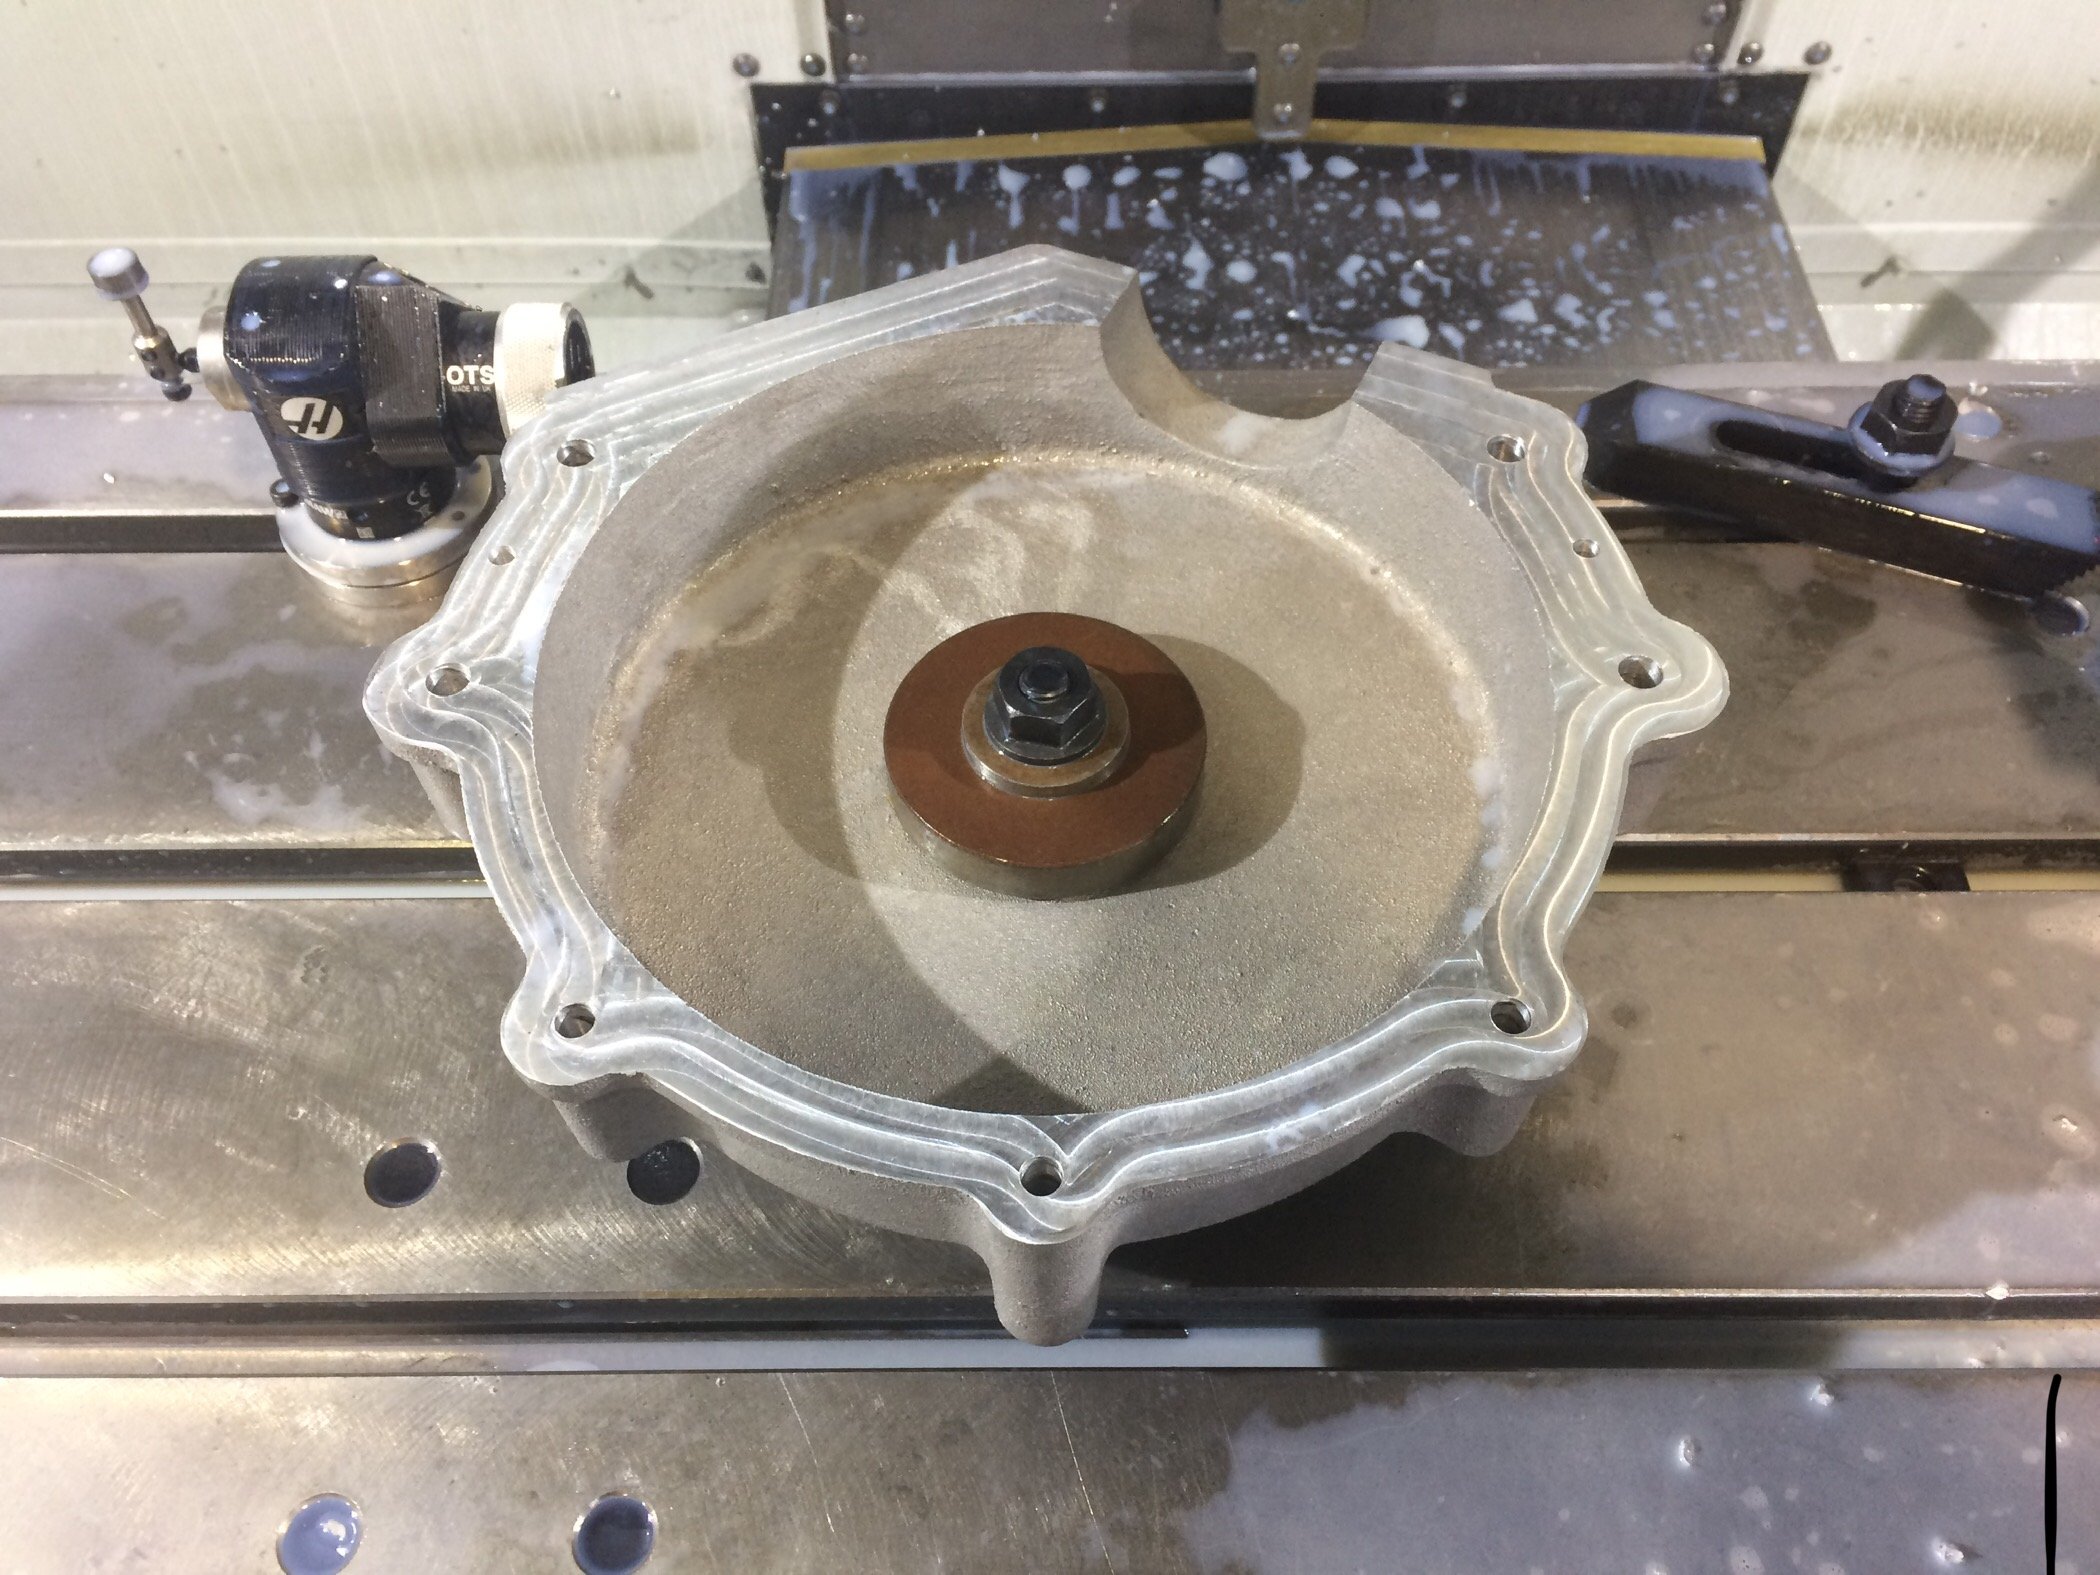
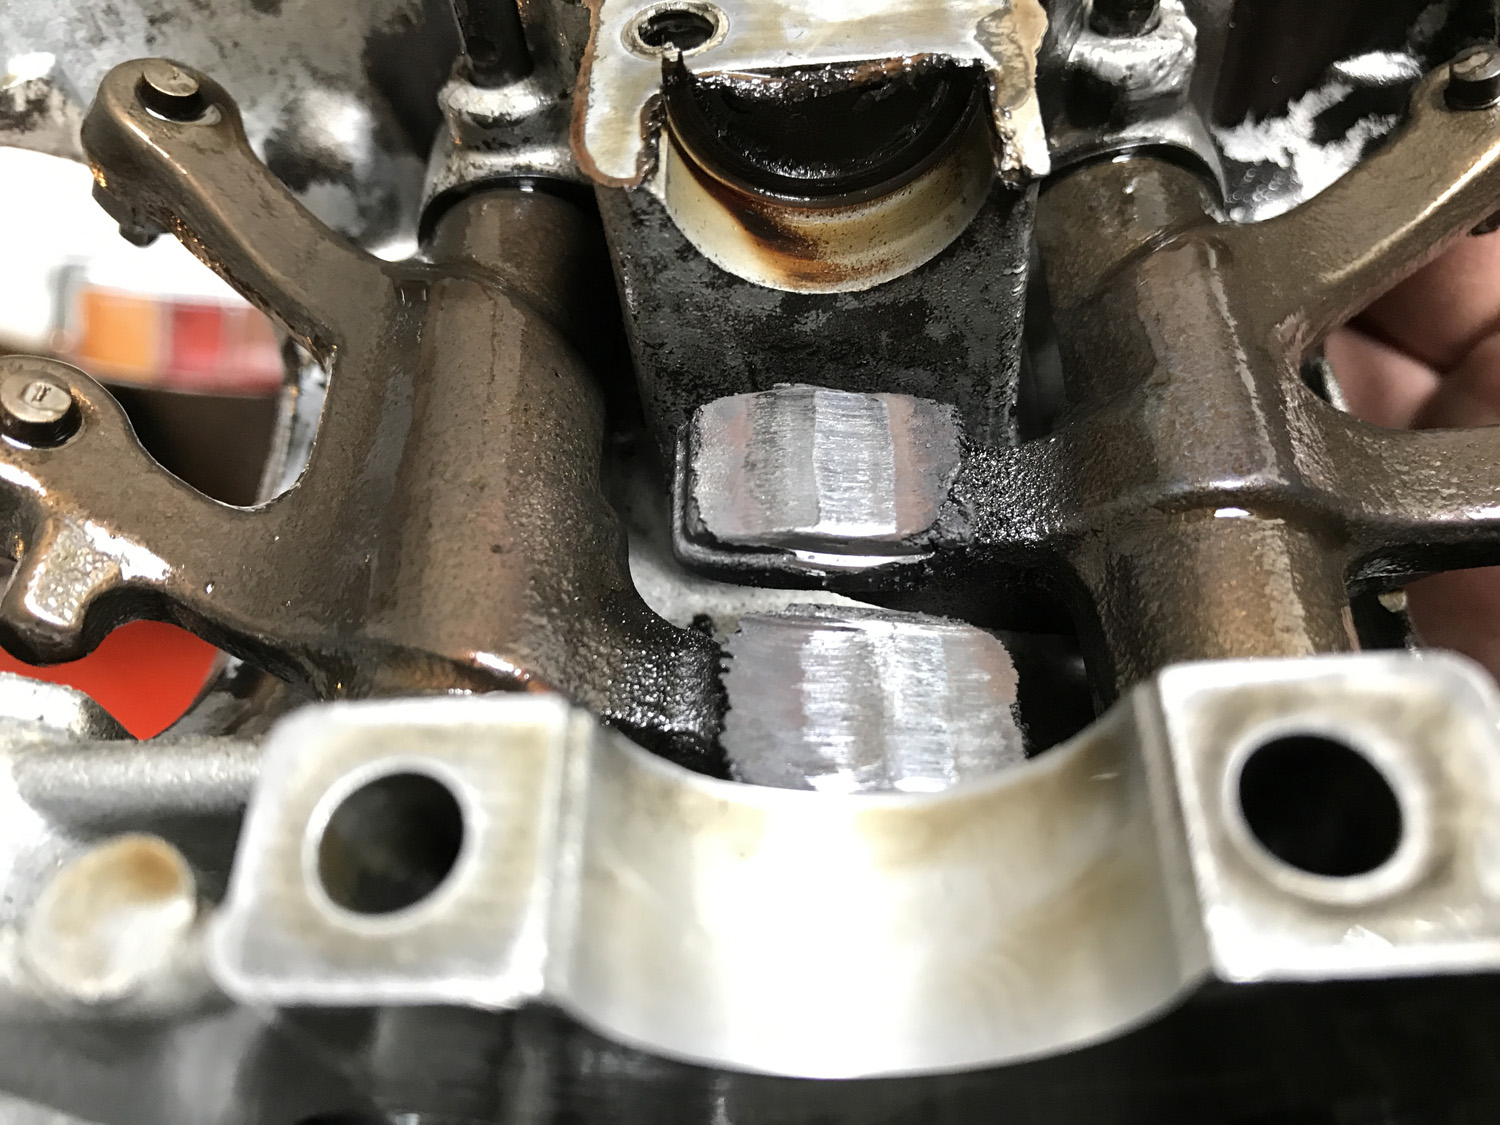
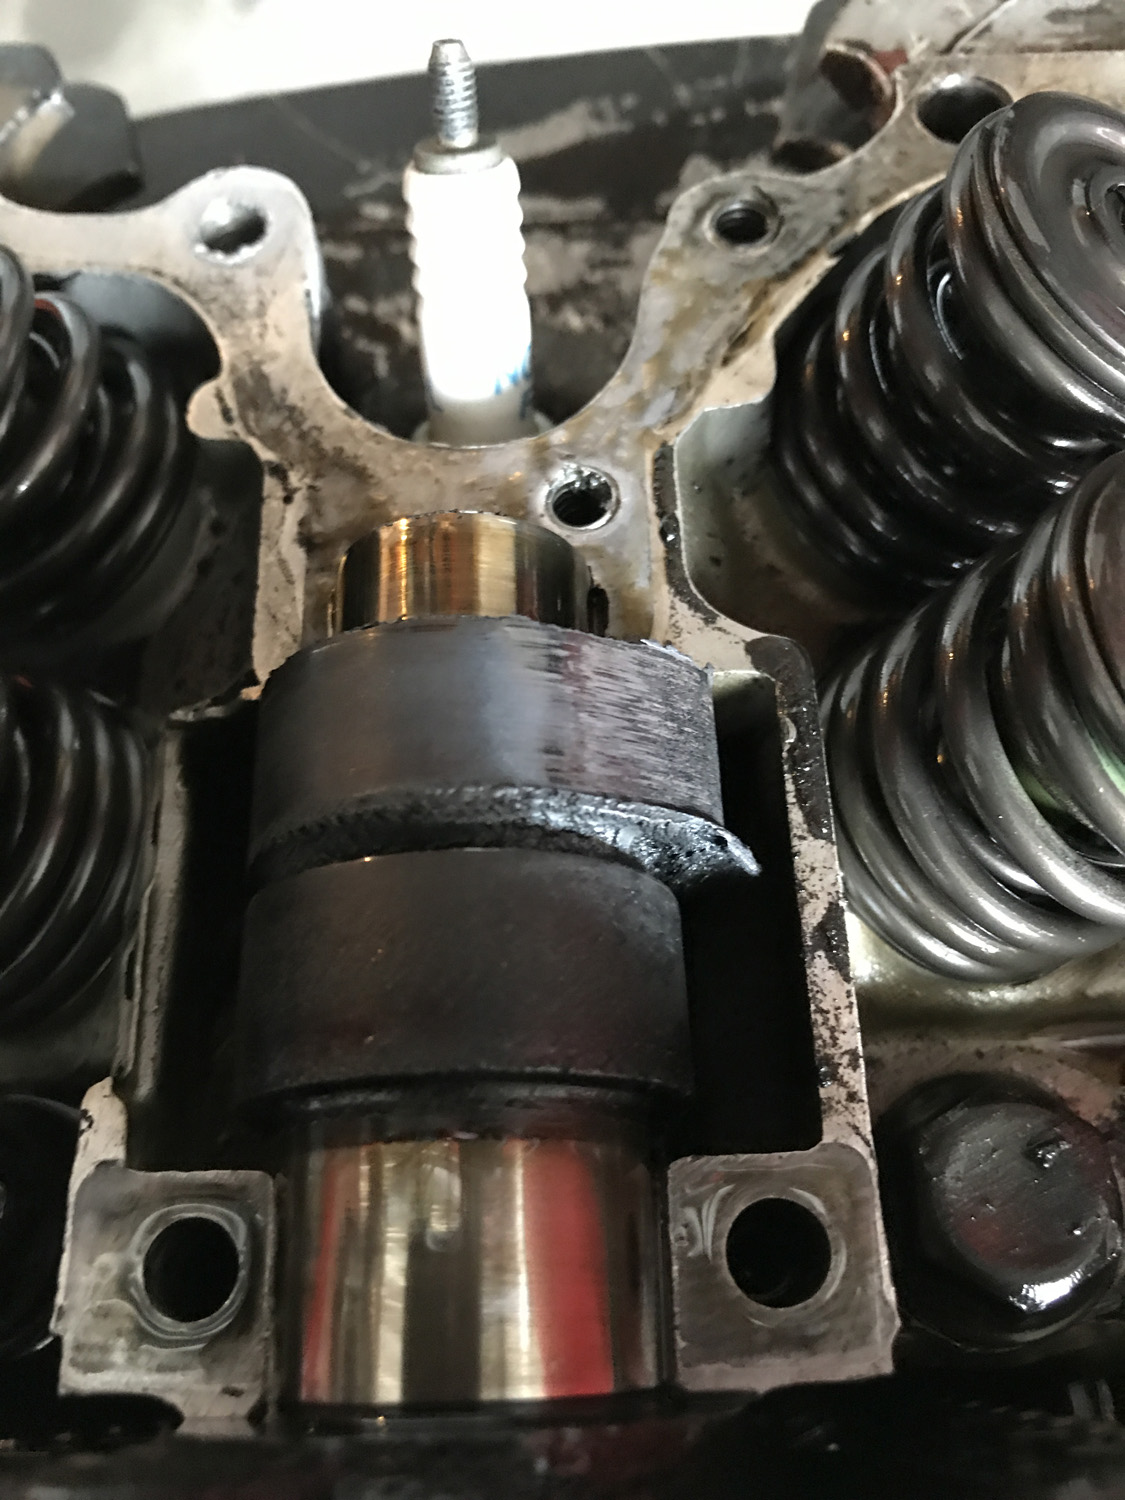
Did you ever see the engine run SOHC? A bit of info on this engine. It’s a 1930 JAP JTOR long stroke racing model of 1000cc. They were used in racing 3 wheel Morgan’s and Brough Superior motorcycles. These v twins are very rare these days and are worth a large amount of money. Lucky a place in the UK has reproduced some accurate castings for anyone mad enough to try make their own. I will be changing a few things with this one to try and get a bit more capacity and power out of it. Made a start on machining the drive side crankcase half. Bearing boss faced off to become the first reference surface Flipped over, mating surface faced and holes drilled. Now clamped down with spacer blocks to machine inner surface and bearing bore Inner features finished Next up timing side
1 point
-
made some ends to cap off the bottom plate....just all tacked in for now.. the i had a look at the fan and oilcooler support panel...just had to make sure i could get the grill on...and be able to remove and replace fan and oil cooler if needed....before i weld the panel fully in..
1 point
-
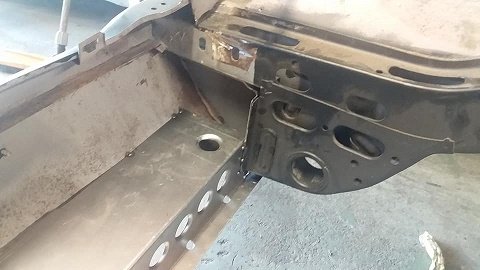
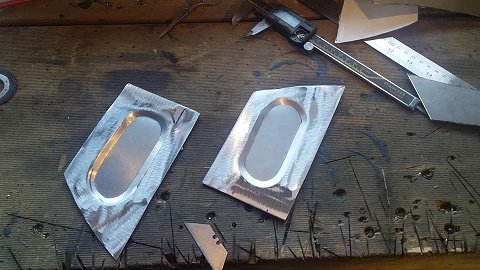
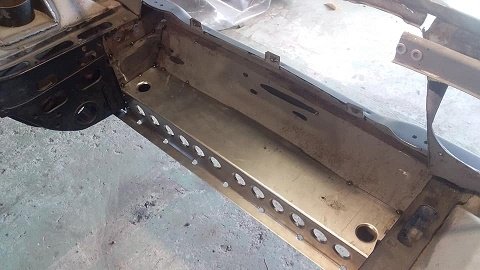
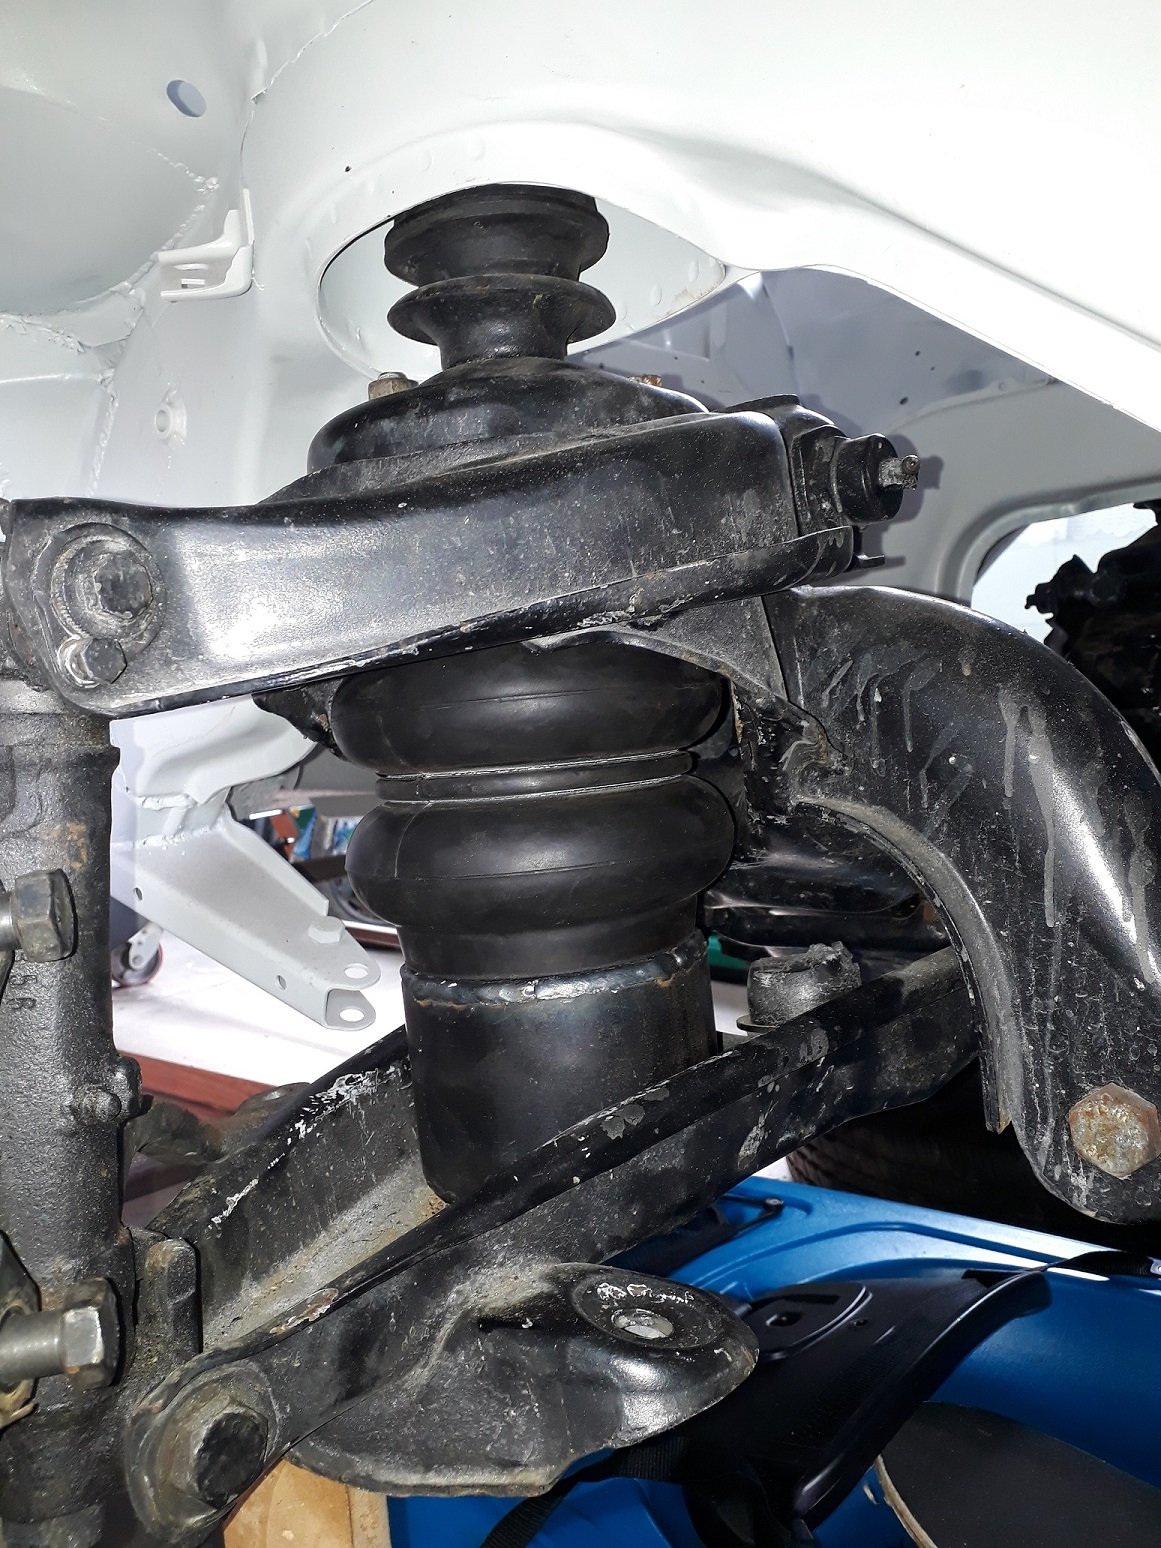
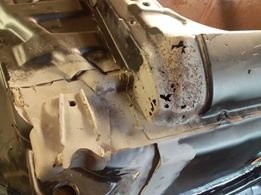
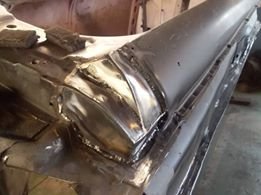
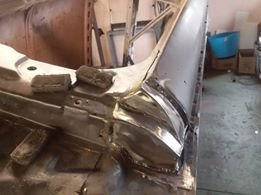
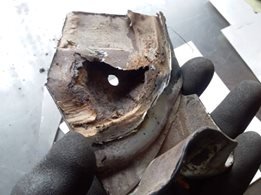
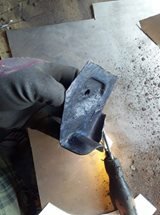
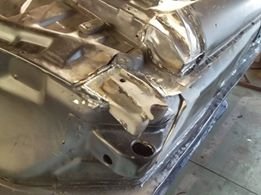
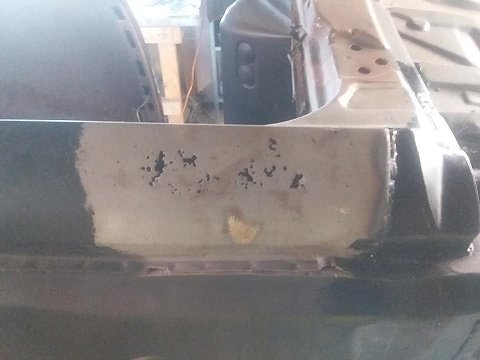
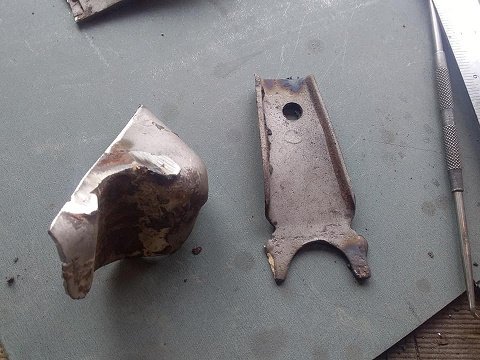
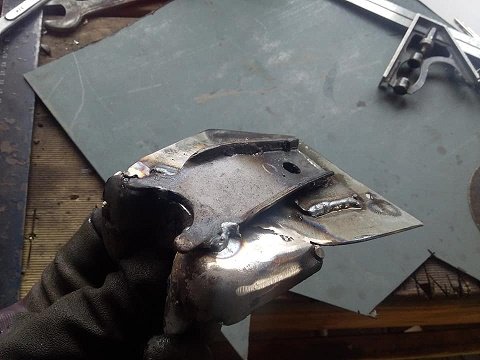
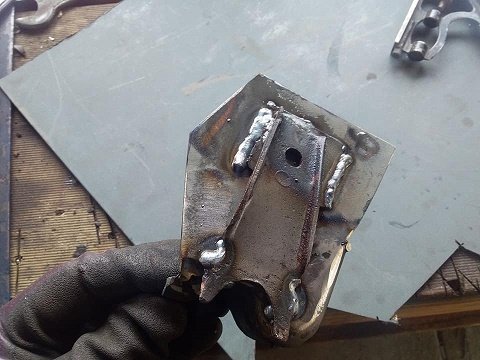
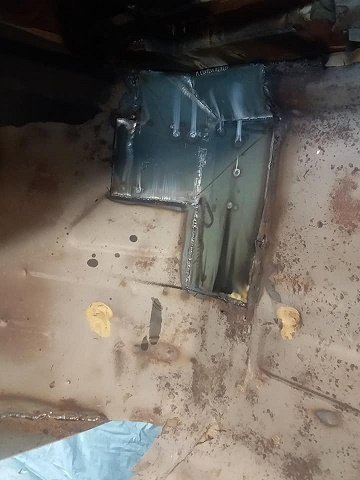
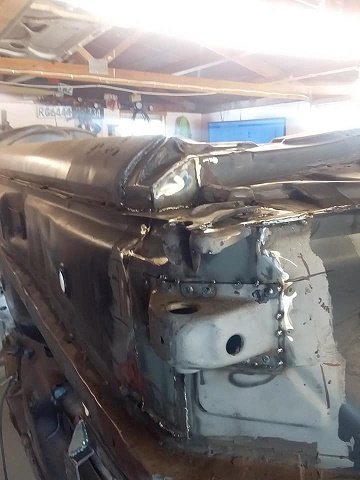
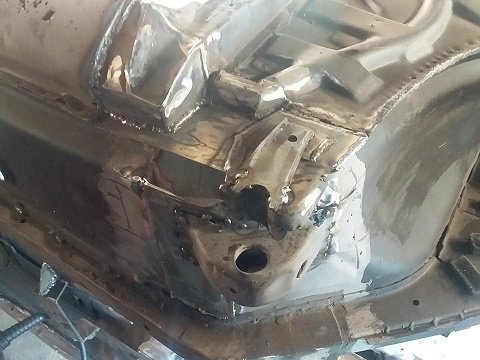
This thing is broken also. have started to fix it. This is front suspension lower link, chassis end mount. its meant to be parallel to the chassis not bent down at the back. the force from the front link is mostly pulling straight forward. the mount has plently of strength to handle that, but it also pulls down slightly, and yeh bendy bendy this is the brace that runs up the inside of the chassis. weld held up fine but has tore a hole in the chassis, which is maybe 2-3mm thick. other side is fine as the braces run to the top of the chassis, this side was cut down as handbrake stuff was in the way. Managed to bend it back to where it needed to be, by putting the weight of the truck on the mount and using massive bit of pipe too leaver it back into place. Then plated the chassis and boxed in the mount, plus added another brace along the bottom side on both sides of the truck. wasn't much fun tig welding left handed and almost blind under there. but is stuck good. yep i changed that grease nipple so it doesn't get torn off One of the front lower links has been bent for awhile. plus had to replace the joints, with the proper johnny joints i brought ages ago ^ ^. Decided to remake all 3 links. New links are a size smaller pipe but are made from 4130. old ones are some cheese water pipe. so yeh new ones should be easily as strong and are lighter. drilled some speed holes in the retardedly overkill hand brake linkage, to make myself feel better about welding more stuff to the chassis. front uni of front driveshaft was smoked also. just looked old and corroded, rather than not being strong enough, so wacked in a new gen toyota joint. White is the old top link ^1 point
-
Work on the scamp has been on the back burner a little bit lately. However a chap in my Hot rod club was in need of some 318 engine parts, so I removed the factory 2 barrel intel manifold and rebuilt carb, I could’ve stopped there but I was at a loose end so I decided to pull a head. Looks like it’s had a pretty poor service history it’s fairly black and gunky inside nothing seems overly worn however Pistons have no markings to indicate being oversized It has a small ring ridge which it to be expected, but a quick vernier of the bore (albeit on the ring ridge) shows 3.89”, stock bore should be 3.91” so looks to be stock bore heads are standard open chamber heads. Factory sized valves 1.78” in 1.5” exh. Obviously until I get it on the engine stand and drop the pants off there maybe a different story but at this point it looks like a good base to start a build with.1 point
-
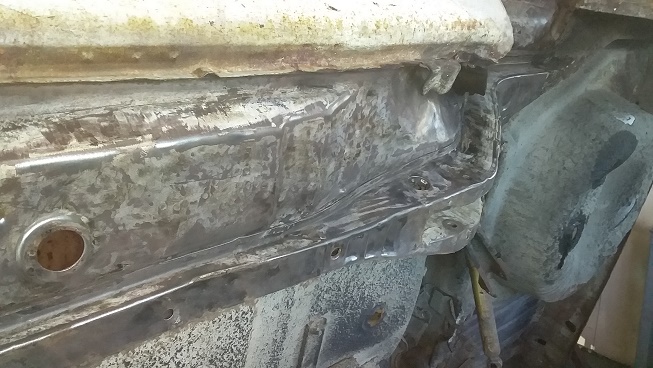
Have now seam sealed the front right inner wheel arch. Also got the car up on axle stands and off the trolley thing it's been on for the last 18 months and seam sealed the under side, no pics of that. Masked up the front left inner wheel arch and top coated it with Wurth 'Gravel throw and underbody protection'. I don't want to use the full fat bitumen based underseal as it's a prick to get off in the future if you ever need to - a lot of the underside of this car is still coated in it as the blaster couldn't remove it and I don't have the patience to lie on my back with a heat gun and scraper to get it off, so it can stay. This stuff seams to be favoured by those in the Porsche circles online so we will see how it goes (means I have Porsche parts on my car now right?) has the added benefit of coming in a rattle can, not sure if that means it won't last but it takes a bit of effort to scratch it once its dry.
1 point
-
Certs booked - 6th of May. Are you meant to feel this nervous? it should be fine, its not a massive list of mods and its not making huge power. anxious and excited at the same time, this has been a long time coming. nearly 10 years of ownership, i initially bought this car as something to learn on.
1 point
-
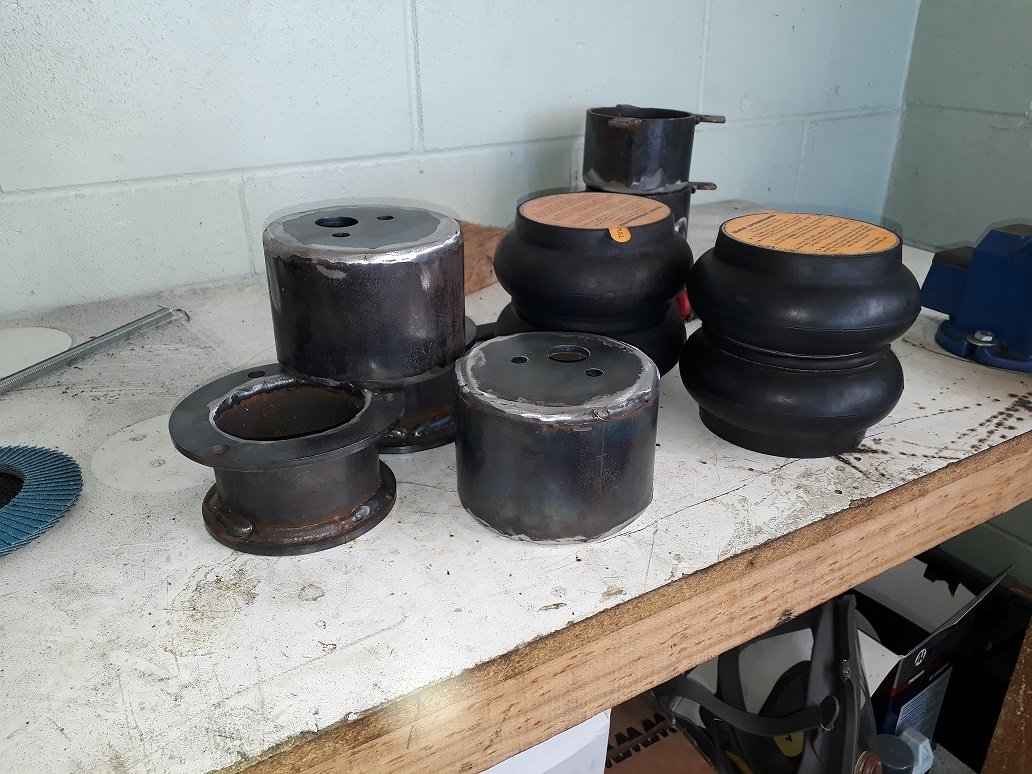
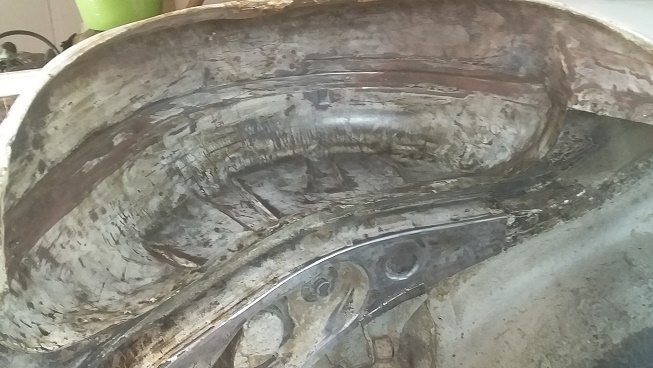
Still plodding away, got a pair of Slam Specialties RE5s for the front, would of likes to run the larger RE6s up front but they're a bit marginal for clearance on the diameter front and I'd rather not risk having a bag rubbing on something. Hot glue gunned some mounts together, all designed to be bolt in: Full Squash (onto factory bumpstops), followed by full droop - looking like I'll need limiting straps at full droop to stop all the weight hanging from the bag. Back when this was at the panel beaters I made a day trip with Ned to Mercworx is Tirau in search of a new boot, as mine was full of cheese. took a punt on one that had a dent in it but look solid. Finally got around to getting it blasted and primed at Autoblast and, other than coming back in the wrong primer and having a couple of dents in it, it looks ace - not a spot of rust in it. New one on top of old one: Have started seam sealing the underside, started with the front left wheel arch. Initially tried masking up the lines to give a cleaner finish but have decided that isn't worth the effort; a finger swipe gives the best outcome. (as an aside when Wurth say their seam sealer is 'brushable' they're using that term very optimistially) Hopefully have the underside seam sealed by the weekend touch wood.
1 point
-
Got the intake all done with a K&N filter, looks pretty good I think. Took a guy for a drive that knows transmission things up the road and back and he reckoned the trans was sweet, shifting how it should, just the engine was massively down on power. Tried to diagnose the problem myself but I couldn't really figure much out. It was throwing error codes for the secondary throttle and knock sensors. Discovered the secondary throttle sensor was only used for traction control so I didn't need to worry about that one. Was hoping the knock sensors were just reading high because the timing was out, so I took it to Danny's Autos in Palmy to go on the dyno and see if they can tune it and figure out what's wrong. They got it on the dyno, they were just bringing it up to speed and fuel started pissing out everywhere. One of the fuel hoses going up to the fuel rail split, don't know if it just happened or if it's been like that for awhile, but we never noticed any fuel in the valley before, where as there was heaps in it then. So off came the intake and manifold to replace it. Whilst they had that off they had a look at the knock sensors and they had seen better days. The wiring pins were pretty corroded and the casings were cracked. They sourced some new OEM ones and chucked them in. They also found one of the breather hoses had a split, as well as one of the igniter modules was only firing 1 of 4 cylinders on that one side. So basically this has only been running on 5 cylinders all this time. Thought it didn't sound quite right haha. The steering rack also decided to start leaking power steering fluid out of a place the fluid shouldn't be. Beach Hop was the next week and the rack had to be sent to Auckland to be rebuilt. Managed to get the engine back together and drive it home on the Tuesday night and pull out the rack to be sent off on Wednesday. Luckily they got around to rebuilding it fairly quick and sent off again so it arrived first thing on Friday morning. Got a different igniter module from the wreckers off a SR20 and it ran waaaaaay better! Chucked the rack back in Friday morning and took it for a WOF, passed with flying colours, so went and got some rego and now it's all legal!!!! On Friday/Saturday the fuel pump must of came out about a dozen times, half of which were on the side of the road. Went for a bit of a drive and the fuel pump kept dying for some reason, thought maybe the wiring in-tank was a bit dodgy, replaced it all and soldered every connector, that didn't make much difference. Discovered that if I gave the pump a good smack it would start back up pumping a bit more fuel or just die completely. Decided to get another fuel pump from Repco and chucked that in. Turns out the brand new "genuine" Walbro pump I got off ebay was shit. Went sooooo much better again!! Took it to the 4 & Rotary Jamboree show and shine at Manfield on the Sunday and took home the Best Commercial Piston trophy. Then on the Monday took it back into Danny's Autos to get dyno'd. Made 100kw at the wheels which I thought wasn't quite right (should be closer to 200kw?), but he reckoned it was running right and just the reading wasn't that accurate, he had trouble getting into 4th, kept changing down, so had to do it in third and that was maxing out the dyno's rolling speed. It had good consistent 02 sensor readings. Took it up to Beach Hop on the Wednesday. Had no issues other than getting some brake fade through the windy bits between Waihi and Whangamata, we think there must of still been some air left in the lines. After that happened I was changing it manually between 2nd and 3rd gear through the windy bits, rather than just leaving it in drive as it engine brakes way more. Survived all through Beach Hop, including going up to Whitianga, Kuaotuna and Onemana as well as cruising up and down the main street lots, the rear bumper took a few scrapes, I think it needs some titanium stripes underneath! I think it was one of the cars that got some of the most attention. Managed to get all the way back down to Marton, then when I was overtaking up a hill, noticed smoke coming from under the dash, so quickly pulled over and checked it out. The transmission sump had either smoke or steam since it was raining coming off of it, also smelt very burnt and the oil was quite dark. My parents caught up and we decided to just keep driving. I then noticed it was revving at 3500rpm at 100km/h, where as it's usually around about 1800rpm. It was only changing from first into second gear and that's it, if I took my foot off the accelerator it would drop straight down to idle. It was a slow drive home from there at 70km/h. Next couple of days I pulled the trans out, pulled off the sump and it had quite a bit of metallic build up at the bottom and just smelt very burnt. I guess it's always been slipping, as to why it didn't make much power on the dyno. Dropped it off today to get a quote on being rebuilt, so hopefully it's not too bad. It used about $400 worth of petrol over Beach Hop, which I think worked out to be 15 l/100km. After driving it for about 1200km I have decided the seat definitely needs redoing, it's way too hard, would also be nice to sit a bit lower and further back as well. Also the accelerator pedal has your foot at too much of an angle back, so gets sore rather quick. Shouldn't be too hard to fix as the seat changes should help and just modify the pedal a little. Also the door latches + door seals are terrible, takes way too much effort to get them closing right. A softer door seal might help, and you can get bear jaw latch kits that are basically a bolt in thing for these which might be the go when I have the spare money.1 point
-
Top tip for doing wrap is coat your arms and hands with talcum powder. The fine granules fill your pores stopping the fibreglass strands from hooking in there which is the cause of the itch. Works great for doing house insulation too1 point
-
Rerouted the fuel line to how i planned it, with the fuel pressure gauge between the two carbs In a timely event, these turned up from @ul9601 and so after reading the relevant section i tuned my MAN-O-METER to 11 and made this very very boring and poorly shot video, which is pretty much the 2nd start after getting it to fire and idle and me tuning it by how tall the rod is on my MAN Engines really tappy! ill redo the shims soon. Next day i tuned it a bit more, 1. balancing the barrels on each carb to each other using the air bleed screws (bleed the highest reading to match the lowest) and idle (small adjsutments), then 2. then balancing the carbs to each other (bleed the highest to the lowest side), then 3. adjusting the idle mix (leanest smooth idle, turn 1/2 turn one way at a time until it slows, then back the other way until speed drops then keep halving the difference until you find the spot 1/4 turn above the lean speed drop point) and back around to step 1 again, etc Turned out the timing was pretty retarded too, but also found a better dizzy spot. Had a dig though the filters stash to see what would work. The big factory thing is the Strada Abarth manifold (fwd) and the blue line is wehre i would need to cut it Tuned out only the worlds greatest filter will fit. Even then the (K&N) bases needed a tweak to fit (My 125 Belina has socks over trumpets) RACE MODE (now i see it in the photo, I dont like the look of those trumpet retaining bolts just waiting to wiggle out and fall into the carb. NO SIR) However, small children and animals no longer in danger of ingestion. Check the clearance to the shock tower. Be a real faff to make the Strada filter thing fit unfortunately, would need a custom airbox and a cut and shut, but would also be better than the Ramflows Test drive soon1 point
-
Oh man I haven't updated this for so long. Six months ~ time fly's and all that guff. Didnt really do anything to the Hudson over the Summer. Messed about on the old 52 Buick a bit as it has been playing up but other than its all been work or play I guess.Anyway thats my lifes catch up hour complete. lets talk old jalopies & do a quick catch up on to where the Hudson currently sits. And then with luck I will pull my finger out so to speak and start updating this more regularly.I should warn you all now this might be a tad pic heavy. Photobomb you all since I plan to follow the old saying "A picture is worth a thousand words". Oh and images are all odd sizes due to camera settings at the time. dratted updates.First off the engine was put back in and tight tuck headers thrown on.Left hand side had clearance issues so we put spacers on the engine mounts raising the engine a fraction to cure the issues. Although we have clearance at the firewall it will get cut more to tidy things up and give a tad more room.Wheels on, engine in and sitting on the ground... better jump in and visualize cruising.Radiator slotted in. Happy that we modded the thing to have twin fillers and a central top outlet. Purely for aesthetic reasons really. Just hope it will work well.Was a bit concerned about the amount of space between the rad and engine at first. but once the custom fan shroud is on and other junk is in there the gap should fill up I hope.With the engine in and headers on next steep seems logical enough - fab up the front exhaust. Was surprised how easy it went. Heap of room on each side so no issues getting to the oil filter or anything else. Still is rock solid.Welded all up ready for a quick paint and fitting. H balance pipe just at the tail of the trans. the two extra out lets poking out the sides are for the lake pipes - I like the idea of them being functional if i want. Looking at the above pic and below you will note they are situated in a low spot. this is not just cus it is just where they should be body wise but also to stop the possibility of any water pooling.Shiny sh!tFirst off i will say IDIDIT sales are top blokes. Why they never just blocked my emails is beyond me. For two years one, two or 4 times a month I would email them asking when there RHD column shift steering column would be ready. Patient bunch always emailed back. After a year or so they made up a column - it failed Aussie testing as it was to strong and didnt collapse enough. Will point out NZ cert laws are also extremely tight around steering columns with only four or so aftermarket brands being aloud. Rightly so as it is a big spear that could impale you. Anyway im waffling. To cut a long story short they have now made up a RHD column shift column- although its still not on the website. Since I had to wait so long they gave me a huge discount.Was a happy boy unboxing all teh steering crap.Initial fit up. Wasn't to thrilled on how the column sat at the dash. column drop was to low(as pictured below) so decided to order in a new one. Slightly cutting up the dash but will be worth it to get it to sit up in the stainless strip more.Whilst we waited for the shorted column drop it was decided to cut up the firewall a bit more as next we would need to figure out the lower floor mount for the column that currently dangled in the air.Three double D universals will be used. Bit tight near the headers but still will be easier than some setups.Below looks closer to the headers than it really is. has near an inch I guess of clearance.Its all nice and tight no slop or wiggle and more importantly no binding.With the front exhaust and steering done its time to move to the gaping hole in the floor and firewall.Top of the firewall all buttoned up. Will get cleaned up down the track but for now at least we have an area to bolt the trans cover to. Heap of room to fiddle about on the distributor etc.Skellington framework being made up for the trans cover. Bit by floor mount will get altered as I dont want it to be incorporated into the trans cover. Who wants the bother of removing the column to get the trans cover out? Will get it all folded up. Note the columns new position up further in the dash. Tilt column so should be ace.Been teaching myself Solidworks. Designed up the fan shroud and got it cut n folded.A couple of Spall high performance fans sit on the the shroud. I figure if they are good enough to cool NASCAR and high end sports cars then they should suck air through the four core copper rad and keep the old donk chilly. The rubber flaps are for highway speeds to let trapped hot air out. Middle rivets hold a divider in place that separates each fan. Thinking here being air follows the path of least resistance. So if only a single fan is running then air would draw through the other fans opening and not through the rad. Being in separate chambers hopefully will stop this happening. So yeah thats me pretty much! All caught up with the Hudson project. With luck will be getting back to it more now its coming into Autumn.One side note is the missus has got her self a new car. Just a small grocery getter / run about. A 1956 Morris Minor split window series II coupe. Seems to be rust free and mechanically sound little car - totally road worthy and legal. Owned by a nursing home from new till the old couple who she purchased it off got it. Garaged and loved all its life.So what do you do when you get a honest survivor in good condition? Cut it up of course!TheMoose on HAMB photoshoped it doing all we asked. chop roof, fade-away fenders, skirts & lower it. Like an old 47 buick just compacted. Once the current warrant of fitness runs out (6 months) the fun begins. Oh and old 30HP factory engine will be going as well.1 point
-
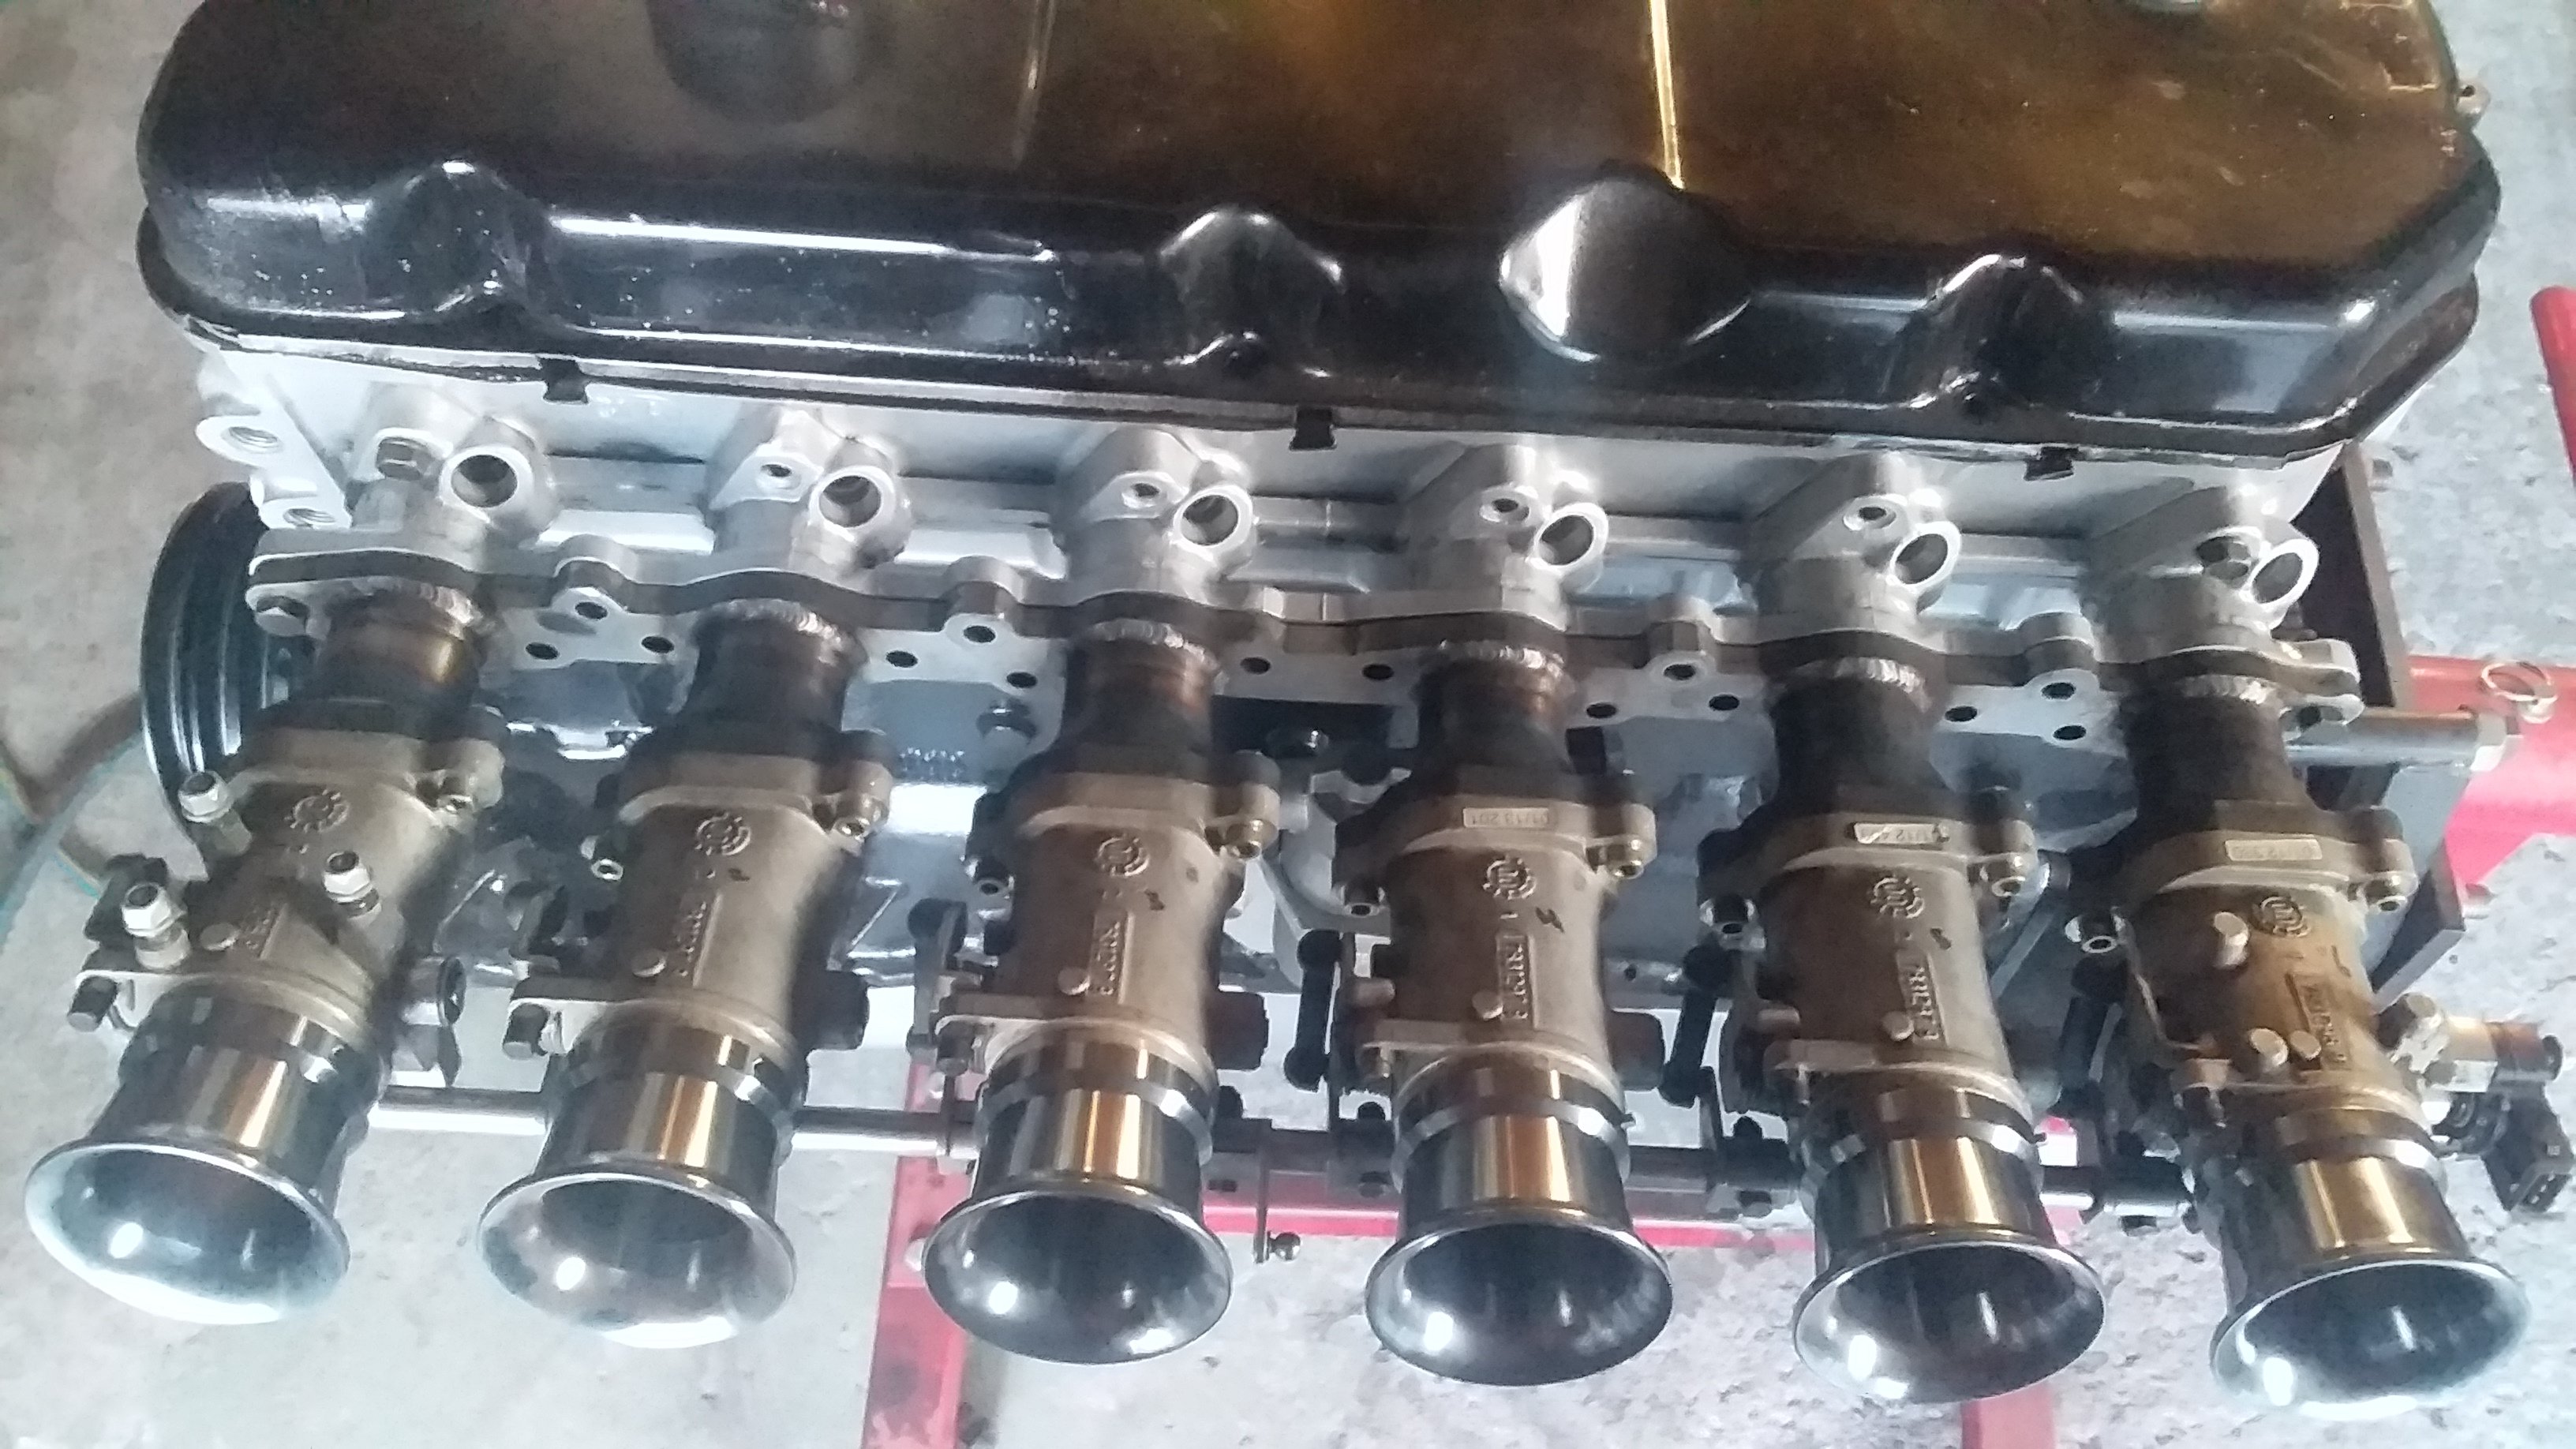
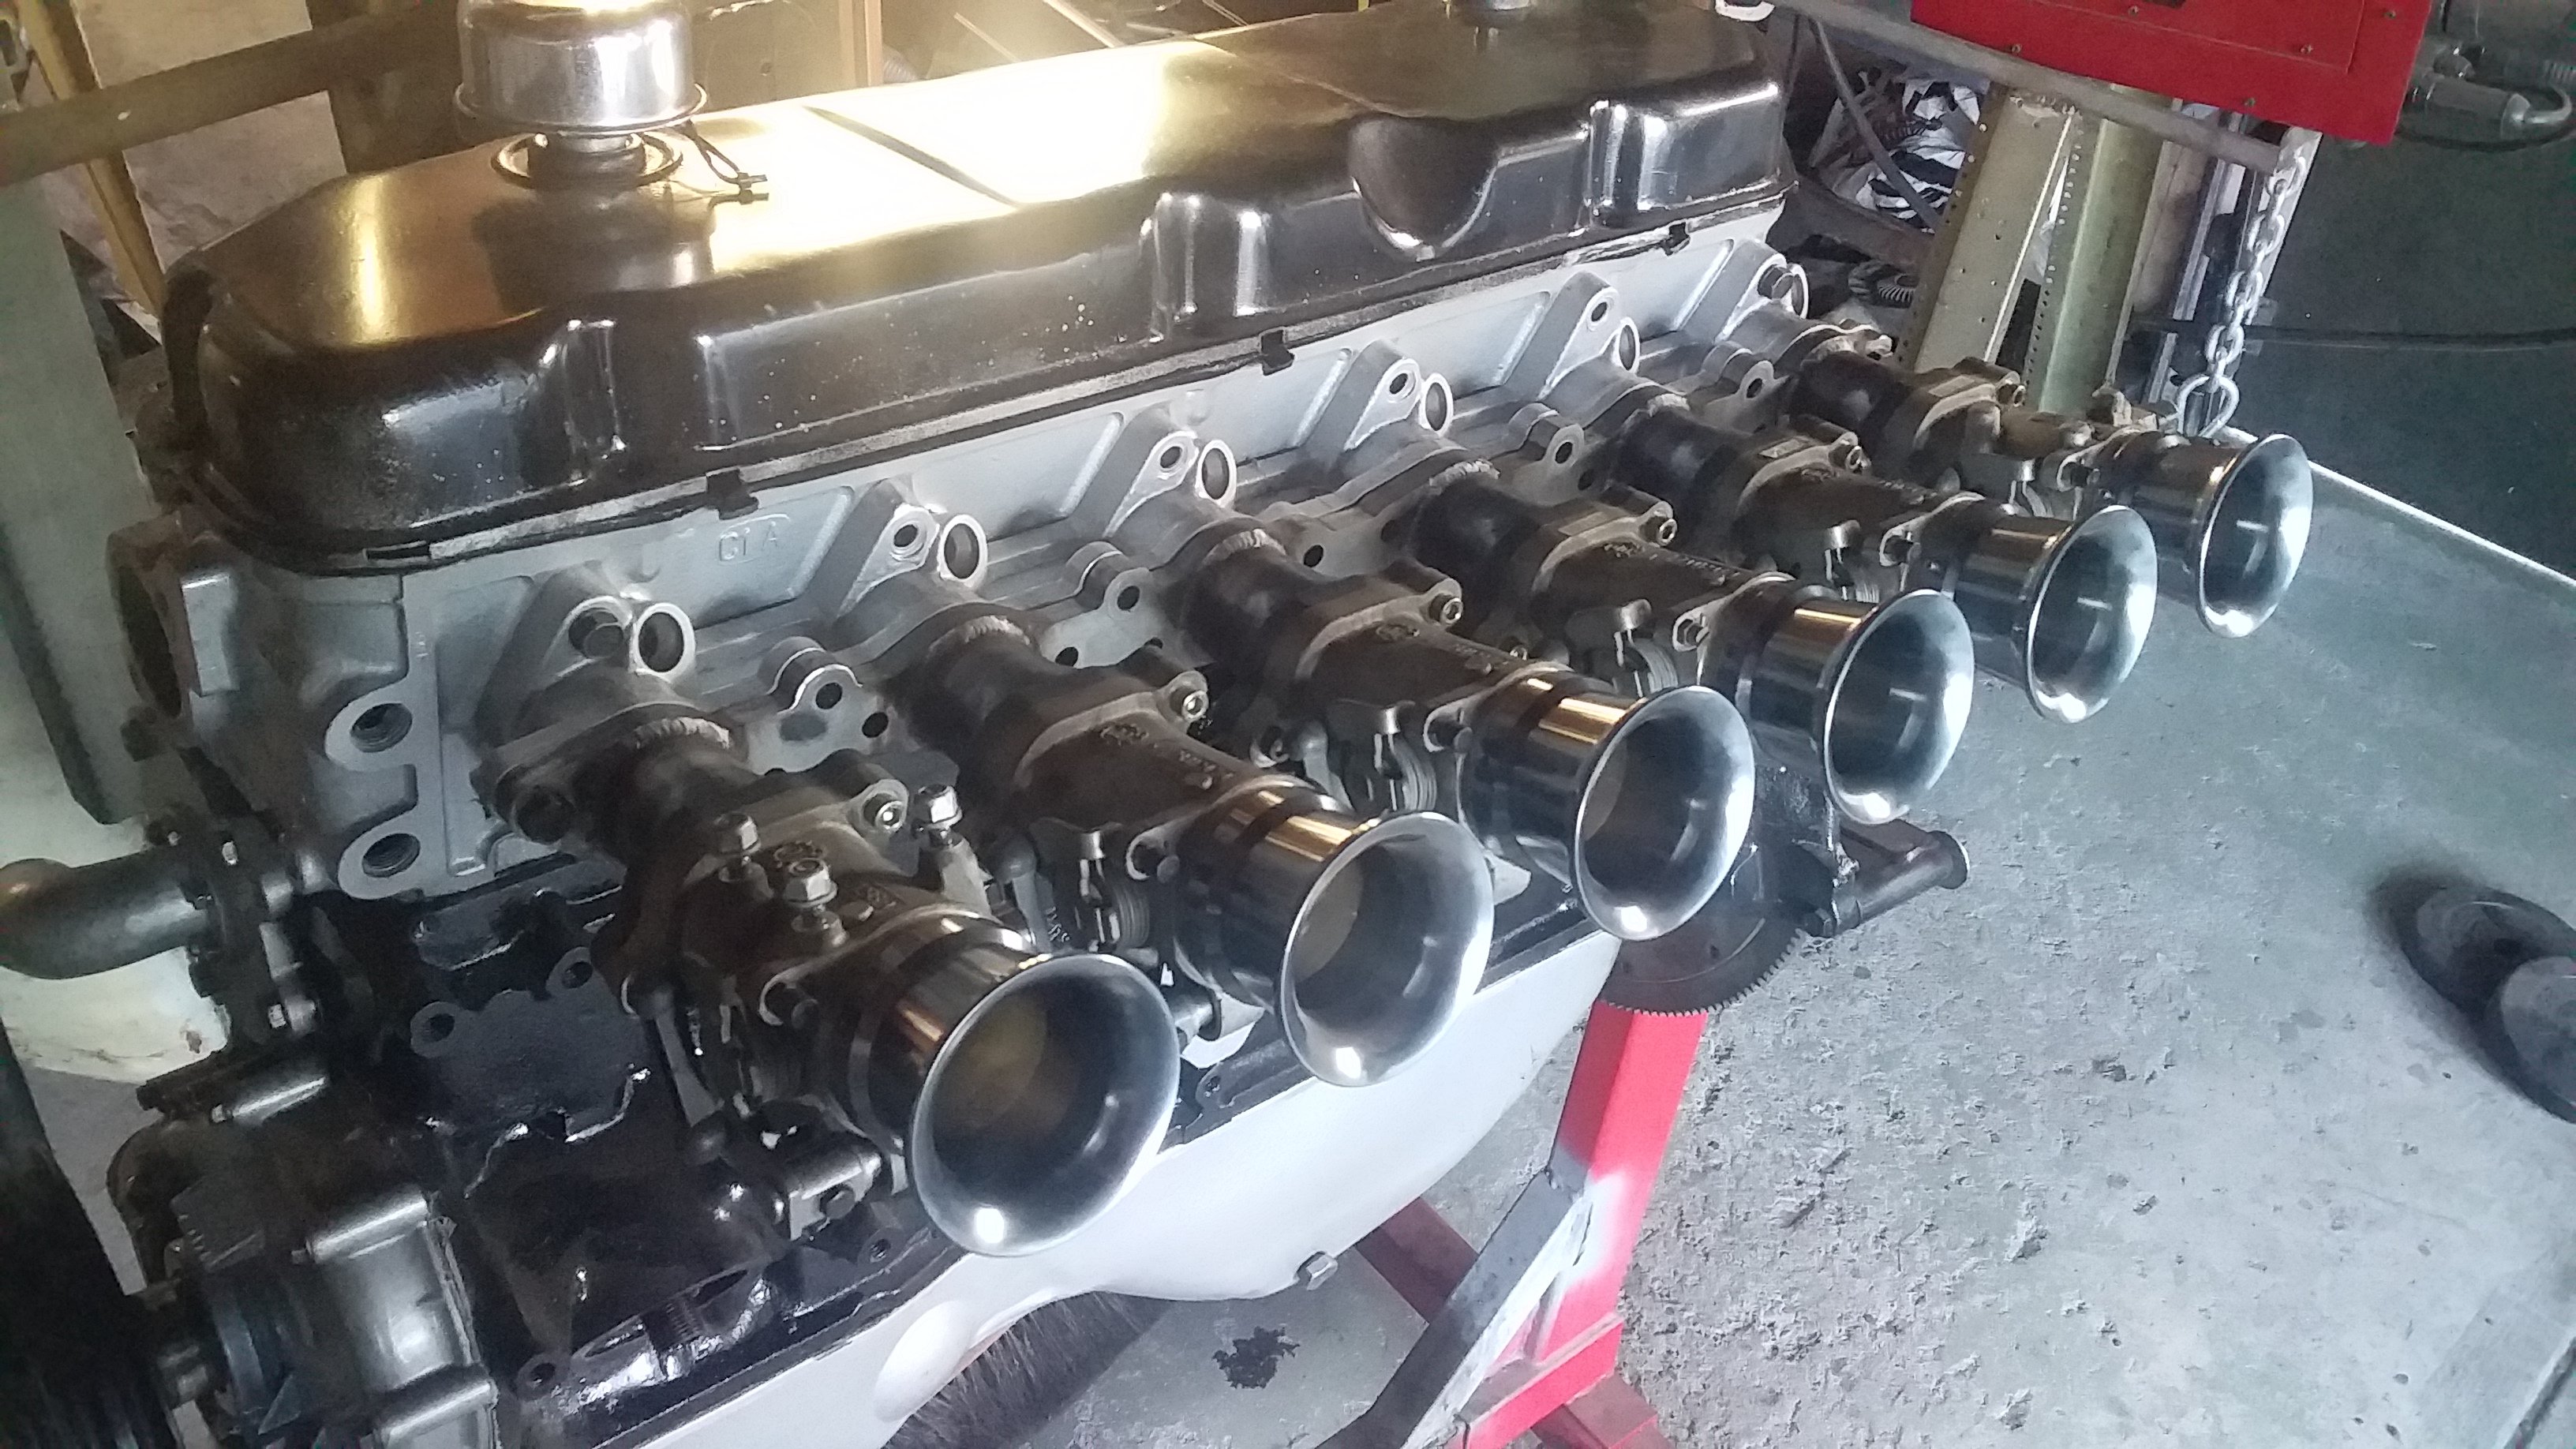
Finally went and got ol mate @EURON8 to ally weld the holes in the already hacked up side draft manifold so i could space the carbs apart about 4mm from where they were but without fouling on the dizzy or loosing room to seal or flow. some careful 'linishing' later Without any trimming the inner barrells will be 49mm apart, manifold spacing is 40mm, min i can get away with on the carbs is 45mm, max on the manifold is 44mm. its pretty flippin tight and doesnt add up... shaft need trimming by 3 to 4mm and the nuts thinned down a bit as well - i ended up spinning about 3 out of the vice, so i need some more M7 nuts to fit back on the venturi retainers i stole my spares from! no need for retaining washers :/ You can also see how offset the carbs are to the manifold Redrilled and tapped - had to open a old NOS packet to get a 5/16 NSP tap out that had been floating around in my grandads too box for who knows how long before that Fitting the o ring holders show where the manifold needs a smidge of smoothing, about 15 seconds with the belt file. The outer edge of the o-ring diameter is just inside the edge of the manifold face. linkage mod, toyota corolla cable from the old single carb set up to twin weber linkage, all this is sandwiched between the carbs boom AS mentioned in a previous post, these carbs came from a very hot mini, and apart from the drilled and soldered main jets, they all looked very close to what various books and setting tables suggest would be ok for 1500-1700cc engines. 32mm chokes, F9 tubes, 45 idles, 185 airs and random sized but soldered and redrilled mains I had previously ordered 125,and 135 mains so popped in the 125 to start with. old manifold off. Removed the (pretty new) old leaky mechanical fuel pump for good, and installed a factory engine blanking plate. Dumb photo cause it shows the old pump. installed and with new linkage mount and brake vacuum routing, both way better than before. Fuel hose routing will eventually be jiggled to look better (i had orignially wanted to have fule coming in from the firewalll side, but the double ended banjo is a bit long to have the hose make the remaining curve without a kink or rubbing. May try bending it a bit, or maybe just buy a bent one. Clearance is ok, but I cant install the bell mouth into cylinder 3, nor will the air filters i have fit - i will look into making an airbox - i have a Strada 125TC airbox with 'ABARTH' and a scorpion stamped on it that i really really want to make work some how but whatever, lets worry about that after! plugged the fuel in, then spend an age jiggled the timing around and carefully power filing the manifold, then trying to find the best combo of a limited ability to clock the dizzy (it fits in only two more or less fixed positions, maybe 5 degrees rotation?) and dizzy drive tooth alignment , and then it fired up and idled. and revved. Sounds good, and AFRs are ball park YAY! DOORTS!1 point
-
Its great to see a car come back from the dead like this1 point
-
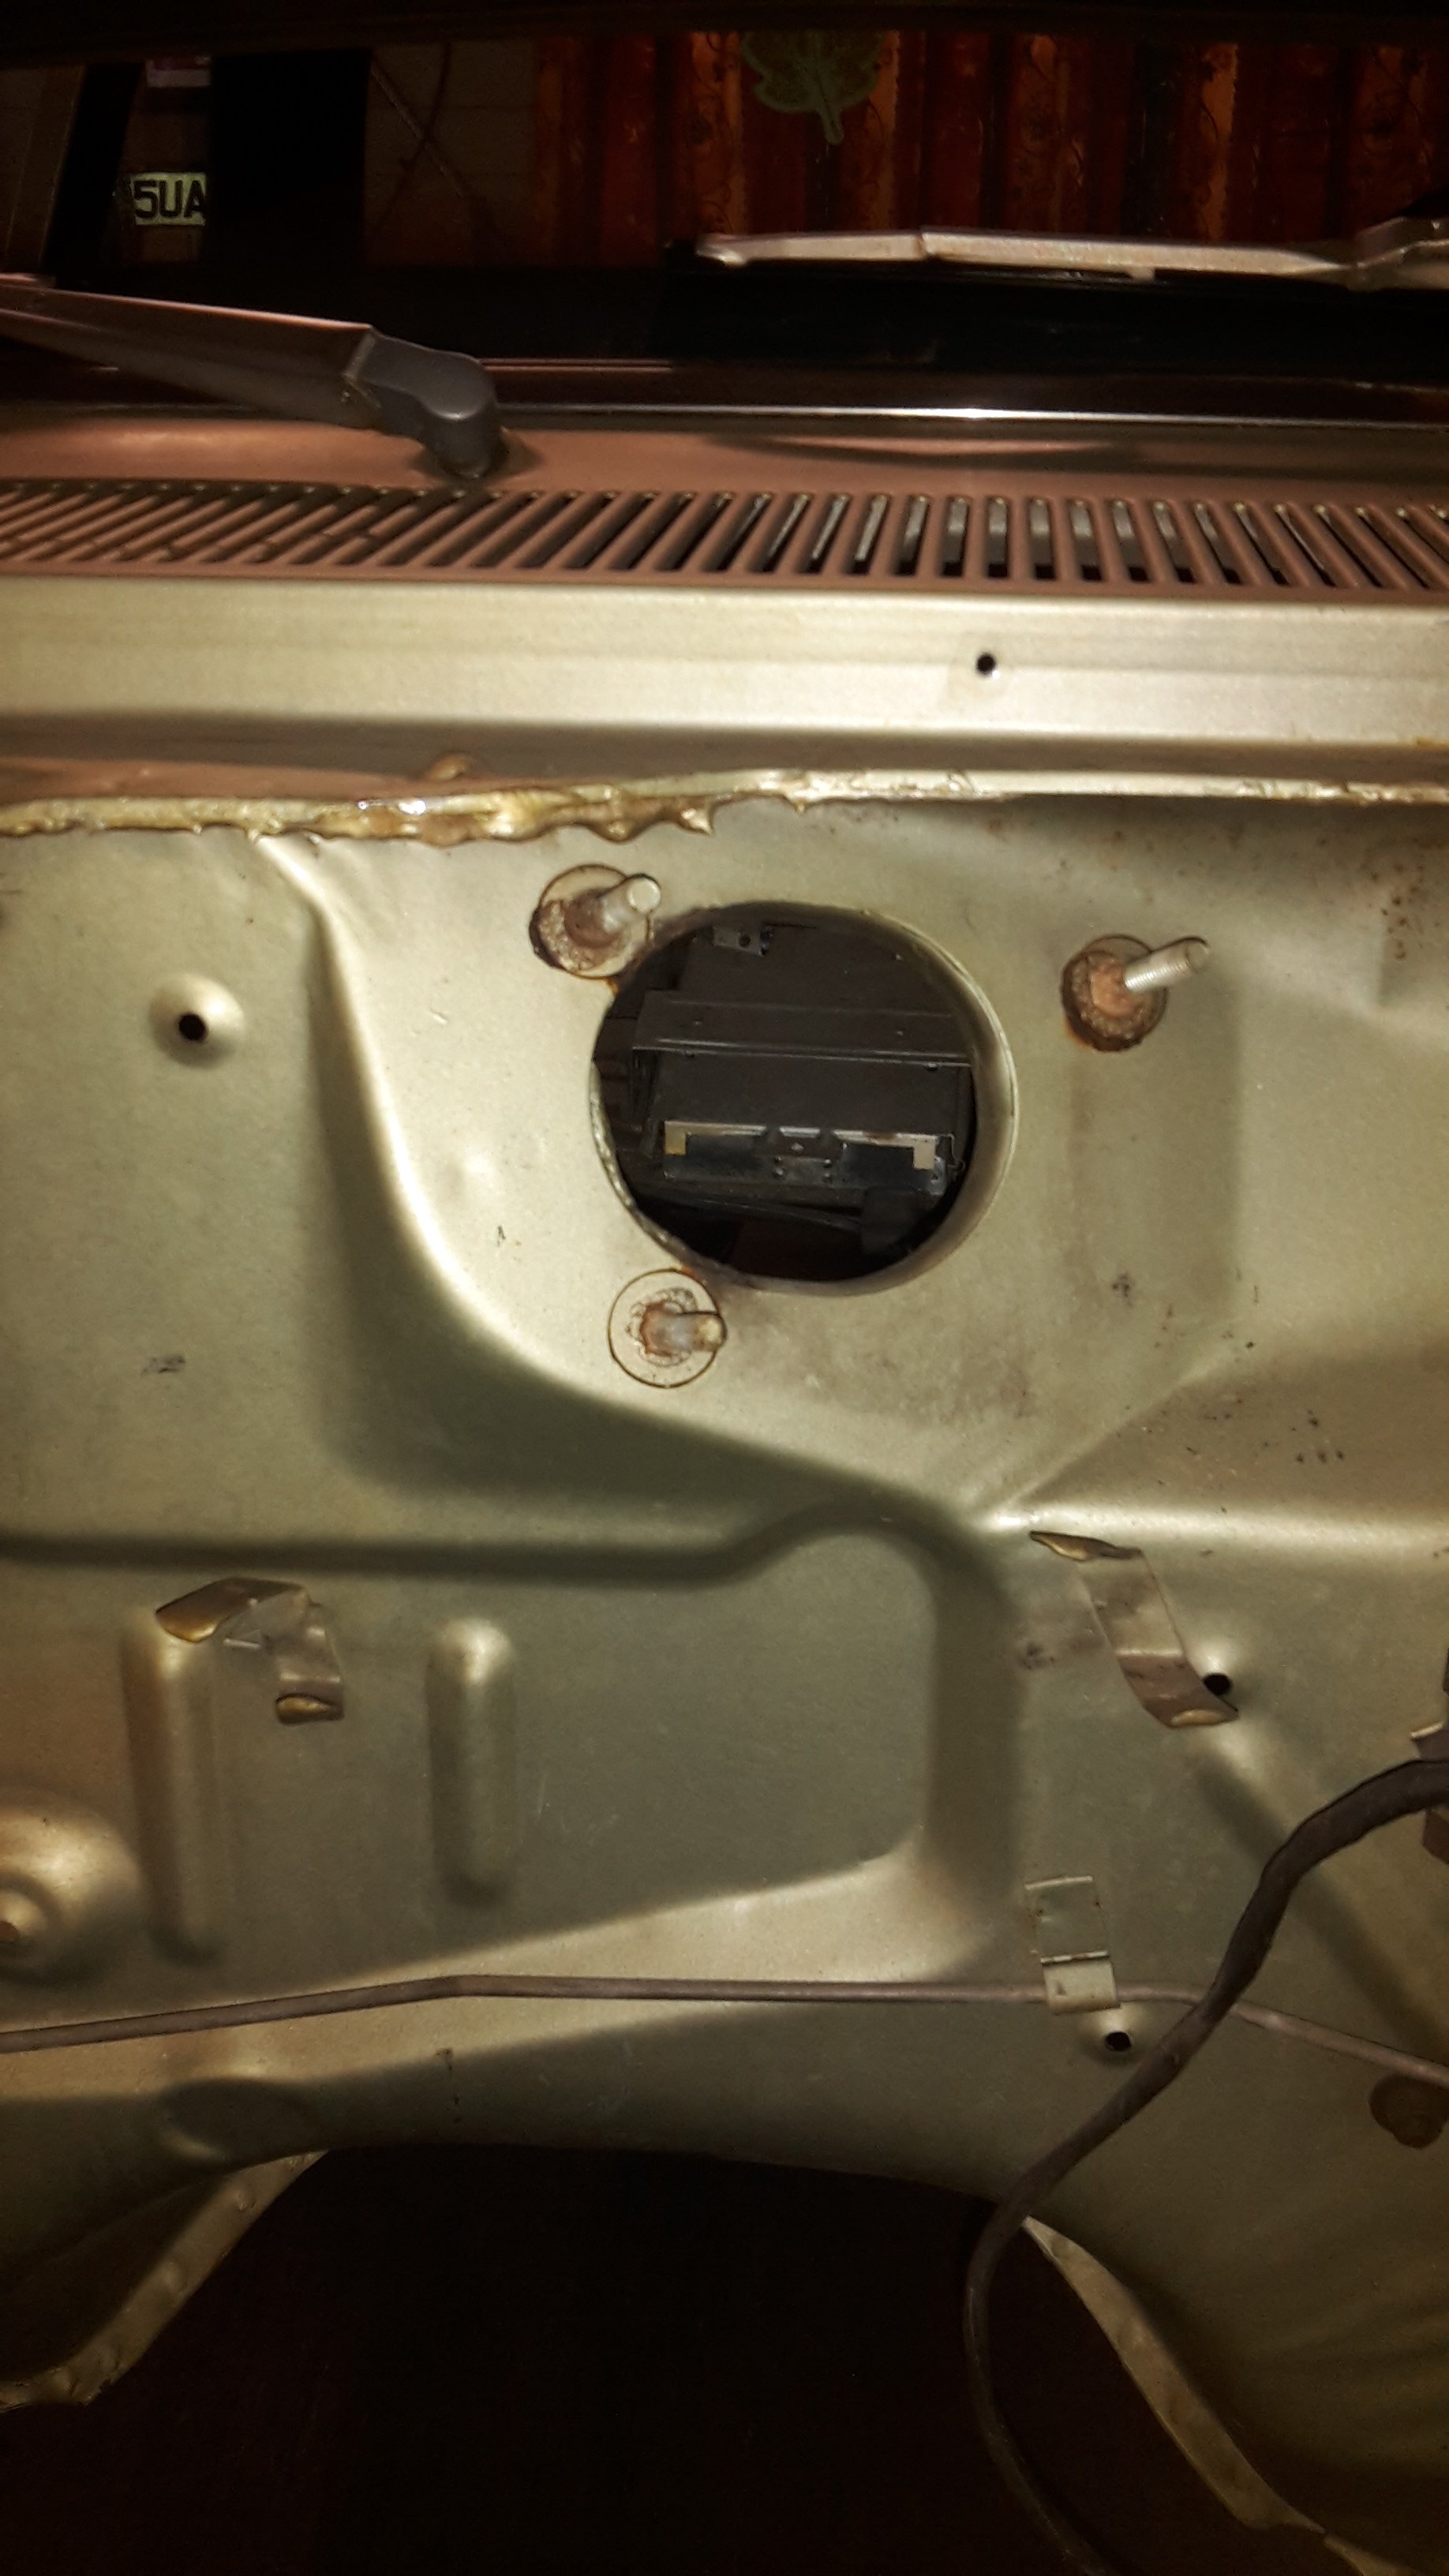
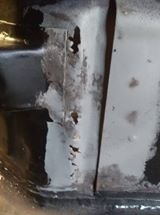
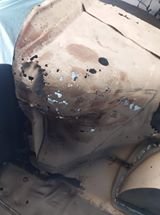
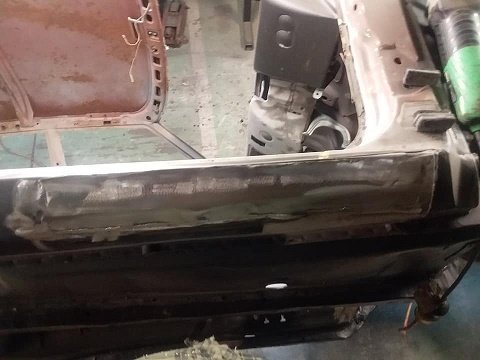
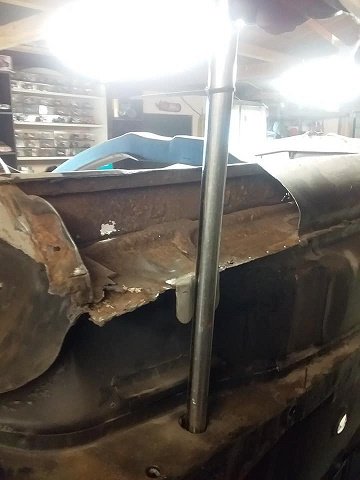
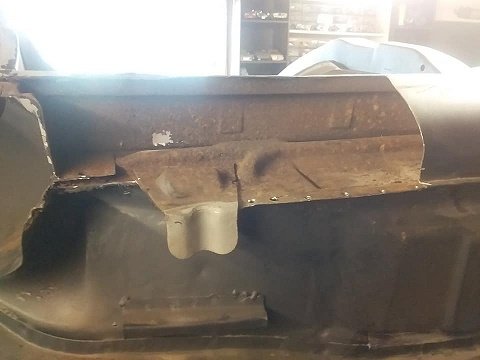
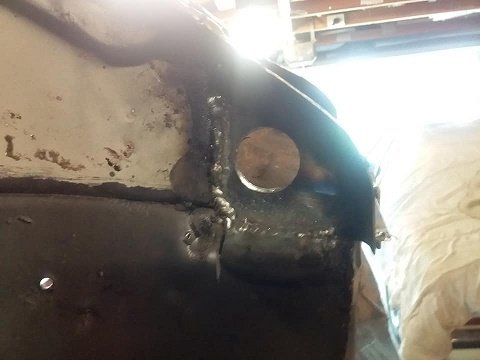
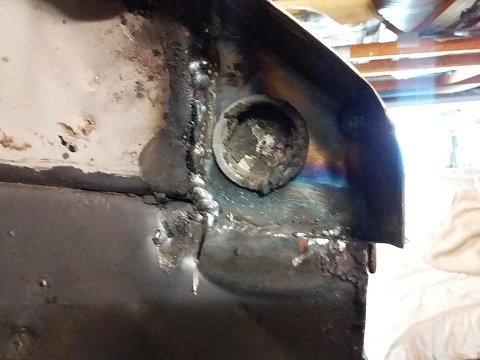
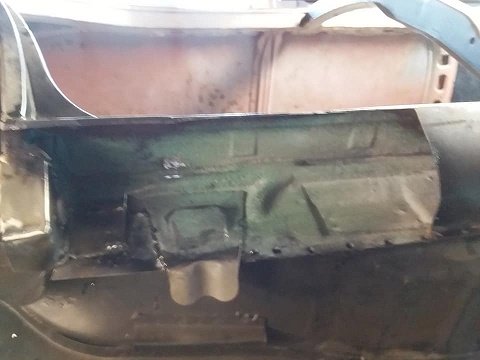
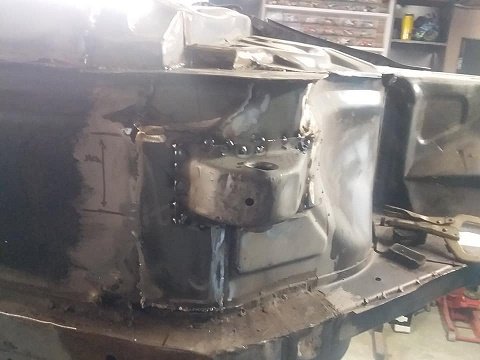
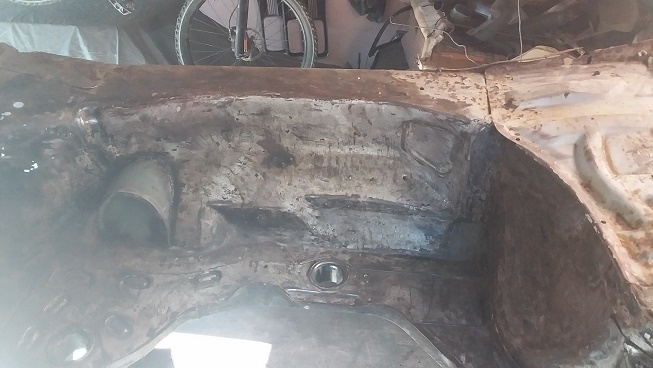
started on the passenger underside got a small patch done on the floor got the cap at the end of the sill done. the jack brace looked but looking from the inside it was rusted so i cut it out cleaned it up welded in a new brace and welded back on. and then moved onto the area under the pasenger headlight...i know its not factory shape but with a couple of holes it will drain heaps better
1 point
-
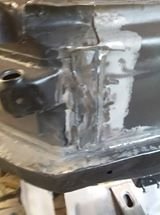
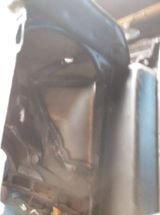
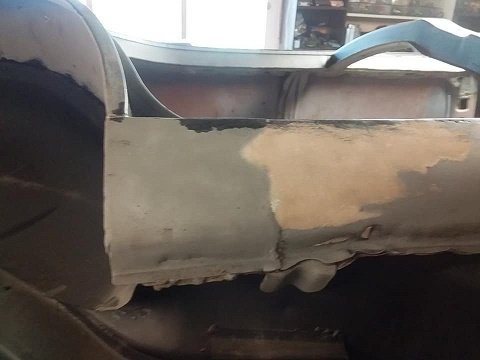
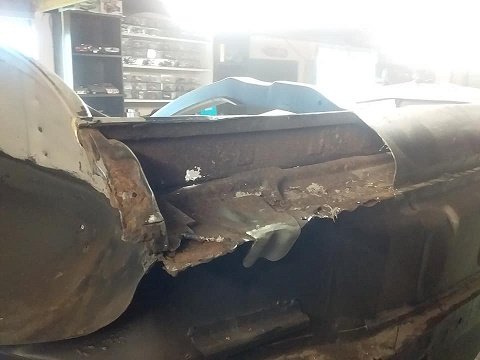
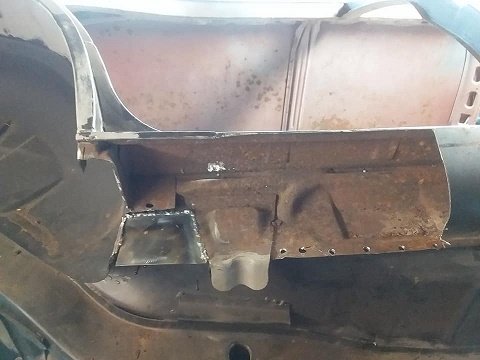
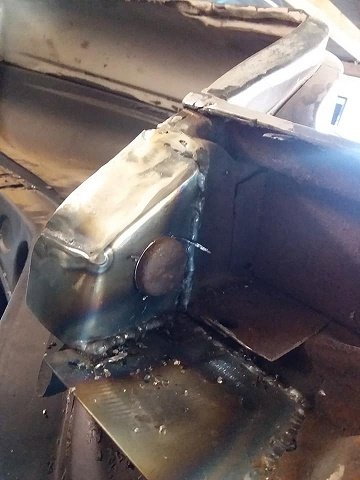
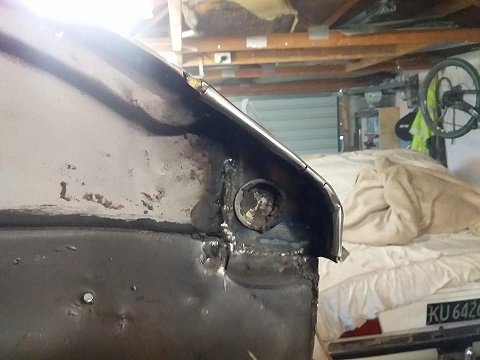
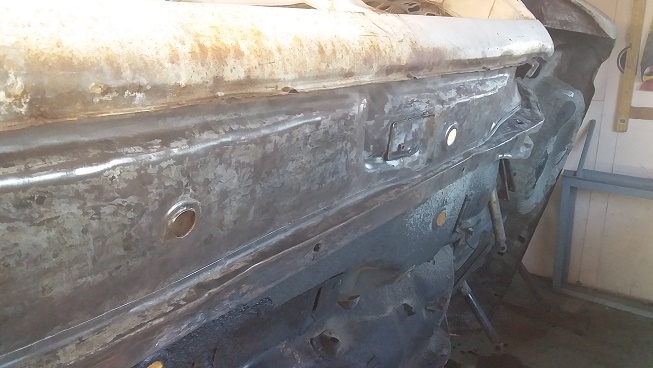
time for the driver side sill....starting with the front end... thought it would have been a small patch but by the time i found clean metal it got bigger. then the rear of the sill (didnt see any rust but it needed straightening and i suspected a patch over rust)
1 point
-
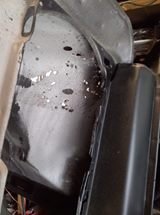
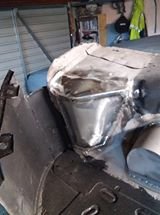
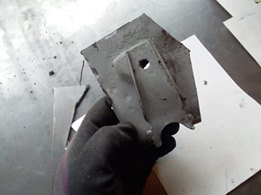
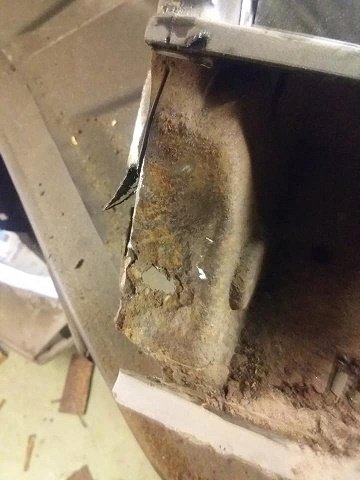
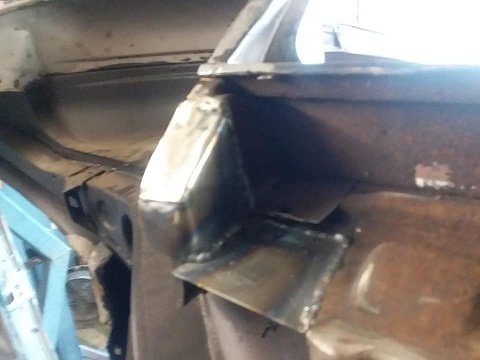
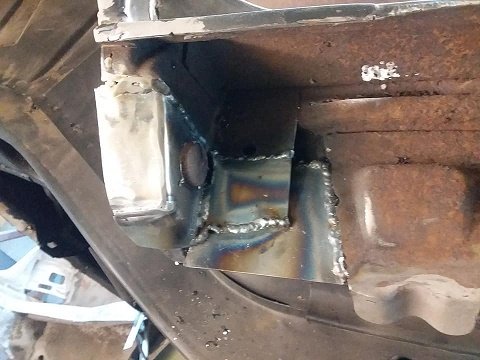
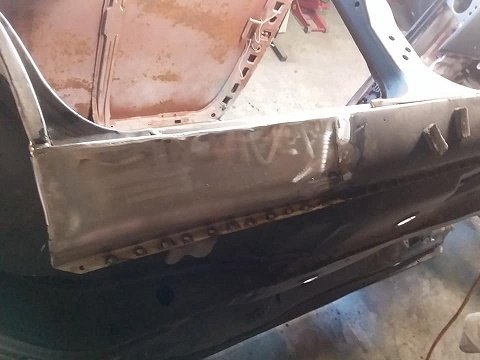
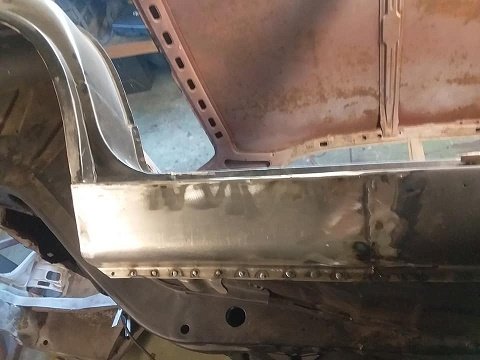
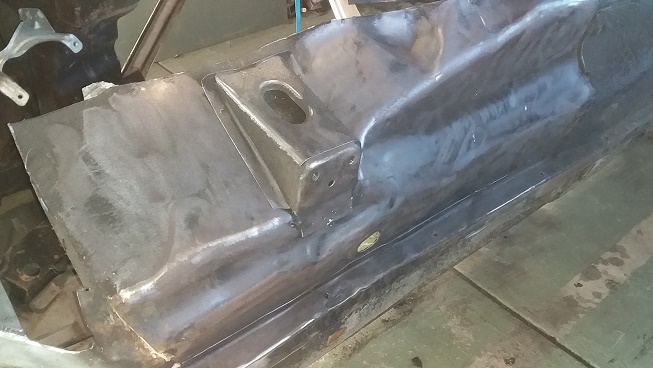
started on the other half of the drivers side floor/jacking point straitened the jack mount and put back on. then there is this bit of the jacking point....it was stuffed this is all i could keep so made this and this is it all done.....time to move on to another bit
1 point
-
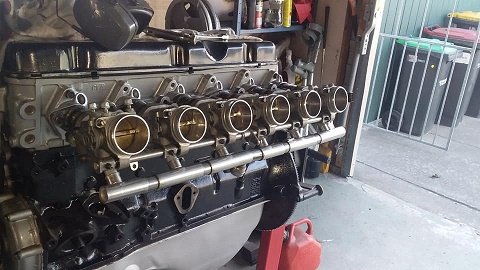
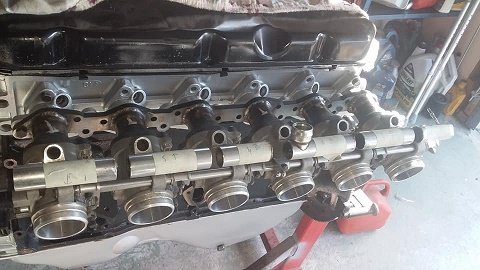
Afterfucking around with different trumpets I hated them all part from the 1st ones I bought... So I bit the bullet and got a mate to macihne down the tips of the ITBs and now im happy ....how i wanted it from the start ant not a fuckinh silicone joiner in sight
1 point
-
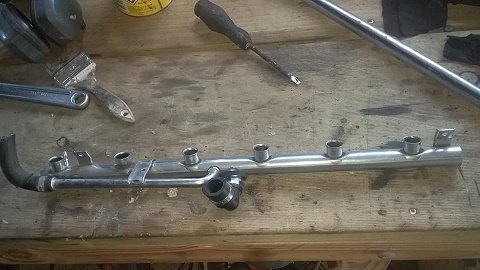
so its about 1 hose 150mm long away from having a bmw idle air control system ready to go on a old school 250 xflow. the bmw IACV (same on e use with these ITBs on the m3) using my trusty grinder and drill i made some brackets (about as engineering as i get ) found a place to mount it all and cover up the old fuel pump hole at the same time. welded the IACV pipe and painted it black and all in place just got to get a hose
1 point
-
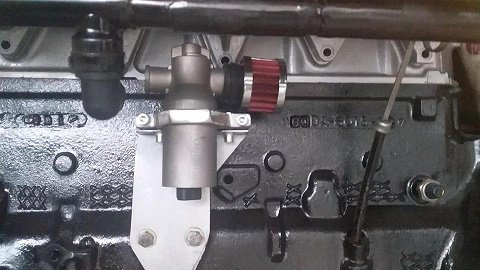
started playing with the factory bmw idle air control system today .. so i flipped the ITBs upside down to make life easier to work on. (normally in the bmw they would have run this way but i wanted them all on the underside to keep it cleaner) and grabbed the factory bar for the idle air control and cut it up as the ITBs have been made to match the xflow inlets. i also removed a few things not needed and just keep the factory inlet.....and i swapped the ends over to keep it cleaner. i had some stainless that was the same size diameter as the inside of the rail so perfect.....cut them up and slid them into the tubes as far as i can for strength flipped it back to where it should be and its perfect ...just need to weld them up.
1 point
-
got a couple of hours in this evening with the blow torch scrapped and wire wheel.
1 point
-
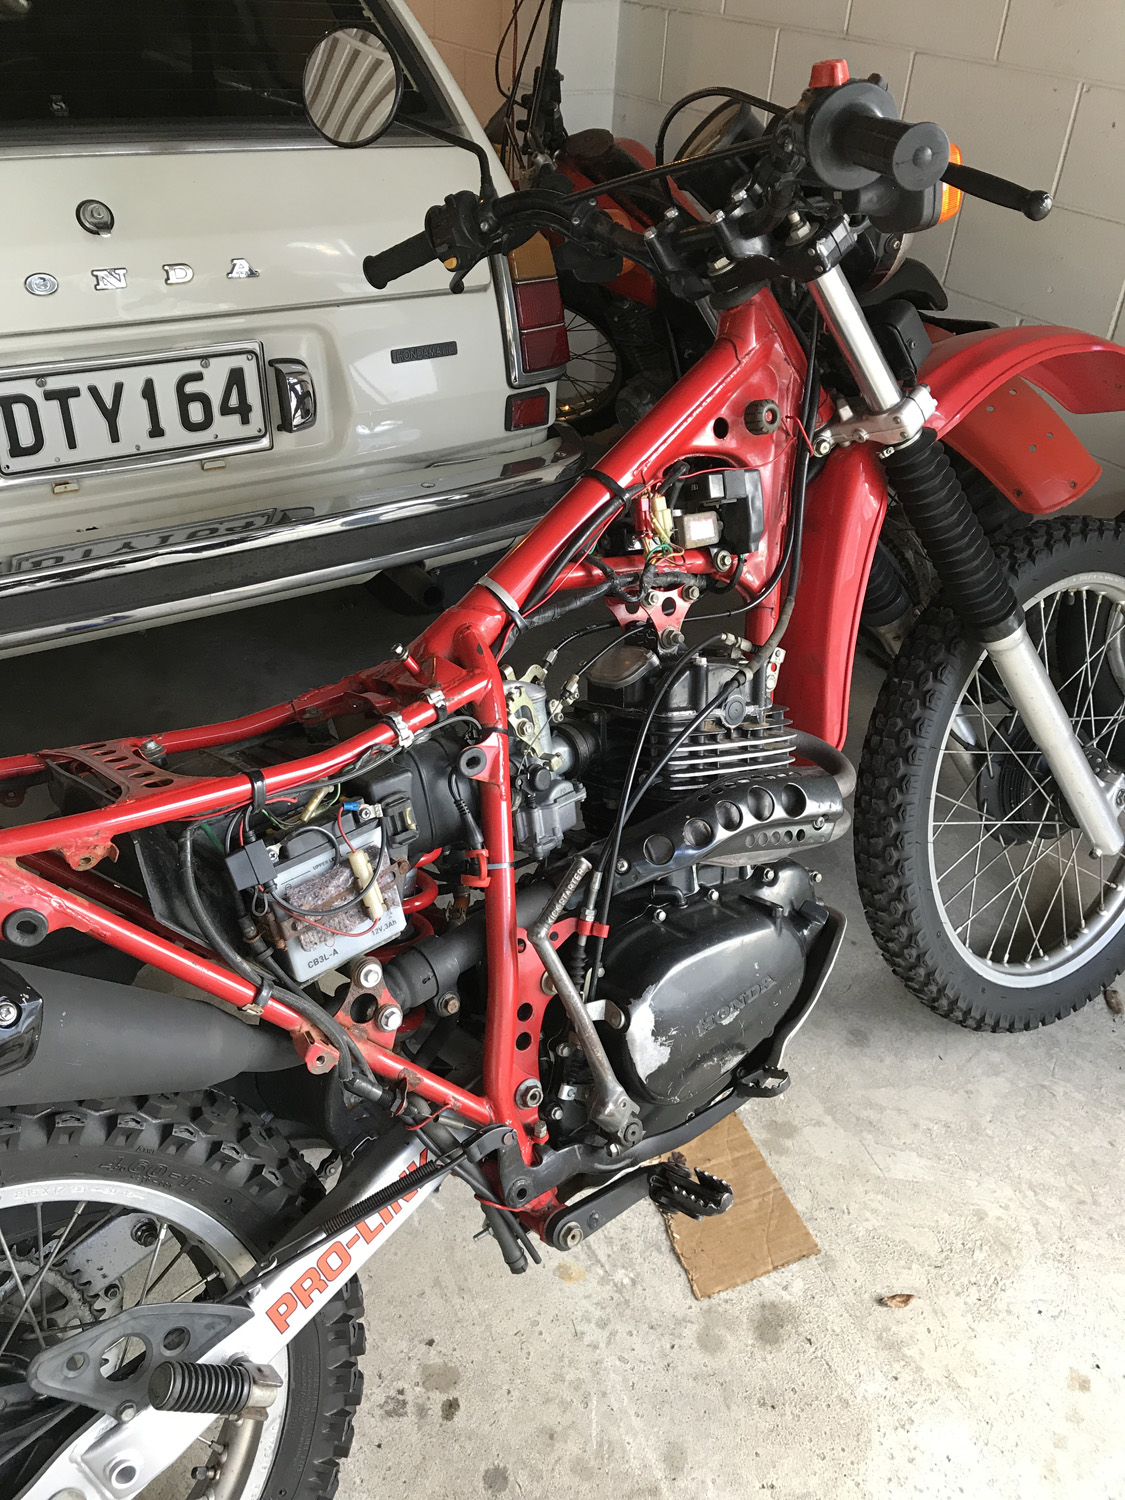
Build's on a bit of a hiatus as I fix the mess that is the top end on the XL250. Prior to me cooking it, a friend took some photos of the bike in studio which look amazing!
1 point
-
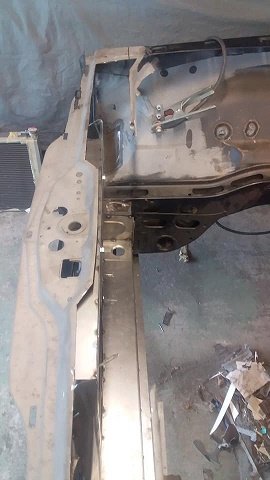
tried the 250 cortina sump on the motor and it fits perfectly ....then curiosity got the better of me and out came the grinder....... its just sitting in there for now but it fits . people that don't modify/build cars just wont under stand the joy seeing the gearbox shifter sitting in the factory hole.
1 point
-
so the motor of choice ticks a few box's for me. #1 all ways wanted an Aussie assembled mk3. so i went for the old ford 250 straight 6 alloy head.. this one has some extra goodies as it was built for a race car....so lumpy cam , headers , inlet manifold and holley carb.some other performance bits and a good old 4 speed borg warner...
1 point


.jpg.b554d75f4775bbfb99e6e9d2bd4d5a9c.jpg)

This leaderboard is set to Auckland/GMT+12:00