
Leaderboard


Popular Content
Showing content with the highest reputation on 10/19/17 in all areas
-
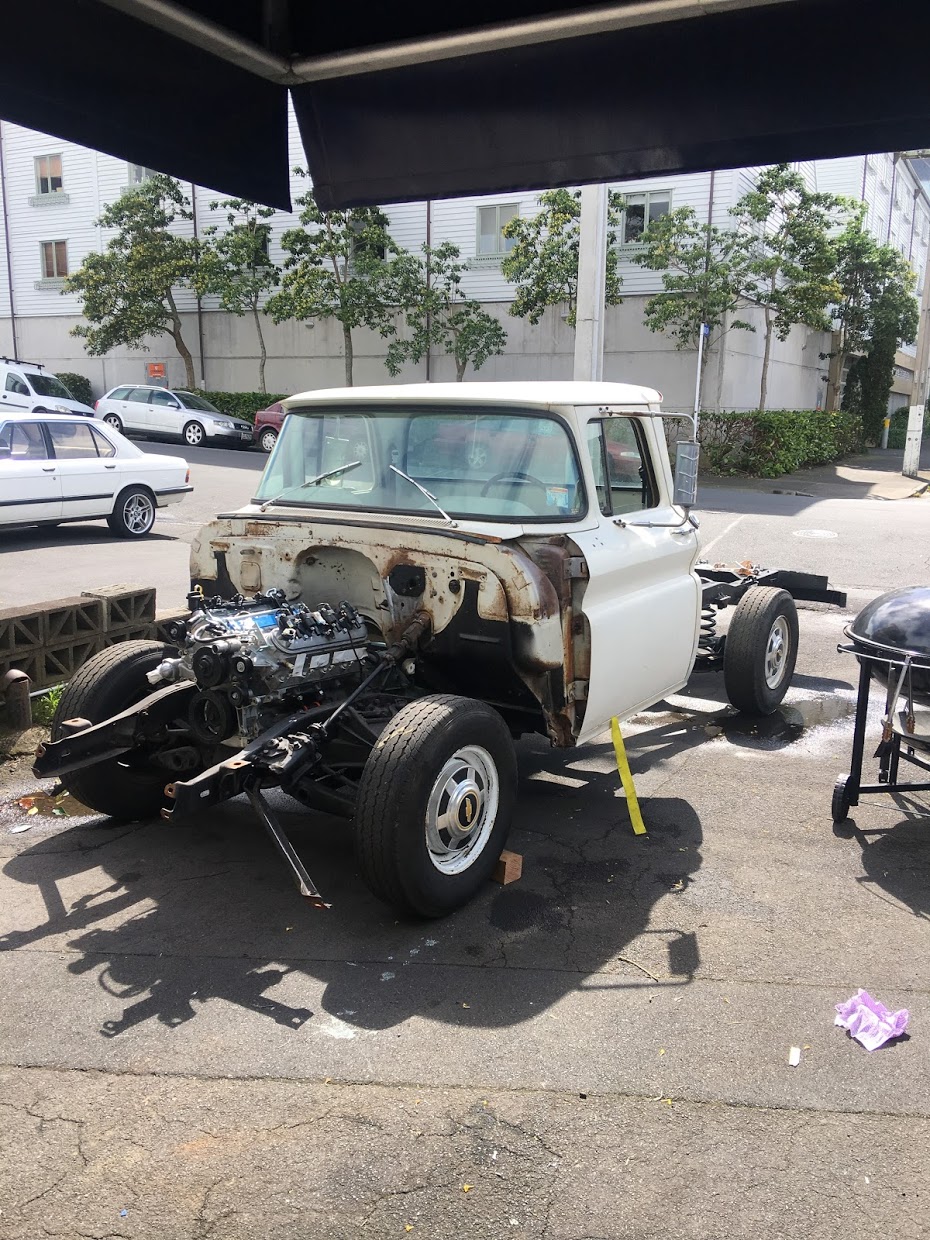
So i have gotten familiar enough with the truck to realise that most of this doesnt do anything Suspicions confirmed when i noticed that the part near the firewall doesnt actually go through it, its all part of the original Mitsubishi loom, and comes from the other side of the engine bay, around the grill, and back up the other side chop it out i reckon hers some of the BS i deal with Unlimited Power!, theres a few weird joins like this, both other ends go back inside the cab, with a long length of do nothing wire. Iv cut them all short and left the joins for now incase they actually do something Kind of funny, there was 3 sets of wires for the washer pump. and none of them worked (they needed to set the pump ground back to the switch, i fixed that when i first got the truck) and the air horn wires did a whole loop around the engine bay All the wires including the spotlamps stuff now fits in the split conduit behind the grill now at least i wont need to buy wire for a while. i totally removed what i could, had to cut some off where the loom splits inside the cab as it was just going to turn into a huge mess if i took the cab fuse boxes out and deloomed everything Looking better. the conduit only houses some 3 core wire for the washer pump (which only uses 2 wires), so i think i will remove it and run a new wire down the drivers side and across the grill with the headlamp stuff. That way the passenger side will only have the holden engine loom, and i can plug up the old loom grommet5 points
-
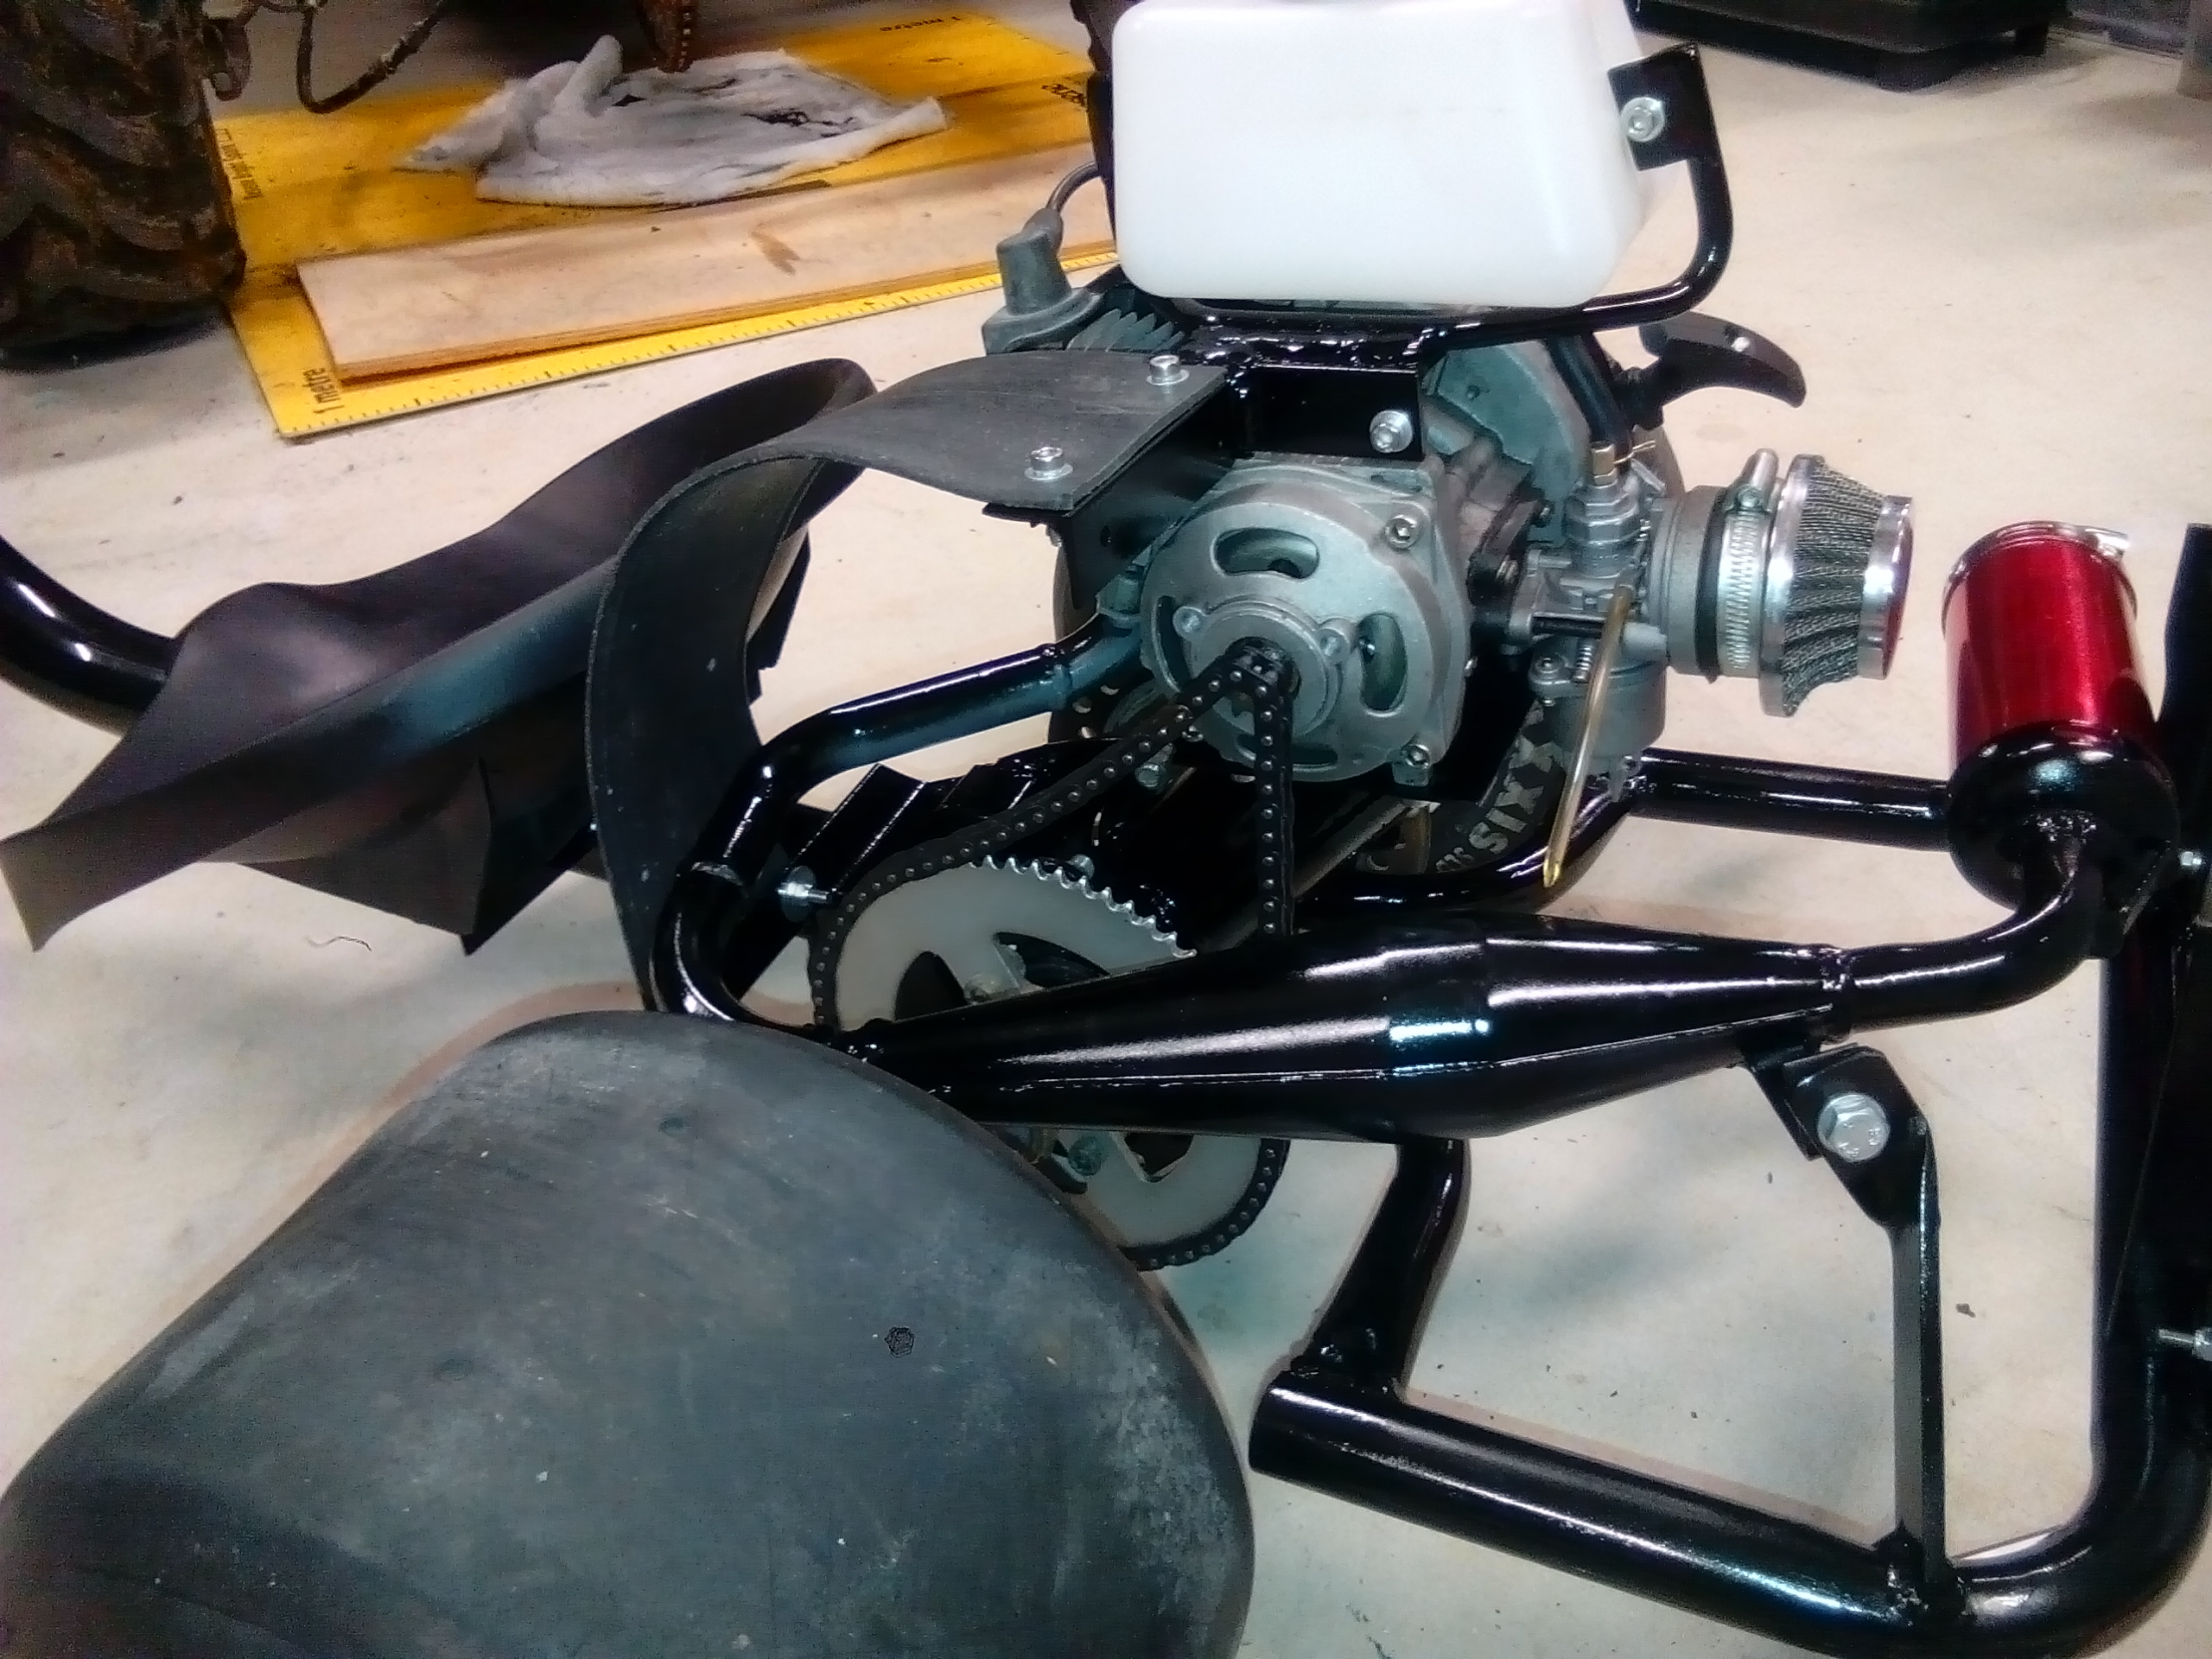
It's alive!!! The motor was built out of left over parts from other such projects...very pleased that it goes so well. It has very high compression so should be good to go!4 points
-
Mixed the paint a bit thicker this time. 13 seconds through the Din 4 cup. Easier to spray I guess. So did that last night and clear tonight.
 4 points
 -
Ready! (Not ready at all.)
3 points
-
I completely forgot to post this sorry, there is a Cortina display for anyone interested at the Palms arena car park this saturday between 9 and 2.30 I will have a couple of cars down there
3 points
-
Time of year again! and its even BIGGER this year Picnic Pow Wow is @Gasser's event Hosted at Takapau's Backpaddock lakes Facebage for info & more pictures : https://www.facebook.com/picnicpowwow/ This event is the night before too (BONUS CONTENT) What is that? Details CHB Soundz over the lake Summertime Festival Time to party with your family & mates under the stars at the Soundz over the lake Summertime Festival @ Backpaddock Lakes Family fun, live music, food vendors, kids zone and a massive Fireworks Display and more for everyone to enjoy! Backpaddock Lakes will be set up with a Family friendly area as well as VIP Area with wine and nibbles for those wanting more corporate entertainment - Gates open at 4.00 pm Tickets sell out fast, so get them quick! https://www.eventfinda.co.nz/2017/rhythm-and-booms/waipukurau Facepage : https://www.facebook.com/soundzandbooms/ and about the Location : https://www.facebook.com/backpaddocklakes/ Should be pretty good weekend2 points
-
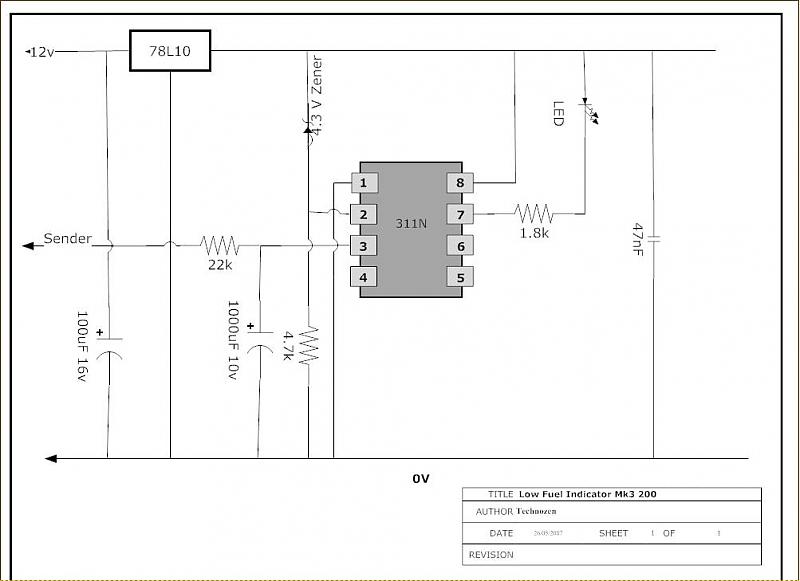
Just a note with these repro tanks, the EF8 fuel sender doesn't fit nicely. I used a non vtec Ef sender in its place as the fuel light section of my one doesn't work. I'll make a up a voltage switching thingee to turn on the fuel light when its low Nice new tank And everythign installed And because everyone likes basic maintenance photos here is one of a replacement thermostat. I just need to let the loctite chooch and I can fire it up2 points
-
have you ever thought about a crane?.....2 points
-
I could put some snags on the barby or just whatever2 points
-
.2 points
-
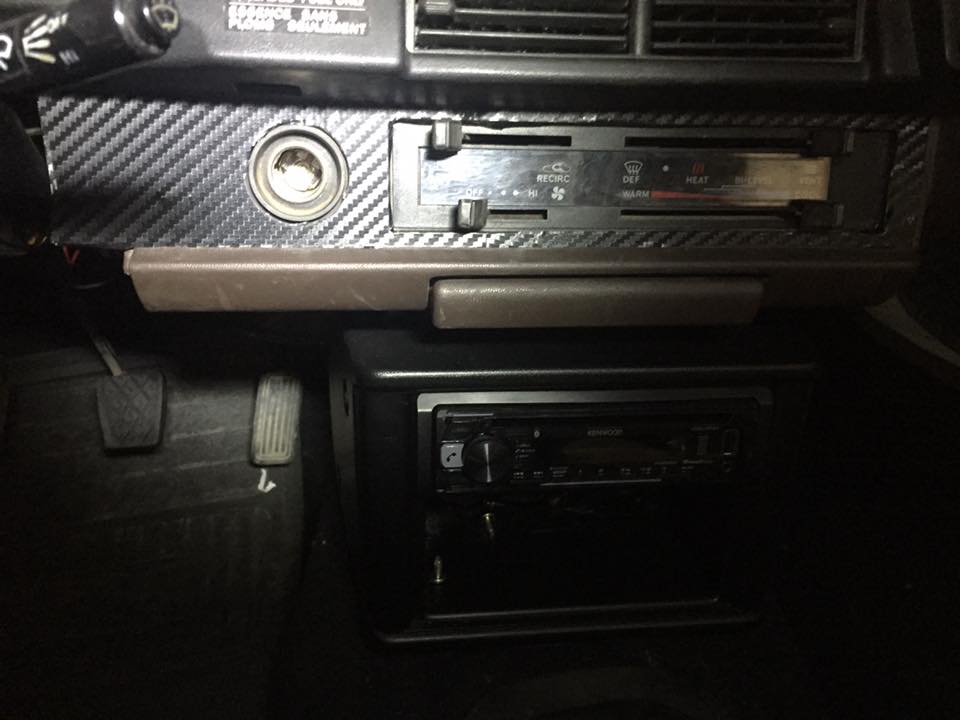
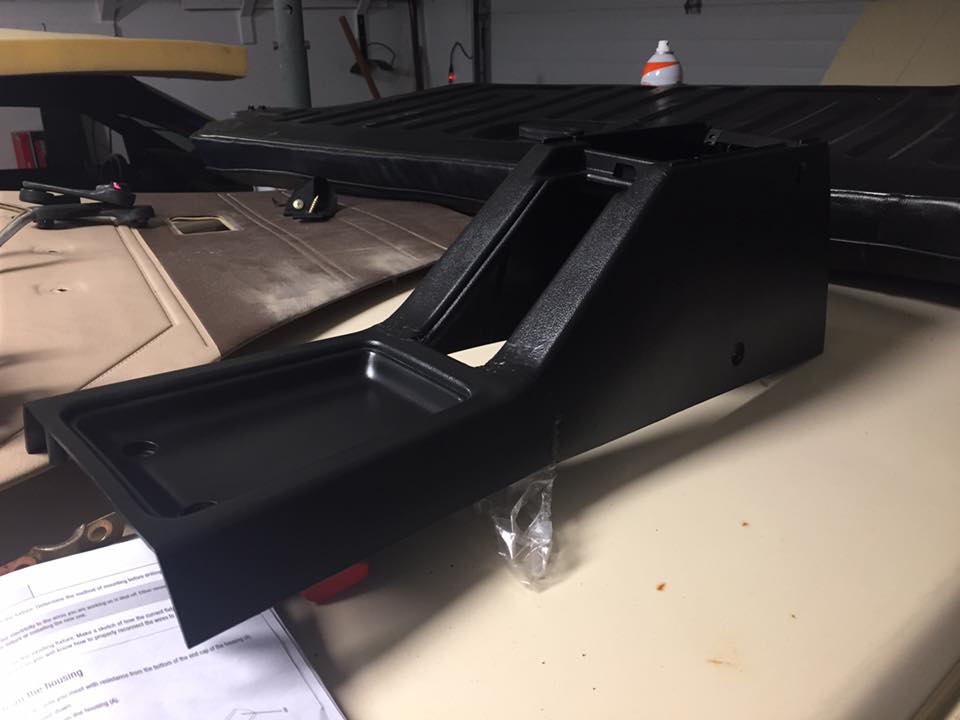
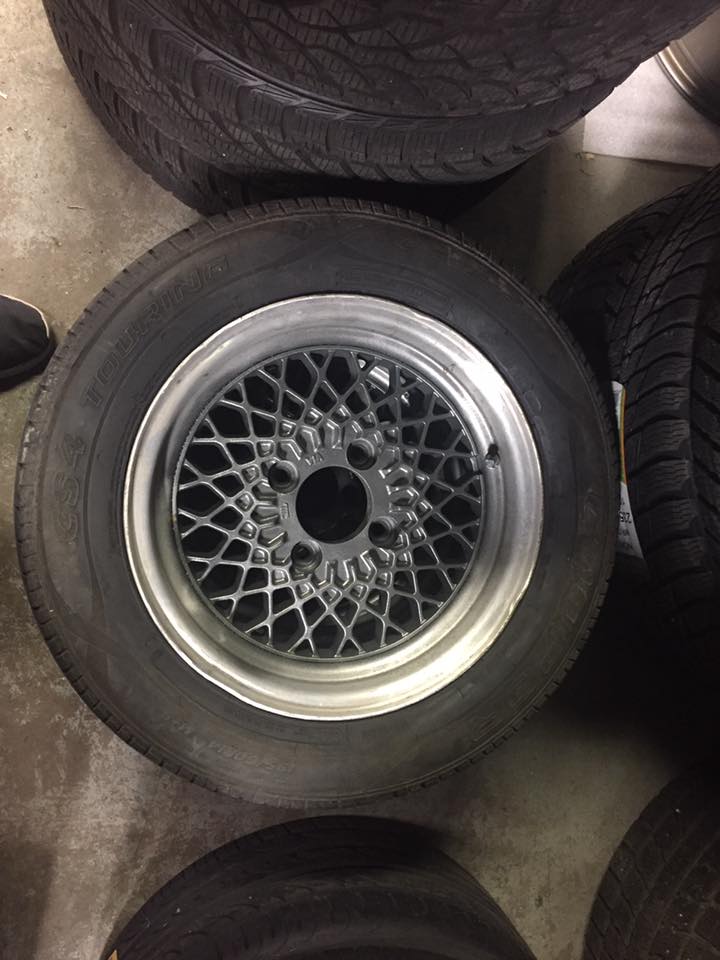
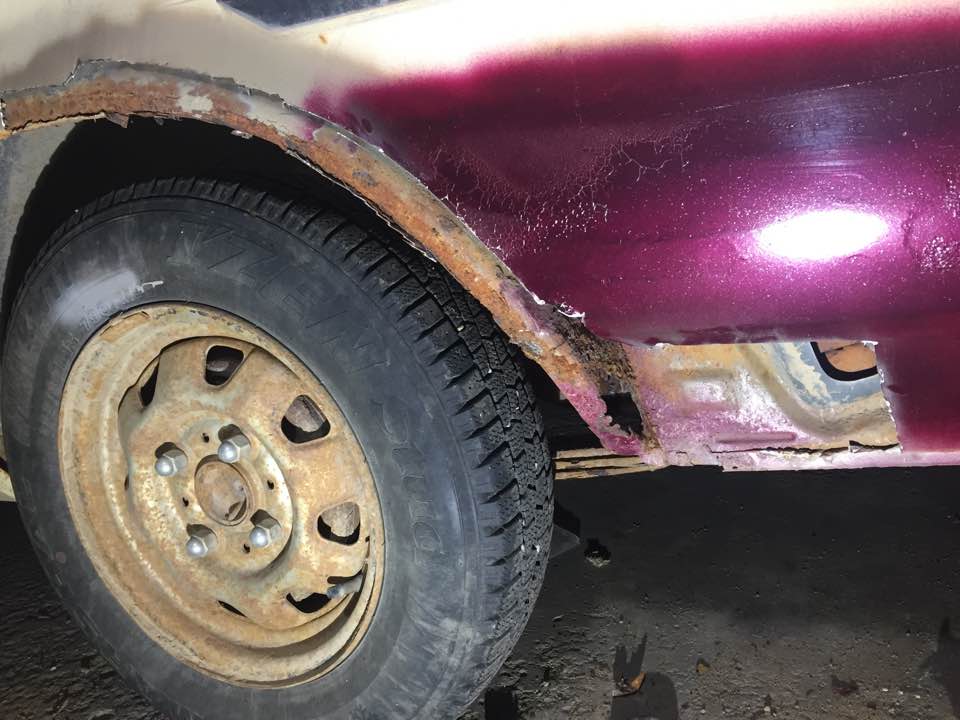
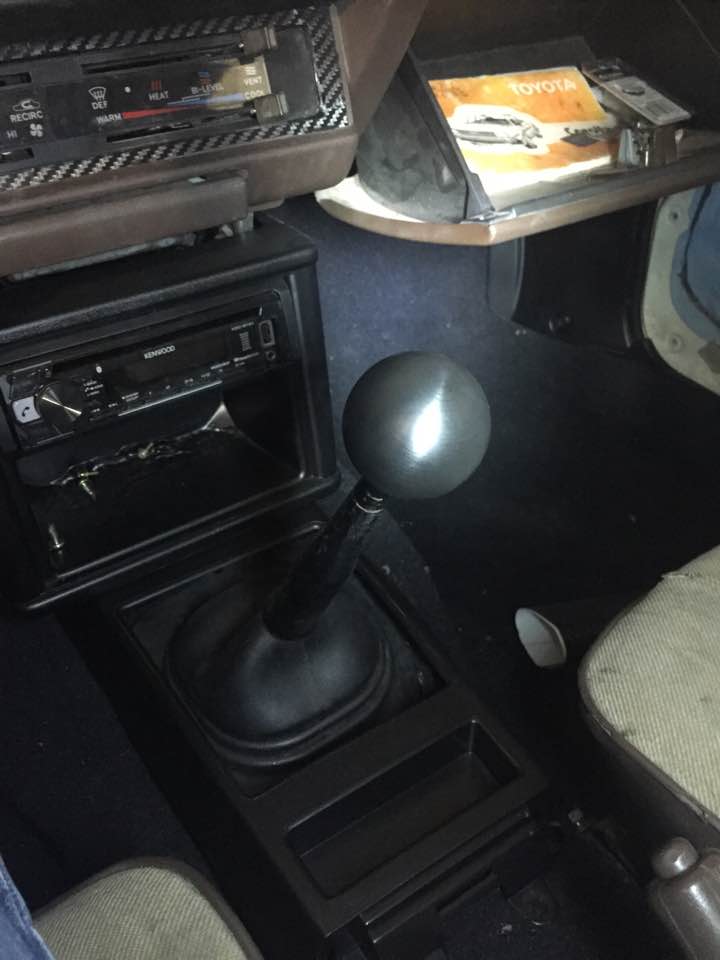
It's been a super busy month, but I actually did some work! First off, I refinished my Riken's and Enkeis. I painted the mesh centers in gunmetal and started to polish the lips. So far I only have tires for the rear Rikens (free tires from work). The problem now is the stock 13" steel wheel is pretty much rust welded to the drum on the car, so I've been soaking the hub in penetrating lube for the last week and I'm going to break out the sledge hammer on the weekend to get it off. I also started working on the interior. I fixed the broken center console. Got a new shiftknob (its from Killer-B motorsports, so it's actually meant for a Subaru) Also wrapped my heater controls with some DiNoc carbon overlay. I also took the dashpad off and started working on filling the cracks and missing vinyl on it. It's coming along pretty good, but I'll save that for another post. The biggest progress is that I started cutting out the rust work to start building patches for it. Don't mind the miss-matched paint, my wife wanted to see how a colour looked on the car. It's suprisingly not that bad in behind, just need to make a small patch in the rear fender liner section, then just basic sheet metal on the outside. That'll be a job for over the winter. And last but not least, I got my front suspension sorted. I found a guy about 400km from here who had a set of AE86 front strut housings with newer inserts, Tein lowering springs and a set of Silver Project (?? never heard of them) Camber plates listed for sale for $200. Since I have an account with a couple of courier companies at work, I got them shipped in for cheap. They are in pretty decent shape as is, but I'll probably disassemble them and clean up the spring perches and camber plates. Thats all for now, I have a week and a half where my wife and daughter are on the other side of the country, so I should be making some progress in the next few days.
2 points
-
All bolted on, and seams to be okay: only thing preventing it from working is the throttle now, which I hope to have by Friday?
2 points
-
Electric ignition fricking rocks!! The dizzy must be tired because electric ignition made it run how it should at TDC without needing shitloads of advance! Would it be a good idea to try get another dizzy? Or this be sweet now it's electric? dizzy is a delco 202 later model, the electric ignition kit was for a delco so direct bolt in kit! Car seems to be running unbelievably better lots more power with no hesitation like it use to have, am thinking of opening spark plug a up a little and see if any difference again! now that she's running mint I thought it would be a good idea to grab the triple carb setup for it! Stromberg CD150 x3 2 of them had been dropped some years back and had cracked with the brass barb fitting where it threads into the carb, the bodies on these carbs are super super soft After having a good look I noticed they were cast quite deep into the carb body so I hacksawed off the broken bit leaving 5mm~ to be re threaded! Too easy you reckon? yeah nah aye. This is prince ownership, nothing is that easy. after I had em re threaded very carefully it blew the arse off the body so that's them stuffed! only very small but they wont seal so decided to go back to plan A and look for some others. mind the JB weld was previous owners attempt at the fix. box of spares... Was quite a successful day auctually, ol mate @Threeonthetree put me in touch with someone who had a set kicking about so they are currently on the courier to my place! Look to be in good nick but insure if they work or not but I plan to just swap it all over anyway as the current 3 on manifolds have been jetted for the Vauxhall 3.3 hopefully be able to chuck em on over next few weeks n make the 0-100 km top speed that little bit faster! Fun in times ahead! Discussion thread!2 points
-
.1 point
-
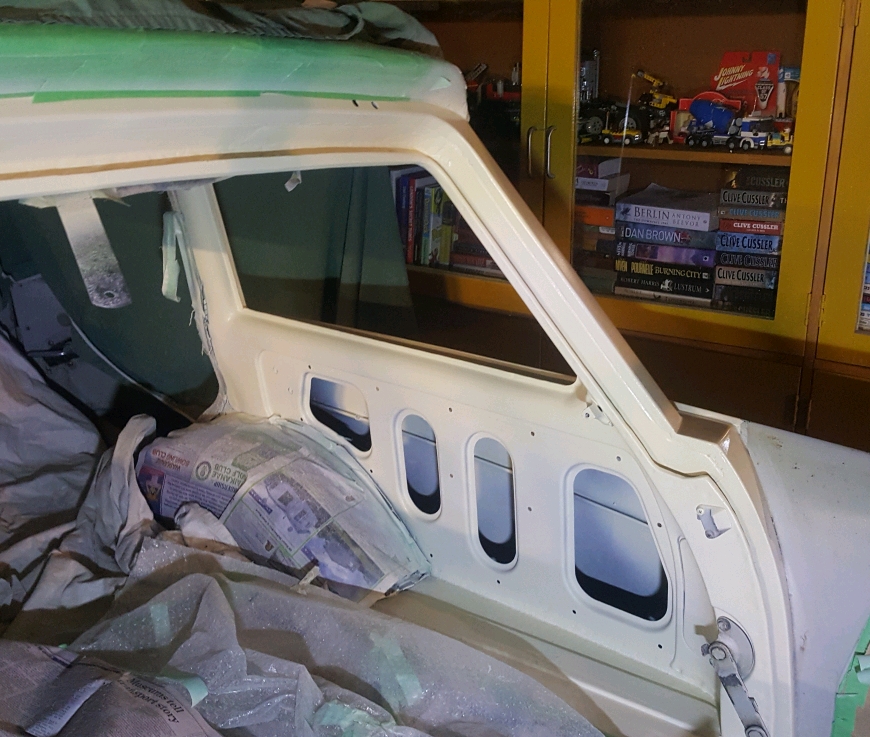
I have two AW11 MR2's - one turned into a mule, and the other is my daily. This thread is about how one turned into the other. The project started seven years ago, when I bought a silver AW11. It was tidy enough, but had a bad engine that kept overheating. I attended a Toyspeed meet in '11 down in Manfield, and after the journey there, doing a few laps of the track, and the journey back again, and having to put up with blowing coolant everywhere every so often, I had had enough, and arranged to buy a 4AGZE smallport, with the intent to rebuild it over a summer and within a year of that, throw a turbo on it. It would be my first engine build to be completed, though I had practiced a few times with various 4AGE's that never made it to completion. Summer arrived and departed, and the engine was in pieces. Money and time were the issues, but I kept at it, gradually acquiring parts, planning etc. I realized this would take a lot longer than I figured, so a year later, I swapped the overheating 1st gen bigport out for a 2nd gen bigport, which was a supreme workhorse and lasted the next four years without any problems. Progress continued on the 4AGTE build as time and money allowed, but was interrupted for a few years, and stored at my brothers workshop. At this point it was an assembled short block and reconditioned head with bigport cams. Financials improved in 2015, and my brother was moving, so I arranged to pick up the engine, and immediately I got the itch again. Within a week or so, the head was torqued down on the block, timing belt set, and turbo slung on the side. It should be noted that the turbo at this point was a T3 flanged China special with a stainless steel manifold that was highly likely to bend. But its what I had. I had some oil and water lines made up, and then started planning the supporting mods. * Adjustable rising rate FPR * 440cc 7MGTE injectors * MTX-L wideband gauge * Megasquirt * Celica W2A intercooler, radiator, pumps, and hoses suitable for an MR2 * DPR blowoff valve * 2.5in twin-outlet exhaust with 20v headers At first I tried using the dual coil packs and CAS that came it, using a Mitsi dumb ignitor with the Megasquirt. The intent was to get this I didnt have much luck getting it to run, so tried a coil-on-plug setup, with the Megasquirt set up for sequential ignition. This also proved hard to perfect, so while I havent given up on it, I figured the distributor based system that was in the car was good enough for now. And it ran, and I was getting bored with ignition. The engine itself is mostly stock. It was bored over 0.5mm, acid dipped, crack tested, shot peened, fully balanced, align bored, skimmed, the works. I wanted this thing to be bulletproof. I fitted brand new factory forged pistons and ACL Race Series bearings to the block. The head was reconditioned to factory specs, but with some slightly bigger bigport cams that I had lying around. I fitted some adjustable cam gears, a Cometic MLS head gasket, and ARP head studs and flywheel bolts. Soon enough, there was nothing left to do, so it went in. And fired up. And it was glorious. The engine that I built from scratch was living and breathing. Its now done about 5000km, and hasnt missed a beat - its been a huge success. Im so happy that nothing has gone wrong with it.. because any kind of engine failure would probably kill the project, and it proves I did everything right. If Im honest, I had reservations that the engine wouldnt destroy itself as it sat there about to be fired up for the first time. But no, its proven to be a perfect runner. Around 8.5:1 compression, 160psi on all cylinders. As I was having issues getting the Megasquirt running well, due to dodgy grounds, mostly, I ran it on the stock ECU for the past couple of years. I attempted to mount the turbo (venting to atmosphere), and had a return bung welded to the sump, but it was too restrictive and resulted in smoke billowing out of the exhaust. Its possible I could have fixed things by just using a much bigger oil drain, but I decided to go down a different route. A year ago, it failed a WOF for structural rust, and when I went hunting for the worst of it, discovered most of the front firewall was being eaten away. I figured I could sink money into it in an attempt to revive the car, or find a pristine AW11 instead. Well, I found one. It has been completely de-rusted, a top quality paint job applied (dont care about color so much), 205-wide 5-spoke deep dish wheels, wheel arches, adjustable suspension, Bride bucket seats, braided brake lines, and (the finishing touch) a Silvertop 20v with open throttle bodies and a Blacktop ECU. Pretty much everything I wanted in an MR2 that I hadnt already done to the silver car. I snapped it up in a heart beat. So the project officially is now the yellow car, and the silver car is deregistered, but still in use as my test-bed. It still holds the rebuilt smallport as its heart, for now, but that will be swapped into the yellow car in the near future. Earlier last year, I found a good turbo setup, previously used on a race spec Corolla. It had a wicked low profile tubular manifold that sat the turbo, a TD05HR, quite high, which is exactly what I was after. Unfortunately, when attempting to fit the thing, I discovered that while it bolted on ok, the inlet to the turbo was blocked by all of the AW11 gearbox linkages, making any attempt to use an air filter impossible. I sold that turbo and manifold for what I bought it for, and considered going back to the original turbo, and sourcing a scavenge pump to solve the smoking, but then as luck would have it, while bitching about this situation on the MR2OC forum, one of the members had the solution - again, a TD05HR, but this time with a manifold designs specifically for AW11 MR2's. The manifold sits the turbo slightly skewed, and so clears everything it needs to, and the inlet is freely accessible. Bought it immediately. Test fit, no problems. Went ahead and started planning a foolproof oil drain for this unit. Took the sump off and drilled out a hole for a large brass fitting, sealed on both sides, and had the turbo outlet bung modified with a -12AN full flow bung, and a matching AN-to-hose barb fitting. Initially I wanted to see what the oil was doing, so am using a length of transparent hose entirely unsuitable for the application, but its serving its purpose. Itll be replaced with something more suitable for heat and oil very soon. Also had exhaust downpipe and turbo uppipe sections made, and finalized the rest of the intake charge piping, intercooler hoses, wiring, etcetc. Just recently, I managed to fix the remaining issues the Megasquirt was having, and got it running well, so there wasnt much left holding me back from going for the first run with the turbo. No smoke! Despite having a guesstimate tune (rich and retarded), and an exhaust leak at the manifold, it boosted for the first time up to 5psi. Great power delivery, though a little late in the game - guessing its due to the aforementioned exhaust leak, and possibly boost leaks. Also probably the tune. Everything can be improved upon from here. So thats where the project is at for the time being. More to come. The ultimate goal is 15psi and near-enough 200kw.1 point
-
Got motivated tonight and went out to garage, Sat engine and trans in rough position and placed guard back on to see where shit will end up and if it is a feasable(spelling?)concept. My biggest worry was where the axles would be in relation to the centre of the wheel arch, as you can see it's only slightly offset from the centre line. I also wanted to see how long the trans was going to stick out the back, which it doesn't, will be well forward of the rear panel. Next will be to bring the rear subframe and suspension in and sit in the engine/boxes place and work out how far the hubs will hang out, and this will allow me to work out how far to box/flare guard. *** insert cheesy grin here ***
1 point
-
Hey M8 im currently making up some of these, and you just select a zener diode to match your low fuel voltage (diagram is missing an earth from chip pin 4) have a bunch of extra components if you like
1 point
-
A crane with 10 propellers1 point
-
Another crane..1 point
-
A helicopter.1 point
-
Whos going to carry the crane up the hill?1 point
-
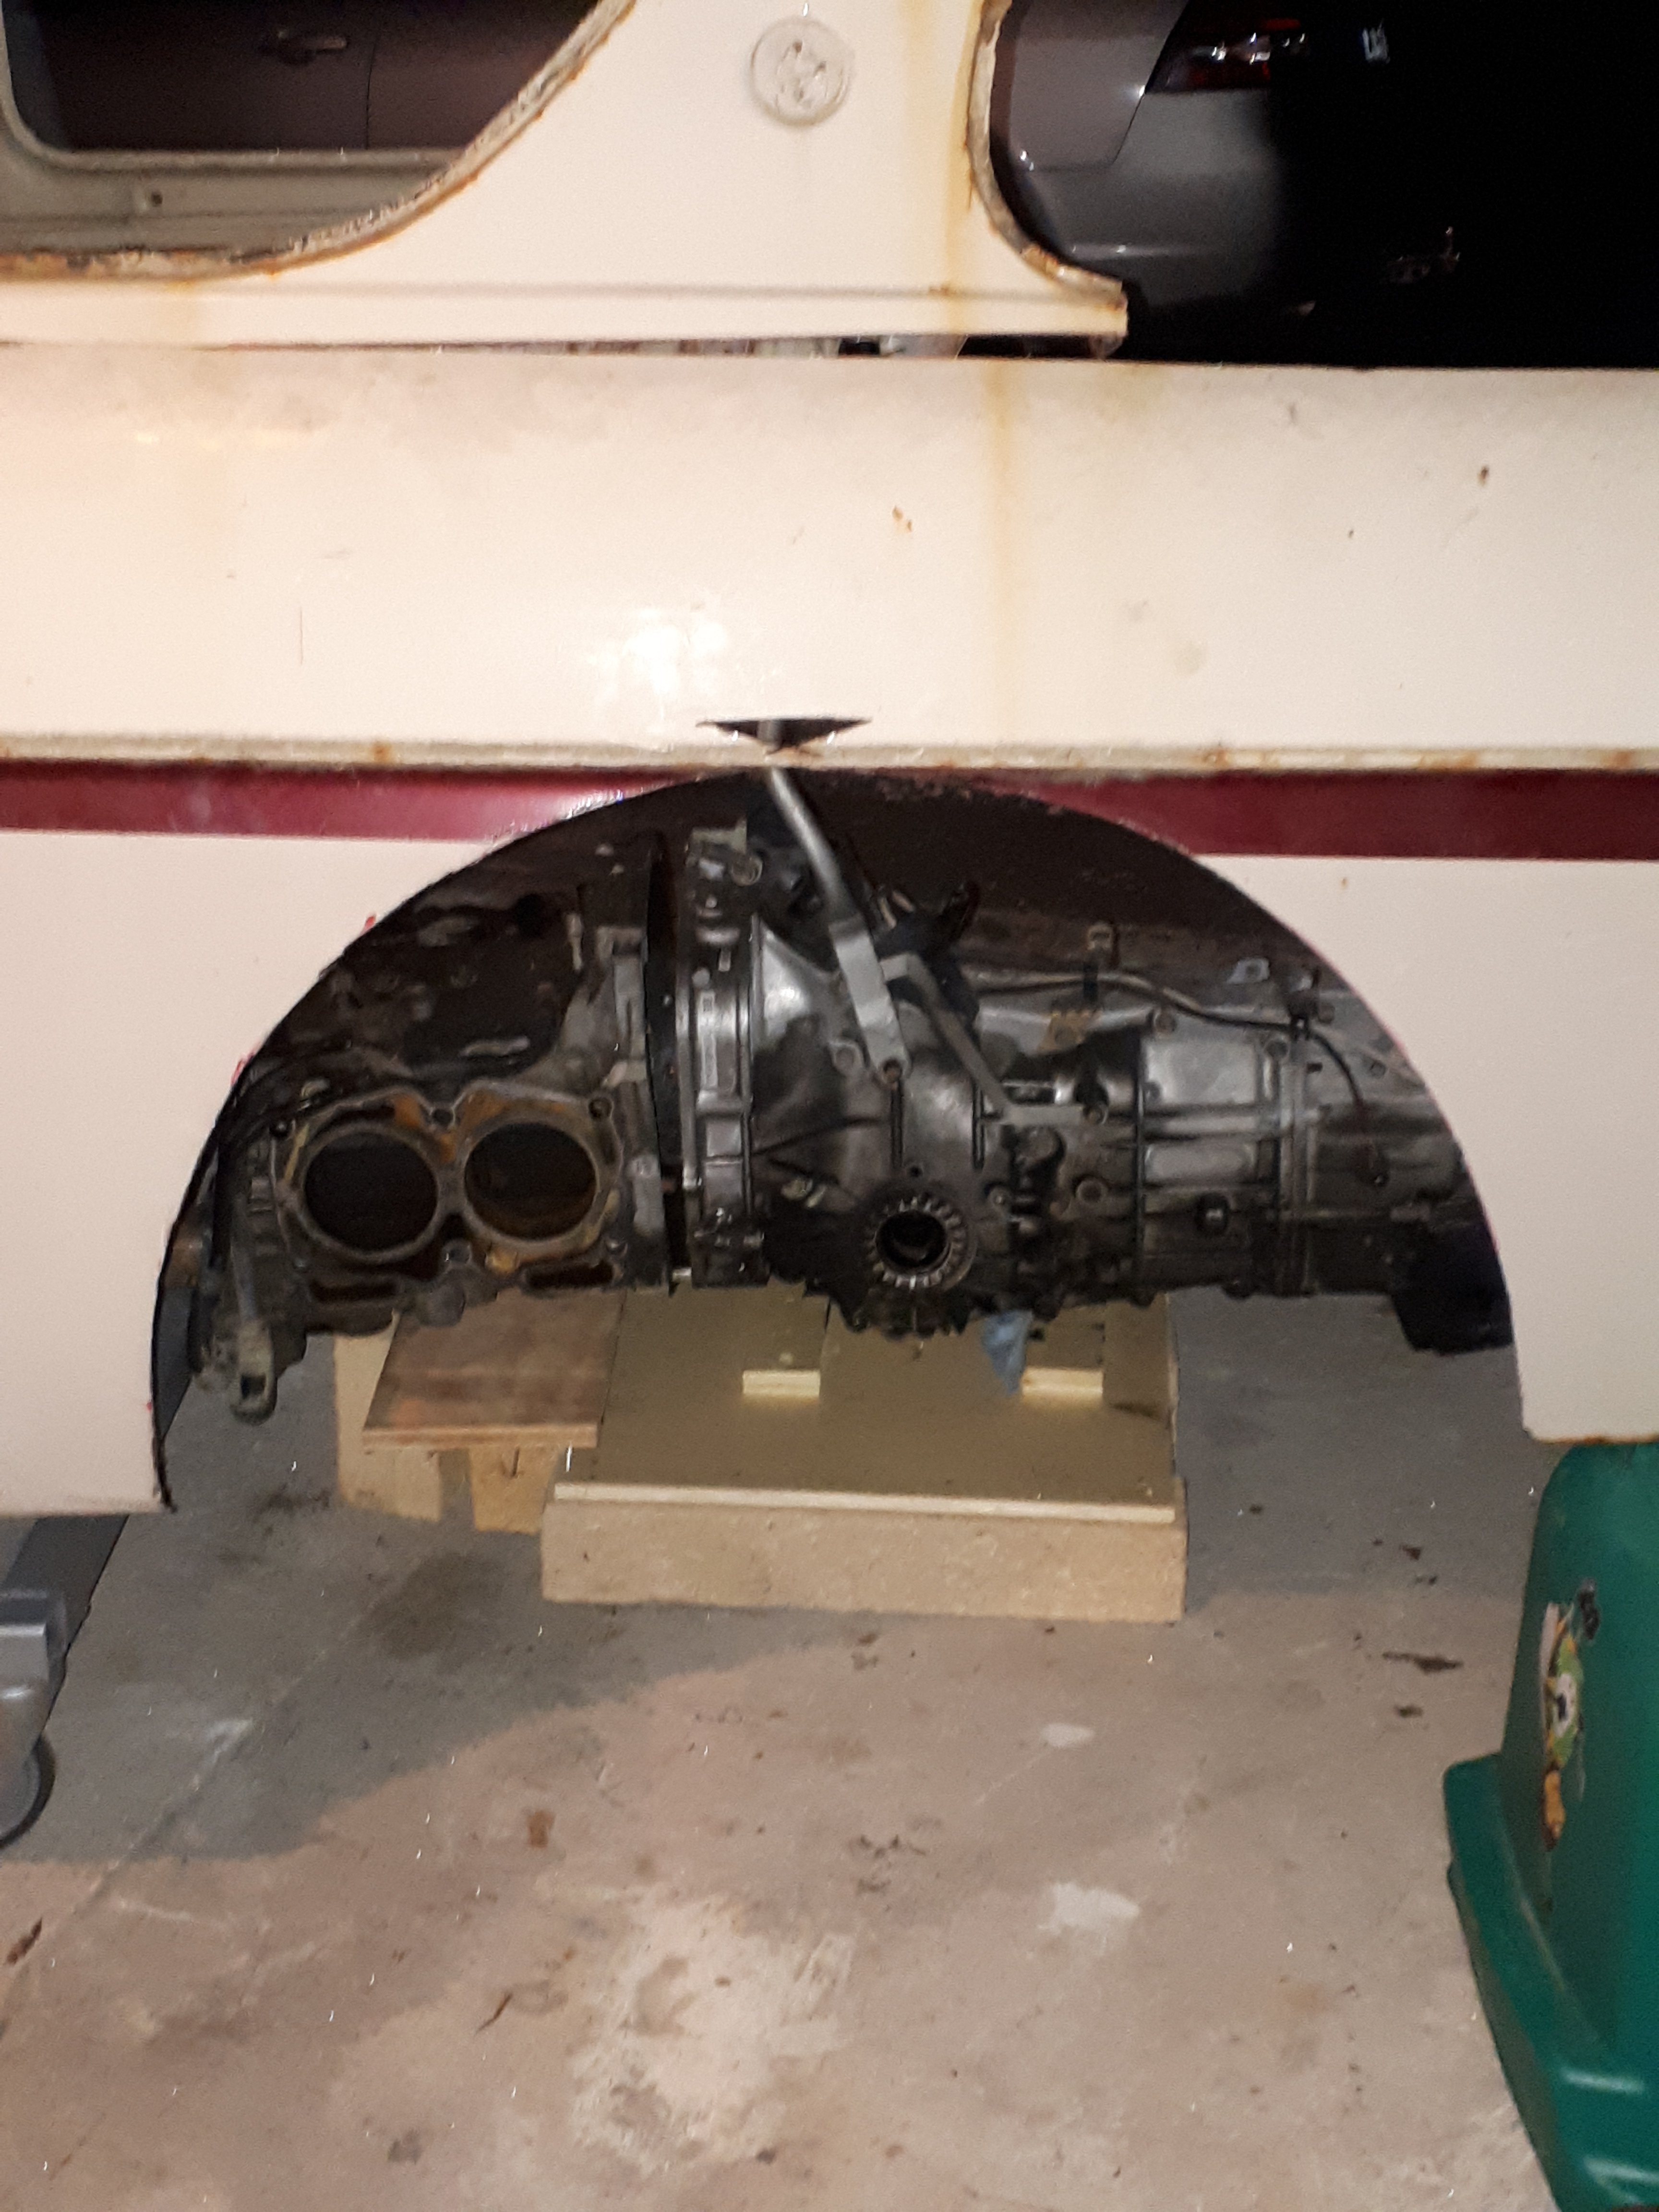
Gave it a blow today, could very clearly hear air escaping from the left hand side of the engine behind the starter gear. Once I make a little puller to get the gear off I'll be able to see whats up with the seal, must be proper fucked though as I can blow a lot of air through it. Stay tuned, or not1 point
-
Ah the Falls Hotel, aka the 'Flying Jug'... Nowhere near as interesting as it used to be. Tried to set up our very naive graduate engineer with a local lass last year (footy team road trip). She was pretty good looking apart from the missing teeth, and had just returned from her yr long ban for fighting. She so terrified him he rang his mates in Gore and left...1 point
-
Got word from the machine shop that I can pick my engine up on Thursday! it came in at under half what I expected to pay so I’m fizzy! they did new bearings throughout, frost plugs, ground crank, acid tanked block, resized rods, measured up the rotating, removed + cleaned + tapped and bunged the crank. tore the engine out after work in preparation, jazzed on a long weekend refit and run in. also got some lock nuts and maybe some freebie chrome wheel nuts. good week1 point
-
Yeah sounds like dry joints on the voltage regulator I wouldn't bother Changing the resistors as they are unlikely to be a point of failure You can very carefully clean up the pivot point as they can get gunk in there or grinding dust if it's a magnetic type, and check that the gauge face is sitting nicely as that can also catch1 point
-
Not a bad idea, maybe I could vape into it then sniff out the source of butterscotch and hipster1 point
-
Bit of inspo for you bro
1 point
-
Gave the hinges a bit of a polish and made some nylon washers, it all should work well I hope. Need to find some wood for the bed now. Decided I should go back and finish mounting the front sway bar. Started by making some new mounts since the ones that came with the rubbers weren't very nice. Bolted it all down in the right place and stole the sway bar links off the rear since they need to be changed anyway. Needed to cut out the side of that gusset sorta thing on the front end that I made ages ago since the sway bar hit it when the front raises up. Another thing that my parents picked up in America was an ashtray that goes in the middle dash panel, since neither of the RHD dashes came with one. Could of used the LHD one but wanted to keep that dash complete to hang on the wall or something haha. Had to get a second hand one since they don't sell them separate from the whole dash panel, and they were never made in stainless so it will need to be painted or chromed.1 point
-
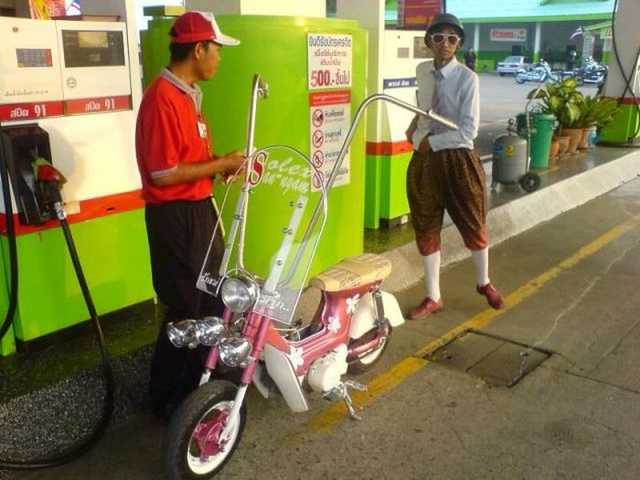
I actually bought this not just because its cool, but because it was a similar price to a decent trailer, but with the benefit of being self propelled! Looking forwards to smug facing at the dump as i reverse up the small gaps between all the jack-knifed trailer + modern ute combos1 point
-
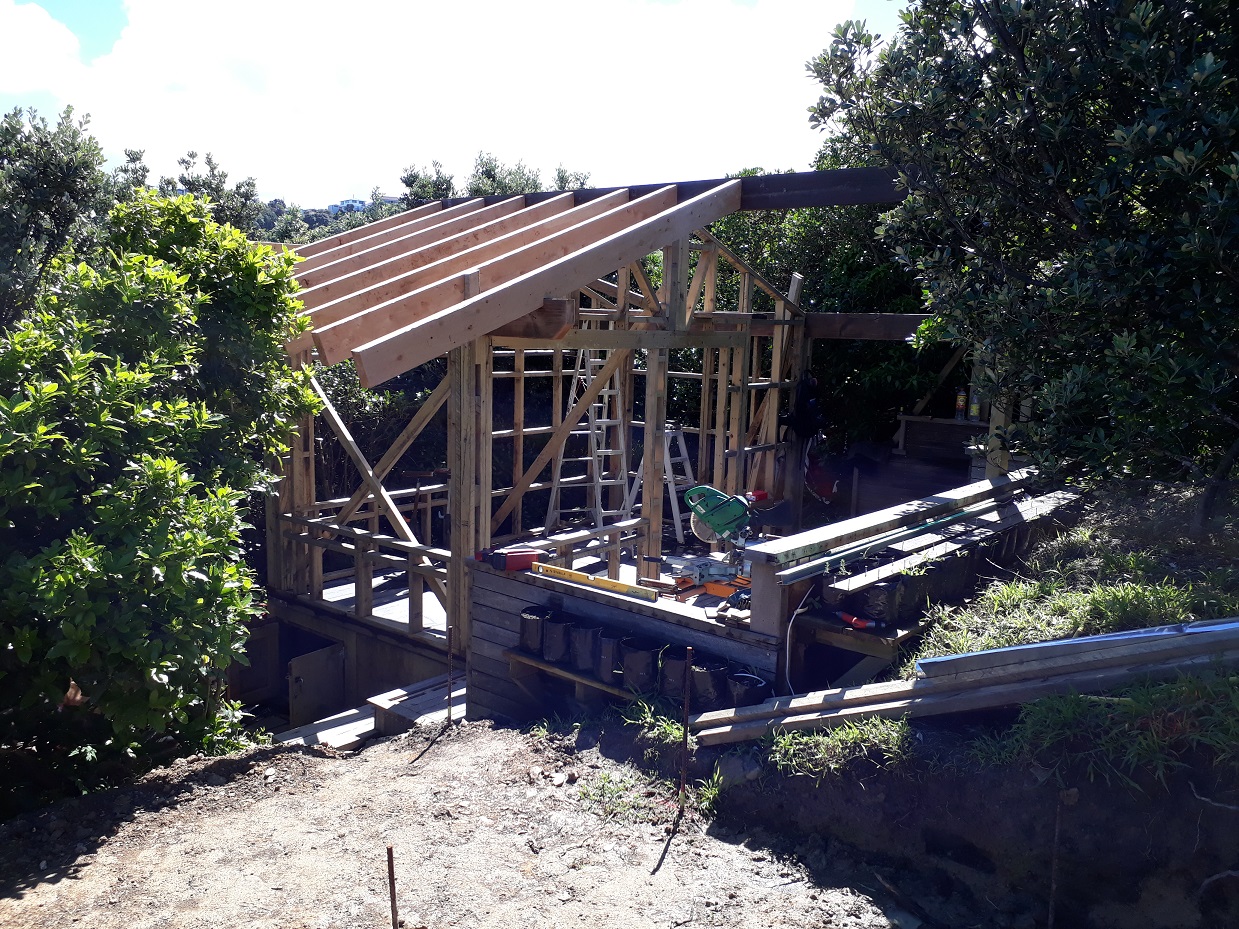
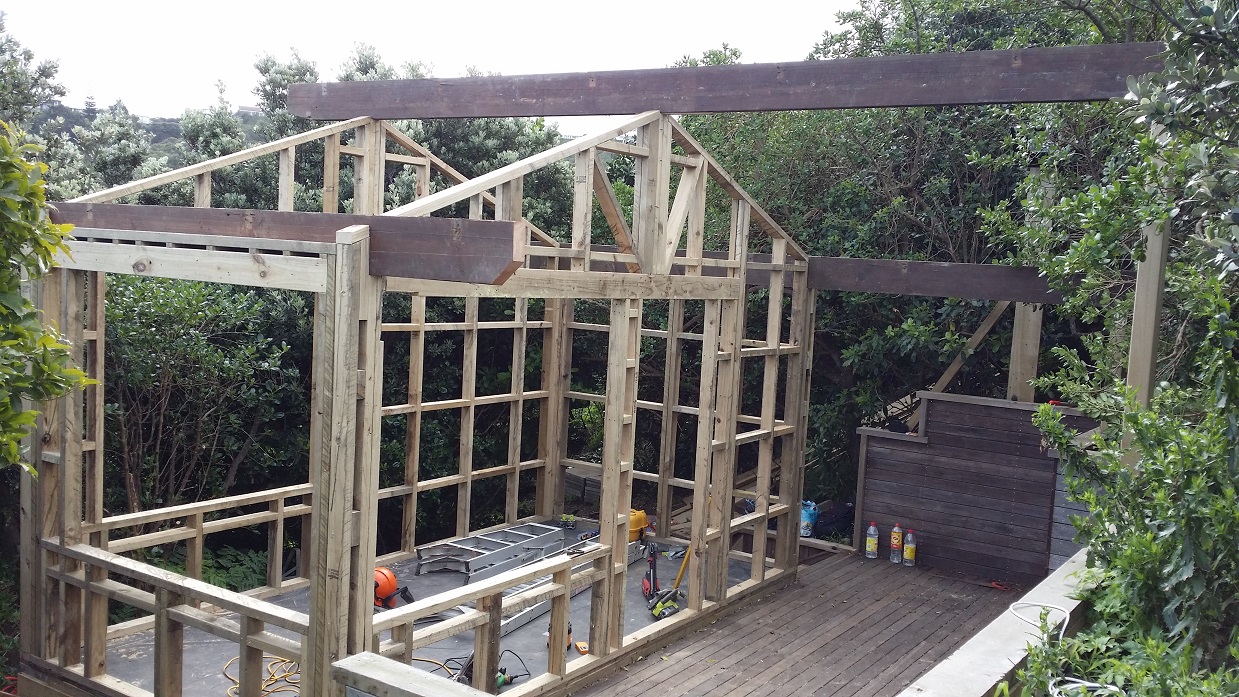
Getting the rafters up by myself has been a mission, but it's about a third done.
1 point
-
1 point
-
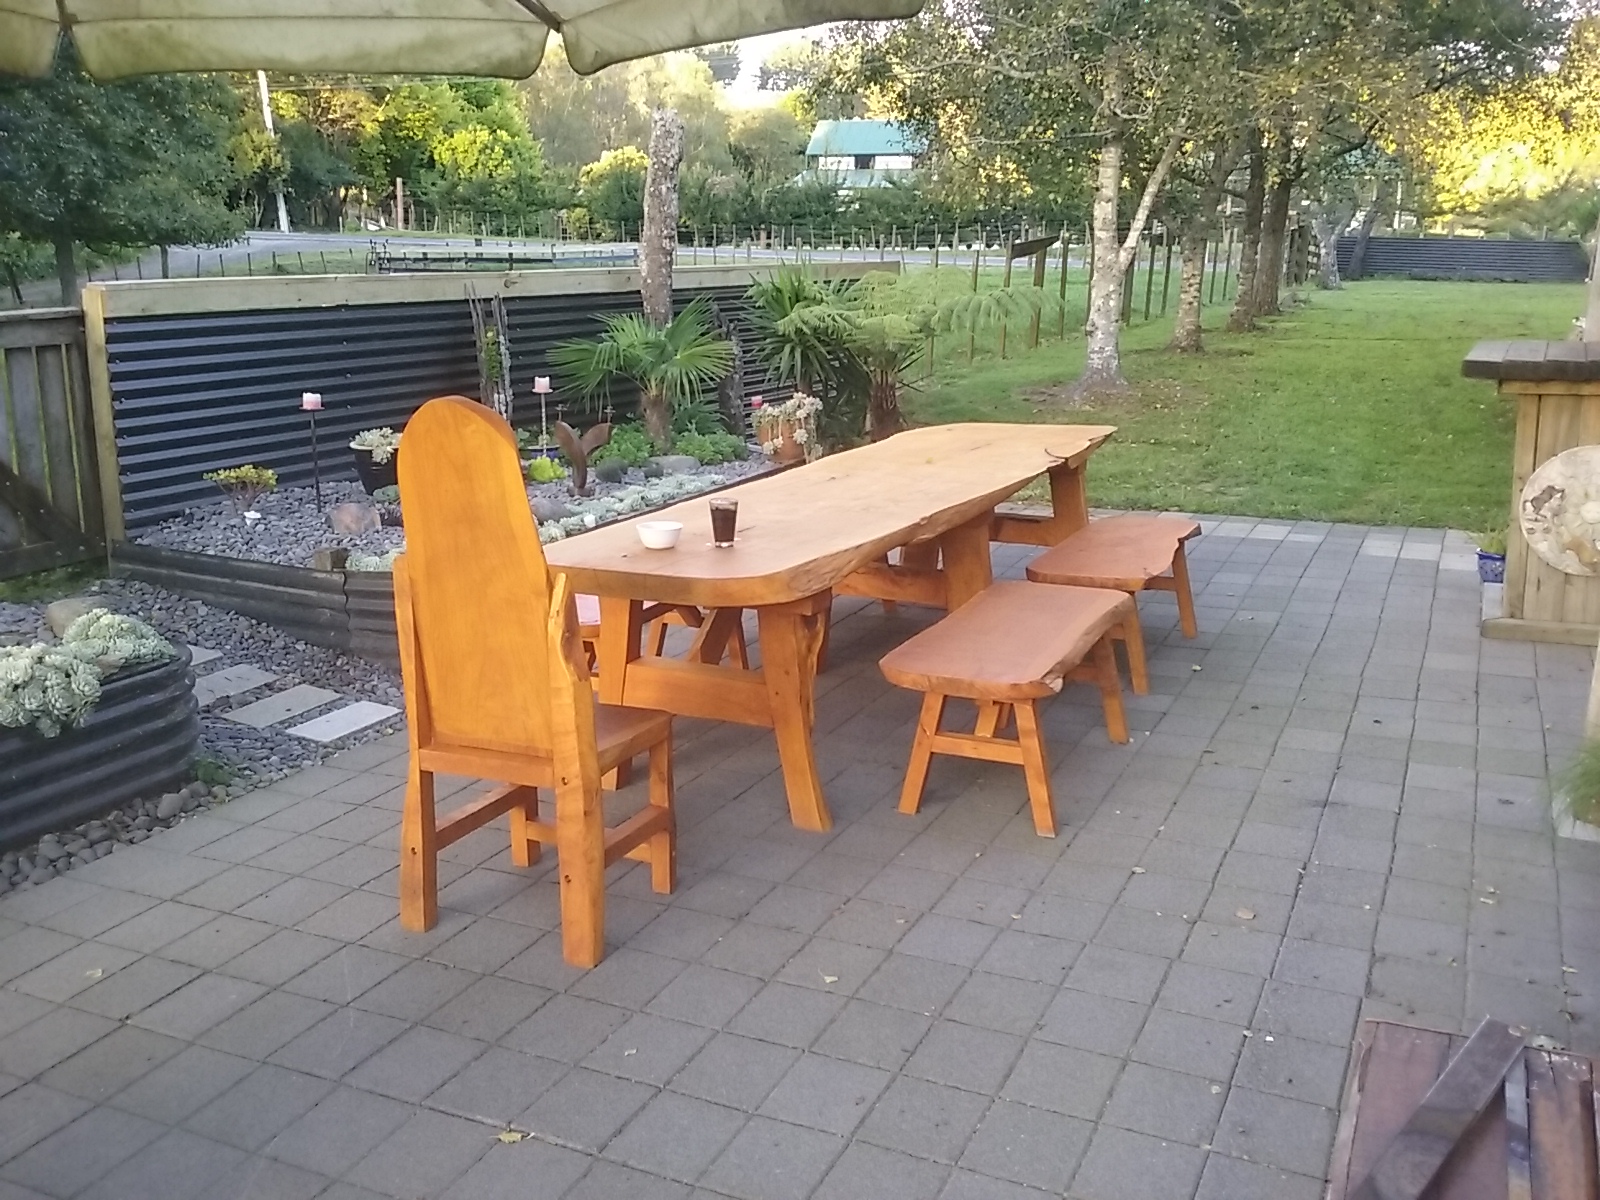
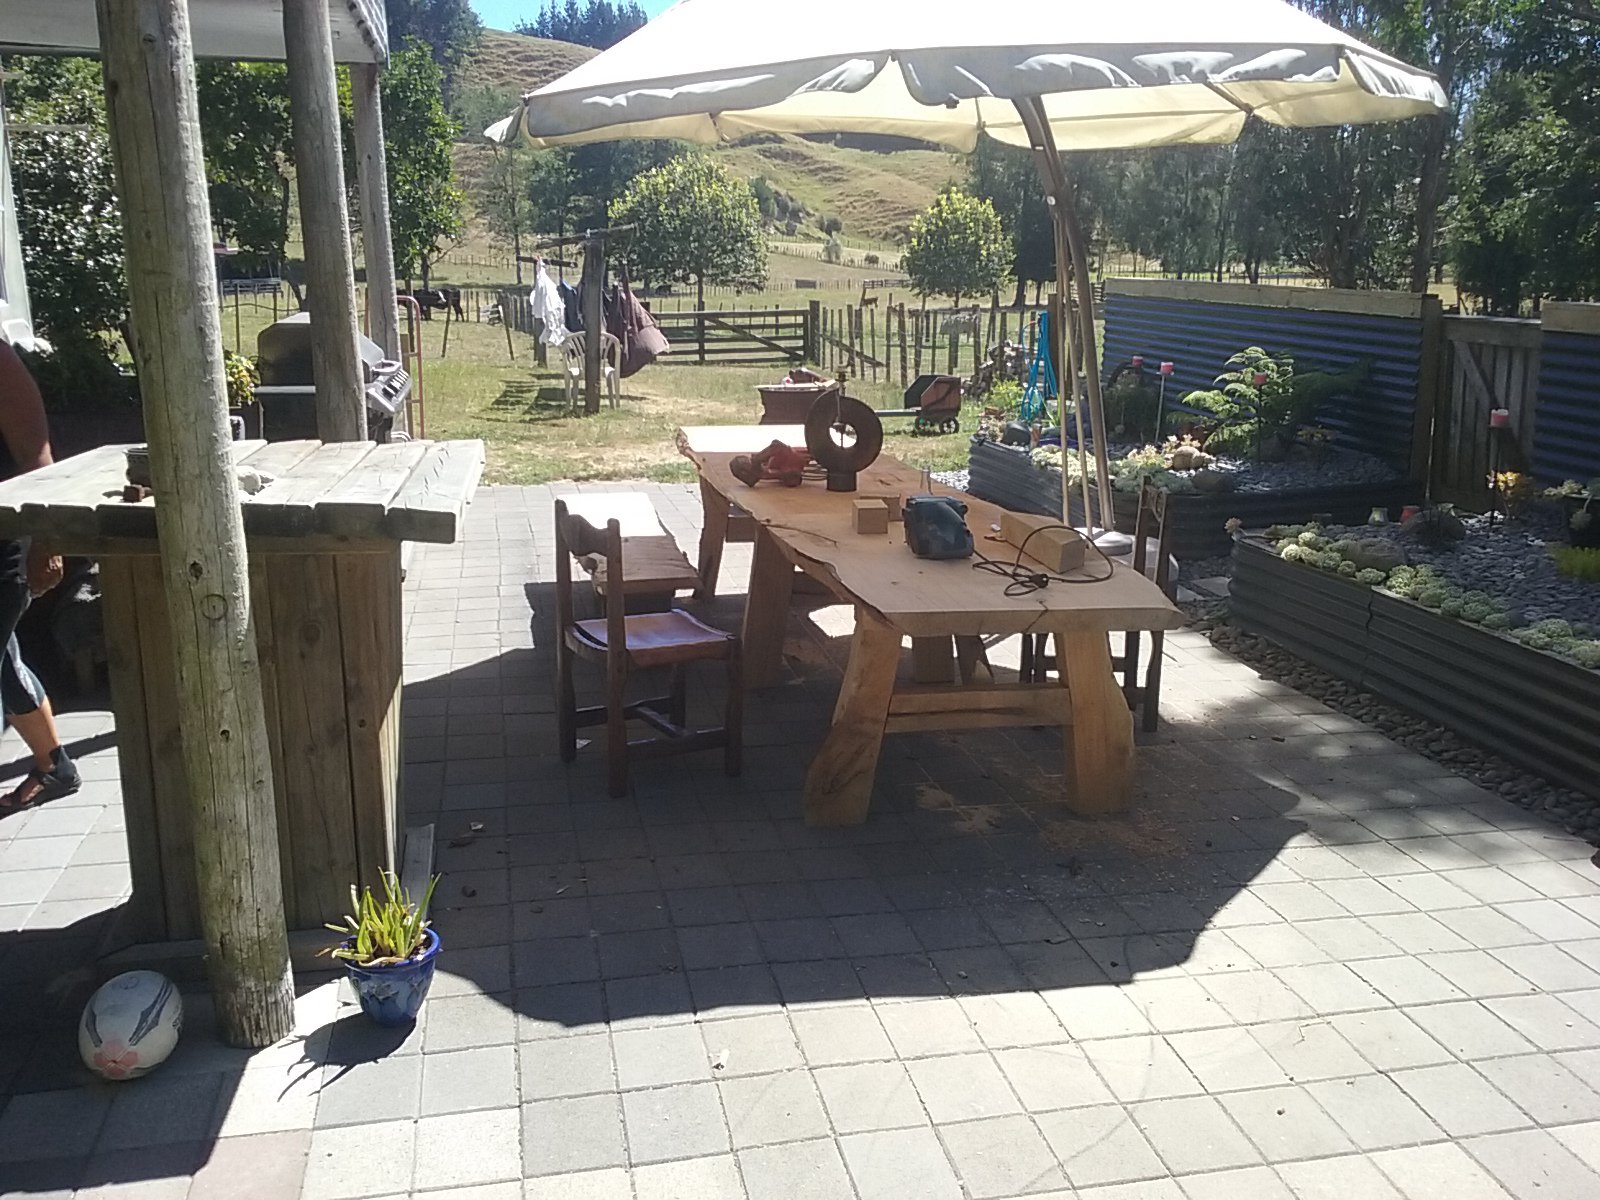
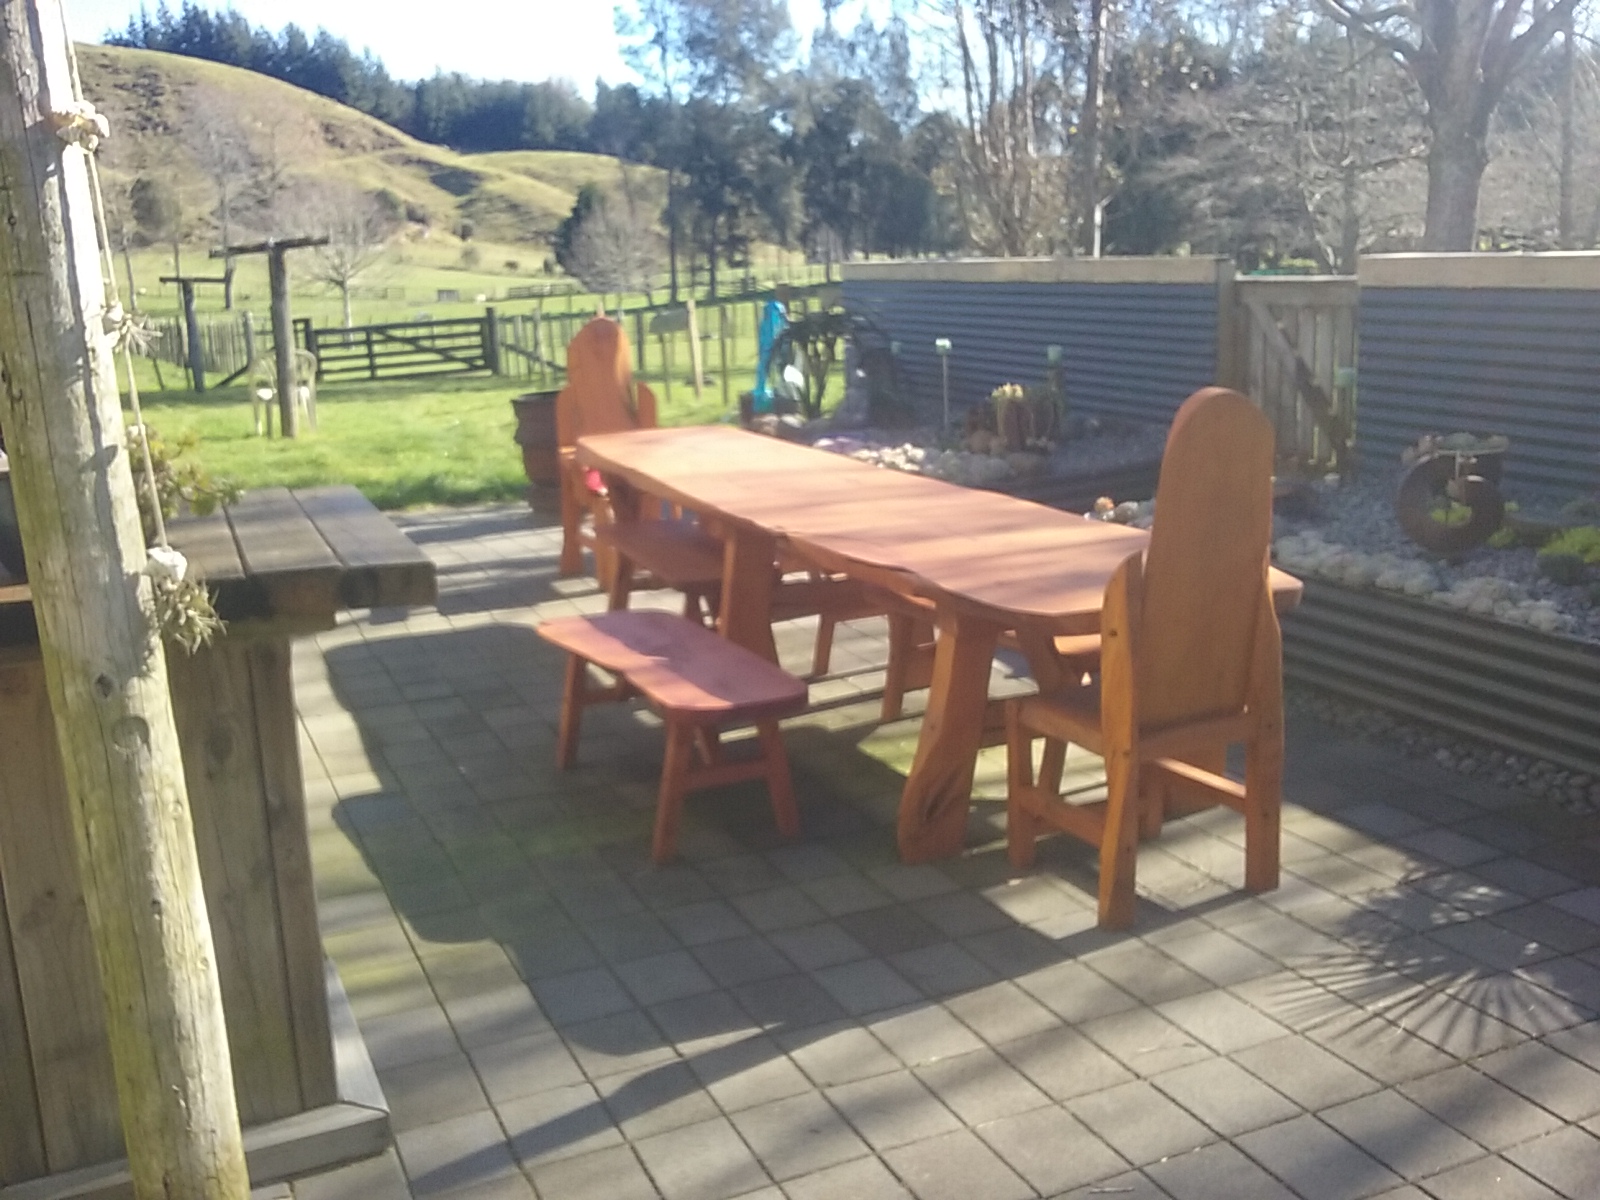
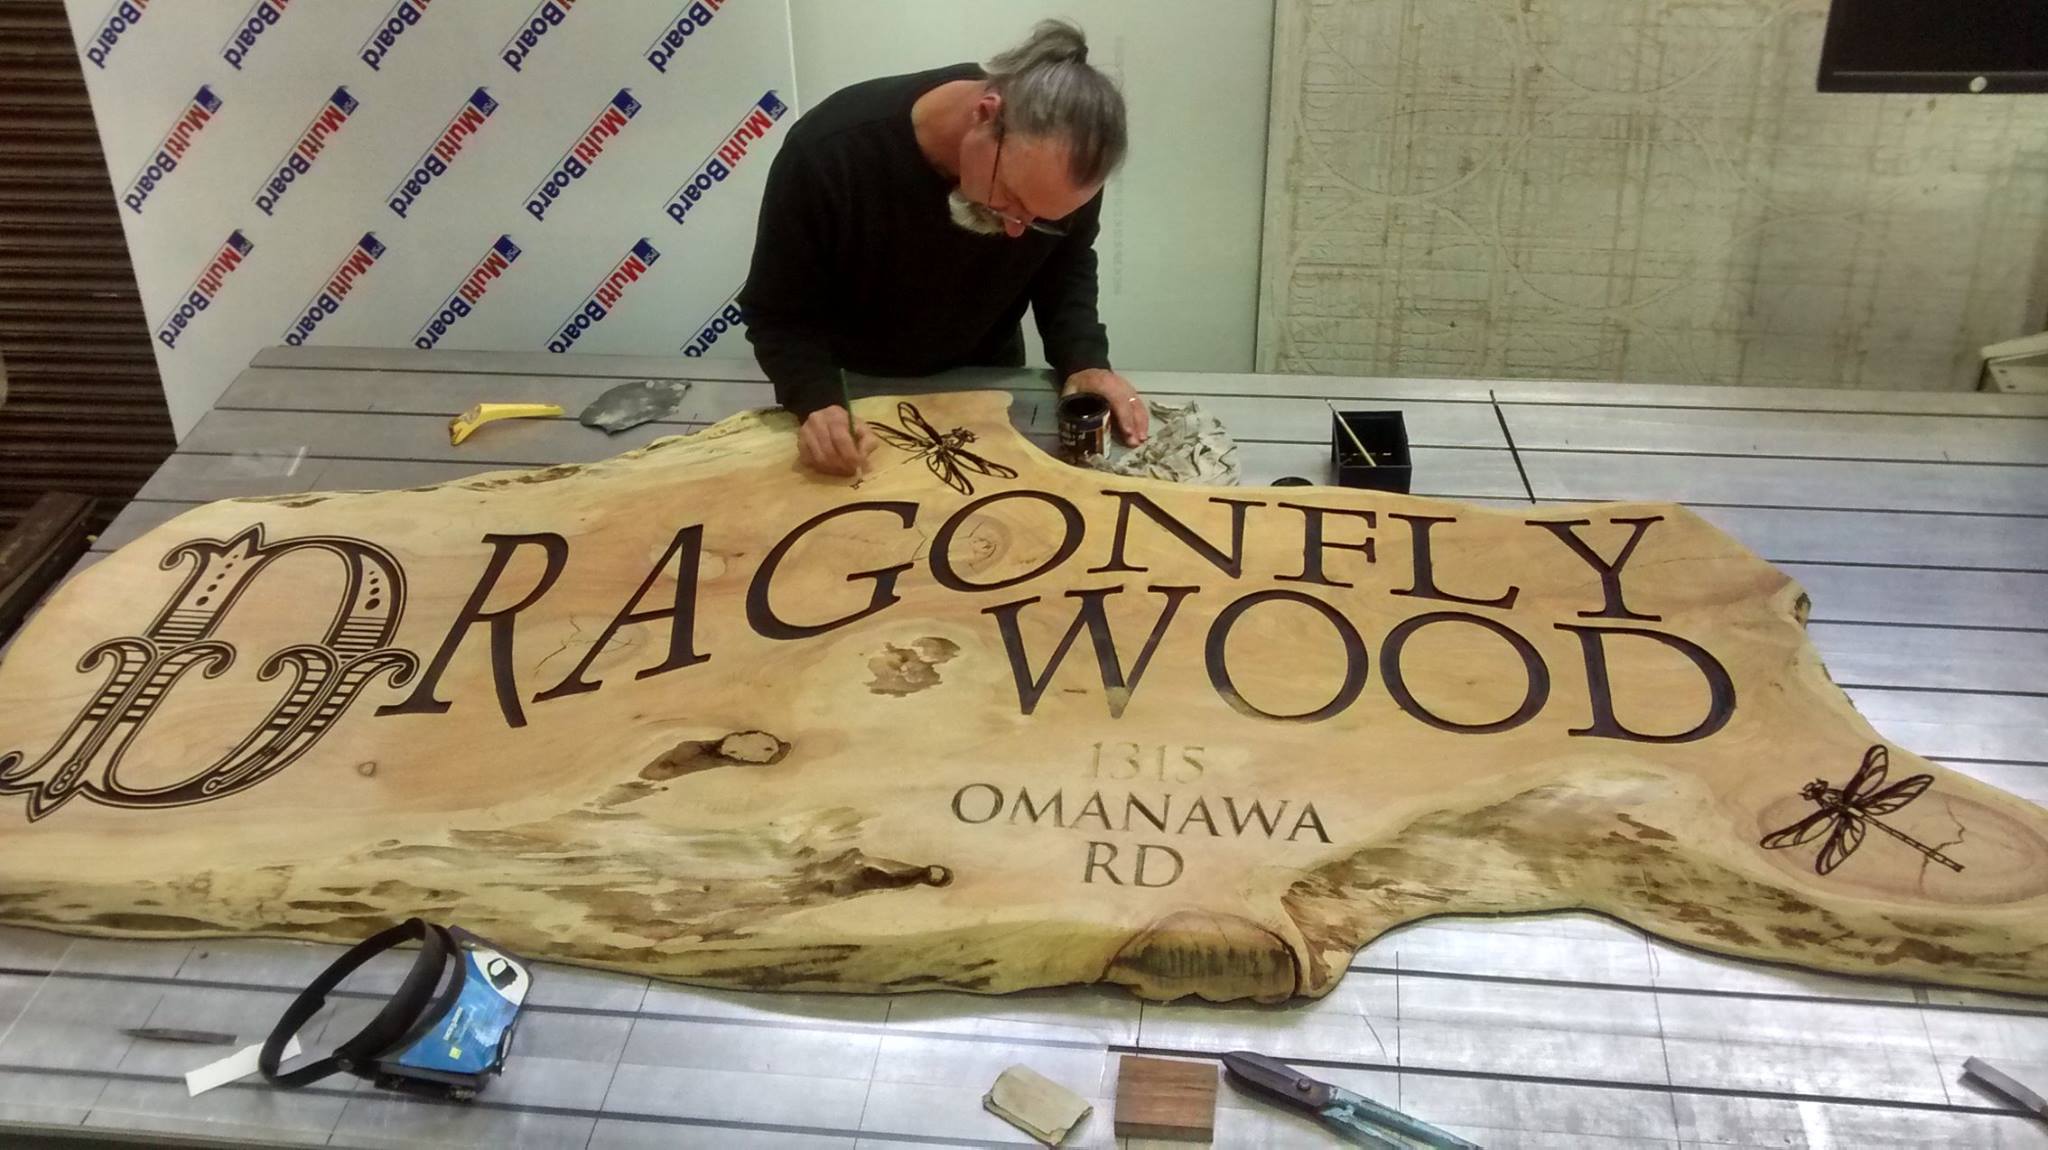
Been doing mantenance at a local mill for quite a few years in return for timber for home renos. Decided it was time for a new outdoor ale consumption suite. grabbed half a dozen slabs of macrocarpa and set to them with chainsaw, belt sander and paint brush. Took a month of weekends but not a bad result for a alcoholic with a roofing problem
1 point
-
Progress Progress... My plan of attack is to get the front & rear sub frames + the engine completed by the end of the year. On my college budget this will be a stretch but I think I'm capable of getting it done! I have new lower arm bushes, engine stabilizer bushes, cv boots and dust covers all ready to be installed. Yesterday engine paint was brought. It's not the original engine color (or even close really) but I think it's an improvement over the standard military looking green engines that minis came with. Certainly brighter than what the cap on the tin said! But I'm liking it. The car isn't being restored to complete factory spec, so I'm not too fussed. I picked up another complete 850, this one's a 1964. Whilst it runs, its been run hot, and hard. Plus its really sludgy on the inside, so it'd probably make a good rebuilder, but for now it's provided me with some really good parts, namely a generator that's dead silent when it spins (quite hard to find quiet ones!) and a tidy starter motor, both of which I have restored. So far, I've got most of the front sub frame parts painted and ready to go back into the frame. The rear sub-frame is virtually finished bar one brake hose! Wish me luck. Jack.1 point
-
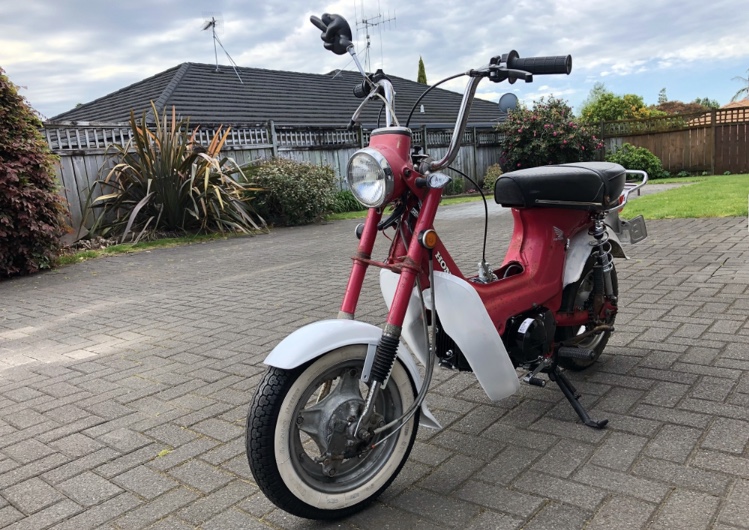
How the bike is currently sitting.
1 point
-
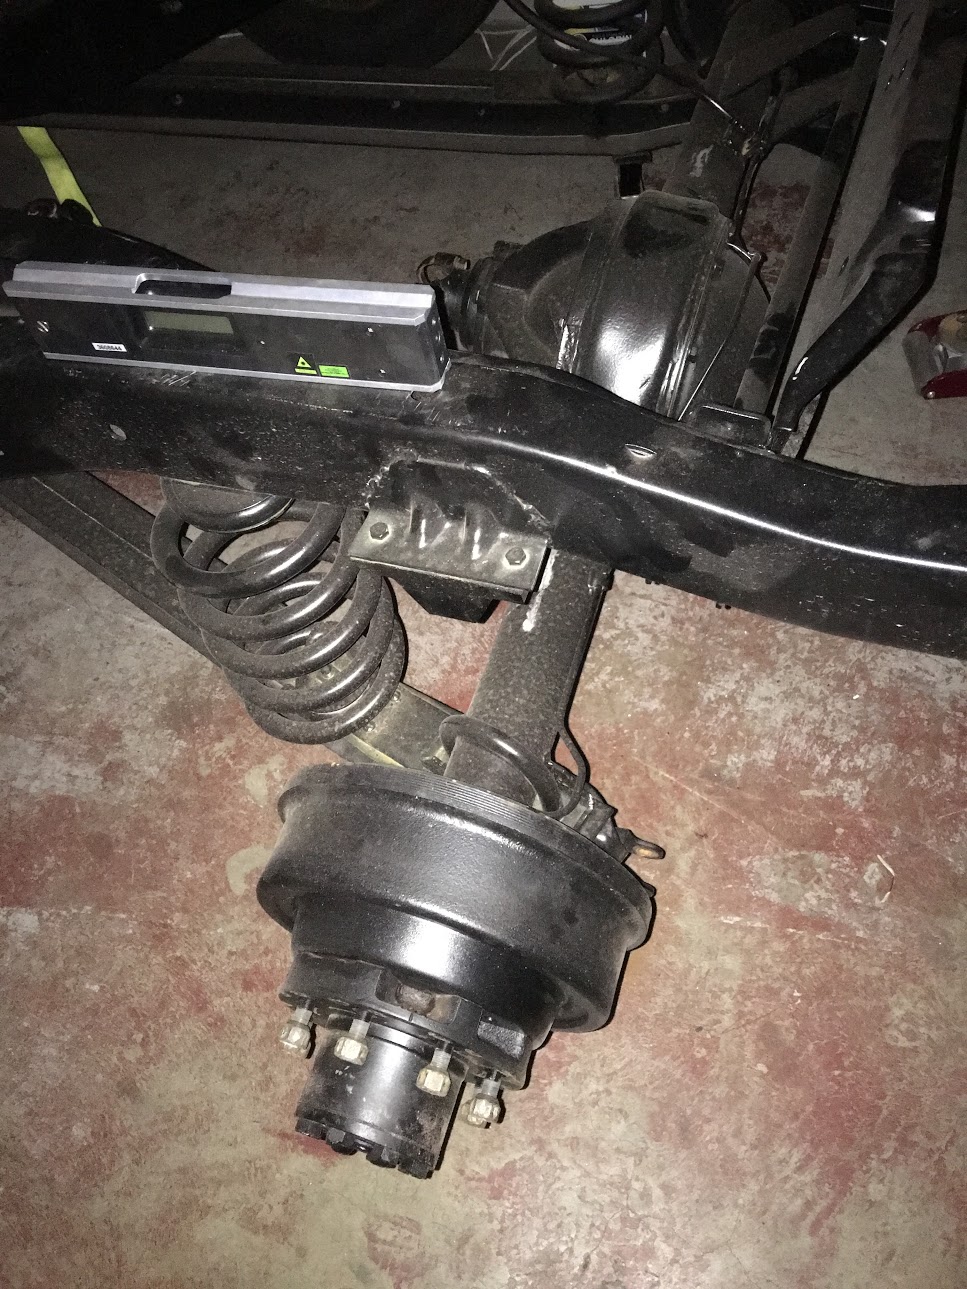
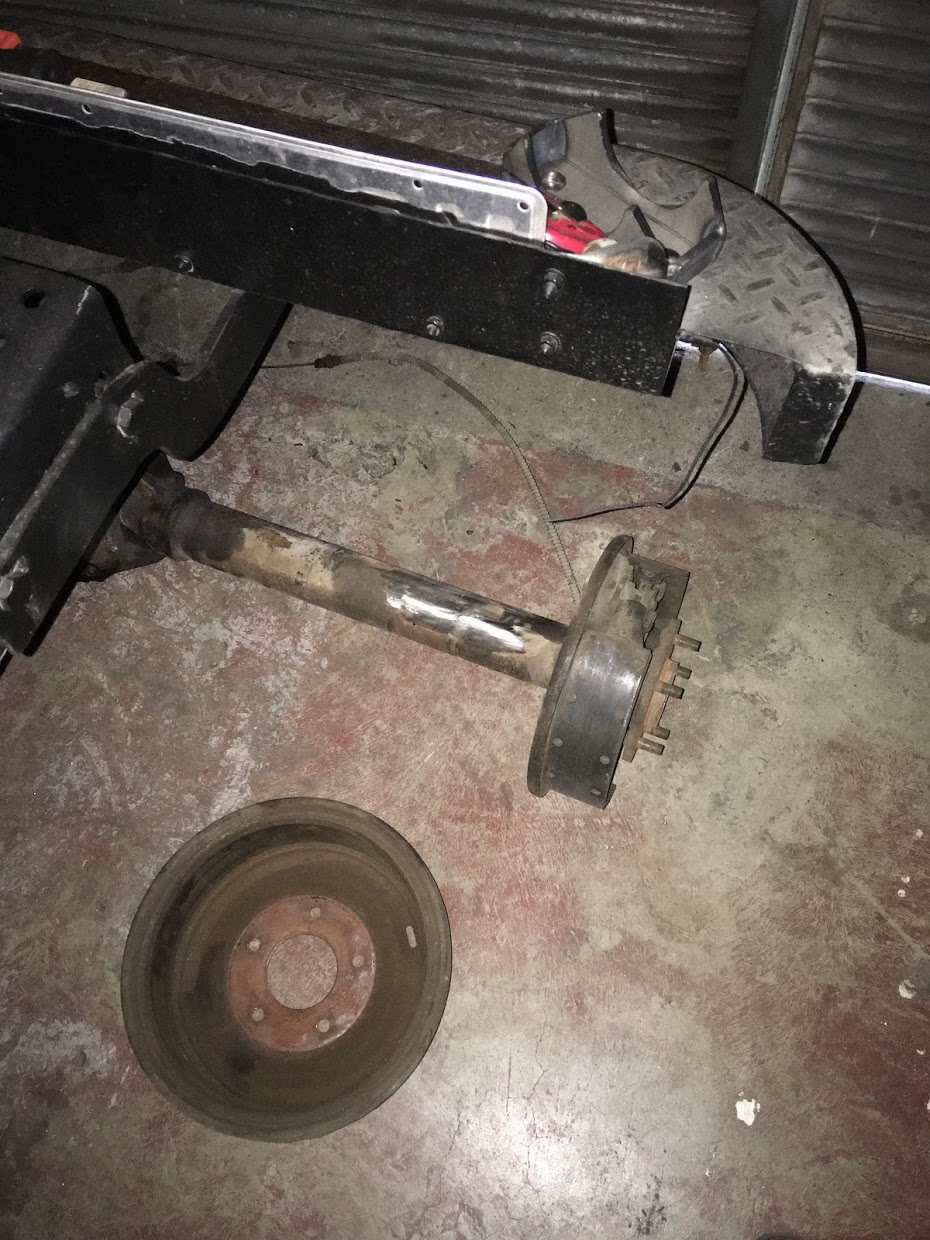
Im Torn... The ratio in the current diff is 4.56:1 which is way to high, I can get a 3.14 for this which would be sweet, but, LSD's are virtually unobtanium for this year, and Id have to do a bit of a work around on parking brakes, cause theres no provision for these, it did have a drive shaft mounted drum..... So I can swap to a C10 diff (photo 2) throw an eaton tru track in there and do 11's. But the C10 diff looks sooo whimpy, the C20 is 8 stud, and manly, but single spinner... Thoughts ? Gratuitous outdoor shot because.
1 point
-
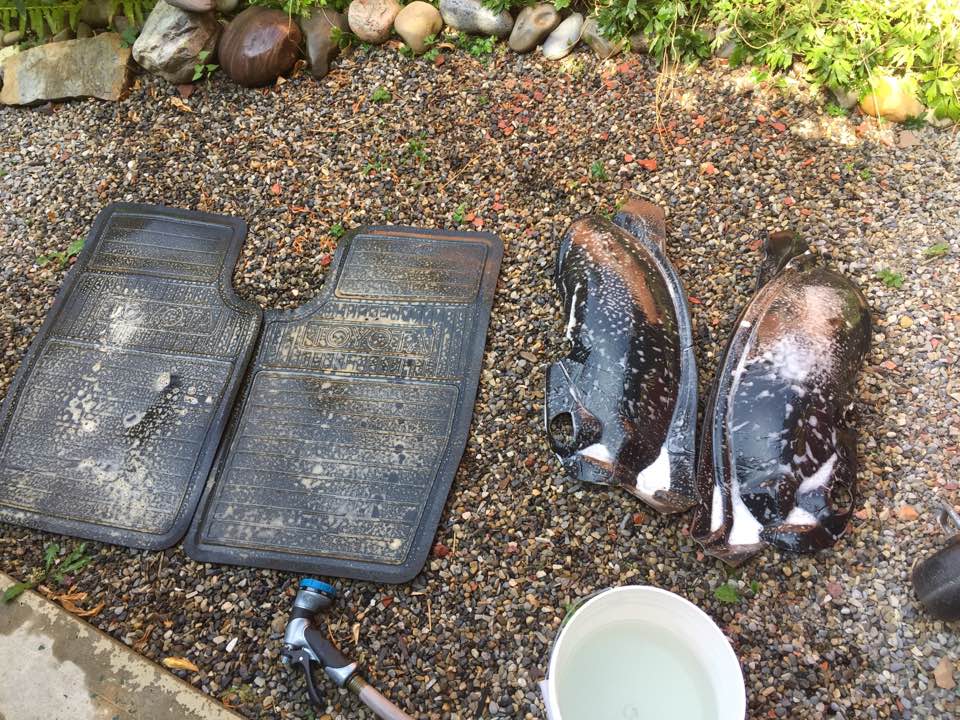
wow, it's been awhile since I had an update to post. Life has got in the way of the car too much. I'm trying to switch careers and work out life, plus sleep train the little one, but I managed to find some time this past weekend to work on the car. First off, I found one of my local auto wreckers happened to have an '82 Corolla listed in their yard, which is like hens teeth up here. I decided I needed to go check it out and see if I could score any parts off it. The car was really really rough and nothing was really salvageable on the exterior of the vehicle. The inside held a nice little haul. Someone had removed the transmission from the car and in doing so, damaged some interior parts, but they were salvageable. I picked up a damaged center console (needs to be plastic welded back together), a black e-brake handle, new fuse box cover (mine I had to repair previously), black window cranks... Toyota branded rubber floor mats, interior fender trim pieces in black, and a set of rear marker lenses that were mint. The best part..$40! I also got around to start working on my wheels I picked up. I spent about 30 minutes straigtening the one wheel that was slightly bent. I forgot to take a picture of it before the repair, but it had a nice bend in the rear lip. I used a propane torch to heat the wheel up for about 10 minutes, then used a 2x4 and a mini-sledge hammer to get the bend out, then used a body hammer to bend the lip back straight. It's still a bit rough, but i'll take care of it when I get around to refinishing them. I also gave the faces of the wheels a good clean, they are in better shape than I expected. I probably won't have any updates for awhile because I have a super busy 2 months a head of me, including flying 3200km across the country to go write a test for a new job, which may require me to move that 3200km, but I'll see if I can post updates as I have them.
1 point
-
Had some time this weekend to keep tackling the interior. Managed to get the door sills plates, door seals, kick pods, trunk panels, c-pillar panels, cubby, e-brake cover, and steering column cover cleaned, and dyed black. Also got around to installing my new tachometer, steering wheel, front speakers, rear speakers, and headunit. I bought another cluster surround to see if I could deal with the poorly installed old headunit, but the one I purchased was from a coupe, which has a slightly different dash, so I had to use my original one. I drilled out the old cruise control plate and pitched it, then fabbed up a block off plate out of some acrylic we had kicking around the shop. I'm going to use it as a spot to install my phone mount. I also took out the severly weather beaten old 5.25" speakers in the rear and modified the panel, plus the sheet metal behind to accommodate a set of Rockford Fosgate 6.5" 3 way speakers I had from my old Subaru. I also mounted them with a foam BoomMat basket on the backside to give them a bit more clarity. Sound system sounds great, just needs some low end. After I get around to mounting my celica seats in, I'm going to go shopping for a slim subwoofer to put under the passenger's seat. Still needs some work on the interior. I still need to figure out what I'm going to do with the cracked dashpad, and dye the rest of the brown black. I also tried to remove the fake wood section around the climate control, but it is stuck in place, so I may just leave it as is.
1 point
-
I often spend time building stuff, i find it quite relaxing and gets me out side. I started building shit years ago with the odd subwoofer enclosure to full boot installs, now i own a home so its cabinets, fences and my most recent - an Activity Table for the kids. I went a bit overboard and made this waaaaay more complicated than it could have been. I started in SketchUp where i went through a few design iterations and eventually settled on this; I then tested how it would go together by printing a prototype with a 3D Printer. I was glad i did this as there were a few things that needed changing - mainly i added hidden legs to support the table more. All the sizes & angles came from the SketchUp model and turned out pretty well. I did need to use a little bog because my cutting tolerances were not that precise. you can see the hidden leg supports if you look closely. I let the kids chose the colours for the table, was pretty fun as i just sat them in front of the computer and tried different colours in SketchUp until they were happy. Then off to bunnings for a few test pots. I think it turned out really well, kids love it and use it every day - its bloody heavy though and i dont think i will build something that retarded again.1 point
-
Just got this out of the workshop Friday.....
1 point
-
Knocked up another ramp for the kids. Not really that flash with wood but it was here so got the nod..1 point


_1.jpg.01281943218524aadc00684f70ed1192.jpg)


This leaderboard is set to Auckland/GMT+12:00