
Leaderboard


Popular Content
Showing content with the highest reputation on 03/28/17 in all areas
-
Finished! Bit of machining porn for you!23 points
-
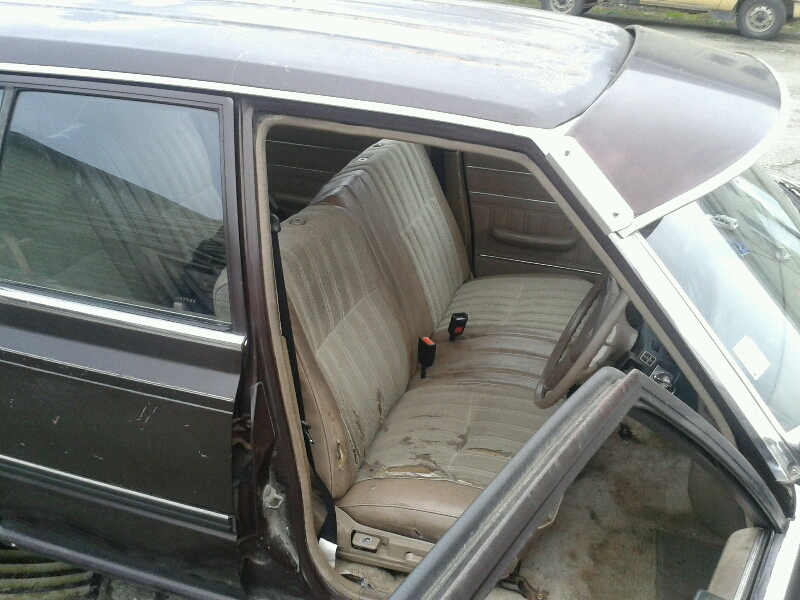
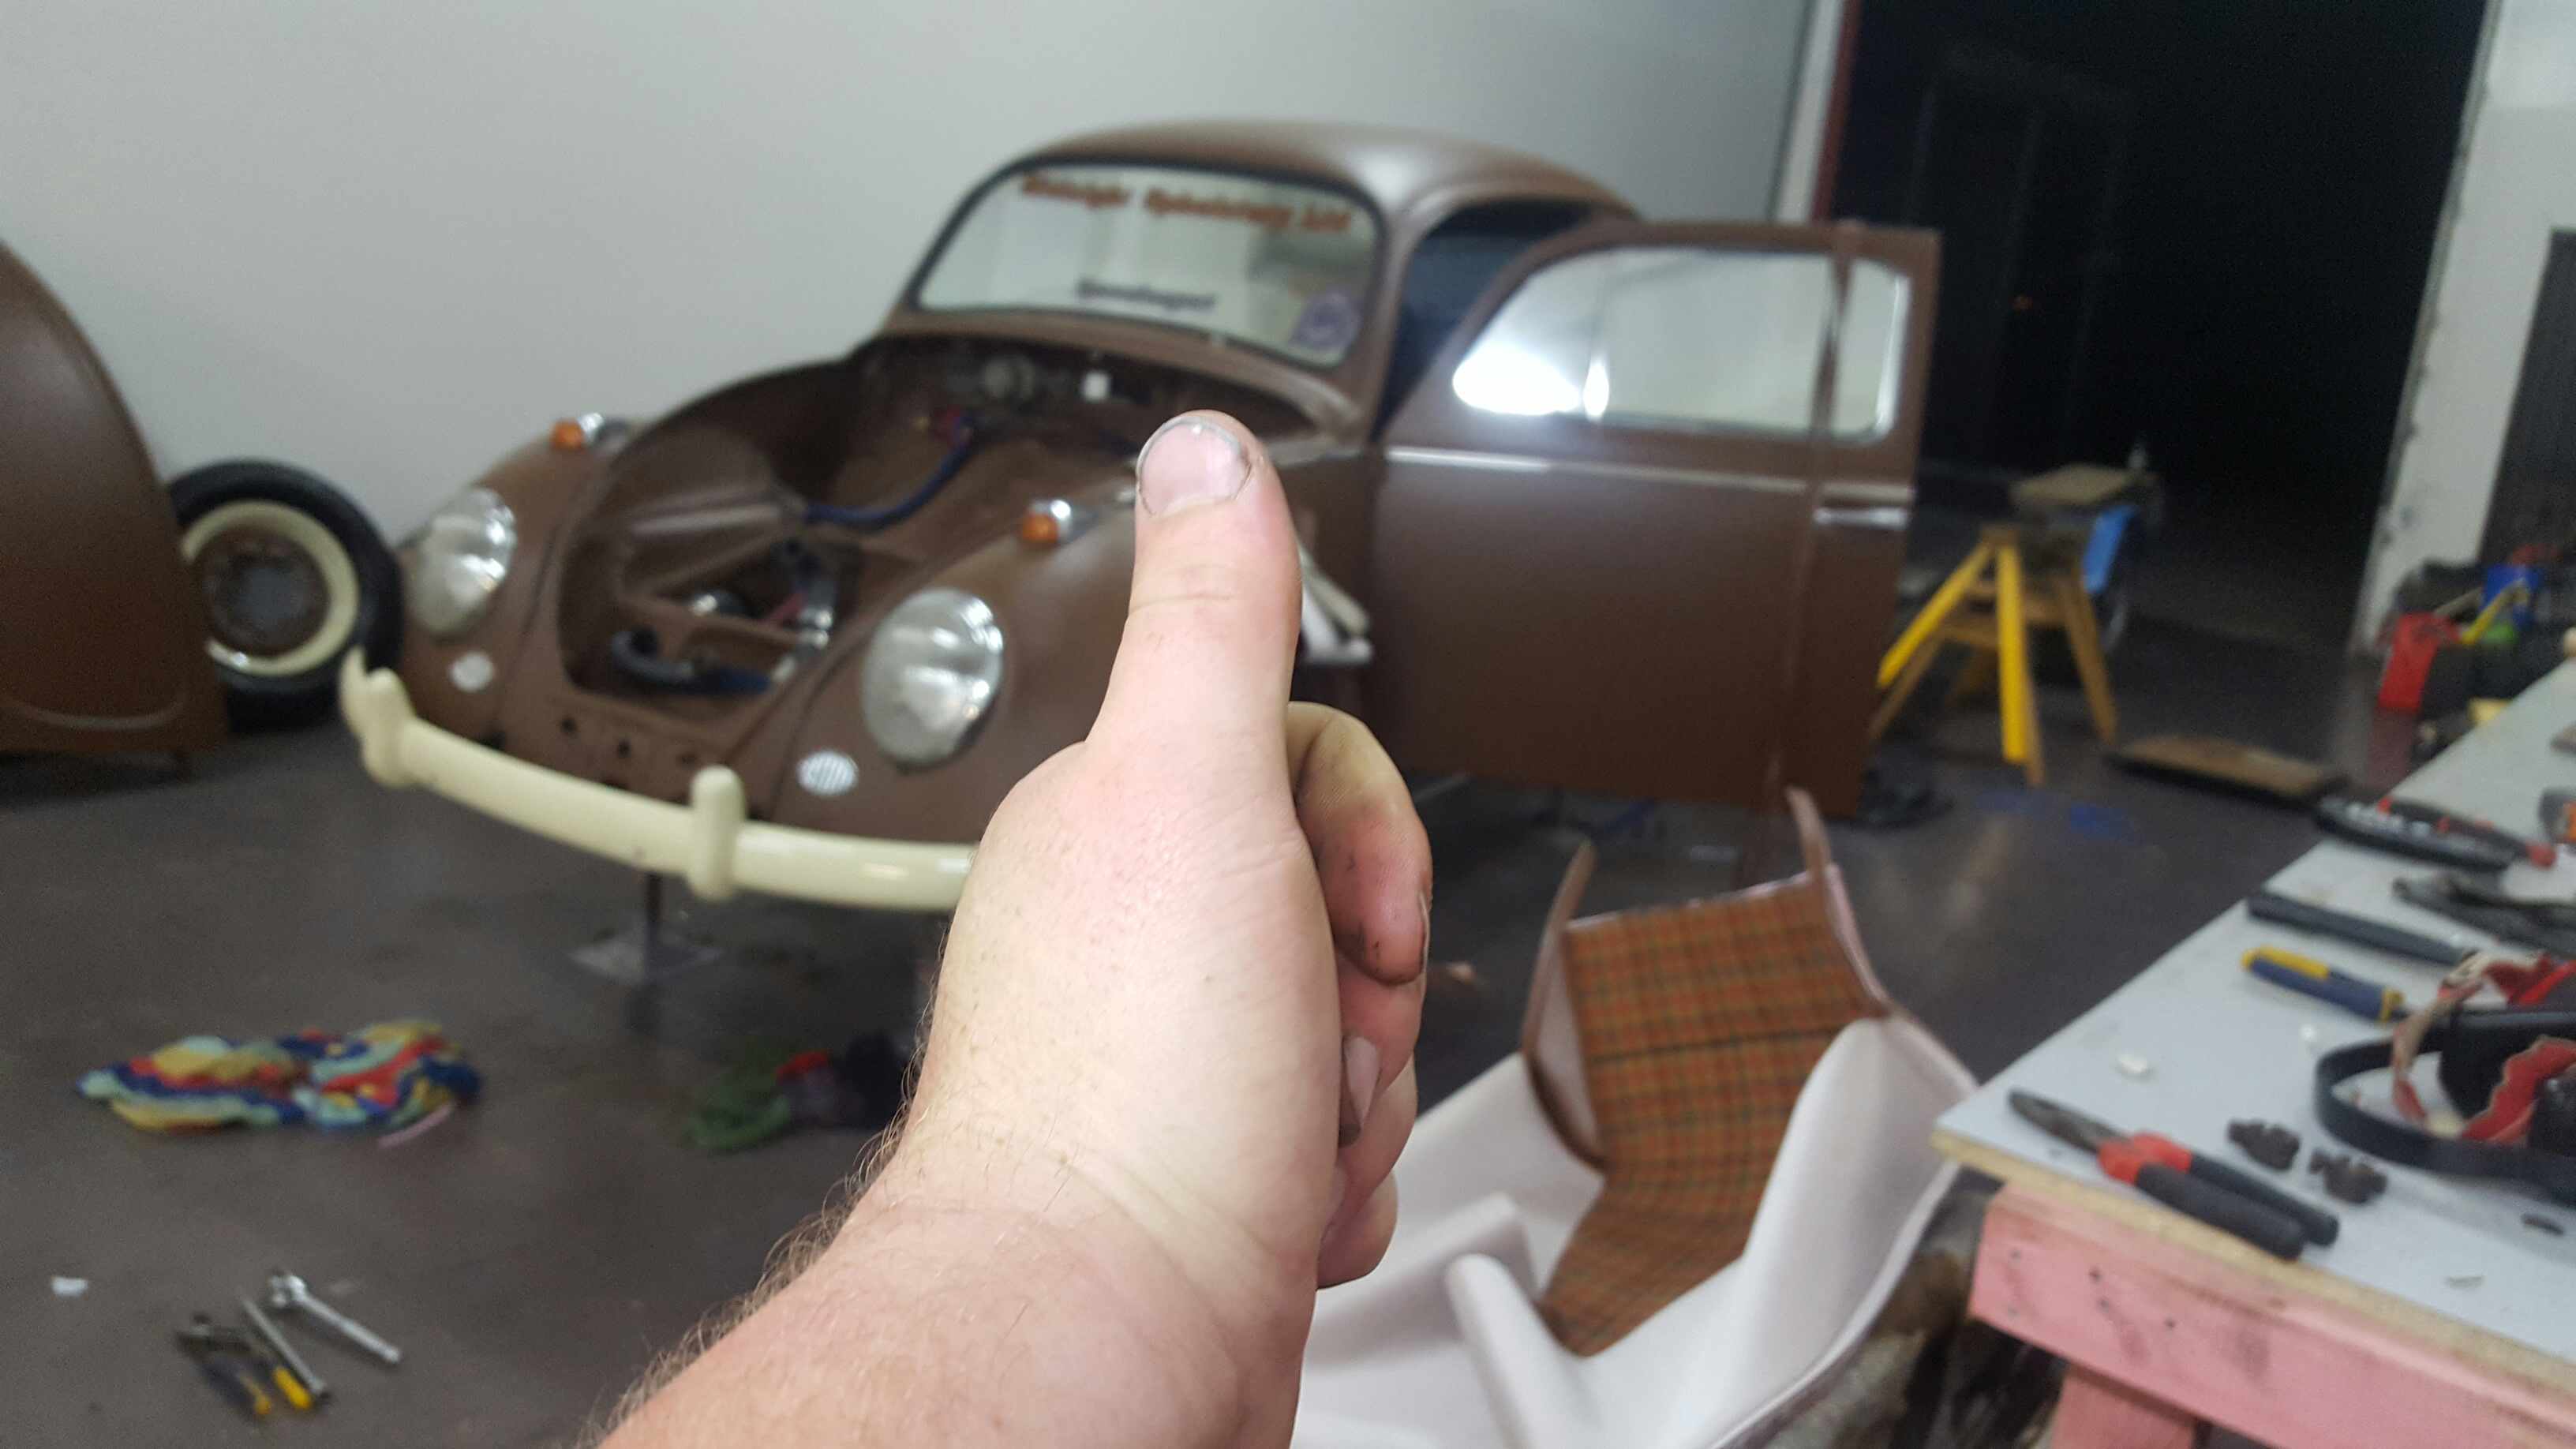
Cooley. Swapped seat over after work. Was a tad gay on my own. But done. Feels heaps better driving around, not so big and gay. Plus niki got me a sweeet brown Mexican blanket for my birthday, so that will make its way in there, once some mods are made for seat belts. So yea. It is now, nats ready. Next on the list, getting the van ready for camping duties, which pretty much just means, clear out crap not needed for the weekend lol. Fantastic.
 9 points
 -
There are a few things in life that are never big enough...ummm yeah, well that too... But other than wishing I was hung like Dirk Digler, a mobile workbench was pretty high up on the list. Something to store tools in, be able to roll around, and assemble stuff on top of. But at around $4000 to buy one, it only left two options for someone like me...make one, or go without. So I'm making one: Collection of 3 draw filing cabinets. I cut about 60mm off the total height of each one. It would have been way to high otherwise. Some were also 4 draws, this didn't matter as I just cut them down to match the size of the others. Next was to mig weld all 5 cabinets together. I stich welded them around the edges. Then made up an angle iron base that it will sit in. 8 caster wheels were added to support the weight. Yes this is epic over engineering...but they are cheap, so I don't see any negatives in this. And paint time... Mounted on roller chassis. It wheels beautifully! All the casters are the type with brakes, so it can also be locked if you don't want it to move. Draws painted And assembled....Boom!!!! Pretty happy with it for the money. Basic cost breakdown: Filing cabinets off Trademe total $70 Caters x8 total $106 Steel $50 Paint $77 Grand total $303 Not bad considering the cost of anything remotely similar is $3000 - $4000. My brother makes kitchens, so the top is on order from his scrap pile. So it will be a freebie for me. But it's still very usable as it for now:-) Kj4 points
-
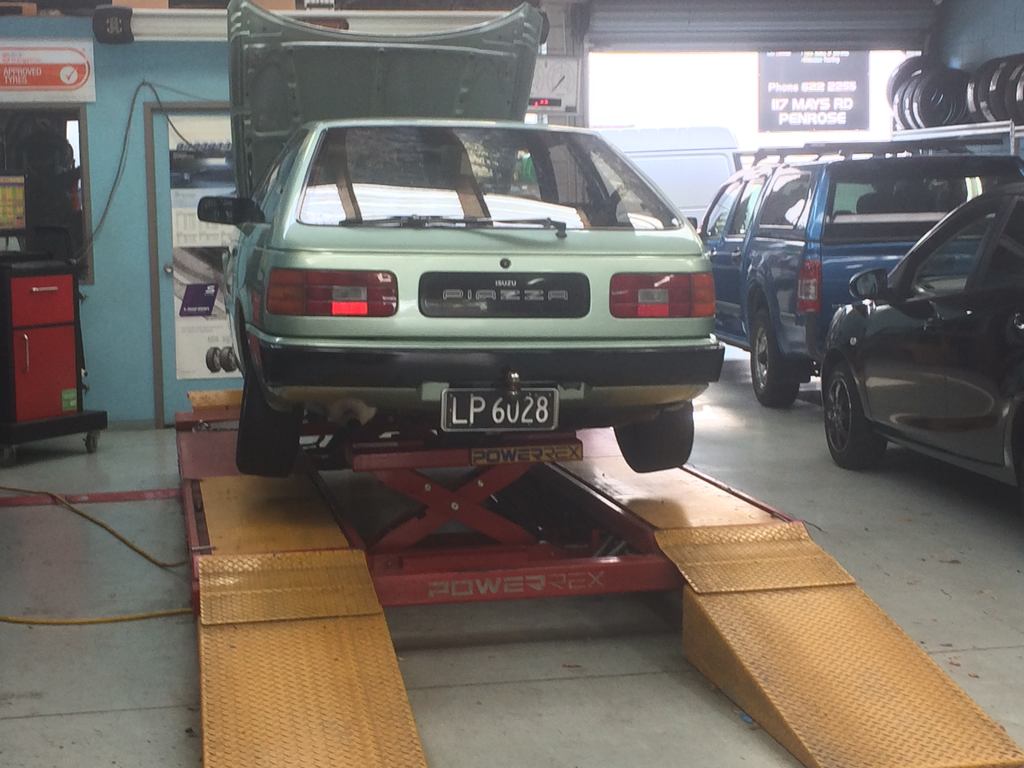
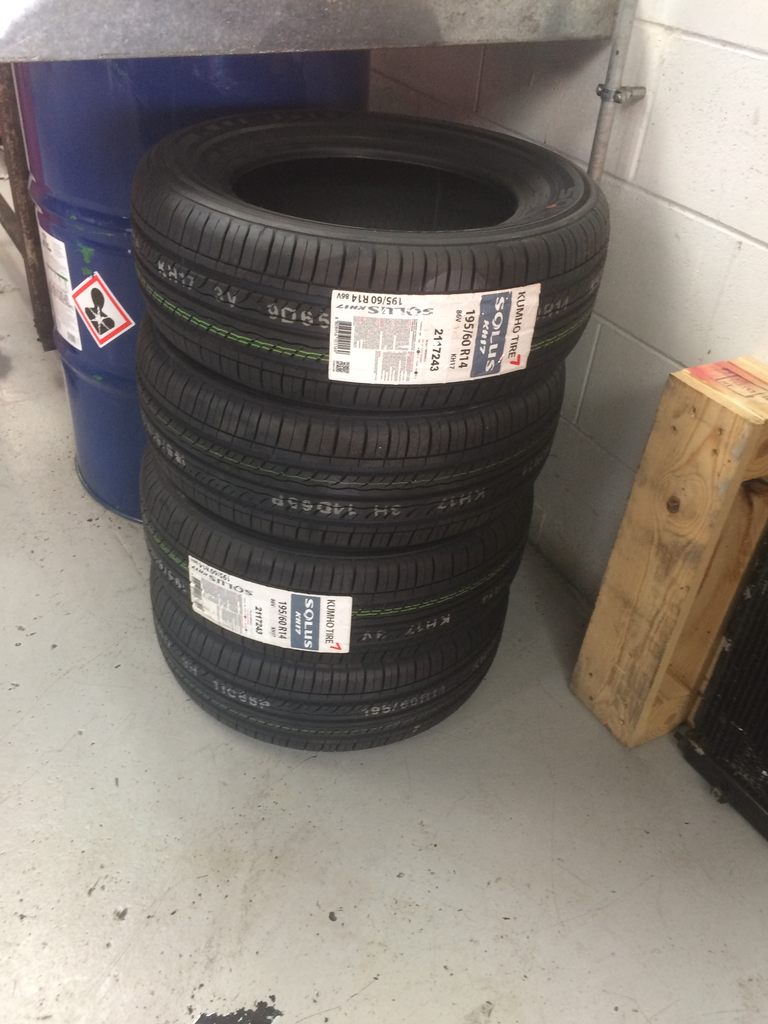
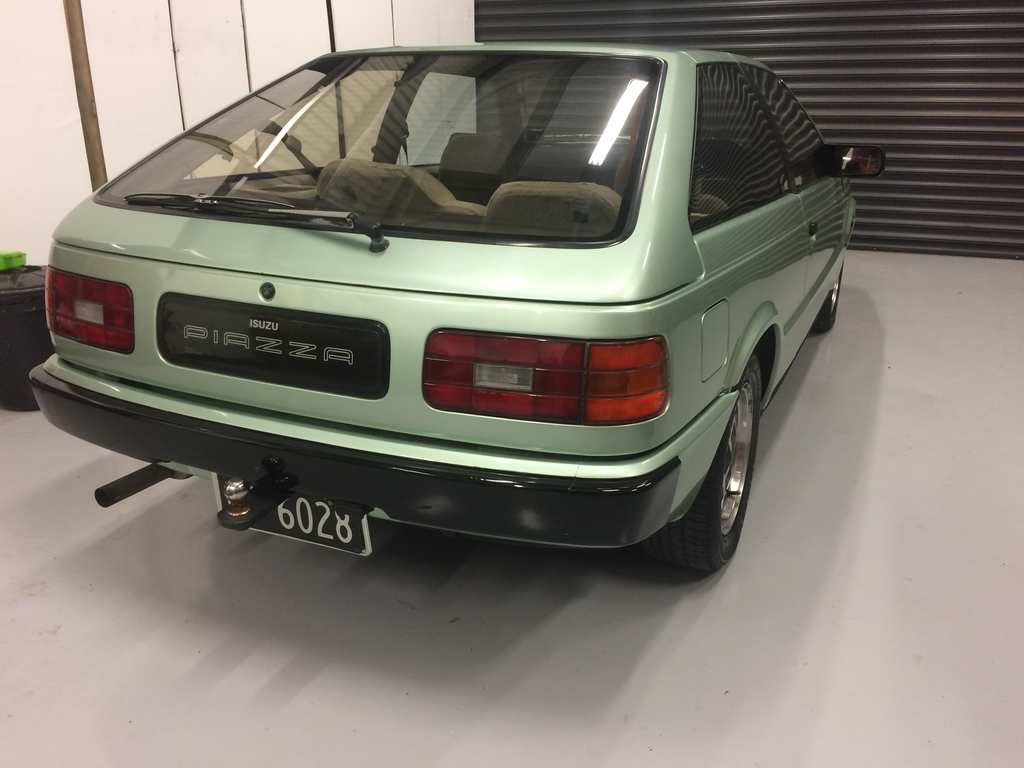
soo with the exhaust and rust done the next thing on the job was the tyres which started with 4 new kumho's got some mad camber going on And while i did the tires A magic wof inspection sheet and label appeared on my dash nothing was wrong i guess... so with a wof and rego now she gets used a bit Not just a show pony mayte 1 ton load of topsoil still pulls hard for what it is probably because the trailer is the same year as the car with the same color combo
4 points
-
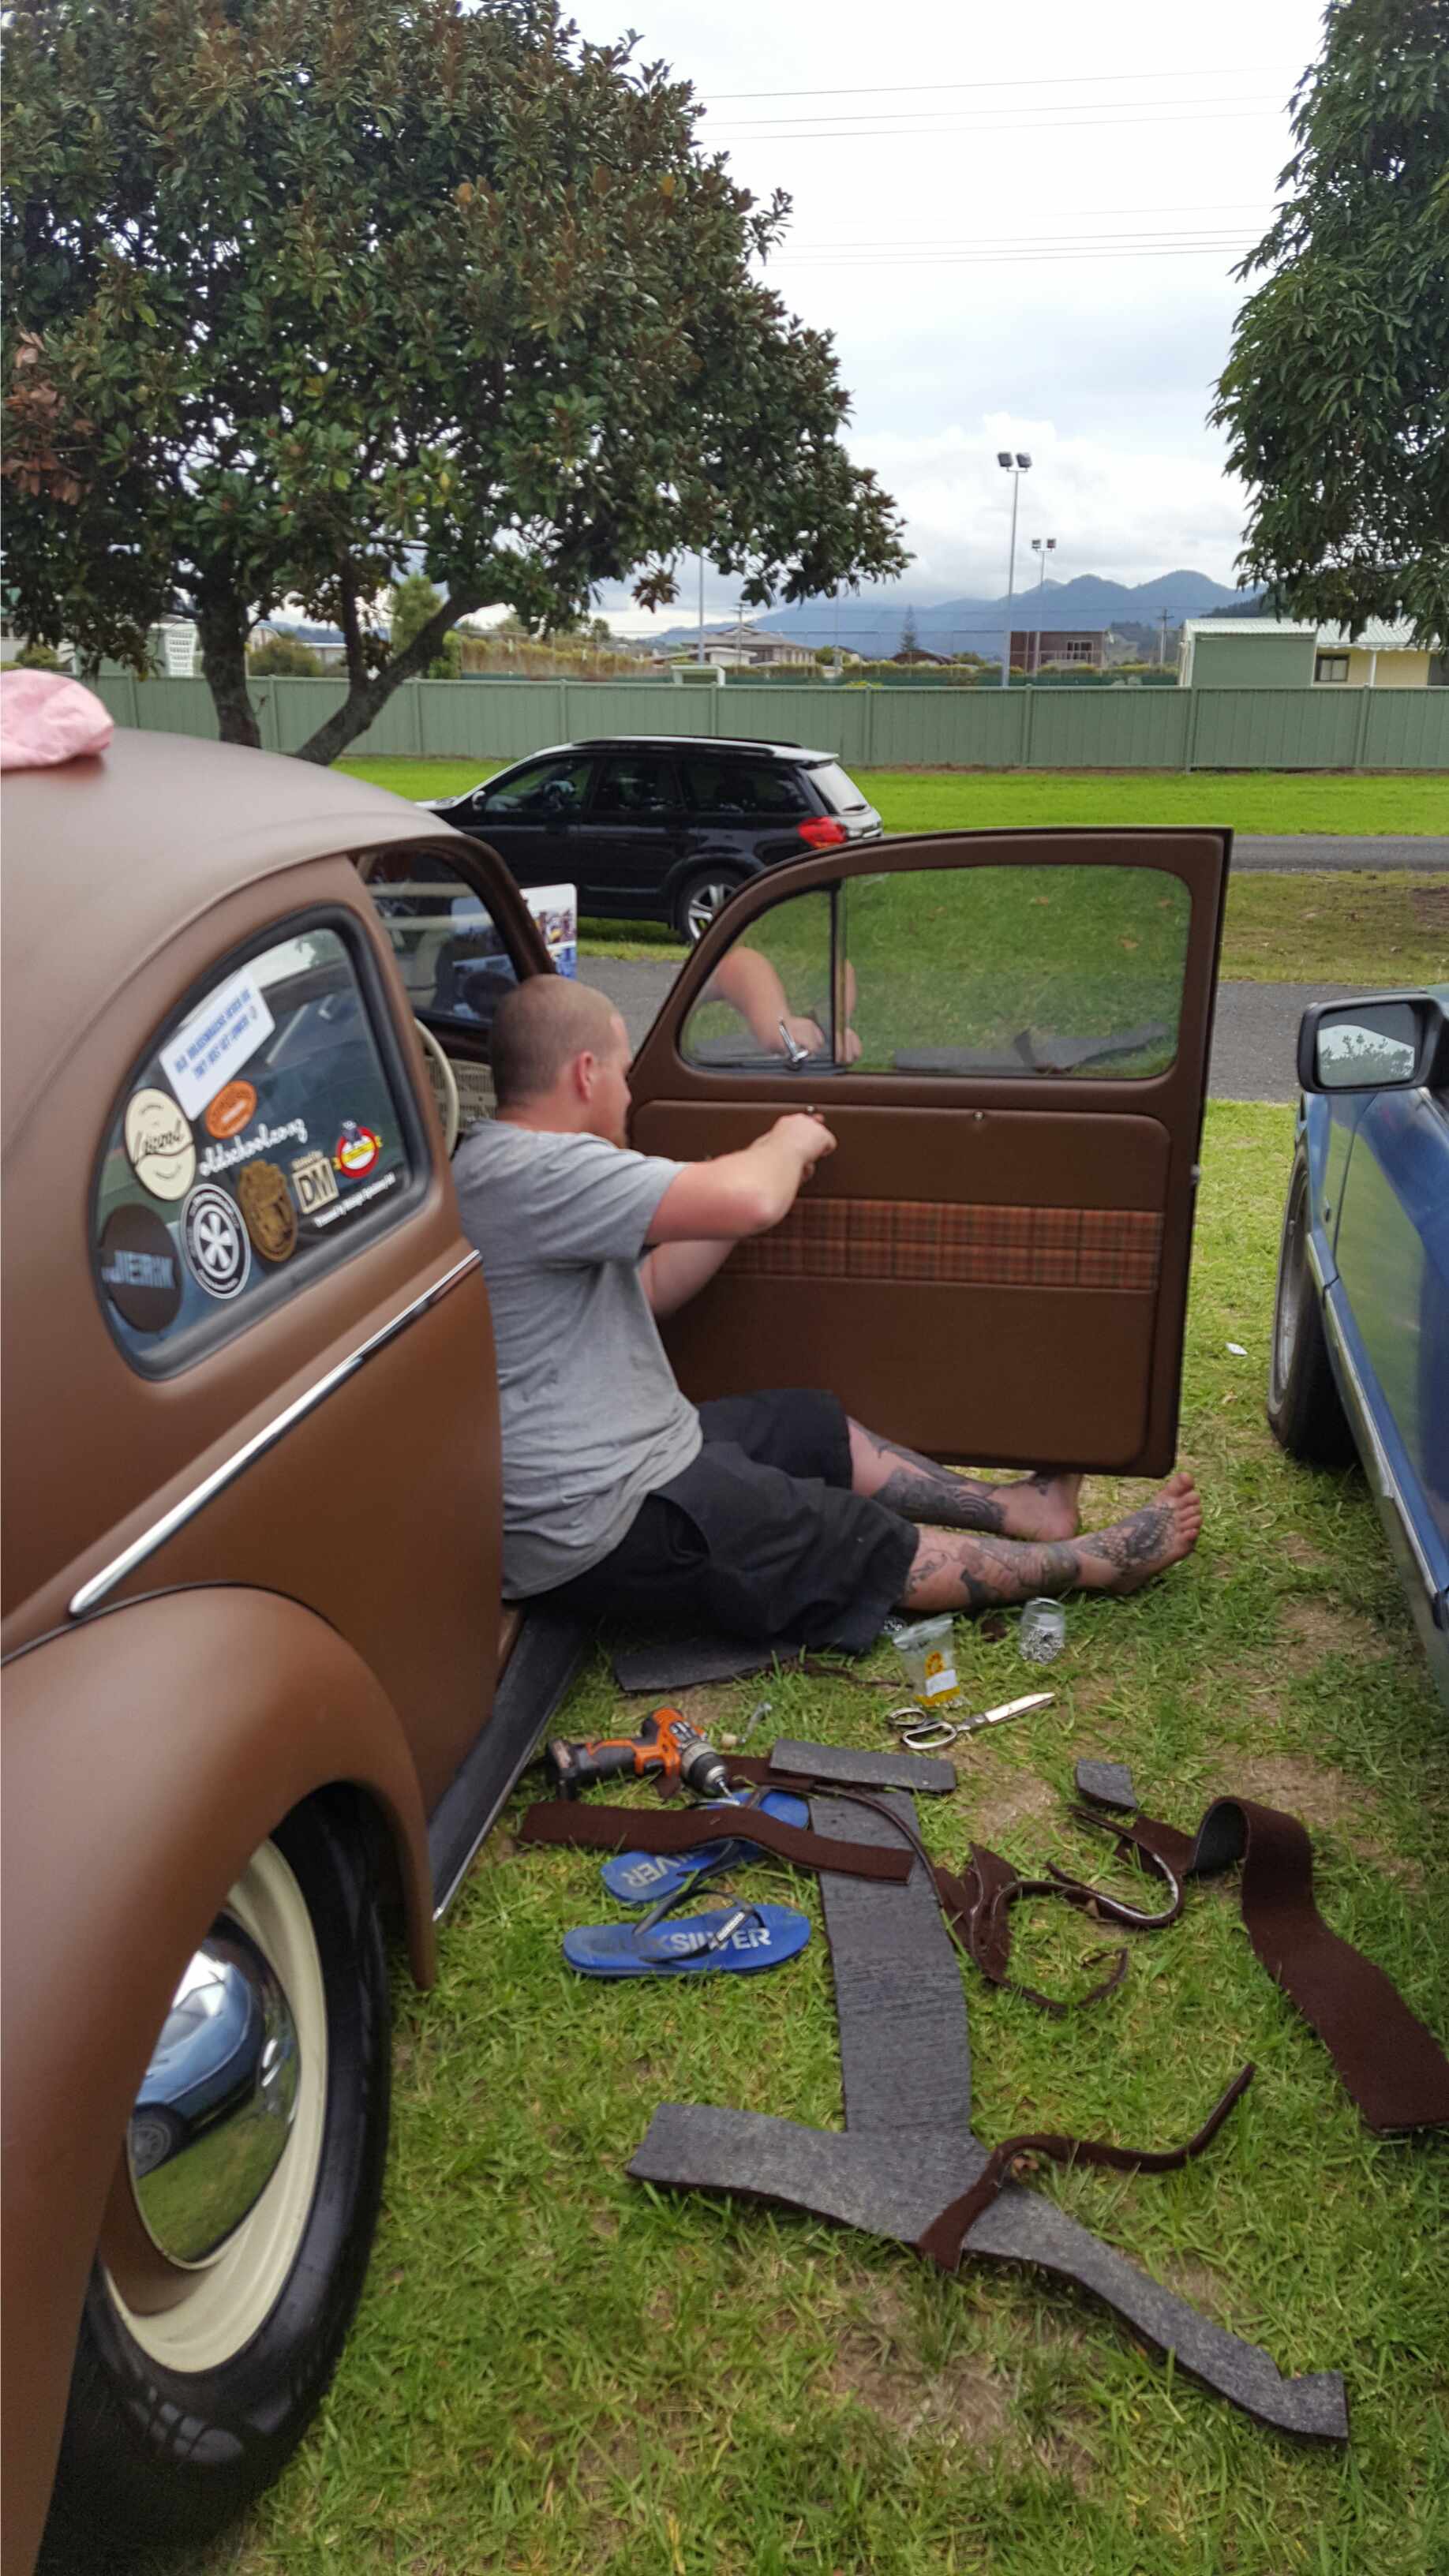
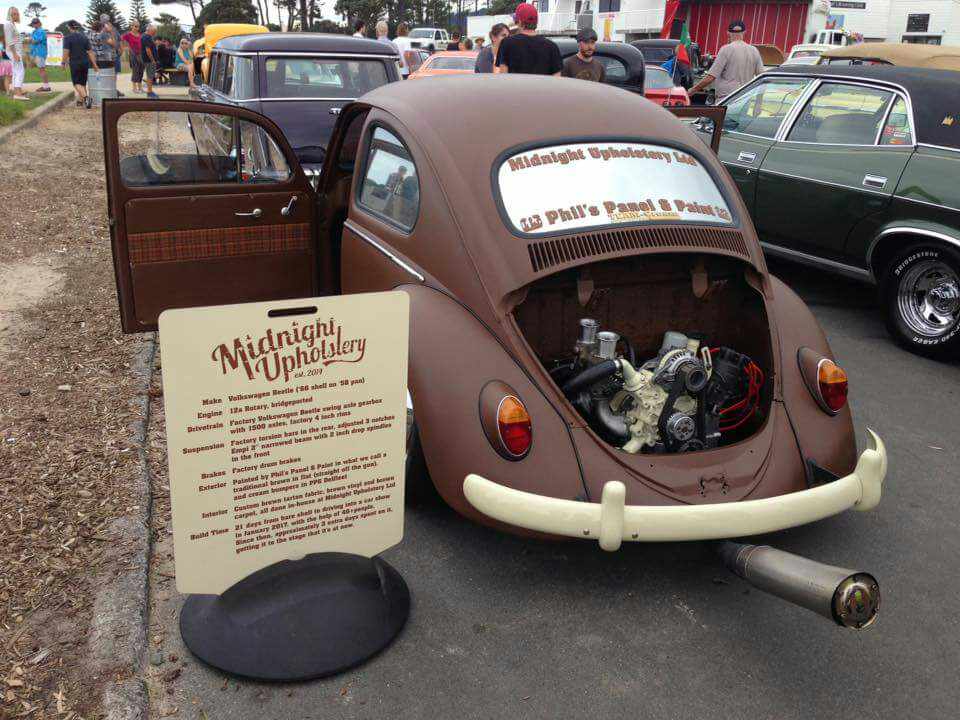
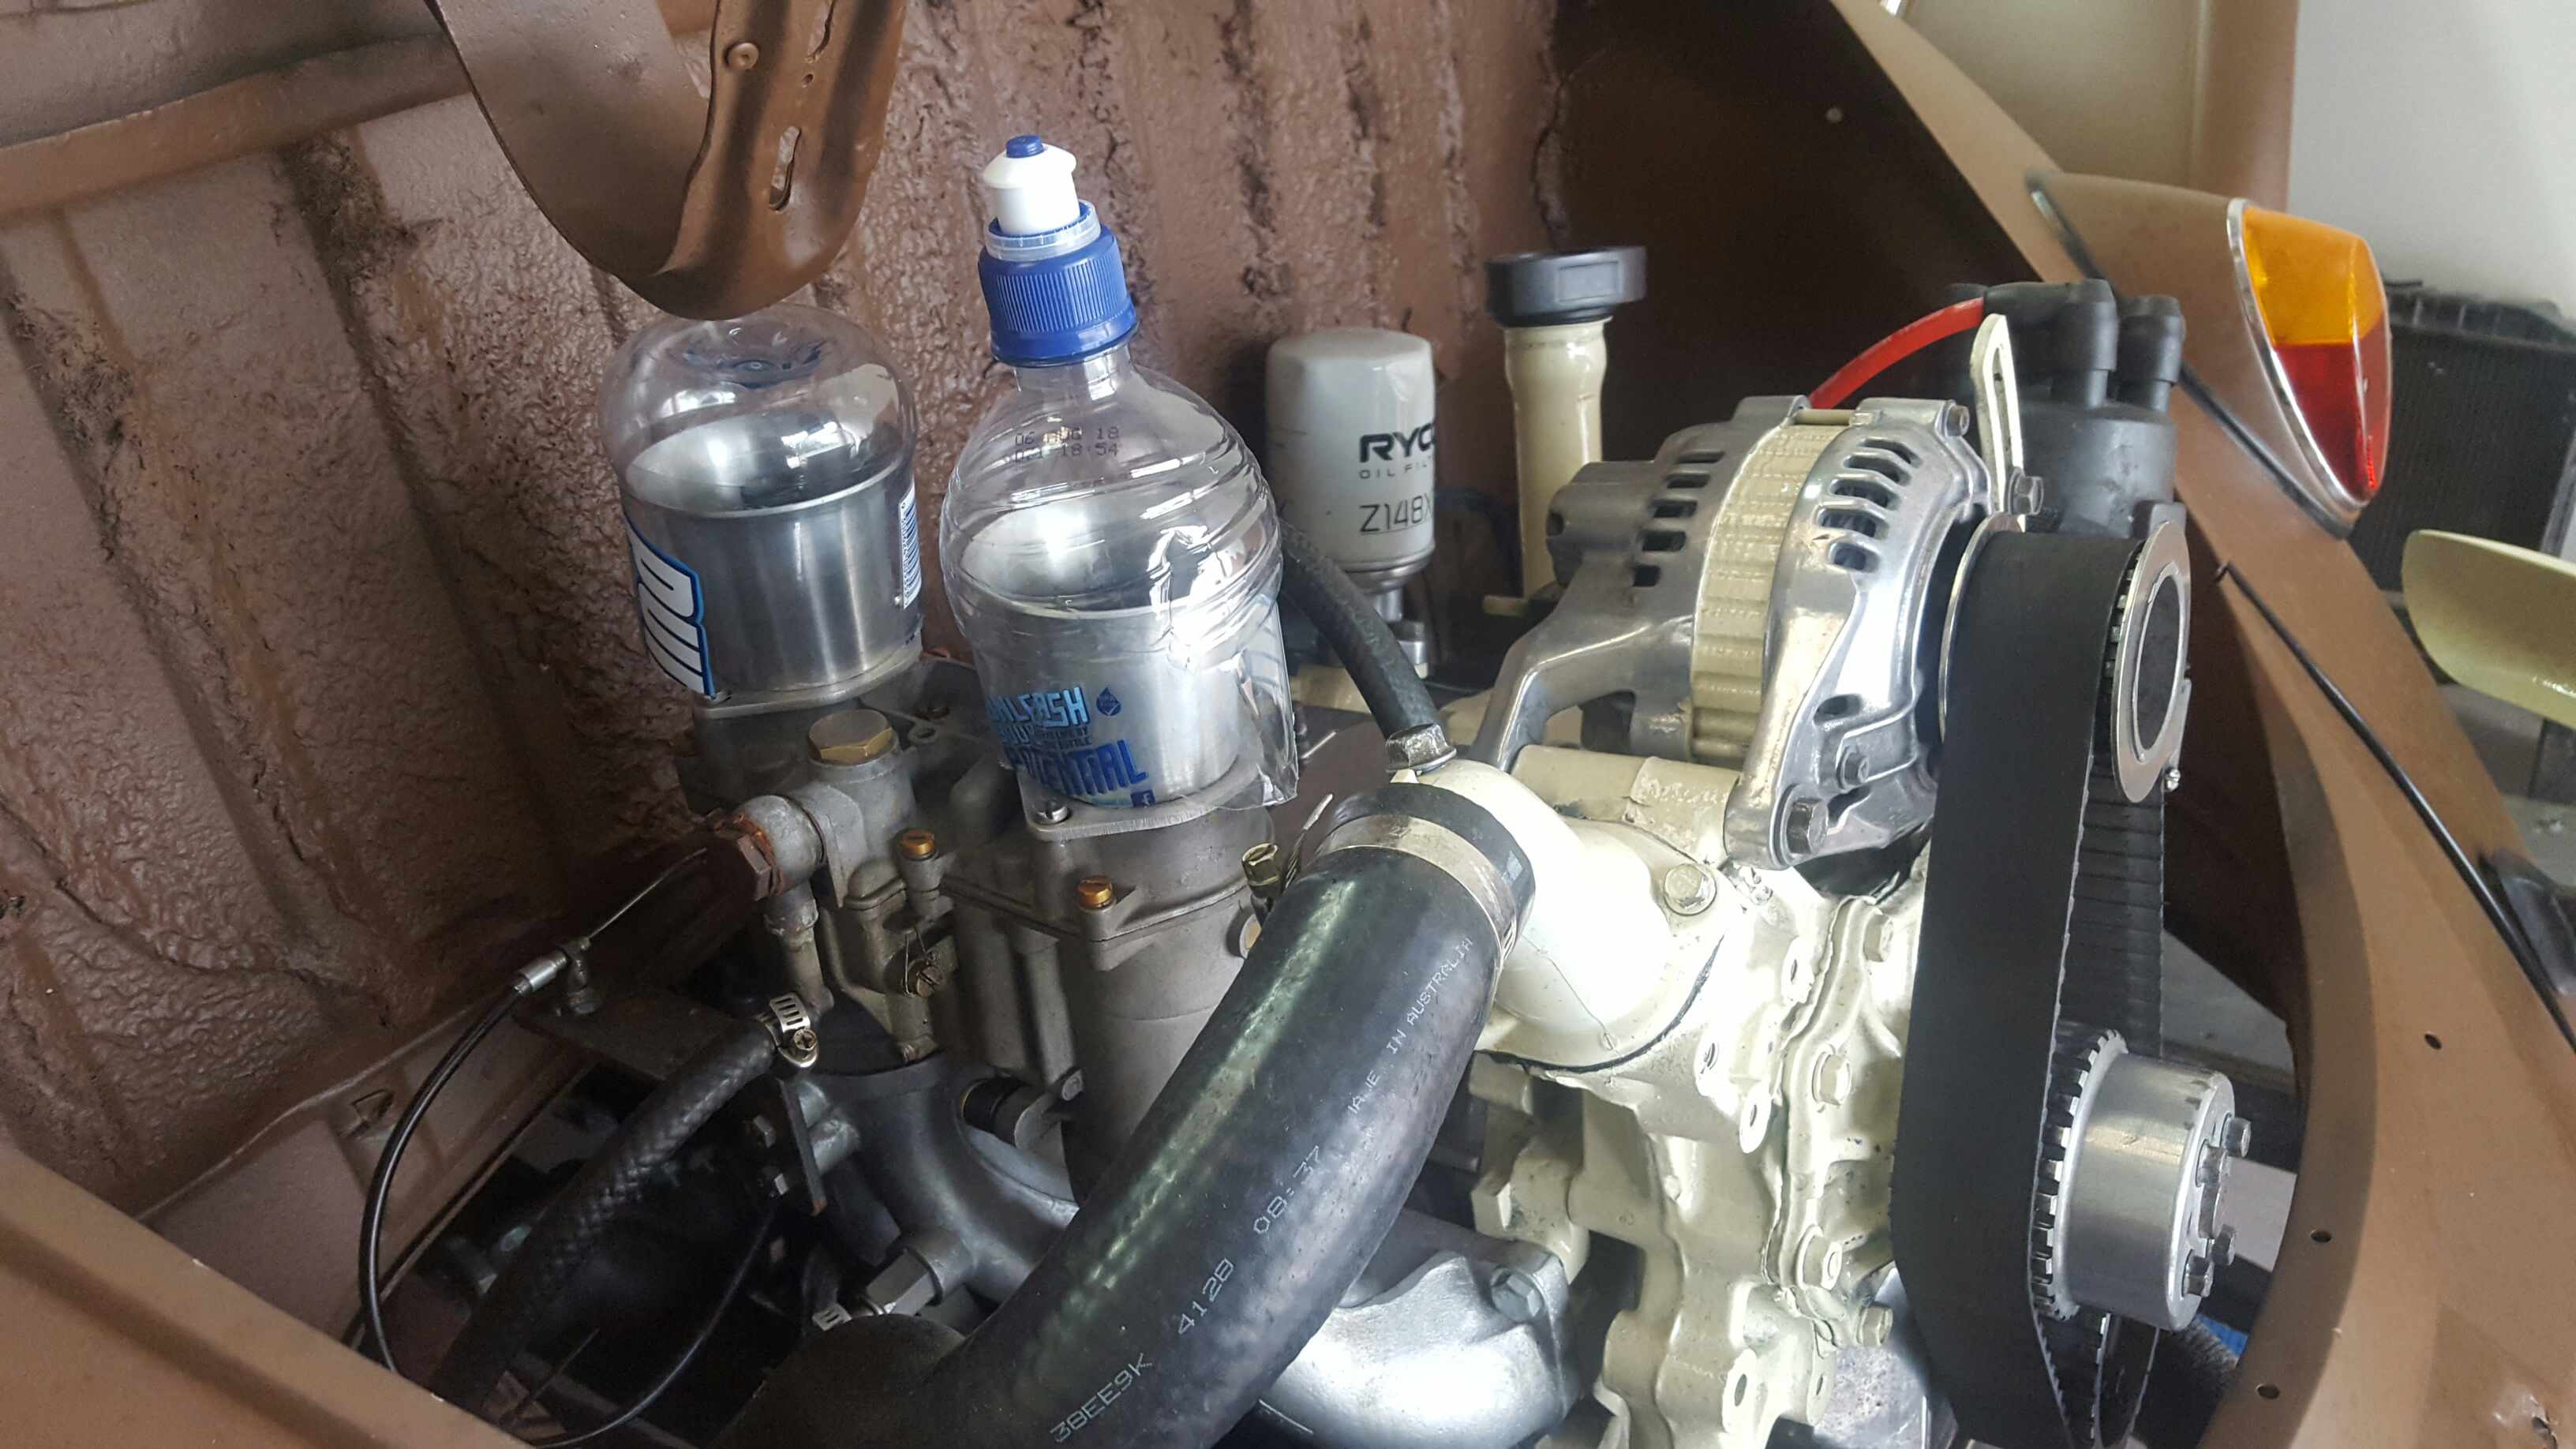
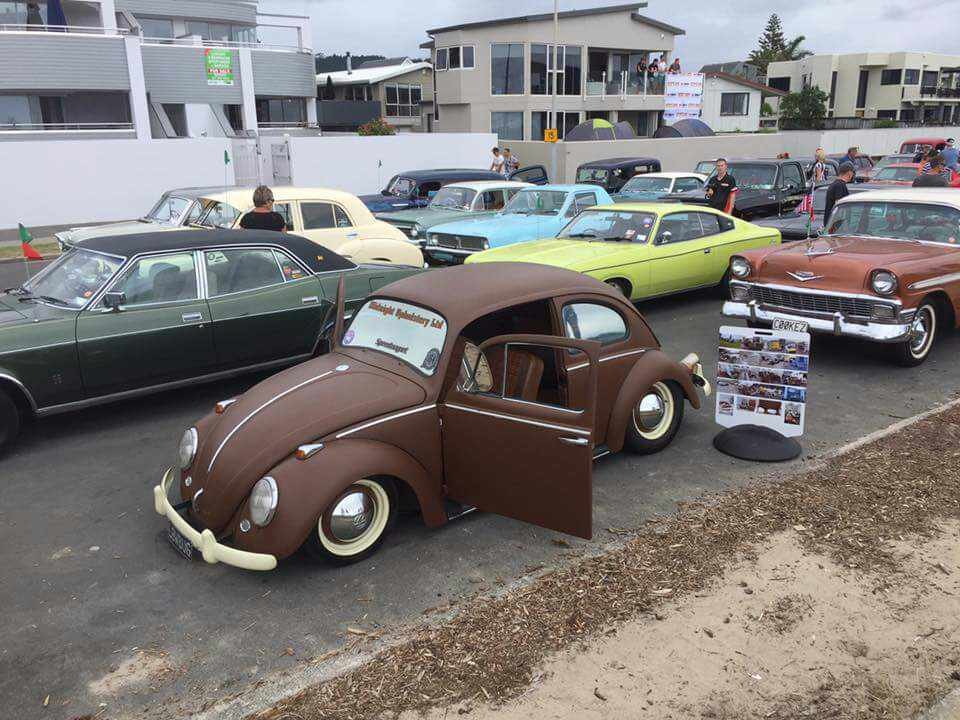
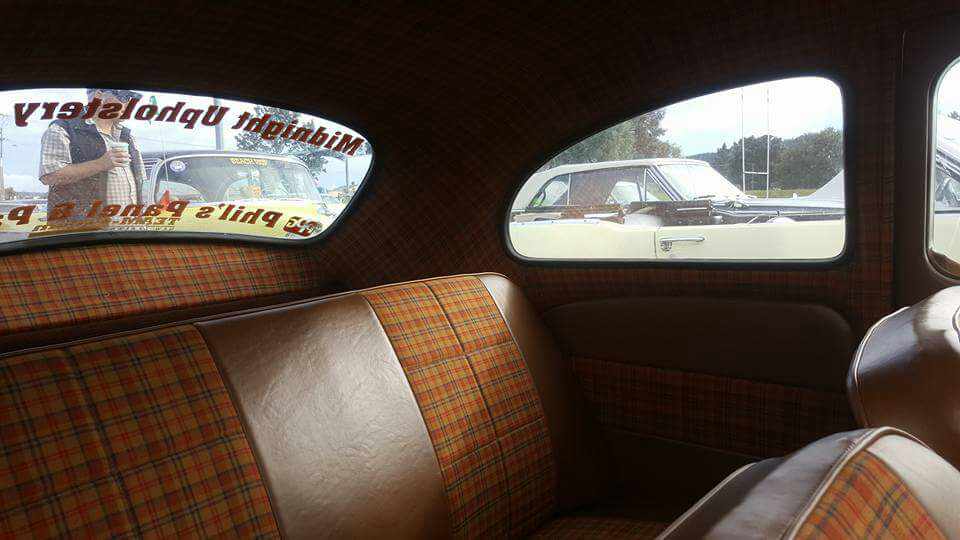
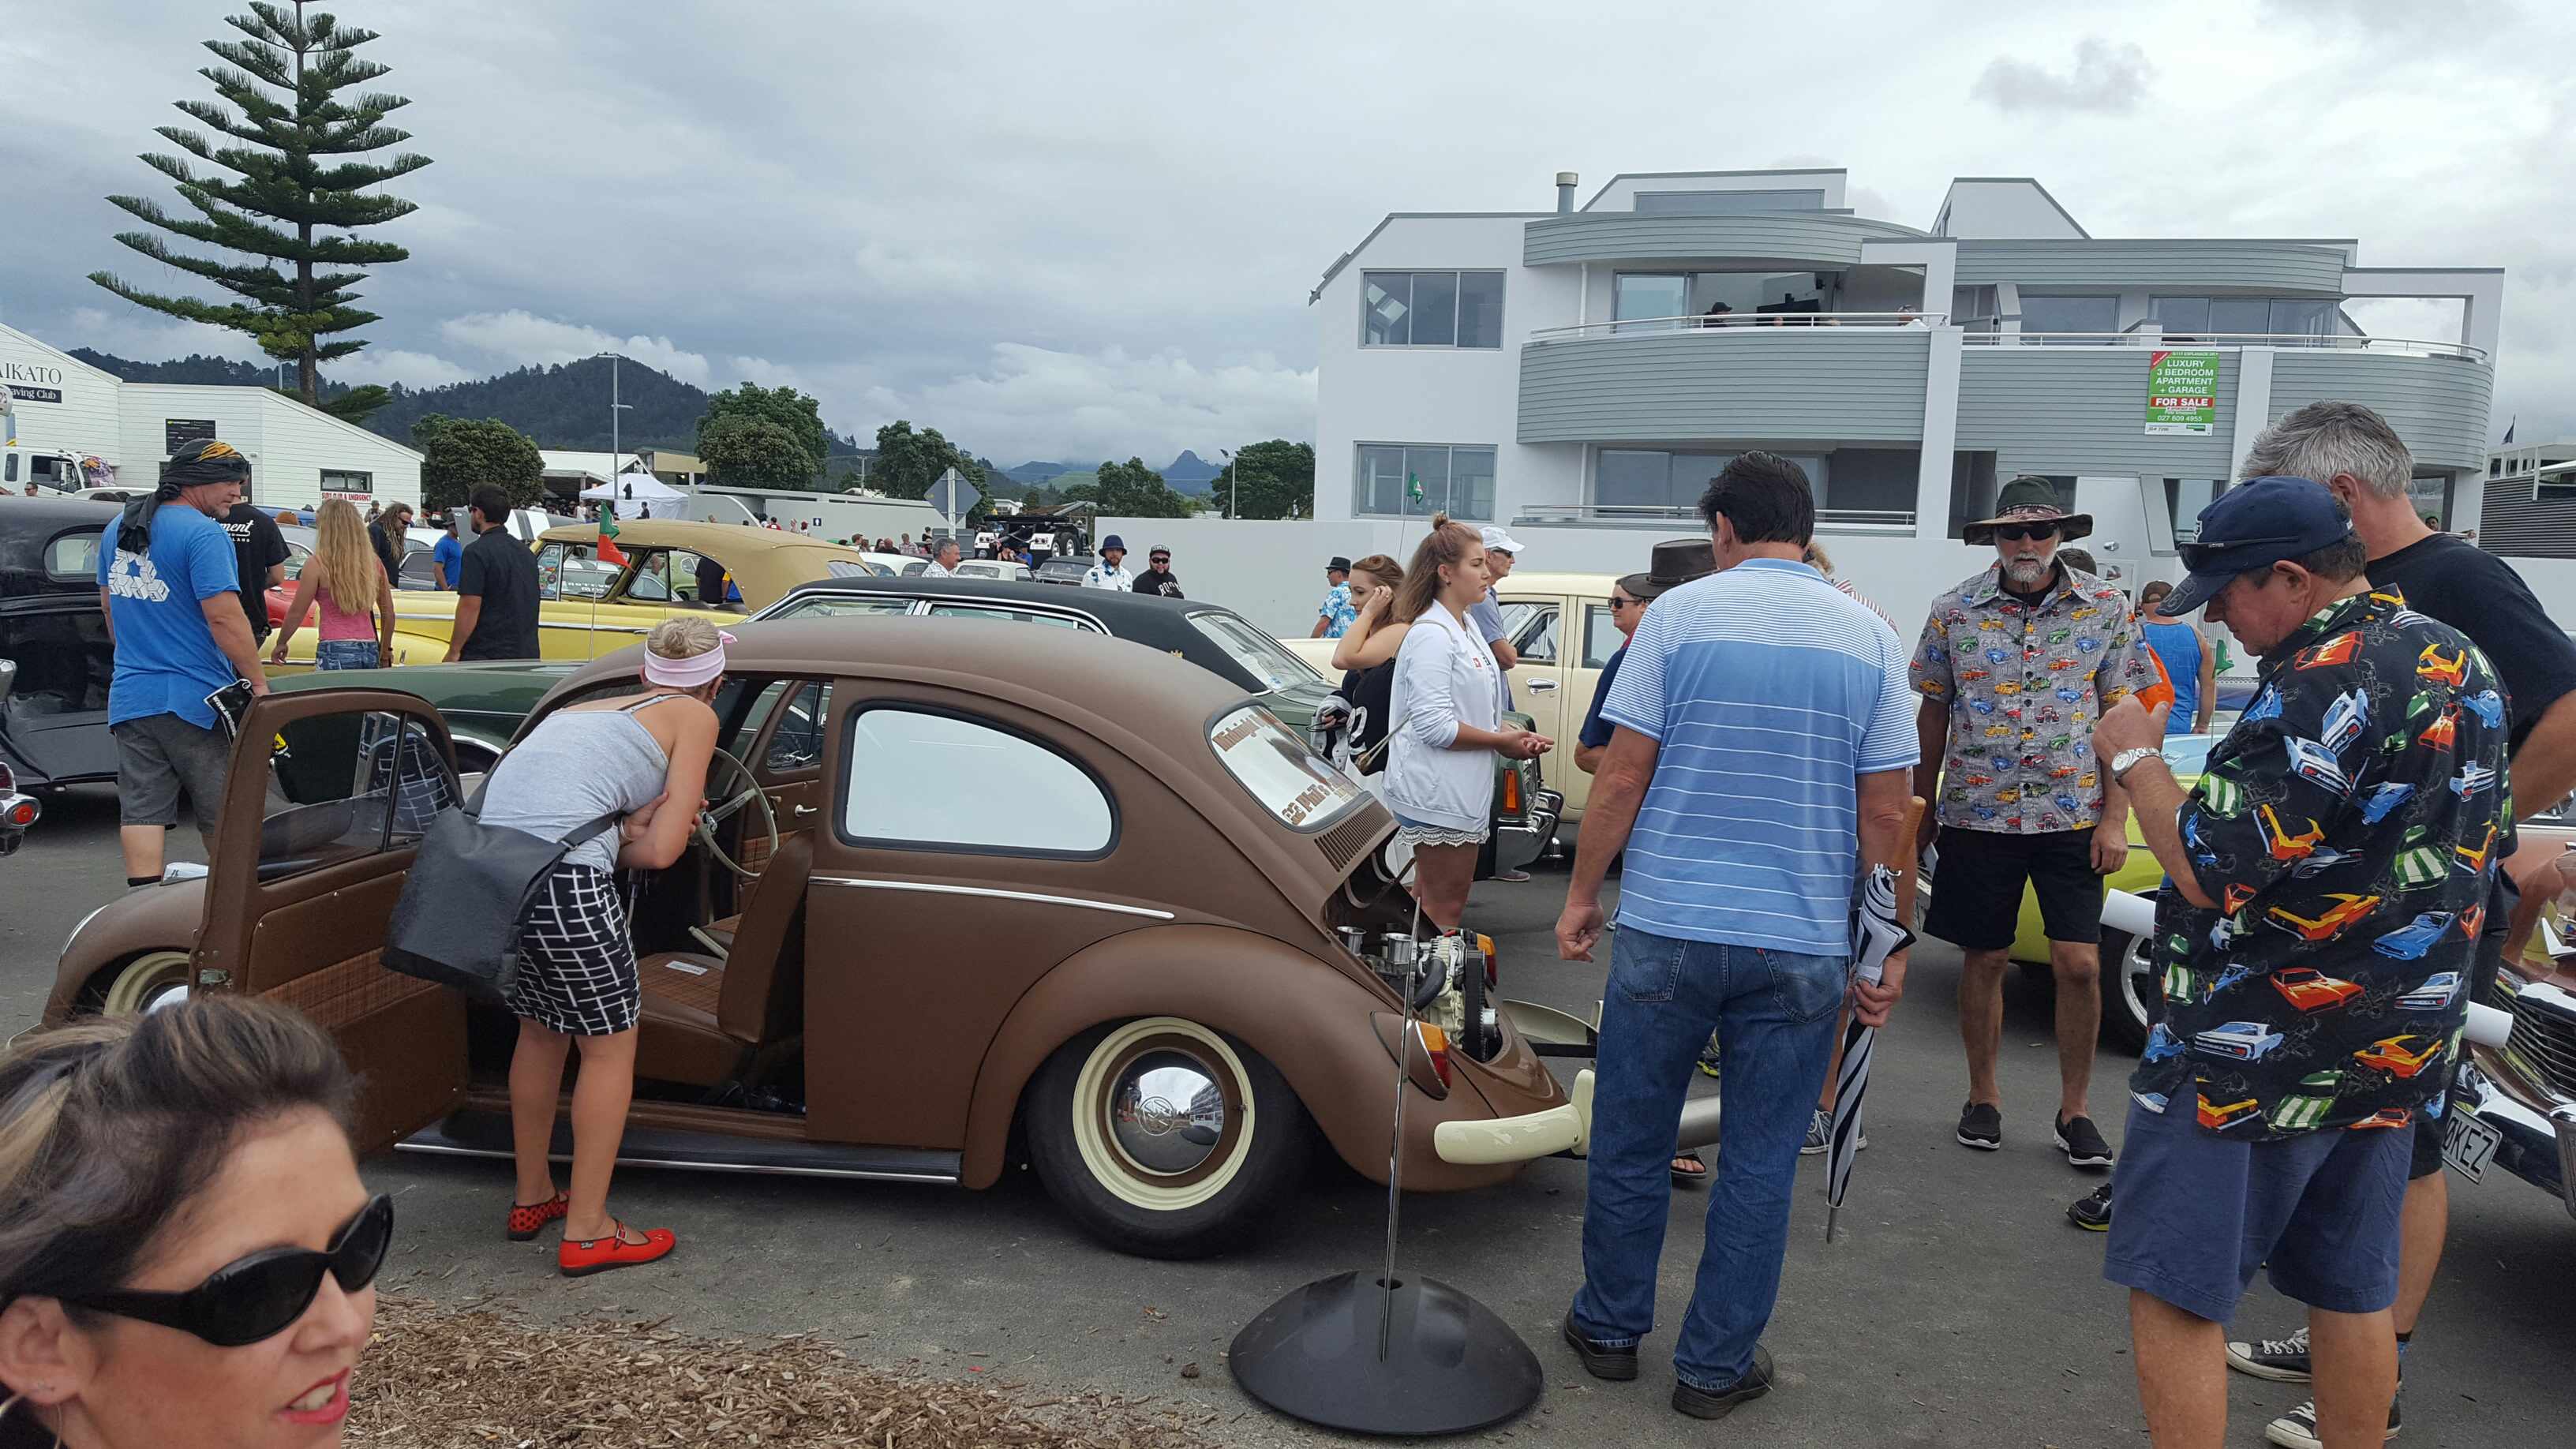
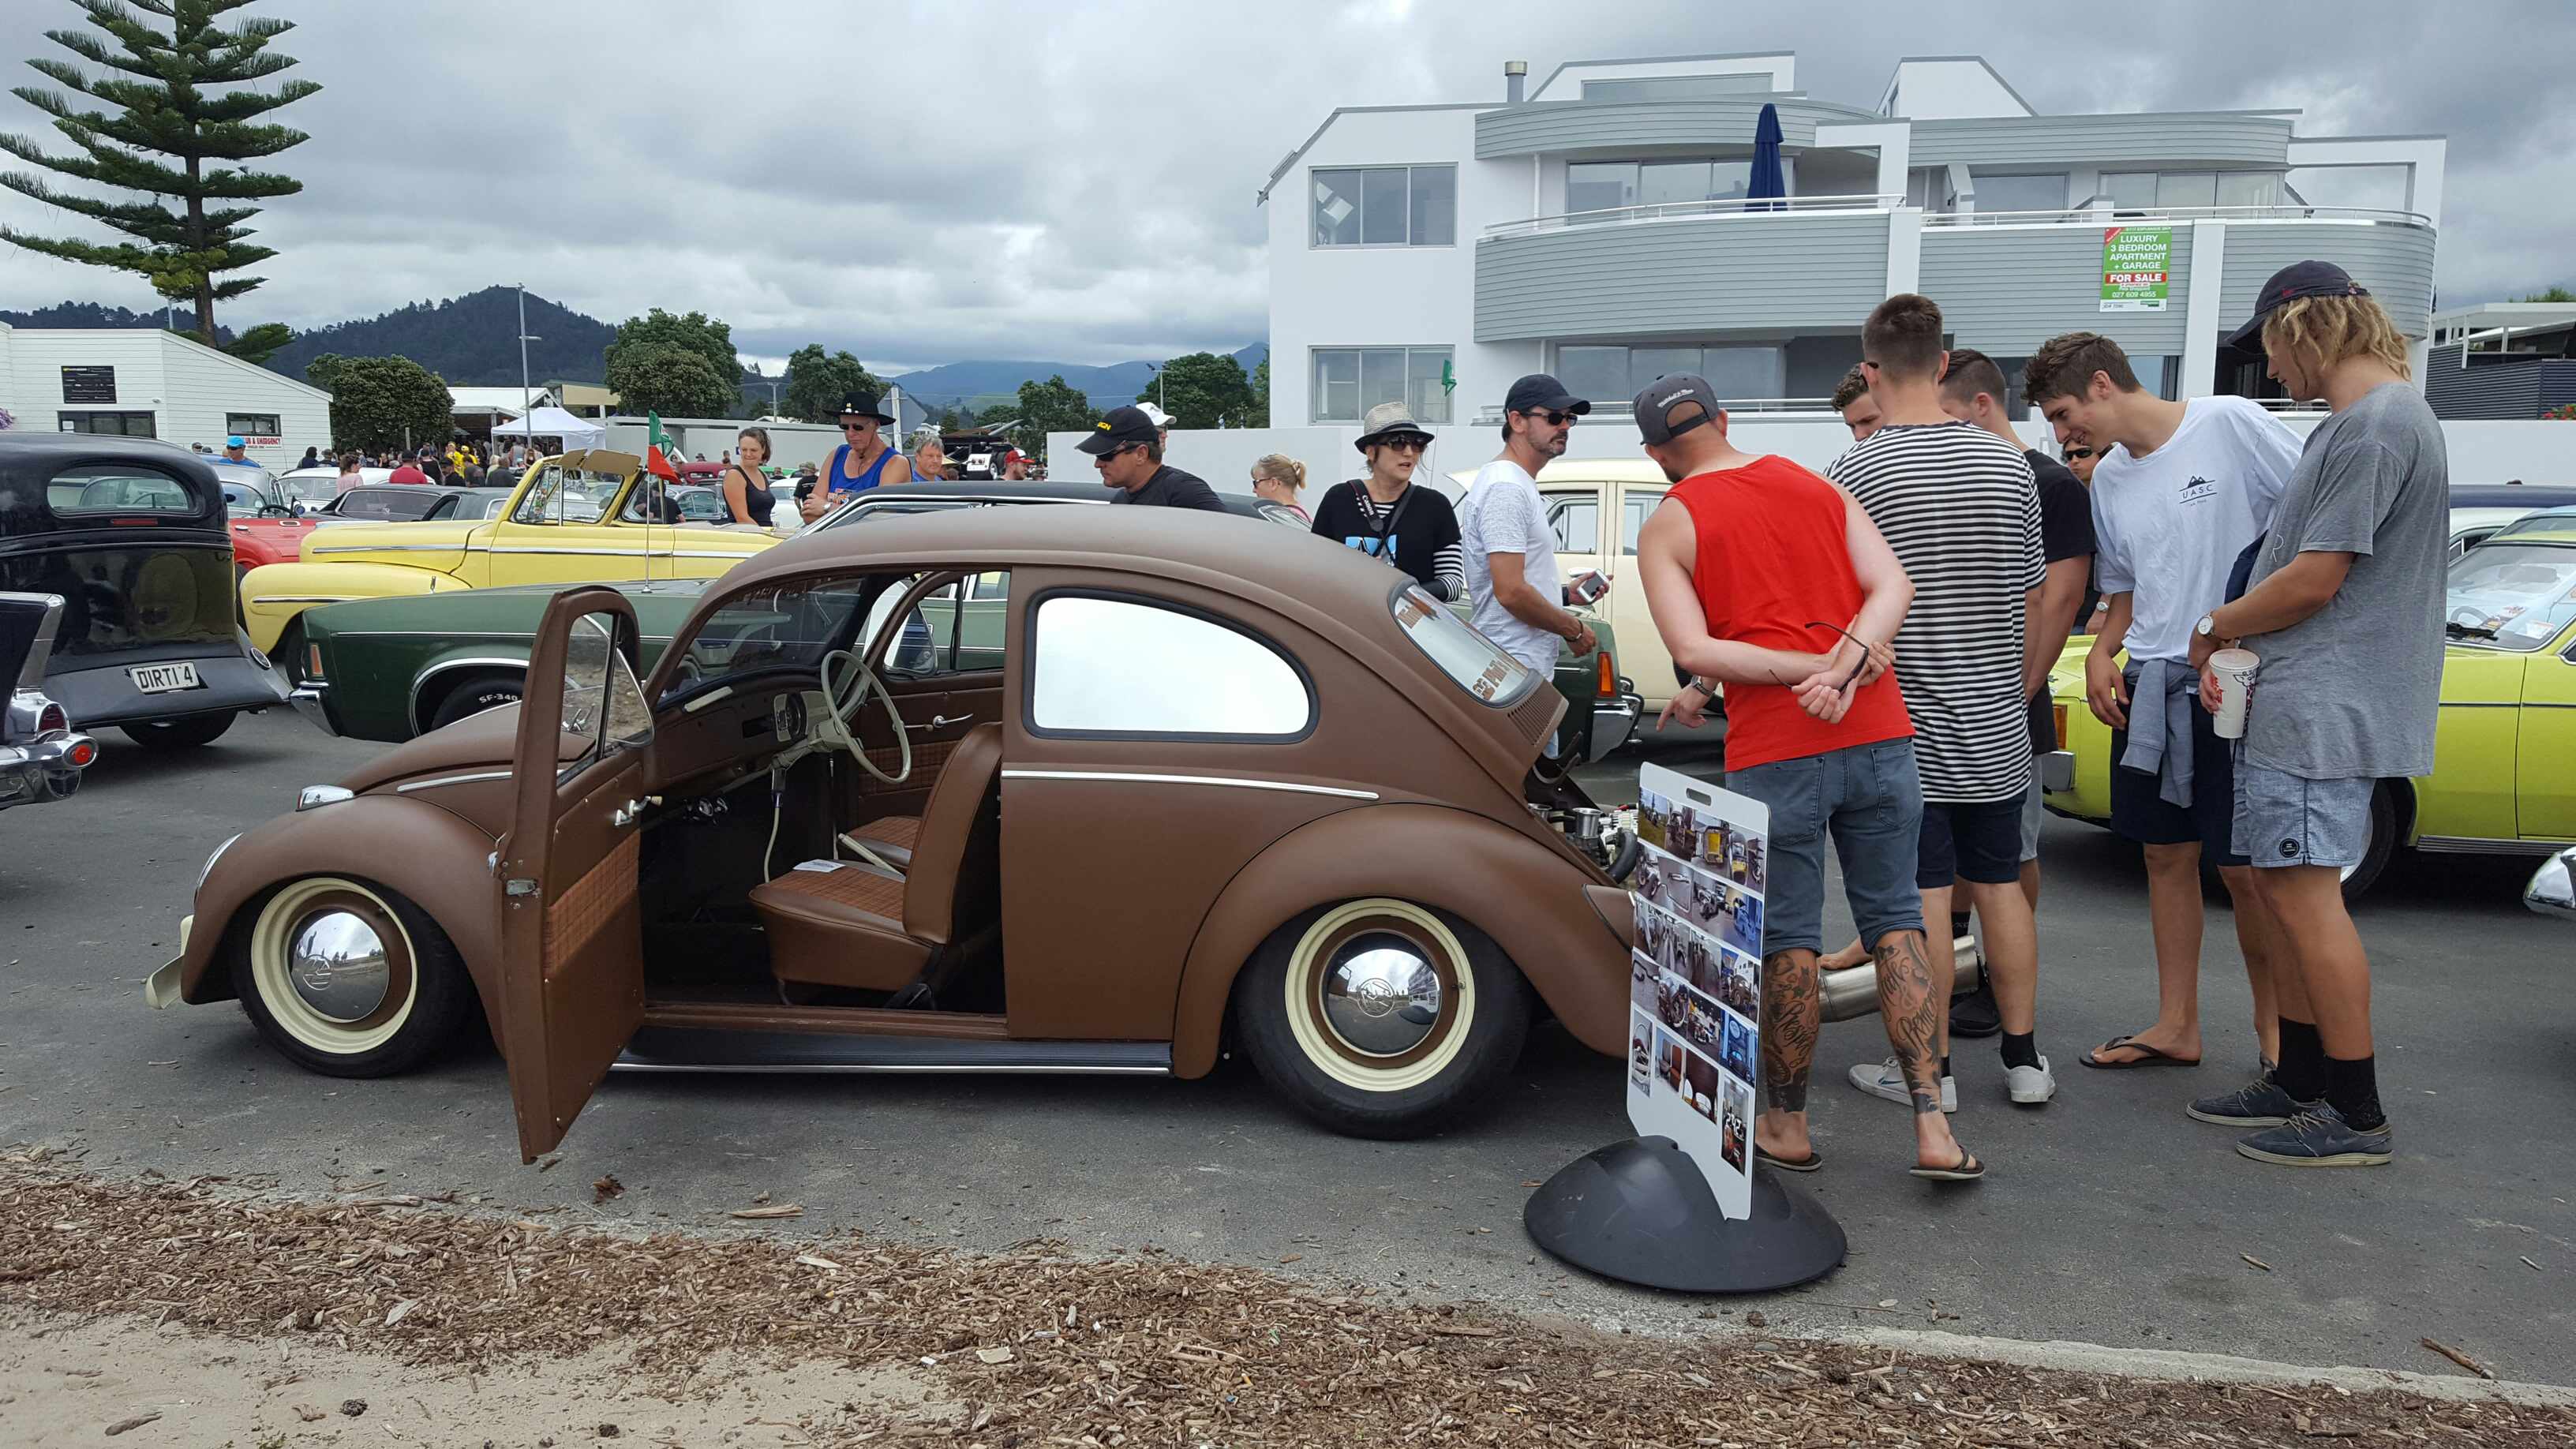
Well we made it to beach hop over the weekend. Started with a trip to tauranga to drop off my 1600 which I sold on Thursday at 930pm..... That's what it's going into. We continued on to whangamata. Made it there at 130am in the end. Fell into bed and was up the next day 1st thing to try get this vw running and make sure we didn't have any issues..... well turned out the radiator was just pressuring and spitting fluid everywhere from word go. So an air lock???? Bled the system a couple of times. Nope still and air lock. At this stage Sean (@oftensideways) was over giving me a hand and we decided we needed to put a bleed nipple in the top housing on the engine. Of we went to see gadget from import x. R100 off old school. We used a drill and Tap from him and got a bolt. Which was handy. Turned out I think the engine had no water in it at all. About 4 letters of water later it was fill to the brim and I was brapping around the block no problems at all. Continued to then finish off my upholstery Yay time to drink. Saturday rolled around and I was up at 8am driving the car threw town to get to the car park. Giving it a good strop and letting the thing Rev it's guts. This was fun. No loud v8s around me. Got into the line quite early which was good. Brent at doozi made me a sign board which I put info on and some photos of how the build went. I had a mate A Aron and his wife come for a ride threw the main parade. Was so cool driving it thew. We had heaps of people ducking down to see threw the front window as I drove passed them. I also packed 2 Bags of ice right next to the radiator trying to prevent it over heating. Did a bloody great job that. Just as we got to our park the over flow just started to spit out. From there I set up camp till about 6. I had a consistent flow of people looking at it and talking to me about it It had a heaps of attention which was cool. Best beach hop so far. All in all it was so good. Also here is a top tip to cover your trumpets if it starts to rain like it did on Saturday while I was by the car. Another shot of it for why not Mate Chris runs the security over there and diverted me to let my car call down but doing that I Gave it a foot full and he really liked the sound, and here he is putting a cone up his bum to impersonate me apparently.
4 points
-
I often spend time building stuff, i find it quite relaxing and gets me out side. I started building shit years ago with the odd subwoofer enclosure to full boot installs, now i own a home so its cabinets, fences and my most recent - an Activity Table for the kids. I went a bit overboard and made this waaaaay more complicated than it could have been. I started in SketchUp where i went through a few design iterations and eventually settled on this; I then tested how it would go together by printing a prototype with a 3D Printer. I was glad i did this as there were a few things that needed changing - mainly i added hidden legs to support the table more. All the sizes & angles came from the SketchUp model and turned out pretty well. I did need to use a little bog because my cutting tolerances were not that precise. you can see the hidden leg supports if you look closely. I let the kids chose the colours for the table, was pretty fun as i just sat them in front of the computer and tried different colours in SketchUp until they were happy. Then off to bunnings for a few test pots. I think it turned out really well, kids love it and use it every day - its bloody heavy though and i dont think i will build something that retarded again.3 points
-
Shes a pretty big job. Been at the machine shop for a week. 1 more week to go! Casting is looking good. Yet to find any lumps of sand or porosity apparently!3 points
-
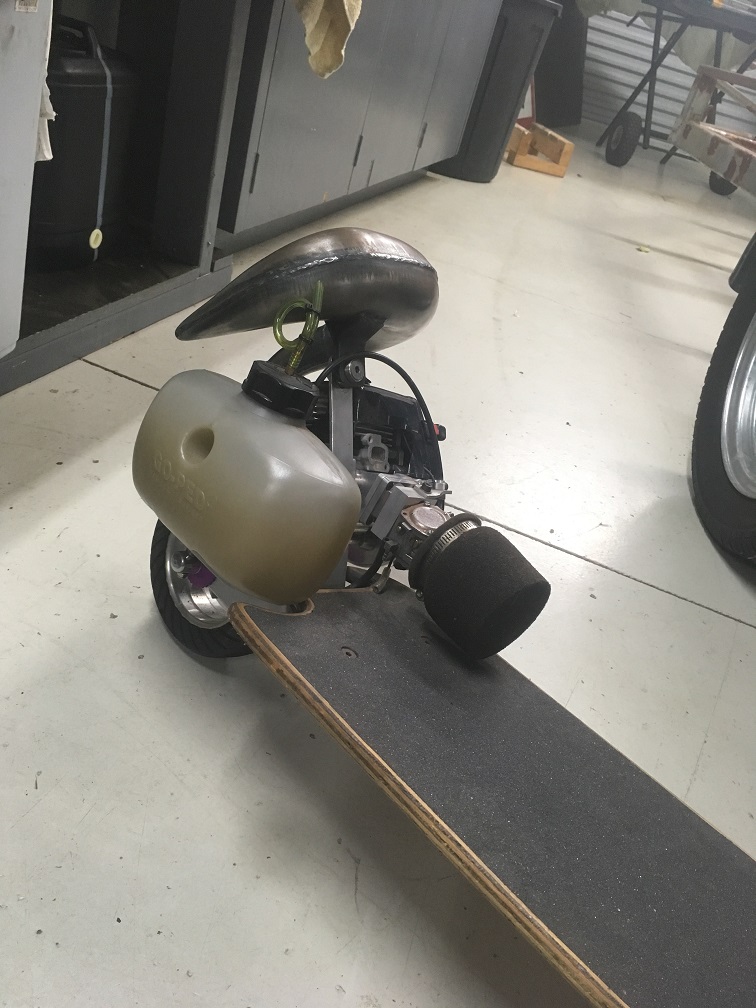
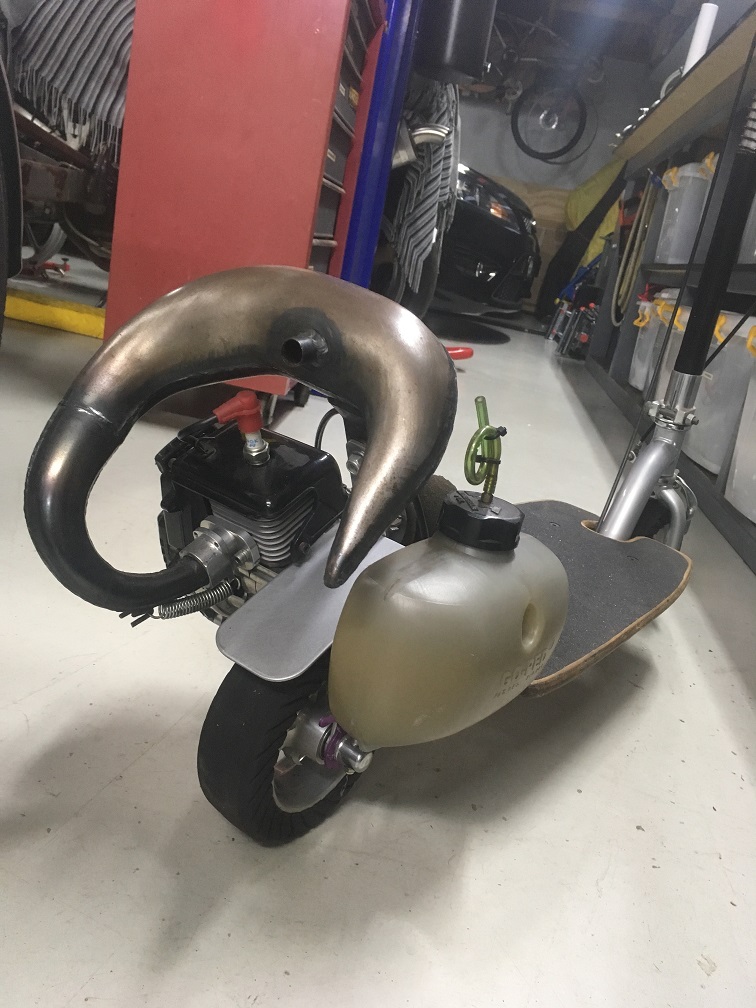
Had some time on my hands today, so I wasted it on doing something pointless. New tank for velobike: Not bad. Best use for one of those disposable gas cylinders...no use for welding as they only last 5 minutes! Only made that mistake twice2 points
-
http://www.trademe.co.nz/Browse/Listing.aspx?id=12897528902 points
-
I may join in, will discuss with the boss. When we did our run around to Maraetai a while back I noticed that we were short on aging bogans in old Commodores so I might look to remedy that situation this time round.2 points
-
Damn its looking good. Piazzas... I always used to see them only as parts bins for Chevettes and sadly that's the way many have gone. Now I see yours and think 'wow.. I'd like one of them' With a V6..2 points
-
This wagon was super amazing.2 points
-
The factory ECU's are shit and the were sooooooooooooooooooooo bad at flooding (from new) they had to make serious changes for the S5. I approve of the mega squirt monster J-Port turbo idea.2 points
-
Did the rear brakes and worked in a battery tray to mount the two group 24 house batteries to the driver side frame rail. Made of .125in plate and 2in angle. Still need to add one more tab to the middle and cut some strap to hold them down and then drill and rivnut the frame.2 points
-
I also am too cheap to spend $8 per pin for the door hinges so machined some high tensile bolts to the right length and diameter and grooved them to take a tiny c-clip. Then heated them up really hot and dipped into waste oil to blacken em. No idea how well this will last or protect from rust but YOLO it was cheap.2 points
-
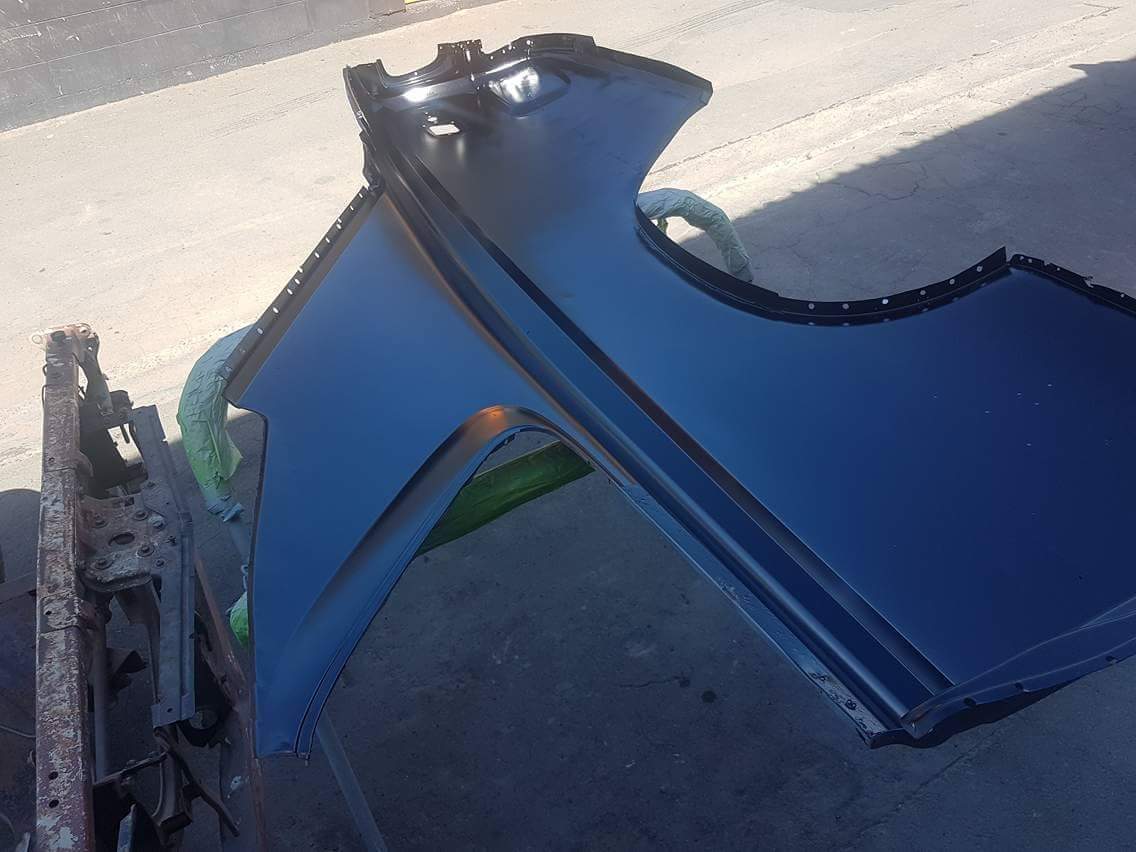
Bit of paint
2 points
-
Almost finished! Bores have cleaned up without any defects. Ports look a fraction off on some of the bores though so hopefully I can cut some valve seats that work! Not going to lie, its quite exciting!2 points
-
Gregs shop is about 47 seconds from SH1* * +/- 2 minutes1 point
-
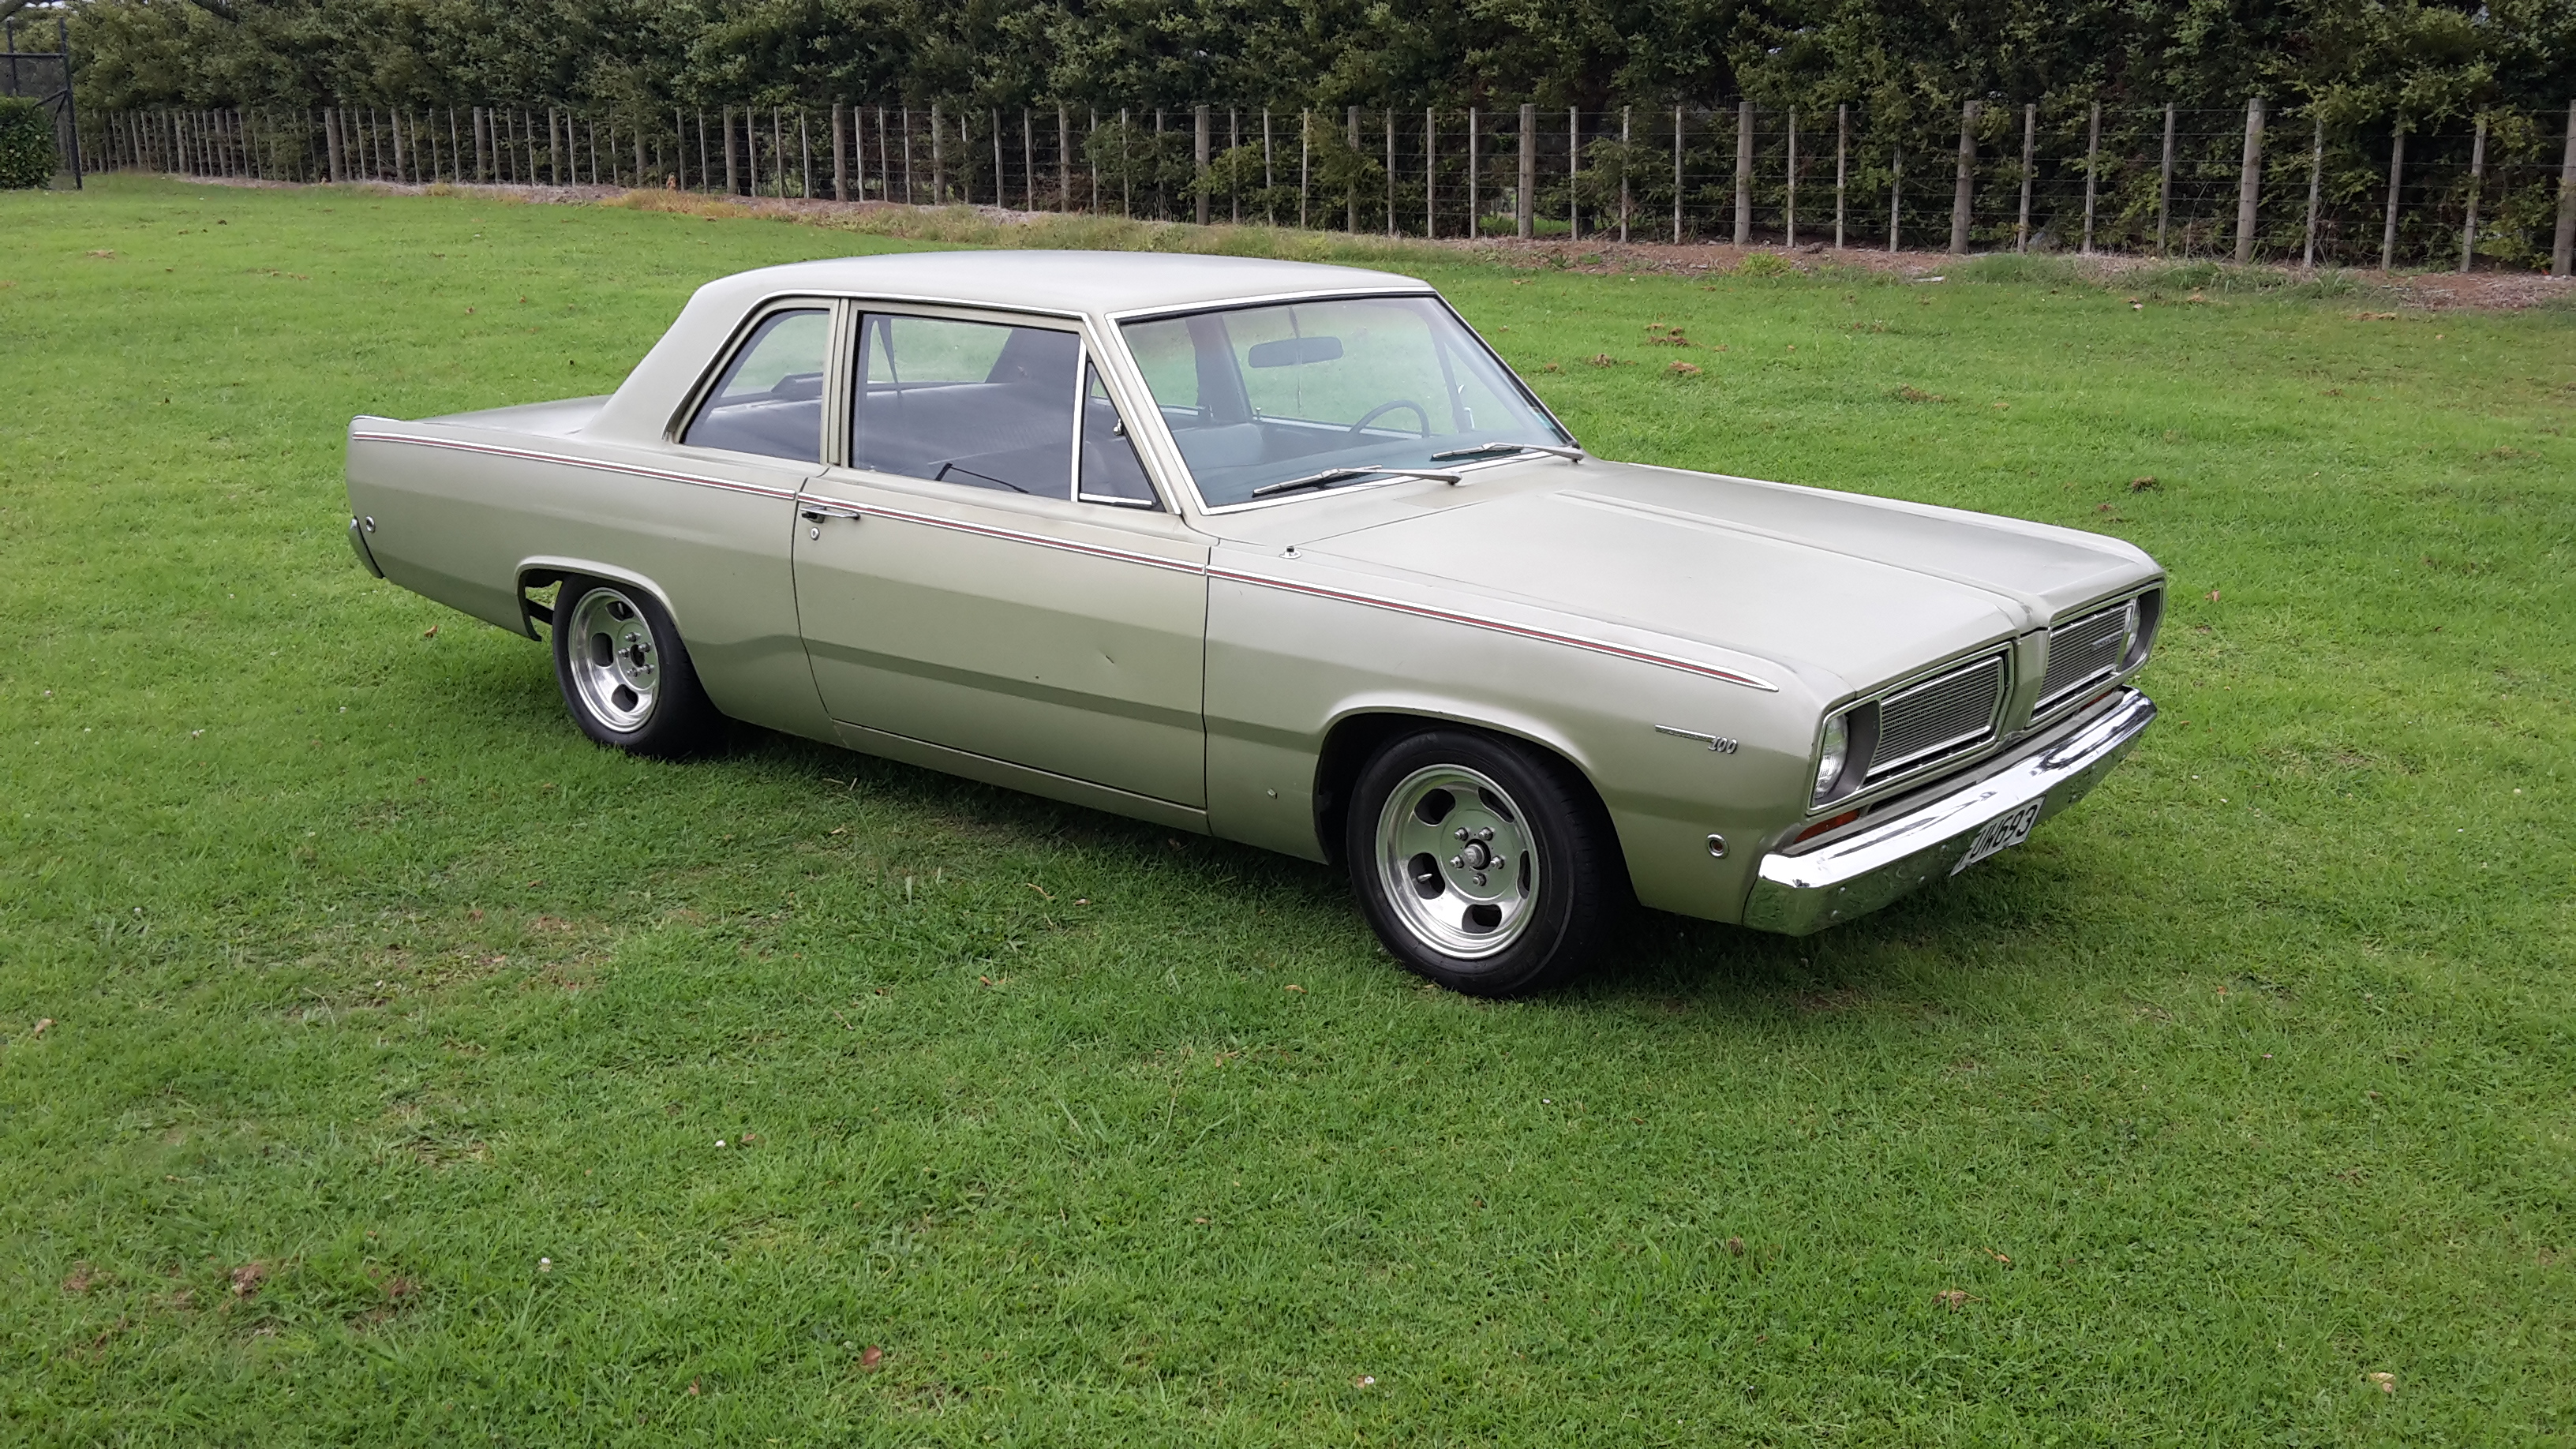
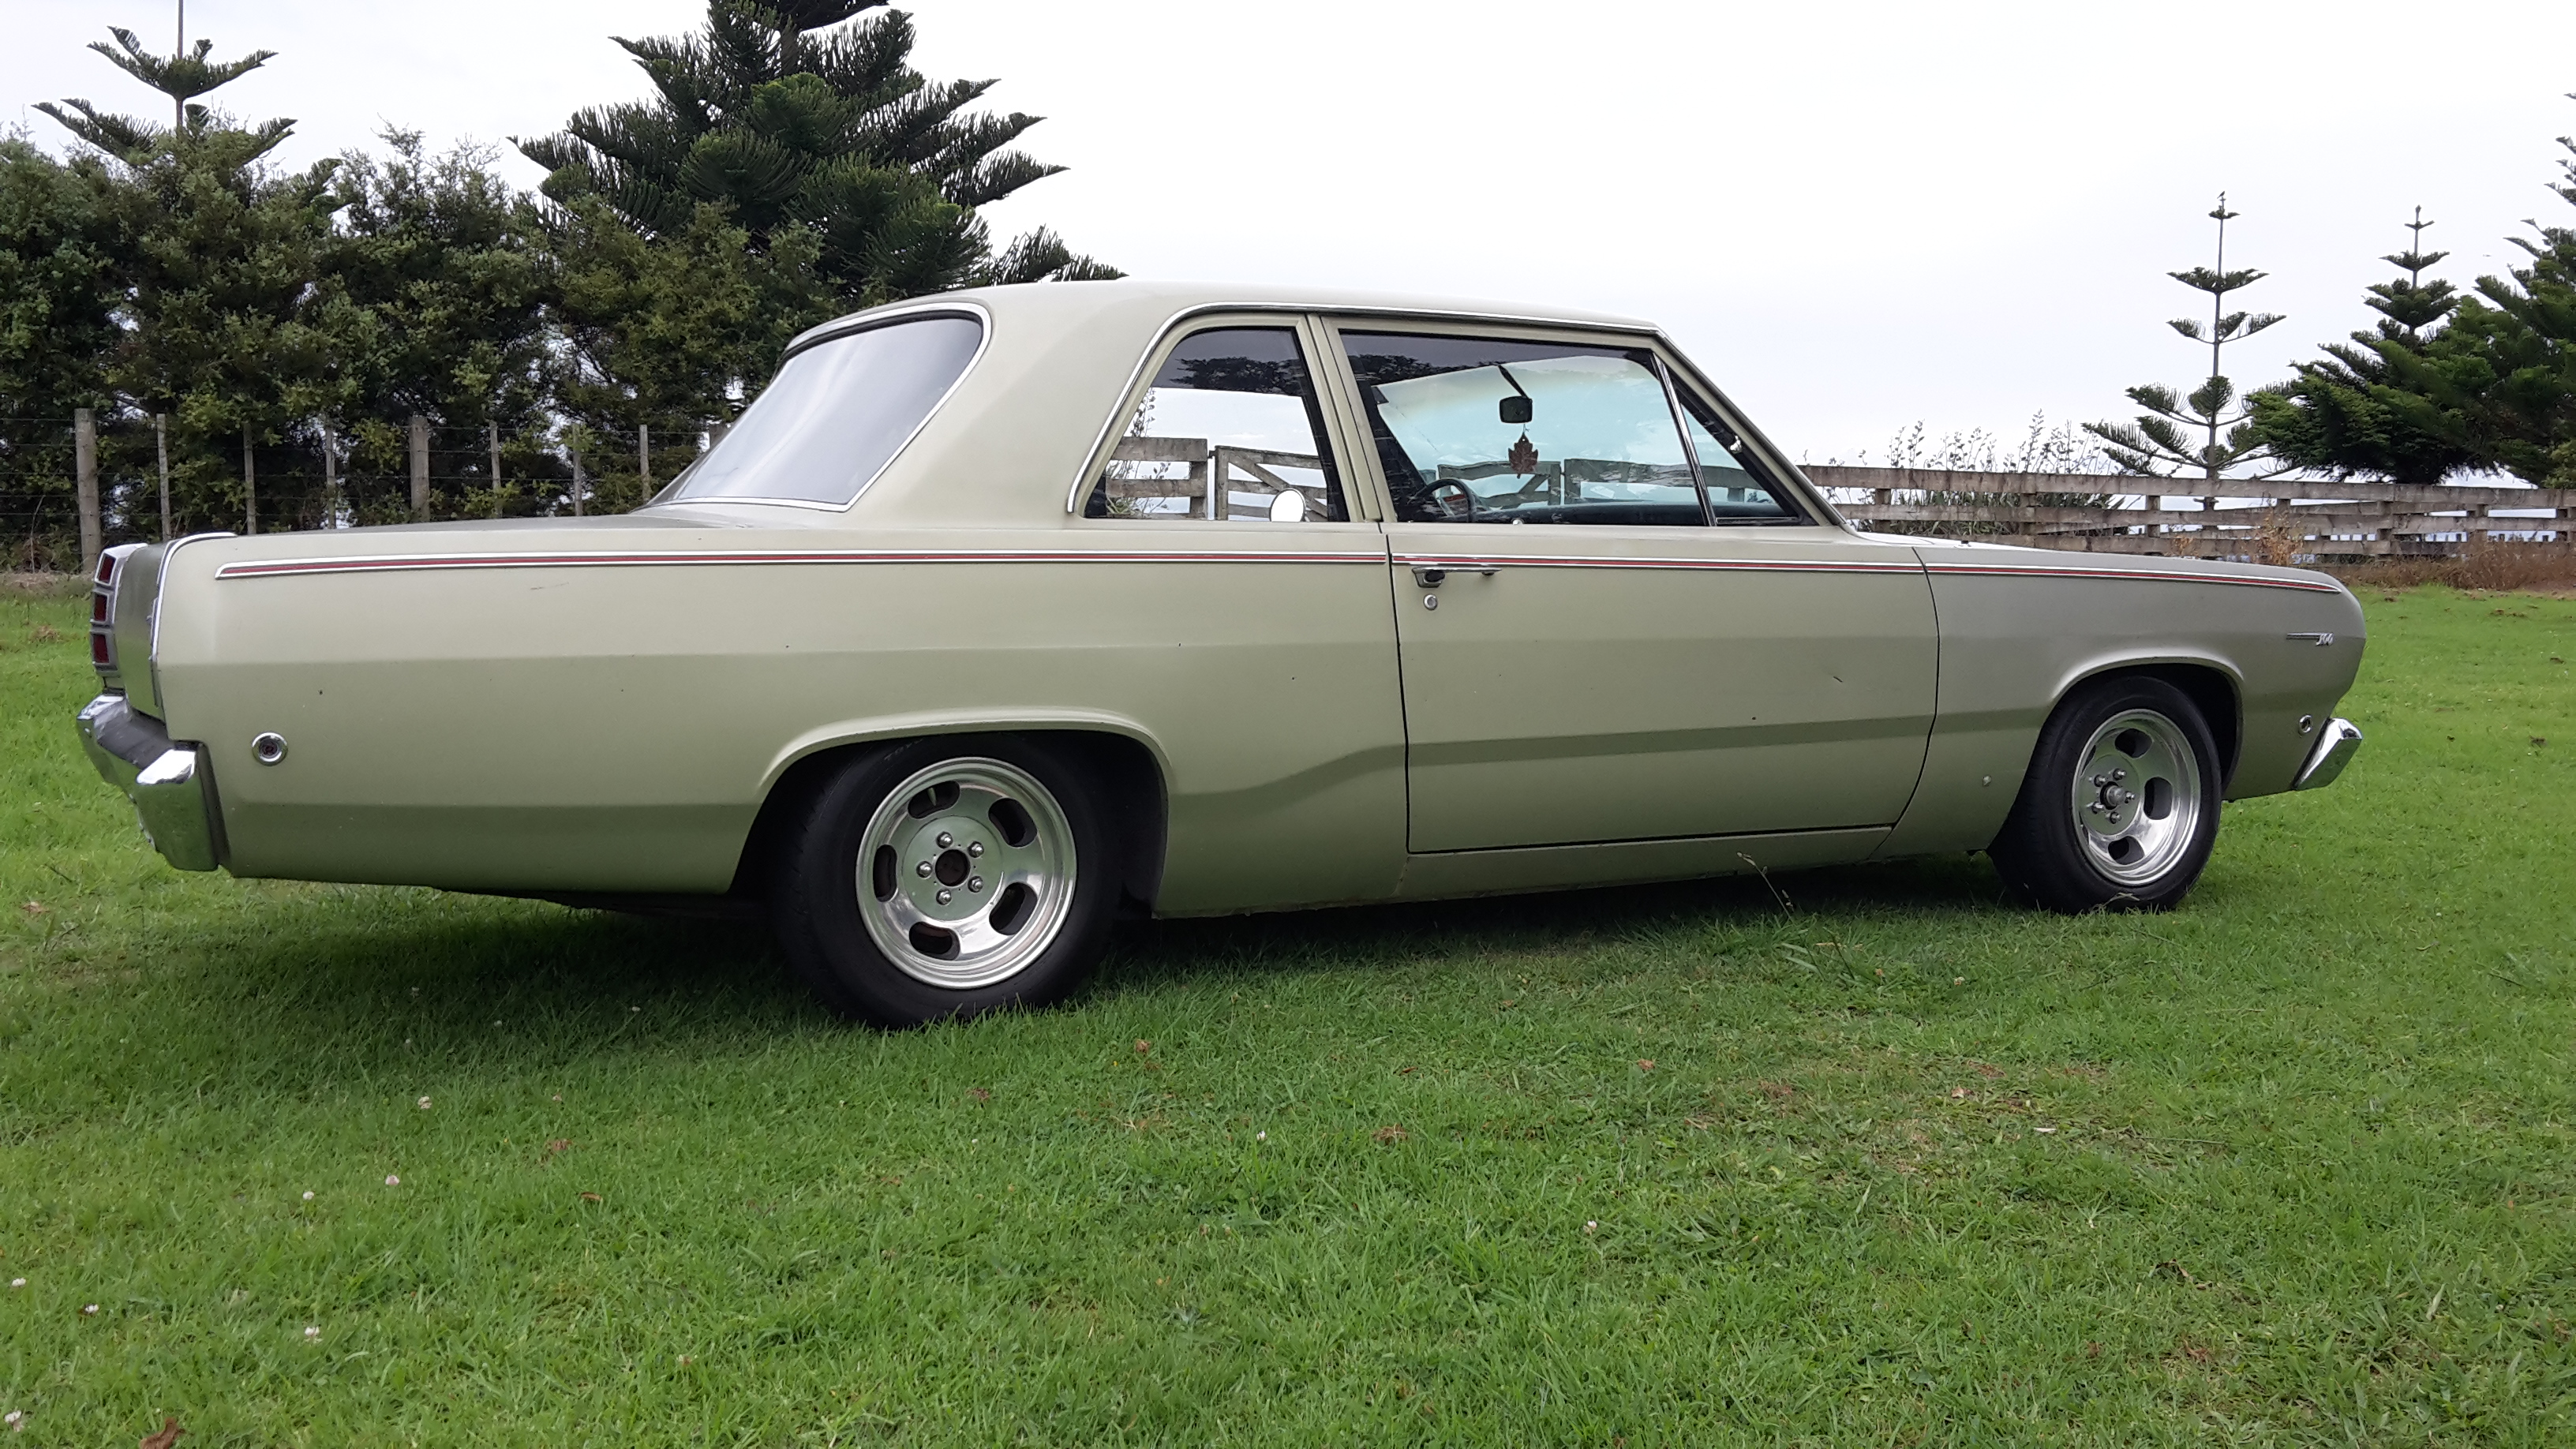
Any good body shop should have a chassis straightener (Car-o-liner or similar). They should also pick up any other chassis or bodywork that needs fixing, so worth a visit. Nice car, an uncle had a Rambler back in the late '60s.1 point
-
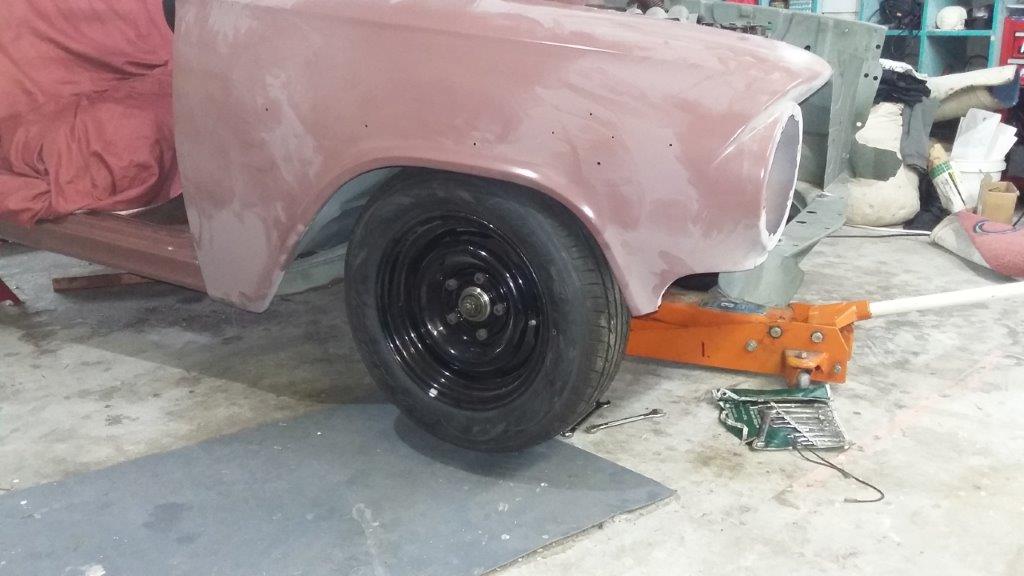
Could have cried when I pulled bumper off and saw this, could lesson for me to have a real good look over car before buying1 point
-
What Tori said- take it to some professionals and they will get it perfect1 point
-
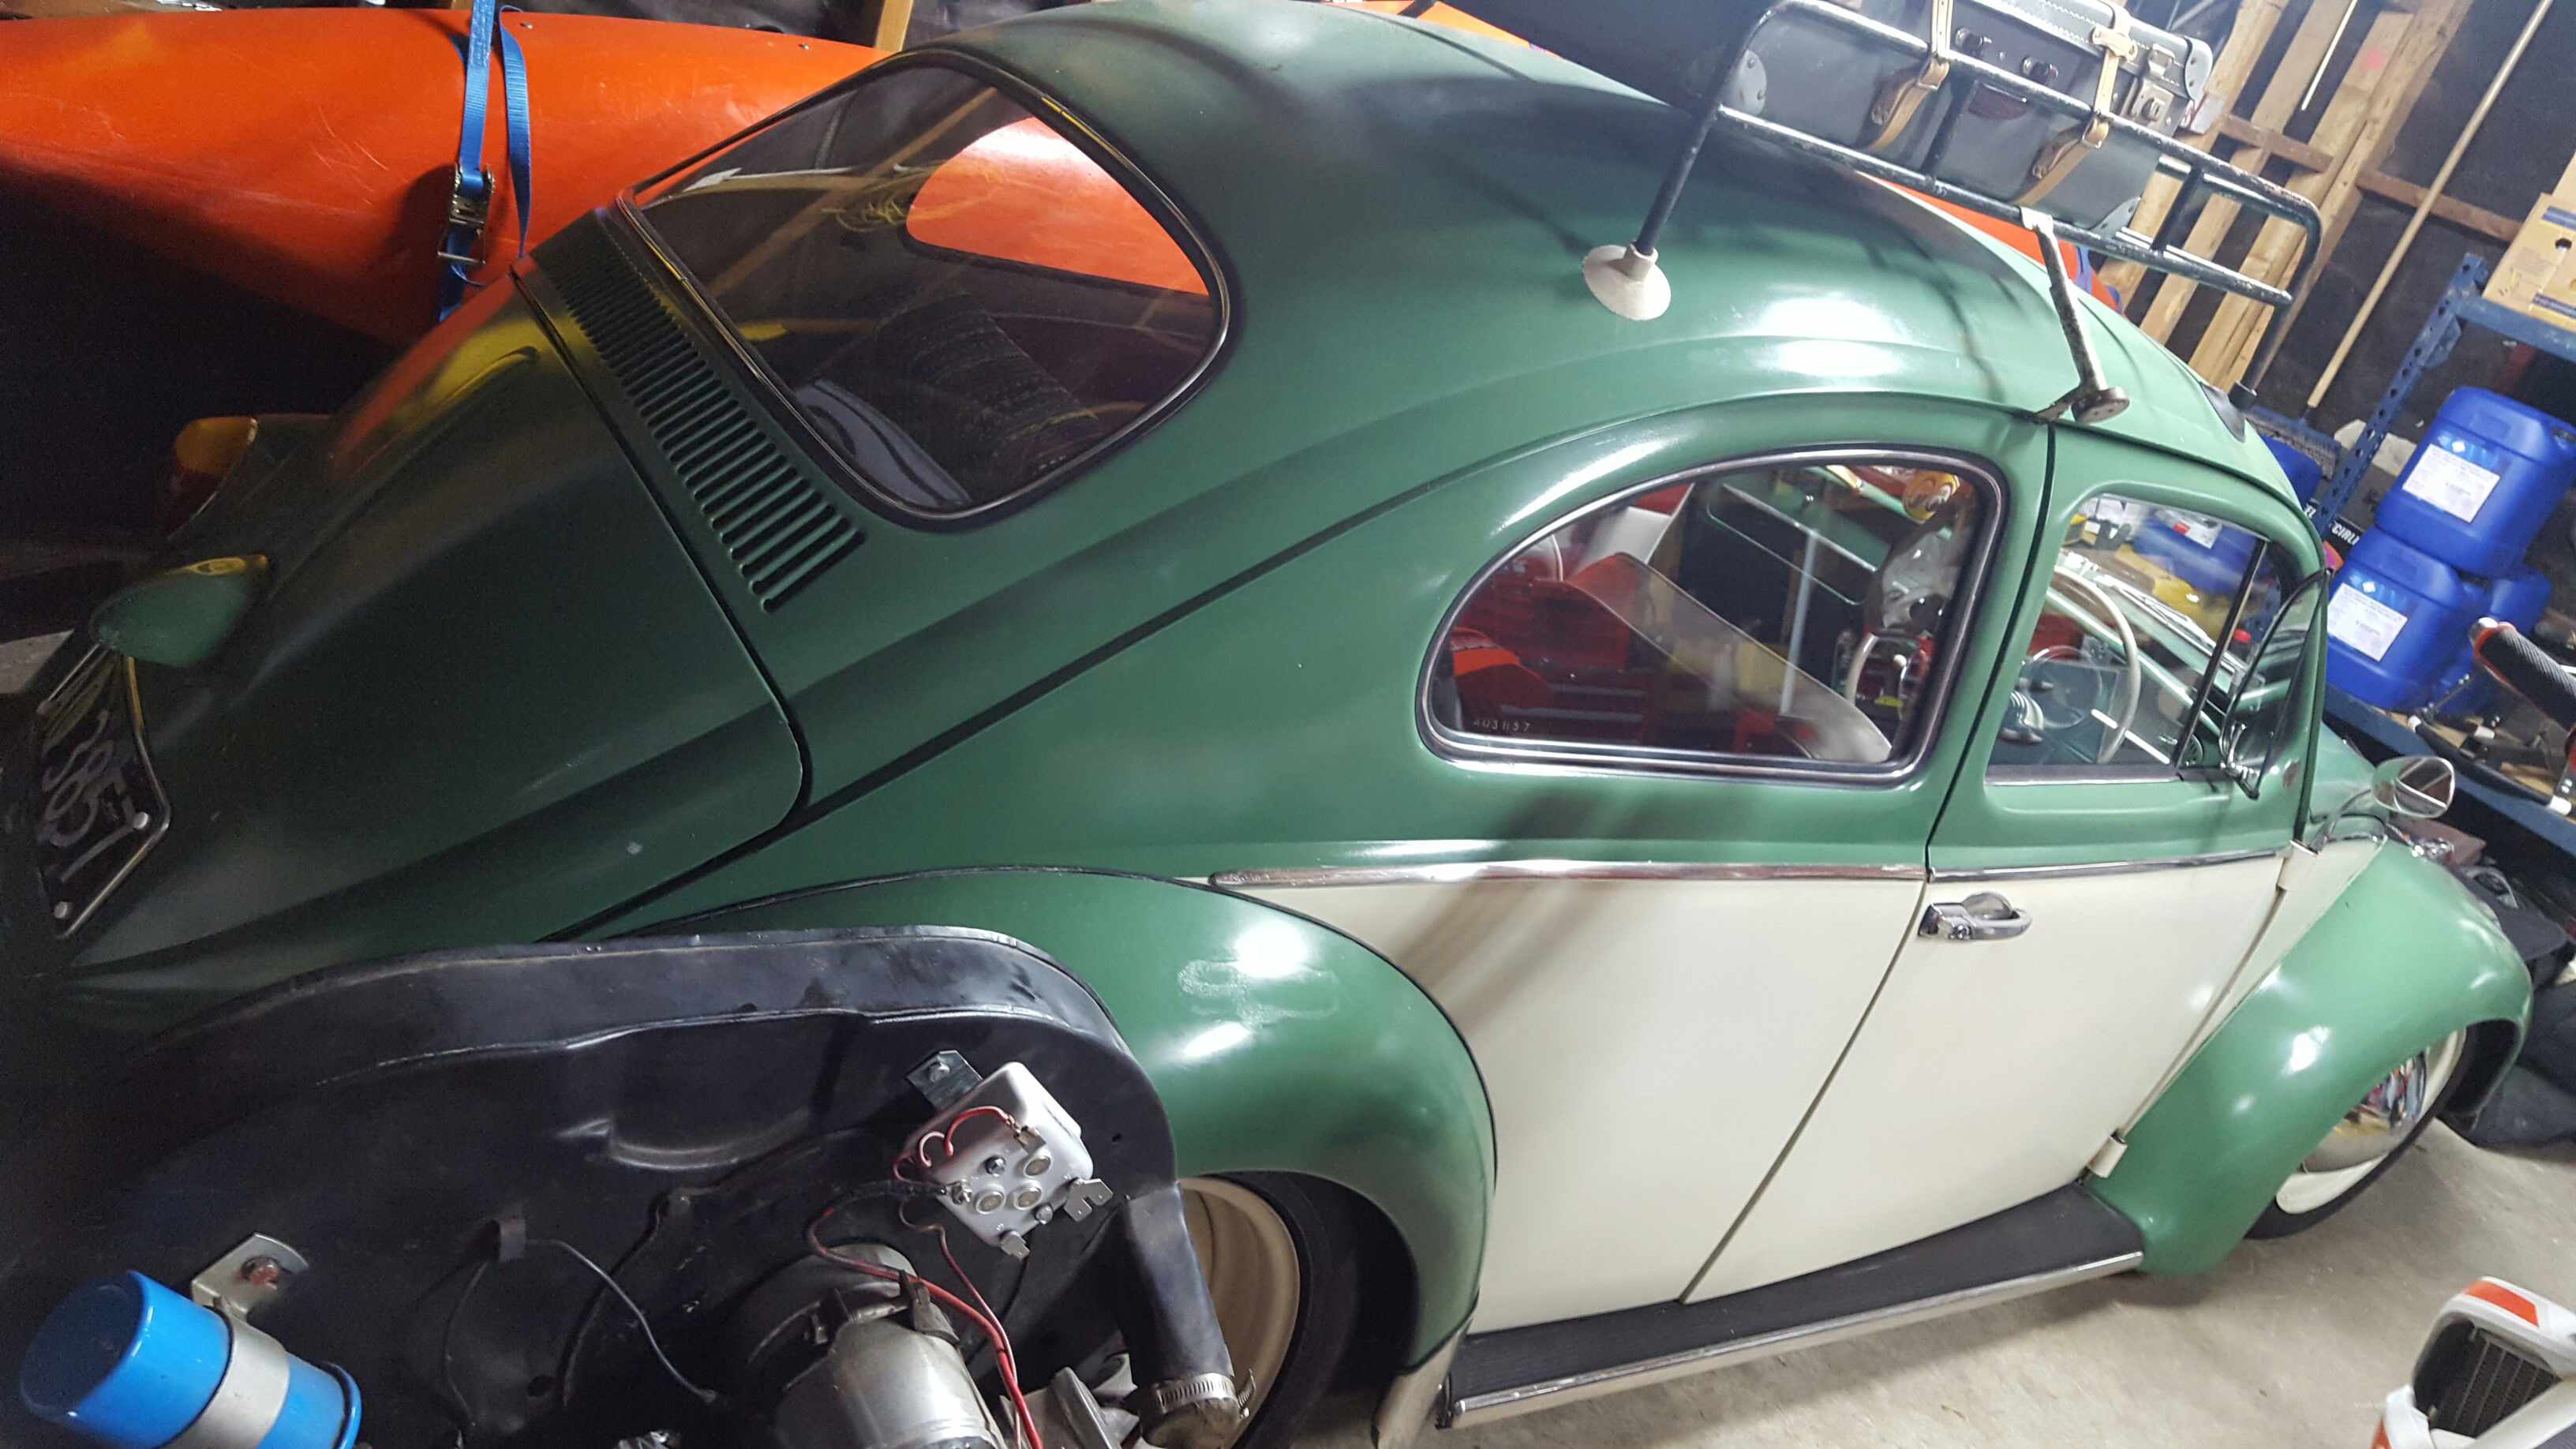
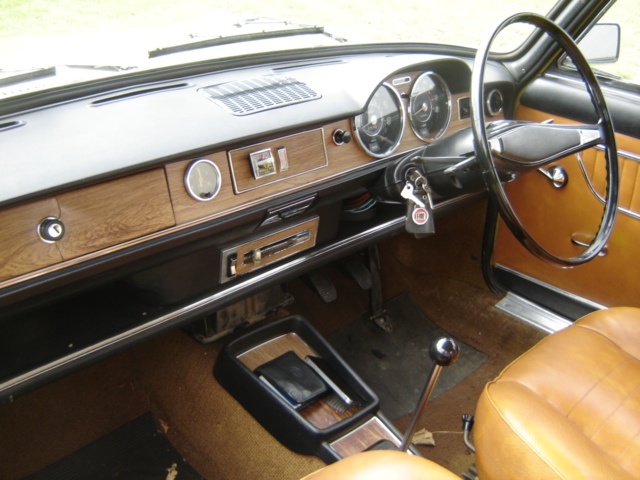
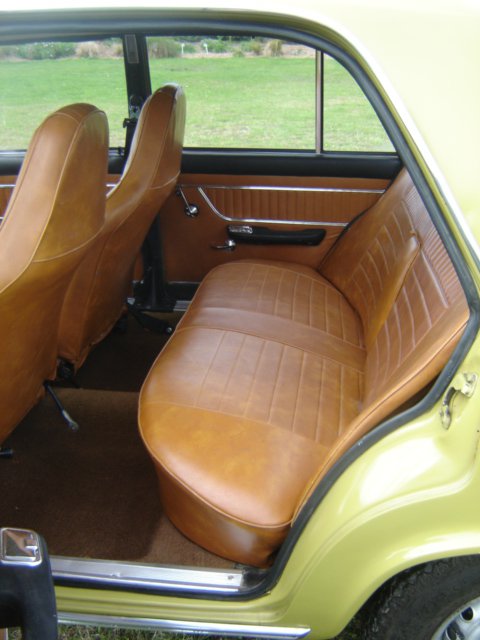
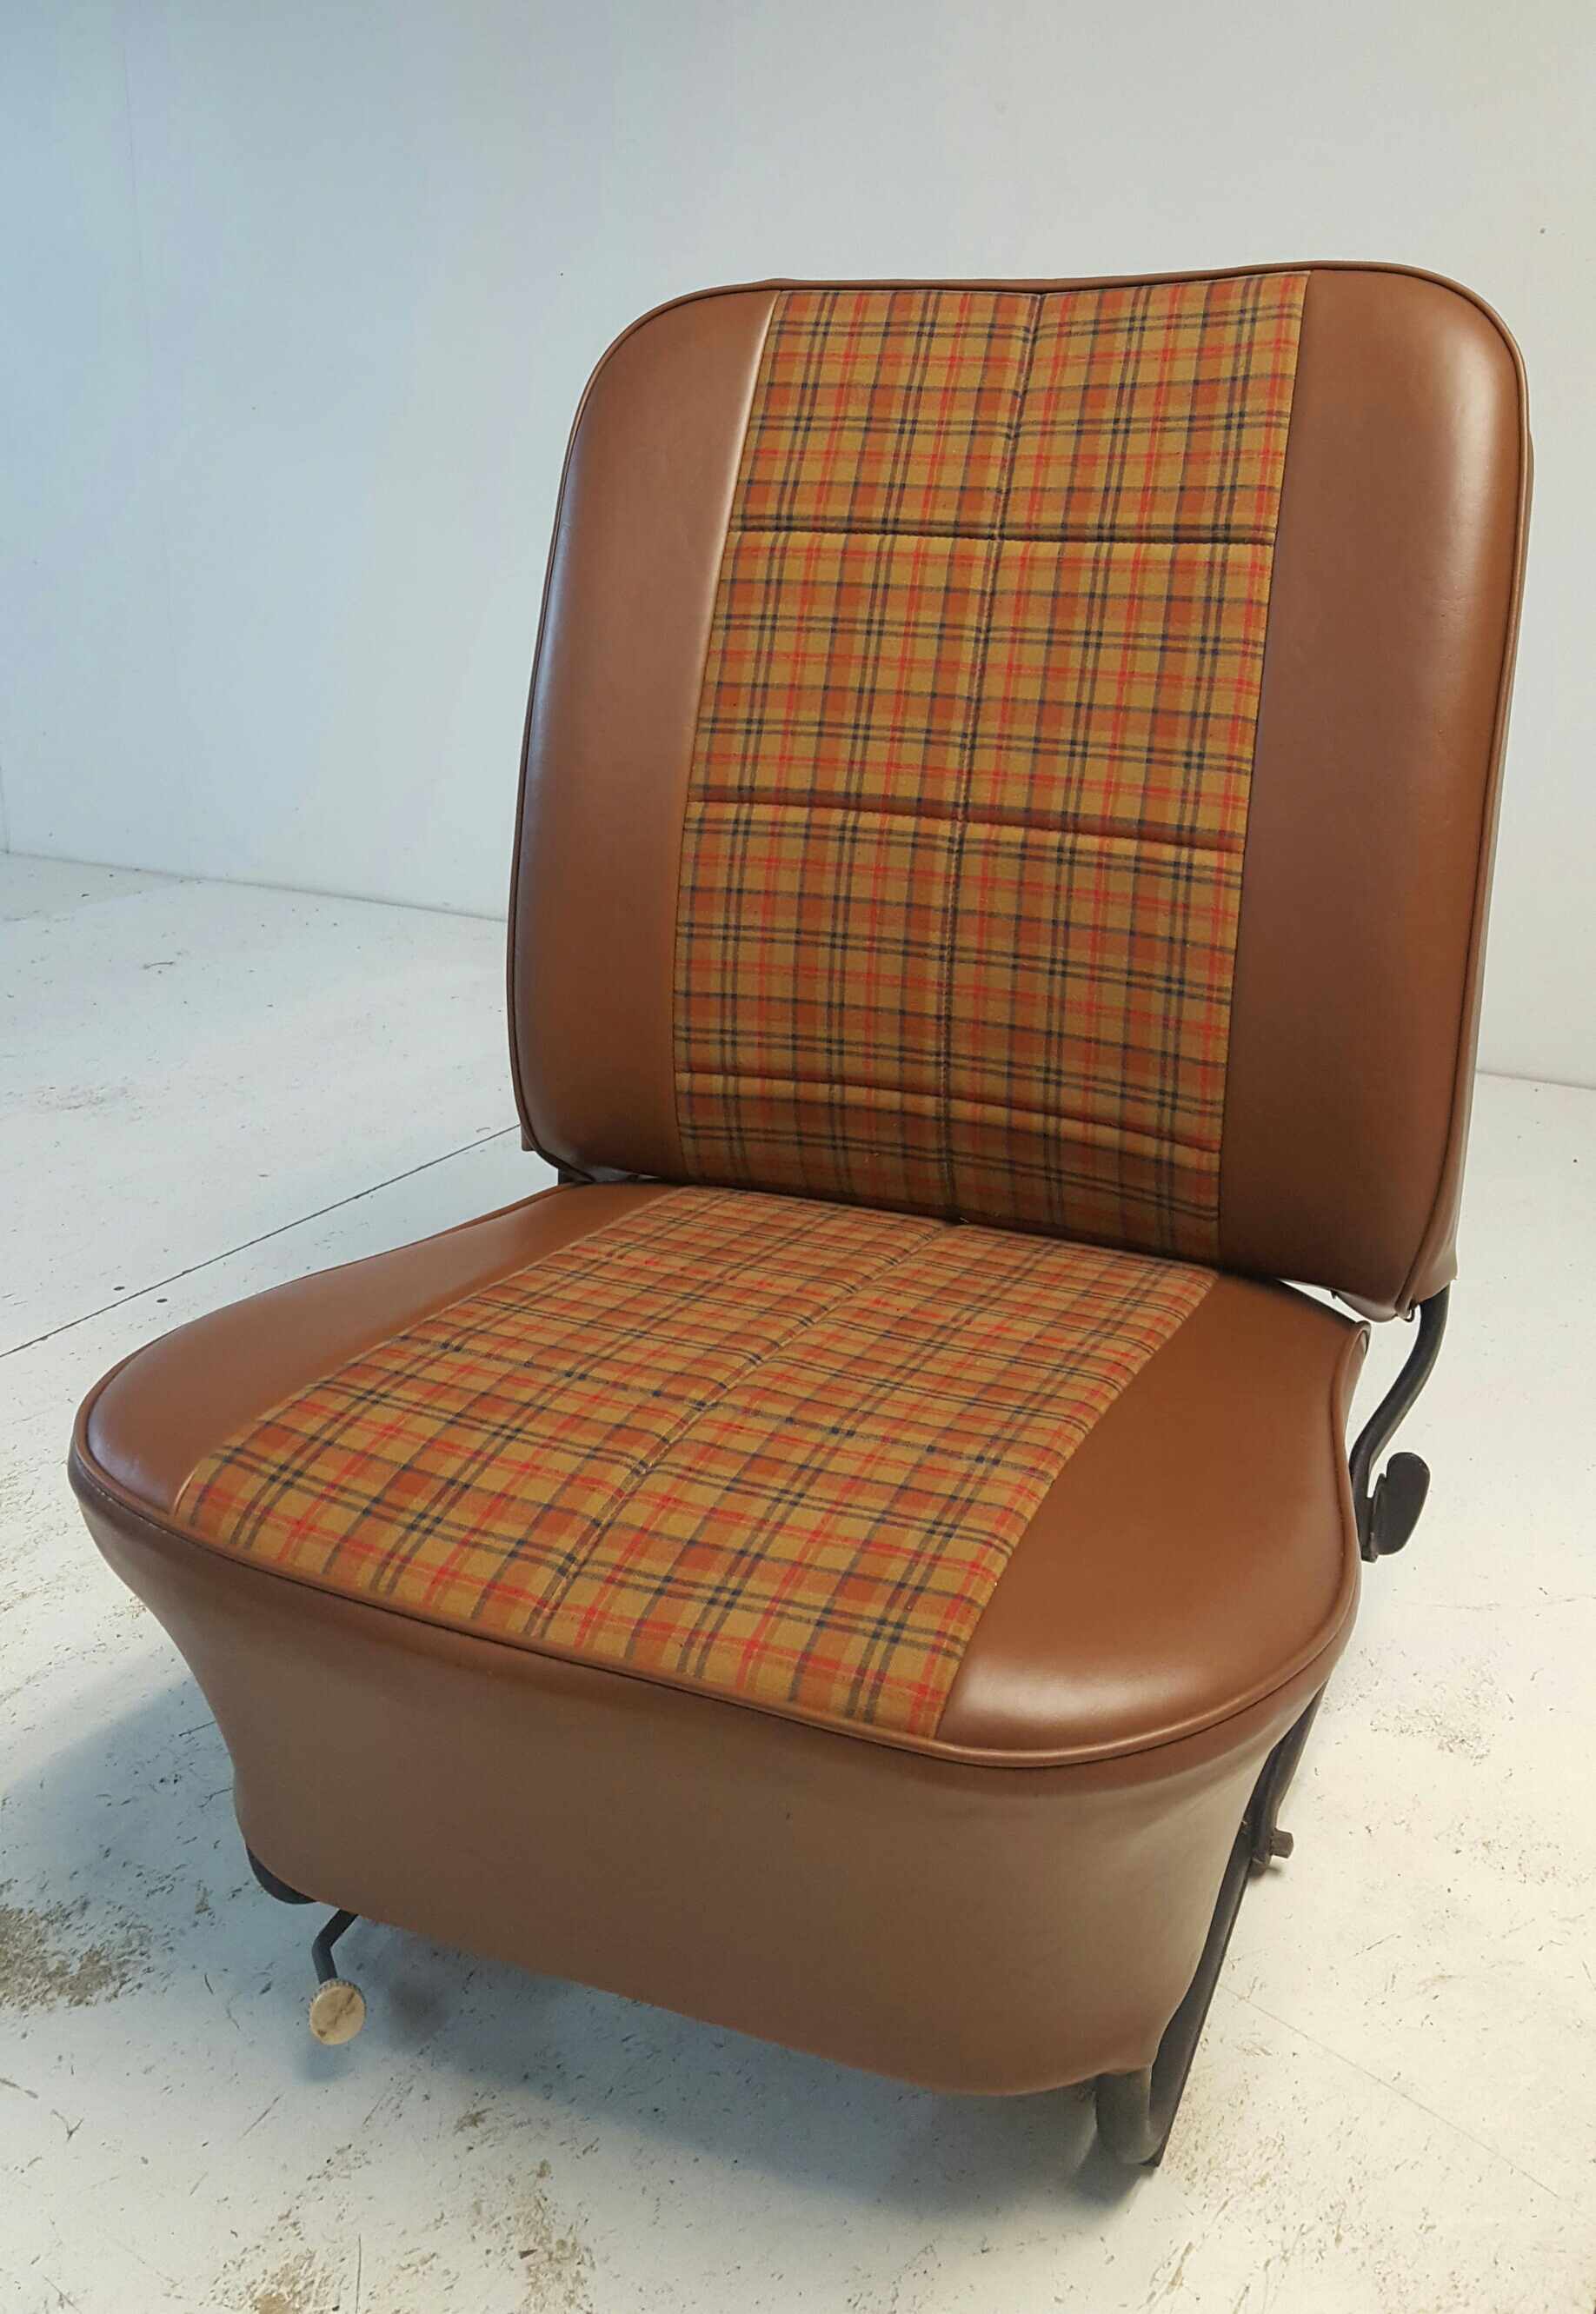
Interieur So, the heater fan doesn't go, and the lower heater flap is a bit broken. Needs seatbelts in the back and needs a stealth stereo. A nicer steering wheel wouldn't go astray either, the rim on the original one has a crack in it.
1 point
-
Today is the day when after nearly 3 months on axle stands in the garage, the wheels are back on! Much excite. The painfully slow brake rebuild is finished. The daughters helped me bleed the brakes (they are finally tall enough to push the pedal). Once bleeding was complete I got number 2 daughter to put both feet on the brake pedal and hold it down to check for leaks of which there were 2. I managed to stop the leaks by nipping up some fittings. Actually by doing them up quite a bit more tight than I'm comfortable with... I felt brave enough to drive it to the servo to pump up the tyres. The car looks quite non-derelict so I don't think I'd get pulled over unless I was doing something stupid. The brakes feel really good. Got treated to a wash too!
1 point
-
Mayte didntya know 4 barrels are a shit option mayte and they're only for yank tanks you should stick to a blow through twin sidedraught setup m81 point
-
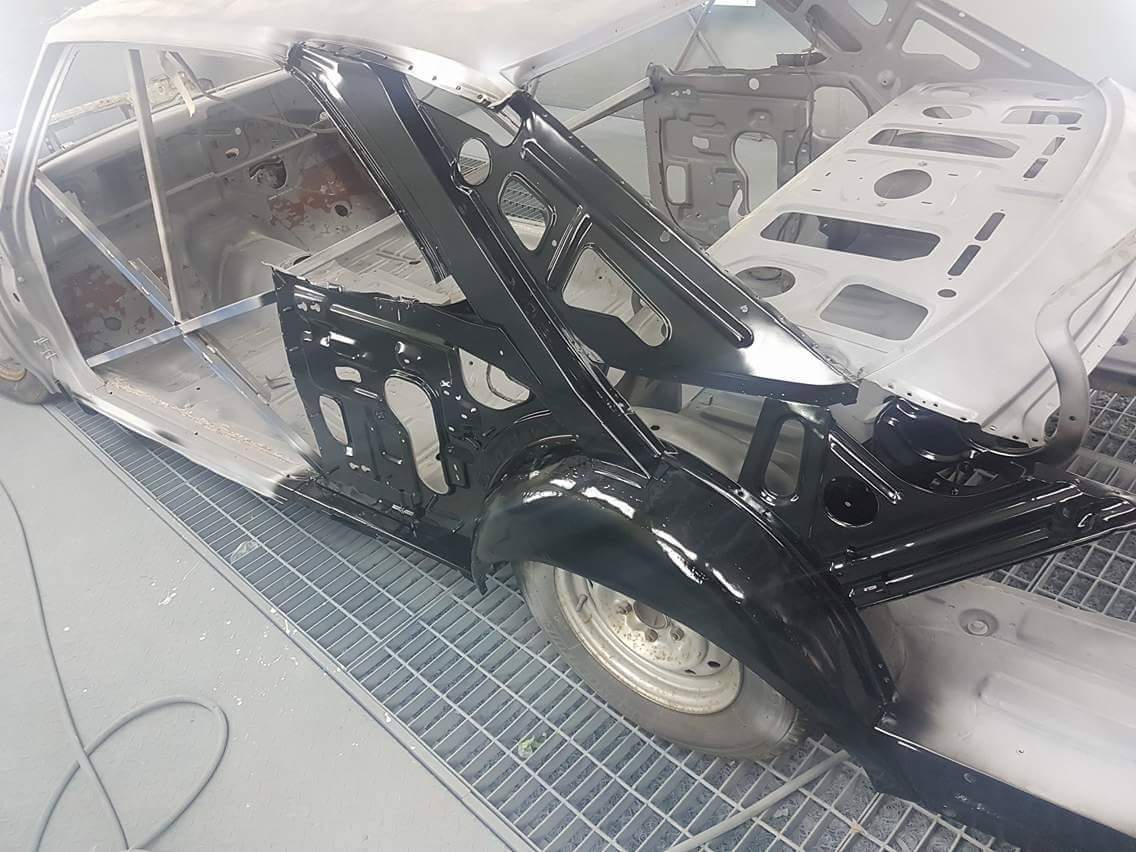
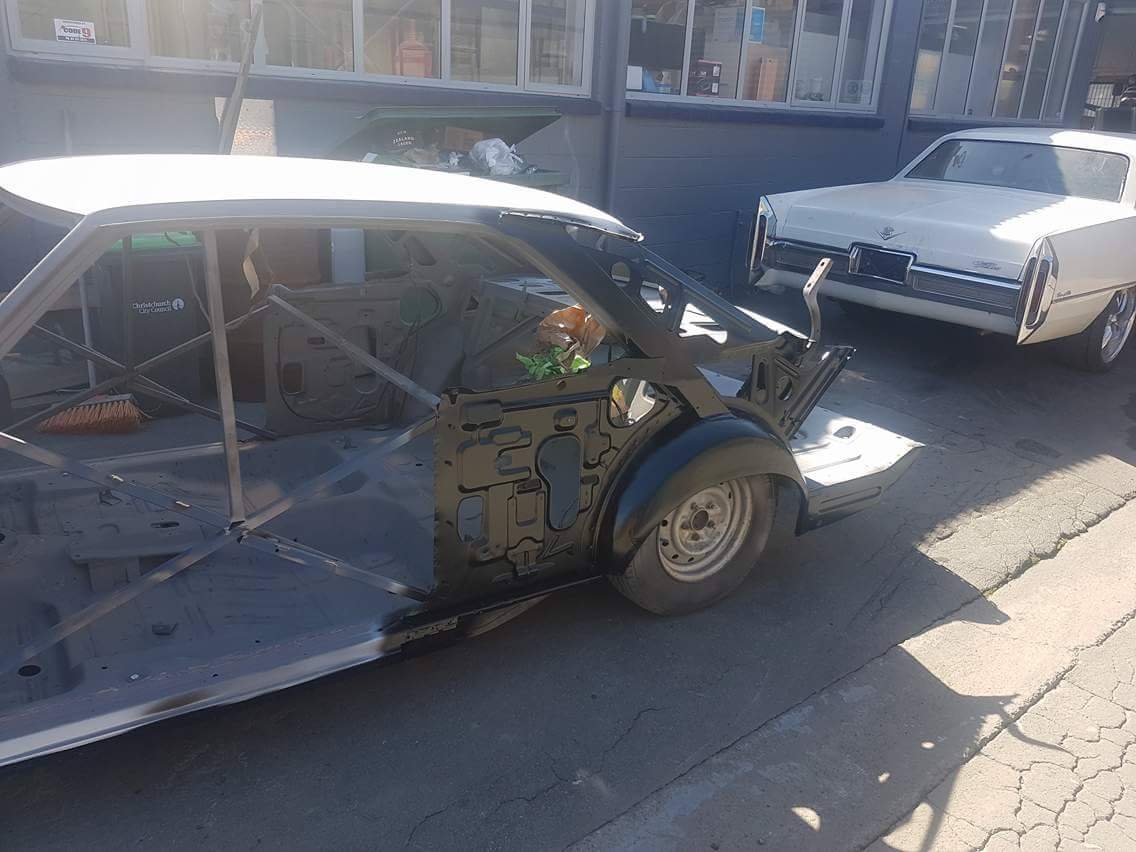
Over the weekend the ears on the diffhead got cut down to create some clearance. On a sedan diff they have a big hole for the suspension arms so no structural. I started cleaning up and painting to get rid of the lovely yellow. I ran out of best quality VHT black so no photos until I get some more and it is one colour. The brake booster got cleaned up as well and is very pretty in copper coat primer. Ordered a new flexible brake line for the diff and will make up new hard lines before it goes under the car. Also ordered a Willwood distribution block/proportioning valve from summit racing. I had grabbed the bonnet and one front guard from the panel beaters. I was playing around with how low I could go and still get full steering lock. Here the tire is about 15mm under the guard and goes lock to lock with no touching.When the car gets a wheel alignment it will be set up with a bit of negative camber so tilting the wheel in a bit will make more space. To quote the great philosopher Aaron Kaufmann of Fast and Loud, lower the altitude, raise the attitude. Once the diff is back under it will play round with the ride height, ground clearance will be the limiting factor I think.
1 point
-
Hoodlums1 point
-
Couldnt find any of my old photos, used to have heaps, but this was nearly 13 years ago (Im 26 now)... Been lost through the few PC's over the years I guess. I dug it out of storage though, exhaust and other bits and pieces have some surface rust on it. TS Reed Cases, 2mm stroker crank, ESP ported cylinder head with the combustion chamber re-machined, Tillotson carb, ADA S1 pipe. Frame has a 3mm fender fully welded... as you know they break off after time. Billet wheels, rear needed a beadlock from memory, as the rubber would begin to expand and seperate from the wheel which felt pretty dodgy at high speed.
1 point
-
Its at Fisher and Paykel PML. Not sure of the exact machines but they have some pretty amazing gear. The last photos are on a 4 axis to do the angled cam and exhaust faces + valve guides etc. They can do some seriously good work!1 point
-
True OS spec..1 point
-
some real serious machining gear there - where is that/what type of gear is it?1 point
-
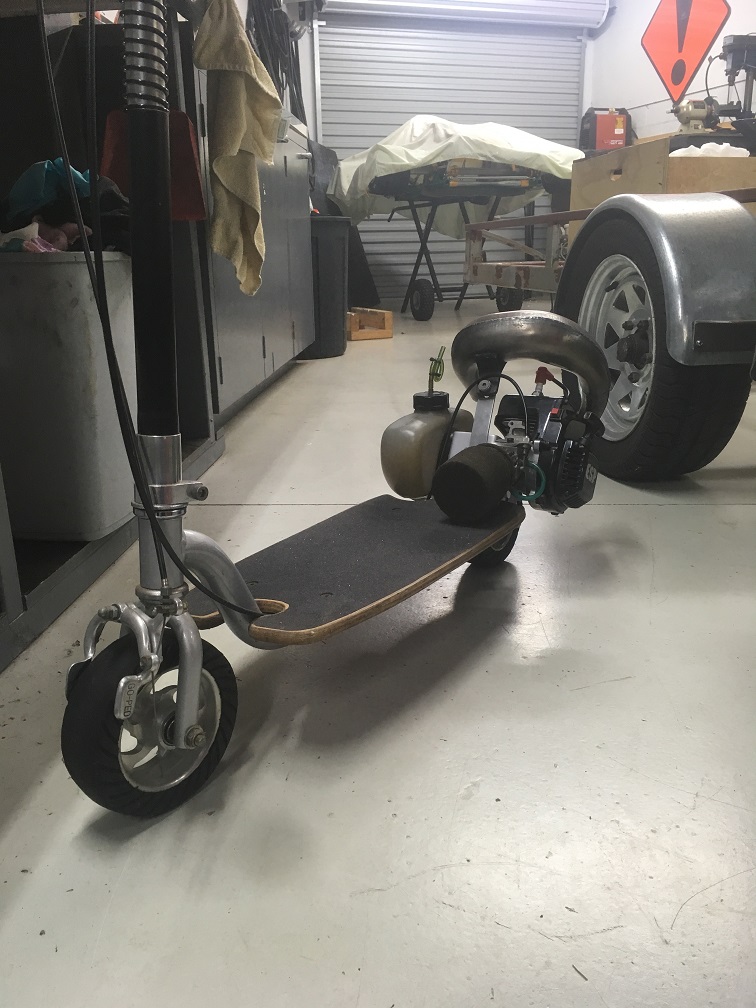
Here's another one of mine. This is a fast goped...but not as fast as the one in this build thread. In the quick and nasty YouTube clip, I'm only about half throttle as there isn't enough room to flog it. My latest one bogs at low speed, so it's pointless riding that one unless you have more room to hit the higher rpm's. Anyway, thought it would give you an idea?1 point
-
Here are the pics of the full respray, car was mostly flat AFTER 28 years, little here and there some dent etc. colour is original ,Sarajevo Weis W18, but in clear coat it was added a bit of a crystal gold pearl, without sun or light you cant see it, it turned out very very good, and I was very satisfied with that. preparing the car for painting Preimer: Ready for paint Colour:1 point
-
To continue with the theme of not finishing any of the utes sub- projects before moving on to another, today I decided to clean up and repair the leather Audi seats so they are ready for installation (even though the rest of the vehicle isn't, lol) Research was done and I did my best while also being extremely cheap. Firstly the seats were given an extremely through cleaning using an old toothbrush and soapy water to get human filth out of all the stitching, seams and cracks. Just this made a huge difference which is hard to show via pics. Before After Next I got a $6 bottle of liquid shoe polish. It is NOT like shoe nugget- this is a thin black liquid that dries and will not rub off- more of a dye. Multiple layers of this were applied to each cracked area- allowed to soak for a short while and then rubbed off with a rag (so it pretty much only remains in the cracks and damage) Before After So the cracks in the color layer are still there- they just don't stick out like they used to. Next up was this hole in the driver's side bolster. This side is pretty fucked and I always said I'd get it replaced properly....But reality says NO right now. Here's the hole. So I copied some instructional videos for $100 repair kits and made a backing patch out of vinyl. I trimmed the hole up a bit cleaner and stuffed the vinyl in there with the cloth surface facing out so the adhesive had a nice surface to bond. Next I grabbed a tube of trusty simpson panel/chassis adhesive and squeezed some out onto cardboard. I agree this is a strange choice of poo BUT in my defence- I know it sticks to EVERYTHING extremely well, it remains flexible when cured AND it is easily painted. I used a flat blade screwdriver to push glue between the vinyl and leather and pushed the leather down as hard as I could. Then I filled the depression with adhesive and smoothed it out as best I could using a rag soaked in thinners. I tried to stipple the surface so it wasn't glossy smooth. Once that was cured I used my finger to apply some cheap black paint. This was WAY WAY WAY WAY more effective than I expected and after a damn good rubbing have established it's pretty durable too! Not perfect but you wouldn't know it's there unless you look really closely! So after a through coating with leather conditioner cream here's the end result.. I'm EXTREMELY happy with how they came out1 point
-
So yeah, picture less update for max who cares. I left the work shop at 8.30pm on Friday, old motor sitting back in the hole, bolted in with no manifolds. Finished up about 2 the next day after just general fluffing around. So then took it for a decent test drive. To my surprise this motor doesn't have ba blown head gasket lol. As said in my discussion thread, this motor had only been driven about 60km last time it was in. So yeah test drive good, what a surprise it also has oil pressure lol. And uses all the gas. And is actually slow up hills. But you get that with a 2litre designed in world War one. And Mourning Cupcake took it for a drive to go see steelies today so she could learn the ins and outs of driving it, as she will be driving it solo to nats as I will be taking the c20. She did good job. So yeah, just wanna swap the bench seat over. Might struggle that tomorrow after work.1 point
-
https://www.motormag.com.au/features/1503/mid-engine-holden-rodeo-track-monster Stumbled across this. Didn't know where to post it.1 point
-
Some better pics.
1 point
-
"Hello officers, just a fellow crime stopper dropping in to get my share of old cars"... waits until they are looking the other way LEYLAND PI OUT1 point
-
I will probably attend the tour de oil leaks1 point
-
Well hot damn it worked Things i learnt theres enough adjustment in the gauge to shift the range +- 40 ohms for fine tuning to a sender (i.e E can be shifted from 40, down to 0 or up to 80, and same with the F) The heating wire is ovbiously bloody small, but it looks to be about 50 coils i unwound 10 of them, and spread out the remaining along the bimetallic strip. and it appears that i have now adjusted the gauge to a full sweep over 90 ohms at around 10v, which seems to be what the gauge will see i the cluster. The bench set up i used was a bit rigged because i have the minimum of electrical tools, but in any case it seems to be proof of concept. i will have to pull the sender out and test it though its full arc to see how accurate the gauge will be in the points between F and E. Will post up a full walkthrough of what i did, because i cant find anyone modifying a bimetallic gauge anywere (dipole types look to be possible with resistors on the full and empty sides). I did find a case of a guy modifying the sender some how, and various senders chopped up and put into other units. But this method would appear to be rather cheap and easy1 point
-
Might build one for hawkes boes lol.1 point
-
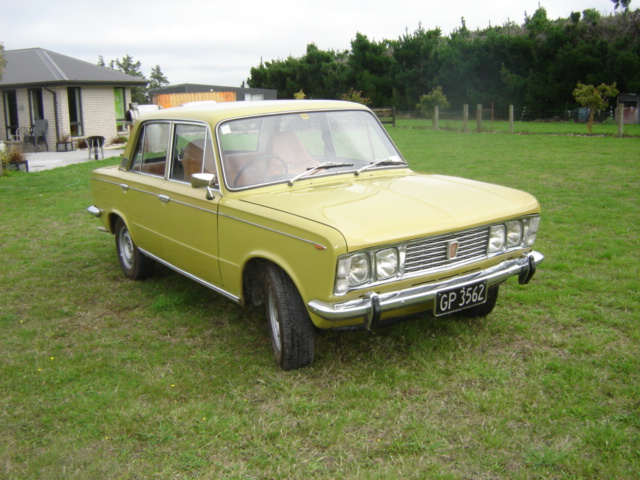
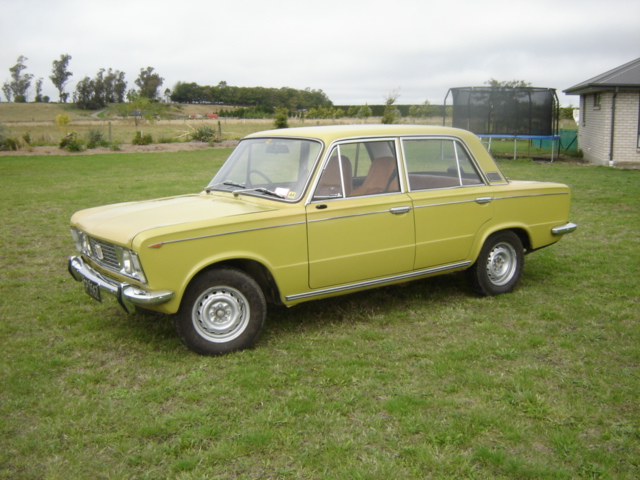
It was awesome to see the Fiat in the flesh after following the thread. Also congrats to Roman on the job1 point
-
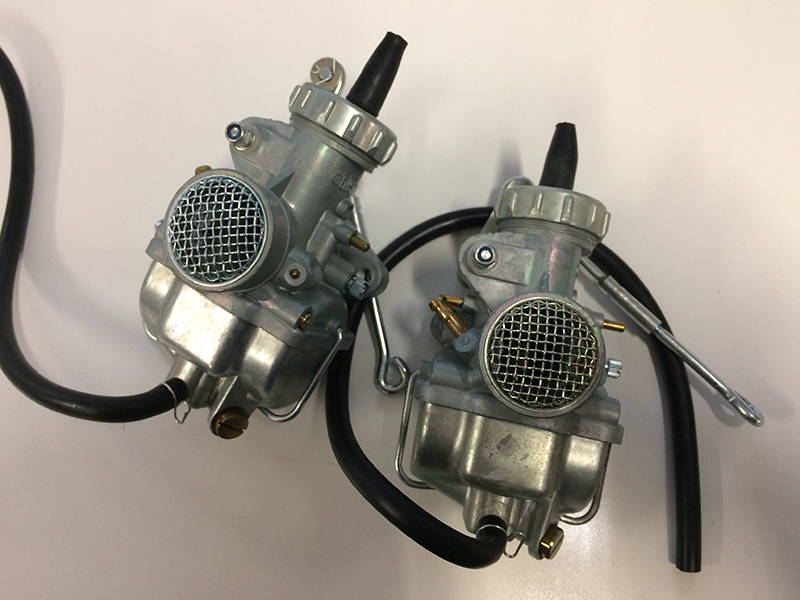
New carb day!
1 point
-
Man I can't help myself but share this here. So over the moon with how well it's come out. Oh beach hop also starts tomorrow and my car looks like this. So excited to get there. Got a fair bit to go but we can do it. EXCITING!!!
1 point
-
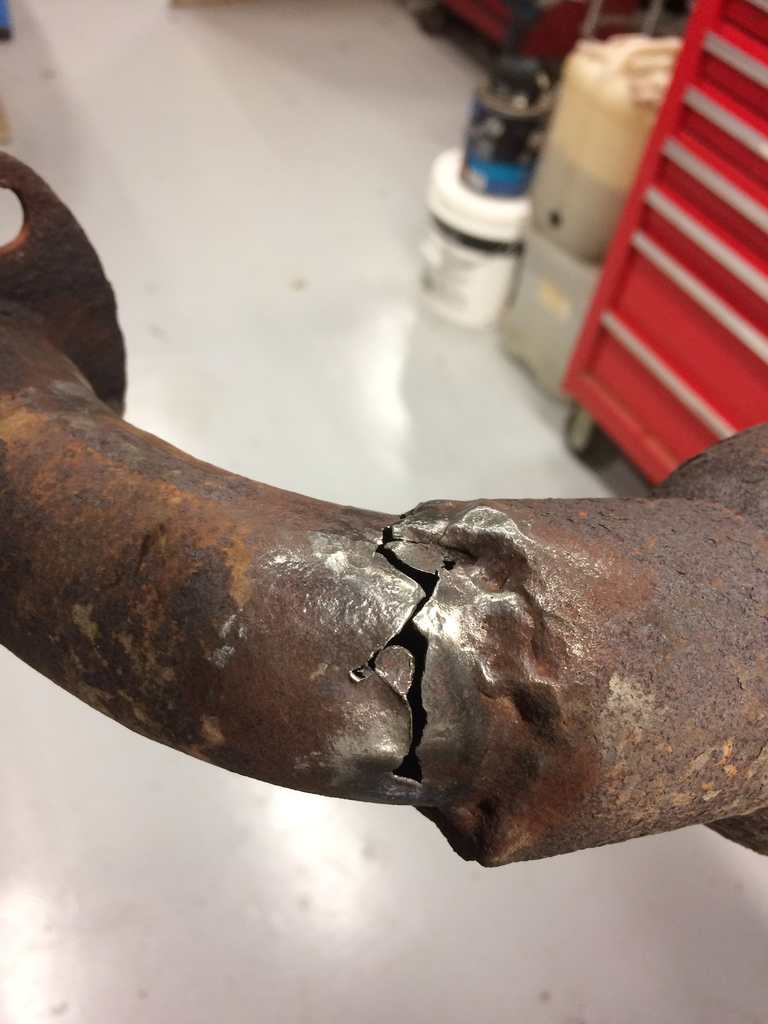
So with the rust and the Assembly done the next job would be a wof right? nah mate drove it a few times to work and back with no wof etc Then decided i would do a thing that i had needing to do on it for awhile which is a good wax and general tidy up of the paint so i spent one night did that then another night i went through and buffed all the windows of most of its water spotting etc. And then shit hit the fan.... it started miss firing on take offs knew it was the dizzy cap as i had never replaced it and have clean it up a few times too dropped the cap and rotor off at Bnt so they can get me a new one and they give me an old piston mazda 323 cap and rotor to try as they looked close gave the cap and rotor a go and what do you know now constant misfire took rotor out as someone previously had tried it on their car and fucked the metal retaining tabs tried out old rotor and new cap and no more misfire so went back to Bnt too pay for the parts and... NAH BRO THEIR FREE THEY WERE GOING IN THE BIN ANYWAY. Like what? YEAH BRO WE GOT THEM IN AS THEY WERE LISTED FOR OLD SCHOOL MAZDA PISTON ENGINE AND THEIR WRONG. AND PLUS THEY HAD ALREADY BEEN TRIED ON A VEHICLE AND BEEN WRITTEN OFF. YEEEEEAH FREE PARTS!. Then drove it to work another day after this misfire was sorted and then drive it home after work and notice the exhaust tone is abit louder so have a quick look underneath and can feel a leak pop in back in the shed and place it on some axle stands and find this The whole exhaust on this thing is getting abit past its used by date now... second bit ive had to patch up now got the old man on the welder again to patch it up done and made a new exhaust gasket too as old one was fucked and some newish bolts too as old ones were rusty n shit. yeeeeah
1 point
-
Almost worked. Got quite a bit of shrinkage in one corner on both parts. So I'll have another go and add some big risers to those areas. Other than that it worked really well!1 point
-
Bit of CAD. Slowly slowly getting there. Most major parts are detailed. A lot to go.1 point
-
Won an auction from trademe last sunday for a km48 160cc 8hp rotary, thanks to Chris R for OS freighting it to me yesterday! It's missing the pull start and has a geabox attached with a hole blown out of it but apparently was a good runner, ill add fuel this weekend and see if i can fire it up with a drill. I have also won an auction from ebay for a box of km48 NOS goodies which looks to have various pull start parts included. Evil looking exhaust This gearbox leaves me with a number of options as its a direct gear against the gear on the end of the crank its essentialy reversing the output direction. The original engine ran onto a variable belt pulley which on the other end of the shaft had the chain drive to the rear wheel (as pictured below)1 point
-
RAD! My votes that you just focus on the running gear and leave the body as is1 point
-
ok, well as some of you know, on my way to do my euro trip i blew the gearbox coming into stormin the castle, so i ditched the beemer and bought a bandit12 to do it on, fast foward to a few weeks ago when i finally got round to picking up thebmw and dropping it off to a local guy who is an expert on air head boxes, he has dozens of them and they get sent to him from around europe to do, luckily he agreed to do mine as he had nothing on, and didnt even want to get paid for the job, just pay for parts, so here is his write up on the job I had a quick look at the bike after you had gone. That box sounds as though its got a really serious problem, I've never heard a noise like that before. It will be interesting to see what happened (I'll post pictures). I was out with horses today and tomorrow I've got to sort out a neighbour's chainsaw before doing anything else but hopefully I'll make a start at getting the box out. I'll report back on progress. .... Just to remind you, this is what turned up: It was very difficult to push about as the box wasn't running free in Neutral, this was accompanied by horrible 'clunking' noises. Pretty soon it was a sorry little Rat Bike Taking it apart wasn't difficult. The tank was held on by the single fuel pipe and the airbox only had one bolt - which was very loose. The seat was clinging on with two nuts that were just started on their threads The air filter is a scrapper :blast. Anyway, the box was soon on the bench: The Output Flange nut came off OK, but the taper was very tight (a good sign). The box was very dirty around the clutch end. The clutch lever was very stiff so I was expecting trouble there. The magnetic drain plug didn't look too bad - which surprised me as I was expecting more swarf than this: Soon the box was apart to reveal . . Swarf everywhere I can't show it in stills, but the rear bearing on the output shaft was the worst I've ever seen - its almost possible to remove the outer track from what's left of the balls and cage. The other bearings are shot as well - but are not as bad. The output shaft has been pulled back from the front bearing. There shouldn't be any discernible space between the bearing and the fifth gear pinion. This is why we fit circlips to the front of the inner bearing The swarf has contaminated the oil and has worn the two bearing sleeves that the first and second gear pinions run on - The plain sleeve for First Gear: The First Gear pinion has a plain thrust washer on each side. The inner one has been pressed into the Third Gear sliding pinion - its supposed to be flat. This has further damaged the bearing sleeve that did the damage to it. The (expensive) roller Bearing on the front of the Input Shaft is usually OK, however, this one is jammed solid and the rollers won't turn so I guess its full of swarf I think the box has run low on oil at some point in its life (there was oil in it when I drained it) as the Input and Output shafts have been 'blued' with heat where the bearings have been choked with swarf: I'm not intending to replace them as the bearing sleeves will be renewed. I can't see them going soft (or brittle) with the heat treatment. Some of the retaining washers and circlips on the Output Shaft are damaged and will be replaced. One circlip has been reduced to almost half its circumference, yet I didn't find any broken pieces The 'clunking' noise heard when the bike was being wheeled about came from the Drive shaft. The rear bearing on the Output Shaft was so worn that the Drive Flange was hitting the outer sleeve on the rear gearbox cover - where the 'boot' attaches. This movement allowed the Worm Drive on the Flange to chew-up the Speedometer Drive gear - you can see how the spline teeth are now tapered towards the lower end. I have ordered a 'Good used' one from Motorworks. Worse, the Drive Flange has cracked the rear cover. Its not critical and I'll put a touch of Epoxy adhesive on it. A 'Good Used' rear cover is £110 from Motorworks The good news: There is some. The selector forks are fine with just one tip showing signs of heat. They will go back in OK. The complete Selector Mechanism is also A-OK. I'll replace the springs and Indexing Roller as a matter of course but this is actually better than some I've seen The cam faces on the Input Shaft Shock Absorber are also very good. The Clutch: The Clutch assembly looked well past its sell-by date and I wasn't very hopeful about saving all of it. I removed the six 'hold down' bolts and expected the outer retaining ring to fall off and the Friction Plate to fall out . . . not a bit of it, the thing was welded together and nothing would shift it. I soaked the three locating pegs in Penetrating Oil and left it for a couple of days - still no movement. So with a gas torch and a hammer and cold chisel (to use as a wedge) I eventually got the bits separated. The Friction Plate is just down to the rivets and the rest is rusty and seized. I'll save what I can but I have ordered three new parts from Moto-Bins today. The problem then was that all the components were contaminated with very fine metal swarf and I didn't want to put anything back in that state. Washing the Gear Pinions in Kerosene didn't remove the swarf so I dug out my 27 litre Ultrasonic Cleaner "Hubble-Bubble" After two 20-minute sessions, the cleaning fluid was a dark brown colour. When the fluid was drained the bottom was coated in particles - mostly steel swarf. I cleaned the tank out with a large clump of paper towel which came out covered in sparkly bits. As the gear pinions and so on were now thoroughly de-greased I carefully re-oiled everything and set it aside ready for assembly. I have a couple of (large) orders outstanding with Moto-Bins and Motorworks so assembly will have to wait until the shiny new bits have arrived. To be continued.... ..... I fitted the centre track from a 6403 bearing onto the Output Shaft and then stuck it in the lathe. Using a carbide strip ground down to a shade over 1mm thickness and given a cutting tip, I cut a circlip groove into the forward end. It doesn't take long and a new circlip fitted OK. Then a van arrived . . Oooooh, shiny bits Hmmmm, doesn't look like £432-worth does it It's not all for this bike as I'm re-stocking some of the small stuff . New vs. Old. The second gear bearing sleeve was a nice tight fit on the shaft. Always ensure that these oil holes are lined up as there isn't an oil groove on the inside of the sleeve. The new 'High Fifth' gear was fitted, along with fourth & Second gears, front bearing and the all-important circlip. Second gear is a lovely fit on that new sleeve - smooth without any hint of play I then added the third and first gear pinions. First gear is also a nice smooth fit without shake on its new sleeve - quite unlike the way it was when it came off originally. The 'Standard Fifth' gear is shown, there is no difference in diameter they just cunningly re-profile it to include fewer teeth I built up the Input and Intermediate shafts yesterday, but didn't take pictures (it involves spring compressors, various home-made steel 'dollies' and my floor press) all three shafts are now ready to go back in. The Gear Selector mechanism is also ready with new springs and Indexing Roller. I may get the box assembled tomorrow but then there will be a short break as I'm off to "The Bristol Classic Bike Show" at Shepton Mallet on Friday/Saturday. I won't be on the 1150GSA this year as I don't fancy the M6 on a Friday with snow and ice - I'll be taking a large 4x4 . I must be getting old and soft I put the gearbox casing through the Ultrasonic Cleaner yesterday. It is clean but the alloy is now dark and mottled. I'll see if I can clean it up with something before building it up. To be continued . . . . ..... More progress to report Having assembled the three shafts I heated the gearbox case with a Propane torch and fitted them along with the intermediate shaft selector fork that has to go in at the same time. There are two oil baffles in front of the Intermediate & Output shafts and the Input shaft's roller bearing has to go in before the others as all three bearings are an Interference fit. It entails a bit of juggling and one has to be quick. A quick tap with a rubber mallet ensures that all bearings are seated before the case cools. Then the Selector mechanism, Output Shaft Selector forks and shaft and main oil baffle are fitted. When the case has cooled the gear lever if fitted and the gearchange is checked. It isn't great with the rear bearings unsupported but as long as all gears can be selected it will be OK when the rear cover is fitted. Then the rear cover gasket goes on with a light smear of Blue Hylomar. And now for the technical bit - Shimming the end-float . One needs a 'Shimming Plate' for this job: I have drilled mine so that I can bolt it down on top of the gasket. I think that this gives me the most accurate measurements but people have different approaches and may just rest the plate on the case or put the gasket in after the measuring has been done - each to his own. I use a 'Outside Micrometer' and a 'Depth Micrometer' for this job. First measure the thickness of the Shimming Plate: Then measure the thickness of the oil baffle that goes on the rear of the Intermediate shaft: Using the Depth Micrometer, measure the height of each bearing above the plate - I take about six measurements around each bearing. Then measure the depth of the bearing housings in the rear cover - again, I take about six per bearing. All of this is written down and then the shim thickness is calculated for each bearing: The formula goes . . (Depth in cover - 0.05mm clearance) - (height above plate + plate thickness + baffle thickness) = Shim thickness. One then has to assemble a collection of shims to the right value. These come in four nominal sizes - 0.20mm / 0.28mm / 0.38mm / 0.50mm. However there is quite a variation and I spend time mixing & matching until I get the right result to within 0.02mm. Here, I am looking for 0.95mm for the Output shaft and the shims measure 0.94 - good enough for me . The collection of shims are lightly greased and placed centrally on the bearings - you don't want them moving as the cover is fitted I screw four 6mm studs into the back if the case as a guide for the cover. It will be hot and if fumbled causes mayhem with shims falling about the place . A final check is made of the rear cover to ensure it is flat. If not it will cause problems. And then the cover is heated with the Propane torch and carefully lowered onto the bearings. It is then tapped down with a rubber mallet and five of the nine set screws are fitted. The studs are removed and all set screws fitted and torqued-down to 9 lbs/ft. When the box has cooled and I am happy that the clearances feel right I fit the three oil seals. First the input shaft splines are masked and the shaft given a light smear of grease. I use a long socket of appropriate size to seat the oil seal into the case. The seal is given a light coat of Blue Hylomar to ensure its oil tight around the case. Surplus compound is wiped away and that's one done :thumb. Now remove the gear lever and repeat the process with the gear lever shaft oil seal. I used an 18mm socket to seat it. The gear lever shaft is given a light smear of grease and replaced. The Output Shaft oil seal is given the same treatment. This is a Monolever bike so the oil seal lips face outwards to let the box breath into the leg (which has oil in it). Paralevers have a different oil seal that is faced inwards as the leg is dry. Paralever boxes breath through the hollow bolt that secures the speedometer cable and battery earth strap. I use a flat steel disk I turned on the lathe with a 50mm 3/4" drive socket to seat the rear oil seal. The output Shaft drive flange is then given a light greasing and fitted to the taper shaft - the taper is kept dry. The nut is torqued down to 161 lbs/ft which is a bit of a heave. I use a long locking bar and a Certified 50-300 lbs/ft 3/4"-drive torque wrench for this. Almost finished now. The Neutral Switch is checked with a Multi-Meter and fitted with a new washer. The Drain Plug is also fitted with a new washer. I cleaned the swarf off the magnet with cloth and a high-pressure air line (don't try this at home kids :rob). The replacement Speedometer Drive, a new collar and the breather bolt are then fitted (it doesn't strictly need a breather bolt as a plain one would do but it has one so it went back in). And that's it - the box is finished . . . . Now for the clutch . . . . ...... so thats it, box is done clutch done, bike back together and a massive parts bill to pay, almost to the price i paid for the bike a couple of years ago1 point
-
Alright, So you have a sweet ride, but its way to Jack and you cant get no love from the ladys because they can Limbo under your veilside Side skirts. Well heres a little artical i wrote, And I hope you do it, note for note, but dont worry, Be happy. Anyway, Secondly, This is my disclaimer, follow this as a general guideline to what I have done in the past, its not gosbel, and if anything happens to your stuff Dont blame me, push a push pop. I would like to note, i Have had a few sets of these Certed in the past, But you never know what might happen, so consult your nearest Cert guy. Right, The fun Stuff. The struts used in this build are from a 1981 Toyota Cressida Wagon, however they are the same as pretty much all 80's corona's cressidas and the likes. Ae-86 etc are equally as easy, you just need to use AW-11 or AE92 strut insert, instead of the GT-4 celica ones used here. I always try and water blast the shit out of the struts once removed from the car, makes like so much easier and nicer, plus your less likely to drop a strut on your nuts. So you pretty much have something like these. Then its into the workshop, Where I recommend some fucken sweet beats, and some fucken sweet beer. I chose Deftones, and Flame in this case. Next, pull all the shit off the strut like brakes, hubs etc, the lighter the strut, the easier to man handle, Like your mum. I also find the easitest way to get two piece brake hoses off is to very very carefully, attack it with with a hacksaw so you can bend them open. I have never had an issue when it comes to putting them back on. So you now have something like this. Then its time to remove the dredded spring. Note, I would always recommend using a spring compressor, as It is safer and better than note. (however in this instance i didnt, So.......whatever) Once compressors are on (not shown ), undo the nut the holds on the top hat, and remove both, along with the spring. You can now choose to throw away the spring, or weld them to your roller skates for max fun. So you should now have a lovely springless strut, This Pics shows what happens when you dont use compressors. Shit likes to explode Next step is to remove the smelly shock insert. i find it heaps easer in the vice. I tend to use pipe wrenches, but you can use punches, drifts, hammers, All that sort of stuff. I would also reccomend putting a tray under your vice, as if you still have origianal oil shocks, its going to want to spew that everywhere when you try and pull them out. This in it self can be a mission. I tend to refit the top hat and give it a bit persuasion with a hammer. tray Shown here One shock top nut Shock coming out of its closet Once you have removed that Pesky insert, its time to remove the spring platform. I usually grind a ring round just just just above the weld, being very carefull not to cut major deep. Then its hammer time From here, you can see how much longer the orginal MX72 shock is compared to the new gt4 shock. Which leads me to the next bit. you need to figure out how much of the strut housing you need to remove to make this new shock insert captive. I do this very simply; Insert new shock into housing, Refit strut housing nut, (note, fit it so 1/2 to 2/3 or the nut is wound in, but leave a bit for error etc) Push insert all the way down to the bottom of the strut so the shock housing is max low, Mark it, then pull strut so its set as max hight, then measere from the nut to your original mark. this is the measerment you need to remove from the strut housing. (in my case I think it was about 57mm) Measure the length when its like this Next its time to cut your strut, this can be done two ways. With a drop saw..... Or with a grinder. If using a drop saw make sure its set up perfect, and if your using a grinder, I tend to find the easist way to get a equal cut is to wrap a piece of tape round it making sure it joins up square. Then grind round the mark. Magic!! ALSO! WHEN YOU DO YOUR FIRST CUT AT THE TOP, MAKE SURE YOU DO IT RESONABLE AMOUNT BELOW THE INTERNAL THREADS OF THE STRUT HOUSING Then mark the measurement you had to remove, and remove it. Also make sure to try and cut it to the inside of you measurements, allowing for thickness of grinding disc etc, otherwise you will end up short.. I tend to v the ends a little for a bit better pentration, something like this. next I chuck the new insert in the strut, put top part one, and fit the nut, till the two sections are meeting up nicely Then its the super fun part, tack welding. I have these sweet welding magnets, they help making everything nice and straight. Then chuck 3 very careful, short and sweet tacks around it to hold it together. you dont want much heat getting into the shock insert Then remove the insert, and finish welding it up. I then give it a grind down so its pretty smooth(like how I like to grind on your mum). This makes its much easier to fit the sleeve. Which now brings me to the sleeves. I use 50nb running tube from Steel and tube, its what plumbers use, can order at any length. I also got the nuts from steel and tube. price wise came to $65 inc for 600mm of tube and 4 nuts. You should be able to get away with 300mm of tube, Usually allow 150mm each side. Anyway, cut this to length, and I have found with the last lot I got I had to file the inside abit where the seam is, to get it to slip over. In the past I have never had to do this before, so not sure what thats about. I had to press these ones on, Which is probabaly a good thing anyway So thats on, then wind on both the nuts, as once you weld the sleeve you cant get them on. SO DO IT! I tend to cover the sleeves with tape, to stop any welding splatter etc to stick to the sleeve. However, if you do, can usually fix it with a hacksaw and a small file anyway. Then its sleeve welding time. Easy. Right, next is the springs. 50NB tube has a daimeter of around 62mm, and I have found that springs around 65 internal will be fine. In this case, i went to the local wreaker, and got some aftermarket lowering springs from a 1989 Honda civic. For $40. Next is simply jabbings these in, and seeing how it all looks, setting hight of nuts etc. But wait, there is more. The top hat needs a way to hold the springs. I happened to get my hands on some none threaded 50mb tube, so cut short lengths, just long enough to go atleast 3/4 of the length of the top spring so it cant go anyway. Centering them can be hard, I tend to do it by eye, and then weld them in with three decent welds. Always clean up the area to be wleded, makes for a Nicer job However, there is one more small job to do, and that is to make it so that the springs can stop turning on the struts I did this by fitting the top hat, and marking where the spring ends. then putting a massive blob of weld on. its not the neatest, and you could make a little piece of steel etc to do the job instead. but it works Then, fit top hat on, maybe do some painting on the welds etc. And put a decent smear of grease over the threads, will make adjusting easier, and stop them from rusting at the same time. Then just slam it all back together, Then fit in car, do your measure up and then, DONE! Max low struts at a max low price. So what did you need to buy, Strut inserts, usually around $130 if you know anyone in the trade etc. Dont pay repco prices, they are crazy 50NB sleeve and nuts, $65 Springs, $40 So $235 all up. I happened to get my inserts from a mate at $40, so this made my whole job cost $150.... so yeah pretty damn cheap. What else to note...... Not much really, I have found with this style of strut mods your camber ends up pretty bad, as in close to Possitive, so Some adjustable bottom arms or similar would go down a treat. As would some RCA's, as your now rocking 4 inch's lower than before. Also i have made these for a Nissan 910 bluebird, now in Hemis ride, Was pretty much just as easy. just needed to get some spacers made up to support the shock insert (I used gt-4 again) inside the housing. To a cost of $60. so still mint. Anyway.these ride pretty nice, Non lowered springs would make for a harder ride, which I have in my corona, And it drives pretty damn nice too, but to get the hight, I am runnign them un captive. Anyway, fucken done. Any questions, go nuts. Mad look out for more, like how to make adjustable bottom arms, and an Adjustable Pan hard rod. Seedy Fucken Al1 point


This leaderboard is set to Auckland/GMT+12:00