
Leaderboard


Popular Content
Showing content with the highest reputation on 06/06/16 in all areas
-
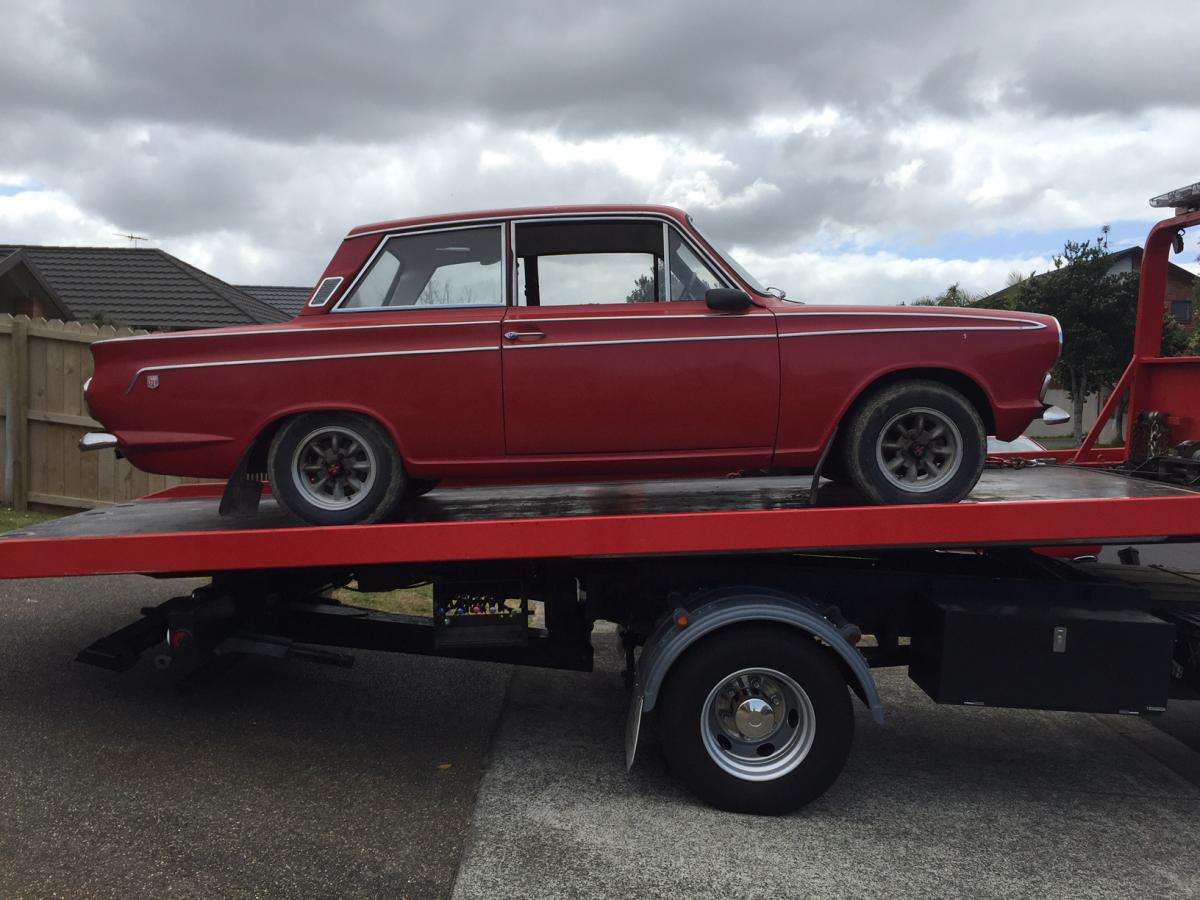
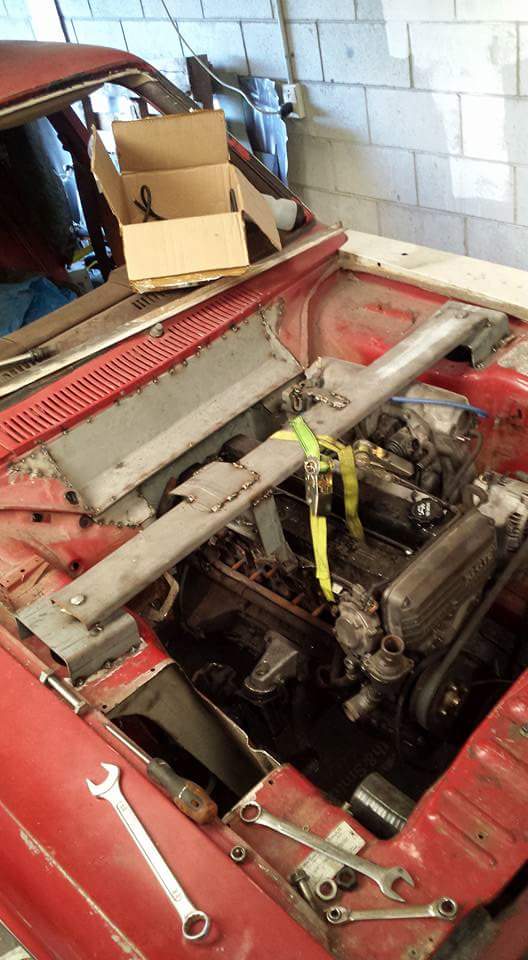
Well it's mobile again... Since I last drove it it has been converted to IRS, fitted a new gearbox, a new return fuel system, disk brakes on the front, bigger drums on the back a sway bar, special custom camber link pin bushes, and a new exhaust system. still not finished, still have a fuel leak to sort out, which is proving trick as it seems to only occur under boost. However the new box seems a lot stouter than the old and has survived a couple of runs under boost so far. Also sits higher in the back than I want, either have to cut the current spring plates or sort some dropped IRS plates...10 points
-
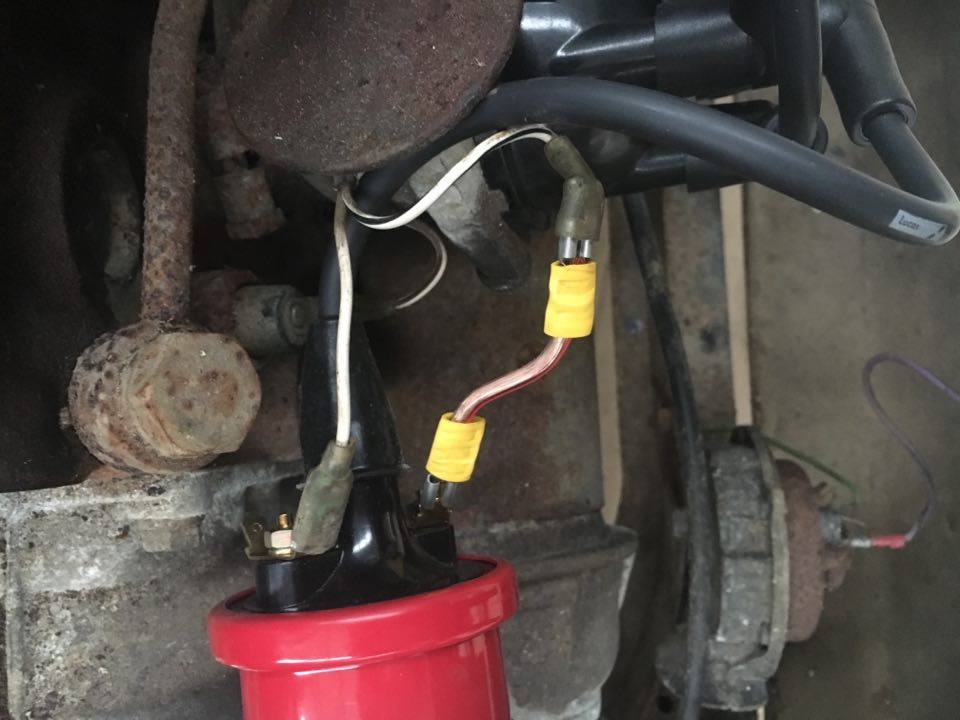
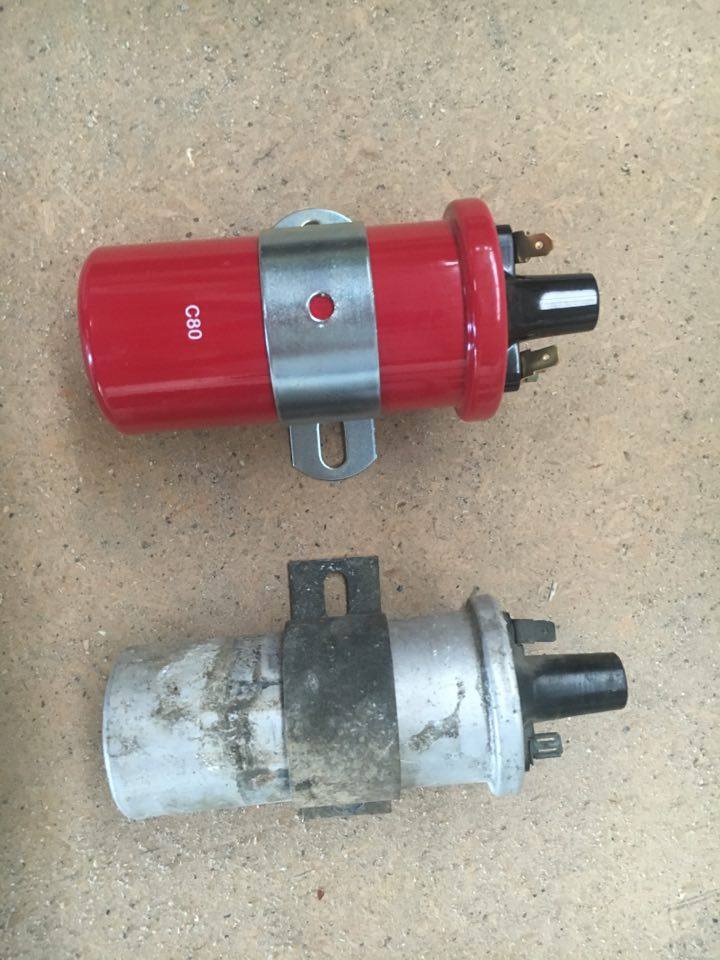
Remove bootlid, apply tape and yellowpages I have no idea what I'm doing. STAY AWAY RUST.7 points
-
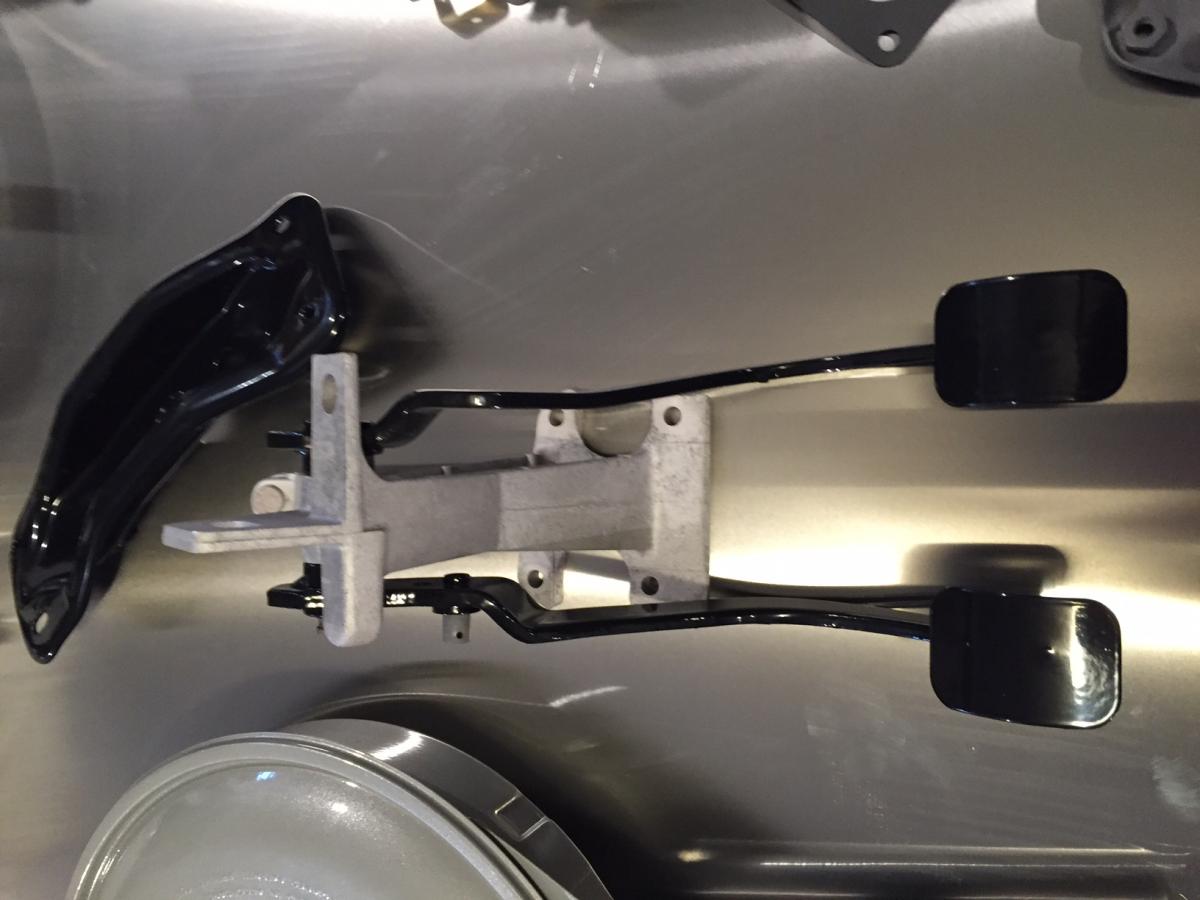
Been balls out at work and doing shit around the house so progress been slow. The roof has been hammer and file finished and all the front panels are back from the blasters all looking mint. Greg is going to tidy up the back end and then onto the jig to get all the front back in. Been getting lots of bits powdercoated and the carb is back fully rebuilt and looking brand new. Need to sort the pushrod bushes at the pedal box for both the brake and master cylinders as both slogged out big time.
 5 points
 -
Cant find any challenging 4wd tracks? put some near bald road tyres on.. featuring nosy ginger cows:4 points
-
Back together and running. Motor doesn't tic so much since filming, reset the tappets. They take a 0.05mm gap! Tiny. Can't seem to get the carb to lean out, the plugs get quite wet on all settings.4 points
-
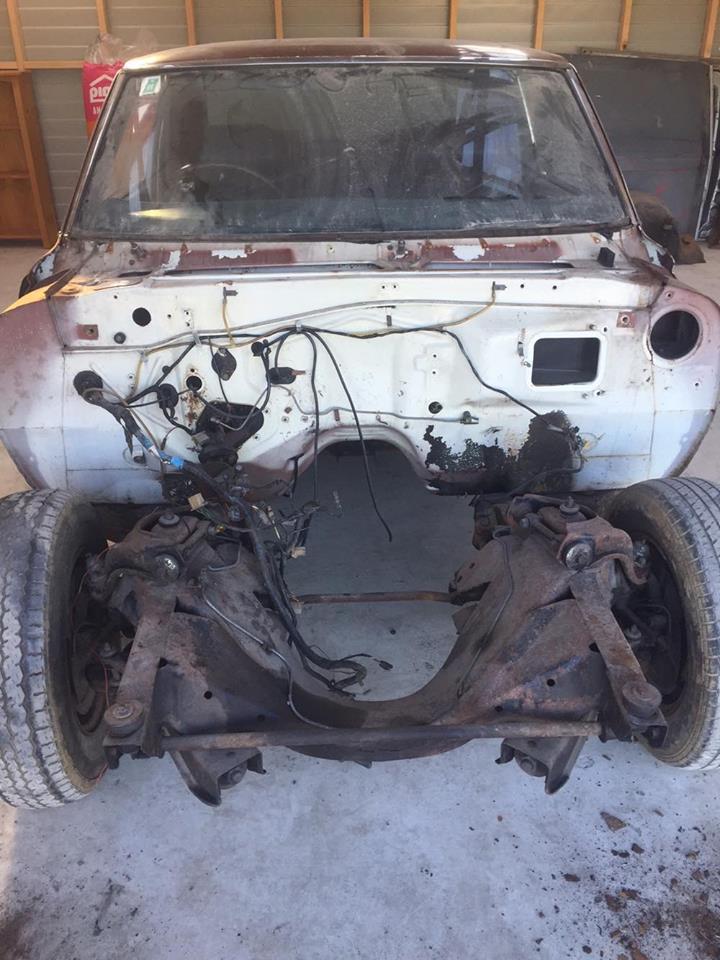
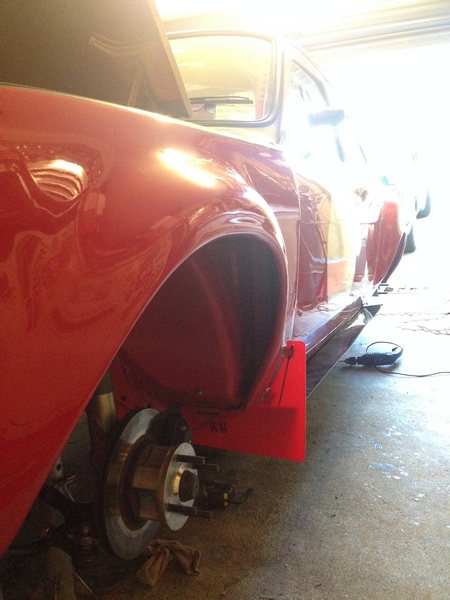
Pulled the remains of the exhuast off the parts car, wasnt expecting much, but is acutally in pretty good nick (after filling a few hioles) and has a stainless back box, so that will do for WoF. Now that the towing is done, time to remove what little structual rigidity existed in the front right quarter... this is what i looked like before: After my treasure more than a couple of spot welds to drill then i will start adding new steel back in. Like a complicated jigsaw puzzle where you get toi make the pieces. Im going to rebuild the sill to strengthen it up again before removing the floor panel and heater cross member itself. The jack is under one of the cross members to ensure the door still closes nicely!4 points
-
its had the cert inspection and it failed on a couple of little things which I've remedied. Clint has re-checked it and its all done so the cert is sorted. I've been doing little jobs here and there but nothing exciting the only thing i took a photo of is the badges. I've got all the badges for it now I'm just waiting on the last one to turn up from the states. 2016-06-06_03-42-50 by sheepers, on Flickr 2016-06-06_03-36-49 by sheepers, on Flickr 2016-06-06_03-17-49 by sheepers, on Flickr4 points
-
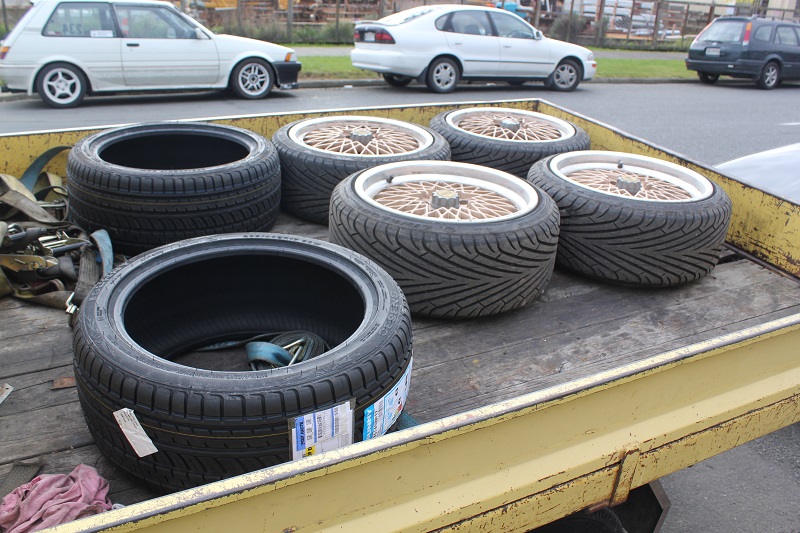
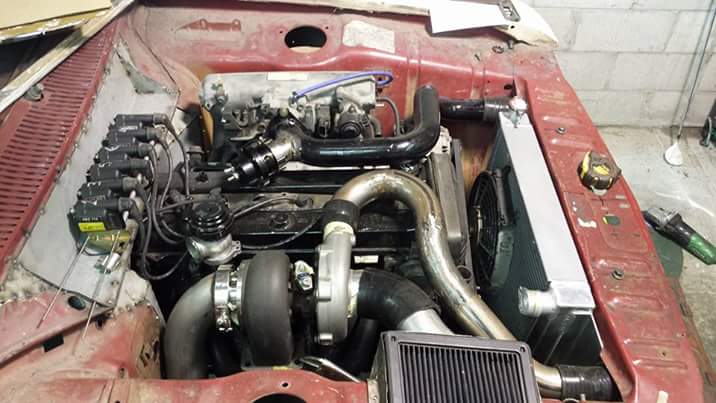
Another week. Not so freaken sure where all th time went. I mean, I got some shit done, but it doesn't really feel like it was much However, motor is now mounted in the car, gear box bolted up, drive shaft in etc. Might have to modify the clutch slave mounting some how, It clearly isn't right, and my guess is I was in to much of a hurry last time to do anything about it, I suspect the clutch slave movement isn't enough to fully operate the clutch fork. Maybe why I had issues with clutch slippage. Then again its probably fine. So next up is strip all the stuff off the front of the engine for painting. Which I guess is what this week is going to consist of mostly. Need the rocker covers and intake manifold painted so I can sit the loom back on the engine and figure out the few mods to the loom I need to do. As I plan on doing everything in wrinkle finish, I also need to figure out some sort of paint booth where I can use some heat. Oh and My 235 / 40/ 17's turned up so droped all my wheels down to local tire wizard for some fitting Not looking forward to finding out how much space I don't have Rad I know
3 points
-
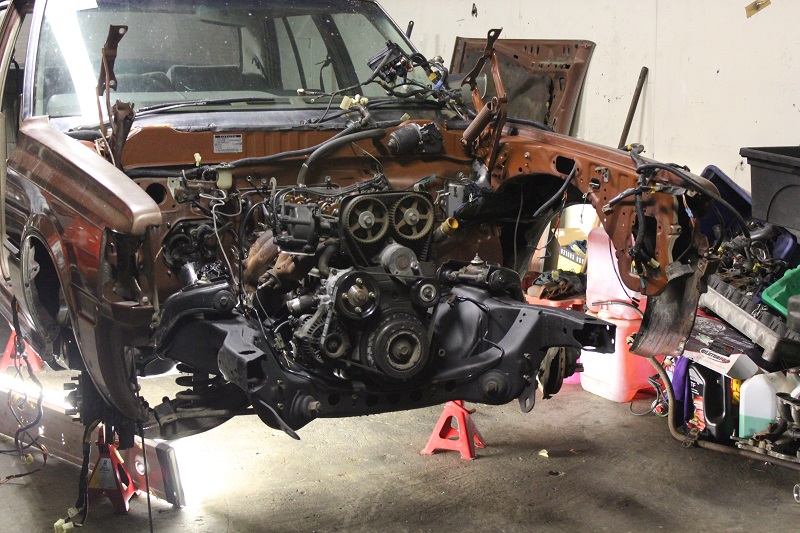
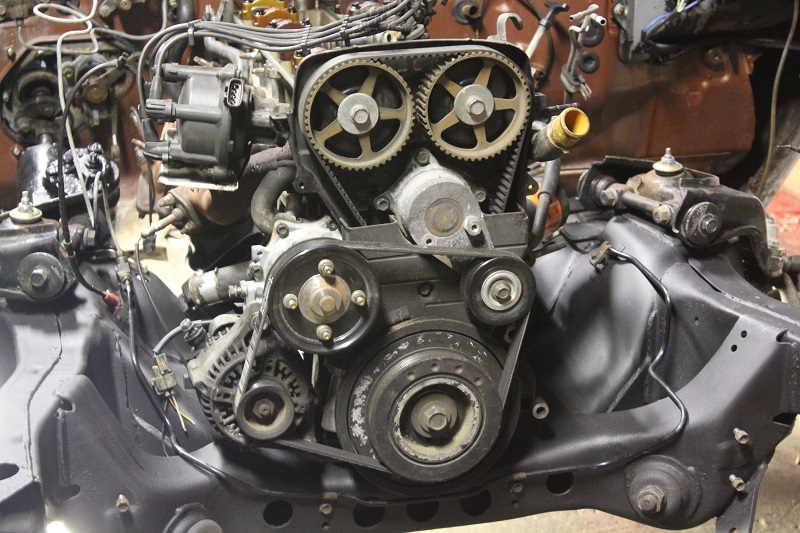
I thought I better check the ITB adapter to make sure it actually fit. It seemed to not fit initially but then I realized it was just the vacuum barb touching the coolant pipe, this can simply be solved by removing the barb, fitting the adapter and then re-fitting the barb through the gap between the coolant pipe and engine block. Anyway back to work, this time I did the clutch salve cylinder bracket. No pictures of the entire disassembly or cleaning etc, getting a little bored of this painting business: The slave cylinder is located in a kind of unpleasant area, so I decided to rebuild it in hopes of not having to do it later on when access is restricted: A little compressed air easily pushes the piston out: Used Vs. new... glad I decided to do this: New piston in: Finished cylinder: Alright so at this point I was tired of seeing the transmission looking so dirty so thought I would deal with it next. This is how it looked when I got it: In the progress of being cleaned up: Again I kind of forgot to take pictures after getting busy with this, however, once it was all clean I used some etch primer on it: Painted black: Ok next it was time to remove the axles which I had been putting off for a long time. I had never removed axles before and thought they would be a nightmare for some reason, they were actually pretty easy. As suspected the auto and manual axles seem to be identical (bottom one is my original one, middle one is the one I got with manual swap): Also time to drain the oil and disconnect all the engine and trans oil coolers: Chocolate milk as a result of the head gasket failing: So as you can probably guess this is all leading towards removing the engine. I went down to the garage today expecting to do one or two small jobs.. ended up dropping the engine, I suppose it was going to happen one day soon. I had gradually been removing all the accessories/wiring etc. so there wasn't one single big load of work. Soon to be out: I know its a shitty situation having the crane up near a wall like this, had I known it could only work in this position I would have tried to move the car earlier. The reason it doesnt work from behind is because the transmission touches the cranes leg. Because of the location of the diff and the engine lift points it kind of went down a bit crooked: And well that is all I have. At the moment the engine is resting on the ground still partially in the engine bay, I'll get better pics tomorrow but chances are I won't be able to actually get the engine out from under the car until sometime later. Oh, I got something nice in the mail: Again it was too hard to wait so I installed the shift cables even though it would have been 10x easier with the engine out of the way: It feels so right having a manual shifter in there rather then the auto:3 points
-
itll be the one i did a cert check on, i saw it on the motorway on saturday , i think he lives in drury or papakura. 19'' vette rep wheels2 points
-
Good job danger russ ! Do a skid that should sort it out2 points
-
so have started to strip out the crown ready to take the body of and start some of the rust work on the sills
2 points
-
Tarmac Rally Prep Part 2 Wheel alignment and suspension setups ready for Taupo
2 points
-
It was coming up to dinner time last night and I was mucking around on the laptop Girlfriend: "Hey, how much longer are you going to be drawing graphs in that program for?" Me: "About 20 years" Girlfriend: "Okay"2 points
-
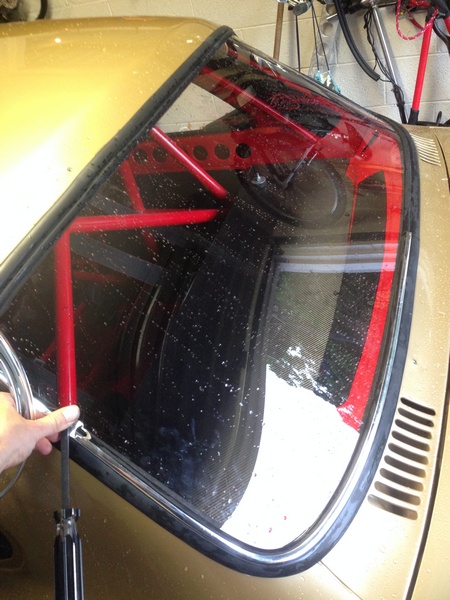
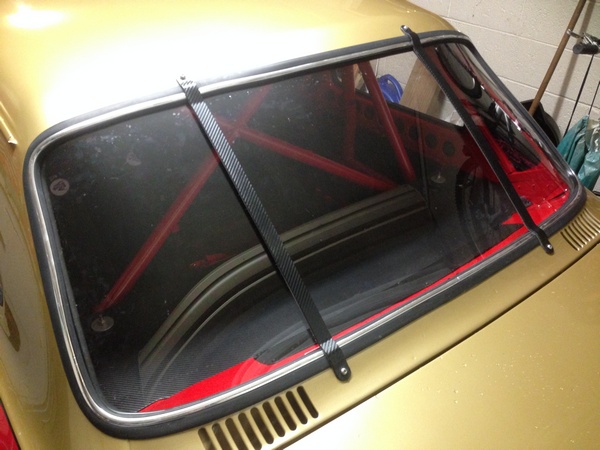
Tarmac Rally Prep Part 1 Underbody protection and mud flaps Fitting the chrome strip at last
2 points
-
Oh hang on.. yes.. it's coming back to me.. my past boy racer days back in Blenheim with the young solo mums and spotty teenage girls throwing themselves in a drunken state at my mates rotaries. Yes.. rotary hoes...2 points
-
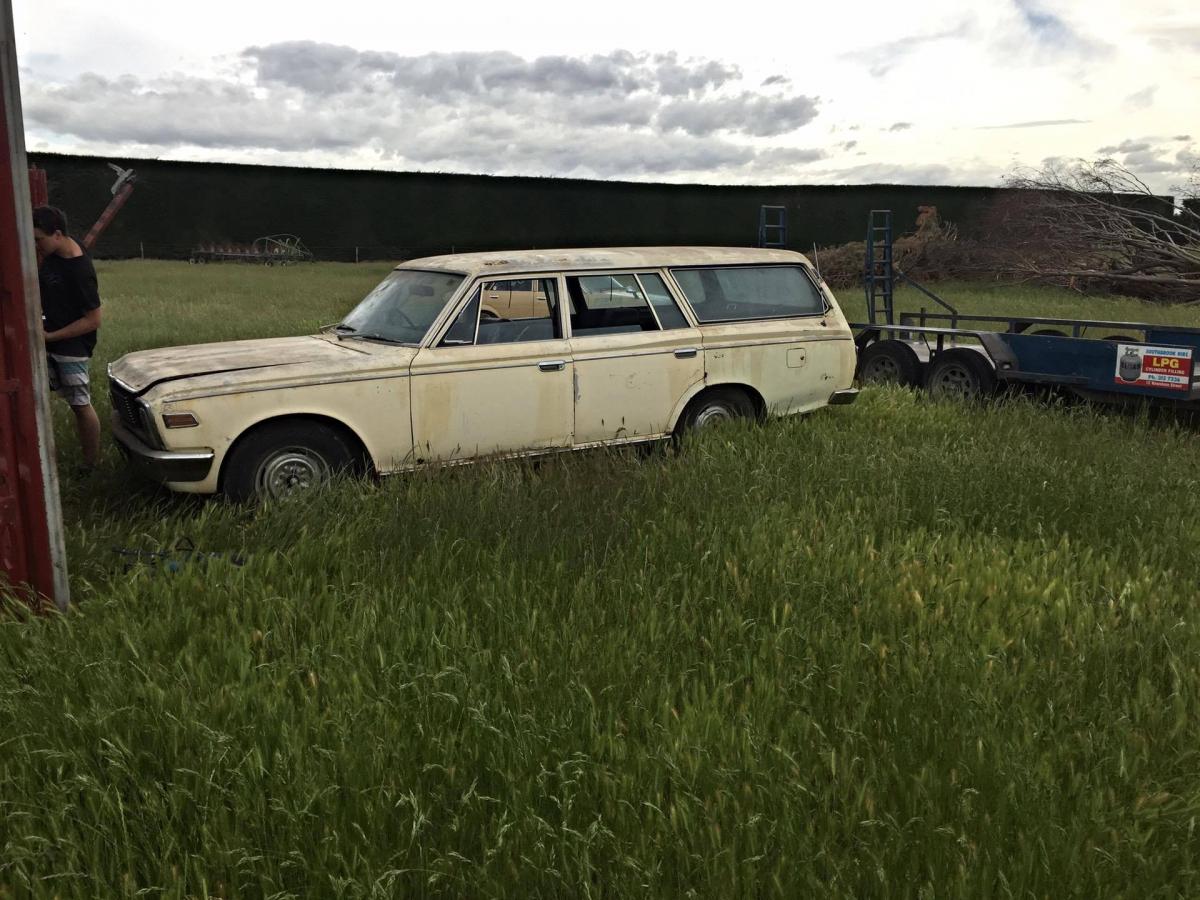
got this old bus running again after buttoning up the cooling system, and fitting the tow bar Then backed it out in to the sun for the first time in aaages. leetle bit of rake! will hopefully come down with interior etc installed then proceeded to pull the parts car out of its spot (which is over a bit of a hump and slighlty down hill) with it. YO DAWG! I HEARD YOU LIKE 2300 WAGONS SO...etc I had to get Mrs Azzurro to drive the tow car while I 'steered' the parts wagon (by kicking he wheels, as it has no steering box or steering wheel!) and controlled its forwards momentum with wooden blocks. Seems a shame to put an exhaust on it, but in other news, she said she likes driving it So now its in reach of my air hose and extension cord its dismantling time Unfortunately when emptying the boot out (so i can remove the fuel tank - the one that came in the nautilus has a massive dent in it,) the pane of spare hatch glass smashed lucky i have two more i guess.2 points
-
Last week i priced up a respray and decided to attack all of the rust, dents and scratches. Here it is with the front guards off, the worst rust was underneath them, and you can see half of it sitting on the ground After i fixed the rust i primed and sprayed rubberized underbody spray on the inside of the guards So anyway the guards are back on now, rust has been fixed, the dents and scratches that have been fixed have been primed and there's now only a few little things to do before its ready to be sprayed. [/center] And ive only been pulled up for one random license and breath test2 points
-
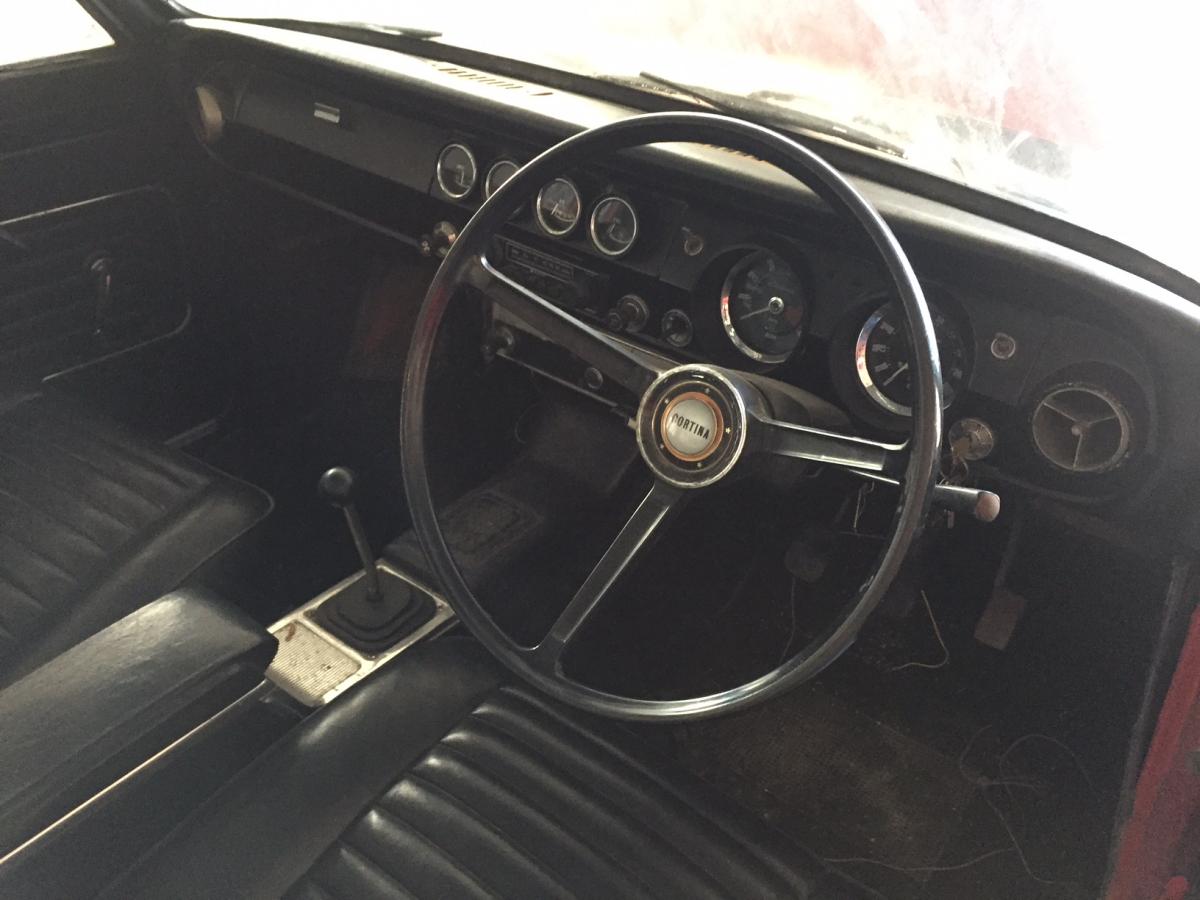
Hi all. I have just started a full restoration of my MK 1 GT 2 Door Cortina. Currently it is fully stripped and with Greg at Custom Metal Shapers. All the exterior paint has been stripped and it is very rust free for one of these. Unfortunately it was restored in the early 80's after I suspect it had a frontal and as a result the front rails and inner guards are a bit ugly. It would really annoy me every time I opened the bonnet knowing what was there so the front rails and inner guards are going to be replaced. The exterior will be finished as per the original Dragoon Red and all completely standard. Ditto the black interior apart from a Les Leston woodrim wheel. Running gear will be all standard precrossflow with period modifications. Engine is a Throbnozzle Racing pre crossflow running the standard 28/36 Webber with jetting to suit. Gearbox is fitted with a 2000E gear set and Ali bell housing, tailshaft and remote housing. Diff is 3.7 in an Ali Nose. Shocks all round are adjustable Spax. Wheels are going to be BRM 4 spokes from the 60/70's. Aiming to have it on the road October 2016
1 point
-
Bit bigger cams. and some more diy porting. Long version: It didn't really respond too well to the cams. I started to pull it apart so could dial wheel the cams, as i was initially too lazy to do it and the last set of kelfords were spot on. Got a bit carried away and decided to do some more work to the ports, as head seems to be the restriction. When i put it back back together, dialed the cams. Exhaust cam was pretty close. but kelfords had ground the Inlet cam 20degrees retarded.. which happens to be 1 tooth out from factory marks. So before i pulled it apart i had advanced the inlet a lot to try get it to make some power .. 20degrees, so was running at there recommended settings, while i was thinking it was way advanced.. After the porting. set the cam timing back to where it was. didn't really gain much. but didn't go backwards. advancing the inlet 10deg after this gained a decent amount through midrange Log above is new cams (193c) + some more porting vs old cams (193b). both old and new cams dialed at 10degree retard exhaust and 10degree advance inlet. over there recommended settings. really needs a big valve head and some good port work to go much further.1 point
-
Just noticed the seats in the one Terry saw are Recaro meshies. But not in your pic Geoff. Jeeze they are like Daves... LOL #singleoriginglutenfreeartesianlongcutcommodores1 point
-
yeah man he came and bought two rusty steel wheels from me to go on his LWB S1 Landy. Drove all the way from the hutt in his SWB S1. Seemed like a super GC1 point
-
Inferior diodes often found in cheaper range of mig welders are prone to failure. Once one blows the rest will follow rapidly. Why? Because the type of diodes fitted in the bridge rectifier are linked together so that the sum of all of the diodes covers the amps and voltage generated by welding with the machine. These press fit diodes are the same as used in vehicle alternators. Obviously installing these enables the welders to be sold at the lower end of the market and for a while they hold out but inevitably fail. The diodes are installed in a heat sink made from aluminium. and install new Standard Recovery Vishay 70 amp 1600 volt diodes that collectively exceed the workload of these welders and provide a more robust machine with the ability to work at the lower end of the welding scale as well as the higher end with ease.1 point
-
You can use normal diodes and make a discrete bridge but check the current rating of the diodes carefully . The bus capacitors in the welder are normally what causes diodes to fail.once one fails then they will all go. Use standard recovery diodes about 70 amps and around1600 volts. That's because of the inrush current. Use a good heat sink and make sure you remain within the ambient temperature range . They are the same type of diodes as used in automotive alternators Good lucj1 point
-
If the specs match up I'd say replace it. Its not like it cost you much or you can break it more than it already is1 point
-
Ripped into the trans too, unfortunately it's been so long I couldn't recall what bits went where (I really wanted to avoid that situation). Thank fuck for phone pics. Thought I'd lost some pan bolts till I found these brackets etc in a box, what went where was a head scratcher till I scrolled back through some images... I've never looked into an auto trans before, first thought here was shit look at all that crap... But after a wipe up I realised these bits had fallen out of the filter when I rolled it over, and it was actually pretty clean inside... And a new filter made it look pretty flash... I cleaned out the pan and gave the holes a tickle with a hammer to straighten out the dimples... And all together, also chucked some heat shrink over the tatty wiring, couldn't get it as tight as I'd like as had to slide it over the plug, but I'll tape up the join and should be all good... I also checked I had torqued the flywheel bolts and was contemplating mating the engine to the trans when a mate came round with beer, so that's pretty much where things stopped...1 point
-
Nice. It is quite fun "testing" them in gravel/mud1 point
-
All sorted - half a dozen 'skids' on gravel loading up the ABS and the squeal is gone. No fun at all was had finding out how well the 4WD hooks up in mud either...1 point
-
2weeks of my life and about 1k later. looks like i've gained a couple of kw. na lyfe pink old. more inj d/c at same afr + rpm starts to pull away.1 point
-
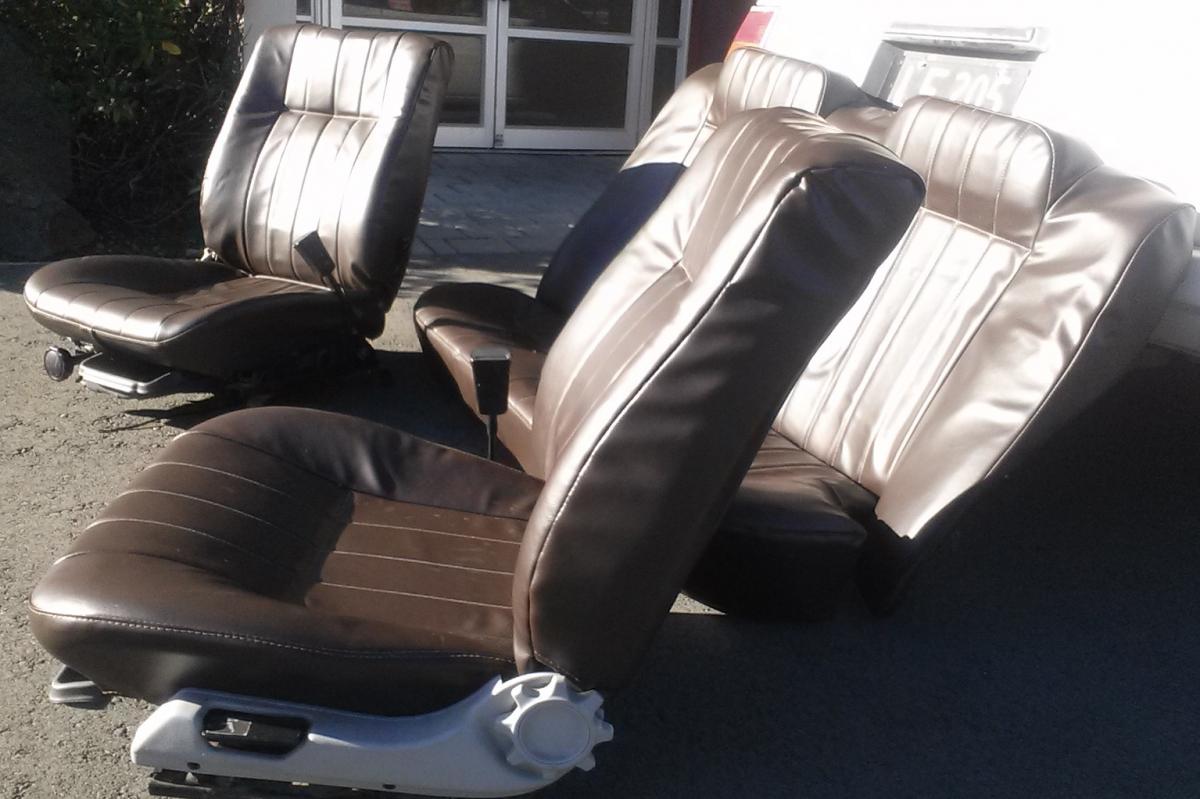
The seats are back from being reupholstered, Should fit great in chocolate brown. Need to get carpet sorted now then re-assembly shall begin!
1 point
-
KK's Auckland company car.1 point
-
The doppelganger was seen... The paint was a bit nicer, and it had some funny wheels on it, but same colour, same height, etc. The drivers door had a more even shape to it as well1 point
-
My GT Replica is coming along well [/url]">http:// [/url]">http:// [/url]">http:// [/url]">http://http://s1010.photobucket.com/user/garryhg/media/gt1.jpg.html'>1 point
-
Wow, new these things are $456.55 +GST https://www.electricaldirectltd.co.nz/index.php?route=product/product&product_id=3700 Some used ones here for starting price $80 no reserve http://www.trademe.co.nz/building-renovation/electrical-lighting/lights/exterior-lights/auction-1098249107.htm http://www.trademe.co.nz/building-renovation/electrical-lighting/lights/exterior-lights/auction-1098249113.htm1 point
-
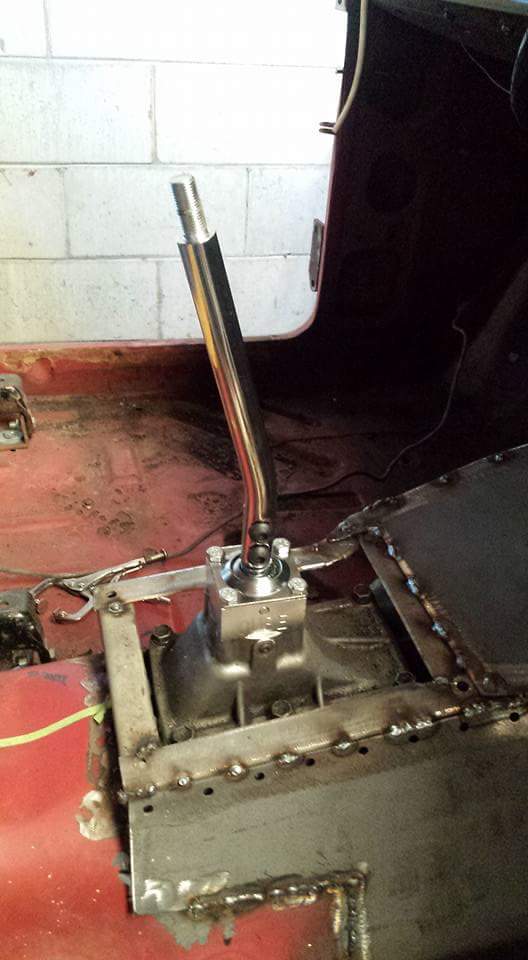
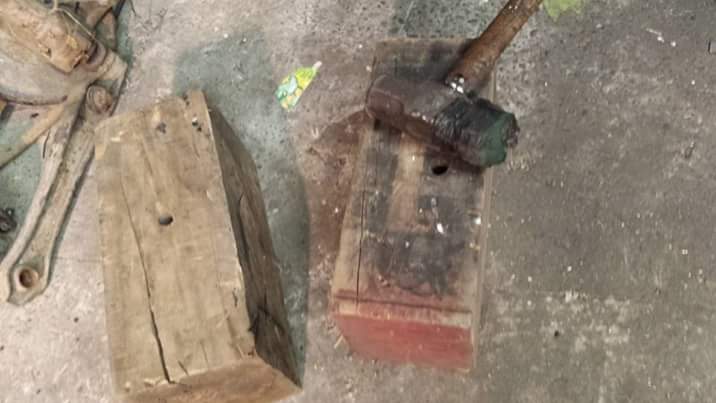
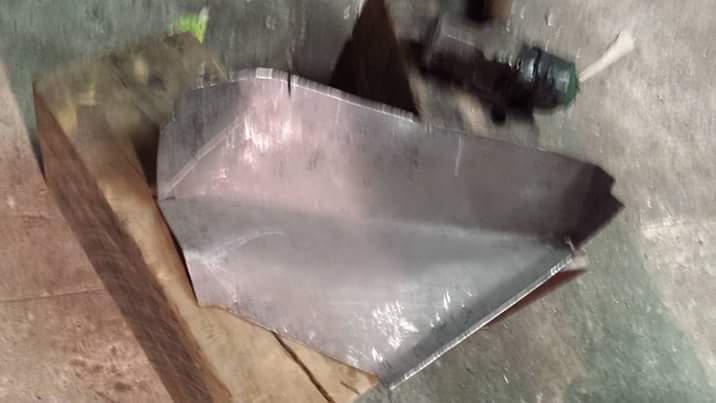
Special tool #37 ..this little brace it what you need when you make your own crossmember to mount the engine and then make everything else of the position of the engine ........only to find out you fucked the crossmember up!!!! .so special tool #37 it there to hopefully keep the engine in place while you remove and make another crossmember and engine mounts. . And just because I know the fucking thing will drop at some point I made captive nuts and bolts that will allow me to lift it 2" . On a side note my cube racing shifter turned up....
1 point
-
I take offence to this!1 point
-
Not to prison, before someone asks.1 point
-
Maybe it's so slow because the back wheels are on backwards. They've still got 40,000 km of inertia in the other direction stored in them.1 point
-
Has anyone nicked your oil filter yet?1 point
-
Ok lets see if this works http://vid225.photobucket.com/albums/dd95/105re/TRIM_20160530_061135_zpsn99jdybk.mp41 point
-
1 point
-
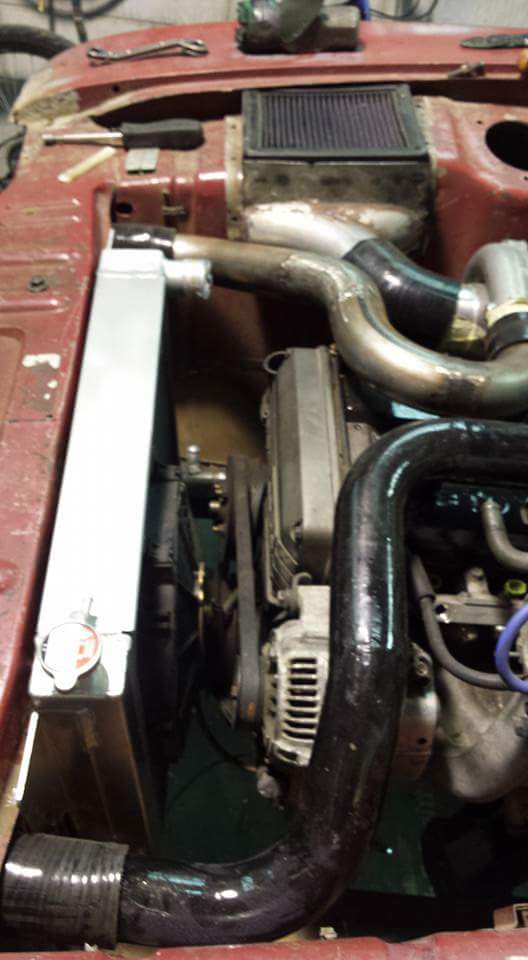
Radiator turned up yesterday so I got it mounted 70mm rotary radiator should help keep things cool Pretty full now
1 point
-
Someone has set up the forum software to replace l v v t a with aliens. Funny funny.1 point
-
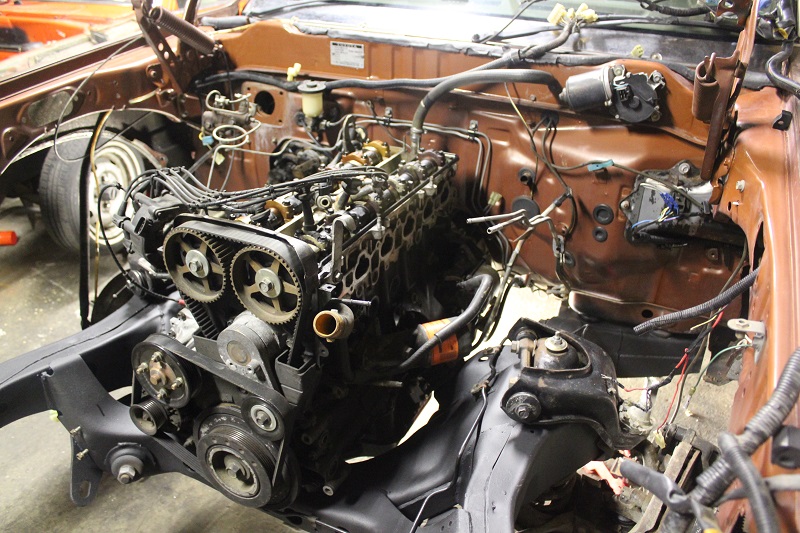
Okay so although I want to keep the car mostly stock, there are a few modifications I will be making. Other than the manual swap the next biggest mod is going to be ITB's! I picked these up some time ago: Cleaned up: Still a little cleaning to do on the insides: Anyway that was quite a while ago. Although I'm no where near installing the throttles I got something in the mail today which is why I'm posting this ITB related stuff. Hmm.. what could this be: ITB adapter of course: Nice, as it should be; I didn't realize the NZD had dropped to what it is now... Like I said I'm no where near installing the ITB's but I couldn't help it; had to see: I thought the throttles looked pretty clean but now with them next to the adapter they look dirty again. Had to check what it looked like on the engine too: ..Engine is still so dirty too.. Anyway moving on. I also had to order a new distributor rotor, cap and seal because the originals were no good (as you will see below): Original distributor off my car, which I will be using: Doesn't look good: Seems the rotor had somehow rubbed or burnt the plastic cap?? Honestly I'd seemed to run well but couldn't just ignore this, which is why I bought the OEM Toyota replacement parts. New rotor: New cap: New seal: Cleaned up dizzy heat shield: Refurbished unit: Alright onto another completely different area. The transmission and its various brackets/ linkages were looking pretty bad so I decided to clean them up and coat them with the same rust preventative coating as I did the brake/clutch/shifter parts. Here's what it initially looked like: Note the direction of the arrow on rubber seal (not really sure if this was important, but best to reassemble the same way): Rust/protection coating: Feels a lot smoother now. Oh I also picked up a blacktop flywheel since it is about ~1.2Kg lighter than the 16V one, stock feel/driveability should be retained while being slightly quicker revving. Of course it needs resurfacing.1 point
-
New parts..... still wont start tho. im thinking maybe the starter solenoid is shot cos the positive battery cable gets really hot when hooked up to a battery. bogus wiring untill i get some proper fitting crimps haha Also jacked up this on photoshop, this is where i want it to be when its done.
1 point
-
Awesome selection of cars dude.1 point
-
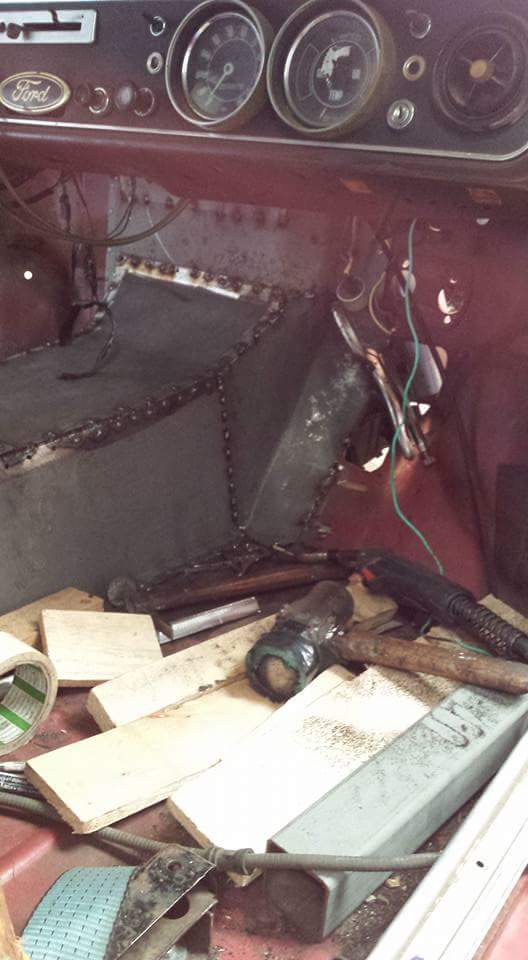
Ah sadfacerednoseclowncar can not be unseen!!!!! Finished off the drivers door today. so I still need to do this on the other door, but I really want to get on with finishing the heater channels and get some paint on the underneath and the pan before the weather gets colder.1 point
-
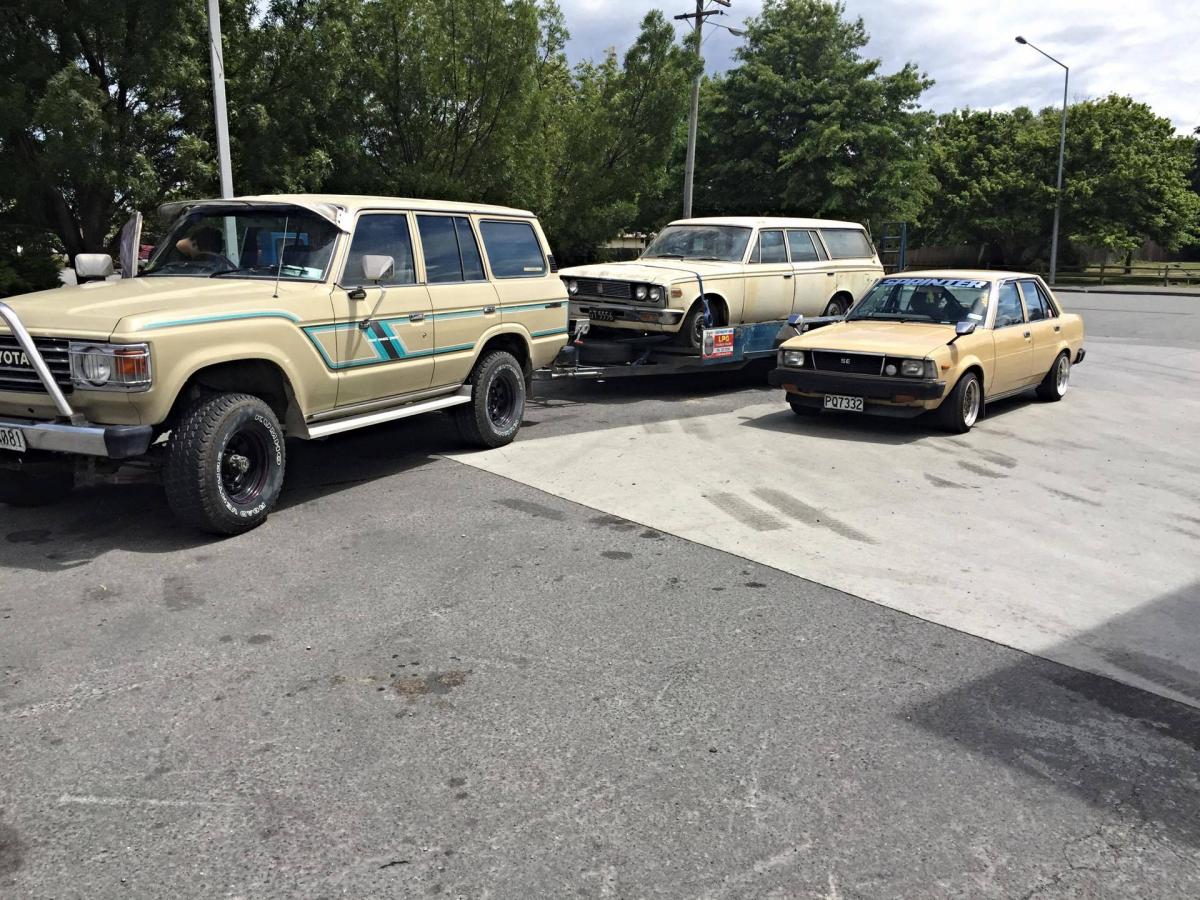
last pic with the tan team, matts 60 series cruiser with his new ms53 crown wagon behide and my 1980 ae70 sprinter sedan next to it
1 point
-
Awesome - I brought the Green 330 260C from that family a few years ago (which i later had to sell due to house buying commitments - great bunch of people.1 point
-
So I picked these up a couple months back. Lucky find Got a bit desperate to get them on so just have shitty balloon tyres Just 13X5.5 again. But they fit well. Currently thinking about shock/slammage options. With different motor in it the headers go under the crossmember, Leaving a fairly low exhaust especially in the middle theres not much tunnel to even tuck it up into. Should just sideout it. But yeah... resonator hits anything mildly raised if loaded up/moving above 4km/h I shall try something to fix the height in the front anyway as it is pretty shamefully high (and 4x4's quite well )1 point


This leaderboard is set to Auckland/GMT+12:00