
Leaderboard


Popular Content
Showing content with the highest reputation on 04/17/16 in all areas
-
Here's a build from way back in the day - I finally found an old photo album I had lost - It may be of interest to some... It starts when I was 14 and lived on a farm in Mid Canterbury by the beach. I decided I wanted to build a beach buggy - visited the local wrecker and told him so, looking for suitable chassis to base it on. He said "How about this Trekka I have here" I said OK (not knowing anything about them) I also said I don't have the $60 you want for it, he said "Would you like a job?" The deal was done, so 1 Trekka chassis + a Humber 80 for the motor and box turned into this with my fathers help. 1 20-04-2013 8-04-16 PM 20-04-2013 8-04-16 PM This equated to many happy years of sideways driving around the farm / scaring my friends / rolled it once etc. But I decided that I needed more POWER - so here is the story of what came next.11 points
-
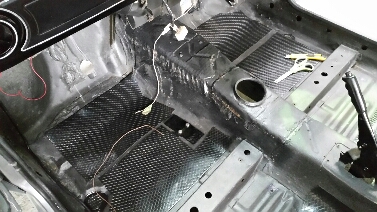
wow haven't updated this since November, oops, it isn't because things haven't been happening, just that I have been really slack at taking photos. Got this in the mail the other day I had the cage inspected after getting it all finished off and in the car and it was all good, so the car is officially a race car if I want to go that way with it. in reality I did it to make cert a bit easier and so that if I want to turn it into a full cage later on then it is already in the system but still... So that has helped with the motivation a fair bit but over the last few months I have done a lot to it Got the exhaust finished, wrapped the headers because I didn't like looking at the join between the schedule pipe elbows and the exhaust tube. Pretty happy with how it came out and learnt a valuable lesson on why you should wear gloves when putting this stuff on. I didn't and my hands itched for days Then it was on to the wiring, the old motor was running a generator so I ripped out all the wiring for that and wired up the new alternator, coils etc. I was going to leave the wiring in the engine bay (the standard Anglia wiring runs out through the firewall just below the windscreen) but it really looked bad so I rerouted it all through the guards where it is all out of sight. Wasn't too much work and makes the engine bay look heaps cleaner. And the engine bay all wired up Now I just need to deal to the washer bottle...... So what next? well I have been patching up all the little (and not so little) holes, finally go the gearlever all sealed up, ended up making a bit to cover over the hole and to adapt the type 9 boot to the shifter, that was the biggest hole to be filled so it is nice to have that one sorted. I decided to rivet it on just in case things have to move in the future. So that's where it's at, I am really just tidying up all of the little jobs now to get it ready to fire up, the wiring behind the dash is a real mess and needs some attention but that's about the worst of it I think. Hopefully the next update will be to say that it is all running........5 points
-
Following the successful design of one my cousin built. I started on a new creation. It involved the chassis from one of these Thames van by David, on Flickr and a V8 of some sort So I got a chassis 5 17-04-2016 5-59-18 PM 4 17-04-2016 3-52-51 PM As these vans are forward control, I cut about 2 feet off the front - and converted it to rack and pinion (thanks to an Avenger) you can see the rack ready in these pictures. Also at about this time I got these wheels and tyres for $50 from the McLeans Island Swapmeet - these vans are standard Ford 5 stud, stud pattern. I also got a Bedford diff (more on that later) which very nearly fitted the springs. 7 17-04-2016 3-52-55 PM4 points
-
I'm hoping the steel rockers I bought will fit ok under my stock covers, being smaller (and more expensive) than alloy rollers. There's not too much info on line unfortunately, most people chuck aftermarket (tall) covers on. The polylocks obviously hit the baffles on a test fit though, so I 'borrowed' some playdoh from my girls to see what the score was... No too bad really, decided to try knocking some holes in for clearance. Just used a 1" hole saw in the supercheap drill press... And cleaned them up a bit... And clearance looks ok. No idea if these holes will affect the purpose of the baffles, will see how it goes. I'll recheck clearances with more clay after the valve lash is set, while rotating the engine. If I had to I could rivet some stepped baffle plates in over these holes I guess... And stripped the covers for some fresh paint, hope it sticks as well as this stuff did, it was out of a rattle can and took a lot of effort to get off. Wish I could remember the brand it had cured really well.. Getting bummed about the short evenings now too, makes it harder to chuck paint around, so will be a weekend job...4 points
-
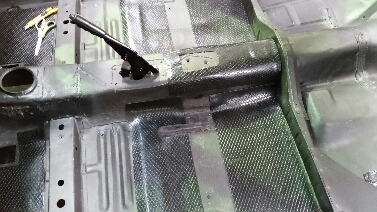
Subfloor almost done http://www.iforce.co.nz/View.aspx?i=4fu3nkcs.qfr.jpg4 points
-
today i put the door seals on and took the brakes apart so i can match some seals up for them at Stirling Clutch and Brake. i also took the dizzy out so i could give the other one a try but it turned out that the one i found needs an external module that i don't have so i put the original one back in. and it wouldn't go. no spark at all. fucked around with it to no avail so I've given up for now. bastard of a thing. if i wanted a car that randomly decided to stop working all on its own id have bought a fucking british piece of crap. fuck.3 points
-
Weeeew, finally got some mocking on the go. But first, needed to do a top notch job at securing the wiring for the indicators in the headlight. They were barely attached when it arrived from Ali: Then the engine mounting came. Original engine just mounted with a bolt straight through the frame but the new engine had a bracket in-between itself and the frame. A bit of grinding, and it fits pretty well. Still gotta shorten the bracket, weld it up for strength and mount some new tabs so it can be secured in 2 places and hard mounted. See below: It will end up being mounted straight up and down as opposed the angle in the below picture. First moments of Moped resemblance: And here's a clearer view, gotta get some new tabs laser cut and then will keep on keeping on from there.3 points
-
aint no update like a picture less update. things done today or last night in no particular order made a parcel shelf out of 12mm MDF and carpeted it and stuck that it. cleaned the rear seats and put them back in (they will get recovered when all the carpets and that get done) installed the front and rear seat belts painted the rear door cards and put them in painted the front door cards and put them in put the passengers seat in put the new inner and outer belt line seals in pumped another 2 liters of cavity wax into the sills and doors cleaned and painted the sill trims drove it around the block a few times. its starting to look like a car now, I've got to pull the brakes apart so i can match up some seals and then its wof time.3 points
-
slow progress is slow. new wheel installed, more wood. i love wood. Turns out the new bosskit didnt have the doohickys for cancelling the indicators, so grabbed the back plastics from a nissan wheel at pickapart and cut out the doohicky and glued/epoxied to the bosskit. Should do the trick. also had a nosey at the rear end (gigidy gigidy) for ordering lowering blocks. Have some u bolts left over from something that will work a treat, perfect size. Starting to look for wheels as well, looking at 15x7 or 7.5 with around zero offset. Will fit nicely without having to fuck with guards. will run something like a 195/50 tyre. discussion //oldschool.co.nz/index.php?/topic/41006-beavers-87-gloria-wagon/page-42 points
-
Brought a new smaller turbo. casting on these are pretty average But whats inside matters right? Its a GTX2863r. slightly bigger than a "disco potato" and has the later billet wheel, so good for bit more power. uses the same exhaust side as what was on there (GT2876r). So it bolted into my existing exhaust housing, only needed to adapt the intercooler pipe and airbox Before and after says it comes on boost about 400rpm earlier. and seems to run a touch more boost. afr bang on same other then where its on boost earlier, pink lines old turbo: So If you bothered looking at log above and got keen eye. you'll see its running 2 degrees advance. because of -15degrees transient trim.. I put the trim in after i took it out for the first trip, to try stop it going bunny hop spec over bumps. basically making it gutless when stabbing the throttle. Which worked ok, but i obviously didn't check what happened when mashing the throttle for some boost or just generally driving, then likely left it in the shed for months before driving it. Next drive just thinking its normal for a heavy pig with 4age. Anyway in the runs above it would pull 15degree when stabbing the throttle around 2500rpm and ramp the timing back in at around 5000rpm. after messing with the settings and getting it to work how it should, fells like lost about 500kg haha. goes so much better down low with same top end. This is after fixing the ignition timing. can see how the timing effects how it comes on boost. 400rpm later than with retarded timing, since its not firing half the charge out the exhaust.2 points
-
Did some work. Took the Mower deck off. Jacked the front end up intending to put some axle stands under it. But then this happened. FYI: It has a tow bar that's stopping it going any further back. I used a ratchet tie down to pull the cracks in the frame closed. It took hardly any effort at all. Welded the outside of the crack and plated the rear with some flat bar I had lying around. Chucked some paint on there that was left over from the mini bike. The underside and brakes were coated in loads of grass and muck. Most of it came off with the hose. Also welded a broken bracket here. Forgot to paint it.... Took the brake off to clean. One of the pins was totally seized, I had to press it out with the vice. But seems to work now. Needs some adjustment though. The drive belt is super fucked. Definitely need to replace it. There is an idler/guide pulley that does not look factory. They have used an UNSEALED?! bearing that's totally seized and missing some balls. You can see where the belt had been rubbing on it.2 points
-
Iron Maiden socks are appropriate for all areas.2 points
-
The rocker cover gasket has been leaking for some time but due to the summer season, working 6 days and having car events on most Sundays it has been put on the back burner. bought my $7 gasket this week and then last night I got all motivated and decided to start pulling shit a part in order to paint the r/c while it was removed. After a couple of hours and a cup or 2 of coffee I was happy with the prep'd surface. Got up nice and early this morning and laid down a couple of layers of silver basecoat I then layered on the anodized purple and ended up with this Chucked the gasket on and reinstalled While I was waiting on paint drying I painted the rear bumper satin black to match the front Pretty stoked with the outcome. I have intentions of relocating the battery, changing the route of the heater hose, painting or wrapping the extractors and getting some pretty HT leads but as with everything it all takes time.2 points
-
So this turned out a lot easier than I expected. Vehicle I was putting the trans ins, happened to have plugs corresponding to the trans. IE, there were two wires that came out of the fire wall and were plugged together. Unplugging them showed that the car will no longer wind over, boom town, inhibitor swtich wiring plugs straight in. Still had to run some wiring for the over drive tho, as I could not find any wiring for that under the dash. Its probably there somewhere,but very much could not find it. Also my center consol wiring was just as easy, found a plug taped up under dash, pulled it down, plugged it in, boom, have hand brake light etc. So I'm going to let Toyota off for now, as I had been cursing it a bit recently with What I had been doing. SO To sum up Inhibtor swtich wiring Black and white are your actual start wires, so join in park and neutral Pink and blue are your reverse light wires Black on the other side Is the over drive solenoid, must have fuck all draw, wiring diagram in my manual shows it to be directly powered from the gauge wiring circuit, no relay etc. And the pink, on the left hand side, I still have no idea about and don't care any more lol2 points
-
took this for a wof yesterday and it got failed on modified gearbox crossmember needing cert, which i completly forgot was even modified as noone has ever picked on it in my 6 years of ownership. so now im pretty sick and tired of unpredictable wof issues, and theres always something not legal or needing a cert, that was fine last time so im coming around to the idea of just certing it for everything. engine (6r - 18r) gearbox + crossmember (4spd - 5 spd) lowering (with my nice advans and white writing tires it sits about 80mm off the ground) seats (porche 911) engine power increase (unsure if it breakes the threshold though) its an expense that i didnt really want, but with the way times are changing it seems wof guys are less inclined to let modifications that are safe slip by.2 points
-
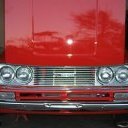
hoping these all come out good enough - my comp skills are real bad - "old -timers" stripped the Mazda down - blame it on "Maxted"2 points
-
Engine mounts. Started out with a few odd shapes cut from 6mm aluminium plate: And after welding: These are the weld-on brackets for the mounts, cut from 3mm steel: The assemblies will sit on the chassis like this: (this is the back view).2 points
-
got me one these recently but am pulling me hair out - need new crankshaft and piston sleeve+pistons +rings+bearing rebuild kit -else a no go venture - any help with references on websites would be much appreciated takes Mazda AU 1484cc engine - found in Yale forklifts+HYSTER forklifts and some TCM forklifts1 point
-
I'm not sure if this is worthy of a project thread. I got this mower for $250 buy now. Seemed cheap. Picked it up this morning. It had been sitting in a farm shed for ages. All the tyres were flat. I pumped them up and they seem to be holding air, they are full of cracks. Had to remove this wheel to fit it on the trailer. I JUST fit it in the garage. Both sides of the frame are cracked just behind the engine. V-TWIN! No idea how old it is. I think they made this model from 1990 to 2003. The Bonnet thing is missing. It has a big steel bumper now. The battery is stuffed, need a new one. I fucked around for ages trying to jump it off the racecar, but my shitty supercheap jumper cables just started melting. I could only get the engine do do part of a rotation.... So I connected the battery directly and discovered that the problem was that the ignition cuts out when you turn the key too far?! I chucked some gas in it. Still no go. Checked fuel was coming out of the pump. Drained the float bowl. SUCCESS!! It's alive!!! No smoke. It has drive. Doesn't seem to have brakes... The pedal only seems to disengage the drive by taking tension off the drive belt. WTF am I supposed to do on a hill????? Things to do: Replace the fucked fuel hose. Use the big ratchet ties to try close up those cracks and weld some plates over them. New battery(racecar battery is too tall). Replace the front left kingpin bush, it's totally shagged and making the steering have massive amounts of play. Tighten all the loose bolts. Find out why it shreds the belt(according to seller). I think he's just put it on wrong maybe?1 point
-
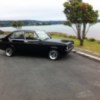
Not actually much to report right now except the trial fitting of the Cheviot Turbo mags from the wagon. They were off the wagon while I have it up on the hoist and I just couldnt resist fitting them... I like them heaps but I think the 185/65 are a bit too tall compared to my 185/60 I have fitted to the steels. Plus that extra height means they are very close to rubbing the back of the wheel well at half lock. I thought they might have more offset but they are identical to the steels in that respect. I still really want some Hustlers or what ever they are called- like what Greg has on his Valiant. More of a 60's style that would suit the Viva better I reckon. Anyway- have another couple of photos. Not really much else to talk about. Oh I did get a shiny new windscreen. I have been intending to do so for bloody ages now and had bought a proper decent silicone screen rubber custom made for Vivas by some Viva fan in the UK. Tight fitting but really good. Whilst it was out I cleaned up the aperture and luckily there was no rust. Lovely new screen is amazing to look through- I wish I had replaced it ages ago ! For now the car is being used heaps as our daily and has needed nothing but fuel. Clocking up a fair few fun kms1 point
-
Discussion //oldschool.co.nz/index.php?/topic/52597-jay-199-1985-peter-pan-kp61/1 point
-
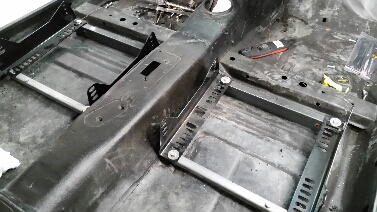
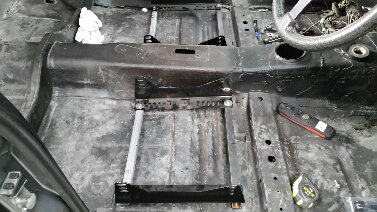
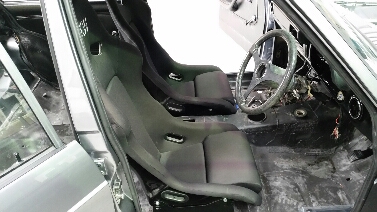
Cut up some 75 and 25mm box section today for the seat mounts and bolted the brackets in position. Worked out quite well And bolted up the seats. Super solid and comfortable too Took it all back out for paint then cleaned up the floor and put a bit of sound proofing down (might help, not holding my breath tho)
 1 point
 -
Are socks the right attire for a static sensitive area? Lol1 point
-
Did another hour on the setup today Just stiching it all together bit by bit hoping it doesnt warp to much! Heres the new Garret VNT turbo on the left Vs the old one peice teeny tiny little KKK turblow on the right... Just need to make sure i get the new turbo positioned close to where the stock one sat so I can avoid having to make new oil return. (Yes im being a tight ass)1 point
-
is the bolt in to steel or alloy. It may be safer to take it in to a engine reco and get them to spark erode the drill and bolt out. Yes it will cost but it will mean you will still have a usable head afterwards.1 point
-
Ah thats looking rad !!1 point
-
it looks great. and ill probably steal the idea.1 point
-
getting new bearings for the differential then will adjust the backlash - thanks to YOU-TUBE lessons1 point
-
Went in on Friday afternoon to do some more work and things were going well, on track to have the engine in the car this weekend. Until I went to swap the exhaust manifold to the e28 one. This is where things came to a halt, much like a stance car that has hit an unforseen bump. So 9 of the studs came out nicely, either stud and nut or nuts came off. But 3 didn't want to play along, snapping under the nut. There was some stud protruding so I thought it was in luck. However this was not the case. I tried doing the double nut trick, welding the nuts to the studs, vice grips etc. Either the stud would not budge, or it just snapped, leaving me nothing to work with. Still, not the end of the world, time for the drill. So I went about trying to drill them out, which went well on 2 of them, however on the third, the drill bit snapped inside the hole. If my emotions at the time could be expressed in an image, I think this would be fitting: The offending obstruction that will need extraction: If this wasn't enough to set me off, I went to try and buy some tools I thought might work to try and resolve this sinkhole of a situation, such as carbine tungsten drill bits to hopefully drill through the drill bit, every shop I went to was either closed or had nothing. So not only do I now have extra expenses and the awaiting of a very unpleasant task, but my weekend is also wasted as I couldn't do anything further. Which has also delayed my driveshaft as I can't drop it off to be modified until I am sure how long it needs to be, which I need the motor in for. So there you have it. Here I was hoping I could show you all how to do an M30 conversion in a week. Might be 2 weeks now.1 point
-
Yawn update. Drive this thing every weekend basically rain or shine. Rain is lols. Made burger meet (in the rain as above), went to caffeine & classics etc Got new rear tyres and found one of the rear wheels is buckled hence the slight motorway wobbles I've had so going to drop both in to Arrow Wheels soon to get sorted. 4th & 5th are pretty noisy but not notchy or anything so just keeping an eye out for a w57/58 to have as a replacement if/when this lets go. Changed the blocks out today for 38mm (had 50mm's) just to get some more clearance in the rear, makes it nicer to cruise now, can hit bumps without worrying about peeling tread off in the arches. Carpark picture shows height as it sits now. Still haven't done the fuel sender or wipers. Will get to that lol. Pretty sure the tune has been locked so can't do launch control or anything without starting from scratch. Might do this as the valve springs were shimmed super tight because it was dropping valves due to harsh limiter and I think this has been changed now so could go to smaller shims so the motors not so noisy.1 point
-
Haven't really done a lot with this lately. A while back I fitted a single side draft carb to it (Weber 40 DCOE). Have been fiddling with jet sizes and watching the wideband, but still haven't got it right. Will probably need to cough up some money and get someone who knows what they are doing to look at it. A lot better then it was to begin with though. Sorry for the potato pics, will find a better camera some time. Had a bit of a wiring tidy up, not motivated to do a full wire tuck but have re-routed and hidden some to make it look a bit better. Did a grass khana with it a few weeks back too, was a lot more competitive then I was expecting.1 point
-
too new? still in its box though.. http://www.trademe.co.nz/Browse/Listing.aspx?id=10666444991 point
-
So I've managed to buy a factory Tehnics head unit for my Mz12. It has a mic port, seeing as I only listen to my ipod etc, I was wondering if I (by I I mean someone much more competent) could modify the mic port to turn it into an AUX port?1 point
-
Sooooooooo while I've had the car apart for other stuff. cobbled together an injector test bench so I can work out deadtimes and flow rates etc etc. Took about 4 hours of running tests at various pulse widths and voltages etc last night to characterize the Altezza injectors @ 60psi. At 60 they are awesome and linear right down to 1.6ms which is lower than what my car idles at. Will test a bit lower today and see where they start becoming a problem Hopefully the second set of injectors will take a bit less time, now that I know what the process is. I came up with a spread sheet that helps figure out the dead time, basically you adjust the number up or down until you get a flat line instead of it sloping one way or the other. Deadtime too high: Deadtime too low: Then once I worked out the deadtime for this voltage (13.4v) I could run a simpler test at other voltages, as I already know one of the values. So this time I'm looking to get the flow rate matching at all voltages, once their deadtimes have been excluded. Based on already knowing the value for 13.4v The Altezza injectors are awesomely linear though. (If injectors were non linear you'd see less of a straight line and more of a curve) It will be interesting to see how well my $120 Aliexpress 1000cc single pintle injectors compare, haha. I should probably start putting my car back together though, trackday is next weekend!1 point
-
1g-eu manual says: Use API grade SC, SD, SE, SF or better and recommended viscosity oil. Gives a chart for recommended viscosity vs atmospheric temperture. mega frozen balls to 10'C use 5W-30. but dont. -22'C up to 30'C you could use 10-30W. 10W-40, 10W-50 starts at -22'C ish up above 38'C 15W-40, 20W-40, 20W-50 starts at -12'C ish up above 38'C. seems 15W-40 is about the sweet spot for NZ temps. oil pressure (warm) at idle speed .. more than 0.3kg/cm2 4.3psi 29kPa at 3000rpm ... 2.5 - 5.0 kg/cm2 36 - 71psi 245 - 490kPa says when bleeding lifters, dont pull them apart. gives leak down test specs.. 20kg takes 2 -7 seconds/1mm after the first 2mm.1 point
-
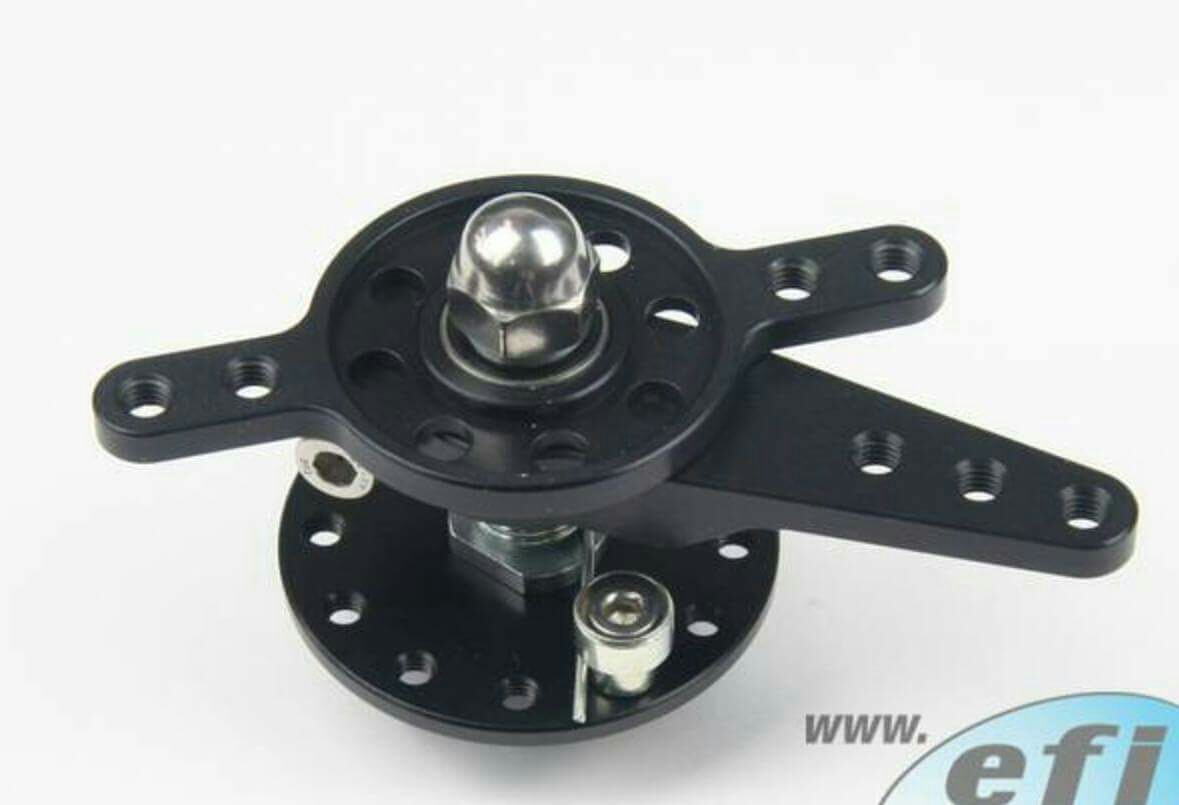
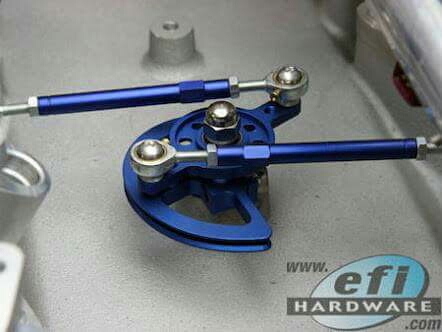
So my engine picture broke the social media internets today. Where were we... Right so ordered the linkages today. Should be here Monday.
1 point
-
bleeding them would be a waste of time most likely, you would be balls deep in having to try clean any shit out of them etc personal experience with g motors they don't like not being serviced and tend to cake up with oil oil flushes scare the shit out of me as that generally blocks up your oil pump pick up more than anything maybe try running a diesel oil 15w-40 for a bit with some mbl8 and do an oil change 1000km later1 point
-
Gas lanterns converted to electronic ignition.1 point
-
Dinitrol. dinitrol fucking everywhere. 2016-04-12_05-51-56 by sheepers, on Flickr 2016-04-12_05-52-05 by sheepers, on Flickr1 point
-
Access is available from both top and bottom but lots of overhanging trees from the top so carrying big stuff down is impossible. It all needs to go up. Also: From above is around 12 mins walk and I need to park on the road (with the generator and dropsaw running on the back of the ute). From below is 4 mins and I can park the 4x4 on my own beautiful beautiful land. Land fo lyfe. Fuck it's awesome there1 point
-
There in the road, straight ahead, sparkys starlet had stalled, the 12a was dead. He couldnt stop, chuffing the meth pipe, atleast the kp wont get, impounded tonight.1 point
-
Hoes mind is rotary-twisted, she got the jport bends She got a lot of drifty, drifty boys she calls friends How they skid round the corner, fried tyre set. Some tang to remember, some tang to forget1 point
-
So I called up the captain, "Please make gillies whine" He said, "We haven't had them ping so tight since 1969"1 point
-
On a South Auckland highway, cool wind in my hair Warm smell of my engine, rising up through the air Cop stop in the distance, I saw the shimmering lights Threw out my bevvy and my lights turn dim I had to keep out of sight Temp went colder than Norway; I think compression fell And I was thinking to myself, "This tang could be heaven or it could be Hell" Then I gave it the Jandal, my tires went away I had my foot right to the floor, I hope my seals Stay... Welcome to the 12A California1 point
-
music video of simon at a burnout comp His palms are sweaty, knees weak, the clutch is heavy There's coolant on the ground, 155/13s fitted already He's nervous, but on the surface he looks calm and ready to drop Os, But he keeps on looking at camo skirt wearing hoes, The whole crowd goes so loud He turns the key, but the braps won't come out He's pulling out the choke now, everybody's joking now The clock's run out, time's up, over, blaow! Snap back to reality. Oh, here comes hi viz guy there goes sparky, wave him off the pad, bye He's so mad, but he won't give up that easy its goin to get some mad slap seconds believe me1 point
-
finally got all the beadlockers on after getting the rears to fit over the brakes short vid bro took on the weekend.1 point
-
And that's all for March. More to come in April, but this baby will take me until November or December to finish as I only have about half a day a week free, so it'll be a wee while between meaningful updates. I'd love to have the subfloor finished by May. Always May EDIT: Oh, I should probably share the view that'll be from the cabin's second deck. There will be two decks, one covered and hard up against the cabin (that'll have an outdoor kitchen), but there shall also be a second deck a few meters away with an outdoor dining table. This is what that dining table will look at. I quite like it (sorry about the horizon).1 point
-
An actual update! Surprised how easy this was, not perfect ( a few small bubbles) but only took an hour from woah to go (pulled the panel off the car to make life easier) and looks a million times better. cheap too! Its just cheap stuff ($8/m for a 40cm strip) but at that price I dont care if it fades overtime or whatever Excuse the potato photos Discussion //oldschool.co.nz/index.php?/topic/41006-beavers-87-gloria-wagon/page-41 point
-
Hi Folks, the B1500 Mazda Proceed project is a GO it seems, I got me 2 used engines I found - and both cranks inside are still "STD" with "std" bearings on big ends(rod bearings) and mains so far the load bay has been removed and I am getting excited to tackle the job - never done this type thing before - don't know how much in gin n tonic it gonna cost me as well - I get thirsty when I work what is outstanding in the parts arena are the following: 1. big end bearings (rod bearings) - for love of me - i cannot seem to source them here (South Africa) - maybe another vehicles bearings will fit - 2. I would really like a spare distributor cap 3. original sleeves and pistons ( I can bore the B1500 sleeves to take B1600 pistons - compression height the same(42mm)+bore is only 3mm bigger - 75mm vs 78mm - the sleeves have walls of 6mm thick(possible - hmmm yes I would say) but B1600 is domed top piston and I will lose some compression - but I score on the bigger bore - should balance out somewhere in the middle - will have to have a head gasket made up to accomodate the bigger bore seems the old gaskets B1500 head gaskets were made to just cover the piston sleeves edges(firing wall) to stop people boring them bigger and thus also sell more piston sleeves instead maybe someone out there can sell me some rod bearings + me on PAYPAL and registered Ebay - meanwhile I got me a few sets of mains - all sizes - Std to 40thou - just in case will post update and pics as I go along now to buy some time somewhere?1 point
-
way to flash to drive through mud. or put on a shitty hilux.1 point


This leaderboard is set to Auckland/GMT+12:00