
Leaderboard


Popular Content
Showing content with the highest reputation on 04/14/16 in all areas
-
so as i said in spam some cunts tried to steal this car. they didn't get very far, my neighbour stopped them in the street. but - they fucked the key barrel and somehow they managed to fuck the clutch/driveline to a point where there is no drive at all. wont know what they did until i pull it to bits which will probably be in the next week. Swan insurance have been fucking magical in working with me to fix whatever has been done. at this stage paying for whatever it is in the driveline thats fucked is a given but they also want me to pull the motor apart for a bit of an inspection to make sure they didn't ruin the motor in anyway (they had the thing pinned on the limiter for about 2 minutes which is why my neighbour got suspicious and went out to have a look) so im going to pull the sump off and a couple of caps and maybe the head too. so yea, i have to pull it all to bits but it could be way worse.16 points
-
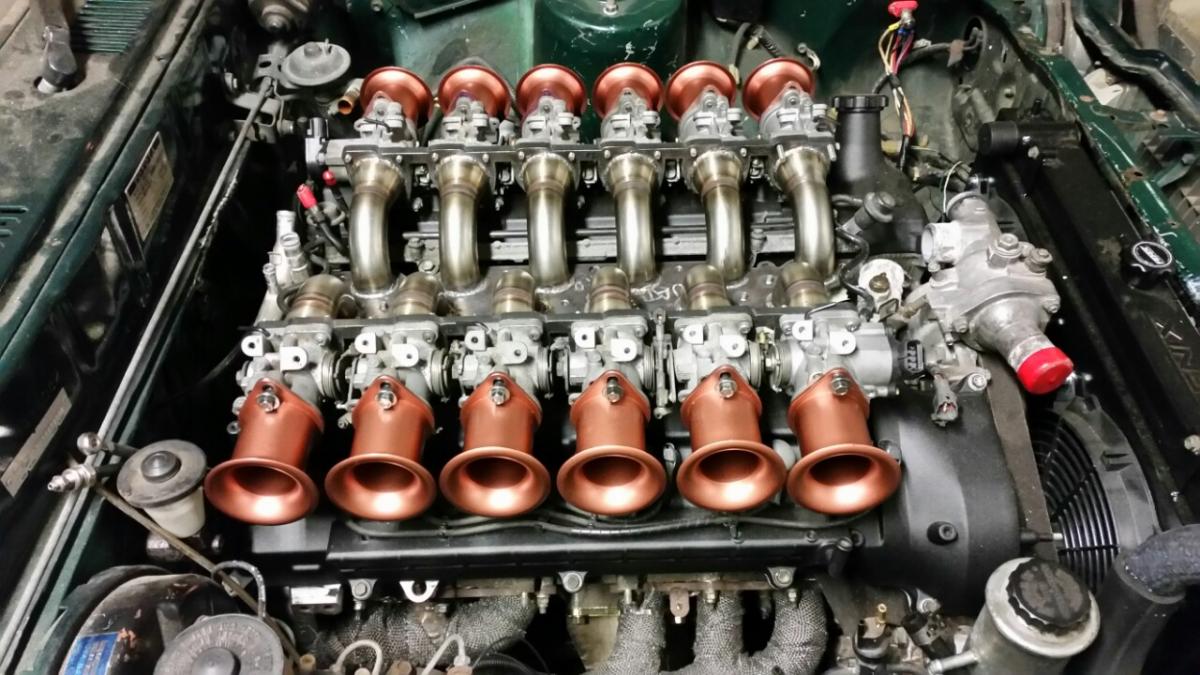
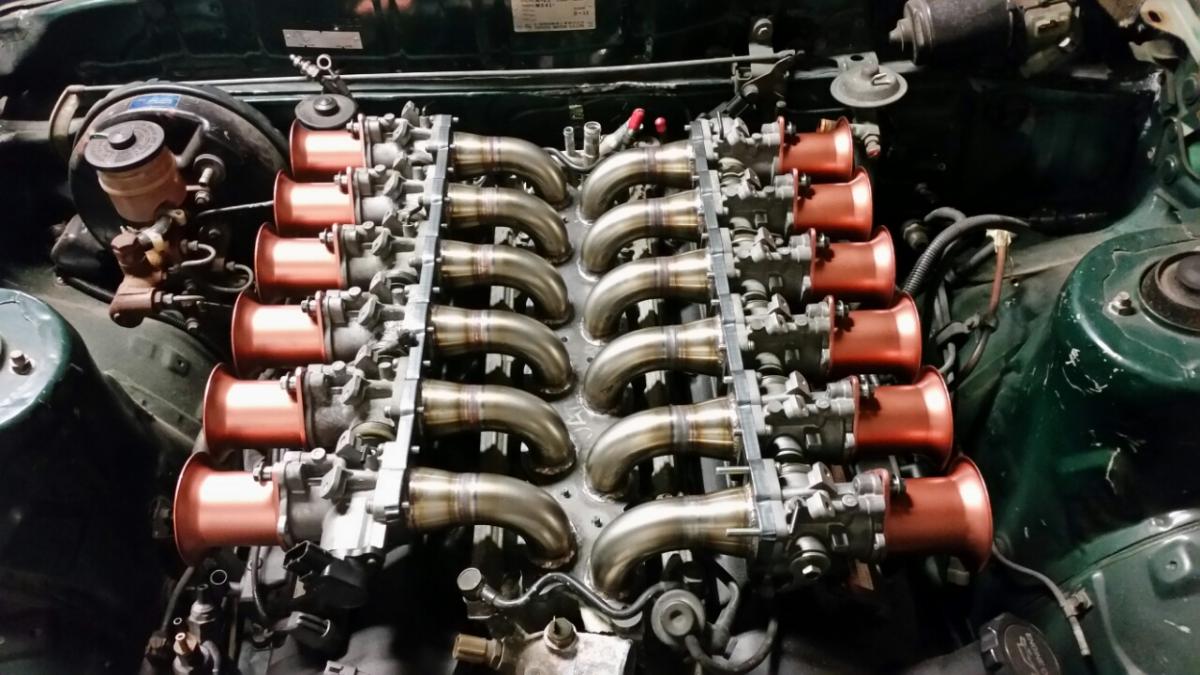
Dam, talk about a thread revival!! So Sqengineering put out with the goods, I have been waiting ever since he started talk of the j160 adaptor plate some 2 years ago. Whilst at it, I ordered the water relocation kit, 70mm stacks/trumpets, throttle linkage kit, C.O.P plate & dizzy cover for all the blaang. No excuses now, have basically everything there to mount everything etc. Sweet times ahead8 points
-
Now, the hinge side of things, bit of a mission. first I had to cut what was left of the old hinge out. I managed to separate the hinge cleanly from the 3rd rivet, and drill a hole through the center of it, which would help in lining the new hinge up in the right place, after much beating and grinding I was happy with how the hinge was sitting. then I made up a patch to fill in the gaps welded it in place and ground smooth. using the dremel on the inside so I could fit another even smaller patch to the inside panel. the steel I'm using is actually a little thicker than the vw stuff, but this is not a area I want to crack in the future. I also stuck a few spot welds between them because I could and just in case. the inside had to be smoothed out so the hinge would sit right and I also welded up the 3rd hole/mess once the hinge could be bolted in place. like this! nearly a door again. stay tuned for next weeks adventure!!!!6 points
-
A 4age map sensor wont have much head room for boost, Toyota NA map sensors read atmo pressure at just under or over 4 volts from memory. But yeah something from a turbo car at pickapart will do the trick. Or just use what's in the car already if there's one there. Saves a bit of a ball ache if you can find a common one that people know the calibration data for already. That's where the link ones are nice, but you sure do pay a premium. I wouldnt be too fussed about knock detection, I ended up turning mine off because it picked up too many other vibrations as a reason to pull timing. Example - tune the knock thresholds in 3rd or 4th and its all fine, but then in 2nd gear it'll think there's shitloads of knock, when really it's just a screwdriver in my sump or my broken engine mounts. lel6 points
-
Found an E36 radiator that fits perfectly between the chassis rails so made some mounts and now it's in. Also fitted my engine mounts and adapters. The adapters needed a couple of small alterations before everything lined up 100%, somewhat like a custom-made suit, if you will. Also sideways mode has been activated with the installation of the LSD: I also replaced the center bearing in the driveshaft but the front needs to be modified as it's not the same as the e34 one, meaning it doesn't like up with the guibo. And this one's entitled "A new perspective":4 points
-
yep. caught them both.4 points
-
well I managed to make a bit of mess of this patch! I'm sure it was all nice and flat?? before?? that is terrible. solid as though, must remember this is the bottom of the door, so fuck it. looks good from this angle.3 points
-
Should attend their hearing and show photos of the celica as a victim impact statement. Everyone will shed a tear for what your baby has been subjected to and throw them in jail for a long time. If not they might think of an st202 celica with ss3 wing and have no pity.3 points
-
Finally got round to making to footpegs, the BSA ones i had originally werent going to cut it and i wanted to use a set of Anderson style pegs that Ive had kicking around. The right one was pretty simple. I cut a plate out of some 10x25 flat, drilled and counter bored some holes to match those in the frame. Bent up some 16mm round bar and made a mount on my lathe to accommodate the bolt for the peg. Same sort of deal for the left hand except 2 bends to clear the primary cover and a shaft for the brake pedal to pivot on3 points
-
Manifold is all welded up. Everything fits nice. Time to make linkages.
 3 points
 -
I got my injector test rig up and running. Interesting results from an initial muck around. Running at 12v and ~71psi Method: Run the injector for 6000 events at 6ms. Then run it for 12000 events at 3ms Then 24,000 events at 1.5ms spray, etc etc rinse repeat. If the injector flowed 100% perfectly with no deadtime, it would fill the container to the same level each time. But it doesnt because of injector dead time and non linearity at low openings. The only thing I could find to measure with is a rainfall gauge, so my units are in mm rainfall per square meter. Dont judge me Looks like the injector is probably reasonably linear until down to ~3.9ms, so I'll get some more data points around this region so then doing some conversions and blah blah, the line on this graph, where it crosses to zero shows you what the deadtime is for the linear flow section of the injector (large openings) So just under 1ms deadtime, the value currently in my ECU was 0.79ms so 20% inaccurate. What is interesting though is that my injector wont flow anything at all when running at 1.5ms 2ms is fine though, so at some point in between is where it just stops flowing at all. So again, currently the settings in the ECU currently are way wrong. Currently if my car tried to idle or crank at 1.5ms, the ECU would try to run at this setting and it wouldnt get any fuel. My short pulse width adder table (which is supposed to compensate for this) is prepopulated with some values but they're junk too. I promise I will buy a decent graduated cylinder so I can get some accurate measurements in some better units than mm rainfall hahaha. There's a big difference though that's easy to see though, at 9ms the tube fills it right to the top, at 2m/s it will only be a quarter full. Looking through some logs my car idles on the primary injectors at somewhere just under or over 2ms, so it's right in the shit spot. No wonder it's been hard to get the fuel right there. I reckon once I pick a fuel pressure that I want to run, and run this same procedure at varying voltages. The autotune, temp compensations, idle, closed loop etc etc will all work way better.2 points
-
Welp. Raizer is the boss man. Was wheelie stoked when this arrived today! Here's some real life photos of the aliexpress stuff to give ya an idea on sizes. More solid than expected for both of them. Tail light is bigger than imagined, which is actually a good thing. Gonna play with the frame and engine over the weekend.2 points
-
That would maybe involve hanging onto the car long enough for it to rust? Which is about 6 to 12 days, being a 1970s Toyota so I'm sure you'll get a review soon.2 points
-
Cool, thanks guys. I want to keep it simple on the TX3, being such old tech and only a street car, so MAP/TPS/O2 seem to be the most logical ones to have. What about knock control? Is that even a thing still? I didn't even recall seeing it anywhere in the spec sheet. My existing G1 has no knock control, no closed loop O2, and no TPS, it purely relies on MAP. Boost control is handled externally of the ECU and I don't have existing speed/RPM switches so I guess the digital inputs remain free for logging etc. Crafty that it doesn't have a MAP sensor though. Almost expect a scenario where I buy one and straightaway a big pop-up window appears with "CONGRATULATIONS! YOU BOUGHT AN ATOM! NOW ADD ON A MAP SENSOR FOR $499.95! ORDER IN THE NEXT 10 MINUTES AND GET A FREE LINKECU STICKER!"2 points
-
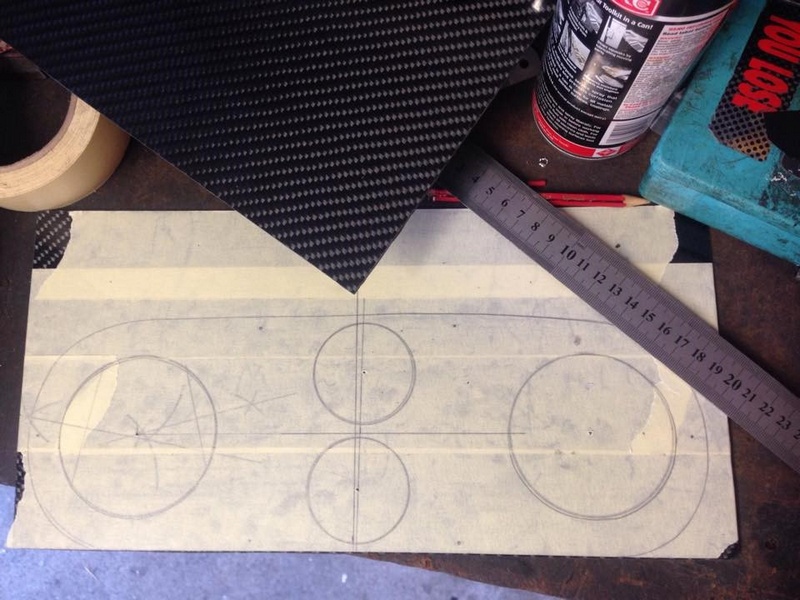
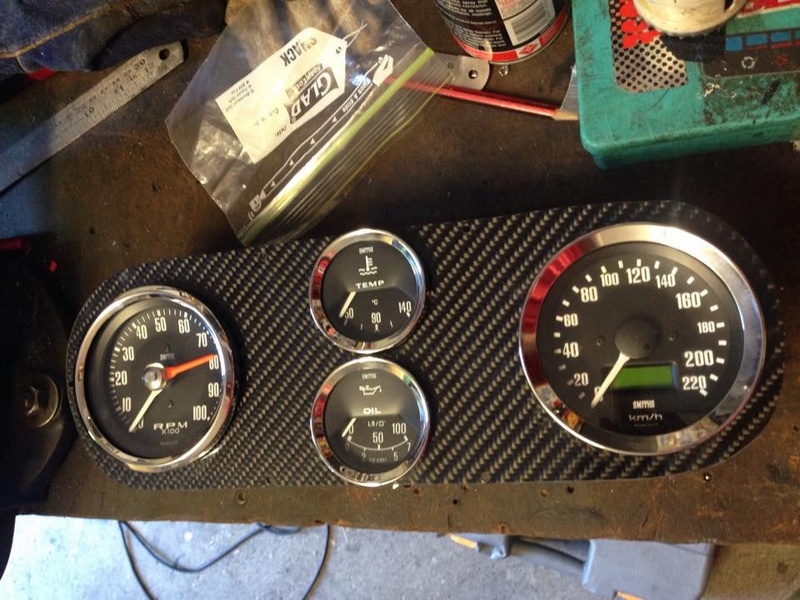
Got me some real carbon fiber from Motorsport Composites ltd Much Better and fitted the smiths water temp to match the rest of the set Much better
2 points
-
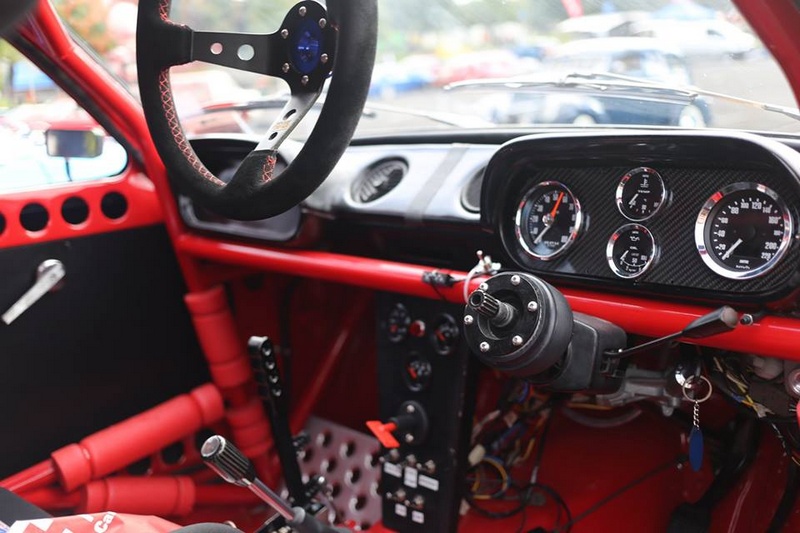
I made a thing in this pic yea the woody thing with the Paua inlay "W" logo, also the back 'seats' : full article http://www.themotorhood.com/themotorhood/2016/4/12/weekly-motor-fix-gas-attack2 points
-
Hi everyone, I recently acquired the car of my dreams and Greg (64Valiant) has told me to share it with you. I'm pretty new to forums but here we go: She's a 1972 Datsun 240z in off-white/cream. The previous owner had her since 1976. The Z was driving around 20 or so years ago, but has been parked up in a garage with a cover since around 1995. He passed away four years ago and the family decided to sell it through the Z Club to find an enthusiast to bring her back to glory. Luckily, I was the first serious buyer and the rest is history. NZ new car 85000 original miles I'm the third owner Interior is near mint (no cracks in the dash and factory radio still installed) Minimal rust (no such thing as a no-rust 240 haha) She runs but clutch won't engage, so is probably fused to the flywheel which should be interesting. The rego has lapsed and I'm trying to keep the black plates naturally, so anyone familiar with this process please shout out! Currently assessing what needs doing for Re-vin and looking at options after that. I will keep her mostly stock, only changing the suspension to something a bit stiffer and throwing on some 15 or 16" Minilites or Watanabes a bit later on in the piece. She's a real darling so I'm not going to deflower her with flares or an Airdam. I've probably forgotten something else important but I'm sure you'll all point it out. Looking forward to chatting and meeting everyone. Thanks for reading, -Reubin First fresh air for 20 odd years! Discussion Thread1 point
-
So, last year I went and had a look at a mates 616 he had stored away in his sisters shed for better part of a decade. He bought it cheap, drove it for a small while then pulled it apart and did some work to it. During this period he bought a rx2 and then another rx2 and thus this got neglected. Anyway, deal was done and I became the new owner of a complete (but in bits) rx2 converted 616. This conversion was originally done by the infamous Mazfarm, those that know him know he would have been drunk and distracted by chickens while doing this and therefore did a halfarsed job of it. I'm sure Mutiny has some old pics of it. Plans? well, I'm heading off to 'murica for a while so I've dumped it with bubblegoose. He's going to do some paneling and painting and stuff. It came with almost everything - I had to buy some front seats, rear garnish and a horn pad. everything else seems to be there. it has a rx7 12a and s1 gearbox. engine has been pulled down and checked and ports have been extended. I will most probably add some bridgeported plates into the mix before it goes into the car though. I already had the rays/volk mesh wheels. I bought some SSR MKIII for it and am currently looking for some hotwires to put my eagers on (you can never have too many options!) That's it for now Discussion: //oldschool.co.nz/index.php?/topic/47513-2nd-child-update-noscos-mazda-616/#entry14843611 point
-
Hi all, as you all can tell i'm new to oldschool.co.nz but I hear you're a great crowed! This is my e30 that i've owned for a few years now. Was bought with a humble m20b20 engine that one day decided it did not like to live anymore. So I was more or less forced to do a m50b25 engine swap. These pictures will span over many years and life events. I feel that I have grown a lot with this car and can look back at the decisions i've made and learn from them. These were the 1st modifications I did, it took a lot longer than it should have and caused much anguish but it was all gone when I stood back and looked at her. The Patches if primer was the cancer (rust) forming - M20b20 (2 liter straight 6) - Manual conversion using 325i getrag 260, m20 lightweight flywheel, exedy clutch - Lowering springs with koni sport adjust shocks - Front and rear 325i sway bars I drove the car around as it was getting a feel for this new to me german vehicle. I did many minor modifications I pulled the trigger on attending my 1st track event. So I bought some things to make it feel more race car. But i had purchased this car for a reason, I wanted to build a rotary e30. A 20b NA powered e30. Ohh how this was gonna change... My girlfriend at the time was getting bored of me taking photos One cold winter's night, I was on my way back from a friends house when the humble m20 had enough. Twas the night before my day at hampton skid pan I have cool friends though and had started a following of e30 friends! Richard let me use his m50b25 powered e30 for the day So after I had a hoon I had to get back to reality. No rotary build for me. I needed a new engine and I needed something that I could do in a relatively short amount of time for a "budget" build... another thing I learnt, the term "budget" is not relative when it comes to cars. But after driving the m50 powered e30 and reading many (not enough) build threads/DIYs I started my search for a M50. Marcus (you'll hear his name a lot) had received a crashed e34 525i and offered me the engine and auxiliaries for a great price, so after checking the engine over, I gave him the thumbs up. I was now the proud owner of a M50b25 (cellphone pic FTL) And after a little more reading on feedback and noticing a trend with M50b25 swapped cars, I looked into selling this engine and find a m52b28. The reason being, most that did the swap found the m50b25 to have little reward for the effort. Until one day a friend asked why i'm not going to stroker it? So I started researching high and low for options and things I should do. I decided on the 2.8 stroker mainly because I had the conrods needed. I got a phone call from my wife (oh yea i got married) that she had bought me a birthday present. F*ck Yup my wife, bless her, pretty much upped my game for me and bought me the rotating assembly from an m54b30 (with help from ray@hellbm). So I guess I was going 3 liter. At this point I said screw it and sent the e30 in for panel and paint, my thoughts were by the time the e30 was finished the engine would be finished. This ended badly for me. I was naive and had put money down before they had finished the job. That is all I am going to say about the body. On a brighter note, PARTS! The apartment we were living in was not going to do, So we moved to a place with a double garage and just bigger in general. The apartment was super cramped, this town house we moved into was bigger, had a double garage and was the exact same price in rent. Auckland FTL Progress was going smooth for the rebuild Factory hone marks FTW while that was getting sorted I started unplugging the loom and disconnecting all the water and fuel lines as well as disconnecting the driveshaft and shifter linkage, work had shut down for the end of year break. I had 3 weeks to do the swap. Later that evening we got started on pulling the boat anchor out After much twisting and turning, prying and swearing it was out. and a me in the engine bay pic while Marcus makes it clear he is tired I prepped the engine bay, gave it a clean and changed the things that needed changing for the swap. I dont have pics, but the night before we dropped the m50 in, we installed the machined lightweight m20 flywheel and a brand new 6puk solid clutch between the engine and getrag 260 gearbox. The next morning we got on to fitting the engine IN after wiring up the engine and spending a few days diagnosing a non start, SUCCESS! https://www.youtube.com/watch?v=0vT7jQQLmbw&feature=youtu.be Between that day and present mistakes were made. I had issues left right and center. Not doing enough diagnosing and trying for the quick fix I bought a "tune" from a company in the united states that claimed to have the right chip for my car. This just made things worse. The tune was so rich averaging 10:1 all over the rev range. This chip was pretty expensive, and the car would still misfire, jerk and barely idle. It sat here for a long time. I was in the gutter, it had been 1.5 years and I couldn't for the life of me figure this car out. I had checked every sensor with a multimeter, bought some new ones just to double check, checked the coils resistances, changed ecus, checked codes. I had checked everything. Makeshift smoke tester Checking tps Double checking sensors It went up for sale, people were coming to view. I had given up on it. Marcus the beautiful yellow man came around one evening and forced me to check everything again, even though we both had gone through everything twice. So we fired her up, to get her warm and I pulled off the plastic ignitor cover... It was like a light from the car gods telling me that my pain and arguments with my wife had satisfied them and this is the cure to my cars' defiance to idle and drive... Only in the darkness we saw the light. The insulation on one of the coils had cracked, so spark was jumping out of the side of the ignitor pack to the rocker cover. I had a spare SET of coils sitting in my garage and the only reason I didn't change them over was that they measured fine. We VISUALLY inspected all the coils I had before installing my spare set. Took her out for a drive, I couldn't believe it. I had a idling, running non misfiring e30. skipping ahead to the present, the mods haven't stopped. 5 stud conversion with bigger brakes from an e46 328i installed with e46 coilovers, whiteline swaybars, an assortment of wheels, wof, regd and certified for everything. I can finally enjoy this car. I've been trying to attend every meet, every event, anywhere I can enjoy this car. Talk to people who have their own projects, their own stories. Here's to the good times Discussion Thread1 point
-
Went and had a gander at this and put a deposit on it about a month ago, and finally organised myself to go get it yesterday. Formerly owned by ESKIN8R who i think originally chopped it up and put it together and then Zebra Dude, who got it painted and sorted the draw bar etc. //oldschool.co.nz/index.php?/topic/26688-zebra-dudes-esky-van-trailer/ (photos are down) I knew i was in the right place! (you will know their works by the trail of bodies) Needed the lights wiring up, + some beers and Ben didnt finish till 6, so by the time it was ready to roll it was pretty late! Ran the gauntlet no troubles at all, and tows well, will go even better with some weight in it. I also managed to convince Ben to through in some schwweeeet rims. In case you are not a wheel aficiondo, they are * 13 x 6JJ * CHEVIOT * TURBO * Anyway today started getting into it, cut down the roofies from the van ( ) hung a gas bottle from a handy attachment and pondered on how to cram a LWB sized vans worth of camping stuff into half an Escort... Solution - Make the small thing bigger with Extentions! Roll * 13 x 6JJ * CHEVIOT * TURBO * to entice only the hottest classiest babes into the stabbin cabin. Need to buy some hardware to mount the doors then start thinking about the interior. Its basically going to be a bedroom for the boy + bathroom and kitchen that I can tow with the 2300, 125 or my daily1 point
-
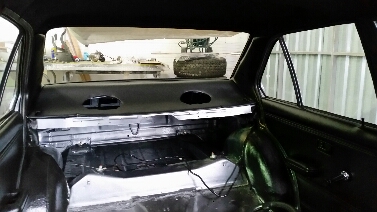
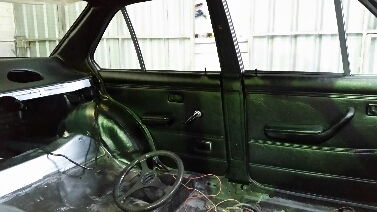
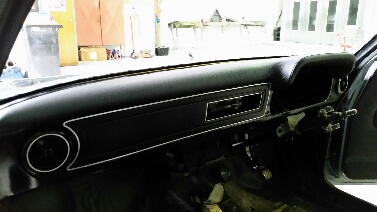
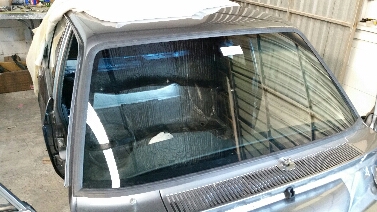
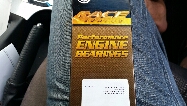
Got the "b"and"c" pillar trims in along with the rear parcel tray Also in went the pedal box, heater box and piping and dashpad. In the middle of tidying up the wiring atm and putting back up under the dash(going to rewire the engine bay new and hide a bit of it too). New windscreen turned up this morning so in it went Bro inlaw dropped off the sump he modded for me too, with the bottom squared off to clear the cross member and a return pipe for the turbo. The old man called today to let me know the pistons and crank were about to go in too! The engine is basically going to be a fresh standard rebuild(with race spec rings and bearings ) for now just to get it running and to tune in the link(will run low boost)and will be building a forged engine later with the 205 sierra block I have waiting...
1 point
-
big part of what makes a usable/decent ecu is the software/firmware . so even if you found some hardware that could be adapted to run an engine. sofware is going to be the problem far easier to work some overtime, buy a link1 point
-
I can't even begin to fathom what goes through people's minds when they try to steal such an obvious car, I mean surely it's not as easy as steal one day sell for parts the next on Facebook without anyone being any the wiser or is that just flatpeaker mentality? Glad to hear they didn't get away with it but sucks about the damage caused in the process, least you seem to have a good insurance company which is a help1 point
-
how did they even know it was there??1 point
-
was the clutch too heavy for them?1 point
-
Did they catch the scum?1 point
-
lol, i did mean how it sets but yes rust prevention review would be helpful1 point
-
Might depend on what you want as inputs - that seems to be the Atom's weakness on a 4 cylinder. It has 3 analog inputs which can typically get used up by MAP sensor, TPS and wideband. I've got a Storm that will eventually see use and I plan to use 2 more analog inputs for (1) switching between boost settings and (2) 0-5V oil pressure. This is a compromise for me, as if I had more analog inputs I would do more. It also only has 2x digital inputs, but that might be enough (eg high boost / low boost (if you have a boost control solenoid) and speed sensor). Also doesn't have "motorsport features" if that's your thing. Which is good, coz with limited inputs its hard to use them.1 point
-
atom doesn't come with a built in map sensor, so need to buy an external one. probably the only reason someone told you to buy the storm for turbo1 point
-
That photo of the burnt orange HQ with no trim, bumpers.... on steel wheels takes me back to the HQ I had when was I much younger. Biggest difference between now and then, damn near 30 years ago, was I drove it home from the paint shop after bolting in the front seat. None of this trailering stuff around rubbish. Nice work.1 point
-
oki - I managed to source almost all of the parts I needed - including the 2 used engines (B1500 ones) with Standard crankshafts in them with standard "big-ends" (rod ends) - wonderful - as the crankshaft and main+big end bearings availibility was holding me back from keeping the "bakkie" (pick-up or utility) with it's original engine anybody youtube the "Mazda B1600 with skyline engine RB20 - straight six 2 liter engine I think ???? - sounds awesome - https://youtu.be/-_vkLql1SRo hope I did this computer reference thing correct? I cannabilised the best sleeves +pistons+rings to make up one good engine - specs look ok. stripped it down to the chassis (that's Maxteds fault - I am copying him) - all parts dismantled, at moment rebuilding EVERYTHING - not a single bolt remaining on the chassis - busy with learning how to take the backlash out of the differential - you tube will do that for me, I will post pics just need to get them reduced in size - getting there, lots to do back soon - nearly midnight here -1 point
-
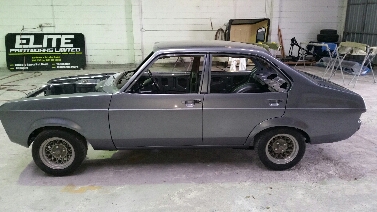
That primer grey is 100x better that poo brown haha. glad you changed that haha1 point
-
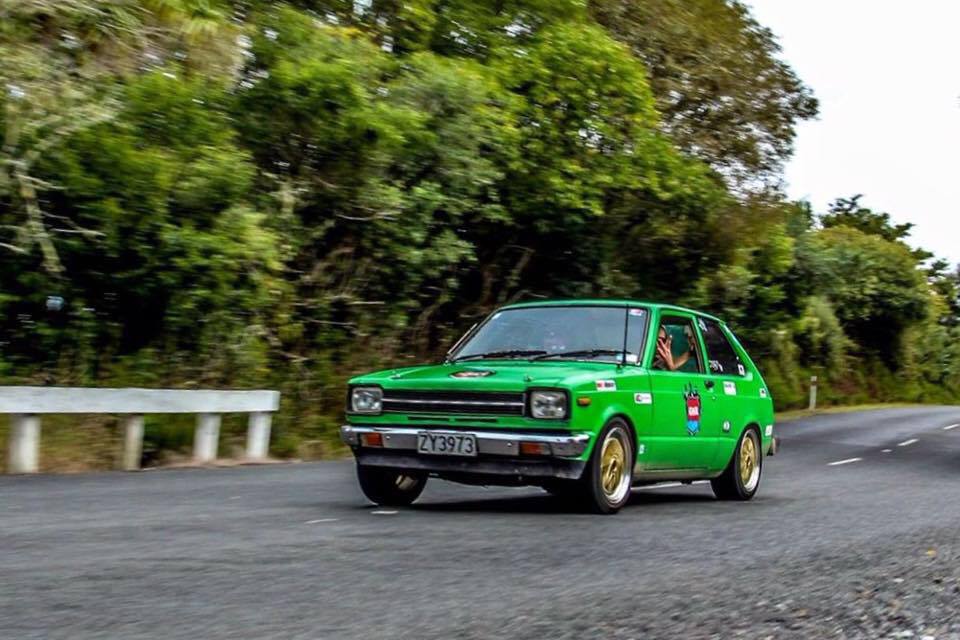
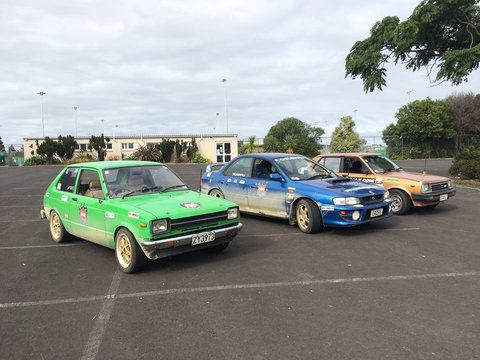
ok so in the lead up the Gumboot Rally. thursday I took her to work to make sure it was running right turned out I had a mean water leak after taking all of the water lines off I discovered the previous owner had use fuel line and a bolt to block up some water take offs and no hose clamps so as soon as it got up to pressure it leaked. so I used hose clamps to stop that for the weekend. Friday morning I took her to work all loaded up ready to head to Pukekohe for the night as I pulled into work to put the window up the gear on the window winder fell apart. Luckily I found one in Waitara and got that on my way to puke. On the way to Pukekohe I realised that the second hand wheels I had purchased had not been balanced and it was too late to get it done so I shook it all the way to Pukekohe. On the Saturday morning while everyone registered at the start line I shot to Carters Tyres in Puke and the owner opened up early and balance all four wheels for FREE absolute legend I will be dealing with him as often as I can. How does she run, It starts and drives even starts well when cold and the chokes are not connected. Rich is how I would term it between 10-12 on the Air fuel guage and there is no real point reving higher than 5,000 rom the power just doesnt get any better. But OMG its fun especially on the gravel. It was fast enough to enjoy it all weekend and have a lot of laughes. heres some pics of it and its friends on the weekend.
1 point
-
# 1 daughter was sick today, and I kindly offered to stay home to care for her and let wifey go to work. Was awesome, got to sleep in, watch movies with a 6 yr old, score some Dad points, AND blag some bonus time in the shed. Having (slightly) sick kids is a great gig... Here's the temporary solid lifter I'd bodged up to check the pushrods, just washers and shims cut from a speights can to pack it out... And I pulled the head to refit the valve spring and new gasket, and gave the heads the first torque after lubing new head bolts and bushing/washers with ARP torque assembly goo. Never used this before, seems good stuff, it just 'felt' right torquing up the bolts... Also fitted water pump as the gasket had arrived... It's really starting to come together now, should probably do a lot of the remaining fiddly jobs while I'm waiting for those pushrods, though it'll seem tedious after playing with shiny engine bits...1 point
-
Just the tip1 point
-
ive done it with plenty of lapsed stuff. its all been discuseed before. mr2b form and confidence is all you usually need.1 point
-
air cleaner setup finished. i hunted for ages to find a filter of any sort that had a small enough outlet to suit the 2TG but i couldn't find anything that wasn't utter shit. i had this trust one that I've had for ages and it fit better than anything else id found but it was chrome and the foam filter medium had turned to powder. i found a pod filter that had a similar foam bit so i bought that and the foam fits nicely into the trust pod, unfortunately the foam is blue but you can't have everything. then i took the frame to work and gave it a light bead blast so the paint would stick and i painted it black. job done. and in exciting news i put new plugs in it along with fresh oil and a new filter. oh, and i got the heater core reco-ed and I've put the heater box back together with new foam in it and thats back in the car now. oh and also - the windscreen washer bottle was a bit second hand looking with some of the plastic all powdery and shit so i gave that a light bead blast too. i gave it a thick coat of primer then i sanded it back to try and get it looking a bit more presentable then i painted it black so thats done as well. I've bought a cylindrical radiator overflow bottle that ill mount down beside the side of the radiator and that will just about finish the engine bay i think. 2016-03-29_04-48-47 by sheepers, on Flickr 2016-03-31_04-41-02 by sheepers, on Flickr 2016-03-31_04-41-10 by sheepers, on Flickr 2016-03-31_04-54-52 by sheepers, on Flickr1 point
-
Yeah easy enough to make, just need a Bosch donut style knock sensor, shielded cable and then wire it as an aux in to your laptop. Then listen with headphones. Just need to turn off software processing or whatever so you dont get any latency. Handy that you can record it as well though. I had it setup this way but ended up wiring knock sensor directly into ECU.1 point
-
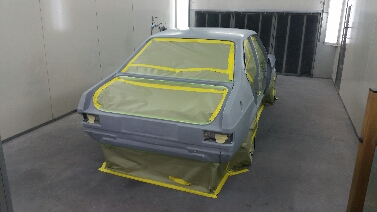
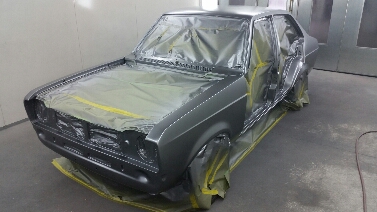
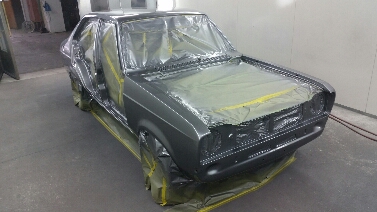
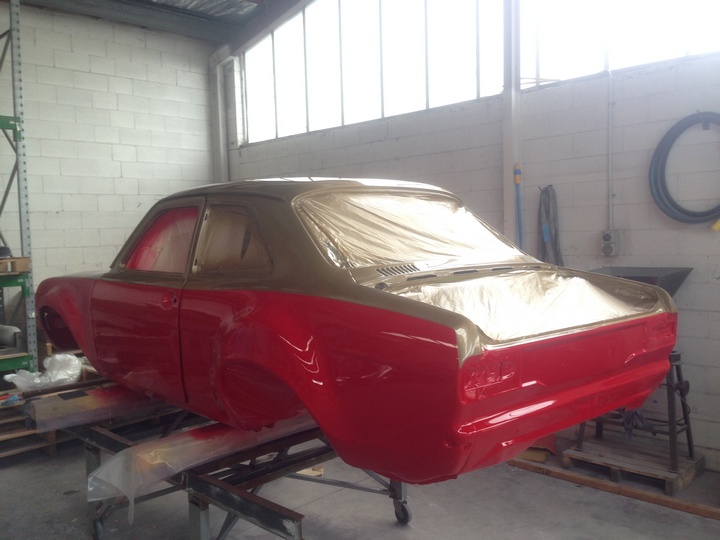
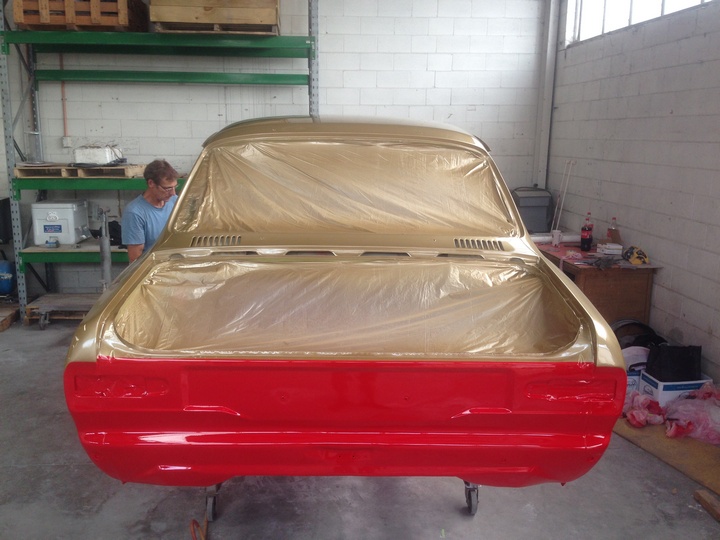
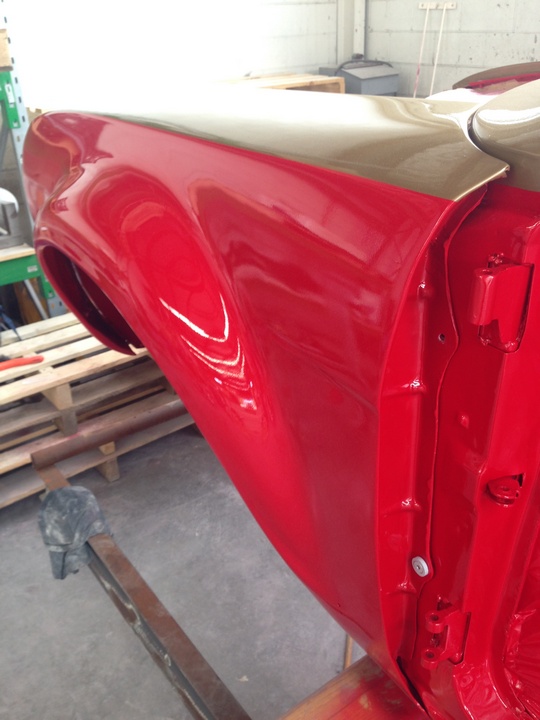
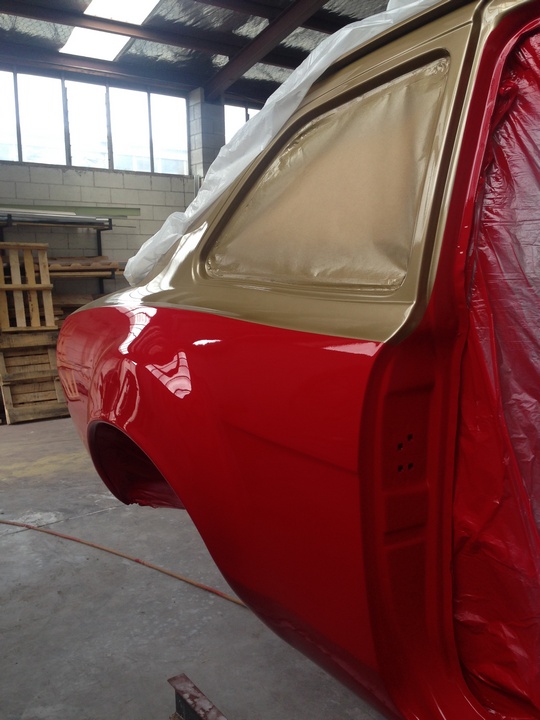
And today after all customers had their cars back for the Easter break and after nearly 18 months since I started,the body was in the booth and masked up After degreasing,checking everything was right,degreasing again and checking again color was on Letting the basecoat flash for 20 mins I hit it with 3 coats of clear And a 40min bake later out it comes Bootlid on And finally doors Real happy with the result and how straight it's come out...not bad for a painter lol Well I've had a guts full of cars for the moment so going to hook up the boat for a couple days fishing and diving. Thats all for now. Chur
1 point
-
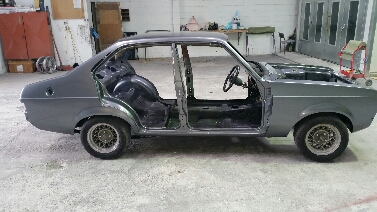
So I want these doors solid, I'm just not completely disassembling them like the shell. That said the bottom hinge on the drivers door needs some major work, some numpty(me) tried to drill out the pin about ten years ago, removed runningboard, jack car up on one side and drilled straight up, sept the car was on a angle this it's self would be bad enough, having to drill out the rivets in the door, fit a new hinge and then suss out nuts and bolts to hold it in place, but I can't. Because someone at some point folded this door right round and half ripped the rivets out, and then welded everything back together. So. This is stuffed anyway, so off it came. See how I skillfully drilled out half of the pin! this is looking from the bottom of the door, there is even less meat left on the top of the hinge. I was hoping to somehow fix this half of the hinge and just use half of the new hinge, but everything is so bent and twisted it really needs replacing. after thinking long and hard about the easiest, fastest or best way to fix this thing, I did this. and chopped the inner panel, hinge and all, out. started removing rust and hammering the folded door skin flat, something I couldn't do with the inner panel in the way. Also cut this out of the other end on the bottom of the same door. very krusty in here. removed parts and new hinge from this angle you can see how far the hinge has pulled though the door. it's going to take some work still to separate the hinge without damaging the door panels shape. Again, What have I done!! started making a patch for the bottom corner, might have to wait till the weekend till I can cut the hinge out of the door panel. Also finally welded up what must be the last rust hole in the body, on the passenger rear quarter window sill. and just a wide shot of the shed just to prove I haven't cut the whole thing into tiny chunks. my names Angus and that's my story.1 point
-
Got around to doing some more on the new extractors. similar design to original's but cant do a direct copy due to pipe diameter1 point
-
Finally got this thing working again after the spark disappearing on me. After replacing the coil and ignitor and lots of fluffing around I called an auto electrician to come and have a look. He suspected the ECU so after getting a replacement off pbaines (super fast delivery! 10/10 would get their tofu delivered on time by his AE86) it was all go again, retimed to 10 degrees at idle (the IACV I rebuilt is working fine now too) In the meantime I stripped some paint back where rust was showing through, had to do some welding around the fuel filler area as it looks like water has been finding its way past the seam sealer and sitting between the outter panel and the filler pocket thing. There were a couple of little holes, note really enough to patch though so I drilled them out til the metal was a bit thicker and filled with weld and ground it back. First attempt at spraying 2k primer, I really went way too thick because I was expecting it to be opaque but it is kind of a weird milky transparent colour. Is this corract? its protec epotech 408 and I used the prescribed reducer and waited the 10min after mixing before spraying. Anywho its not permanant its just to protect it until it gets a full makeover (so a long time) Anywho next up is putting some new wiper arms on and go see if I can pass a WOF!1 point
-
And I pulled the heads the other night. Disappointingly there was no solid evidence of a gasket leak that may have been the reason for overheating. A couple of cylinders however did have dark exhaust valves, which may indicate a valve seating problem? Could be weak valve springs from sitting maybe? Anyway, will post pics later, it's valentines day so I should be able to get some quality shed-time...1 point
-
PROGRESS!! Thankfully everything fits as it should, was worried the clutch m/s was going to be in the way, striked lucky there Diamond in the rough.. On a downer I found more rust...decided i'm just going to por15 the f@#k out of every patch of rust on the body and be done with it. Bring on tomorrow!1 point


This leaderboard is set to Auckland/GMT+12:00