
Leaderboard


.thumb.jpeg.384ff72c8d2b0ee0d34a7bdedb55bdcf.jpeg)
Popular Content
Showing content with the highest reputation on 12/03/15 in all areas
-
So finally ordered the correct an8 fittings for the fuel rails. Third time lucky. Managed to order M8s and M10s the first two times. Muppet. Started plumbing the fuel. Got engine completed back to the firewall. Will be running braided line along the tunnel inside the car. \ \ \7 points
-
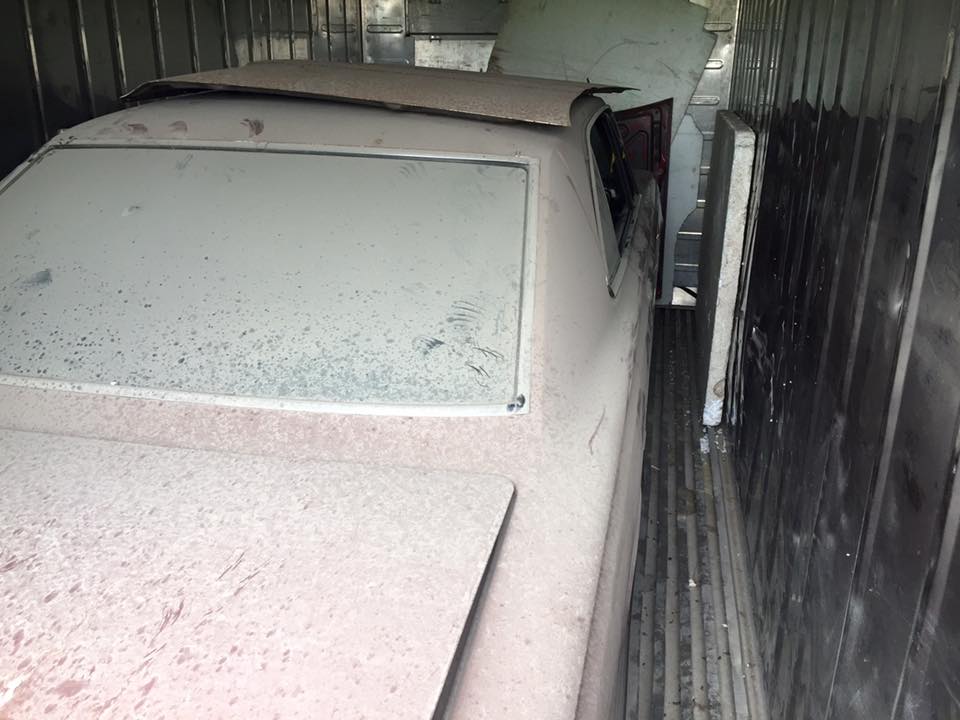
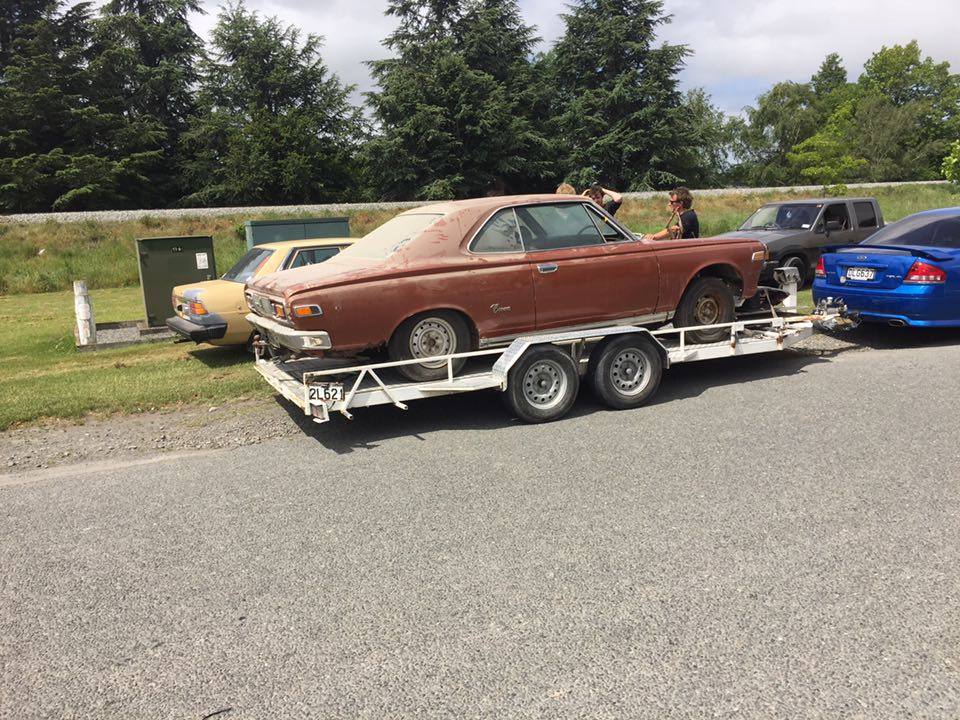
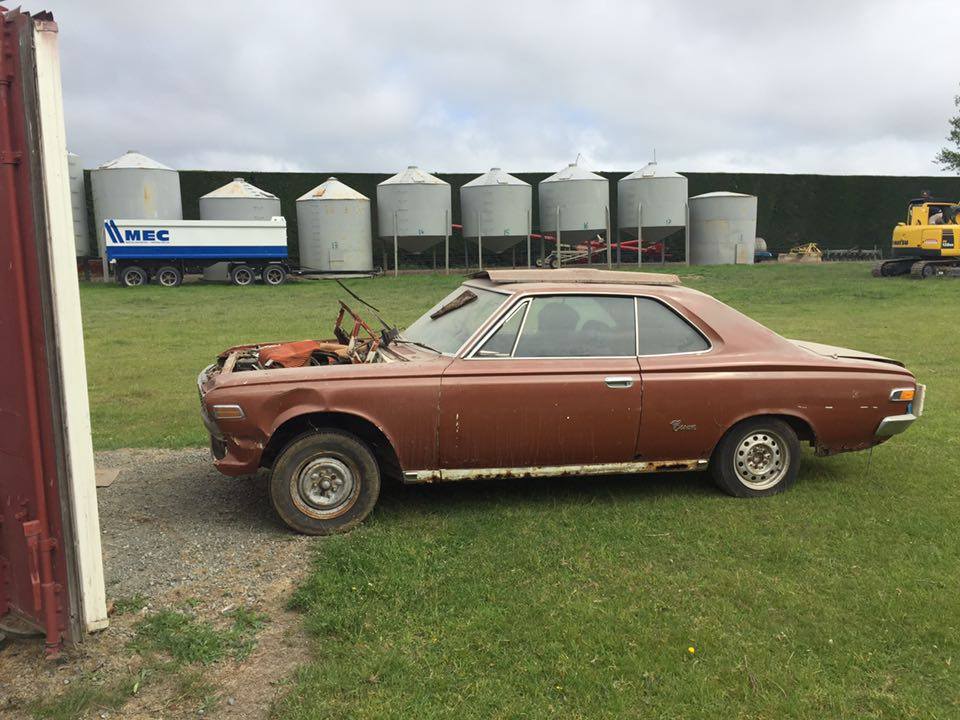
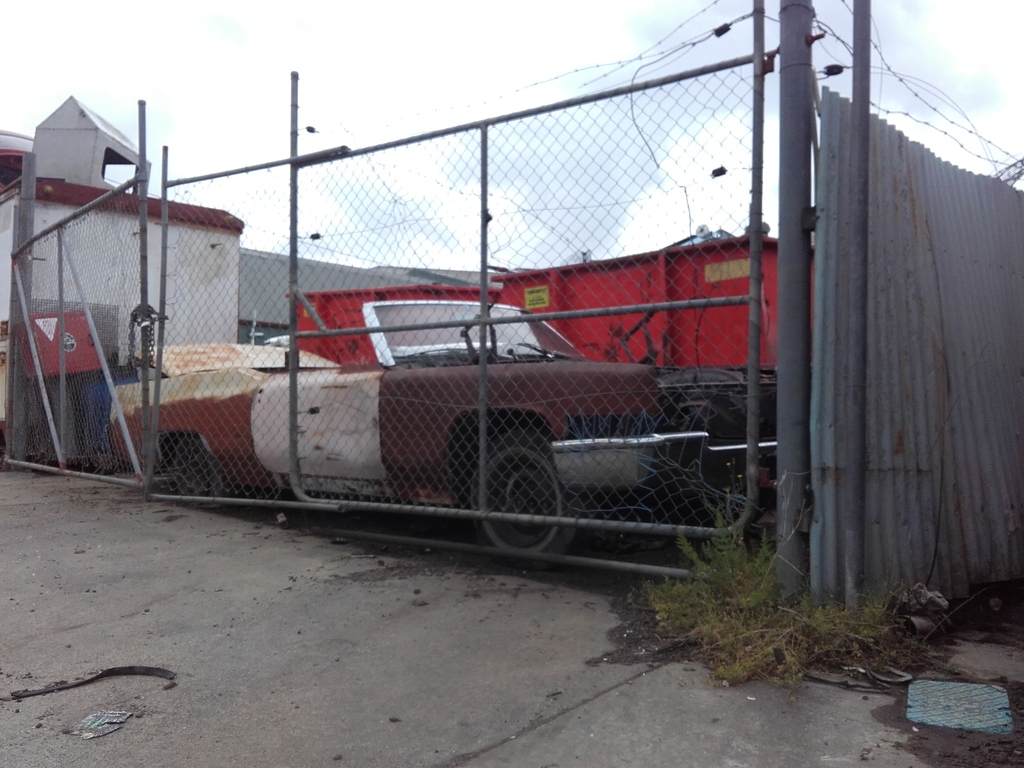
Discussion Thread hey guy just starting my build thread of my 1969 ms51 crown coupe. wont be starting the build for some time. I have been after this crown coupe bran find for over 3 years the guy finally let me buy it, it needs a fair bit of work as its just a rolling body at this stage. dereg and rusty eg sills and rear guards seams to be mostly there apart from motor and box. has been off the road since 89
 6 points
 -
Oh hi there...6 points
-
Ass bandit hears his callers hadnt done an update as not a heap has change as far as photos go, just more of the same Anyways..... Got all the cables installed thanks to Boyles Kawasaki, GN400 01 by Hayden Rowe, on Flickr Managed to take it for a burn down the street, goes really good, thought it might be a lazy pig, but gets along really well. cutting a few Kgs out probably helps. Felt good to ride it for the first time since buying it! GN400 02 by Hayden Rowe, on Flickr Brought a Honda 4 wire repo ignition from Boyles GN400 03 by Hayden Rowe, on Flickr Made a bracket GN400 04 by Hayden Rowe, on Flickr pretty happy with how it turned out, really nice ignition switches, might use on on the bobber aswel GN400 05 by Hayden Rowe, on Flickr without tank on GN400 06 by Hayden Rowe, on Flickr While making it I drill through my finger tip, went in the nail and out the other side, felt pretty cool. GN400 07 by Hayden Rowe, on Flickr Seat is done GN400 08 by Hayden Rowe, on Flickr Looks exactly how i wanted it, uncomfortable as shit, but didnt care ho wit felt, Form over function..... GN400 09 by Hayden Rowe, on Flickr ......and anyway, you get a sore arse on any bike GN400 10 by Hayden Rowe, on Flickr Bobber has about as much padding a zero suspenion GN400 11 by Hayden Rowe, on Flickr GN400 12 by Hayden Rowe, on Flickr GN400 13 by Hayden Rowe, on Flickr GN400 14 by Hayden Rowe, on Flickr GN400 15 by Hayden Rowe, on Flickr GN400 16 by Hayden Rowe, on Flickr GN400 17 by Hayden Rowe, on Flickr and now looks like this, getting pretty over pulling it a part, but anyway progress is progress, swing arm issues, need a 14mm drill bit GN400 18 by Hayden Rowe, on Flickr Got the indicators sorted, pulled the LED guts out of the housings, then put a standard 6v bulb holder in, with the lens in they've worked sweet GN400 19 by Hayden Rowe, on Flickr So thats were im up to now, List is getting pretty small now but so is time to finish Wire up speedo indicators finish off swing arm needs wing mirror, front guard and chain guard for WOF plus plus plus etc etc etc and then... testing and tuning all before Boxing day Easy6 points
-
It drives really nice apart from the diff whine very low geared 4.7 screams its head off but it loves it. almost got the tune sorted just trying to iron out a rich cruse and slight hesitation off idle but runs great. Suprisingly those lockrite diff lockers are quite streetable does u turns tight corners with no scuffing few clicks but locks well when wanted. just need to glue the rear windows in get me some handbrake cables made and new seatbelts and cert time everything passed crack testing too even the wheels so was stoked with that6 points
-
Turns out the driveline vibration I have been stressing about since April was just finger tight centre CV bolts. Guess they've been working loose since August 2013 when I paid a decent chunk of change for a reputable driveshaft shop to rebuild, shorten and balance my driveshaft. Tempted to go back to them and kick them in the balls, but know it will achieve fuck all because its been so long and I've done several thousand Km since then. Anyhow I'm going for a bit of a drive tomorrow night to see if the vibration has disappeared at all speeds and will report back with pics.5 points
-
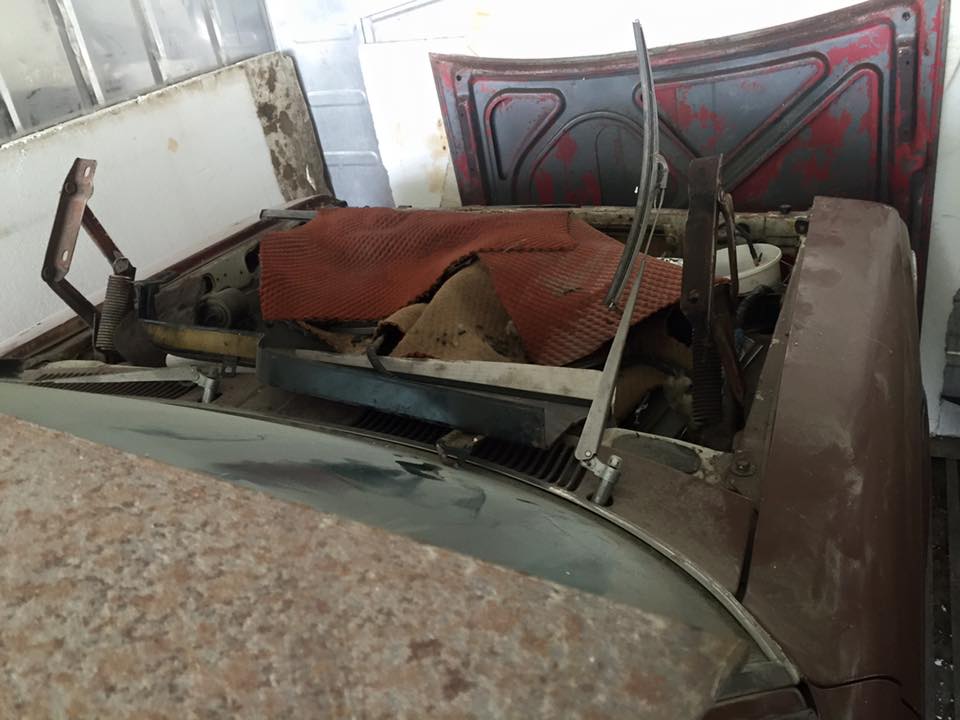
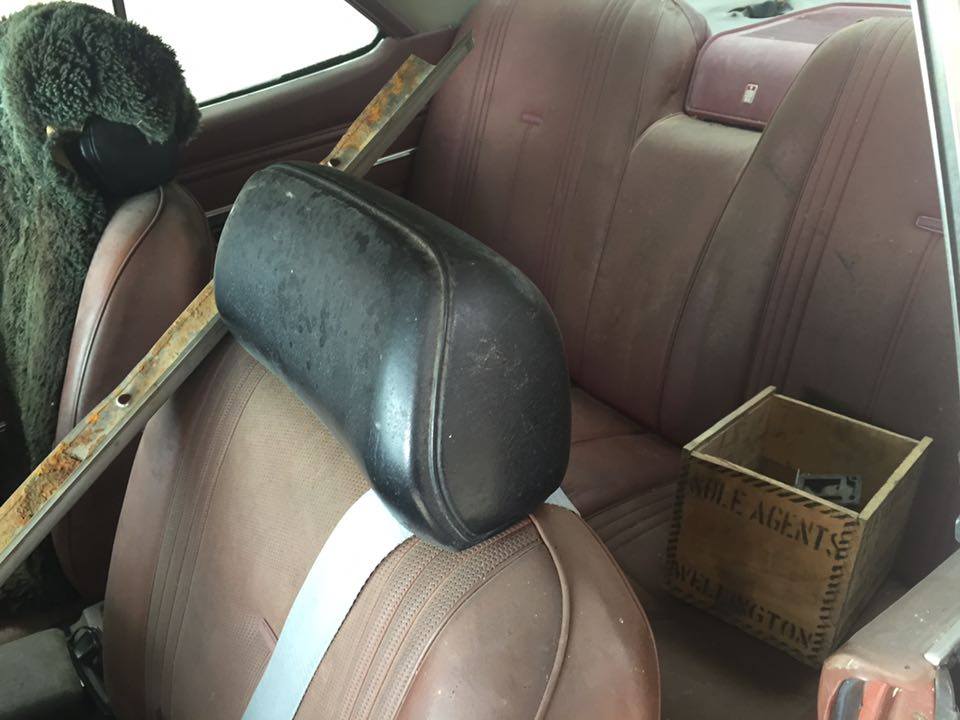
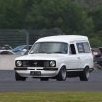
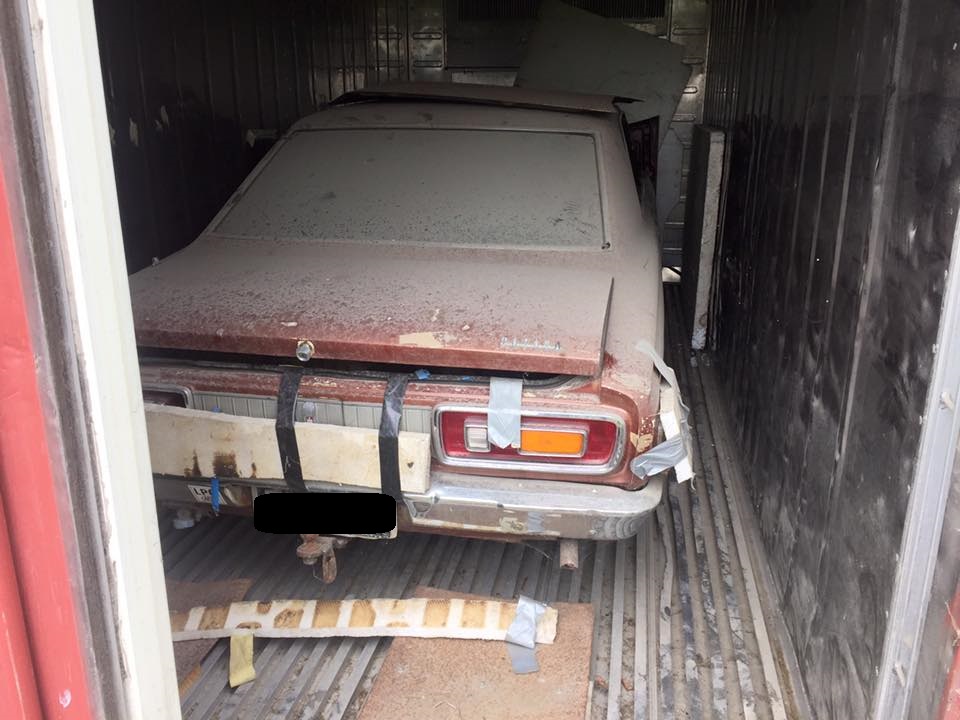
few more photos, came with tones of parts that I still have to sort out
2 points
-
I can tag along as well depending on the time. This is also on bimmersports looks to be a not to bad car.2 points
-
BURNOUTS!2 points
-
Quick stupid question... Who should I go to about re-vinning a car? In particular getting permission or whatever to use the old number plate for now, then actually getting the proper re vin later2 points
-
Been doing a bit of welding finishing things up. Got passenger seat harness plates in for a potential passenger. Welded up a few trim holes and other bits and pieces. Got from guards welded on now and the bubble arches bolted up. Want bolt on for ease of replacement if they brake/ get broken during racing. \ \2 points
-
Found some Halliday racing wheels in 15x10 that I might buy. Looks sweet. Fronts might have to be taken back to 9s because I have to space them 10mm to clear the brake calliper which means the tyre probably won't tuck under the arch.2 points
-
Caddy is a roller with steering now dude!!!! Everyone try to find 1969 Caddy bits, like everyone!!!! We are going to fix the brakes, throw in a suprise motor and we will be rolling in this bad boy!
2 points
-
Hello People! Myself and a lad from teh french forum are pretty keen to get out and about with our lovely french machines over the summer for a few relaxed cruises. The greater Manawatu has hundreds of kilometres of beautiful roads and even more beautiful scenery and what better time to enjoy that than summer time with a saucy french minx. We're thinking for the first cruise to kick off in Feilding, take in a quick lap of two of the river valleys and back. It's around 115km of pretty quiet roads and we're thinking we can either stop for a quick bite/beer midway or carry on back to Feilding for the same. There wont be any gravel roads or anything that'll harm even the slickest of cars. Looking at Sunday 6th of December. register your interest! This definitely wont be the last of these so get on board and enjoy some car lad banter, bring your partner and mates and lets have a bit of fun! This is definitely open to out of towners too. Cheers Cam1 point
-
now that very same piece of steel has lines all over it. 2015-12-03_09-05-01 by sheepers, on Flickr and its all bent. 2015-12-03_09-04-36 by sheepers, on Flickr saturday is the day for instillation/weldy/smashy/makey the right shapey.1 point
-
Got Todd (driftnmaz on here) to mount my seat, had to bolt it to the floor as otherwise my head was going to be on the roof. Also got him to raise the rear section of my exhaust and chuck a new muffler on as mine was fucked. Now can lower the rear to match the front as the exhaust wont be trying to smash itself to pieces. Then just need to fit RCAs and take it for an alignment next week and am good to go for the next track day in a couple of weeks.1 point
-
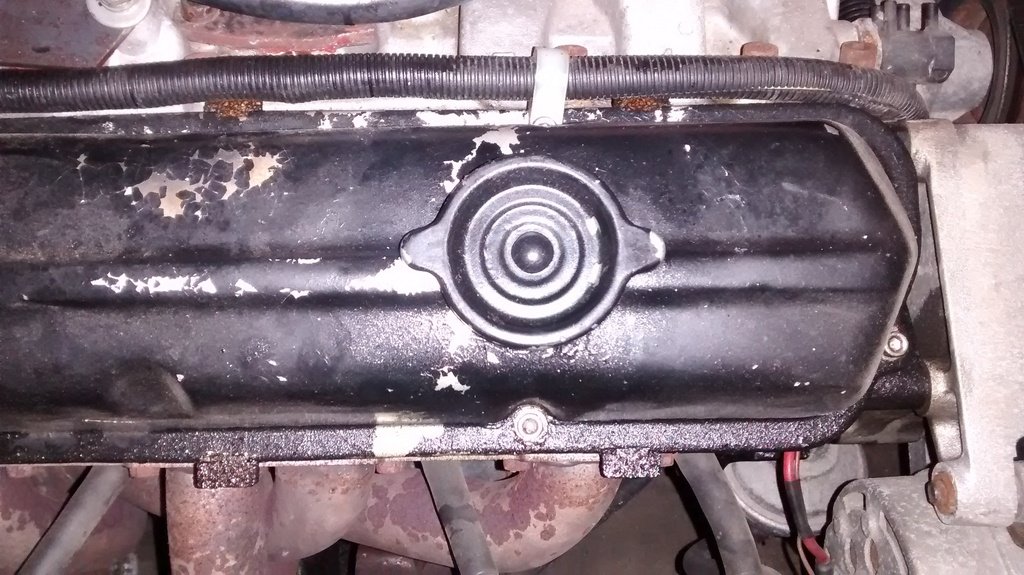
I'm pretty sure I don't have an exhaust leak. But the tapping is so powerful that with a stethoscope I can't define where it is because it's everywhere. maybe I'll try run engine with tappets cover off1 point
-
I was.thinking of a small gas cooker, and pancakes in a bottle. (that is about the lit of my.cooking ability tbh) iits going to be mint when.the Mrs goes back to.work. Im sick of having bugger all.play.money......1 point
-
Ha, KTM orange. Nice looking job, disc brakes etc, a fair bit of engineering under that shell - bet it hauls. Wonder how it goes for heat dissapation? There is room for radiators under the front and you could direct air where it needs to go... Imagine being passed by that - I was looking for a flogged out shell to do something similar but the one I got was too complete - guess I need another one to mod...1 point
-
1 point
-
After seeing this at Dromeageddon I can confirm this machine does quality burnouts.1 point
-
Dave owns it. I think he's taken the back windows out and paneled over it. Due for paint. It's a bit of a weapon with those side drafts. Sounds the part anyway.1 point
-
And that concludes the filming work for my Series Two SD1. It is now parked in the corner of the shed awaiting the V8 conversion process to begin. I now have to strip and dispose of the yellow Series One SD1 and then work on my Morris Minor and VW Golf. So there won't be much progress on the Series Two SD1 until the new year. I'll still fix a couple of small issues on it and have a little list to work through: - Boot struts don't hold up the hatch - Drivers' window does not go up or down - Wiper stalk is broken - Trip computer is missing some buttons - Steering column bush is missing - Horn inoperative - One rear wheel cylinder is seized - Rear air shocks leak - Rust below front windscreen - No radio fitted to car (will find a suitably 1980s one) - Fix centre console by returning it to original specs - Tighten up both wing mirrors - Replace gearbox oil - Replace right rear tyre due to excessive one wheel peels by previous owner - Align headlights and spotlights - Fix broken switches on instrument cluster - Clean the car properly Just a few things...1 point
-
That surprised me about howatt like you I have had a bit of work done by them and its always been of top standard1 point
-
Who owns that orange Mark 2 Escort 45 Panel van? Was built by a friend of mine. I remember many a hoon around the block in that thing. Nostalgia. Glad to see it's still out and about. Also, well done to Karl for the organisation and good times that were had by all!1 point
-
no. if you own a truck, yep. but anything outside that you take your chances.1 point
-
fuck ive had nothing but bodge and fuckups from the "major" players when it comes to driveshafts. fuckin ADL are dicks, there are a number of branches up here and 3 of them i can confirm are fucking useless. also hows that drivers door repair coming along??1 point
-
ooh its 40 mins from my house too meet you halfway1 point
-
Went for my first drive in the Caddy today, oh yaeh its badass. Ok we towed it round the yard, I'm going to need a little help from everyone to get this bad boy up and running for Kumeu, but it will happen, and it will rule!!!!1 point
-
Glad to see it's coming along! I'd recommend bracing the upper 4 link mounts back to the wheel arch. Mine were similar to yours but with angled braces to the tunnel - still cracked eventually. They will get a bit of a beating, so it's better to be safe!1 point
-
Fuck bro that is looking spectacular ! Love all your work on thing1 point
-
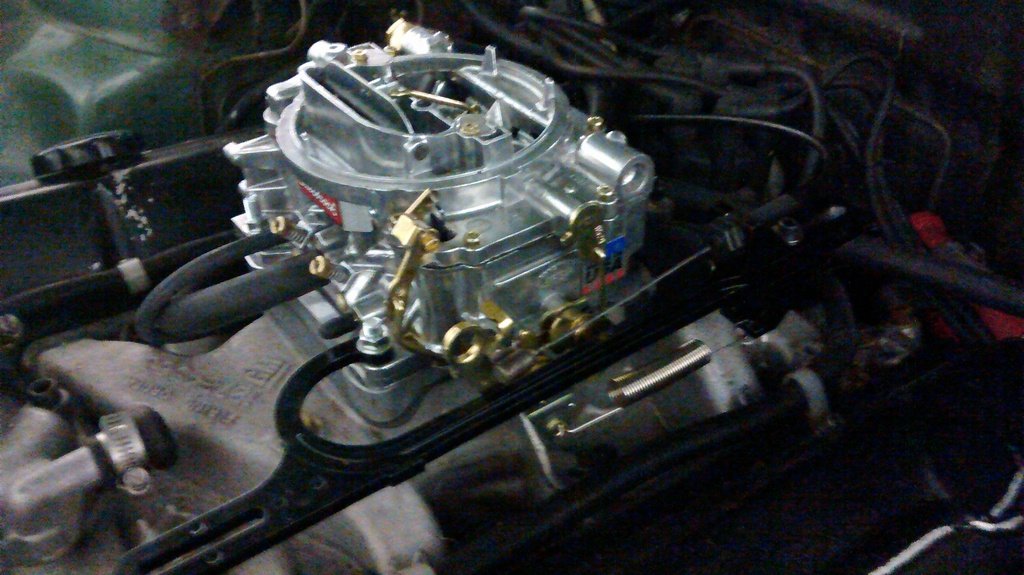
The car has always required a bit of cranking to start after sitting overnight. It's a drain on the battery and hard on the starter too. The easiest solution seemed to be fitting an electric fuel pump to fill the carb float chamber before starting. Ergo 1 Carter 4070 pump. I ordered this from http://www.nzperformance.co.nz as the price was OK, and it was closer than the USA. Very happy with the service there. Pump comes with 3/8 fittings and mounting hardware (not the mig tips, they are just lying around on this temporary workspace) Mounted it just forward of the gas tank. Pump instructions recommended a filter before the pump. Connecting the 3/8 outlet to the stock fuel line needed a soldered adapter. The pump also leaks a little bit from the threaded outlet connection which is annoying. The instructions are clear on not using any sort of sealer there, and it is done up as tight as possible. I'm only going to run this pump to prime the carb so this connection won't normally be under pressure so it will be OK. Car seems to run fine using with the stock mechanical pump sucking through the Carter one. It isn't permanently wired yet - I ordered a 12v 55 delay relay board from AliExpress and will use that to set it up for a 15 second run when the ignition is switched on (like a typical EFI setup). It is fairly noisy as mounted - the pump is rubber mounted to the supplied plate which I have bolted to a new part of the airbag controller mounts. If I ever end up running the Carter pump full-time I'll get some rubber mounts for the plate too. There's a lot junk in front of the gas tank now. Plenty of clearance at full low though.1 point
-
So after a couple of nights in the shed she now drives not 100% finished yet but close to cert time1 point
-
los bandidos culo1 point
-
Basically whats left... - change cam-belt and waterpump - machine chamfer on to bottom pully to accessory belts can be install removed without having to lower the engine away from the chassis leg - install front mount intercooler - plumb up intercooler piping. - plumb up cooling system - bleed up brakes - make new hydraulic line for the clutch pedal. - setup coil-overs correctly. - re install dash etc. the body will stay rough for now.1 point
-
Step 1. Unbolt compactor Step 2. Tie compactor to solid object Step 3. Drive. All taken place in your local refuse contractors yard (at 3am when no one is looking)1 point
-
I am keen but but but.. time is not of the essence1 point
-
i asked the cat to get the panel ready so we could wheel up a panel to patch the sunroof and when i got home from work he'd done it. I'm really hoping that Peter will make the patch this week and we can start welding it in late this week and this weekend. 2015-12-01_05-29-11 by sheepers, on Flickr1 point
-
keen for Gore Bay1 point
-
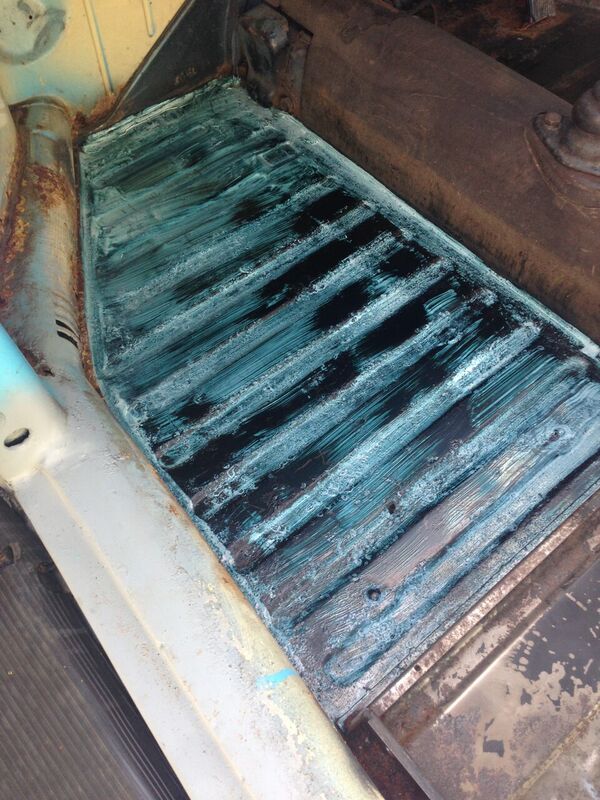
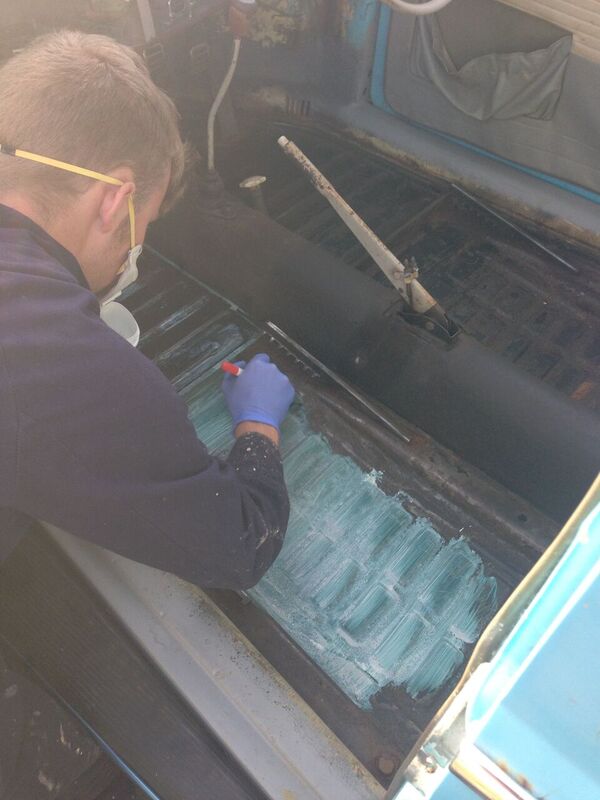
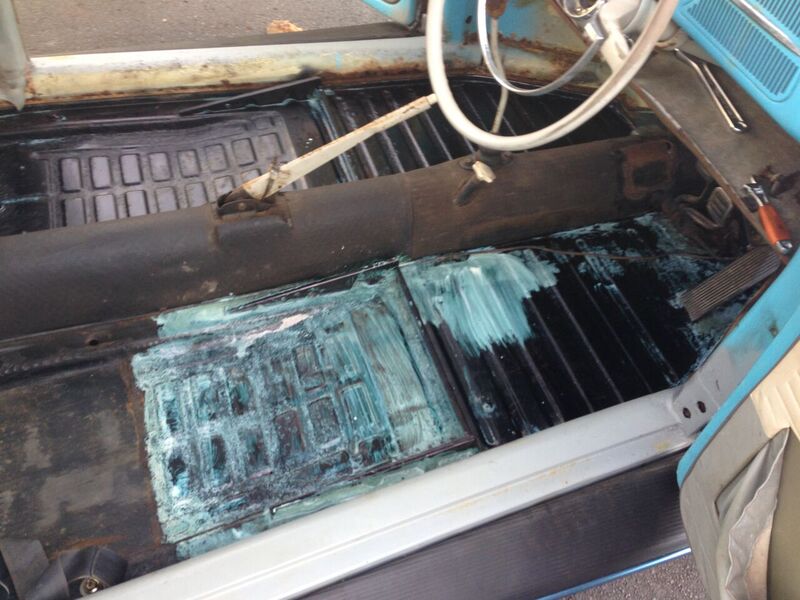
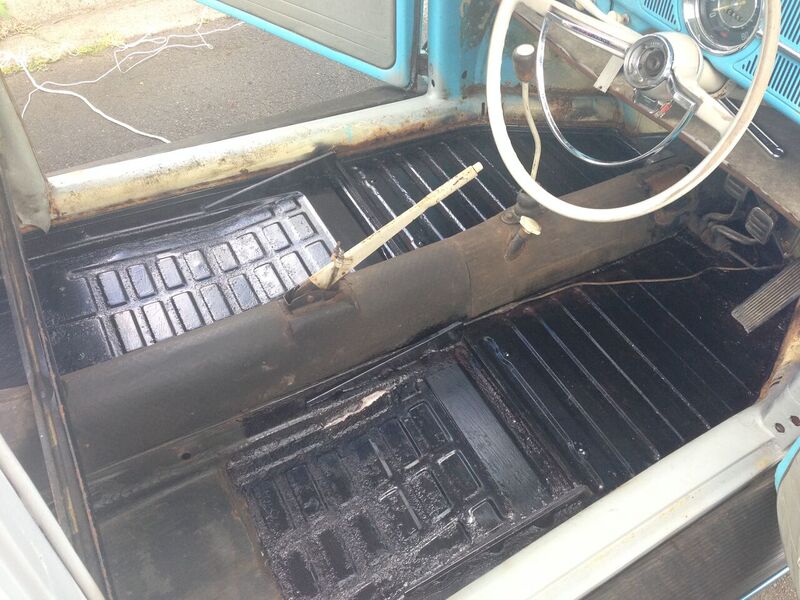
Also at Bunnings buy the product in link and get some shit brushes, rust kill the shit out of the floor apply it good and everywhere you know its working when it turns black, wear all ( P.P.E ) you wont need a big 1L but good to have. Poor into a container and dont tip used stuff back in because u will activate the whole bottle and there goes $50 http://www.bunnings.co.nz/quik-rust-converter-primer-1l-_p00270361 shits strong wear a mask Once you have done one coat let it dry and do another
1 point
-
Can we please change the name to Joel the Jews vw beetle haha. Good luck with the wof tomorrow Dude.1 point
-
I've never been much of a fan of that. It looks so simplistic and chunky that it could almost be home-made, and it sets you up for a different body width / ground clearance / profile of the side of the car which doesn't eventuate, because there are no side skirts etc. Just the standard black painted sills. So the look just stops dead after the front wheels.. Yes, this you may do. The obvious solution is not to convert a manual car to a 2-speed auto. That's the last resort.1 point
-
Lowering attempt number 2 has become a failure. I installed a shorter suspension part (arm? I'm horrible with these types of names) and then the stiffer springs which I tried to use earlier to lower it but raised the car by a centimetre: As of now the lowered side sits 2 centimetres higher than the non-lowered side. This is due to the stiffer springs which came from a sedan 1501 and on that sedan the car did actually sit lower but that was likely due to the heavier 2 litre fiat engine that was in it. We put in the stiffer springs to stop the car from rubbing against the wheel during corners but I guess I'll just have to hope that doesn't happen when I change the springs. Sadly though, just changing the springs won't completely fix the problem, well, it will fix the problem but there is another problem at hand. The lowered suspension part (and I've got spares, than god for that) is rubbing against the inside of the tire as seen here: This leaves me with the options of either grinding down the suspension part, which seems kind of risky, or putting in wheel spacers which could probably work. The guy I bought the car from up in Auckland has a white sedan where he had the wheels widened so for that to not hit the suspension he probably had to use spacers or something as well now that i think about it. Unless of course the widening was done into the other direction like with this 1501 wagon: Although that car was actually sold with those dish wheels, they are very rare, I love them. Sorry that this comment may be a bit incomprehensible apparently I am getting worse at English over time.1 point
-
Righteo! We'll kick of on Sunday the 6th of December at the grubby gravel pit located at 44 Cambridge Ave, Ashhurst Plan to set off around 11.30am, so aim to be there around 11am. Come mingle at the start. We're all shy. We're all not hugely outgoing I'm sure, but we all don't bite and we all love cars so there's something in common for everyone. https://www.google.co.nz/maps/place/44+Cambridge+Ave,+Ashhurst+4810/@-40.2946584,175.7515998,17z/data=!4m2!3m1!1s0x6d41b74255e5e4f1:0xdb1ecc05871d86d9 We'll stop for lunch at a country pub/cafe type place along the way. bring ya o/s car. bring ya daily. bring ya work ute. whatever. everyone welcome. Bring your camera! This part of the North Island is pretty awesome. great driving roads and great scenery. LOW CAR FRIENDLY: Don't be a sook and stay home coz your whip is slammed. come spin some yarns and do some hooning.1 point
-
Here's how I see myself riding the dusty, palm tree lined back roads of Southland once she's done...1 point
-
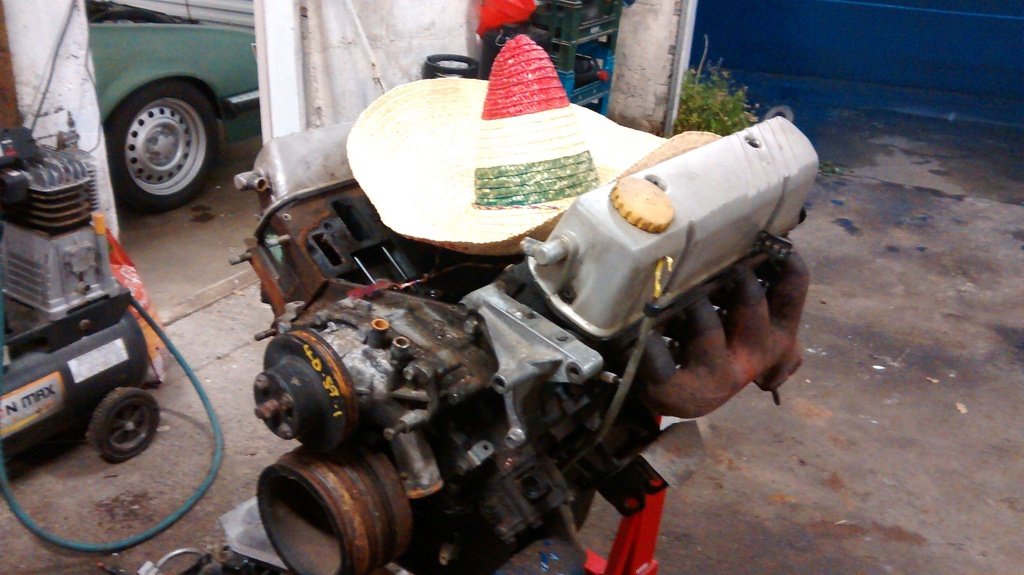
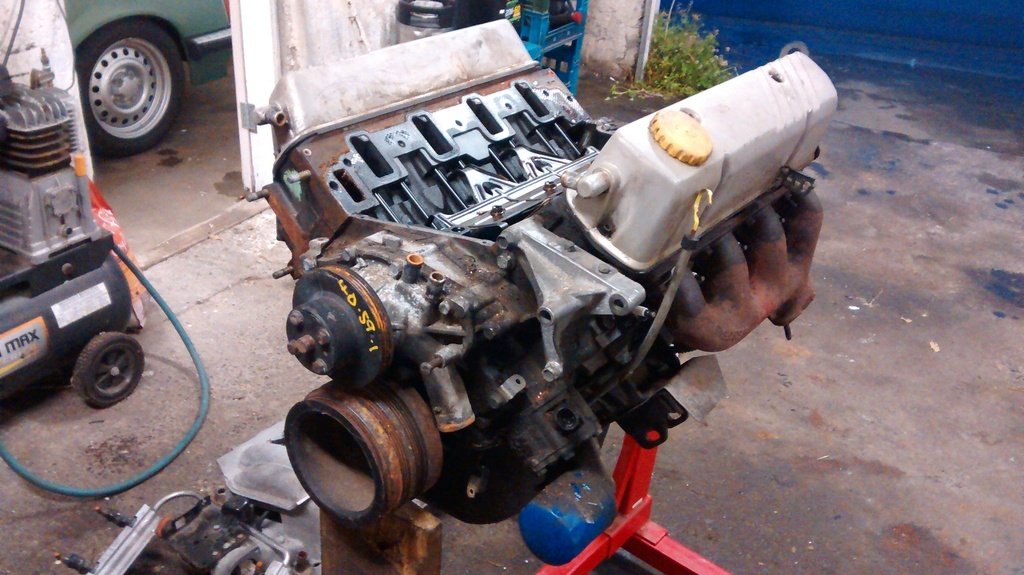
Also I scored a replacement oil cap after I lost mine at Nats on the side of the road. Cheers to... Joe for bringing the motor door to door from Auckland to Wellington Seedy for the loan of engine crane and bringing it to my lockup tonight Beaver for the loan of an engine stand Kamahl for a free oil cap and picking up a booster for me Chris and Tara for storing my motor in Auckland for a month or two Kicker for selling me the scooter and Steelies for turning up as generic peanut gallery motivation Thanks all - hats off to you
1 point
-
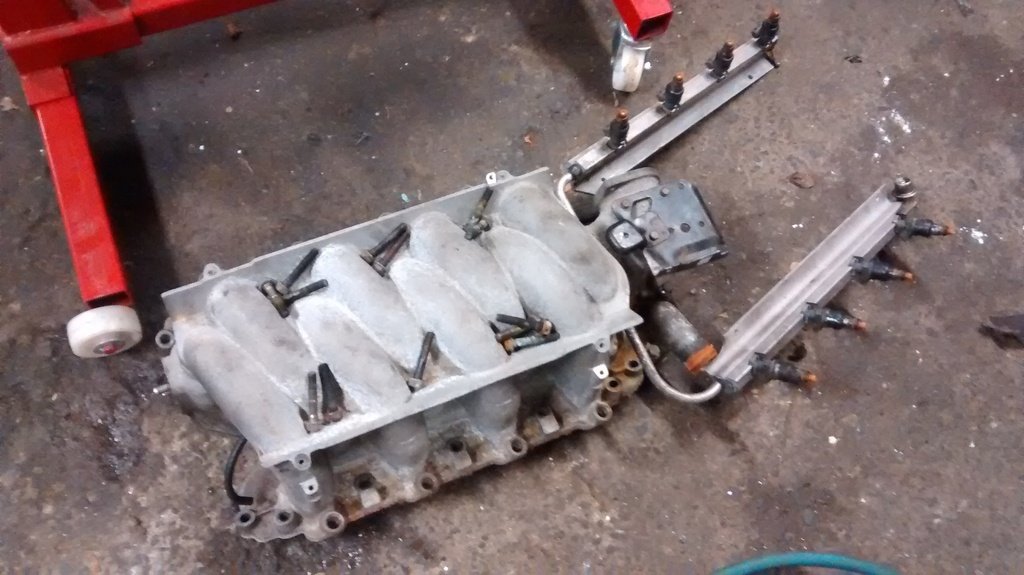
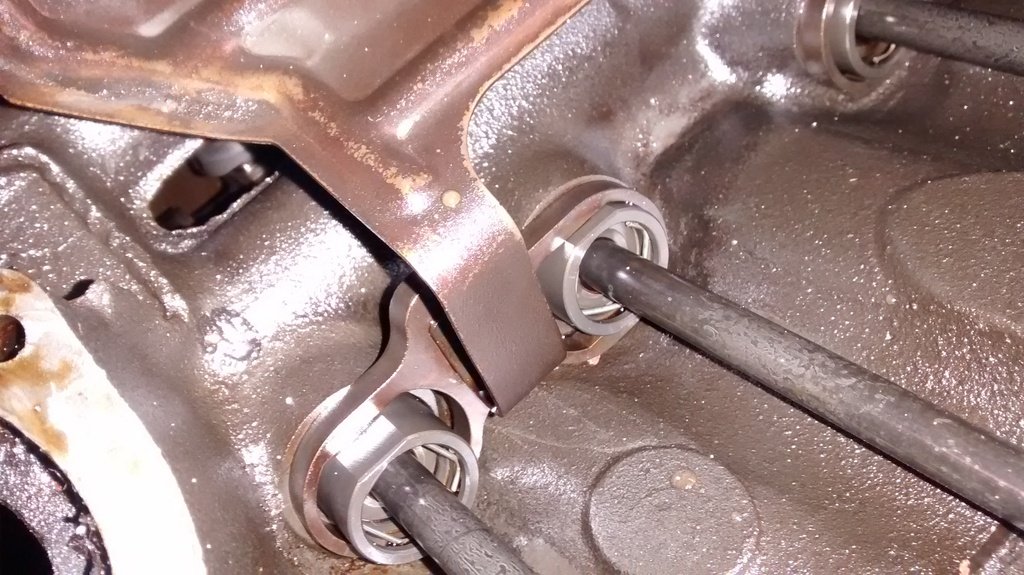
Tonight was a unexpectedly productive night now I look back on it. Was meant to just be meeting Joe and Seedy to unload my motor and chuck it on Beavers engine stand but a traffic accident on the motorway held them up. So I trudged on and cleared up a couple items I've been meaning to do for a few weeks but just haven't had time - even though I've had the bits on hand the whole time. First of all I fitted up a new spacer/adapter and throttle bracket to fix the twitchyness that I was experiencing - all to do with the angle of the throttle cable in relation to the pivot. (sorry for potato photos) I mounted the spring mount at the wrong end and upside down because it fouled the air filter in the correct place. Probably puts a bit too much strain on the spindle so may rethink this. (but probably will leave it cos I'm lazy) Then Joe and Seedy turned up and we unloaded my new motor. I wasn't going to do anything more than just jam it on the engine stand but Joe tricked me into taking off the wiring loom. ... and the inlet manifold so I could check if it had a roller cam - which it does. woooo. leaving me with this by the time I was done. I also scored myself a scooter tonight too.
1 point
-
OK, so I wanted to get some front disc brakes sorted and certed at the same time as the bags. After an abortive try with EF Falcon discs (that are integral with the hubs) that didn't work out (hit the upright and I didn't want to mess with swapping the whole Falcon upright in) I picked up a BA Falcon disc and caliper from Gaskin Ford Parts in Seaview (good guys to deal with). Pictured with the Merc (same as Galaxie) upright Tight fit inside the 15" Radir wheels, but looked OK. I got the brackets cut from 10mm plate. The two pieces were needed to pick up the 3rd mounting point on the upright. The smaller piece would have been welded flat to the big piece on the extended bit. I didn't do that in the end because the cert man was happy with the single plate using two of the upright mounts. The top mount is really big as it carried pretty much the full load of the drum brakes. The caliper bolts to the adapter plate, while the plate is drilled and tapped for the upright mount bolts. I machined a couple of small spacers to go between the adapter plate and the upright. The thickness is worked out by mounting the hub and disc on the upright then clamping the caliper (with pads in) using air pressure (I have a brake flexi hose brazed to an air line fitting). I've used this approach a couple of times now and it works out OK. Ideally they would be tacked to the mounting plate to make it easier to assemble, but I didn't want any cert hassles over welding the adapter. Next time I have them off the car I'll tack them on. I had to put longer studs in the hubs, so the old ones were pressed out. A bit of a drama because the factory studs were swedged in place to retain the drums. They came out with a bang! Fitted to the hub and upright and testing inside the wheel. You can see the brake-air adapter thing. I should have been a bit more careful prior to this stage because when I bolted everything up on the car the calipers rubbed on the wheel. A little filing on the caliper corners didn't to the trick so I had to weld up and re-drill the adapter to upright mounting holes in a slightly different place. This is the caliper adapter from the other side. I ground the plate a bit where the main part of the upright joins the stub axle boss. This all cleared the relocated shocks OK. And with caliper. All assembled The cert man said I needed split washers on all the bolts so I had to dismantle everything to put them on. It is a bit of a hassle to get apart as the caliper can't be directly removed without following a specific sequence and pivoting it once the disc is on and then tightening the bolts with a ring spanner, but it shouldn't need doing often. For brake lines I used the matching Falcon ones and made a little mounting tab behind the upright. The lines then reach the factory hard-line on the chassis rail behind the suspension (I moved this a bit to clear the new shock location). As per above I used a Corolla master cylinder (anything with a 7/8 bore would be OK, 13/16 would be a better choice I think). Some new brake lines were run, with a fitting to use a pressure switch for the brake lights (didn't feel like fitting a pedal switch as I was short of time). I did put an adjustable proportioning valve in when I had the bigger M/C but I'm not sure it was really necessary. The brakes work well, and passed certification. I feel more confident driving it on long downhills now, and don't get the vibration from the drums that it used to have. This was all done with wrecker parts (didn't even dismantle the calipers), but new parts are probably fairly cheap.1 point
-
Billet crank Argo rods Carrillo Pistons Race cams with modified controllers.1 point
-
Cert plate acquired. Beach Hop attended. I do need to make some changes to the rear shocks or something as it is rather bouncy in the rear when driving. I've been advised that '4WD' shocks would be better. Will do some research after the school holidays.1 point


This leaderboard is set to Auckland/GMT+12:00