
Leaderboard


Popular Content
Showing content with the highest reputation on 12/01/15 in all areas
-
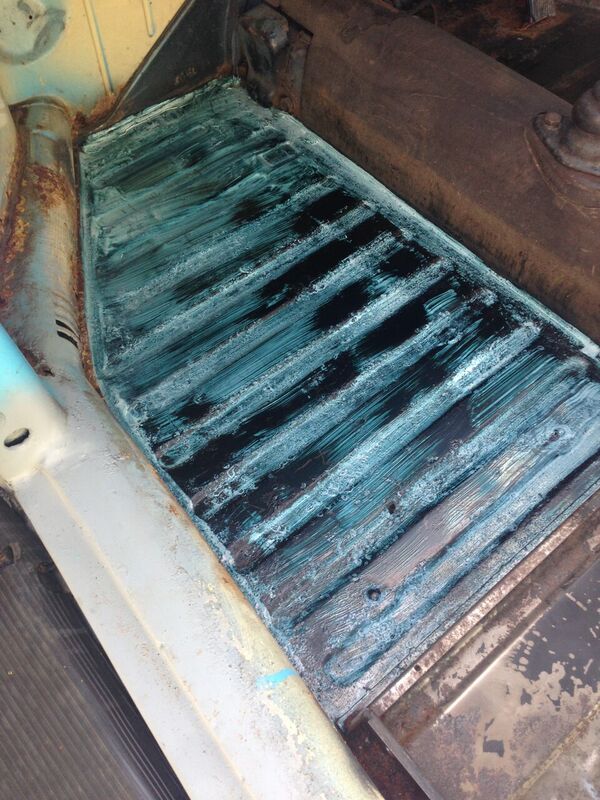
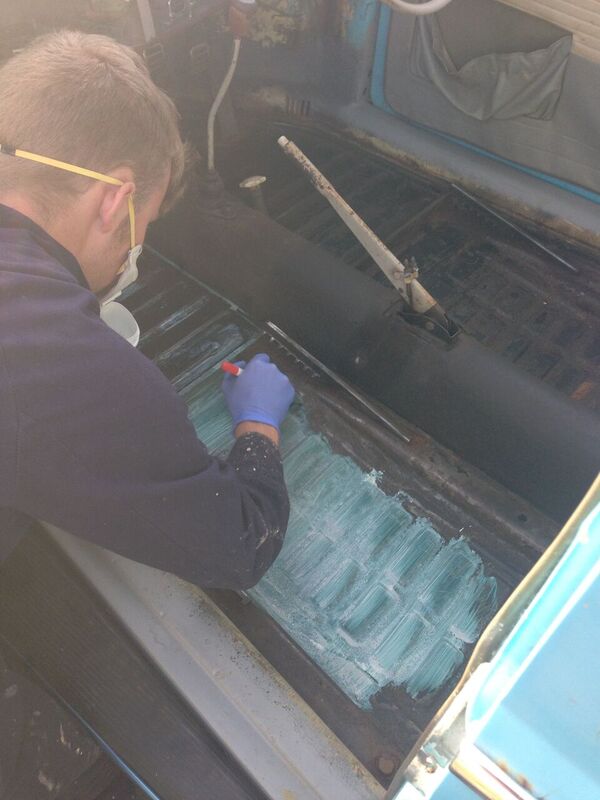
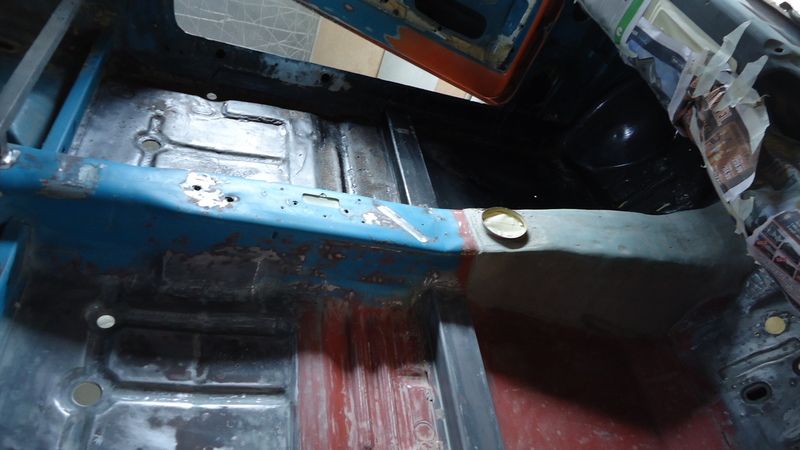
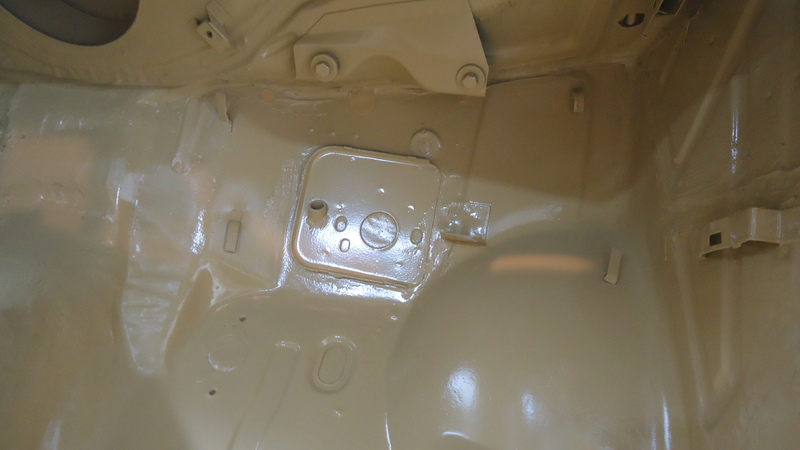
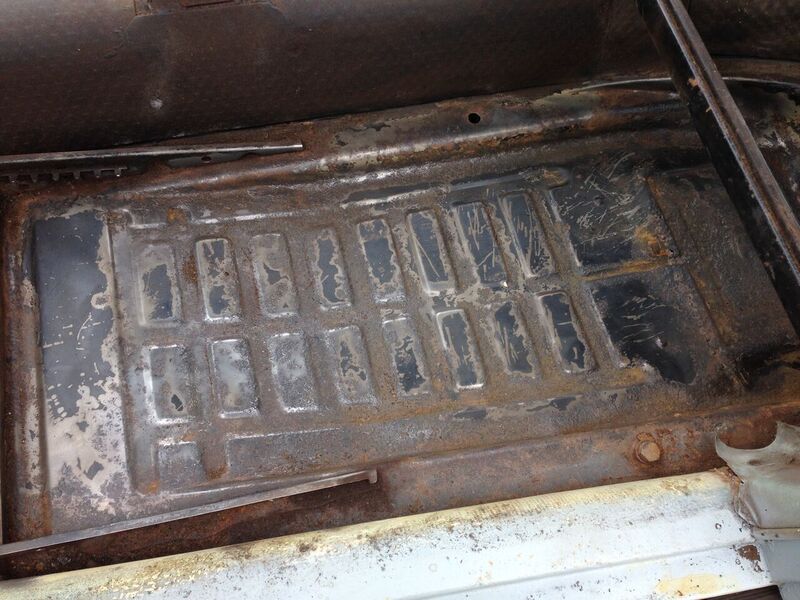
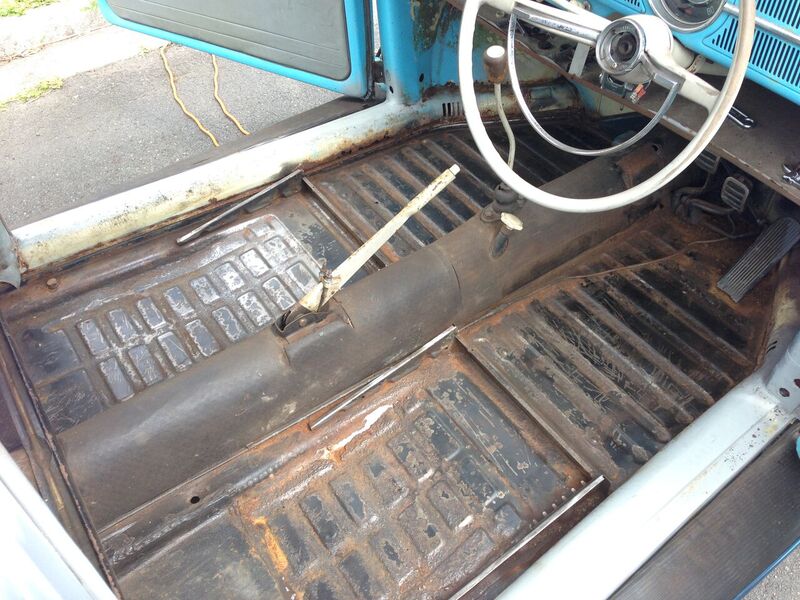
Also at Bunnings buy the product in link and get some shit brushes, rust kill the shit out of the floor apply it good and everywhere you know its working when it turns black, wear all ( P.P.E ) you wont need a big 1L but good to have. Poor into a container and dont tip used stuff back in because u will activate the whole bottle and there goes $50 http://www.bunnings.co.nz/quik-rust-converter-primer-1l-_p00270361 shits strong wear a mask Once you have done one coat let it dry and do another
 9 points
 -
7 points
-
I am so baffled by this thing I'm getting quite excited to see it rolling.4 points
-
That. Also dont do it.4 points
-
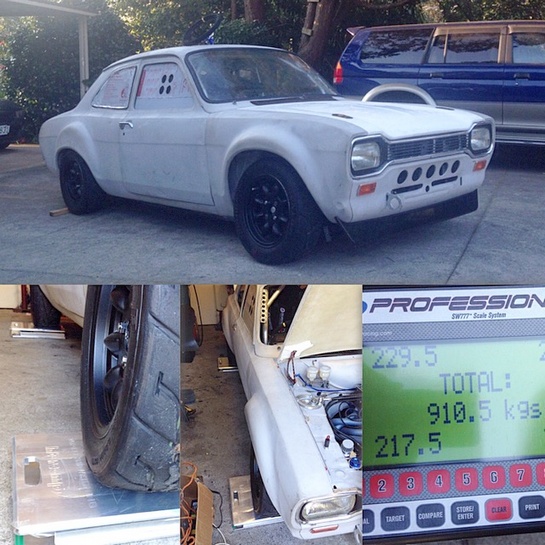
Release bearing and lines fitted Gearbox on Flexies and flanges on All going to plan exhaust manifolds will be heat wrapped tomorrow and fitted for the last time. Then engine and box go in. Let's see if the driveshaft fits and the hydraulic release bearing works. Getting closer.4 points
-
Weigh in time Loaded on the trailer ready for part 1 inspection for the cert
3 points
-
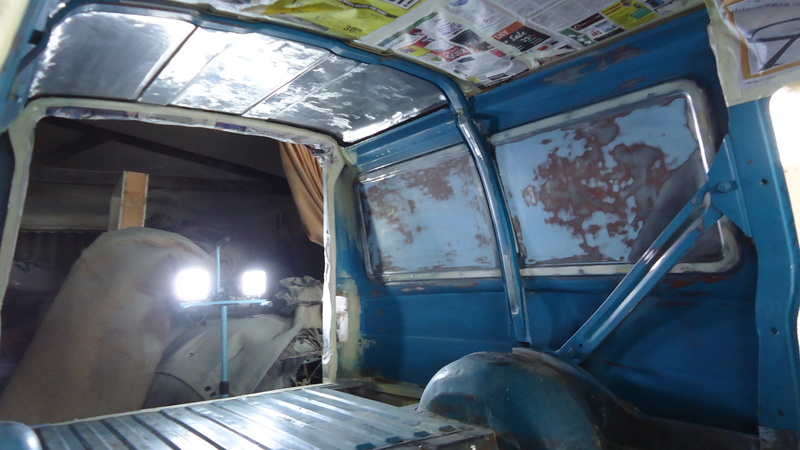
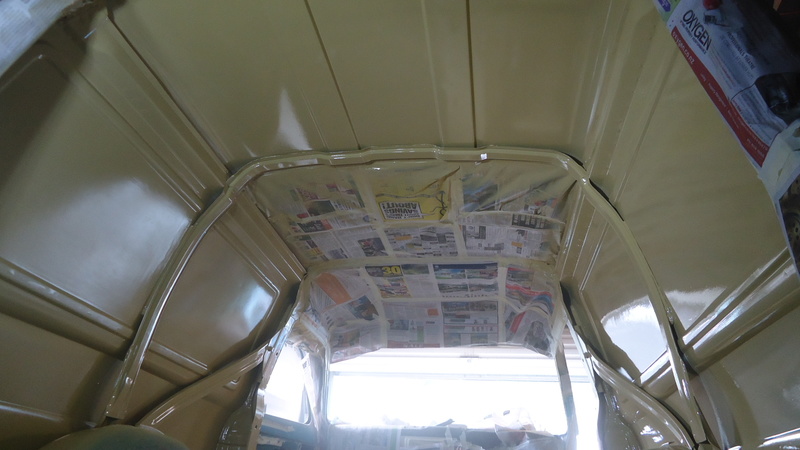
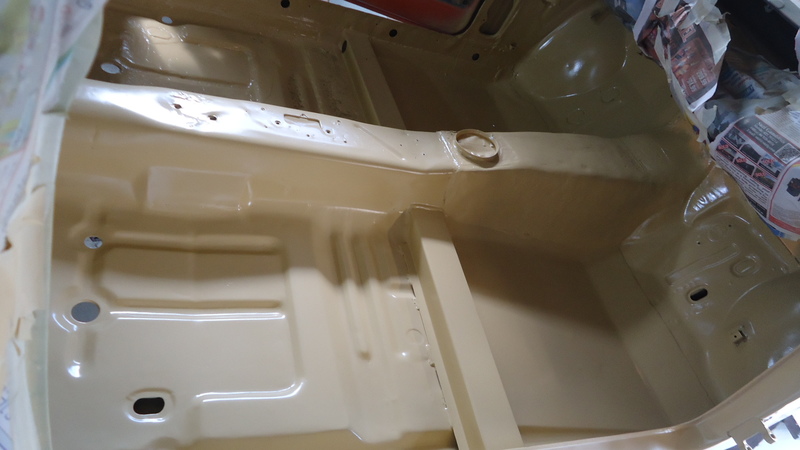
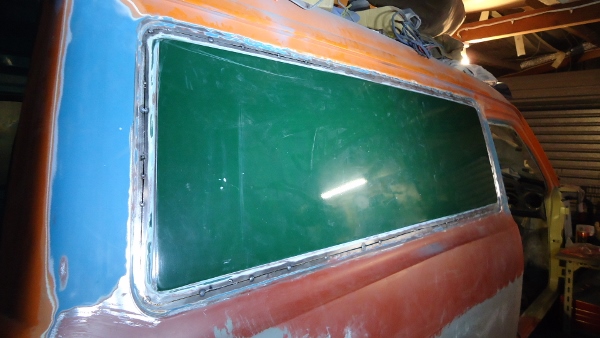
Another long week spent sanding and prepping the inside. This time round did the remainder of the roof, the rear sides, the front floor pan, firewall and under the dash etc. Before After Under the dash looking clean. Went on real nice, couple runs but thankfully not in any obvious places, will sand these out later on. Have started bare metalling the floor in the back and will hopefully be able to prime it this weekend.
3 points
-
Pine Engineering for all your pining needs.3 points
-
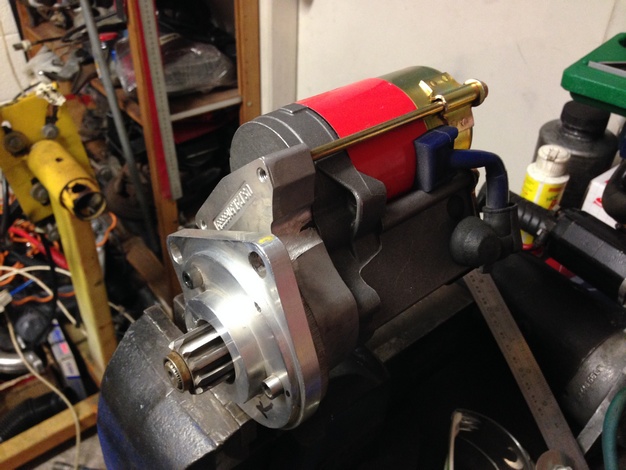
Found the reason the car wont turn over Lack of clearance between teeth on flywheel to starter motor causing it to bind Made some mods to the starter gear Turns over but but wont start properly checking over the carbs and found the accelerator pump assembly had come apart Back together again First start up....finally http://www.youtube.com/watch?v=94XKnQGsmwM]
3 points
-
Well we havent done any work on it in a long while, but things are heading in the right direction. Rather than it being cramped up in a small shed completely full of car parts and stuff stacked on top etc, it's now in a workshop where we've got heaps of space. Awesome! The other Soarer has it's own garage now too, out of the elements. So hopefully that should keep the interior in a good state. Realistically thouuuggghhhh Soarer project is going to take a back seat behind getting tow vehicle version 2.0 sorted. Dad has had a dual cab truck for towing his boat around, which we use for trackday towing too. However it's been dunked in and out of the ocean a few too many times and ended up with some structural rust thats uneconomical to repair. So when looking for replacements, wanted a single cab and shorter wheel base. Found out that there's a common type of rubbish truck that an auckland company uses and always wants lots of parts for. So... bought a rubbish truck! The intent is to strip the compactor etc off the back and sell it to recoup some costs for fitting the 5th wheel and a regular tow bar etc. This will be a bit of a project in itself obviously, not quite sure what the plan is for removing the compactor just quite yet... I dont think the 2 tonne engine crane is going to be up to task! haha. At some point I'll CAD up some plans for building a trailer that fits the Soarer and Carina nicely too. I'm slowly convincing him to buy a Link for the Soarer as well, for maximum tinkering / graph drawing ability But after my last experience of "she'll be riight maatttteee" driving to Taupo trackday without a trailer and blowing up the clutch... I'll be happy to see a working tow vehicle again haha.2 points
-
I'm not gonna look for them though, you can do that.2 points
-
So! Things progressing on this a little. Sorted a head/block/cylinder kit for the bike from a PW80. Will have some fun with that when it arrives, looks like the last person who had it running wasn't too fond of a filter so the carb and such are filthy, hope to rip it all apart this week for a proper look inside. Got a friend in Malaysia to sort an exhaust for me, didn't cost the end of the earth. A genuine v50 exhaust is $168 with another $122 for shipping. This is about $50-70 excluding shipping, which I don't imagine will break the bank either since it's the actual cost and not inflated via eBay. Smiling ear to ear at the moment!2 points
-
Need to get down to horopito to scope out parts cars. But time is poor right now. Failing that I can source what I need from Russia. Next years problem. House and holiday is top of priority list. But she will be straighten out, fixed and more slam.2 points
-
went for a cruse on Sunday with the wonderful Uterus keeping me company for the trip. we discovered that something is hitting something else under hard acceleration and there was a fuel surge type issue that ive been chasing for a little while not sure what it was. when we got back Simon went on his merry way and i had a quick peek under the car and found the cause of the issue. 2015-11-30_08-58-55 by sheepers, on Flickr the day before i had replaced all the trailing link bushes and it seems that having the diff not flap about caused it to be closer to the floor than it was. i also remembered that ages ago i was chasing a drive shaft vibration (that turned out to be the centre bearing) and we tipped the nose of the diff up to change the pinion angle. that didn't fix the vibration but i never put it back down again. so ive adjusted the trailing links to tip the nose of the diff back down by about 10mm which should do it, and ive taken the drive shaft out and given it to Aden at Drive Inn services to check it out for me. as for the fuel setup, i had plumbed the rail return into the tank, don't want all that hot fuel dumping into the surge tank and making the fuel progressively hotter and hotter. but since ive installed the fuel cooler the temps of the return are pretty low so ive plumbed the rail return through the cooler and into the surge tank. that should take care of the fuel supply issue. i suppose ill find out at the drag day.2 points
-
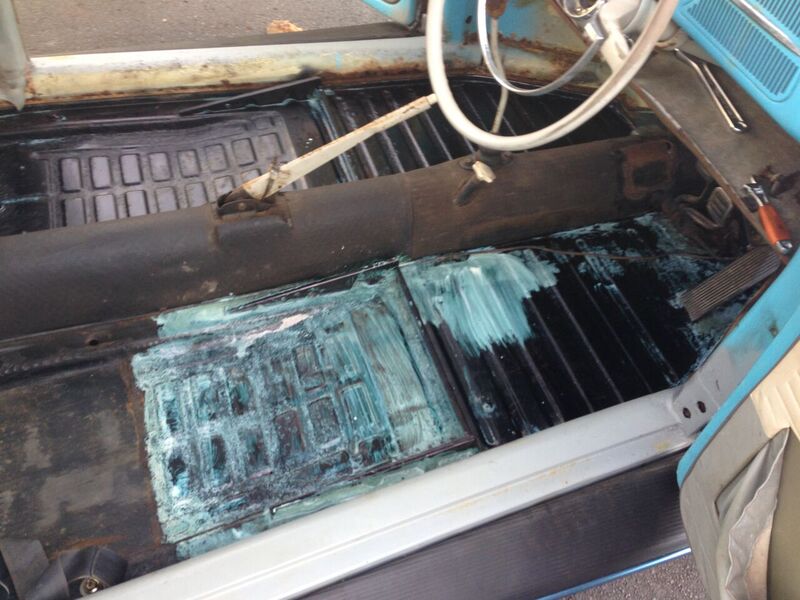
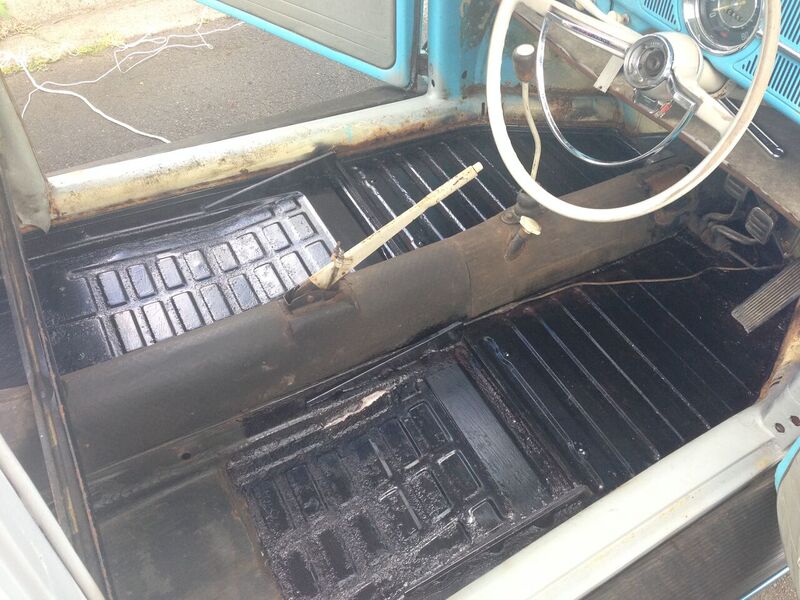
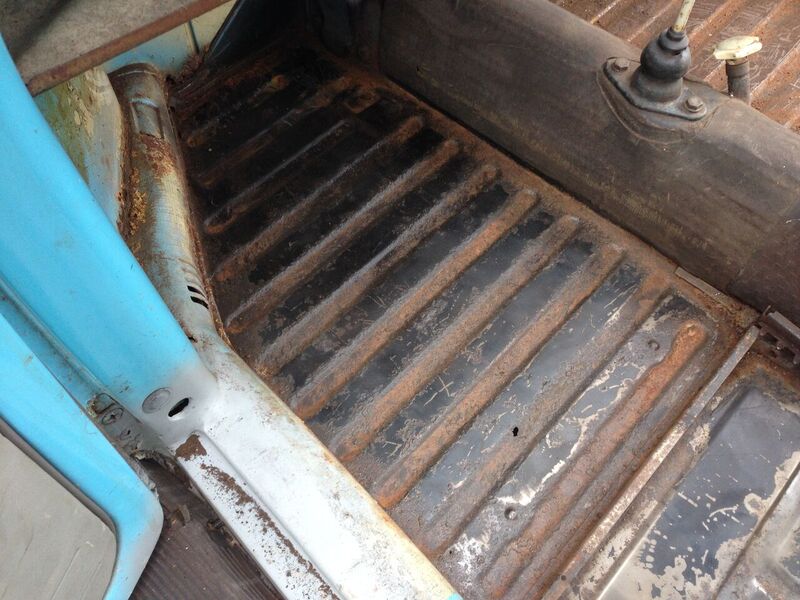
Go to Bunnings and buy a good wire brush attachment as in link below https://www.google.co.nz/search?q=wire+brush+attachment+for+drill&biw=1422&bih=626&source=lnms&tbm=isch&sa=X&ved=0ahUKEwidspW29bfJAhUItpQKHQfuBMoQ_AUIBigB&dpr=0.9#imgrc=zxao3b6cCb3R6M%3A Make sure u wear gloves and all that cause it goes everywhere and just go hard on the floor to get rid of all the stuff in last post As you can see it works mean and gets ride of it all Pretty happy with how well it worked
2 points
-
This was awesome, still a bit gutted that i had to bail after the pizza barn but Speedway was calling.. Some average photos Cheers people, especially Karl for organising it2 points
-
Starting to put it together now, knew i should have gone slightly larger with the stainless tube as it took 3 hours to feed the pipes and wires through with a lot of silicone. Loosely mounted on the frame for the first time, starting on the control solenoid mounts and filters in the fuel tank. Managed to keep it to still just a single bolt to attach/detach,2 points
-
I saw an SD1 on my way home today that had so much stuff in the boot that it was on bumps at the back. Thought of you, Jim2 points
-
Update your page homo! This thing better be ready for when I come over tick tock2 points
-
Basically whats left... - change cam-belt and waterpump - machine chamfer on to bottom pully to accessory belts can be install removed without having to lower the engine away from the chassis leg - install front mount intercooler - plumb up intercooler piping. - plumb up cooling system - bleed up brakes - make new hydraulic line for the clutch pedal. - setup coil-overs correctly. - re install dash etc. the body will stay rough for now.1 point
-
Fuck that sucks dude. I'll certainly keep an eye out for bits coming up for sale. If you have a Facebook page then make a post and post it on the OS FB page and I'll push it as admin.1 point
-
Some of it is.1 point
-
Is that the starter from the VCC shed?1 point
-
bad video of starter without a bendix spring Would have a shot shell starter if money & practicality were no objects.1 point
-
I have an uncle with a P76 in a jetboat, which is ok on 7 cylinders. He's going to change the whole setup, If'n you need the rest, I could put you in touch. It's unclear yet how bad the engine is, he's reluctant to pull it down, could go either way.1 point
-
There's pics on the nzta / lvv sites outlining it all1 point
-
Look at all those random pieces that can be purchased! Warp-o-matic instrument binnacle top covers, crumbly steering column bushes, randomly sticking electric window mechanisms, headlamp switches with the smoke still in them... *mind blown*1 point
-
Edit: Woops wrong thread.1 point
-
http://www.syncrogearboxes.com/land-rover-lt77-gearbox-oil-change/ http://www.rimmerbros.co.uk/SubCategory--Rover-SD1--m-3258 The car is off for its last filming mission today. Then the V8ing can begin. Thanks K-trips I'll get in touch with those jokers and see if they can help me out.1 point
-
Its going for wof today so thats where im up to, have heaps of photos to upload still1 point
-
The only issue I am having with going with a link, is wire in vs plug n play. Would love to have a wire in for future applications, but rewiring the whole car is a big job! (Nothing I cant do). Will be doing a custom engine harness anyway, so I am still on the fence really1 point
-
Jack.If you are still using this post I would like to catch up with you while I am in Christchurch. I had one new in 1960 and am now restoring a MA-1 And a 50MAA Incidently i have both a genuine parts manual and a copy of the workshop manual If you are interested, the correct spark plug is a NGK B4, or Champion J8 (not J8J) equivalent Std spark plug gap is 0.5-0.7mm points gap is 0.3-0.4mm timing is 27o BTDC with marks A&B lining up Can you give me a contact number? Cheers jagmarkone1 point
-
Powerglide is no ordinary 2 speed auto though...1 point
-
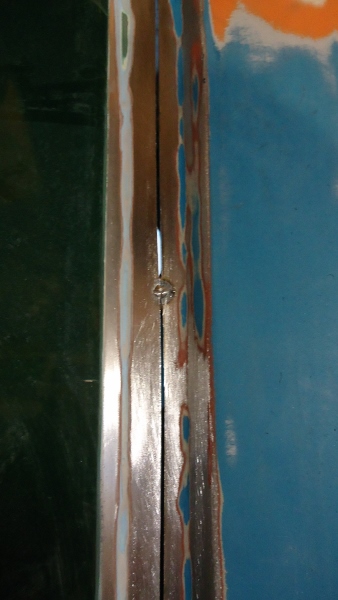
Basically stretch each weld by tapping the steel into a dolly. Just hold a block of steel (or the head of a heavy hammer, or an actual dolly from SCA or trademe) onto the back side of the weld and tap it from the outside. Just slowly work ur way all over the welds evenly.. Tap here tap there until you feel like its all covered.. Then if its not fixed do it again but tap a little firmer. Eventually you should see that it's sorted itself out. PS. As stated in no expert. Wavy panels drive me mad1 point
-
had best get some rego for the Cressida then1 point
-
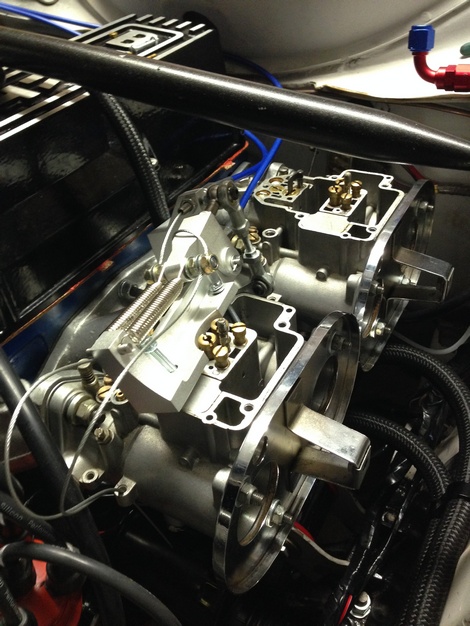
Carb bodies didn't come up as mint as I had aimed for but good enough for now, soaked them in gun wash then ultrasonic bath in simple green & hot water. Carbs back together, went up a size on the main jets, bench synced And after heaps of waiting, exhaust arrived. Great look and sounds vastly better.1 point
-
Just keep doing your own thing mate. No need to copy someone else.1 point
-
Slow progress Put some switches on the dash that do aboslutly nothing. Started on mounting the radiator and making an exhust Also started making a seat out of copper. Petrol can that i aquired that will hopefully sit on a small roof rack and gravity feed the engine. Parts to hopefully turn into a rear axle1 point
-
Please get well soon. We're here for you.1 point
-
Disclaimer: this video may be faked. i took some time to polish my wiring loom. *Imagine a wiring loom made from copper tubing with wood insulators that was polished. This didn't last. Putting wire inside the tubing was ok for a while but when the wire gets damaged inside there's nothing i can do to fix it.*1 point
-
Thanks, Gave them a call, they agreed its not like normal primers and essentially looks like a top coat.(weird looking), they assured me its the right stuff. Will perservere with it and hopefully the car comes out OK It better be, complete bare metalled shell under, over, inside etc will be a giant f*&k up if its not1 point
-
ive fitted a pair of Toyo proxes 4s in 225 50 15 on the back and the car is back to not sucking. i have calculated the exact improvement in handling and feel as 2 billion percent.1 point
-
Some more new tings. Got some wheels off Cul8r (yes, I got all 4 before someone asks): Stripped the paint: Now I'm sanding: The plan is to polish the spoke faces and lips and paint the center bits around the bolt holes and the spokes sides black. Also put in my Wolfsburg steering wheel. And check my new radio, how's that for period correct? I've got my ticket to the twilight session at Hampton on Wednesday which should be good fun. However the car has had a bit of an idle issue for a while and in an attempt to diagnose it the other day I started unplugging and replugging things and now it's worse. Haha. Let's hope a throttle body calibration at least puts it back to how it was, as that was what I unplugged when it when worse. Bloody new school electrics, I do miss a throttle cable. I'll be going regardless but would be nice if it's running ok.1 point
-
1 point
-
Im back! Well I was always around but on one night a couple of weeks ago A cold sneaked up behind me, threw a sack over my head and dragged me off to a place where I did not want to do anything but sniff and feel yucky. This was just after having been busy fixing other peoples cars for that money thing. Basically put.. my roll had stopped rolling and this wagon stayed up on blocks. But yesterday I got my rust mojo back and got stuck back in. The wagon has been sharing the workshop for the last few weeks with a cool old Volvo 145, a very bright Saab 95, Bimmer 320 plus Hannahs Trump Mk1 wag. I do like lifting the door to see intersting cars in there Not too much to show because it was all slow repairs around the chassis rails and jacking points which I want to really make sure is nice and solid. I have now just earlier finished the worst of this area with not much to go. I used a combination of 1.6mm steel and a very handy piece of box section that happens to be the correct width and thickness. This has been saving my folder from trying to fold 1.6 too often- it being really only designed to fold up to 1.2mm. Luckily the rust has been along the bottom of the rails where the damp has sat thus leaving the uppers attached to the floor nice and strong. I remade the gearbox mounting brackets and made them semi fixed with an extra bolt rather then the little tabs that Vauxhall had fitted, now rusted away. As I have been working my way along the rails I have sprayed the insides of the new steel with zinc rich paint. Later on it will get a heavy dosing of wax. So the last very interesting photo for this mega update is of the underside sort of almost rot free. I promise I will try to do better next time although I most likely will just take more photos of rust. I am very much looking forward to the mechanical/bodging/fiddling/tweeking updates when I get the car moving and stopping. I have been having many day dreams whilst chilling in the sun under the influence of man flu about what I could do with the engine/what I could swap it with. I still love the absurdity of a grand plan I dream about where I squeeze a BMW V12 with a manual box in place However I usually come back down from cloud nine and mull over more realistic propositions such as a sneaky carb fed turbo, perhaps a Datsun engine or maybe fit fuel injection from another 1200cc car (that last one more for the technical fun in doing so rather than any real benefits it most likely wouldn't really bring) For now though it has to be rust removal.1 point
-
Yup going to fit a rear bumper just waiting to hear back from enzee weather he has one or not1 point
-
Small update. Lowered the back of the car a while back by a notch. Sits much better now, much more even. Today, after many, many hours of sanding and spending a few hours polishing today, I finished my intake manifold: Will try put it on within the next week. More to come. Also, my front tyres are almost bald.1 point
-
Finally got around to fitting the rocker cover, really looks out of place with out sidedrafts on the car but that will happen soon once i get some new extractors made to suit. Current cheap coby extractors have the 4th flange welded on a angle so it enjoys to blow manifold gaskets every few months. Also finally fitted a decent steering wheel after the last one decided to destroy its self Have got some cusco camber plates to go in at some stage which will most likely happen when i sort the 280ZX struts.1 point
-
All tacked in place. Still have lots of shaping and sanding to get done on the flare This is where the old piece was cut and the new one tacked in. No warping as of yet
1 point


This leaderboard is set to Auckland/GMT+12:00