
Leaderboard


Popular Content
Showing content with the highest reputation on 11/02/15 in all areas
-
Still plugging away at this, redoing stuff I'd already done. Exhaust and intake, redone. Hooked up the PCV valve, breather etc. Clutch cable redone. Broken bolts drilled out of the blade, all cleaned up and back together. Even got the steel work for the blade bolted to the chassis, and put the guards back on. I've measured up for a hydraulic tank so it can be started this week. Sorry about the poor photos.11 points
-
AAAAAnd after 7 years sitting in a shed the bitch has a wof as of 3 o'clock today....10 points
-
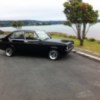
Hello all, been a long while since I have had a car worthy of "oldschool" status but I have finally parked my arse in a cool little Esky. HISTORY She is a 1980 mk2 Escort 4 door and has had a rebuild carried out by The Surgery here in Wellys. The guy I got it from was the one that spent the time and coin on her and up until 2 weeks ago it was his pride and joy. She has a rebuilt 1600 crossflow, 4 speed and tons of character! All the body was stripped back, rust removed, paneled and painted in a sexy shade of black. The Interior has all been reupholstered too. The not so good. The previous owner was driving to work one morning a couple weeks back (risking it with no wof/no reg) and was rear ended by a 16 year old learner driver. No insurance. The damage done is bad but not terminal by any means. Long story short, he was heartbroken, going through some major life changes and just wanted to scrap the esky. I spoke to him and worked out a fantastic price and that evening I picked her up. Pics, cos whats a build thread without them. Discuss here //oldschool.co.nz/index.php?/topic/50660-666dans-1980-mk2-escort-discussion/8 points
-
picked up most of a 9" diff for it today, I was thinking about using a 28 spline BW or possibly an 8.8 out of an explorer, but this came up for $200. Its missing a few bolts, no axles, and it is way too wide, but narrowing was going to have to be done regardless of what diff I use, can get axles for 9'' easily, same with parts for the center, can get any ratio, etc. its huugemungus and weighs a million heavys, but should be strong enough for what im doing.8 points
-
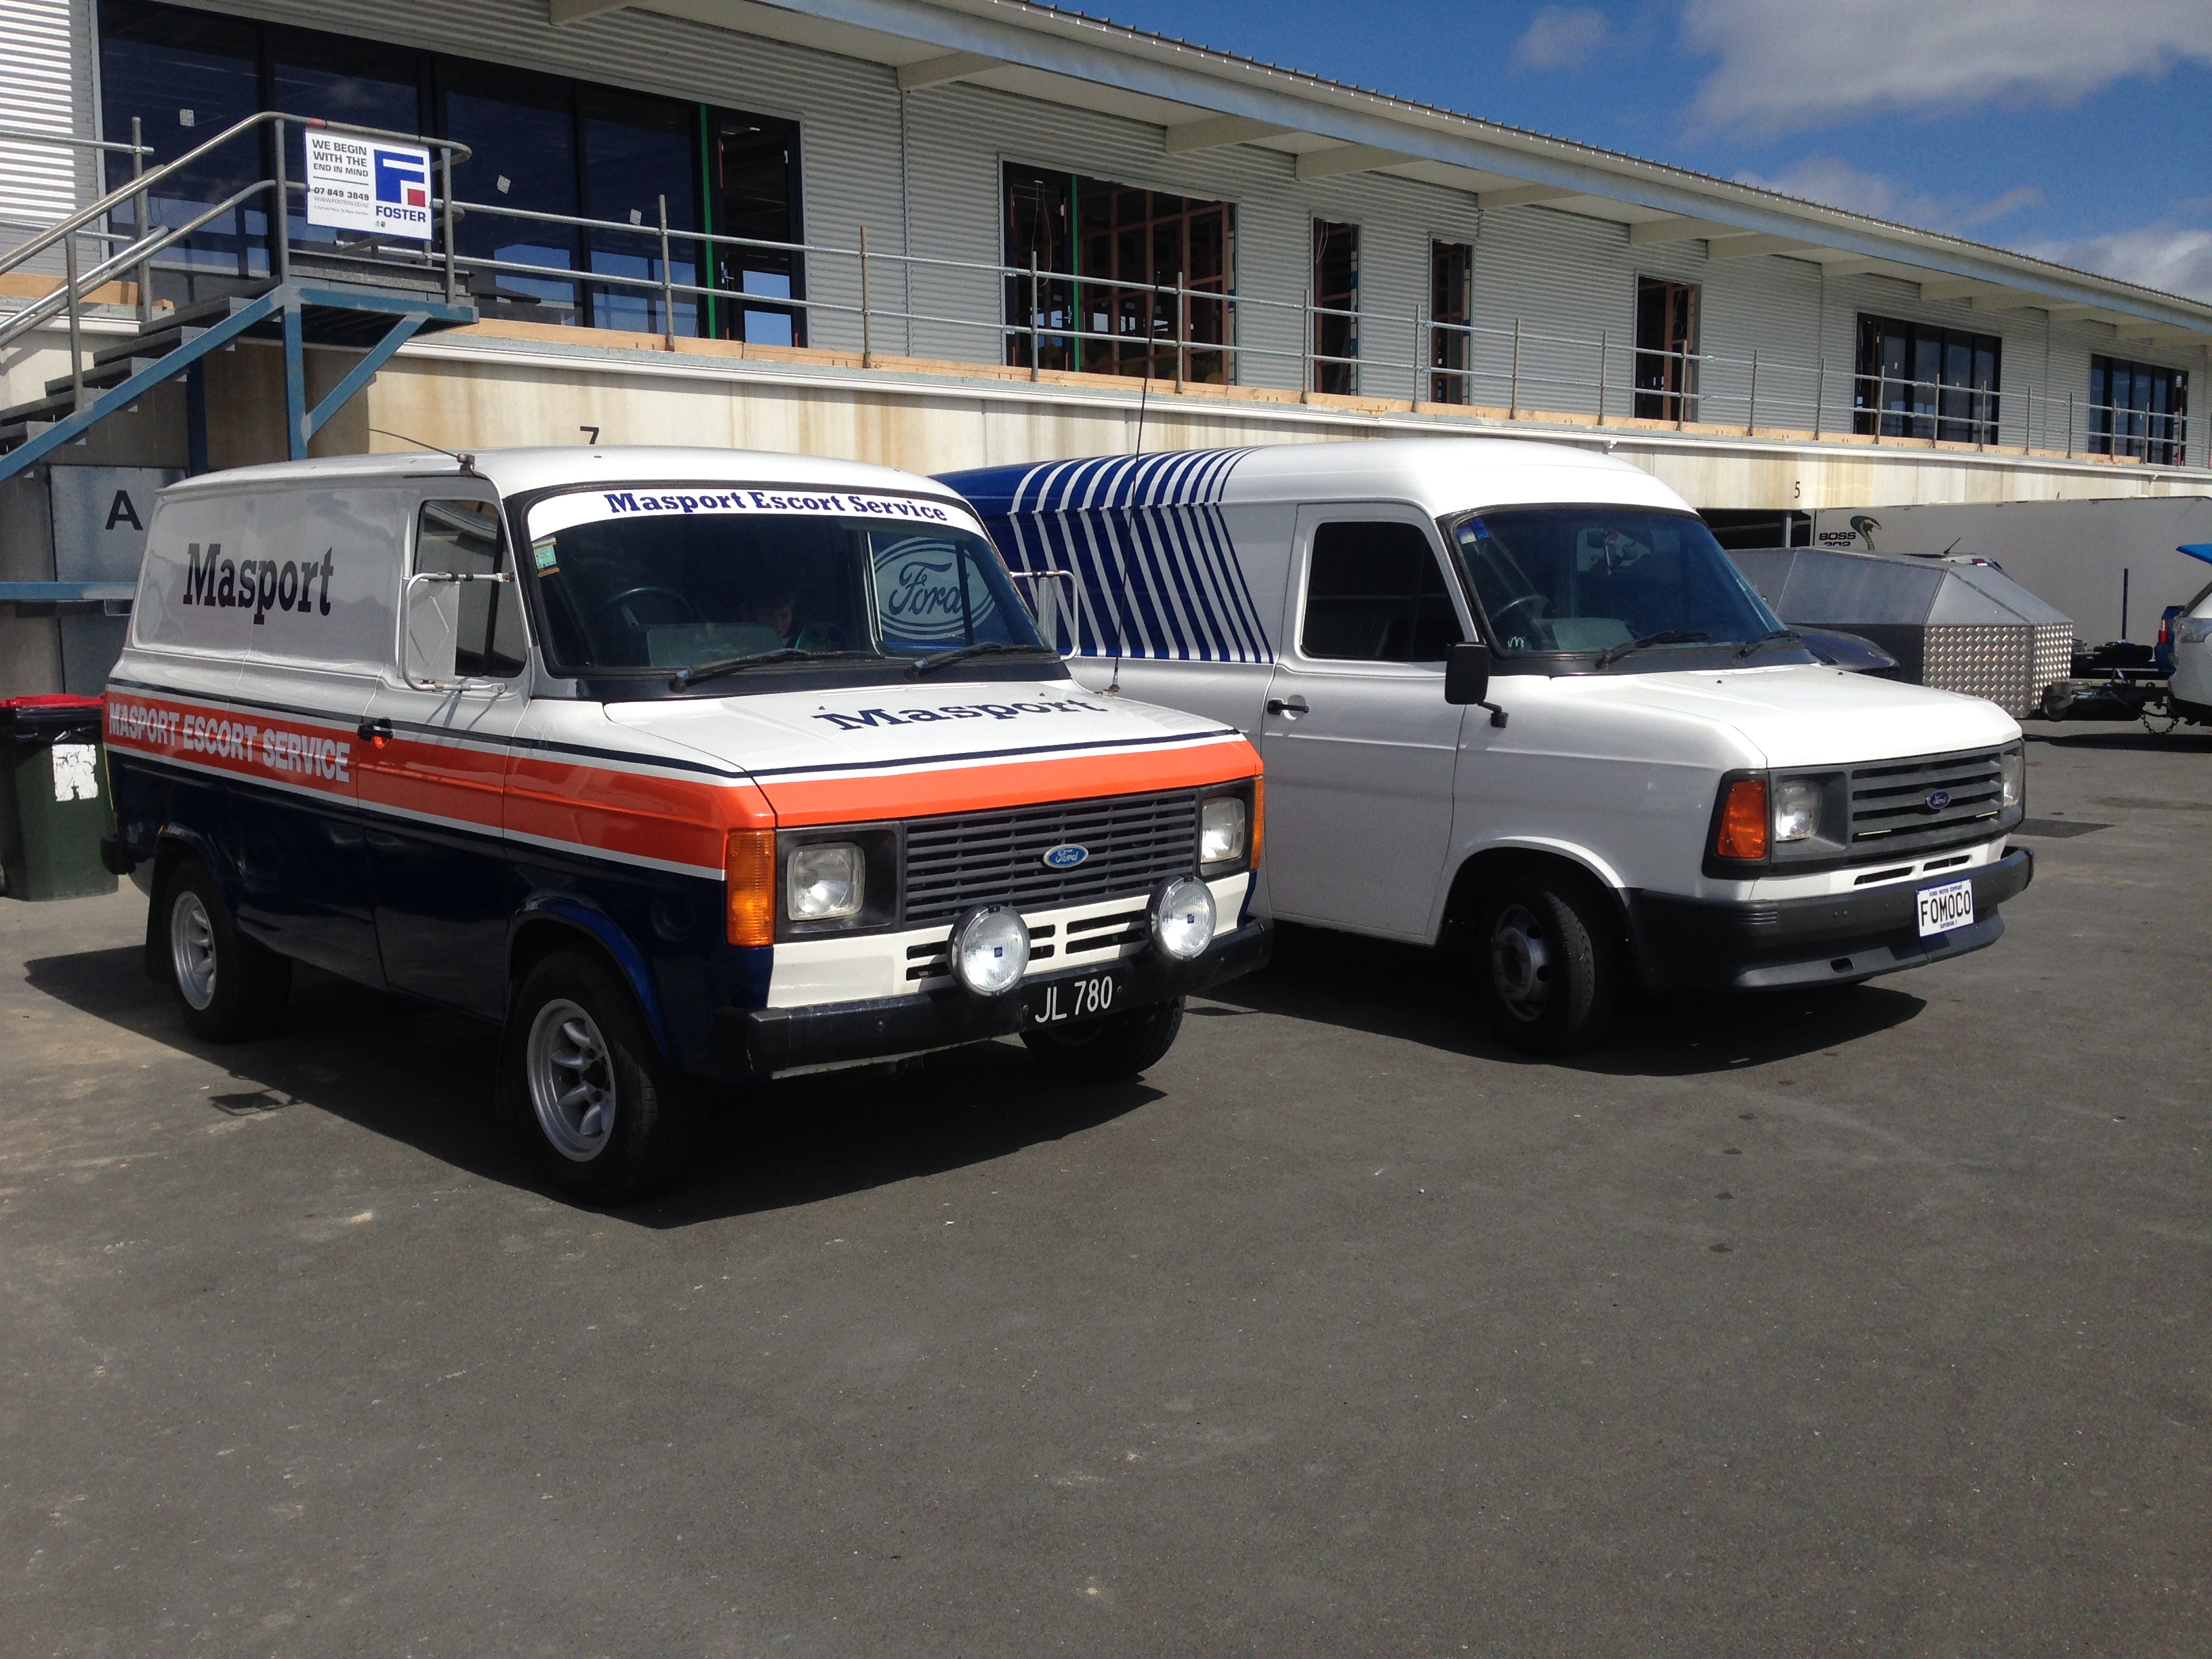
I was going to pick the van up at the end of November, but couldn't wait, so paid the balance and picked it up Saturday. Been driving it around all weekend, and really happy with it. It is very good to drive for an old van, quite tight. Took it on a long run yesterday, and refilled with fuel when I got back. Looks like about 20mpg, or 14l/100kms, which is very good for something that has the aerodynamics of a house, with a fairly large engine. And way better than my current LDV "Police" van, which will be replaced by this as my tow vehicle. Parked up at Hampton Downs yesterday next to my mates "Masport" V8 Mk2. They certainly got a bit of attention there!
 7 points
 -
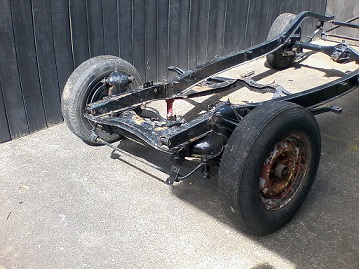
The chassis is now fully welded. It is so much stronger now, hardly twists at all. This is the design I've come up with so far. I was thinking of using 1.25 inch round tubing and getting it all cut out on the tube laser we have at work. It will be double layer like the last image, so there's room for the exhaust etc to go through. In-between will be hoops for the drive shaft as well. Does it sound like a good idea?7 points
-
### Due to Photobucket being a pack of complete fuckwits, I've removed all the pic links to shorten Fred up a bit. ### So I got side tracked once again, with the offer of a go kart frame. I made it longer so myself and the GPX750 motor will fit in it. I've been fiddling with it on and off for a few months now. Any ways, pretty basic business, just the old road bike powered go kart lark. Annnnnnnnnnnnnnnnnnd that's about where i'm up to. Regards, VG.6 points
-
MOAR PAINT!!! I've had a few more bits back from paint and they are looking slick!! A before and after of the bonnet shows just how bad the condition of the car was. Before After The front scuttle/bulkhead has come out really good and now has a loom and dashboard hanging off it. With the scuttle in place we could drop the engine back in All bolted in Progress has been slow while I've been finishing up my final year of uni, but exams are very nearly over so it'll soon be time to crack on again. I'm expecting the rear tub section back early next week so that i can get the car in an almost road worthy state. Discussion post: //oldschool.co.nz/index.php?/topic/45607-loopy-lutons-herald/#entry1407951%C2%A0
6 points
-
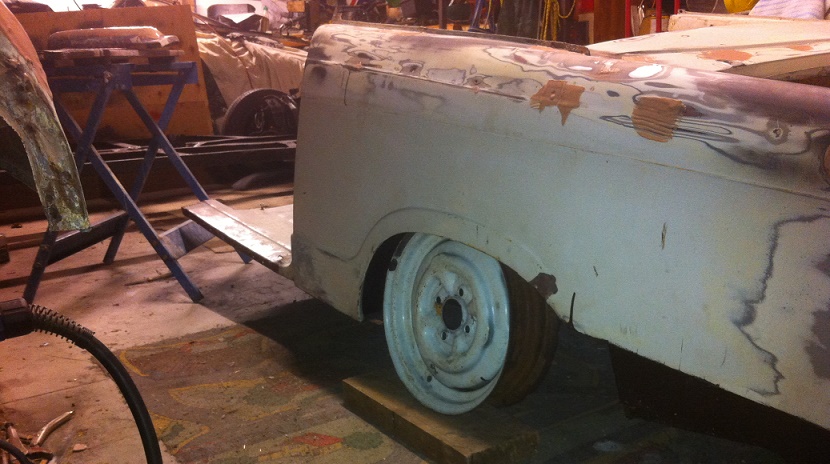
Tyres are now mounted (thanks to everyones favourite Christchurch Mag and turbo rep) and they will do for now. Took alot more cutting to make it fit.......5 points
-
fuck thats a sweet escort dude and damage is minimal. escortsescortsescortsescortsescortsescortsescortsescortsescortsescortsescortsescortsescortsescortsescortsescortsescortsescortsescortsescorts escortsescortsescortsescortsescortsescortsescortsescortsescortsescortsescortsescortsescortsescortsescortsescortsescortsescortsescortsescorts4 points
-
just going to stick this here, I like this. a lot.4 points
-
So here it is on its side showing how bad this bit is IMG_5552 and after I removed it IMG_5555 IMG_5564 got this folded up IMG_5563 test fit IMG_5565 weld it on IMG_5568 Finished, with the floor trial fitted IMG_55714 points
-
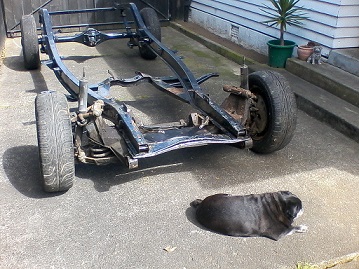
safe as mate just dont get under it getting it up onto the rotisserie was a bit of a mission, was probably the sketchiest thing ive done in a while. jack it up as high as possible, stands under it, make extension for jack, jack up as high as it goes, attach ratchet tie downs to roof of shed and pull it up last 100mm, bolt rotisserie on, all the time ready to bolt in case it all came crashing down4 points
-
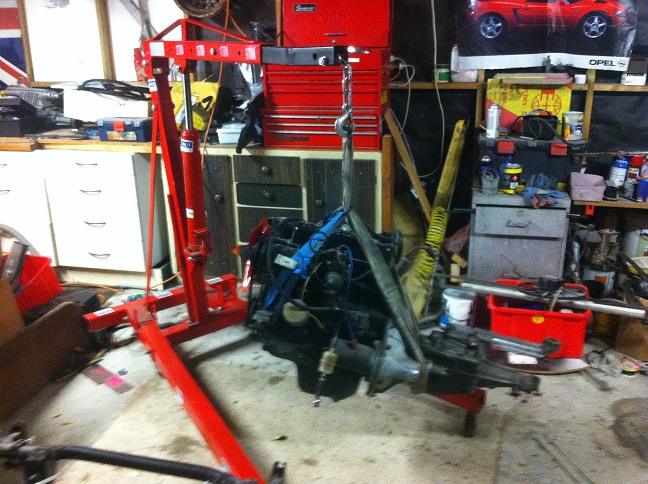
been a while since an update... For no better reason than I already have it, I've decided to fit a bigger turbo. It was built up for years ago, using a water cooled core as the early garrett/air-research nissan turbo's weren't. It's basically a T03 exhaust wheel (upgraded and cant remember the trim now) and 0.63 T03 housing, and a T04 inlet with a larger trim wheel. By today's standards its probably an old slug, but surely better than the original 30+ year old factory one i'm running now. original turbo is on the left, new on the right: and after removing the old turbo, trial fitting the new one. its sits extremely close to the engine mount bracket, but just clears it luckily. now i'll have to source some water feed lines to supply it with. i have somewhere to tap it into the engine, but i need to find a M14 X 1.5 mm banjo type fitting to connect to the turbo with.3 points
-
started on the other side. got the inner skin patched up and then attached the new drip rail. just got the outer to fit and weld up now. 2015-11-02_07-44-03 by sheepers, on Flickr 2015-11-02_08-32-20 by sheepers, on Flickr3 points
-
So last week I had all the fabrication finished up and pre wired the whole bike On sat morning before Josh's wedding I stripped the bike to a frame and then yesterday I finished some welding of brackets I'd done and cleaned up plenty with the flapper disc on the grinder . Then tonite dropped off the frame to Jonny for tig welding the critical frame and rear calliper mounts . Will drop it off at crack testing tomorrow and hopefully have it back before the end of the week so I can sandblast before dropping back to the powder coaters! Only 19 days till the smash palace bike show and 250 k ride the day before !3 points
-
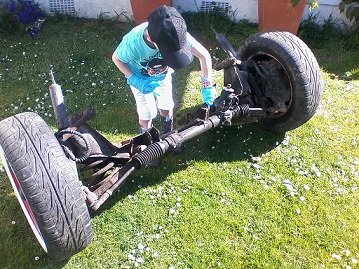
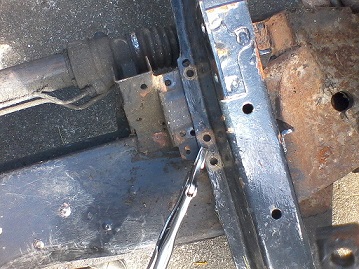
Got out in the drive way on the weekend as the weather was mint. Had my little helper cleaning up the second hand new jaguar front end . Managed to mock the front end up and line it up were it is needed for the right wheel base next stage to mount it in , don't think vise grips will work for cert. The jag brake hoses line up with the chev's factory brake hose mounts too which is a bonus. Changing to jag front has lowered the front rails by 110mm so a good start, just need the weight of a heavy chev body on there and some engine, still undecided on engine I've got a Camaro 396 big block that needs a trans and a rebuild or do I pull the motor out of my LS400 for a reliable farely cheap to run cruiser? Yeah added some photos of the factory cross member in then picture of it with the jag mocked in.
3 points
-
How about the footy aye, Few more coats of primer on things in between coats I tidied up the gearbox on the outside, New guibo, and new gaskets. looked ok to me on the inside. but Im unsure if the speedo drive works, 124/125 type wont work the drive gear is reversed and a wee bit larger on the 2300. X1/9/lada clutch slave needed some modification to fit but it does, + new clutch line. I had to cut off the clutch return spring tab as well so gonna need to make a bracket or something for that on the outside Also spacers - i think it must mount on the opposite side of the engine on the cars lits listed for. I also seem to have mislaid the clutch ajdustment nut And finish up with the first coat of proper paint - its a very light cream/grey that matches the original engine bay/interior sheetmetal colour. TBH looks a bit crap and glossy over my poor prep (urhg i hate sanding, especially around all the fiddly tabs and bolts in an engine bay) but the ugliest lupiest runnyest bits will be hidden by stuff still to go back in to those same bolts and tabs, and it wont be bright, clean and shiney in there for very long!3 points
-
Small progress lately.Mounts are getting sorted.Motor is going to be a tight fit all round as i want the shifter to line up in the factory hole so no cutting of the interior has to happen.a slight sump mod may be needed and swap bar will have to change.Also complete dash out of a ms75sl Japan only turned up from Japan.so now i have nice round gauges and a factory rev gauge.Re-painted the dash and have it fitted,just need to change the plug to suit. Old square style dash,found in most 60 series crowns New much rarer dash Also i am changing the headlining to a mint condition factory black as mine is stained and gray.Also likes to pop down when going over 100km Might try get that in next weekend.The sides of the headlining are glued,under the trim edging.Will Ados be ok to re glue or is there a better glue? Thanks matt3 points
-
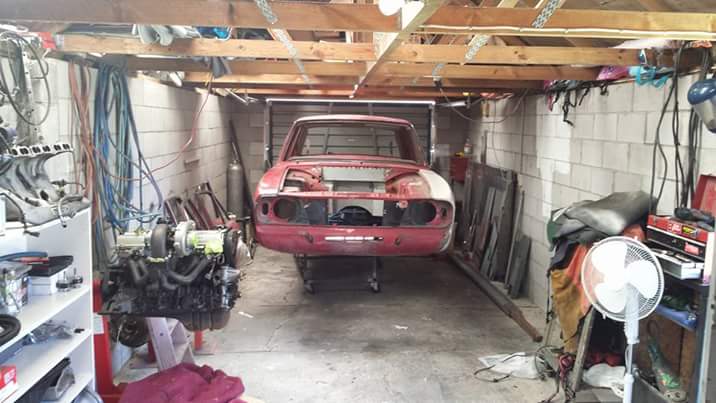
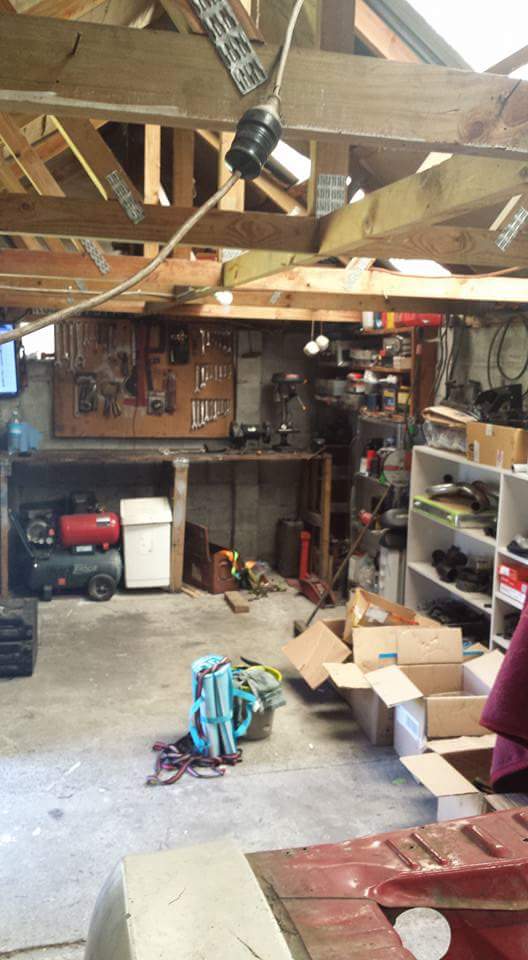
Well after the move and not even opening the doors for 2 weeks I thought I would get in the this weekend and sort it out. Its about the same length as the last garage but half the width. Over all still'pleanty of room so I might get back into it.
3 points
-
A little bit of progress yesterday: The grill, bumper and headlights off. The Guards off: A couple of pictures of the front end rust: Dads starting to cut out the rust and the motor will be comming out soon.3 points
-
Fitted 1/4 bumpers to front2 points
-
I'm up for a road trip neal2 points
-
A lot has happened recently. We have put the motor back in after taking it out and repairing the head gasket. After doing so we put it back in and tried to start it, which was pretty sucsesful. Untill we started to drive it. One of the lifters was not oiling up and after a lot of investigation we found out that multiple wernt. And also after driving it up and down the road it was constantly backfiring which we nailed down a air leak which was confirmed after taking the gaskets between the supercharger and the intake manifold off. So now we have replaced the lifters and push roads and also the rockers. The pully is away getting re machined. And we are waiting on cork for a proper gasket. Hopefully soon we will have it ready but at this point it is staying in the garage.2 points
-
Yep it would seem so, ever panel or part I take off is rusty on the inside - no thought to corrosion protection at all. That panel I had made is one of the few you cannot buy - luckily it was a simple shape. Also I had an offer out of the blue, of a spot welder to borrow so that will make things soo much easier!2 points
-
I got my knock sensor mounted properly so set it up. Interesting results so far. It looks as though I can advance the timing at cruising right up to the 45-50 degree mark if I want, before it starts knocking. I'm glad I waited and got the knock sensing setup though. Because with the reccomended ignition settings I was given for a beams motor, it was actually knocking through some parts of the RPM range at full throttle. (my engine has slightly different cams/compression to an Altezza beams motor) And I couldnt hear it happening from the cabin or feel the difference in any way. So it's snipped a degree or two out here and there which is cool. Interestingly though, I can now recognise by the exhaust note when the ignition timing is too far retarded. Sounds really rough, maybe because there's still some energy left in the gas when coming out the exhaust? When I start advancing the timing and the engine sounds way smoother and a fair bit quieter too. Not what I was expecting.2 points
-
use the plastic out of a clothes dryer door to make a mini bubble dome for head clearance maximum future 60's kustom2 points
-
not an escort in sight2 points
-
Took her for a drive out to Harwarden today and discovered that the 626 diff had actually dropped the revs significantly, here's me driving along thinking not much had changed but it's thrown my speedo out the other way so at 100 I'm doing about 27-2800rpm, a good 800 rpm drop.. a lot quieter..2 points
-
She's here! I was able to drive it from the port to storage which was sweet! Smelly, rusty, hot, no power steering, no power windows, average brakes, overall very awesome. Makes all the right noises, especially driving it through the city. She's a big job so I won't be starting repair until next year when I'm back from overseas in February, for now, stoked! Oh, and bonus the front under lip turned out to be carbon, thought it was just FRP! Chat: //oldschool.co.nz/index.php?/topic/49704-mlracings-hakosuka/2 points
-
made some chassis connectors and glued them in. 75x40x4 was the nearest size to the rear bit of chassis rail i could get, made some gussets so it spans the height of the rail at the front part. my other car i put some 50x 5 round pipe in and it made a big difference in stiffness, the 2 door body obviously has no b pillar and is slightly longer so it probably needs all the help it can2 points
-
So now that i got my least favorite part of the resto out of the way, its time to start putting Harold back together. At the current point in time, my dad and i have been finishing up with welding, bogging and just getting things finished. The little Triumph is so close to completion, i can almost feel the wind in my hair as i roll around in classic style. So this is how Harold is sitting at the moment. So after trawling through many, many Speedhunters features, i decided that the Triumph would have to ride low.... Very Low!! It would also have to run the widest set of wheels i could possibly run, with plenty of camber for that all important 'tuck'. This decision to run the Triumph 'rail scraping' low has annoyed some of the more 'traditional' Triumph owners. This was a little mock up of how i want the rears to sit. So the plan for action is; Lowering block for the back, custom rose-jointed vertical links for height and camber adjustment, adjustable rear dampers ,front coilovers and banded factory steels (2 inch wider fronts and a whopping 3 inch wider rears!) To fit all that dish under the factory arches, some serious cutting and bashing was required. So that's all the updates for now. Harold will be back once i have finished with my exams in 2 weeks, after which i will be road tripping down to Christchurch to pick up some very special bits for the car. Discussion - //oldschool.co.nz/index.php?/topic/45607-loopy-lutons-herald/#entry1407951
2 points
-
Hey guys im moderating the thread for my dad. Here we have a 1964 Ford XP falcon that my dad has had for 20+ years. He has had a fully reconditioned heads and motor blocks and he has had a single carb supercharger. About a year ago we started peicing it together and this is how it went: Disscusion: //oldschool.co.nz/index.php?/topic/48719-1964-ford-xp-falcon-noel-supercharged-disscusion/ My Anglia: //oldschool.co.nz/index.php?/topic/48706-1963-ford-anglia-first-car-shannon/ Anglia Disscusion: //oldschool.co.nz/index.php?/topic/48716-1963-ford-anglia-first-car-shannon-disscusion/ Brothers Anglia: //oldschool.co.nz/index.php?/topic/42275-jordens-1967-ford-anglia-105e/?hl=jordens Dads Anglia: //oldschool.co.nz/index.php?/topic/45036-noels-1963-ford-anglia/?hl=anglia So this is how it started out as Yellow and just sitting in weeds with flat tires: This is the super charger: And the motor on the stand: First step was to take the old shot motor out: Which looks like this: Next was to put the motor together first to give it the signature Ford Blue paint: And then we put it fully together and it looked like this: Next we started the long process of putting the motor in: And that ended up looking like this: Side veiw, but we wernt happy with how high it was sitting so a future project is to make a spacer to make it as high as the top window line: But we diddnt have time to make one before the formal so we just went with it. After checking everything and fitting a dummy fuel can to feed it fuel we started her up for the first time: https://youtu.be/brKckiFJRjQ Next we had to cut the hole in the bonnet, although we did not want to as they are hard to come by: And finally came the paint: And this is how it turned out, pretty well i think for no body work except a small bit of sanding: But now this is how it sits waiting for us to get her going as she blew a head gasket. The plan is to pull her out this weekend and start getting it ready properly rust and all for the Kaikoura Hop. Here it has the recently purchased shotgun scoop which gives it a mean feel. Will update soon!1 point
-
Looks good in gloss black makes a change from all my mates ones that are matte black , good score1 point
-
Wow the bike looks amazing! Very good job mate, looks very good1 point
-
Another busy day. Got a new rain drip rail for the left rear window, very happy with how it turned out. Was going to cost 180 to get one made by APC in Aussie and get it shipped over. This one was folded by me at a mates metal shop, then trimmed and bent to shape. I've finished the rust repairs on both doors and hung them and got them as square as i can given the play in the hinges (any sources in NZ for new ones?) Fitted guards and started to move them around to get them lined up, and then fitted the front valance and started to square it up and make it look pretty. //oldschool.co.nz/index.php?/topic/43814-darryls-3rd-1200-coupe-discuss/1 point
-
After about four trips to Autolign the sway bar bushes are sorted. Many thanks to Tim who's the big man there, super helpful! Anywho have done a few bits: -Replaced a headlight -Cleaned and regapped the plugs -Valve clearances -Made up a new battery bracket -New shocks Valve clearances made a good difference, sounds much less like a tractor! Still need to mess around with the carb though, idles very low on cold starts. Have ordered some 14x6.5s in the same style for the front from YHJ auctions so eagerly awaiting those. Turns out there are two gearbox cross members for these Coronas, one to suit auto/W50 and one to suit W40. Bit of pain since I'm putting a W40 in so have to locate a new cross member. Also need a pedal box and a speedo cable so on the hunt for those now. Have been driving it around quite a bit, seems to turn a few heads despite being pretty rough with the primer patches. Just needs to be manual and I'll be stoked with it!1 point
-
Sheepers...1 point
-
So micro is short for microcontroller, which is the processor. (sometimes can get referred to as uC to shorten it some more) Arduino has lots of different boards with different micros on it depending on how many pins you need, or what size memory etc etc. The one used for speeduino is the biggest, baddest one they have. All of them, share the same arrangement for how the connectors come out of them, and you can plug in things called shields. A shield is just some extra hardware you can simply plug in, and sometimes even stack lots of them together. So if you want to add ethernet to an arduino, you plug in the ethernet shield. If you want to control some servo motors, you add in that correct shield etc. Speeduino is essentially just an engine management shield that you plug in to give it the hardware it needs to run an engine. Nice and easy for development, not very robust for real life applications. People use arduinos for 2 reasons really. 1) arduinos have a very simplified coding overlay provided for them. So hobbyists dont need to learn an aweful lot about software and hardware because it's all standardised and simplified. You can just about say "turn on pin 1" and in the background it goes and figures out what pin is pin 1, find the correct register for that ports data direction pin, set it as an out put and then find the right register that controls the state of the pin and then set that high. It's like driving an auto vs a manual car kinda. You dont have to use the simplified software, so people like me will use an arduino as a set of building blocks. I will get an arduino, find a shield with some bit of kit i want to use in a project and then i can just plug it in and evaluate my design, get testing etc and if i like it, i can go and build some dedicated hardware where everything is just on one board. This is what speeduino is kinda doing, but they arent making the leap to dedicated hardware yet and i'm not 100% sure why they havent yet. They might have a good reason i havent found yet.1 point
-
Aloha, I thought it might be time to update this thing since the last post was... July? damn. Much work has been done however! - Bumpers re-chromed and all the little rubber bits replaced (in hindsight, the cost versus snazz factor here was not great but hell, it's done now). - New Tokico Illumina adjustable gas shock inserts front and rear. - New Eibach "performance" progressive springs front and back. - New Ball joints in the front. - New Tie-rod ends and boots on rack in the front. - Full black polyurethane bushing kit installed with plenty of swearing and grease. - New Spindle pins for the rear control arms. (because we had to cut the old bastards out). - Sent front control arms, rear control arms, mustache bar, diff mounts, front cross member to powder-coaters for cost effective snazz factor and protection. - Bought a set of 16" Konig Rewinds with tyres (yeah yeah not OG but were cost effective and I like them lots). - Scrubbed the exhaust and painted with heat paint stuff so the VIN man doesn't see the ugly weld job so much. (will replace eventually) - New exhaust manifold studs to try fix the leak at the gasket. Righto, that's enough for now... have some Pics: Le shock inserts Uh oh shocks need SHIMS to fit snug... nothing in the packaging... time to go see Hayden! Hayden has a magical Shim machine All safe and snug for another 40 years. That was the front suspension, but the back was a bit trickier I will break these posts up since I have a few more pics for y'all...1 point
-
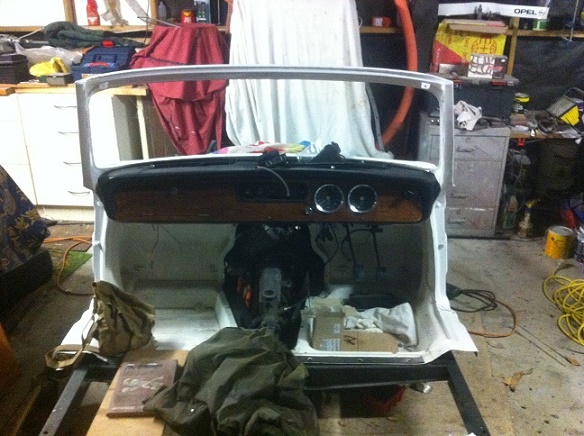
Fuel line done, brake line done, battery cable almost done. Figured the thing to do next was to get it out of the garage and get some pics to help with my motivation and this is how the bonnet sits if I leave the current filter on, it actually sits a bit lower as it wasn't pushed down all the way. The back of the filter just sticks out above the bonnet when it is down. I am still undecided if I will go this way or put a shorter filter on and have it sit under the bonnet1 point
-
Pictures are so 2014.. Went well to hanmeet a couple of months ago, although on the way back I had to stop twice to purge the the fuel line, so the blockage is obviously back. Wondering if it has something to do with the fuel return line and maybe a weak pump. Changed the diff to a 626 3.6 which has made a reasonable difference to the 100km revs, sits at about 3k now, much better than 3500. Also took her in for a wof the day before the swapmeet and she passed with flying colors (fucken yay!) The list of things to fix from the last wof seemed to have magically disappeared. The two blokes there where pinning over it while I was pinning over a newly repainted camaro one of them owned, blew their minds when I wound down the "opera" window haha..1 point
-
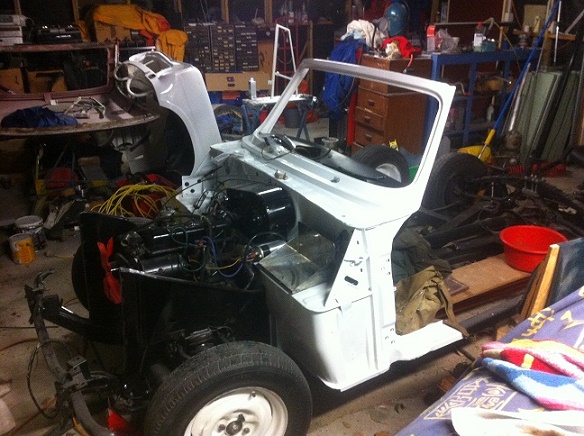
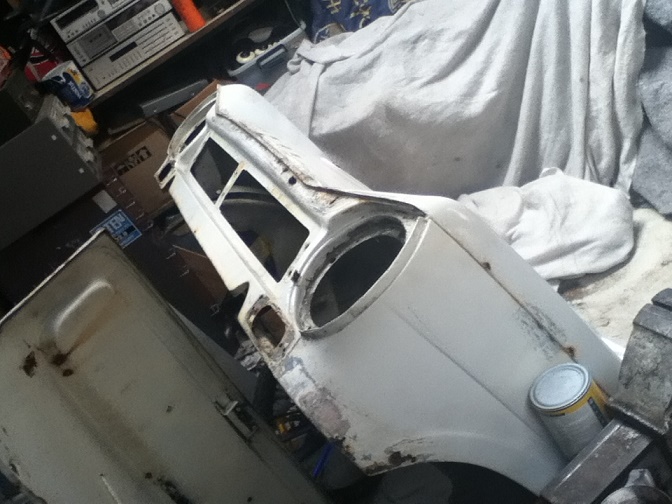
Progress with photos!!! Roof is all welded back together, not as good as I would have liked but itll do, I put a few layers of different colour paint on sanded it back and it sort of suits the rest of the car old running gear all gone. May need to do same reinforcing as the floors and sills arnt connected anymore. Because factory suicide doors The bike has been stripped and the engine is sitting in about the right spot ready to make some mounts.1 point
-
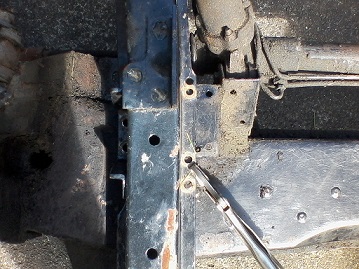
Cut up some plates to fit up to the front crossmember, drilled some holes for the bolts that the front end mounts with. Close-tacked all along the top and down the joins, just need to tack along the bottom. Then I can start the long process of tig welding it all together.1 point
-
Pulled the cab off the chassis today. Flipped the chassis upside down so I can finish welding the c-notch. Once that's done it can probably go to get sandblasted. Heaps of room under the bonnet for a supercharger1 point
-
And last weekend i took a trip to wellington to check out a 2300 sedan parts car for rust cut purposes. The car is owned by well known wellington 2300 nut Mark, and he has a really nice '65 wagon, the parts car i went to check out, another 'good' parts sedan and a '65 sedan in the body shop. 65 Wagon 'my' Parts sedan I also managed to get a few bits off him to take home including - spare indicator/park lights (for the terminals) - spare dash - column indicator/lights switch (which i broke when i got it home!) - tail light lens - fuse box cover - and some other small bits and bobs unfortunately the parts car is pretty poked in much the same places as mine but may be useful for quite a few random bits. Mark is hanging onto it in case he needs any bits for the sedan in the shop, when it comes out early next year, and i cant use it or collect it at the mo anyway, so it worked out well. Nice to have a good contact anyway. I also picked up some 130 rims from another guy on the way back, so will tidy them up and chuck them on soon. heres a pic of a 2300 sedan with some on (and a 16V Turbo engine)1 point
-
Got the front end centred and straight (hopefully). Made some mounts for it and tacked them on. Unsure whether to TIG or MIG them on. Opinions? Also had some air bag mounting plates laser cut at work. Going to weld the 3mm plates to the front end and then just bolt the 5mm ones to the bag, which then bolts up to the front end. Then to try and figure out how to setup the rear suspension.1 point
-
More progress! Got the top fully welded on now, chassis cut out and the bottom partially tacked. We are thinking of putting the airbags on the outside of the chassis, since they would be pretty close together if they're on the inside. Like the pic below, except the top bag mount will be about an inch or so lower.1 point
-
I got the c-notch semi welded up. It's welded on the inside to the chassis and plug welded on the outer sides. Also has some reinforcing plate in the middle. Just need to fully weld around the top now, then cut out the original chassis and bend up the bottom piece. Also found a use for the rear bumper.1 point
-
So, I'd gotten the car, and needed to plot a course for what I wanted to do with it. I had to decide between 3 options. A full, back to original resoration (as you can see in the pics there'd been an attempt to make her look more like a Supra, rather than the XX she is). A fully modified, all out performance car, packing a worked 2JZ (NA), or a kind of middle path, with the car lightly modified, but fully able to be brought back to 100% stock. The middle way was the one I chose.... So I decided to theme my build as a modern interpretation of what I would likely have done to it IF I'd had one back in the mid-late 90's. So I started collecting parts.... here's the shopping list: Rabid Chimp intake kit, Cusco strut brace, King low springs, KYB gas shocks, Technafit brake and clutch hoses care of George at Raptor Racing, vintage style steering wheel (unknown brand), TRD vintage style gear knob, Rabid Chimp rear suspension brace, Whiteline sway bars front and rear, and that's about it! Meanwhile I considered what I would do regarding the body. As previously mentioned there were some less than perfect repairs that had been done in the past, but I wasn't quite ready for a full bare-metal restoration, so I decided that I'd get a repaint done, and have the repaired areas tidied up. I eventually (like when my kids have grown up) plan on doing a full strip and rebuild, but I figure what I've done should keep her well enought for the next 20 years, given a little care. I had to decide on what colour to go for, as I wasn't particularly enamoured with the red/black, and I'd always thought they'd looked sharp in white or silver. In the end though I decided that it'd be best to keep the colour standard. So in late 2011 I sent her off to GT Refinishers. It was great to deal with someone who understood the fact that I was fixing up an 80's Japanese car. Other places either just saw it as another job, or just really weren't interested. I'd been feeling a little undermotivated with the car and the build, but after getting it back from paint I was revved up, and really started to appreciate the colour, I don't think I'd have any other colour on her now! More to come soon!1 point


.thumb.jpeg.384ff72c8d2b0ee0d34a7bdedb55bdcf.jpeg)


.thumb.png.b2aee08688778d18bdc7b3e3c1852d9c.png)


This leaderboard is set to Auckland/GMT+12:00