
Leaderboard


Popular Content
Showing content with the highest reputation on 09/23/15 in all areas
-
whilst waiting for food to cook i thought id show you this. its pretty good for the first block. apart from the couple of bits sticking through its correct shape wise and you could, if you were a ruff cunt, spot prime this patches and put colour on it because its that close. very happy about that. it will get one more coat of primer and a final block before colour. 2015-09-23_06-41-42 by sheepers, on Flickr 2015-09-23_06-41-32 by sheepers, on Flickr 2015-09-23_06-42-38 by sheepers, on Flickr also i paint the wheel on purpose because. now imma stuff some foods down my pie tester then attack the other side.6 points
-
Just drag the container up the drive. Or use a helicopter. Wait, wrong thread.6 points
-
Awesome, the guards are the right shape and its the correct length to the wheel arches and the rear. Wellside here we come!!!5 points
-
Picture heavy, everyone loves pictures End of the hummusing, not the end of the sanding Guide coat on (danger ladder teetering) ......... GN400 Build 2217by Hayden Rowe, on Flickr ....sanded ready for paint GN400 Build 2216 by Hayden Rowe, on Flickr GN400 Build 2215 by Hayden Rowe, on Flickr Really happy with the lines and finish I got (note; I have a brand new fuel cap to go on/ not rocking a colour matched one) GN400 Build 2213 by Hayden Rowe, on Flickr GN400 Build 2212 by Hayden Rowe, on Flickr Glad thats all over GN400 Build 2211 by Hayden Rowe, on Flickr GN400 Build 2210 by Hayden Rowe, on Flickr Not too bad considering this is the first thing Ive properly used bog on GN400 Build 2209 by Hayden Rowe, on Flickr Colour down GN400 Build 2208 by Hayden Rowe, on Flickr GN400 Build 2207 by Hayden Rowe, on Flickr First coats of 2K clear on GN400 Build 2206 by Hayden Rowe, on Flickr GN400 Build 2205 by Hayden Rowe, on Flickr had to put it on the bike this morning when I came into work GN400 Build 2204 by Hayden Rowe, on Flickr pretty happy with that GN400 Build 2203 by Hayden Rowe, on Flickr GN400 Build 2202 by Hayden Rowe, on Flickr GN400 Build 2201 by Hayden Rowe, on Flickr wet sanded it and cleared the underside, then re-cleared the top, Looks super sweet 20150922_191230_resized by Hayden Rowe, on Flickr Big thanks to Chris and Mammy for the pointers/telling me completely how to do it all, being this is the first thing Ive bogged, shaped, painted and cleared, it would have been well shittera without there help. Cant wait to put the decals on the side to break it up alittle, Looks pretty "massive green tank" on the bike, but once the decals are on it should tame it down abit Next up finish the forks, and then drop it off to get the seat done. then everything else Cheers Hayhole5 points
-
anal beads and meat curtains4 points
-
An anal beaded curtain...4 points
-
bahahaha! i've been looking for a flymo nod actually, so now i have to make sweet orange plastic skirts. aero etc? got tank sealed up and outlets put in, tank/shifter mounts on. just need a frayed bungy cord to secure the tank appropriately weighed up at 22kg minus motor internals and some levers and stuff. so maybe 25-30 at the end? holds 1.5l of juice just sort of assumed similar speeds to the villiers. could only get to 4th or 5th gear on that thing, mathsed maybe 7th gear on this, given all the reduction changes. Kirk got his tecumseh to 70Kph with a belt system on a 20" steed on the beach.. so given losses in 16" sizing, gains in chain vs. belt, and a sprinkling of carb, compression, seals and conservative exh porting, first goal may as well be 70kph without dying. villiers topped out at 70 on a good day. main goal this year is spraying one or more of the Ellis brothers with dirt, and/or forcing them into the long grass.4 points
-
See you all tonight in the corona4 points
-
3 points
-
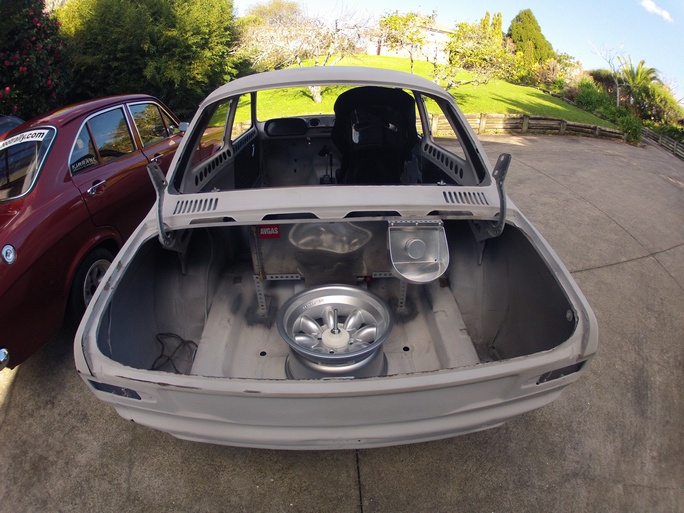
So I've been looking for a hako for about 4 years now, keeping an eye on the prices and how quickly they seem to be appreciating in price as the world notices them (thanks RM Sotheby's) and with some hard saving I've been able to finally make a purchase. The car is a 1971 2000GT with L20 engine and 5 speed. Unknown ks, bit of rust around the place (wouldn't be one without it) but overall a fairly solid start. I purchased this from Restored.jp who some may be familiar with, they make aftermarket FRP and carbon parts for old cars like that Hako. This was the owners personal car.. whether that's good or not is yet to be known but it's a nice story anyway. I'd be interested to have contact with other owners of Hakos in NZ as it would be handy for parts and general networking. I'll be working on this in stages (as I'm now broke) to get this up to road legal spec.. More to come but I've already figured a couple things I need to do before it's even here ! I understand there are several in NZ already, any coupes or road legal ones? Discuss: //oldschool.co.nz/index.php?/topic/49704-mlracings-hakosuka/2 points
-
May I suggest removing the door completely and replacing it with a beaded curtain.2 points
-
seeing we're just jamming beavers van thread up, my vote is for medieval theme airbrushing with drawbridge doors and clanking ratchet chain winch.2 points
-
Cert check today on the Mark II went pretty well Fit air filter to turbo (so kiddies can't put their fingers in there?) Wheel alignment report, which is my biggest concern if camber is out of spec - will find out next time. Julian thinks it should be ok though. Fit 2nd throttle spring, easy peasy. Front struts too close to rims. So he gave me some Falcon discs out of the rubbish which I can easily machine down and use as a spacer. Then just drill & tap my hubs to suit. The discs are the perfect 5-6mm that we need and has the pcd all ready drilled. Too easy2 points
-
you're a machine Greg! a tip of the afro to you sir. this is also awesome because now we know that KK's gona fully slam his wag at the expense of travel and steering. yeah bout time!2 points
-
Any idea on it's speed? 20kg is rad Just needs a nod to its origin2 points
-
the Cruizy Frog!!!2 points
-
Hi All, Going to try and get along tomorrow as a first timer. I have got an old wagon but it's not quite back on the road yet so won't be in it tomorrow - maybe next month all going well. Cheers Nick2 points
-
really went to town on the tank/old oil can. chop, fit, solder, smack repeatedly with things to 'adjust fit', leaks like a shower rose, of course. one more attempt at soldering leaks up then it goes in the bin. driveline coming together, had plenty stuffing round with the clutch which is on the other side. coming in just over 20kg as it sits.2 points
-
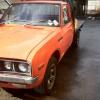
been on a few jaunts in the old girl. Currently chillin' with this fly hunny in the driveway. Pretty lol when your tyres are taller than the front of a Triumph.2 points
-
Karl and I have talking about doing a vintage gaming day, I'd be keen to set it up at mine as a meet in the next couple months2 points
-
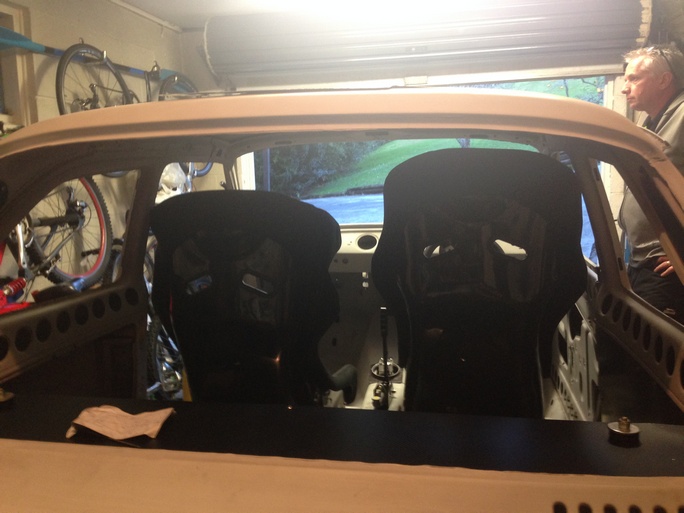
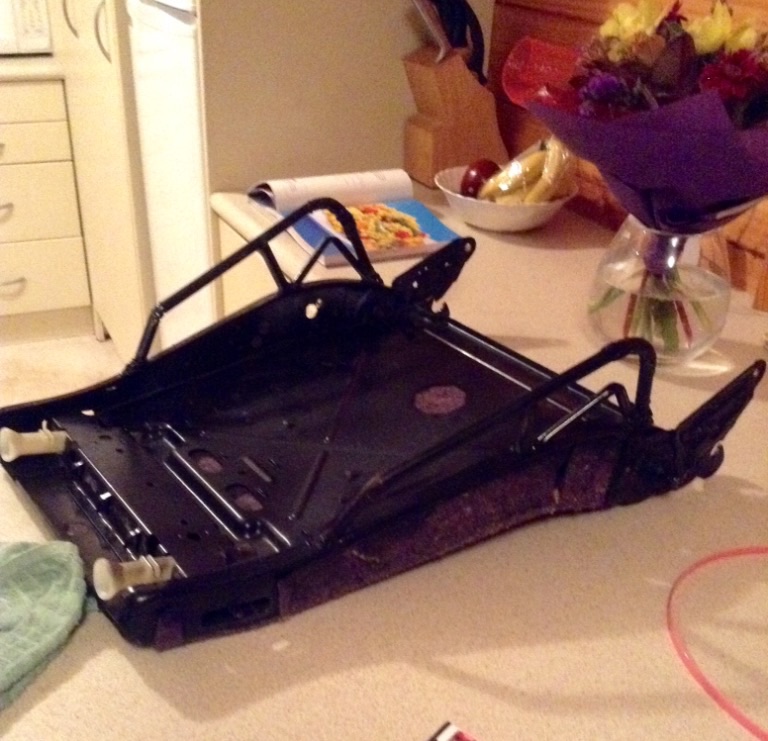
Bought some seats How I intend on mounting them Quick release hub and OMP wheel installed
 2 points
 -
OK sorry for more spam but Shane just sent over some more close up images with various repair stuff which is good and thorough. Engine had a strange miss which turned out to be a bung plug, replaced that with some random one and it worked. Compression appears to be a little low on one cylinder but the car still seems to run relatively well so when I get it I'll do plugs/leads/dizzy cap etc anyway as a precaution. Shane also has some MDI spark booster thing (you know those boxes you always see on old Jap cars to boost the spark) so he'll throw that in too. A few more pics.. Powerhouse! I'm actually happy that the numbers match on this and the body.. otherwise that could be a bit of a problem come time for VIN etc. Angry face! Interior is overall very clean, will need new centre console as that one looks banged up and not correct for the car (more holes for buttons and switches than my povo one has). Plus side, less things to go wrong in mine right? But this really got me excited.. https://vid.me/fhmd Annd they reckon we should have a booking for shipping next week so that's pretty exciting.2 points
-
oh LOL engine will be coming back out this weekend. i replaced the rear main seal cause it was leaking oil. turns out it still leaks a bucket load of oil so this has got me buggered to what ive done wrong or screwed up. another day in vw life with greg whos selling a rotary?1 point
-
It pretty much sums up the van though.1 point
-
Trick is when you export the log as xyz.csv open with exael and find your starting point of your run when tps hits 100% then delete all rows before that tgen find the end of the run ie when engine rpm hits 7000rpm or what ever your testing to then delete all after that. Tps needs to be calibrated correctly or itll just make stuff up. And on the subject of e-manage..... Ewww lol1 point
-
If you look back to the top post you'll see what the guards used to look like. Here is what the drivers side looked like this morning: So obviously there is a bit more cutting to go before new parts can go in. But given how much bog was in the lower guard it could have been a lot worse. I expect the other side will be similar. Booked in for a WOF on 6 October so hopefully it'll be driveable after that.1 point
-
Im not allowed to spam your for sale thread so ill spam here. RAGING HOMO1 point
-
I guess I should take the cedric for a wof1 point
-
$5 is cheap parking to be right in there, im keen1 point
-
Another tease video - https://vid.me/SNdN Boys are sorting shipping paperwork this week woohoo1 point
-
That tank colour is boss and just screams out for some engine turned lettering with a name like "the Green Monster" or "Sweet Lolita"1 point
-
Looks mean as with tank colour on it1 point
-
Do it.1 point
-
Welded some tube onto the sides. Bends look rough as I dont have a tube bender so just cut notches then ran over them with the welder once bent to place Picked up foam from para rubber. Went through the cut offs and go the lot for $12. Picked up some ados f2 contact adhesive to glue All the foam together. Dunno how I'll cut it, couldn't find a cheap enough elec bread knife (all +$60) so I'll try the angle grinder with a thin cutting disk. Woohoo! Recaro reclinable buckets on their way
1 point
-
1 point
-
They aren't that shit, but they are a bit shit - noisy, slow, some parts are really expensive. I will definitely have another one1 point
-
So shiny, tyres tomorrow Other minor things I forgot to mention New dash is in Replaced the C210 mirrors with chrome Cedric ones Swapped the analogue clock for a digital one but it's a dud :/1 point
-
couple of interior pics. original as. aftermarket 70's tacho kind of ruins the mint dash, but sweet 8 track player makes and selection of terrible 80's tapes makes up for it! engine bay looks like every other cedric it was sunny last weekend so went for a cruise needs the front right brakes adjusted and thats about it1 point
-
nope. Condition and performance1. The risk of a component (Note 5) hooking a vehicle, or hooking or grazing a person, has not been minimised, eg a bonnet or bumper has been removed, exposing sharp, moving or hot components.1 point
-
No GT-R logo going on here my friend. It's not a GT-R or a clone so won't put it on 2000GT life!1 point
-
underside of the bonnet prepped and painted. there was a tiny bit of rust in between the skins right at the front lip. i tried to take a photo but it was pointing into the light so it didnt work to well. but you can see right at the front of the bonnet the lip is all wrinkly. what i did was prize the two skins apart between the spot welds and i used the air hacksaw in the gap to act as a scraper, using the sides of the blade rather than the face, to get the shit off the two surfaces, then i rust killed it a few times while using the air hacksaw in between coats of the rust kill. it came up really well. so then i painted it. i mixed up the paint then used a brush to flow paint down between the two skins. its better than new in there now. then i painted the rest of the underside of the bonnet. ill give it a sand with 240 odd then wet lay another coat of primer then colour but thats a little way off yet. next is to fit the bonnet and get the hinges right then ill weld some gussets into the hinges so they don't fold like the frenchmen they are. 2015-09-17_11-36-05 by sheepers, on Flickr 2015-09-17_02-37-20 by sheepers, on Flickr also i blocked the bonnet down and wasn't happy with it so i put a tiny bit of green spot putty in it and primed it again. i hope that this is the last coat of primer before colour. i bet somewhere in this thread there is the immortal phrase "I'm not going to get to carried away with this build" whatever dick. 2015-09-18_12-43-47 by sheepers, on Flickr 2015-09-18_01-58-58 by sheepers, on Flickr also did some snow tyre traction testing. snow tires don't traction too well. 2015-09-18_05-50-17 by sheepers, on Flickr1 point
-
1 point
-
So these are bizzo's, and he thinks they might look ok, I tend to agree Wait for it Lets find out out.. Well needless to say he was right. Shank nuts,tyres and LOW required. He's not selling these so if anyone has a set they are willing to part with let me know!1 point
-
This I want to build one and create an out of control oil fire1 point
-
Cheers mate, I am in with a scrap metal outfit so am sweet for supply.But thanks for the offer.1 point
-
They use shit all oil, like 500ml an hour or something. When i was "tuning" mine i found the flames would "blip" out the sides like that too until i starting covering up the holes in the base plate above the pot. Seems to draw the air through better in the flame tube. I need a better flu like yours has. Its really important to have the flu as big and long as possible to get the draw going. Ill post up some links to websites about making them when i have the time. There is a fair amount floating around. The dimensions of everything dont seem too crucial. If you can get your head around the whole fuel to air mixture and tuning the size and amount of holes in the tube/base plate which im sure most on here would understand, its easy. I might get mine cranked up this weekend and take some pics/vids. Motivated to have a play with it again now.1 point
-
If I could redo mine, Id go full fendered slam. Something abit different, everyone cuts the backs off, each to there own, I cut the back off mine too haha1 point
-
some good progress has been made on panel and paint, should see the light of day again by the end of the week apologies for averages photos. Also picked up these for a tidy sum out of a Porsche 924, i doubt the rear seats will fit, but they have good leather on them so ill proably keep them incase i ever need to make a repair on the fronts1 point


This leaderboard is set to Auckland/GMT+12:00