
Leaderboard


Popular Content
Showing content with the highest reputation on 09/12/15 in all areas
-
7 points
-
Getting down to it. Coated stuff back from HPC, shroud nearly there, and I've been painting seat/rollbar interior stuff.5 points
-
And some more pics Body gets primed tommorrow so will update with that soon4 points
-
well after quite a while of this being in storage in Christchurch while i was in Auckland, i am now back into this project. i have been buying up bits and pieces and today, got started on installing them. OS member NZford sorted me out with an awesome 1" high strength axle, with 1/4" keys cut in where i needed them. also supplied some castle nuts, and threaded/drilled the ends to suit. was very well machined and everything fit on and lines up perfect. also bought a taperloc type sprocket mount and rear sprocket to suit. today i mounted the pillow bearings and axle, and drilled the holes in the engine mount, so now the engine is mounted in, though i still want to add some braces to the taller front mount. i finished off the front suspension and steering linkages, though it works well on the ground, im not at all confident that it wont need a redesign, as the effects of the suspension travel on toe in/out are substantially larger than i thought, but for now i will probly just lock out the shocks and carry on with the rest of the cart. with the axle on and the engine in, the sheer size of this car became quite apparent. its the same size as a mini, if not slightly longer!3 points
-
Bump steer and camber measurements with the Toyota knuckles installed. It looks like the top balljoint really needs to come in from underneath to help the camber curve and a drop on the steering arm balljoint to reduce the bump steer. There is also scope to lift the steering rack 5 mm which will help.3 points
-
Few updates on the 120. 5 speed is completely in bits, bearings going in soon. Housing had to be tig'd up and milled out, the input bearing jammed up (the oval balls above), causing the bearing race to spin in the housing. Its eaten about 2-3mm of alloy. After thats done, the box will be ready to go back together! Replaced lower ball joints, old ones were so had it. New nolathane bushes in lower control arms to cross member - bitch of a job. Busy.. A car "group" that I made - Wairarapa Oldschools made its debut at the Masterton Motorcomplex Drag strip open day. We are basically a bunch of guys in our region that get together with our old cars as not alot happens in the wairarapa! Picked up a heap of parts on Wednesday, a police repo man saw me driving around and there was a bunch of 120y parts at a repo job he had. He saw me up town and gave me is number... that night was off to pick up datto parts! $100 bought me all this3 points
-
Pulled off all the extra mounts and brackets that I no longer needed and welded up the bottom of the c-notch. Took it to A1 sandblasting who sandblasted and primered it. Looks so much better! I think the next step is to box it, make some new crossmembers and sort out the rear arms.3 points
-
You may remember my (and beavers) old estate ....... I missed it like crazy Since then I built and sold this.... And after a lot of searching I got contacted about this last week. So today I payed for it, the base car is an original Triumph 2500 pi mk2 estate with 4 speed o/d. Was restored or tidied up in the early to mid 90's. Sadly a terrible aftermarket sunroof was added at this time, along with a modern roof rack which was screwed into the roof.... At least it is pretty much rust free Plans at this stage are to remove the sunroof and fill the holes in the roof along with a tidy up of the crazy cracking that has occurred at the rear of the roof and around the fuel cap. Rebuild the engine and tidy up engine bay.. Summer involves getting some coilovers made up and building some 15" 3 piece wheels to fit Future future involves new carpets, re trimming some retro fixed backs in the original leather from the spare front seats and re trimming the boot floor and back of rear seat in hardwood. Also has a tonne of spare parts including a full leather spare interior, a couple of Pi engines, a couple of o/d gearboxes, a few diffs and a nos tailgate and bottom valance I pick it up in 6 weeks time on the way back from uni will update then Heres a few more pictures... Discuss here //oldschool.co.nz/index.php?/topic/49975-connors-pi-wag/#entry15827742 points
-
Just started a page on Facebook to see what interest there is for a Jappa classic car day in Welly, along the lines of the Yank and Brits shows that we see every year. Looking at Moonshine Park in Upper Hutt Sunday 29 Jan 2016. Just thinking that this could be an informal park up, show and shine... to gauge interest. What do you think - going to fly or bomb?? Search for; Wellington classic Japanese car day on facebook and "like" if you like.2 points
-
2 points
-
Man all this talk of $500 distributors makes efi look even more attractive, scrap all of your dinosaur tech junk folks and come to the dark side...2 points
-
So, ever since I lowered the wagon ive never been happy with how the front sits. Theres an awful amount of guard gap but I cant go any lower with the standard struts without it resting on the bump stops. I needed to make "JUDDIES" or "JUSTIES" or how ever you young-ens say adjustable suspension. So, with a lot of research and referring to Seedy Als guide I decided to hack up a pair of Sigma struts. I purchased adjustable platforms and top hats from George Stocks. I also purchased a pair of SW20 (i think) rear inserts that were about 50mm shorter which meant I needed to cut the strut tube. Strut tube cut and ready to be welded back together A test fit to see how everything sits. With the different shaft size of the insert I couldnt use the factory top hat. I purchased some adjustable camber plates to suit. A little spacer was made to sit between the top spring perch and the top hat. The top spring perches didnt have a locating indent in them. I got a quote to have this machined fro $200! So I get my maori ingenuity on DONE Ordered some springs with keepers. And all fitted up I trial fitted one strut and found that the spring rate was way too aggressive. At the lowest setting the car was higher than before and was solid. I bought some more springs that have a friendlier spring rate So here are a bunch of pics showing the height before installing the new struts, new struts at max height and new struts at max low (actually could go down another 15mm) New struts - Max height New struts - Max low Measurements taken from top of arch to centre of stub axle Obligatory chassis rail comparison As it sits at max low, im sad to say, its too low. But, I can easily raise it to the perfect height. I had to use my roller blade wheels as the wheels I was using wont fit the new struts. Pics Thanks2 points
-
This is my thread for my factory 16r Toyota and to show progress of its life. Discussion thread I bought this Corona November 2013, It already had a been painted and 5-speed and cream interior transplant. Kept it as a daily and weekend cruiser til Febuary 2014 when I got all the rust in doors, wind screen, etc cut out and repainted in Volcano Red. Not long after I bought 'her' I was striaght away researching into a simple and easy motor swap. I really fancied the 22r and was deadset on one but the pricing and even getting my hands on one near-by just didn't seem realistic so I kept an eye on TradeMe for a few months til July 2014 I spotted a 18rgeu pop back up, I had seen it months earlier but the seller was very vague about details. I took a risk and bought it, I got it for $380 , including Long Block, Fuel injection setup (AFM, Intake, Loom, etc), piping, the whole works, even a complete RA63 Body loom and a few christmas lights in the bottom of one box lol. I looked into what I would need to alter first. *Return line to fuel tank *Cert for EFI Conversion *Wiring I stalled the conversion for a month. I then got a hold of the guy who sold me the motor, He had some Sidedrafts that were pretuned for a 18rg, I took the risk and bought them for $260 I then got cracking in. With help from a mate, we had the 40 year old 16r out.. With work and my simple knowledge of mechanical shit, I got a mate to put the shortblock in for me while I was at work. Wacking the side drafts on, giving it fuel, air and spark the motor ran, and ran beautiful. Not long after I ended up getting a txt while at work and my mate thought it had blown headgasket... It wasn't, he had just jumped ten steps forward. Anyways I ended up doing the head gasket, New filters, timing done, side drafts tuned, throttle made up etc The project got put on hold for few months and I missed out on 4s & Rotarys that year. Early this year, with it in and side drafts on again, exhaust made up the conversion was done Took it for wof, all she passed flying colours, no cert needed. Photoshopped: Cheers for reading.
 1 point
 -
So tiny update, new baby came along, haven't been out much, but did make it to Toyota Festival, pics from parade lap below. Getting a bit excited now, only a month or two till the exemption expires, and we get near summer, time to start looking at a bit of servicing and get her wof'd and reg'd!1 point
-
Got a snap last night, my mate picked up my exhaust after work yesterday, so I really did score a like new Stage6 for $100! The seller asked my mate to warn me that it's very loud Hope to have it Tuesday. Today has been somewhat productive, as I'd gotten seriously sick of having to lean the scoot against a lawn mower or what ever to work on it my first mission was to make a stand of some sort. So using the Sepia ZZ centre stand and a few off cuts I came up with this ugly but strong and functional mess Will keep an eye out for a stock AZ one or see about getting something a bit nicer bent up one day I think! /Make a side stand Next was the pegs, got them in a comfy spot where I can have my feet up or have my toes up on the pegs and heels on the frame (might add a pair of heel rests) 4L became 4.5L Still need to grind the terrible welds back and think I'm going to try silver solder over them to seal off the few leaks. Started mocking up the petcock location, had to twist the fuel fittings around but it'll work. And as it sits now Still not entirely sold on the look of the seat. Those bars are temporary, just whacked them on to get a better idea of seating position, the straight bars were way further forwards, plan is to use a BMX stem and bars. Still not sure what I'm doing headlight and control wise yet. /The ZZ seat doesn't look too out of place to me, but would mean the fuel tank would be totally exposed/could be replaced altogether with a larger one.1 point
-
Could you go out to the garage and see I can't be assed putting this onto ramps and then jacking it up.1 point
-
so this is the amount of lock i get at the height it is. this is wheels straight wheels turned i dont even get a full rotation of my steering wheel. its about a 3/4 turn at the best. and thats the reason for narrow beam. so i can turn while been slammed (and i cant LOL)1 point
-
So. I have had for a while now my baby, 1986 Volvo 360GLT. A while ago I had plans of +T ing the old girl, then one day she developed a knock so out came the motor, and my build began. At first I was just gonna drop in a B200FT high pressure 2L turbo,figured if I'm gonna do it, might as well go to a 2.3 turbo, so started scavenging parts for that. A while later I came across a B234 dohc head. So now I was going to build a 2.3 dohc turbo. As I started doing the wiring a mate of mine, came across a 1jz for his supra, and thus had a total of 4 spare sets of supra turbos off all his 1g motors. So I got to thinking..... 2.3L twin cam twin turbo 360.
1 point
-
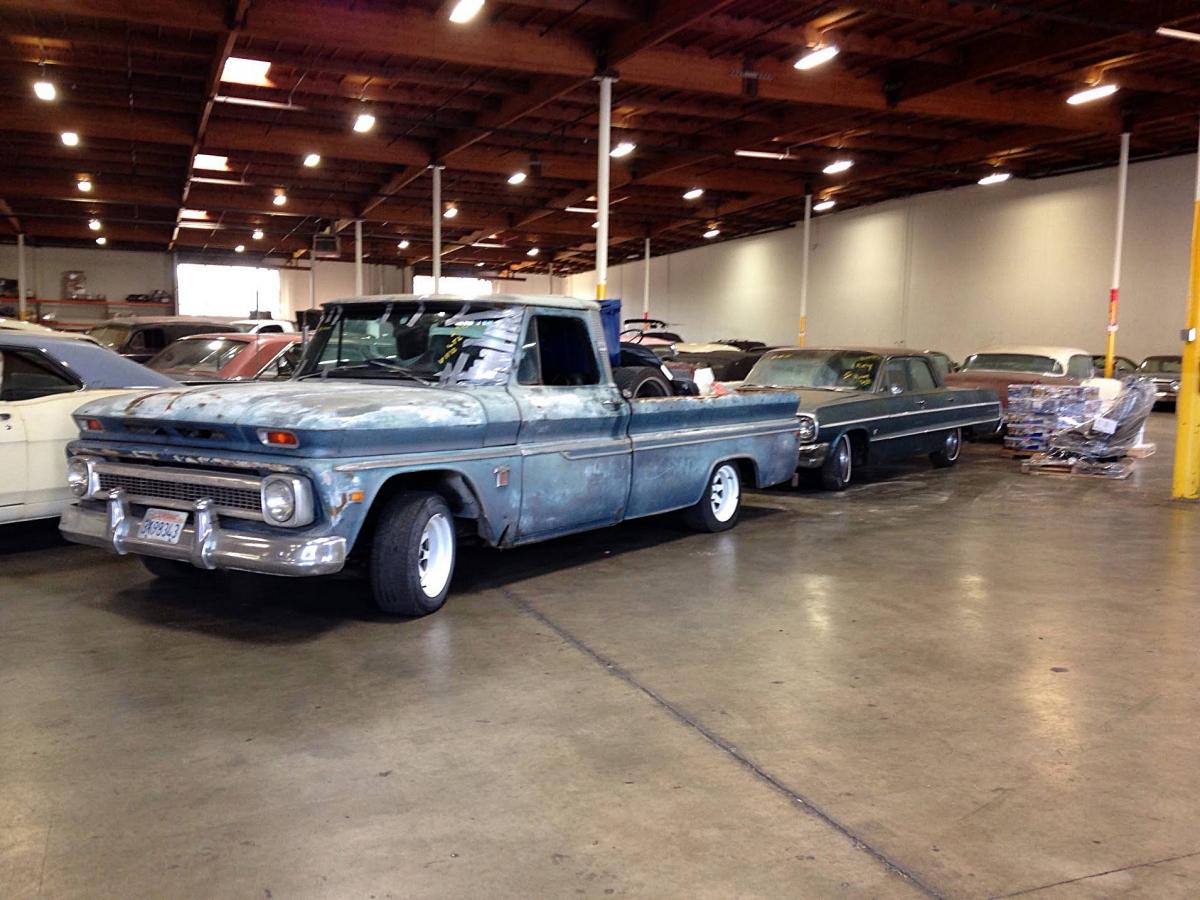
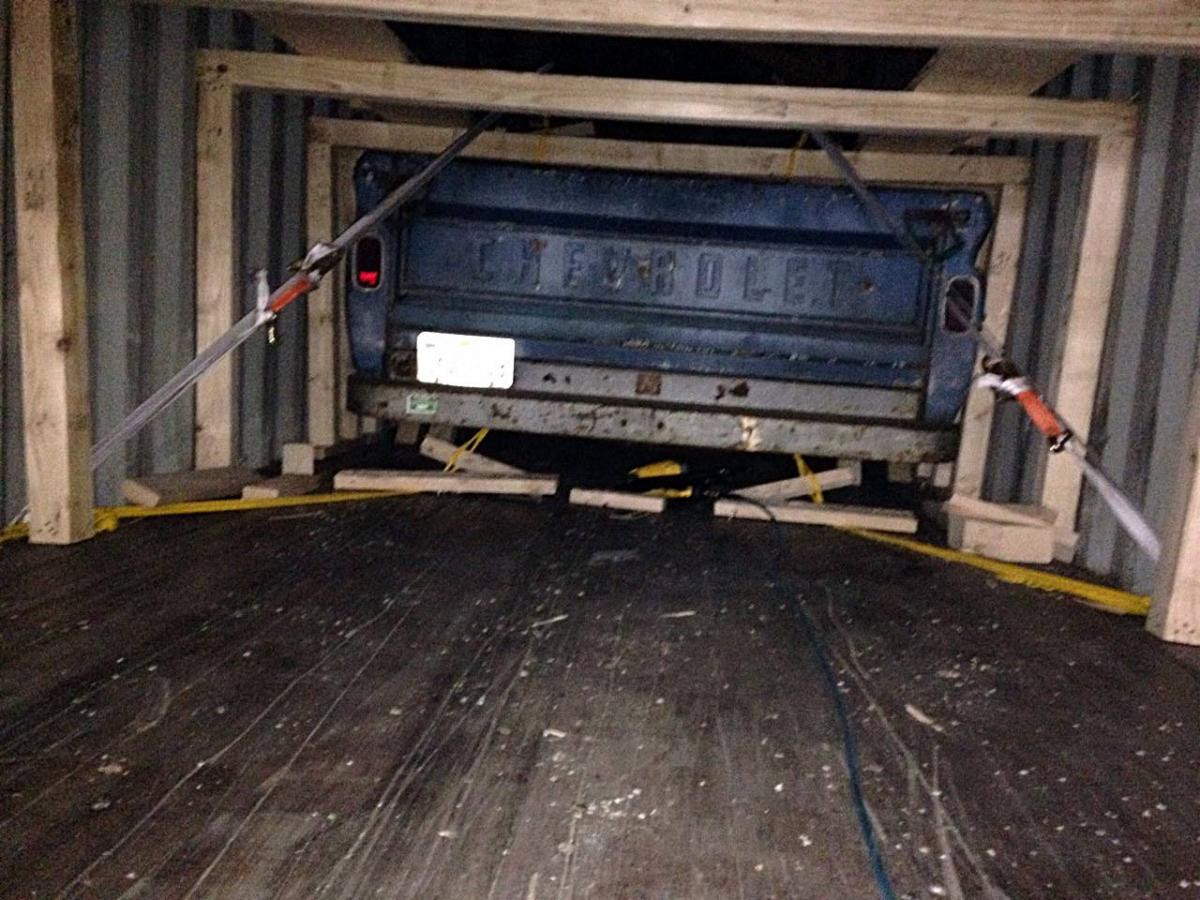
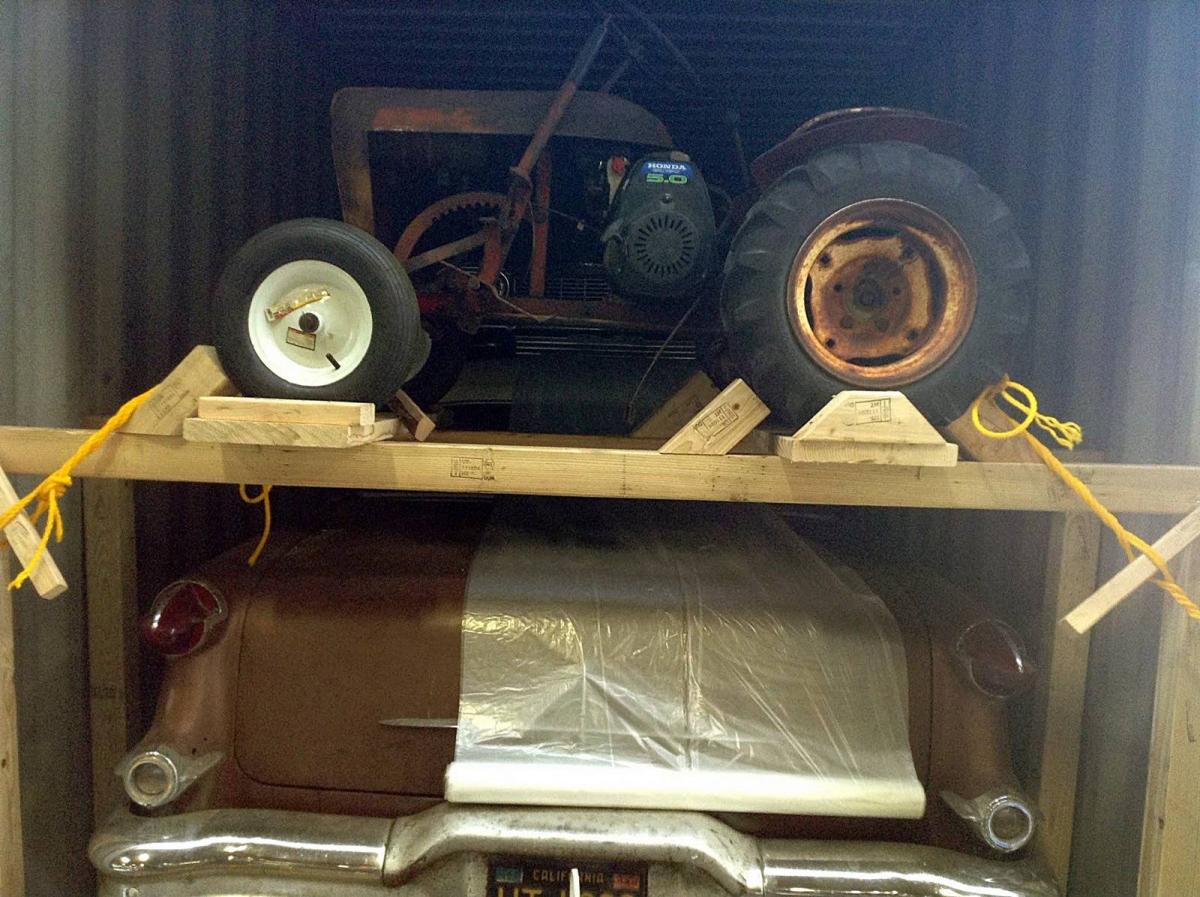
Some pics of it lined up at the shippers and in the container.
1 point
-
Hi everybody, So as per the link below, 73crownwagon (Denham) and I (Neal) are the new Auckland Area representatives, joining BDA780 (Karl) who is remaining. Click me That means that we'll be aiming to do the following: - Spin yarns with members at meets and events - Dish out Oldschool stickers - Organise Auckland meets. Come up with new ones too. - Do some moderating on the forum - Continue the great work put in by our outgoing area rep Chris (EURON8) So if you have OS specific questions then we're here to help. We're also looking forward to suggestions from you guys regarding sweet cruise/meet ideas, events you would like to see us take part in and any other suggestions you may have. Anyway, have a lovely day and we're looking forward to some sweet OS happenings in the near future! Meow1 point
-
POR Sealer in the tank doing it's sealing thing. This was mid ways through, followed instructions to the letter, so should be goodbe.1 point
-
bonnet primed. again. 2015-09-10_05-17-59 by sheepers, on Flickr 2015-09-10_05-49-53 by sheepers, on Flickr1 point
-
So horny right now.1 point
-
this. when we cert an engine swap we have to check the emission side of things if its efi, it has to have all the things it had when it was in the factory application, ie check light, oxy sensor, TPS, etc etc aftermarket ecu just has to have whatever its designed to have carb just has to run right1 point
-
I hope he has configured it to tell him when rear wheel speed has dropped to the same level as front wheel speed.1 point
-
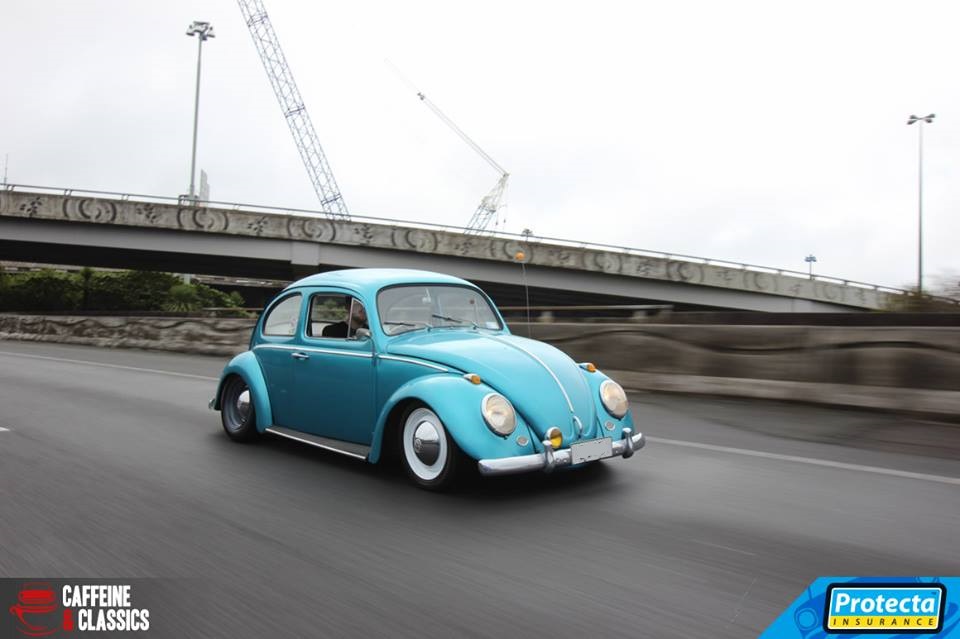
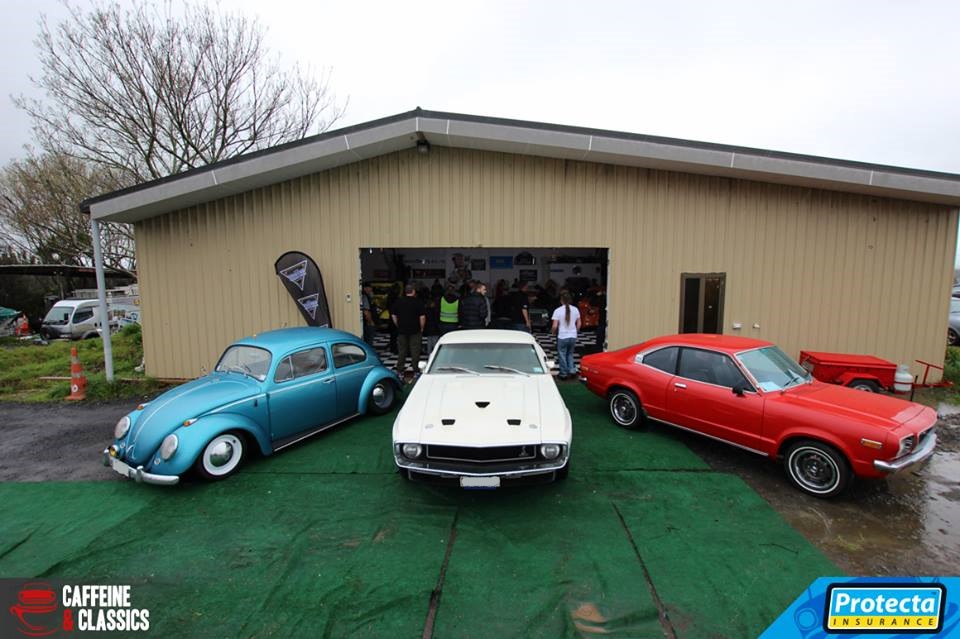
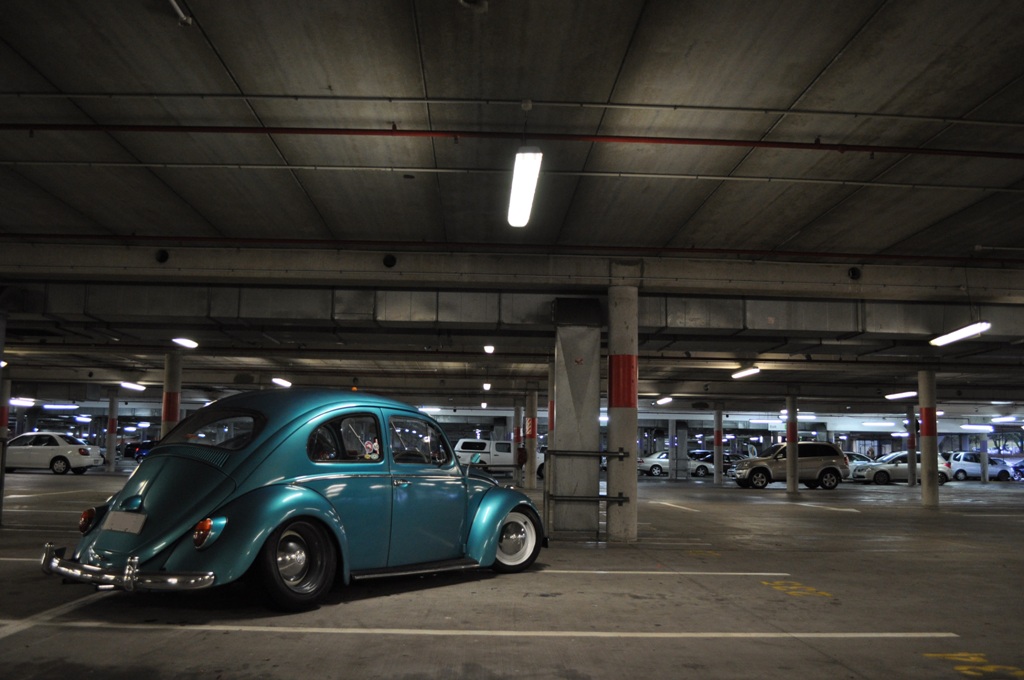
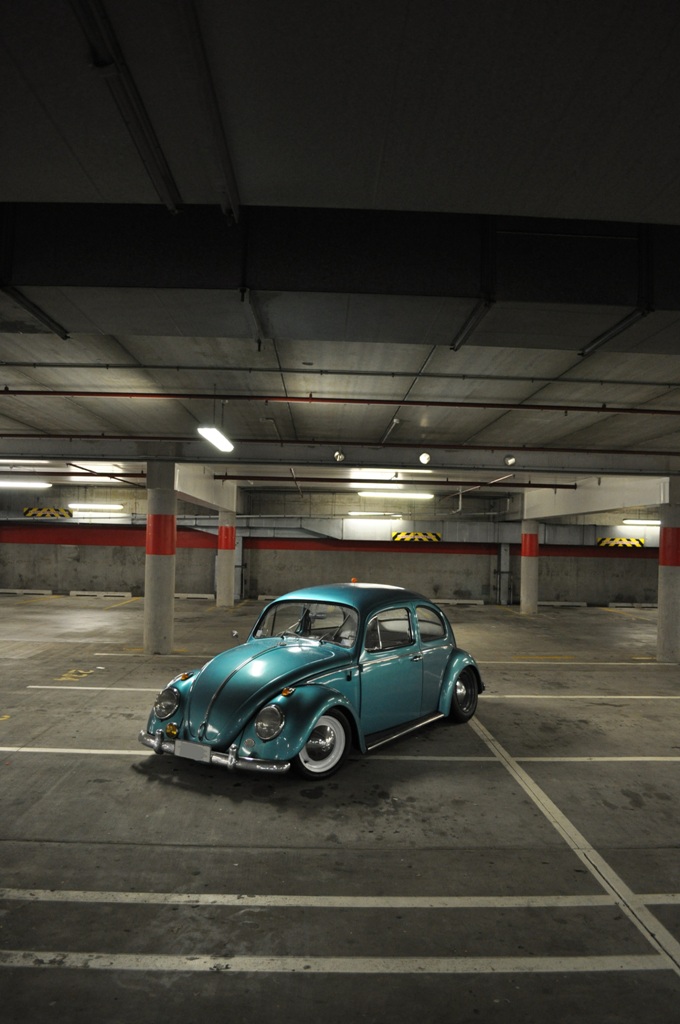
Nothing major to report lately. Got a spot on Caffiene and classics cruise to filming of HotRodTV and ended up getting drawn to be in front of shed/in opening sequence Also got this sweet rolling shot taken on the way out there which is probably my favorite photo of the Bug so far . Also, I borrowed 10Speed Dave's wheels off his bug while I was trying to figure out widths for the rear and sort of really liked the look/width of his rears. A deal was struck and BUGD had some new slightly wider rear wheels than the factory 4s. Im still not 100% sure on width, But they're probably 7 inches wide. Also tweaked the ride height a bit more because I cant have Greg having all the slammed Volkswagen fame on here. [Although, I think hes trying to sabotage me because he took my spare springplates to notch for me and I haven't seen them since ] Almost at the stage where I really need to throw some money at a narrowed beam and notch/raise fuel tank DISCUSS
1 point
-
and also sorted out the bonnet.1 point
-
Show and tell... Vinyled parcel tray. Will probably blind me being too light, but fuckit, live once. Guts out Oh, hello quiet... New chocolate Autodec carpet. Pretty average fit so far, too big over the hump, shitty seams. one gave way in the fucking unfolding... Split Seam: Will leave it laid out for a day or so and see if it sits down a bit. Yes, it has underfelt. Good at 10 feet though... Did the first two stages of the fuel tank POR kit, still trying to dry the thing out, slow process. Hopefully some more heatgunning and air blown through this week and it'll be dry enough for the last stage.1 point
-
Nay. But no cactus garden out front incase she pops wheelchair access cos she wont be walkin out after this amirite1 point
-
Wheelchair accessible or blind friendly?1 point
-
Chucked some trademe lowered springs and lowering blocks in. Borrowed the wheels off my RX-3. Tram track much??1 point
-
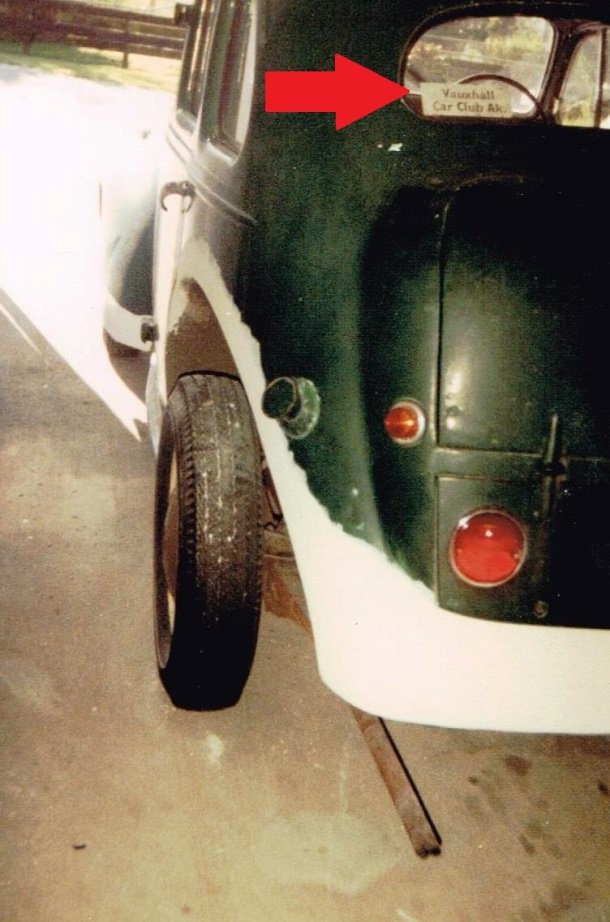
The body was looking a little sad so some panel work was called for and a coat of burgundy paint. Near this time I was ignominiously excommunicated from the Auckland chapter of the Vauxhall Enthusiasts Society for the then unforgivable transgression of “automotive blasphemy”; (i.e. modifying an “already perfect” Vauxhall). Rigamortice loved doing skids with her new motor but the Vanguard diff ratio was far too low and the stud pattern was different to the HQ pattern on the front. When the novelty of doing one wheel burnouts on 15” skinny cross-ply tyres finaly wore off I found a 3.3 HD Holden rear end, fitted it with the larger HQ drum brakes and changed the stud pattern by welding up the old stud holes in the axel flanges and re-drilling them. The old girl was starting lift her skirts and haul arse well (for 30 years ago) and it became obvious the 1930’s style lever action rear shocks were struggling with the additional power and traction so out came the rear end again so I could convert it to telescopic shocks. With a little tweaking of the new suspension I had a car that was happy to be pushed hard and was comfortable with 3 times the original 48 BHP. The only issue was that the standard under floor single circuit 1” master cylinder was having difficulty with the HQ disc/drum combination. I was running a dual Hydrovac booster system with a VH40EL on the front and a VH44D on the rear and despite fitting both boosters with matching “complex” (dual acting) control valves the combination still felt clunky and lacked feel. When late one night I caught myself designing an external control valve system that could operate two boosters simultaneously I knew that drastic action was required and in desperation the following morning, I attacked the driver’s side firewall with an angle grinder…… I mounted an XA Falcon pendant style pedal box and rebuilt the firewall to accommodate an XB Mastervac and dual circuit master cylinder. At the same time I converted to a hydraulic master/slave cylinder clutch combo. Finally the car felt balanced and a joy to drive- problem solved! After a series of small but interesting and exciting fires Rigamortice had to be completely re-wired and I ditched the generator in favour of a ‘modern” alternator. A good mate turned up with a rare (at the time) Yella Terra head he’d procured from his neighbour and it proved to be the ideal combination with the X2 cam, the pacemakers and the DCD Weber (I tried a 350 Holley but it just used more gas and never idled properly). With a little tuning Rigamortice was starting to get a reputation for being a lot quicker than the old tart looked……… love those "one wheeler peelers!"........ One month (and a number of instances of unintended, deliberate, sustained loss of traction) later the Nissan gearbox shat it’s self into shrapnel. I found a W40 Steel case 4 speed Celica box (very sexy in its day) and modified the Holden bell housing to accept it, problem was the main cross member sat where the new gearbox needed to be. I jacked the old girl up, put her on axel stands to keep the chassis straight, pulled the front seats out and cut the whole floor out from the B pillar to the fire wall to expose the chassis. I welded in a piece of 4” RHS to form a new cross member, cut a section out of the original cross member to accommodate the new box and extended the original inside chassis rails. A new floor made from 16 gauge Zintex was welded in and a pair of Triumph 2000 front seats were fitted. Rigamortice had yet another new lease on life.
1 point
-
i sanded both rear quarters back looking for rust and general dodgy shit. i took WHOLE BUNCH of bog out of the passengers side but apart from that there wasn't much to find. there is a dent in the drivers side thats pretty hard to fathom how it got there but thats about it. so after removing a ton of superfluous bog i laid a sealer coat of primer over it all. ill start getting some shape into it this week. also i tripped on my air hose while i was carrying the bonnet and dropped it on the panel stand putting two nice dents in the skin. i need a grown up to help me because i think ill fuck it if i hit it any more. 20150823_155327 by sheepers, on Flickr 20150823_155402 by sheepers, on Flickr1 point
-
I recently moved out of the big city to a sweet lifestyle block and I've been dailying this all week to get to know it better I can happily say I think I like it a lot!1 point
-
Shroud is getting close - Any suggestions on a clear coat that wont melt ? The guy who has done the cf work is a boat builder, so not quite sure what to coat it with. Anyway its looking pretty schmicky, just bonding the mount and a bit of tickling up this week and we should be done...1 point
-
1 point
-
I cant help myself, after selling these a couple of years ago, I just bought them back, these were in the old slug that made 200hp at the flywheel and ran a 12.43 before I had some major oiling issues. Long term Im thinking maybe a small capacity destroked screamer. 64 stroke 94 bore 1776 ccs. lots of lift/duration/revs... *insert money into pit here*1 point
-
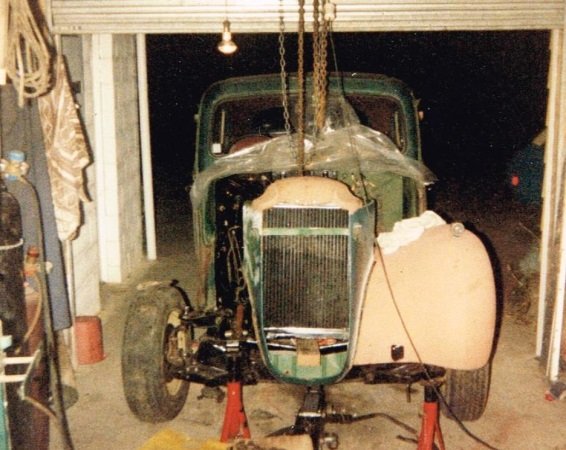
All barred up and exhausted. Home for wiring / plumbing / coating / painting stuff.1 point
-
Christmas rush !! Firewall pretty much done Seats completed, looking a bit more industrial which I'm really happy with. Notice the big boy seat and the little scared passenger seat.1 point
-
Cage progressing well, should all be done in a couple of weeks.1 point


This leaderboard is set to Auckland/GMT+12:00