
Leaderboard


Popular Content
Showing content with the highest reputation on 07/15/15 in all areas
-
So I have finally decided to document my twin rotor Wankel engine project. Years ago I saw the video below of the twin O.S. Wankel engined R/C tractor pull car and thought that was the coolest thing since sliced bread. Fast forward a few years and I saw a twin rotor O.S. Wankel based engine in the YouTube thread, which has been the crux of this project. The engine build by ‘20B’ combined two O.S. Wankel PI’s together with a custom machined centre and rear housing, in addition to an oil hardened 4140 eccentric shaft. Unfortunately the only video of it running is the one below and the project thread stagnated years ago due to a crushed bearing. It wasn’t the only twin rotor project, as avid model engine collector Miguel de Rancougne had another O.S. Wankel PI based engine in his possession as seen below in a Christies auction handbook. http://www.christies.com/lotfinder/lot/a-twin-rotor-wankel-engine-4223480-details.aspx?intObjectID=4223480 Both 20B’s and Miguel de Rancougne’s twin rotor miniature Wankel engines provided enough reason for me to attempt to make one myself. So in March 2014 I purchased a brand new O.S. Wankel PII with the aim to build a two rotor with my friend Ben who happened to purchase a used PII from rotary mad Puerto Rico. The idea was that we would test run both engines then pull apart his engine and CAD model it. The parts required would be additively manufactured on the universities recently acquired selective laser melting machine prior to sanding smooth. To test this theory a single rotor and eccentric shaft were manufactured from a CAD model off GrabCad in AlSi10Mg aluminium alloy. With the surface finish of the parts worse than predicted and lack of a ferrous metal powder for the machine I decided to focus on building the test table for the engines.12 points
-
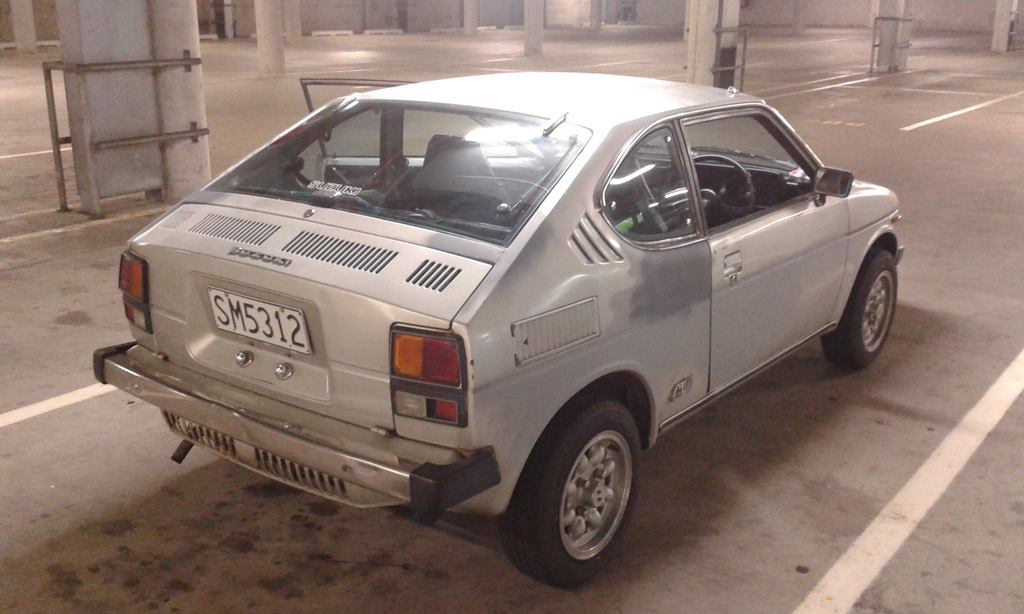
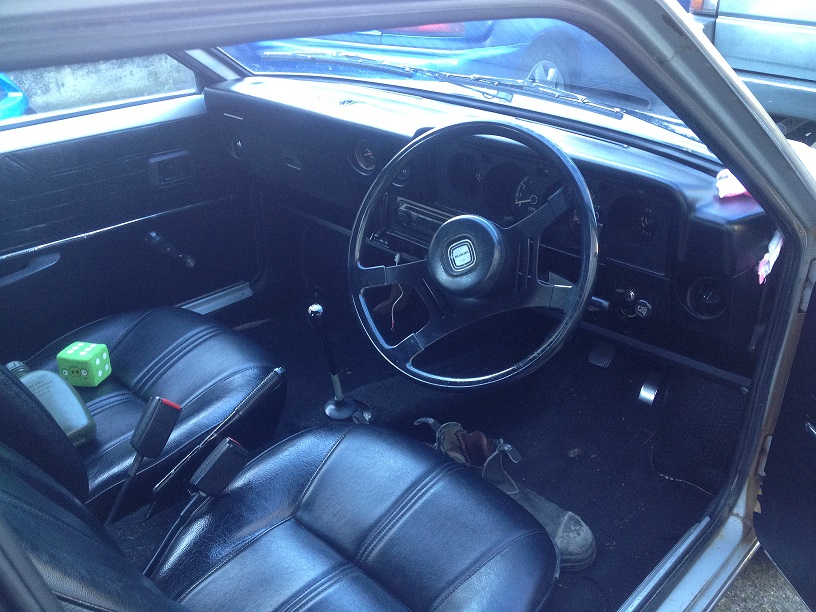
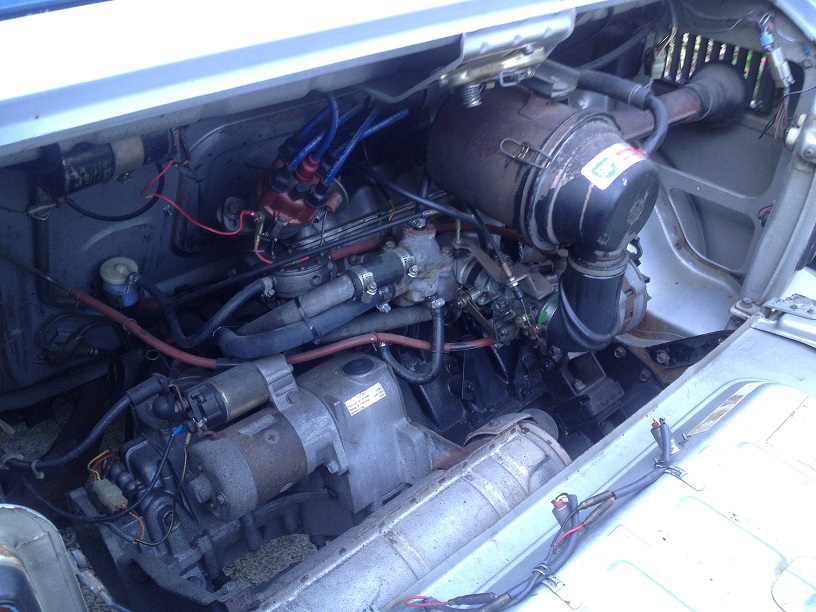
Hi i'm Mason, ive being skulking around these forums for about 2 years and haven't really posted too much. So a little while ago Threeonthetree told me to put my Suzuki up and ive just got round to doing it. (shit time management) Right, so its powered by a F10a (45 timewarping horses) and its hilarious to drive, especially in the wet. Interior is probably the best thing about the car. The outside is many different shades of primer with bits of surface rust here and there, haven't found anything major yet but im sure there with be some suprises somewhere. Plans Make it all one colour Remove whine coming from gear box Linkages aren't the best so sort them out. Daily the hell out of it. Unfortunately it has recently deveolped an electrical fault (randomly the fault developed when i was installing the radio,weird) which has caused it to only be able to power the high beams and thats it. So if anyone has a wiring diagram for one of these long shot i know, please PM me or if you know a good auto sparky around the souf auckland area that would help too. Cheers for Reading about my Japanesse rollerskate and hopefully i can bring it to more oldschool goings on Disussion - //oldschool.co.nz/index.php?/topic/48750-masonh38s-1979-suzuki-cxg-sc100/?hl=cxg
 5 points
 -
Well they're on the ute now. Leaves will be out in the weekend to be reset, it desperately needs some low! The front wheels poke out a little. Im not really sure what my best option is here, theres no room to move the center for more + offset, and im not keen to run those rubber universal fender extenders. Option #1 - Roll the shit out of them? The bodys already dented a rusty so could definitely pull off a rough guard look Option #2 - Some wide flares of another truck that will suit the later model guards? Option #3 - ??????? Give me your guard thoughts! http://oldschool.co....gos-b1600-yarn/4 points
-
Rightio, a long time between drinks on this project build. So since last time.. Sometime last year I started some work on the reproduction tray. The nats paint job was a temp job. Essentially it was shitty supercheap rattle can paint over equally shittiy Thai primer, so it was time to take it off and give it a few thick coats of etch primer for the mean time. I also cut off the engine mounts at some point. Later on in 2014 I tucked this and the engine away in a lock up with Seedy Al. Sadly it remained untouched…until a couple of Sundays ago!! I gave Al a hand towing one of his new steeds and then later in the arvo we went to work on the hilux. Thanks Al! With a bit of maneuvering, we had the 3RZ in the hole and the gearbox mounted up. As in the last post, Allan modded the gearbox mount, dropping the bolt up point for the gearbox about an inch or so. Al must have had the magic touch that day because it was perfect!! We got the engine sitting pretty straight and bang on level. She’s a bit tight at the firewall but not super tight – move a couple hoses and some other bits and she’ll be right as rain. I already knew the driveshaft yoke was a match to the gearbox output so I wanged in the driveshaft just to see the angle of the dangle and how much it needed to be shortened/lengthened. Turns out it is the perfect length! Gotta love those Toyotas. Didn’t get too many photos as the phone was running out of battery It hasn’t come without a couple problems however. The swaybar – had to undo this bugger and drop it down to get the 12R out/3RZ in. Now it is awfully tight around where the sump bowl will be, so this will need to be spaced down about an inch. The sump – a modified sump was always in the cards. With the engine sitting where I want it, the sump will need a notch where the sway bar will go. Because of this, the pick up will likely require a tickle up too. The sump will also need a tweak over the front crossmember, and the center link/drag link. The drag link – looks like these things are also known as a centre link or centre drag link. This bastard is right in my way!! Ideally this would need a drop in it, as the below pic. It looks like most of the 2wd Hiluxs have the same amount of straightness, up until the late 90s/early 2000s when the RZ etc came out (go figure) but the design is a fair bit different, not too mention probably a lot wider. Does anyone know the logistics/legalities of modifying these?? Or know of one off another vehicle that might fit? I saw this website but ahhhh unsure ?? http://grannys.tripod.com/centerlink.html Discuss: //oldschool.co.nz/index.php?/topic/25299-bizzos-rn35-toyota-hilux/page-6 many thanks4 points
-
Small post. Painted few things at work Also I think tom likes my car2 points
-
Rack & pinion conversion??2 points
-
make sure to cast a Toyota logo in it.2 points
-
Blog post with pictures plz2 points
-
So it's been an extremely long time since I've updated this or been on since my computer kept deciding to break itself all the time losing every picture and record of the car, I ended up selling this one but not before buying another 1976 Ford Escort mk 4 door but auto which has two owners, once I get around to sorting out a new thread and learning to do everything on here again I'll make a new thread and build, Looking at changing the original 1600 kent into a sr20det or if anyone has any new ideas or better styled engines to fit etc or any tips on what I would need to upgrade aswell to fit the new engine would be handy, pretty sure the build discussion is still open for this not sure BUT I'M BACK!2 points
-
The story of a very sad Technics SA-T470 Receiver. Saved from the scrap. I was told by fans of OldSchool to put it up there as something different, as I believe they are Retro/OldSchool just not of the automotive kind. Thats my mint one but This is how it looked when I got it. You cannot really tell that is been dropped hard on its face apart from the missing selector tuning shafts on the very right of it, and the face has been pushed in 14mm at selector shaft. The purpose of getting it was to keep the other three going. But as they are one of the most indestructible amps I’ve ever used, so I see no need in having a parts amp. Solidly built in 1981ish by Fisher & Paykel, Consolidated and some bits from Japan. There a total oddball, the tuner in them is from a Technics ST-8080 with the board rearranged and a few modifications and are notorious for being out of adjustment at this age. So overall they’re sort of based on a Technics SA-5550 which would be the Japanese equivalent. So the first thing to do is see if there is any life in it, plug it in oh wait there is no fuses in and that is just the start. Fuses and stuff in, it trips the RCD dodgy power switch going to ground and some life, I managed to get both channels after a lot of soldering up cracked joints and tracks...... then smoke, a suppressor blows Can you tell which one it is? The shear amount of dirt, grinding dust, overspray, glass and more dust causes problems so magic it away(this took many hours)and its clean. Thanks to Michael I got a new piece of glass cut for it and it showed me how out of shape everything was. So a total dismantle and a straightening of the frame was in order. this proved to be quite hard, literally. They are made of a lot of metal and are solid!!!!!!! It makes me wonder what they did to it to get it this bent. I have pioneer TS-X11 out of a crash vehicle and they’re less damaged but they are a good substitute for a brick. many pieces of wood later and a sore arm from belting the shit out of it, its kind of square.For the selector and tuning shafts I ended up turning up a new ones on a lathe out of brass and circliping them in there. I'm slowly going through and replacing all the eletrolytics (capacitors). so now it works like new and looks good apart from the odd scratch. the top got sanded and new veneer glued and pressed on it. The grill got attacked by a wire brush and a coat of gloss black, looks great1 point
-
So, I finally bought one. I was hesitant in buying this one but not many have popped up for sale. Typically, as soon as I get this one a few have popped up on various websites. I was told that it was a sweet runner, no worries. It wasnt till I handed over the cash is when they started to mention the faults......The joys with dealing long distance. Anywho, this is my (soon to be once I fix a few things) daily driver. It runs the powerhouse 4G11 and yes, it has the SUPER SHIFT Plans are to add some wheels, some low, and eventually some (slight) power1 point
-
Couldn't resist mayyyyyyte. Took this for a bit of a spin down to the local shopping establishment.1 point
-
Get Bizzo to buy it then him and sparks can have cute matching 2door sedans.1 point
-
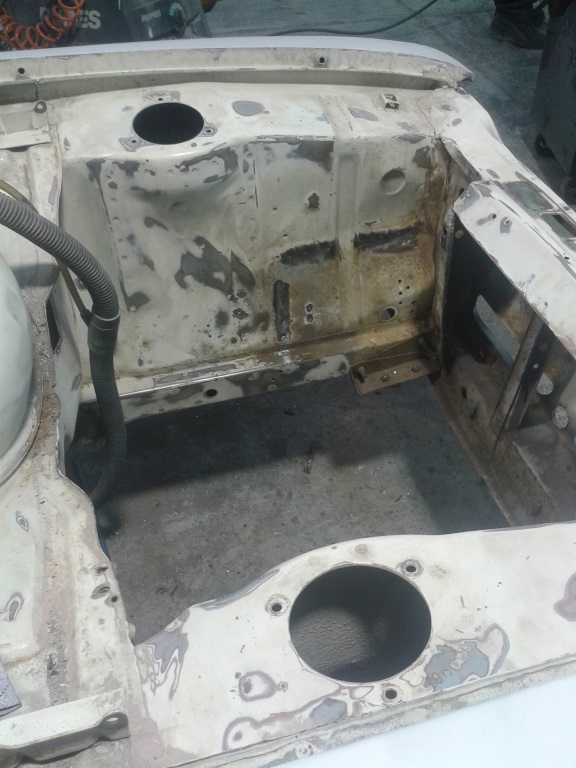
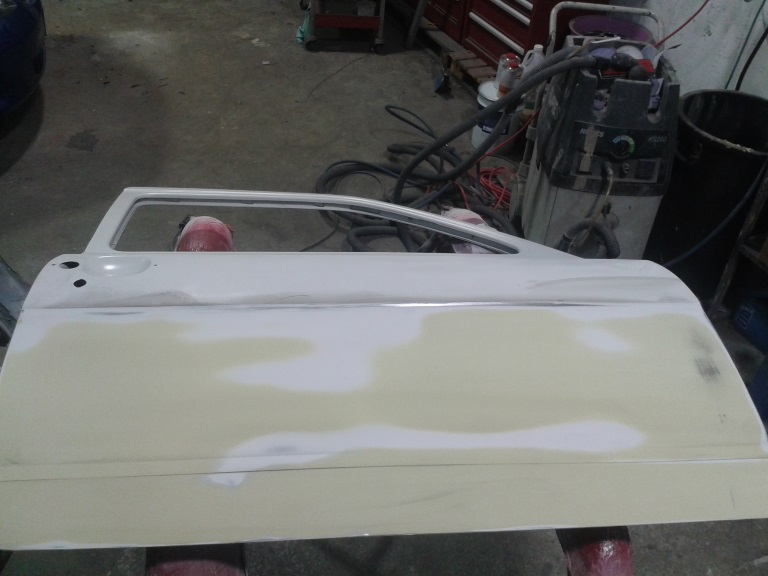
So the complete outside of the car is now in epoxy etch(sorry no photo of this), I've also been working in the engine bay. I've removed the original battery tray as I'm going to relocate the battery and I also welded up probably more that 30 holes in the firewall and inner guards in the engine bay(hopefully you can drive without dying of fumes now). I will be running new brake, fuel and electrical lines/wires and trying to avoid running as many as possible in the engine bay. I'm not completely stripping all the paint from the engine bay like the car exterior but any sign of rust or cracking in the paint I've stripped in back to steel in that area(havn't finished all of this yet). I've also continued with filling the doors Even though the doors appeared pretty straight and were in pretty good condition they still needed a fill, you can see I almost got a away with a single skim on this door but there is still a slight low at the front of the door and a couple small low spots on the bottom aswell as the bottom body line isn't quite right here(but isn't as bad as photo makes it look). I will also need to skim the top section of the door aswell. Just for fun after work while rushing home to work on my house this happens bish rear ends me, tops it off by saying I stopped too far back... WTF - anyway contacted insurance about it but just don't have time or patience for it right now.
1 point
-
Yeah looked into palm side. Might suggest buying a new quick rack might be a better option1 point
-
They can be adjusted if they are like an escort one ? Plam side sell quick racks for not to much1 point
-
New shoes. Disc : //oldschool.co.nz/index.php?/topic/49000-stylez-gx61-mkii-hardtop-couch-spec-disc/?p=15449791 point
-
I have a tow barred car and up to fuck all if you need a hand. 02733801641 point
-
we should just sand cast a new one and sell them for profit1 point
-
got my timing light on it and had it started up and running smoothly in a matter of minutes! aside from my oil pressure gauge popping its wire off and giving me a heart attack, first test drive went very well, even on the base map its gotten way smoother and a little more power. now to fit the extra bulkhead plug i got for the coil wire and tidy/fasten the loom in place and tinker with the spark map for a while! will update my build thread with pictures/videos pretty soon. also next week ill be able to take it for some timed 1/4 mile runs which should be great to see the results.1 point
-
This is the look I'm going for I think
1 point
-
Make it a dry sump?1 point
-
nah 2nd time king pins. haven't done them since the 1st time round yet. lucky i have some good mates. 1st name basis with everyone around here. mate owns the tyre shop. 1st time we done them we made them way to stiff so definitely need some freeing up.1 point
-
That noise :'( Those camber plates :'(1 point
-
i assume you've seen the Russian guy that strapped 4 of those to a wing and wears it like a back pack and shoots across the sky1 point
-
Hi great project you got going there, a good link about the dizzy mod here http://www.starchak.ca/tech/pdfs/hitachi.pdf theres a link at the end to the 123 unit very nice $$$ though I found this mod close to 10 years ago can't find text on that but I had the chance then to get 2 dizzies a D4R80-08 pulsar I think and a D4R83-36 think sentra, the info I found back then said one was good for a standard engine and the other more suited the modified one not sure which one is which now. Fast forward to a few weeks back finaly draged from storage I bench tested a 1275 alegro engine with the pulsar one it runs fine the motor has a DHLA 45 Dellorto on it and when tested no vacuum hoses on and don't know how the dizzy curve will work out as can't road test for some time yet I just wanted to test the mod. In the link info they say cut the swing arm off turn down or file the base to fit the mini clamp I traced the mini clamp on to some sheet and included extra metal for the swing arm and a sloted hole with a bolt and a recangle nut that rocks when tighten and locks against the block a heck of a lot easier to adjust the timing than the mini clamp. Also thinking of un screwing the vacuum unit and redrilling the locking hole 180 deg so the connecting pipe comes out away from the engine. now the important bit yours 1) the link pics of the mod and my running dizzy have the vacuum unit 180 deg from yours 2) mine would only fire when I first tried it and by what I can see in the pic you just may have made the same opps as me, us mini nuts have firing order 1-3-4-2 brain implanted but the dizzy turns anti clockwise so looks like cylinders 2 and 3 ht leads are backwards and would hate that to seal your thunder and stop a first crank fireup for your rebuild. Cheers may your build go well1 point
-
Something I hear often by people who obviously have either very little mechanical knowledge or are just trying to sell a noisy engine is that it has a the typical noisy tappets. A good Holden engine is typically very quiet as they Hydraulic the pushrods onto the rockers. I think I may replace a couple of lifters as they haven't gone quiet like the rest. It is an easier job in a Holden 6 as they have side plates to get to them, remove the side plates and the tappet cover, remove the pedestal & pushrods, replace lifters & pushrods and torque down. put side plates back on start engine and if quiet, put tappet cover back on. My plan is to clean up a spare head(mild port) and get it ready for bolting on, add efi flows and a 600 holley on a modofied black carby manifold. You may laugh at a 600 holley with vac secondaries but in actual fact it will be a 4-barrel which will only ever uses 2 throats so actually a 300cfm carb. It is lying around and I have used this on a 6 before and it delivered very punchy performance to about 4500rpm which is what I am designing the engine for, mid-range. If that fails I will throw on the 450 4-barrel.1 point
-
Fluffed around all day getting motor in with the help of Greg from midnight upholstery and Dave Brock lee. Took way longer then expected I'll finish wiring and plumbing up next weekend. Air litre looks stupid big so won't be staying long term.1 point
-
more parts got primered. boot lid top has a coat of primer on it to seal it before i do any bog/shape work. hinges and drivers door. Untitled by sheepers, on Flickr Untitled by sheepers, on Flickr1 point
-
I watched that a while ago and had a chuckle at it. One thing I didn't anticipate is how loud this thing is and the extent of how far very hot air extends. certainly not going to be an every day commuter. Put the engine on a test rig and had a couple of trial runs up to 90Krpm, loads of fun! The Mrs now knows about the secret jet bike plan, that's for sure. pretty sure the neighbors do too.1 point
-
It is almost a healing cruiser too!1 point
-
Ive been looking for some sweet 6 stud wheels for this for a while, and haven't really found anything all that appealing. The decision was then made to widen the factory steel rims. While discussing widths and tyre sizes with my foreman, he mentioned a spare set of 245 and 265/50r14 Eagers...... Now for as long as Ive been working with him, I have constantly given him a hard time about his bogan taste of cars (has owned several SA22s, one with a SBC, now has a HQ), But alas, he has broken me. The deal was done and all that was left was the task of selecting rim width.... A quick measure up and a few phone calls to friends later...... 8s on the front, 10s for the rear. Still need a quick coat of black paint, but pretty excited about running the factory hub caps. Now before any of you monkeys want to call me out on ridiculous offset, my skinny arms snapping due to the lack of powersteering, or the fact that such wide, quality tyres may be detrimental to my health when driving in the wet, Just remember how much of a bad motherfucker I am! (if youve met me before then maybe just use your imagination) chit chat http://oldschool.co....gos-b1600-yarn/1 point
-
Just got back from Auckland after two weeks working. Car started fine, runs mint. Took it for a quick blat out to the Port Hills No snow unfortunately1 point
-
Hay man did you grab that 323 motor??1 point
-
vid from today, taken by the bro. nothing broke other than crashing into a tree haha. it doesn't really turn so well. but seems to go places in a straight line, if you hold on for the ride.1 point
-
Things and stuff happened today. Motor and box are now in. Need to get some bolts for the gearbox then can chuck driveshaft in. Couple of jobs to do before wire up, like sort out powersteering lines, which im hoping to do this week. Also found aother pair of centre caps to finish off my wheels.1 point
-
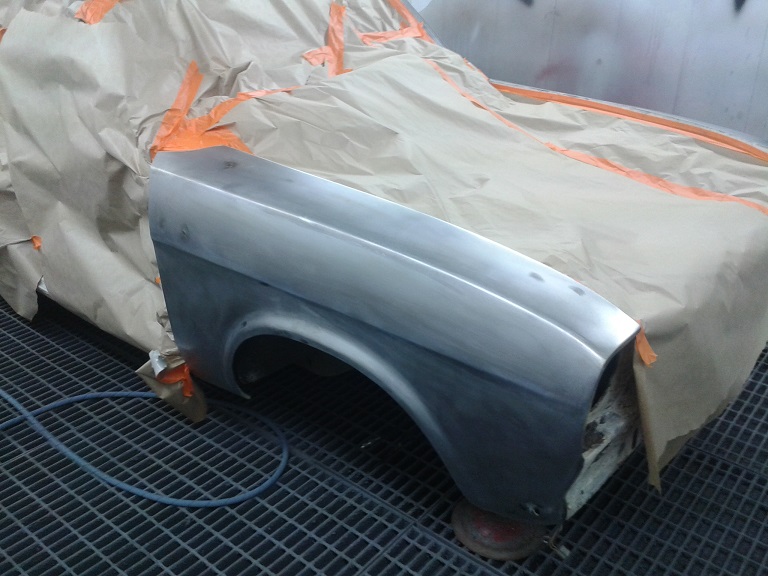
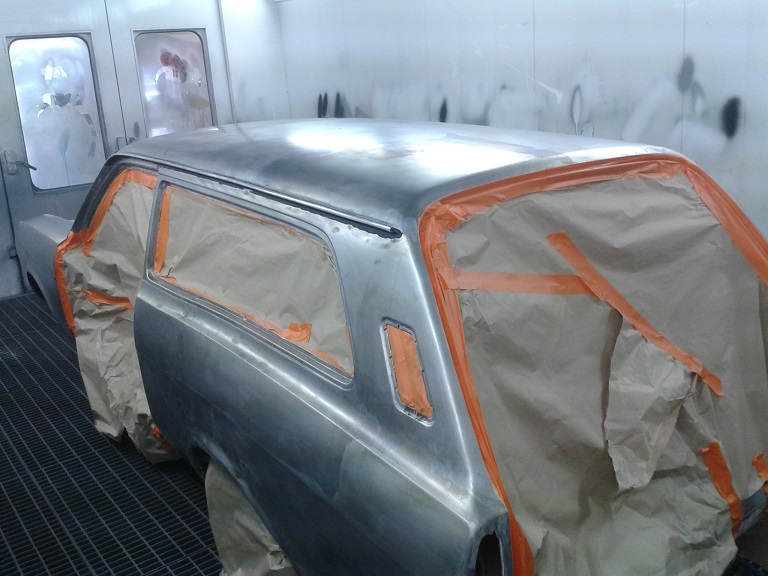
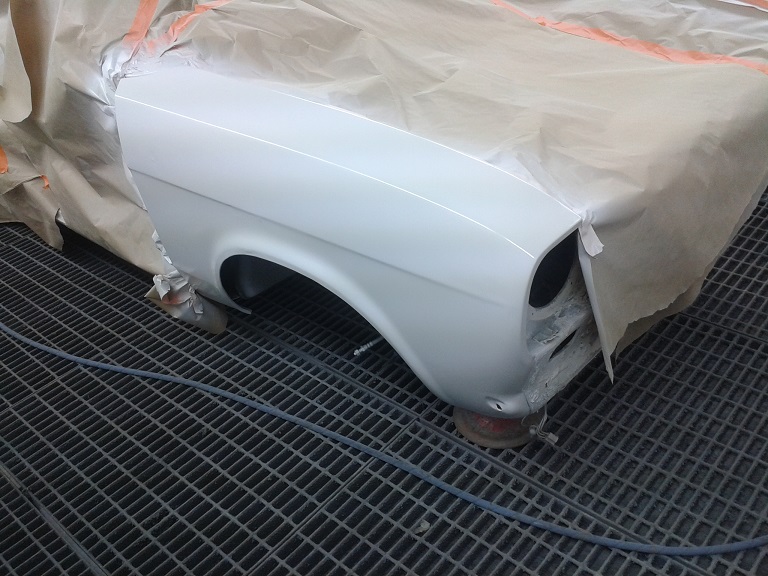
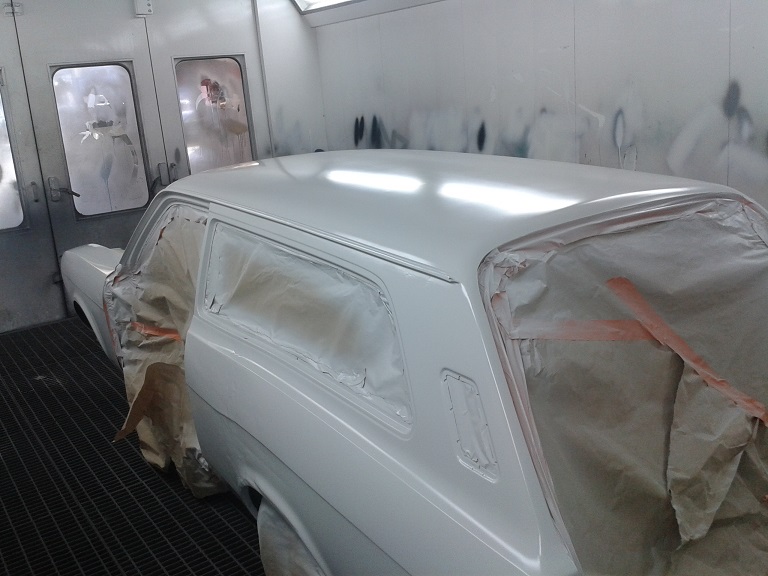
So finished off spring some areas today, hit any sign of rust with the wire wheel and gave everything a good metal prep. Here it is all masked up in the booth ready to go and here it is in a couple coats of primer After I got that done spend the last part of the afternoon striping the two doors, they are almost ready for a metal prep so hopefully might get them done on monday. Didn't get anywhere near as far as I hoped but glad to have a good chunk in primer before the weekend.
1 point
-
Update please!1 point
-
Managed to score a cluster with a tacho. Extremely useful for the big RPMs this car can hit! So, out with the old.... ...and in with the old. Also found a front bumper thats a bit straighter Ive got my eyes on an injected 4G15. Im just waiting for the guy to drop his pants on the price and ill grab it. This was meant to be my daily, its now turning into another project. Story of our lives!1 point
-
I scored some wheels off Tank a while ago in anticipation of getting one of these things. They're Enkei 知りますか 14x6 Didnt know what tyre size to run on these. I ended up choosing 155/55/14. Found a pair on trademe from JP Auto Spares. I asked if they had another pair which they did and had them fitted up. Awesome service and very cheap. The Japanese guy there was extremely thorough. Cant praise them enough. So all fitted up Time to try them on. Side profile pic for reference And with them fitted I need to sort the front rims out. The rotors have bolts on the mounting face and the rims foul on them. Ive asked a few people for ideas. And of course you need to do a MS Panit lowering job Now to get it around that height. If you've had experience with lowering a Mirage or fitting mags to the front please let me know Thanks1 point
-
Yeah man, we're a friendly bunch, with an oddball taste in cars, loads of conversions available I would think, including Turbo, but me, I just dig the two gearstick Powershift1 point
-
so replaced all front brake cylinders and adjusted + bled them. The mrs (Annika) found a good rug for the seats, suits it really well Removed and flushed water lines and radiator,replaced hoses as they were rock solid and cracking. The radiator was full of lime stone and crap, stained all the concrete at work, oops. all good now and got all the bits for engine service. need to find a thermostat housing or make one as the one on there is stuffed. oh also cut some under lay up and got Annika to sew it on the weekend.1 point
-
Heres a few tips to avoid or identify a car that has had its ID tampered with. In my line of work, they are quite common, this relates mostly to later model stuff that has the chassis number stamped into the firewall. Some are done poorly and are obvious, some are tricky to spot. 1. Biggest giveaway is a firewall thats been painted in the area around the chassis number, when the outer panels or engine bay hasnt been painted. Cars dont often rust around the chassis number so dont often need painting around there. 2. The chassis number should look clear without sanding marks or evidence of primer or filler buildup in the digits. 3. VIN tags that are bent or crinkled up from being removed, they are riveted and stuck on so usually get damaged when they are removed. 4. Non original rivets holding tags on- eg nissans have a plastic clip thing to hold the tag on 5. The etched in vin number on the back window should match the vin number on the car- look for stickers covering it or if its been ground or sanded off 6. Check the year on the seatbelts matches the year on the rego 7. Check the car features match what it should be- ie a car I saw the other day said it was a 96 but had the facelift lights and twin airbags that were not fitted on 96 models 8. If the stamped chassis number looks like its been fiddled with, you can usually get behind it via the cowl panel, check for weld marks, also check the thickness- i have seen ones where the 'new' chassis number was stuck straight over the top. giving it a good push with your thumb will sometimes crack the filler holding it on. One of these things might not mean anything, e.g if the car has had the rear window swapped out of another car the vin number wont match. But if theres more than one thing, start getting suspicious....... Older cars that only have a plate riveted on are harder to pick, plus are more likely to have been painted at some stage. Make sure the car matches what it says it is, ie if says its a VK commodore but it doesnt have the little c pillar window........ heres one that hasnt been fiddled with, note the faint red stripe over it from factory and one that has been this one was glued in, cracked when I pushed on it...... here you can see different rivets, and where the old ones were. hiding that with the alarm siren wont work. tags cut off belts to remove date 'new' chassis number stuck over the top of the original hard to see, but there was a weld visible from behind and the etching on the window sanded off1 point
-
Well it has been awhile since ive posted some updates done a bit... Or nas felt like i have done a bit... Bought some new fittings for the waterpump sorted the hose out cut to length found out the heatercore has a bit of a leak in it so ill braise that up hopefully no more leaks in it otherwise it will be sent to a radiator plus to actually get some love and attention. Fibreglassed some of te flooring up where there has been rust holes, cut my thumb amazingly good on the air filter.... Chicks dig scars right? Tried to scrape all the old deadening and floor scum off didnt want to budge so i sprayed it with some decent paint stripper and then used a gasket scraper to do my floor.... Thats right.... The entire floor. Only up to the rear seat at the moment. also found an amazingly hectic piece of rust which will suck a lot of nads to try fix without taking the engine or dash off. Started painting the floor etc bit sticky still as my jeans found out.... Couple more coats then onto fixing maybe three to four leaks mostly the rear quarter windows so ill get around to finding maybe a new front window if its not to bad. Things ive bought include pretty much a whole new set of capets hence the leak fixing.... Since its like a lake in there at the moment with this rain. New sparkpluggies just to get rid of all the stale fuel that pretty much has gone past its use by date by a fair whack. Once all the painting of the interior is done and ive fixed the firewall cavity and leaks are done ill get around to tuning cleaning sussing any problems with the engine, brakes, suspension and bushings and also four not so good tyres.... Then just cosmetic crap to make her look pretty again Here are some pics enjoy! Actually just the stuff i scraped from the drivers floorpan... Bags rather big at the moment All the photos i have at the moment will do te rest of thw floor and boot with rust and deadening then suss these leaks hopefully Then get my carpet soon, hopefully heater done. All the interior needs is doorcards roof lining and some recond seats and shes done and dusted for now. Next is all the terrible paint bubbles that plauge the most common areas then start it up run it down to the workshop do the electrics and undercarridge. Thats all folks For now1 point
-
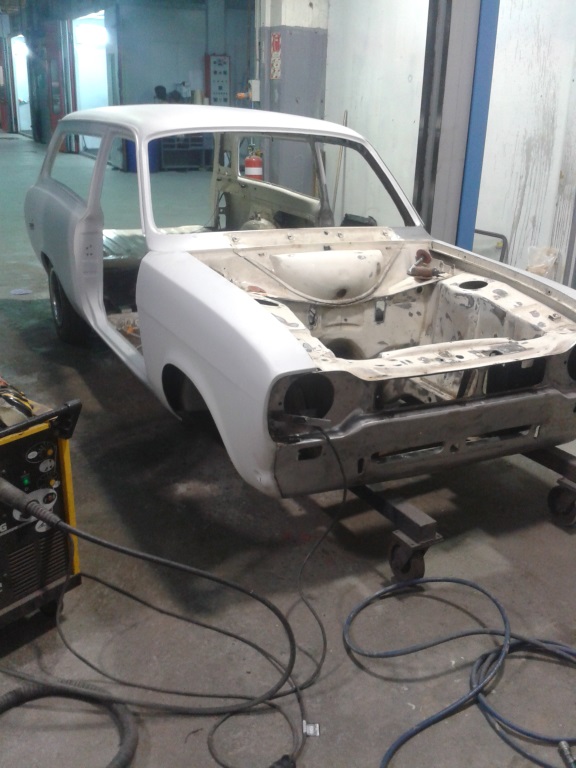
Ok so I have sometime to try get these images thrown onto here and post an update worth talking about. So here first of all are the pics of it when i first saw it then later trailered so it can start its journey to being taken apart slowly and painfully. Ass shot since people generally like them. Pretty much the major damage that i saw, someone over extended the crap out of the door... Later gets fixed forgot if i have any pictures or not... But skillfully bashing it with a piece of wood and the back of a log splitter It moved into place so the door could actually close. Also saved the glass aswell! Inside was somewhat grot before i fully took the cover off and shooed most of the residents living inside From what i heard it was explained to me as a 2.0L pinto but soon as i opened it and spied no cam on top. Thought about it for a week and at 800 bucks i thought it was a steal. That reminds me i still actually need to pay the guy. No ownership papers cause this baby isnt licenced! Sorry if the images are large the site doesnt seem to like letting me upload multiple images or even the option to scale them at all. Ill throw up some more soon of it being hauled away, me ripping the scummy seat covers off, soaking wet sound deadening mat and finding The patches or rust and breaking parts of it as i cleaned it. Wasnt allowed at the house looking dirty and especially that its a ford living at a holden house hold I needed to do some begging. Soon to be hauled or actually driven down to the workshop where it shall commence!1 point


This leaderboard is set to Auckland/GMT+12:00