
Leaderboard


Popular Content
Showing content with the highest reputation on 06/12/15 in all areas
-
So, been driving past this example for the past 3 years on my way home, got turned around once, and was under covers for most of the time, but one day the cover blew up, spied the corner showing the 16v Badging, so naturally I burned that into my brain. Fast forward another year and the cover disappeared. Been trying off and on for the last 6 months when time allows to get this.. South African Assembled, GTI 16v - thats the twincam rather than Povo spec 8v GTI - just that little more special. 105,000km Full leather interior. Comes with a small selection of spare parts - Including spare flares. Rego on hold so no tough compliance this time! Has already had the bumpers swapped out for the "Big Bumpers" Small amount of rust on one inner guard which I need to attend to. Plans? - See how well it goes and how reliably, but if its any good I have had thoughts of weekend/motorkhana car. Lower + 15" wheels (BBS or similar) and sticky tyres..9 points
-
well thats nearly 2 more months evaporated. im sure ive made more progress but not alot to show for it mostly boggling over how to do various things and planning what needs to be done to meet project deadlines which this in now on. of course this means the 124 had to fail a wof yesterday too of course, but i digress. tonights work, foot plates for drivers side seat mount rails. of course where they need to go is right where there are compound curves in the trans tunnel. a couple of hours of bashing steel on steel and blocks of wood and thinking what was that bussiness sheepers goes on about stretching this or shrinking that then more bashing and fits ok then I decided to have a wire wheel party8 points
-
Yay! Ha, now you'll have to fix Austin. No more excuses6 points
-
OH SHIT CONFLICT AT HOME! MUM AND DAD AREN'T TALKING! IMMA STAY AT JOHNNIES TONIGHT SO I DON'T HAVE TO HEAR THEM YELLING.4 points
-
Cool, yeah I have the side in me which says replace replace, but then there's the "it's just a bike you'll use once in a blue moon" bit, I'll get the bearings and see how it feels, it it pisses me off then I'll get a new crank/cups. Leaving it looking rusty has been a challenge for Mr. ooh shiny bead blast it, chrome/paint3 points
-
Here is the fuel pump cradle, complete with a sealed electrical bulk head from MSEL. Here it is installed in the tank through the cut out I made in the floor. Makes it a lot easier to work on, means I dont have to drop the entire tank just to get to the lift pump. Added some -6 bulk head fittings. Fuel in from lift pump, surge tank overflow, fuel rail return and fuel out from the Bosch 044 pump. Had to make some 3mm thick aluminium washers as the sheet metal was too thin for the bulk head nut to do up tight. I had my mate Graeme at SMS fabrication tune me up a surge tank that I drew up for him. He's got all the gear to cut and fold sheet metal, and hes a bit of a whiz on the TIG welder when it comes to aluminium. Here it is mocked up. Brought an Aeromotive fuel regulator, mounted that on the fire wall. Made a few changes to the fuel rail to make it easier to make up the fuel lines. Decided to go with braided lines through out, although a little more expensive it was going to be easier to plumb up and make it alot simplier. With the fuel rail back on, regulator mounted and bulk heads to the surge tank fitted I started to make up the main and return fuel lines so I could get the car back on the ground. I wanted the fuel lines to hug the underneath as much as possible, but with the stainless braided being quite abrasive I was worried that it would rub on the steel causing all sorts of shit. I ended up ordering 10m of 20mm clear heat shrink to cover the fuel lines to act as an insulator. Hard to tell from the picture below, but the lines have been covered in the heat shrink. Underside and engine bay side of things were all sorted, dropped the car back on the ground and began working in the boot to finish it off. Purchased a rivnut gun to mount the tank and fuel pump as well as the block off plate. With those mounted I could make up the remaining fuel lines, so after mocking a few lines up and getting an idea of what fittings I needed to purchase, it was done! Primed up the surge tank and checked for any leaks, which there were none, so plugged the Bosch 044 pump in and checked for any leaks in that circuit, which there was, and see where the fuel pressure was set at. I had to tighten one fitting a touch more, and replace a copper washer on the fuel rail. No leaks, but the fuel pressure was still at 5 bar (what the reg was set to out of the box, atleast I know it can handle 5 bar!) so I dropped that down to 3bar. So a few weeks later it went out to Hitech Motorsport again to have the engine tuned on the Link Atom G4+. Got them to setup 2 boost maps to switch between, low boost is 9psi, and high is 16psi. Green line is high boost and pink is the low. Power curve gets a little peaky on the high boost map after 6500 compared to the low boost which holds the power right through to 7500. Could be to do with the boost dropping a 1psi or so up there, or maybe turbo inefficiency? Still plenty of power though! Probably need one of those fancy new billet comp wheel turbos to spool things up quicker. Saying that, and even though boost graph looks dull, it doesn't feel like there is any lag. You can put your foot down in any gear and it will pull hard, and the power curve definitely confirms that.2 points
-
This is no longer needed. landlord is paying to get it fixed. thanks for the offers and advice2 points
-
yeah you'll be able to source that stuff, but if you dont care then dont haha. most of my bikes get the grease burnt out of the bracket, filled with grinding dust, and run like shit for ever with no troubles.2 points
-
Oh. Yeah. So we got a door on sat. This is what arriving home looks like now. Whoot.2 points
-
So yeah I've already posted these in the bike pic thread but meh A few months back my nan mentioned a couple of old bikes in one of her sheds that she wanted me to dump, so I pulled them out and found my grandads old Healing Cruiser and my old budgie Obviously there was no way I was going to dump them so I took them back to my workshop and gave them both a good wash and squirted a bit of rust converter and crc around, pumped up the tires which were still original and still held air (for a while at least, rear tire on the cruiser went bang on the first ride lol). So other than a new tire/tube on the cruiser and a bit of grease for both I haven't had to do anything to them. I'm going to leave the Cruiser as is with the scrapes etc it has gathered over the years, if I can find 12.5" red tires I want to get the Budgie back to mint and might sell it once my son has finished hooning round on it lol Then earlier this week I spotted a Raleigh Twenty with a $1 res on the tard and ended up buying it for the grand sum of $8.50, picked it up from 4 houses down the road from home lol Its a 1969 UK made one and its going to need a bit of work before its in the condition that my missus wants (got it for her), so far I have stripped, cleaned and regressed the Sturmey Archer hub and killed the rust on it, and if anyone has a spare spoke for the rear wheel, a stand that goes in the tube on the bottom bracket, a carrier or dynamo light to fit the stock mount let me know! Plan for this is a repaint in a 70's metallic, get the hand painted "Twenty" redone and probably get all the chrome redone as well as add a few period accessorys like a chrome bell, carrier, dynamo and maybe a basket etc Anyone know where I can get drive rivets for this? Thoughts/ideas/criticisms?1 point
-
Righto, 1st time poster, long time browser. Gotta say i love reading all the projects and shit on here, gives me loads of inspiration and enthusiasm for cracking on with me own loss of coin and sanity. I've always liked my small British Fords, but I've always had a soft spot for the old Anglebox, I've had a few over the years in various states, my first car was a lovely crimson one with a 1600 xflow, 13x7 hotwires, custom suspension..... And NO floor lol. About a year ago I decided I needed a toy to play with and that toy needed to be another Anglia. I squized around on the usual sites and found any that were avaliable were pretty pricey. Step in MADBUZ who hooked me up with a chap in Wellys who had an oldie with a 1500 pre xflow, the rest standard but with dead plates and plenty of rust, but for 2hundie who can complain. When i got to yard collect and had a quick look over it was in better condition structurally than I thought which was a bonus. Got home and unloaded into garage then proceeded to stare at my new procurement for the rest of the arvo. I decided i wanted to either A: make a road going track day car, or B: make a dedicated race toy for trackdays and autox/gymkhana. I wanted V6 front engine rwd setup... initially lol. I had at that time wrecked our Mitsi Diamante family wagon coz I couldn't sell it, so I had a good 6G72 engine sitting on floor of garage, queue research time... Rwd 6G72 gona be a pain in the arse, involves custom bellhousings etc. Then my brain decided it wanted to REALLY throw a spanner in the works and completely change the whole project. The car had at this stage been stripped down to the shell and found floors were mint, minor structural rust but doors, boot and bonnet stuffed. My brain got out the sawsall and cut out the rear floor in readiness for rear mounting the 6G72 and fwd tiptronic box... WTF. Dedicated racer, aint never gettin this nutbox on the road lol. I thought yeah why not the mitsi box, will be easier to hook up in rear engined format, as no linkages involved, just switches etc and fwd/rwd cable, with mk2 Escort front end and steering.... but coz im an indecisive knob i shelved that idea too. Now im going EJ20/5T as rear mounting that has been done plenty of times before, its relatively easy to turn 4wd box into a transaxle, nice short engine, plenty of power, loads of aftermarket support and cheap. Right, I've got about as far as I can go without a donor Subie so will start saving and post pics of what I've got etc, and will keep you posted of my sanity going out the window..... cant wait to take it for a spin woho.1 point
-
Cheeky scooter for getting around the city... Needed more noise... (Aprilla racing 50cc pipe)1 point
-
Have you just said FUCKIT and gone full retard? It be super uncomfortable1 point
-
2K Cup Car? surely with the 16V be quick enough - nice score1 point
-
That's sweet!1 point
-
Try Australia. They had more P76s than anyone else and they also had their fair share of W50s. Might be worth a crack.1 point
-
Sorry, forgot to add they used to do the bellhousing.1 point
-
Try the guys in the link. Dellows don't list the correct bell housing for the RV8 on their website but might still be able to get/fabricate one. http://dellowconversions.com.au/product-category/bellhousings-manual/1 point
-
I have 1x couch if you need it Michael. Cullen can sleep in the garage. I'll get him a water bowl.1 point
-
for heat as pink batts etc. it is mostly trapping air, and trapped air is a great insulator because the molecules are far apart (i.e. most gasses that are kept relatively stagnant) on its own (solid fibreglass and resin) it's ok but nowhere near as effective. better than metals because there is no ordered crystalline structure as such (on a macro level) but an order of magnitude less because everything is a solid and right next to eachother to pass the heat along to the next guy. trying to remember how electrical stuff works, i think because the glass or epoxy are molecules where the atoms are stuck to eachother by the bussiness with sharing electrons etc. and the because long chains in a mess the electrons are not very free to jump around as they are in an ordered crystalline metallic material where they are stuck together because of +/- charge at different ends of the shape of individual atoms or smaller molecules? could be wrong on that but I don't have time to open a book or wiki it so that will do1 point
-
dont run those bearing cages aswel, just loose bearings with plenty of grease, the cages are shit1 point
-
1 point
-
only if FOB mounted, otherwise be knuckle-smashingly cunty to pump up. ideally mechanical or electric pump so i can add another aux ram and diverter valve later for additional duties. push comes to shove i can use a boat winch or a manual ram, but i do like the idea of in-cab control1 point
-
Ask ya father. I thought sign off was today, then Ben can sneak in after. It is but we will wait till its 100% ticked off and do all the 'other' work then1 point
-
Steady on. Confusion has been resolved. As usual, I am right.1 point
-
get cups and cones too1 point
-
You're such a nerd, kempy. It's fucking great.1 point
-
belt driven off the engine. As far as i know they are a vane type. Have replaced heaps due to leaking around the main seal ( 30-50 year old chevs so understandable) but so far only seen one properly break when it snapped the main shaft, which was on a late model 2500 silverado1 point
-
I'll see you guys and girls there!1 point
-
Man id love to know how to do this. Very interesting mr kempy1 point
-
Jeez i get the "subtle" hints. Will be round about 11 this morning u guys home or leavn a key?1 point
-
I rode one of these across the usa what a pig haha. Have yoy tried it on nz roads yet? The most i could get out of it was 100mph before the panniers tried to fly away and the windvisor started to flex was neat hitting fireflys at night and having glowing guts all over me tho i recall mine had a dodgy headlight and fuel gauge, so maybe electrics are poo on trse edit: hell its for sale and in hamilton. You tempt me too much. Missus wont let me have cruisers tho she only.likes sports bikes haha Tho i wouldnt mind strapping a blower to this and being a nucience around hillcrest again.1 point
-
Yep can get replacements. Im sure adventure cycles in panmure could help. Or order online. Being a healing it should all be shimano componentry1 point
-
Started to strip it down tonight so I can get measurements spot on and do a bit on maintenance. With a bit of a scrub it should come up pretty well, don't think I'll even bother to paint completely, just a couple of patches. Any Idea what the colour might be? Crank bearings are poked, what's the go can you buy replacement bearings, balls or?1 point
-
With the board unsolder-ed from the transformers, I can now start the re-capping process. First up will be the black "Hunts" capacitors as I have suitable replacements in stock. I'm lucky to have a good stock of old "mullard "capacitors to replace them with, they hardly ever fail and are hard to get, also quite desirable to guitar amp builders. They are also can be named "Mustard " capacitors because of their colour. I'm using them as they don't look out of place unlike the new yellow ones either side of them. last one for tonight, Here's the "Hunts" capacitors removed. You can see from the picture that some look a bit worse for wear, they also fail testing on my ESR meter.1 point
-
Chucked a barbie together while I was there lol, 7 burner, again best price...FFRREEEEEEE. Also the look Im going for too.1 point
-
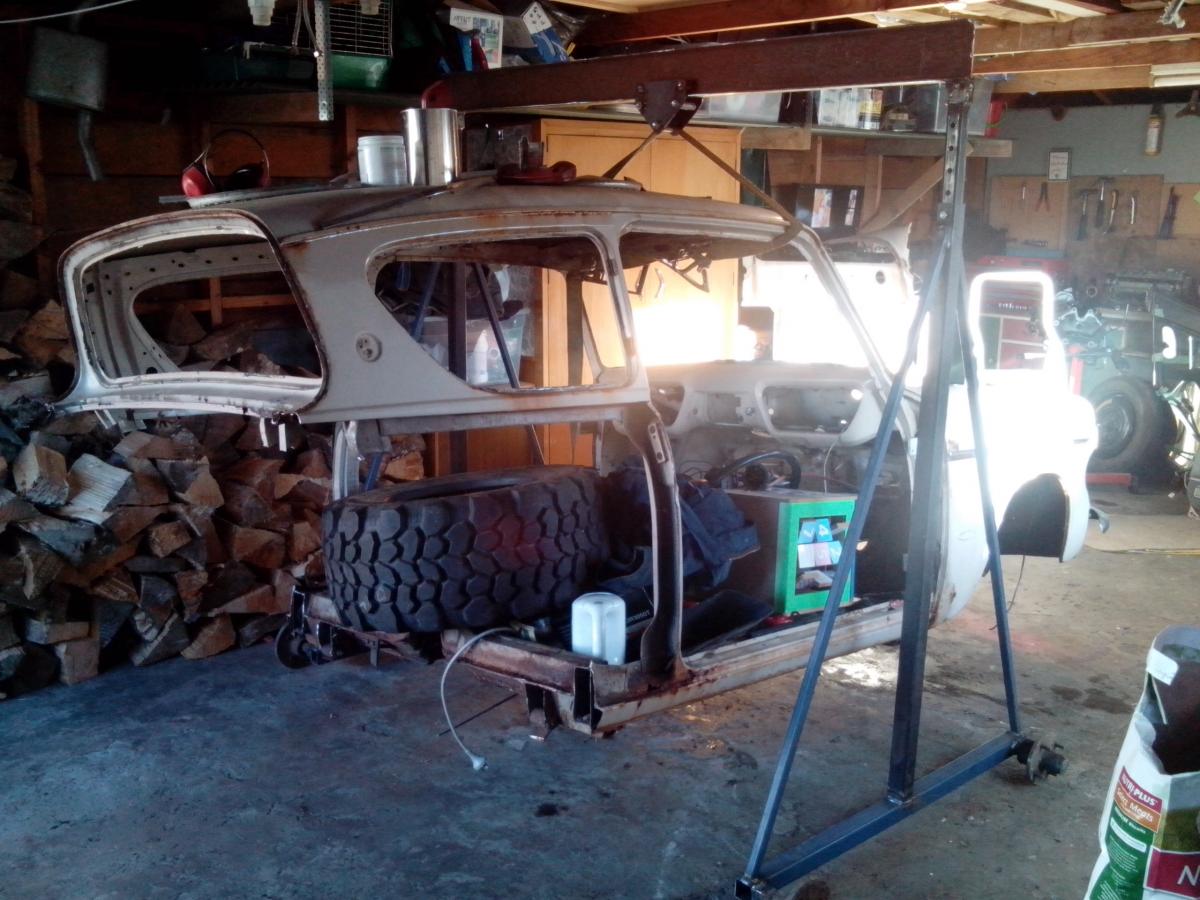
Im such a retard, dont know what Im doing with pics llooooolllz. Pic of arse removed from car and me gantry i made, had to make it height adjustable as wanted to be able to have both in garage and out in drive when unloading heavy shit, but doorway pretty low. Didnt cost me a bean and slammed together after work one night.
 1 point
 -
I did manage to sort some of the vacuum issues out, since 2 springs were missing in the throttle linkages it was sitting a bit open, enough to suck heaps more than the other two carbs. Test drive was exhilarating. Now Greg, that means exciting.1 point
-
Over the weekend I got the gearbox mounts done, welded some nuts to the folded plates that sit inside the chassis rails then welded them in and finished off with some patches in the floor Then it was on to the handbrake mount, I took the brace thing out before I cut the old tunnel out and moved it back 150mm, problem was the tunnel is a completely different shape at this point, so I cut sections out of the back of it and welded it back together then widened the front by adding some steel back in. Some hammering and grinding later and I had this. Then welded it back in place It looks pretty much factory which was kind of the point so I am happy. Got a few other little jobs done but they were mainly filling in all the speed holes that the car has collected during it's life. It's weird but I have pretty much run out of things to weld, might be time to get another shell and start again....... So now I can start putting it back together, maybe with one last distraction, A few years back someone was selling a roll cage for an Anglia on Trade-me, I got it for like $20 or something, it was only a main hoop which doesn't meet the new MSNZ regs (it's only dia 38 tubing)and some braces but I figured it might be useful to have as a template or to throw in for a laugh but now I am thinking maybe I should put it in to attach the harnesses to as it does meet the rules for cert. Anyway I am undecided as to whether or not it will actually make it in yet but I have set it up in there and I will see if it grows on me or not. As I said I can now start putting it back together so the updates from here might be more interesting1 point
-
Haha It's not sitting! It's Reg n wof currently and I drive it regularly. Will fix guards when wof runs out. Honest. Its ok to cry though.1 point
-
So exhaust done, I had to finish of the changes on the hot side of the I/C piping. I machined up another one of these adaptors This rotates the intercooler elbow that bolts to the compressor housing 60 degrees, so that it points to the front of the car, instead into the manifold or strut tower. Welded a boss on to said elbow, added a 90 deg hose barb for a pressure signal to the wastegate. Bolted it up to the adaptor I machined earlier and fitted it on the turbo, which meant I could finish installing all the hose joiners and clamps. Ditched all the blue joiners and went for black stuff, also went to an 3" intake pipe instead of the 2.5" I was using previously. With that done it means its pretty much all sorted, except I decided to relocate the boost control solenoid to reduce the length of the lines. Oh and because race car, I made a racing light weight race pipe for racing because race car loud race pipe tip... yeah. Basically just a 3" tip, I put a V-band on it so I can swap back to the muffler if noise became an issue (which it was) With everything back together and ready to go on the dyno again, in typical fashion, I decided to pull some more shit off it so it wasnt going haha. The AE85 fuel tank has always been a pain, from mounting the fuel pump, to the lack of baffling and the surge you get below half a tank of gas... Made the decision to finally sort this out by putting a proper surge tank setup in it. Bought a Bosch 044 and a 10 micron Aeromotive filter from NZ Performance. Always a pleasure dealing with them! So after talking with NZEFI about whether I'd be able to use the Bosch 044 on the same electrical circuit as the DW300 pump (which shares with the ignition), we came to the conclusion that I would be pushing the current draw to high, and also the fact the DW300 pump wouldnt be suitable as a lift pump I purchased a low pressure lift pump to replace the DW300. The good thing about this lift pump is that it only draws 1amp, so it drops the current draw to much more suitable level. NZEFI have been really helpful with any questions and queries Ive had since purchasing the Link G4+ Atom from them. Pulled the tank out to drop the new lift pump in, and I could see a fair amount of sediment in there, aswell as really small fragments of what looked like rust in the DW300 filter sock... Not something I want going through my new pumps or injectors! 15mins researching of how to clean a fuel tank and I found that hydrochloric acid was recommended, which was good as I had 15-20L of this. So stripped the old paint off the outside of the tank, filled the tank up with hydrochloric acid diluted with water. For anyone doing this at home, make sure you're wearing suitable protective gear, dont want to get any of this stuff on your skin or breathe in the fumes! Let the acid do its thing for a few hours, added some baking soda and let it sit for a bit then drained it, then filled it back up with water and a few cups of baking soda to further neutralise the acid. After draining that, the tank basically looked like new inside, stoked! I filled it back up again with water and some "Super Ripper" cleaner, let that soak to remove anything left behind and went through a lengthy drying process which involved pumping hot air through it with a heat gun. With inside clean I masked off the holes and removed any rust on the outside, painted it with a rust kill etch primer and then finished it in satin black. I just needed to get the lift pump in there now, but I was sick of staring at this old fuel pump cradle... Soooooo I made a new one. Machined up a few pieces and welded the lot together, added some Fragola -6 adaptors so I can run braided line from the tank to surge and vice versa. Ill leave it here for now1 point
-
spotted I'm hugely proud of this. The same issue as the immaculate ZERO3 as well, A++1 point
-
So a few posts back I made a comment about the engine sounding a bit noisy. So after pulling it down this is what we found. All four top shells on the rod bearings were like that. Not incredibly worn, but enough to open up the clearances and make some noise. So the rebuild began, I let the guys at GER take care of that for me. We went with .5mm O/S 4AGZE pistons, MRP forged H-Beam rods, ACL Race main and big end bearings, ARP main, head and rod bolts, 1mm MLS Toda head gasket and Toda valve springs, tidied up the intake and exhaust ports a little. I hopefully have a fairly solid and reliable engine now On to the head work I did. Didnt go crazy with it, basically cleaned up the factory casting/machining misalignment and flaws. Before: You can see the misalignment between the casting for the actual port and where the valve seat/guide have been machined here on the intake port, probably about a 1.5mm step you can see there. Exhaust ports were a lot better, apart from the port floor radius into the valve seat being very sharp, almost a bottle neck. Little bit hard to see due to the carbon residue and angle Also noticed after poking around the head and having a bit of a look, that there were a lot of burrs and casting flaws around the valve train area, and majority of them would fall off if you gave them a scratch with your finger nail leaving small pieces of metal to fall back into the sump. So I deburred the lot, didnt want to run the risk of that happening. Intake and exhaust port bowls done, as well as removing the shroud around the valve seats in the combustion chamber. Only did the valve bowl area for the intake and left the rest of the port as is. Exhaust port I polished as much as I could, although couldnt quite get in around the valve guide. The guys at GER had the block and head ready to pick up. ARP head studs in, Toda 1 MLS head gasket Was messing around with valve cover colours1 point
-
Have you considered 27" Simmonses?1 point
-
got 10's but 255/60/15 would not fit maori boys at the tyre shop told me they could jump through the gap between the bead and the rim so will keep eye out for some 26x10.5's or 275/50/15s I got 8s as well though so I got them put on those haven't cut the tubs yet (it is imminent) but I could shove it this far, maybe has 10mm left to the top of the wheel tub but fouling on some other junk (which is gonna get cut out anyway) will probably be sitting axle housing on frame rail at this height then tried a 235/60/14 definitely C Notch time1 point
-
another four hours of farting about and its still not done, another boring update of things no one else knows what they are. but starting to get close to finished now, one more session should have it all together. shift lever and parking brake pawl reverse piston and clutch pack installed and tested low band servo./pointless video installed planetary+output shaft and high clutch drum then installed the low gear band and temporarily fitted the front pump to check thrust/endplay to work out what size thrust washer I need. A: 78 thou thrust washer, which I'll have to get sent down tomorrow from auto trans back in my northern stronghold of mt eden1 point
-
In the light of day/my eyes the goggles do nothing!1 point
-
so needed to get the locknuts off, boggled at a bit at it then asked a couple of people if they had done it - dave #7 suggested this worked pretty good but not as good as my new spring compressor also oh my wow this car is so great. anyways, project is pretty much finished now Sitting on bumps,Rolls fine, and doesn't even rub on full lock either. - plus front crossmember is still 115mm from the ground, so silly america. the front bumps will need slight adjustment/chopping/replacement to even it up with the new struts and whatnot installed and the factory rear bumps are going (bumps will be in ther rear coilovers). theres 20-30mm axle to chassis rail at the rear so its going to be about 20mm higher than where it is now depending on tyre clearance with the larger drag radials, and +1" rear ride height due to those being taller.1 point
-
sssspppprooooooooooooooooooooooooooooiing and continued with the weight reductions1 point
-
Panel steel is typically pretty soft stuff so that it can be easily formed (malleable) with little springback. Depends what you want though... if you're just doing little patchwork repairs and basic shaping pretty much any annealed, mild steel will work well. If you're looking at forming bigger sections you may want to look at either a deep drawing steel or a low-carbon mild steel as the forming will be easier. Be very careful if you're forming bigger curved sections in cold-rolled low-carbon steel as you'll end up with the steel forming Luders Bands (ripples) via strain-aging after a period of time there a perfectly formed, painted panel will self-ripple over time. This can be avoided by using VERY low carbon/nitrogen steels (<0.003%), or by artificially over-aging the steel as part of the annealing process to try and encourage the formation of carbides in the steel to draw out the interstitial carbon that causes the strain-aging. It's also possible to reduce this effect by performing a small-reduction cold-rolling pass (0.7%-1.9%) reduction after annealing. This introduces mobile dislocations that will allow a more continuous yield. This should only really be relevant if you're doing large-scale deformation though such as complex curvatures in metal, which is a pretty advanced panelmaking skill.1 point


This leaderboard is set to Auckland/GMT+12:00