
Leaderboard


Popular Content
Showing content with the highest reputation on 04/07/15 in all areas
-
Im getting another arm..4 points
-
4 points
-
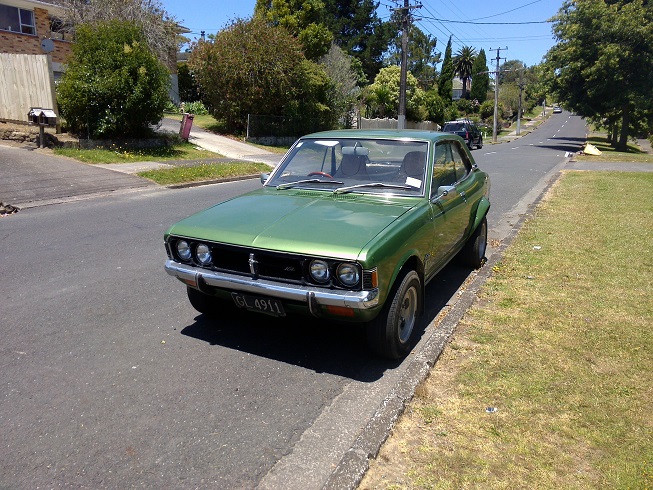
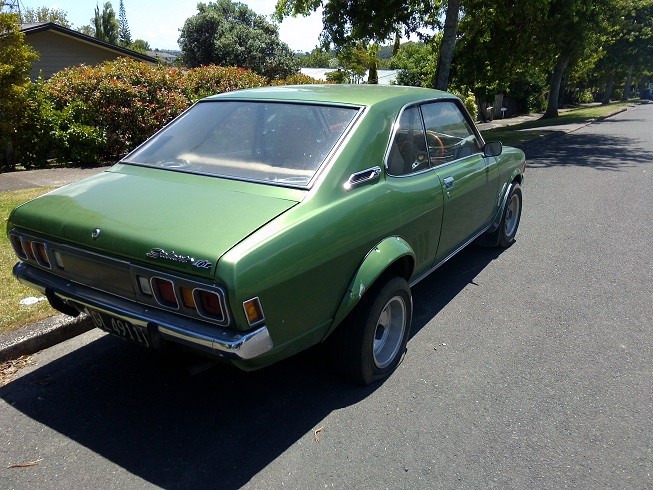
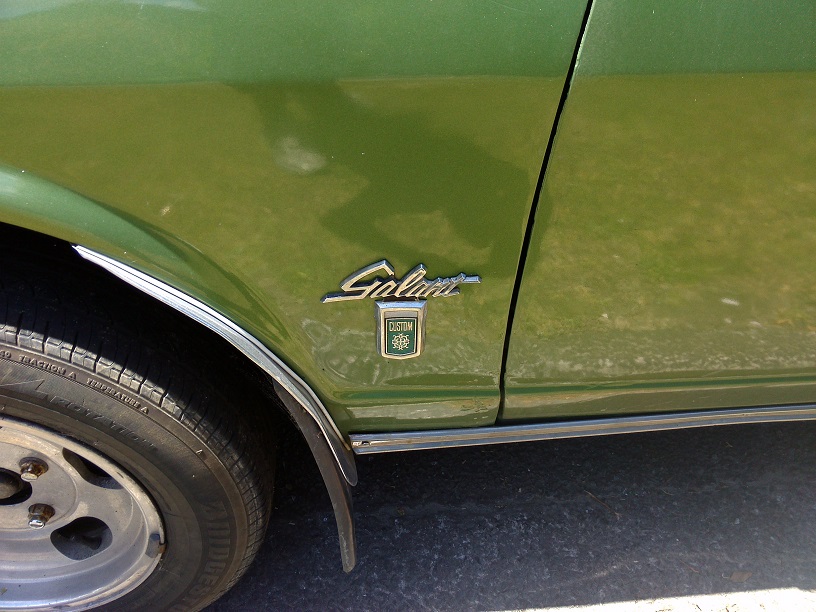
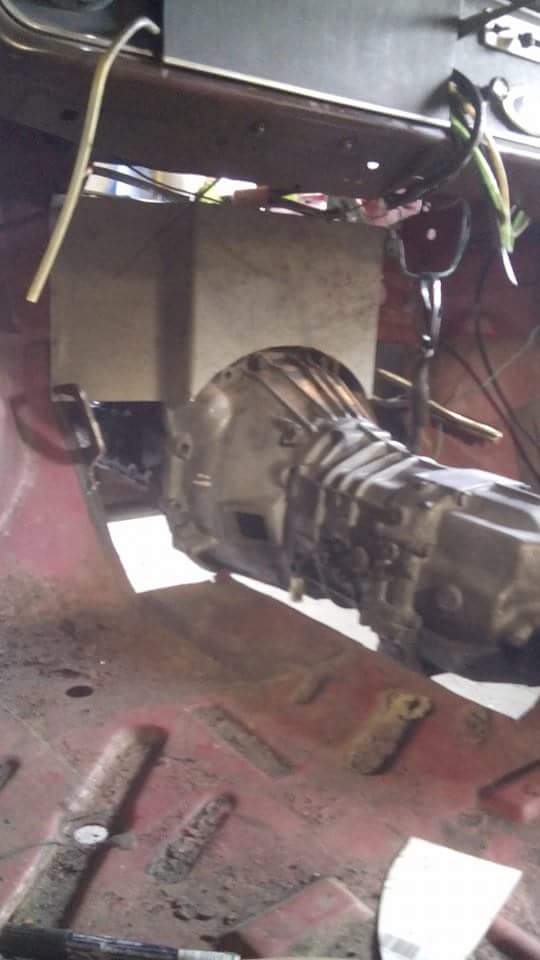
So here I begin. //oldschool.co.nz/index.php?/topic/47814-dannybattie-1973-colt-1600-discussion/ This little beastie was a little neglected on the side of the road and so I decided to rescue her. She is mostly original. I'm gradually fixing her up. Gearbox is freshly refurbished with an extra 5th gear. The Green Machine interior is good and the engine (1600 Saturn 4G32) is running fairly well from what I can tell. While I'm sure the purists out there will be disappointed, I am looking for parts/advice on simple and cost effective: Motor upgrade (extra power) Lowering kit/parts Lock or tight diff Any other bolt on upgrades Any feedback, comments, parts, motors etc is most welcome
 4 points
 -
I got my hands on a '74 FR50 for bugger all, but it wasn't running and looked like it had been neglected for some time by previous owners, it didn't run and none of the electrics worked. I later learnt it's a FR50K which was the very last of the '74s before they ceased production until 1981 (I think) but there isn't too much difference, just cosmetic stuff, like paint, the plastic piece that screws to the forks and the seat. that's all I've noticed that's different to a normal '74 FR50 so far. I don't have any photos of it together because I was far too keen to strip it down for paint/other mods. It was pretty rusty to begin with, nothing too major though just surface rust mostly. The front rim is pretty bad (that's the rear one) and has a sweet speed (rust) hole near the valve. she'll be right though. It also had a sick rattle can black paint job on the frame So first thing I got around to doing was painting it, but as it always goes I got too keen on sussing out some mods before I had finished painting it, so here it is post primer, and it looks shit. kinda looks like a slug in this photo I got my hands on some LTZ400 quad handle bar mounts and cut them up to fit in a narrower gap, and drilled out some existing holes to fit the 10mm bolts for the mounts, worked really well. Came out something like this; Ignore the bars, those are some random mock ups that were made out of a shitty warehouse broom handle. Also cut up the standard bar mount thing that houses the ignition and what not so it filled the gap between the head tube and the leg guard a bit and looks sort of tidier. Continued to mess around with bar mock ups; Thought these kinda looked silly, made it look sad or something so decided against making bars with that kind of downsweep. With the help of Mitch (Mitch.W on here I think) we got rowdy with the grinder and chopped the rear guard off and had a look to see what it would look like slammed. Definitely going to make it low (not this low though) in the future via some hard tail struts, kind of ghetto way to do it but it'll do the job. It then turned green.. This is pretty much as far as I have got with it so far, still needs a few things but I want to get it to run first, Needs headlight/tail light, throttle cable, and a seat and it's pretty much good to go. Here are some photos I took to see what I want it to look like when it's finished more or less. Probably going to paint the wheels black though. Still haven't made the hard tail struts so it's just sitting on the tyre here but you get the idea. Will keep posting updates as it progresses3 points
-
The potato salad was a bit of anticlimactic experience..3 points
-
Well got a door cut out today: And the other side cladded.. roof tomorrow?? then off to buy supplies to make the hatch and alloy trim3 points
-
When I got home from work made a cardboard template and folded the 1st section of the firewall.......life would be a shit load better if I owned a folder.
3 points
-
also some other crap to add to the oh i should show you guys this stuff3 points
-
Brother and sister...3 points
-
more removal of the things. will get a glass guy to remove the windows i think. probably cheaper to do that than break them. no big rusty surprises hiding which was good i knew this bit was lurking not much more to come out of it. will probably make some sort of frame so i can flip it on its side or upside down to do the underneath stuff. also have to decide how to tackle the body- i might get it properly blasted and primed. im going to fix the rusty bits myself but i will give it to a panelsmasher to get it straight and paint it. also been looking at other mods im going to do engine wise- current plan includes a new exhaust, might use some of these or similar, they are for a dodge truck. turned around and the collector shortened and re angled, should be able to make the pre turbo part of the exhaust shorter, and flow & sound better3 points
-
did a bit more today. started folding down the lip and clamped it up to see how it would come together. Untitled by sheepers-ra28, on Flickr after a few tacks its starting to come together. Untitled by sheepers-ra28, on Flickr and this is it all stitched back together. Untitled by sheepers-ra28, on Flickr Untitled by sheepers-ra28, on Flickr im not very happy with the result to be honest, i fucked up the folding of the first crease at the front and i didn't fix it before it was to late. its nothing that a skim of bog won't fix but still it could have been better. on the whole the result is acceptable and it will come up fine but id like to think i could do it better. the guard is now 15mm wider than it was but the important part is I've made it wider at the back part of the arch (where tires rub if they are going to) so there is more clearance there now.3 points
-
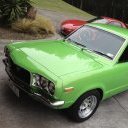
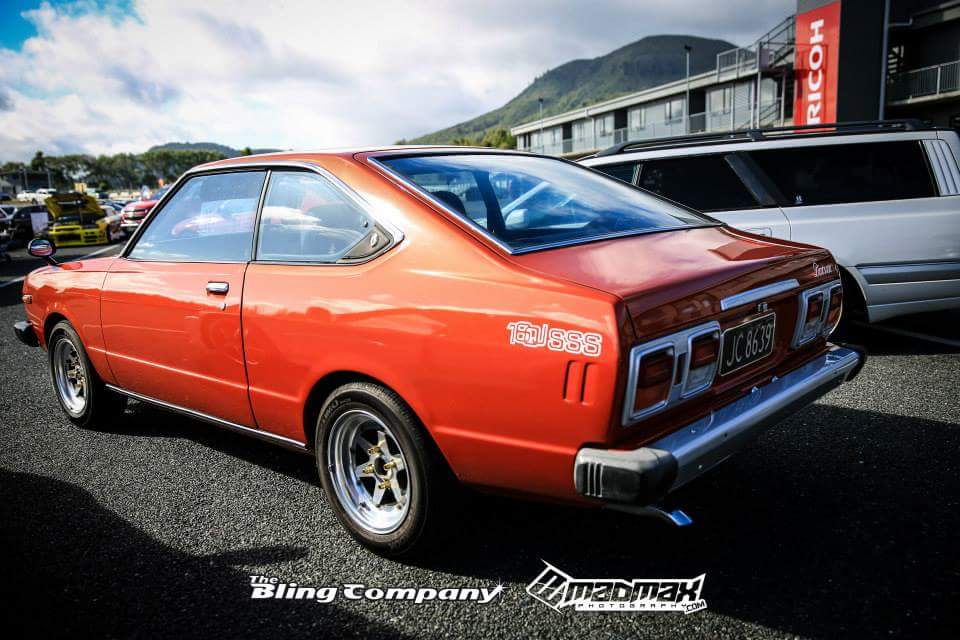
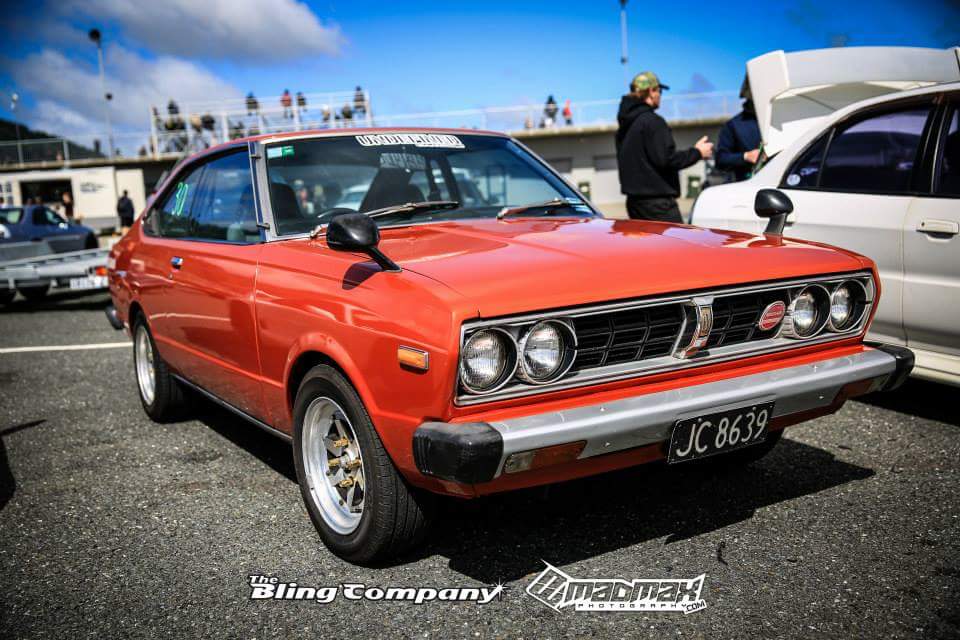
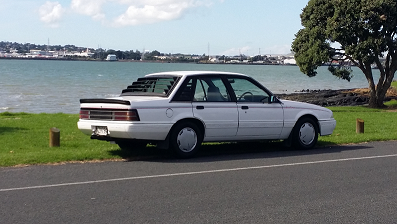
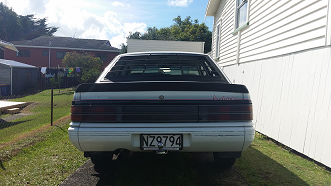
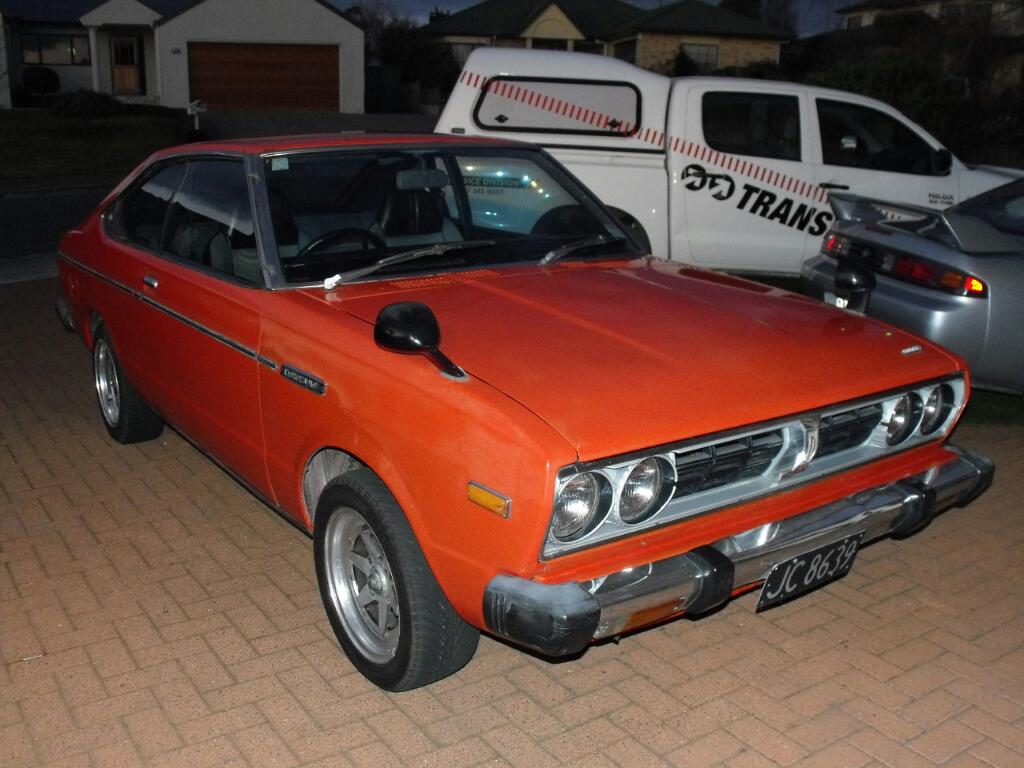
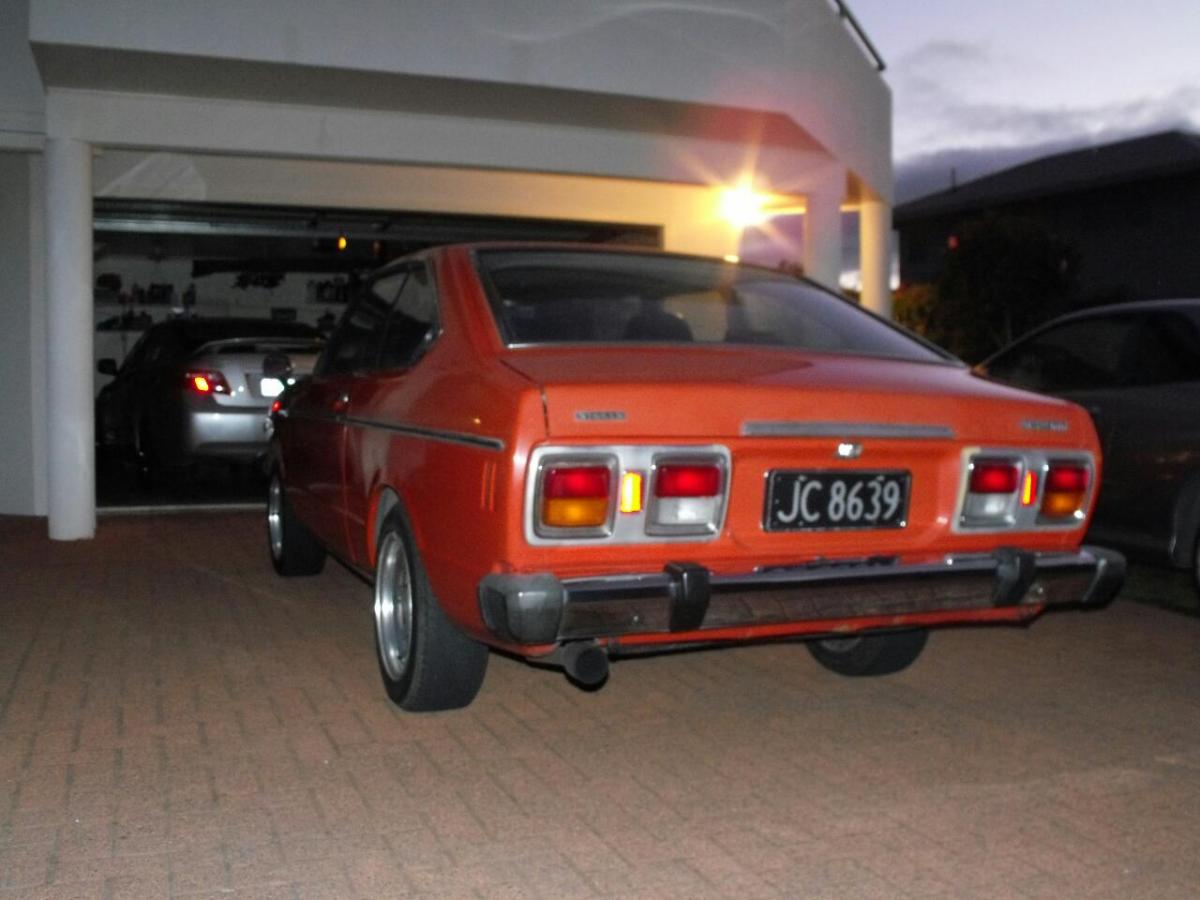
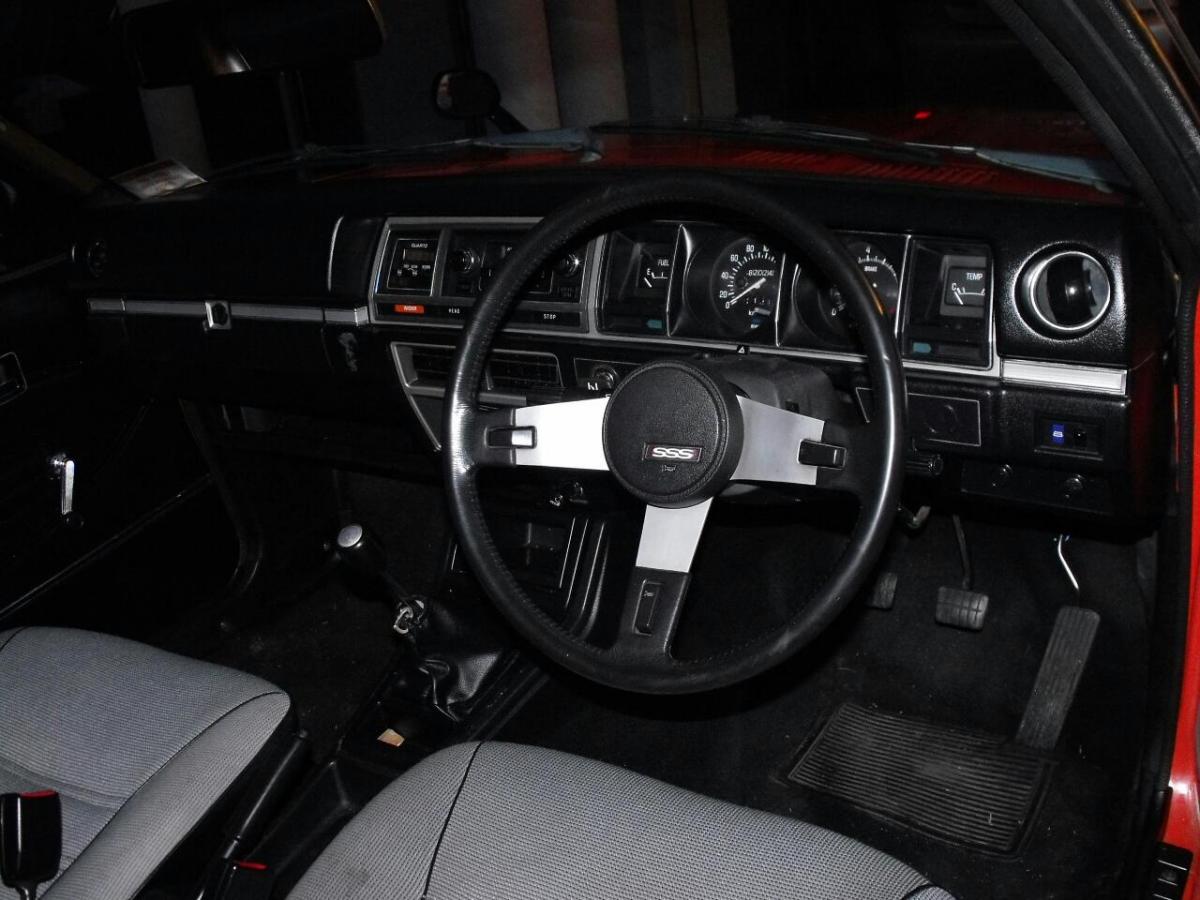
My name is Todd im a 22 Year old mechanic from Rotorua, this is my 160j sss ill do proper updates soon with what iv done from start to finish but for now a picture of how it sits will put up discussion thread in a minute cheers guys.
2 points
-
New house, massive garage, time to get the Coupe worked on!2 points
-
Got some louvers off trade me the other week came with everything even rear quarter louvers and mounting kit so stoaked i don't have to find all those individual things came up really good with a cut n polish They just make it look much better with the added bonus of keeping it slightly cooler inside think i need a dash mat now
2 points
-
This reminds me of that other great thread where the guy asked how he should fix his bent chassis. He got sound advice and then went his own way and fucked it. I'm kinda waiting for the OP to go SO I ONLY HAD A HAMMER AVAILABLE.2 points
-
Also this is my new favourtie build on OS right now. You best finish this one before palming it off!2 points
-
2 points
-
Jeeesus. Nobody in here is arguing that it is not illegal. But just because something is not legal does not automatically make it dangerous. Done with a small amount of forethought and an even smaller amount of information the process that OP is wanting to do can be done safe as houses. If a guy is going to straighten his steering arm regardless surely it is better to have a small amount of information on how to go about it rather than him just heating any metal to any temp and cooling it down in a bucket of engine oil. May as well ban Roman for putting up a cut springs tech thread and just about every member for having the wrong wheels and the wrong tyres and the wrong engines.2 points
-
Just so I can keep score; 4 people who know what they are talking about say it will be fine, and 4 people who are mechanics with no metallurgical training say you will kill babies... I think that's it settled then.2 points
-
So these pics are of the night i got my baby, spent a day in auckland looking at a few different dattos but finally settled on this baby and so glad i did. More to come, got a lot of pics etc so updates will keep rolling, please discuss
2 points
-
I was a mechanic for 15 years ,I was also an avi for quite a few of them years, i have worked on trucks cars and bikes , I have done truck wheel alignments which require bending the front beam . i know all about what you can and cant do . but i also know the law . i had to learn all the dos and don'ts and the reasons why and now I am an apprentice tool maker , so I am currently studying metallurgical science. in fact metallurgical science is its own entire trade. inspecting metals and why they have failed, for insurance etc. there is so much to it, i could talk ages about it, its fascinating. . . but the depth of this argument is to wide to sum it up with broad statements and comparing a solid truck front beam suspension or a ford I beam to a tinny Toyota steering arm is not a debatably angle that I would like to take, its silly, and i don't have to time to point out why its not worth trying to argue about you just cant fuck with cast , that is the law. this is it. now I know that it can be done, we do a lot of things in industry that is safe and fine . we test things and there are procedures created from metallurgical science , this is how we came up with the techniques . but at the end of the day this is a car forum , someone needed some solid advice so lets give them the right advice .2 points
-
Id bolt one set in and measure it up with internal micrometer. Then do the same with the other set. Then fingers crossed one set is obviously the correct set.2 points
-
My engine exploded! IMG_40302 points
-
Jeeze all i got to do was measure a k series engine gor someone to rebuild and build a shitty weathervane nice work on the hubs.2 points
-
Finally got the c-notch pieces laser cut. So we pulled off the tray and started stripping it back.2 points
-
The trick is to bolt the head down before the jb weld sets, then you don't need to file it down.2 points
-
I took it for a ride through the country1 point
-
I ain't reaming your bush, no matter how much alcohol you supply.1 point
-
Haha cheers dude. This one's just been neglected over time. But give me a month (talking positive at the moment) and itl be a good car again....1 point
-
Hi Cletus I've been having a fick threw the hobbie car manual and I can't find much info on modifying cross members. What sort of things can you do? I mounted mine in the origanal postion so the TCA arms will be in the same postion. Then cut the central section out and welded some 6mm wall tube to the back side of it and gusseted ....basically to make room for the sump as I really didn't want to fuck with that to much. Thanks for your time kind sir1 point
-
Everyone's been saying that lately......"how long till I sell it". This build is for me mate and probably the last 1 I do ....so I'm not in a rush but it will be finished.... Kinda wanted a mk2 since you had yours...but every time I had the cash Karl didn't want to sell the mustard 1... And when he did ......I didn't have the cash. Any who Sam has that beast now and I have this 1.1 point
-
at a guess it was disabled when the car was converted from 6v to 12v... I wouldn't worry about it myself, just let it warm up for a minute or so on cold mornings....1 point
-
FUCKING HITLER CARS1 point
-
no need to worry wheels will not be going red at all!!!!!! SOOOOOOOOOOOOOOOOOOOOOOOOOOOOOOOOOOOOOOOOOOOOOOOOOOOOOOOOOOO OVER DONE!!!!!!!!!!!!!!!!!!!!!!!!!!!!!!!!!!!!!!!! need to sell the ones i have on here to get my others widened. any one after some staggered vw wheels that have been widened as well?1 point
-
I found an AP5 Val sedan for sale way out in the country yesterday. Reminded me of you. Anyway, good stuff. Hope you get it back on the road soon.1 point
-
Hey Bro! I was one of the fellas in the Kombi you yarned too at the campsite Was nice to meet you, I think I have a couple (probably quite rubbish) photos of your car on my phone I'll post up at some stage1 point
-
ahhh i did see it at vw nats was later in the day and by the time i went to take a photo you were gone. such a nice car!!!!1 point
-
Looks like a fun upgrade going on there. I have an AX100 motor with a lightly scored cylinder that's been sitting in the corner of the shed for 15 years if your interested, I'm in the South Island unfortunately. Includes kickstart and carb .1 point
-
the same amount of skill for example, as required to not put your wheelnuts on backwards. we are right at the bottom of the barrel here.1 point
-
could all the naysayers please outline their specific ability to make such statements. anyone reading above would think that practical metallurgy is magic or something.1 point
-
I wouldn't cold bend, or press it, now that would weaken it1 point
-
Mark got the engine back together and it's up and running again, as promised. I picked it up tonight, and will be getting it re-dynotuned before I take it to another track day soon. A short test drive showed that the car runs a lot smoother than before, and definitely has more power/torque down below. Smells wicked on Mark's premix too.1 point
-
Still working on this.. Worthless update but time for a bit of cleaning/paint1 point
-
today i finished stretching the inner guard out (which is a cunt of a job) and got the lines scribed so i could start folding the lip back into place. it dosent look like I've achieved much but i can tell you its been a long day. obviously there is still heaps left to do to get the lip right but getting to this point is good. Untitled by sheepers-ra28, on Flickr1 point
-
Lol that's a big call1 point
-
was talking to someone the other week about the same problem, 4AGE had a corroded bit in the block, he fixed it with jb weld then filed it flat in place with a hand file. it worked too, haha1 point
-
get the deck surfaced, that will tidy it up. it will be fine1 point
-
Mocked up the doors: wiley window open: wiley window closed Wiley window ventilation mode progressing slowly1 point
-
Going in for wof tomorrow, and getting wheel alignment done next week, so all going well will take it in late next week or the following week for recheck. A few pics in its current cert ready state. Obviously not as bad ass as before, but hey, dem the breaks. Just want to get it on the road now. People with other opinions can go get a car certed at a stupidly low height and then come talk to me. k thanx bye1 point
-
holy batman I've actually been getting some work done on this thing lately. Have made it my goal this year to finish this thing and get it on the road. Have made a list (very long one at this stage) with all I need to do and its a bit daunting but just need to pick away at it getting 1 or 2 jobs a week done.. Enough with yabbering here are some pics. Have decided to strip the car right back to bare metal to make sure I can tidy up all the untidy bits that I screwed up last time with the paint.. I've decided to go with sandblasting + 80grit sand paper should do the trip. This involves stripping engine/box and subframes out of the car so I can remove all the underseal and sealant in order to seam weld the chassis while its bear. Been cutting heaps out of the doors to try make them lighter but retain power windows. Got perhaps 10kg out of each door but they are still 15-20kg each once I put everything back in them. Hoping to have car all sandblasted and ready to go back together in the next month or so. Looking at CNC'ing new hubs for this as I always suspected the geometry was bung. How wrong I was! It actually isn't that bad with only +/- 1mm in most of the stroke length. Still worth doing the hubs though to correct the roll centre and reduce unsprung weight a bit as I'm building bilstein shocks as well so can slam it heaps and have it work (full compression will see 50mm of ground clearance). Made a jig to measure accurately. Plan is to make it standard replacement fitment so brake mounts and lower ball joints can be re-used, making it more universal for people wanting to buy. Will be made out of chromoly so the design can be approved by LVVTA certifiers which will make it even more valuable! Once I have the geometry I can make a full race item too, possibly out of Alloy for the likes of dads and Grants cars. This is the ride height I'll be aiming for - trying to decide on where exactly it will sit as I don't really want adjustment on my shocks, only by clevis. Still not sure about how that will go. Apprently 50mm travel in each direction is what I should be aiming for - a bit on the short side in the front but that won't be the end of the world. http://i1101.photobucket.com/albums/g437/touge_ae101/20150125_182625.jpg Hopefully more progress to come1 point


.thumb.png.b2aee08688778d18bdc7b3e3c1852d9c.png)


This leaderboard is set to Auckland/GMT+12:00