
Leaderboard


Popular Content
Showing content with the highest reputation on 08/22/23 in all areas
-
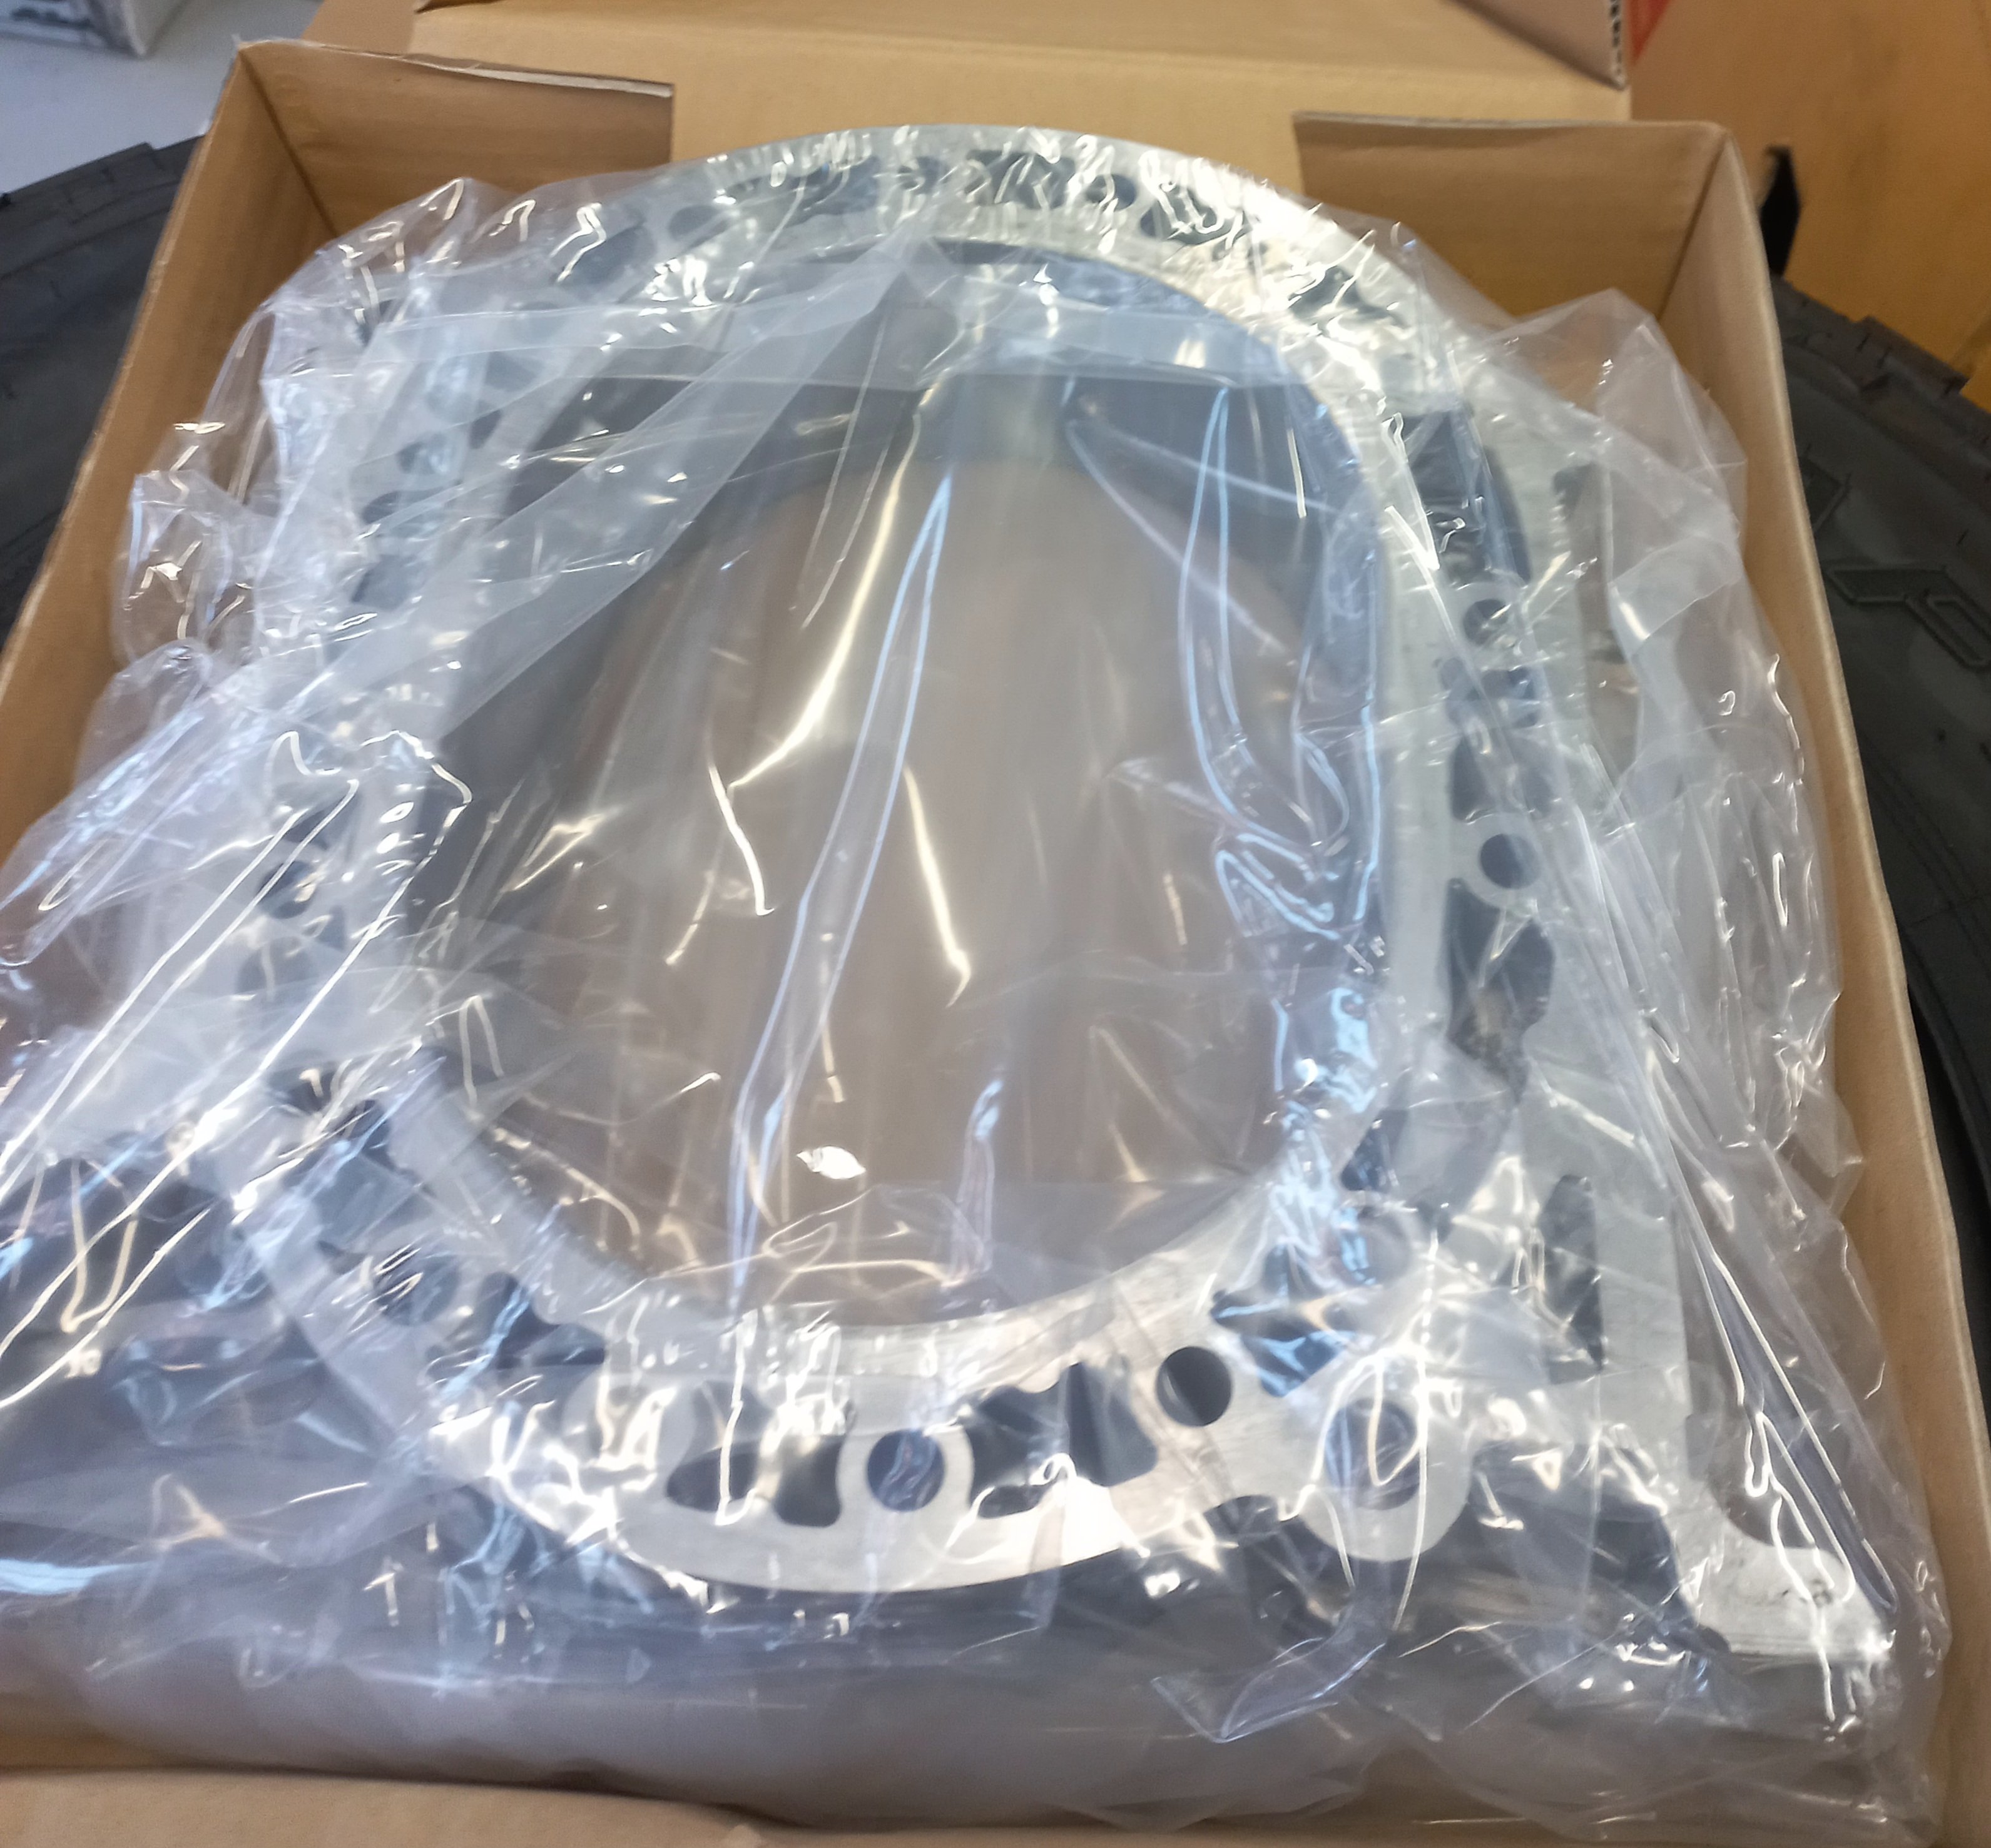
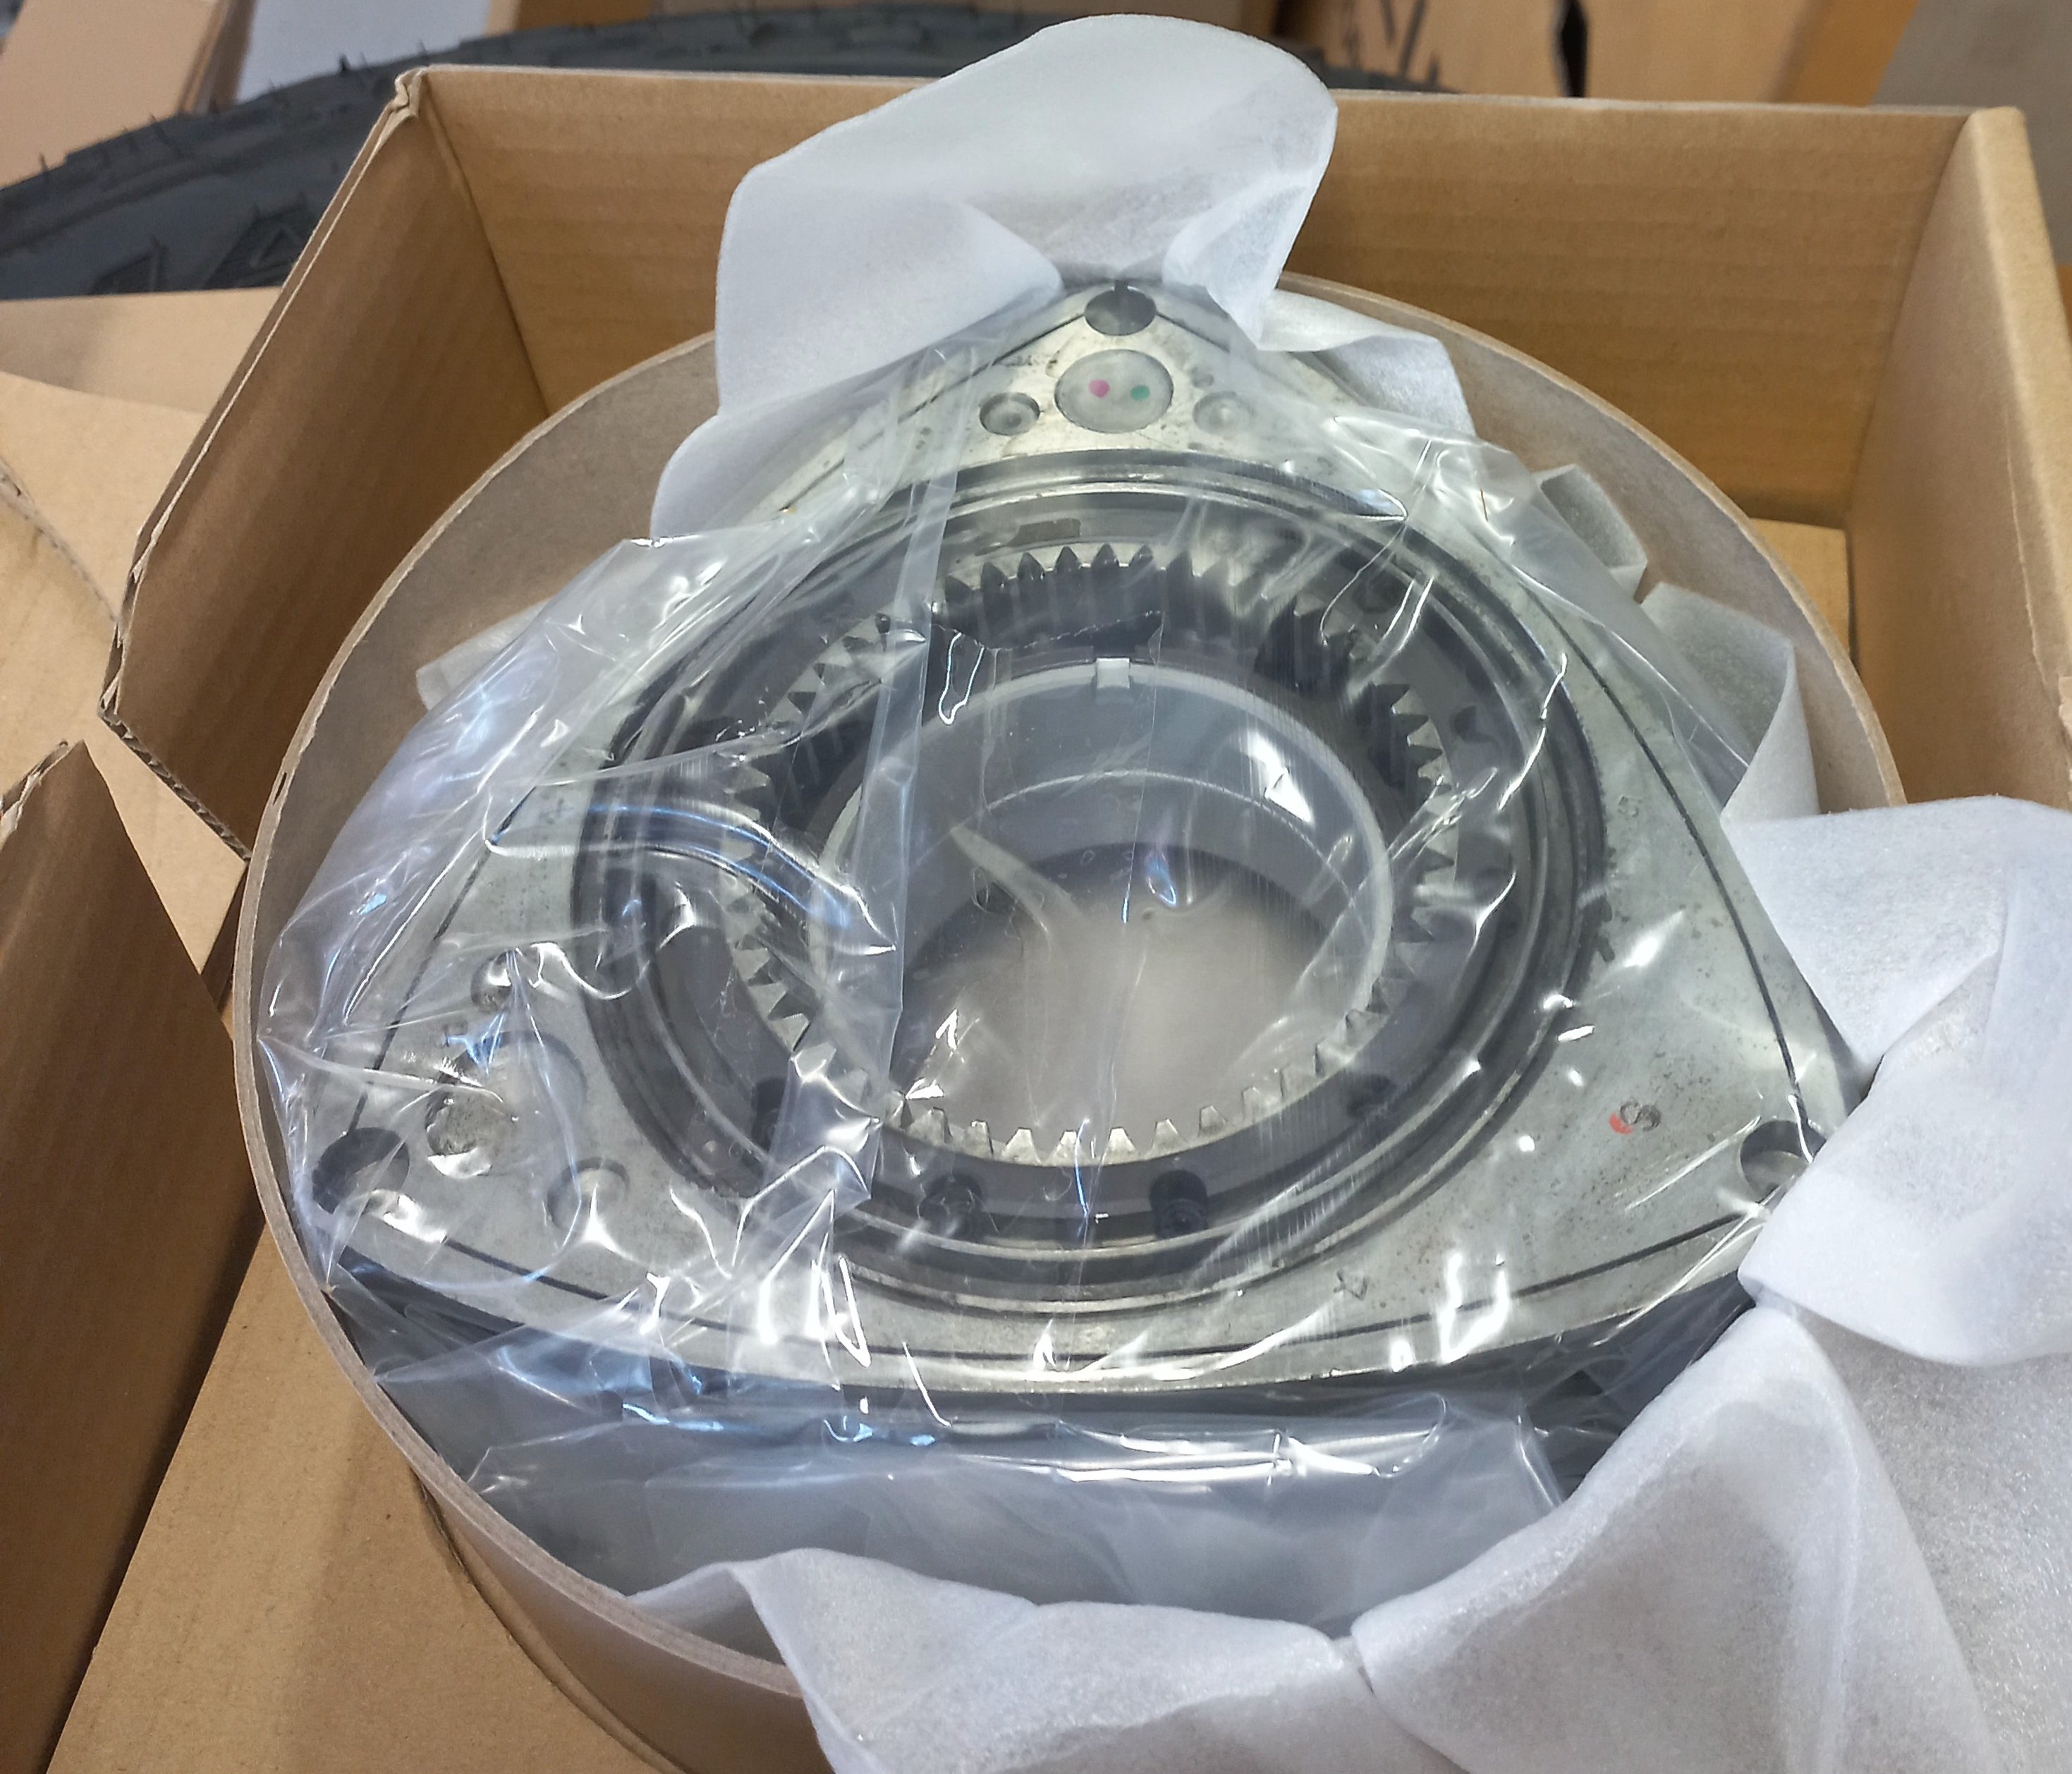
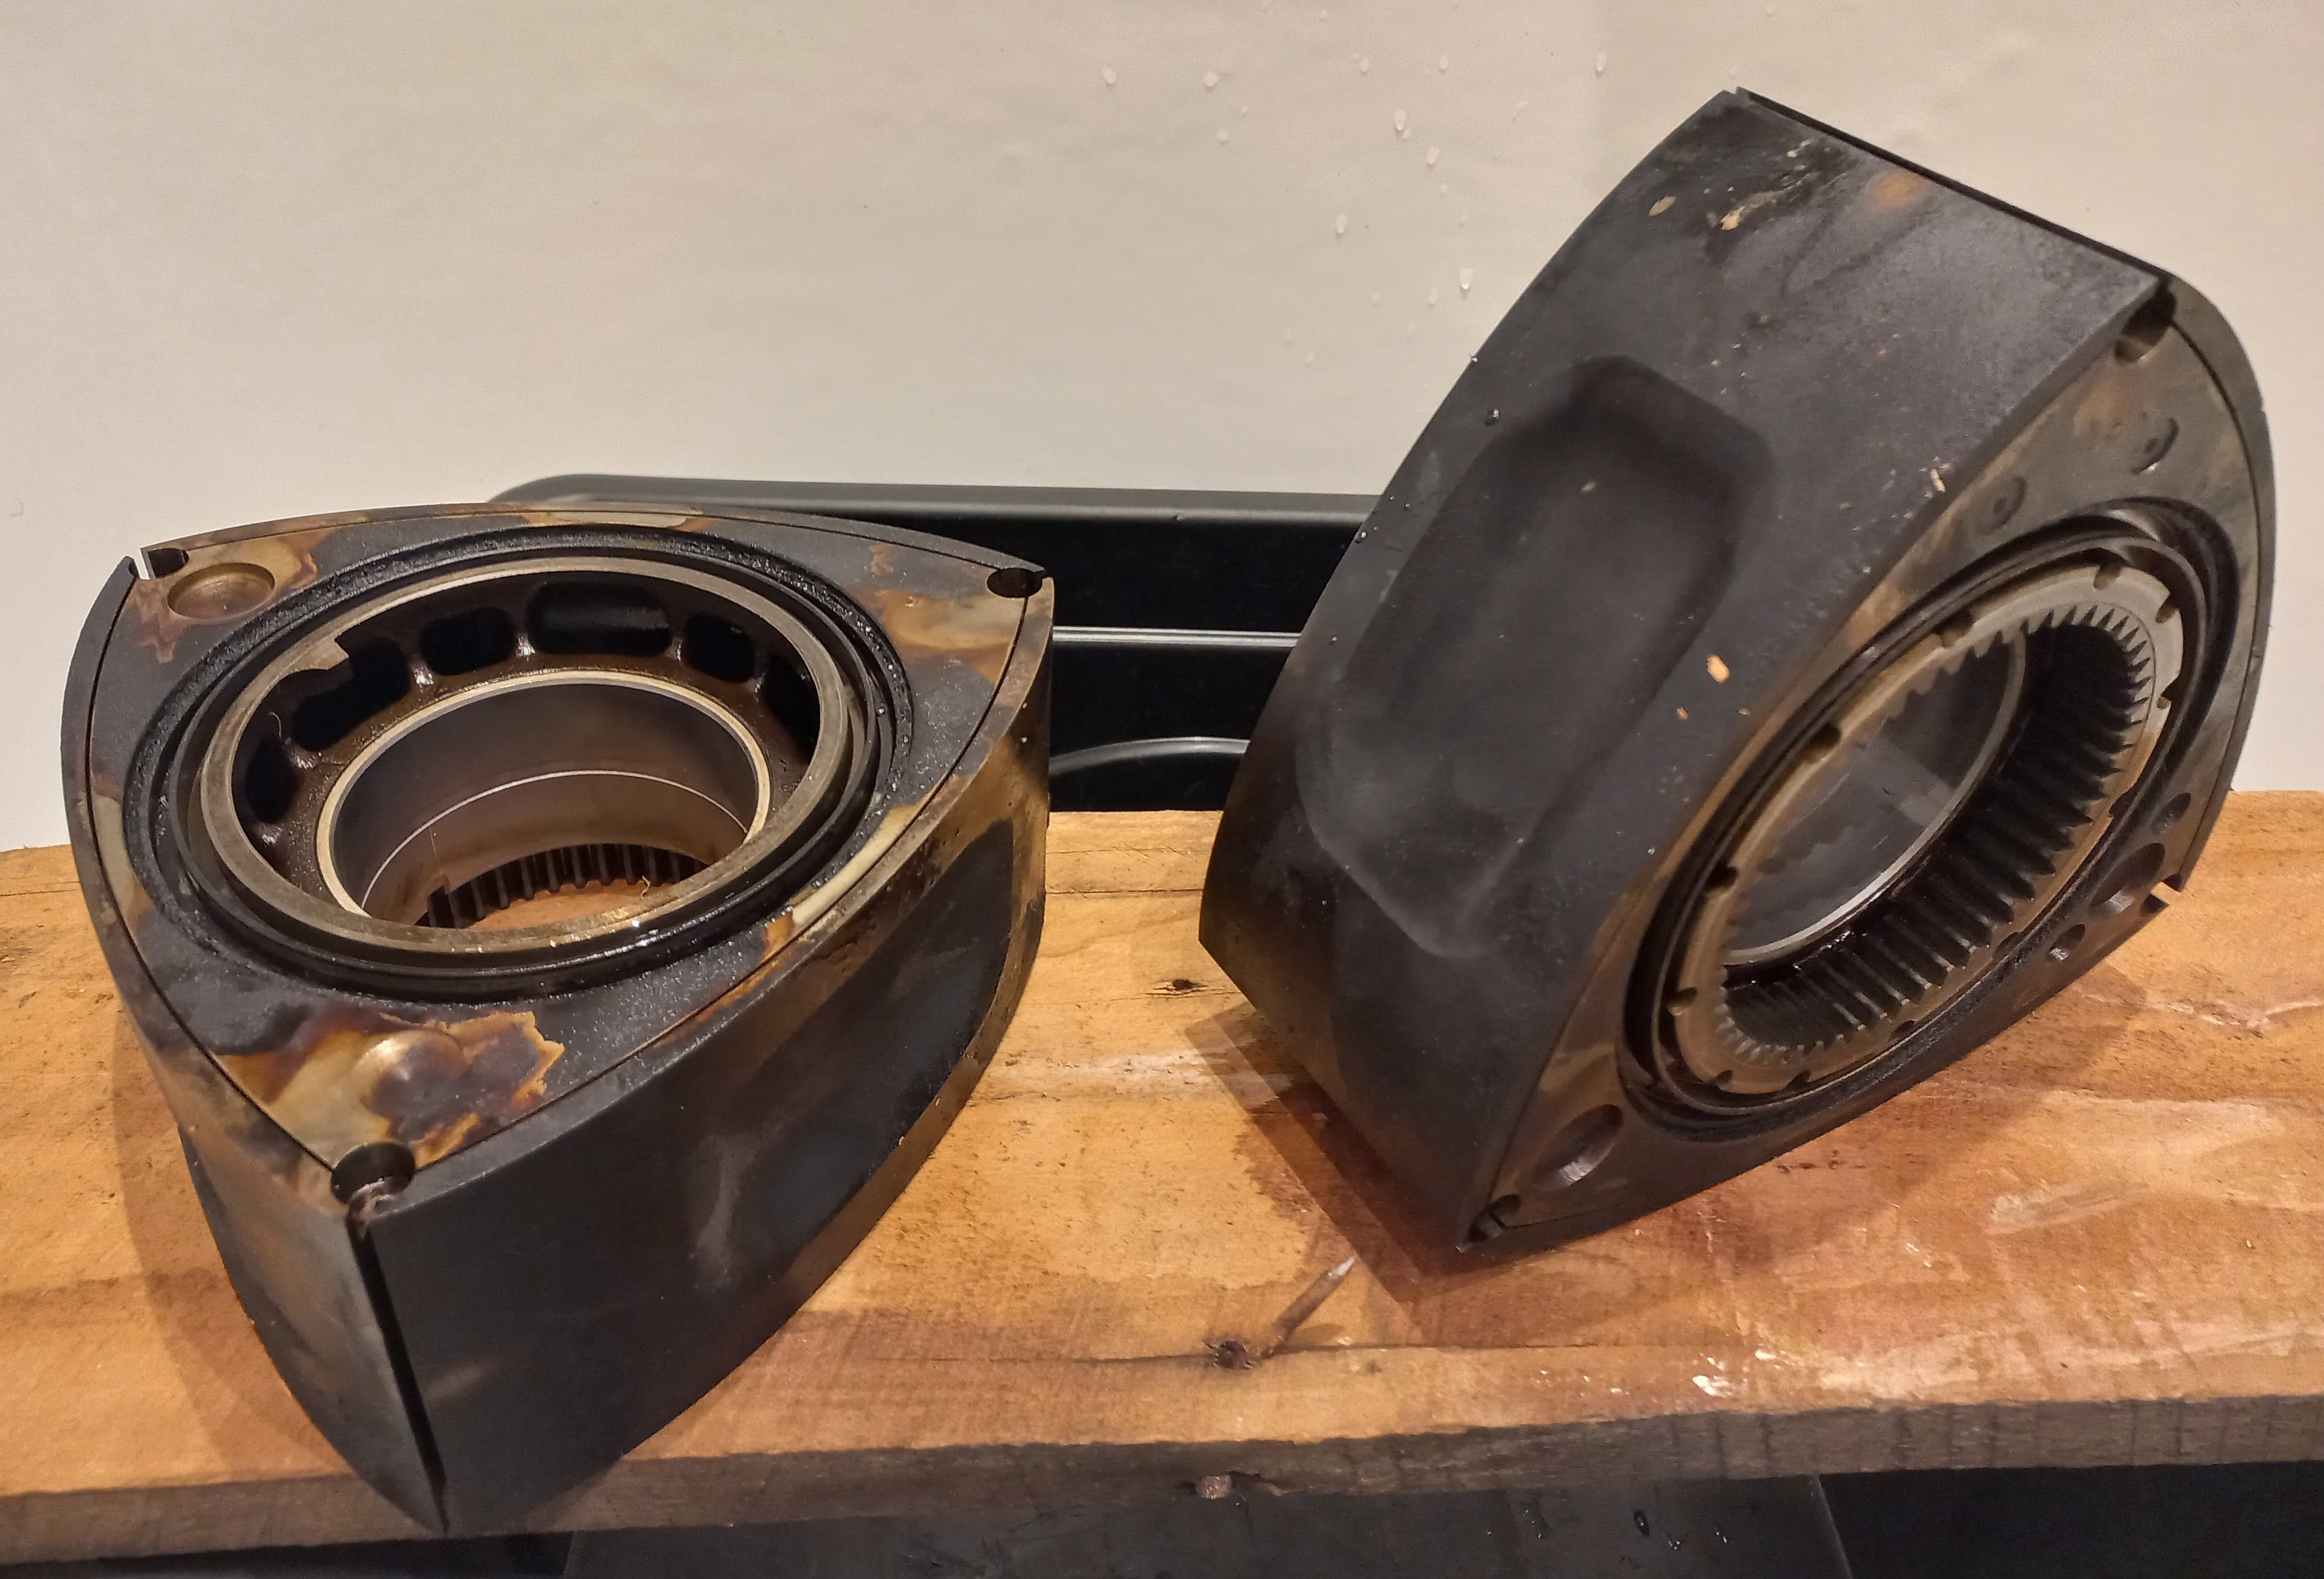
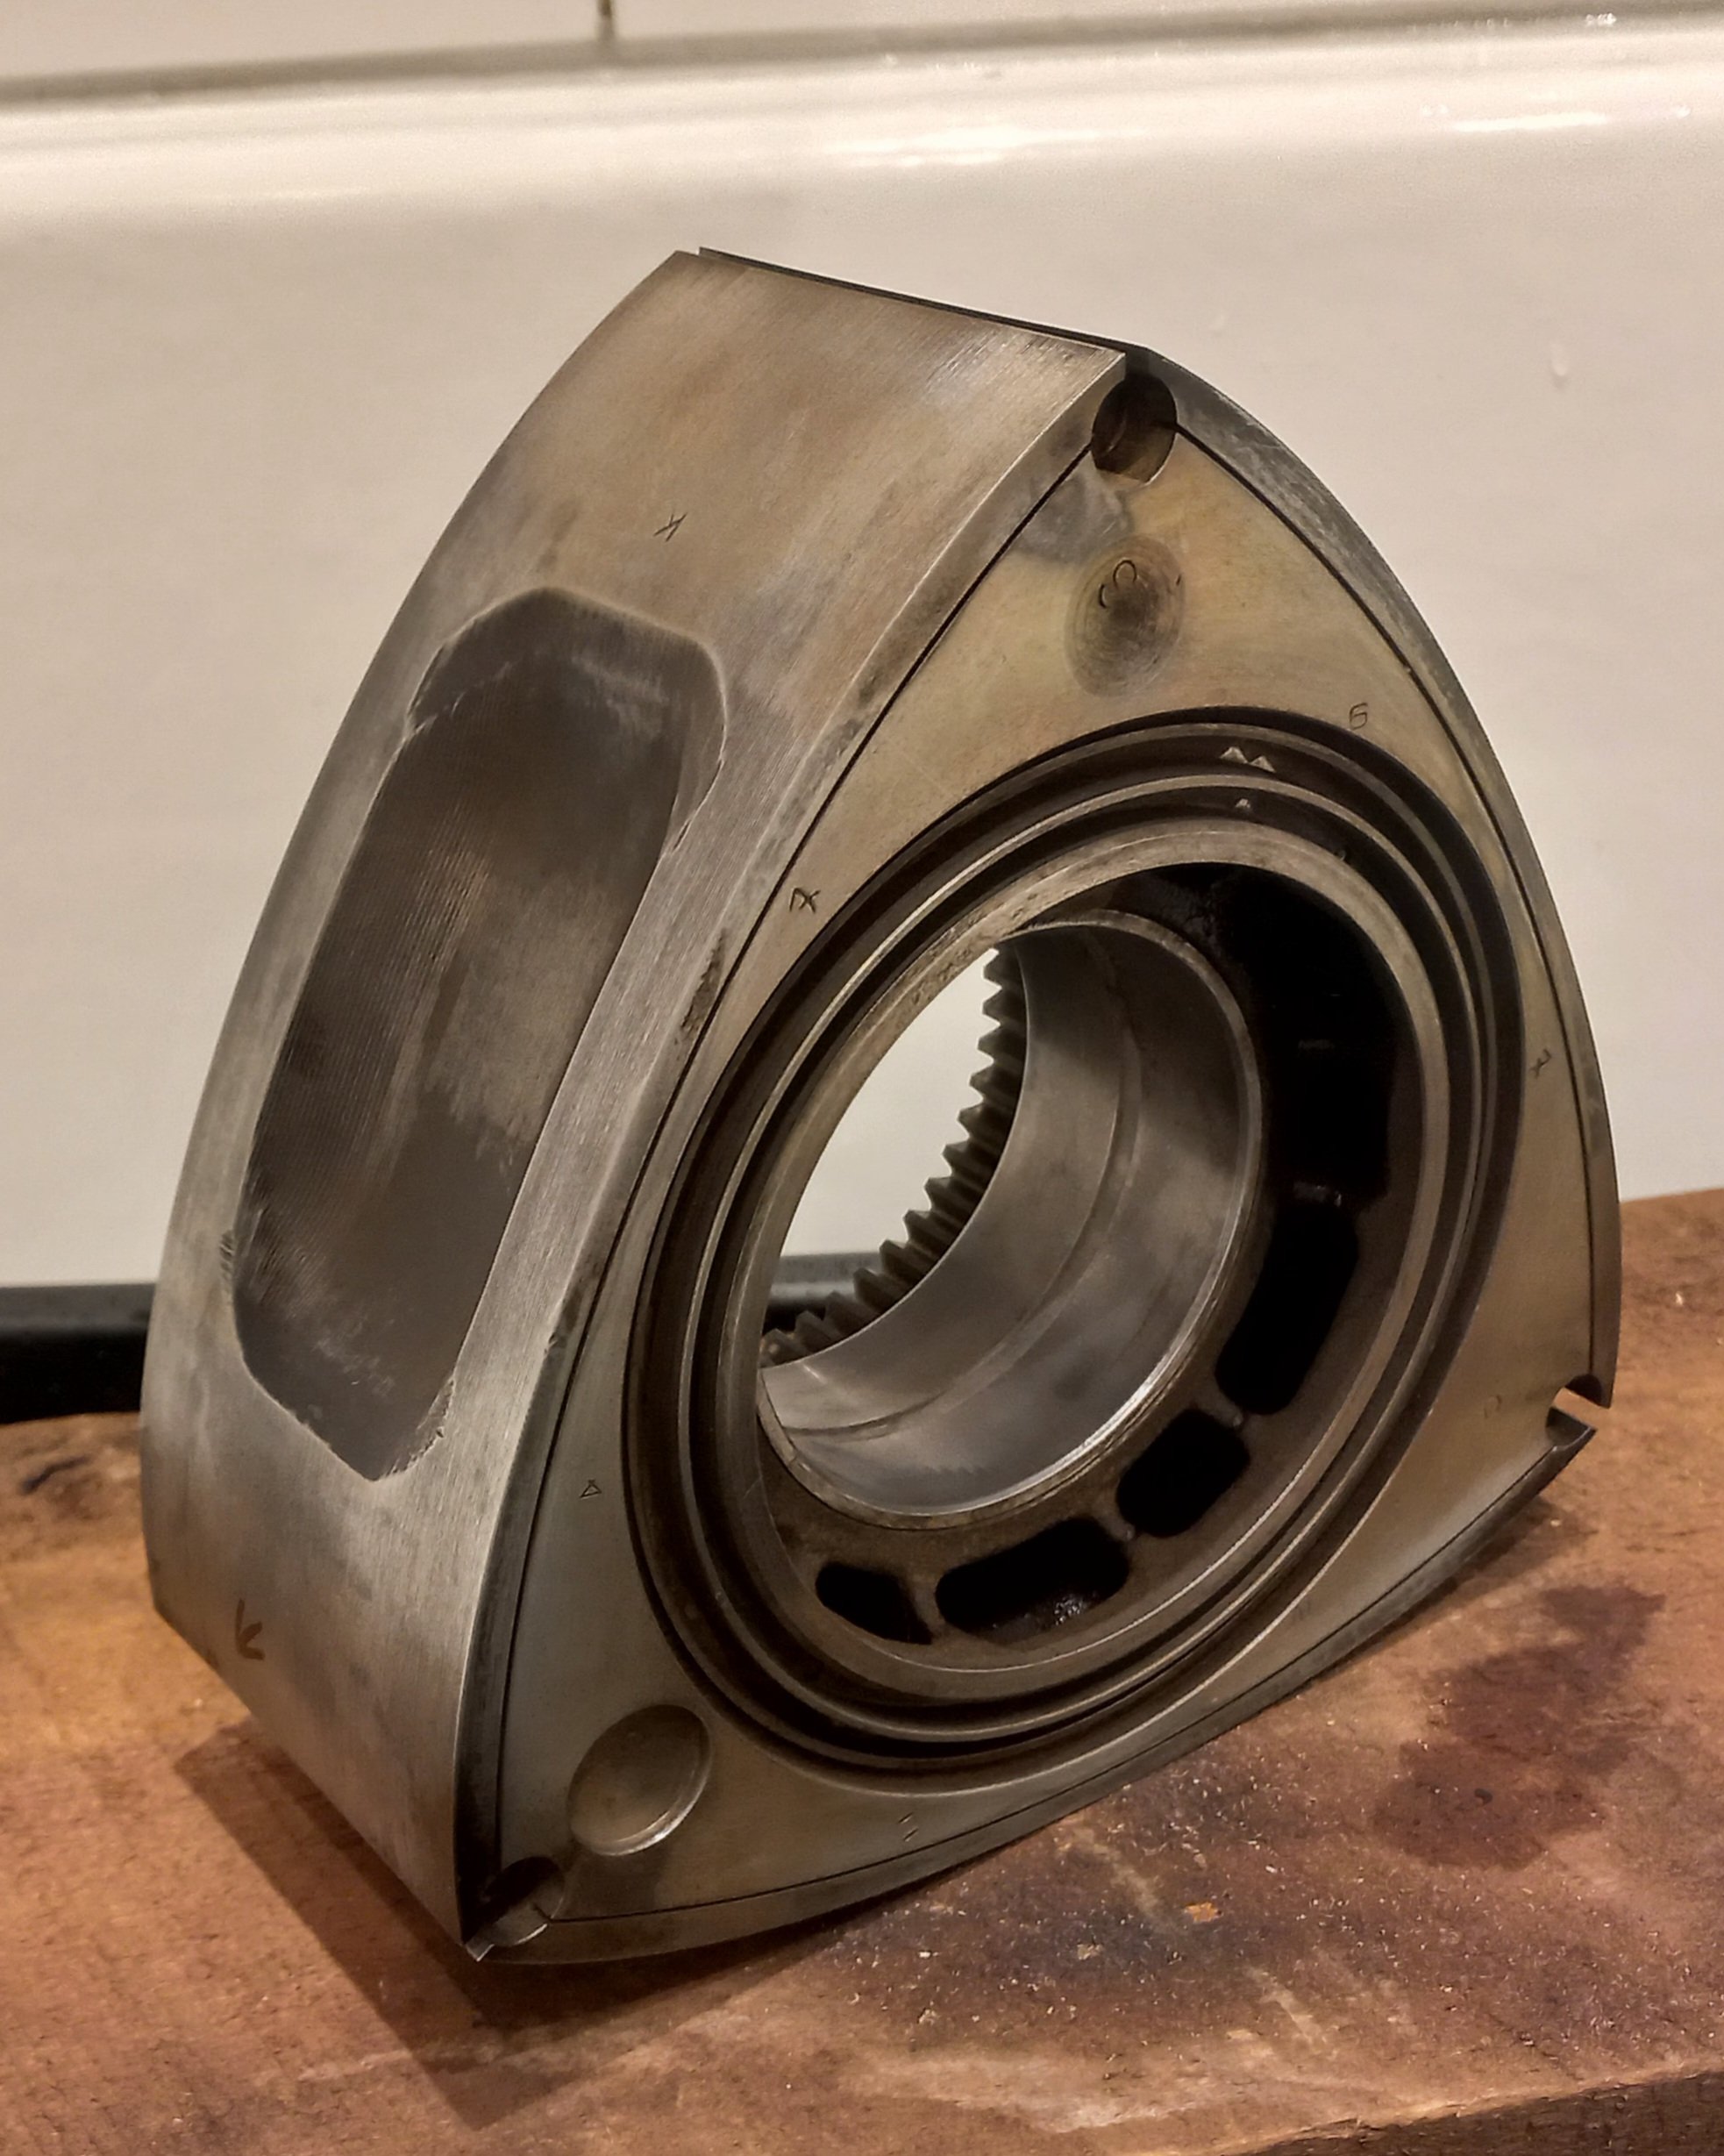
Popped into builders and eyeballed my parts haul thus far and picked up my now surplus rotors for selling purposes. Couple pics of a pair of bagged FC housings and FC S4 NA rotors for the thread...yeah I pulled the new rotor x2 trigger as it feels the correct action so I know its all good in the assembly with no sketchy variables. Checked over the irons as not yet been shipped for skim/hardening yet...builder fulltime non mazda dealership mechanic and does his 'wankeling' after hours or weekends. Bridges looks spunky as, as are the opened up primaries.
 9 points
 -
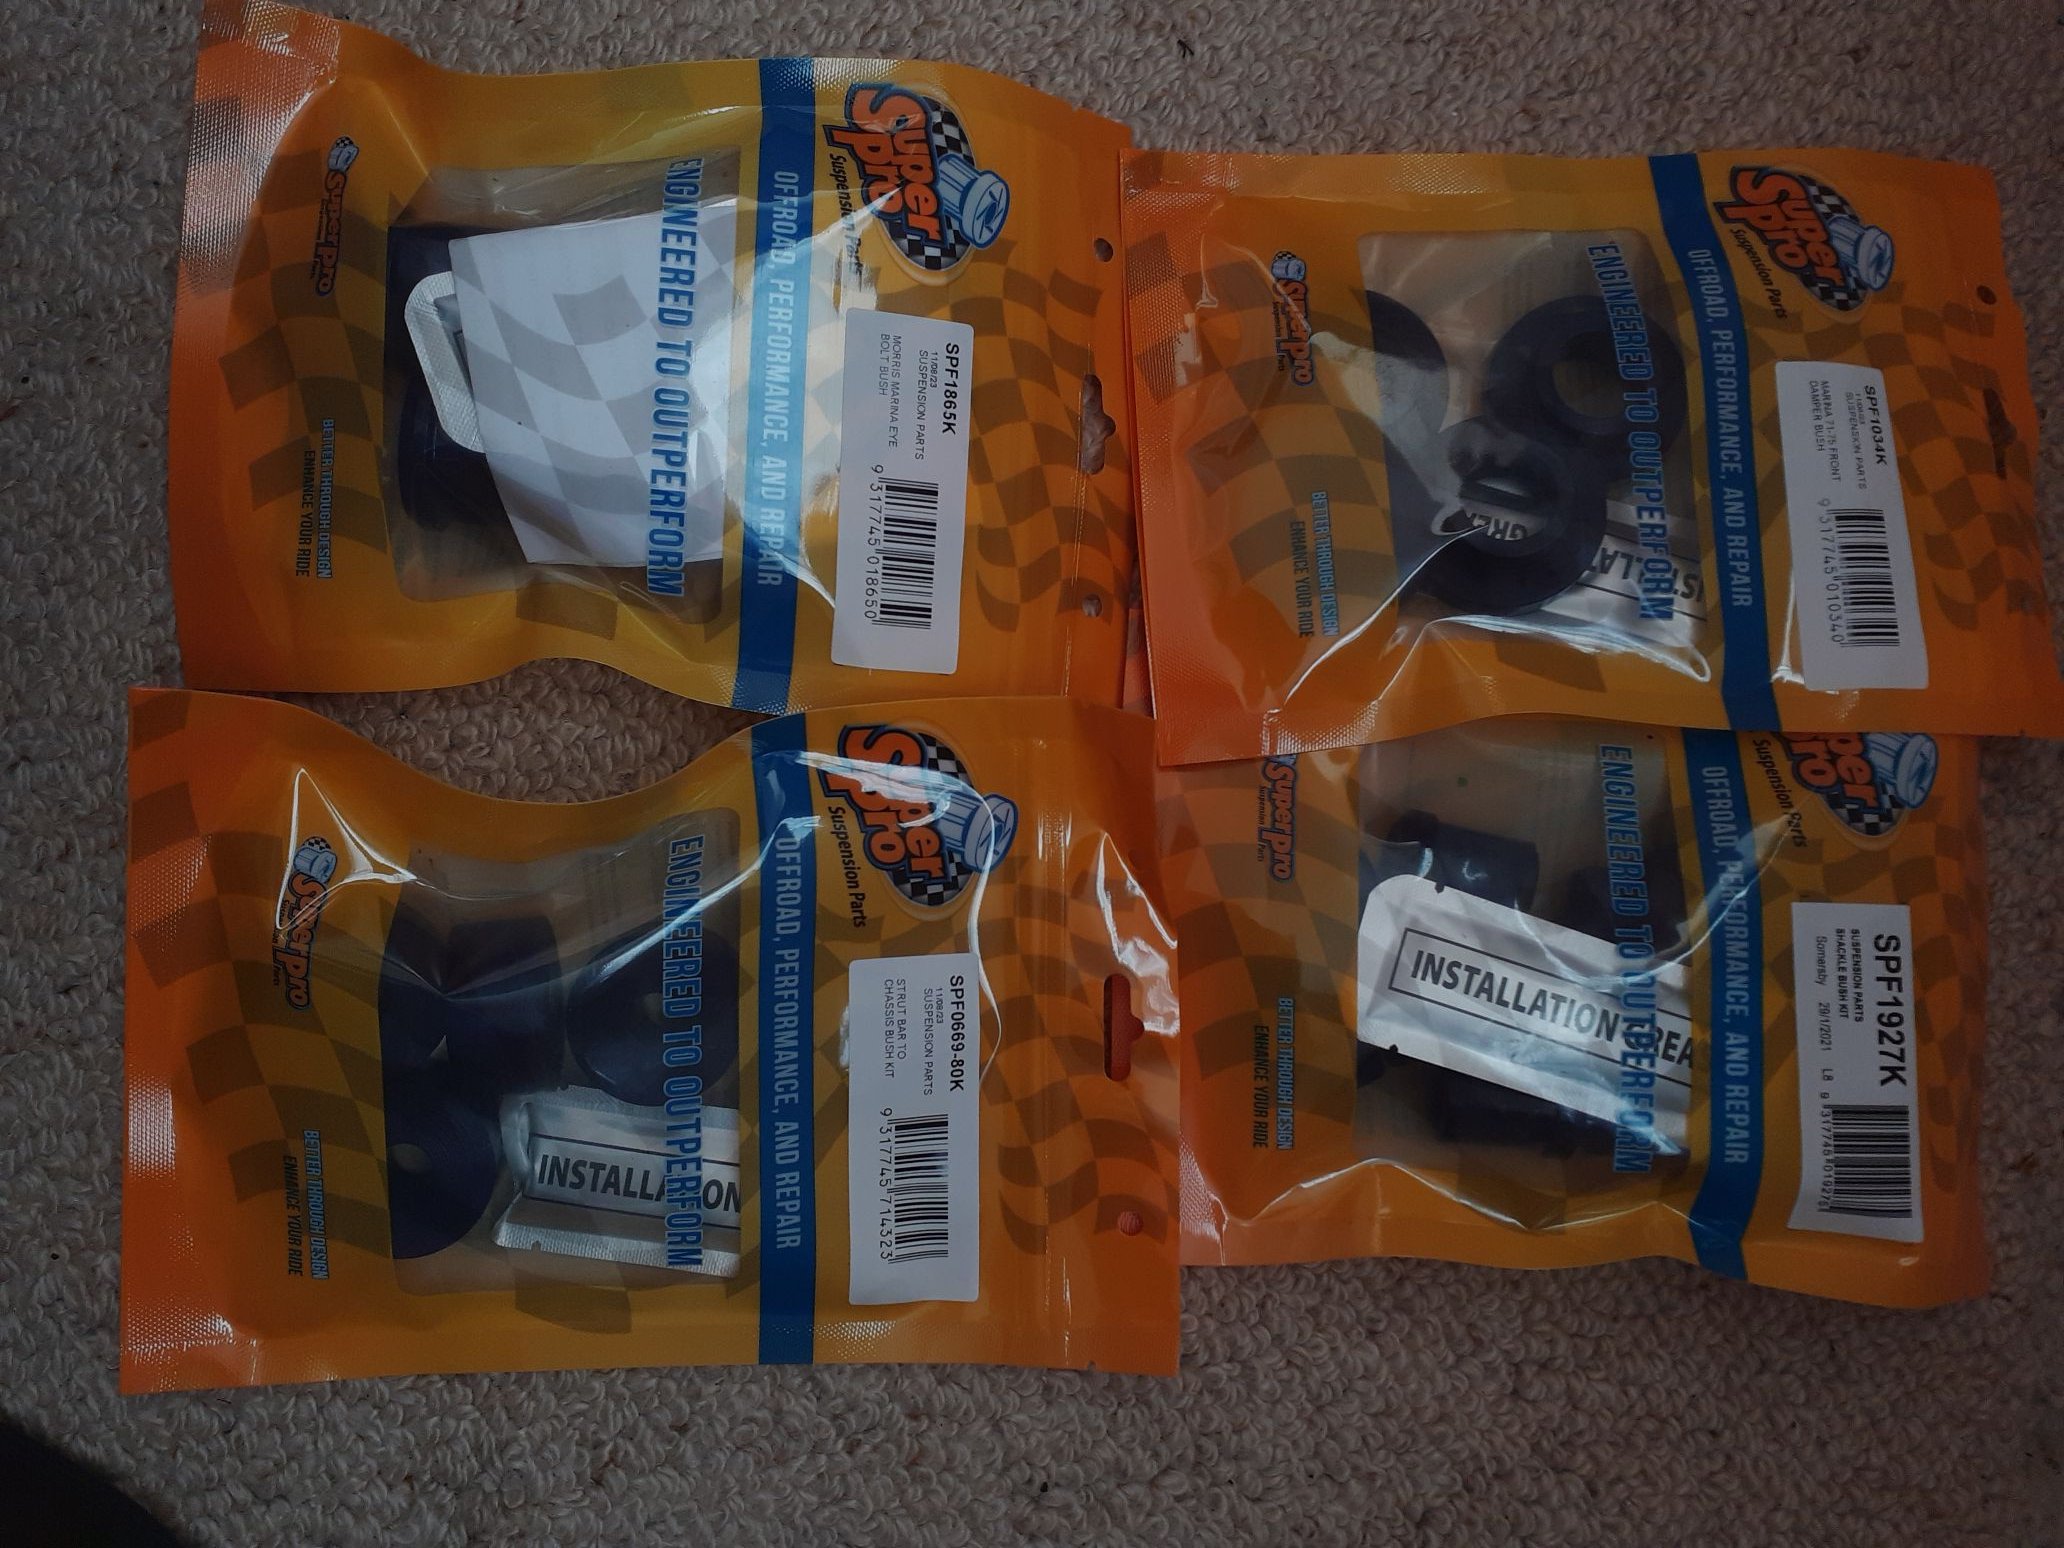
Oof, 2 years since the last update. Finally pulled finger and ordered four sets of Superpro suspension bushes. Ordered them from an Aussie crowd on Trademe, who offered a package deal that was pretty good. Ended up getting charged about 20% more, because they quoted in Aussie dollars. Decided not to complain, as it was still cheaper than I could get from anywhere else. Took a long time to arrive, as they had to order some in from the UK. But they're here now, dispatched from Aussie on the weekend and delivered today. Also used a Supercheap voucher I got from work to buy a new grease gun. Now I need to make time to go into the store to get some rubber lube that I couldn't seem to order online. Then I can put the rear quarterlight windows in. And make a trip to the transfer station to get rid of some old furniture that has cluttered up the garage.
8 points
-
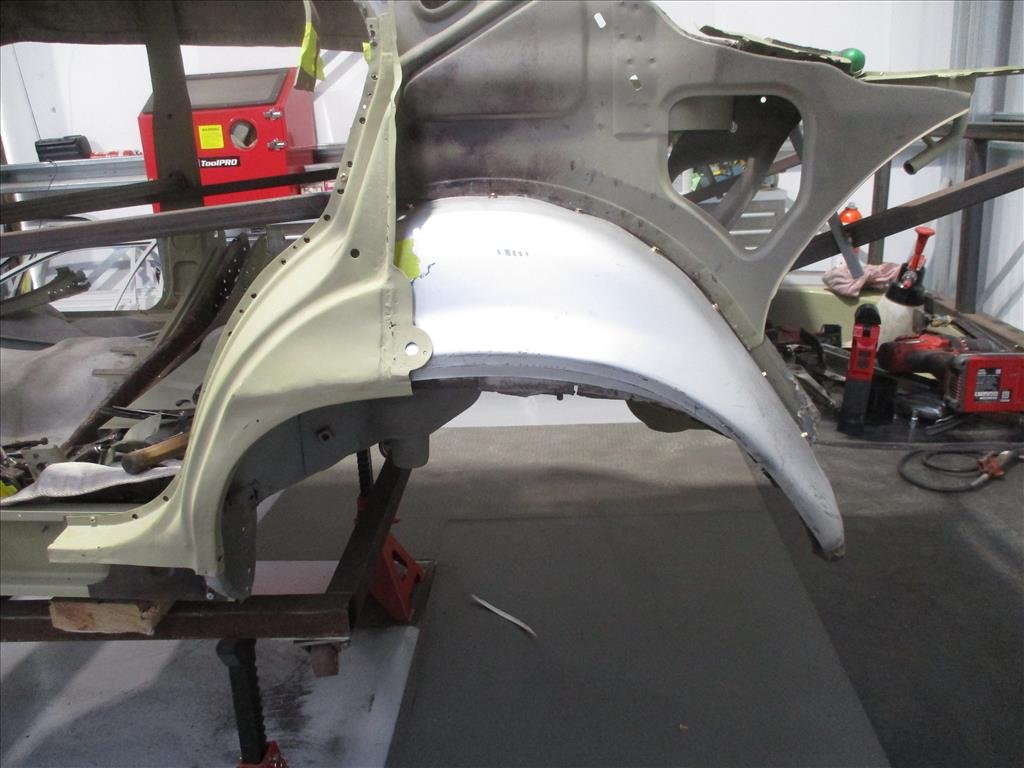
Panel Barry's been hard at work doing various small patch jobs and finishing up some chassis work on the Skyline as well as rebuilding basically the whole rear end. That's all very exciting but what's really exciting is this. The Ford Escort inner arches look like they will fit up really nicely with a little bit of finagling and a bit of extra metal. The curve is amazingly close. Might be a smidgen wide for the outer skin as I think it pushes it out slightly so it cannot join quite correctly but in the grand scheme of things I think that's fairly small all things considered.
7 points
-
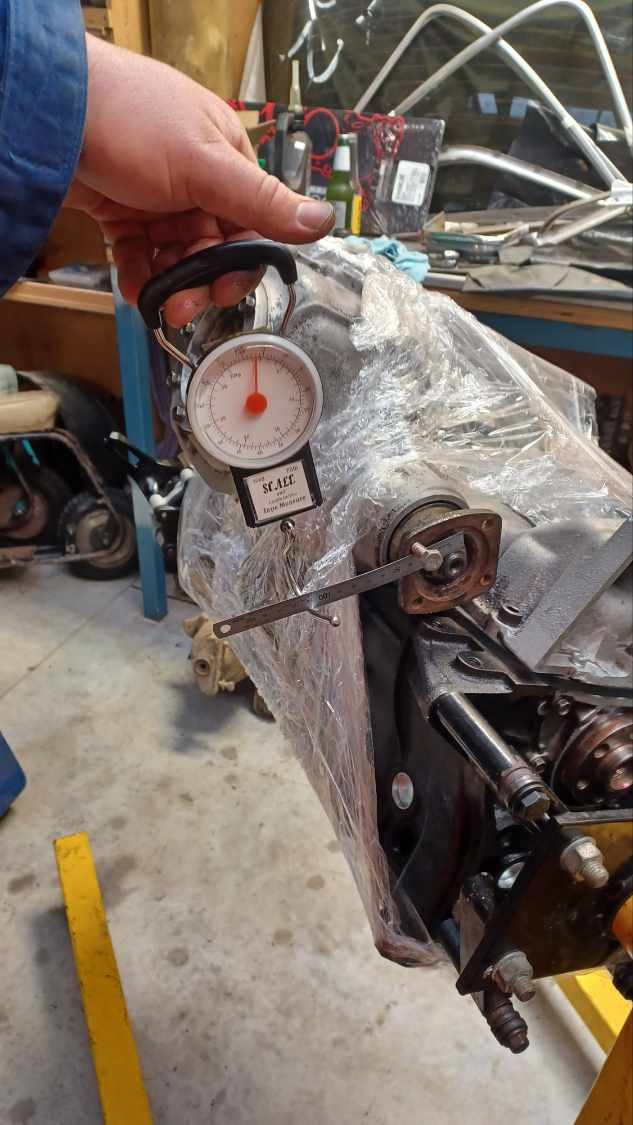
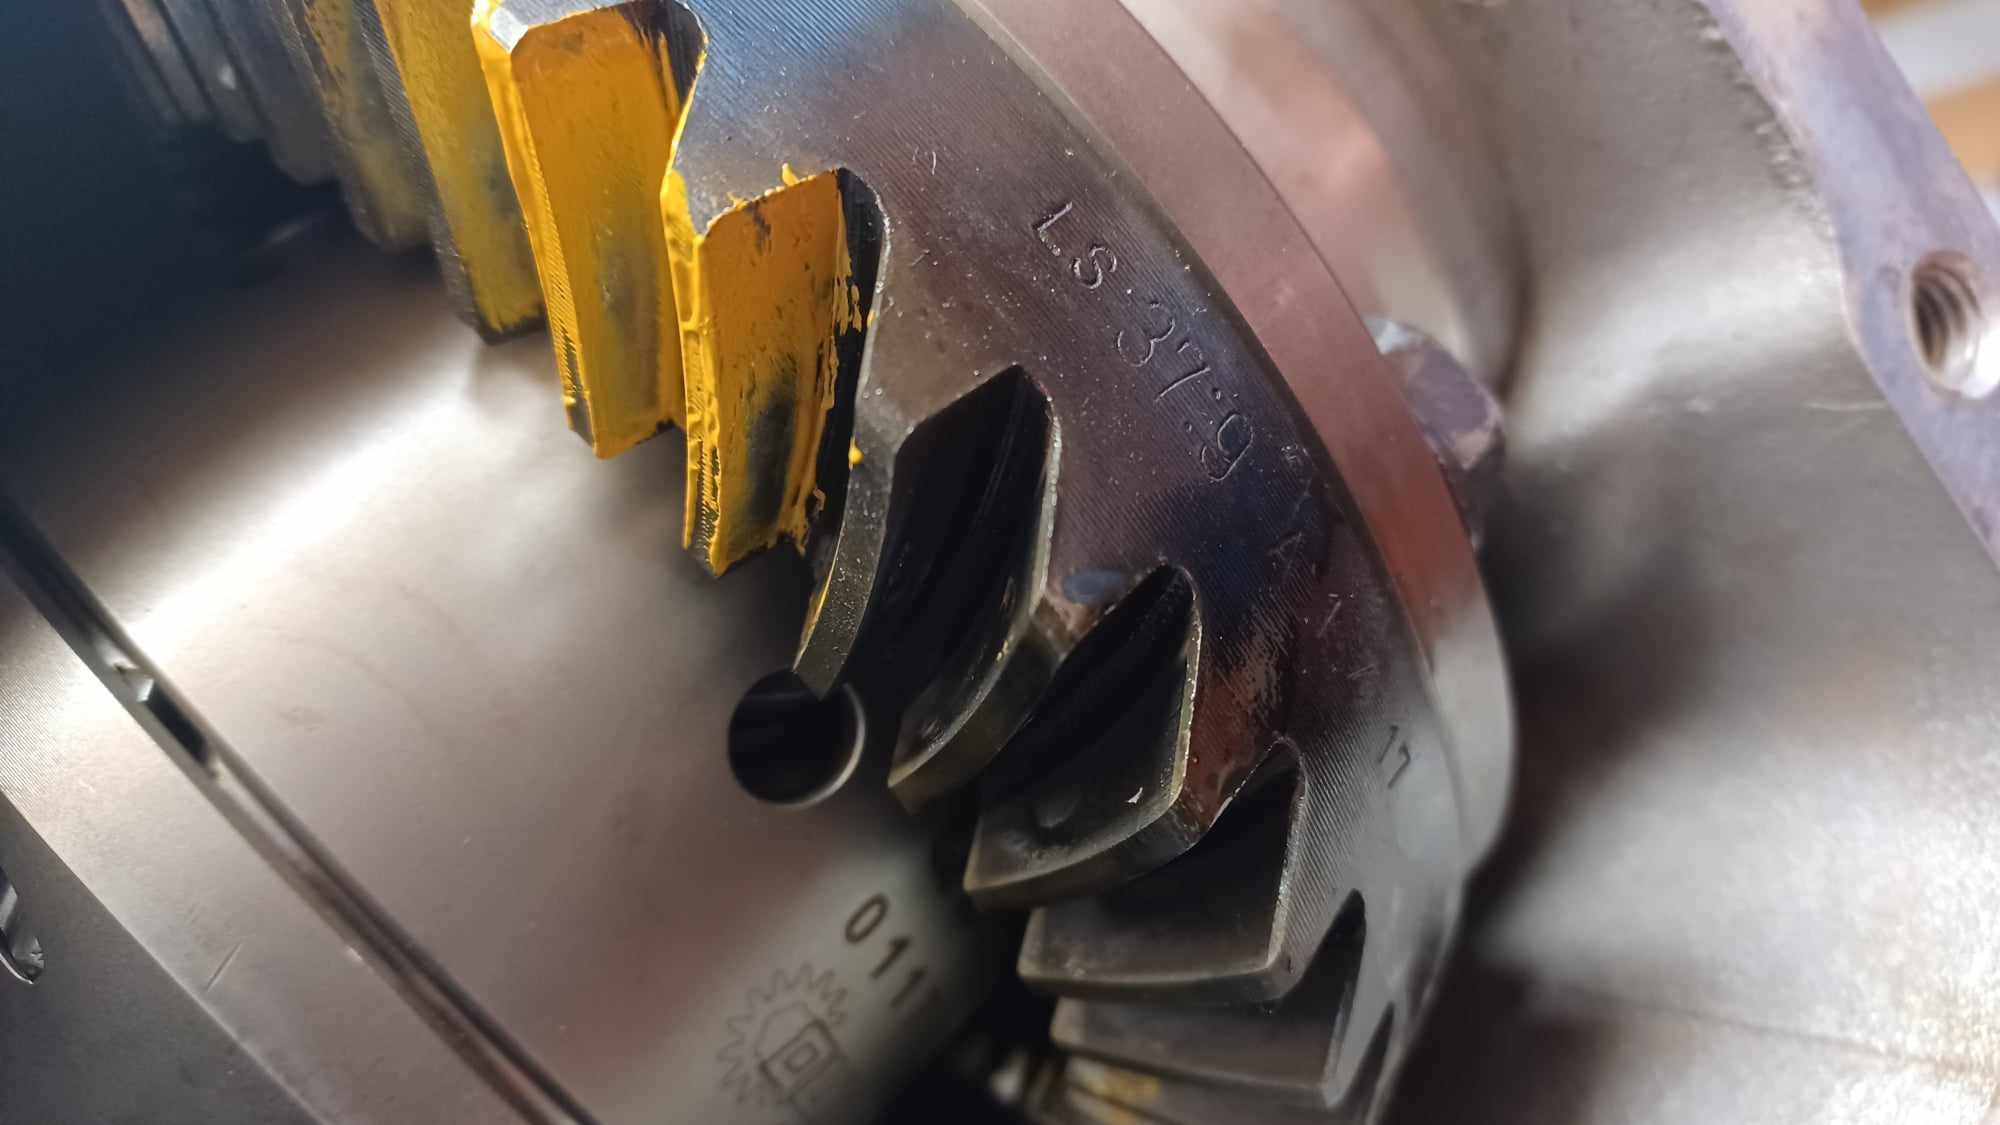
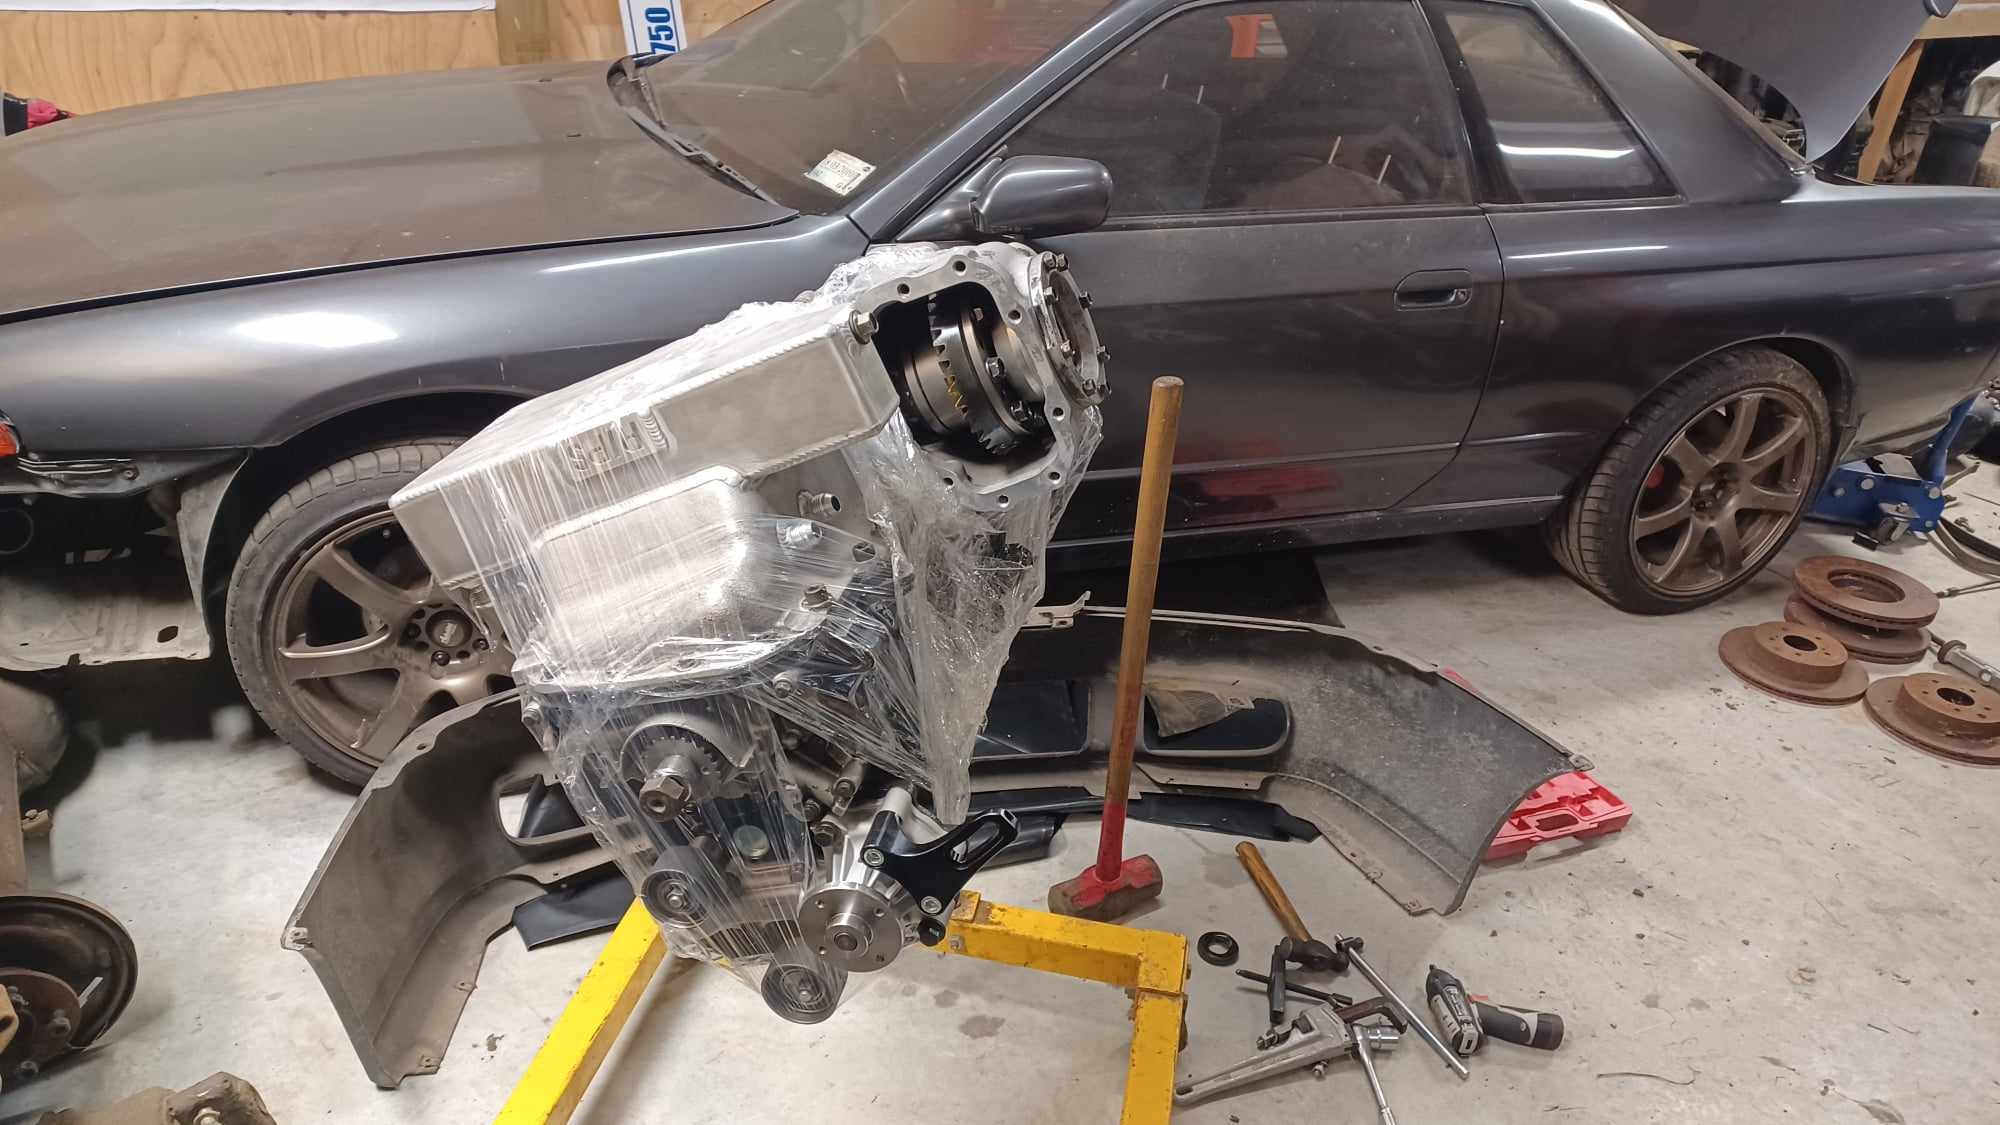
Current job is the front diff. I should have done it before bolting it to the engine but I was waiting on overnight parts from Japan. Here's my pinion preload gauge Got the pattern nearly there, but it's not perfect and the backlash it too tight so I'm waiting on more overnight parts from Japan. Currently sitting at 32 nights, but could arrive tomorrow. Fingers crossed As it sits now. Head gasket had arrived, but can't put the head on or it will be too hard to turn on the stand. Also found another sump, front diff, and transfer down the road for cheap so thought I better hoard them...... Hopefully an update in a week. I would like to get it going before Xmas and on the road in Feb
7 points
-
Back together - a few minor dramas with order-of-assembly errors. WOF now due - I found one brake light not working in pre-check so will have a look at that.
6 points
-
id suggest fitting a proper muffler there are few things more punishing than a loud exhaust on something that is slow.5 points
-
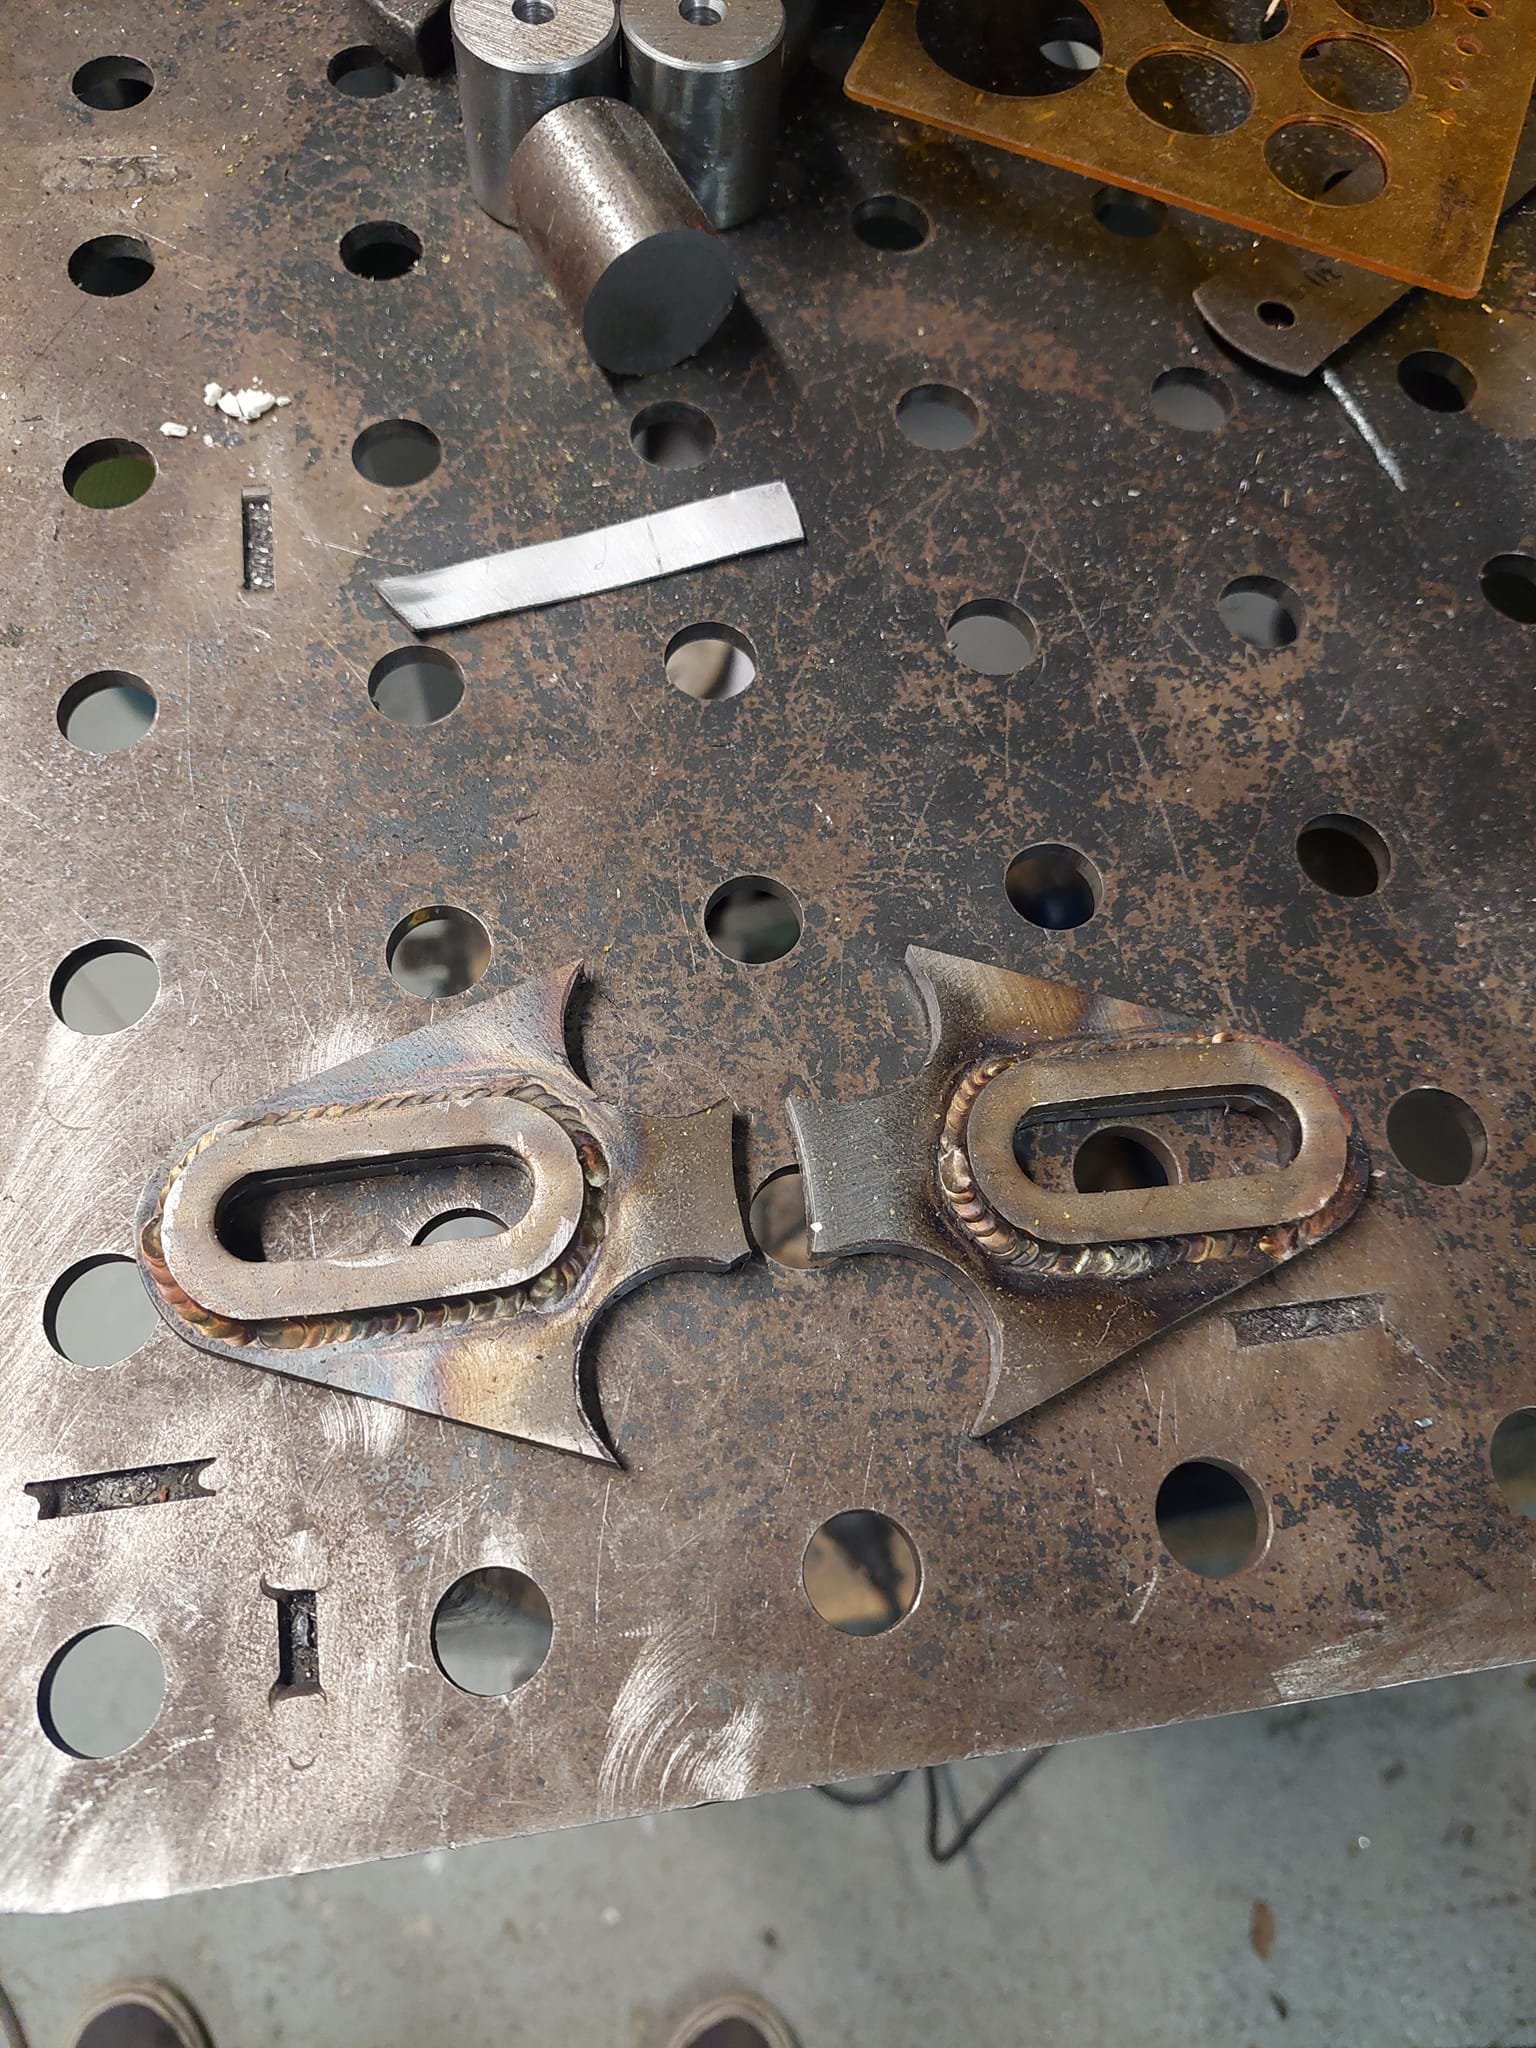
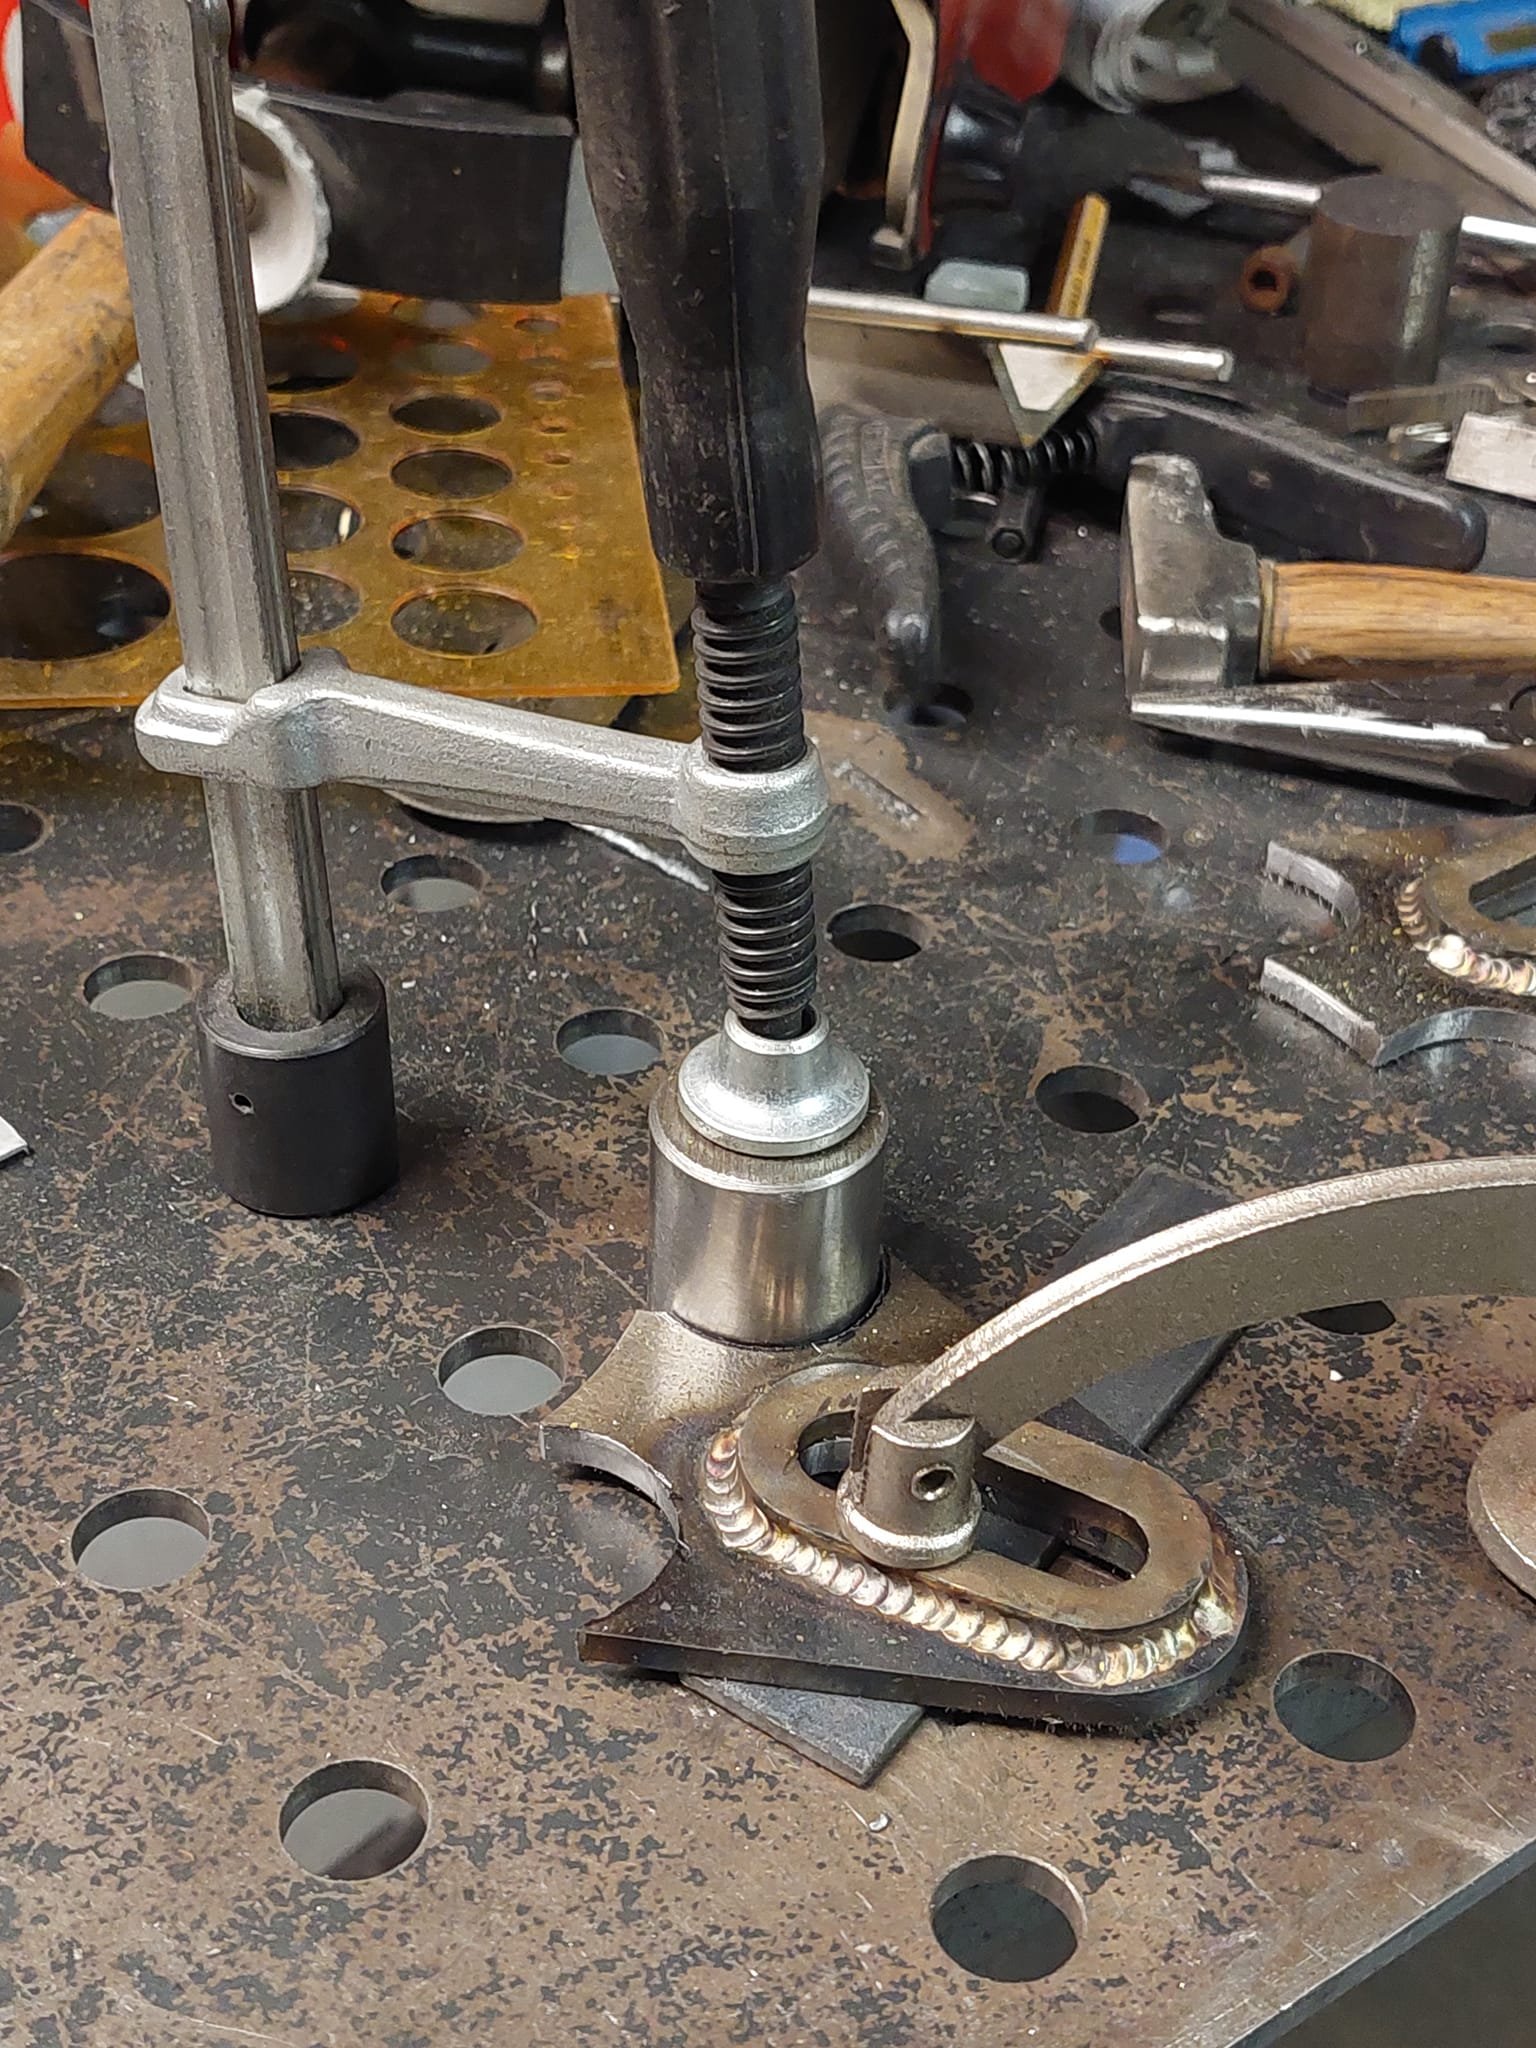
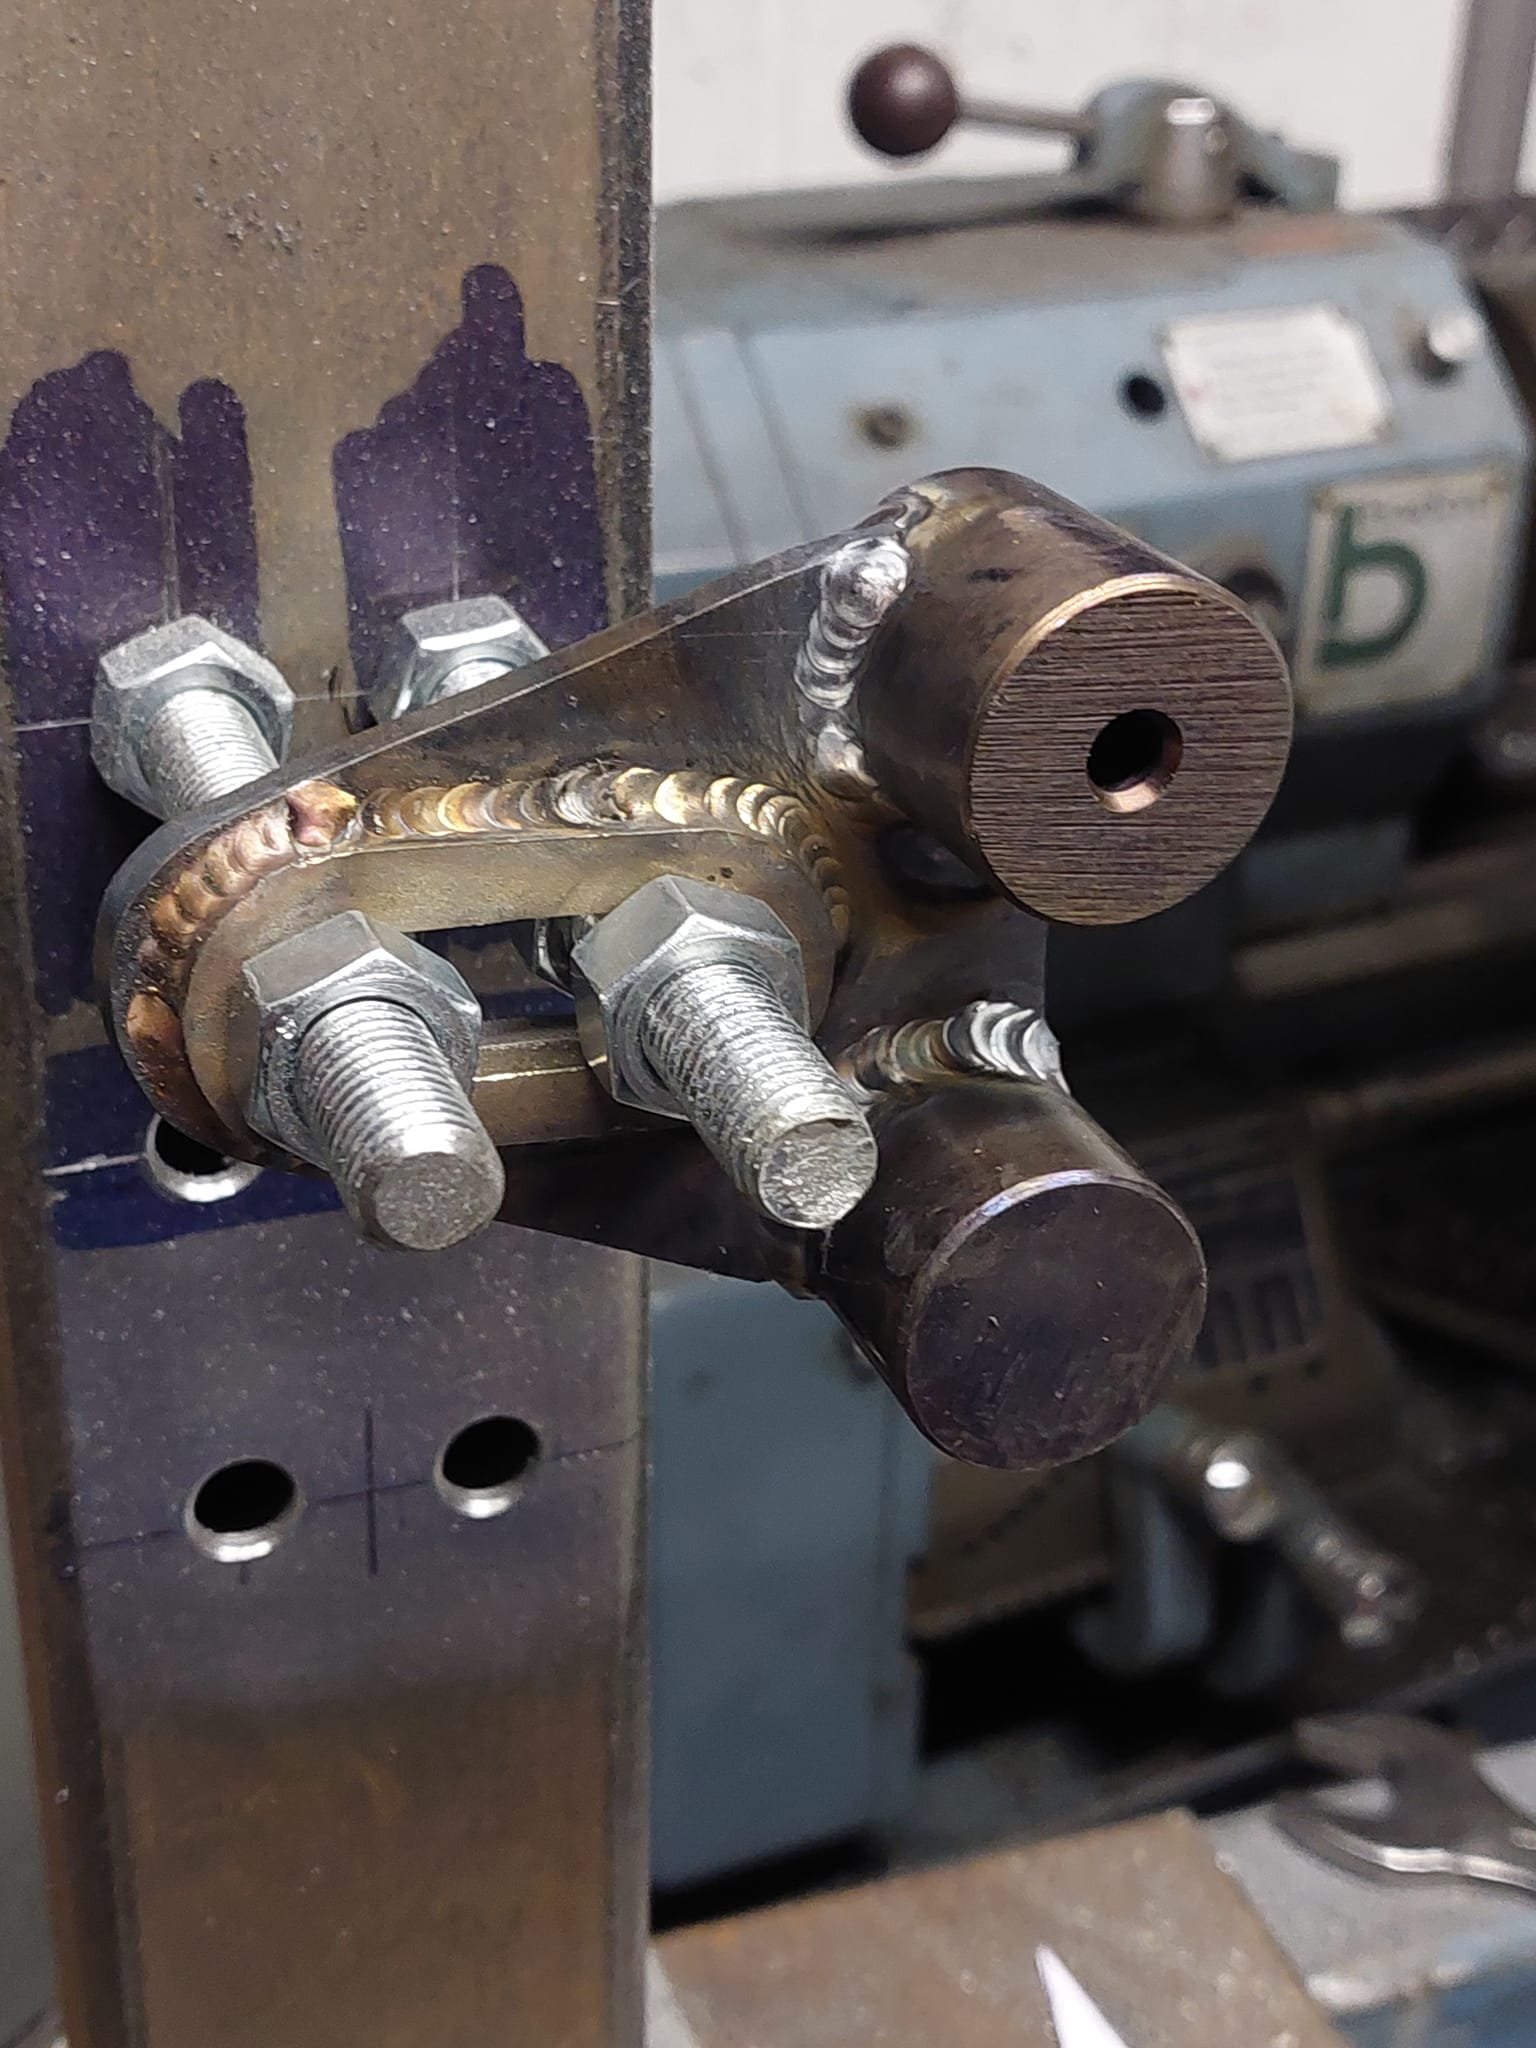
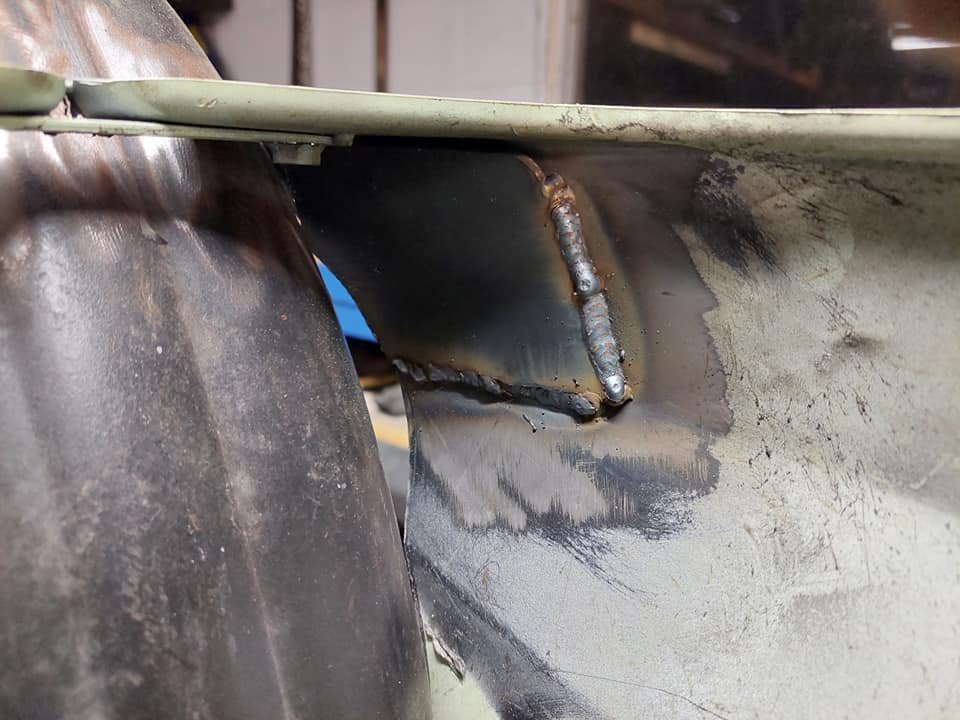
Front stabiliser bar - Chapter 9 Average looking welding in true Rough & Ready Resto style, but at least that is the first mounting bracket all glued together.
5 points
-
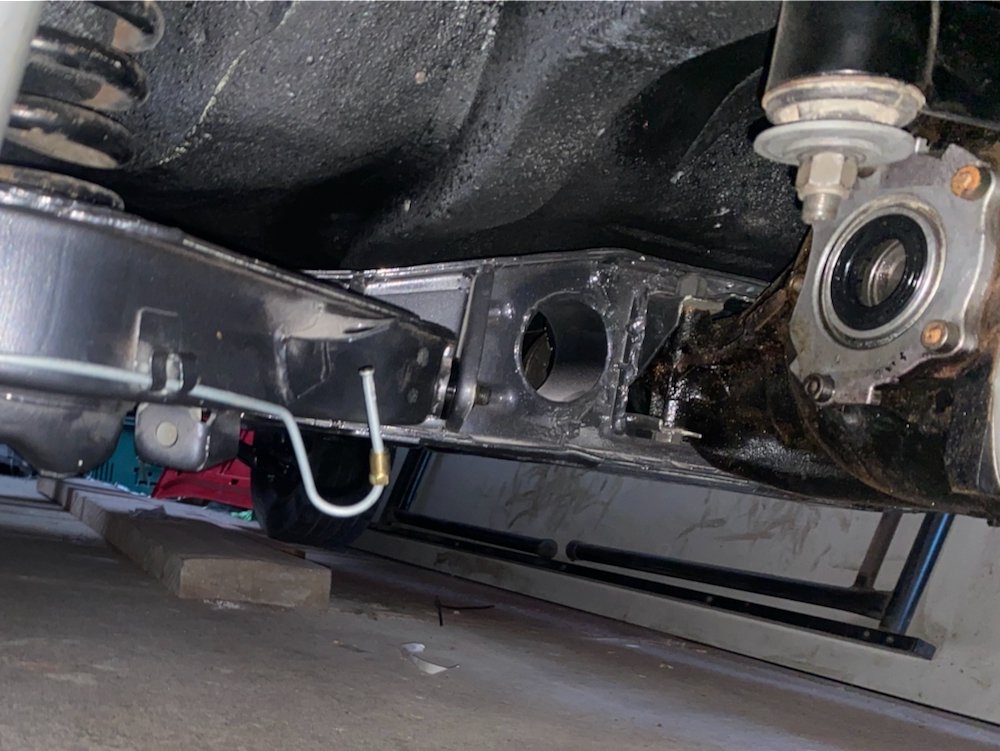
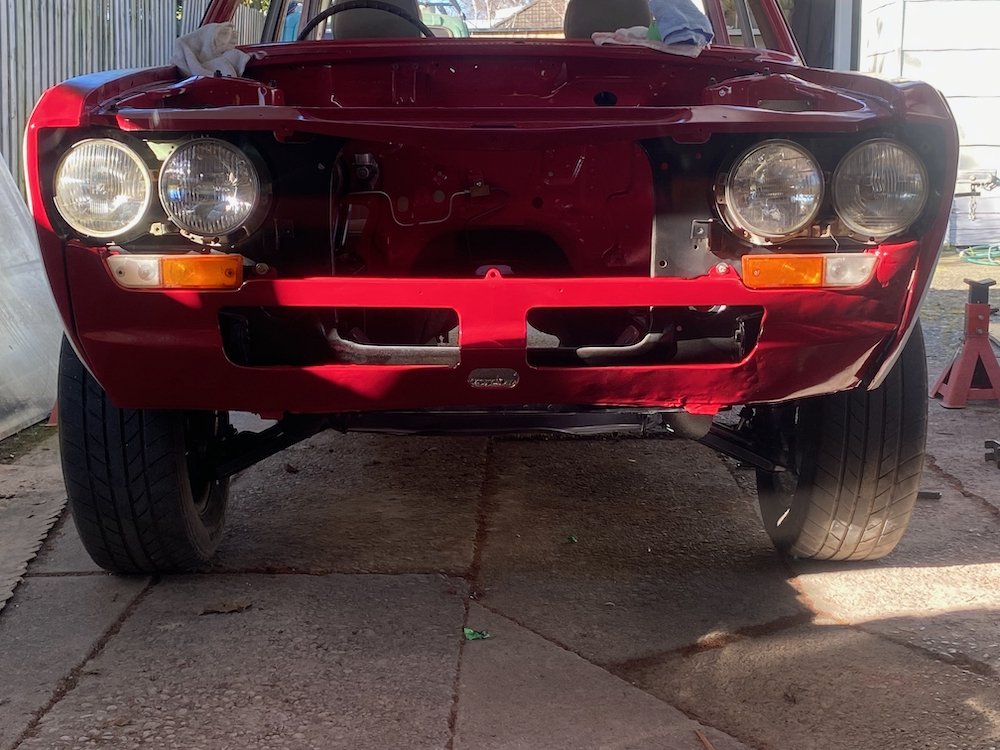
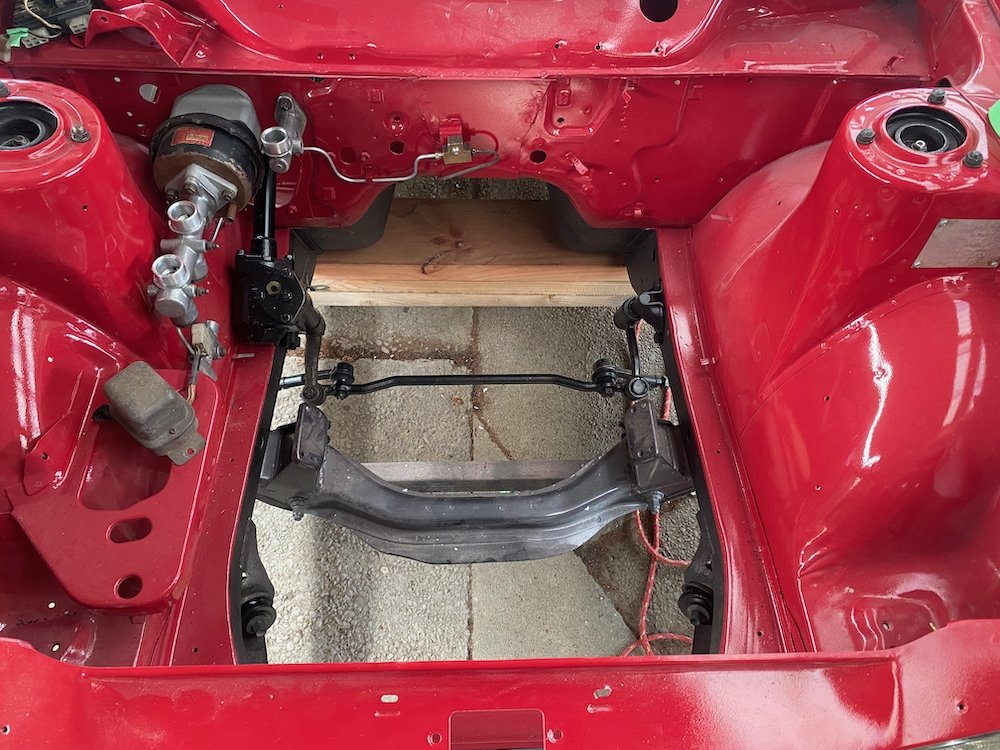
Still plugging away, winters been a bitch, weekends haven't gone to plan and the cold weather makes opening up the workshop a pain. And then when the weather did play nice, of course I had to keep up with house renos, at least I could outsource some of the work to the cnc and click through lighter work such as tending to the chrome. This week I started fitting out the engine bay, original brake booster, master cylinder, steering gear and pedalbox, new tie rods thanks to Rockauto, coat of black paint for pretty much everything else. Front struts and hubs complete with new bearings are in, same as the rear, at this stage keeping the same shocks all around, have a few things to work out before confirming what way to go. Wheels go on, dolly comes out Good to see those eyes on their feet again! Valance is pretty messed up, made the call during paining that i'd repair but not get too worried about shape as its ultimately hidden behind the bumper, hopefully a longer term plan will eventually sort it out. Have been renewing all the brake hard lines as I go, after putting the suspension in I found an issue, brain fart while bending the left rear I had the arm upside down on the bench, thinking I had more space the turn to get to the union hangs pretty low, best replace this one before going to far.
4 points
-
Thanks for the update. He had such terrible arthritis it was a wonder he could even think through the pain. His cars were always immaculate and he was a gentleman to race beside. There's not many blokes I'd touch wing mirrors with entering the Pukehoke hairpin at 160kmph on drum bakes, but Bill (and a drain layer from Te Awamutu) were amongst them. Edit: IMHO business should be like racing with those chaps. Go hard, go into it to win... but give your opponent racing room on the track and help him out off the track. Shake hands, share a beer in the evening, bit in the morning go out to try to beat him again without ever trying to make him lose3 points
-
you would probably get away with a straight thru muffler if the engine had a turbo , but an NA engine will need something better. go hang out at a boat ramp and when a tractor with a coby sticking up launches a boat, thats a good indication of what a non turbo 2L diesel would sound like3 points
-
3 points
-
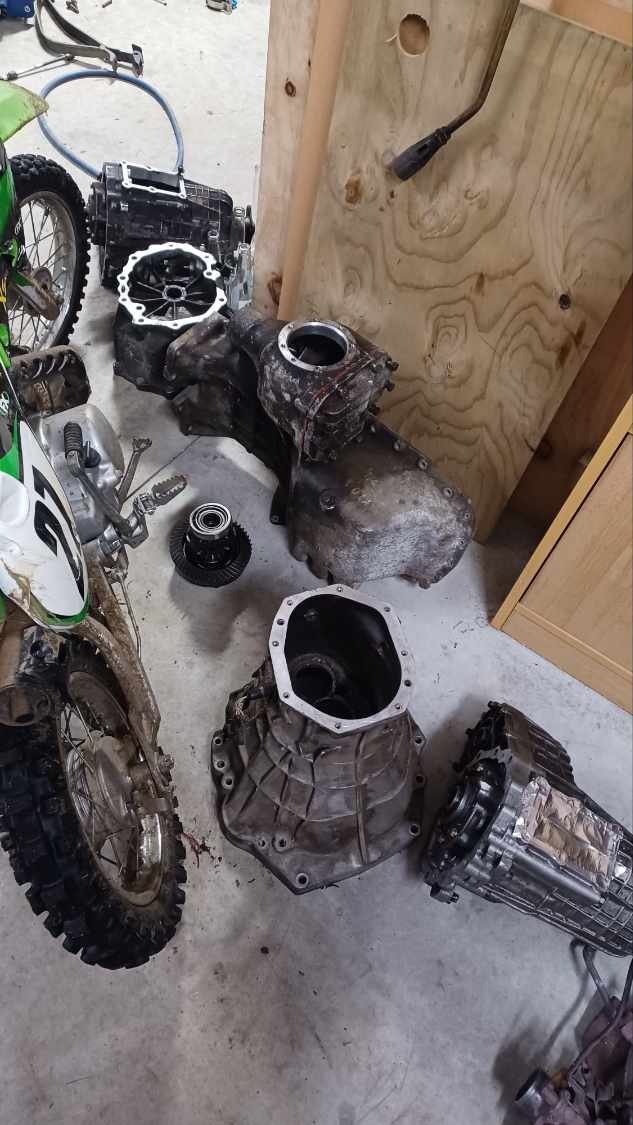
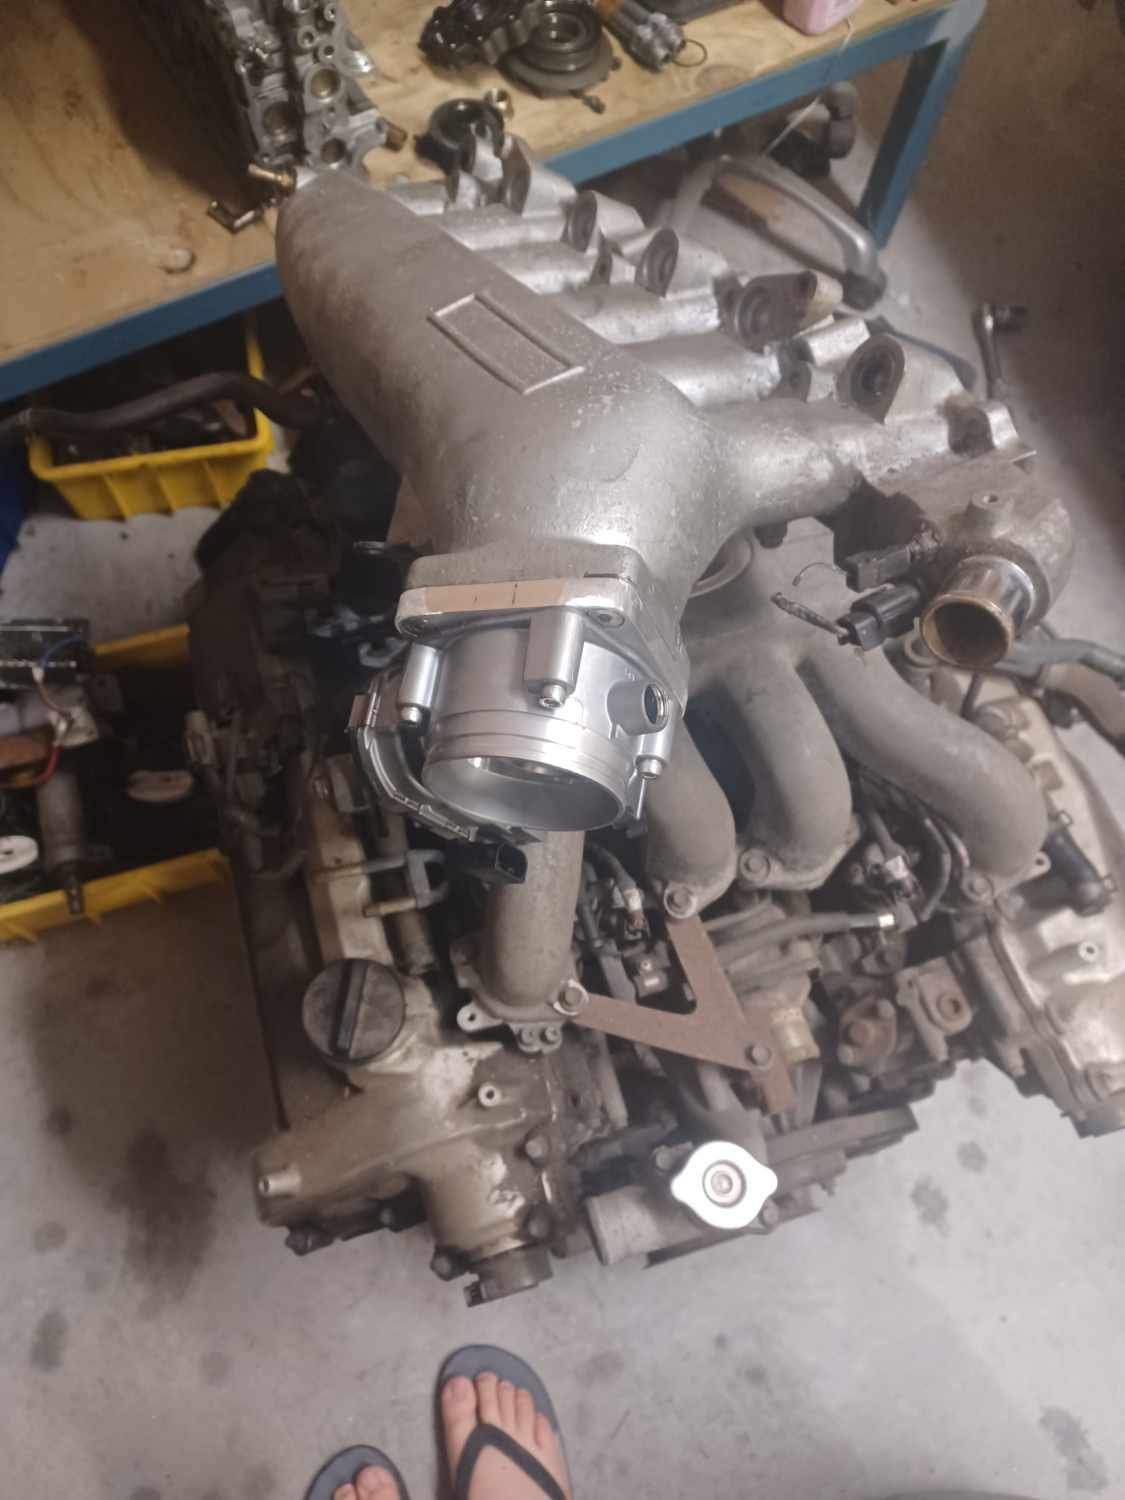
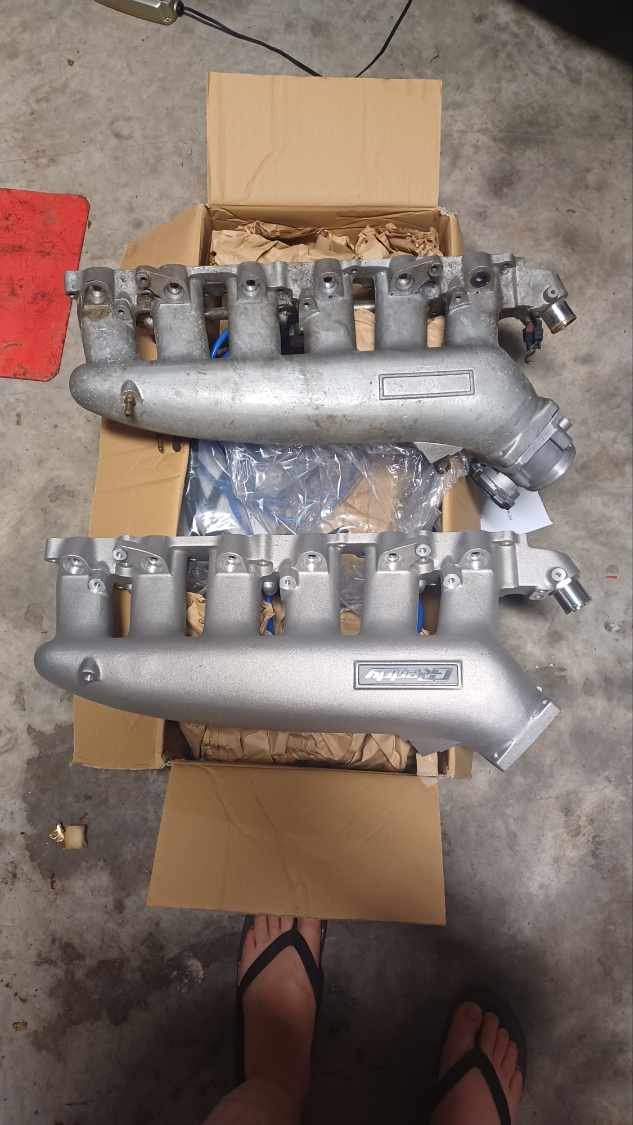
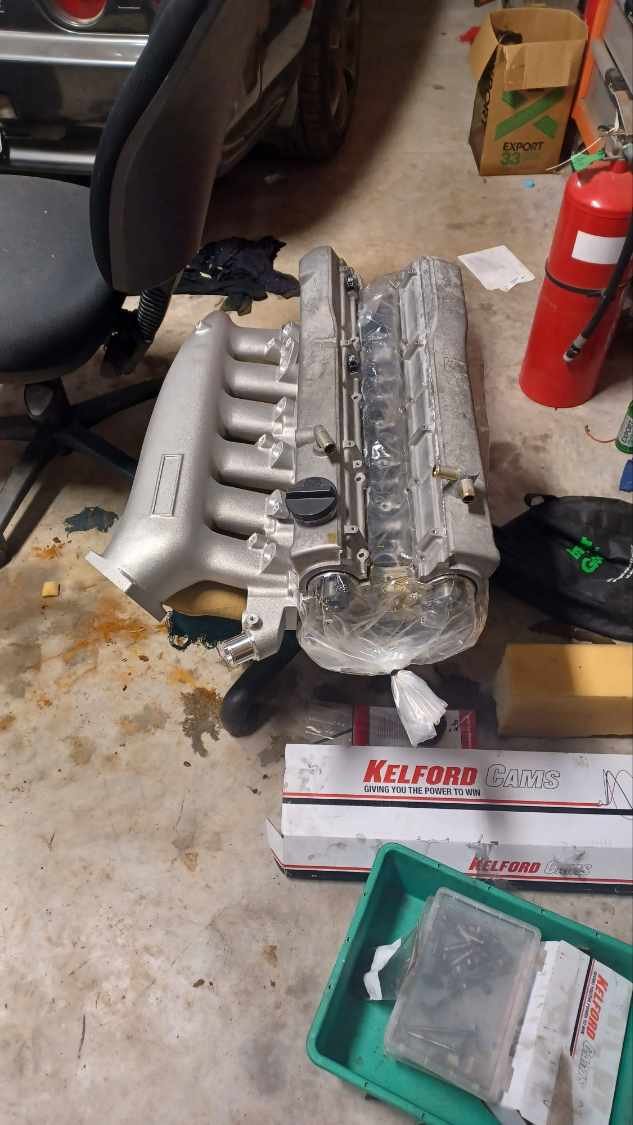
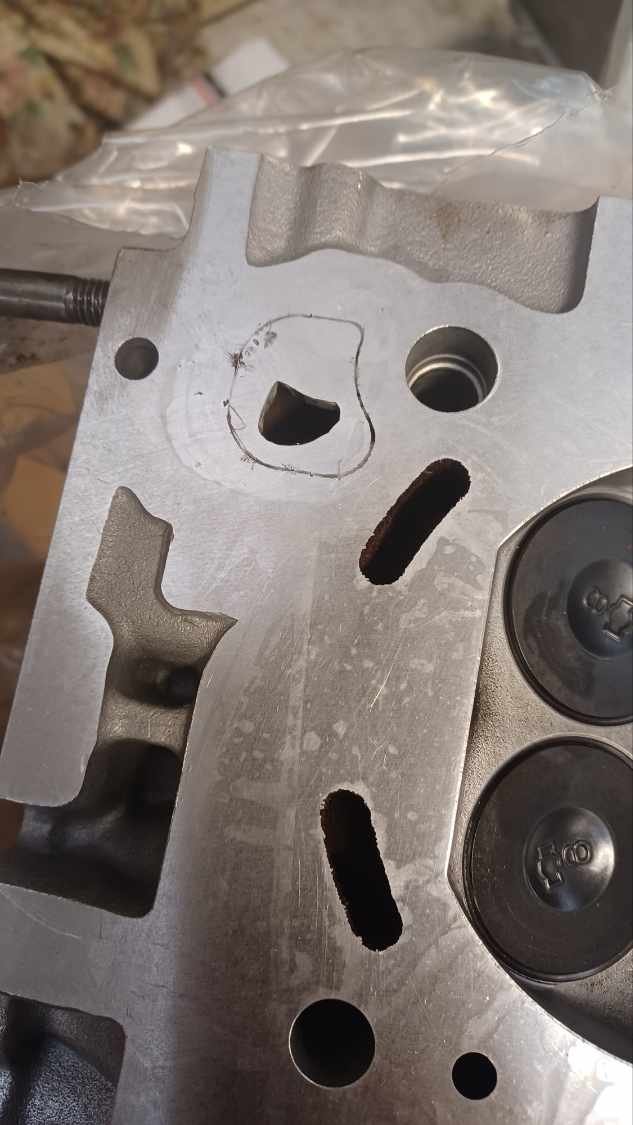
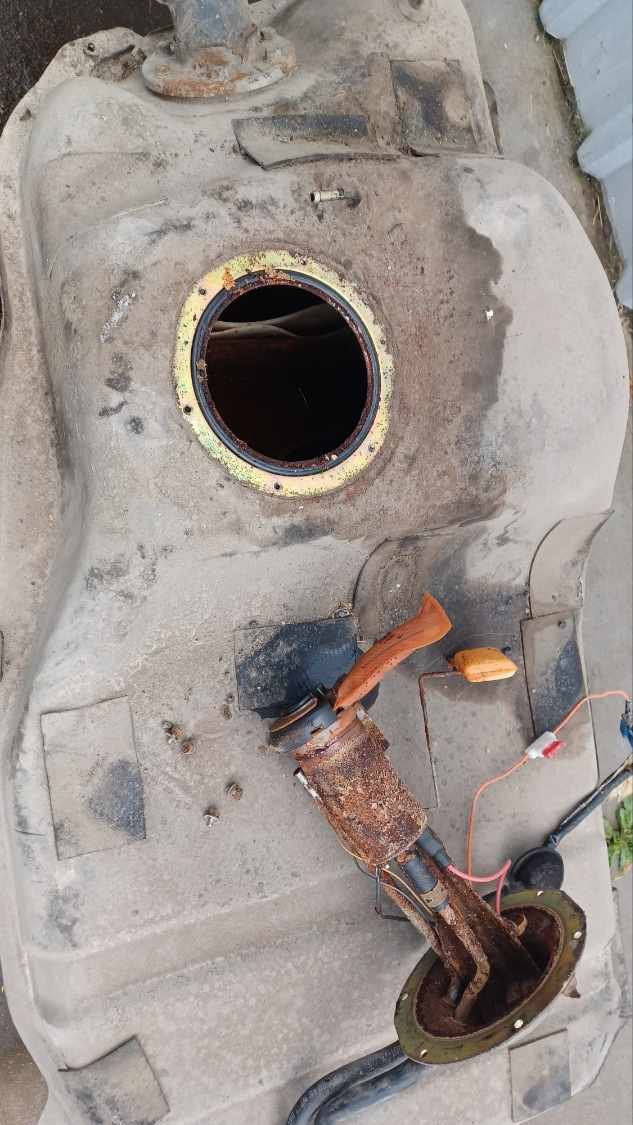
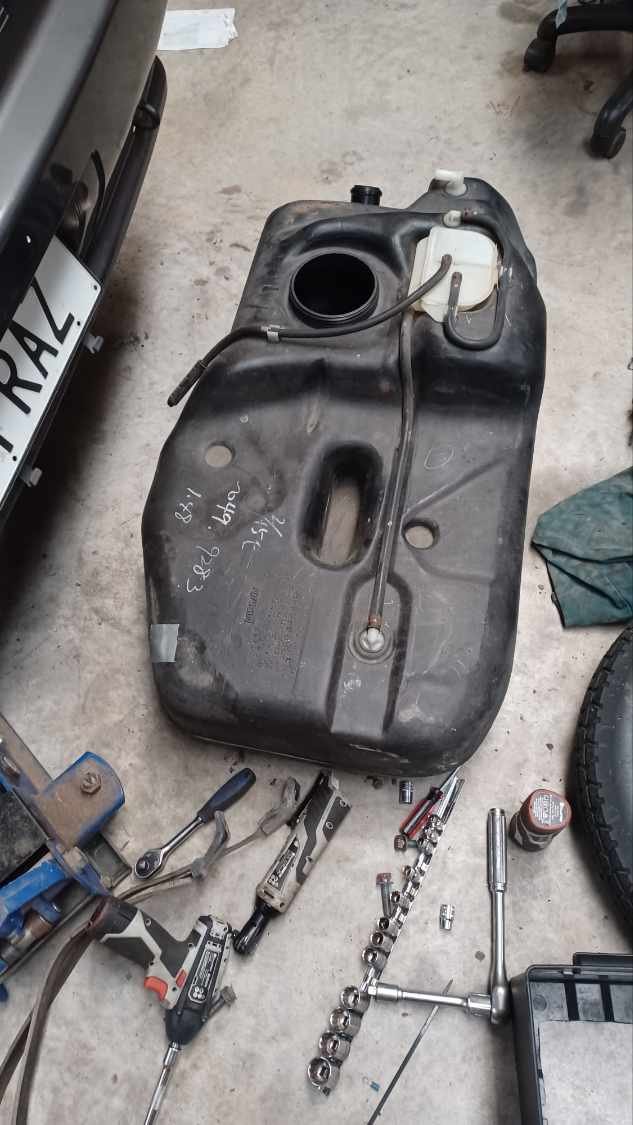
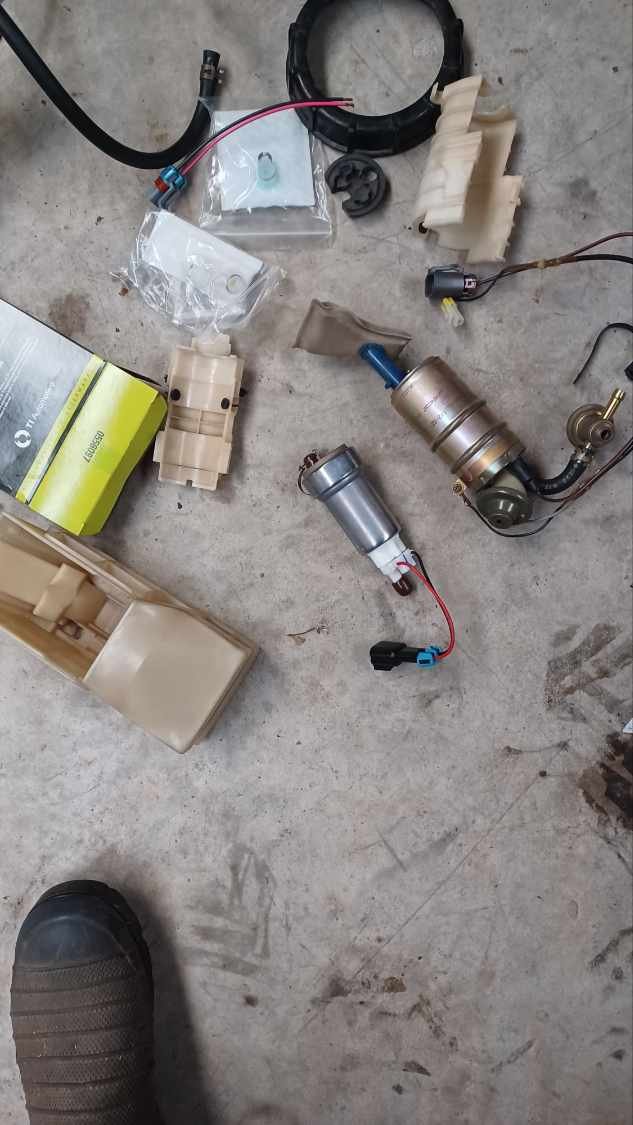
Wow, time flies when you're on OS. So I got the transfer back together and put it on the back of the box ready to go in. I'm suspicious of the gearbox, but don't want to open another can of worms right now so I'll ignore it. Next job was to adapt the 74mm ethrottle body to the inlet manifold. Adapters are not common (=expensive) for this application as most people run the bigger throttle so i got a bit of Ali plate and a holesaw and some backyard machining later Just needs a polish and it's done. While doing this I remembered that my China plenum was actually a dog and I did some shitty things to make it fit and also not leak coolant through the casting. I found a genuine one online for a good price and the quality is far superior. Got the head back recently so it's waiting to go on. Just need to port the water bypass port in the head as I welded it up to suit the rb30 block. You can see the weld where the water port was. I think I'll get in here with a die grinder and vacuum cleaner to catch the swarf. Hopefully it will work out. I dropped the fuel tank and it was fucked. Has been sitting for maybe 12 years and was maybe 1/2 full when parked. Fortunately I had found a gtr plastic tank a few years back. 72L vs 55 or 60 so a good improvement. Picked up a walbro 525 L/hr fuel pump to go in. Hindsight says I probably could have gone for a 460 but now I can run e85 if the opportunity arises without needing more pump. Surprising how much smaller it is than the stock pump. Got some more goodies for the fuel system too but no photos yet
3 points
-
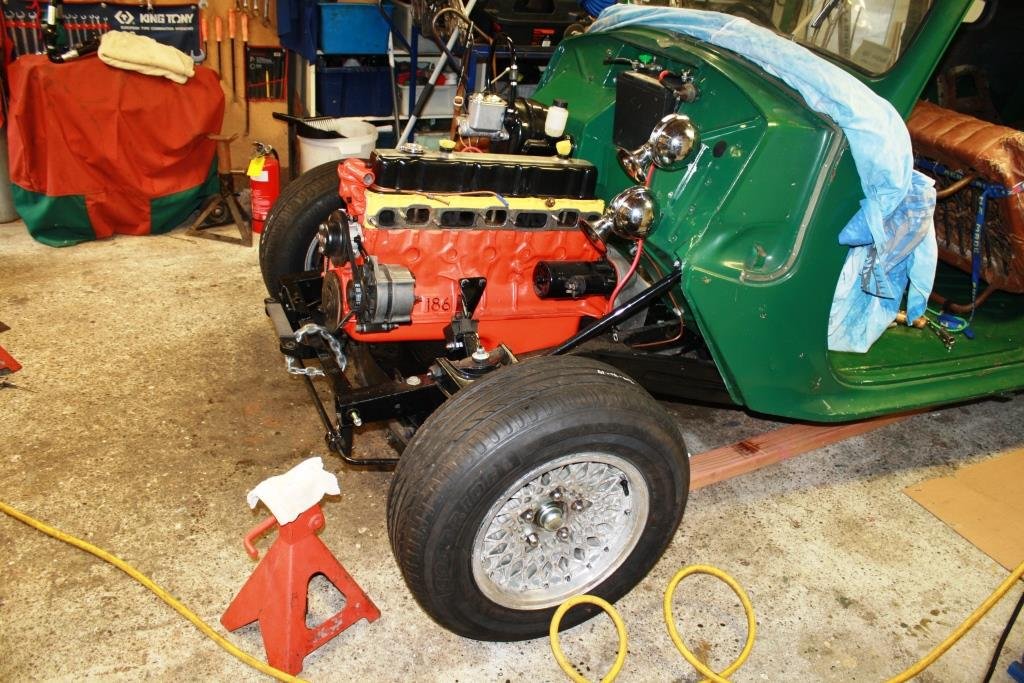
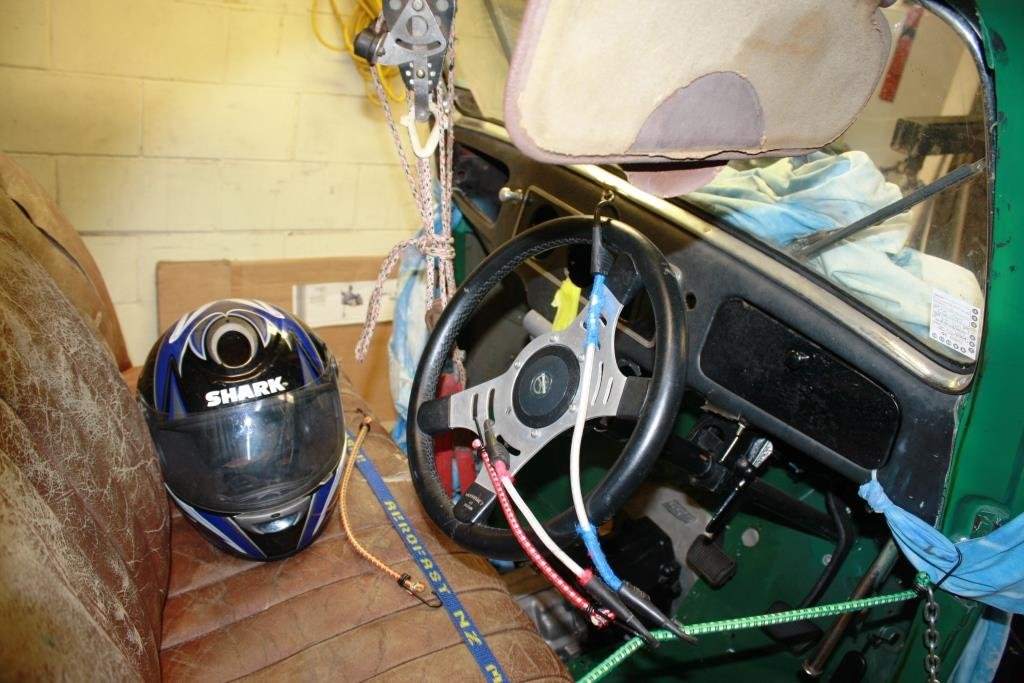
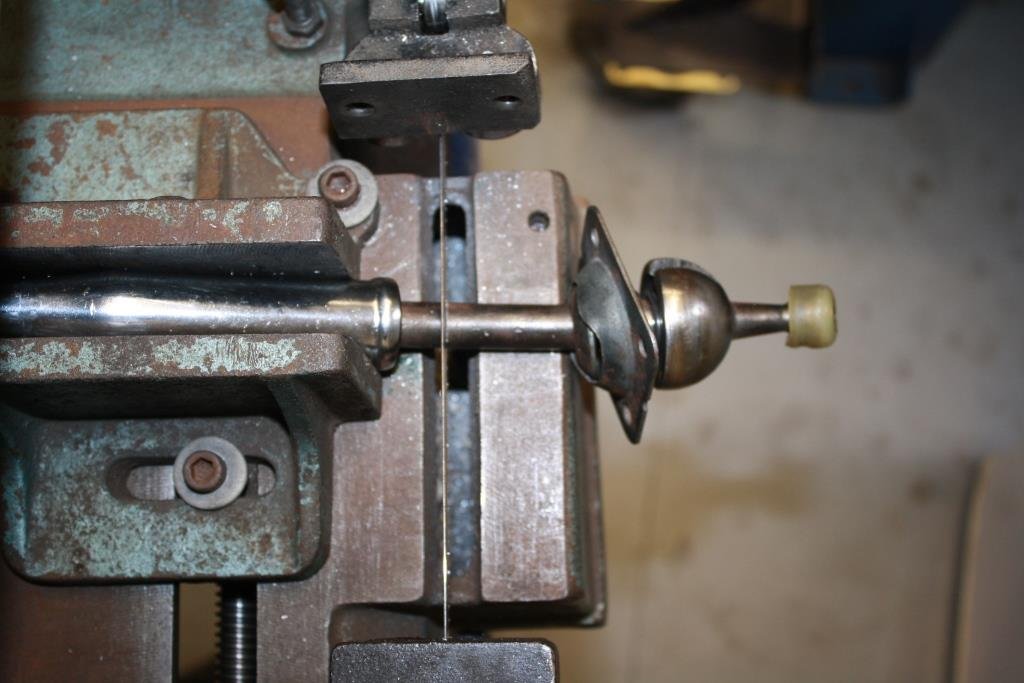
The following day I awoke filled with remorse and contriteness for my display of non-woke, non-PC vitriol the previous evening. (I.e. spitting the dummy). So for the umpteenth time it was radiator & front shell, off… Inlet and exhaust off… And engine & box out…….. (I enlisted the help of our professional racing driver - he lives next door to his “Gramps”). (He also helped out with some creative steering wheel mods…………). With the rear gearbox housing off it was a good chance to check 5th gear - all looked ok. Cut out a new gasket…. Re-assembled with the new parts….. Poked it all back in the hole it came out of and it looks like the gear lever is finally in the right place. Decided I didn’t want to use the Toyota gear lever so I cut the bottom off it….. I then cut the bottom off the 70 year old original lever…… And did a bit of welding, bending and painting. Although it took far too much of my spare time the gear lever is finally where I want it - I love the result.
3 points
-
Bloody rotary owners, always selling shady crap haha. I guess lots of that can be put down to peoples skill level - what they think is ok often turns out to be subpar at best.2 points
-
Agreed totally expect some work when buying an old car,but yeah...... took it out for a run today to test a bunch of things, and it's driving really nice now, suspension is doing everything it should, no noises at all, got up to temp, ran really well, felt pretty good all round There's still a few things to do, as listed and it's not starting well ( bad starter/voltage drops maybe), I think that's down to wiring issues which I've already planned to look at. And I'm going to change the fuel system a little. Overall, I'm starting to like the car, and it does look pretty sweet on road2 points
-
Bill sold Coby a while back now. He is a good bugger and can wrestle a race car round a track with the best of them. I think he still has the Nova but doesn't drive it anymore due to health reasons. I miss his monthly visits at work.2 points
-
Ive used Superpro bushes a few times, usually ordered via Sparesbox in Aus, by getting the part numbers from the Superpro site. No complaints here. Depending on the style they can take a bit of work to fit, but I haven't had any that couldn't be fitted or were damaged on install.2 points
-
Coby is a brand and was owned by a guy I raced cars with. He may still own the business but I have lost touch with him. The Coby brand includes products such as reducers, doughnuts, mufflers and resonators. A resonator is a free flow style design slightly similar to a motorcyle baffle system. A resonator will reduce nasty exhaust noise but leave a fair bit of burble in your exhaust tone. They can sound great, but can also sound shit if the exhaust diameter is too large for engine displacement2 points
-
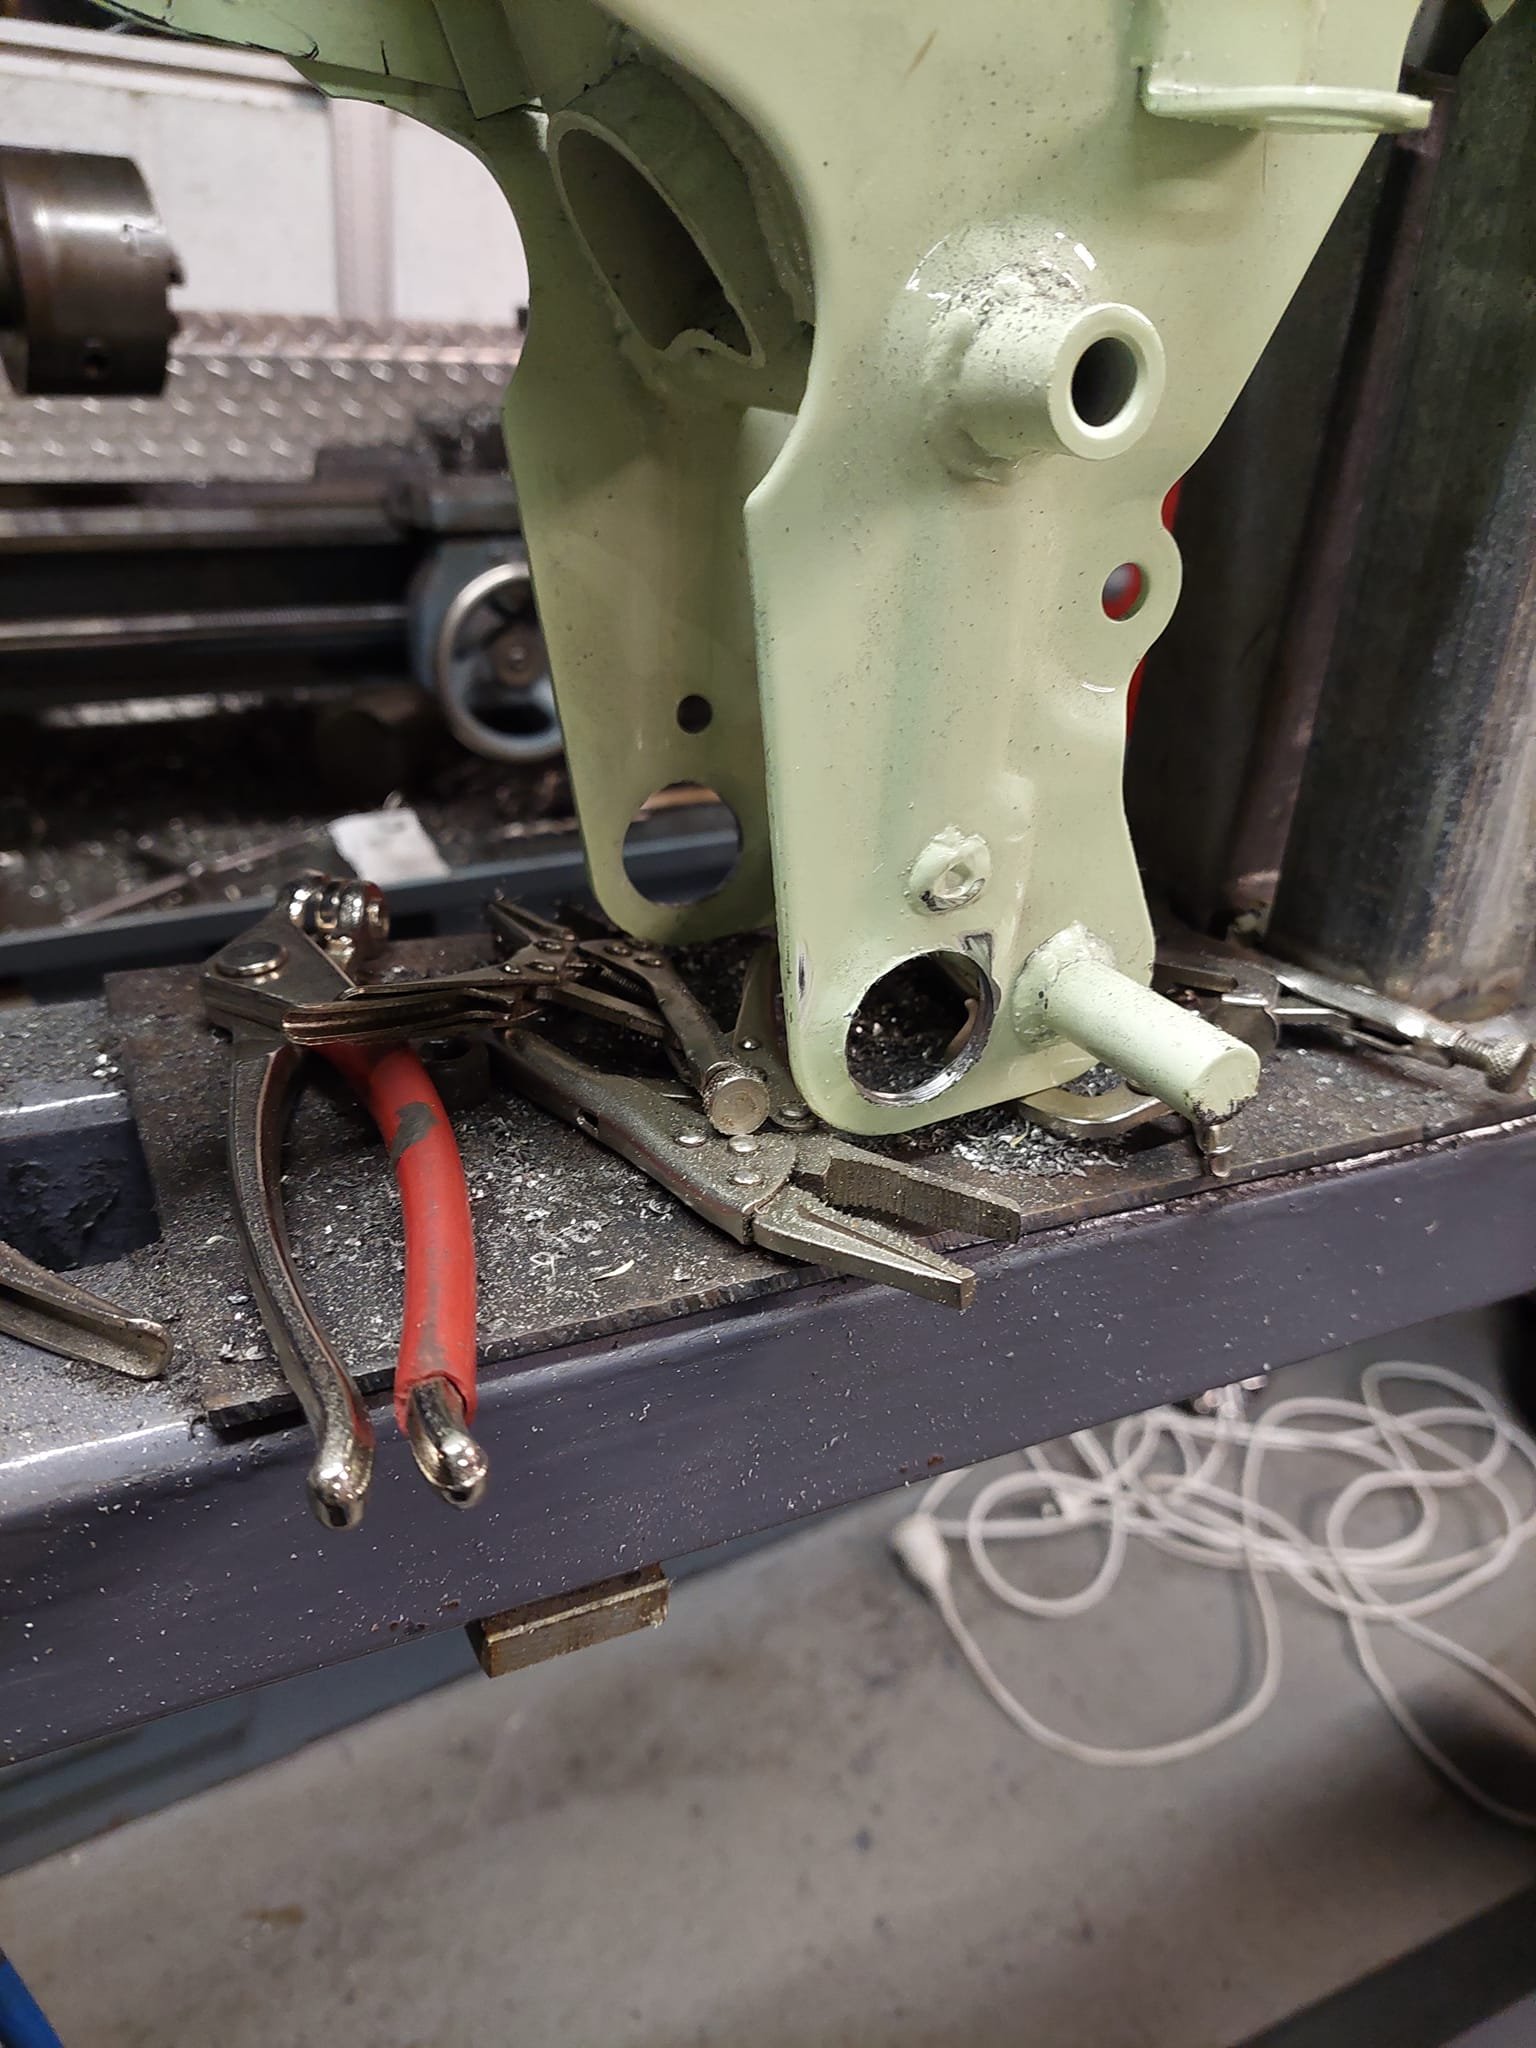
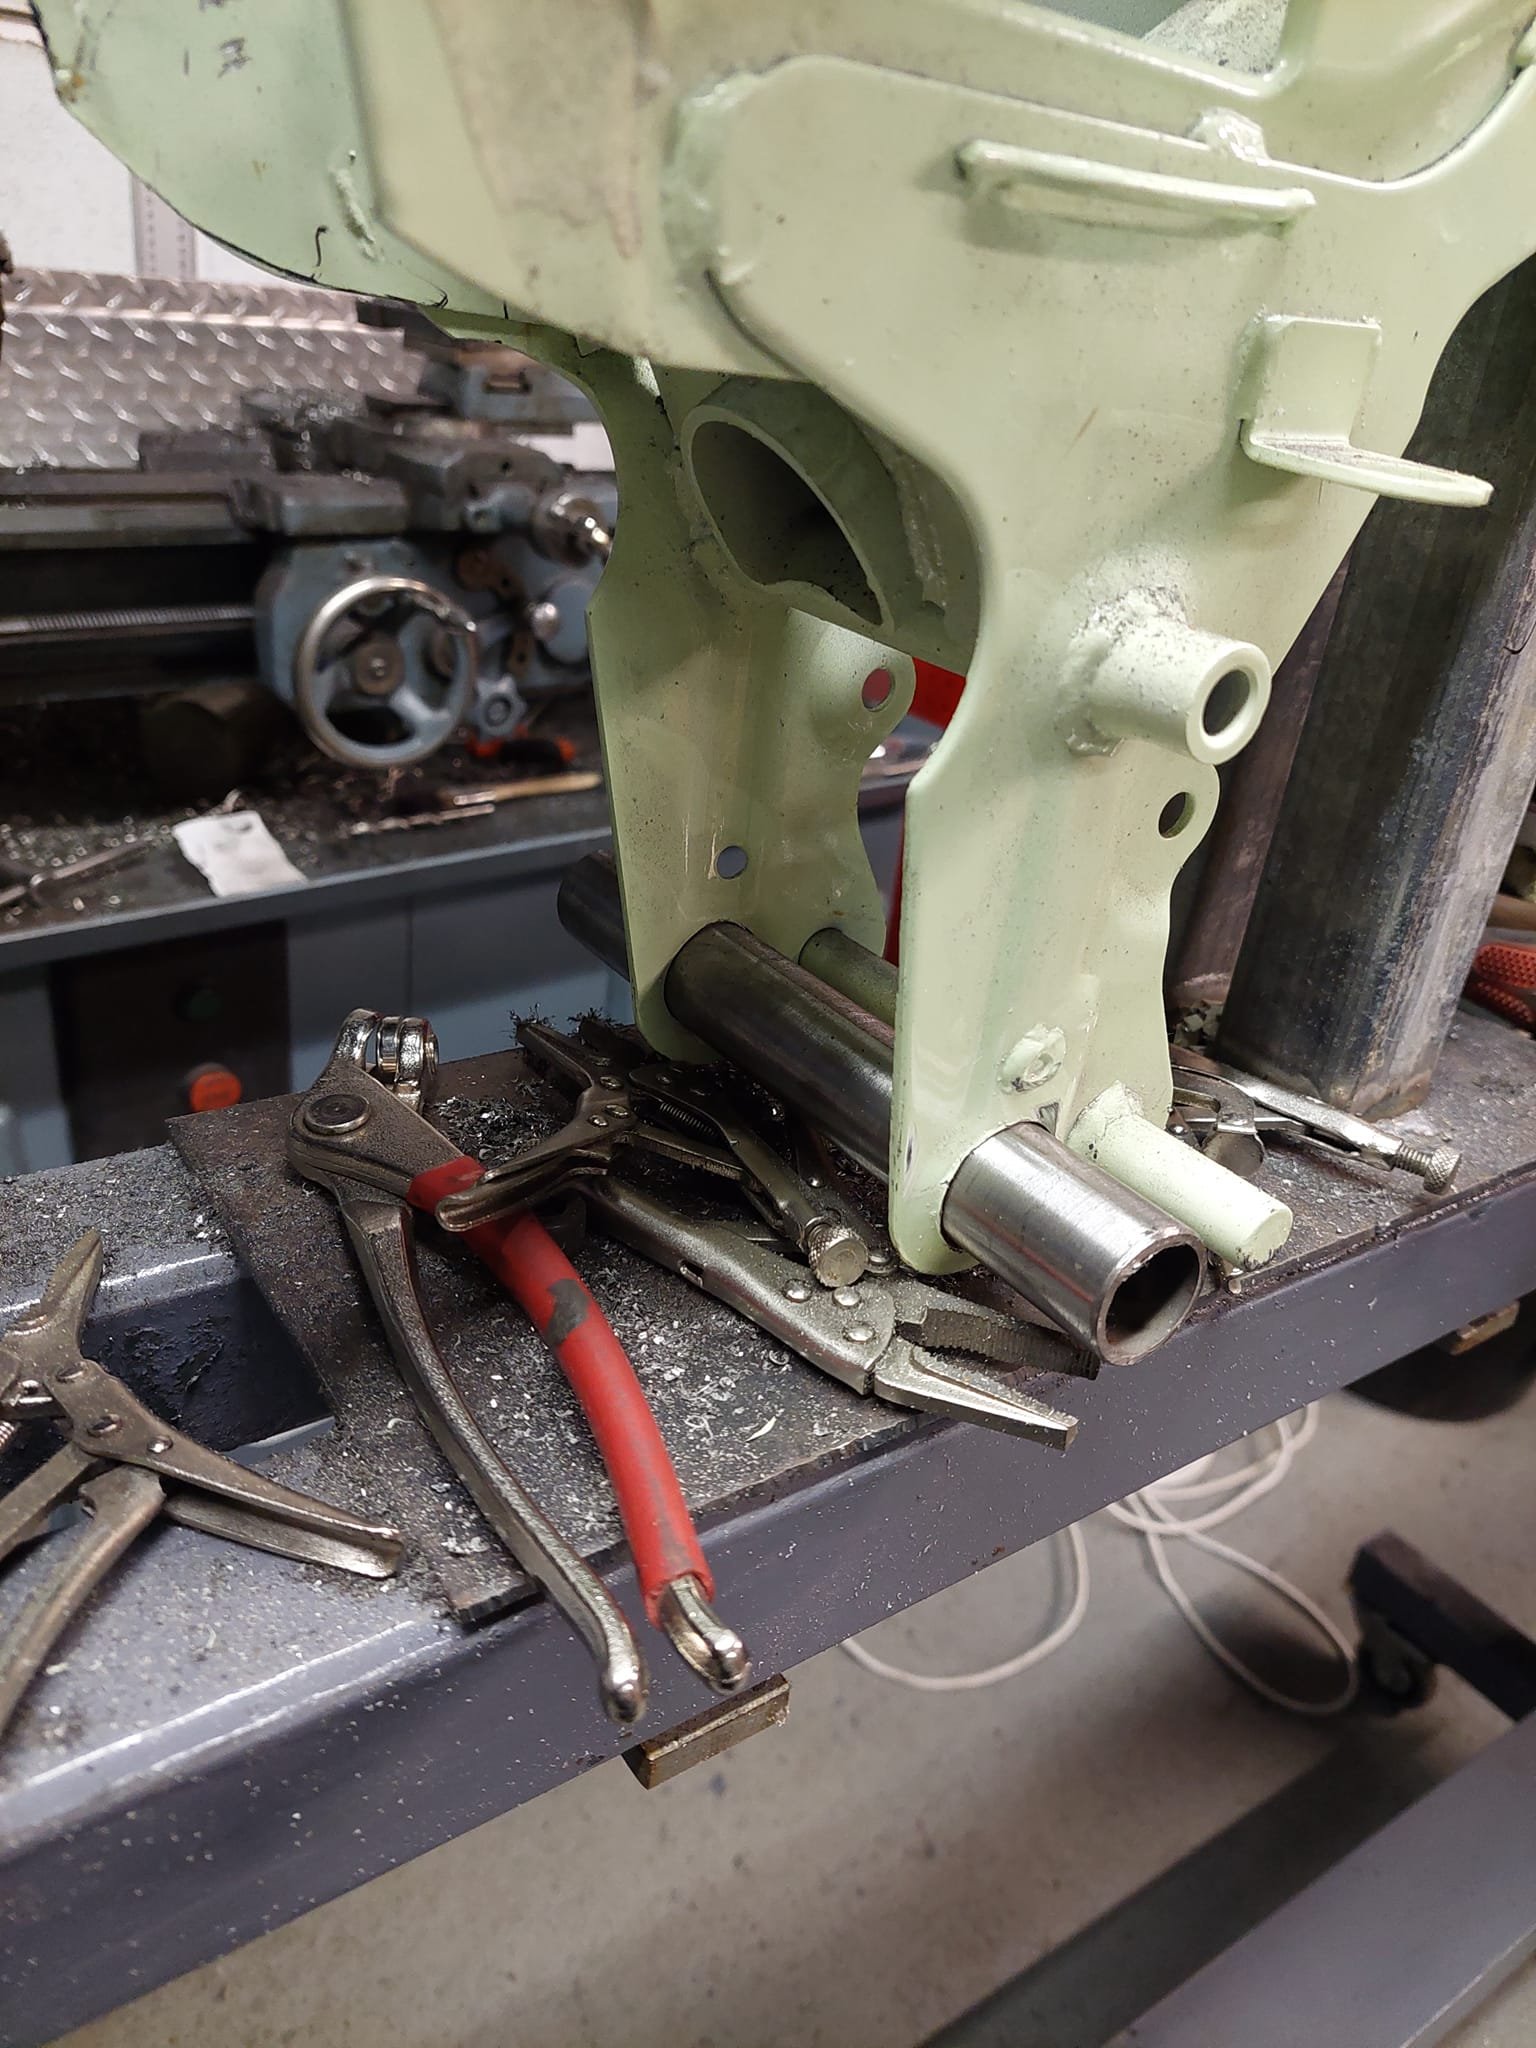
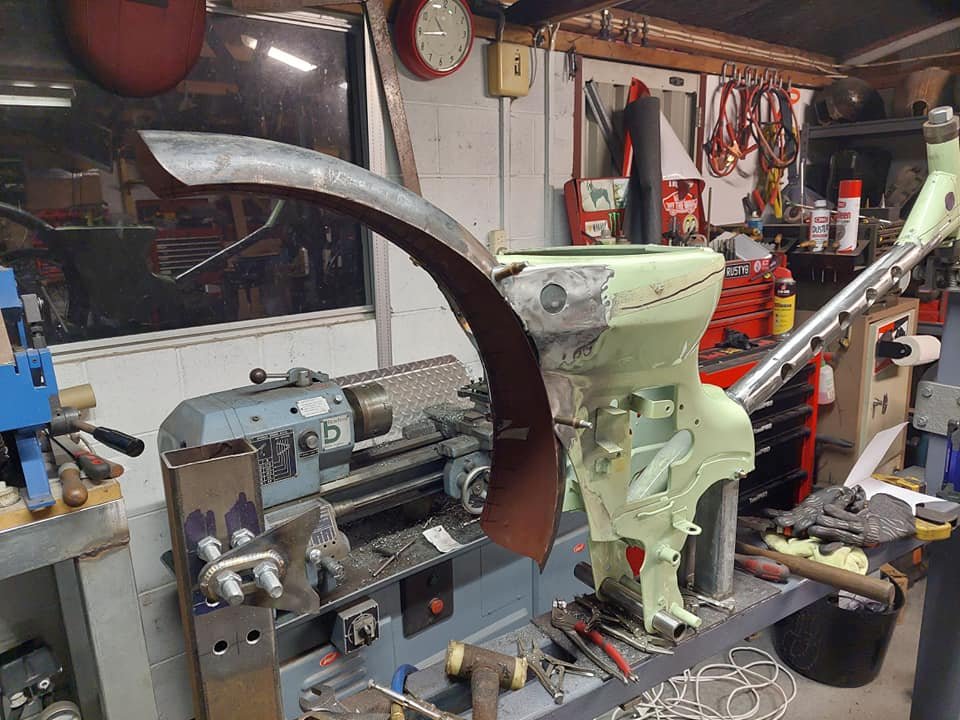
I modified the rear axle plate to accommodate the mounts for the seat and chainstay tubes. Theyre basically some 30mm round bar with one of them with a drilled and tapped hole so I can mount a sissy bar to them. Working away some more on the tube mounts I drilled out the holes that the rear brake pedal goes through to accept some tube that the front part of the chainstay will be welded to For the seatstay mounts Ive added some 3mm plate to the inside of the frame so I can drill some holes to pass through some more tube like the front chainstay mounting point. Then I offered up the mudguard in place and cleco it in place. Once I've got all of the hardtail tubes welded in place I'll be able to fully weld the mudguard in place which will add heaps of strength to the frame and stop my dickies and flannel shirt from getting all dirty.
2 points
-
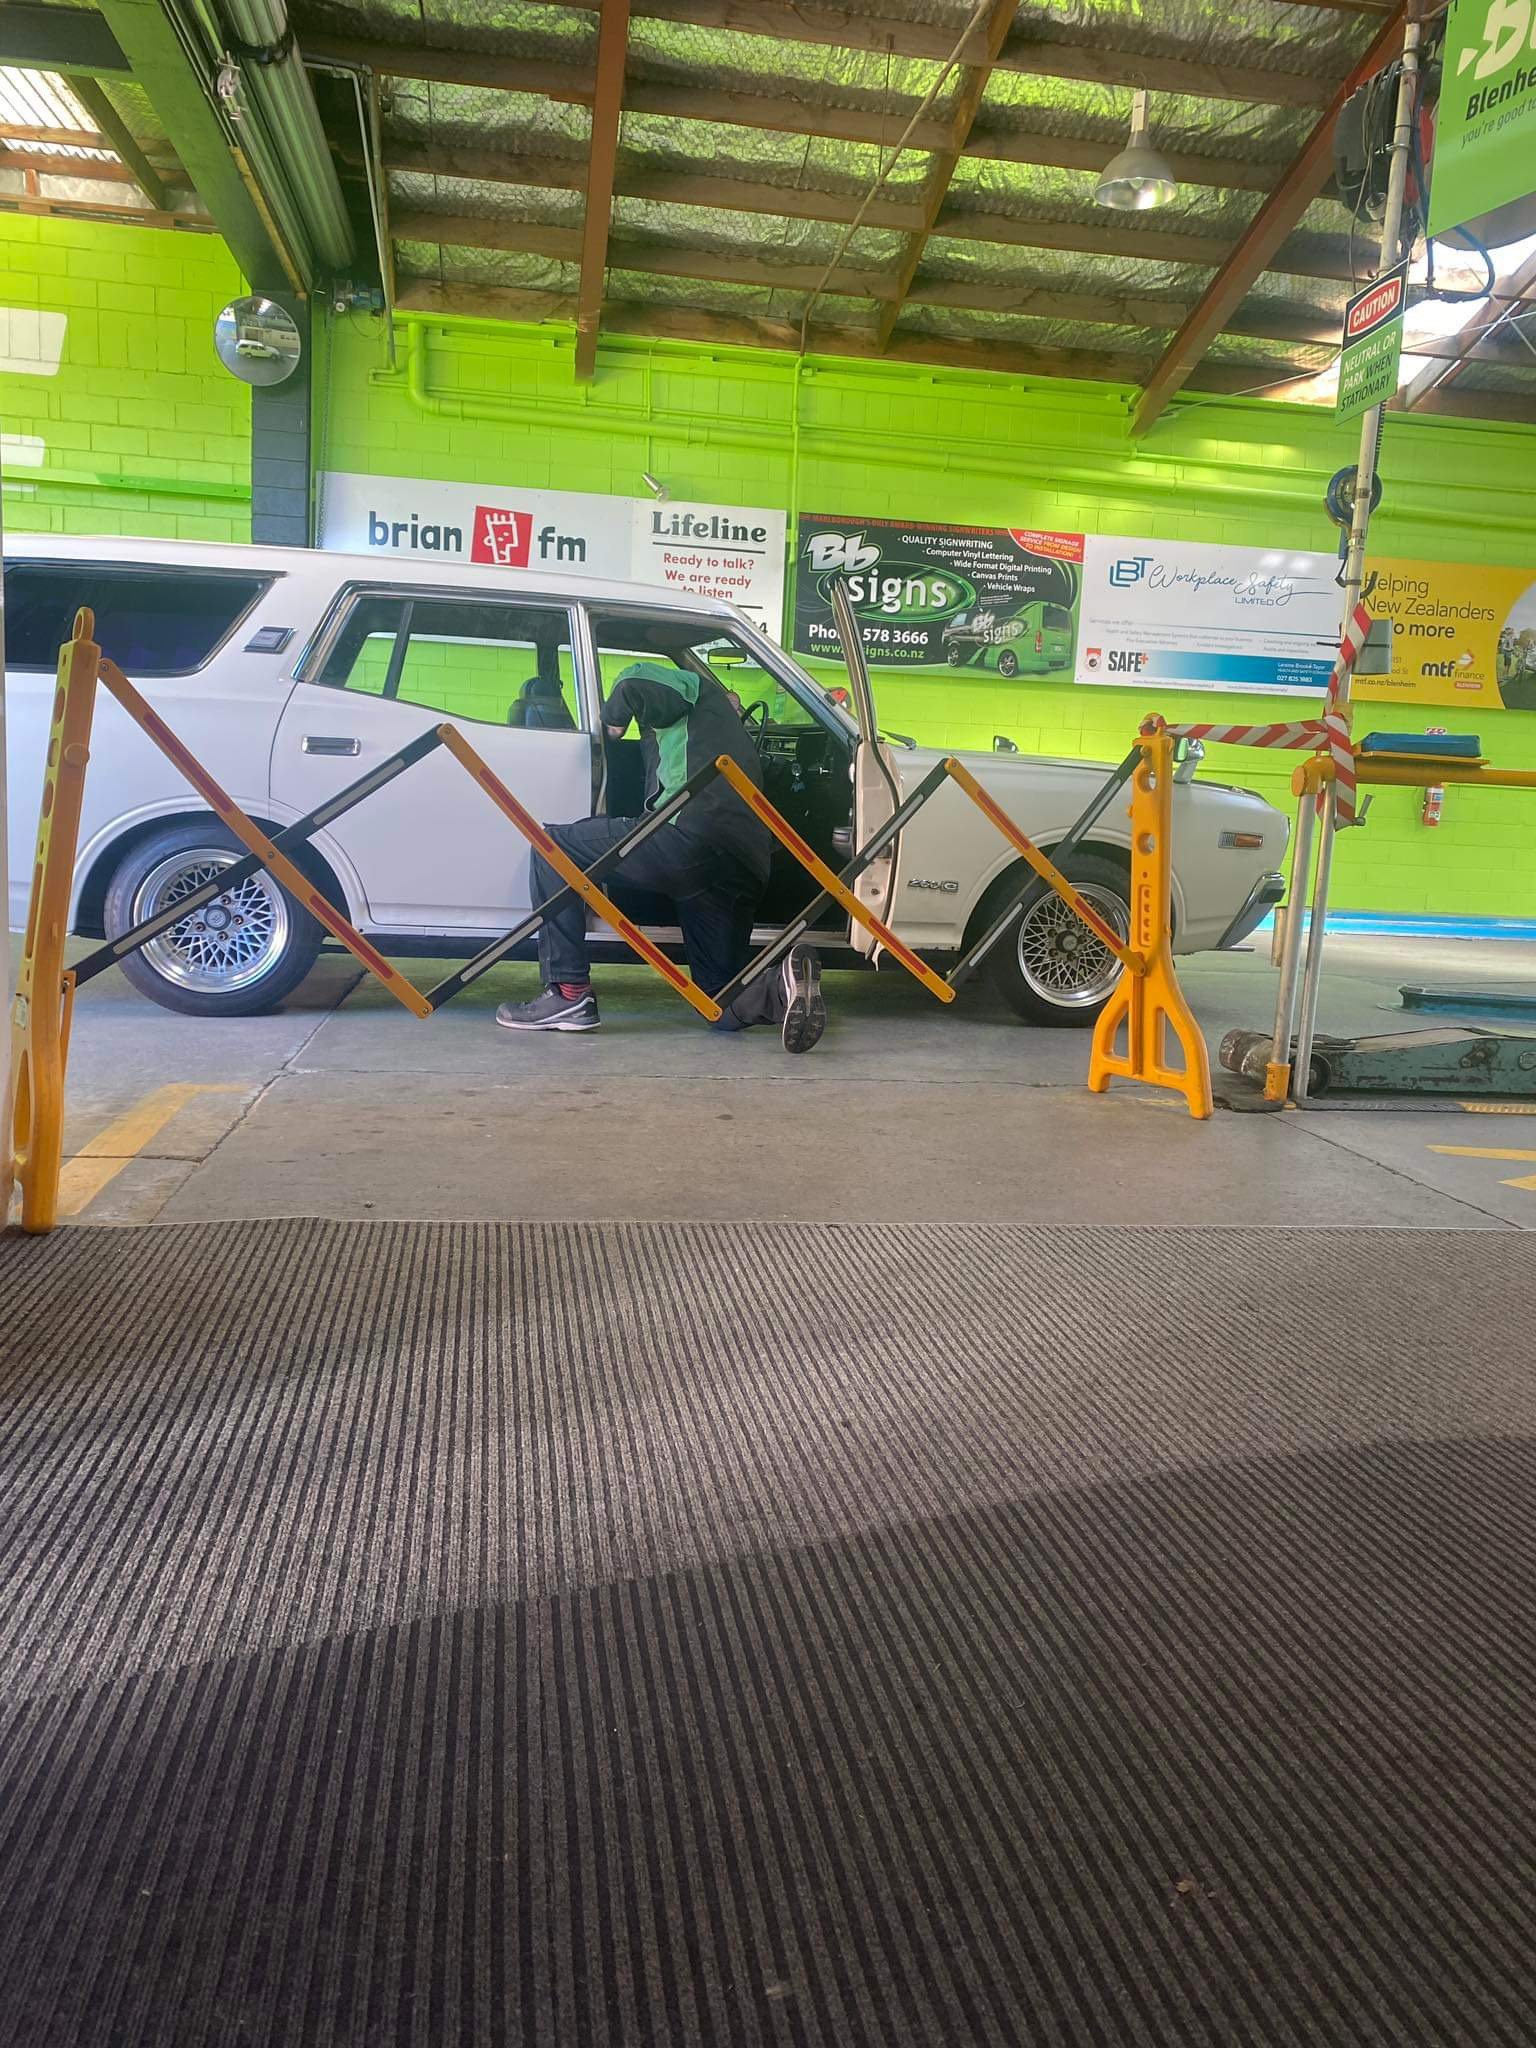
Ha. Im in the hard park pic.2 points
-
I think it's the curse of buying a modified car. Even if it all appears ridgy didgy there will be some shit wrong. I didn't have so many issues, but fan wired backwards and headlights wired wrongly (no proper working high beams) on a legal car.2 points
-
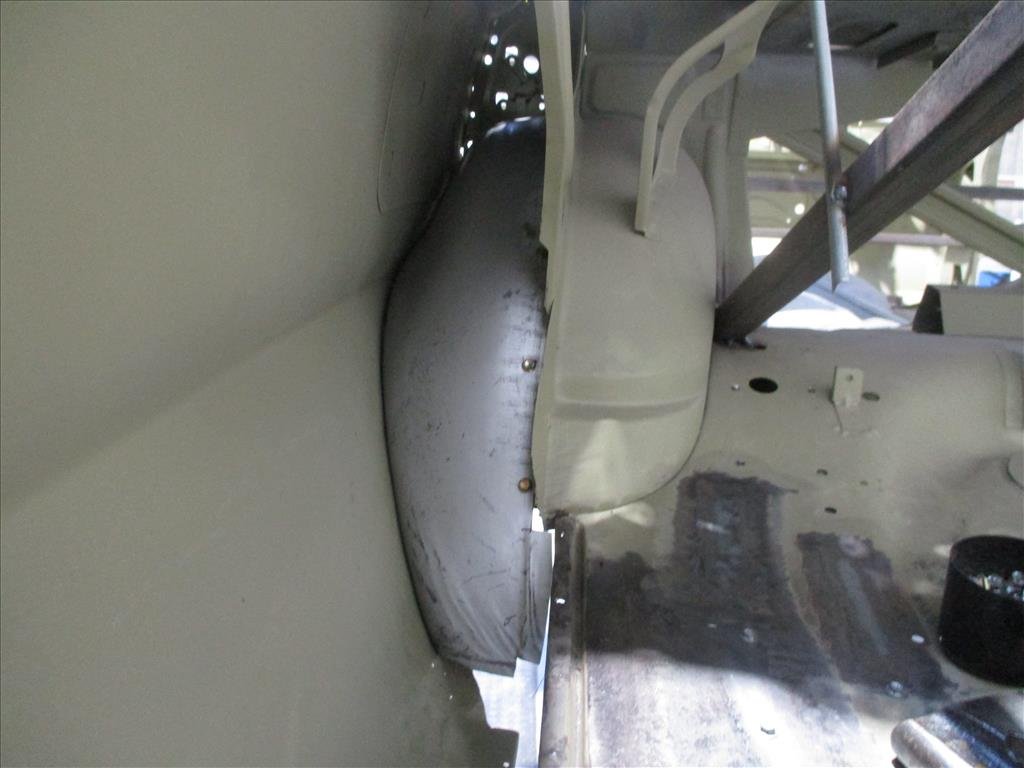
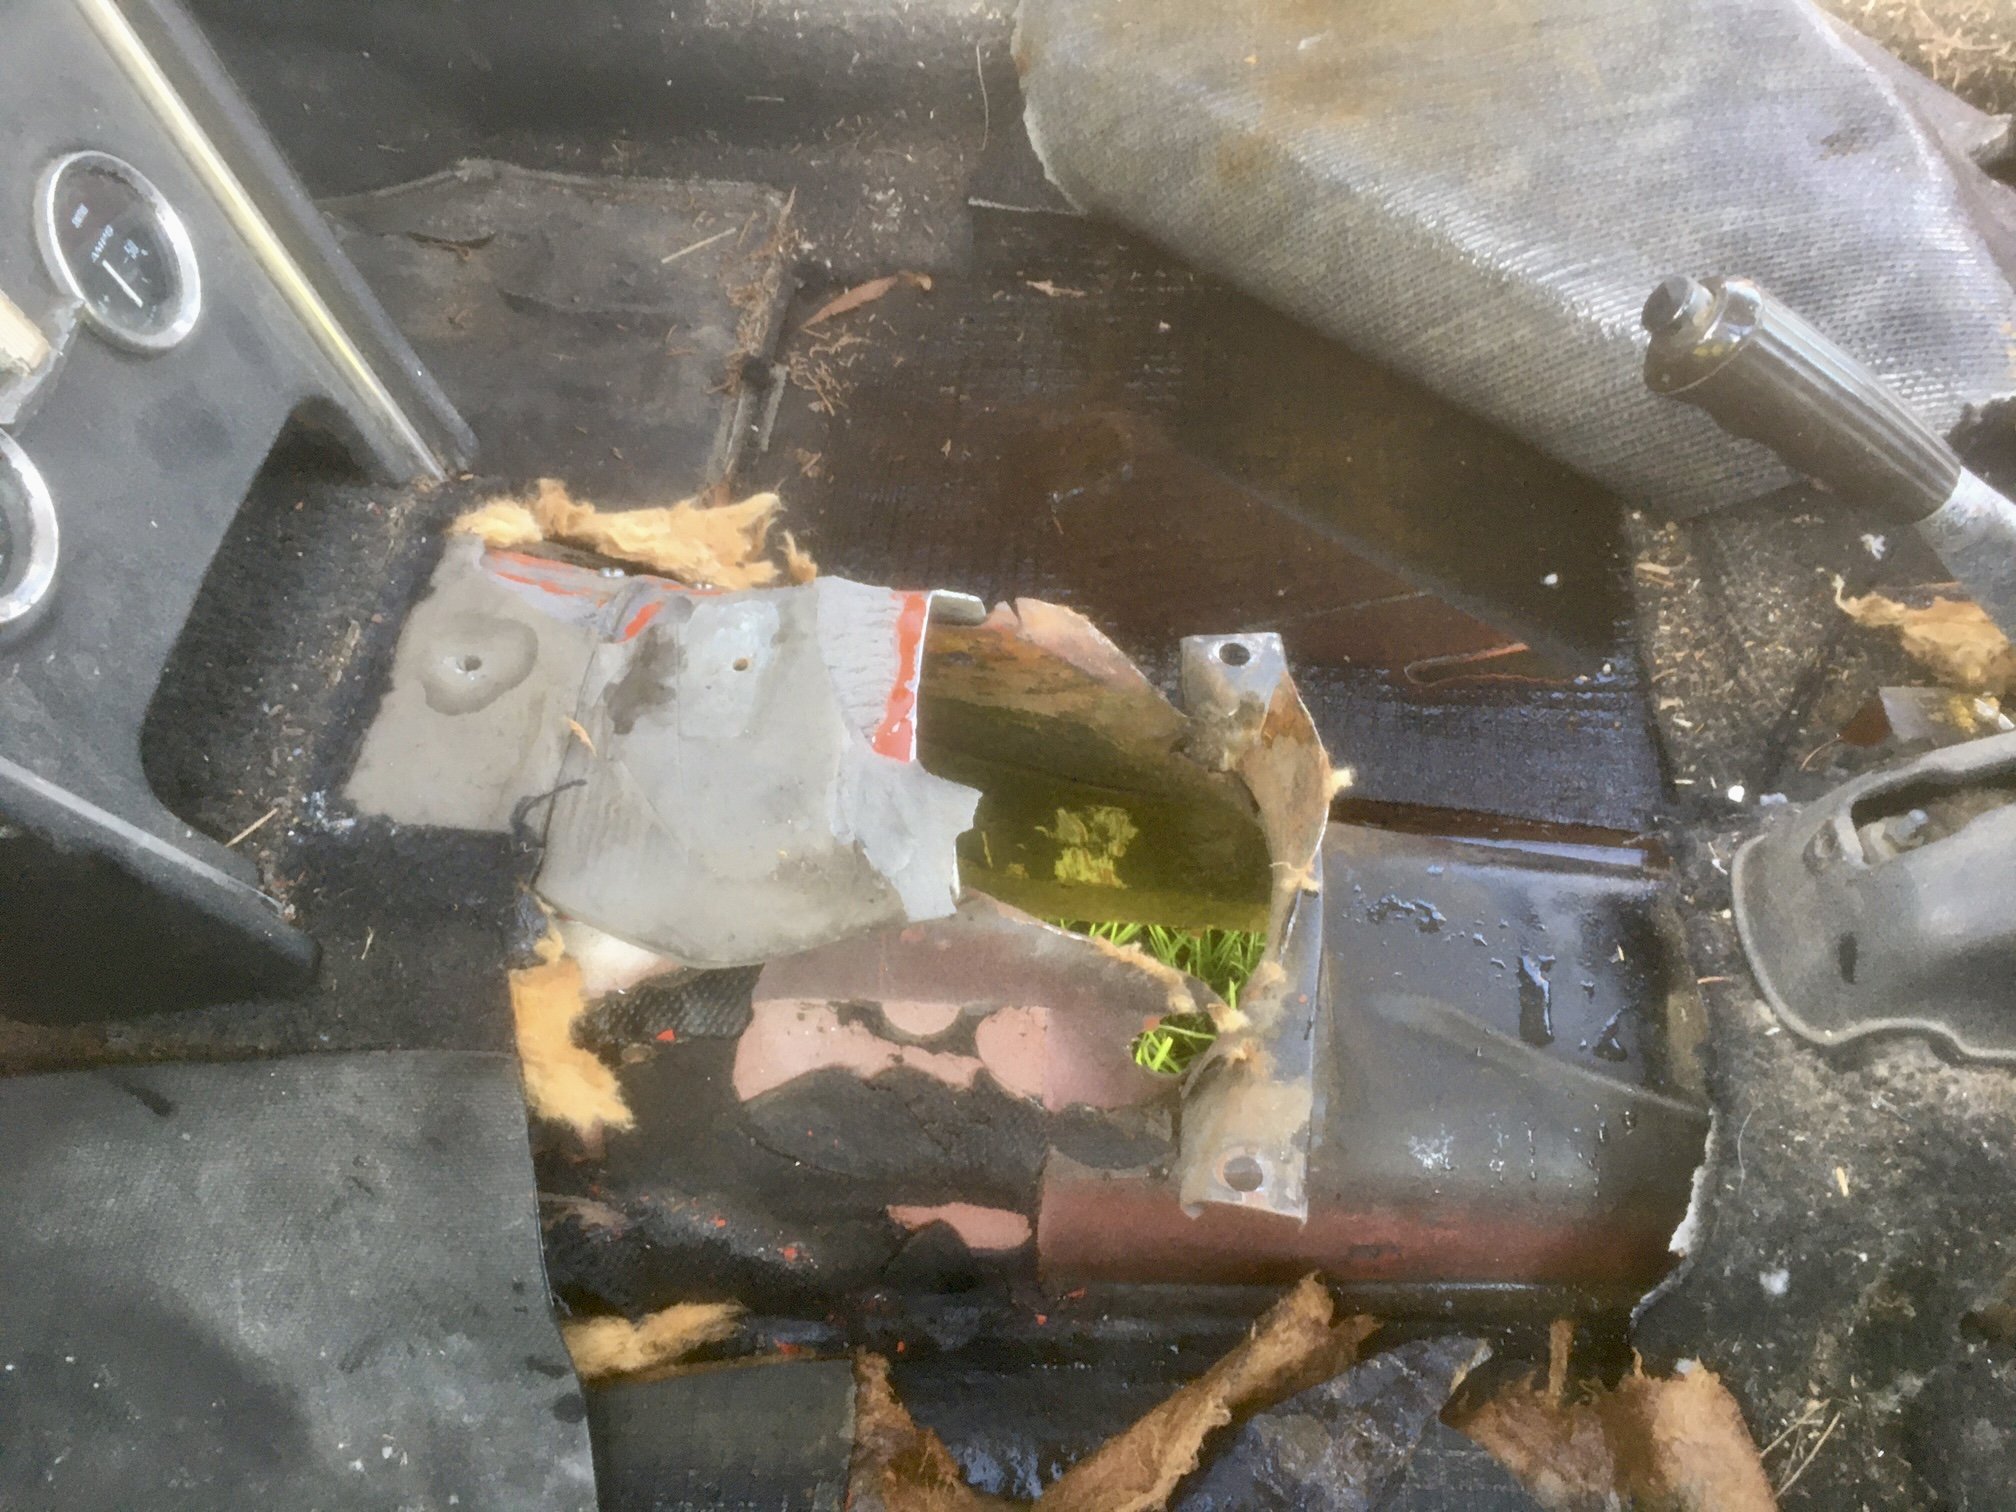
The reason I bought the parts car was for the 5 speed transmission tunnel. It’s been modified with an axe.
2 points
-
How good is the camo diff and driveshaft!2 points
-
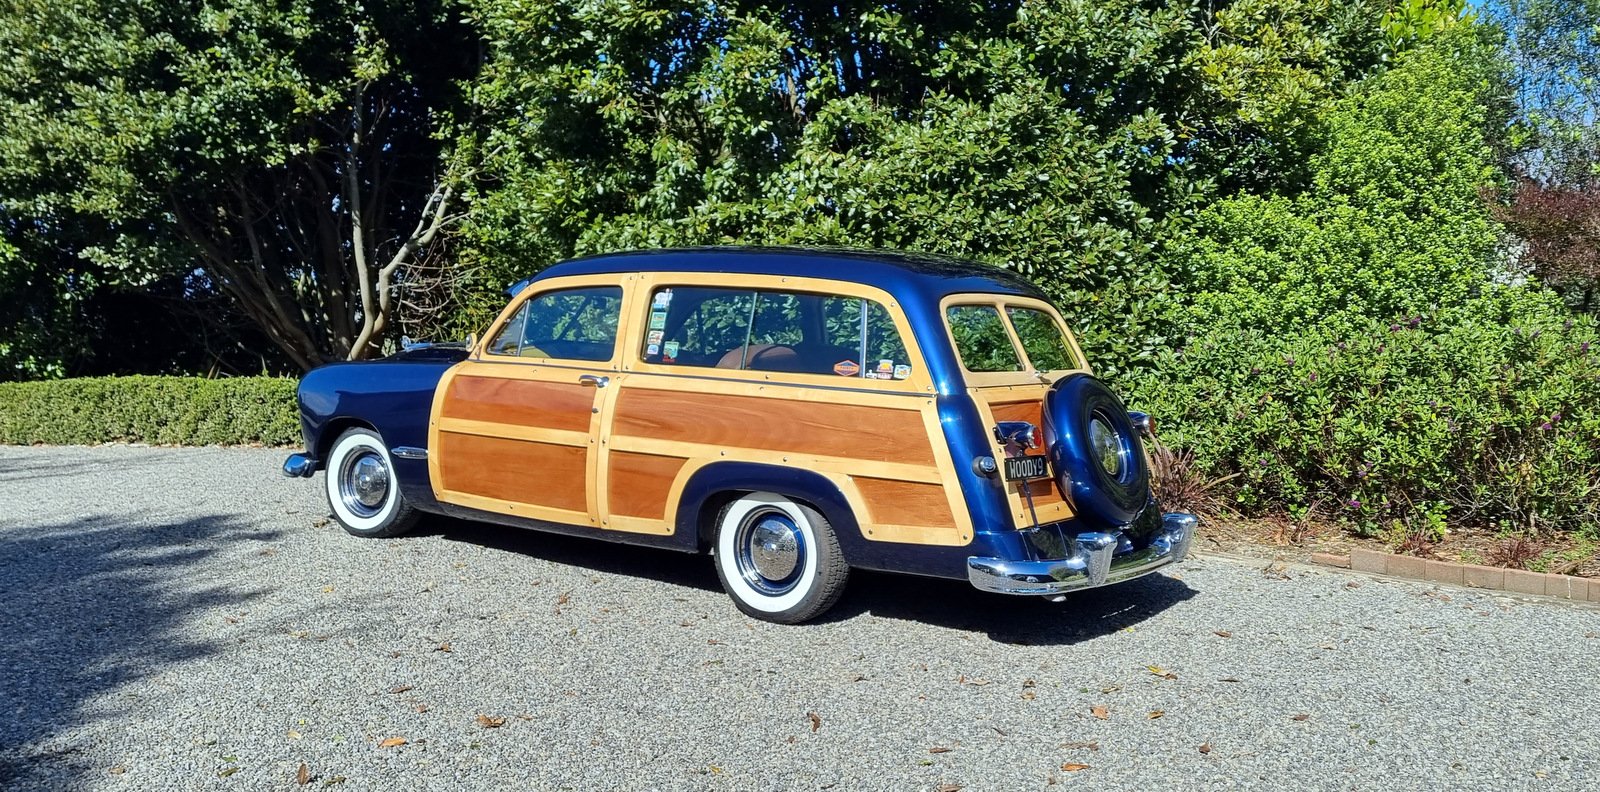
well then, 3 years has flashed by. in that time the 51 has been in storage a bit and ive driven it a bit. done a few things to it but nothing major. it continues to run well despite it having a 4M for an engine. things done to it are, re-valved the shocks to give a better ride (was a bit "bouncy" before) rebuilt the driveshaft uni's because they were fucked replaced the front tire that had a lump in it and caused a vibration on the motorway. new set of plugs coolant flush the standard oil and filter changes new battery and thats it. drove it to leadfoot over the weekend and it went perfectly. here are some pix of the adventure. last minute warrant, 2019-02-05_07-29-27 by sheepers, on Flickr played chicken with a truck, 2019-02-05_07-29-36 by sheepers, on Flickr 2019-02-05_07-30-00 by sheepers, on Flickr 2019-02-05_07-30-16 by sheepers, on Flickr 2019-02-05_07-30-28 by sheepers, on Flickr 2019-02-05_07-30-58 by sheepers, on Flickr2 points
-
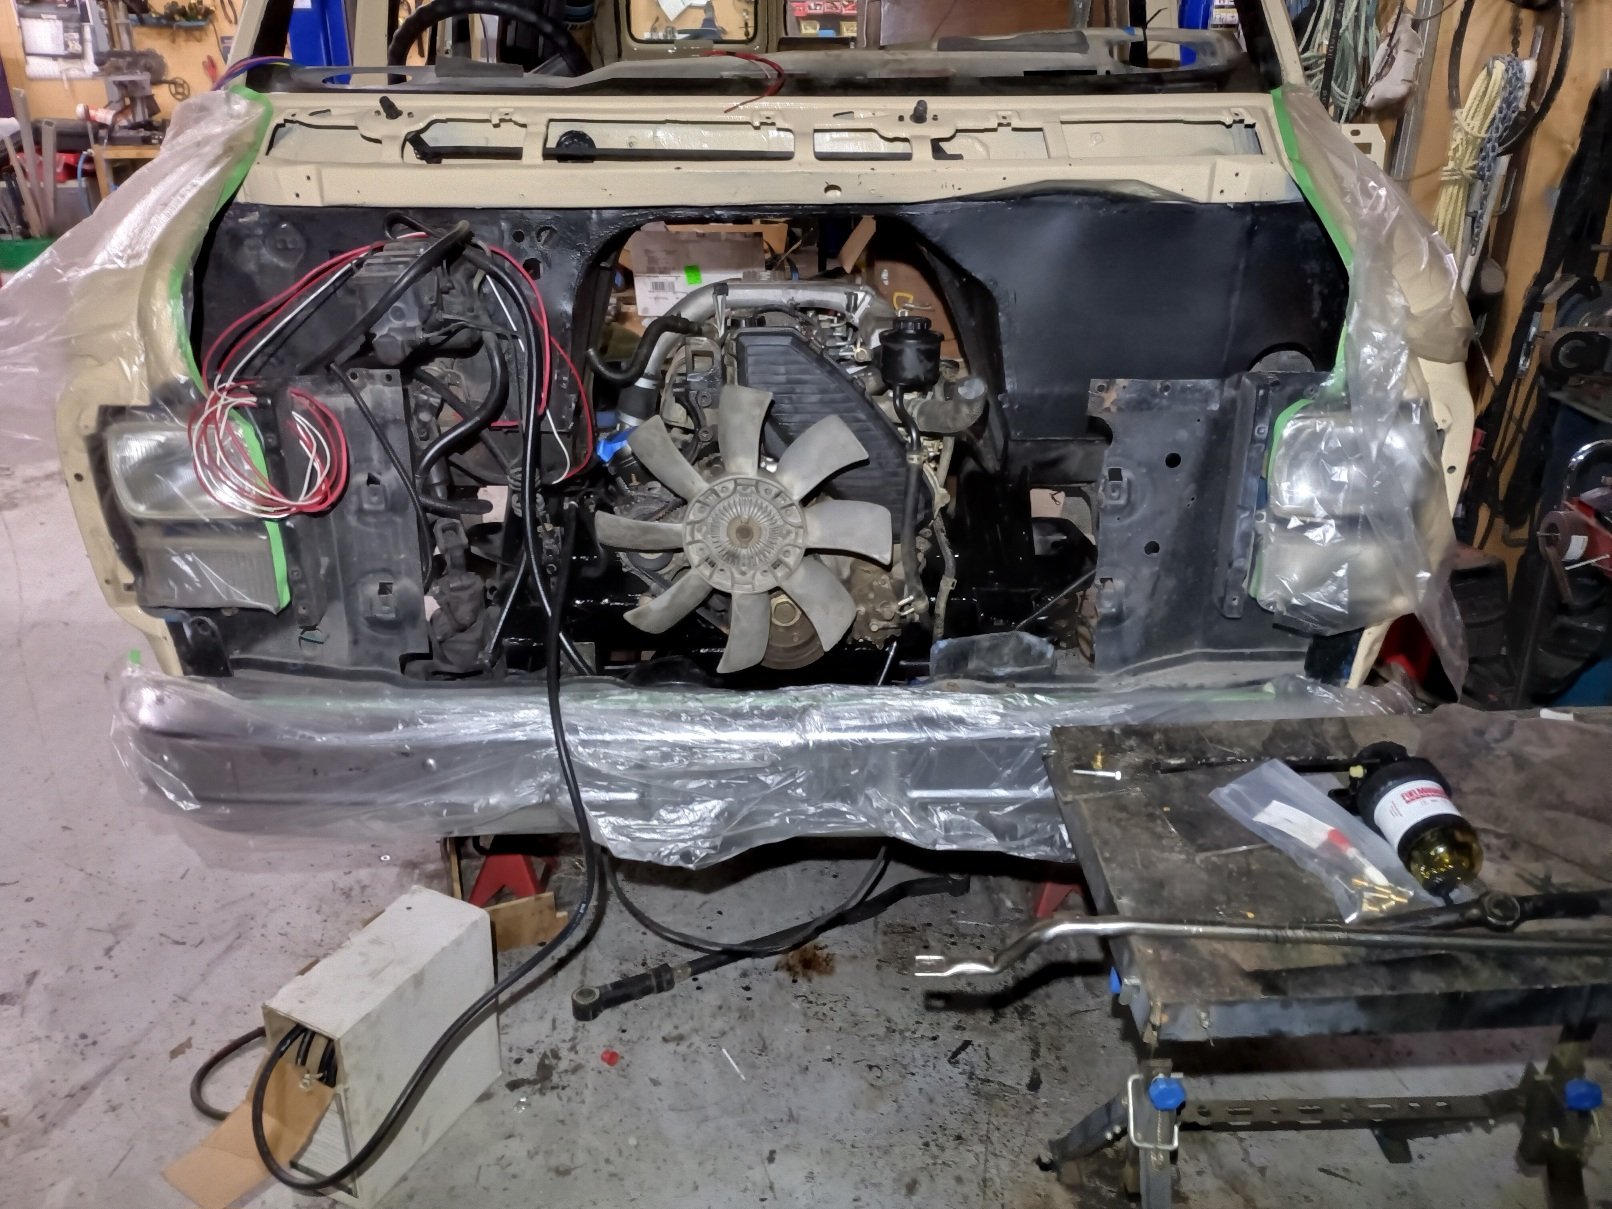
I got this back when i was an apprentice and did many of the period correct mods. RB30DET, cut a hole in the front bumper for larger intercooler, loud exhaust, terrible surge tank in boot, poorly fitted gauges (not in the A pillar to my credit) etc etc. It went terribly fast, and ran kind of poorly due to some lol issues that i never worked out at the time. I went overseas not long after and i kept it in an old barn on dads farm with dreams of someday spending a heap of cash on it and doing skids etc This pic was early 2019 when we dragged it out of the shed. Lack of genuine barn dust due to being well covered for 10 years. Nothing happened until maybe a month ago when i got the motor out and apart. Assume the position like the rest of my shed - bonnet up.. Im not sure about the condition of the crank, it has some marks and has already been ground undersize, so i stripped a spare rb30 and will get it measured up and the machining done in July hopefully. So far, i have nitto rods, CP pistons 8.5:1, link G4X fury, 1000cc injectors, GTX 3582r, sinco manifold Its 4wd so i might buy one of those flash PRP block brace/adapter plates. Apparently they are necessary, as if you have 600+hp and a front LSD you will crack the block. But they are expensive, and so is a front LSD. so i might pass on that. Also bought a bosch DBW throttle, and got a 350z pedal assembly, they bolt straight in so that was an easy win. I have some time off in July so hopefully ill make some progress1 point
-
The supplier PIC said they were waiting on their SP, which was probably Superpro, just my jumping to conclusions that the lengthy wait was getting them from the UK and not from across town. Possibly SuperPro just make them on demand.1 point
-
I'll see if I can get some pics of the rubber profile, with any luck they might have used the same profile as other BL cars with butterfly windows - 2-door ADO16 1100 or Mini maybe?1 point
-
something with a bit of a 'maze'inside ie not straight through. Autobend - Universal Mufflers - Page 1 - Created with Publitas.com1 point
-
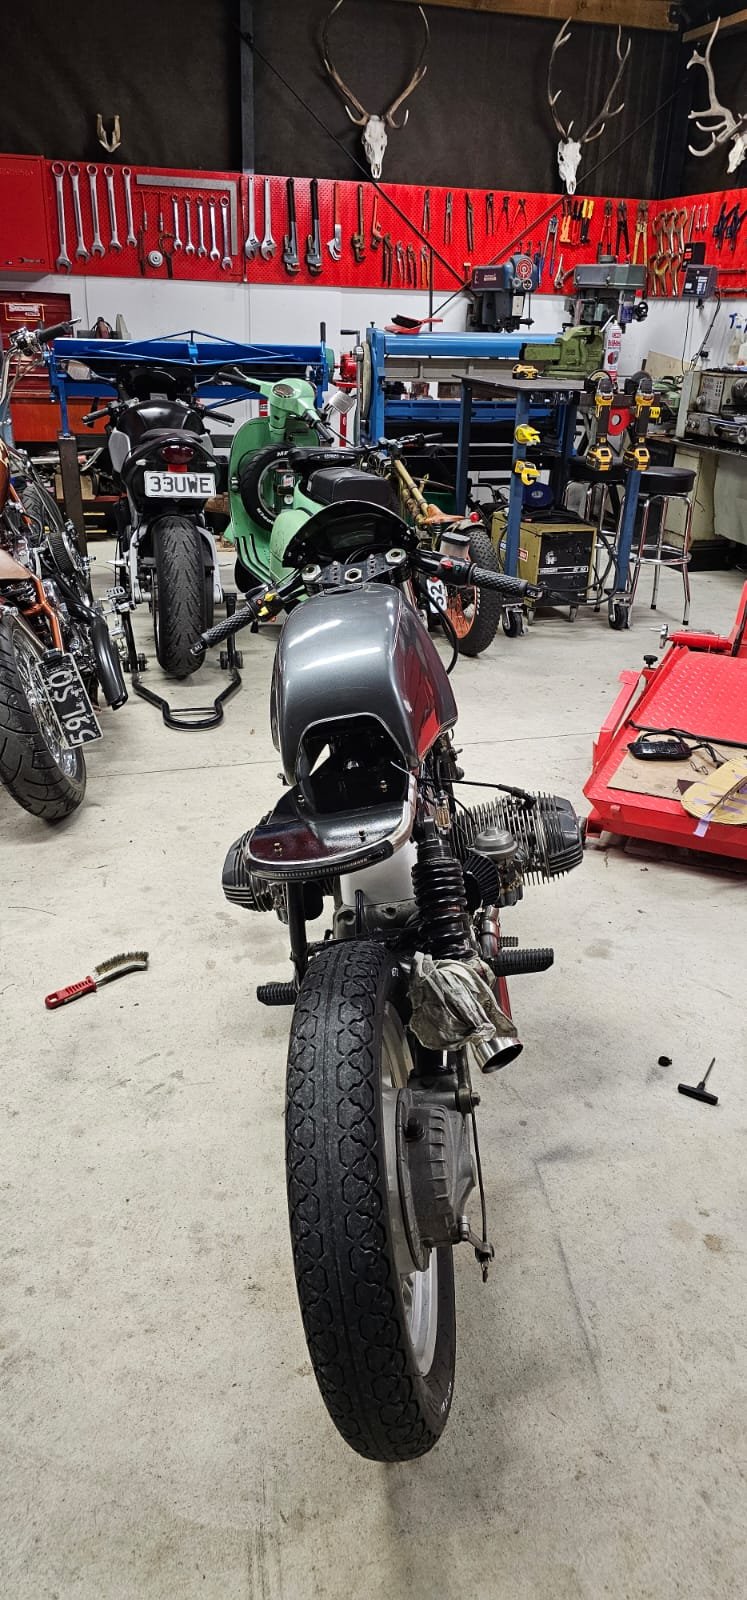
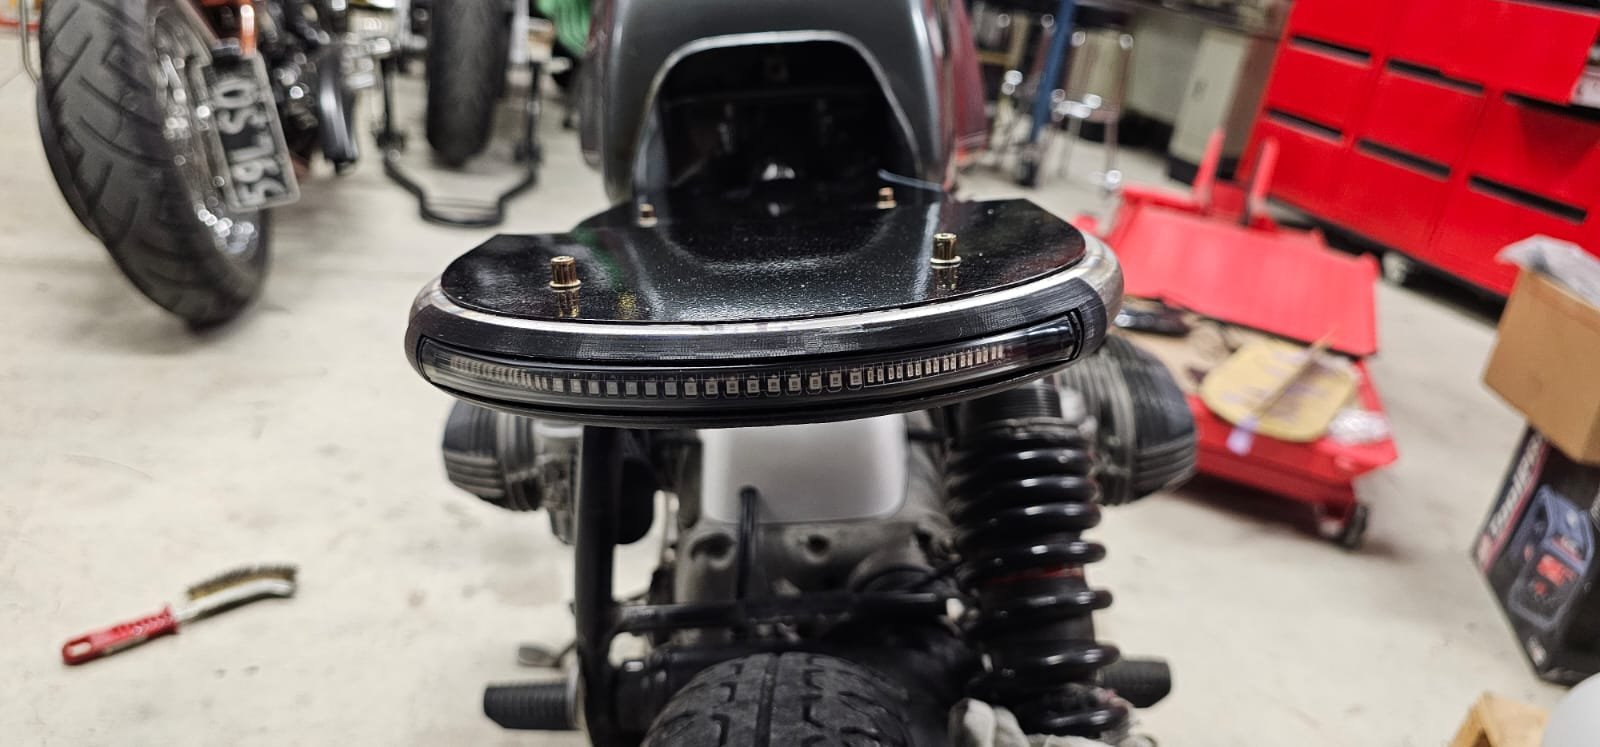
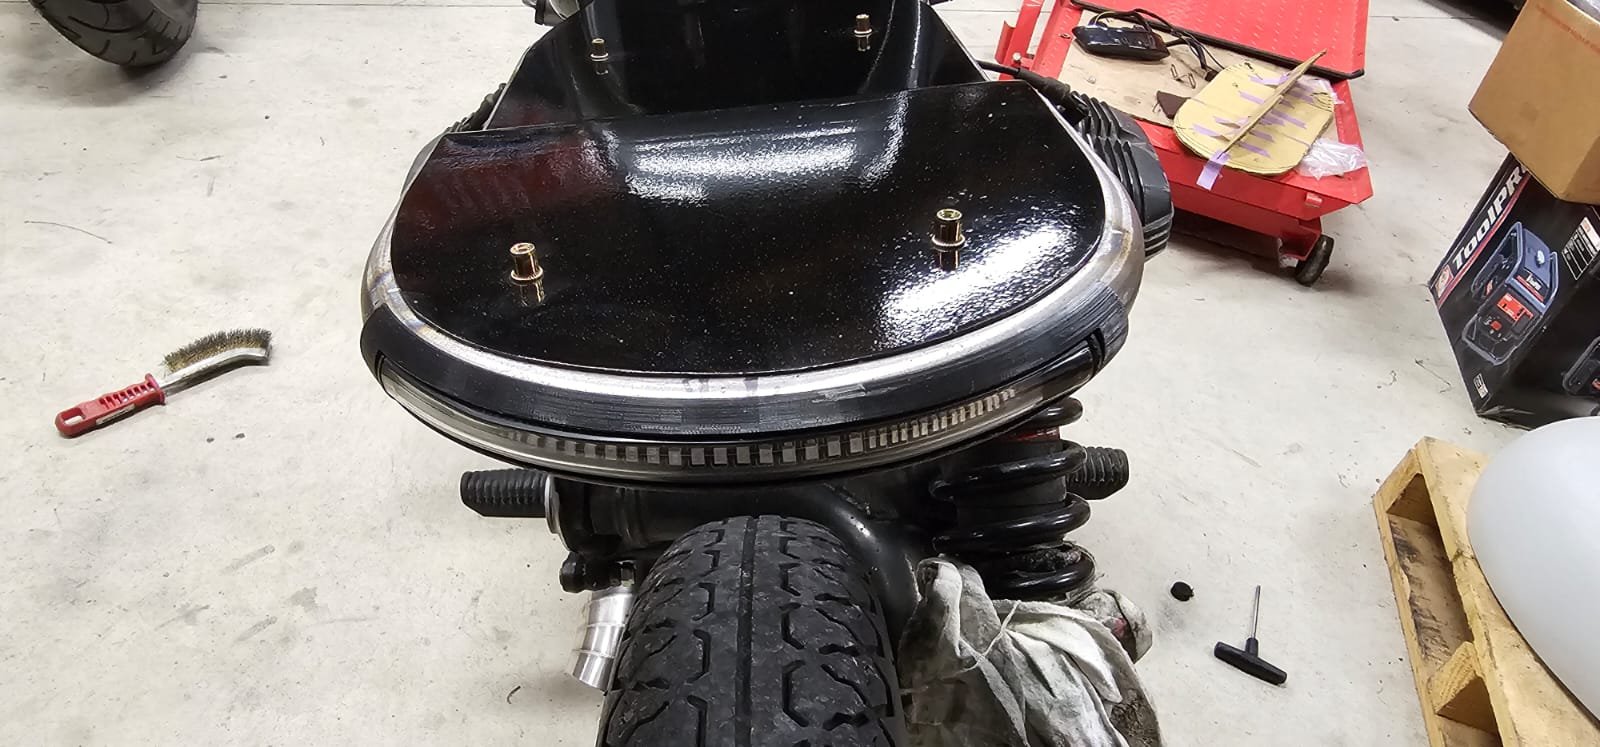
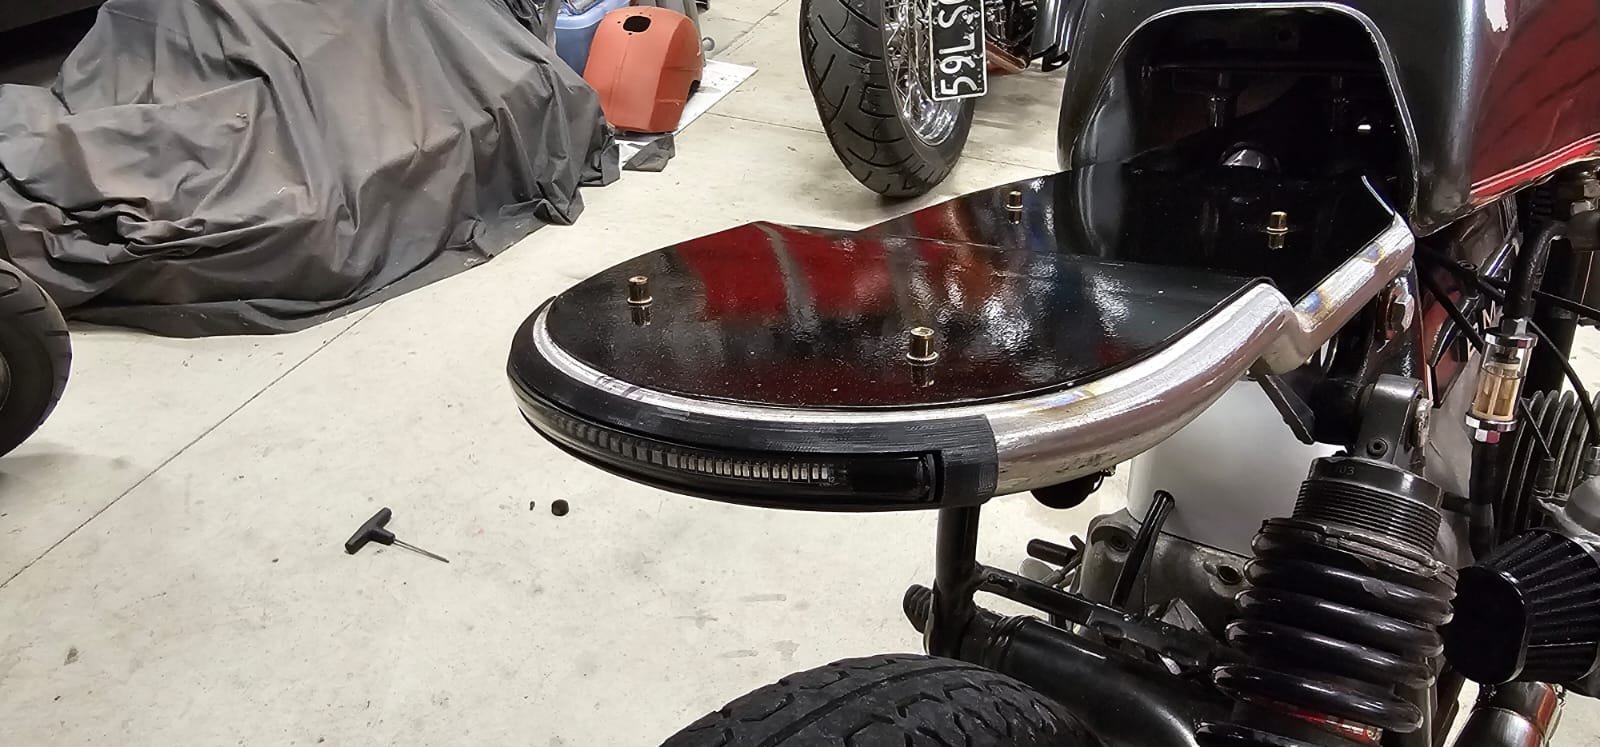
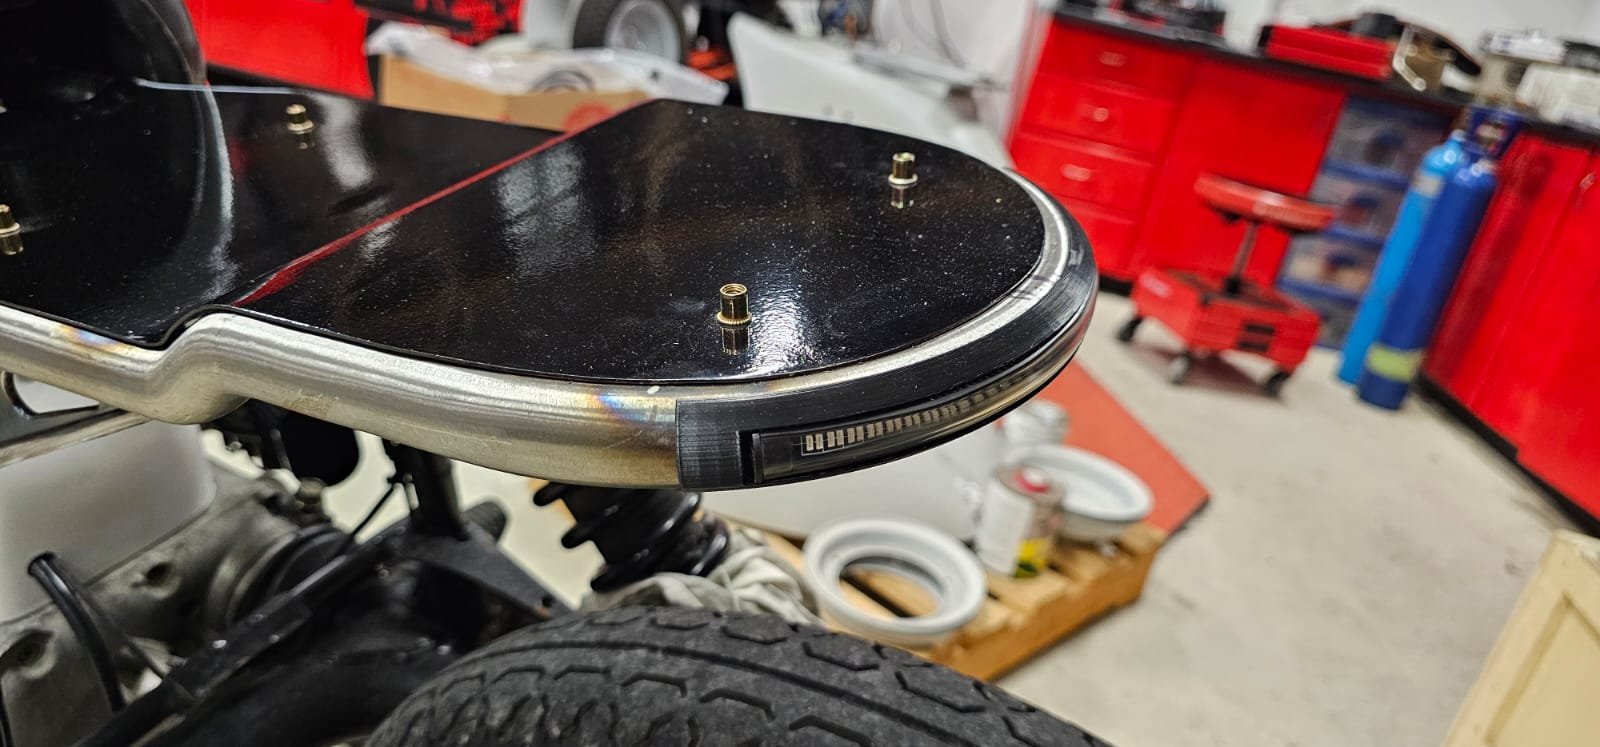
Came out amazing. Custom 3D printed LED taillight. Fuck yeah!! I've tweaked the drawing a little bit and I'm going to do a version 3.0. Slight changes...but mostly unseen.
1 point
-
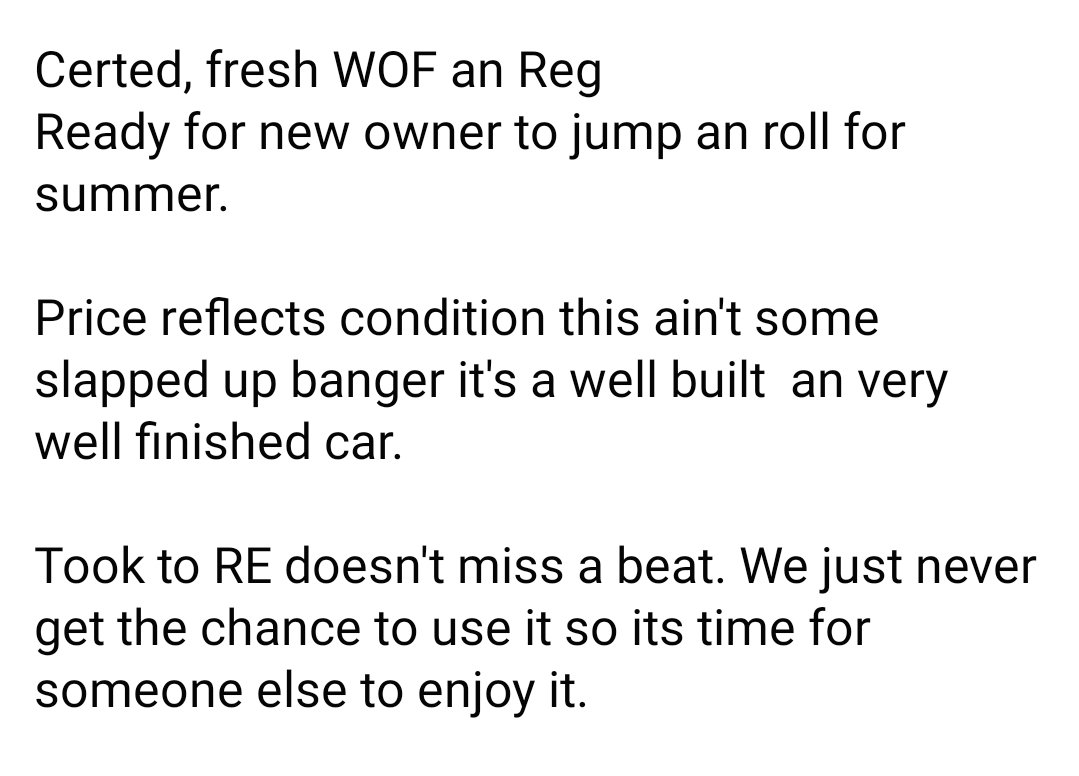
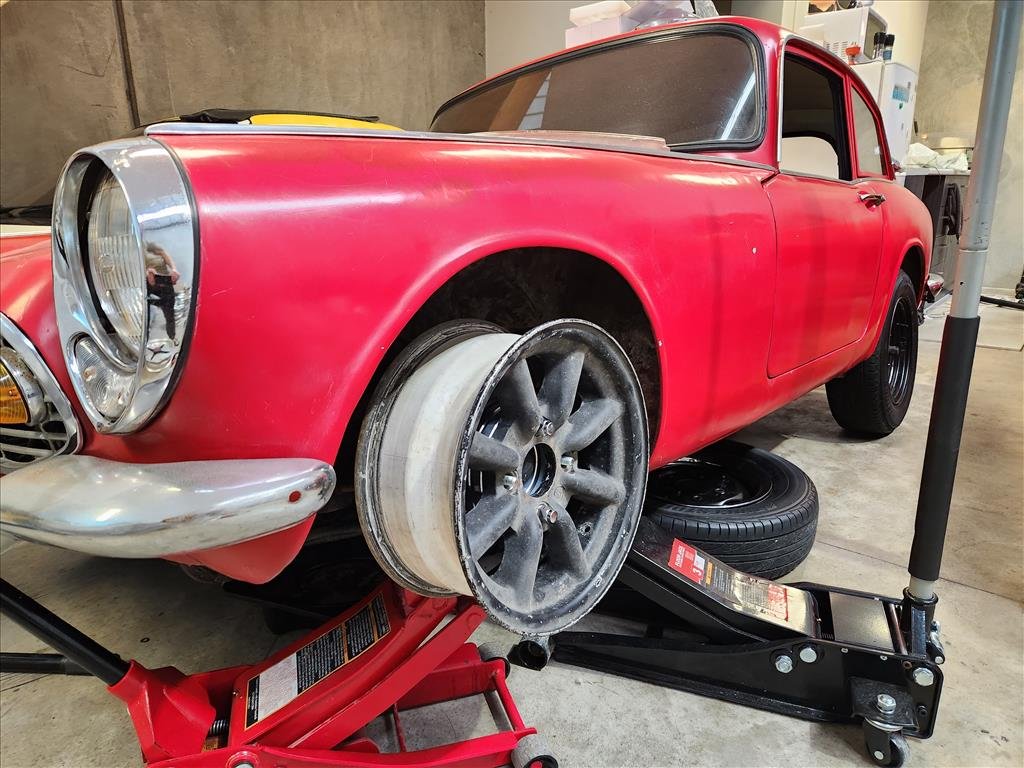
I prefer the F18's over the black rims... having polished F17's myself Alot of issues hidden for the most part, seller can't be that 'blind' to all of them...If as you said he 'had' for sale previously how does it get fresh WOFs all these months since? Also..wonders why, as you mentioned, he removed from sale due to tyrekickers..maybe they got it inspected and the red flags made them run...meh who knows. But Safety first and you sorting the wrongs for your offspring and of course yourself and fellow road users which is paramount and then its a known entity.1 point
-
Latest LVVTA Newsletter is out LVVTA_Newsletter_2023_November22-June23.pdf1 point
-
Modern problems require modern solutions.1 point
-
Haven't fixed that yet Waiting on my sparky mate to come and go through a bunch of other stuff, will do that at the same time.1 point
-
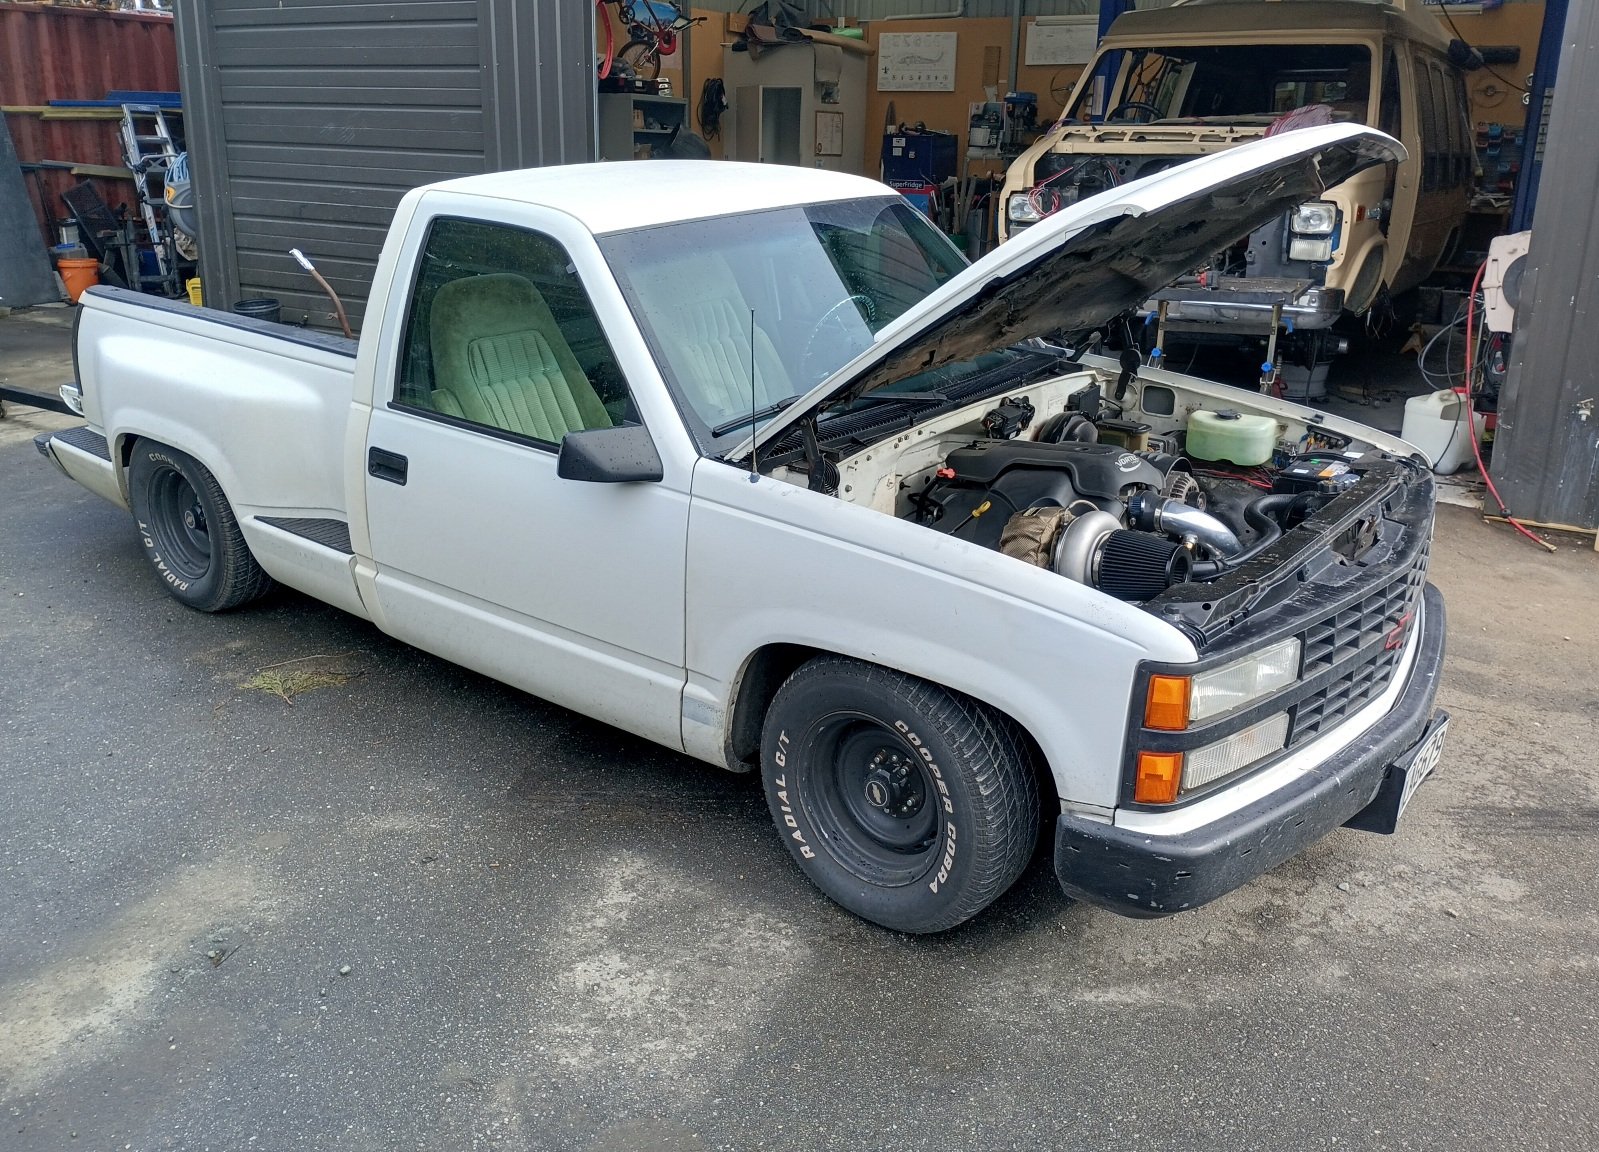
This is not a rant, and I suppose at the end of the day I will have far more confidence in the car, and more importantly confidence with taking my kids in it, once I’ve finished going over everything. I thought it would be good to put up a current list of what I’ve had to fix here so I can look back and go WTF bro…. Still cant really believe how much I have had to do even though the car was; A. Sellers quote “not some slapped up banger” B. Halfway through a 6 month WOF C. Pricey 1. Fitted 18 inch 3 piece Simmons wheels. 2. Full Red taillights. 3. Fitted rear ¼ Mazda RX4 badges. 4. Fitted new Red ¼ reflectors. 5. Fitted Rear seat belts. 6. Replaced Leaking water-pump. 7. Replaced front wheel bearings after having no grease, damaged and worn. 8. Replaced bent strut and remanufactured Coil-overs, they were a major safety issue. 9. Made new trans tunnel gear stick cover for massive hacked up hole, and fitted new shifter rubber to seal it off. 10. Fitted large new custom rear mild steel boiler muffler because it sounded awful in stainless – still loud though. 11. Replaced gearbox mount, and modified crossmember so it didn’t foul on the mount as it was before and banging. 12. Replaced worn leaf spring and hanger eye bushes. 13. Fitted new rear bump stops, to stop driveshaft hitting tunnel. 14. Replaced leaf spring pad bushes. 15. New U bolts as threads damaged. 16. Adjusted non-working handbrake. 17. Replaced Missing number plate light and bracket – rewire so it works. 18. Replaced missing window washer system with an under dash hanging bag – wire up as original system butchered and non-existent. 19. Repaired dash indicator lights, because of the Autometer dash setup they had to hack the back of the gauge cluster but failed to properly modify the wiring and bulb holders and their badly soldered joints just fell apart. Fitted new LED bulbs and wiring, and secured correctly so it all works now. 20. Fitted the correct Steering wheel boss as the indicator cancelling part in the one fitted was incorrect and the indicators didn’t turn off after completing a turn. 21. Reconnected horn as was just left unplugged, due to previous boss kit not reaching the contacts. 22. Thermostat was missing and thermo housing by-passed for full flow, coupled with rad fans on full time as soon as key on, meant on a cold day the engine wouldn’t get over 60deg and would run like shit. So I have un-modified housing, fitted new thermostat and a thermo switch to the housing (still yet to wire in with a relay) to be able to let motor warm up properly before fans kick in. Things to do: Calibrate speedo gauge. Calibrate fuel level gauge – even though seller promised me he did this. Deal with terrible wiring around car. Get reverse lights working. Fit radiator overflow. Re make throttle cable setup. Get a WOF Then “maybe” I can start on the actual fun stuff……
1 point
-
I 'fixed' the leaking sunroofs in my Disco a by covering them completely with clear PPF. I need to redo it as it has split on one part though. Definitely stopped the leaks though. The headlining on mine was ruined so I replaced it with grey polar fleece bought from Spotlight. You can get it in extra wide widths so can do the whole headliner in one shot. It's stretchy and glues well (but use high temp contact glue) and looks pretty good. On mine the interior is grey so it blends right in. You don't need foam underneath it which is what goes on the original headliners. If anyone asks I tell them it's headlined in Muppet hide! Simon1 point
-
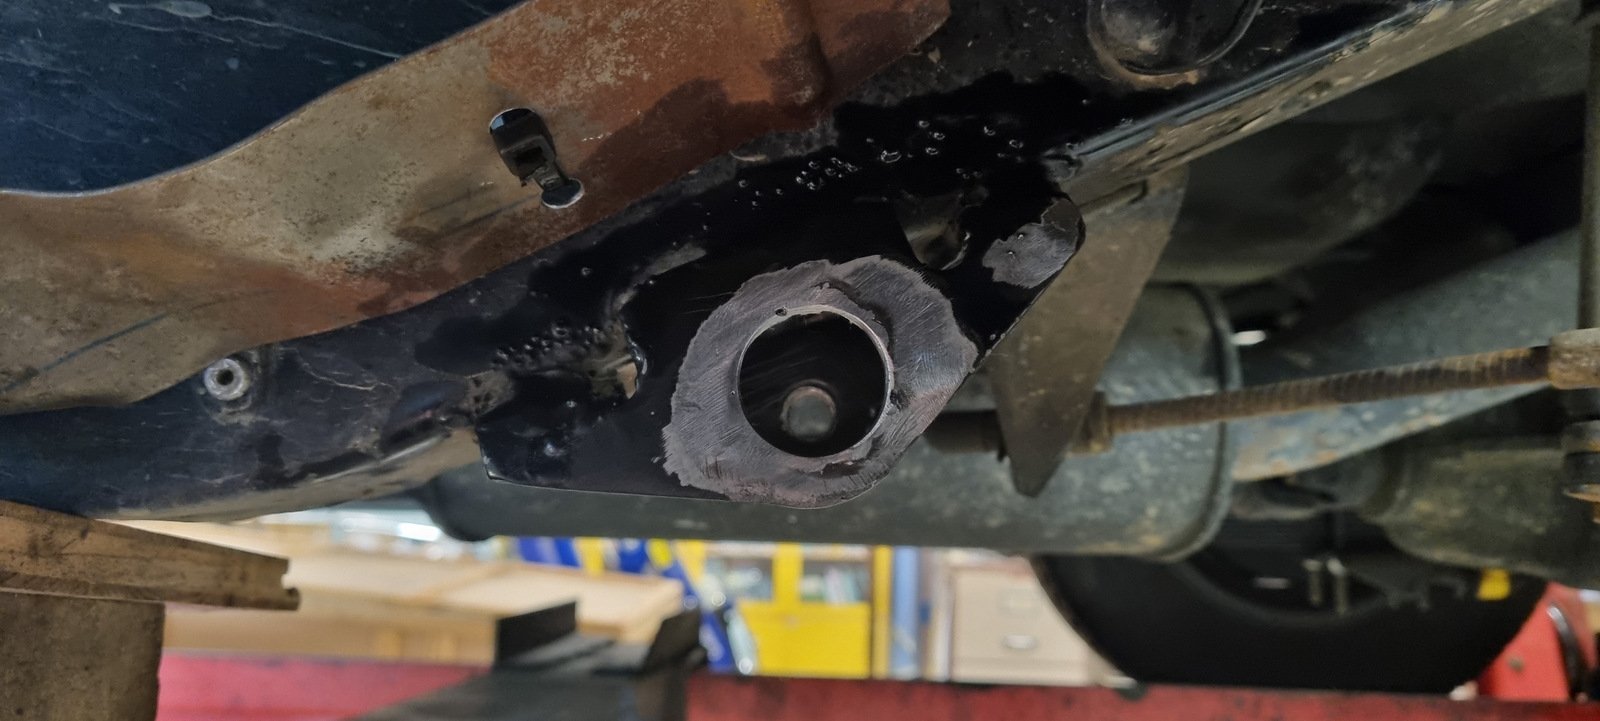
I put a thing in a hole! It took a lot of convincing but got there in the end I was debating what to do with the water pump - but the bearing sounds a bit sketchy so it will be sent off for a rebuild.. all new engine and radiator - don't want it ruined.
1 point
-
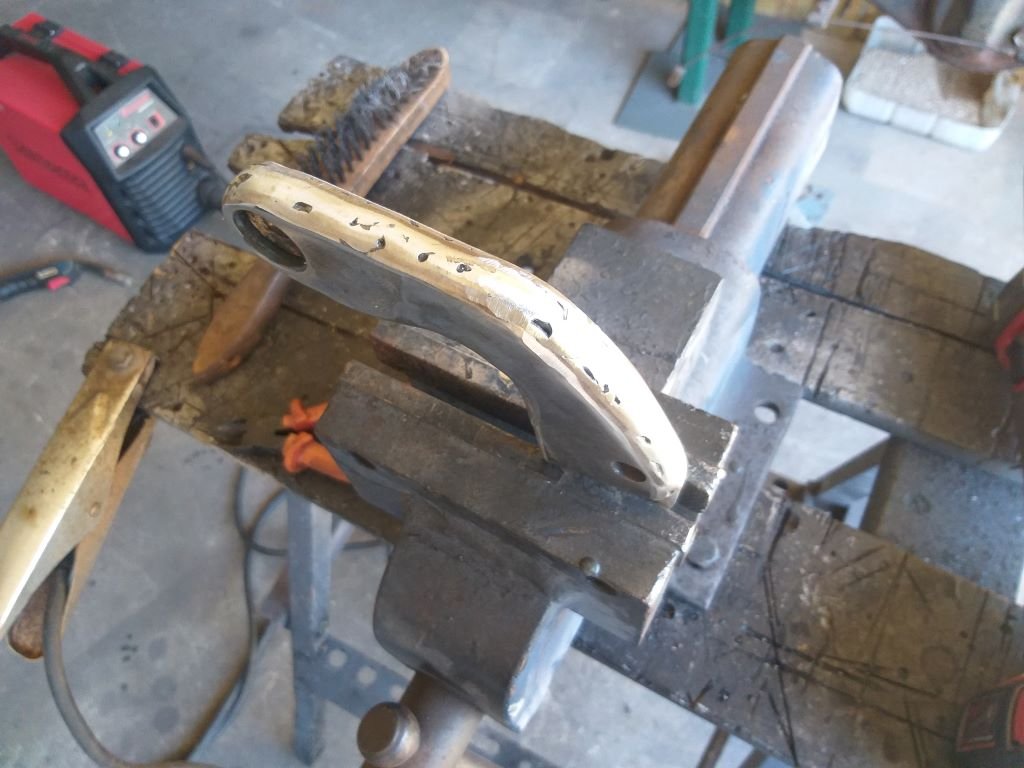
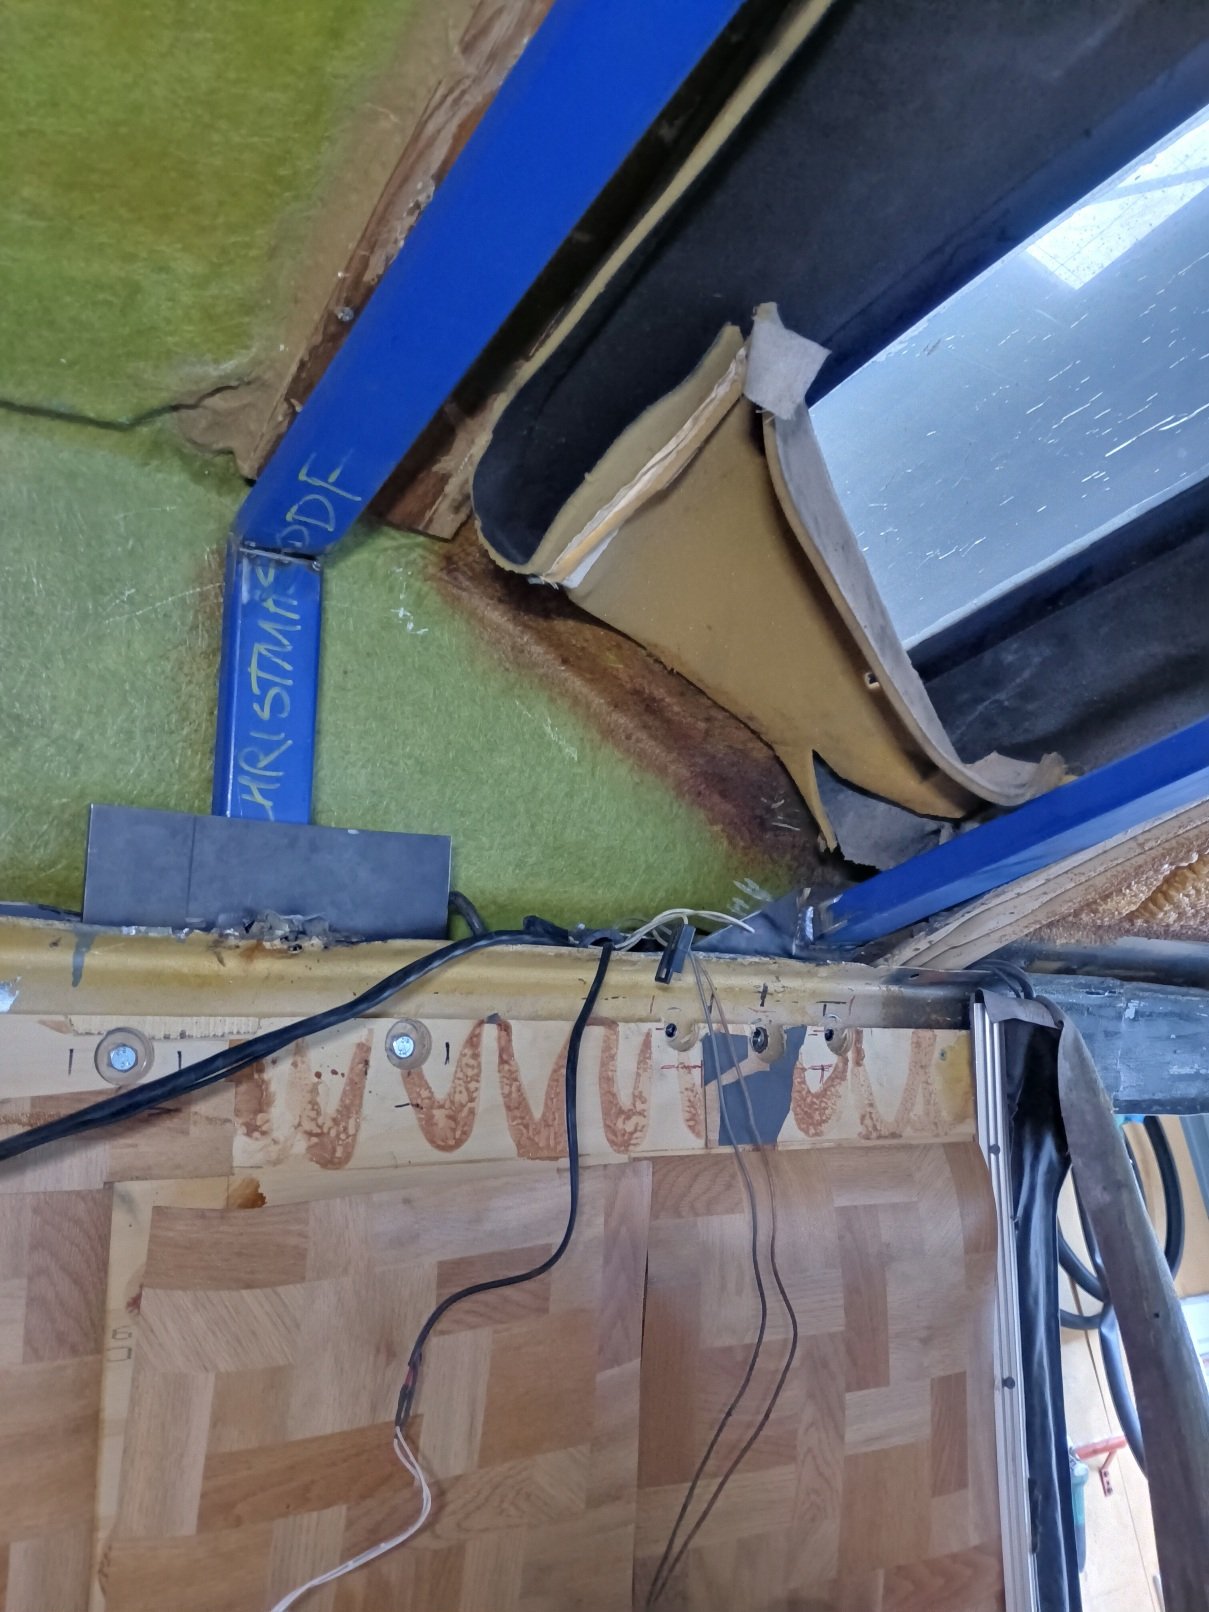
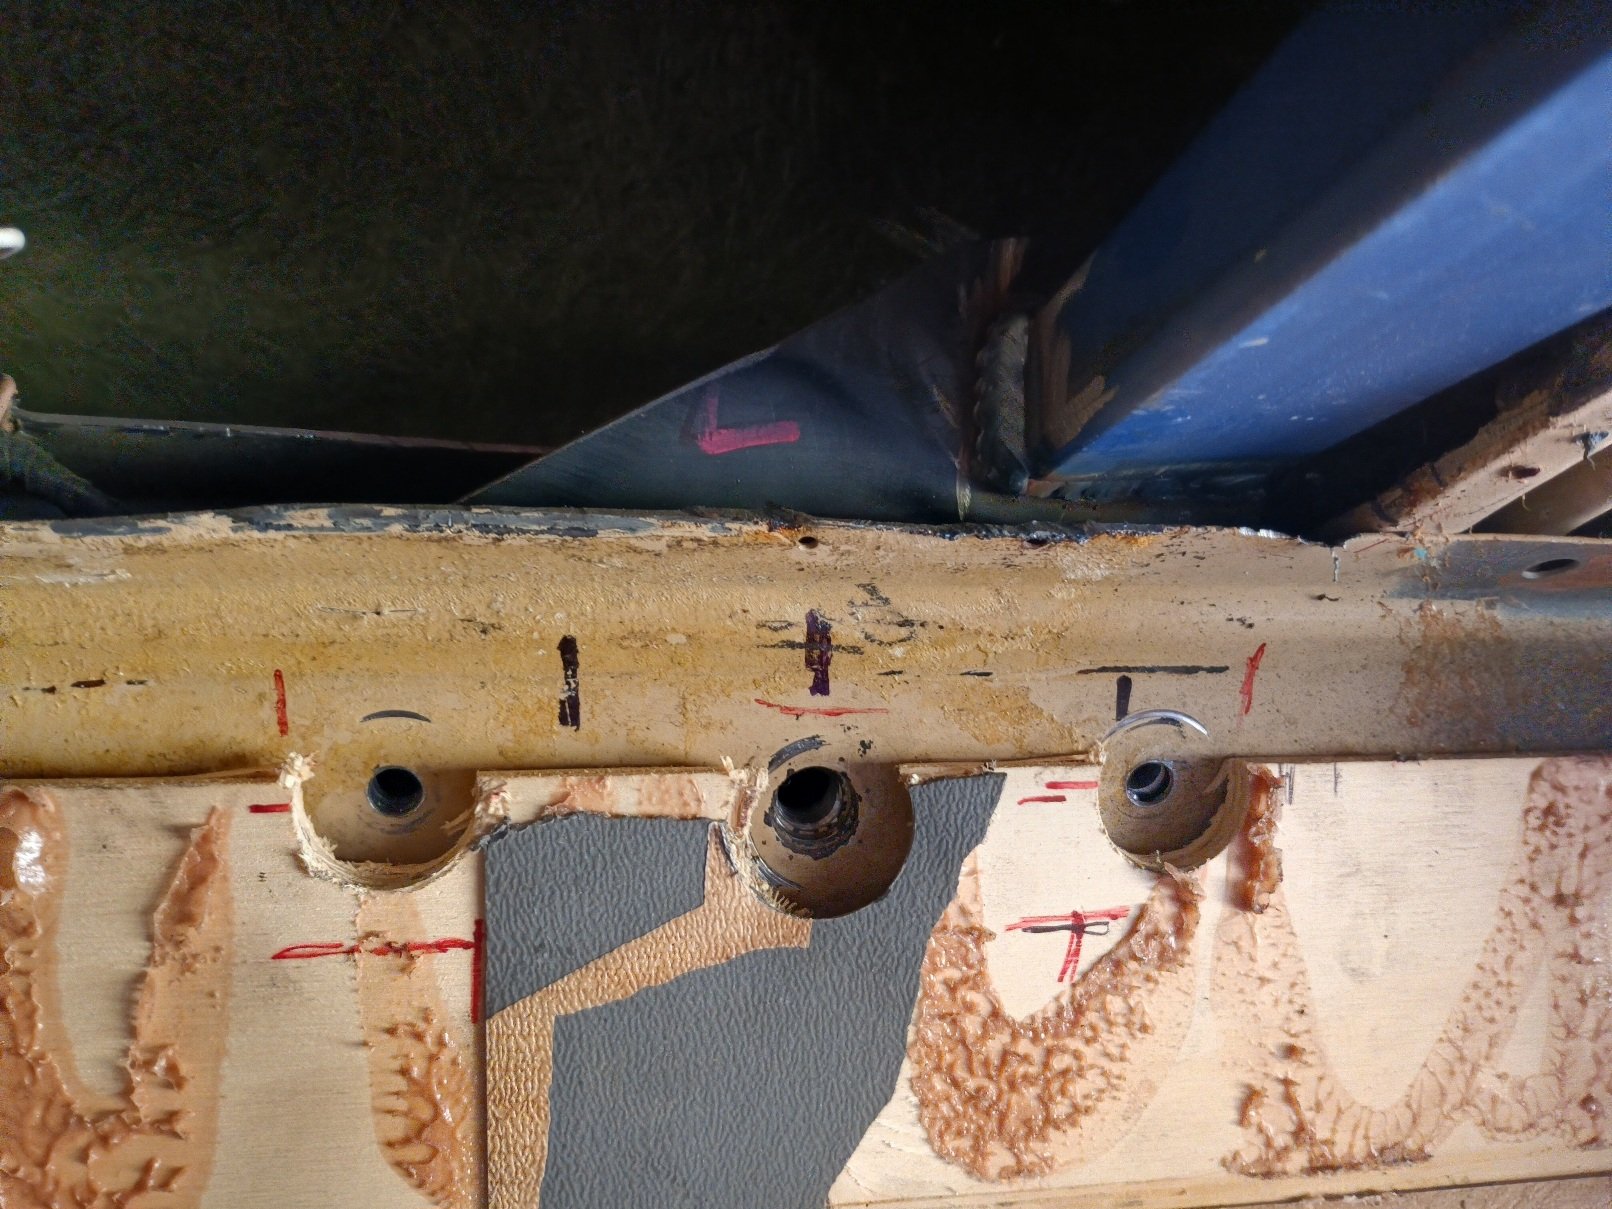
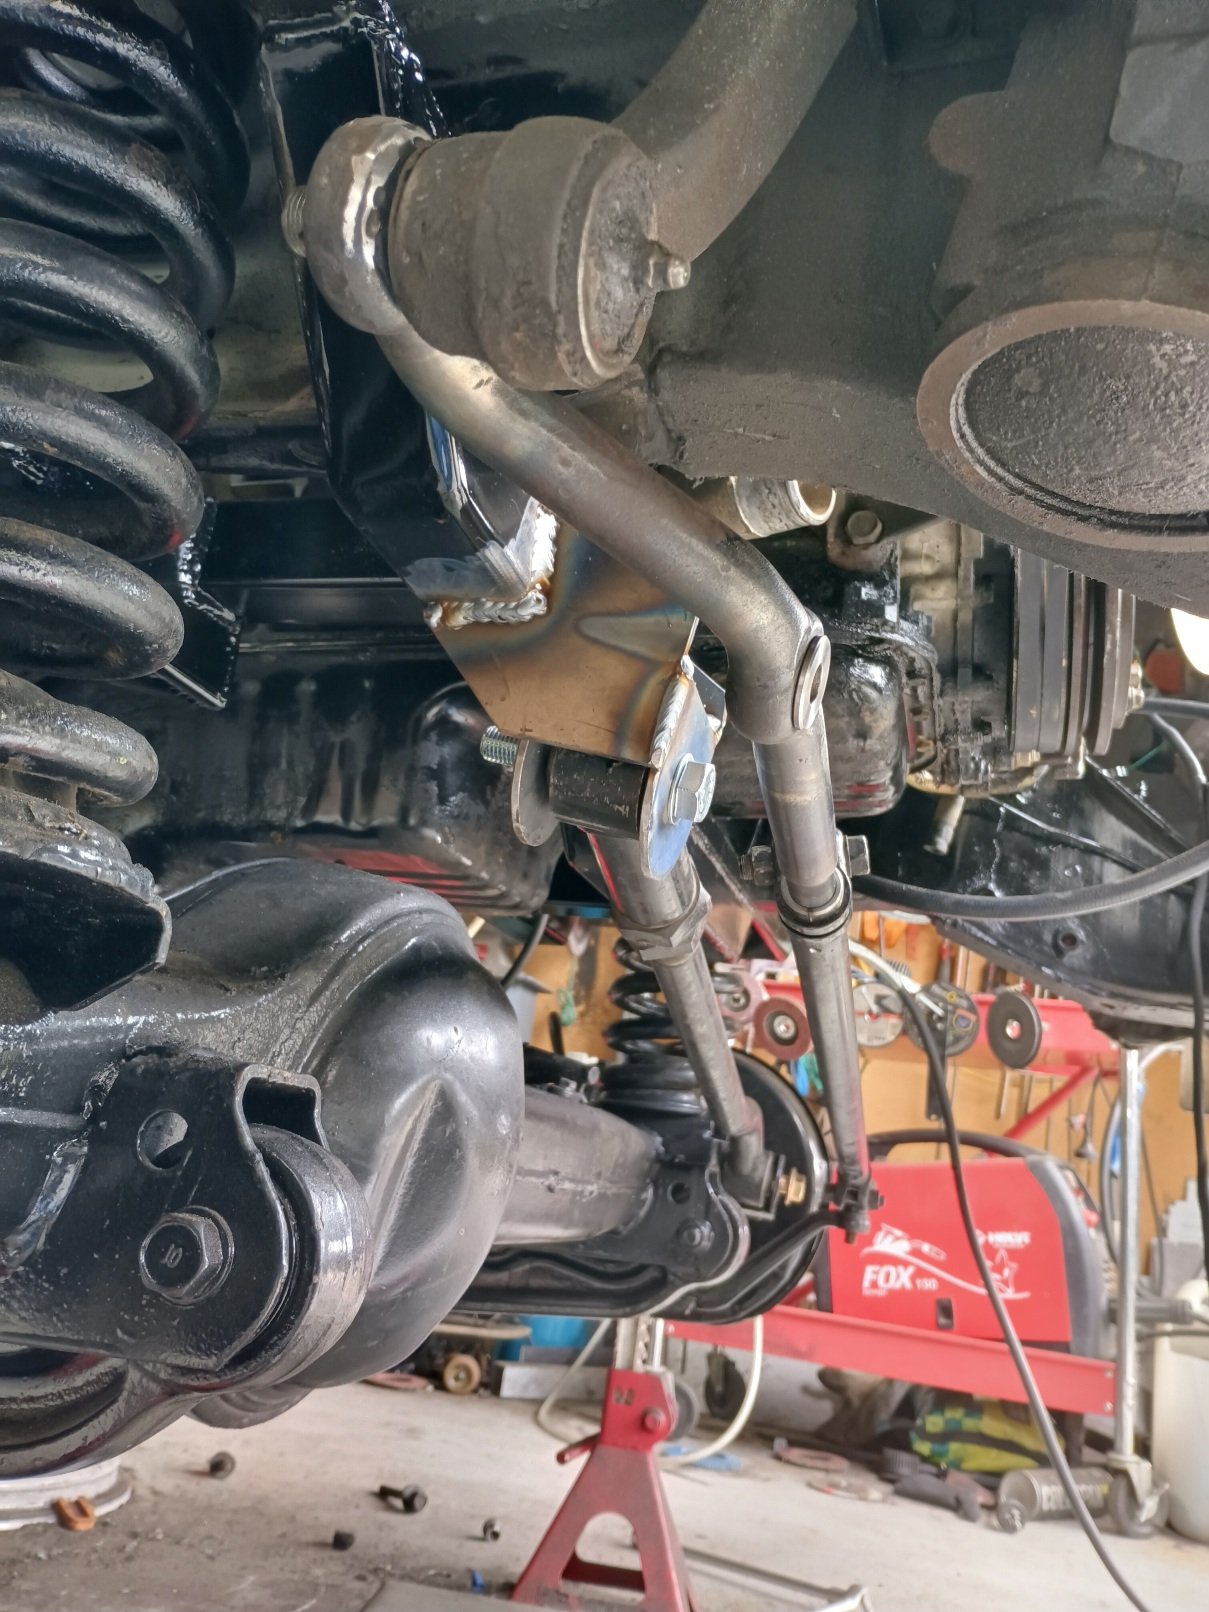
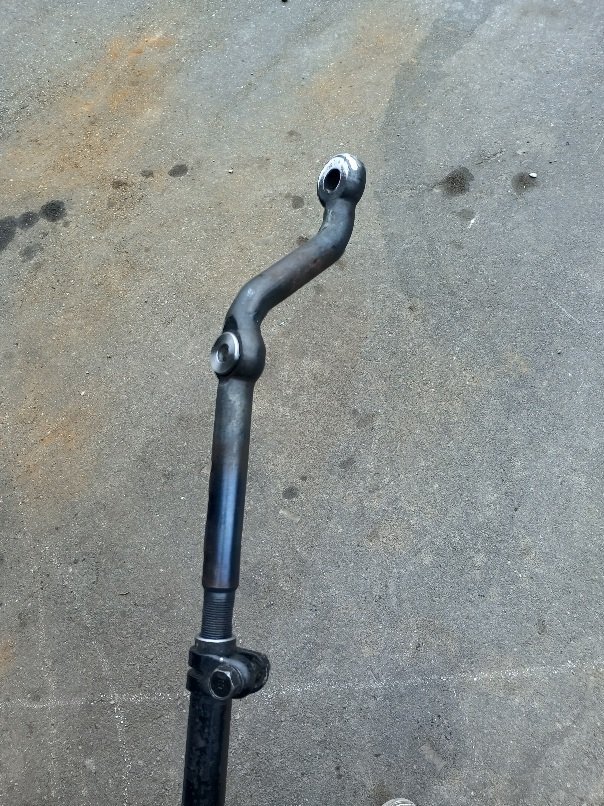
I got another good weekend in the shed, snow is shit and trails are muddy. I got front rails and engine cradle painted and engine in, no dramas, plenty of space around it I got the steering arm back from the machinist, he reshaped it for me and drilled out the centre taper, then made me a press fit bushing to take the metric ball joint on the steering damper, it works great and gives me plenty of space for the Panhard bar. I got the Panhard bar mounted and track set too and it sits good I stared farting around with the roof braces. The gist of it is when the glass roof extension went in they just hacked all the braces out so I need to reinstate the structure. I got one finished which braces the pillar belt mounts and mocked up the others, I need to speak to the certifier again tomorrow before I attach them for good, he's against welding them in so I'll bolt and glue them. Then I put the seat doublers in and read the info sheet again and realised they need to be riveted, rivets on the way. I also sold a 4L80e and transfer case to a fella from down south who rocked up in this weapon, home job turbo 5.3 with a big ol cam, looked and sounded like a shitload of fun
1 point
-
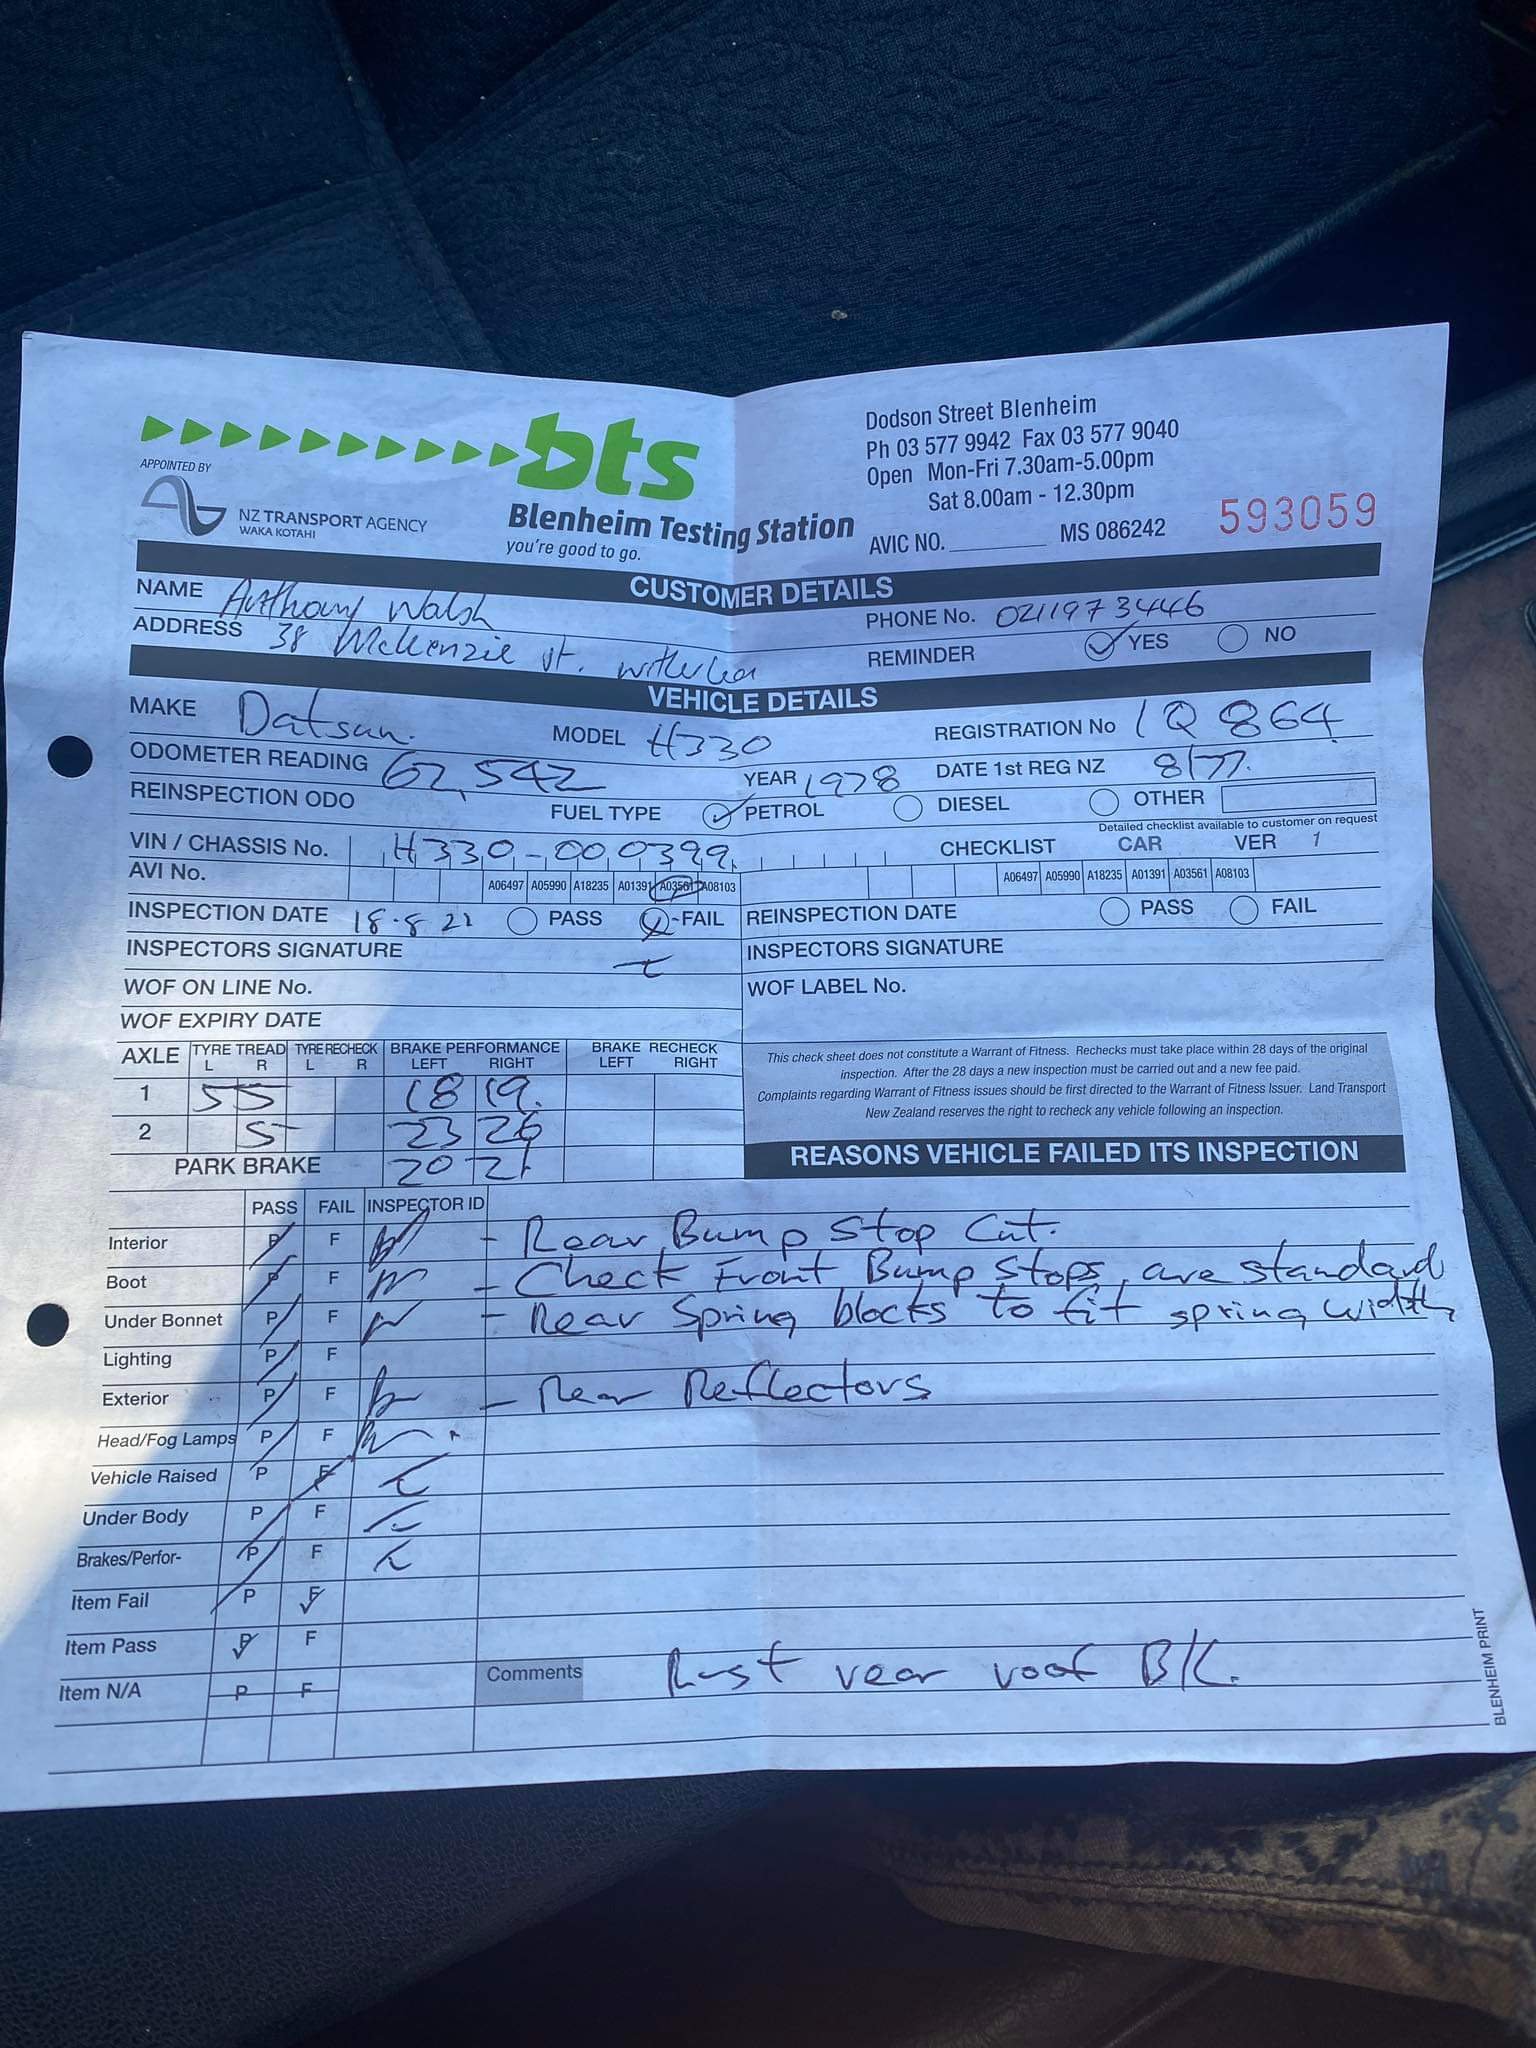
Took for a WOF. Fairly happy with result. Bump stops having been hacked when sacked and needs reflectors on rear. Tyres were no issue. 1” lowering blocks are too skinny over leaves so need replacing too. Will sort new 2” ones so no issues there.
1 point
-
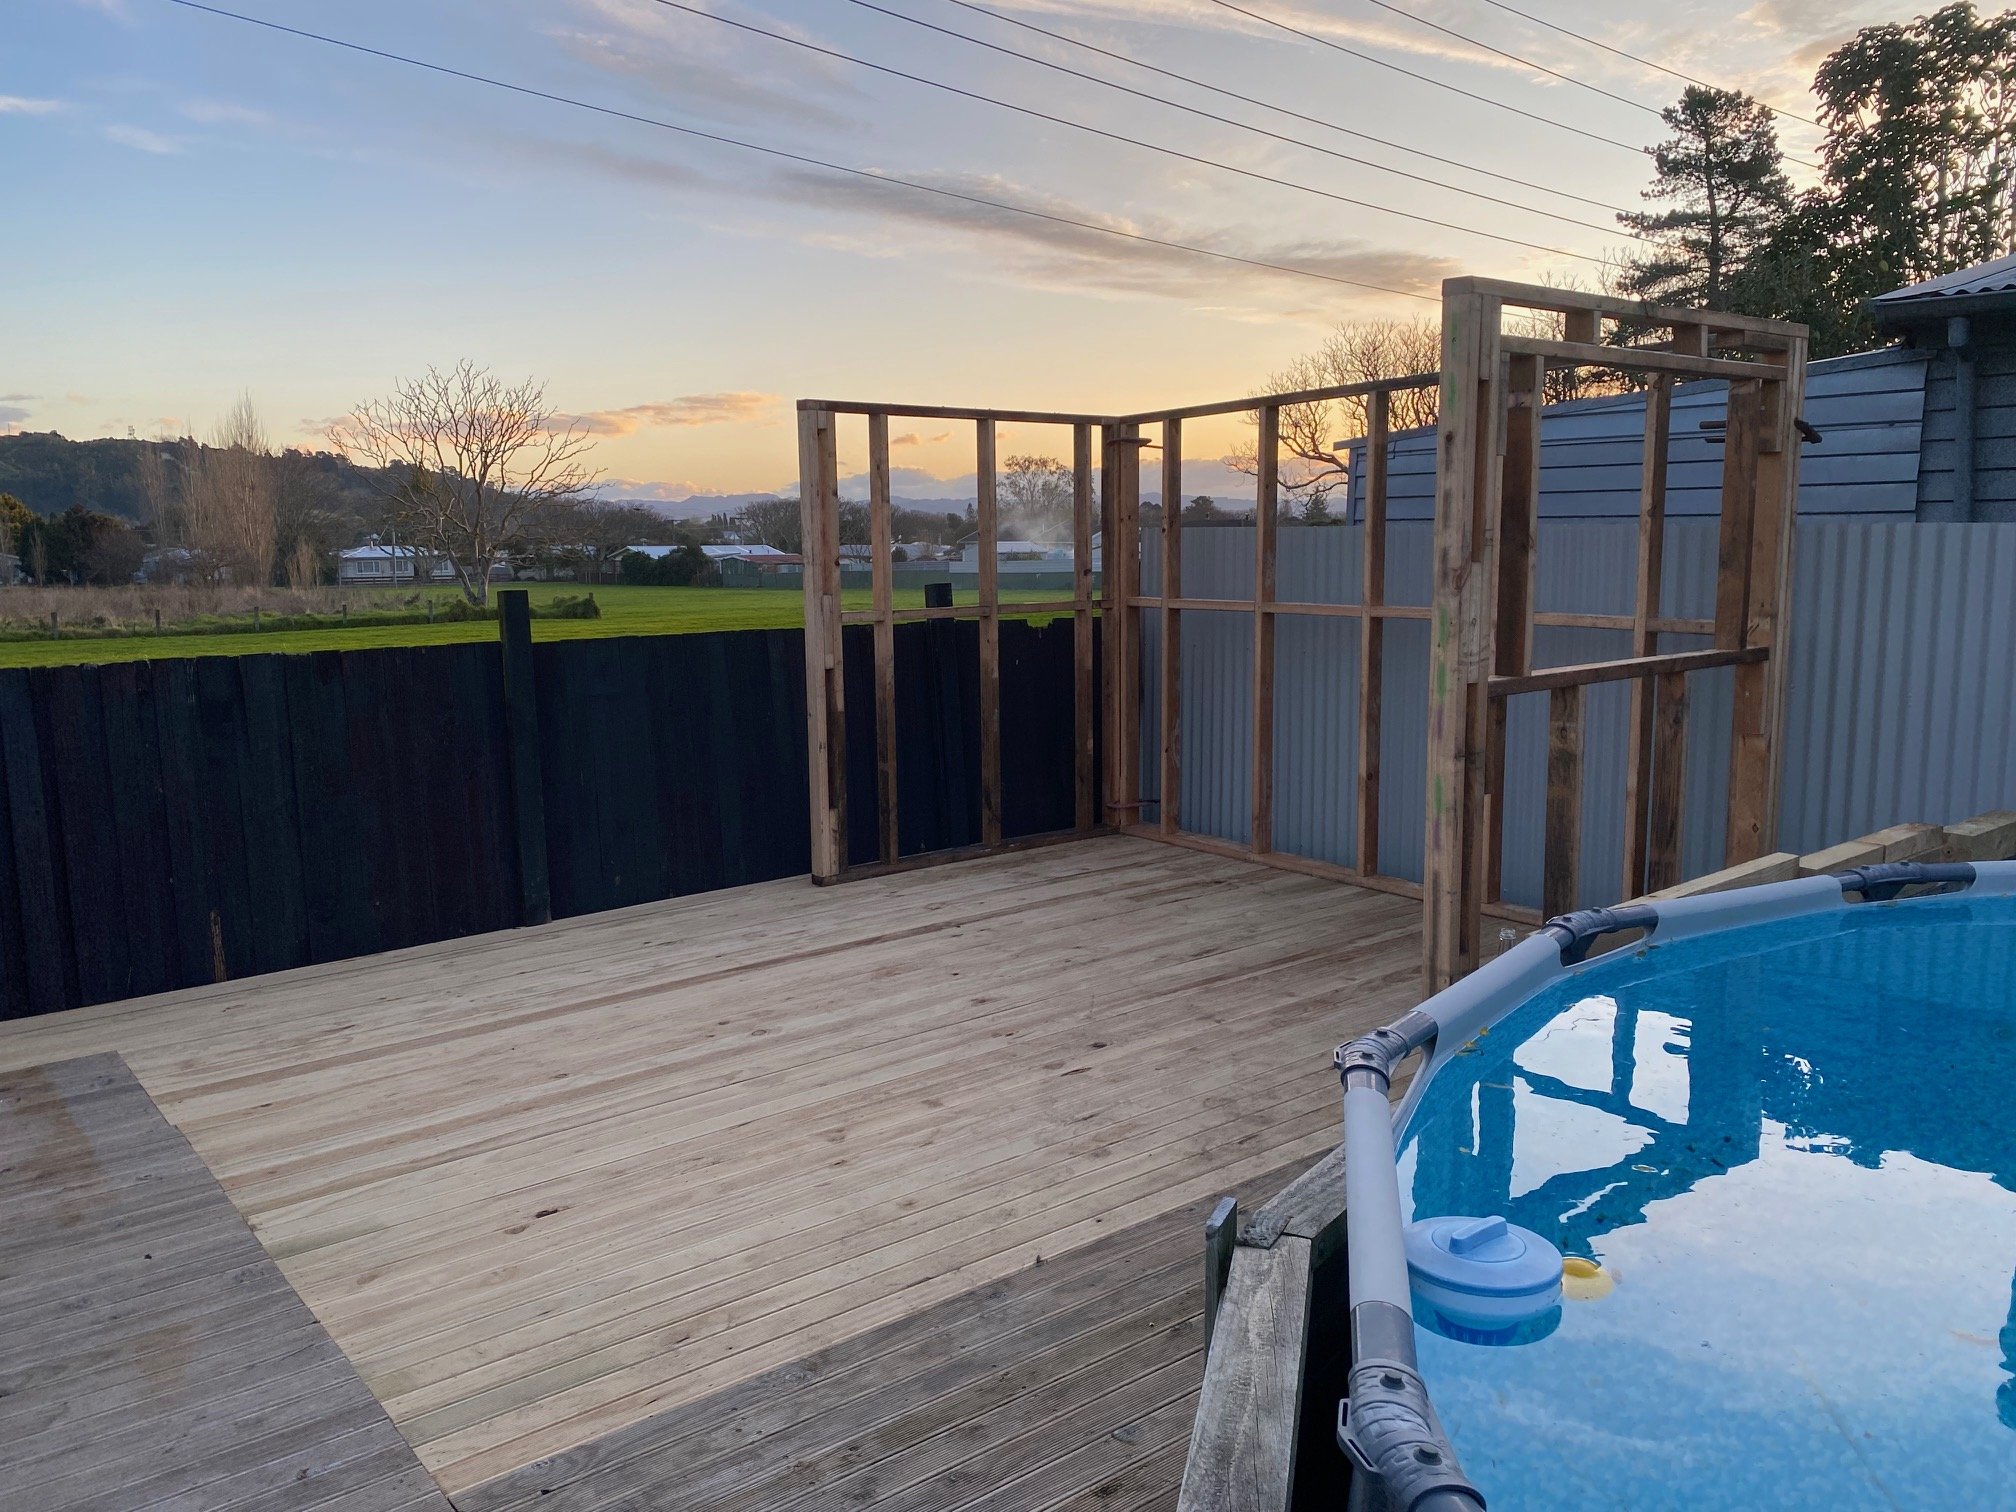
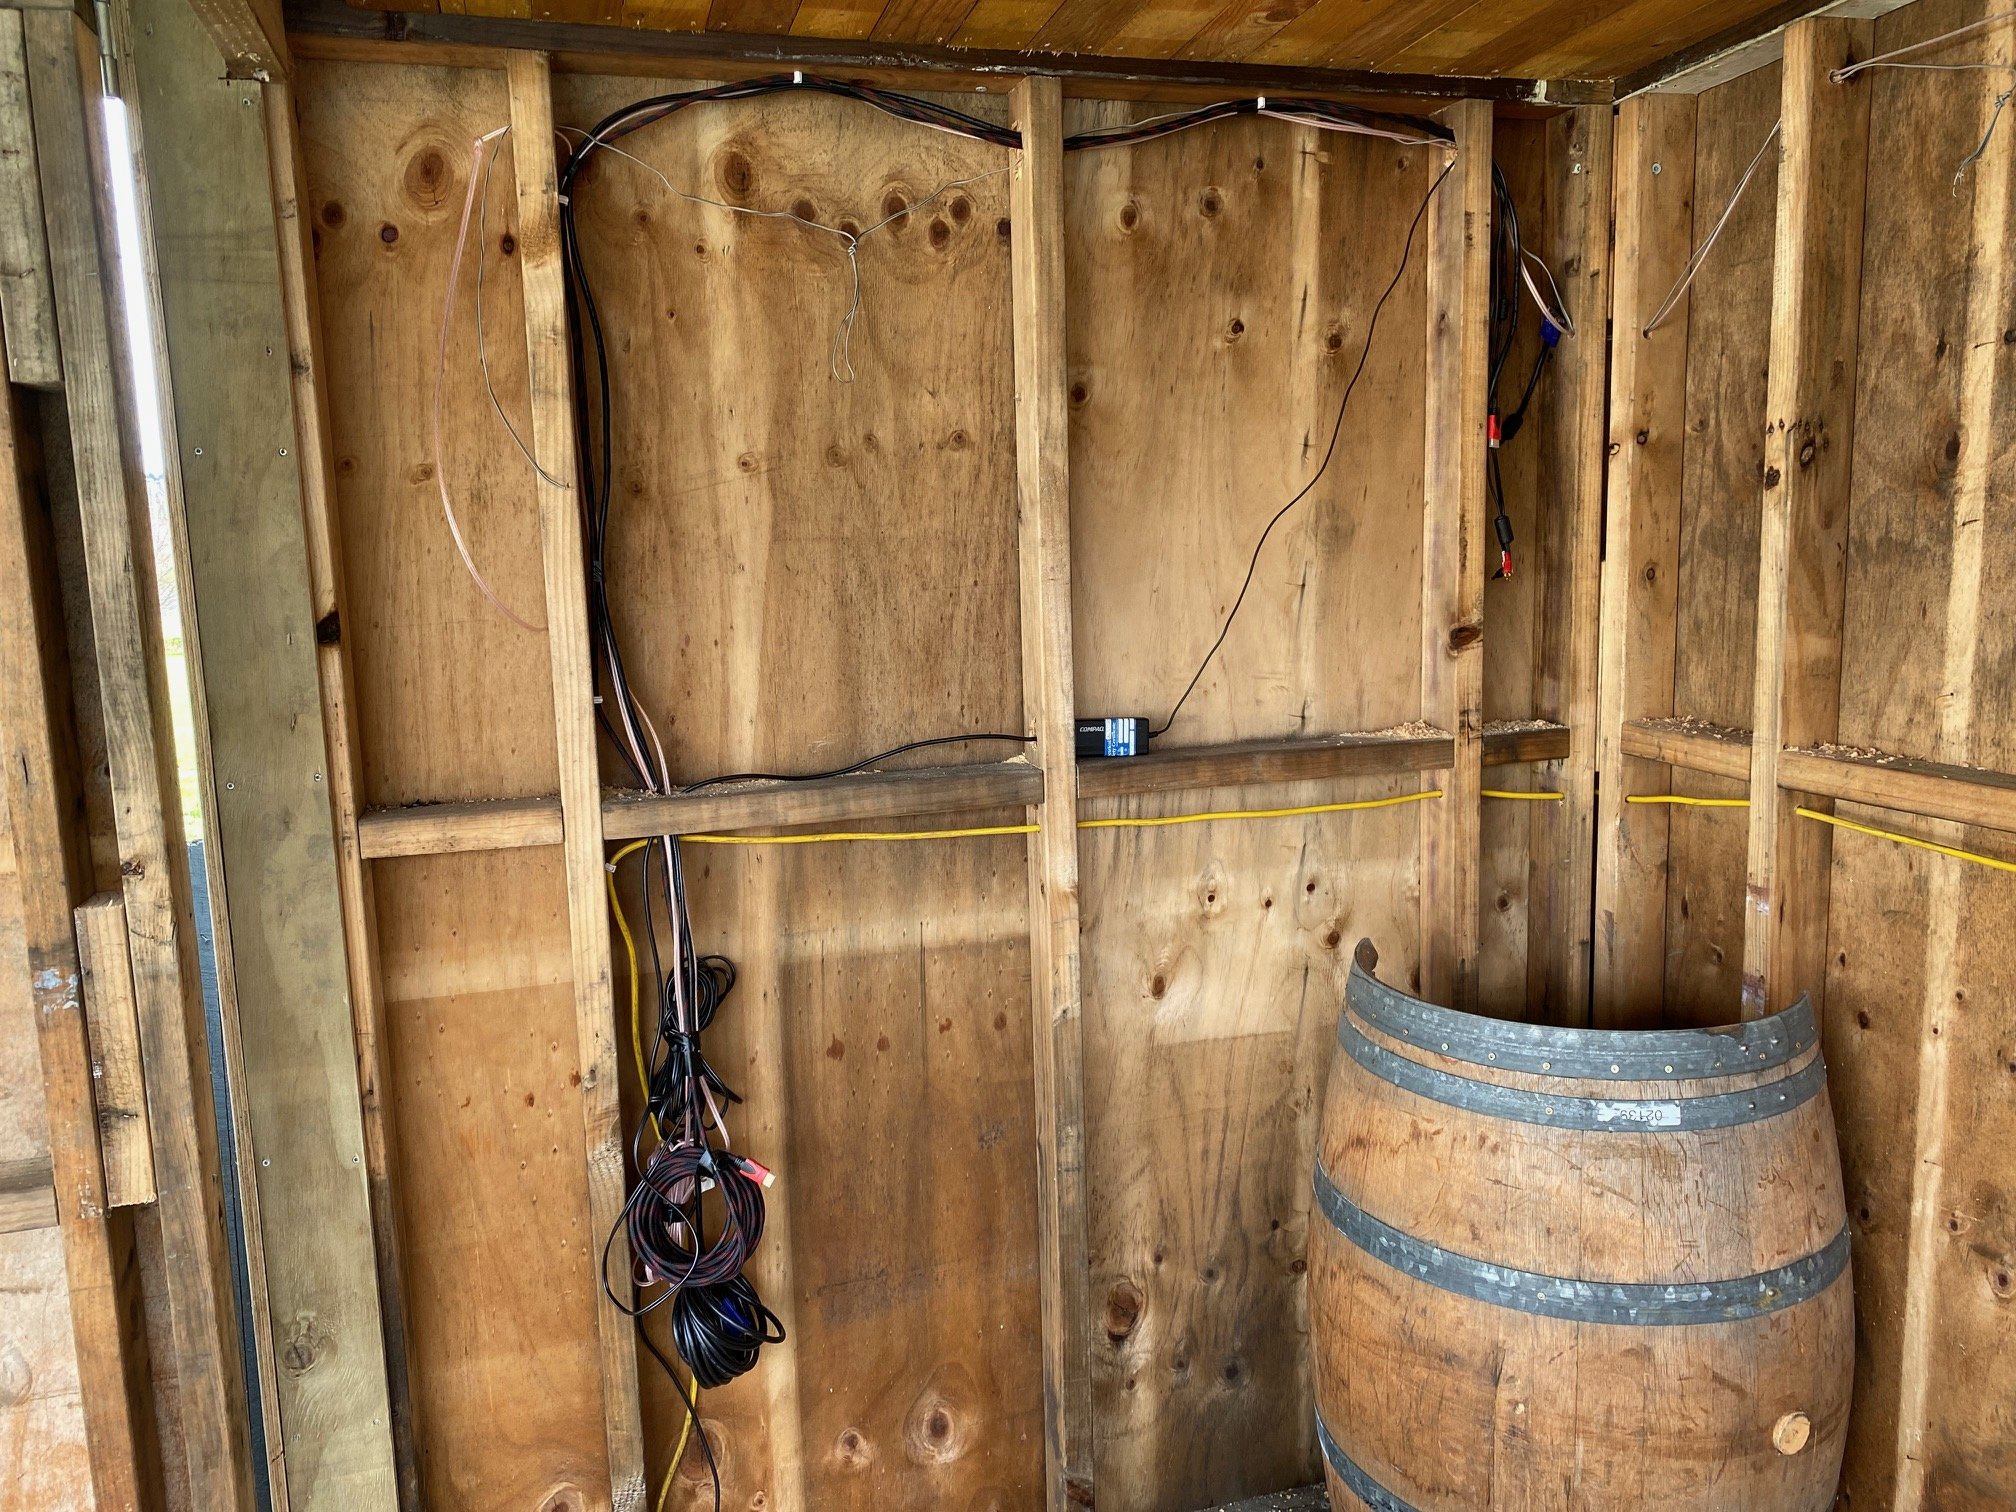
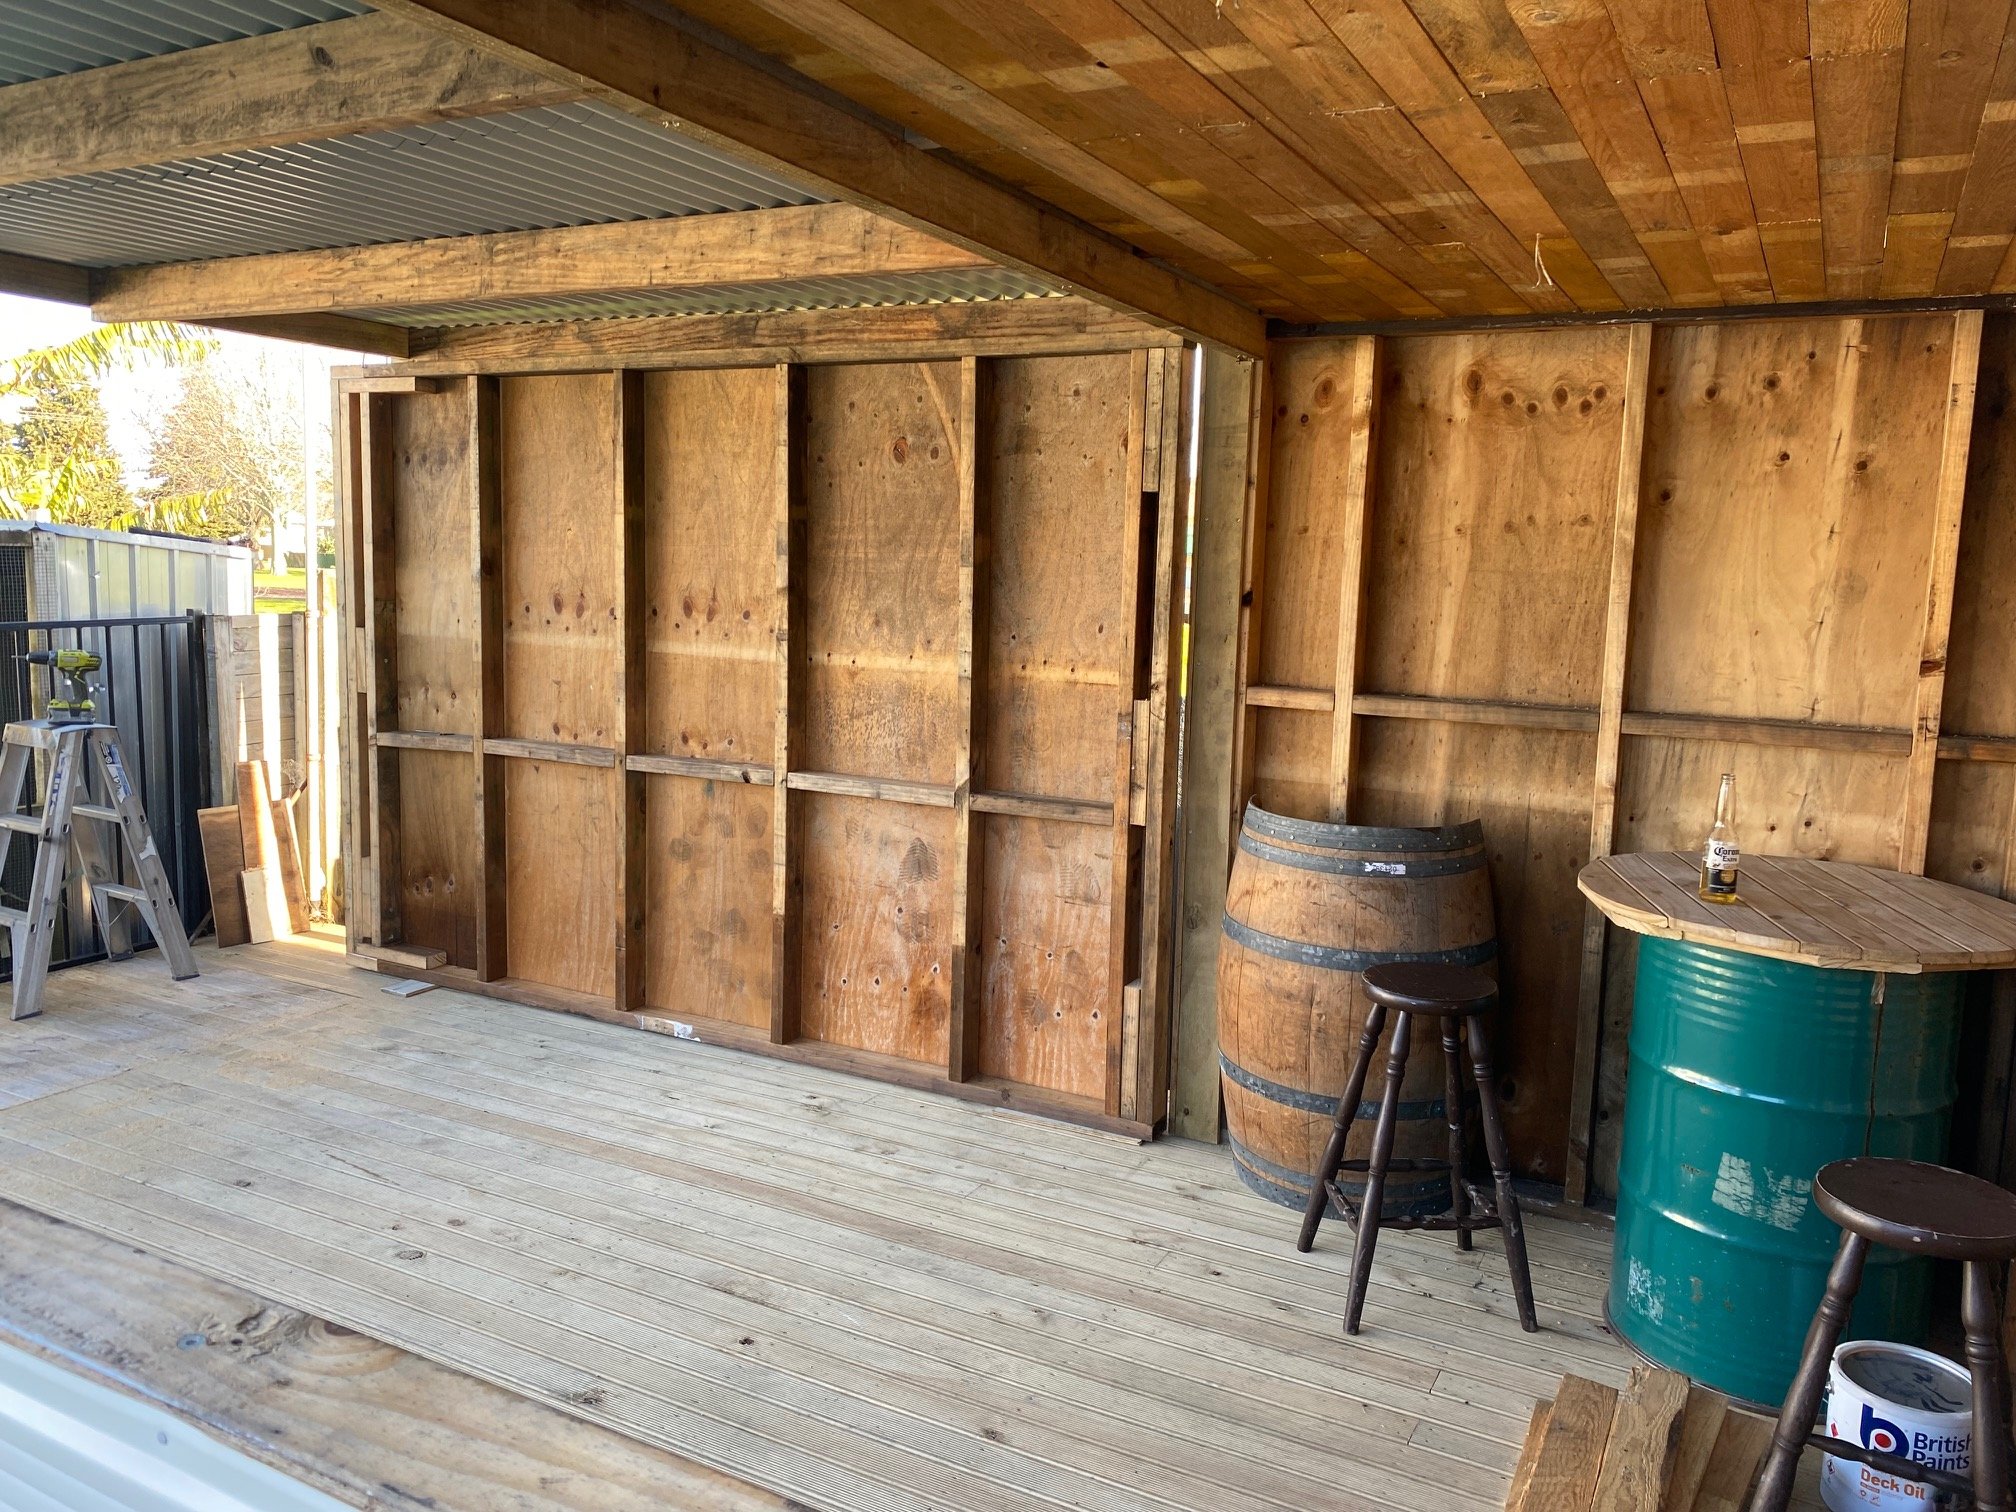
Had enough of playing with bikes for now so turned my attention to some work around the house, the old spa was long dead so what to do with it hmmmmmm ok plan hatched Tiki Bar for summer, how to get rid of the spa built deck over it, find some old scrap timber and just start building I guess.
1 point
-
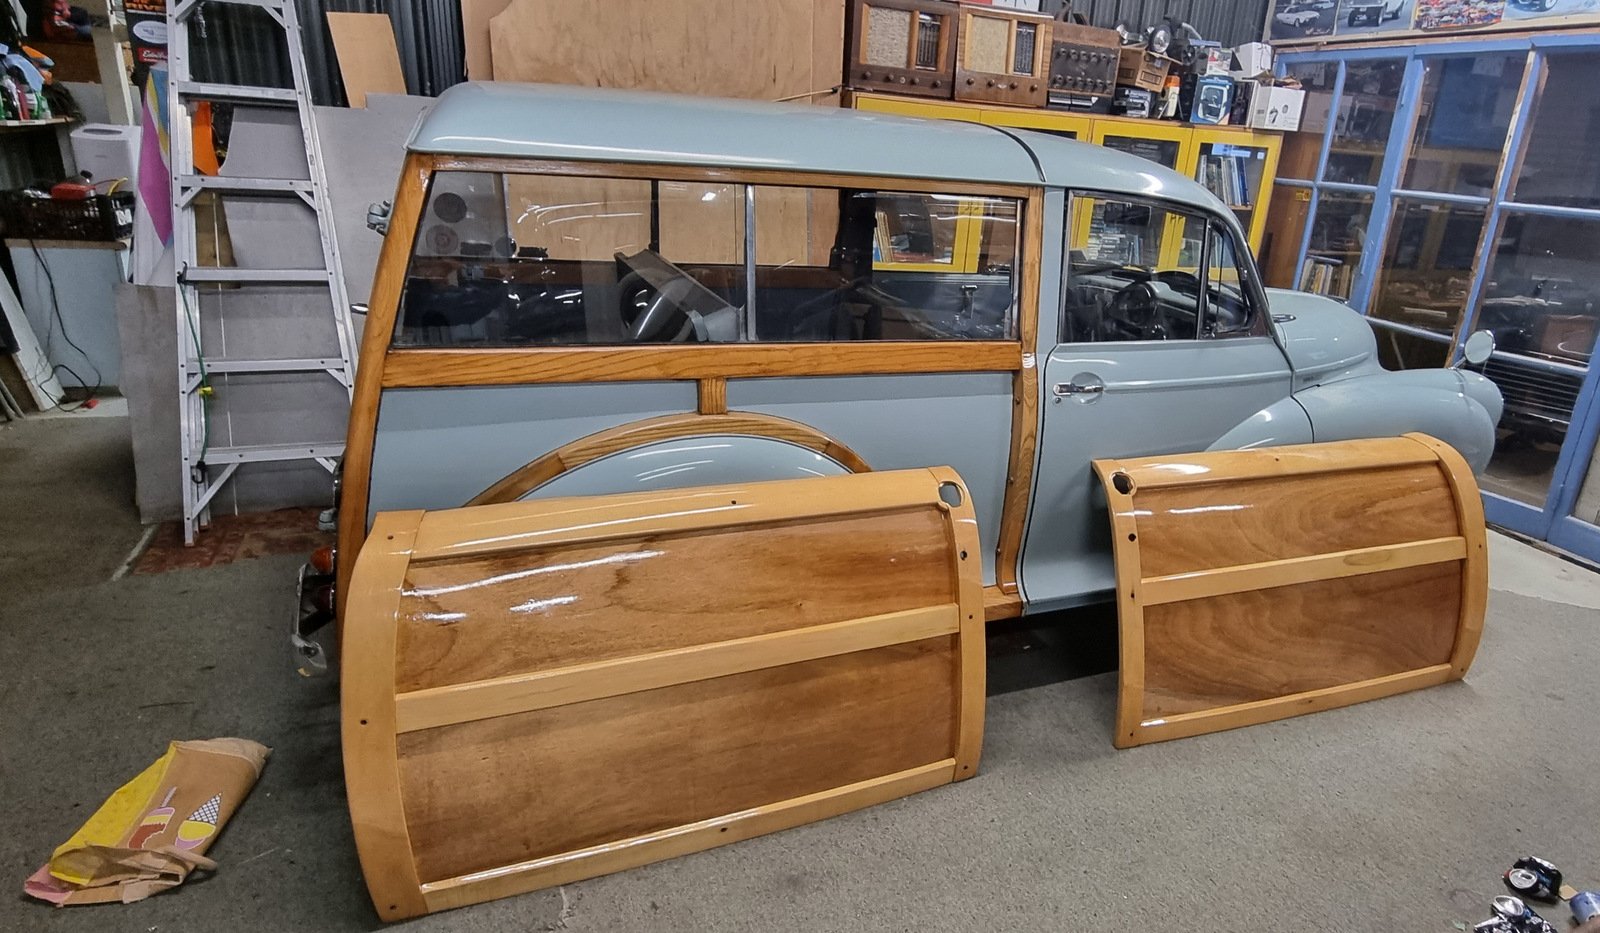
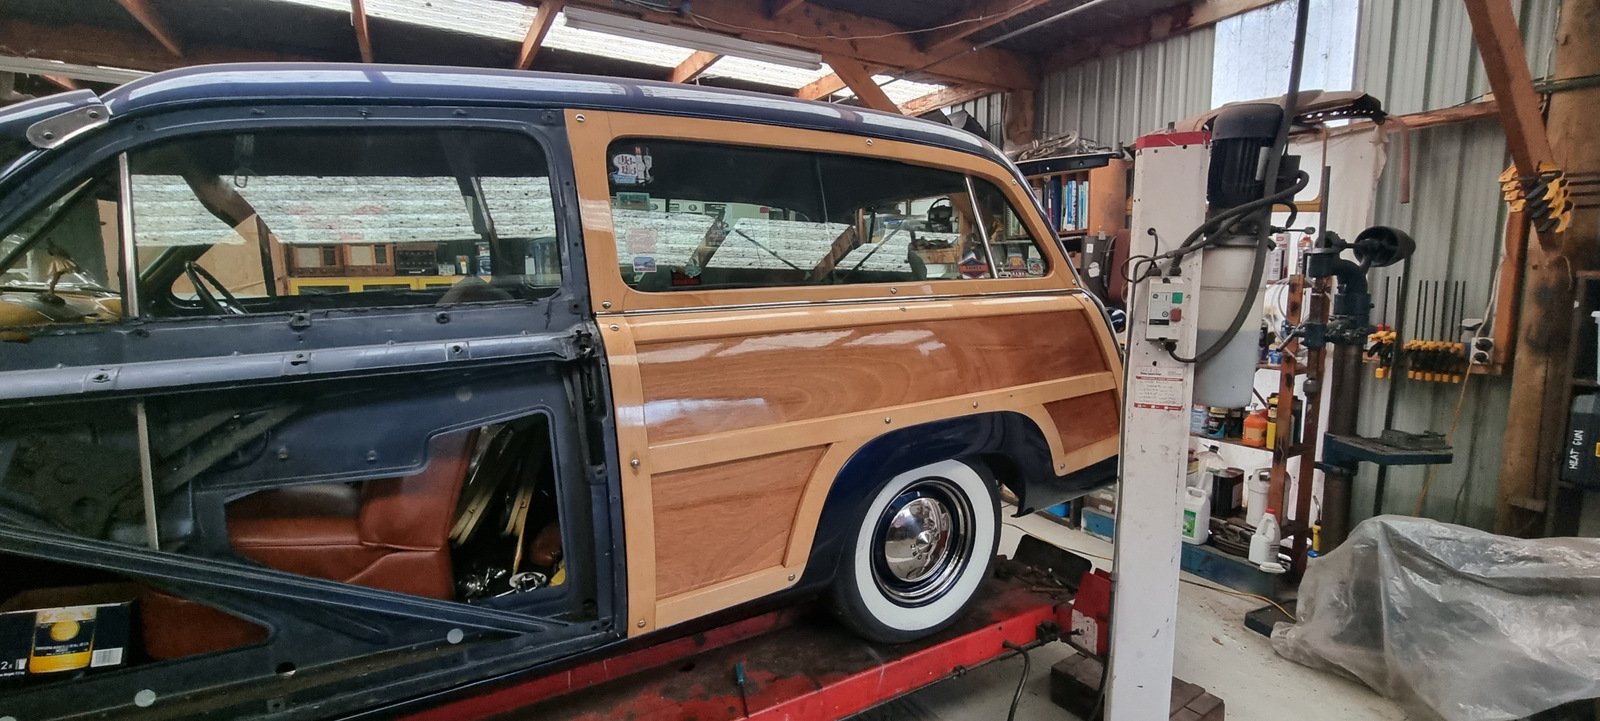
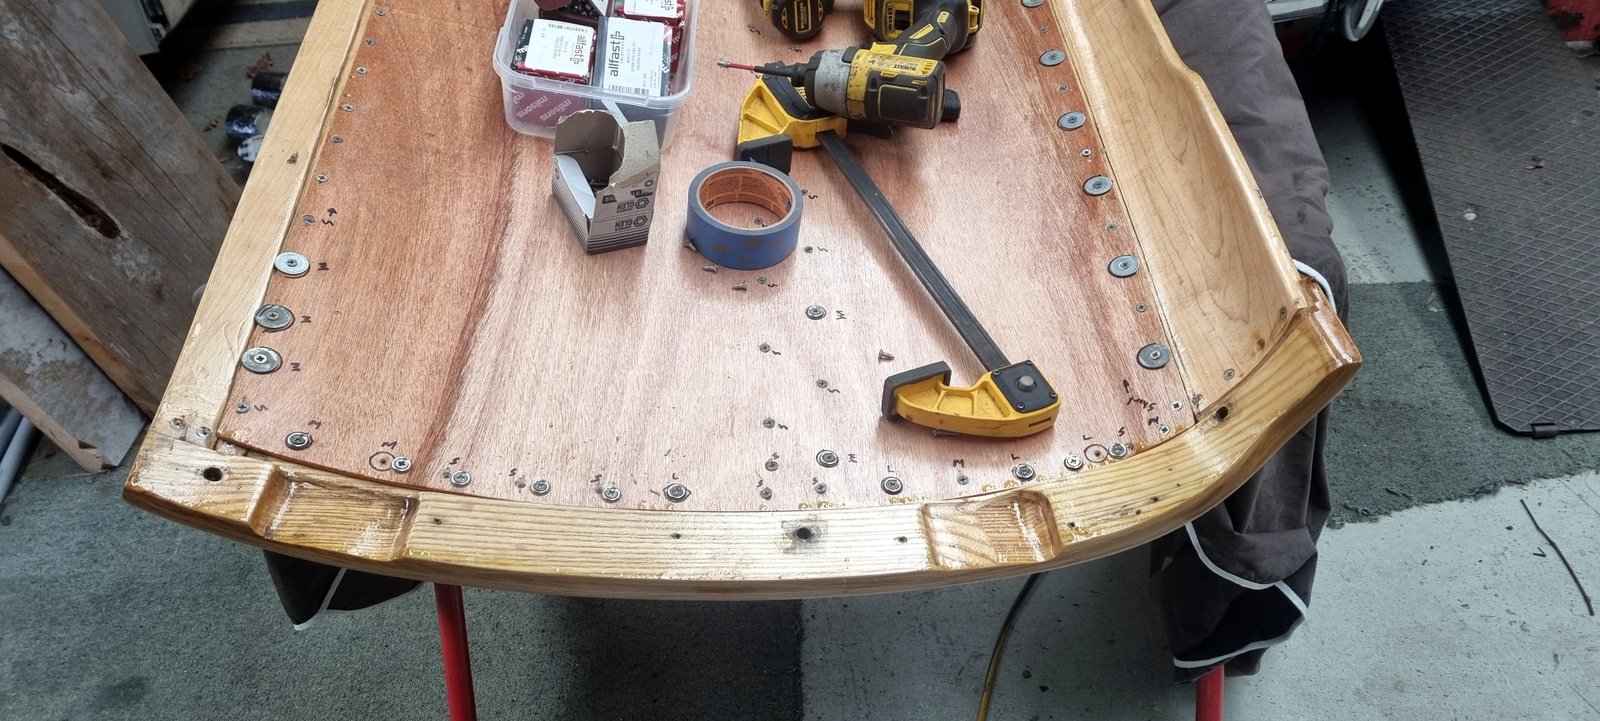
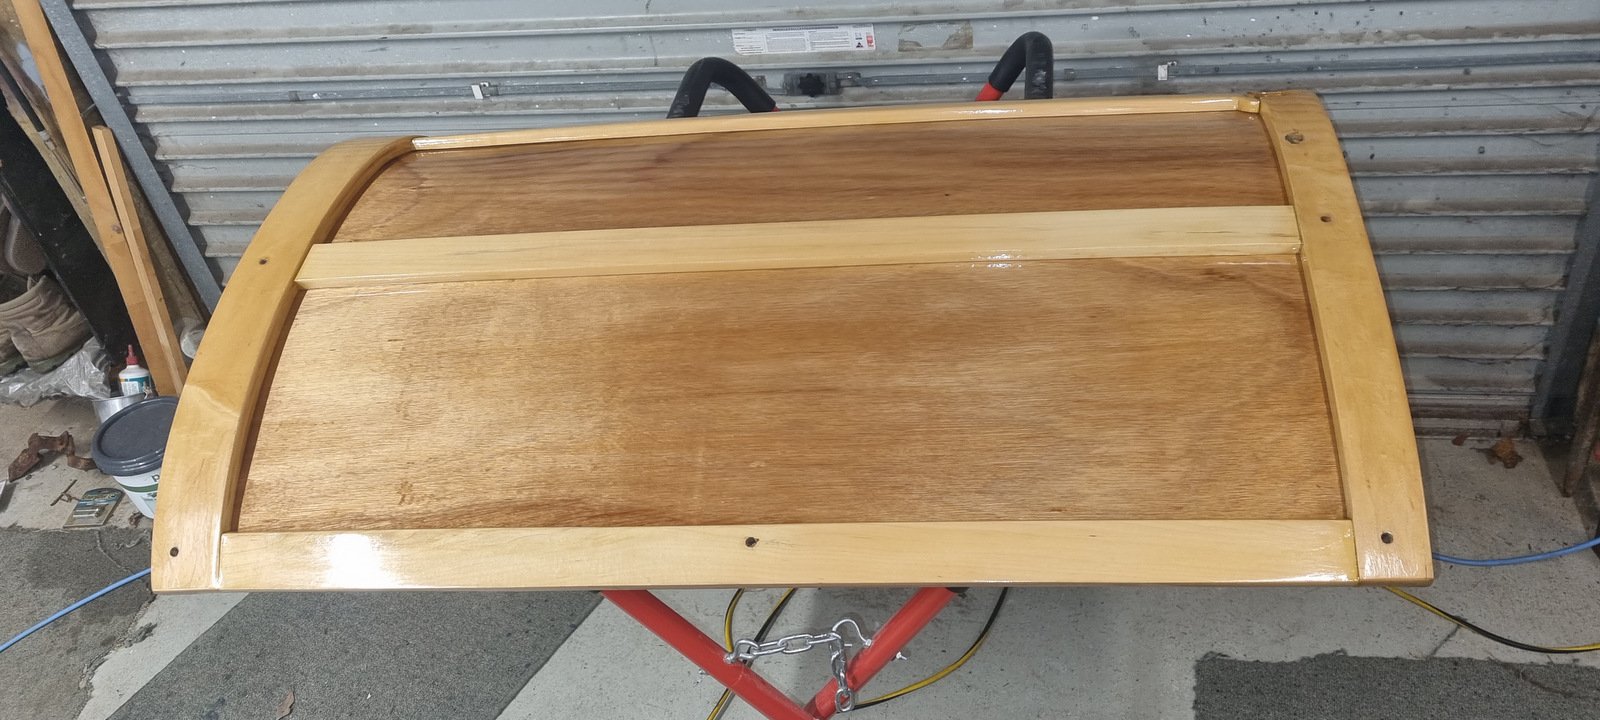
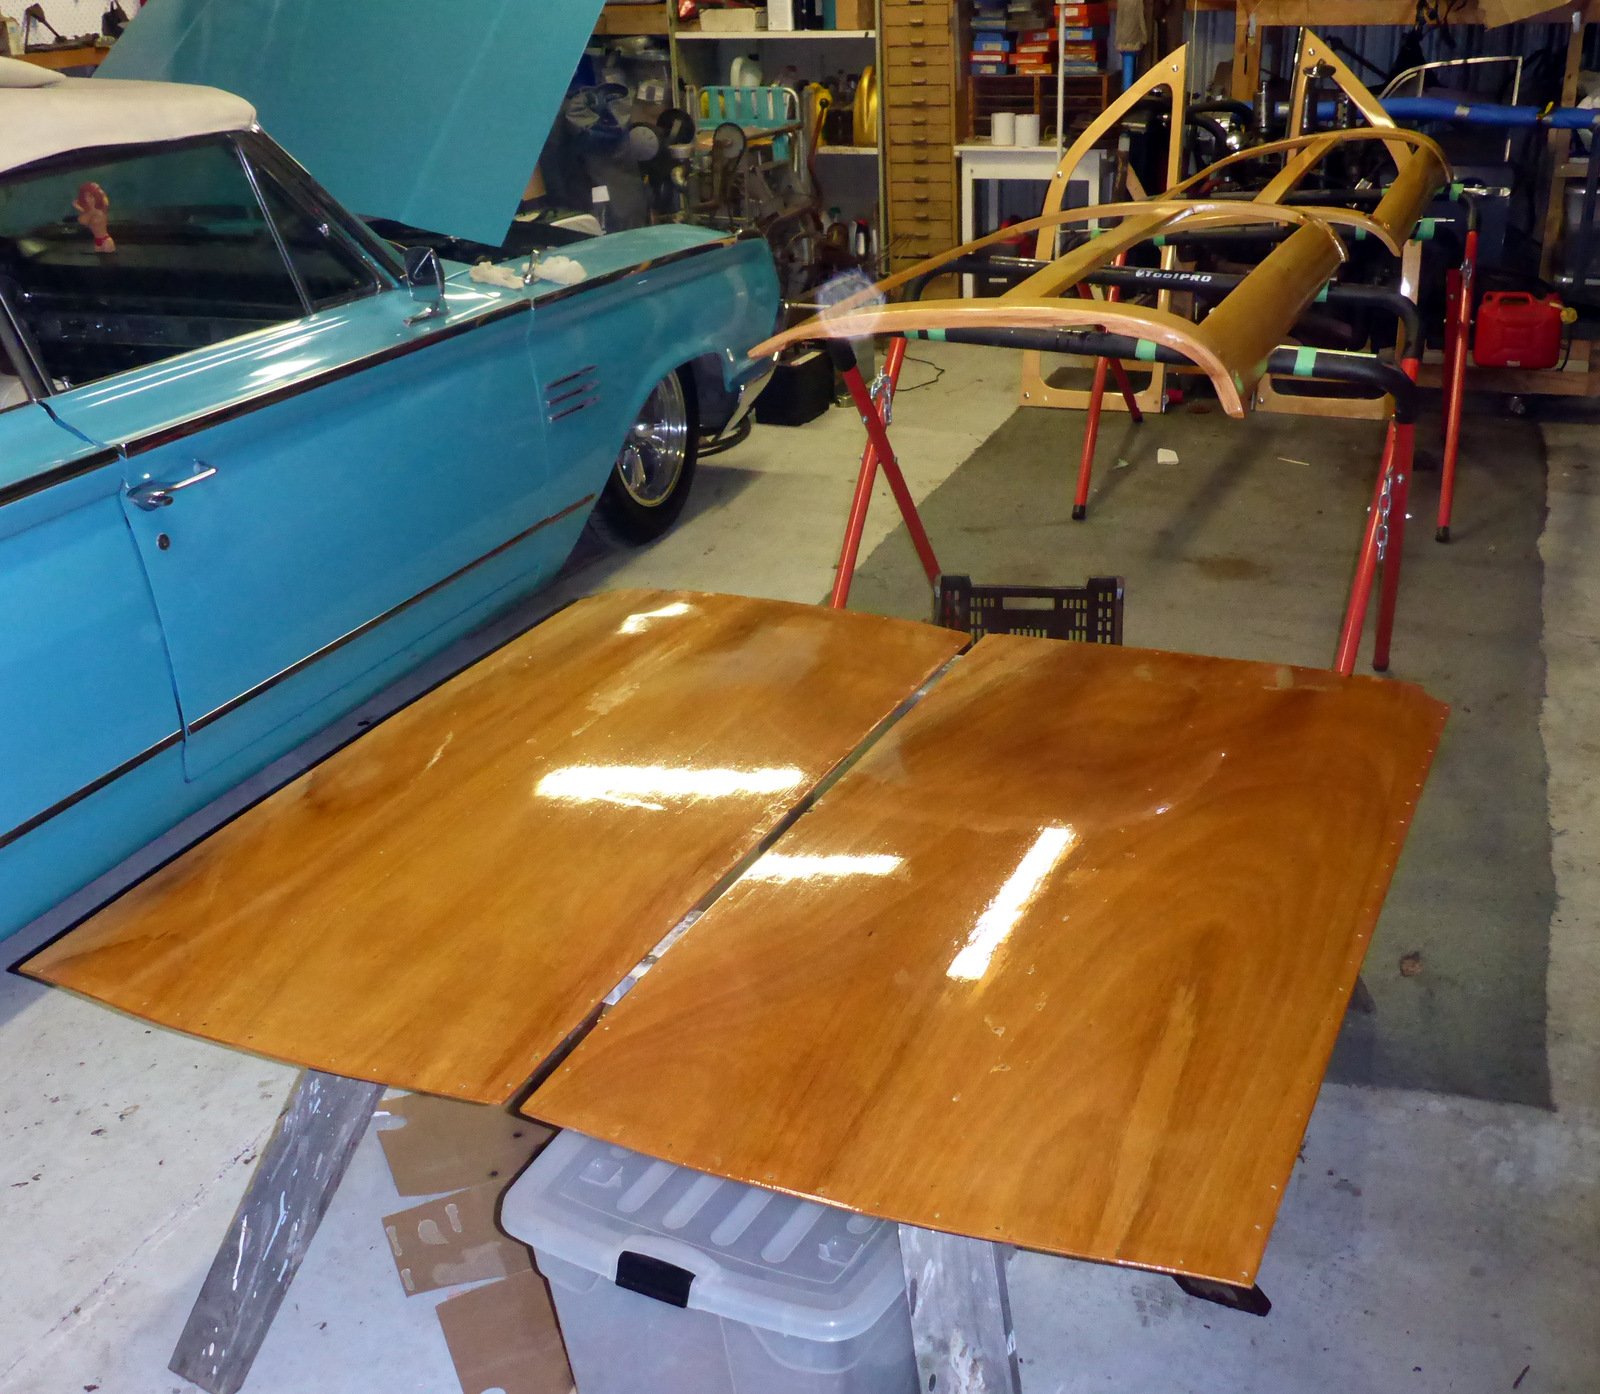
Been varnishing doors And a couple of extra coats on the back half. Along with a bit of screwing around And started reassembly.
1 point
-
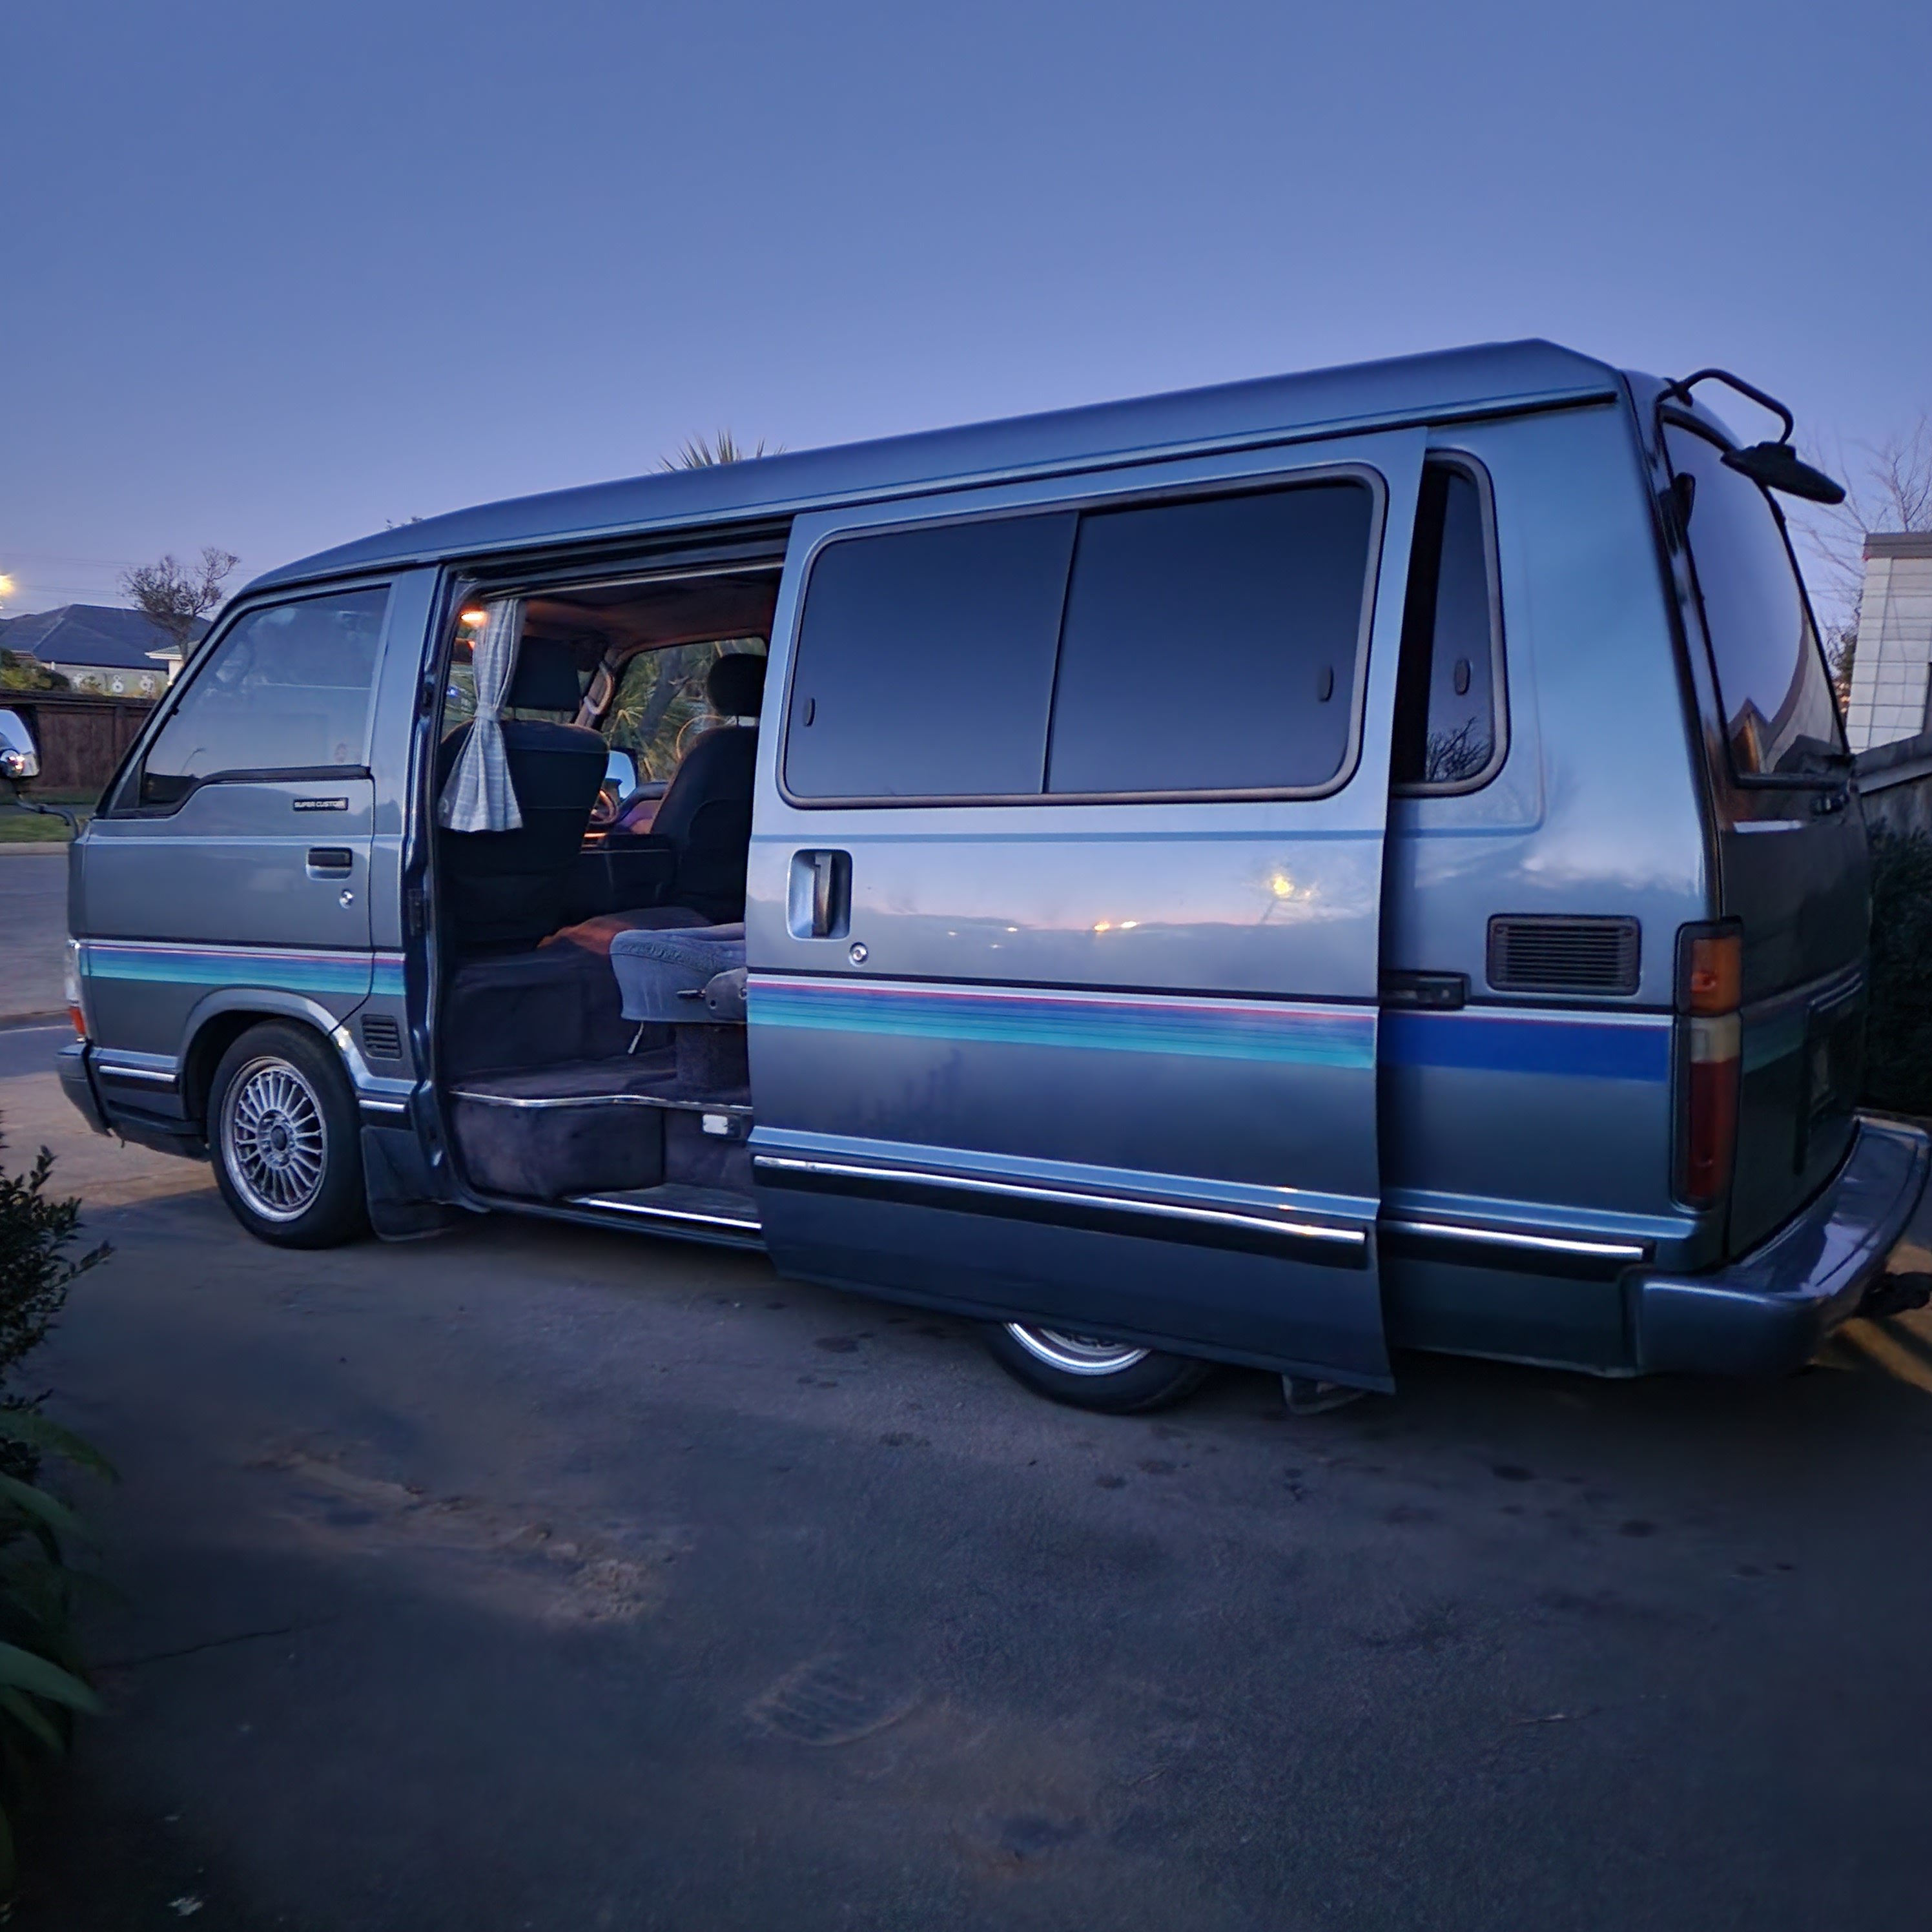
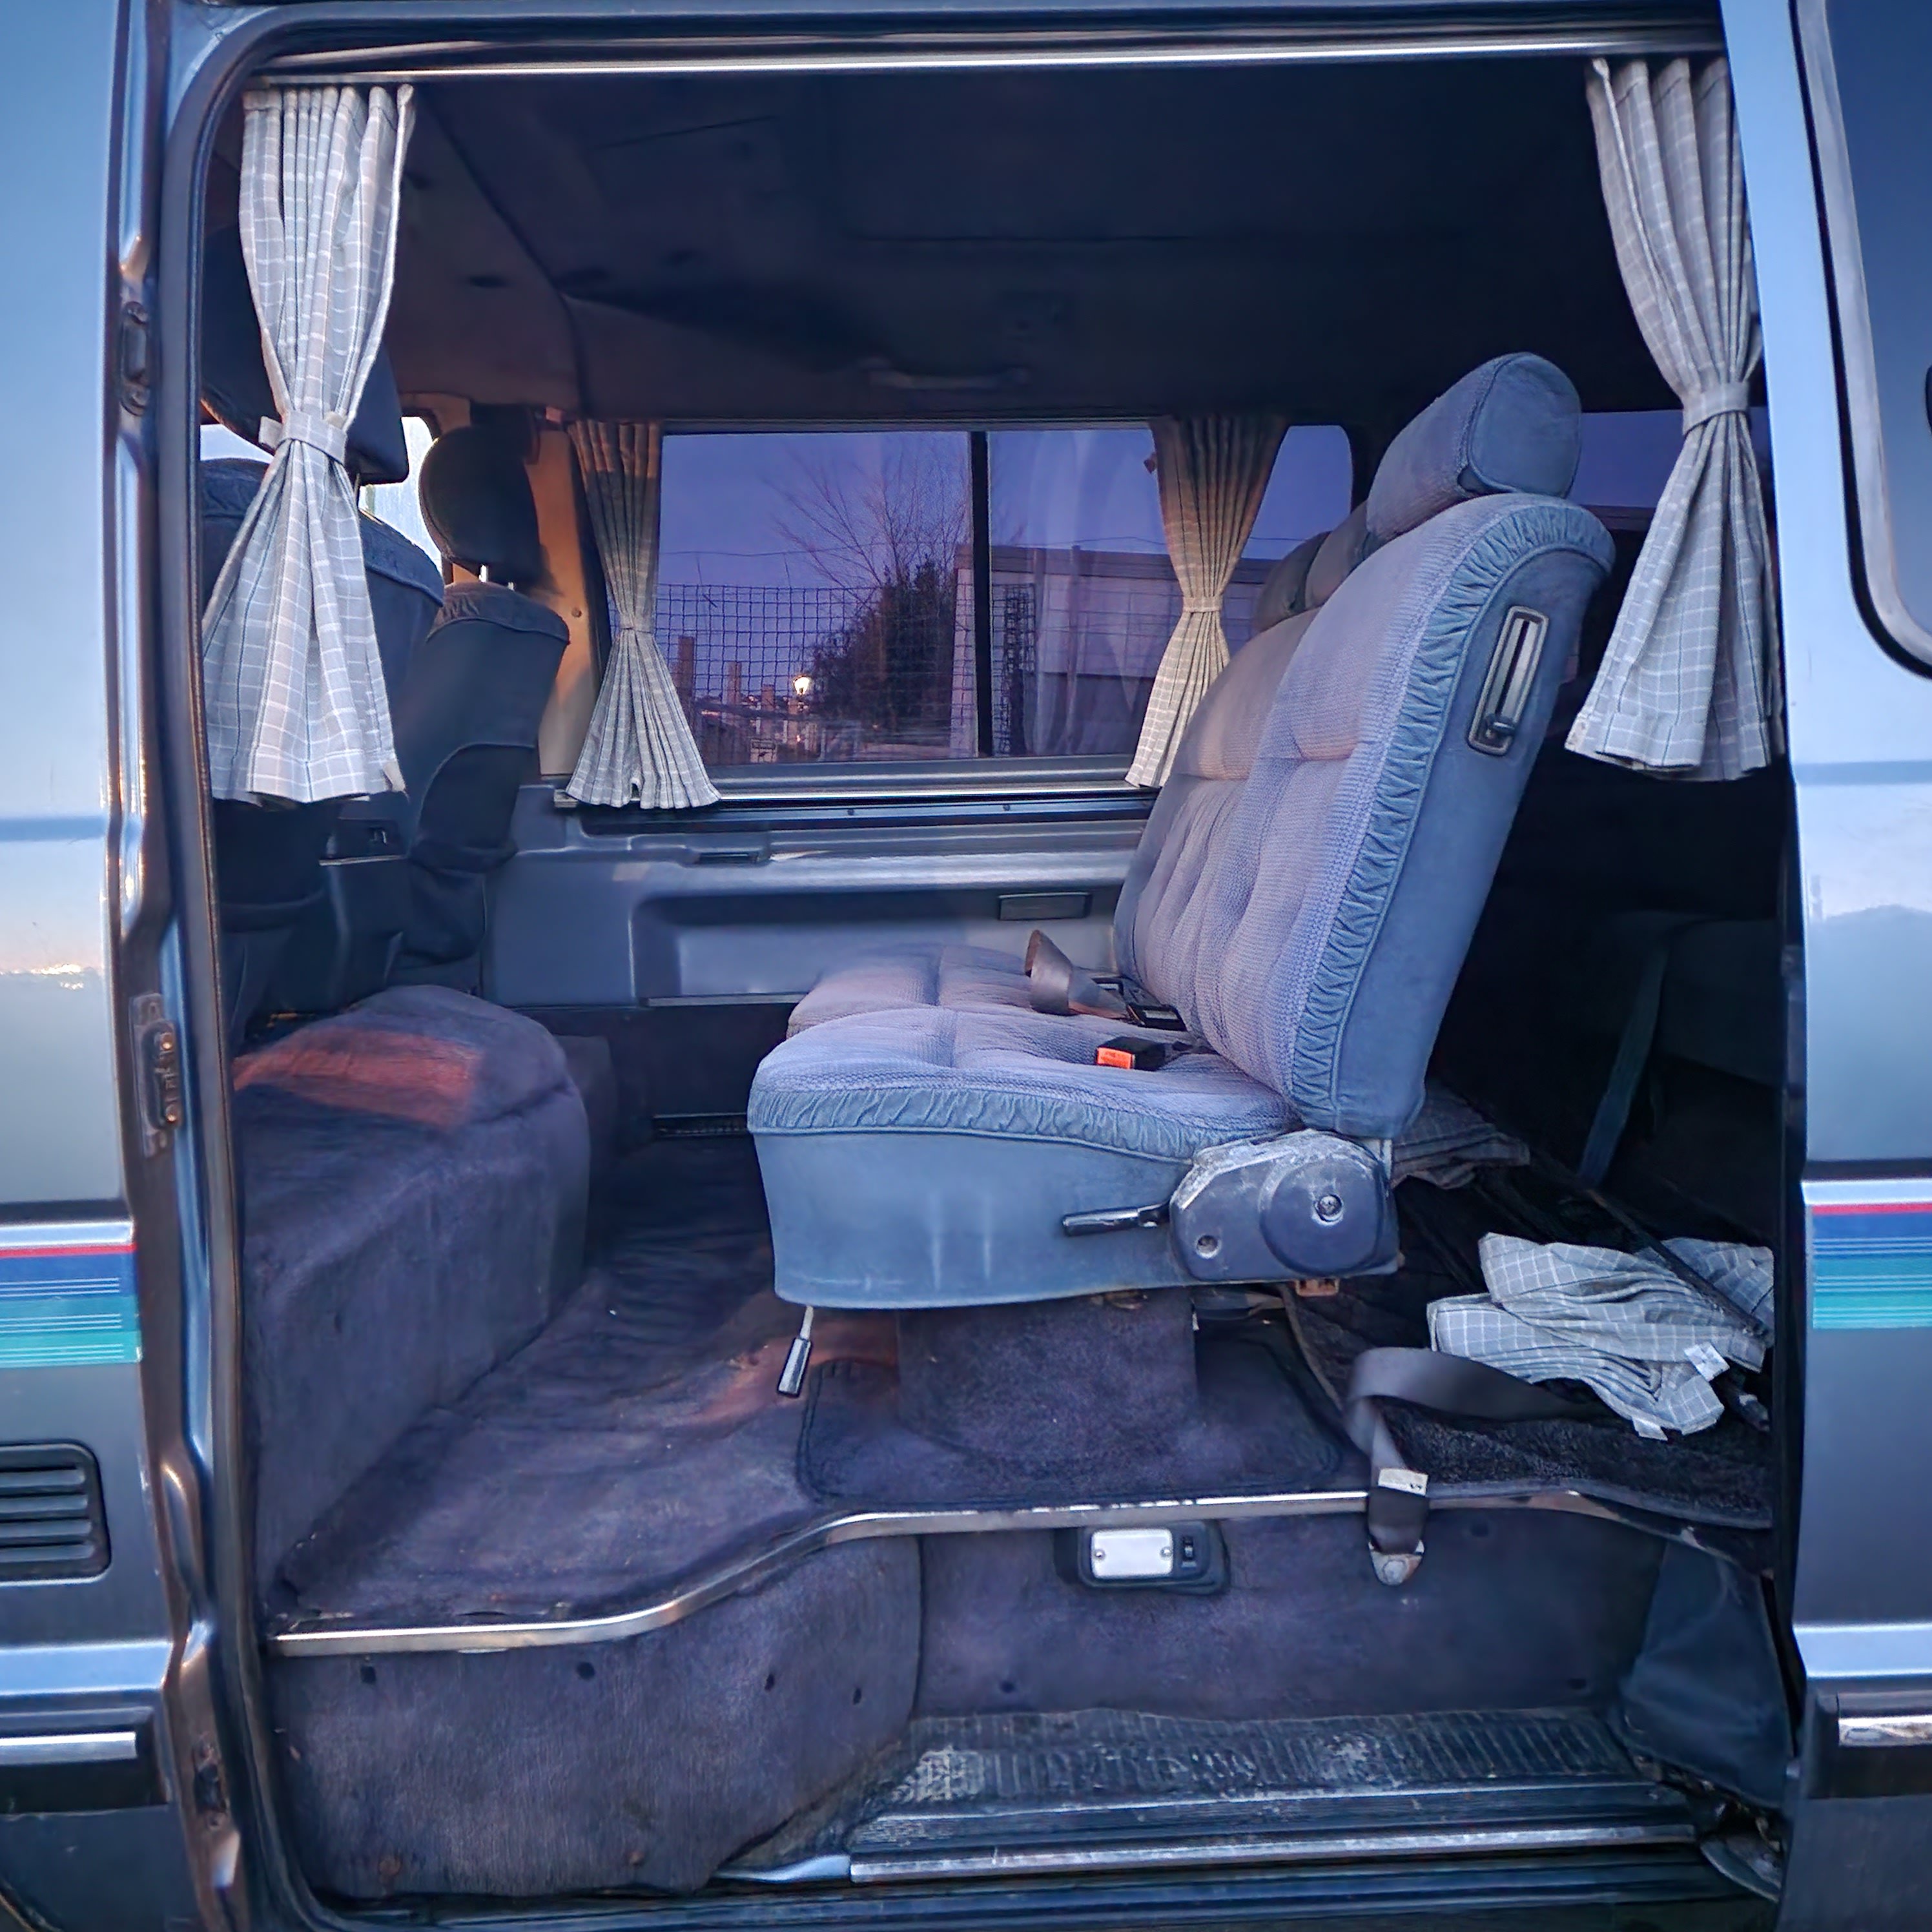
While the tinted windows prevent you from seeing the curtains from outside they definitely add a touch of class when sitting inside. Bit by bit it's feeling a bit less shit! I also lowered the front to level it out. Engine crossmember now sits at a pleasant 70mm from the ground I was also able to get the 3rd row seatbelts that I was missing so now I can safely seat 8!
1 point
-
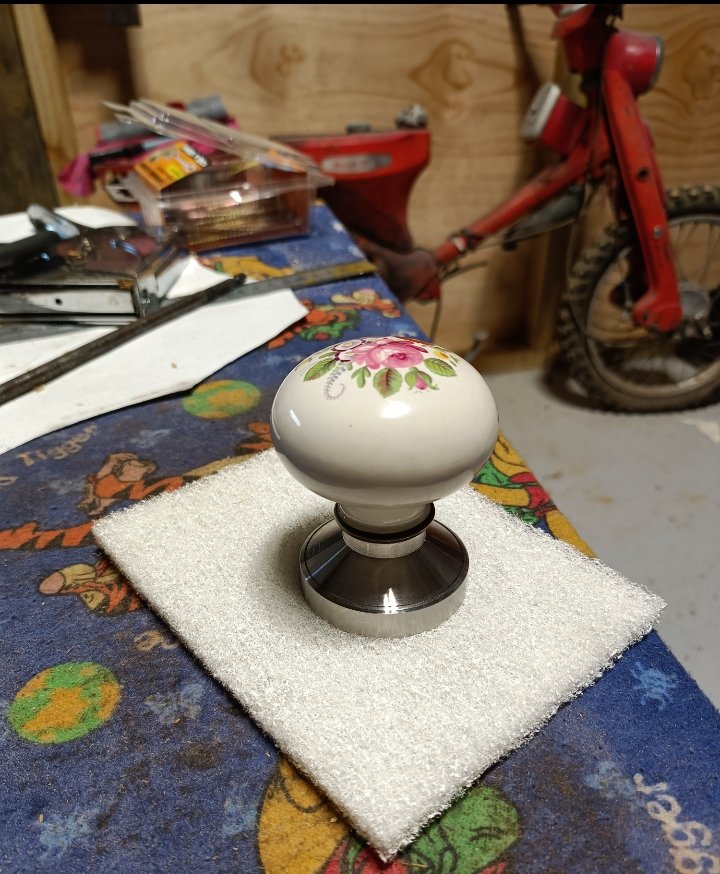
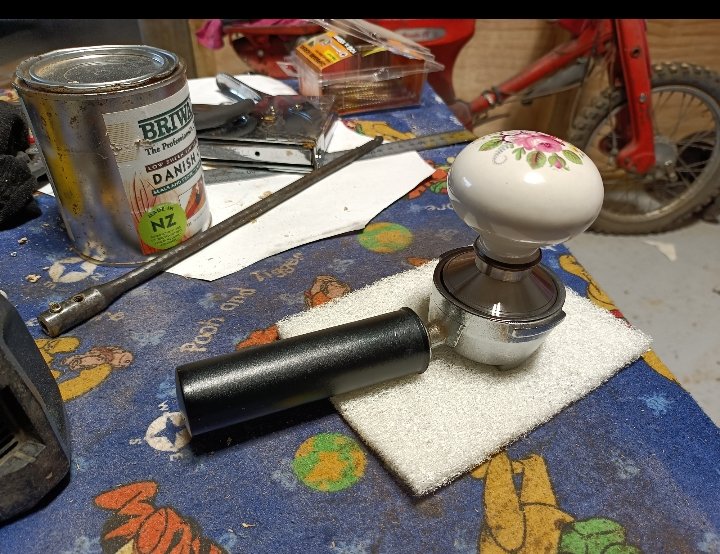
Repost from coffee thread, but needed a tamper for my coffee machine. Learnt how to lathe and spun this up from stainless and an old door handle
1 point
-
Small update. Porting finished all irons and are off to rehardening..ill get pics when back in my hands. The Front rotor above cleaned up no issues. Cleaned the rear rotor but we did notice on pull down that the rotors were machined out for 3mm seals and was a chip 1/3 way along the slot..prob why they been machined decades ago as threw the seal In the back. Anyways, cleaning rear one and was sketchy about how clean it wasn't compared to front and different "texture". Builder suspects one was original..one new. They are both reusable. Discussion now is do I use old rotors in new housings keep 3mm apex with all the new OEM seals or replace one rotor adding a 3mm remachining cost. Or new FD rotors or new FC NA S4 rotors(higher compression to run more boost) and stay 2mm. Sell my old ones as matching pair to offset cost of one new rotor. Leaning towards NA so known history of the new engine.1 point
-
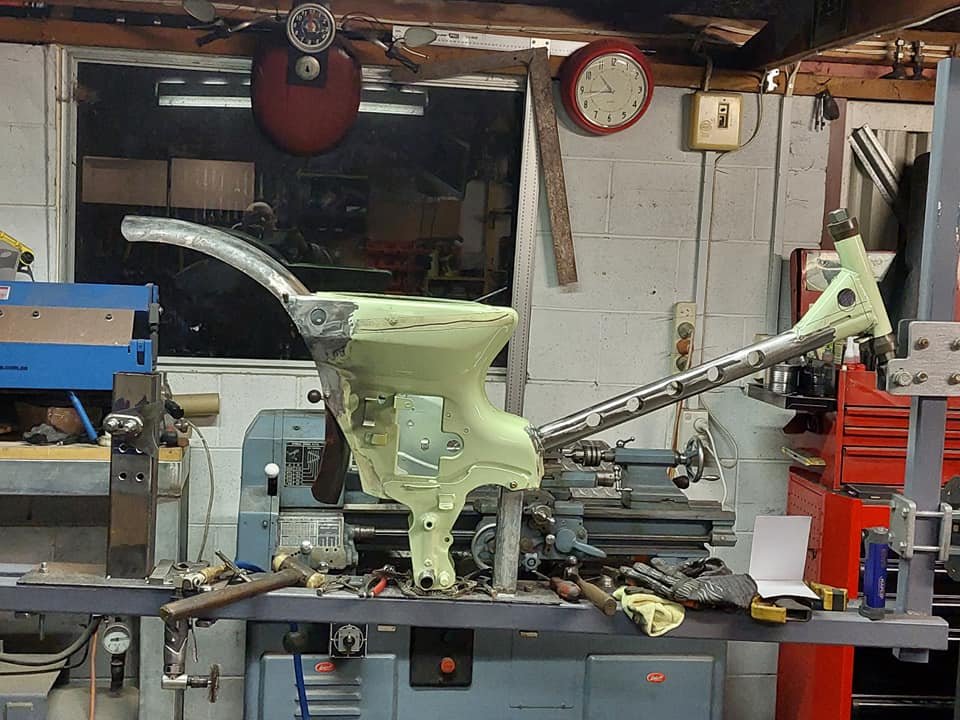
The 'hard' part of assembly completed I can now chip away at the rest of the engine. I'm taking my time, enjoying the process and tinkering with bits as I go along. The next stage is the oil pump and filter and connecting tubes. First thing to go in was the oil filter pedestal. I looked at the hole for the oil pressure switch/gauge sender and it just didn't look deep enough. I'd tapped it out with the appropriate 1/8" bsp tap and it fitted one switch I had but It just didn't look right for my Imps sender. Only one way to double check. Out to the 'garage' where little imp is safe and dry.. I removed the sender (luckily very easy access on the Datsun engine) and tested it in the hole. Sure enough it only barely started on the thread. Out with the bsp taps and I ran one in a lot further. Much better... Tested it in place. Easy access. I wanted to sort this out now as I could make sure the oil ways were completely clear of any swarf etc. Having to tap this hole out in place after fitment would have been a risky thing. That done I sealed up the filter mounting side with tape and fitted the unit in place.. Oh but not before taking this pic after assembling all the parts together in one place... I also weighed the block with crank/pistons in place before the oil system went in too. More about weights soon. But back to the oily stuff. I bolted it all in and set up the chains and sprockets. Some of the tinkering I mentioned as things went together included milling out as much as possible from all the various plates and mounting blocks. No point in extra weight and anyway- the bits looked nicer for it. Not that anyone will see them. But I know they are there in all their lighter machined goodness. You can sort of spot some of my Jenny Craig weight loss efforts going on in this pic on the idler gear mount.. That lot in place I moved on to another little job. For oil changes I needed a sump plug. This neat little stainless item arrived from China.. M12 x 1.25 and I didn't think I had a tap to suit. Luckily I remembered about a set of Chinesium taps my neighbour had given me a few years ago. Probably made of cheese but hard enough to tap the required thread I needed. Look at the spelling on the box ... Drain plug sorted... Cylinder heads will be next on the agenda. Give them a clean, strip them down, check and softly lap in the valves etc etc. I'll also be stripping, cleaning and bleeding the hydraulic lash adjusters. For that job I wanted a tray for all the little bits. I popped over to the neighbours farm as she has many many many chickens. Got some egg trays. She also gave me some sponge cake because she knew Id have run out of the cakes Hannah had made me. I like cake. Another job I am mid way through is creating a 'thrust' ring to go between the flywheel and the back plate. It's really just a belt and braces fitment in case because why not. As shown in the last post, I feel that the stock Goldwing crank thrust bearings are fairly minimal. This ring I'm building will only come into effect if the Goldwing item gets worn to much. There's about .0006 ~0007" clearance on the crank. Good oil and not sitting at the lights with the clutch pushed in should help things last. But just in case I will add this. I cut some 8mm alloy plate into a circle and then machined a ring up... Ordered some special Tecast Pa6c oil impregnated engineering nylon which arrived yesterday. I also got a bit of bar which will be used later on in my gear linkage. See my lovely shiny ring... More on this next time. I mentioned weighing the block earlier. I thought it best to weigh all the engine parts (because curious and couldn't wait actually). The block with crank/pistons was 36kg on the pretty accurate bathroom scales. Everything else I weighed with the digital scales. I wrote stuff down and took a pic.. Pretty happy with that really. It includes the clutch assembly and the engine side of the engine mounts. When I first started stripping this engine down many moons ago I had always hoped I might see a final weight of around 80kg - but unrealistic when the block and heads are 56kg alone. I'll wiegh the Datsun engine when its out but google sources claim my A12 is 87 kg so I'm stoked with a circa 10kg increase there. The Subaru leone transmission is about 9kg heavier than the Imp item. The big benefit is that the flat six is shorter in length and majority of its weight is down low in line with the crank - not up high like my current Datsun is. I'm super happy with how the current car handles so this will be a decent improvement on that. Plus I get the rear parcel shelf back for shopping bags! Since I had an empty workshop for a bit I thought I'd reunite Impy one with impy two for a few nights. Maybe I'll get baby imps?1 point
-
Assembled the lower door panels with only one major fuckup (will see how that crack in the outer ply skin goes in the future ) Going to do a bit differently and give it a couple or three coats of varnish assembled like this before they go back on the car. Also welded up the loose hole (insert Al's mum joke here) and ground it round again ready to reassemble the suspension.
1 point
-
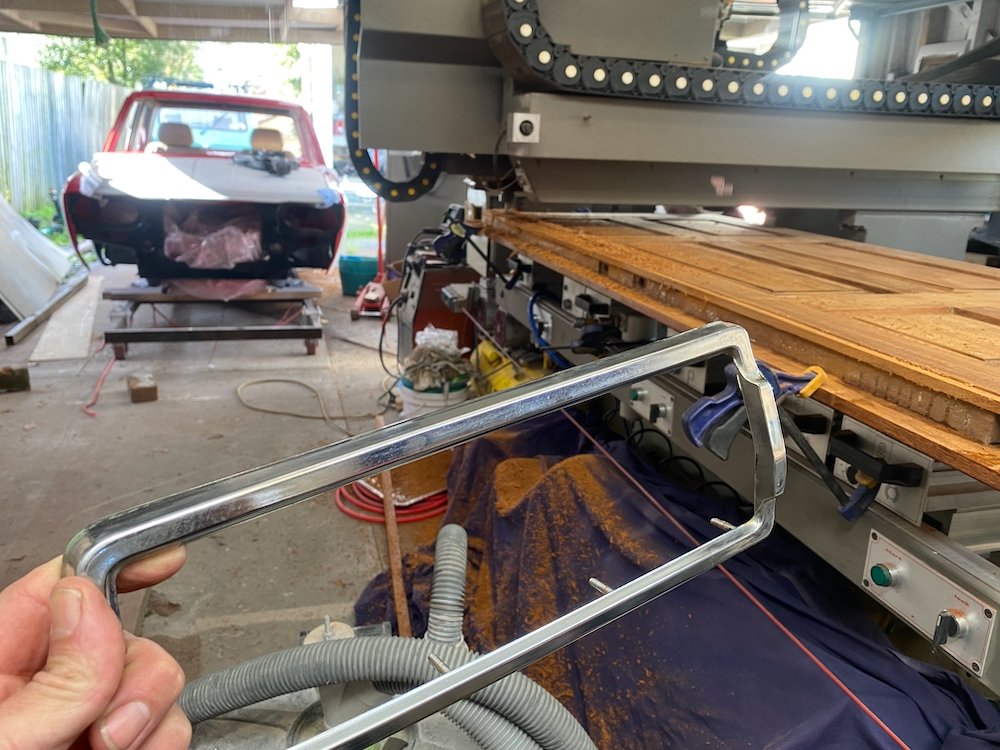
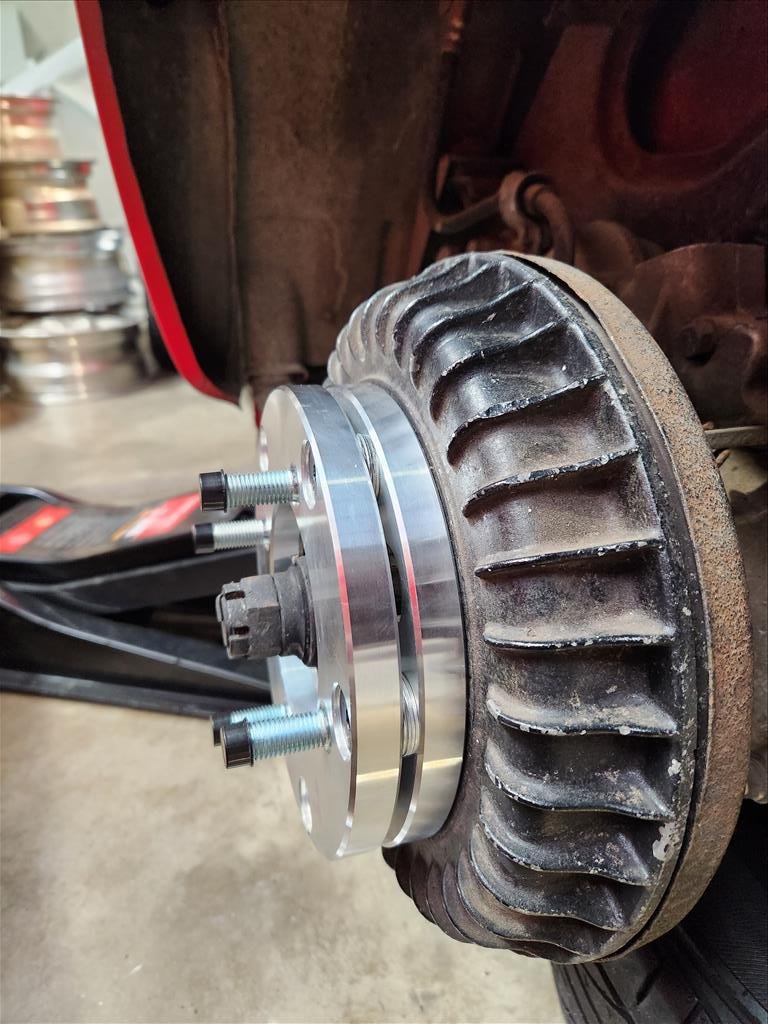
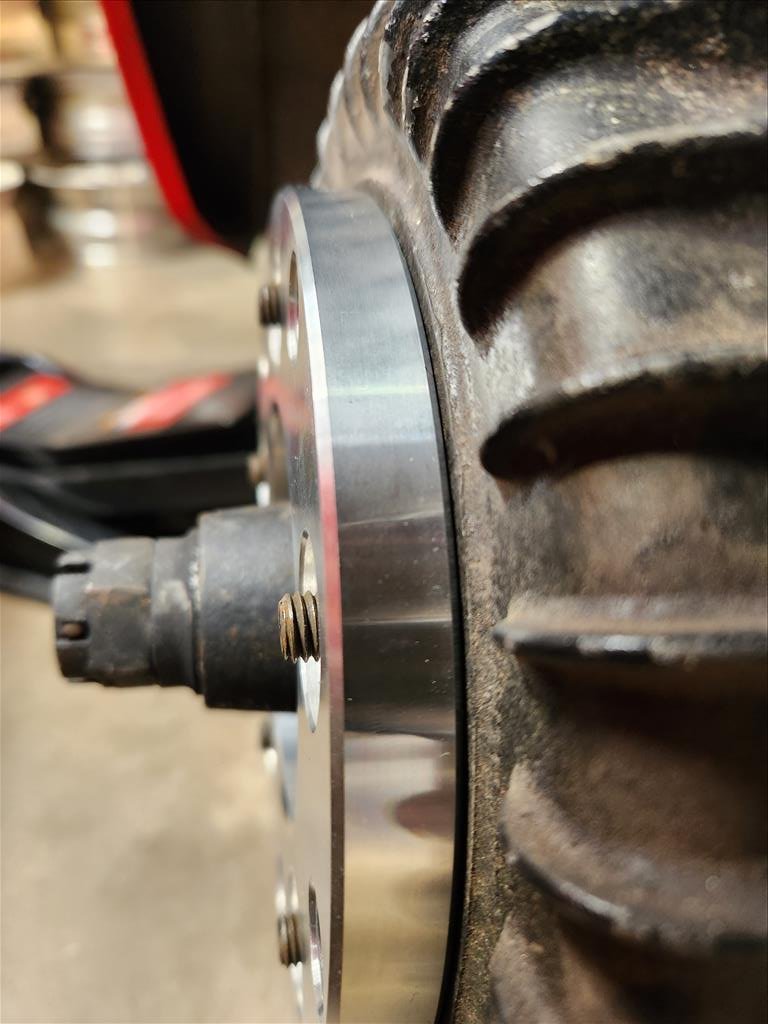
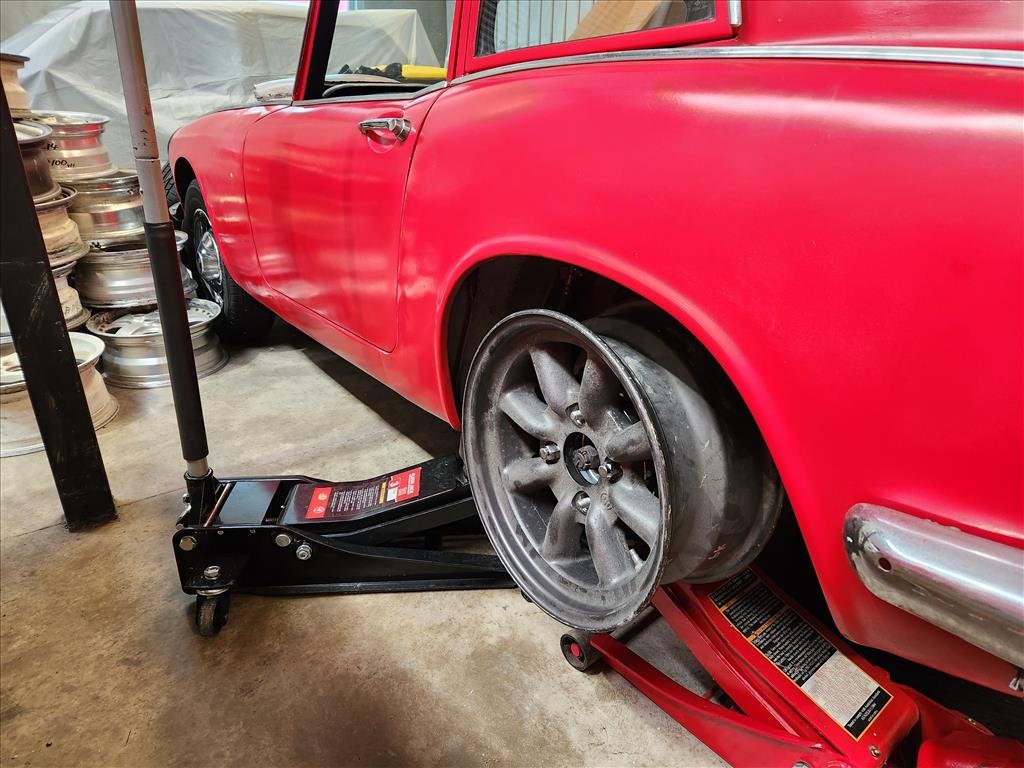
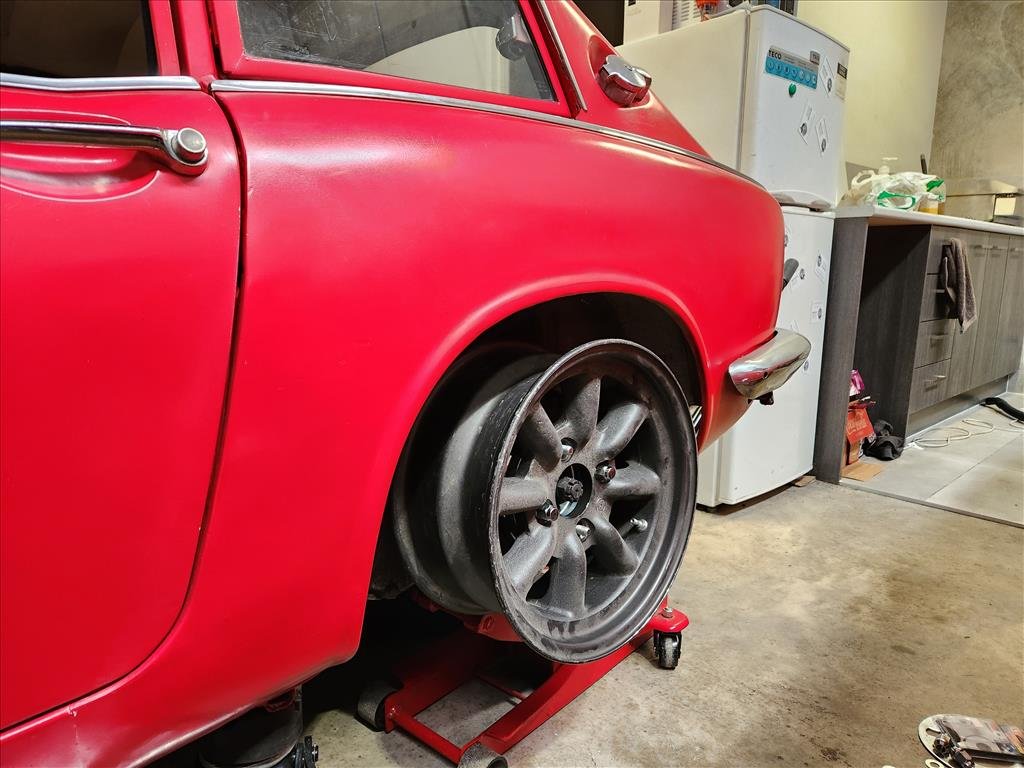
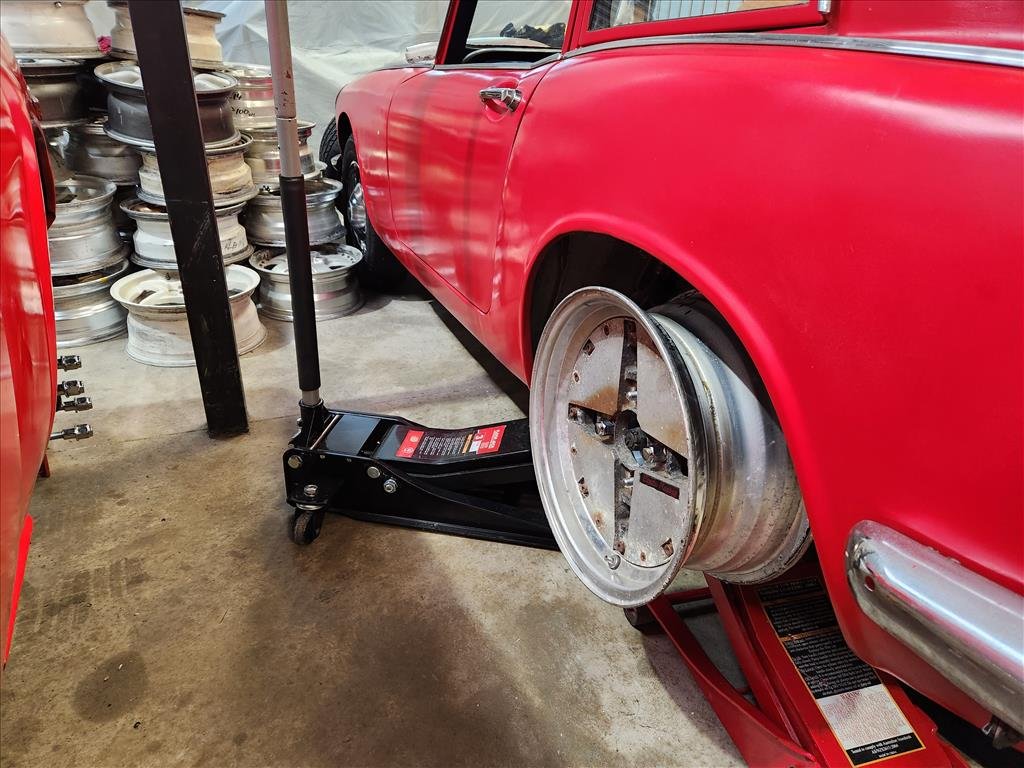
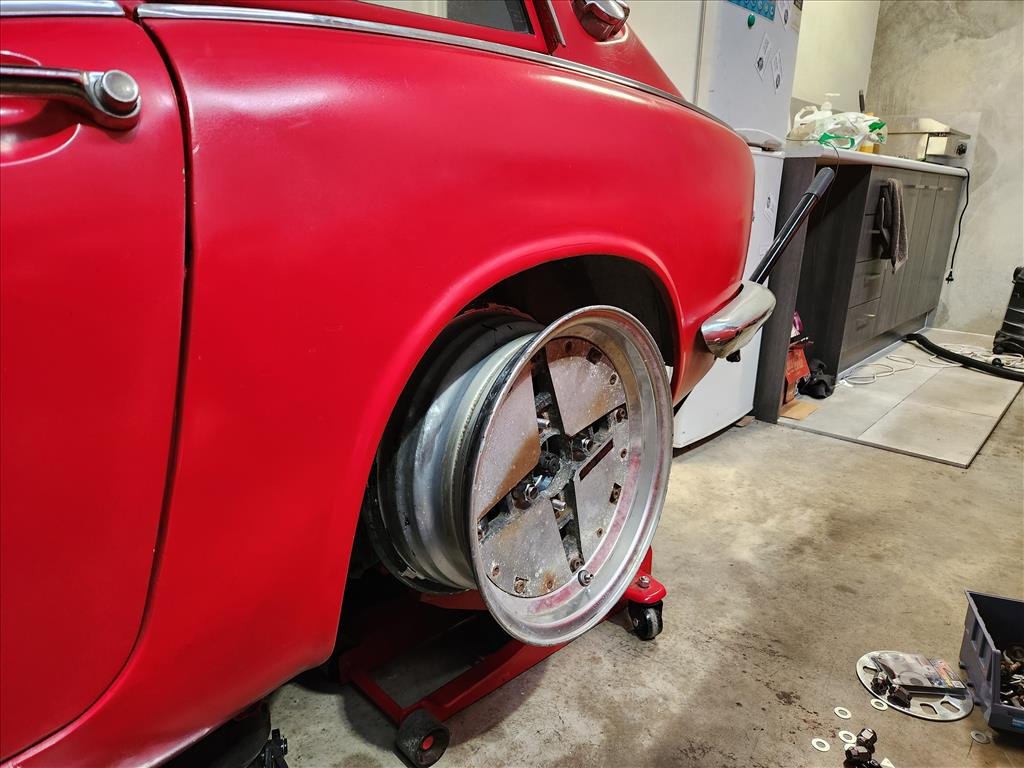
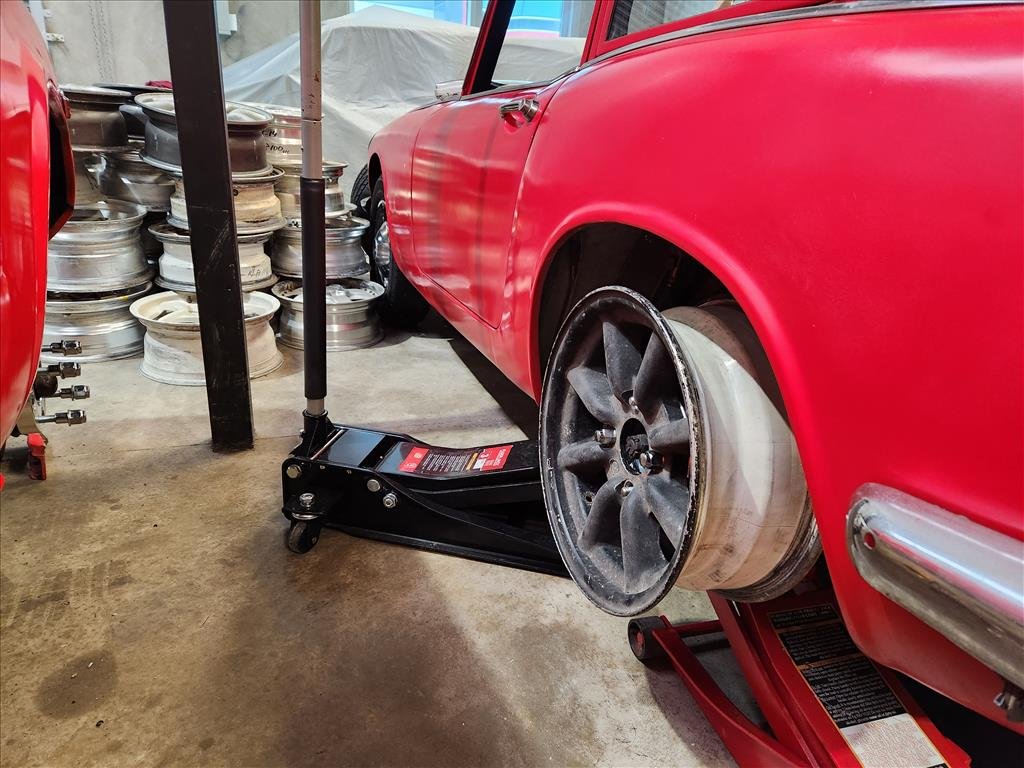
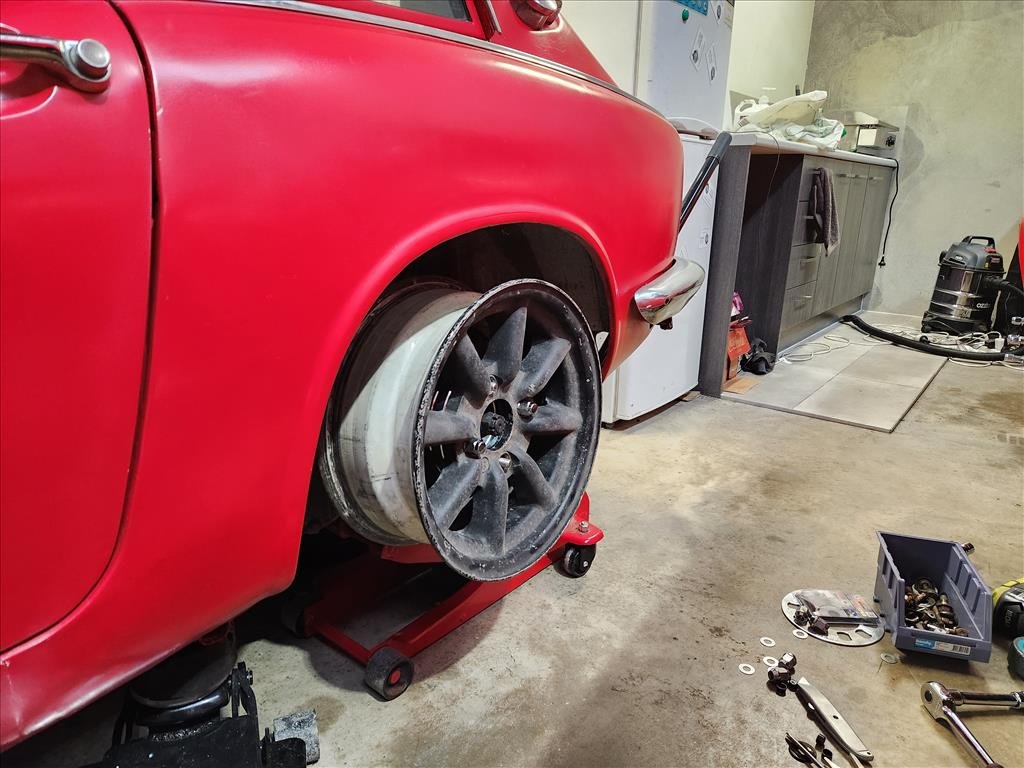
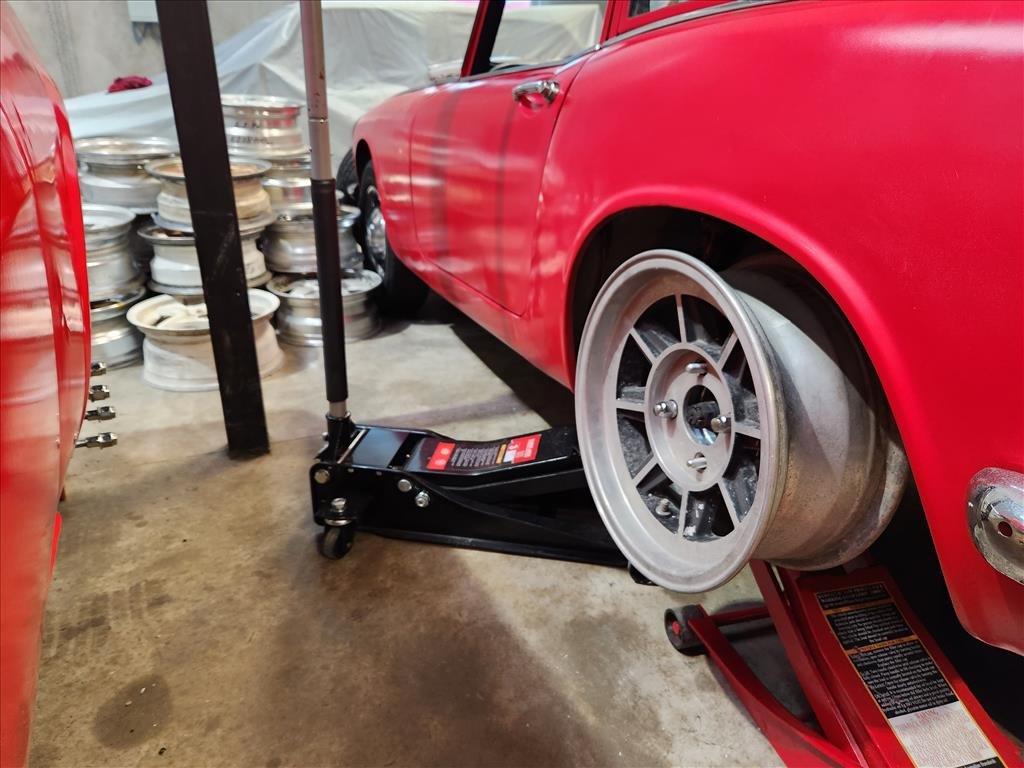
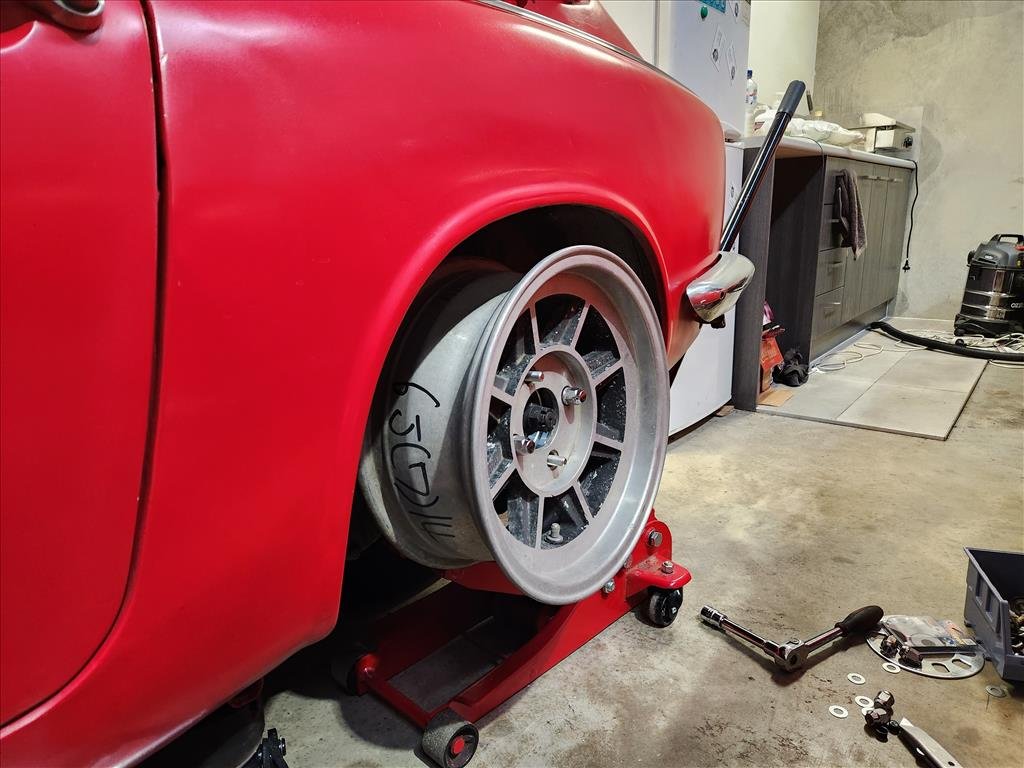
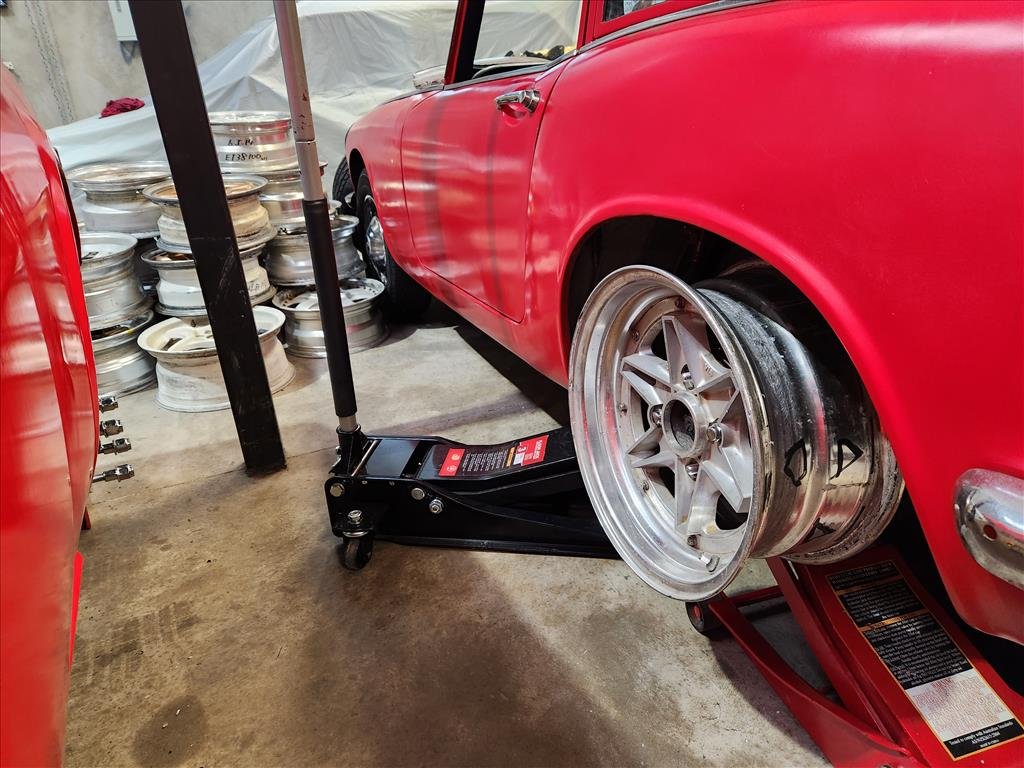
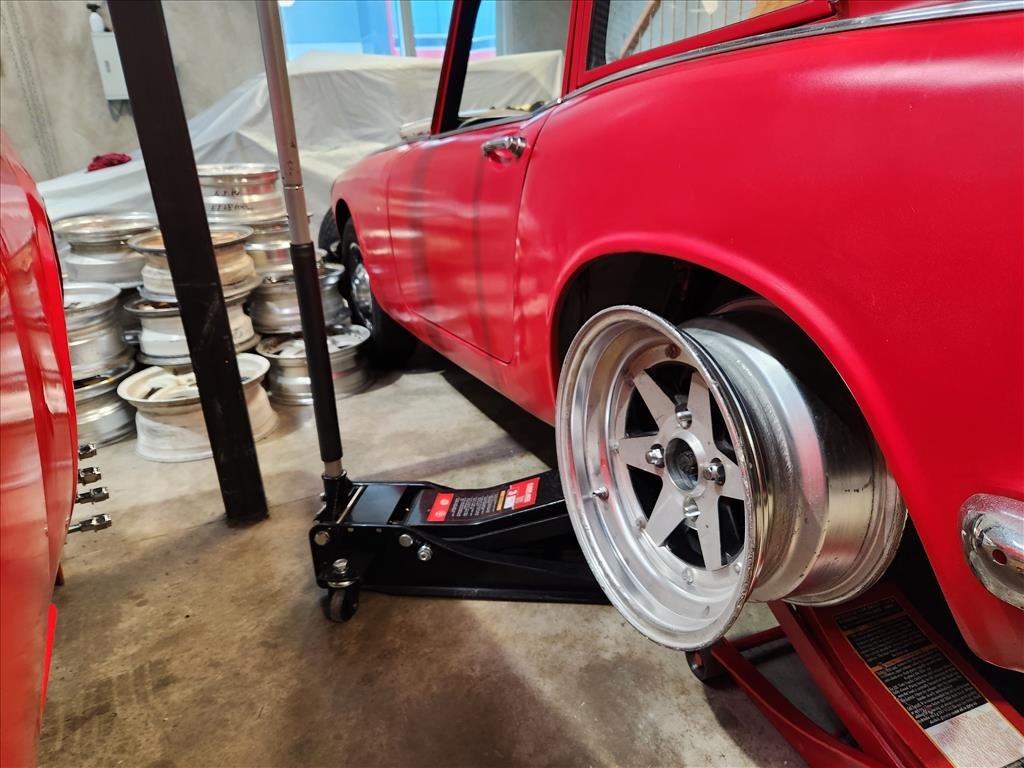
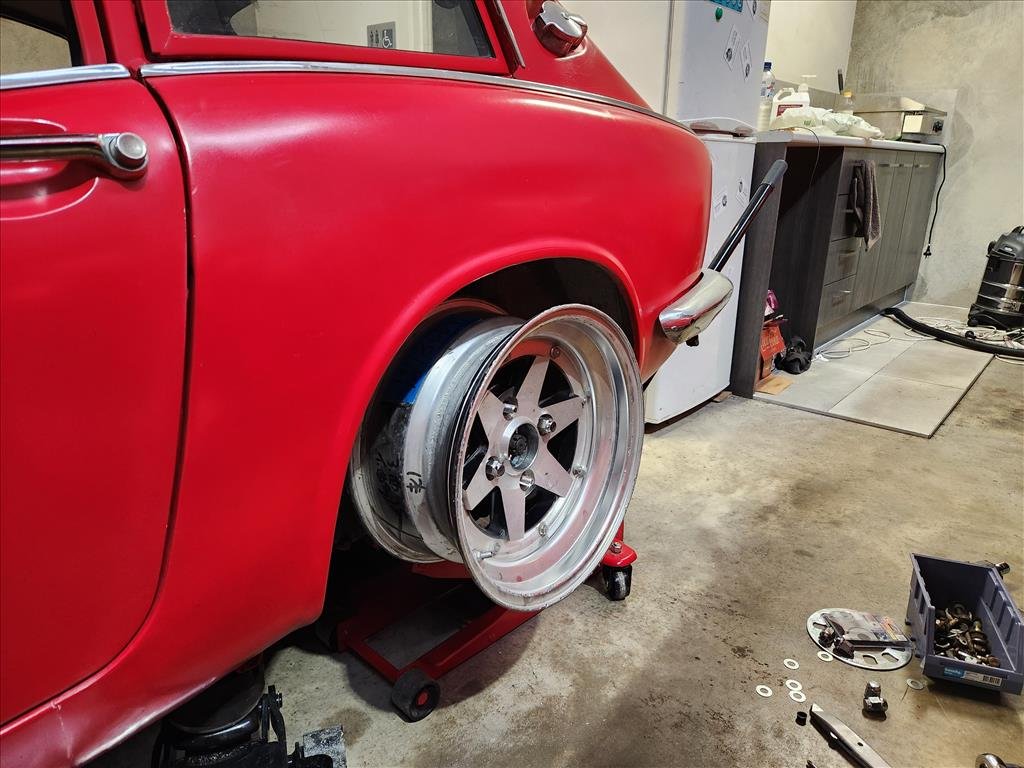
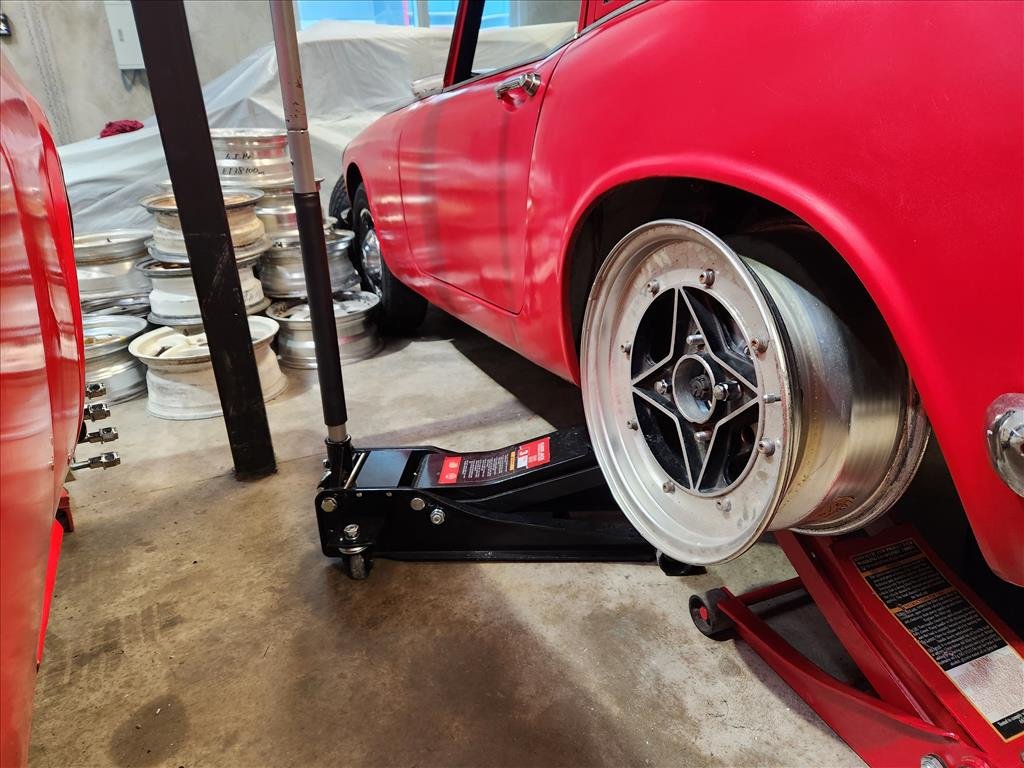
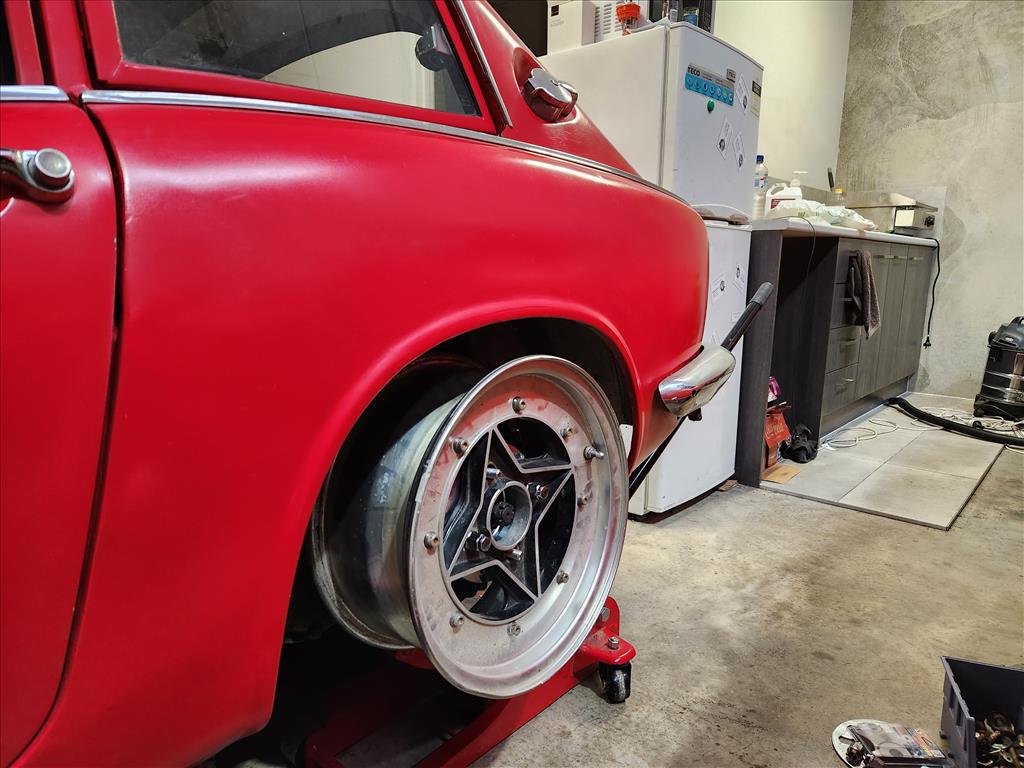
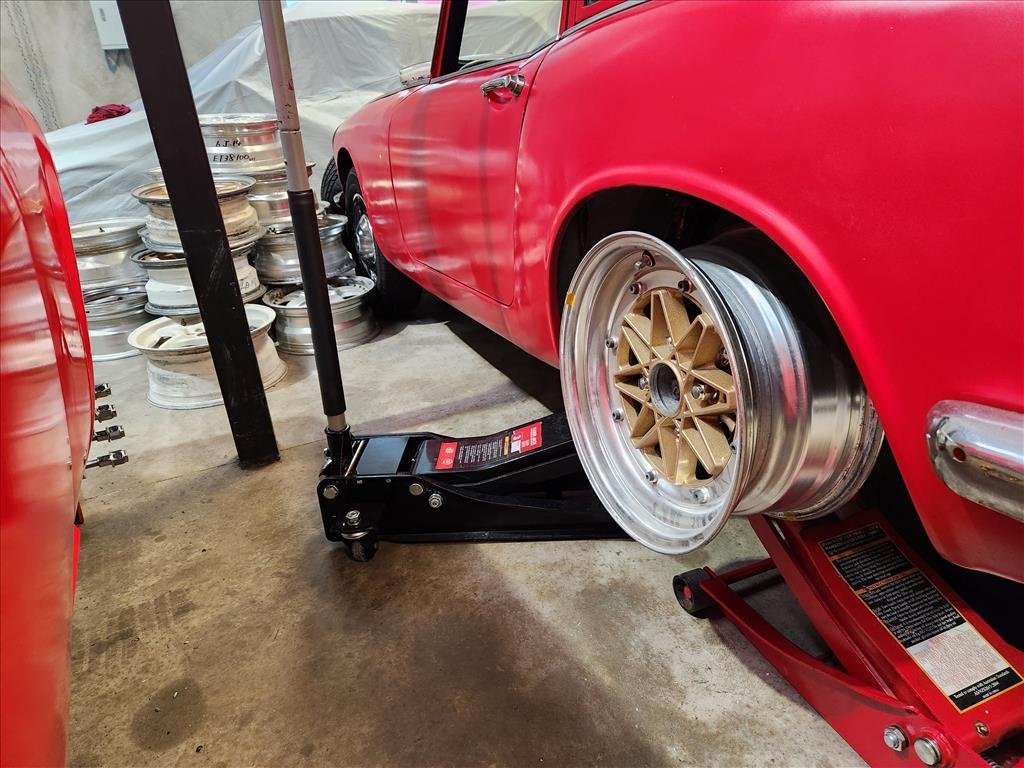
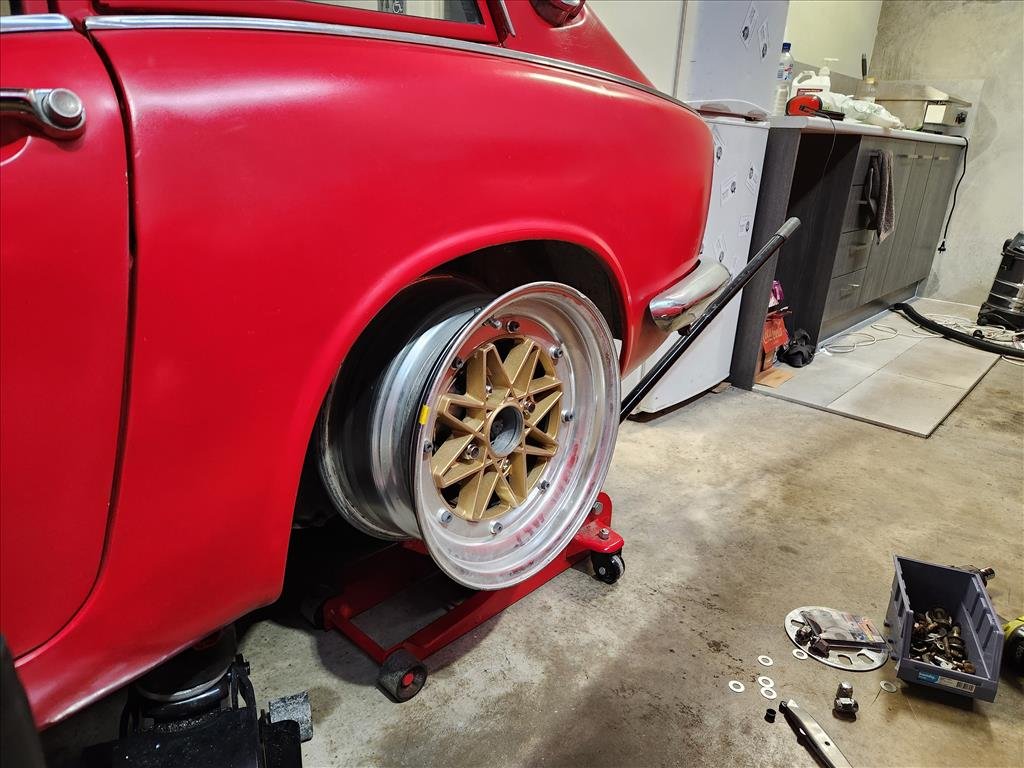
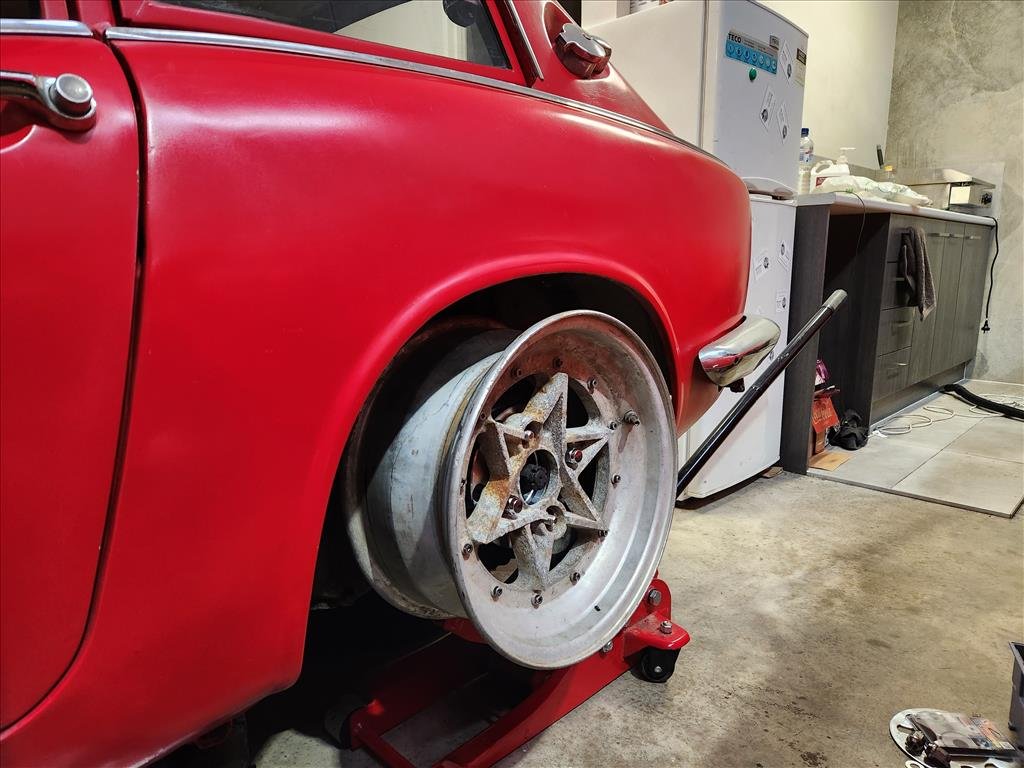
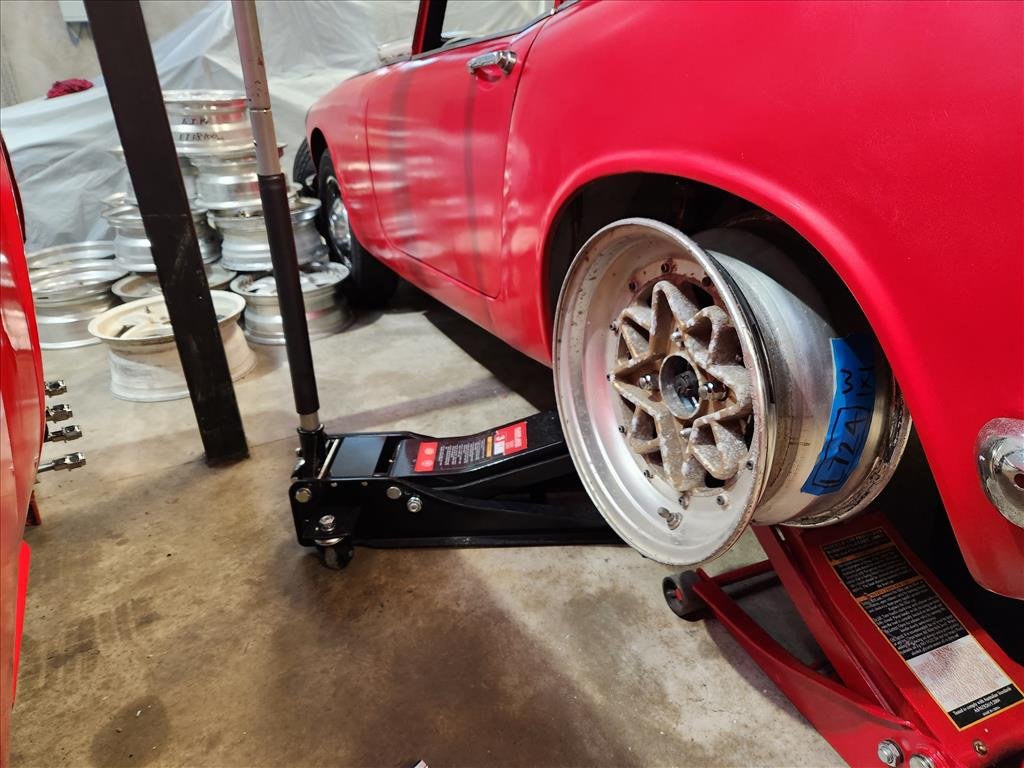
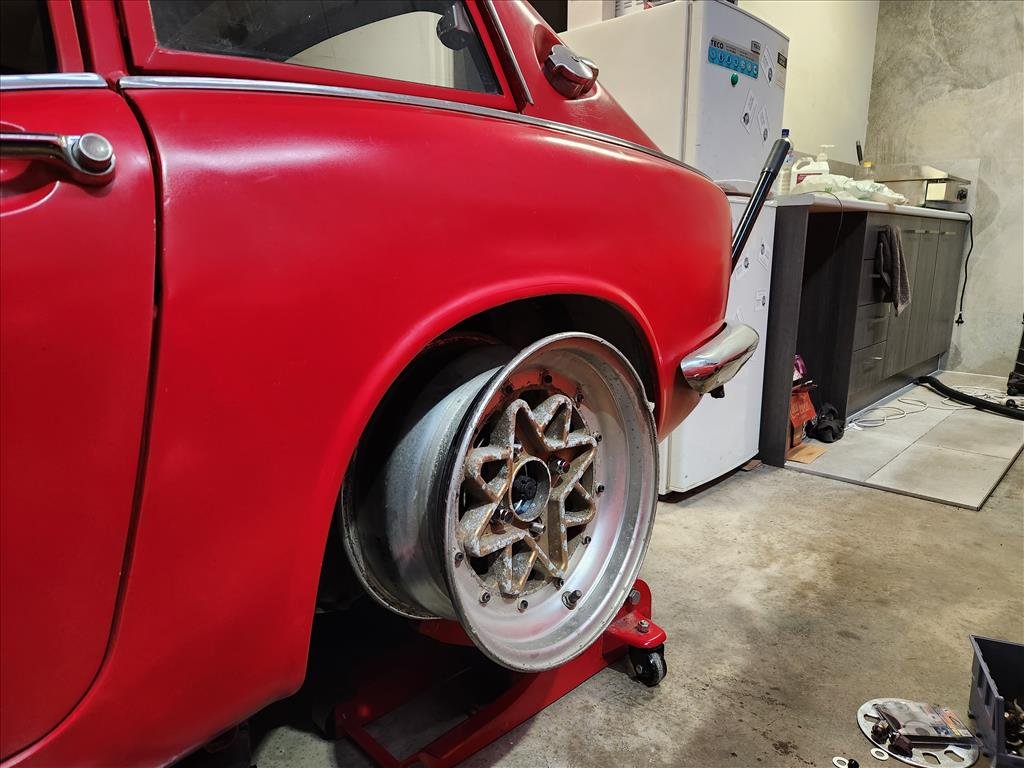
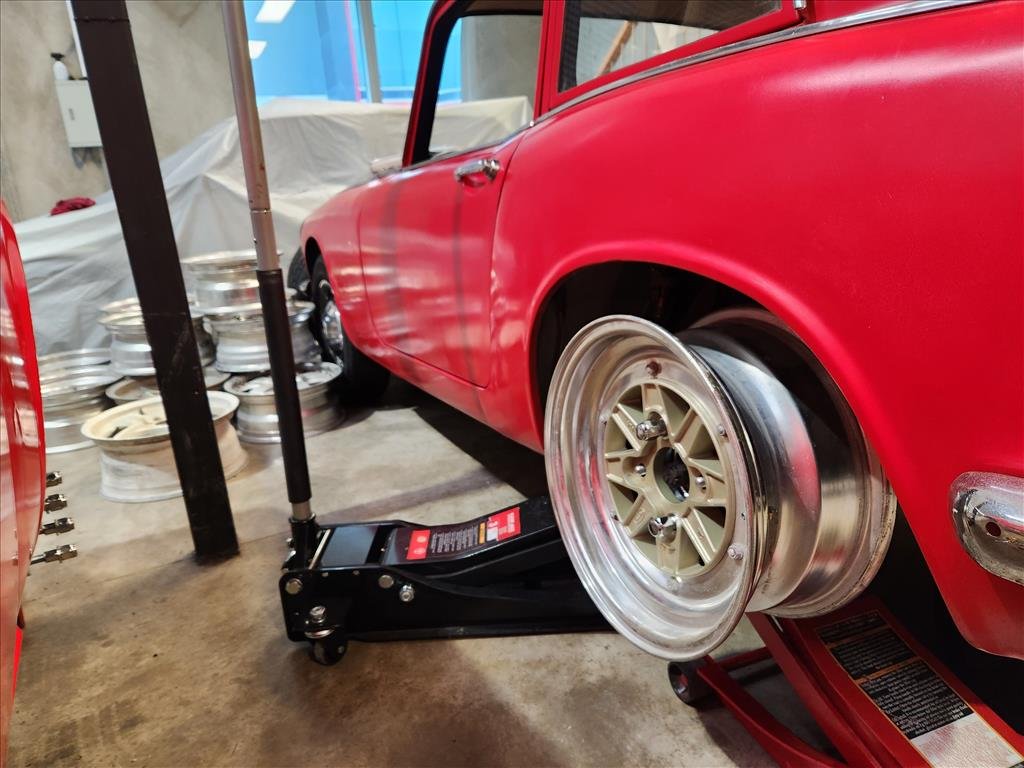
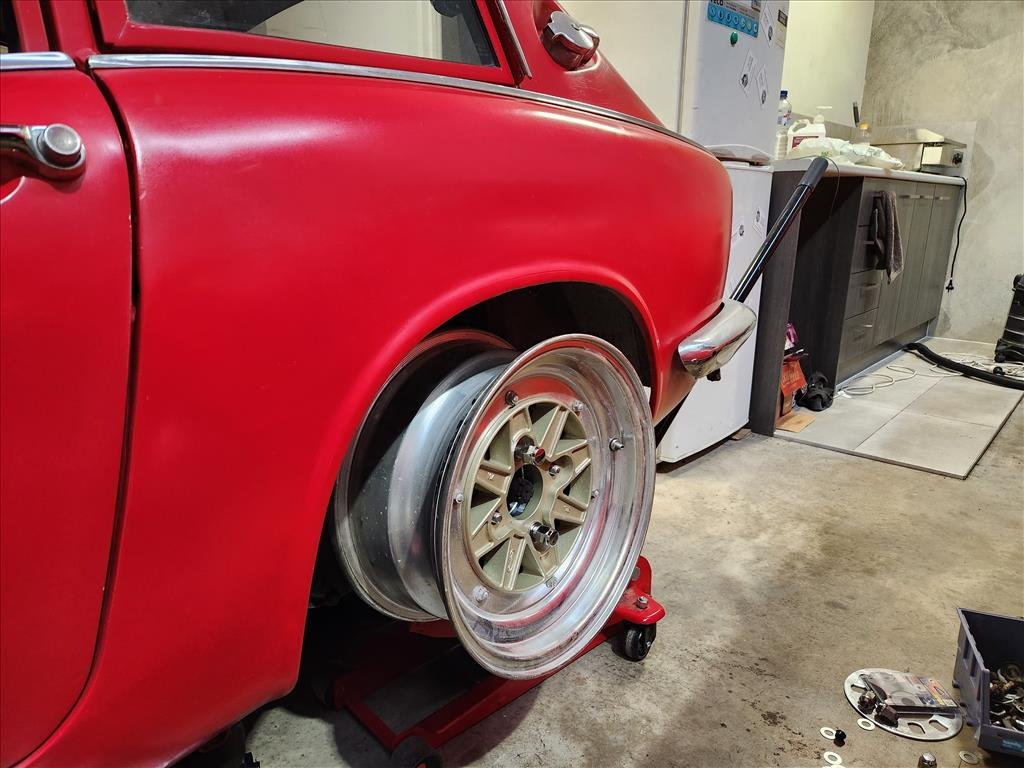
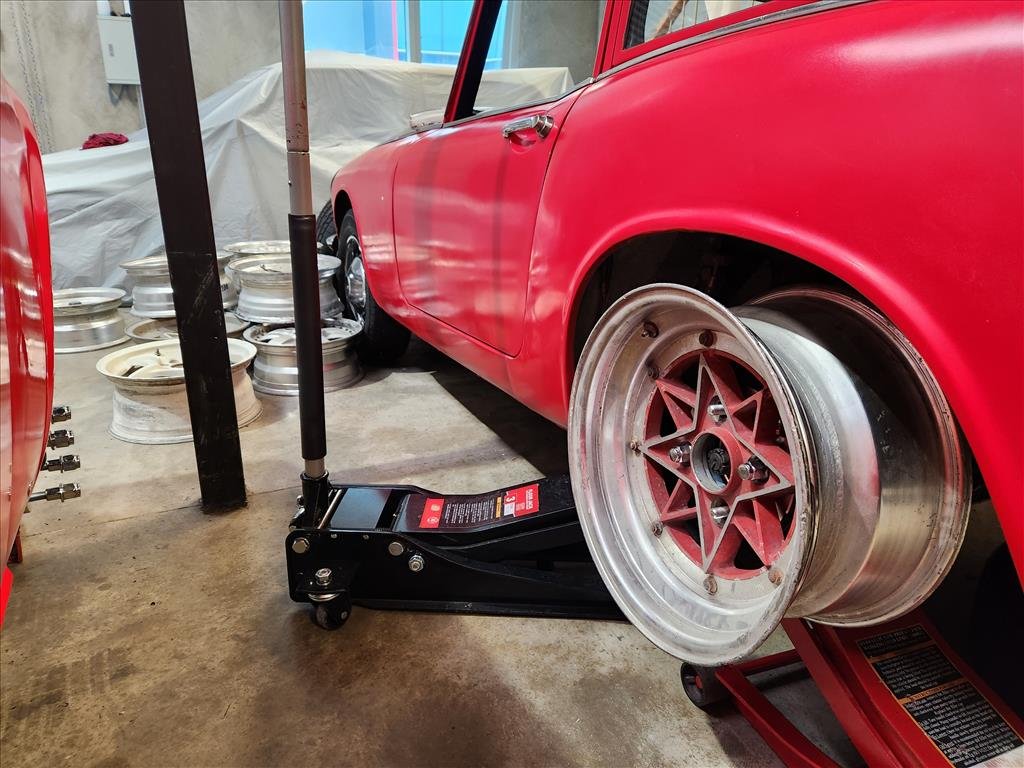
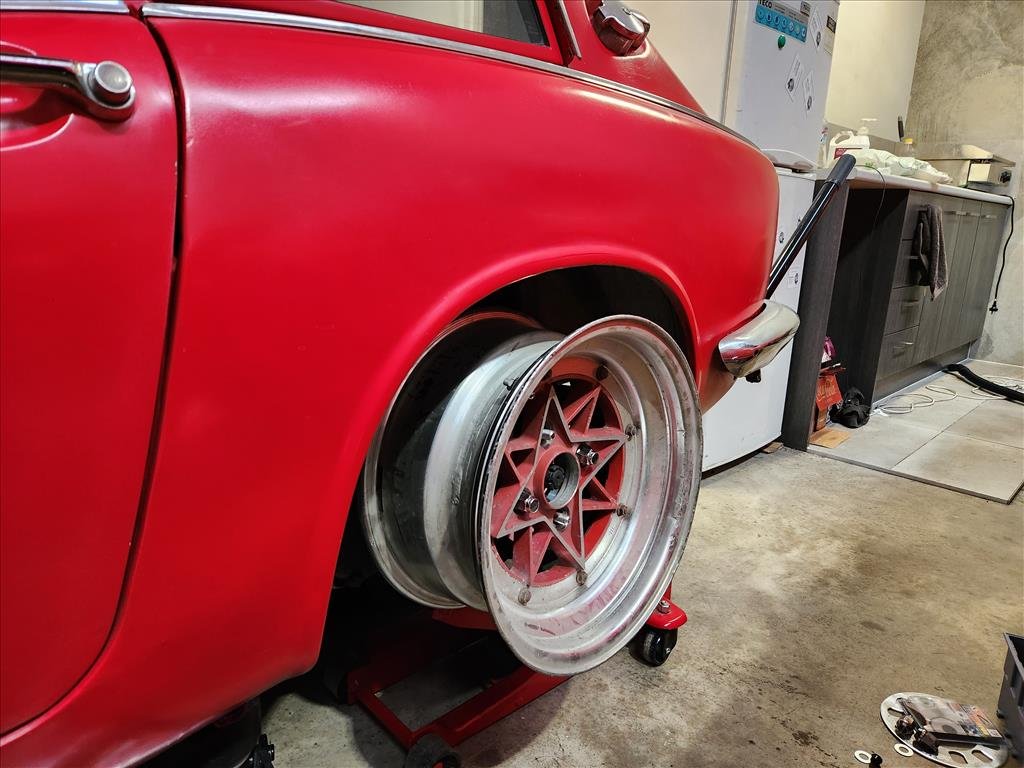
Strap in kids this one is image heavy. I received the spacer adapters during the week and this is how they work. There are two parts with the outer part being bolted to the inner part using those allen head screws. Not super into those allen screws as they have a tendency to round out but probably limited for choice. Apparently in 1965 M12 wheel studs were not invented yet so the S600 just has M10 and the spacer place didn't have a suitable small nut to use however the OEM nuts probably can work but they protrude past the spacer, along with the stud. We cannot machine anything out of the other side of the spacer because of where the studs are for the 4x114 portion so for the purposes of this exercise I've just used some washers. This makes the effective spacer 35mm instead of 30mm. So now, feast your eyes on a large variety of wheel testing in the rear. These are all 6-7 inch wide in varying offsets. Anything more than 6.5 is pretty much a no go due to the width and the spacer so no super deep dish sadly. In the front I knew it'd be a struggle so I didn't go crazy and just mounted up this watanabe which is 14x6 and it still pokes out a bit.. maybe I can find 14x5.5 or find some way to put a little camber up front. I also noticed a lot of grease and fluid up front that I decided to ignore. I like the look of the watanabes as the faded black coating that the used ones usually have matches the 30 year old dulux paint job on the car. I'll have the machine shop make a slightly wider inner spacer portion so I don't have to go cutting studs up I think and we'll go from there. Worst case maaybe I can find a smaller nut and cut stud but would prefer to avoid that.
1 point
-
Gettn into pulling bits apart for vapourblasting and cleaning my rotors. Also dropped off my 5 speed minus bell housing to the local to def replace 5th syncho and whatever bearings/other maintainence bits required or prudent to do. Mentioned getting the internals hardened, smooth (likened to shotpeening) but lets see what 'needs' to be replaced.
1 point
-
Back in the varnish mines. Also found this potato photo I took at the 2011 (I think) Beach Hop. Never thought it would be in our ownership
1 point
-
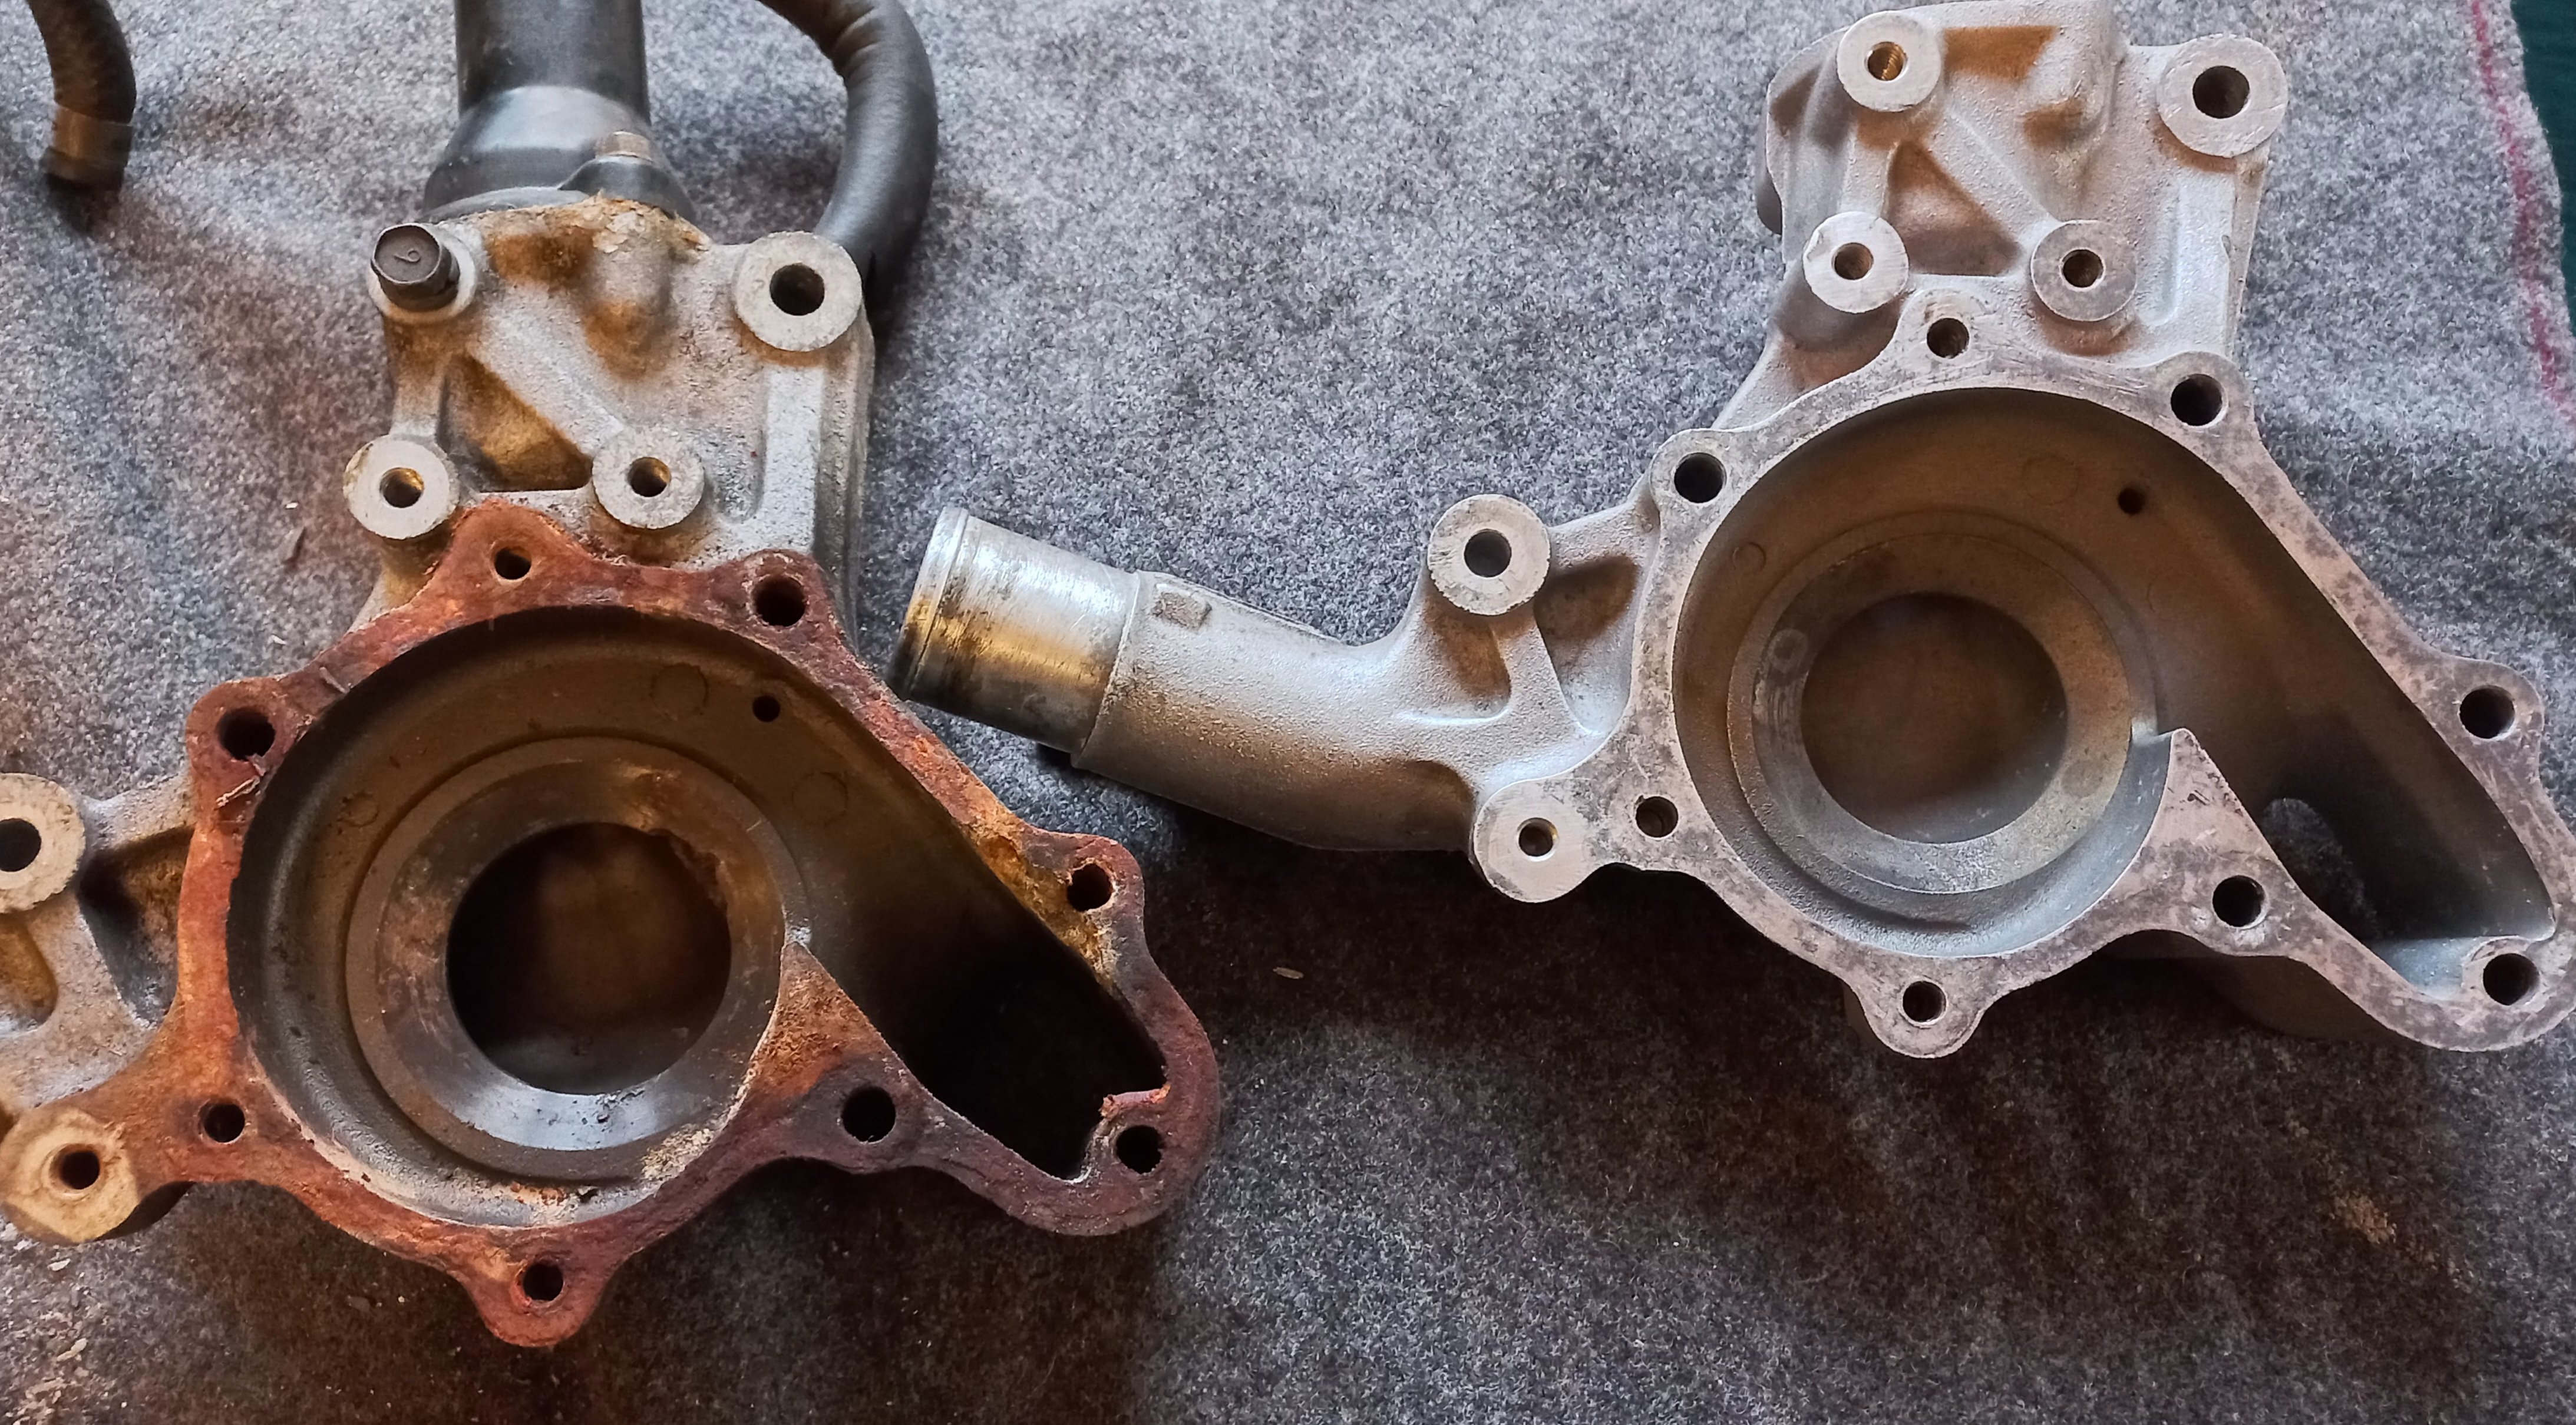
Gots me a water pump housing, seller said they usually corrode in the centre as mine did. He been out of the rotary scene for years now, mechanic used to own Cairns motors out Kilbirnie, raced and fixed the tangas back in the day. Was his last housing so lucked in. Came with near new water pump too (possibly A/M but has 'Japan' on its casting) Paid builder $2.4K fir the rest of the OEM seals, rotor bearings, oil pump etc.
1 point
-
All the missing parts have finally arrived, and been delivered to WAER. Dropped box at the COVID barrier at the front door, rang Eric to let him know, then had a brief socially-distanced discussion about the next steps. Waved to @piazzanoob when he walked out into the workshop just as I was heading off. Marina was sent off for a new exhaust, as the front pipe had rusted out and the rest of the system was heading the same way. Decided not to get too carried away, as the biggest restriction is probably the outlet from the stock cast iron manifold, even though it has a 4-2-1 layout. Did a bit of research on what MGB folk recommend, as it has a similar power range, and my cam is similar spec to a fast road MGB. Consensus was that the stock 1 3/4" was too small, and that 1 7/8" gave the best drivability and throttle response, but 2" gave a slight boost at the top end. Anything larger was found to give less power. Should give a little more power and a sportier exhaust note, as Leyland fitted the same piddly exhaust to the TC as they did to the single carb 1500 and 1750. Might have to save up some pennies to put it on the rolling road and see how it compares to the stock 90bhp at the flywheel.1 point


This leaderboard is set to Auckland/GMT+12:00