
Leaderboard


Popular Content
Showing content with the highest reputation on 01/02/22 in Posts
-
14 points
-
8 points
-
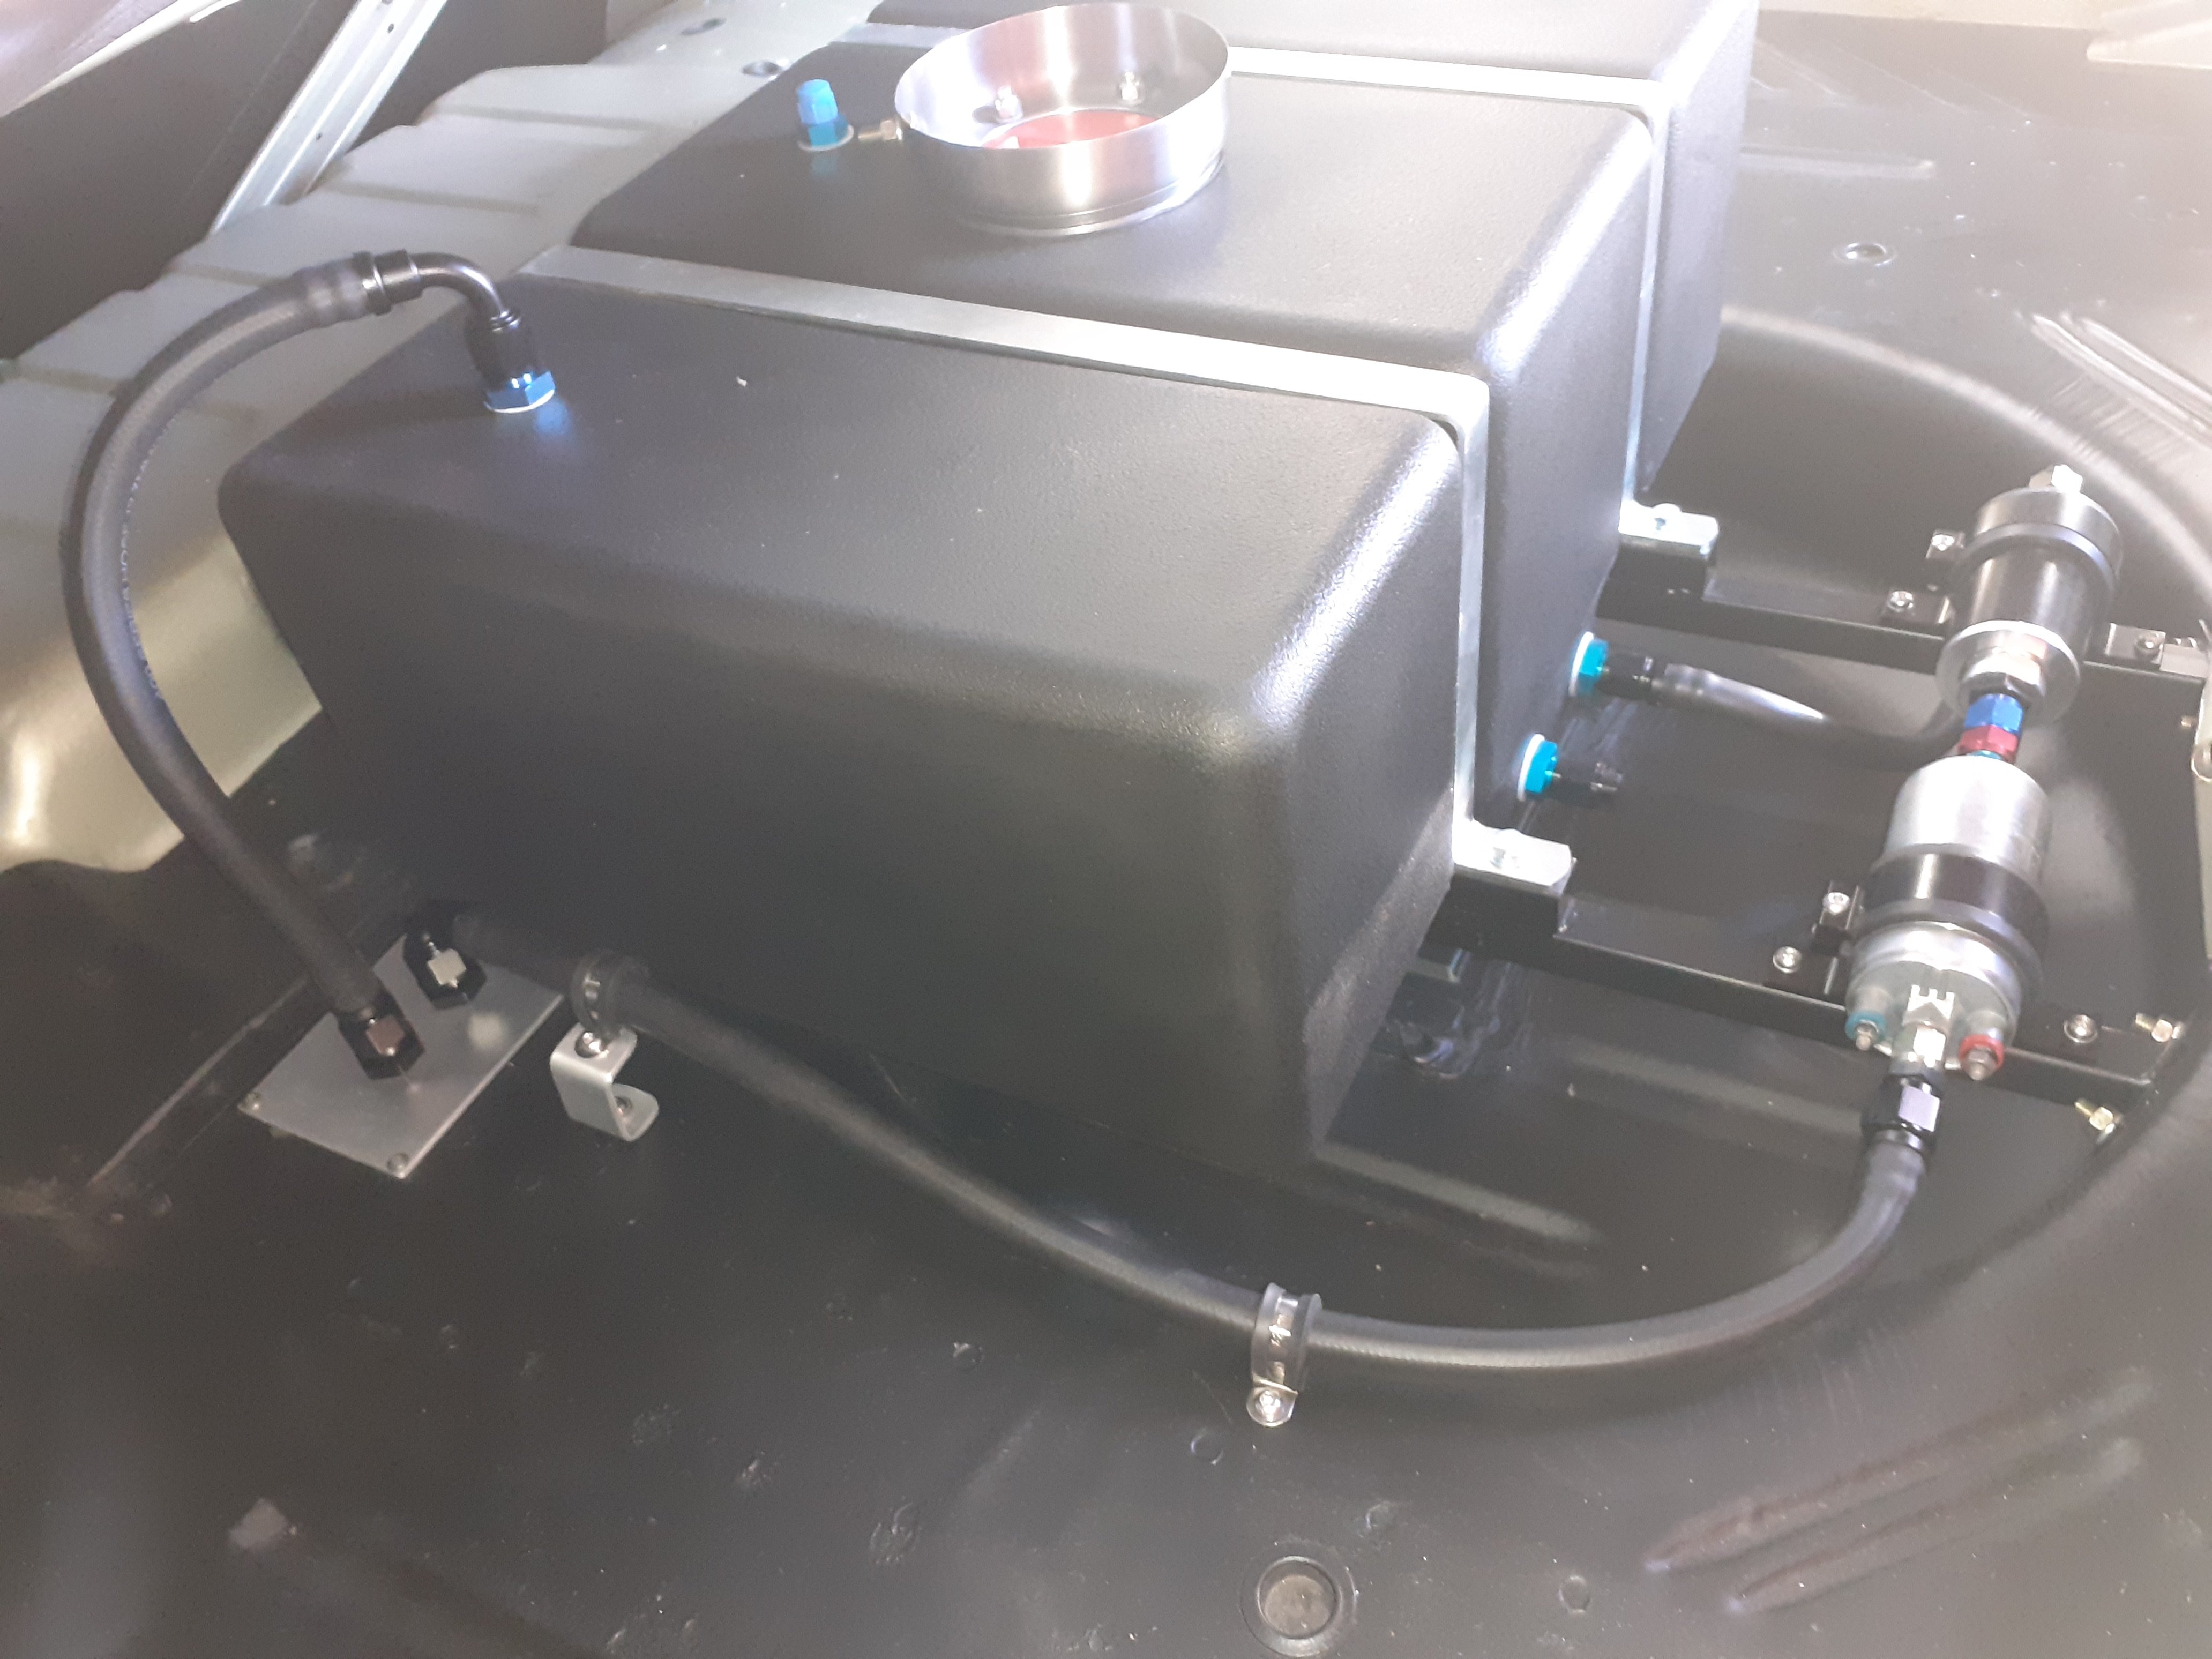
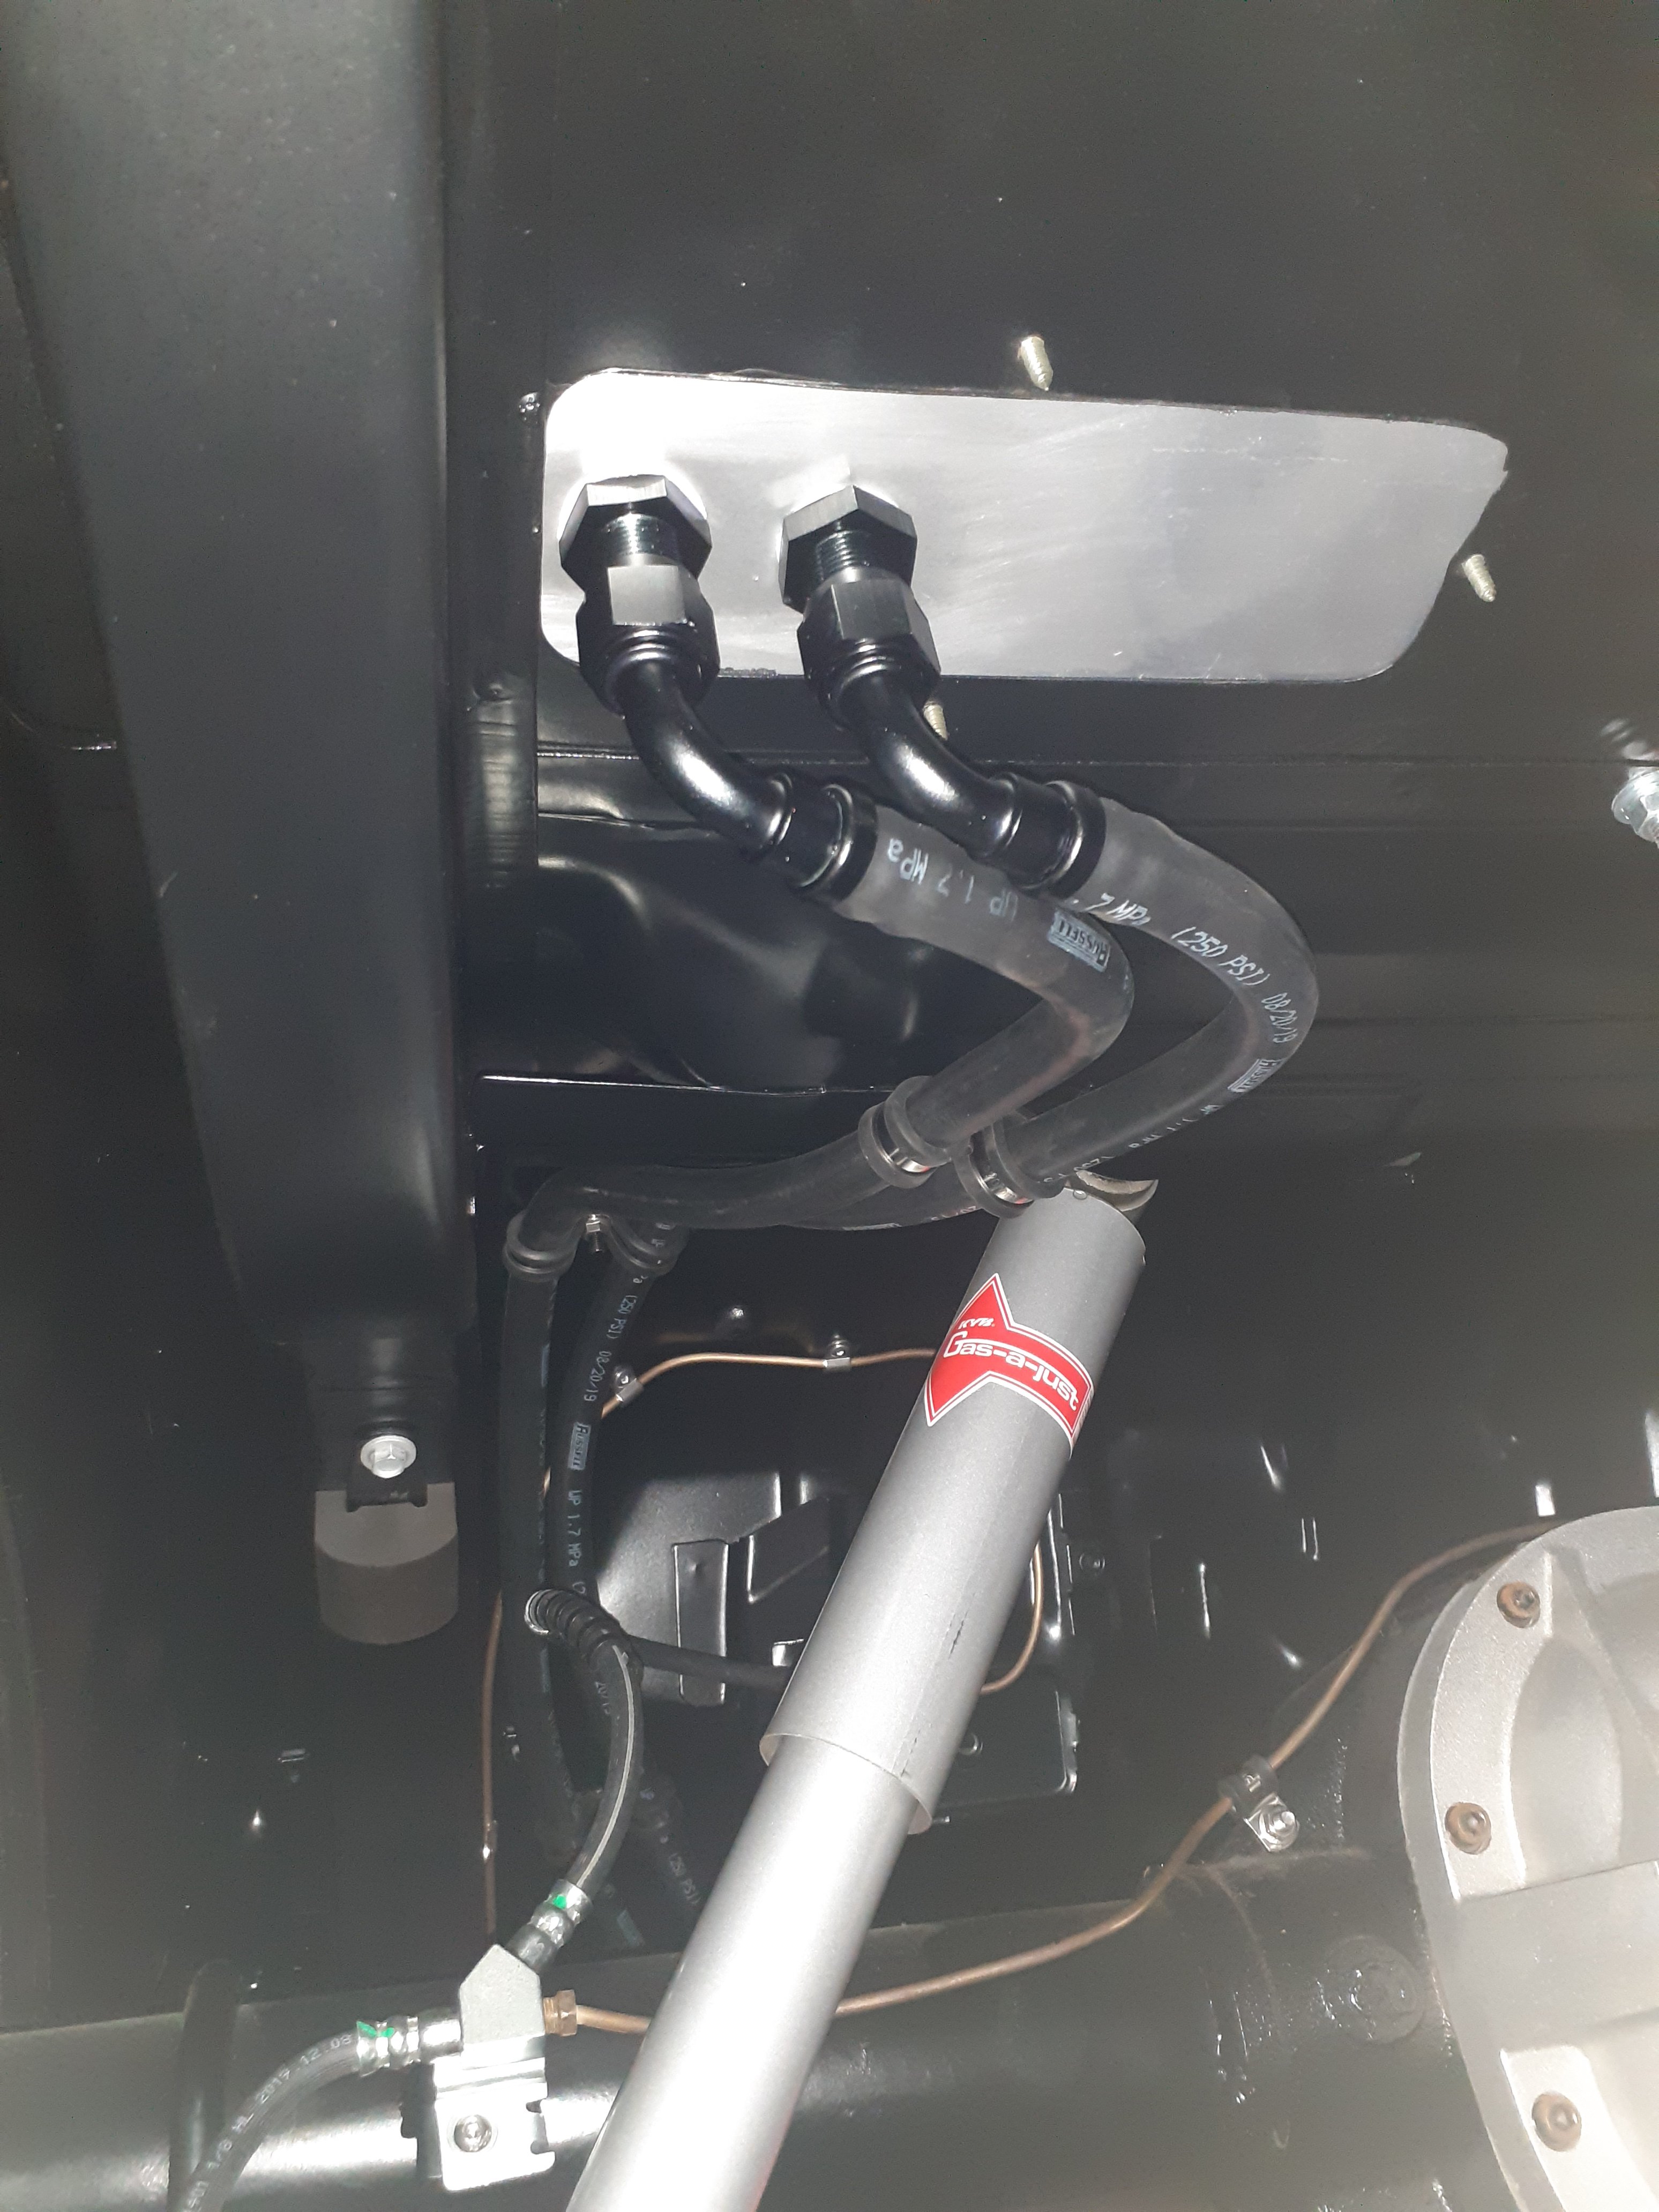
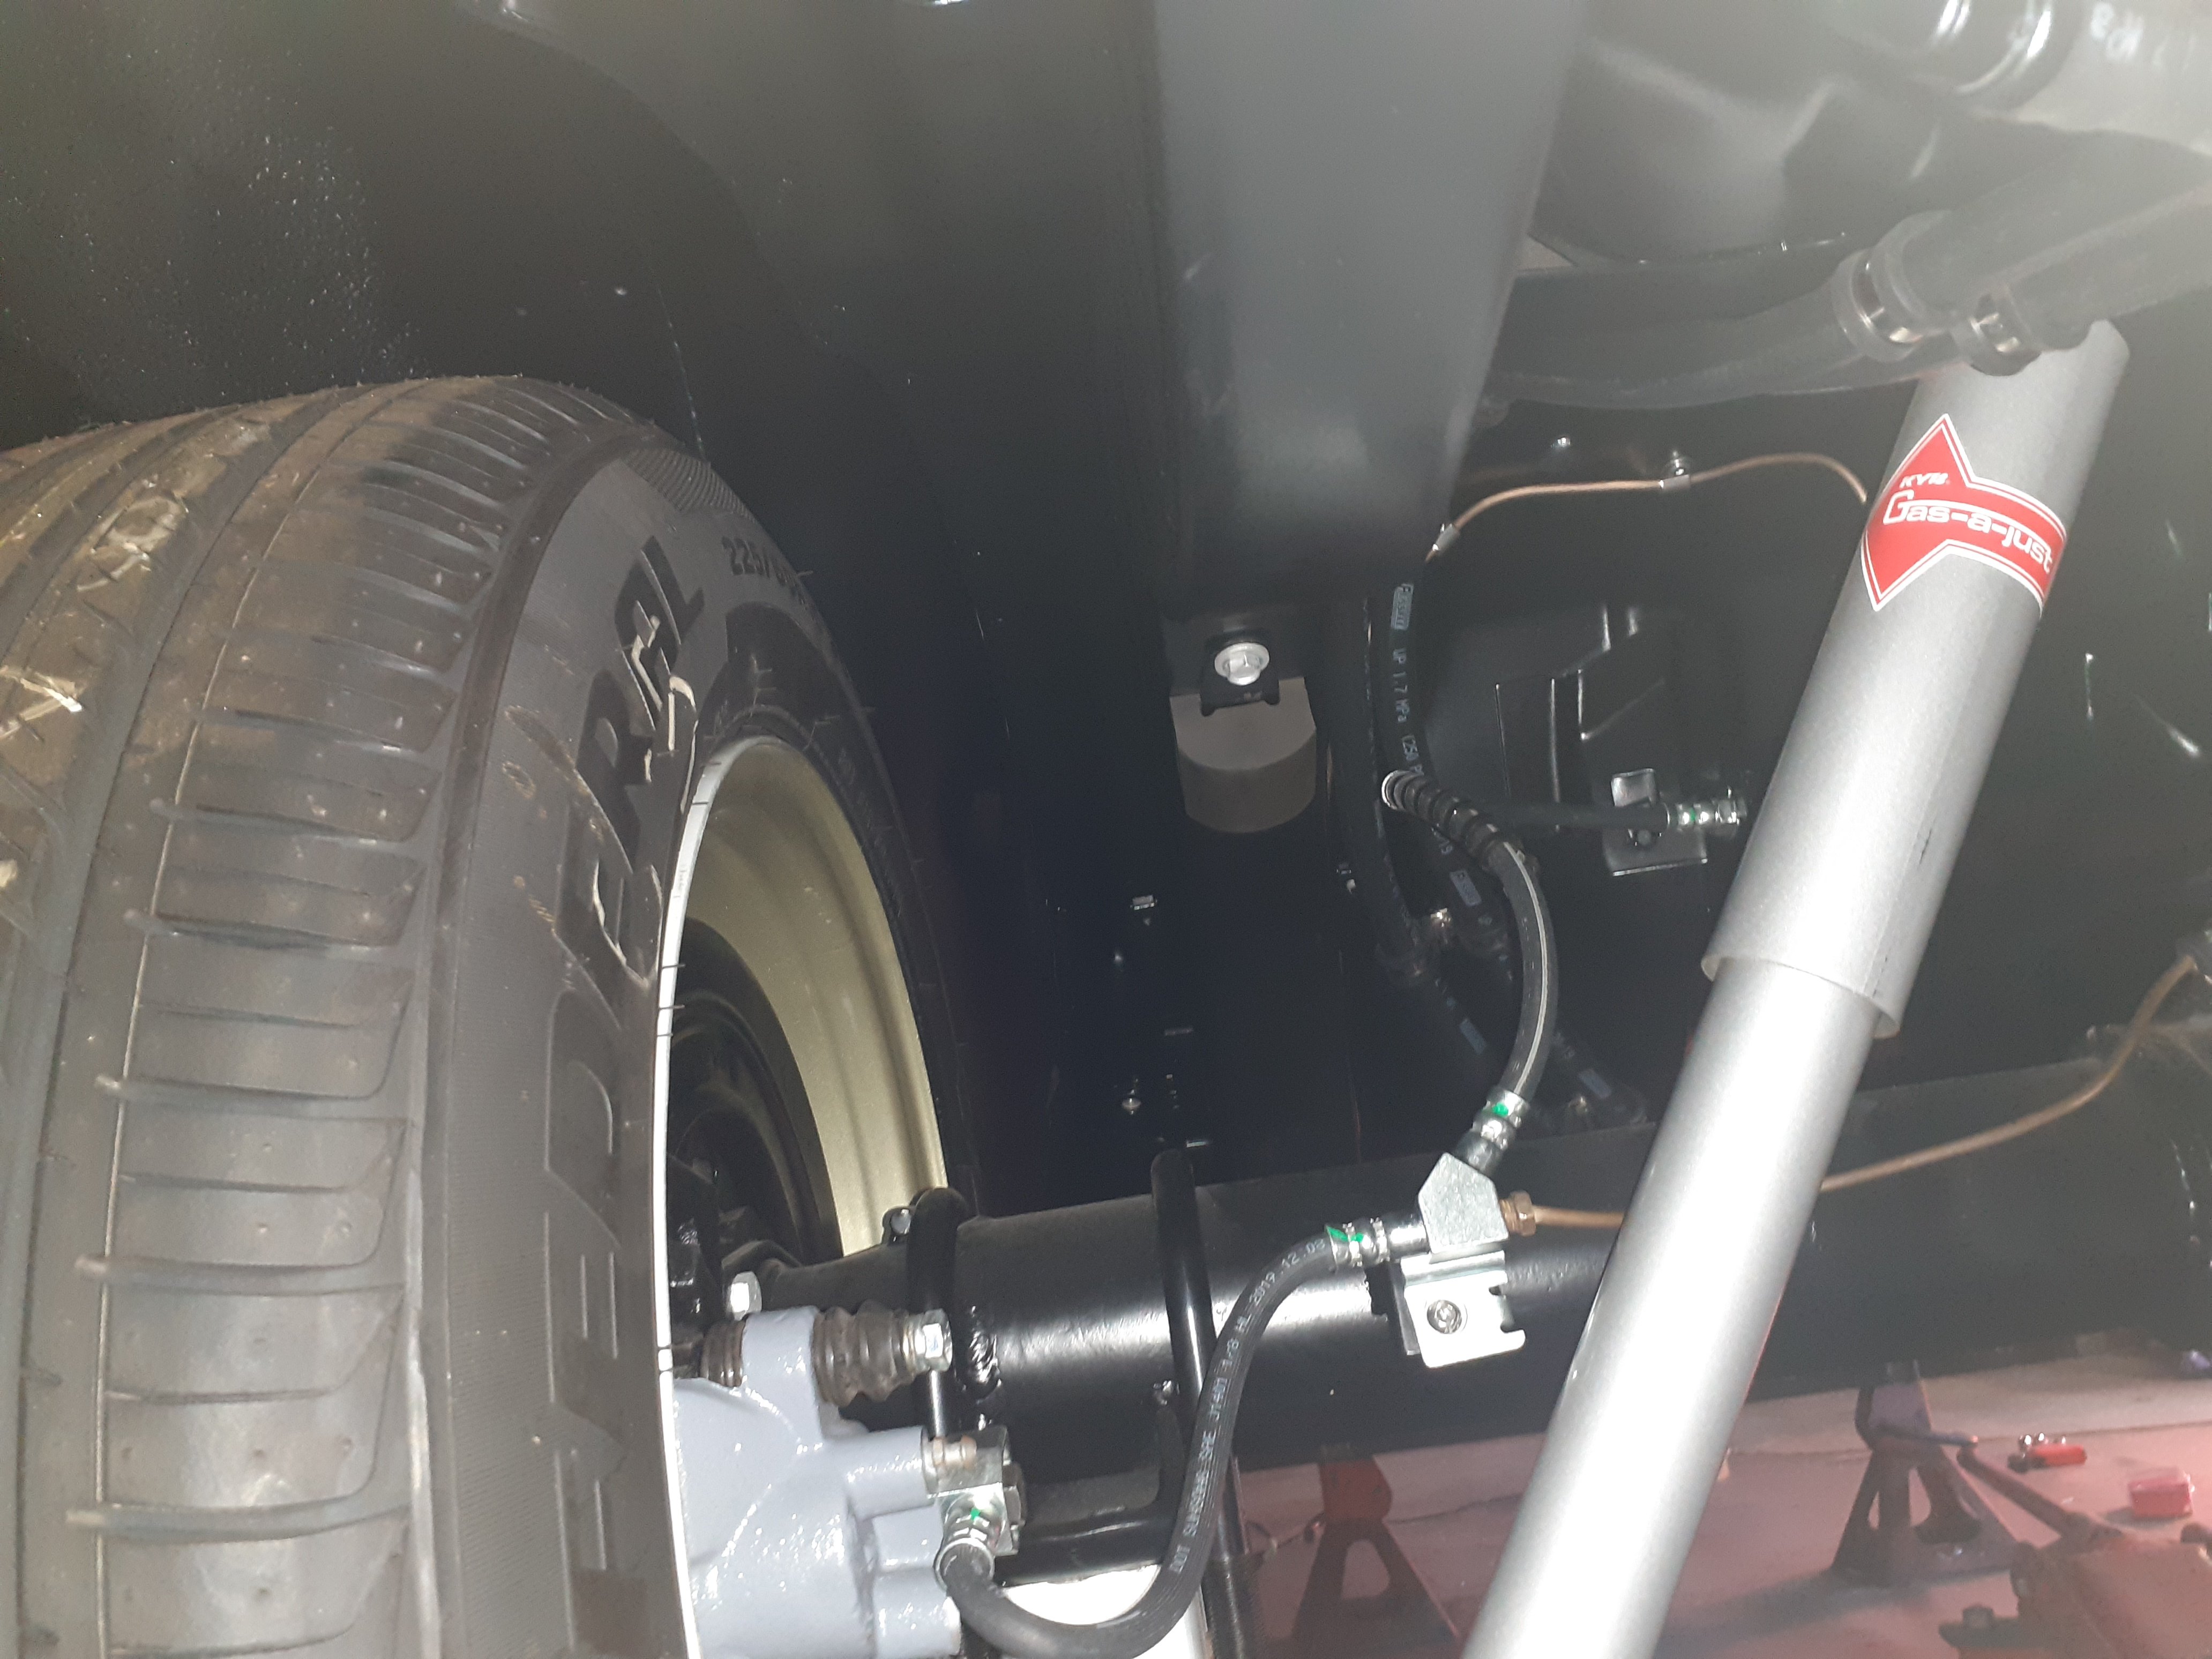
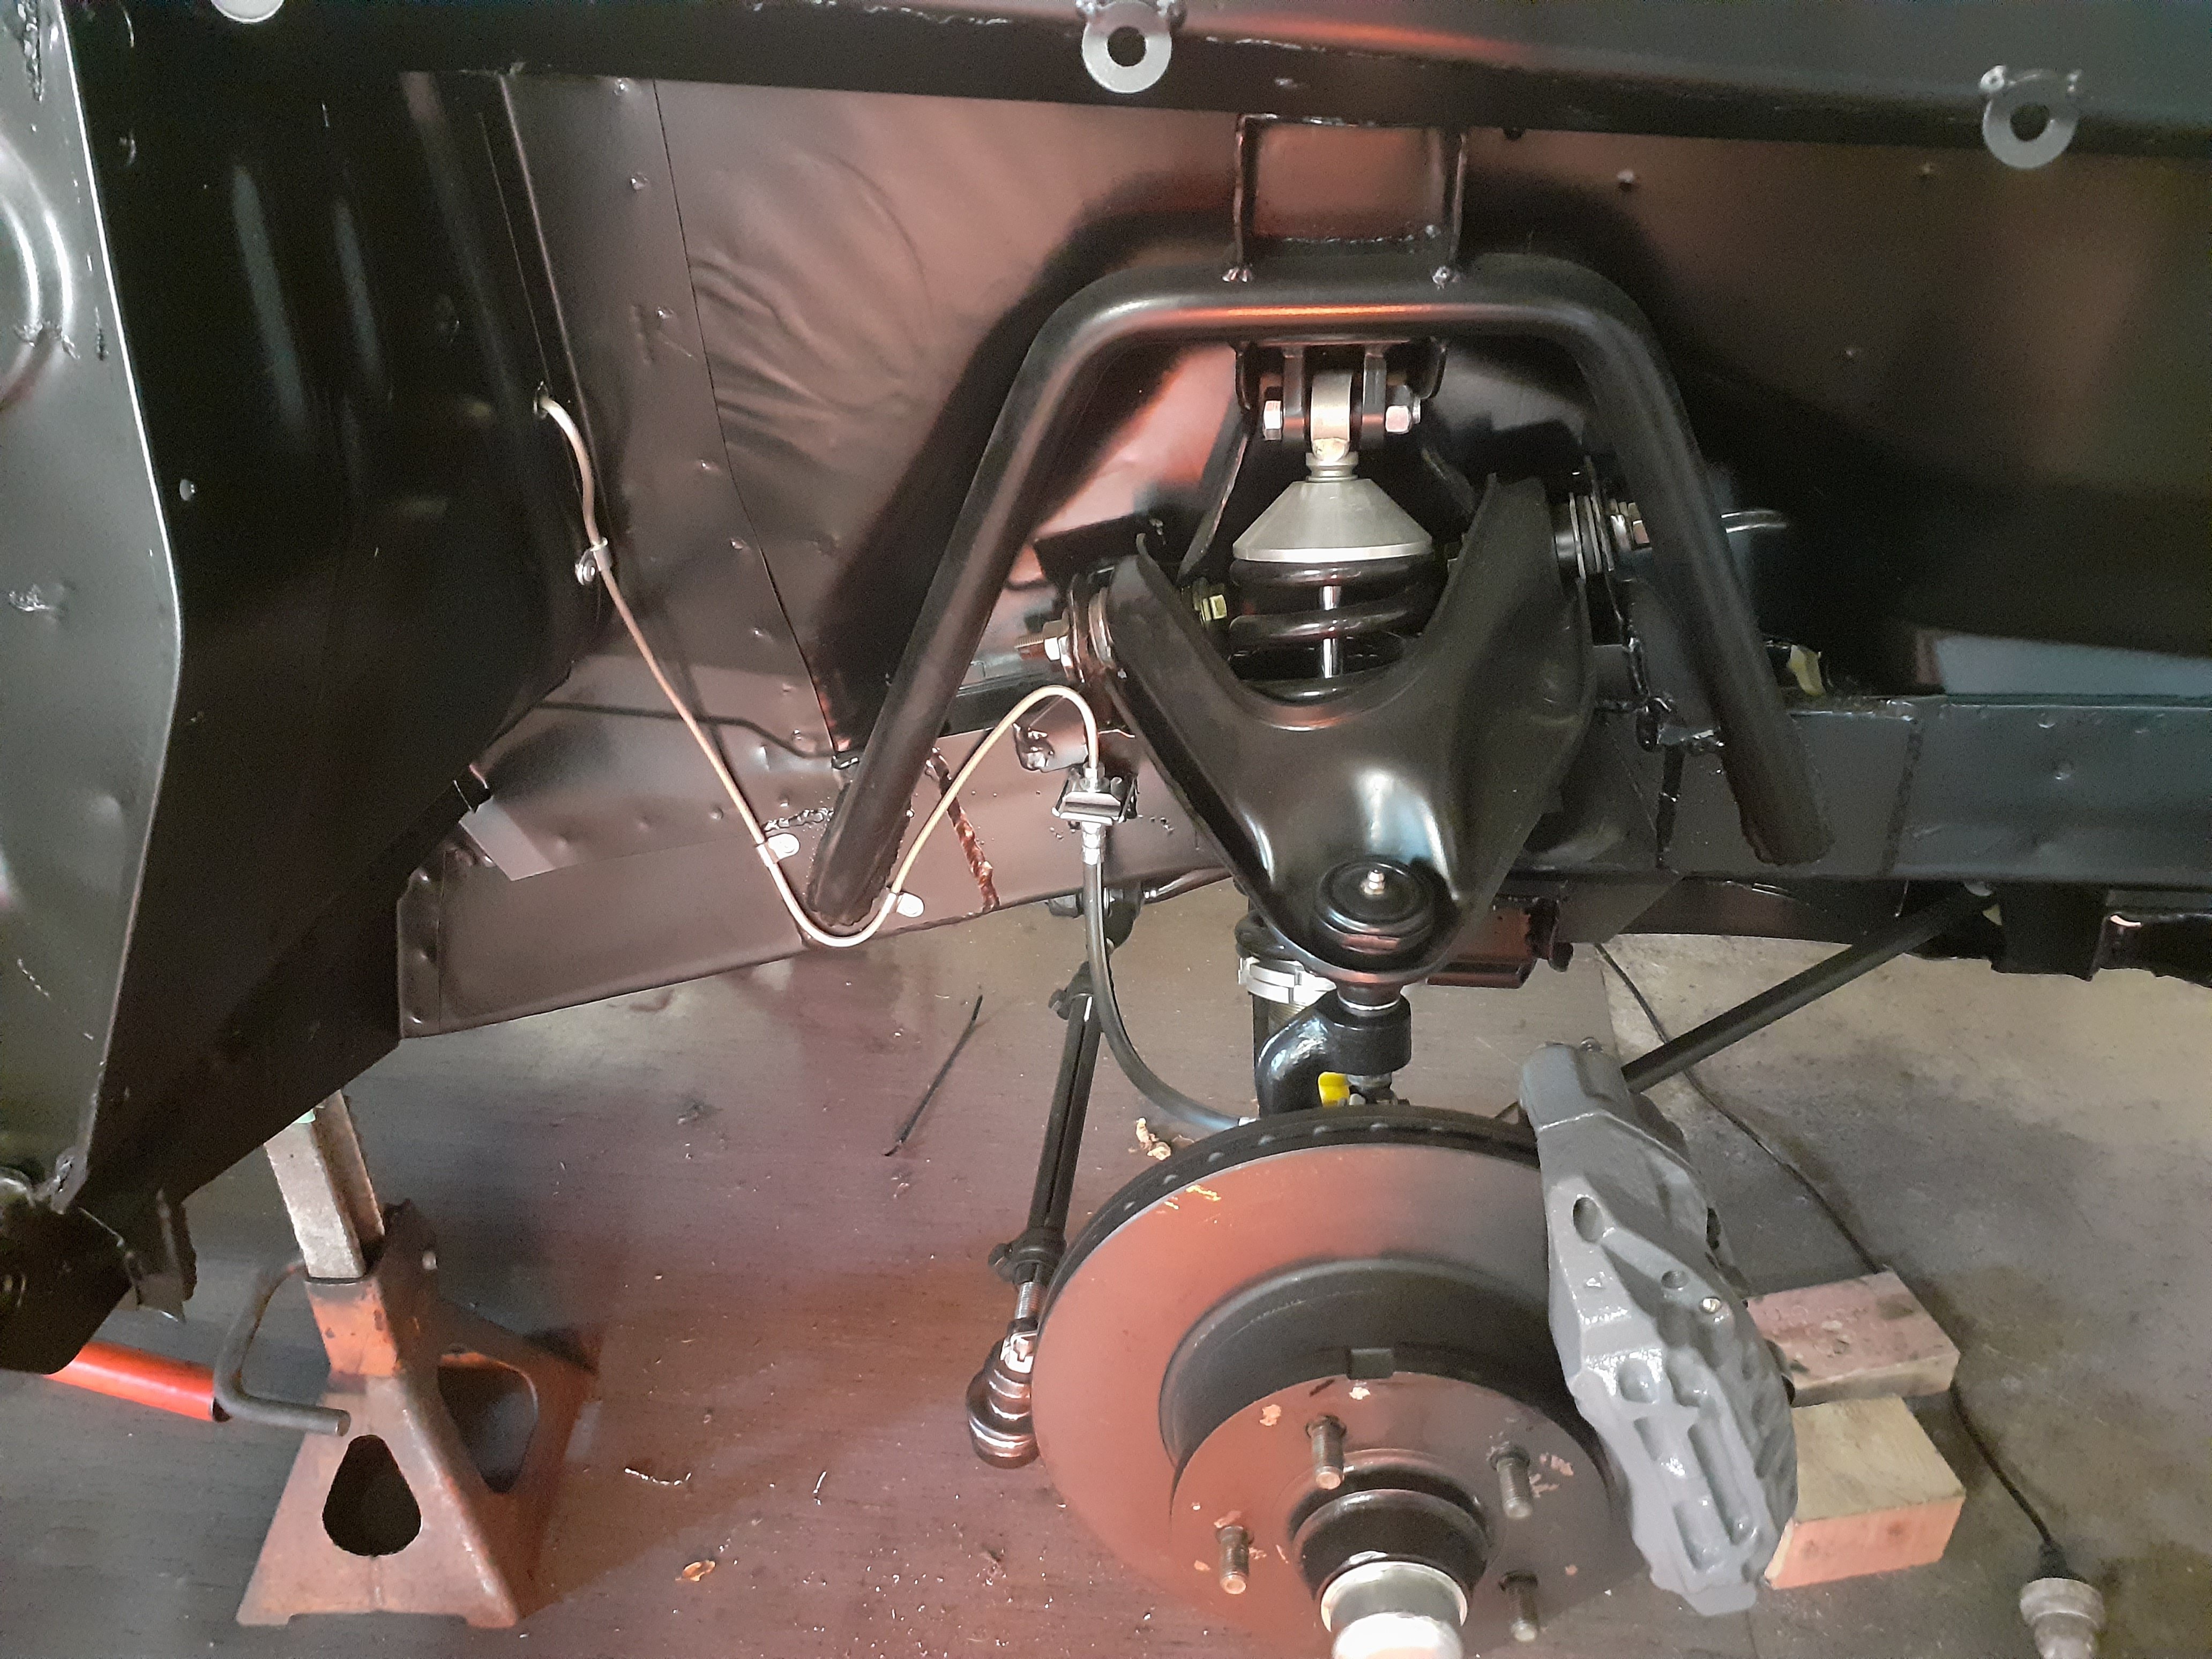
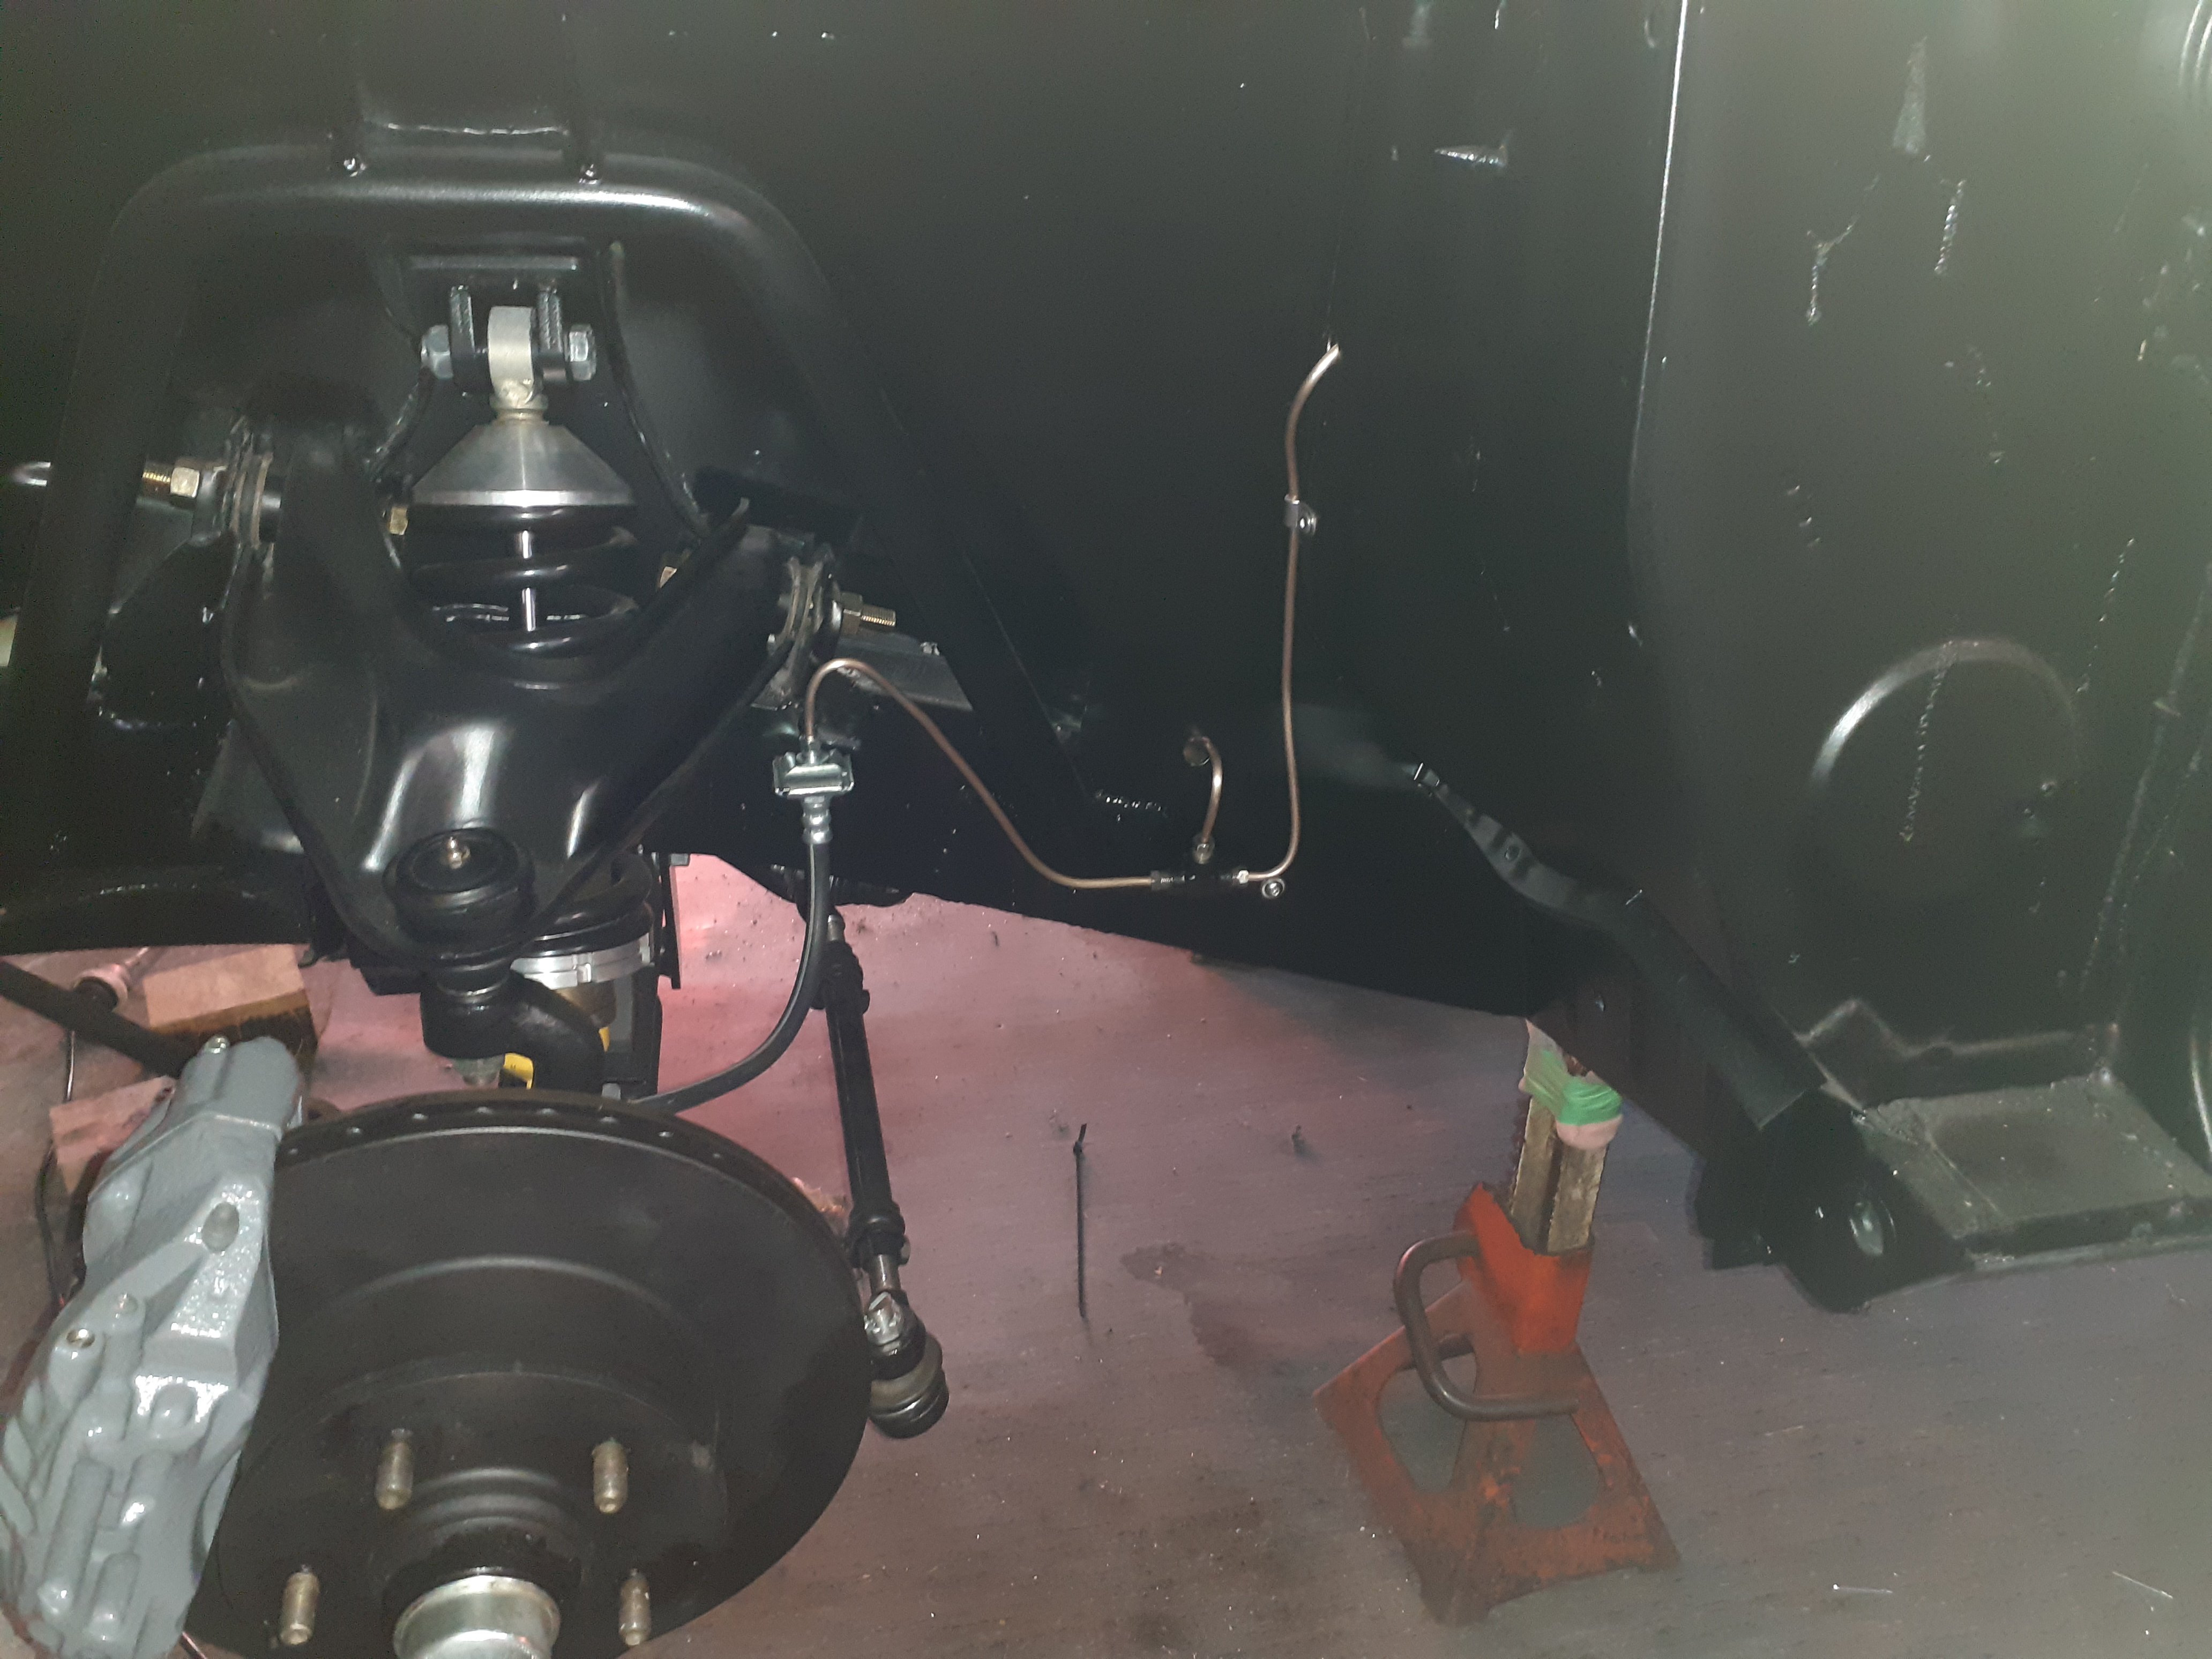
Fuel hoses done, apart from a breather I borrowed a far superior brake pipe flaring tool from @RX FORD which made life a lot easier, and got all the brake pipes done. I'll get some brake fluid tomorrow and fingers crossed no leaks I wanted to keep the pipes as hidden as possible so are routed a bit different to original, the rf one goes across the firewall above the carpet on the inside of the car, to keep it from being cooked by exhaust. I'd welded some 6mm bolts on before it got painted to mount the pipe to
 7 points
 -
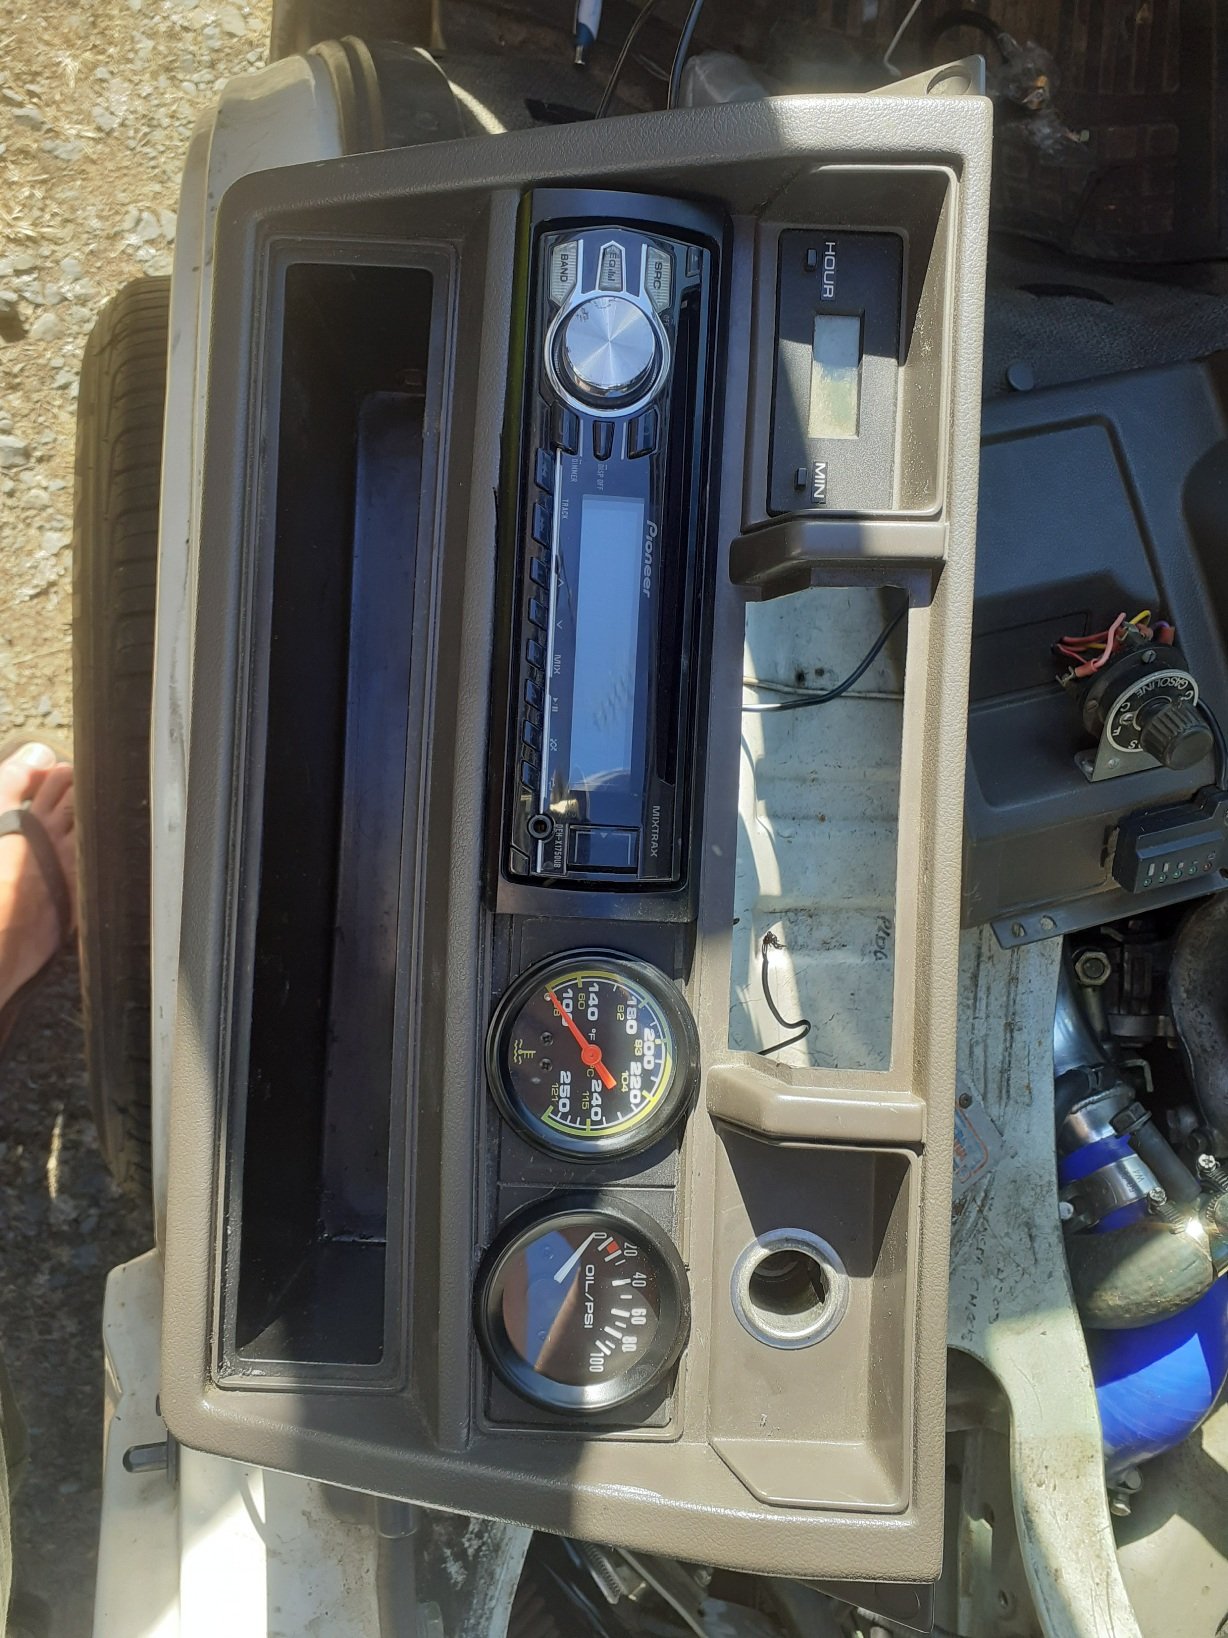
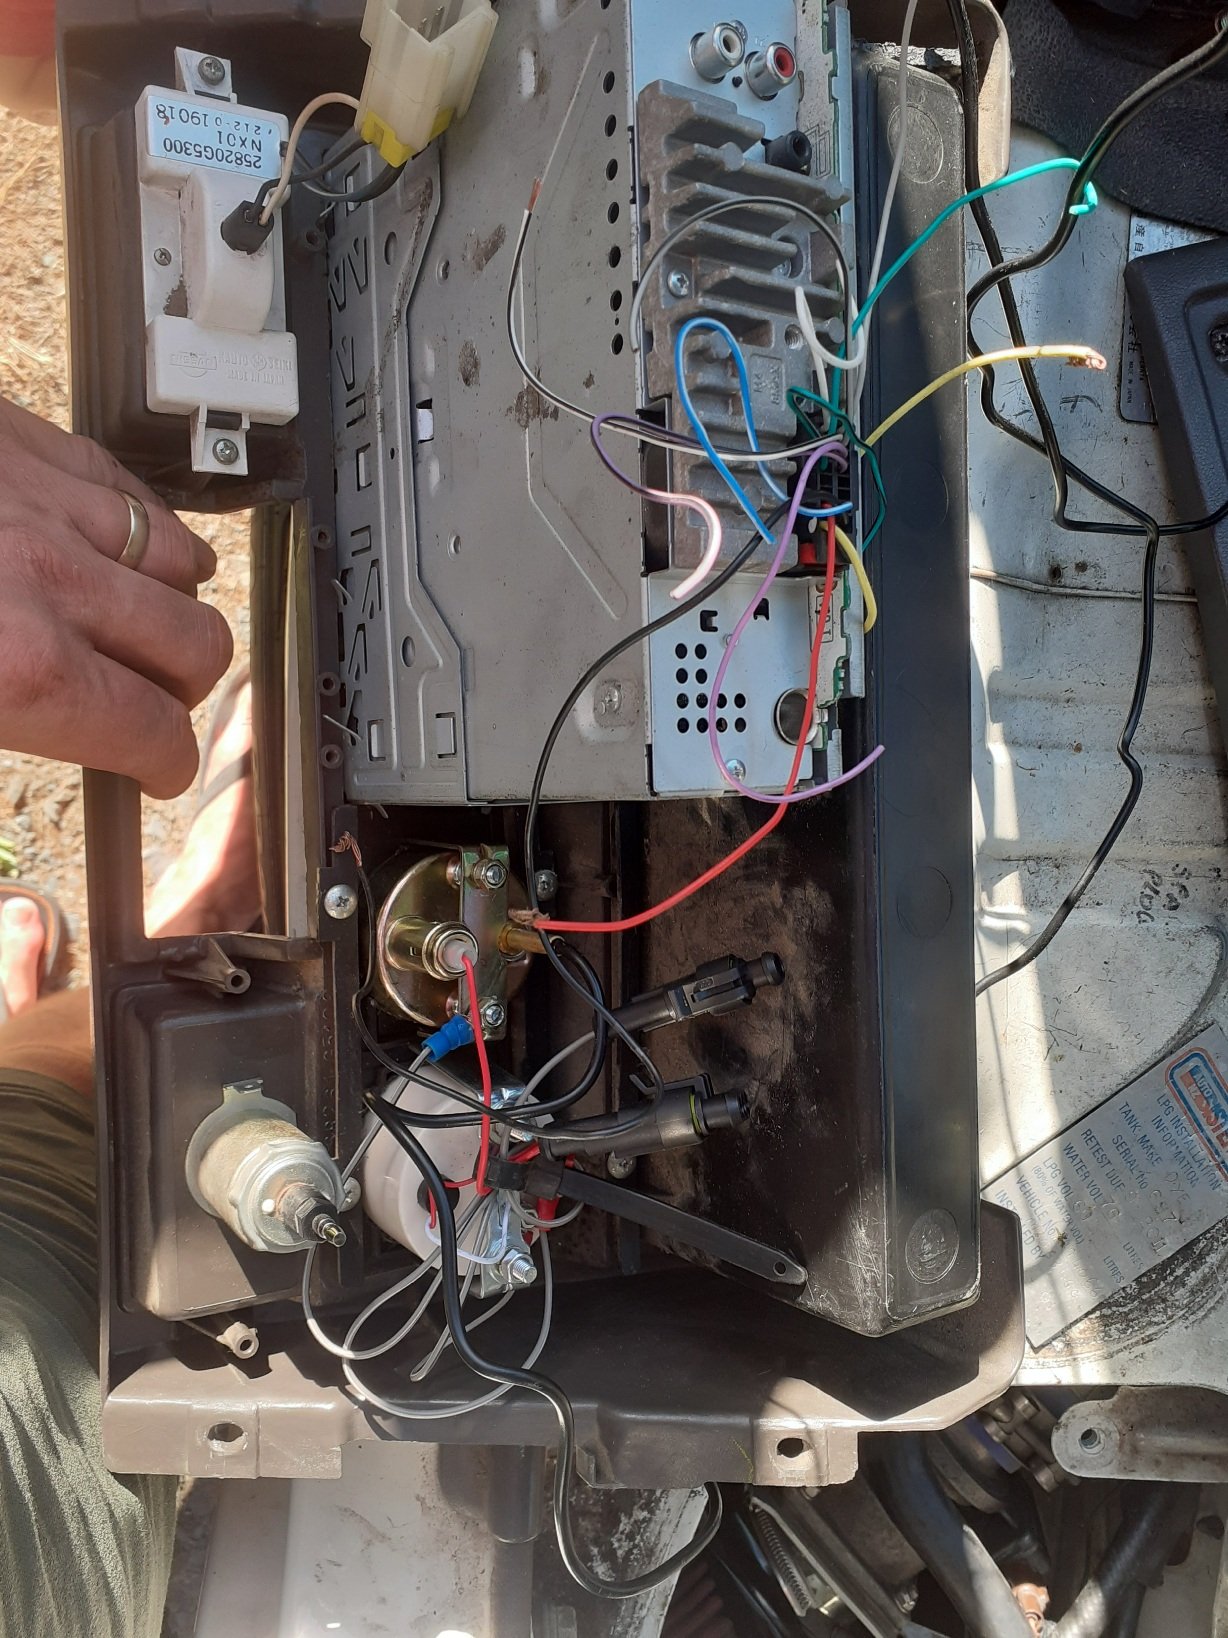
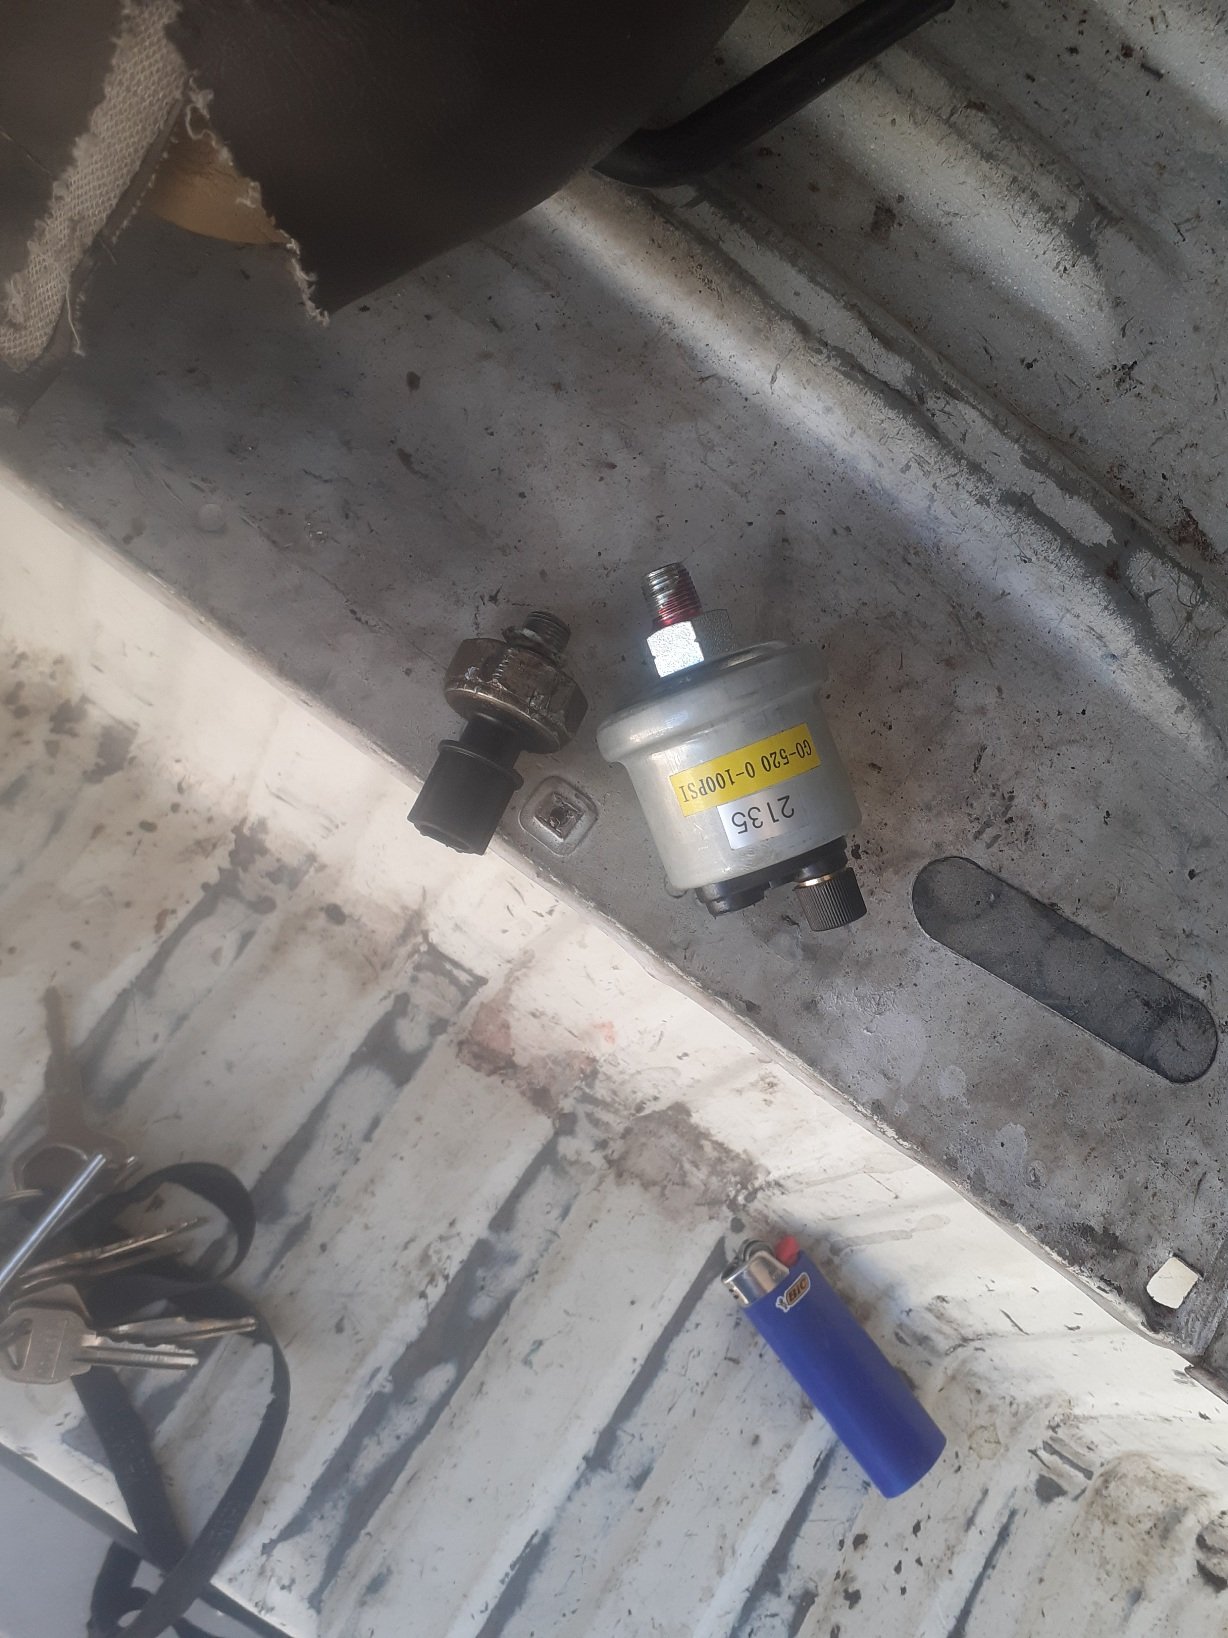
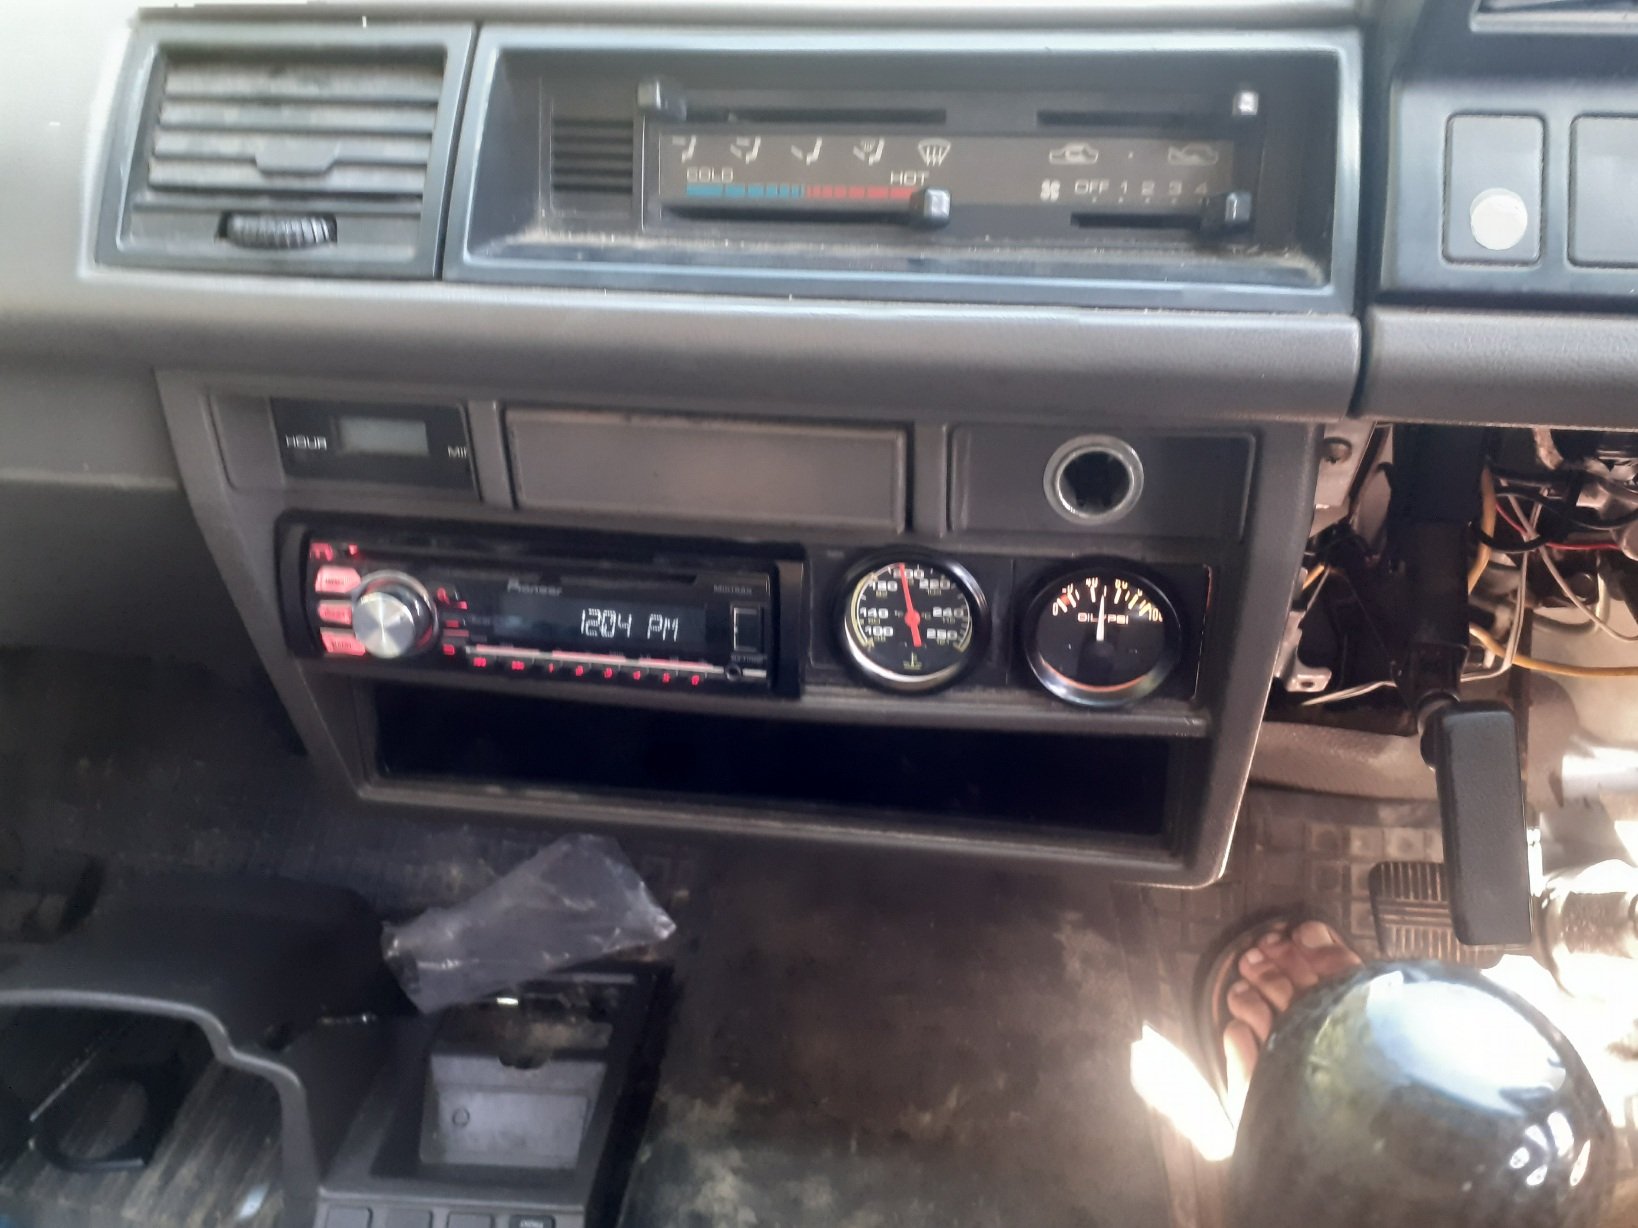
Brought some guages, just cheapo ones but is an upgrade over none lol, oil pressure with sender and temp, work good, wired in stereo which also works now, fairly clean looking, took for another drive, everything seems to be working good so far, just a little concerned about heat buildup in the engine compartment, especially above turbo, may have to add some cooling ventilation sometime. Happy new year
7 points
-
Gonna keep this thread off the bottom of the page, even if it's just me. Trailer painted. It's a big fucker, phone can't focus on both ends at once. Weathering the whole lot next time I have a spare day..... Wrecked Sherman for scale Started on the actual cargo. 1 million dollar pounds if you can work out what it is.6 points
-
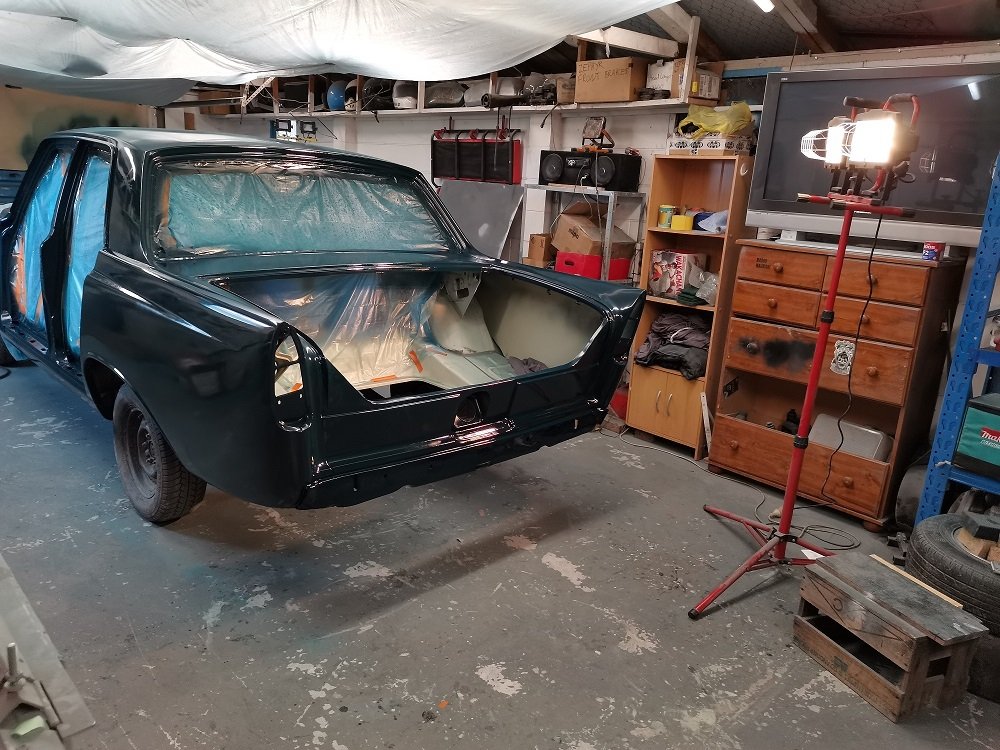
Got it more together still working on it big things in 2022
4 points
-
Back on the chain gang ! Yep. I'm back into this project. Its been a hectic busy last few months. Well for me, but others would probably laugh at my work levels. The last update was in September and both Hannah and I were pretty busy building a custom coffee cart for a customer. It was a fair old mission not helped by that pesky lockdown stalling a load of stuff ordered, including some double glazed window materials from Auckland. We put in some hard efforts to get the thing built and ready in time for the agreed date and managed it with a 2am finish on the last day before delivery. I was well chuffed with the cart we built and the customer is soooo happy with her new cafe ! All fully insulated, huge windows that roll away into the walls, loads of stainless benching and a lovely outside wood framing we made using Eucalyptus timber then oiled. Here's some pics of the build... Phew. Check that one off the whiteboard of jobs. Loads more work to chip through and we are now onto the steel framework for a local ladies housetruck. So I am going to do my best to just put down the tools, lock my bicycles away so I cant be tempted to just go riding and instead do more on this engine swap. Most recent bits I have done are as follows. I wanted to finish off the oil system. The internal stuff from the pick up to the pump and filter was sorted. Now I needed to get the oil from the filter to the engine. Luckily, well I kind of planned around it, there is a hole left where gear selector shaft went. This was ideal to pass a pipe back from the filter block outlet towards the front/belt end of the engine. But it needed to be bigger with some clearance. One big drill bit later... next up was a plate to cover the front. What used to be here was a cast front cover, much deeper obviously because I have lopped off a huge chunk of engine casing. It housed the oil filter, now moved to the side. Instead of that I now needed a flat plate of thick alloy that will serve several things. The engine mounts, most likely typical compression bobbins, will be mounted off it. There has to be a way to get the oil from the pipe coming from the filter block to head back into the main oil feed hole higher in the block. Finally I need somewhere to put oil into the engine and also to check the oil level. I started with a plate of alloy I roughly cut to size. Drilled it to suit the holes in the block that the old front cover mounted to. I then drilled a hole in it to suit the oil feed pipe. This was a hole perfectly located to make sure the pipe would line up with the filter transfer block nice and square. Because I'm using the O rings that Honda used throughout the original system. There is a small tolerance for being out of square with these but I might as well get it as close as I can. I then needed to make a bolt on block that would take the oil from this pipe end and direct it through another hole in the plate which locates right over another O ring sealed port into the engines main oil way, just as the original front cover did. I started with some more chunks of alloy and made a thousands of teeny tiny chunks of alloy with the tablesaw... One of the blocks was then milled out to suit the pipe outlet and oilway inlet sizes. I also used a tiny little slot drill to add a groove to help keep the sealant in place.. Flipped it over and took more material away. Added some cooling grooves. But really.. come on. They were more just so it looked a bit nicer than just being a lump of alloy. Why not.. Clamped it down onto the front plate and drilled mounting holes... There's a nice amount of room to still use the original honda cooling hose if I want but I may well do something else when I get to that bit- depends on my cross member design and engine mounts etc.. Next up was how to get oil in place! I needed a filler point. The original filler and dipstick are in the wrong spot and kind of chopped out. I could have made a dipstick to suit the now chopped down dipstick housing but that's at the rear/flywheel end of the engine. With the engine turned round 180 degrees that puts it under the parcel shelf and would mean reaching over what ever induction setup I use (cough*ITBS*cough) so that's not cricket. A filler tube, right at the front, but actually now the back, of the engine with a combined dipstick under the cap made more sense. I rummaged through my collection of alloy.. Playtime in the lathe... and out popped this... ..into which oil will pour as such.... Now I needed some more bits to hold it in the right place so I made these flanges to suit more pipe. Once I know what I'm doing with the cooling pipes etc I'll cut the pipe to suit and epoxy it into the flanges. I ideally need the main large flange to bolt over a hole below the oil level height - which I have roughly worked out allowing for about 4.5 litres thereabouts. This pipe and cap will be right there, on view, easy to get to at the engine bay opening. The two smaller flanges are so I can remove the upright pipe to allow for the cambelt covers to be removed, or so its not there liable for getting damaged when removing and moving the engine about. I did think about being super silly and adding a sight glass to the pipe. Or use some thin glass or plastic tube. I then even thought about being really silly and adding an led light into the pipe to light up the oil. But oil does not stay honey clean does it. So a neat little dipstick under the cap will do. Lastly I needed to bolt the sump cover in place. I had to think carefully about bolt placement for sealing purposes and get the bolts square. This sump plate is going to have to be sealed well because there is no usual high sided sump like most cars. Hence I built it rigid to help against flex. Good quality sealant will be the order of the day* To get the bolt holes square I had to do this... Impy sat outside looking in at his new heart being crafted (said like some car obsessed bloke who anthropomorphises his cars)... Well then. That's it. Crikey. Another wall of text. I hope you enjoyed my ramblings. I promise I'll put more effort into working on this (but it is summer after all..) *It will leak. Its a British car. Its destined to leak.4 points
-
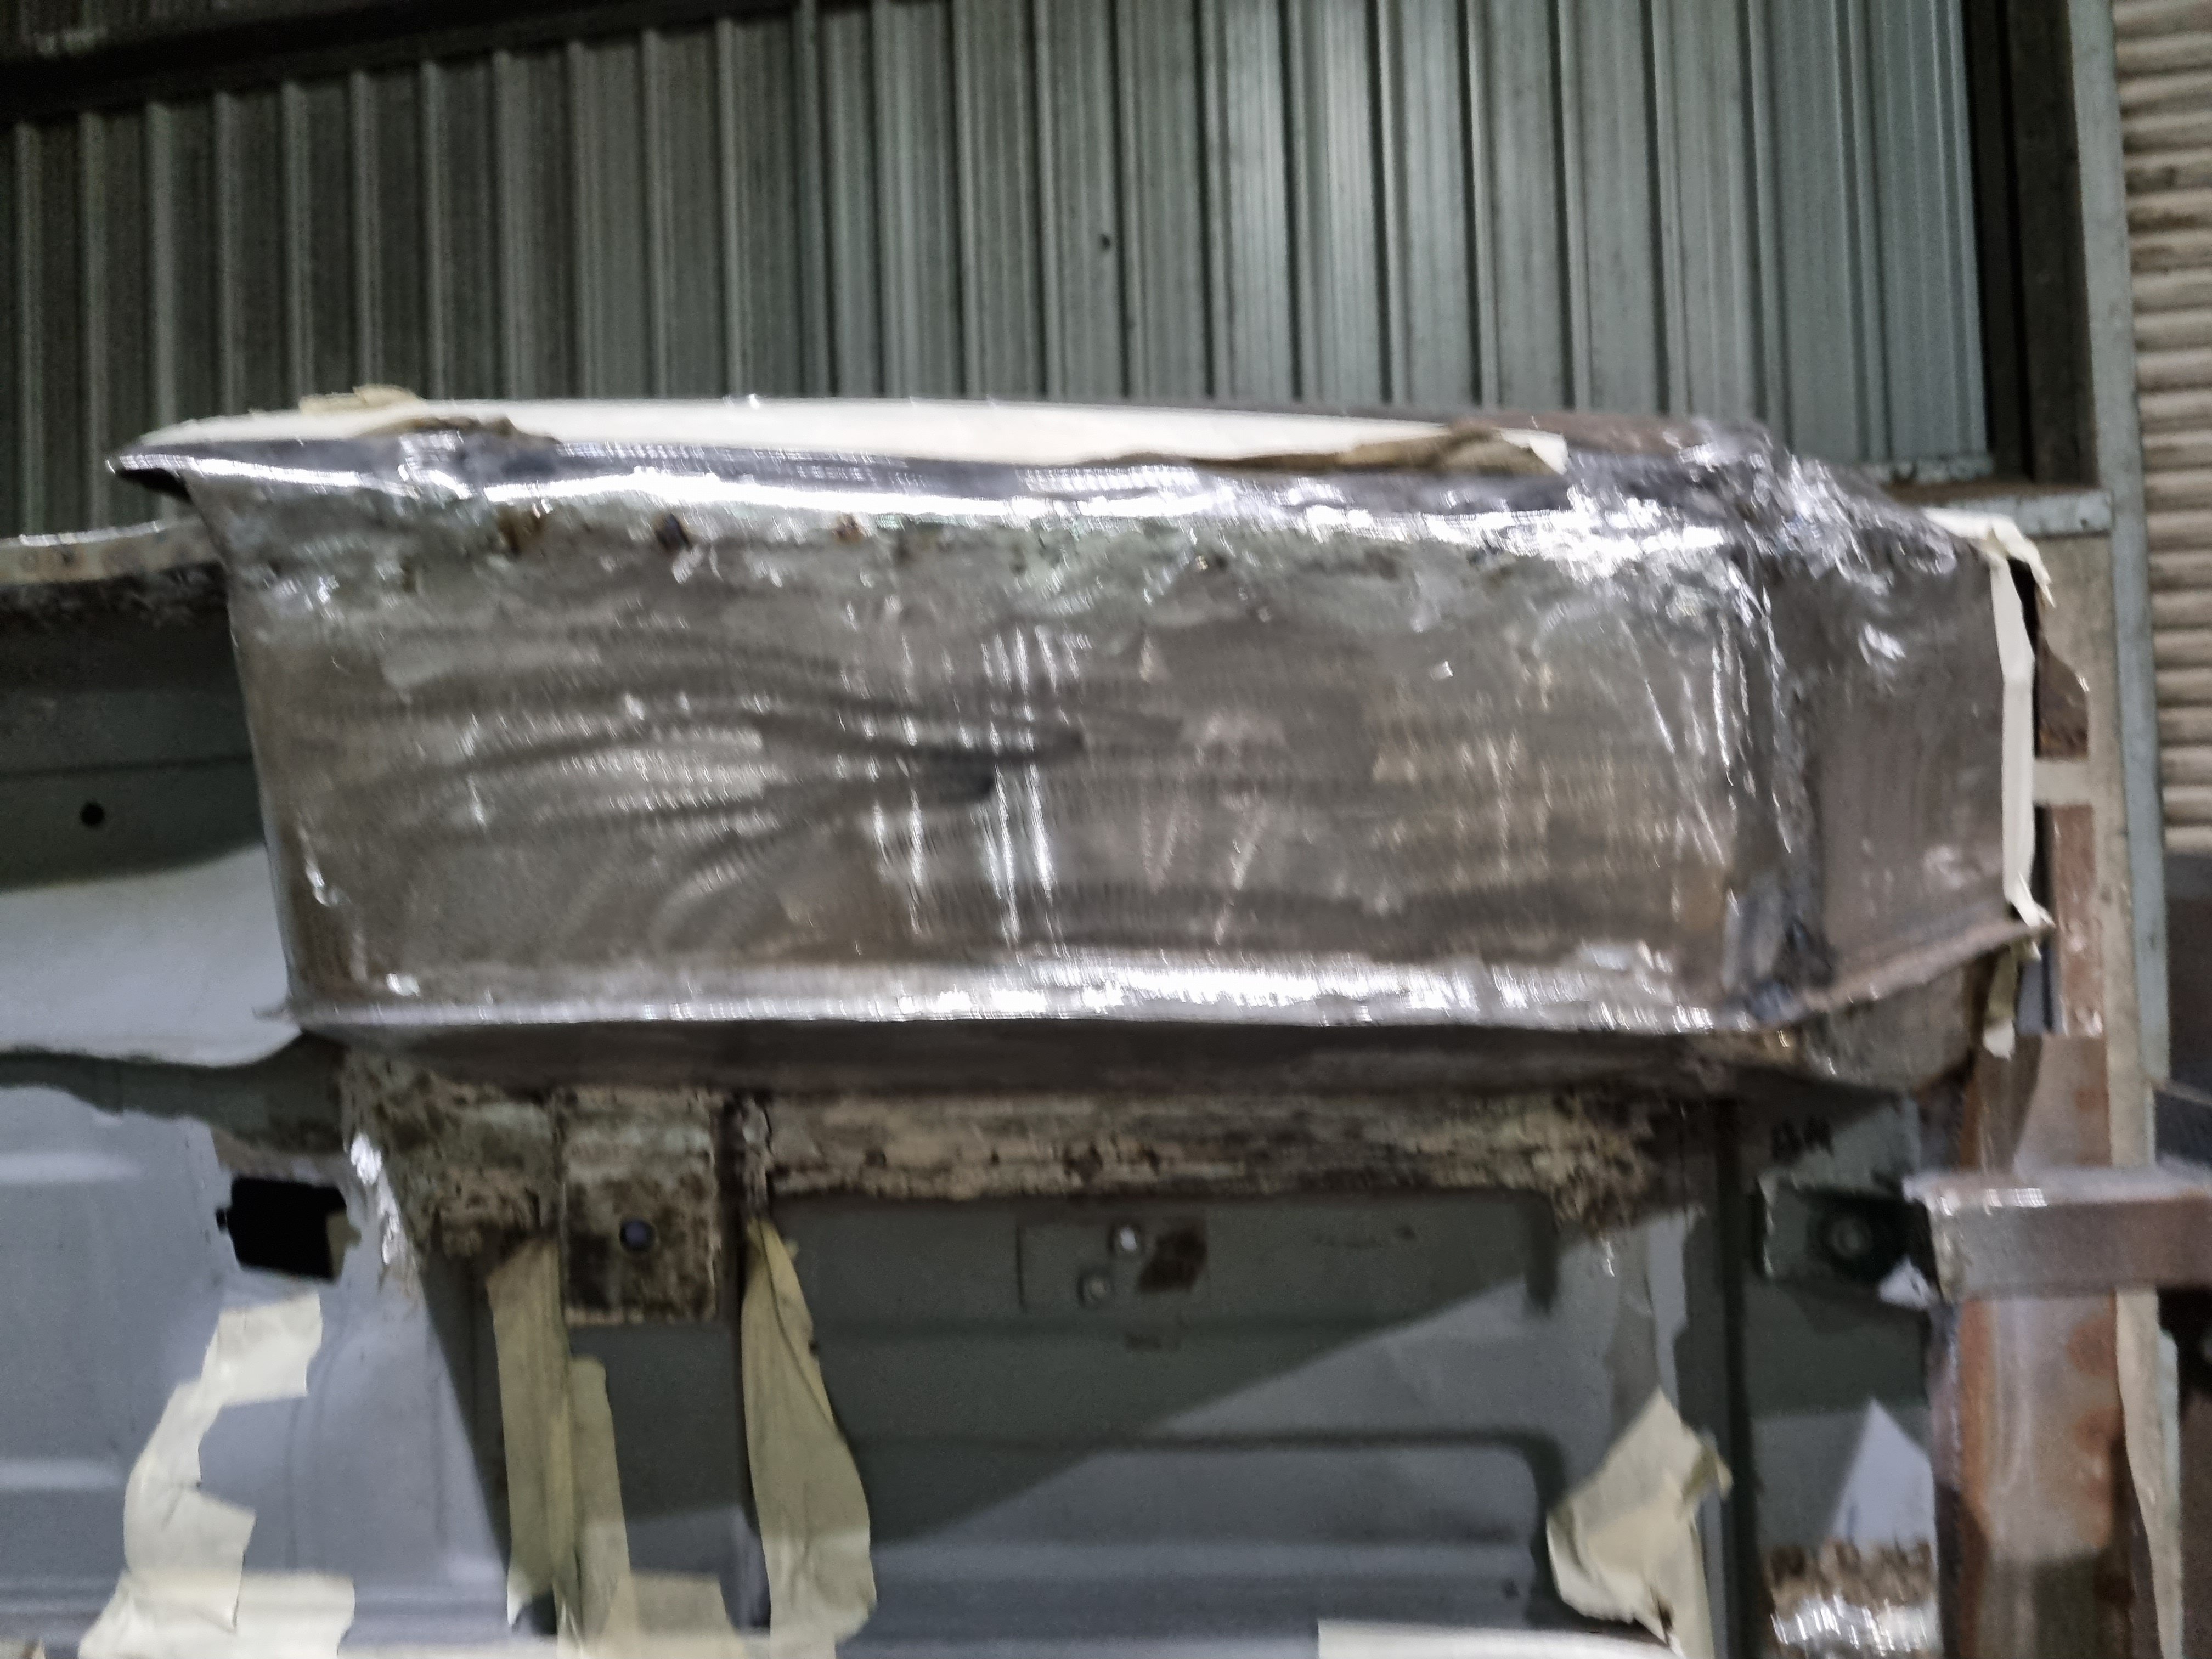
The entire wheel well needed replacing, which ive done while being off work for christmas. glad to say there are now no other big areas of repair to be done underneath.
3 points
-
some parts arrived today. got the clutch pedal helper spring on which makes a huge difference even with it interfering with the accelerator shaft. lesson learned that there's a difference between left and right and drive. considering shipping doesn't change too much when ordering guess I better load the cart up. tempted to just drive it how it is and just lube up everything so isnt rubbing too bad. at this rate car will be mint just in time for me to go back to work3 points
-
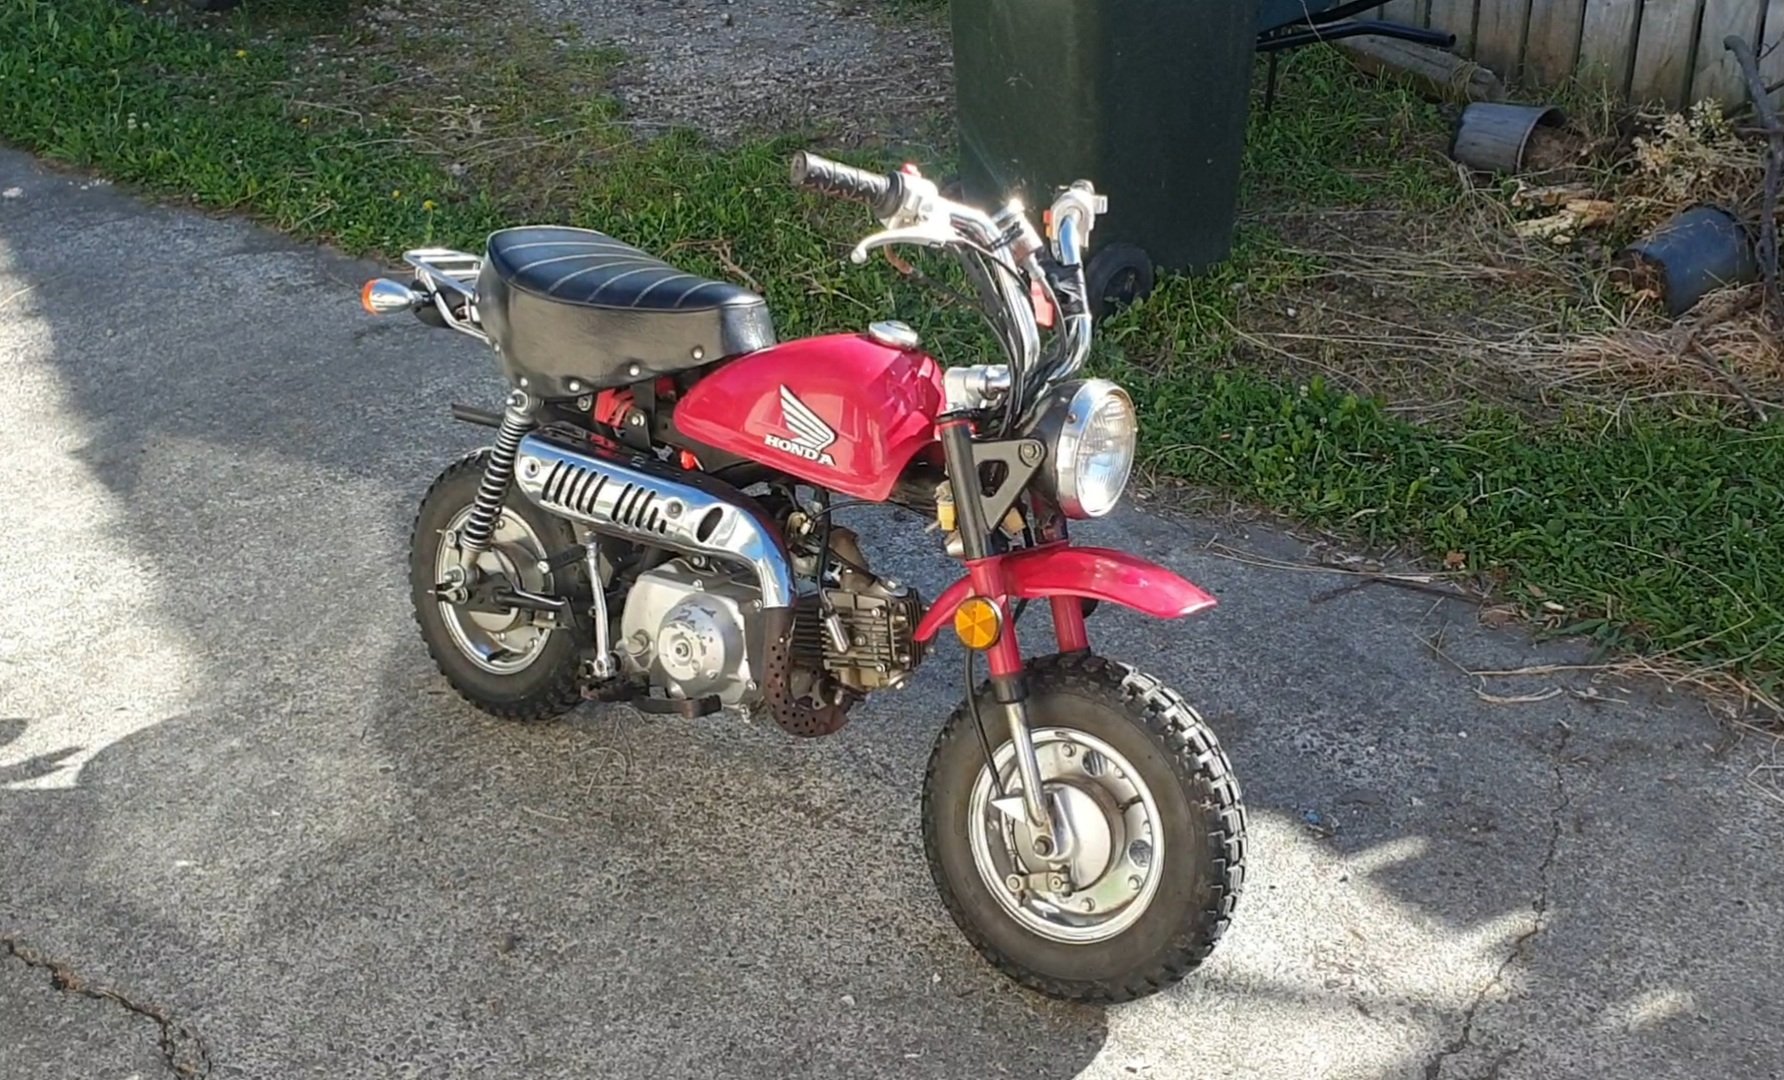
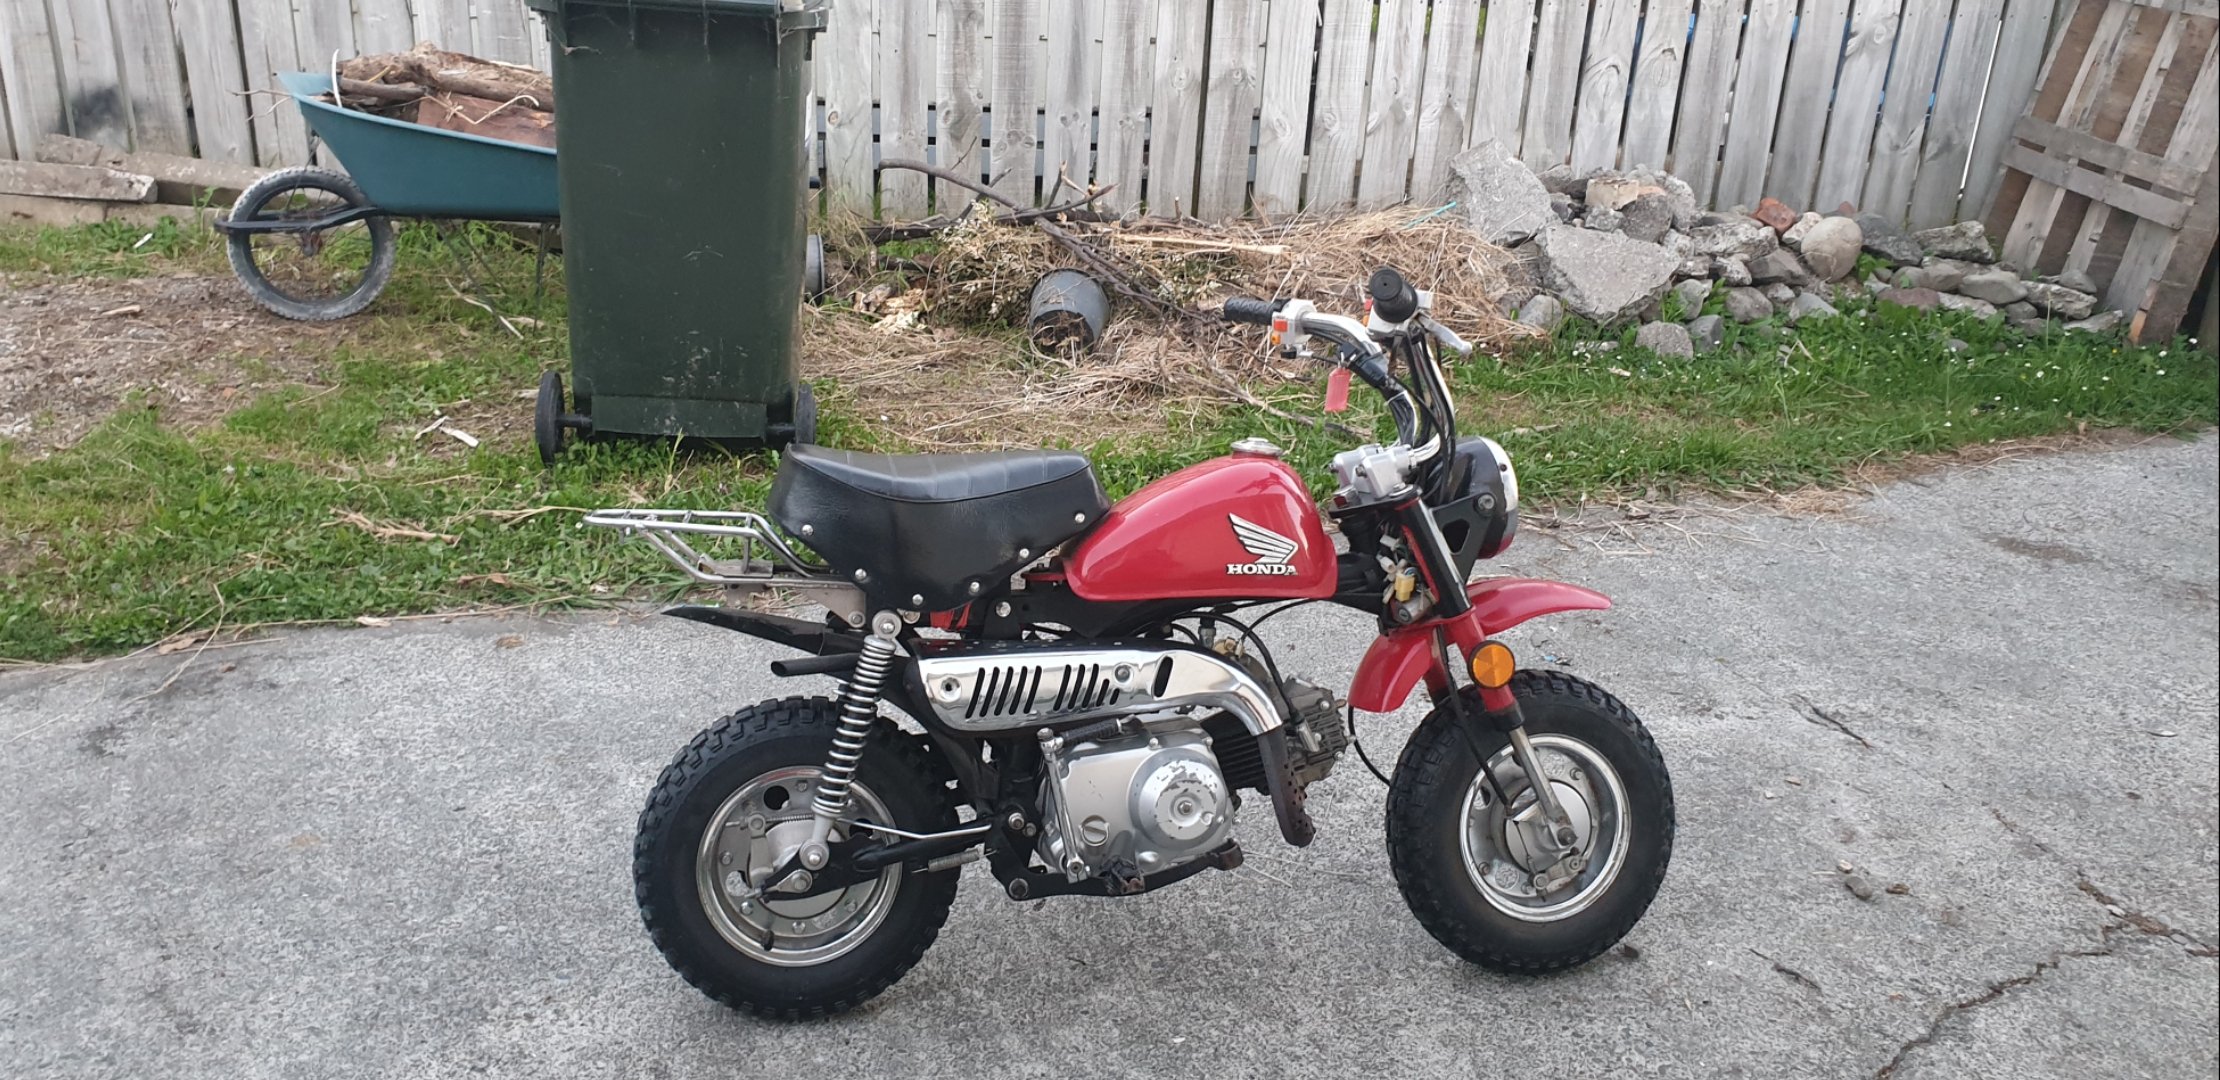
Got this wee jem. Its a clone but still real cool. 3speed 50cc Started ok when i brought it took for a ride was real boggy cleaned the carb now shes happy days.
2 points
-
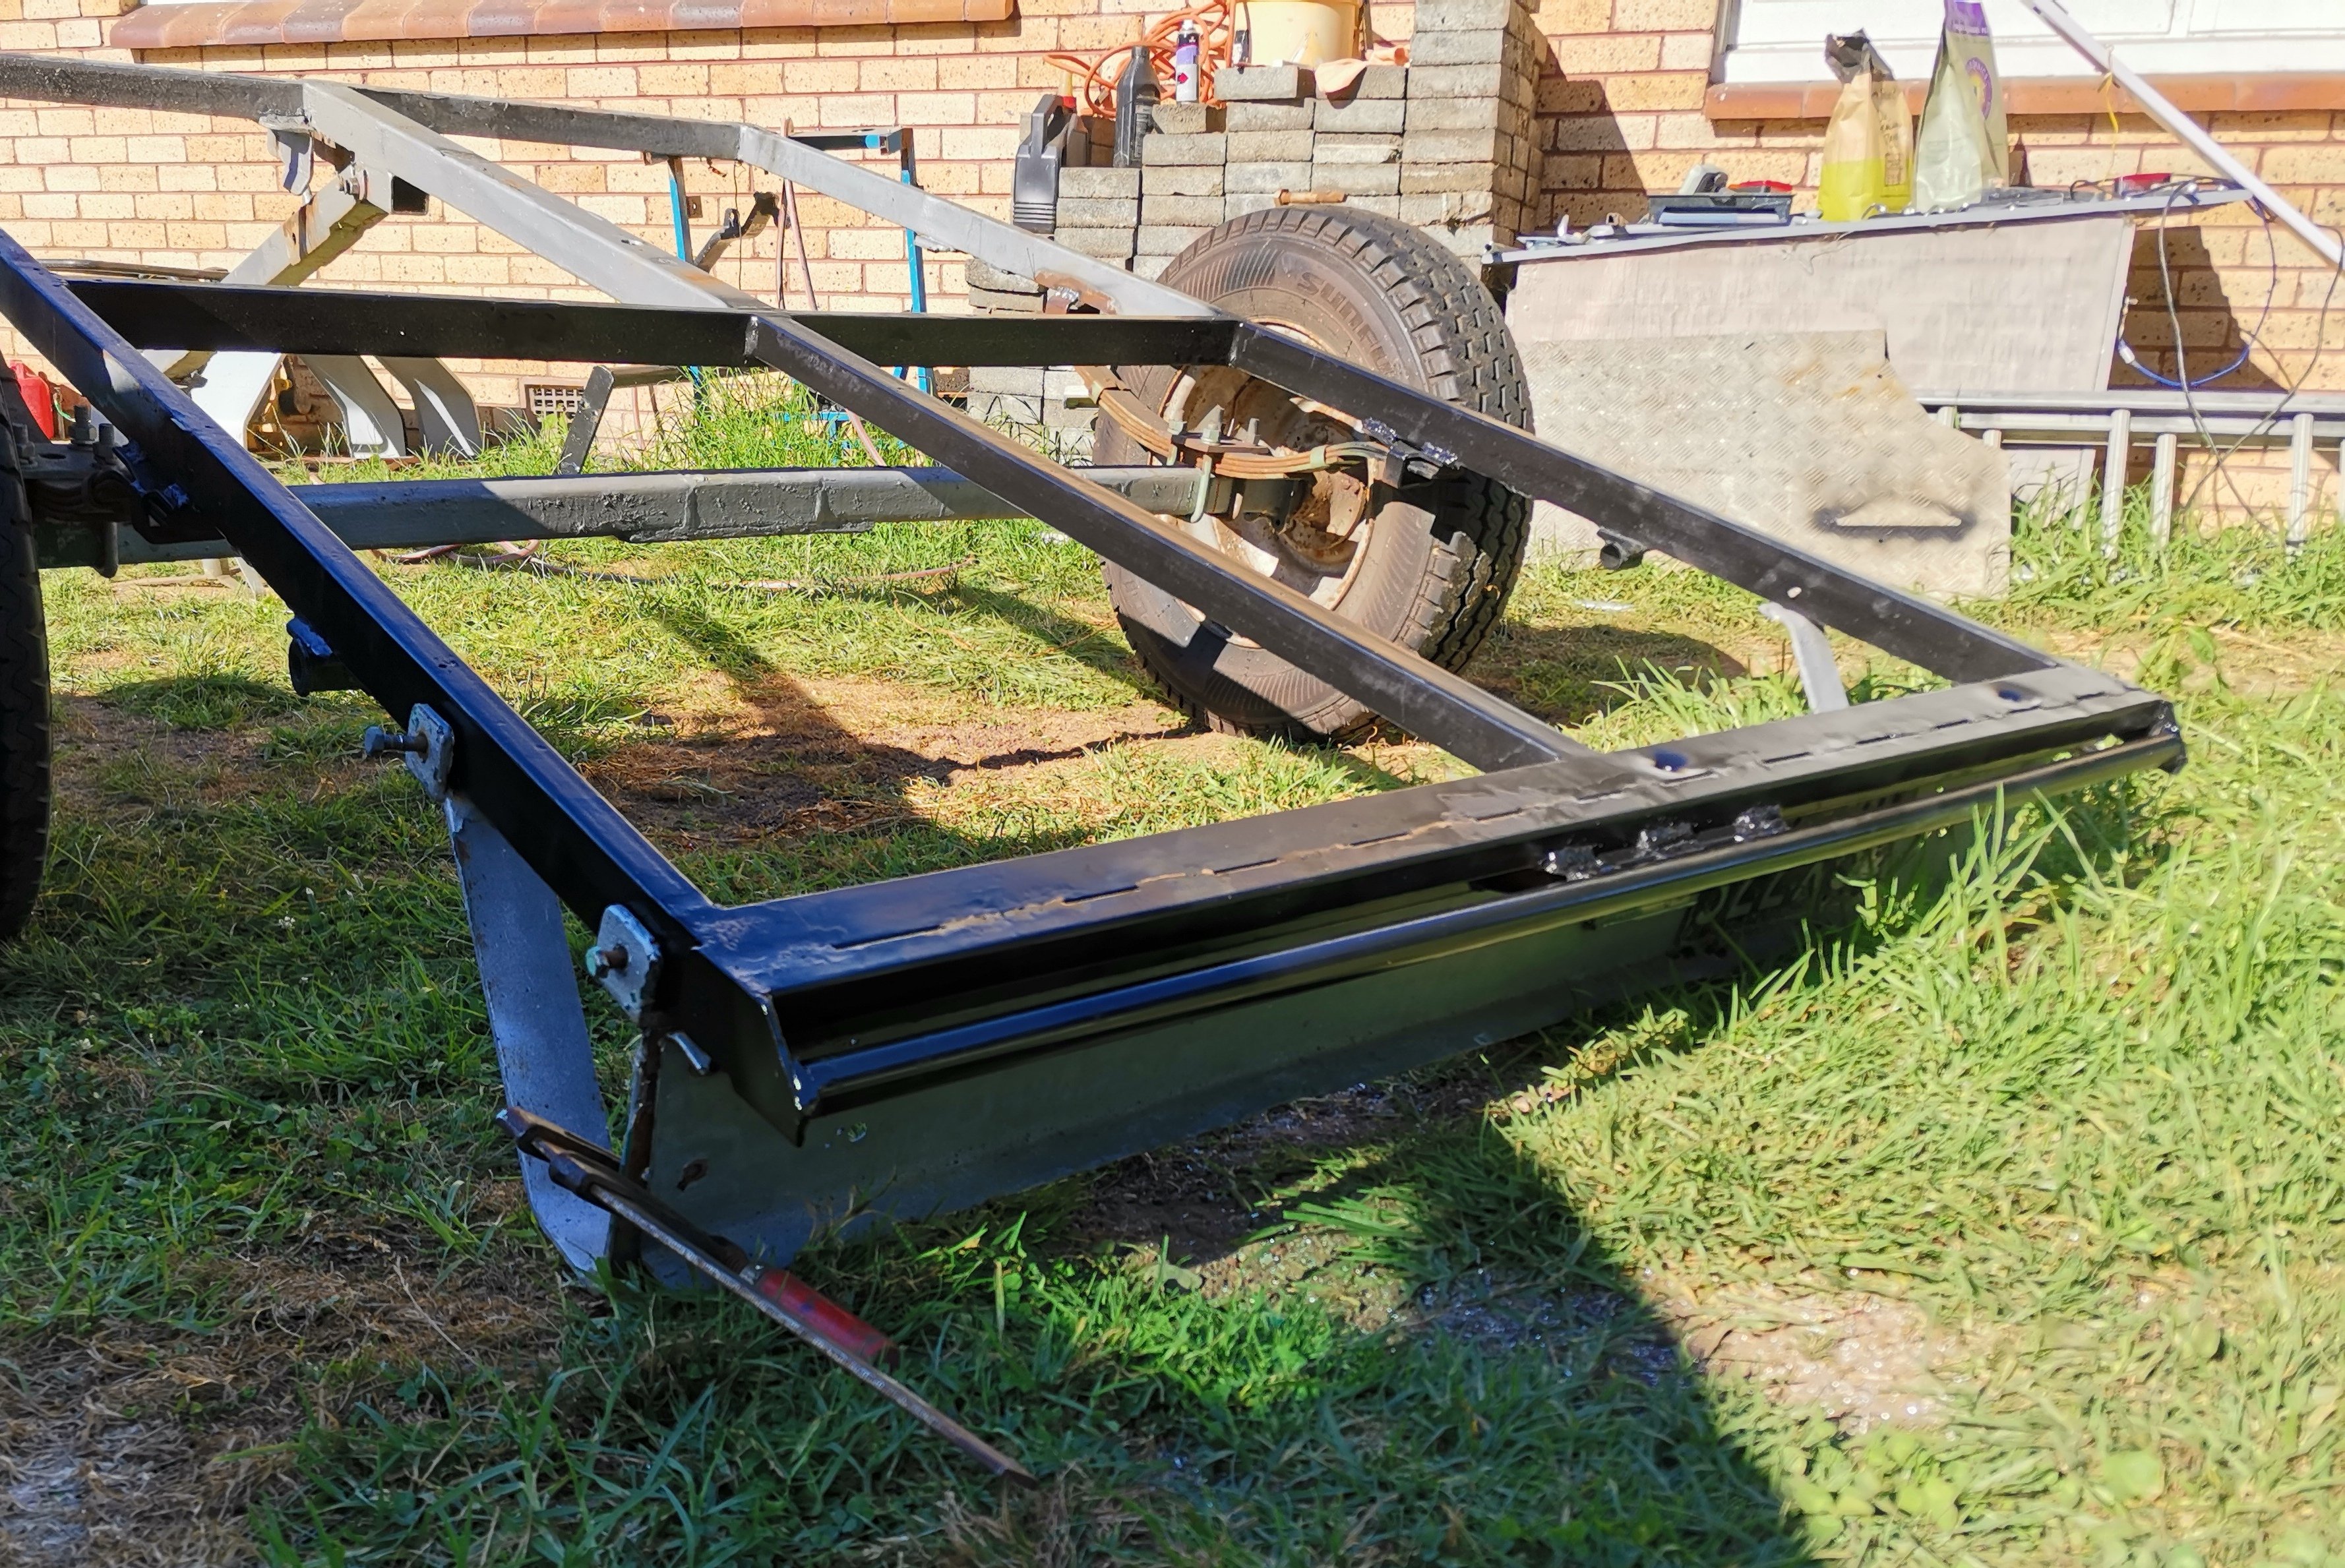
Also stripped the paint off. Zinc paint doesn't really work if it's on top of 5 previous layers. The old green stuff was probably lead tho, so should have kept that. Made that bar to hook some angle. Iron over to attach ramps. Proba ly made it too low cos I forgot about the thickness of the deck till after it was on lol. But the ramp probably wants some framing so it doesn't be d, so it probably works out
2 points
-
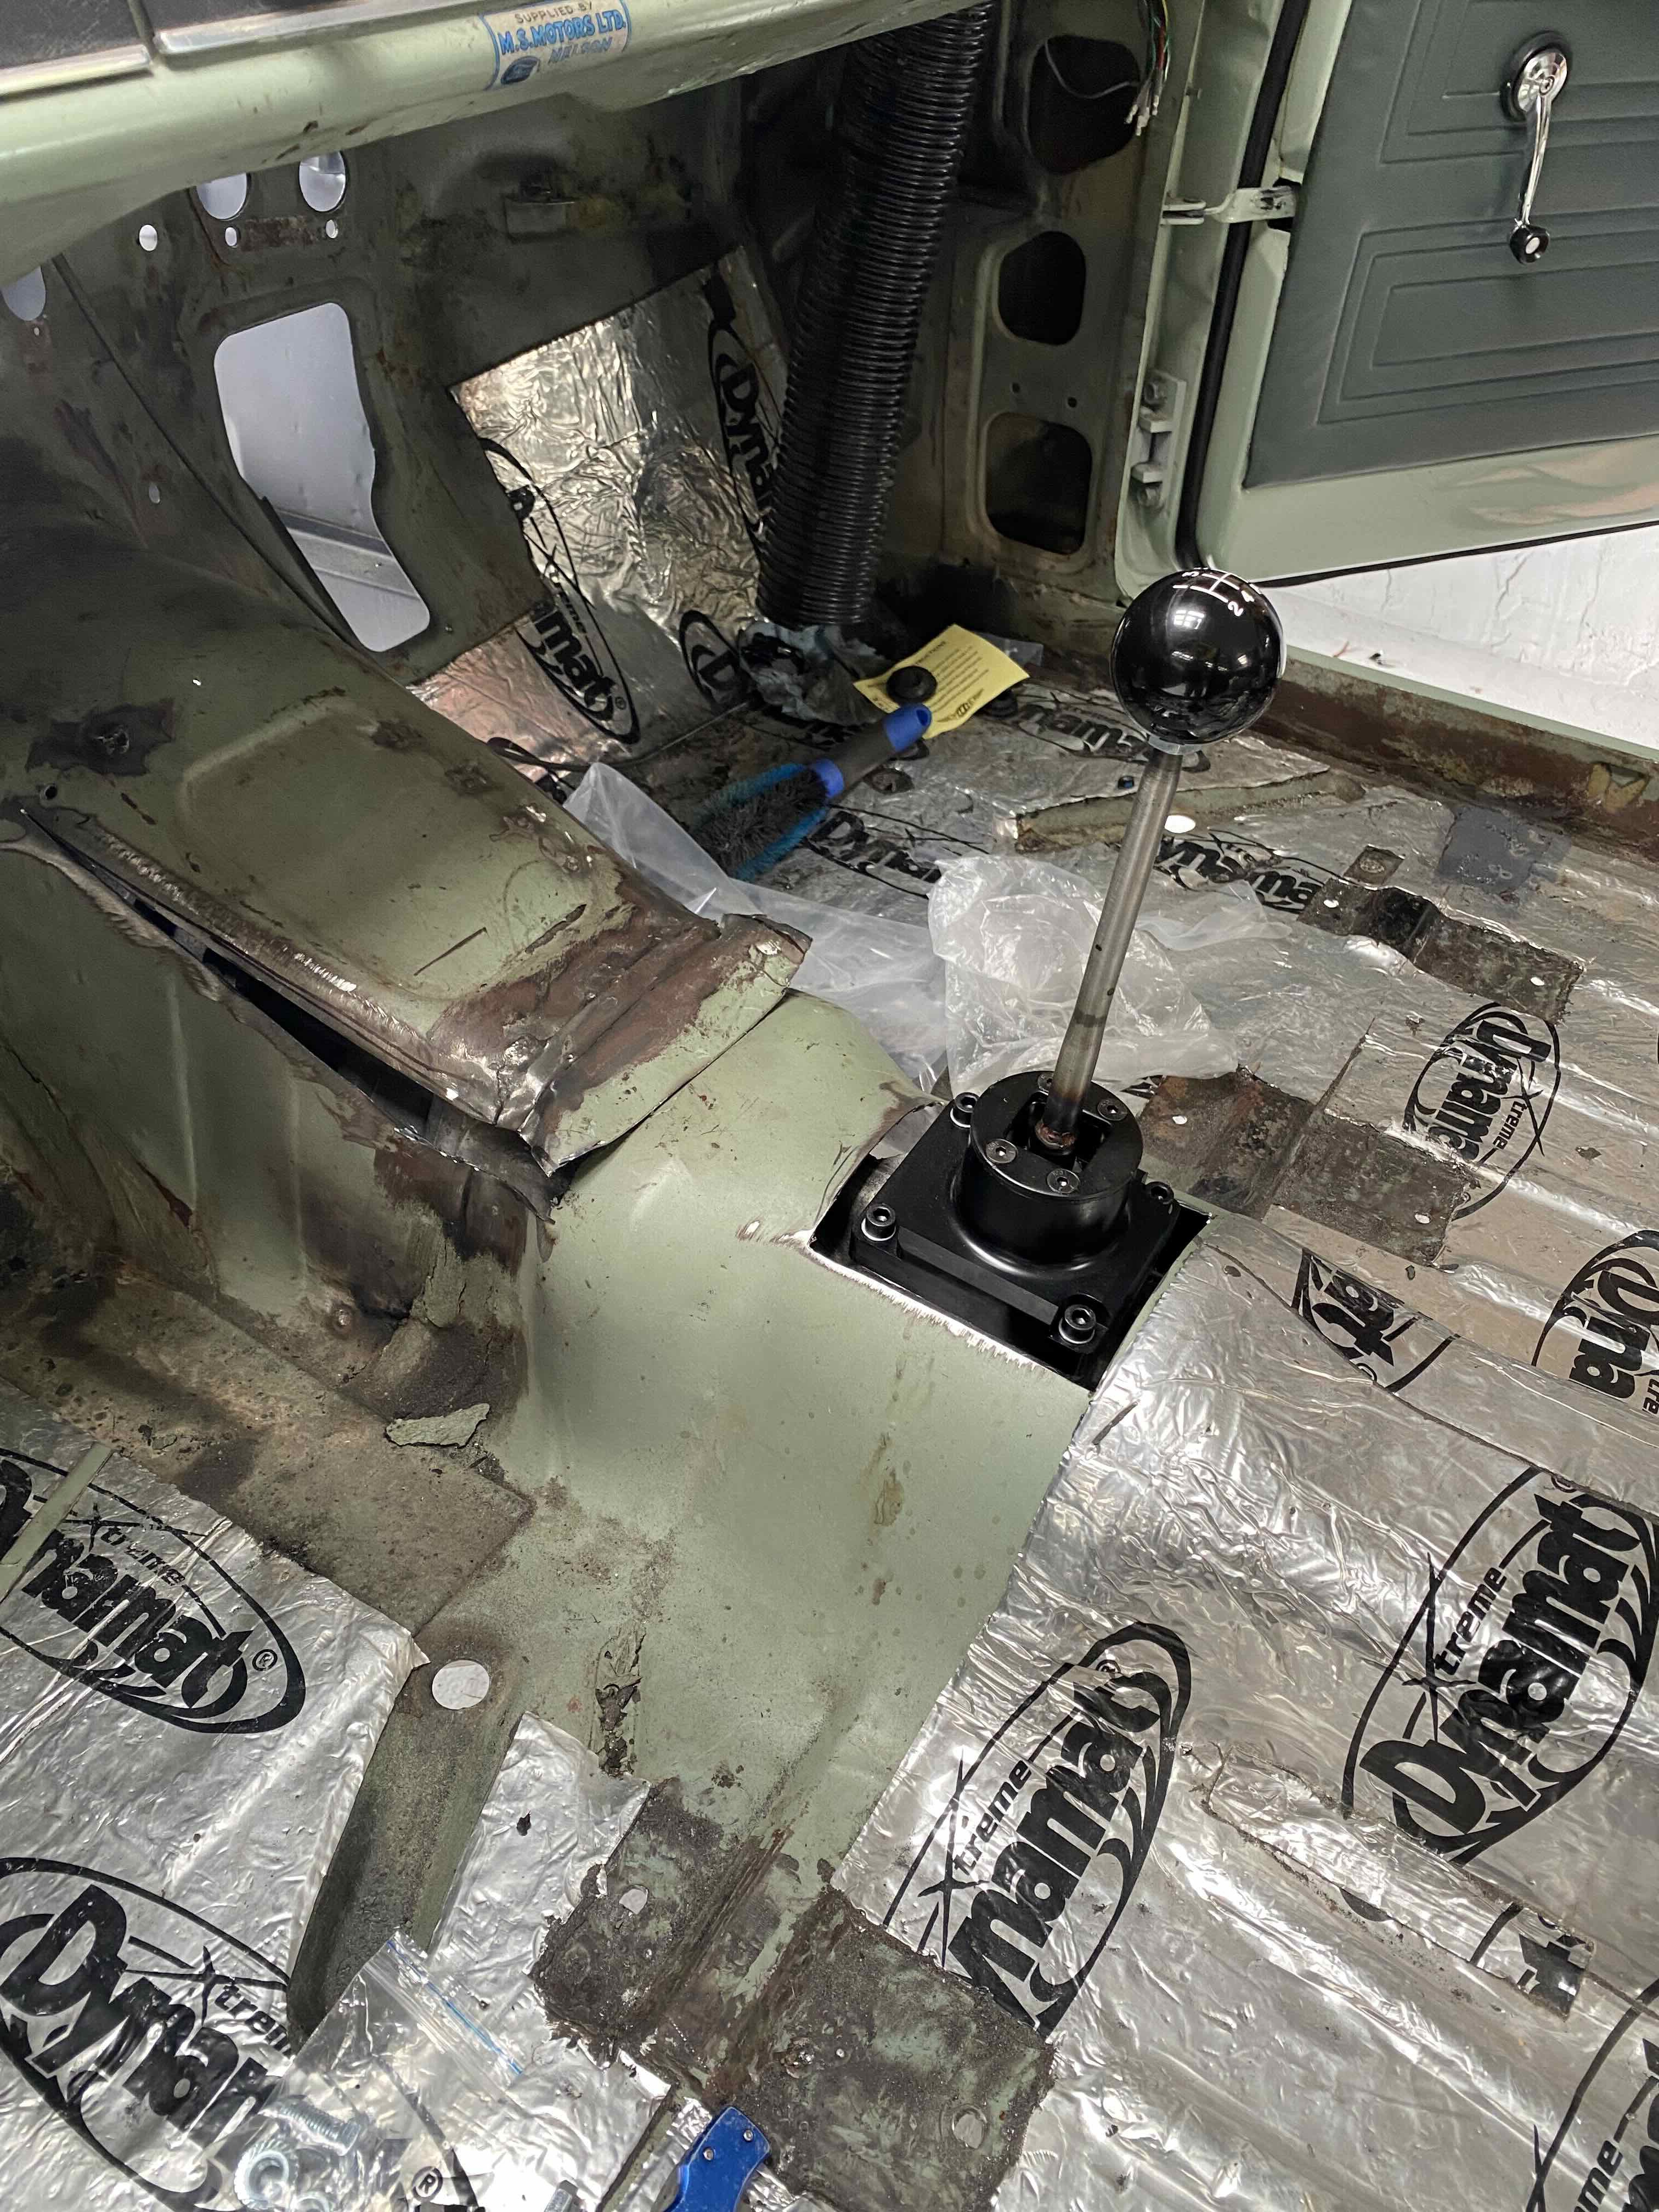
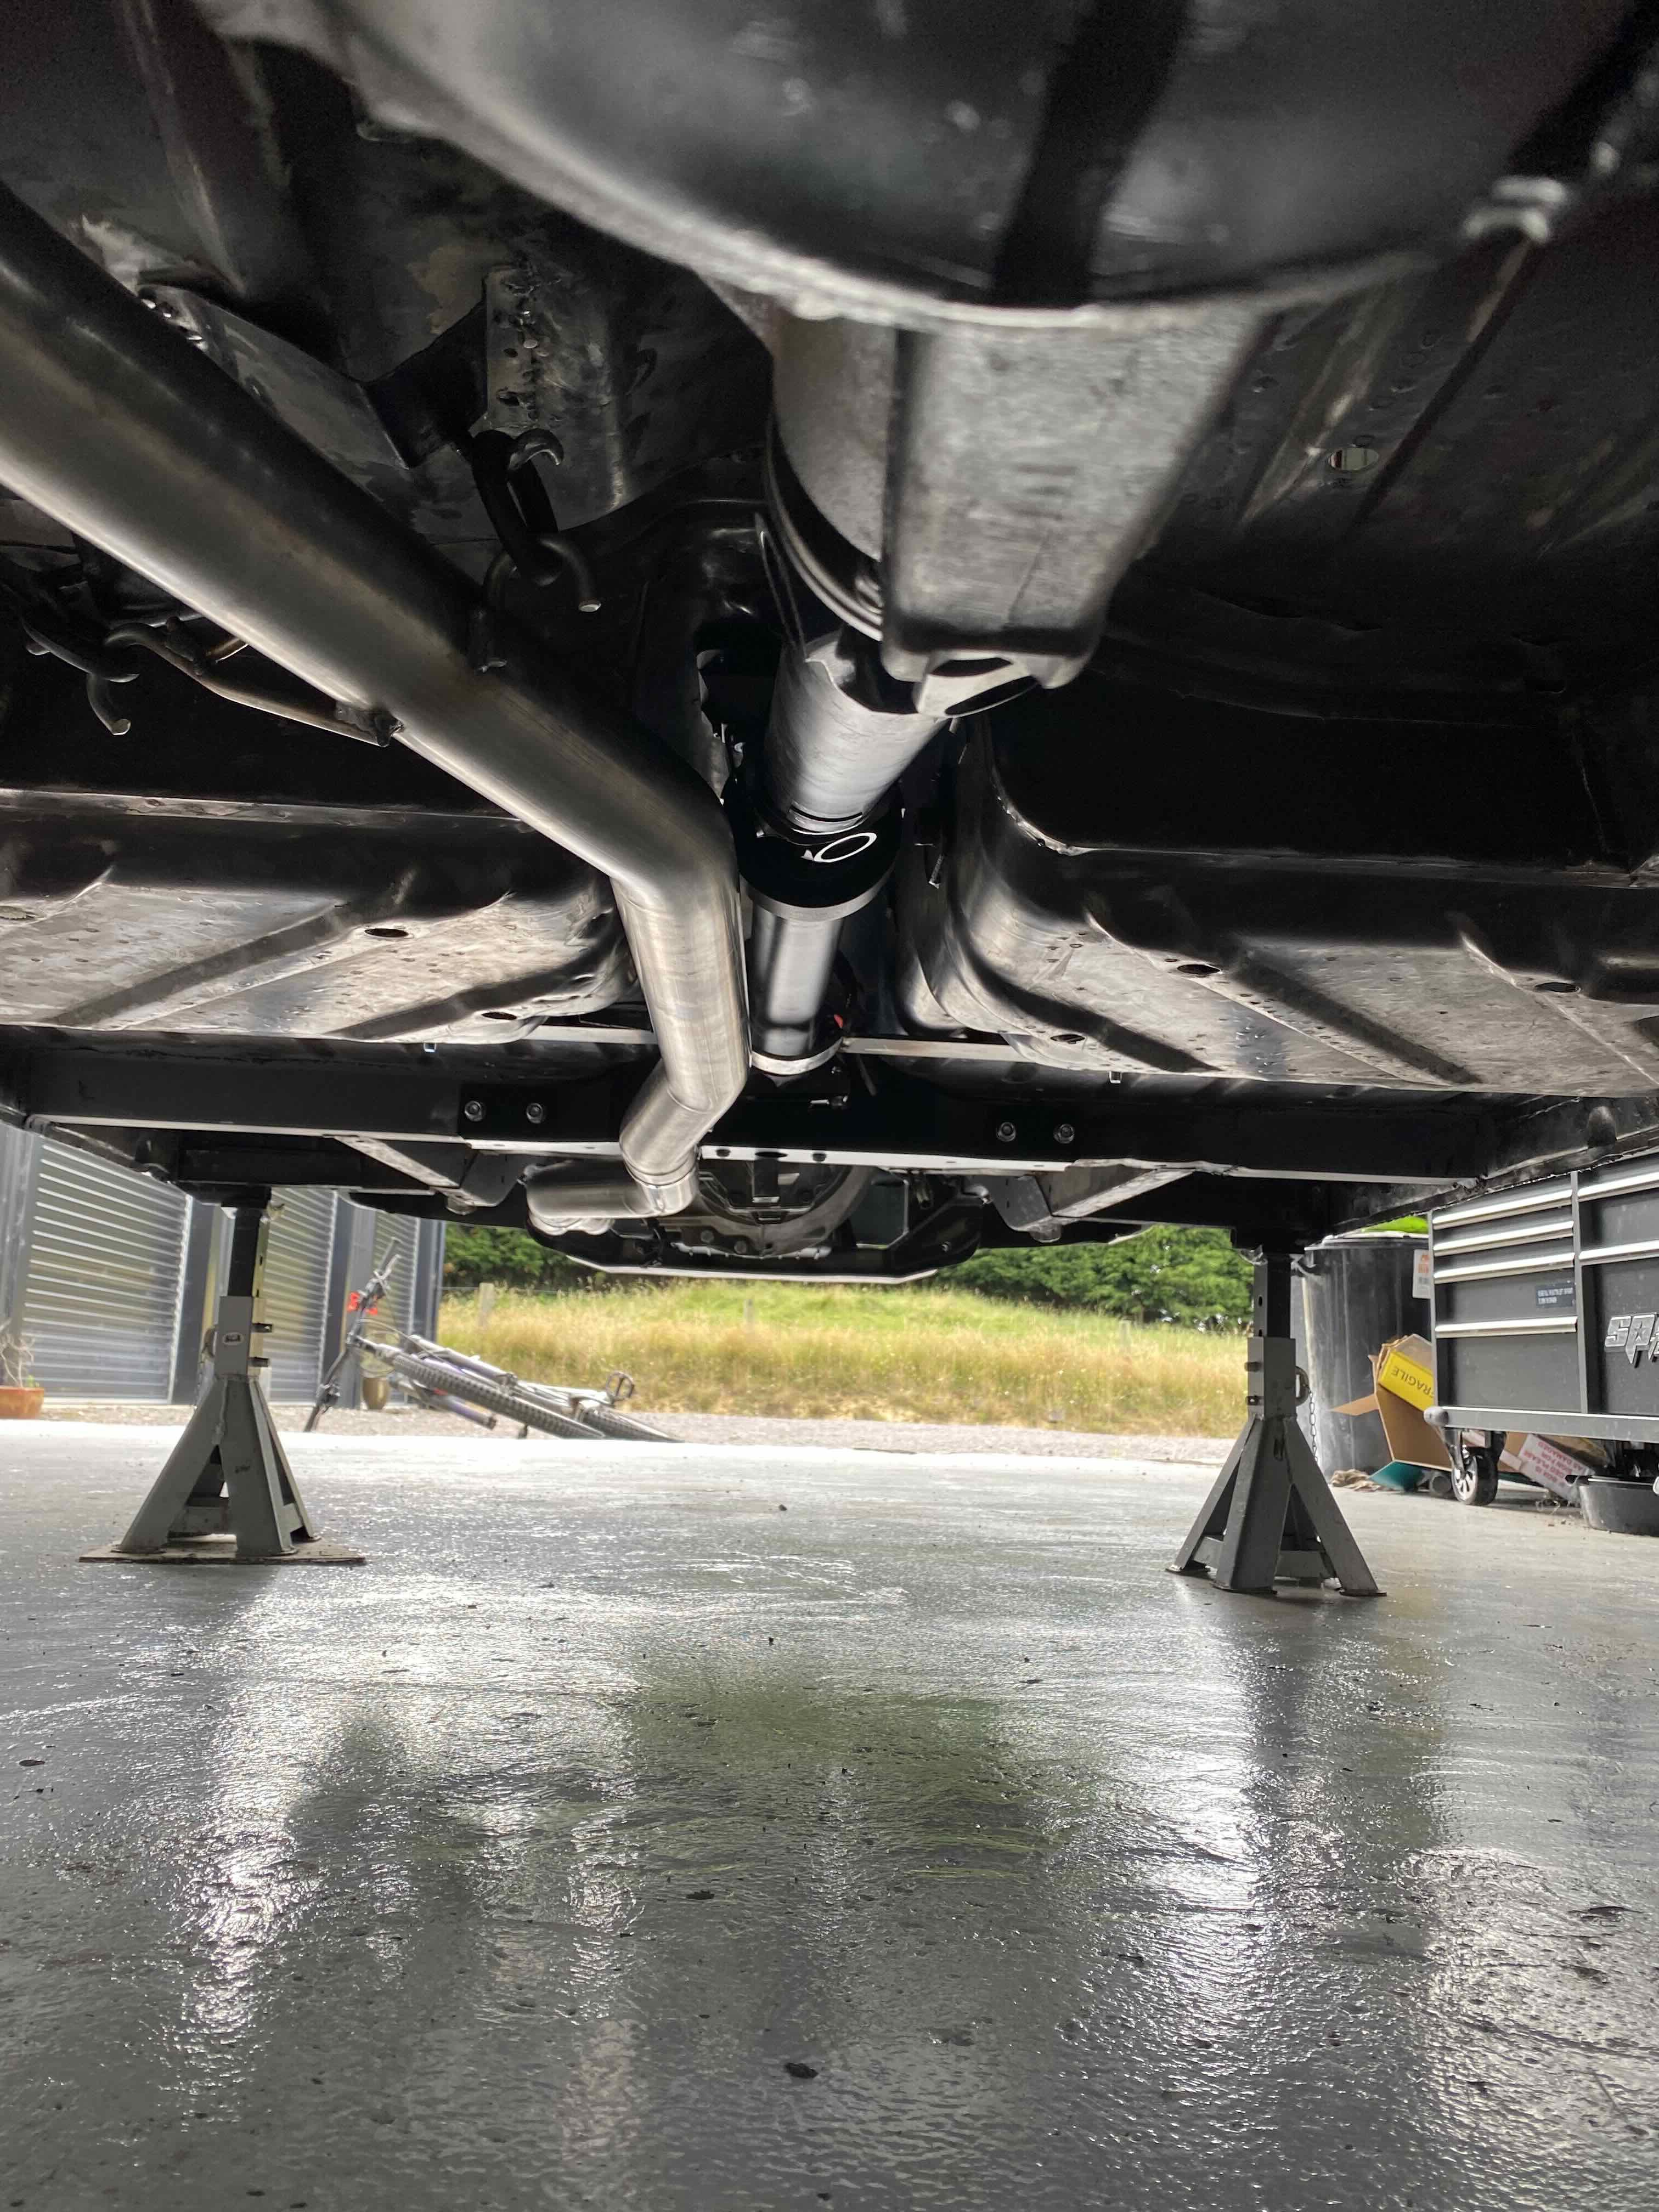
Slowly chipping away at this- hopefully some more free hours coming up shortly. Didn’t have to cut to much out of the tunnel to get the MX5 gearbox to fit, just some massaging and patching to tidy up with now. Drive shaft and exhaust fitted- exhaust tucks up nice and close to the floor. have modified the handbrake cable routing a little to make it all fit and tacked up the first drive shaft hoop. I think I have found a pedal box solution which is essentially a modified MK2 set which retains the original box/mounting for classic racing racing requirements. Just waiting to hear back on whether the brake pedal is one piece to meet cert requirements- even if it isn’t I’ll probably still go with it and have a new pedal made down here.
2 points
-
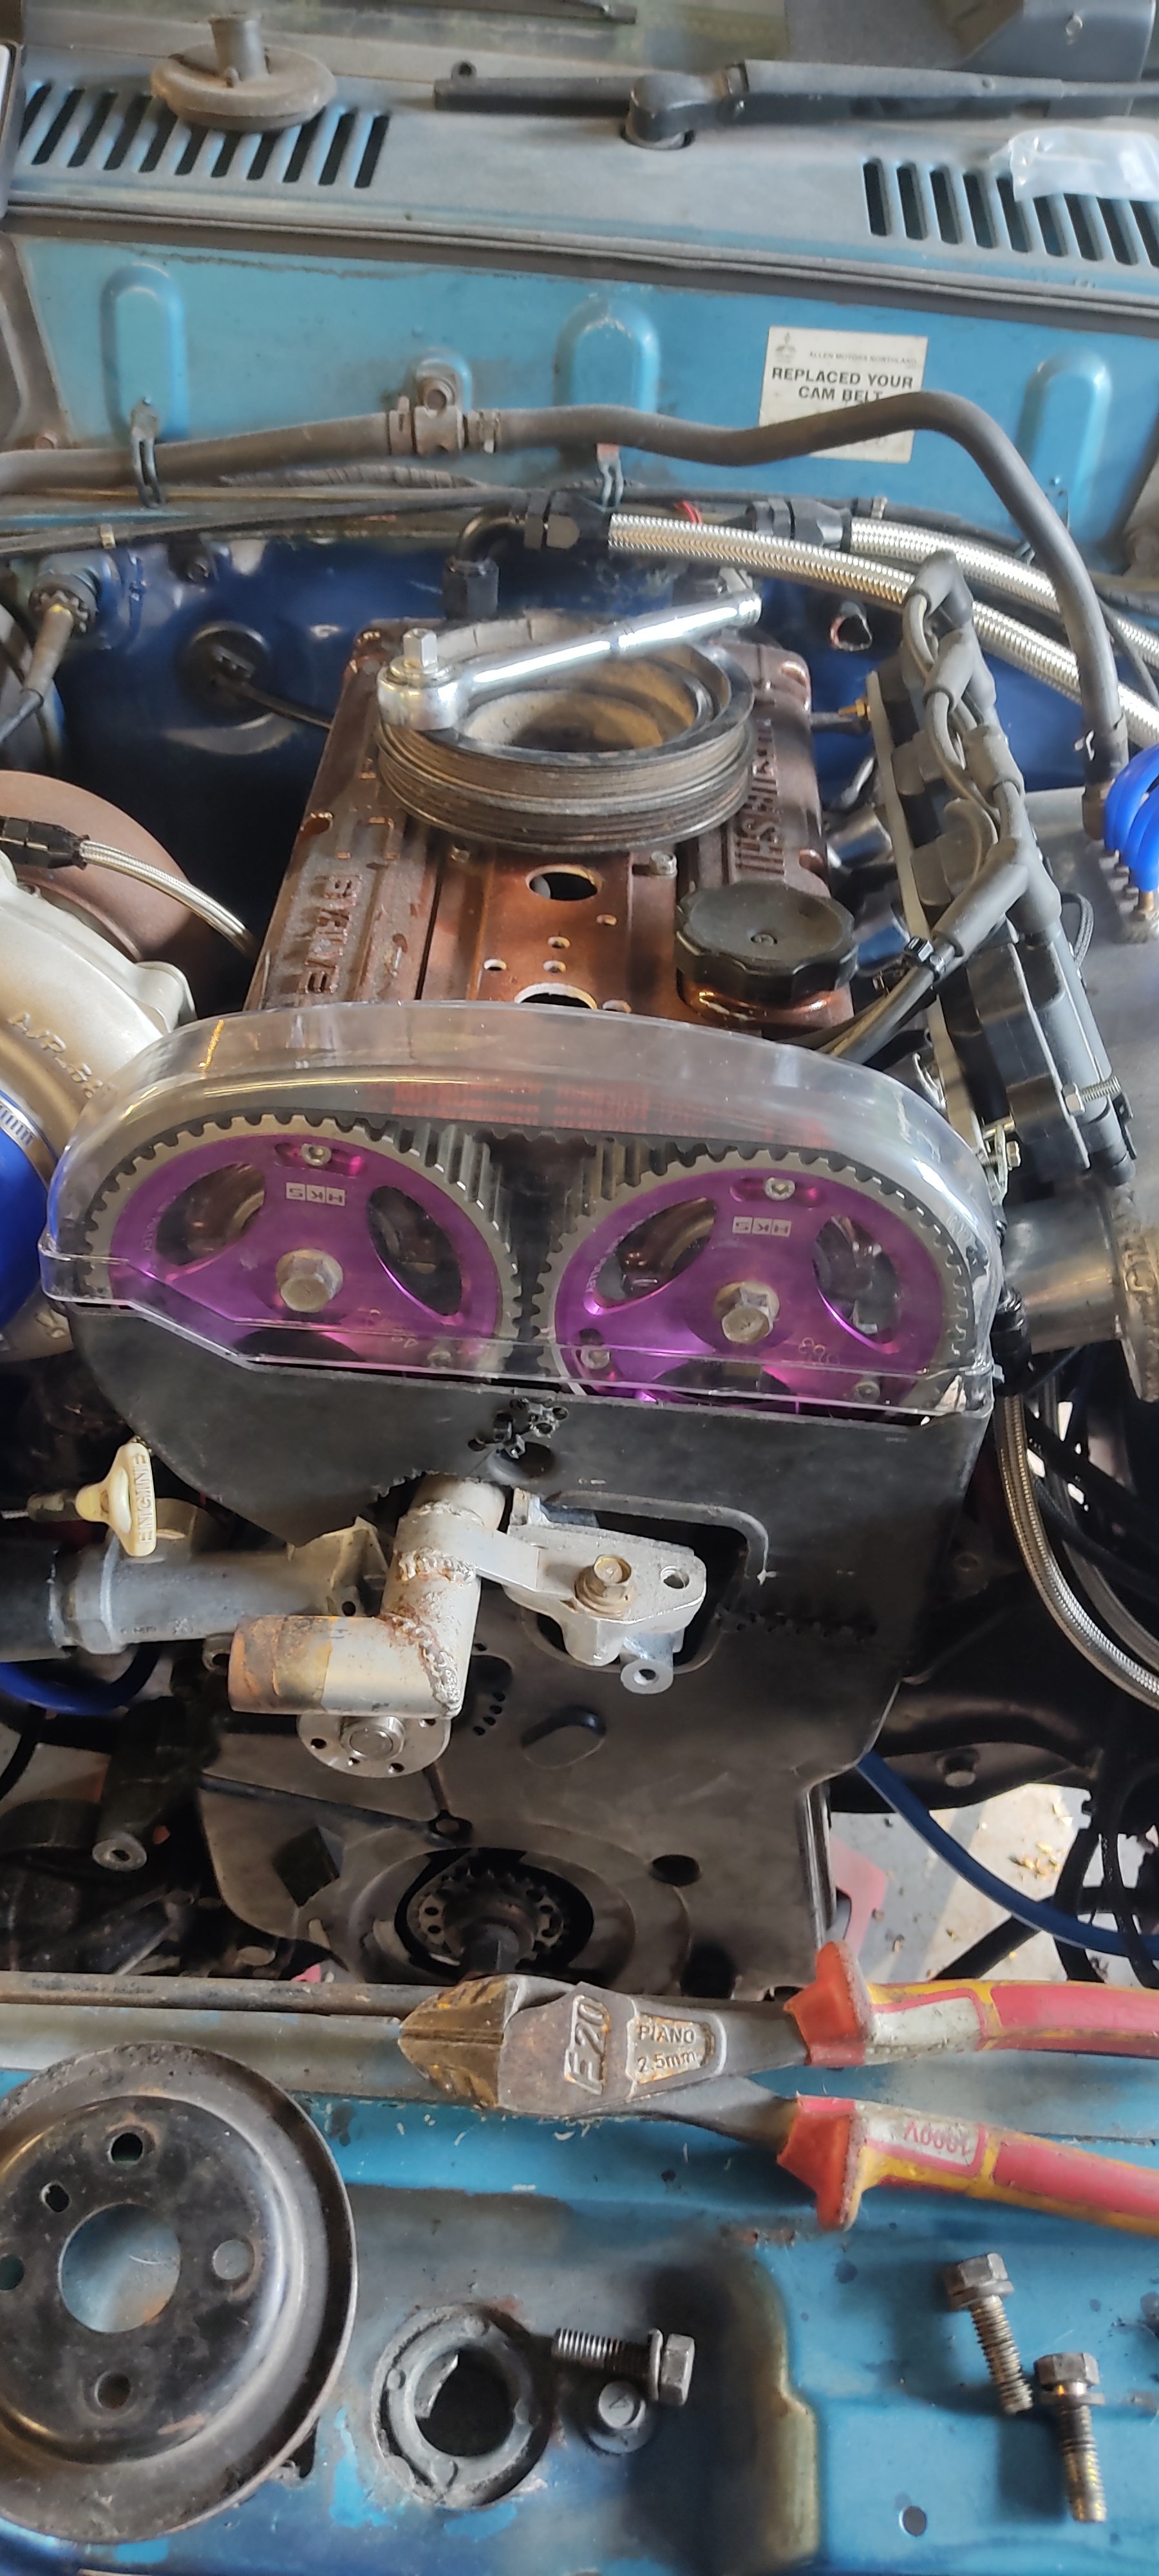
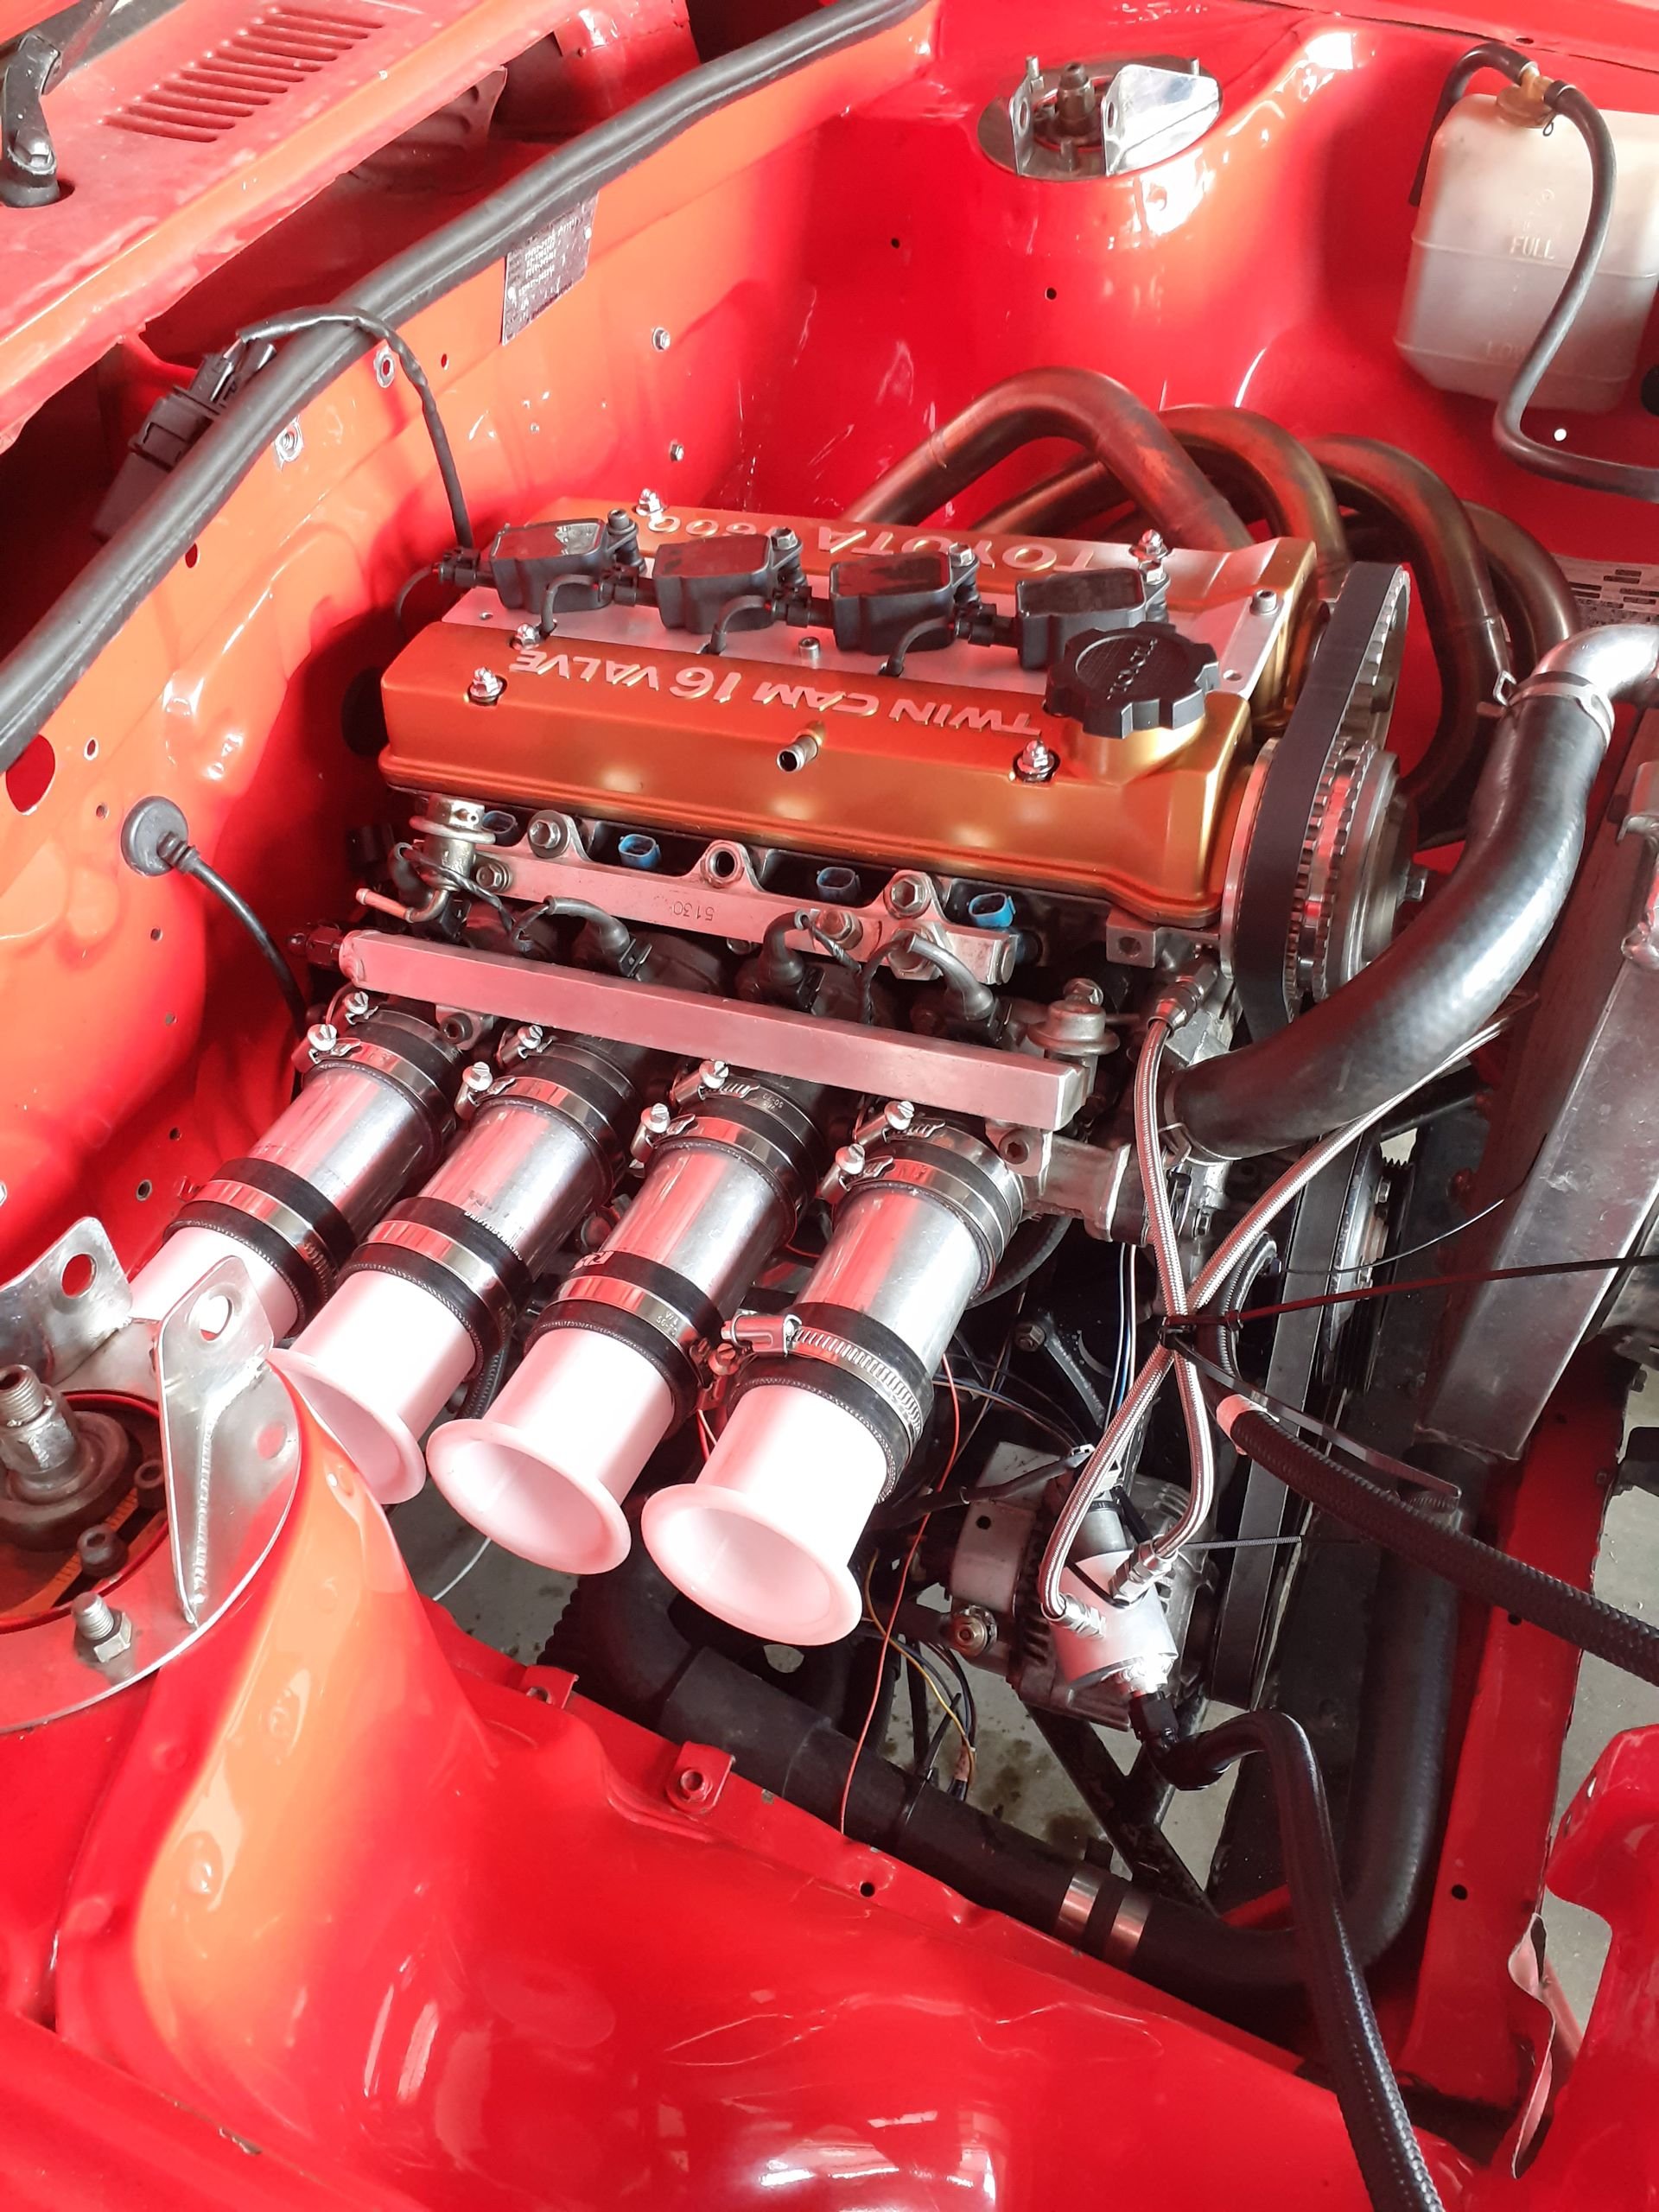
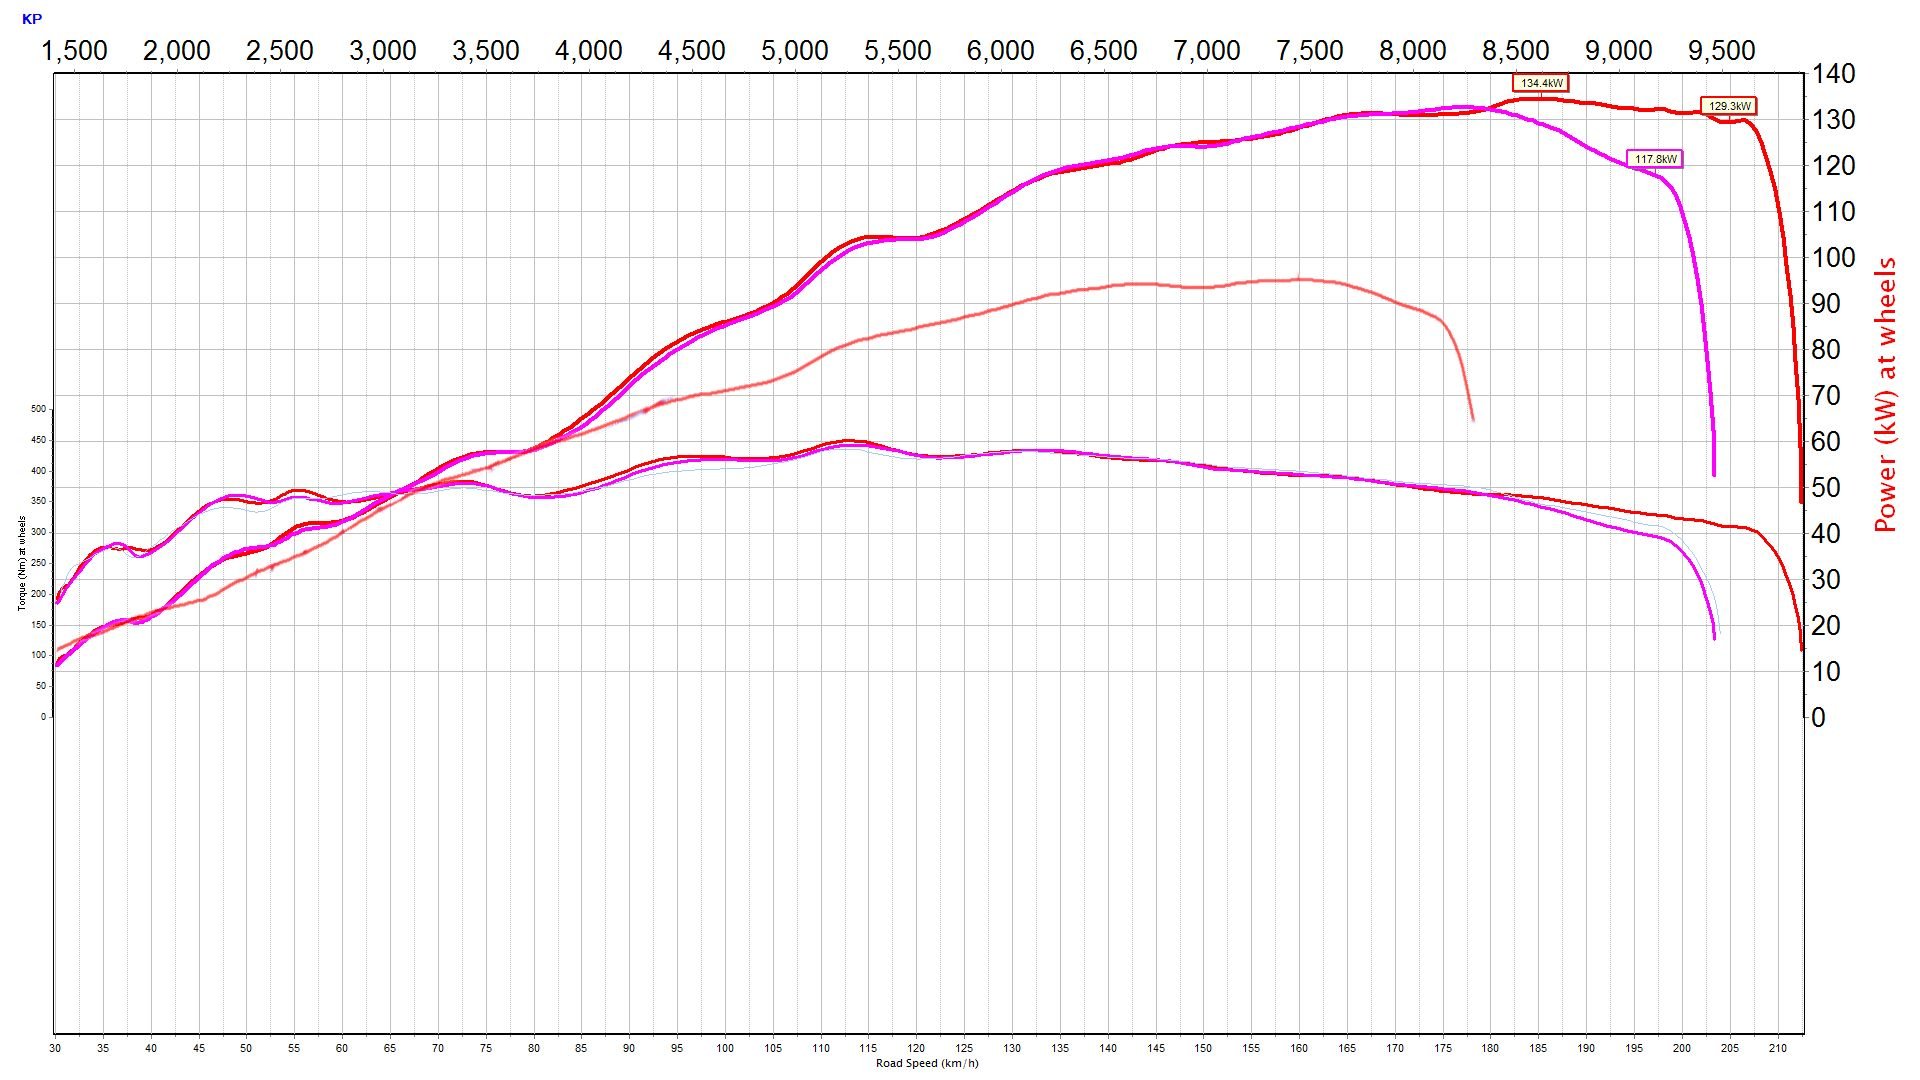
Long time no update. nothing really has happened to this thing other than being strapped the the dyno with various junk engines. Current one being a long rod 4age, 7a block, 4a crank custom rods, smallport pistons. modified bigport head with 193b cams. so yeh just a polished turd. has all the blot-on's off my good engine and the main reason i actually took the good engine out and put junker in, is this abomination Its something Ive wanted to do since forever ago. actually made some parts way back. but ran into issues and all got to hard basket. about 500 years past and attempted it again with a little help from a machinist friend. Intake cam pulley looks a little weird? Thats because its a vvt pulley off a 20v. They are just a simple on off 2 position deal. with 30 deg travel After some teething issues, managed to do some initial testing today The pink line is what it makes with my normal fixed timing. which is quite aggressively advanced. basically as much as can go, to gain all the midrange with minimal loss at peak. the downside is power drops fast after peak power Red line is with vvt on from start of run, which a touch more advance that what it normally runs. Then switches off a 7300 retarding intake cam 30 degrees little red line is a "stockish" bigport engine. for reference Great success? or did i just build a v8 that idles are 6000rpm
2 points
-
Got stuck into the tralier. We're gonna need a bigger cutting mat... Weathering next, then the payload. *edit* Top Of The Tiefladeanhanger2 points
-
Rust aye? Am I right?! I found this little bubble of rust making party on the firewall next to the fuel reg. Awww noes The bit betwixt the firewall and this heater duct was chock full of factory seam sealer, it's pretty tricky to get to, so fair enough I guess. But all that seam sealer trapped water, leaves etc. So I cut it out and made a new duct by beating the living bejeezers out of it around some wood. Welded some more bits to it Removed all the old seam sealer & rust along the length of the scuttle. Welded and ground in the new duct. Seam sealed and painted. So lovely.2 points
-
Nice work on the pipes. That diff cap is quite sexual too.1 point
-
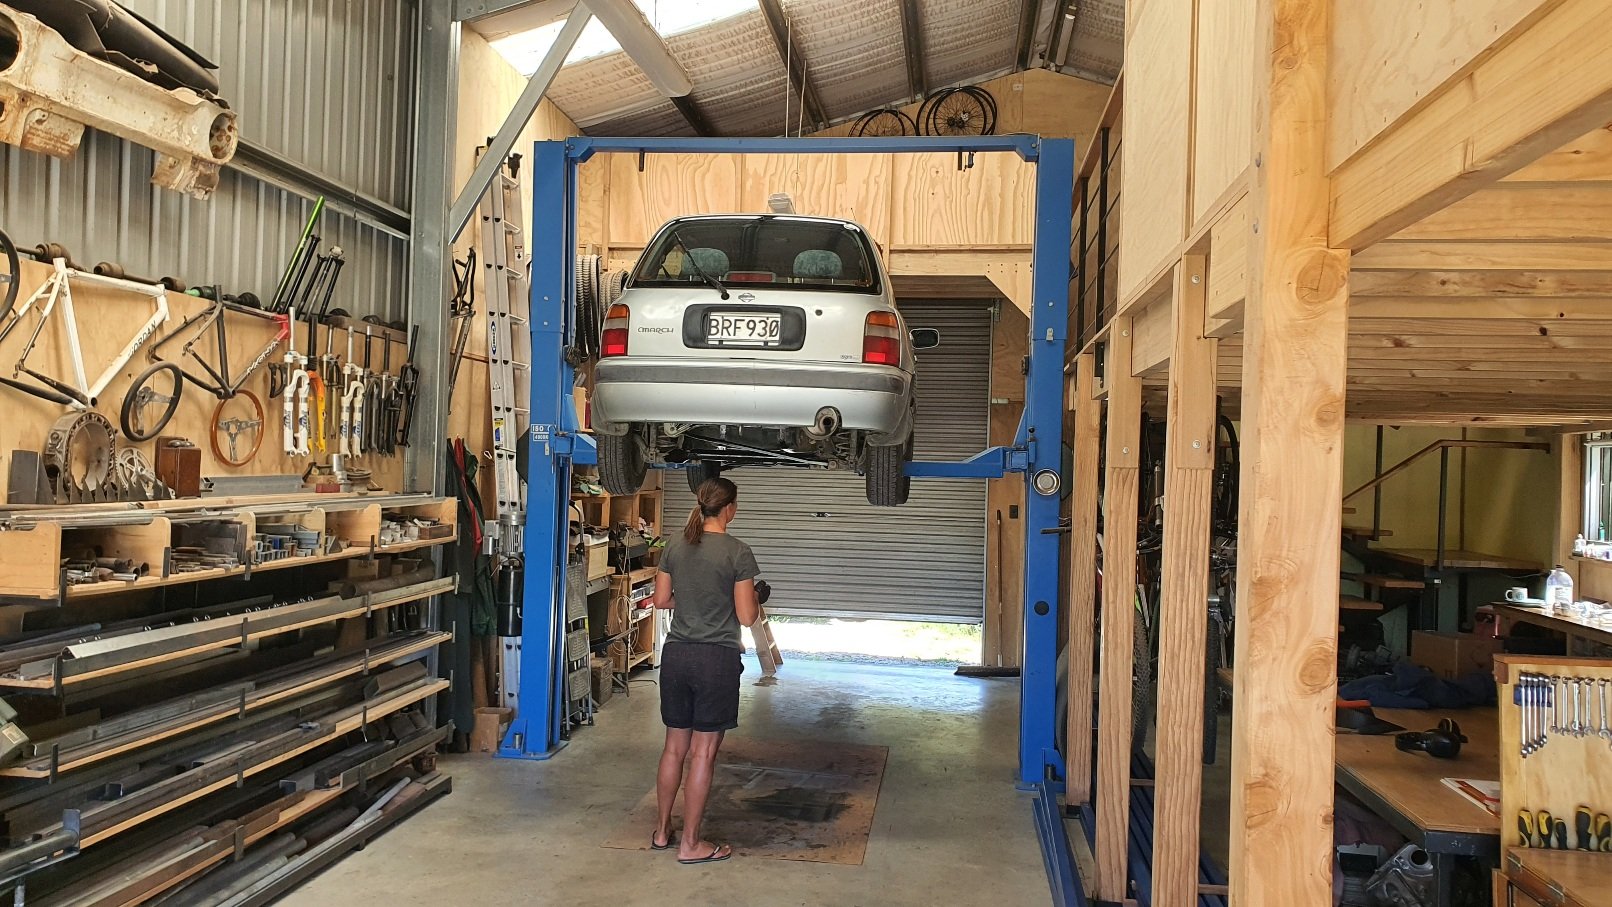
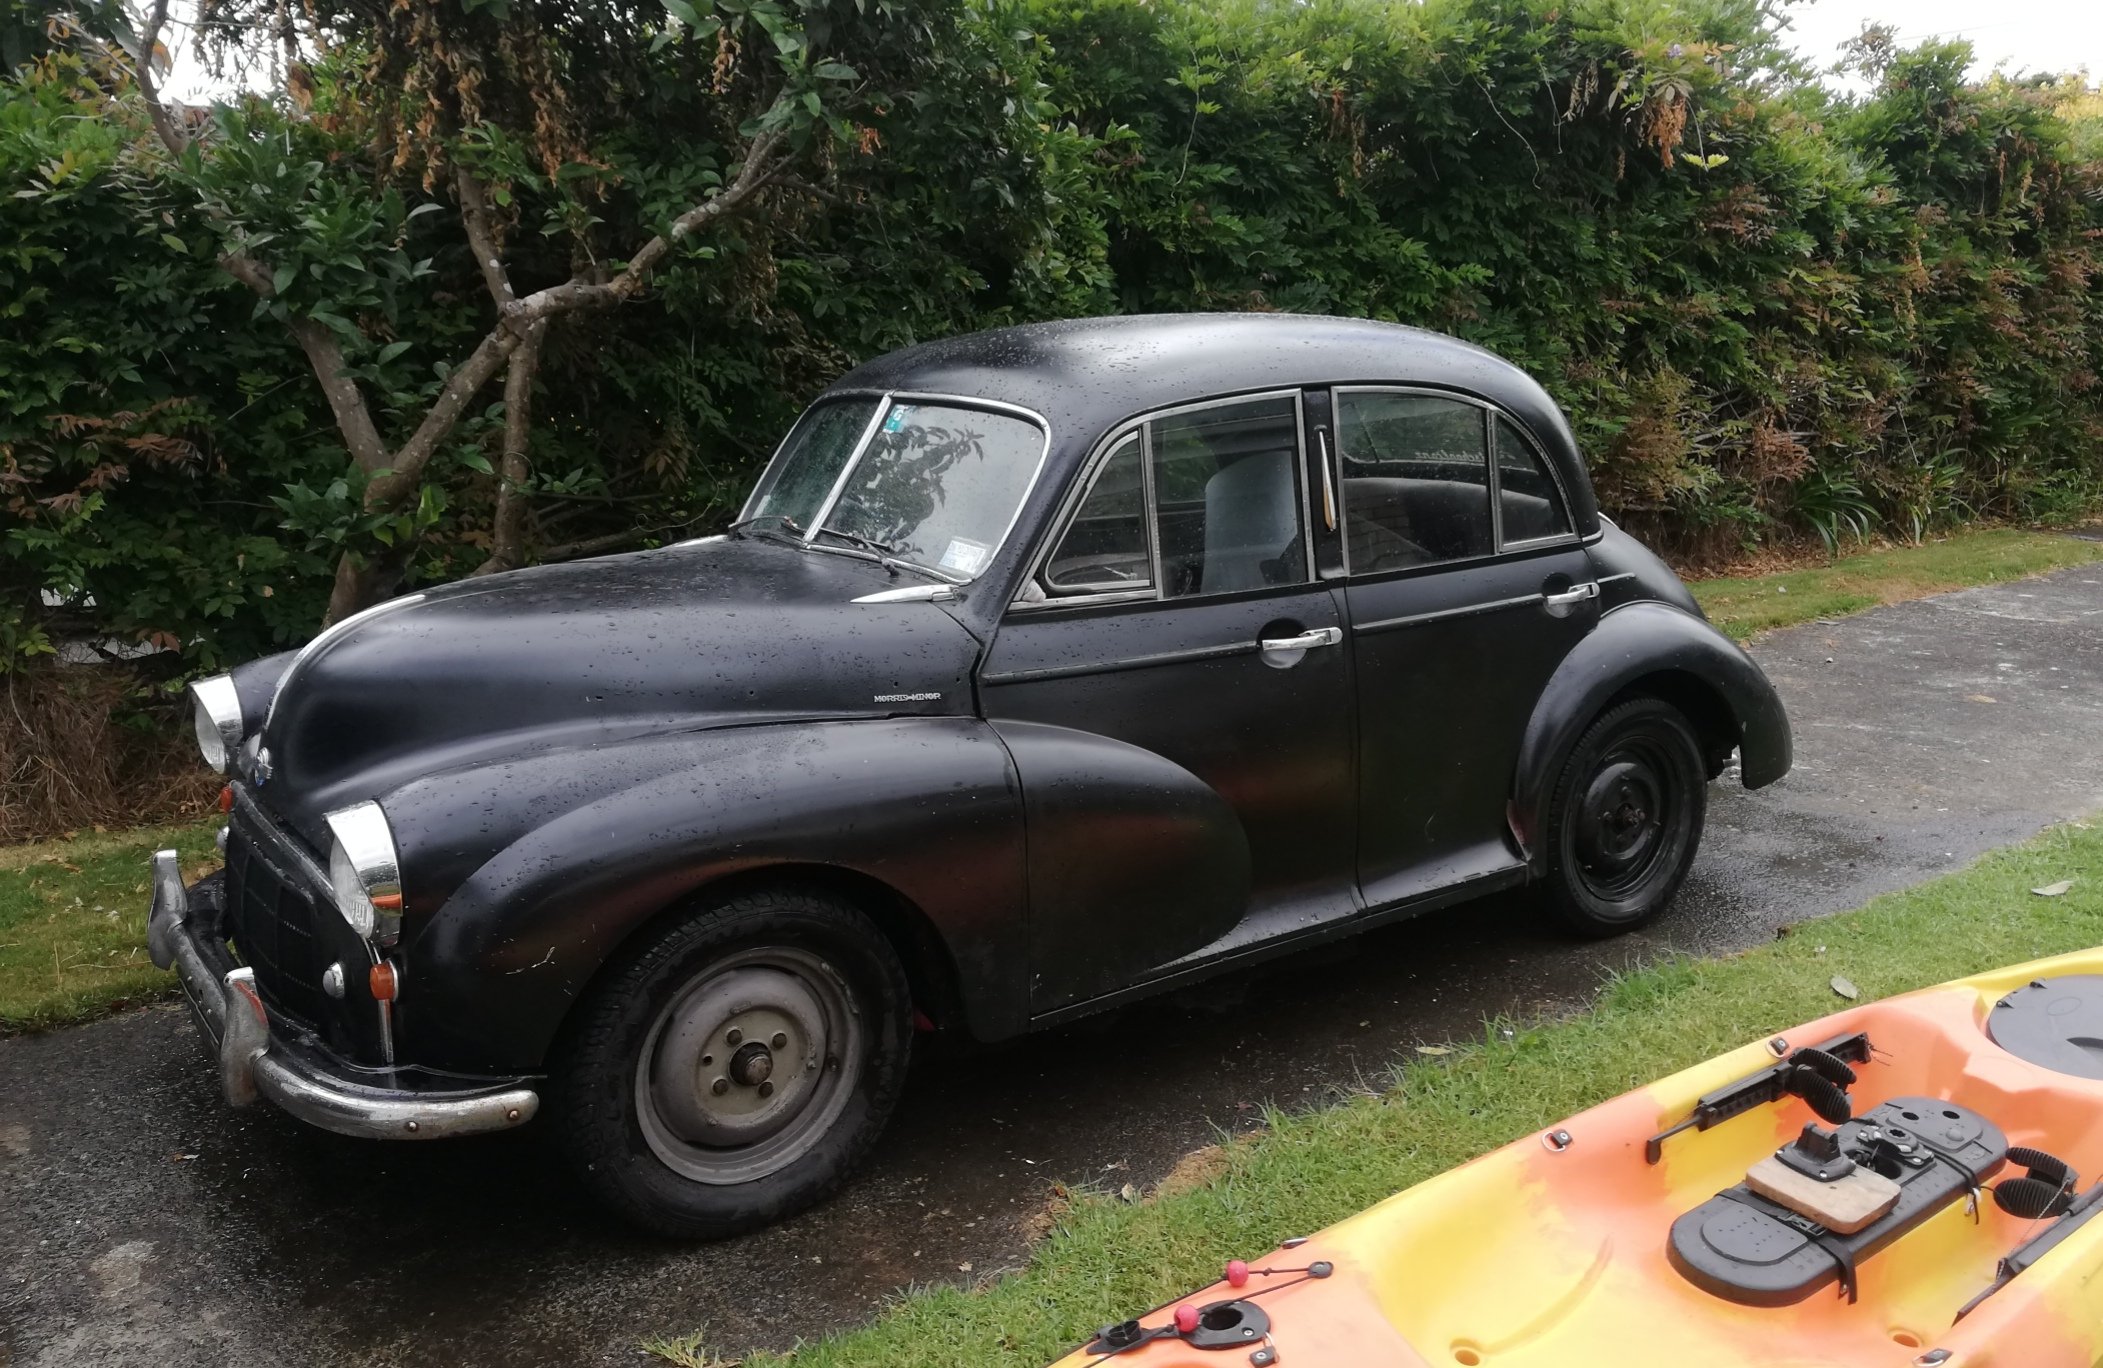
Hannah gets a fantastic first job of the year...tidying up Millies underside before she goes to her new happy home, a fella from this here forum
1 point
-
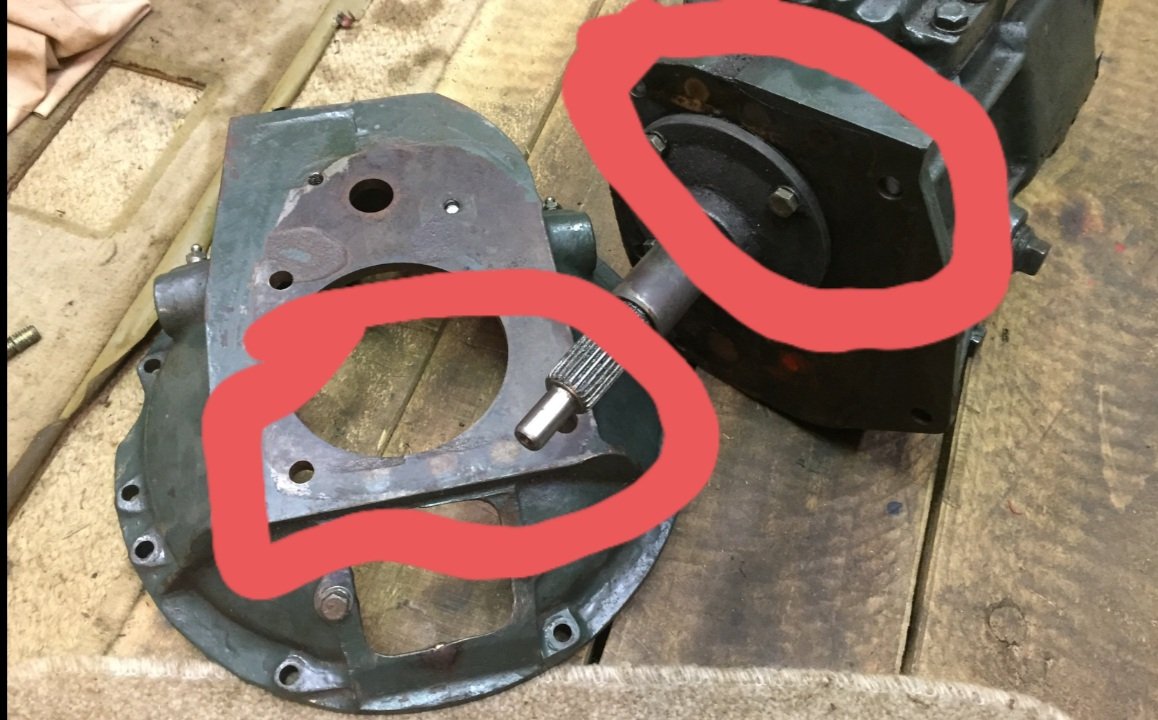
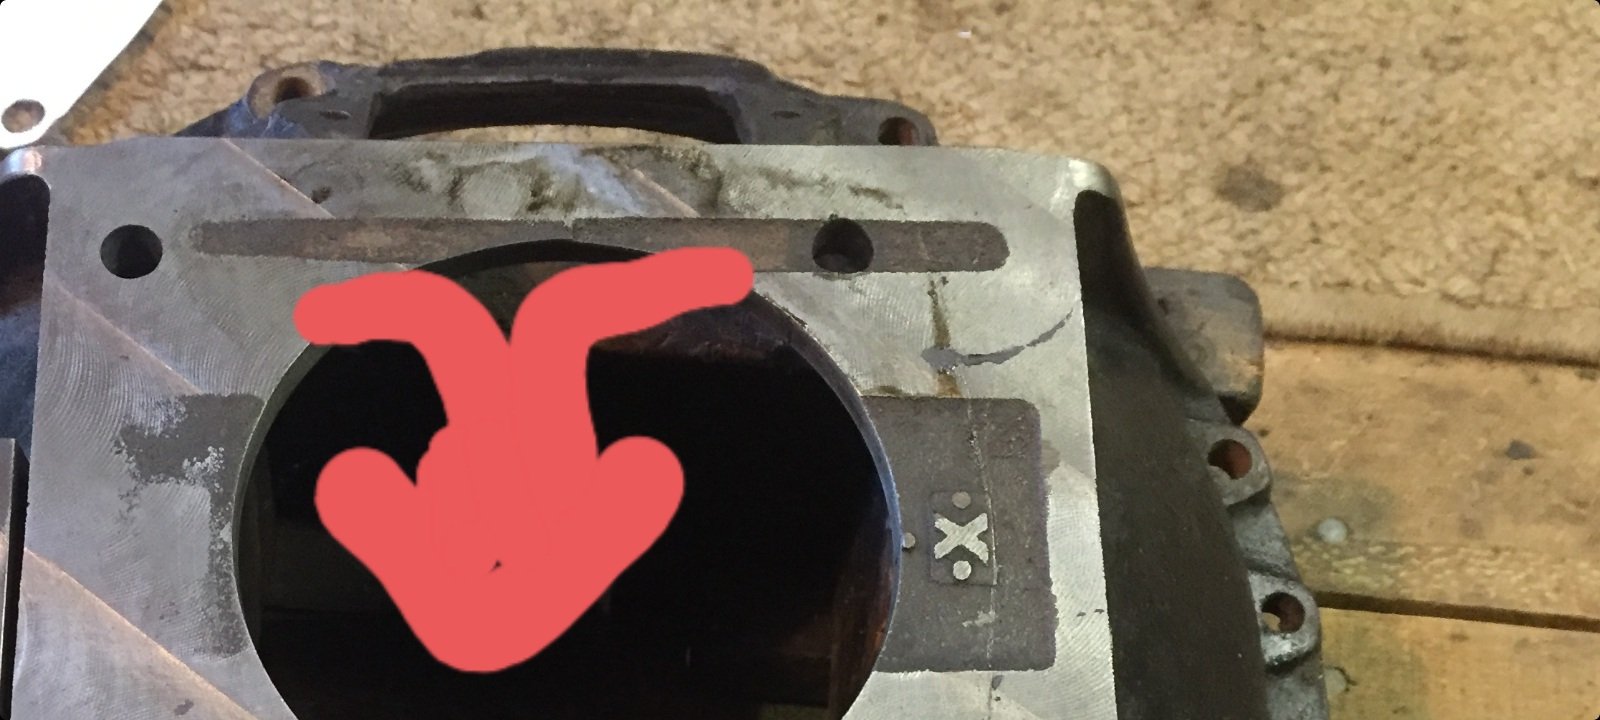
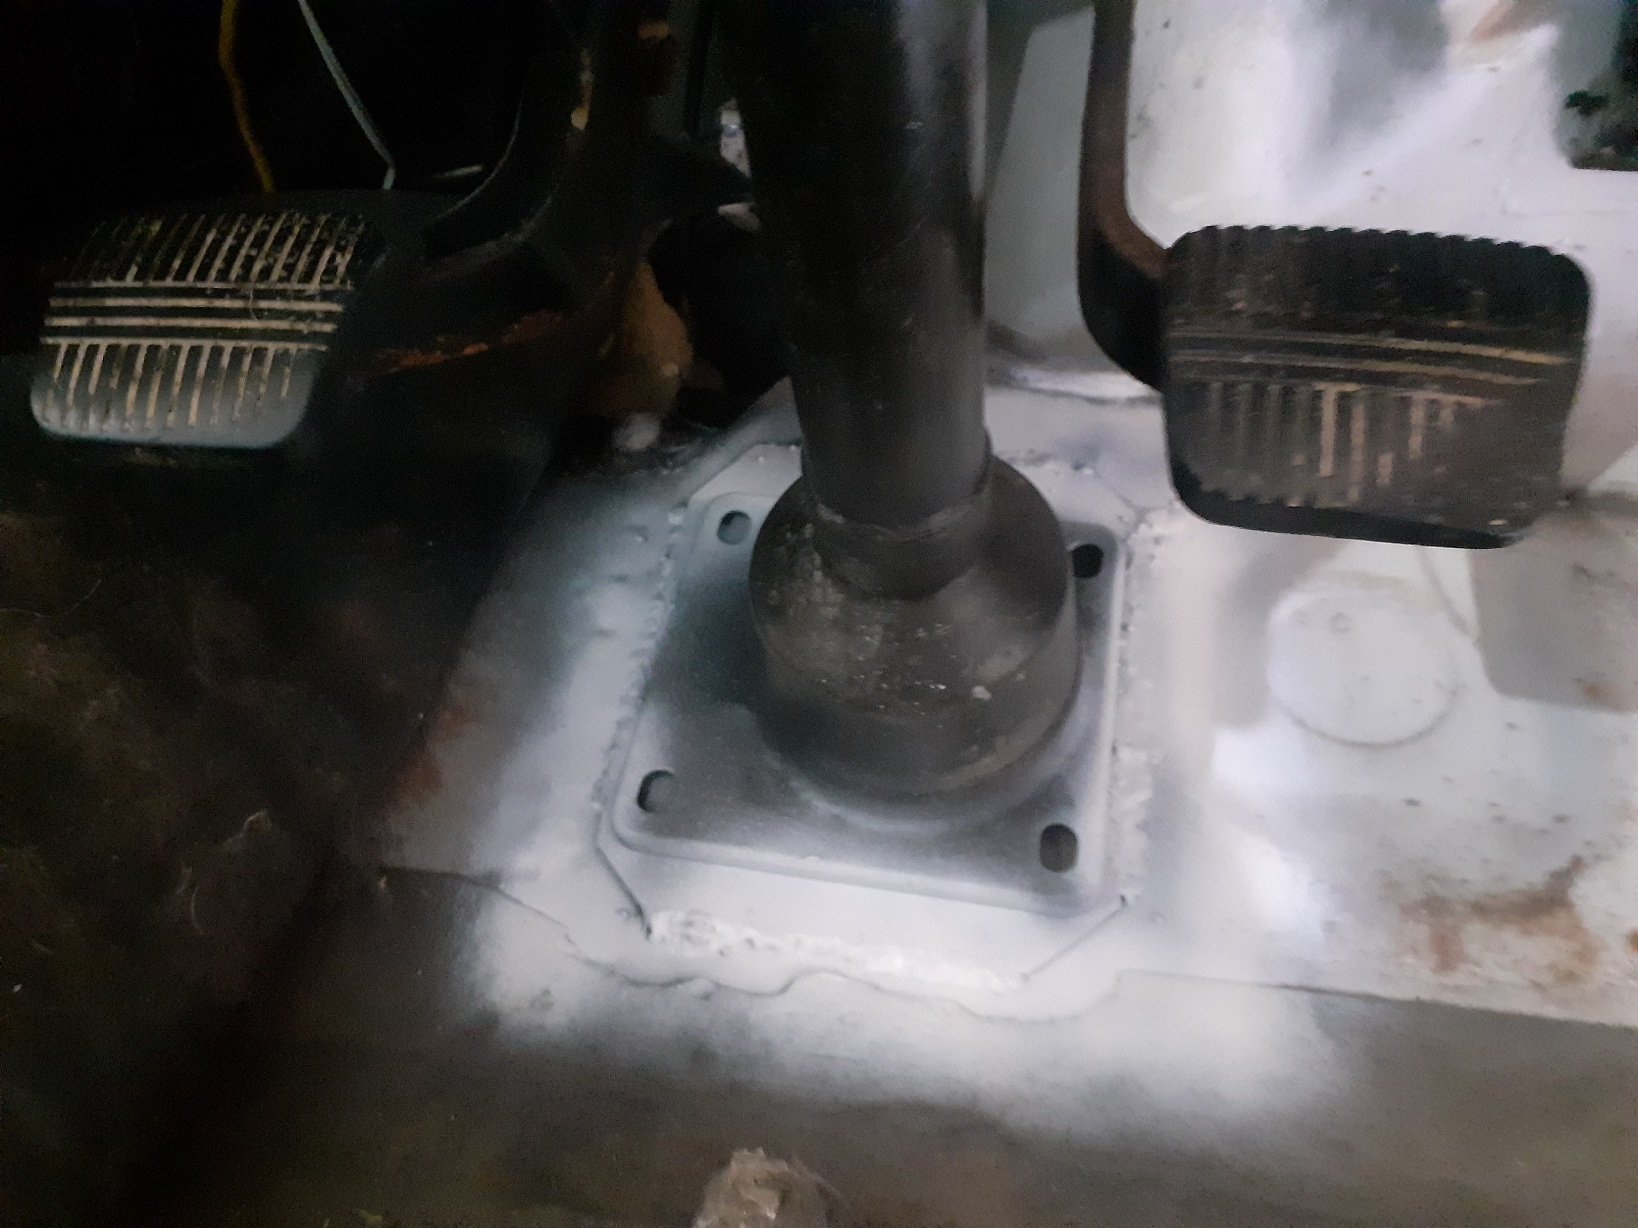
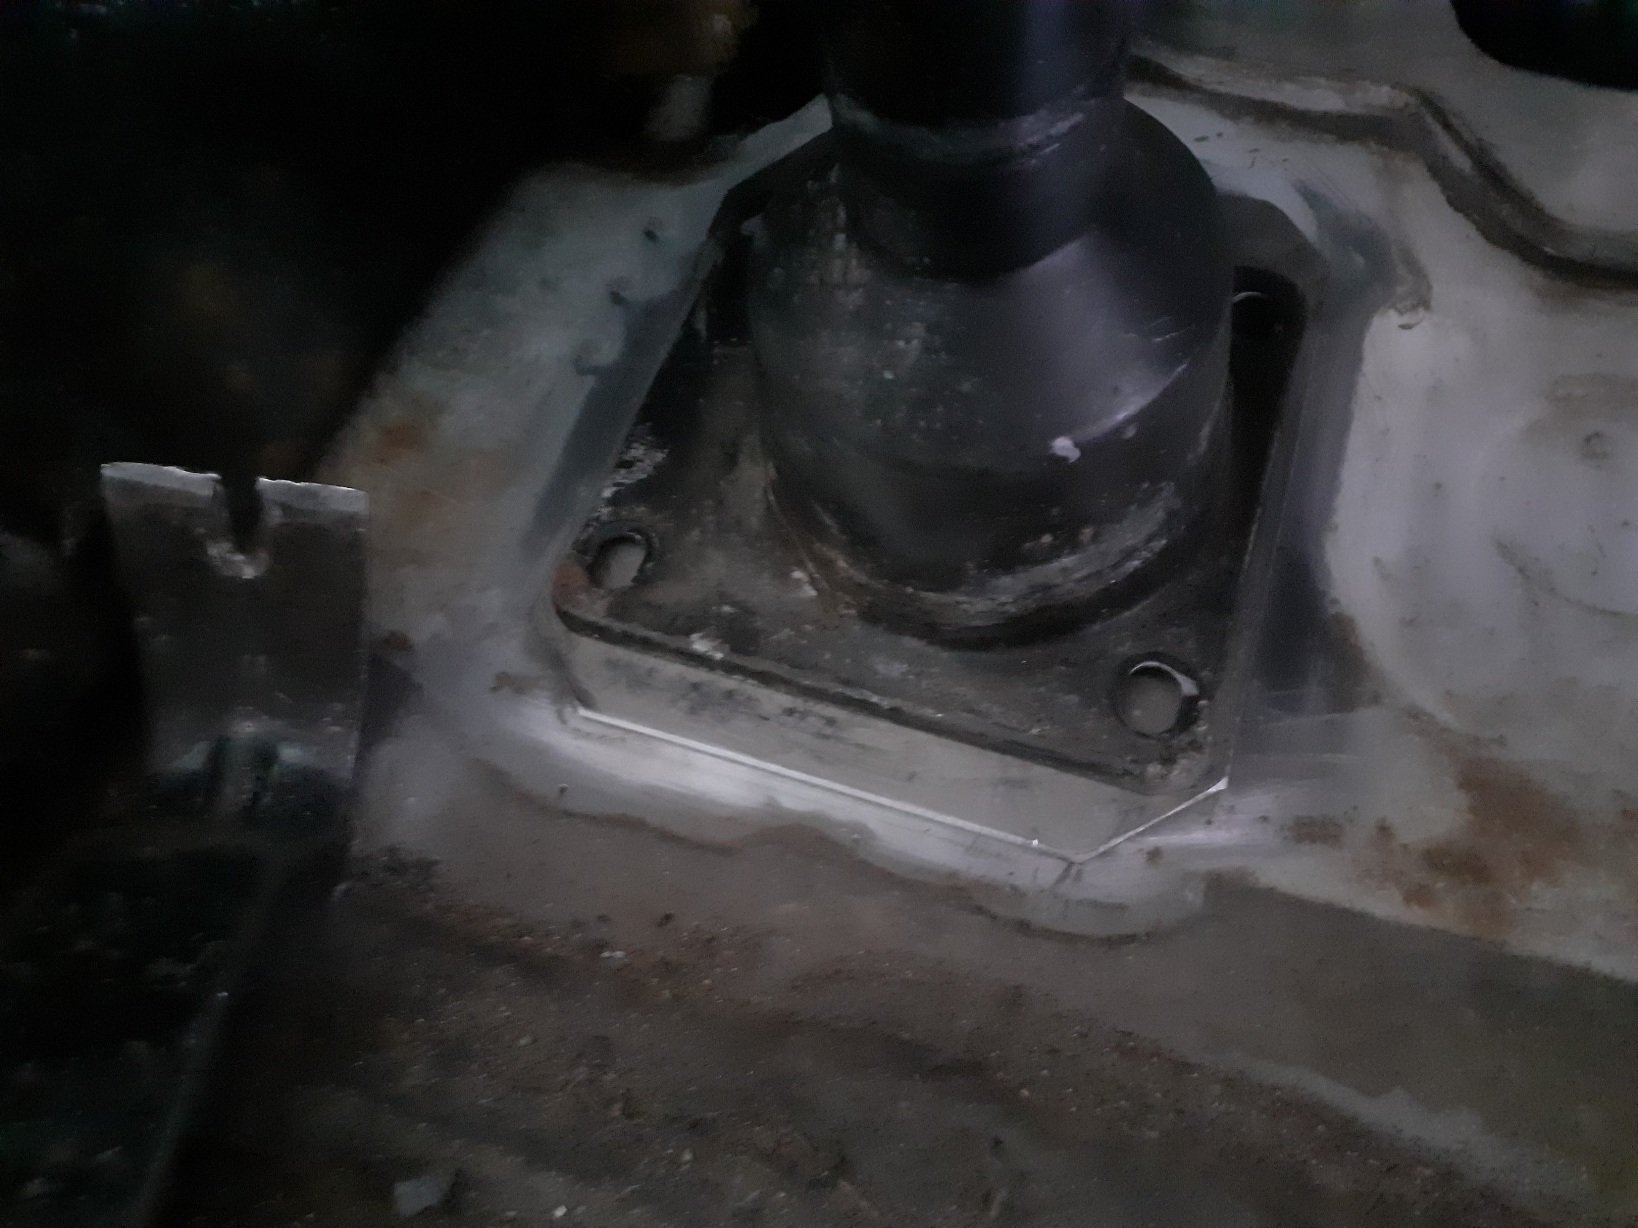
The top photo is the old gearbox and bellhousing, I had a gasket in between the bellhousing and gearbox but I didn't do this with the new one when I milled everything up the casting wasn't as good and I think its weeping a tiny bit of oil out of those 3 holes for the shift fork rods into the dents in the casting witch works its way down and into the inside of the bell housing and makes a drip of oil under the car, this is disappointing because I fitted a new seal and gasket to the font bearing retainer, If this is the case i will just ignore it. Other than that it is going very well.
1 point
-
Headlight buckets, alternator bracket and engine sandwich plate all done. Happy new year everyone!1 point
-
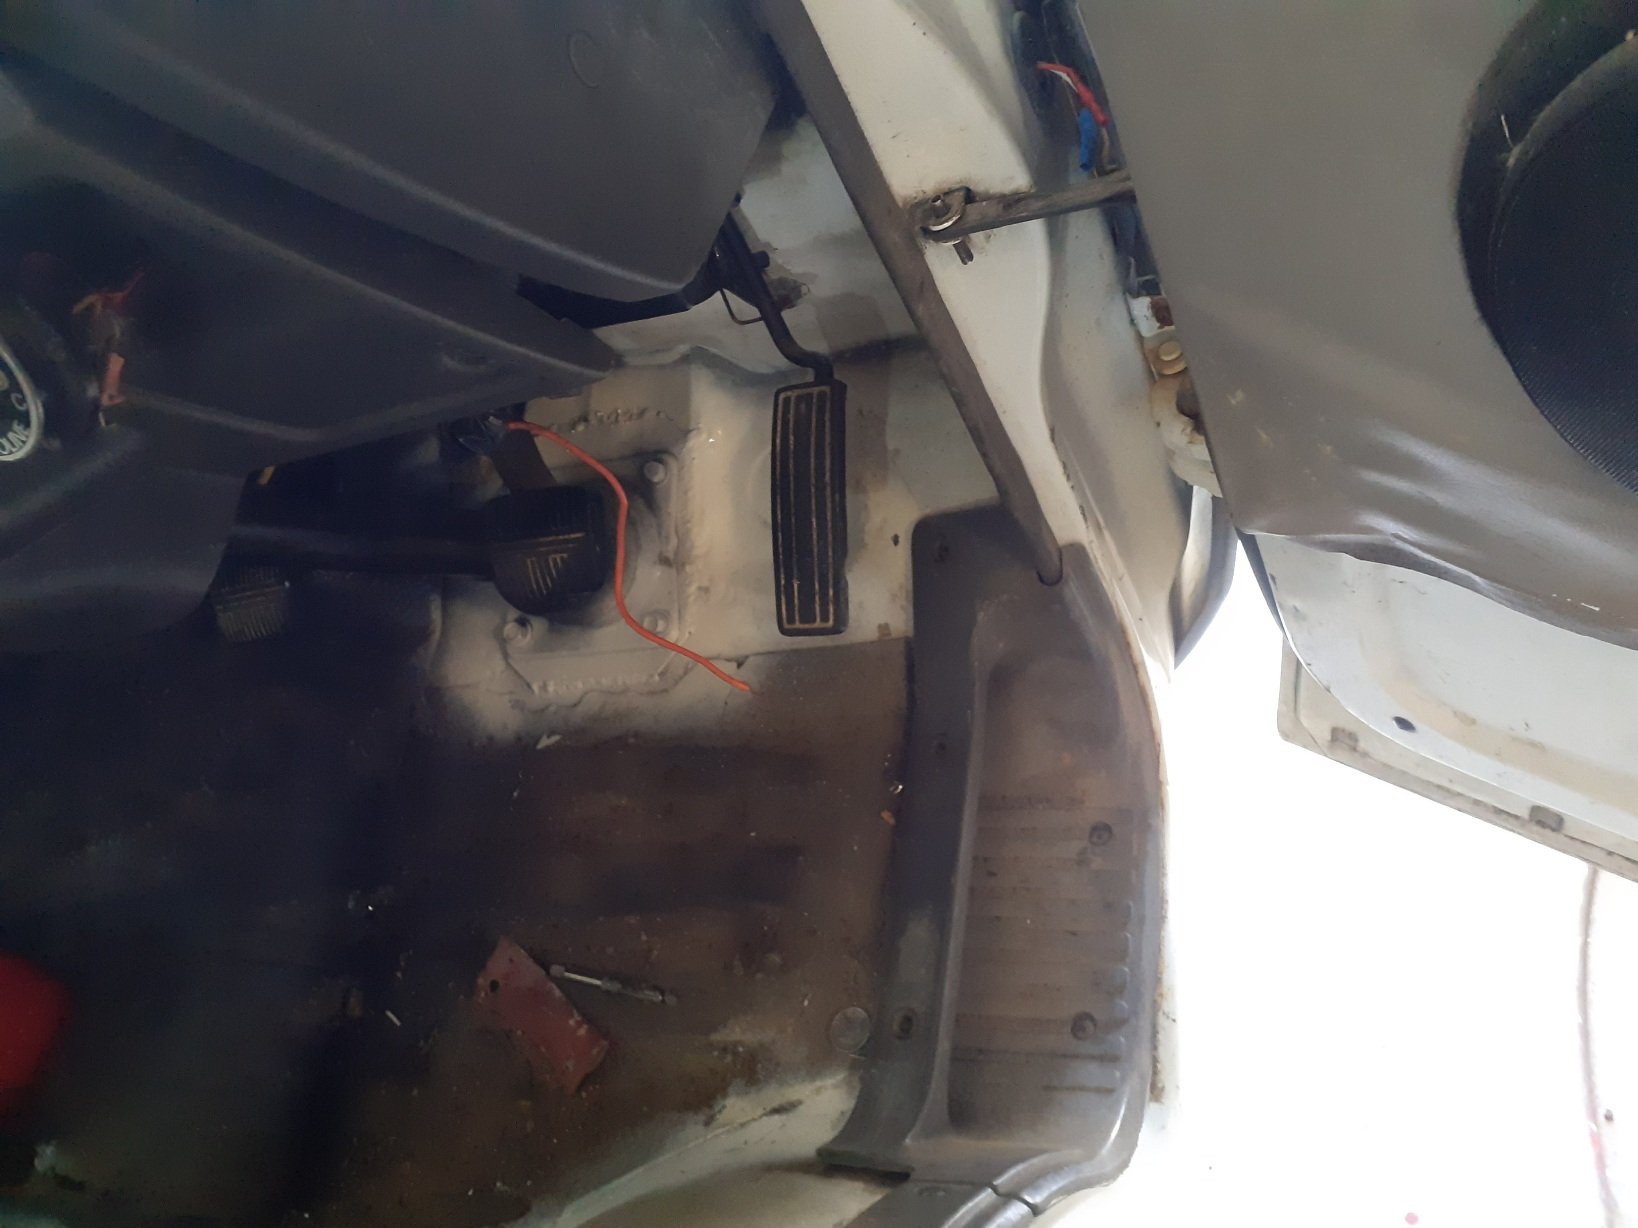
Hi all, Figured some of you might enjoy joining me on my new project so figured why not get stuck into a build thread. Introducing my 1982 Porsche 911 SC. Have been following old air cooled 911s for quite some time and basically just sat on the side lines and watched them get horrendously expensive. Was at a point where my R32 GTR was going to cost too much to take to the next level so it was time for another project - I figured older means cheaper to tinker on?.. right? Found this down in Dunedin, got it inspected and one big wallet thrashing later this ended up on my doorstep. Was always wanting a 930 turbo but since that cost far too much for me I had to settle for this instead. It ticks all the boxes for me though - mint, wide body, right hand drive, whale tail. Will likely just turbo it myself. First impressions - its beautiful - mint and I couldnt wait to drive it. Queue the start of the interesting quirks and also the list of things I want to fix. First drive had me thinking why the hell are the pedals so far to the left (the accelerator is basically in line with your balls and clutch is practically in the center of the car) so that took a fair bit to get used to it. Almost tempted to get the gas out and try bend then further to the right. Also the clutch was insanely heavy and the gear shift never felt like I was in gear as it had so much slop - was basically just stirring a bucket of paint and if you were in the right spot you were in a gear. Made for some interesting times. The wing mirrors are also magnified which is a huge pet hate of mine so that had to go! And lastly before we get to the tinkering this is me on day one just after first drive.1 point
-
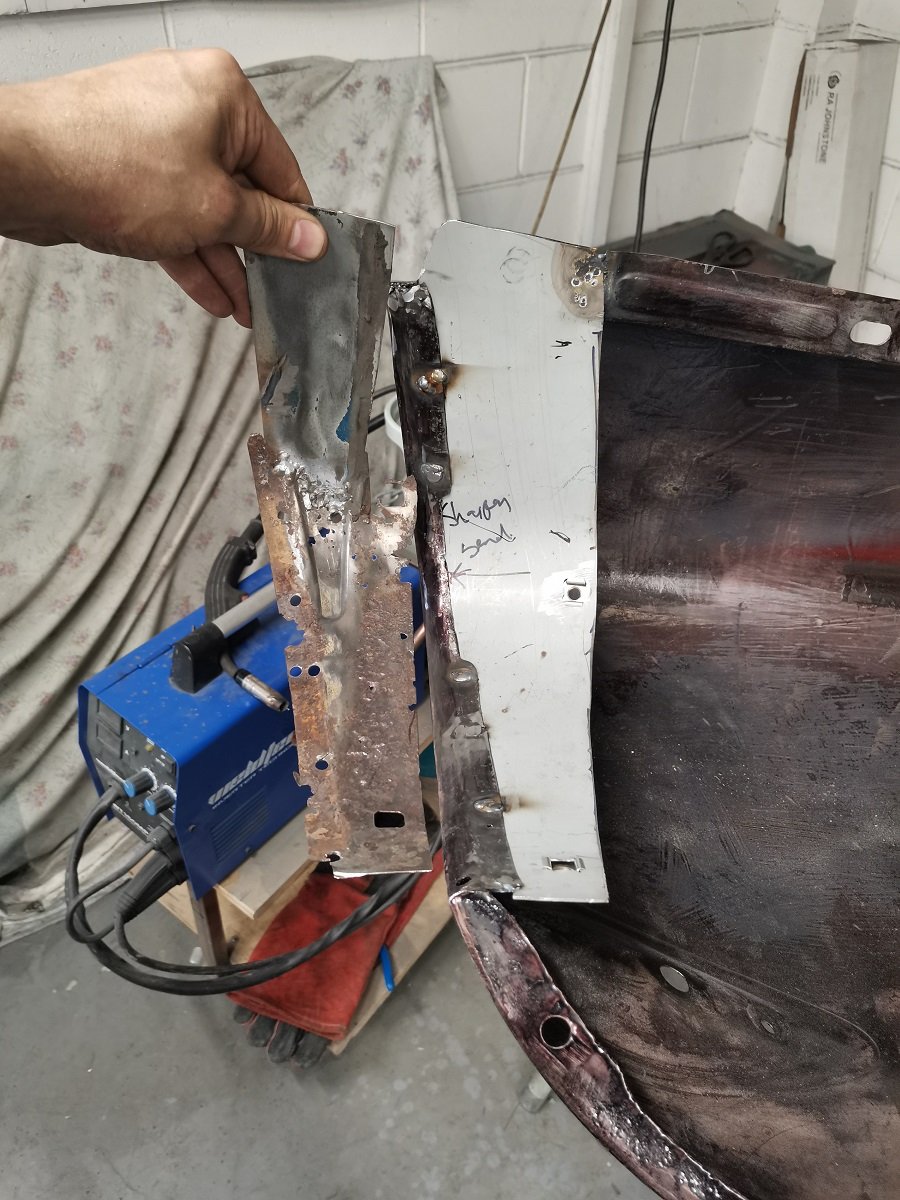
Took a bit of thinking to work out a neat way to fill the last hole on this side. I'll linish back some of these welds, they are welded both sides. S Still got this side to do.
1 point
-
Its a gorgeous car that one, I only wish mine was half as nice. Still waiting on the dominos to fall into place and everything to start going back together. This is the worst time of the year to try and get things done, despite having time up my sleeve to do it.1 point
-
Alright update time (sorry about the internet sourced images here - I will take some actual photos when I work on it next) Parts arrived. Parts installed. Clutch cable and helper spring made a reasonable difference but this is when I started noticing things in the service manual that did not exist in my car. Drove it around on christmas day but still was not impressed with how it drives (clutch pedal weight) and it still made me look like a bit of a rookie pulling away from some intersections. firstly this spring is missing which also assists in clutch operation - I have ordered a replacement. Also the dowel it attaches to have decided to leave the building so drilling and tapping is in order. also when following the instructions in the service manual it said to put a chock behind the clutch pedal to hold it up to assist with installing the cable. I didnt have to do that. decided to find out why. this here is also missing. it actually its trying to pull the pedal down to the floor so its another assist spring. So it appears I have made a few smaller 5% wins by replacing some parts yet the big wins are still waiting to be done. Its no wonder the clutch pedal was the shittest I have ever used since 2 out of the 3 springs that support the operation are missing. next on the cards - ordered those springs, some bronze bushings to replace some work out stuff on the pedal box. ordered a drivers side floor board since they are made of wood and mines rather rubbish. passenger side window frame needs a slight adjustment as it ever so slightly catches on the rear window rubber and makes it so you have to kind of slam it shut. unsure if requires a rear wheel bearing as well as the giant fan the cools the engine might also sound similar - will investigate further. Edit: Forgot to add I removed the center console as it was just a storage pocket with no buttons on it. heaps more room for my legs now. makes the pedals also feel less to the left which is nice but I am also getting used to it now. jumping in another car after the 911 makes the pedals in those cars feel too far to the right1 point
-
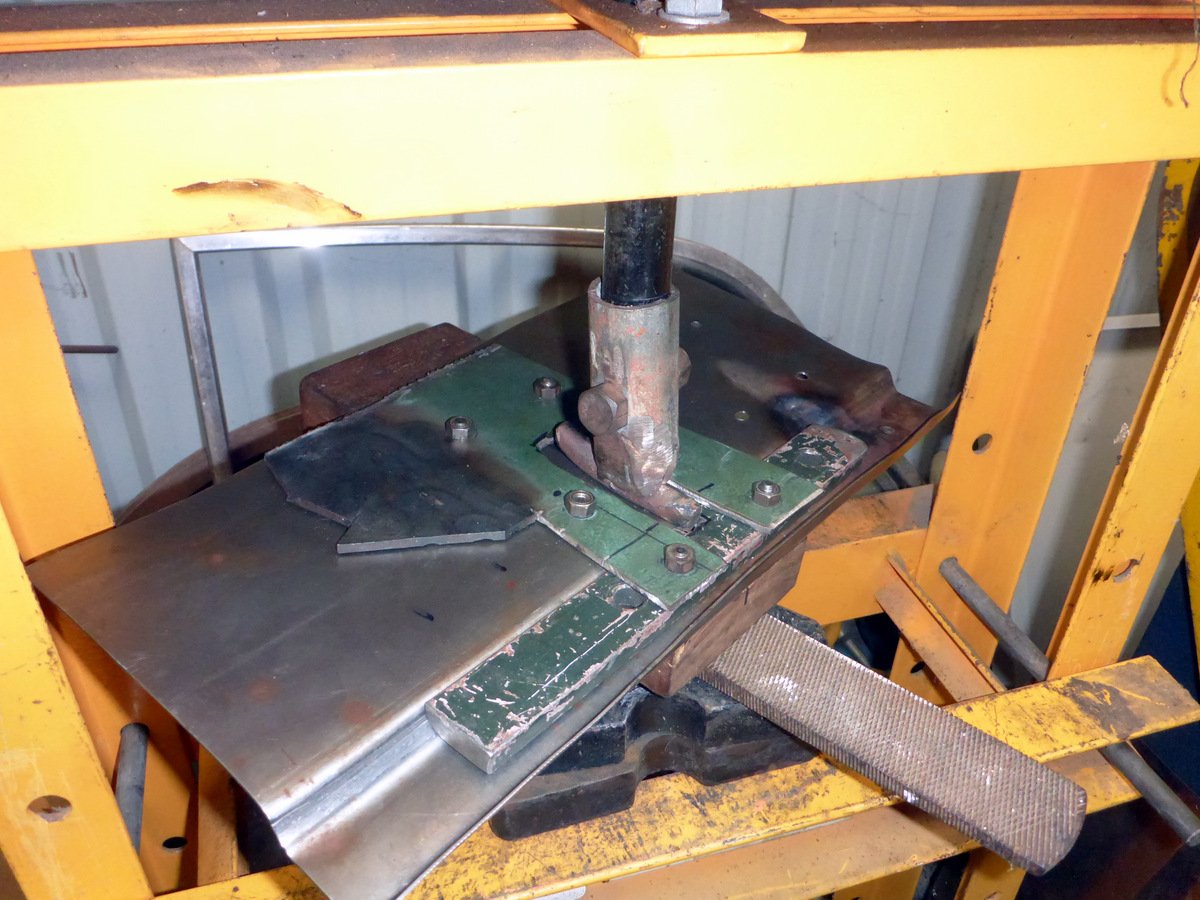
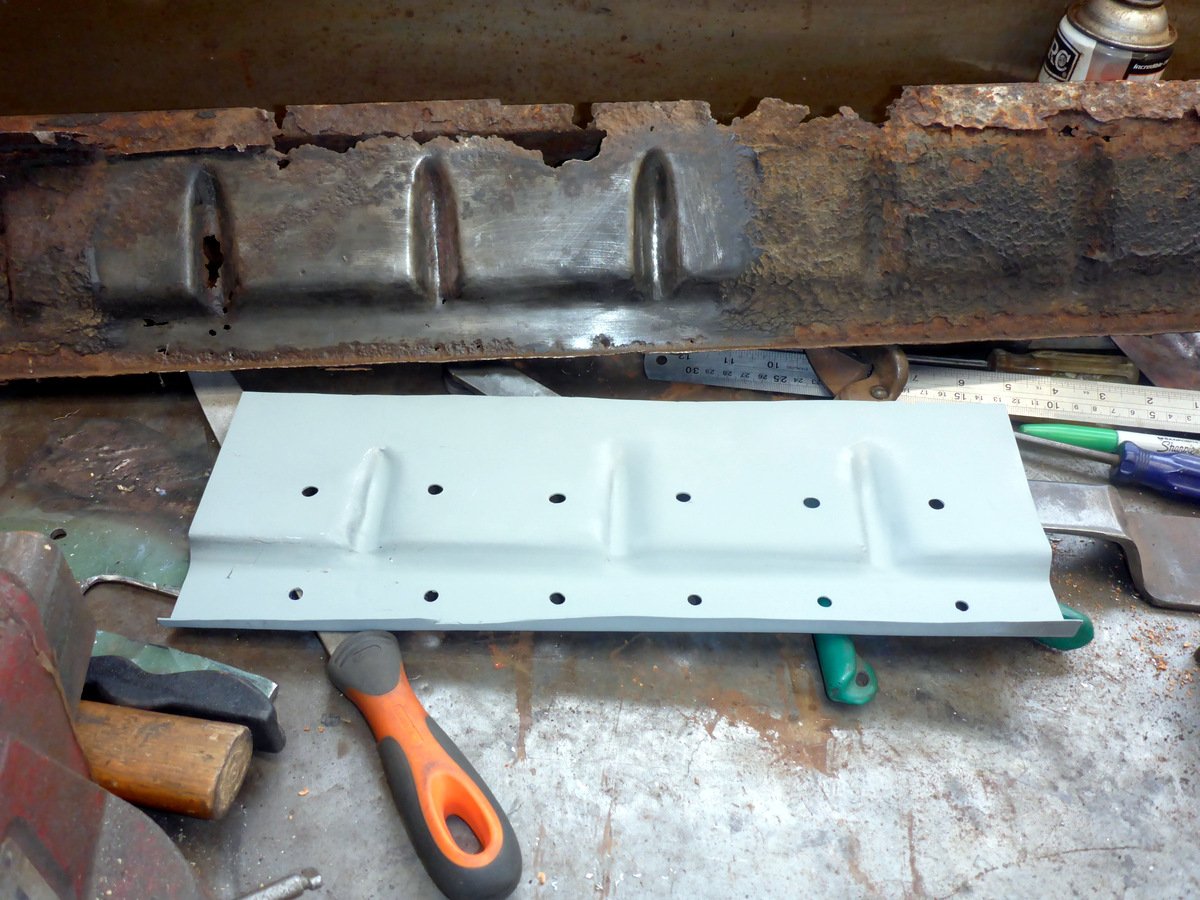
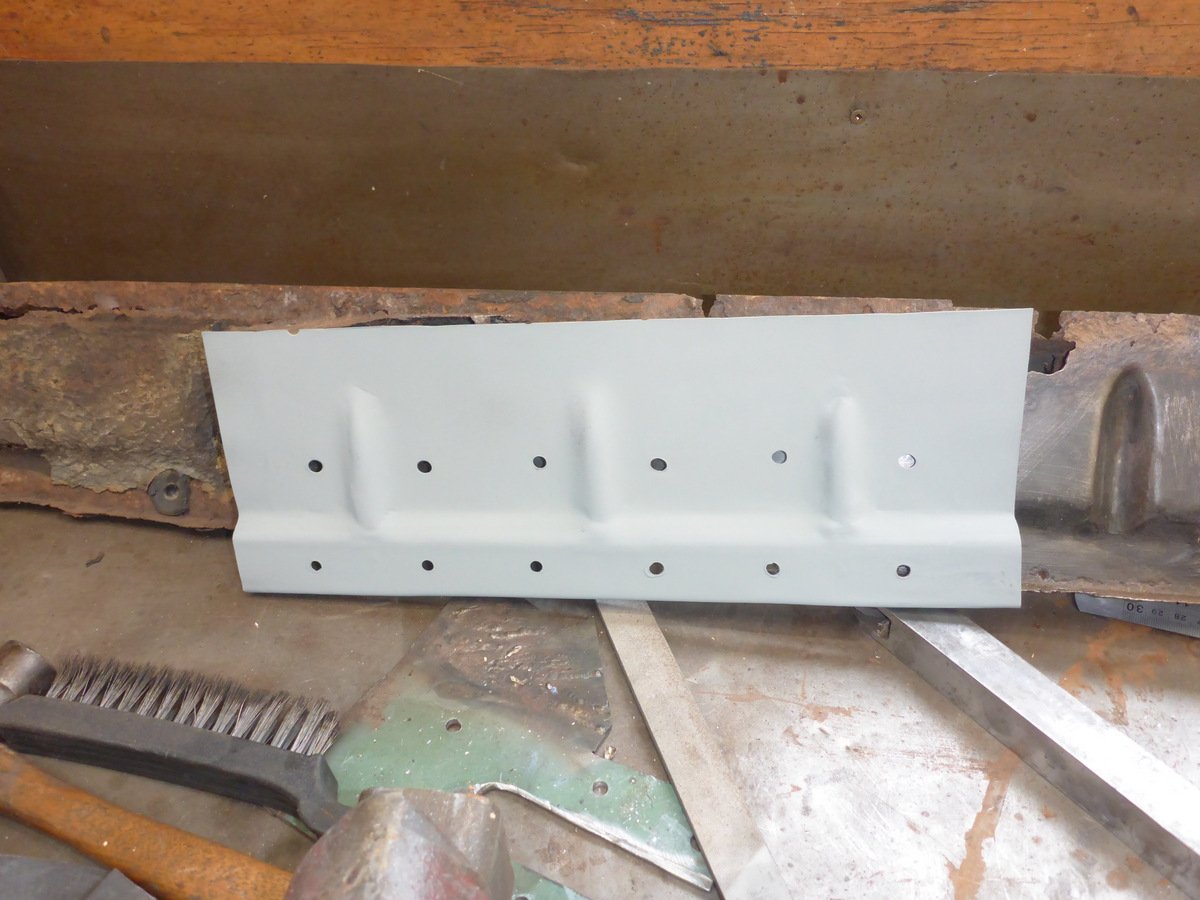
Finally got back to this. Revised the tooling a bit and tried a longer test piece. Came out usably OK I think. Quick squirt of zinc it just to remove the reflections. I haven't filled the holes in this test one, but they'll need to be done for the proper pieces.
1 point
-
Well. 'Murca didn't get back to me so I went with a UK sourced kit. Bugeye, stock-ish wing width & an engine cover with no air intake hump type thing. Should be here in a month. Gonna be simple 60's looking, not some thinly veiled, rear engined, tube framed Trophy Truck Anyhoo, afternoon in the shed. Sayonara shakotan... Wings off Swapped spindles back to stock. Standard right, dropped left. *edit* Just realised pic is upside down, I s'pose. That or I rolled it on the Baja 1000. Gained about 5 inches with the old rear tyres swapped to front. Will aim for a bit more profile to get it level. No suspension lift though. Surprisingly solid underneath, I'll tidy it all up & do the interior next. Gold roll cage, fur headlining and hopefully sort out the "filled" dash.1 point
-
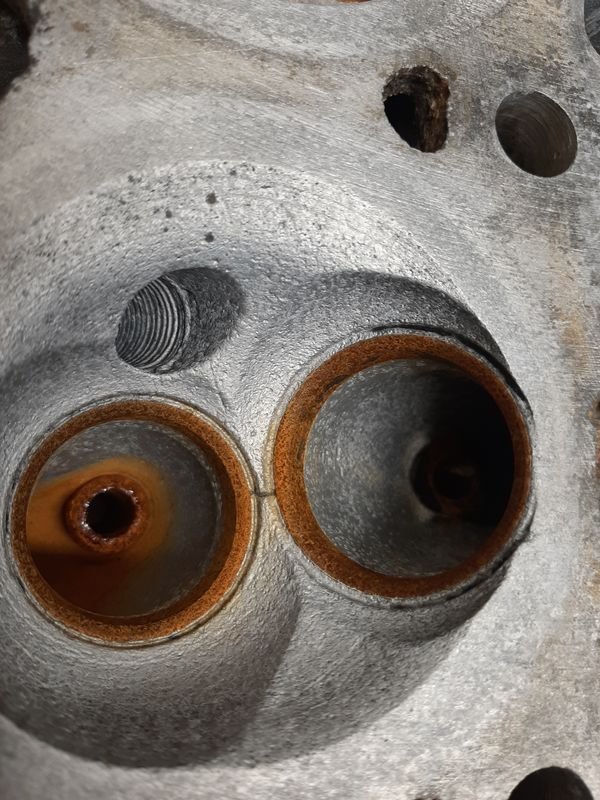
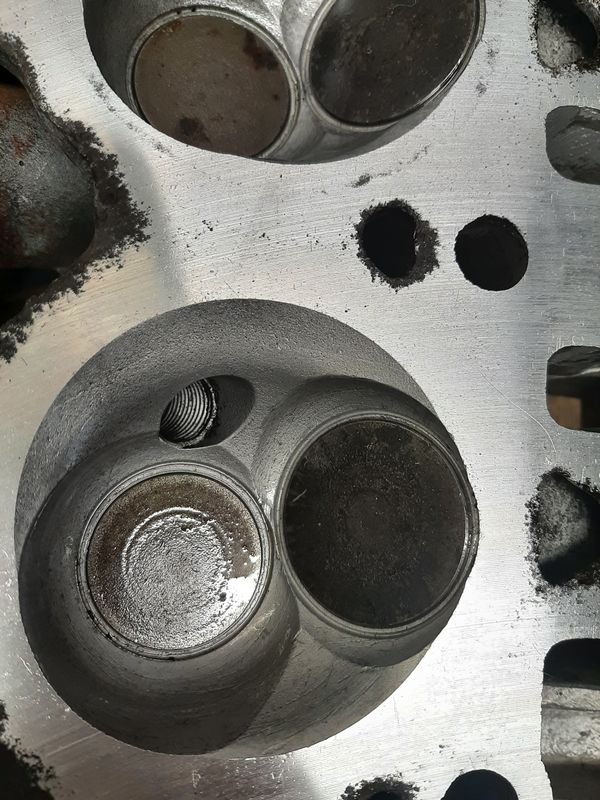
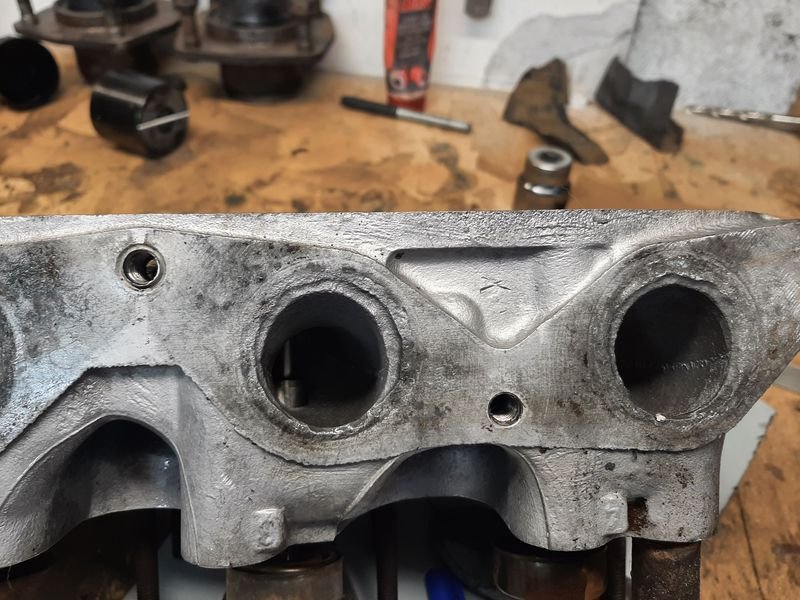
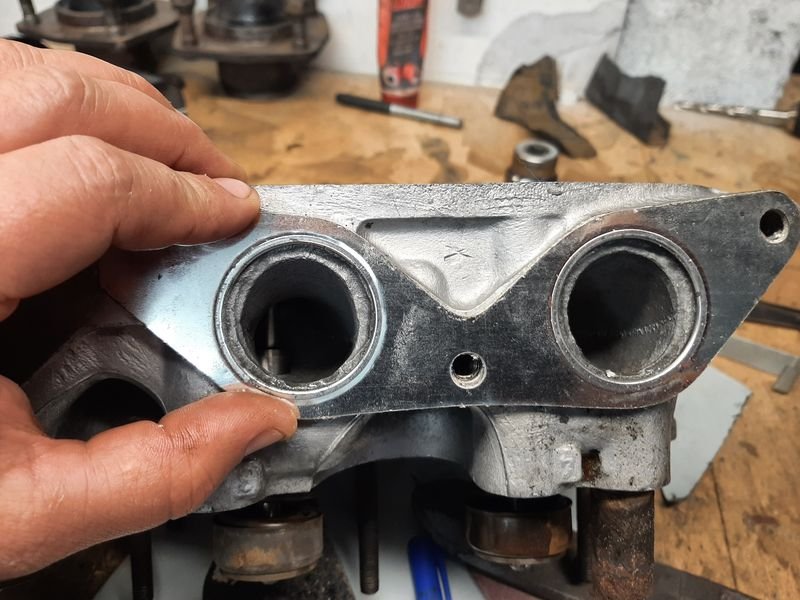
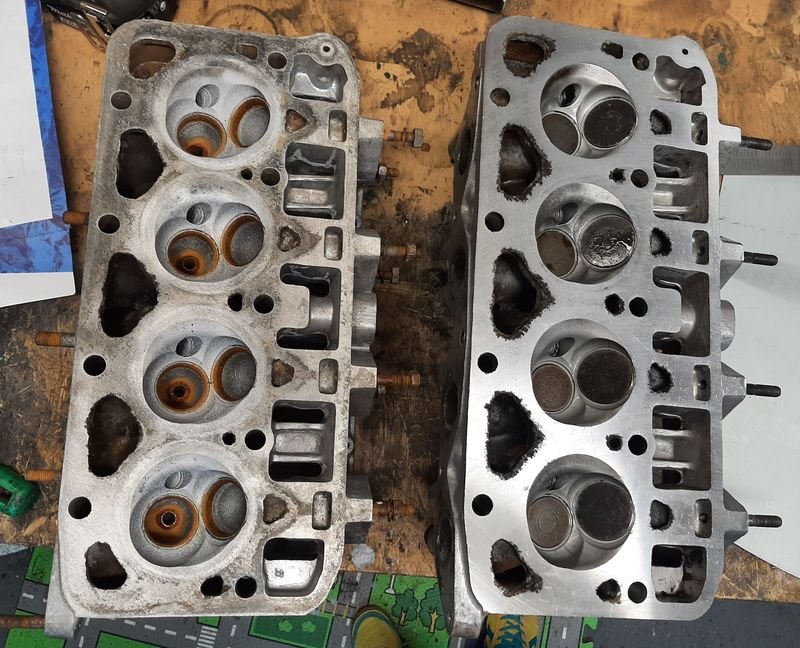
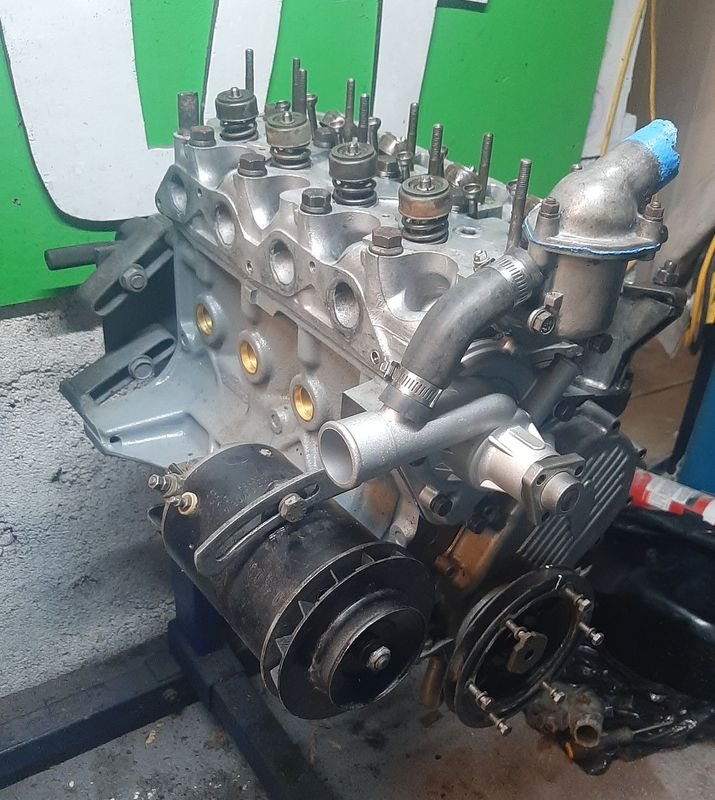
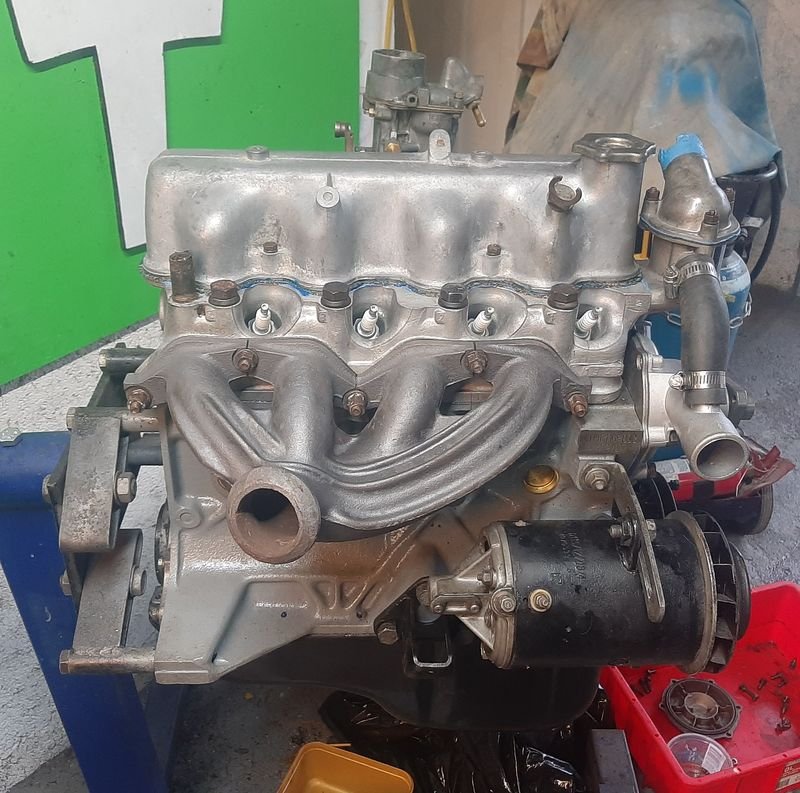
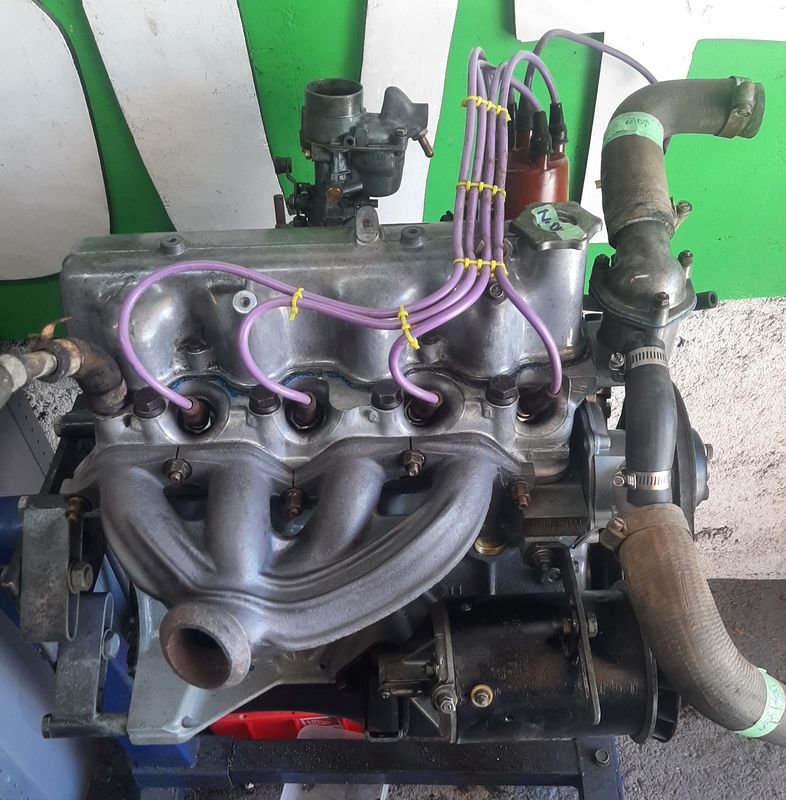
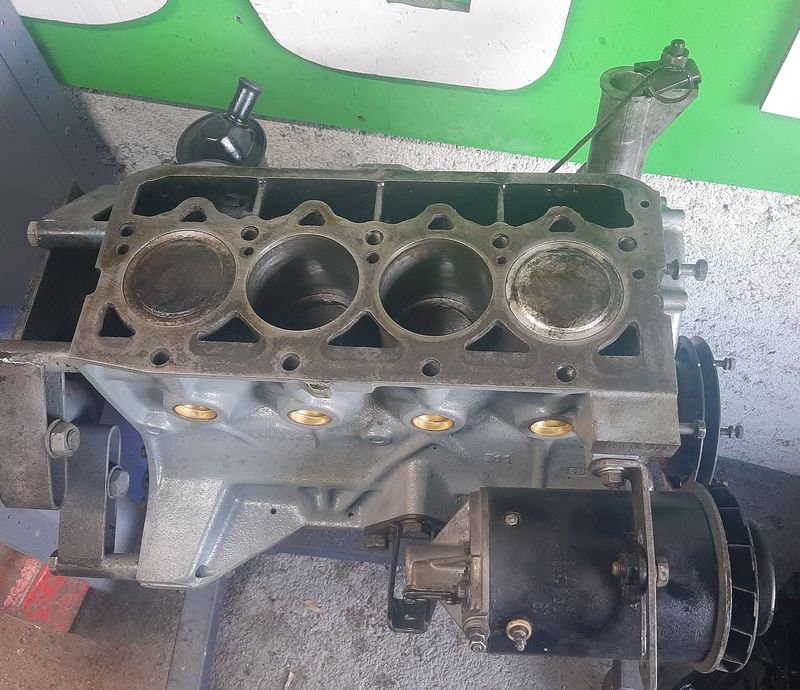
Dropped the head off at Rods Engine Services on the recommendation of @nzstato and very happy with ol' mate Rodney's work. Turned into a bit of a mare but Rodney sorted me out, all for a very reasonable price. Sidesharn follows: The first head i dropped off in November was the car one, as they both looked like poop, the van head had some corrosion around the exhaust ports, and the car one didnt. Rod sucked his teeth, and took the head, as well as a set of nos valves and new valve stems, and would see what he could do with the seats, i said no real rush but i would like to get it before xmas. he didnt get onto it until mid-December, and unfortunately it turned out the car head was cracked between the valves on 2 of the cylinders. DANG Not only is it cracked, the surface inside the chambers looks porous and banged up. "Nevermind!" I said to Rod, i said, "i have another head that might work, or might be just as shit?, we will see!", so dropped the Van head back off the next day, and on initial look he thought this one would be much better. Got it back only a week later (i think he felt bad about having the cracked for so long and then ringing me with bad news after about 3 seconds of looking at it!, lol) . Cam back with a very lightest tickles of a skim (close to the edge of the inlet valves even without any skimming), and he supplied supply and fitted new valve seats, and also fit my supplied new valve guides. He also resurfaced the NOS valves i left with him to remove the 'nos' surface patina rust). He also installed them, along with holden o-rings valve stem guides whcih i wasn't expecting as id left the old manky springs and collets etc and had a clean set on the bench waiting, but im not swapping them around now! All for a very reasonable sum. Very high recommendations for Rods Engine Services in Fox St, Dunedin, A+ would give head again. Check out how smooth the casting in the chambers is compared to the car one above! Side sharn ends. TLTR:, 'spare' head was total crap, original head from the van that i thought was poop actually turned out to be a minter! This is the exhaust port corrosion that made me initially chose the other head as the first/best candidate. There was a matching 'outie' of rust on the exhaust manifold which must have been galvanically corroding while it was sitting in mouse piss wet? Its all inside the gasket tho, so its not really an issue anyway. I did a very light 'porting' tho really more of a slight smoothing as the exhaust manifold is a good match to the head already and seems to be made from tool steel and on only had one spare belt for the belt sander, sooo. So, took the jumbo rubbish bag off the already assembled block to jam this back together and gave the gasket surfaces a good wipe down with wax and grease remover Plonk! Plus new water pump and thermostat. Water pump takes a late model Fiat 1500 water pump pulley ( as also used on lada ) rather than the heavy fixed fan, ill run an electric one, probably set up as a pusher (not much room in the bay, but lots in the radiator tunnel) Then installed the Valve gear (the van set was better starting point after sitting both in the Exoff for the last week) so I installed that after selecting the best of the adjustment nuts, tappets and pushrods from from the two sets (plus a couple of NOS bits i already had collected as 2300 spares). then the inlet and exhaust valves are all adjusted to 0.2mm, which on this engine you have to do when a cylinders valves are 'balanced' (which is about 9deg BTDC on the opposite cylinder) which is basically how you can be 'certain' the cam shaft lobes are pointing directly away the tappets or on the base circle, which can be tricky to find otherwise as these engines dont have many useful timing marks In fact the FSM book uses a special tool (whcih is just degree wheel) mounted to the flywheel, suggesting proper valve adjustment is an engine out job!). Got that all done, then install the inlet manifold with rebuilt Solex BIC (i noticed the throttle shaft play is really quite bad tho) and the special 4:1 van exhaust manifold (that kicks the exhaust out a hole in the side of the engine bay into the drivers wheel well!) Dizzy and the sweet purple solid core wires i got cheap with some other odd fiat stuff from ebay, They have been run on the ute before i switched to electronic ignition And checking out all the hoses and stuff to see what i needed and what i dont and can go in the bin or storage. The car inlet manifold is for a twin downdraft carb, so there is also room for some pretty solid performance gains over the single pumper and skinny runners, and but fitment is likely to be an issue (have found that the Weber DCD of which i have 3 in various states in the stash looks like the best candidate width wise so that may happen sooner than the exhaust, but ill worry about that much later. The car exhaust manifold is a 4:2 setup with long secondaries in the exhaust pipes, compared to the 4:1 into pea shooter of the van one and would be significantly less restrictive, but it kicks the exhaust forwards towards the generator, and im not sure there is room to scoot the pipes between the engine/generator and the chassis rails. These vans were originally designed in the early 1950s for a post war design 1100cc engine, but by the mid 1960s they were shoe honing these alloy head 1500cc big boys in which are almost half as big again in displacement, and probably more than half as big externally and so its all a pretty tight squeeze as it is Need a few bits and pieces like a 11A0955 drive belt, and various hoses, but its basically ready to sling back in the hole, but the hole needs a bit more work first.
1 point
-
Welded in a 3mm steel plate to bolt column housing to, and re enforced shifter area, went well, and shifts good now, driving a bit more stable, although have yet to do some hard cornering to test the sway bar, power steering is nice especially when turning around, pumps all bled and lines securely attached
1 point
-
Because I'm an impatient bastard, I chopped some springs and found some cheap 17's for it. Will now begin saving for some FC adjustables. Took it to Meremere yesterday for it's longest drive in NZ so far, did about 8-9 runs as well, it's damn slow but still good fun having a few races.
1 point
-
Baja Bug it is ! Gonna do it. Beach buggy can wait/ get forgotten about. Got a couple of prices for bugeye kits here, just waiting to hear back from Chirco in 'Murica before I take the plunge. Messed about this arvo, going to put the stock spindles back on & then decide about ride height. Will be some sort of green in the end, but I'll save the roof. Best part of the car though I say it myself. Found this charming repair, not worried about butchering the car anymore !1 point
-
Its a ball ache to get out of the garage so I went out and got some of those dolly go jacks so I can just drive it in now and dont have to jack the front and rear up with a trolly jack to slide it over to the side. Kind of rocking my dream setup of cars now. Only thing I would like to add would be a 90s NSX but than can wait till I get more space. For now I spend a fair bit of time just having a couple cold ones and admiring the garage art while I wait for my damn parts to arrive1 point
-
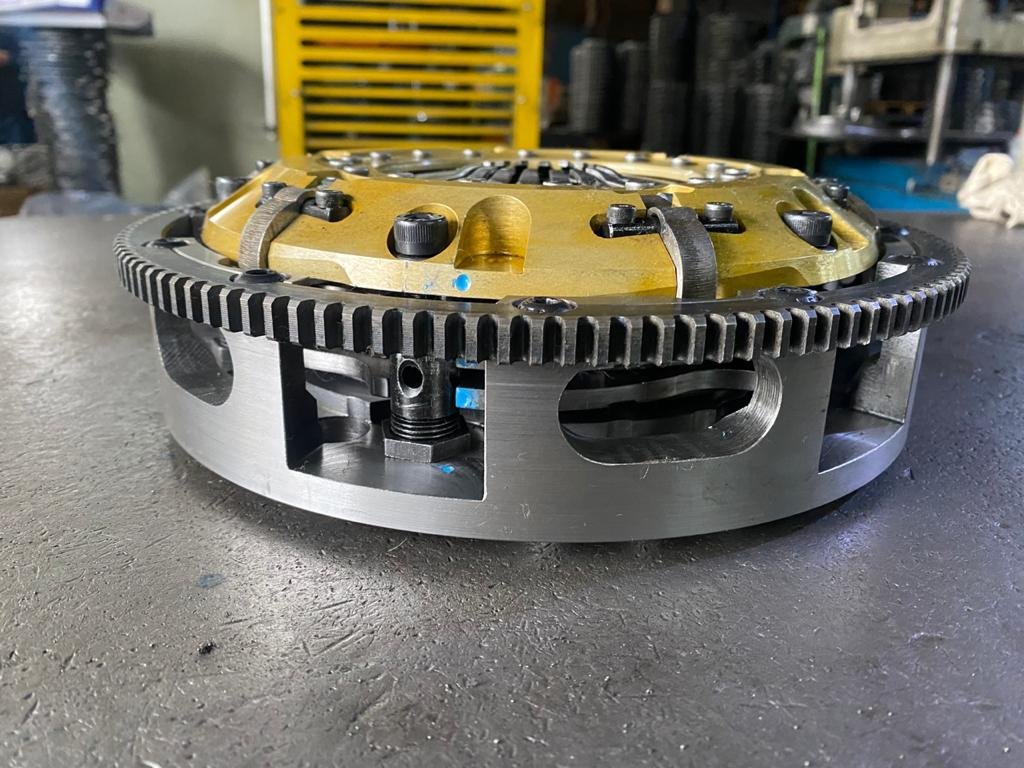
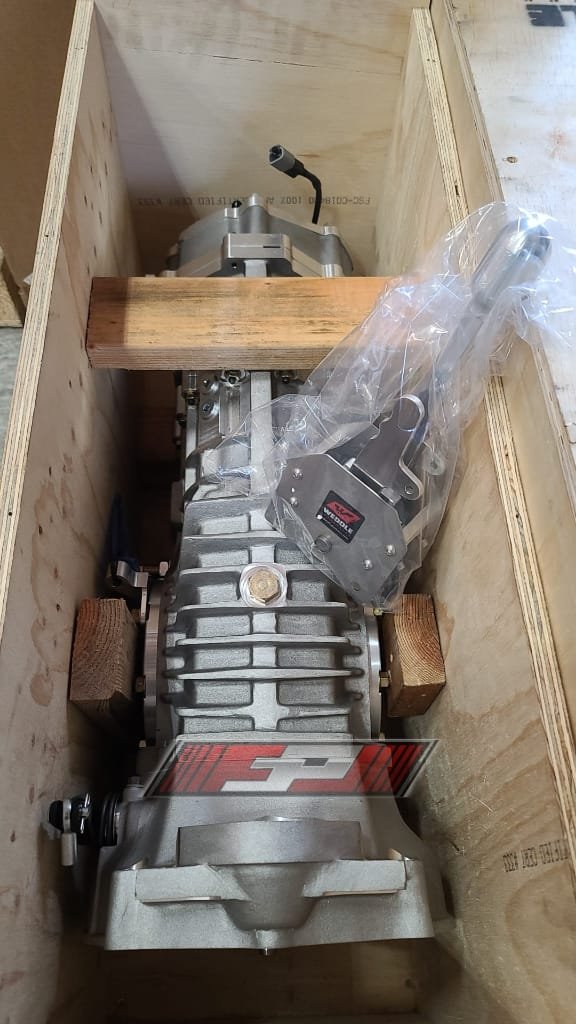
Clutch and gearbox porn... Weddle MD5S 5 speed sequential, triple plate clutch. My kids are going to inherit so many shiny parts, bless them...
1 point
-
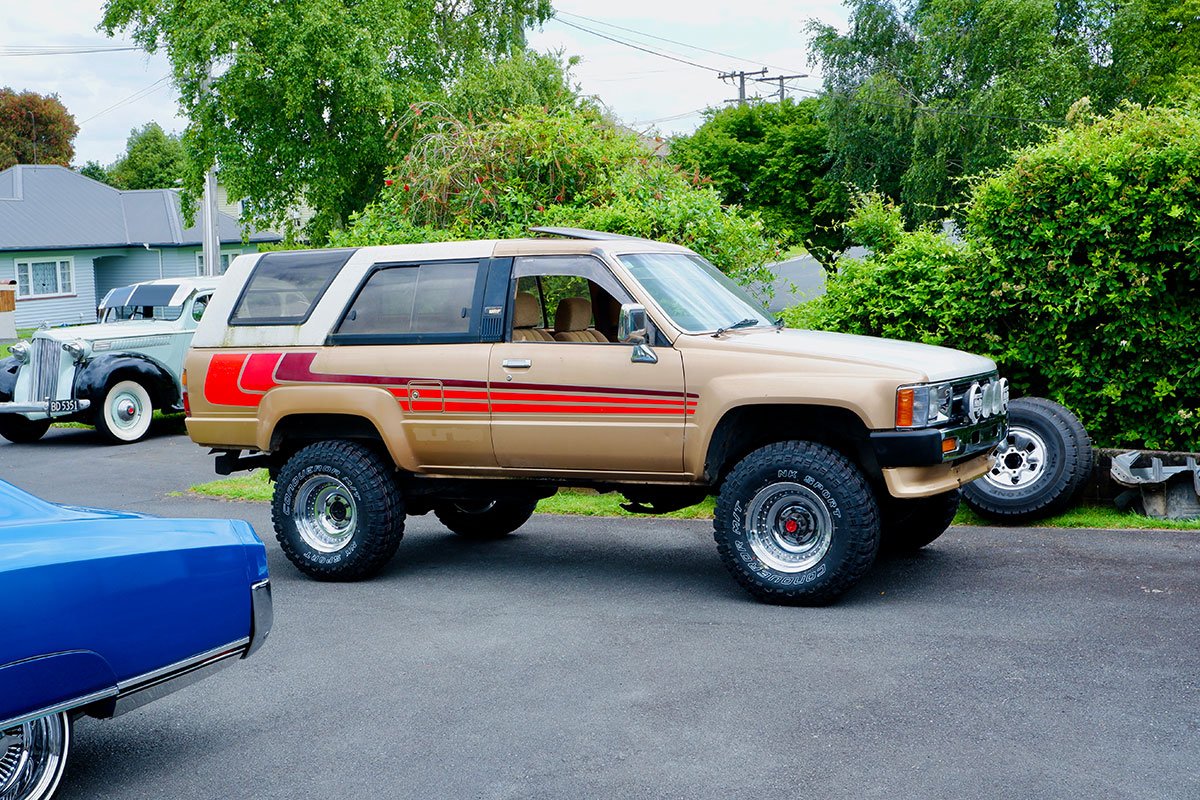
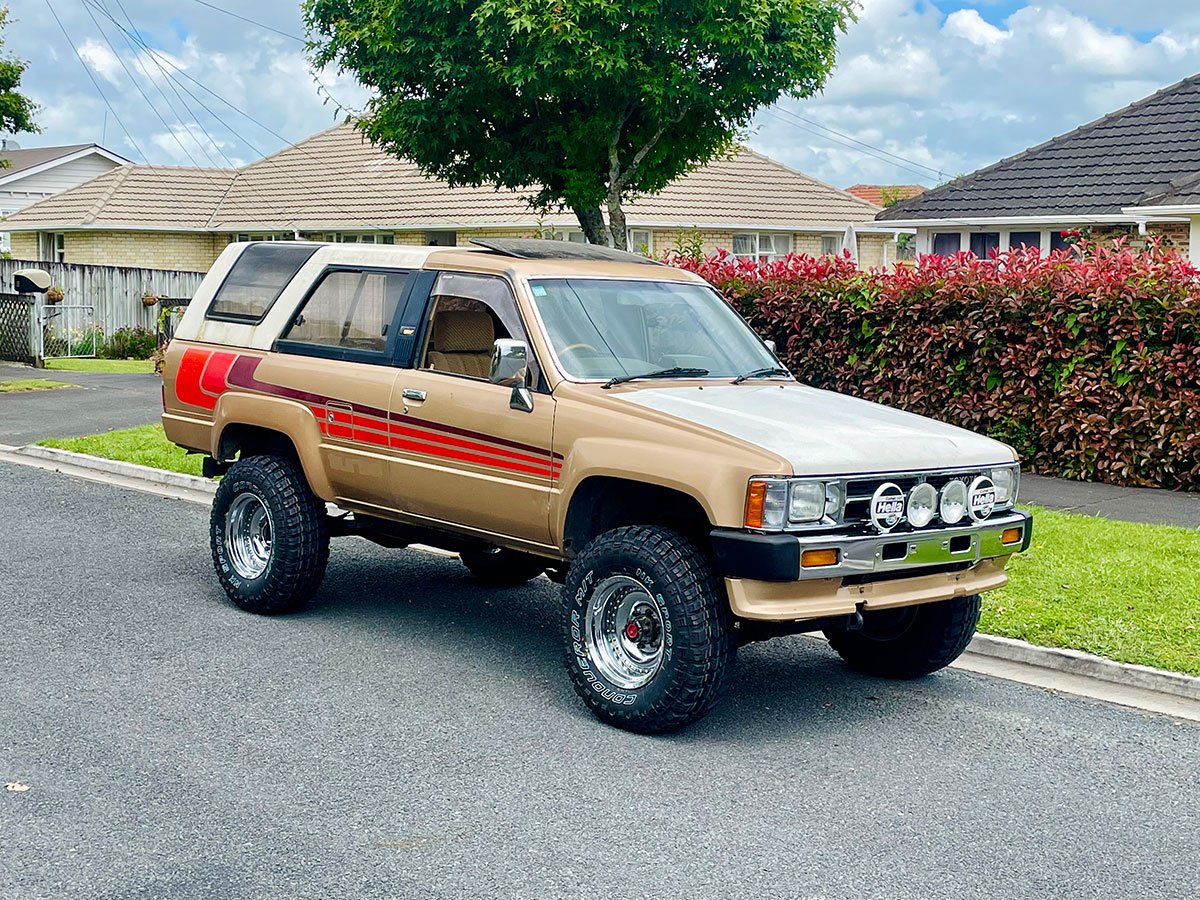
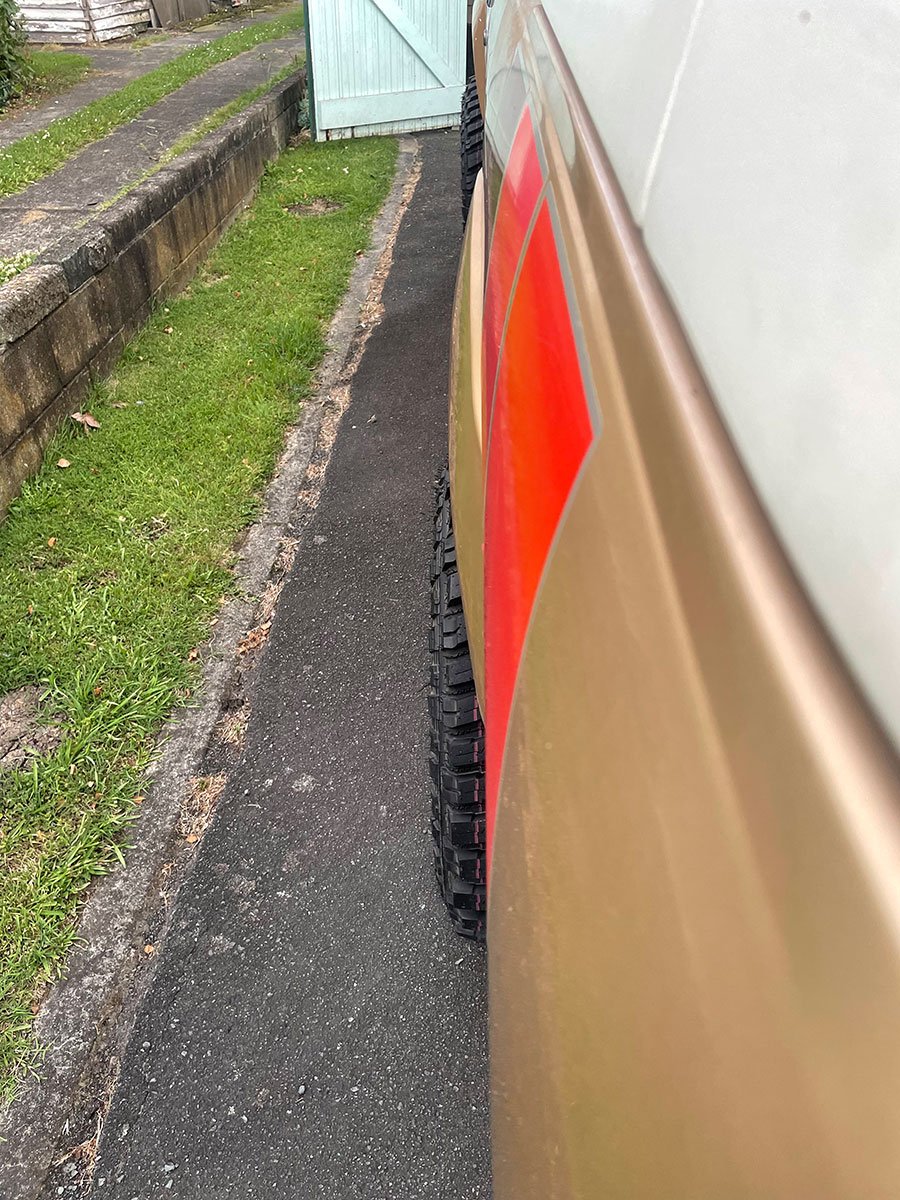
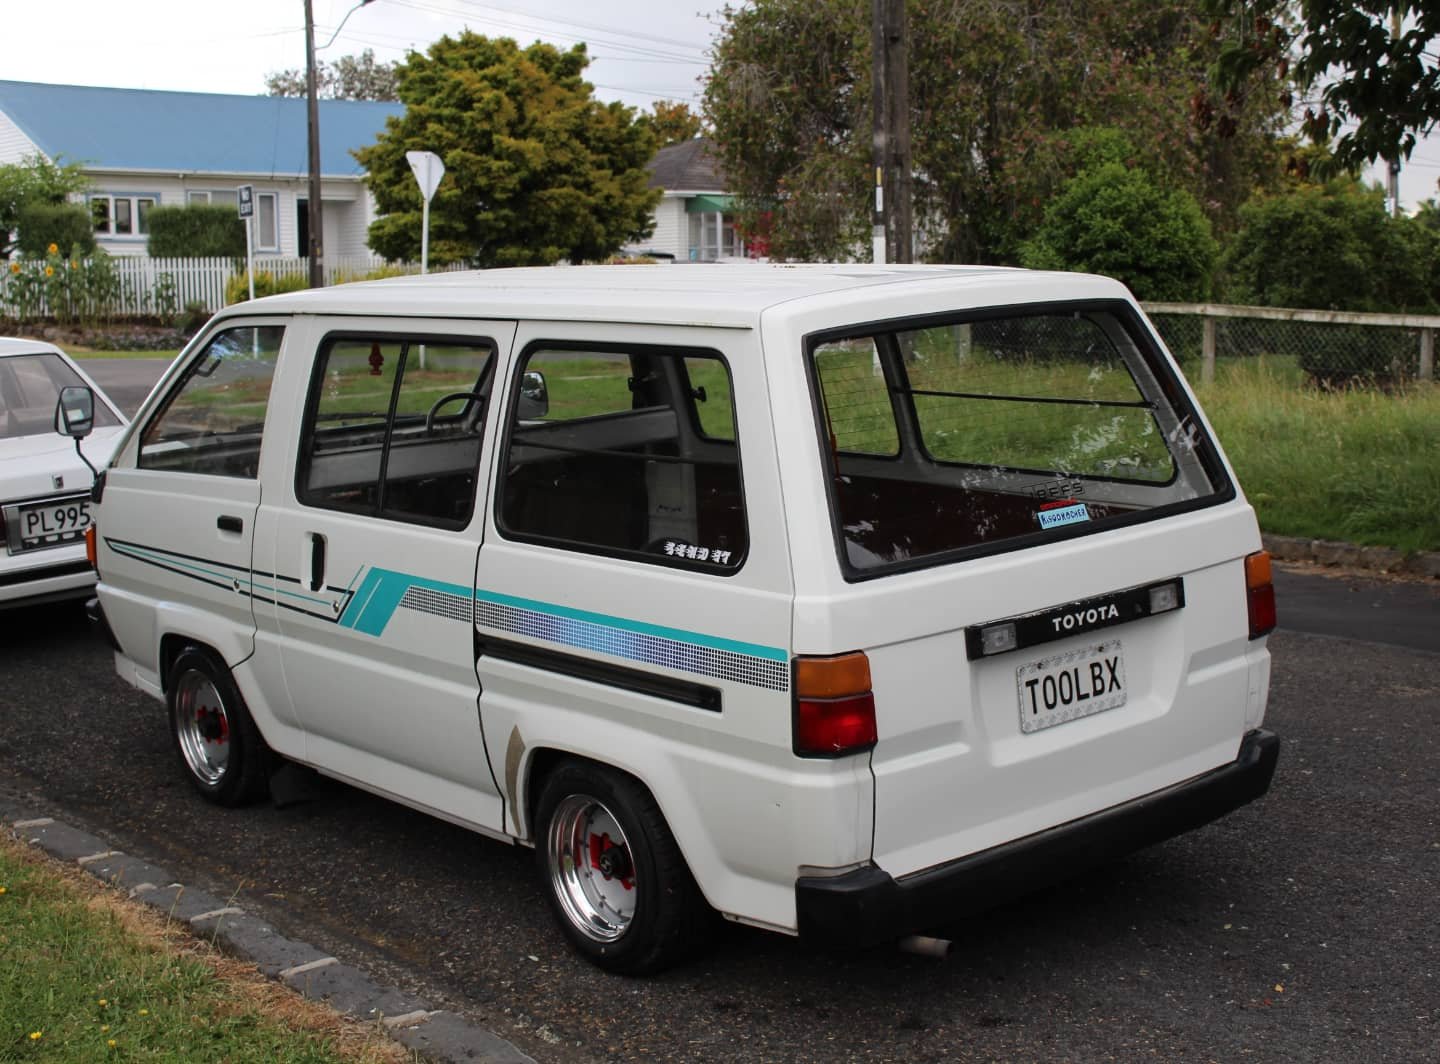
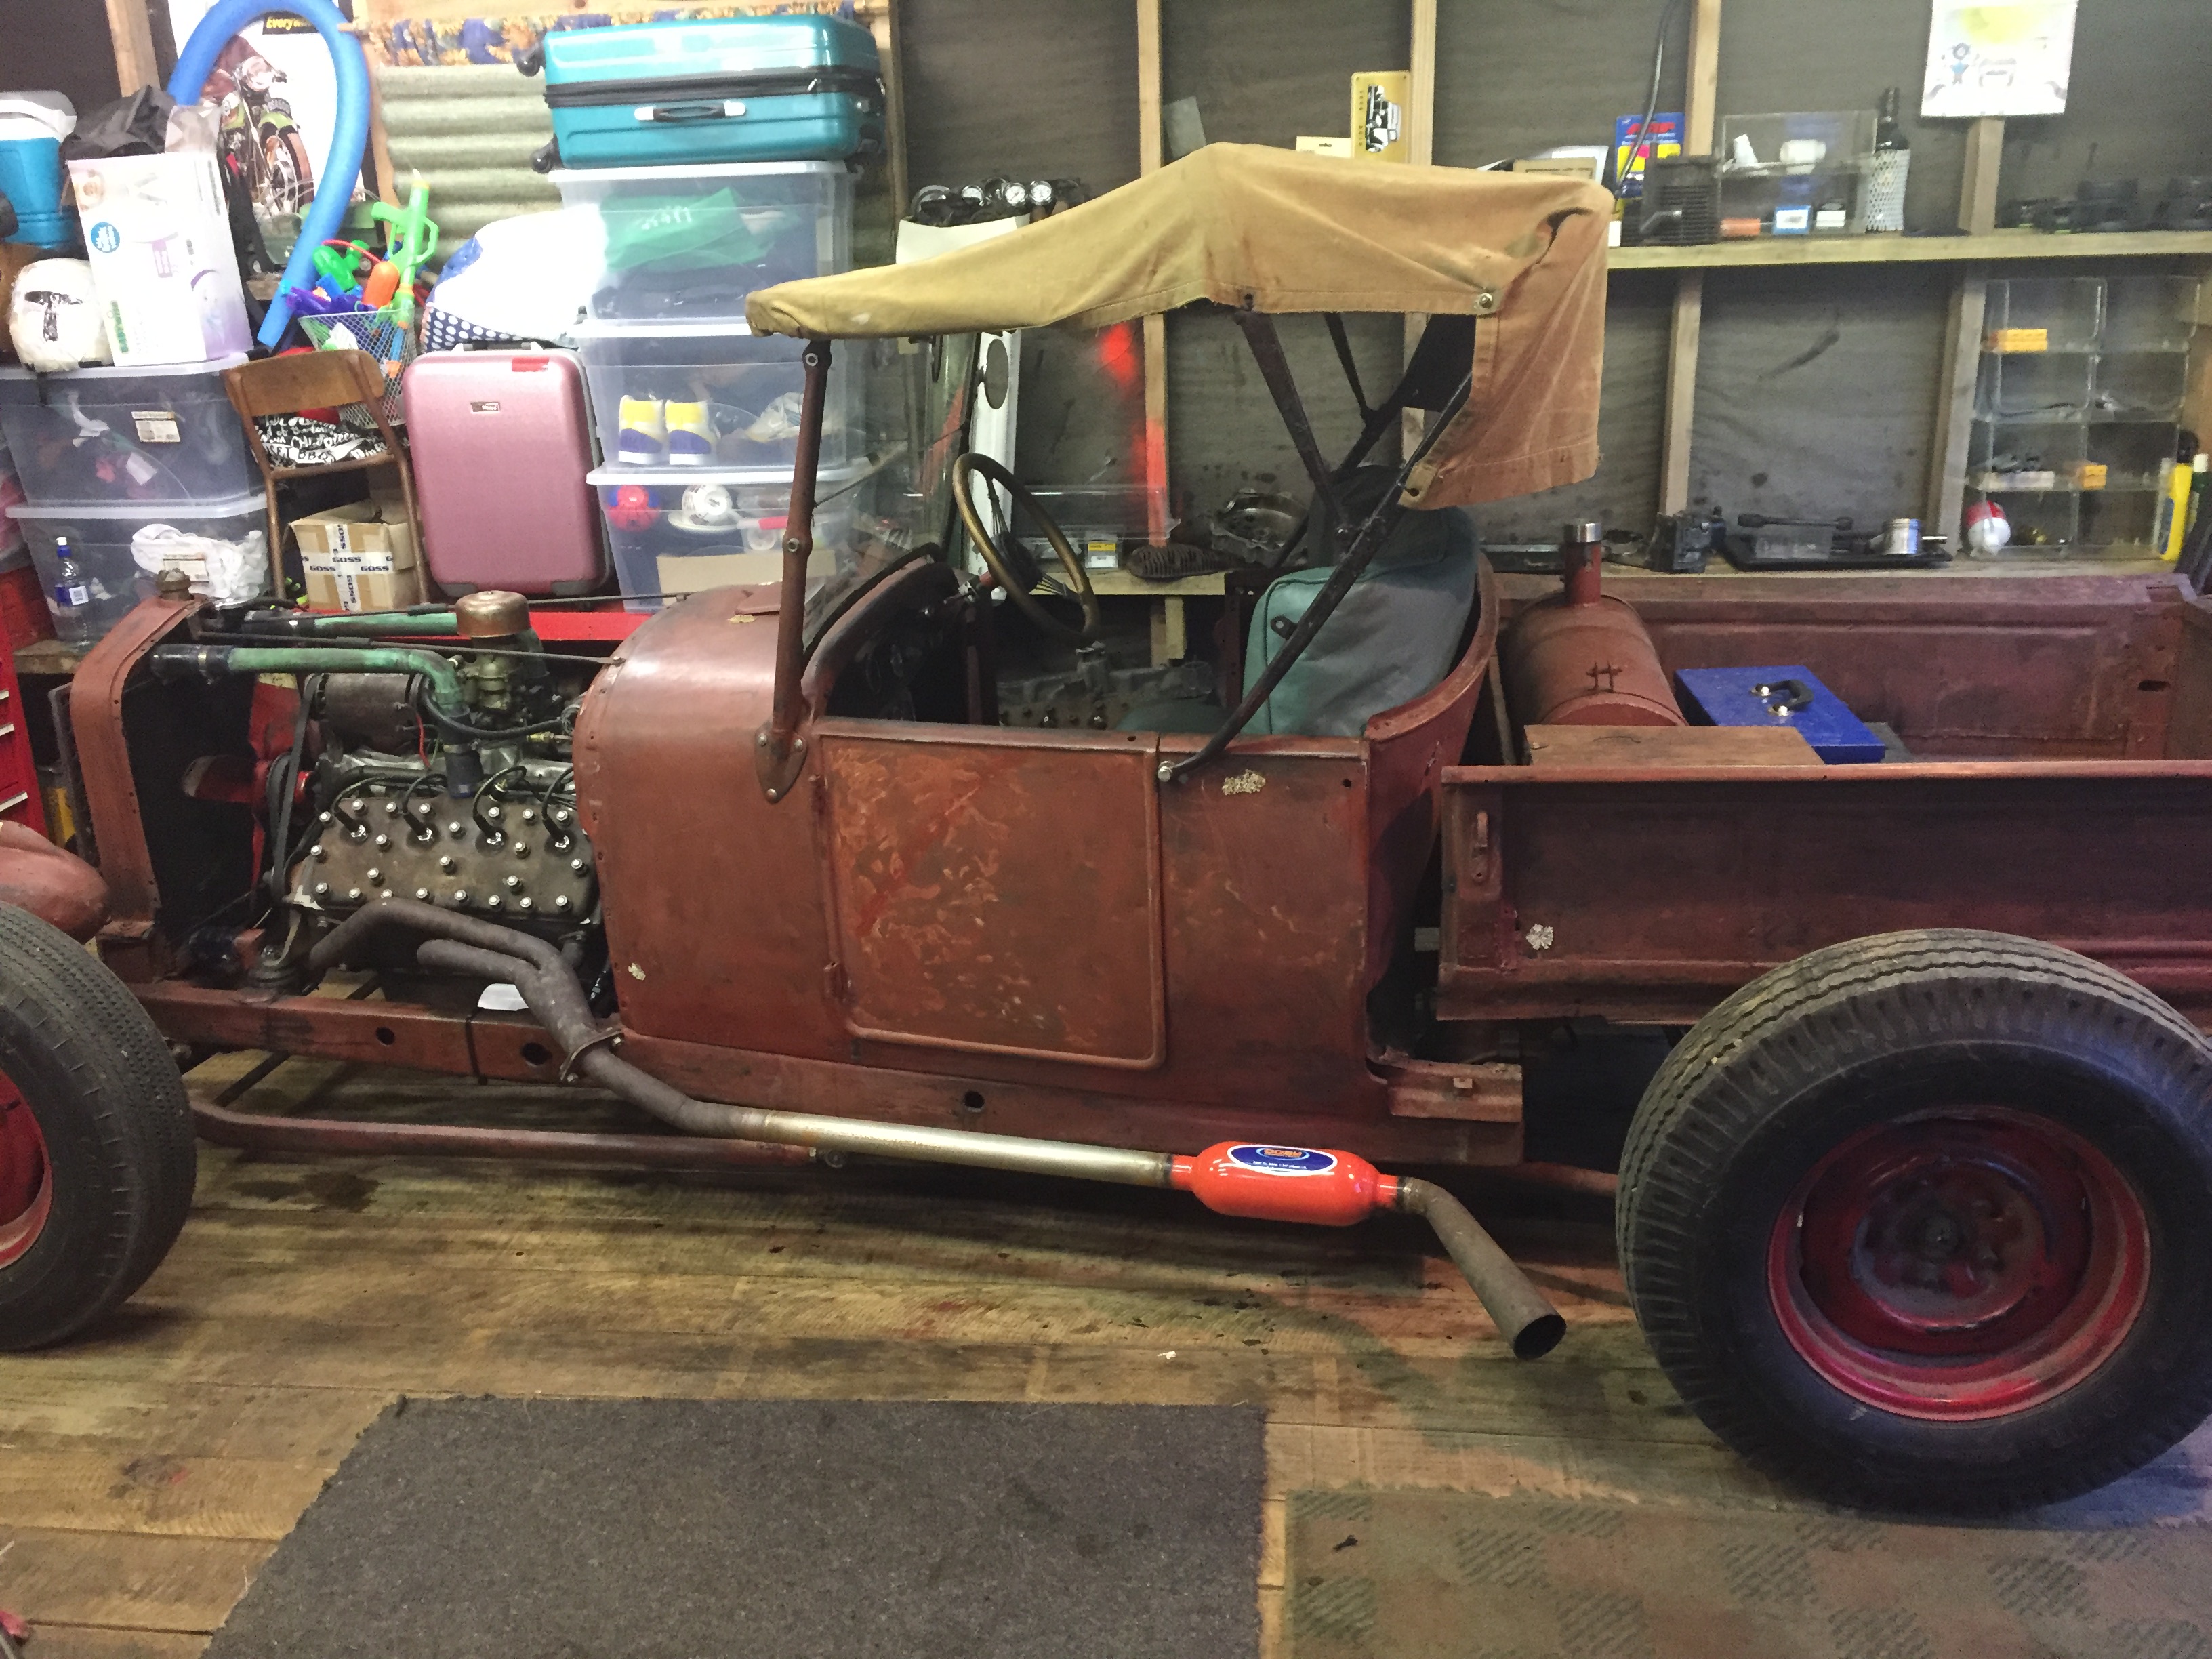
Got the bonnet on and fixed the a few wiring issues with the lights. I actually don't mind the white bonnet on there, it goes with the canopy. I'll probably eventually paint it. Even cooler is I got the wheels on, couldn't be happier. The vision is coming together... And they sit pretty flush with the body which was the aim as I don't want to run flares. Still in dire need of a clean. That'll be in the next few steps.
1 point
-
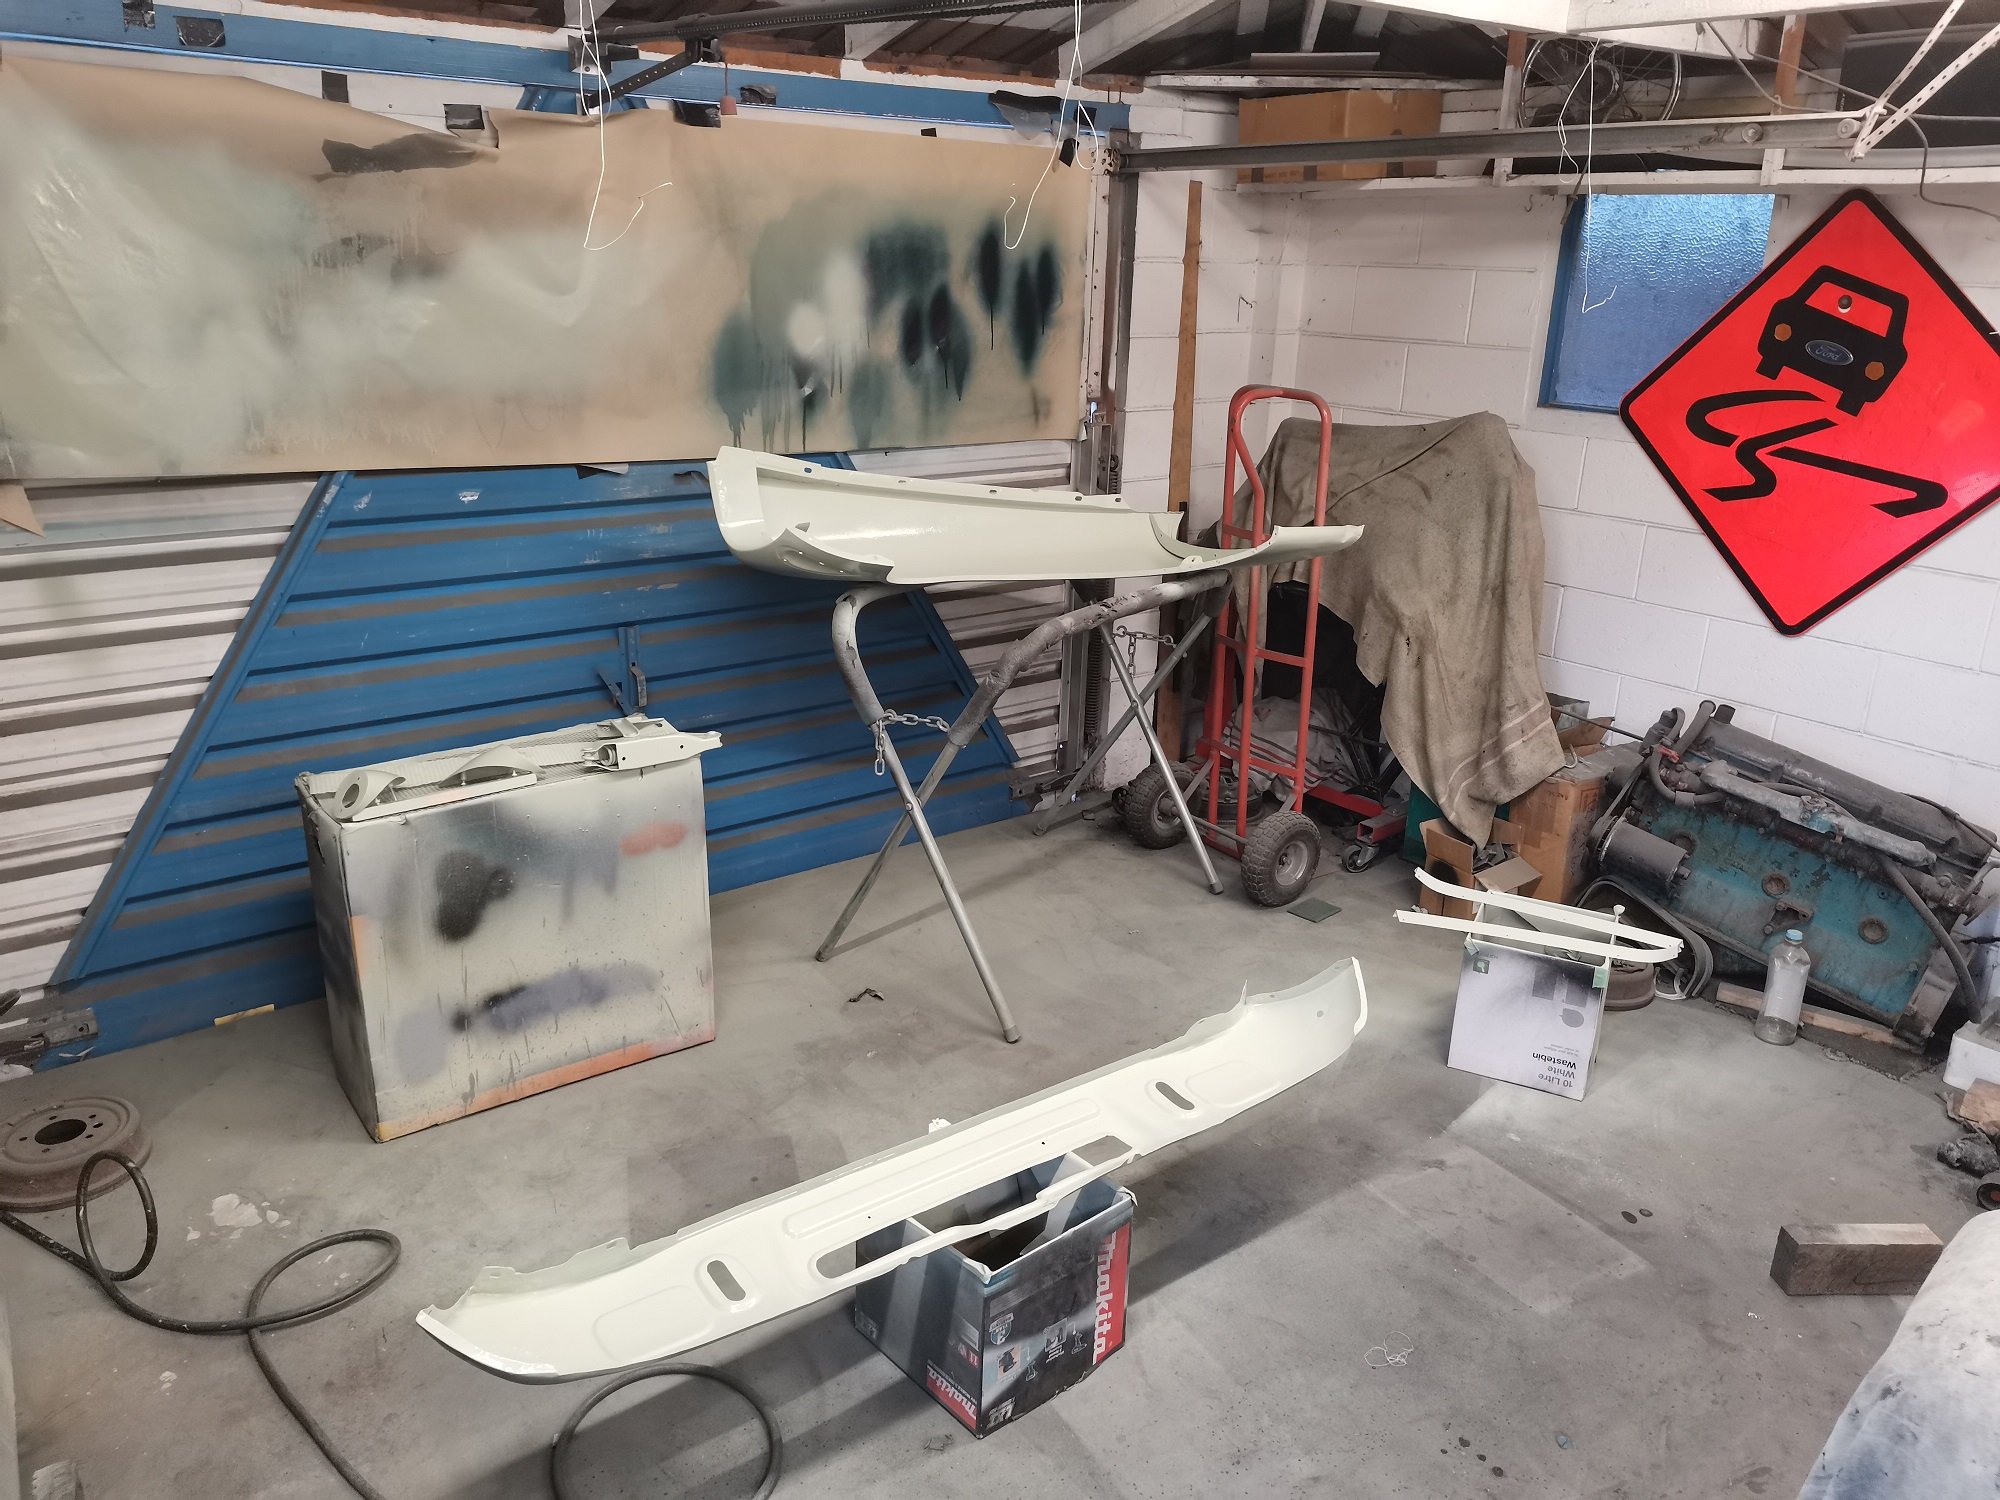
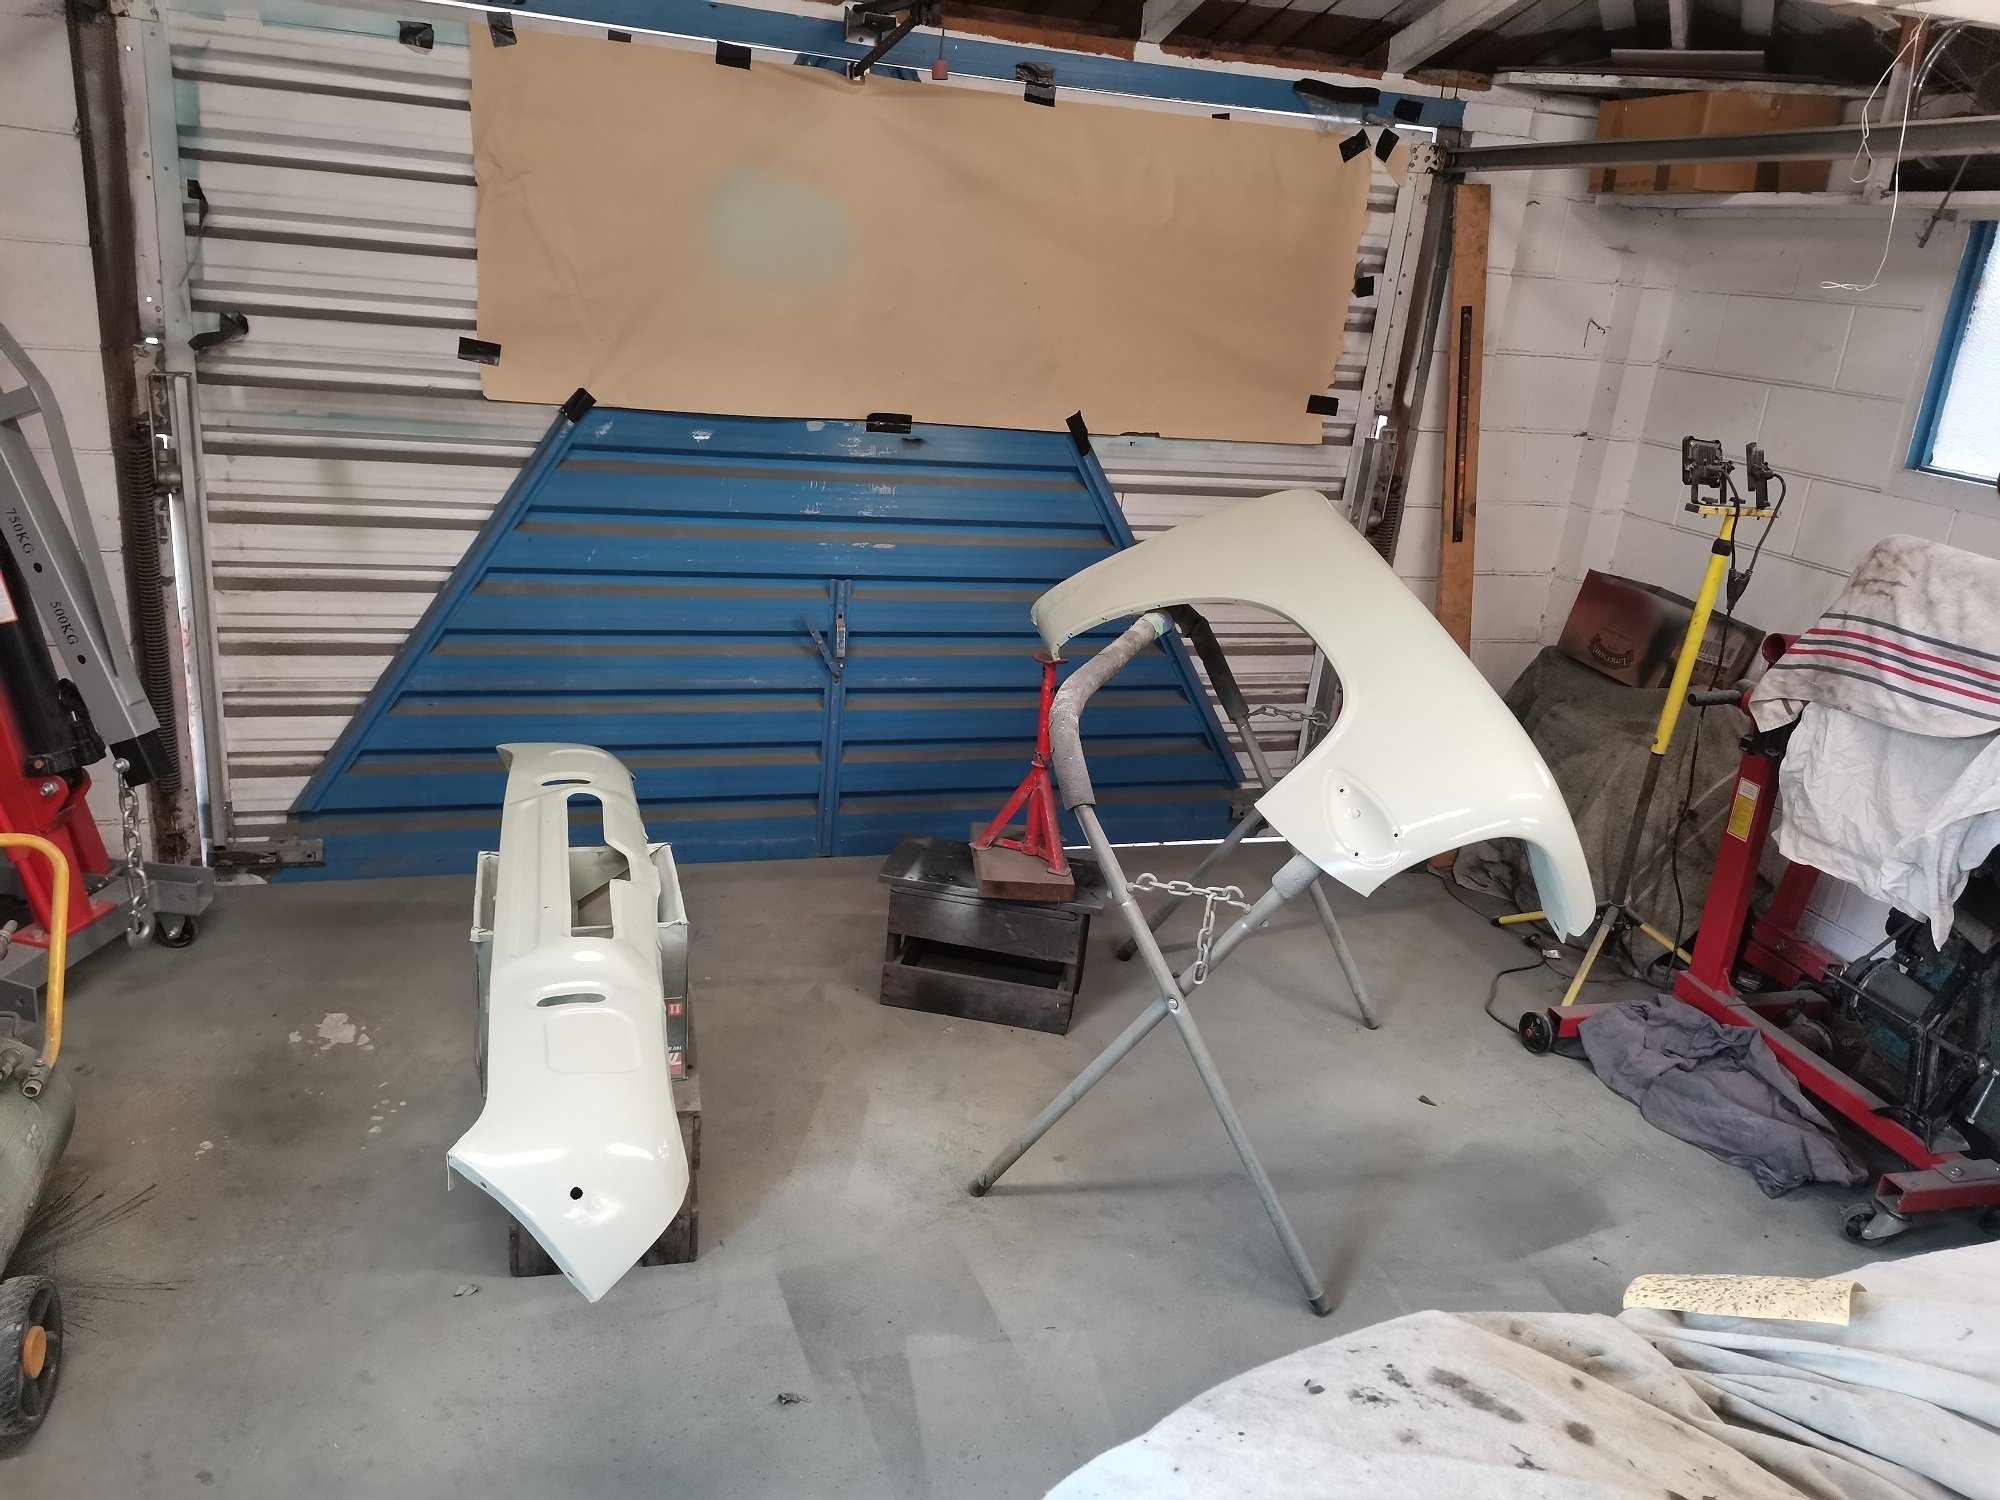
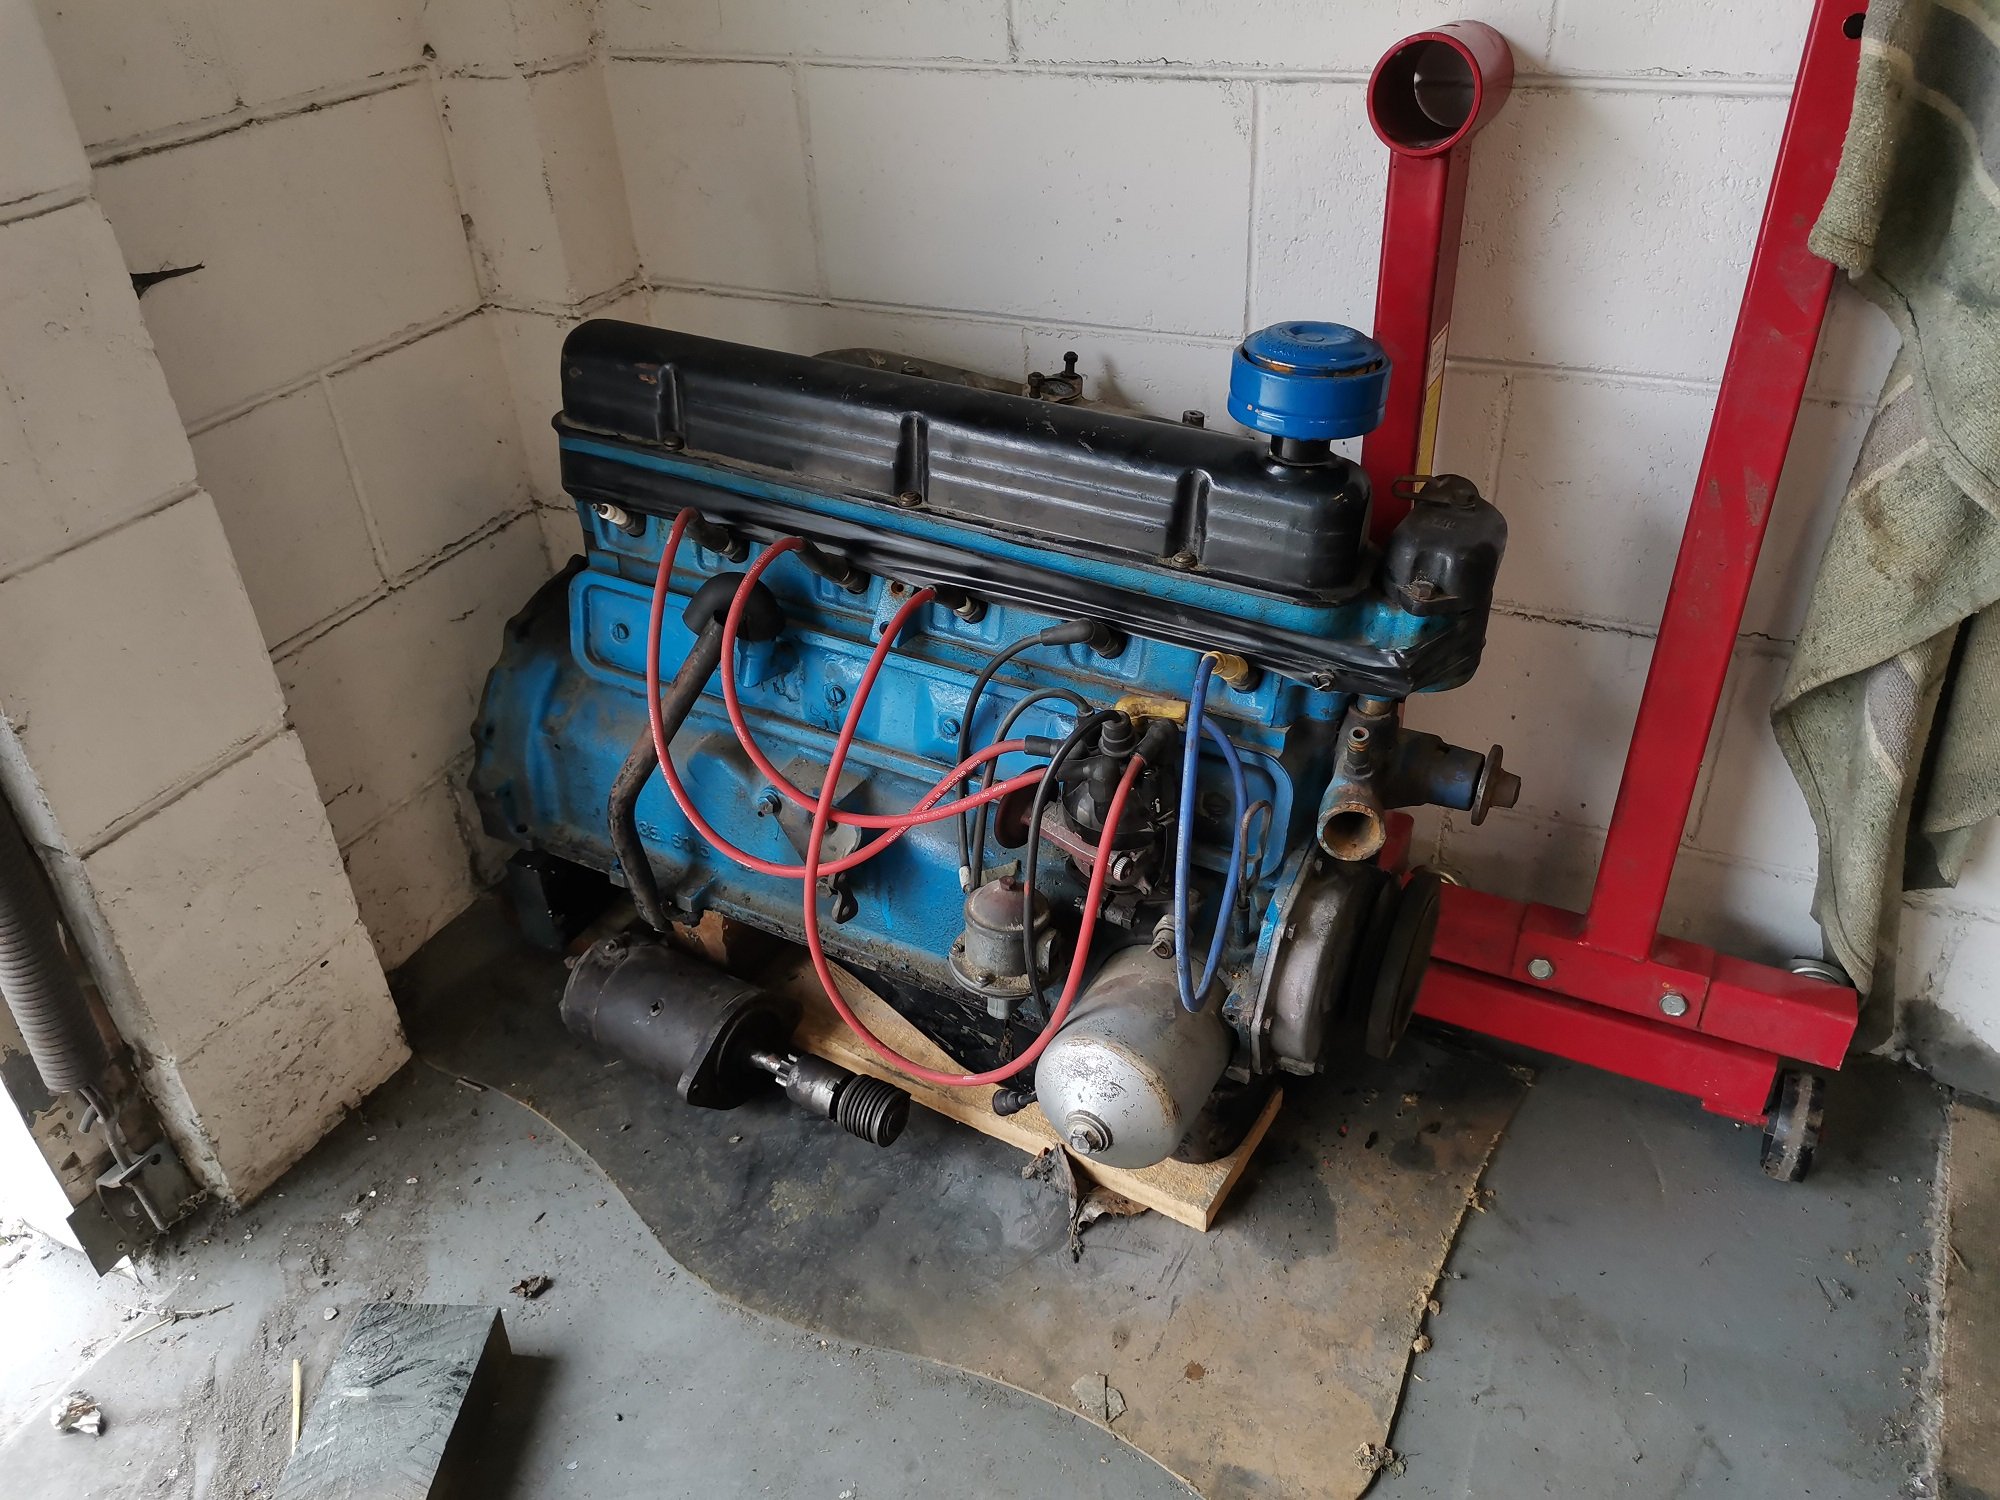
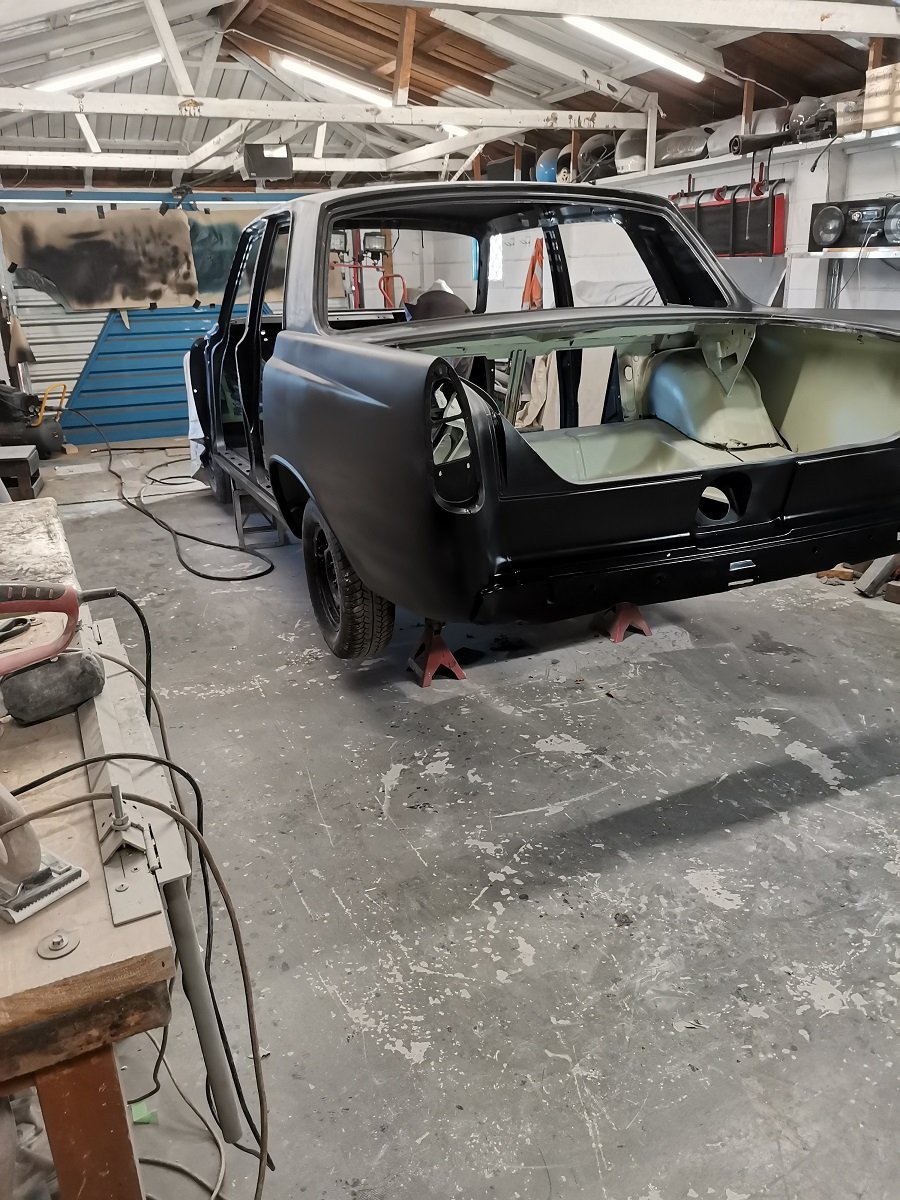
Got a the bonnet, boot hinges, front cowl, indicators and inlet manifold vapour blasted. Came up really well. Gave the blasted parts, guard and front valance a coat of epoxy primer. Found a rebuilt mk3 engine on trademe. No receipts so a bit of a risk, but better than the mk2 engine I previously had lined up for it.
1 point
-
1 point
-
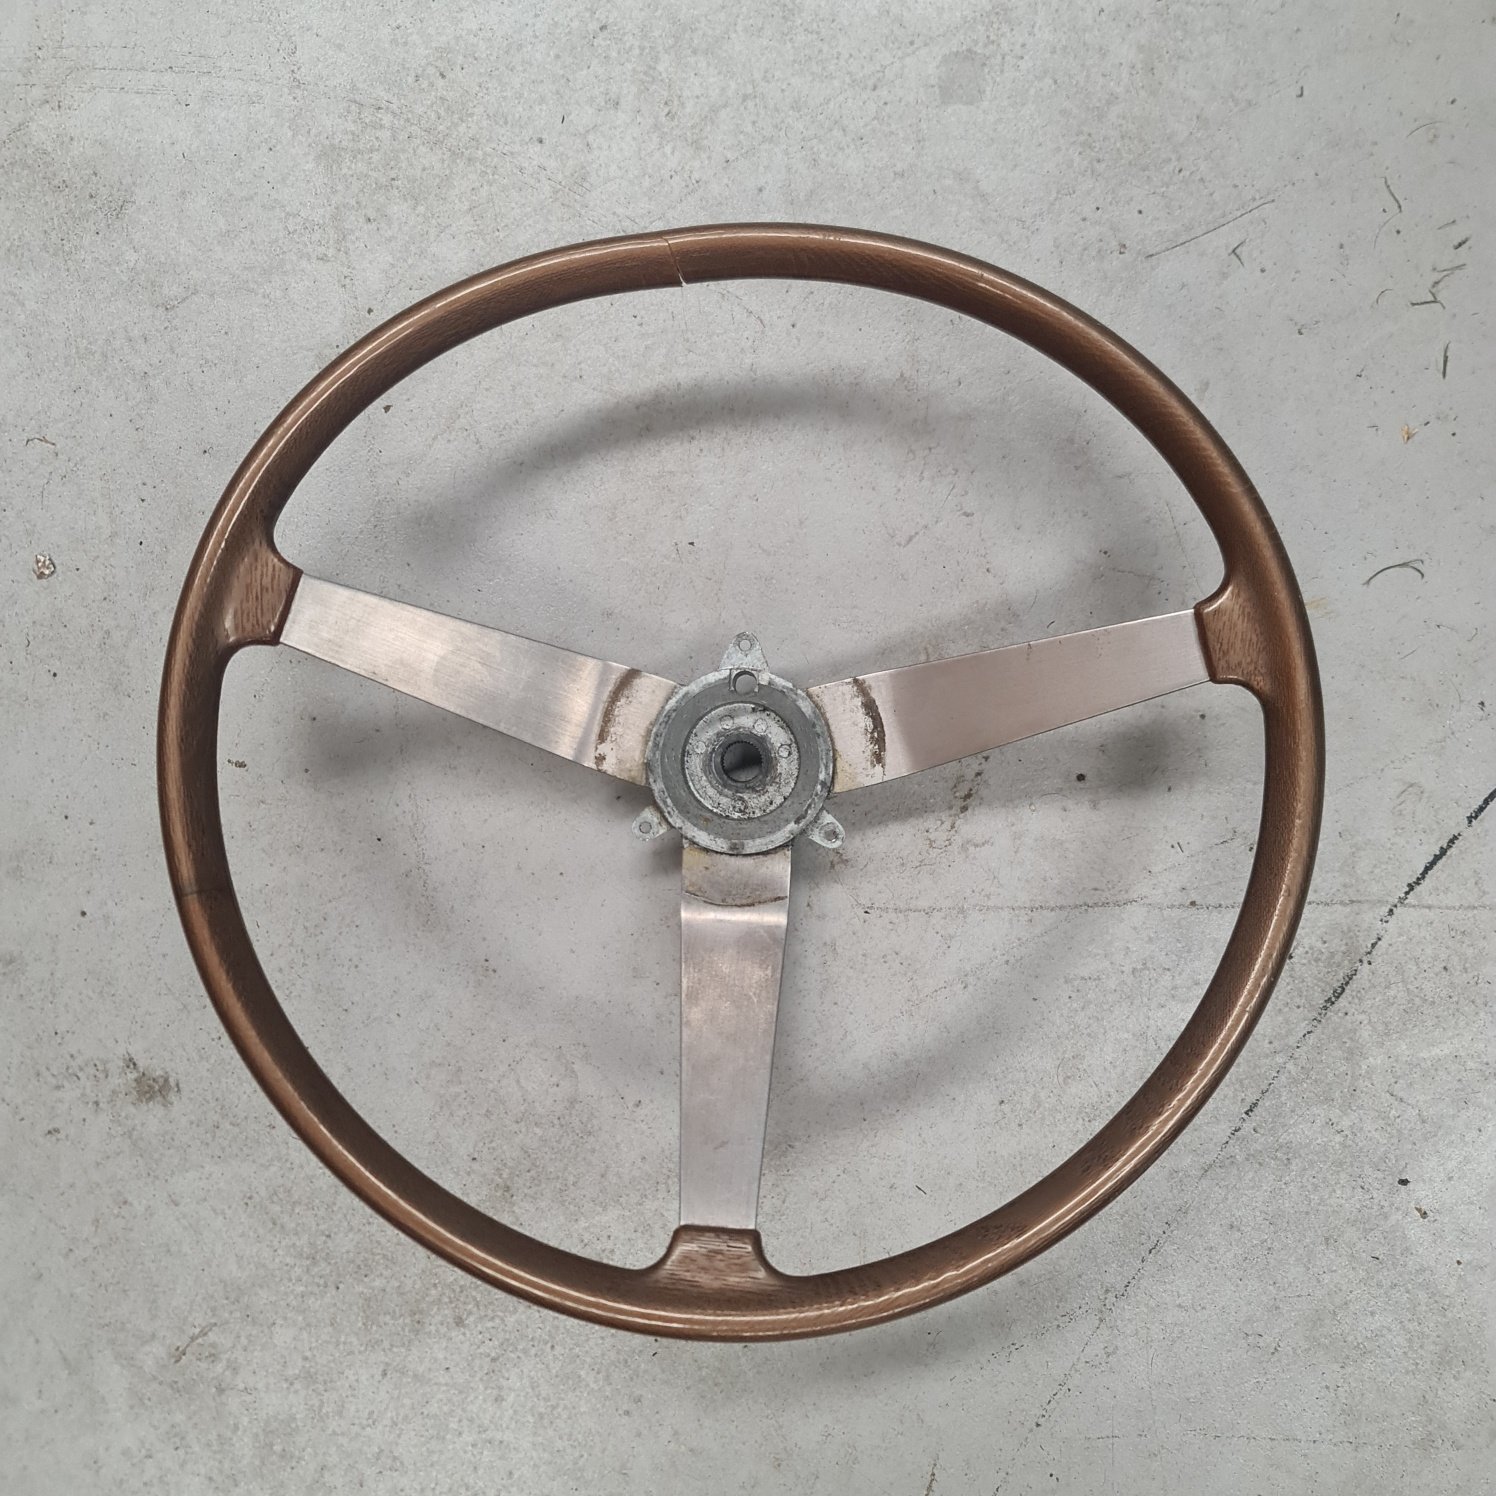
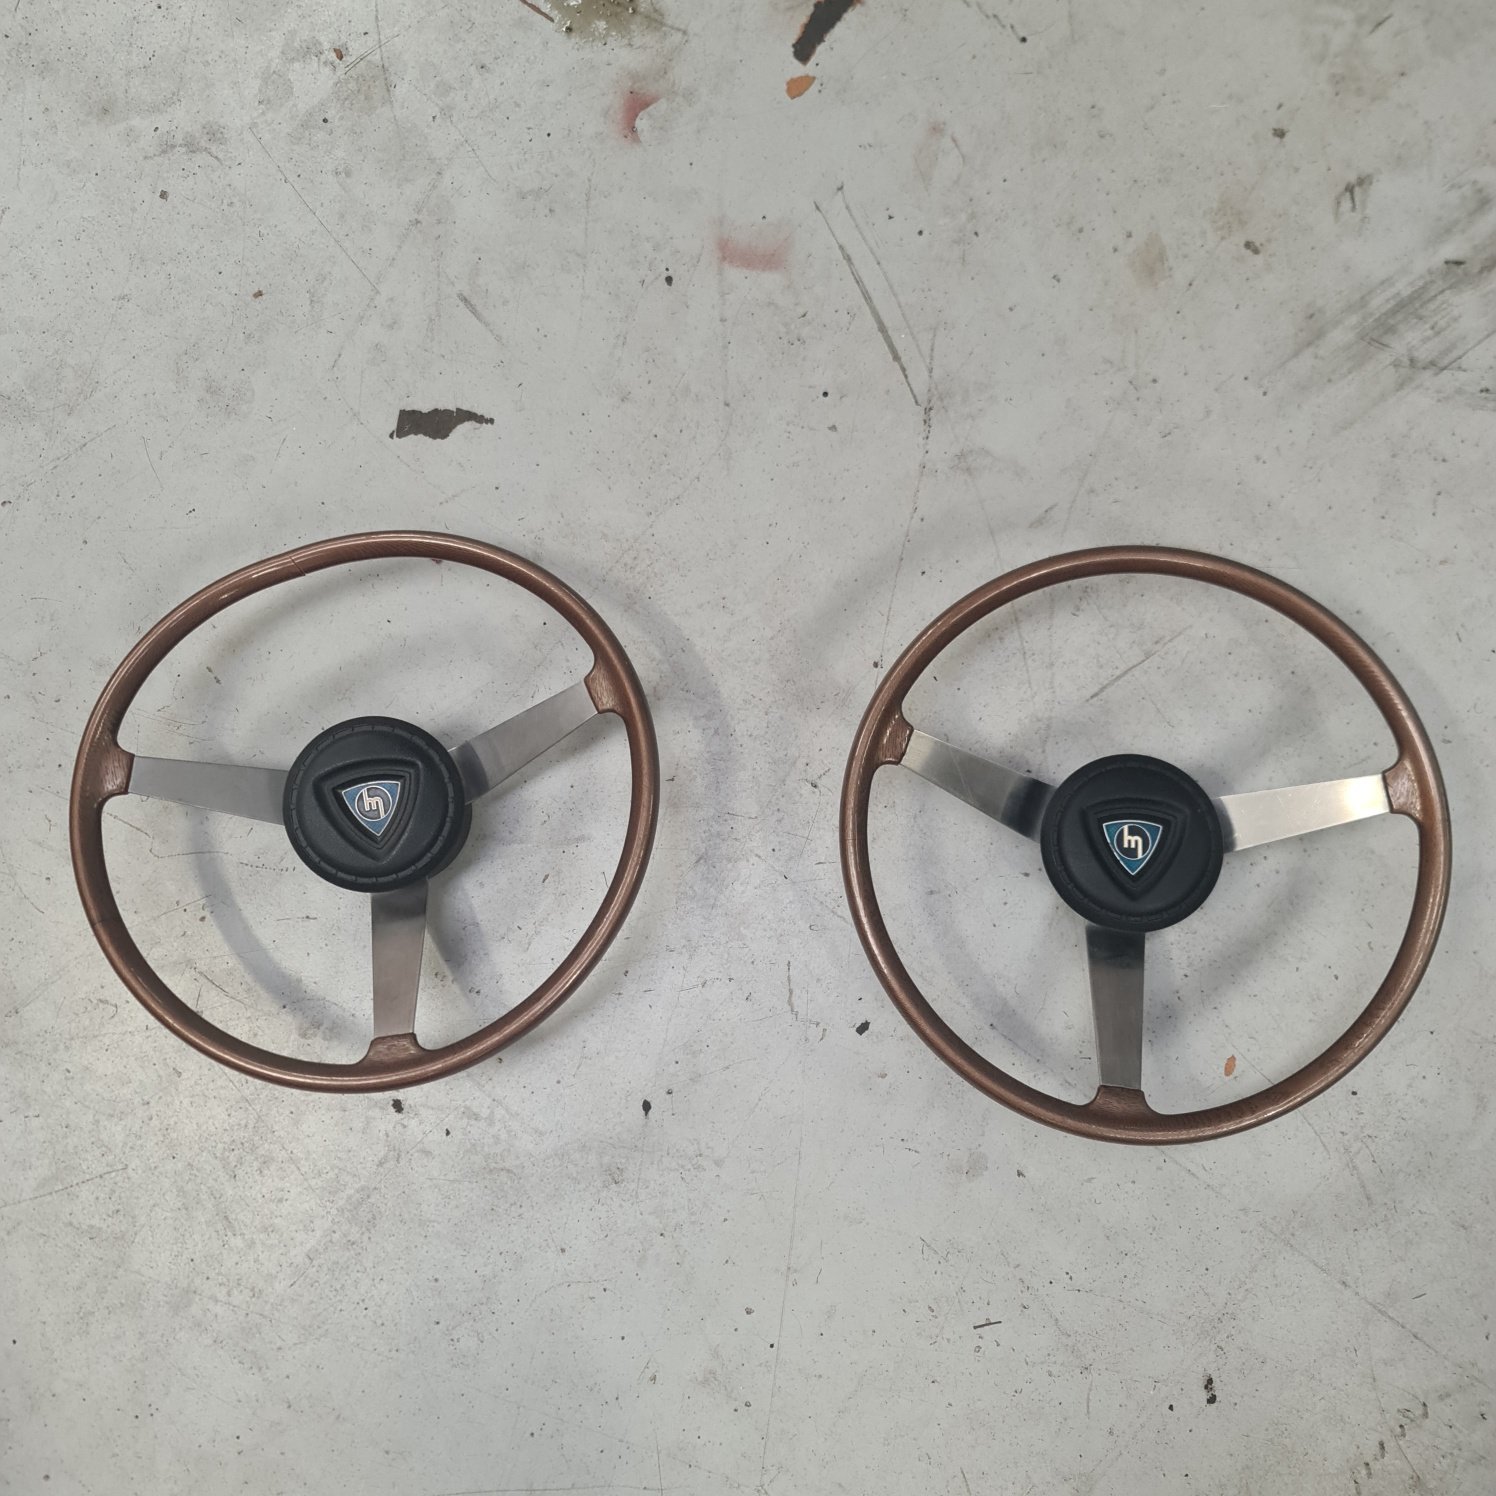
Another piece to the puzzle completed. I couldnt justify the $2k + for a factory steering wheel they go for, if you can even find one and jump on it fast enough. Managed to come across one for a fair bit cheaper that had a horn pad but was missing the horn spring/housing/mechanism. Was hoping id be able to find that easy enough, Turns out it wasnt that easy and finding a complete wheel would of been easier id say! A chance conversation with Andy Duffin and he mentioned a guy who had messaged him with a damaged RX3 wheel which would have the parts i needed. A quick FB message and was able to nab the damaged wheel which had been sitting in the guys workshop for 20 years +. Was able to make a complete wheel with my decent condition one so pretty happy about that! Will help make the interior look how im planning.
1 point
-
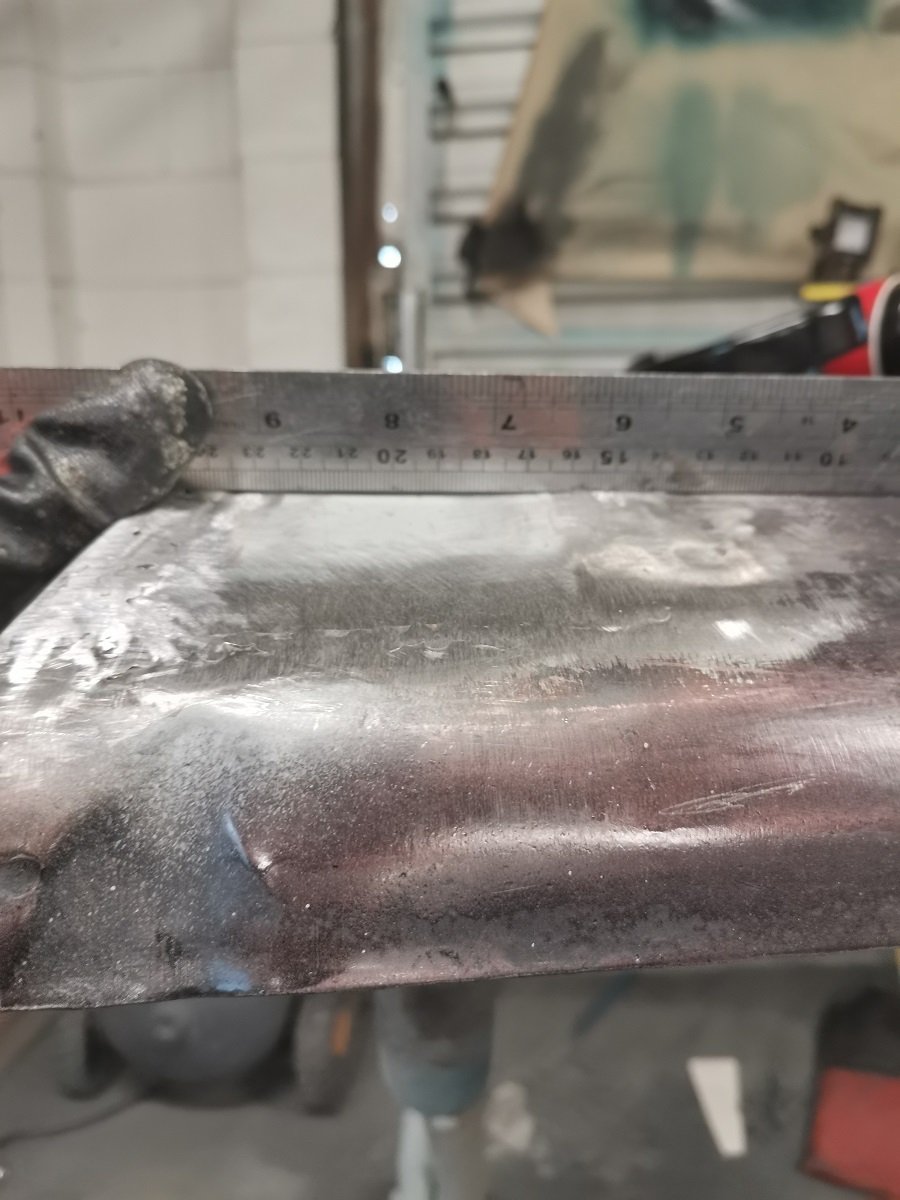
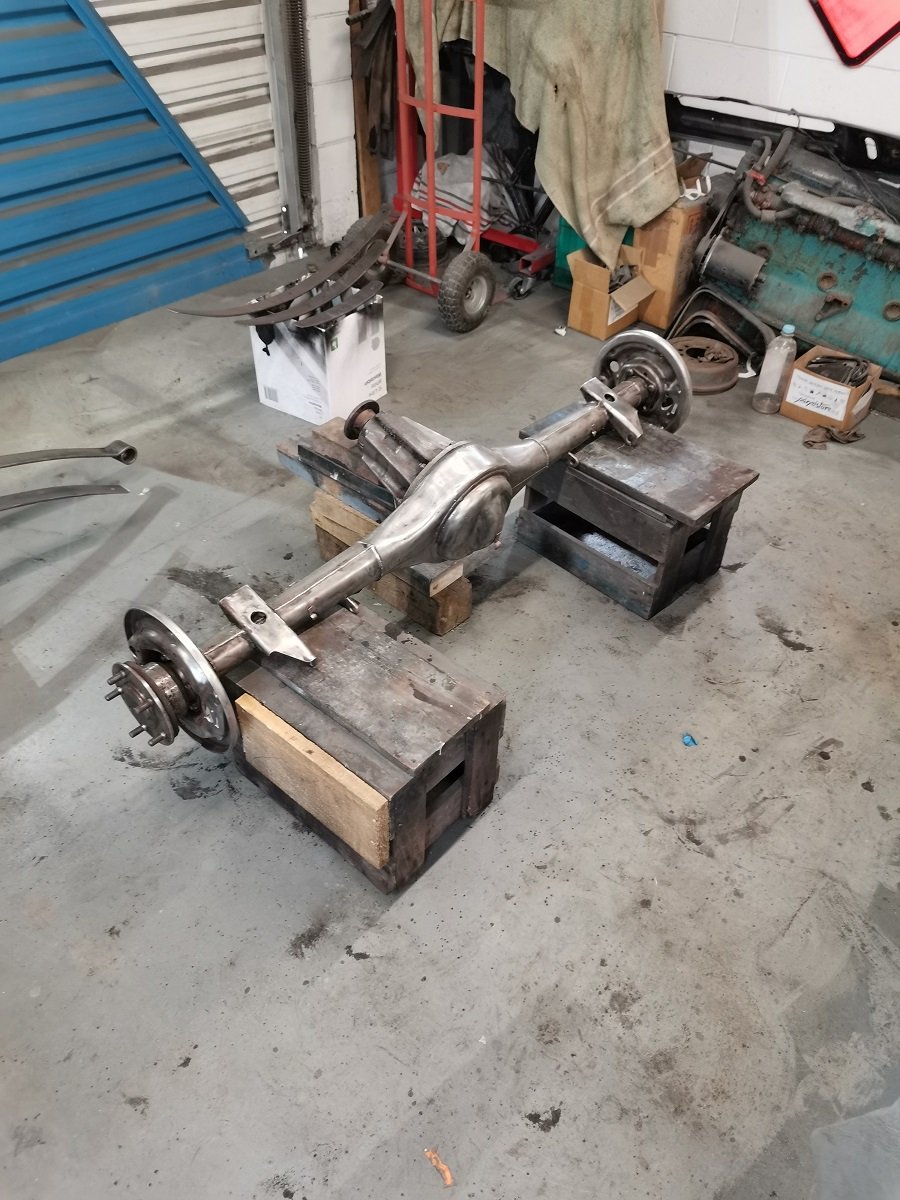
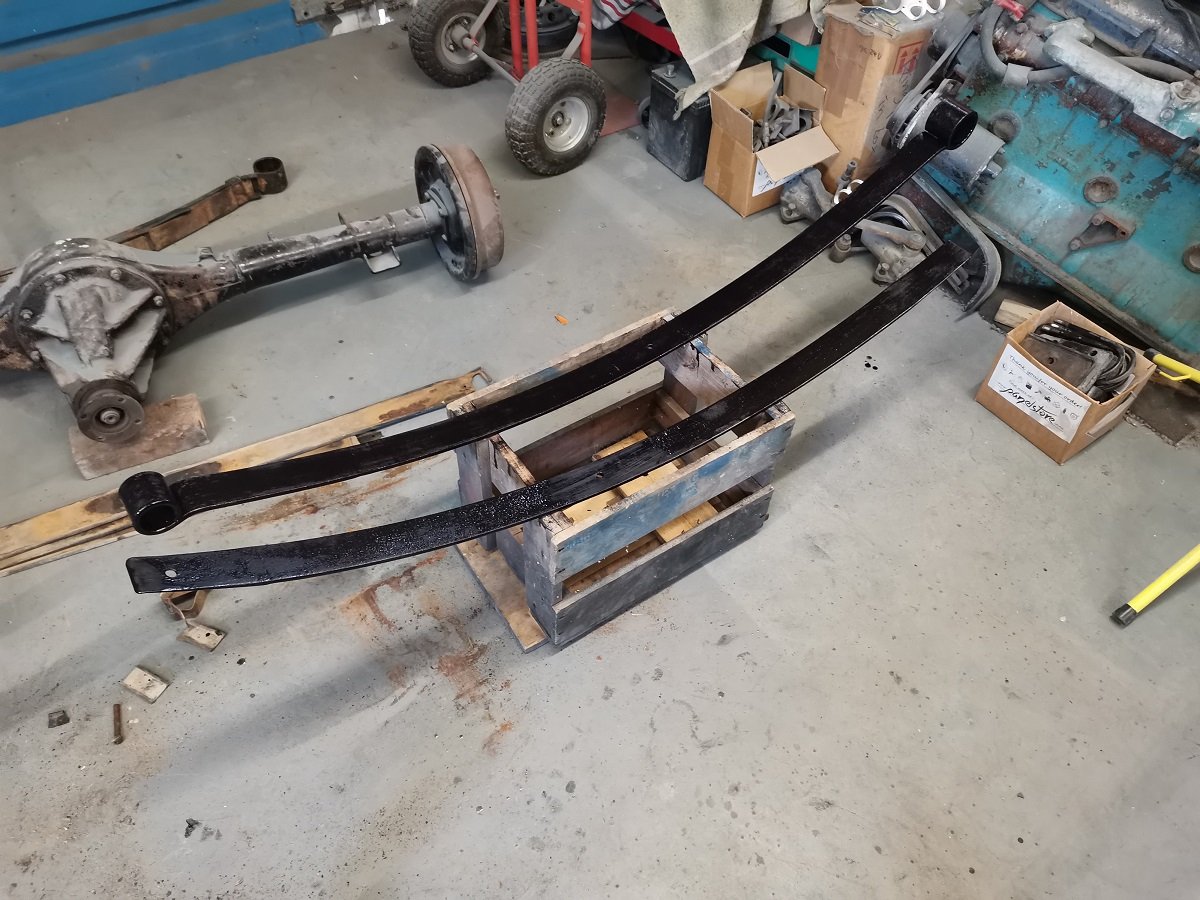
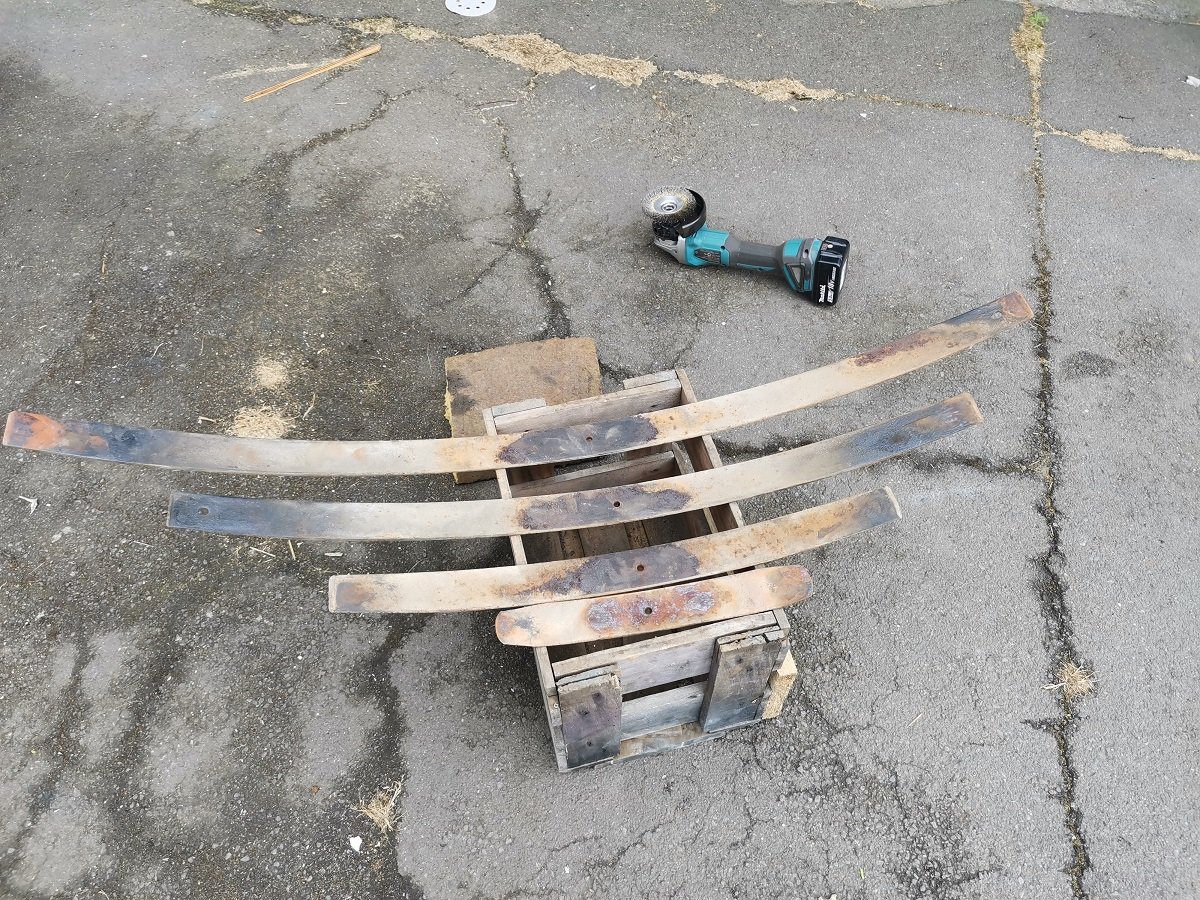
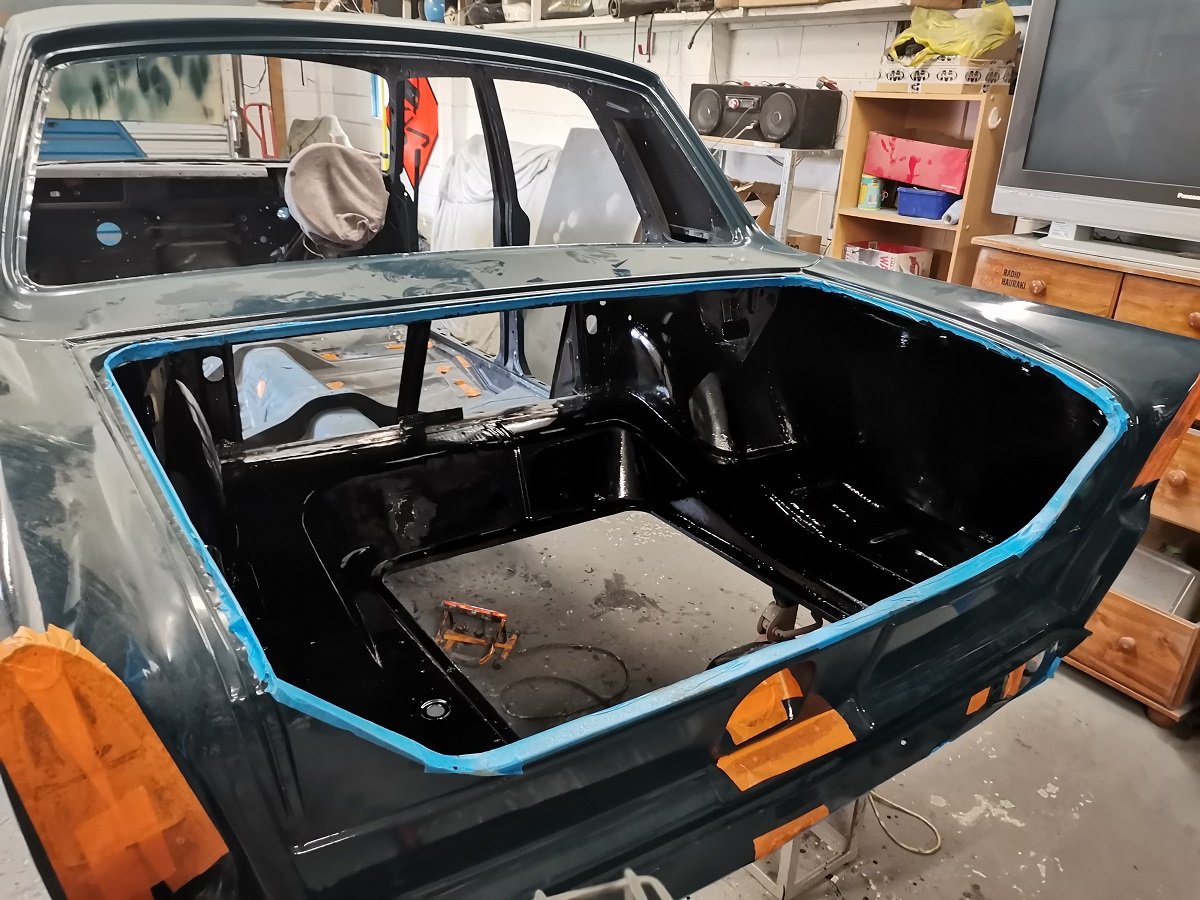
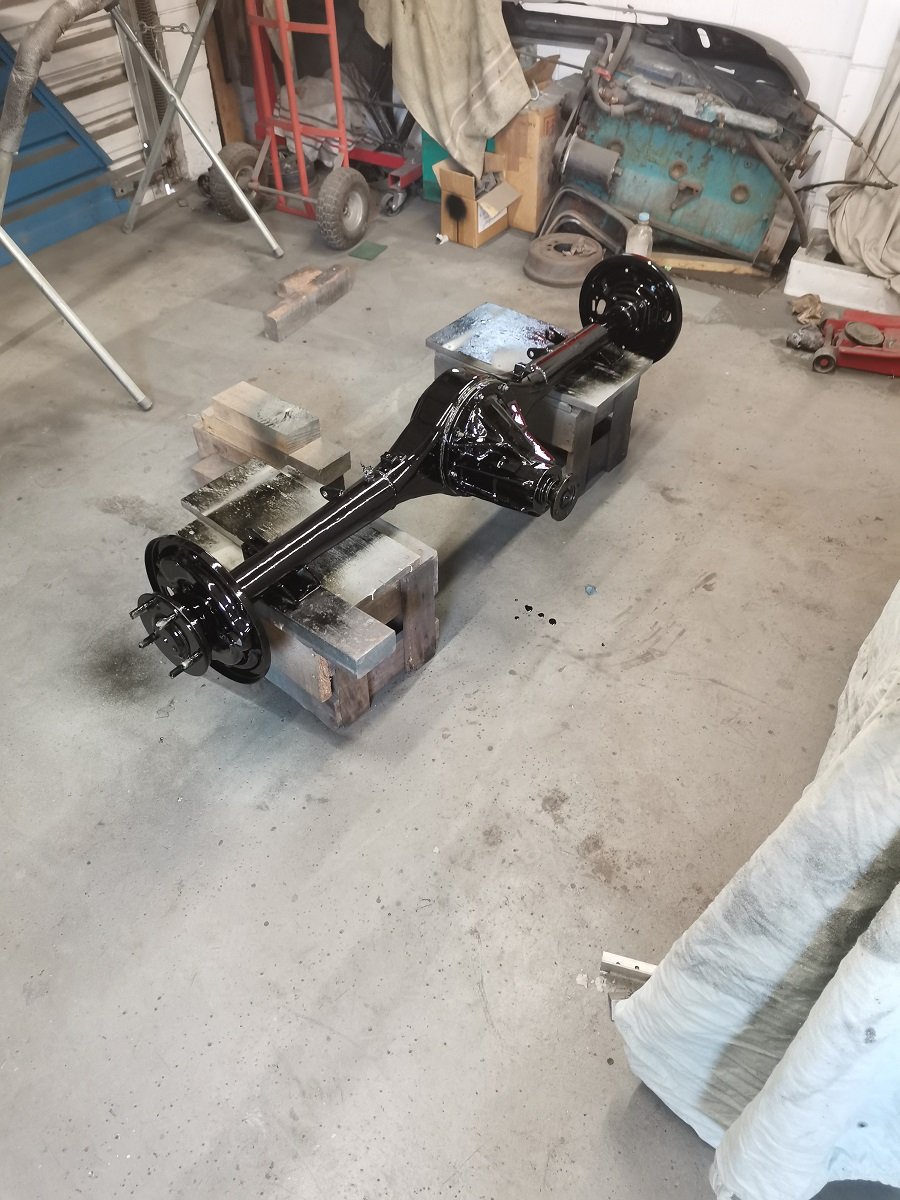
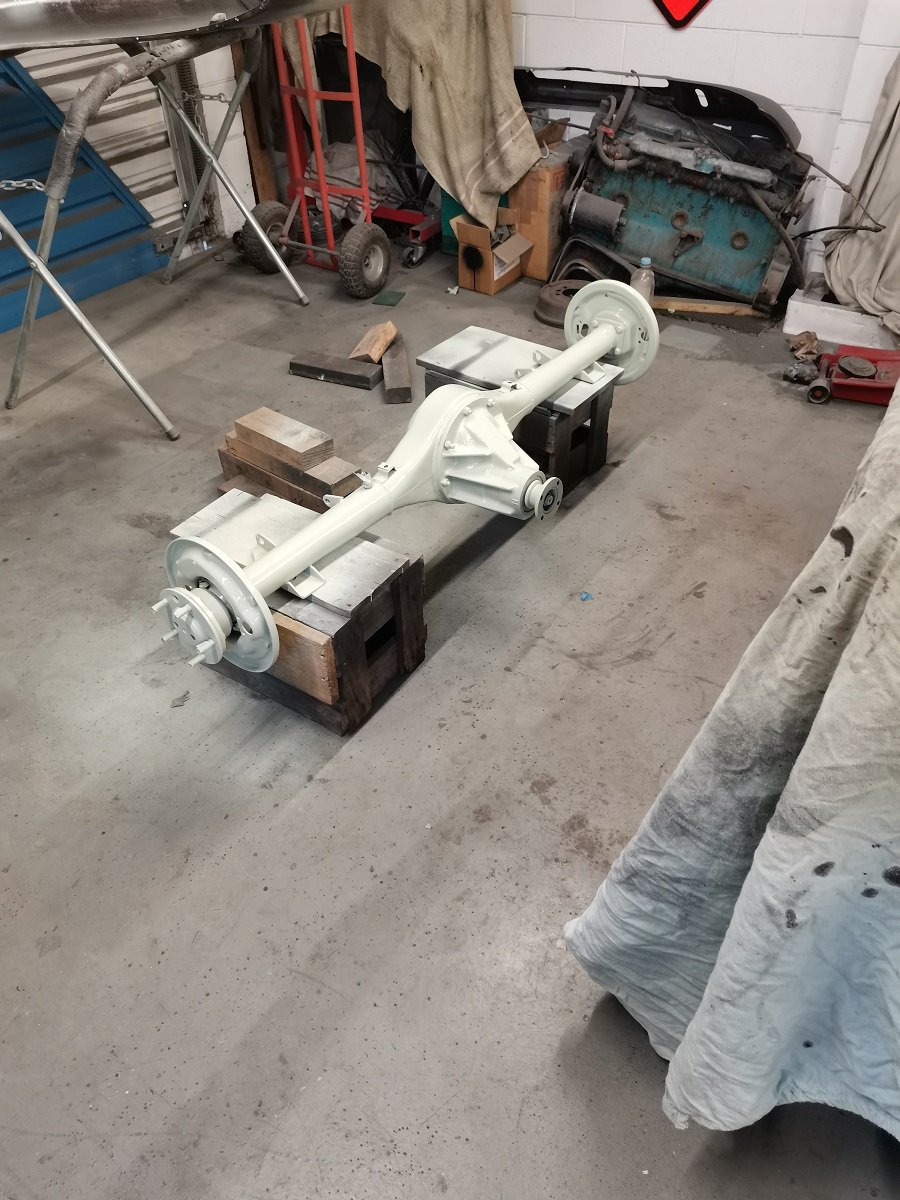
After the painting I pulled the diff and springs back out. Painted the boot with 2K black. Cleaned off all the rust from the springs. Bit of pitting, but not too bad. Treated them with Brunox, painted with CRC Black zinc. Then got them reset and riveted at Bellamy and East, really happy with the job they did. Next I bare metaled the diff, epoxy and 2k black Re-did the worst part of the guard, not perfect but now only a few mm of bog needed Also made a new inner guard nose. Guessing mud etc gets stuck behind it, which rusts it out
1 point
-
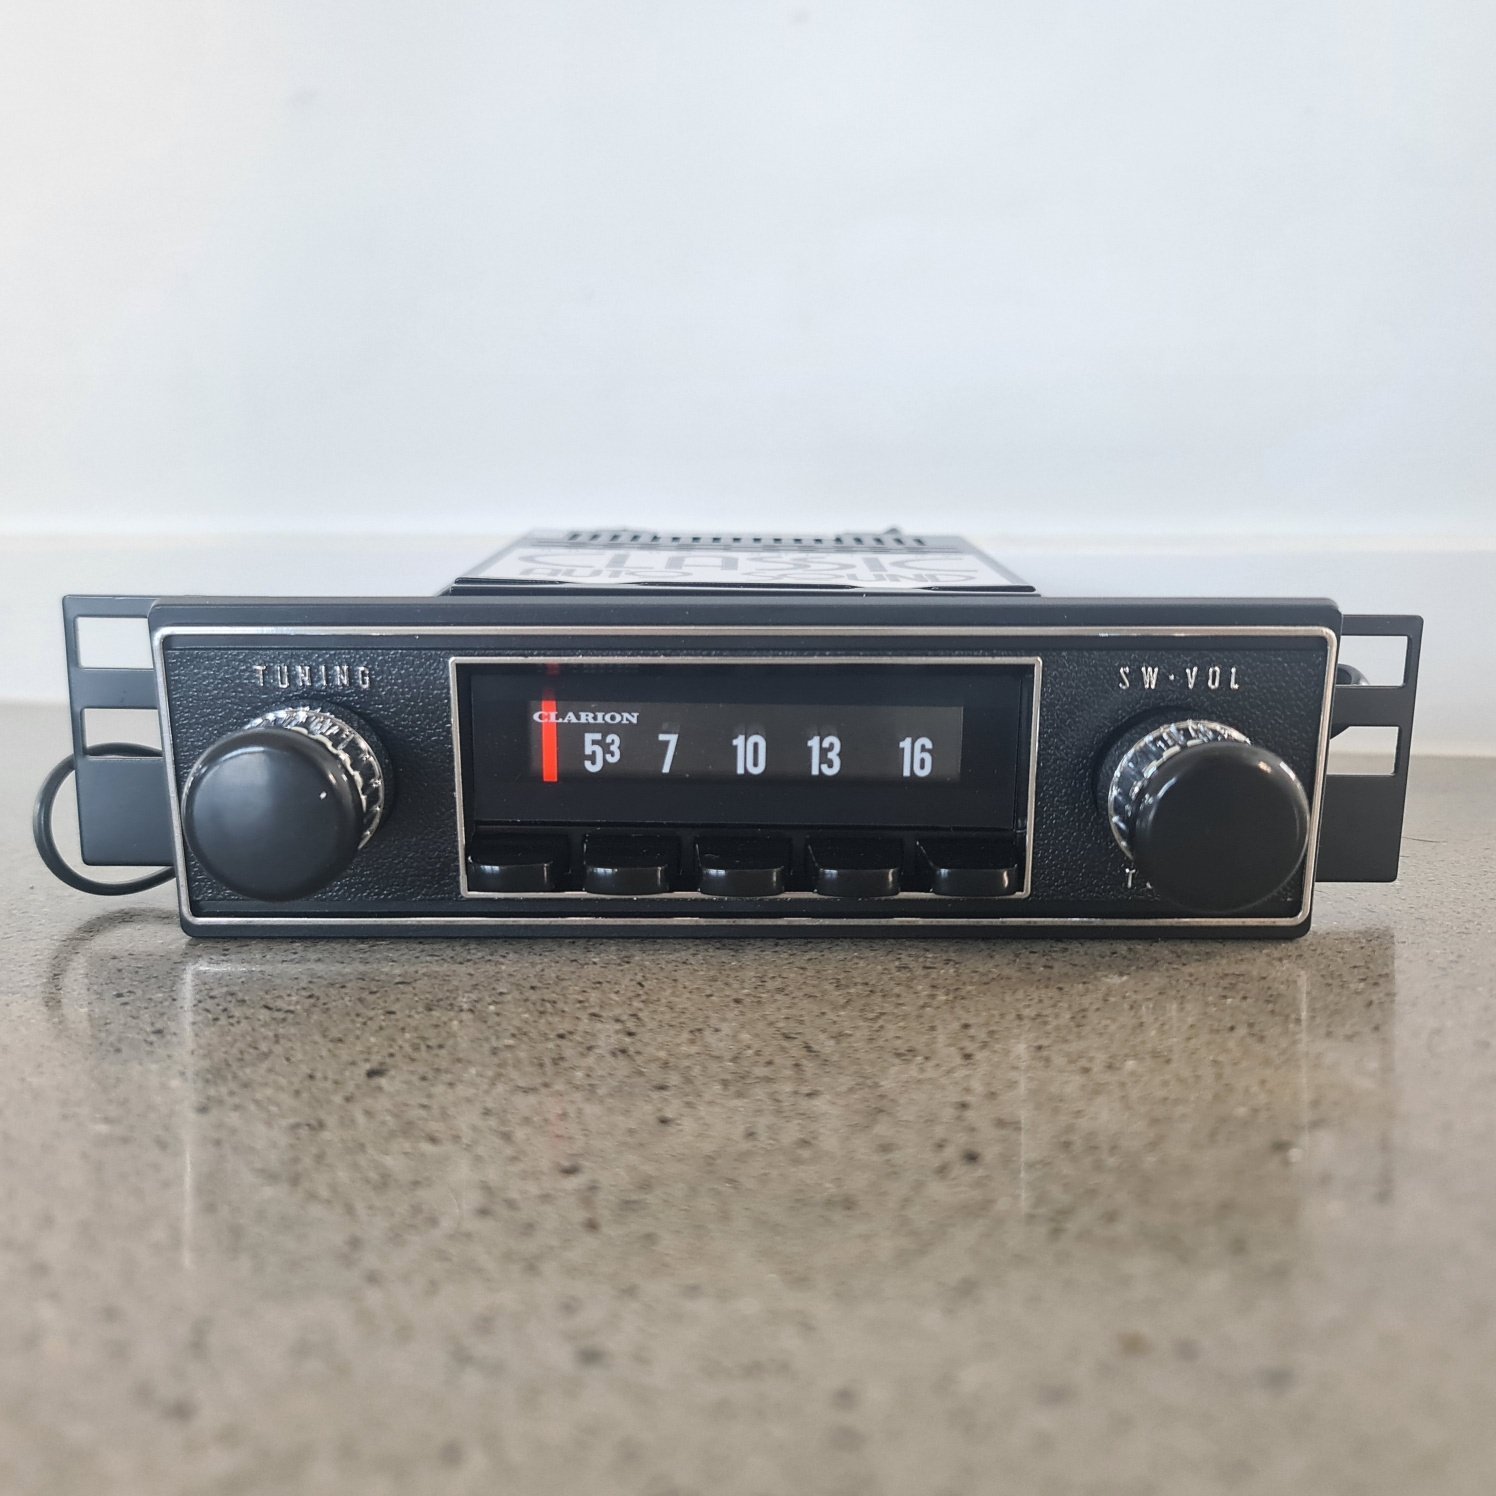
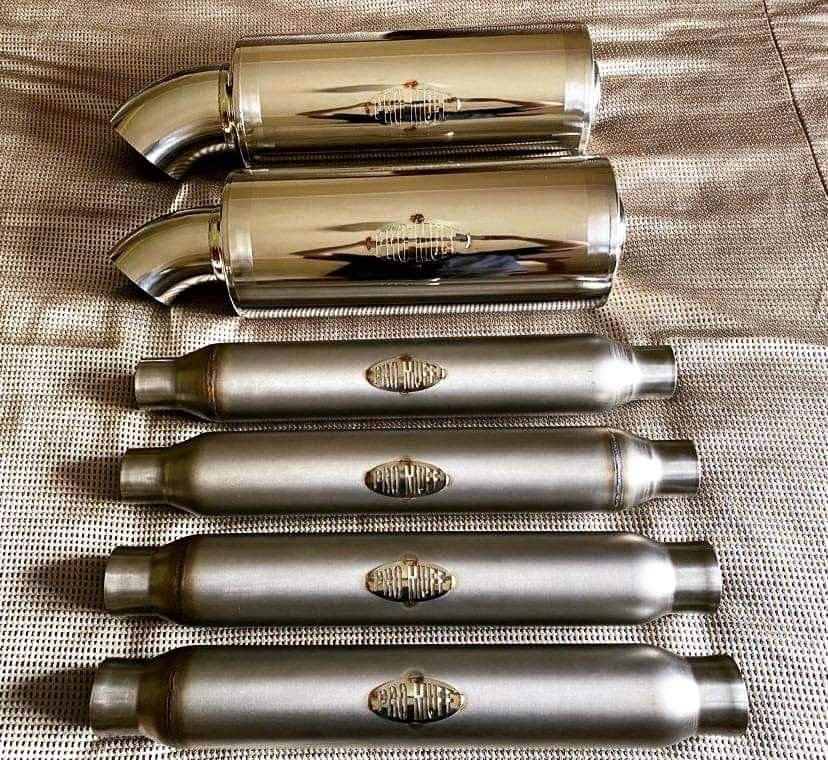
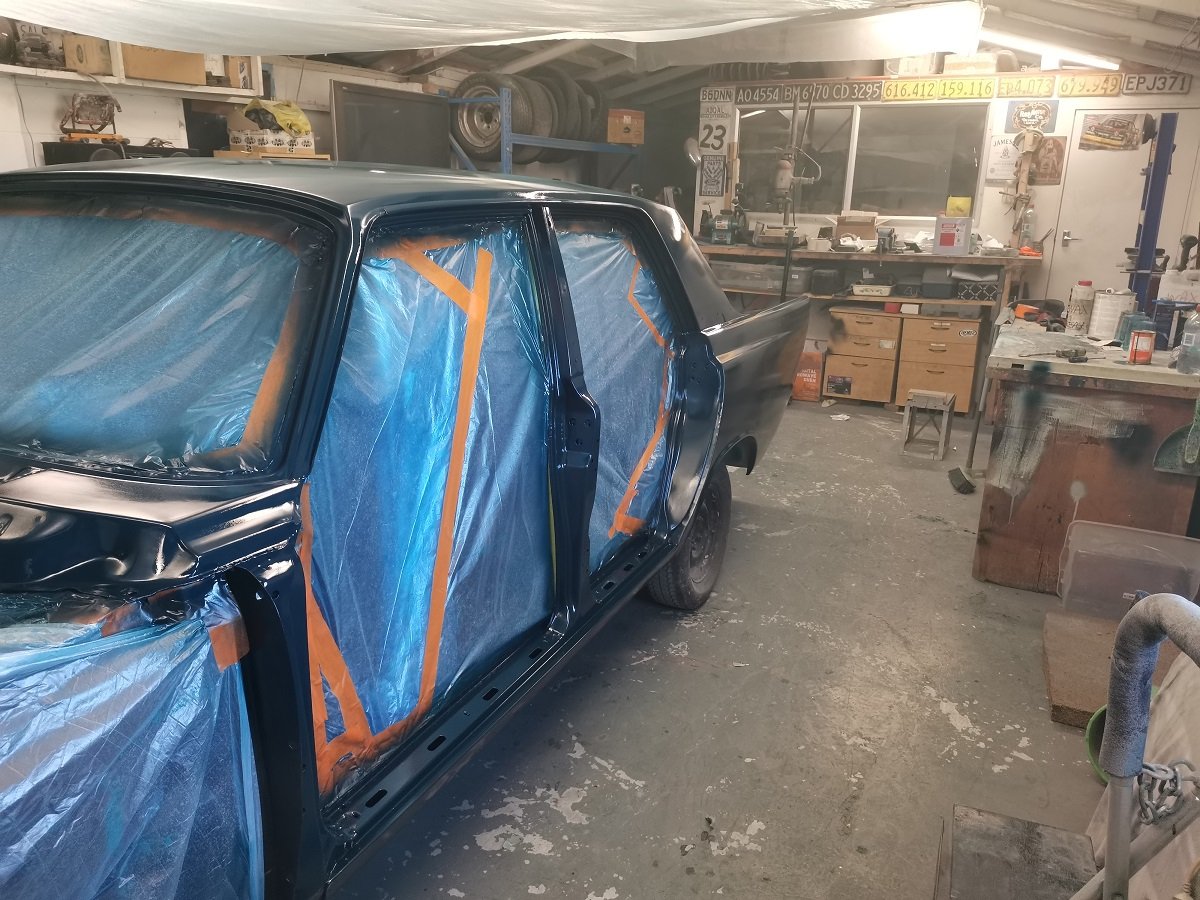
All go at the moment. Mate doing the fabrication has shaved/filled the engine bay excess holes, made a new gearbox mount on the body, mounted the heater/blower for RHD (Was still setup for LHD), did the windscreen wiper conversion for LHD to RHD, reattached front seat mounts (old owner had taken out for bucket seats) , few other minor bits and pieces on the body. Shell has been dropped to mate whos painting it, is part way through baremetalling it again and hopefully get engine bay blasted and get the whole thing epoxied next week. My Classic auto sound headunit turned up after 3 months, a factory look but modern internals. Will go good with the factory interior styling im going with but has all the modern functions such as bluetooth etc. Ordered a PROMUFF muffler and 2 x resonators off BLG Engineering for my exhaust, didnt quite get time to do before painter but itll get done before paint goes on the body. (only half that pic is mine) Ordered a Haltech Elite 1500 ECU on black friday so thatll be suitable for driveby wire ill be running and should do everything i need nicely. Have also dropped interior off to start getting chipped away at. All coming together slowly, Should have the motor in my possession in the next week which will be another mile stone ticked off. Next big push is panel/paint prep, get on to rotisserie for underneath, then final bits and pieces and get it painted.
1 point
-
Oh yea shit I forgot to tell you why everything got covered in oil. So right after I moved the oil cooler I took it for a drive round the block to check shit out. As I pulled away from the kerb I heard a weird sound and it continued as I got to the end of the road and round the corner. I was coasting along watching the gauges and trying to figure out what they noise was when the oil light came on. I shut er down quick smart and got out to have a look. It had inexplicably pushed one of the oil houses off the push lock fitting (that it had been on with no issue for about 3 years) and sprayed all 5 litres of oil all over the entire engine bay. And all over the road. Richie just happened to turn up at the right time and with his help, and the help of Nick the sparky (who, despite being forewarned of the ground being covered in oil stood straight in it and fell over) we pushed it back up the hill and into the garage. There is still oil on everything despite emptying can after can of degreaser all over it.
1 point
-
back on the dyno today and all was well. the car took yet another beating and was fine. no fuel issues, no anything issues which was a relief tbh. made 460 KW again on slightly less boost but call it the same. fuck, like it matters at this point, its undrivable at that level anyway so what difference does it make. oil stayed cool and the oil cooler fans seem to work good too which is great. i do need to replace the heat shielding on the exhaust that goes under the floor. that last lot got oil all over it so i removed it and man can you feel the heat coming up through the floor now.... 2021-11-30_10-20-12 by sheepers, on Flickr1 point
-
the injectors i got for it are those ones with a cap on the top and a cap on the bottom to adapt them to different types of fuel rail and different lengths. dont get them. i fought the fucking o rings in the caps leaking for days. if the injector has even a tiny bit of angle to it as you ty and install it they leak. fucking piles of shit. managed to ruin a base seal and i dint have any spares so i had to improvise. i had a larger and thicker ones from a nissan so i set about making them smaller on the od and thinner. 2021-11-21_04-17-12 by sheepers, on Flickr 2021-11-21_04-17-04 by sheepers, on Flickr 2021-11-21_04-16-48 by sheepers, on Flickr 2021-11-21_04-16-33 by sheepers, on Flickr 2021-11-21_04-16-26 by sheepers, on Flickr with that done the only thing left to do was relocate the oil cooler and fit some fans to it. the only fans i could find that were small enough but still waterproof came from the states, they weren't expensive but they took a bit to get here. the oil cooler is now mounted on the side of the chassis rail between the engine and the rail, behind the steering rack. ive been driving it around with a thermocouple in the oil cooler just keeping an eye on the temps. its pretty good and drops fairly quickly as soon as your driving as there's a bit of air flow. so anyway i made a bracket type setup and mounted the fans onto the oil cooler. all i need to do now is wire in the relay and they should work. im back on the dyno on Tuesday so yea, lets see what happens. 2021-11-28_05-10-37 by sheepers, on Flickr 2021-11-28_05-10-31 by sheepers, on Flickr 2021-11-28_05-10-22 by sheepers, on Flickr 2021-11-28_05-10-14 by sheepers, on Flickr1 point
-
@kyteler, thanks man. Brave pills swallowed, went for it. I found a little bit more filler in the lid than I would like but meh. / Never looked better.1 point
-
Wee skim of bog over the repairs and some other small dents. No more than a couple of mm, much better than the >10mm that was there before. Repeated the bog, sand, filler primer, sand process a few times until I got it to the stage I was happy with it. First coat of colour went on a bit dry, so I put a bit more thinner into the second coat. Wee bit much it seems so have got some runs. Hopefully will be able to wet sand out without too much trouble
1 point
-
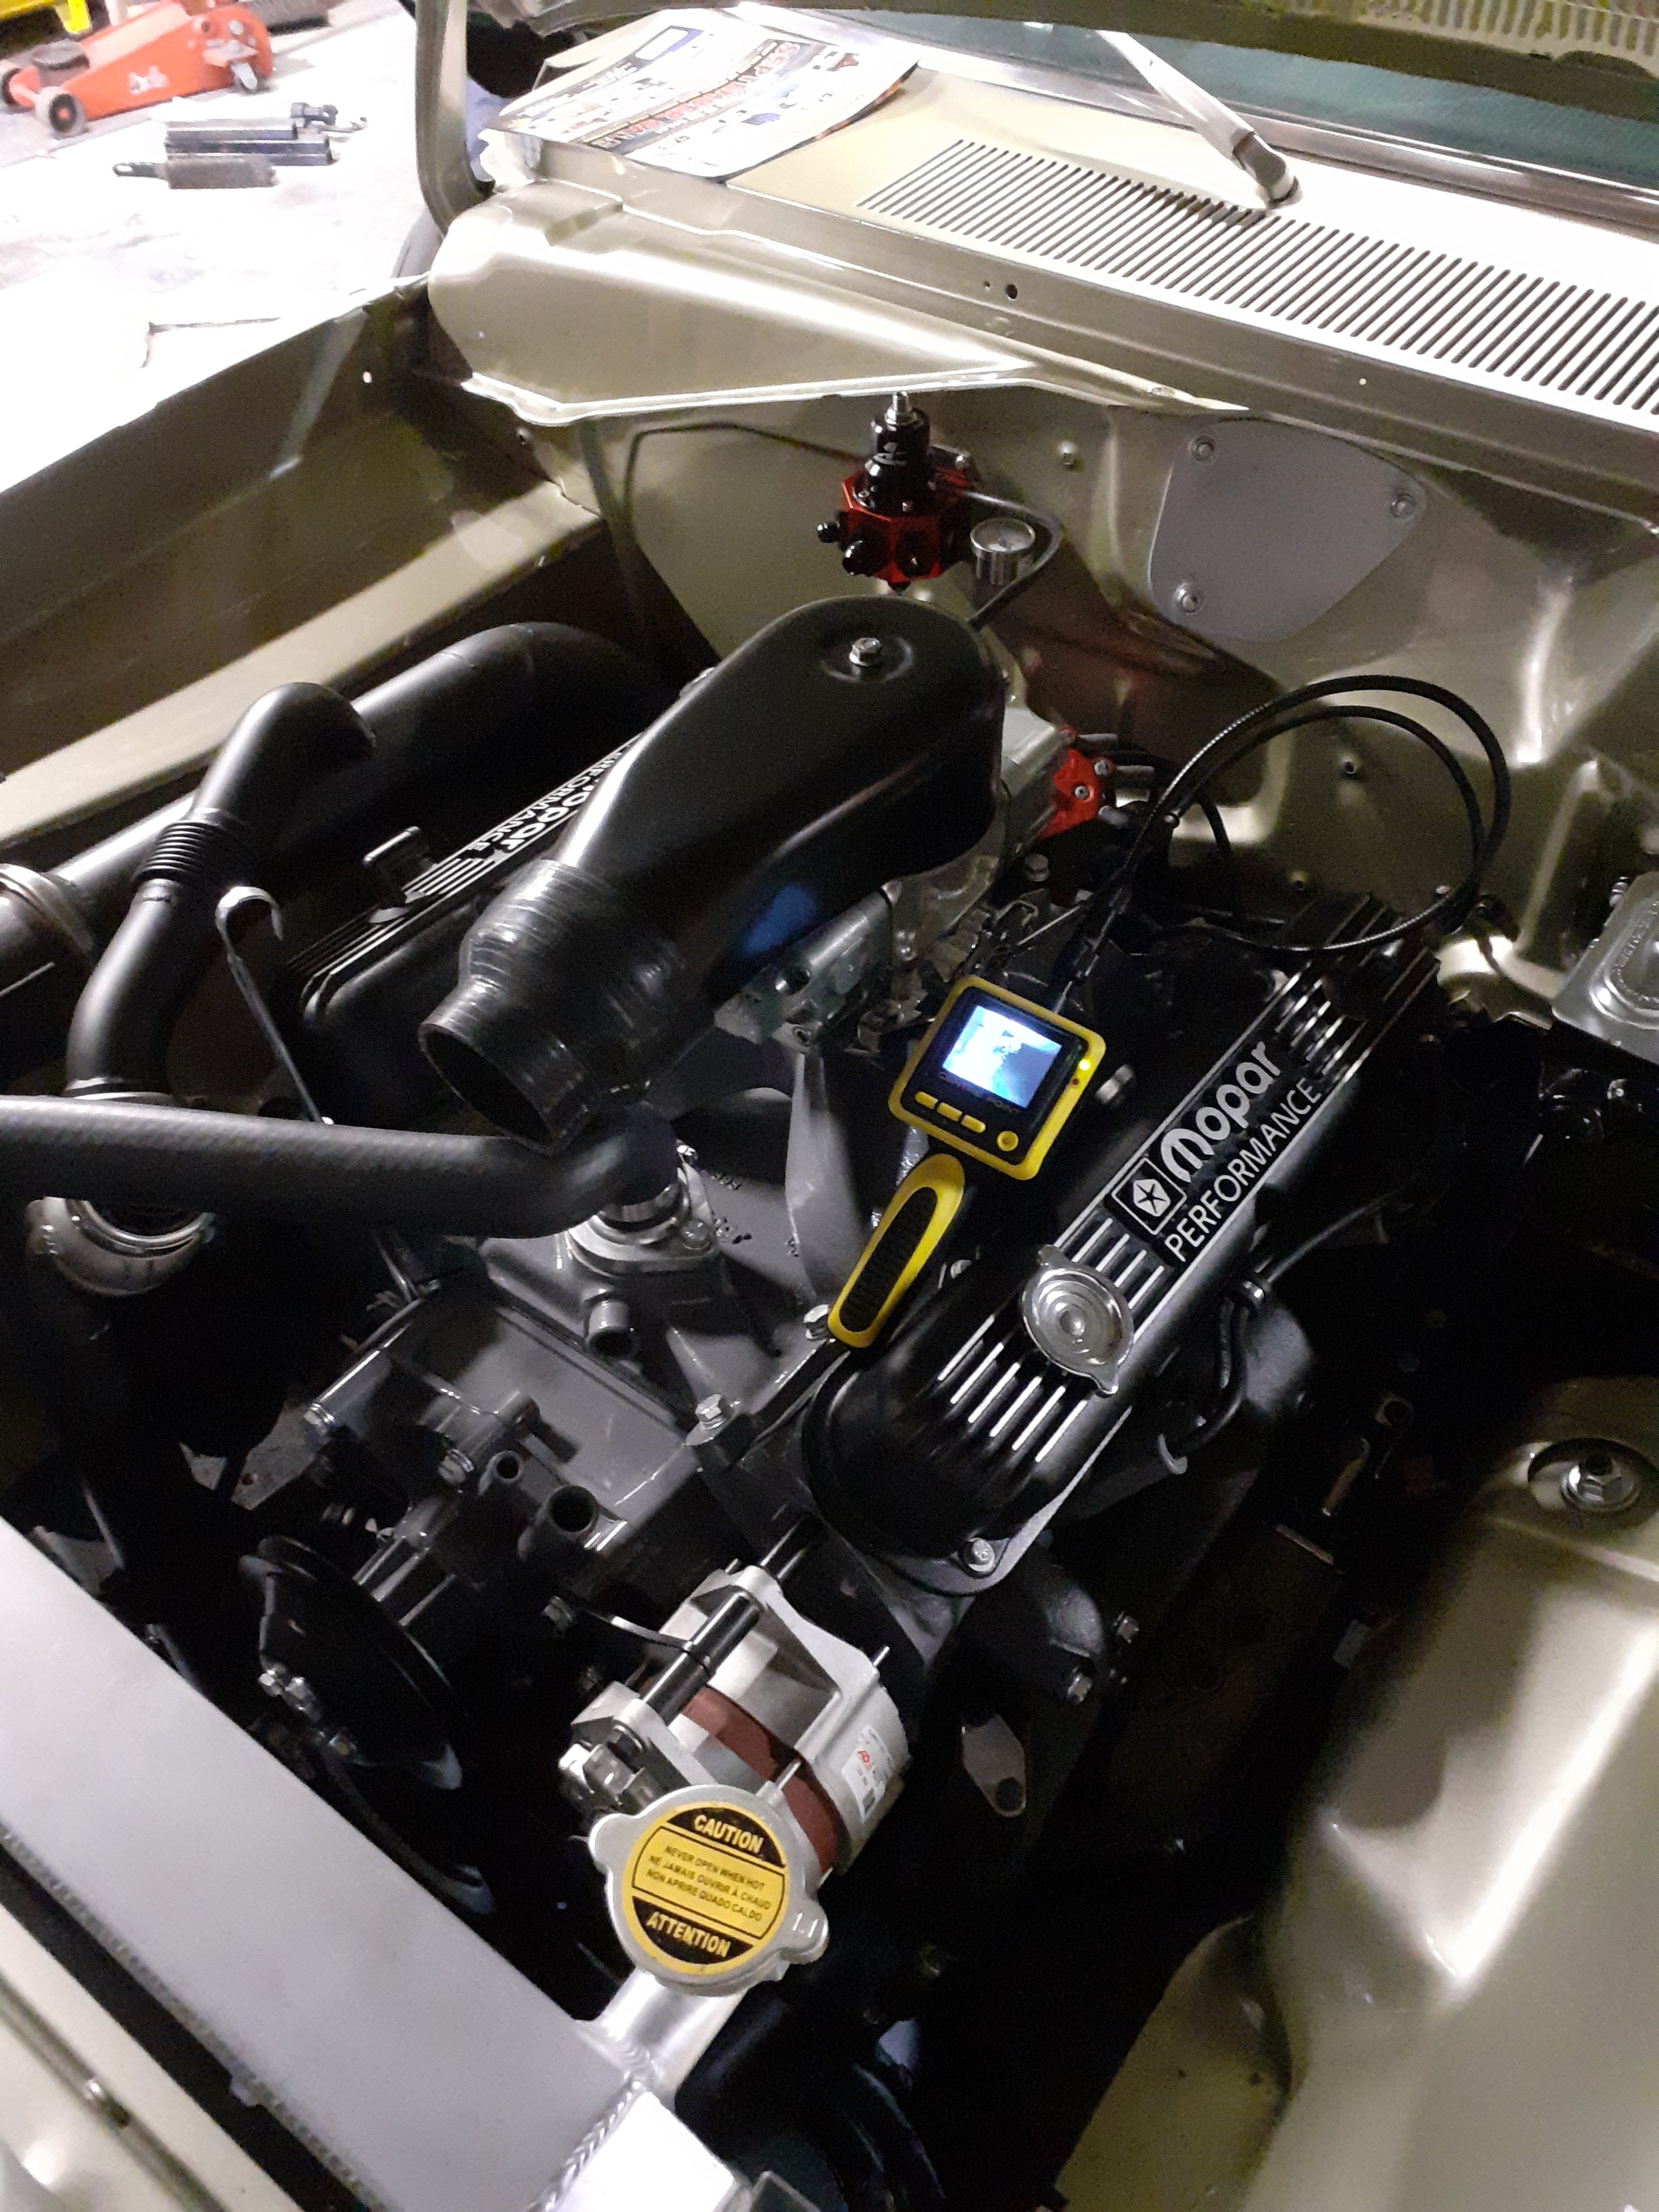
Had a bit of a cockup When I pulled the motor out of the white car and stored it, I put a rag in the dizzy hole to stop shit getting in there Being so long ago, I forgot how big it was I also forgot to remove it when I set the rockers It appears the oil pump drive went om nom nom on the rag . It was quite hard to get out and it was a bit chewed When I got it out there was one bit missing out of the rag that I could not find . I mucked around for ages with the vacuum down the dizzy hole and got a bit of fluff out I deemed getting the rag out to be an essential service so went to work and got my snake camera and grabby thing, found the offending bit of rag hiding in the sump next to the oil pump and did a doctor spec cottonectomy Phew
1 point
-
It’s got a bit of a cakel to it now, I put castrol edge 25w50 oil and went for a drive
1 point
-
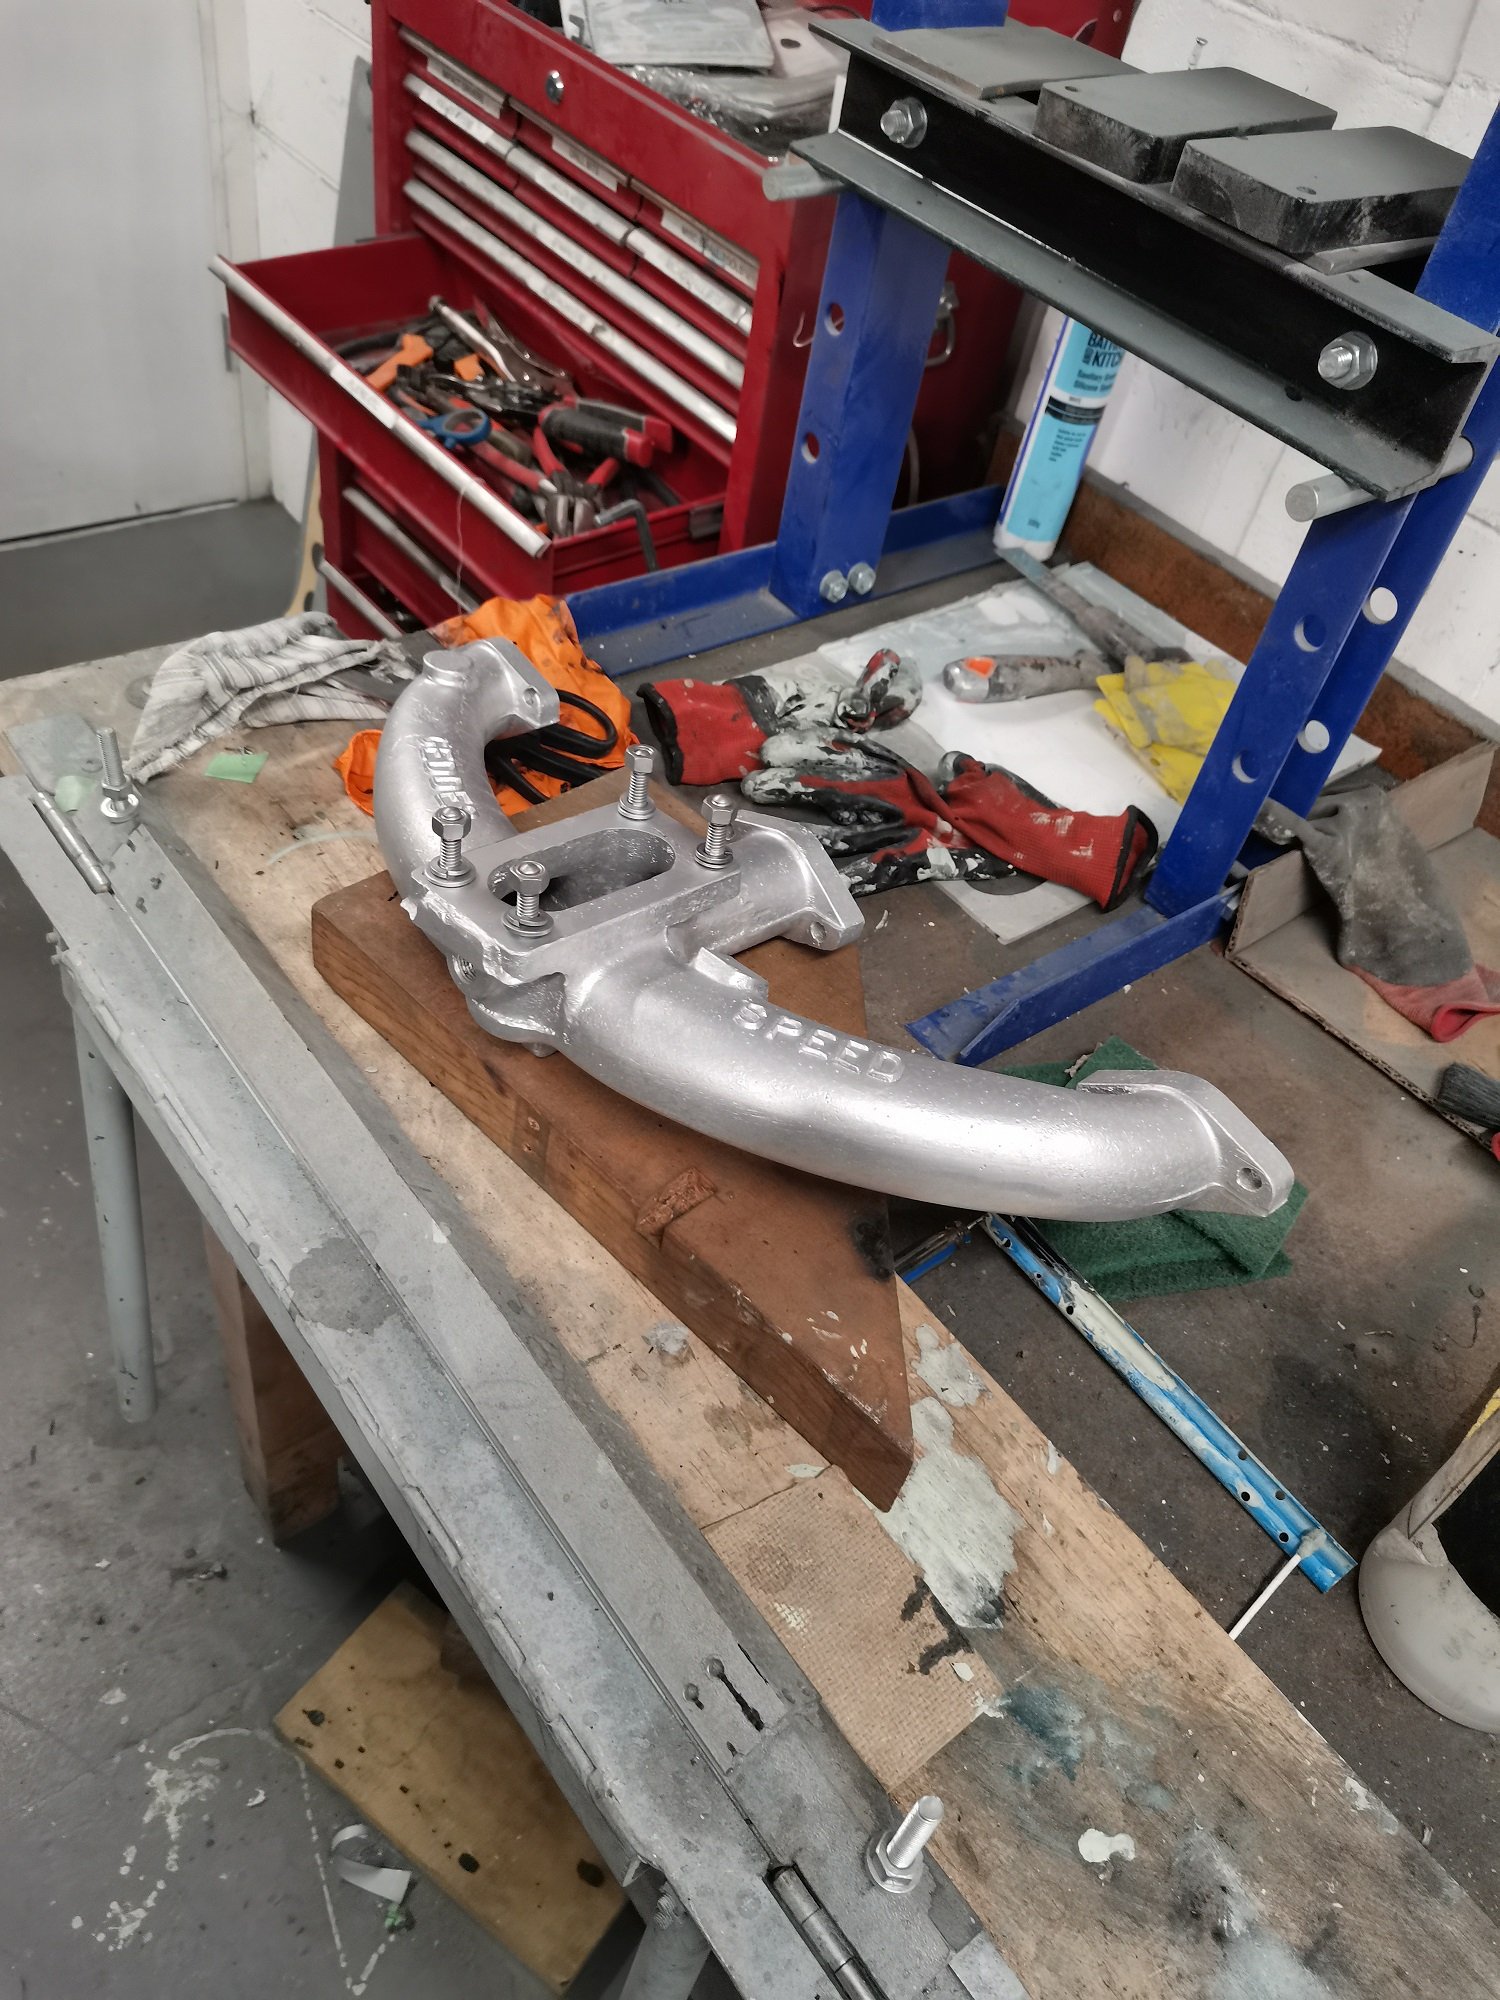
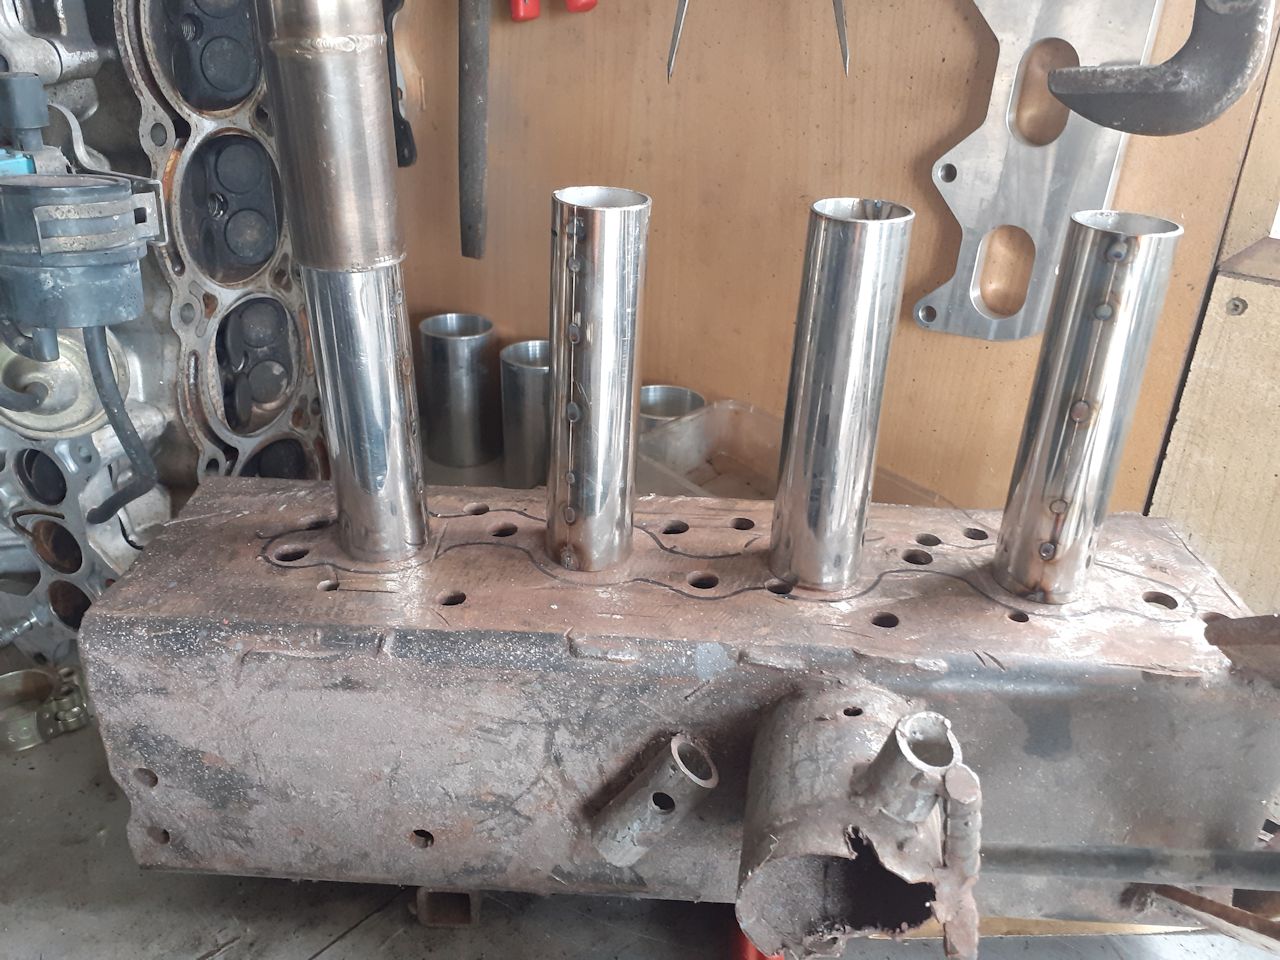
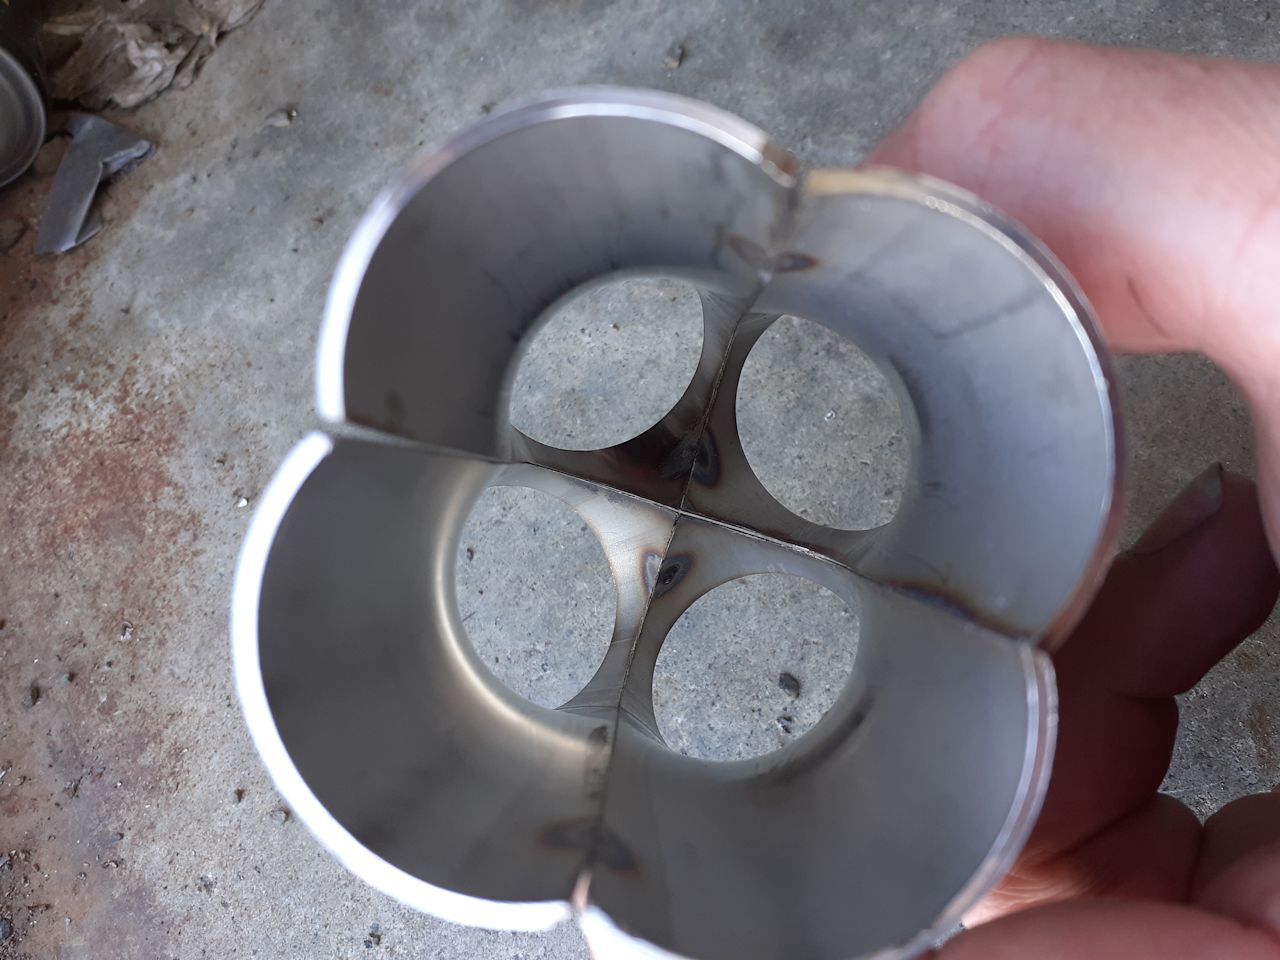
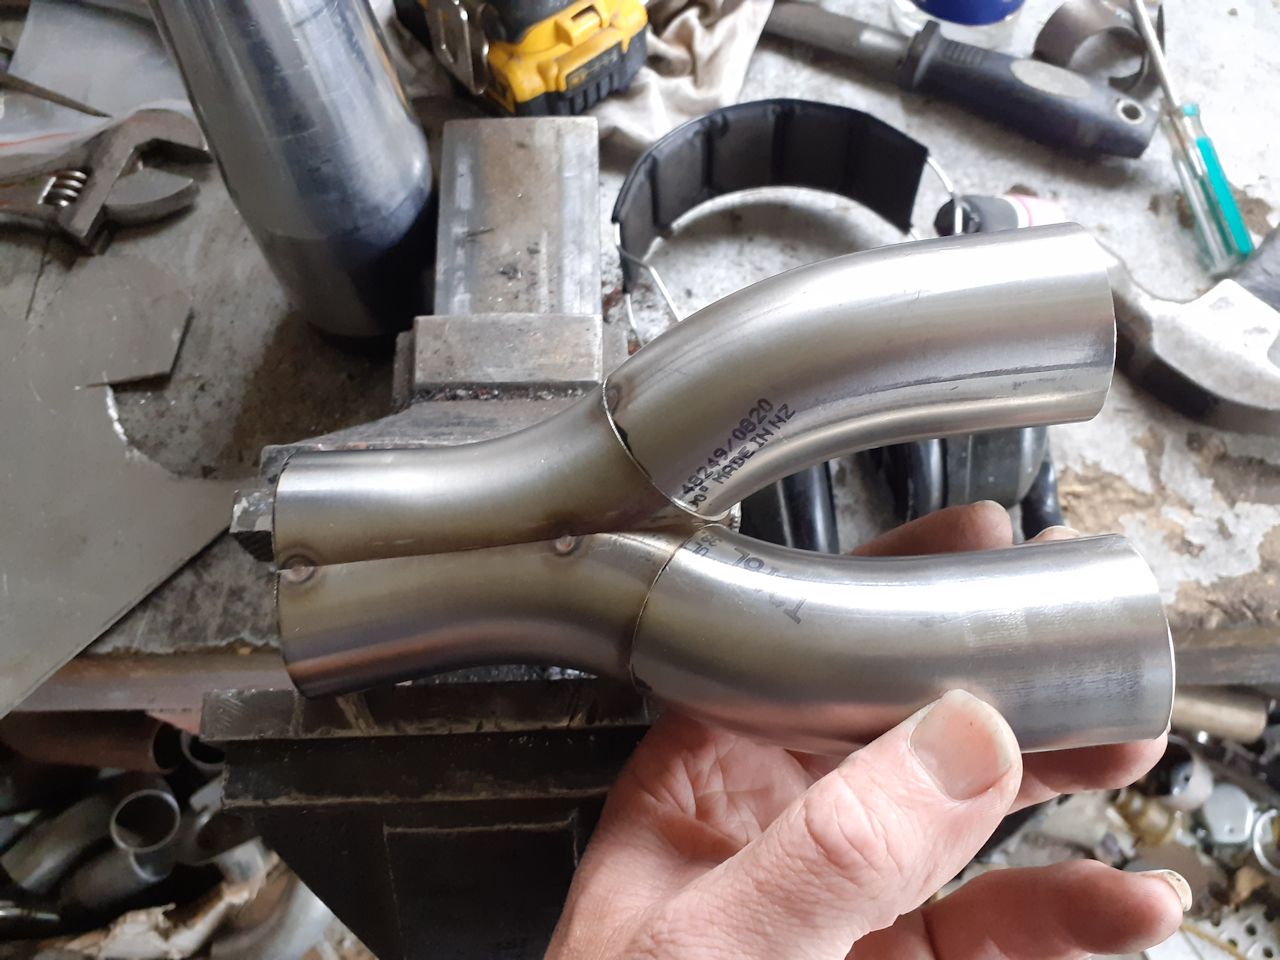
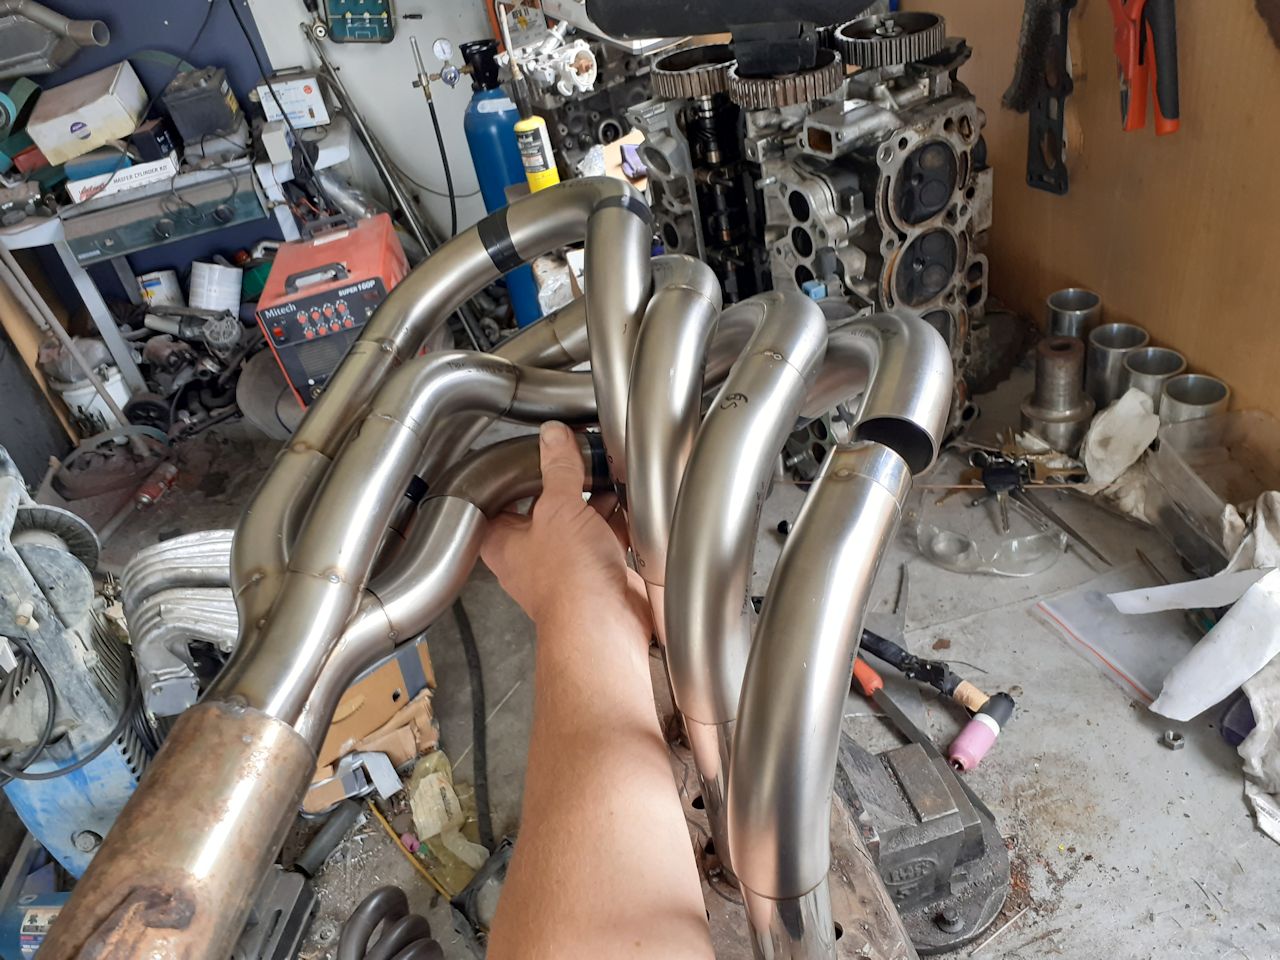
Long time no update. Wanted to try some stuff with the extractors, decided would be better off to make another set that will bolt in same place rather than mod current ones. made these pipes which have a very small taper down so can run a stepped section. port too big to run straight pipe. made a collector. idea was to try cut down the big open space where the 4 pipes connect. this is about how they will go. awaiting the flange and will need a few tweaks here and there. but all pipes are within 10mm of each other as it sits. other than the work in progress number 4
1 point
-
Skitz1 point
-
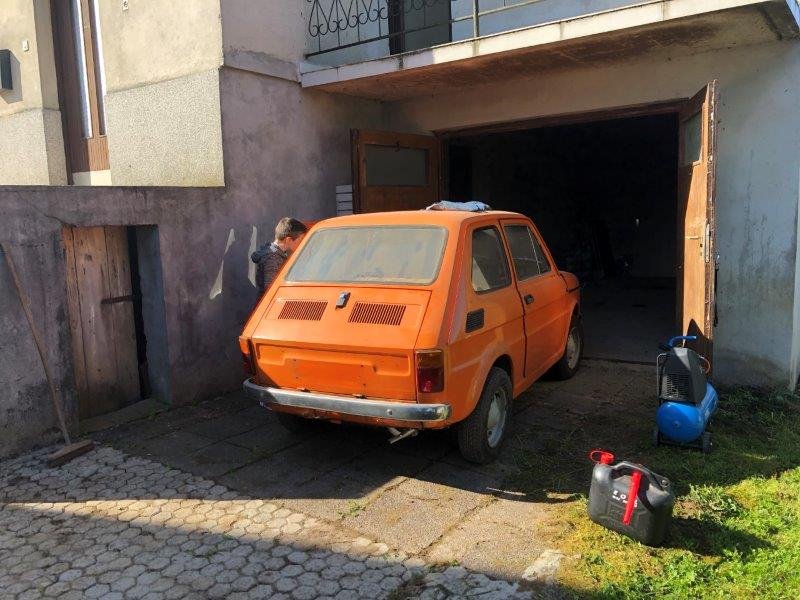
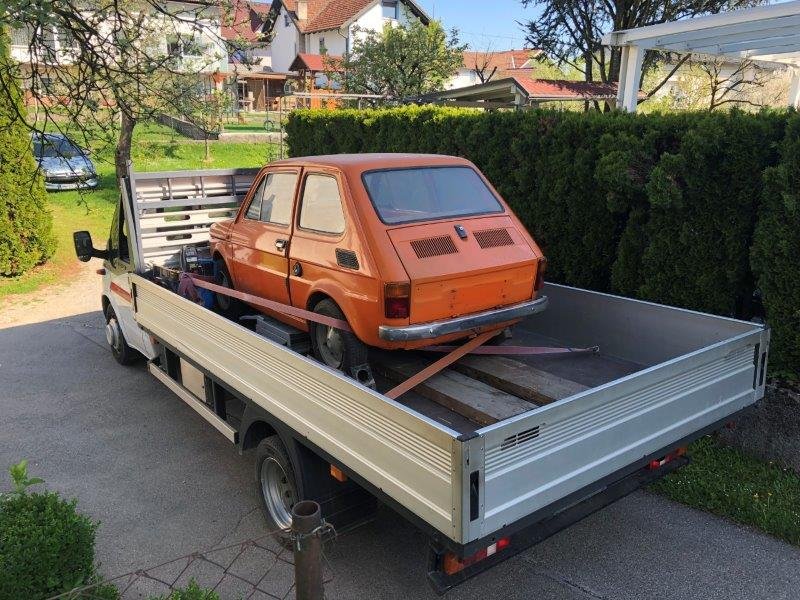
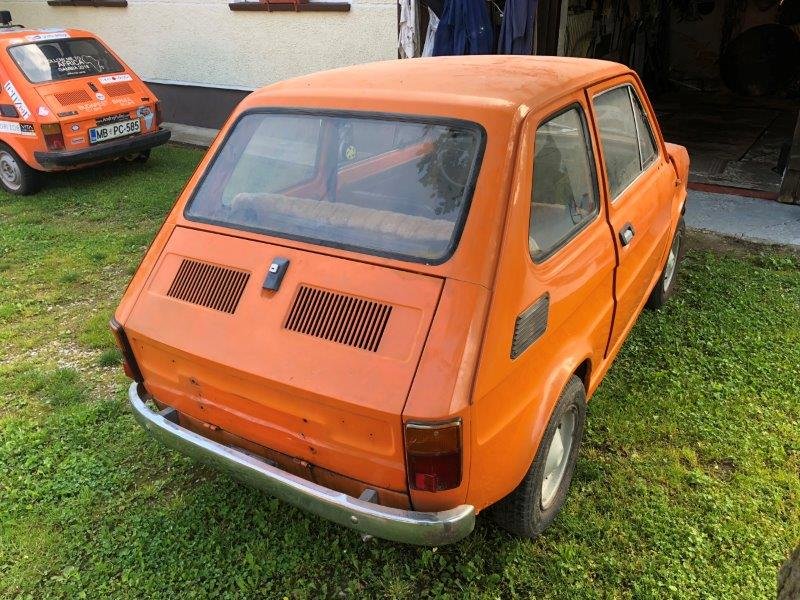
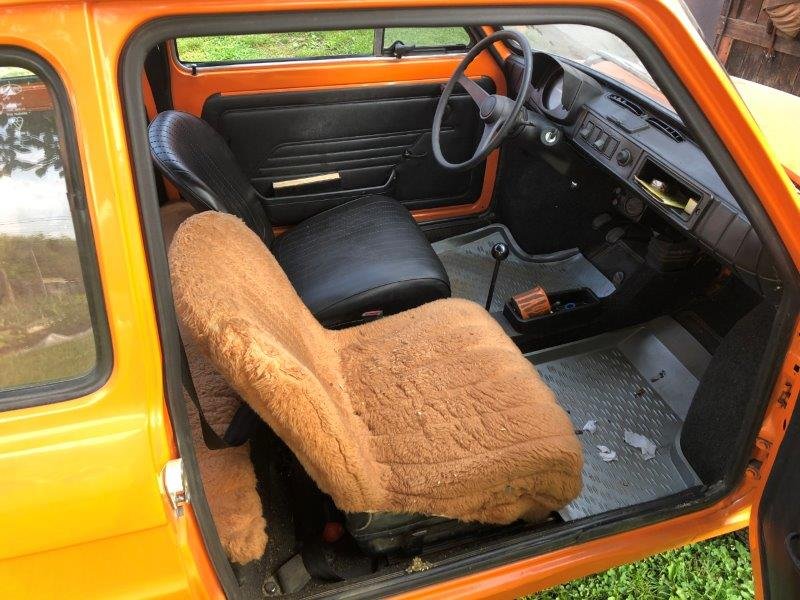
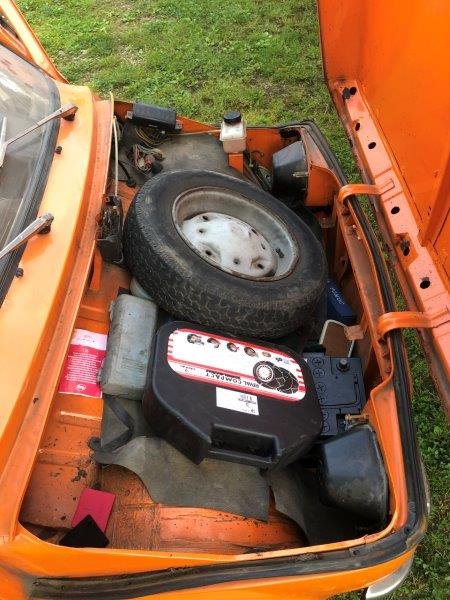
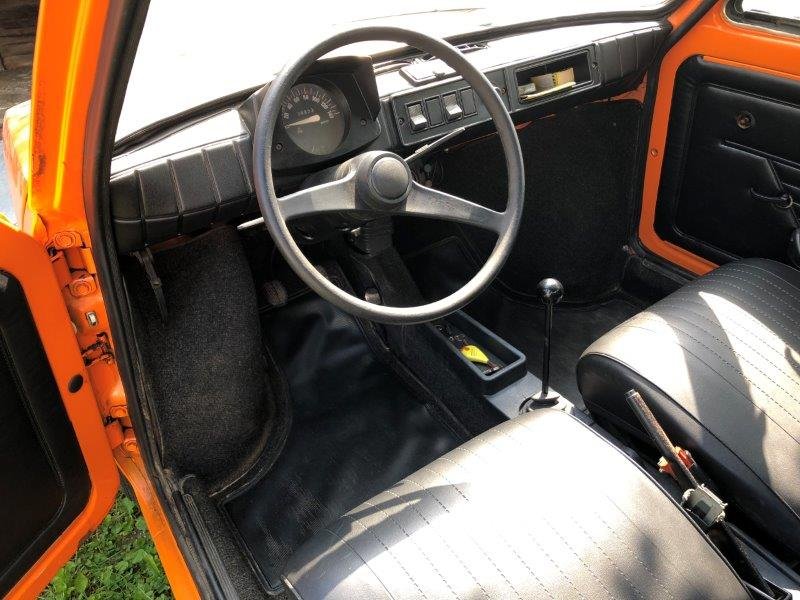
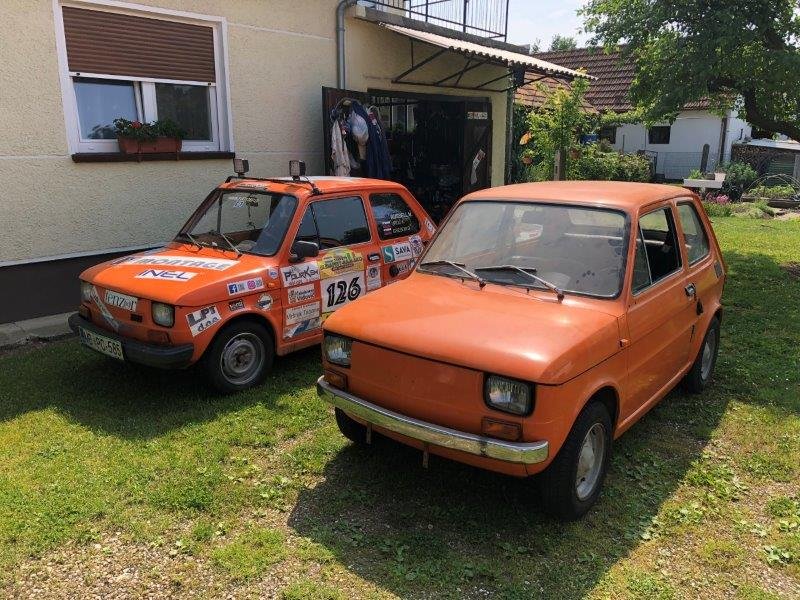
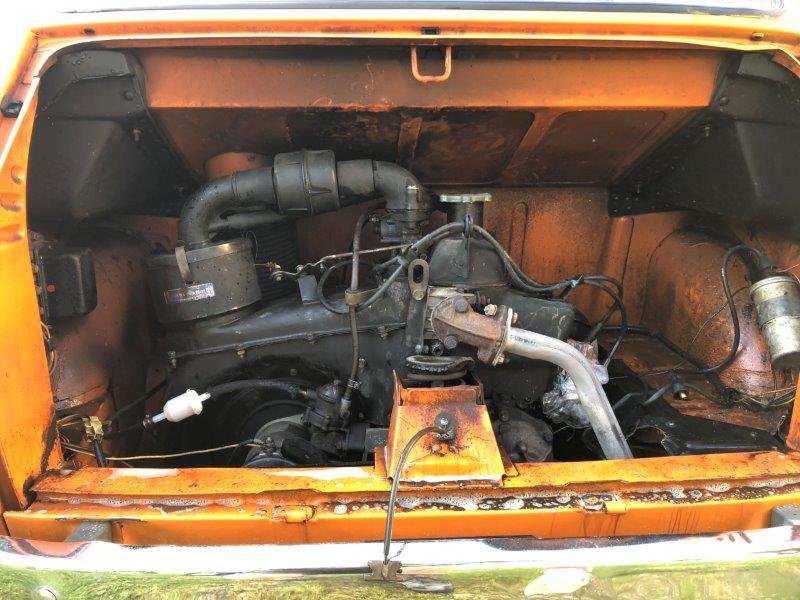
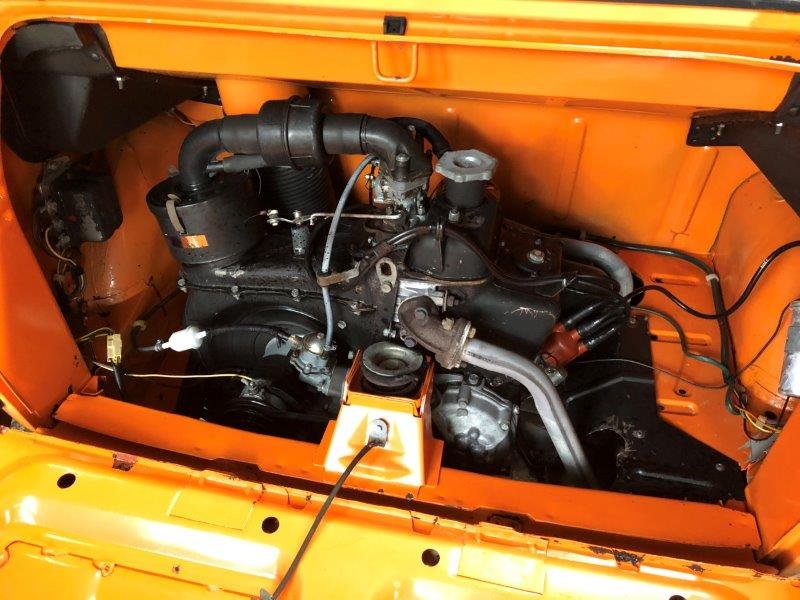
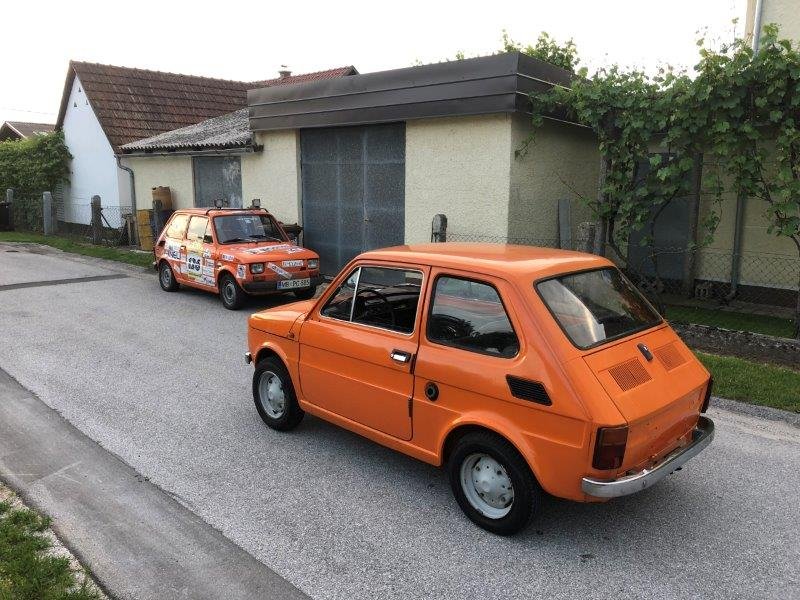
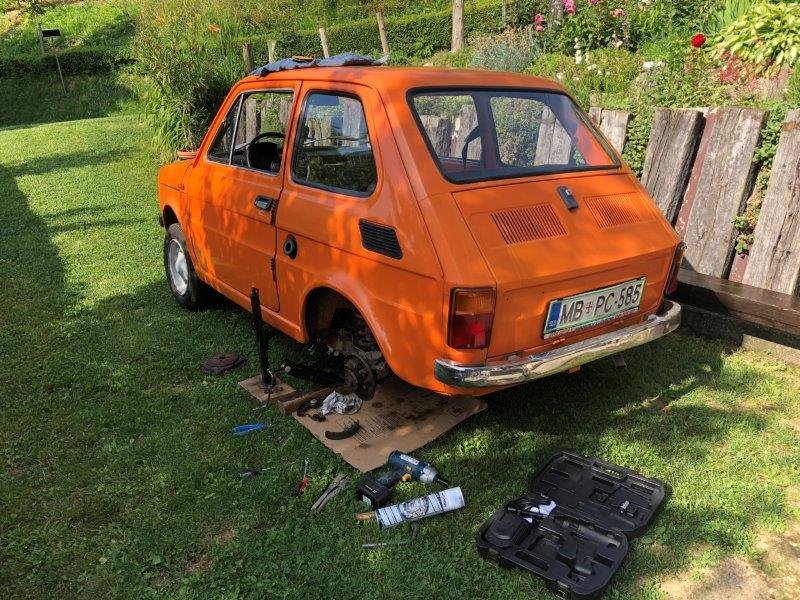
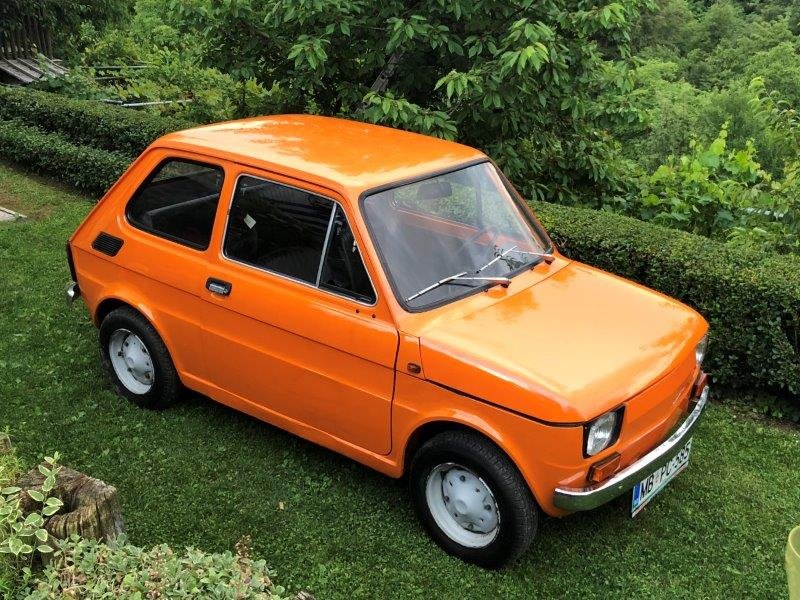
Oh forgot to show video of rally. So after the rally I got a private message on Facebook, that one guy want to give me his Fiat 126p if I want. I asked him about details, but he was just saying: "It was from grandmother, I don't know the condition of the car, but before she passed away she was driving with it. Come take a look, and if you want I give it for free." I couldn't sleep for few days, and after a month or so, we finally went to pick up another Fiat 126p. Parked out from garage Loaded on truck Back home Brothers Than I started cleaning My friend polished it for me Driving around with it and figure it out that rear breaks need a bit of attention - quick fix So yes, car is running ok - he should get some attention but for short distance is good. Otherwise it is 1981, with the same 650ccm 2 cylinder engine, produce all 24 horse power. The only difference with one I've been to rally is that they got different bumpers - older models hat chrome, newer had plastic. Later on there were also Fiat 126p BIS, which was 700ccm and watercooled. Also interior was different. Thats all about Fiats maybe some Opels later if anyone is interested?
1 point
-
Drove it outside Carbs are apparently perfectly balanced from bench setting them. Which I don't believe, but the needles rise equally throughout the rev range. Fuel floats needed setting. I'm running a pair of MOW needles which are what I was told to use/someone else was using already. I set up my innovate lc1 wideband but it won't connect to my surface pro. Lights up to say it's heating but no connection. Might need an ancient laptop to connect? I think it's in the ballpark. I might just have to set it the old fashioned way with a vac gauge and tach. Didn't adjust clutch yet, it's almost usable. Vacuum bled the brakes and they are terrible but exist. The pedal doesn't feel right so I think it's the master cylinder either out of adjustment or just fucked again. Most likely the latter. Amps gauge reads a constant -60 so may want to look into that. TL: DR I reversed it out of my garage for the first time in a couple years. Washed the barn find dust off it Bled the brakes but there's still none Fiddled with the carbs Tried to connect a modern tablet PC to a 70 year old car and failed
1 point
-
flywheel resurfaced crank caps reinstalled made a clutch alignment tool out of some junk in the shed, now to store it for 50 years incase i need it again (was a home made bushing punch.clutch alignment tool heh) flywheel installed clutch and pressureplate installed. made sure to follow the torque specs on that one1 point
-
A few factoids about Cheatin’ The Reaper: I named it ‘Cheatin’ The Reaper’ as after all of the stupid shit I’ve done in my life, even I’m surprised I’m still here…. The car was manufactured in 1938, making it 80 years old this year! It’s like taking your Granny and giving her heart, lungs, hips and knee transplants! I’ve been building it for 2 ½ years and spent approximately 1,000 hours on it so far. In total to date I’ve spent just over $6,000 NZ. A lot of the purchases have been luck, and in the case of the engine I sold off all of the ancillaries for almost what the engine cost me. Friends and family have donated parts and materials. There’s a lot of washing machine, cooker and (now) cooker hood metal in the build. The reaction from Facebook/RNS/Old School and Drivetribe has been excellent. It’s definitely helped me get out into the garage, and pushed me to make it better than even I imagined. It will be finished by Christmas. I’m not saying which Christmas.1 point


This leaderboard is set to Auckland/GMT+12:00