
Leaderboard


Popular Content
Showing content with the highest reputation on 05/14/21 in all areas
-
So I got the bike all together and dropped it down to Danny, Hayhole and the team at Watermark Signs in Wellington. What a bloody transformation! I gave danny a bunch of photos of the original Rothmans Dakar NXR750 along with what vectors of Logos I could find. Danny drew up the vectors that I couldn't find, color matched everything and sized it up. Hayhole did all the application. Im absolutley blown away, its come out far better than I ever imagined. Its still not 100% complete. I still need to get the sump guard and crash protection on. This wont happen for a week or two though as the tank needs to come back off so I can install the new choke plungers when they arrive from Japan, less than a week before the rally, eeek. I'm cheesin. Will get some lush photos done of some of the cool details once its all back together properly. I do find the before and after photo quite mesmerizing.\21 points
-
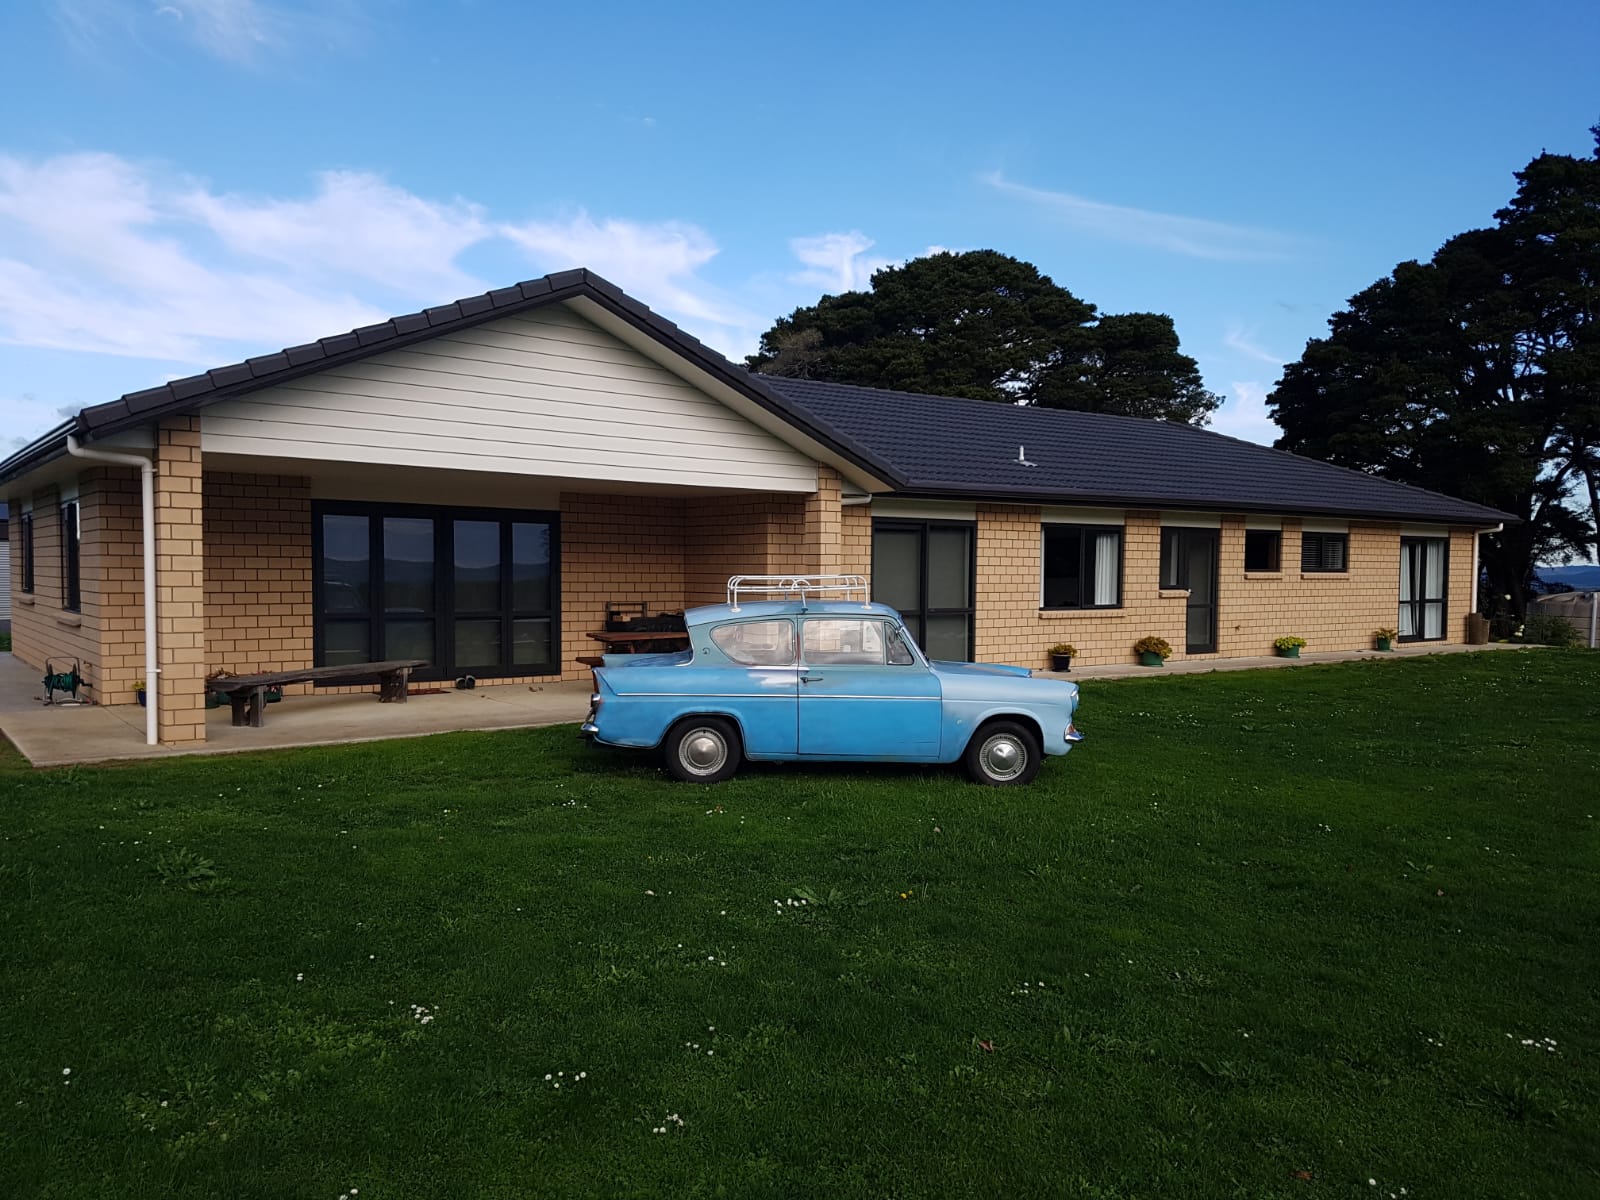
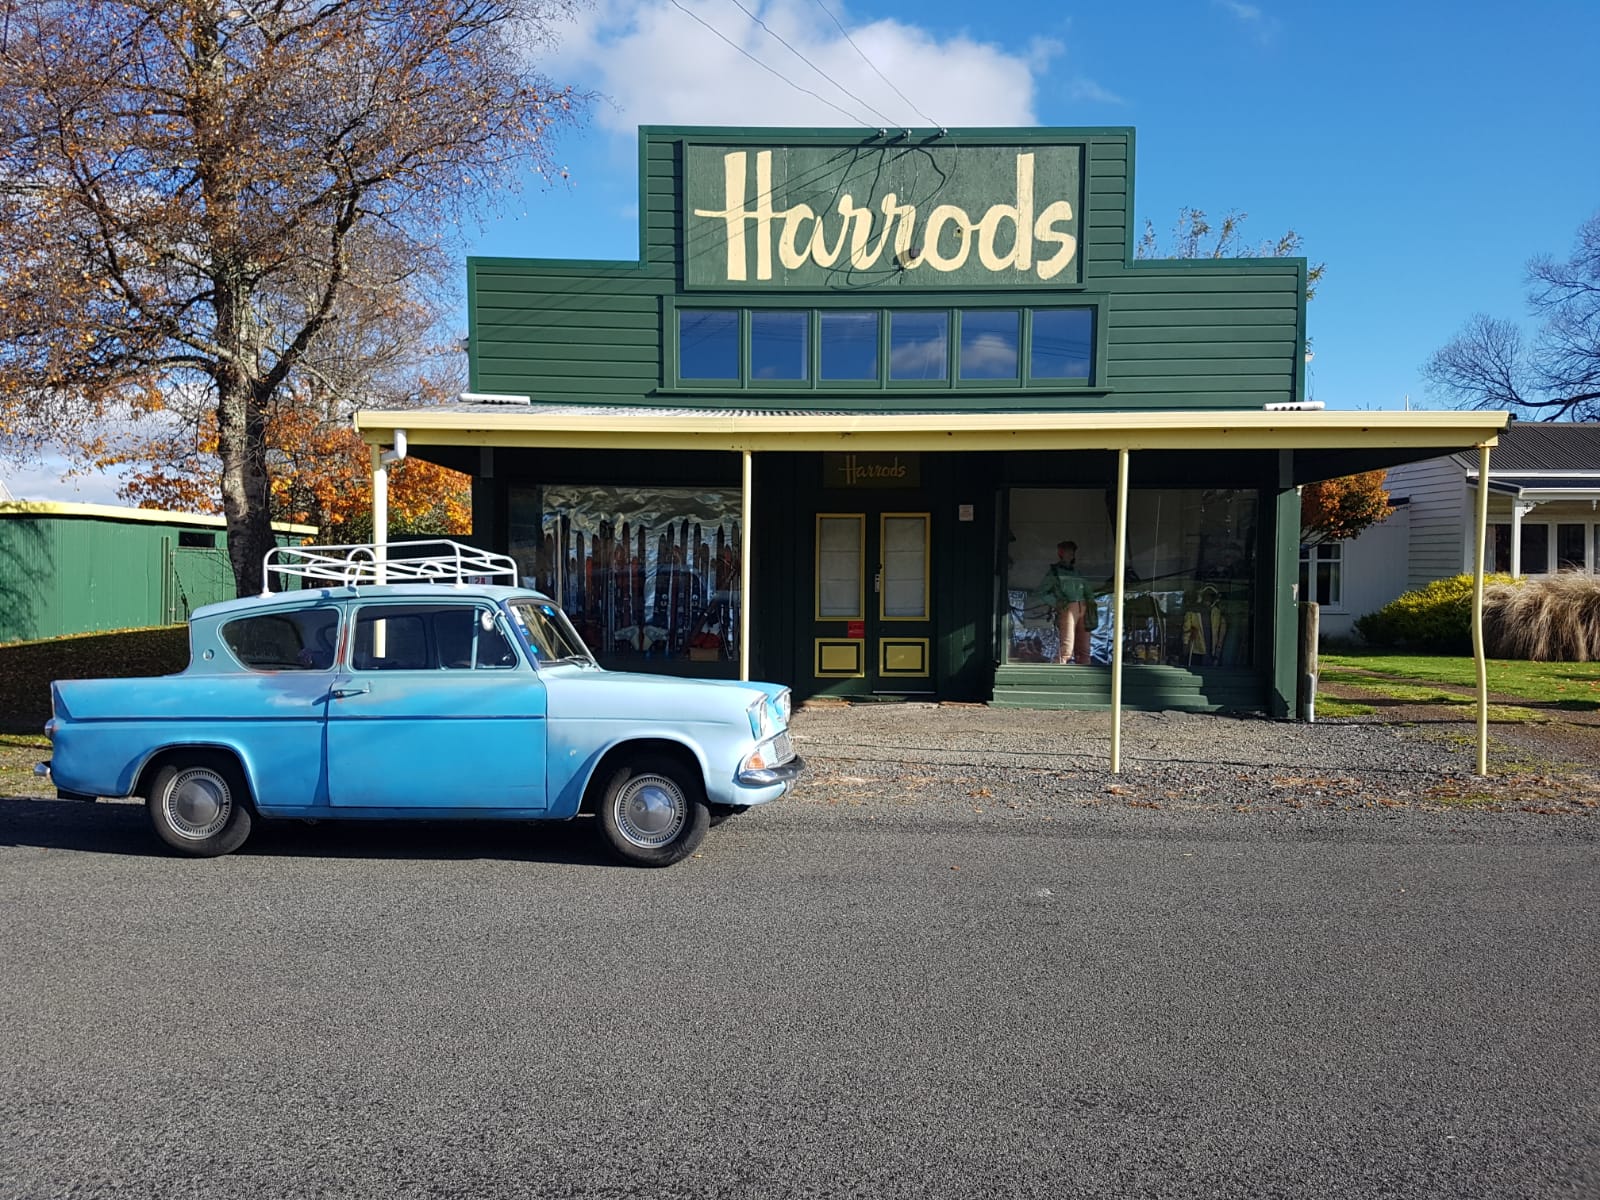
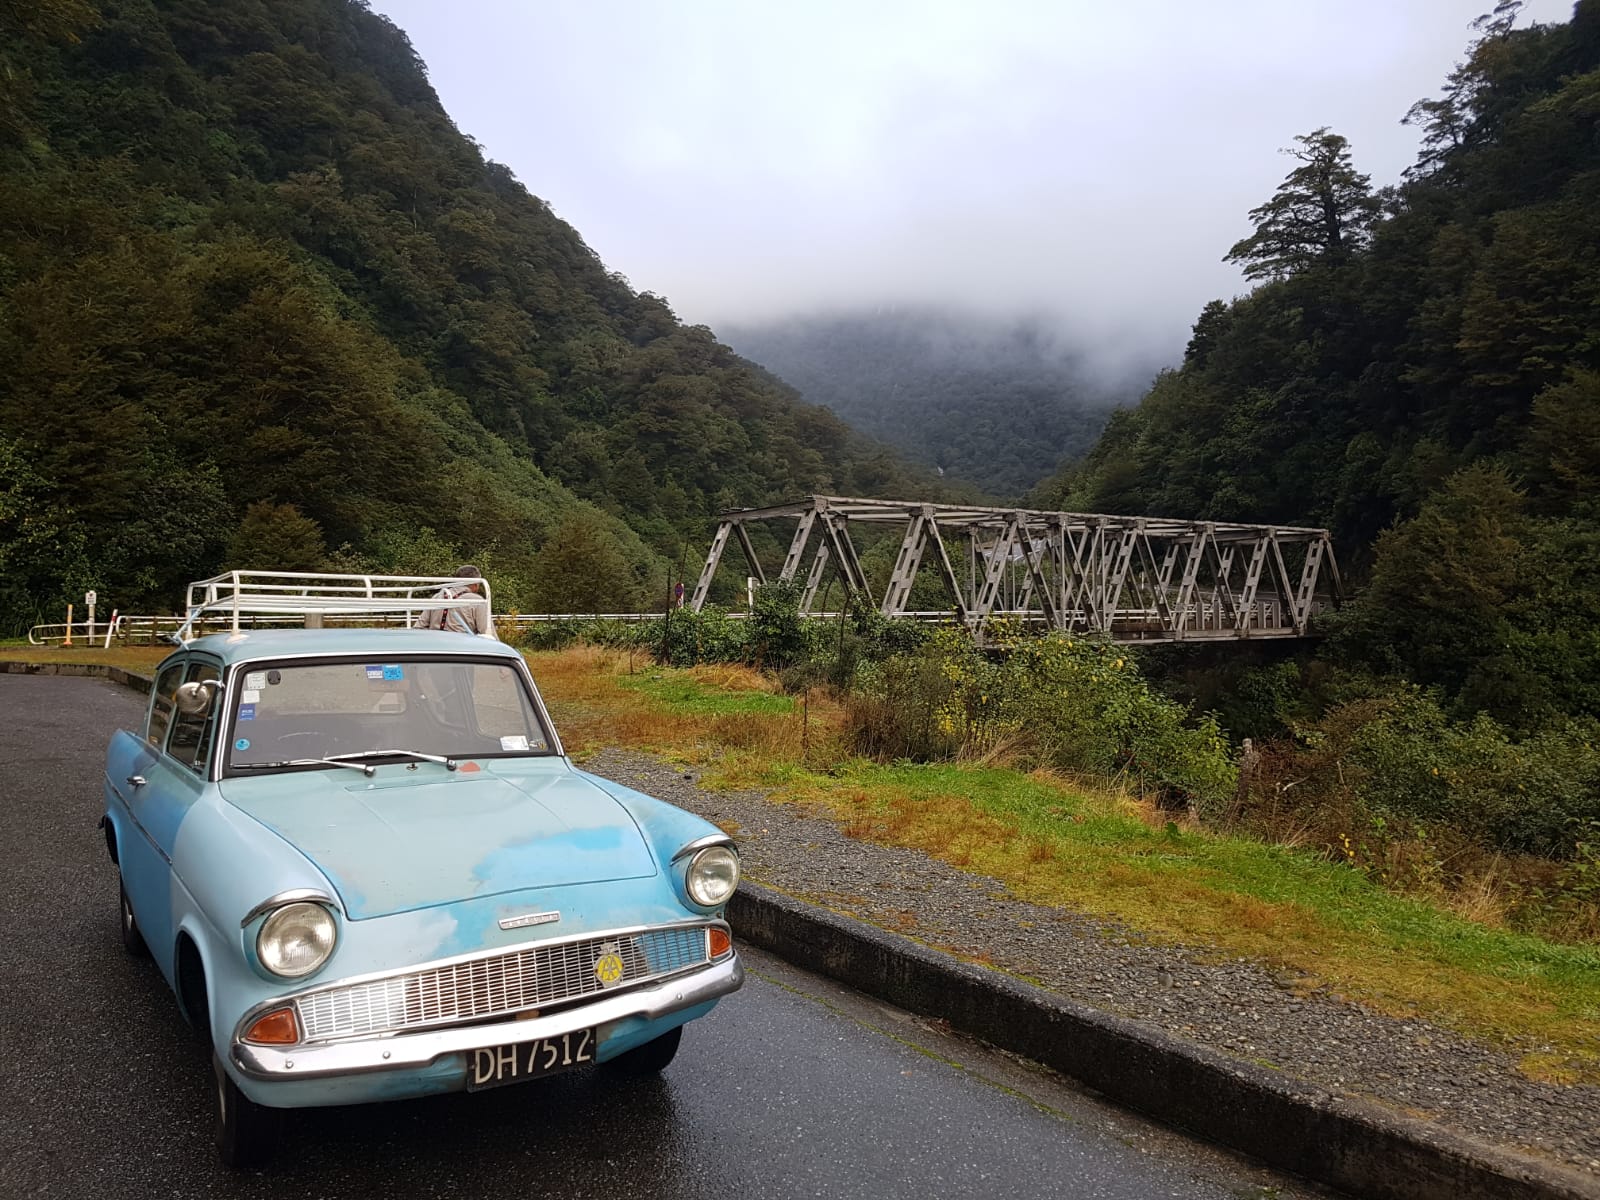
They made it back to Auckland. They did 2000 miles and only had to put petrol in it. They didn't even have any tools with them. He once put a little oil in and then realized the car was sitting on a slope, so it now has a little too much in it. I believe there are a lot more pictures to come.
 12 points
 -
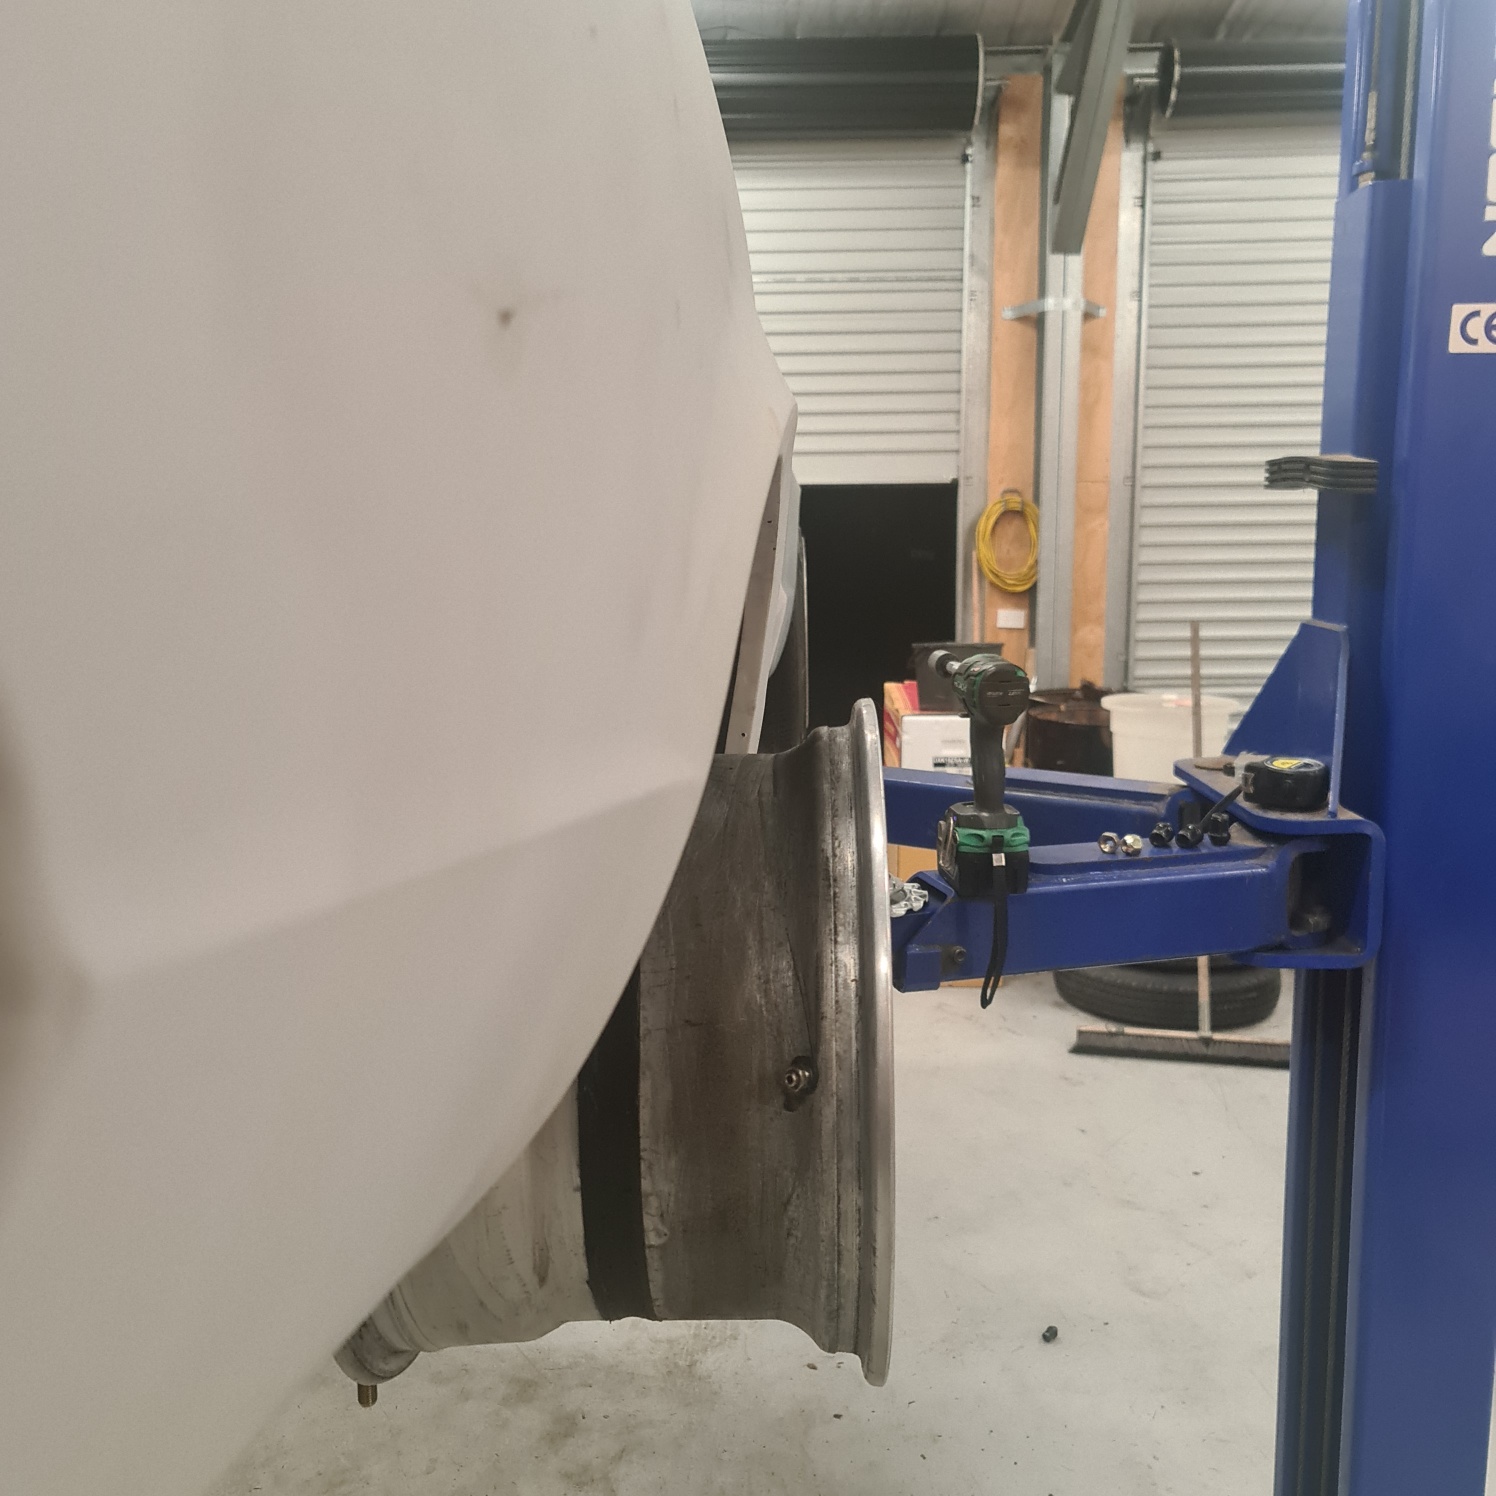
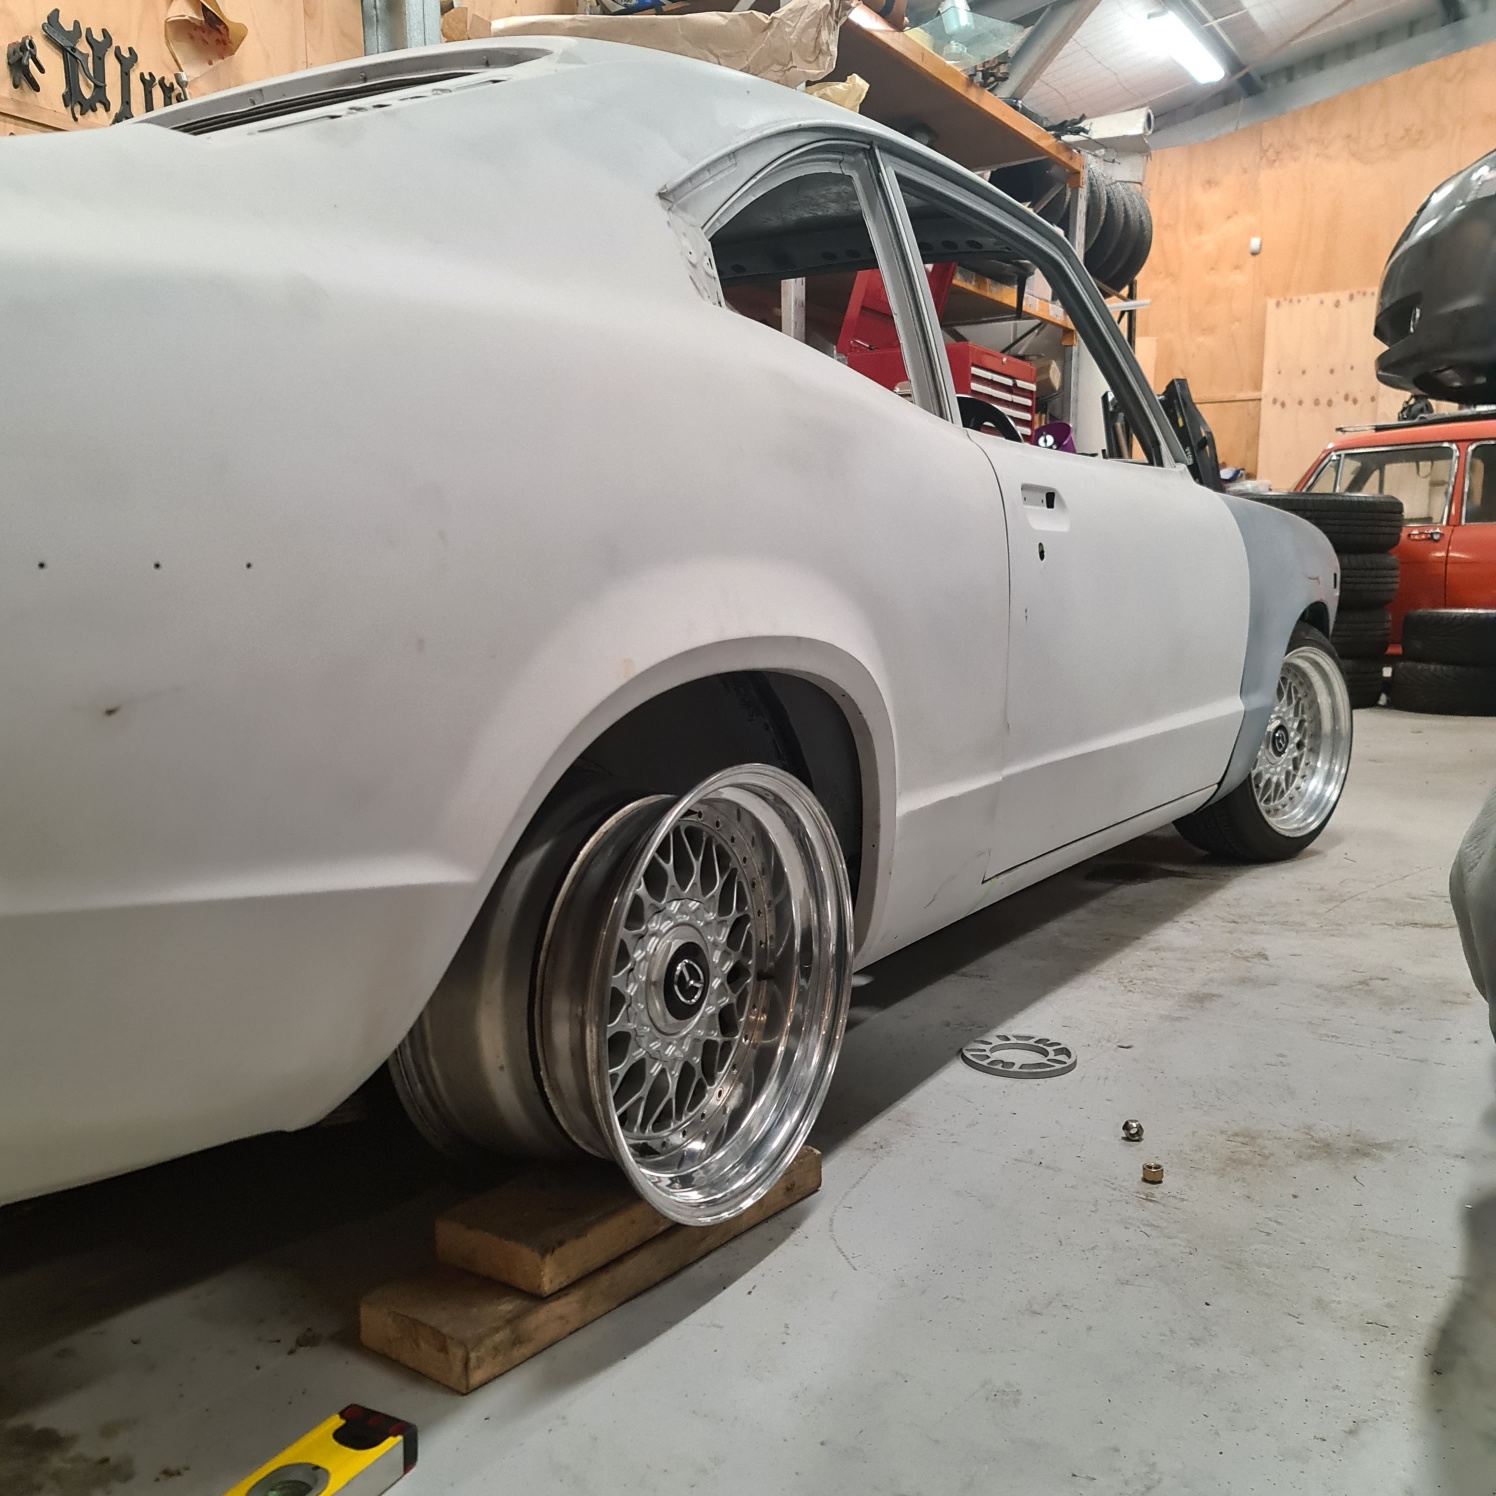
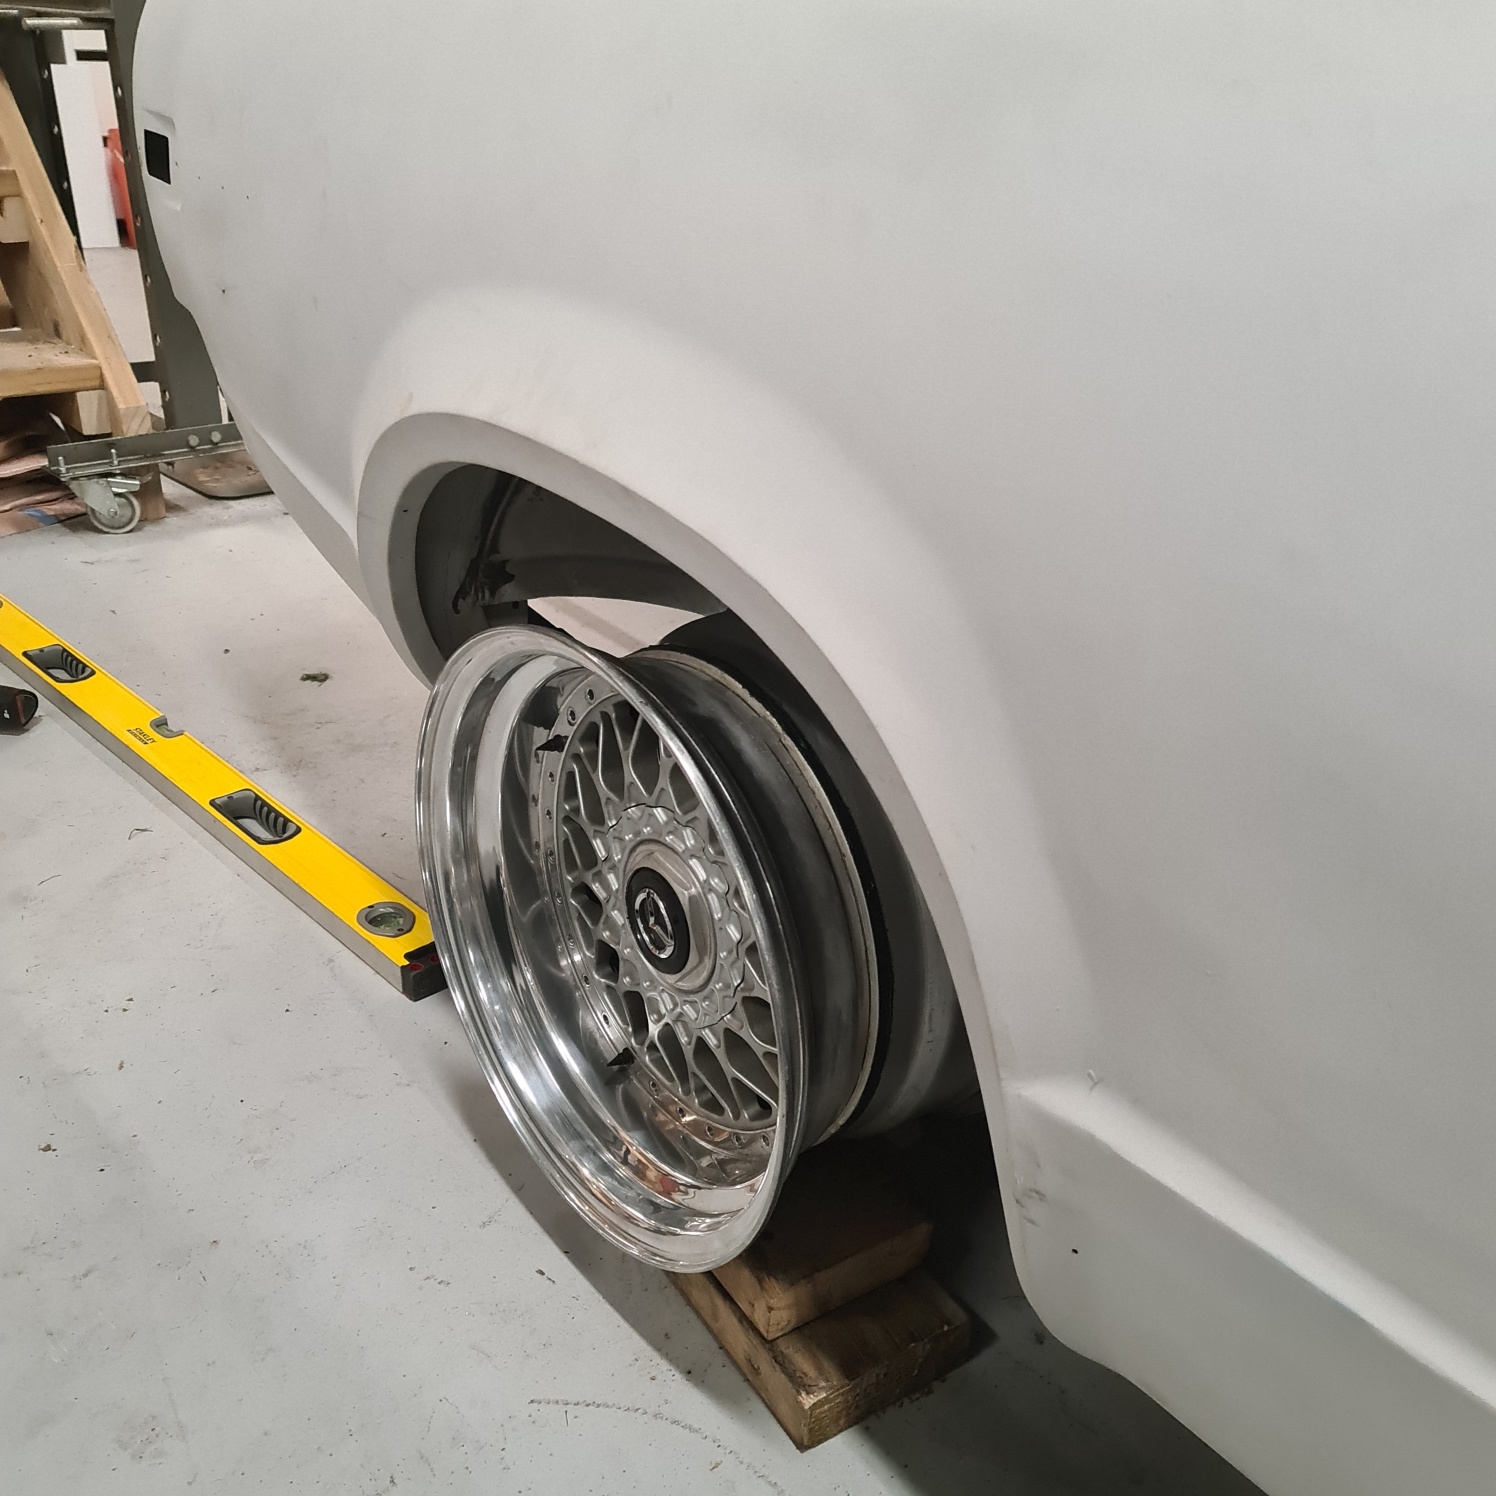
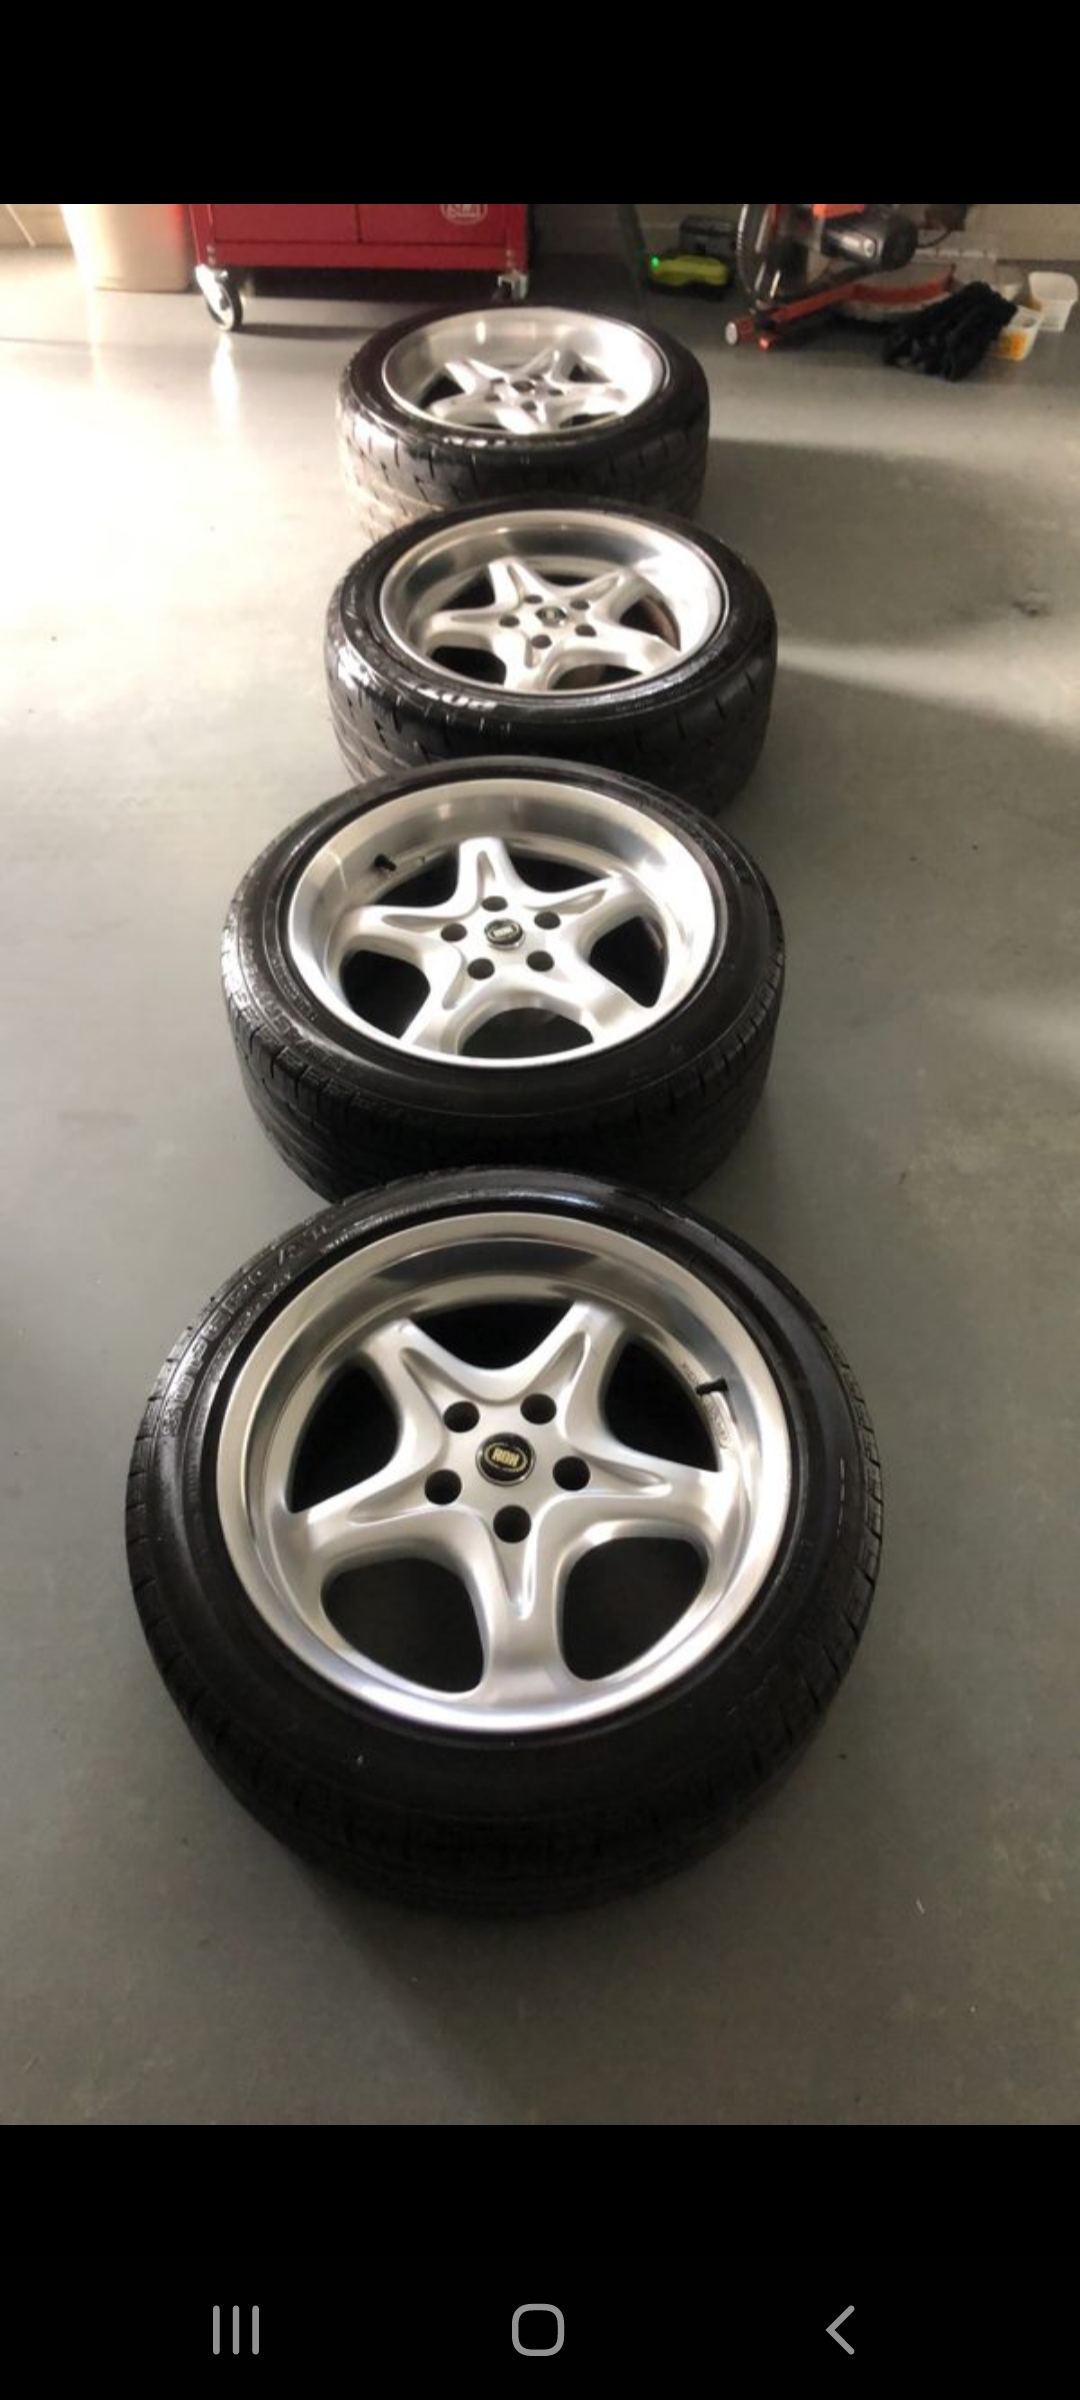
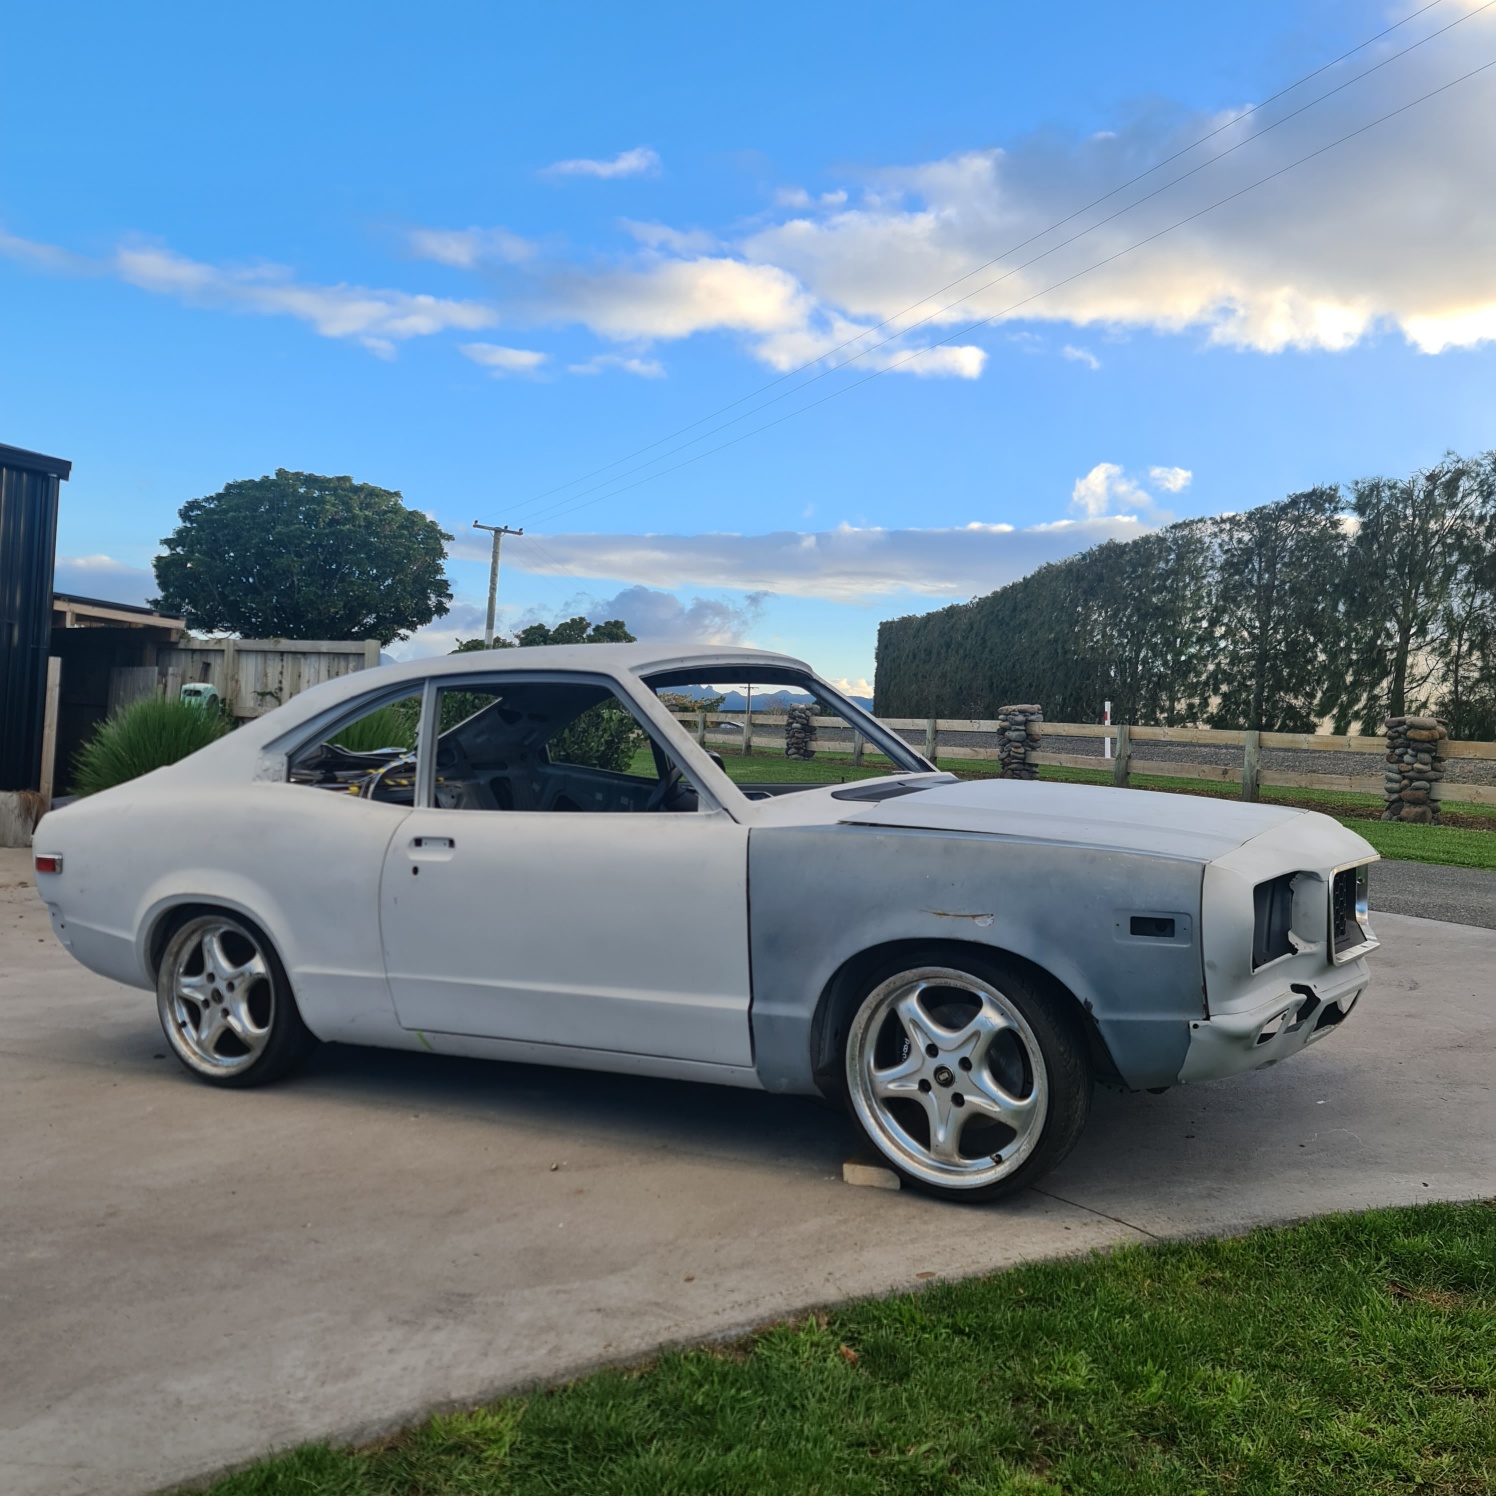
Purchased a full rubber and seal kit for the car from Azhar so thats here ready for when it goes back together. When i sold the 808 i had a pair of BBS RS in 15x11 with 5.5" dish and a pair of 15x8 with 3" dish which i kept for a rainy day. Heres a pic of the 11 on the back of the RX3 for a laugh, shows how big the flares had to be to make them fit on the 808. Anyway was browsing market place and stumbled across a set of 3.5" lip 30 hole BBS lips by chance. A quick measure up and they look to be perfect once guards are rolled to fit on the rear with the narrowed diff. Will give them a full recon, repowder coat centres, new hardware, full height hex centres and repolish lips once i decide on car colour. Fit front and rear with basically next to no spacer so thats a bonus too. I also found a set of mint 5x114.3 17x8.5 ROH Z'S. The 8.5" only came in 5 Stud AFAIK and have a huge dish compared to the 7.5" 4 stud versions. Unsure if they will fit on the front but will definately work on the rear with a 4x114.3 to 5x114.3 adaptor spacer. So will wait for these to get up from down south and i can work out what of these i will run front and rear and then get Toby to give a set a polish up. Have decided to sell the SSR Mesh and the 5.5" BBS lips as im not going to be needing either of these any time soon and iv got too many wheels it seems haha.
7 points
-
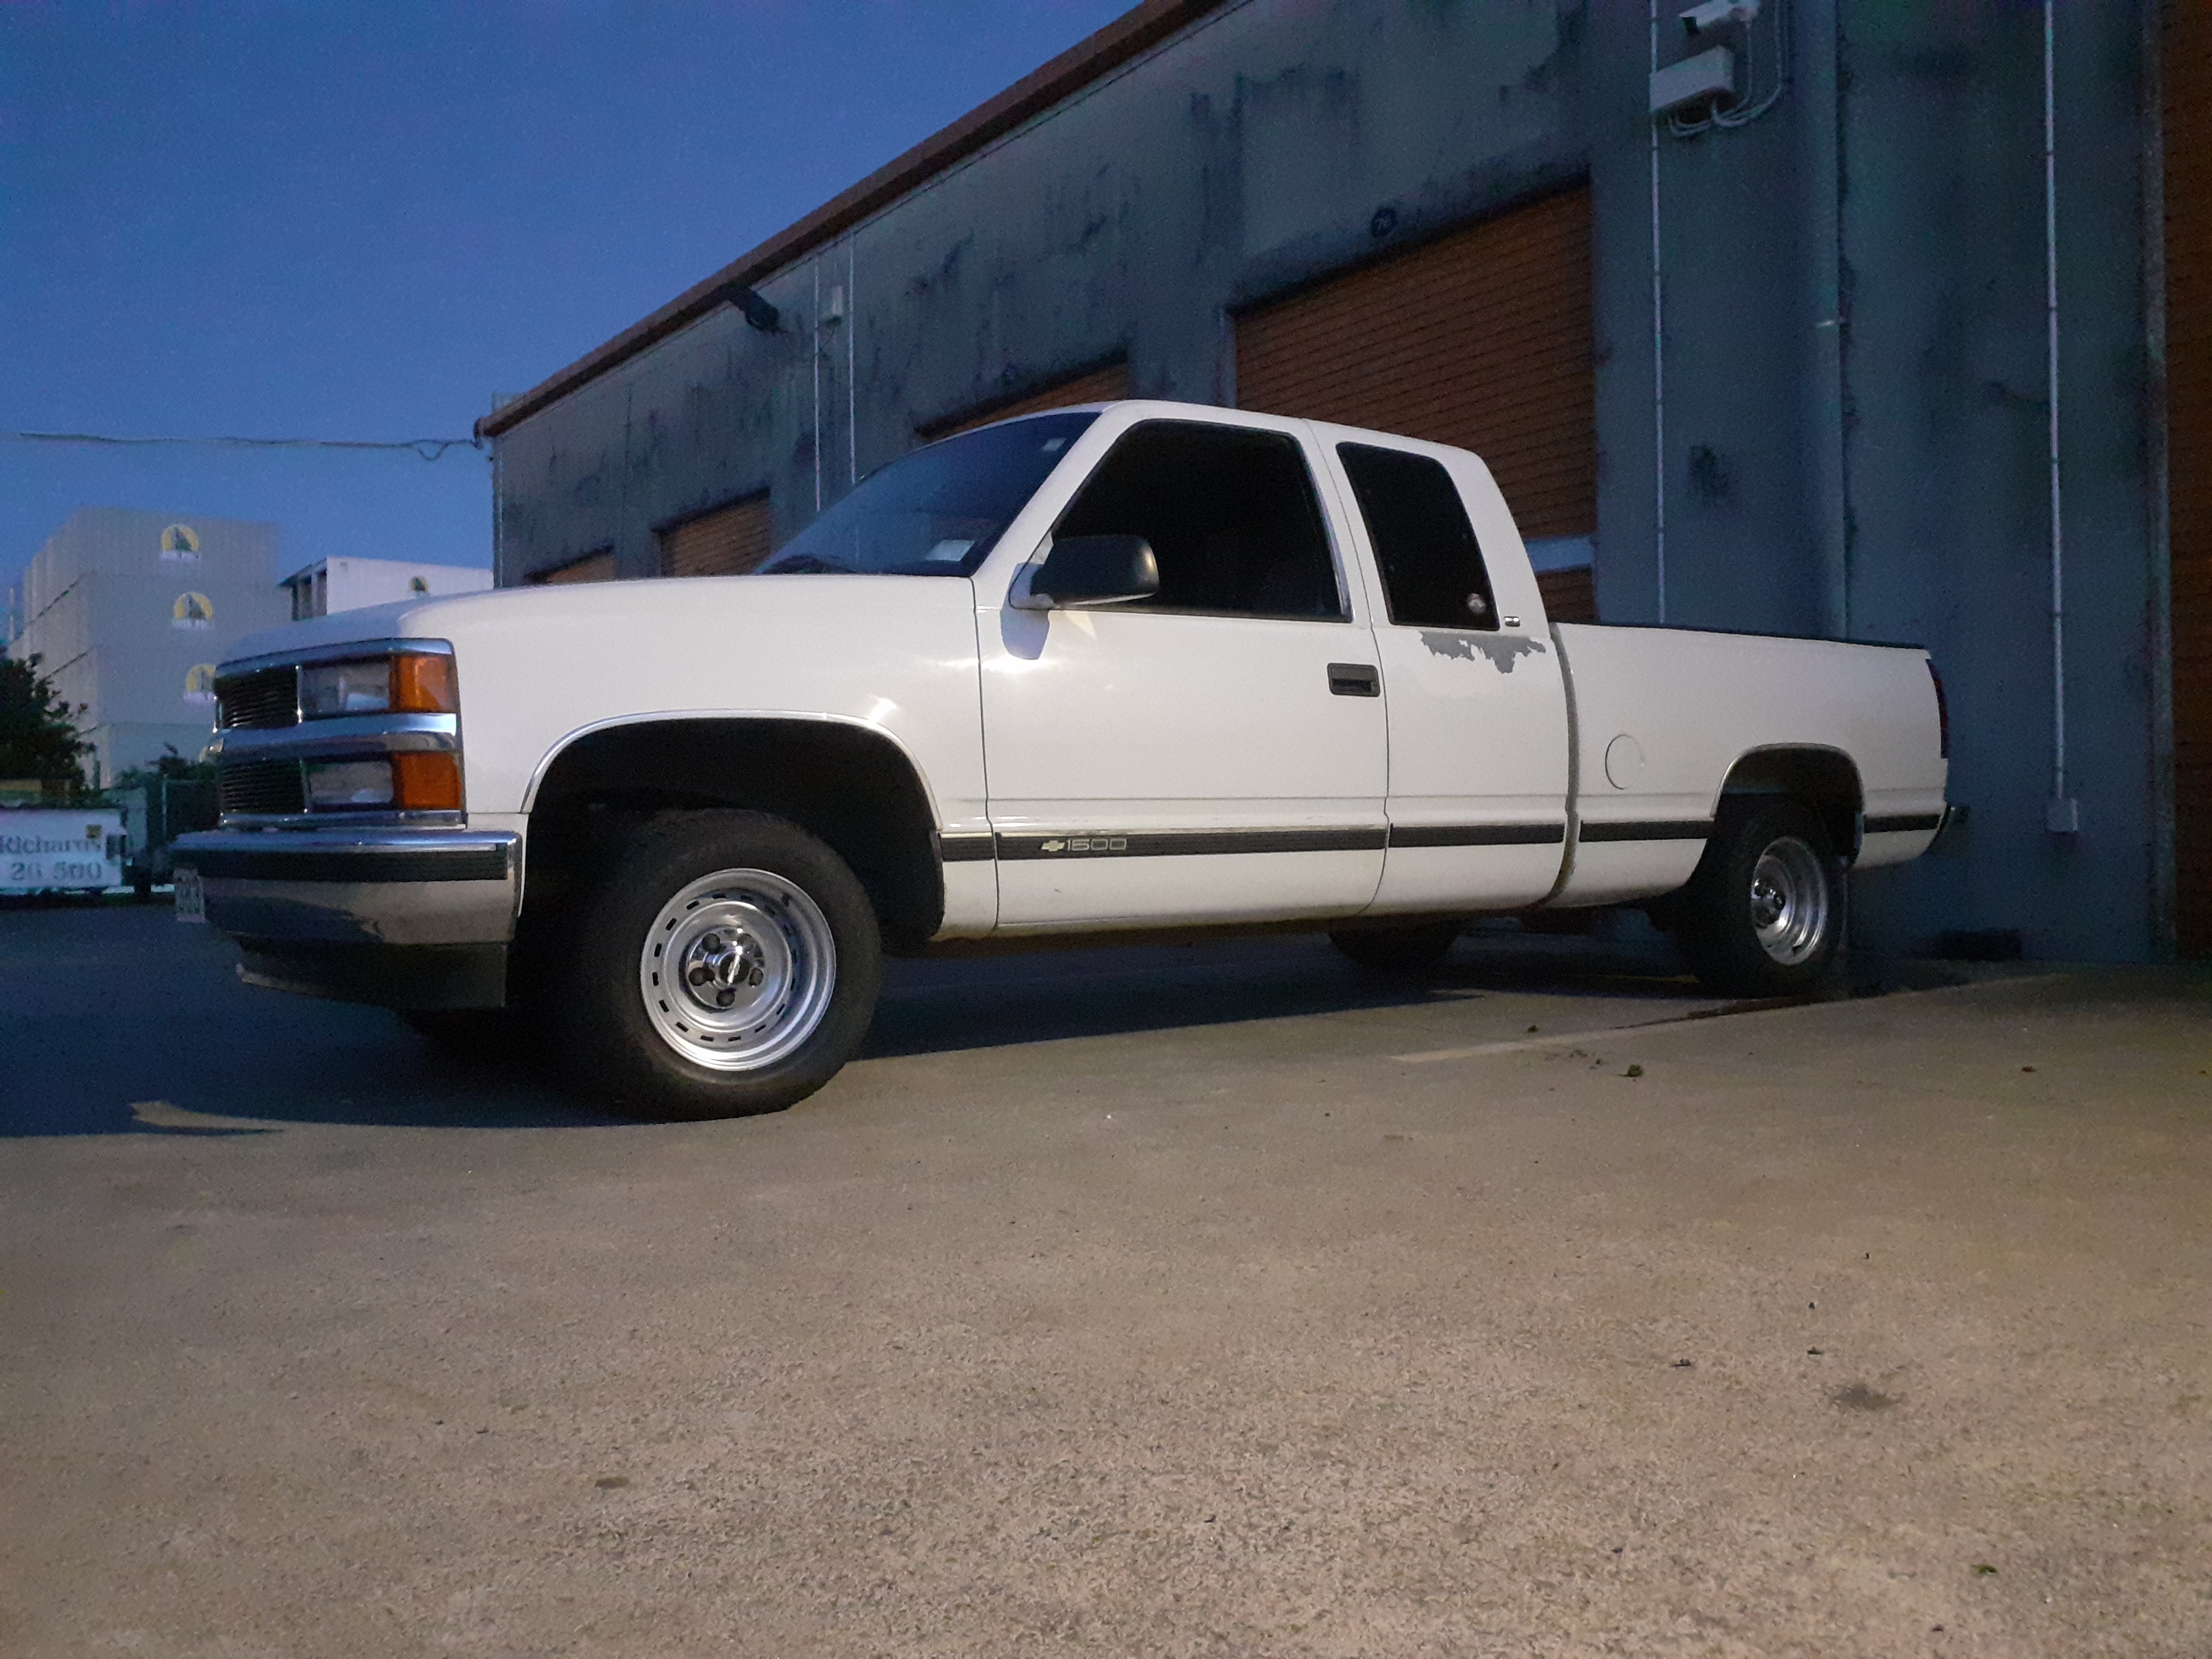
Got wheels powdercoated, 235/60/15 front, 245/60/15 rear. Looks ridiculous now, lowering is required sooner than later. I think its actually got lifted springs in the front, they have eibach branding on them and its higher than other stock ones I've seen pics of I might go up a tyre size all round, if it doesnt rub when slammed
5 points
-
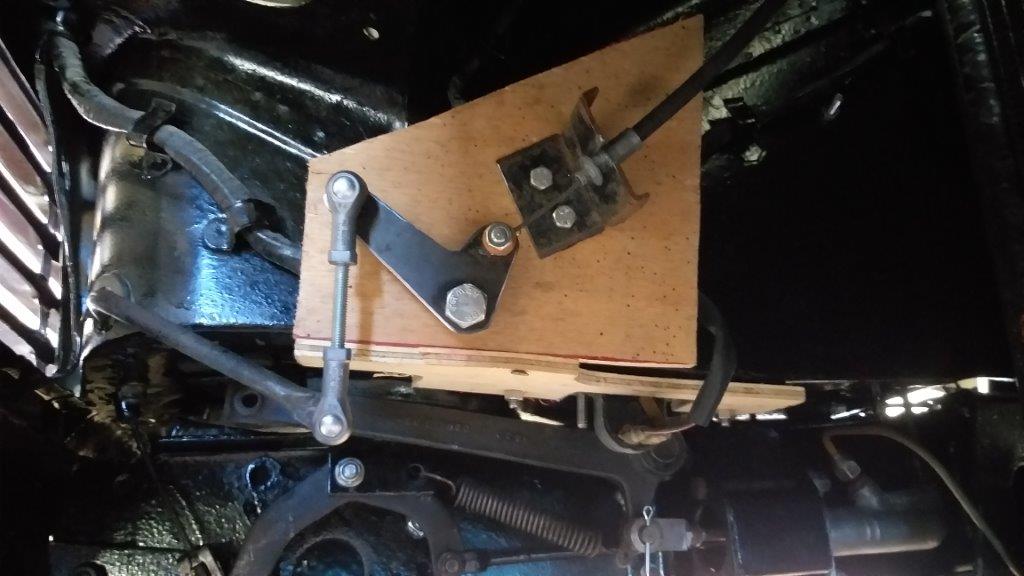
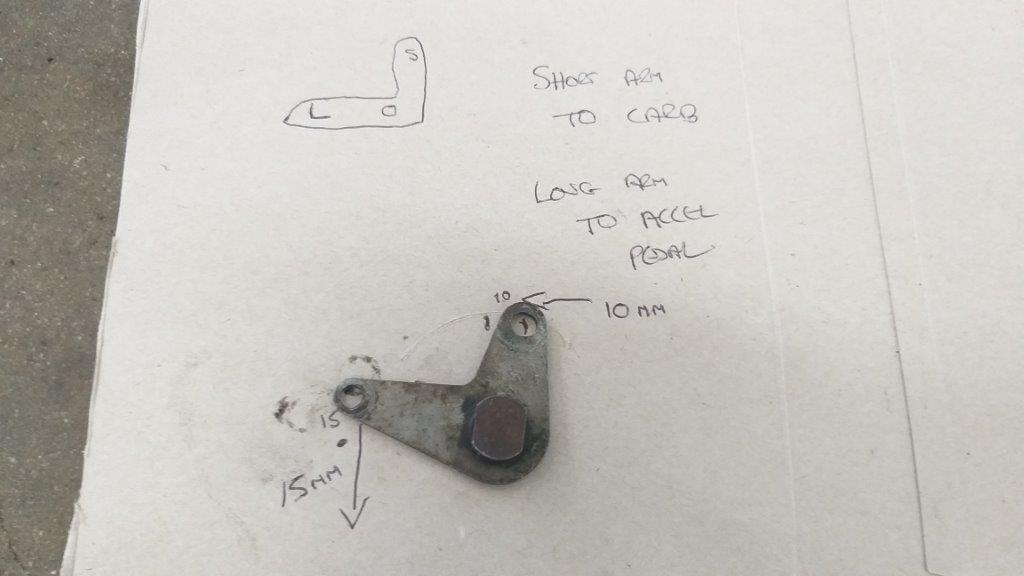
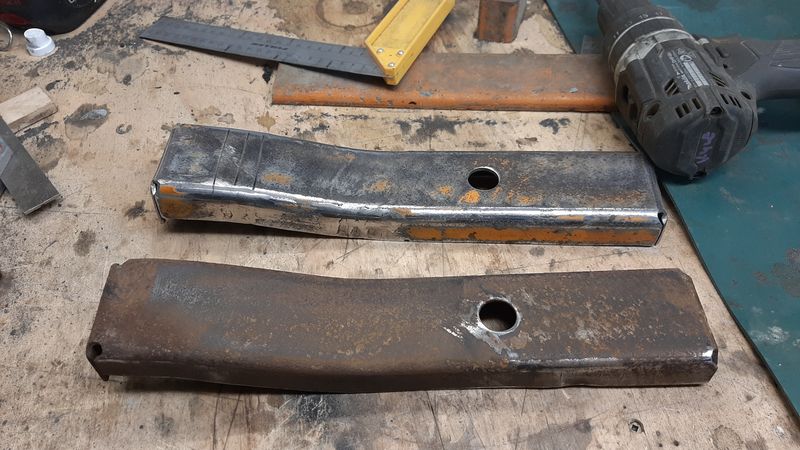
Because my life is pretty sad, I spent a few hours building this working mock up of version 3 of my HiAce to Thames accelerator cable bracket. Stole the mini ball joints off the ends of my gear shift cables for the intermediate shaft, so I'll need to order in some replacements. Even went as far as to make a longer pivot lever so the accelerator pedal is now nice and soft with heaps of travel. Should make for nice smooth acceleration. So all that's left to do is to replicate this mock up in something tougher than a piece of dirt old plywood. I'll hopefully make the finished article a lot more pleasing on the eye. Thanks for looking.
5 points
-
Good run eh. I don't think it's that surprising though. If a car is in OK shape then there's no real reason for them to conk out on long trips. Just keep an eye on the oil and coolant. I seldom take tools along these days, just cross fingers and go.3 points
-
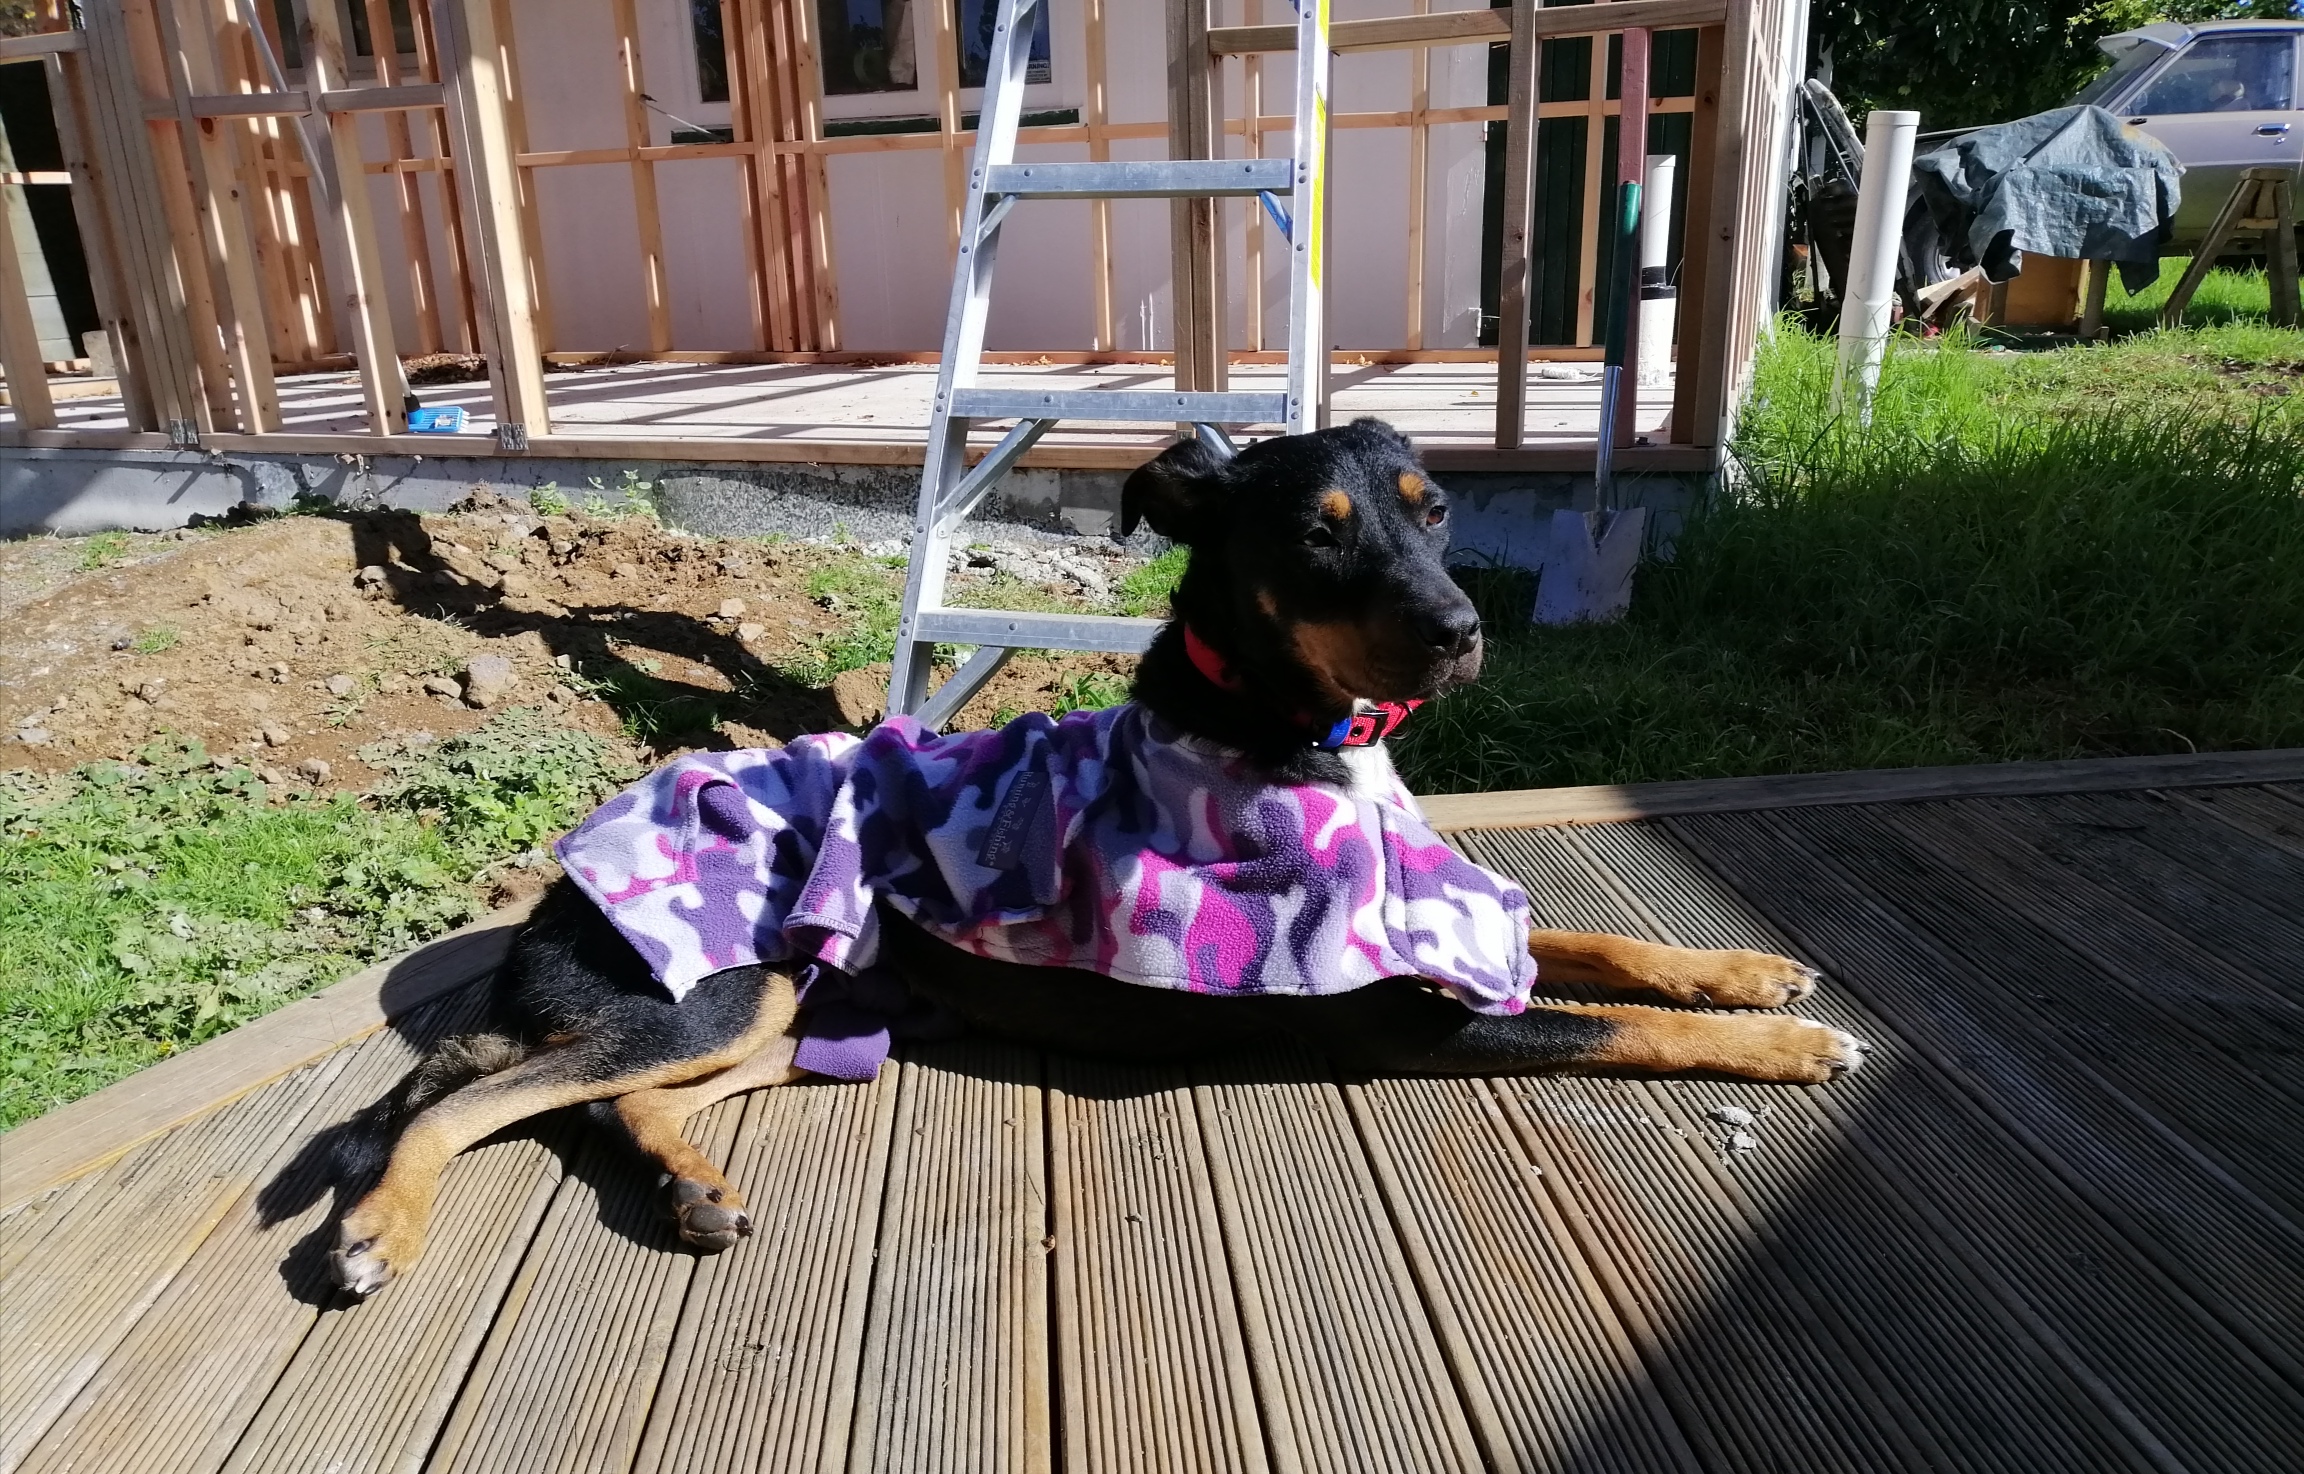
Turned wife's hoodie into dog cloak Needs a bit of velcro for the belly strap and I think I will fold the front bit over, but otherwise not bad
3 points
-
Shit, that looks good. Better not get it dirty.3 points
-
Time for new thread and figure out a good root for 5th year anniversary? Keen to do a mix up of the OG route but unfortunately we wont have use of the bach anymore. There is ol m9 Bill at the Te Araroa camping ground who would appreciate our business though2 points
-
2 points
-
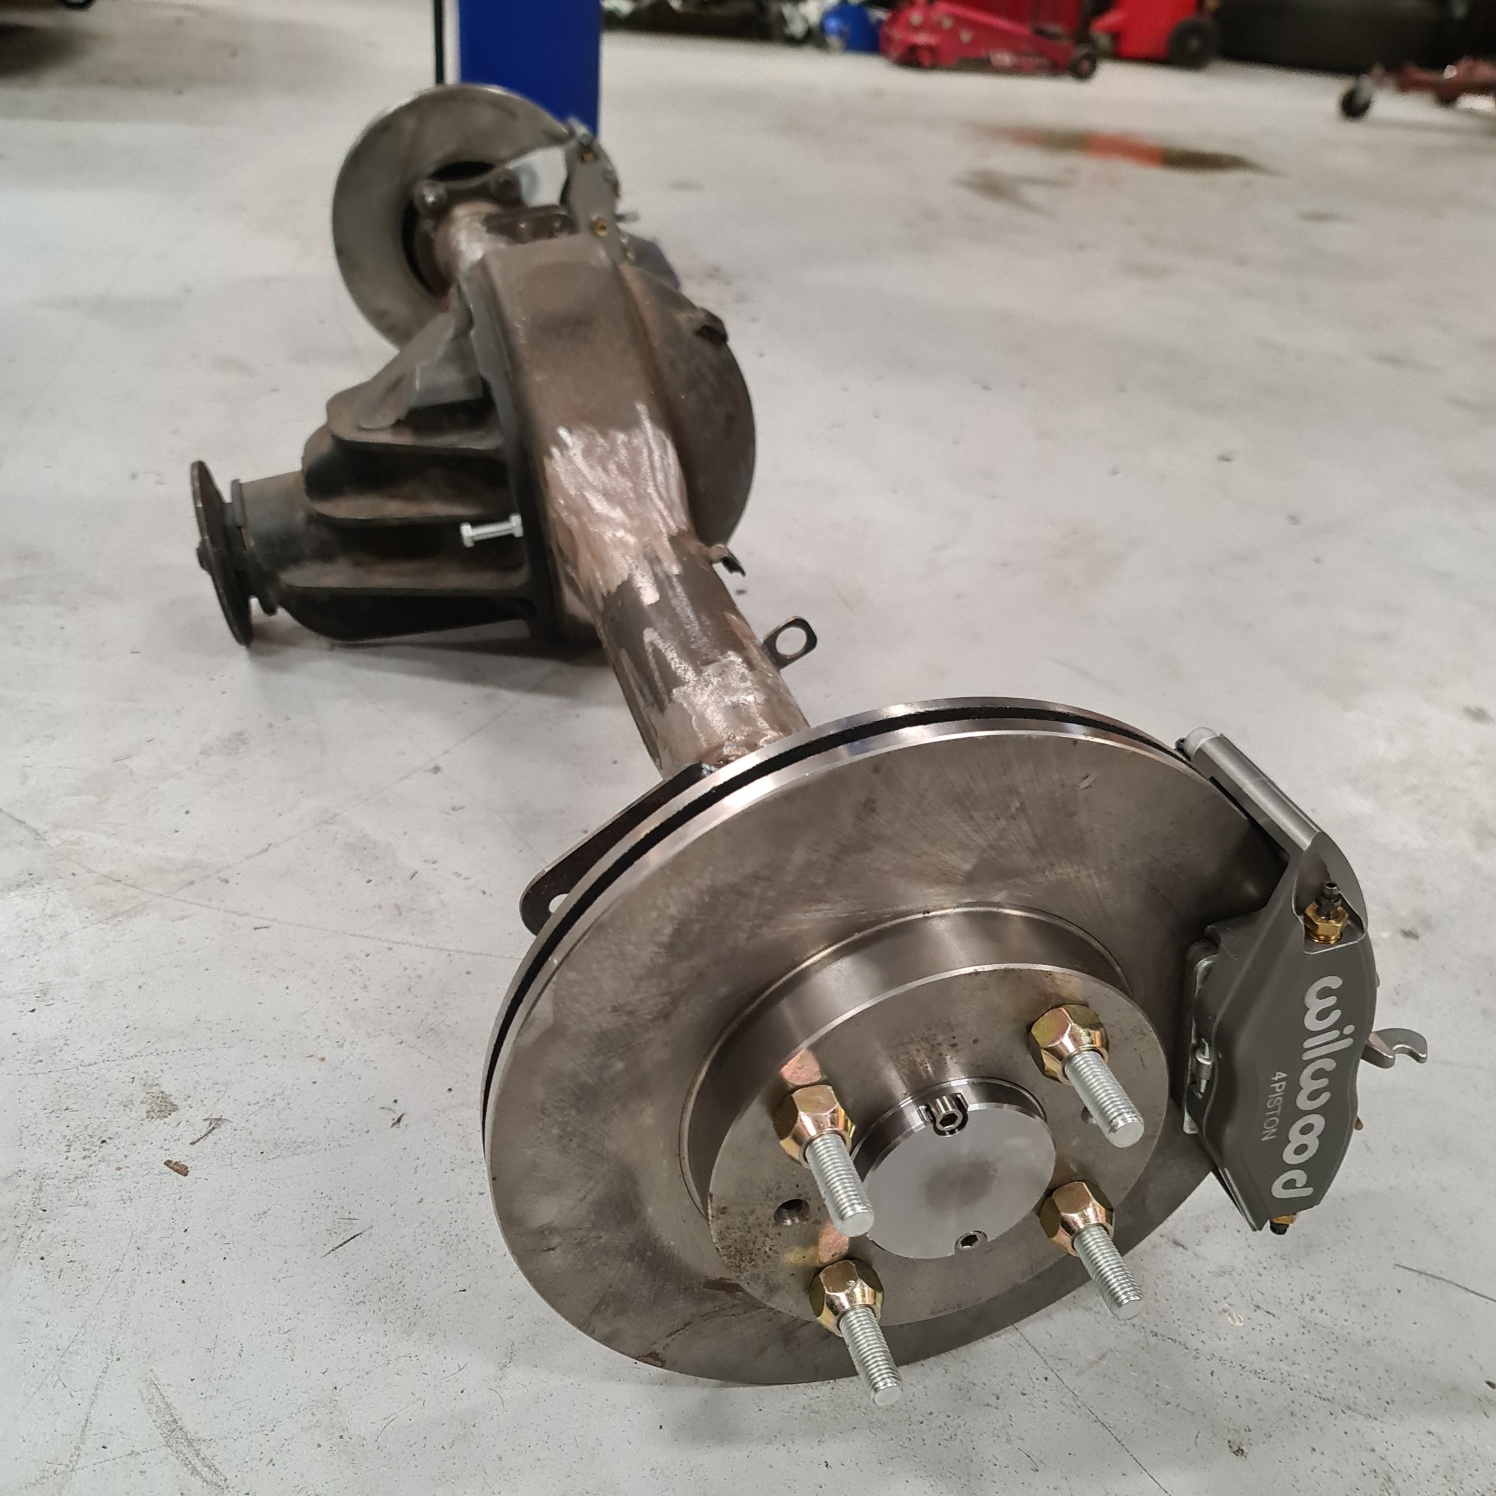
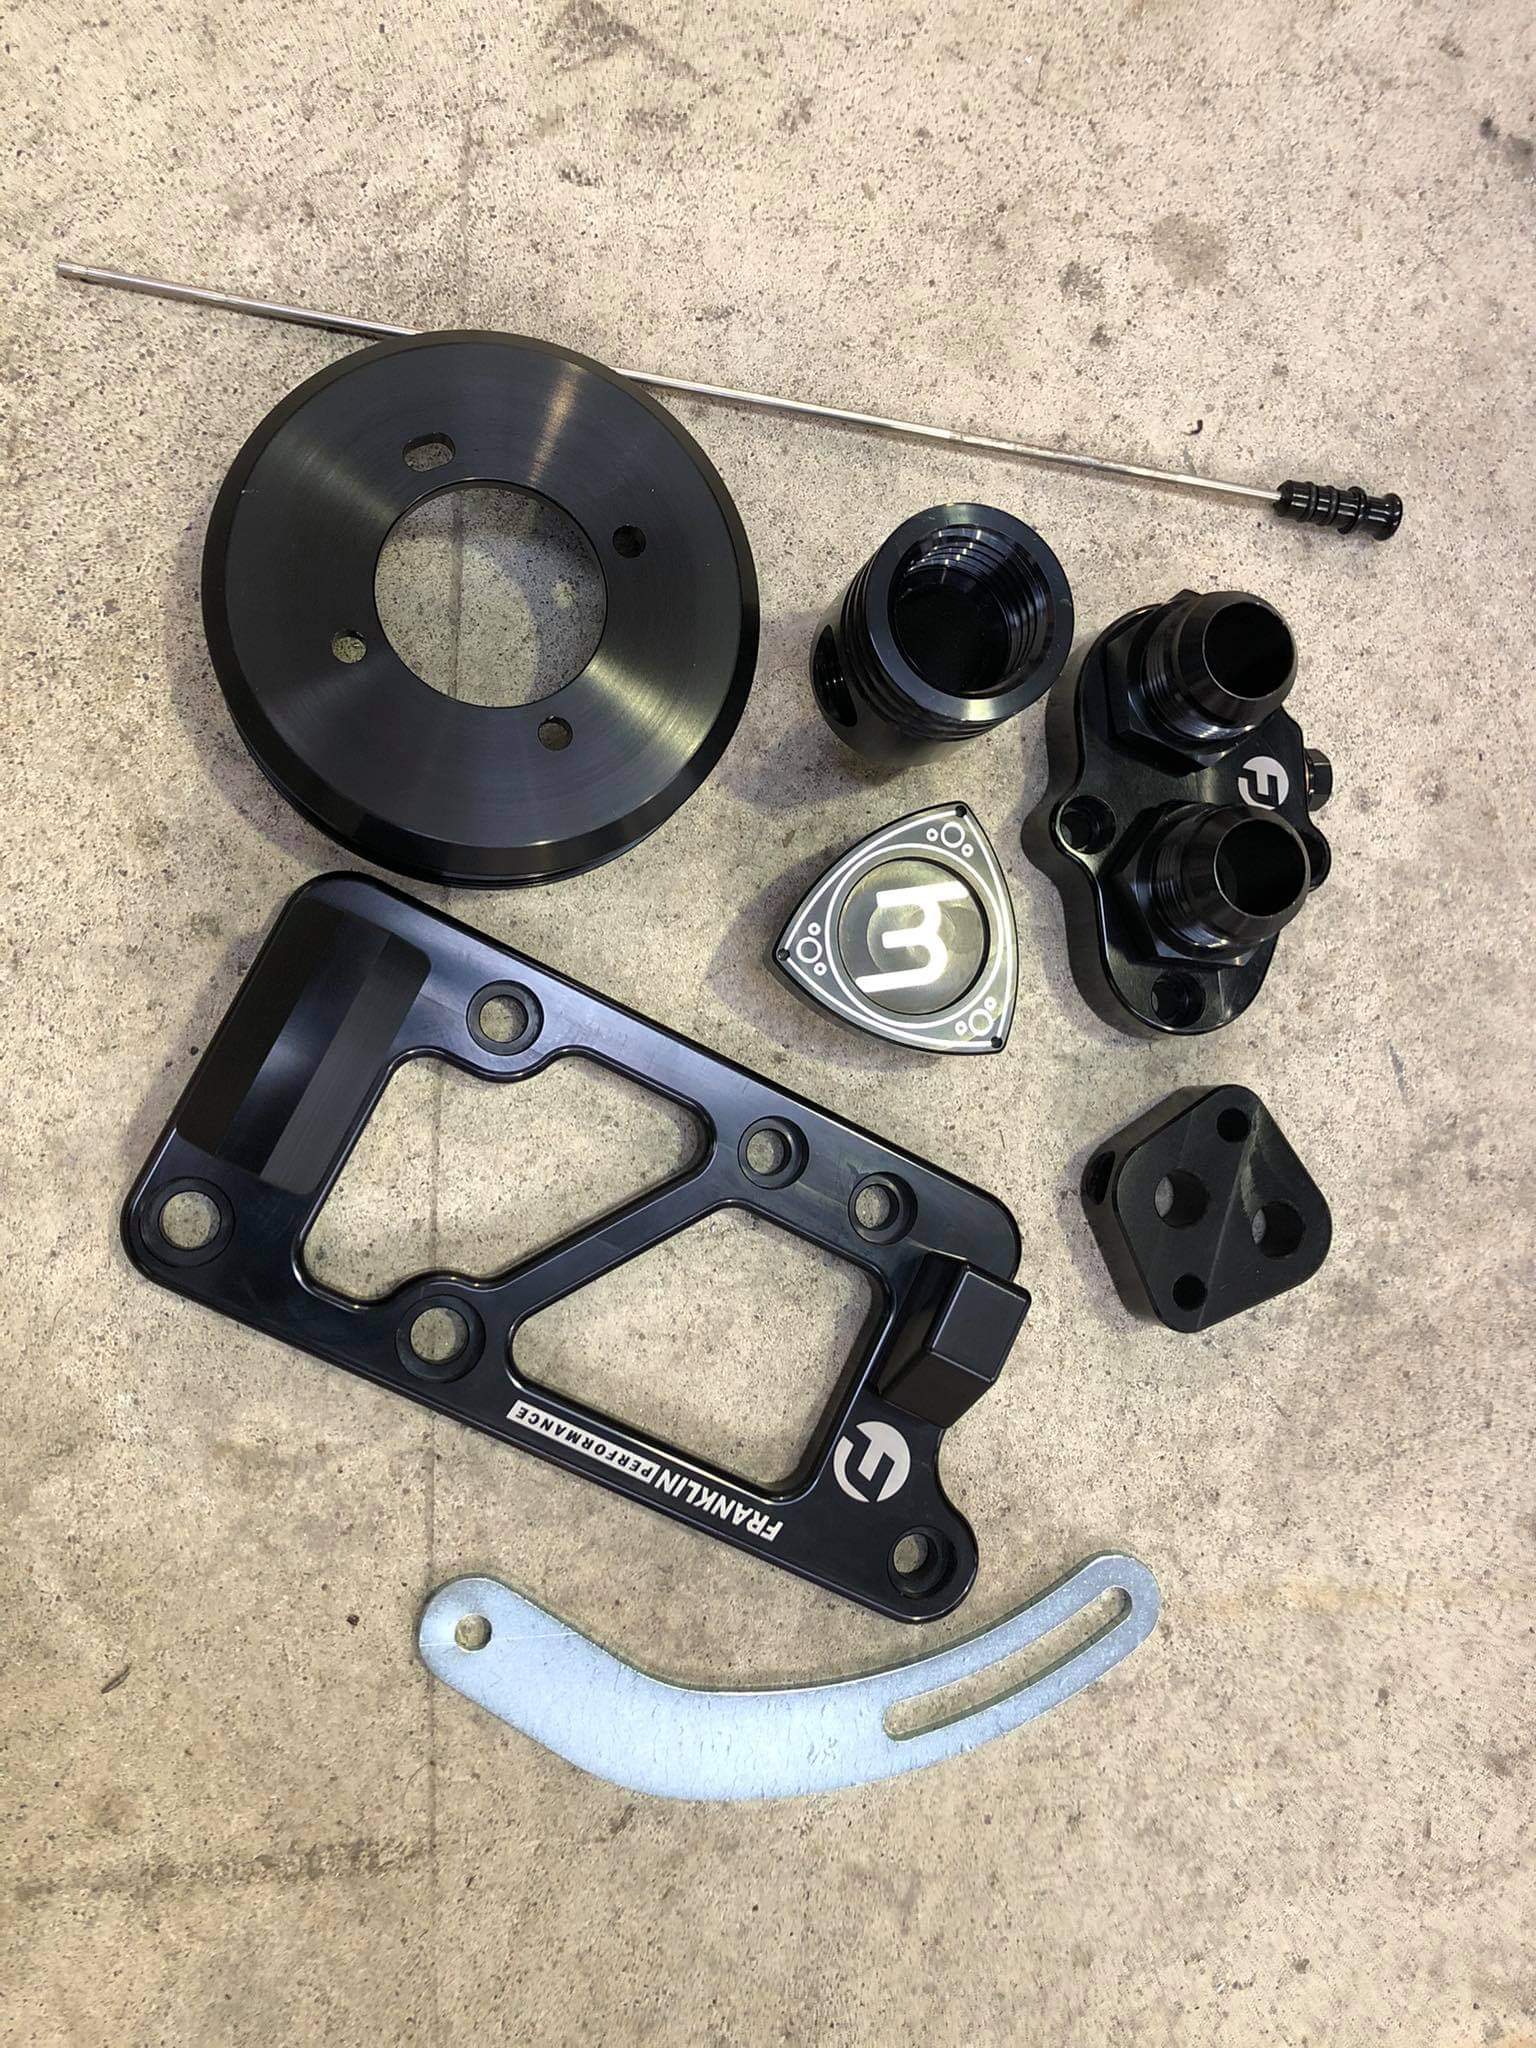
Bit more progress. Mate Gav just finished up the brake brackets for the rear calipers on the diff this week so i got that in, First issue was U bolts for RX3 diff are much smaller so had to get a set of B2000 ubolts and blocks. Chucked those in and got it fitted up last night Have ordered a heap of bits for the wiring, sensors (water temp, oil temp/pressure, fuel pressure) as well as a new alternator, starter and electric water pump which are all getting stripped to go to Toby for polishing. I also picked up a few goodies from Franklin Performance for the motor so they are ready to go on once assembled. Also test fitted a set of 17x7.5 ROH Z's for some nostalgia! Got plenty of space to run a 8.5" at least on the rear so will keep a eye out for a set of those.
2 points
-
got my fairings back from the painter on the weekend. he did a pretty lush job I think. Im glad I put a lot of effort into the prep. Bit of a mockup on the bike Really happy with how the custom tail piece worked out with the XR250 tail light. The tool bag is a cool touch I think and the colour is pretty close. I used the original real mudguard piece mostly to have somewhere to mount the number plate. Would have looked cool without it but will also serve some purpose of stopping too much shit getting flicked around. It is also a small memento of its previous life as it has some of the stickers on it from the South America trip the bike went on.2 points
-
the latest tasks on the africa twin have been the wiring. Ive put together a custom carbon fibre dash which I will show once its finished. The existing wiring for any accessories consisted of both "twist n tape" and household TPS wiring so anything non factory got ripped out and binned. I have a few accessories that i want to run (LED lightbar, USB sockets, Koso temp/volt meter and heated grips. I thought the best way to run all those tidily would be to run a decent guage wire direct from the battery though an ign controlled relay to a small fuse box which can be used as a distribution post, the little narva 4 way ones were the most neat and compact I could find. its all tucked nicely out of the way where it cant rub on anything. I needed one relay to switch the fuse board, and then needed a second one as I want the light bar to be switched by the full beam circuit. there is a separate switch on the dash so I can turn off the lightbar to stop it being switched by the full beam circuit. i got some relays that click together with harness's to keep that tidy. Upon testing I noticed that all 4 of my indicators were flahsing (now LEDs). some reading and i found out this is becuase of the "turn signal indicator bulb" on the dash. it receives an input from each side indicator circuit (no ground) and grounds though the opposite side bulb. This works with the resistance on incandescent bulbs but LEDs dont have enough resistance so the voltage leaks accross and all four flash. the easiest way to fix this is remove the turn signal indicator bulb in the dash, but thats dumb becuase its handy at reminding you your indicators on so i made a fix with two diodes and modifying the factory wiring. I cut one input to the turn signal indicator bulb and ground it, then made a little loom of two diodes merging to one wire for the positive feed (for those that dont know a diode is like a one way valve). I put the diodes in an old fuse holder to keep them safe. Works a treat. https://imgur.com/BCPRJpA The other wiring farkle on these old pigs is shared by many other bikes of the same era (mostly triumphs and ducatis) and that is the regulator rectifiers fuck out. They are old shunt type RR's that get really hot. the biggest issue with the hondas is the cheap shitty plug they decided to use. the plug starts burning out and resistance increases, so the RR cranks out more volts to compensate and eventually cooks itself. mine was working fine but I thought id check the plug out incase and.... It was certainly on its last legs, so preventative maintenance needed. The upgrade of all upgrades to the charging system on these bikes is to switch to a "MOSFET" type regulator off a modern bike. the tech in these farkles means they dont get hot, barely warm and are way better at providing stable voltage. problem is they are like $400 new and the $50 chinese knockoffs are time bombs apparently. A few evenings of trawling trademe and i found a 2016 honda cbr600 that was at a wreckers and got the mosfet RR off it for $100, choice. If doing this mod you want a genuine japanese made "Shindengen" RR, the mosfet ones are idetified by the suffic "FH" at the start of the model number. the most common is the FH020AA which is what I got, it is the same size and bolt spacing as the factory "SH" type regulator. it also has choice waterproof plugs. I had a fair bit of trouble trying to locate some 45mm stainless tube for the exhaust but @Hayholes mum came through with the goods while i was down in welly for conference. Came home and got that all sorted and @Mitch.Wkindly tigged it up for me. looking bloody lush. you can see the new RR mounted here too. im yet to tidy the wiring but its being upgraded and wired direct to the battery with a 30a fuse in the positive line. and here we have it... the first start in almost 2 years, and since all the new carbs and shit have gone on it....2 points
-
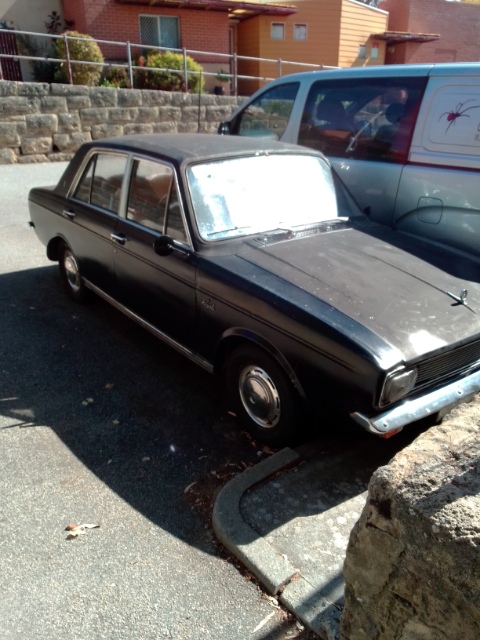
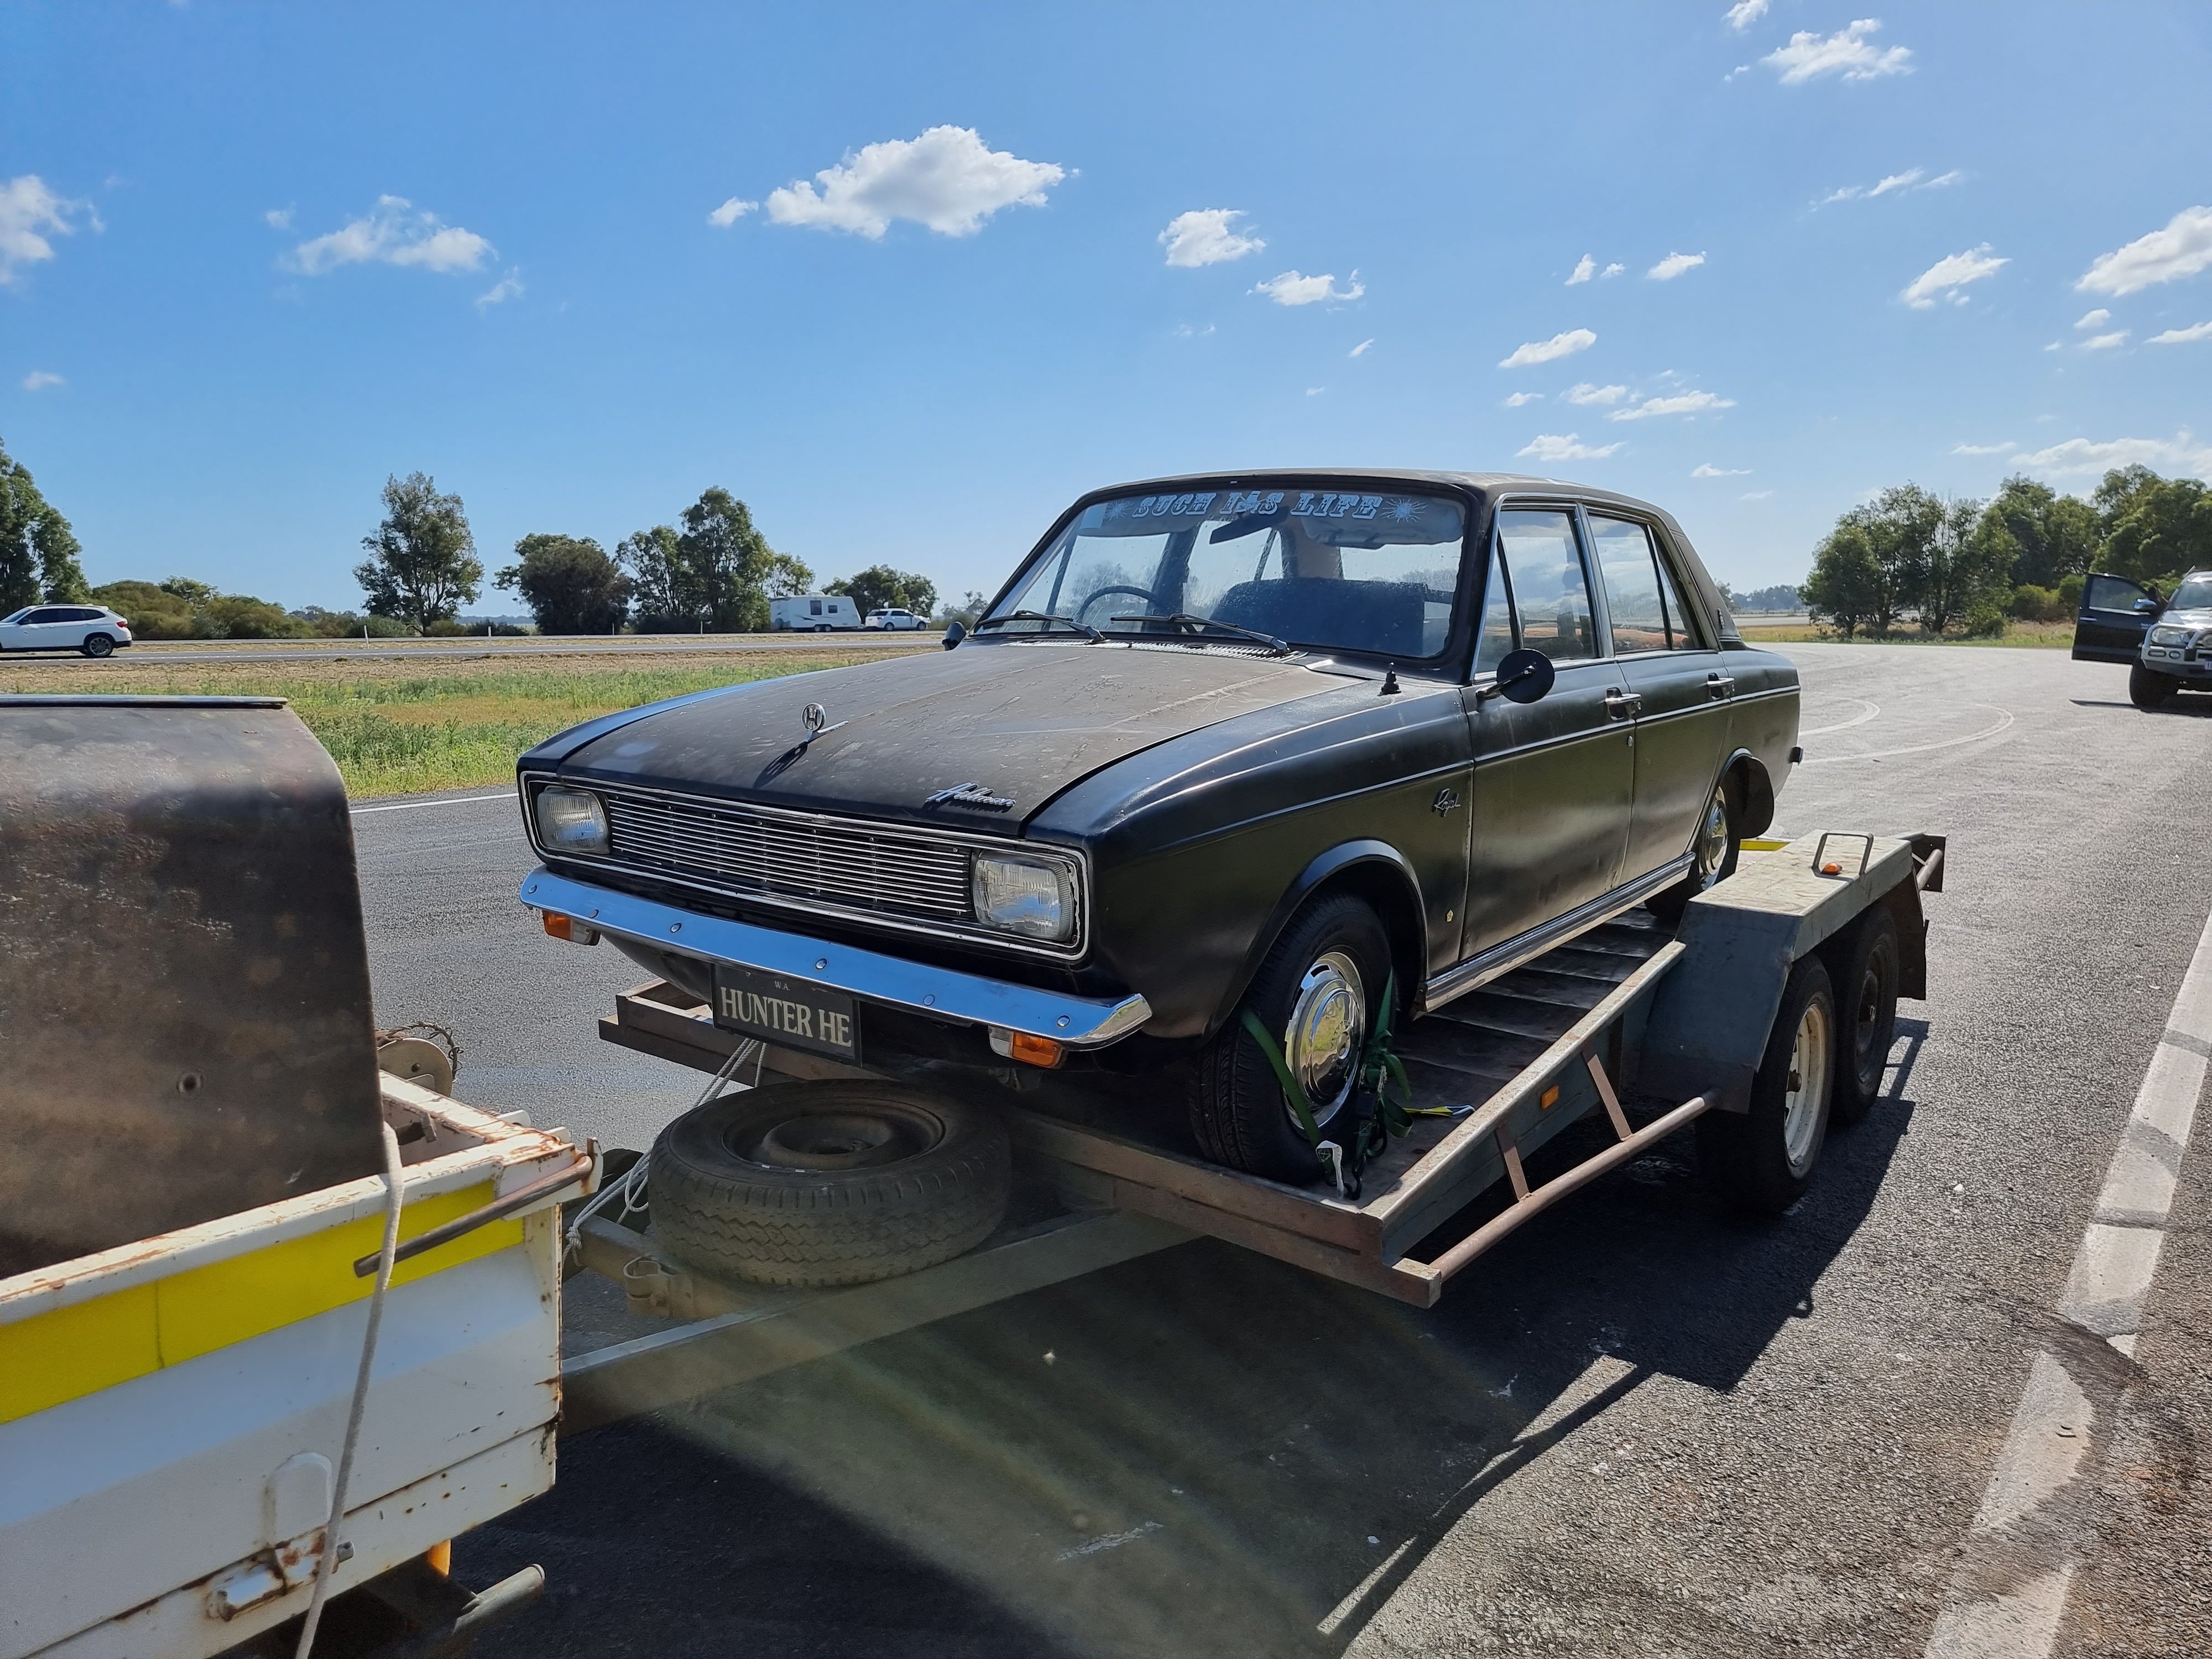
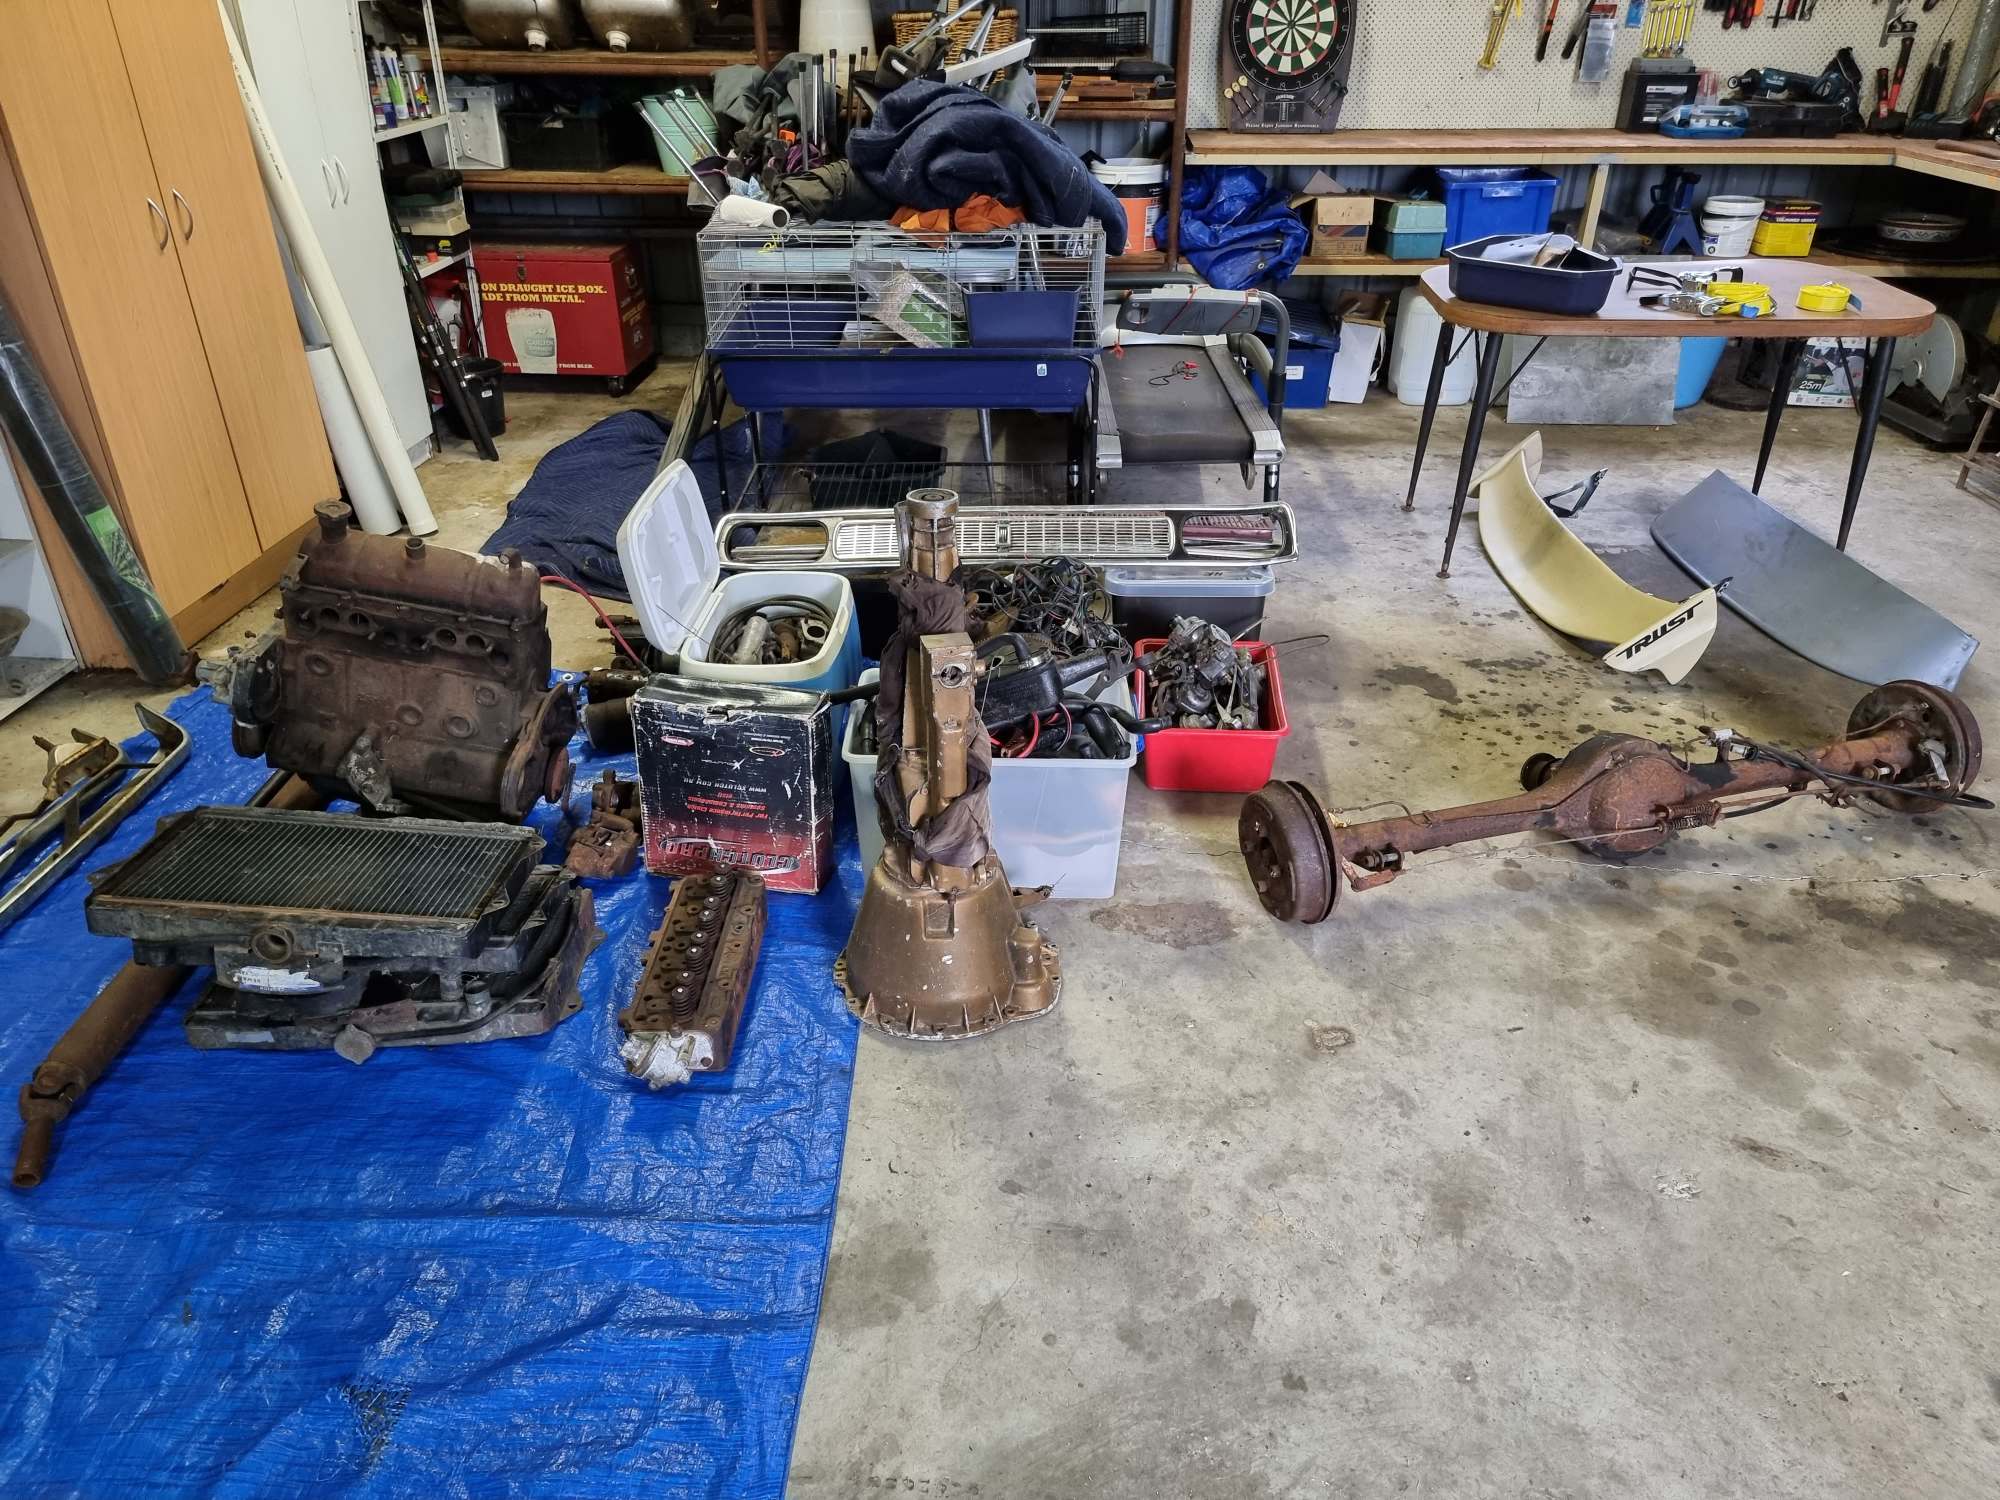
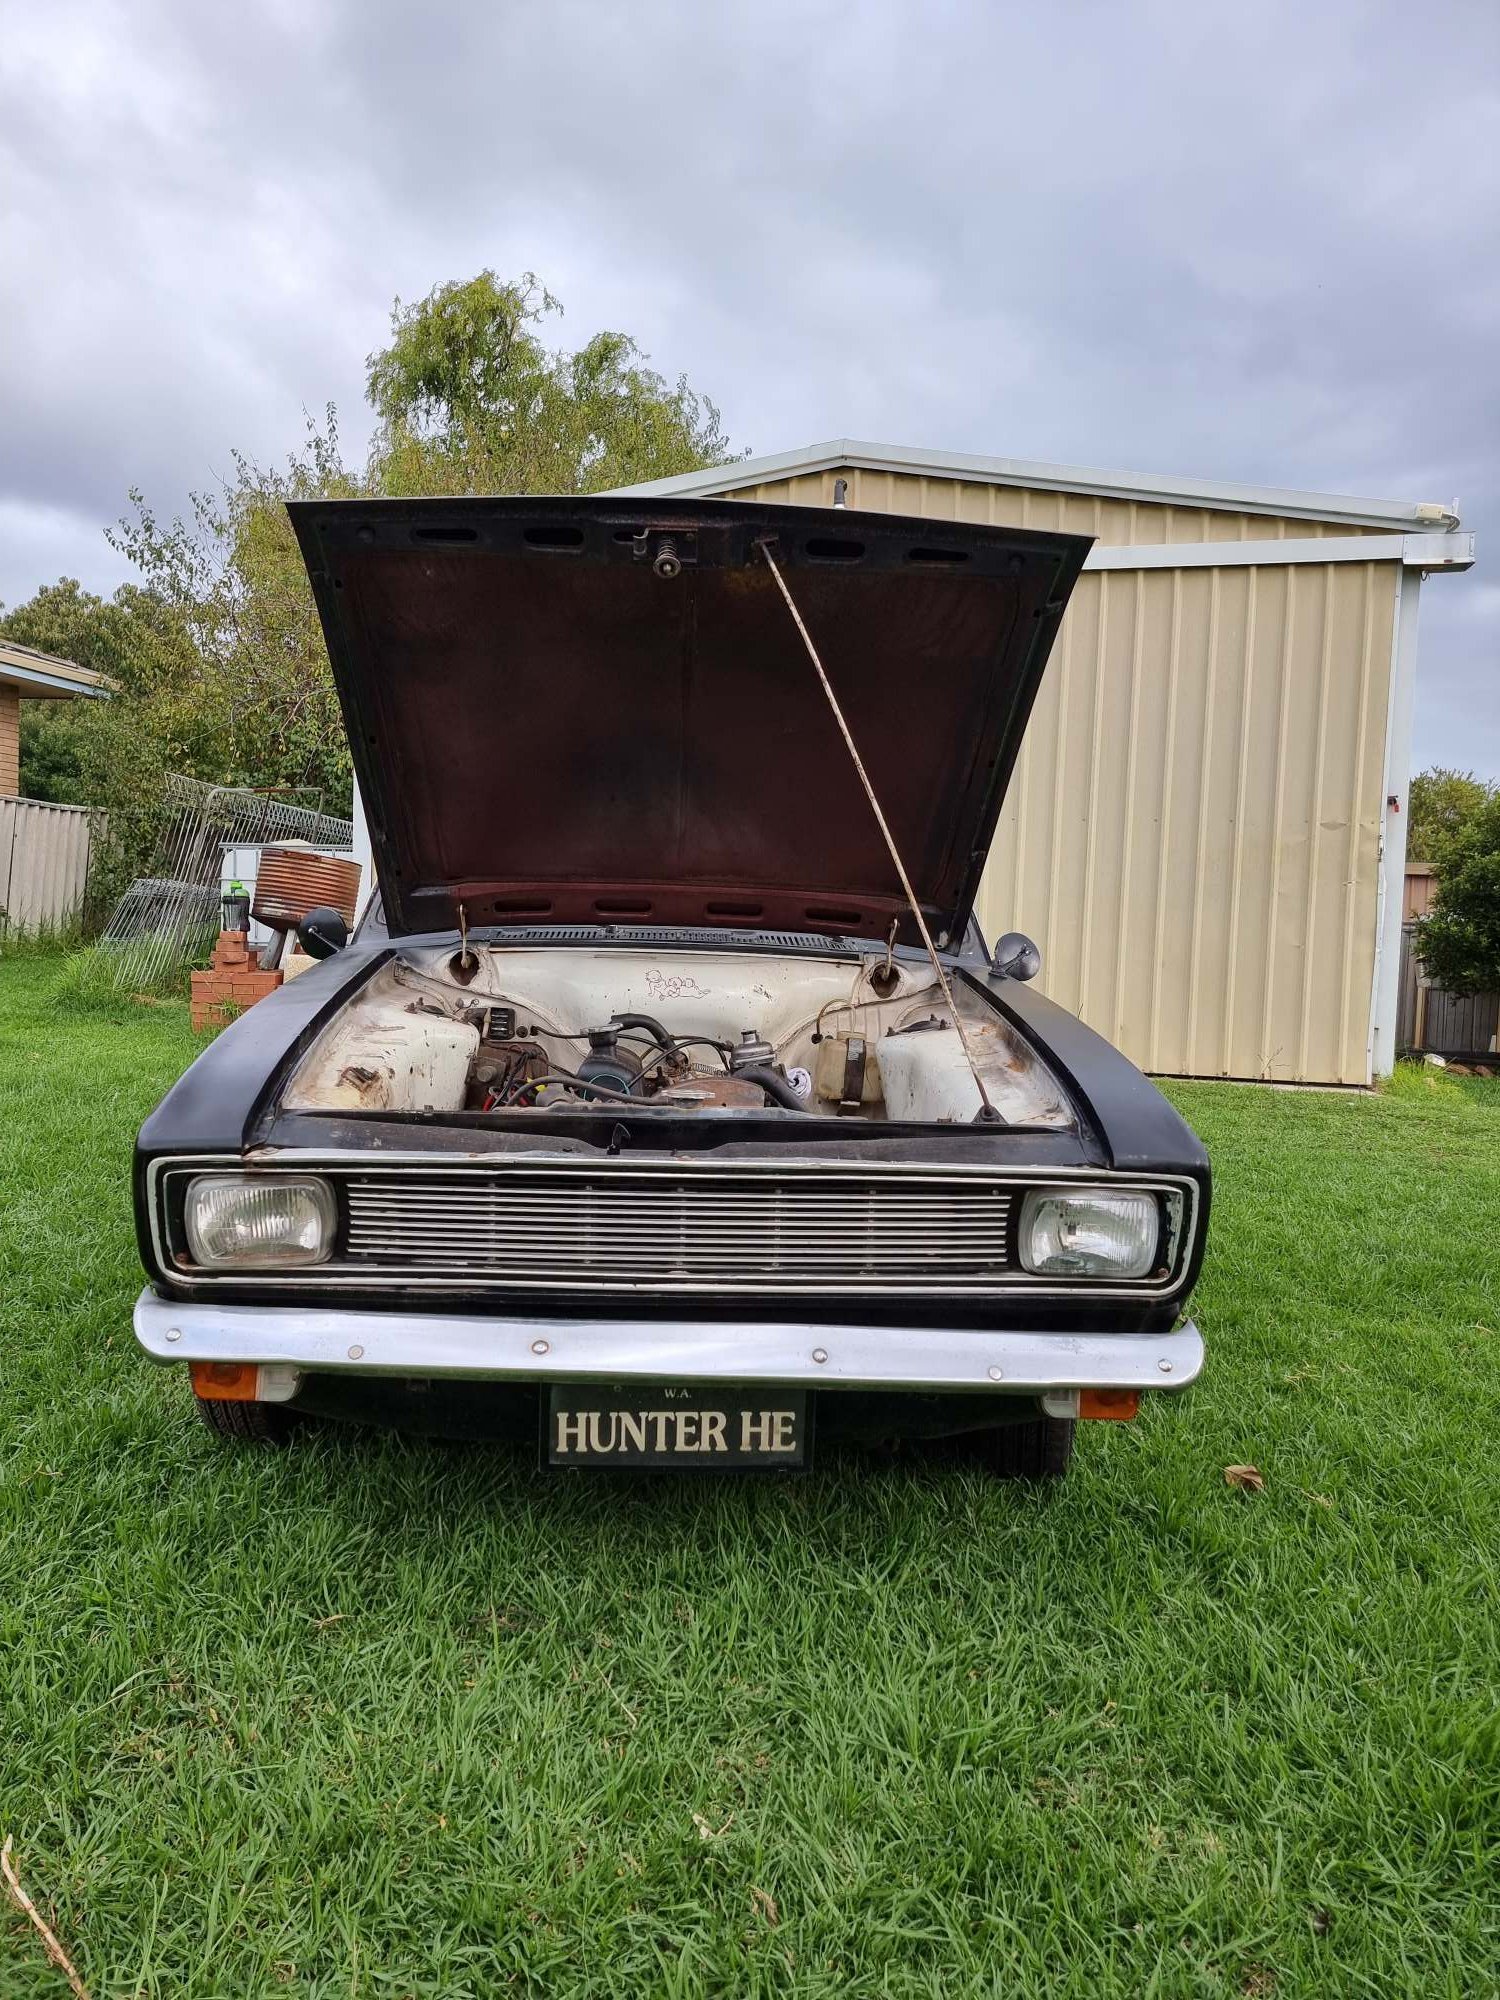
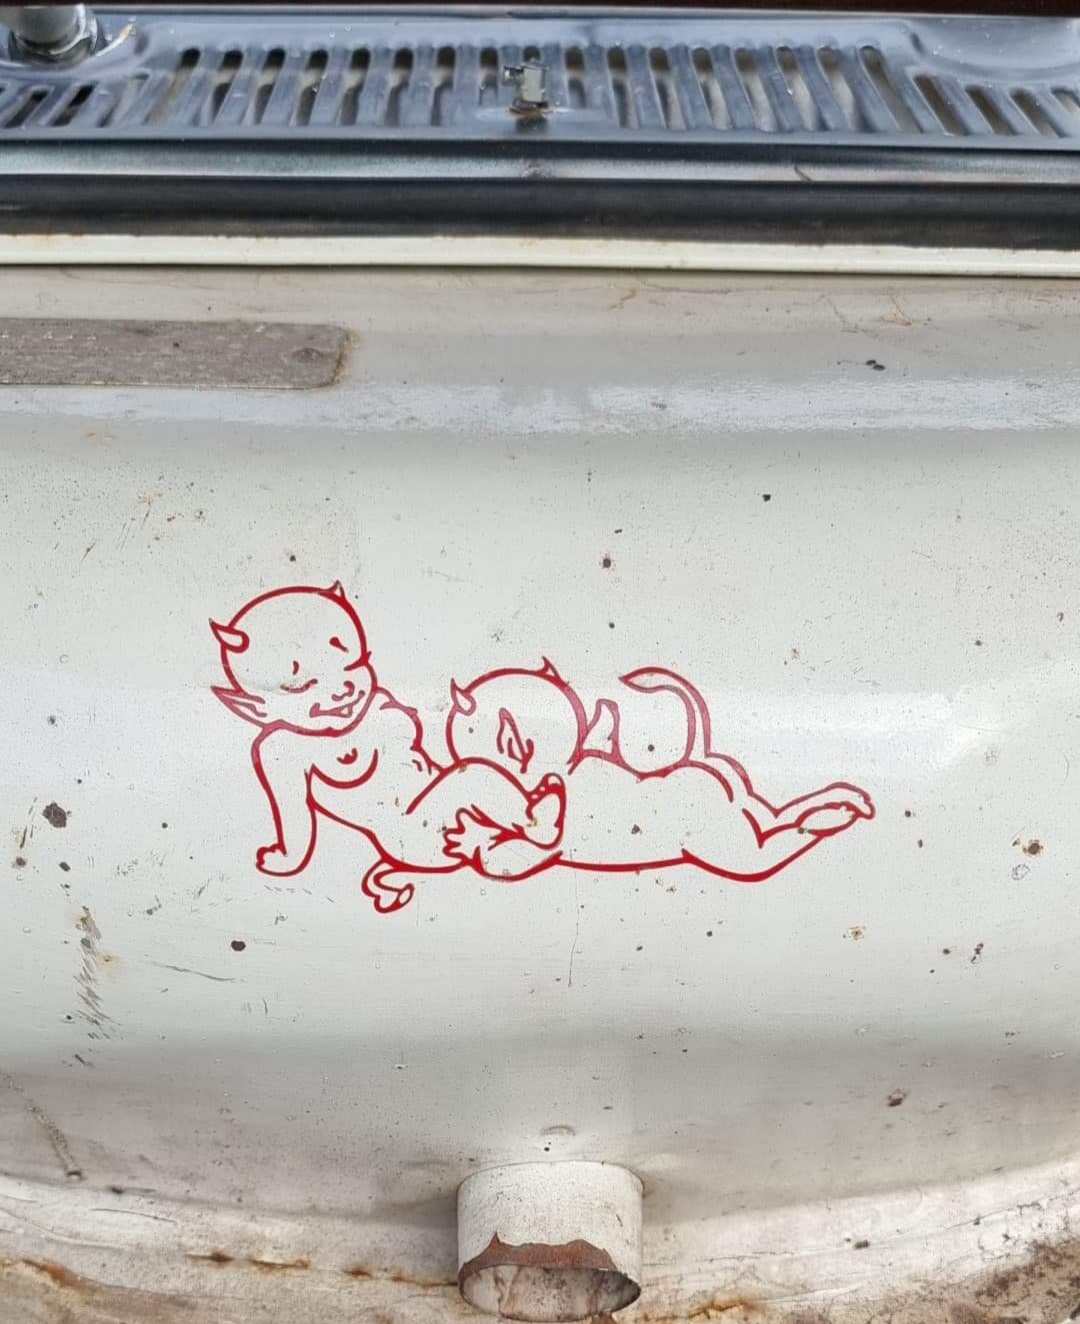
So its been awhile still in WA australia and sold both my escorts, bought a house with a good sized shed thats empty... thought you know what goes in here well. Junk. So I ended up getting this 1970 Hillman Hunter Royal HE of this guy up in perth thats had it for 20 years collecting bits and pieces but got cancer and needed it to move on to someone who will do it up. Its a matt black spray can jobber someones slapped a wing on it for god knows what reason. Came with all new doors, front end, bonnet, boot lid, engine, transmission, and boxes full of unused and used parts aswell as badges lots and lots of badges so if people need parts and dont mind it coming from over here might be able to help So here it is in all its glory and the amazing bit of engine bay art Heres the discussion Forgot how to post and dont have a computer to bare with me
1 point
-
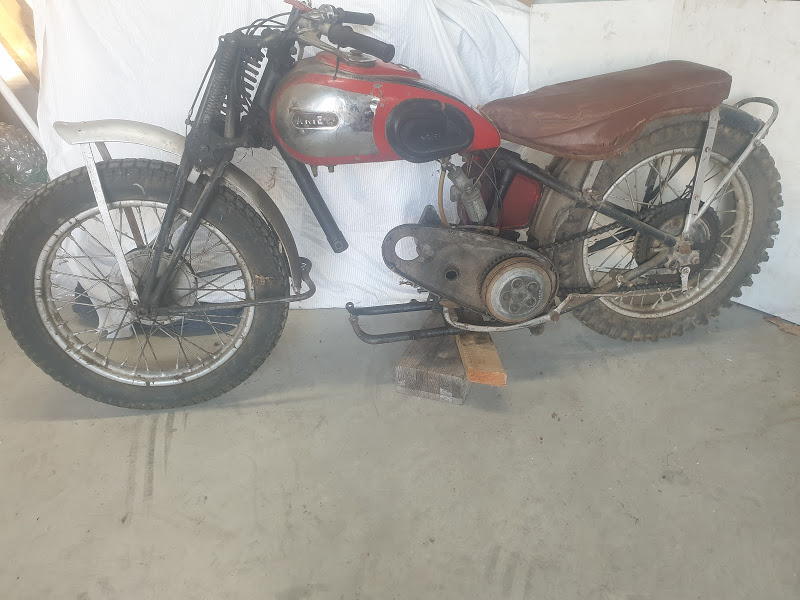
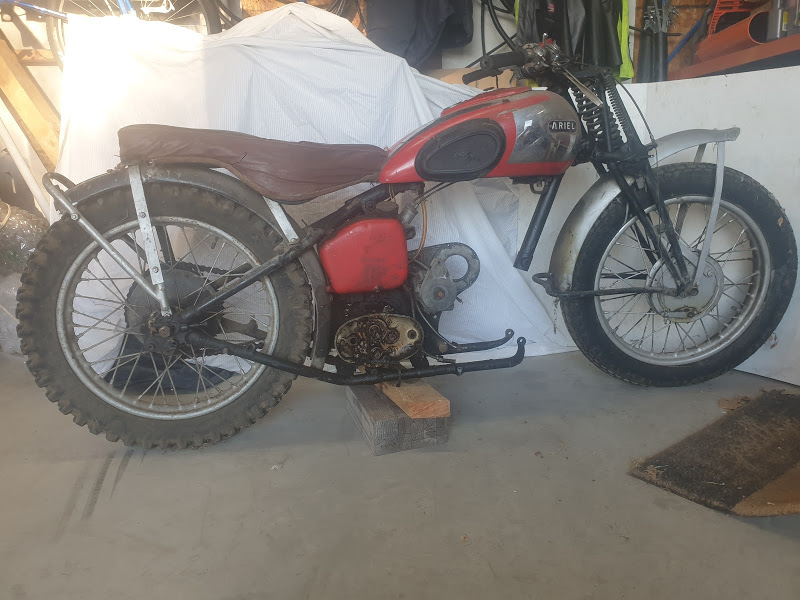
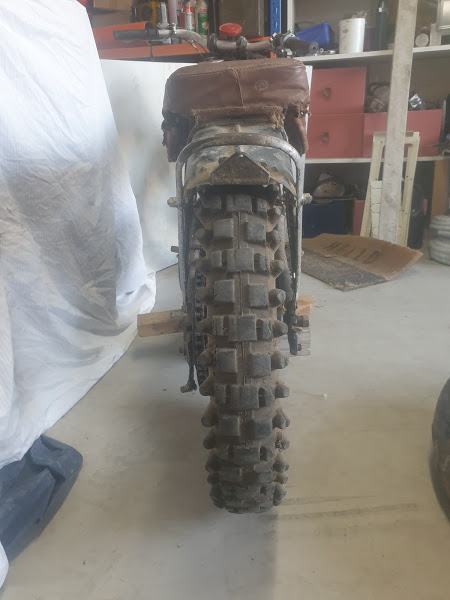
Thought I would put up a build of my Ariel, have been lurking on here for a while and have really enjoyed reading the builds posted, both cars and bikes. I've always been interested in motor bikes and had a few in my earlier years, mostly Yamahas, and had always wanted an older bike. Many moons ago where I worked in Ch-Ch there were quite a few guys in the VCC. A couple of them went to Wellington and bought up a heap of bikes from an estate (Brook or Brock Motorcycles?) One guy got a bunch of AJS/Matchless stuff, and the other guy a bunch of Ariels. I had a look through the Ariels and chose a bit of stuff that would be the grounding of a 1937 Ariel Red Hunter. Engine was 1937 and not too bad, frame is about 1946 from memory. Pretty much enough for a complete bike plus extras, but everything needing work. Back then I got a few bits done, girders straightened, oil pump over hauled and most importantly got the engine done. Had it re-bored to suit a wiseco piston from a 350 Chev and new chev valves to suit. Didn't get much more done due to moving towns, young family, seperating from wife etc. etc. Usual shit. So recently life has settled down a bit and I have come into possession of another Ariel. This is a pretty much complete, bit rough, ex farm/hoons bike that has been hidden in the back of a shed for at least 40 years. It's a 1939 500cc Red Hunter. Frame and engine numbers show it as a 1939. It had been used on a farm for a bit here in Ashburton and thrashed, blown up, piston shattered! Then sold, engine removed and stripped, stashed in the back of a shed until a few weeks ago when I got it. Most parts from 1937 & 1939 are all the same. Will post a couple of pictures of the 1939 bike as I got it, 1937 is in bits and all over the place in my workshop.
1 point
-
Annoyingly the tech data sheet says the gun needs to be 40-55 psi and the gun I ended up getting recommends 30 max PSI. Buuut the guy gave me some free measuring cups and filters!
1 point
-
Yeah she's got drovers boots I don't look at the wife's dog credit card statement and she pays no attention to the car parts piling up1 point
-
yea way tougher with the dish, and yes he has 5 stud PCD all round1 point
-
adv boomer blizzo cant wait to see you standing up on the foot pegs on this eh1 point
-
@Roman wouldnt you want a minimum speed, rather than off completely at low/no load? unless thermosiphon morris minor stuff goes on?1 point
-
Amazing transformation! Well done.1 point
-
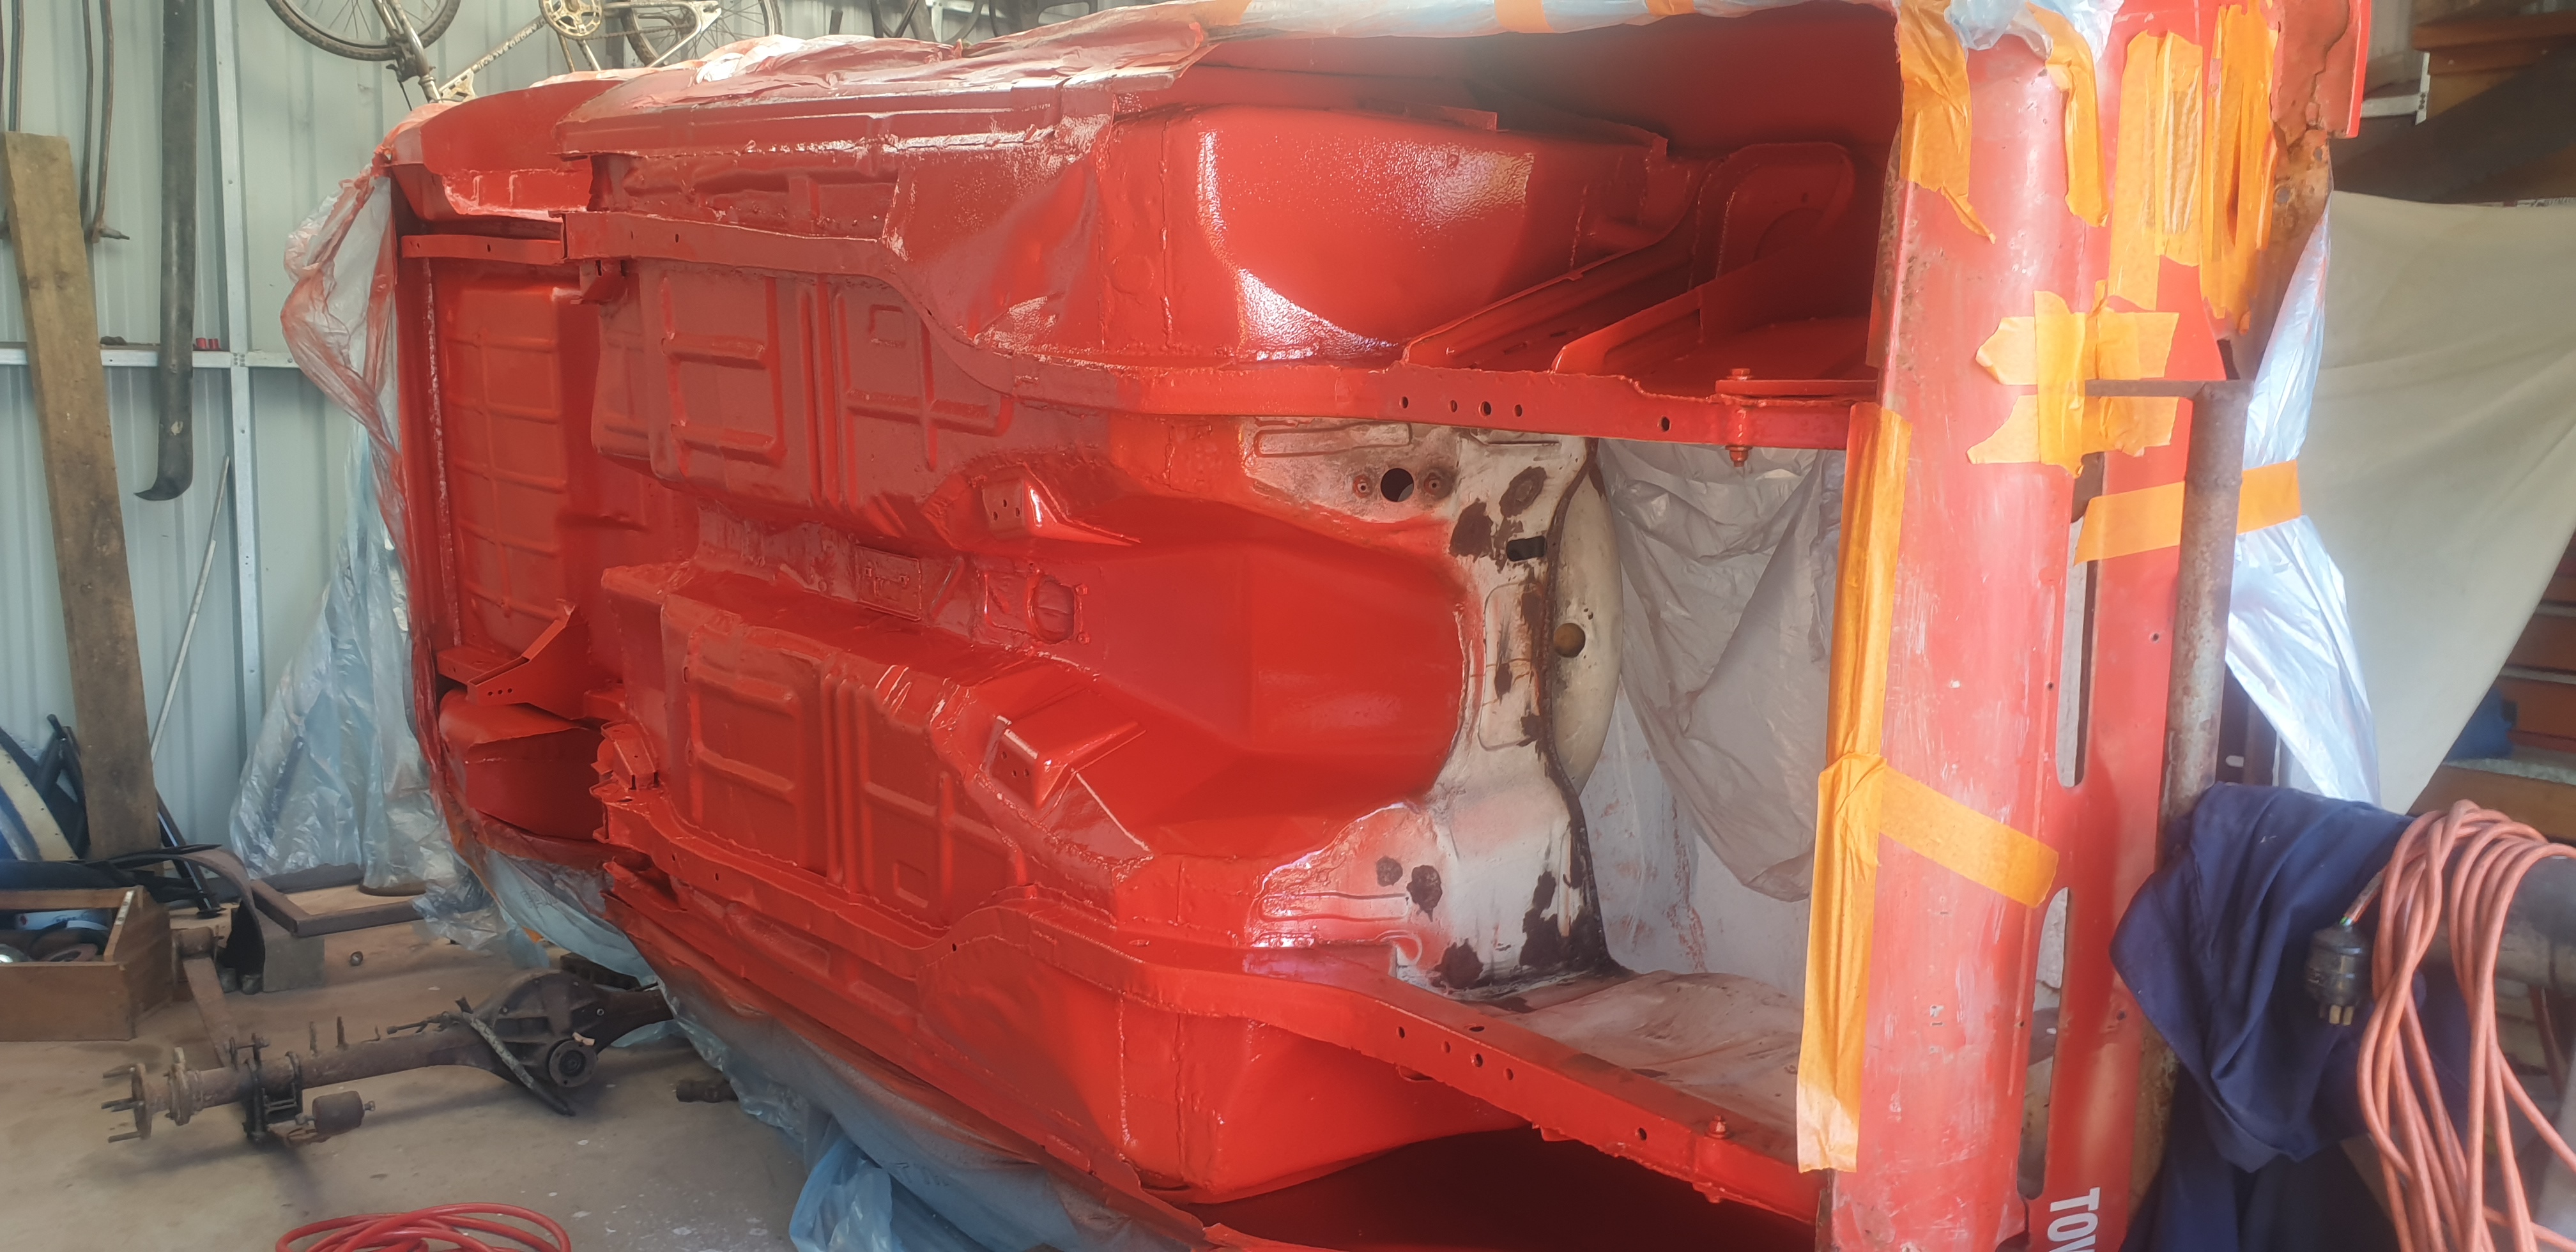
Came up a treat! No before photos cause who needs to see gross v6 stuff. Will paint the rocker covers got plenty of colours at moment will need to decide. They'll go back on for now to make engine watertight so i can go to town with the degreaser again to get the rest of the gunk and paint the block.
1 point
-
I asked the gravel rash riders a while back about the detour route which they said is passable all the way from Gizzy to almost Ruatoria with some chonky gravel but otherwise nothing we aint used to riding shitty non adv bikes on. The only thing they warned was logging trucks working every day except Sunday which isn’t ideal for us Te Araroa camping ground has cabins, bunkrooms and camping sites with an access track to the beach for nangs1 point
-
Yeah I think you're on the money there. I'd like to do a bit of looking at that alternate option you guys took on year 2 between Gisborne and Tolaga Bay-ish1 point
-
You can use foam underlay like in a house, but unless it's closed cell foam it will all absorb water. And that foam underlay will hold it longer than underfelt. If you are thinking the under felt is going to get that wet I probably wouldn't be putting carpet in it. I would look at rubber/vinyl matting. But really depends how often you plan on getting the carpet and underfelt saturated. 10 times a year? Cause dehumidifiers work a treat in closed up vehicles to dry out carpet.1 point
-
Time to go fishing....
1 point
-
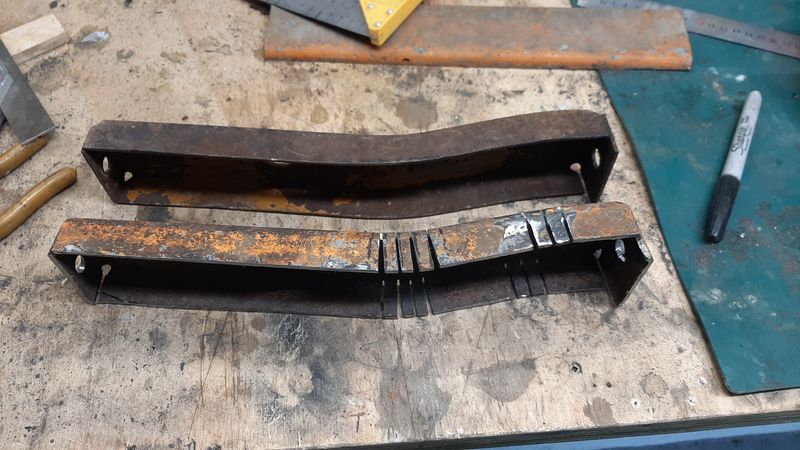
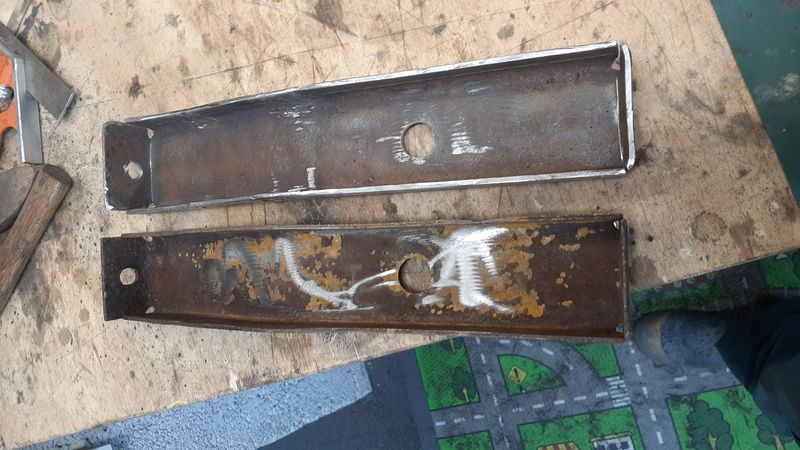
Now the eagle eyed amongst you will notice that the arms are slightly different lengths. I setup a little "test bench" using an old cereal box. Poked a hole through the box for the pivot bolt and ran a little experiment. For every 15 mm of travel on the long arm the short arm travels 10 mm. If my maths is correct this works out to a ratio of 1.5 to 1. Adding my original pedal movement figures of 45 mm to 30 mm into the mix, this just so happens to be the exact ratio that I require. If I was to connect the short arm to the cable and the longer arm to the pedal activating rod, I'm thinking that the pedal will need to travel further than it currently does and hopefully the longer arm will slightly reduce the force needed on the pedal to move the cable. Please shout if there are any glaring errors in my theory. Anyhoo, in order to give this a try I've got to fabricate a MK 3 version of my cable bracket, so that is the plan for tomorrow. Thanks for reading.
1 point
-
I did Alexandra to Whangarei in a 40 year old lancer that hadn't been driven in 5 year1 point
-
Gidday, me again with the crappy volkswagen. so last time we left off that i got it out side. WAHHOOOO the next thing on the list was tires and to dial in the ride height. i had messaged seedy al a we while back and asked what size tire he ran on the front and i run these also but this time i fired him a message to see what he was running on the back, and yikes it was a small tire compared to what i was running, which was a 205 70 14, i done some tire comparisons online to find something that would give me a smaller tire but nothing to small. I ended up with a 205 60 14. this is 22mm smaller in the side wall, allowing me to go a little lower with out having to ram the tire up into the guard. but since going lower i now have a lot more toe in, now causing the tire to catch on the spring plate adjuster. so i got some shims from bunnings, yes bunnings stock shims for vw kombis (washers). what i needed to do is shim the spring plate out a bit from the arm to help correct the toe in being this is one solid arm with no adjustment. this required a bit of fucking around, with the 1st attempt having to much toe out. so i removed a shim (washer) and put it all back together and it seemed pretty much bang on. So i got my 3 meter straight edge and drew some lines to the front and back and chucked a tape measure over them. i had the wheel alignment 5mm toe in. this measurement was comparing 2 meters behind and 2 meters in front of the wheel. so i thought my 5mm was pretty bang on for something that is not really adjustable. picture of the solid arm which i placed shims on to correct my toe in issue ^^^ this is the rear i placed spacers where the arrow points With that all done i was able to actually drive it out side and down the road a couple of times. was good to finally have it out side. I was using it a bit here and there to see if anything was an issue or i would need to adjust anything a bit more. My biggest issue was i was not able to select gears that well, i was really starting to get pissed off about this. got talking to the guys at v-dub shoppe and they gave me a bush to replace in the gear linkage system close to the gear box. fucked one this little guy was toast, it was ment to be solid and have no movement but it had about one 8th of adjustment in it causing it to no select gears correctly. replaced that and OMG what a change! while i was up there i got this image of it all done. next up i proceeded to loose my drivers side hub cap about 4 times with in 10kms from home, found it each time which was a bonus. next i needed to sort some shocks out for the front, while i was out at @Fuckedifiknows house i was talking about what i needed to do and he passed me these. and then i got some shocks but i was going to need to do something as the shaft was to big for the bush on the shock. well we had @Kimjon pop in and take my vespa for a ride and he suggested he take them home and chuck it in the lathe and take a few mm off it to make things easier. finished result! next up i needed to tap the shock tower so these could go into them. she was a tight squeeze but we made it work. time to make some bump stops for the front and the rear. front ones go a little like this. put some holes in them make sure the holes line up then you get them lazer cut and leave them for 2-3 months back ones go a bit like this remover rubber dog chew toy (way before we started this) Get smaller rubber chew toy make small rubber chew toy screw into metal thing thanks to @Geophy make metal thing that rubber chew toy screws into be one with George the kombi glad i still know how to melt metal together not that well. so paint metal thing black and screw little chew toy in also removed the big cup thing off the rear control arm for more clearance so i have a bit more travel before bump stop hits, this was only held on with 2 little tac welds so i feel like i done good here. now when it touches a good solid peace that wont fall apart. done some other things to make clearance issues not an issue but i wont show those as i didn't take photos....... but here is a photo of it allll done. do you guys like the no hub caps? or with the hub caps? visited my mates out at the v-dub shoppe to show of and thank them heaps for all their help. and our next adventure was to the bay of plenty to see some vdub people and inquire about getting the kombi checked over for a wof. the bay of plenty was great to us. chilled out with beth and tayla before visitng the wof place. re done my wheel bearing while i was at the wof place cause it was making some noise and then headed out to catch up with a vdub mate brought some rego and went to take a comparison photo when i got back home. thats it for now. next time on adventures with the 64valiant family and George the kombi we head to beach hop and vw nationals. stay tuned1 point
-
So, I still own this It got used for a daily for about a year or so, and I made a few more changes to it - t3 knuckles and modified the tension arms for more caster. And changed out the rear end to an 4.11 F code center from an mx73, with an Altezza torsen. Here's a terrible, old, cellphone picture of it about then; A little later while I was taking a short break from possessing a license I pulled the windscreen(s) out to fix up the rust that was coming along nicely in the lower corners of the rear screen frame, but didn't actually get around to actually doing that for a long time The 4a was getting pretty tired too - at some point i'd lost one of the filter socks and gave in and just ran nothing at all - so a life of hard work and then that, it was starting to experience pretty heroic levels of blowby. So was looking at doing a rebuild on that, but then I happened to be at Zebra looking for something unrelated, and found this in one of them mental WiLL VS doodads; A 2zz. No real idea what condition it was in but being zebra, it was cheap enough to get to just stuff around with Id actually already bought a j160 to put on the 4a - had a look at that, and the way a few key things on the 2zz were arranged (simple steel sump/pickup, easy waterlines etc) it actually looked pretty straightforward to make work in a rear wheel drive arrangement. Did a very rough 'adapter plate' to the j160, for a sort of proof of concept and threw it in the engine bay, it all fit a little too well I figured they already make 190hp standard, is all aluminium, has vvtli, gain 200cc, so why not really This is going back a little while now, and progress has been glacial (had a kid/wasting my time with other projects) but it looks something like this at the moment; Ignore the 20v throttles propped up with a bit of wood for artistic purposes but yeah it's mounted, the headers are now done, the j160 is more or less adapted, and the rust is fixed too I'll put up some more detail on that stuff soon discussion\tell me how stupid i am1 point
-
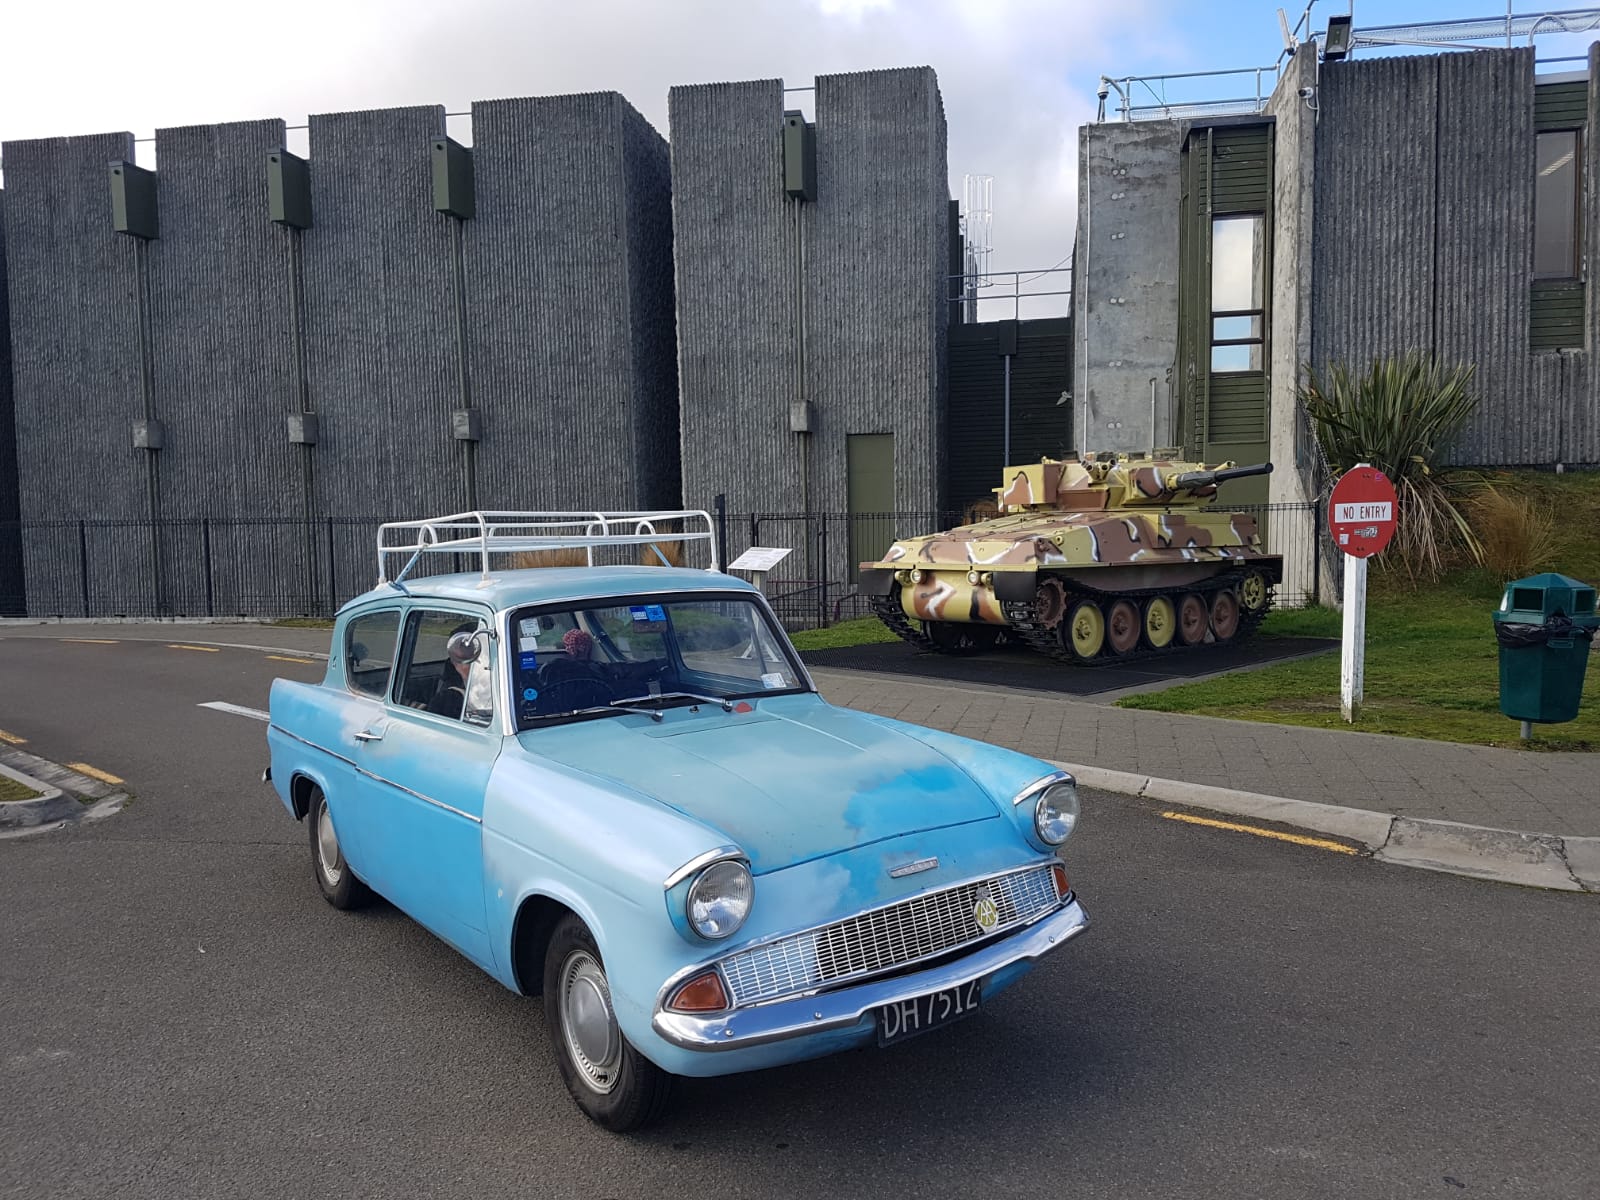
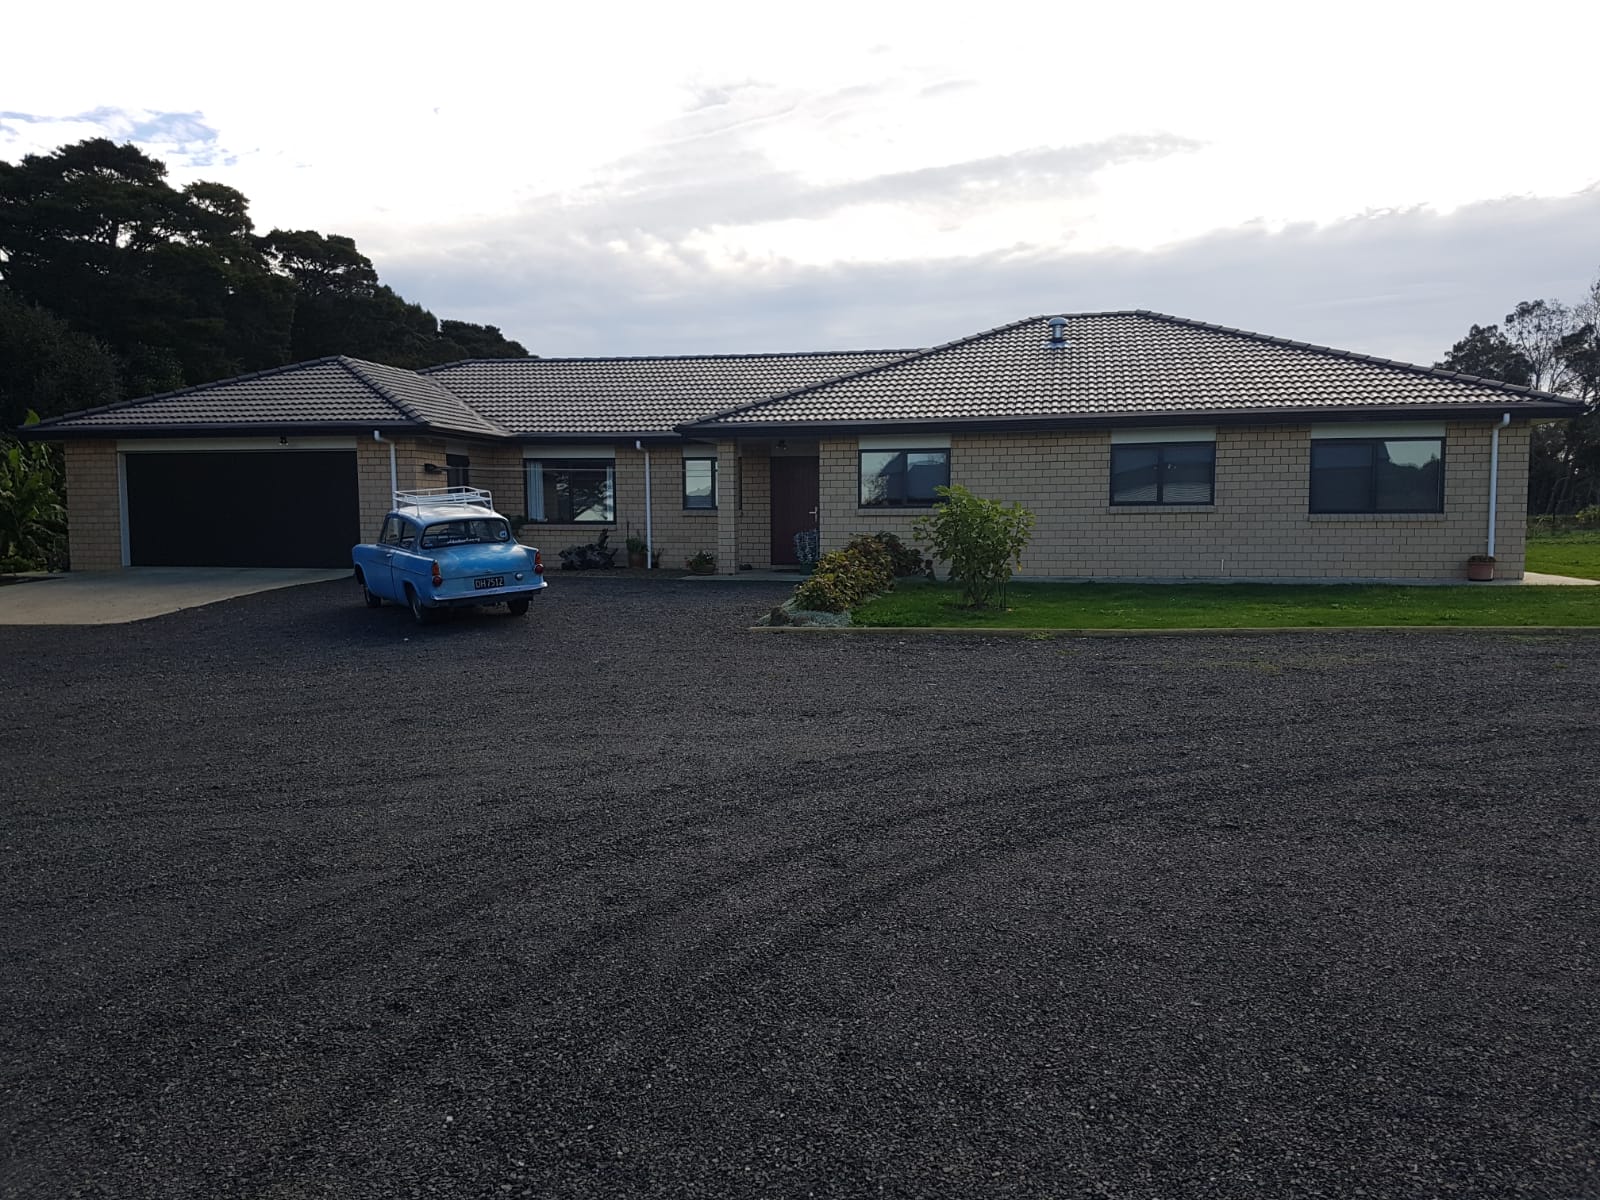
They've begun their trip north now. I think they are in Hokitika tonight. My dad said it hasn't lost a drop of engine oil so far. I call BS. He reckons someone wanted to buy it from him in Wanaka but died when he stated his asking price
1 point
-
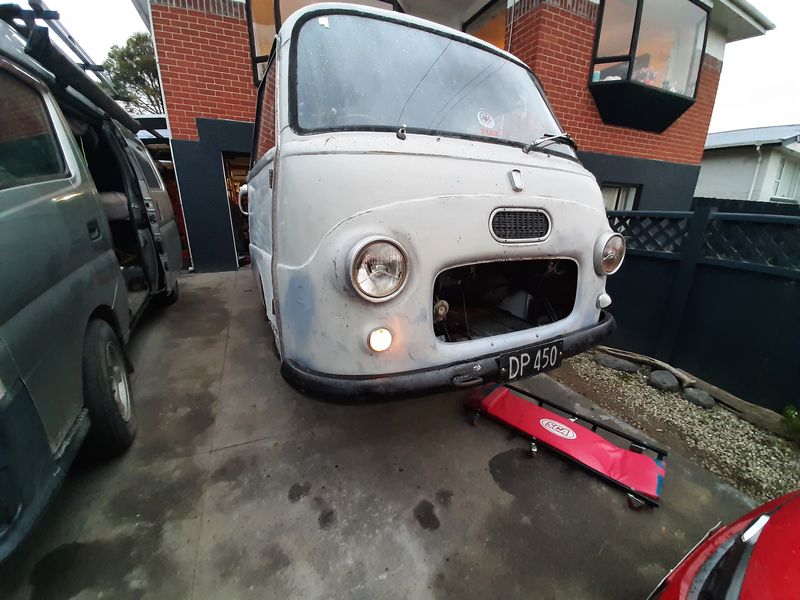
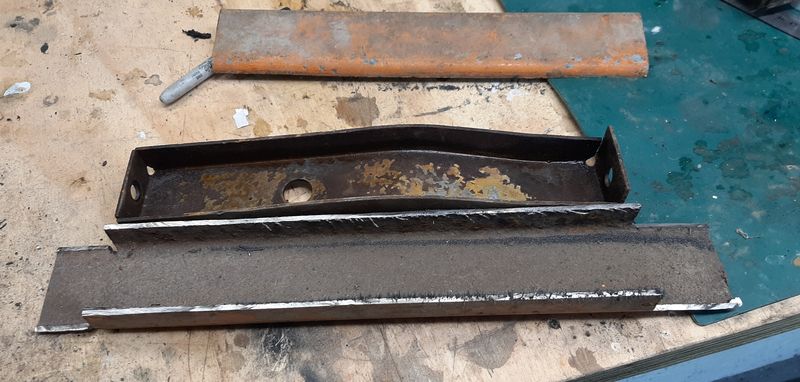
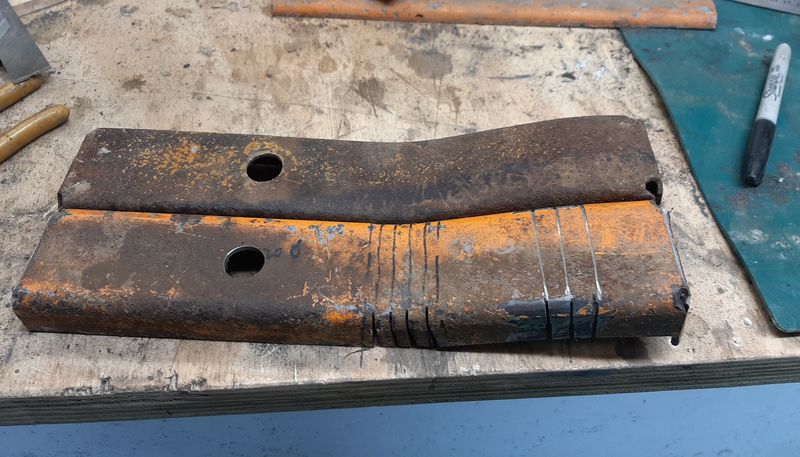
Made a bit of box into something else Its a bumper mount, the front bumper had been removed by a PO and one side was missing some bits. That means i could put the bumper on and finish routing the the wiring from the dash to the engine So i could put the dash back in, and ran a bit of juice though the circuits. IT LIVES! Indicators, dash lights, fan, and wipers all working. TStill some electrical work to do - on the engine side (after i drop it out) need a new column switch so the headlights can works (Ebay, ordered), and to install the new headlight bulbs (stuff in stock). Brake lights use a pressure switch so cant test those yet. So I put the front back together Look at that little face
1 point
-
Also the sweet sweet number plate HUNTER HE So where all things start... seeing what doesnt work and what parts I have Bloke seems to think it was something to do with the dizzy and points so I have like 4 new ones to try out from his stockpile Also about 6-7 stromburg carbys aswell as being able to install two so who knows we will see how things pan out My partner doesn't want to keep the engine bay art either... she thinks her parents might not approve
1 point
-
car went to the paint shop to get the runs out of it and get the final cut and polish. i went and picked it up last night and it looks amazing. anywho, today i wanted to fix the exhaust where the flex joint had worn through because its the lowest point and its had a fucking over judder bars and whatnot and subsequently has a hole it in. step 1 - jack up your car. this is where things went wrong. 2021-04-25_02-55-42 by sheepers, on Flickr car slid off the jack on the way up. given what could have happened i got off extremely lightly. it bent the radiator support up and bent the bottom of the radiator real bad. it also bent the bottom of the front bumper. however, the radiator isn't leaking and the crank pulley is unscathed which is a fucking miracle given what happened. i was able to bash the rad support back down and i got most of the bend out of the bumper so it looks fairly normal again. fuck it could have been WAY worse.................. so yea, after dealing with that i moved on to fixing the zorst. cut out the fucked bit, made a new bit, tacked it in place, remove zorst from car and fully weld, add 4mm thick bash plate and put zorst back in car. 2021-04-25_02-55-49 by sheepers, on Flickr 2021-04-25_02-55-55 by sheepers, on Flickr 2021-04-25_02-56-02 by sheepers, on Flickr 2021-04-25_02-56-09 by sheepers, on Flickr 2021-04-25_02-56-21 by sheepers, on Flickr then it was time to wax the newly polished paint. that went well. it looks pretty ace tbh and yea, i cant take a photo that justifies how good it looks. but it looks good. take my word for it. 2021-04-25_05-34-27 by sheepers, on Flickr 2021-04-25_06-18-48 by sheepers, on Flickr 2021-04-25_06-19-23 by sheepers, on Flickr 2021-04-25_06-32-09 by sheepers, on Flickr1 point
-
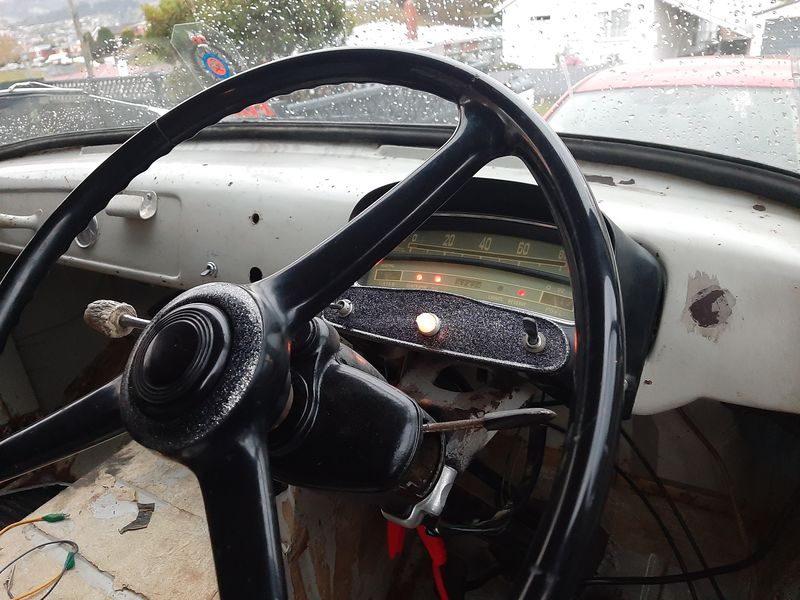
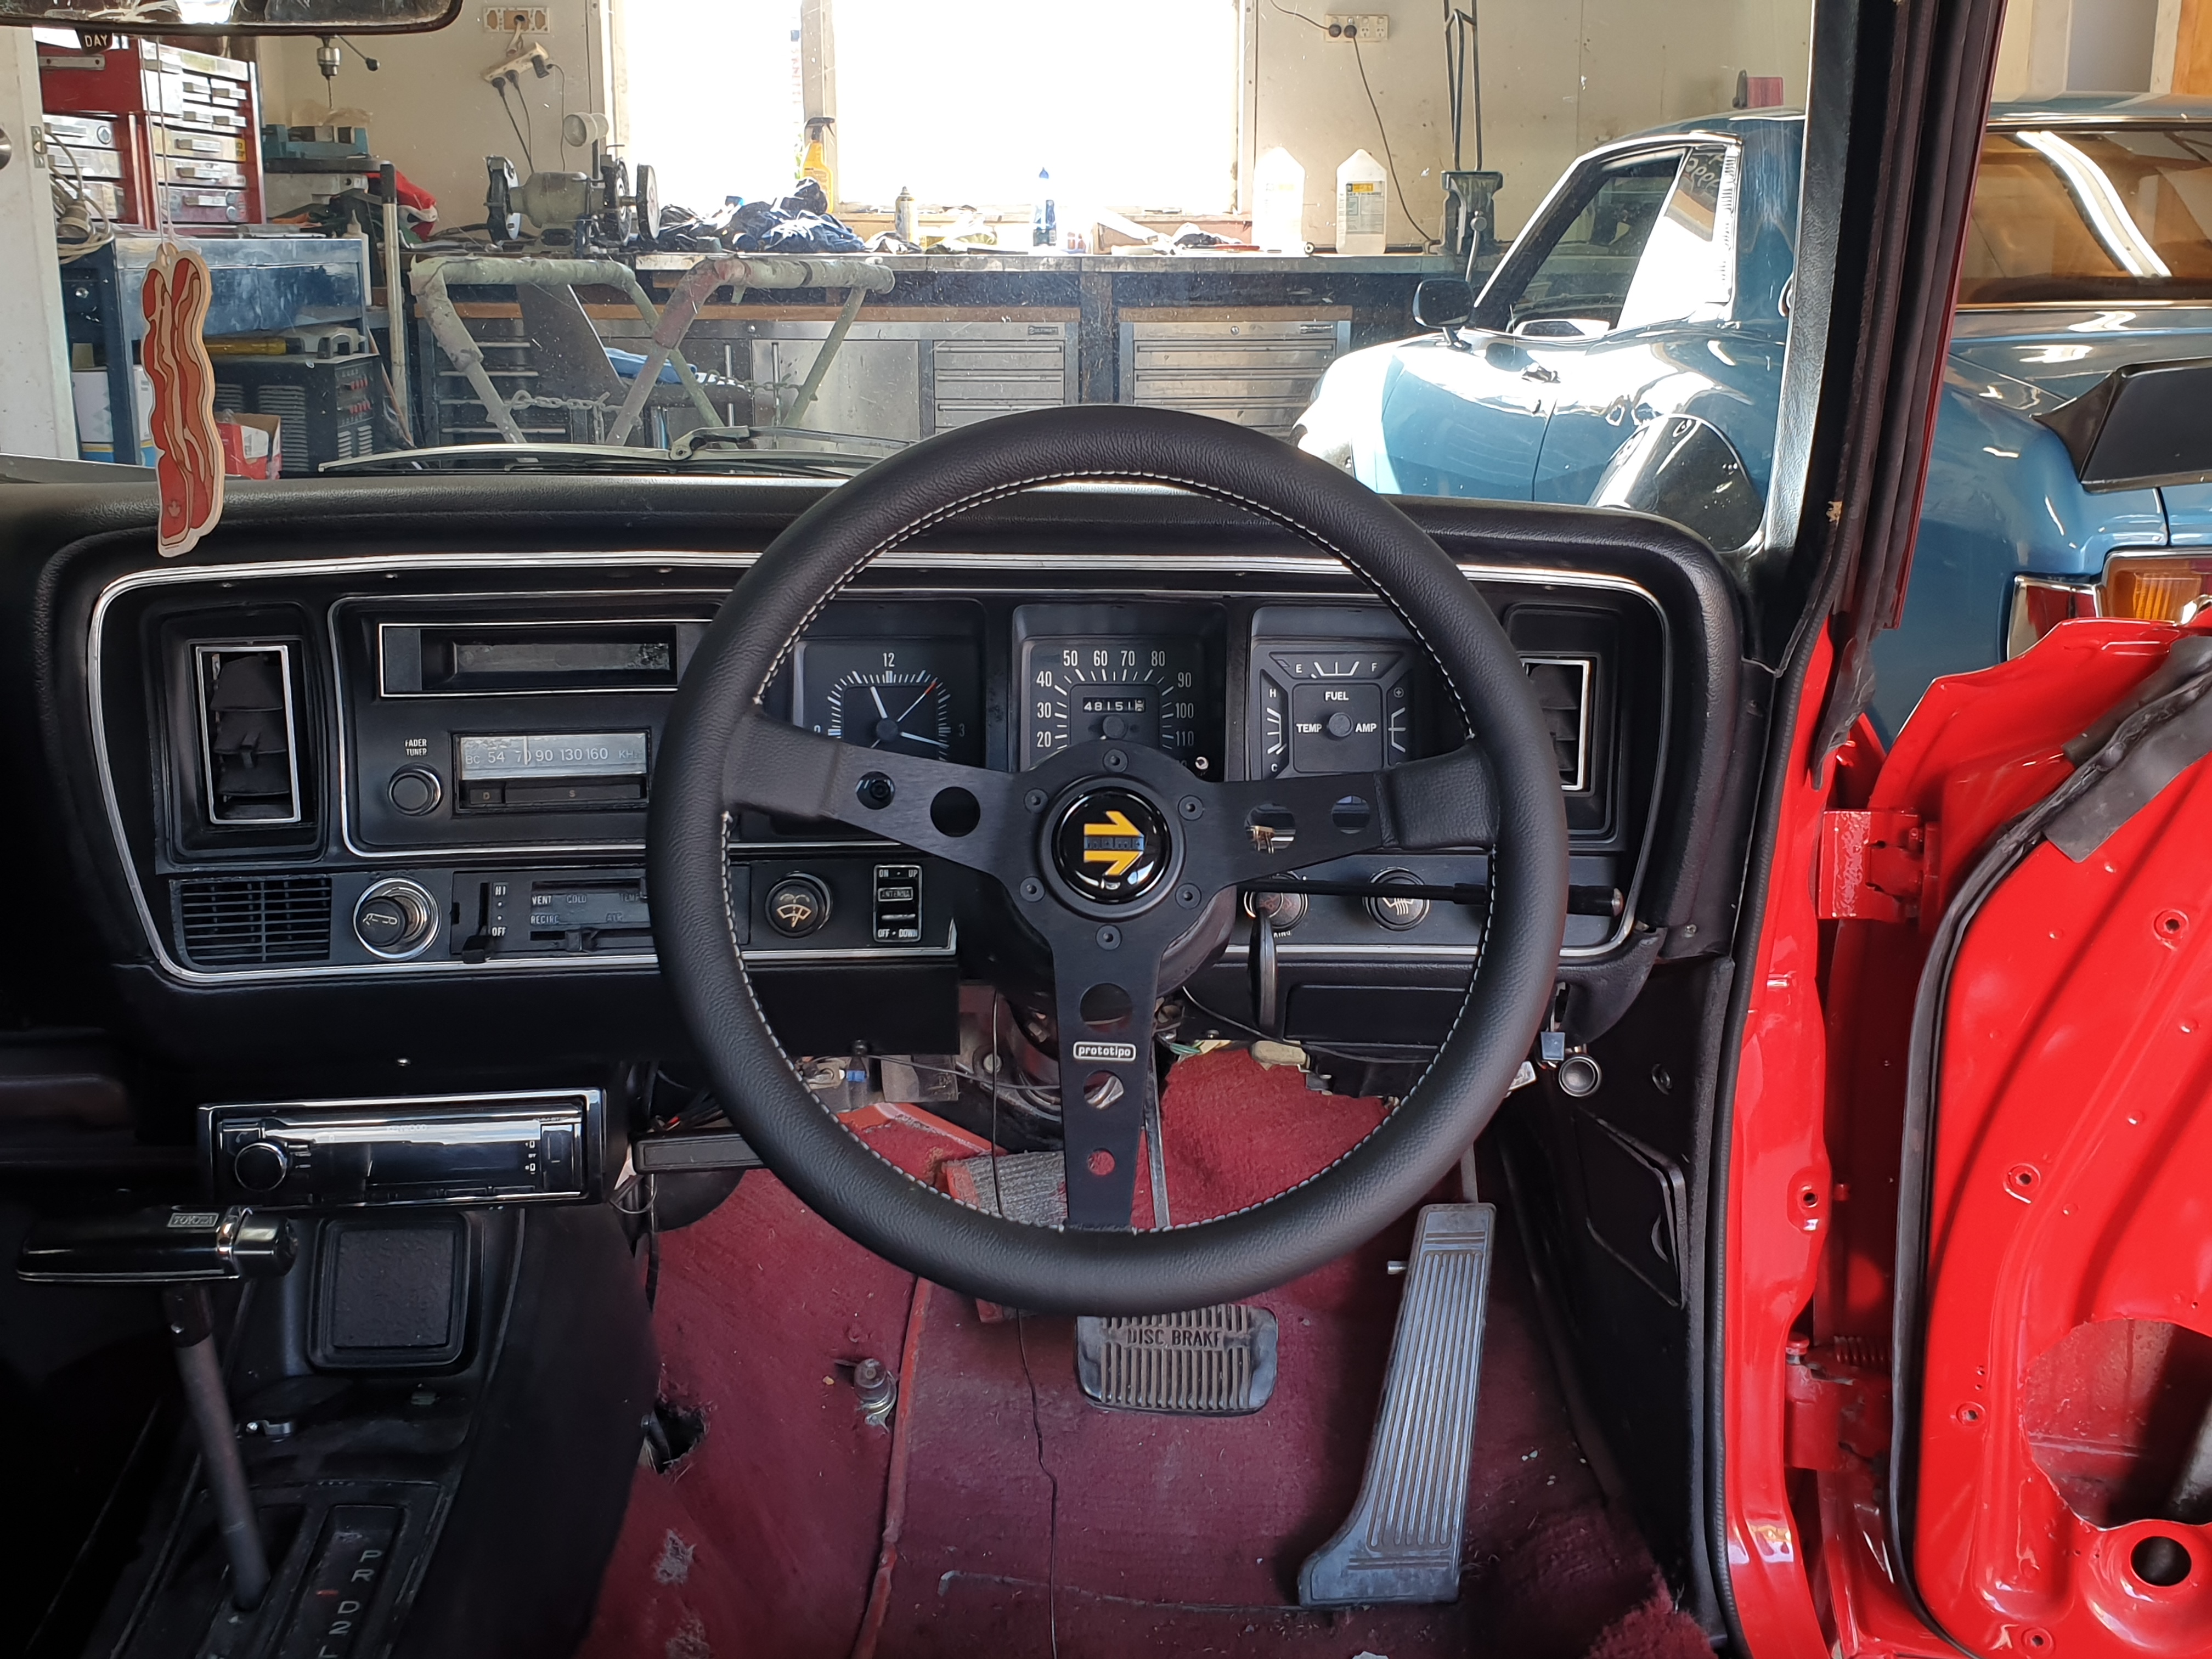
Bought a momo steering wheel for it. I am actually in love with it. Also I'm posting this from my spa pool.
1 point
-
its coming along. im just tidying up all the little things that need doing. ive got some generic belt line rubbers coming for it then i can put the door cards back on. the bumpers are away being chromed and ill get them back in a week or so. not sold on the black center caps and i have another set on order should be here middle of next month. i drove it up the road to get some milk and i fucking love driving this thing, its fucking slow but its cool to just cruze along in and i can see myself doing a bunch of Ks in this as soon as i tidy u the last few things. believe it or not its still got a warrant! 2021-03-18_07-56-27 by sheepers, on Flickr 2021-03-18_07-56-37 by sheepers, on Flickr 2021-03-18_07-56-45 by sheepers, on Flickr 2021-03-18_07-56-52 by sheepers, on Flickr 2021-03-18_07-56-58 by sheepers, on Flickr 2021-03-18_07-57-04 by sheepers, on Flickr1 point
-
wow havnt actually updated this thread in a while! the reason why it wouldn't start was because the starter motor fuse was blown. other things ive done since the last post include fitting the handbrake and having the cables modified to suit. as well as fitting the manual handbrake centre console. i also borrowed a commercial upholstery cleaner and went to down on the seats and carpets. they've come up really nice. i then had issues with idle, which turned out to be the ISCV super gummed up, aswell as the timing was set way too advanced, it now idles good, but i may look to install something like an apeci SAFC II to fiddle the fuel at idle just a little. after the idle was sorted and id kinda run out of other jobs that didnt involve sanding the car down again, i set to colour sanding out the orange peel, now i elected not to sand the paint glass smooth, but to leave an even and subtle texture to the paint, mostly because i did not want to run the risk of taking all the clear off, aswell as alot of oem japanese cars arnt glass smooth. i dont have any bar one photo of sanding the clear, but it was boring and tedious. After colour sanding i tested the process of buffing with meguiars 105 and 205 on the hood to make sure i was happy with how the car was going to look. i was happy! and getting pretty excited so i moved onto the rest of the car starting at the front and moving back with the 105 then went over the whole car with 205 which really brought out the shine and colour, i also set to refiting the remaining parts that i held off in order to make sanding easier. Then yesterday this happened, very pleased. the car is going straight back to daily duties. The car is in dire need of a proper wash to get all the sanding and polishing crud off the rest of the car, but here's a couple pics i took today while out. needless to say I'm extremely pleased, and other than the muffler failing, this project is complete. BOSS coffee can high stop light is a tacky feature i quite like. Plans now are to wash it, grab a decent camera and try get some nice photos, and then just drive it every day. oh and probably fit a new rear muffler that doesn't like the current one.1 point


.jpg.2c3492693f786143c1820d132a7275ab.jpg)
.jpg.74f74e0b06892d5a5a9022a53ed4170a.jpg)
.jpg.9b4e4f5a2a91f5f4c81babcd06be6c27.jpg)
.jpg.0e6a4298a464a5498127fe6e03e1a699.jpg)


This leaderboard is set to Auckland/GMT+12:00