
Leaderboard


Popular Content
Showing content with the highest reputation on 03/31/21 in all areas
-
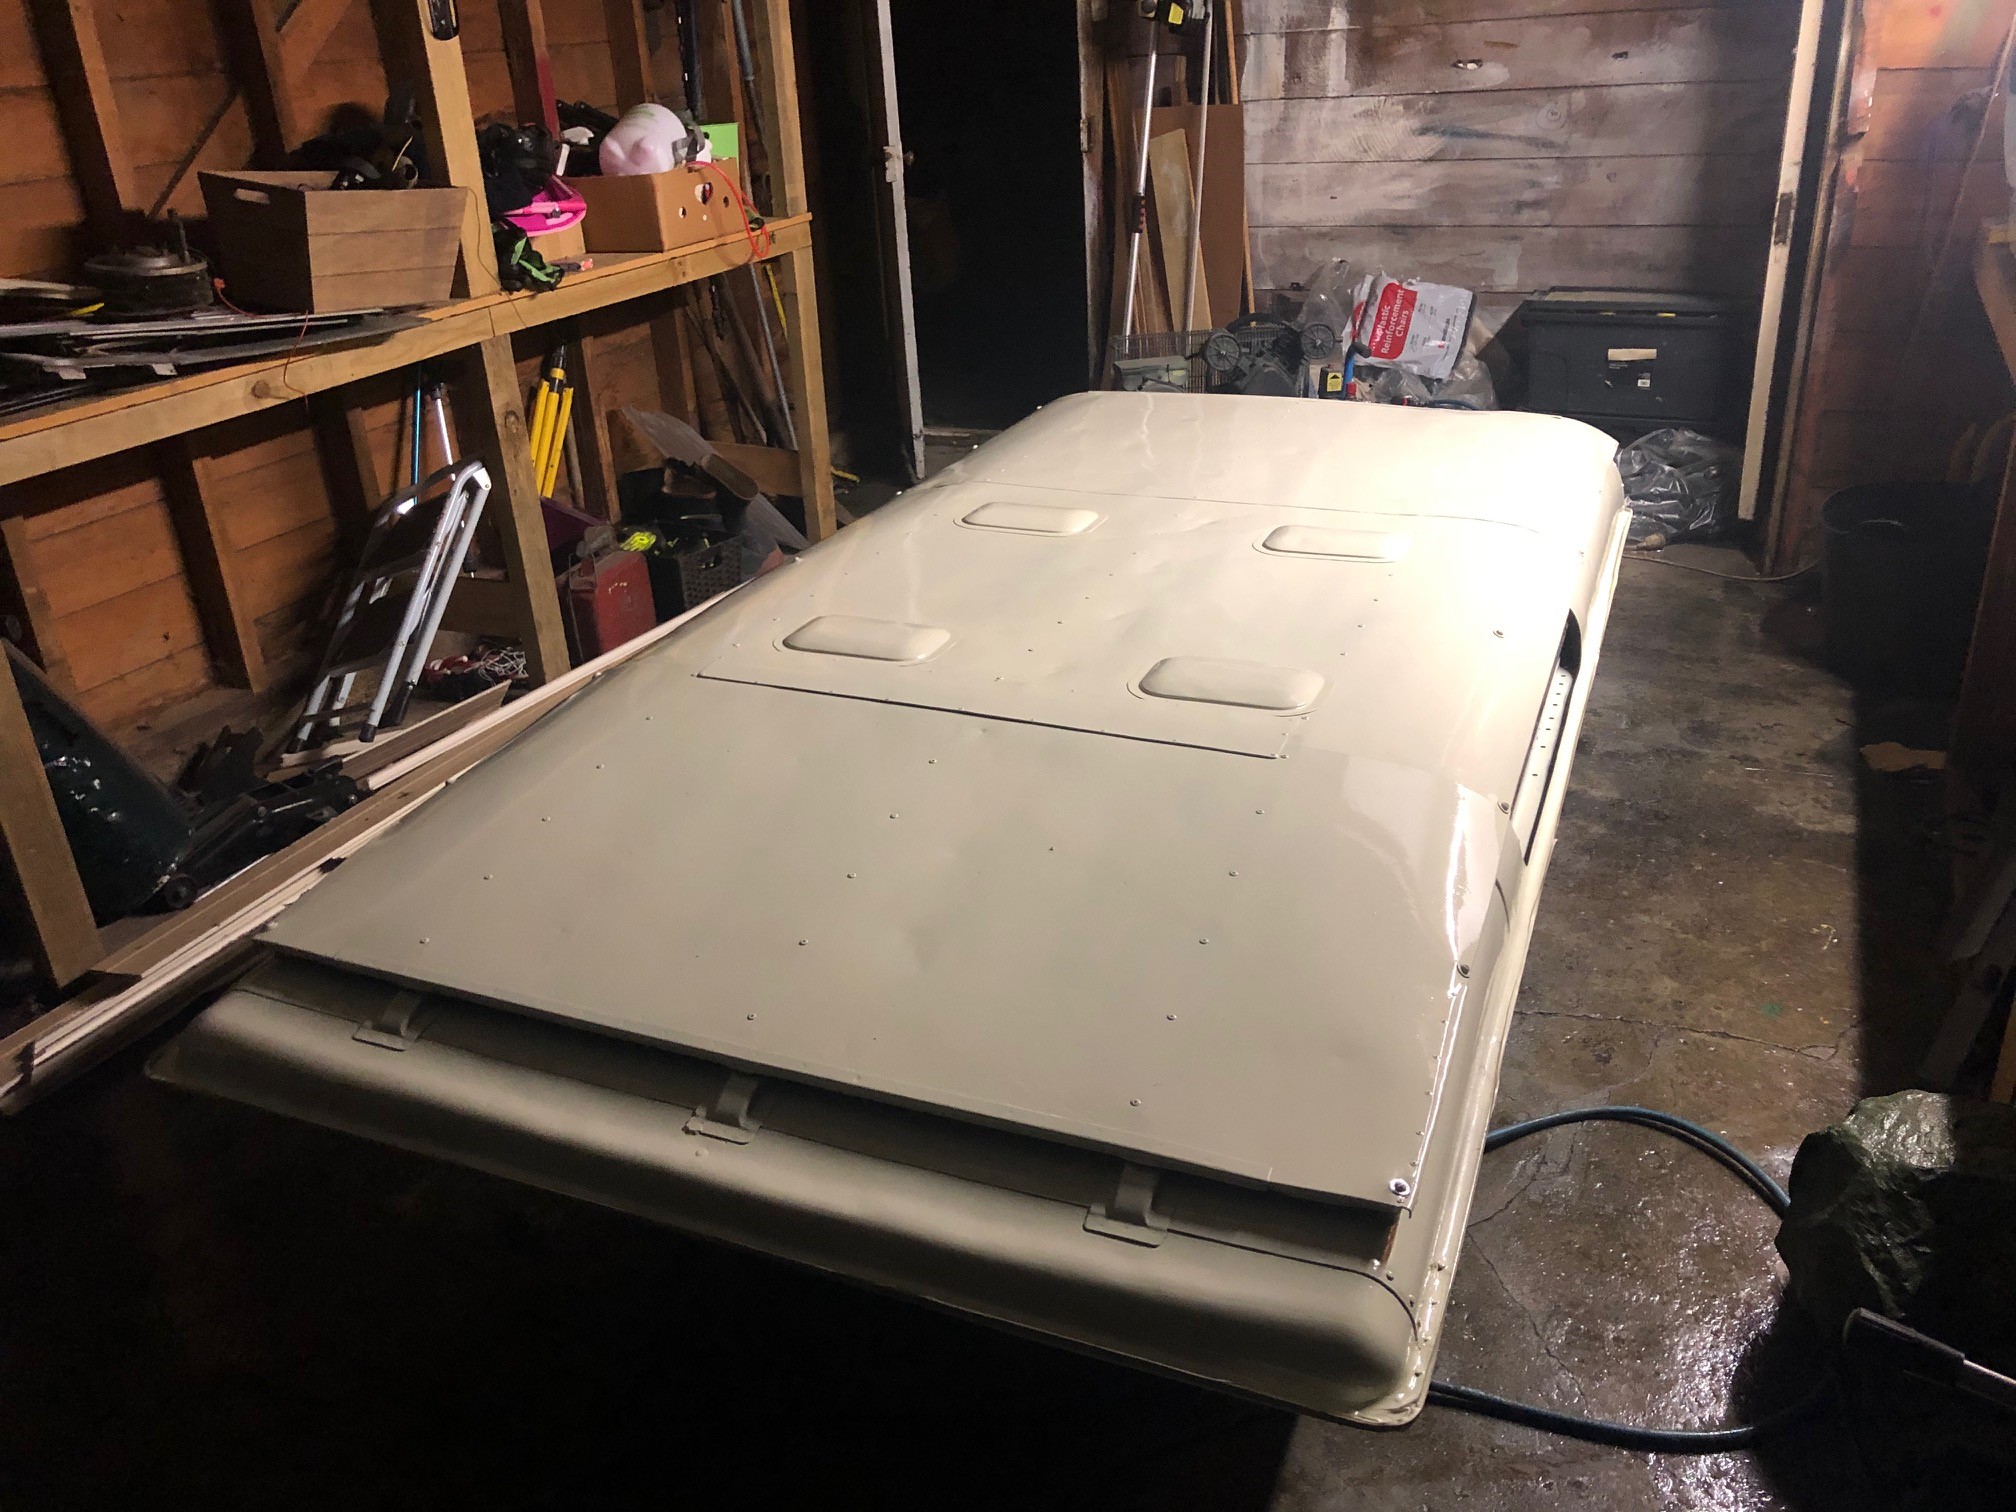
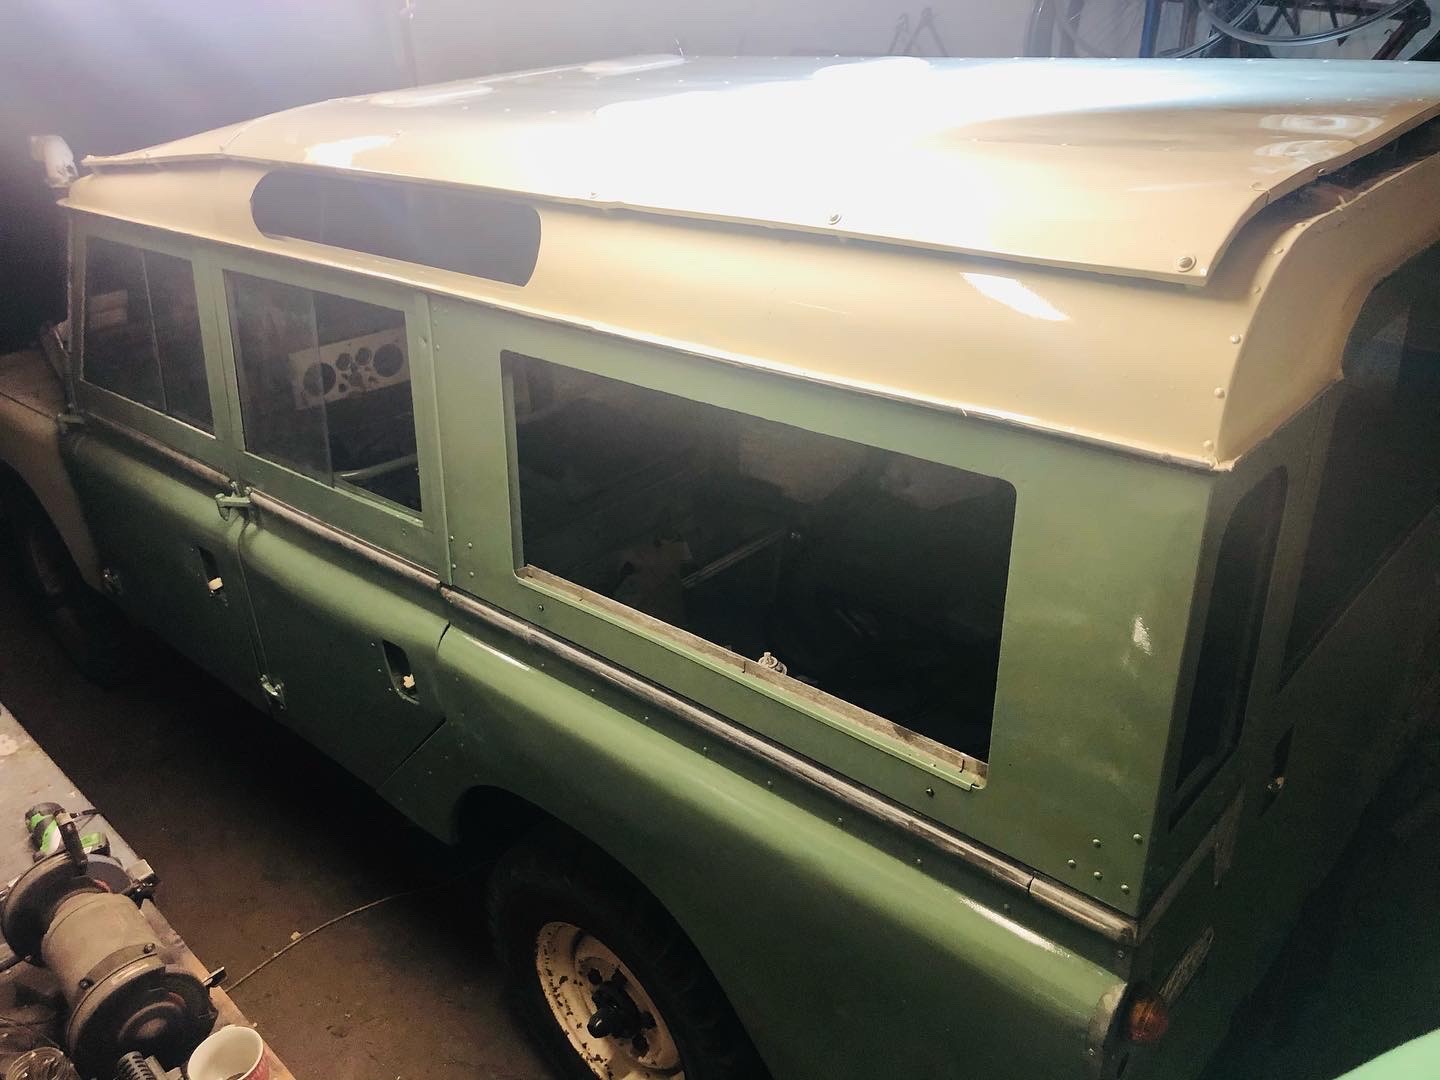
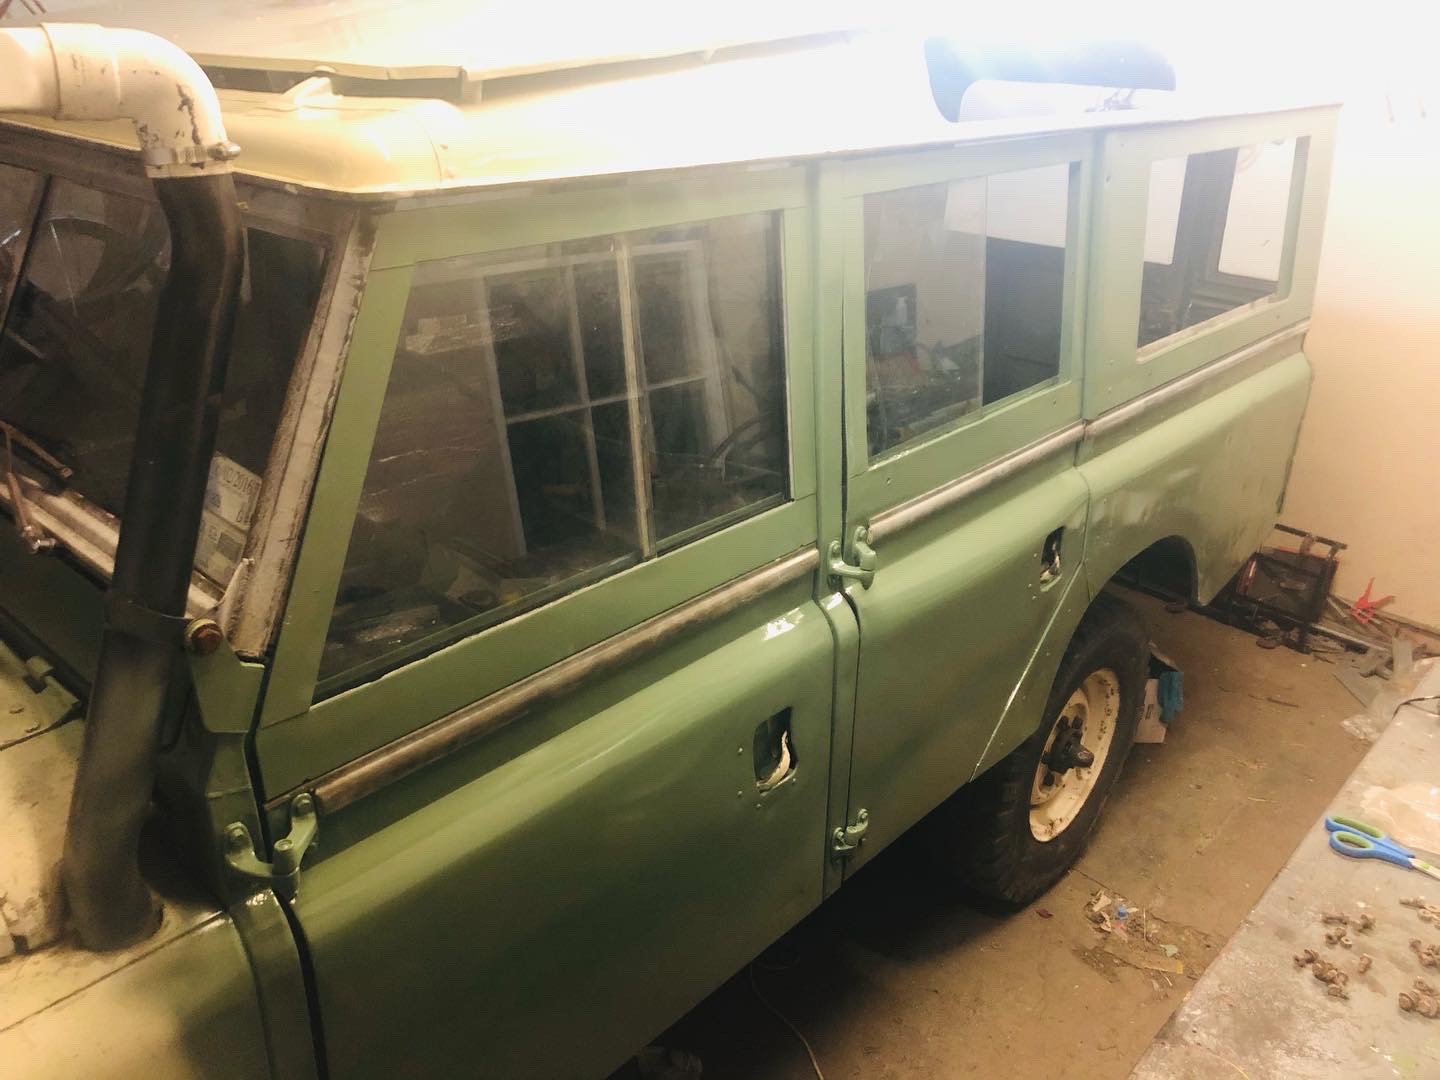
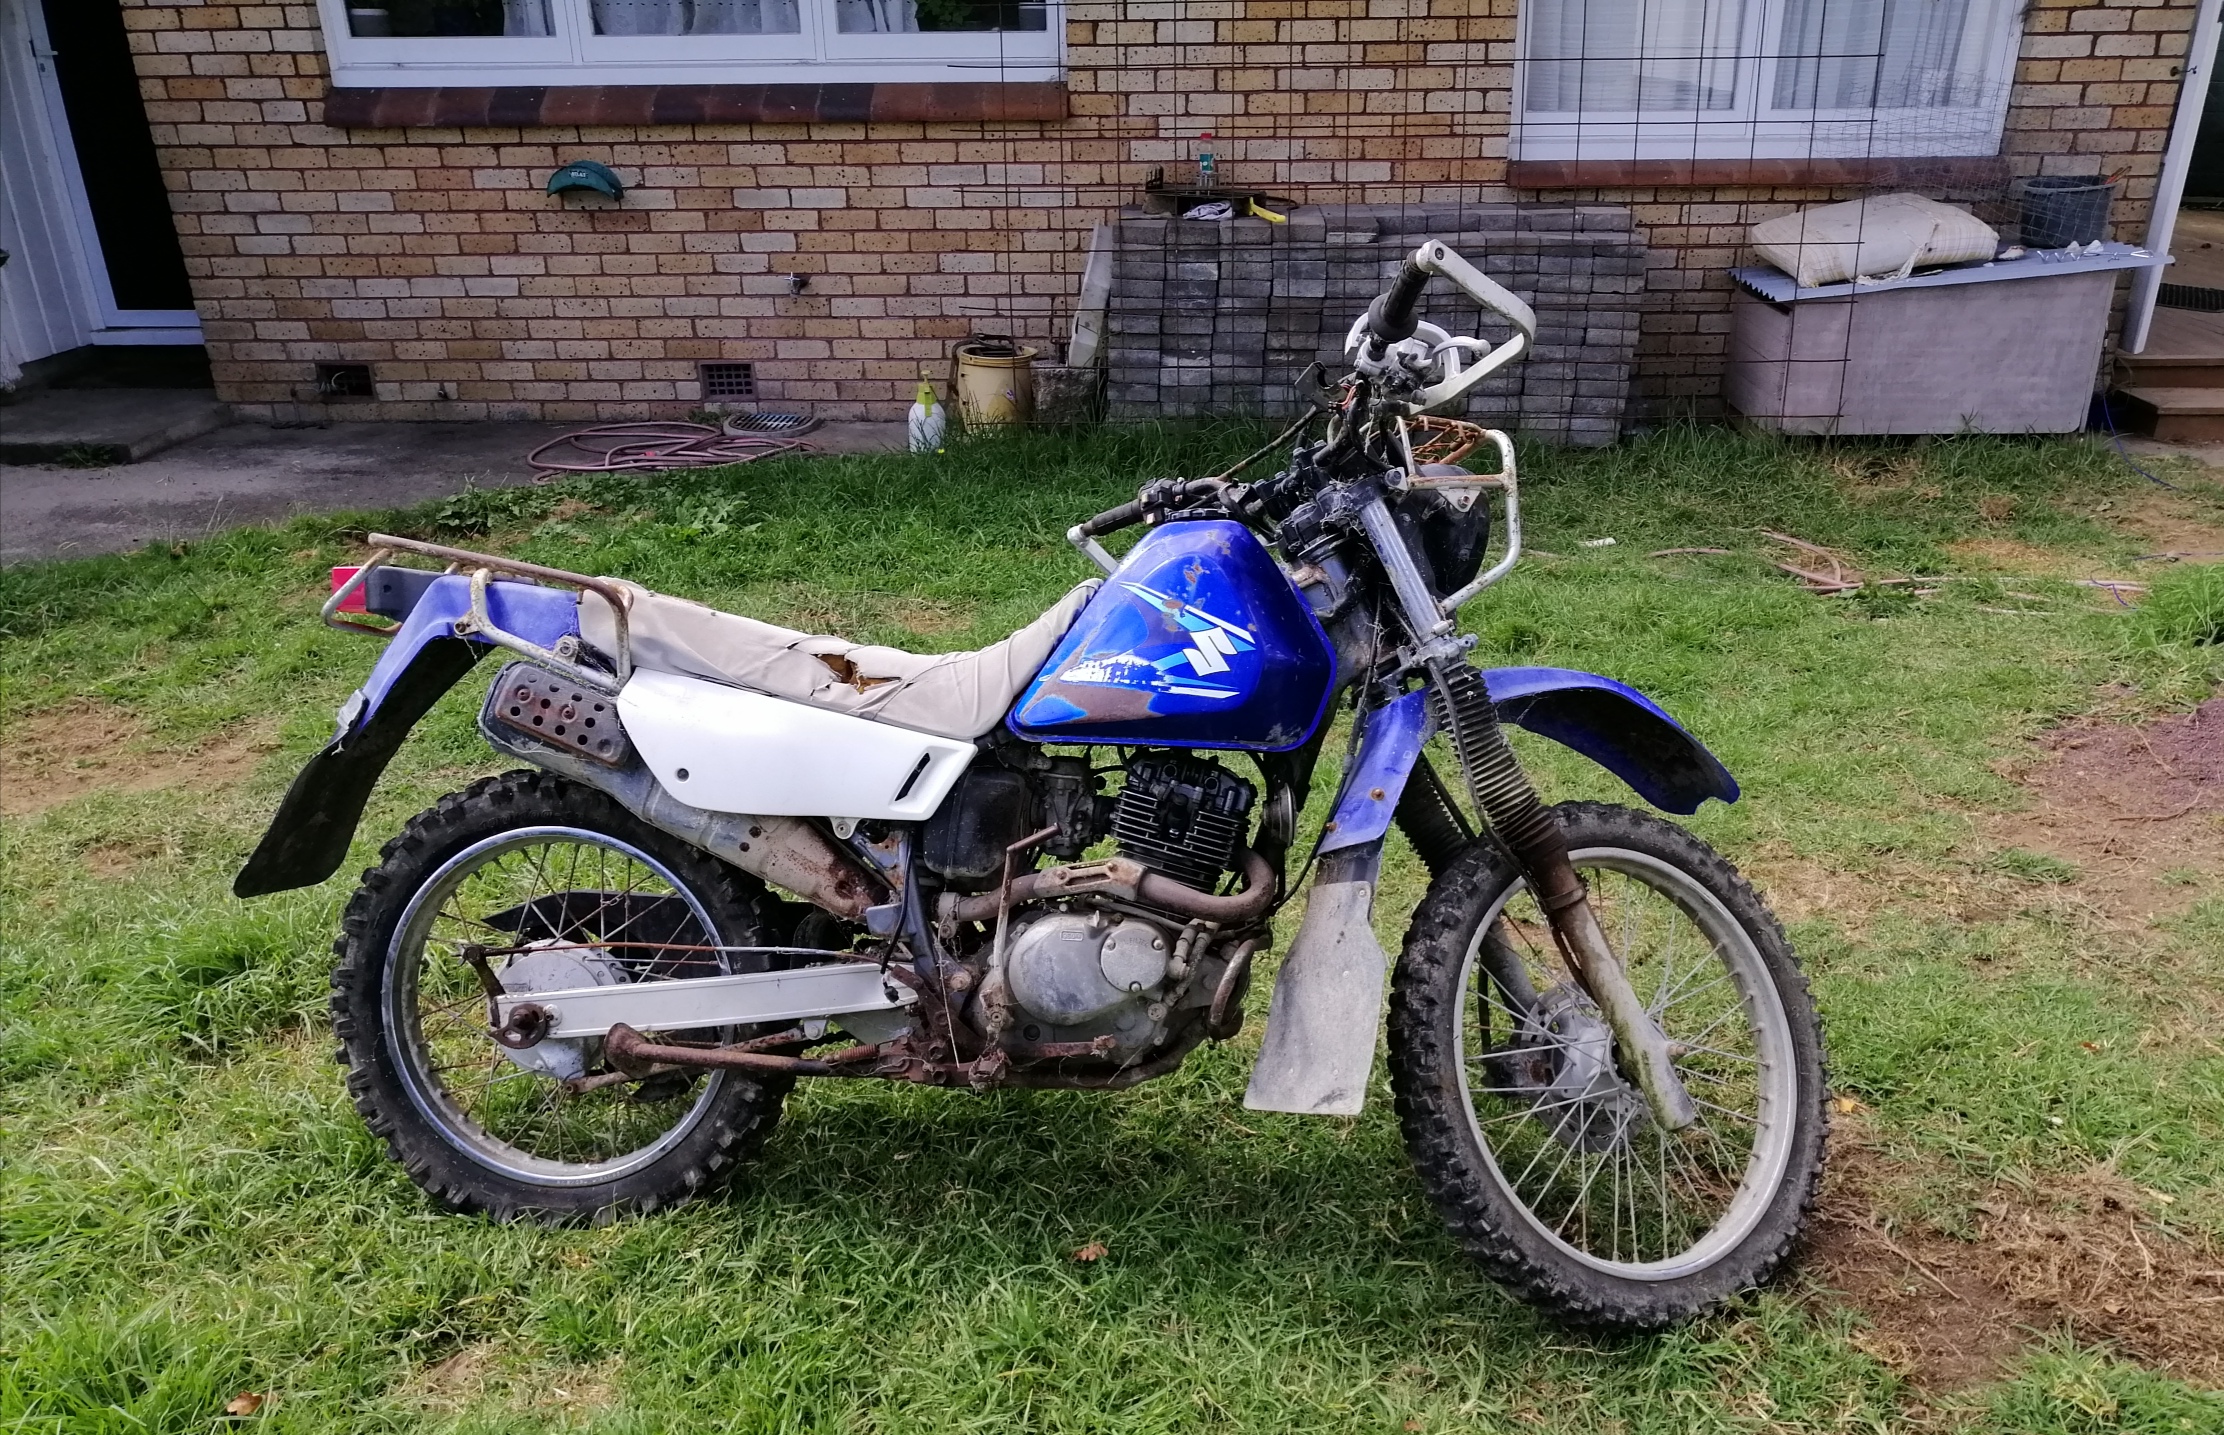
Not my best painting in the world, nor the best photos in the light but I got the roof done and back onto where it is suppose to be. Looking alot more like a truck now...
 16 points
 -
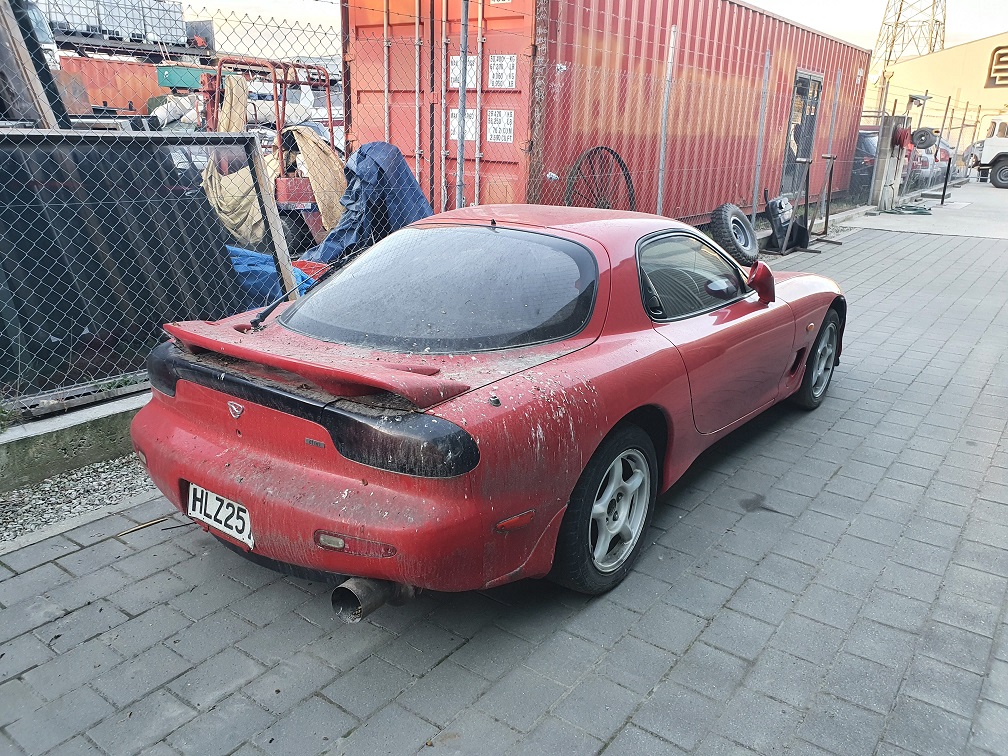
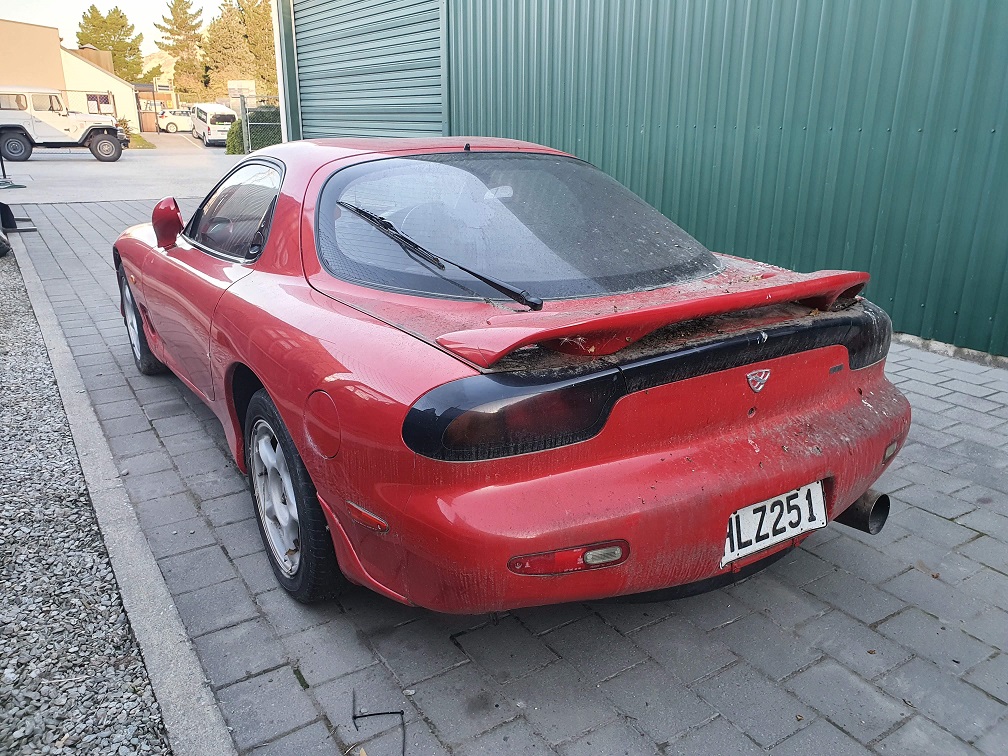
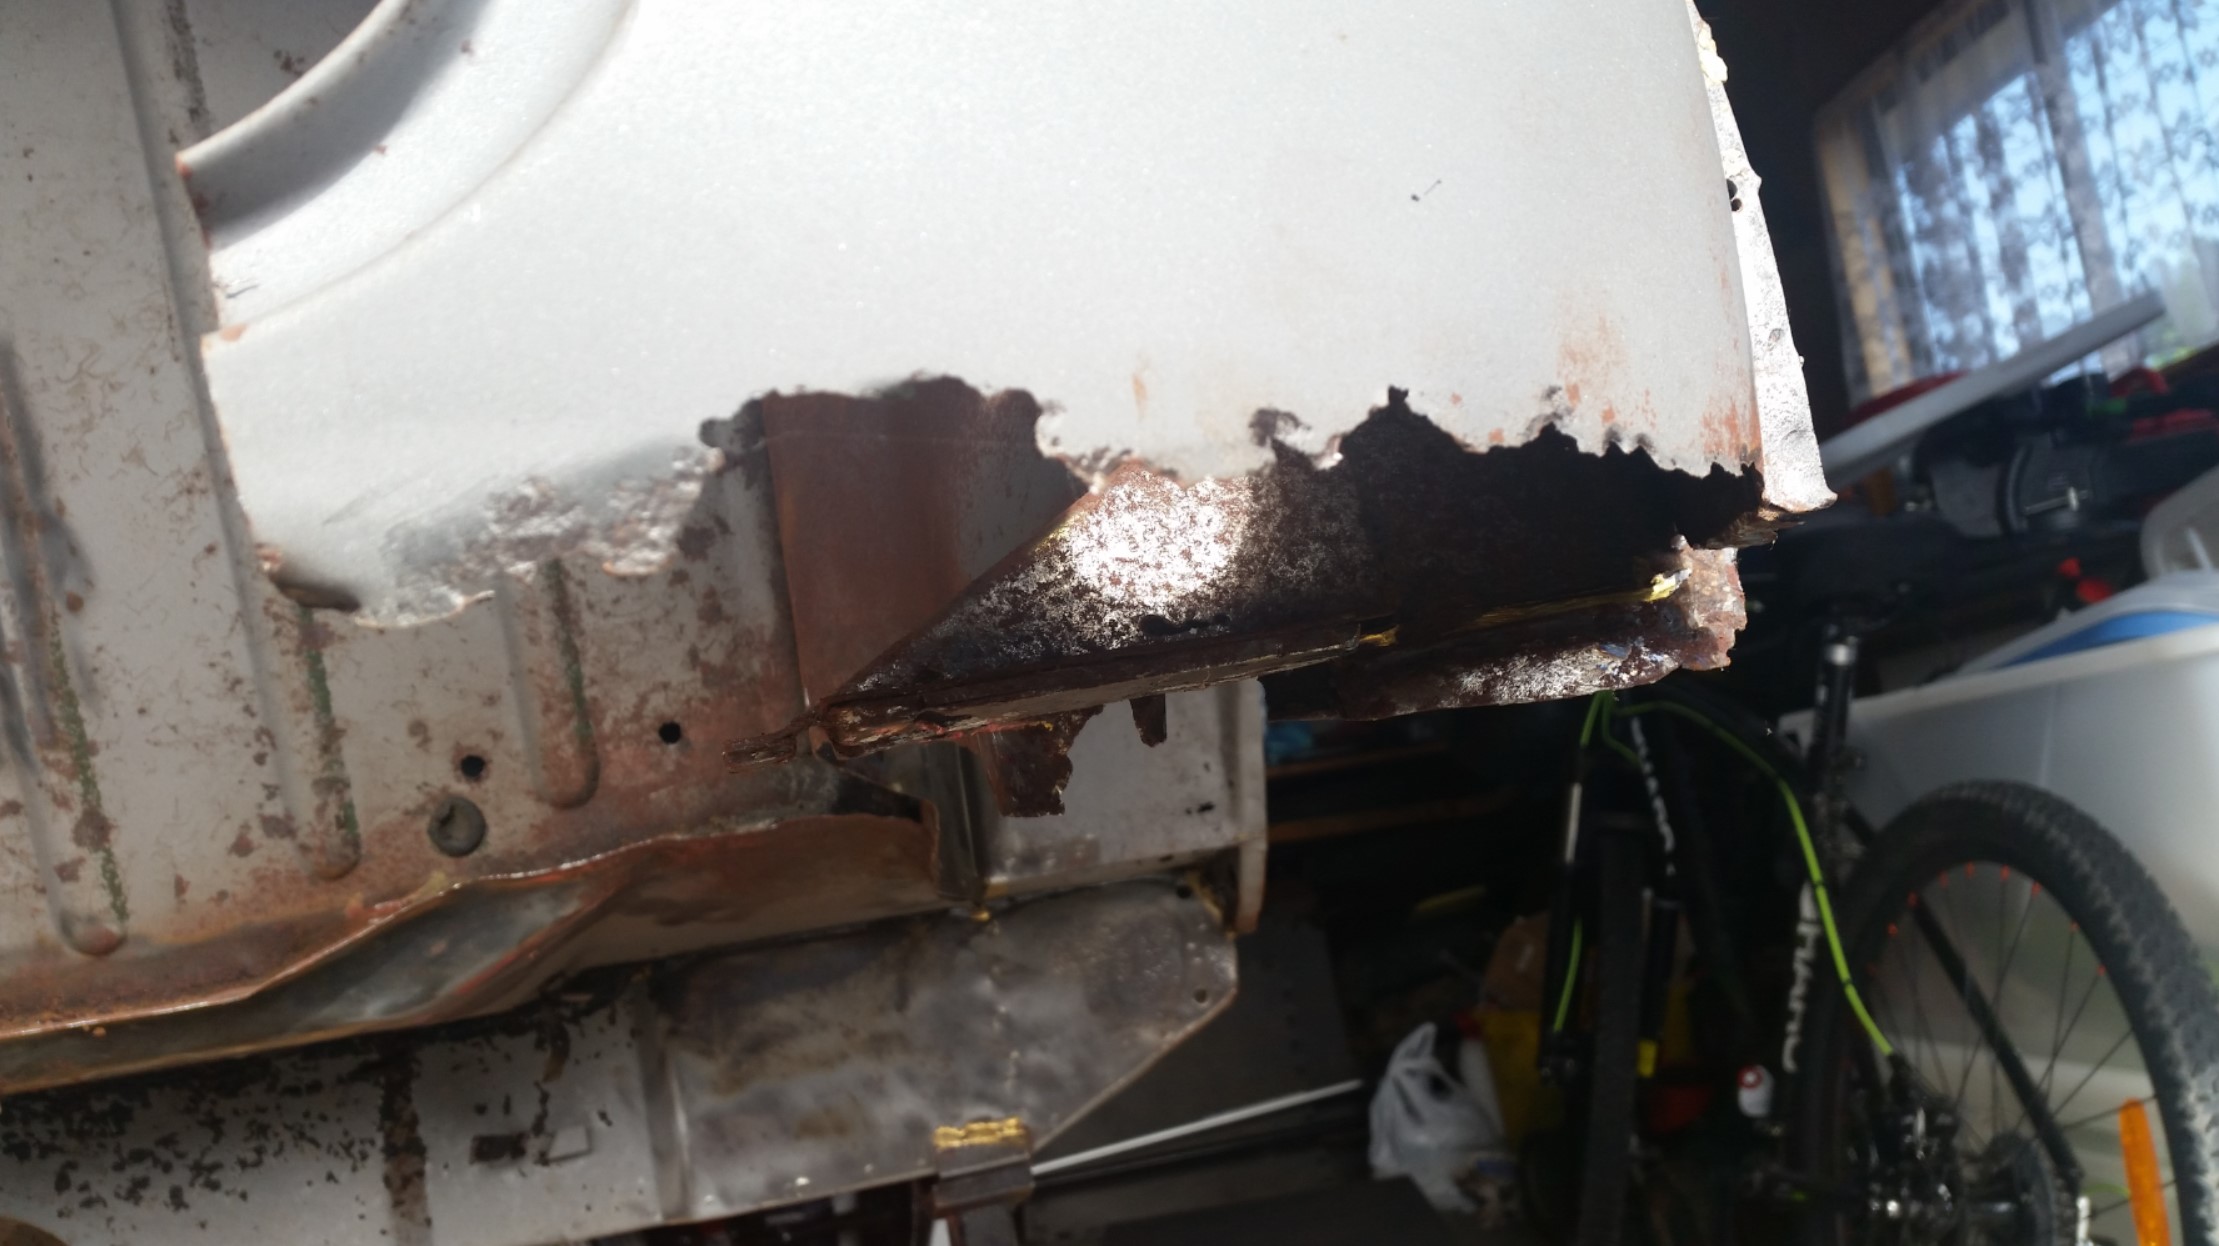
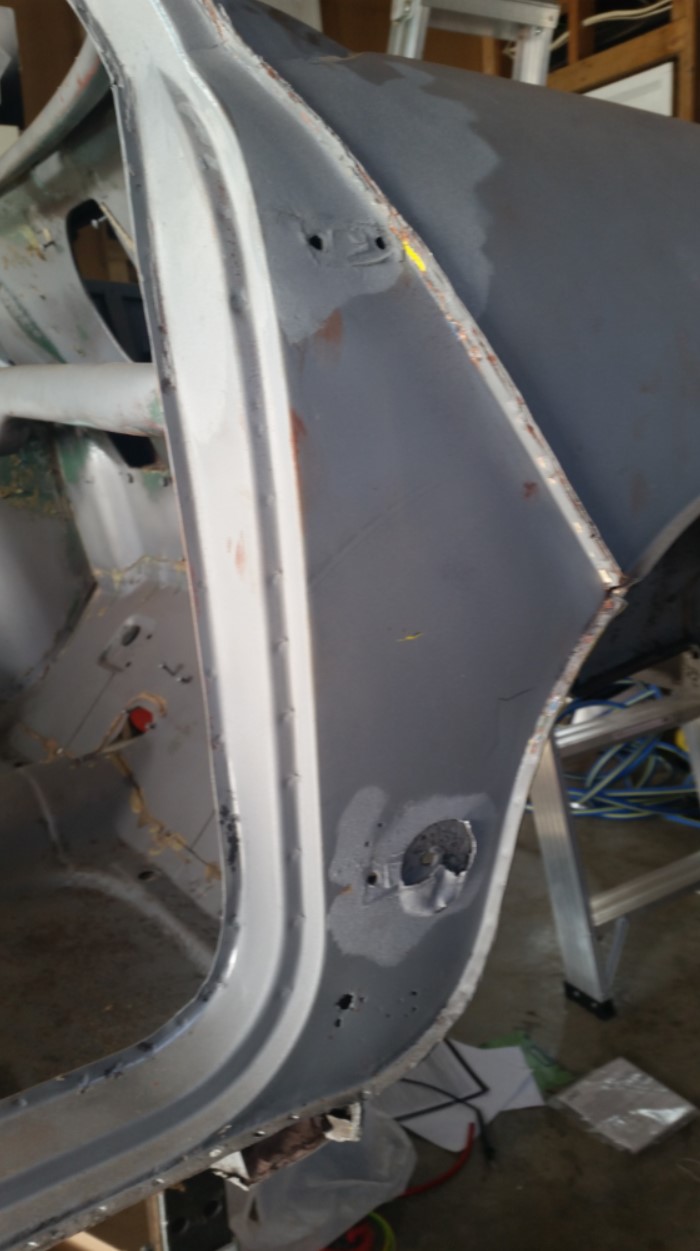
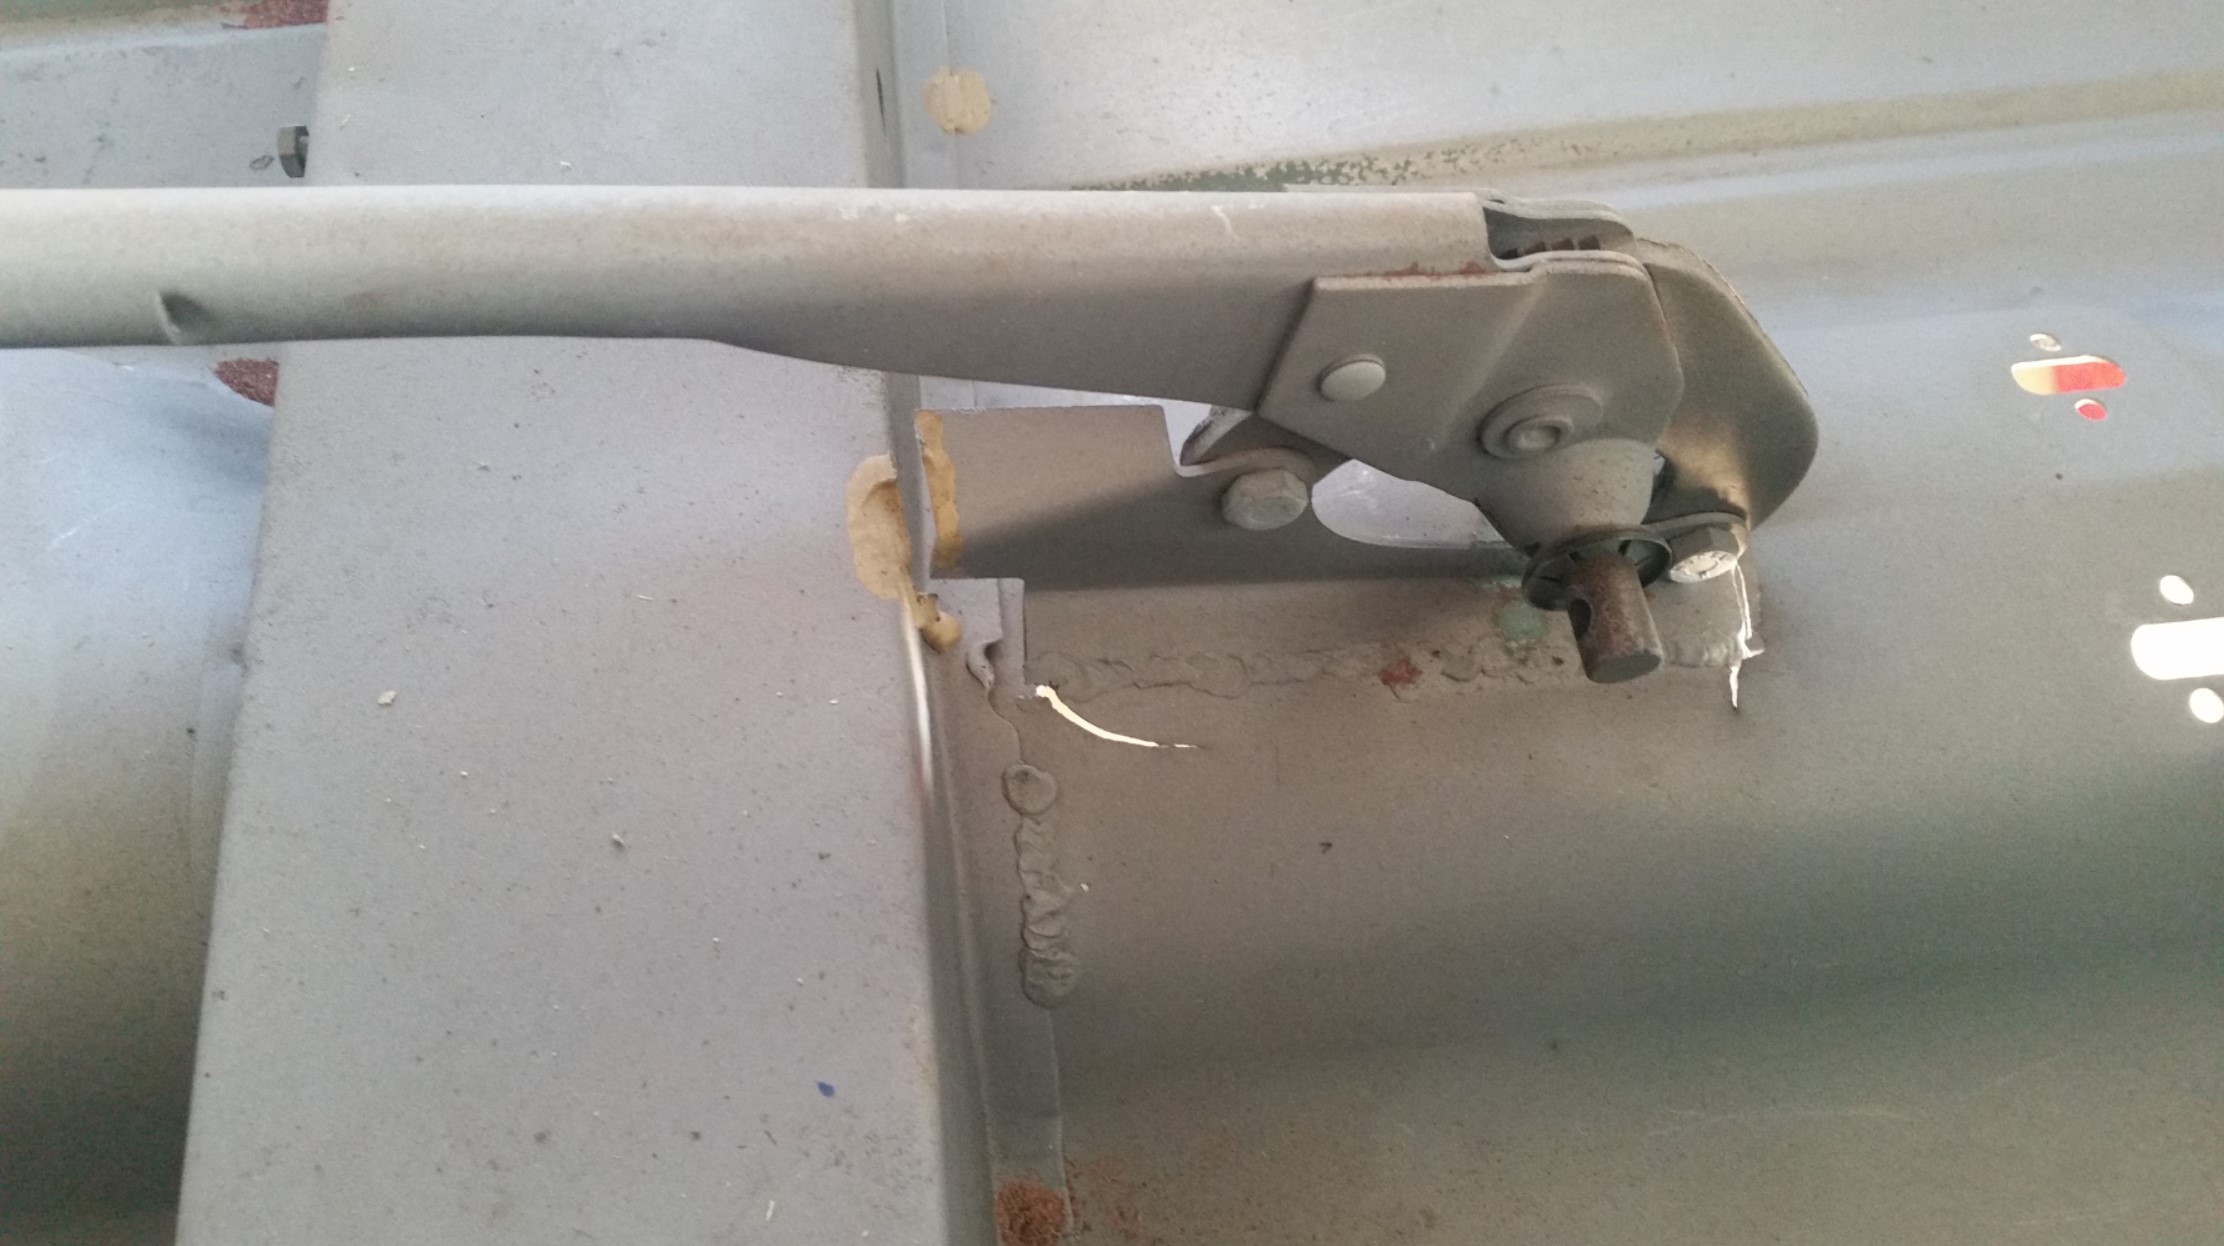
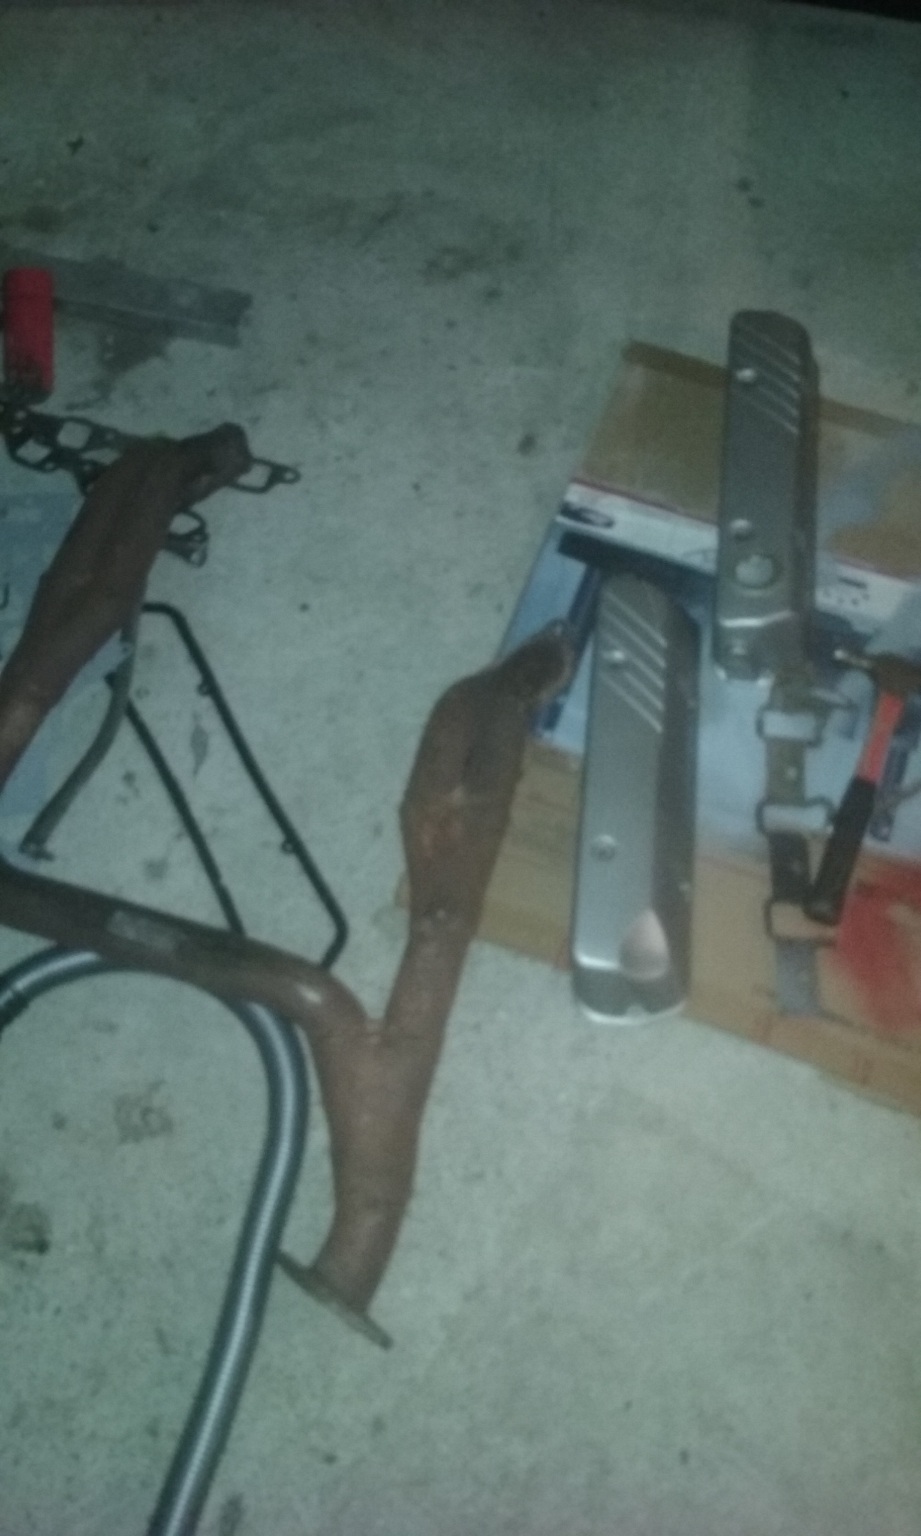
Last day off work today, till I'm back tomorrow, then its Easter break for 5 days. Wow, really didn't think that one through! Still, lots of students want meeting about projects tomorrow, so it should be a pretty fun day. The boot seal area of this car was a complete mess, and I thought I'd give it a bit of a cleanup while I was thinking about how to approach the rest of the project. See if you can guess which side I've done in the below picture: After cleaning it yesterday, I was pretty pleasantly surprised to find the body in good condition. The respray it's had is... not too bad. It was a door-shut affair for sure, and there is overspray and poorly masked edges everywhere that really makes it look shittier than it is. The paint that is on the panels is pretty decent. Overspray I can take care of, the edges I can polish down to lessen the appearance of. The interior is just trashed. everything is super dirty, there is mold, and biohazard levels of yuck in places, so that's also something to sort. I happened upon a complete series 7 interior for sale recently, so I snapped that up and most of those bits are in really good nick, so I should have the majority of pieces I need there. Weirdly, I'm not too worried about the engine / drivetrain side of things. I've heard through the grapevine of a previous, previous owner that the motor was rebuilt not long before HPA got it (lol, standard rotary story, 3000k's on fresh rebuild, bruh!), and it's been stored without water in it... So I should at least be able to get it running and driving on the keg that is in there. Plenty of spares came with it, certainly more than enough to piece together a complete turbo / intake system. The one piece that I hadn't seen was a complete throttle body, but I've sourced one from a GC down in Dunedin. Wiring wise, it's a mess. There is just shit everywhere under the dash, the engine harness is hacked up, and it looks like it's had the whoile catalogue of shitty late 90's alarm systems thrown at it. I'm looking forward to ripping alllllll that shit out. Plan as it stands: Exterior First (I like working on pretty things) Align the panels properly. The doors are pretty good, so I'll work from there forward, get the guards lined up, the bonnet, and the headlights. While doing this, clean all the overspray off. Pull off everything that is bolted to the exterior of the car (bumpers, mudflaps, mirrors, etc) and blend the masking edges / clean overspray. Align properly and refit. Interior Second (I like working in clean spaces) Pull pretty much everything except the dash out, working from the boot forward. Clean the ba-jeebus out of everything. The carpet can't come out as that involved removing the dash, but lift it and check underneath at the very least. While everything out terminate non-factory wiring with extreme prejudice. Refit cleaned / repaired parts from the front back. Engine Third Maybe I should be more worried about this, but I'm really not. The parts are there, I know where they go, I'll probably have to make a wiring harness, but I've got all the info for that sorted. Hell, there are atleast two spare wiring harnesses in the boxes that came with the car. Convert to late model turbo control setup, to go with the late model ECU that is there. Also came with a Power FC, and I've got a Link Fury kicking around, but would need to sort a turbo control system if using that.... This part of the plan is much less clear. Seems odd to focus on the exterior and interior first, rather than getting her running, but those parts of the project are the ones that are hard to find parts for, so I need to get on to it ASAP as parts supply is drying up at an alarming rate! Lastly Skids. Whoa, that was some rambling, but needed to put it down somewhere. For the immediate goal though, I need to take all the spares it came with to the lockup, so I'm off to do that!
13 points
-
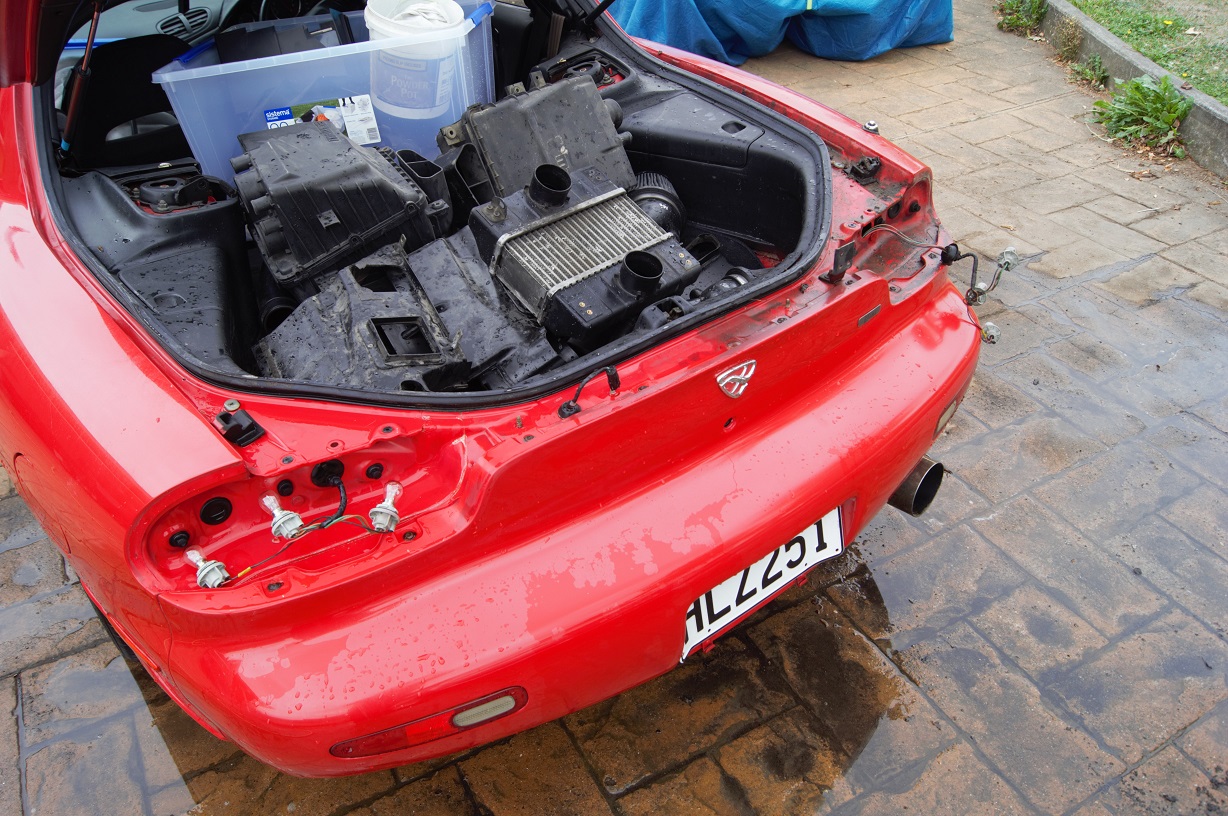
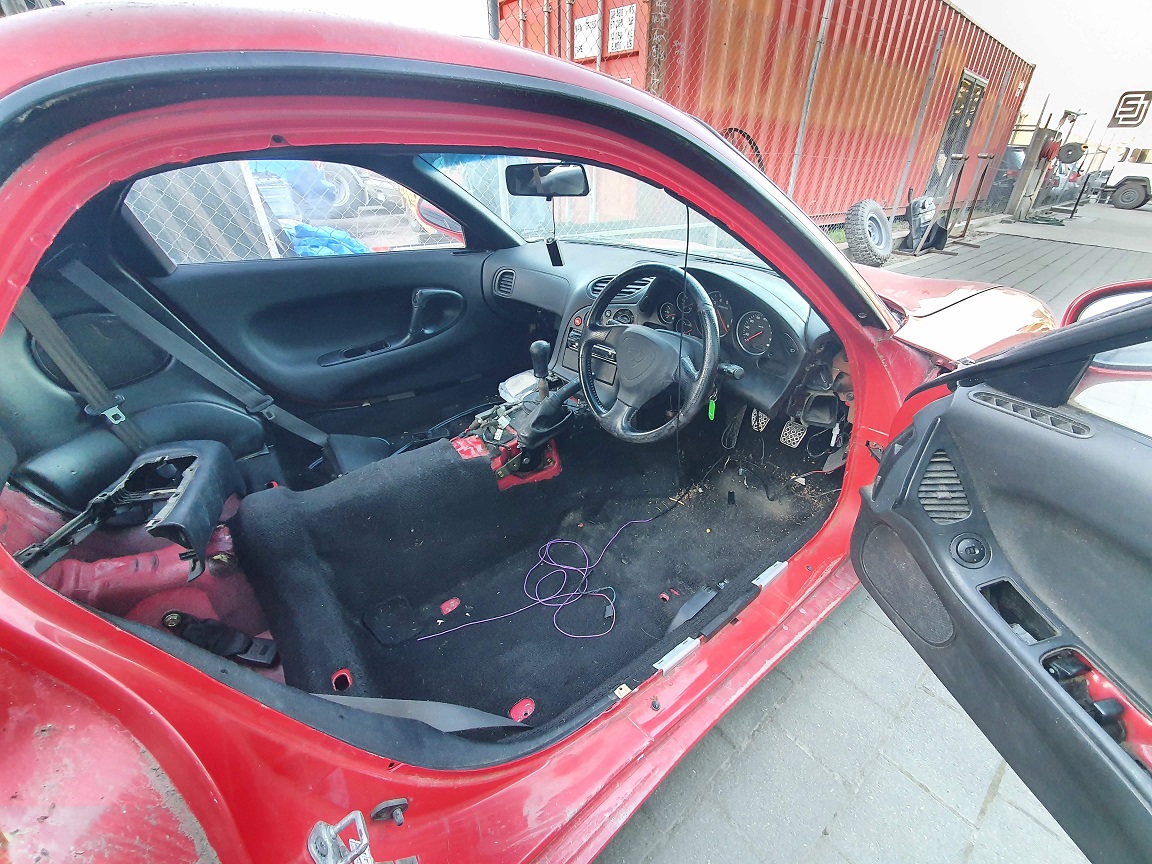
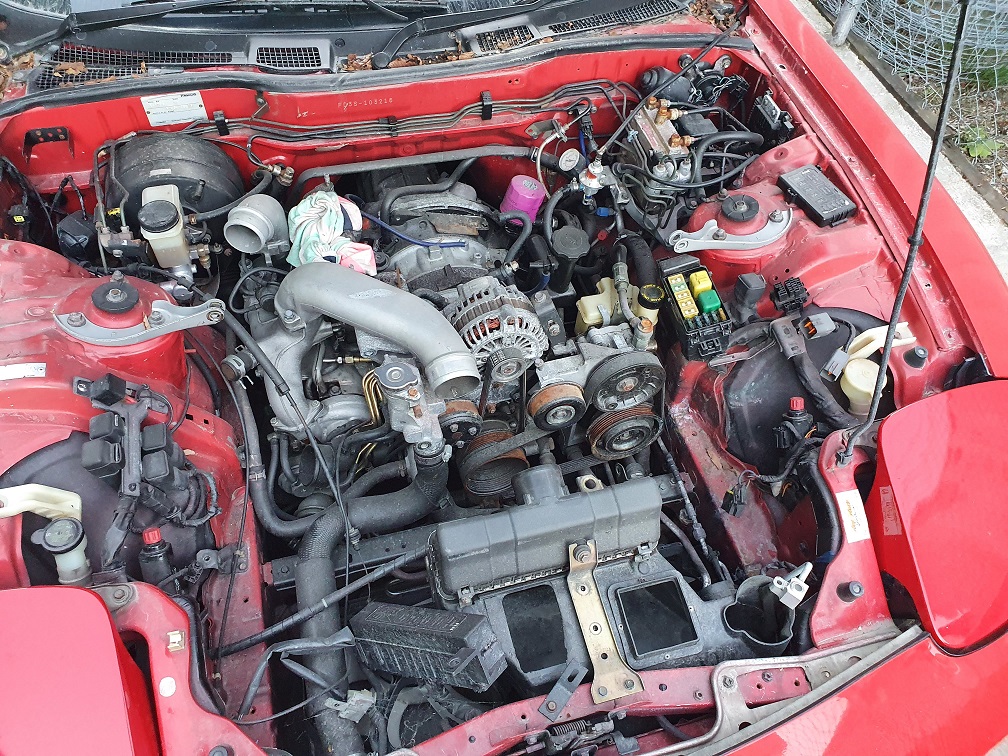
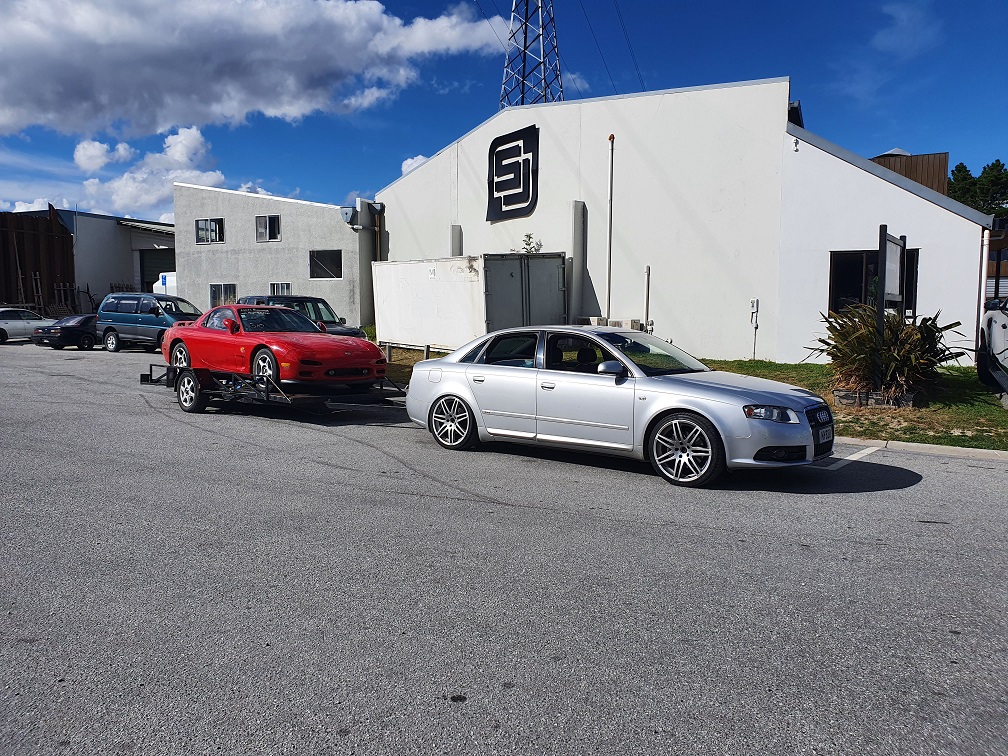
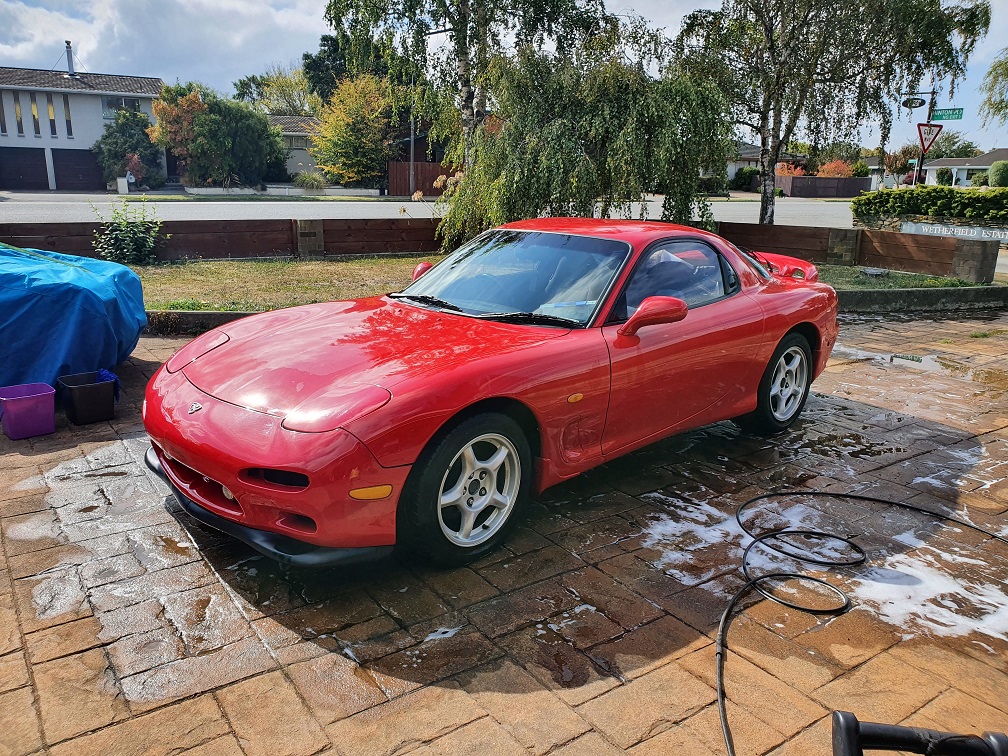
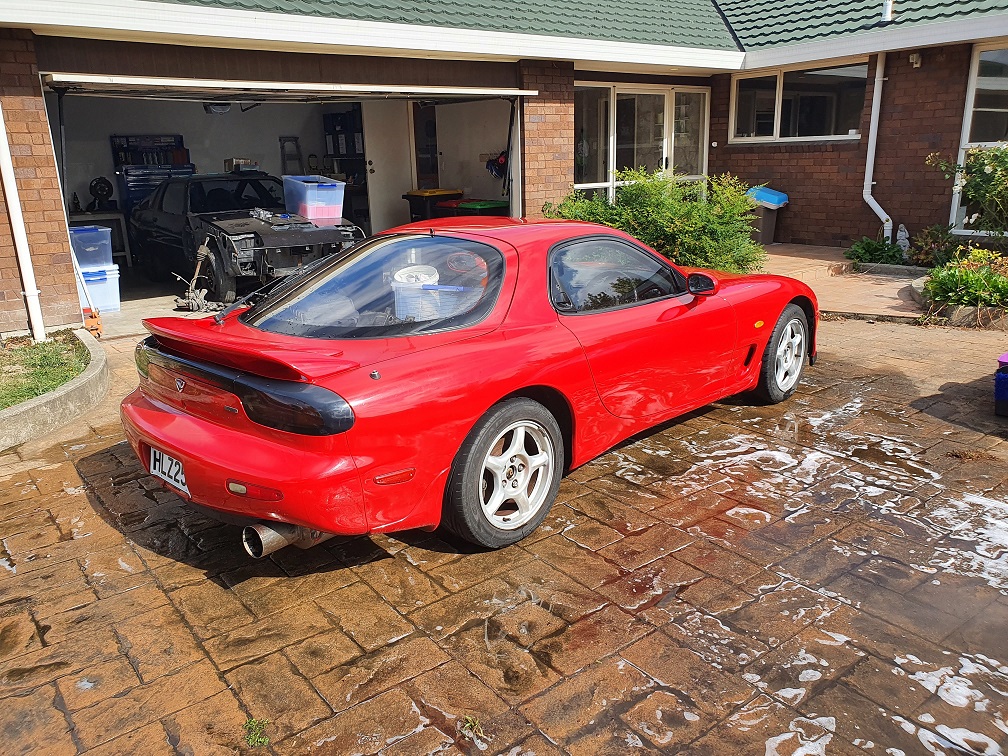
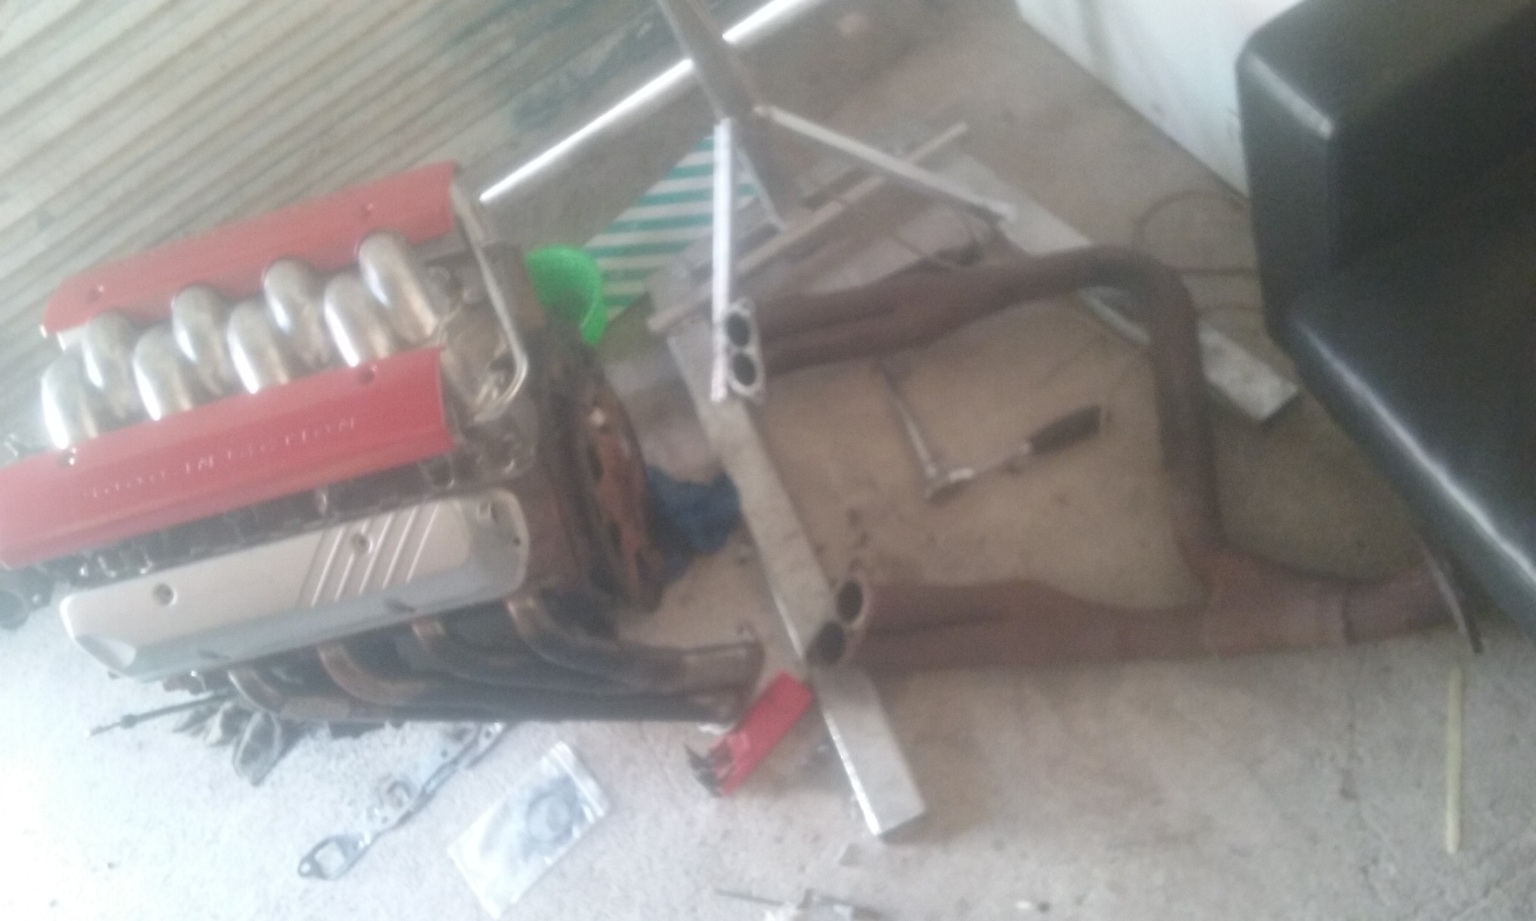
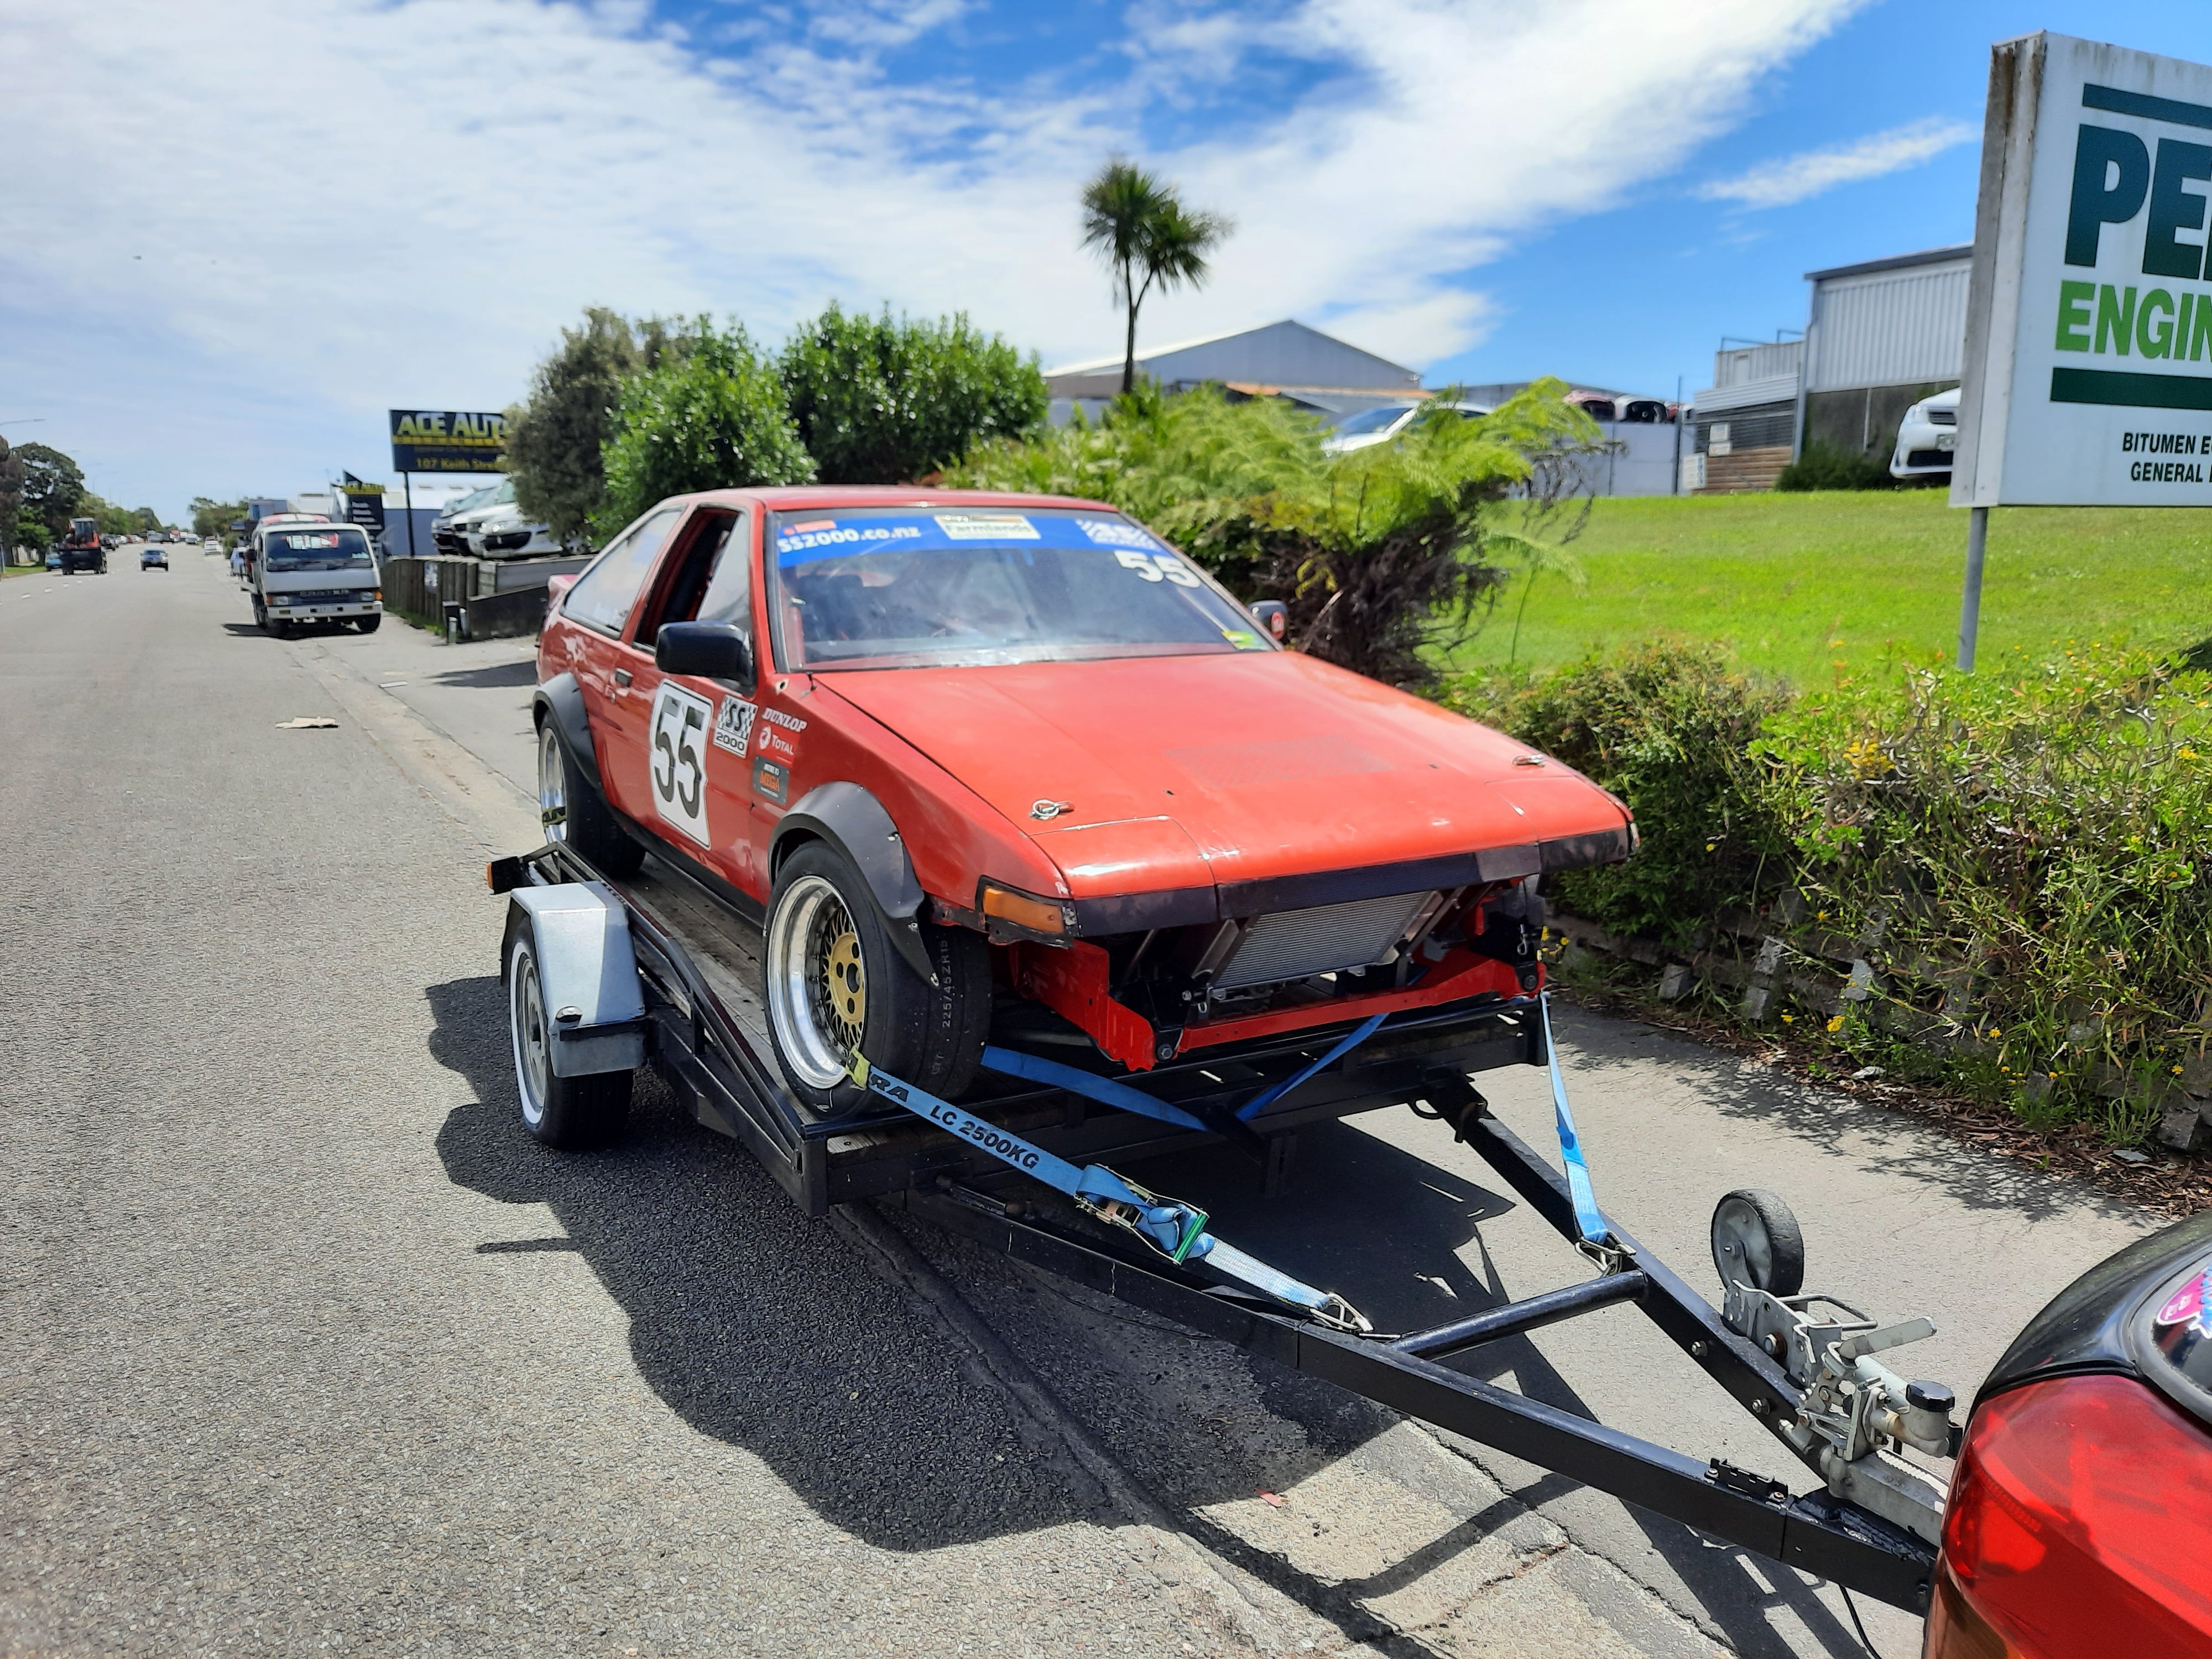
A whiles back I had a nice FD RX7 , and then I sold it, because of reasons. Always thought it was a silly thing to have done, so I have now un-done that decision... Sort of. FD's are in a bit of a bubble at the moment, with asking prices being sky high. It doesn't seem to me that many are actually selling at these inflated prices though... But, you can't argue that the prices on them are going up. I expect the bubble will burst at some stage and prices will fall to something more reasonable, but more than likely still more than I'd be willing to pay. I managed to do a deal with my former employer, High Performance Academy, (whom I still do work for on occasion, they're awesome guys ), to acquire this: They had purchased it to use for their tuning course, as a worked example on a rotary engine, but it just wasn't tidy enough, and would have taken too long to get there for their timeframe. They ended up purchasing the white FD I owned at the time, which was good to go for their needs. Towed it home (Christchurch) from Queenstown last night behind my 3.0TDI A4. Only a little dodgy... But actually towed with no problems. No scrubbing / scraping, and no weird handling, basically didn't know there was anything behind the car, except for the increased fuel usage and lack of usual grunt. Max slam. Spent this afternoon cleaning. So much dirt, bird shit and sap. The cover had blown off the rear corner, and because it was tucked away, no one noticed. Paint is a bit marked (it's had not completely shit re-spray in the original red), but it'll buff out. Plan for this is to tidy it up, replace the interior (most of it is thrashed), and get it going again on some factory(ish) twin turbos. I love the quirkyness of the sequential twins, and I know them inside and out (literally) from my time with my white car, so keeping those is a must. Most of the parts to put it back together are with the car. I'll be doing some hunting and scrounging for sure though. The wiring is roooooooted, but luckily I know a guy. This will probably take priority over the Starion, as it needs much less work, will be good to get it to a nice driver state. HMU if you've got a stash of parts! ;-).
10 points
-
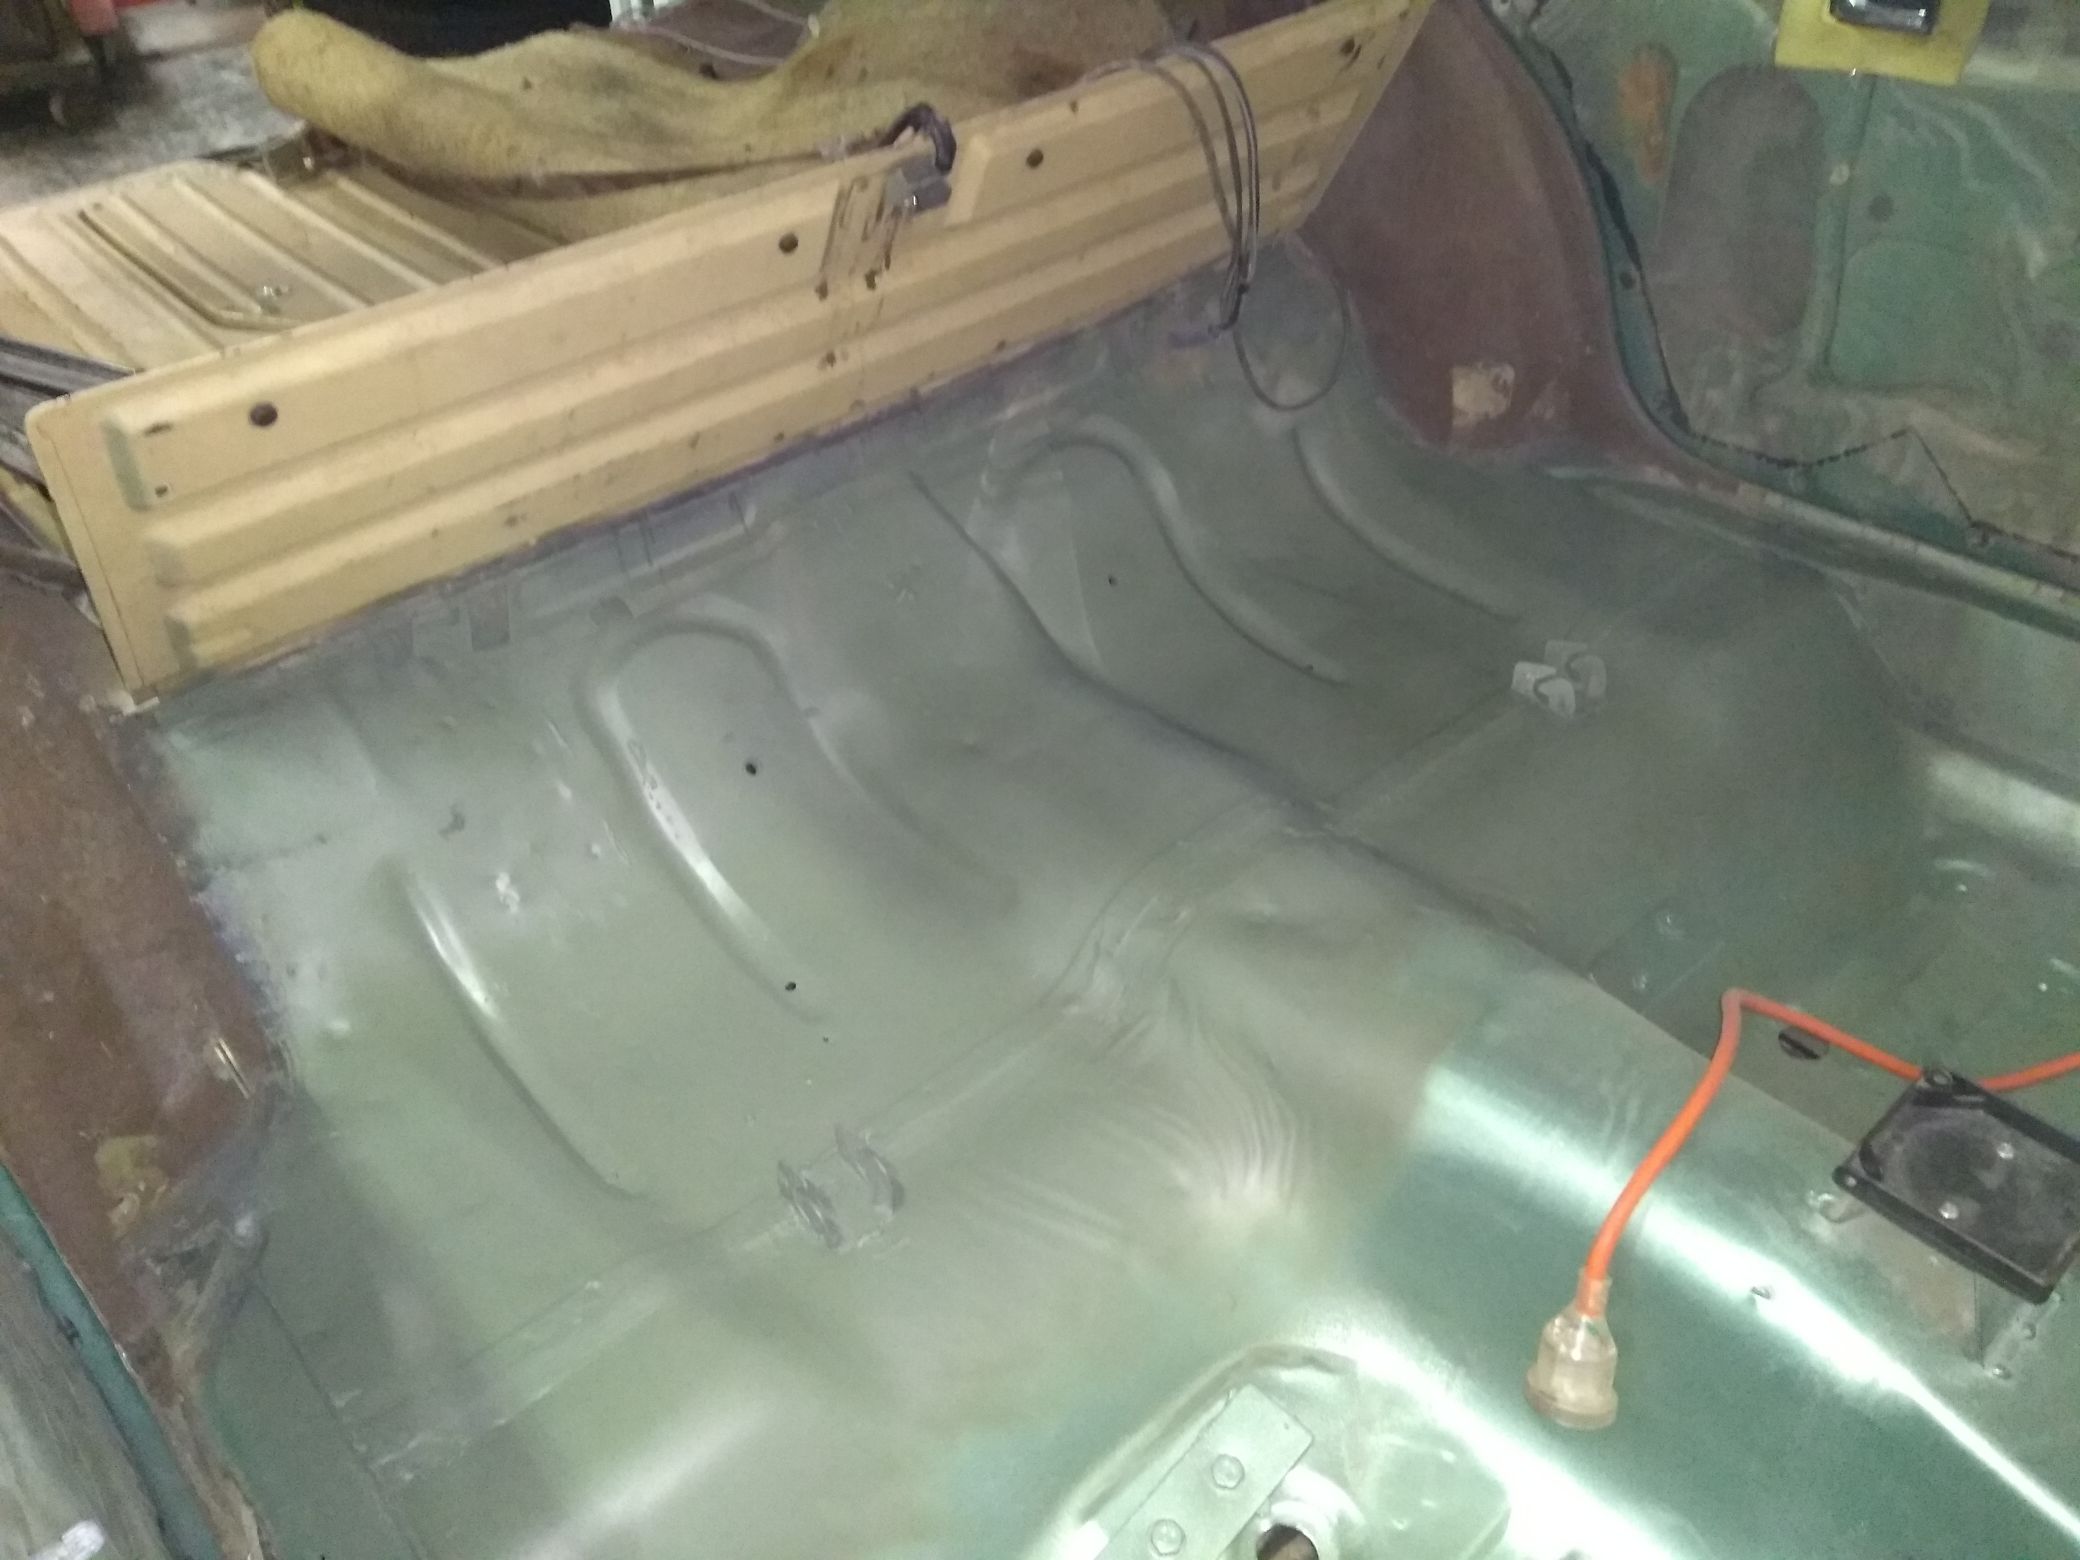
Got a week off work for a nice break. Spent a few hours today wire-wheeling back the whole back underseat area, etch priming and then sealing that shit. It was fucking exhausting. #shutupoldman Also stripped down the 304 to pull the cam to send to Voldo for a new profile and new roller valvetrain. Only broke one bolt, which was surprising, no evidence of overheating and looks top have been fairly well maintained over the years. Probably just high mileage if anything. But its getting a rebuild anyway so wont matter. Tomororow I'll hopefully start on sound deadening, but judging from the state my back is in now, I don't think I'll be ripping into it too hard.
9 points
-
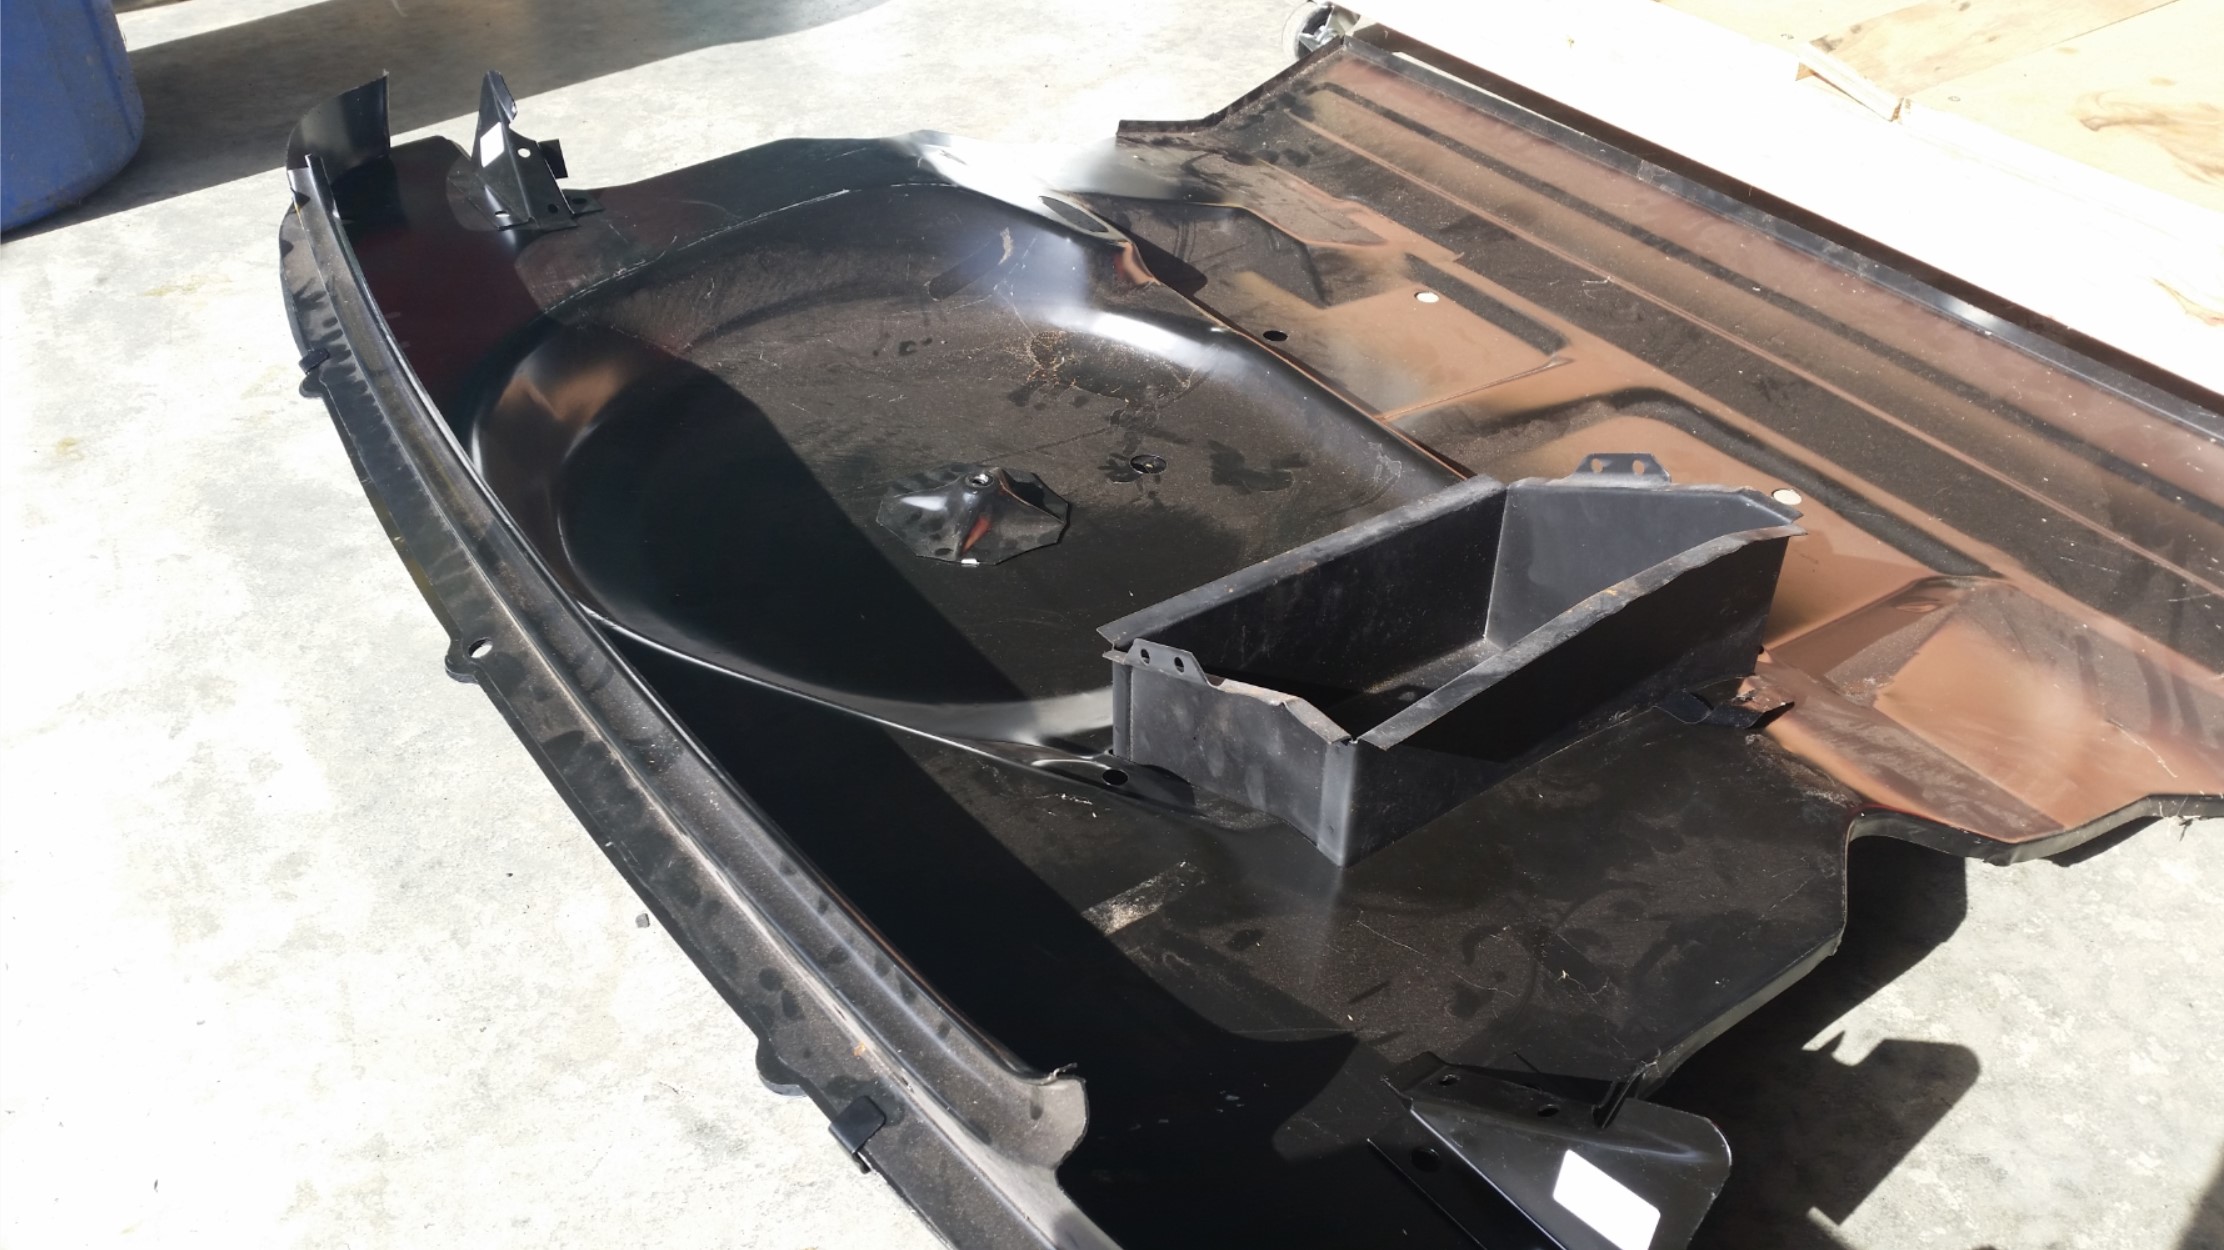
This car has laid dormant for a while. Back before when this was N/A...I had low oil pressure. I mean there was some oil pressure, I could drive it around but it never was as high as it should be. I had to swap the sump over on the motor for the turbo drain so out came the motor, thought i'd check the bearing caps. they weren't perfect and not perfect on a motor that had done 1500 k's since rebuild was not good enough. Took the short block in to the machine shop. Turns out the thrust tolerance was too loose and it was loosing a lot of oil pressure out of there. This was a good find. I had to get the block line bored too. that was expensive. Anyway, $4000 later for a short block rebuild. should be safe to run now. i'm just excited to have everything back and now progress is taking shape 20210124_172456 by phillipbaines, on Flickr How the cars been sitting for the past 6 months... booo 20210331_114925 by phillipbaines, on Flickr The motor went back in 20210331_162024 by phillipbaines, on Flickr I paid the front bar a nice white. 20210331_162040 by phillipbaines, on Flickr 20210331_174441 by phillipbaines, on Flickr 20210331_174505 by phillipbaines, on Flickr Yes, i'll fix the bumper. it annoys me too 20210331_174922 by phillipbaines, on Flickr Next, i'm getting the throttle body modified to get a ISCV sorted for it to be controlled by the ecu Then I save some money and take it to NZ Wiring in Petone to get tuned. Discussion:7 points
-
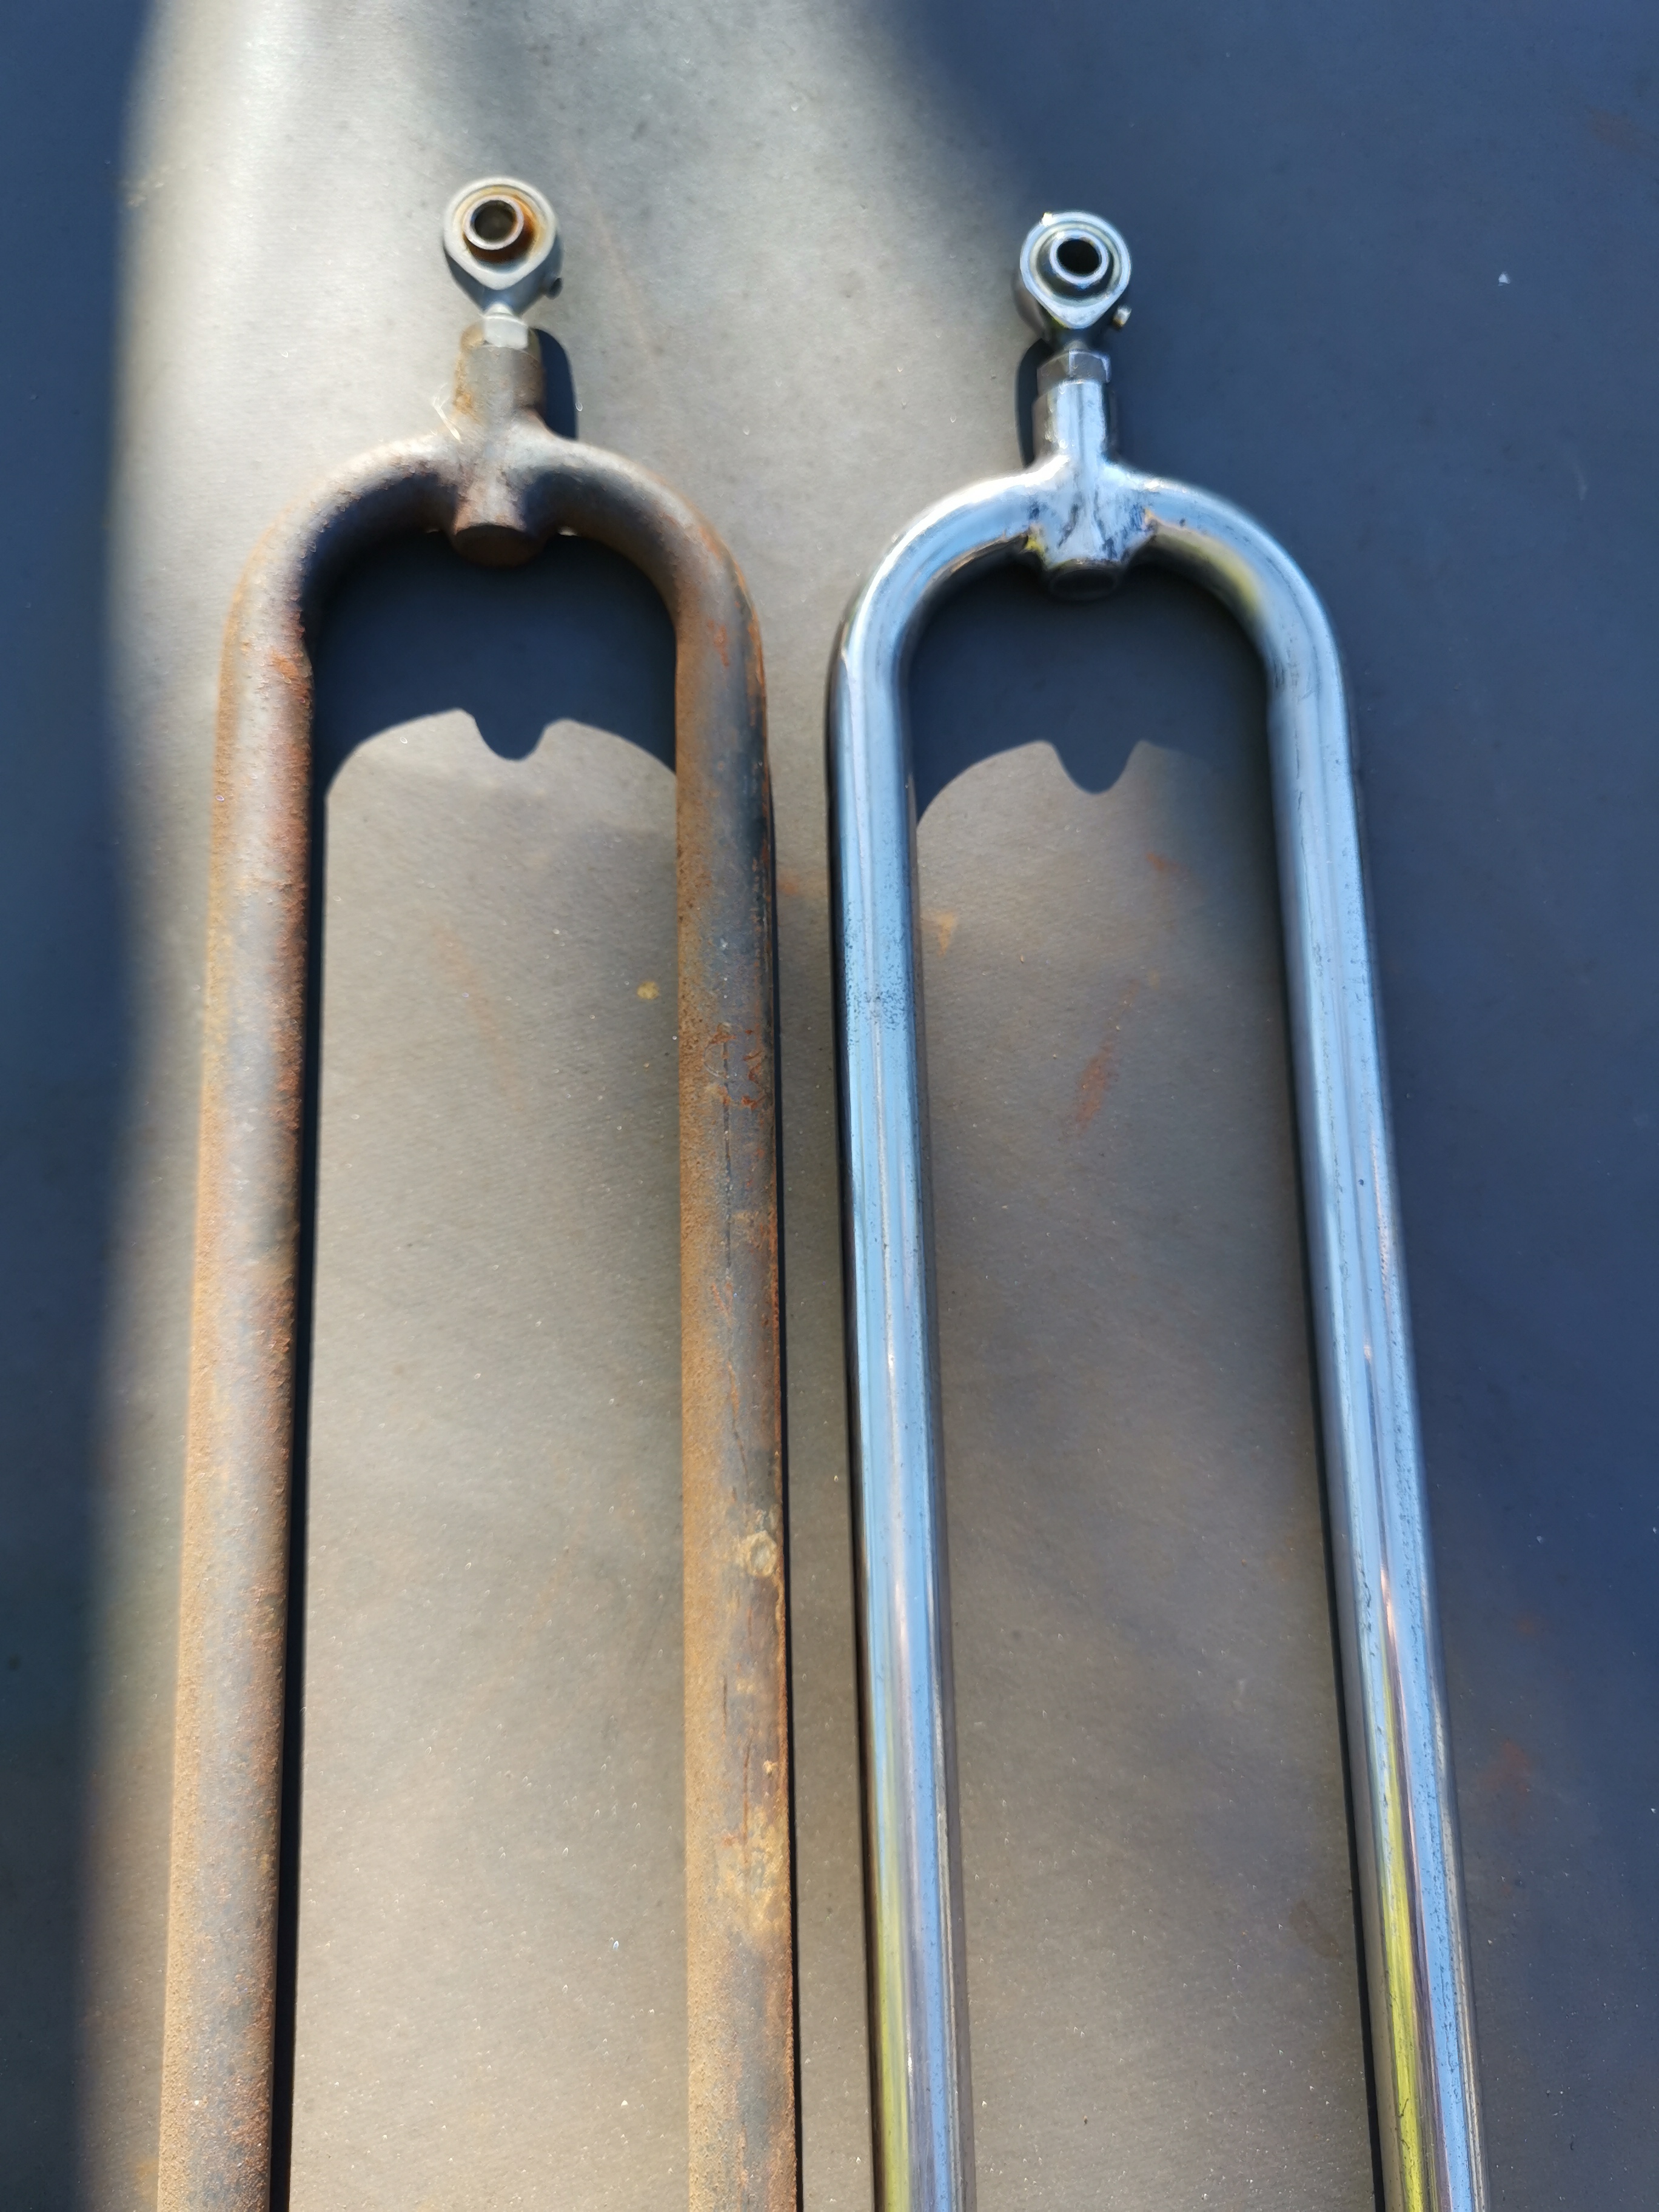
Need to redrill a cople holes
6 points
-
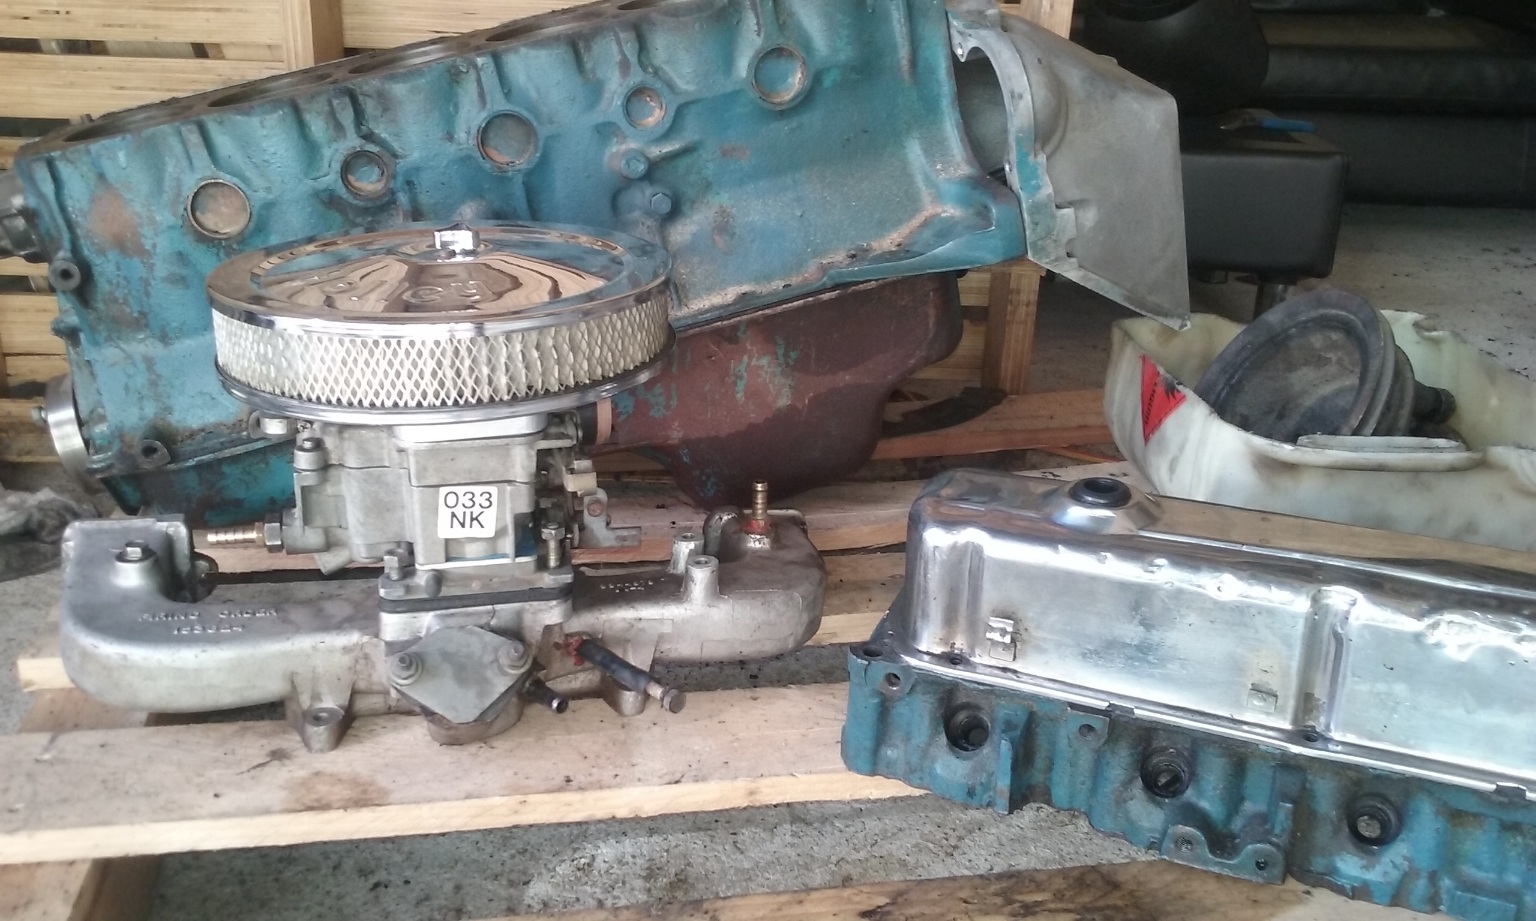
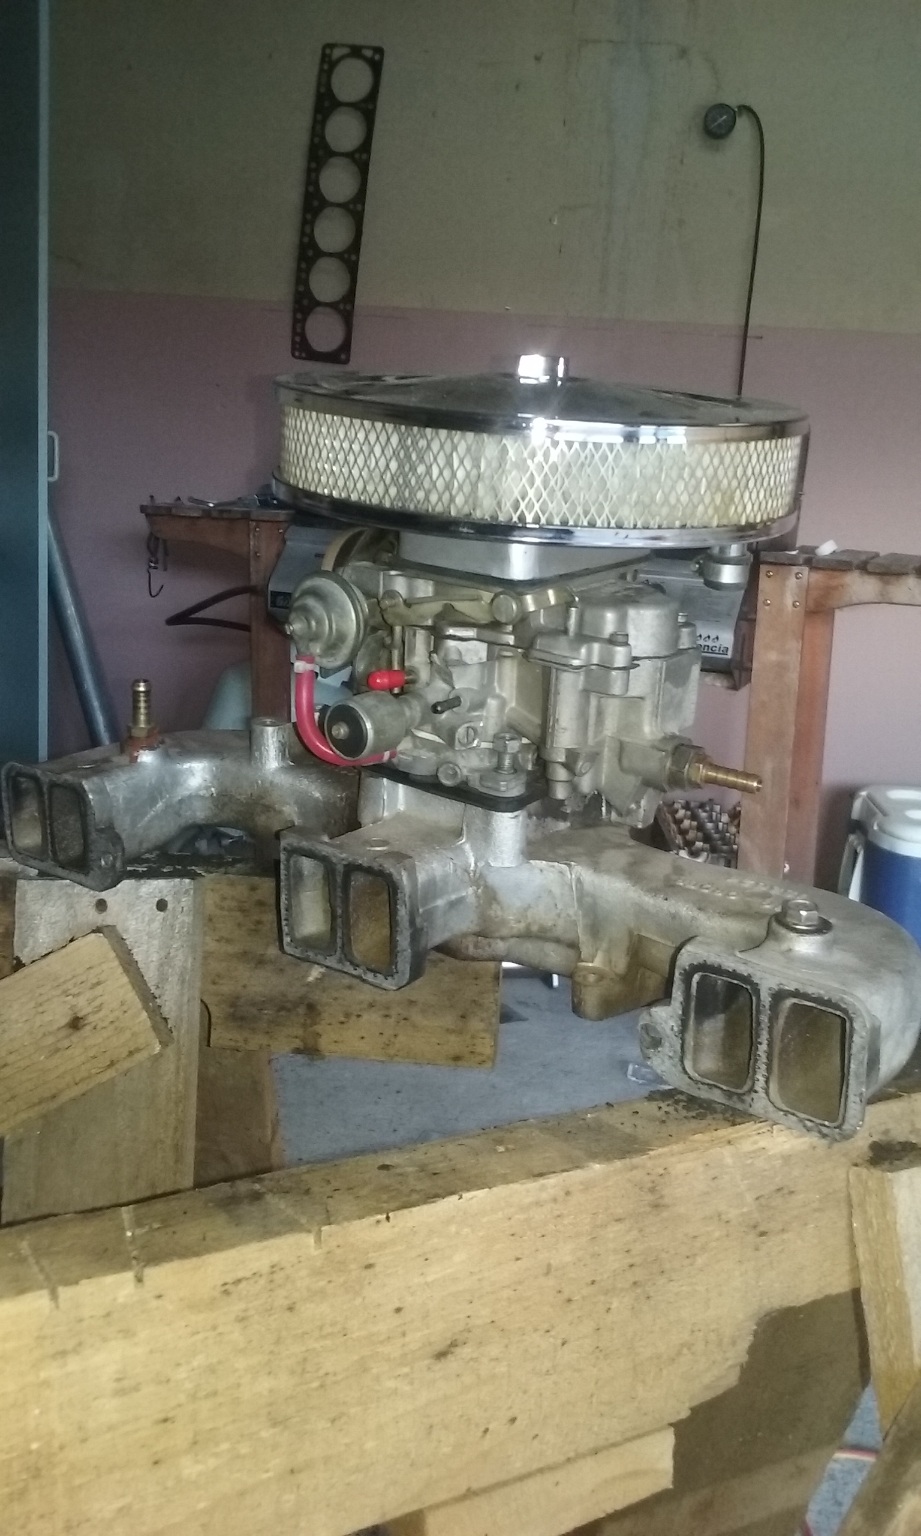
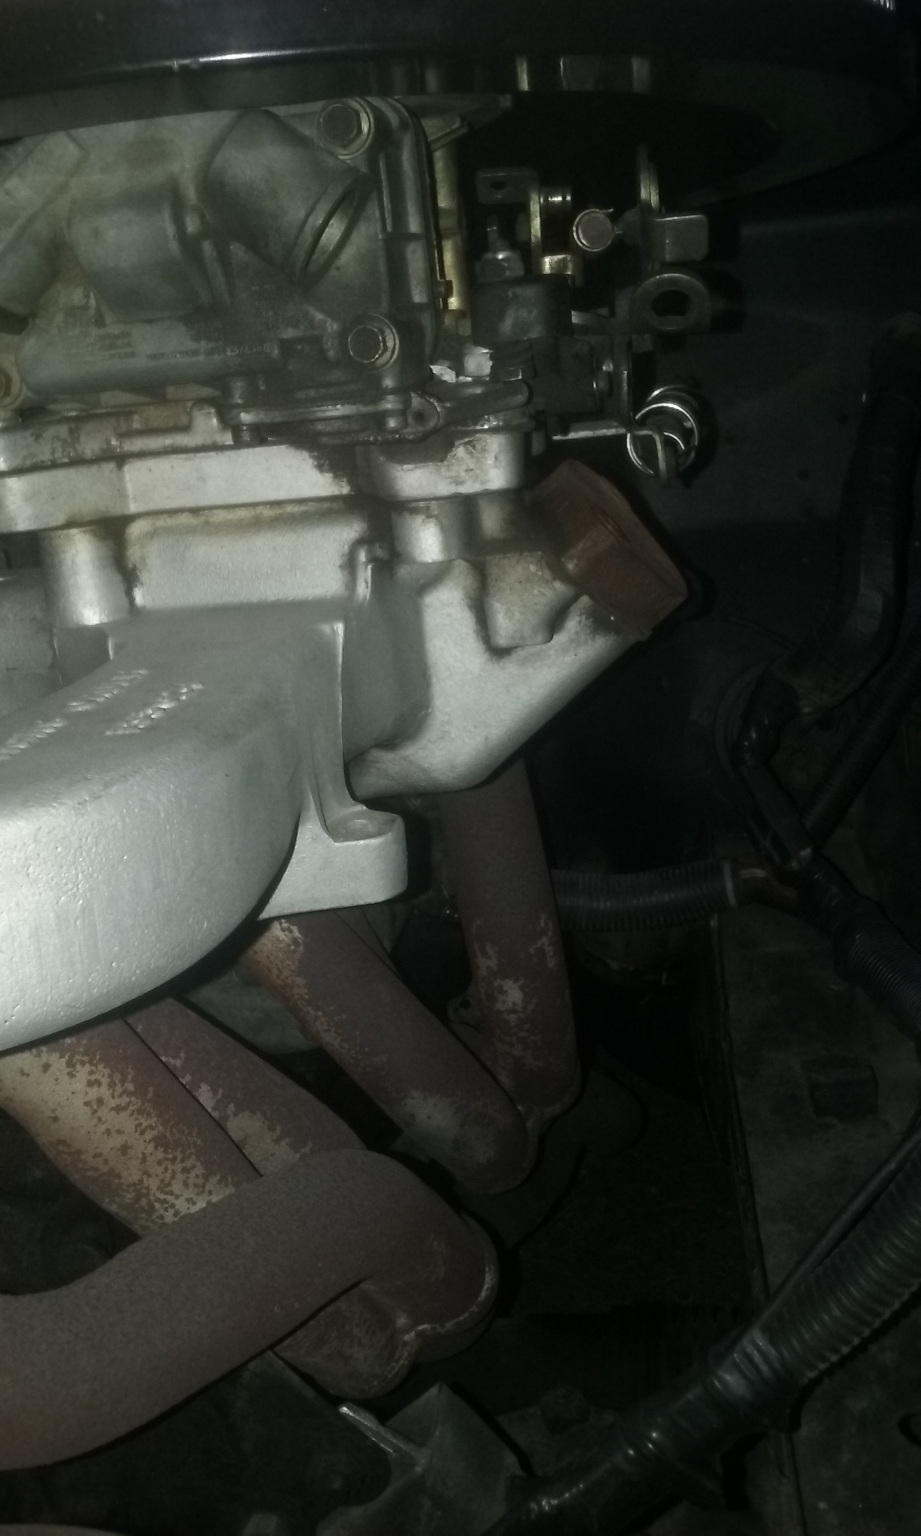
Been running the V8 for some time now and it's been a ton of fun. Just did beach hop and the car gave no trouble. Ended up finding a standard inlet manifold and running a Quadrajet which goes good. Aside from some exhaust issues I've remedied, it goes nice and has been heaps of fun driving to work daily. As something else has come up I've decided to sell the car. I'll have an advert up in the buy/sell section here on OS but it's already on tm and fb. Had heaps of fun putting this together.
5 points
-
I'll get some pics of the completed subframes next time I'm out in the garage too as they look quite dashing in subframe black. Painted the trumpets front and rear in a nice grey also which (even though they're aluminium) came out looking pretty spiffy.5 points
-
4 points
-
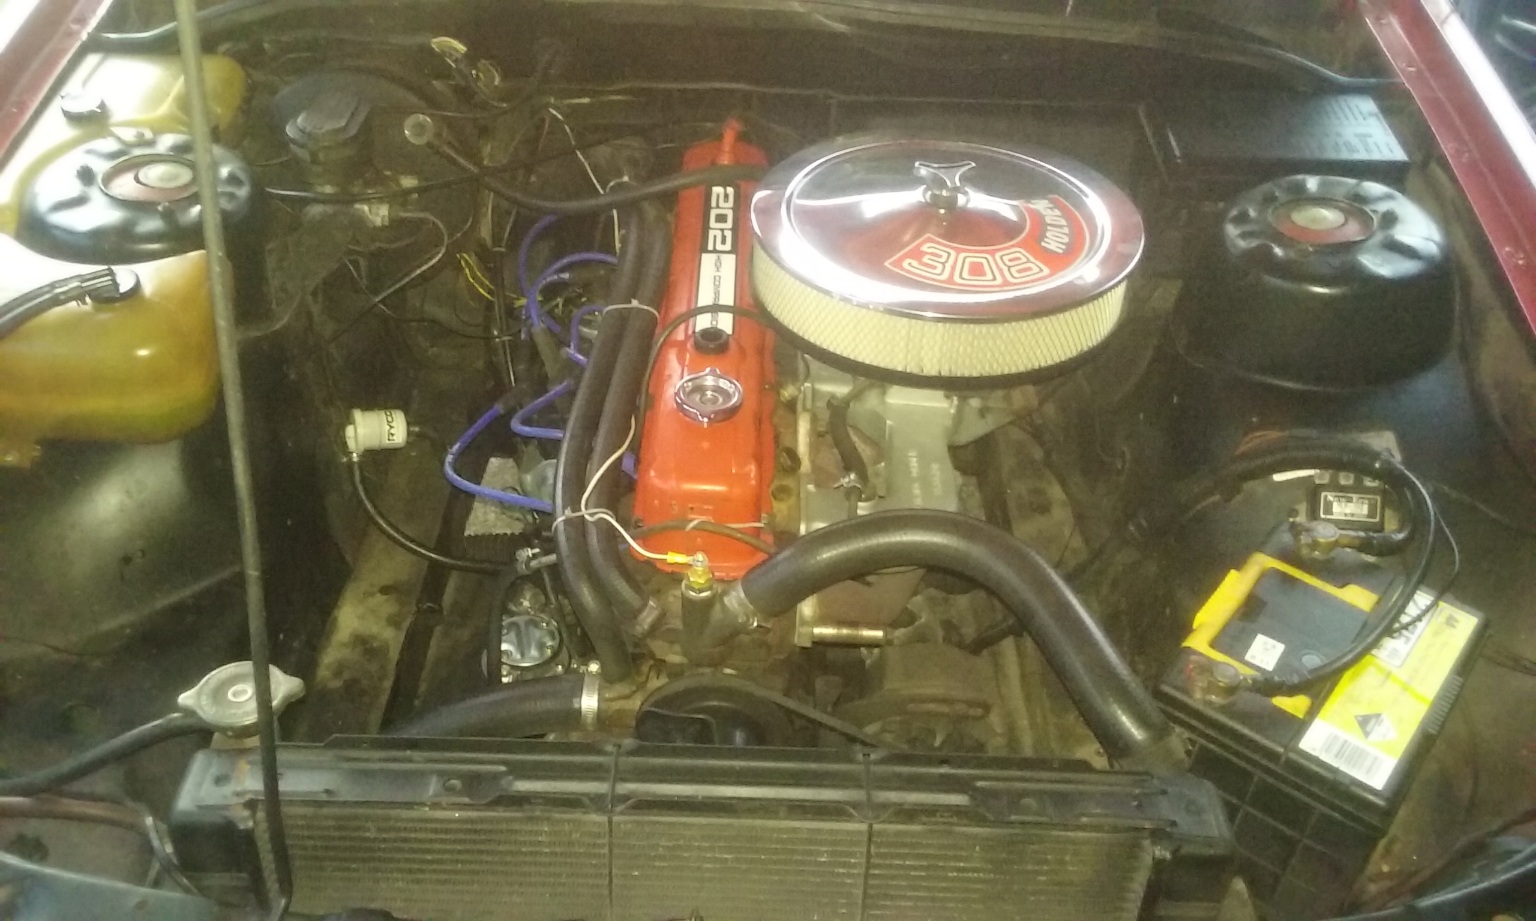
So I got Hamilton windscreens to come and install front and rear screens back in, asked them to make sure its SEALED, (asked them to put heaps of sealer in) which they diddnt and it leaked . Fixed the remains of the fuel breather system as the car always smelled like it was leaking petrol ( hoses were perished beyond anything I'd seen) I brought a holly 350 off trademe and went to get it from tauranga with my brother(rip), fun trip, and the guy who was selling the carb also threw in a free 202 blue block and a bigger air cleaner with '308' on it, haha gc, so sold 202 to a mate for $50, and brought a fuel pump, balljoint, brake shoes, and some bushings, sticker for valve cover to get it up to woffable standard... Drove the car around after some carb tuning, diddnt take mutch and it was running great, took it to work a few times, drove to the mount ,diddnt get pulled over so lucky me.... And tried my luck at vtnz, fully aware that it was Rego'd as a 1.9 starfire, not a 3.3 202 motor lol, yes they instantly threw a shitty and so I was left to wonder ... do I cert it with a 202 or maybe something a bit more powerful.....
4 points
-
I think the only things I have ever shipped with youshop is auto parts - eBay rock auto or Amazon free shipping to Portland Oregon USA thanks - then youshop no problem even for used auto parts3 points
-
Then I came across something too good to be true... A whole setup for a 304, on Facebook for 1200$! Not cheap for me at the time but I got caught up in the moment, so started messaging this guy with a 'legit' profile, older guy, friends, kids etc but lived a bit far away.. Long story short I paid the guy, and he dissapeared and blocked me haha Many visits to police, bank calls and still diddnt get money back, untill a kid by the same name as on the bank account was found and yea. . His mum made him pay back all my money! I didn't press fraud charges and yea props to the cops for that one. So I decided no more Facebook deals unless in person, lesson learned
3 points
-
I got charged $2800 to blast underneath and engine bay, paint the underside black and prime the engine bay. Then I spent another $250 at the painters for them to fix the primer overspray all over the black underneath Then I had to paint the parts underneath that they missed And fix the ripped hoodlining. Autoblast in glenfield should be avoided at all costs3 points
-
Really loving these new rims. Car is also about an inch closer to the ground. Got the car all back together the other night and did a run in. Struggled to get good smooth rpm. Searched and searched for a vaccum leak. Timed it more than once. Messed around with the carb. Then I pulled the plugs. Not sure a gap of 0 is recommended (should have checked before assembling ) 3/4 were too close, re gapped to 0.9mm and boom perfect idle again. Took it for a test drive and forgot to tighten the accelerator cable and it cable loose after the first rev up . Really happy with the cam so far. over easter period will head up to my storage facility (dad's shed) and pick up my 4.3 diff. Currently the car has a 3.4 which I put in when I was poor student trying to save on gas. I also have a set of OG Toyota centre caps in storage so will try and steal @jackeo21s idea and see if they fit.3 points
-
Got some longer wheel studs for the front. Painted the hubs and installed some new genuine Toyota wheel bearings and seals. Have also changed the front springs to some shorter 5kg ones and added some keeper springs. Need to find some 100-130mm long 4kg springs for the rear, but they're proving hard to find. Painted the inside of the hatch, doors and bonnet. Finally managed to finish prepping the rest of the panels and took them into work this weekend. Had a bit of drama with the base coat being the wrong tint, as I had another 2 litres mixed up since there was only about 1-1.5 litres out of a 4 litre tin left after doing the body and didn't want to run out. Turned out the new mix was a bit darker, but managed to get 2 coats of that on and then one coat of the previous left overs sprayed on top. So hopefully it matches to the body! Stoked with how it turned out! I sprayed the basecoat and then my coworker Justin came and sprayed the clear on, so thanks to him for doing such a good job! Assembled a few bits today. Could just stare at this thing all day!3 points
-
Ive used youshop for plenty of car parts in the past, but always from the UK. Havent used youshop USA, but should be the same.2 points
-
And so I found a 304 v8 that a mate had, unknown condition, brought off someone that said it did run but needed a valley gasket, but not in any definitive condition, $500, came with headers, basic block and some bolt ons, no wiring, but yea... why not Looking back I'd have brought a whole running donor car, but yea, not how this panned out So I threw some gaskets in it, cleaned it, painted some stuff and painted my window surrounds which came out great, to this day still great... rare for a rattle can job lol Checked the code on the block and it came back a vs3 or vt replacement engine...... still dont know if this is good or rare? Does that mean someone brought a new engine from aus???? Next up was to look for a gearbox, wiring or carb setup, basically all the stuff to convert the car to v8 specs (more than you would think)
2 points
-
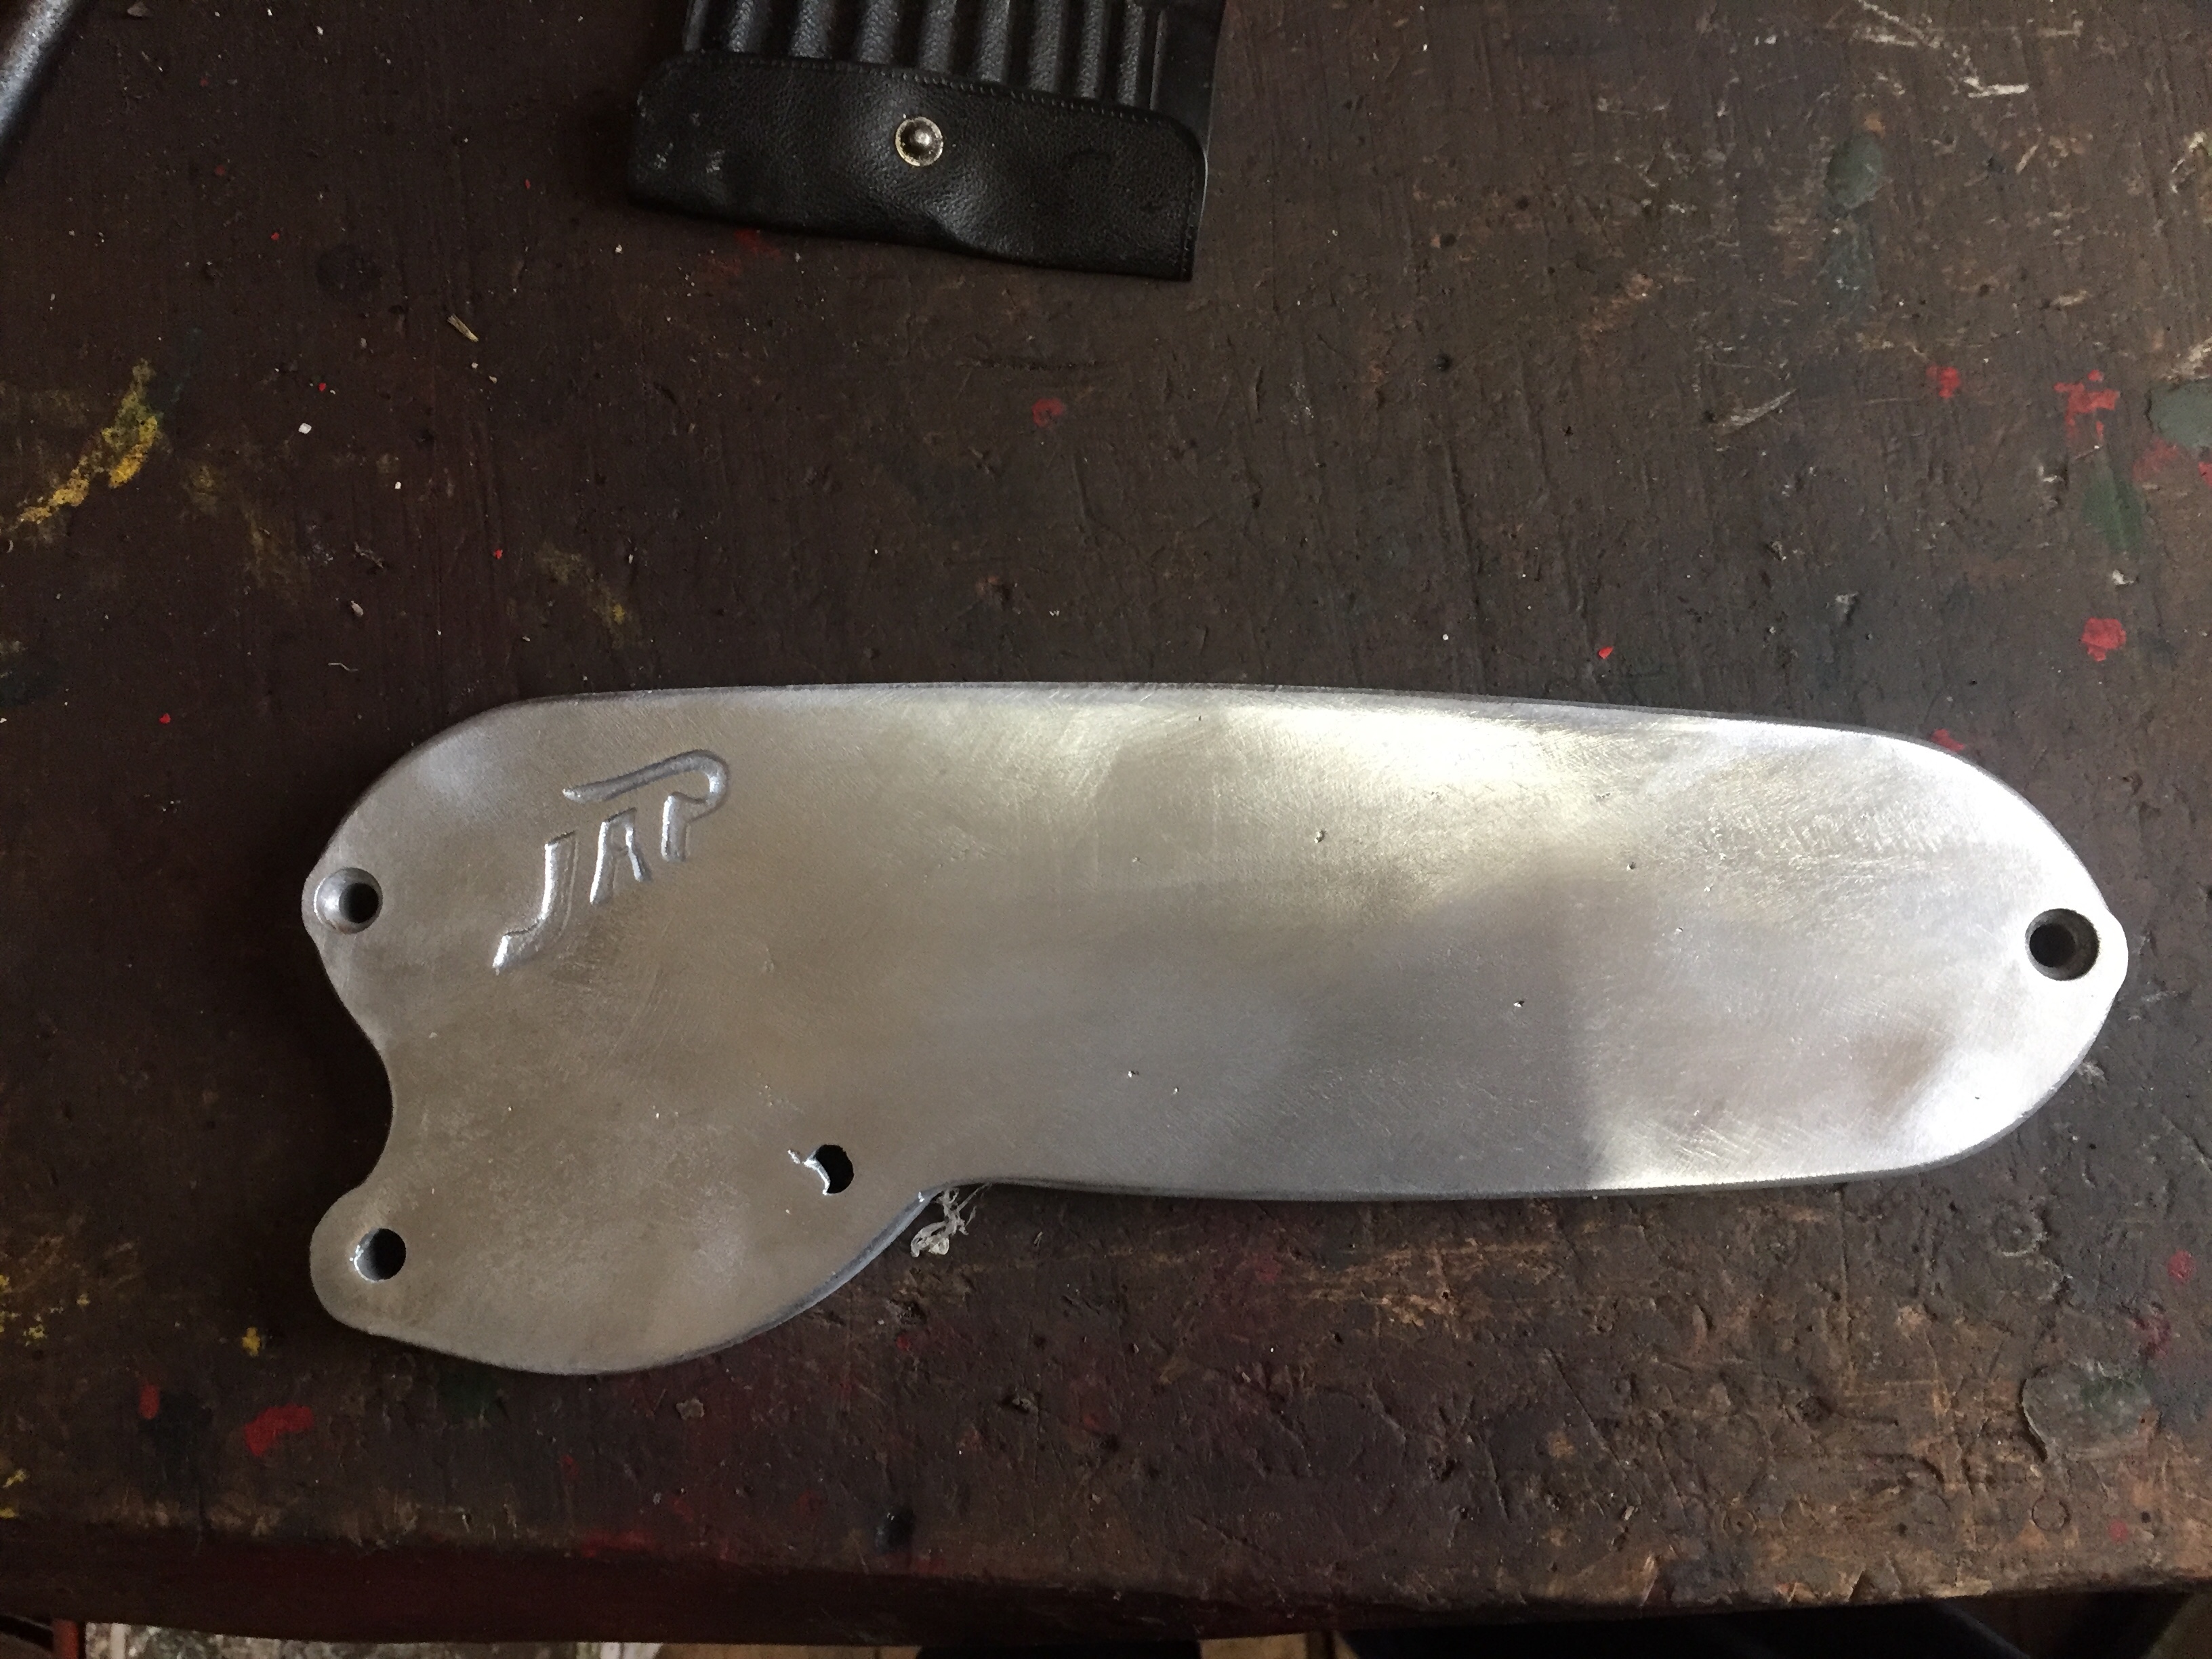
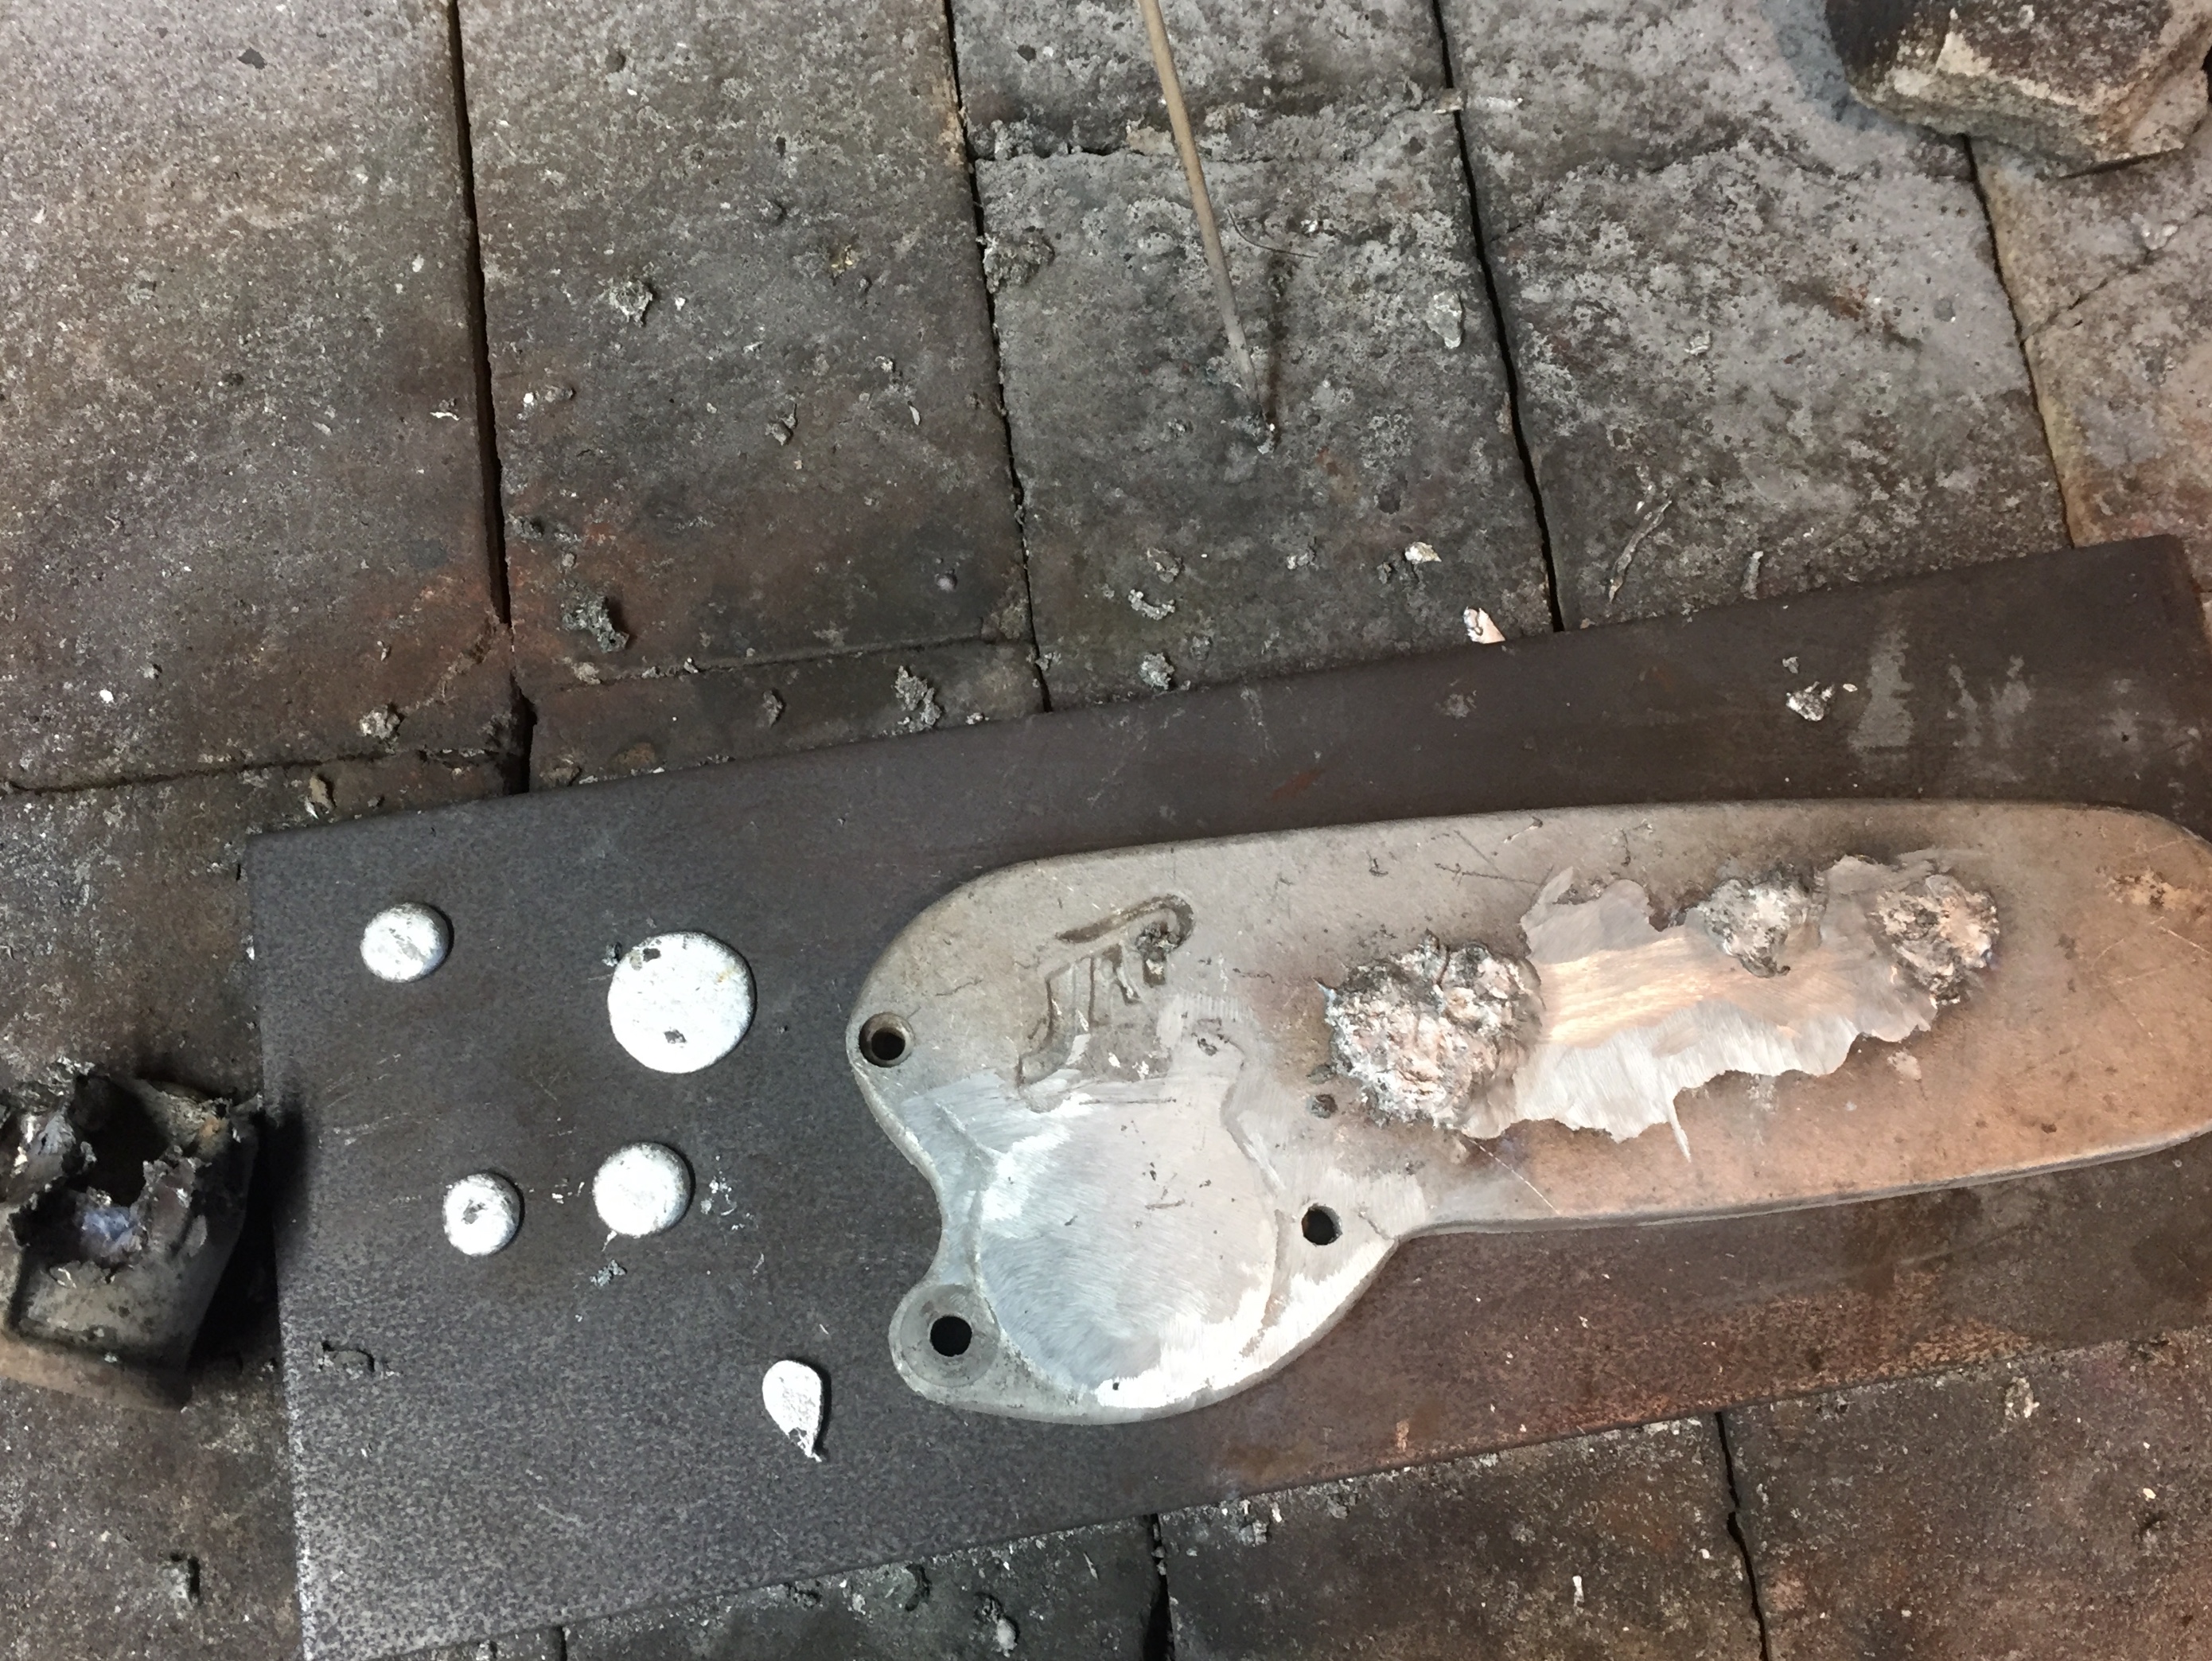
Cut the starter snout off and melted it down into blobs then I have welded up the hole and the script with it using the oxyacetylene, you can use all the crap to your advantage, it works like a flux.
2 points
-
Pest checking in from Dunedin Rolla wont keep you warm, bring a swanni2 points
-
https://www.vogtland.com/en/sport-lowering-springs-toyota-corolla-type-e10-e11-e11-u-up-to-85-kw-1820 Running these in my AE112R with KYBs. A ton better than shitty jamex and well priced, even with shipping. They were cheaper than a set of Kings. I got mine on special for about 155 euro shipped. its settled a little since this photo, but its a good height. -35mm all around.2 points
-
Malt vinegar for a weekend did wonders. Quick rub over with a wire brush and it opens! Now sitting in the kero bath at work getting all the pins nice and free. the corrosion varies from patina stain to semi serious pitting. But progress is progress.
2 points
-
That reminds me of the time I was doing a WOF on a Land Rover. Did a 30kph hard brake test, pedal went to the floor and Landy kept rolling, handbrake stopped it eventually. A hard brake line burst open length ways.2 points
-
Yeah that has been a consideration, one of the reasons for setting up my own workshop was to avoid issues around working at other peoples shops, we have to be careful on what we road test as well, if we find a fault that could possibly cause an issue then we cant test drive the vehicle or complete the road testing until its sorted out Stuff like that, and all the small procedural steps all adds time and dramas though, people get annoyed because we might get a car that for some reason cant be driven for a perceived small reason (ie a broken brake light switch) so they repair it and bring it back and then it fails the brake test so they have to bring it back again, meanwhile costs are starting to stack up because the speed limits in Auckland changed and it takes an hour to do a road test so before you know it, a cert that used to cost $400 10 years ago now might be $1000 and "it's just a 308 in a commodore, some came factory like that, why is it so hard " and so on Rant over, haha.2 points
-
Yes, there are Lvv standards The car construction manual Info sheets Certifier email updates Newsletters Usually training twice a year NZTA sends a reviewer every two years to be present while a vehicle is certified, and the certifier has to show all their paperwork and recording systems to prove they are doing things properly Random jobs are desktop audited when they go through LVVTA for processing as well. So the shit/not shit assessment is like that adjustable spanner in your toolbox, you dont use it often because there are better tools available most of the time As for coverage, we have to have insurance policies for public liability and professional indemnity as part of our operating requirements2 points
-
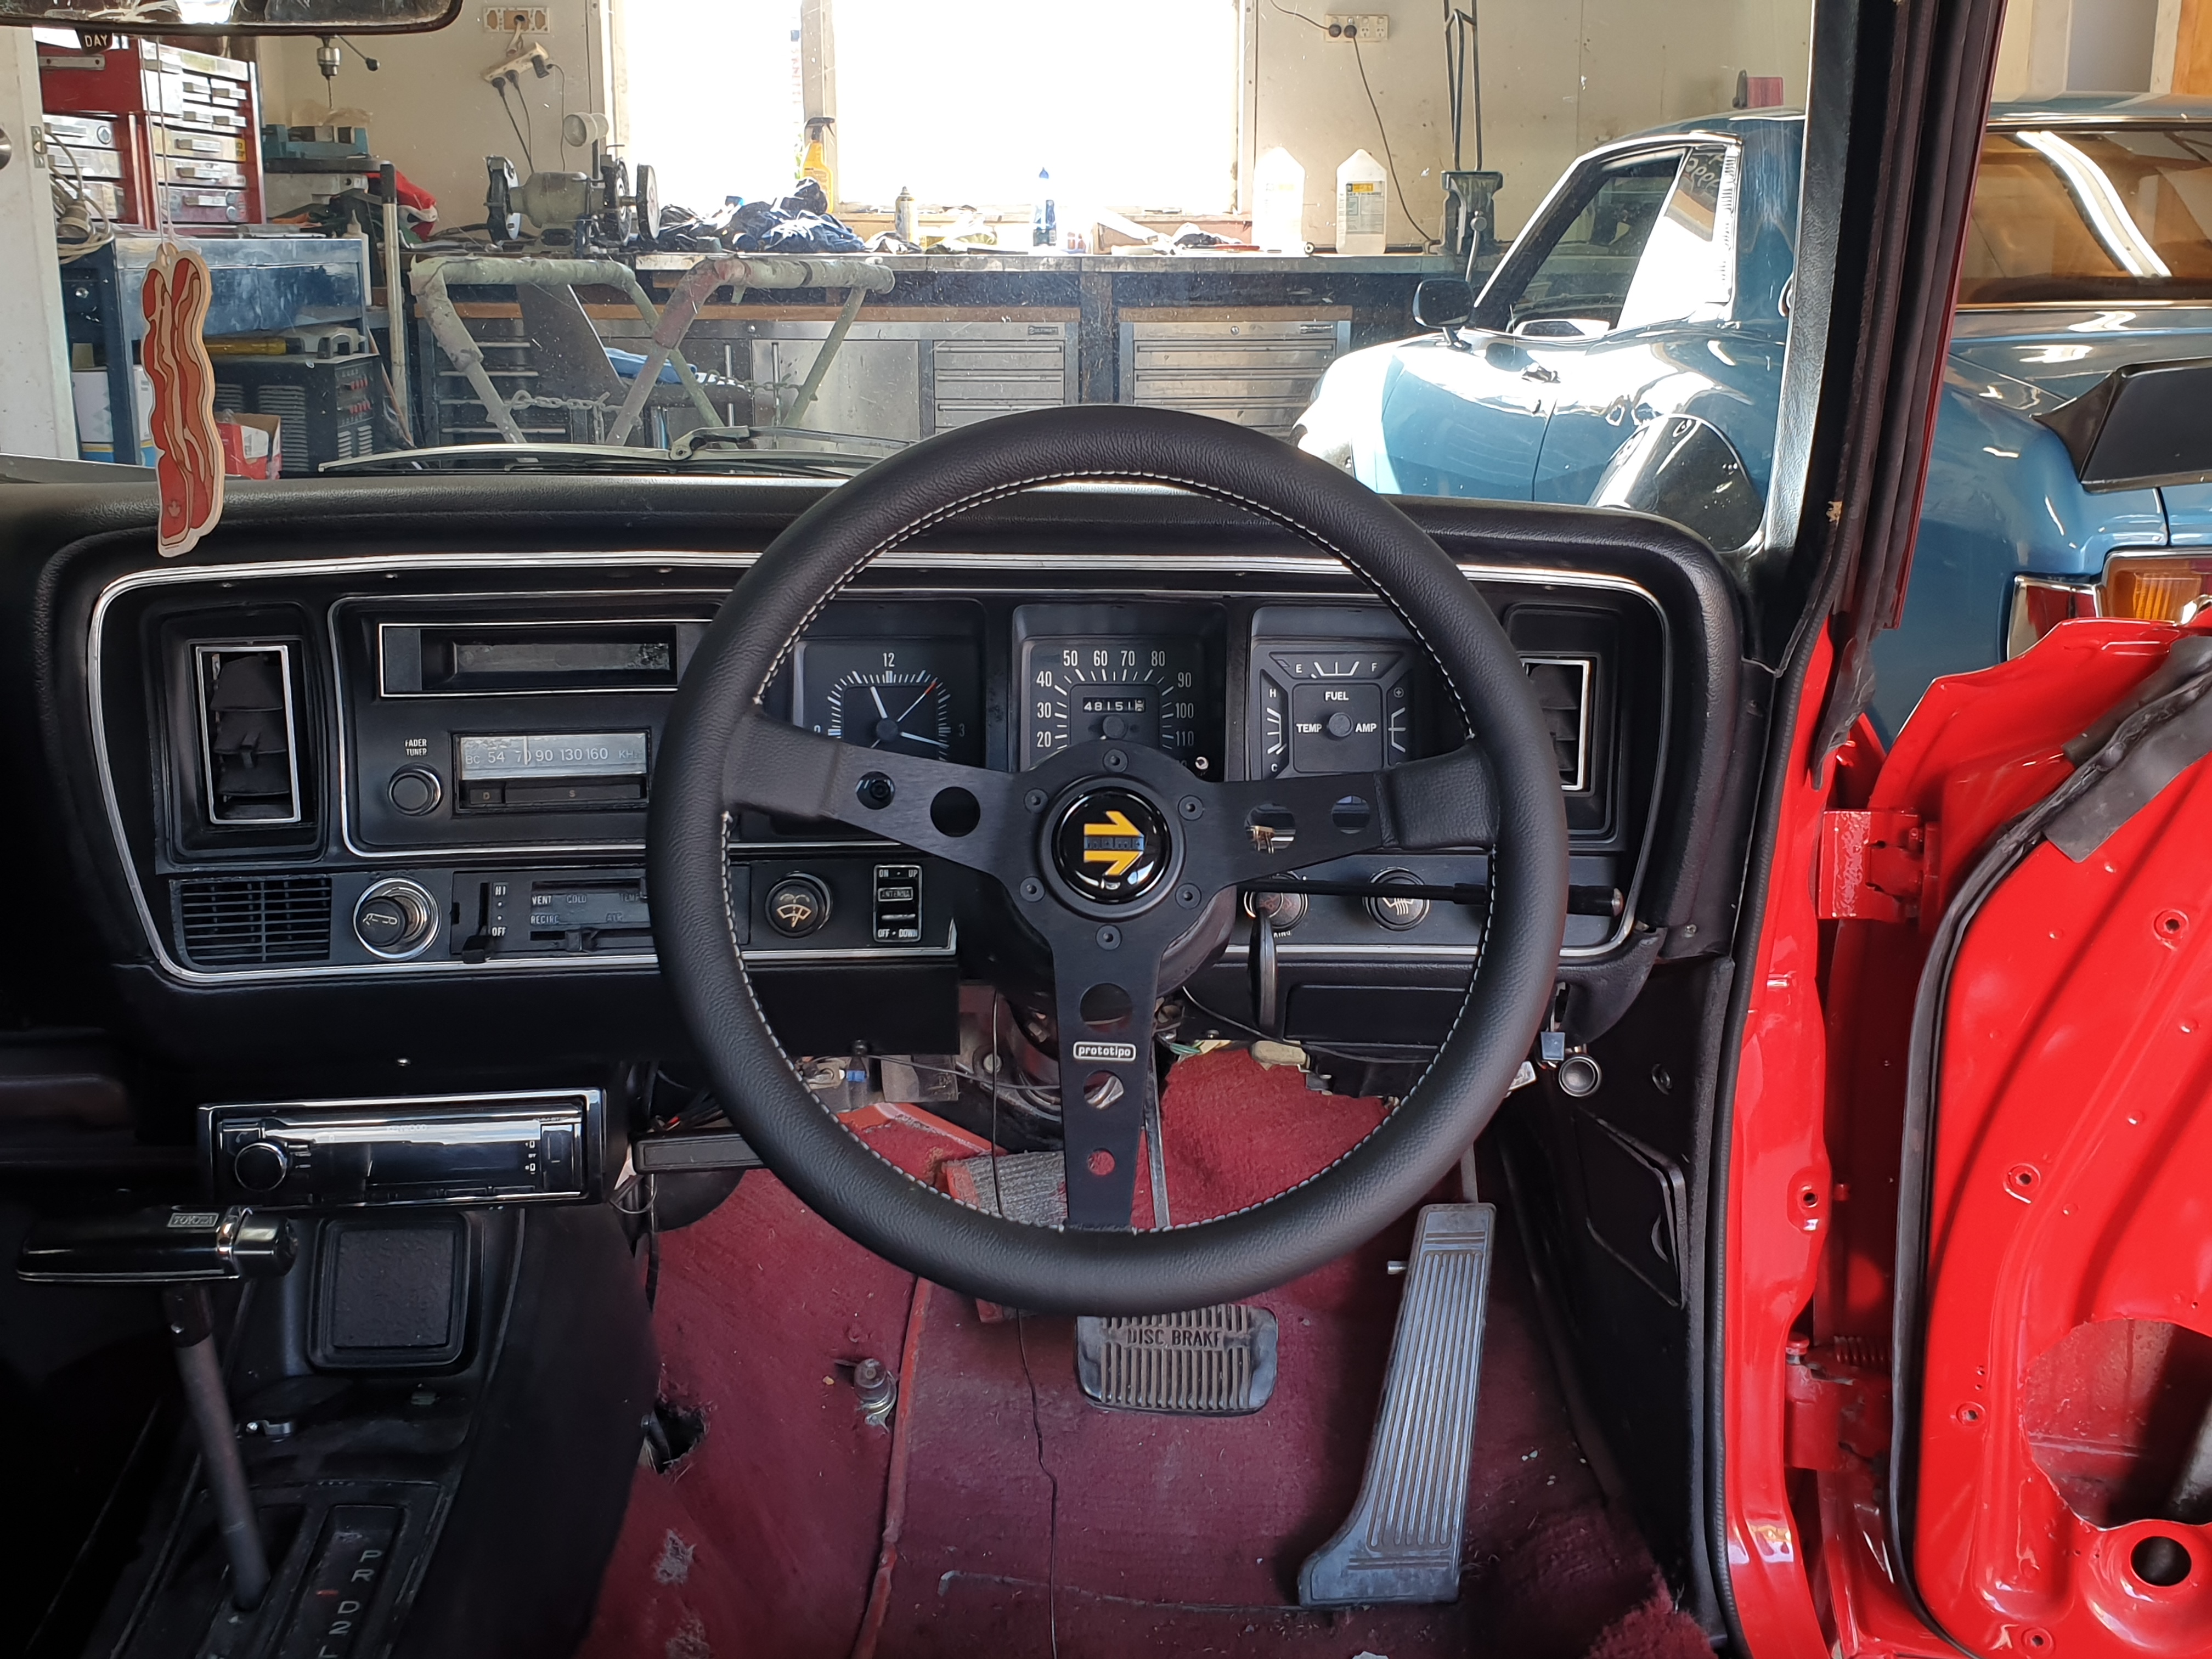
Bought a momo steering wheel for it. I am actually in love with it. Also I'm posting this from my spa pool.
2 points
-
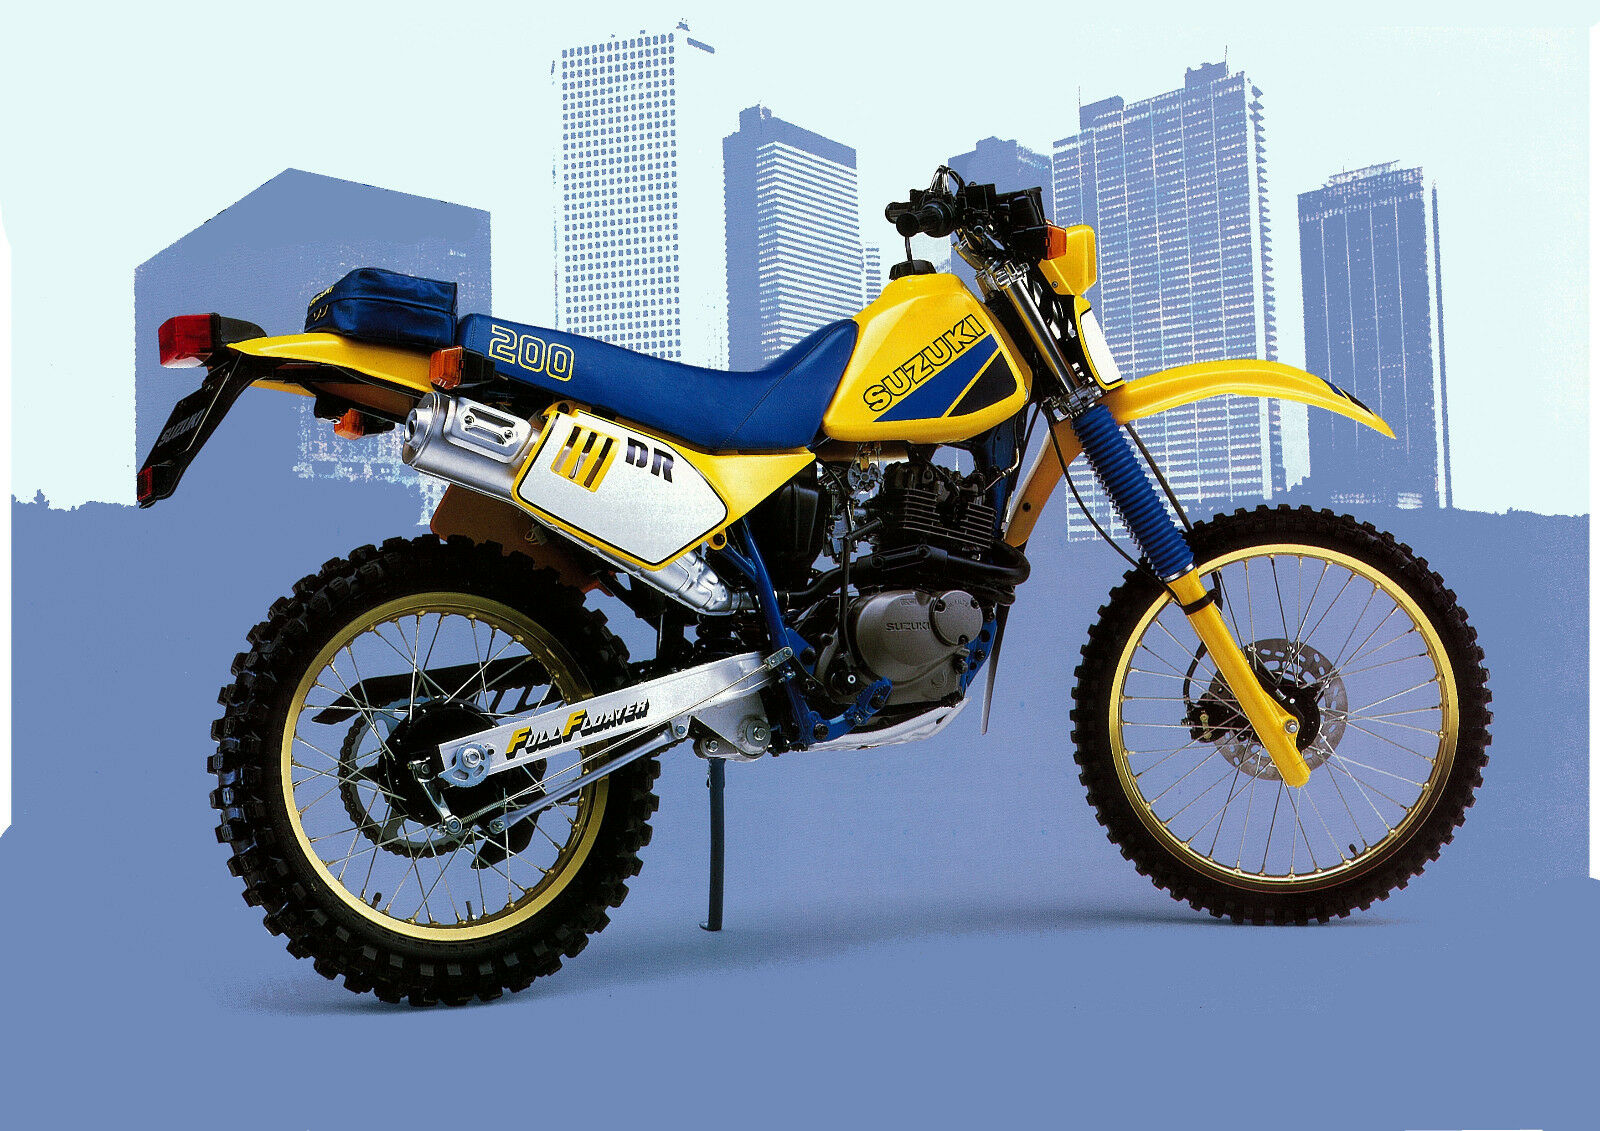
Bought this for parts for the other yellow 200. Been sitting for a year and not running. So ideal for me cos I only want the brakes and a couple small bits. Check the gas. Full of fresh 91 Check the plug. Freshly wire brushed. Turn the key. Lights all work so must be a good battery Press the starter button. Nothing Kicked it over a few times. Nothing Kicked it over with the plug out. Dead. Kicked it over with a good plug out. Dead Remember that the last blue DR had a dicky kill switch. Press it a few times and its gummy as and not clicking in and out. There's some suspicious green growth on the bike so probably it was in the pond at some stage, or a south facing shed. Opened the switch up and it full of gunk, probably bovine in nature. Wiped it off on my jeans and clamped a bit of wire across the solder joints. Kick it over and there's a visible spark this time. Put the plug back in and kick it BANG all the unburnt fuel sitting in the exhaust ignites and knocks loose an ankle deep pile of the finest cow shit North of the bombays. Kick it again and it slowly chugs into life in a cloud of black smoke, clearing up after a couple of revs and settling into a nice tight idle, not a hint of the typical suzuki top end is fucked, so just send it rattle that these get if you even think about running them 1ml of oil below the level line. Once the black smoke cleared, the white smoke began, unmistakably wd40 that was coating the engine and header, so perhaps it didn't have a top end oil leak like I had suspected. Still no life on the starter but that will just be the same problem I'm guessing. Rode it around, shocks are still good, probably the forks are leaking but that's the usual. Also the brakes don't do anything which again is typical farm bike spec. Rotor looks well below 3mm. And the seat is torn and brake light isn't working. Now I don't feel like wrecking it $900 will ride it away today with a better seat and il probably fix the starter or I can do the brakes and bump up the price to cover parts
2 points
-
its coming along. im just tidying up all the little things that need doing. ive got some generic belt line rubbers coming for it then i can put the door cards back on. the bumpers are away being chromed and ill get them back in a week or so. not sold on the black center caps and i have another set on order should be here middle of next month. i drove it up the road to get some milk and i fucking love driving this thing, its fucking slow but its cool to just cruze along in and i can see myself doing a bunch of Ks in this as soon as i tidy u the last few things. believe it or not its still got a warrant! 2021-03-18_07-56-27 by sheepers, on Flickr 2021-03-18_07-56-37 by sheepers, on Flickr 2021-03-18_07-56-45 by sheepers, on Flickr 2021-03-18_07-56-52 by sheepers, on Flickr 2021-03-18_07-56-58 by sheepers, on Flickr 2021-03-18_07-57-04 by sheepers, on Flickr2 points
-
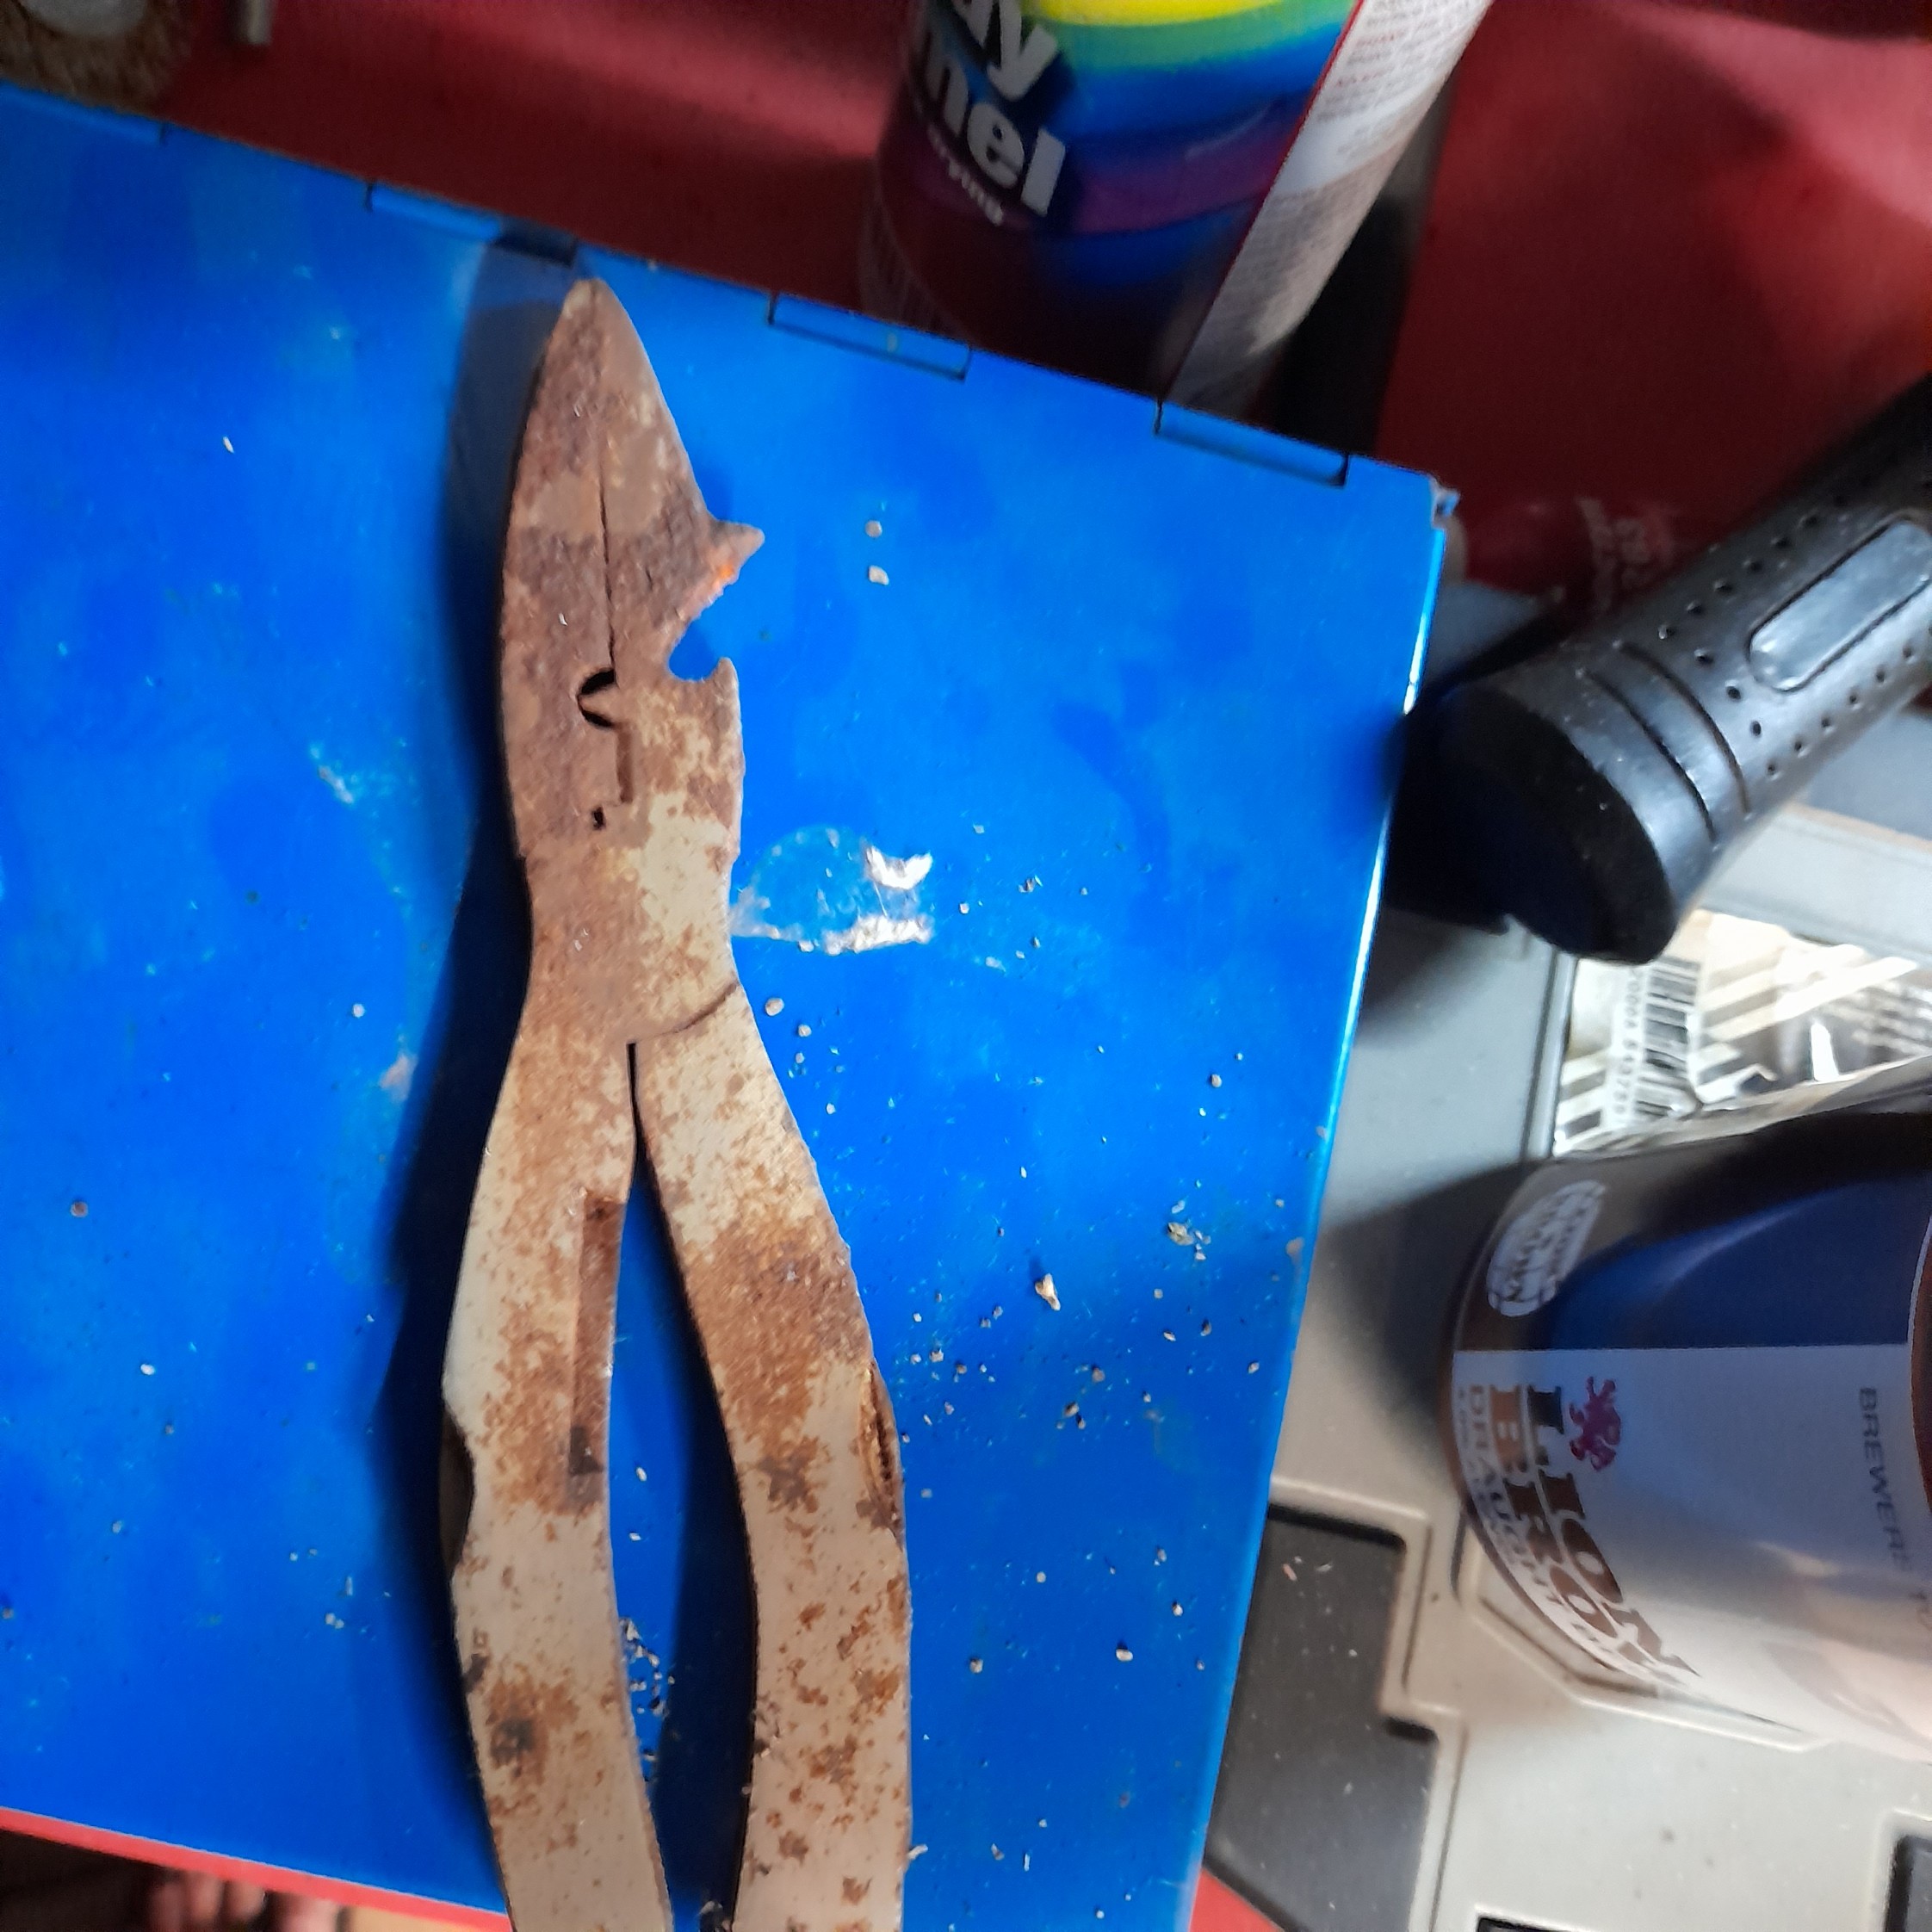
About 20 years ago my pop gave me a multitool. Said he had it for so long he can't remember. Had a nice leather pouch and all. Well it got used and abused, rolled bolled and arseholed. Until the point it was rusted solid on my workbench. Old boy passed away this morning, so i thought i should restore the tool he left me. Keep it going for another generation. Found it on a shelf down the arseend of the bench so here it is. Will derust, descale and free up before deciding the next step. This is very old and i am on the drunk end of the drinking scale. So bear with me. Admin feel free to delete my ramblings...
1 point
-
I use Librecad to cross check files: https://librecad.org/#download then view-autozoom1 point
-
Yep email them to me, I'll pm you my email1 point
-
Bugger that shipping! See there is this one too, https://www.ebay.com/itm/Austin-Marina-Original-Dash-Tachometer-Gauge-Cluster-Smiths-IP5805-00AS-OEM/303581170374?_trkparms=aid%3D555023%26algo%3DHOMESPLICE.SIMRVI%26ao%3D1%26asc%3D20190711100440%26meid%3D07a0355e37554cd2bef195610a4dc866%26pid%3D100752%26rk%3D6%26rkt%3D24%26mehot%3Dpf%26sd%3D163646571445%26itm%3D303581170374%26pmt%3D1%26noa%3D0%26pg%3D2047675%26algv%3DSimplAMLv5hPointwiseWebNoToraCoCoViewsNoHighIdfOrRoundRobinBlenderWithPromotedViewItems%26brand%3DSmiths&_trksid=p2047675.c100752.m1982&autorefresh=true1 point
-
If you get desperate for a rev counter. US$80 (approx NZ$115) + $157 shipping https://www.ebay.com/itm/RVI2435-01A-13H6796-Smiths-Tachometer-Austin-Marina/163646571445?epid=6027593855&hash=item261a1883b5:g:N90AAOSwZKlcLqOJ1 point
-
G'day G'day, Been working on a project for about 10+ years now of a Mk1 Austin 7 Mini from 1961. Had 2 different cars along the build, 1 of which I decided the body wasn't salvageable enough to be worth continuing on with. Had fun stripping em down and pulling them apart and I even managed to get started on building up parts of em as well (completed front and rear subframes with a couple of light modifications like braided brake lines, heavy duty adjustable tie bar rods and adjustable subframe mounts). They're all painted, assembled, greased and ready to go back into the car and the exact same place I've become unstuck on the entire project - bodywork. I'm on the hunt for someone in the Lower-North Island who does quality work on classics of this era. Preferably they have some space in their workshop where it can sit and just be chipped away at every once in a while, as I have no real need for the body to be completed in a rush. Preferably it won't cost an arm and a leg, and preferably they won't just fill the thing with bog. I'm looking for a real proper panel beater as I've bought replacement panels (sills, boot floor, A-panel inner/outer) and need a bit of custom welding work for a lot of rust holes (including one in the rear companion box next to the seat. Can anyone advise of who to see or who to not go to in the lower north (preferably Wellington region)? I'm going on a mish later this week with a mate to see who's where and what's what in the region and see if I can get an idea of who to use. I'll add up a bunch of pics in the next post for where it's at.1 point
-
I wouldn't cert them. Other certifiers might, I dont know. What sort of car have you got? A set of aliexpress shocks seems to average $700 by the time they are here A set of BC retails on average $1700 , but I have heard of them being a bit cheaper A cert is going to cost around $650 regardless of what brand So you might save a grand if you can find someone to certify them, but you are likely going to need another set when they spring a leak in 6 months time, or the lower bushes give out, or the piston falls off the end of the shaft or the car handles like shit or whatever. Then if you get sick of buying replacement maxspeedingrods and put some BC's in it then you have to pay for another cert because they wont match the photos on the cert1 point
-
That link is to a page run by a disgruntled ex certifier who got sued by lvvta for defamation so I wouldn't put too much emphasis on what's on there I wouldn't certify a no name brand coilover, I dunno about other certifiers but in my opinion it's not worth the risk to say some cheap crap is all good when I have no idea what the insides are made like I have seen a set of china coilovers that the piston fell off the end of the shaft and it all flopped around and destroyed itself1 point
-
Front and rear wheel options I'm aiming for. Have stripped down the chassis now and nearly finished cleaning up all the front suspension components. The fasteners all cleaned up well with a soak in vinegar and the bench grinder and some sanding/buffing brought up the front hairpins etc. I also picked up a go kart rear axle, steering wheel and rear hubs. Now to fab up a floor and nail down a motor.
1 point
-
Blaster was keen. Some sorta glass and water deal, but won’t bugger anything left attached. Pulled the bumpstops and exhaust hangers, blasted and zinc sprayed. Quality template (just a reference pic for later) Stripped the hinges, power steer, brake lines & more wee bits off the front and firewall, screen Trims came off cleanly (plenty of bite on the clips, was never going to fall off). Got rust in the lower rear screen like all the other cars but the front was lush! Cooked old vinyl still sandwiched in there. cracked the screen! Next to no effort on the trim it and it provided a wee crack.. gutted it’s the factory glass but it was bound to fail anyway, as there is plenty of delaminated areas around edges1 point
-
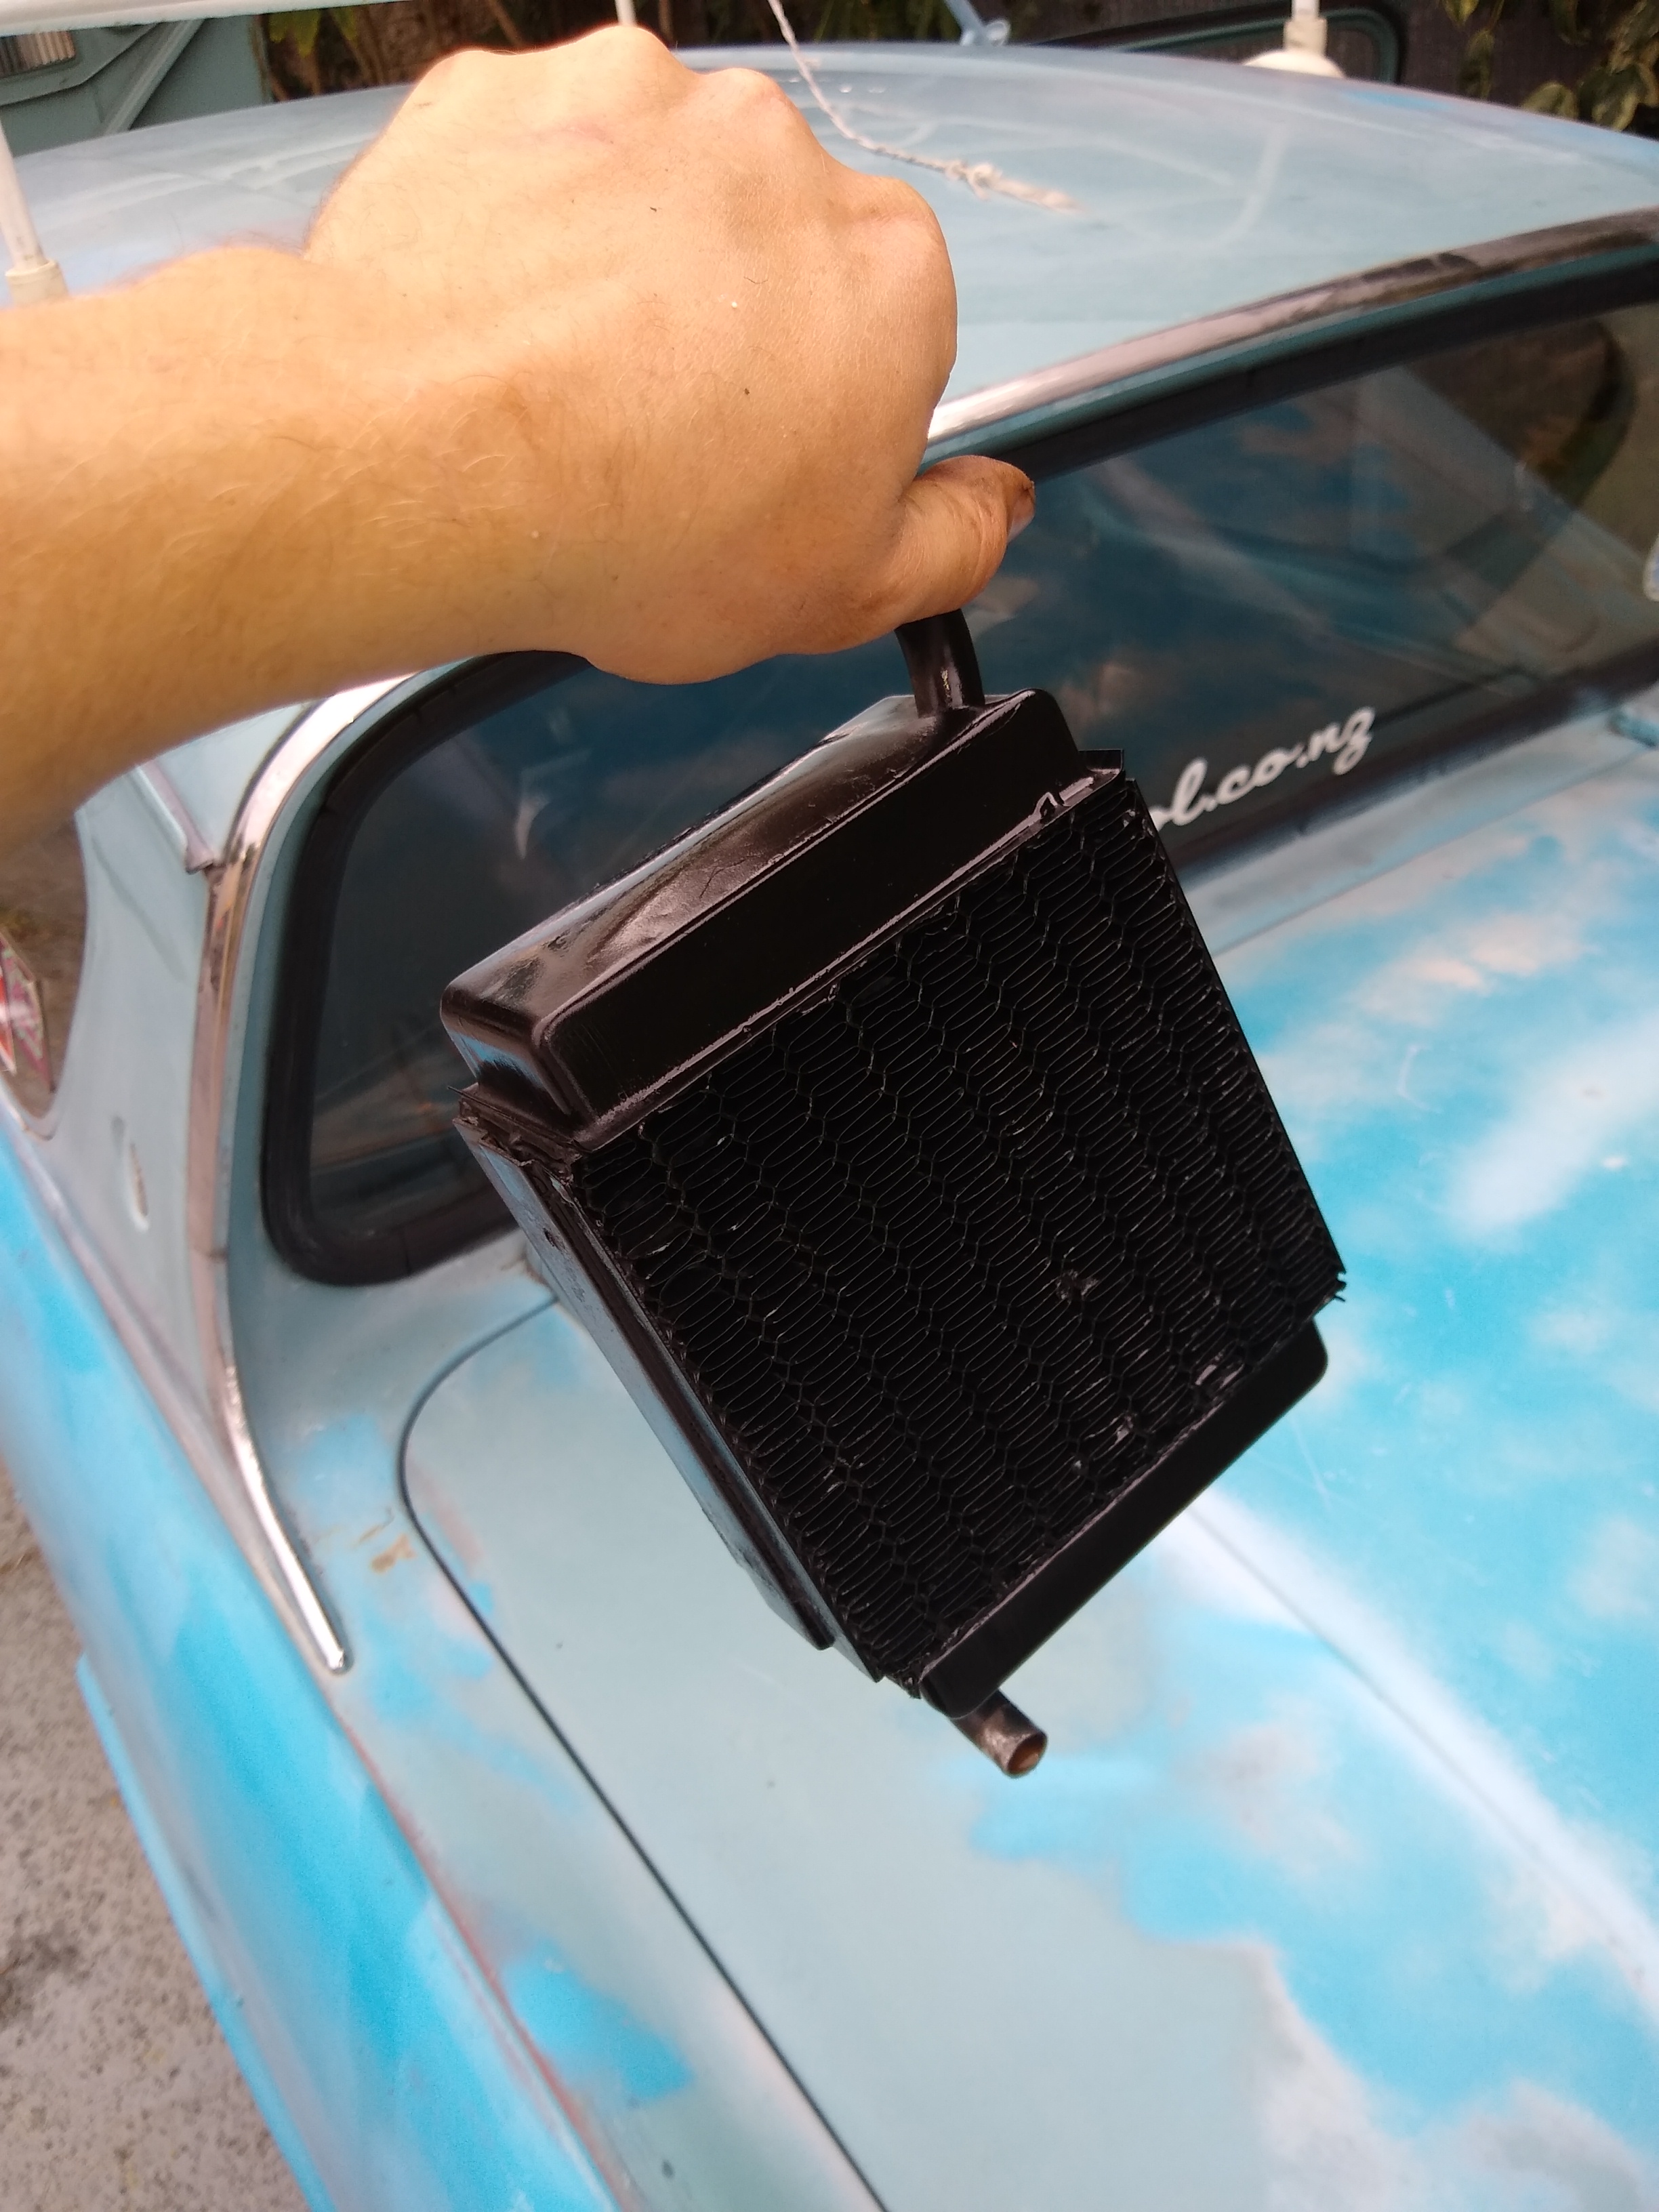
I had to pull the carb apart again when I got home, there were more little bits of glove past the jet. After cleaning the carb out thoroughly it runs a treat again. I filled the bowls with 91, and went for a quick hoon. I didn't detect any pinging - perhaps I can run it with 91 at the current ignition timing settings. I also spent the day fixing the heater core for it. The old one was disconnected, Glen reckoned the tap was leaking. I pulled it all out and found not only was the tap leaking, but the whole core was covered in corrosion from its own leaks. One of the tanks was leaking where it joins to the core and there were a few leaks in the core itself. I used a torch to melt the solder and remove the tank, I was greeted by an entirely blocked core - full of the foulest rust sludge you could imagine. I cleaned all of the tubes out using a brazing rod and a garden hose running at full power feeding the other tank. Afterwards I gave it all a good clean then reapplied solder to the tank and core mounting faces. I don't have any big clamps, so I just used some stainless lock wire to hold it all together while slowly moving around the tank to solder it together. This was followed by about 10 rounds of pressure testing and chasing the leaks around in the core itself. The tubes are all soldered together and in places the solder had cracked or corroded. Simply applying heat and solder to all of the tube seams was enough to fix them eventually. I had a random heater tap laying around, it does the job. I just unsoldered the old one and used a bit of hose to join the new one on. I also lubricated the fan shaft. The heater control cable is a bit short for the new heater so I will have to make one some time. Currently you have to reach under the dash to close the tap manually. Also, I'm not sure what the proper plumbing setup should be for these heaters. I just replaced the single hose between the intake manifold and the head with the heater circuit. Will this cause any issues with overheating if I close the tap? I still need to find a new duct for the drivers side defog vent, the existing one is too short. But other than that, the car gets uncomfortably warm inside if the heater fan is on now.
1 point
-
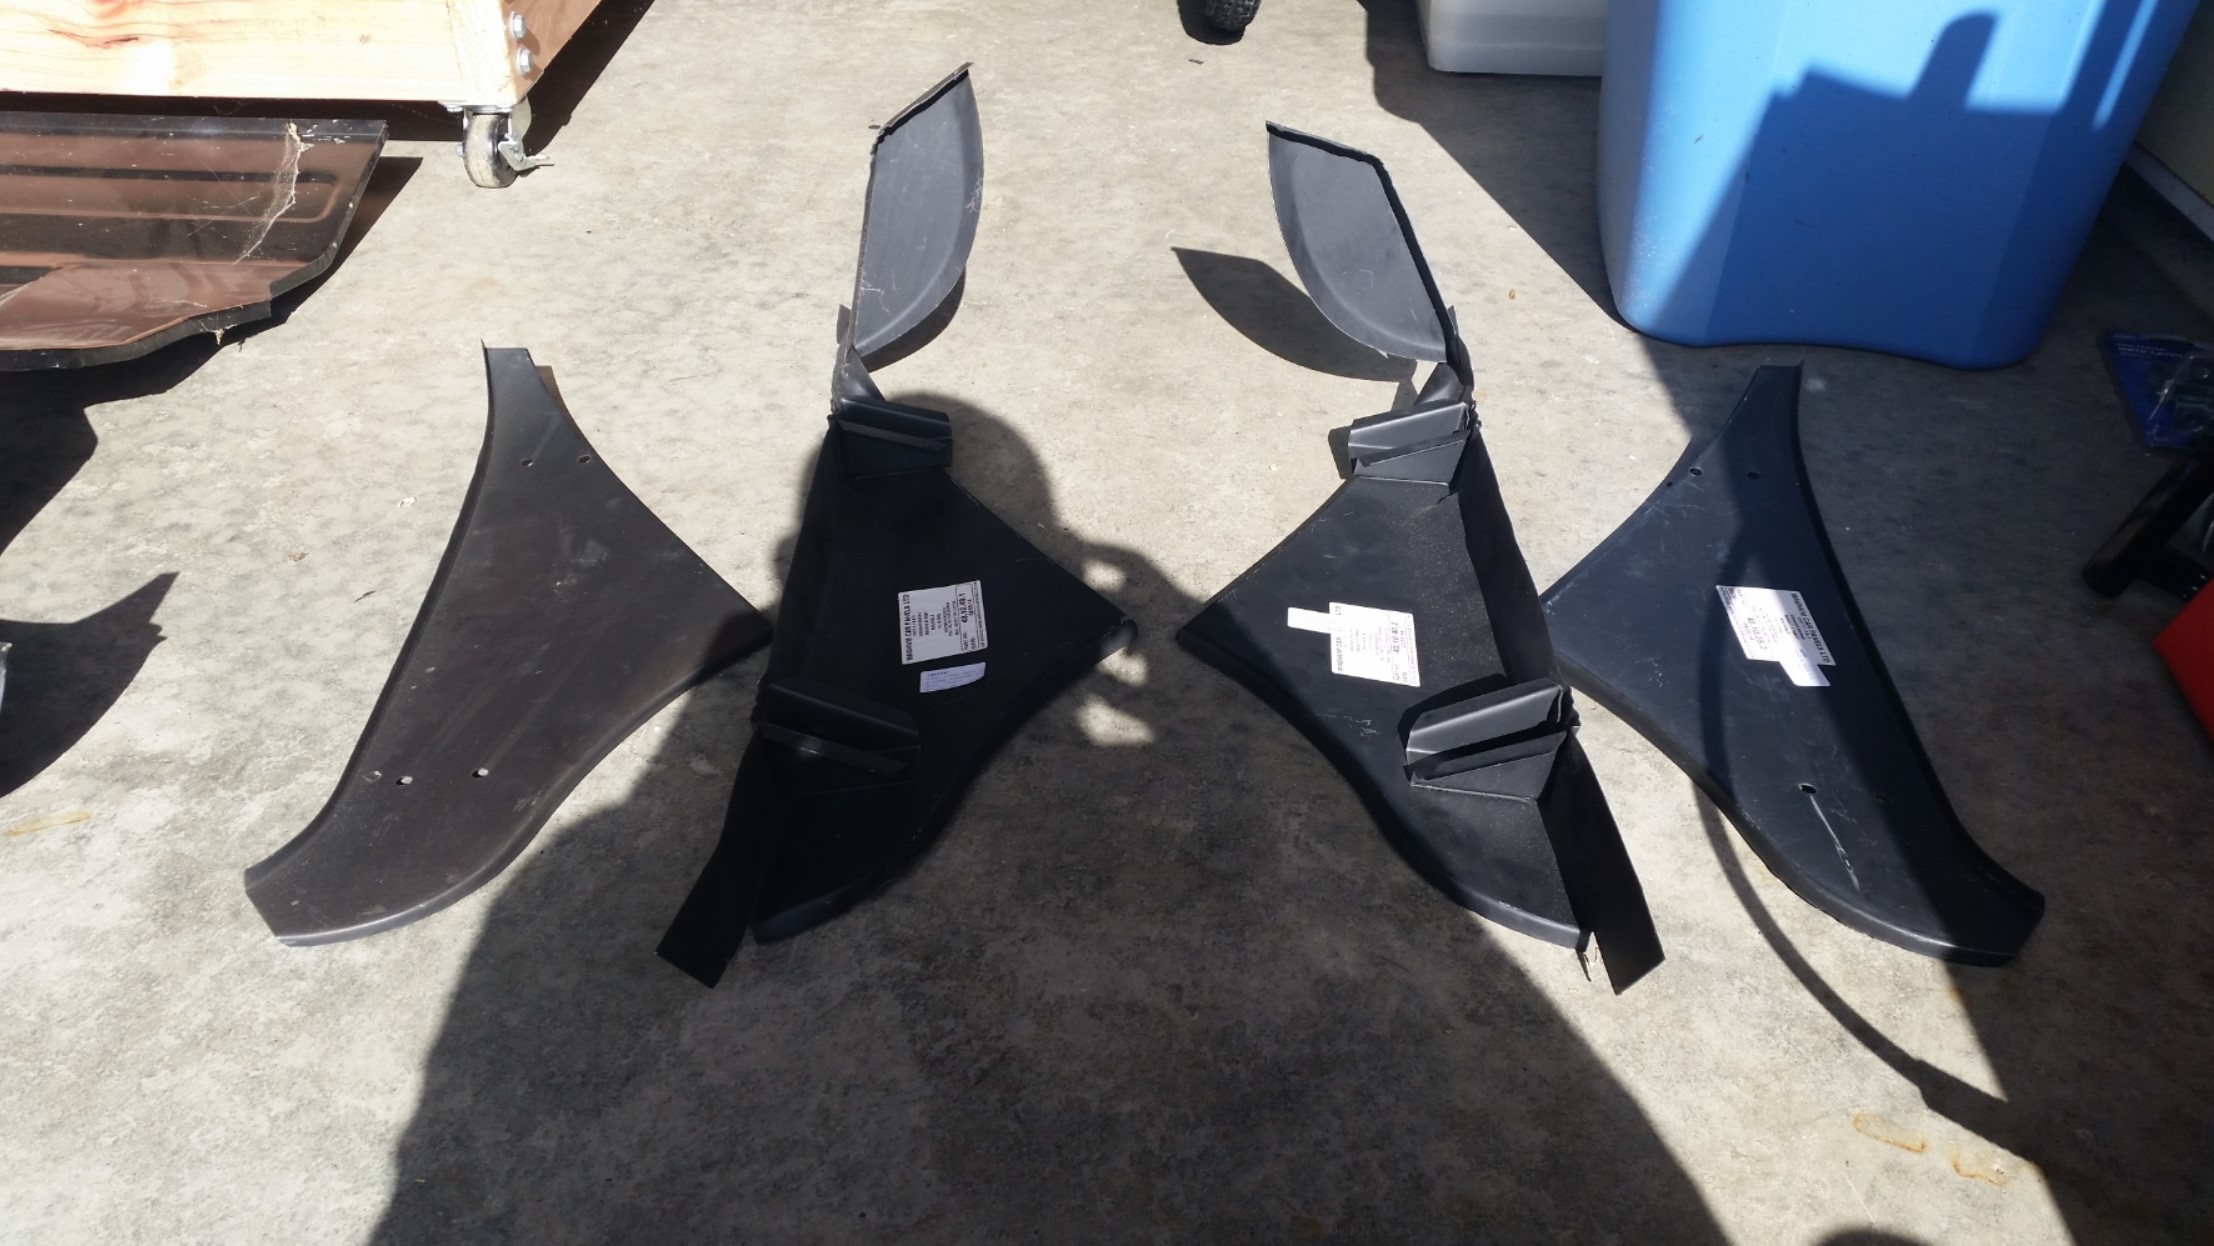
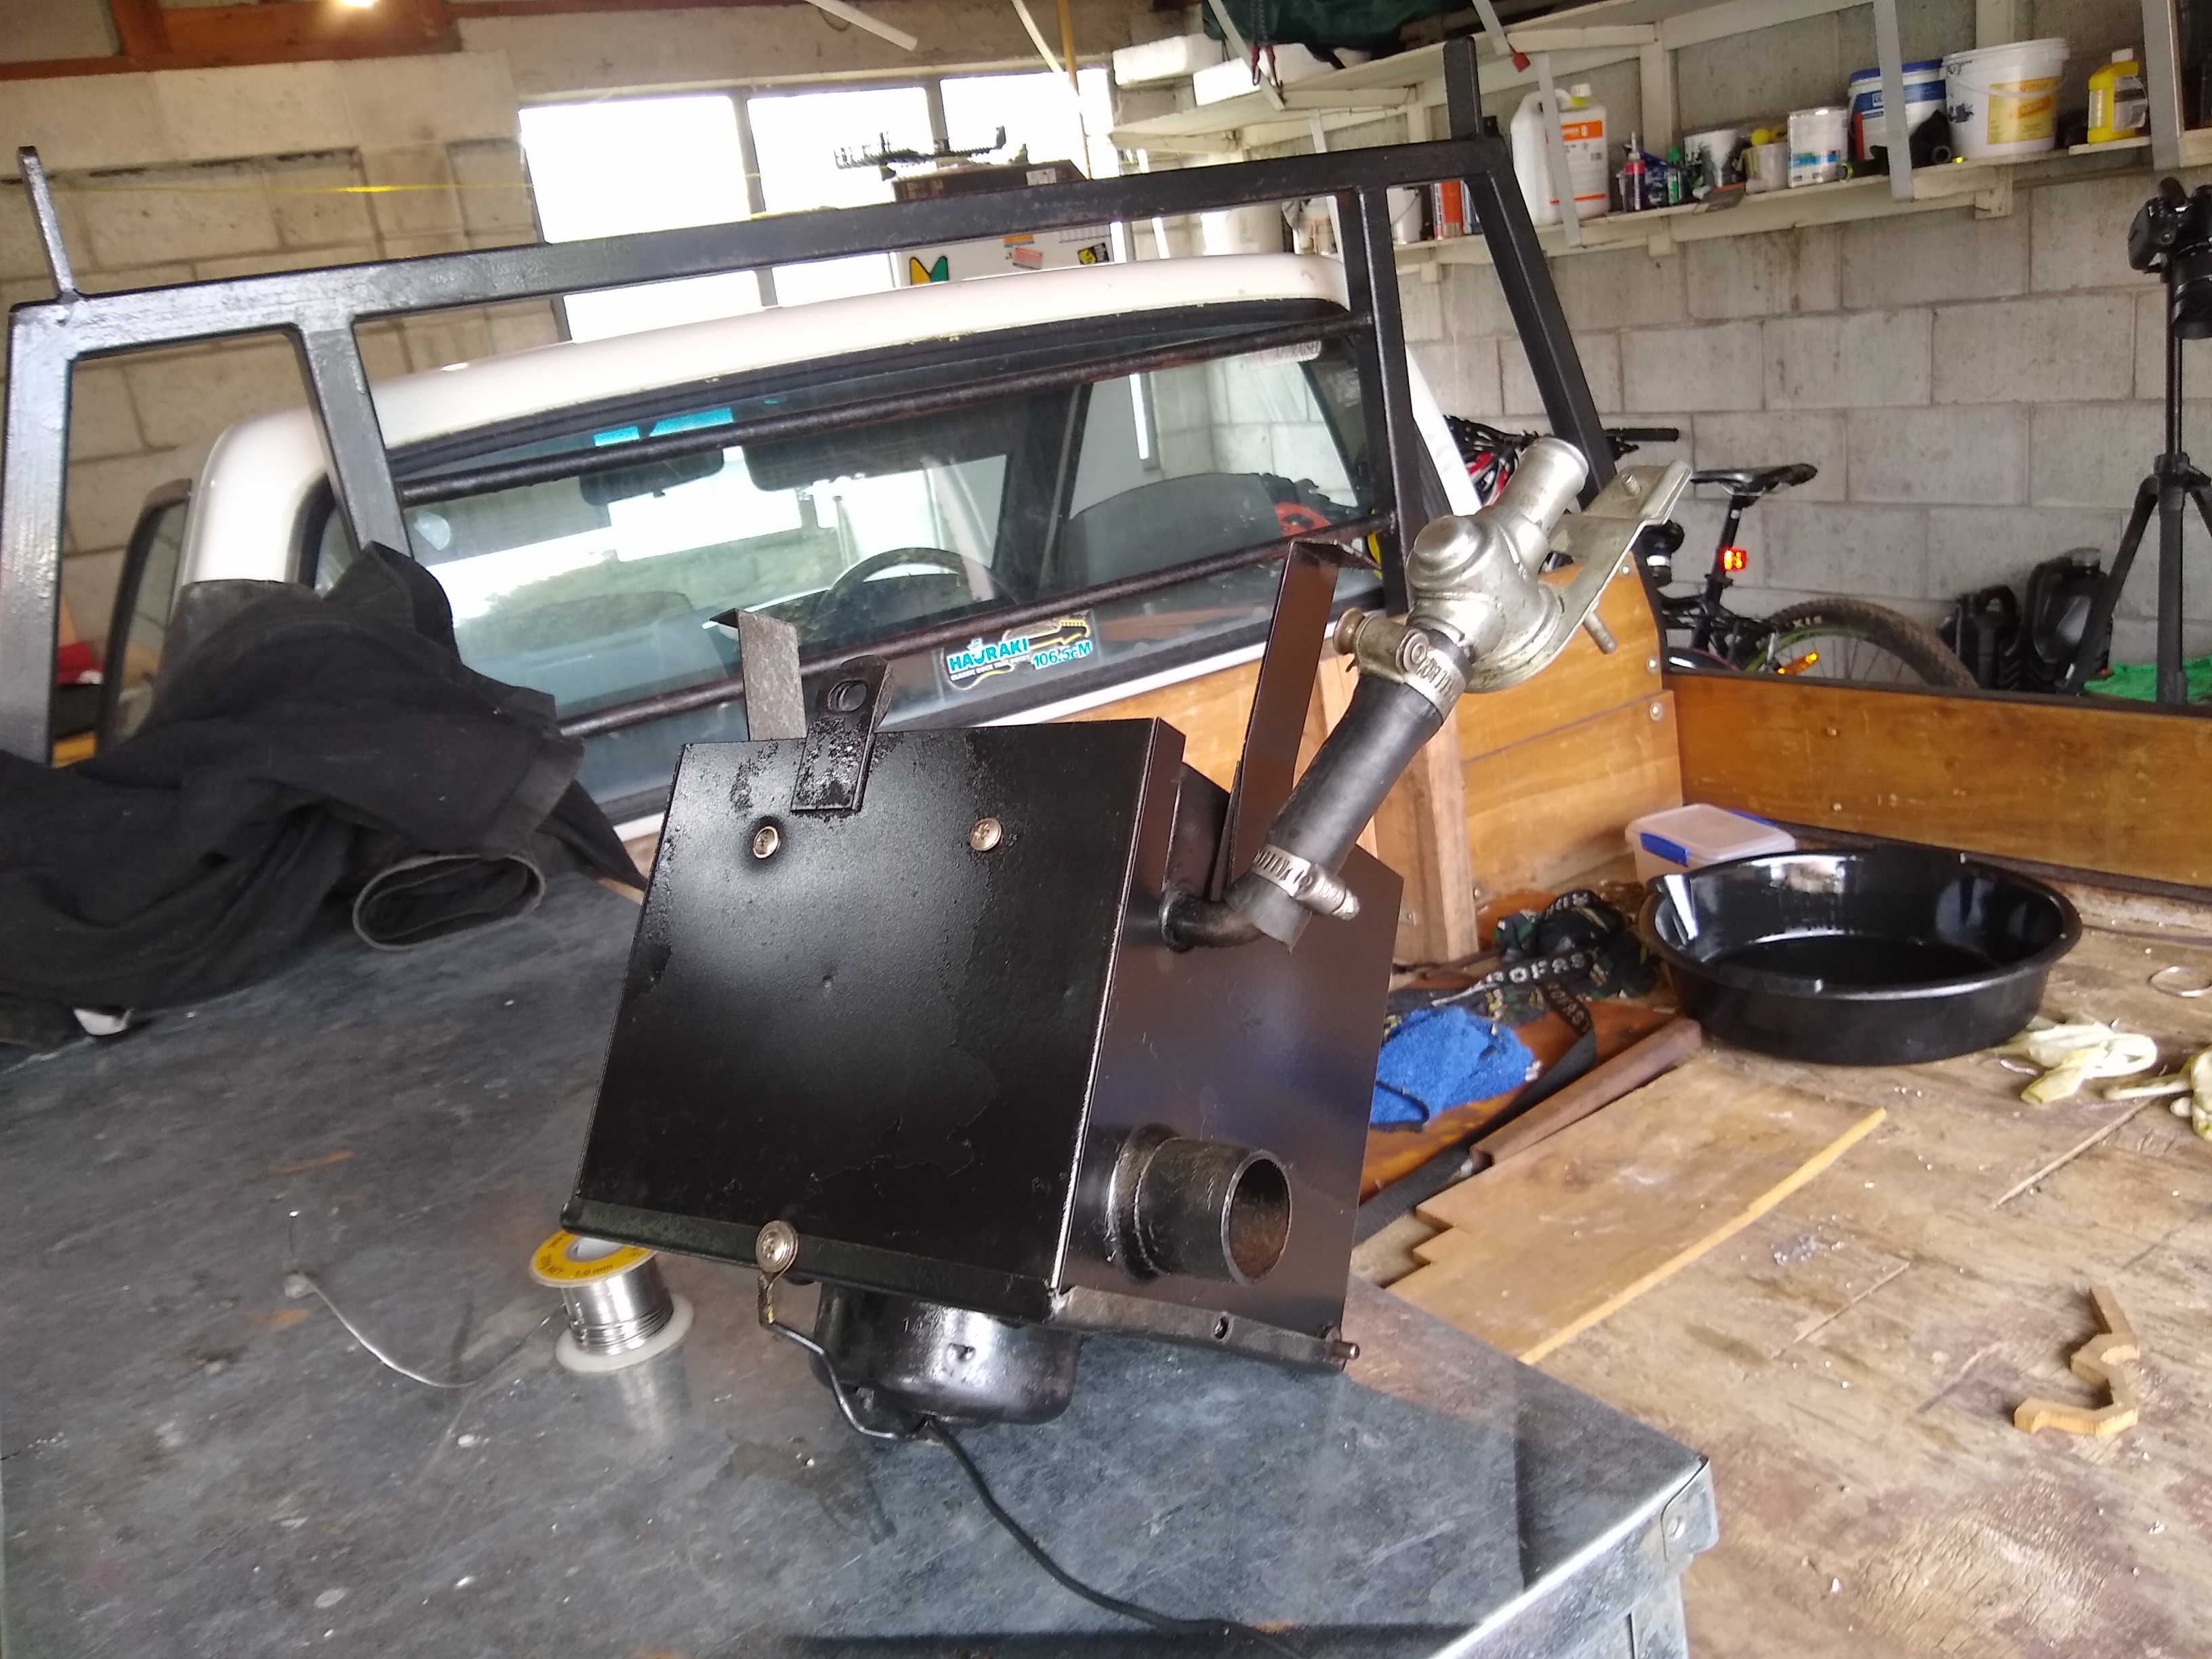
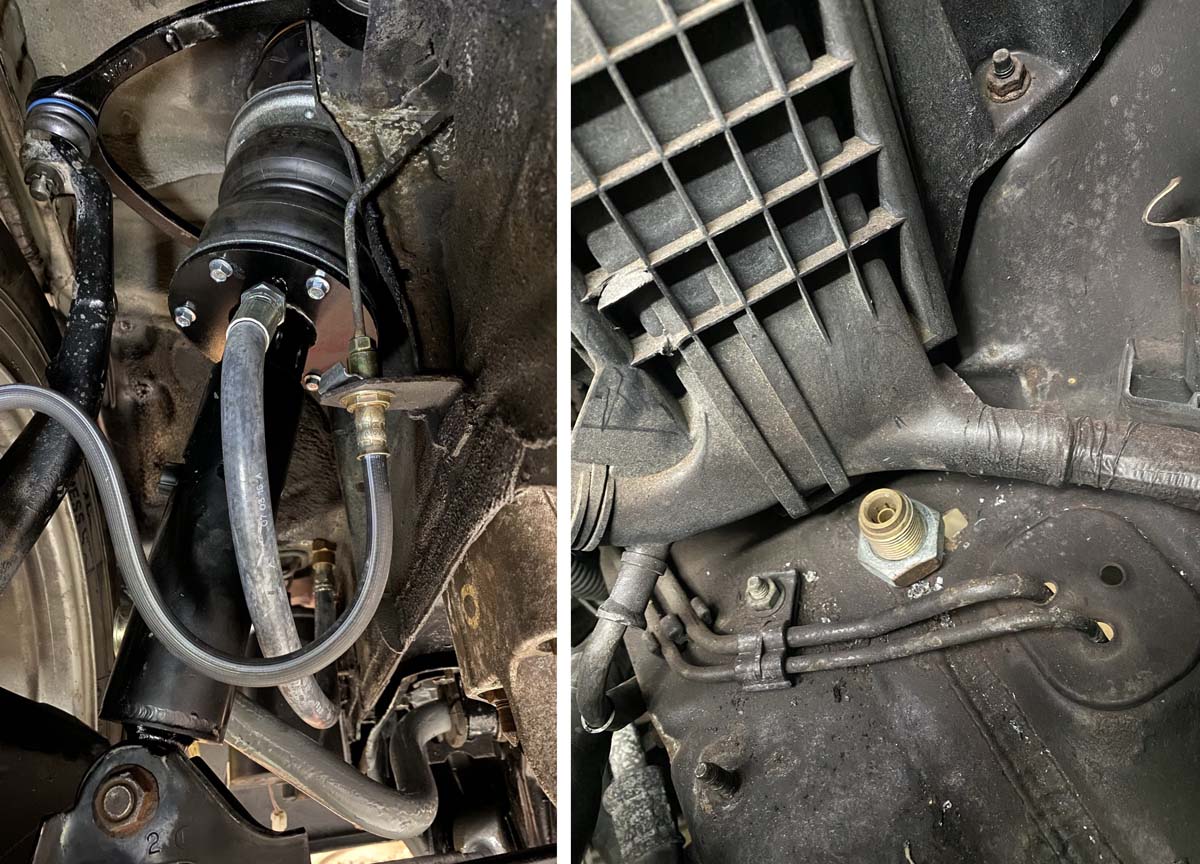
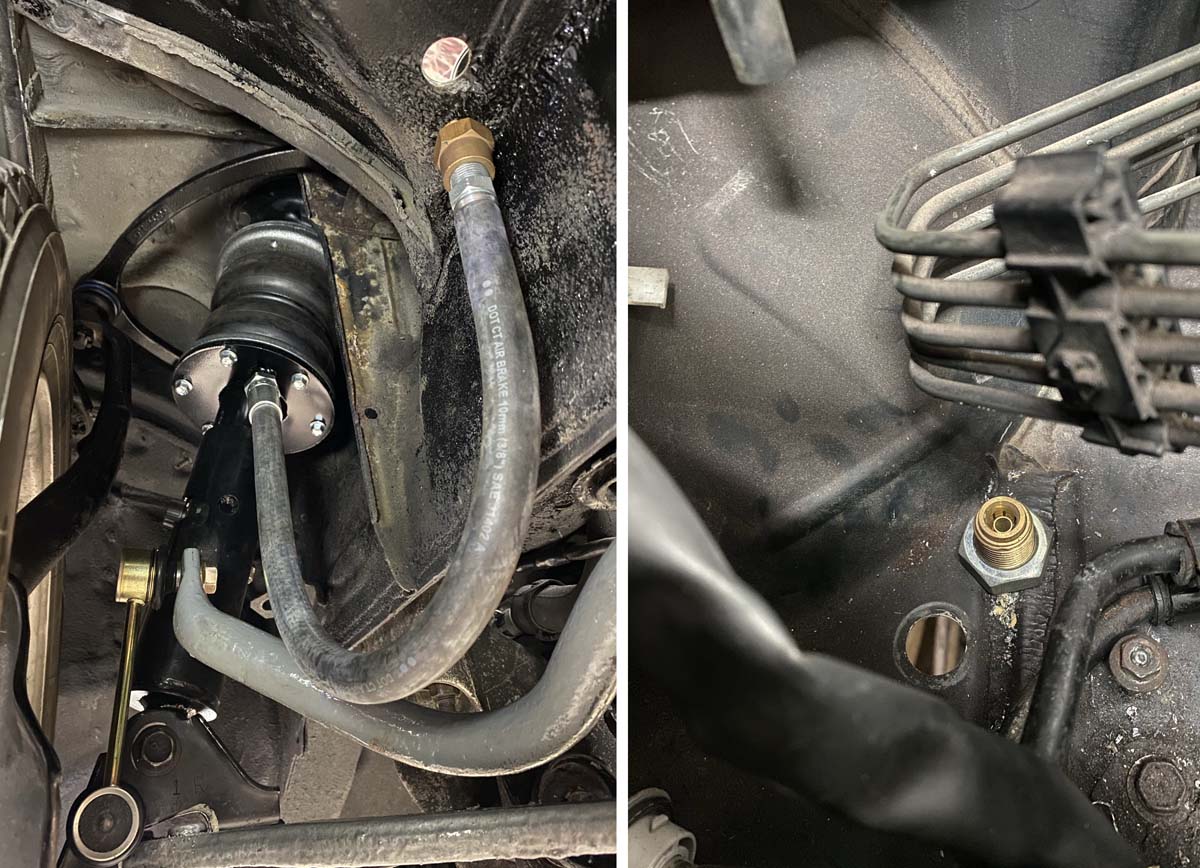
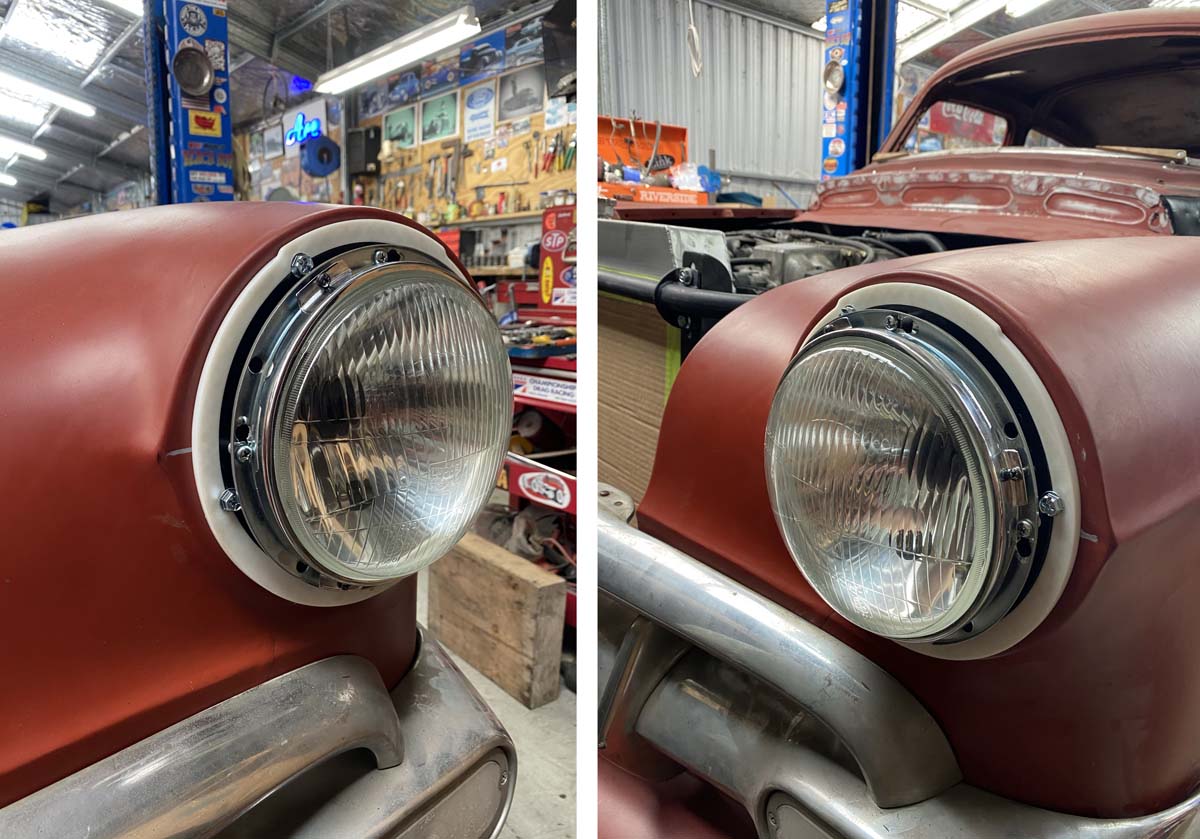
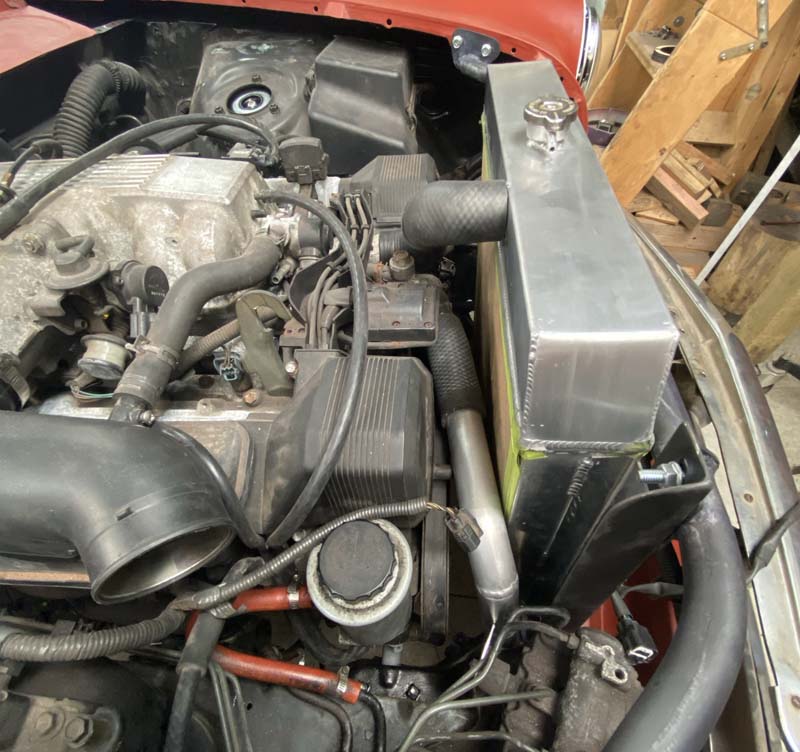
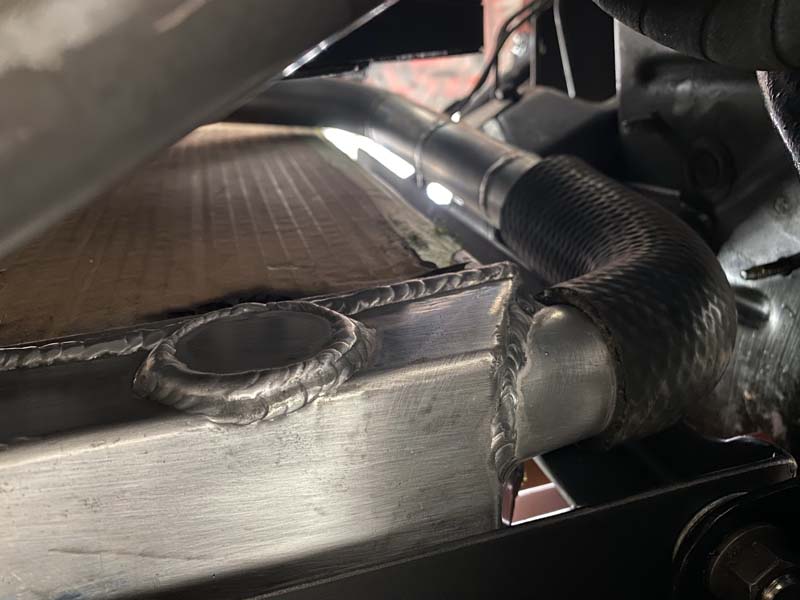
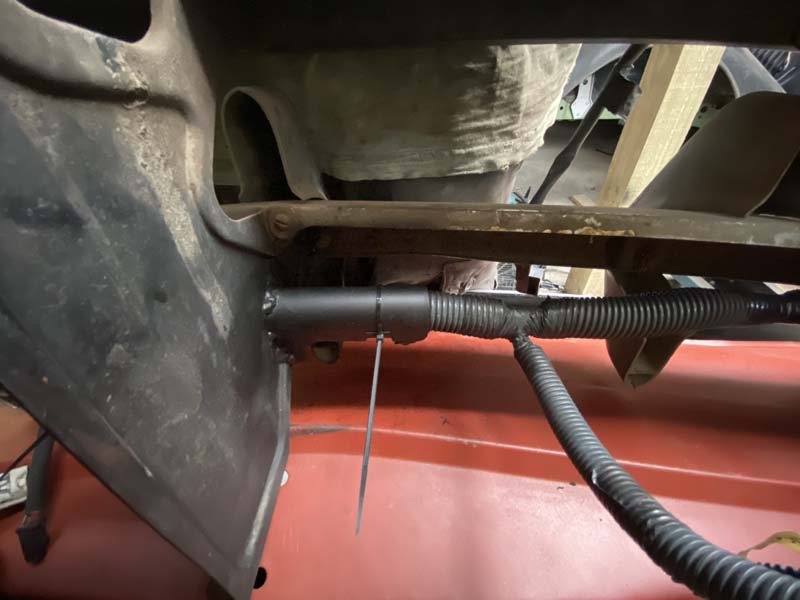
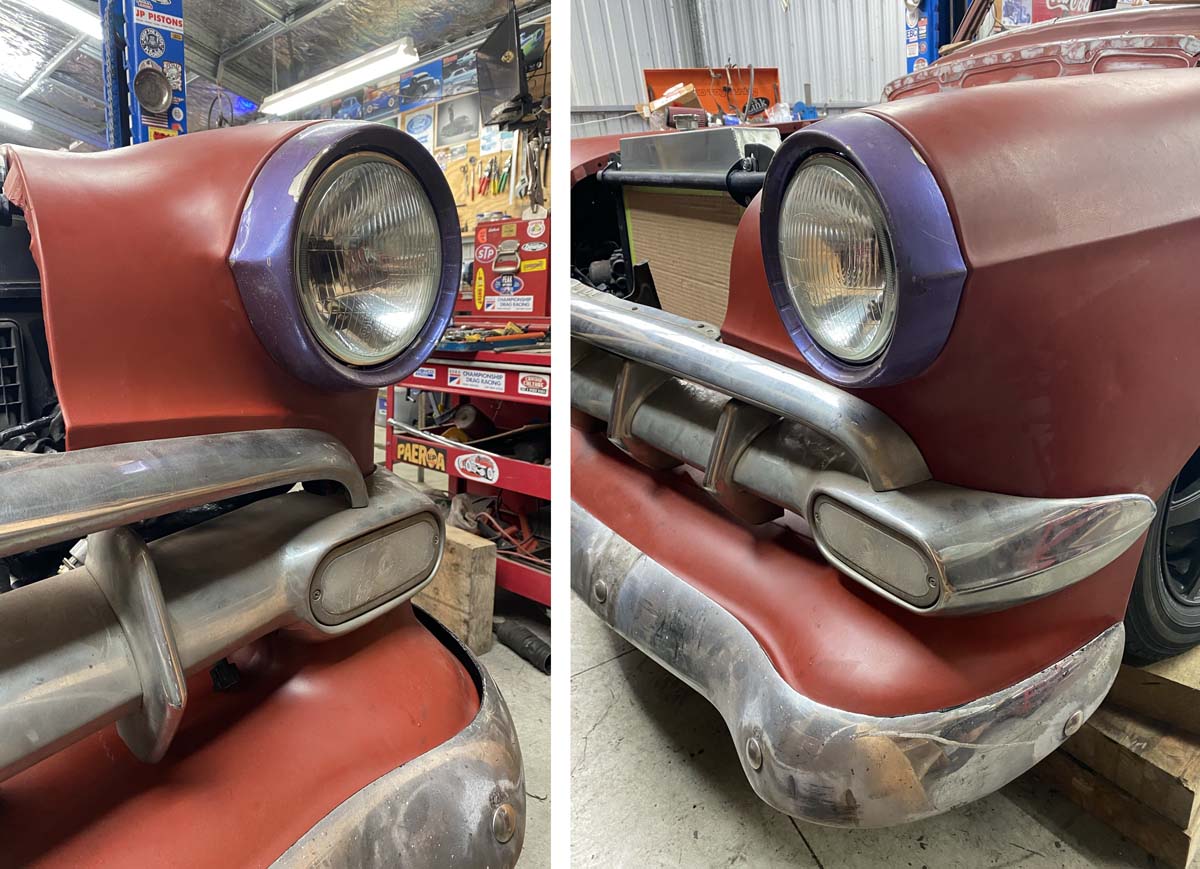
Didn’t have the factory headlight buckets. So brought some Narva plastic universal buckets. They were a little small to fit the screw holes in the guards. And also didn’t accommodate mounting the trim rings. So I 3d printed a couple of adaptors in PLA. Worked well enough for v1. 80s lavender eyeliner trims on. The radiator and hoses are coming together. Seems like it will work. Just a little tight for space. Beneath we relocated the outlet to the side. I Cut a hole in the Grill support bracket, and welded on a "c" shaped tube. So the large lexus loom could be cable tied up behind, and be hidden by the grill. The boss airbags came with some huge 3/8" airbrake hose, with pre crimped ends. They are WAY to long. Almost Twice the length they need to be. So I cut them down. And will add a new barb on the cut end, or a screw on brass air brake fitting, or have a new end crimped on. Unsure yet. This is the Left hand side. Going forward and up through a bulkhead DOT push connect fitting. And this is the Right hand side coming forward and up through the bulkhead. (yes 2nd attempt at position, due to touching tyre.) You may notice the air line passes behind the strut on the left hand side. This is because Boss Suspension decided to make all the struts the same. Not in pairs. Not stoked on this fact. My OCD likes symmetry.
1 point
-
1985 complete 1987 complete less brakes 2008 - complete (this one) parts 2003 - stripped and half sold off, some went on the 87 4 additional 1980s frames aboout 6 sets of forks 3 front wheels 3 small bins of misc parts and a dr2501 point
-
Now on stands.
1 point
-
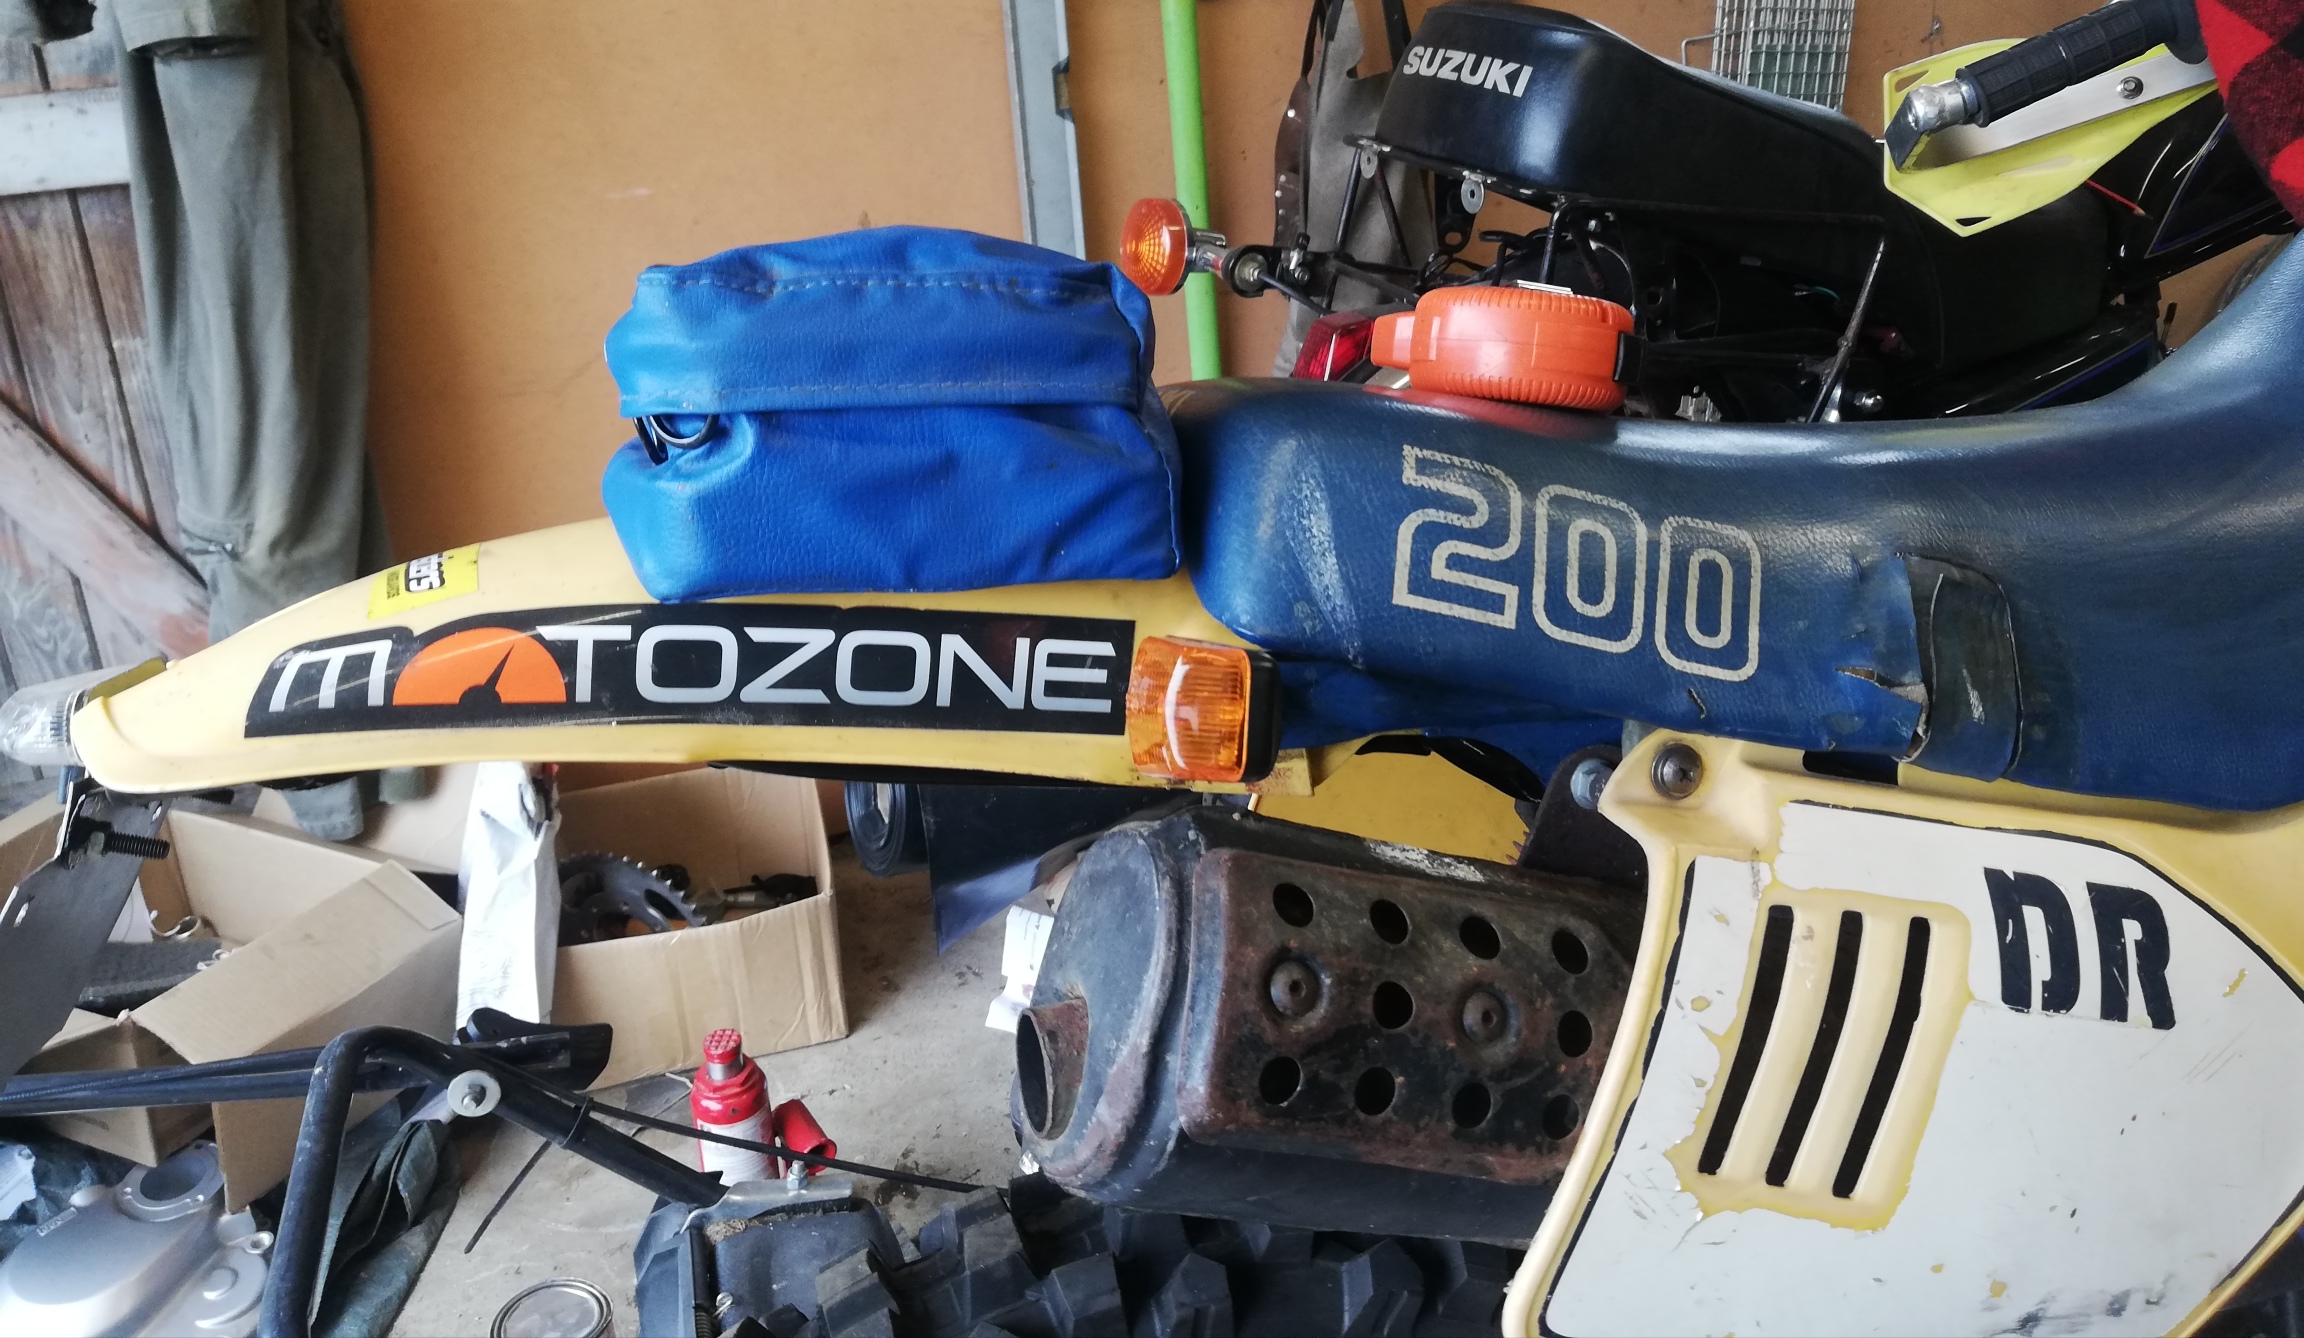
Been looking for one of these tail bags. Found a place in Bolivia of all places making them, and a bigger version. But then this one came up locally, and it's new old stock, doesn't seem to have ever been fitted.
1 point
-
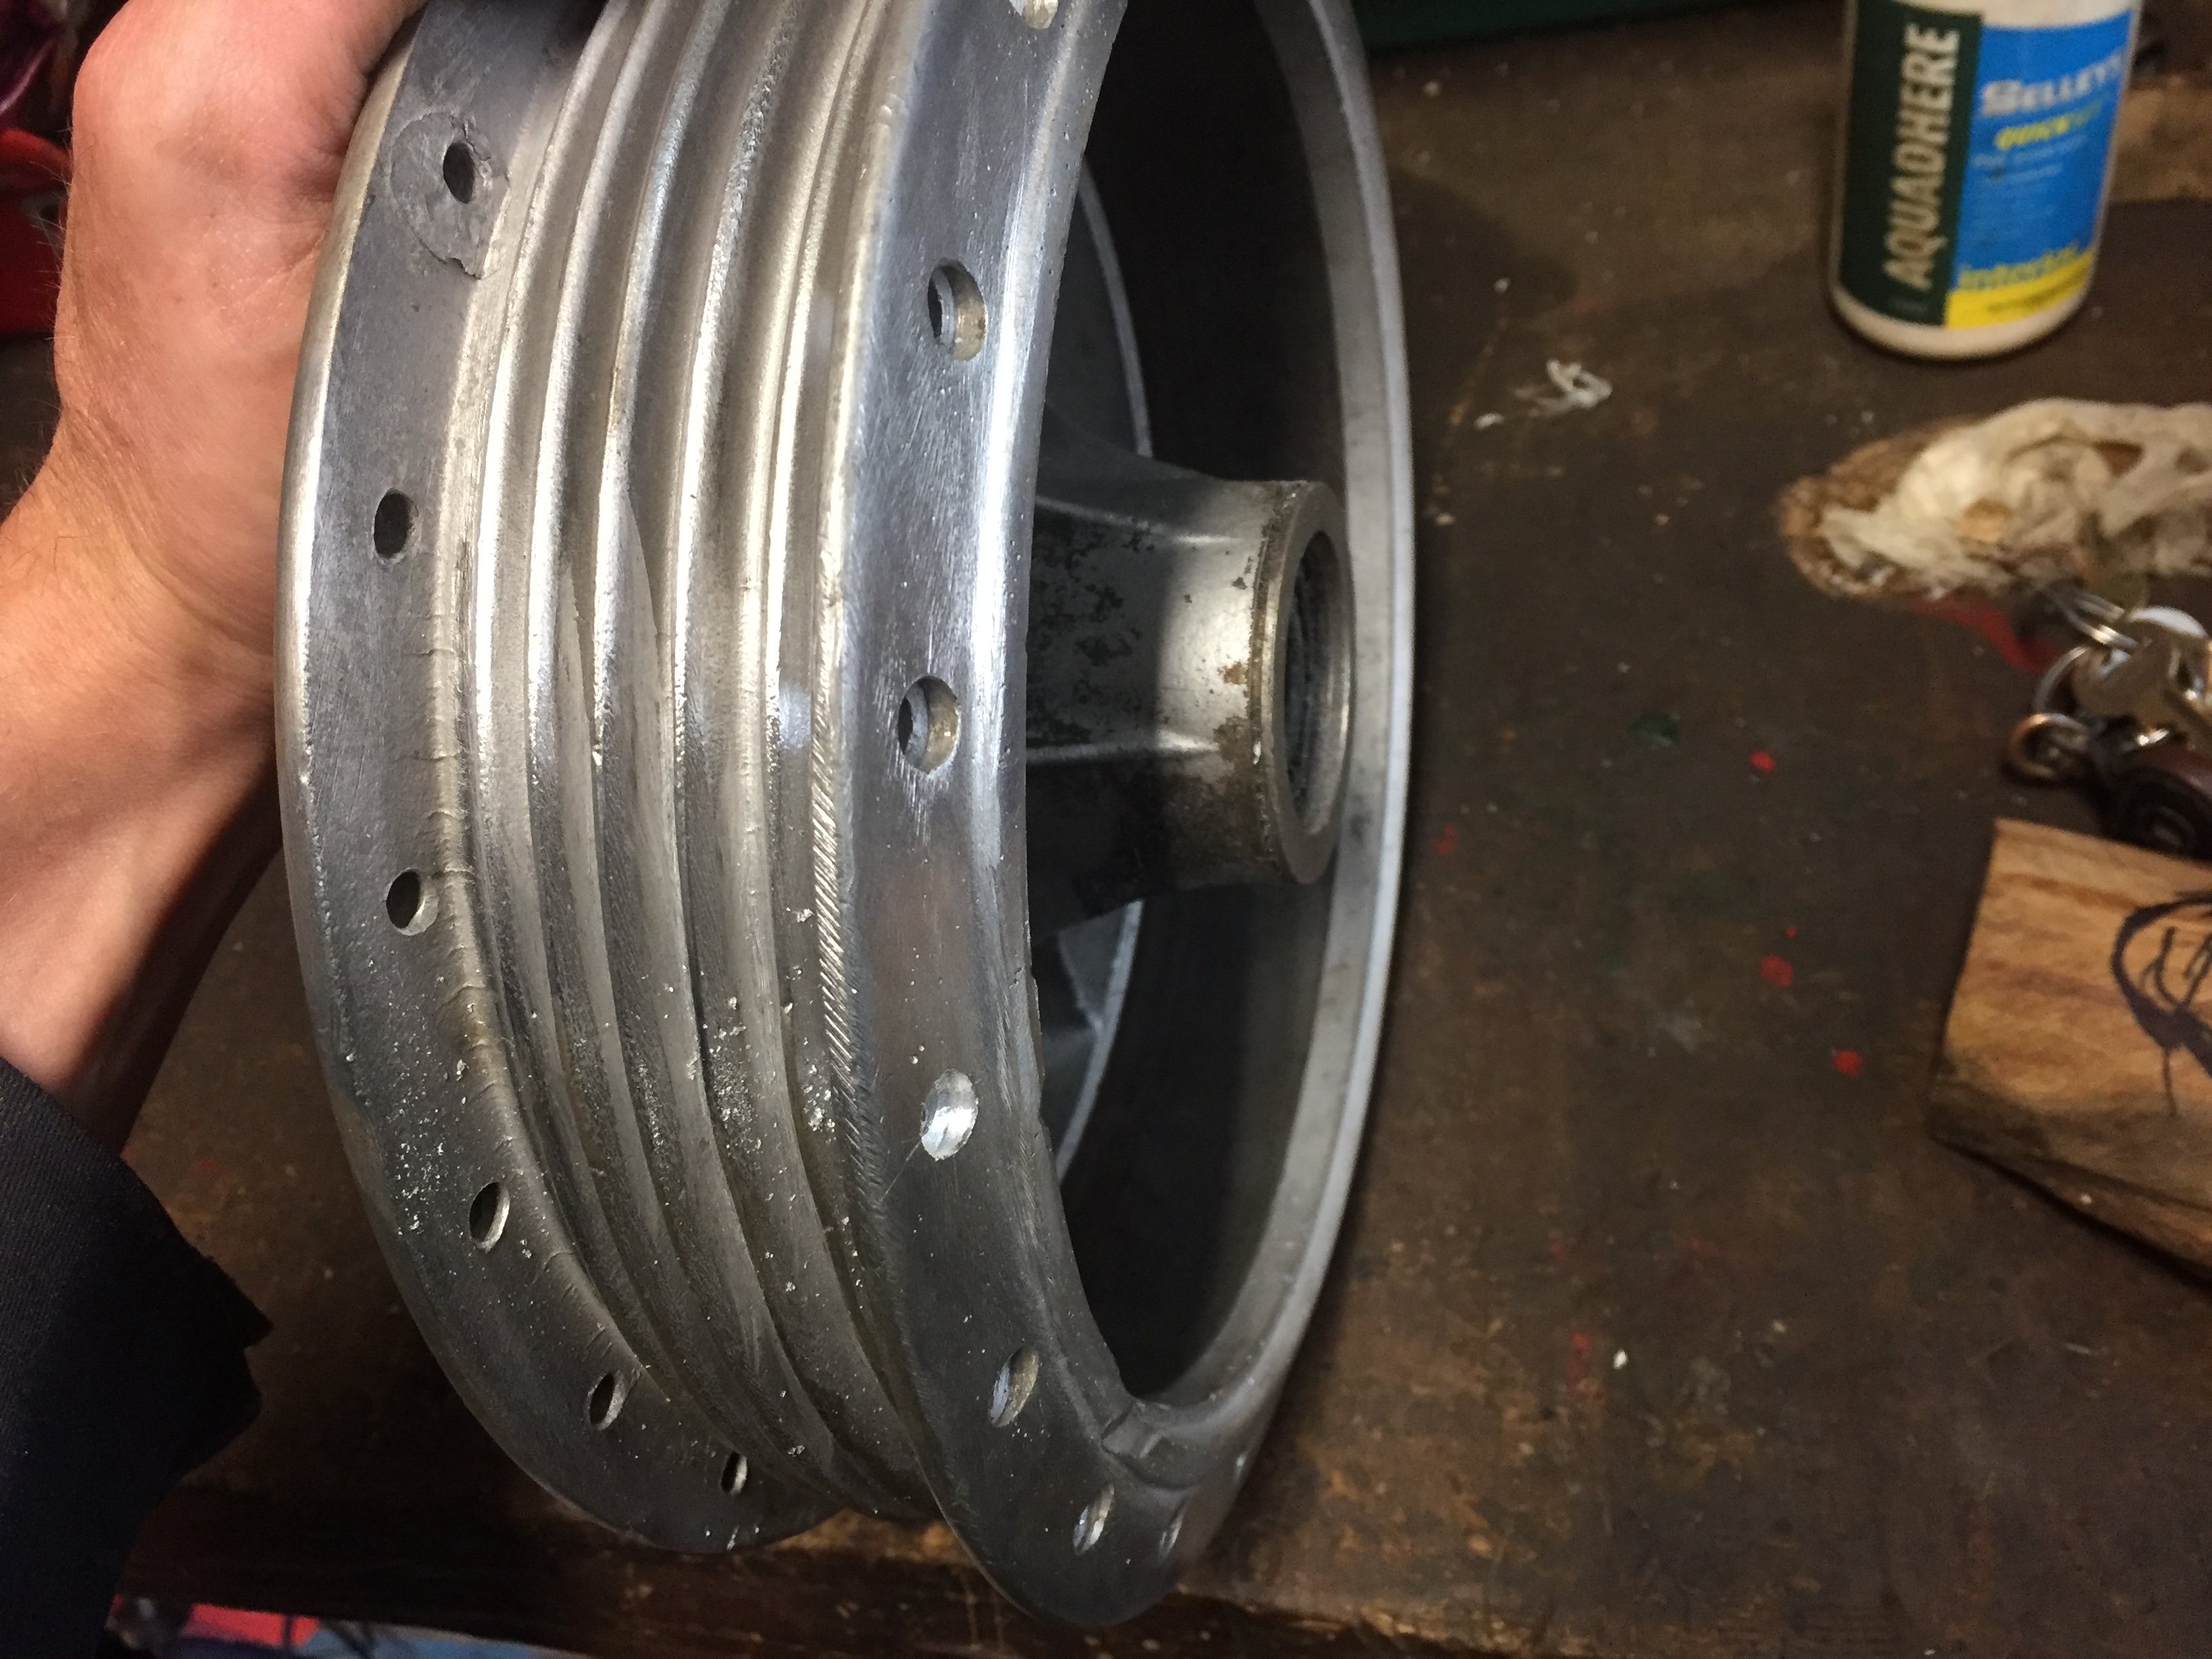
Hub has been welded and I ground down the welds and re drilled the spoke hole.
1 point
-
Noticed the upper triple clamp was hitting the tank when turned all the way left. Starting to leave a mark on the tank and it would suck to bust a nla plastic tank (but I looked into it and I'm pretty sure I could fit an aftermarket dr350 safari long range tank) (or a steel dr200 tank with some mods to the front mounts but that's lame). The stop on the frame was a little bent up at the front, hammering that back down helped a little but still hitting. So welded a bead on it, now it's perfect Tail light is nice and bright, really happy with how that came together
1 point
-
its uncanny, that guy in the video looks just like you.1 point
-
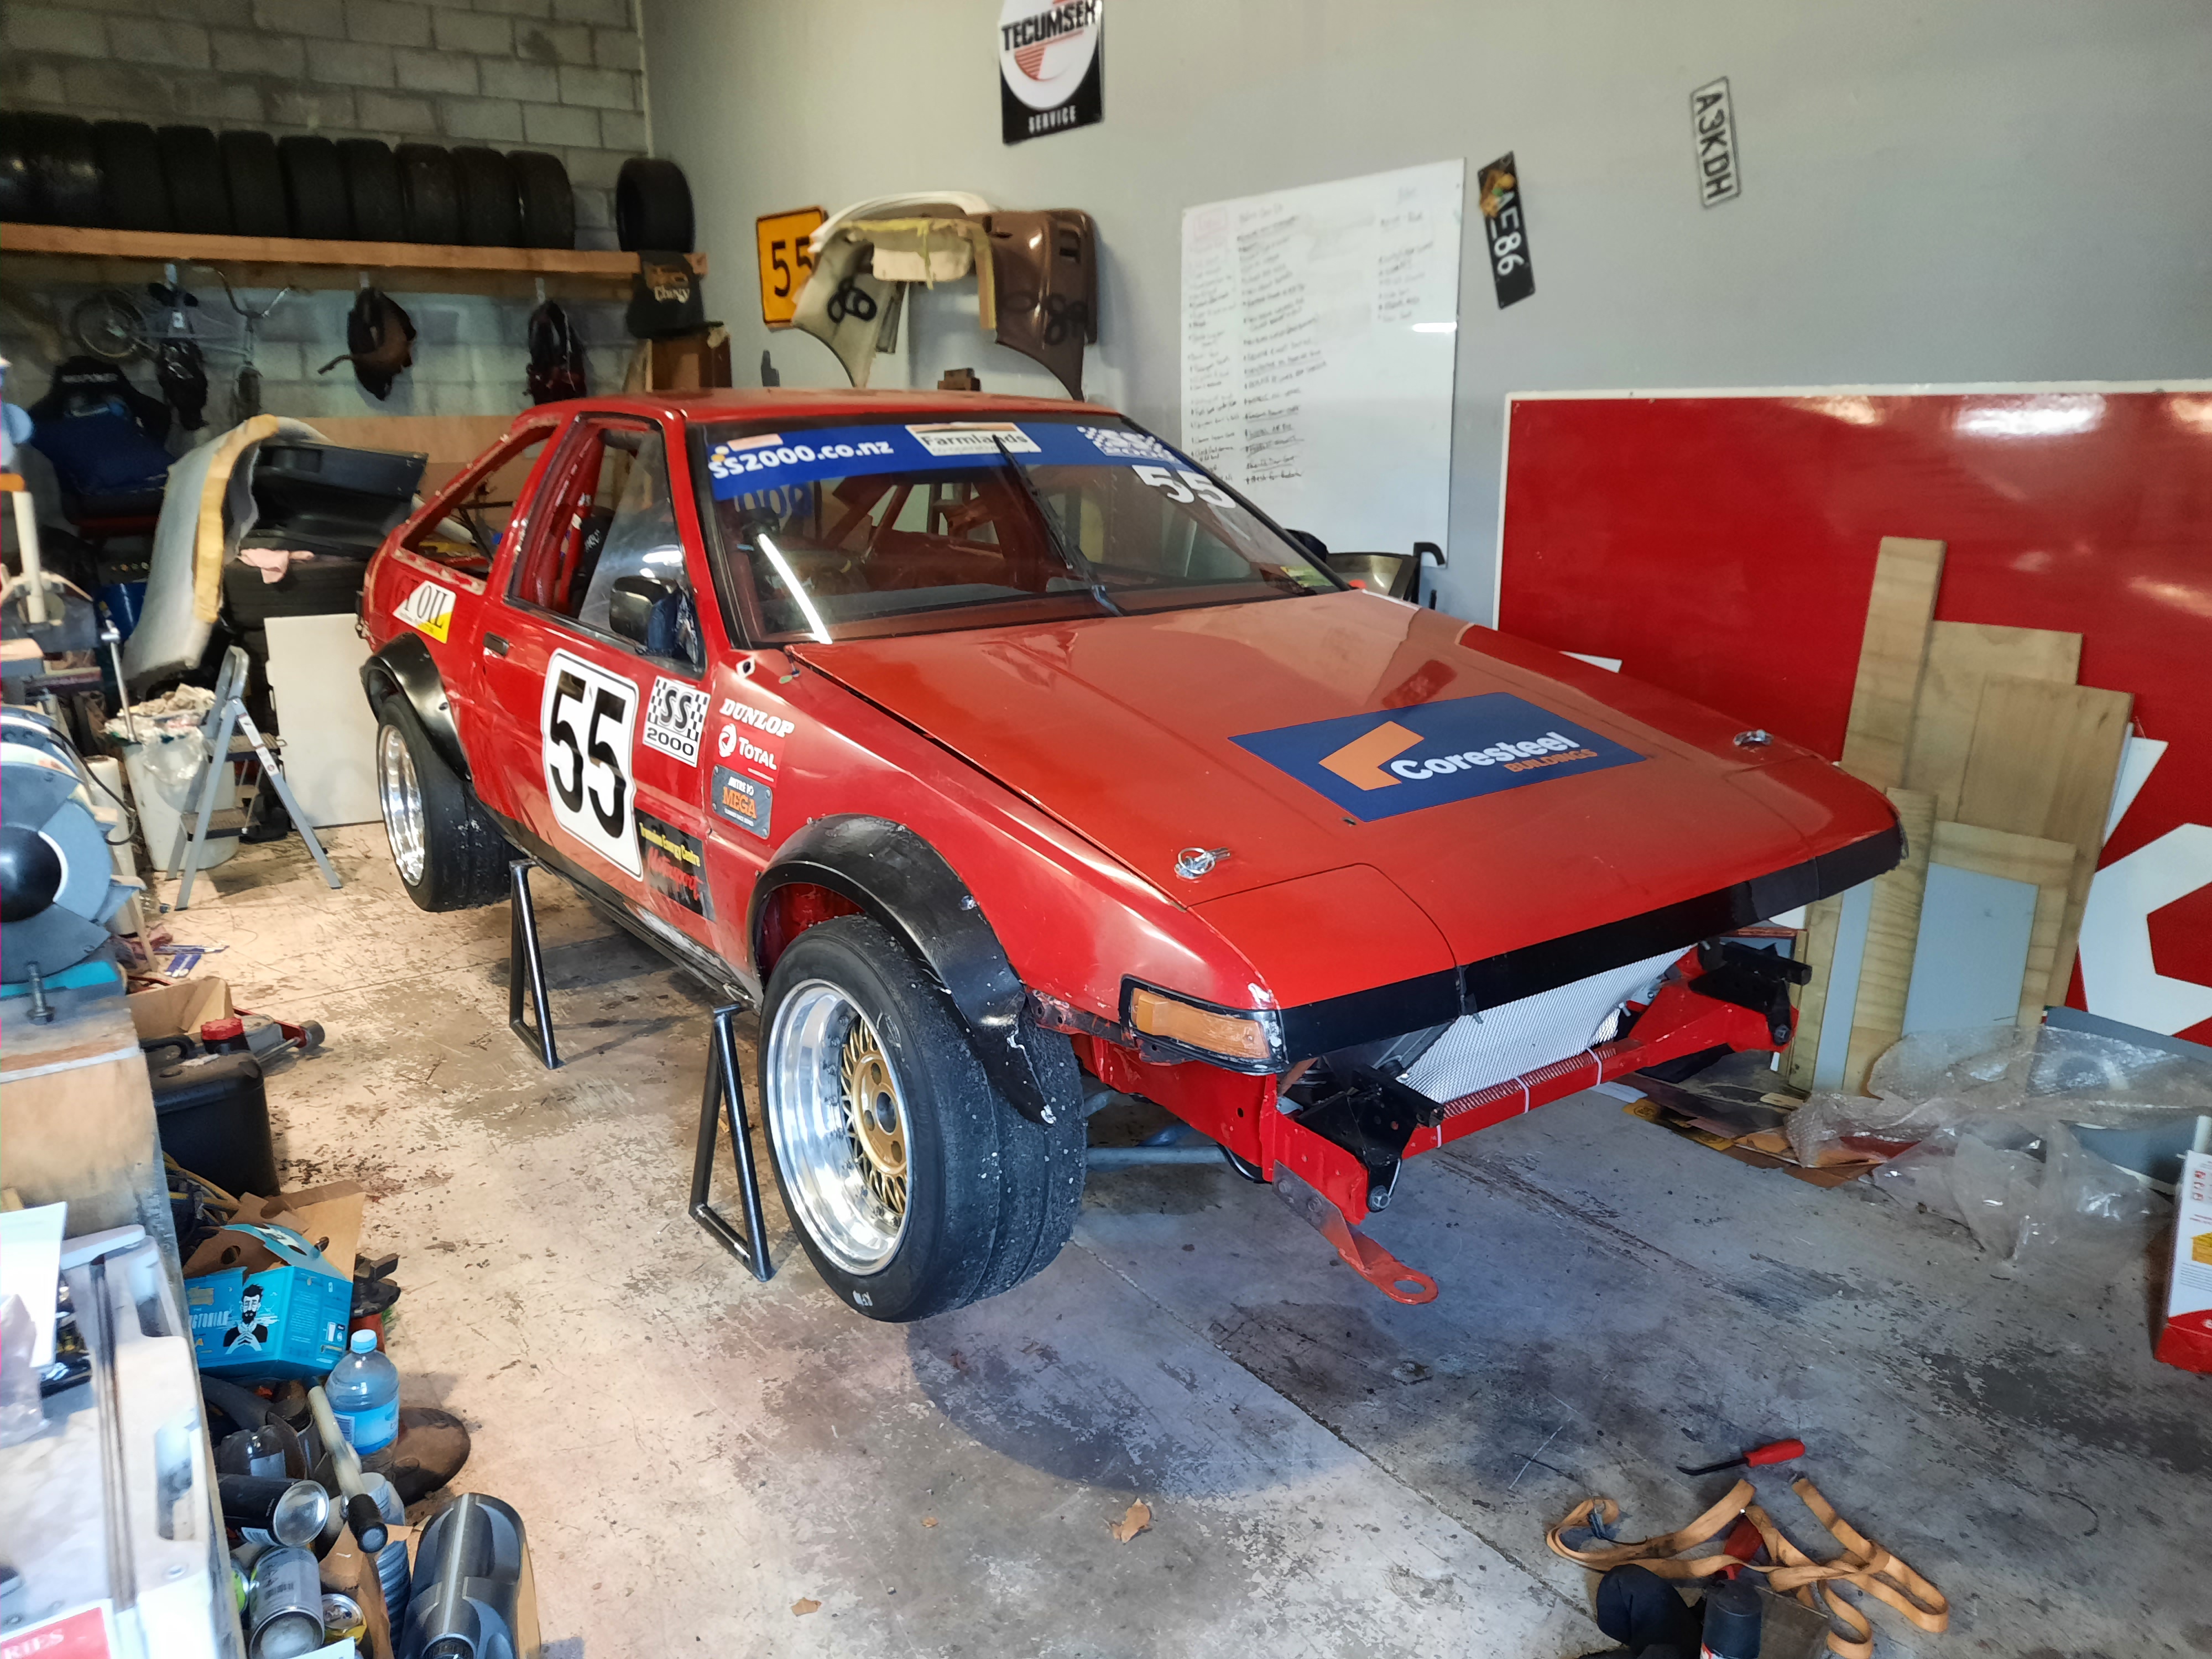
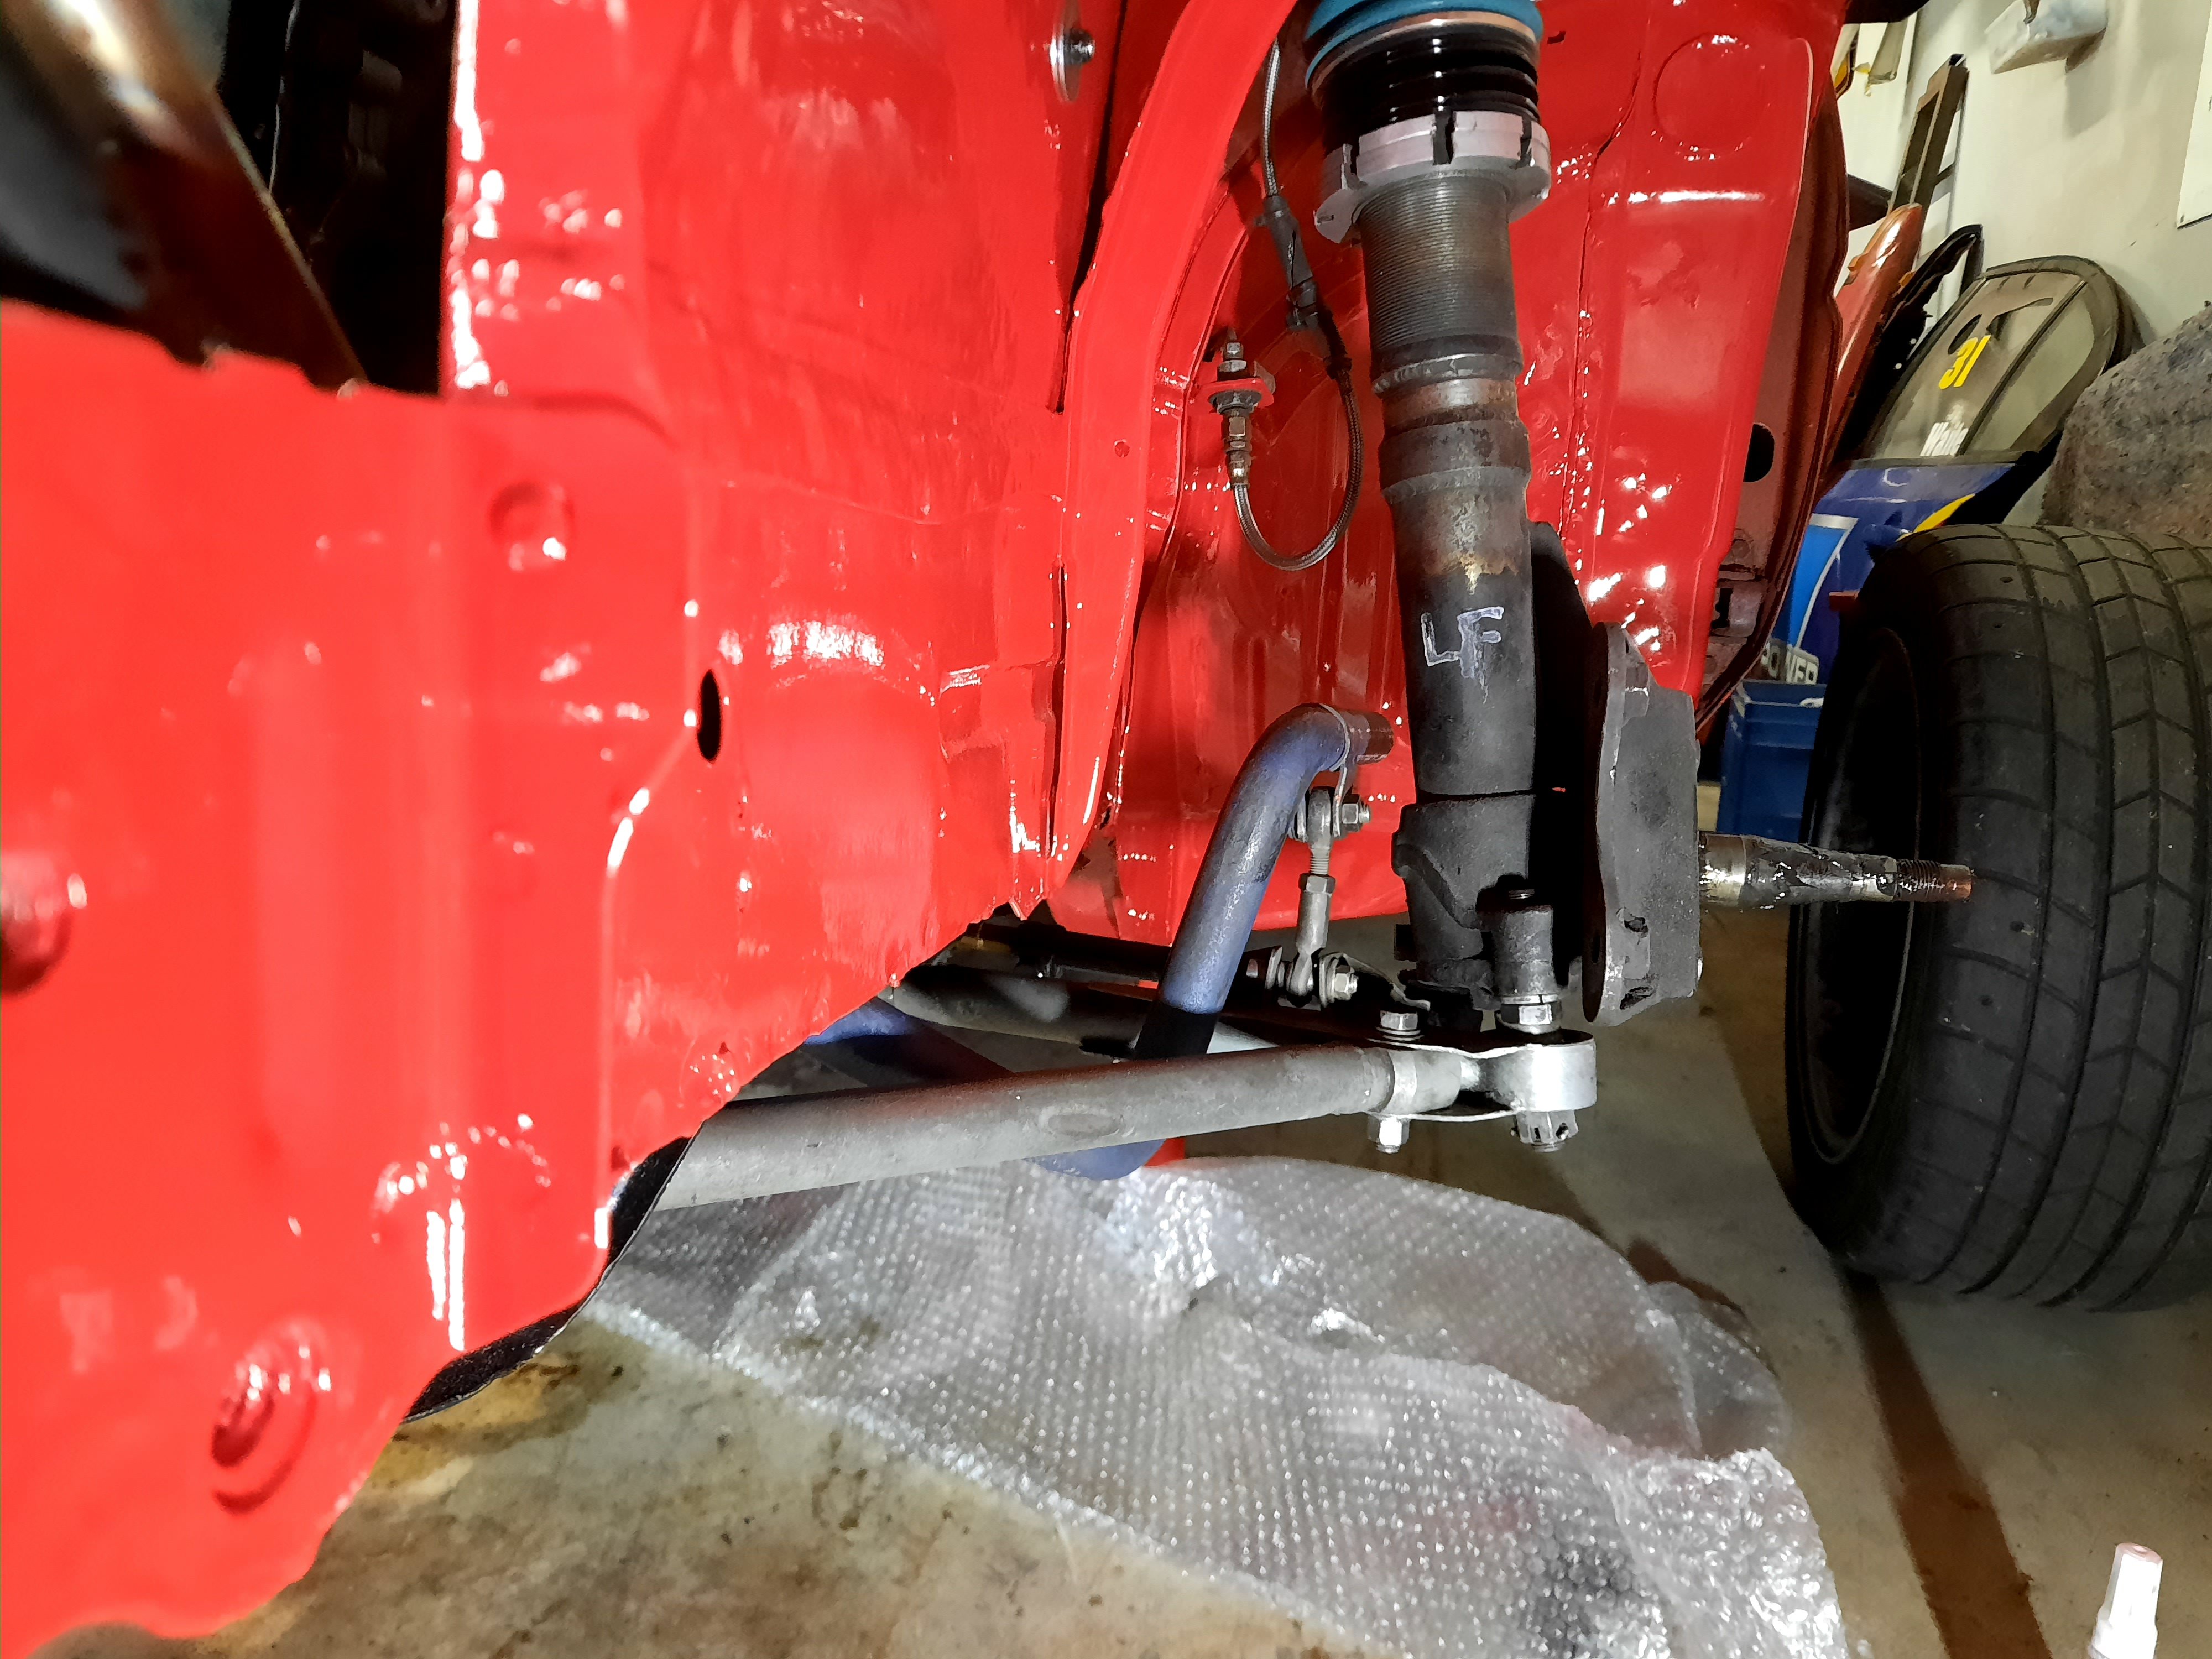
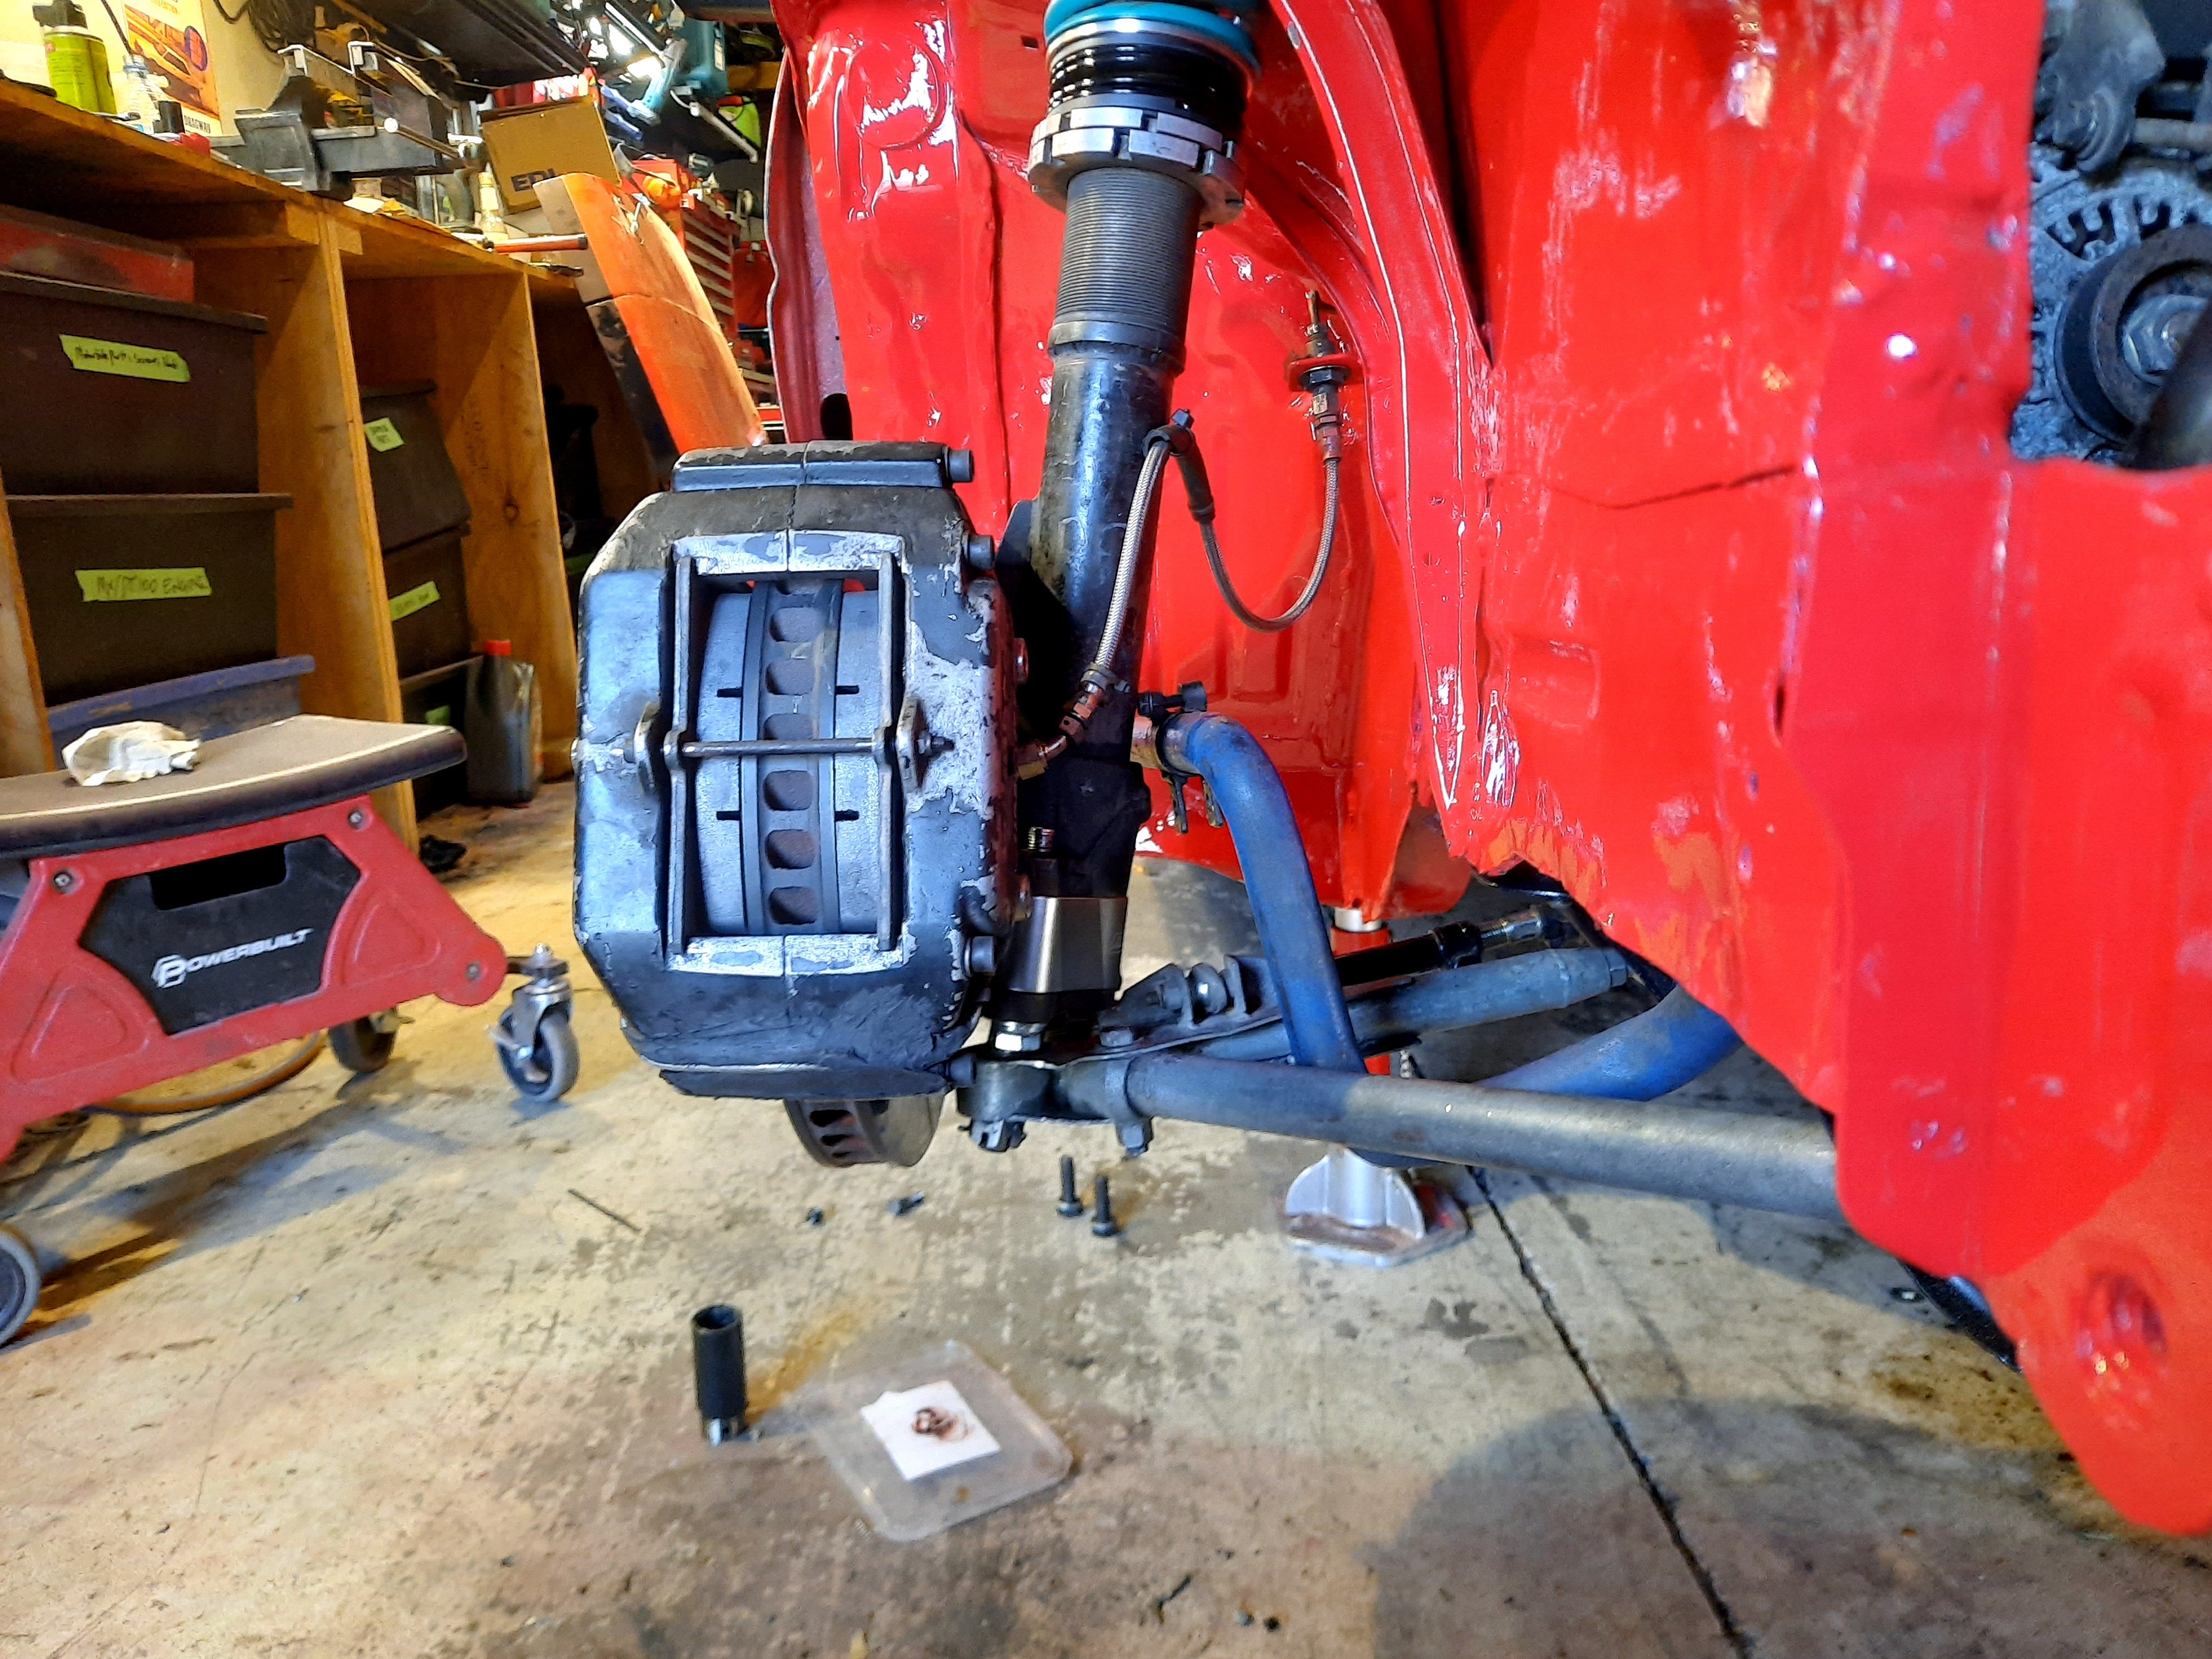
Ticked off a few more jobs in the last couple of days. My new RCAs, caliper brackets and rotor hats arrived from MRP late last week, so I spent a couple of evenings fitting everything. Old setup - the arms were basically level at full droop (not what you want). New setup - this is much better, but I could possibly go even bigger with the roll centre adjusters. These are 38mm. You can also see the old vs new calliper brackets in these photos. With the caliper installed: Popped it on the trailer and took for an alignment: Pumped the lower lower arms out by a decent amount. Ended up with about 3.5° camber, 6.75° castor and 3mm toe out in the front. Also squared up the diff while I was under there. The extra track width looks tough from this angle. Hopefully it works well too!
1 point


_sedan_(23230030334)(1).thumb.jpg.34d765361d66c78db614bae6ea2c156a.jpg)


This leaderboard is set to Auckland/GMT+12:00