
Leaderboard


Popular Content
Showing content with the highest reputation on 01/04/21 in all areas
-
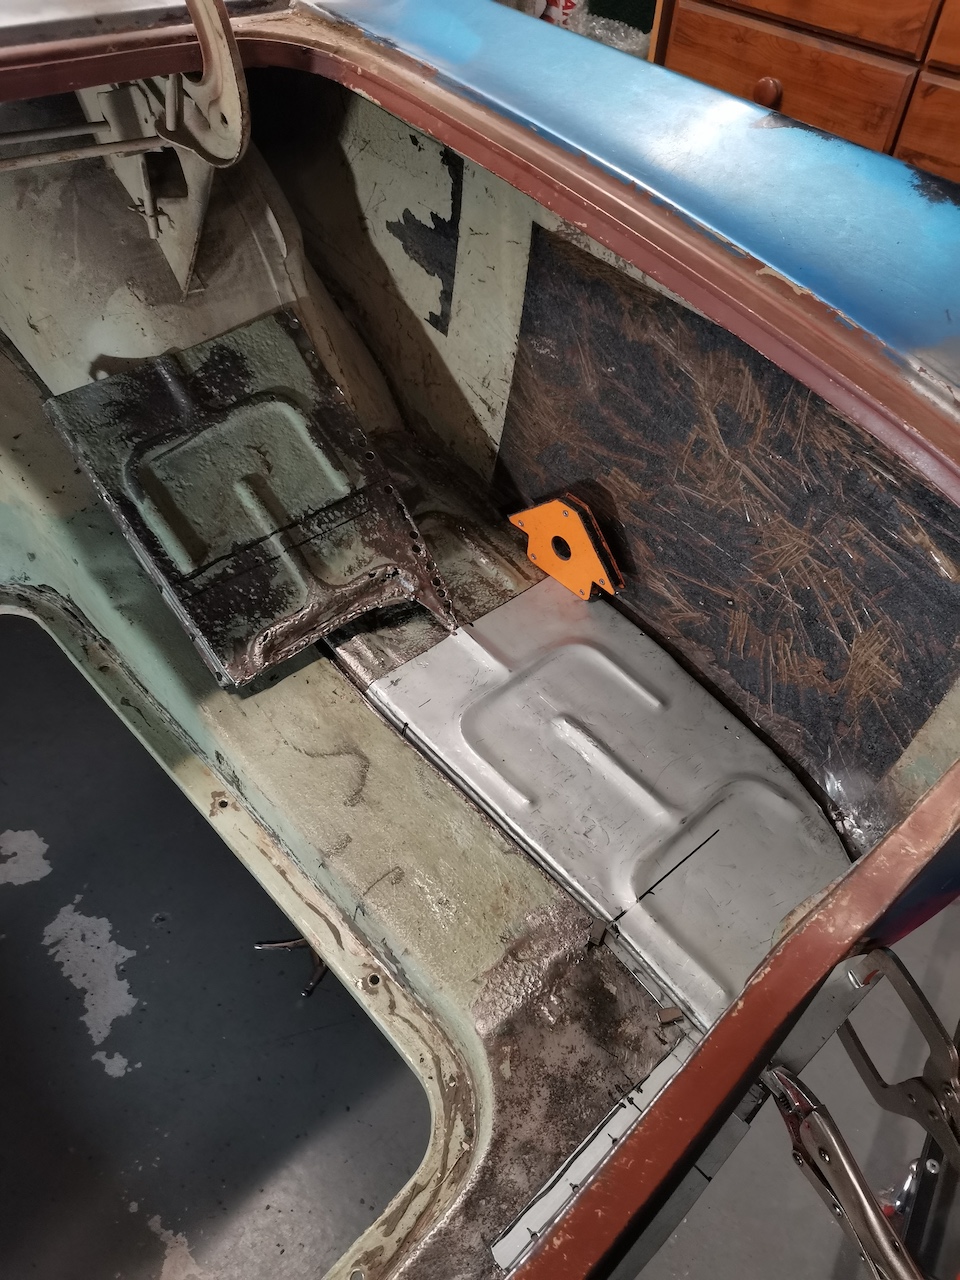
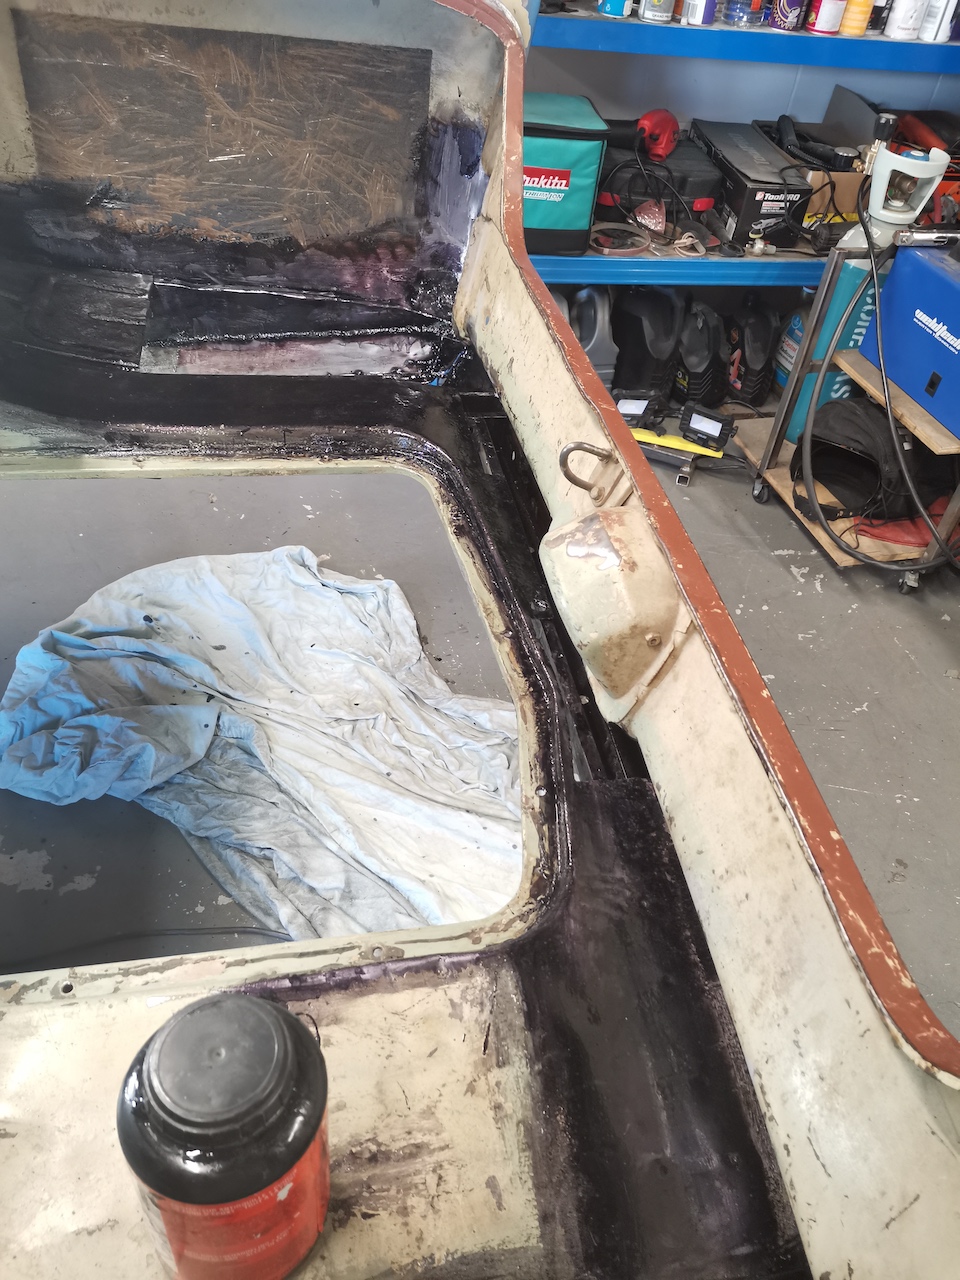
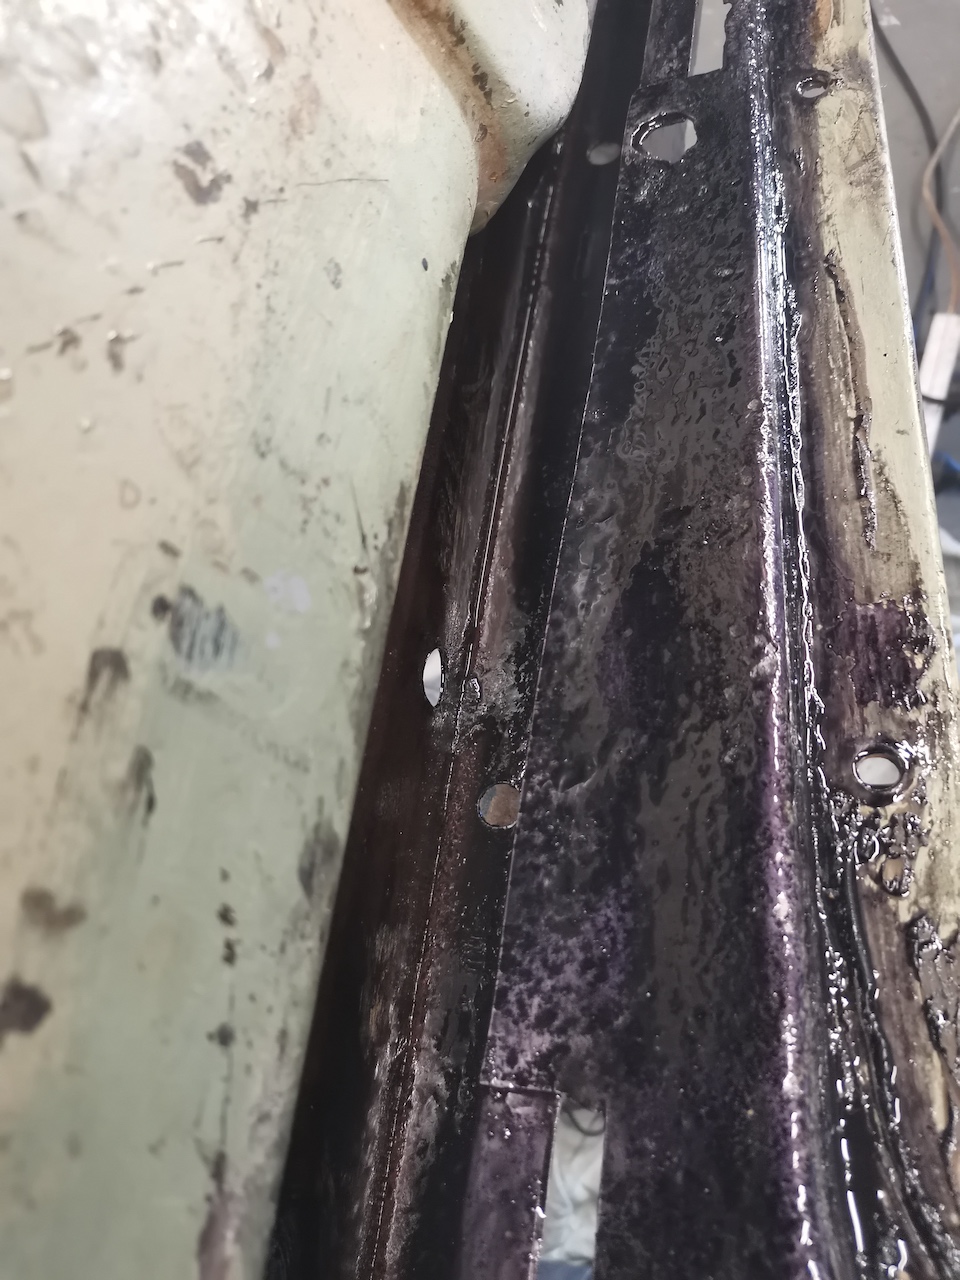
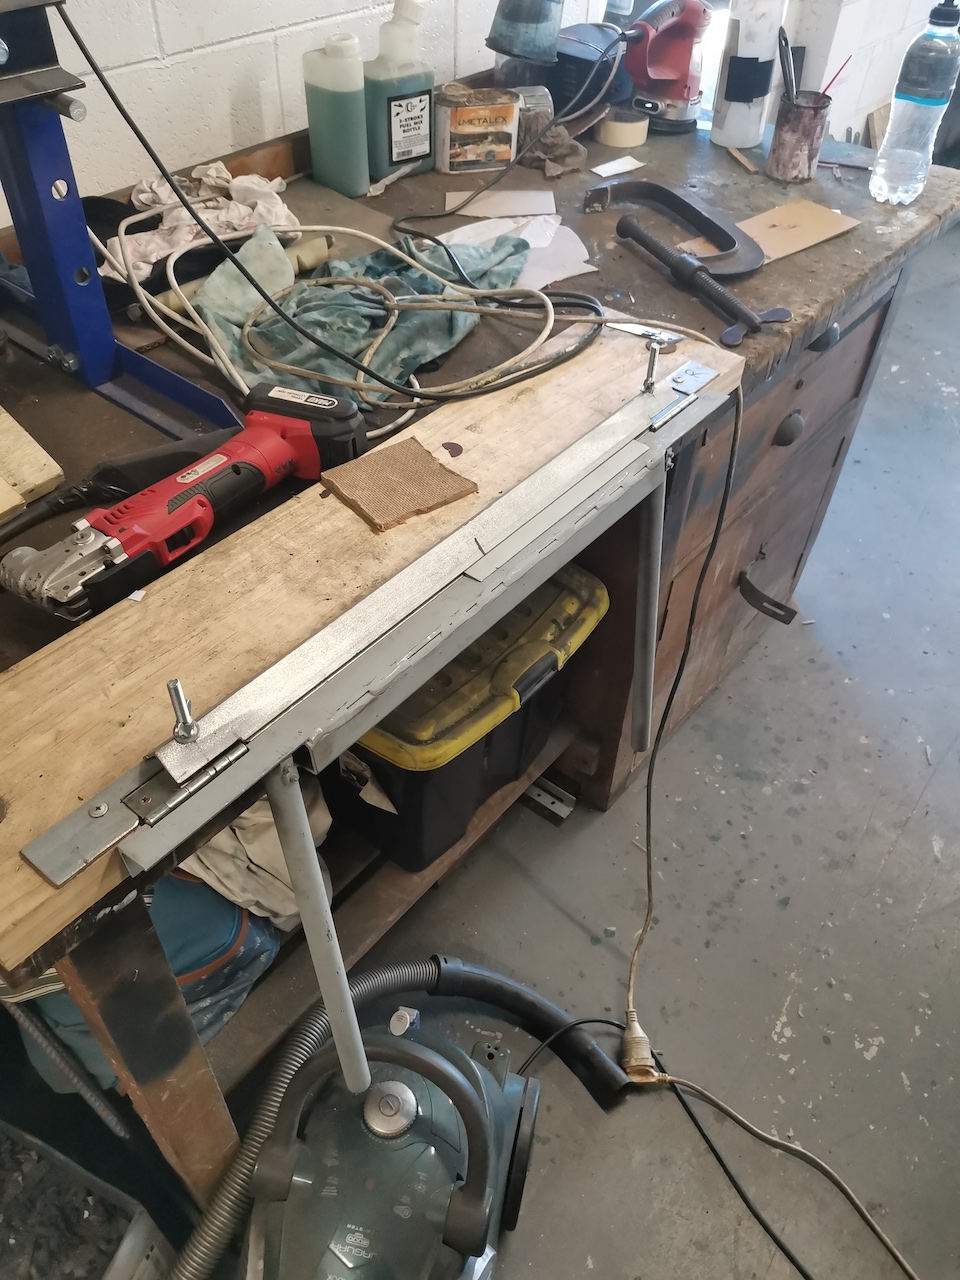
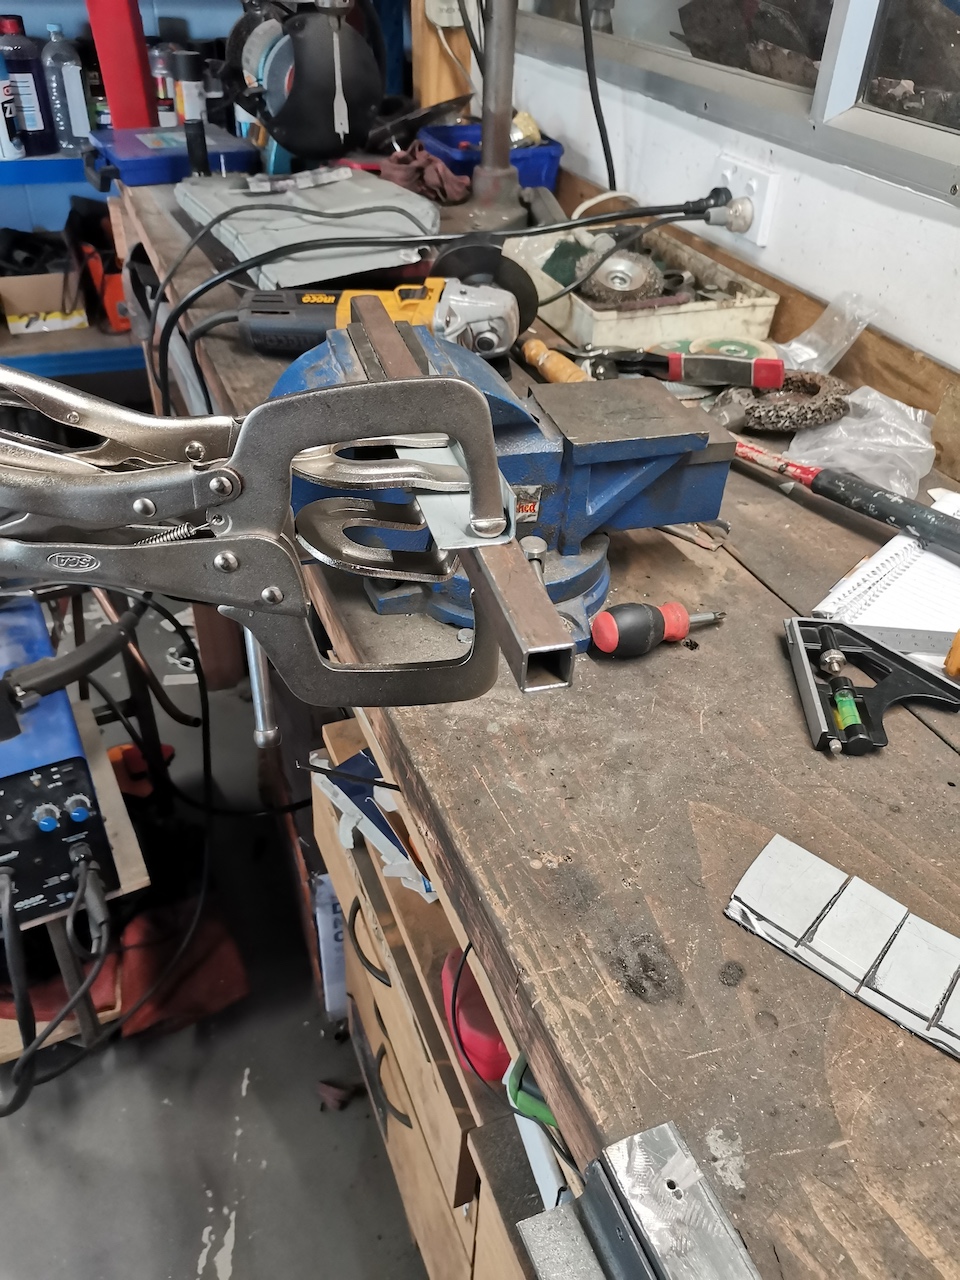
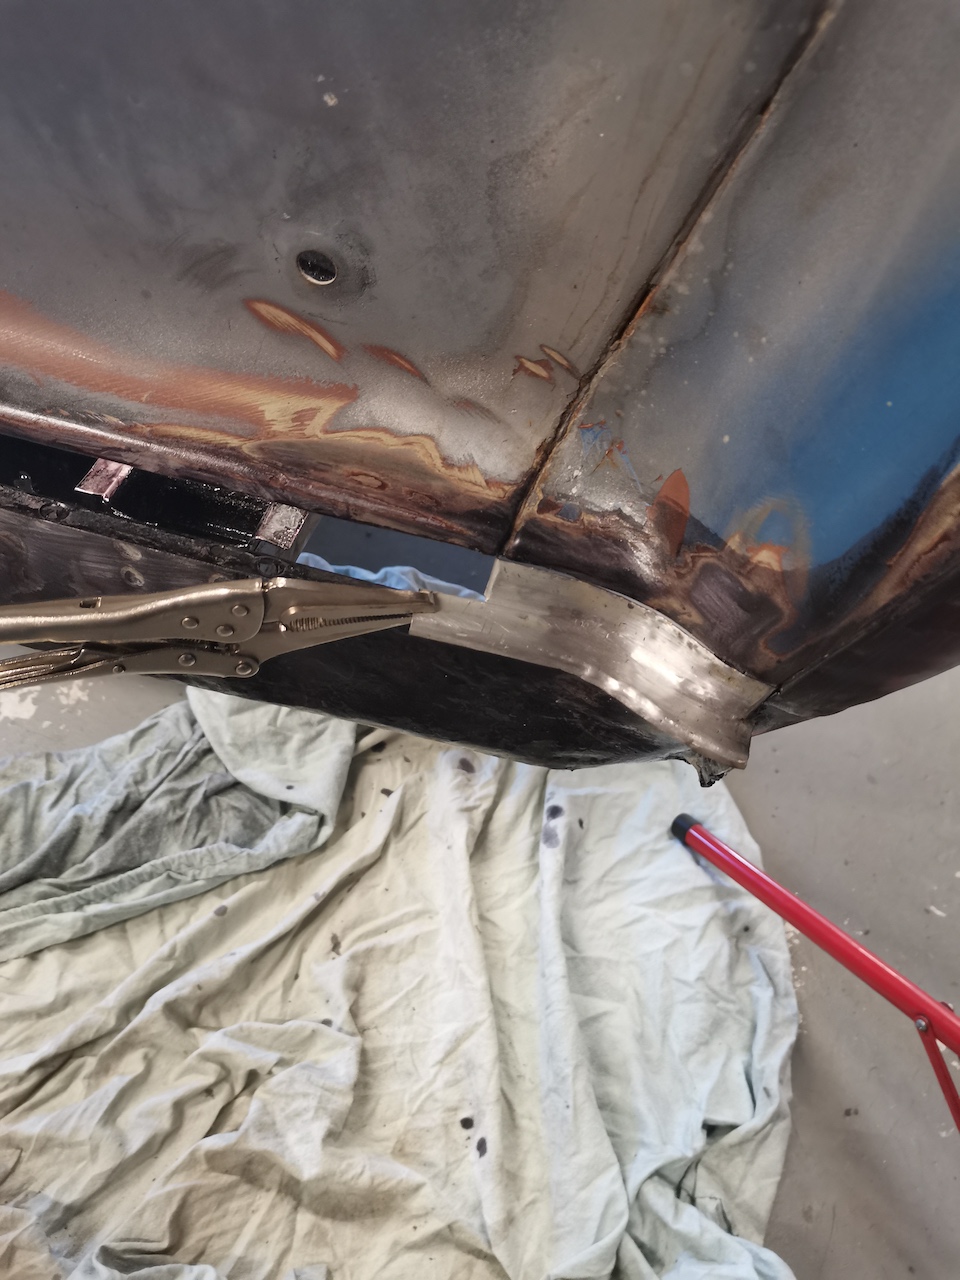
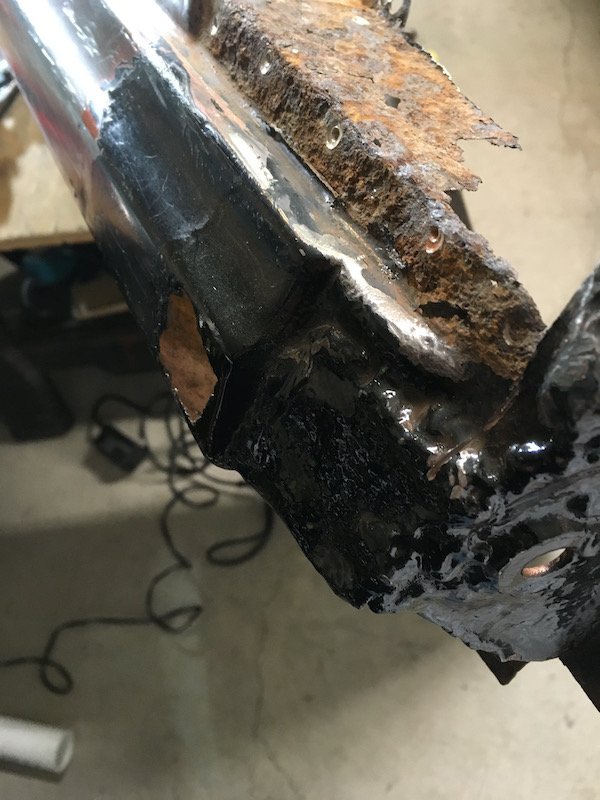
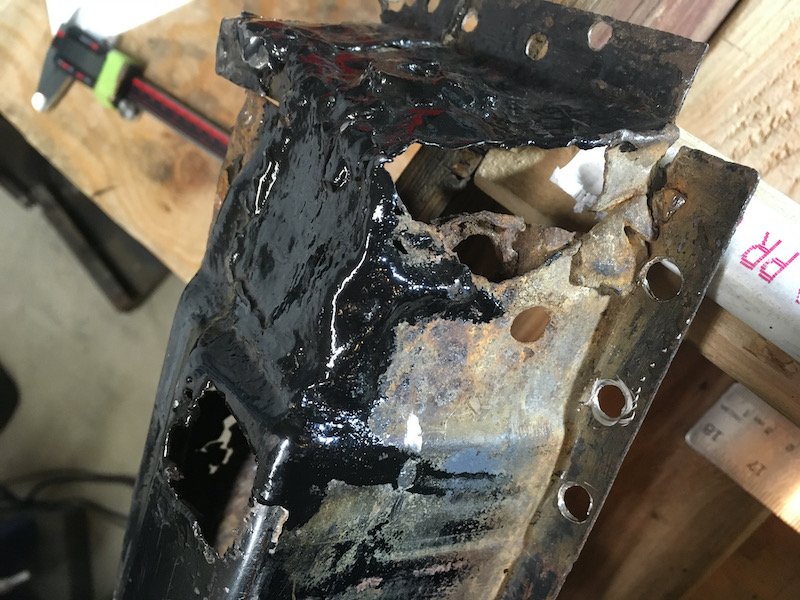
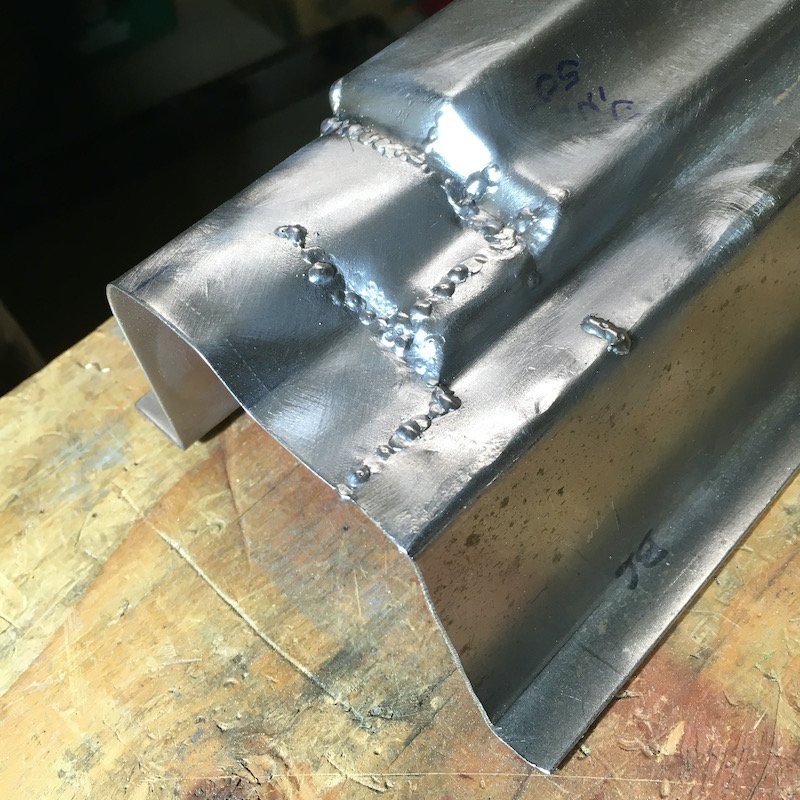
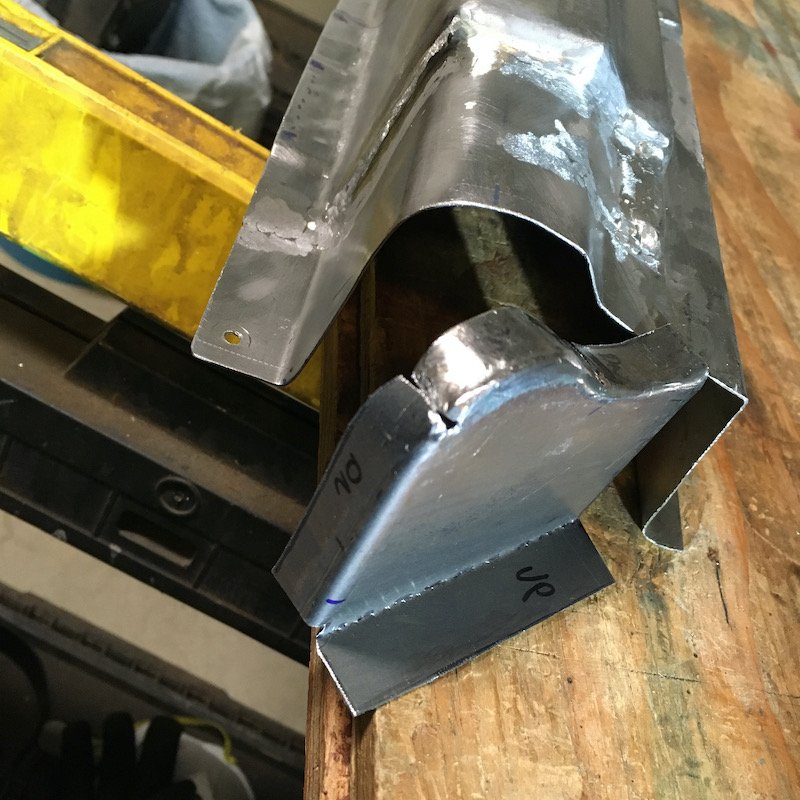
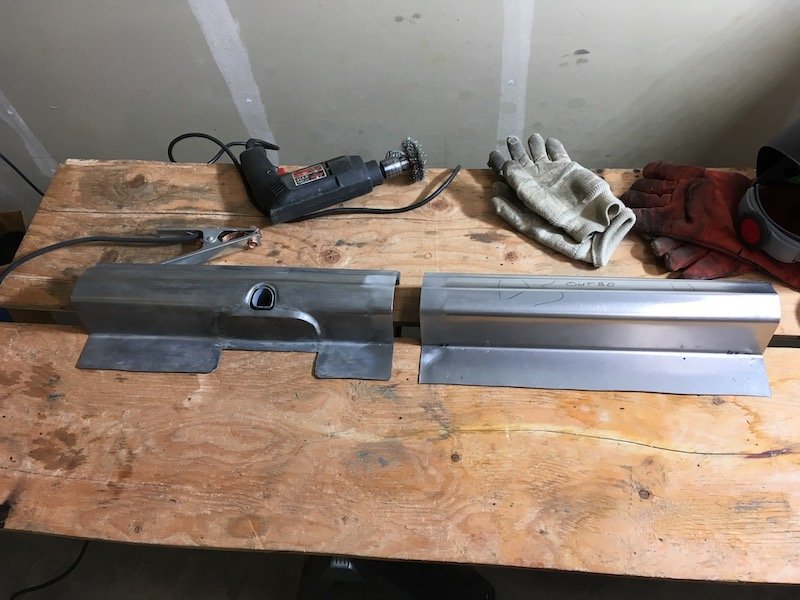
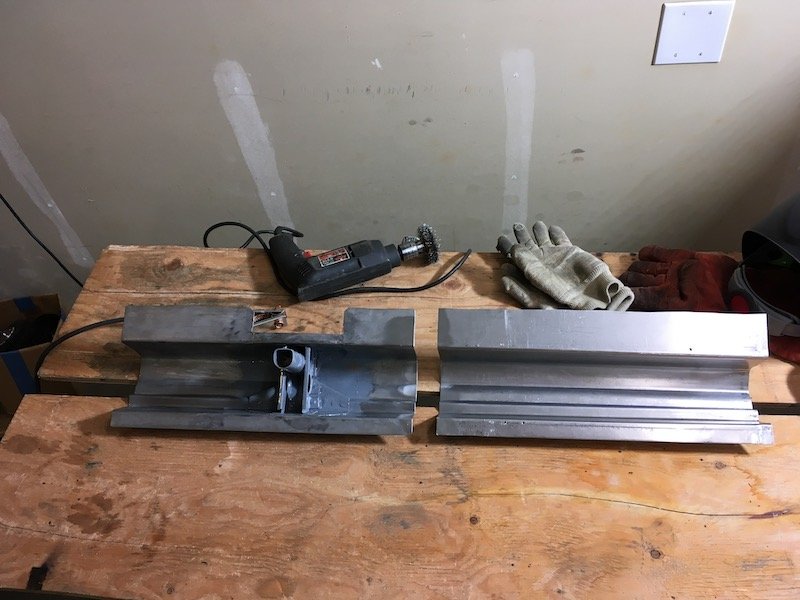
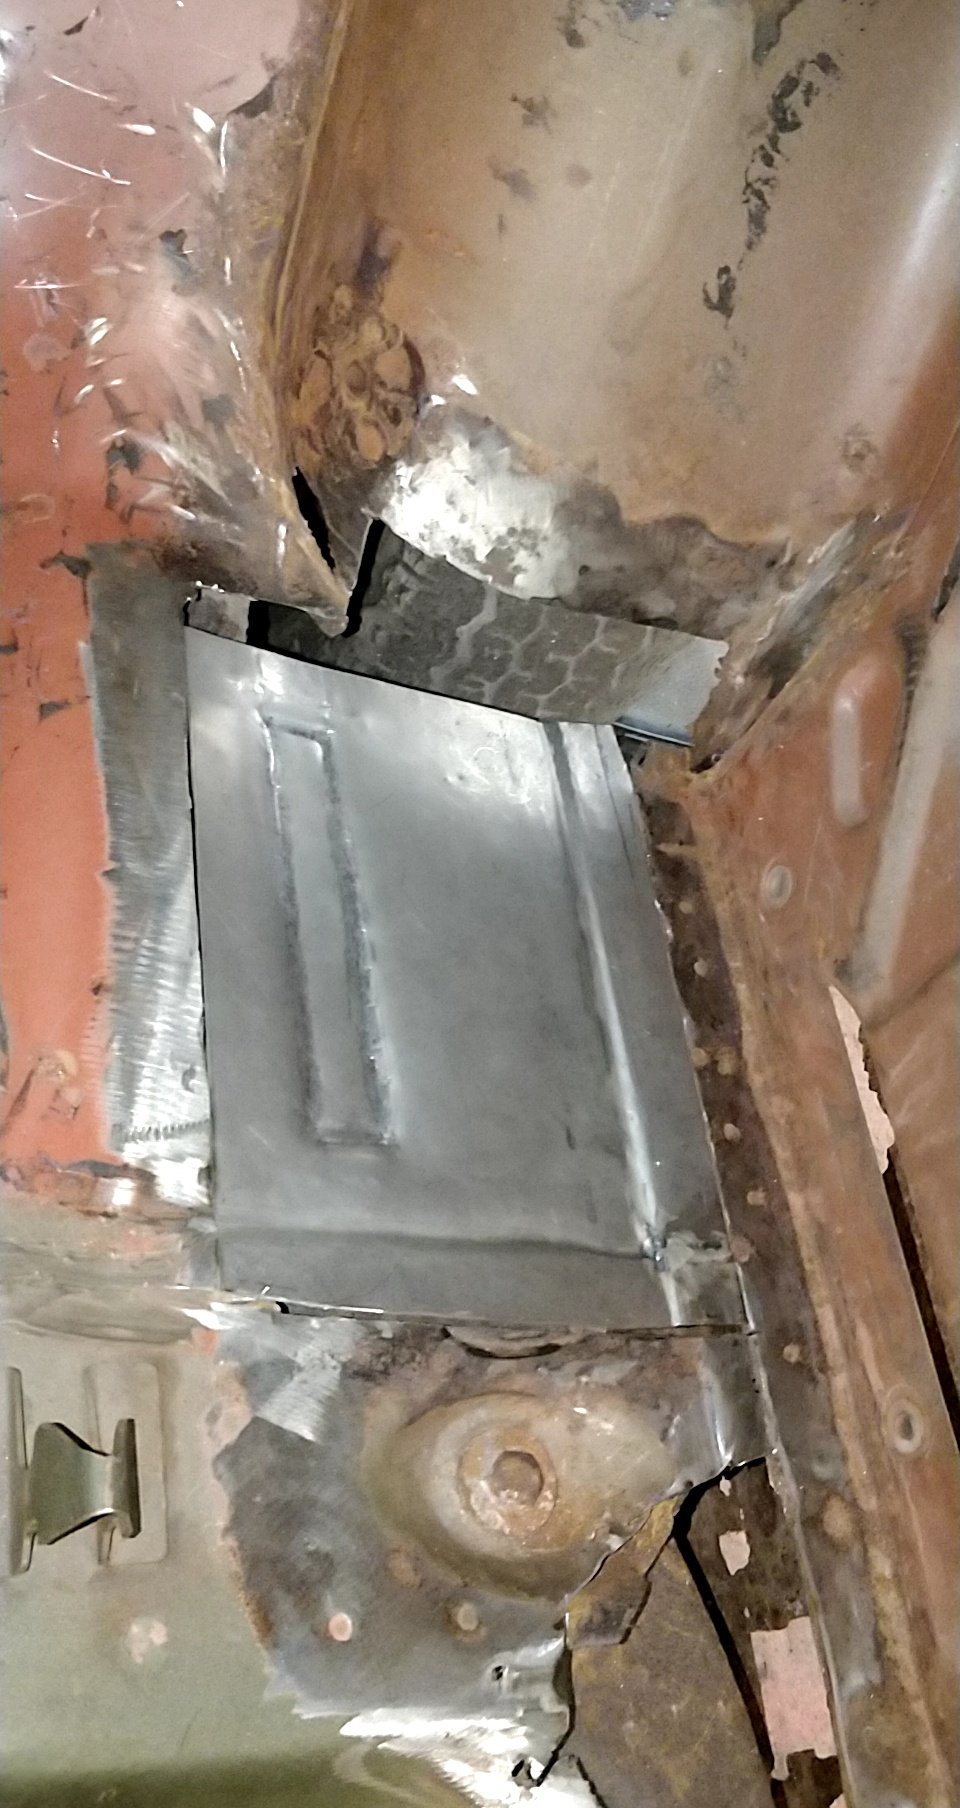
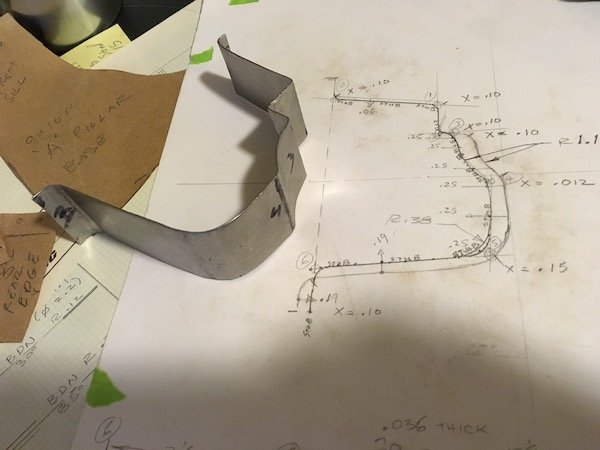
Got the boot floor repair patch sorted, made a wooden template and hammered the side to suit. Cleaned off as much rust as I could in the boot strengthening crossmember, treated with Brunox. I will paint the areas I can with some epoxy primer, will get some cavity wax down to the areas I can't before I weld the floor path in. Started making a patch for the boot edge. Started off with my high quality sheet metal brake Clamped and welded to some SHS, hammered to get the right profile Fairly happy with the end result, will still need some minor shaping before I weld it in
 8 points
 -
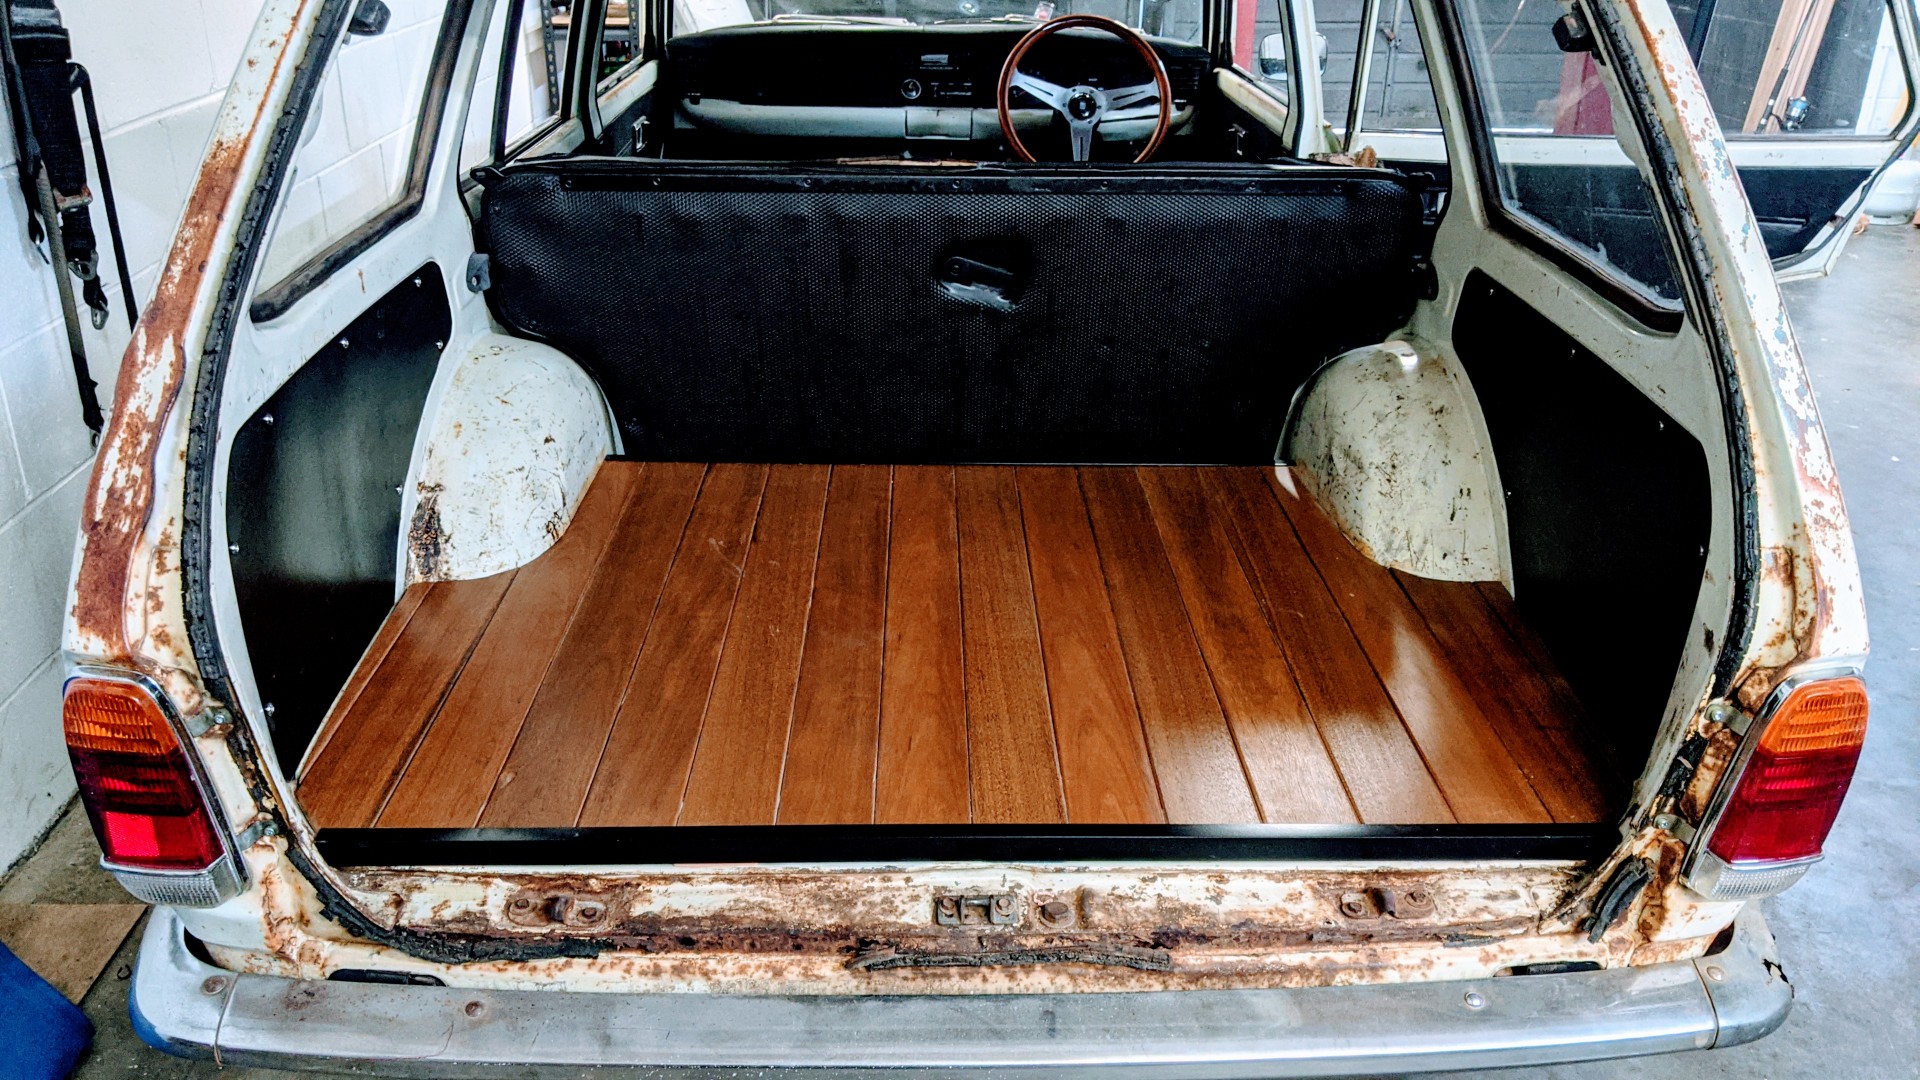
Finally finished the boot this past weekend. Won't be everyone's cup of tea, but decided to do a spotted gum floor.
7 points
-
Took the 1year old for a test drive this afternoon. Wow. Those webers should be factory fitted. Really opened the old bitch up. And the noise is great too. Nearly got a onewheel peel going doing a uturn.6 points
-
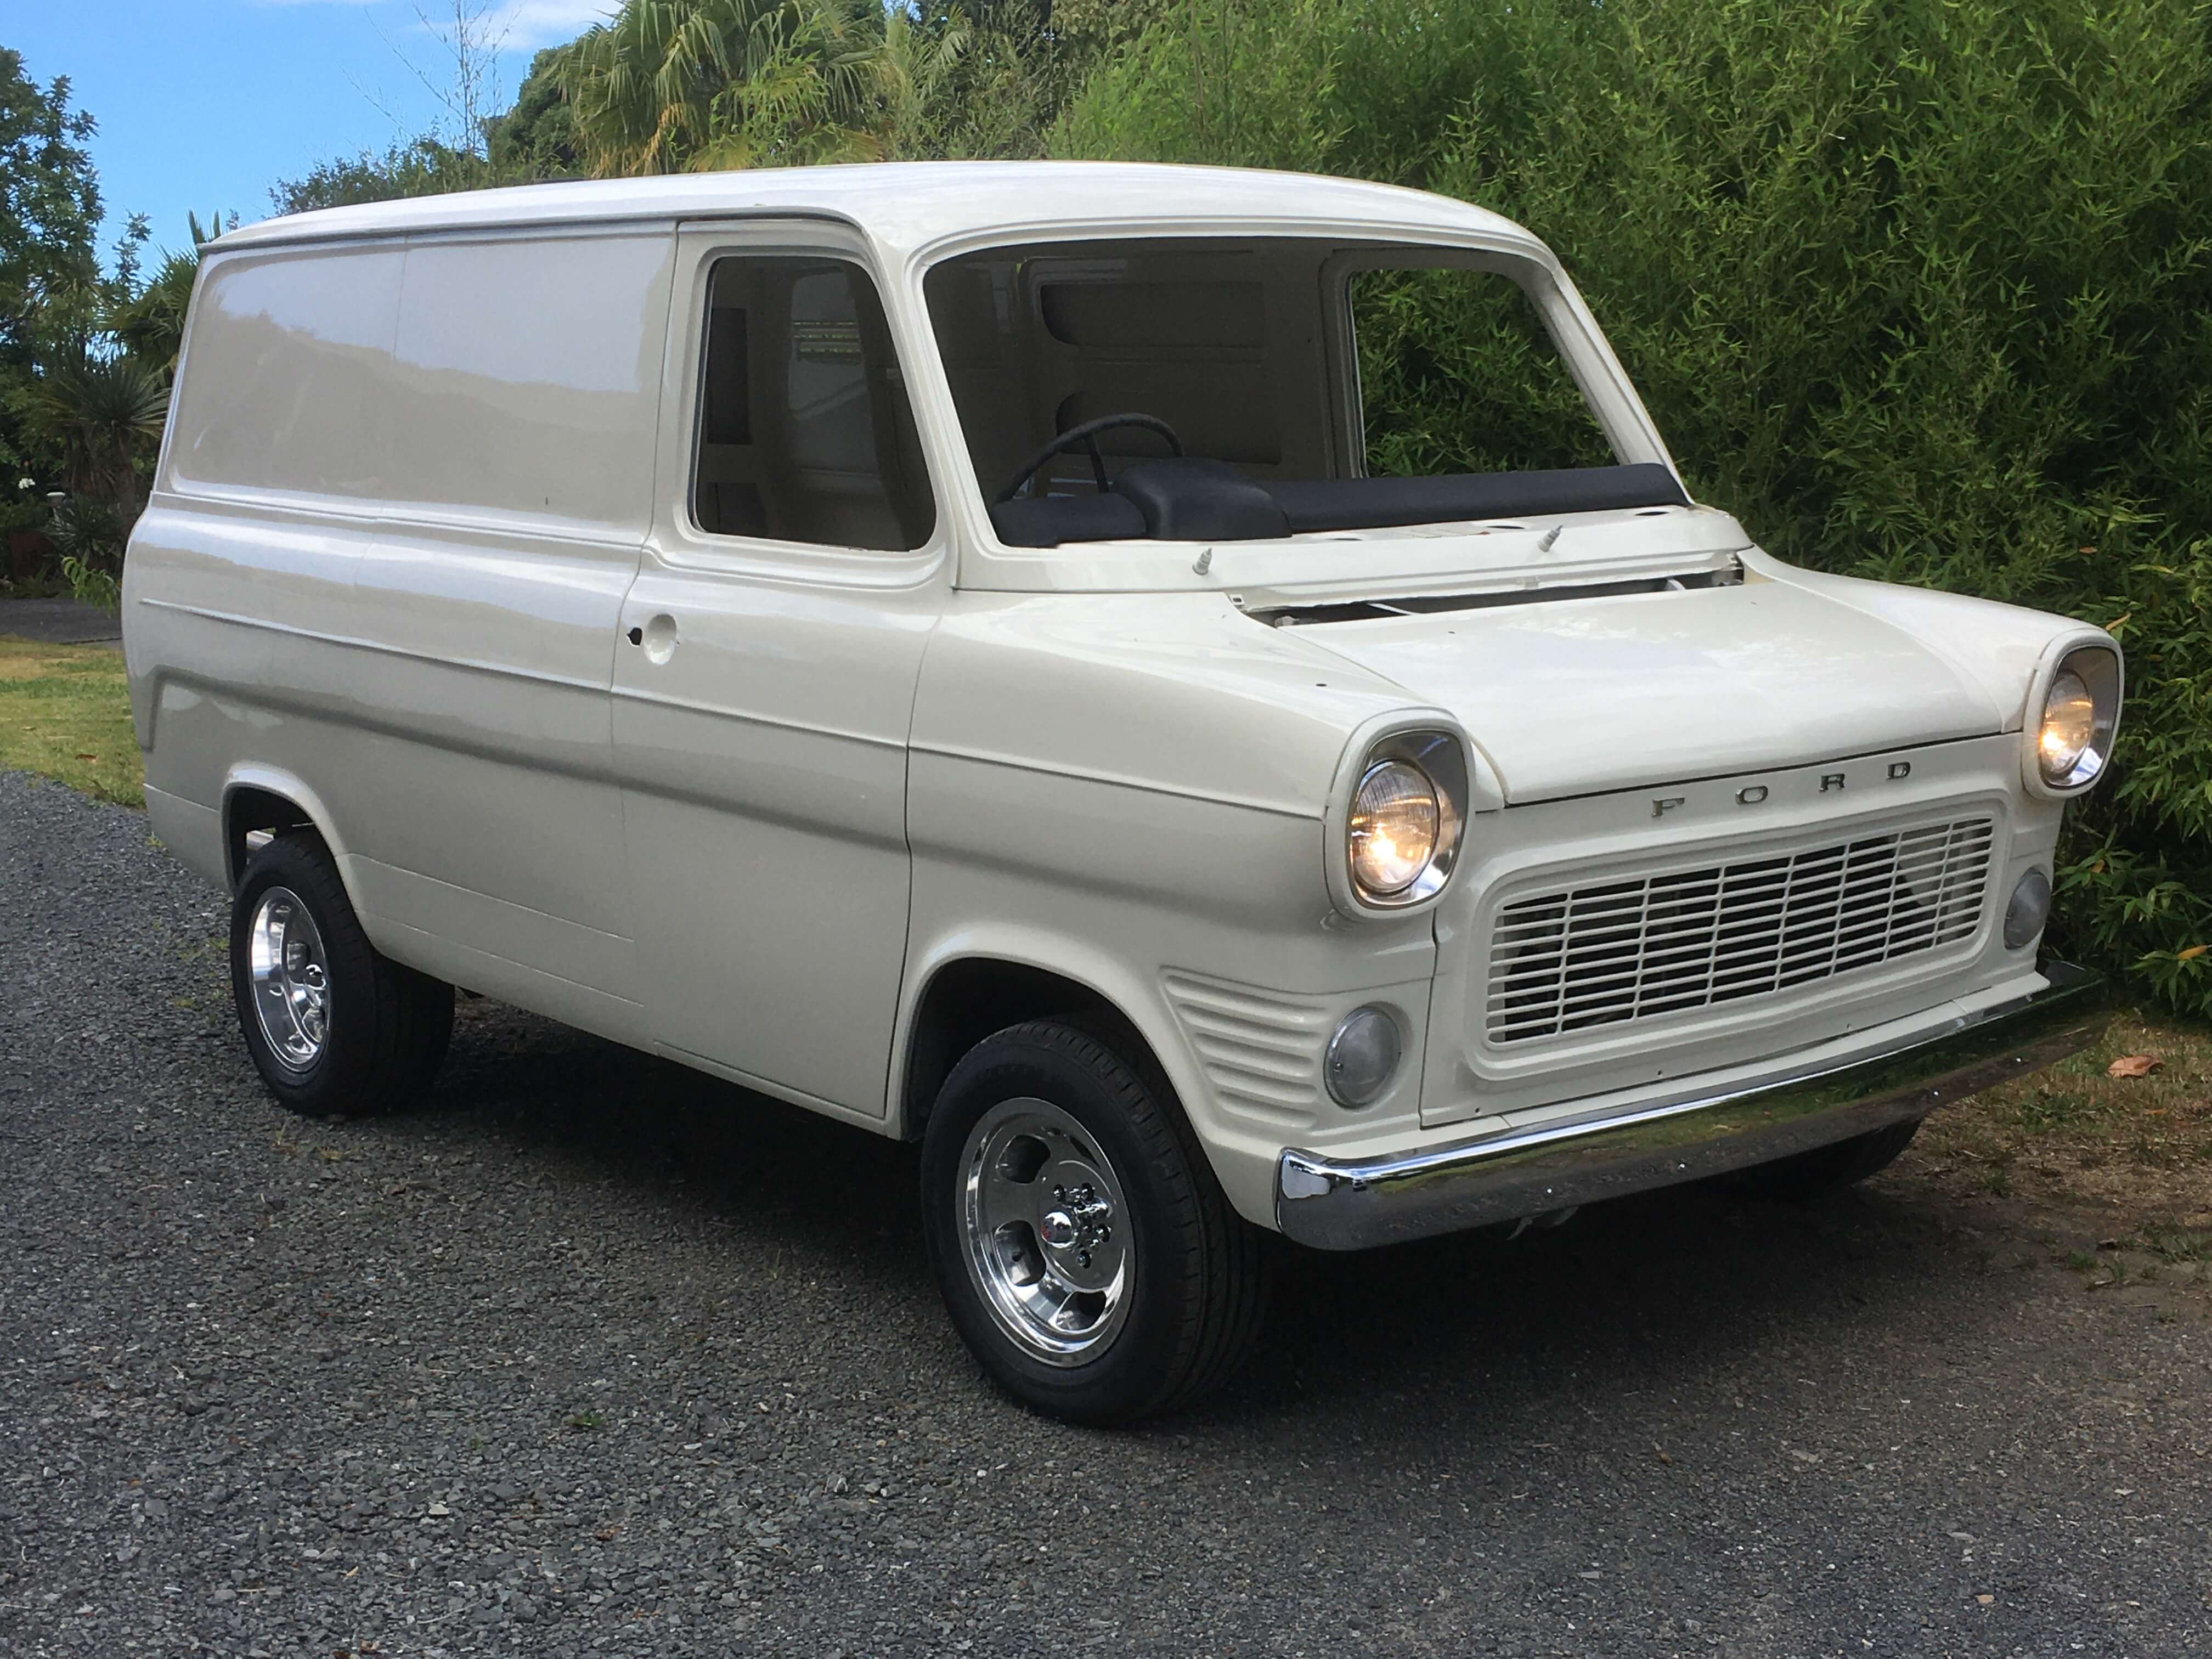
I spent a few hours today bolting on some parts; lots of NOS parts which I have been collecting for this project. Headlights temporarily fitted, new bezels, bumpers, clear front indicators, tail lights and rear reflectors. The headlights I bought a few years ago are an interesting thing for trainspotters like myself; a pair of Cibie Biodes. Invented in the late 1960's, before the H4 dual filament halogen bulb was invented, they take 2x H1 halogen bulbs. There is a separate reflector in the lower part of the headlight (which you can see) that is the high beam, and the upper bulb, which has a shroud and is not visible is the low beam. These were the choice of works rally teams in the late 1960's and early 1970's such as Ford Escort, Porsche 911 and Mini Coopers. Although very old technology, they are still give off an extremely good light output, even by todays standards. I was quite lucky to find these, they are extremely rare and sell for ridiculous money on Ebay.
6 points
-
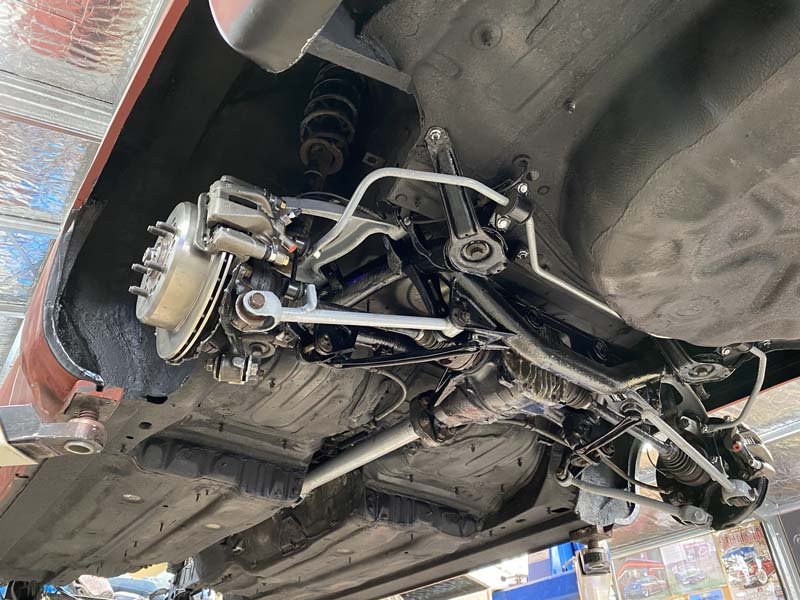
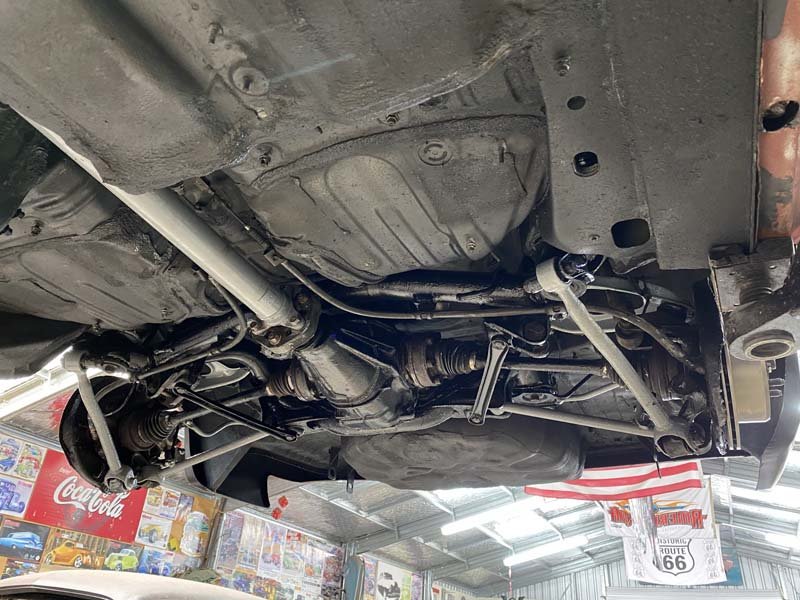
Made some more progress today, gave it an eyed up wheel alignment, fitted up the new booster and master cylinder, repinned all the door hinges, refitted the cert plate and cut off the old exhaust ends. Also pulled out the pedal box to give that a small birthday while it was easy to get to it. Back on its own 4 wheels for the first time in 9 months.5 points
-
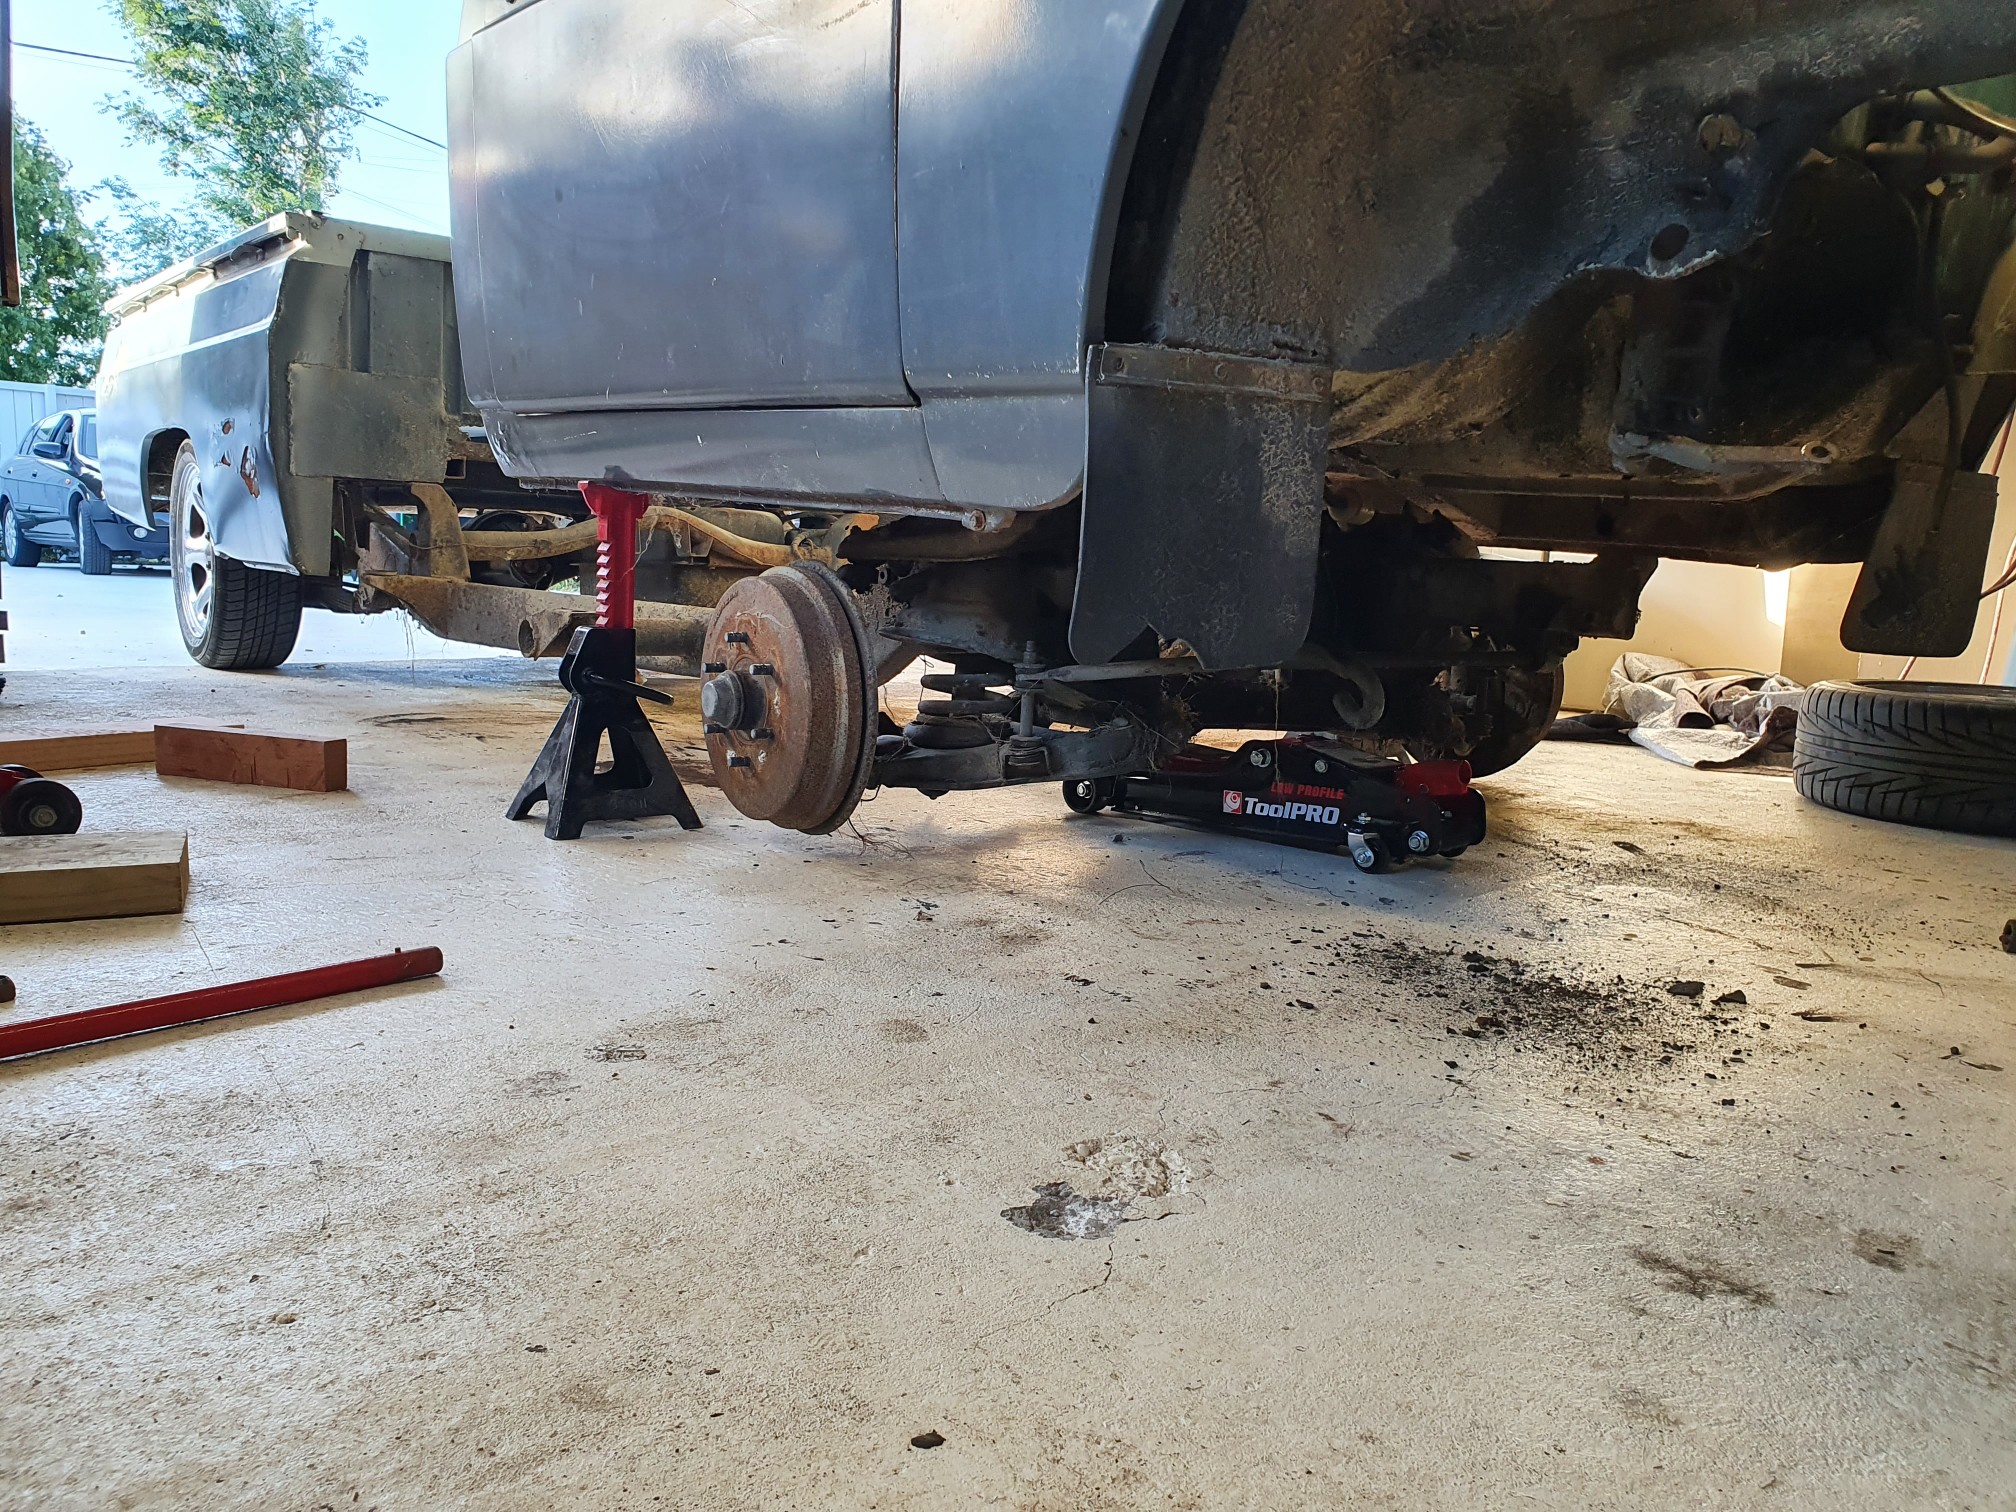
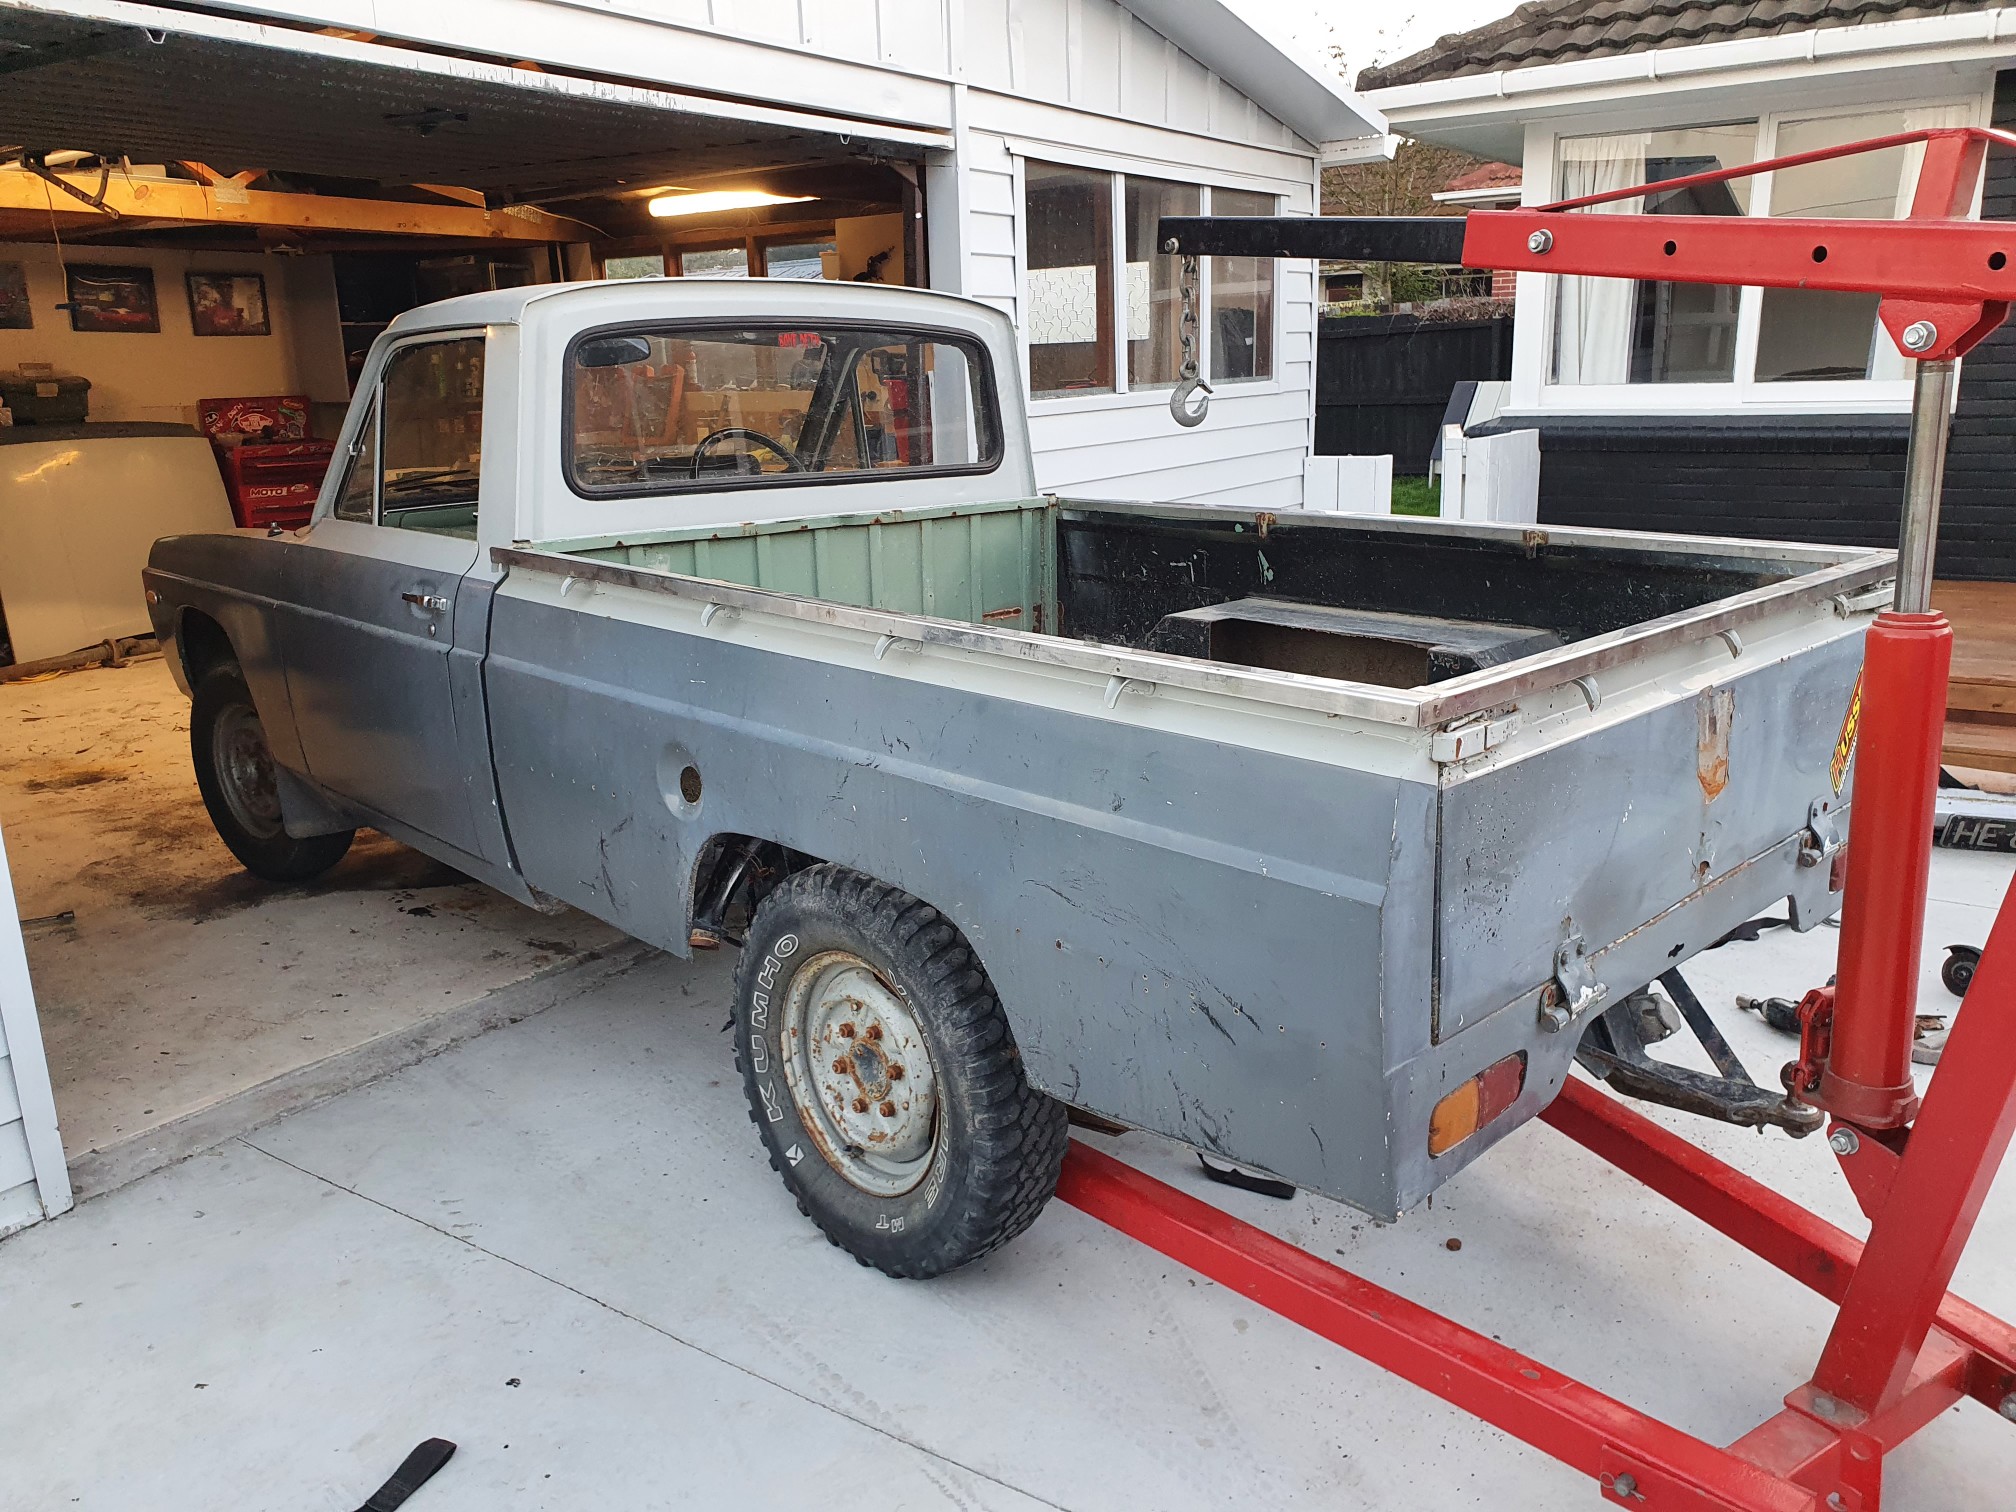
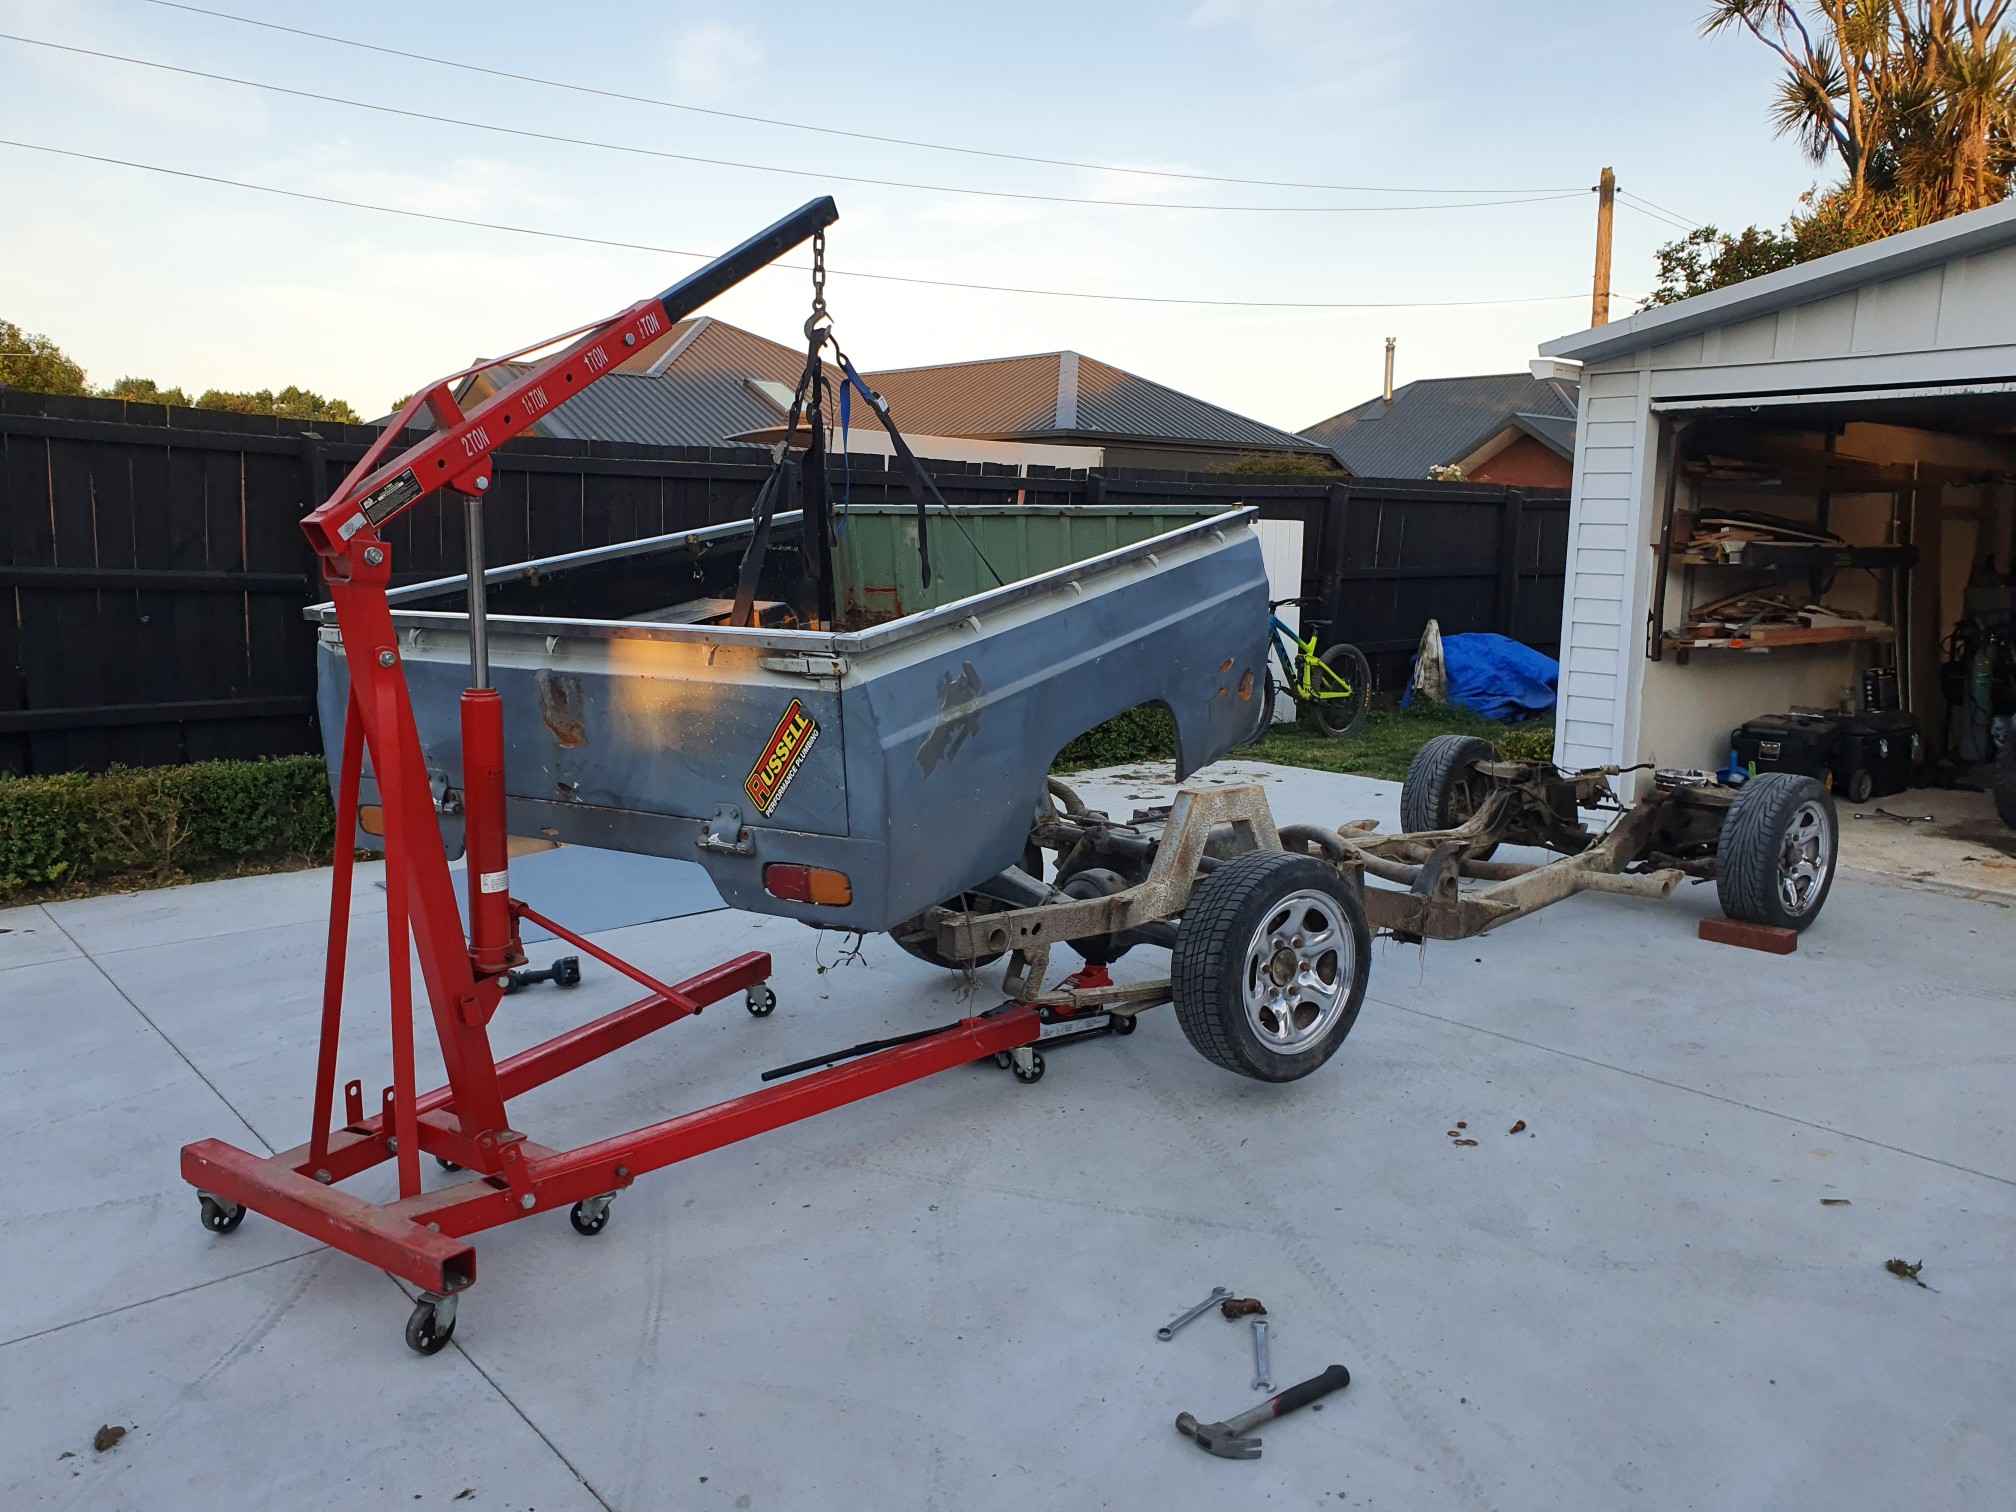
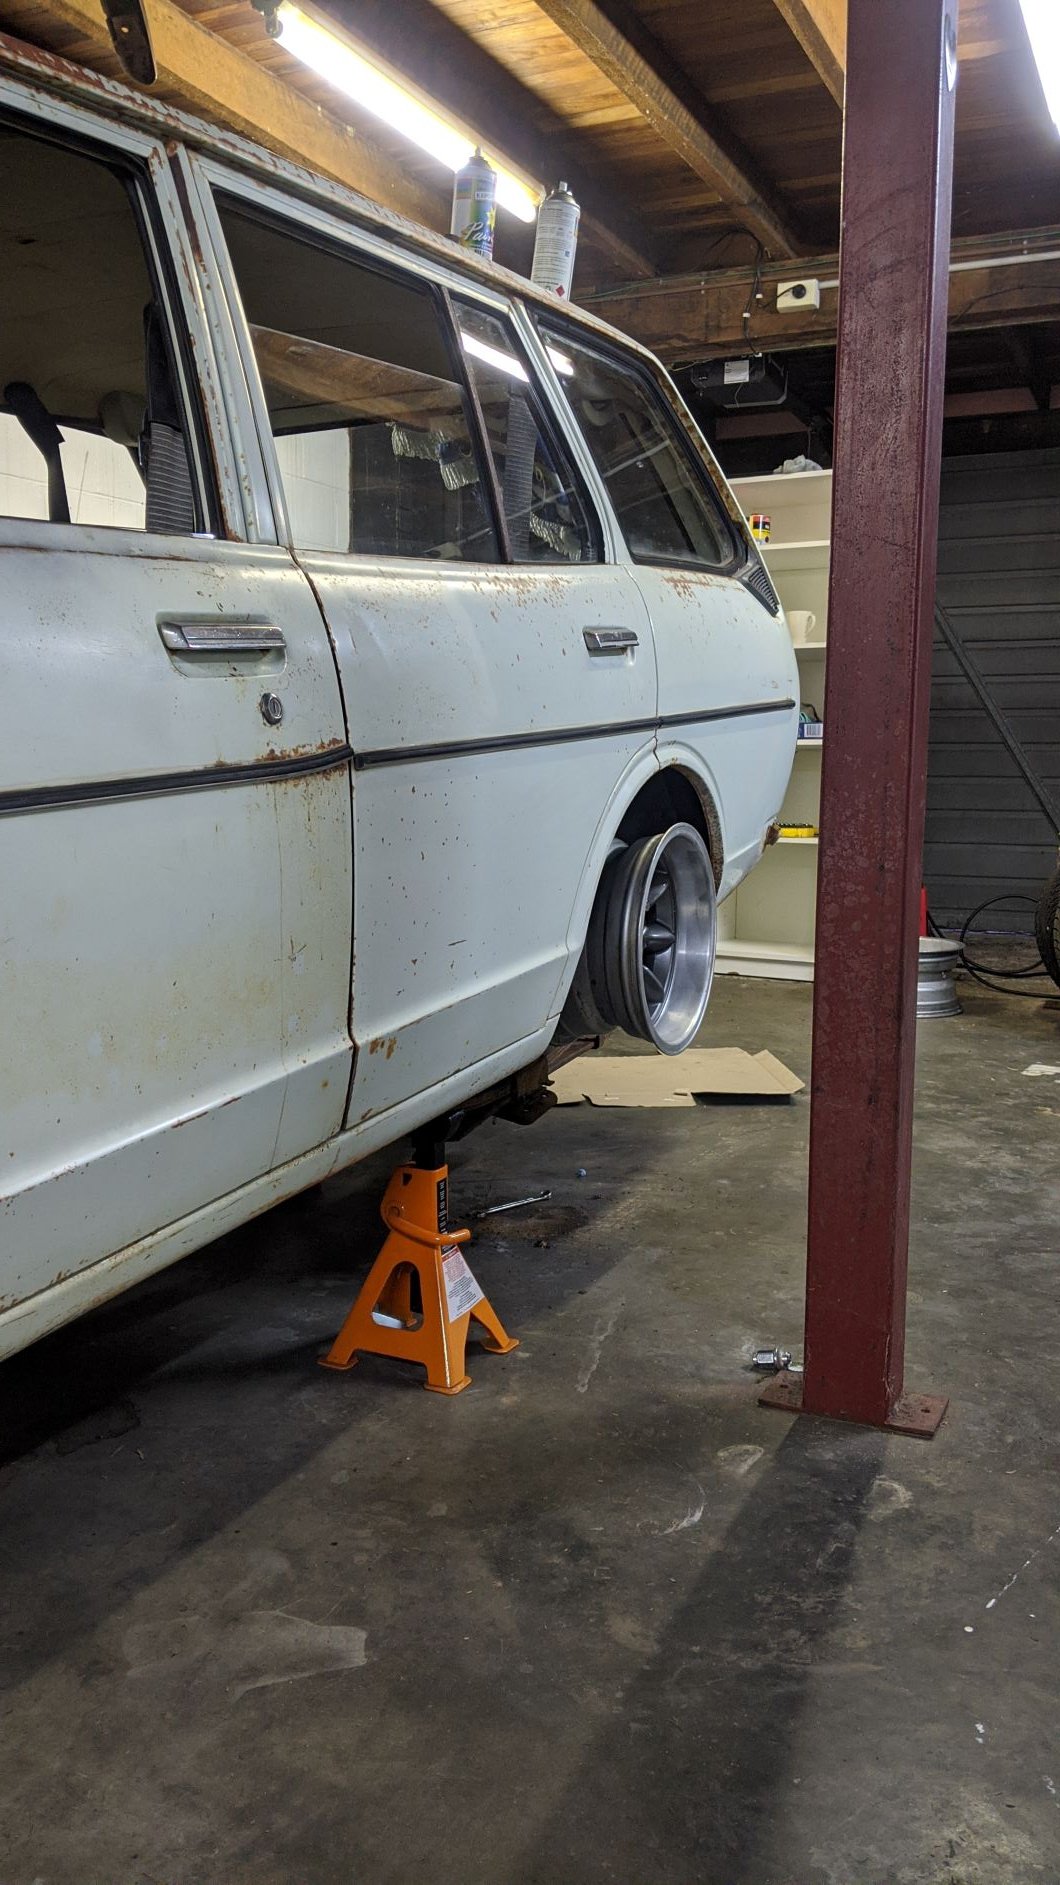
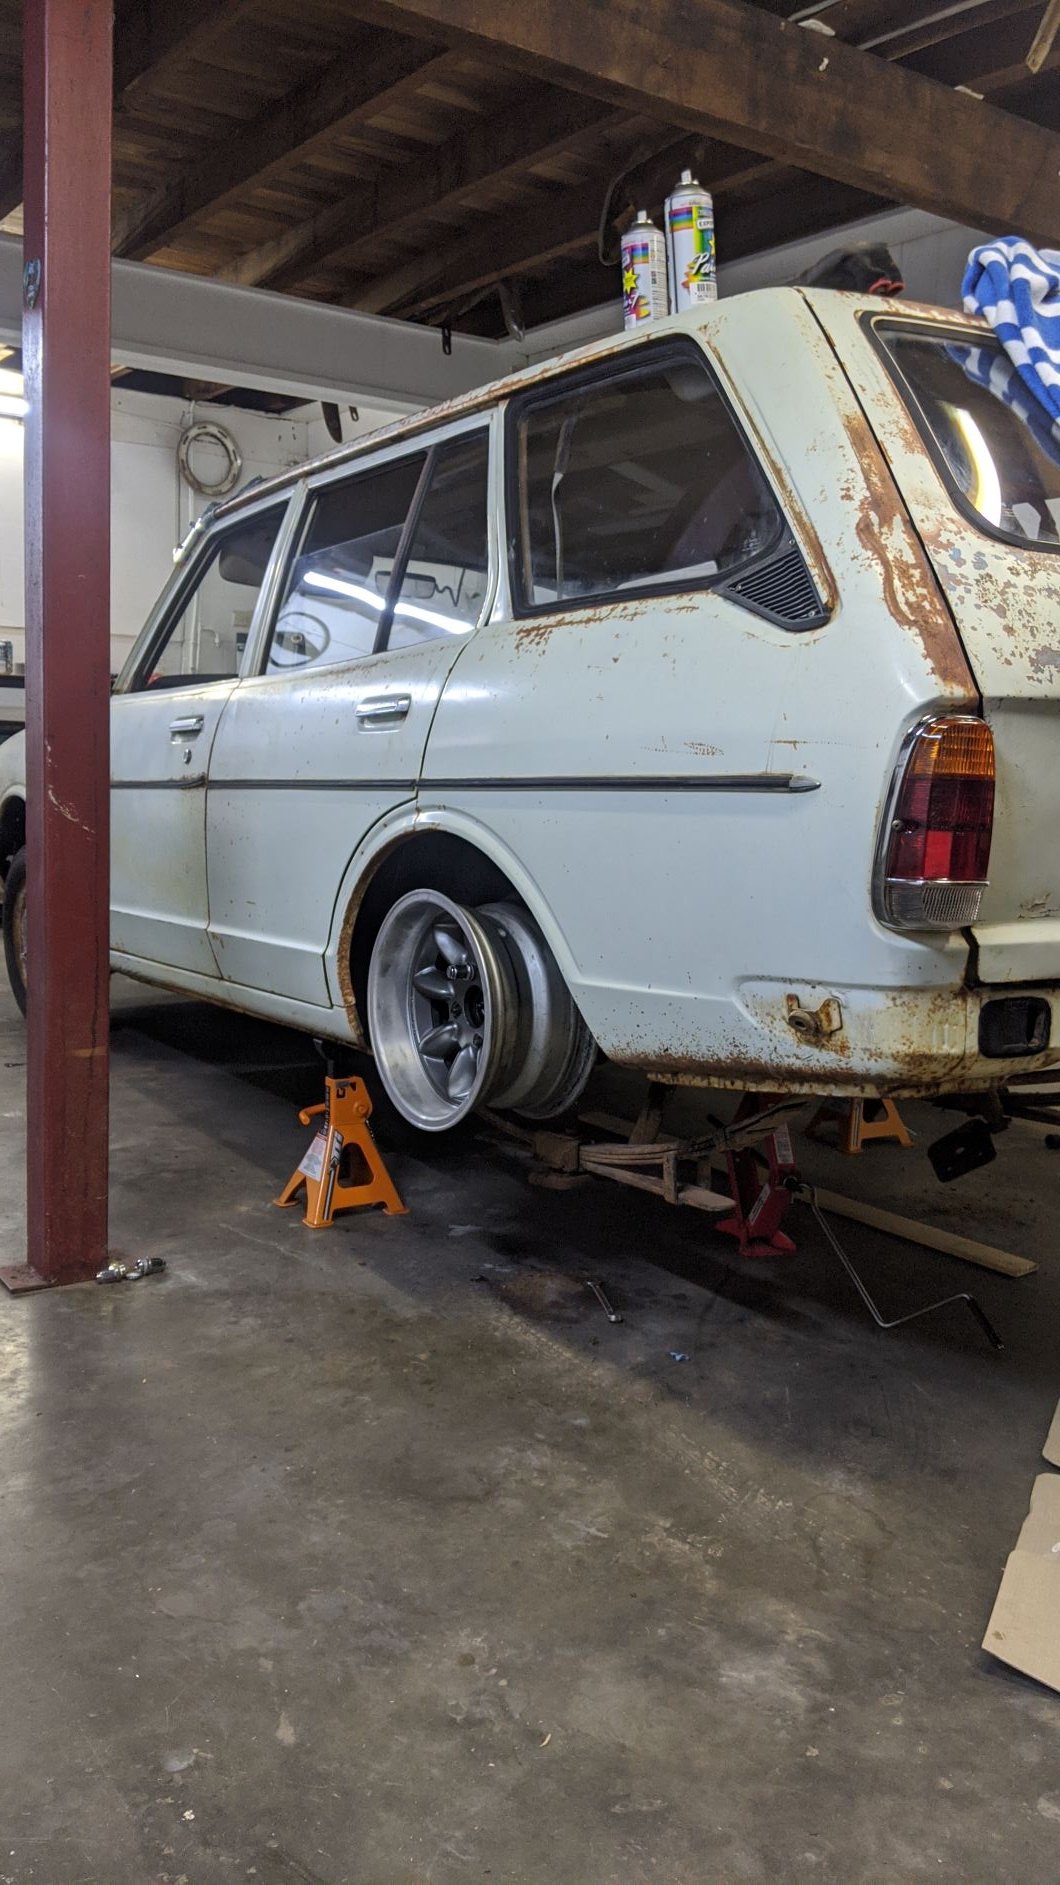
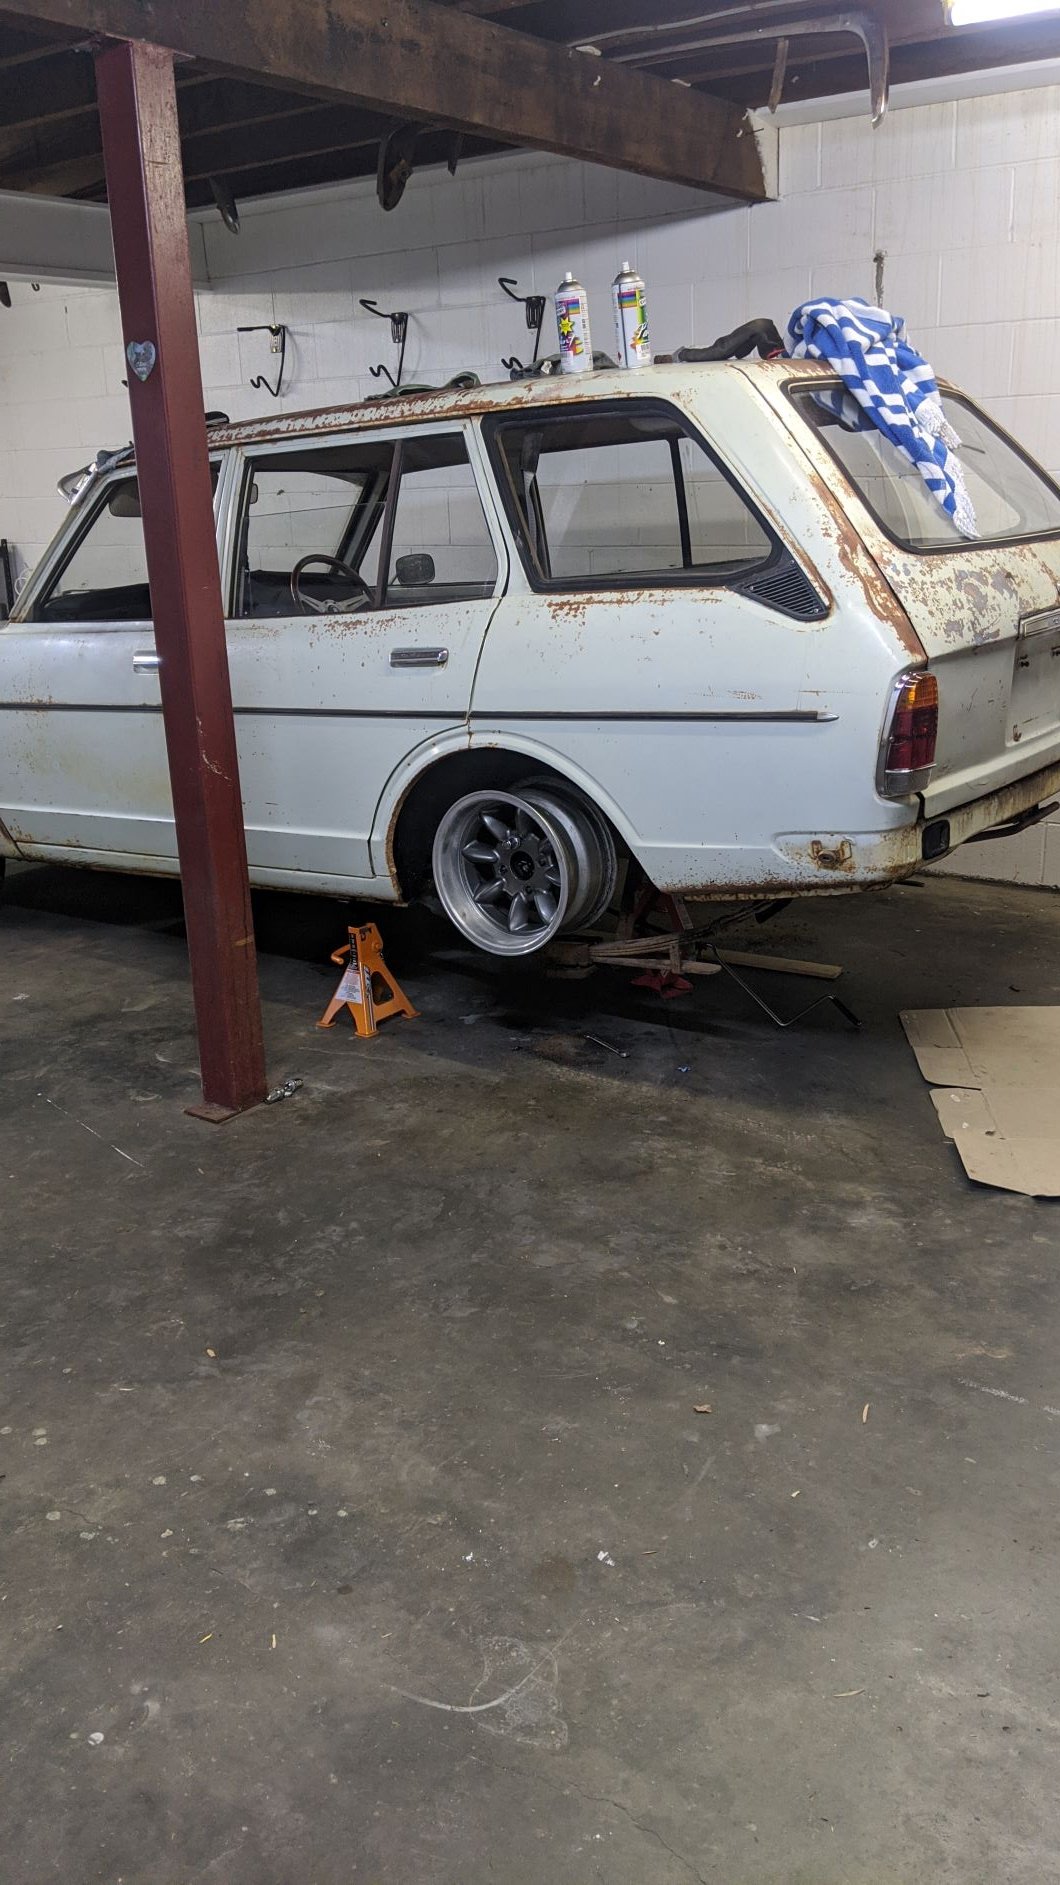
Had a productive day today. Got the chassis swapped over. Damn it was ghetto. 2 small jacks and 4 axle stands haha. C notched chassis is up for sale if anyone wants it. 300 bucks bare
4 points
-
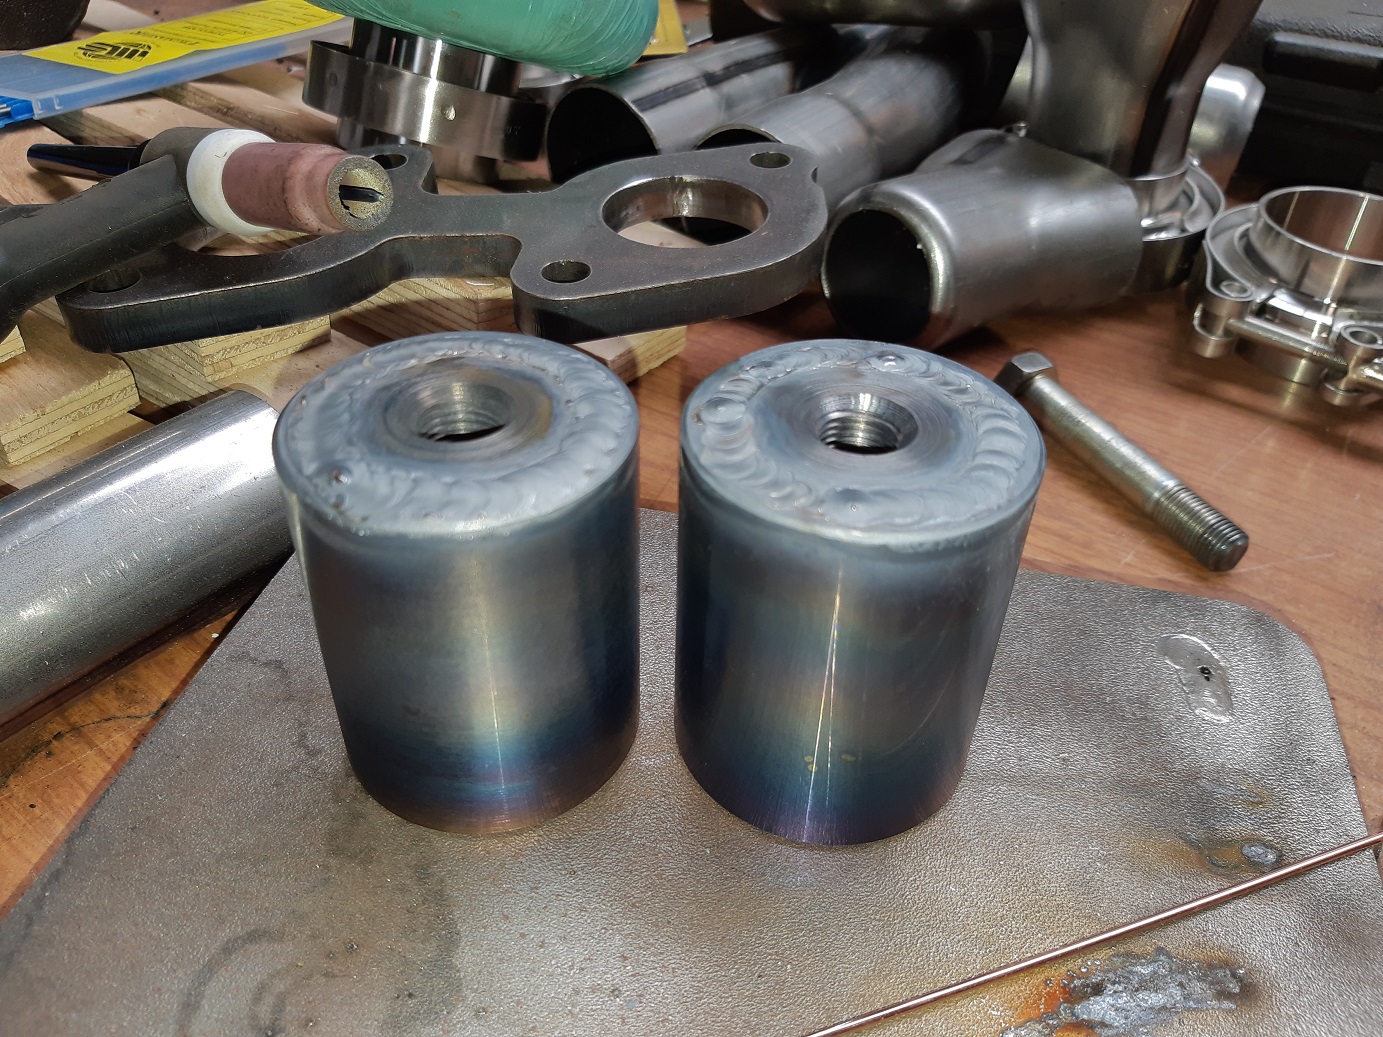
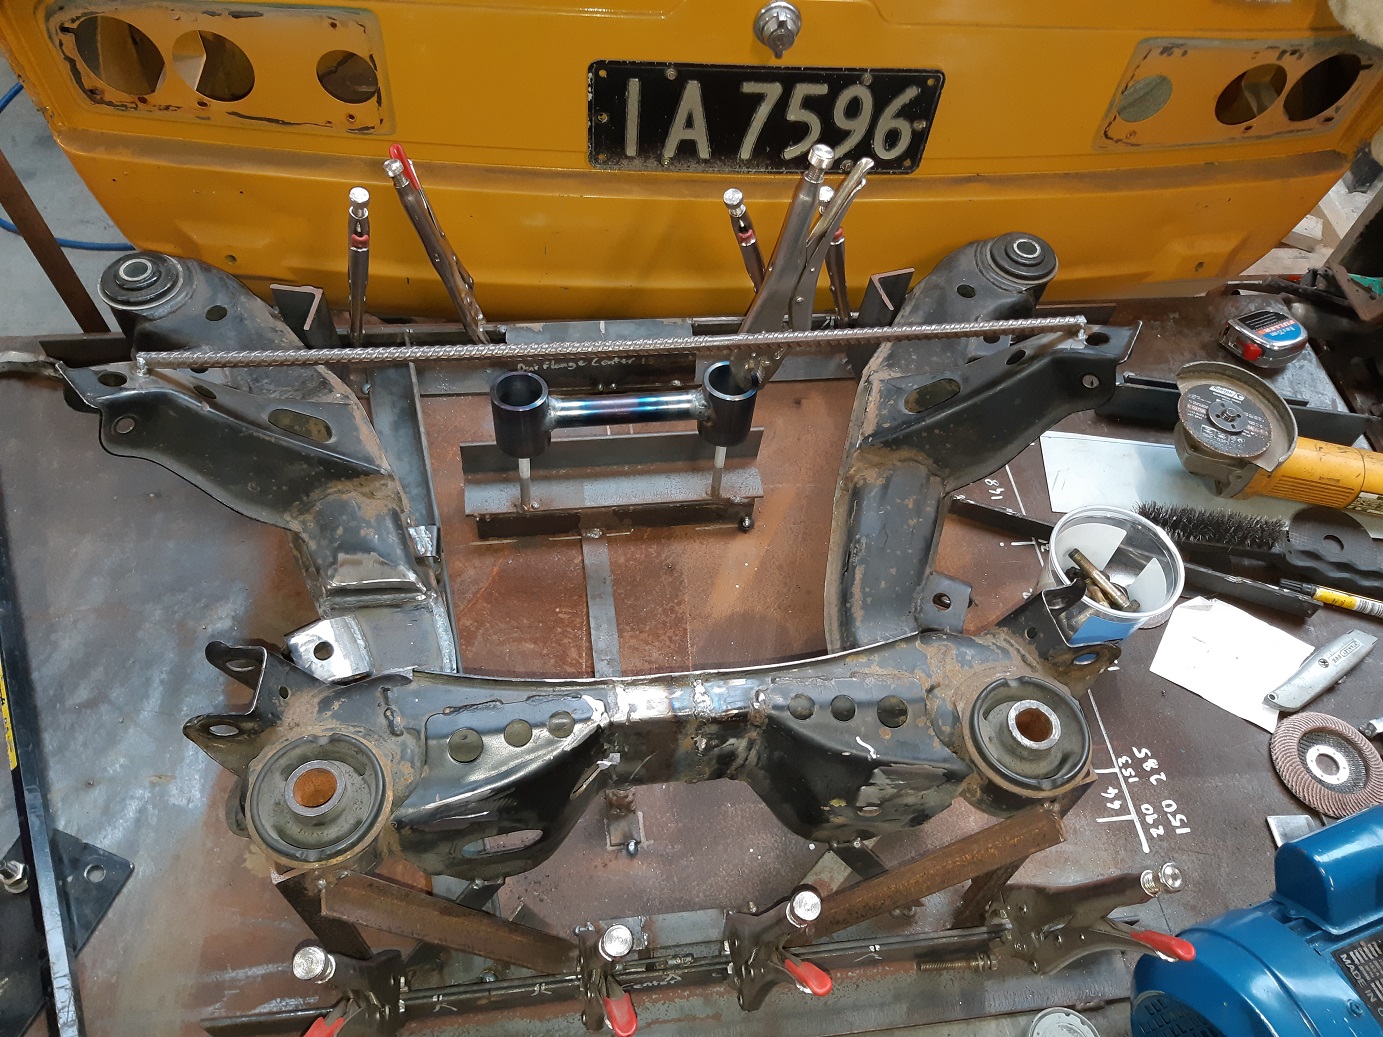
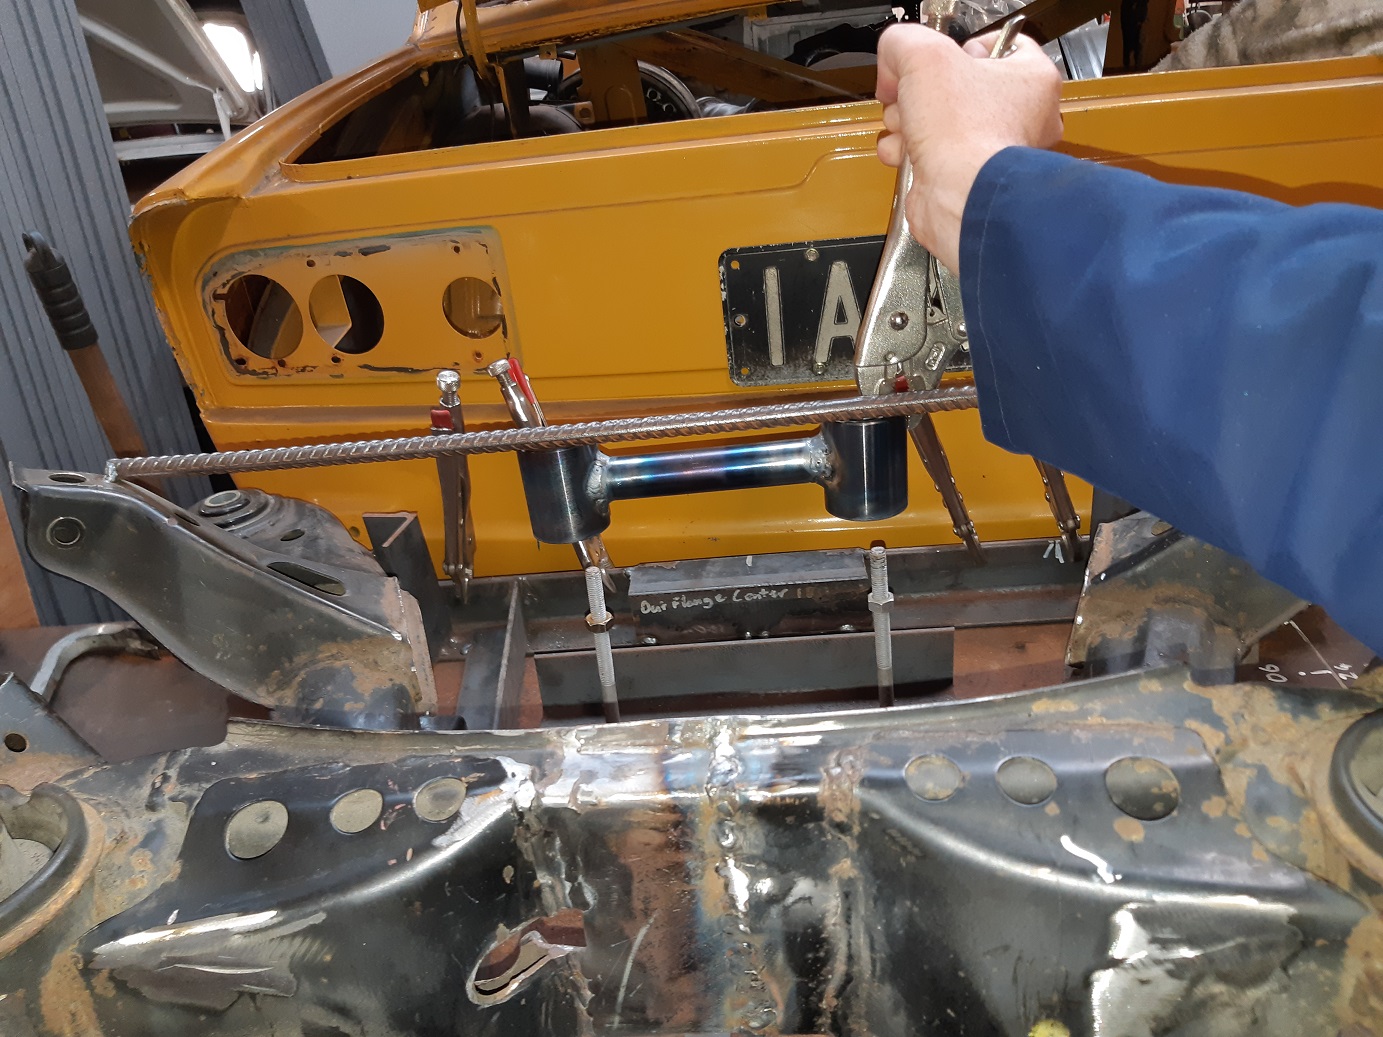
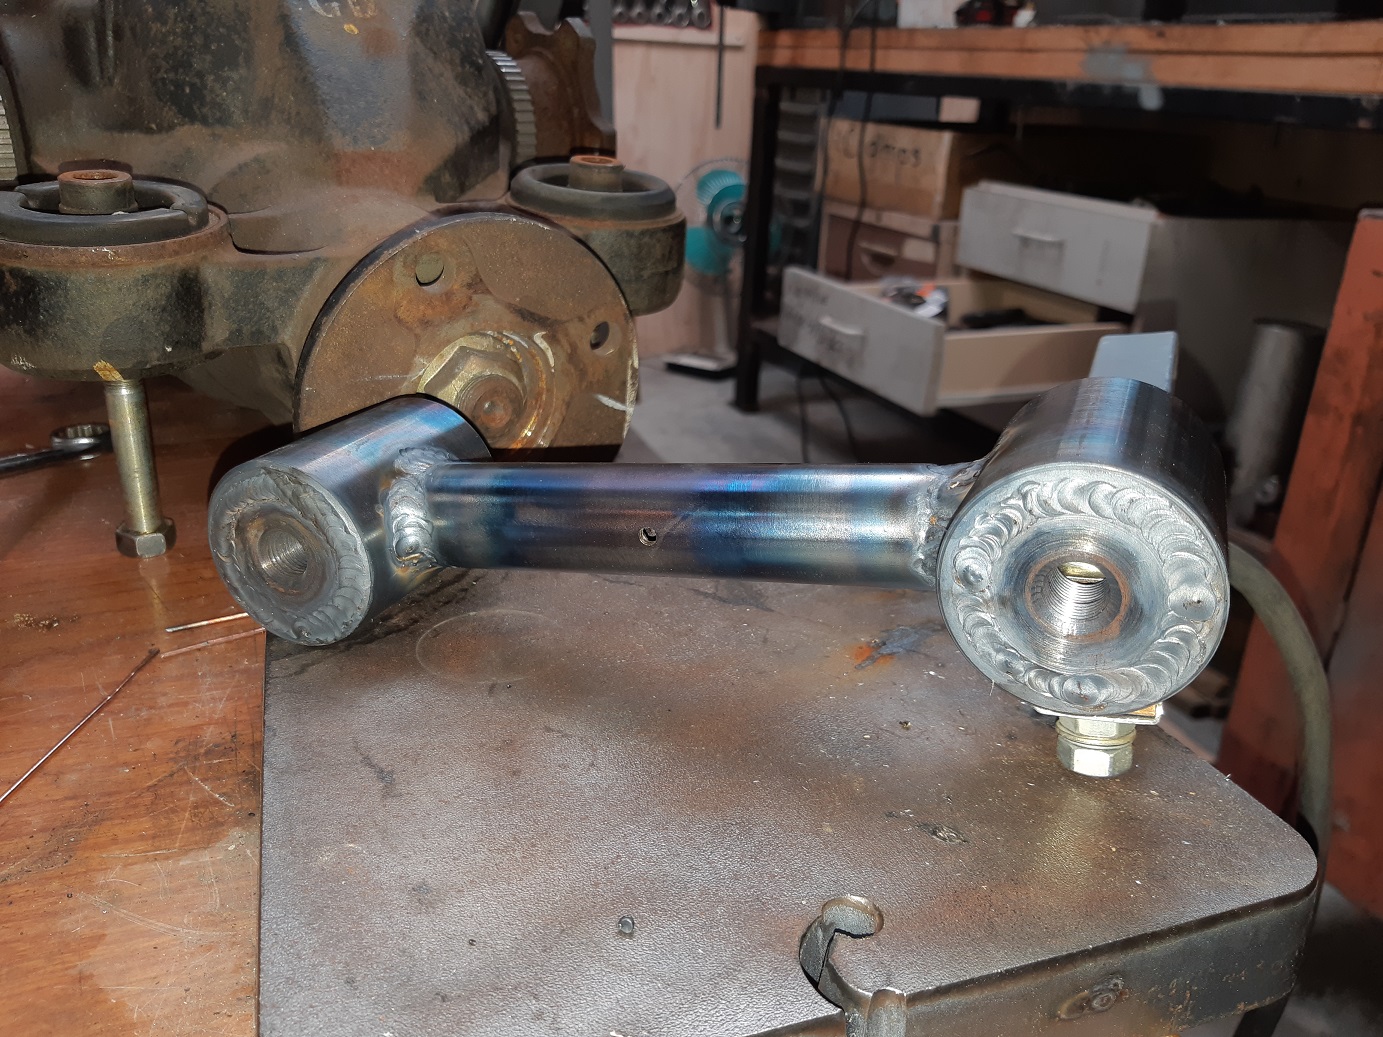
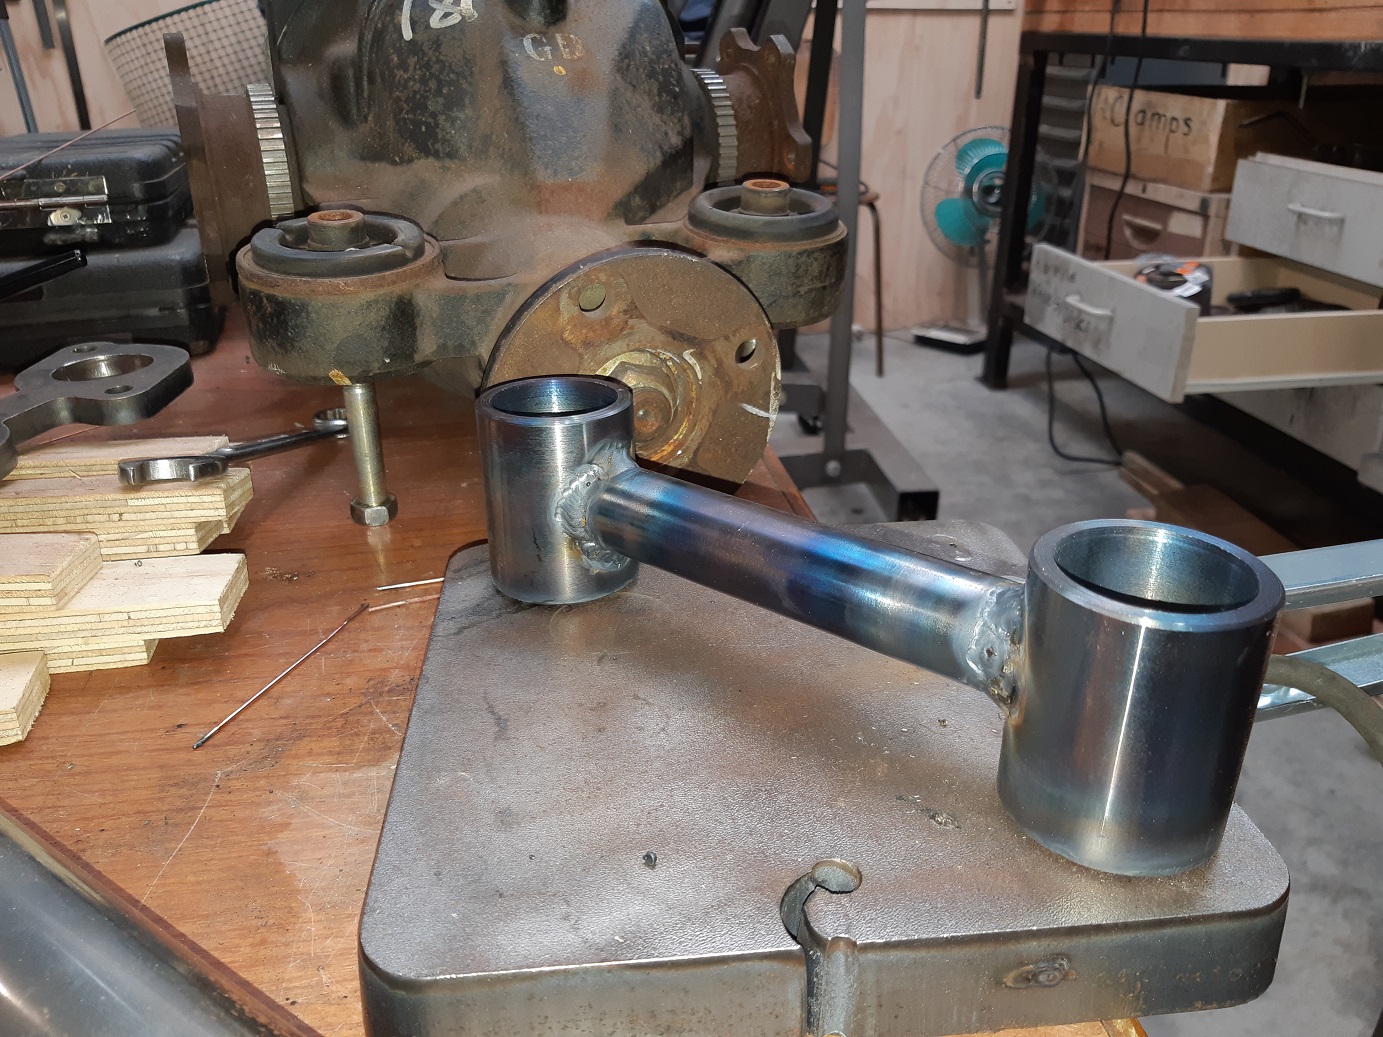
I made some round things with holes in them. Then made different round things with threaded holes in them. Then zip zapped them together. Then I joined them together with a more different round thing with holes in it. It is the start of the diff.... cradle? thing which will be about here. It's currently still thermonuclear, hence the holding aid. I worked out that I needed to narrow the subframe a further 50mm if I wanted to actually fit tires on my wheels. Which I do... I think I've narrowed it a total of 250mm. Because the diff sits off center, I needed to make some clearance for the inner CV flange, just on one side. Damn thing really wants to become a pretzel from all the welding, one corner of the frame has lifted 5mm off the table, but I can flatten it out just by standing on it. So It's got ALL the clamps. Hopefully once the diff cradle is done, it will brace it enough to keep it flat.
4 points
-
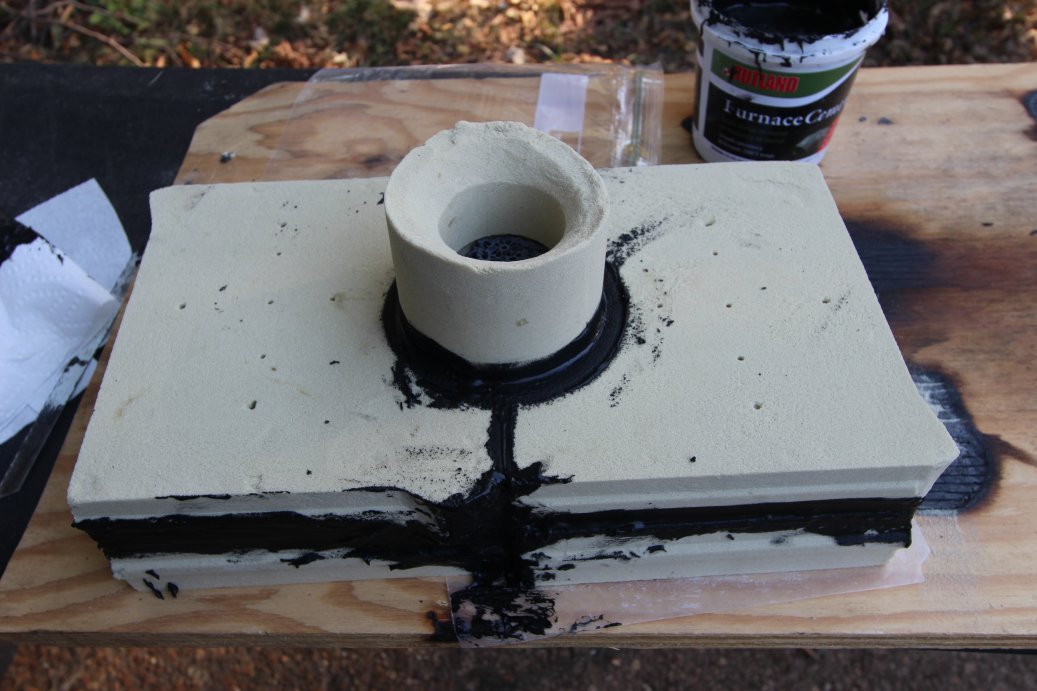
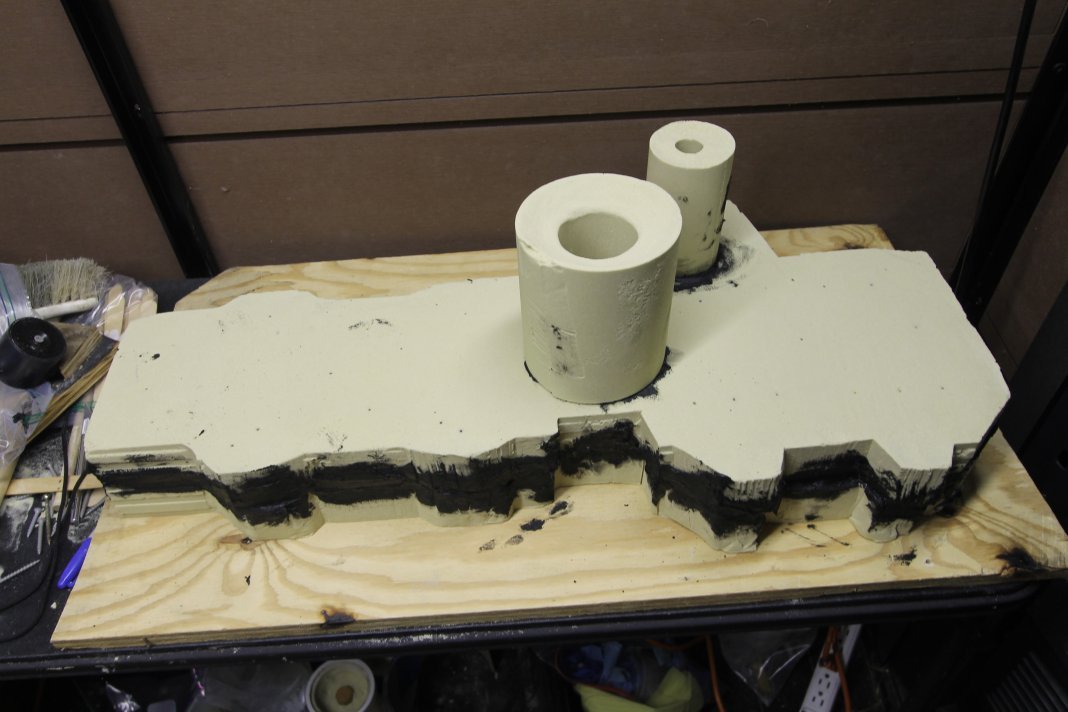
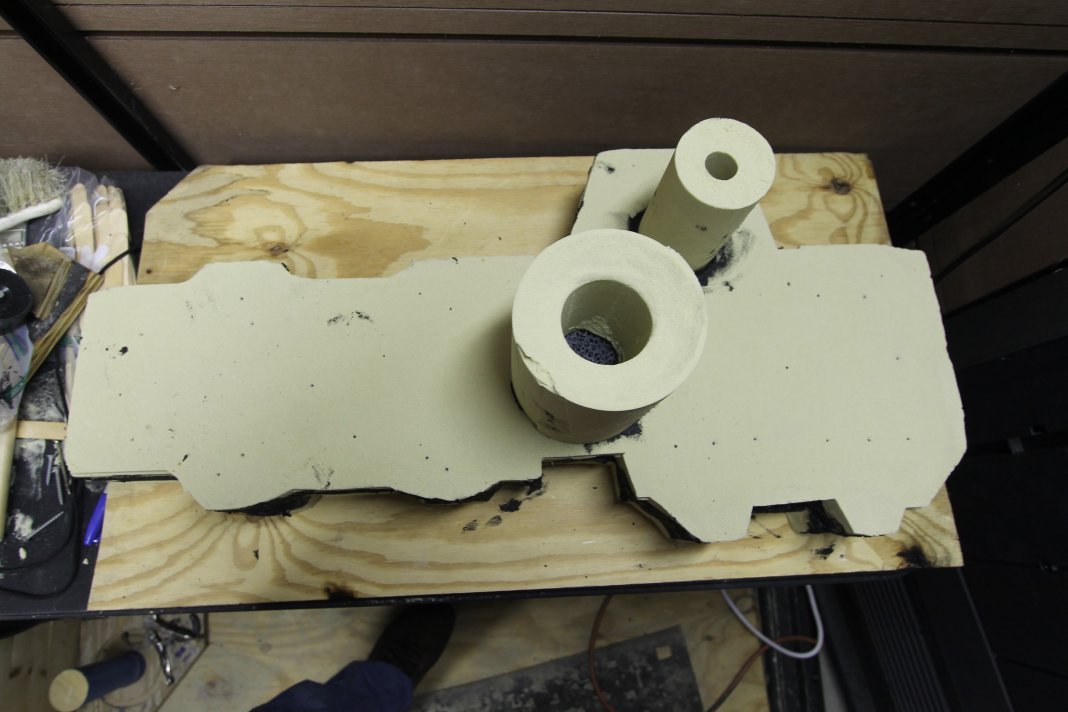
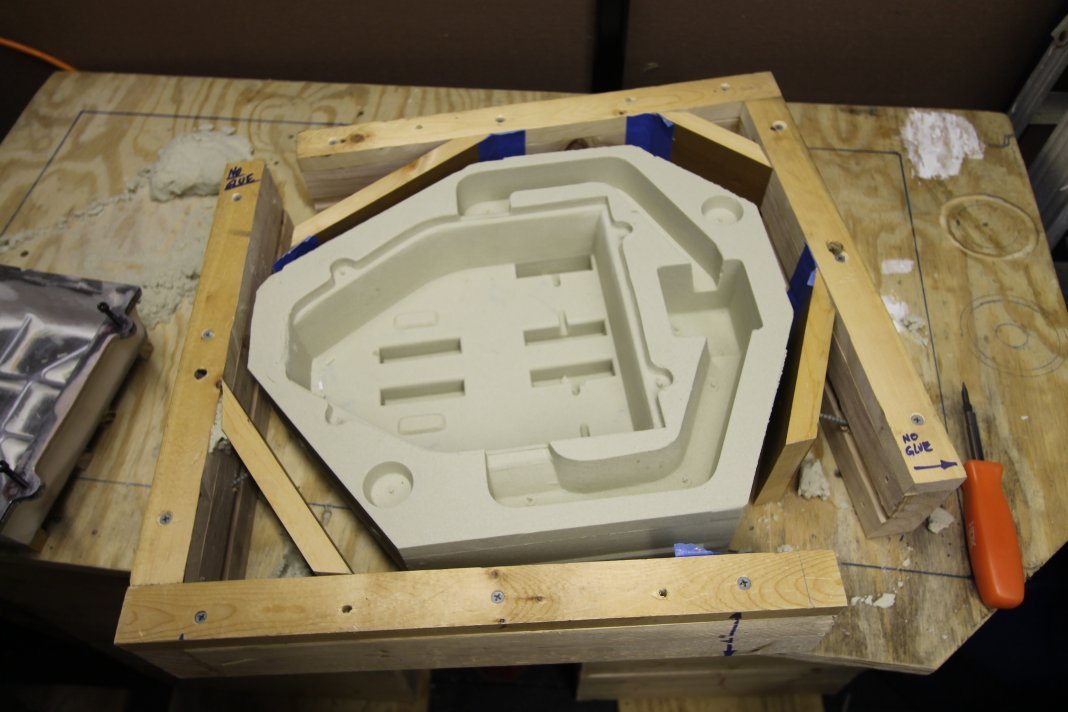
Got the sump inner core pattern assembled and painted. Should be a lot easier to sand than the outer pattern! This gives a visual on what its making. The main inner core. A couple of smaller cores attach to it.4 points
-
So we did a few things in between family obligations. We replaced the oil and oil filter - well partner did, I remain an oil change virgin. Not too much mess, at least nothing a rag and some dirt won't clean up! We found top dead sexy and got the distributor installed - 50% chance it's right, gotta figure out if it's on the compression stroke but #1 cylinder is too hard to reach rn - we'll find a cork or something. We also dropped the dizzy nut and it entered a portal to another dimension. So now a windscreen wiper needs a new nut. We followed this guide and so have the timing 10 units before TDC. Pulled all the spark plugs to check them out, visual inspection seems good even if they're two different brands for some reason. Metal isn't bent, can't measure gap but it seems okay, no crazy build up of stuff, threads are dry (ignoring penetrating lube), except... ... #3 is cross threaded >.< It took most of my strength w/ a breaker bar to get out and required the use of the bar for almost the entire journey out. It's definitely the socket that is the main problem as other spark plugs struggled to go back in too. The socket itself looks like it has some crap in it - I got a pokey magnet in there and drew out a fairly substantial amount of shavings and dust from the threads, but... eek. Down the line we'll try a back tap and see if we can avoid removing the head. We're still lacking the dizzy cap (on its way) but we hooked all the bits back up and the battery and tried to turn it over just to see if that was all good - but nothing, just a click. Full charge on the battery with plenty of CC's tasting like these. The click doesn't seem to come from the starter but rather inside the car on the passenger side which is confusing, but the day was long so we called it there. To do: figure out exactly what's making the noise, also remove starter and see what it looks like / poke it with some electricity. ---- Bonus older gif: pop pop up and down headlights! The left hand horn likes to sound when the lights pop up. I'm guessing there's a short somewhere. The left light also is sliiightly slower to come up giving it a lazy eye effect. Features?4 points
-
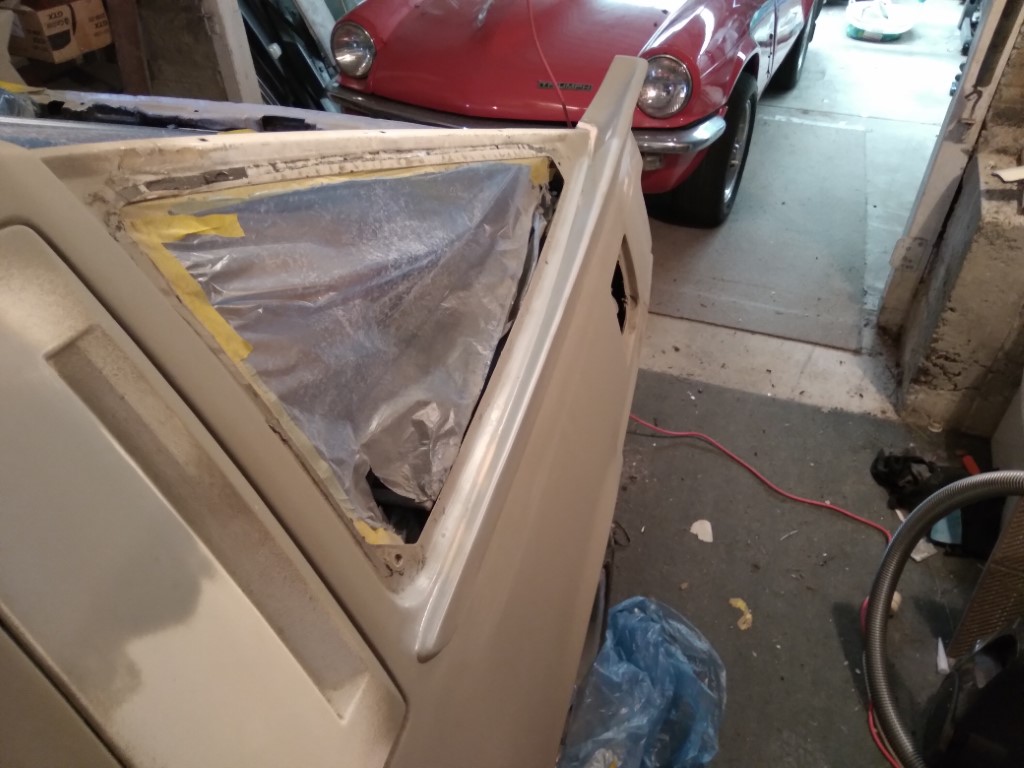
made some pretty big fuckups over the last week or two, lads. Blew some high-build primer over the body and that came out pretty good at least. Yucky stripes on the roof, my compressor decided it was no longer self-regulating so I had to manually shut it off every minute or so to stop things going pop. definitely need to get that sorted before I do anything beyond laying waste with the primer Decided I had to smooth the spoiler into the body - it'll never fit perfectly so shit was always going to get trapped between it and the body, and ultimately rot out. So I banged some sealant (KD bond+seal) on the side pieces and fixed them on. I was originally going to blend them in with bog, but when some of the sealant squicked out the side, I thought "why not just mask it up and blend it in with the sealant?" So I did just that. Then it dried and didn't look very good.... and you can't sand this stuff.... so I ended up trimming all the carefully-shaped sealant off and then reformed the blend with filler Then I made another fuckup. At the top of the spoiler where it blends in, the radius forms a little valley all the way along. And so I thought "why not just pour paint into the valley, it'll self-level and come out perfectly smooth?" as it turns out, paint doesn't like being poured in real thick, and it all cracked and just turned into a bag of roaring ass. So I scraped THAT back, and reshaped it with some filler. Two cockups from being a lazy ass SOB this is the Valley of Death. Best of all it's 90% hidden by the window and trim so really it's a lot of work for no great reward. blending this fucking spoiler in has nearly beaten me tbh. I wonder if I should have just owned the seam. masked up a tidy, straight seam of bog or even sealant, painted it up, and have it visible through the paint rather than spending hours trying to make it all blend in. It's a 4mm bead of sealant around a bodykit, who gives a shit? I probably will end up doing this around the sideskirts as it's less likely to root the paint if they ever have to come off started prepping the guards too. Thankfully they're pretty straight, some meaty repairs at the bottom but it's all steel and again will be under the kit
3 points
-
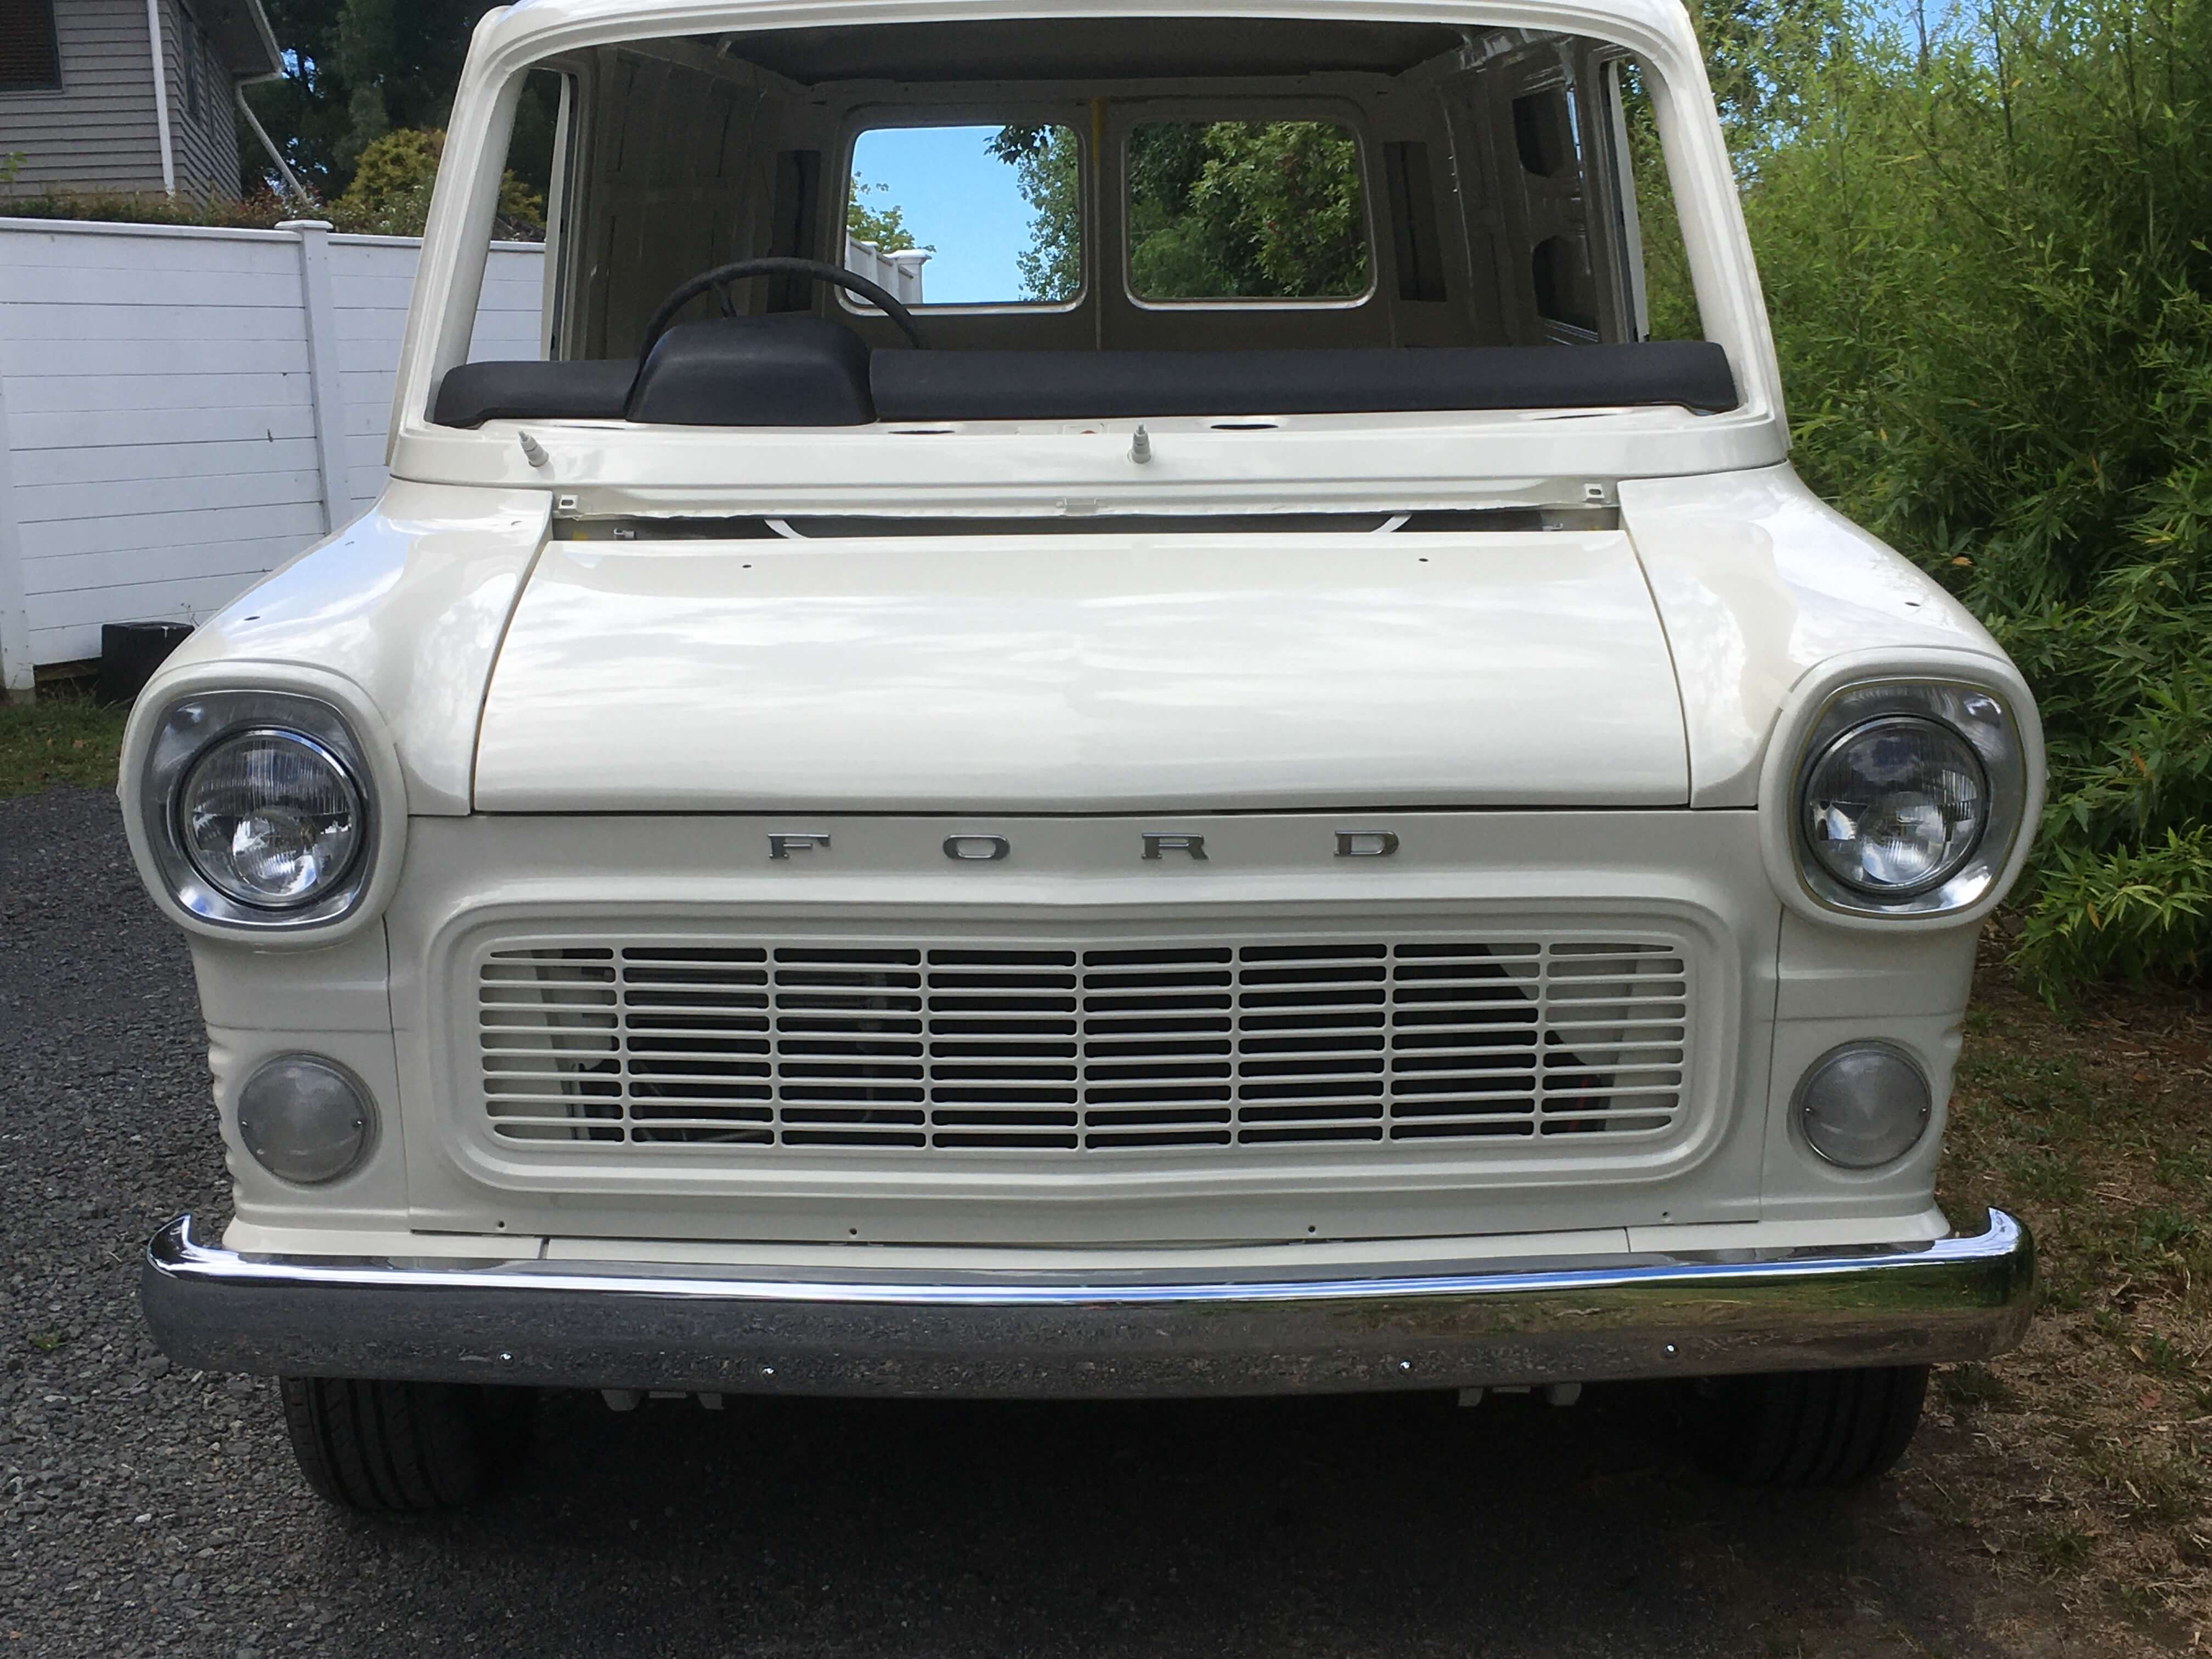
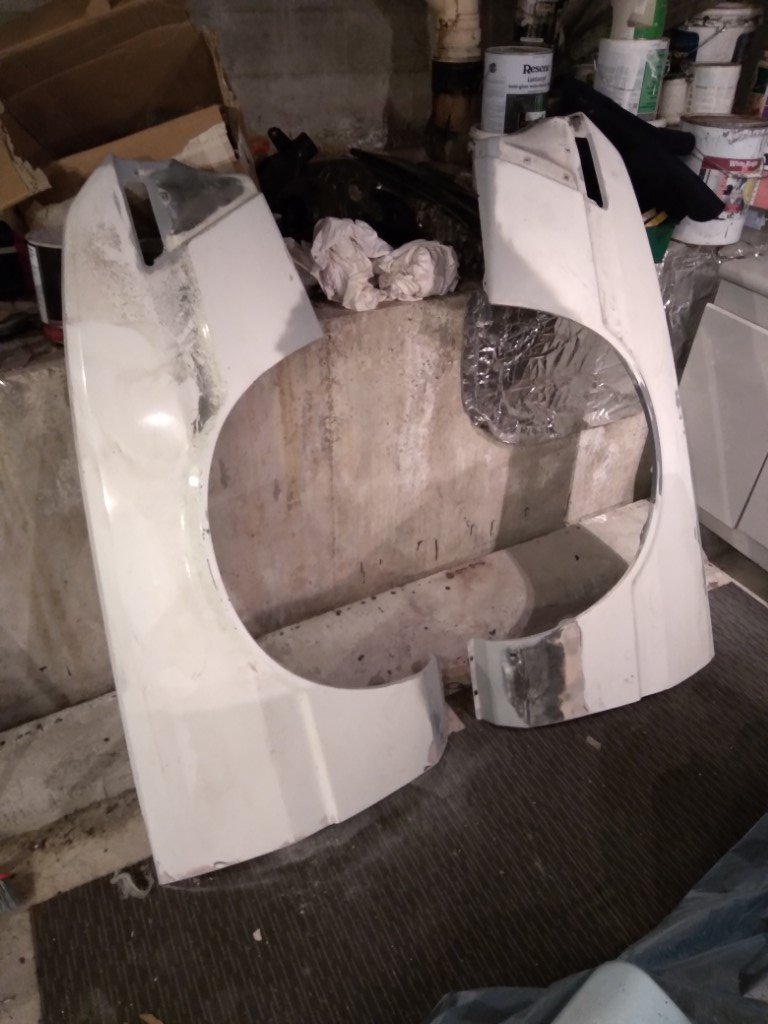
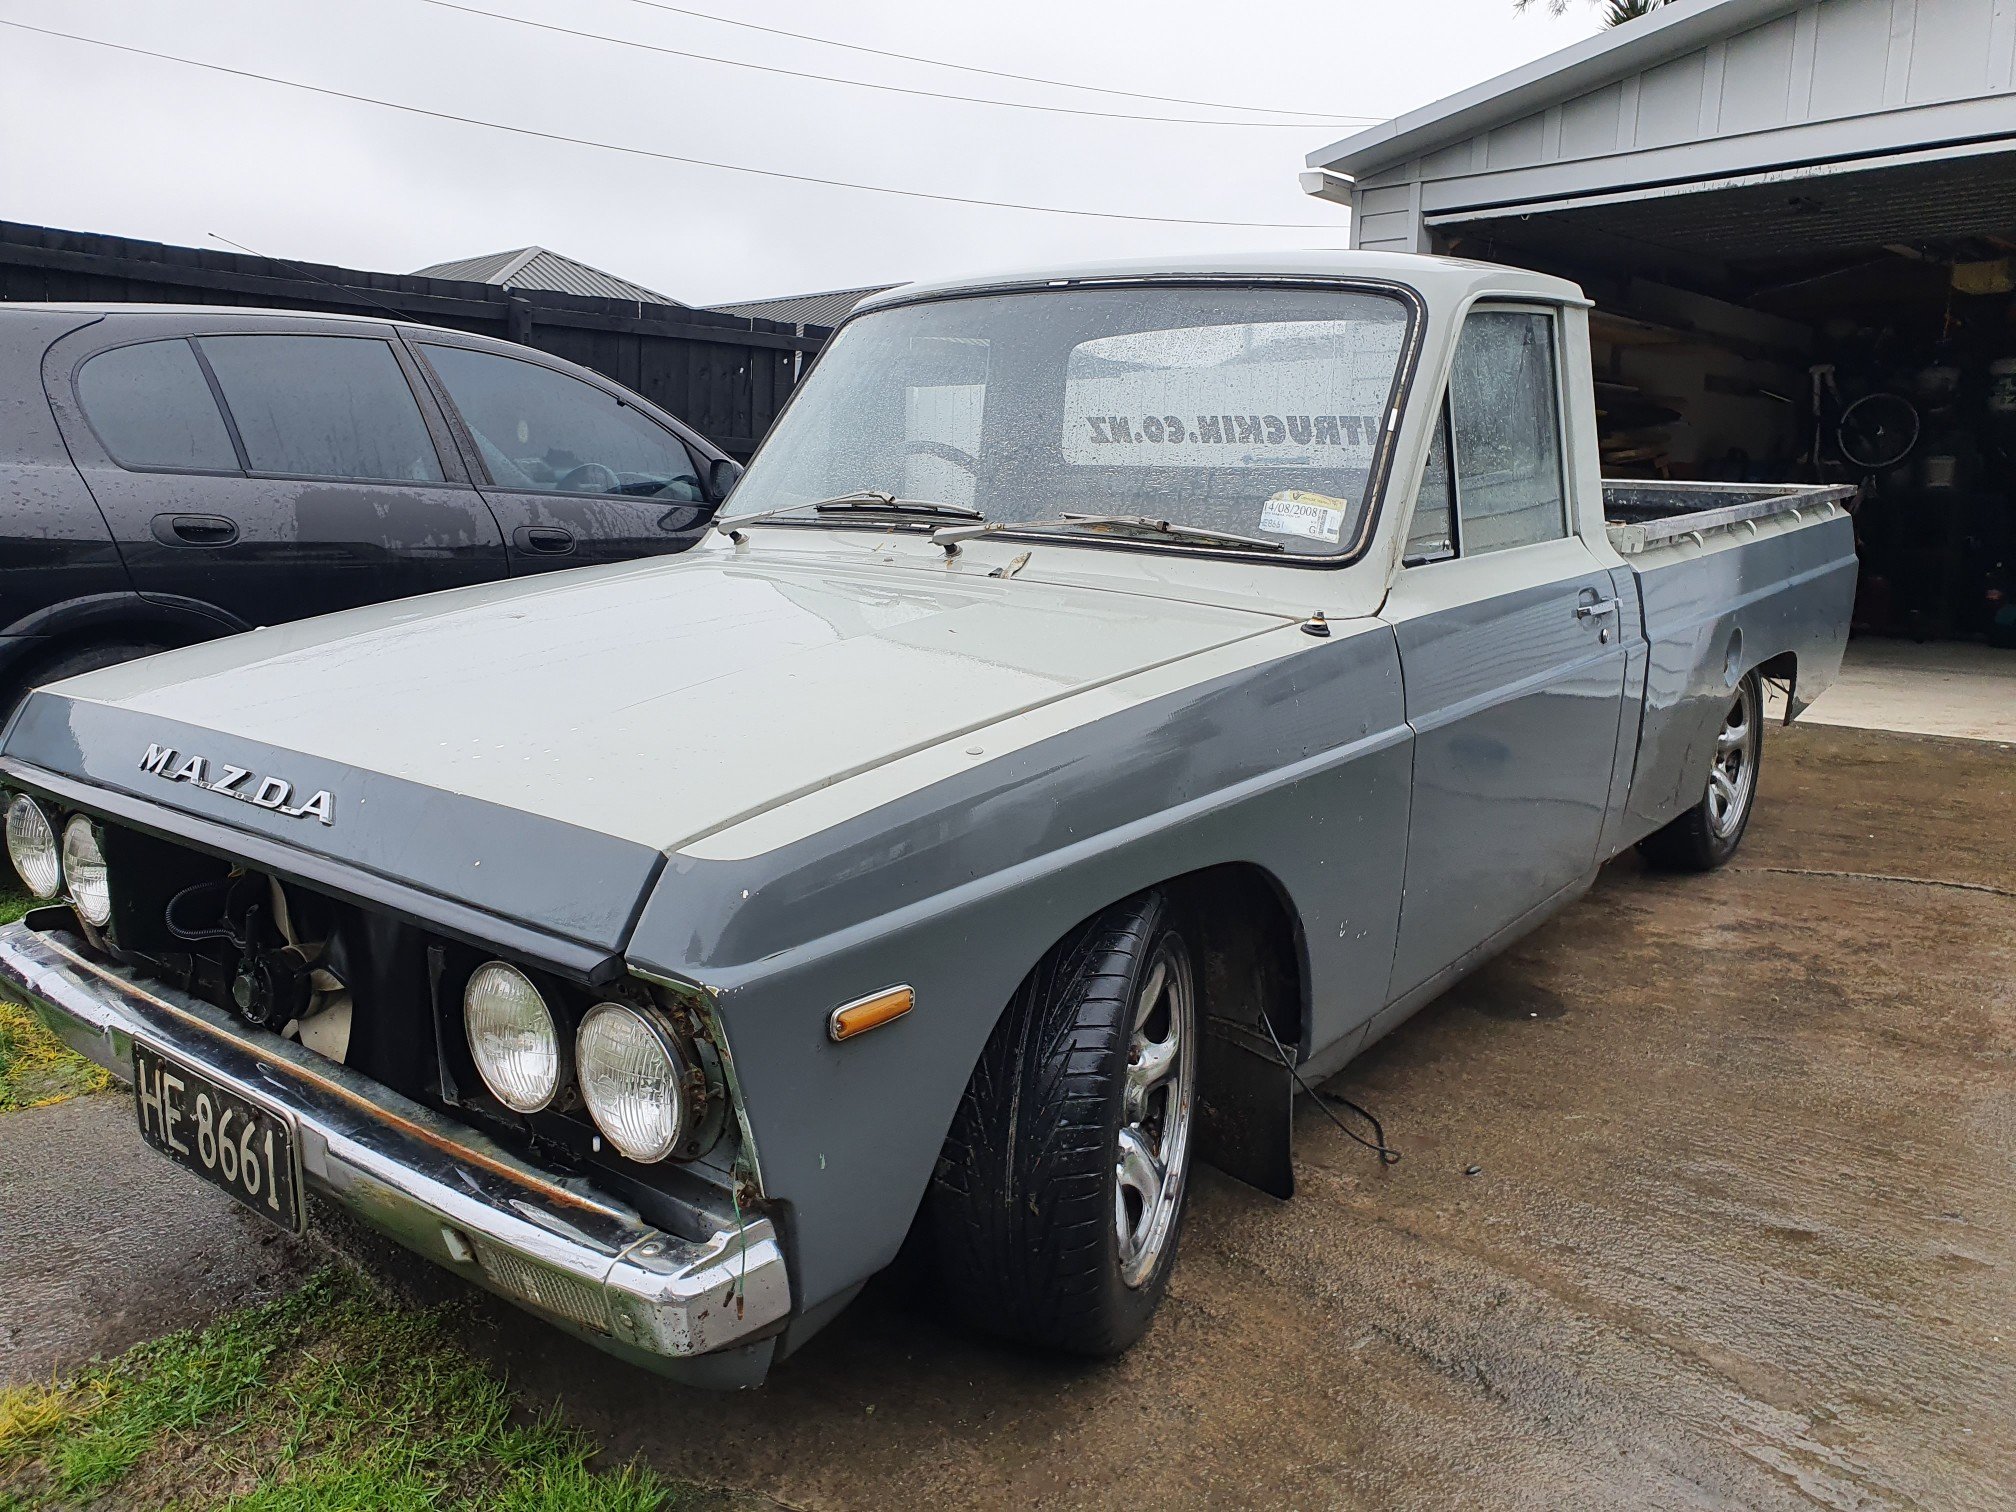
Really taking shape now - the bumper, grille & bonnet chrome are only mock fitted, next jobs are to finalise them, along with welding to the drivers side wing & a pillar.
3 points
-
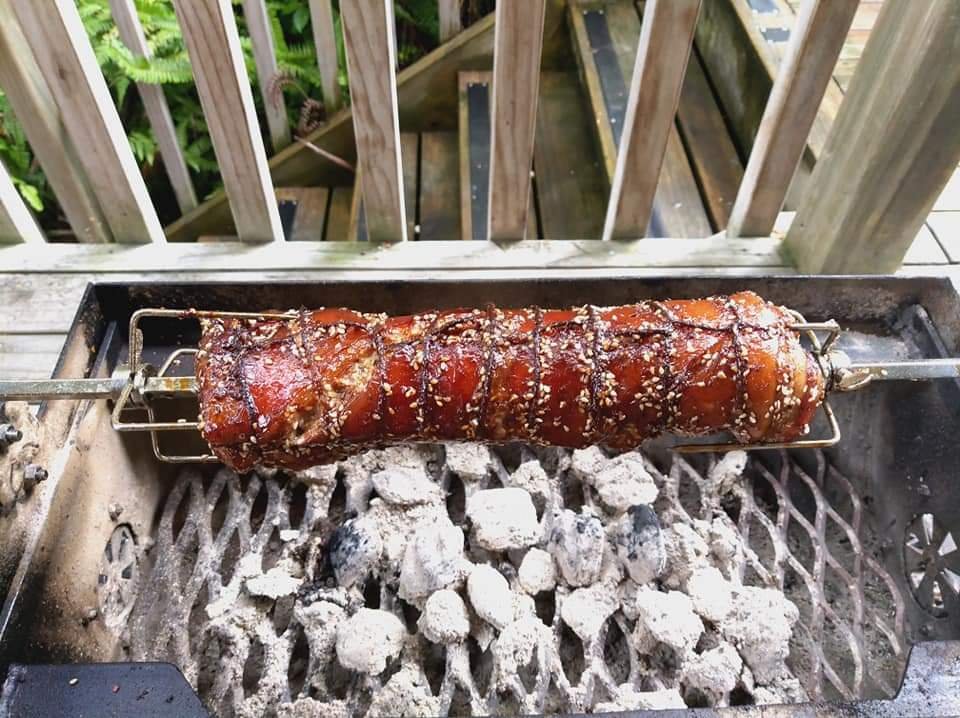
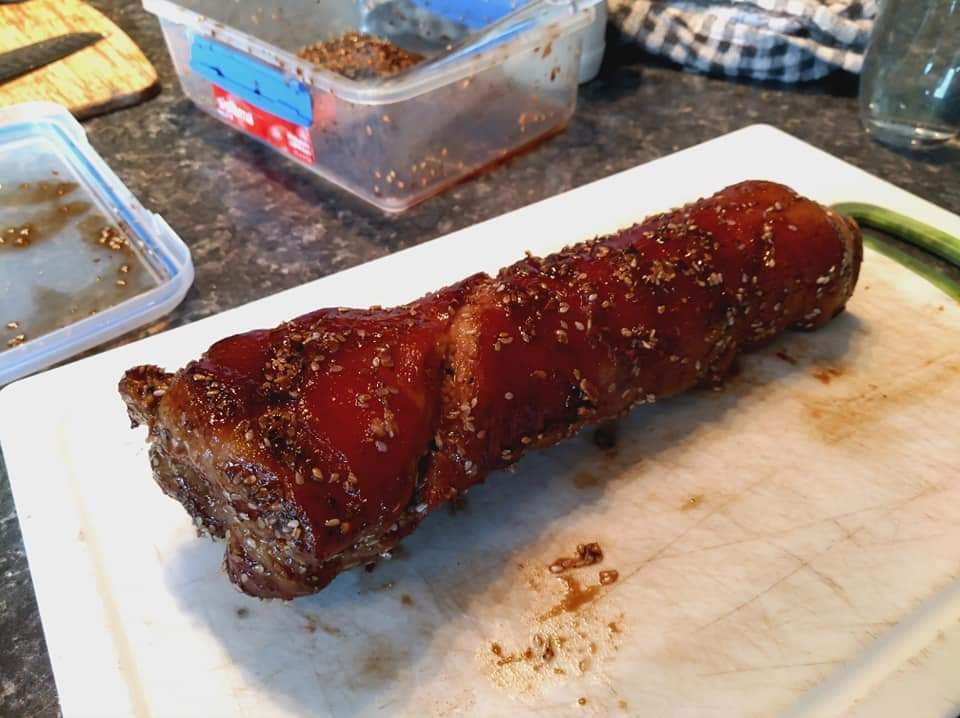
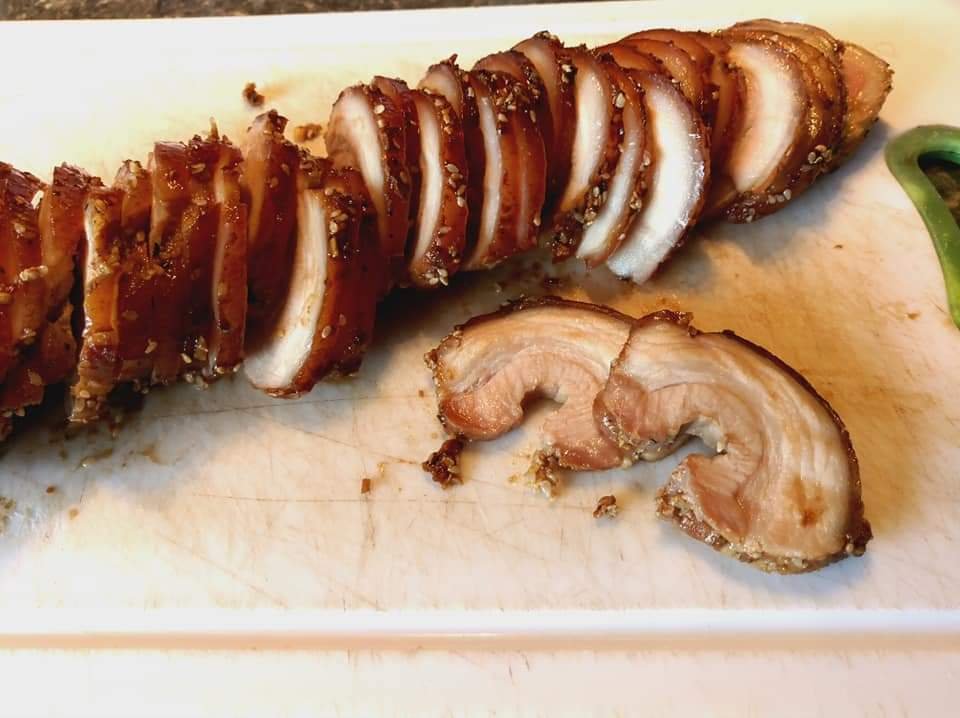
After 2 hours on the rotisserie and the internal temp to just over 60 I took it off, wrapped it and let it rest for about 20mins. Removed the string and cut it up and damn, not too bad. Juicy and tasty as, sticky on the outside. Made a quick sandwich for a snack and will be using it in noodles tonight. Probably freeze some of it for future ramen.
3 points
-
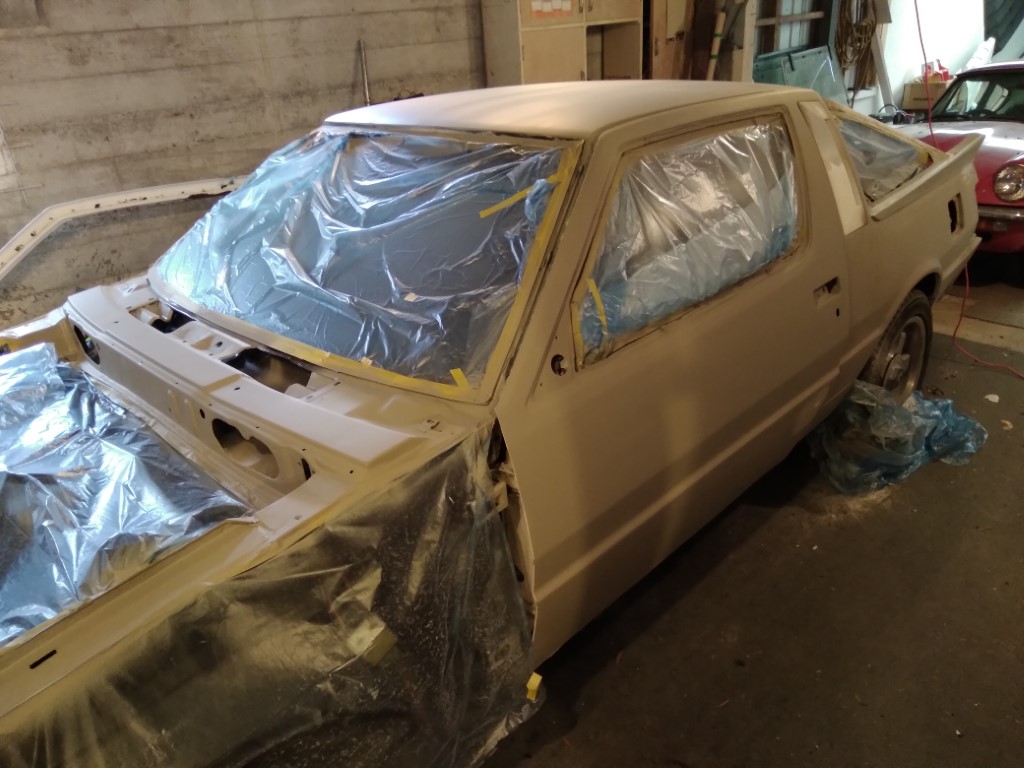
Got the body in primer about 6 weeks ago It then took me all that time to get it up to a reasonable state so that it could then be painted. So then a couple days a go we loaded it up on the trailer (only just fit!) and dragged it into the spray booth at work. Sprayed the base and clearcoat on, it turned out pretty good! A few runs around in places, but nothing that can't be fixed. Pretty stocked really! Could of easily gone wrong haha. Gonna leave it in the booth for a few more days to harden, then take it home and get some underseal on the underside. In the meantime get the rest of the panels ready for some paint too.3 points
-
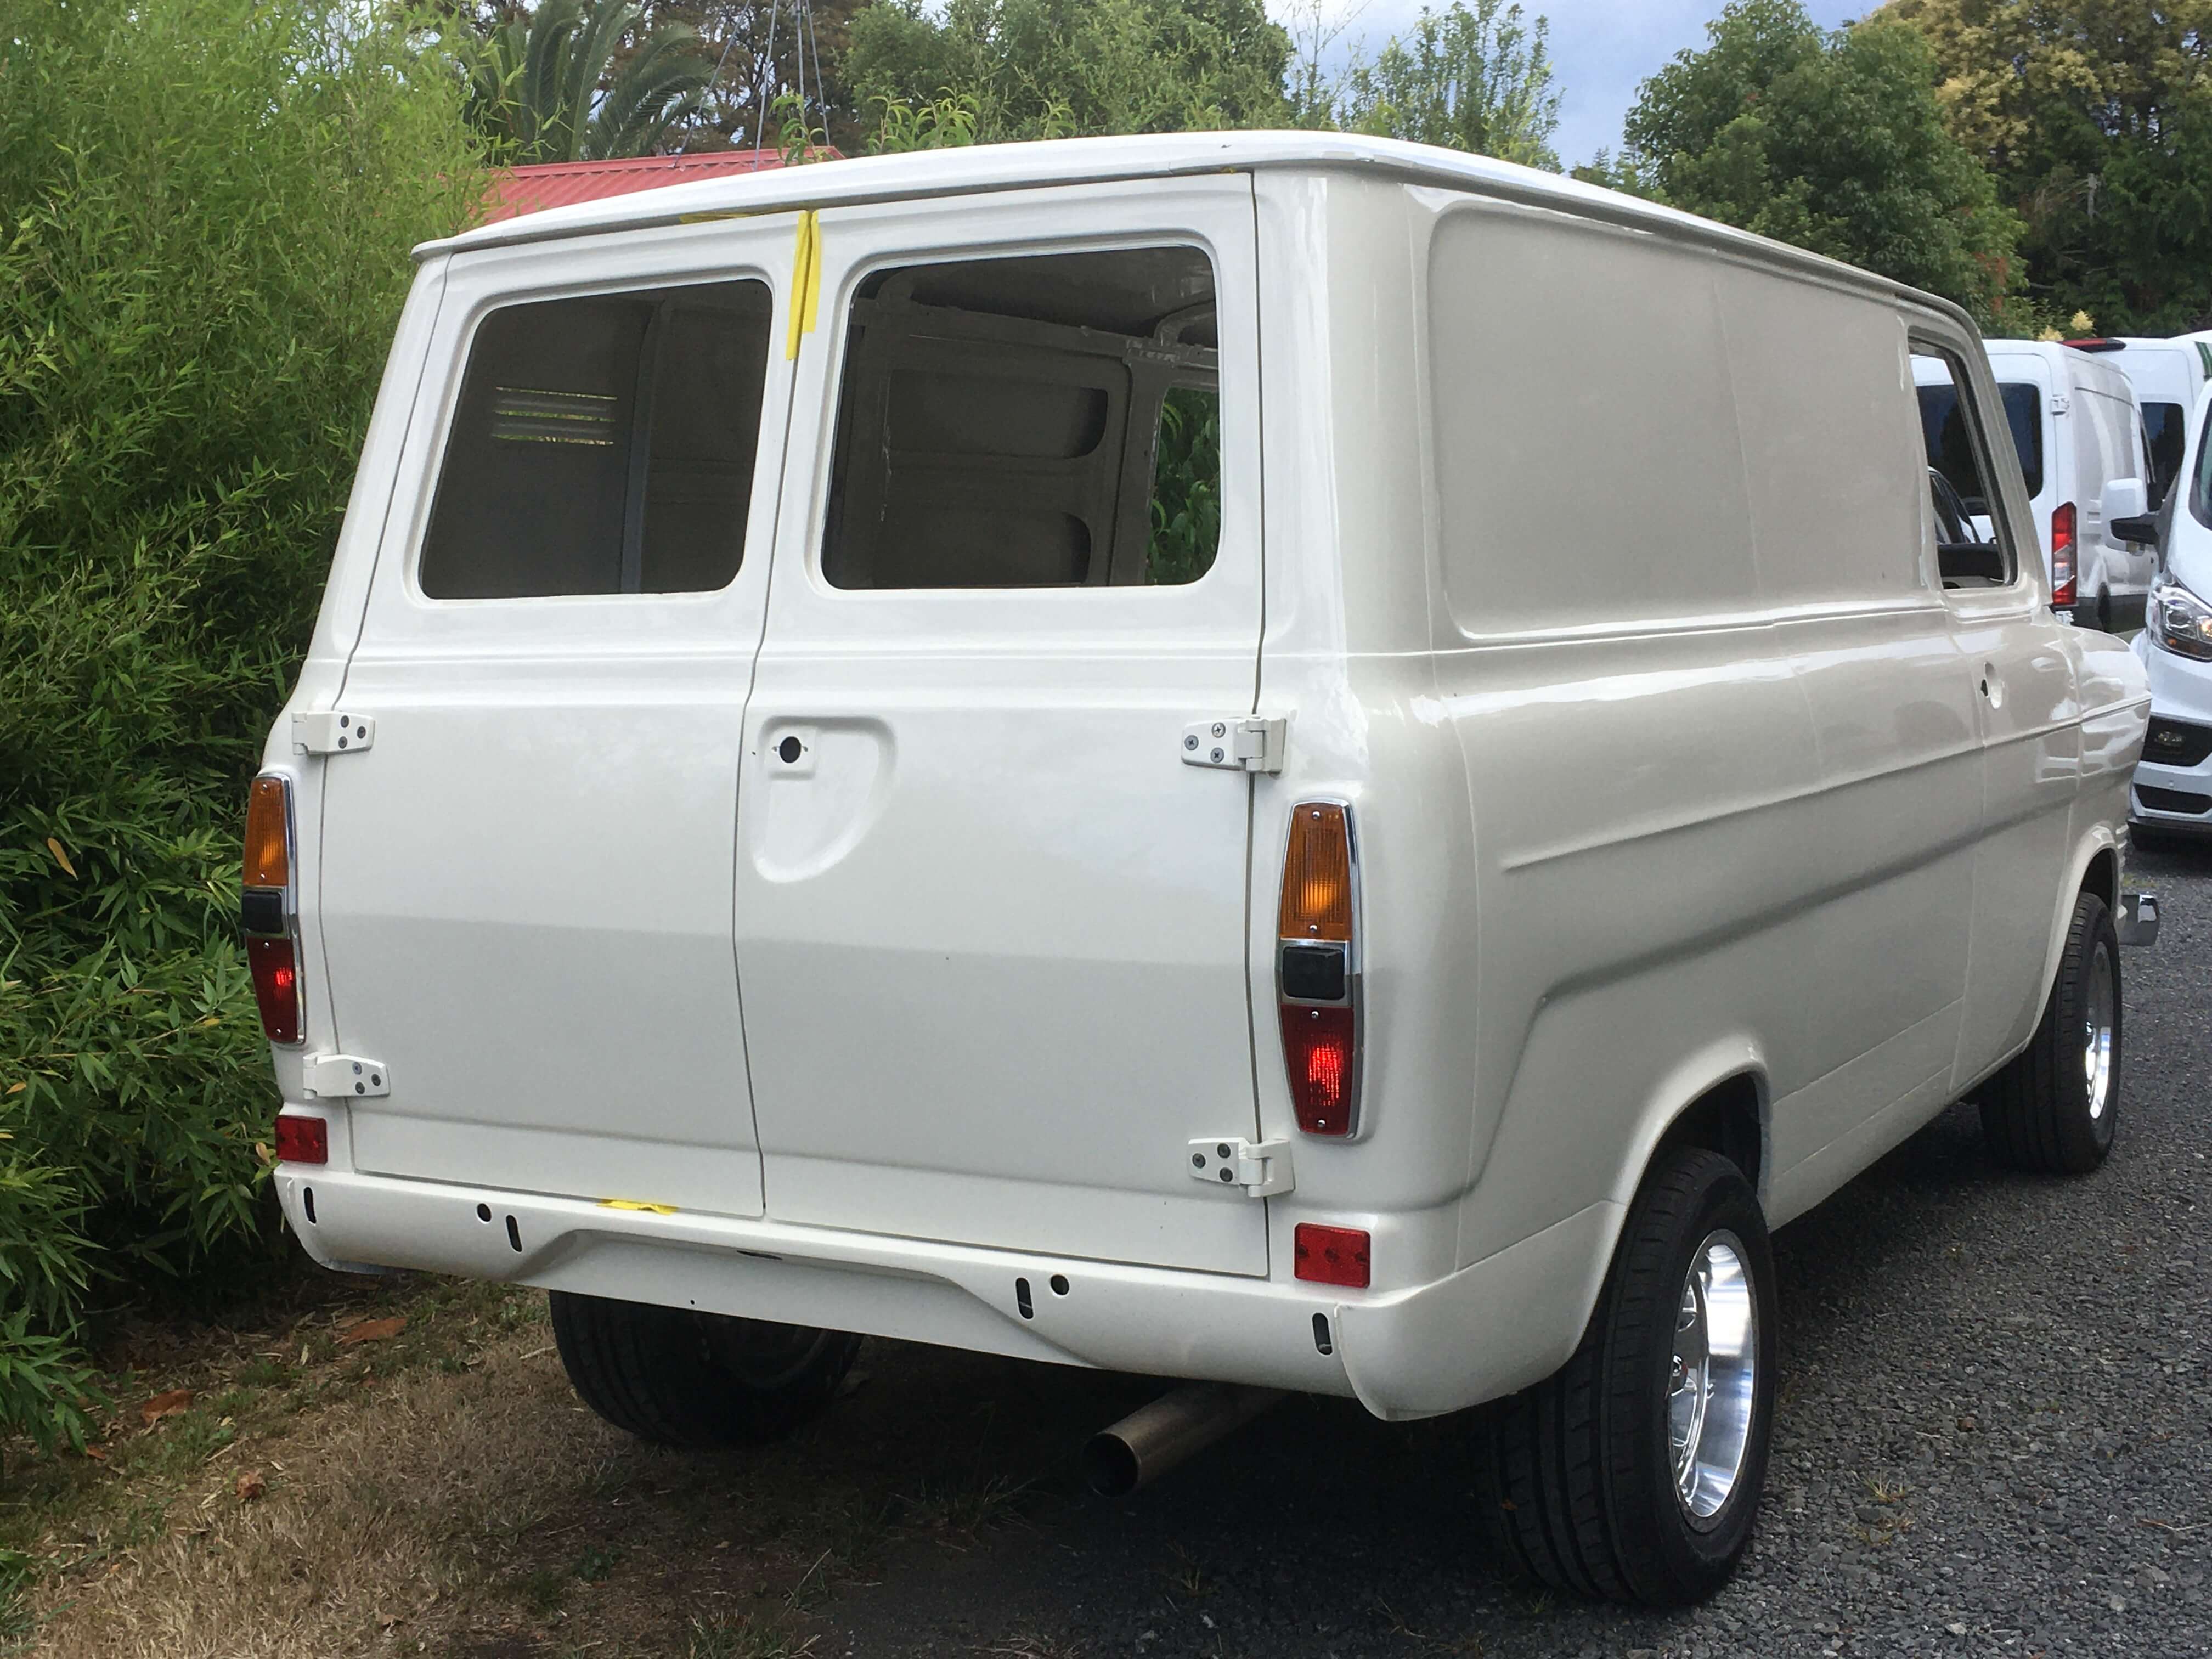
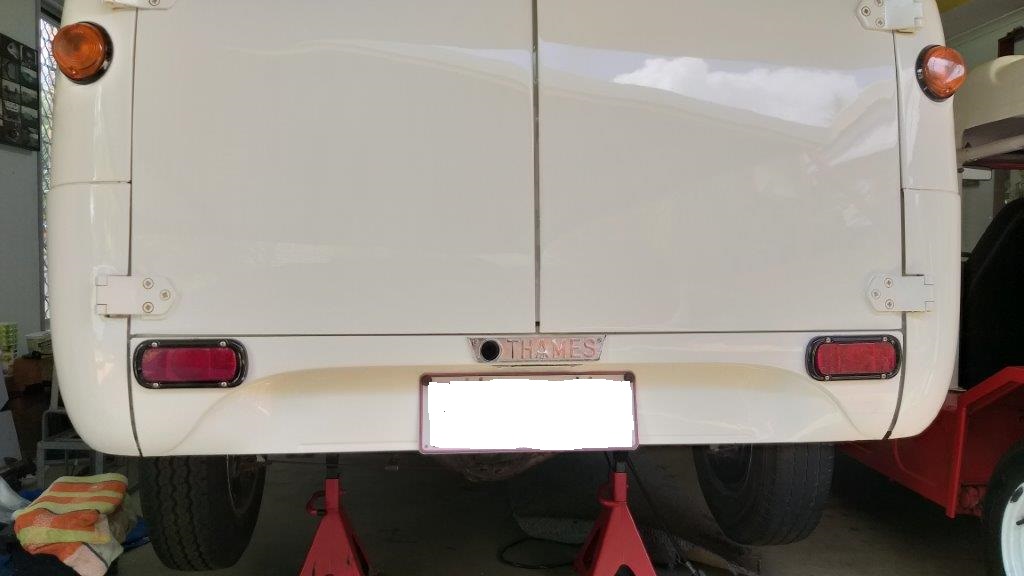
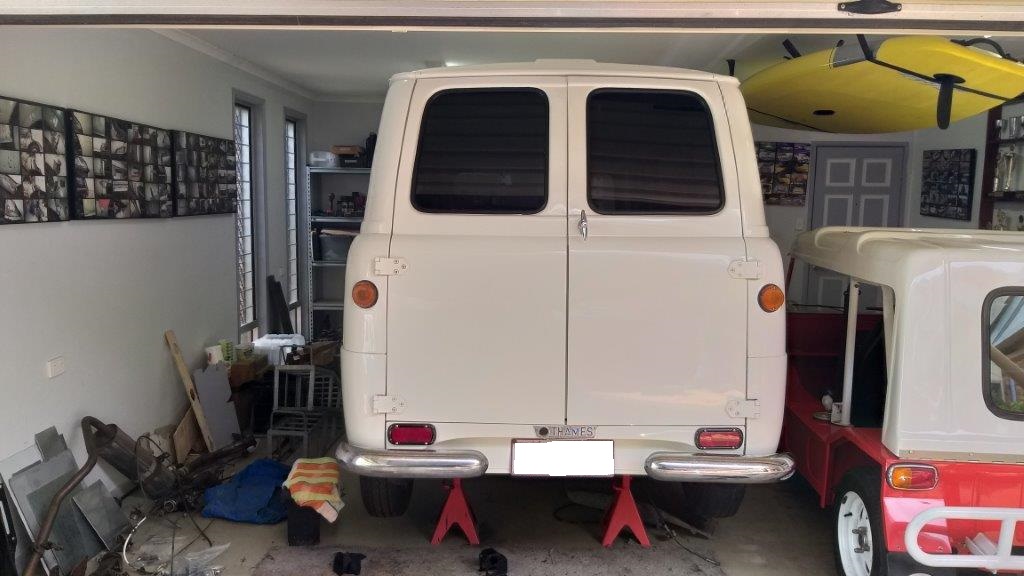
I got tired of tripping over the back bumpers so thought I'd fit them. First time that they have been on the van during my ownership so it's going to take a bit of time to get used to the different look.
2 points
-
NPD 100Plus is one of the highest octane, road legal petrol products to be offered in the South Island from an established fuel retail network. NPD 100Plus is designed to deliver clean-burning power and efficiency and can improve throttle response from your engine. * NPD 100Plus is a specially formulated unleaded petrol with no ethanol content.2 points
-
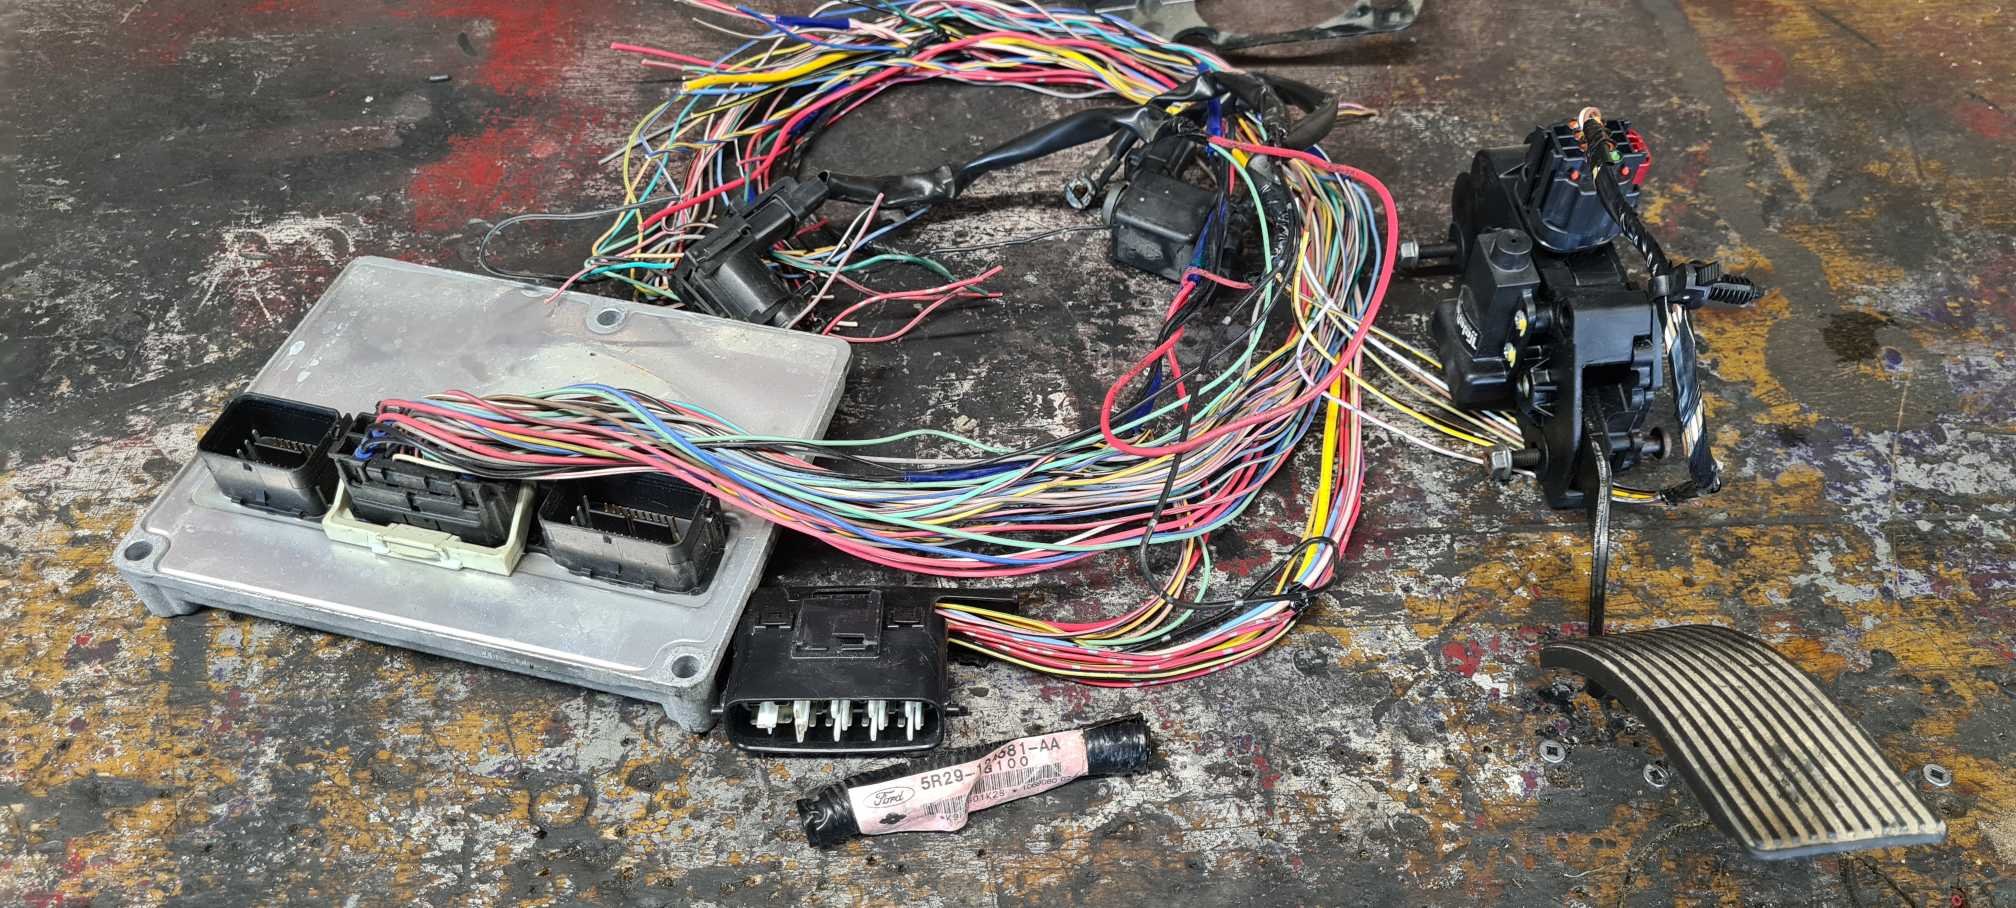
After some googling and video watching I figured a few things out the click is the relay near the ECU in the passenger side activating, and this click means that relay (and the electrical system) is probably all good there's a control terminal on the starter solenoid which is meant to have a cable going into it Here's the ECU, being good looking But our starter only has the one cable actually: Also it's really hard to see back there, that's a camera shot because there's no actual line of sight to the back of the solinoid. ... Wait what's this? Sure enough there's a dangly boi in the engine bay that slots right on (hard to do when you can't see it!). The prev-prev owner must have removed it with dizzy etc. So we plugged it in and gave it another ignition test... ... and no dice. But the solenoid activates! Hallelujah - that means it's not an electrical problem! After much fandangling with next to no space and funny angles under the car, partner manages to get the two bolts undone to haul the starter out. Here she is standing in triumph. We gave it a quick test on the bench by grounding the case and 12v'ing the positive terminal, then bridging the control terminal with a screwdriver. The starter clicked and whirred into life. Probably still bad but an interesting turn of events given that the motor wasn't spinning at all inside the car, even after some hammer hitting. So we chucked it back on the car, first just with the wires attached (it spins when ignition is turned, hooray?), then with it properly seated, and gave it another whirl. It struggles, hard. The battery's CC rating is fine, and doesn't drop below 10.4v while cranking. I doubt that's the problem. The starter also still randomly fails to engage sometimes. So I think the reason it's struggling is just that it's old and shitty.2 points
-
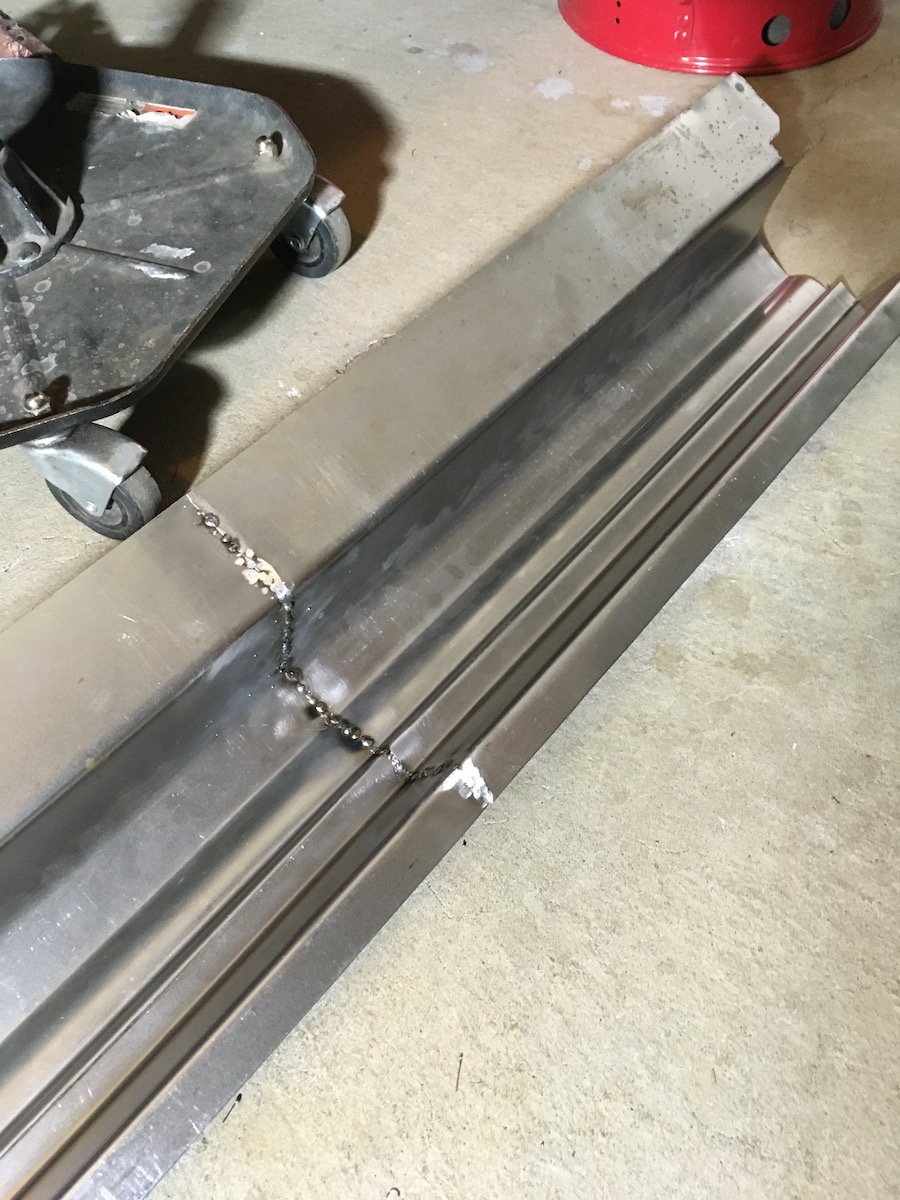
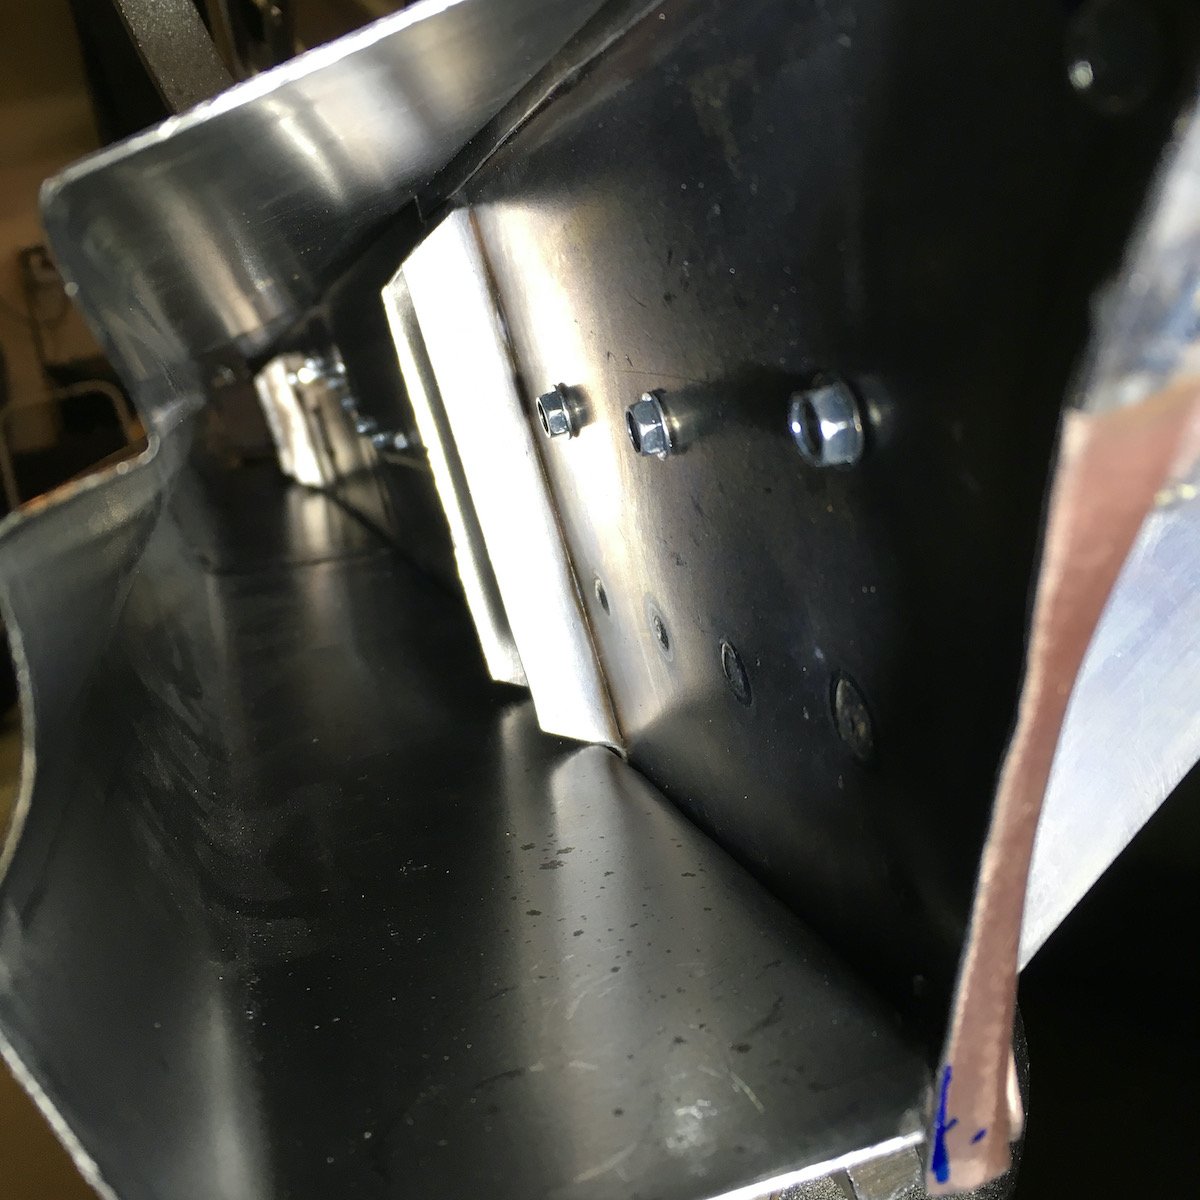
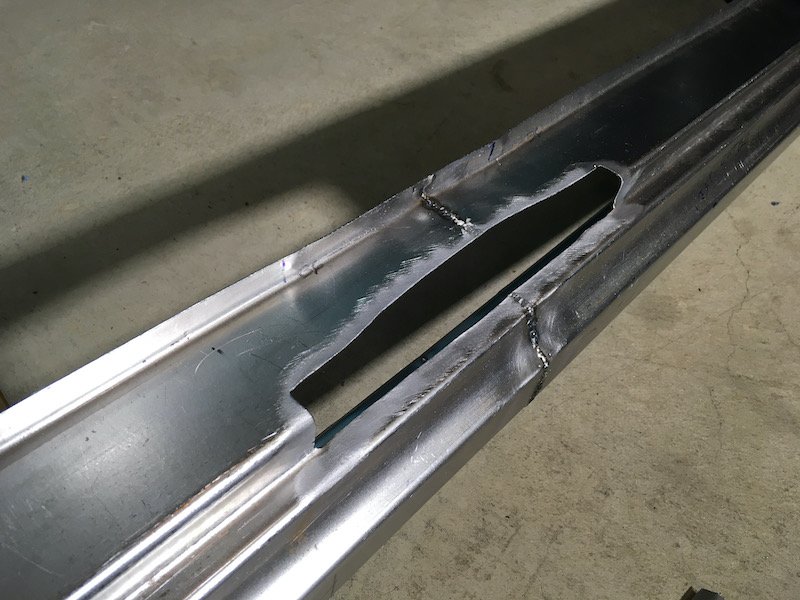
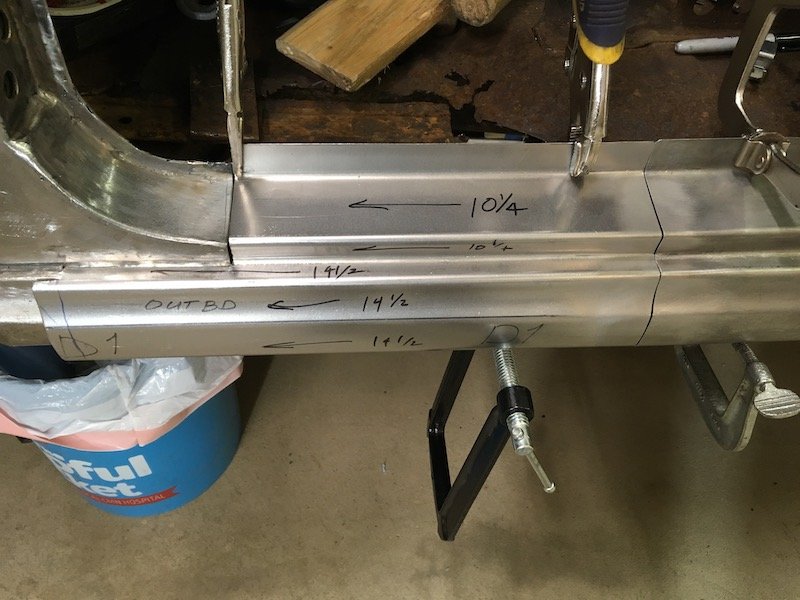
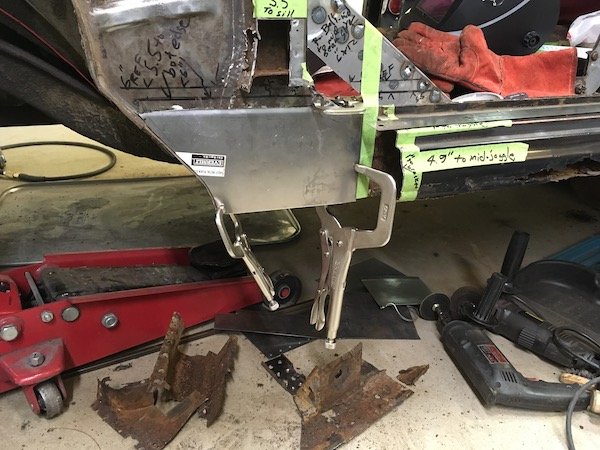
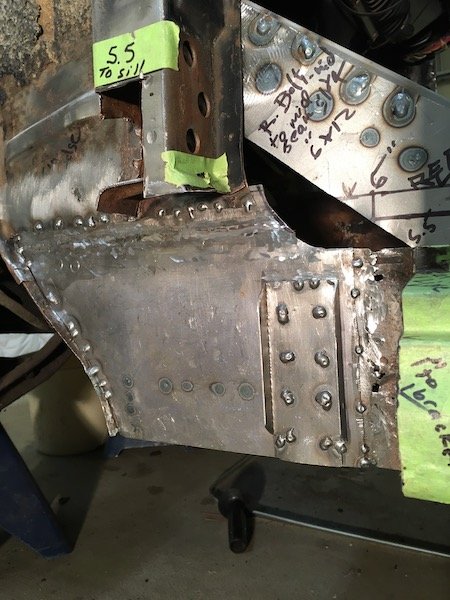
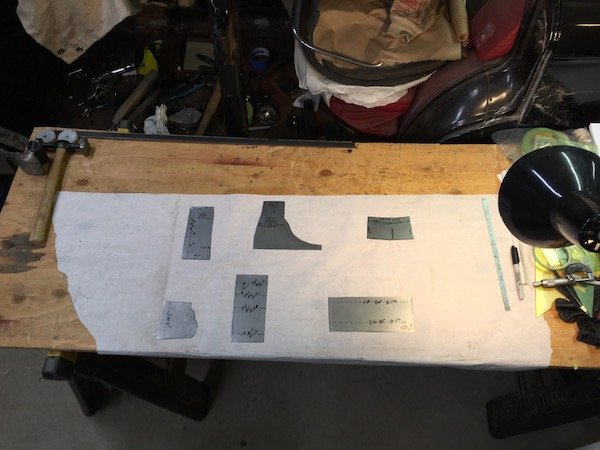
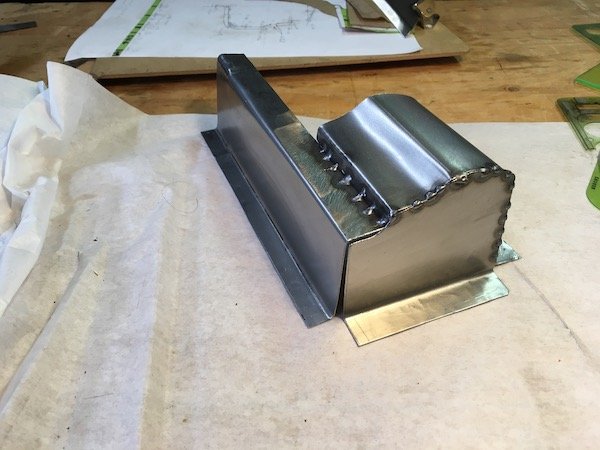
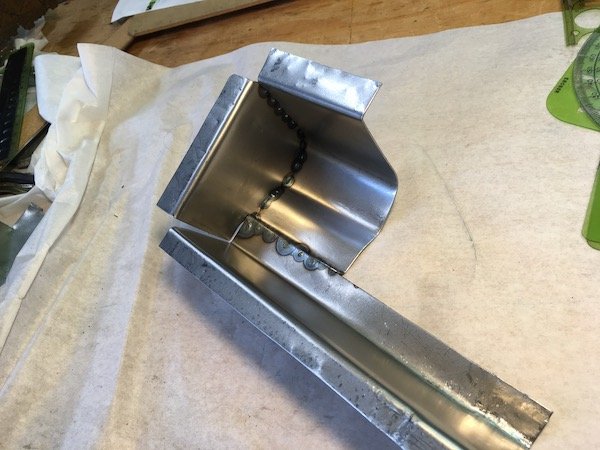
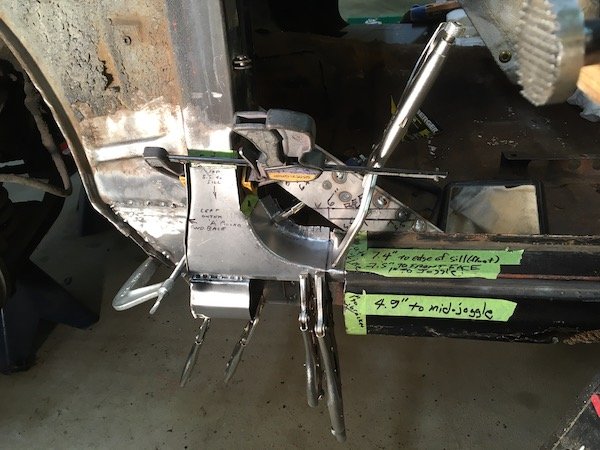
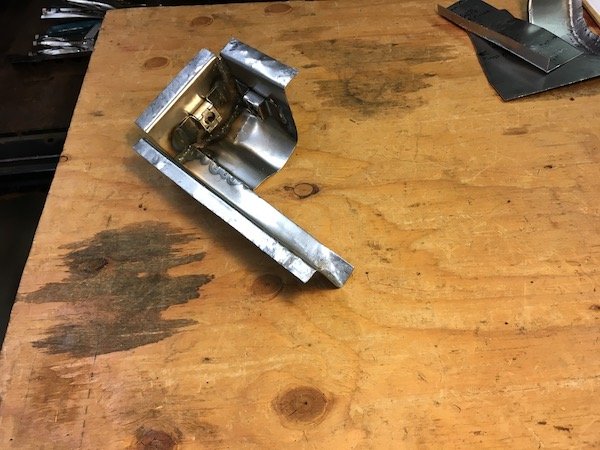
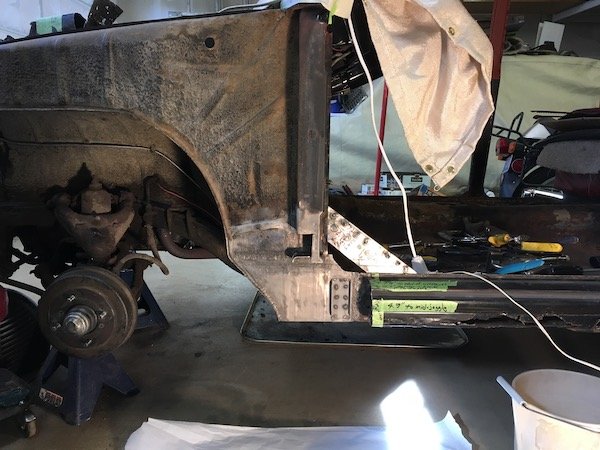
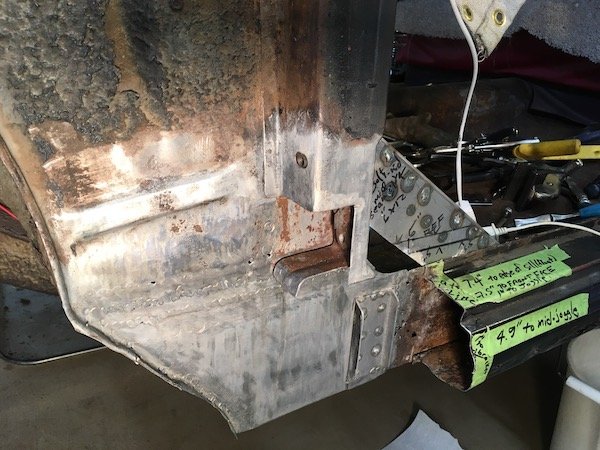
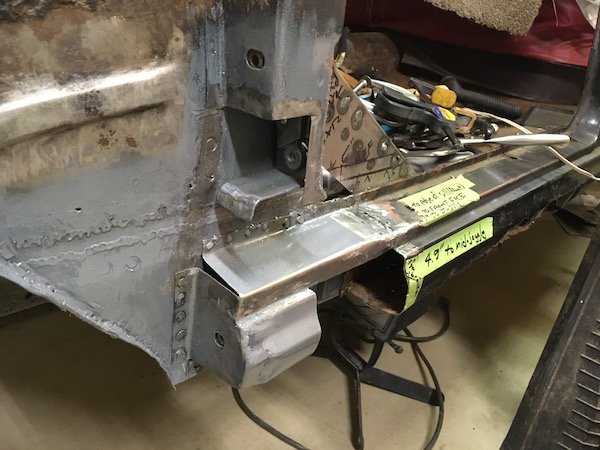
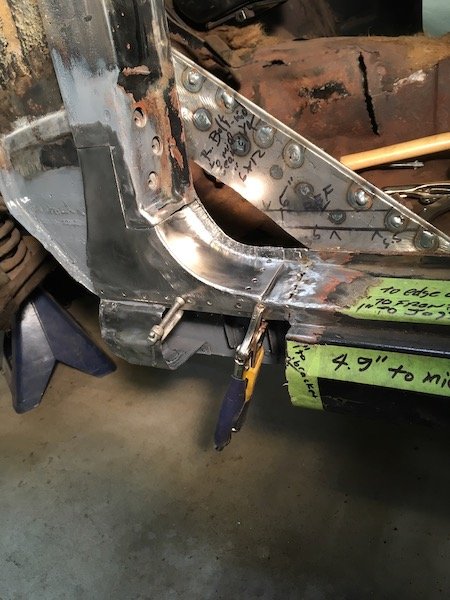
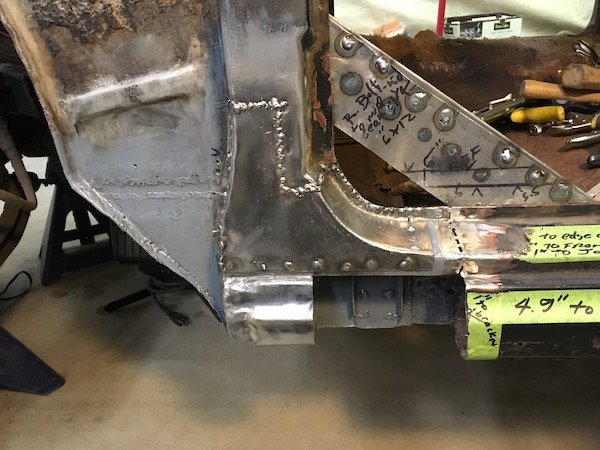
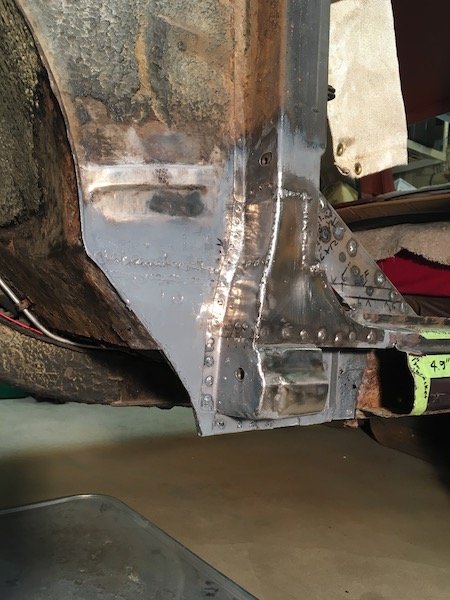
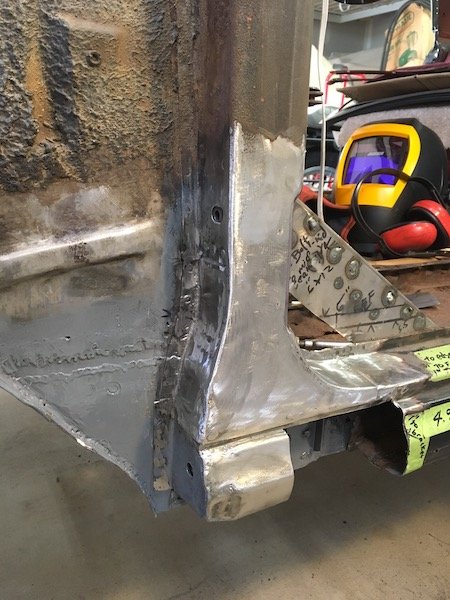
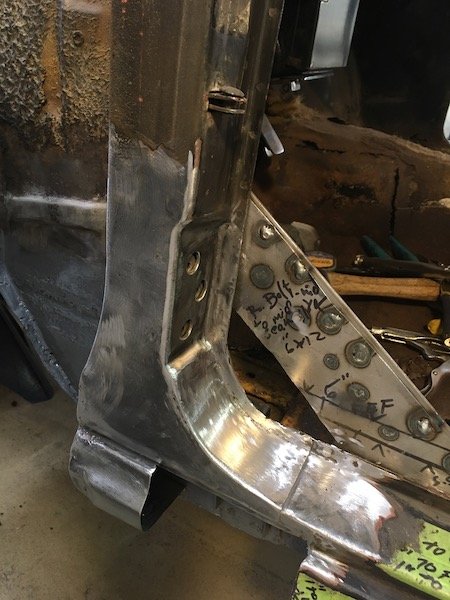
Building the 1961 Datsun 310 Bluebird - RHS Outer Sill Weld Together and Details. Time for an update reporting progress on the RHS build. Outer sill segments are welded together, including most details; end stub, end stub cap and inward joggle at B-post base. Lower A-post below the belt line and down to the sill (about 2 feet w/hinge mount points) is fabricated, tack welded together and temporarily fitted (mock up installed with Teks). The Inner body skin behind the A-post is repaired with another patch. The RHS front door hinges are rebuilt. Both RHS doors were dragged out of the backyard shed, temporarily installed and checked for fitment with the other repairs and all is well. The lower half B-post repairs are underway and nearly complete. Posting the outer sill progress/pics. Other stuff noted above to follow later. The three RHS outer sill segments welded together. Fully welded on both sides since outer is to be sanded flush. Trimmed and fit checked. Kept the weld heat under control by alternating tacks between the different joints and sides and it all came out exceptionally straight. It could have easily warped and created a nightmare. I don't recommend this approach but with a cheap 18 inch metal folder it was the only way to make it. Looks good enough now to proceed with the forward end stub. Next, making the RHS outer sill forward end stub. What follows is the detail required to allow the sill to have clearance with and tuck under the inner front fender support structure. I had no reliable original stub to copy from and just made my best guess to reverse engineer this new stub from the mutilated mess of the original as shown in the pics below. I got lucky and it does test fit snugly with the inner fender structure with just a millimeter or two of clearance. Then, after dressing the stub welds, I made a forward end cap to fit it based on best guesstimate. Stuck it together using a resistance spot welder from Harbor Freight. First time use where I may have been holding the dwell a bit too long. It's permanently stuck on at any rate. In preparing for future repairs and fitment work on the B-post, I made a cutout about mid-length down the outer sill to fit the base, same as on the original. Then filled it in with a custom small inward joggle piece that, though small, took several hours to build. Tacked it in and left it that way for now until the B-post is complete and fit is assured. Made several other minor joggles along the pinch weld flanges to accommodate overlap of bracket flanges and such. Not worthy of pics. That's it for this post on the RHS outer sill. As mentioned in the beginning of the post, hopefully more to follow soon. Discussion: https://oldschool.co.nz/index.php?/topic/60267-marts-pl310-61-datsun-bluebird-sedan/ Build: https://oldschool.co.nz/index.php?/topic/60264-marts-pl310-61-datsun-bluebird-sedan/
2 points
-
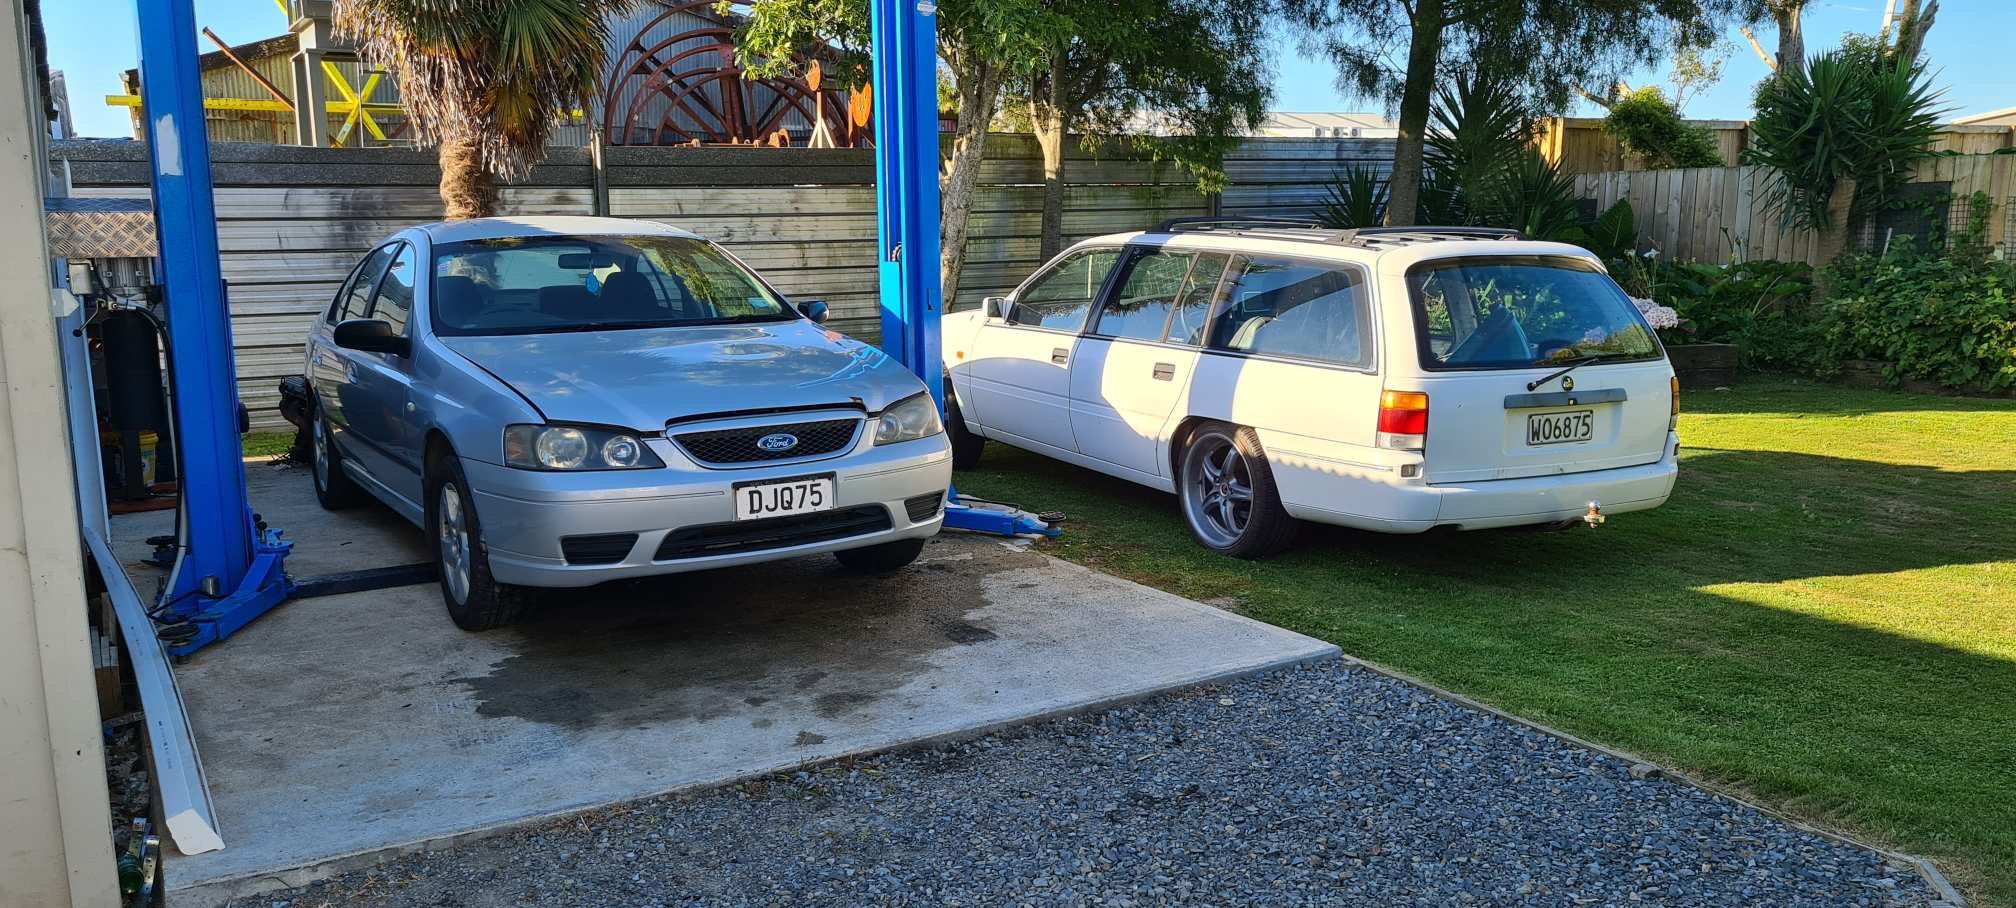
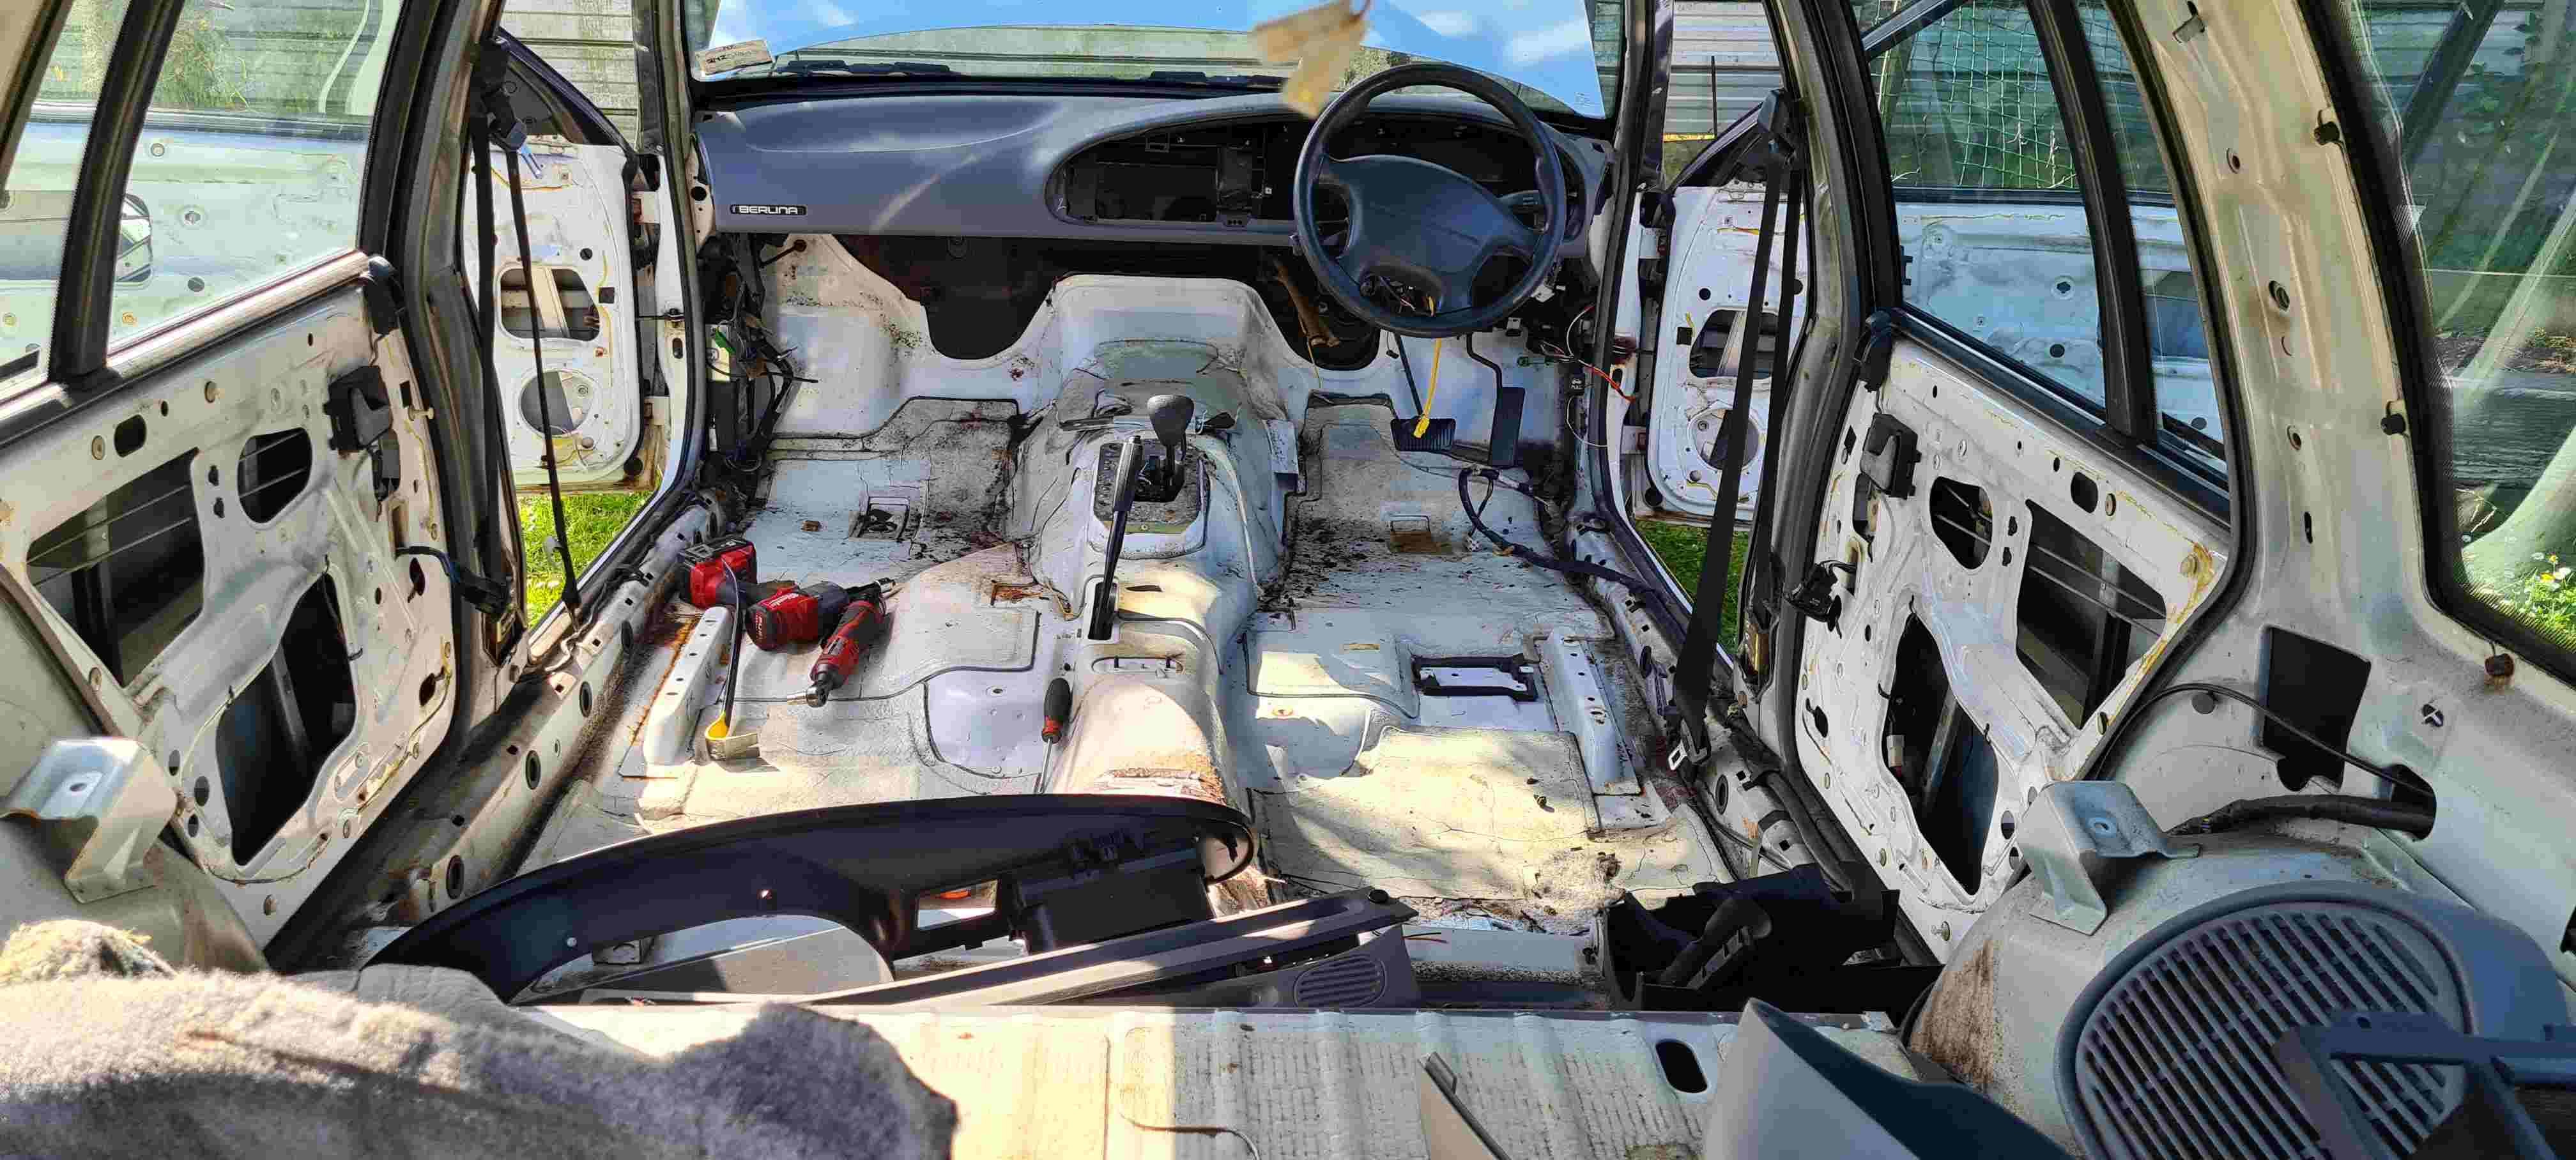
Pulled the engine out of the falcon and got all the turbo goodies bolted up, been setting up the ECU to take the Fg throttle and injectors and converting the tune file with HP tuners while on nightshift, should have the engine wiring finished off in the next day or 2. Getting rid of the falcon body soon so will get the wagon back on the hoist and look at getting the engine in and mounted
2 points
-
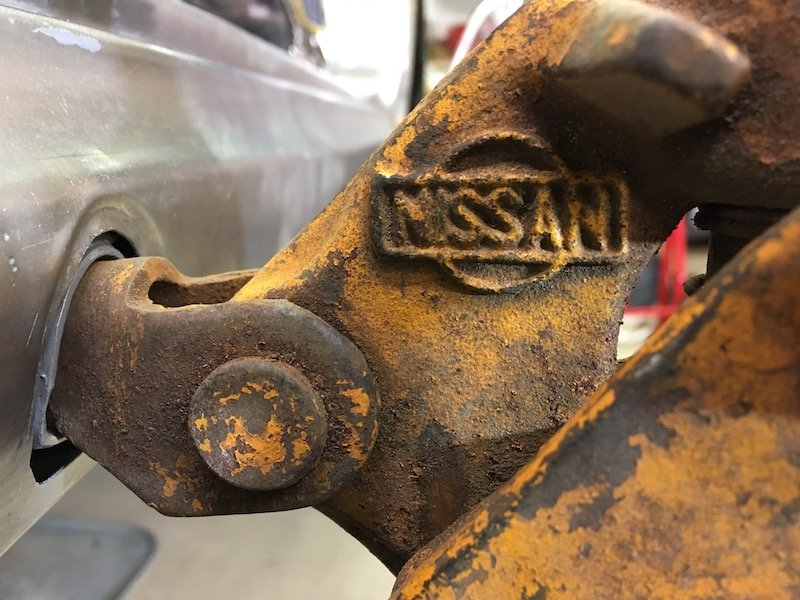
Get us one of these please love - this ones fucked. Previous owner has indeed filled the seal lubrication hole with silicone. Everything has also been reassembled less the electrical insulation stuff so the front bearing was pretty loose in the outer housing - had not been loctited into place as they recommend. Might need to get someone talented on a lathe to spin up a new spacer. This ones got a pretty decent groove in it from the oil seal and the front edge is also chooched so i cant just turn it round. I really hope its not part of the shaft! I guess I'll find out soon enough once I get a suitable sized puller to go in there.2 points
-
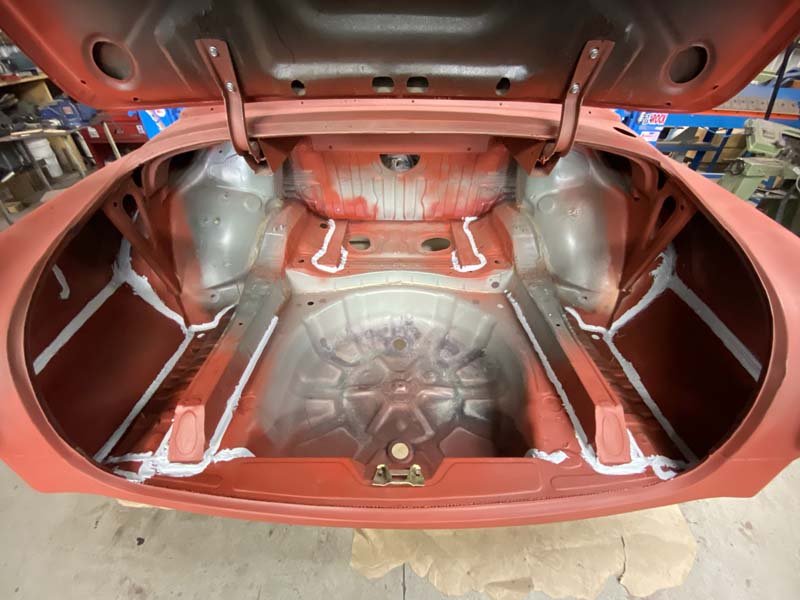
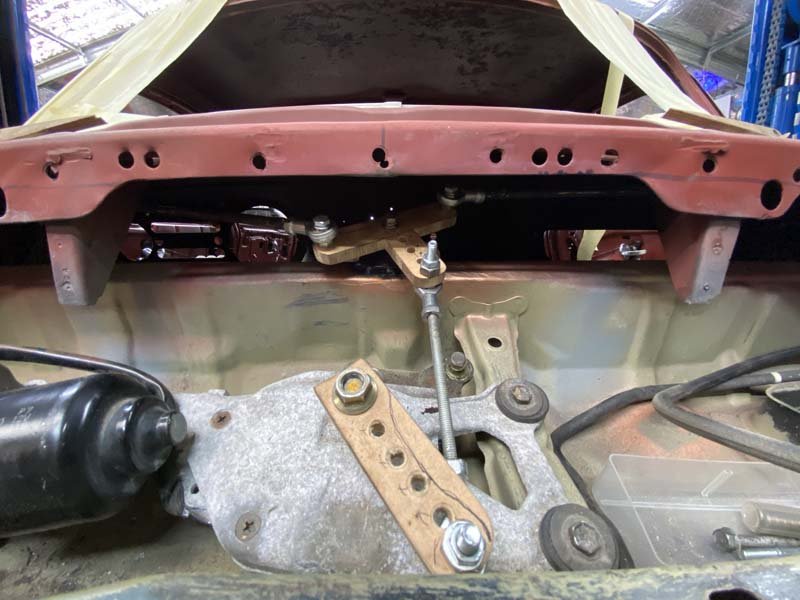
Seam sealed beneath and in the trunk. Undersealed over the seam sealer beneath. And while waiting for that to dry etc. I made a start on mounting the 50s chevy pickup wipers. Work well and much easier to purchase than the sedan's cable driven factory units. Then made a start on connecting them to the cut down lexus wiper motor. Is working Well. Even has an extra motor to park the wipers. Which should bring them to a rest on the windscreen rubbers very nicely. Will continue once Ulrich is back open again. So I can replace the wood. Today I reassembled the rear subframe and reinstalled.
2 points
-
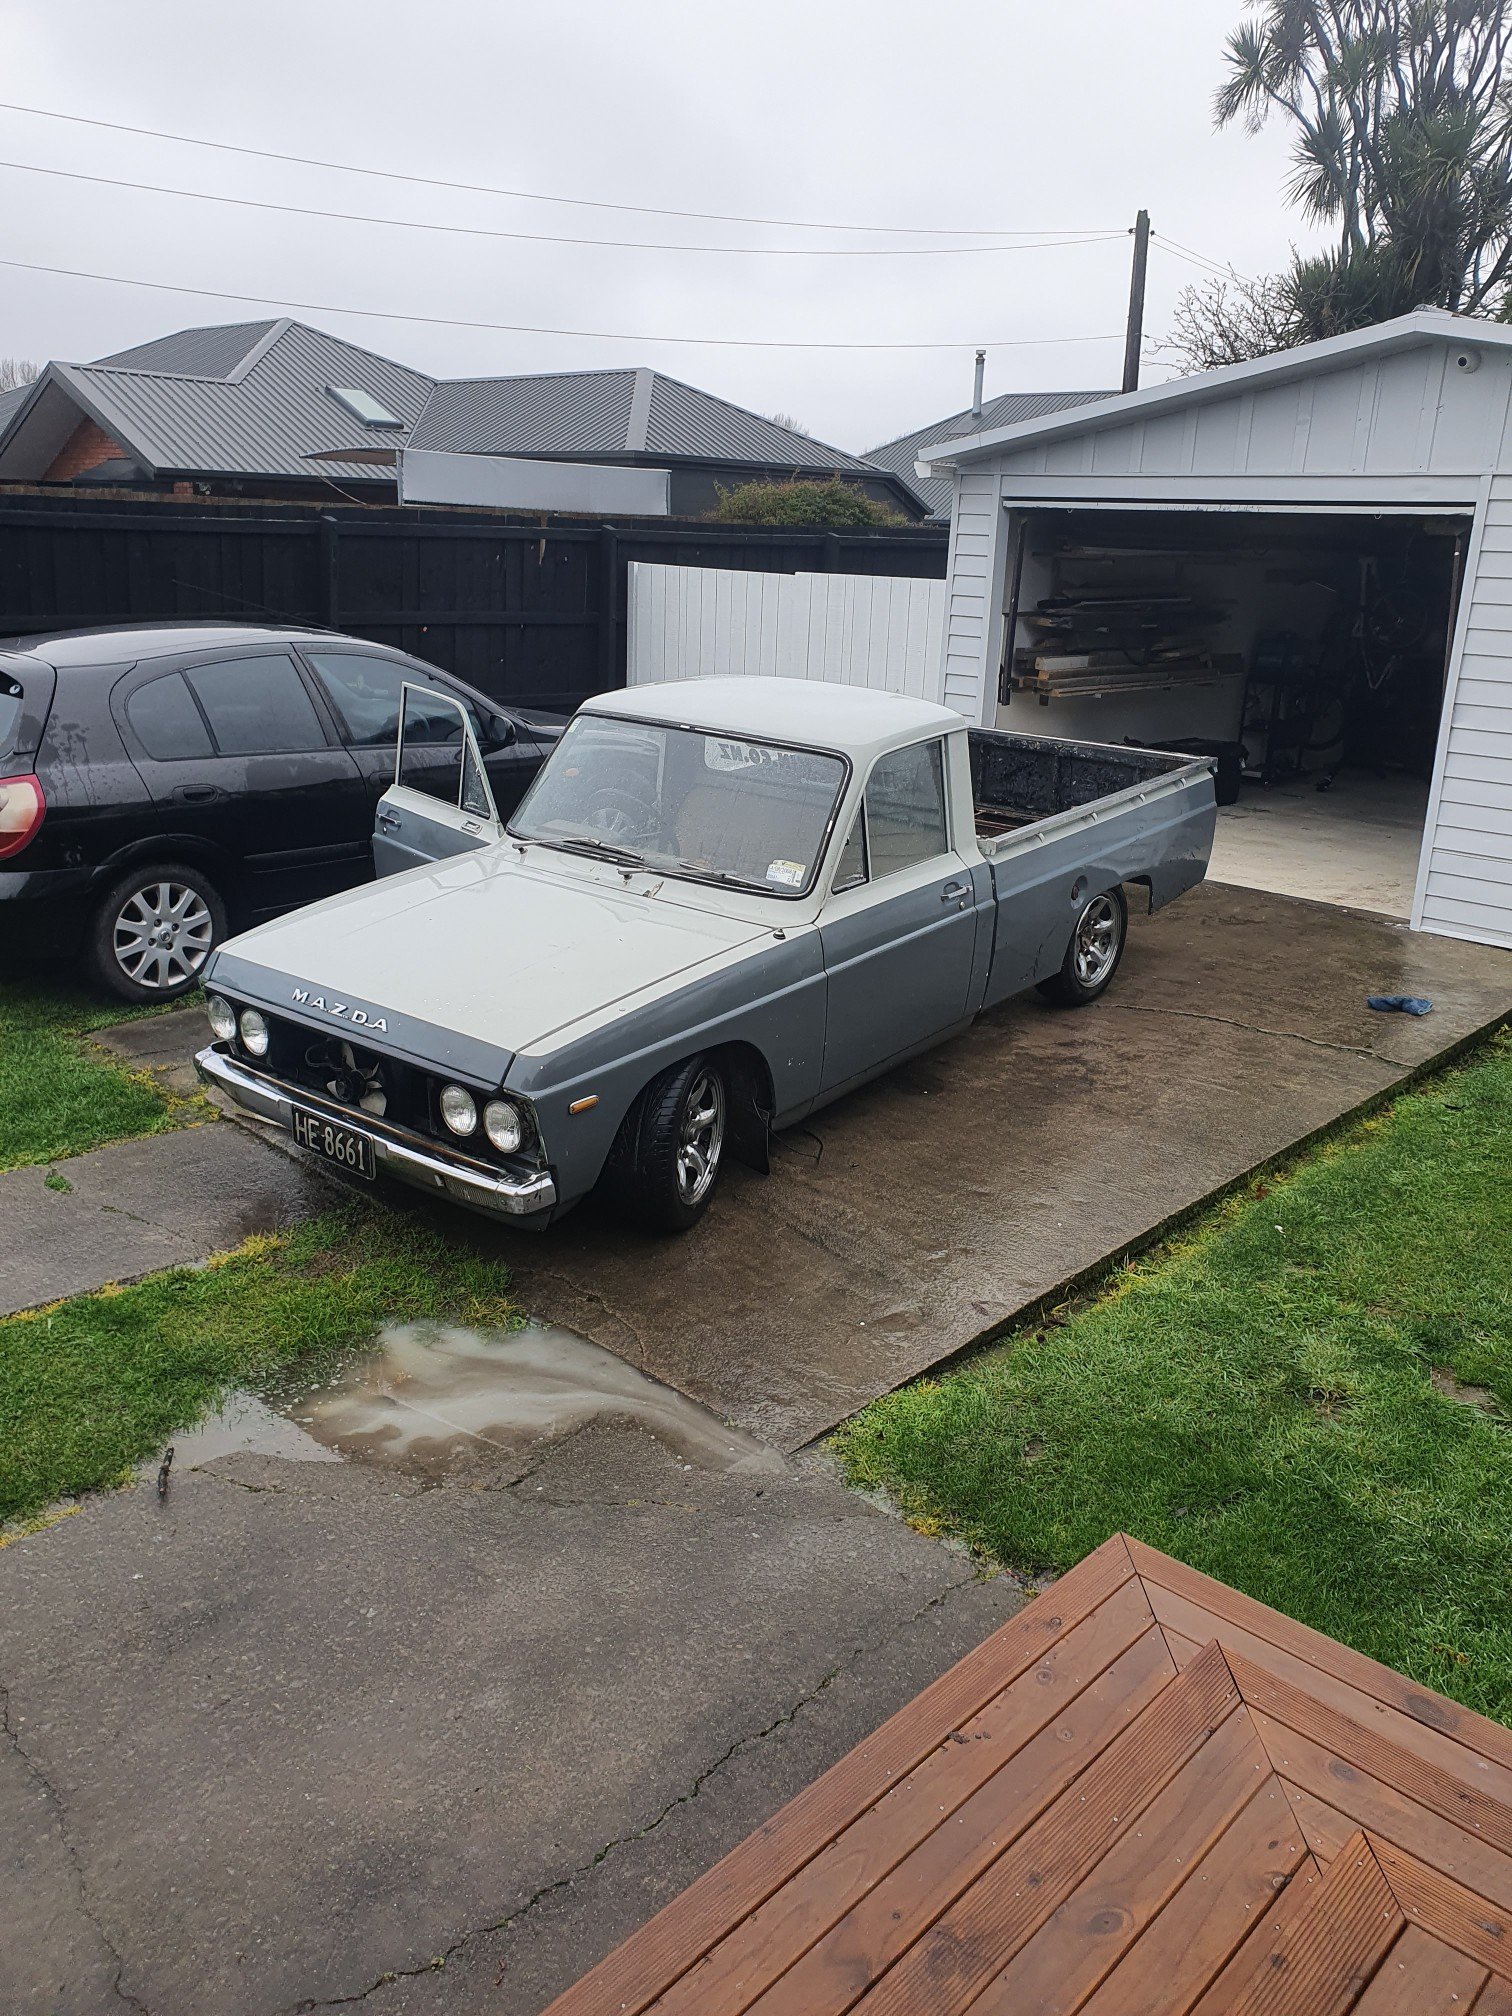
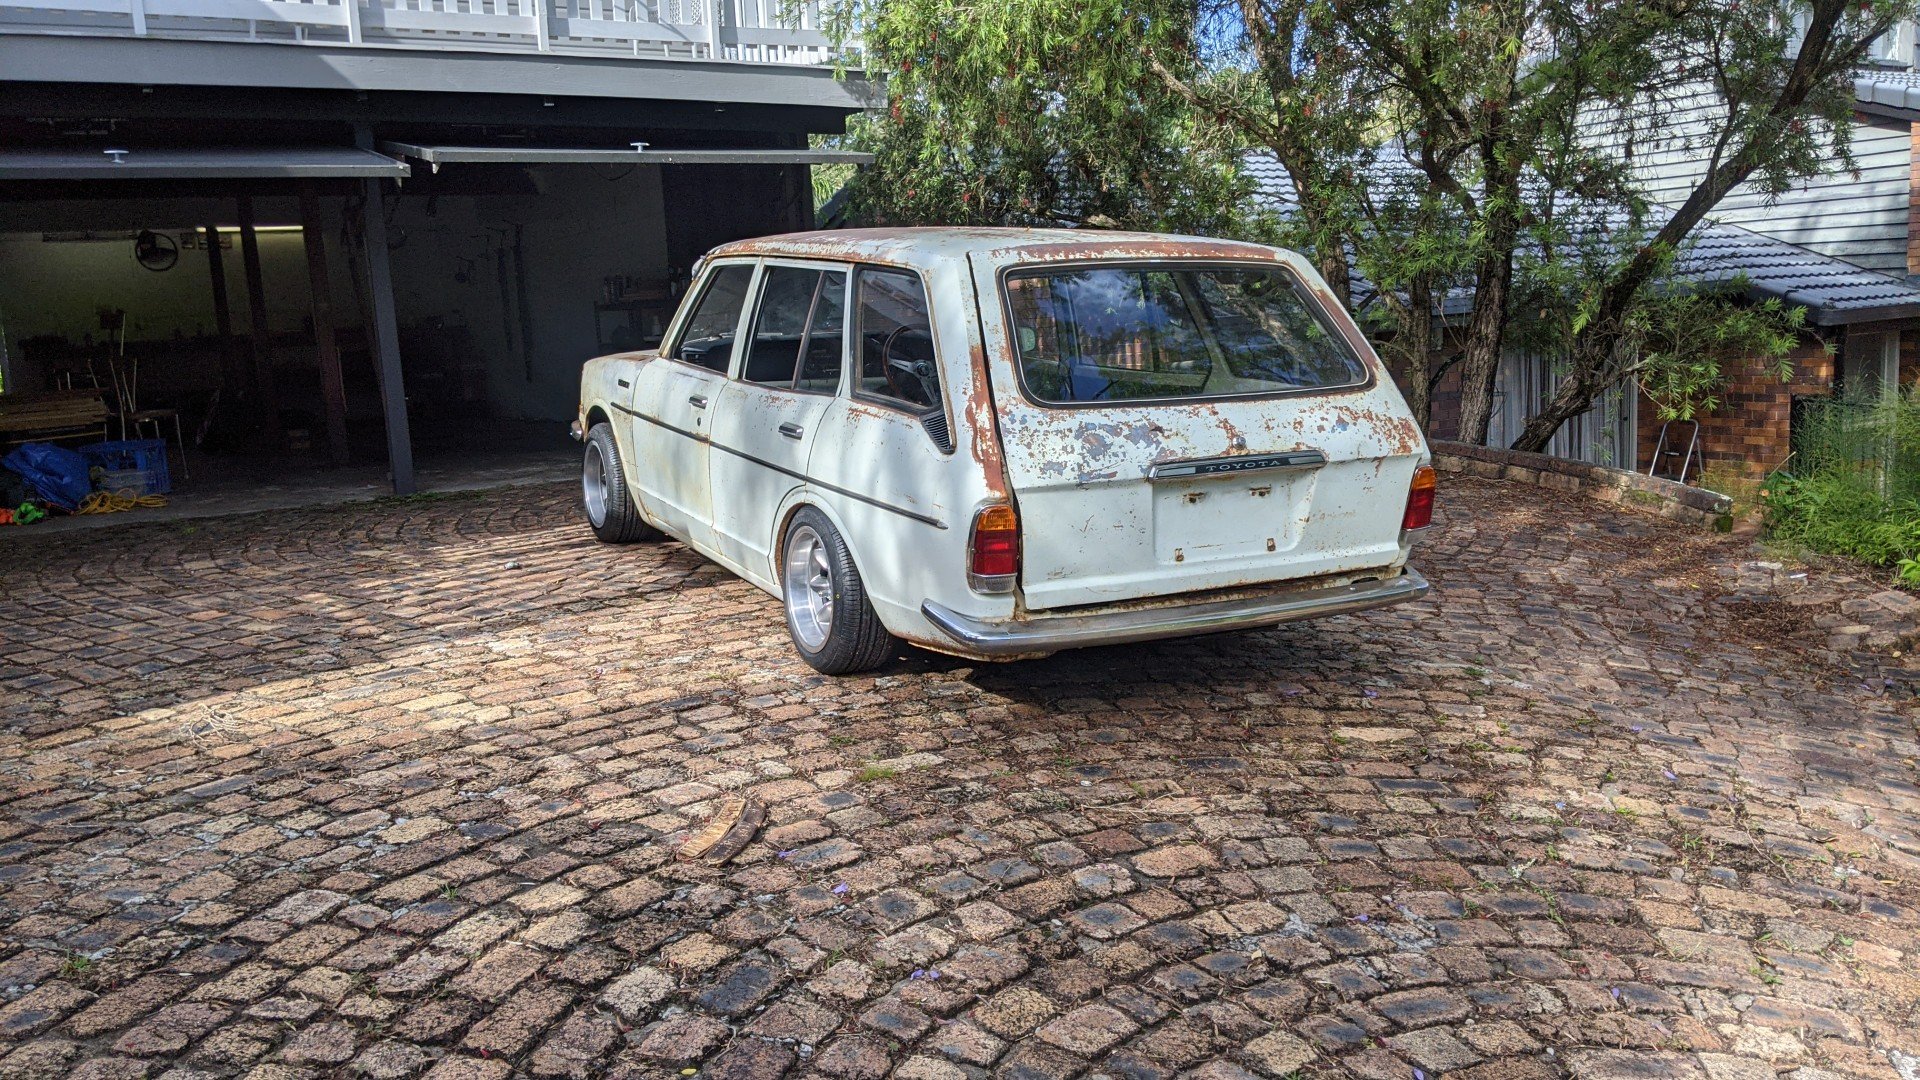
Excuse the post, but how it sits on flat ground.
2 points
-
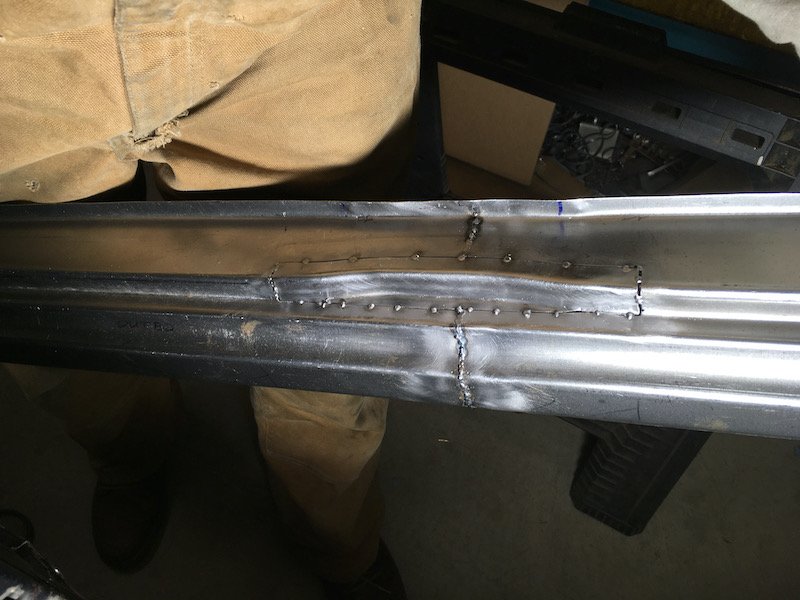
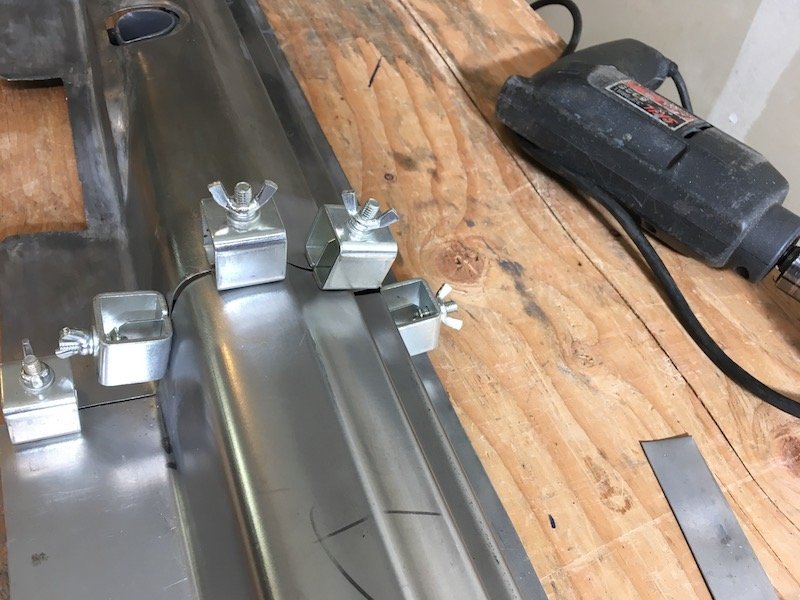
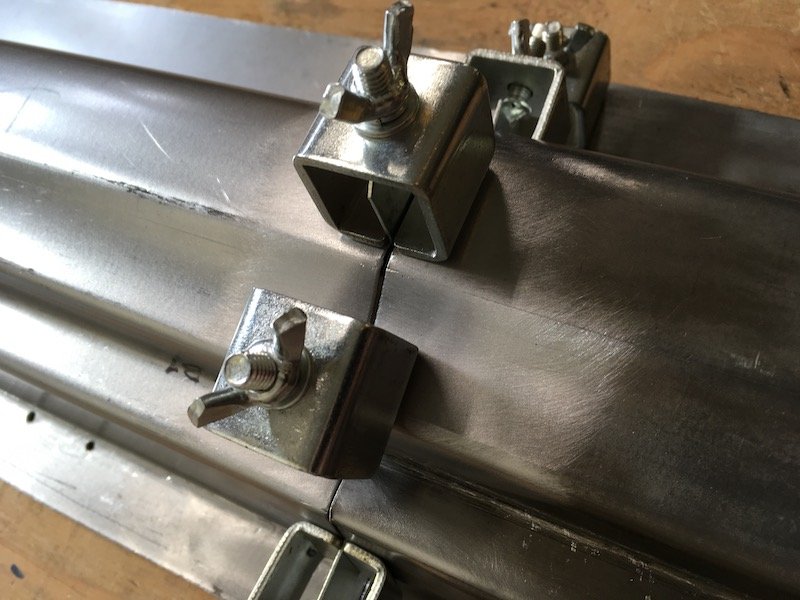
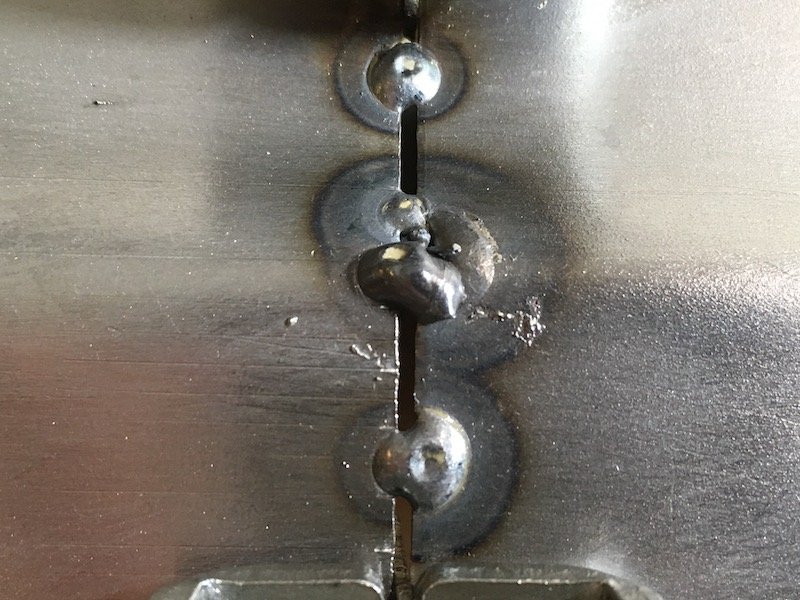
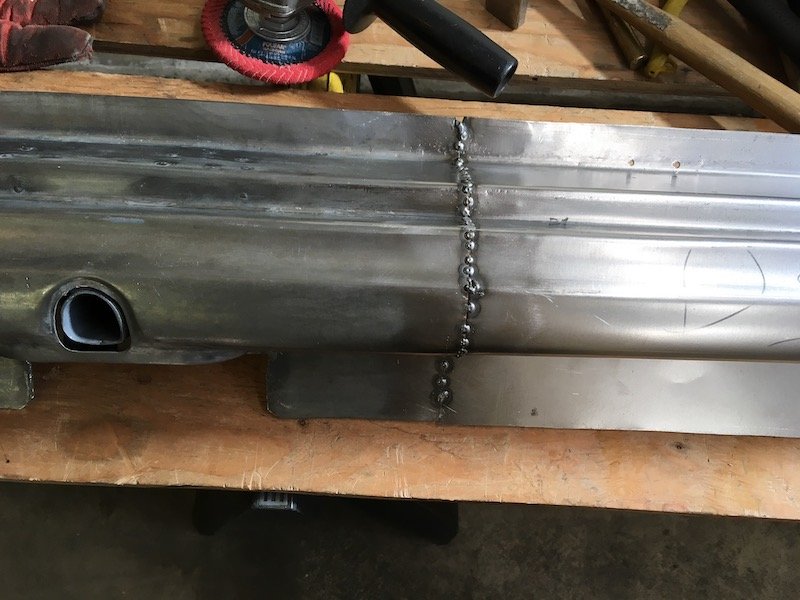
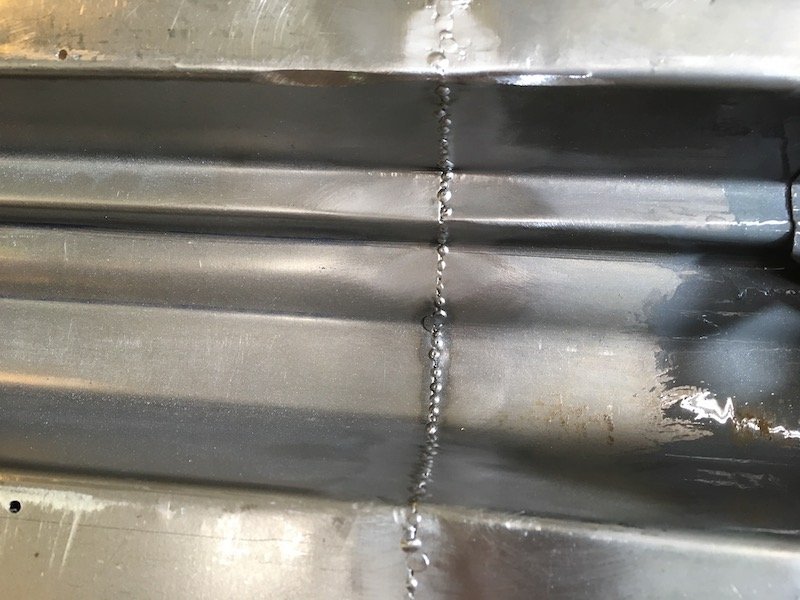
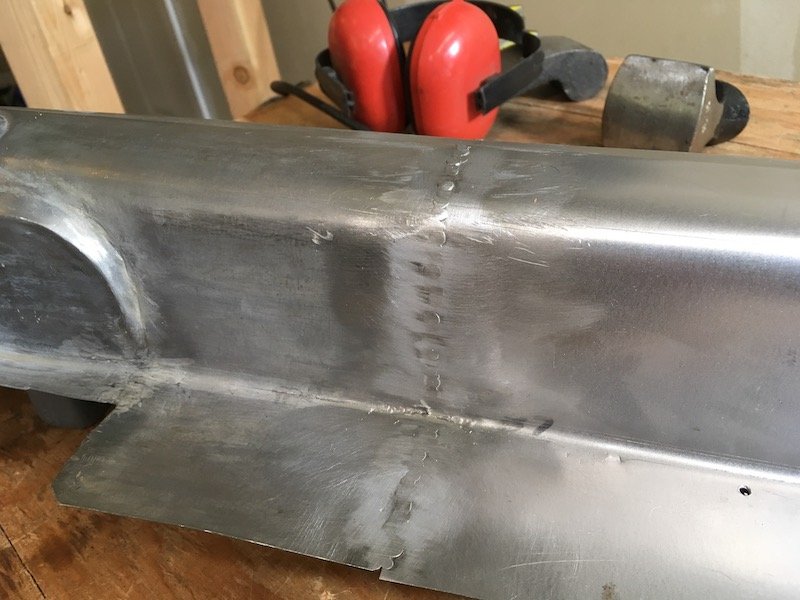
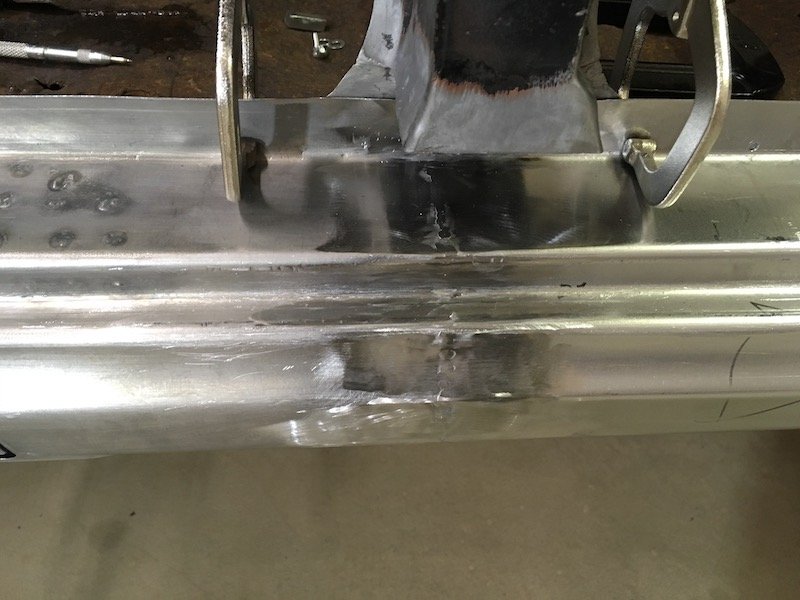
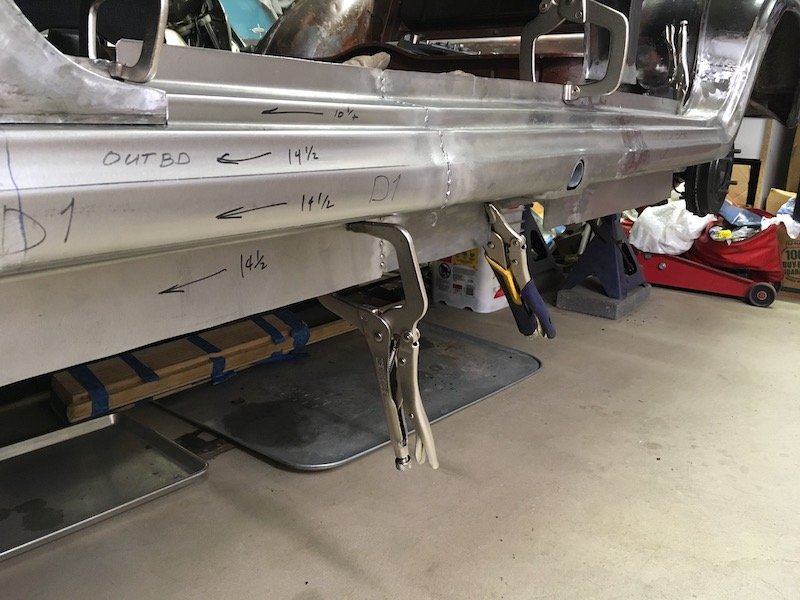
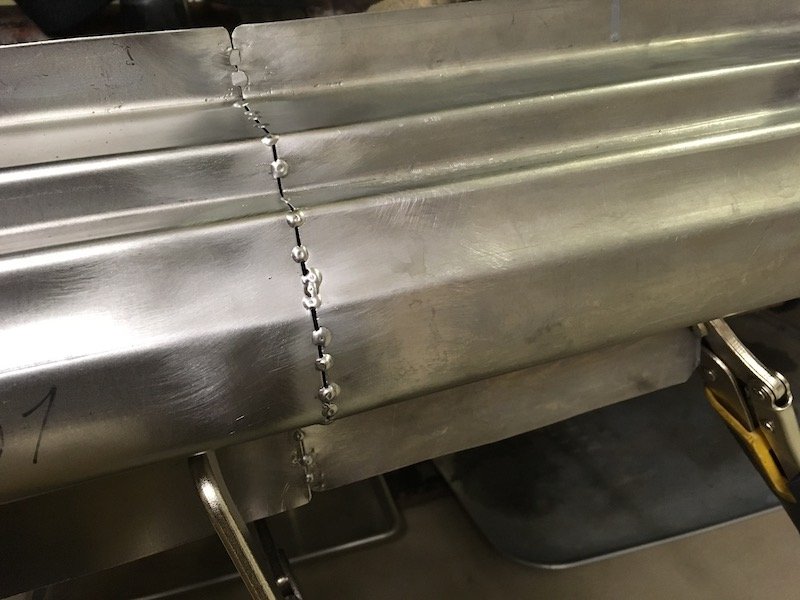
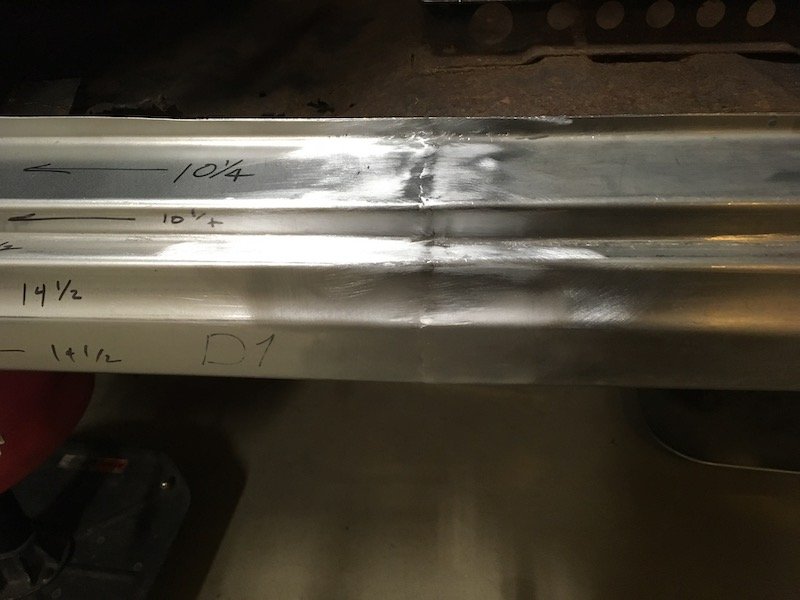
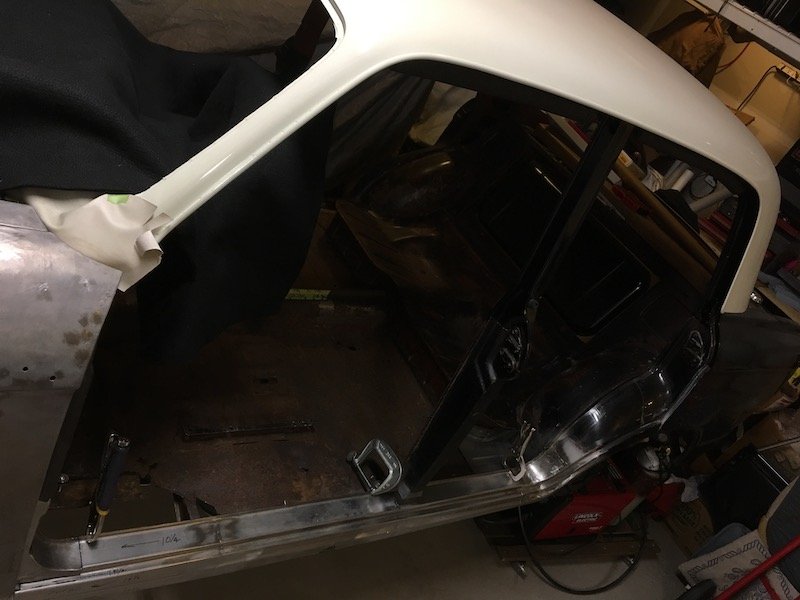
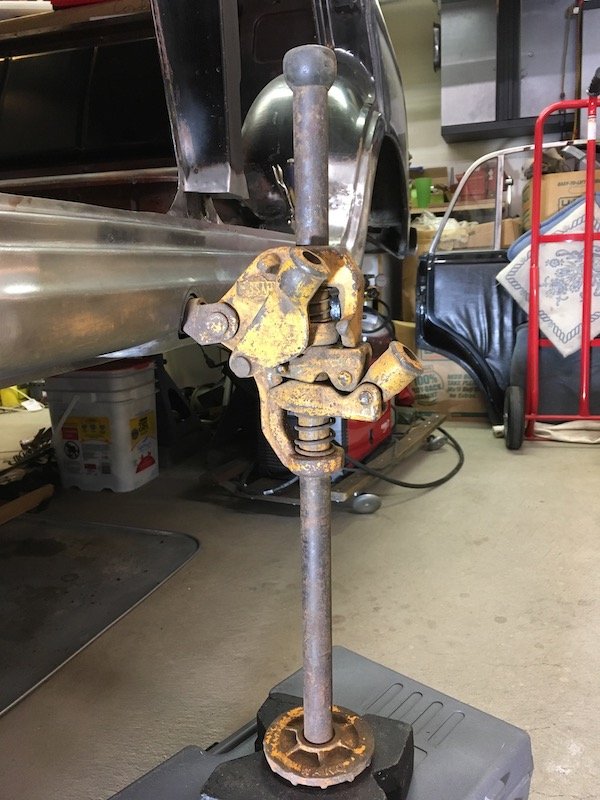
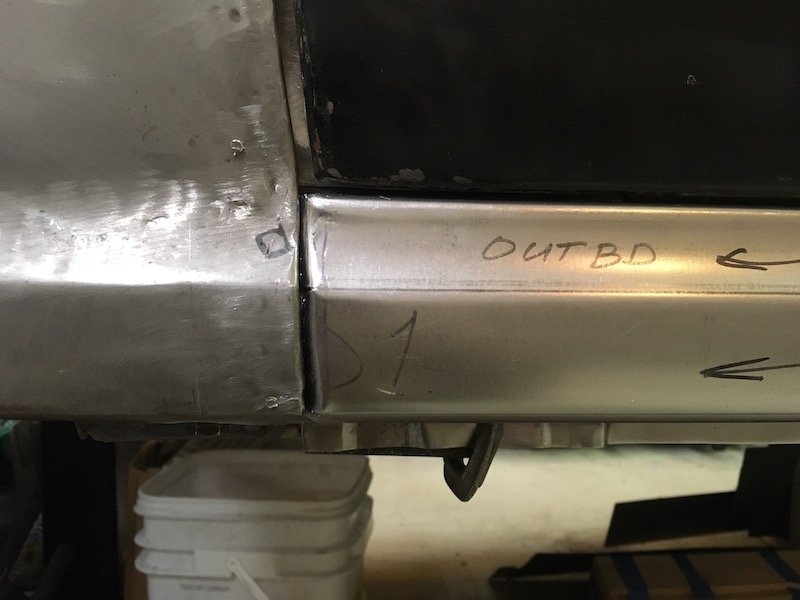
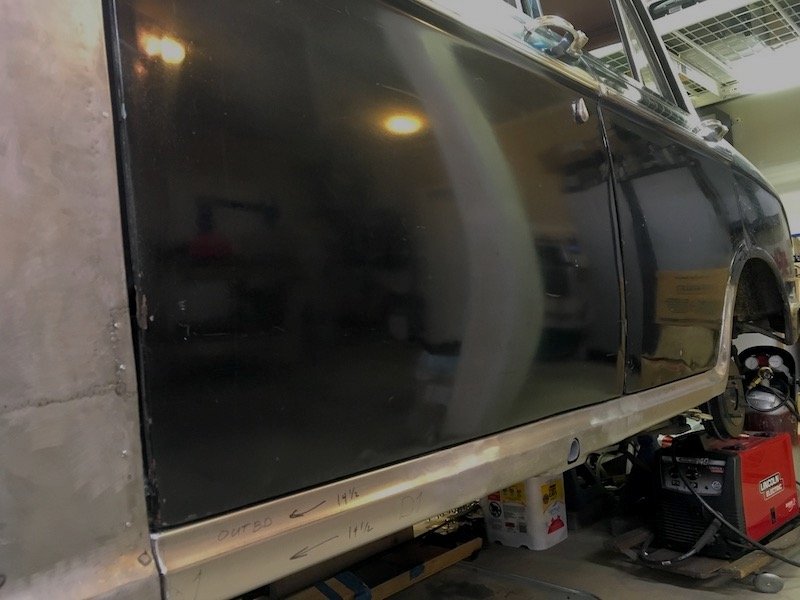
More progress with the Bluebird left side outer sill. Welded the three outer sill segments together. Started with these two shown previously Then I fixed the sill segments together with these little clamp things. These set up a nice gap to make good weld penetration to the back side. Then starting making tack welds. The first strikes in the center of pic were really bad and missed. Remainder of tack welds were usually on target. About 70 percent complete in these pics. Front and back side shown with good penetration. Front side will eventually get ground and sanded flush. Back side gets left as is. Initial grinding and sanding. After that I held the assembly against a bright light and check for pin holes, fill with weld and complete. It looked pretty good in a fit check against the car body. No weird wrapping or anything. Then on to the joining of the third sill segment to the assembly, same as the first. Except I was checking against the fit to the inner sill on the body before tacking, and after initial series of tacks, because there is a slight bow or curvature on the body fore and aft and I wanted to make sure of no issue. Did a little more rough trimming of the forward end as well so as to permit tailoring a nice fit up against the A pillar and lower stub later on. Finished weld of the last segment. Overview of the situation Then I decided to play with this. No, I did not actually try and jack the car up, just having fun with it. Later on I bolted the doors on again, probably for the fifth or sixth time, and did a final check for gap along the lower edges. Plus I formed the forward edges of the sill assembly to mate up with the A pillar stub with just the right gap next to the fender (or wing, right?) As seen underneath in above pic, there are several joggles along the lower flange to accommodate fit against several parts that are layered on the vertical inner sill plate. Below, the gaps look decent and body lines of door to sill are flush. Installed some trim to show off for the camera. Discussion: https://oldschool.co.nz/index.php?/topic/60267-marts-pl310-61-datsun-bluebird-sedan/
2 points
-
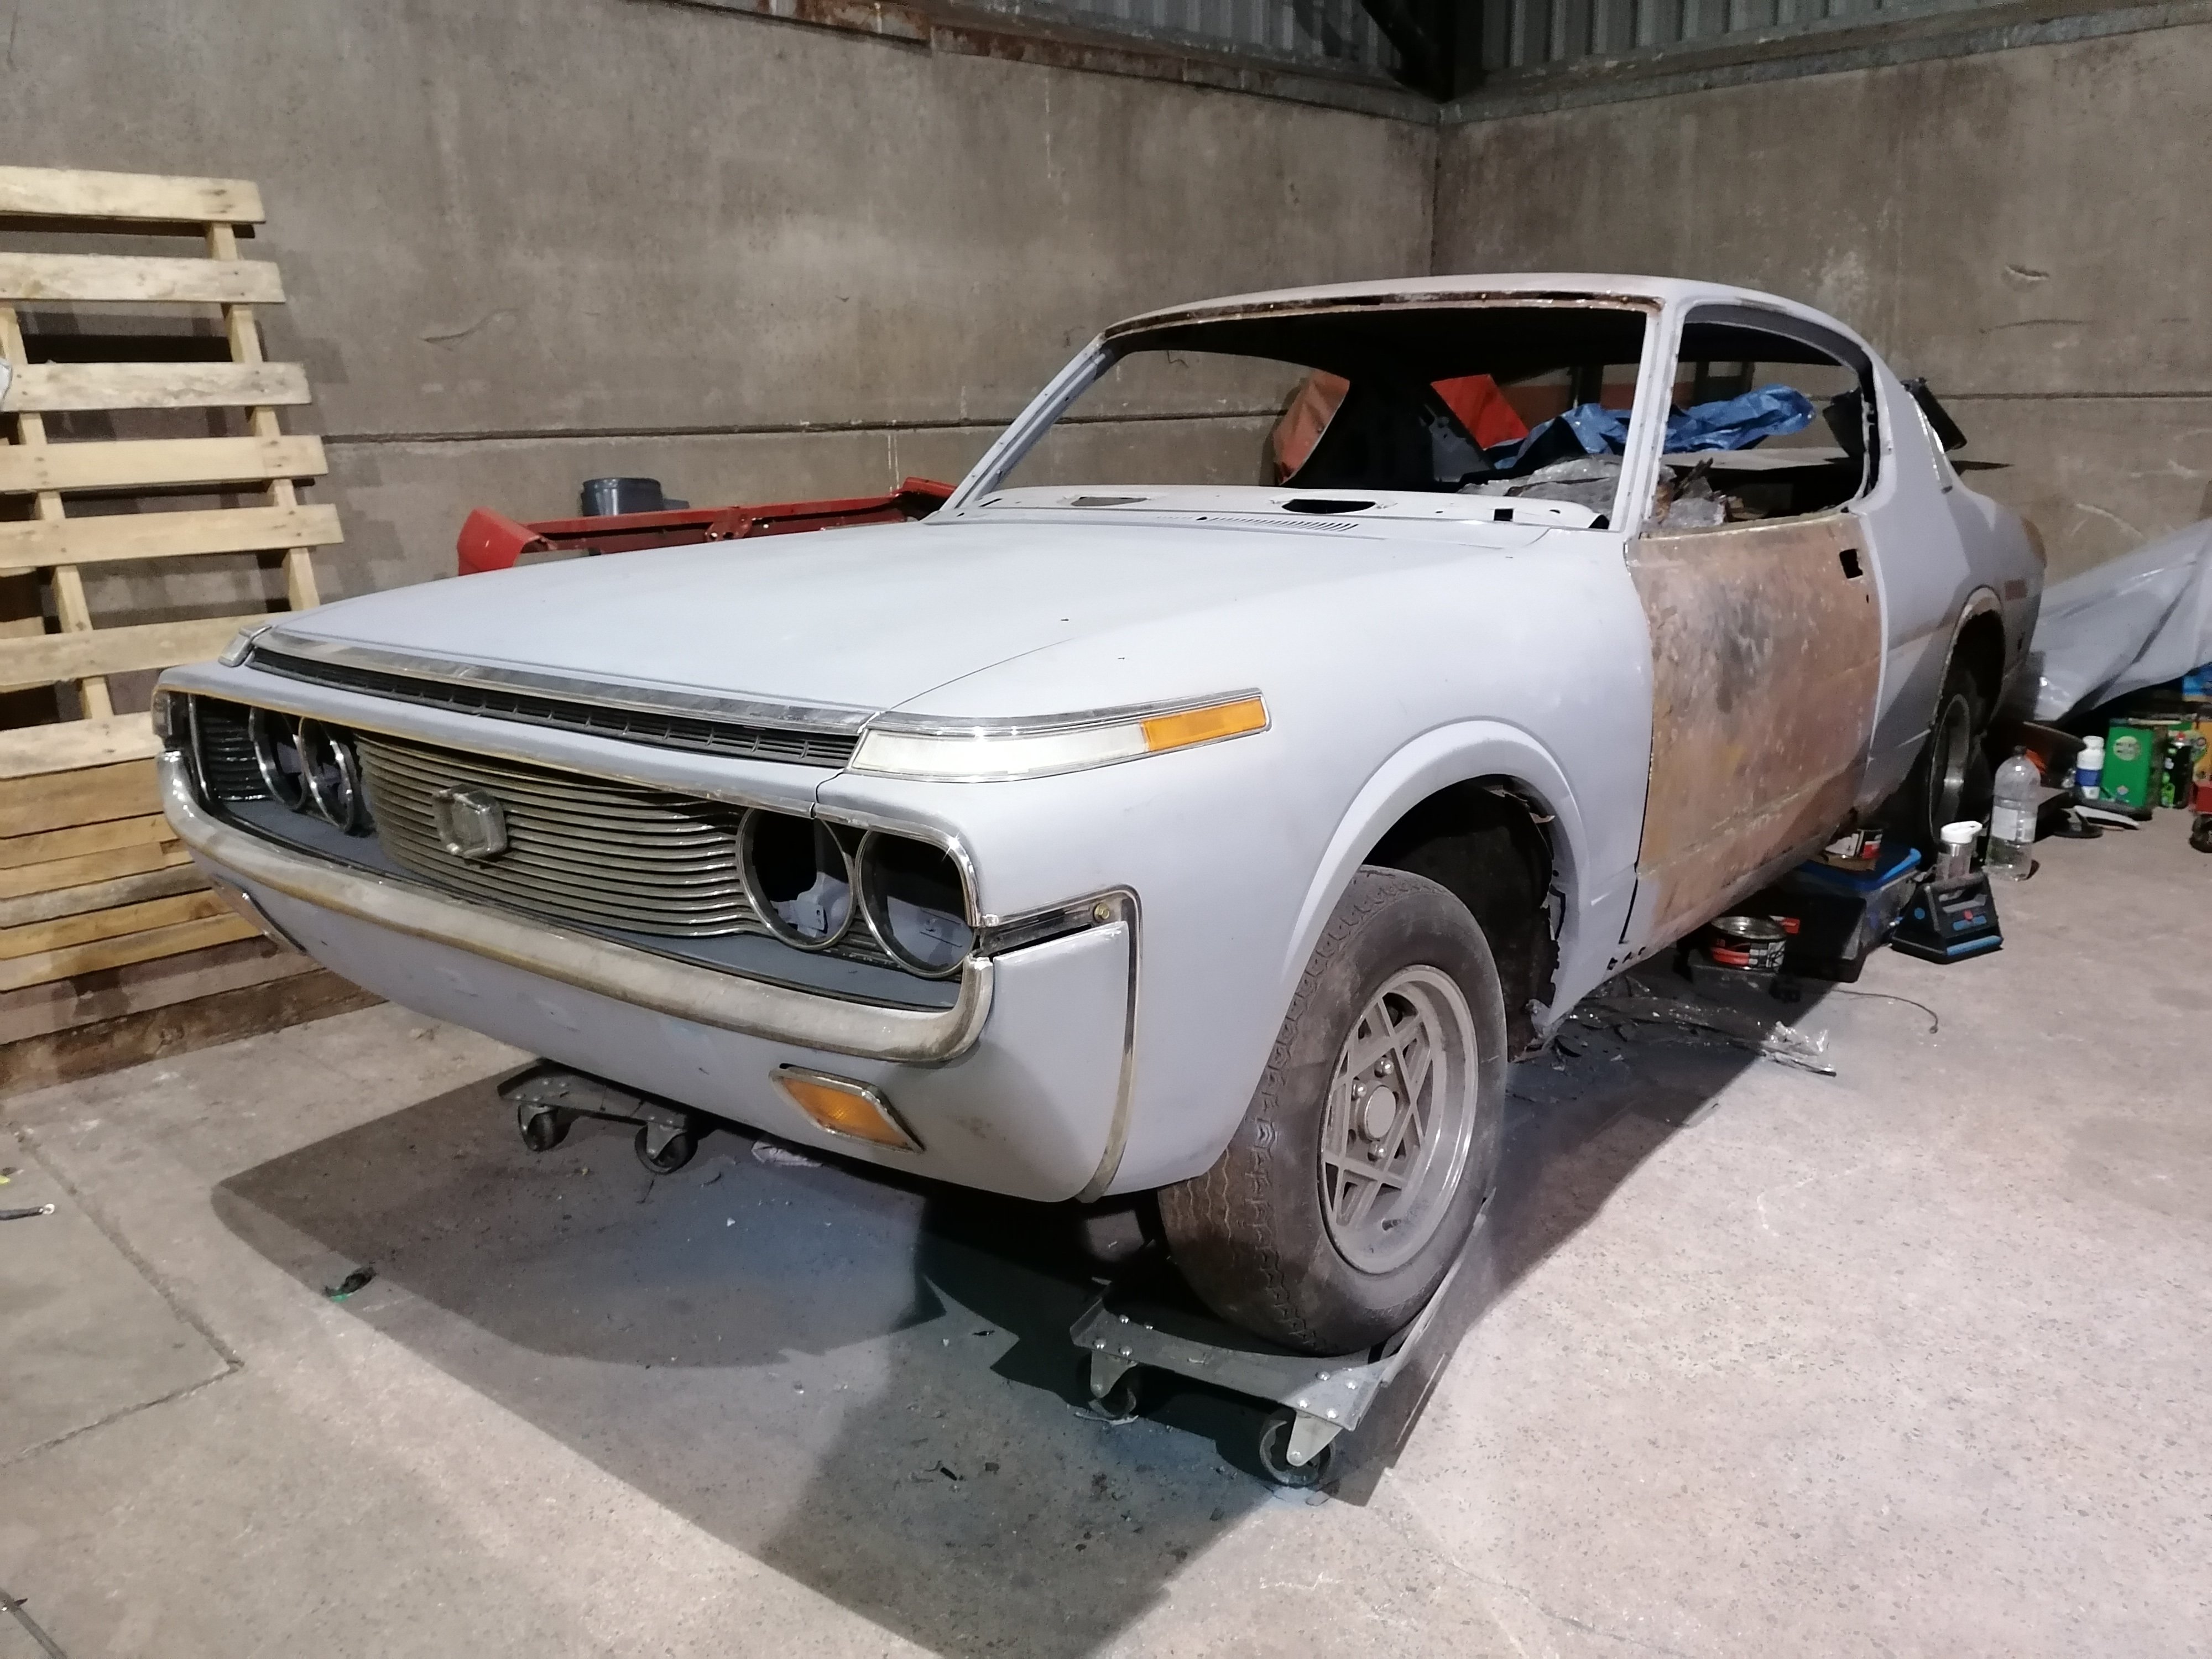
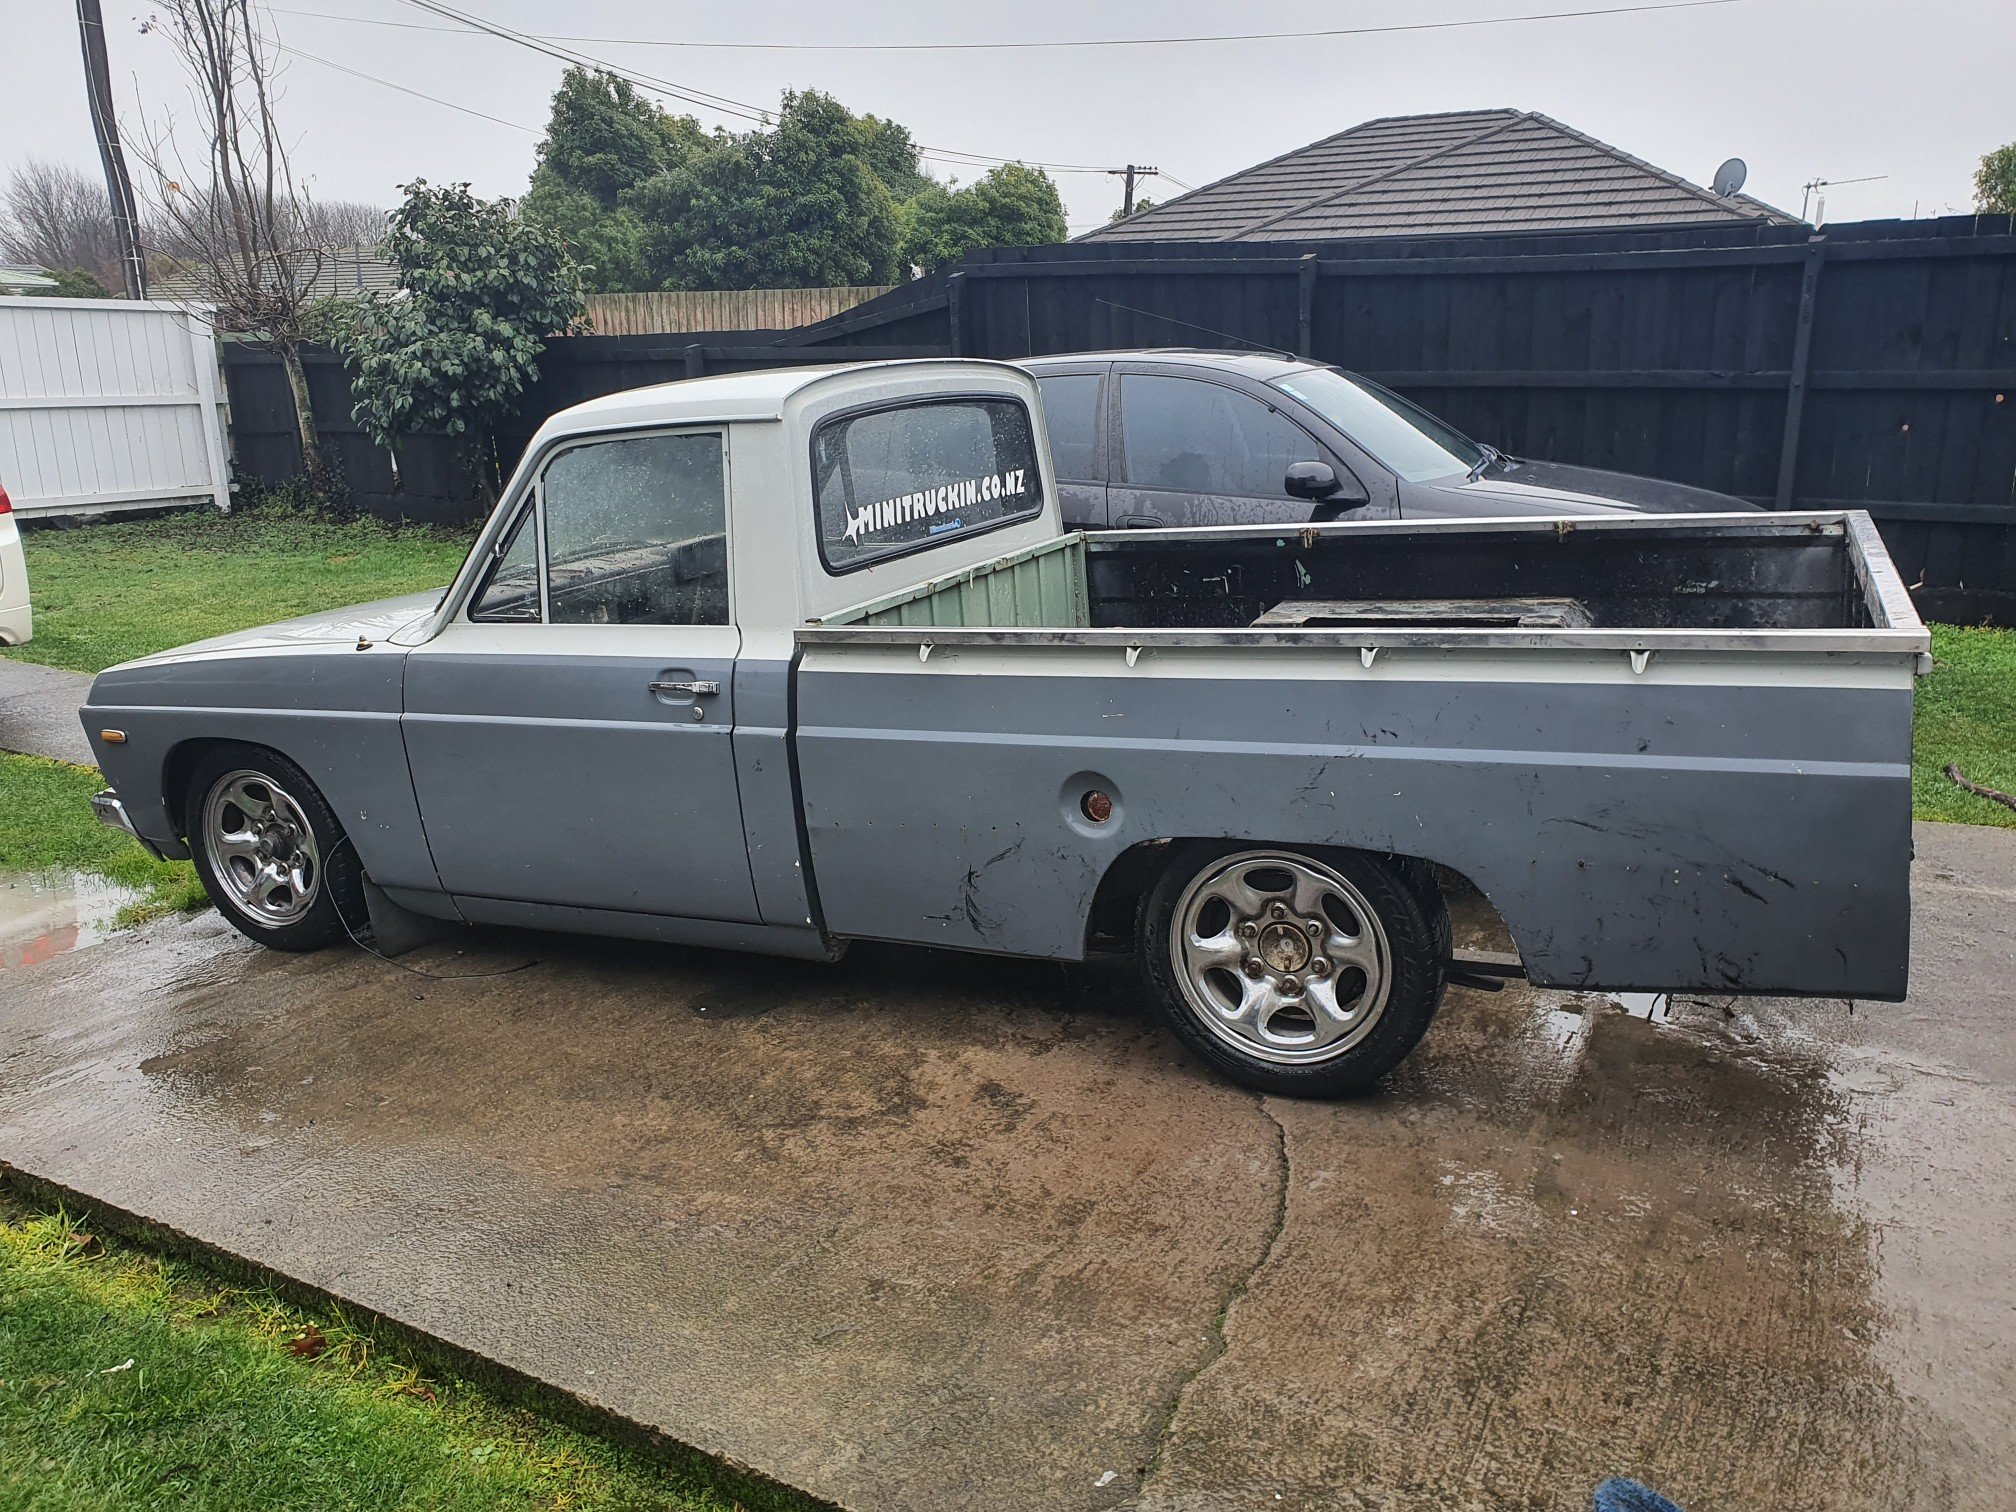
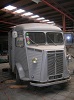
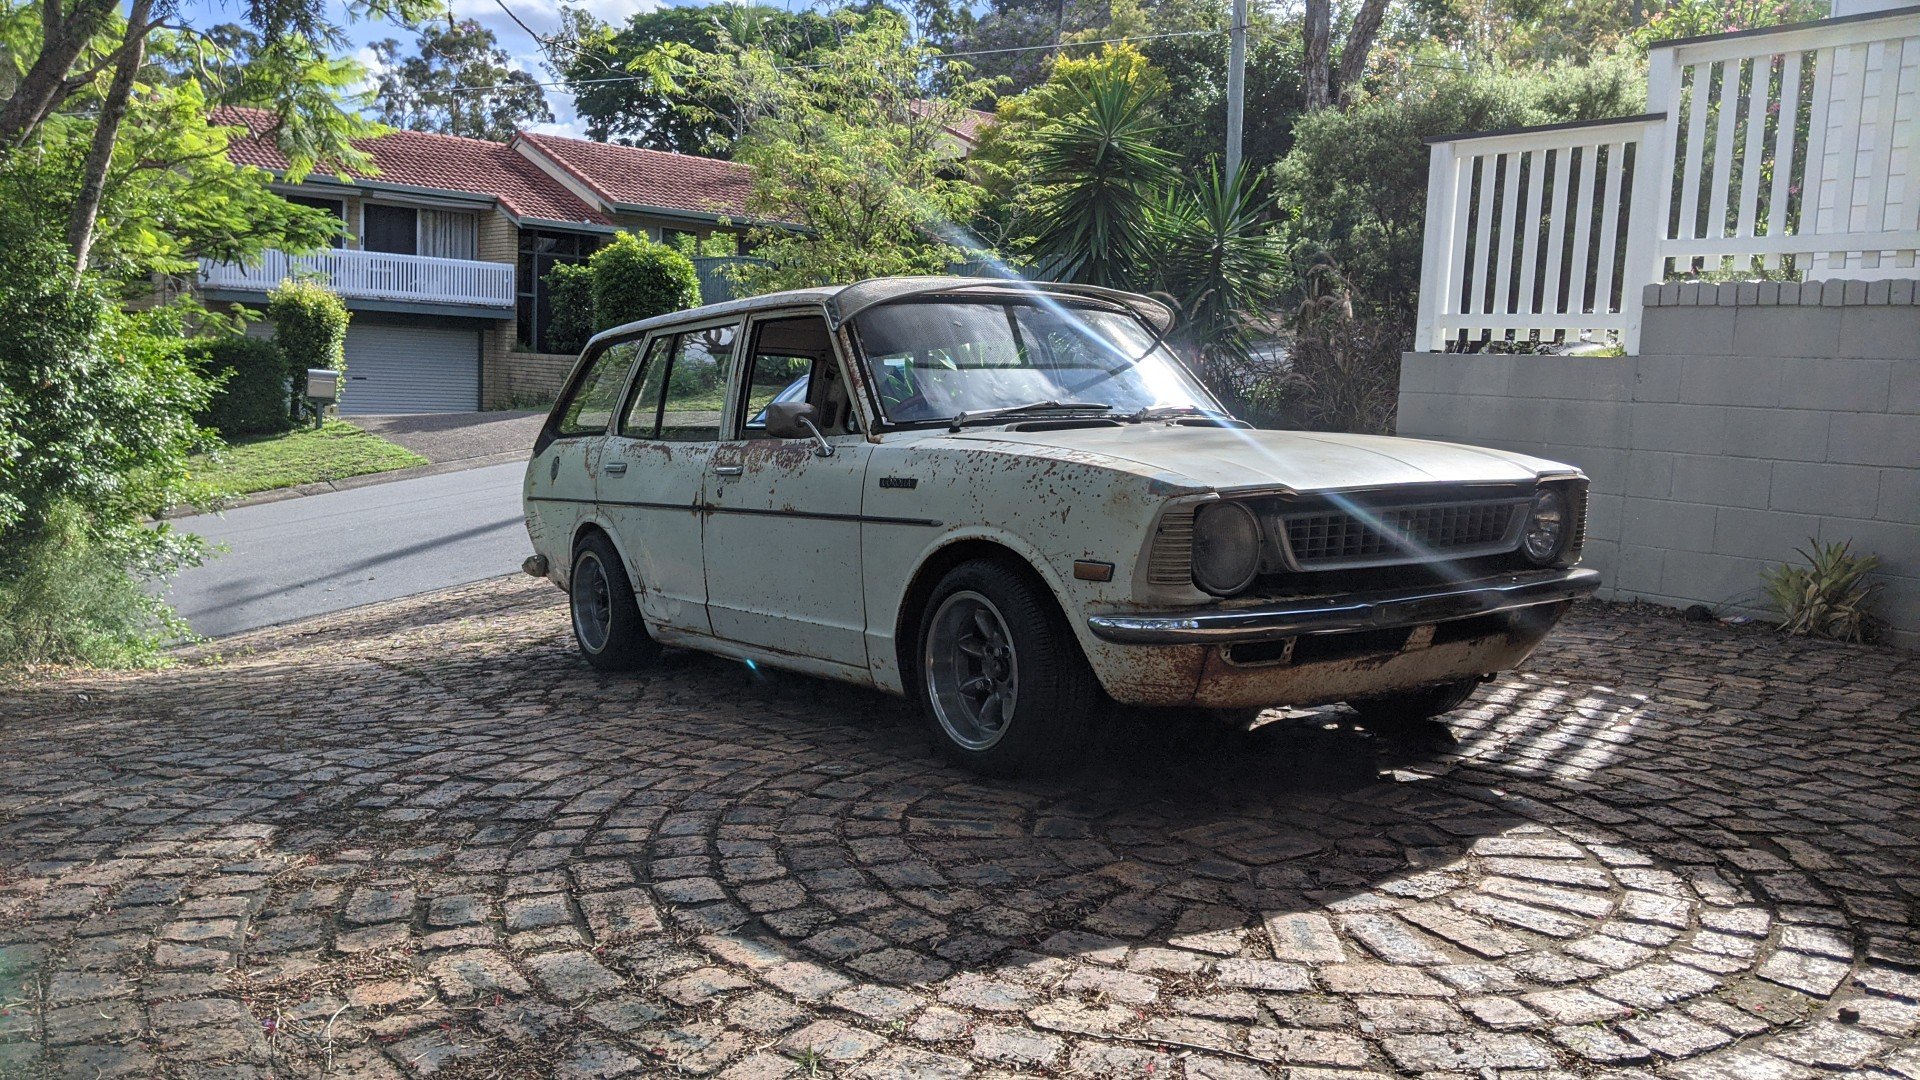
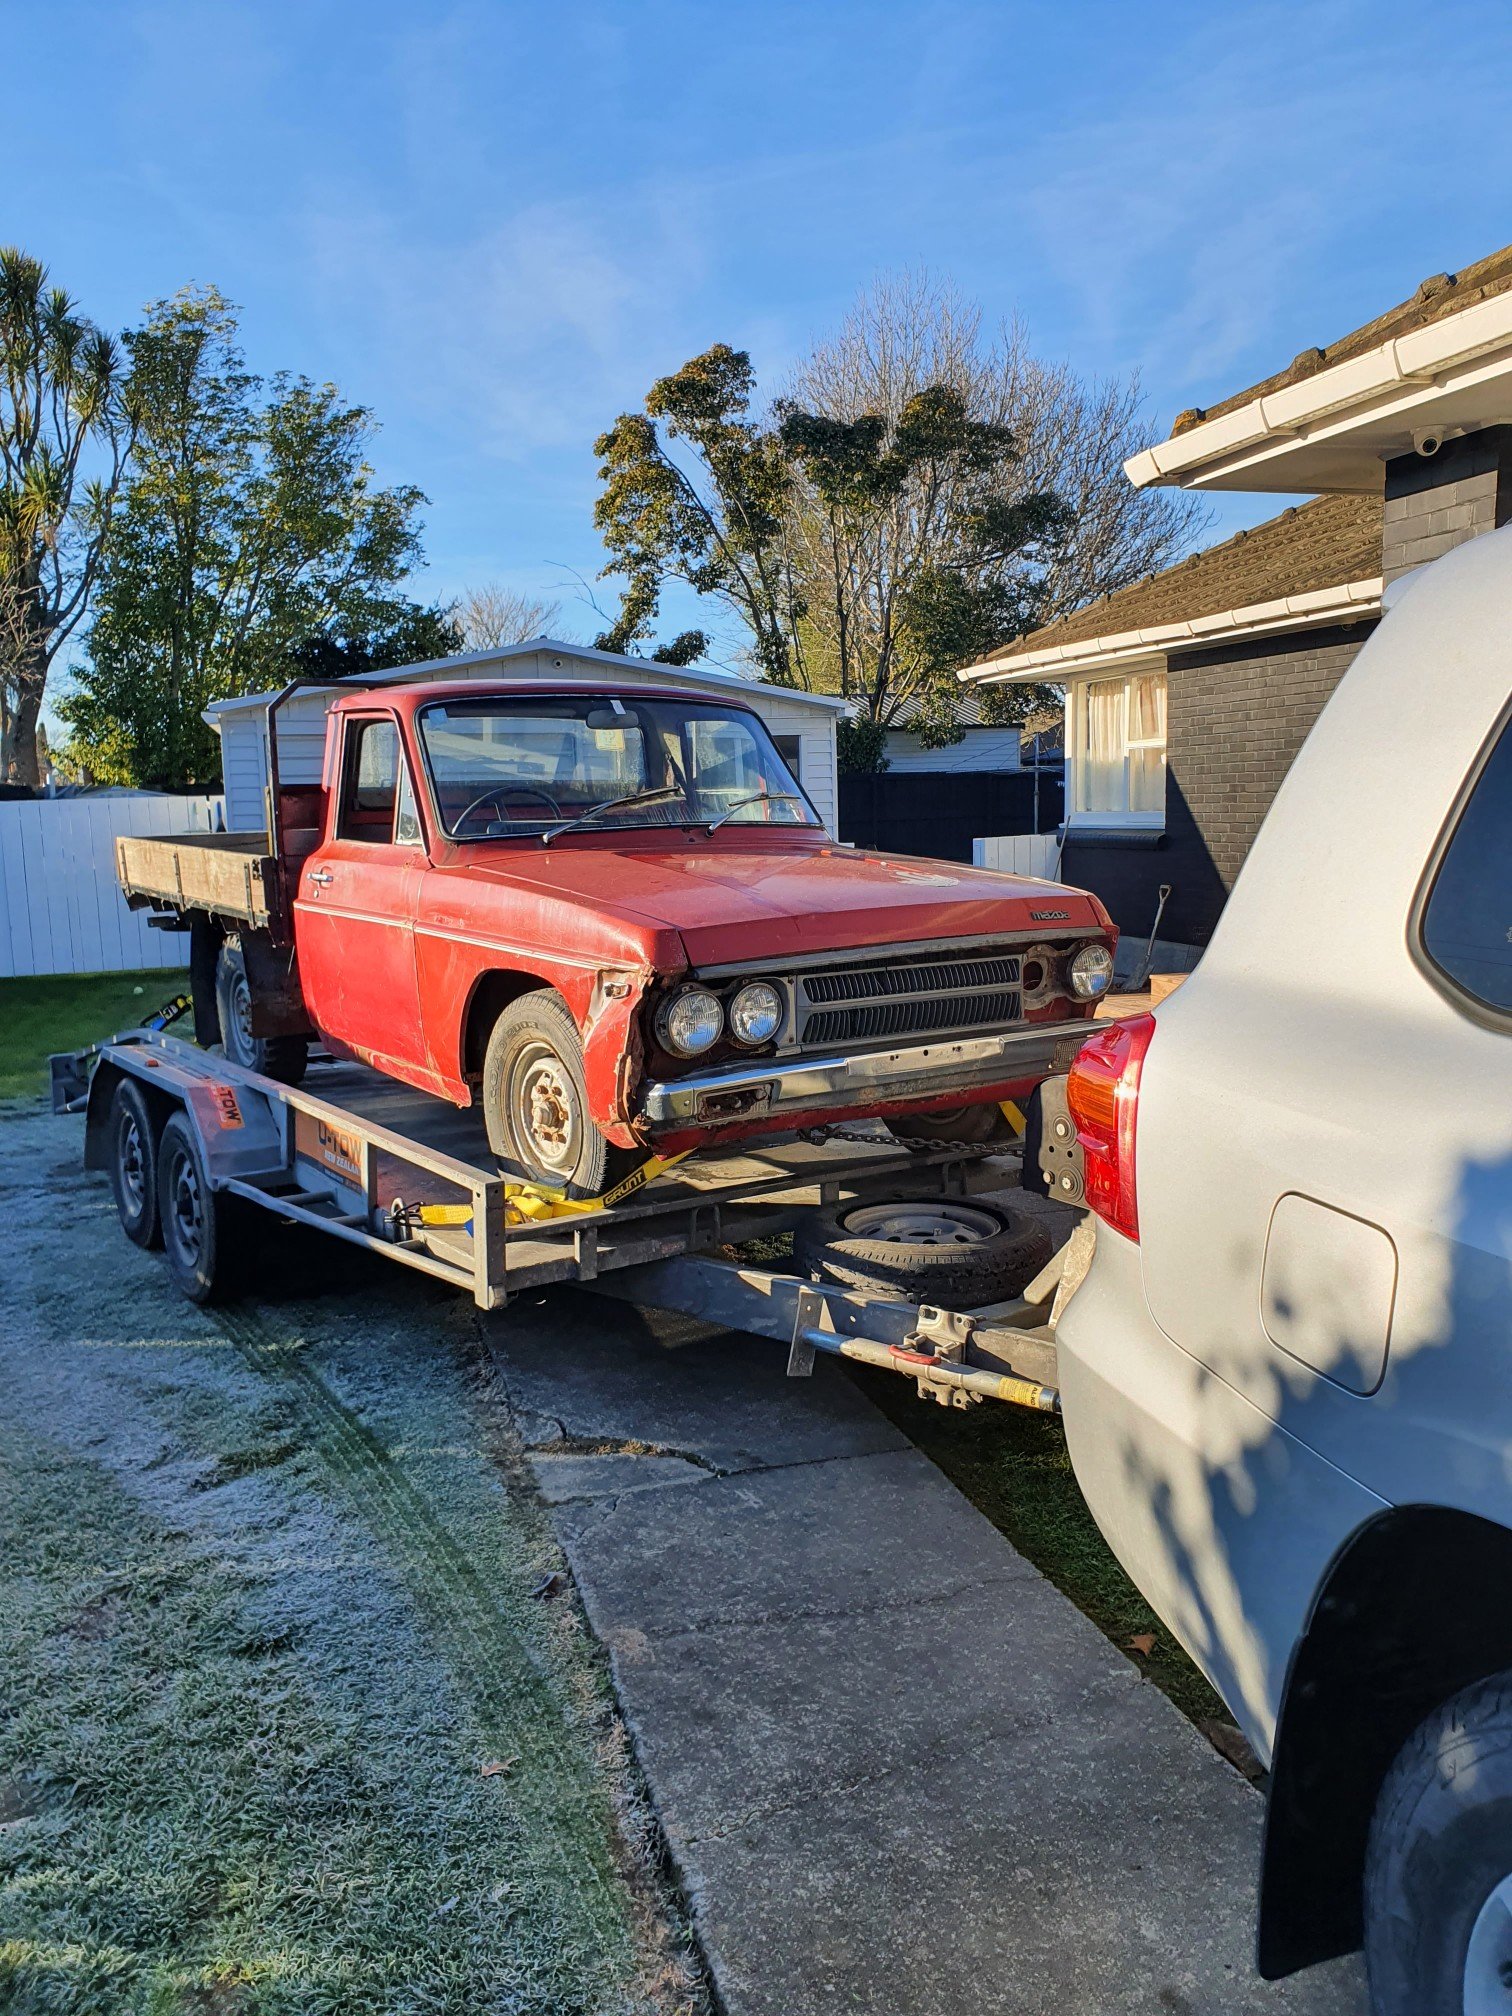
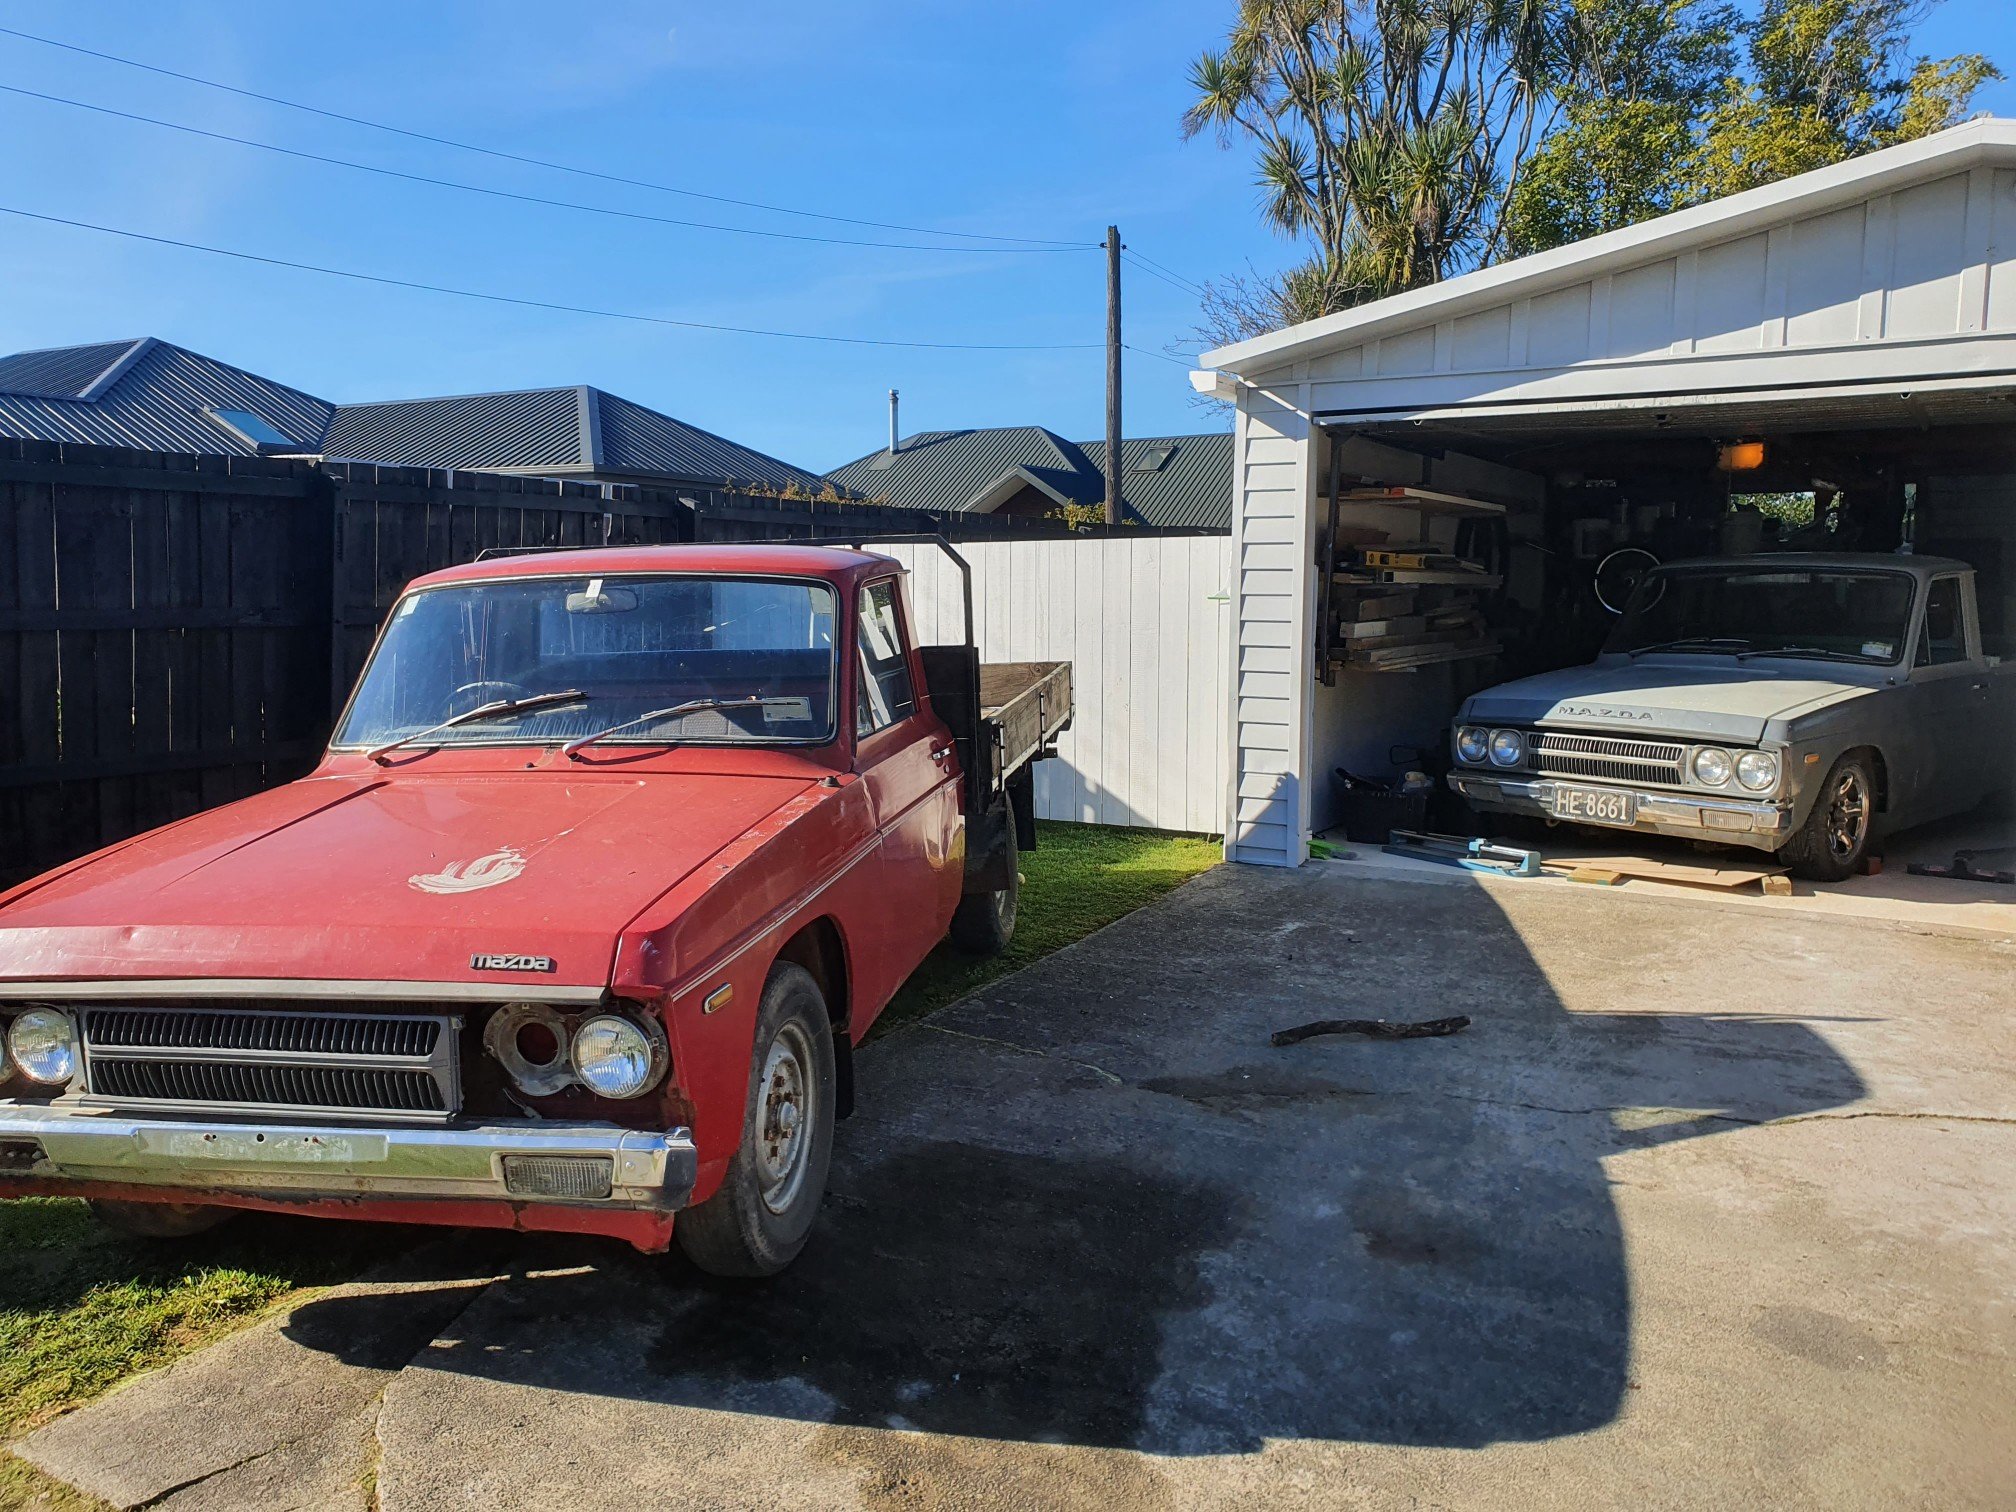
Just picked up this old girl off a mate of mine who had owned it for about 12 years. It's going to be a hell of a lot of work to get it legal ago. He built it as a bit of a skid hack and not alot else. Has a 2l in with with a bit of head work and a cam in it with a 5 speed box. Has been c notched which I'm not sire of i will continue down that route or hunt down a factory chassis . I've got the grill and head light surrounds to throw back on which should make it looks a bit tidier Anyway on to the pics Disco thread
1 point
-
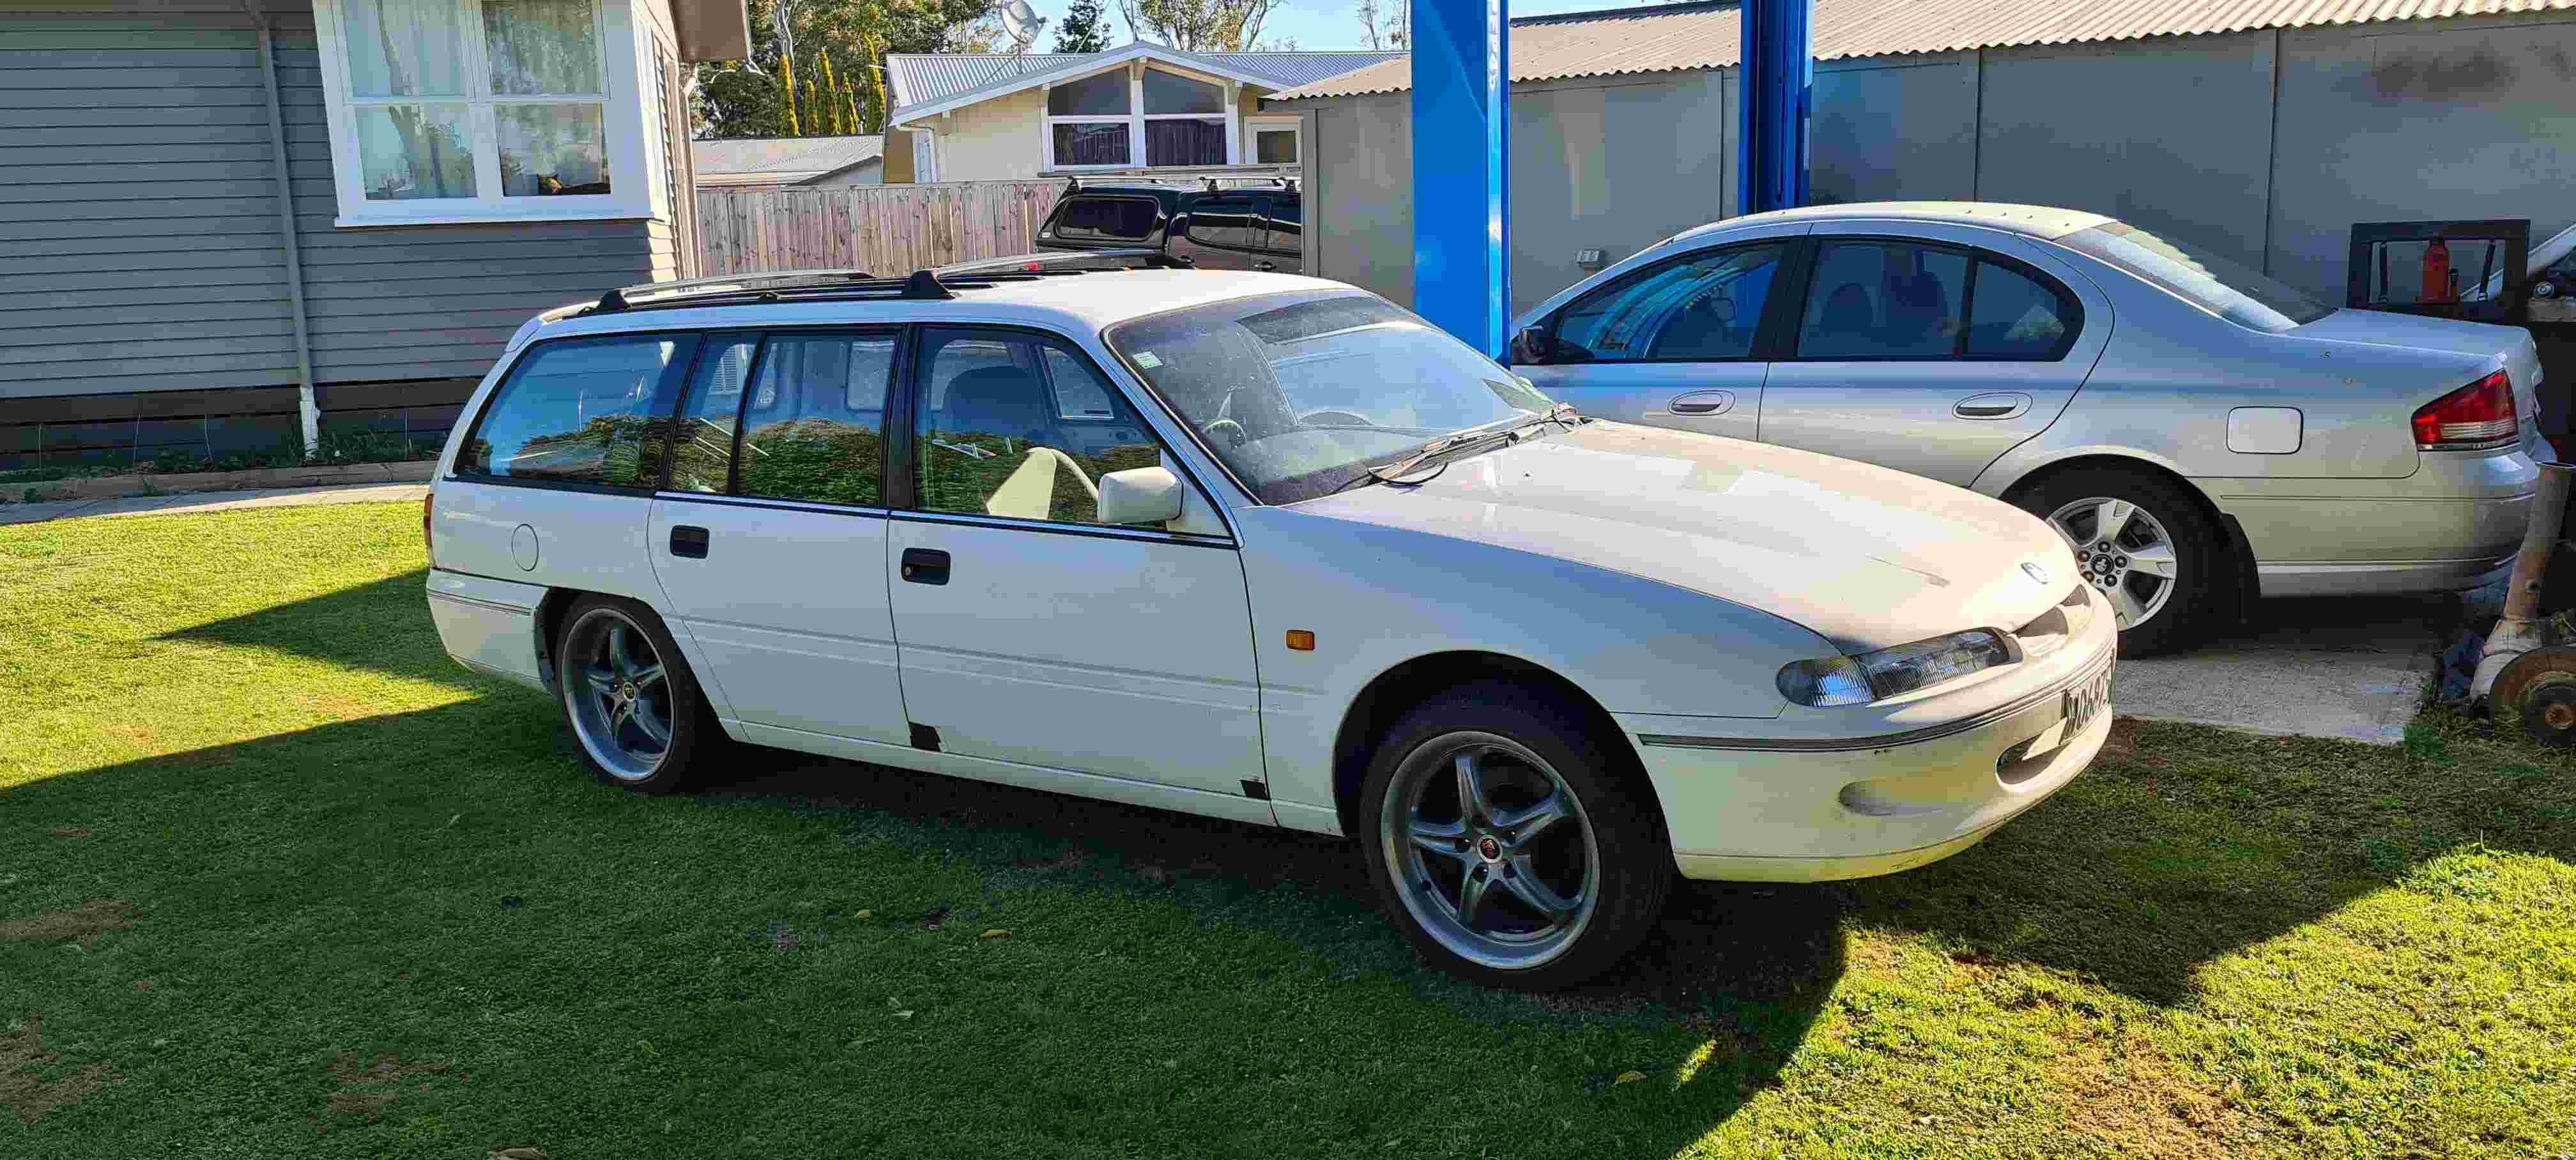
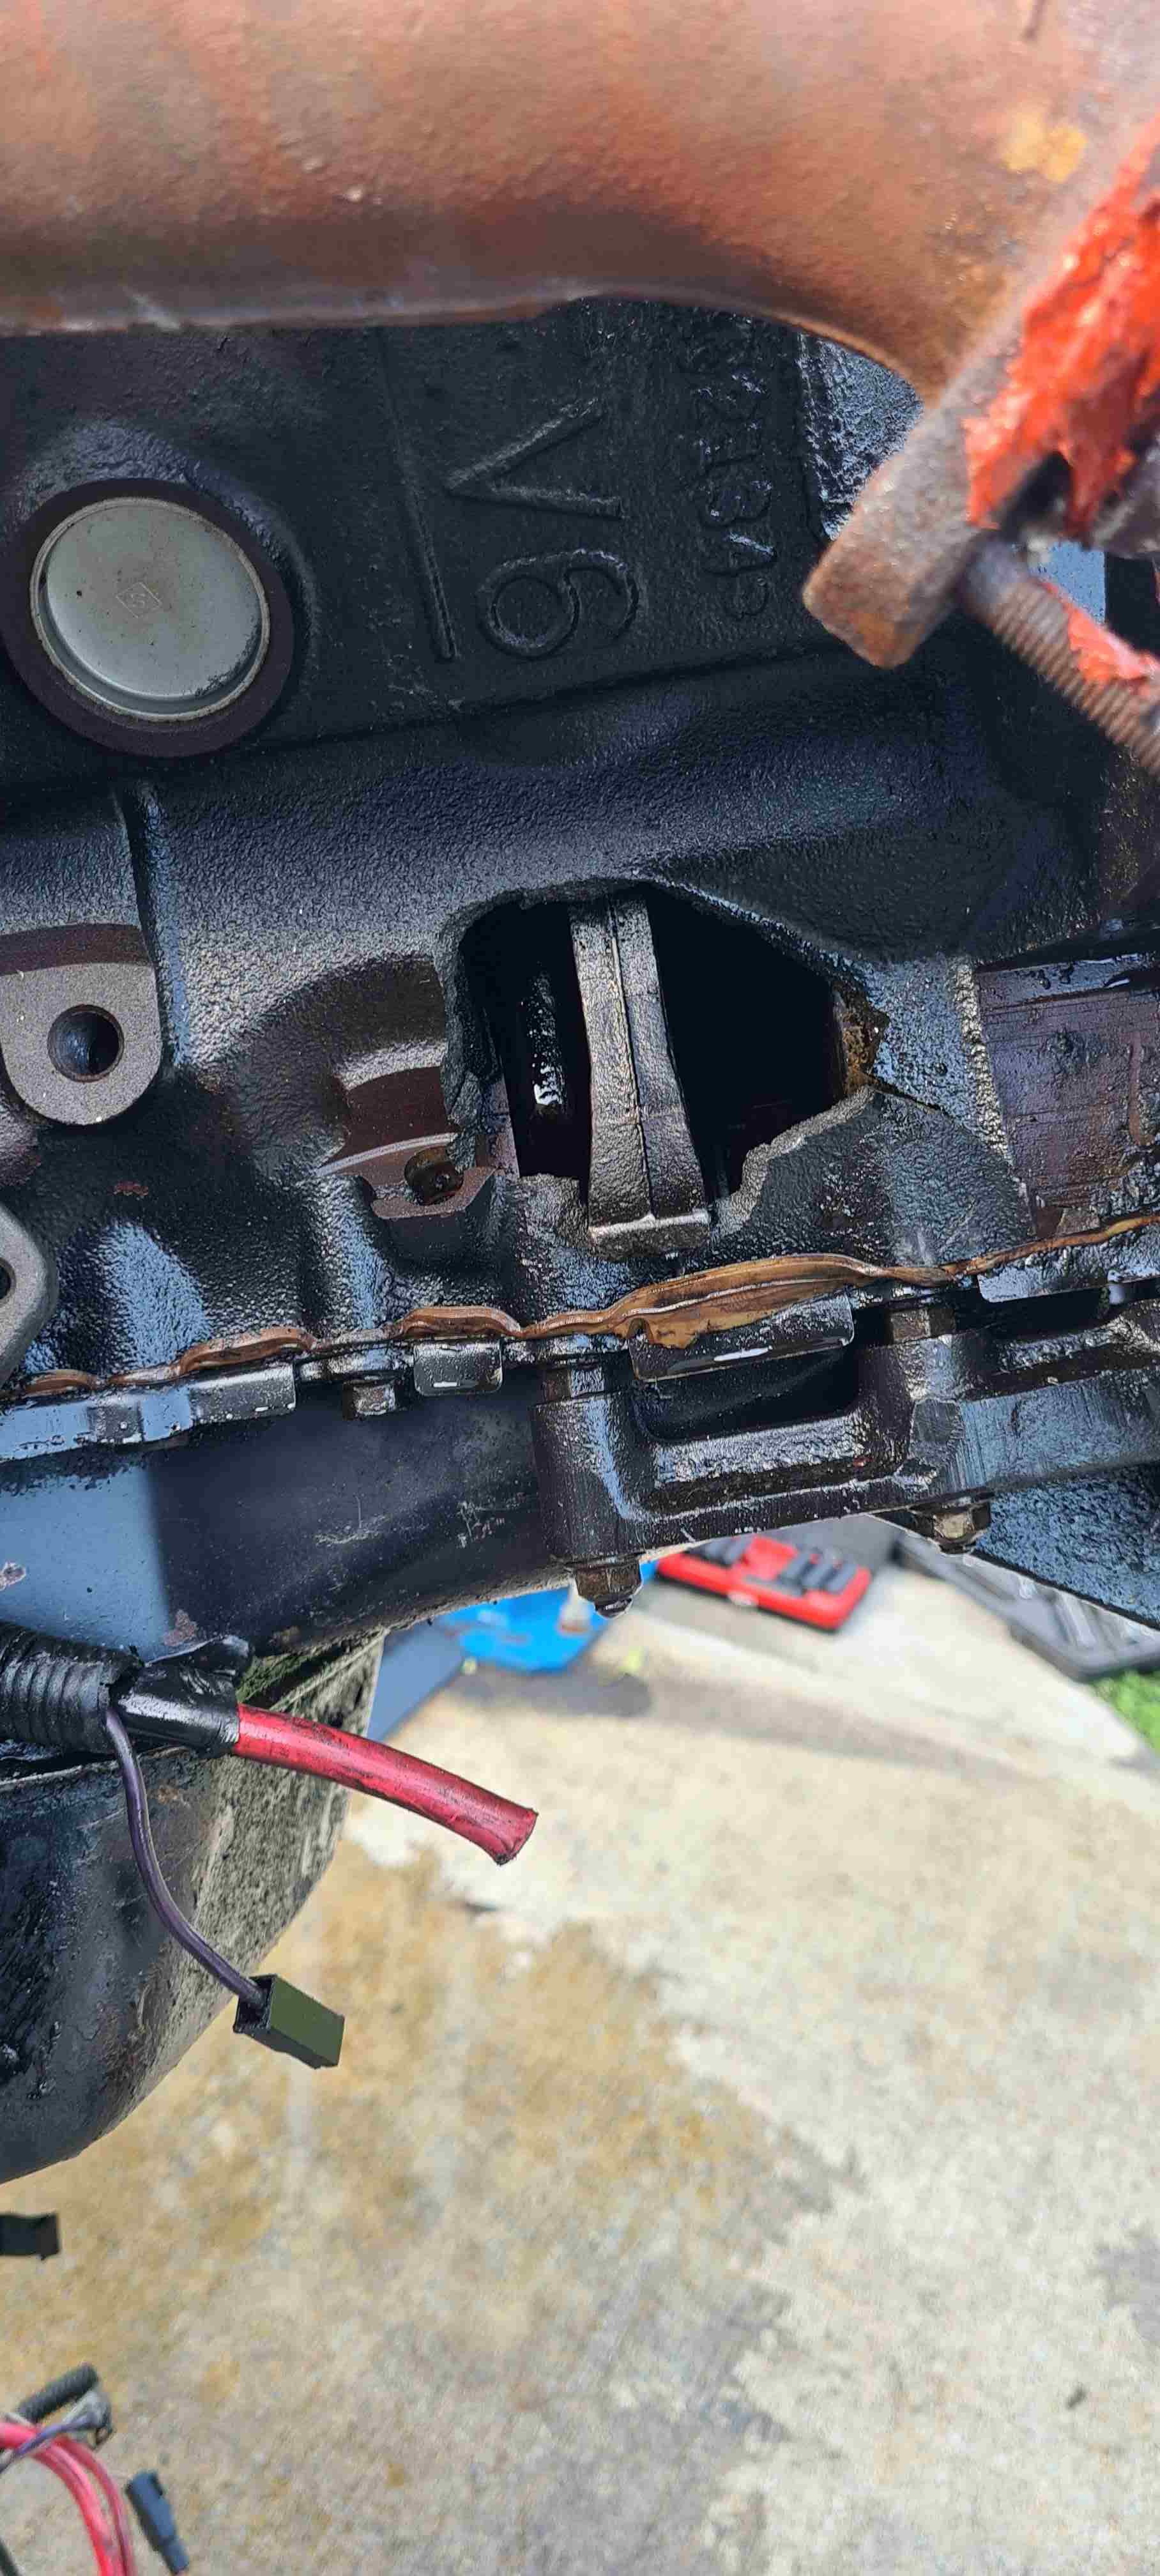
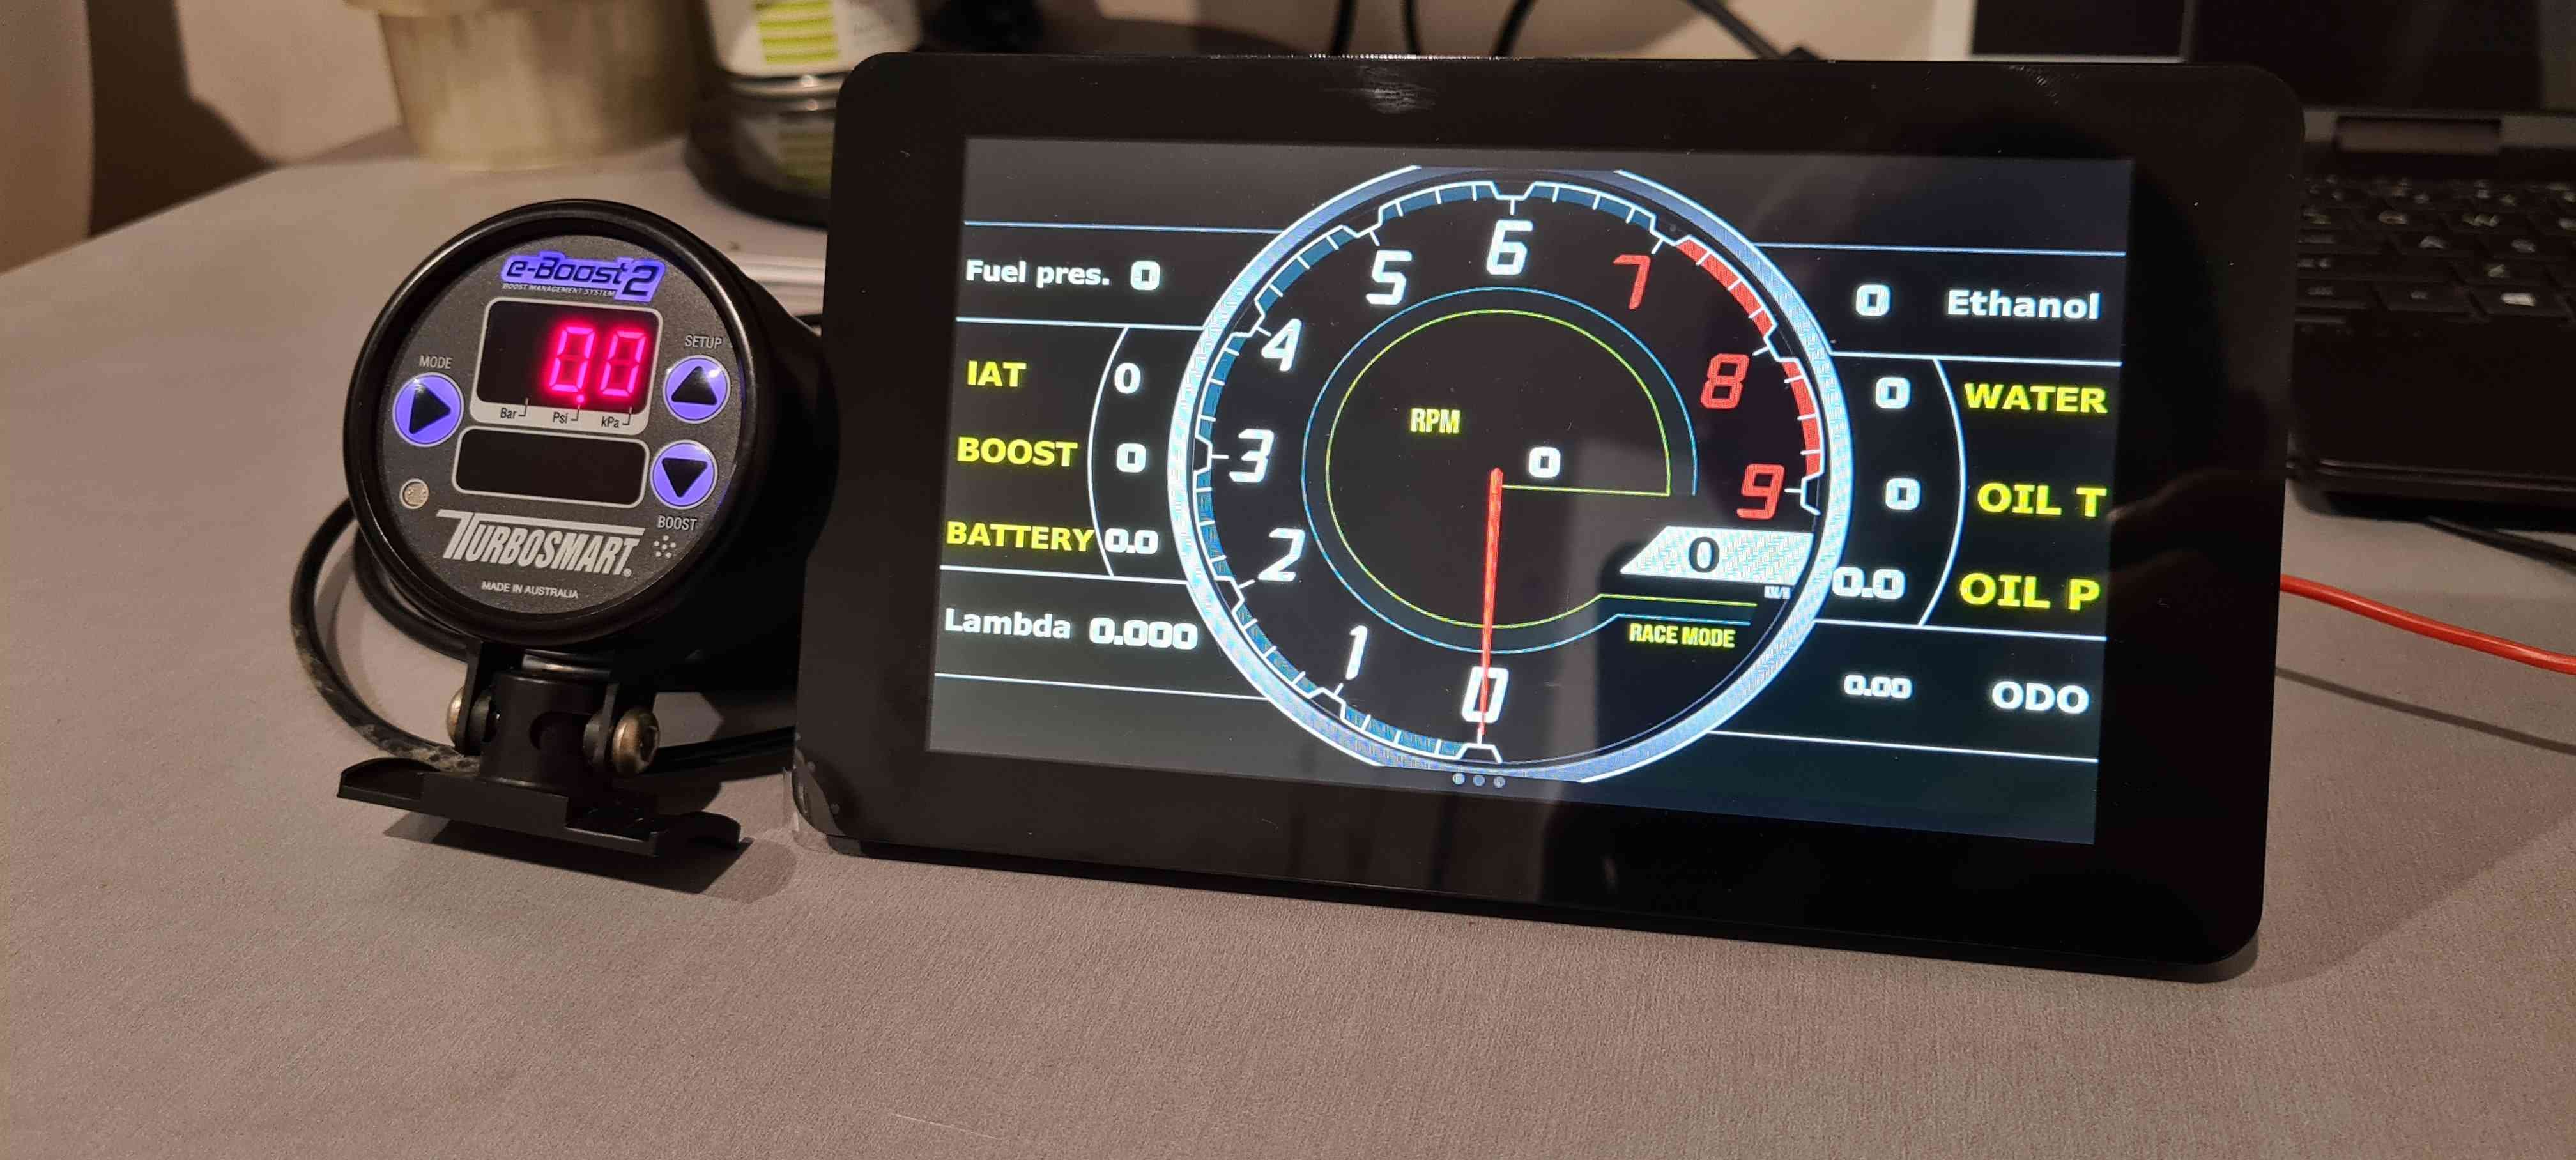
Time to chuck up a post about my latest project since iv just started pulling apart the donor car, starting with 1 VR commodore wagon the old 3.8s rod came knocking and put a window in the block. Iv stripped the interior of that, to make way for a 6 point sfi cage and rear tubs to the rails to accommodate wider rubber and a parallel 4 link 9", to be commenced early/mid 2021, Now the fun part the bf falcon some of you may know from such shenanigans as palmy/fielding 2020 swapmeet is giving up its engine for the repower to be backed up by a th400, now let's see what the stocker na can do with an FG xr6 gt3576 strapped to the side of it. Already got some goodies a powertune digi dash to run off the factory ford pcm and eventually the link g4 when it goes full send, also picked up an e boost2 to keep the boost pixies under control. Plan is to make it fully street legal and be able to swap wheels and tyres and go full send on the drag strip/power cruise and chrome.
1 point
-
Yup good outcome that cleaning the ISCV and setting the timing works. If its in the ballpark you should be able to fuck around and get it better over time. 100% on getting some new gas and a injector cleaner in there, I think the nulon one is the only over the counter that has PEA.1 point
-
had been running on 95 pre paint job as 98 was not everywhere and real expensive. but recently npd have rolled out 100 at a reasonable price and nearly every station.1 point
-
Icv clean made it alot better, but still had issues. Got dad's timing light and checked it. Car was set at about 35btdc.. I bumped it a little advanced earlier but into a couple degrees. Anyway it's 99% good now shockingly. I suspect I could get it slightly better if I fitted something like an apexi safc II and fiddling with fuel down low. My brother has one in his lockup which I may fit at some point. They look pretty cool at any rate. The cars still mid polish job so havnt driven it, but am pretty keen to see how it's running on the street now.1 point
-
Good quality stuff like that makes all the difference!1 point
-
Brought these today. They work amazing!! Only $20 from jaycar, super happy with them.
1 point
-
Fuck I hope I don't ever need to remove this.
1 point
-
I mounted that expansion tank somewhere convenient. Went for a drive and all seems to be behaving. I also made some racks to carry long things, did the rear a few days ago and sorted the front out today. I'll get those zinc arc sprayed I imagine; Might make the rear clamp on rather than ratcheted, you have to properly crank it up to prevent it from rocking a little....1 point
-
20th Jan, who's in?1 point
-
I like this thread a lot so time for some contributions... random stuff I just found on my phone. I made a doll house thing in a little suitcase for my godchild and wire people Check for details... I also made her a dragon like doll to cuddle no pic of it all assembled Other gifts... Lamp for a friend who has bees and just had his first son at that time Rack for spices, one for my brother, one for my sister in law Some deco for my sons bedroom, a lamp... Another lamp And some cut in half dinosaurs For the daughter as a present something to hang and store clothers for her dolls And some covid protection thingy for my wife as she is a speech therapist V1 which was to wobbly according to her And V2 which she and her partner still use That's me for now, not revolutionary or shocking... Thanks for watching.1 point
-
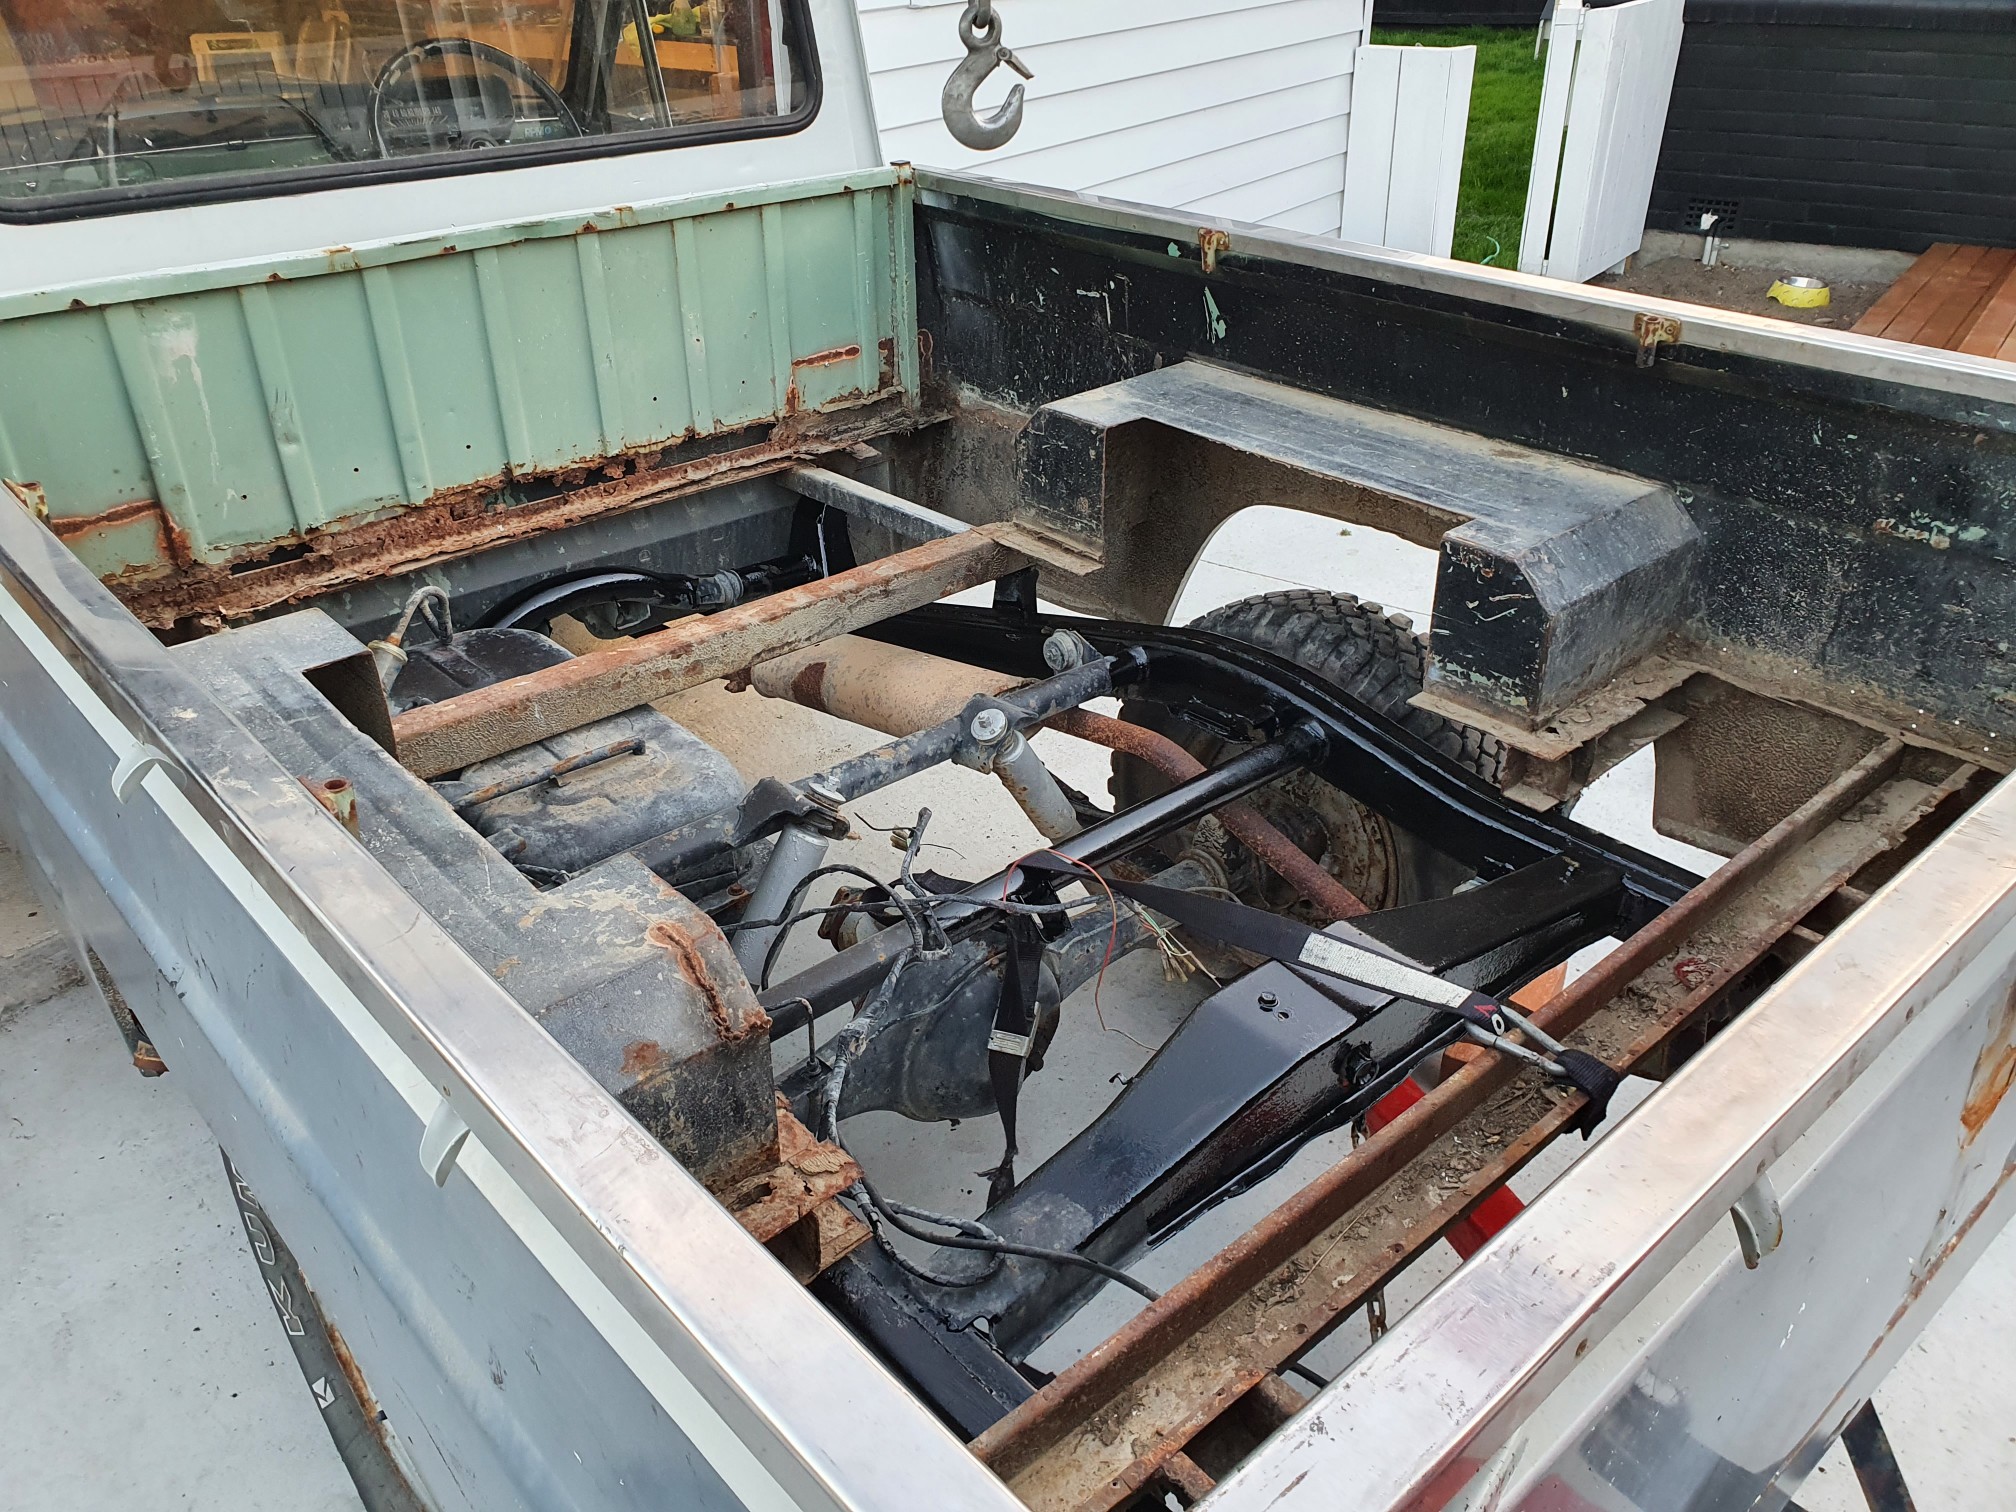
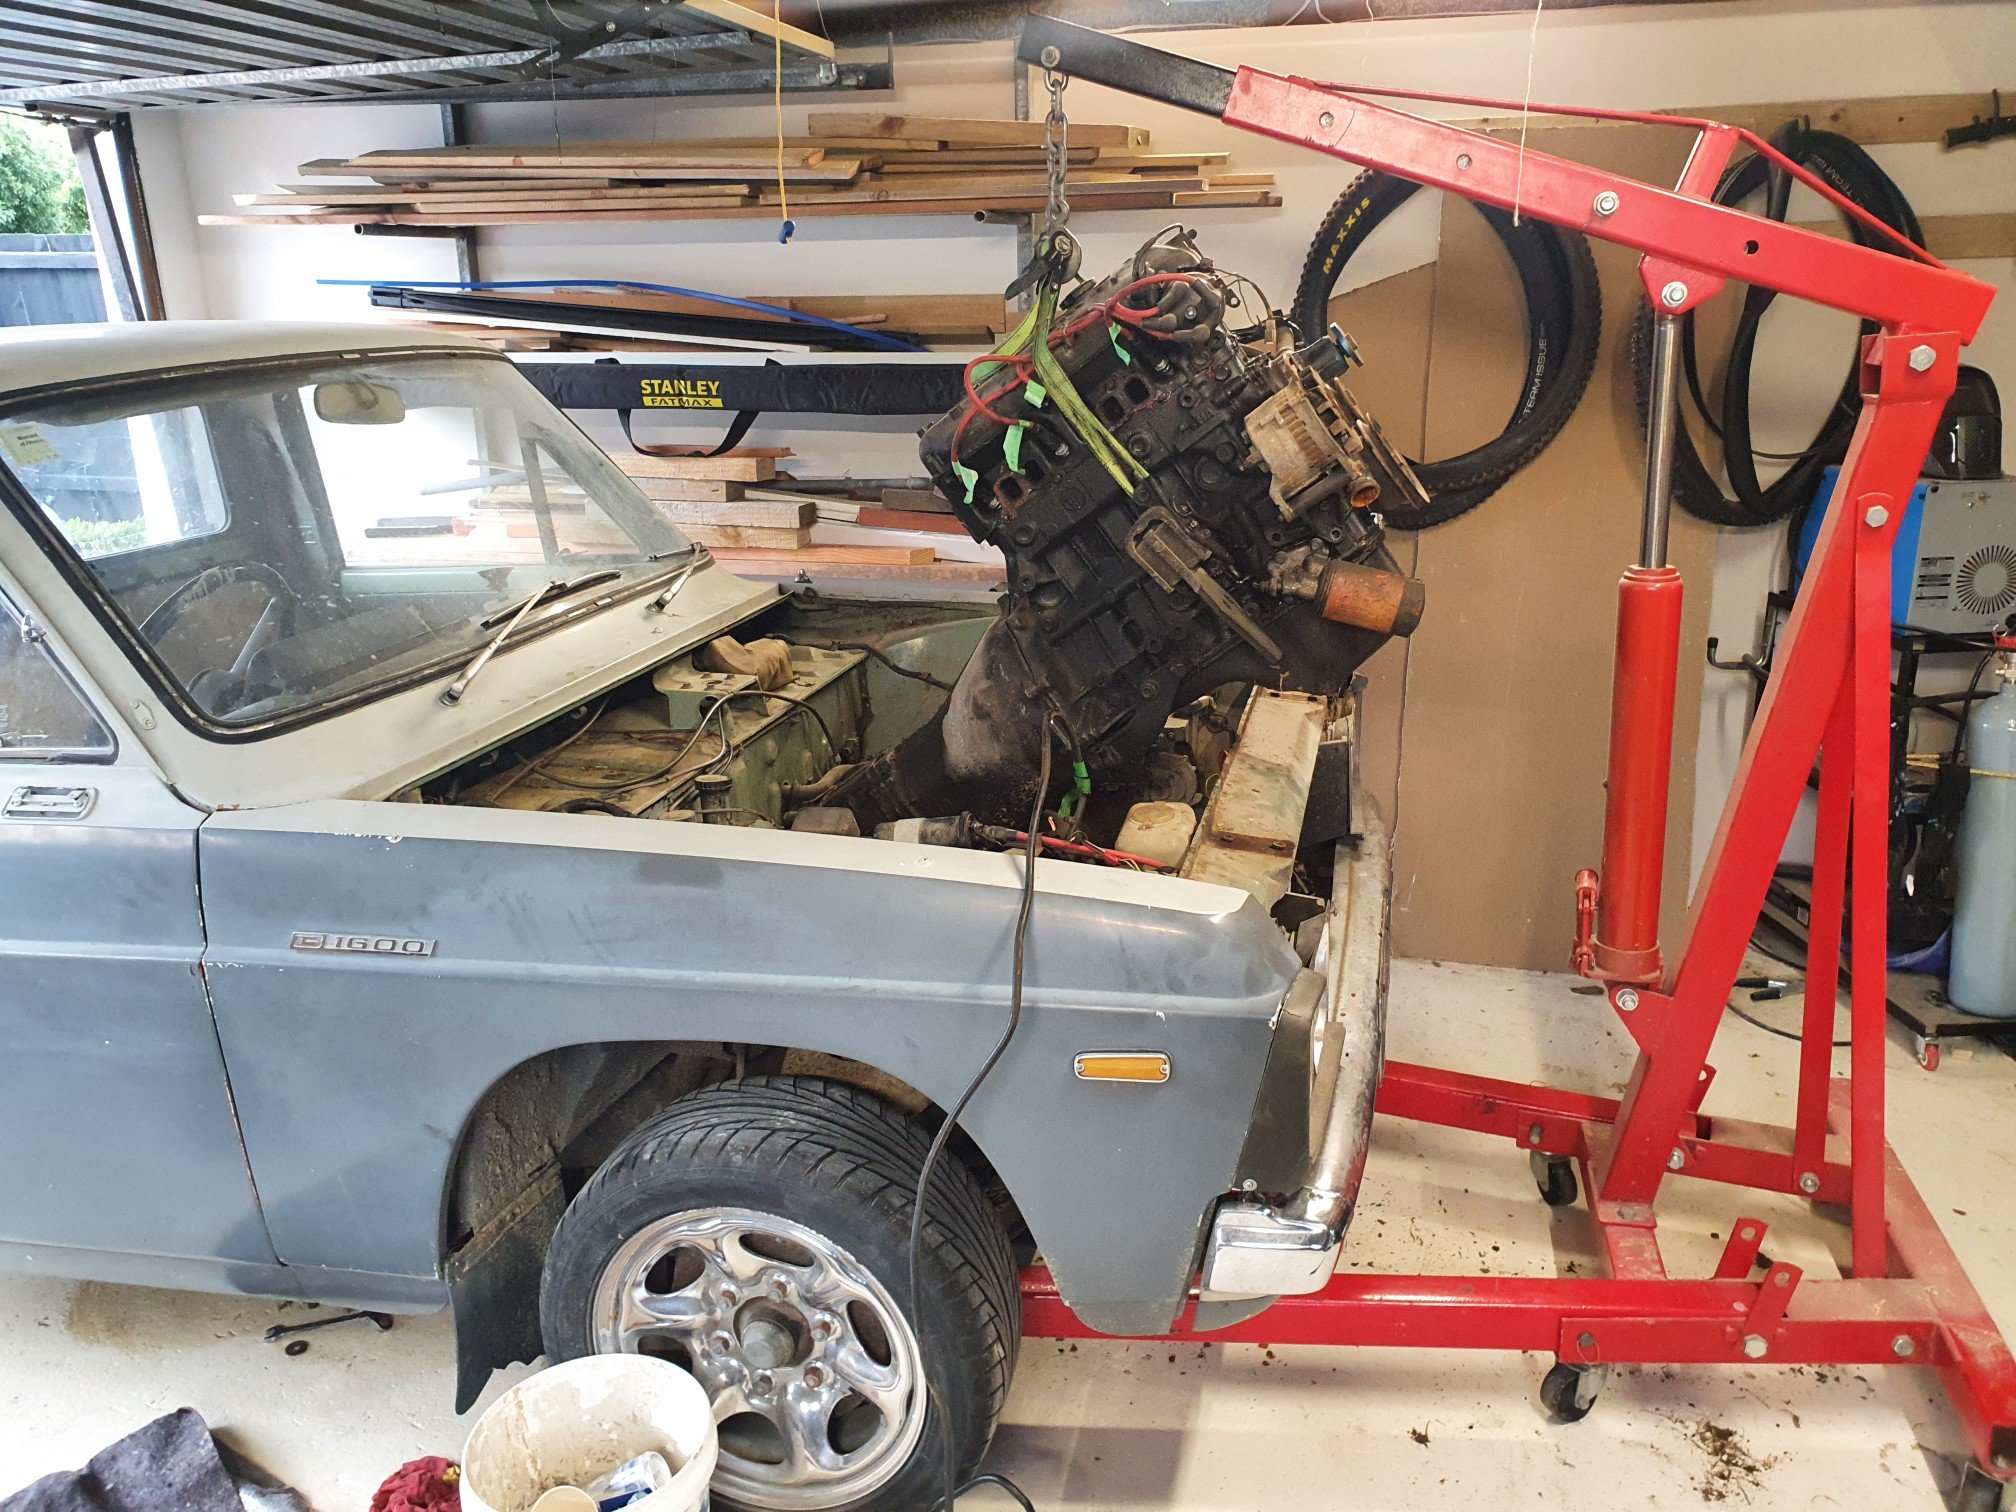
Thread dredge from page 6 haha. Progress has been very slow on this. Lack of room is just a killer. Tonight I pulled the 2l out. One step closer to pulling the cab off the c notch chassis . At least with the motor and box out it will be a little lighter to push in and out of the garage. That's all the progress for now. So here's a boring pic for a boring build
1 point
-
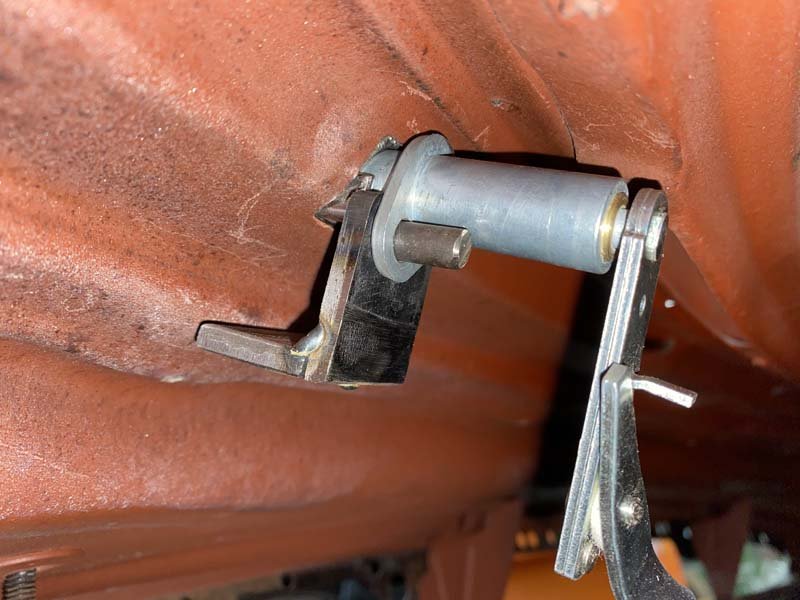
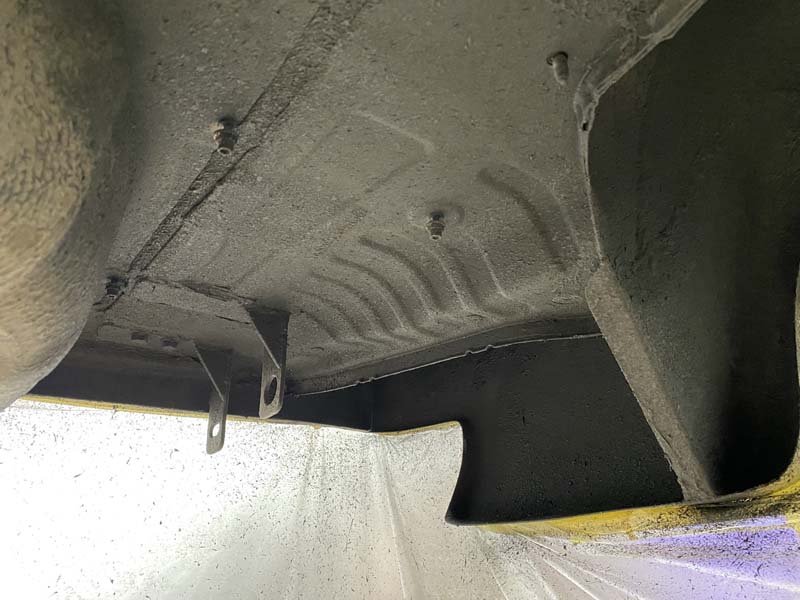
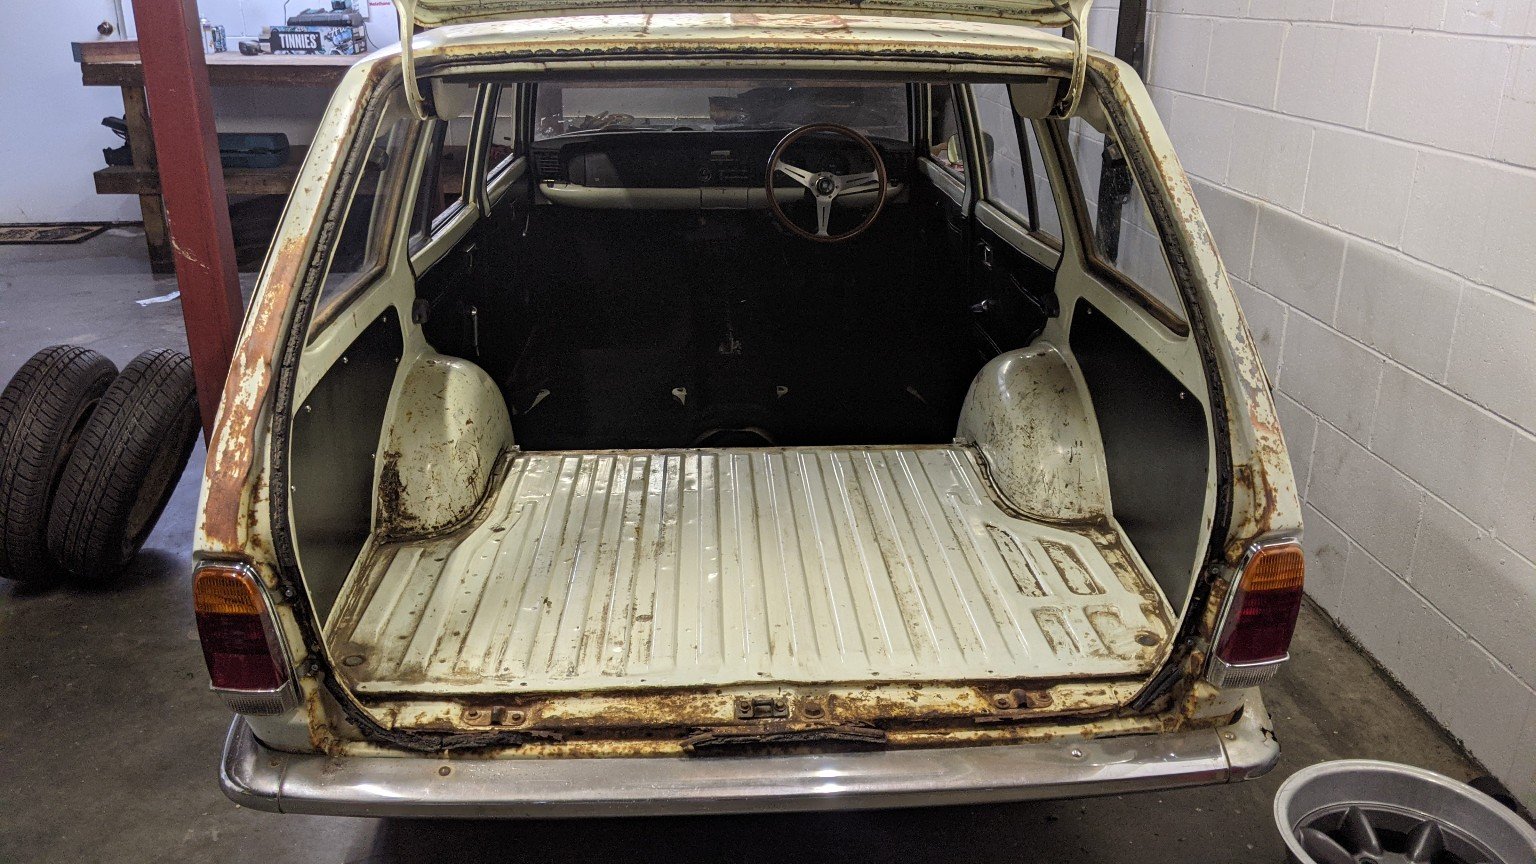
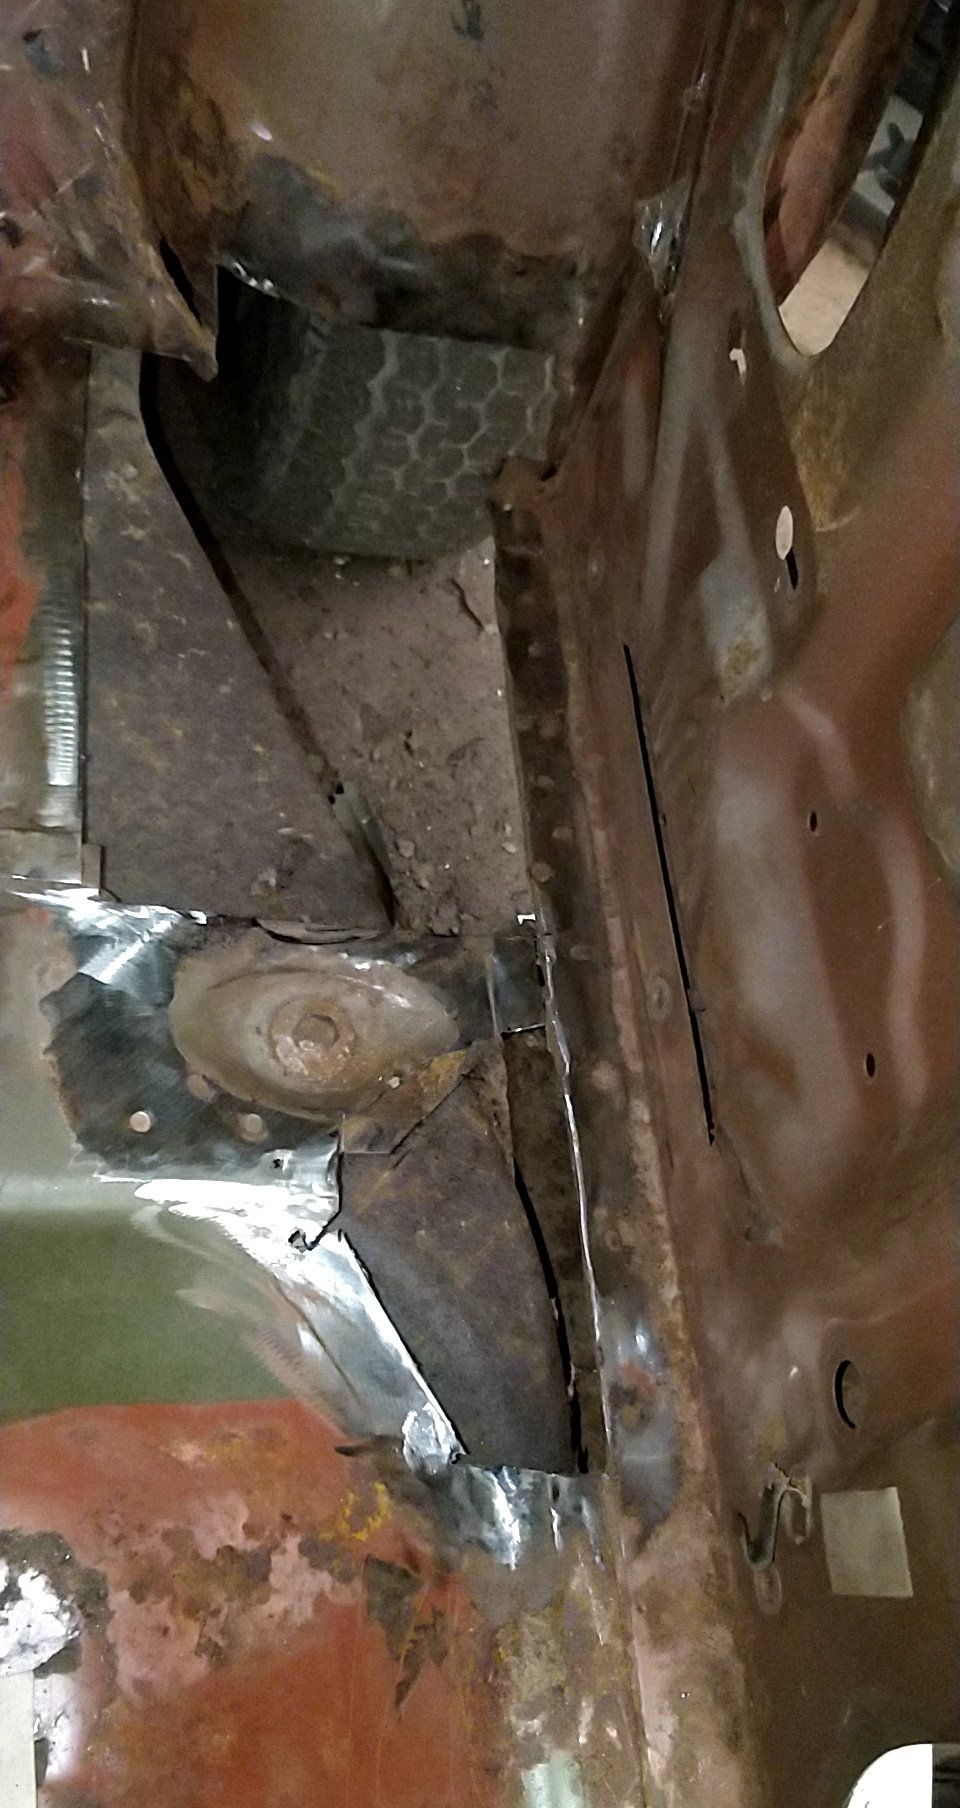
Managed to get some work done on the car over the last couple of days, got the wire wheels out in the boot and surrounding area. Boot floor wasn’t looking too bad (not 100% done brushing back in the photo): Slapped some primer on it (there’s one little rust hole near the drain opening in the spare wheel tray, the cap that sat in there crumbled in my hand lol): There is a bit of rust around where the seal/boot lip runs along near the bumper in the middle, so to get a closer look I removed the rear bumper (came off surprisingly easily, after some of the horror stories I have seen/read about). Was a bit sad to see this rust here, next to the forward bumper support (similar on the other side too), so that’ll need to be sorted: Does anyone know how to get these brackets off? I can see some screws and nuts, but they look fairly rusted on. Likewise, any tips on how to remove the trim here on the C pillar junction, as to finish the survey of the rust in this area: It is a bit disheartening to find more rust, but not surprising, as that’s the nature of the beast when it comes to classic cars. The good news is that there are a few areas which will be hidden once done, so perfect for me to cut my welding/repair teeth on, onwards and upwards.1 point
-
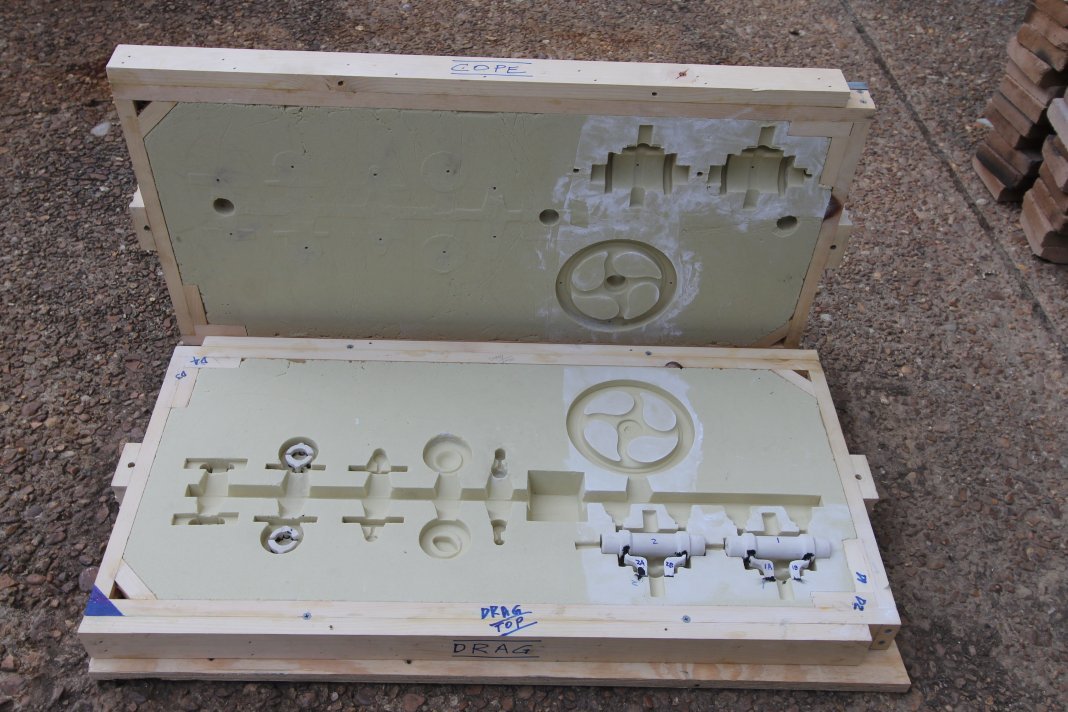
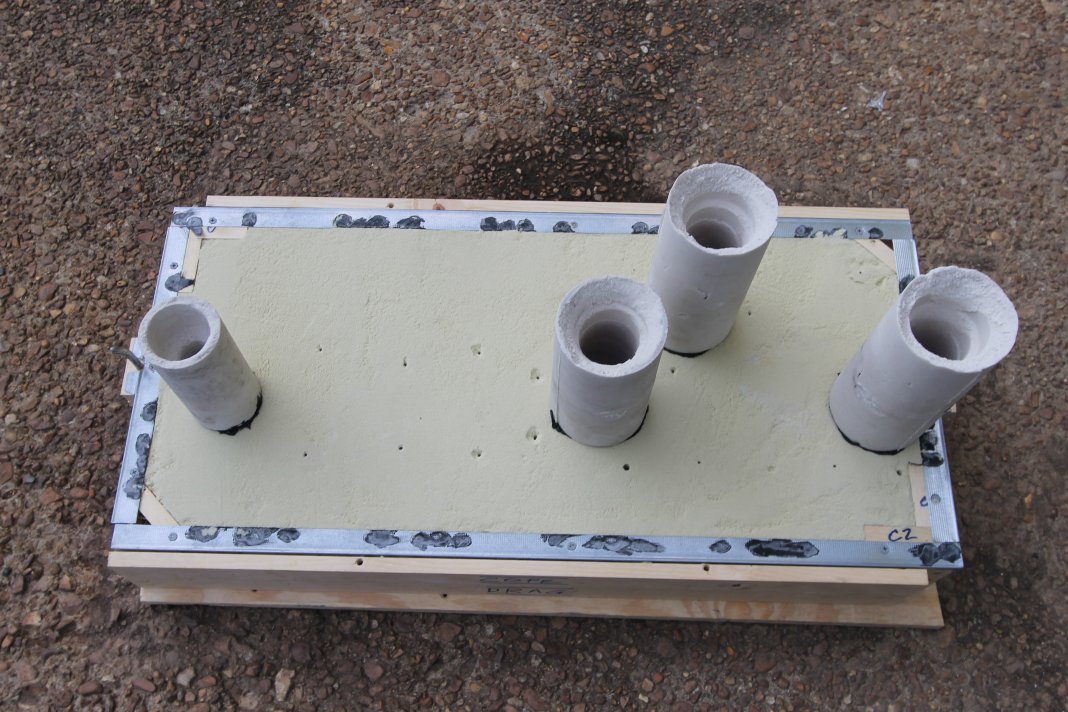
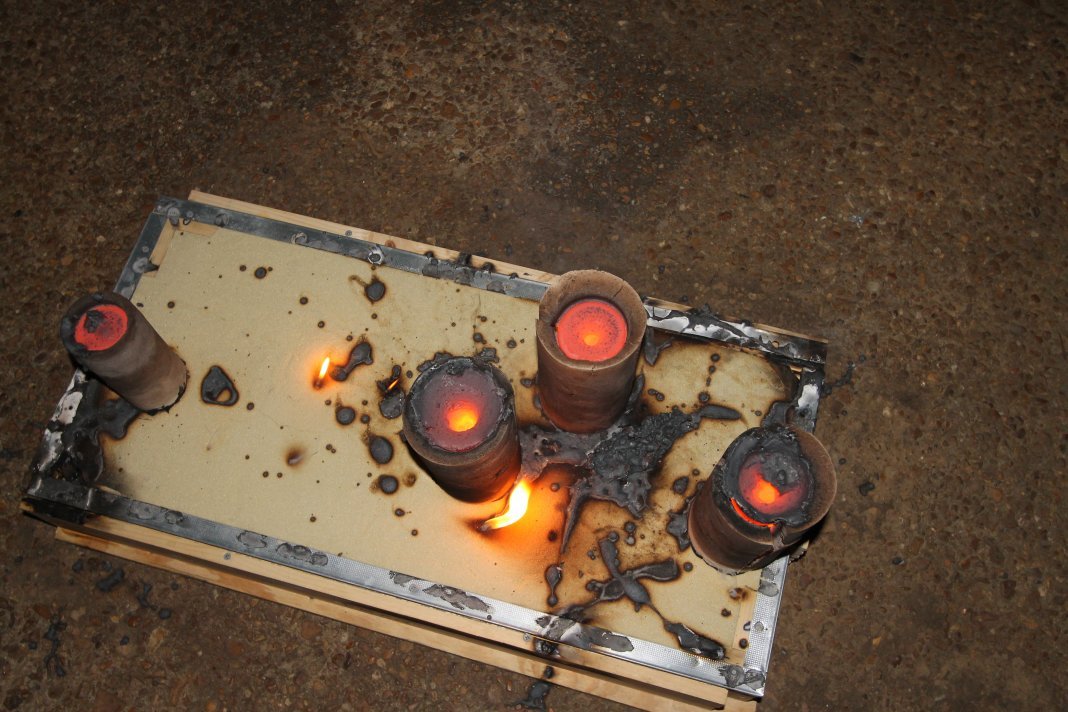
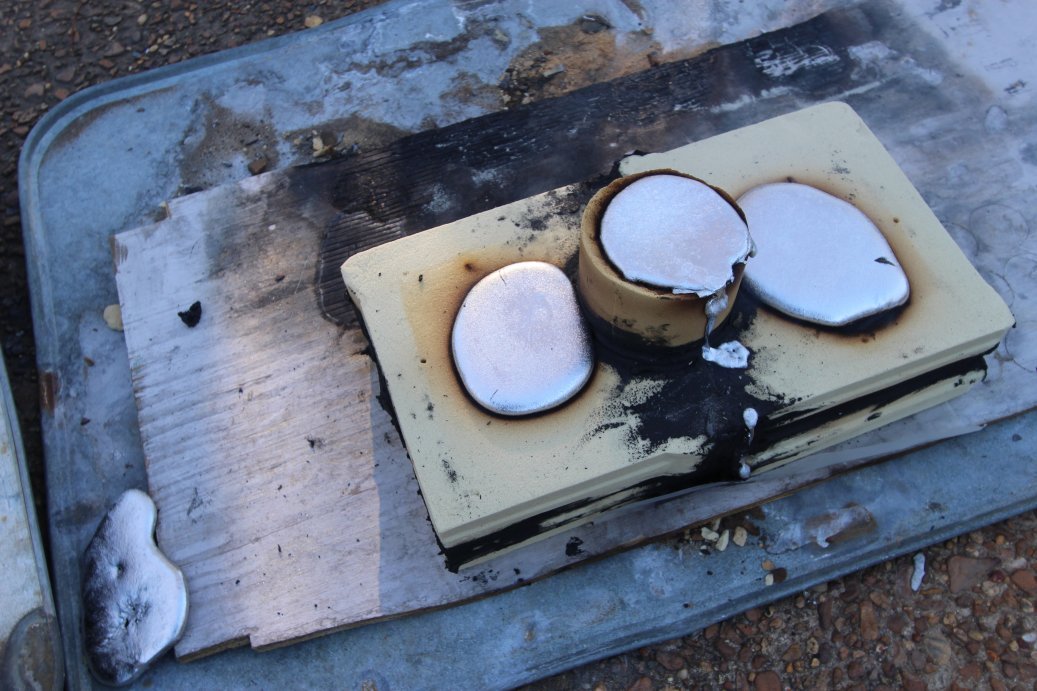
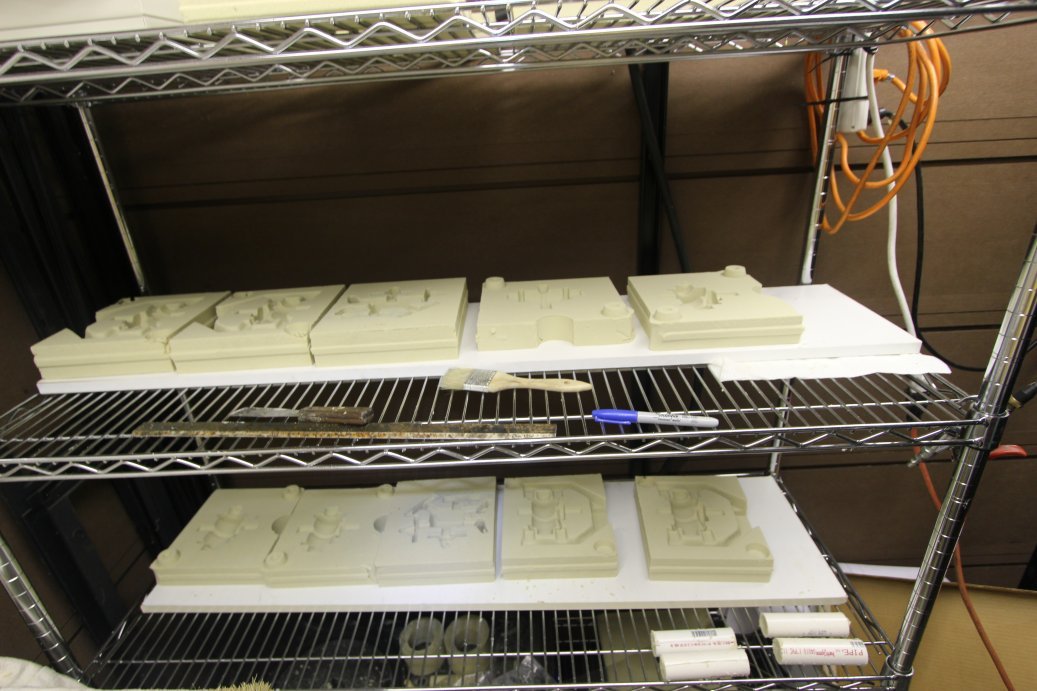
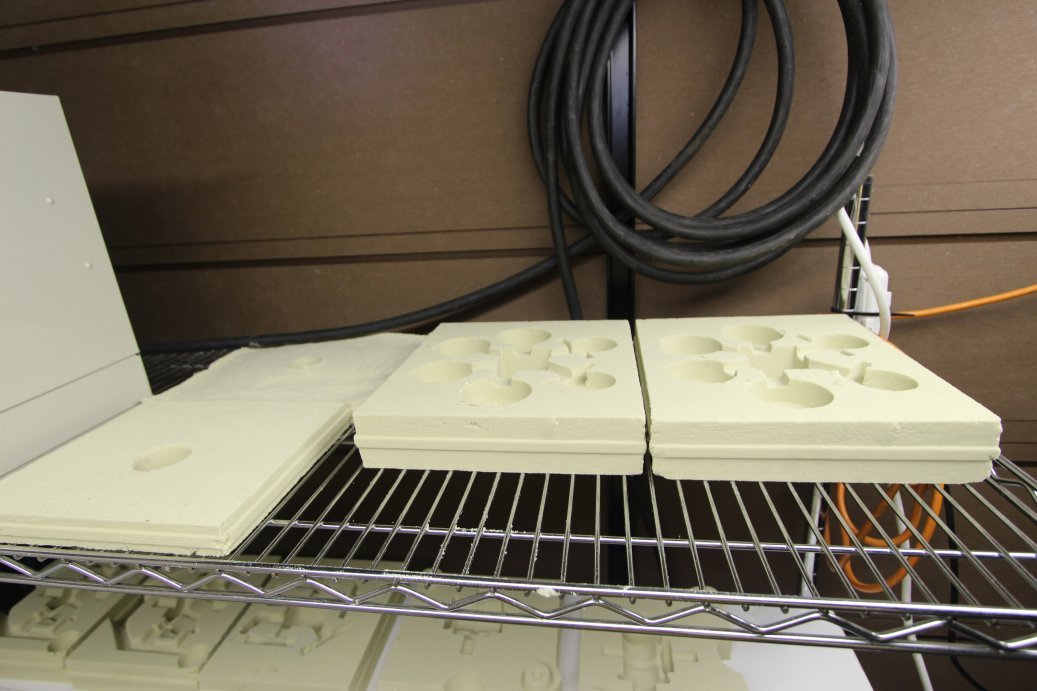
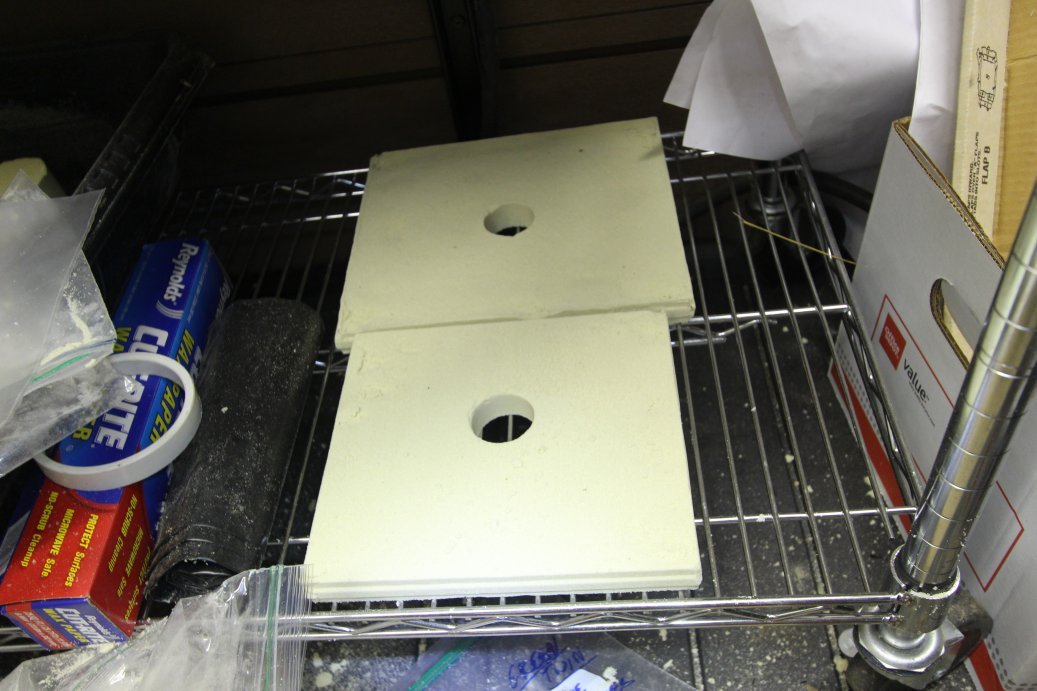
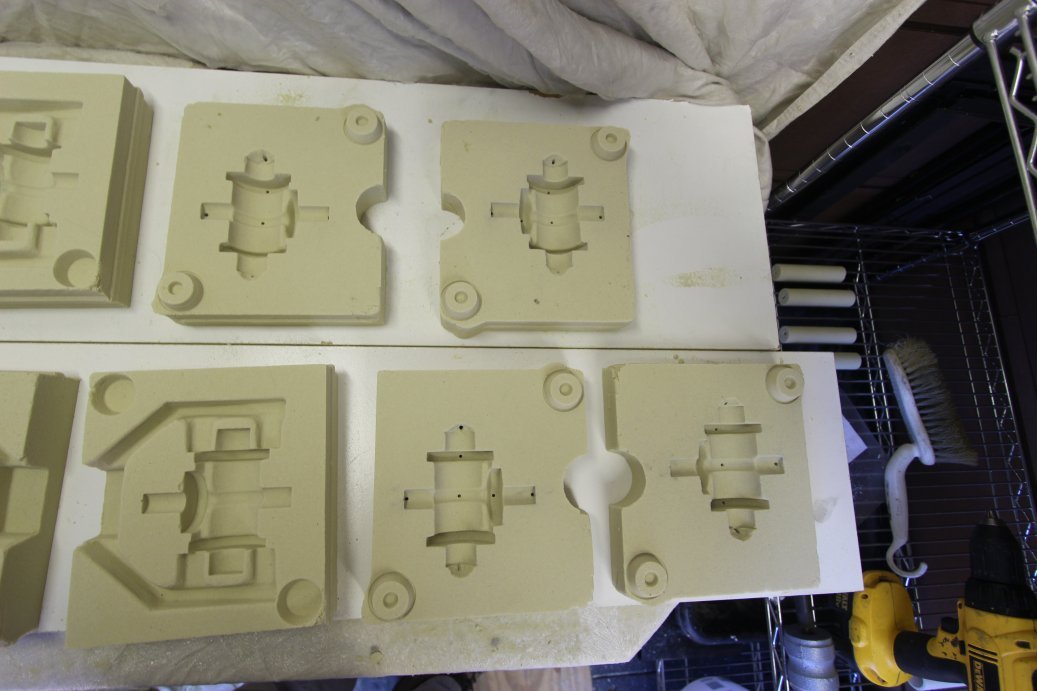
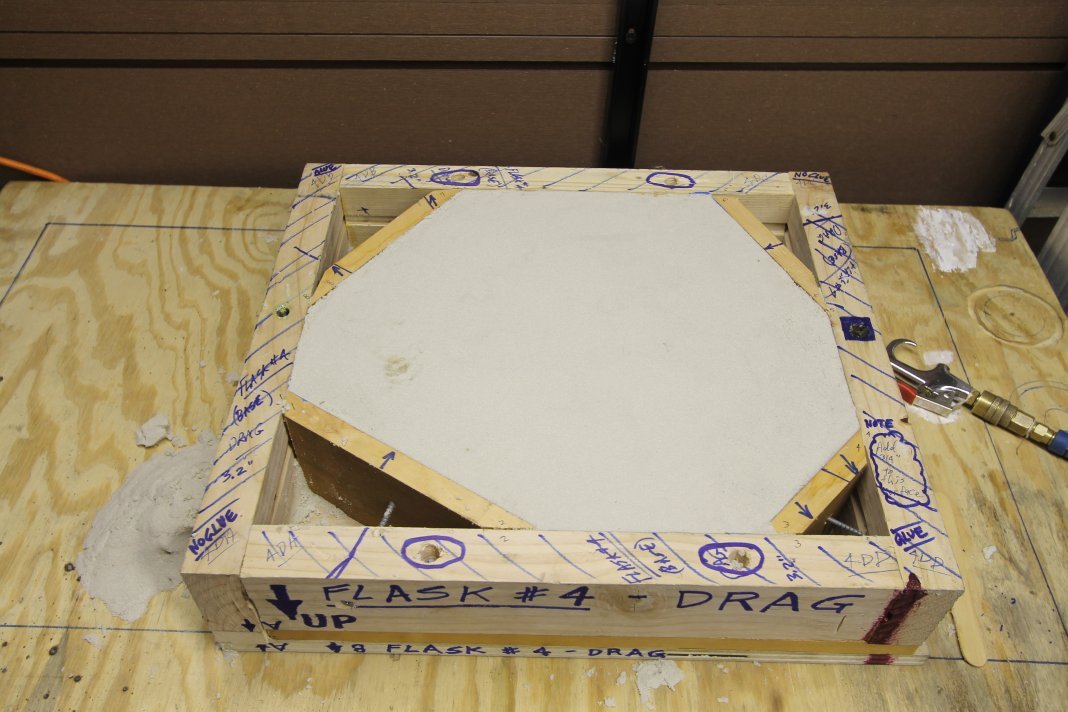
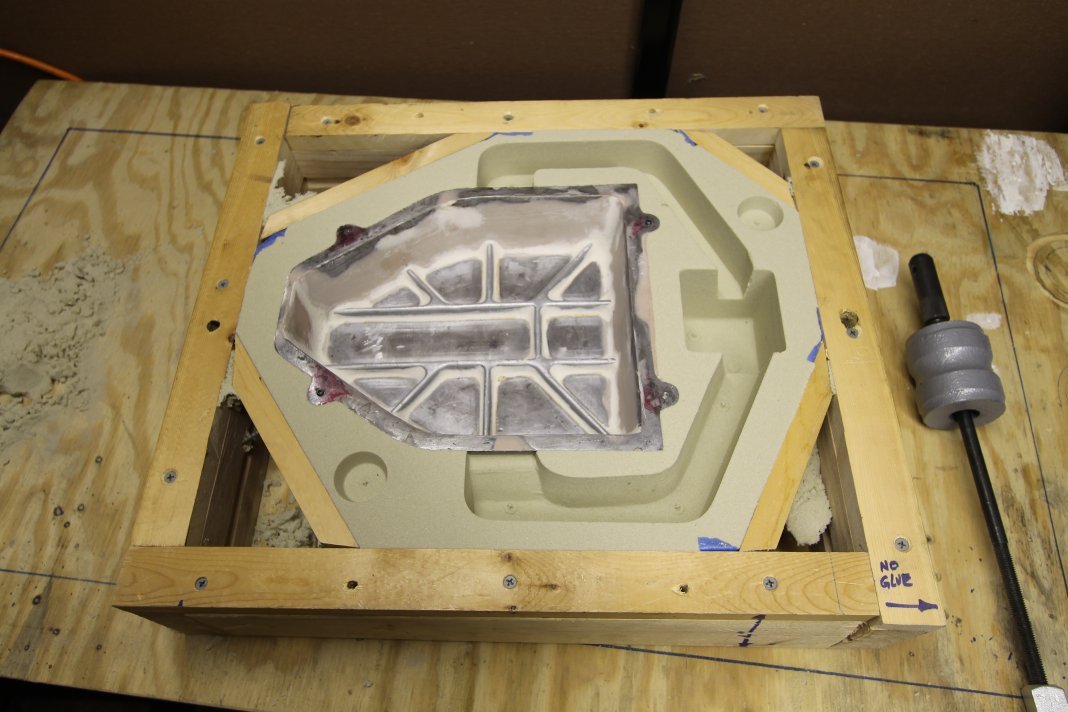
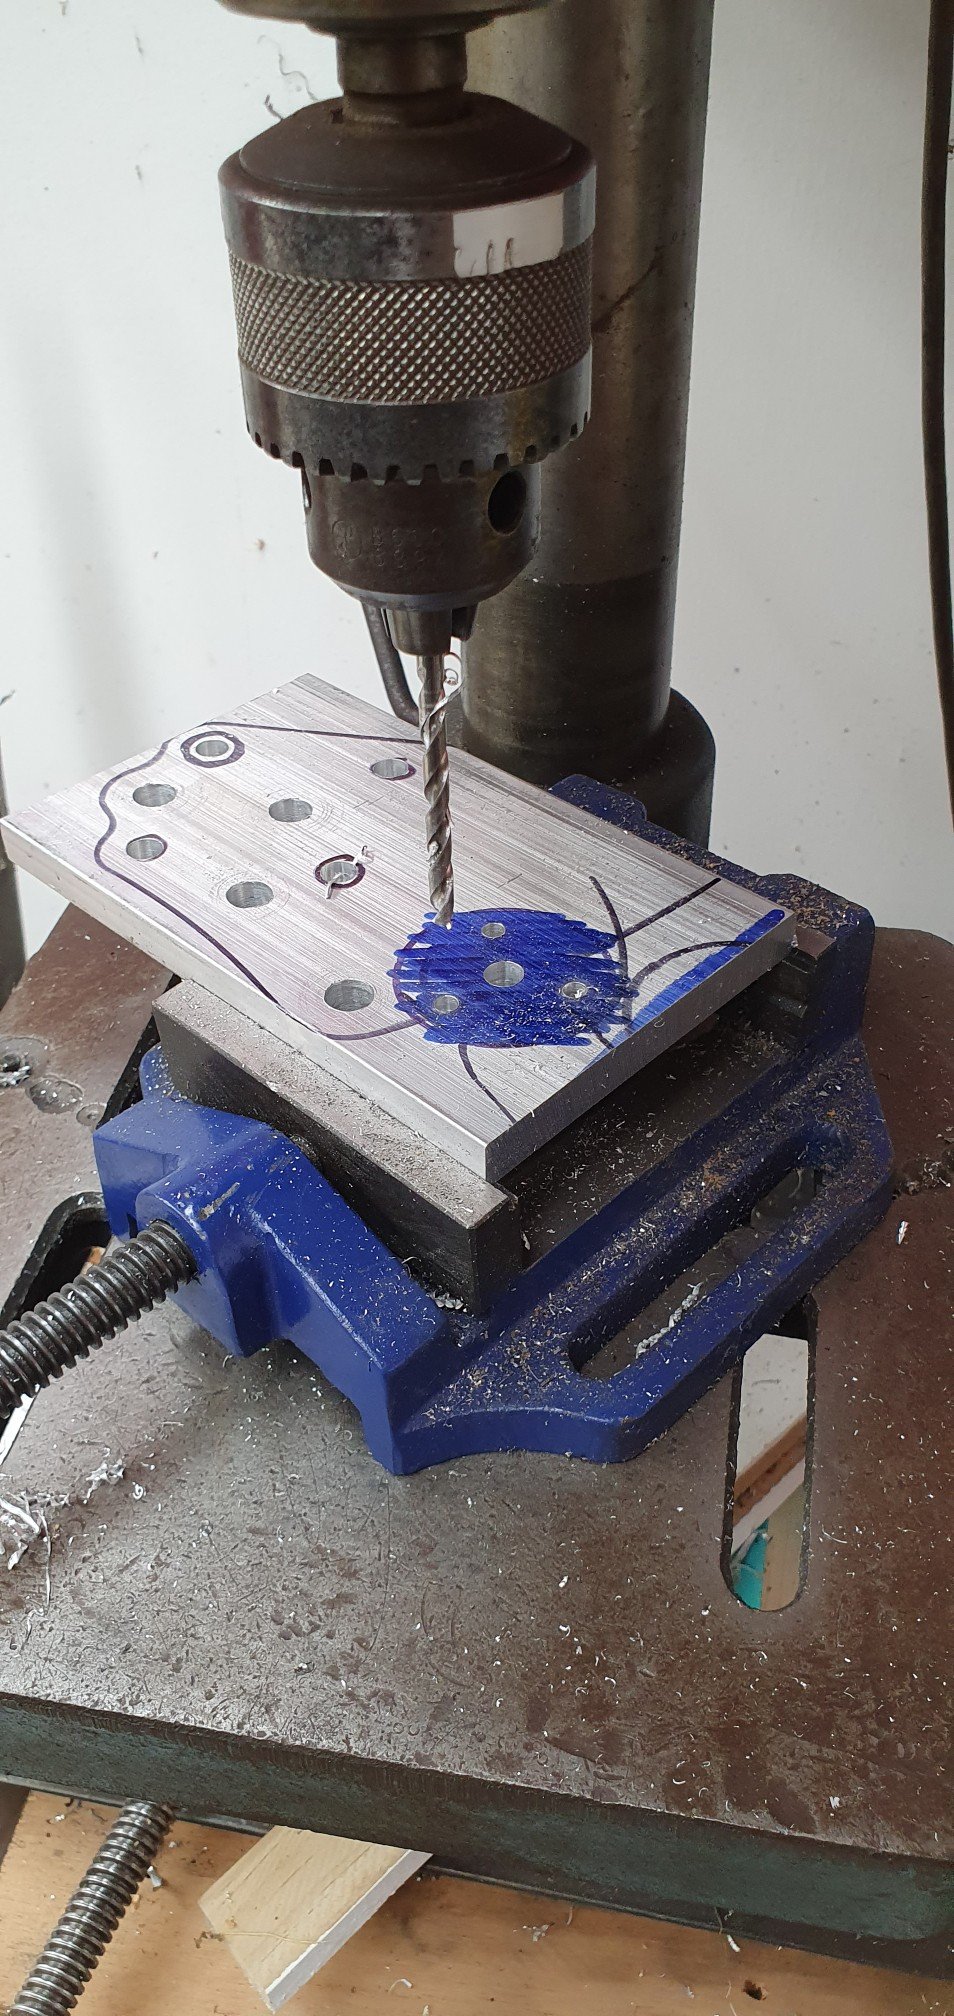
I glanced at your molds, and I would say you could probably reduce their weight by 1/2, but I don't think it would be worth the trouble. By the time you fooled around with filler blocks, and then perhaps had an irregular shaped mold, and risking one or more parts of the mold being too thin and blowing out, I think it would be wise to stay with the mold sizes you have. For me, if I blow out a mold, I can just recast the piece, and my molds are not nearly as complex as yours. I think you need extra mold strength to keep things intact during transport, and while being manhandled at the foundry. I have never had a mold fail, even with spots that are 1/2" thick, but my pours are generally 20-30 lbs of iron. I did have a mold separate once due to hydraulic pressure when I did not use enough weight on top. Below are a few molds I have made. The runner was too small on the long mold, and not all the parts filled. I typically use smaller flasks now with fewer parts in each mold. .
1 point
-
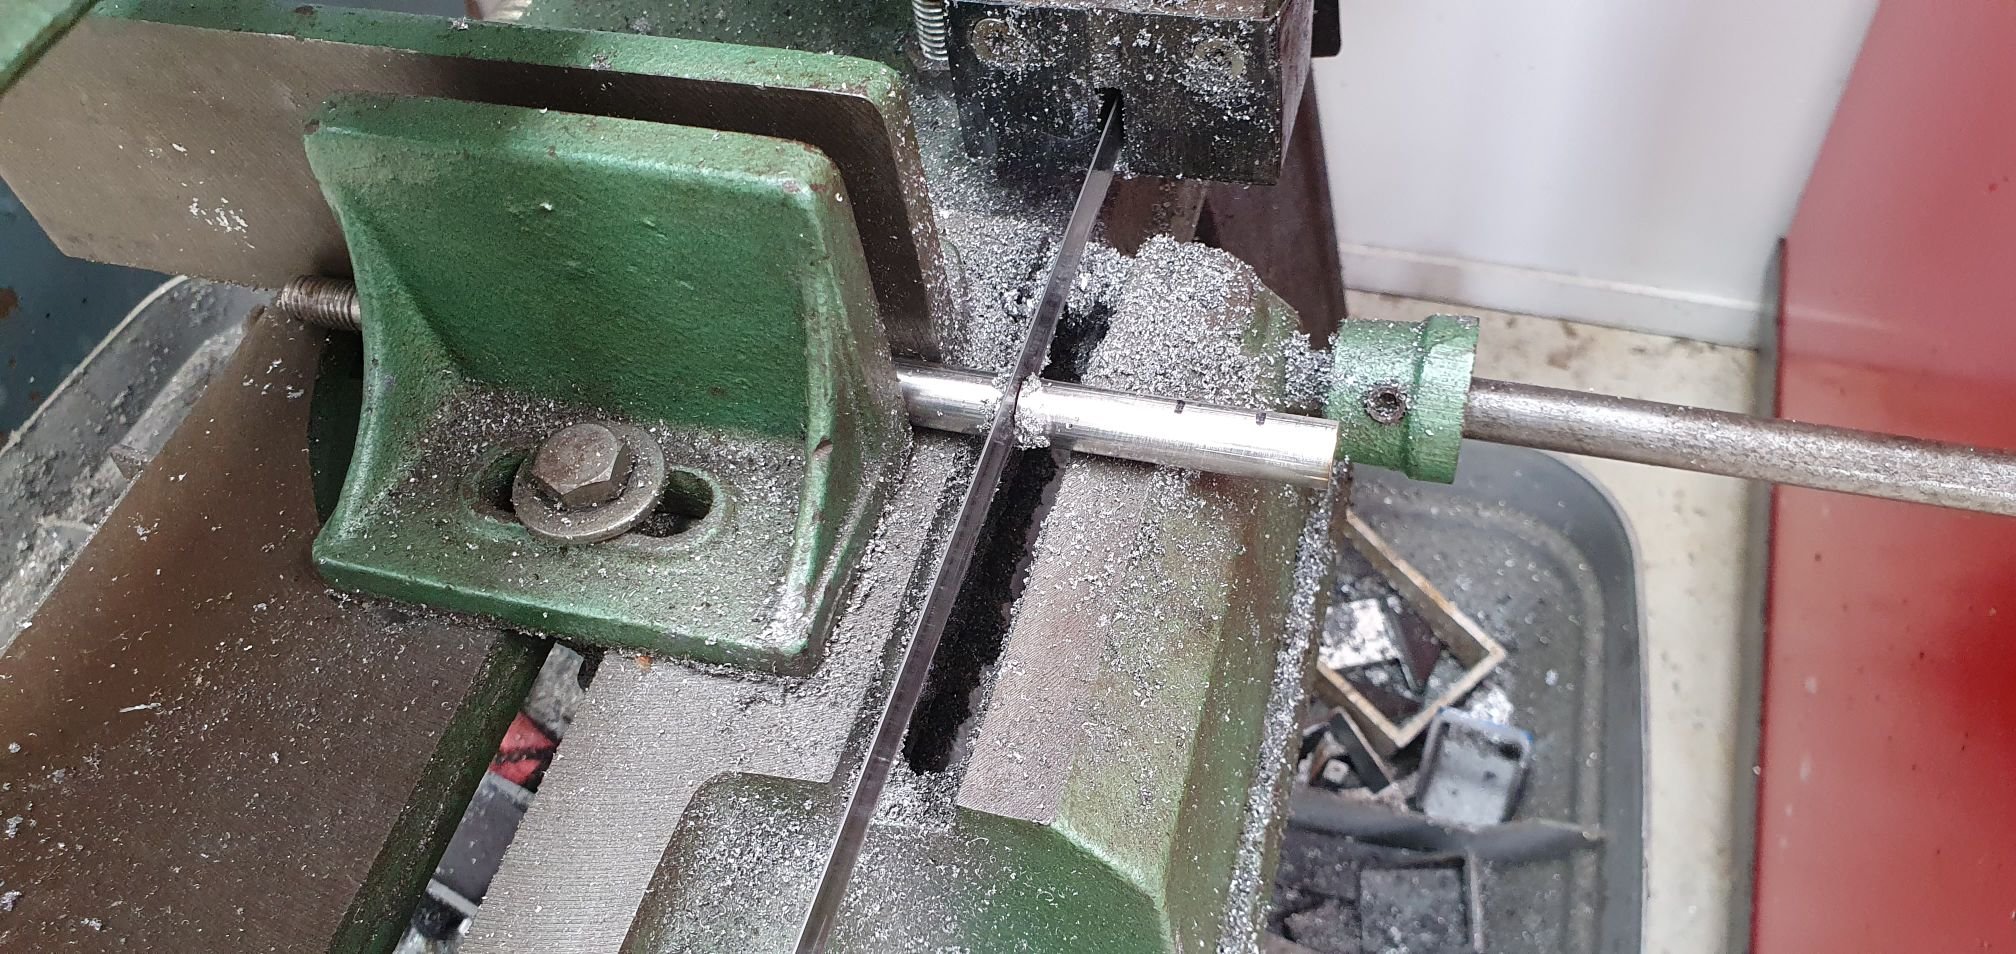
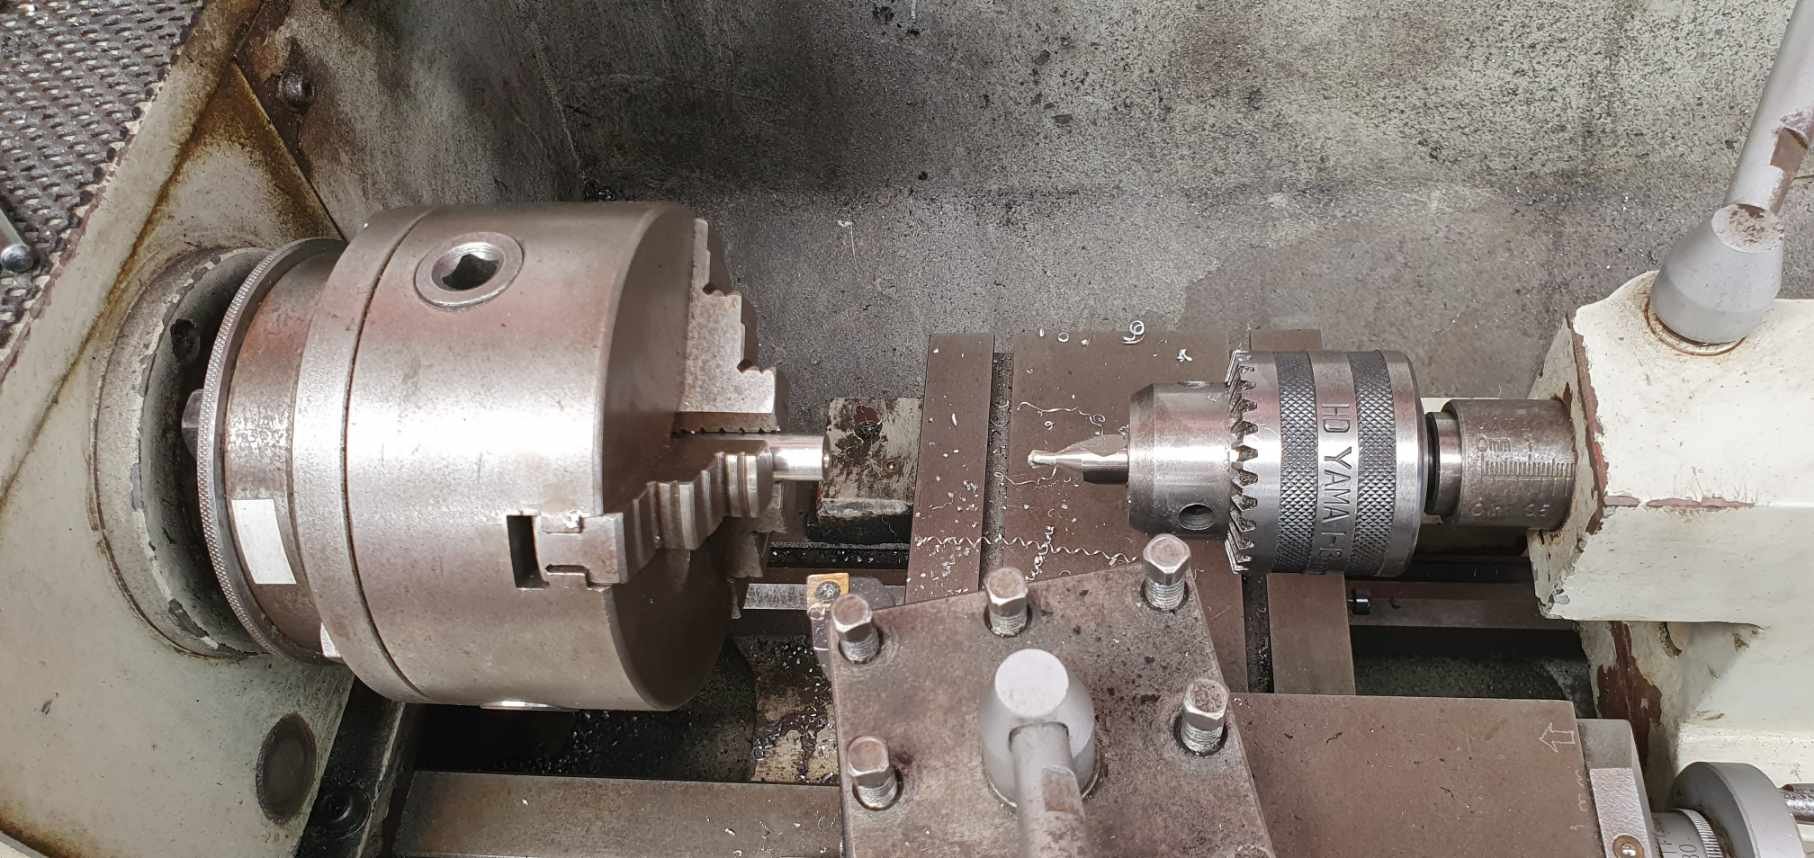
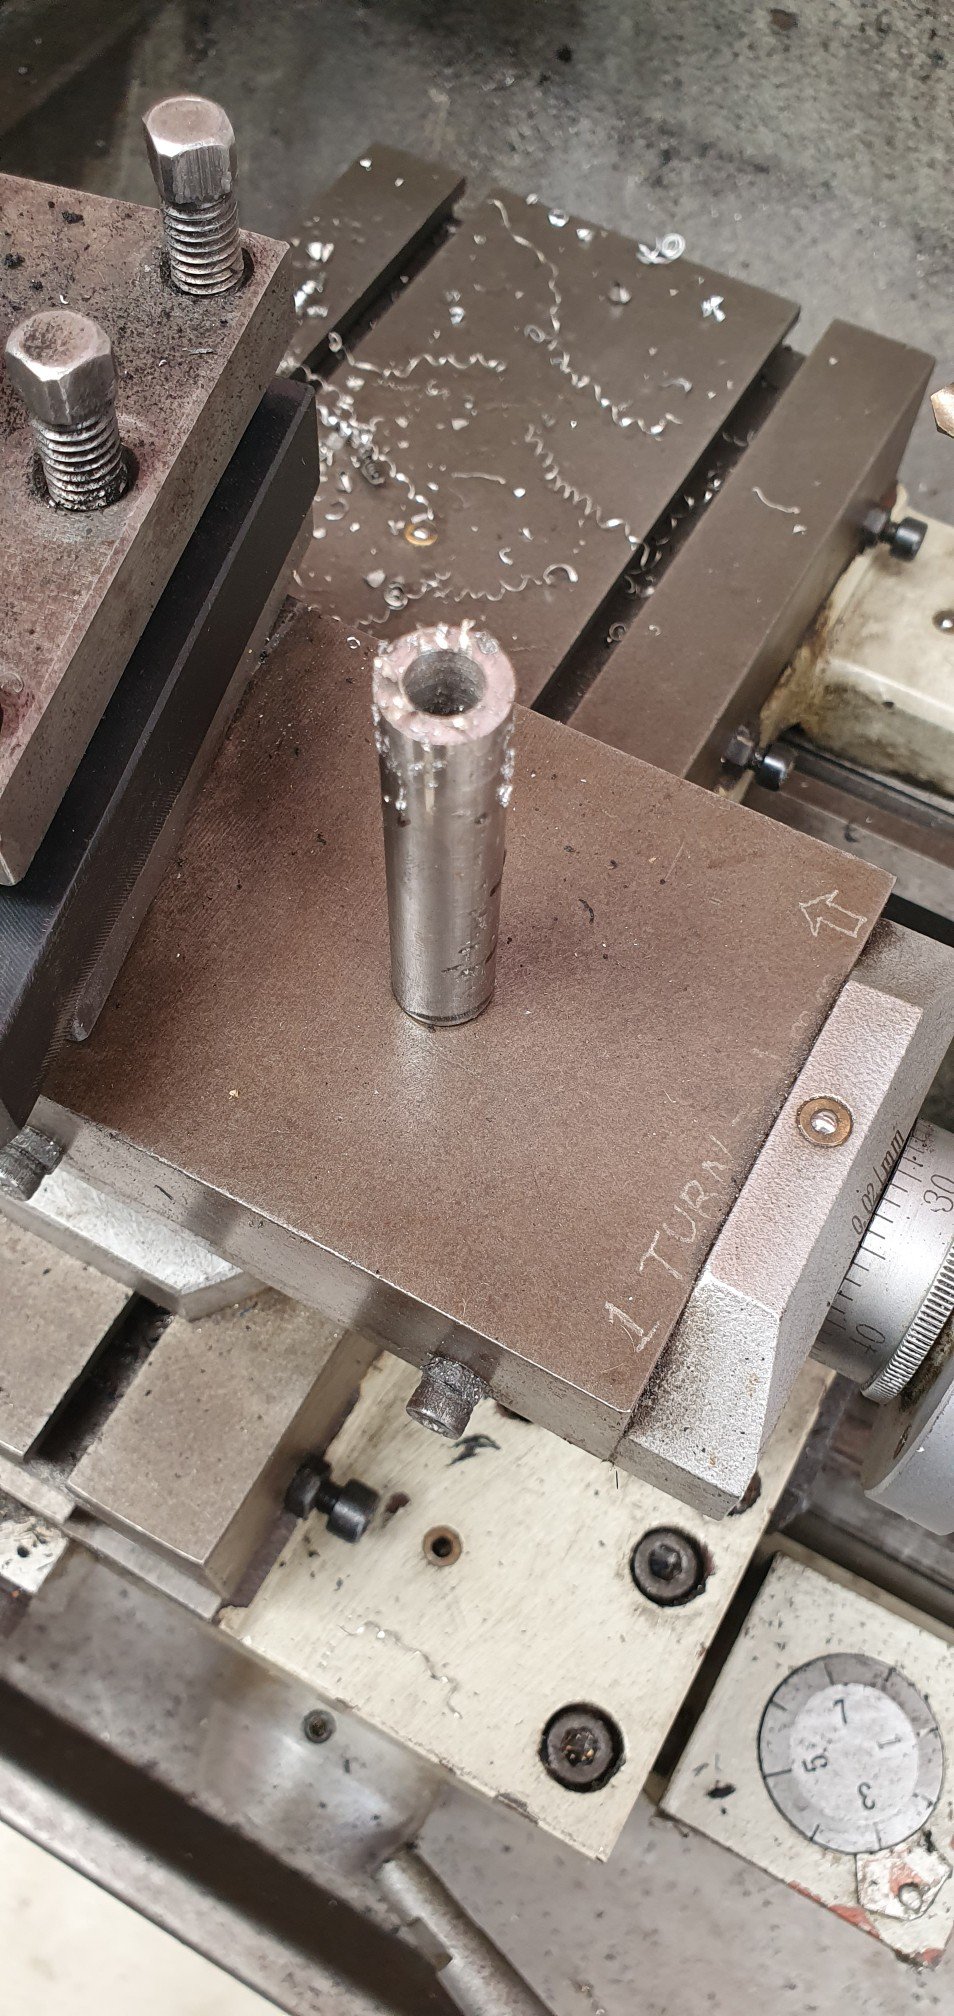
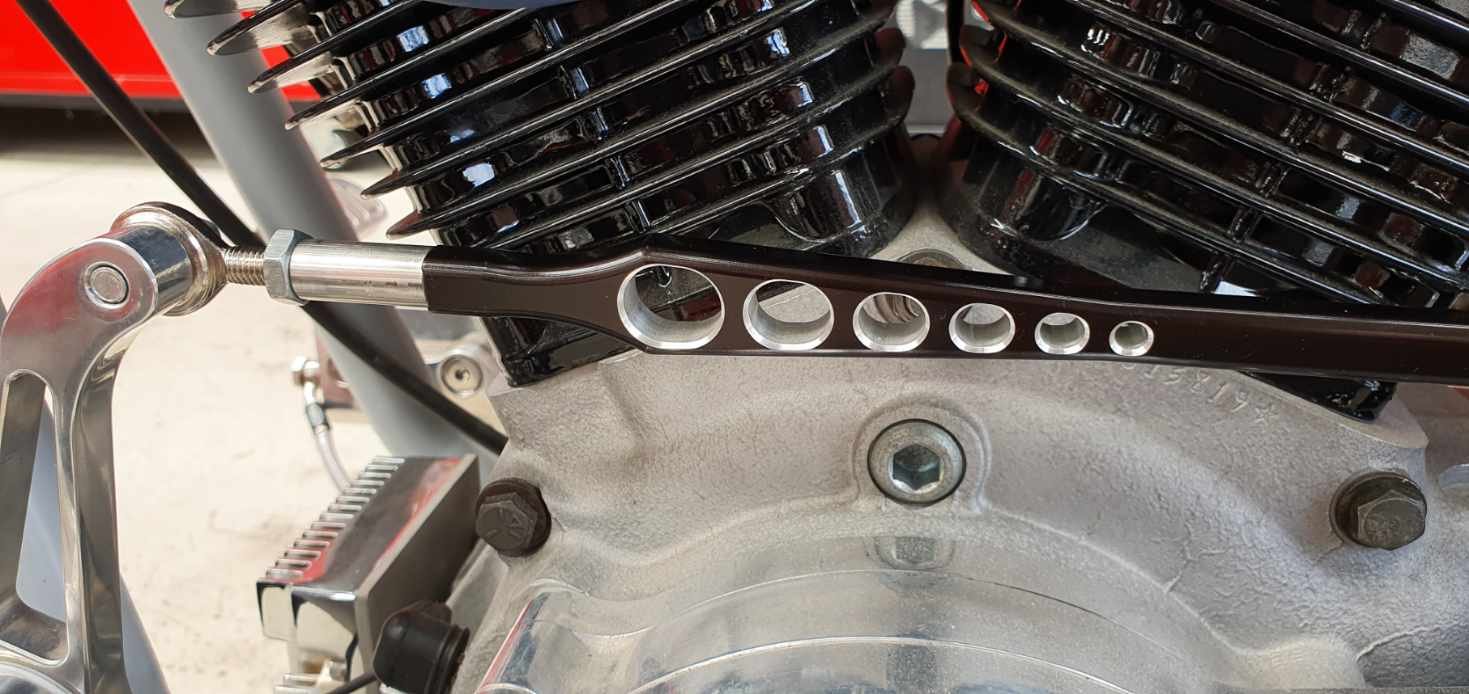
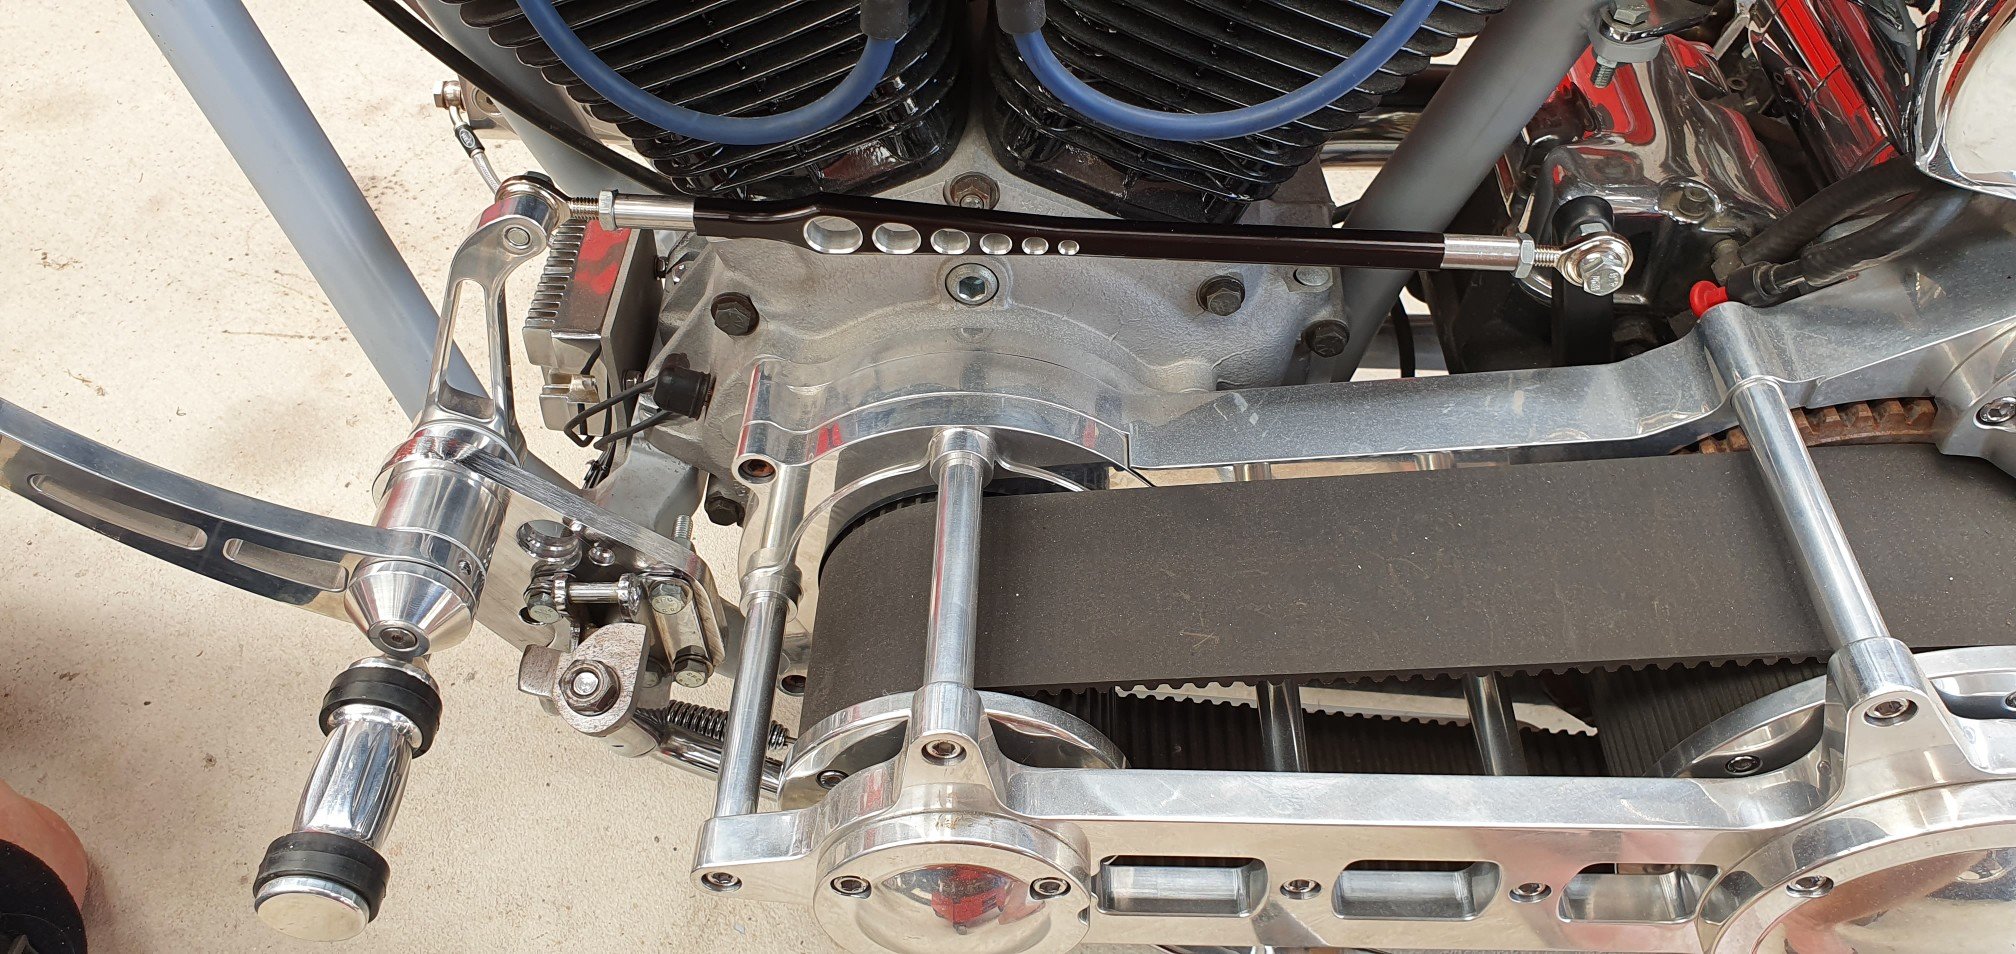
The shift linkage ended up on a less than perfect angle after shifting the centre point about 100mm. It worked, just...but was shit. So I machined up some stainless rod to extend the length, as hey let's be honest, a little more length is high on most guys wish list: I then tapped an M8 thread through it, and used about 30mm of M8 threaded rod to connect it to the existing linkage. This added ~60mm in length and i made the rest up by having the threads out a bit on the rod ends. Boom!! Now the linkage has near 1:1 give or take mechanical advantage, so about as positive as you could get in a set up like this. how does it work now? Perfectly...Fuck yeah!!
1 point
-
That's my favourite bit. Prob cos I'm so mechanically inept, but understand sparks...1 point
-
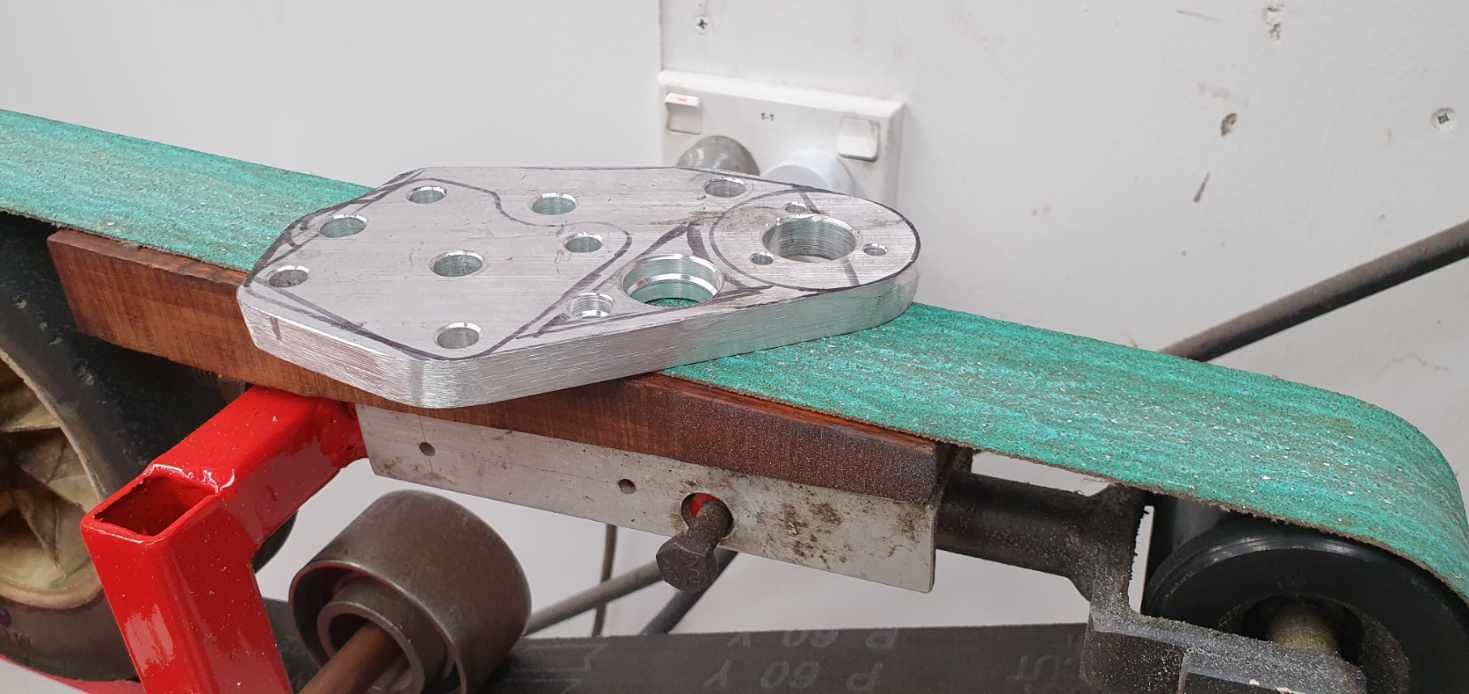
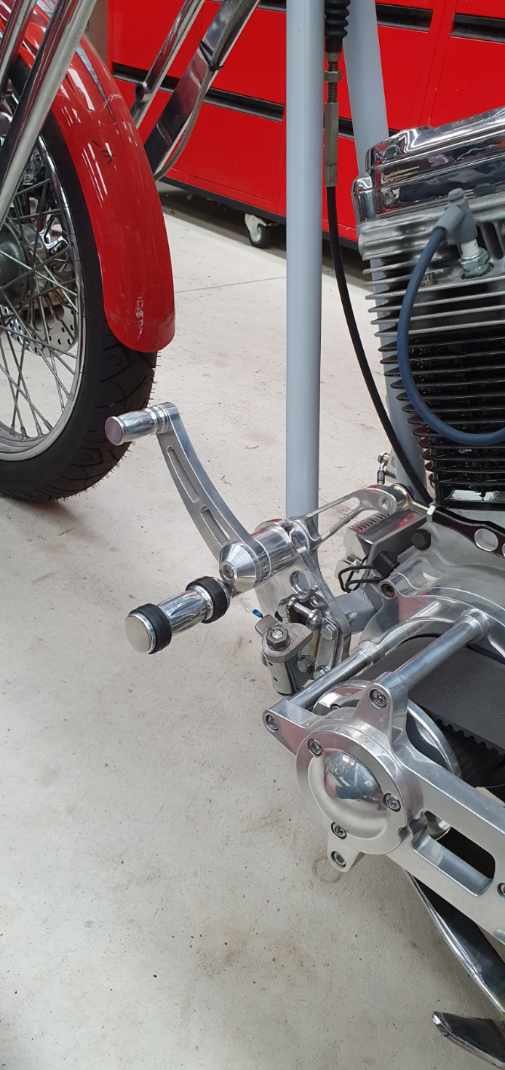
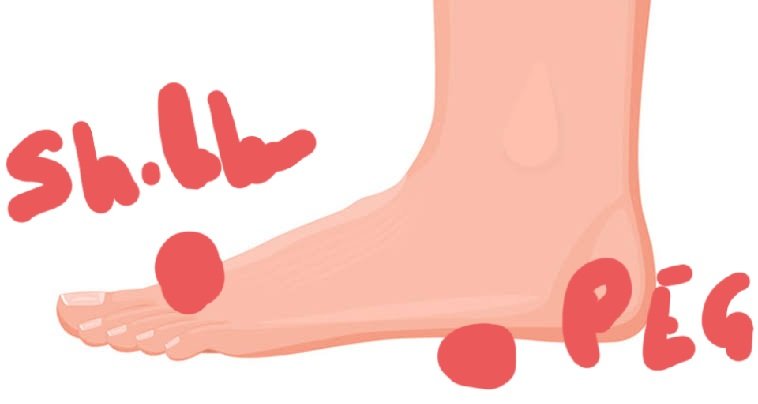
The forward controls looked awesome, I figured someone must have done some kind of R&D on them, or at least tried them out, but whoever designed these was a fucktard!! Seriously, the shifter arm had its pivot center about 100mm behind the foot peg. The arm was only about 150mm long, so 150mm - 100mm = 50mm of room to squeeze your foot in. ○Basically you had to lift up with the shifter here. ○Then, you had to lift your entire foot off the peg and lift it up and over the shifter, put you entire foot on top of the shifter to shift down the gear, with no heel contact on the peg at all, your foot literally floating in thin air with only your toes sitting on top of the shifter as you brake and down shift!!! Most forward controls have the shifter share the same pivot centre as the foot peg. I checked all my measurements and think I can get away wwith moving them very close together, as the arm is quite long. Re engineering the mounts. Now it work more like this: Only the tip of your toes has to flip around the shifter, maintaining heel contact all the time on the footpeg. Much better, it actually works now. You can simply pivot your foot, maintaining contact with the foot peg and shift gears up or down, just like a real motorcycle should. I'm happy now, much better.
1 point
-
Got all the tyres on today. Pretty happy with the fitment. Some photos (Sorry about the uneven driveway) Need some SSR's asap
1 point
-
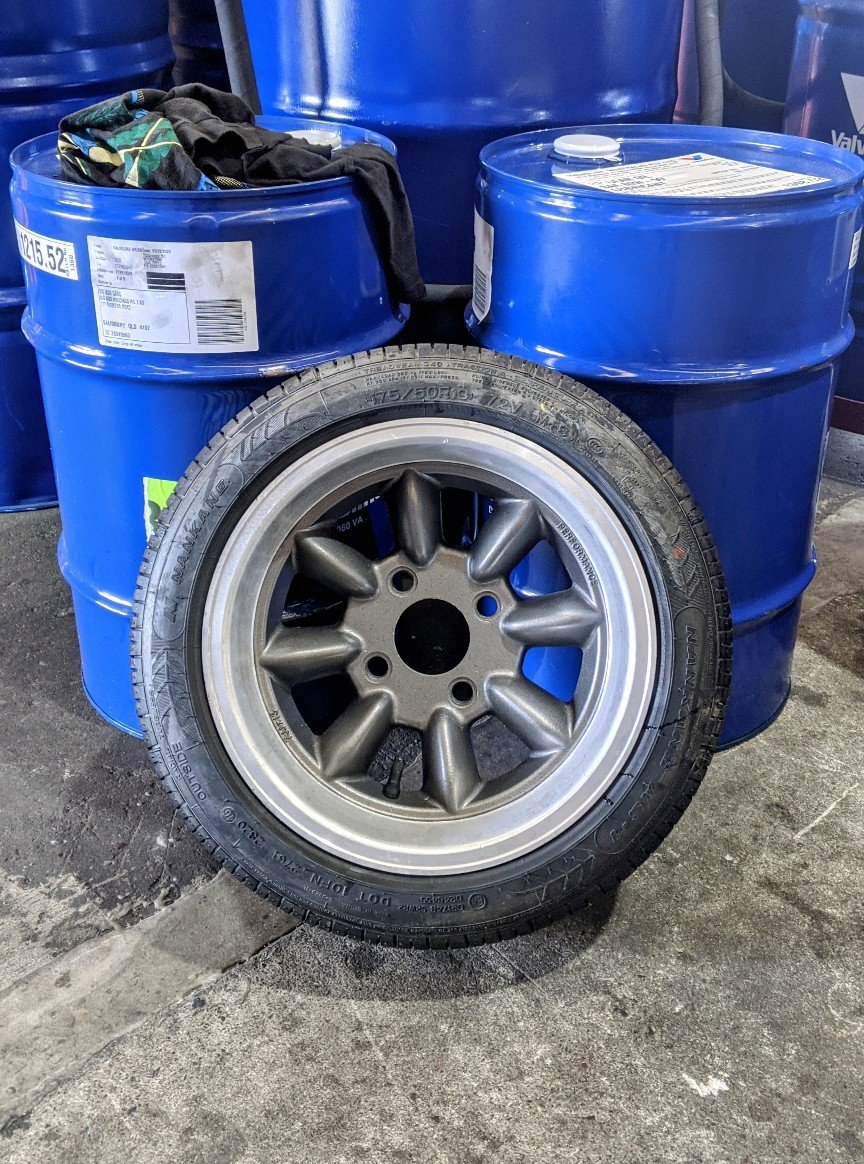
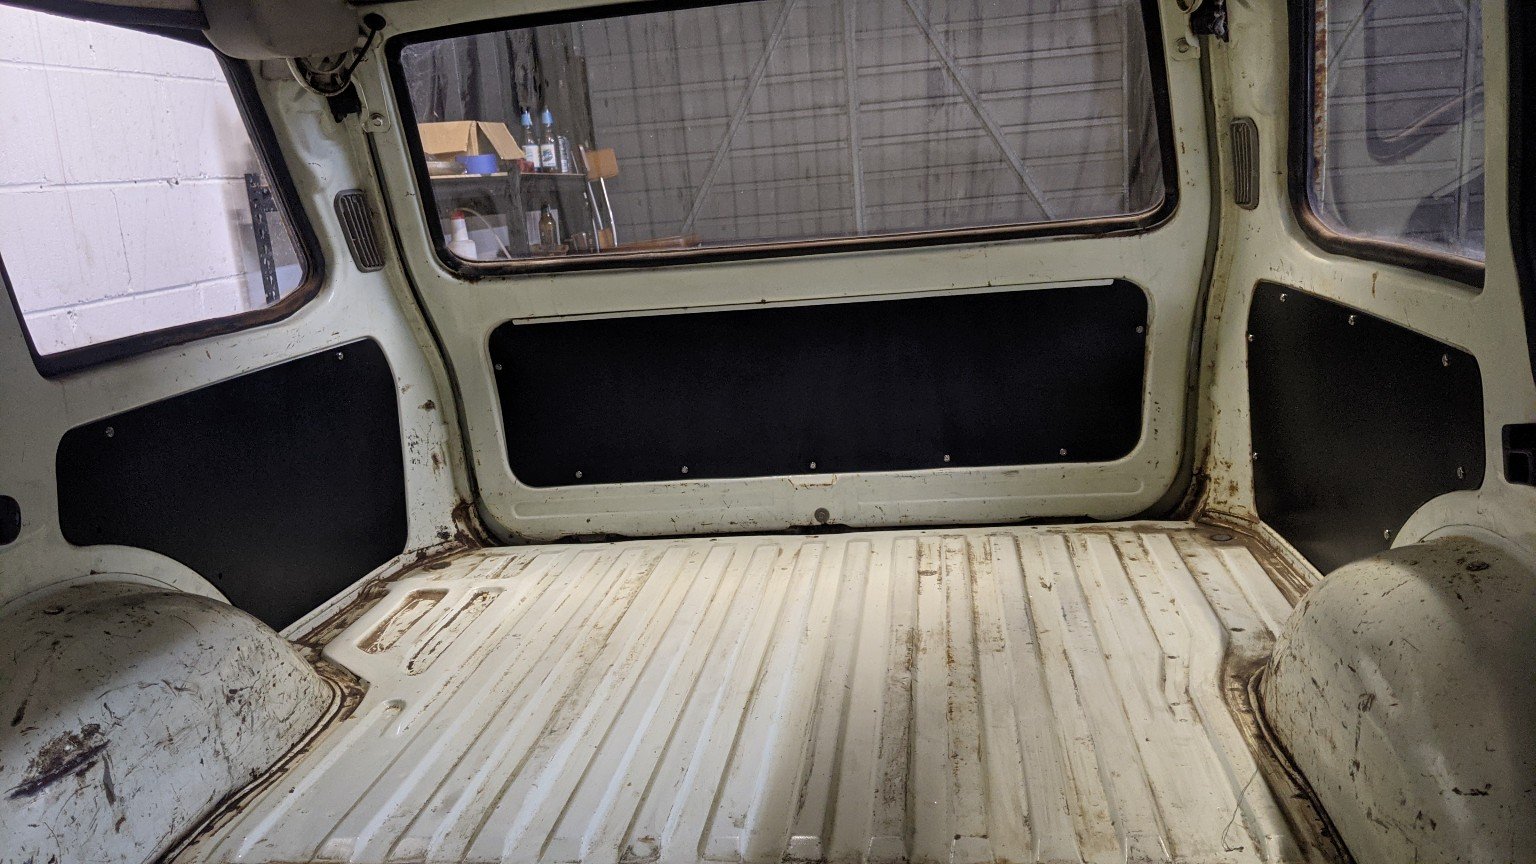
So I got a tyre fitted up today. Pretty stoked on the profile. 175/50r13 nankangs. Very cheap as well. Will fit the rest up tomorrow, and hopefully get some proper photos. Also bought some masonite in the weekend and finally made some boot interior panels, as they were missing. Has tidied the interior up tenfold. Highly recommend masonite over MDF. Much stiffer and easier to work with. Still need to get some speed nuts for the RH side. My front indicators showed up too. Genuine fakes from Thailand. Pretty happy with the quality though. Can't complain for $50 all up.
1 point
-
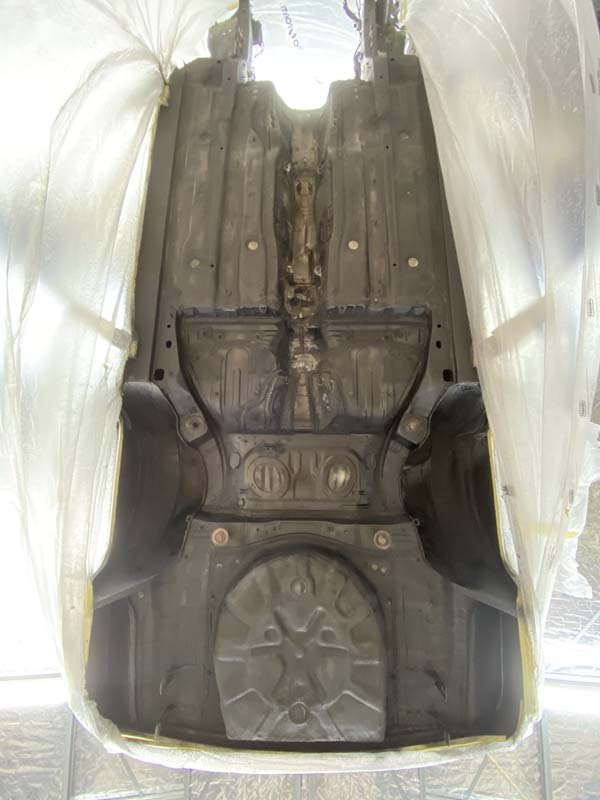
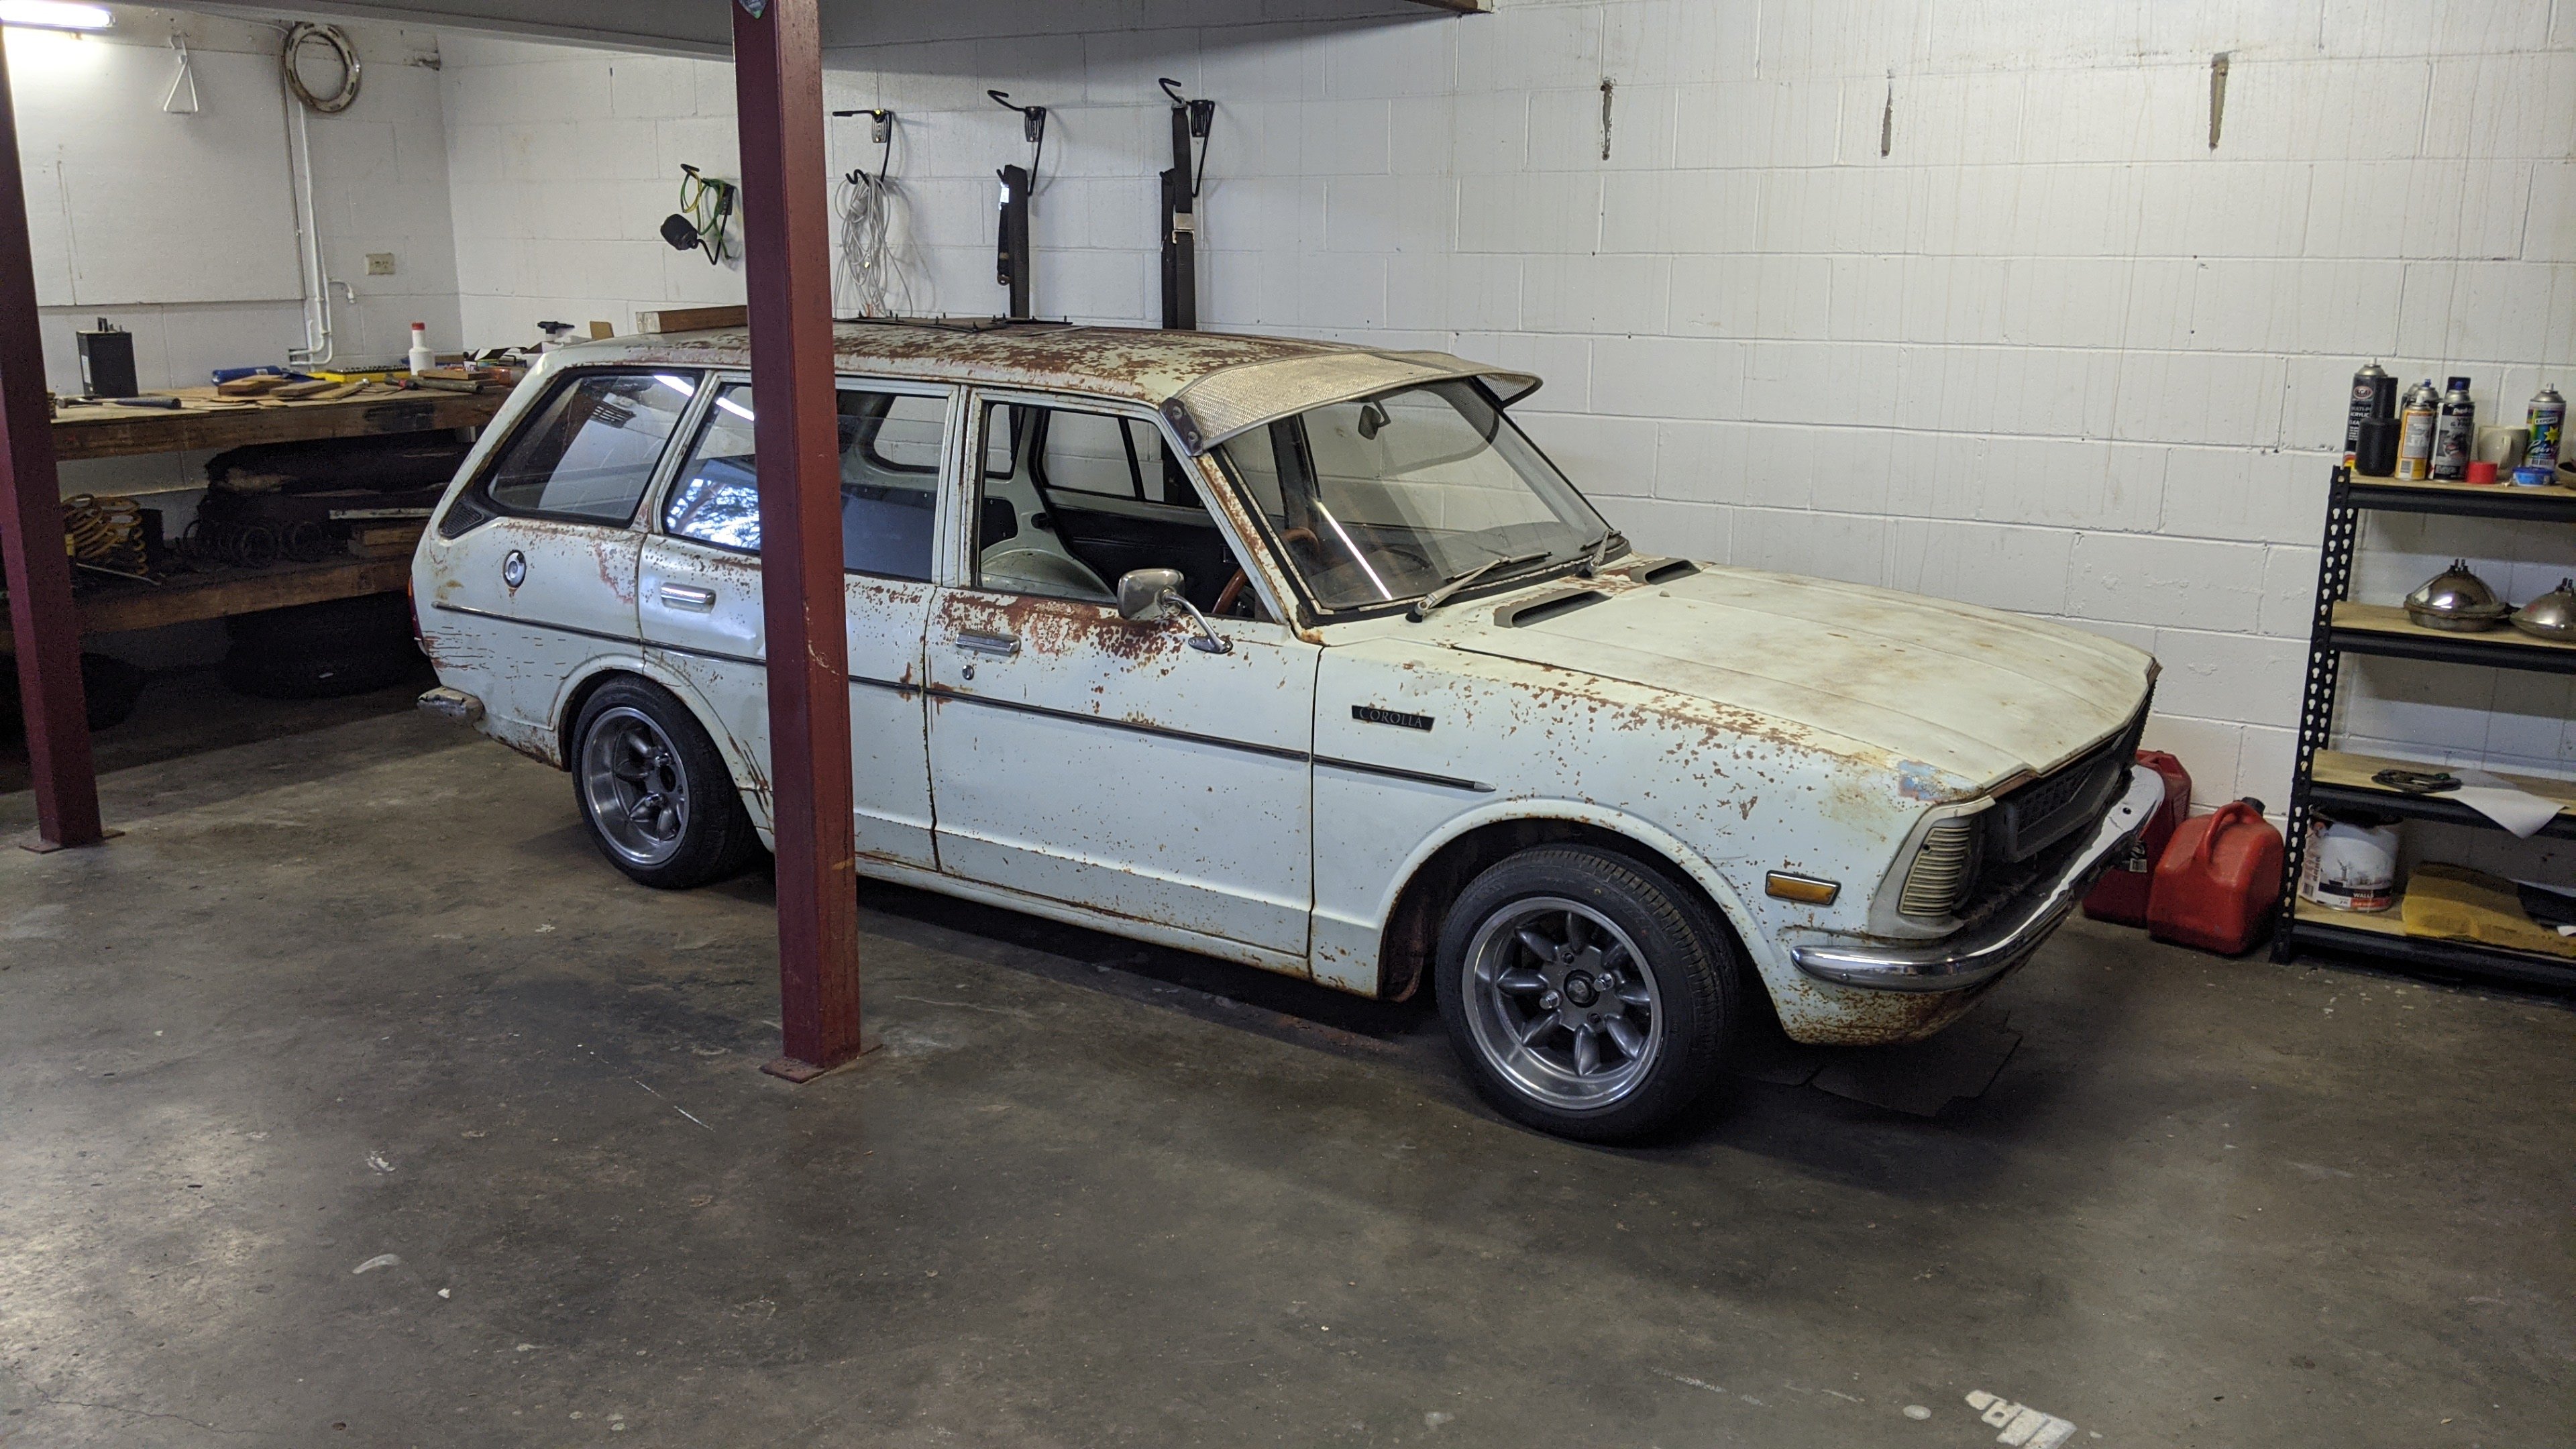
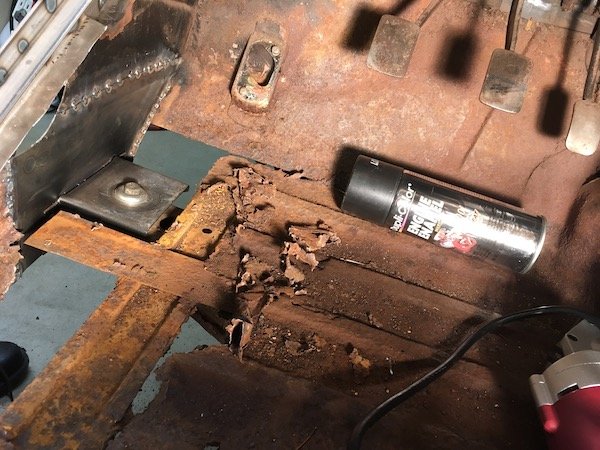
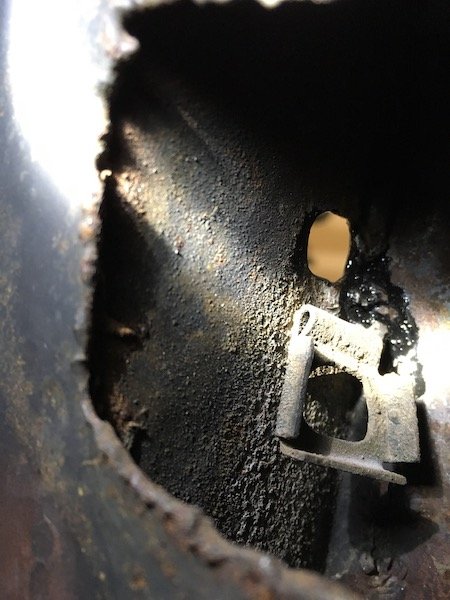
Maybe some more background as I've kind of started part way through. I saw this car pop up a couple times on Trade me and couldn't really get it out of my brain despite never being interested in this sort of thing before. We bought it went the price made sense a couple months after first seeing it. In my original post I put some asterisks after some words. This because we realised that the previous-previous owner probably told some porkies to the previous owner to sell it to him. They say they took the dizzy out as an anti-theft measure but it's the wrong dizzy, which calls into question all of their other claims (driven into a garage for storage 15 years ago for eg). And why cut the battery out? :\ Things we knew were wrong with it both of the boot latches are broken the distributor is (was) missing the battery has been removed via wire cutters fair amount of surface rust paint is horrific 14+ owners, and it's clear that the last few have not cared too much for it unrepaired front passenger corner collision (plus evidence of other historic repaired collision damage) interior trim is horrific or missing with only a few 'ok' bits only truly concerning rust was a piece at one of the rear latches and on the back of the bonnet The previous owner left a lot of fun stuff for us to find. Not pictured: all sorts of screws and bolts and trim bits that had fallen off deteriorated trim and found their way under the seats. Also 12 pence somehow. I considered the rust situation to be "ok" but after seeing a few restoration threads I have upgraded that to "pretty decent actually". No rust underneath, and the "usual" spots for starions seem to have escaped unscathed. There's surface rust in a lot of places but it's only eaten through or "bad" in a few minor spots. The rear driver's side floor doesn't look happy, but is surface only. Even the battery tray hasn't been eaten through Lots of dodgy looking bits actually cleaned up relatively ok with just a wire brush. It turns out that both latches have some rust that has managed to eat through - it's quite minor but will need some welding. I've dressed some bits with rust converter already. The only really bad spot we've found so far is the front crossmember which has a hole eaten straight through it. So we'll have to either find a new crossmember or get it repaired. I feel like we've dodged most of the rust bullets, but I do need to impress just how much surface rust is on this thing. There's also a ton of rando bog from historic repairs in places. So I'll likely get the whole thing media blasted down professionally just to make sure we're not leaving anything to get eaten away.1 point
-
Did it. Much serenity was had and now she doesn't hate me as much for selling the spa pool to buy the boat. Swapped in another ignition control module and drained a good 100ml of water out of the filter. Will see on the next test run if the hot start issue is still there. I thought it was gone, but the second VG got in the boat - it did it again.1 point
-
Will you take her out in the boat aswell?1 point
-
Tonight's update. Changed the plugs and re-routed the HT leads a bit tidier. Discovered you can't fit a plug socket between the manifold and the plugs....so had to use a spanner which may explain why I found one plug finger tight with sooty brown skid marks all around it. Used genuine GM plugs because they are OE finest quality/$19 for a set of 6. Also named the boat using a $4 K-mart stencil and a Sharpie. This weekend's goal is to go boating with VG and maybe take the missus for a hoon1 point
-
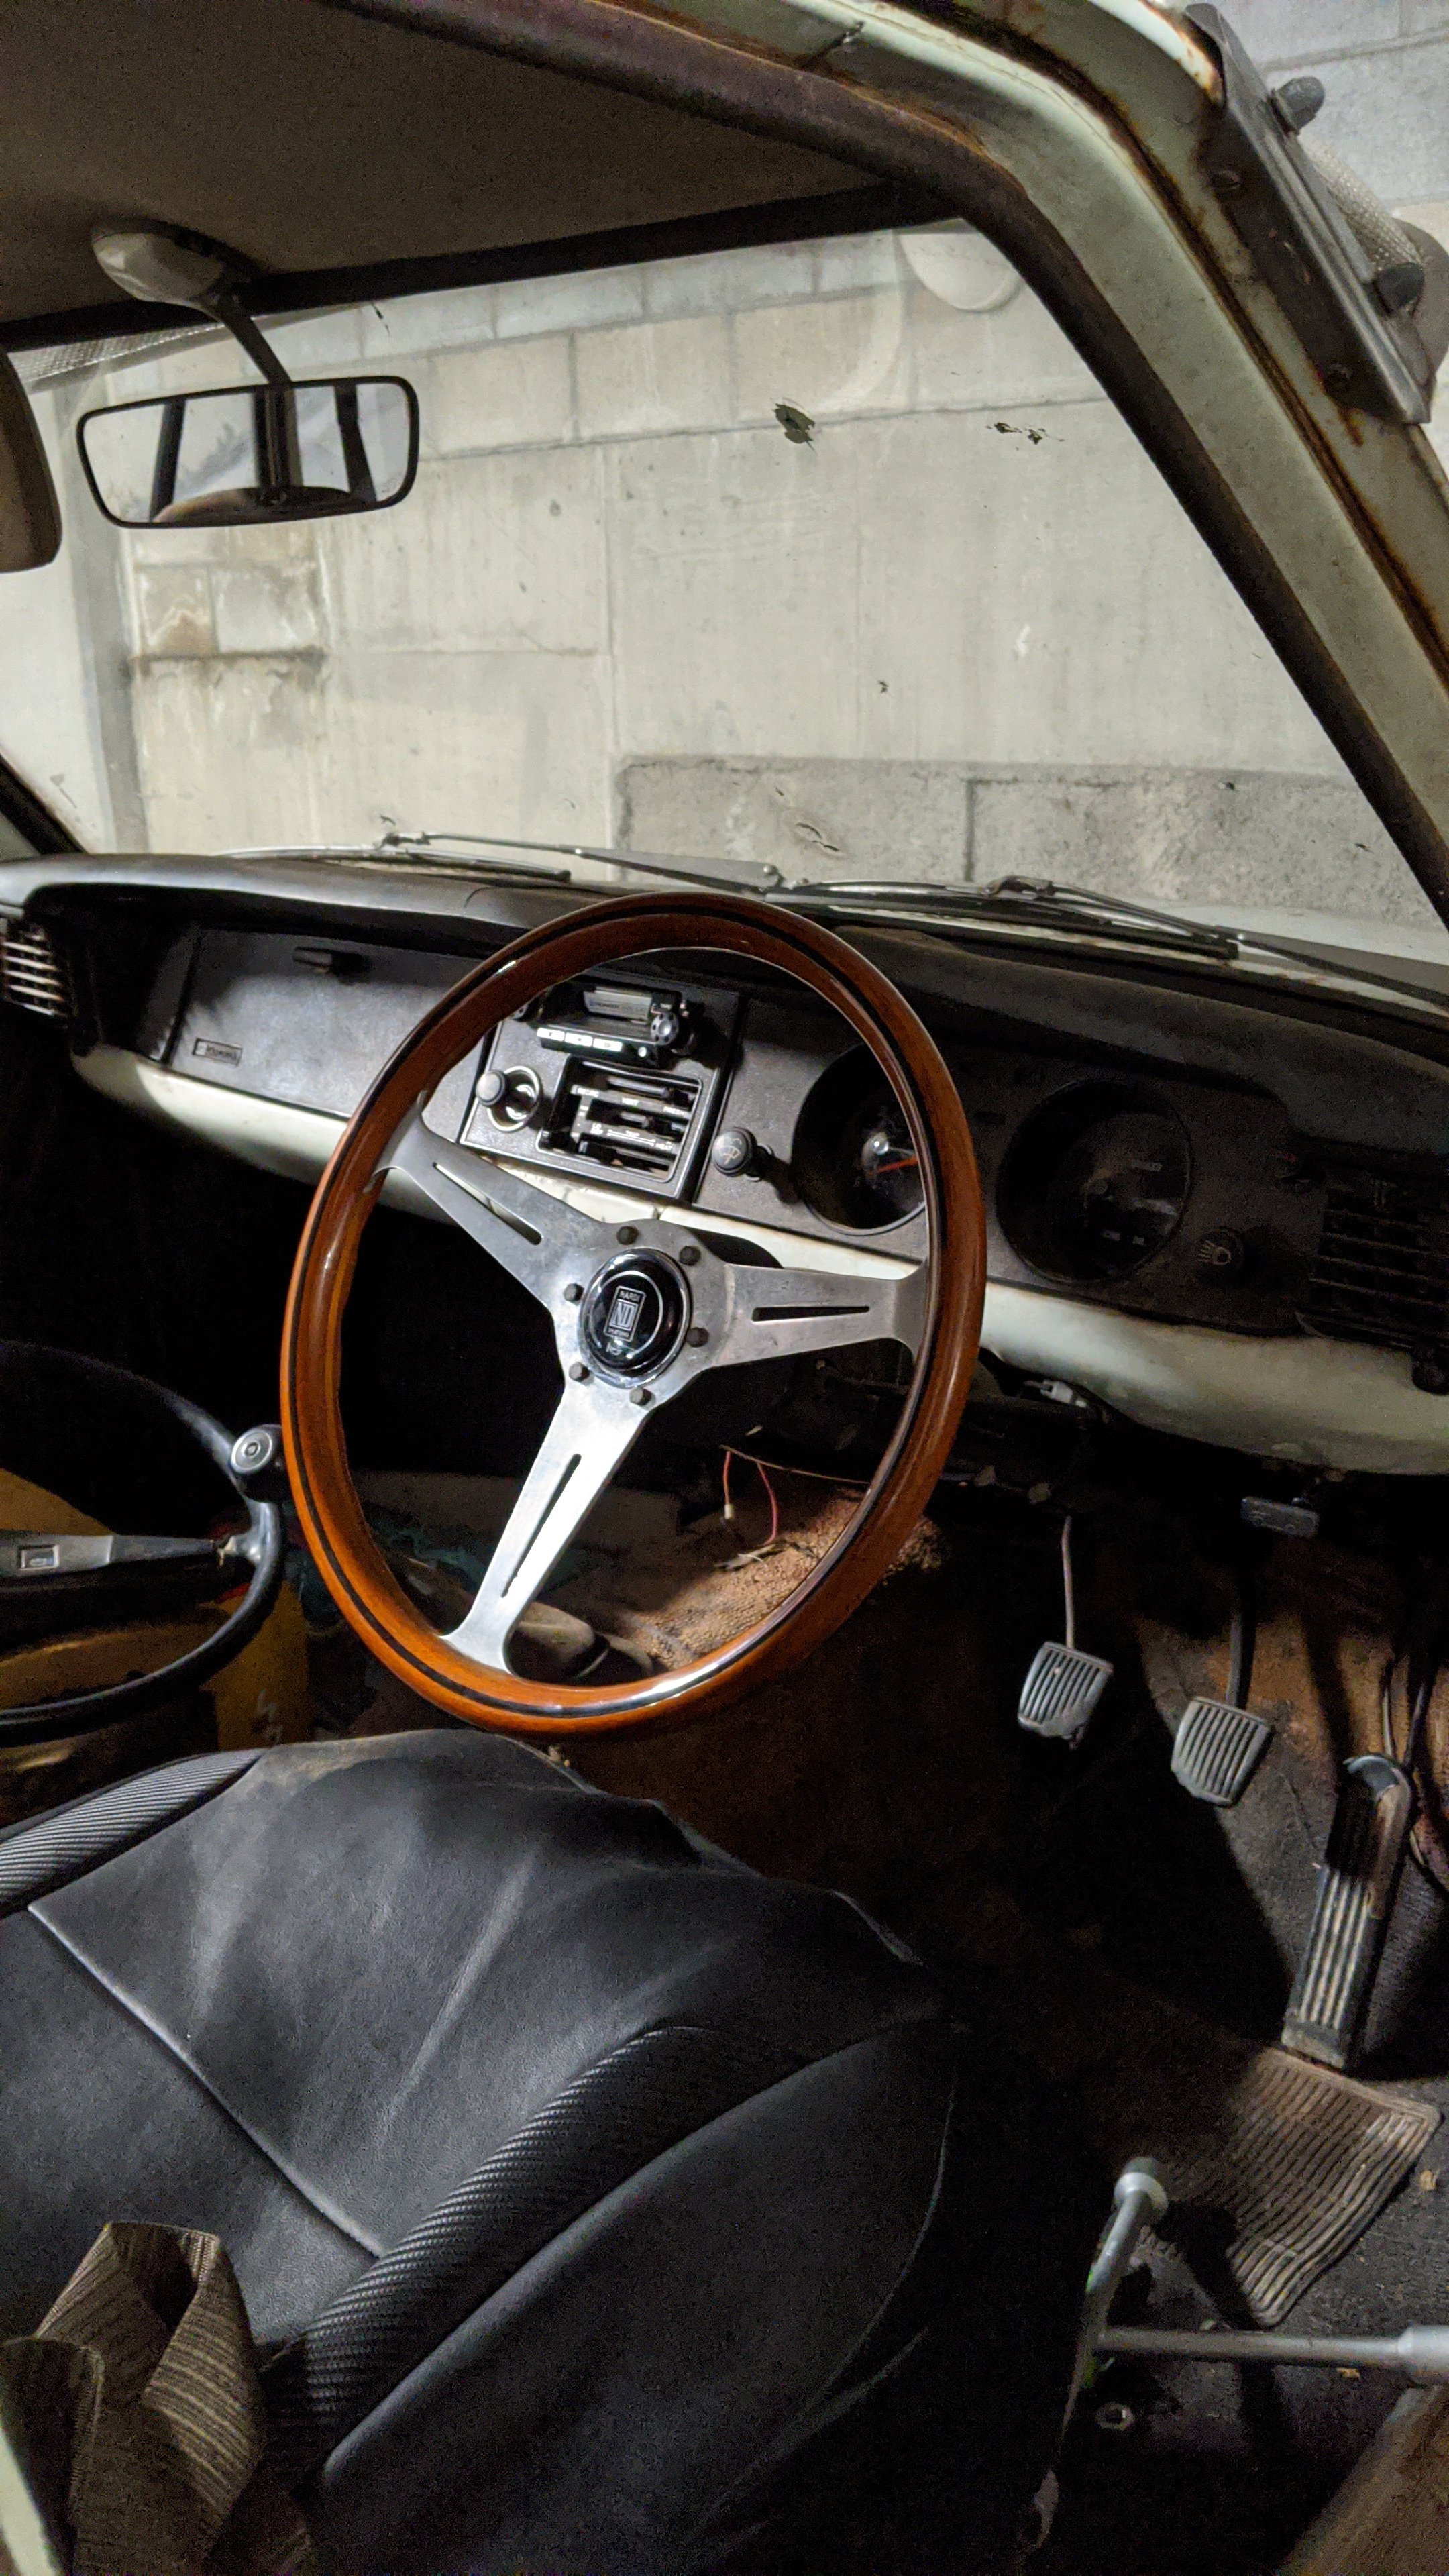
One of my favourite steering wheels popped up cheap, so I jumped on it. Must of been meant to be, because the boss kit even fits. Was on an old Hilux apparently.
1 point
-
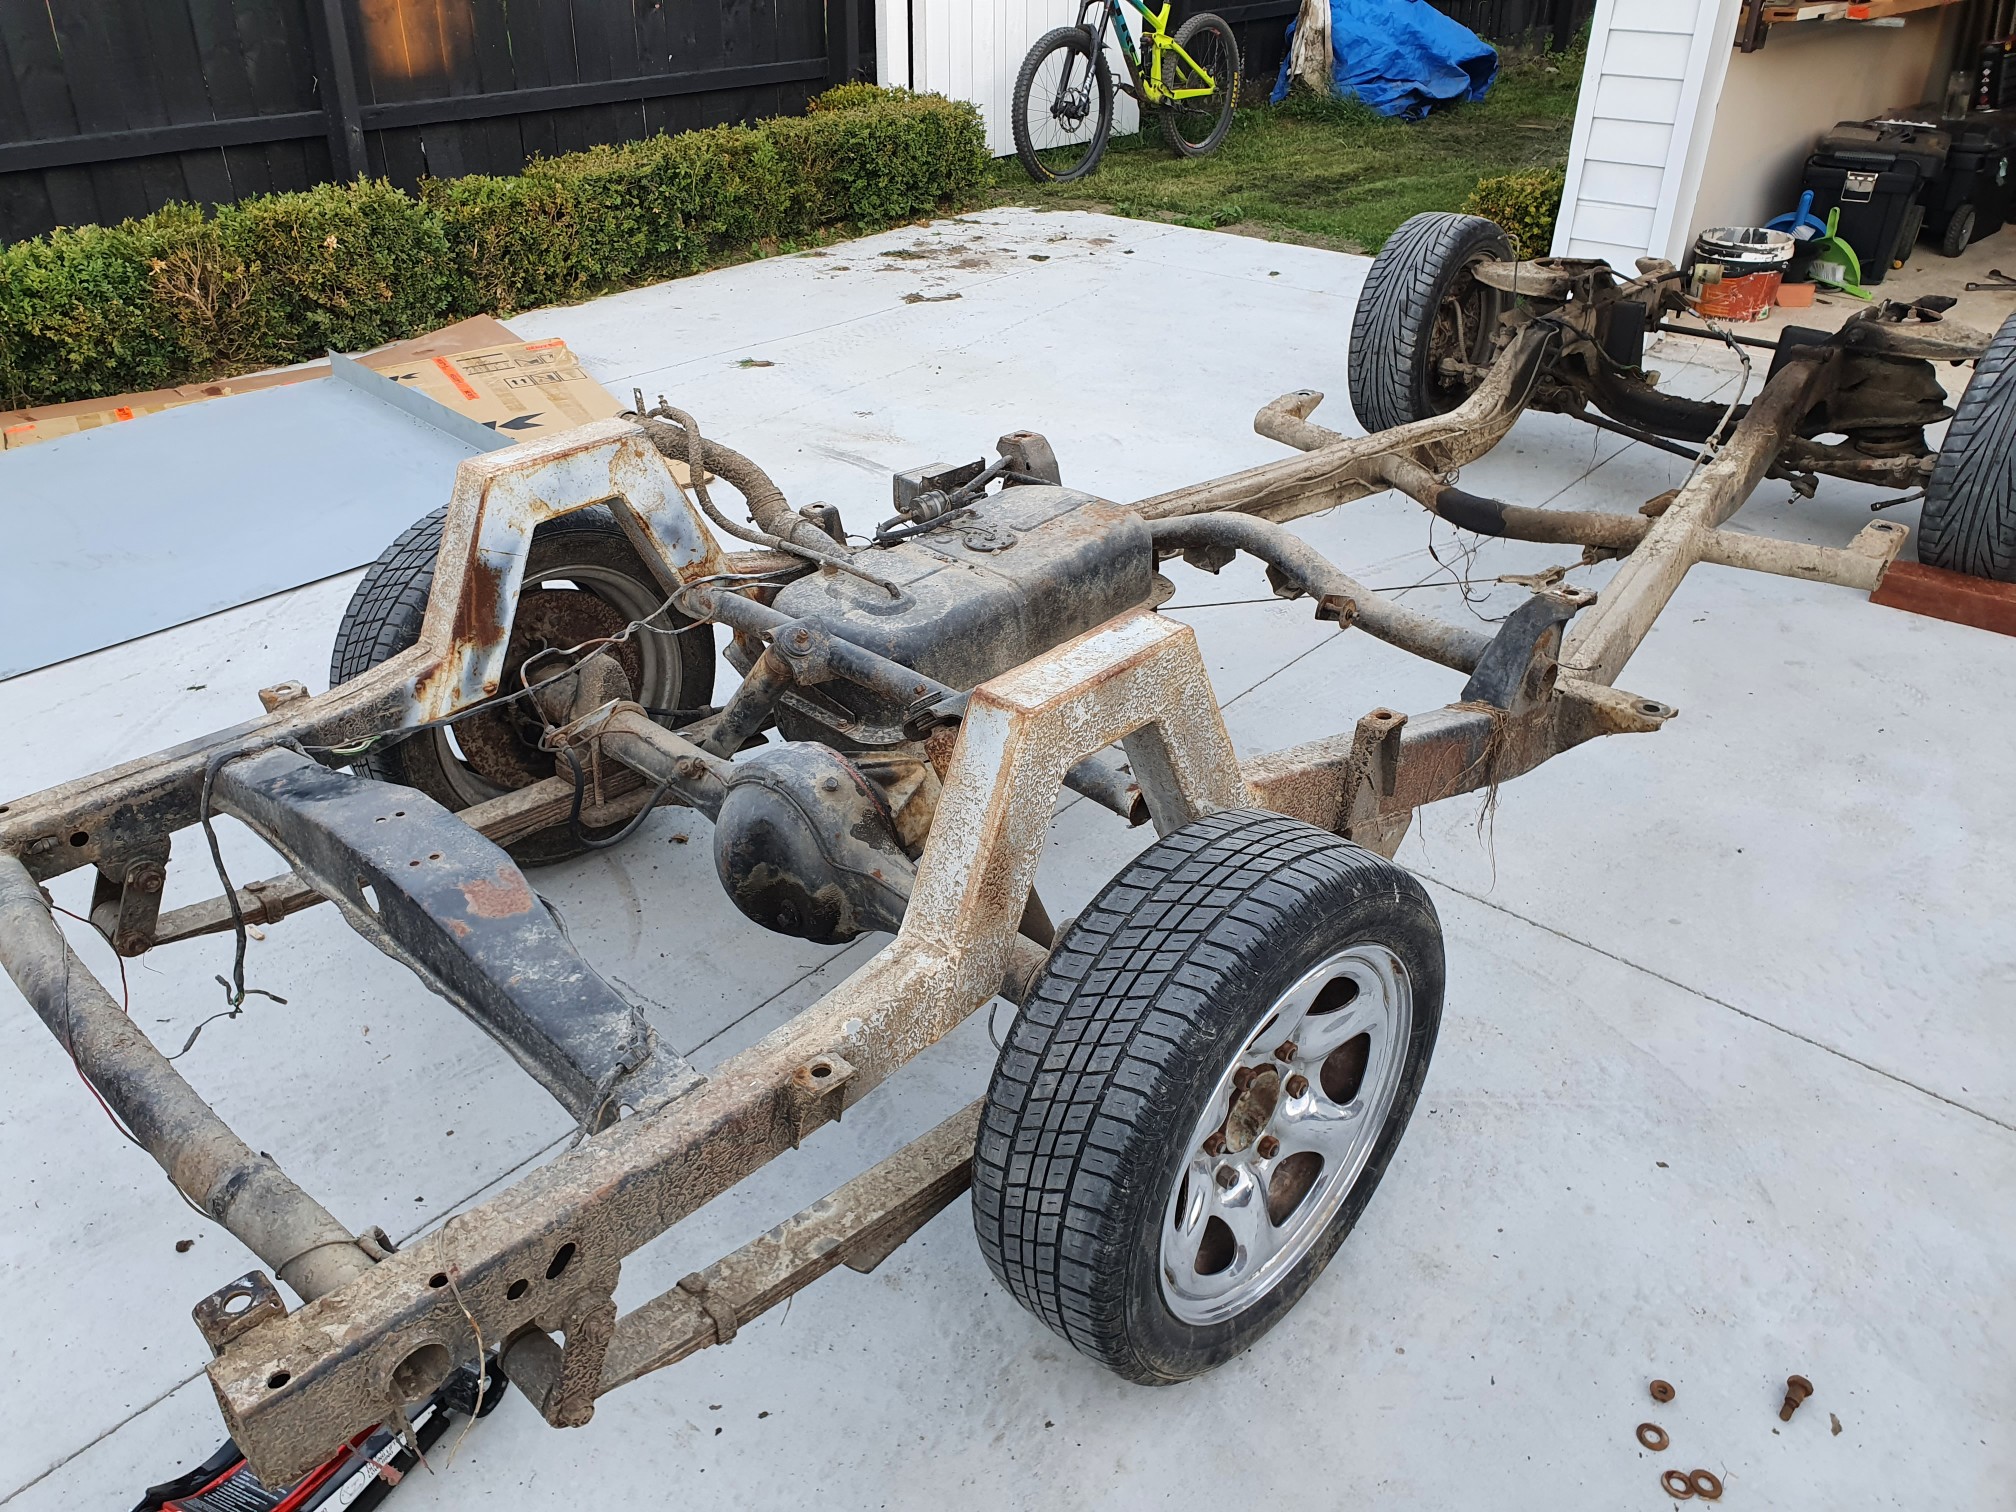
Well not a lot to report on this. I did pick up a parts car. Going to run the standard chassis and flick the c notch.
1 point
-
Slow progress today, but I've made up the first panel ready to weld in.
1 point
-
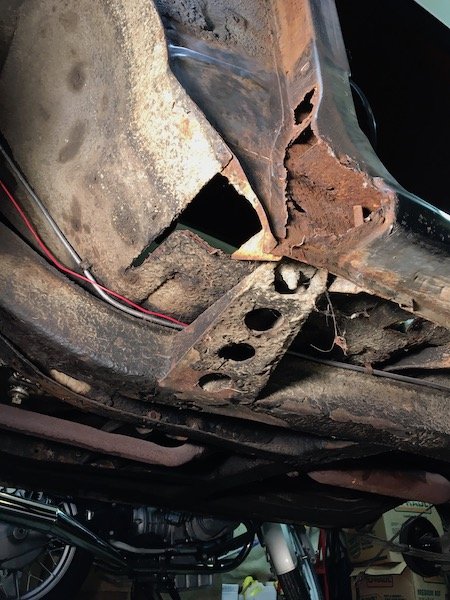
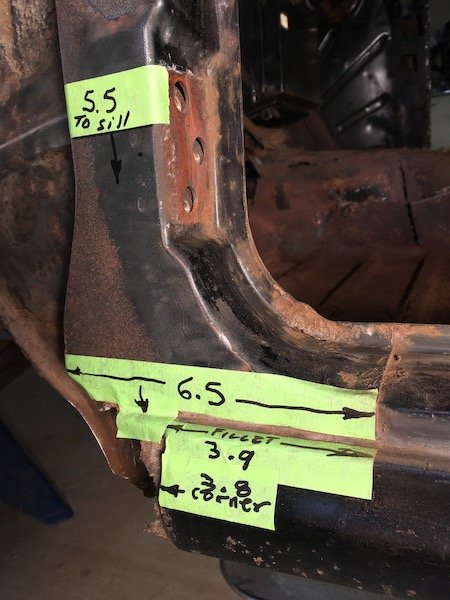
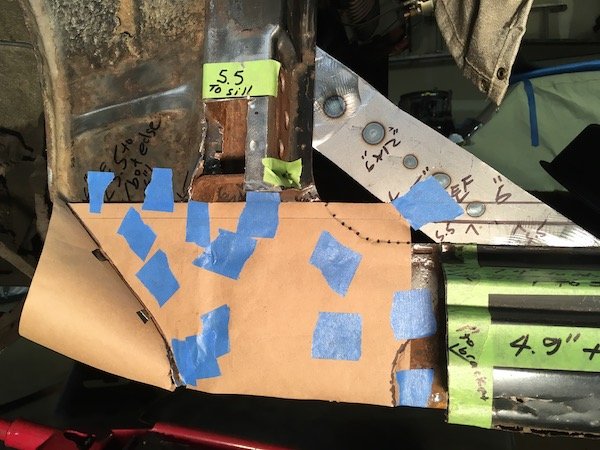
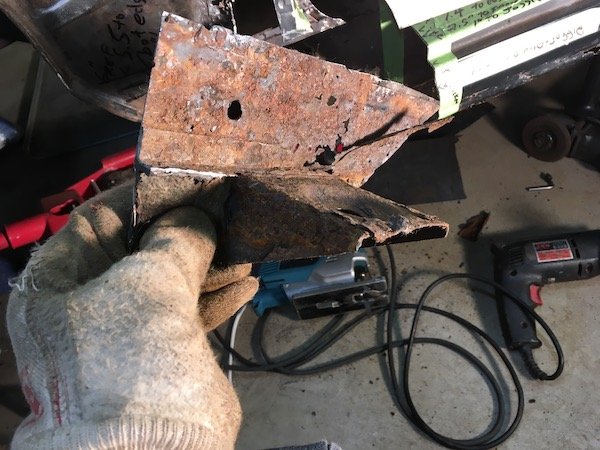
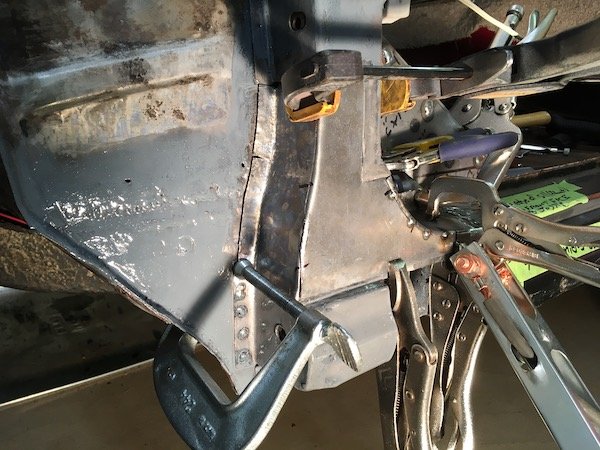
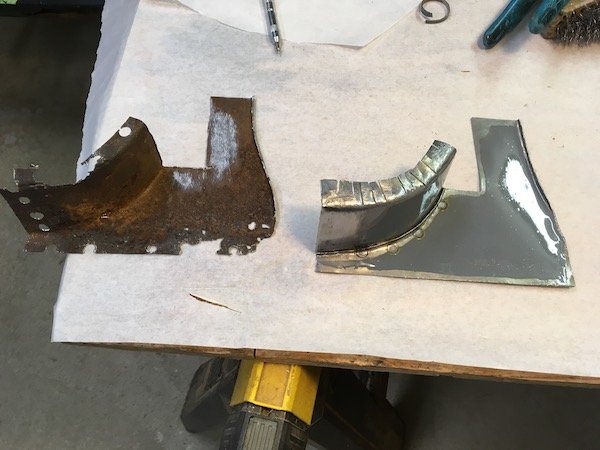
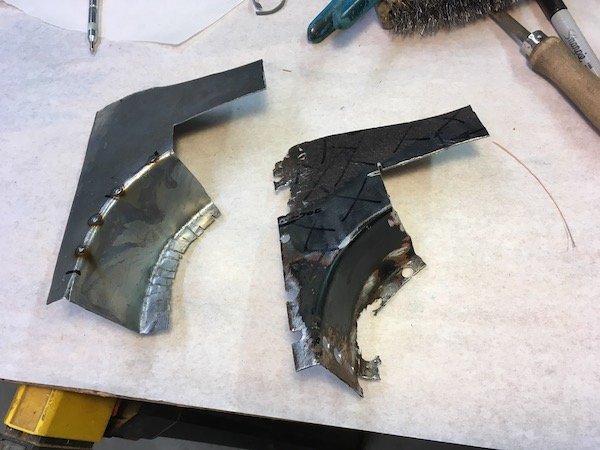
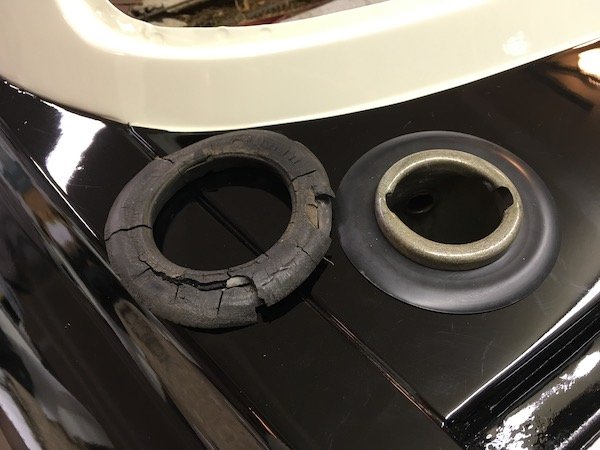
Repairs to the 61 Datsun Bluebird left hand side 'A' pillar (or post) The starting situation. More than a little rusty. Several portions are completely gone. I started by making reference measurements Cutting the remainder of the forward sill stub off Reinforcement was added before cutting the inner sill plate out. Making a paper template for an inner sill patch Cut it out Sizing up some 16g steel sheet Finally the patch, gusset plate and body mount bracket (on inboard side) is welded. Had to do it twice as it was placed crooked the first time. Still learning how to weld with the MIG. I should have turned up the heat for these welds against the 16g, still a bit cold with too much build up. The rest of the inner sill going aft will get cut and replaced later. Inboard side Did some sketching and cut out some flat bits to make the rest of the pillar They may not match perfect, since some of these cover undefined areas, but they are better than empty air space! Beginning of the outer sill forward stub Forward sill stub inside Initial fit checks, and adjust and fit and repeat Added the floating nutplates A view of an original style retainer for the square nut. Bent over 180 to get a wrench on the nut after torching a hole in the inner panel. Notice only one tab is welded to the metal. From the right hand side pillar that is toast. The area is phosphoric acid etched and prepped for weld and protective paint where it can't be reached later Another viewpoint Beginning to weld it. Finally I'm getting the plug welds hot enough to penetrate well and lay flat. The reproduced upper bits. Didn't like the pie cuts but it worked Same as above, flipped over This metal work was getting tedious. For a diversion, I located a Nissan rubber grommet to replace the rotted rubber on left. This is the typical state of the rubber parts all over after nearly 60 years. Okay, back to the business of welding the parts onto the Bluebird... Prepping more of the soon to be hidden innards Get it welded! It's taking shape Getting there Now to just grind and sand the welds flush It looks not too bad. Solid metal again! The rest of the outer sill will be reconnected at the stub joint much later. Next posting will be removal of multiple parts, including; outer sill, 'B' pillar bottom, 'C' pillar (or dog leg) and remainder of inner sill.
1 point


.jpeg.f51a899fbb62ee27267b4ca377d73c80.jpeg)
.jpeg.7db9077b86fe69e11960d3ceae544c3e.jpeg)


.jpeg.97bcae224baa660788ecbe5c66ea2d3b.jpeg)
.jpeg.45b1f882a00612b6bf0bbf14723ea704.jpeg)
.jpeg.f7d3c5b4d407d307c18cca7c933f5bd0.jpeg)


.thumb.jpeg.384ff72c8d2b0ee0d34a7bdedb55bdcf.jpeg)


This leaderboard is set to Auckland/GMT+12:00