
Leaderboard


Popular Content
Showing content with the highest reputation on 12/31/20 in Posts
-
I like this thread a lot so time for some contributions... random stuff I just found on my phone. I made a doll house thing in a little suitcase for my godchild and wire people Check for details... I also made her a dragon like doll to cuddle no pic of it all assembled Other gifts... Lamp for a friend who has bees and just had his first son at that time Rack for spices, one for my brother, one for my sister in law Some deco for my sons bedroom, a lamp... Another lamp And some cut in half dinosaurs For the daughter as a present something to hang and store clothers for her dolls And some covid protection thingy for my wife as she is a speech therapist V1 which was to wobbly according to her And V2 which she and her partner still use That's me for now, not revolutionary or shocking... Thanks for watching.16 points
-
Better epoxy that floor too incase some english cars turn up my vote for offtopic build of the year i think7 points
-
today went better. i got the little bit of surface rust of the inside of the scuttle panel and chucked some brunnox on it. poured some brunnox inside the fuel filler flap and then chucked some primer on things. yesterday i primed the car again so only the drivers side needs another coat, the rest of the car is ready for wet sanding. yay, wet sanding. 2020-12-30_02-33-07 by sheepers, on Flickr 2020-12-30_02-32-59 by sheepers, on Flickr 2020-12-30_02-32-45 by sheepers, on Flickr 2020-12-30_02-32-52 by sheepers, on Flickr before priming, 2020-12-30_02-33-43 by sheepers, on Flickr 2020-12-30_02-33-36 by sheepers, on Flickr after priming, 2020-12-30_02-33-29 by sheepers, on Flickr 2020-12-30_02-33-22 by sheepers, on Flickr7 points
-
Got the body in primer about 6 weeks ago It then took me all that time to get it up to a reasonable state so that it could then be painted. So then a couple days a go we loaded it up on the trailer (only just fit!) and dragged it into the spray booth at work. Sprayed the base and clearcoat on, it turned out pretty good! A few runs around in places, but nothing that can't be fixed. Pretty stocked really! Could of easily gone wrong haha. Gonna leave it in the booth for a few more days to harden, then take it home and get some underseal on the underside. In the meantime get the rest of the panels ready for some paint too.6 points
-
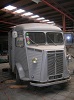
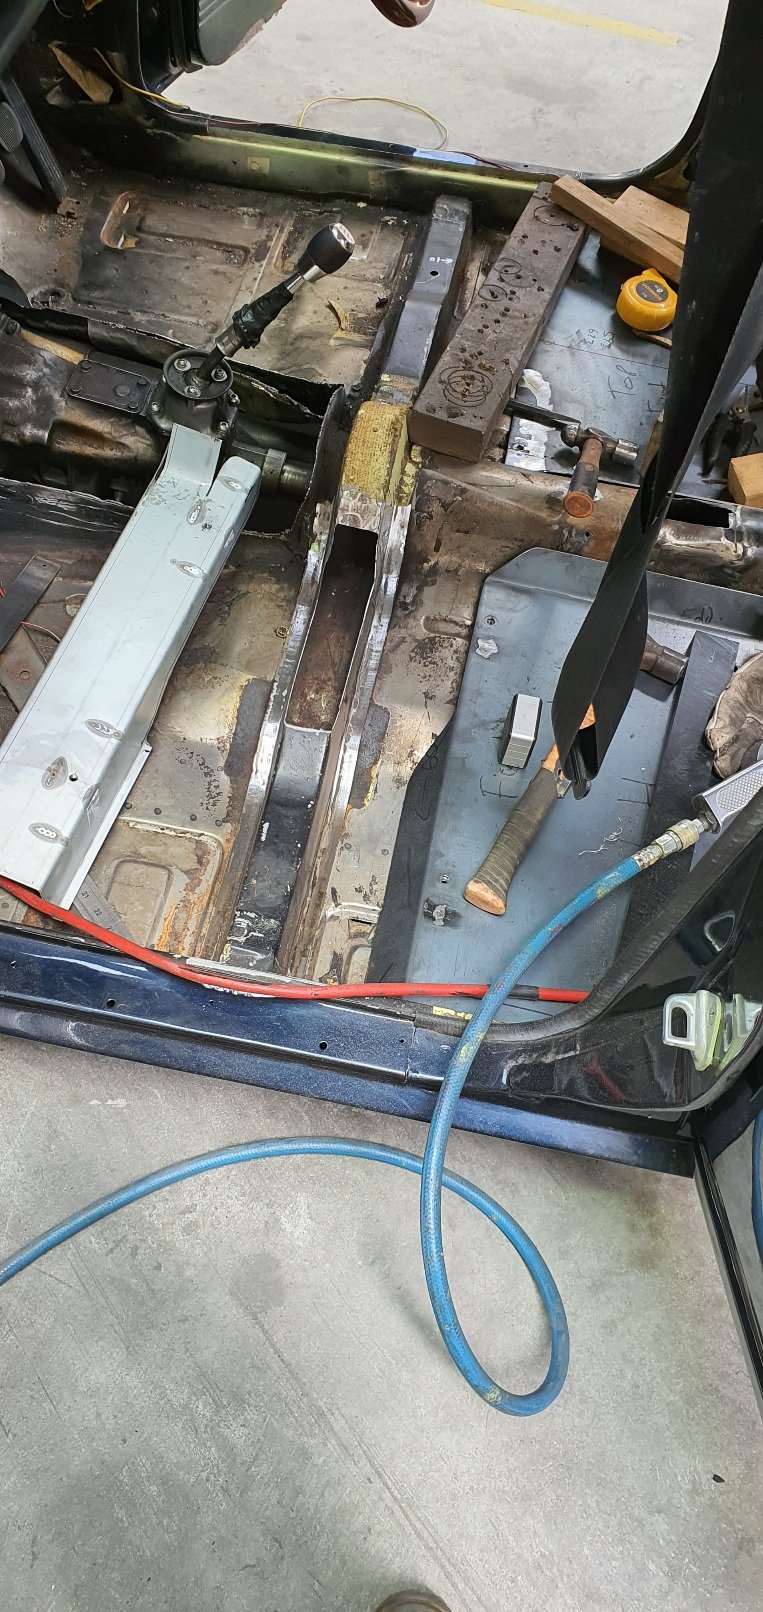
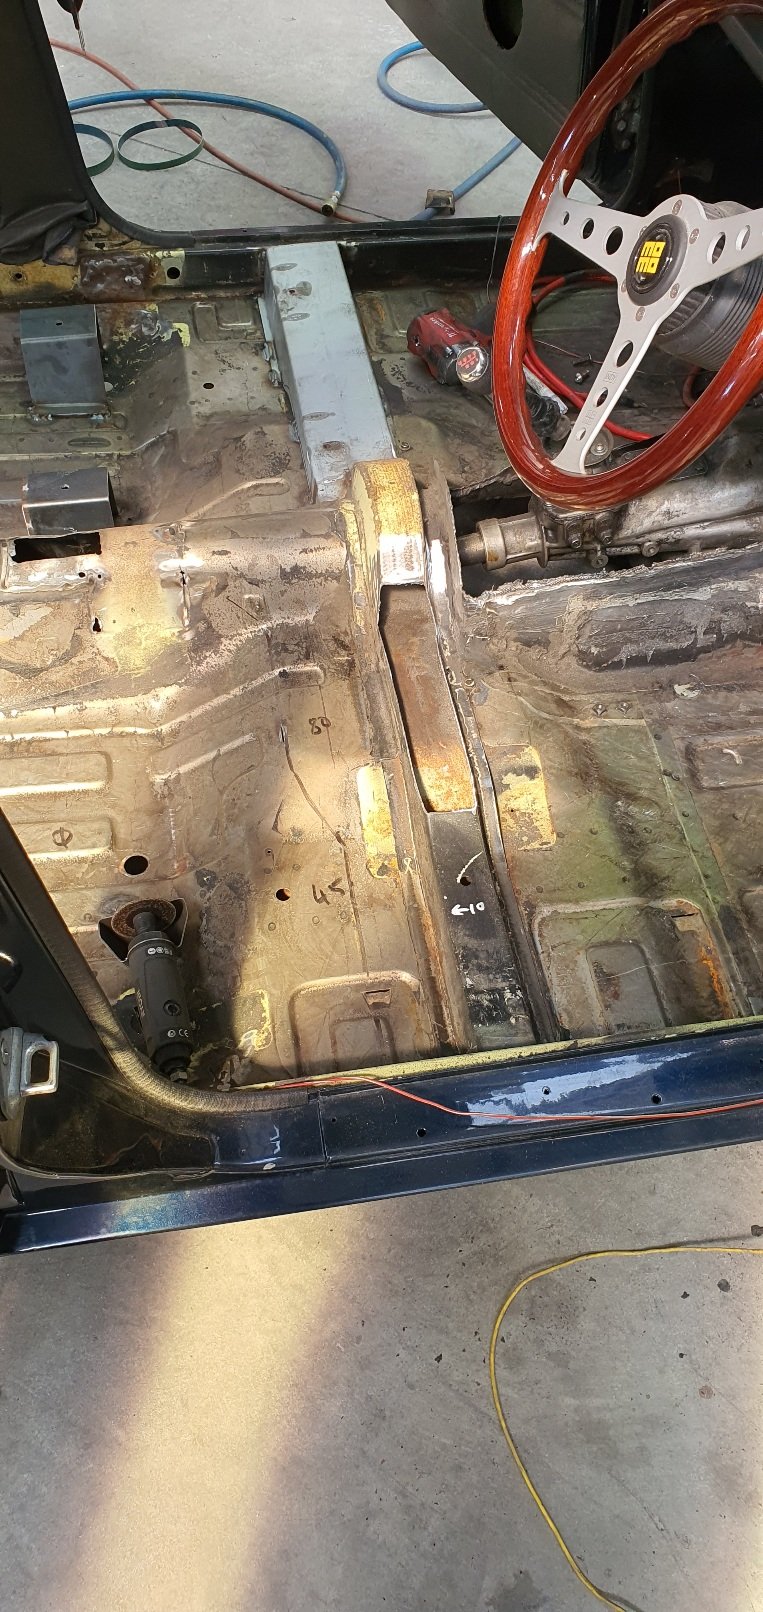
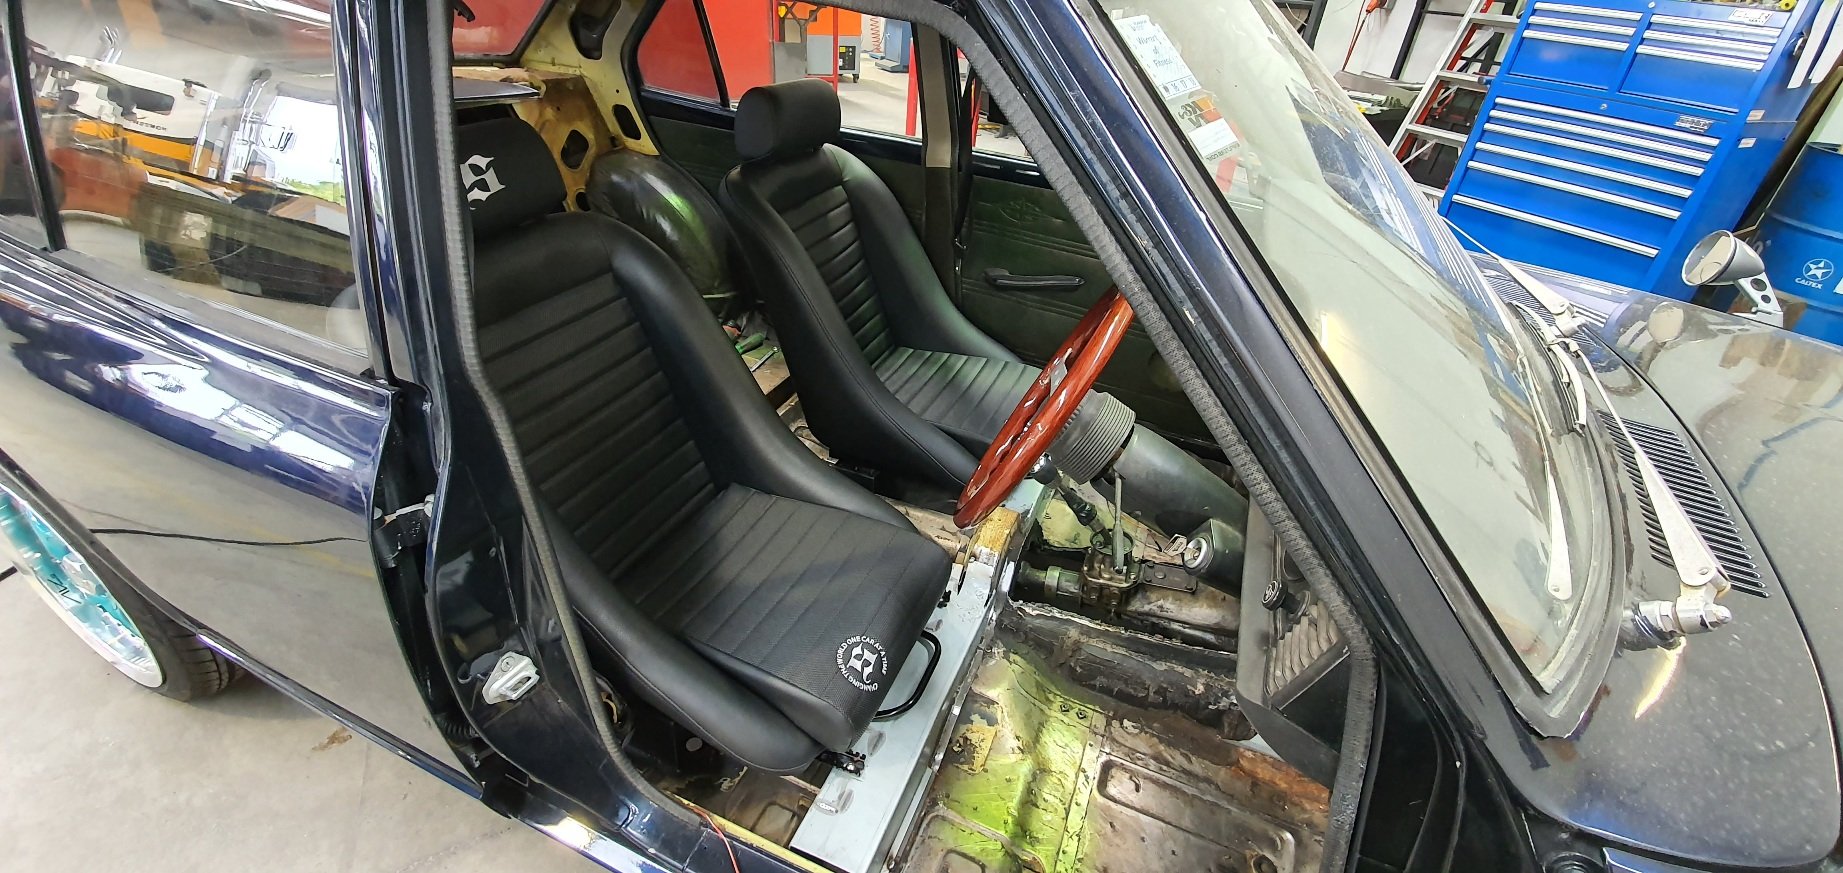
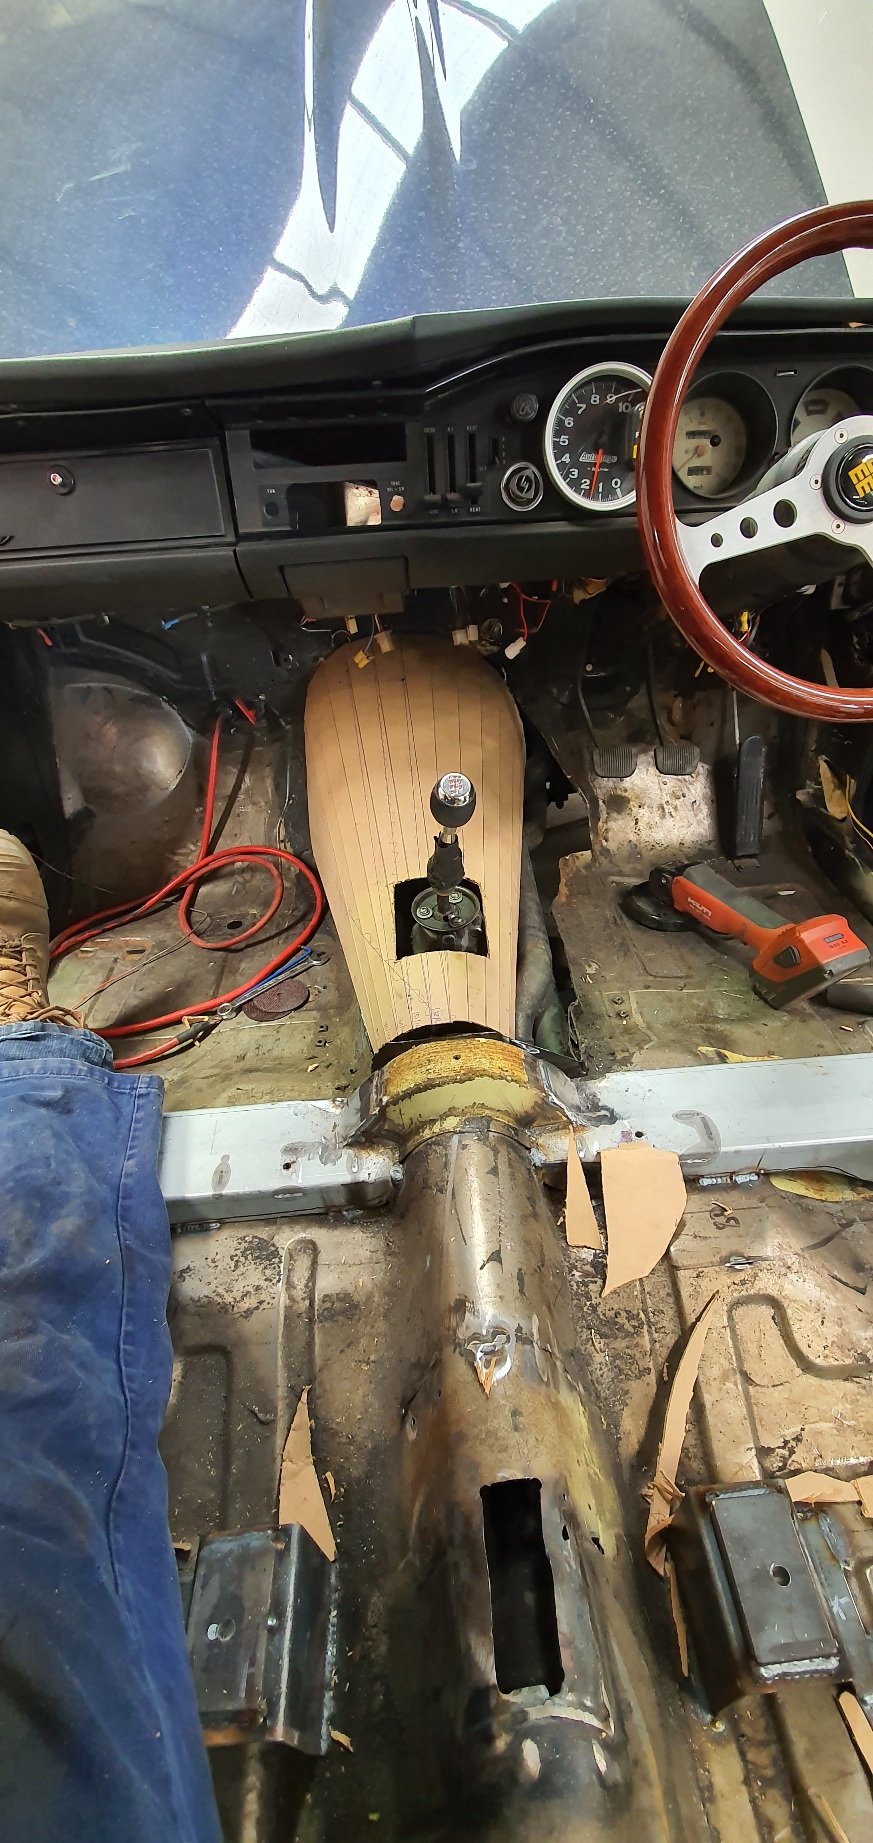
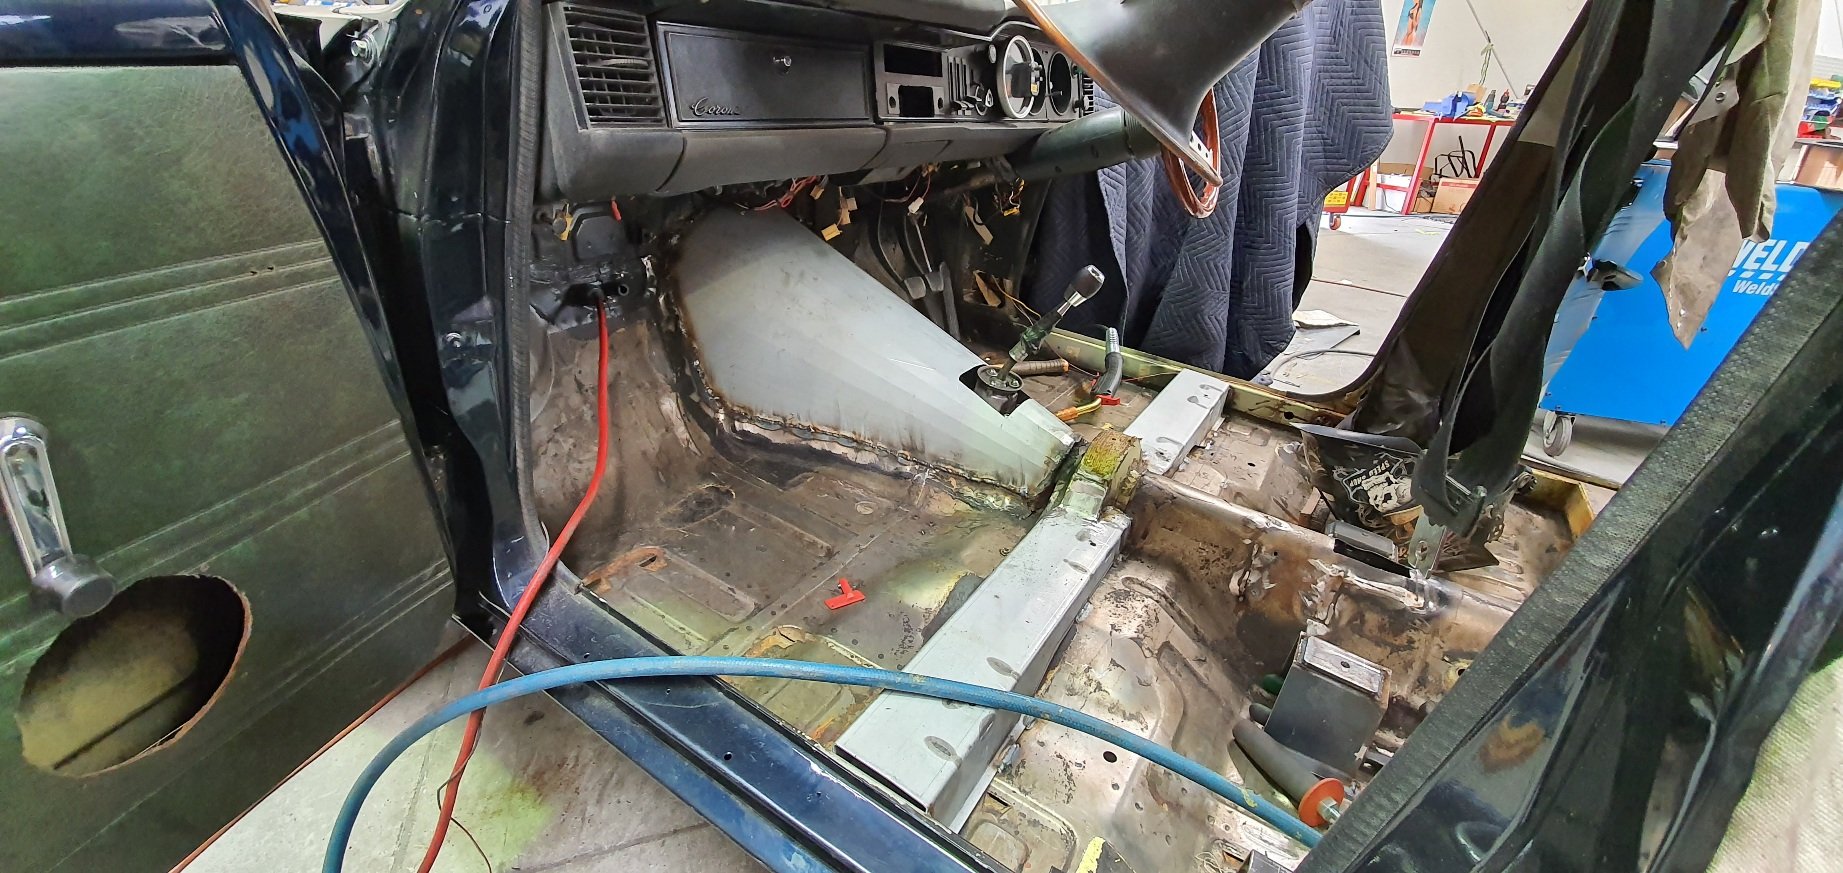
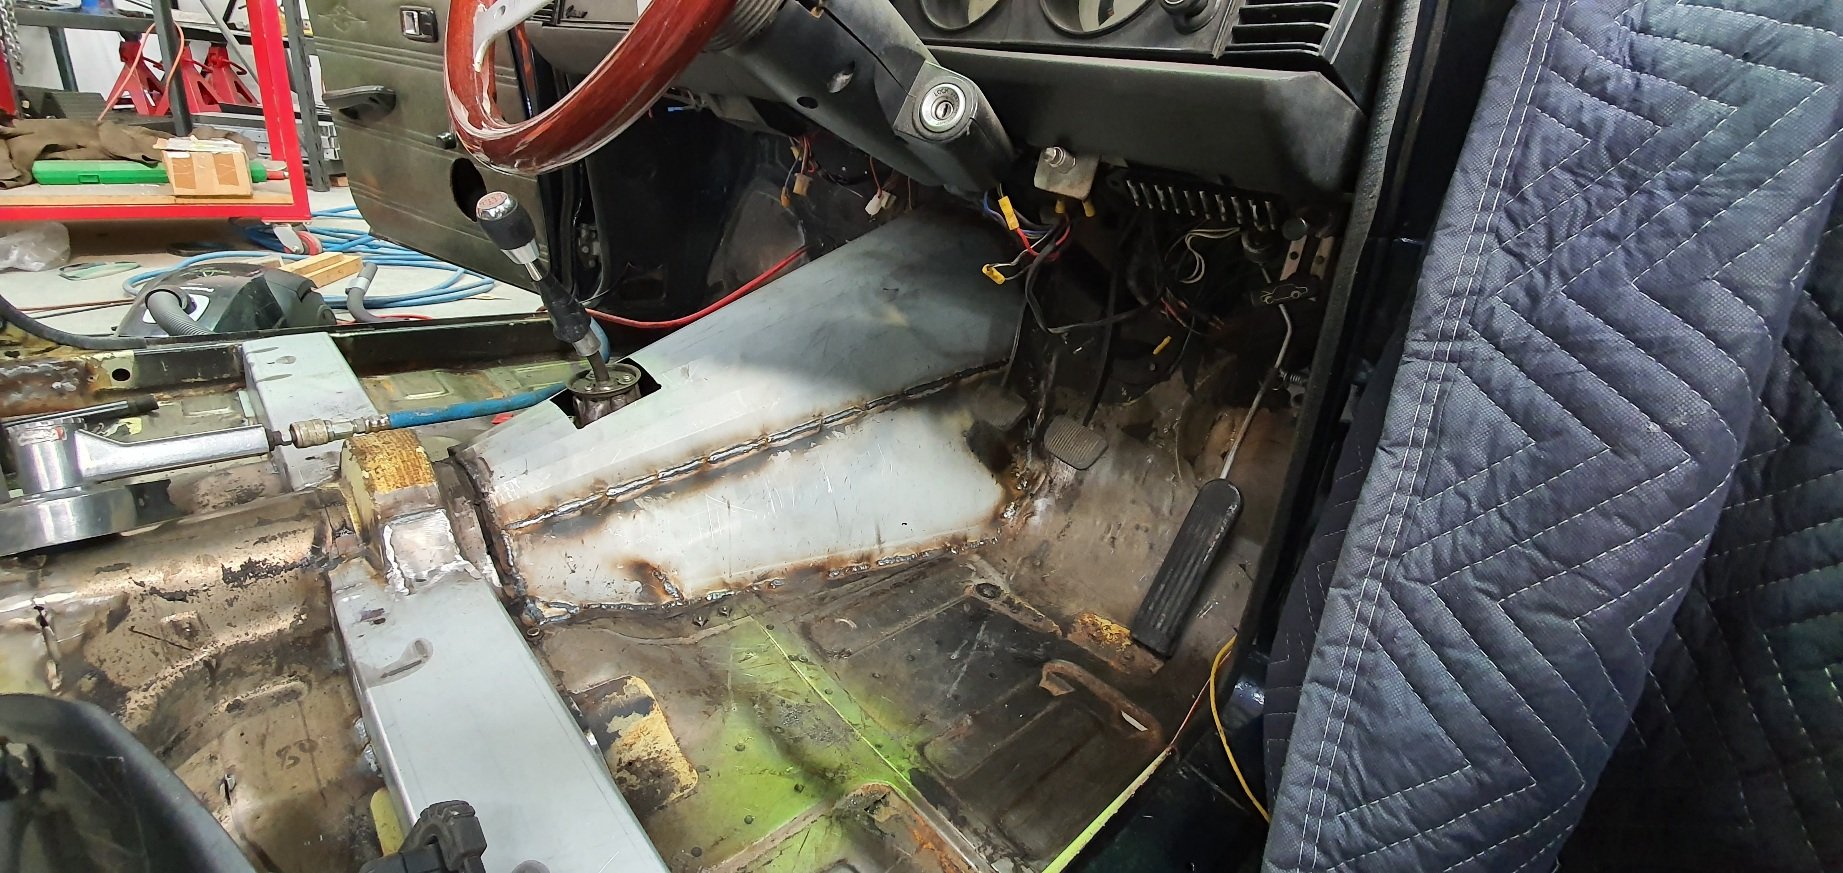
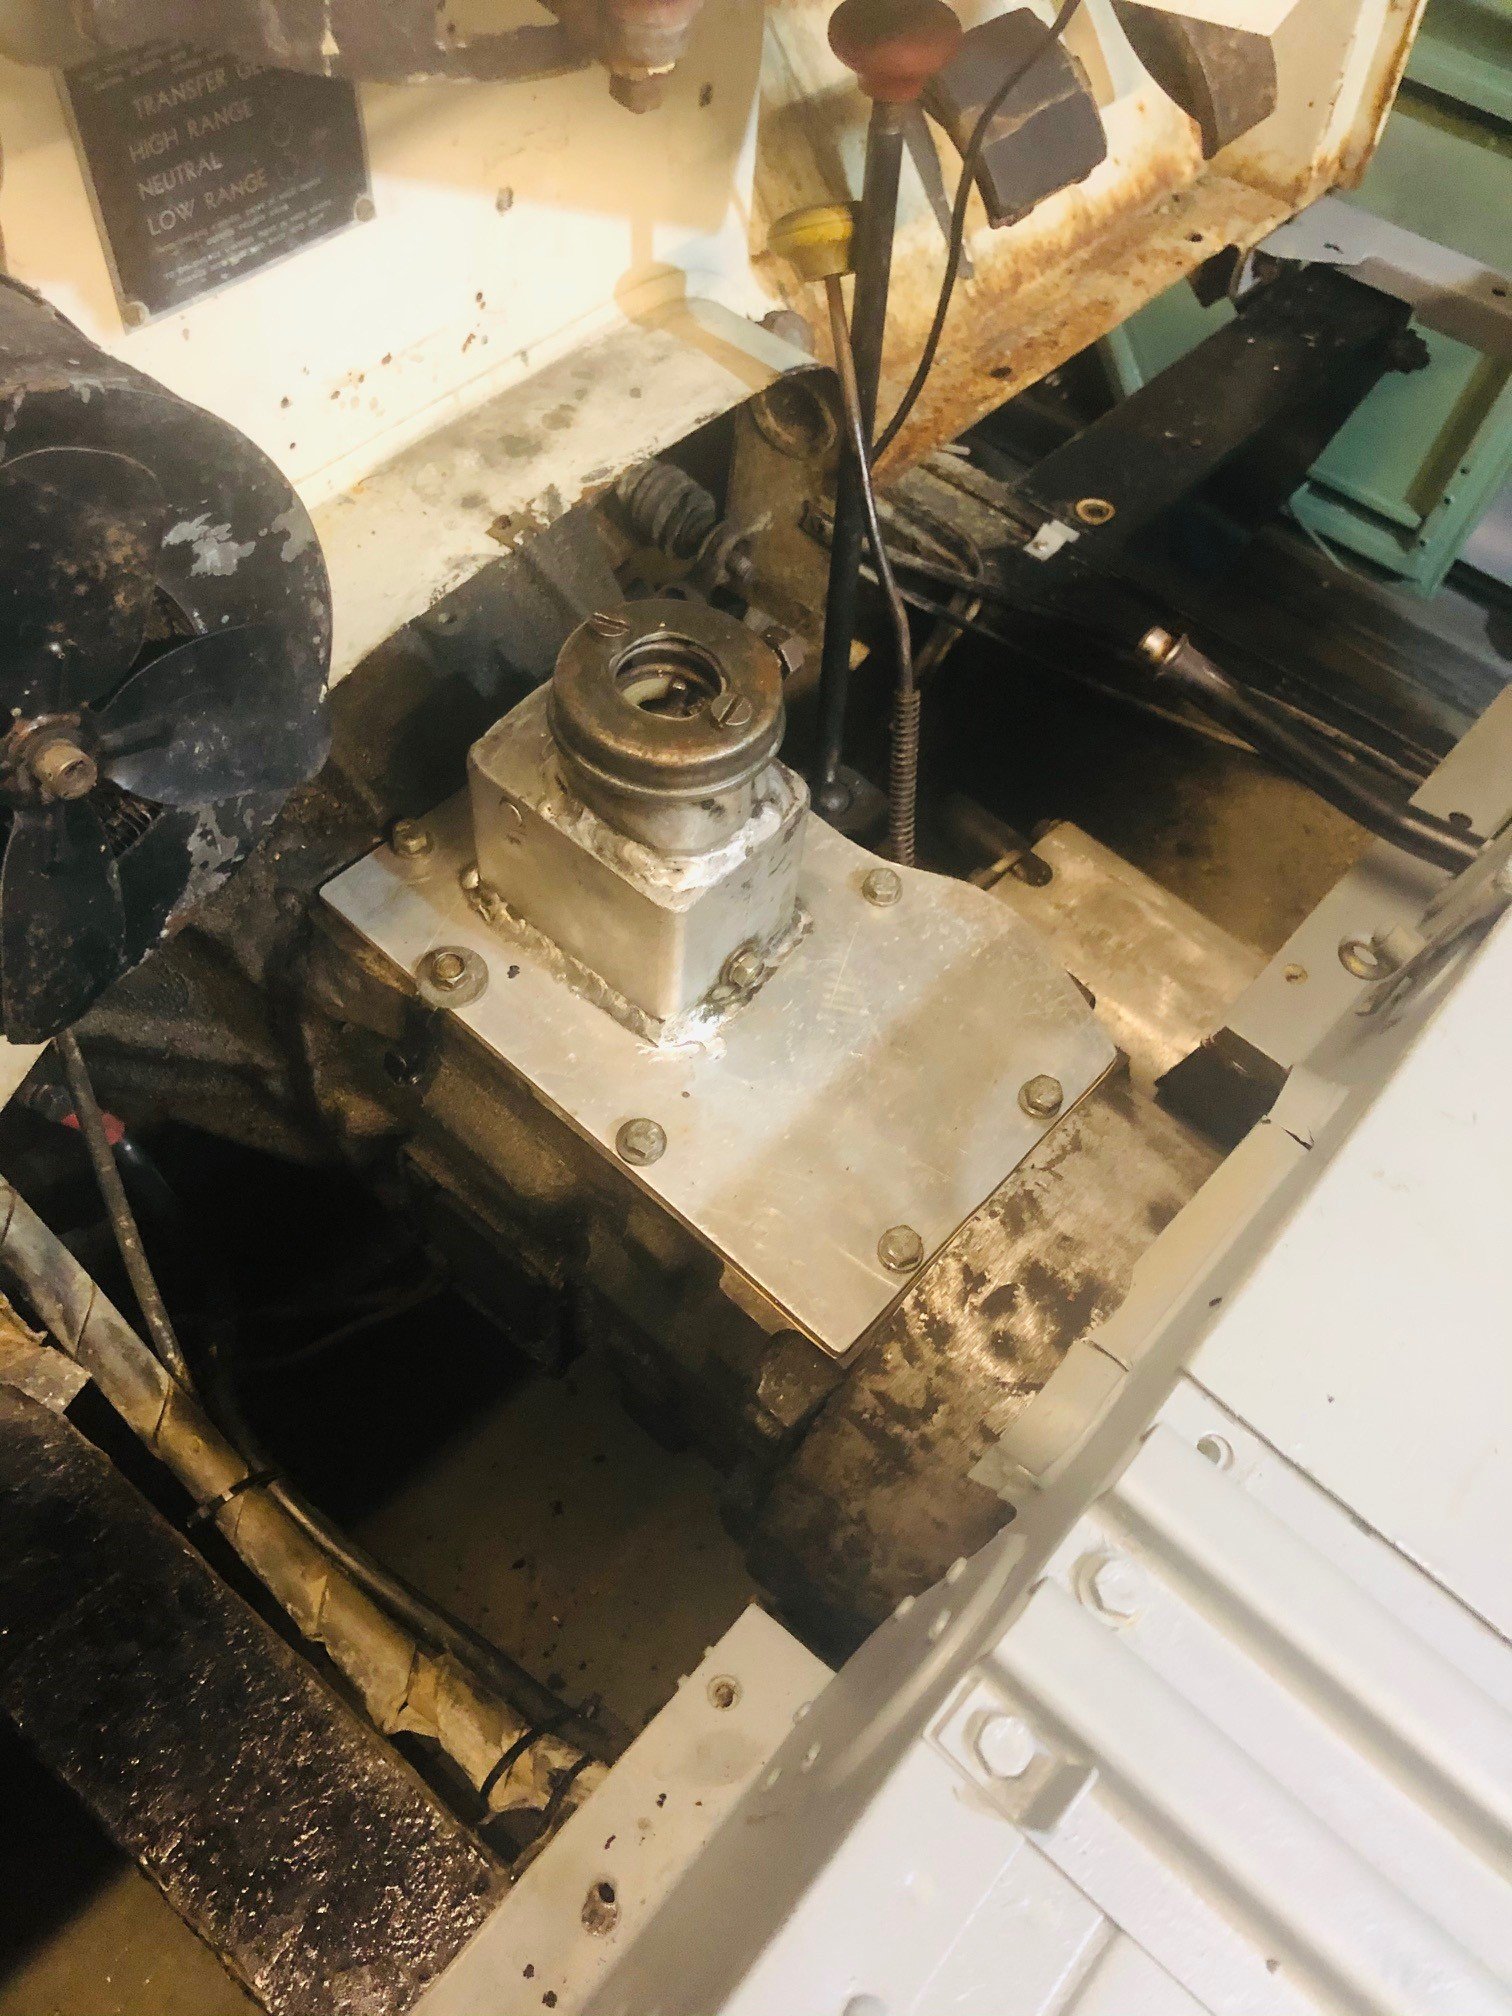
Well after staring at this in the workshop for the last 3 months while we've been massively busy at work and I've been caught up on the weekends entertaining my son I finally managed to get a couple of days to spend on this so I managed to mount my seats and get my tunnel fab'd up. I had to change my plan for the seats as my original design ended up too low and too far back surprisingly. Also the cert man wasn't happy with me removing the stiffer running the width of the car. So, I went back to the drawing board and came with this Then I made up a cardboard gearbox tunnel. And decided I better turn it into steel Happy to have those big jobs ticked off. I do still have to pull the engine and box to weld underneath but the hard work is done for the tunnel fabrication which is great
 5 points
 -
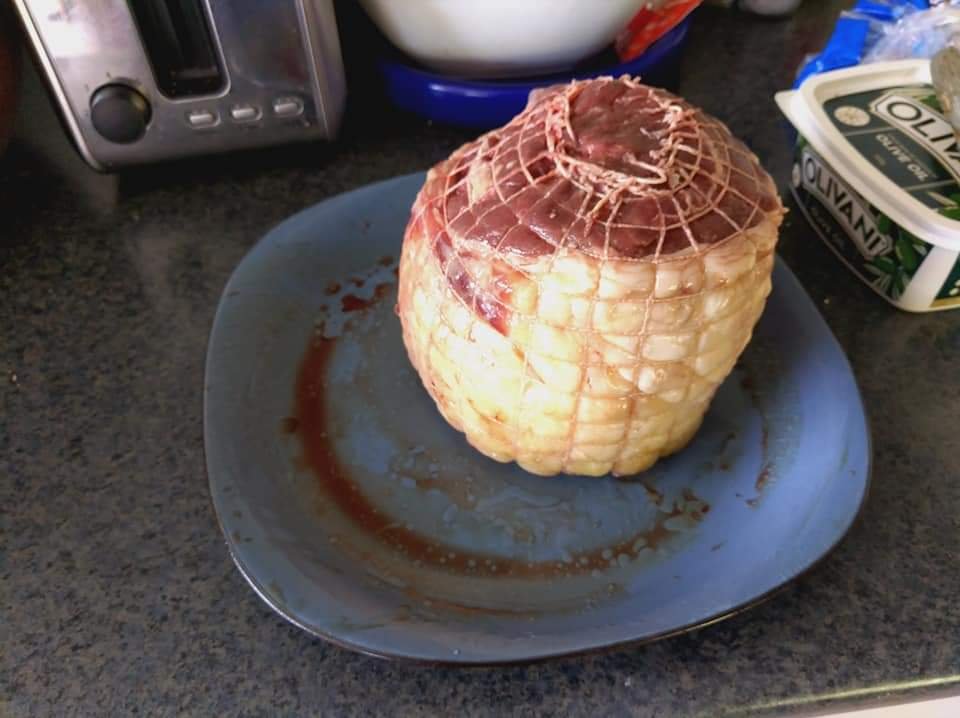
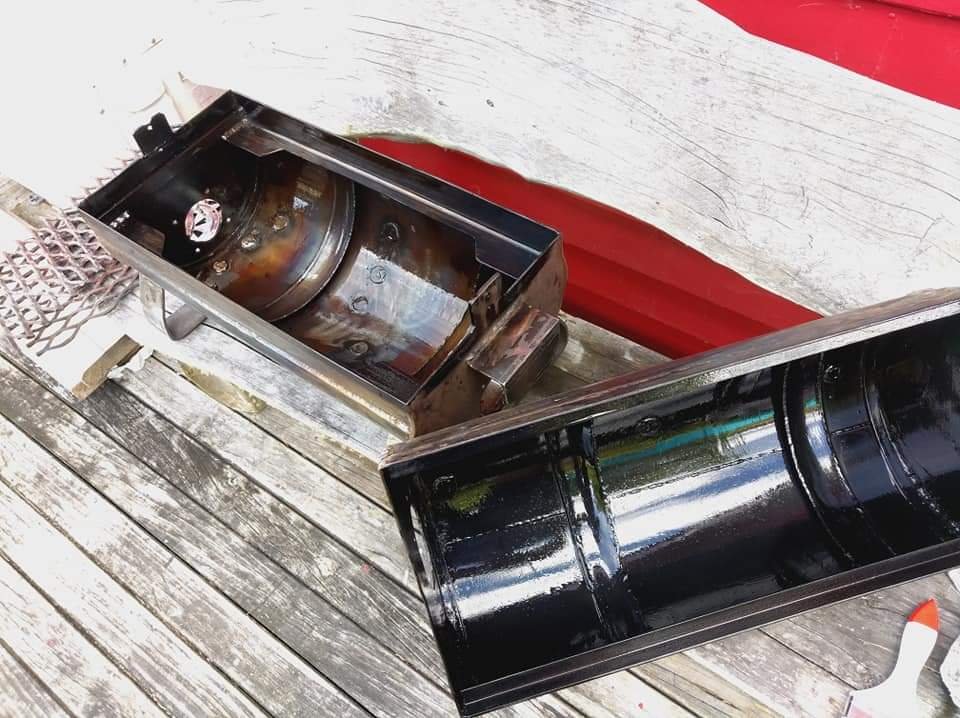
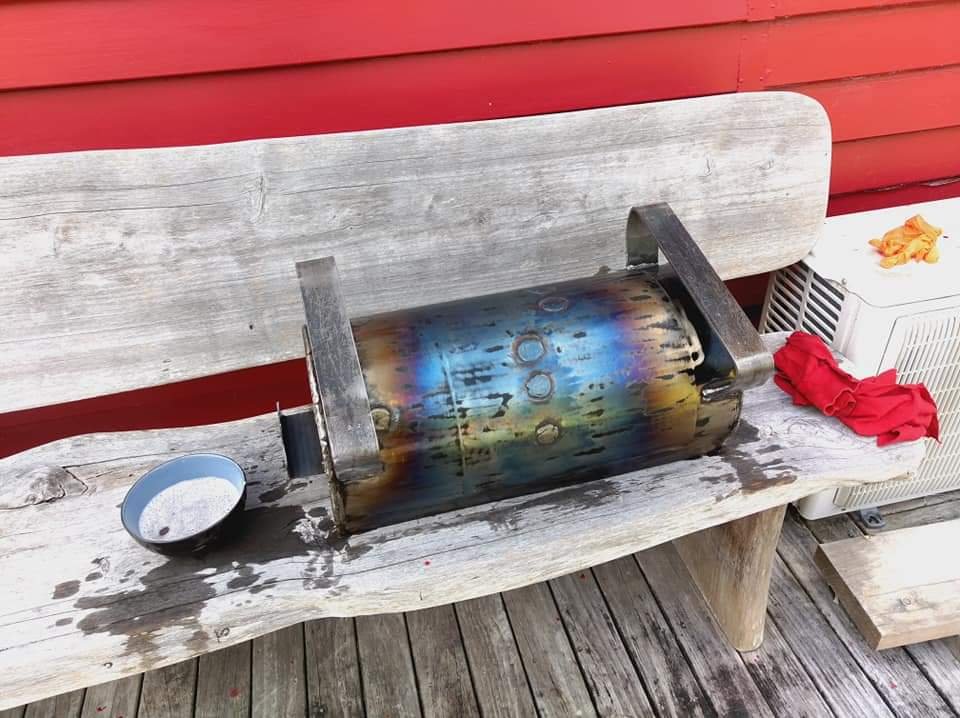
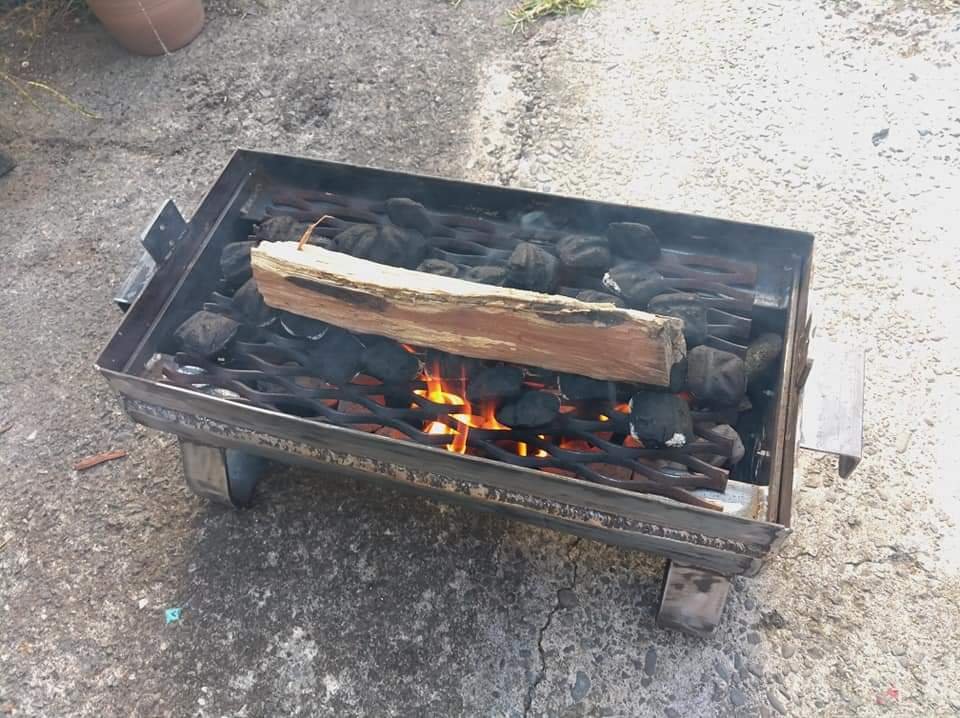
We had people coming over for a late lunch so we had to get cranking asap. Let the paint sit for 10 minutes then quickly fitted the vents and assembled it for another burn off. Only had about 2 hours to burn it off and cure the paint before I needed to get some food on. Got it up to about 500f for about an hour and a half the tried to drop it off in preparation for cooking. Random home kill rolled beef roast I found in the freezer. Approx 3kg gave it a blackout rub. Really wanted to get it on the rotisserie but it was too bloody hot to fit it up haha. Got the temp down to 350f and threw it in, couldn't really wait for it to drop anymore. Ran it at about 350f for 2.5hours indirect with stout in the driptray. Combination of Kingsford briquettes, applewood and some Manuka we had lying around. This is absolutely winged and rushed, for the first cook and I had no probe for internal temp. Let it sit for about 20mins wrapped in foil, when served it was about medium, slightly rarer in the middle so not too bad considering (forgot to take pics). Held temp well, I think if I start off with less coals (i.e not doing a burn off) I'll be able to get the temp right where I want it and also vent/damper controls will work a treat. I'll look at cutting the cooking grille so it's 2 piece for access loading up coals. Chur
5 points
-
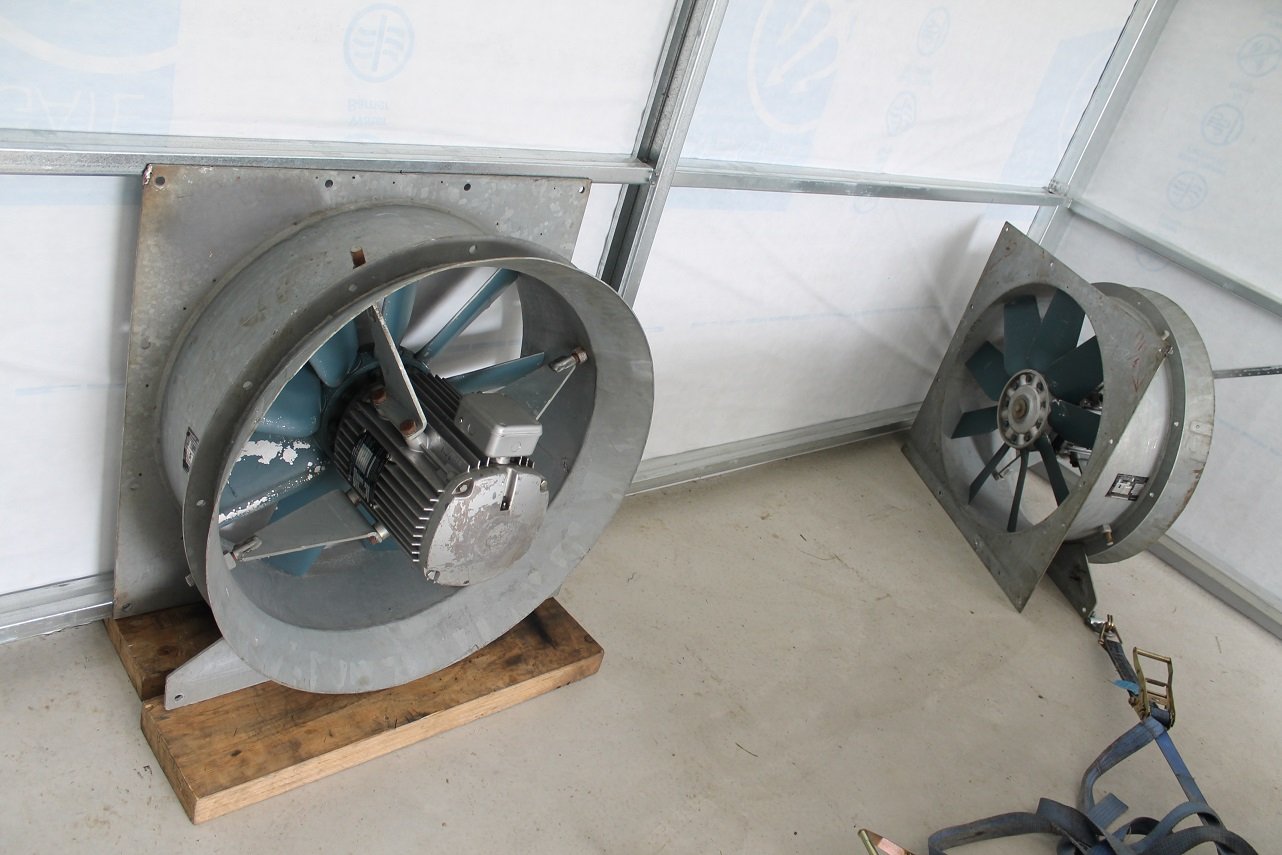
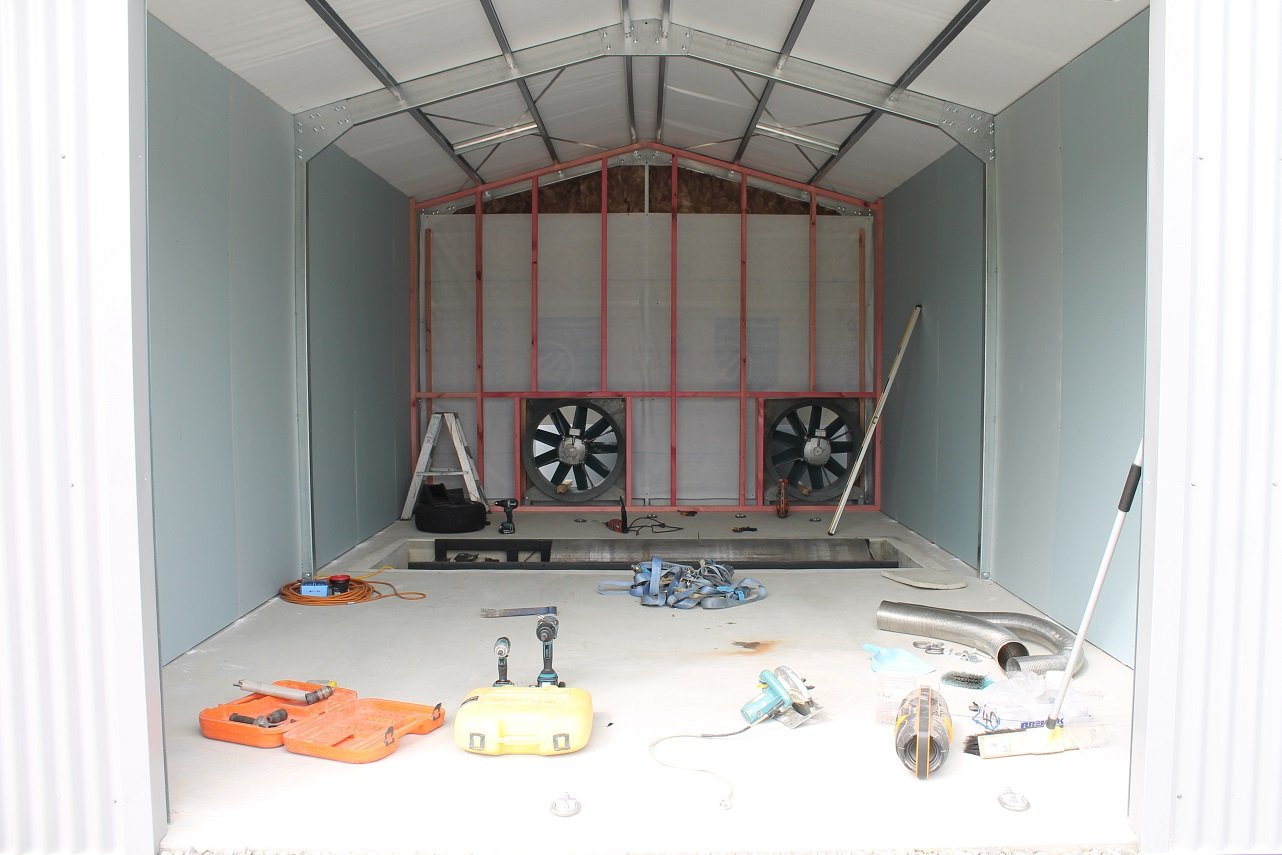
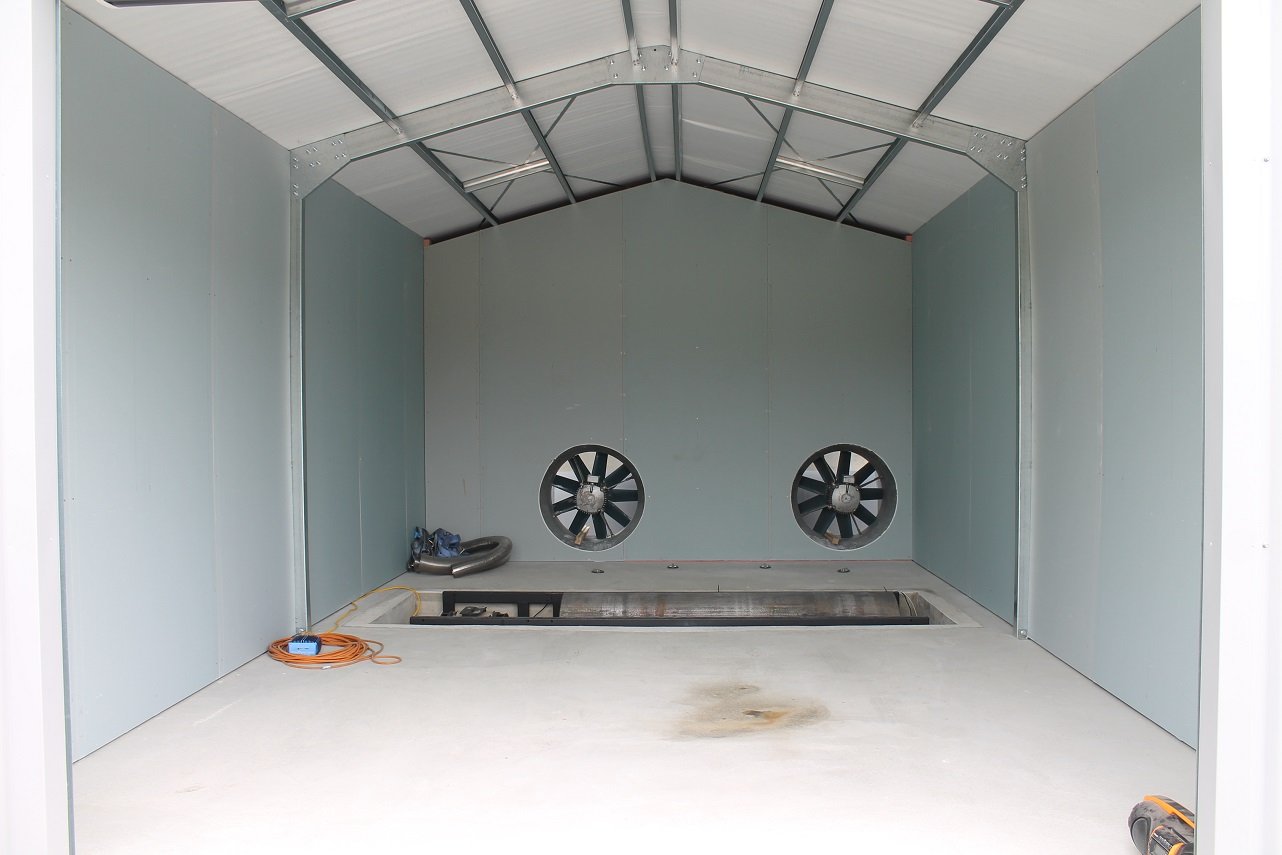
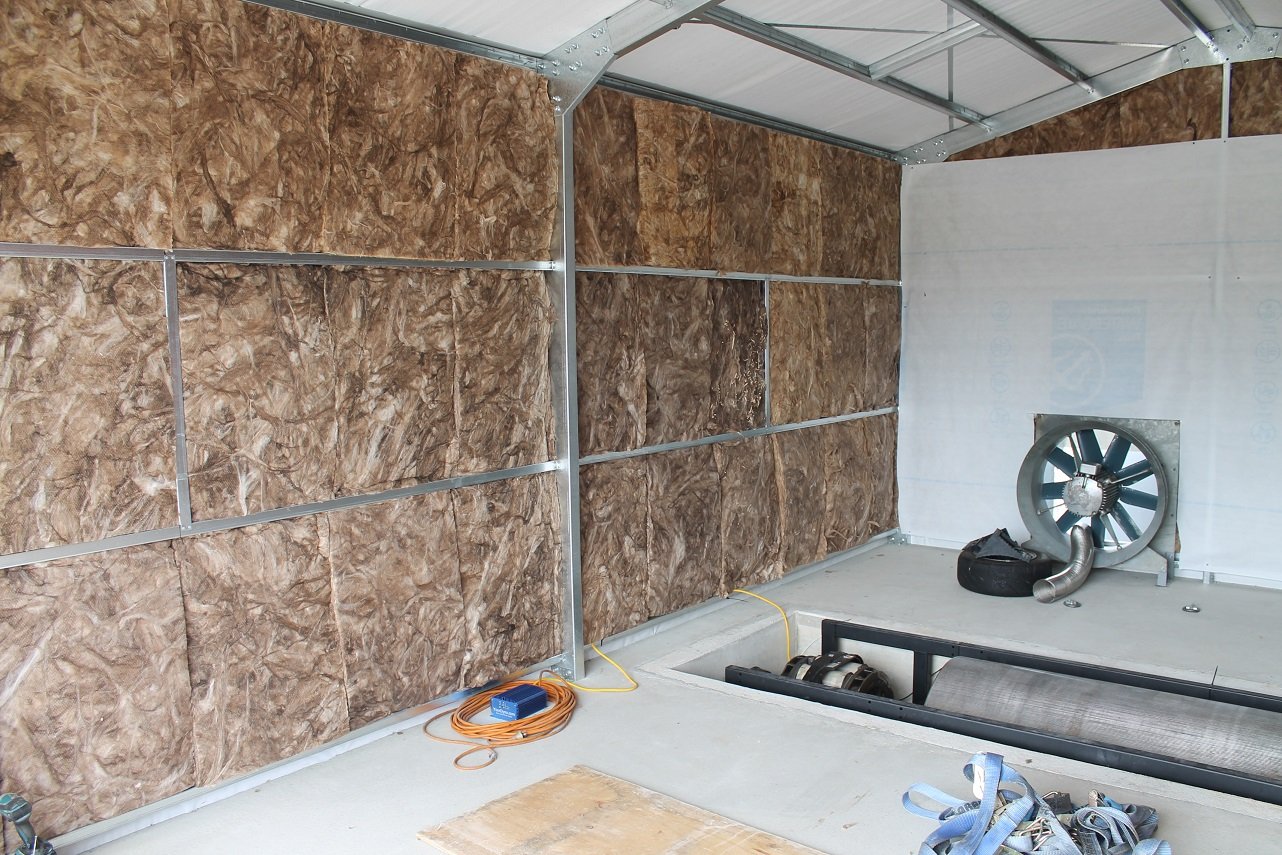
Bought a couple 10.5kw, 30" fans 2nd hand, which should be enough to suck the nasties out. These are 3 phase so I really need Mr sparky to come and wire them in. You read my mind. Except more just to keep noise down a little for the neighbors in general and get rid of the tin can feeling inside. I had some left over noise batts at home and some normal batts I scored from work for a box of beers, so I banged them in the walls and threw up some noiseline gib for now. Built a false wall to enclose the fans as well. I bought some sheets of 60mm polystyrene for the ceiling too, but will wait for mr sparky to do his bit first. Also finishing off 2020 with a quick hit in the gem.
4 points
-
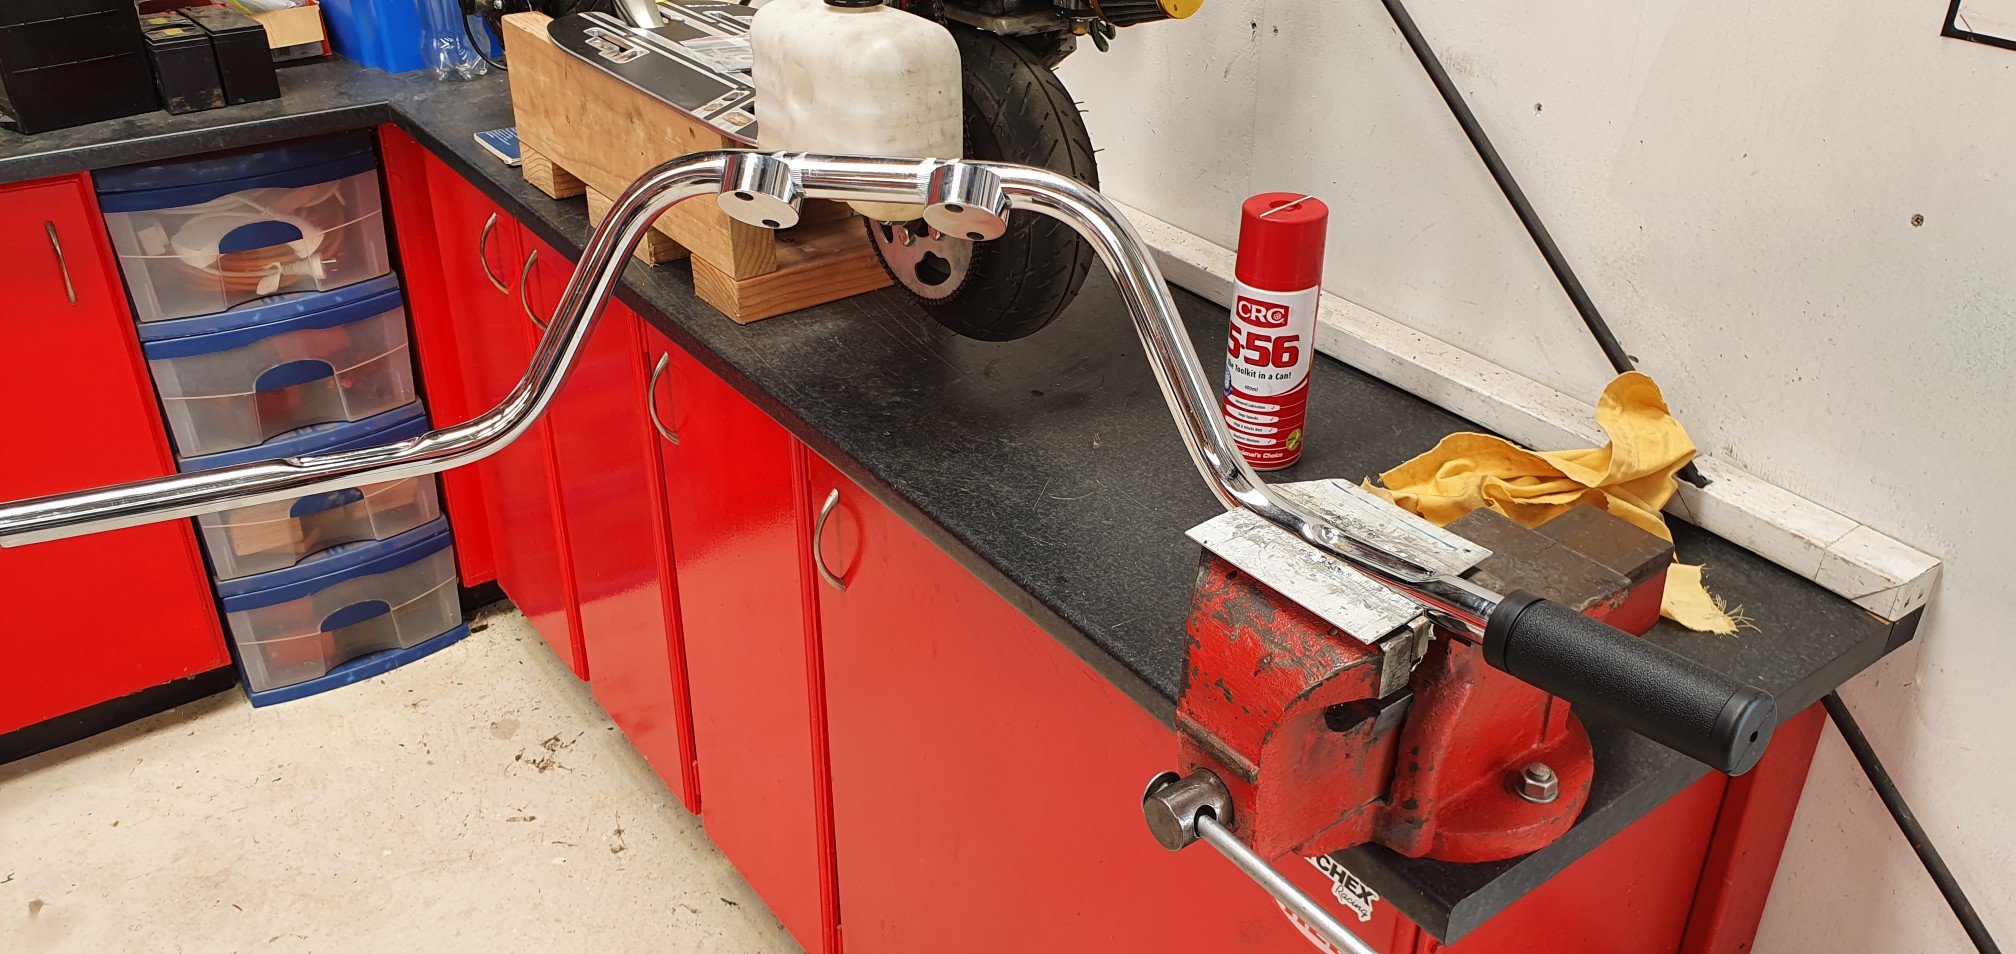
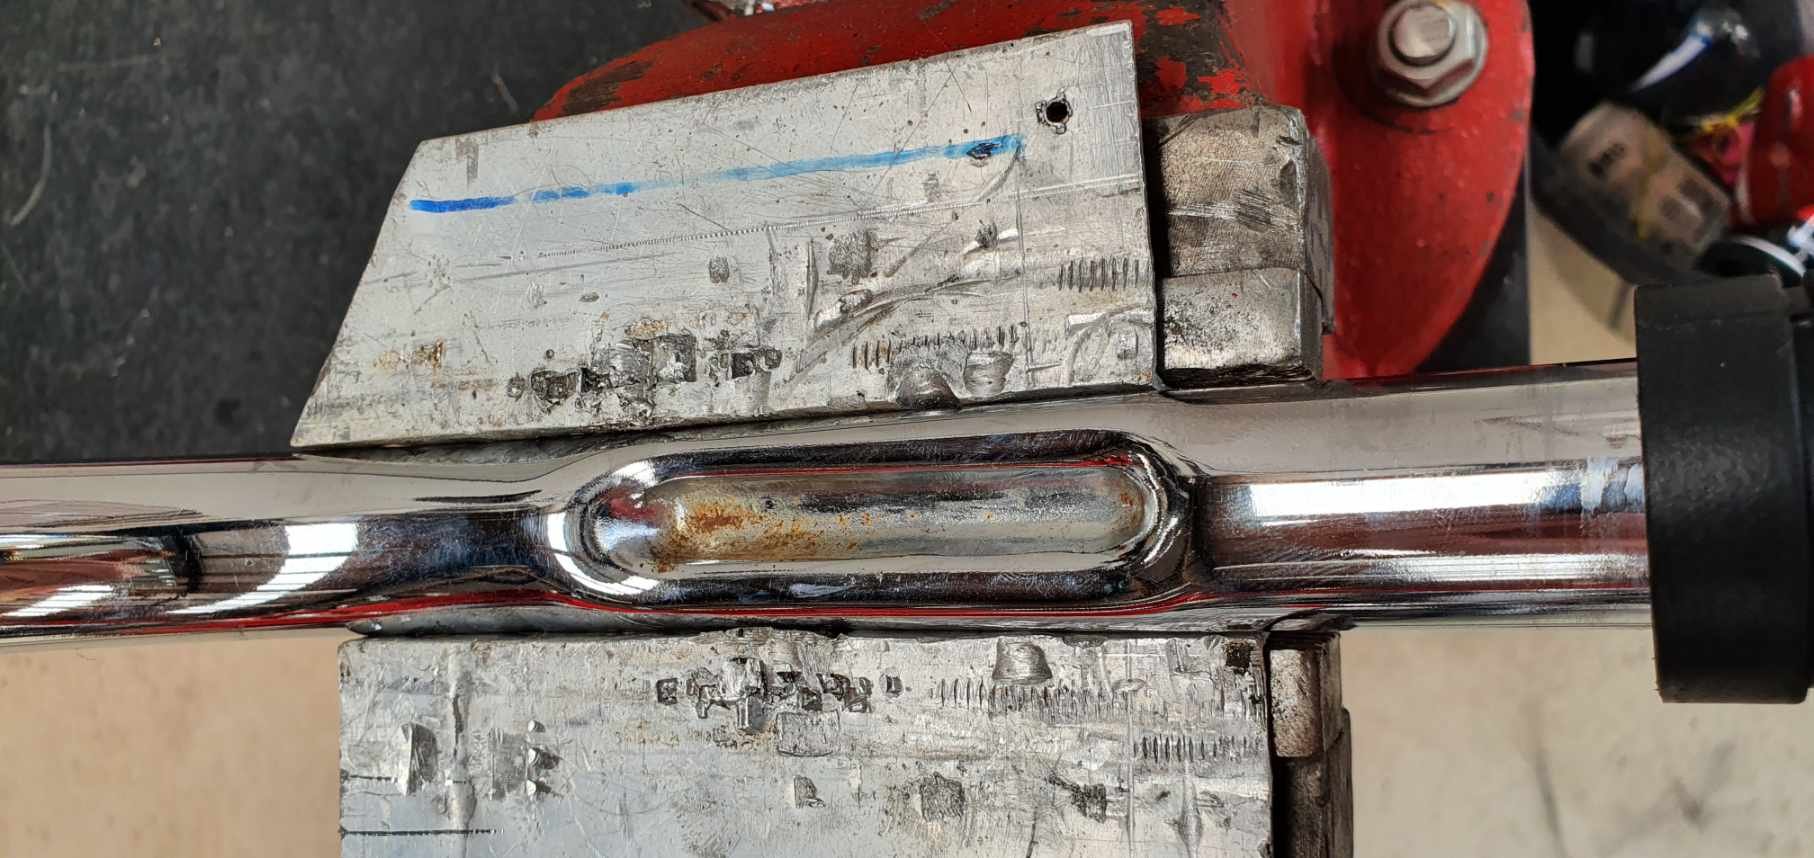
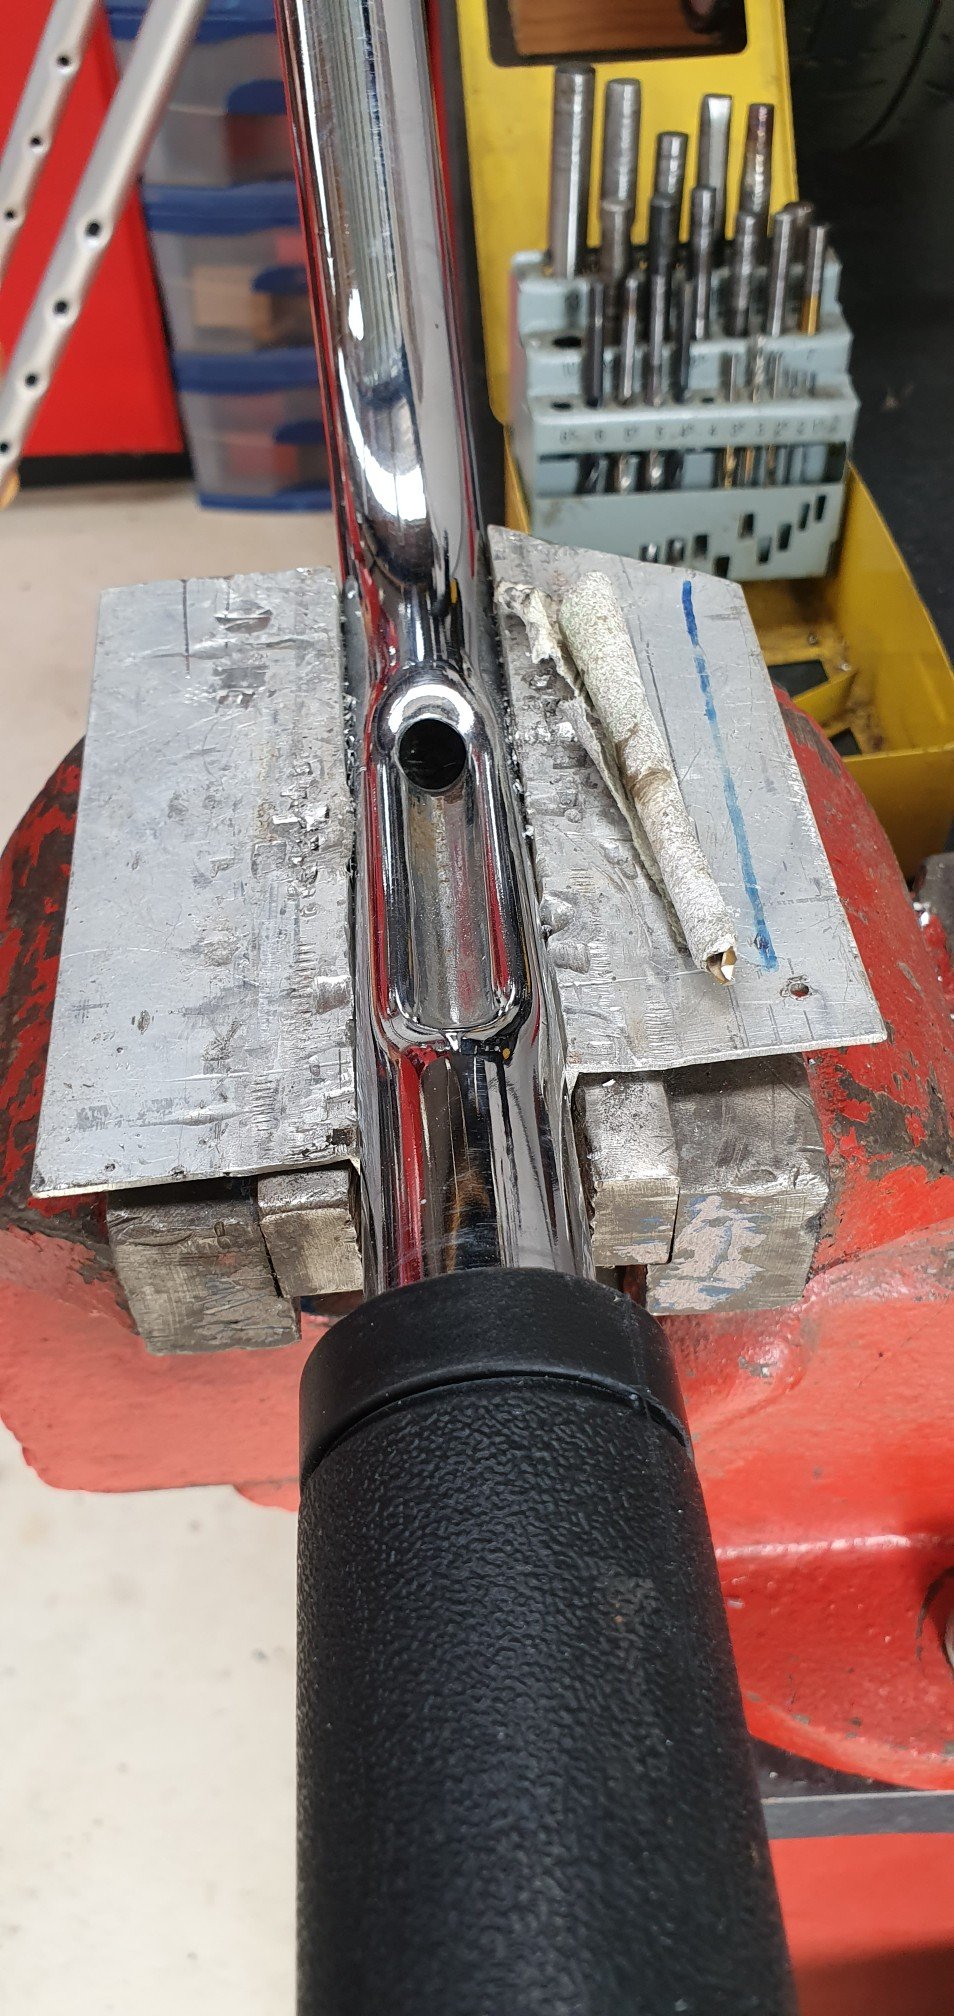
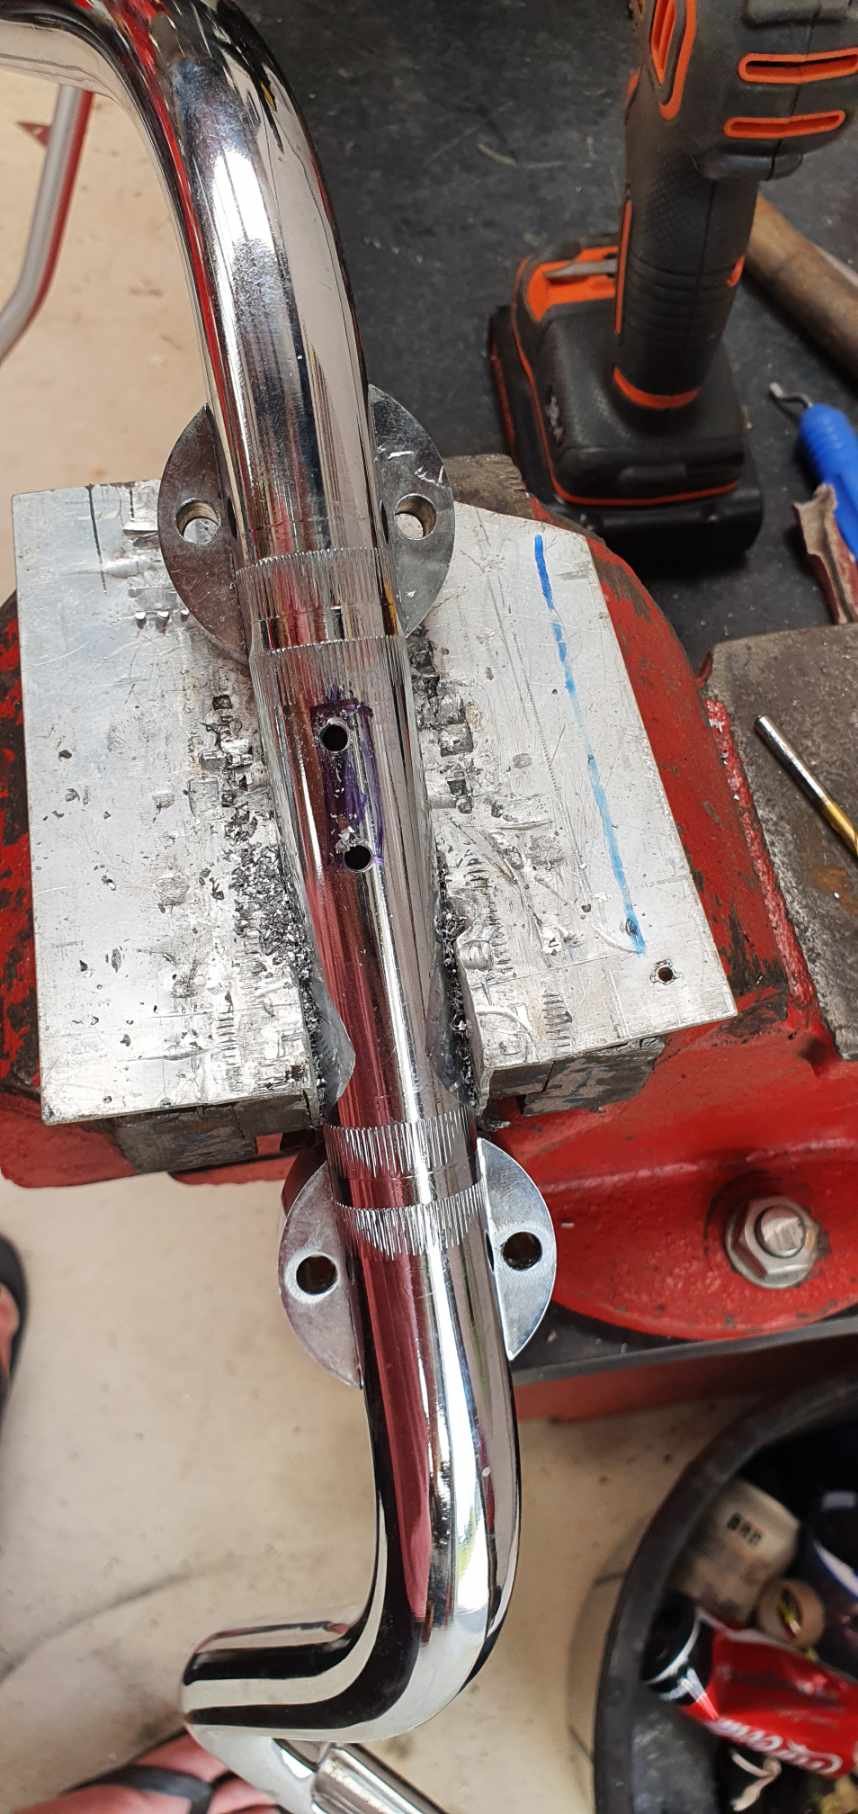
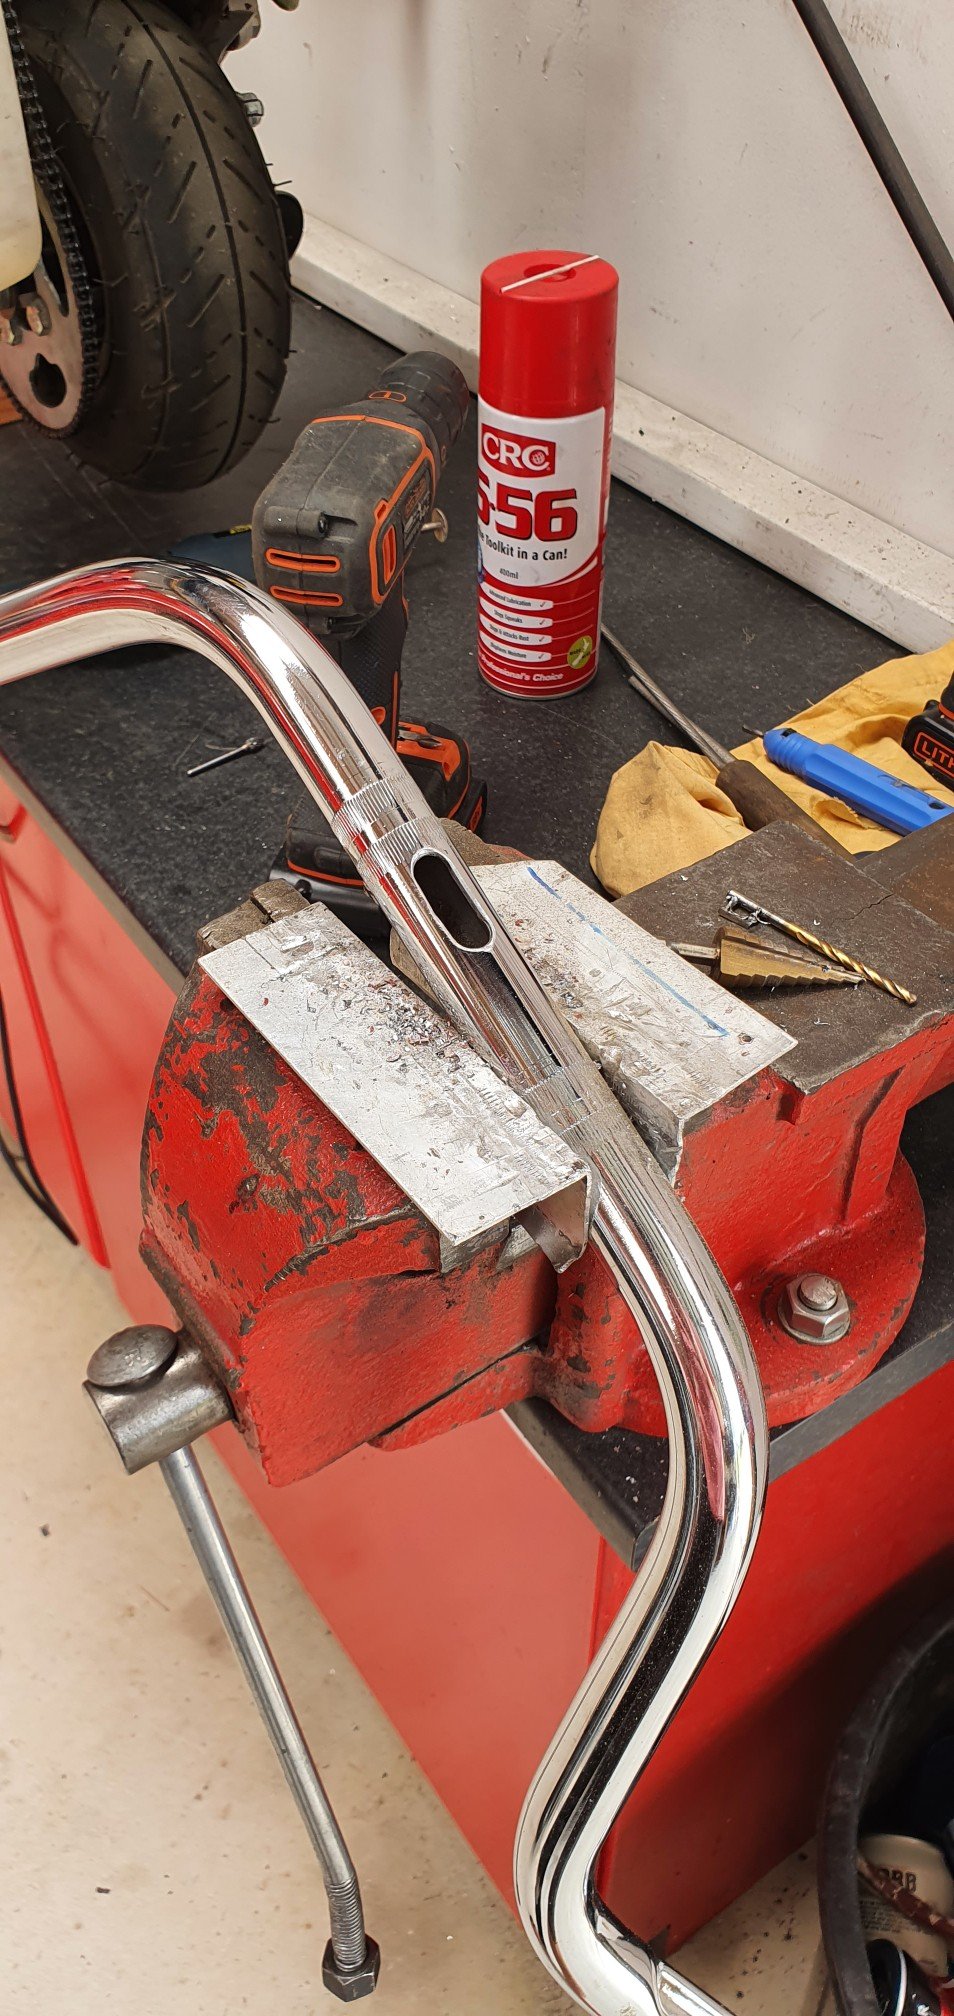
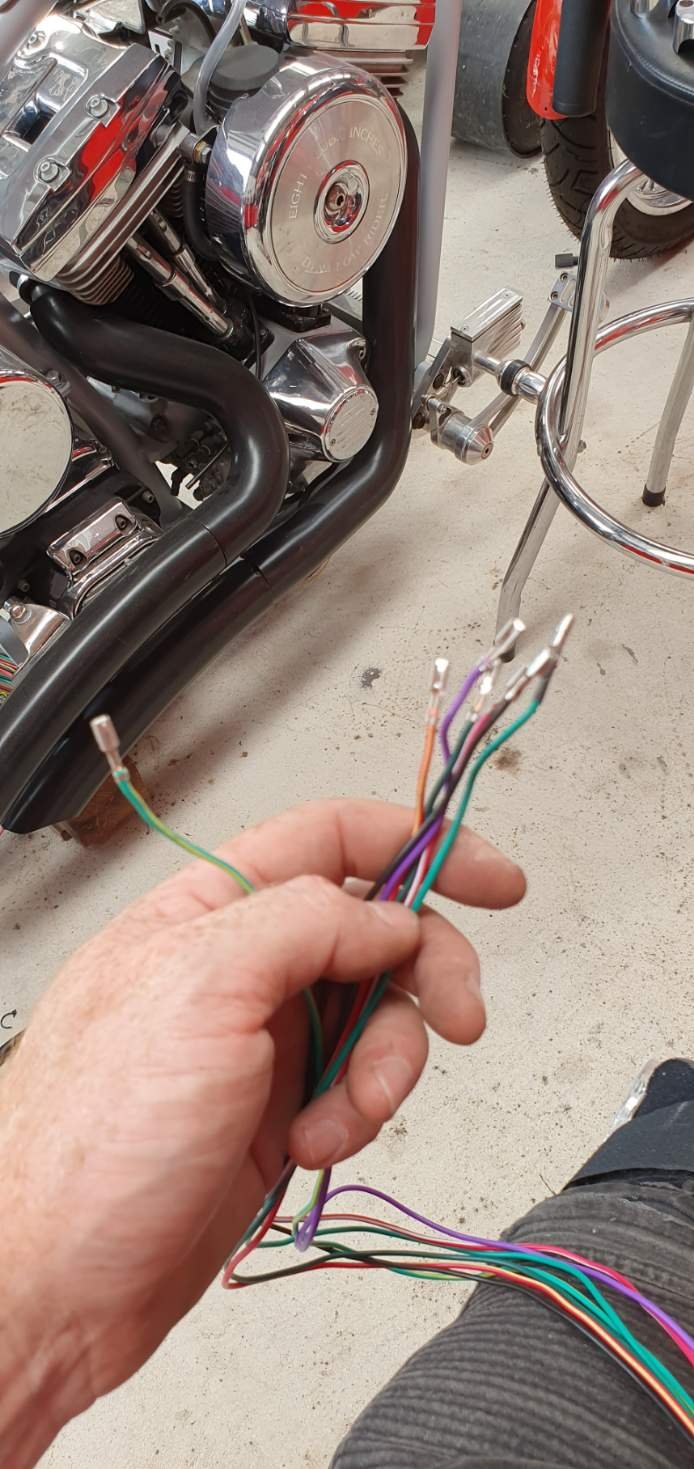
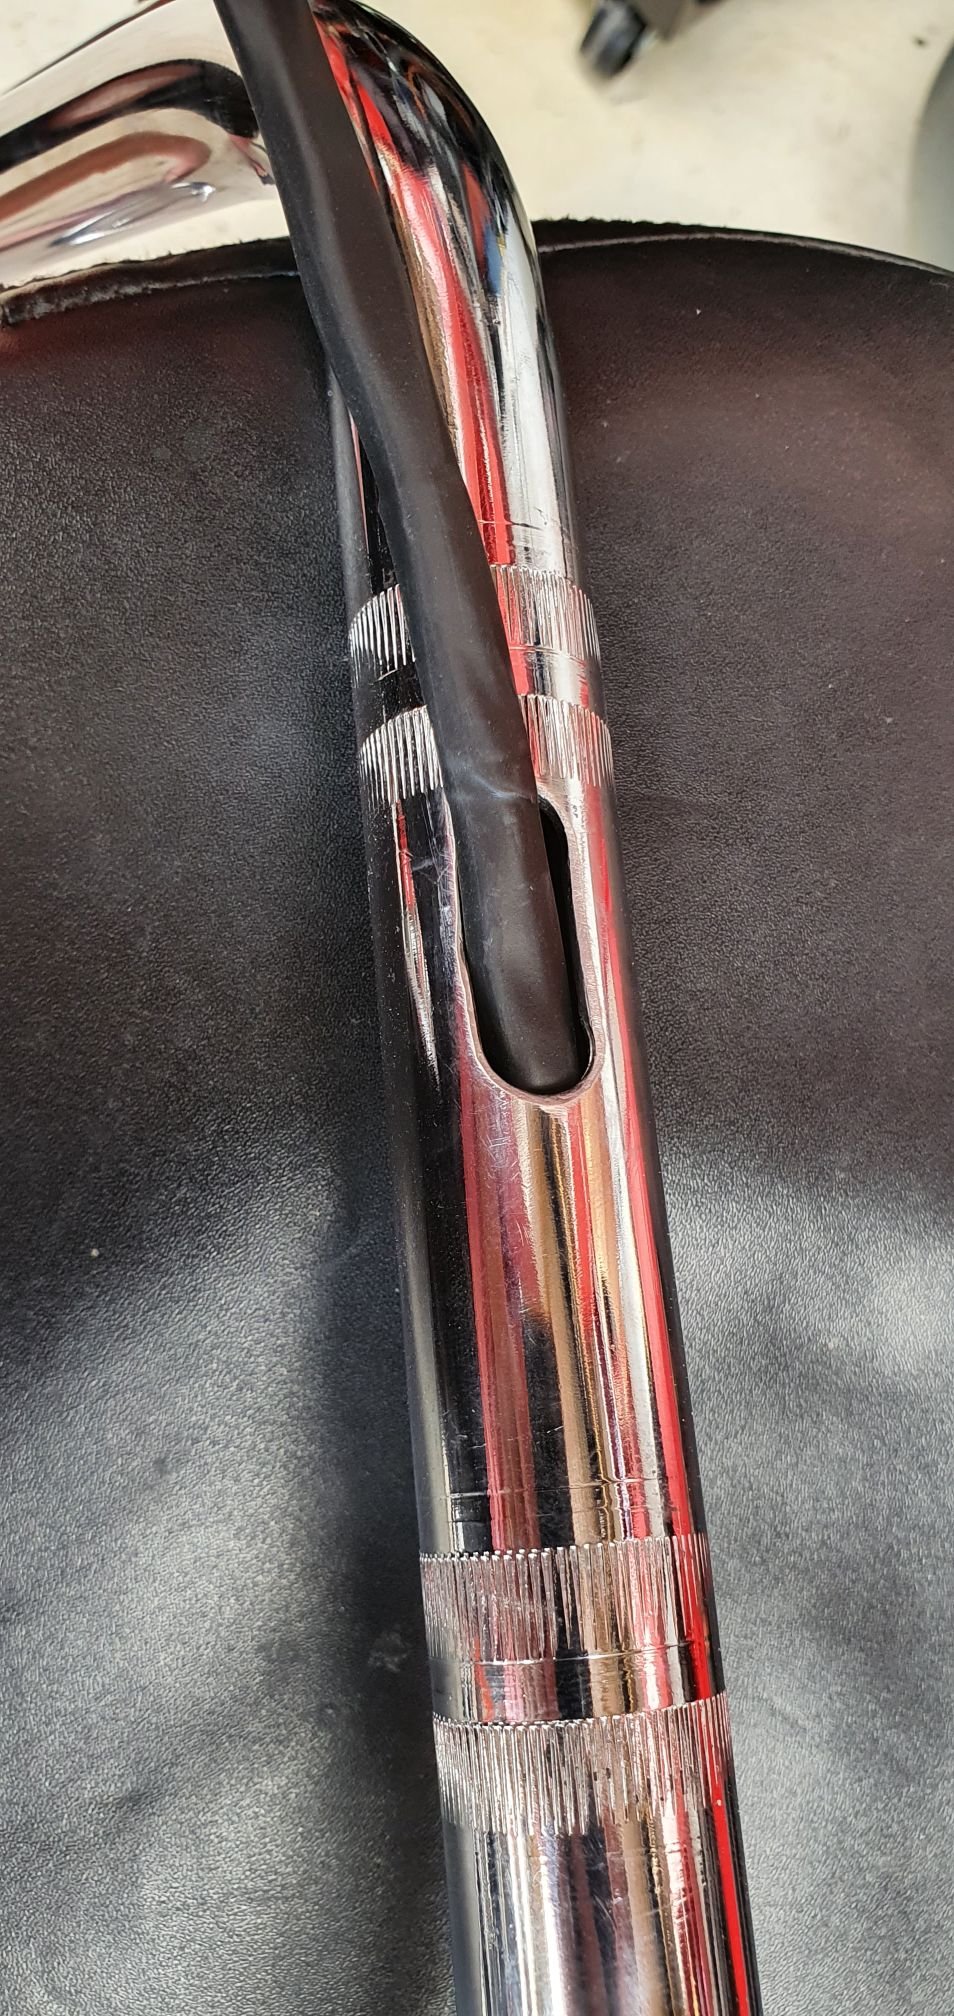
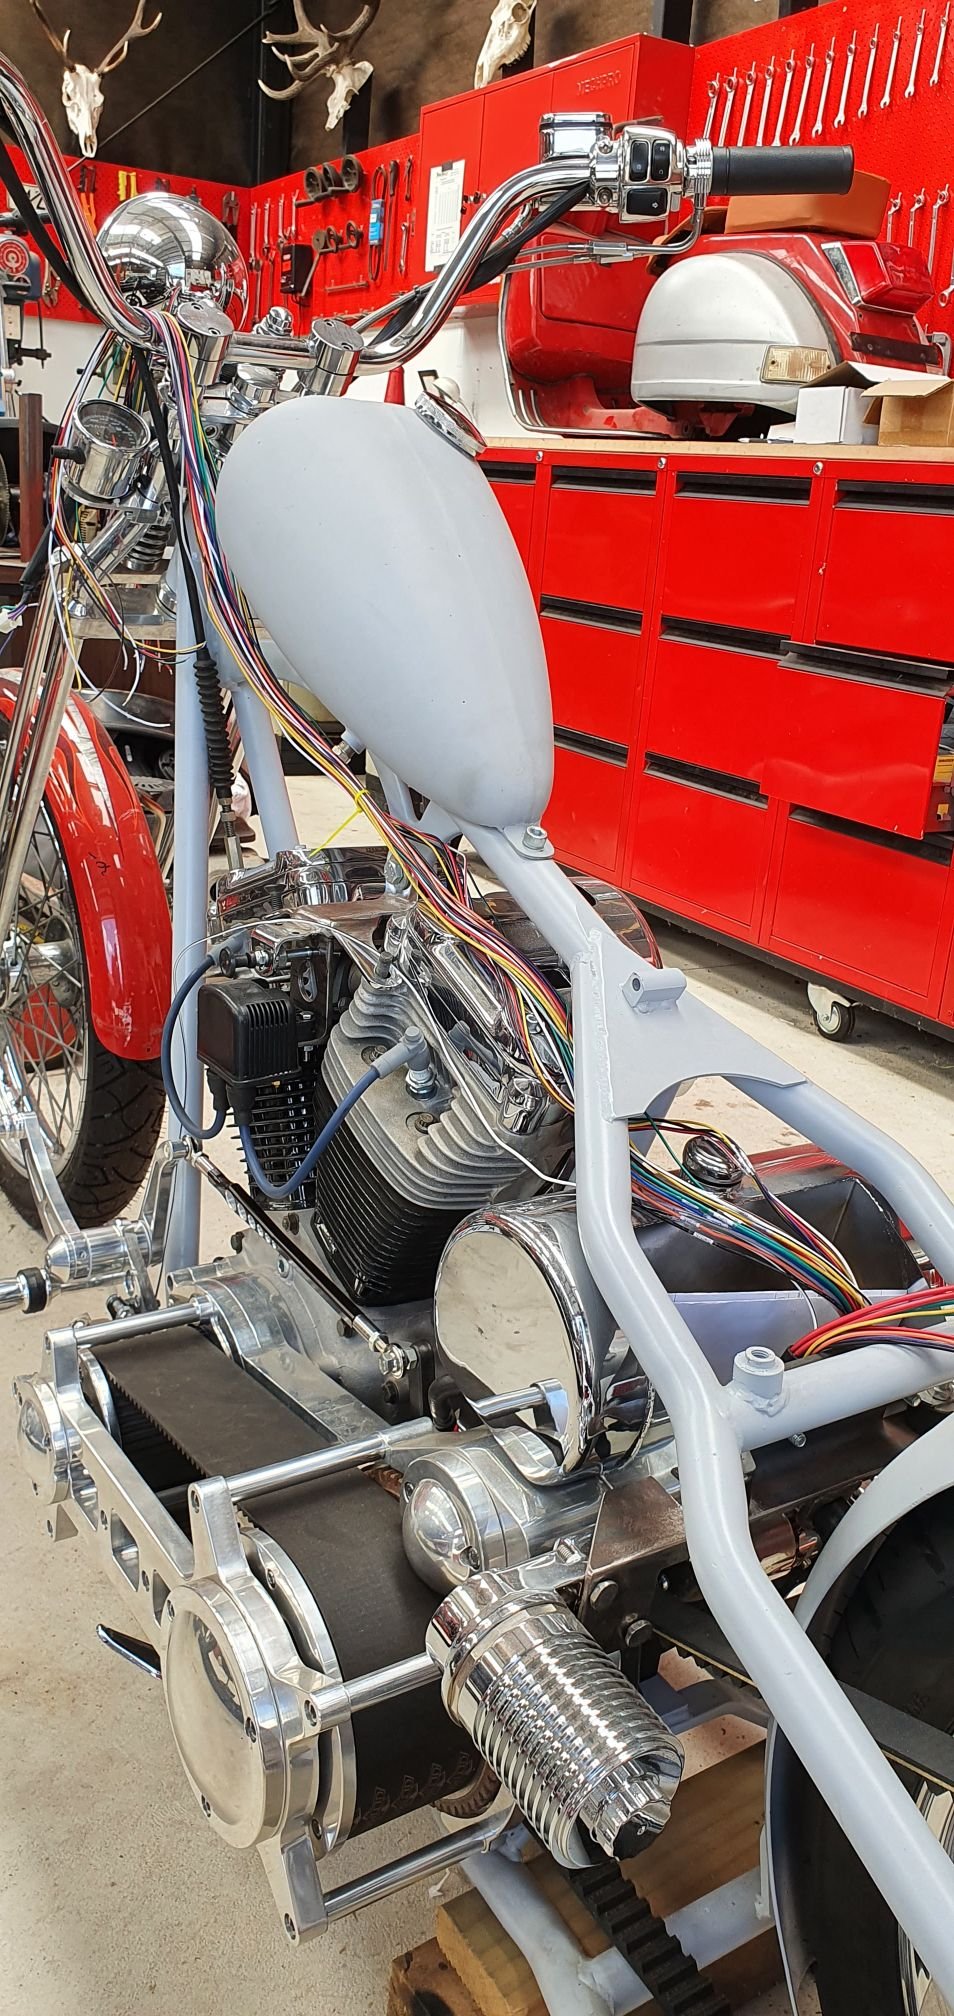
Doing the practical thing and hiding my wiring, so if there's a problem its impossible to get to it...oh, fuck...yeah...ummm...why do we do this again??? I googled and googled and the general consensus was that upto 1/2" (12.5mm) hole is fine, people have been doing that for years without any issues. I decided that 3/8" (10mm) was enough to get the job done and would leave a little bit more meat on the bone, so thats what I did. Offset slot to the left. Everything is going to run down the clutch cable once done. I spent ages sanding everything down so there's no sharp edges to cut the wires. Now I've just gotta heat wrap this mess and shove it down the inside of the bars. Oh and the other side has double this amount!! Ummm... for want of a better phrase this was my "first pull". Hey, sounds better than "tug"?? Boom, both side done. New loom pops out right by clutch cable, I'll cable tie it together and run it down to my new wiring under the transmission. So that's a good start on something I've been very much procrastinating. Winner, winner...chicken dinner!!
4 points
-
The new genuine Delphi sensor in all its splendor.
4 points
-
So yeah, as seen above, took it back to the water yesterday and it does run a lot better when its not breathing its own fart cloud. Picture of failed engine mount and V band that needed toightening. IMG_20201228_170634 by John Bell, on Flickr I'm not completely happy with its performance though now its making full more power, it doesn't 'bite' the water like I would expect, if you feed it more power than it can shift water, it nangs out and feels slower than if you were to nurse it up to speed. You can see/hear this in one of the vids. It handles a quite loosely, but I don't have much reference to compare it to, aside from the donor ski which carved corners like a water-skiing cut cat, comparatively. If you do manoeuvres that are too aggressive or any spins it comes off the plane pretty easily and doesn't pop out of the water like the motor seems capable. So next step is to look at the spare jetunit, if its any better pop it on for testing, and I feel I'll probably wind up giving one of the pumps a birthday. Cute IMG_20201228_182945 by John Bell, on Flickr4 points
-
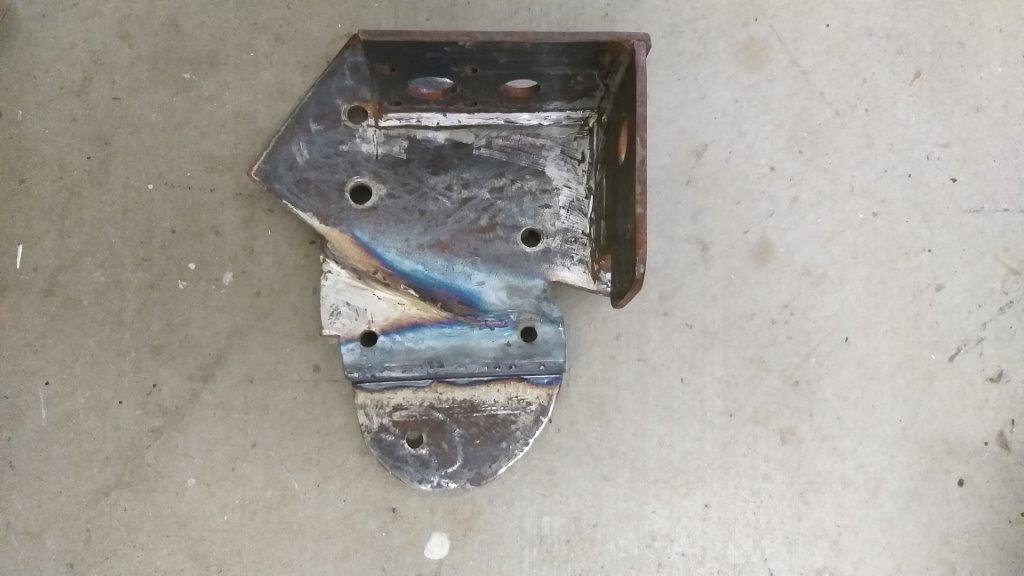
Heavy rain stopped play yesterday, so I only got to glue the steering bracket together today. Just needs a final tidy up with a flapper disk before I call it done.
3 points
-
3 points
-
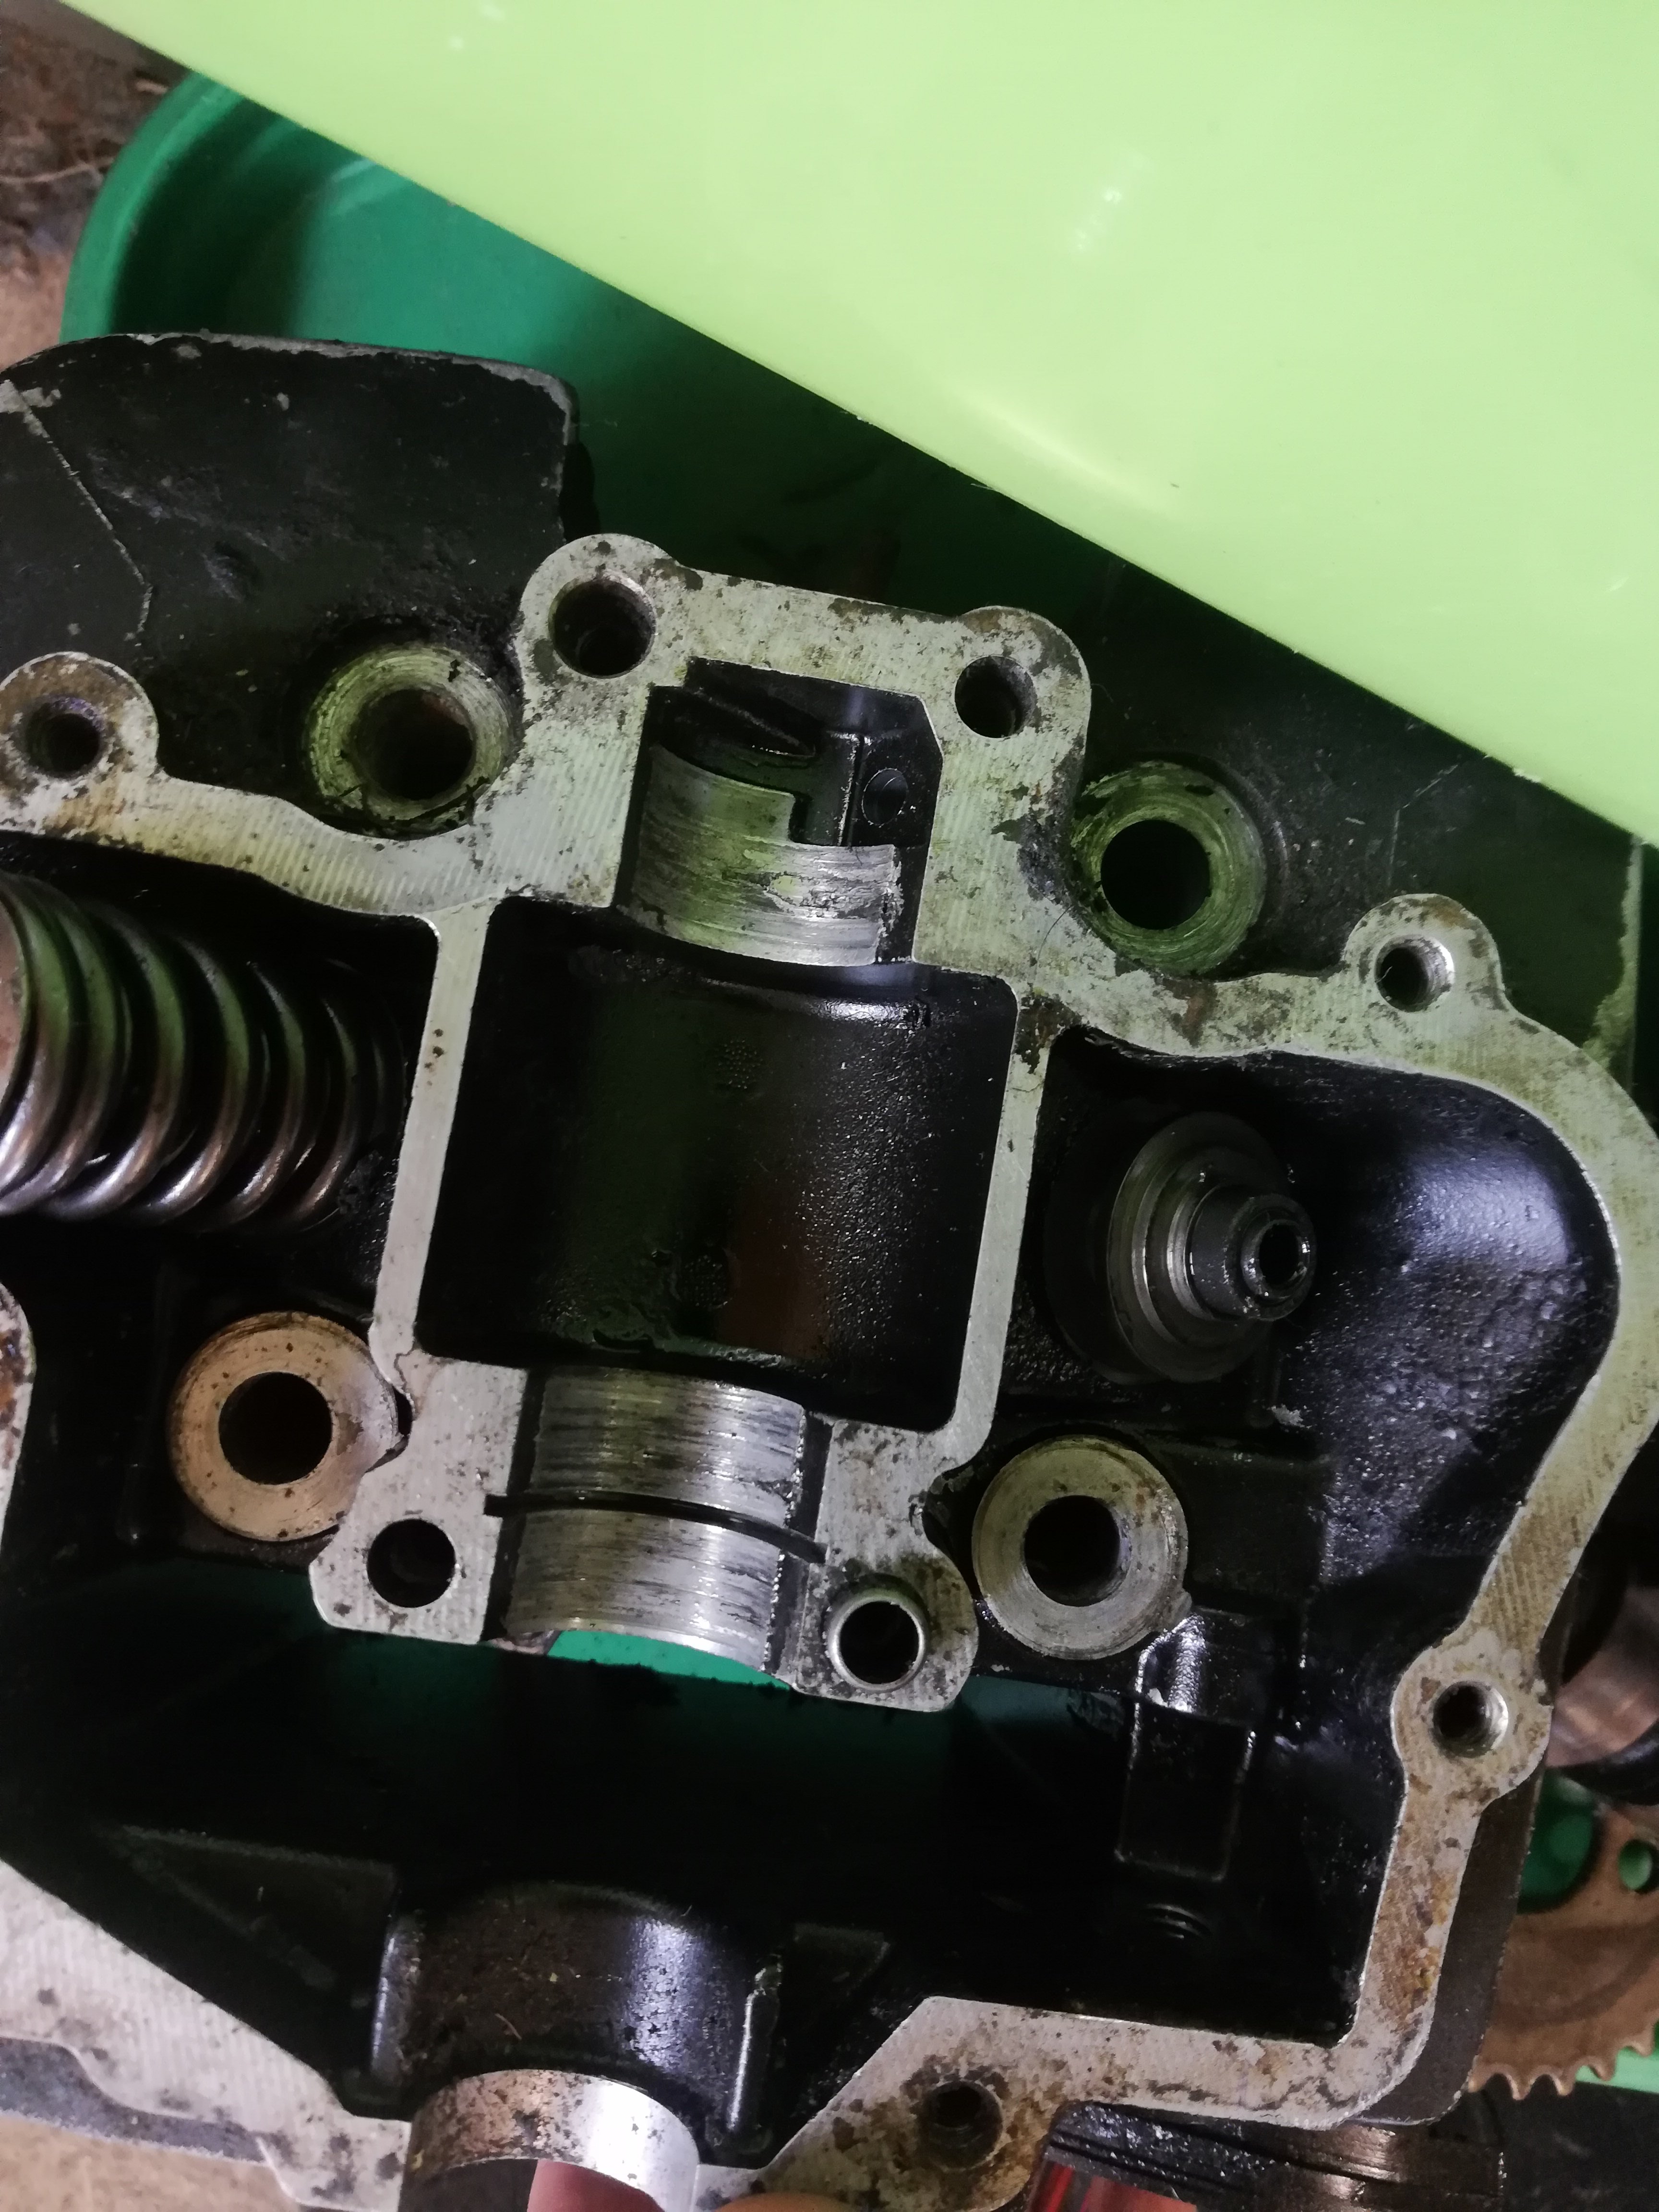
Oh also the DR had dropped a valve as well. The tip of the valve was gone (and the spring etc for that valve was missing so someone opened it up I guess) and both valves bent. I just happen to have new valves already
3 points
-
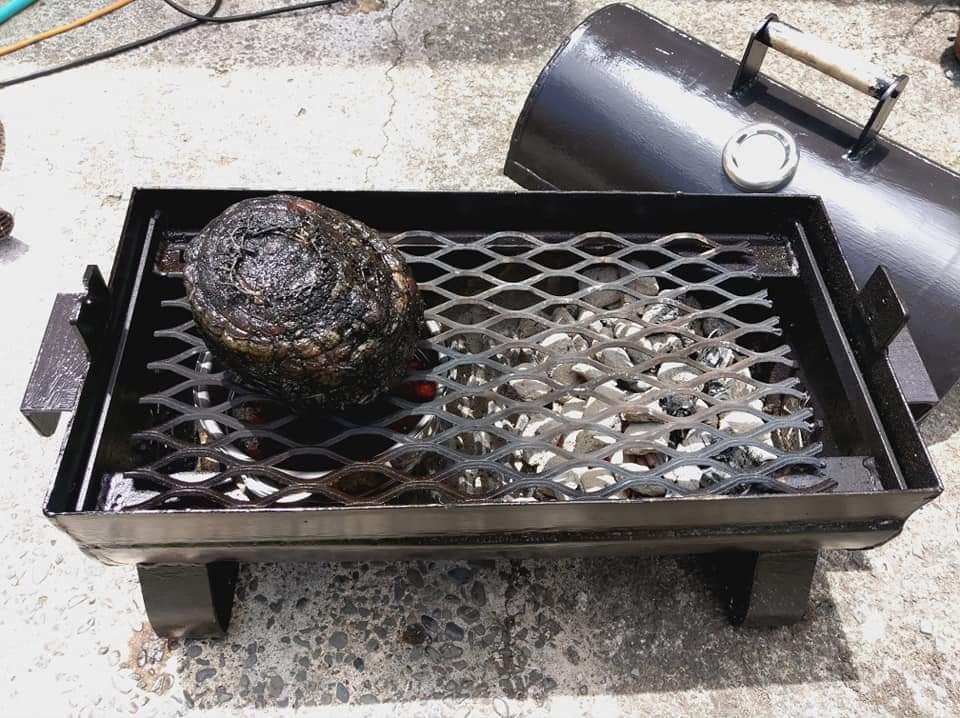
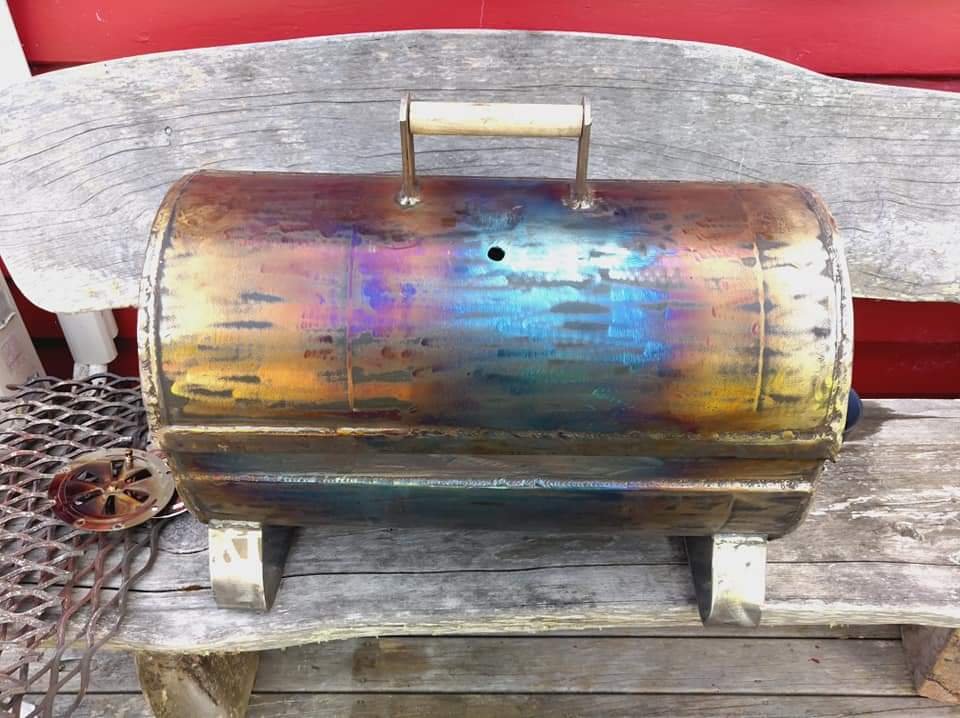
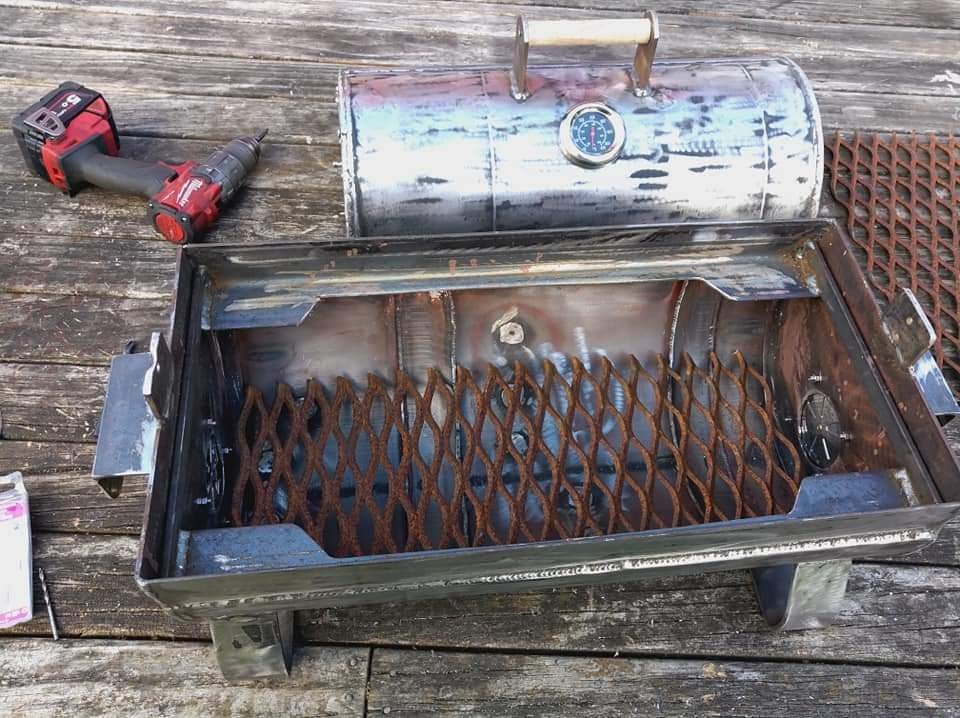
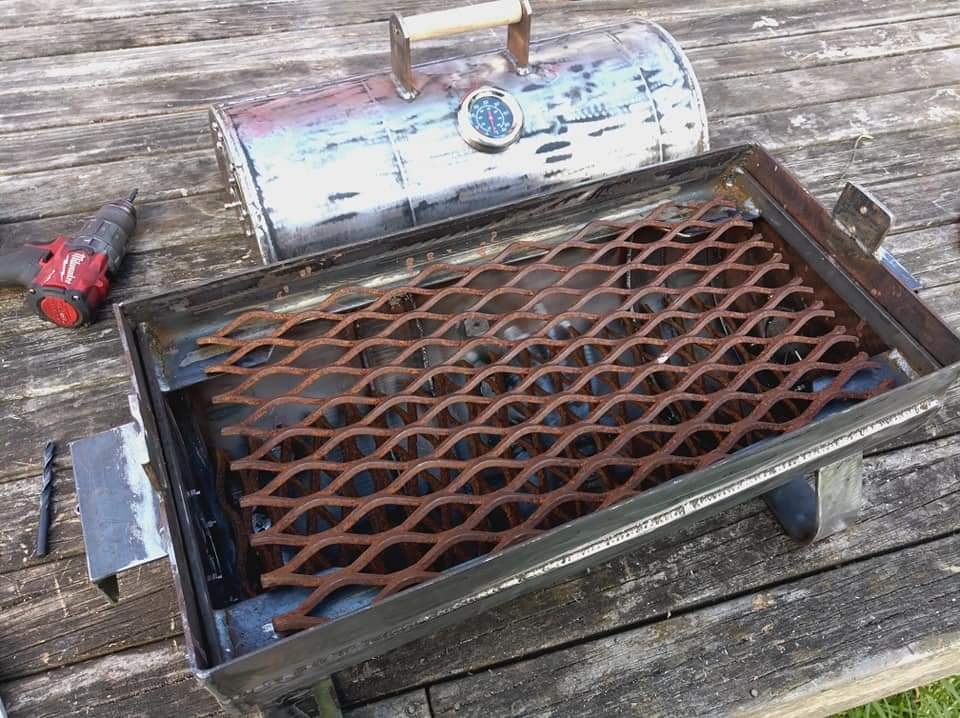
Burn off the other night went well. Got it to 500f and it held there for atleast 3 hours without adding any extra fuel. Left it going when I went to bed. Had a look in the morning and it looked like this... Emptied out the ash and gave it a good clean to prep it for seasoning and paint. Just used olive oil on the inside as that's all I had and Mangawhai shops are shit to go to this time of the year cause of all the jafas and northern bass homies.
3 points
-
Awesome. What a cool project, and it looks like quite a pro setup for someone building it in their shed. OS Dyno day at your place?3 points
-
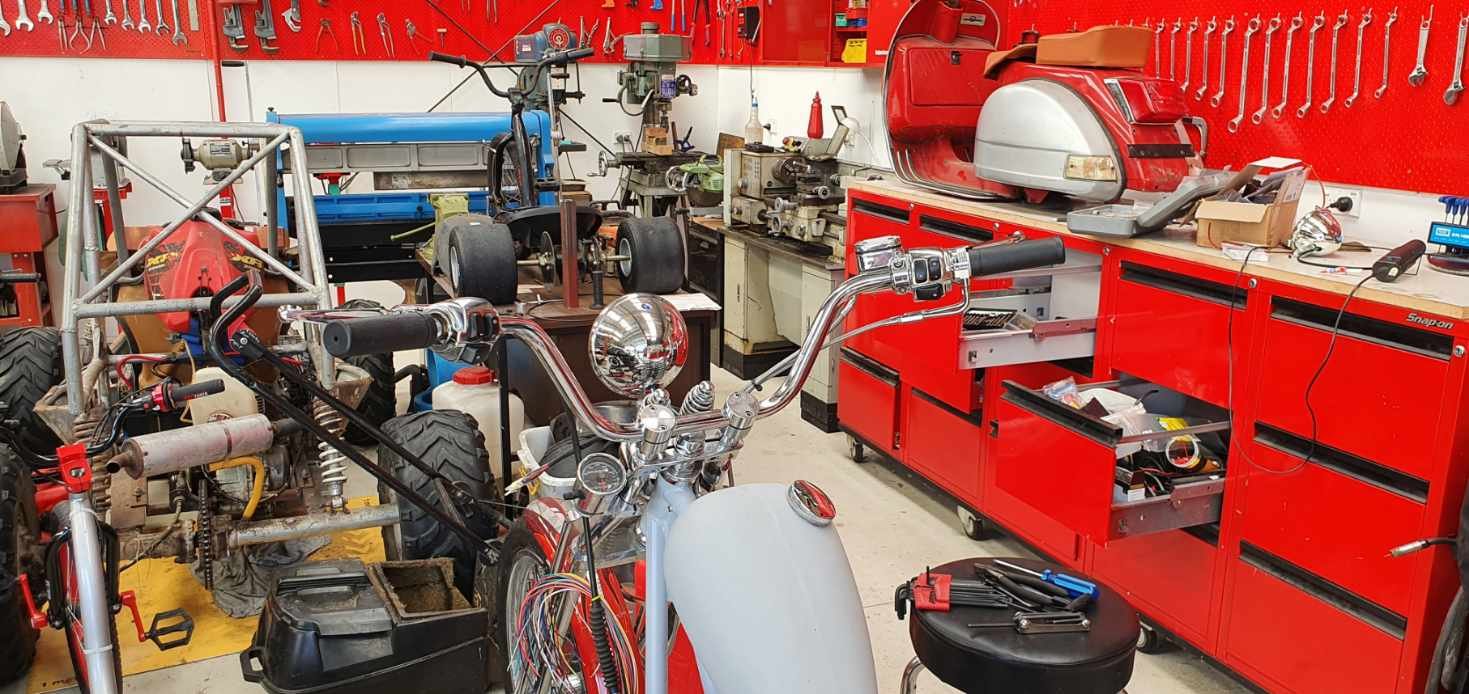
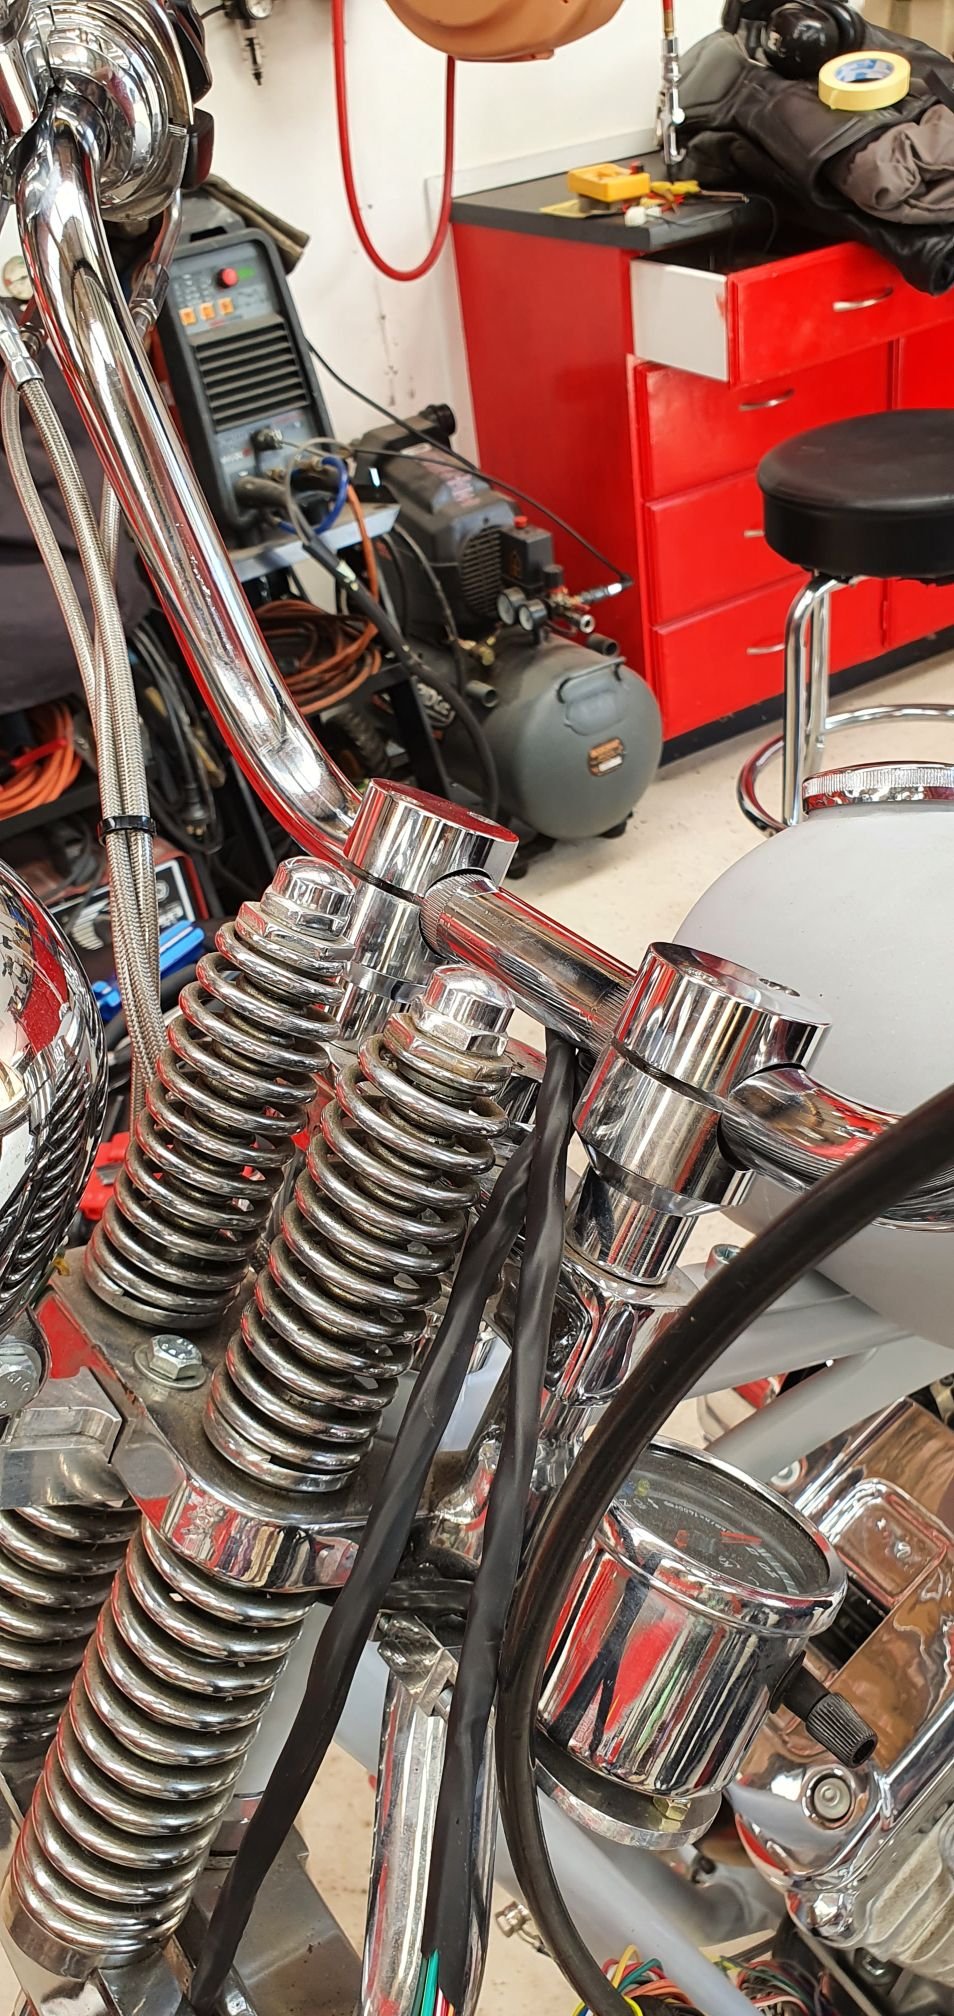
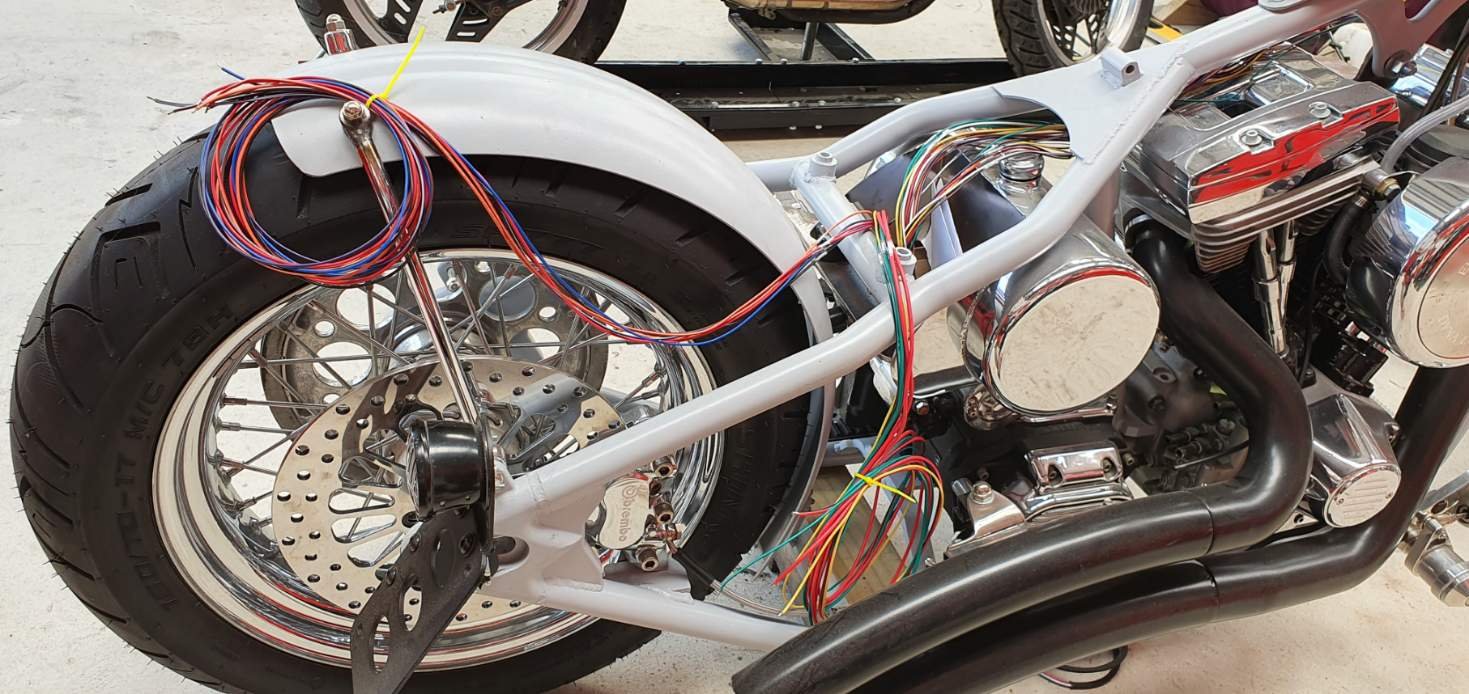
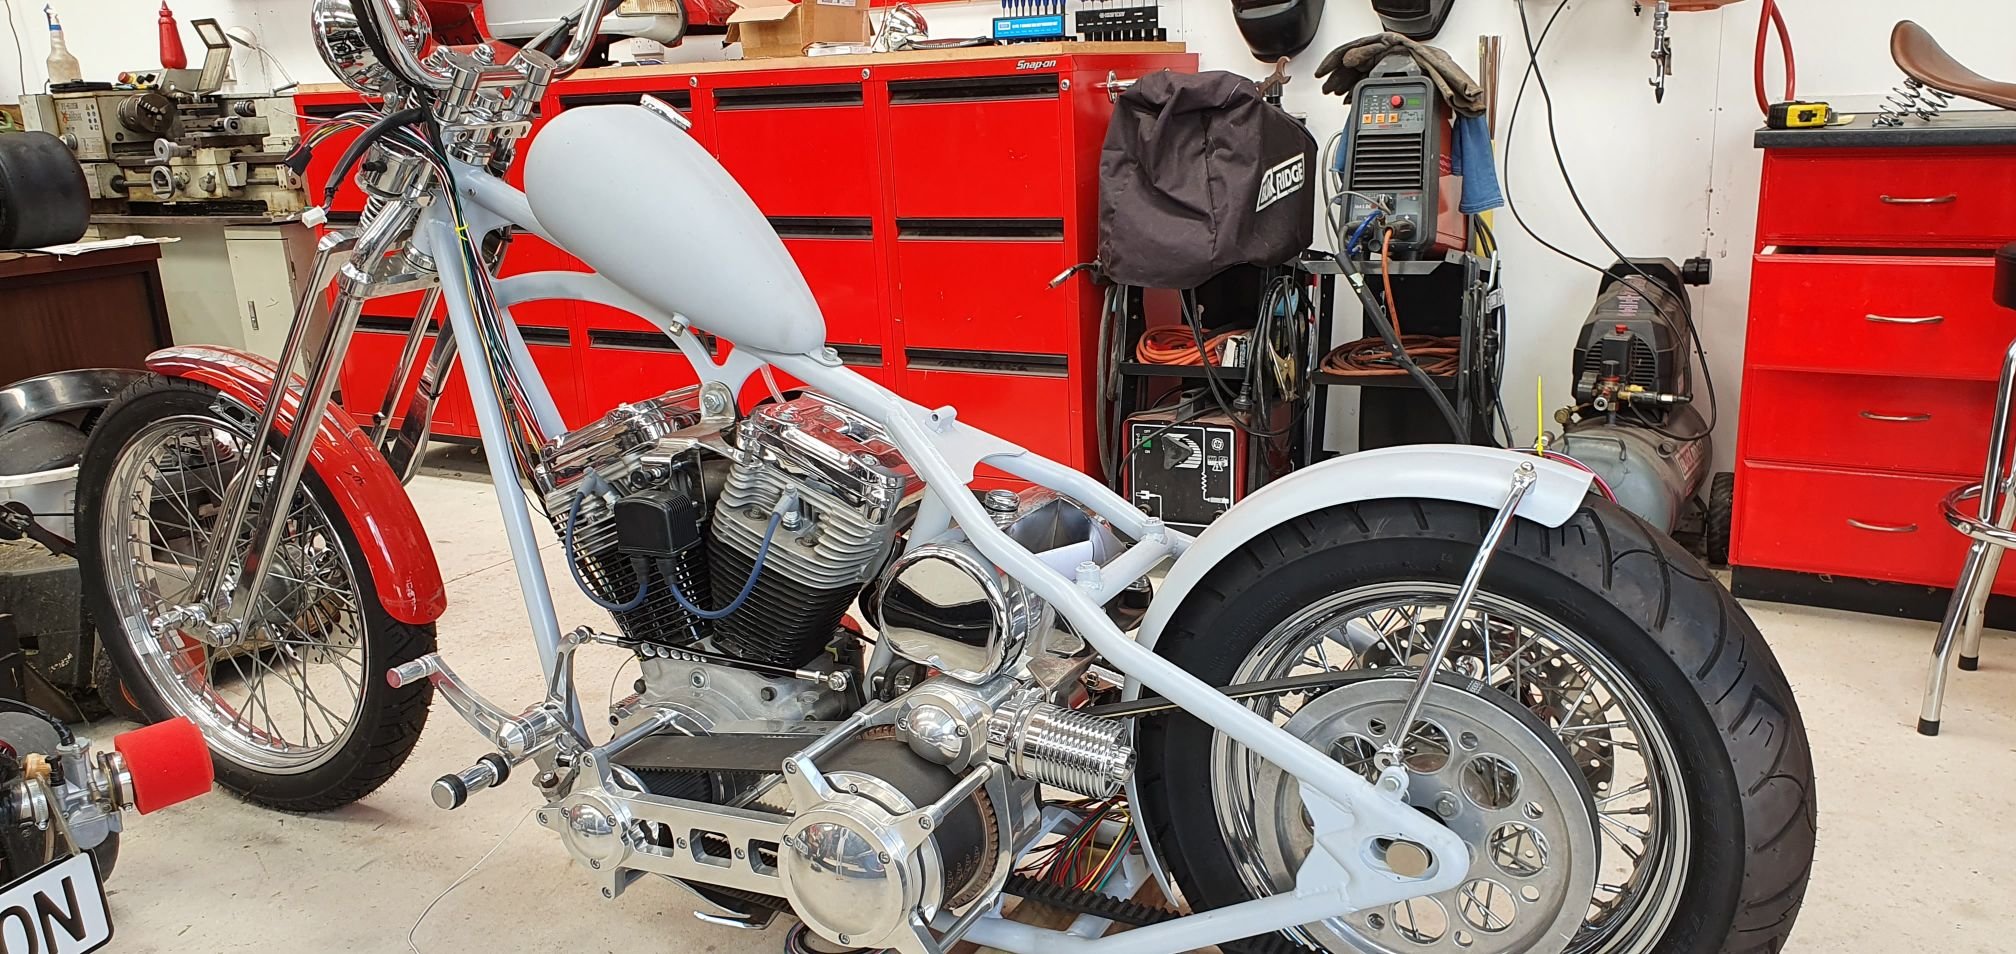
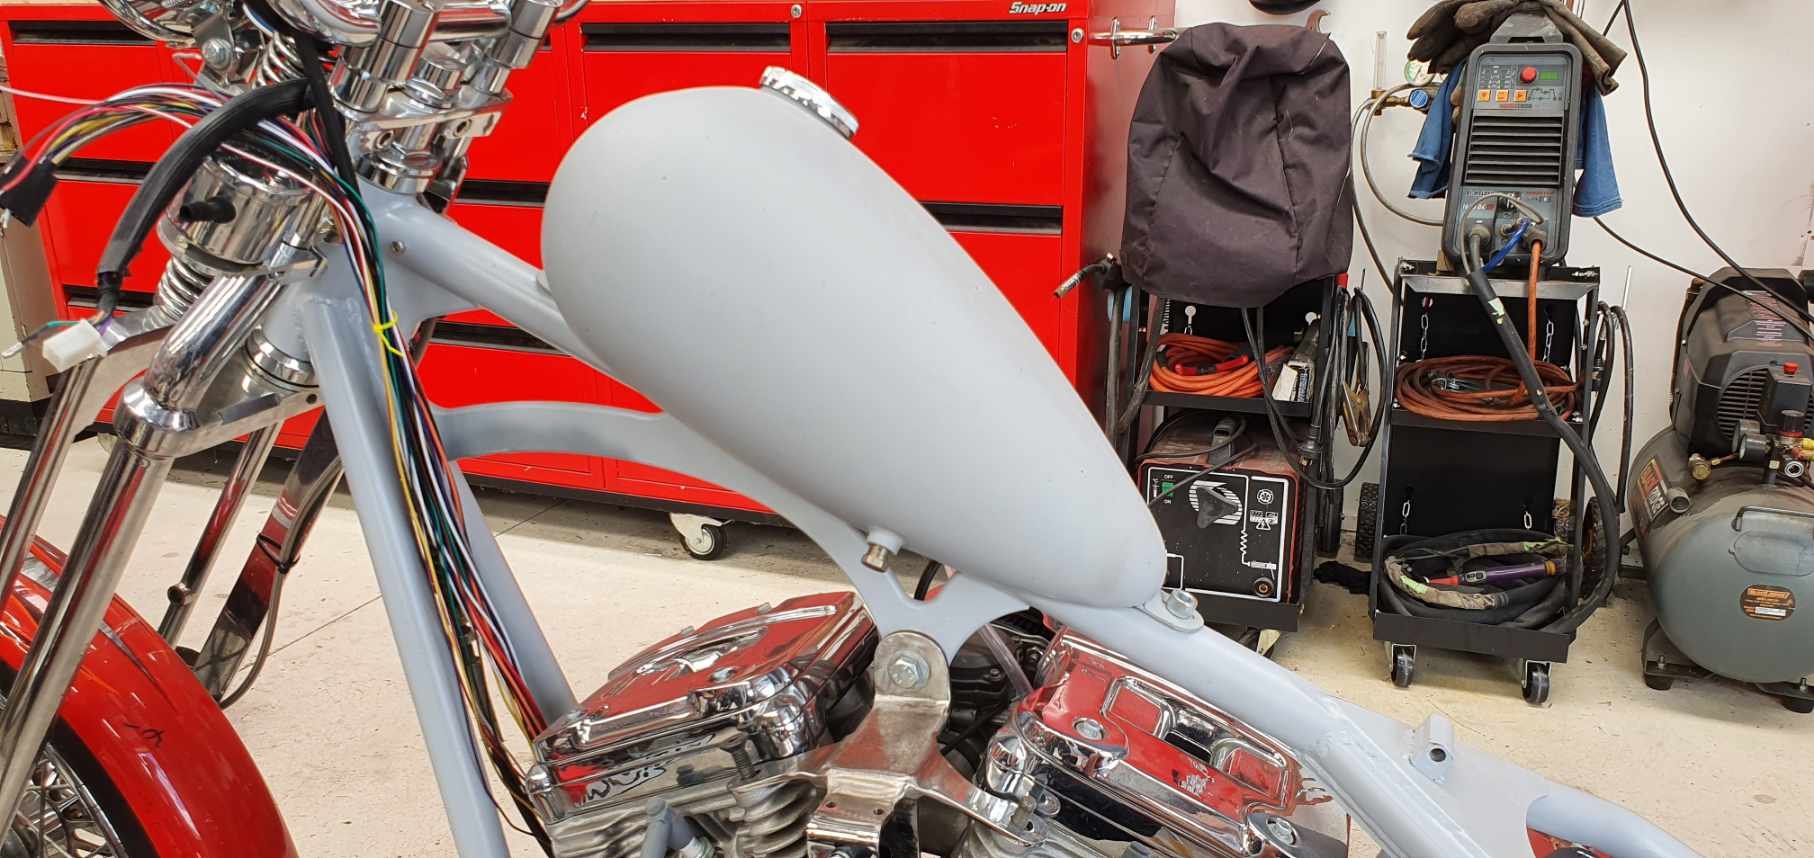
Wiring is for dicks!! I wish I just kept my "Bluetooth" Wiring as it looked much better without real Wiring... Anyway, reality dictates I will actually need to do it, despite how much I want to avoid it. Take 1: Relays in the battery box. Seemed like a good idea, and was reasonably tidy. However I was unable to run the wires internally up the backbone of the bike as I envisioned, as the loom has too many wires to all fit in there with other stuff going on like fuel tank threaded inserts and the way the saddle tube connects and blocks the spines opening...arghhh...grrrr!!! So, take 2: Try shifting everything under the transmission. Sweet, rear wires = very tidy, I can easily hide those. Front wires can be run alongside the clutch cable (heat shrink to keep it all coved of course). I can even use OEM fittings for connecting everything up, which was always my plan if possible. Yip, standing back it looks fine. 100% better than my first attempt, which was just fucking ugly. This is much better, no ugliness along the backbone distracting from the clean lines. The naked spine and tank are this bikes main feature and cable ties and a honking big wiring loom there would have looked shit!! Calling it a win.
3 points
-
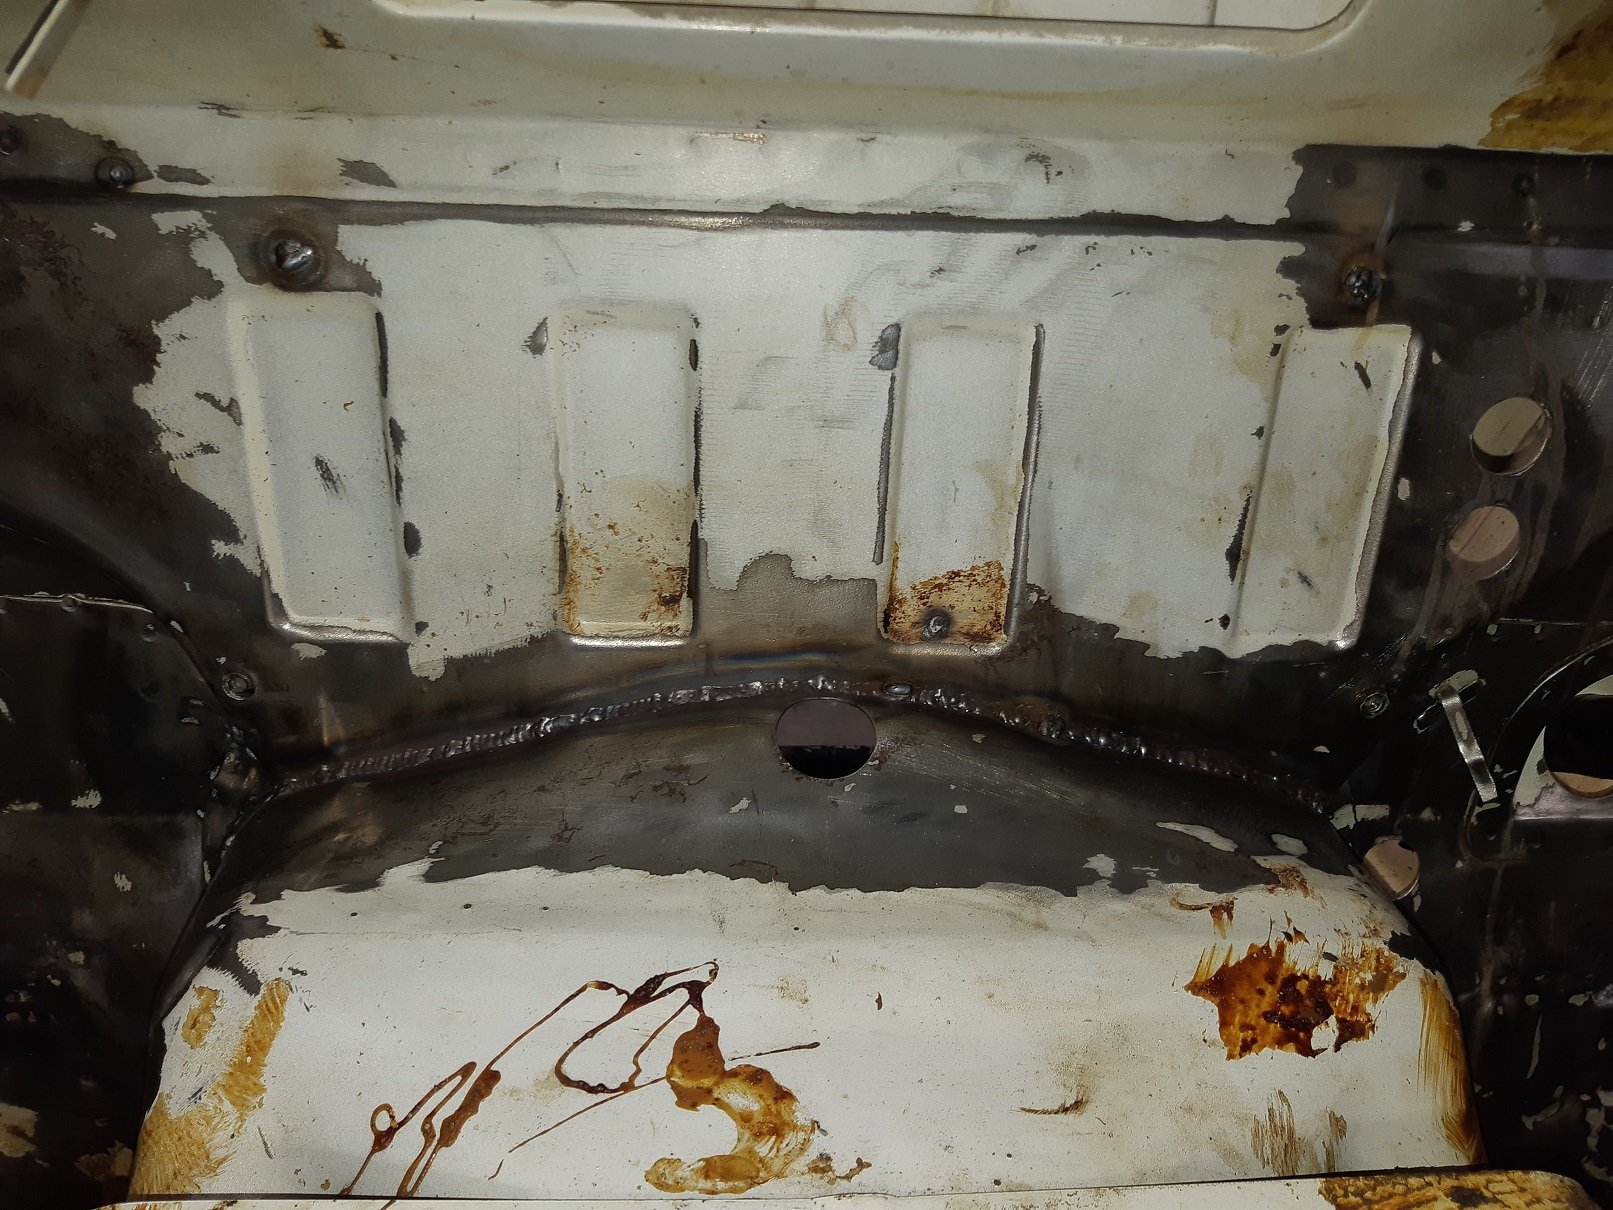
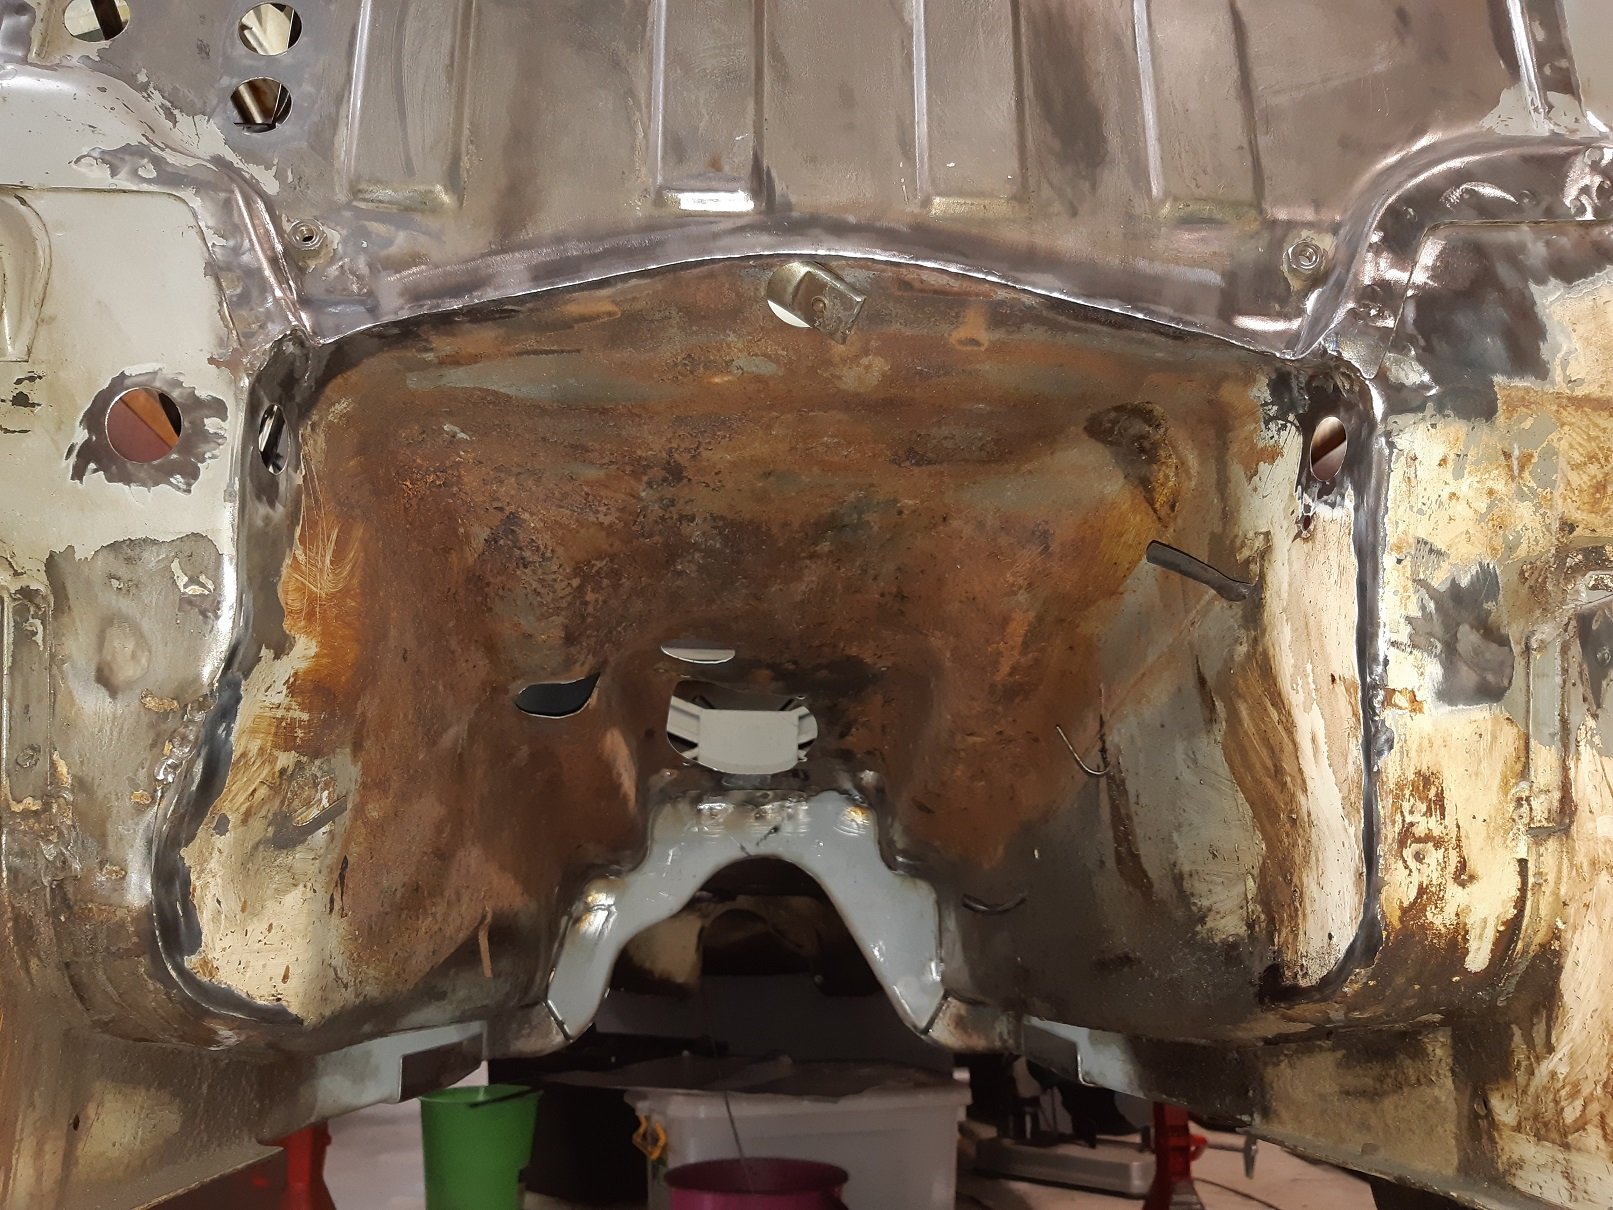
Found what was causing the intermittent wire feed when I used 0.6mm. Turns out the drive motor can move a little on it's mounting bolts, 10 or so years of tightening the roller had shifted the drive wheel down a little bit so the mechanism bottoms out before it's tight enough for the thinner wire. Fixed now. YAY! It was so frustrating. Zip zap. Got rid of the ugly seam flange thing. Welded inside first. Then cut off the flange and welded the outside. Then linished and used the knotted wire brush to show up any gaps I missed. Then weld and repeat until no gaps. I also welded up some rivet and bolt holes that are no longer required. I need to cut some round patches for the original heater pipe holes because I've relocated them. I've also welded in the modified cross member, but the photo was blurry. I still need to make some filler bits for the 'corners'.
2 points
-
Hopefully that sorts the issue out with the miss firing, gotta love the Chinesium quality see problems all the time with the ls1 o2s and knock sensors2 points
-
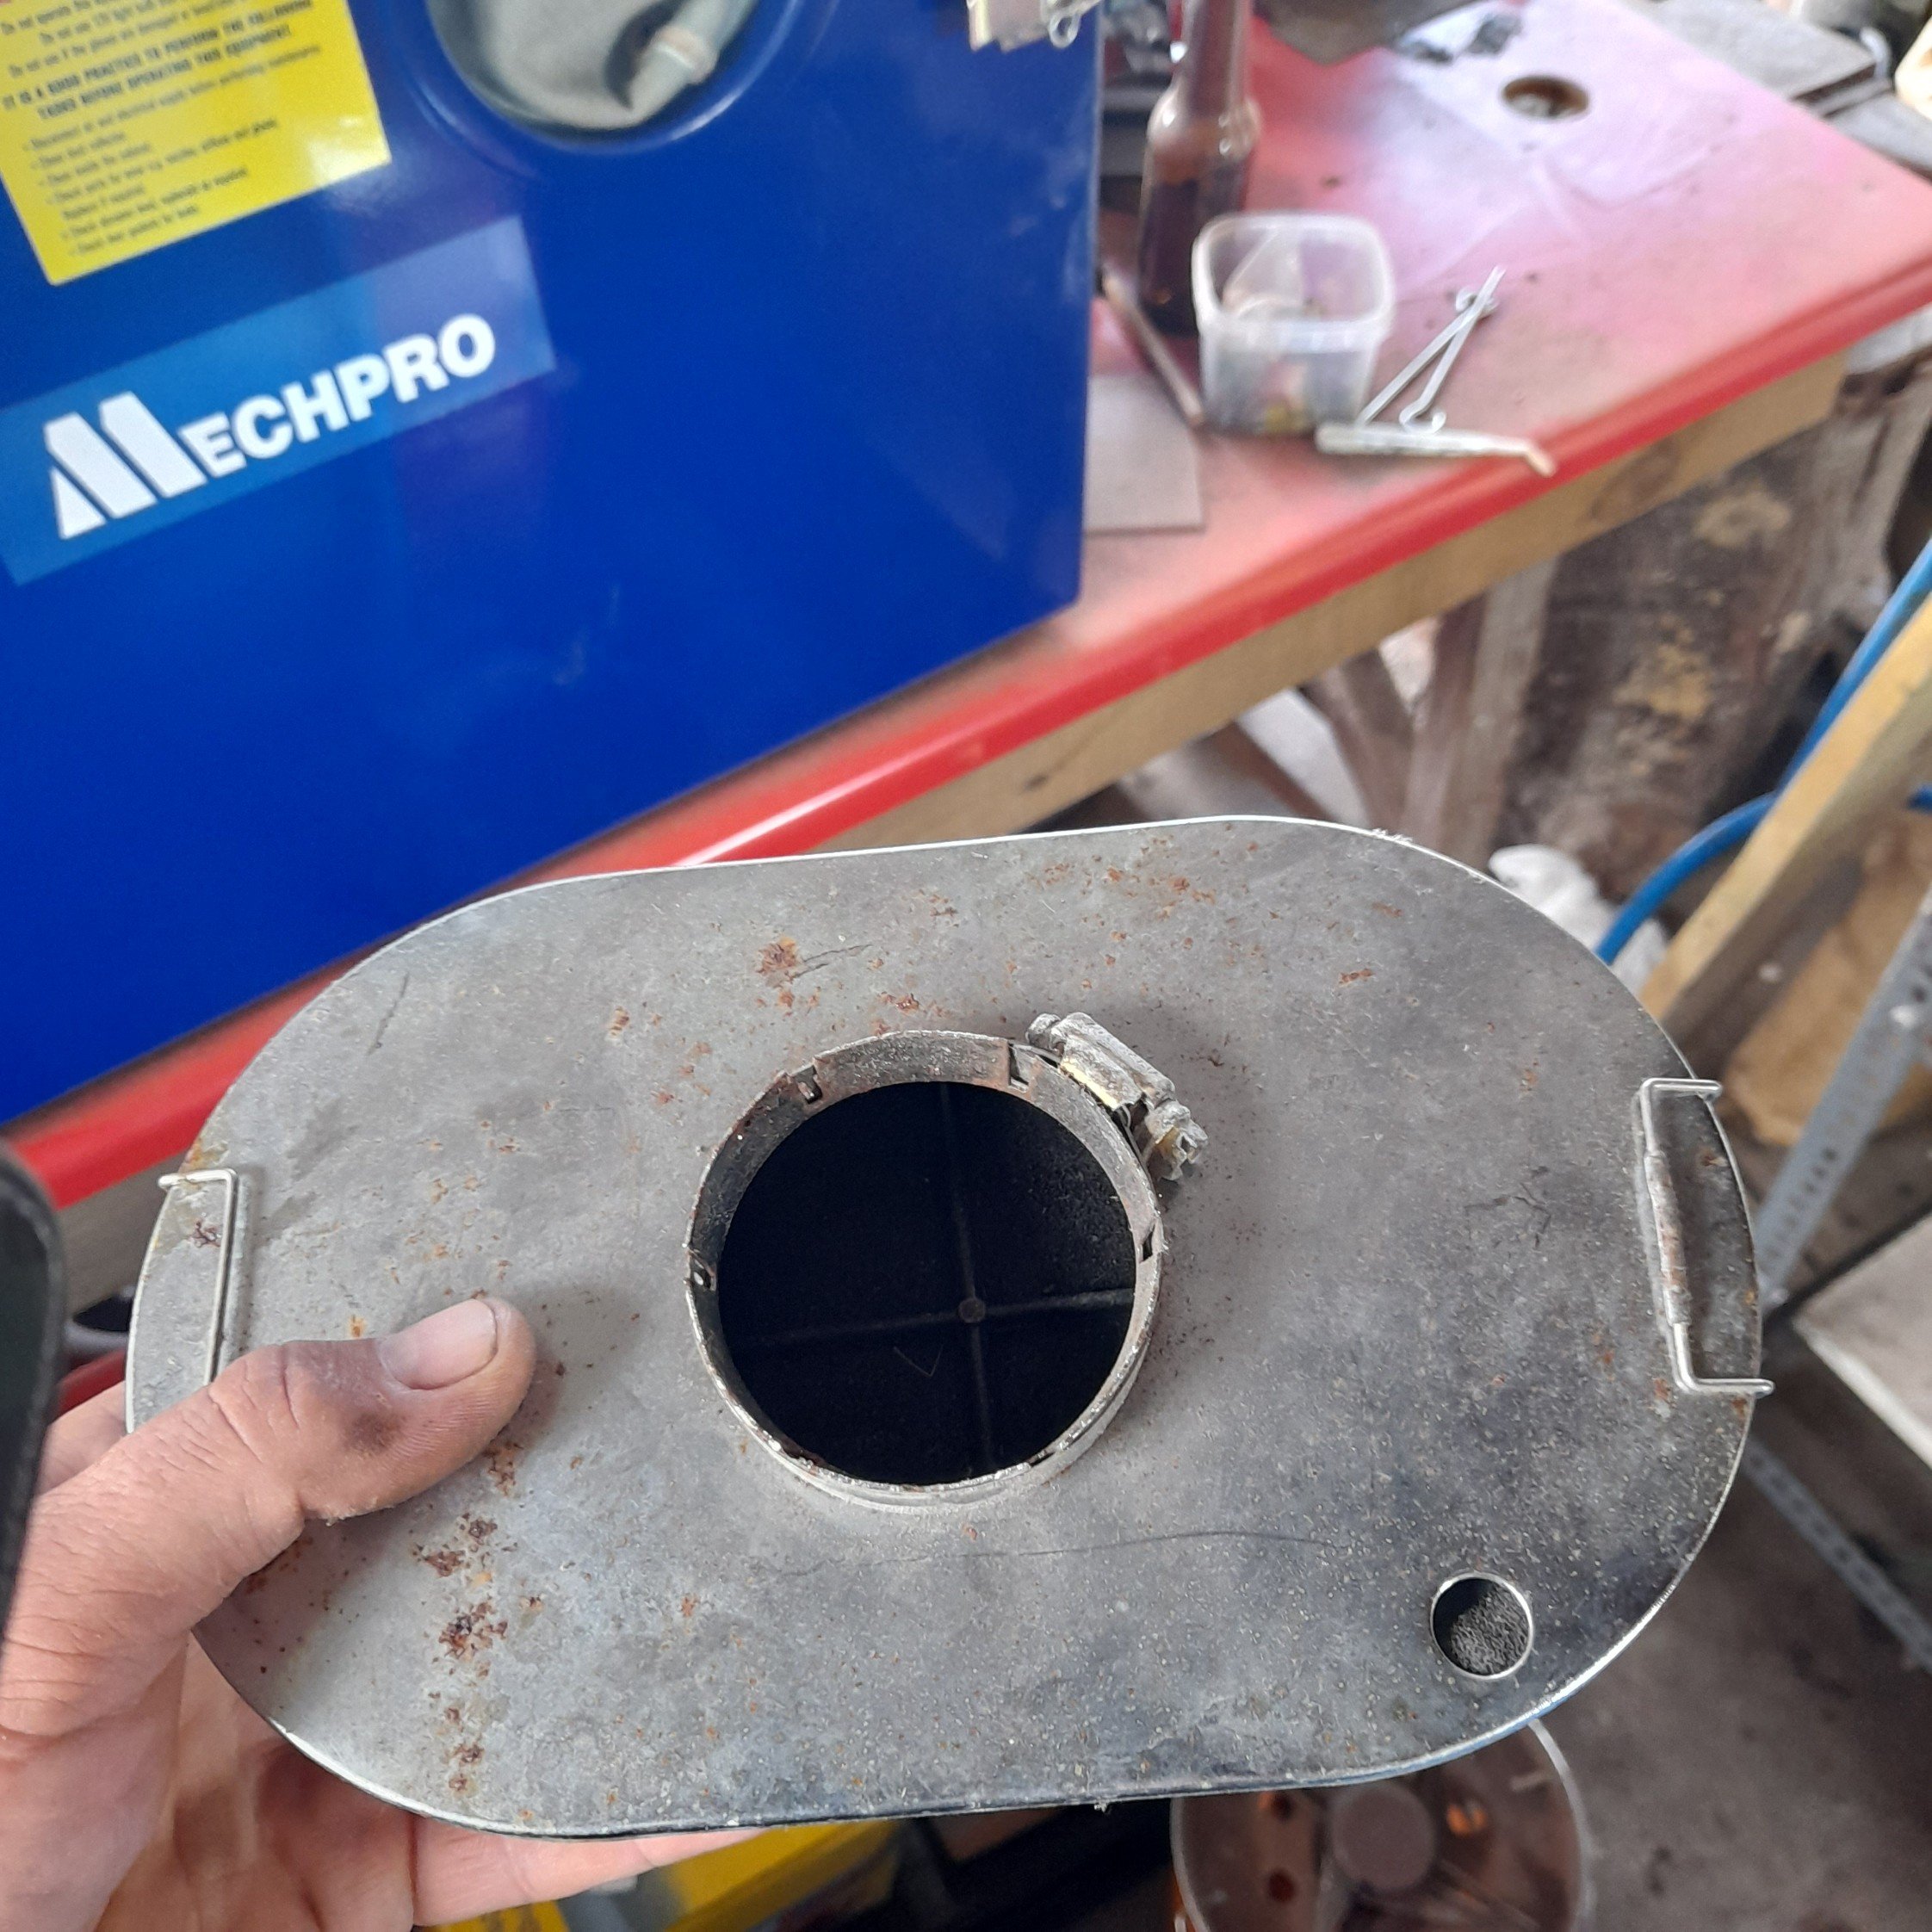
Well yeah But nah Not sure what i ran this one on, possibly my falcon when it had the single barrel stromberg? Or i swapped the weber base with one of the guys and got this in return. Oh well, best be ordering a new one next week. Already loving how much freeer the engine feels, haven't messed with timing yet just warmed it up and set mixture by ear. When i get back to work i will play some more, but for now ooohhh boy i forgot how the old webers sound with no airbox.
2 points
-
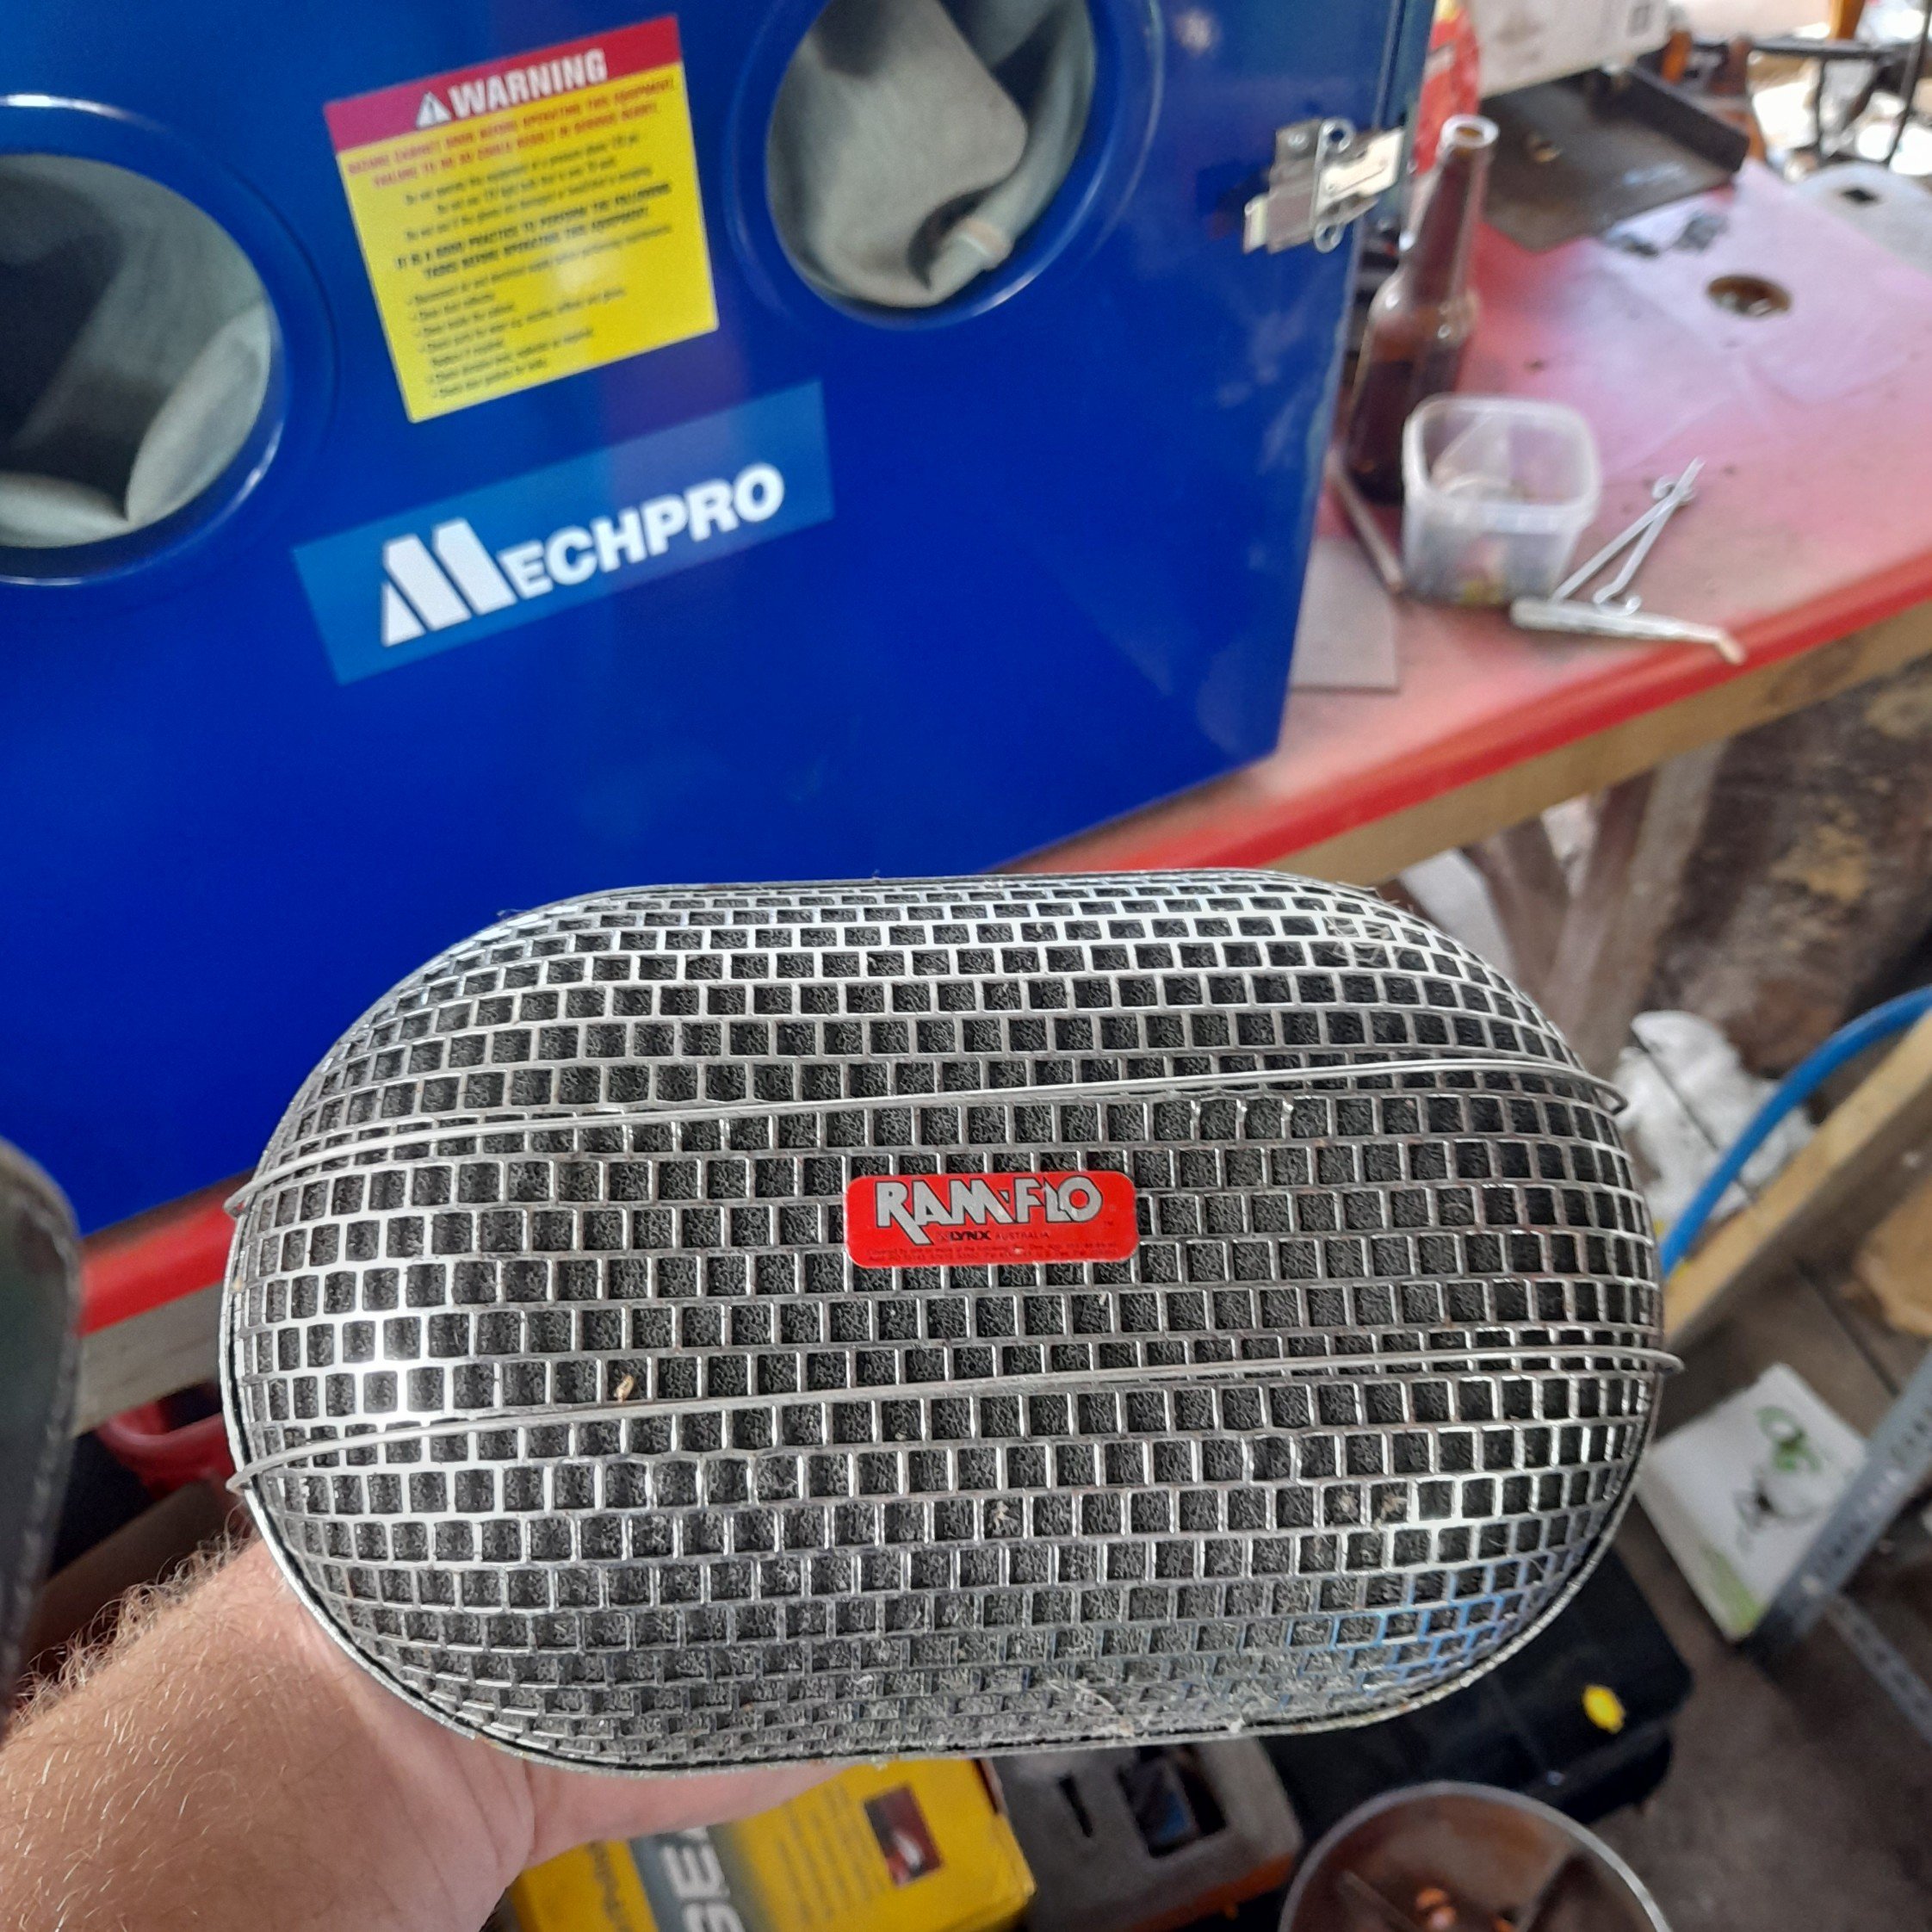
Now to track down the ramflo off my old cortina, only lived in a dozen houses since then..... think i know what nail it is on in the shed2 points
-
Just brought a banjo bolt with inbuilt pressure switch, this will send a signal to indicate that the rear brake is applied. And a nice little ignition switch (key). I realised I would need these parts after reading the wiring diagram fror the 50th time and wondered how to get a brake signal to the rear, I figured there'd be an existing solution for this problem, so happy to pay the money for it.2 points
-
The more I look at this thing, it never stops looking awkward as shit. Luckily you can't see much boat when you're sitting in it I guess. God its ugly.2 points
-
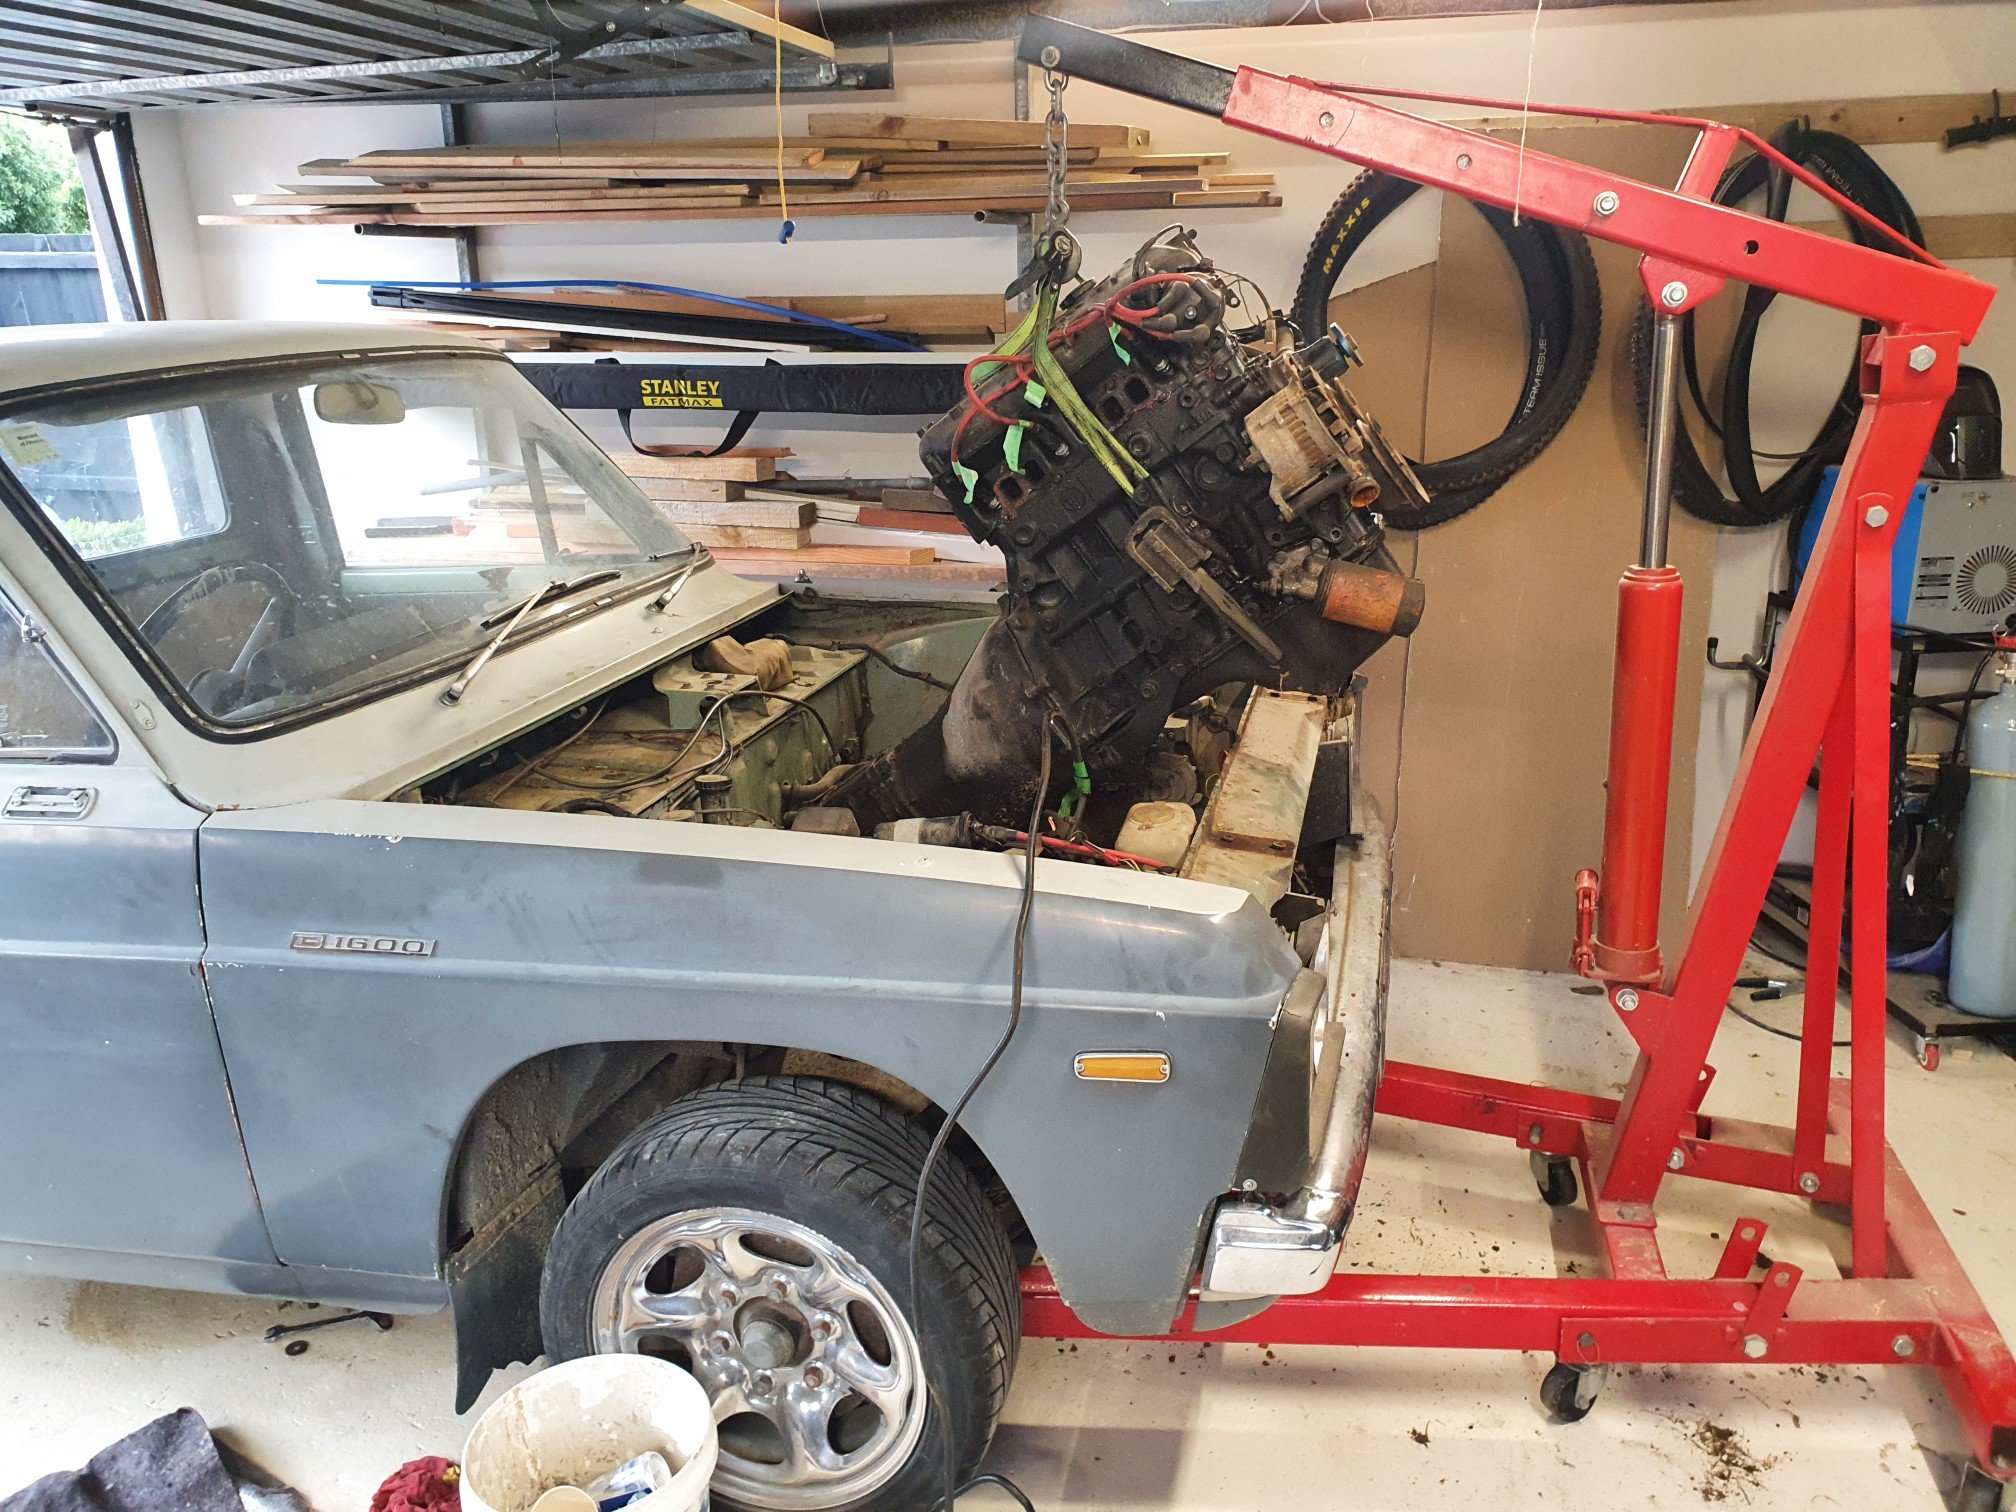
Thread dredge from page 6 haha. Progress has been very slow on this. Lack of room is just a killer. Tonight I pulled the 2l out. One step closer to pulling the cab off the c notch chassis . At least with the motor and box out it will be a little lighter to push in and out of the garage. That's all the progress for now. So here's a boring pic for a boring build
2 points
-
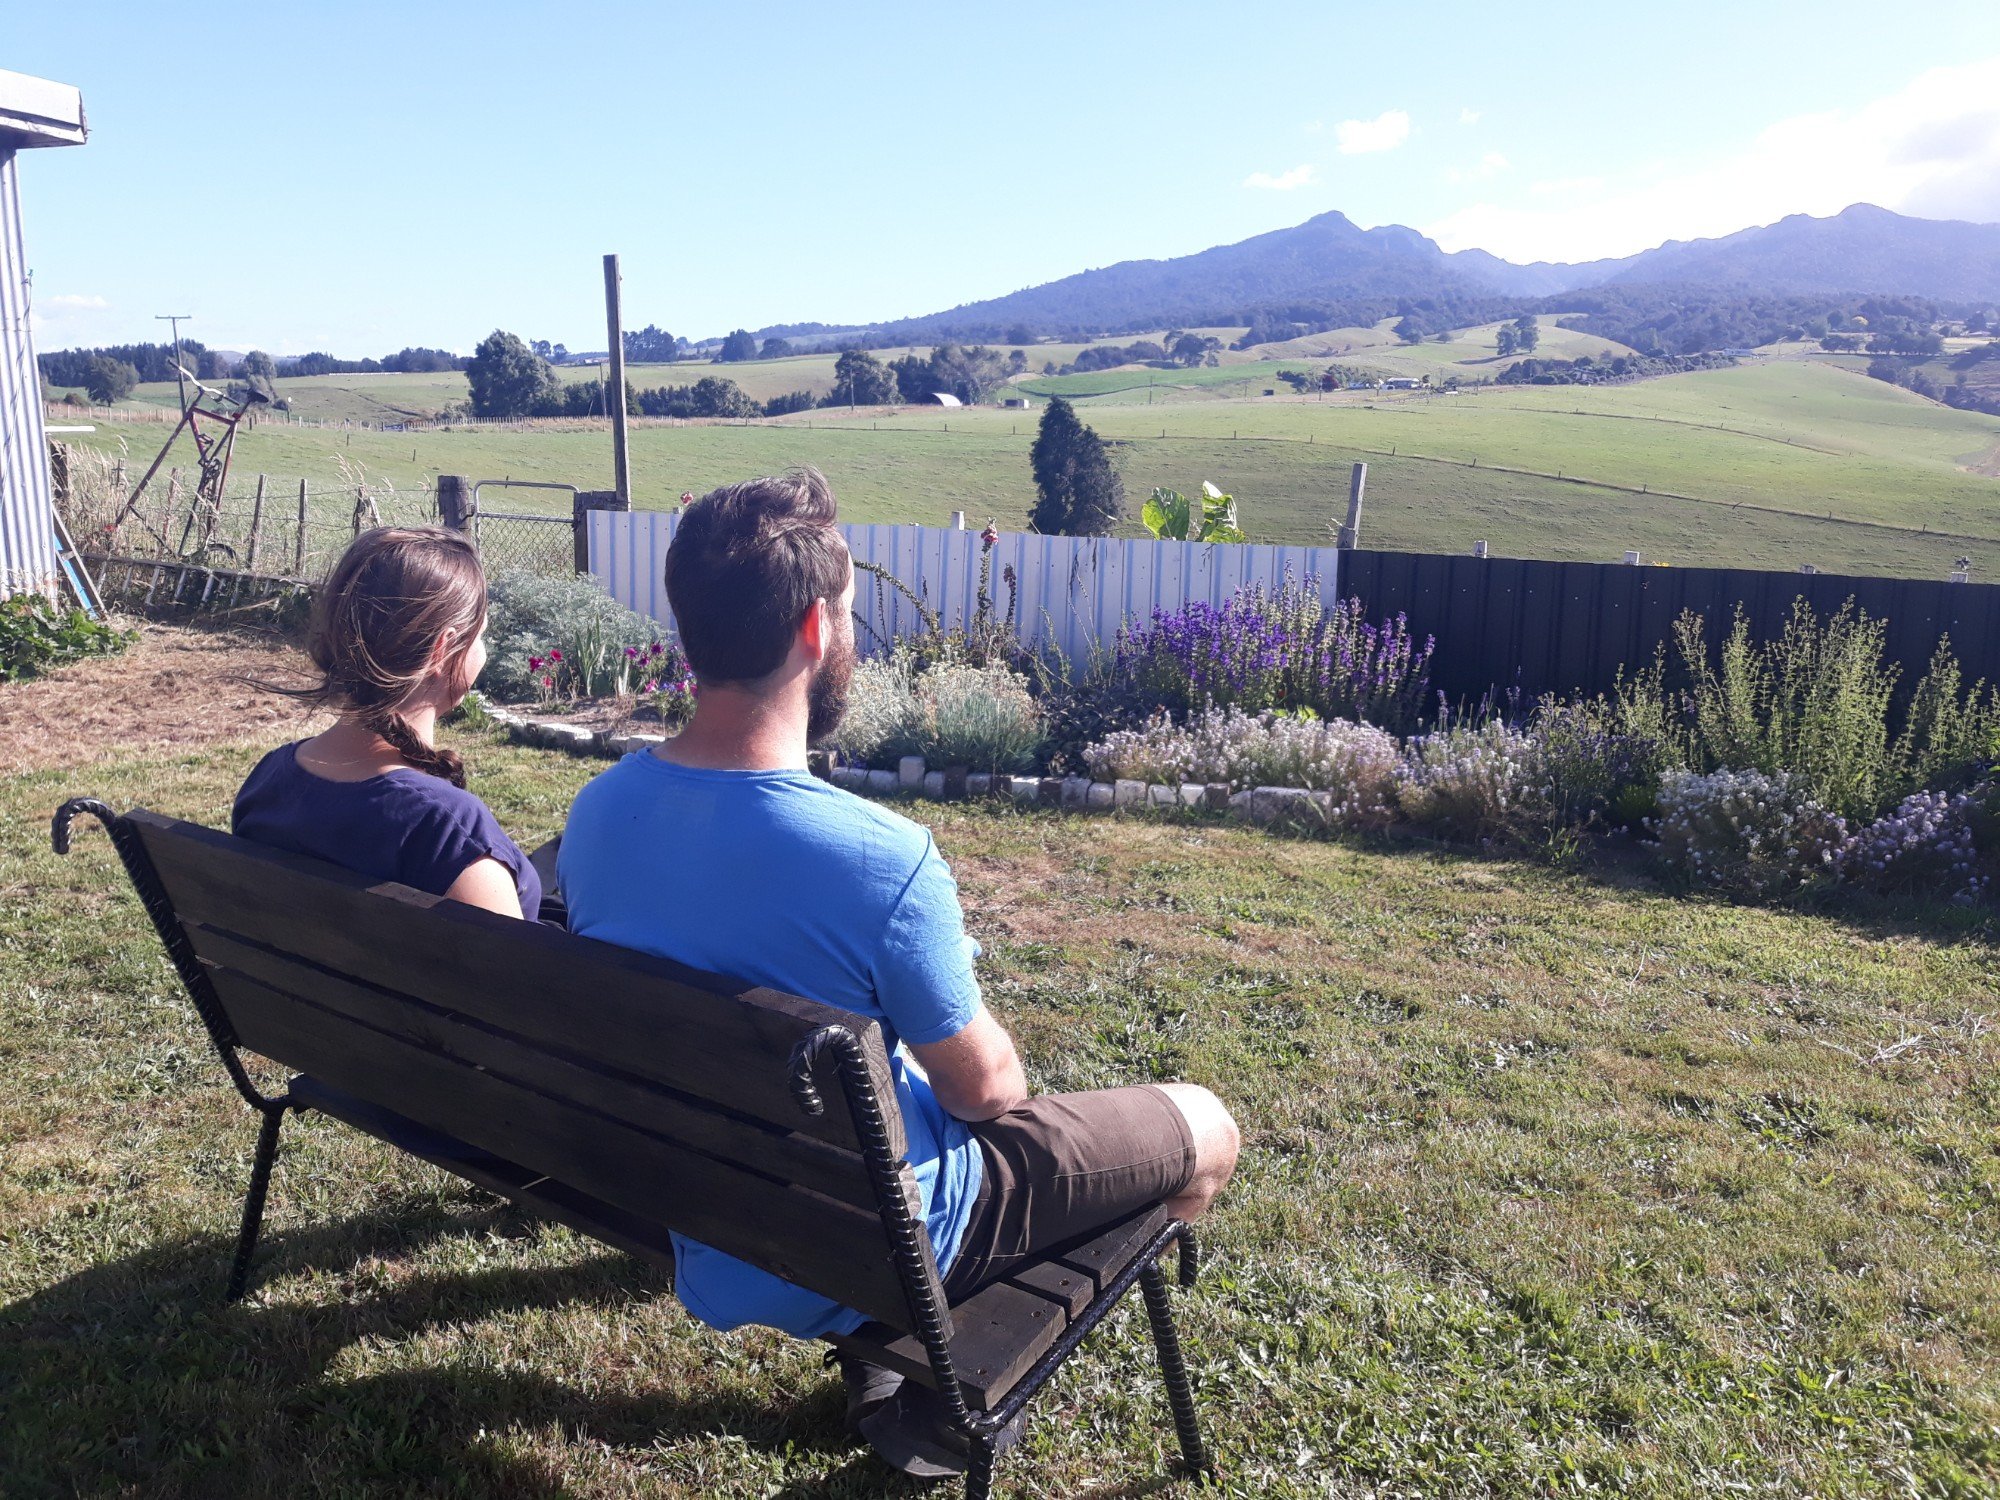
We (well, mostly @Guypie.. I kind of just handed him beers and water blasted the old fence palings) made a chair to take advantage of our view
2 points
-
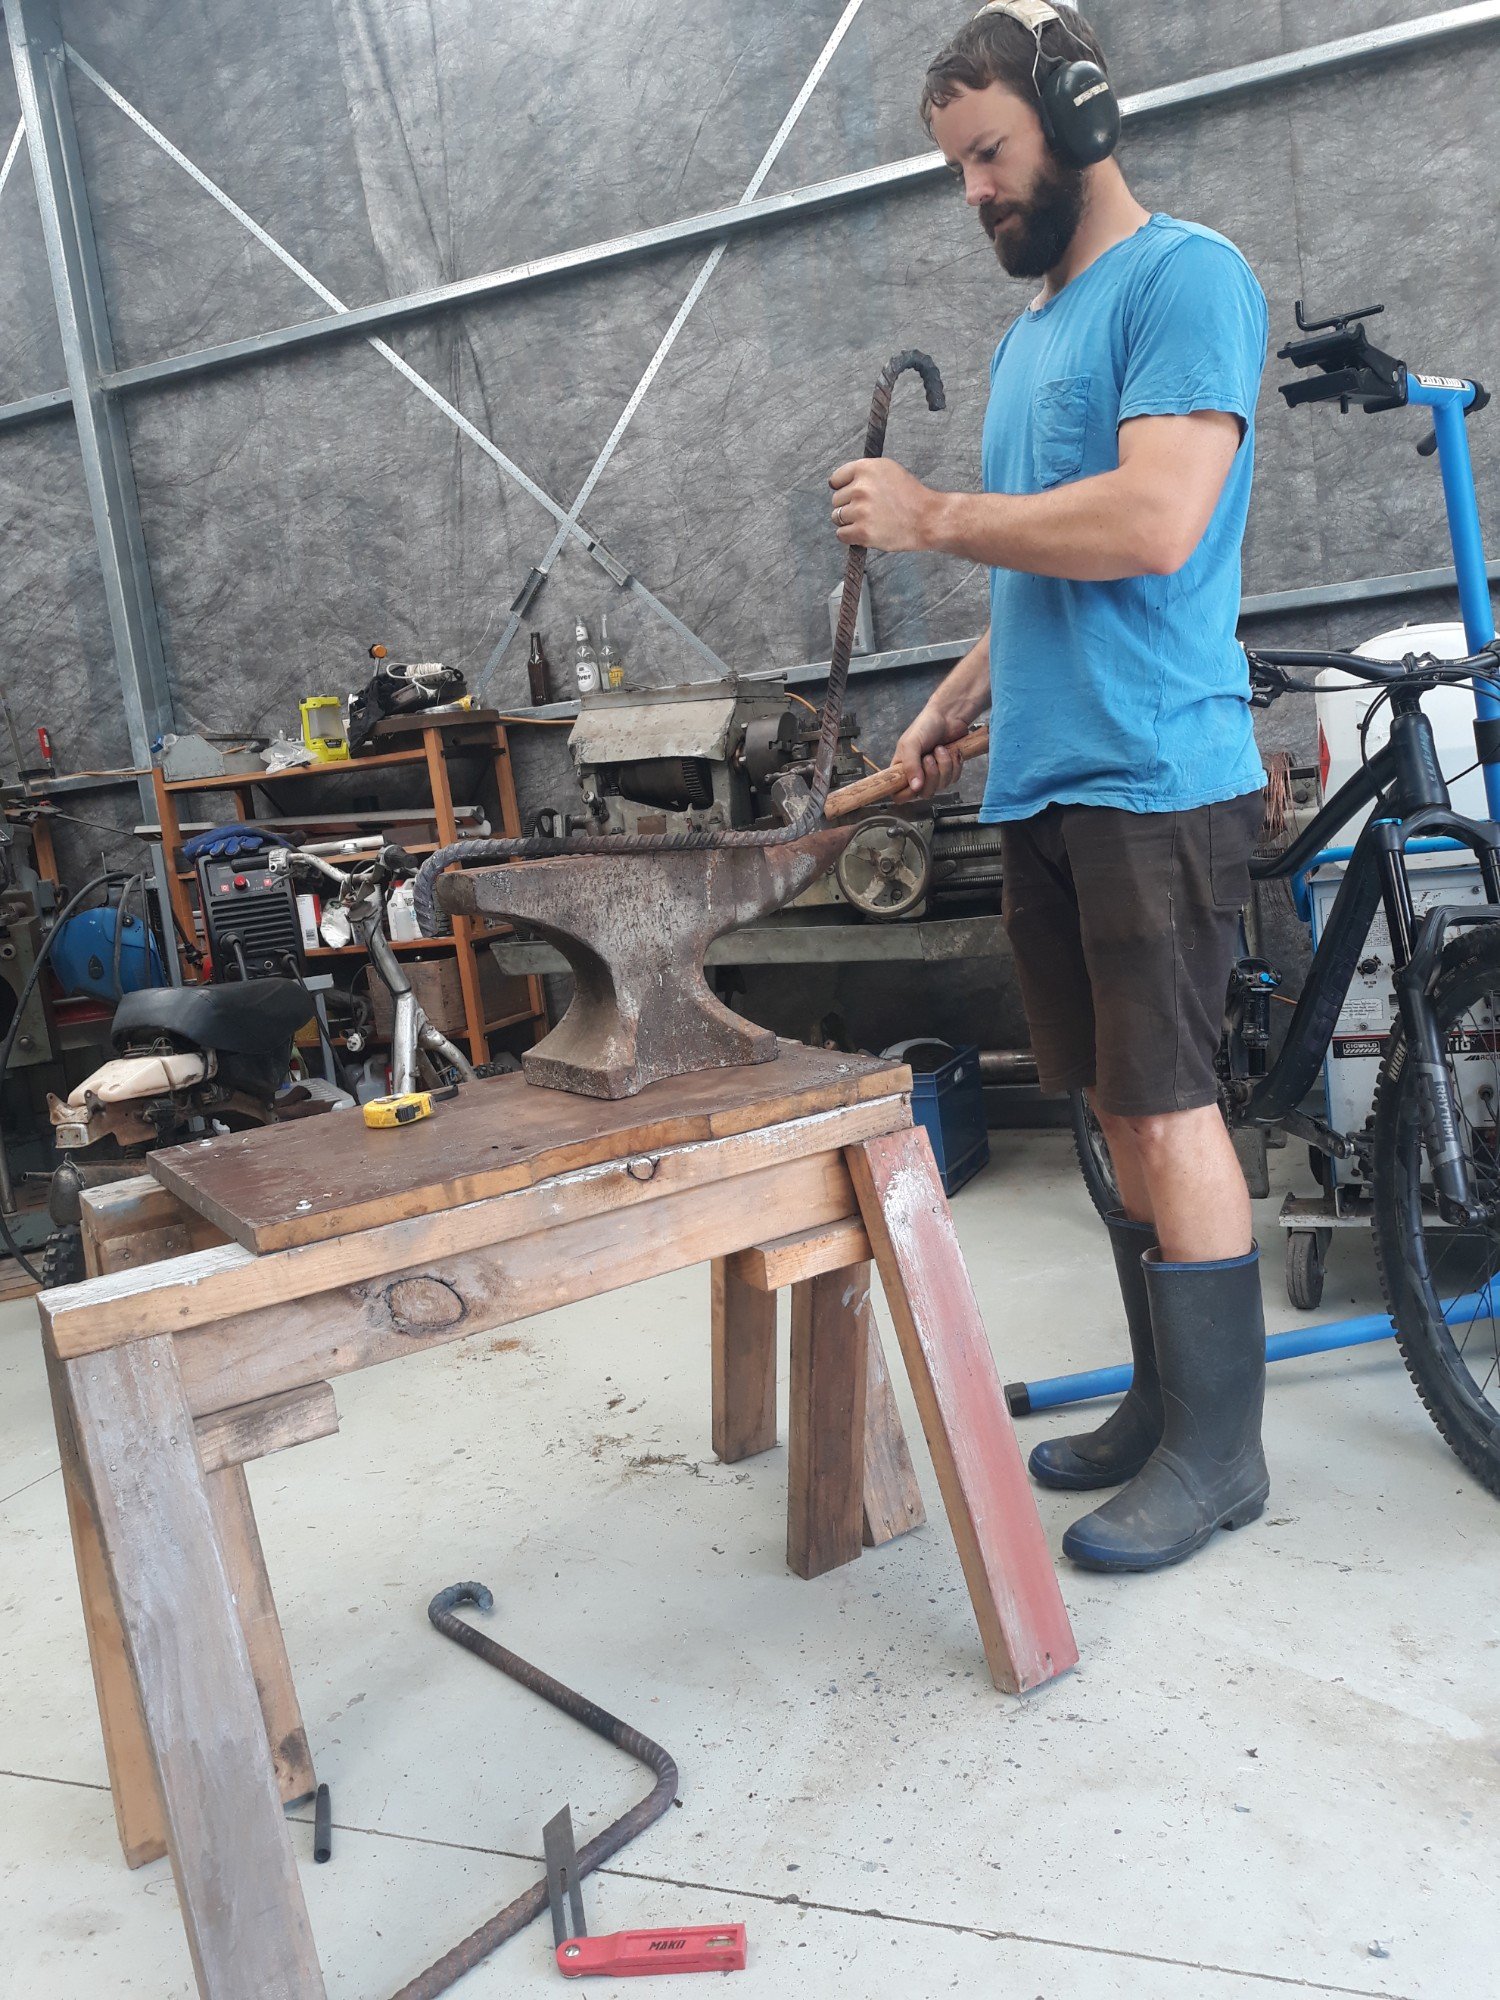
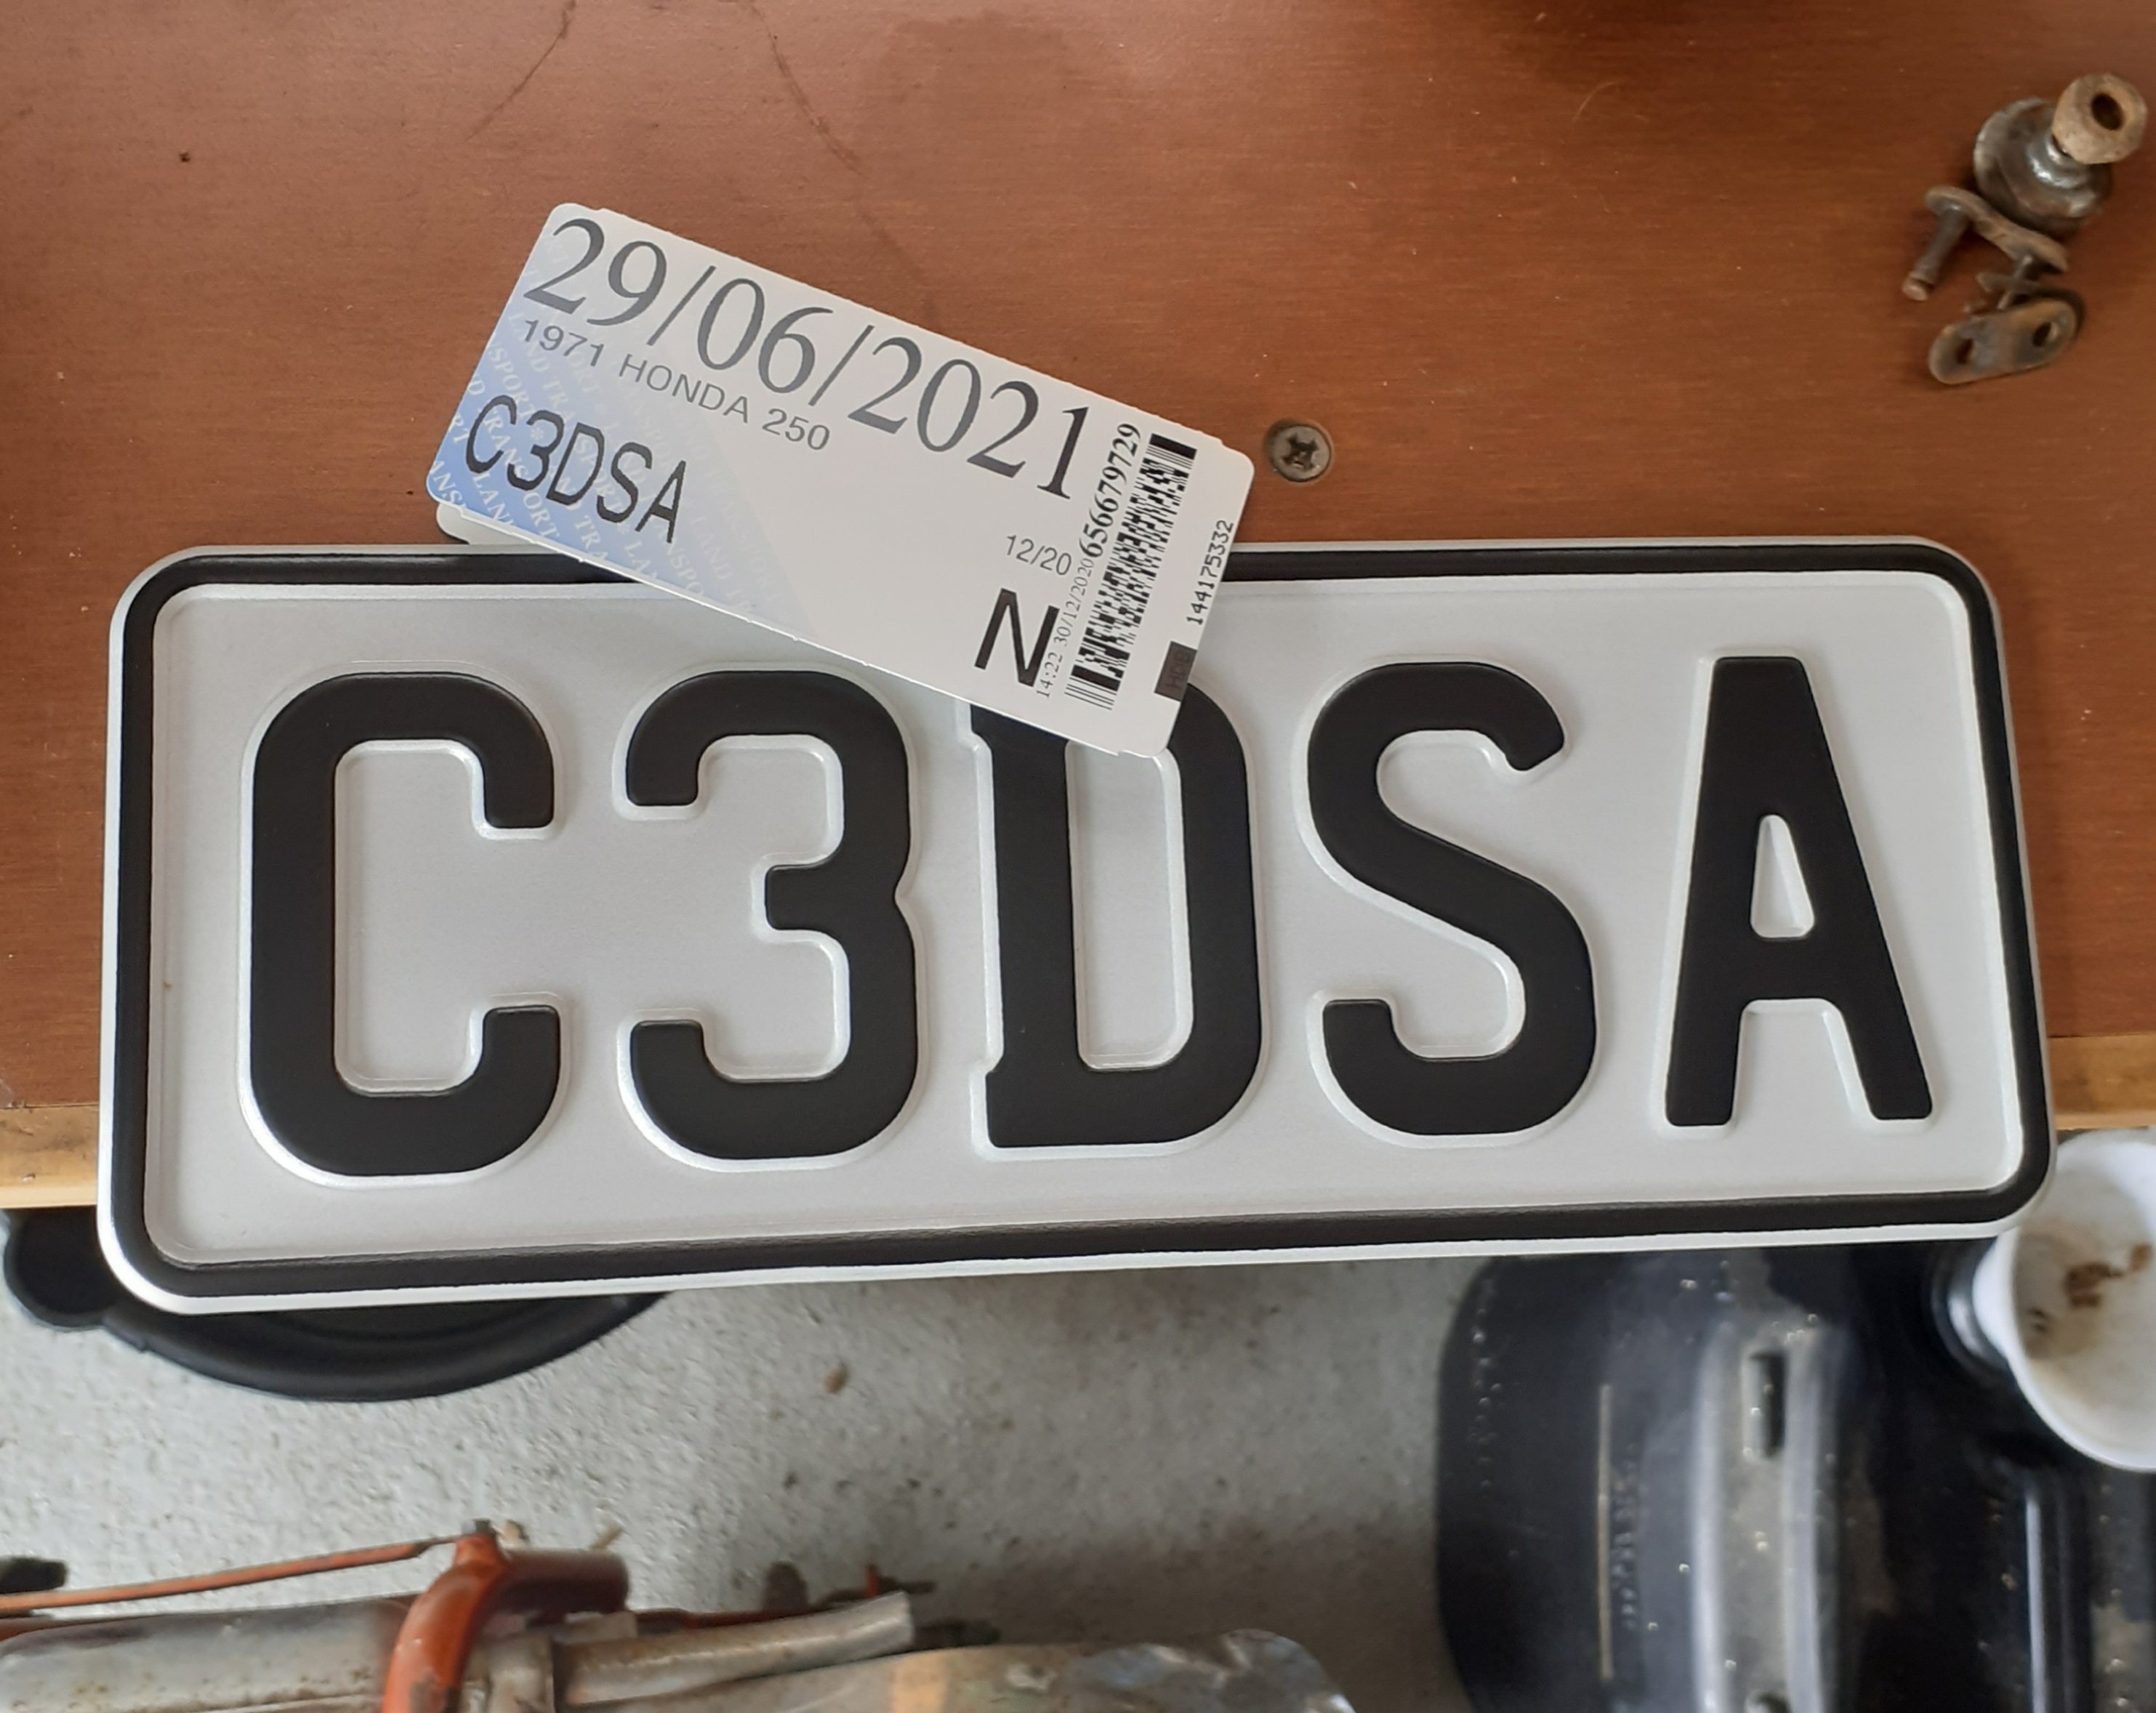
Successful day. Thanks to @BlownCorona and @Raizer for some advice after first attempt was a fail. Shame the lady couldn't read my scrawl and incorrectly typed 2 50 instead of Z 50, but I'll do the paperwork to get that changed.
2 points
-
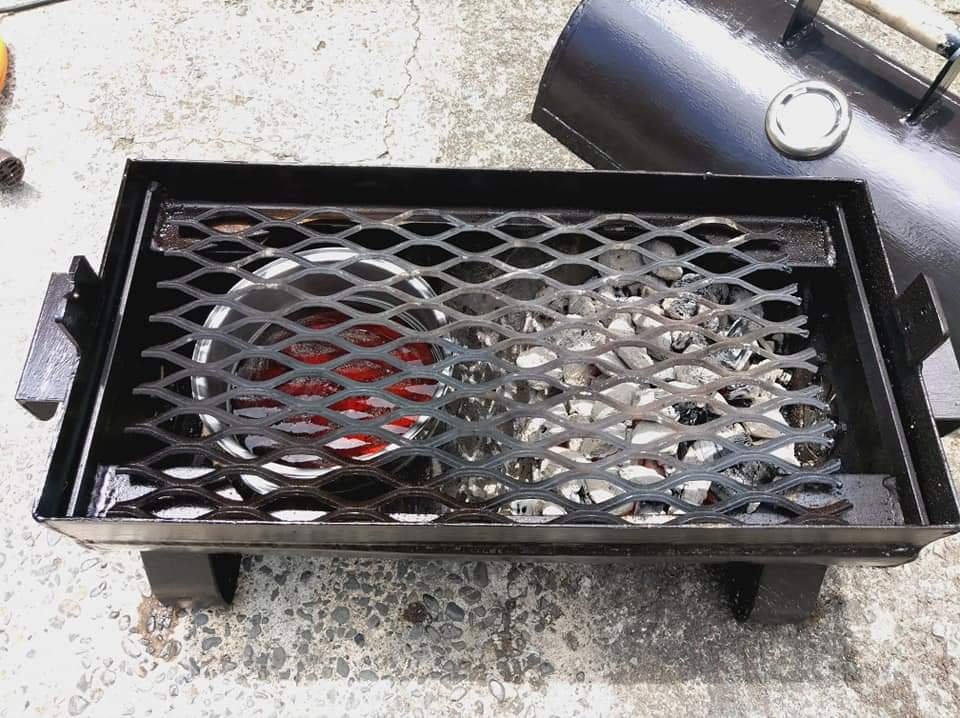
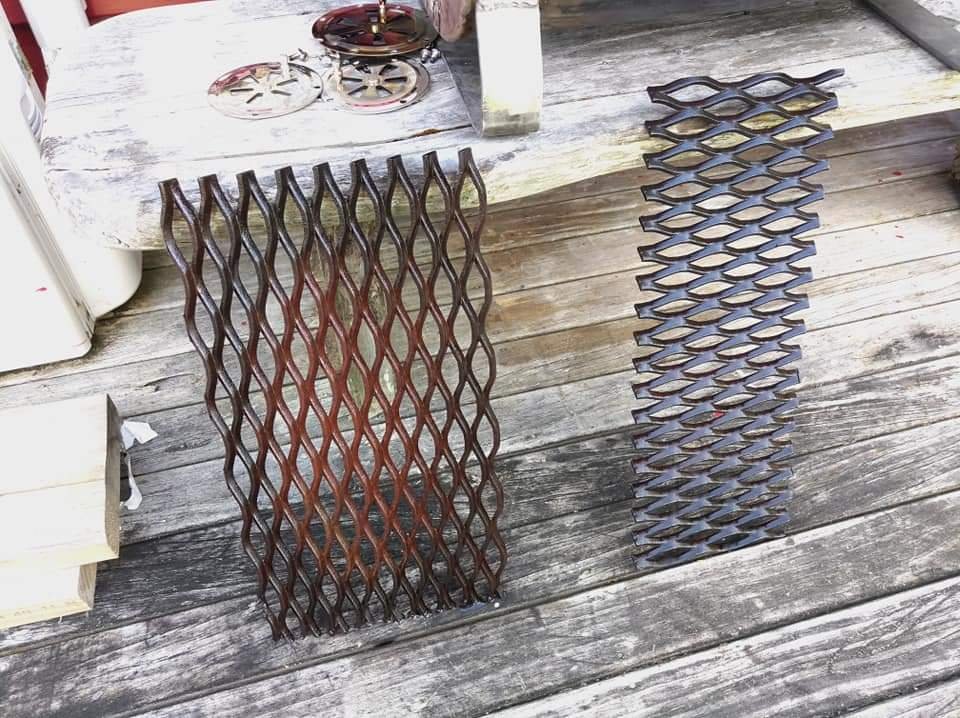
Upper and lower racks sitting in place. Then set it up for it's first burn off to kill off any nasties from the paint and stripper. I added a few more similar size chunks of Manuka and got it cranking. So far it has been sitting at 500f for the last 2 and a half hours with no extra fuel. Seems to be going well enough for something that owes me about $130 and about 10hours. Yeah a Weber GA is only $150 but this is far more rewarding. I might give it another burn off tomorrow morning then I'll be seasoning it, throwing some paint on the outside then throwing in a rolled beef roast. Keep. As to see how it turns out. Will get a picture of the rotisserie tomorrow. Chur
2 points
-
A few months back I bought the 4 items in this link to make it all work https://yourdyno.com/shop/ - I had to wait a couple of weeks for it but it was perfect timing as they had just released their own eddy current power supply. After checking out his youtube and forums it seemed like a good option for a reasonable price. I then bolted some tie down points to the concrete, hooked the speed sensor up to the YourDyno controller and connected it to the laptop. I set it up for inertia mode with a moment of inertia number based on some weight calculations of the roller (educated guess for now). Strapped the trusty old NS250R to the roller and just eased into to things to get an idea of how it was all going. I popped it in 3rd and did a run right out to 10,000 rpm or so. This was a pretty epic moment for me honestly. Everything felt smooth and nothing looked out of place, so the next day I mucked about shimming bearings and coupling the retarder to the roller. Still in inertia mode, I strapped the paddock basher MX5 to the roller and did a test run in 3rd. Once again everything looked pretty good at this stage so I am very happy. Here's a video.2 points
-
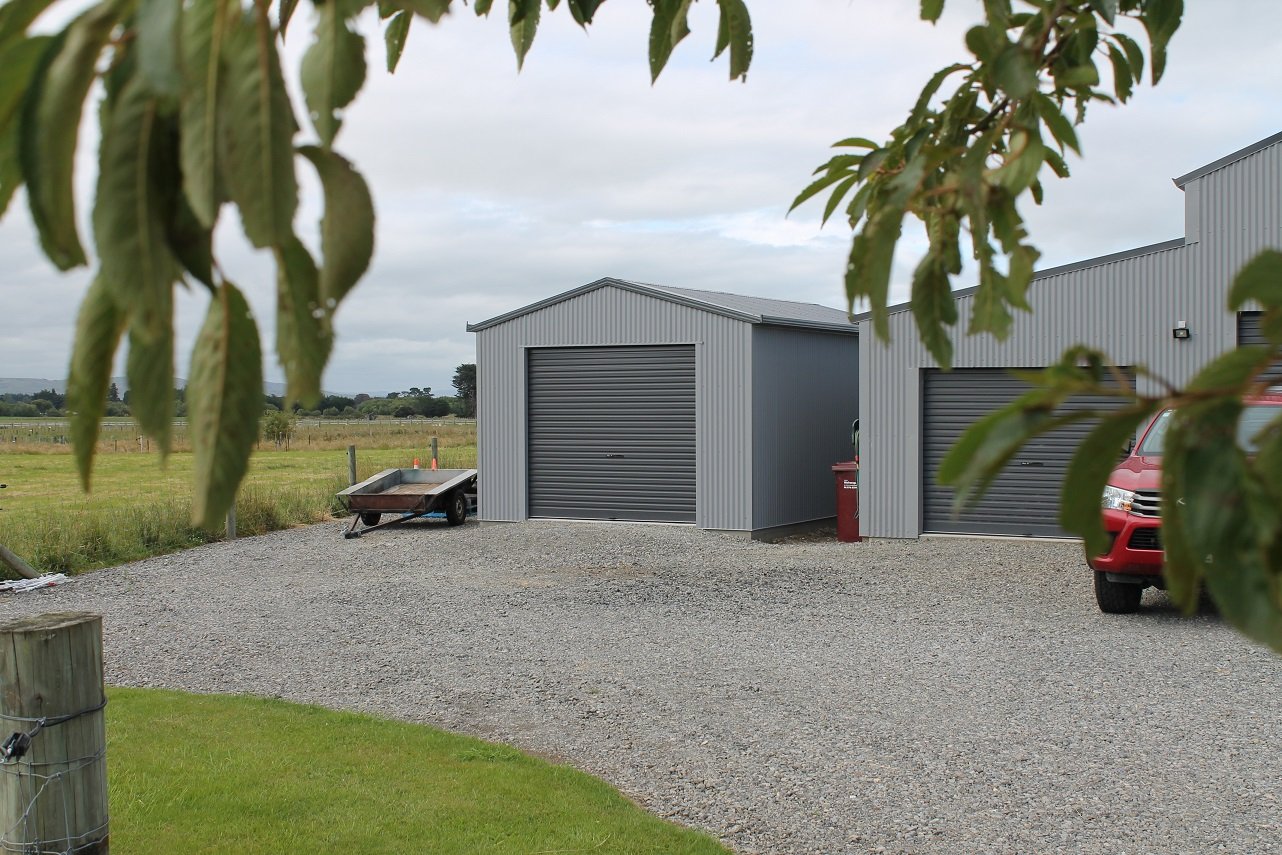
Shed up
2 points
-
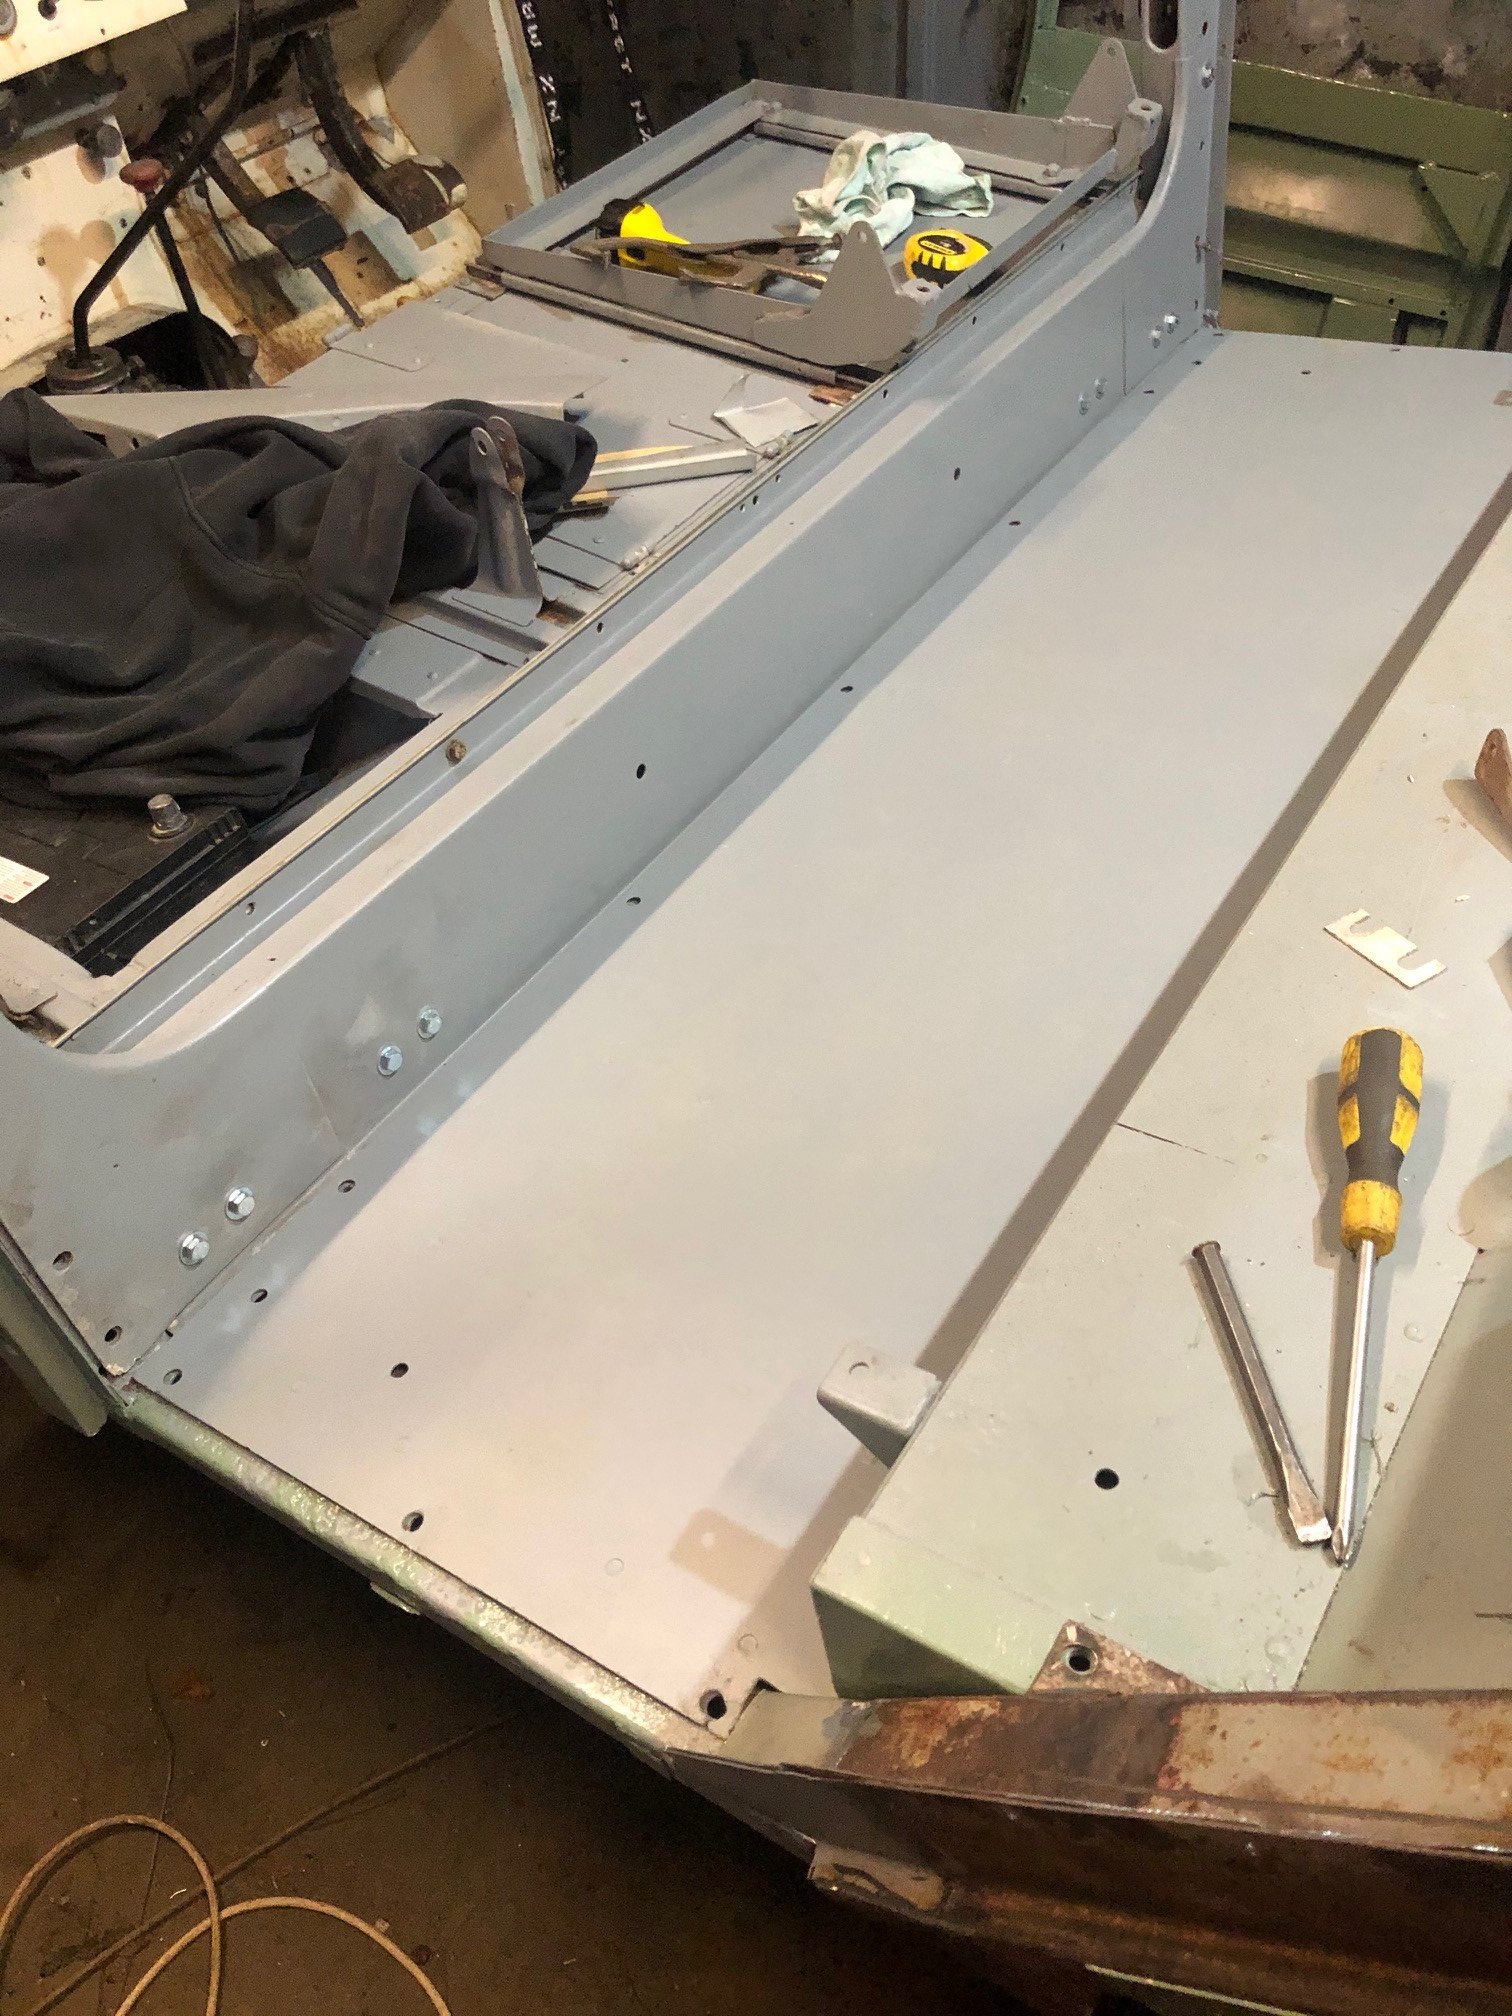
Finished up what I think was all the fabrication and welding on the body. So gave the inside a good clean, sand and then sprayed some epoxy primer down. Came out really nice and smooth! Scuffed back the bits that need to be nice as they aren't being covered up once the interior is back in; wheel wells, strut brace and the b to c pillars. Also went around all the seams and applied some seam sealer, matched to the factory look. Then it was ready to spray the base coat and clear on. Really happy with how it turned out, got all the visible bits nice and glossy! Got some basecoat matched to the brown colour of the dash and spayed some on the dash top piece. Sprayed some flattened 2k clear on top. Got the outside, underneath and engine bay mostly sanded back, hopefully done by next weekend so it can be epoxy primed. Not really too sure on what order to do things from now though. Would like to try and avoid having to mask it up multiple times and having to sand the whole thing in-between each process.2 points
-
Got some stuff back from zinc plating. Was more of it than pictured but I had already started assembling the bits back together before getting a photo. Still not sure why some comes out really nice and shiny and other bits come out dull. Most of it will get painted anyway so not too worried. Bought some longer trumpets from MRP. Need to get the throttle bodies vapour blasted! Got the Estima handbrake cables remade and lengthened. They didn't work with the original mounts so machined up a new aluminium one, took far too long! Bought an AE86 boot and fuel door lever assembly as I never liked having to open the hatch or fuel door with the key each time. Now was a good time to modify it all to work. Shaved the key hole. Works perfectly!2 points
-
Project discussion: I bought this site unseen from Hamilton a few months ago. It's @brocky41 old car credit to him getting it going. Turns out it's actually a good thing... Spend the last little while fixing little stuff.. Tuning it up and charging around the country side. Really nice jap cruiser.1 point
-
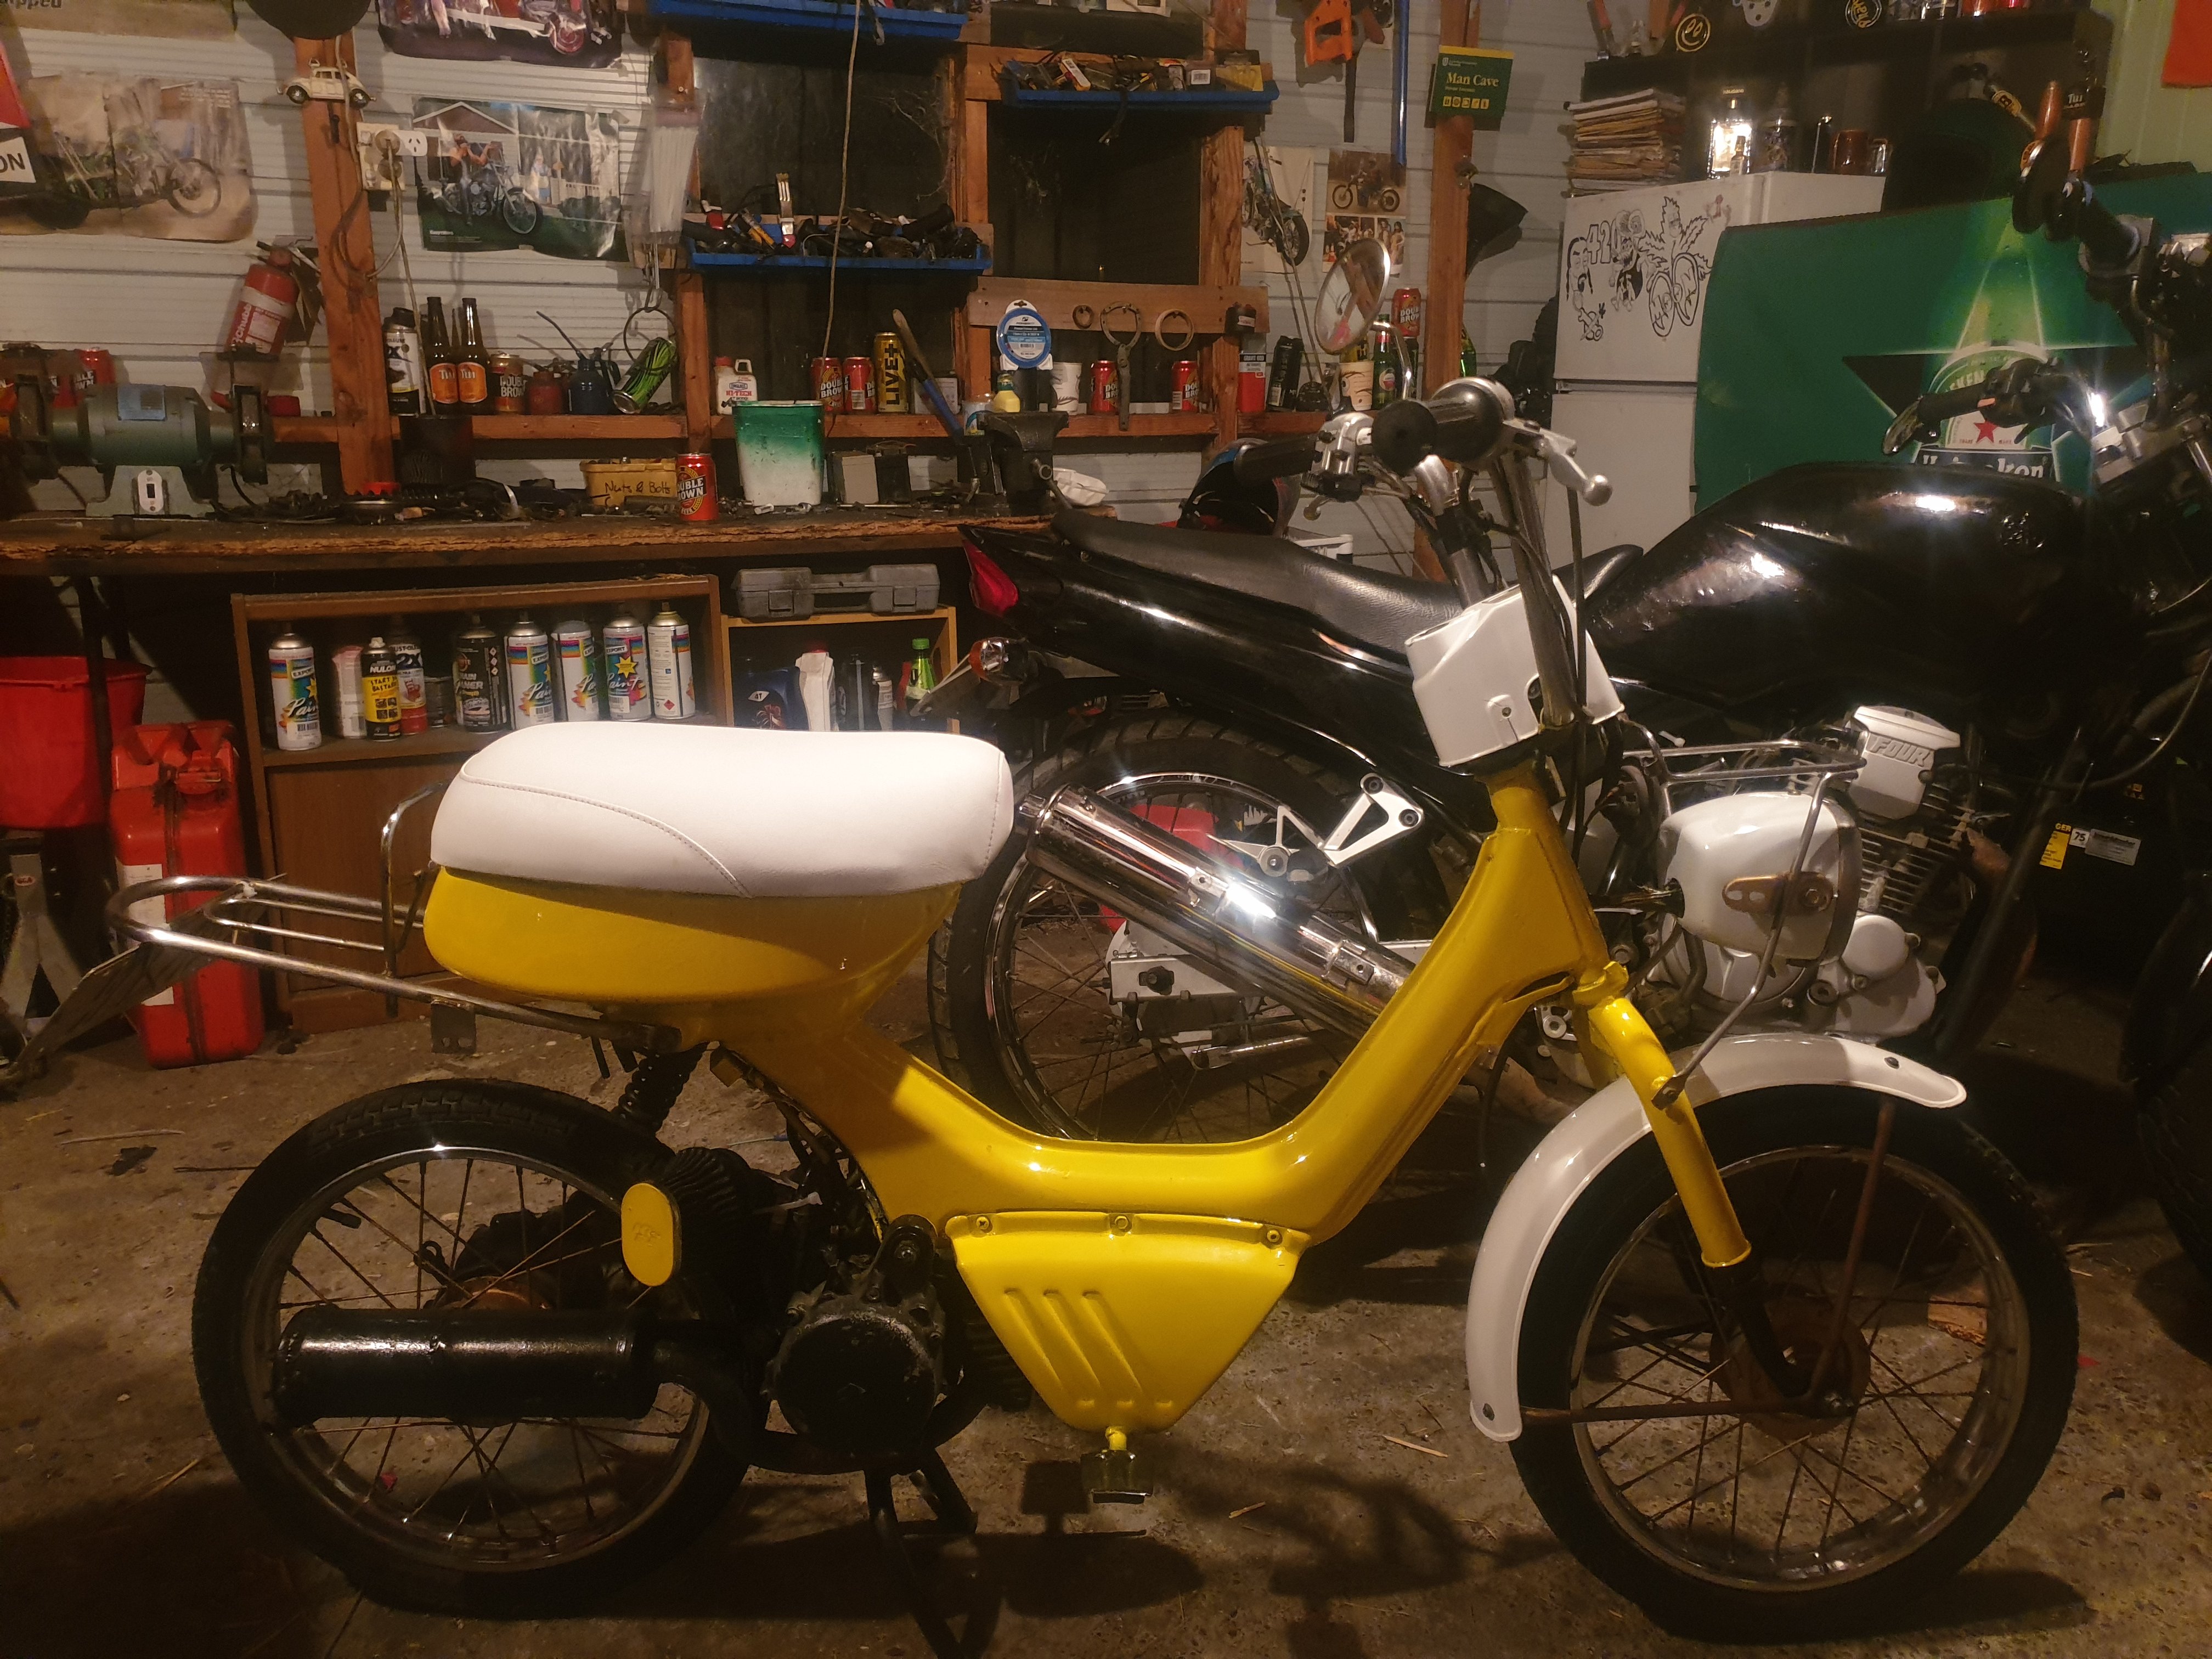
New seat is mint no rips yuuuus
1 point
-
It's probably worth looking up the difference between JIS and Phillips screwdrivers, https://www.webbikeworld.com/hozan-jis-screwdrivers-review/ and finding where your 10mm socket(s) have escaped to.1 point
-
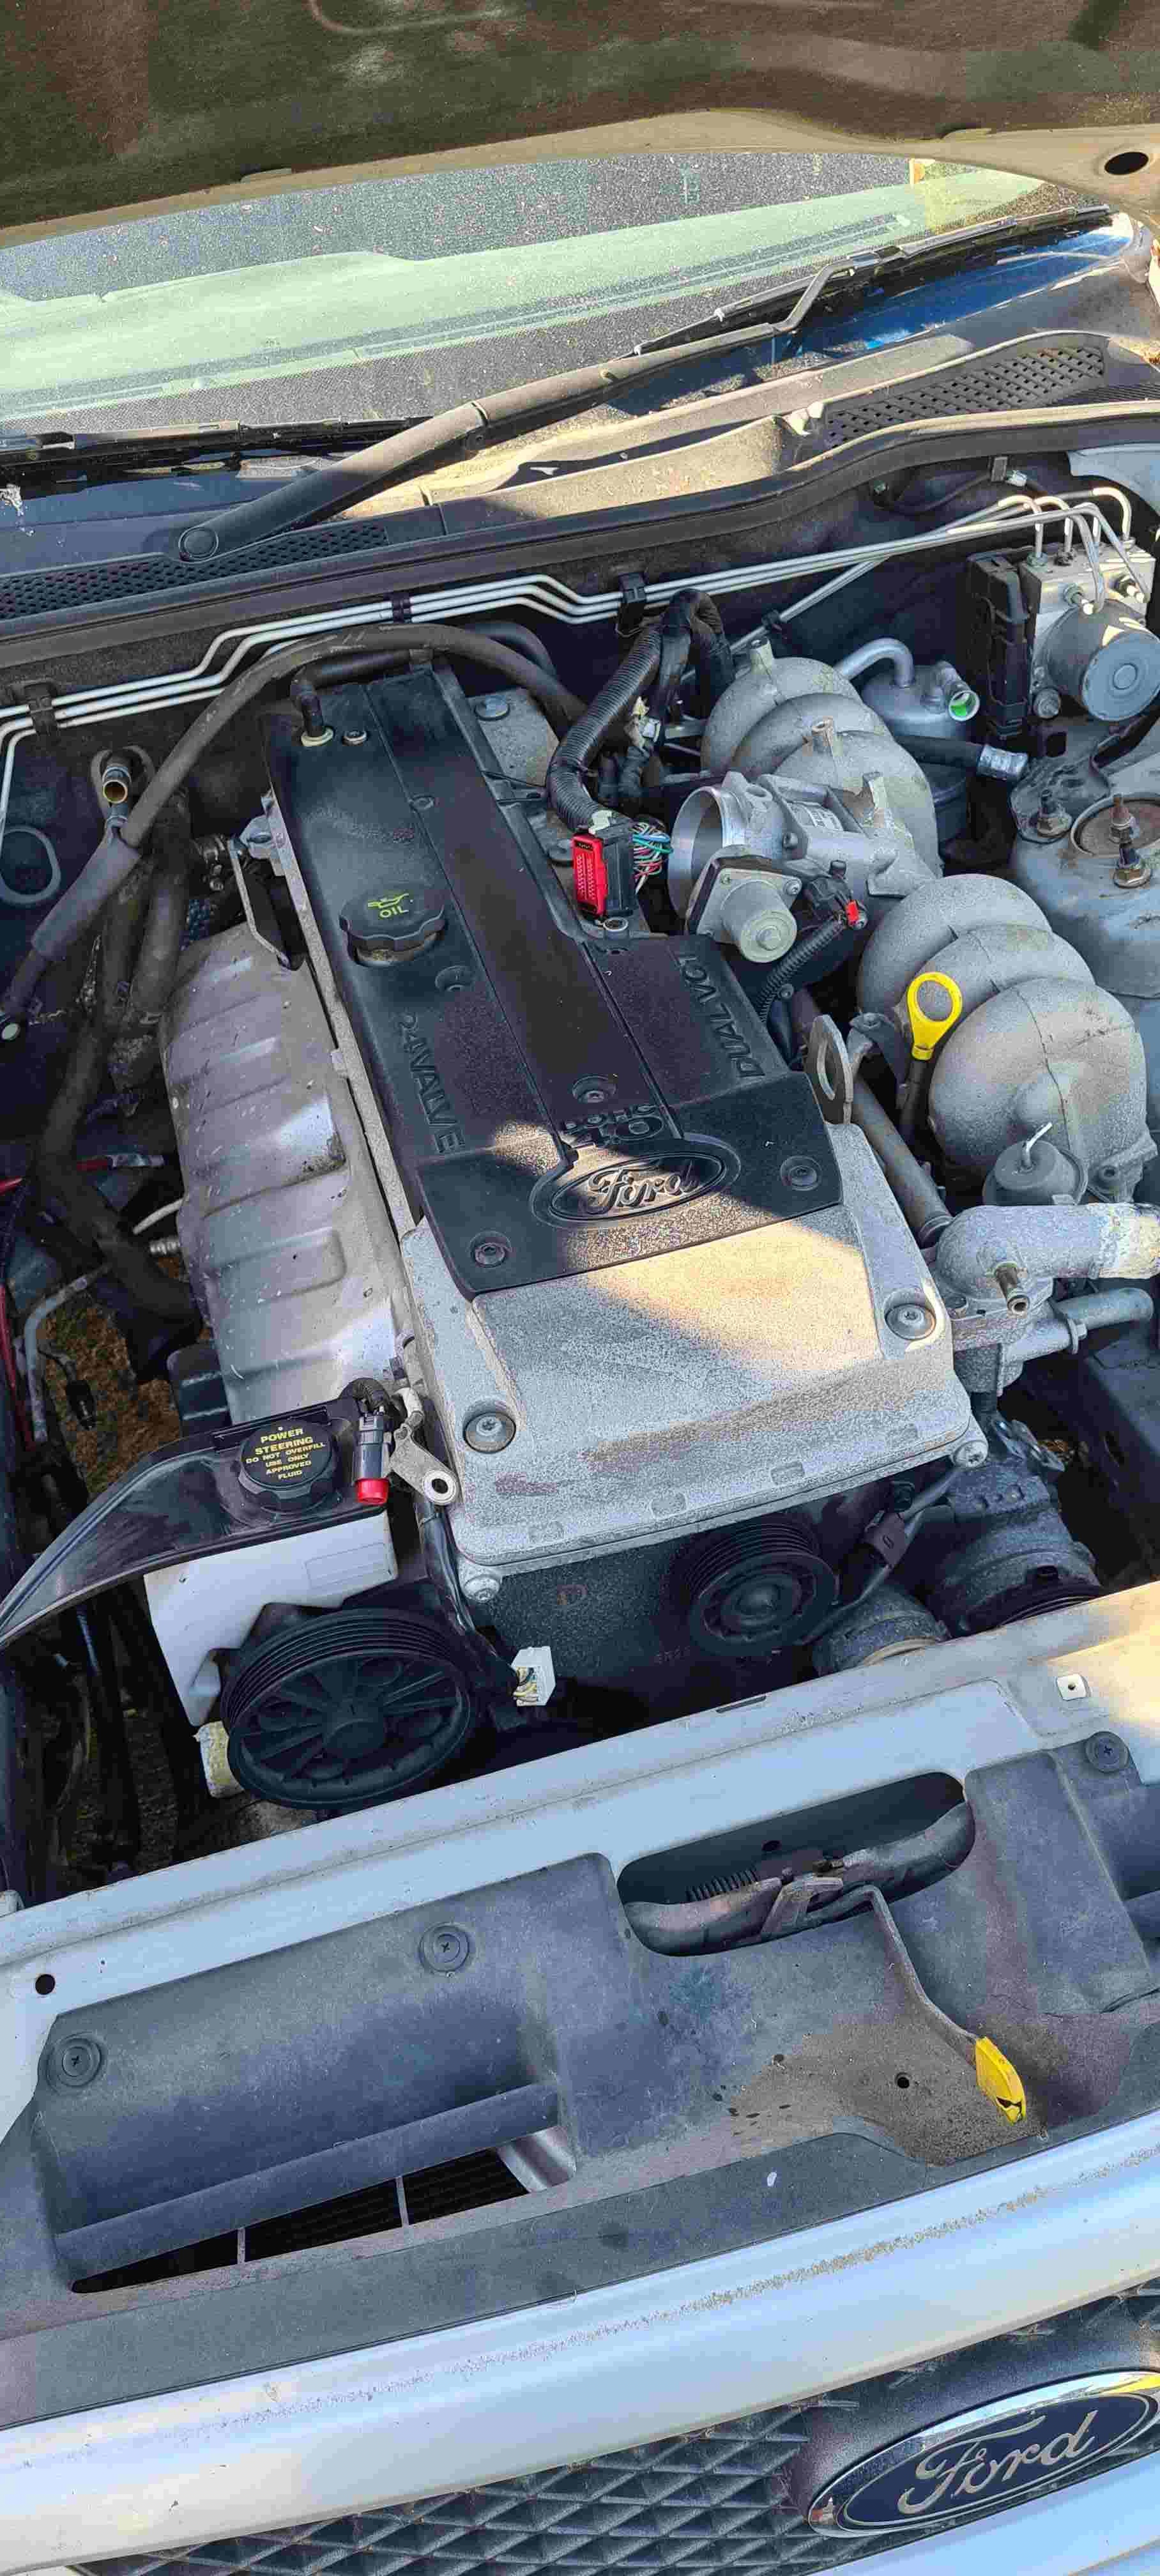
The "full" mark is for when the engine is at operating temp? Is the cap on the expansion tank allowing air back in during cool-down to replace the volume of coolant headed back to the radiator?1 point
-
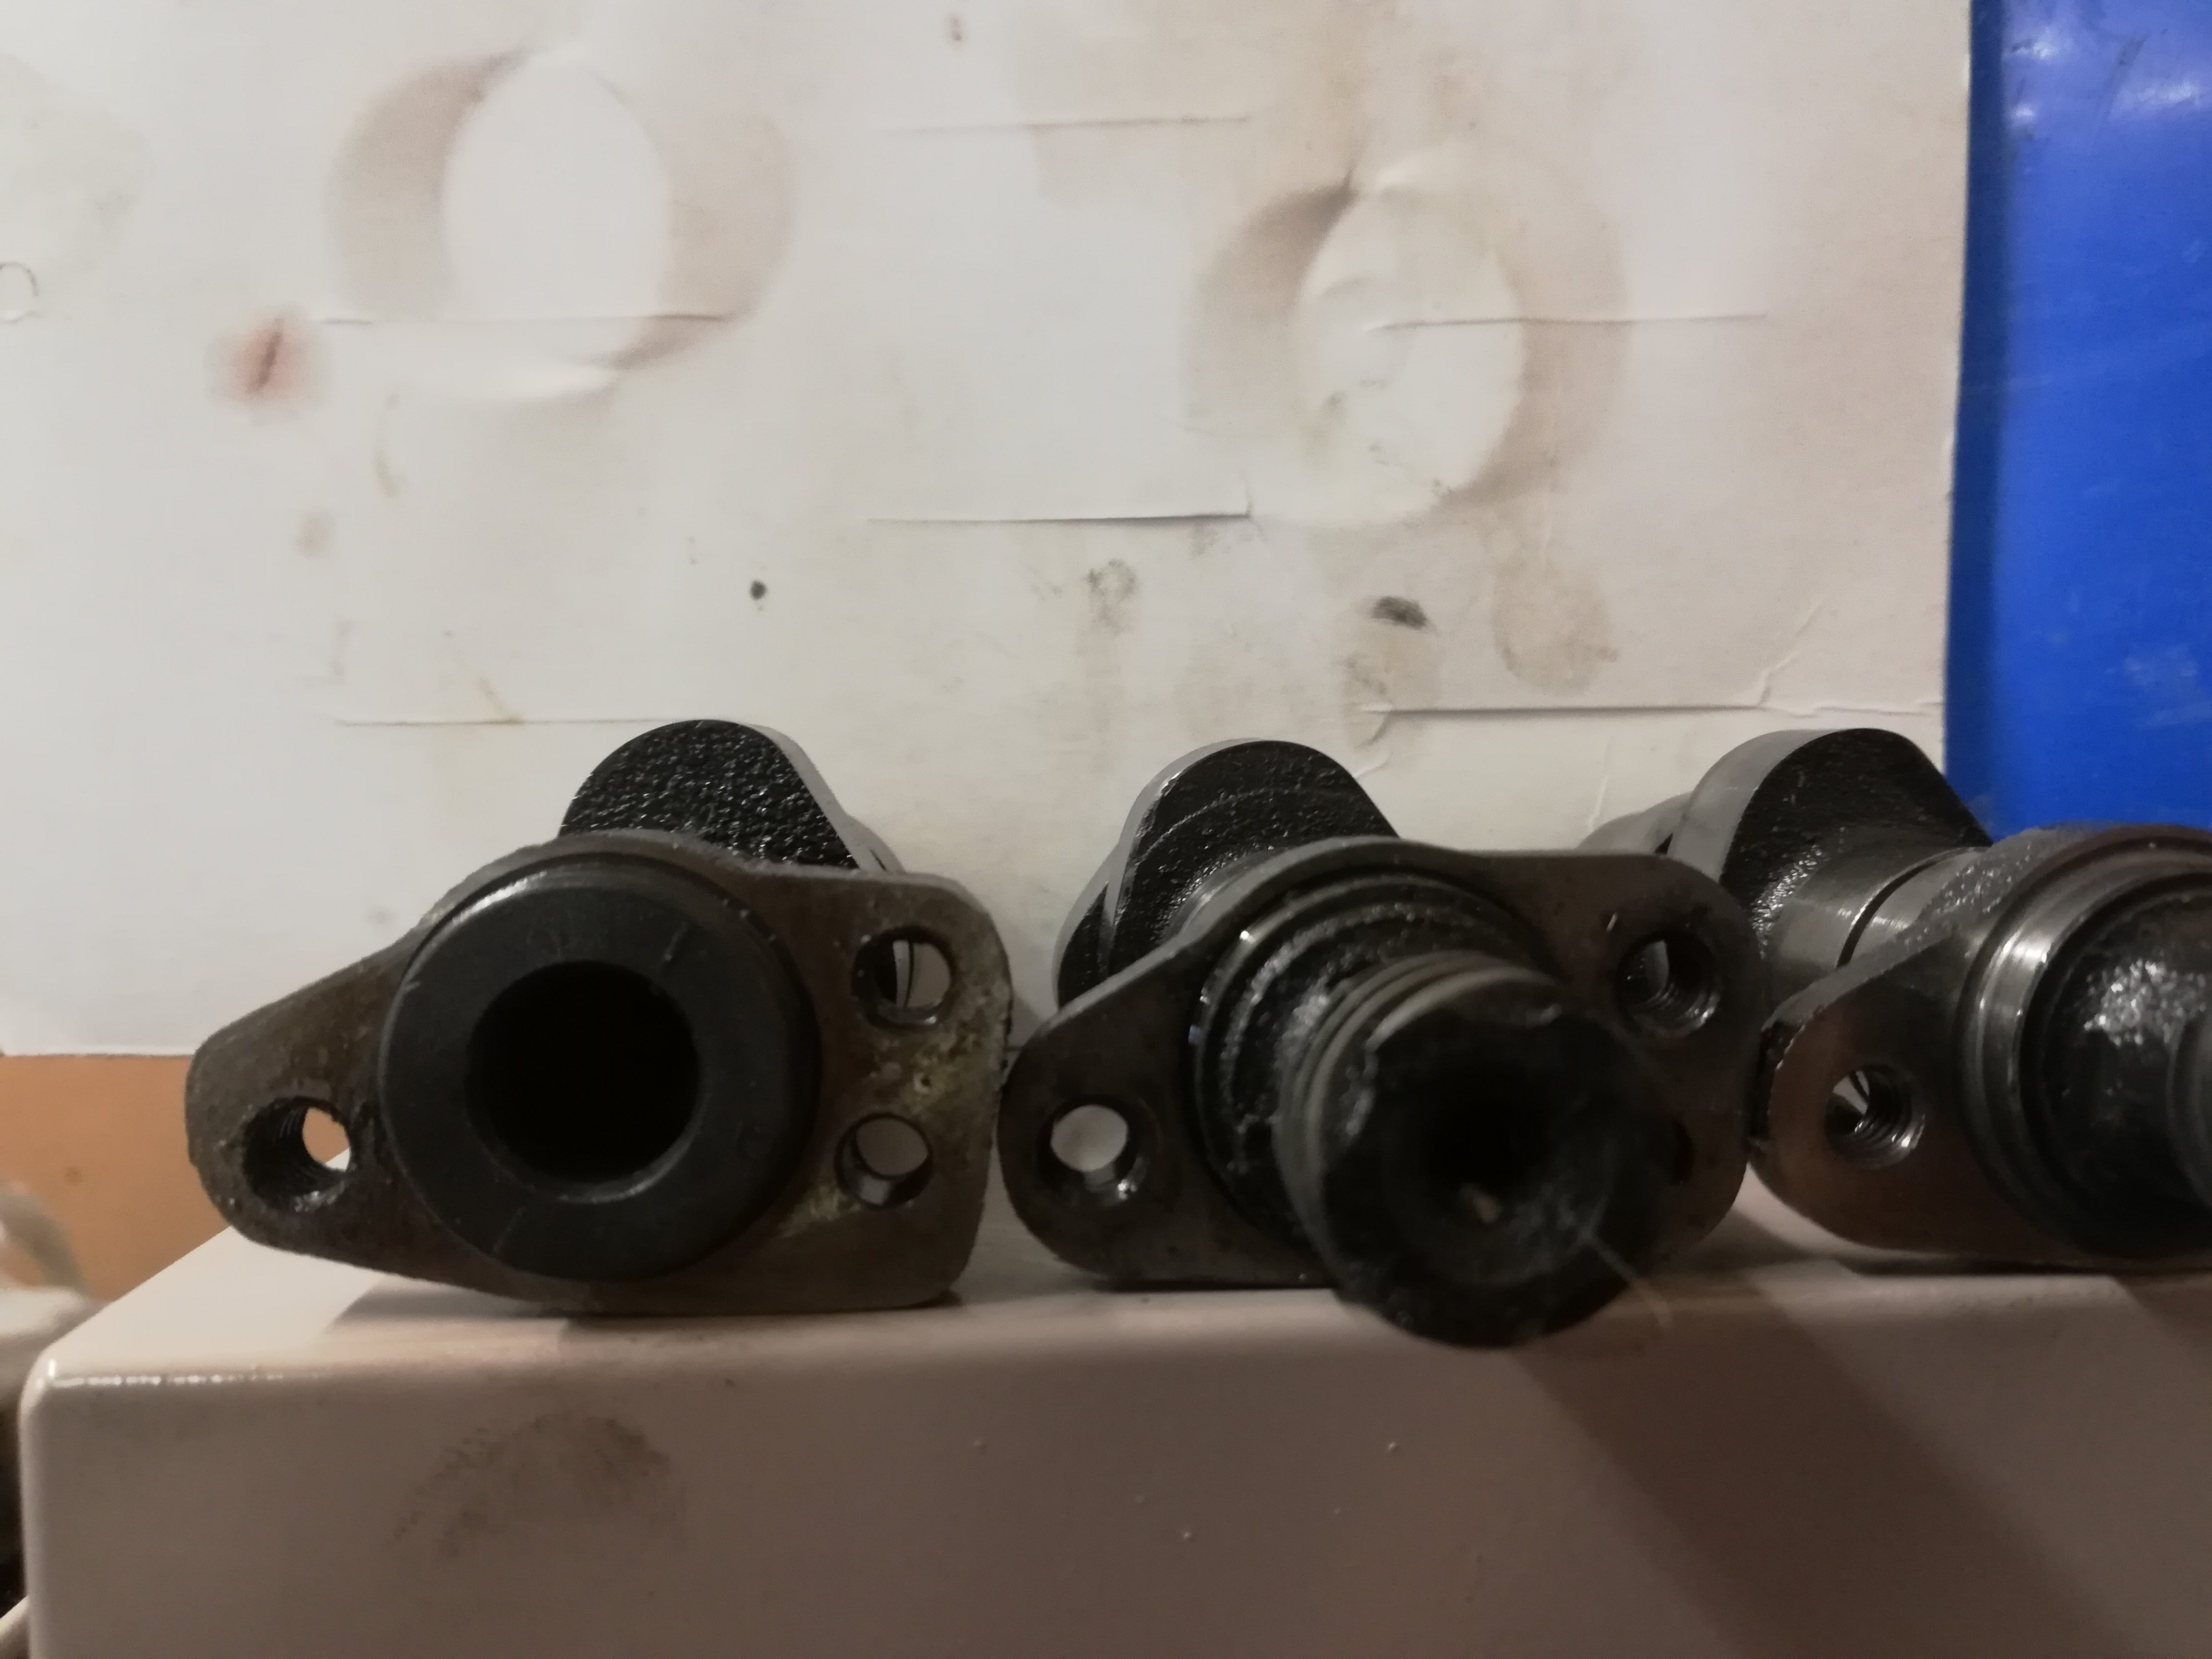
Hotcam, (what came out of a)DR125, gn125 Looks like the Dr one has a tonne of duration on it so it might be an old dr200 cam. Should measure it. Cam "bearings" I. The dr125 head got a bit chewed as they all do in these engines, but I should be able to lap a little off the mating surfaces and run a reamer down to remove the worst of it
1 point
-
Bloody hell just looked at the date from the last post, haven't done anything to the ute since october aside from a few runs up n down the street to keep the battery charged. Got daughter outside with me this morning and we swapped the carbs over. Did a bit of cutting and grinding of the factory cable mounts and throttle wheel, drilled/tapped out the coolant port in the manifold and glued in a bung. Testfired and it runs, will fill with water after lunch and warm it up, set mixture etc. Have bypassed the water choke for now, no need for it over summer anyway. Pics to follow.1 point
-
Not really, I'll try and get a photo at some point, it doesn't have many features if I remember right, aside from many scrapes and marks in the plastic.1 point
-
oh outstanding! super glad you got it over the line man1 point
-
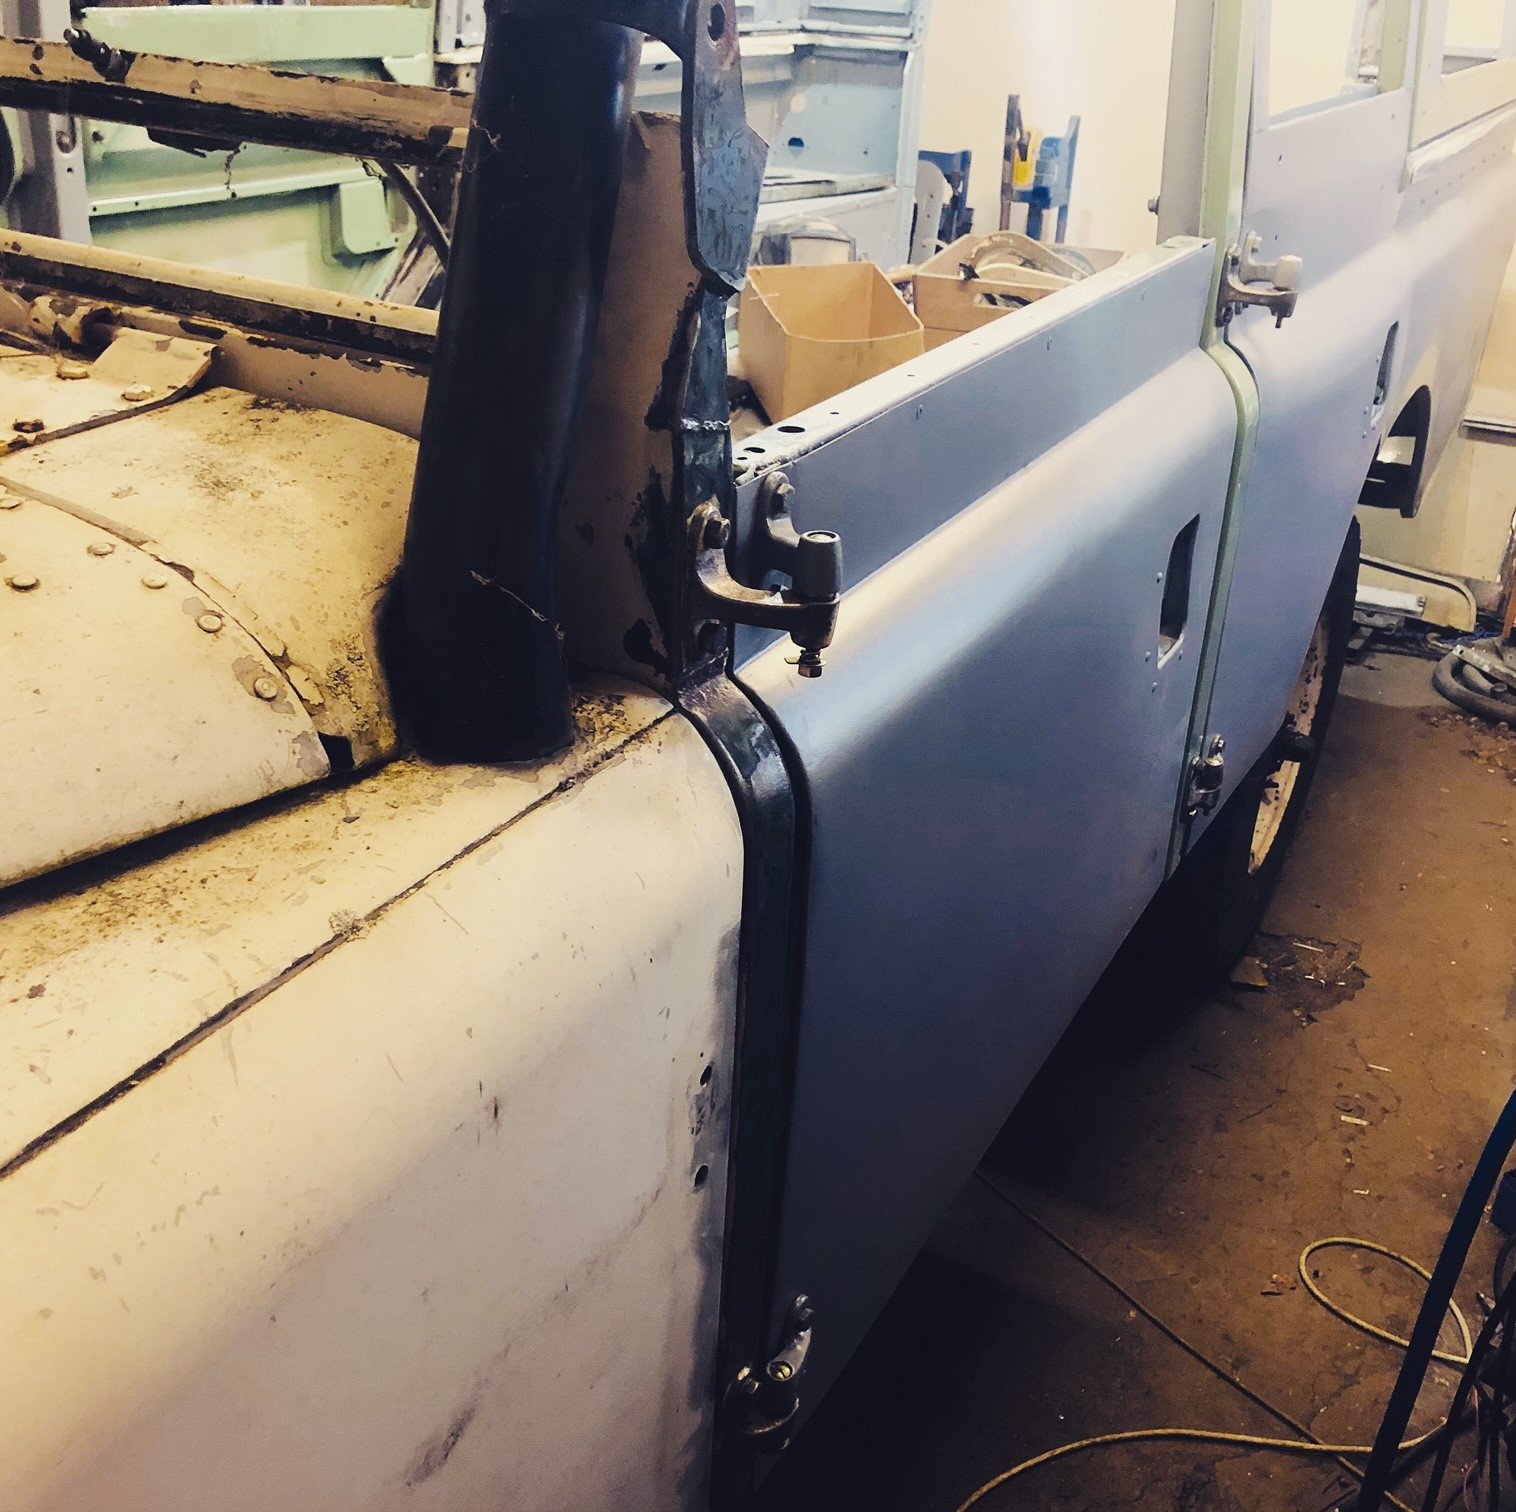
Making some more progress... Welded up these sill/b-pillar/dogleg sections as one Started hanging all of the doors with new hinge pins Need to throw some diesel in it so I can move it to strip the rest of the firewall and get the rest of the colour going.
1 point
-
Big bum fitted
1 point
-
Wife wanted a long dinning table bought a 2.4M slab of cherrry? Wood measure twice and it actually test fitted the first time! turns out it’s a bit long once we put it in the lounge..... so have cut shorter belt sanding for hours sucks, maybe 1/3 of the way there now (should of hired a floor sander) recycled some legs from scrap at work1 point
-
Job for the night was to check out the fuel tank. Plenty of rust & crud, but no holes anywhere. Have a sealer kit on the way.
1 point
-
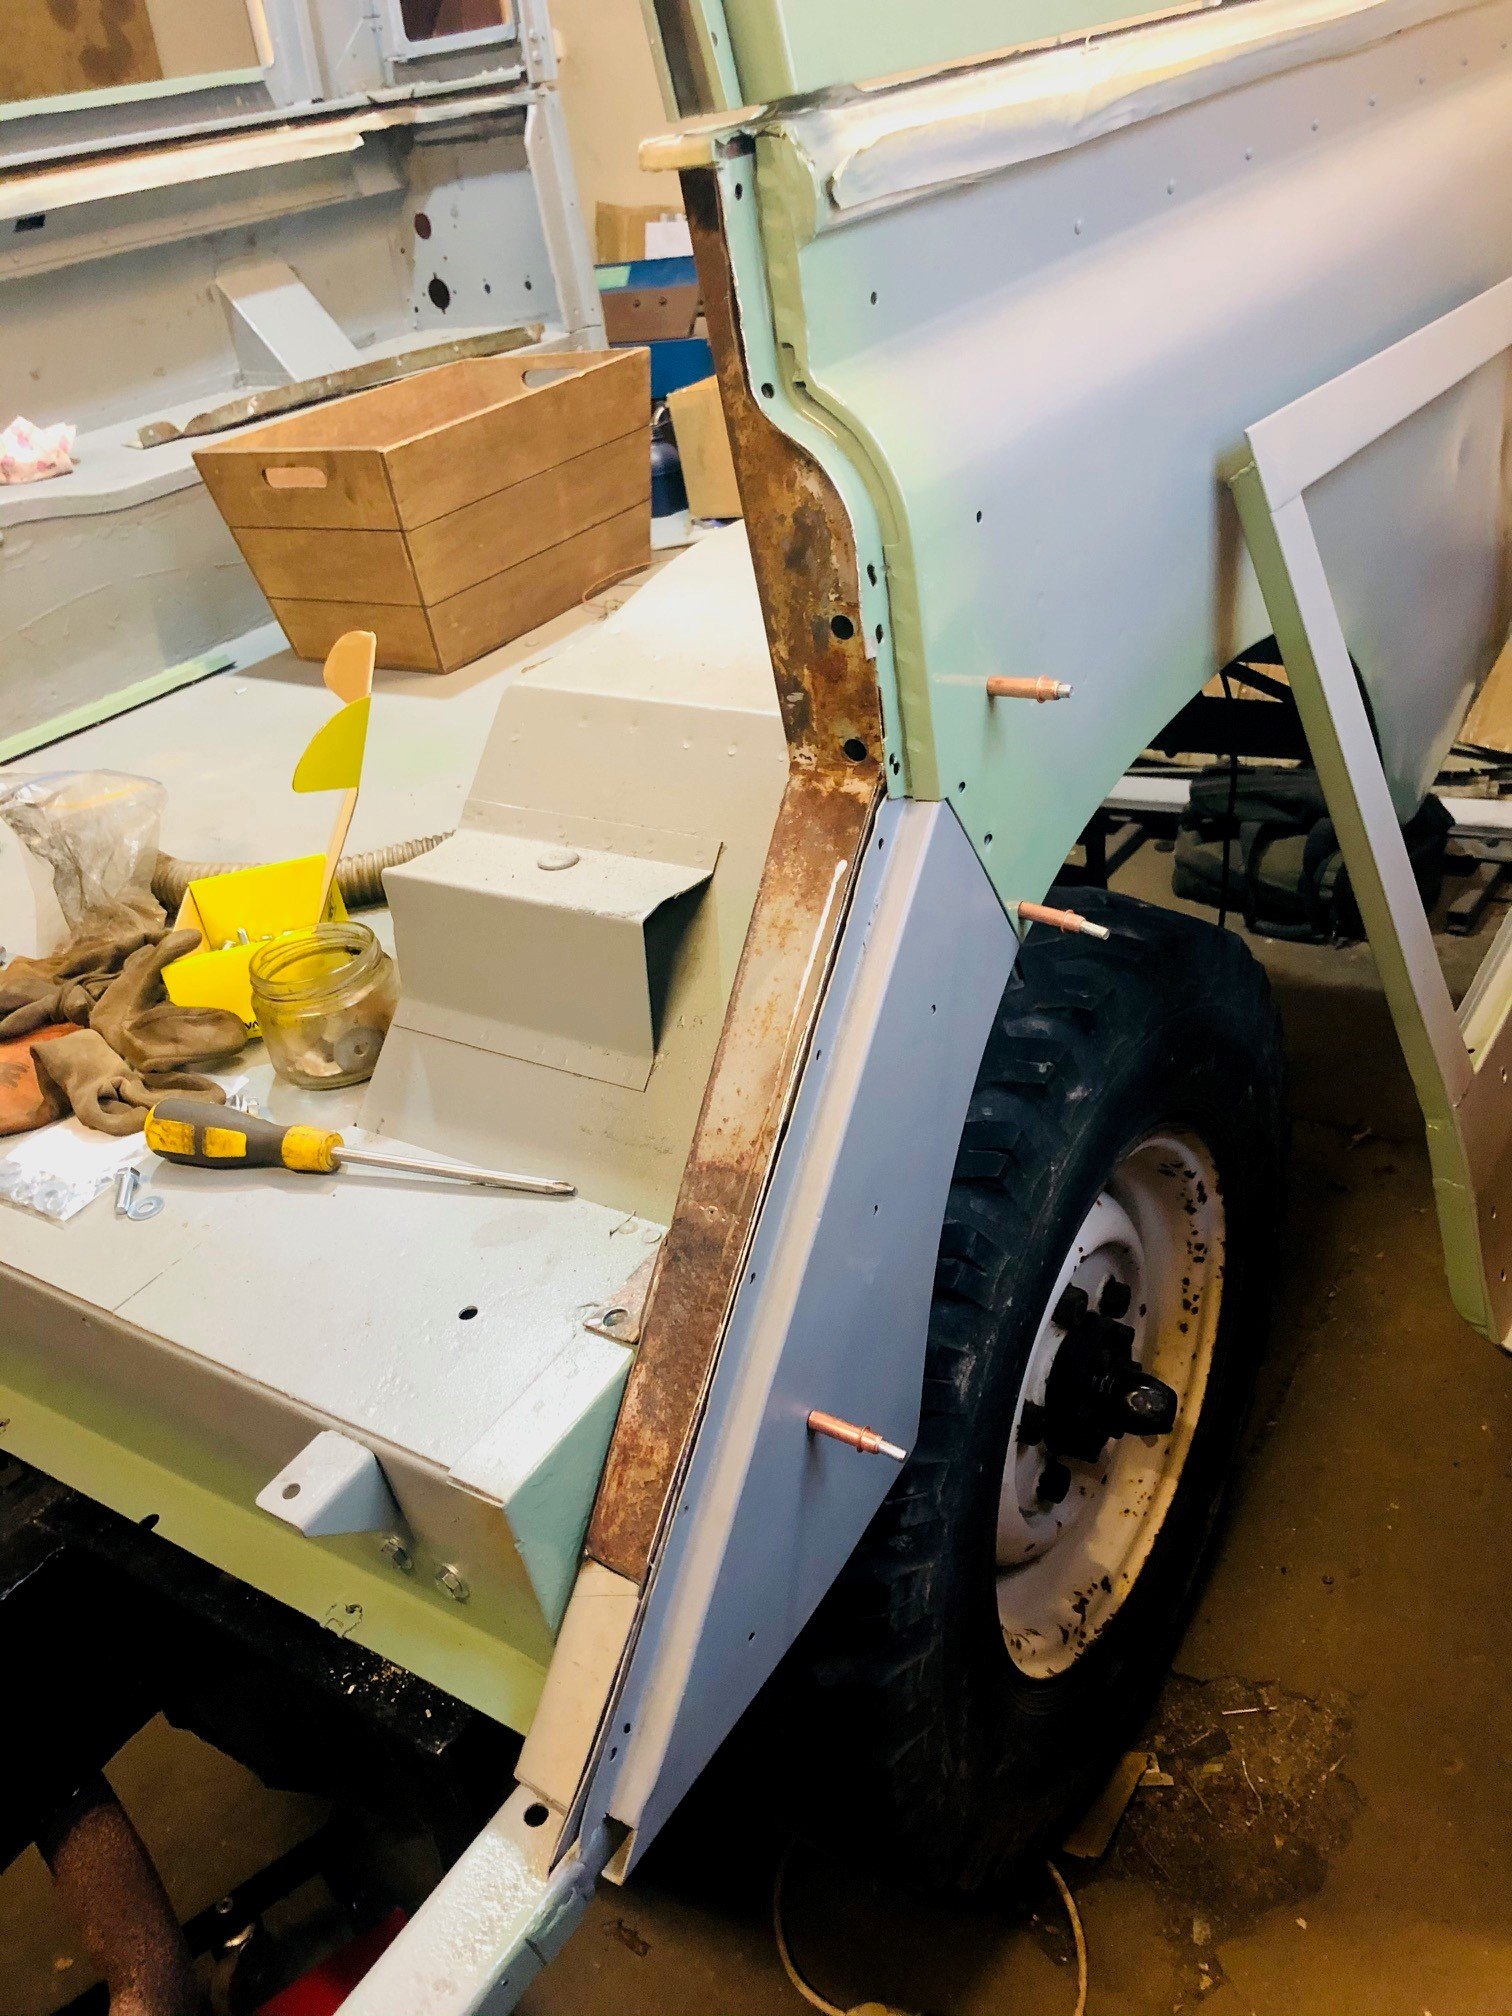
Gave the gearbox a lil clean and made a new gasket for the top cover (it never had one). The selector mech is still a bit sloppier than I'd like it but tough to make it much better with the current set up. Got alot of the sills/box bolted in. These dog legs are notorious for rotting out at the bottom (exposed to mud from the rear wheel). Got most of a repair done and checked the fitment. The b-pillars arent quite where they need to be so may need to be cut/re-welded. I'd love to replace the whole sill/b-pillar but at 3K plus shipping a side that isnt going to fly....
1 point
-
Maybe some more background as I've kind of started part way through. I saw this car pop up a couple times on Trade me and couldn't really get it out of my brain despite never being interested in this sort of thing before. We bought it went the price made sense a couple months after first seeing it. In my original post I put some asterisks after some words. This because we realised that the previous-previous owner probably told some porkies to the previous owner to sell it to him. They say they took the dizzy out as an anti-theft measure but it's the wrong dizzy, which calls into question all of their other claims (driven into a garage for storage 15 years ago for eg). And why cut the battery out? :\ Things we knew were wrong with it both of the boot latches are broken the distributor is (was) missing the battery has been removed via wire cutters fair amount of surface rust paint is horrific 14+ owners, and it's clear that the last few have not cared too much for it unrepaired front passenger corner collision (plus evidence of other historic repaired collision damage) interior trim is horrific or missing with only a few 'ok' bits only truly concerning rust was a piece at one of the rear latches and on the back of the bonnet The previous owner left a lot of fun stuff for us to find. Not pictured: all sorts of screws and bolts and trim bits that had fallen off deteriorated trim and found their way under the seats. Also 12 pence somehow. I considered the rust situation to be "ok" but after seeing a few restoration threads I have upgraded that to "pretty decent actually". No rust underneath, and the "usual" spots for starions seem to have escaped unscathed. There's surface rust in a lot of places but it's only eaten through or "bad" in a few minor spots. The rear driver's side floor doesn't look happy, but is surface only. Even the battery tray hasn't been eaten through Lots of dodgy looking bits actually cleaned up relatively ok with just a wire brush. It turns out that both latches have some rust that has managed to eat through - it's quite minor but will need some welding. I've dressed some bits with rust converter already. The only really bad spot we've found so far is the front crossmember which has a hole eaten straight through it. So we'll have to either find a new crossmember or get it repaired. I feel like we've dodged most of the rust bullets, but I do need to impress just how much surface rust is on this thing. There's also a ton of rando bog from historic repairs in places. So I'll likely get the whole thing media blasted down professionally just to make sure we're not leaving anything to get eaten away.1 point
-
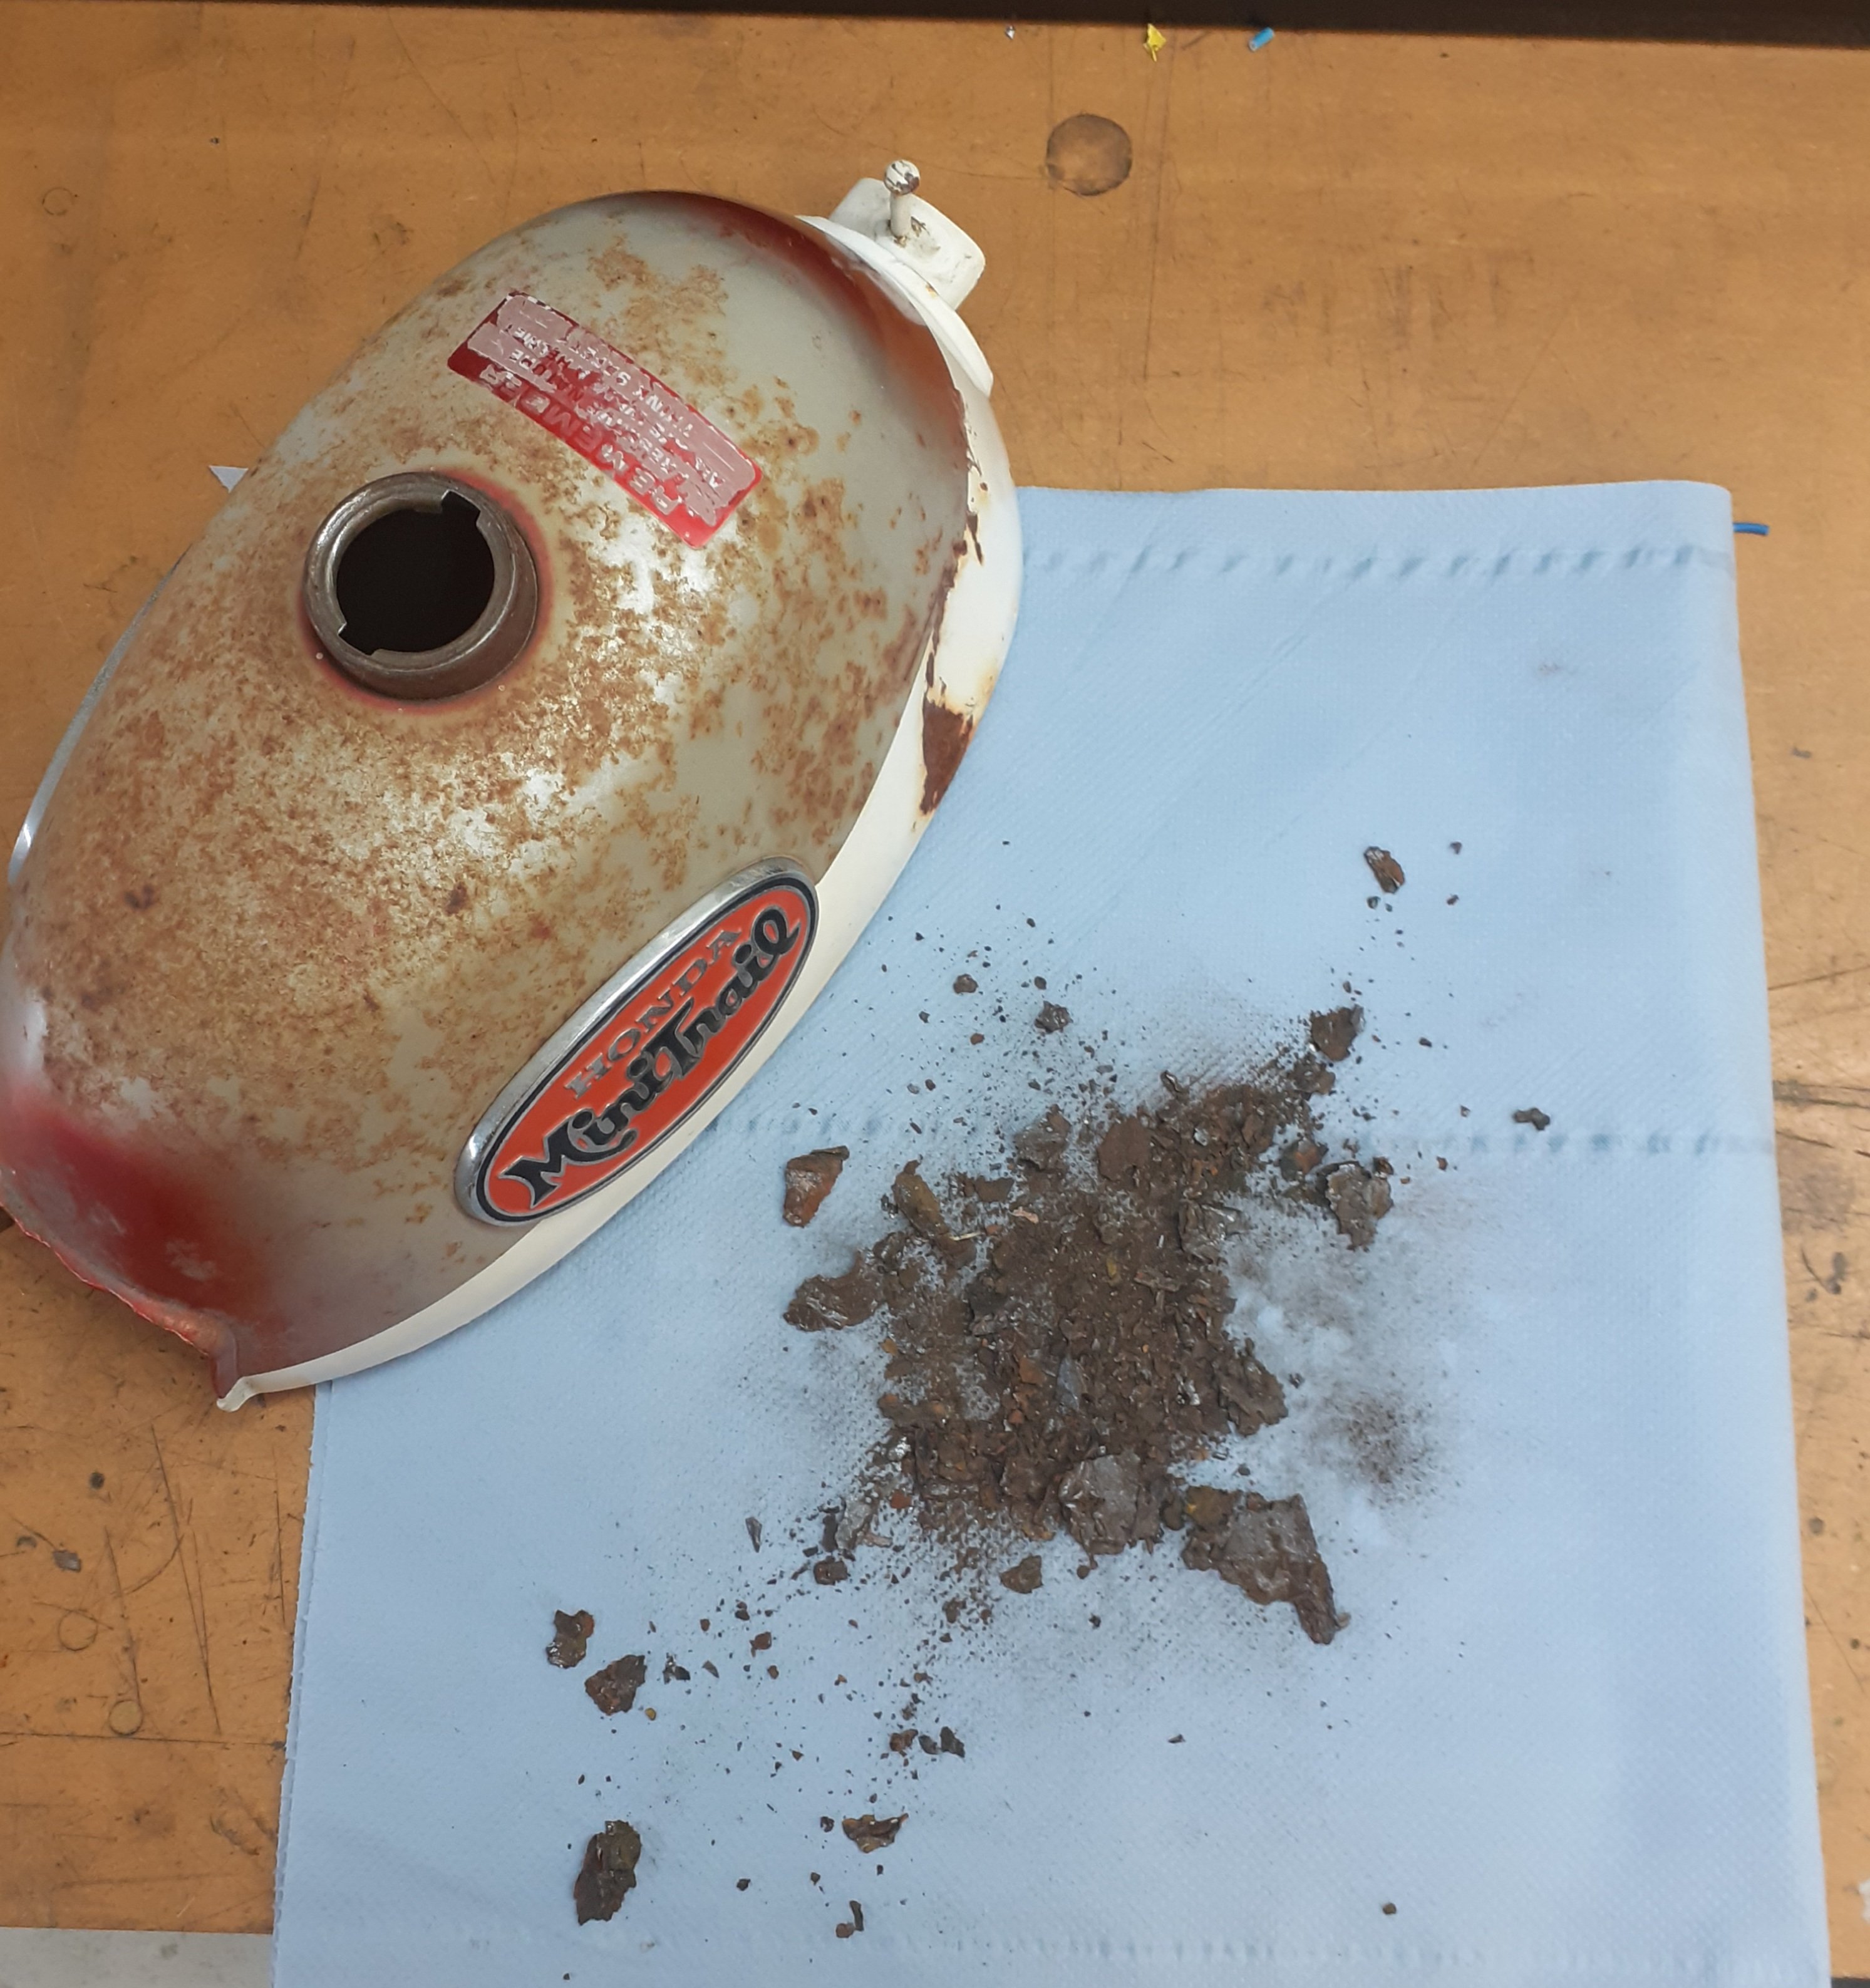
Getting the engine started is a milestone I want my partner to be there for so putting it off until the holidays when we have the time. So in the mean time let's take a look at our fuel system. I read that fuel drains slowly so I didn't bother to raise the back of the car to fit jerry cans/buckets under, instead opting to just use a pan and ice cream container and swap them over. This went poorly... But at least I didn't roll a 1 so the garage and everything is intact and I just have to deal with the fact that I need to keep all the doors open for a while. Also poor: my preparation. I bought a 10L jerry can and for some brain fart reason decided that is all I'd need. I had a couple more litres than would fit in it so I threw it in an old container and let it evap outside until I could get another one. 15 year old fuel smells and looks pretty bad. My old container was dirty so I was hoping that the crud at the bottom was already there. Foreshadowing Fast forward to weekend: Partner is over! I want to see what is borked and what can be cleaned and re-used. She removed the wheel and dropped the fuel tank after a bunch of dirt/fuel to the face. What a trooper. I disassembled it and found probably the first truly effed functional pieces of the car. I'm actually shocked at how bad this has rusted. It's like the rust has generated its own cities and infrastructure on these tubes. This float mechanism is truly beyond hope. I was hoping to be able to clean the in-tank filter and re-use it, but it's $15 from amayama and it looks like I'll need to find some other bits too so shrug emoji. I gave the tank a quick zhuzh with a smol brush and left it outside to tackle another day. I can hear debris shift around when I tilt it. A brief shitty look inside is inconclusive - definitely some rusty bois floating around in there but not sure what the tank itself looks like. The exterior has some minor surface rust in places, hidden under the geological layers of dirt. It sucks that the holes are so small, definitely won't be able to get my arm in there to clean it properly, so we may have to wait for some solvents to arrive courtesy of partner's chemistry connections. As a side, the paint around the drain hole peeled off from the fuel. Seems like a design flaw... also the fact that the heat guard can't be removed so treating up in there is going to be "fun".1 point
-
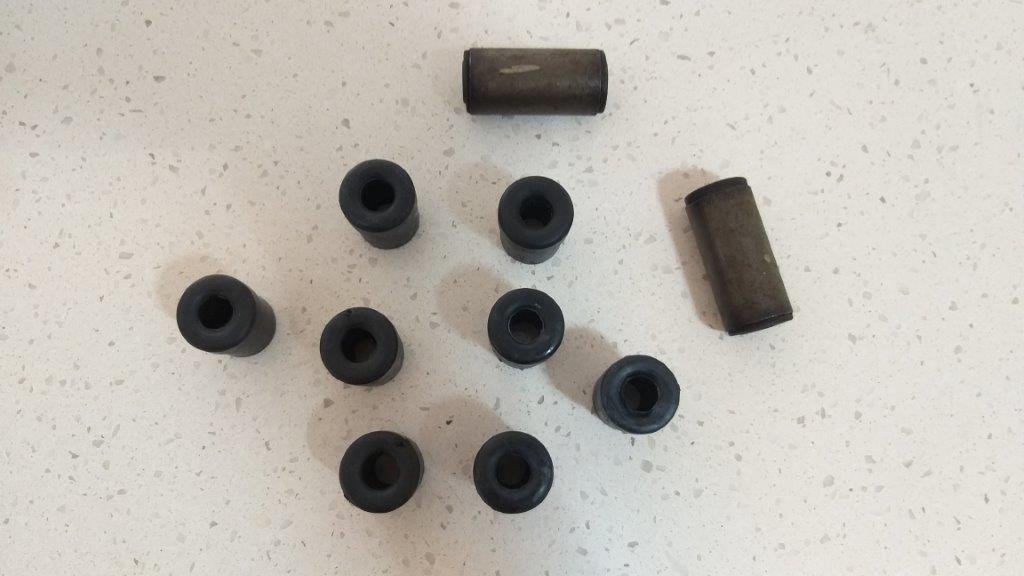
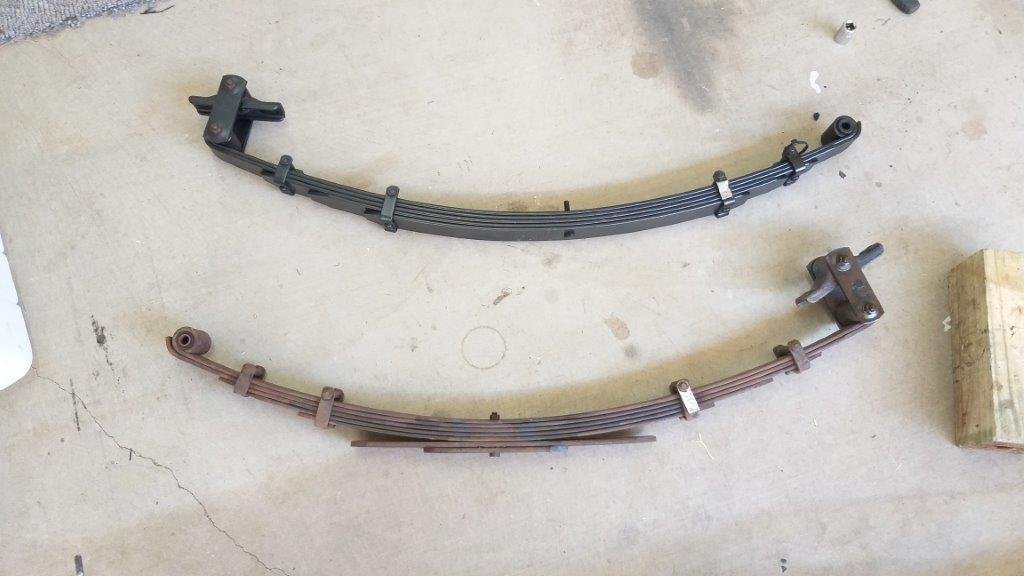
In other news the welding on the steering column inner passed it's dye penetration test with flying colours, so that's another box ticked on the way to cert. I made a start on the refurbishing of my rear leaf springs today and managed to get one completed. After removing the two small leaves I had to cut more thread on the through bolt. Luckily I had the correct imperial dye nut to complete the job. Managed to use my bench vice to press the old steel sleeved front bush out and the new one in. The shackle bushes are soft all round so were a piece of piss to replace. Everyone likes a pic of a nice clean bush, so here you go. More tomorrow.
1 point
-
I was fuming and I was waiting a while for the person to come back, but what would it have achieved? it could have been a widdle old lady who was completely oblivious, or it could have been the hulk who would beat me to pulp. There wasn't any monetary damage other than a bent plate, but that didn't stop me from writing the most Canadian passive aggressive note left on their windscreen. But yeah, next time it'll be four flat tyres with their valve stems removed.1 point
-
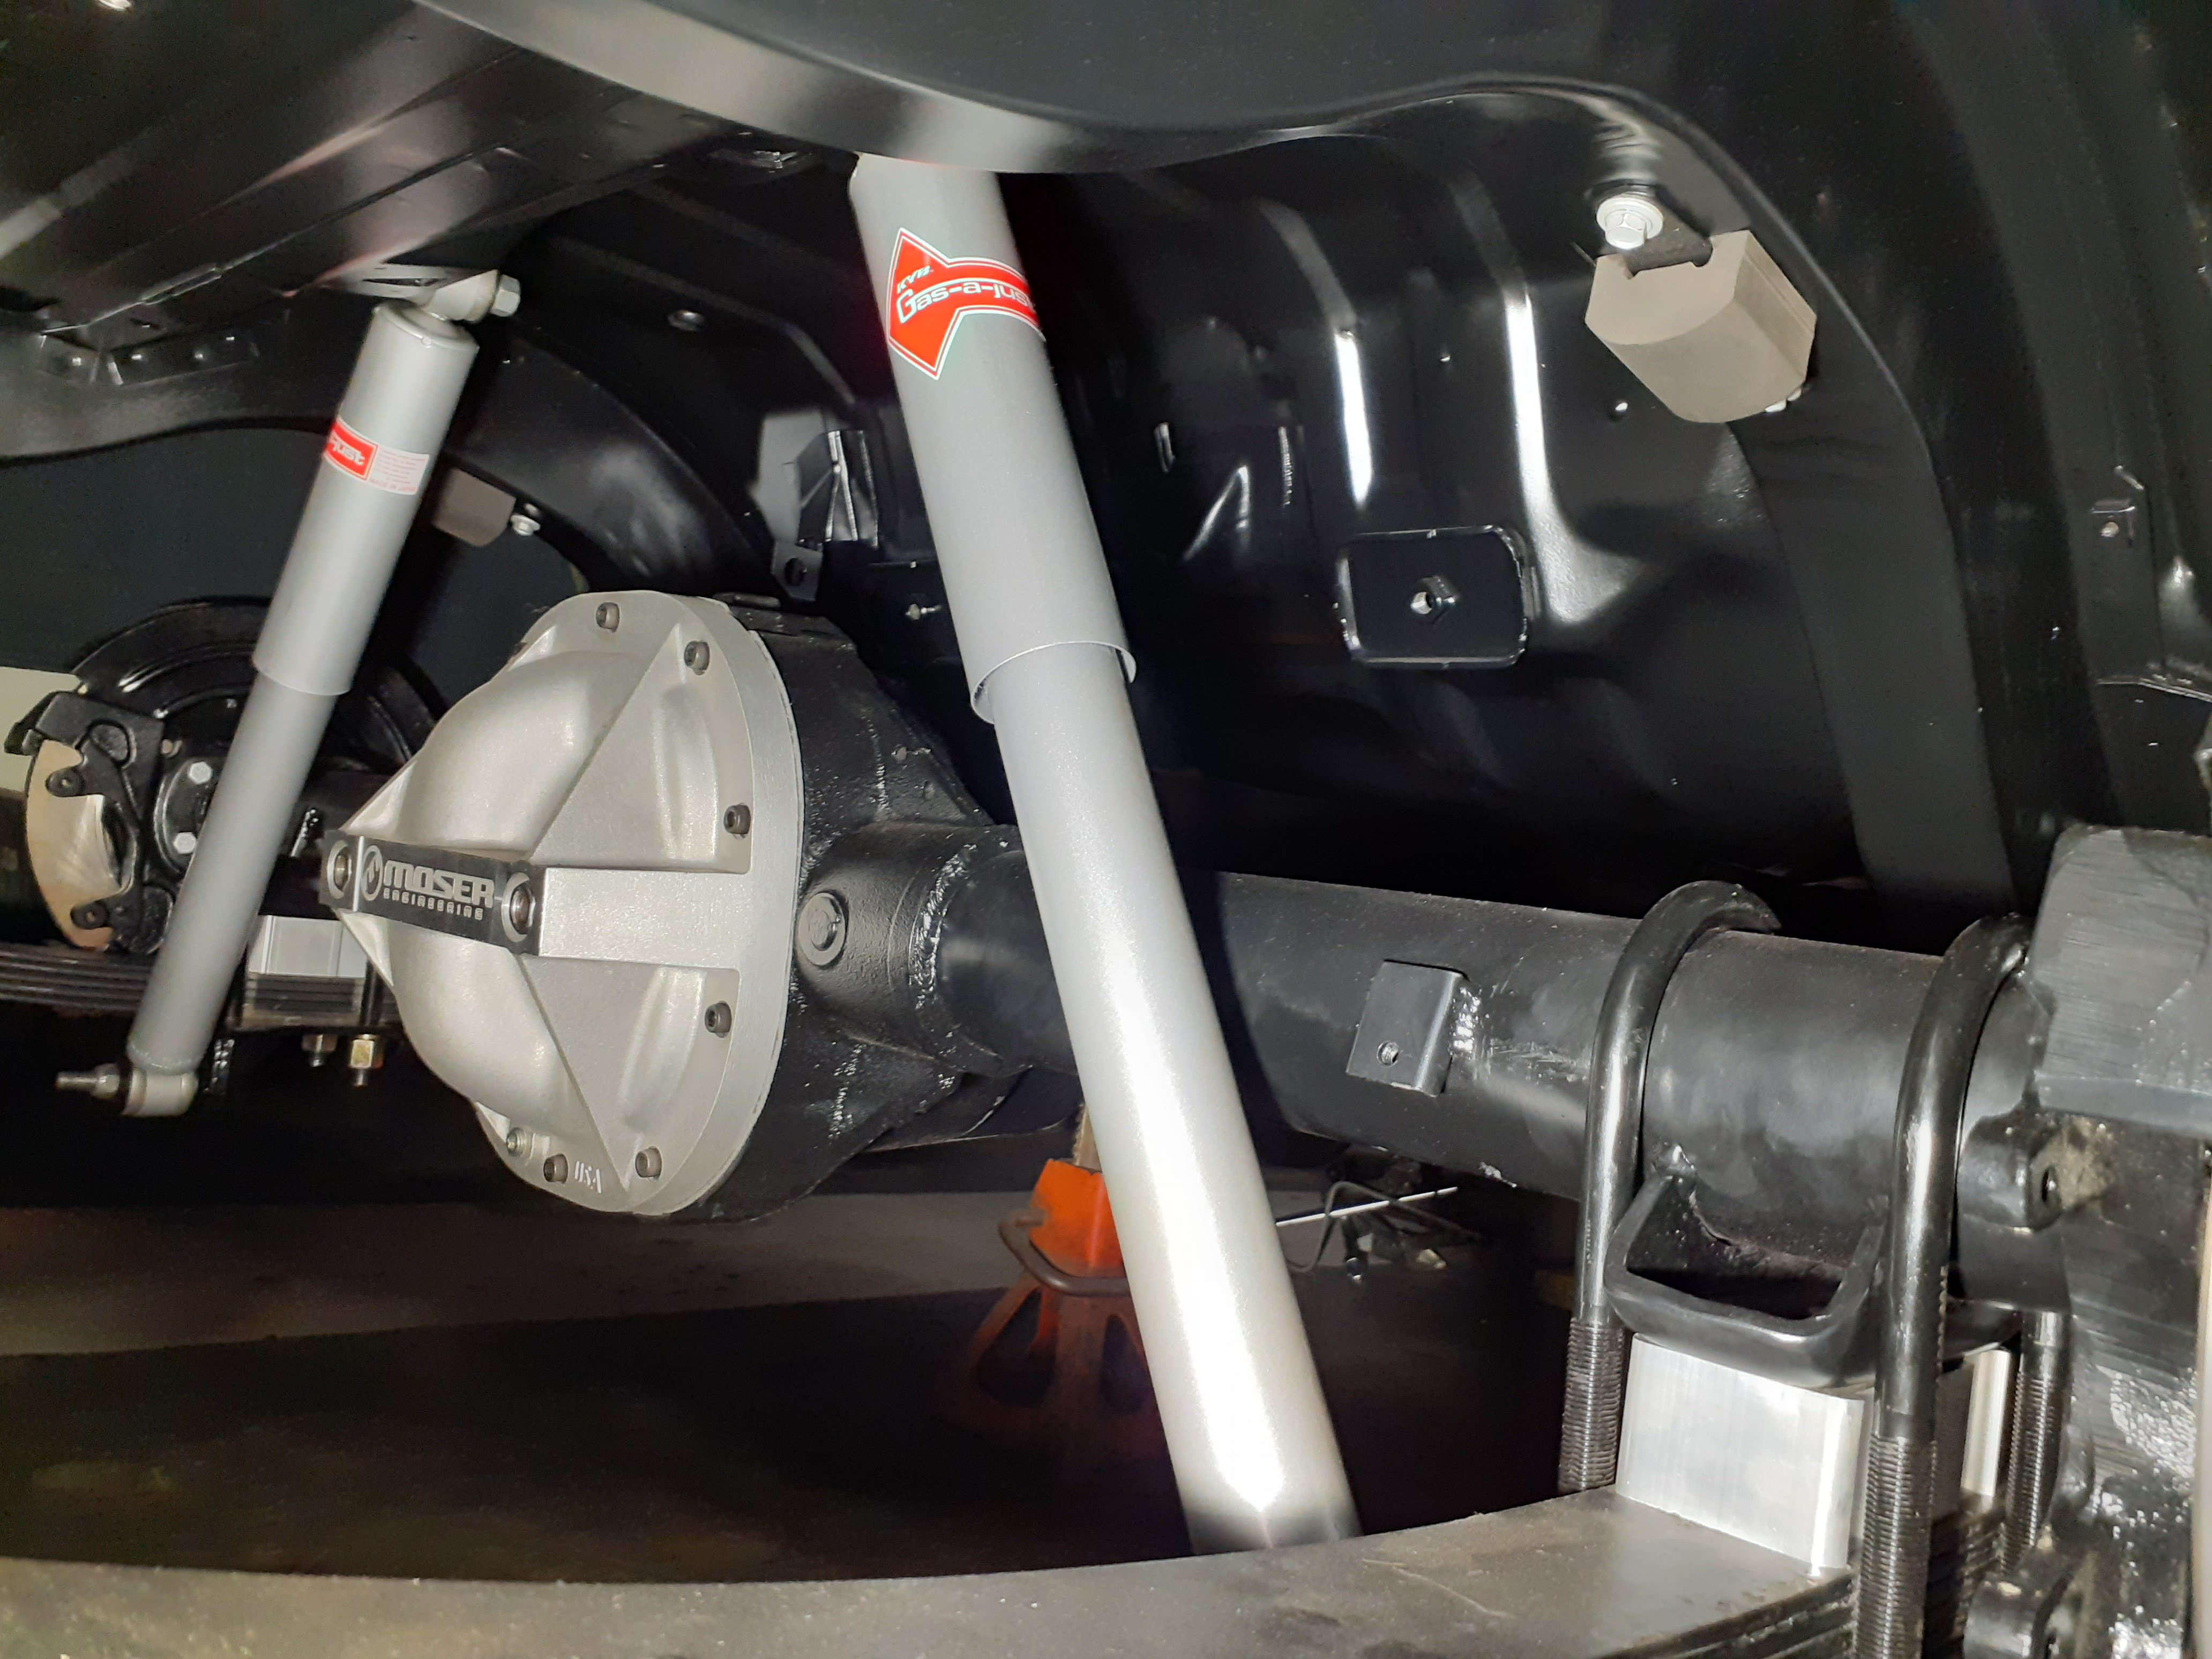
Been slack at taking photos, although there's more photos than I thought there'd be. Got the driveshaft hoops done. Rear one was pretty tight to fit in the tunnel. Front one didn't have much room above the driveshaft and shifter, but it all ended up pretty good. Once the driveshaft and diff pinion angle was sorted I could finally fill in the new tunnel at the back. I wanted to tuck the radiator under the radiator support panel, but there is usually another support that goes vertical down from the centre. So pulled that out and made up a new one out of tube, for a bit more room. New thick core sort of tucks under nicely. Built some stainless steel headers. Didn't take very long to make! The no.1 runner is a little longer than the rest so they aren't quite equal length but I'm not too worried anyway. I have now welded tension springs on to the collector and cleaned up the flange welds. Made a little bracket for the oil level tube. Made a reservoir for the brake and clutch fluid. Think I'll powder coat it black or something. Made a Aluminium fuel tank. Slightly larger than the factory one and a bit more centered. The original strap mounts didn't really line up or exist anymore so had to weld some tube across the chassis rails. As you can tell I also stripped all the old underseal off, took way too long! Stripped and cleaned the heater and then got all the steel bits zinc plated. Added some new foam on the sealing faces too. Pulled apart the engine because I didn't really know what else to do/was waiting on some other bits to arrive haha. Everything looked alright in there. Have ordered everything to rebuild it apart from bearings, as I need to get them measured up. Borrowed a Ultrasonic cleaner and chucked most parts in there. They come out sooo good!1 point
-
Stripped most exterior stuff off, except for the doors. Have cut off the a-pillar rain gutters after ajg193's suggestion, cleaned up all the rust underneath and plug welded them back on. Found some spots of rust on the hatch after removing the window. Most of it is just surface rust. Got carried away and stripped all the paint off the exterior side. Previously someone has stripped it and gone over all the rust spots and ground them out. Which I wasn't too happy about, but it seemed to have stopped it rusting further. Has a little patch welded in on the lower right as well. This top bit, just below the water squirter had a few small holes. Cut it out and made a patch to weld in, after I cleaned up the rust inside and painting it. All welded and cleaned up. Picked up a new engine! 4AGE 20V Blacktop!!! And a J160 6 speed. It already has the SQ Engineering adapter plate. The clutch/pressure plate and starter is already set up ready to bolt the two together. Pulled out the old 4K. Empty and dirty engine bay. Gave it a steam clean, came up heaps better. Test fit of the J160, definitely going to need to pull out the grinder! Laser cut out a 12mm stainless exhaust flange. Planning on building some high-rise headers at some stage. Ordered some goodies from SQ Engineering. Bought some Cusco AE86 engine mounts. Also have an AE86 water pump set up and some other bits on the way.1 point

.thumb.jpeg.910c6632f6e66e8cba89476e83b41634.jpeg)


This leaderboard is set to Auckland/GMT+12:00