
Leaderboard


Popular Content
Showing content with the highest reputation on 08/24/20 in Posts
-
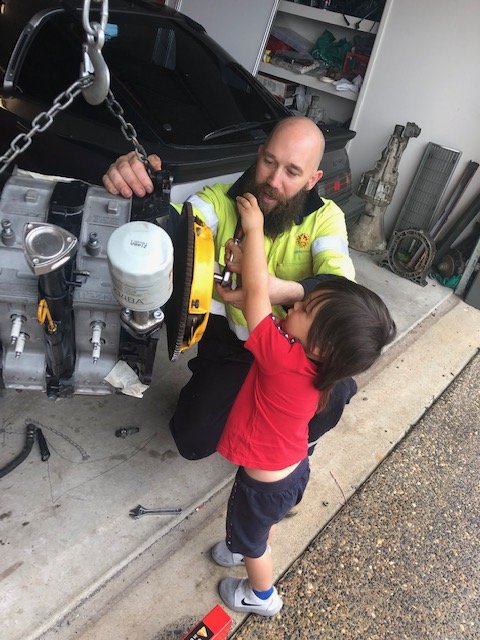
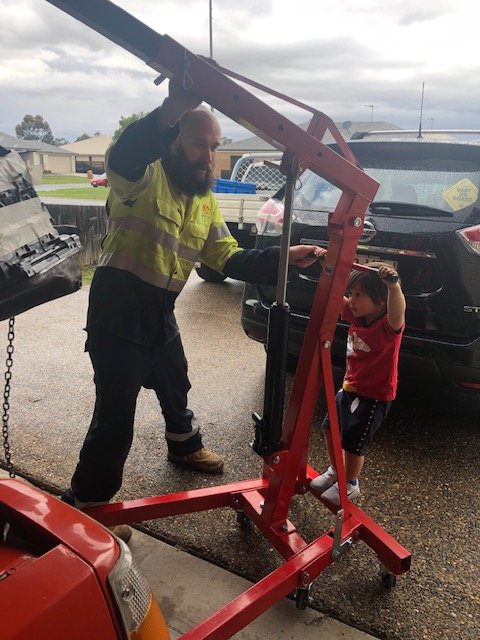
With that all done, and a bit of time up my sleeves it was time for rebuild #2 on the little 12a!! this time with everything being new I was sure it’ll be ok. Everything went together without a hitch. and this time rotating it was the compression I remembered got it thrown back in the engine bay, hooked up and spin up for oil pressure. even got me young fulla off the couch from watching paw patrol to help dad throw it in!!! no dramas. Checked timing, ensured there were no leaks.... then went for a start. started first turn of the key.... smoked the house out and gave the dog a heart attack. Headers only meant it was loud.. just right. I'd upload a video... but I’m shit with technology and don’t know how to.
 16 points
 -
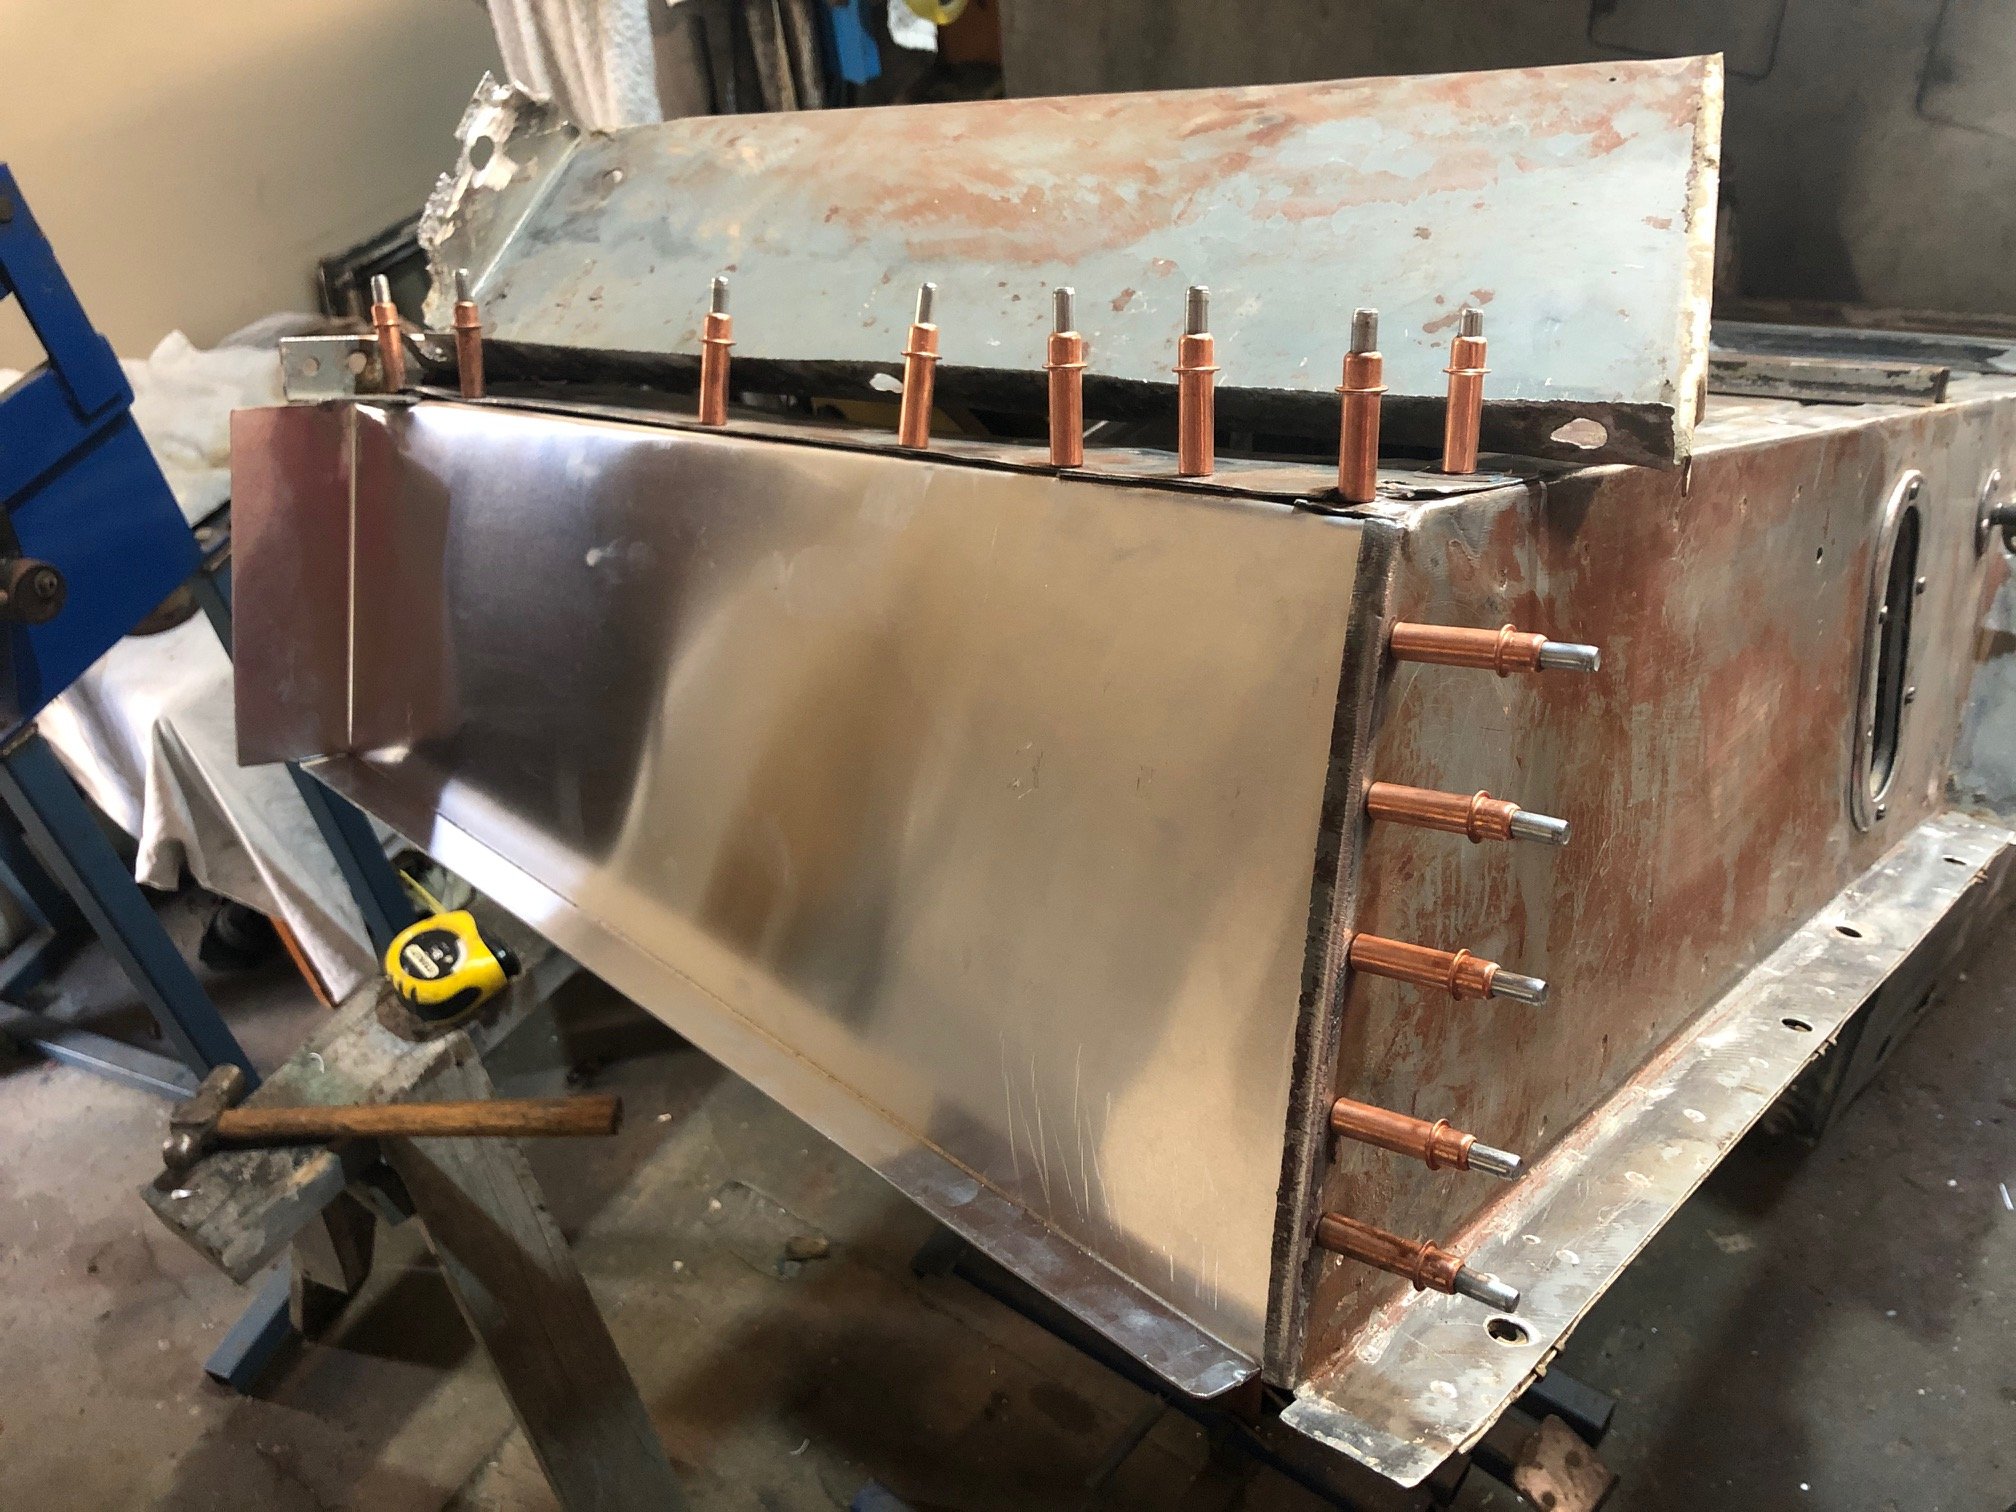
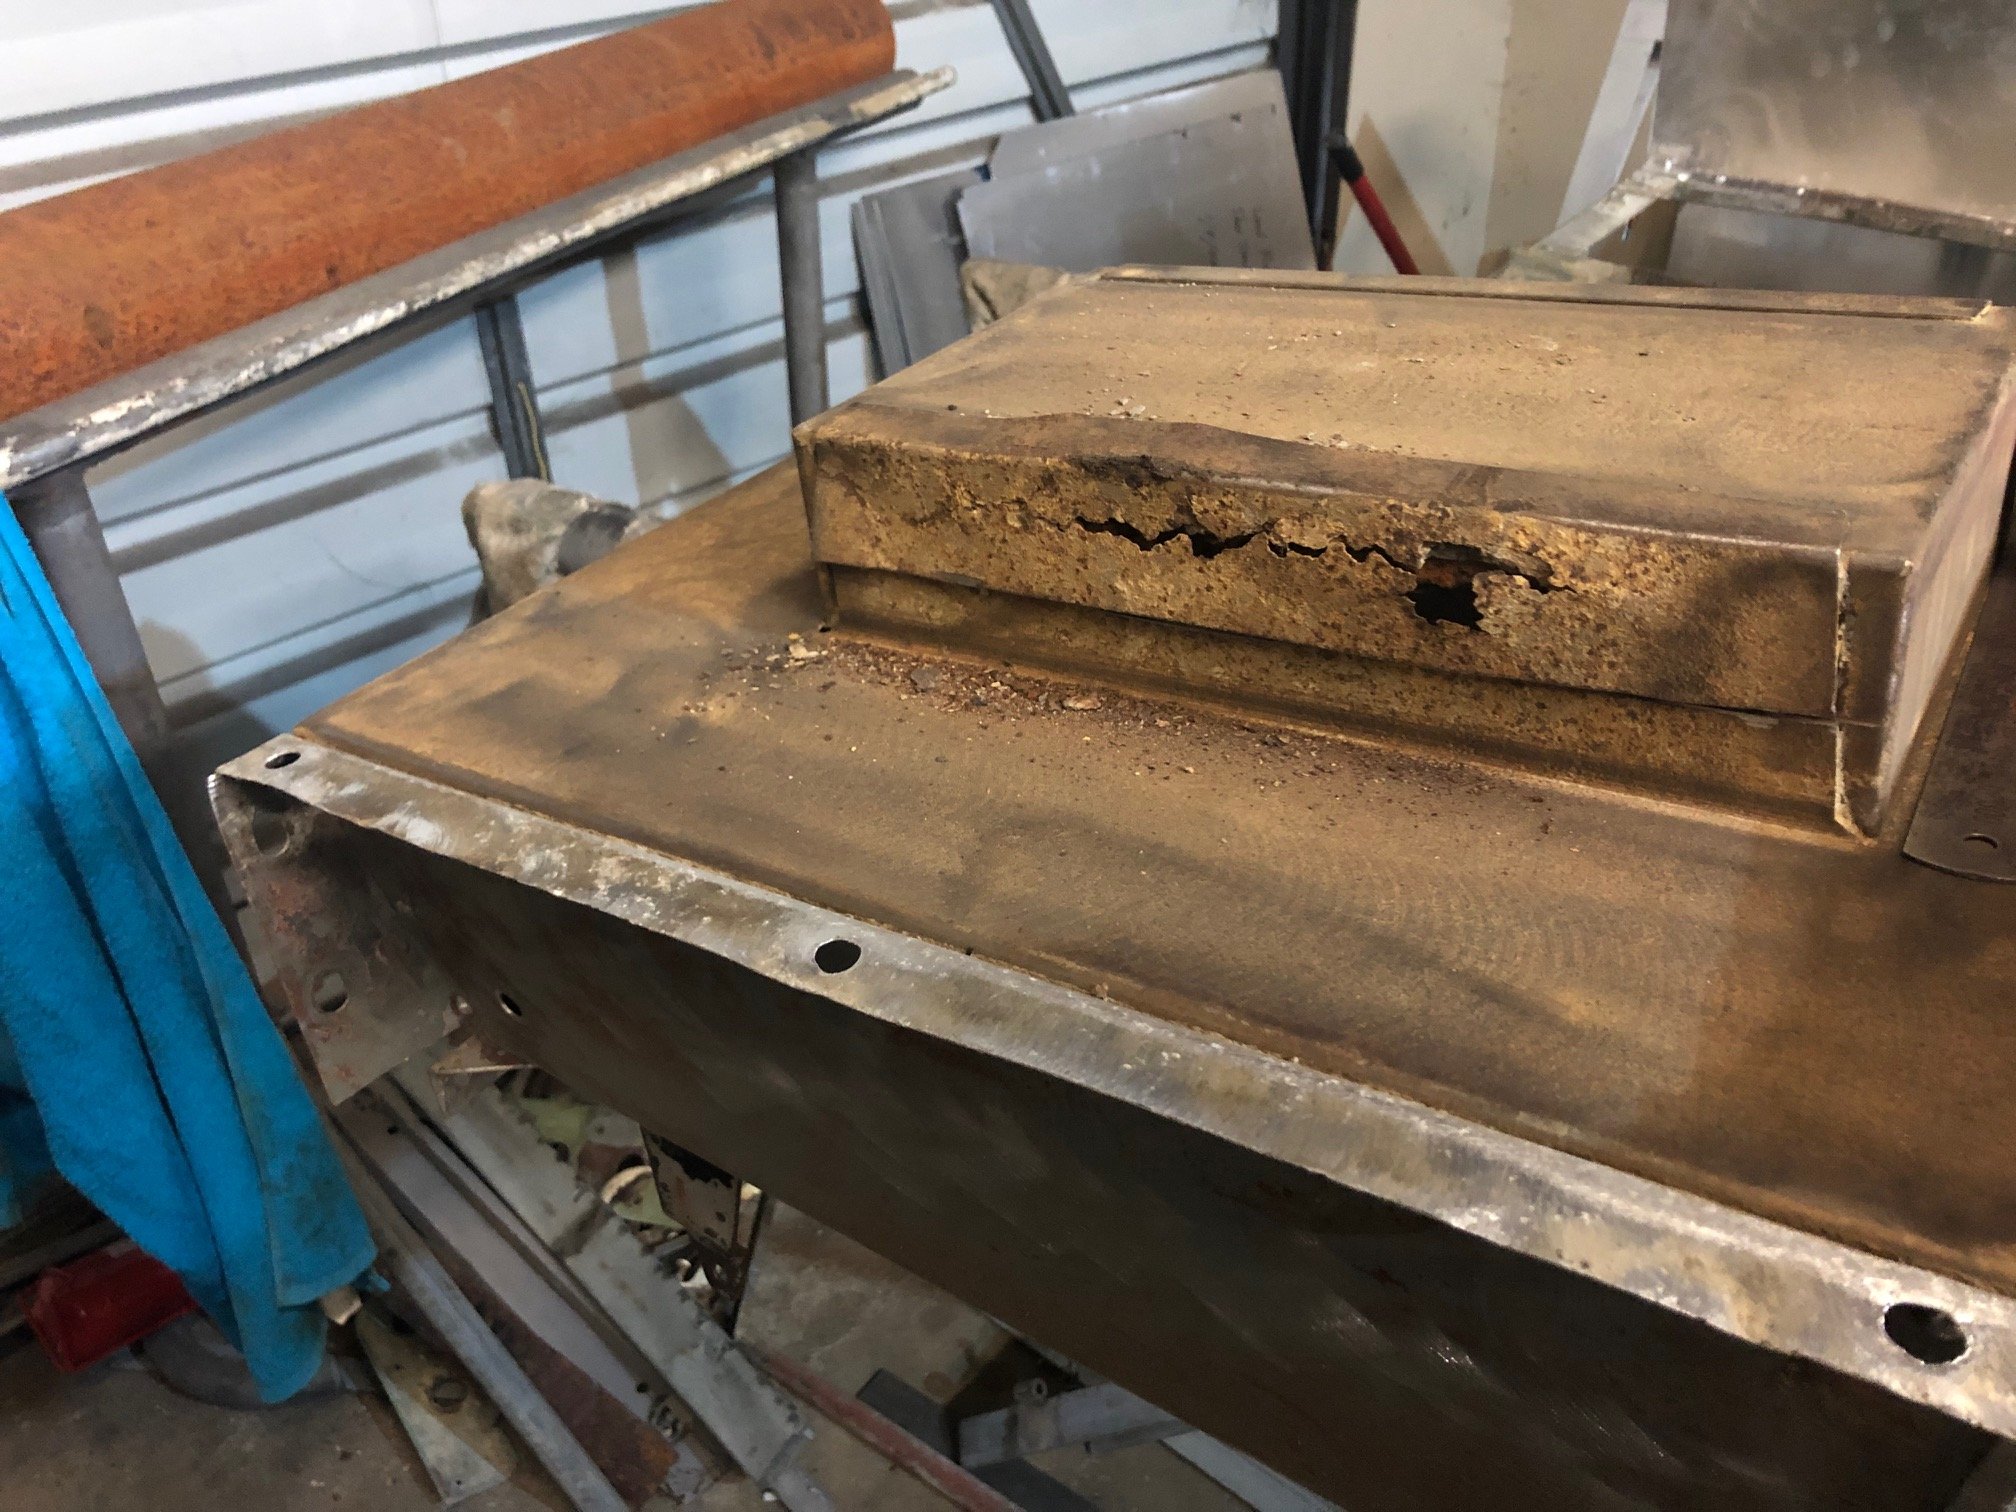
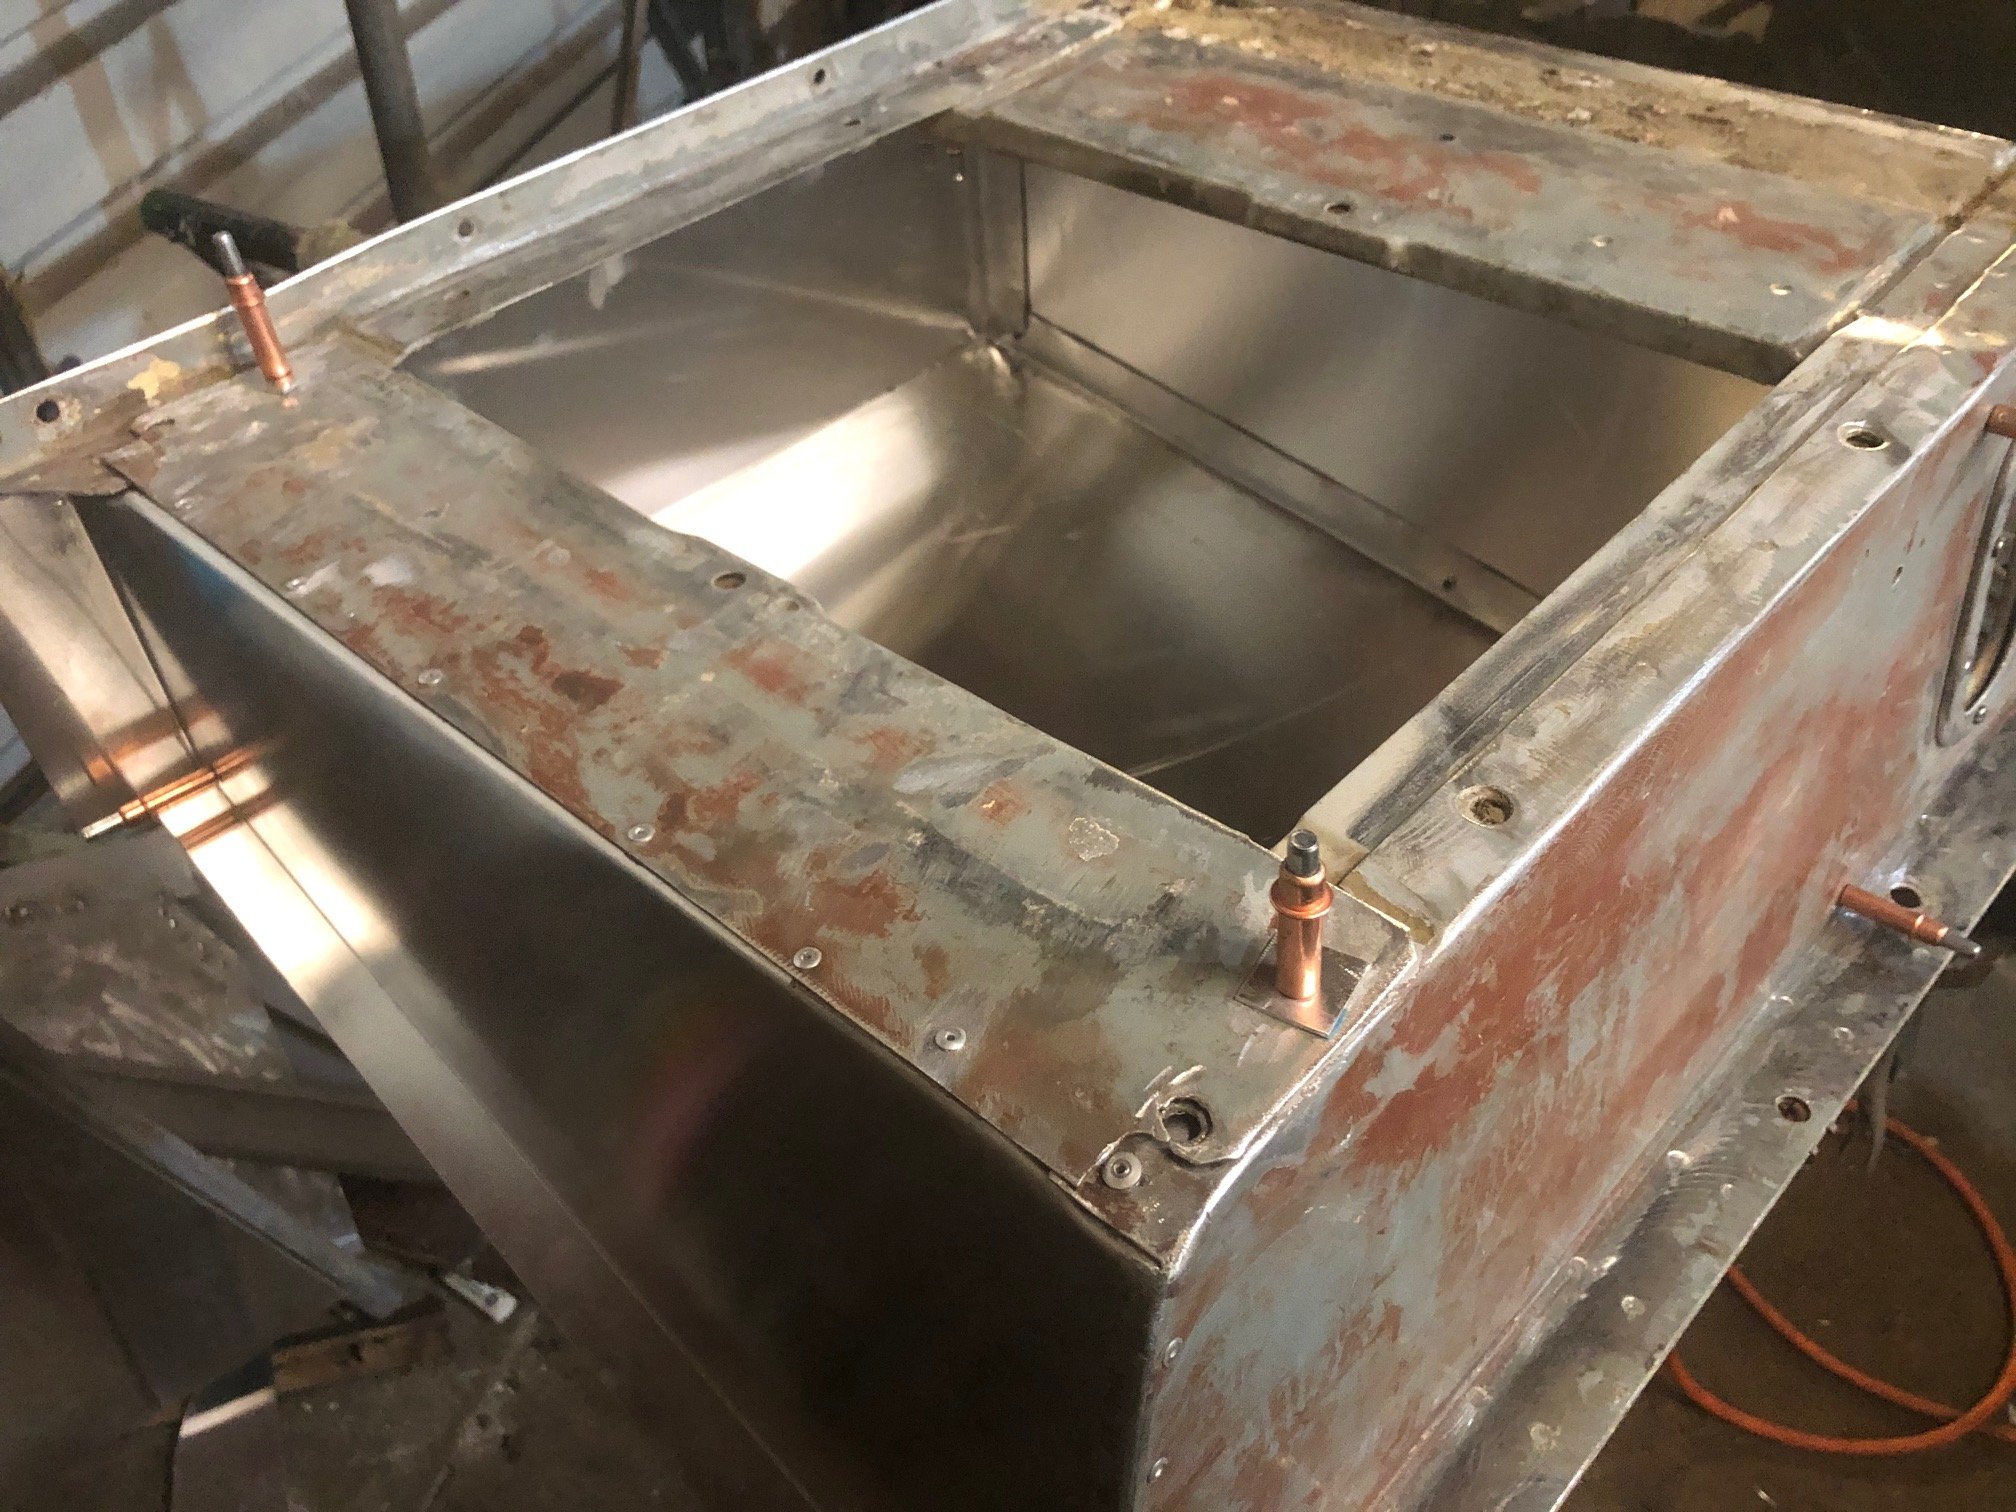
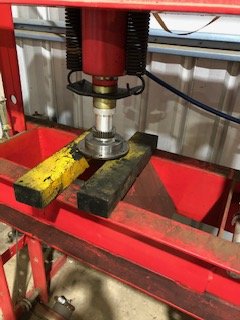
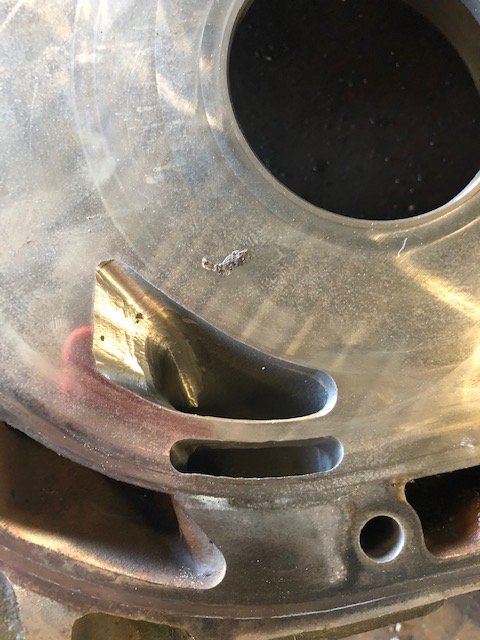
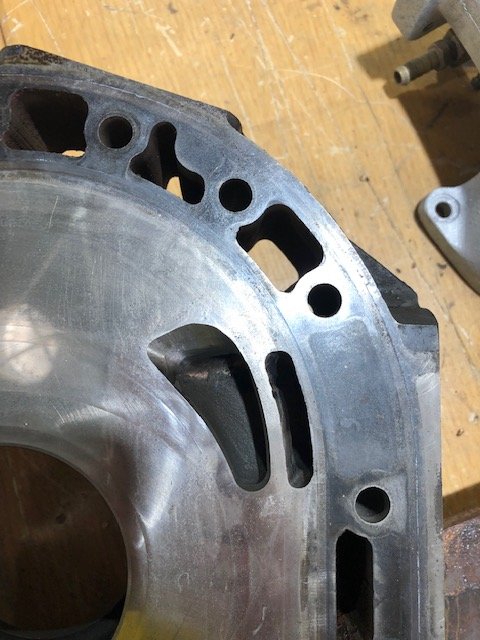
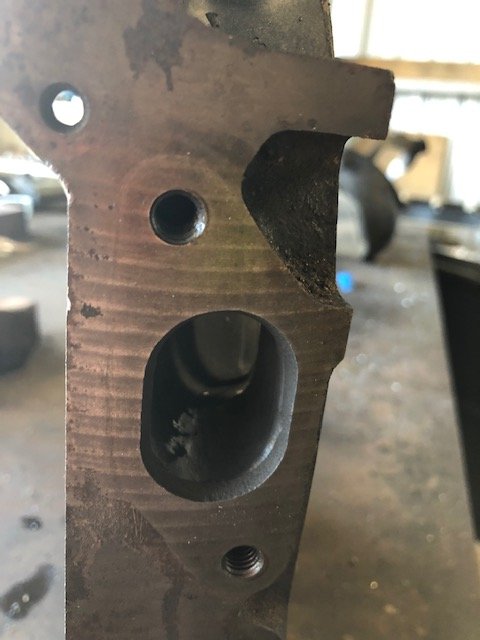
Got the next one ready. Now have 4 chill blocks, 4 risers, 2 main in-gates and 2 small gates. One of the chill blocks didnt pack very well so we'll see what happens there. The sand around that area is pretty thin so theres a chance itll get super hot and fall apart. Bigger problem is I had an issue with the sand strength for some reason and it cracked when bolting up. Hopefully it doesnt fall apart when filled!16 points
-
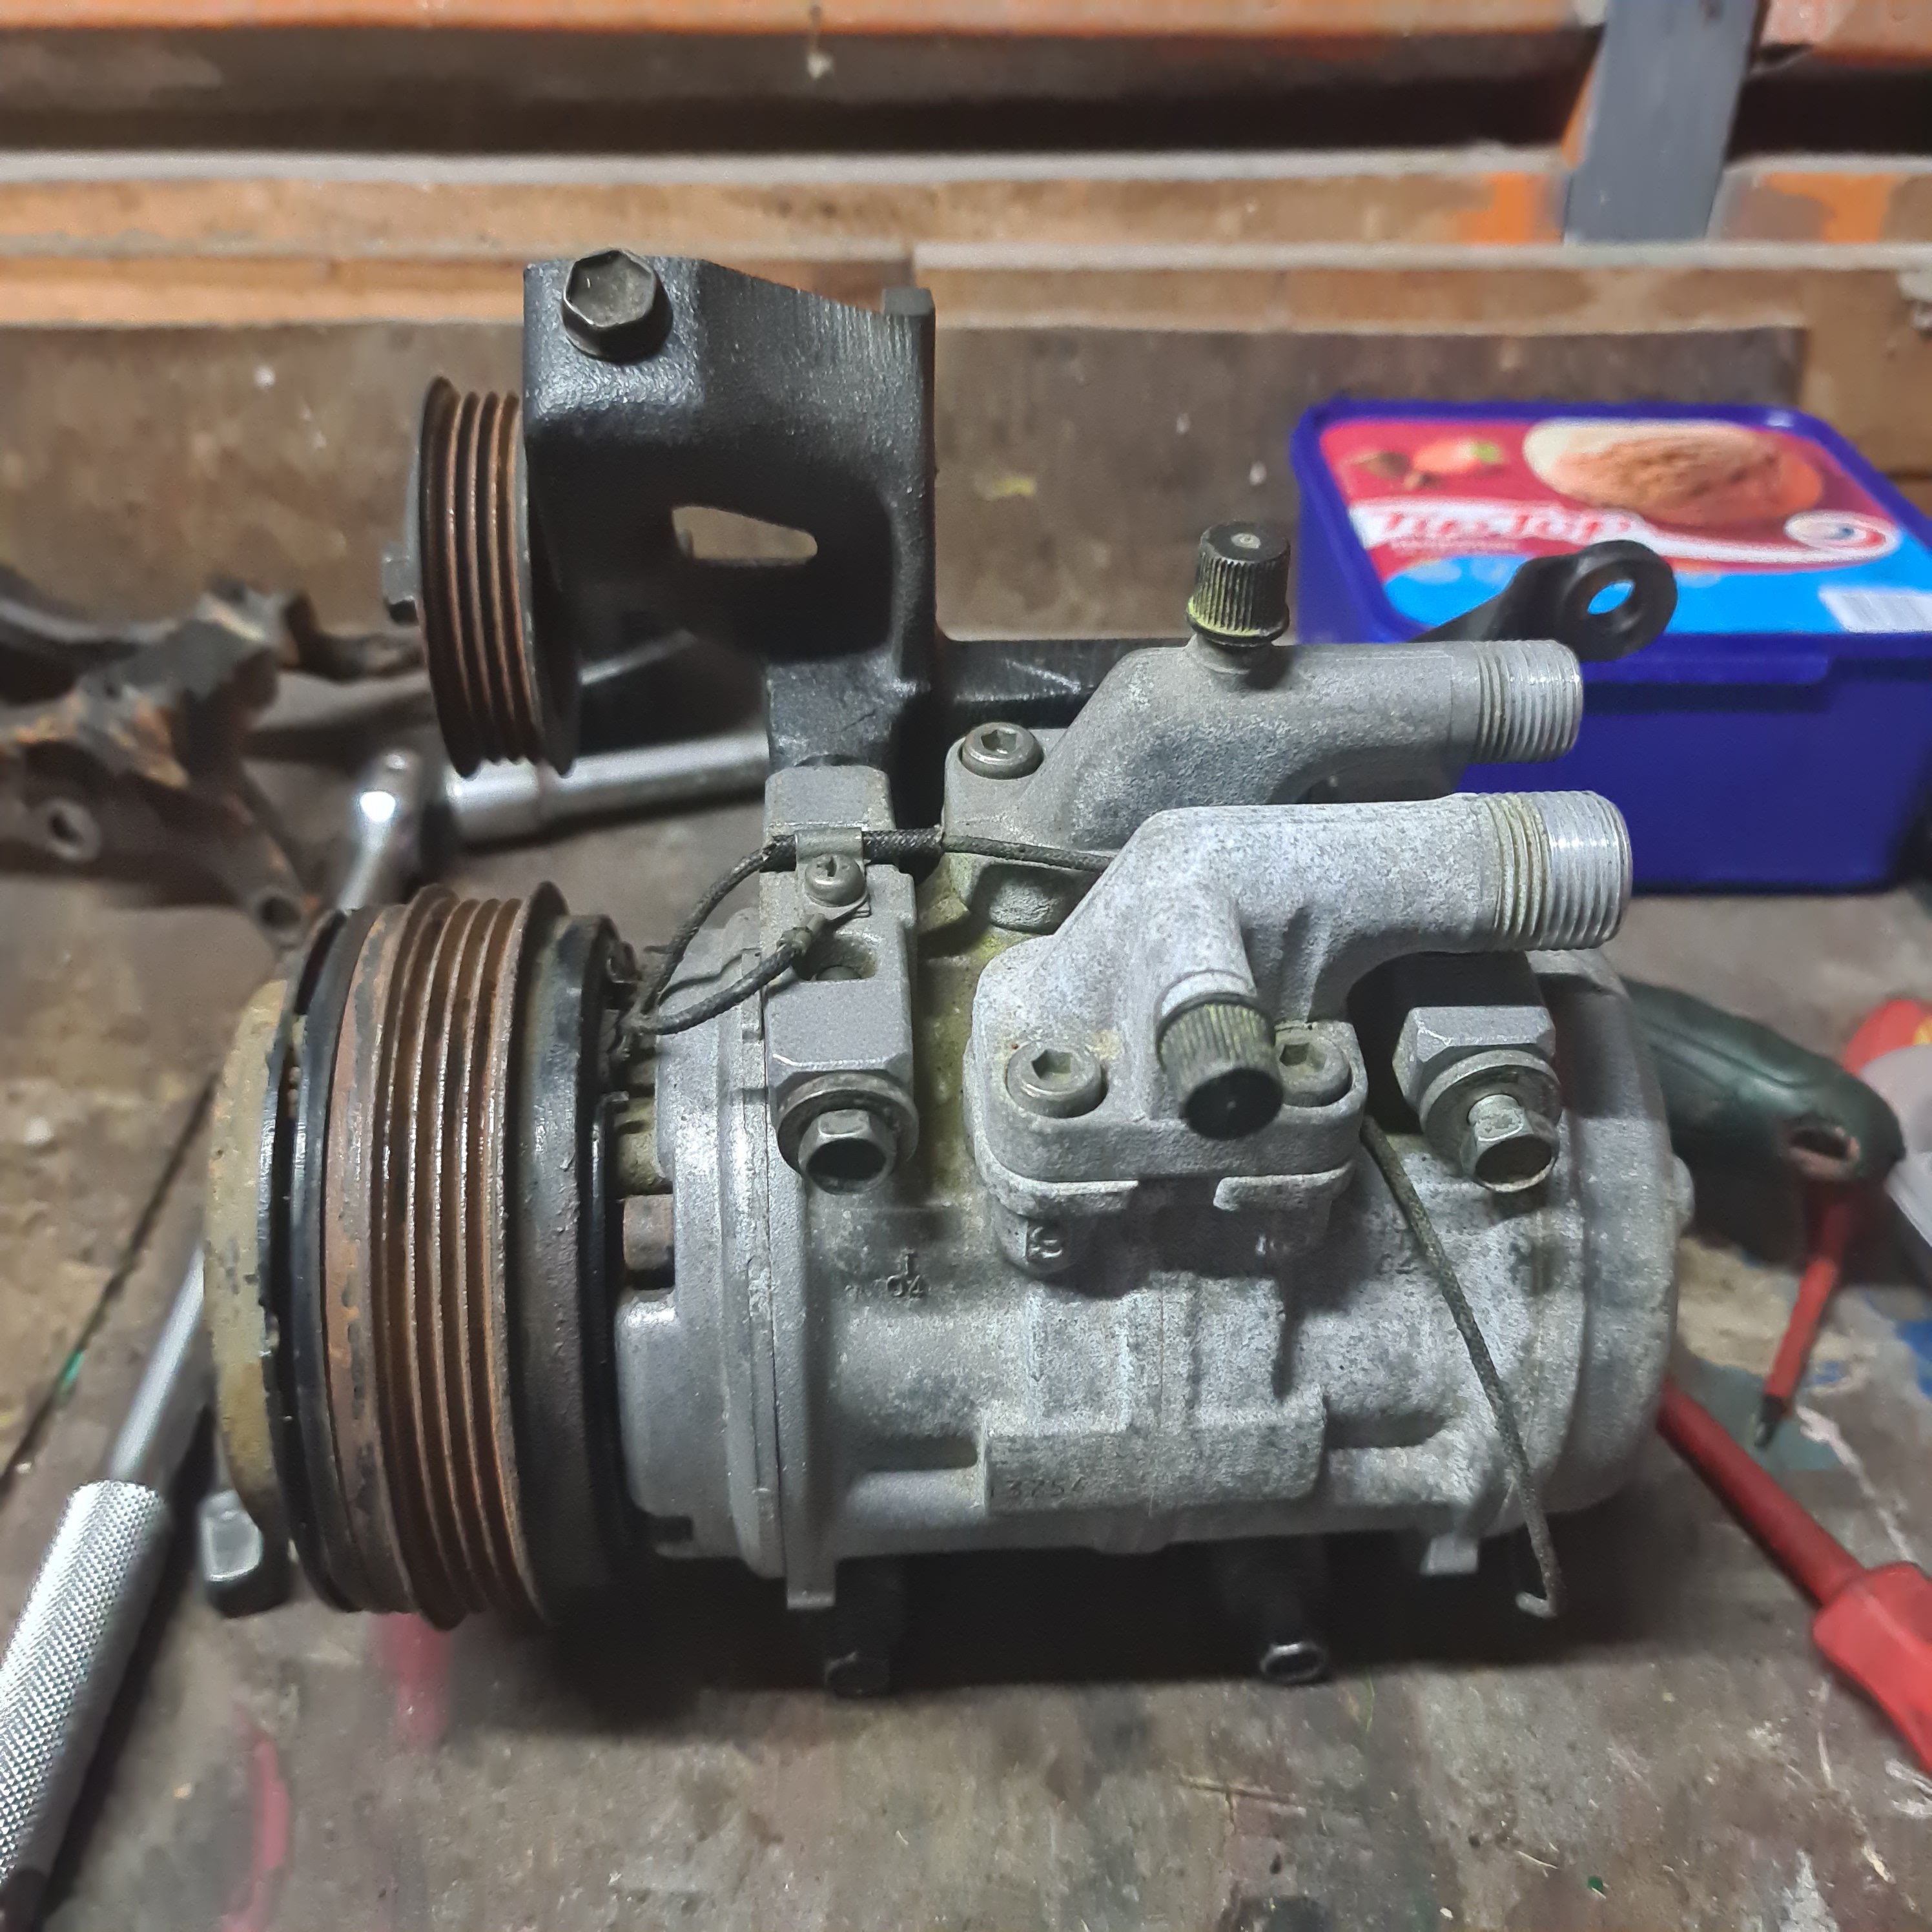
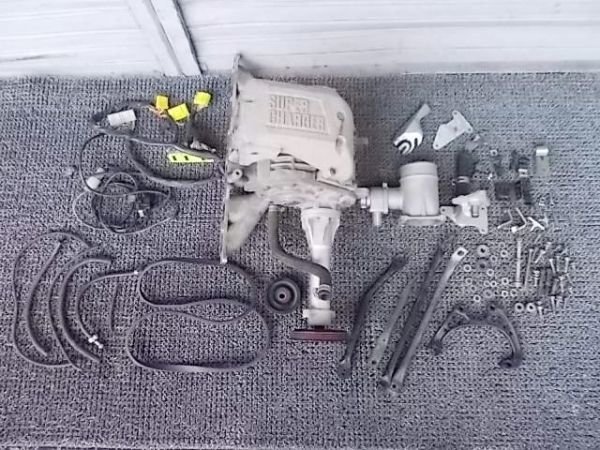
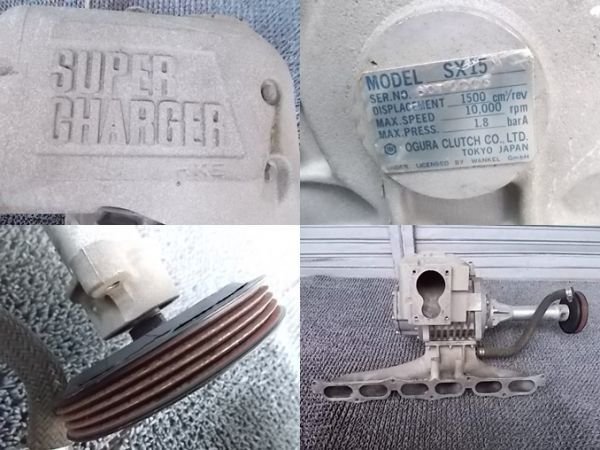
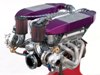
@jackeo21 hooked me up with the correct AC bracket Made the call to purchase this other HKS AC thingy from yahoo last night after eyeballing it daily for a month or so. Looks like a big job
15 points
-
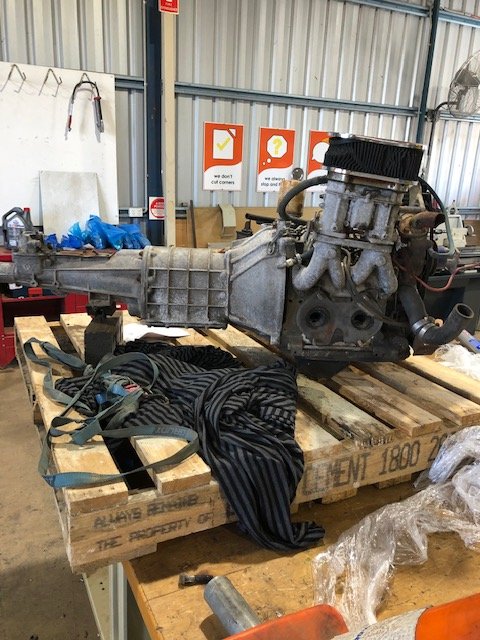
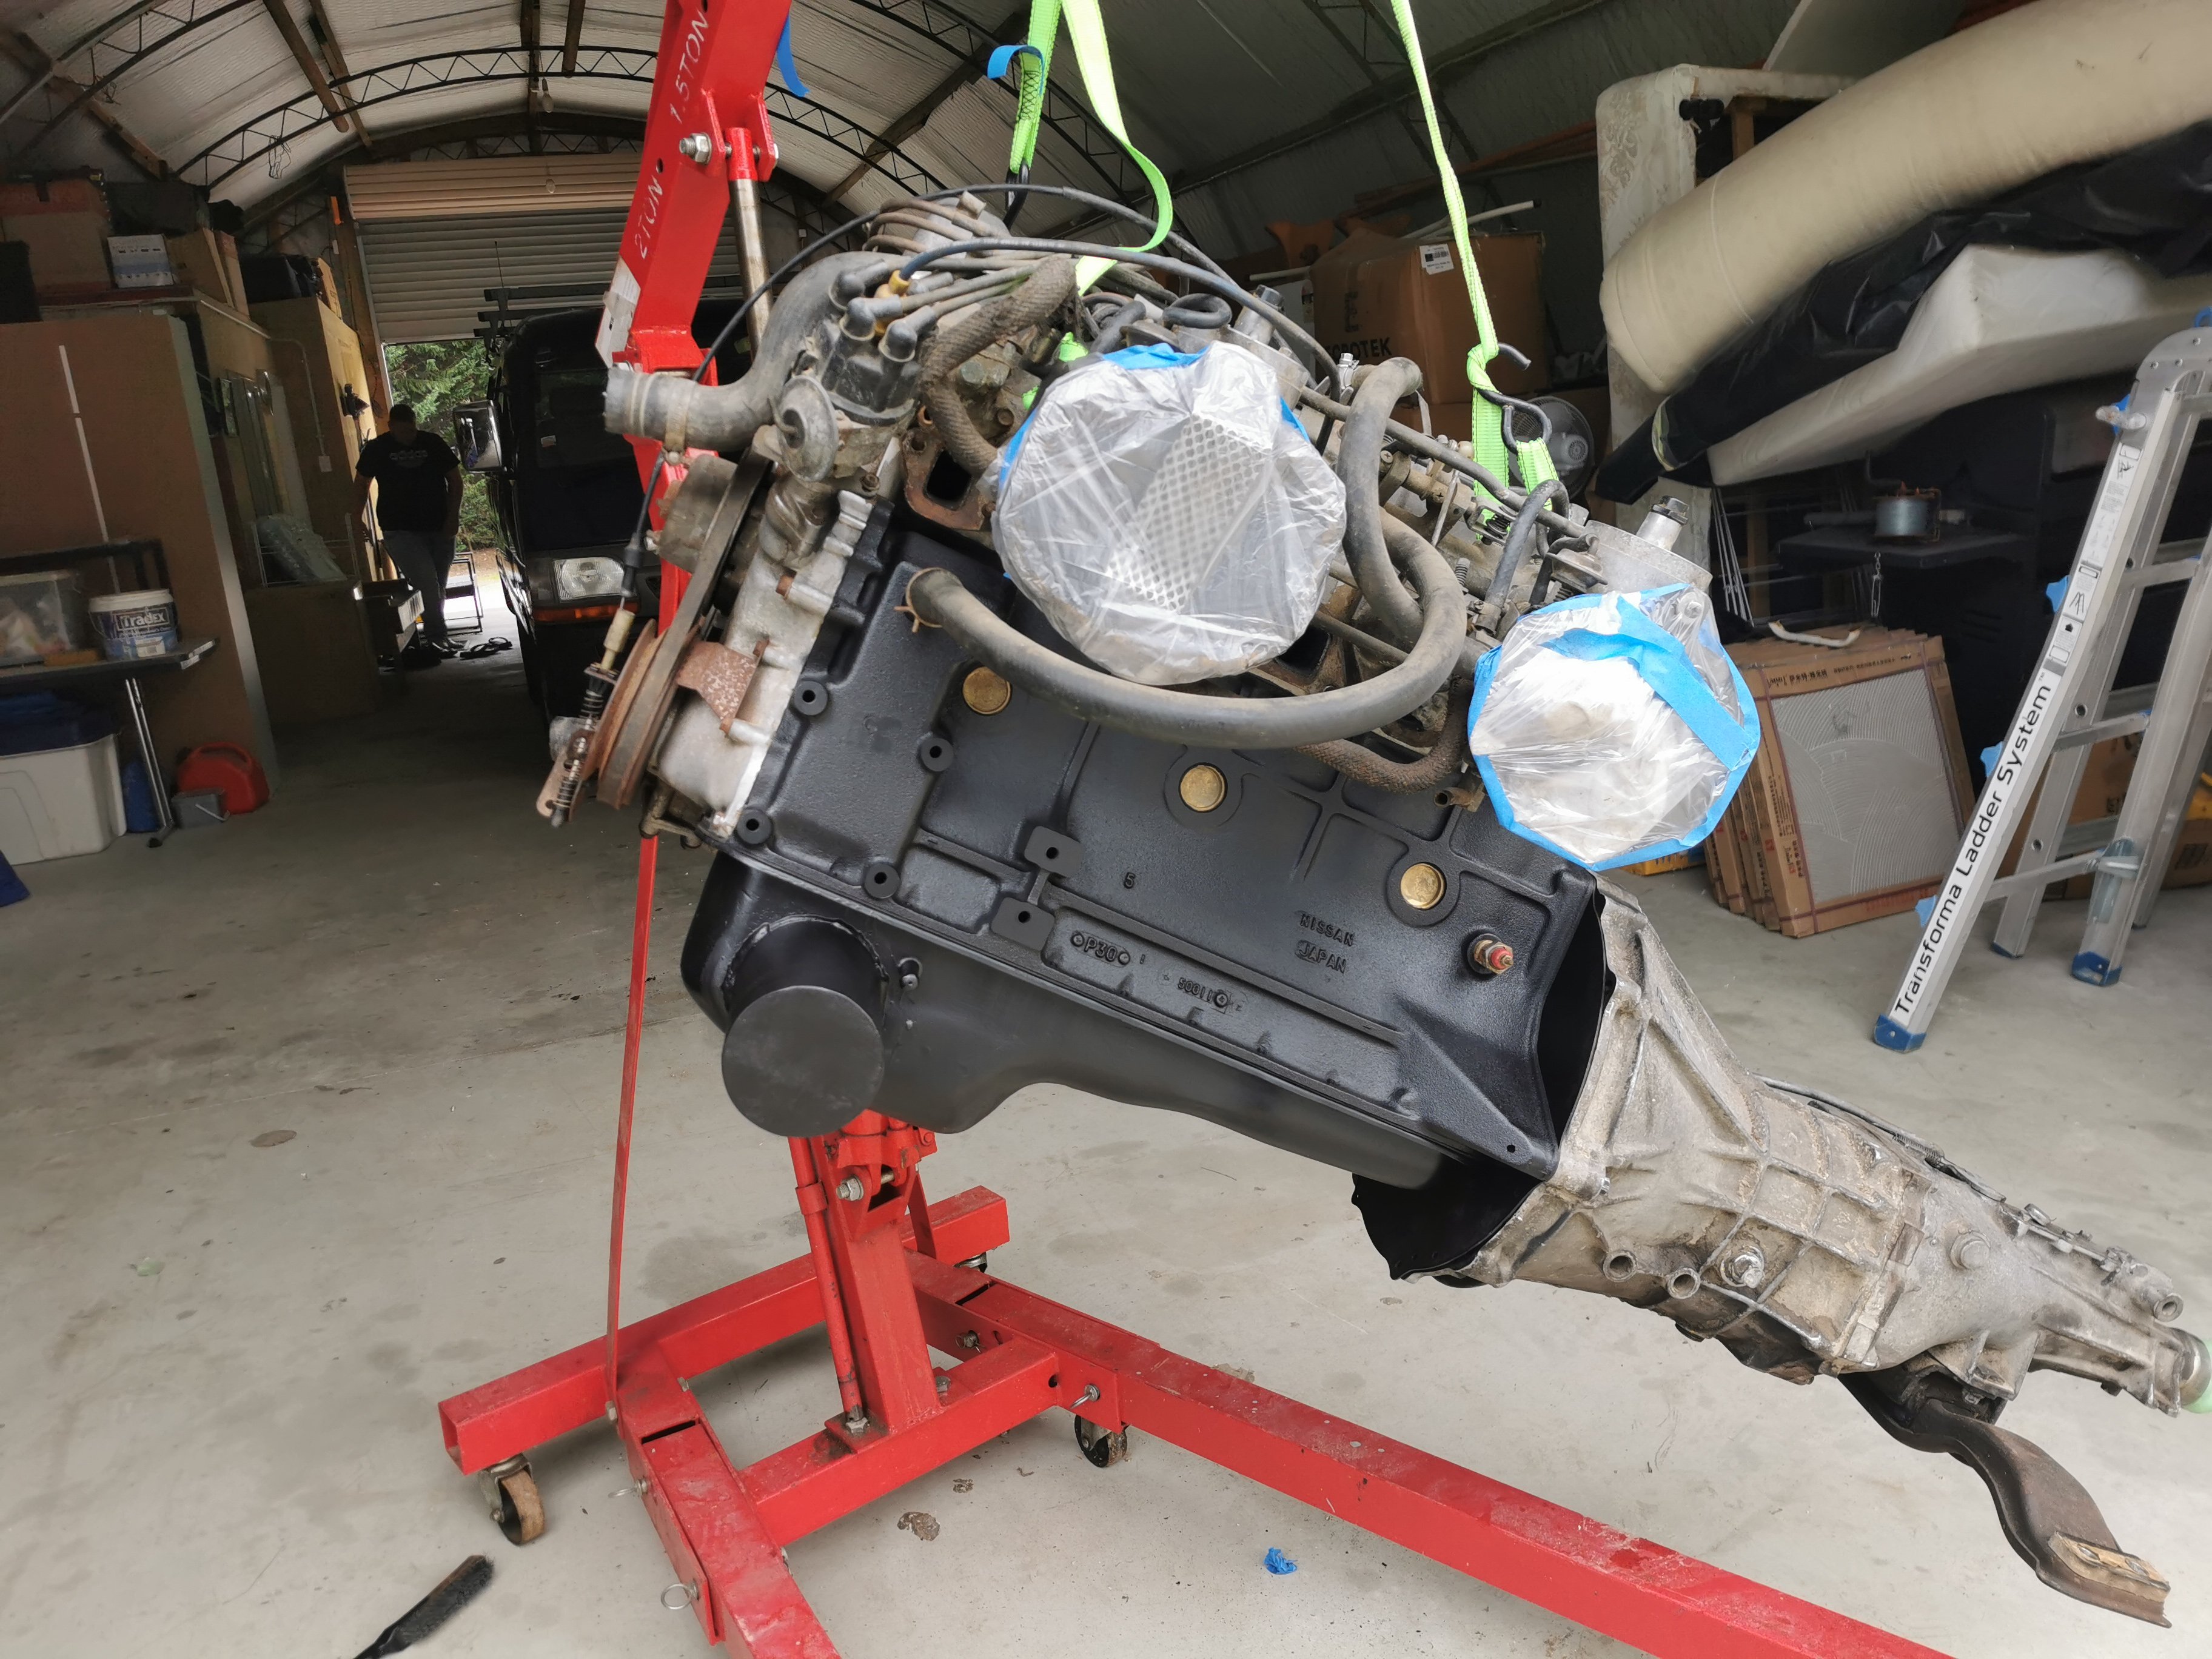
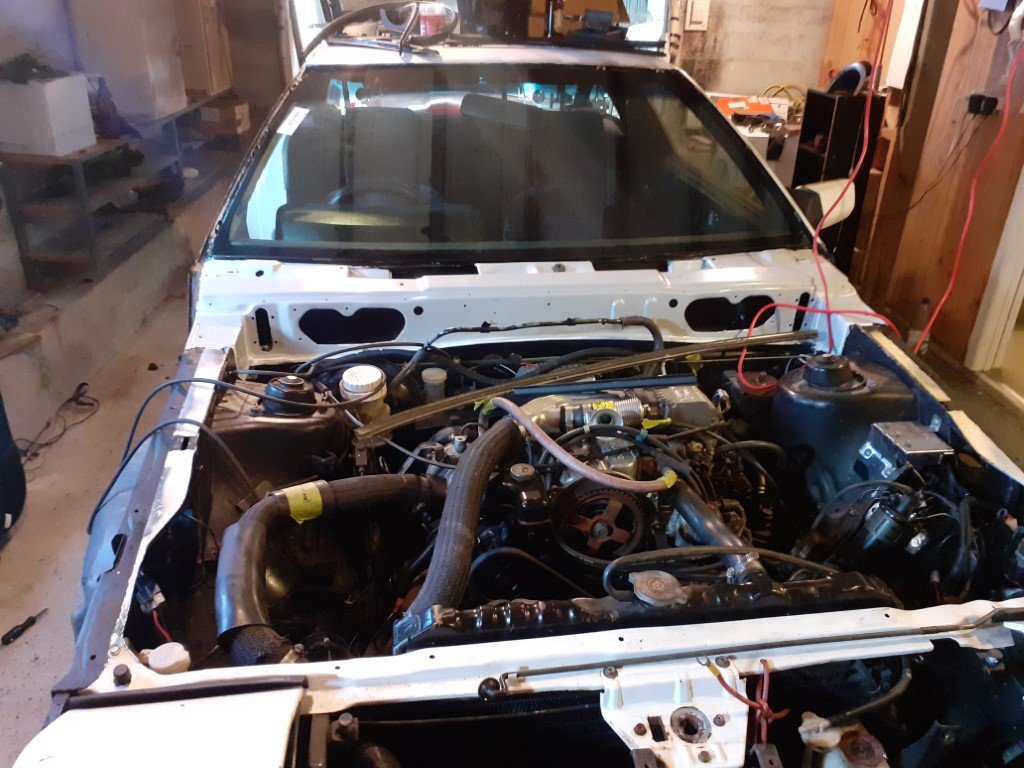
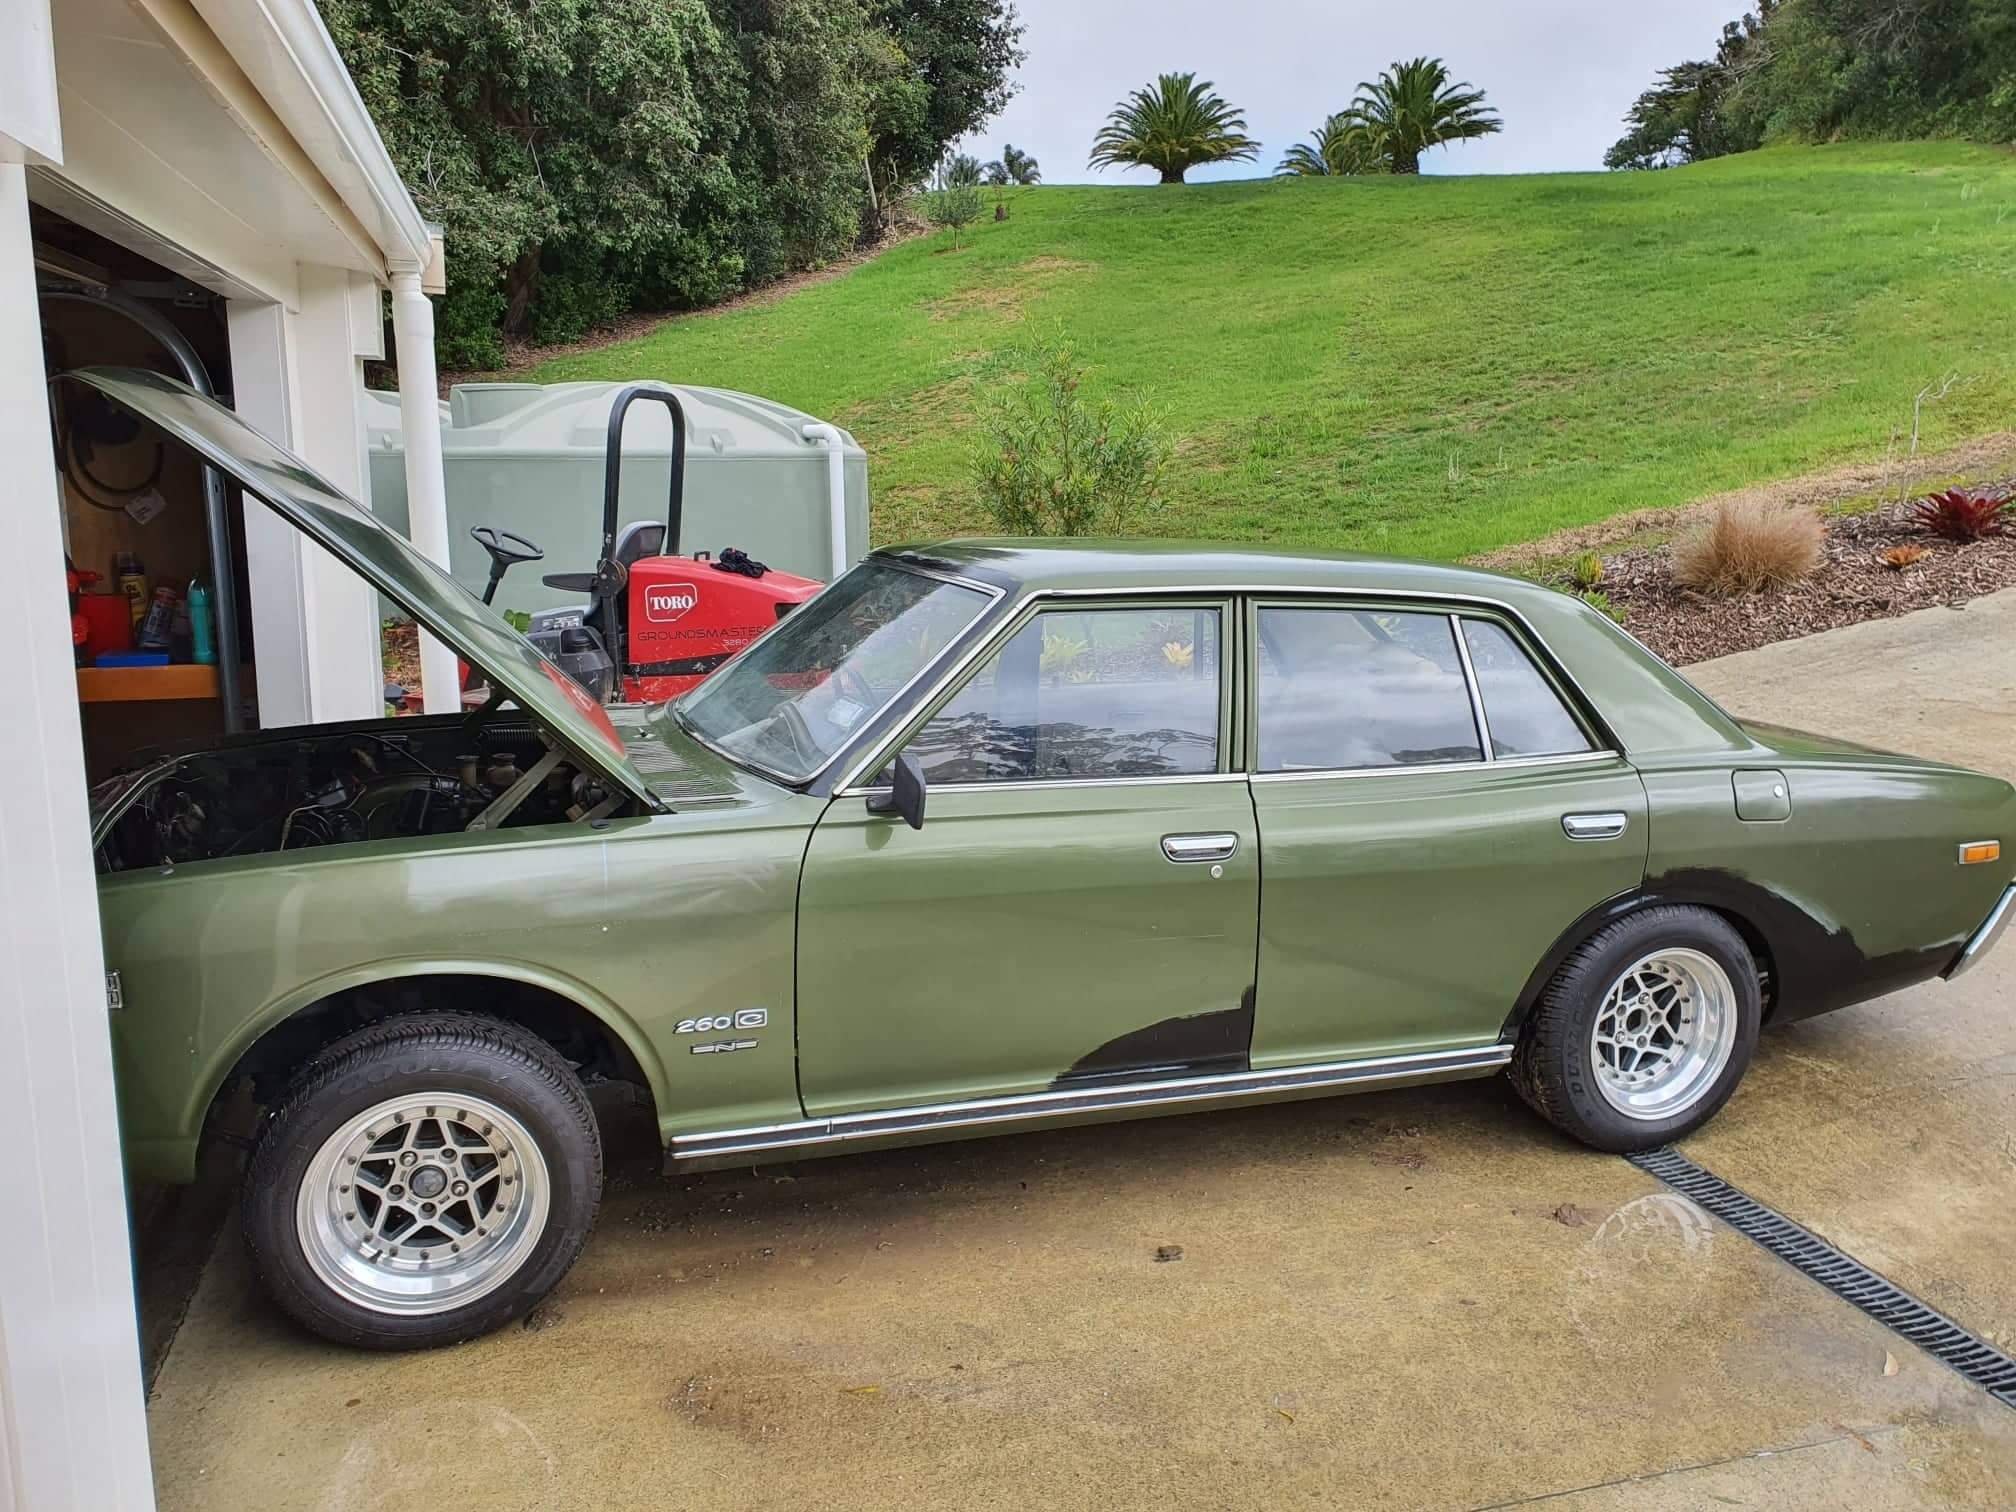
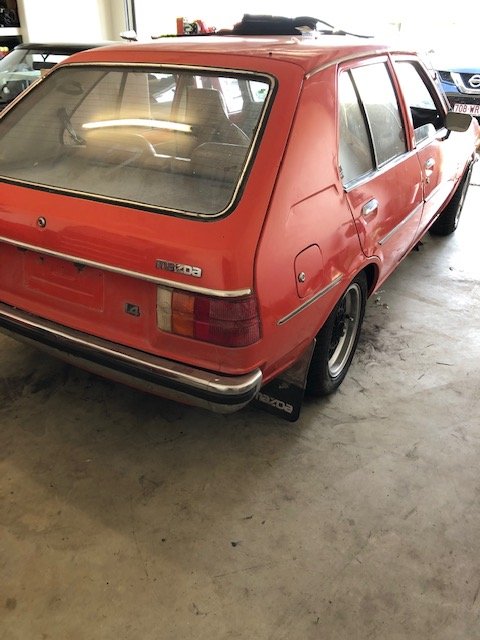
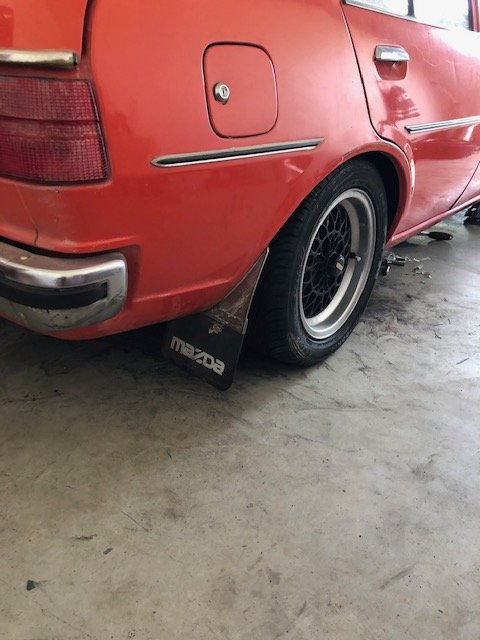
Moved my OS car over the weekend. Not under it's own power of course... Got it here on my own till I needed assistance... To push into its new home, slope of drive was too much... And there's a gap in the man shed now I will fill with tools/bikes and maybe a sofa. Be nice to able to walk in here now without climbing over stuff So nearly ready to install engine again. Next step is finding all the bits and pieces (crossmember, bolts, engine mounts etc) and putting trans together for mating up...9 points
-
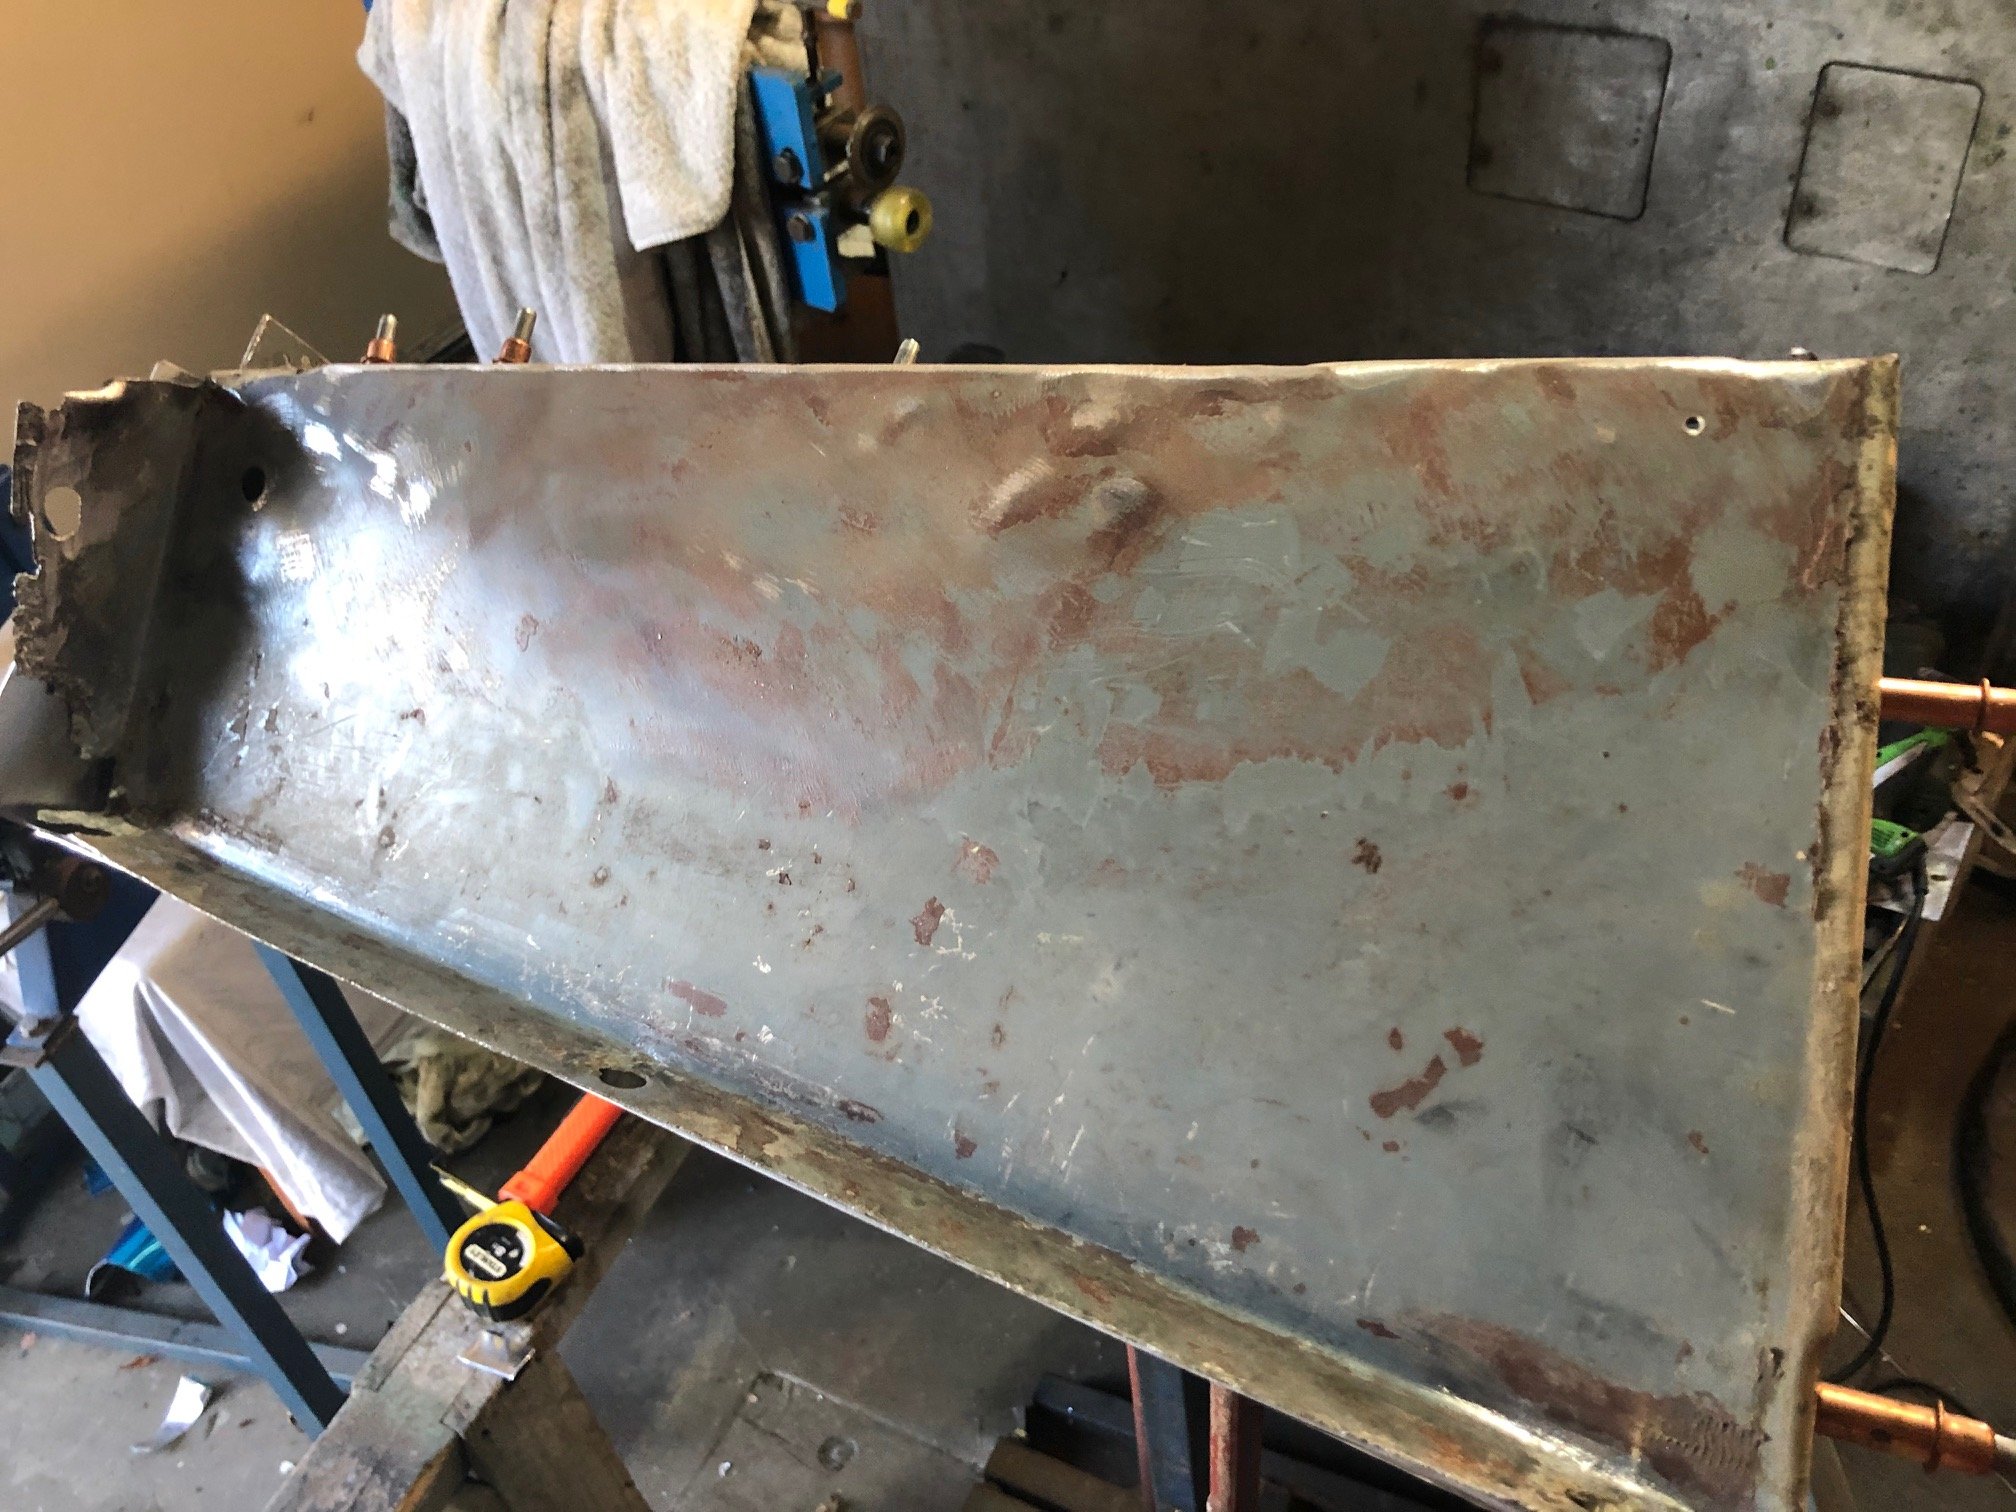
Getting there, first lot of pics update.... The alloy at the side of the seat box was cracked corroded.... folded up a new section, did I say I'm a fan of clecos...? Also the bottom of the battery box had some small rot which I fixed. The drivers side doesnt have any factory underseat storage (since in the SWB the fuel tank sits under there) so I folled some more sections up to create some space. Perhaps for a small diesel heater in the future...
6 points
-
6 points
-
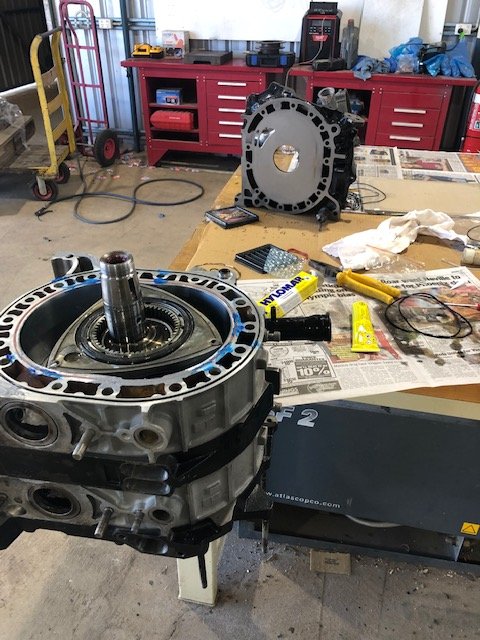
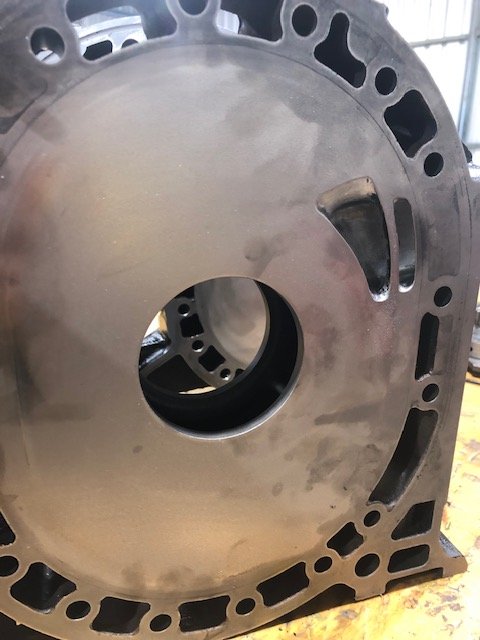
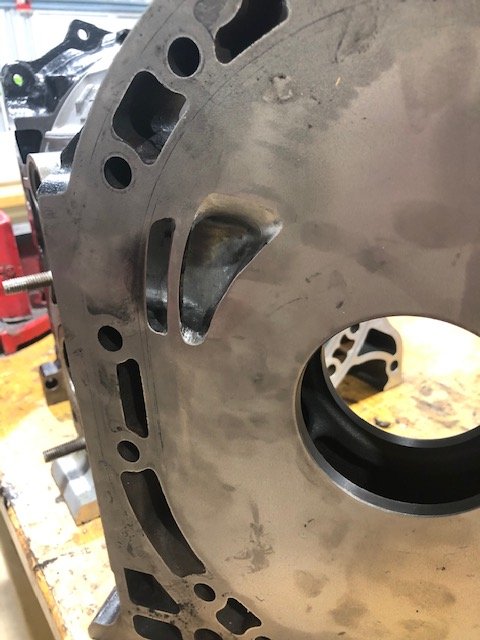
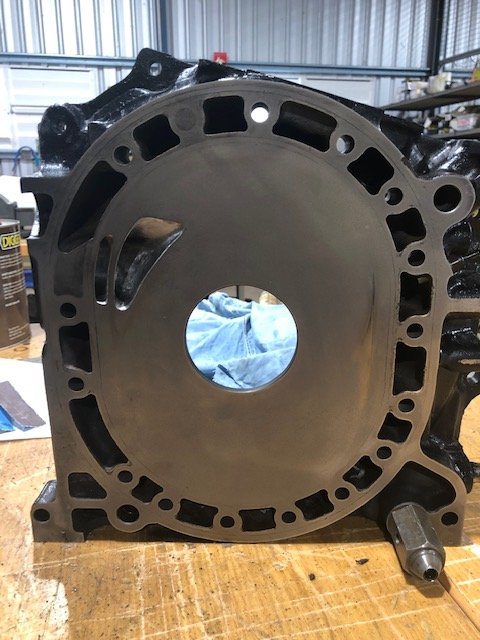
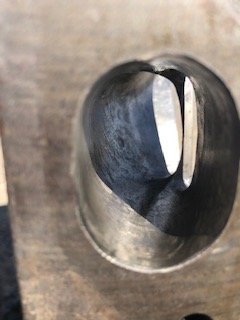
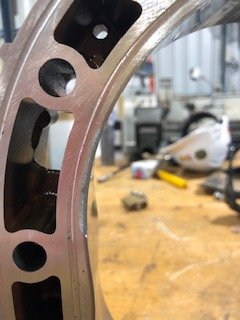
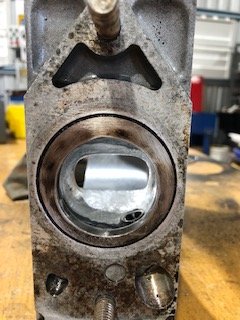
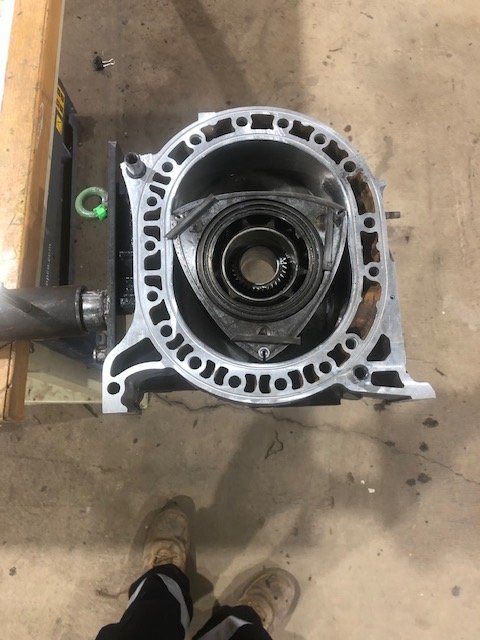
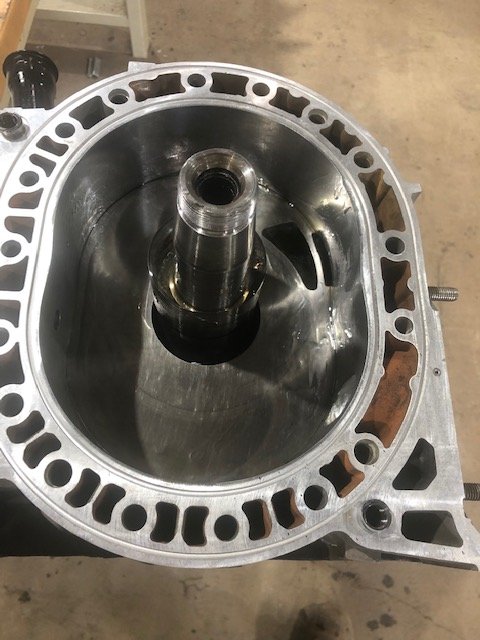
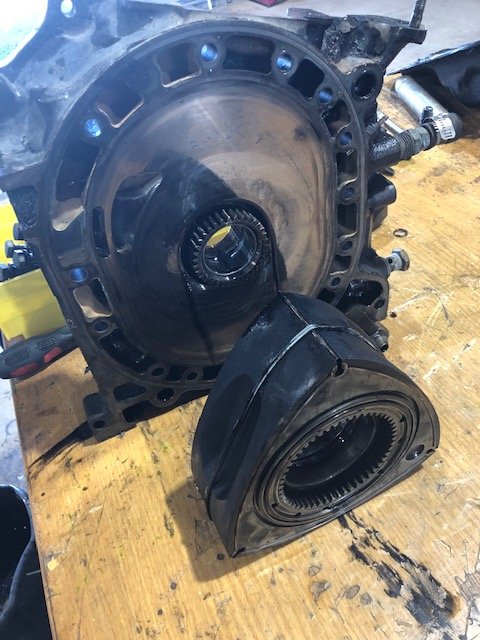
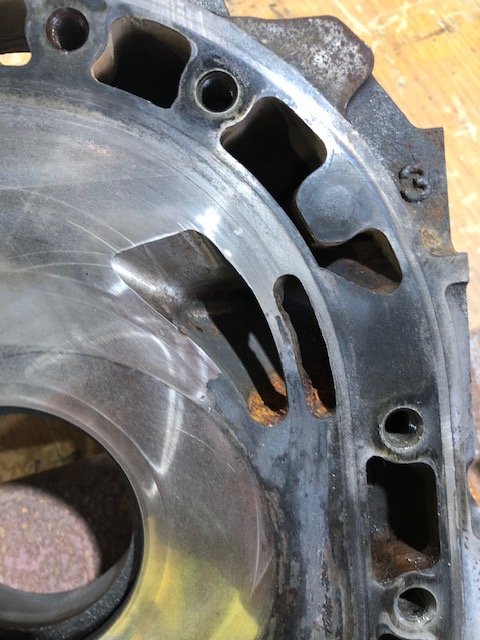
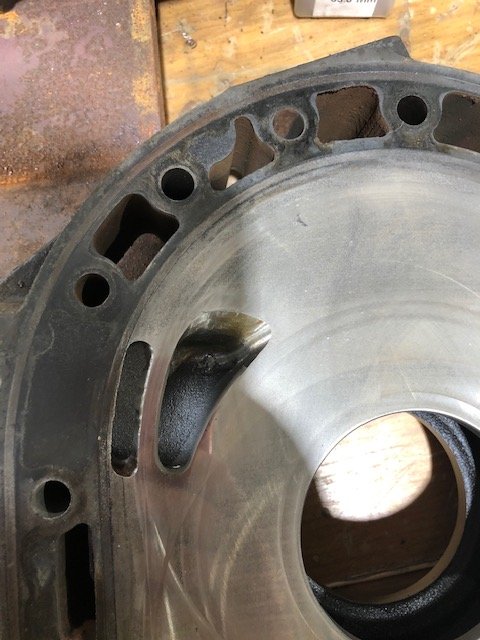
So it’s been some time since I actually did some work on the internals on a motor and it took a bit longer than I hoped. And being I live in rural Queensland, parts deliver is painfully slow. I tidied up the ports as well as I could, had some 13b housings machined down and some water seals cut into them. I did a measure of everything and it all seemed pretty usable, although the front rotor was rooted, dunno if this thing actually ever run after the last assemble as the rotor looked like it had been dropped. Apex seal Slot dented to buggery, corner seal hole had been made into an ellipse and side seal gap had been closed up beyond repair. Alas.... replacement. the bearings looked pretty shagged so as a matter of course, replaced those and both front n rear seal. Had some Atkins corner seals I had from a while back and put new springs in it.
5 points
-
Mods, please feel free to take this down if not appropriate. Hi Everyone, I mentioned this in the DIY thread, but it's open to everyone here. I do all the estimating etc for Unity Scaffolding here in Auckland. I can help you out with scaffolds large and small, or simple roof edge protection. I can't do it free, but I can give OSGCs the same rates that the big boys get. If anyone here is a builder/painter looking for scaff on their projects, we're Sitewise accredited and are currently doing all kinds of commercial and residential work. Happy to work out good deals for you too. Just send me a PM, text me - 021 0249 3707, or email sam@unityscaffolding.co.nz. instagram: unity.scaffolding Edit: range is Greater Auckland. We tend to stop being economically viable around Silverdale/Warkworth up north, and Pokeno to the south.4 points
-
I was doing that kinda stuff in oz in the early 90s. Done a f**k ton of old minitrucks and drag cars in that style. Long live the 'heartbeat' pinstripe, palm trees and checker boards lol.4 points
-
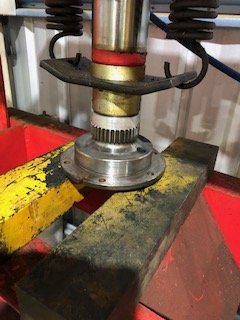
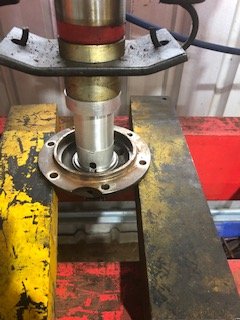
Once I got the control arms back, I pulled the diff to paint it and the rest of the suspension, then replace all bushes
4 points
-
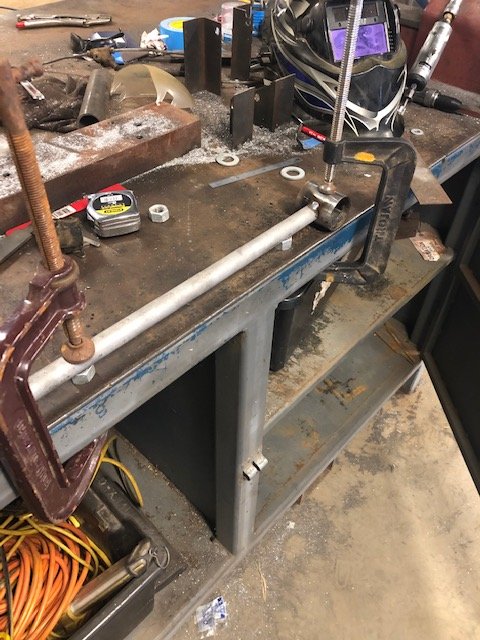
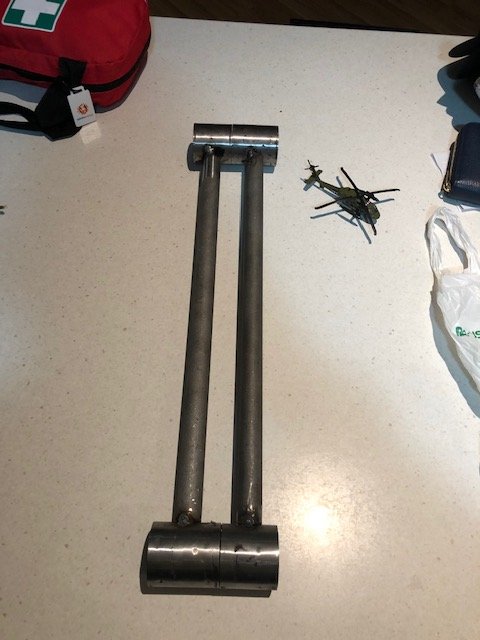
While this was all going on I was also trying to work through the last pieces of the diff conversion and suspension upgrade. i had some lower control arms from a s3 rx7 sent to me, cut the eyes off the factory 323 ones that incorporate the spring seats, cut the eyes of the rx7 ones and went to shortening them to have em the right length. Got em tacked and trial fitted. perfecto!!! So had a local welder glue them up for me
4 points
-
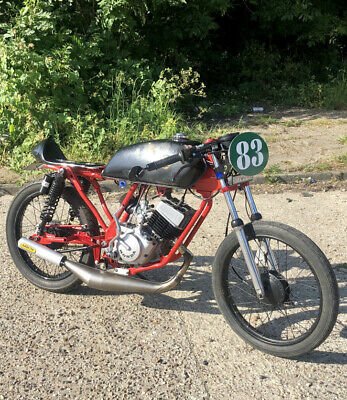
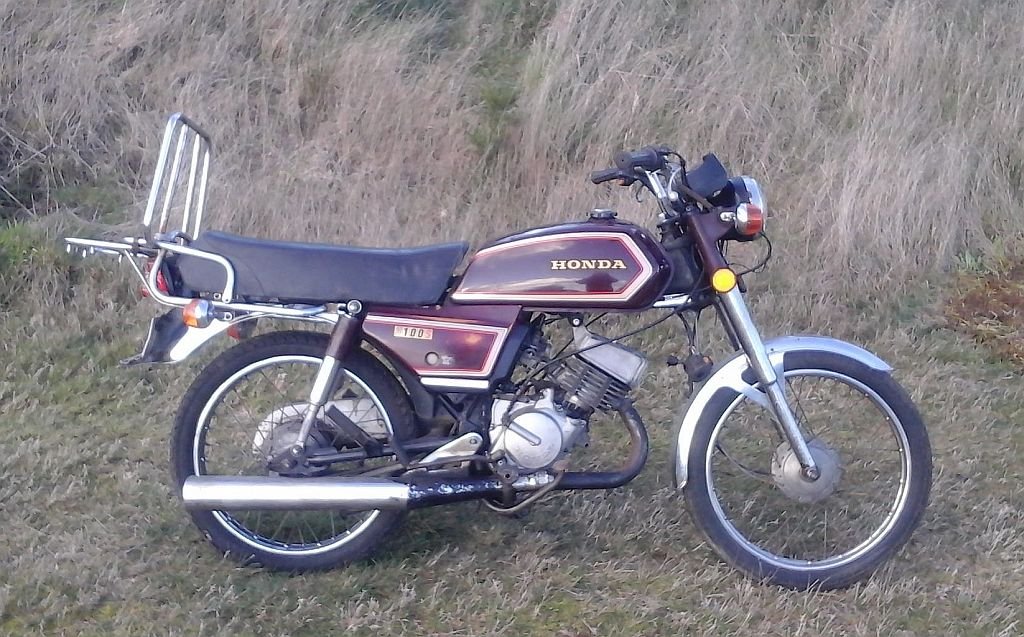
Gerrdoutovityamongrel! H50S I'm thinking full 80s spec, few subtle custom touches, brown metallic and factory graphics reproduced. Or a new wave inspired paint scheme lol MB is the parts donor to start with, but thinking something like this eventually CB forks, CR80 gears to make it a 6 speed, Athena big bore and wild fluoro frame paint.
4 points
-
Haven't got anything specific in mind as such, other than very 80s abstract But I am very much leaning toward a metallic brown and stripes tbh3 points
-
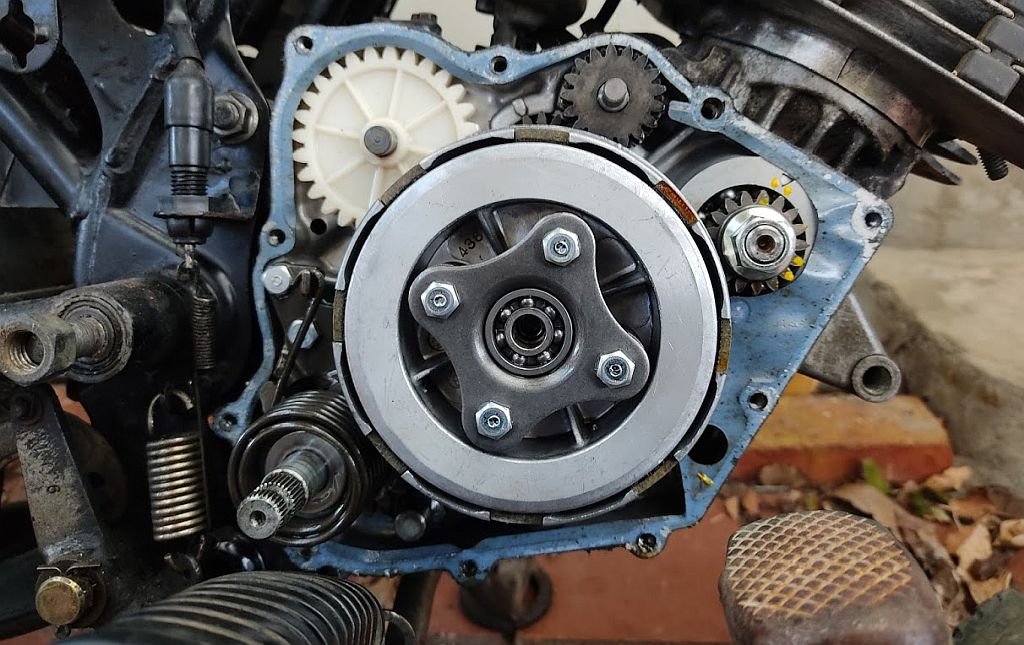
Turns out the H100S isn't a S2 model like I thought, it's just an S, so it's got points rather than a CDI (had been told several times that the CDI was missing, guess they meant the coil lol). Added an A50 coil and got a nice strong spark and then discovered that the stuffed kickstart gears was just that there was a shim missing and the return spring hadn't been hooked on when someone had it apart in the past. Looking in the exhaust port the piston, rings and cylinder all look sweet, so squirted a bit of gas in the open intake and got flames out the port so once I clean and fit a carb it should be a runner!
3 points
-
Na he is sold on this flat 6 thing - commer ts3 it is then lol3 points
-
Yea I say that when it lunches itself we run a poll to decide what the next engine should be, we all chip in to get it to Alex, then sit back and watch the mad antics as he solves all of the unwieldy problems in getting it to fit. To start the suggestions I choose an OM606 with a DPUK 600hp pump.3 points
-
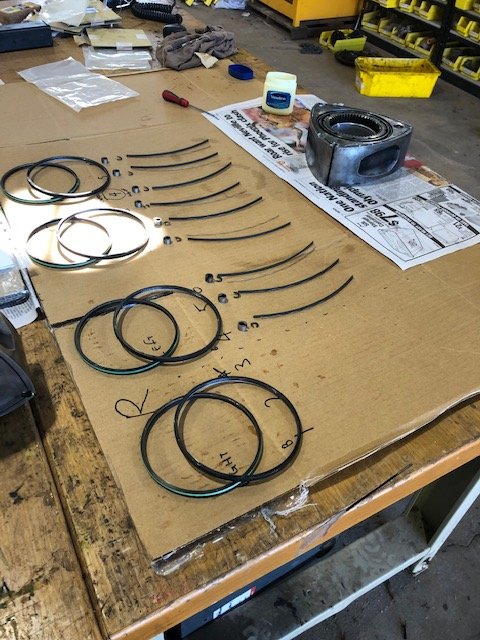
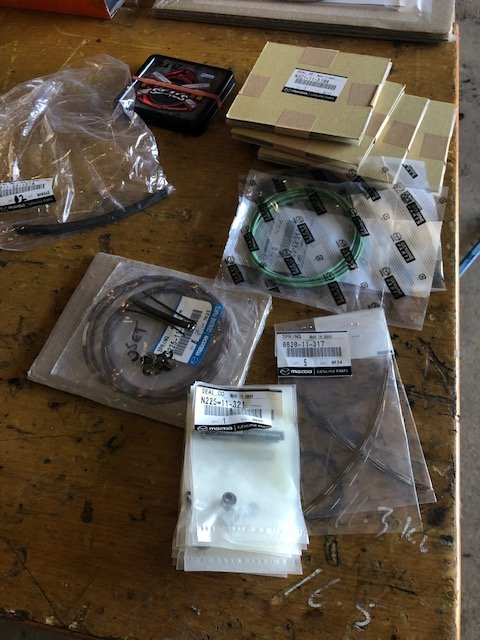
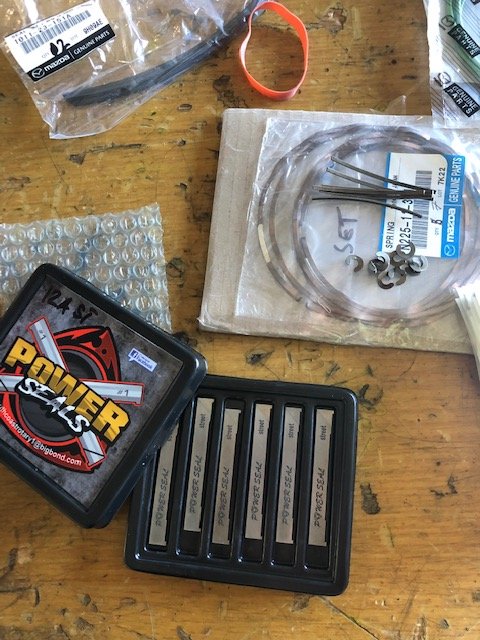
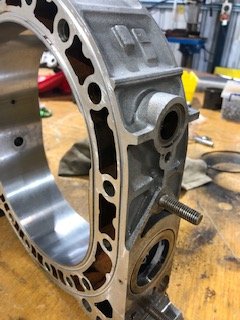
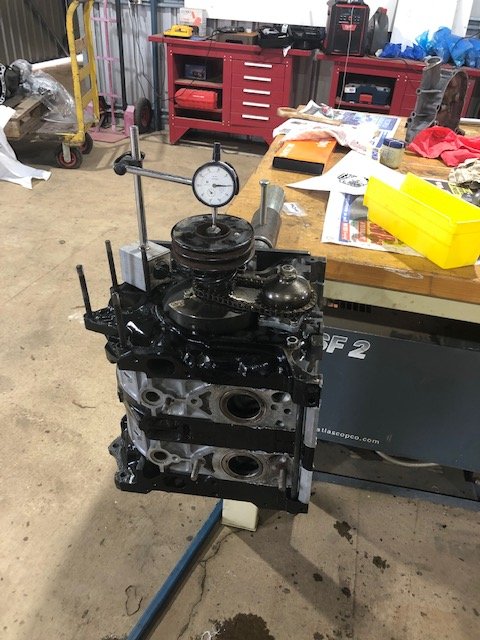
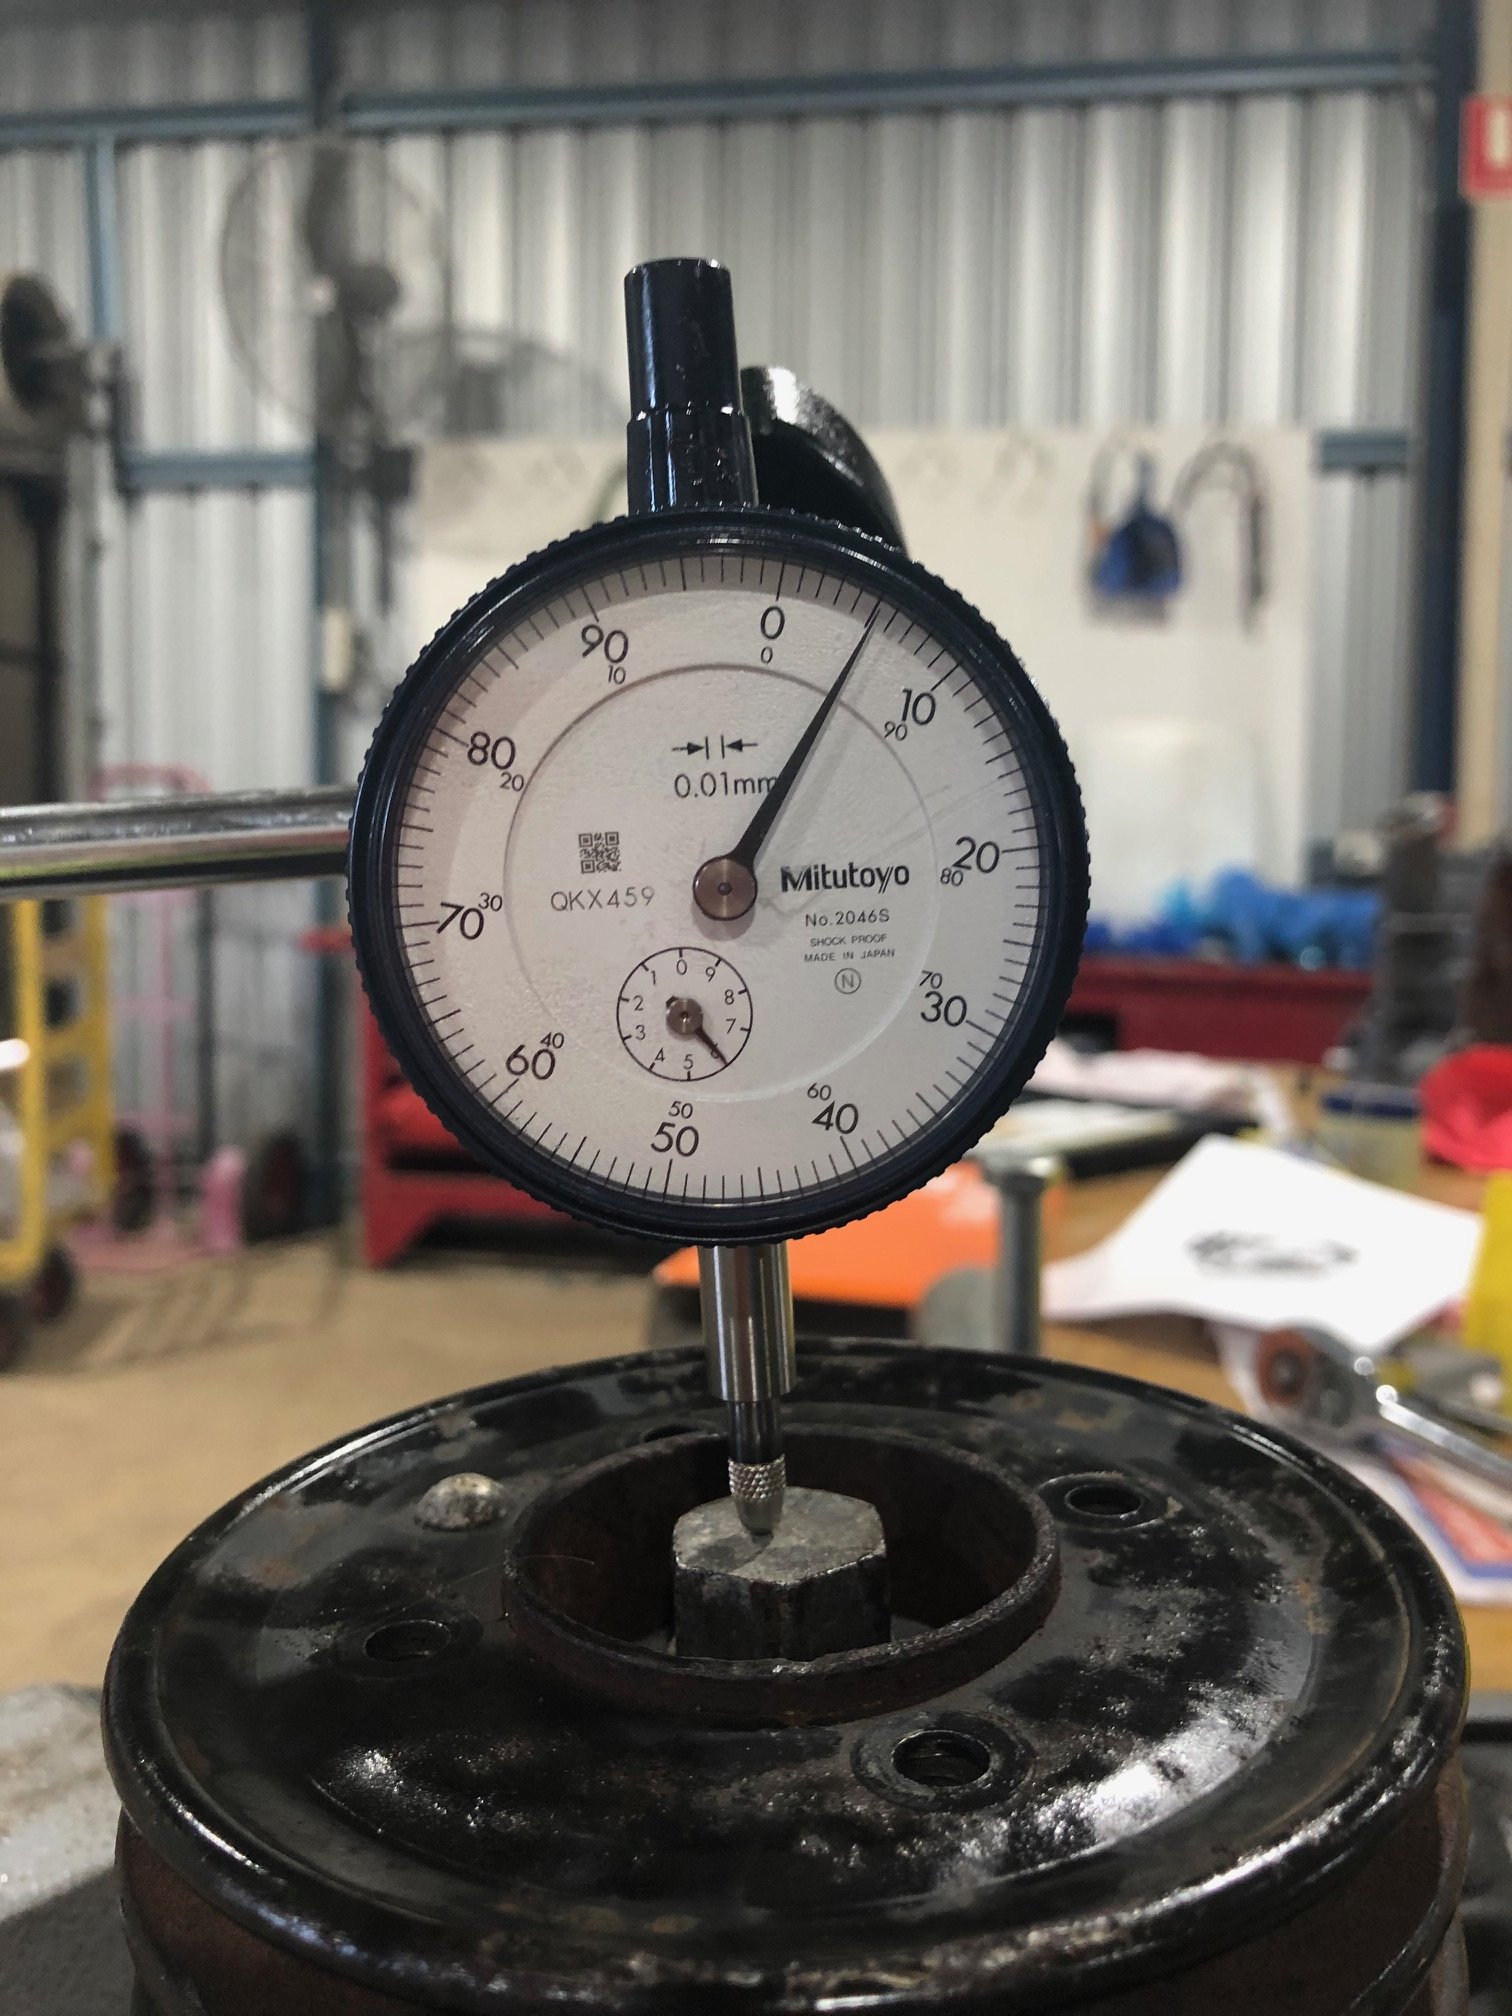
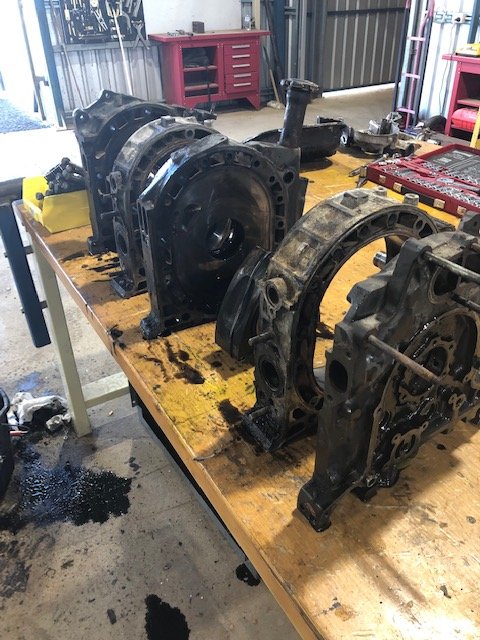
So completed the task of assembling this thing. went smooth, all together nicely. Had to muck around with the spacer for end float but all n all was good to get back in the groove. pulled the pp out to give it a once over, ensure oil pressure and all that good stuff. I must admit, when I had it in the engine stand and rotated it to ensure all was good it was easier to rotate than I remembered..... swung it in the there no worries, got it all hooked up, threw my ida on from my 13b and went for a spin over. didn’t even sound like it wanted to start. Got mum to turn it over while I checked etc and it looked like someone was putting fuel down there. Far too big. so boxed up the other ida that came with this block and whipped it to a carb specialist in Brisbane. 10 days later it was back at my door. beaut!! Set it up, bolted it on and tried again. Nothing..... chucked my compression tester in and you got it. Not even enough to pull me off. absolute fail and waste of my time. so with that, it was decided a complete reseal and birthday. so with that, whip it back out, I jumped on a Japanese parts website and ordered all new seal and springs except apex seals. while I was waiting for them to arrive, pulled the motor apart and got to lapping the plates.
3 points
-
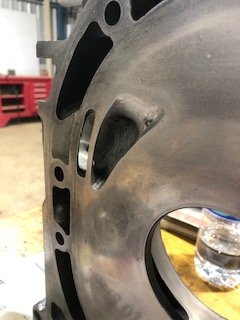
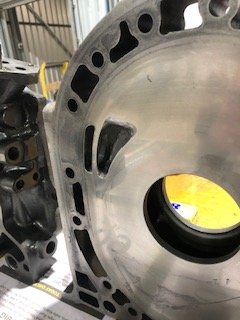
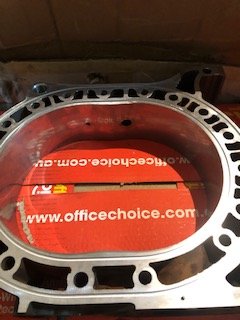
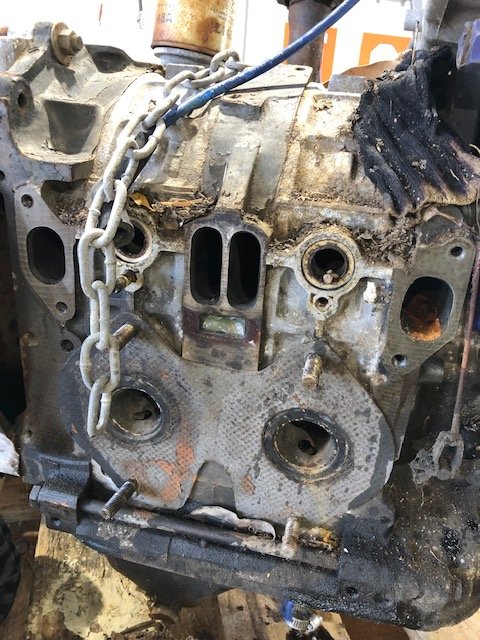
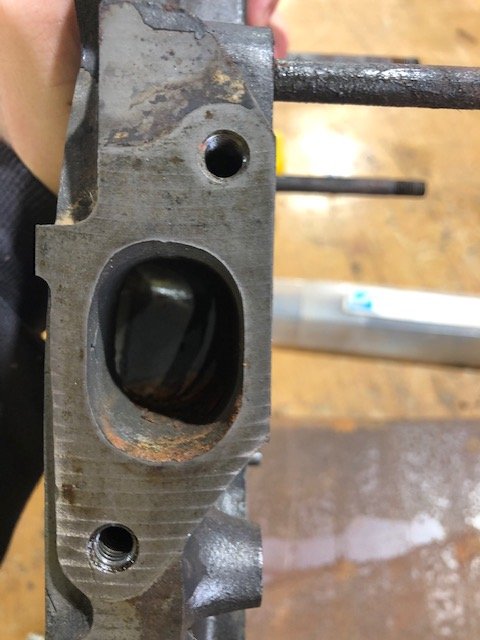
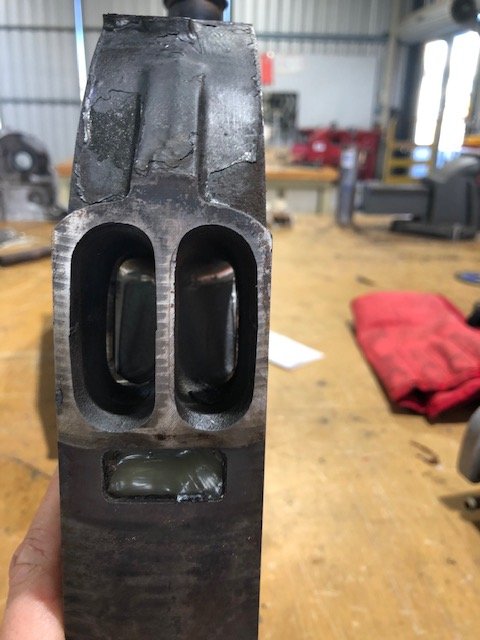
It’s been a while. my wife gave birth 2 days after the hole saw ate my hand. been a few purchases and other things completed. things obviously slowed down on the car with the birth. But I bought a little 12a I saw someone comment on. Unknown condition, came with a 48mm ida and 4 speed gbox for $1200. Thought it was a pretty good deal so snapped it up. got it sent to work, to find out she’s seized solid. Removed the carb and manifold, Sprayed/tipped some penetrene in the intake ports am slowly started to turn the front pulley. Kept at it and freed it up. no compression, no worries. I bought it knowing it wasn’t ideal. spent the rest of the day at work ripping it apart. coronavirus has been great for me and working on my stuff at work!!! So once I opened it, it was apparent someone had “bridgeported” it. No work done on the runners, literally just cut a bridge and open up the port on the face of the plate. Was pretty rough and the bridge was wide, almost into the water seal. Housings well rooted, good for a game of horse shoe maybe a few pics for those with interest.....
3 points
-
Tl;dr Sounds like a job for a Predator carb.3 points
-
If you would like to enjoy my financial ruin3 points
-
Had a productive weekend Got the headlights working with dip switch got horn up and running and removed the ridiculous speaker boxes on the doors . There was some left over vinyl so i hole sawed and patched over Not perfect but 100x better than previously Treated myself to some hydraulic wheel dollies so handy for small garages Cars running like a bag of dicks not sure why..3 points
-
3 points
-
Righto. Turns out that the leak around the power steering pump was just leftover juice from the 14,387 times I evacuated it to fix leaks. A bit of a wipedown and it appears solid. I went through a few things with cert man, one of which was a discussion about seatbelts. I think it was @KKtrips in the cert thread that told me that as a scratch built it needed reels all round. This seemed straightforward at the time so I dropped some coin and bought 4x as the fronts were a little manky anyway and I figured presentation and a clear commitment to doing it right is going to be of value in the very near future. The fronts went on with some minor shenanigans around the stalk mounts, but no drama. The rears turned out a bit problematic. Because they were fixed belts there were only three mount points and no great place to mount the reel. So after a bit of mocking up and getting the concept approved by the advisory peeps I cracked on. 1. The beginning with all the seam sealer scraped out. Both the horizontal and side wall skins are doubled up with no way to get in there short of cutting holes, so a doubling plate would have been difficult. 2. A bit of angly stuff that could be welded in place and hold a captive nut 3. An extra bit of stuff that ties it in to the existing mount for extra lovings 4. Sorting some ugly on the other side before making a mirrored replica of the previous mount. 5. Plug welding the back skin to replace the factory spot welds 6. Weld all around, paint with poverty spec Toyota white from a rattle can and assemble. Looks good. Just some minor painting and reassembly of the airbox and it is time to ship it off....3 points
-
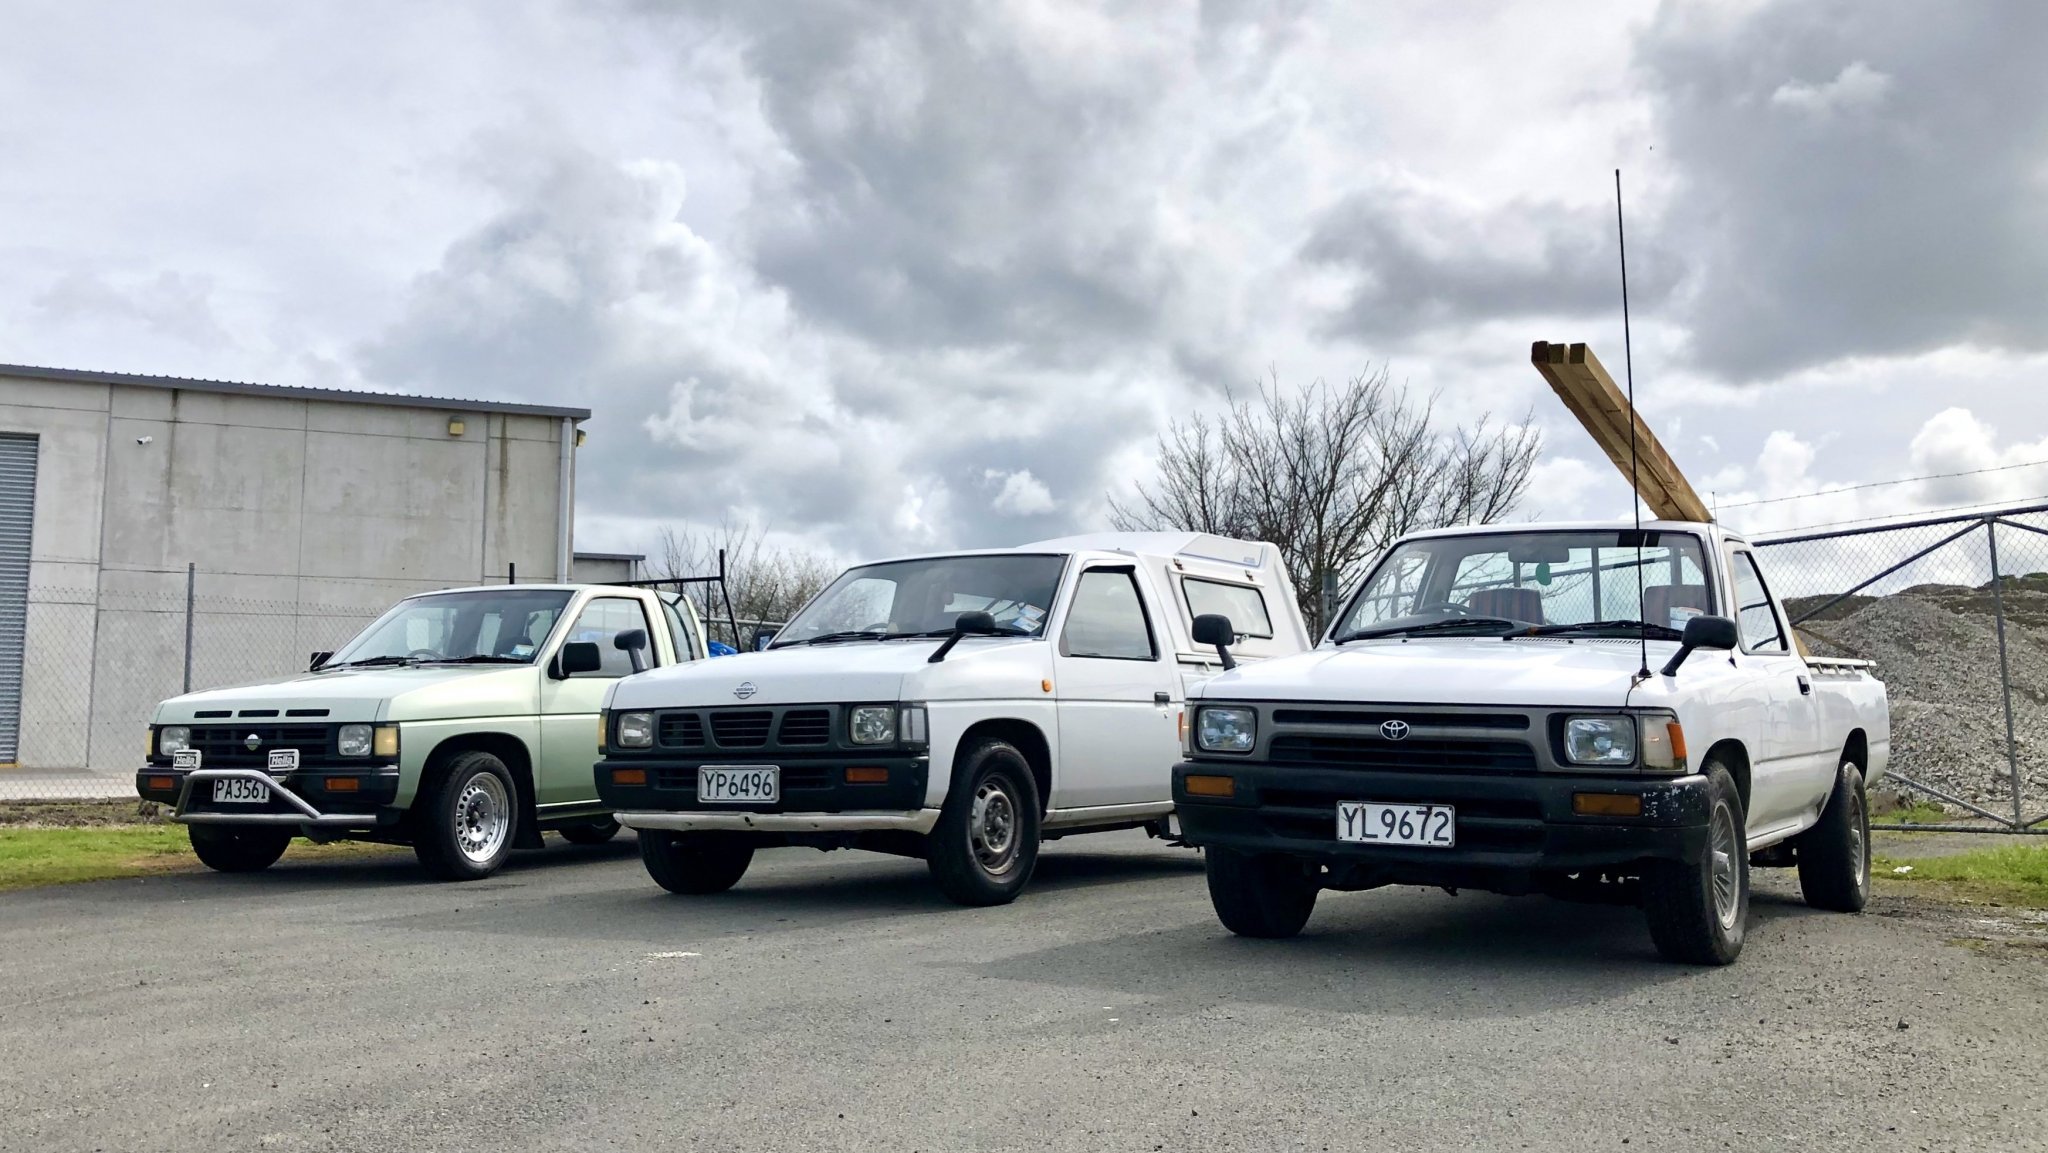
Picked up a nudge bar for @GuyWithAviators but they looked pants on his Ute (flat front) so tried them on mine and was sold. Stole some spottlights of @Geophy to see what they looked like, and I like how it looks so will keep eyes peeled for some of my own. Also found some commercial friends
3 points
-
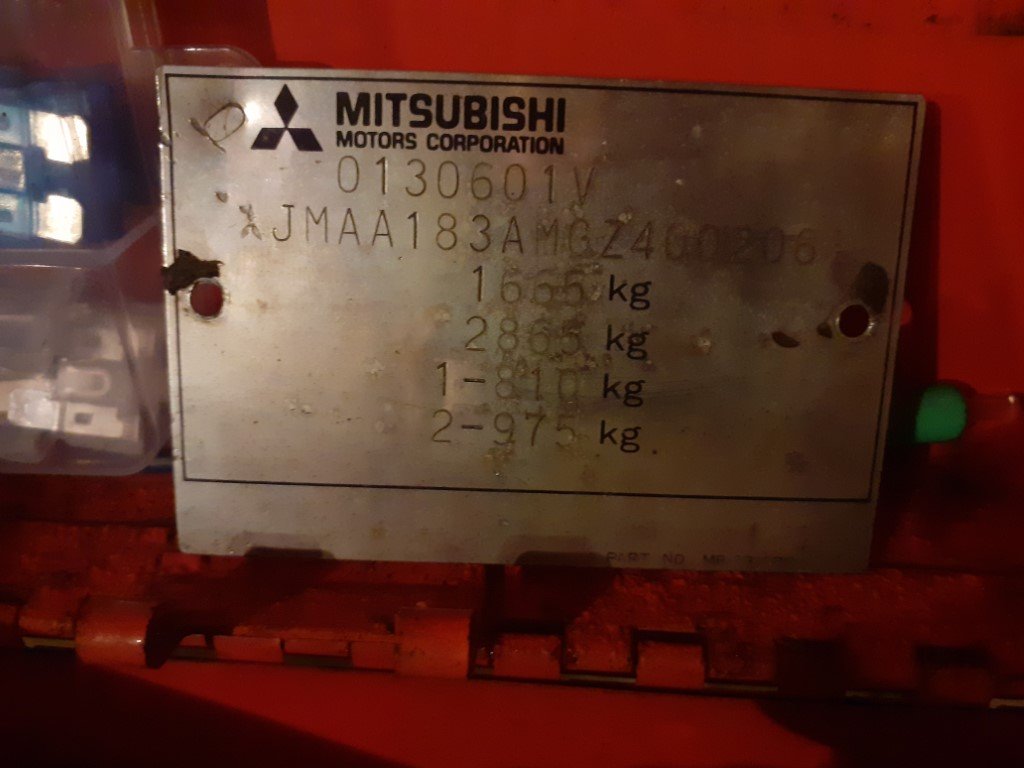
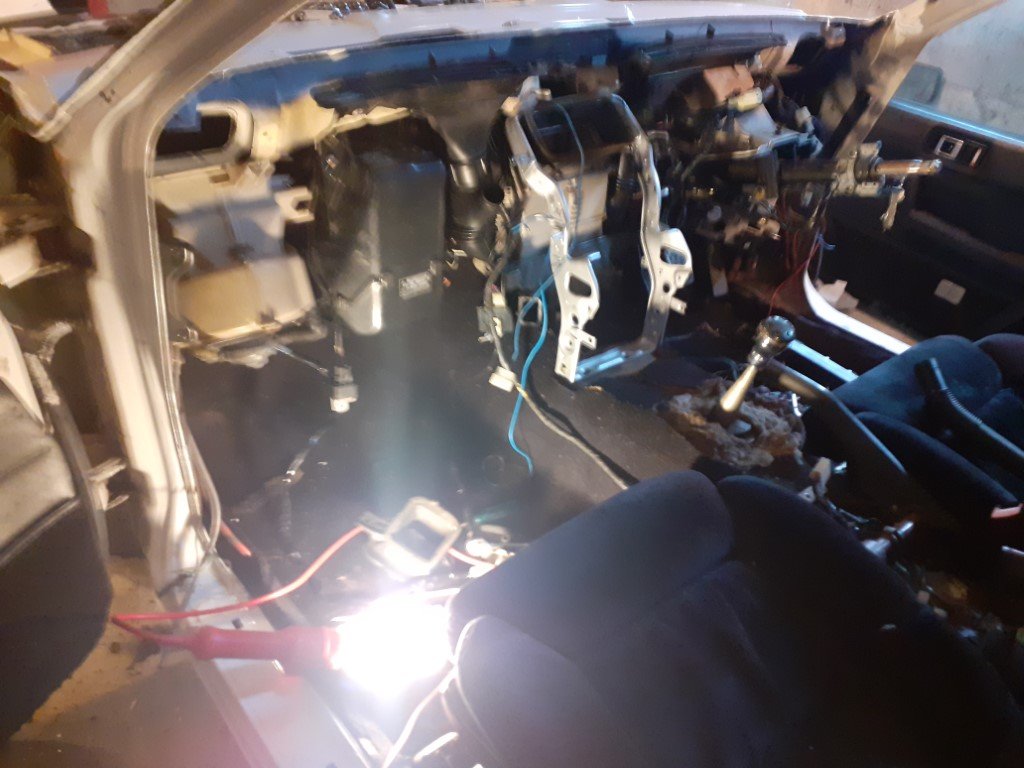
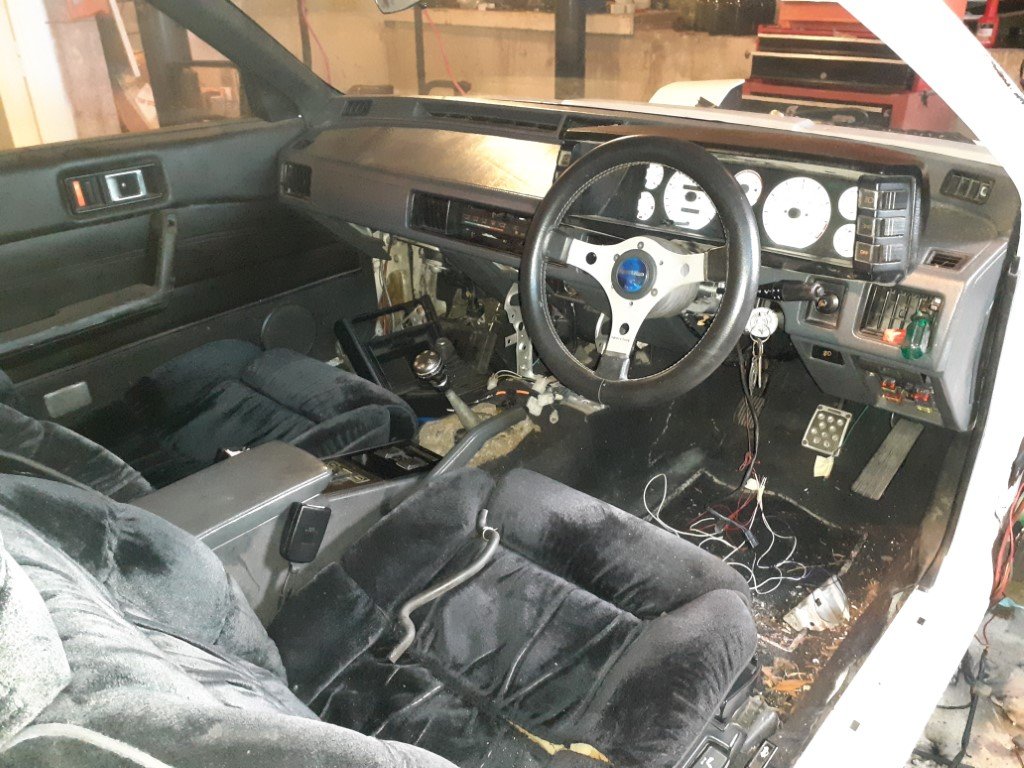
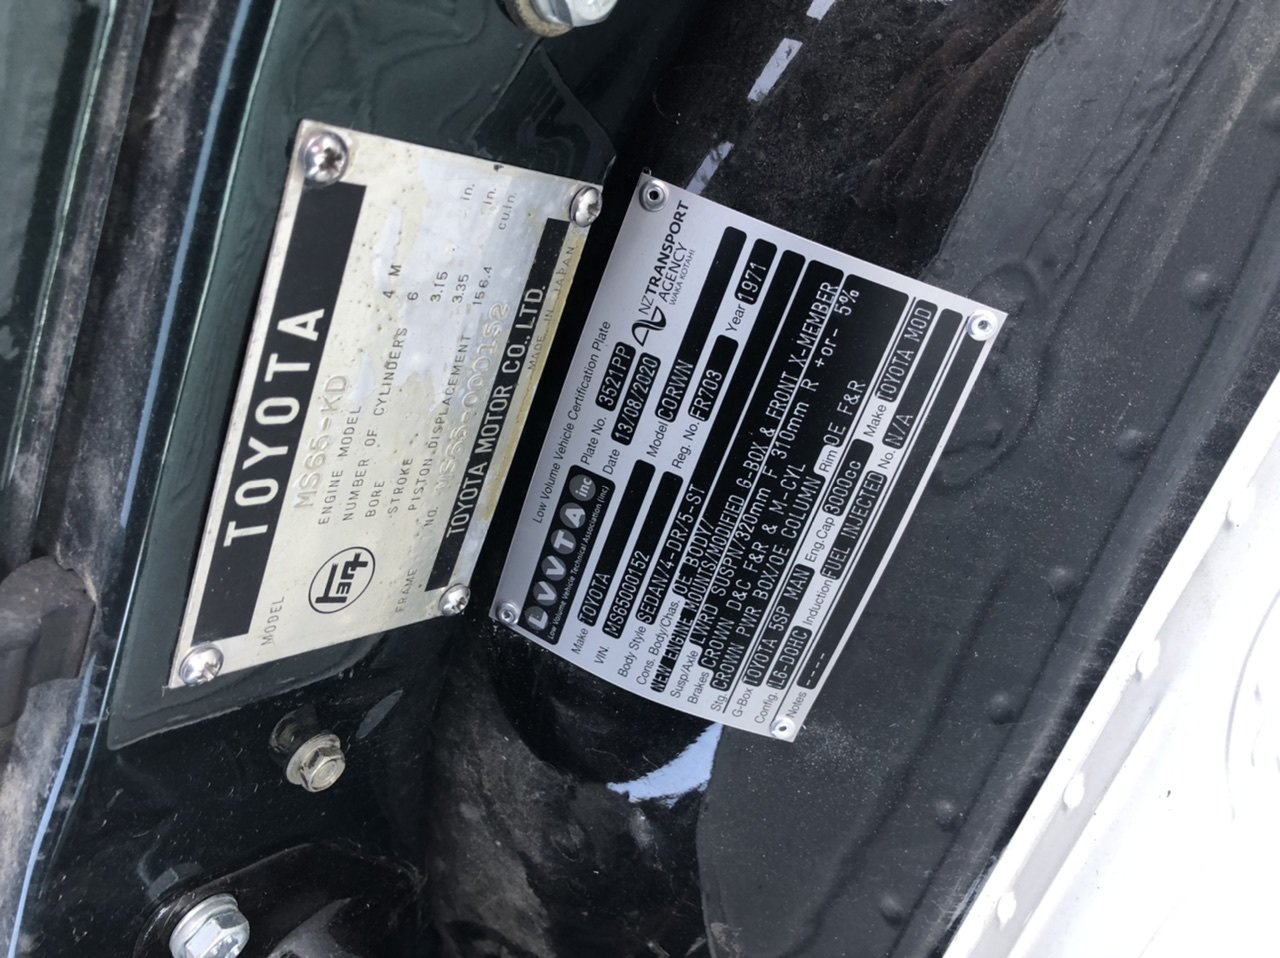
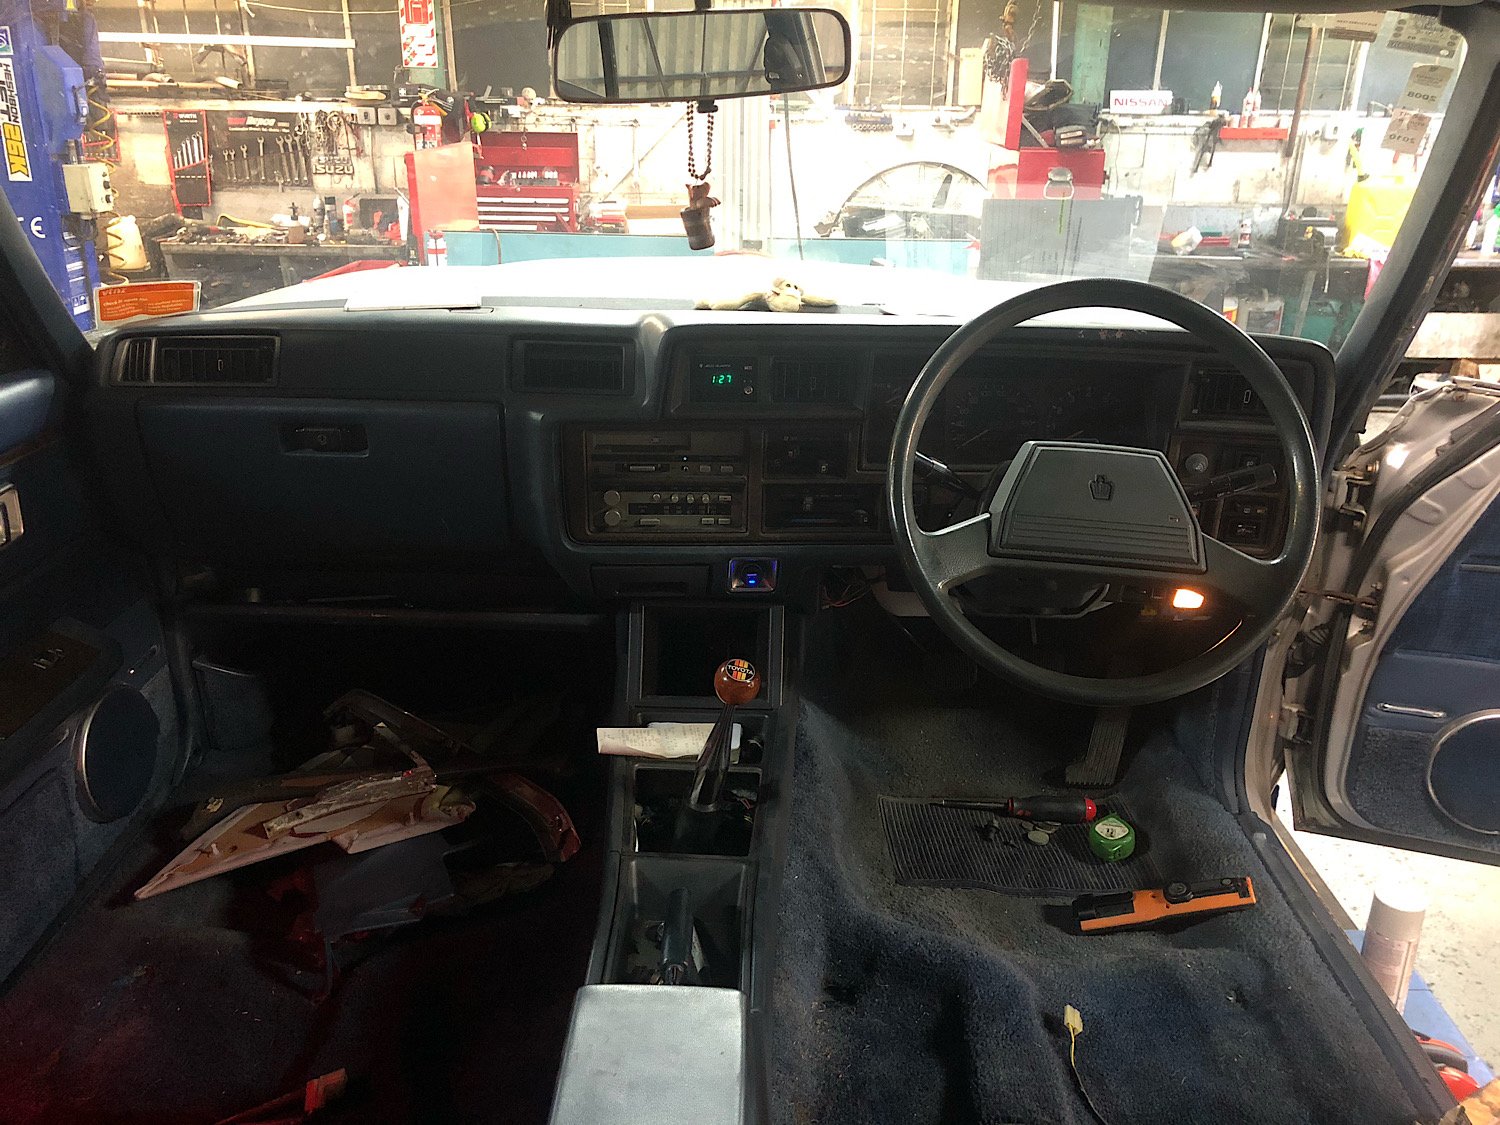
Been a slow couple of months, lighting in the garage is garbage so doesn't exactly lend itself to crawling around an interior or doing paint prep, which is exactly what needs to be done got all the heater doodads installed (and replaced the dreaded tiny water pipe that lives on the heater box, thanks to starquest forums for pointing that one out) dashboard back in... not gonna lie, not every single nut and bolt made it back in. I call it "interior by Lotus". Previous owner fitted some swank white faced gauges... however I also have a prized '83 digital dashboard in the cupboard which is kinda tempting. Windscreen back in and the engine and turbo back together, just the airbox left to go. Had so much fun routing allll the wiring back around the engine bay, gosh I've just started scuffing the body back for painting but unfortunately only have a half-hour attention span before I start half assing any given job (ESPECIALLY) panel stuff, so it's slow going. At this point I also heard my son sitting in the Triumph shouting "sticky! sticky!" so had to hurriedly drop tools and intervene Bonus question: what on earth do the weight numbers mean on the dataplate?
3 points
-
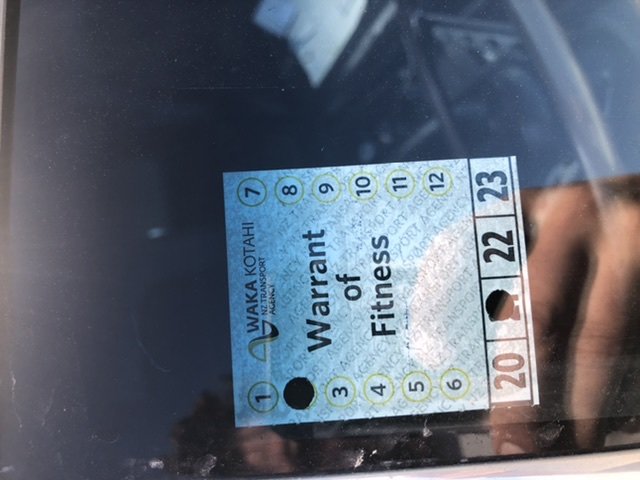
How to be a nerd, Part 7 I've always loved the NSX-R steering wheel/horn button combo, and have long wanted to pop one into a DC2R as homage to the original Type R. Since I had my first one, all those years back. Anyway, these steering wheels are actually still available, as is the horn button and the trim ring. The steering wheel price is $1440.00. Yeah um. Maybe not. The trim and horn button, while expensive (for what they are) don't break the bank, so I hatched a plan. 2000 Honda Integra Type RX-1060-Edit by Richard Opie, on Flickr Here, you can see I bought a contemporary MOMO Tuner wheel. For all intents and purposes, this is an NSX-R steering wheel. It feature a marginally different offset in the spoke, and a different printed logo, but still has the red stitch and pretty much identical rim/grip style. 2000 Honda Integra Type RX-1066-Edit by Richard Opie, on Flickr This is a gen-you-wine NSX-R horn button, and trim ring. 2000 Honda Integra Type RX-1072-Edit by Richard Opie, on Flickr And this is a detail shot of a gen-you-wine NSX-R horn button and trim ring wedged into a MOMO Tuner. There's something pretty cool about these brand new OEM beauty pieces, or maybe that's just me swooning irrationally. But yes. 2000 Honda Integra Type RX-1076-Edit by Richard Opie, on Flickr This is what the assembled item should look like. I've got a WOF due in September, so I'll pop it on after that as I have to replace the OEM airbag wheel for WOF time. Fun.3 points
-
Funny you say that re the 465. My old man farked around for moons with a 600 on his 302, the experts had a few goes. The old man one day said fark it went a brought a brand new 465 bolted it straight on outa the box. Fark me what a different car! Drives so much better uses heaps less gas. So agree bigger is not always better!2 points
-
Tell me more.2 points
-
It will 100% need a rekit. I wouldnt put too much stock in what racecar guys ran. A road car will have completely different requirements. In fact in more recent times (like after a book I have called "how to modify and super tune Holley carburetors" was printed) they produced a 465cfm vac sec. Which goes well on a 5ltr v8. People are always overcarburating their engines. One dirt track neanderthal at work bragged how well a 900cfm carb went on some "small" ford in line 6. (Might have been a 221?) On one engine I saw first hand a 390cfm 4bbl would light the tyres with a stock converted when given a hard stomp. Yet with a 600 it would not.2 points
-
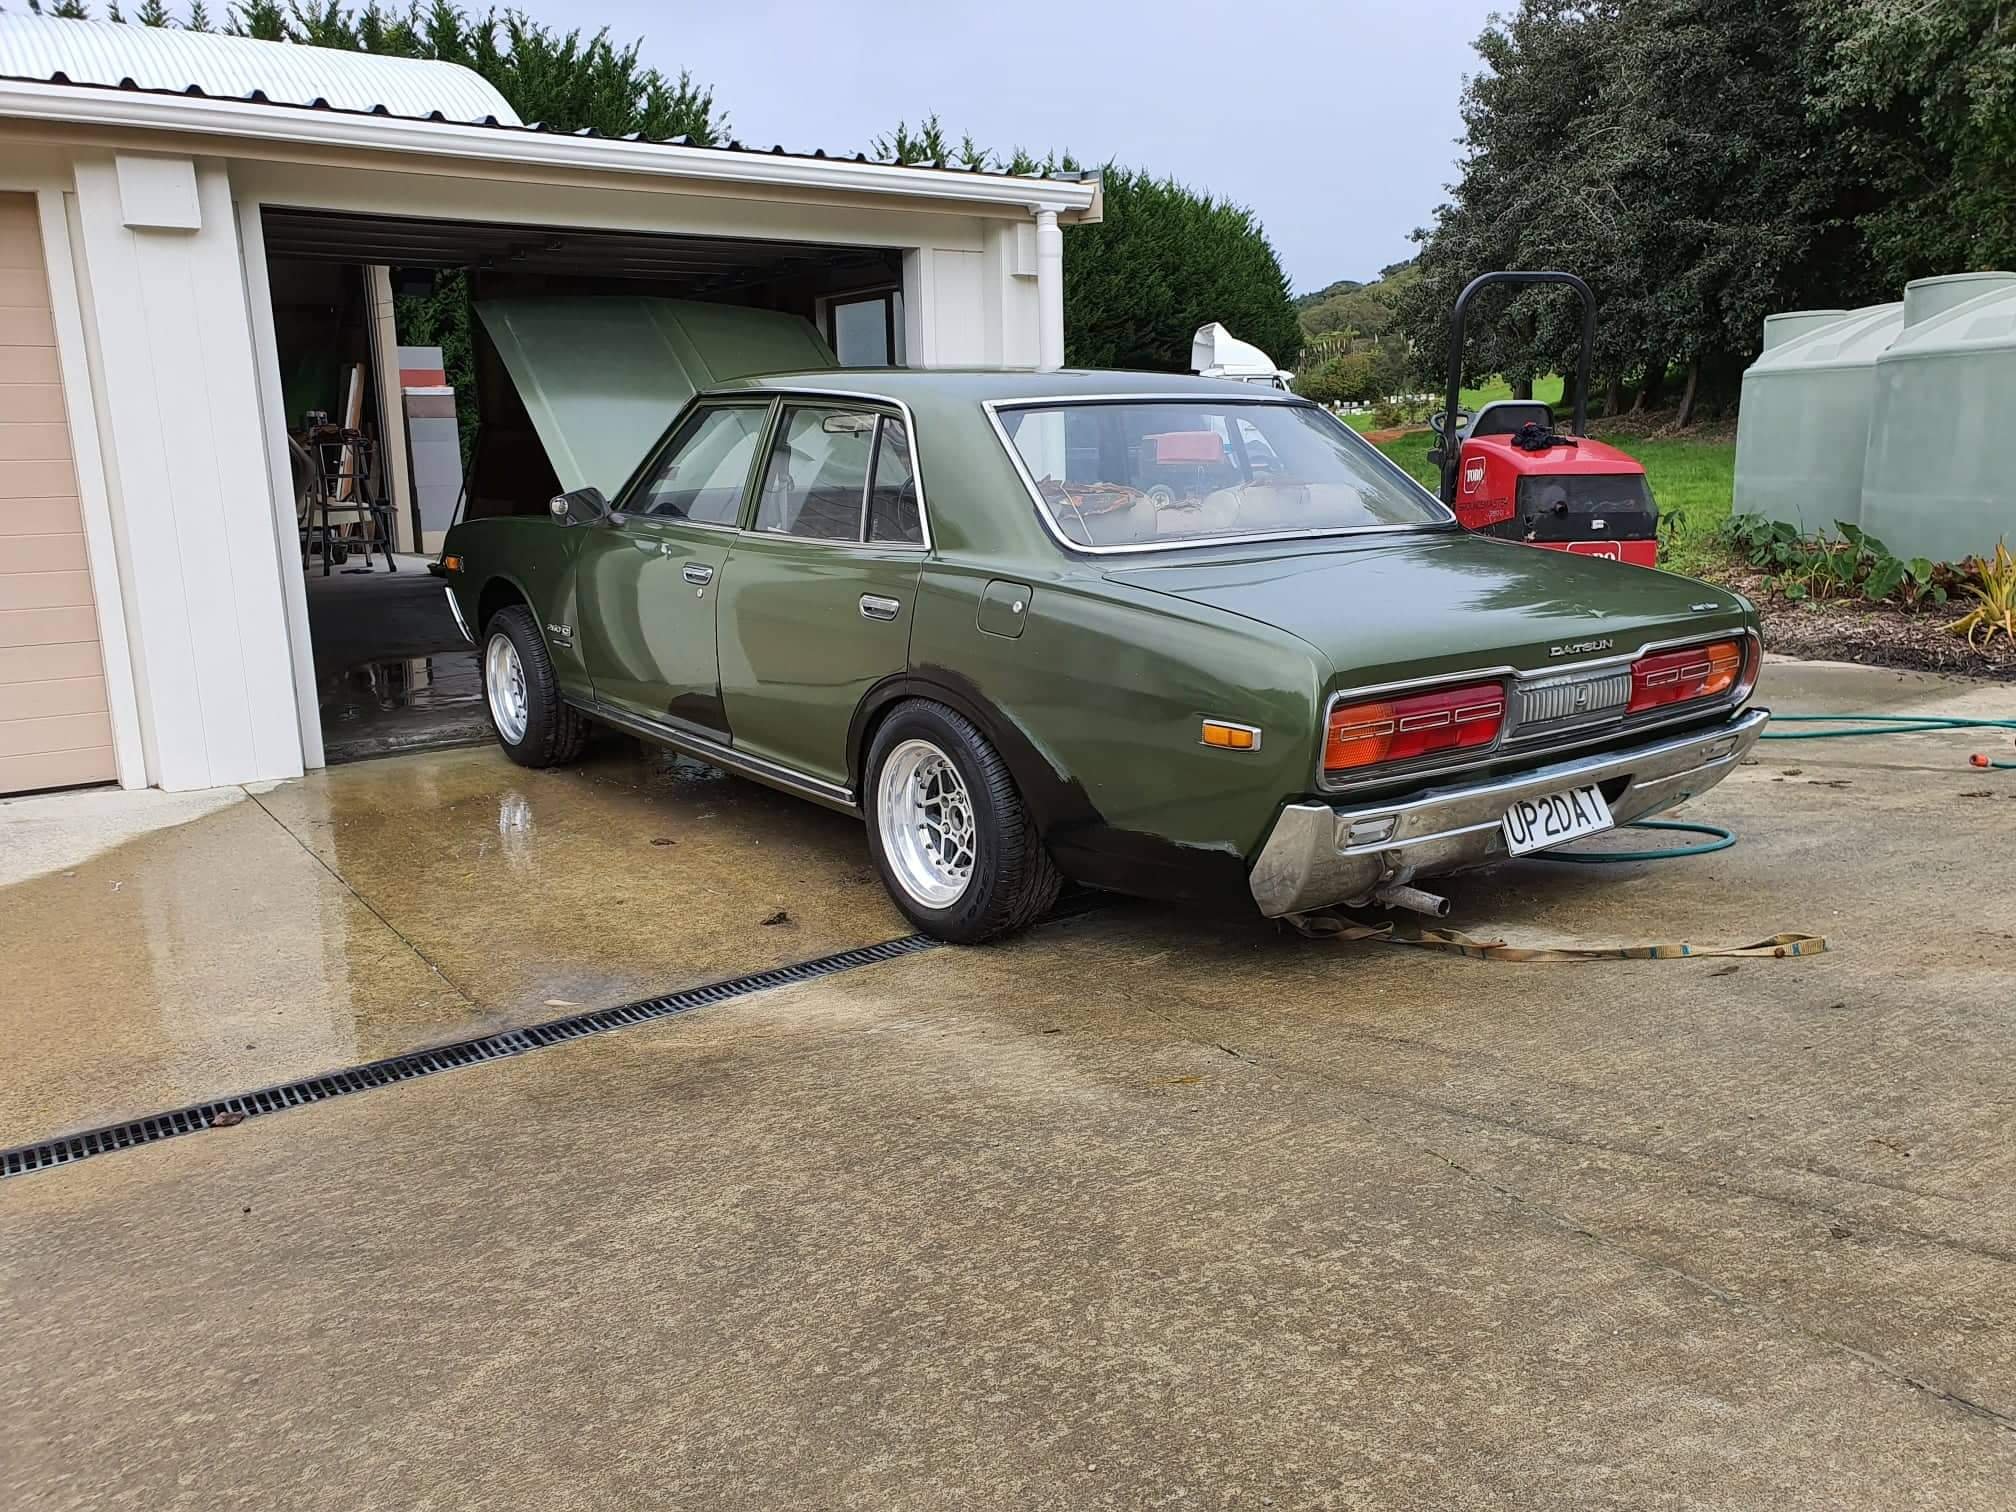
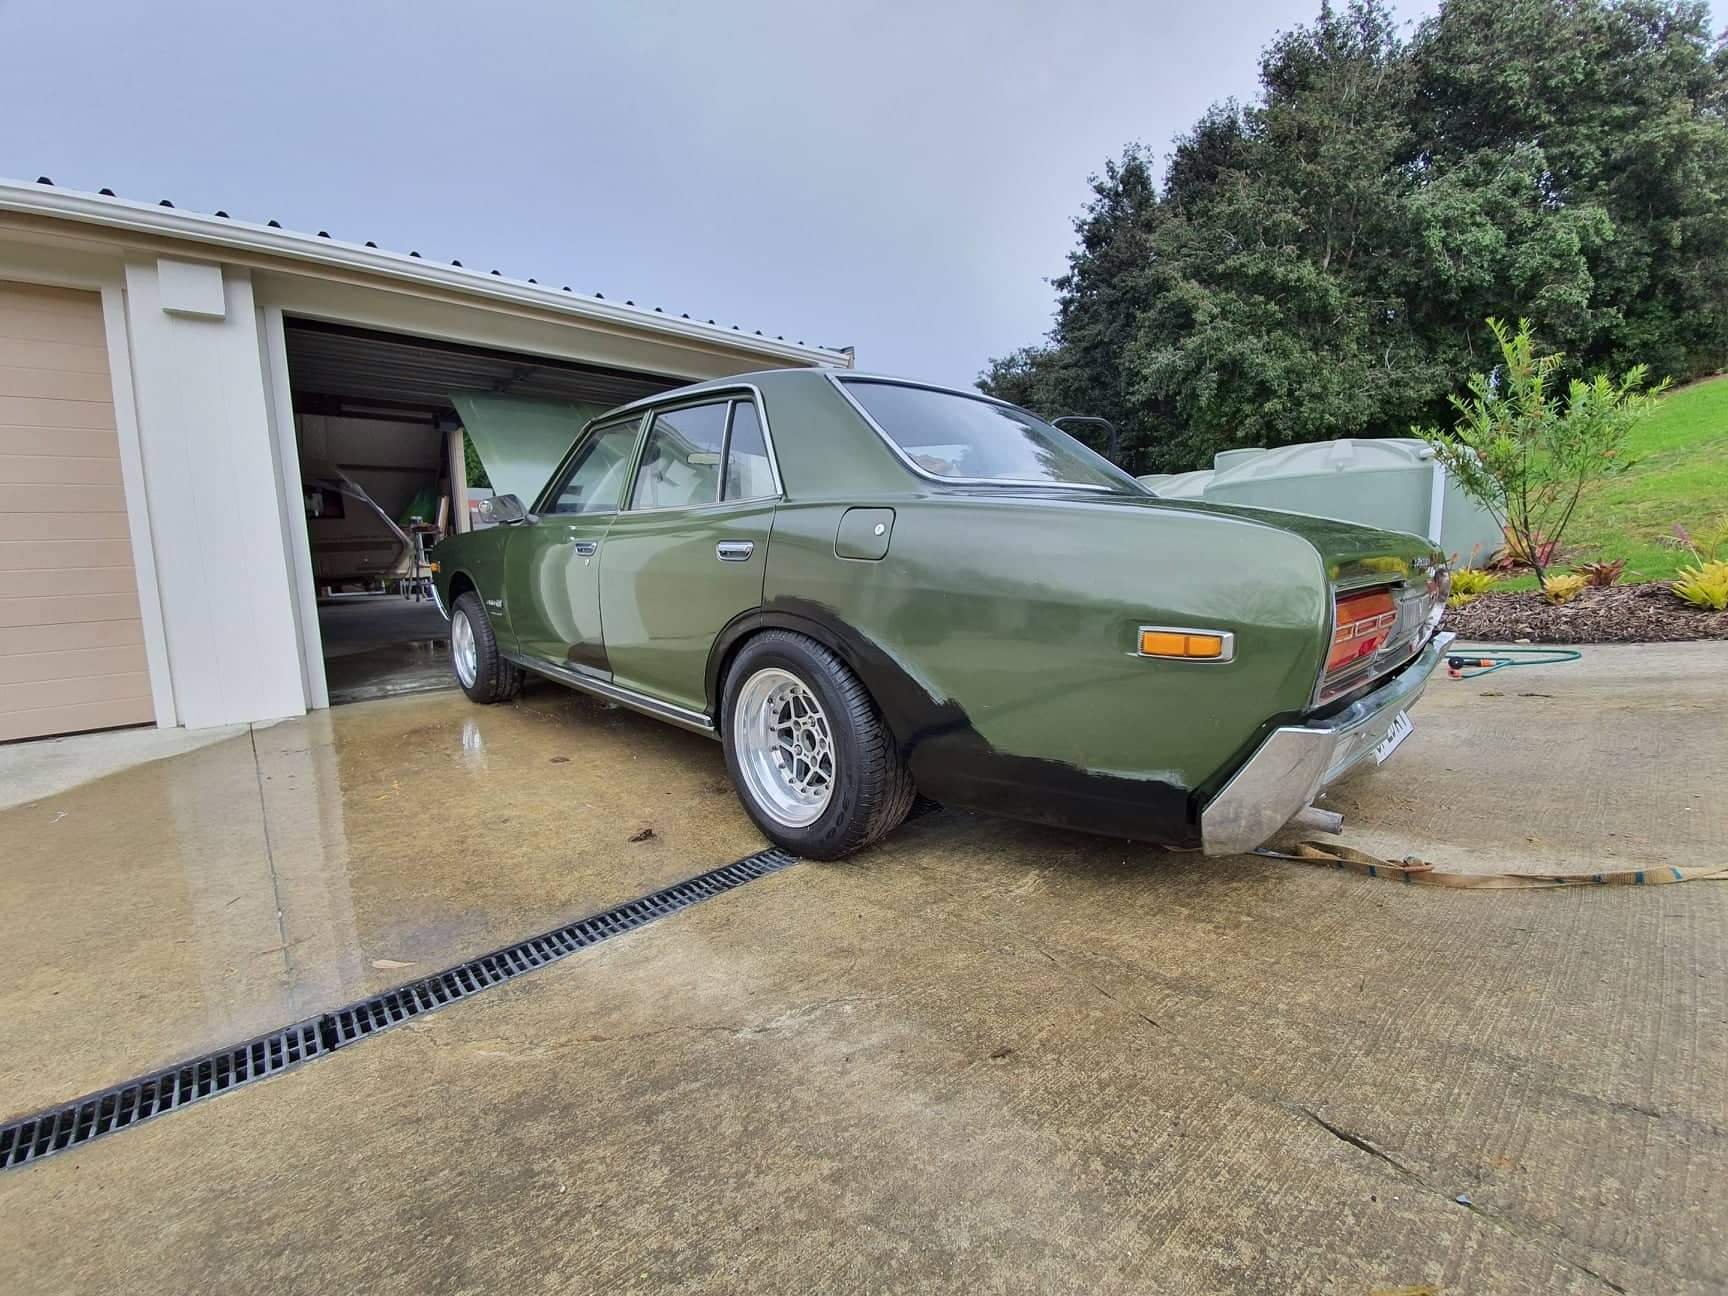
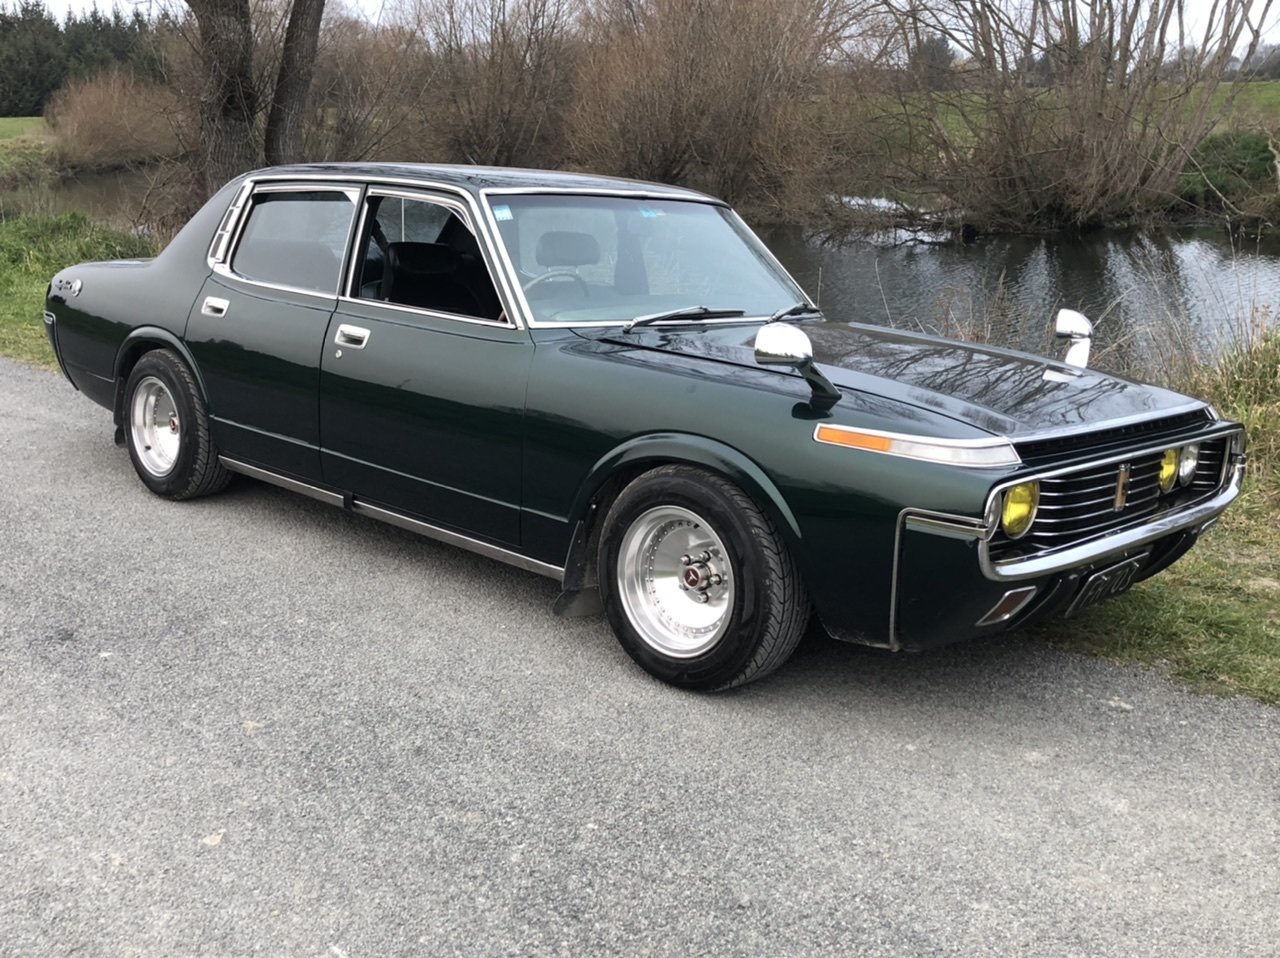
Hi guys this is my 1973 datsun 260c h230 that my grand father got brand new. I've had it now for about 6 years and kept it stored away for the right time to start rebuilding it.
2 points
-
2 points
-
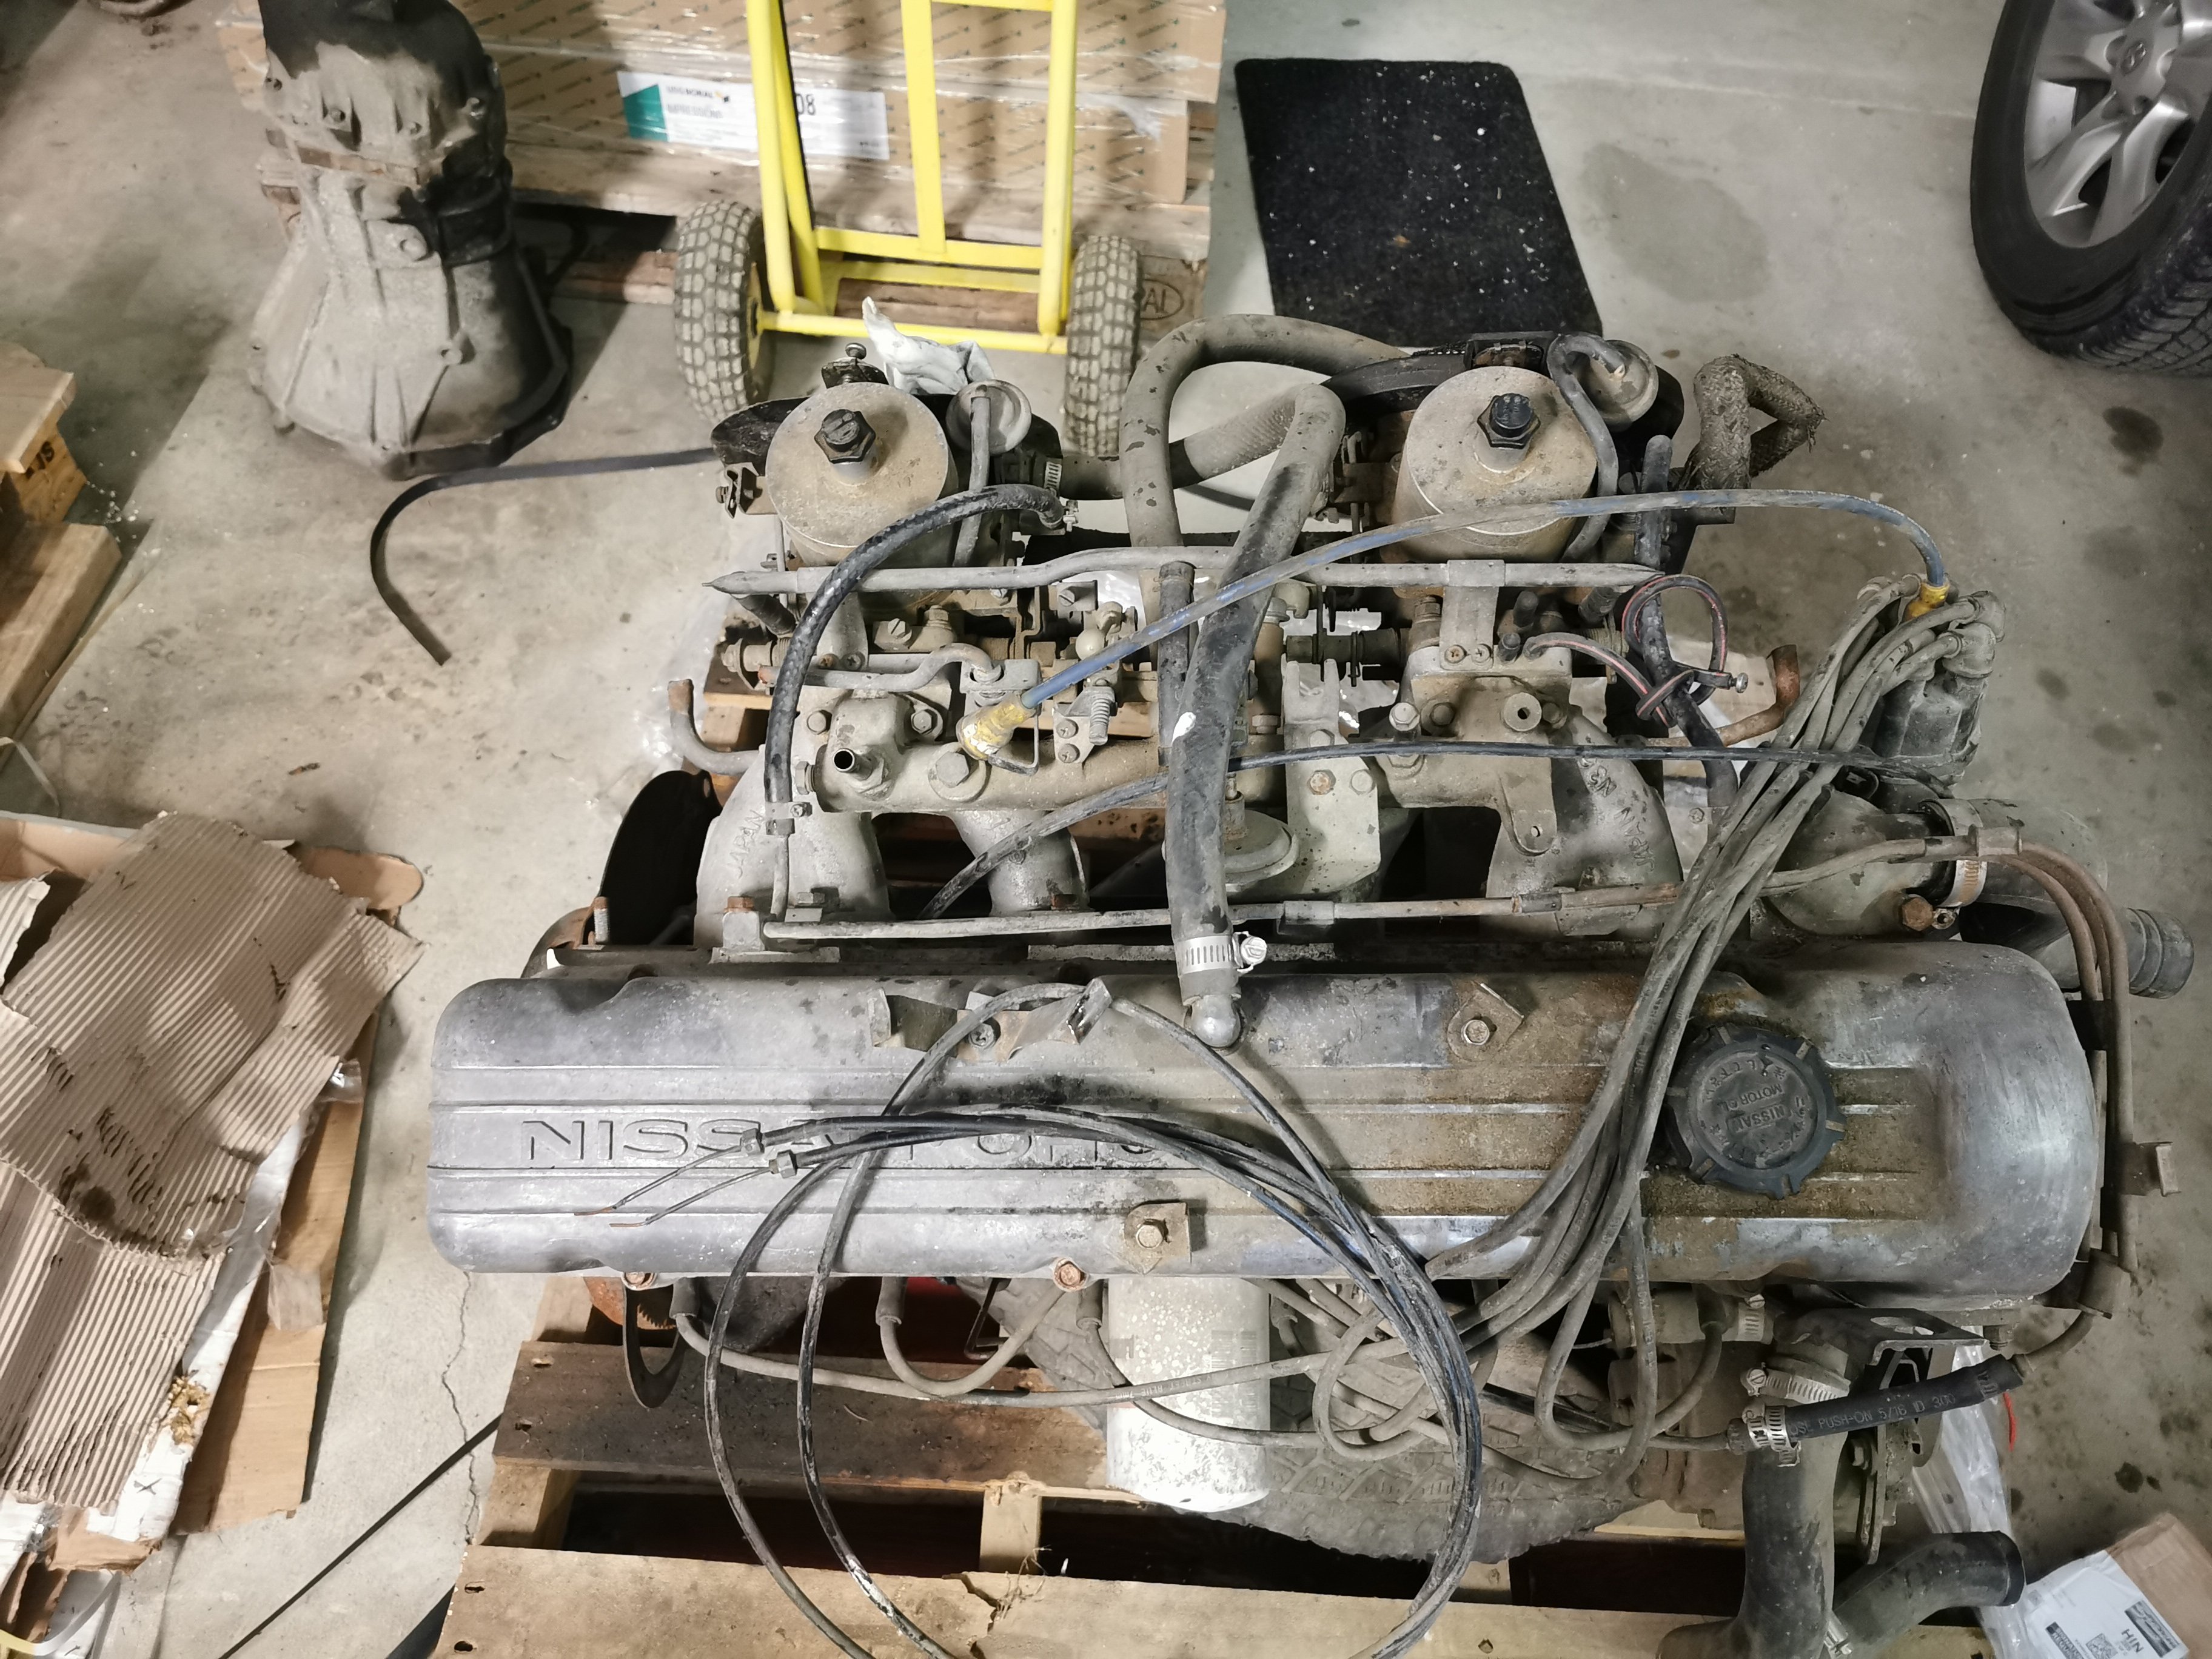
Finally I've found the right motor for the car it was built by a guy in matamata named Paul who raced it in a 240k back in 2000 I think he raced it for a season and a half before he sold the car and kept the motor. He had done alot of work to it at the time like put a cam and twin SU carbs on and also done alot of machine work. Its been sitting in a shed for many years so needs alot of cleaning up.
2 points
-
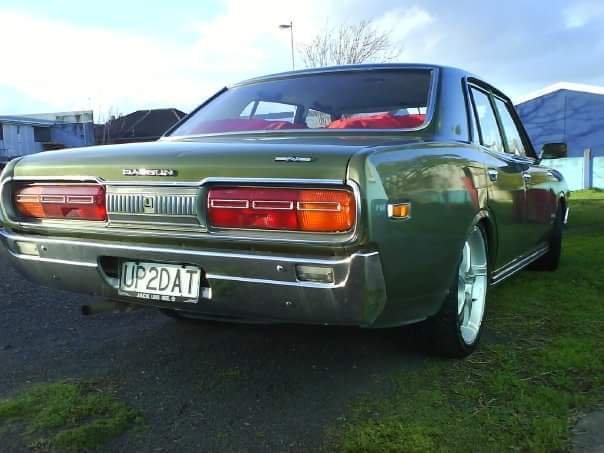
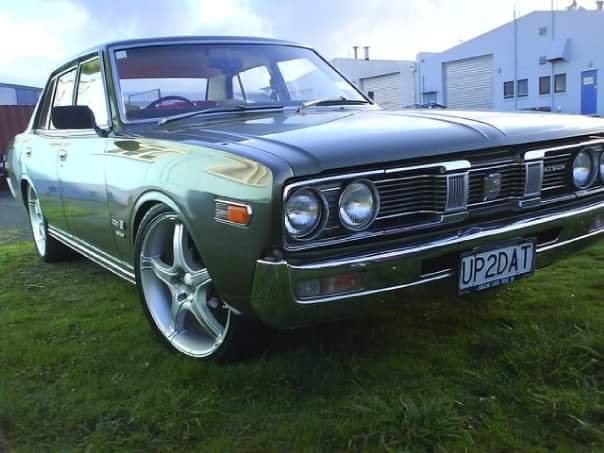
This is what it looked like before it was parked up for about the last 10+ years.
2 points
-
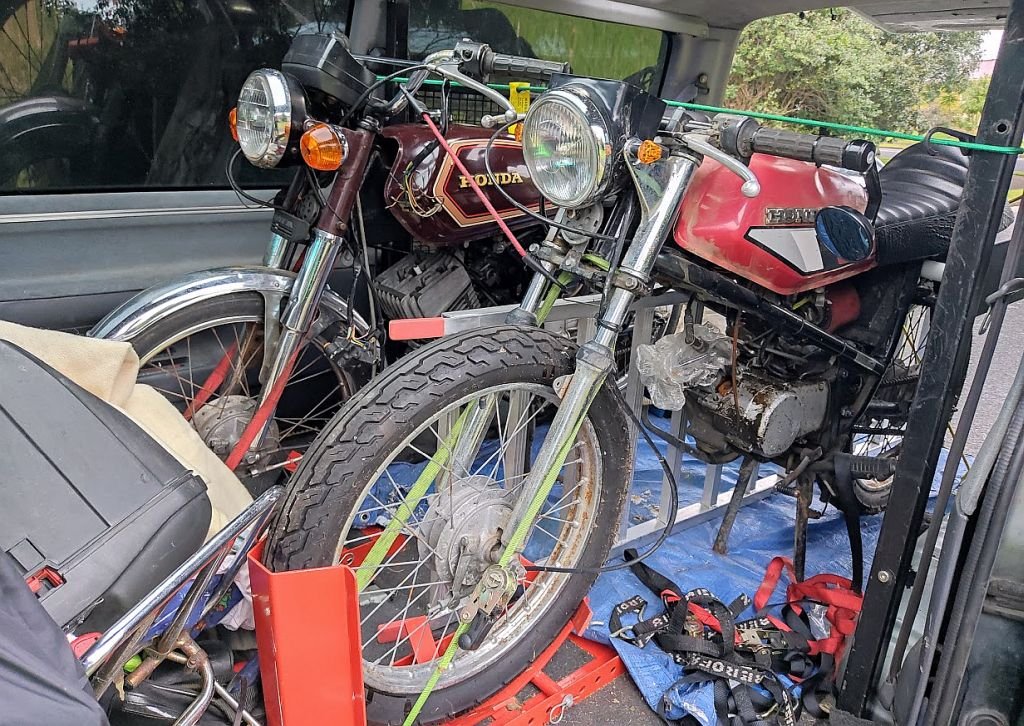
Not my fault, @Tumeke and @flyingbrick peer pressured me until I cracked... Took a 15 hour round trip to get them too ha Yeah, it's all their fault!
2 points
-
Got first spring in the other night, but wasn't happy with how it sat so pulled it and rotated it against the anti rotation tab better. Bloody easy job using the old impact driver on the spring compressors... And sitting much better... And torqued up the ball joints, needed a hardened washer to space the split pin correctly in the castellated nut. Also did some research on which way to align the pin, such a Barry-argument minefield. Turns out this way is the one used by the aviation industry (as opposed to bending them round the side of the nut), plus it is easier when there are clearance issues, but really doesn't make too much difference... And driver's side done, and new shock in, also torqued and pinned suspension rod arms etc. This is the easy side as the other one is against the shed wall... Discovered the new tie-rods weren't painted so painted them black like all other suspension bits, will install them tomorrow... And I'm over the cheap fittings that come with supplied gear, spring washers chewed out at only around 25 ft-lbs. replaced them with decent stainless ones... And installed new rotors. I'd packed the bearings 3 yrs ago but that had gone hard, so cleaned them out with solvent and repacked them. I'm not fitting the brake pads yet as I have to push the car into the other shed and new pads will probably rub. I just loosely bolted the calipers in position till it's moved... And repeated the job on the other side, all went ok but the rotor is rubbing on the dust shield so I'll pull it tomorrow and bend the shield back into place... So a big day, and frustratingly short of getting it mobile, should get there tomorrow though...2 points
-
Torqued up heads, 70 lbs on short bolts and 80 on longer ones, supposed to prevent any head gasket leaks after torquing intake doing it like that. Then removed old intake gaskets, cleaned up surfaces with brakleen, and installed a new thermostat while things were apart. Then dug out my old bits, I'd labelled the lifters and pushrods so they went back in same place, sadly I'd dated it too, Feb 2017, that's a long time sitting... Problem with using polystyrene was bits getting stuck in the pushrod holes, glad I checked... So cleaned them out before re-installing them, used assembly lube on lifters and top end of pushrod... And when gubbins were in, ran a bead of sealant on each end of block and insterted intake locating studs.. And a tiny bit of sealant around water passages on gaskets, don't think it's needed but easy to do now... And a thin smear on underneath of manifold... And the beads look like the right amount of goo was used... And assembled, Nice to have things buttoned up... Setting valves next, quite looking forward to a non-messy job...2 points
-
So the jaycar module died, I got another and it didn't work out of the box. I did what I should have in the first place and orders the right bosh module Wired it all up and it works like it should1 point
-
Dribble feed did the job. Had a small fire. Had a lol. Started first pop. It runs good. Time to pull it out and put it in the corner.1 point
-
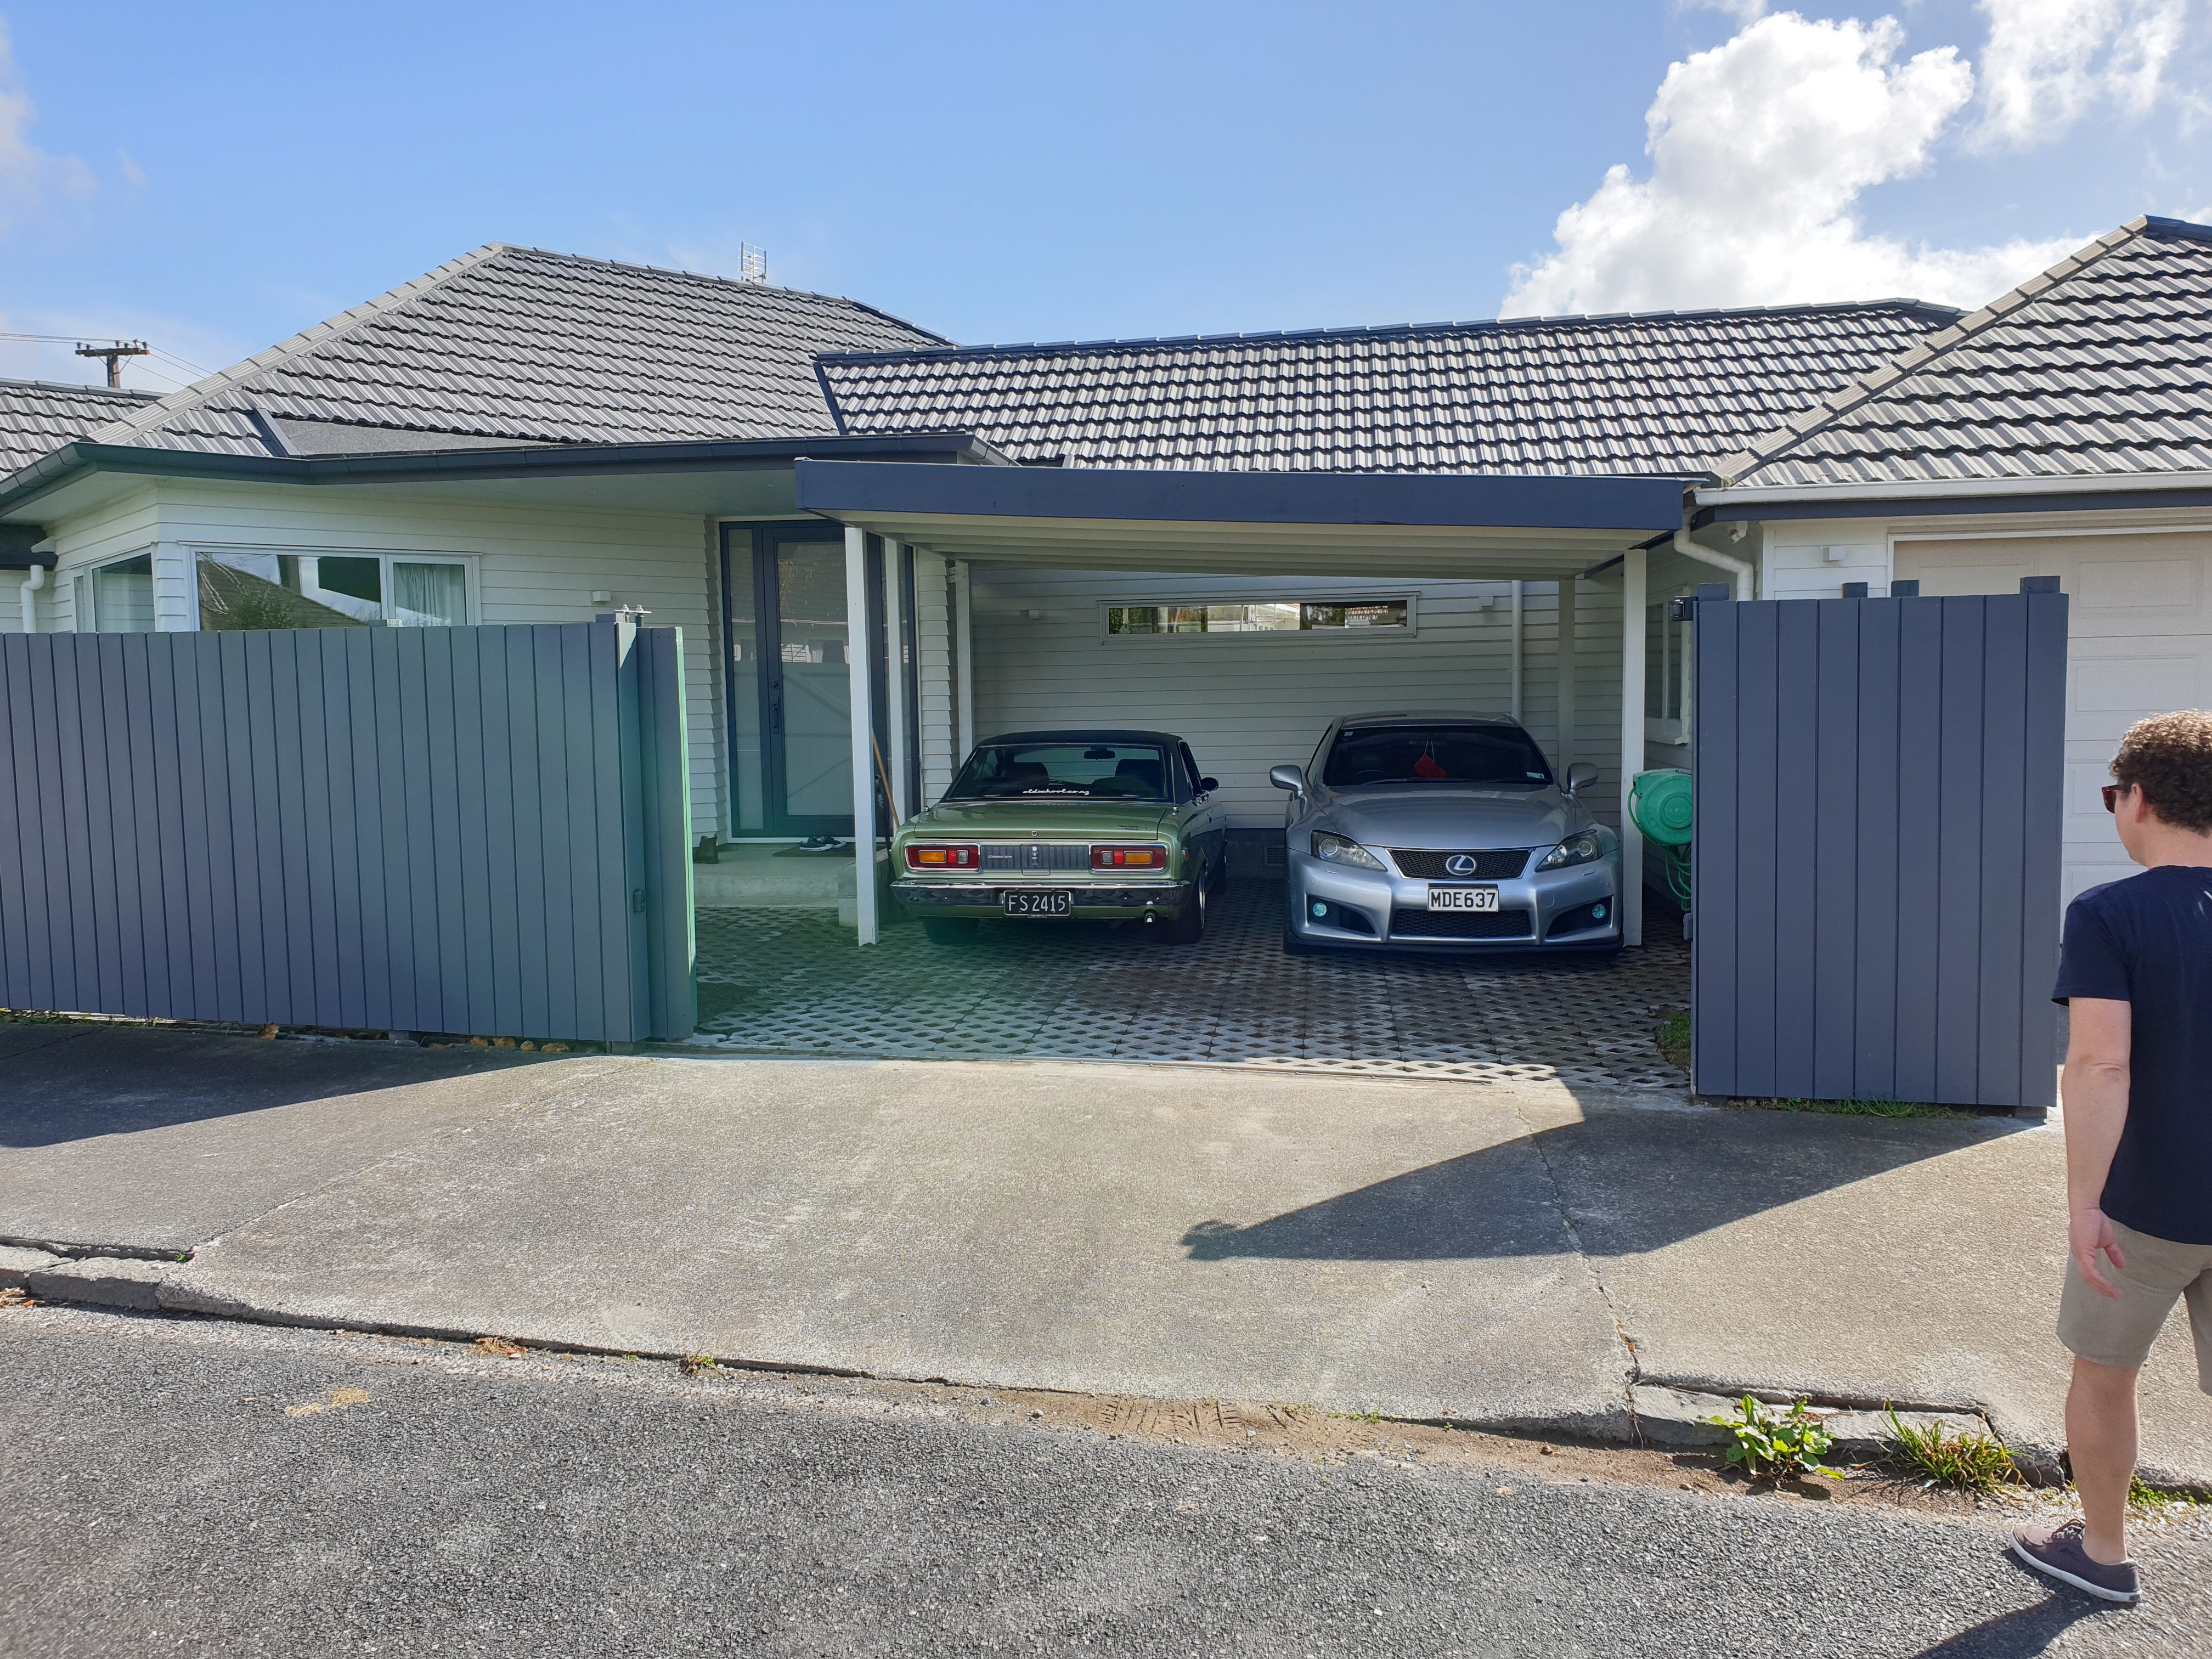
After 6 years of it being off the road its finally certed ,wof and reg . so stoked to have reached this point now its off to the dyno then i can enjoy it
1 point
-
Yeah that VHT stuff is much more of a greener and lighter blue. than the actual Chrysler blue. not that it really matters though but good progress anyway!1 point
-
This went 0-100 real quick, unlike the car itself. Subframe is also going to be blasted and painted too and bushes replaced where necessary (everywhere); just have to find some.1 point
-
engines not fit for purpose and bicycle parts is how we went from horse and cart to the moon in a hundred years1 point
-
Ooh, update ? Nah, clickbait. Was tidying stuff out at my dads & found an aerial I had on loads of cars back in London. I probably bought it in about 86 as it was on my Imps. It also lived on two Granadas, the Consul, at least two Cortinas and ultimately, for that period of my life, the Marina I used as a getaway car when I headed for Wales. That got scrapped coz I had to crash that car, it but I kept the twig 'safe'in a damp box in a rat infested shed. Spent time messing about with it today and now it lives again on the Hilux. /Circle of life /pic Catch ya on the flip-flop.1 point
-
Box popped off and seam rebuilt Box back on again Patching the holes in the firewall - I did have a go at doing this myself before I realised just what a job it was going to be to do it properly Soo easy to do when it's just an OS montage. Rot at the bottom of the A pillar post removed. A side note, the underside of the car is actually in fantastic condition. Patched up, simple as. RH upper firewall getting the same treatment. Box section off, rot out and the whole lot cleaned back more new than old
1 point
-
Righto, this might be the last update for the moment as it's about as finished as it's going to be for a while. Try and stifle your relief. The tub is sold. Got 400 quid for it which is better than a kick in the nuts. Better make the thing roadworthy again. Because of virus I can't get Steve to do the welding so nuts & bolts it is... Sanded the chassis & got a bit of paint on. Shiny. Chopped the ends off the box section, Painted & bolted down, mocked up the bed frame Run out of excuses to do the electrics so gave it a bash. I don't really get it but how hard can it be ? This was about the time I went in and had some food before I lost the plot & ruined it. One of Carol's pizza's & an ice cream later and I finished the job... They don't all come on at the same time normally, I'm not that useless. Liberated a pile of 1" roofing boards from my Dads barn, pretty fucked but did the first layer side to side & the top layer front to back. It's good & sturdy. Gonna add some tie down rings at some point. Good enough for the moment, would like a hoop, etc, but we're moving soon so I'm going to have to learn proper welding before that happens. Hopefully have a bit more in a few months. Chur.1 point
-
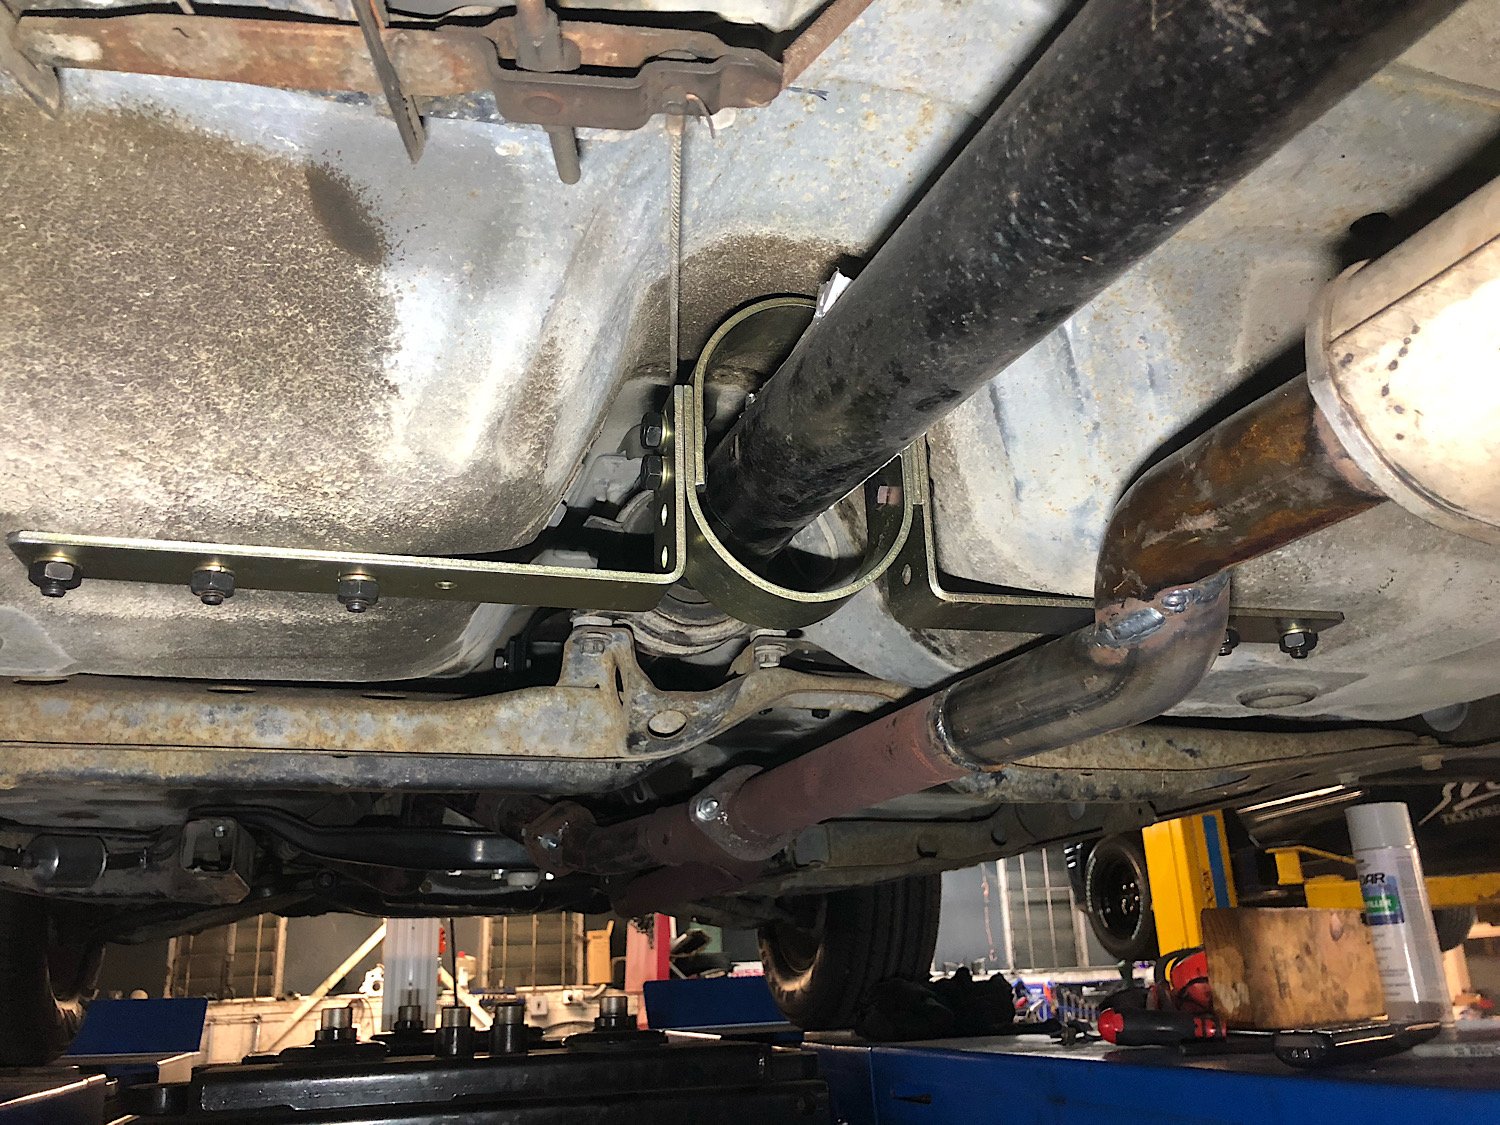
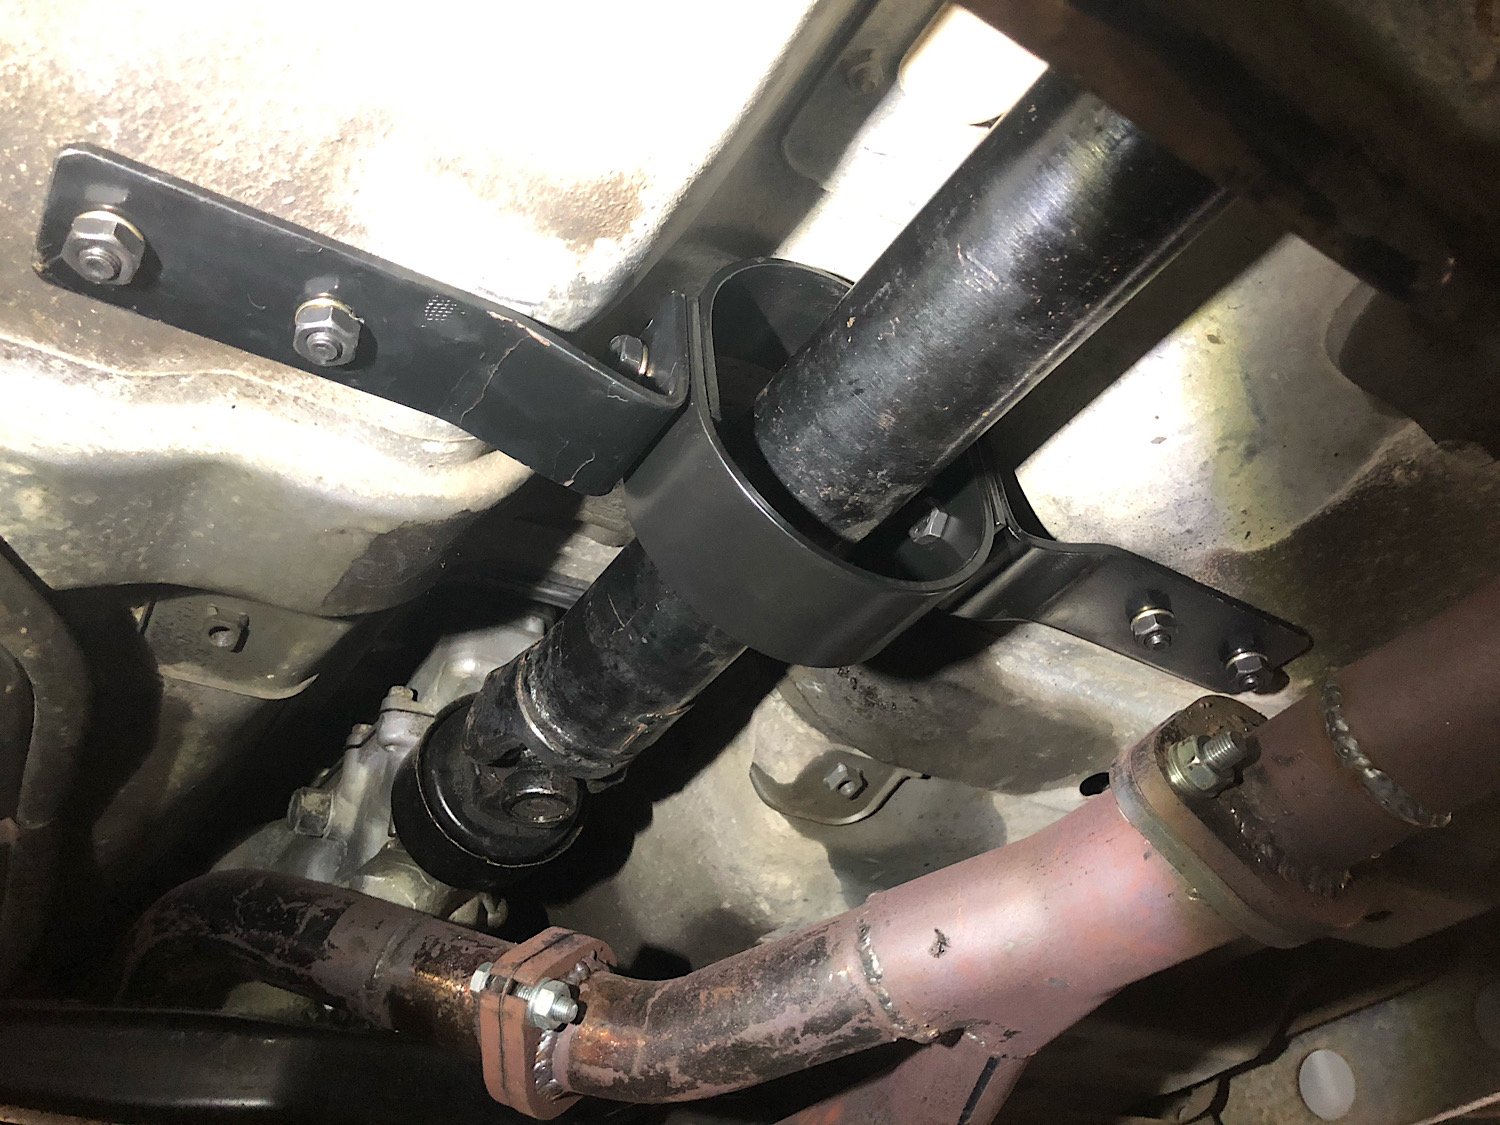
Cert day is fast approaching! I’ve ripped out the seats, collected all the 5c coins, chopped the driveshaft hoops to suit and put it all back together with some beefy doubler plates. Hopefully I’ll never have to use them!
1 point
-
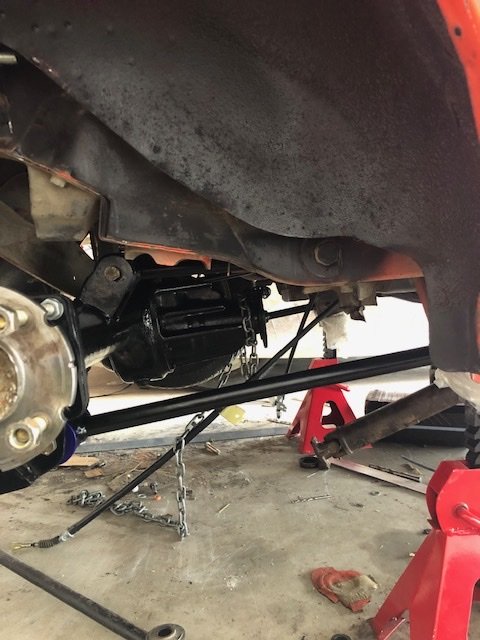
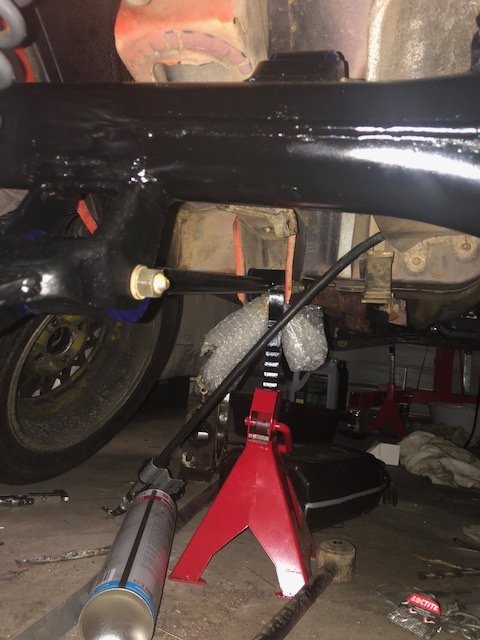
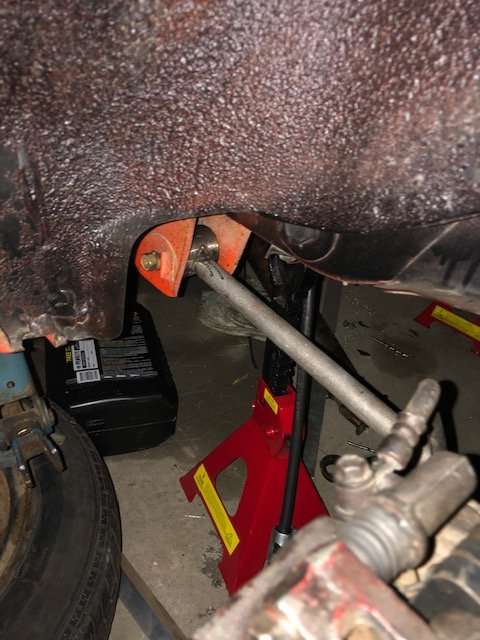
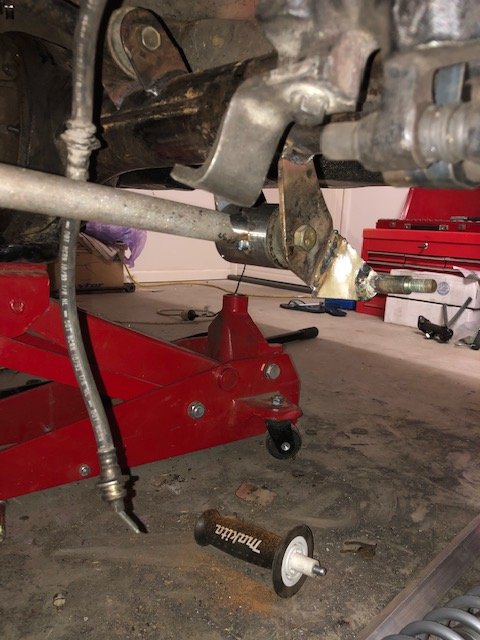
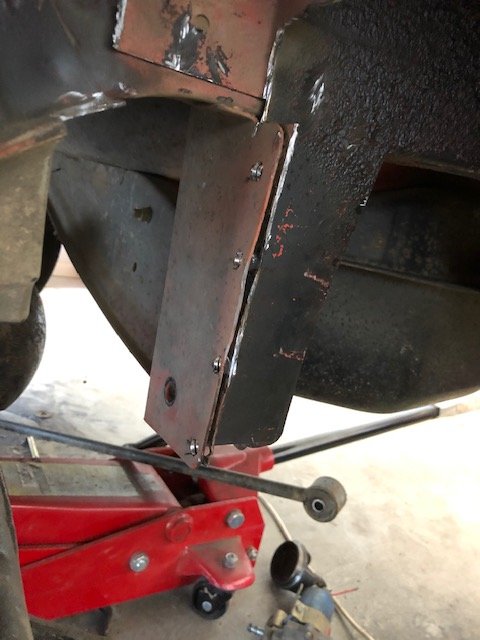
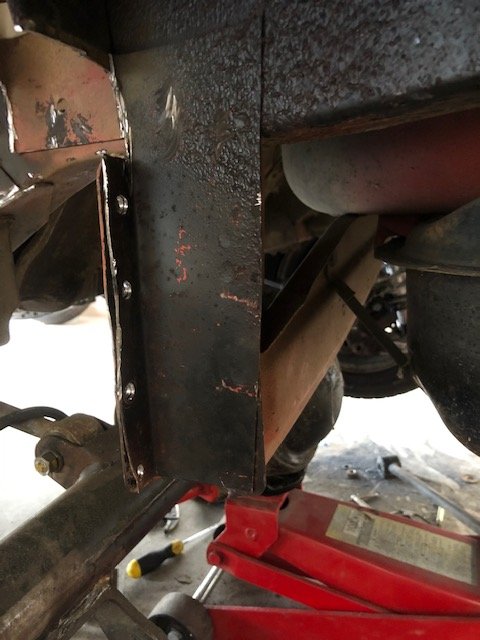
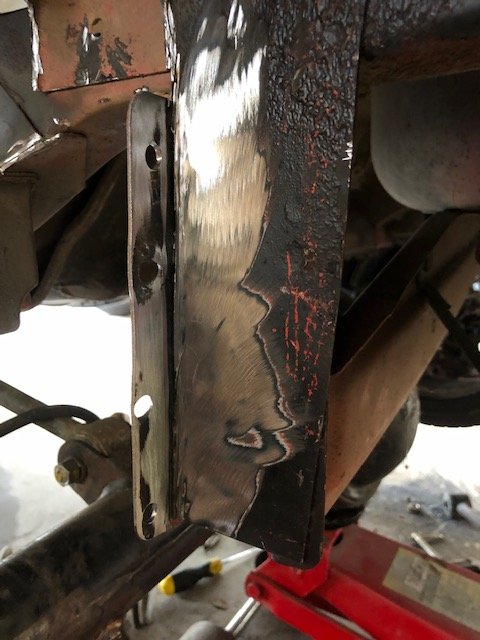
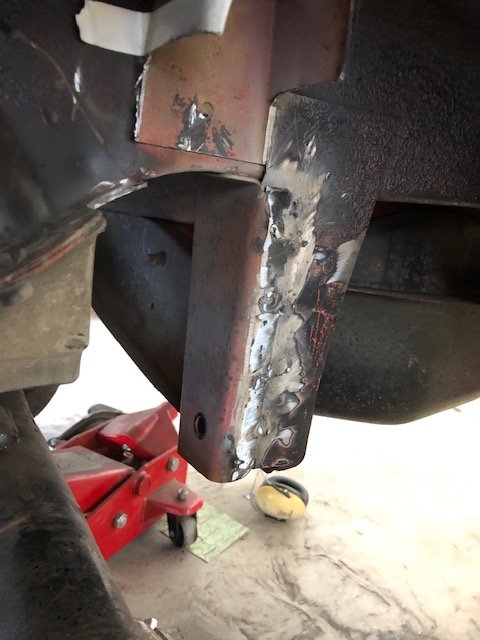
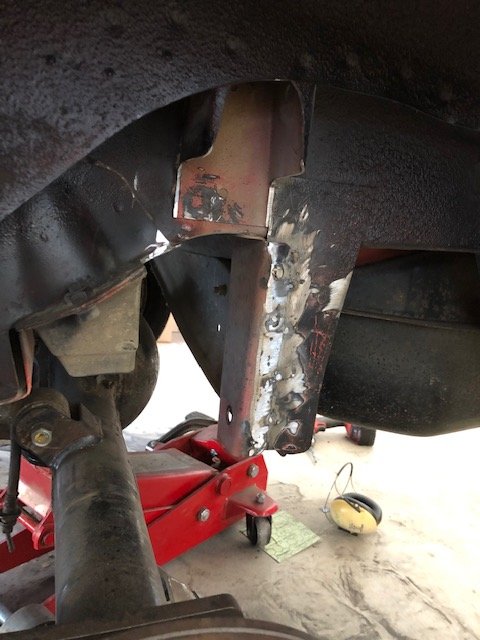
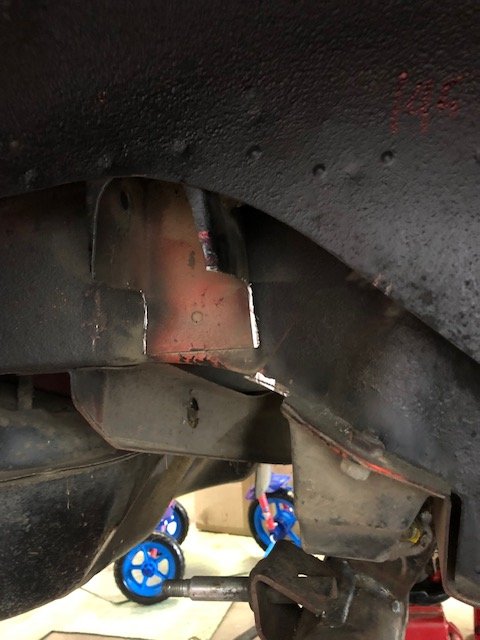
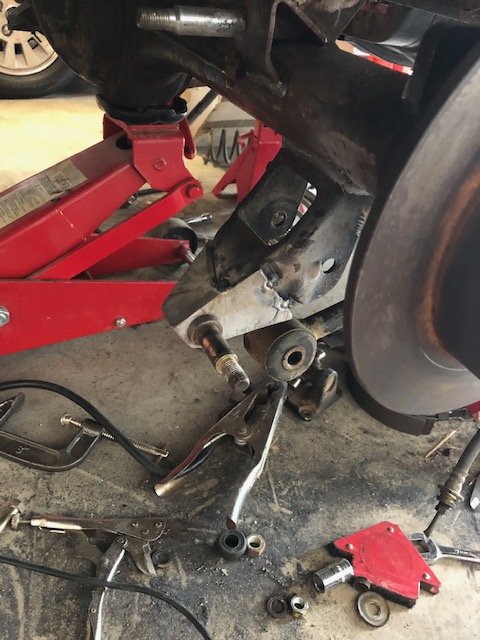
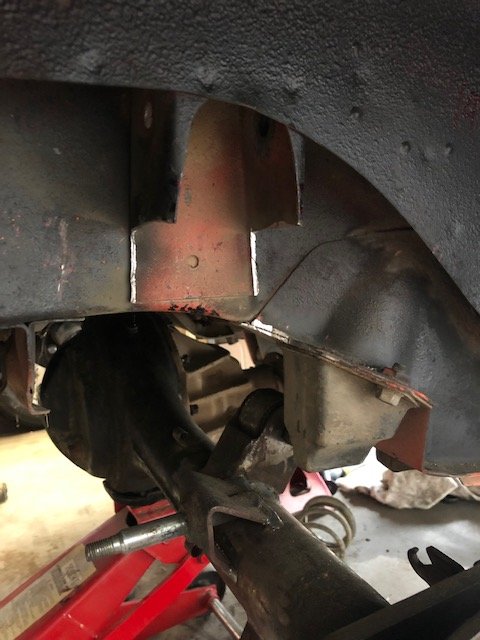
I got bored today so started on the passenger side suspension mounts etc. scratched my head when I got to the panhard rod mount.... but endeavoured to have a win Ended up unstitching some of it, wrapping what was left around and welding it back together. the pictures do a better explanation. most of the fabrication is complete, just need to get my brackets fully welded that I’ve tacked on and top shock mount bushes. I’m thinking of getting the spherical bearings for the top. at least it’s back as a roller-ish and on my week off will try have all the engine stuff done and go for a start. enough jibber jabber....
1 point
-
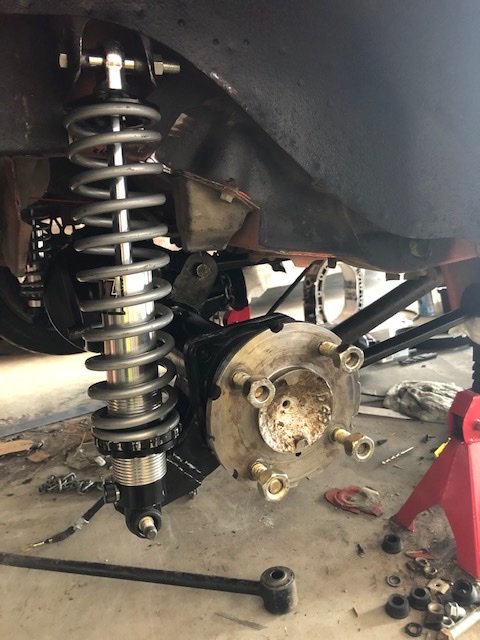
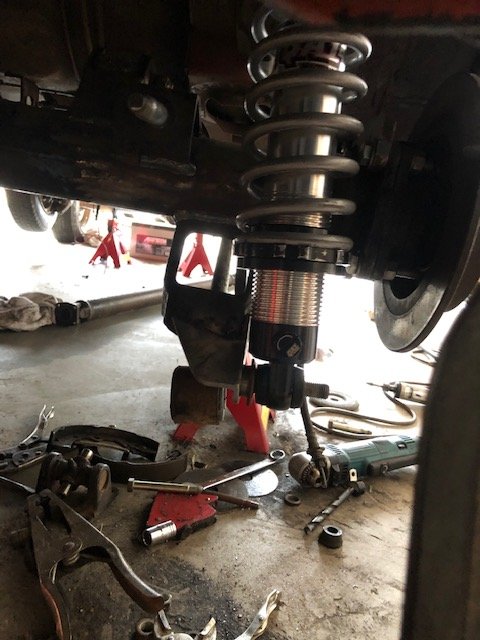
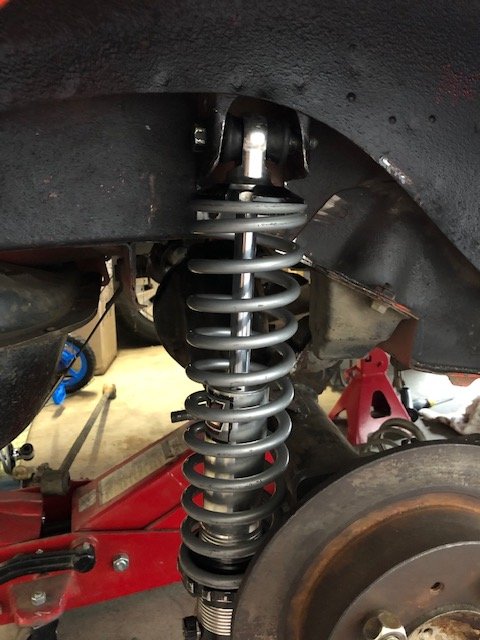
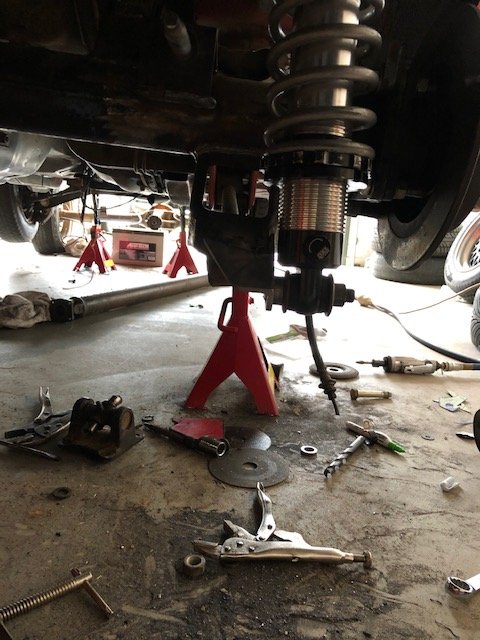
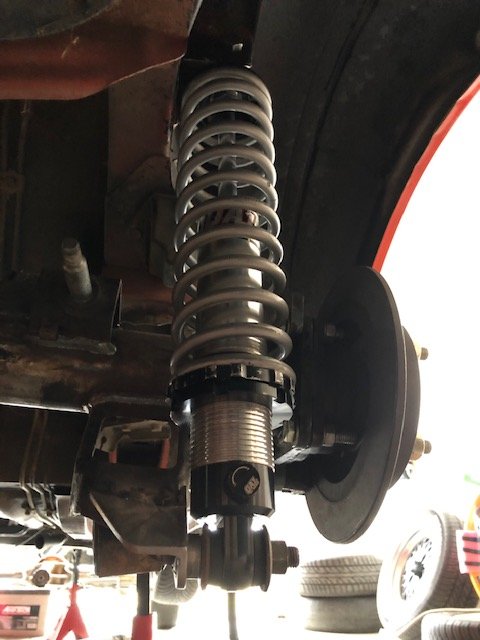
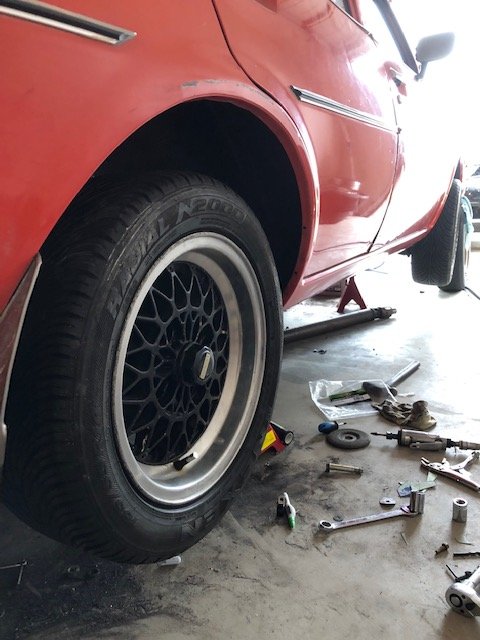
Well.... I tacked it on, and used the old bushing to try it out. clearanced the old shock housings to fit the new coil over diameter. and it worked in all aspects. Clearance in all areas. its taken a lot of trial n error, but I finally have it where I think it can work as designed. From all accounts it’s not just an easy trim n fit. But totally achievable with a grinder, some scrap steel, welder and patience.
1 point


.jpg.5d4646497fec00be9b9d5a57c45e3e9c.jpg)


.jpg.4396892dcda8985c332b5c397f91bfa2.jpg)
.jpg.d6b6035956aa3a7b47a09cf62e066fd9.jpg)
.jpg.76db9d04d86d277090e1b3bf8ed9081a.jpg)
.jpg.2469e4f4675c33082dafeacefb263b95.jpg)
.jpg.e7322e1c9d862305299af4b7f1de64e1.jpg)
.jpg.8f9821315b7c1ce6b2872dab4ab564f0.jpg)
.jpg.1ce95400b16cfb9fba2e403b72803cd7.jpg)
.jpg.20ec9f2c89f75a52ca0334855c04b343.jpg)


This leaderboard is set to Auckland/GMT+12:00