
Leaderboard


Popular Content
Showing content with the highest reputation on 06/17/20 in all areas
-
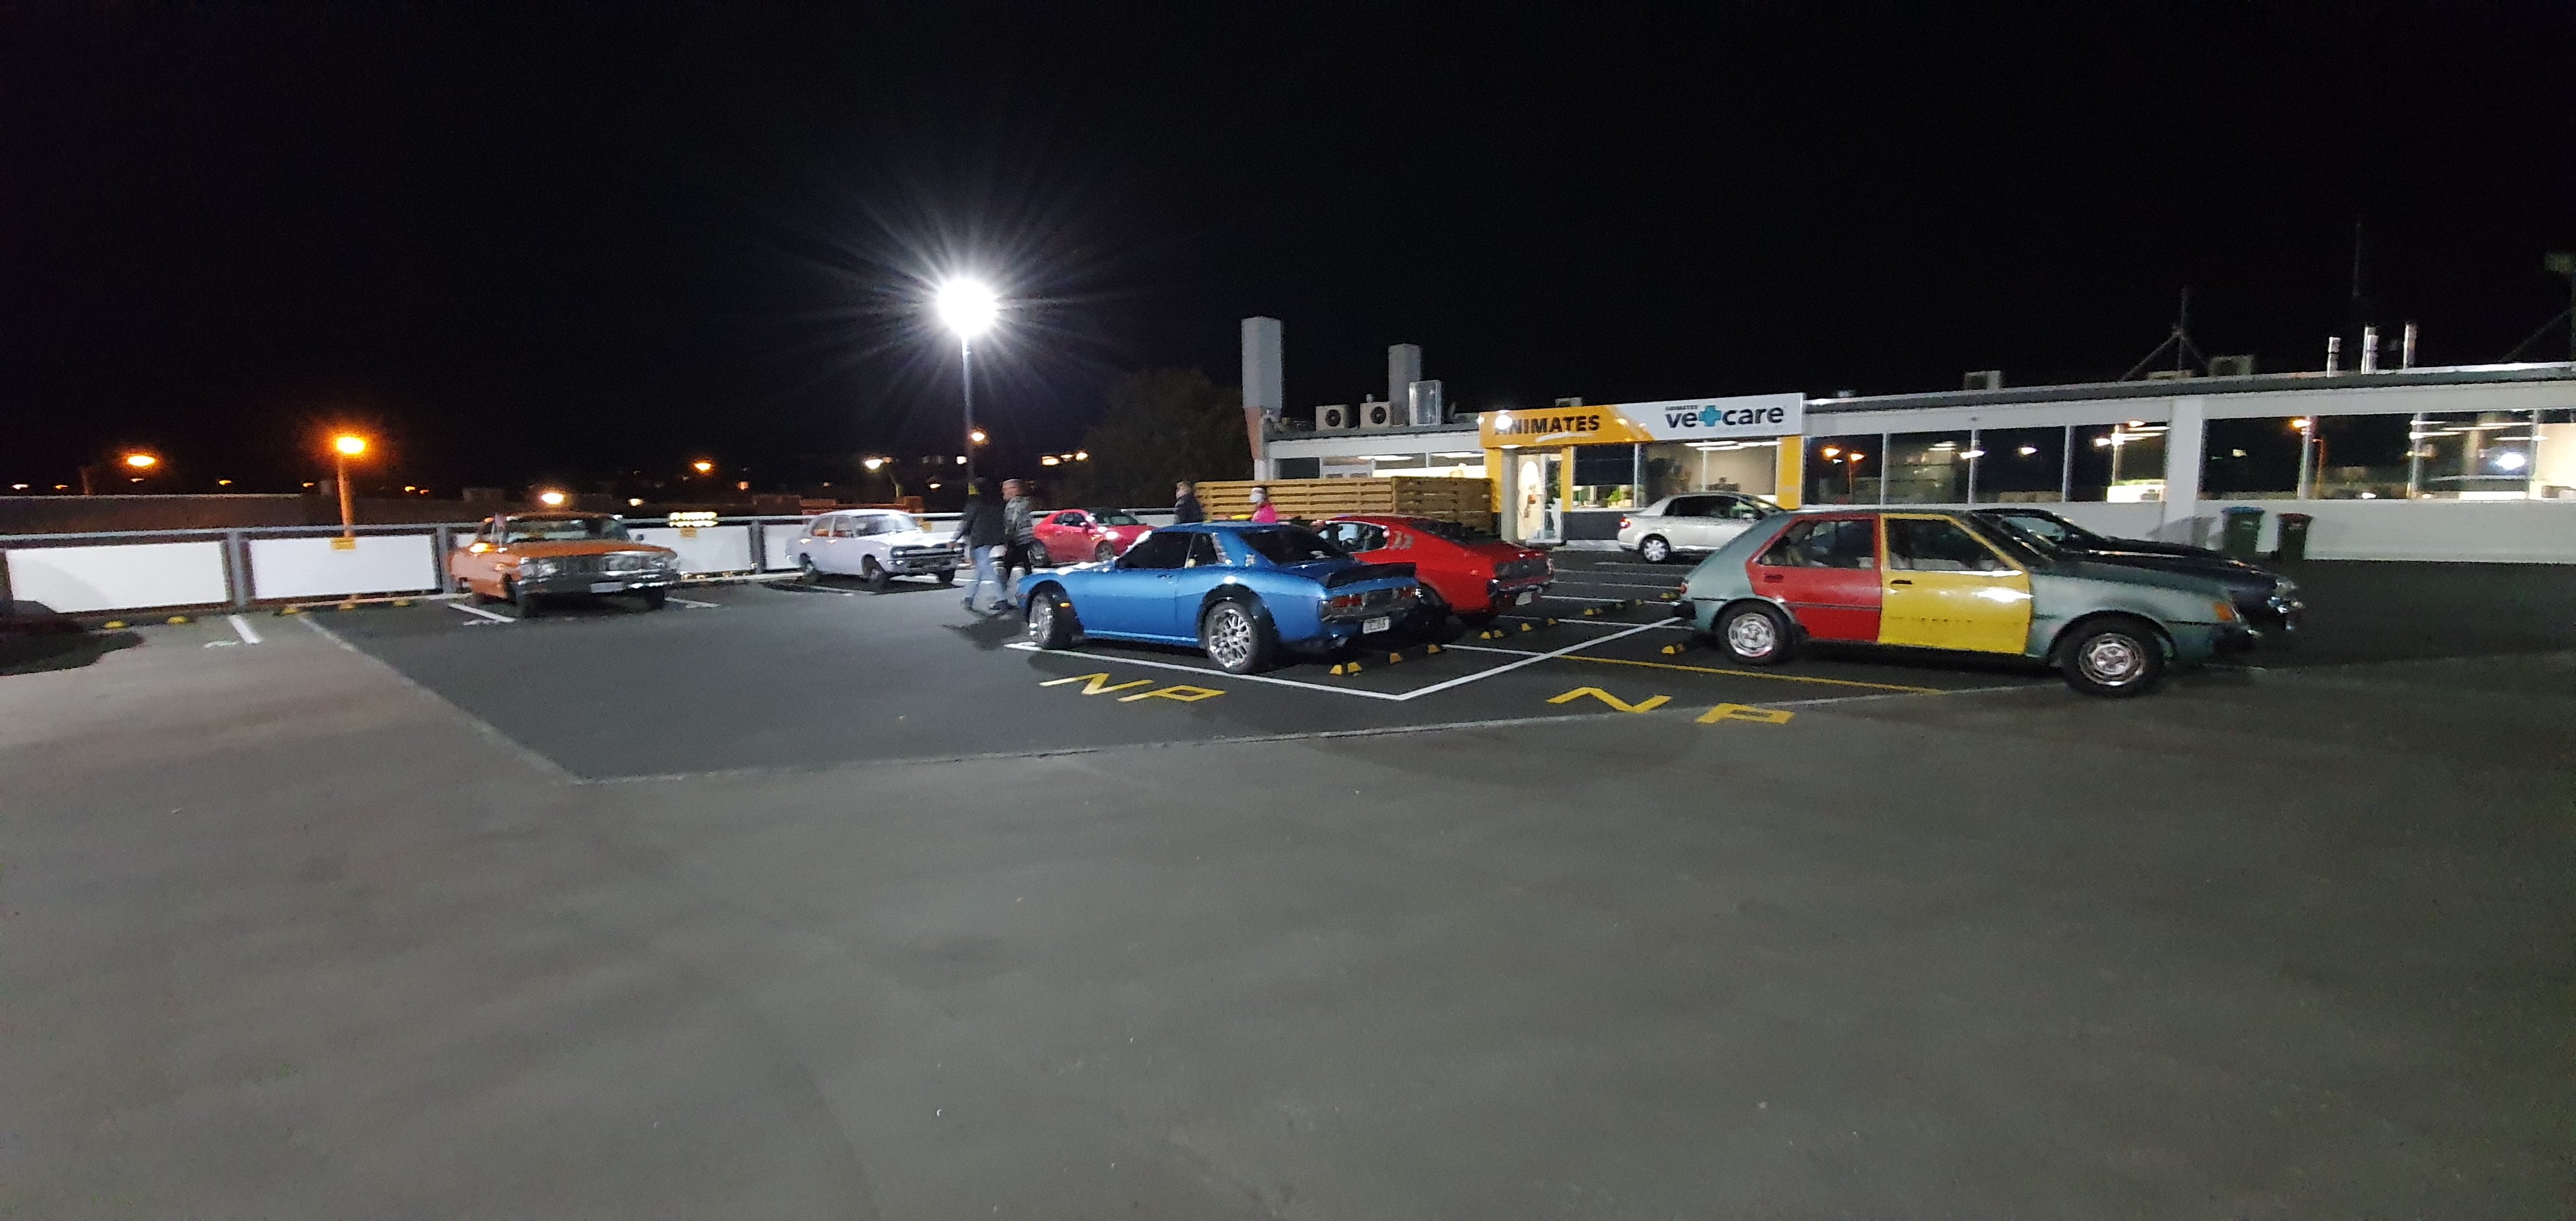
It runs, going to Ellerslie to have a burger and celebrate with people who understand!!!!!10 points
-
Coming to Lake Waikaremoana soon.
 7 points
 -
New Exhaust out through the sill to get it clear of the ground as I kept knocking it. Fuel/surge tank boxed in for a cover. Most of the bits back on. Wheel base has gone from 1300mm to 1400mm (standard AE86) so will be interesting to feel the difference. Fab work should be finished this week.7 points
-
5 points
-
Link to discussion thread Thought I might share this with the oldschool community. I did attempt to attend an old school track day in Taupo right back at the start when I brought this car but had a shattered wind screen in Waiouru which prevented me from attending. So quick run down. Car is a 73 Ke20 2 door sedan which was aussie built. Check out the youtube clip of the cars first build below. SR20DET, roll cage, paint was all completed in Australia. Since I brought it I have overhauled most of the car, had some fun but now it is time for my version two with reliability in mind. Will start this with progress pics to date and take it from there. Original Build video https://www.youtube.com/watch?v=h35kYINEhaw From the drive home. This is how I brought it. First show. Now the strip and rebuild Stripped every bit of wiring from the car, all panels from doors forward removed. I have taken the entire fuel system out and will focus on the wiring aspect first then for a mix of all things to finish it the way I wanted.4 points
-
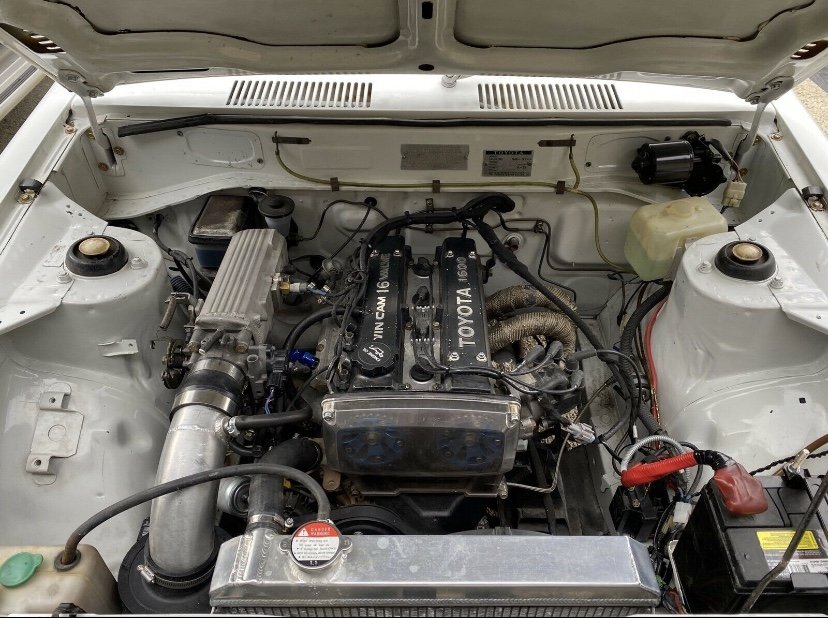
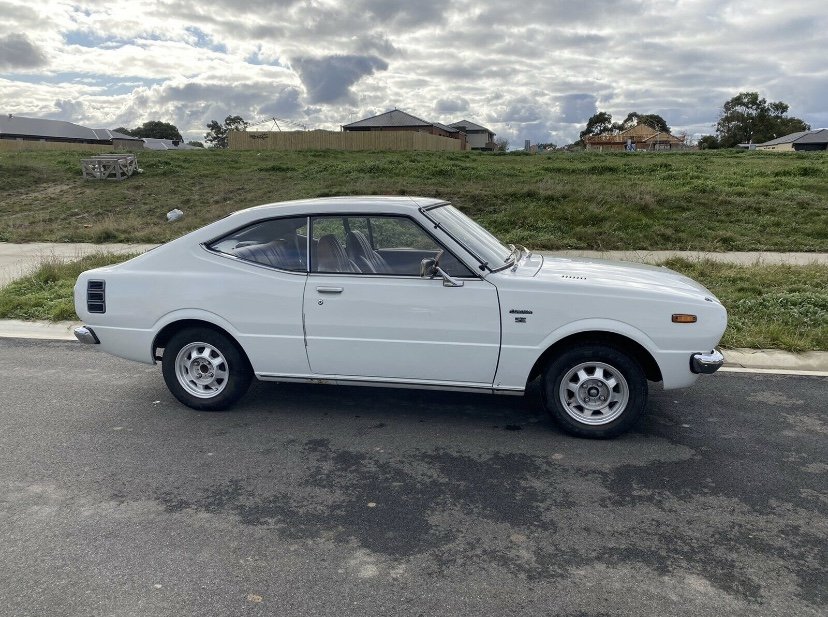
So after selling my old ke35 in Nz around 9 years ago I’d always pondered getting another one. This one popped up on gumtree over here for $7500 and after a quick phonecall to the owner I pulled the trigger and bought it sight unseen. It has a few minor rust spots that he sent me photos of and a rebuilt small port 4age with 264 cams, wolf ecu and extractors backed up by a t50 gearbox. Fingers crossed it’s half as good as the photos make it out. Future plans I’m undecided. Originally I was thinking slam on 13” work equips, ssr’s or equivalent but depending on cleanliness I may just tidy up the rust spots and lower and keep as is. Should be in my possession around the 30th of June.
3 points
-
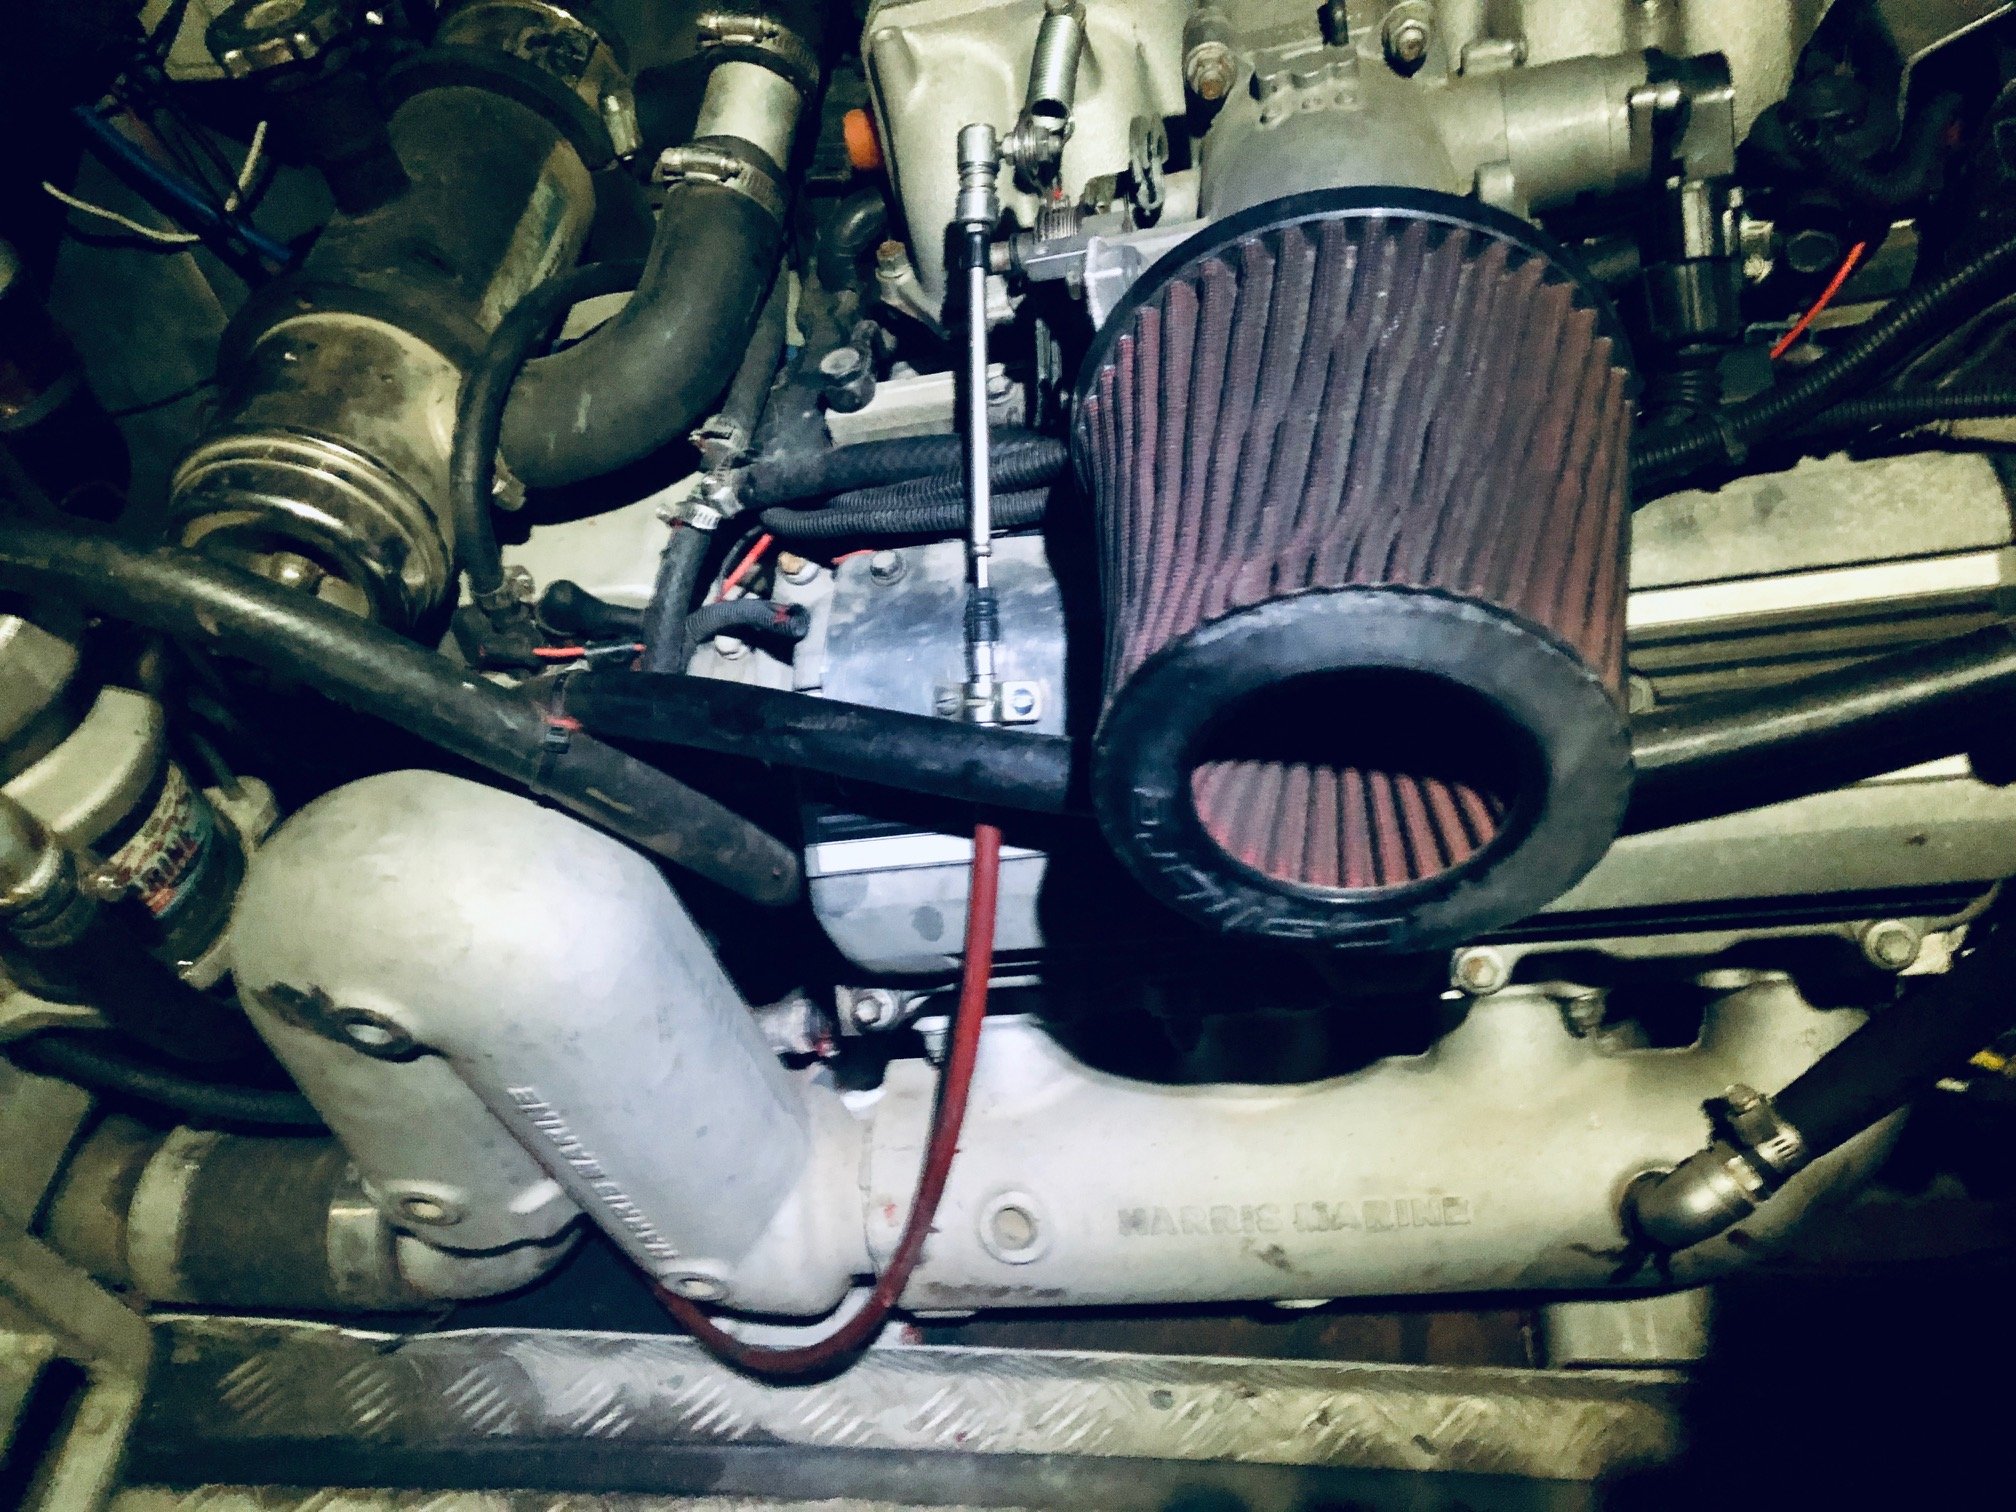
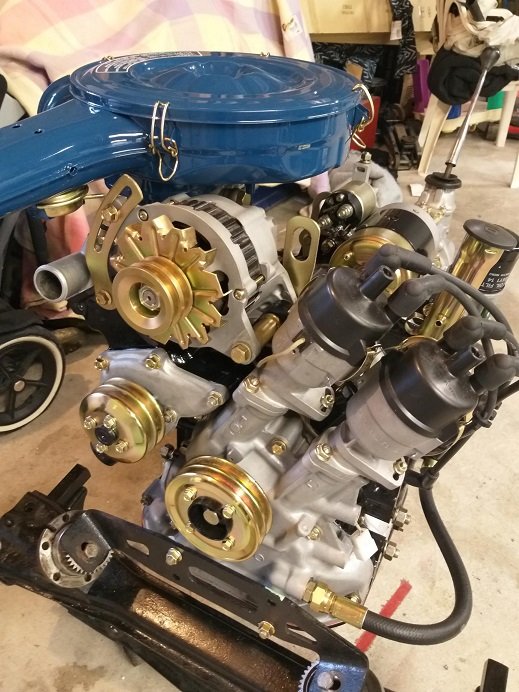
Got the injectors to play ball, the last one decided that it was going to need a beating to get it going. All have had plenty of carb cleaner spay through and the spray patterns look ok. Putting the injectors back in the fuel rail and took a chunk out of one of the O rings. I have to go to Pakuranga tomorrow so will stop off at Seal house and get a fresh set of O rings. Burger night tomorrow so maybe not getting it back together. I might finish work early and get it together.3 points
-
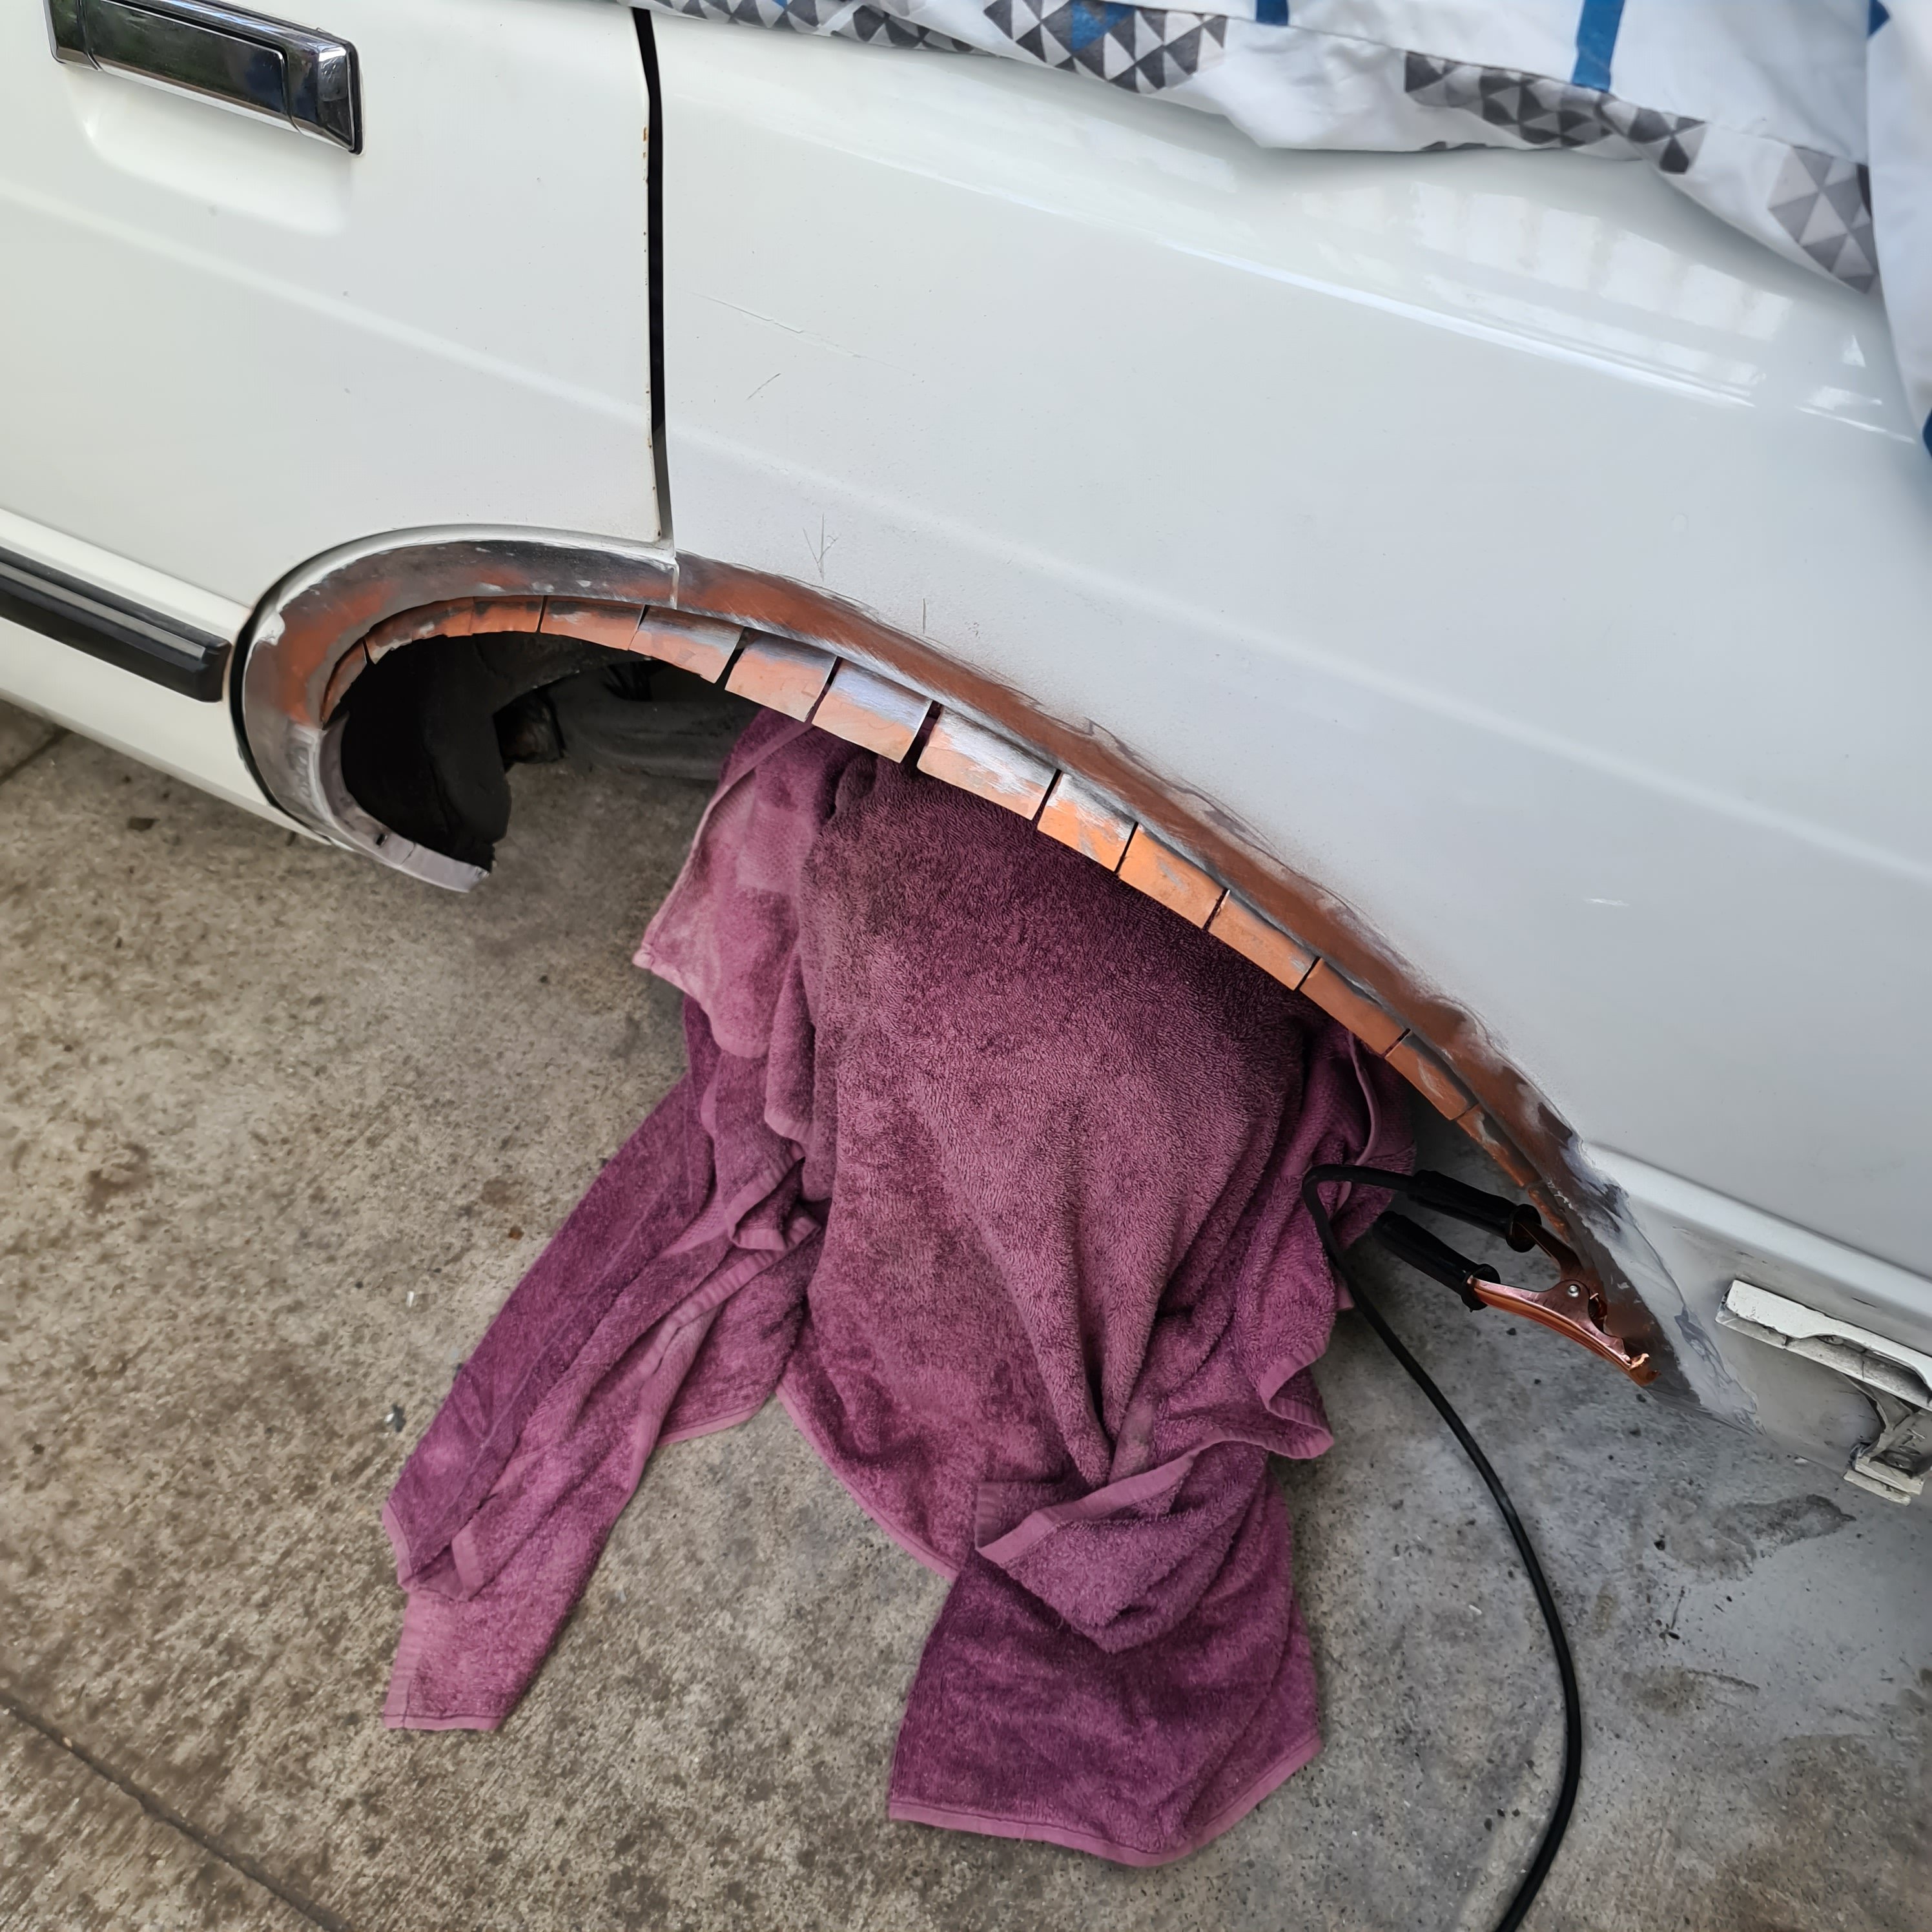
One side has been tacked all along the arch just need to go back and stitch together the pie cuts. Fairly minimal warpage which will be concealed by new outer. Have been using this link as a bit of a guide https://ameblo.jp/vats4649/entry-12410796671.html?frm=theme
3 points
-
Chuck a factory log Mani back on and run a stack out the back, chuck the sensor in there for tuning.2 points
-
Imagine asking that question on oldschool Amazing2 points
-
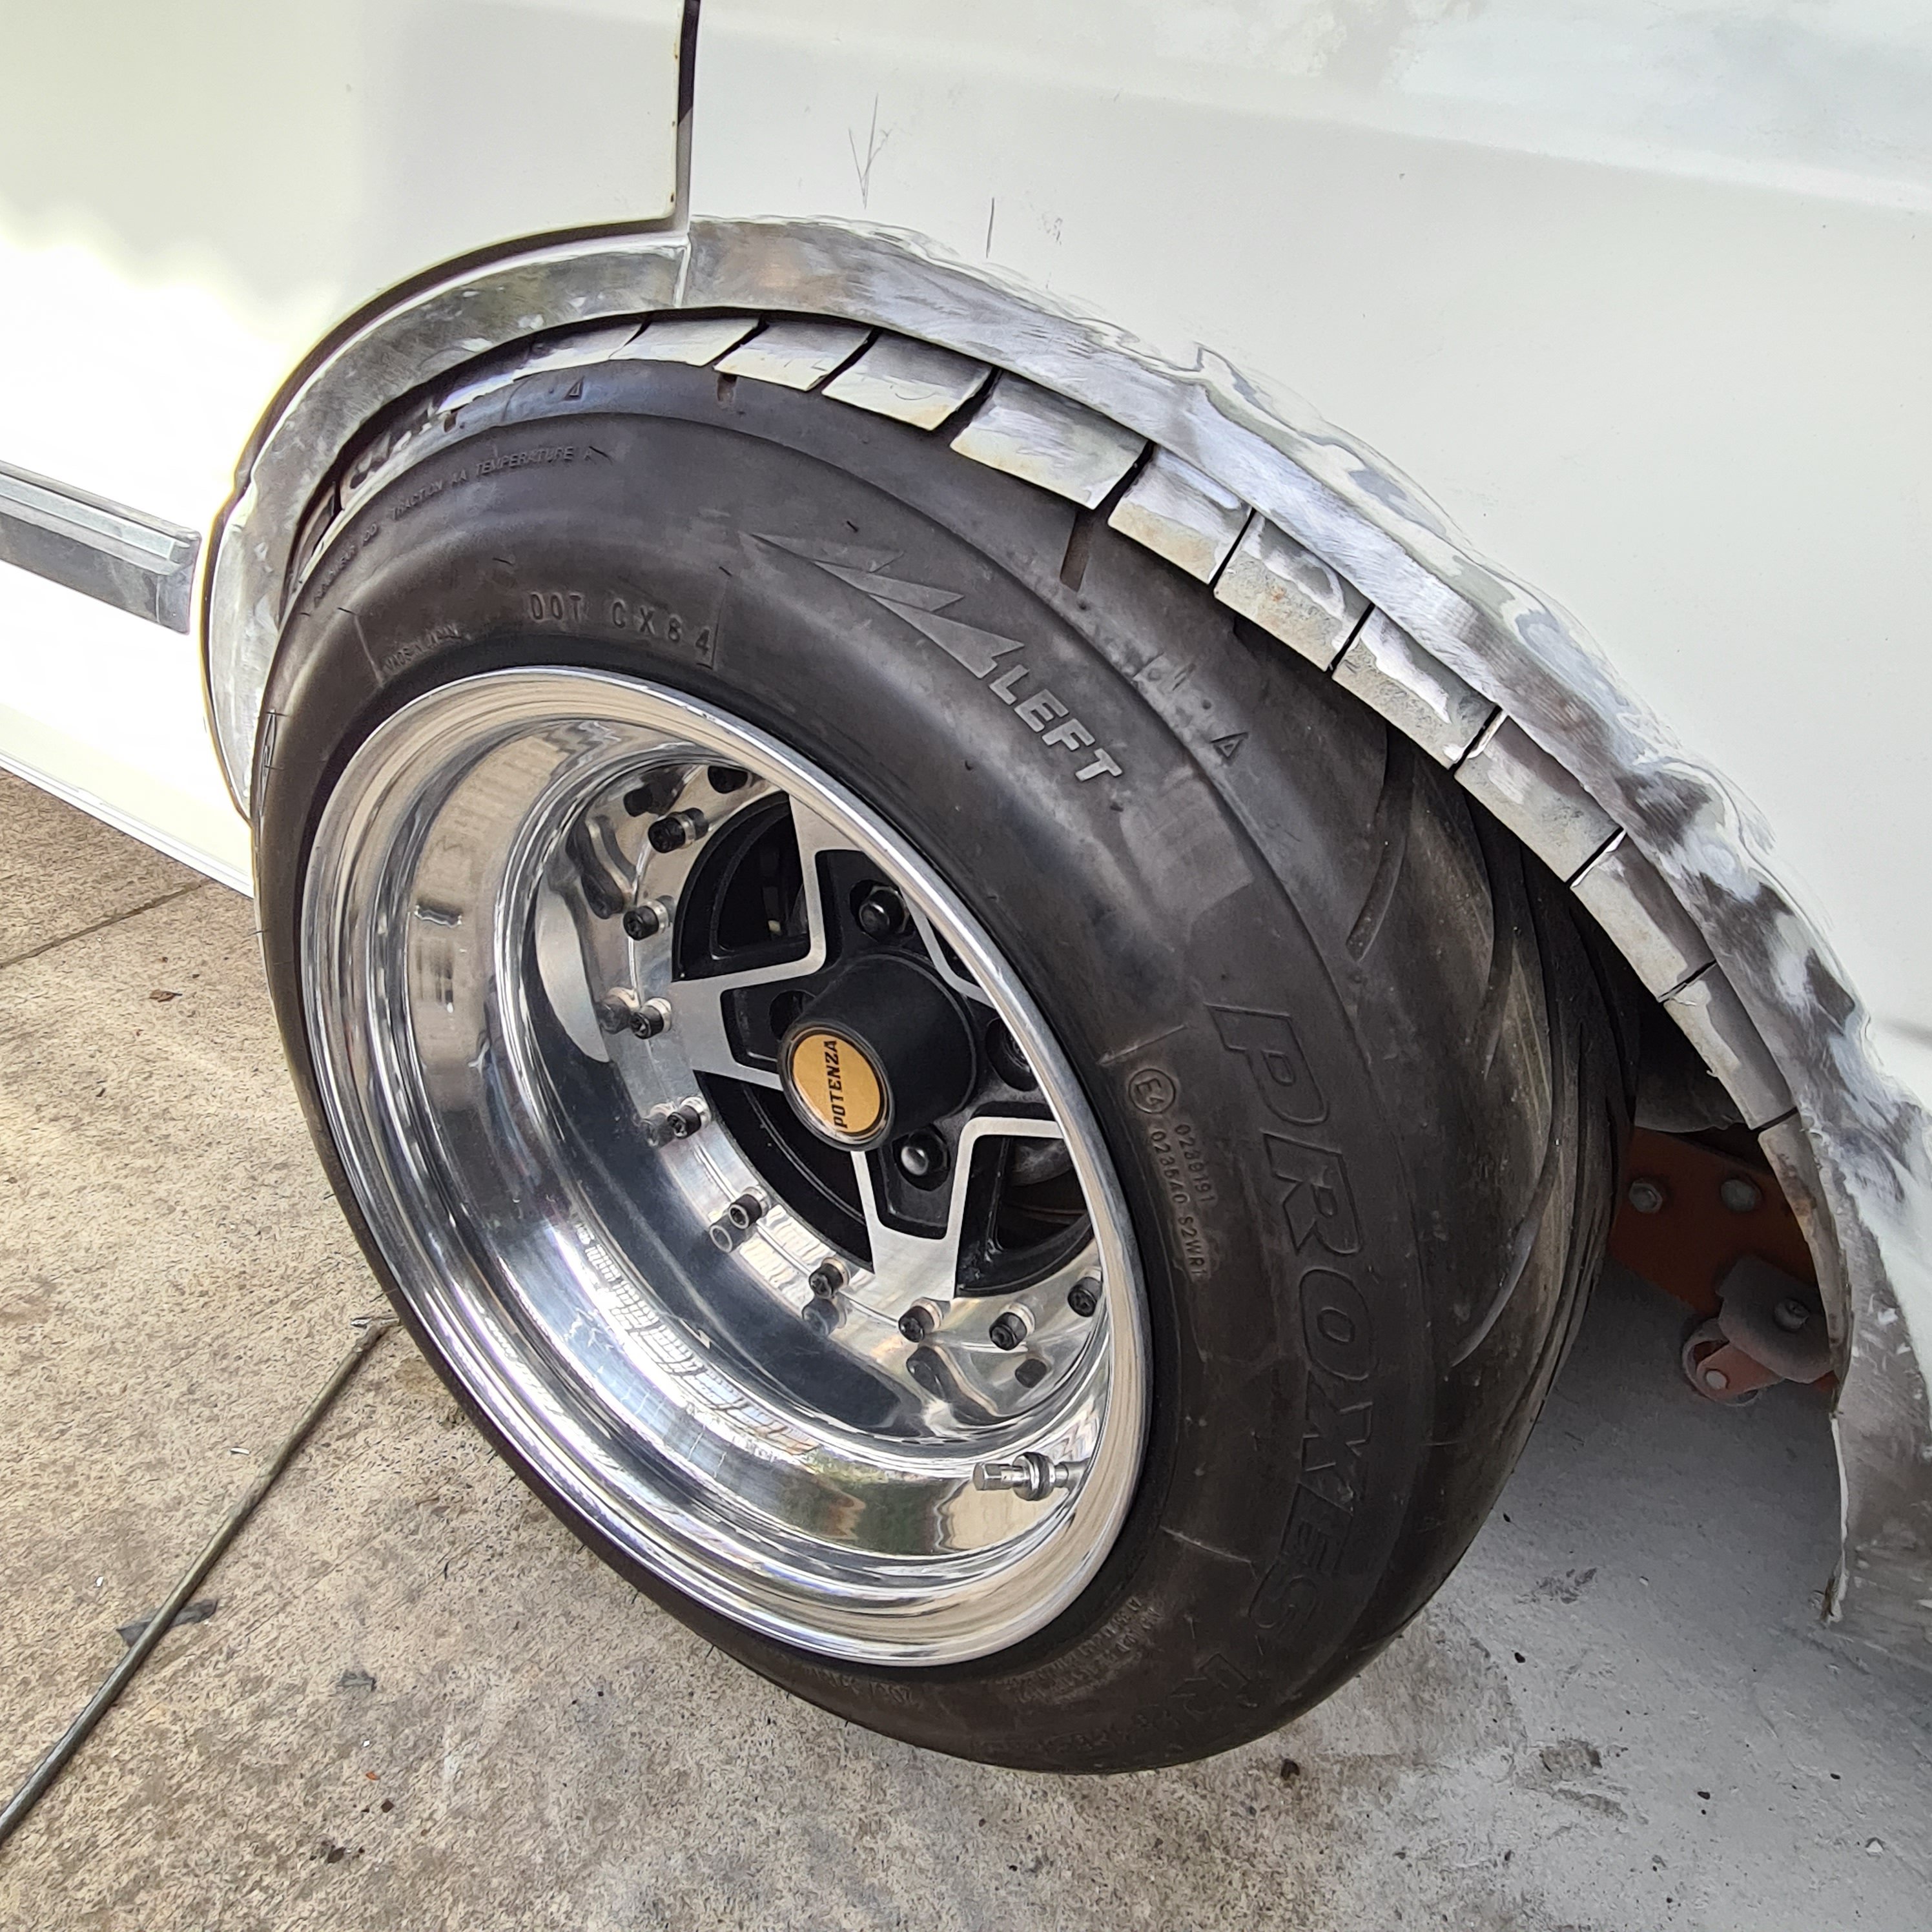
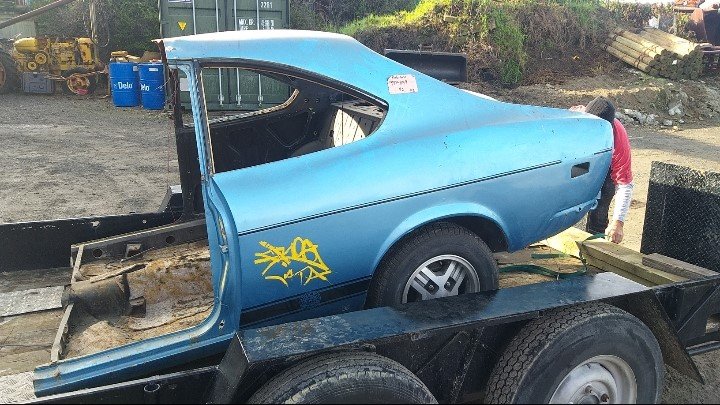
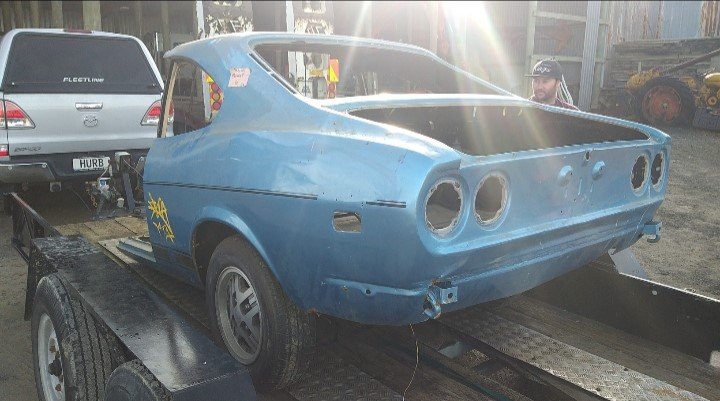
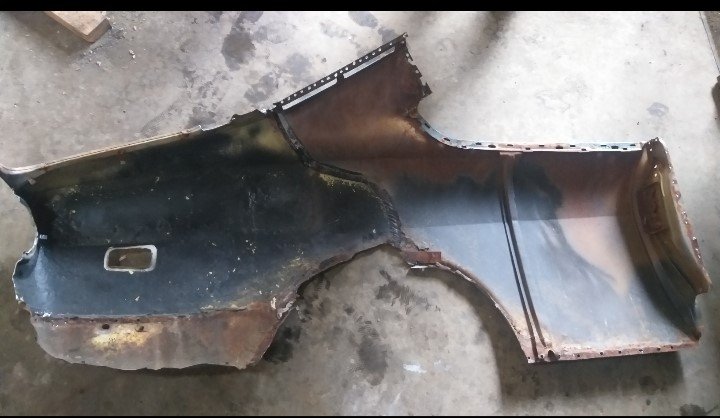
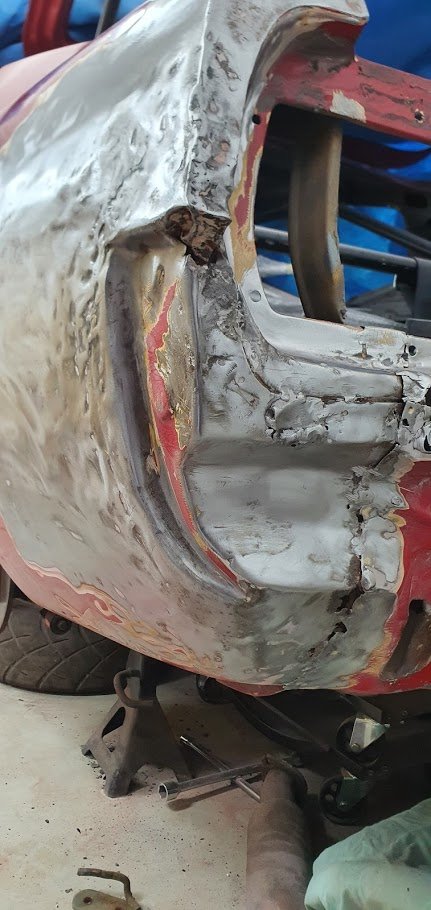
Tried to find a new 1/4, found a NOS one, but by the time it got to me it was nearly $5k! - pass. otherwise options are very limited for these coupes now Have ended up taking the 1/4 off this half cut a mate had stashed (ill weld my shitty one back on the half cut), once removed it had plenty of Mexican repairs, it wasn't great, but still better than what I had, Choppers Auto Body says hes far happier repairing this so its currently at the dippers awaiting a full strip.
2 points
-
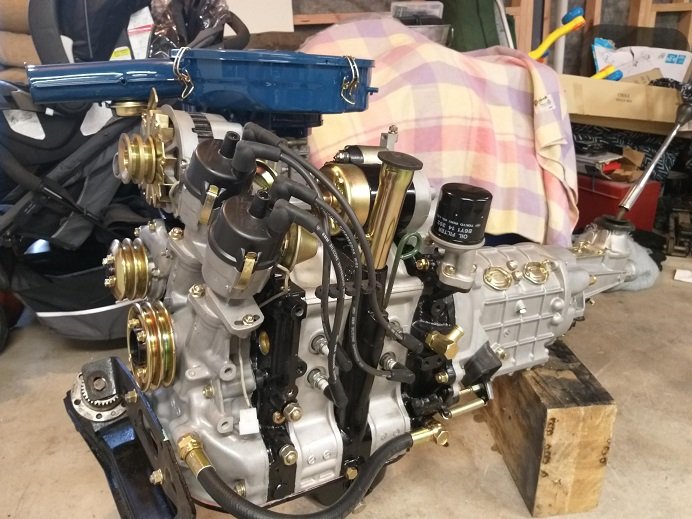
Spent most of Sunday working on the car, fuel tank in, fuel inlet sorted out, breather sorted, wiring to the pump and fuel gauge done and made nice. Tonight was meant to be the big start up, did lots of little finish of things like put in the O2 sensors, put on the shiny new Supercheap locking fuel cap.......... My mate turned up with his jump pack to help the battery. We connected up the alternator and all the smoke stayed inside.Added the jump pack and turned the key. Fuel pump primed OK. Gave it a few prime and then tried to start. Lots of turning over, no firing. Found my old school timing light and checked there was spark. Spark was OK, and it decided to fire on one cylinder. By this time the starter was smelling a bit over worked. Gave it a break for 15 mins and tried again, still firing on one. I pulled a couple of plugs and they were dry. Figure it was injectors and pulled the fuel rail. Lots of blocked injectors. Not surprising since the engine has sat for 6 or so years Tomorrows job, clean the injectors. Anyone have a good idea on cleaning injectors?2 points
-
Water pump was new not too many miles ago, and I was surprised at the corrosion considering I always run inhibitor in the coolant... Only really on the backing plate, inside seemed sweet... And I imagined a new pump would do the same pretty soon, so I cleaned it up and epoxied the plate while I was painting other stuff... Should hopefully stay a bit cleaner. Similarly cleaned up the sump and laid gasket on the block after installing the oil pump (that I'd messily primed beforehand)... And loosely buttoned up, will torque when the sealant has set a bit, didn't want to squeeze cork out... Used Permatex #2 sparingly on the timing cover gasket, looks ok (forgot to assembly-lube fuel pump eccentric but can get that through hole)... Coupldn't find a backing plate gasket in my new kit, but found one in the garage from previous builds. Assembled on dining room table in the sun for max danger while wife at netball... And pump on, so nice using new ARP bolt set. Looked at making up my own, but they're oddball lengths so this was easiest... And ready to start putting the top end on now, be nice to get it bolted up, always nervous when engines are left open too long (only been a few years)...2 points
-
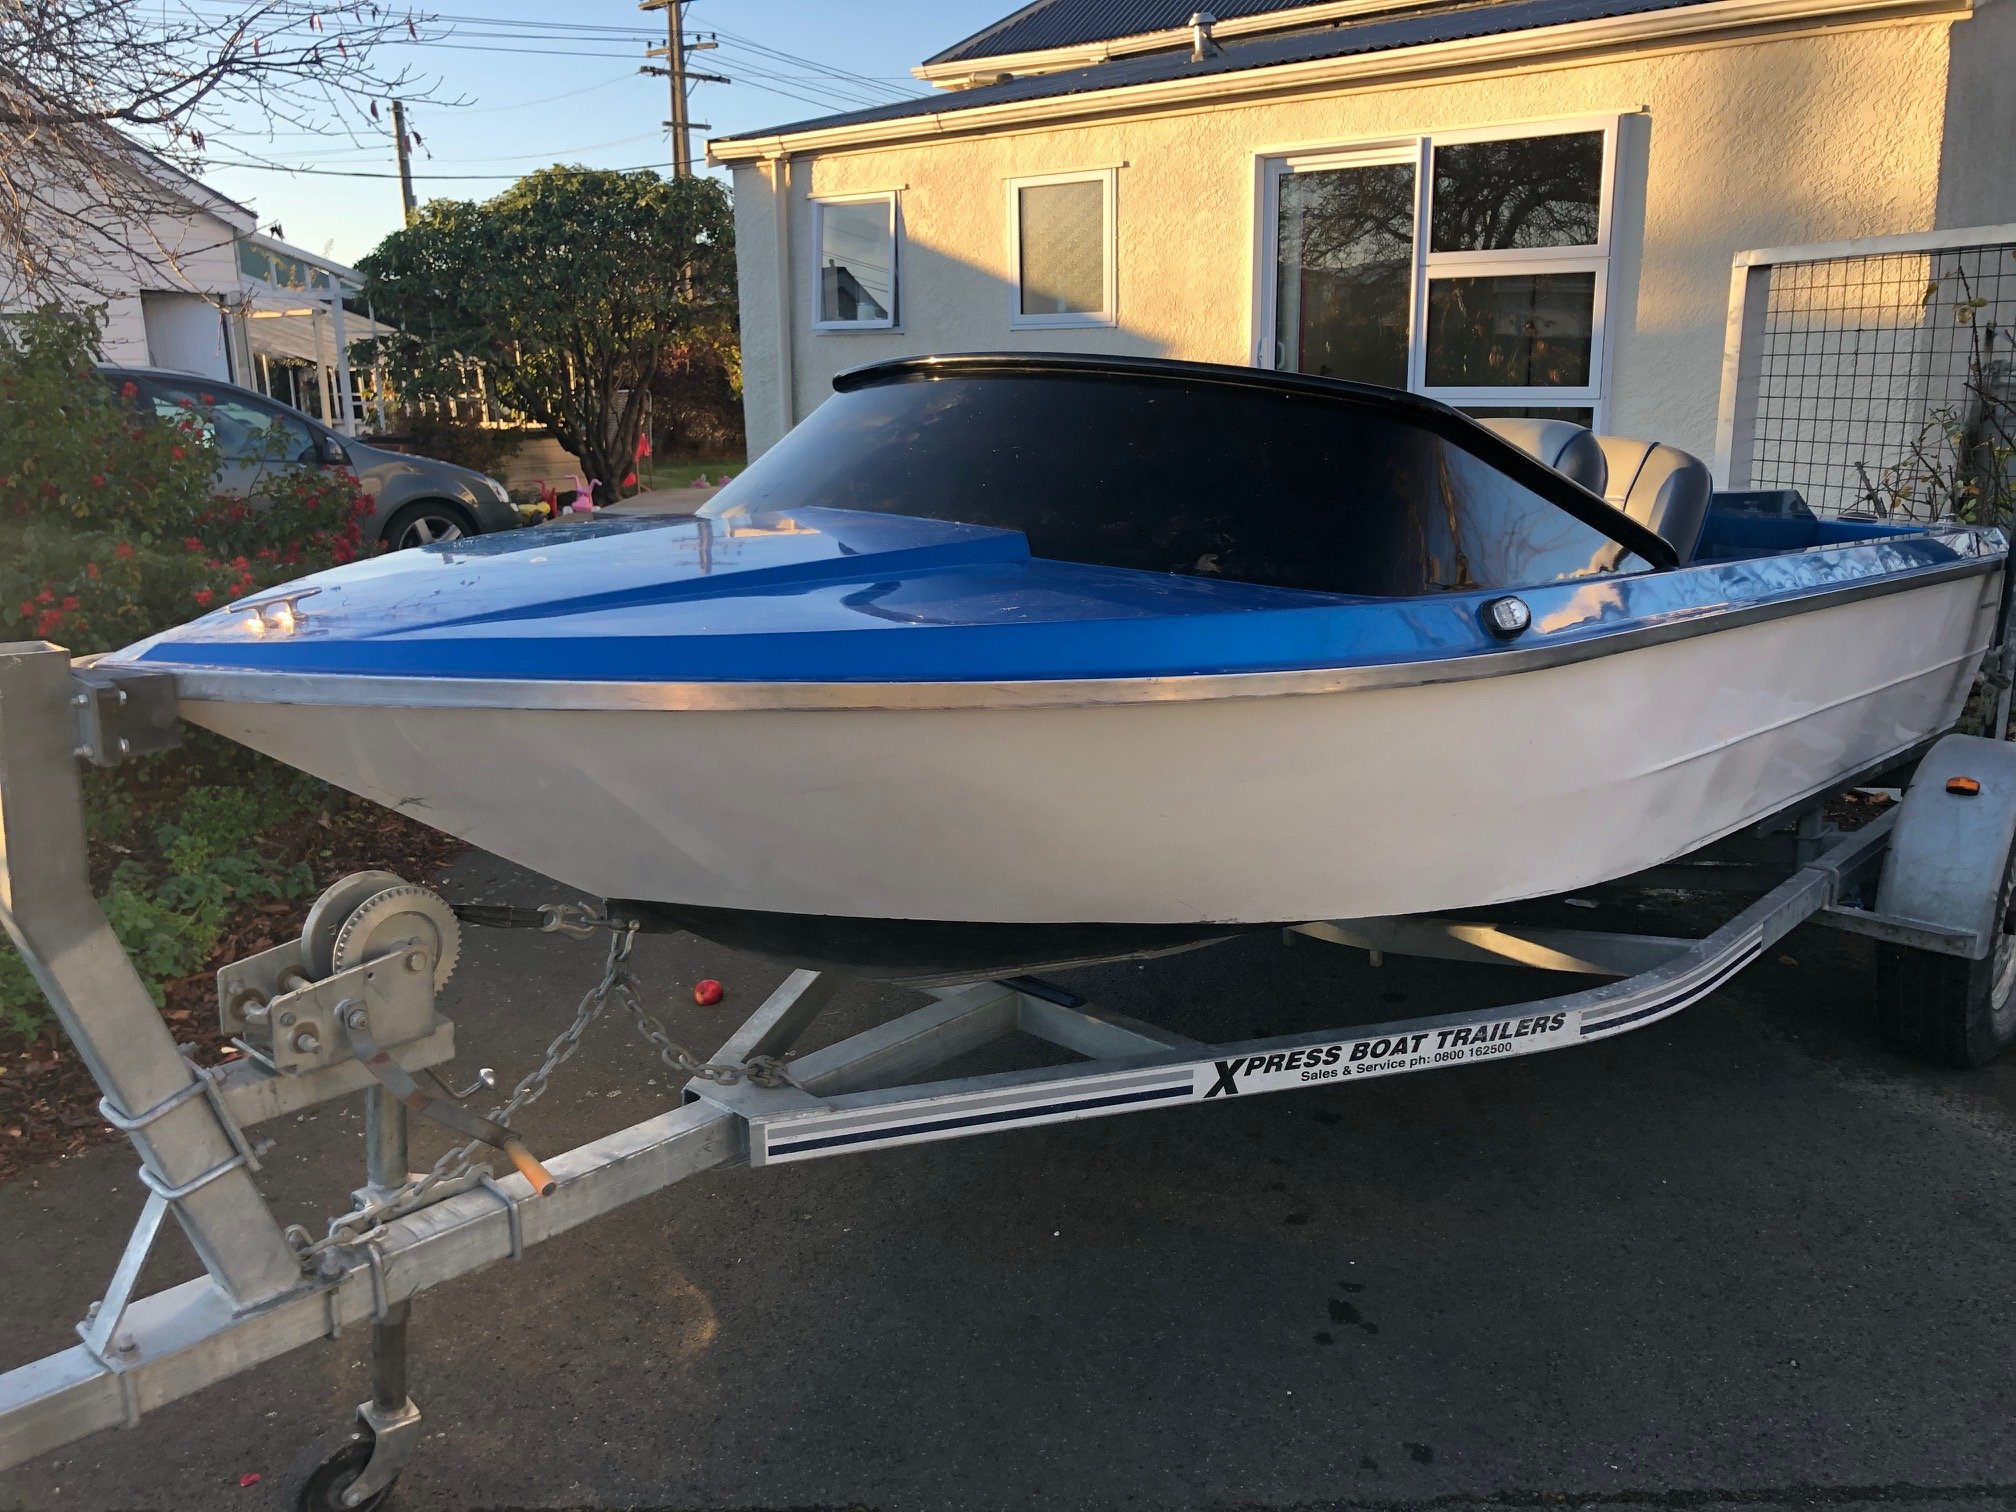
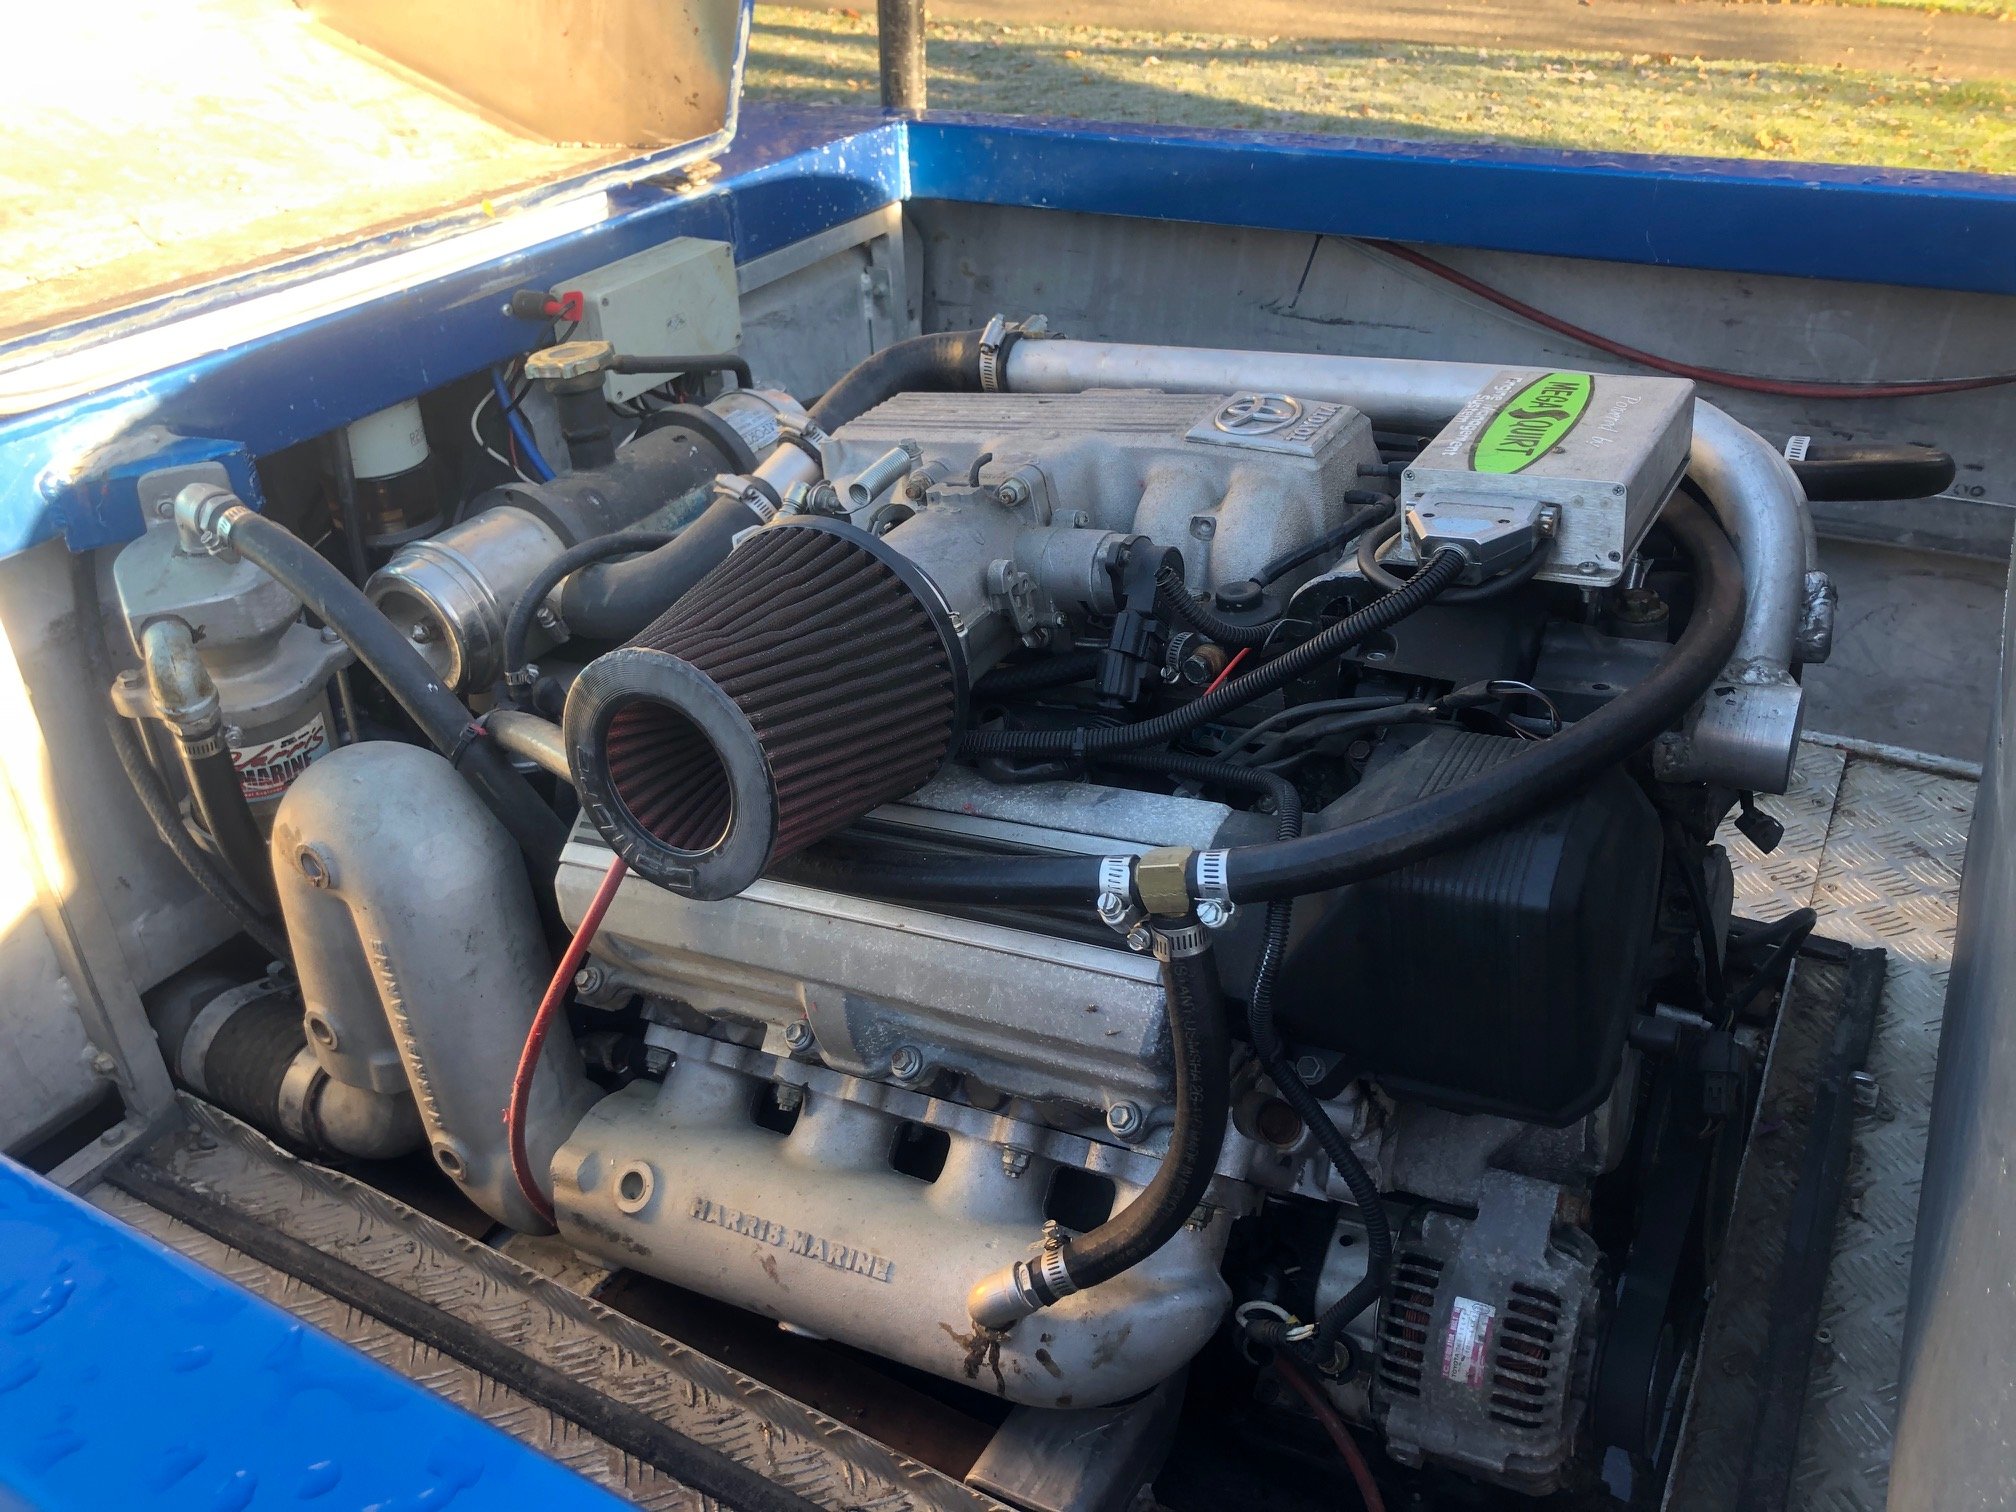
Since I cant help my self and started pulling it to bits within 20min of having it home, this is going to have its own built thread.... I don't yet know who built the hull, the design/manufacture of it makes me think it was done by a firm rather than at home (unless that builder was quite good at alloy). Its got quite a unique dash layout so hopefully if I post it a few other places then someone will ID it... Either way this thing has done some work... plenty of gravel rash and quite a few hits in the hull. It has plastic covering the centre keel but it ripped around the intake so that will need to be done in time.... Running gear wise we have gen1 1UZ with an old MS1 running it (more on that later...), the jet unit is a 2 stage 'ProFlo' which is essentially a modern remake of the Hamilton 770. Someone has run some of the cooling pipes wrong. It has a heat exchanger so the exit water needs to only flow out of the risers, someone has added a 'tee' for it to go into the front of the manifold heater, with no where to go that water is going to get very hot after a while.... Found out that the fuel pump is wired directly to the key (not happy about that), but it has some other pluses.... two ~45L tanks into a centre filter/sight bowl and a decent gravel trap so someone knew enough how to set it up.
1 point
-
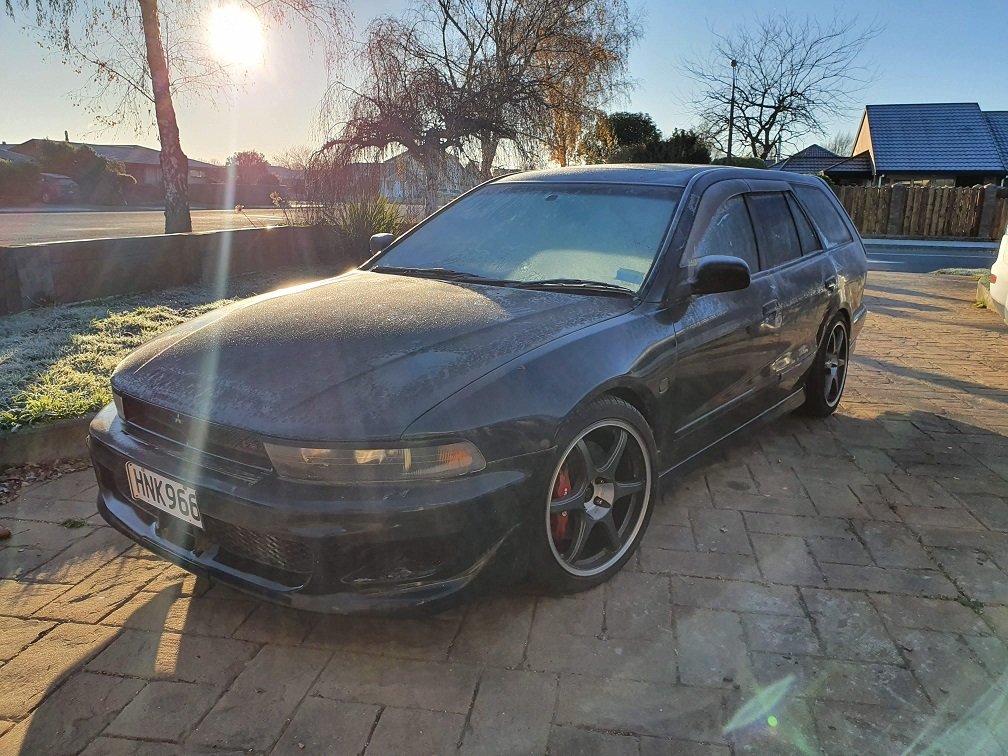
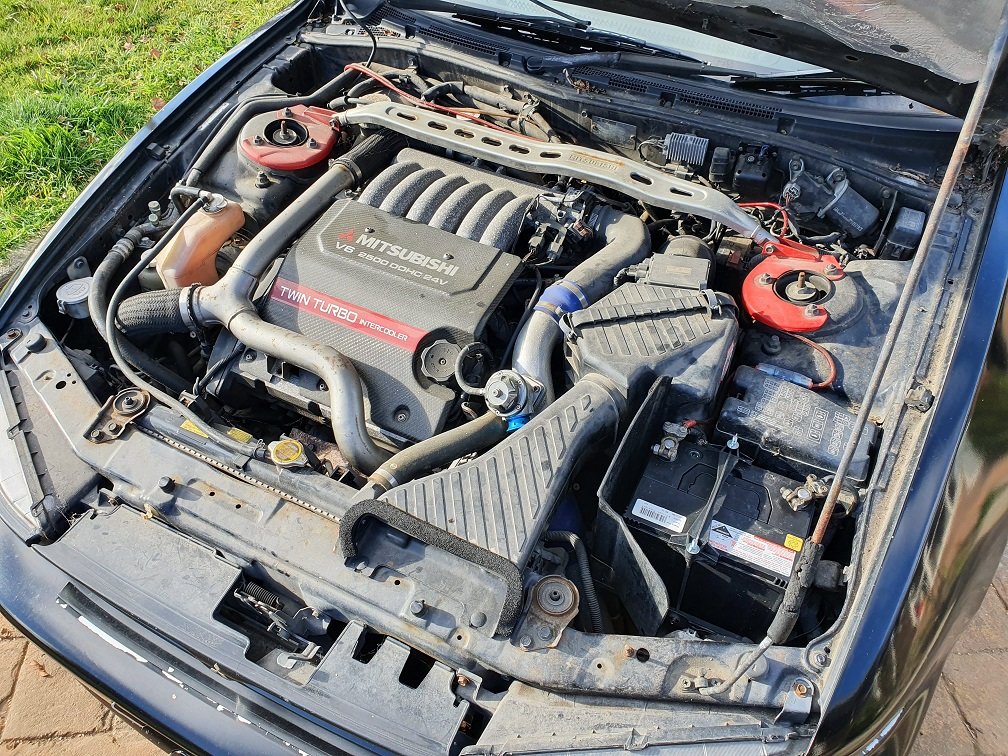
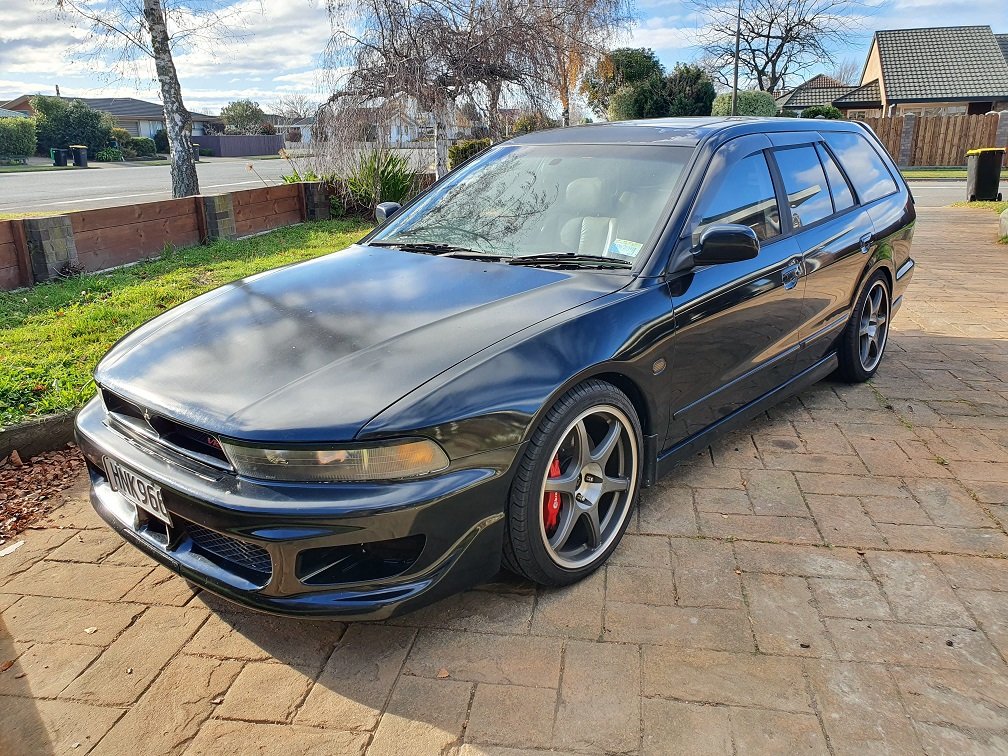
My truck will need to come off the road sometime soon for the engine swap and body tidy up, before it starts rusting into oblivion. Another daily is needed. Was on the hunt for something reliable and family orientated with good resale on the other side on the truck can resume daily duties.... Somehow I veered hard left and bought this instead. Hadn't been driven in 4 years, and only started occasionally. Bit of malarky with the battery, some fresh fuel and it started up just fine though. Idles nice and smooth with far less lifter tick than expected. I'm sure that'll change once its driven a bit more (for the worse, lol). The valve-stem seals / turbo seals are SHOT. Its a smoke generator on decel. It's got an FMIC, skank whistle, manual trans, evo bembos and is allowing me to live out my mid 2000's bogan dreams again. Are the diesels and lumbo runs still a thing? I'm going to need to buy a baseball cap. It's pretty decently optioned, has AYC and the moonroof sunroof too, so that's nice. I know nothing about the trim levels / models and such, but I'll be researching with glee infront of the fire this evening I'm sure! Ahead is a day of cleaning, detailing, and 'getting to know you' :-).
1 point
-
You can’t hide, even in your modern toyota, haha1 point
-
I'll be there.1 point
-
For reference I am rebuilding this. Always room for improvement.1 point
-
Yeah man that’s the route I’m thinking of taking. Not keen to touch the guards if they’re unrolled to fit wider wheels. Will post up some more pics of condition when it arrives. Cheers for the feedback.1 point
-
I'll be there. Burger get in my face.1 point
-
Remember this is tomorrow night people! Old car or not does not matter its all about getting fellow OS members together for shit yarns and a burger1 point
-
Alas the little lady is sick today, so am home with her. Took the opportunity to snap a couple more pics. I spent about three hours cleaning it on Sunday, and I'm not even 10% of the way there, hah. Booked in for a warrent on Friday. Probably less of a warrent, more of a plan of what to sort. I've replaced the blown bulbs and everything seems to be working. I'll have a diddle with the drivers side seatbelt as its pretty slow to retract and hard to buckle. I'm hoping the low, the exhaust and the wheels wont cause me any issues. The place I'm taking it to purports to be a mitsy / evo specialist, so hopefully they'll like it. Once the other half is home to take over care of wee miss I'll shoot into pick-a-part and get a couple of things. Needs windscreen squirters. One of the trims that goes up the side of the windscreen and over the roof flew off on the motorway, so will see if there is a tidy pair of those there, and if its possible to get them off without fucking them too badly... Need to pull the tape 'eyelids' off the headlights too, but I think I'll just get another set, give them a polish and chuck them in. It's _weird_ having a car you can just buy parts for easily. The interior is pretty nice really. Would have had the tan leather from factory, but has had black carpets put in which I quite like. When the manual was put in it the cluster was swapped aswell, so it's a pretty seamless conversion, no sign that it was an auto basically. The headunit is super dated and wont talk to my phone, so I'll replace that at some stage. I've been wanting to play with a double din android based one, so will likely head that route. Apparently its a thing to swap to evo flywheels and clutches in these? I wonder if its just a parts availability thing. Its got a heavy duty evo clutch in it apparently, and it certainly feels like it on your leg. Getting the muscle memory in place to drive it smoothly and efficiently is taking a bit of time, as the turbo's respond so quickly you're in boost before you know it. I suppose that's a good thing though. They're tiny TD03's... With some larger internals fitted to them I bet they would go really well. Not going down that path though! The FMIC kit looks pretty decent really. Nice welding on the BOV flange. I suspect the BOV causes a couple of issues though, venting to atmosphere on an air flow metered car is a bit of a no-no. Fun Fun.
1 point
-
sweet ride, personally, id keep it a sleeper, lower it slightly, and just make it as tidy as possible. good score1 point
-
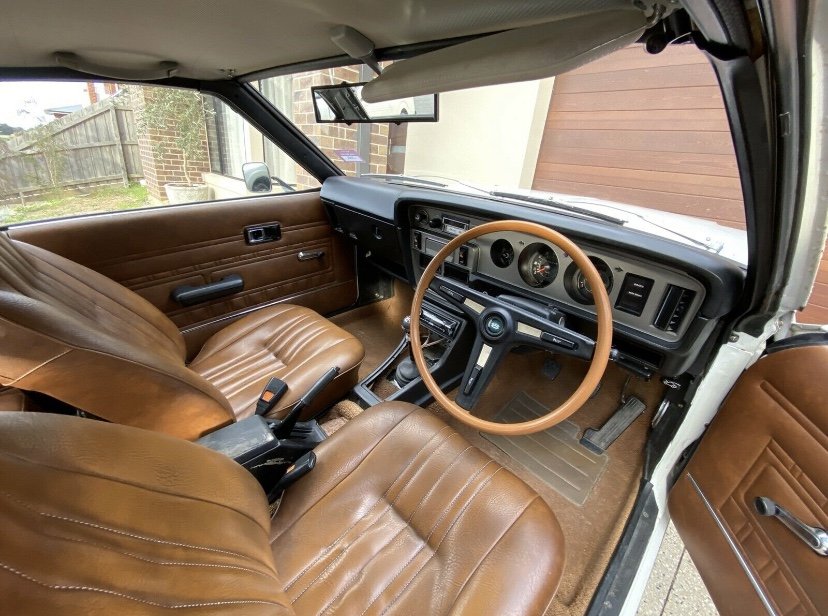
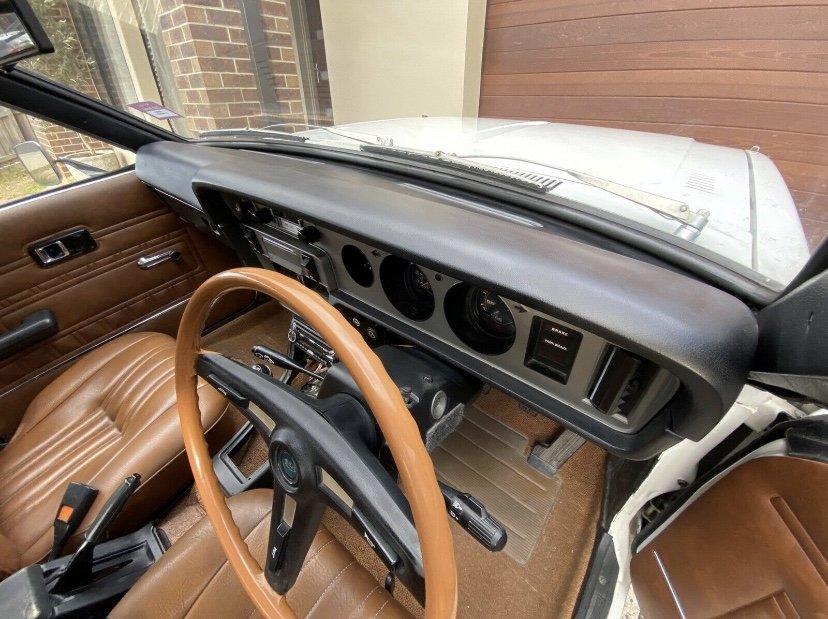
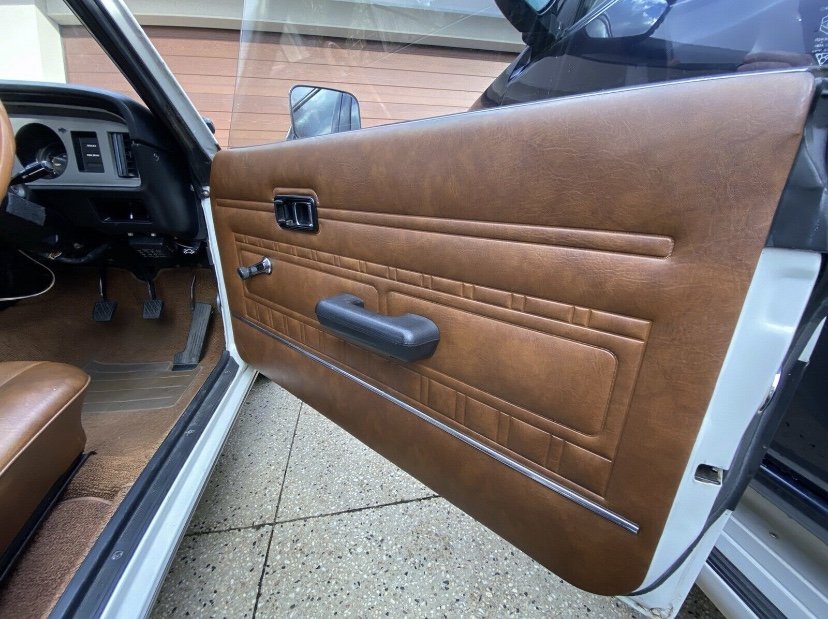
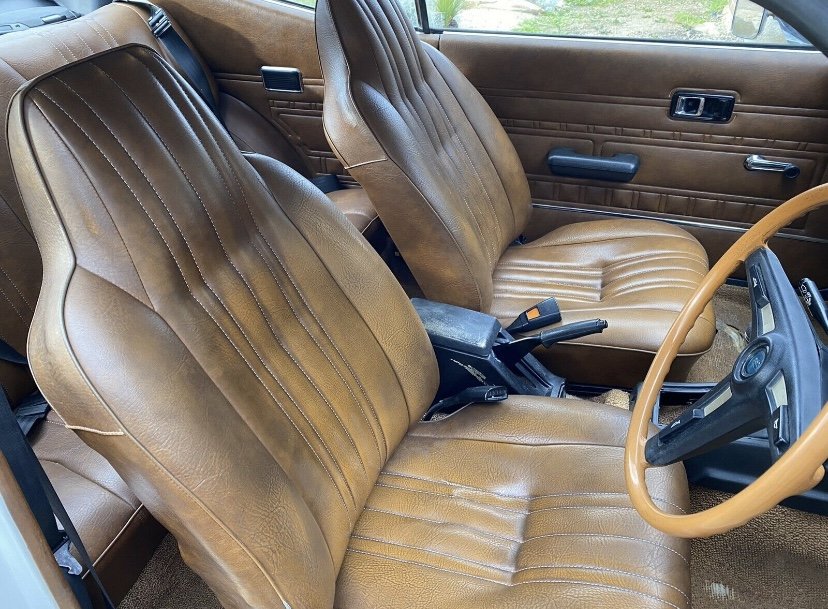
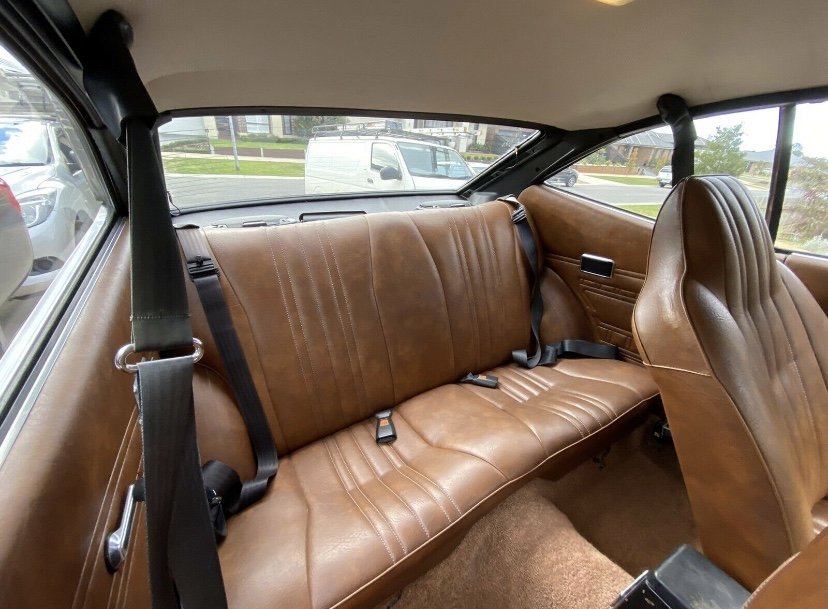
nice. i love the aus spec interior with ashtrays in the rear passenger cards, looks tidy for the price1 point
-
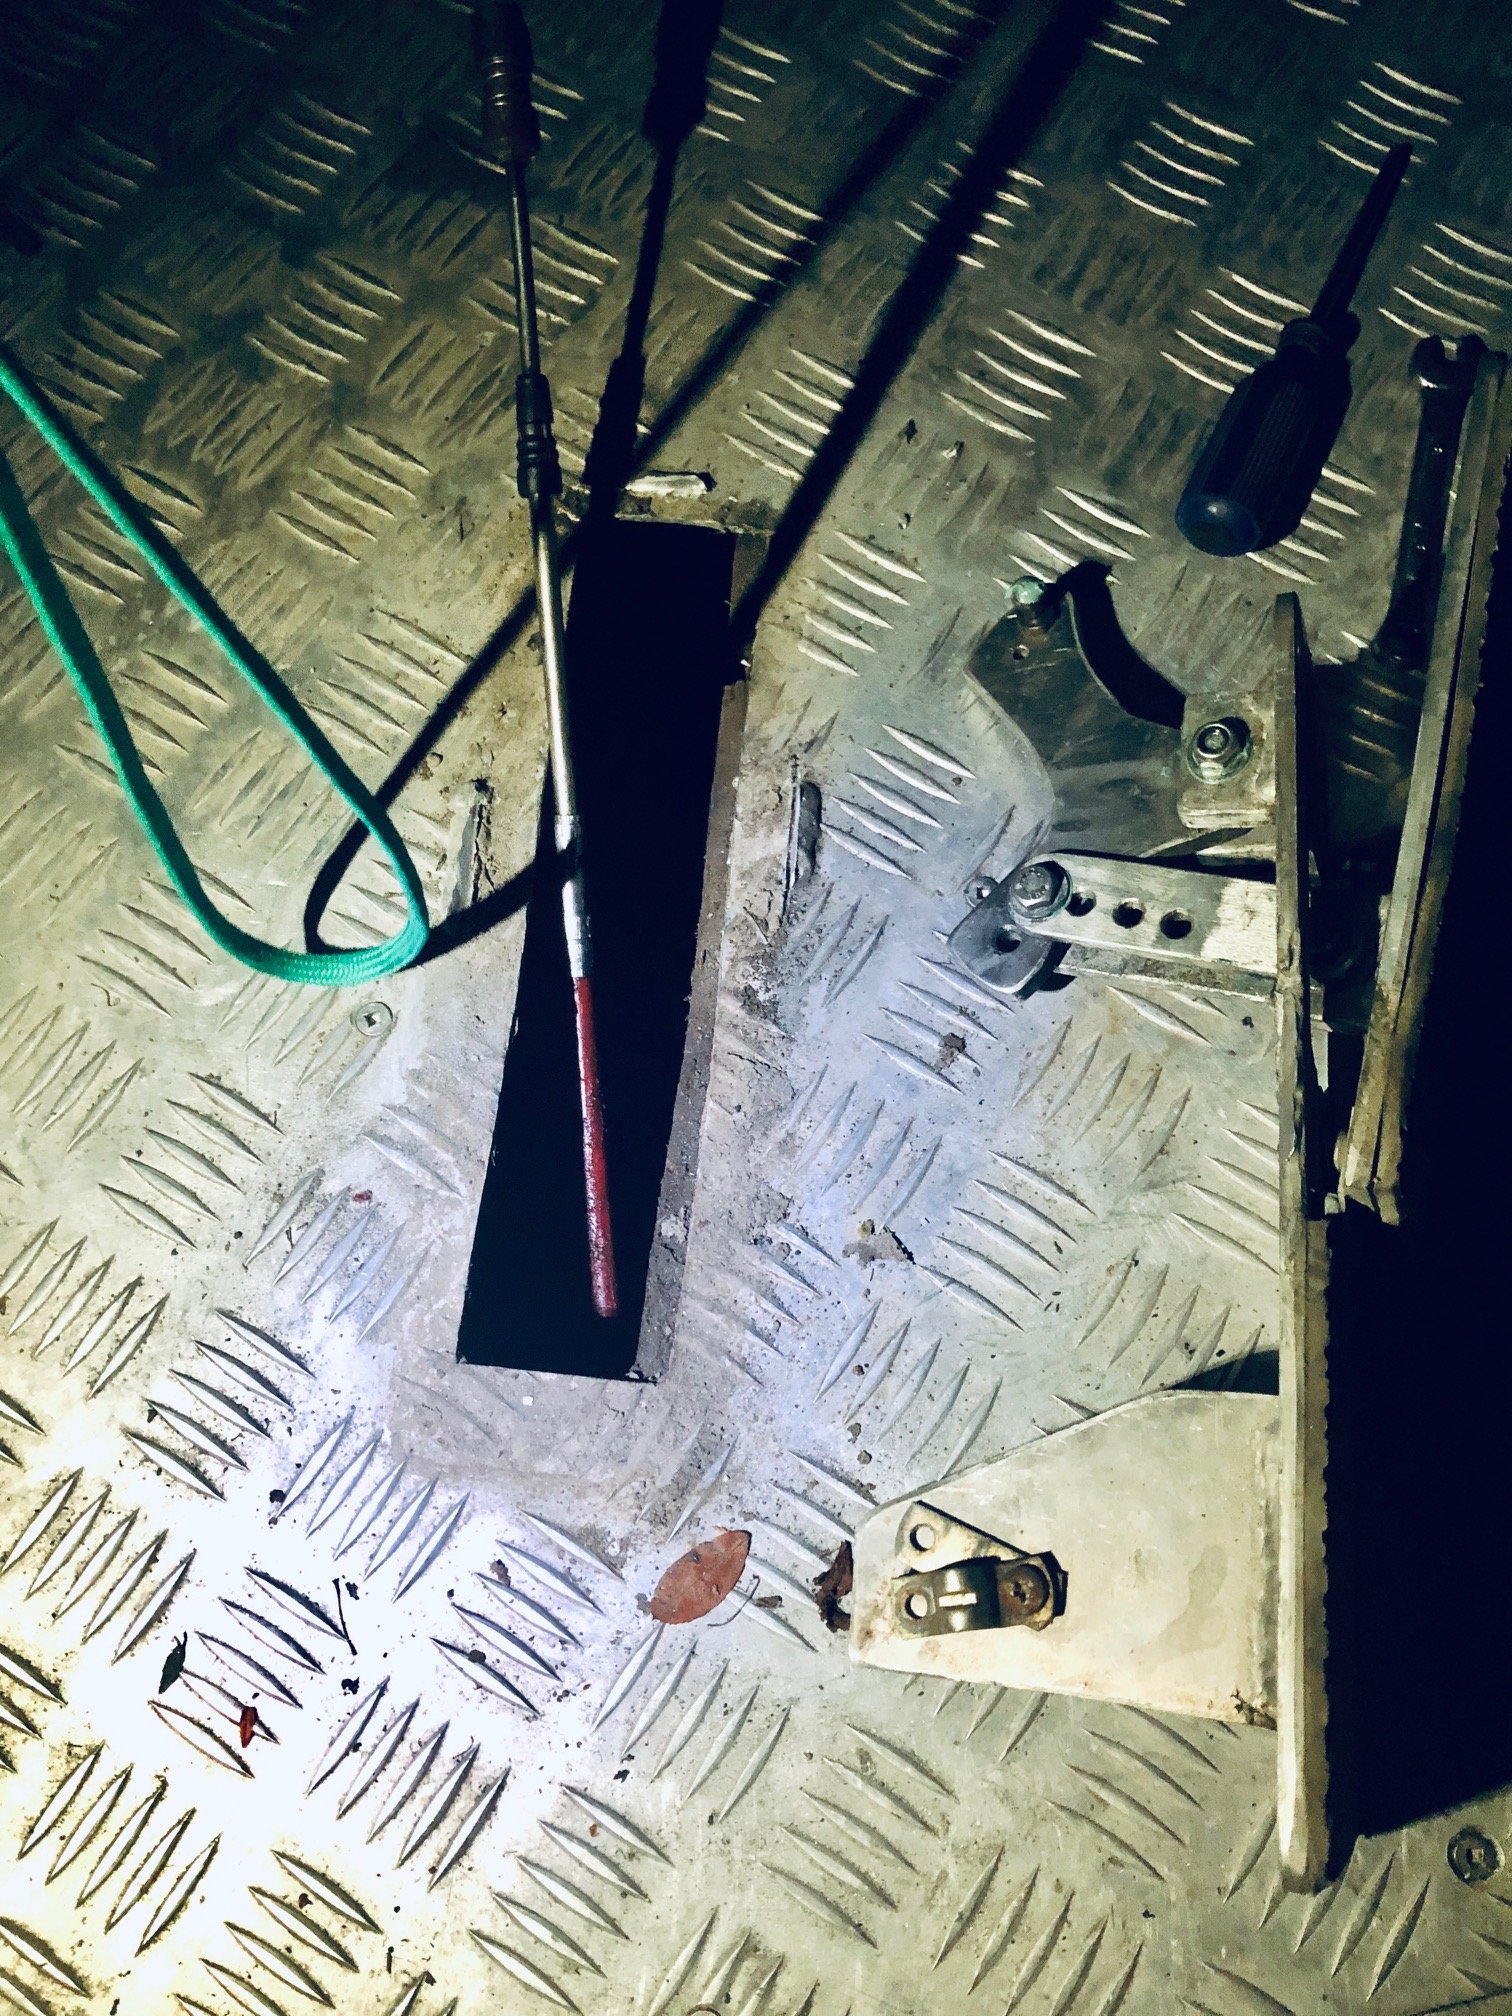
Some more tweaking tonight... apologies crap pics at night with head torch... The more I got into the throttle setup I found 2-3 other things I didnt like. First was the foot pedal... Its a home made affair but functional enough, pivots on m5 bolts with nylock nuts. Doing nothing drastic I just ensured there were washers at every pivot, used a dab of marine grease everywhere and snuged it up so it moved smooth with min drag. Drilled at each corner to hold it down to the checker plate (with ply underneath) The cable was next, ideally you wouldnt use a morse cable here, you'd use a normal cable to reduce friction and have a return spring at both the pedal and throttle body. I think they did this to get away with one (heavy) return spring, and coz Jet Boat. Anywho it in a bit of a coil in the bottom of the bilge so I pulled it out, checked for kink and then re-routed in a gentle curve round the back over the top of the jet unit - its quite a long cable.... Then the throttle assembly itself... lots wrong here, the clamp holding the cable isnt square to the throttle shaft so its tweaked the pivot sideways, the spring is barely holding on. Also since the arm has been pulled its now contacting an alloy boss on the side, both the position of the cable clamp and the protecting sleeve is preventing full travel of the cable. Result being that this thing was only able to run 1/2-3/4 throttle at any point in time... Bunch of small tweaks.... moved the cable clamp, removed the cable sleeve and cut down the offending boss. Now we have full throttle and it returns correctly to idle position when you take the foot off the pedal. This will do for now, ideally I'll run a proper cable at some point in the future. Made me think... previous owner reckoned it wasnt as powerful as it should be.... did I mention he was a mechanic and managed a workshop....
1 point
-
Finally got my new front beam mounting brackets glued together. Neglected to take a pic of them together before I mounted the first one, so the one in the pic below looks a bit lonely, but you get the idea. Now that I am running the shorter coils up front I need to double check that the front wheels are nicely centred in the arches before attaching the beam to the mounting brackets. Thanks for reading.
1 point
-
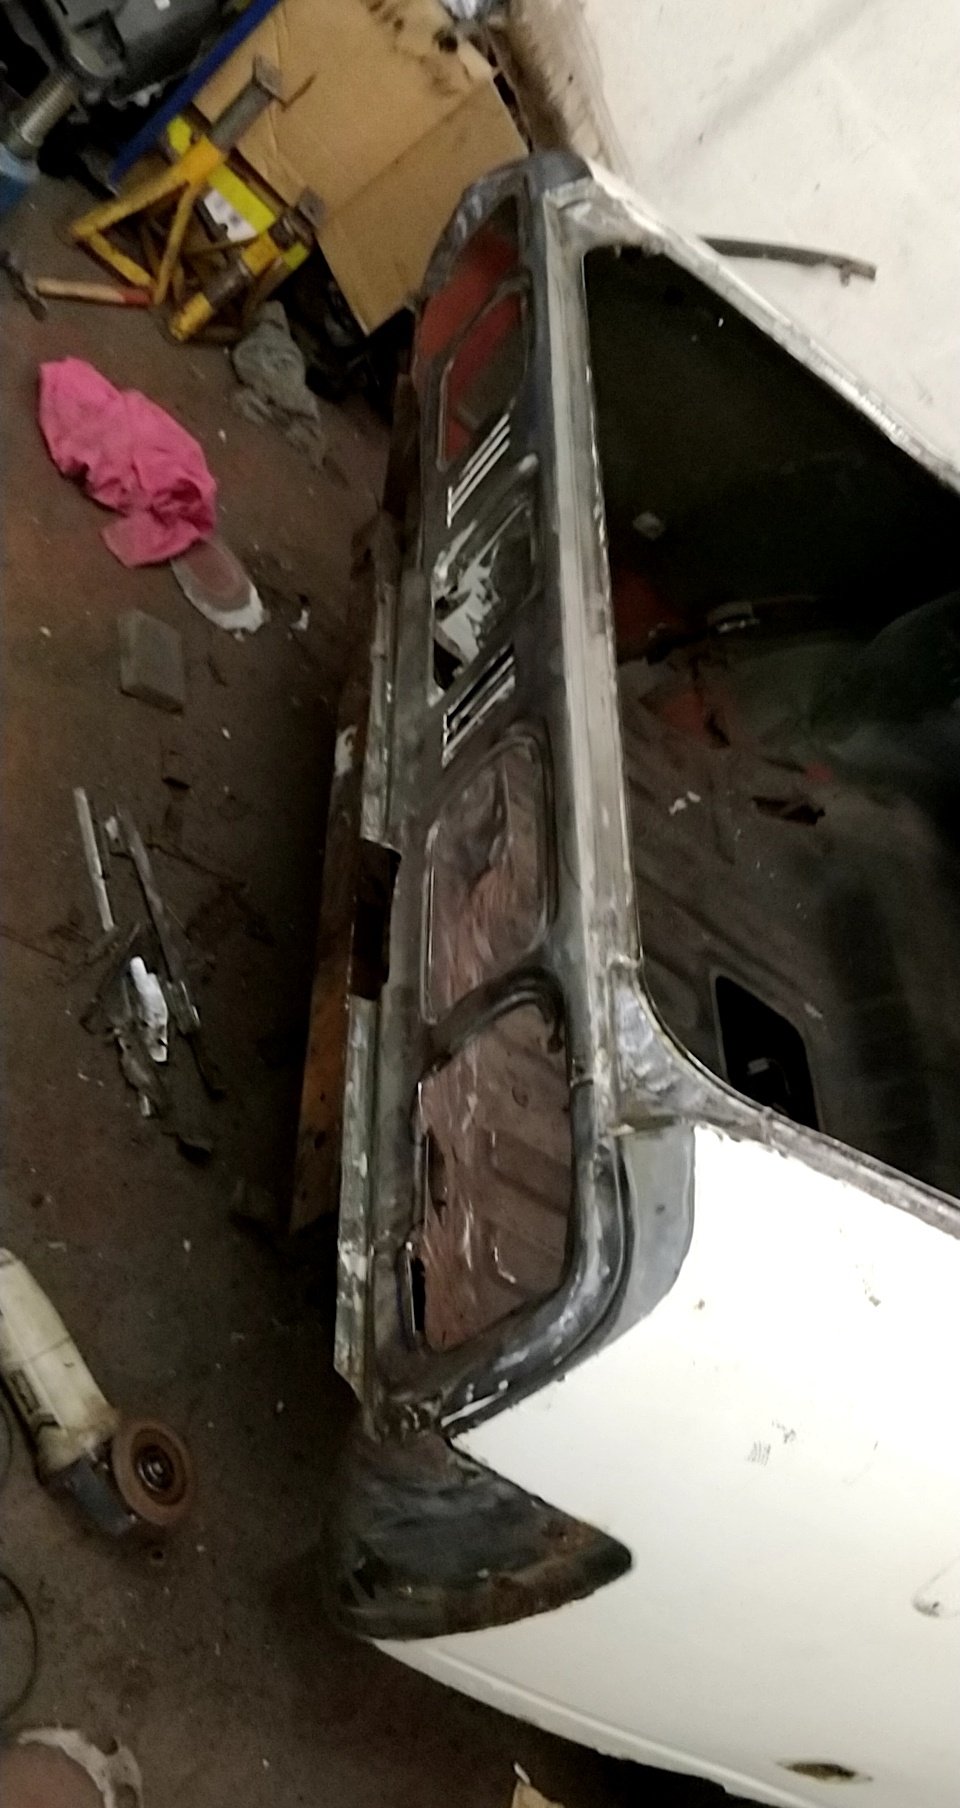
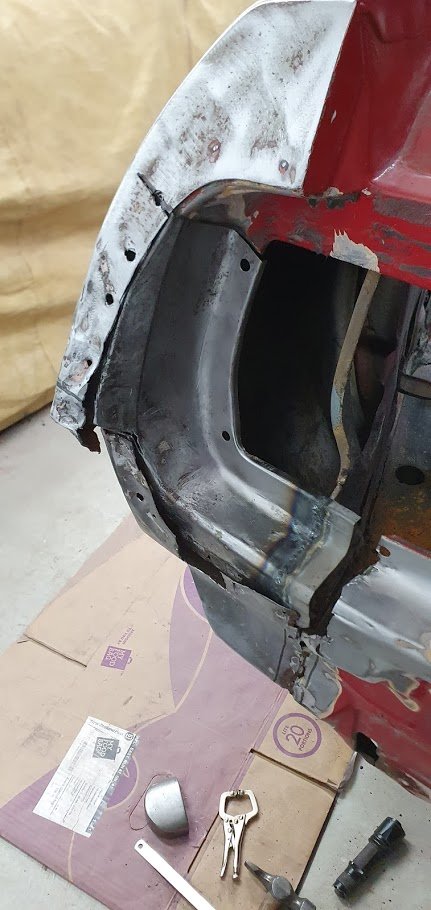
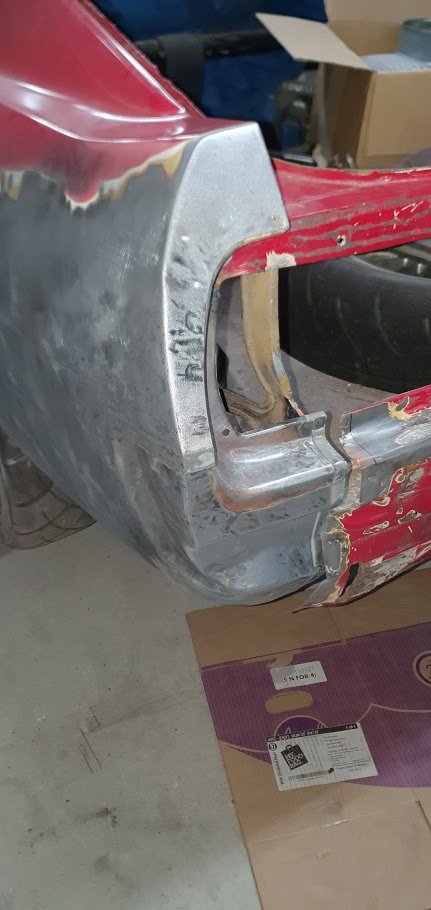
Made a start cutting the rust out of the back panel, ended up with some dramatic holes, but made a decent start on the drivers side.
1 point
-
Finally found a hub and bearing combo to convert Cortina MK3-5 and Escort non RS stubs to 5 stud! Early Valiant hubs and bearings (RV1 SV1 AP5 AP6 VC VE VF VG CH CJ) I got a set of VF hubs. Bearing seal will have to be bored out to accept the cortina seal (53.5mm to 55mm) and hubs redrilled to 5x114.3 from 5x101.6 I'll post up more once I find a disk and caliper combo that works. Thinking RX7 rotors and calipers as I've got a set in the garage or Altezza... Hub height - 55mm Caliper bolt spacing 82.5mm RX7 FC - Disk height 65mm, 276mm OD, Caliper bolt spacing 160mm, Pad size 107x68x14mm, 4 pot alloy Altezza - Disk height 48mm, 275 OD, Caliper bolt spacing 123mm, Pad size 144x64x17mm, 2 pot slider alloy Will have to test both but slightly leaning more to the altezza as they cost nothing and bigger pad. In other news hopefully finally getting the V6 down from @fletch place with the help of @JustHarry so she should have a hunk of metal and a gearbox sitting in the bay by next week.1 point
-
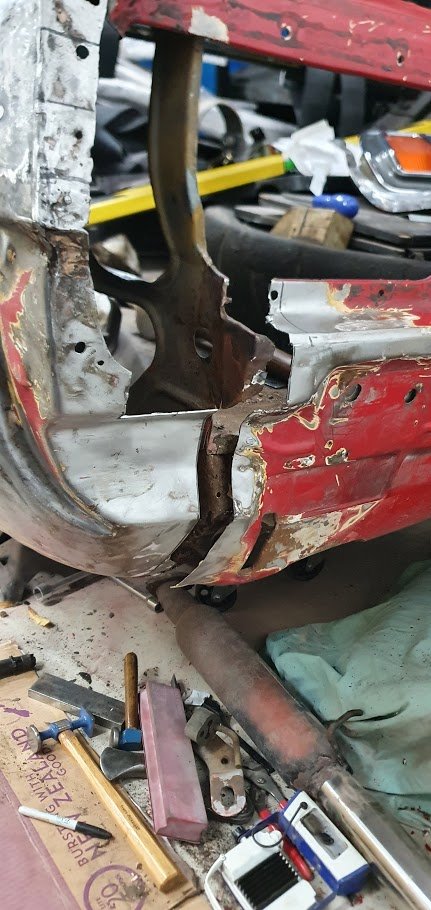
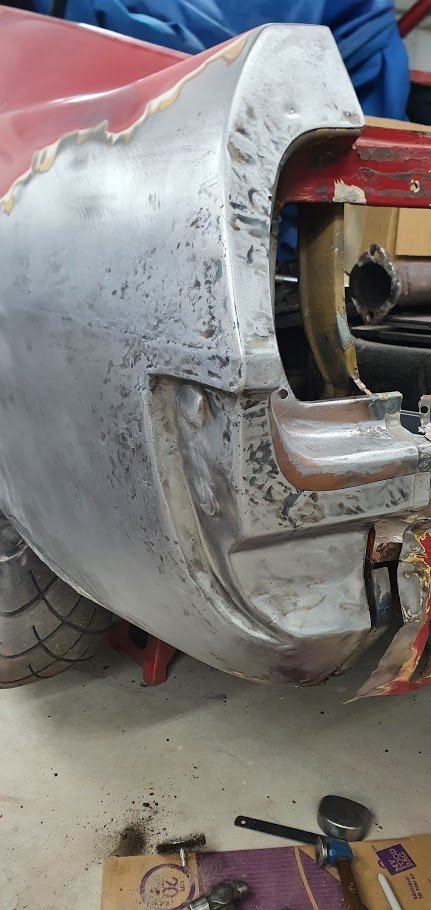
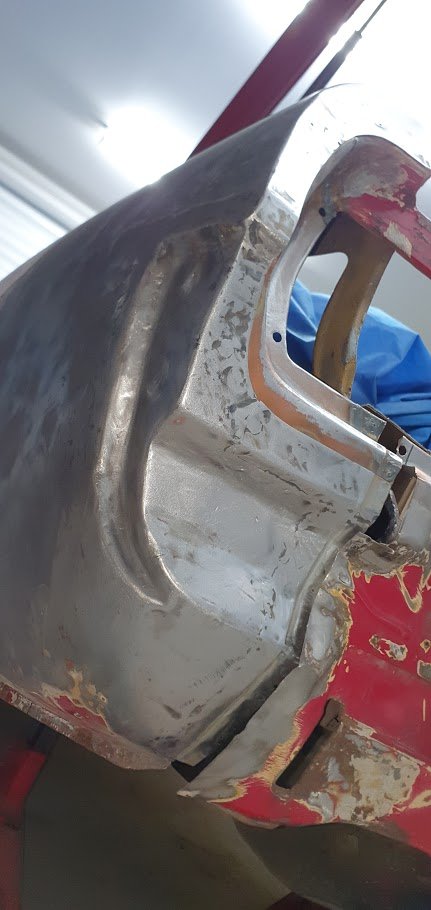
Keeping on theme with the left-hand side... Rear quarter has taken a hit at some point and been "dent-pullered" out, and smoothed over. So i un-stitched all the mess and started again. Due to me being a muppet - lots happened and no pics got taken!! So.. many hours of hammer and dolly, welding etc. etc. Still have the rear valance to straighten, lengthen, and reattach..
1 point
-
56k warning Popped over to my uncles today and we had a play with his plasma cutter, Did some test runs on scrap steel and they all matched up Played Tetris one the scrap metal we dig out of a bin Drew up a air cleaner base.got it slightly wrong but it turned out perfect for the tbi Grabbed another bit of all and did the rest of the plates Everything cut out and pilot holes drilled I'll finish filing and tidy the rest later1 point
-
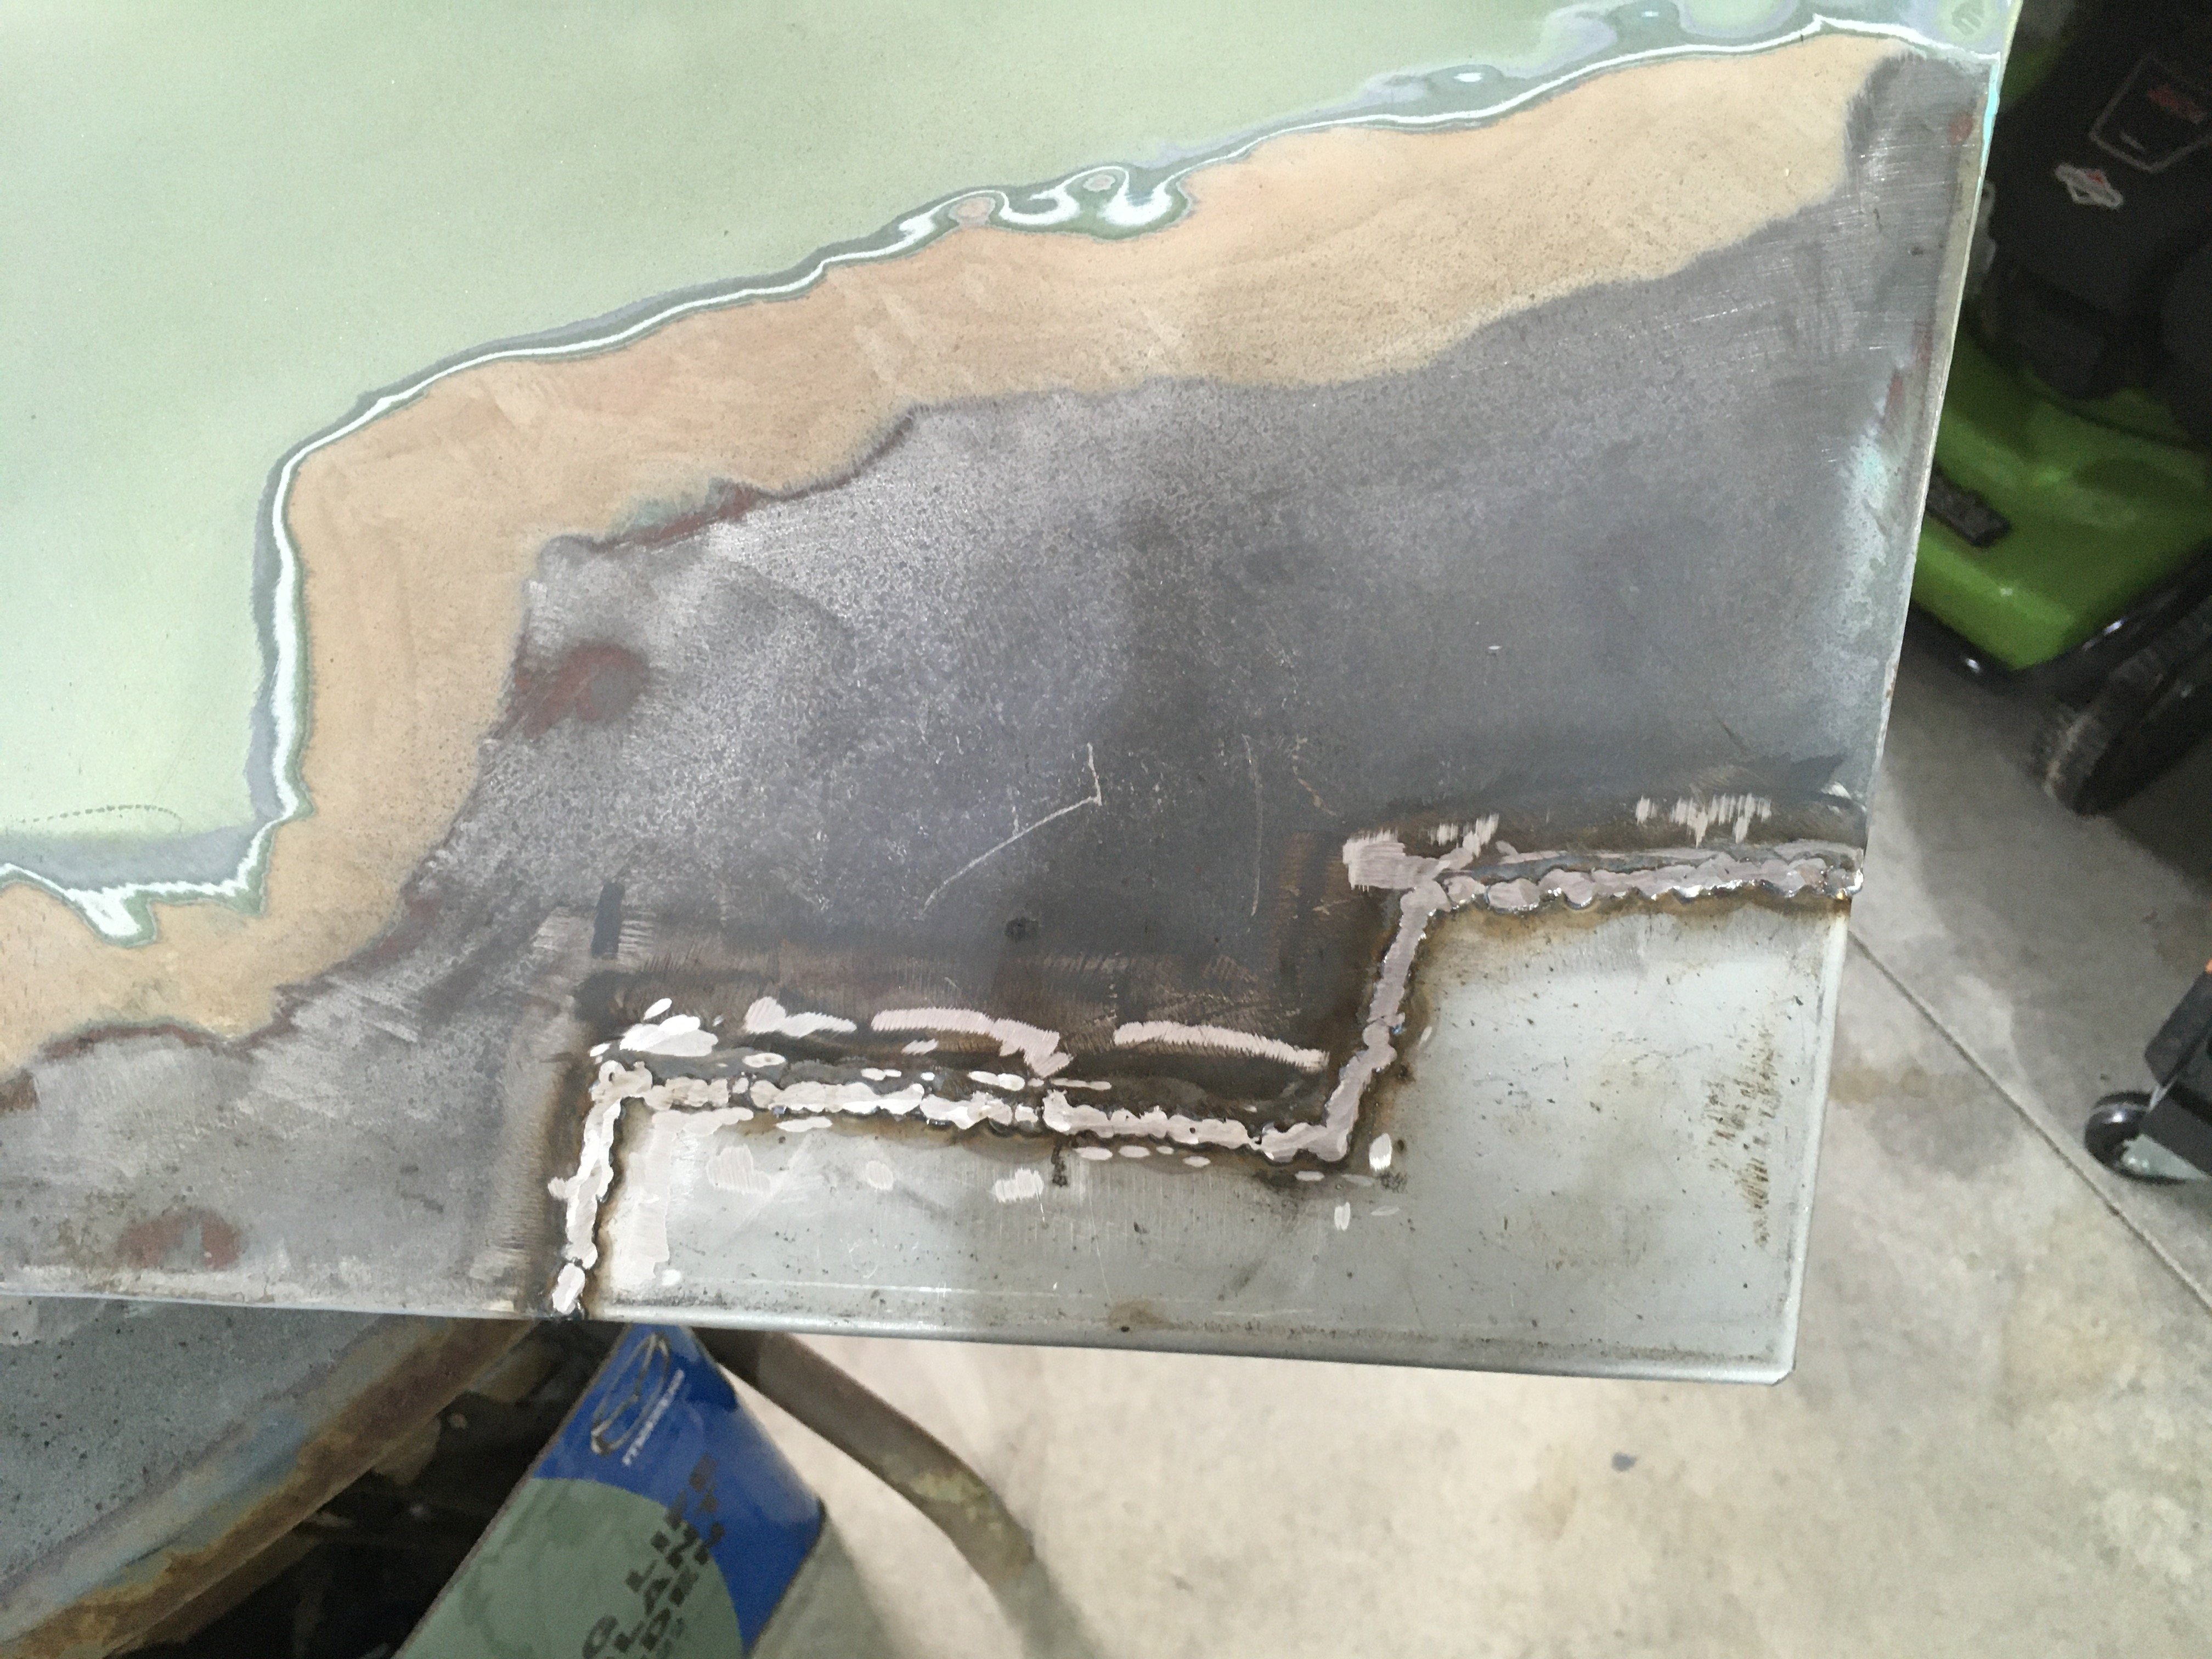
Made some progress on the outside of the big corner job above Welds got a bit hot and bowed out a bit, so I dug some more bog out. Bit of a mess under there.
1 point
-
12 inch stockies on for a change, rides like shit but it’s ‘lively’1 point
-
Wow, such Gran Turismo 2, I used this for the wagon cup, until I figured you could use an R32 GTR. I think you'd be surprised with how much of it's value it holds, surely I cant be the only other piner.1 point
-
So true to word I finished trimming and cleaning the ends of the chassis rails. I plan to trim these tabs off and replace them with some facing outwards instead. That will let me get inside the rail to clean it out properly and get some good rust preventative paint in there before the valence gets welded on. Before that though, I decided to make up the valence panel itself. I had planned to make a cardboard template to base my replacement panel off, but then I realised that if I just tacked the original panel back together it would make a perfectly good template itself. I had sliced it in half to get better access to the spot welds for removal but that was nothing the welder couldn't sort out. Finally, with the "template" back in one piece, I cut out some material and took it to a workmate's to borrow his swaging jenny. In a perfect world you'd make the whole panel out of one piece and reap all the mad cred for your panel beating skills. I realised though that I don't actually have anyone that I need to impress and it makes no sense doing something the hard way when the easy way reaps essentially the same result (cough cough sump cough cough). Also there was the fact that the swaging jenny's throat wasn't deep enough to reach the center of the panel if it was in one piece. So it came to be that the panel would be made in a total of three parts. I used the jenny to raise the long edges of each of the rectangular swages that run vertically up the panel. While I was there I also borrowed the sheet metal brake to put in the two flanges on the top and bottom, as well as the slight horizontal kink in the swages, about 25mm from the top flange. All the stretching and folding left the panel with some considerable internal stresses which gave it a fairly substantial twist along its length. Rather than trying to hard to correct it at this stage, I carried on forming each of the features in the hope this would help to relieve some of the stress and help straighten everything out. To finish each swage, I hand formed each end with a hammer and dolly, while using the vice as something of a stand-in anvil. I know that's one of the cardinal sins of vice ownership but I don't really have a lot of choice. They're not perfect and there is some bruising from being a bit overzealous with the hammer but it's good enough for the girls I go out with and it wont be visible when everything is painted and undersealed. These alone were enough to take the majority of the twist out. Next it needed a bend in the top flange to follow the original panel shape. The flange itself is around 25mm wide in the centre where the bend needs to be. That would be a fairly ambitious shrink even if I did have access to a shrinker/stretcher, and now without it's even more so. Happily one of the rear door catch bolts wants to exist in the same place as this centre shrink so by adding a cutout to go around the factory captive nut, similar to the factory panel, I made hand shrinking the flange much more doable. So the top flange is bent slightly while the bottom remains straight to weld to the outer rear valence. The top flange front edge was also trimmed parallel to the vertical section meaning the outer edges are narrower than the center. Looks pretty good so far. The last thing that needs doing to this centre section is the addition of the water drain points in the lower flange. The panel gets some speed holes from factory and wiring penetration points, all of which will love to scoop up water. Without some way to let this water back out you end up with a substantial rust trap. Ford knew this, hence there are these water drain points in the factory panel that I am going to attempt to recreate. Making my life easier again, rather than trying to form these points completely with a hammer and dolly and deal with mind bending shrinking and stretching, I opted to chain drill out the space above where the flange will be moved up into, then weld it back up once the desired shape was achieved. I don't think I got any photos of the welds but suffice to say I'm still getting my eye back in after the extended break. Nothing a grinder and paint can't fix though. That meant the centre section is more or less complete. But there are still the two outer pieces that need filling in. Starting with the driver's side due to its more simple shape. This one I did start with a cardboard template before having a go at the steel. It has a tricky double bend where the two folds are in opposite directions but overlap each other which the cardboard doesn't really conform to very well. This translated to similar problems with the steel and as such I didn't take many photos as I battled to fettle the panel into shape. Eventually though, I got the end piece tacked in place on the end of the centre section and fully welded up. Finally I gave it another test fit. I also folded the lower edge over to match the centre section but I guess I missed the photo of that. It ended up fitting really nice and tight up against the chassis rail and where the flange would be on the outer edge so I'm quite pleased with the result. Moving to the other end, the shape required is quite similar but the panel behind it is a bit different. On the passenger side lies the spare wheel well which had a flange on the rearmost edge for the rear valence to weld to. When I went to start working on the shape of the last piece of the inner valence, I realised just how poor of a state the wheel well panel was in. Being completely honest I fell down a rabbit hole and completely forgot about the rear valence for a while. The first thing I noticed was the signs of weld penetration from a patch panel on the inside. Next was the panel tacked on the outside, presumably covering a rust hole. So switching over to the inside of the wheel well, I hit it with a wire wheel to knock off a lot of the rust and shitty underseal and have a proper look at what I'm dealing with. Which wasn't pretty. There's at least two patches on the tub, one on the outer skin, one on the bottom, and one coming partially up the inner side of the wheel well. So rather than try to unpick everything and try to repair it, I threw a new slitting disk on the grinder and ran it next to the lower seam and bing bang boom, Yeah that's not going to go back together very easily. In any case, here's the panel I'm going to need to recreate somehow: Can you count the layers of patches? This one might be a palmside jobbie yet, but they only have the saloon version available so I might has well have a go myself first since an off the shelf panel will need modifying anyway. She's gonna be a pretty big job. If you made it through that, thanks for reading my typically over explained and lengthy post. Be sure to pipe up in the discussion thread if you have anything you'd like to add. Cheers.1 point
-
Nice trolling. @KKtrips
1 point
-
After all manner of little set backs (and, to be honest, cock ups due to me not really knowing what I'm doing) I was starting to feel like this job was never going to be done and then all of a sudden, here we are. I have a blue car again. Managed to surprise myself by getting around the whole car with no major issues. The colour looks crazy different in bright light versus shade, it's very cool, I like it. The finish is a bit orange peely but I prefer fixing that to runs and there should be plenty of clear for me to cut that back and remove dust specks and whatnot to end up with a fairly nice, shiney, garage paint job. It's far from perfect but heaps better than it was beforehand, so for a first ever attempt I'm going to take that as a win. Once it has had a little time to fully harden I will cut it back, buff and polish it up and then reassemble with the many restored and NOS parts I have been working away on gathering for the last couple of years.1 point
-
Finally all legal-schmegal I guess this means I can now fit a T50 and massively work my engine without a WoF guy getting grumpy (not that I'm going to) An item of note is that the high pressure fuel hose from SuperCheap isn't EFI rated, so don't buy it. It's also not really rated for being in engine bay. Just get some good fuel hose from BNT, it doesn't even cost that much more. (Must be SAE J30R9 instead of J30R6) Hopefully WoF guys don't get grumpy about the red springs in the back of my car as they aren't technically OE...
1 point
-
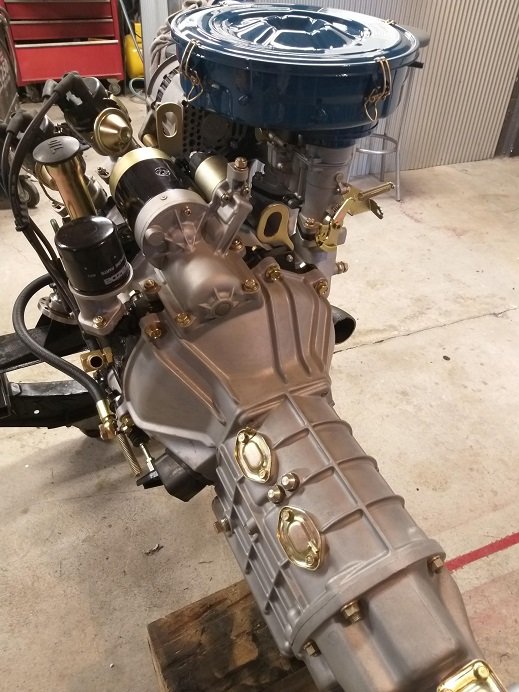
Next challenge was the intake manifold. With the engine rotated around into RWD config the throttle body points directly at the firewall. This is where you have so many options off the shelf as it's all been done before. You can buy an adapter plate to fit an F20c (S2000) intake manifold to the K motors, but they look terrible so I didn't want to go down that track. You could go Quad Throttle Bodies (with multiple options from different manufacturers, swoon...) Straight: Curved: Kinsler mega dollar ones... But this conversion is already going to cost a fair bit, so that can be an option for a later day... So I ended up with the Skunk 2 Ultra Street Intake Manifold https://skunk2.com/induction/intake-manifolds/ultra-street-intake-manifolds/307-05-0600.html It has a rotatable plenum cover, which can be removed if you want to go crazy and port the runners and you can also buy spacers for it to increase the chamber size. Supposedly it also gives 20hp over stock manifolds. It also matches up perfectly to a 74mm throttle body (standard for the engine is 65mm) so I didn't need to port anything and it saved a lot of time. The downside is the quality of the casting is not super great with some imperfections and I had to port match the thermal gasket to the head, which was disappointing as it should just be cut correctly from factory. The other thing to note is the Idle Air Control Valve (IACV)on a Euro R is NOT the same as other K20'a Type R engines, i.e it won't bolt up, so I got an Integra R which fits..1 point
-
Wooòoo Tempting. But I'm over sleeping in tents. (Even though there probably wouldnt be much sleeping1 point
-
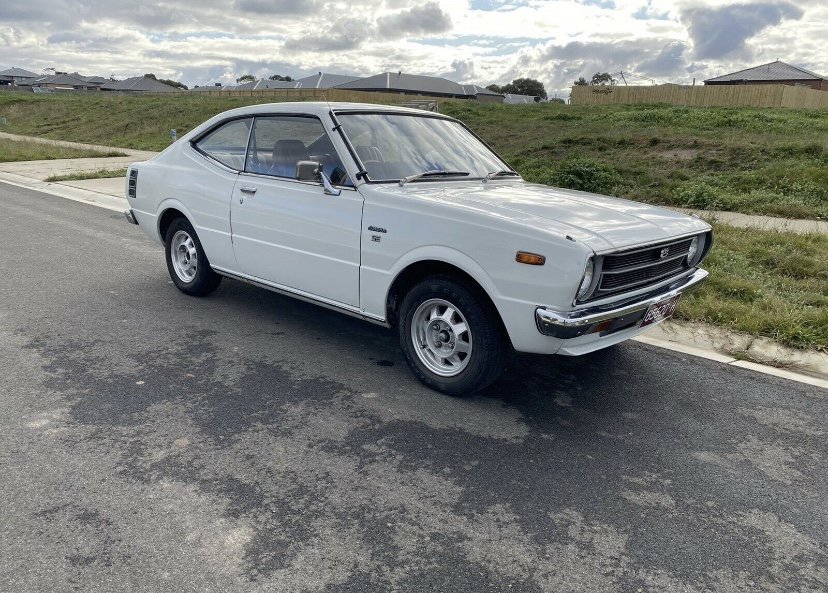
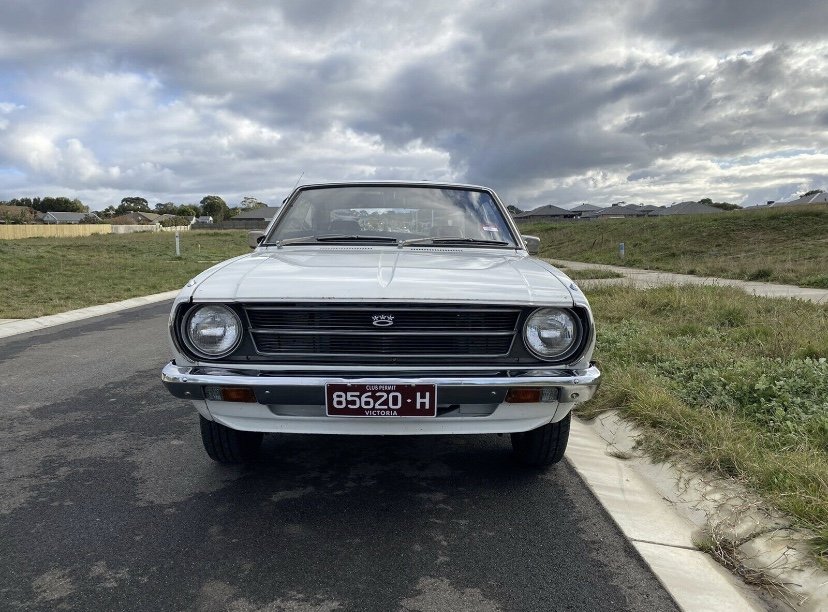
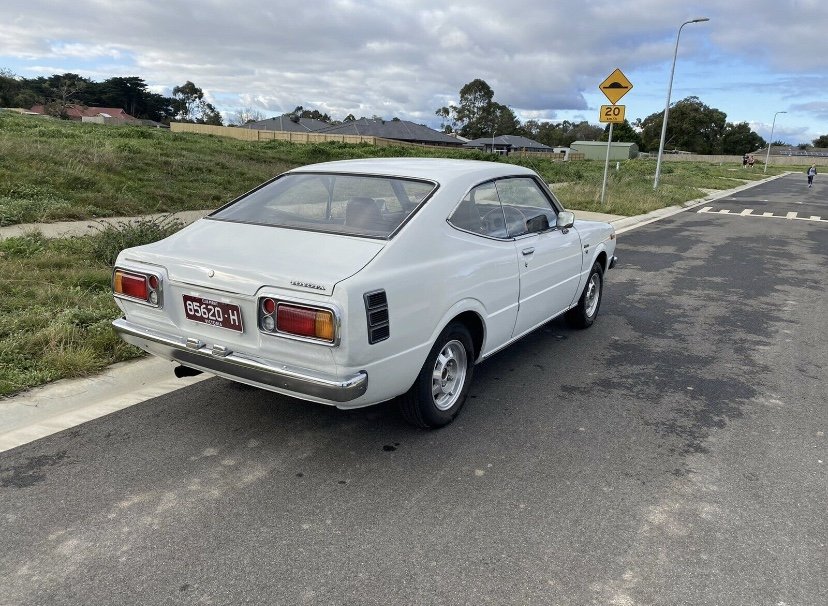
And here she is in all her glory!
1 point


This leaderboard is set to Auckland/GMT+12:00