
Leaderboard


Popular Content
Showing content with the highest reputation on 04/08/20 in all areas
-
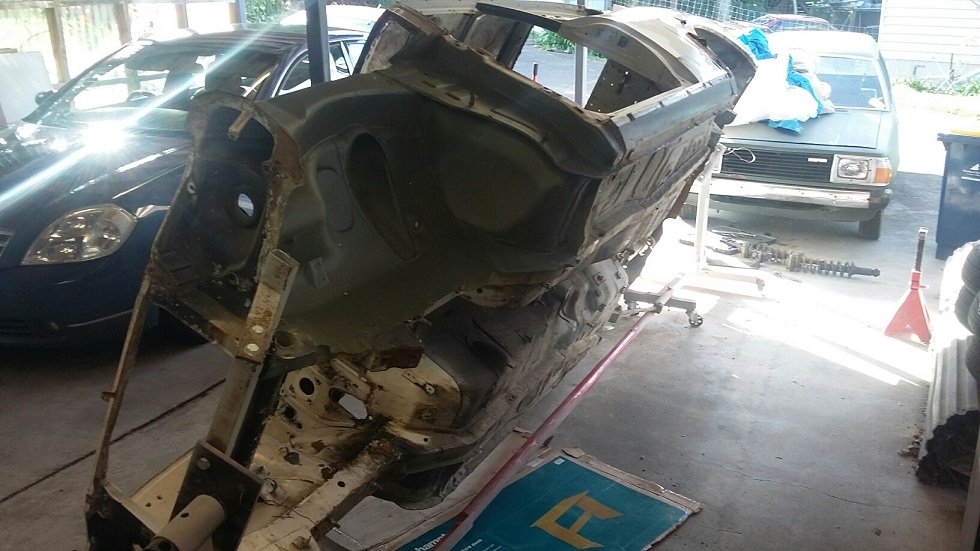
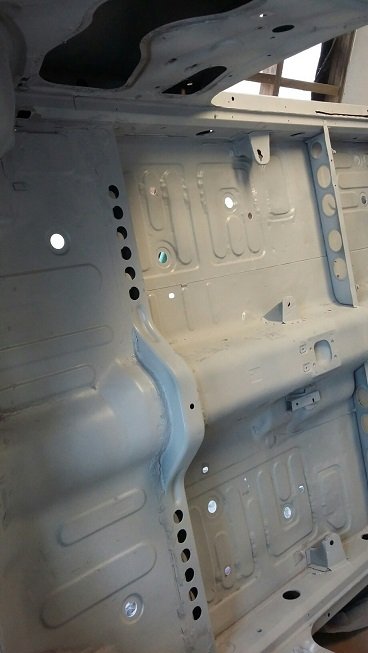
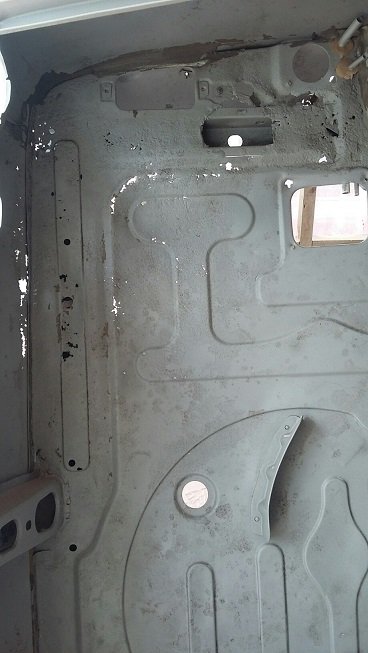
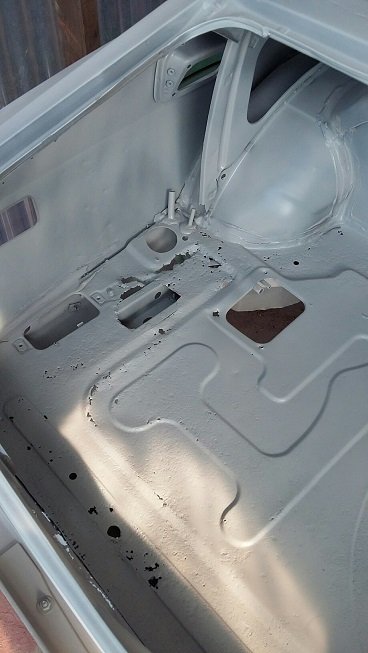
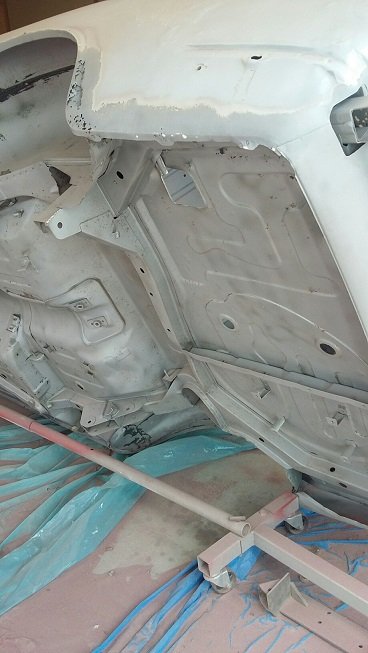
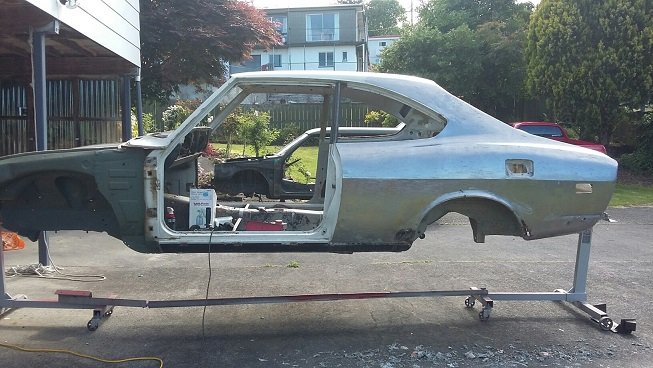
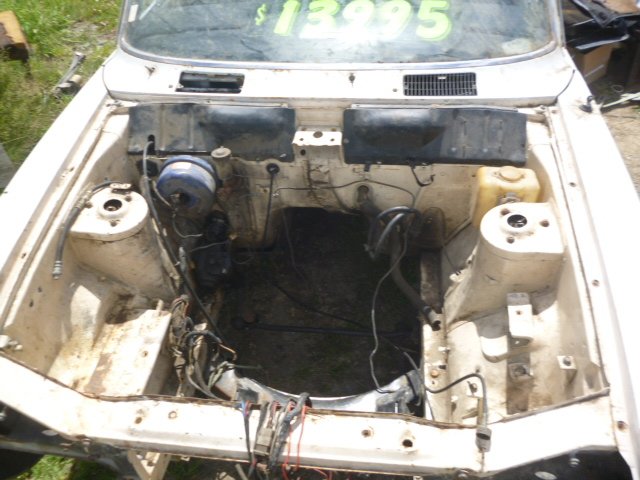
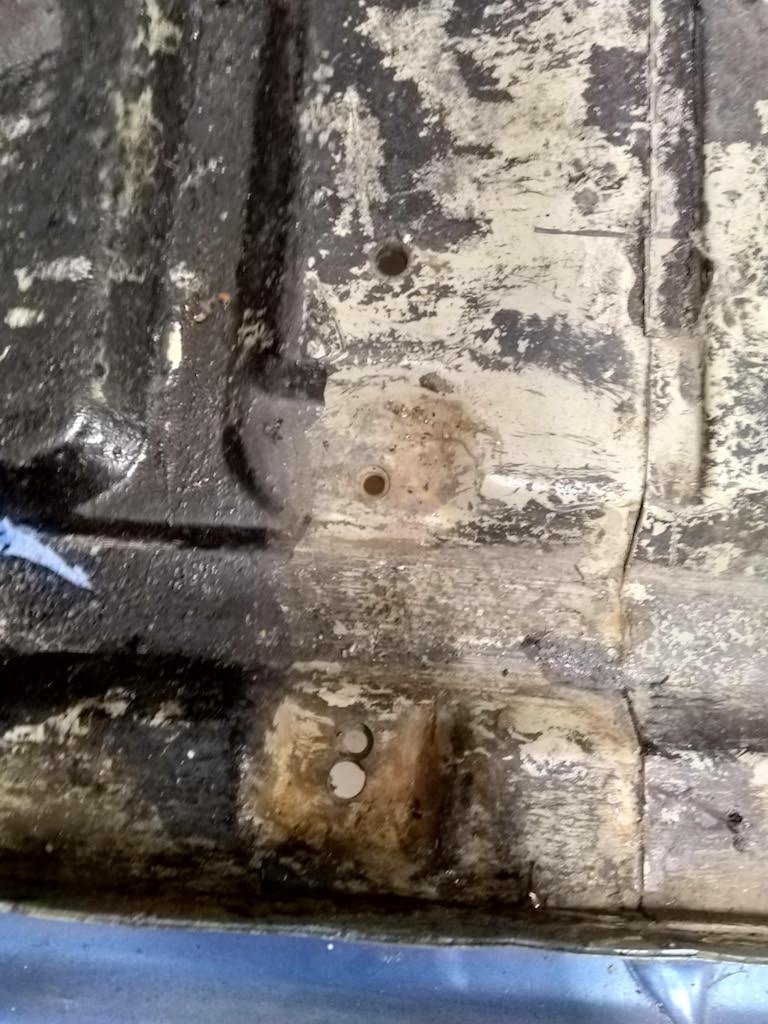
Car was fully stripped to a bare shell, and i set up a booth under my house, a mobile blaster came over and did everything except the rear 1/4s and roof. Once he was done I 2k epoxy primed the shell to lock it all in. later on I hand stripped the 1/4s etc, and epoxied again
 16 points
 -
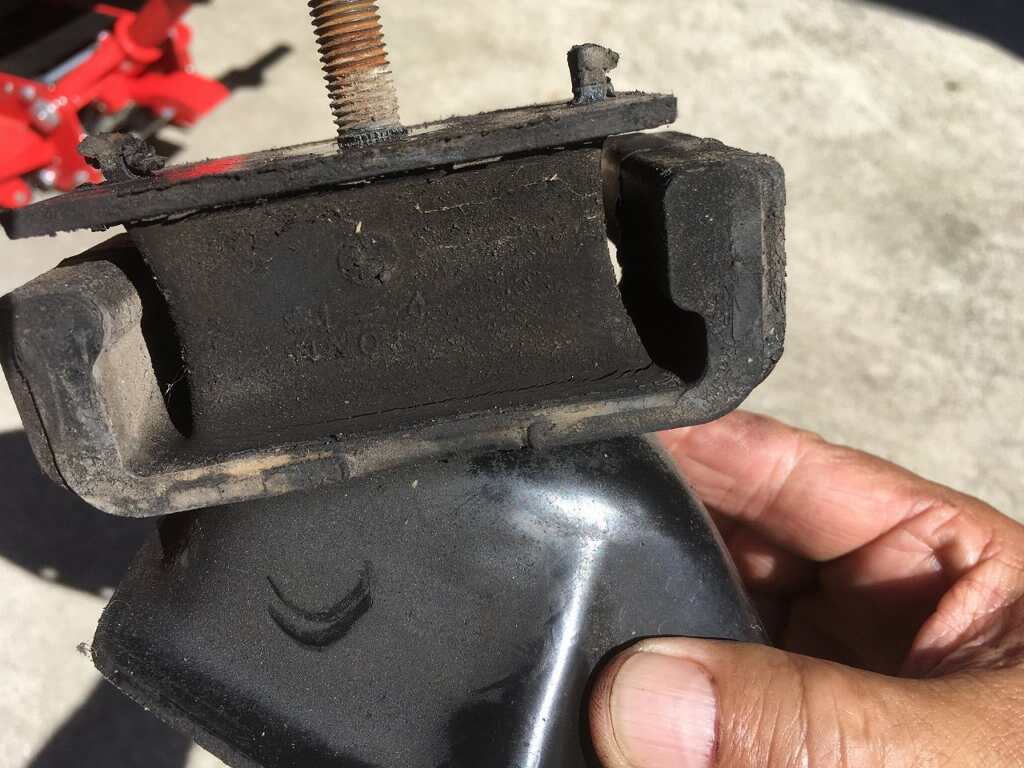
Man, a bunch of months have gone by. Lock down time now, so had a play with this. Cleaned up the points, rotor and cap. Turned over engine to see if the points open, which they do. Connected a battery directly to the coil and starter. Turns over but no spark. Tested leads and it turns out none of them have any continuity at all. I guess they have been unused for 35 years and probably over 40 years old. The Cap to Coil lead would have a connection if I bent it at the right angle. So because shops were closed I cut up some spare extension lead, not that dodgy considering the LUCAS leads just have a bent metal cap shoved into the core and jammed on. So I reused those end pieces. The spark plug ends are literally screwed into the core. I tried reusing these but there was still no continuity. It turned out all of the spark plug connector bits were the problem. So I then made it properly dodgy by stripping the rubber and wrapping the wire around each plug and jammed the old ends on. I know, pure class. But I just wanted to see if there was any life in it before spending any money on the engine. IT HAS SPARK! On what is probably 40 year old bits! Poured some fuel into the carb. Tried to start it, no life. Sprayed some carb cleaner in the throats, because that all I had and its flammable. And it almost fired!! I don't think it's getting any fuel from the carb, its probably just trying to run on the carb cleaner fumes. Once it tries to fire, the starter disengages and free spins. Not sure why since I am bypassing the ignition switch altogether. Just using a battery on the driveway and jumper leads. All the while my 2 year old girl is saying ''gen gen'' (again again) from the deck above me and my 5 year old boy is running around excited. Raising them right haha This is encouraging.14 points
-
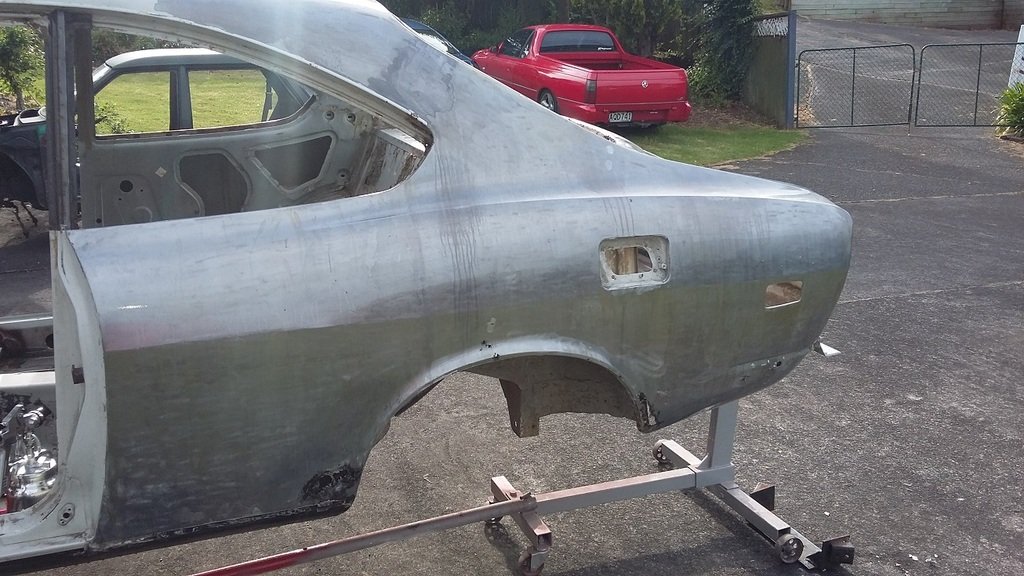
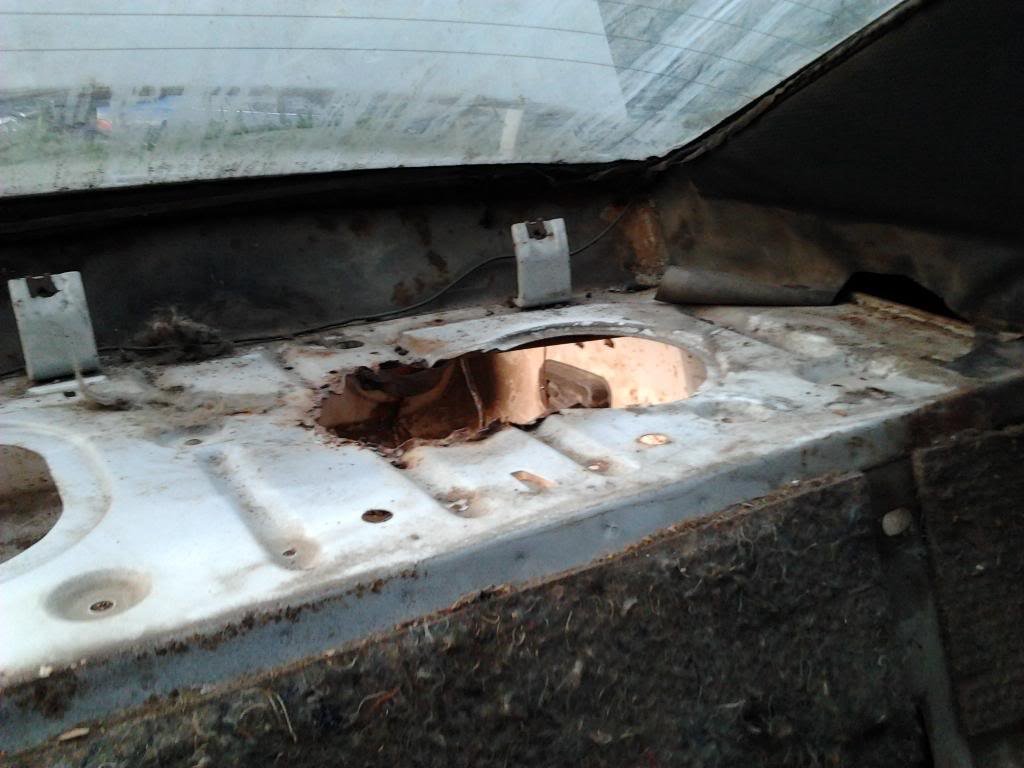
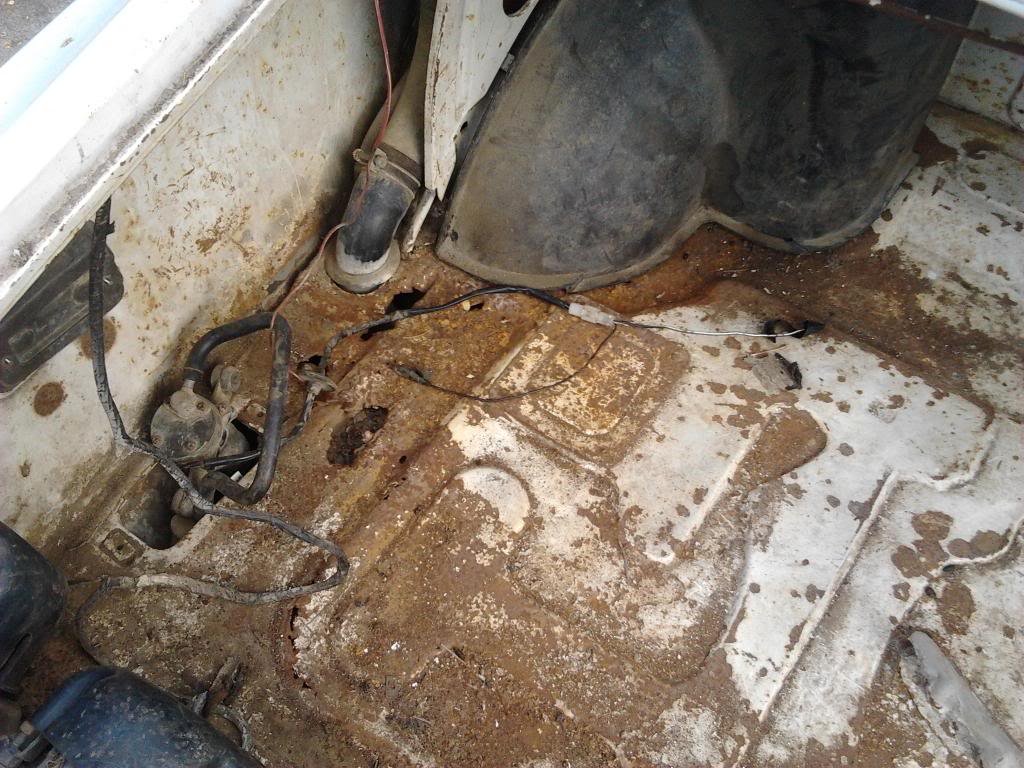
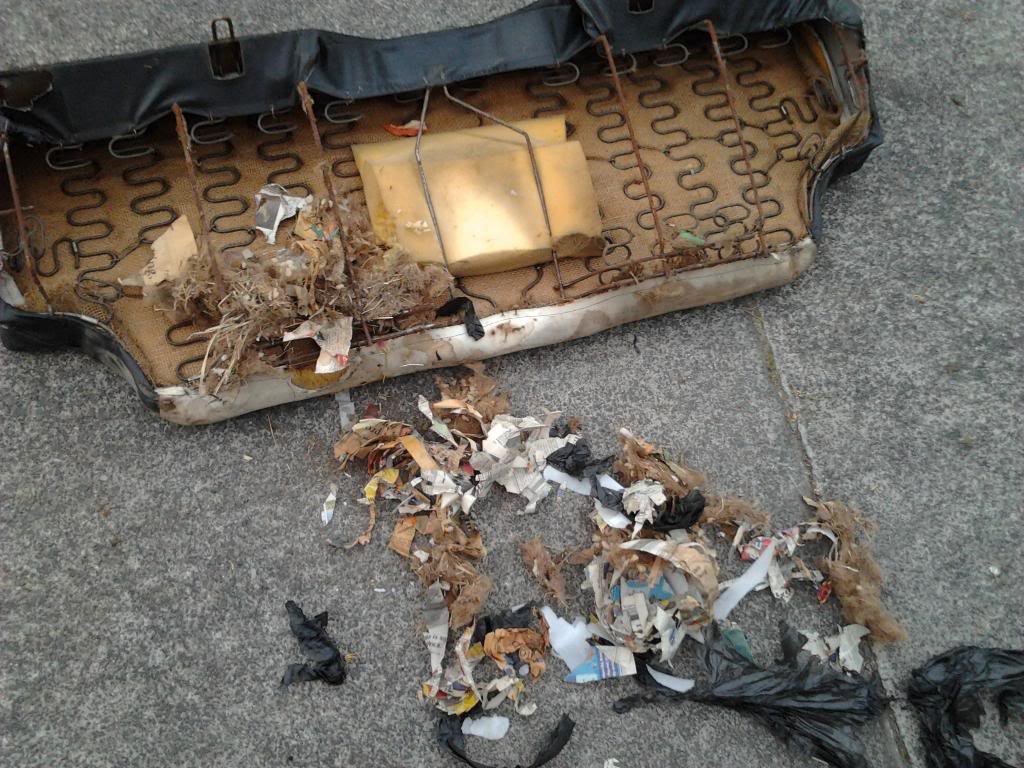
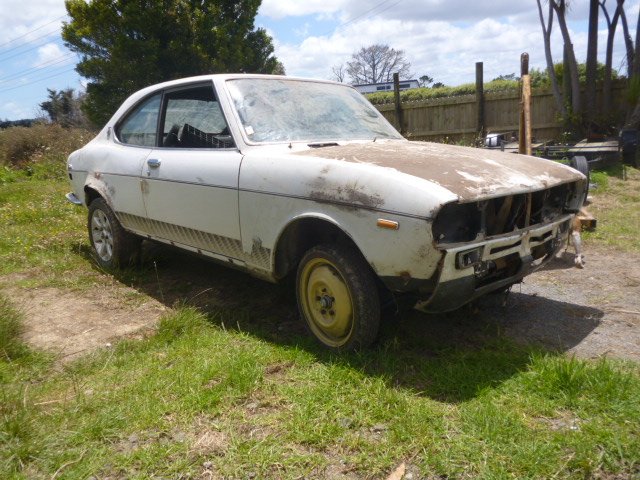
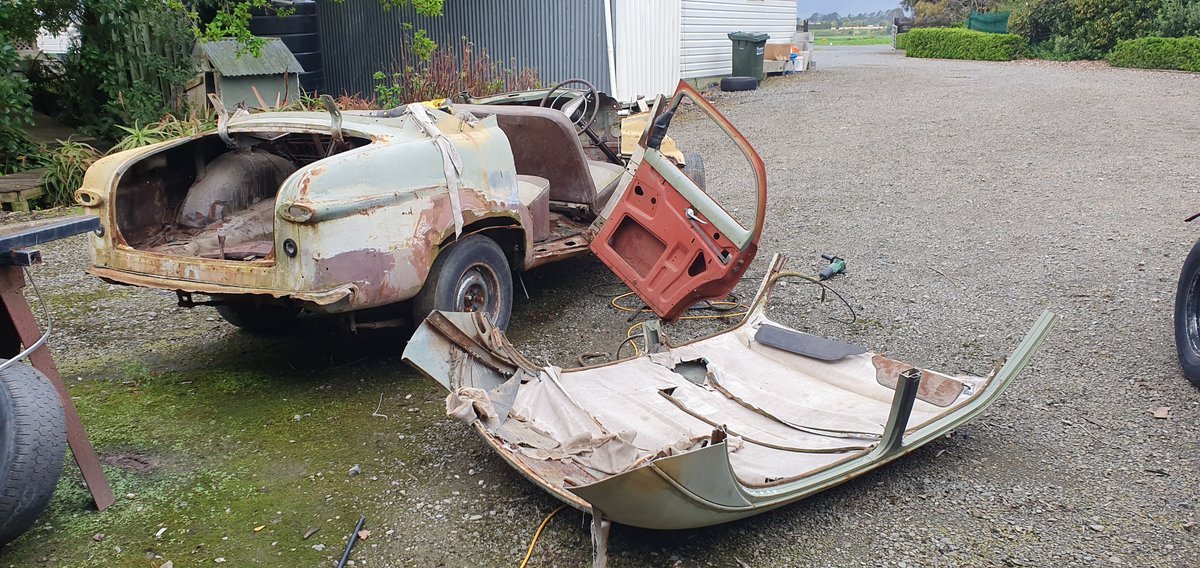
some more butchering, and rust found when I got it home, thing stunk of rats, found a nest and one very dehydrated Rat under the seat. there was lots of little issues around it, probably far more than I realised in hindsight, but the car being what it is, had to be saved. it will soon be apparent i went a little too far down the rabbit hole with this one though, and the main reason its still not finished 8 years later....
14 points
-
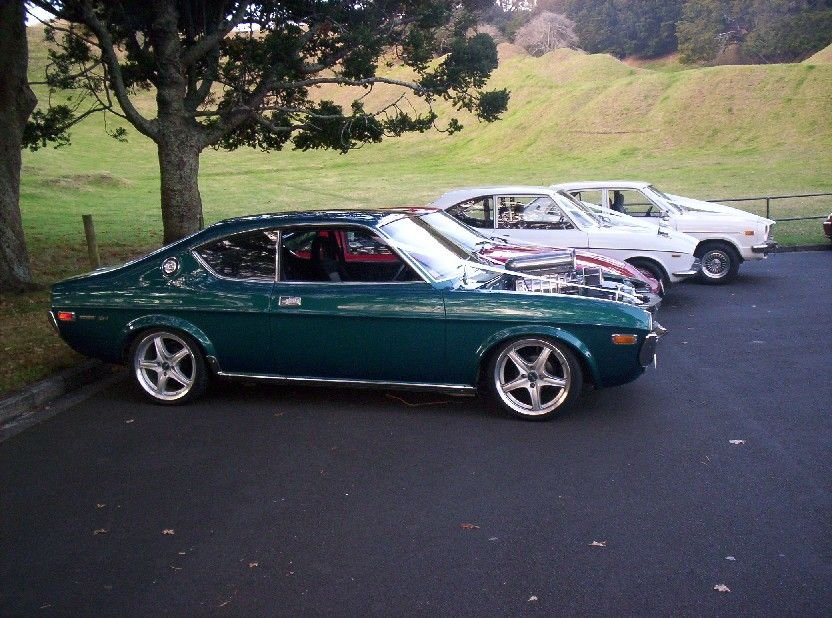
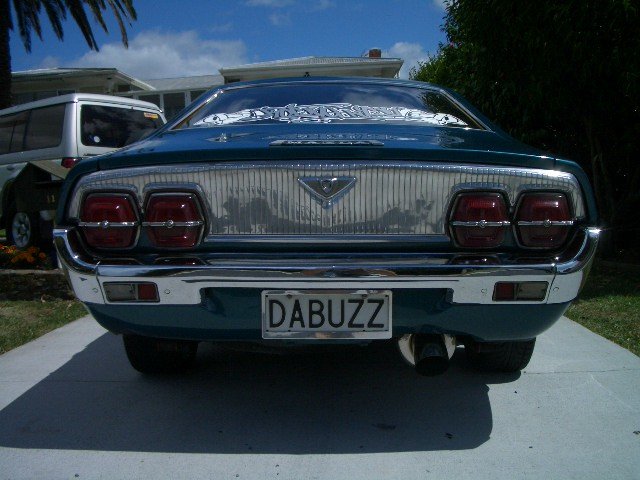
Well, I have had a build thread going on Ausrotary forum for many years, due to the snails pace rebuild of this old Mazda, Thought I would be better off copying over a condensed version here as the car is in NZ after all. The plate DABUZZ was originally on a 1974 Mazda RX4 coupe, that was fairly well known in the early-mid 2000s around the Auckland rotor scene, had that for 11 years, and sold it to buy a house (no Regrets) Was a factory 13b car (only 12a cars were ever sold new in NZ) private import from Aus, which was repainted when I got it, and had a mild stage 2 13b in it Over the years it grew to a Microtech Injected 4/71 Supercharged s5 Rx7 13b, s5 gearbox, and plenty of other mods. Took home a few trophy’s at the 4&Rotary nationals, and was just a general fun street car, wasn’t big in power, but got along OK, and sounded incredible.
10 points
-
Some of the UK readers of this forum may have already see this episode of car SOS- its a goody. The Imp they restore is like Hannah's first classic car , a 1974 Imp super painted in Prairie wind. A little car we enjoyed immensely and what made me always want another... The episode can be watched here.... https://www.dailymotion.com/video/x7t30c310 points
-
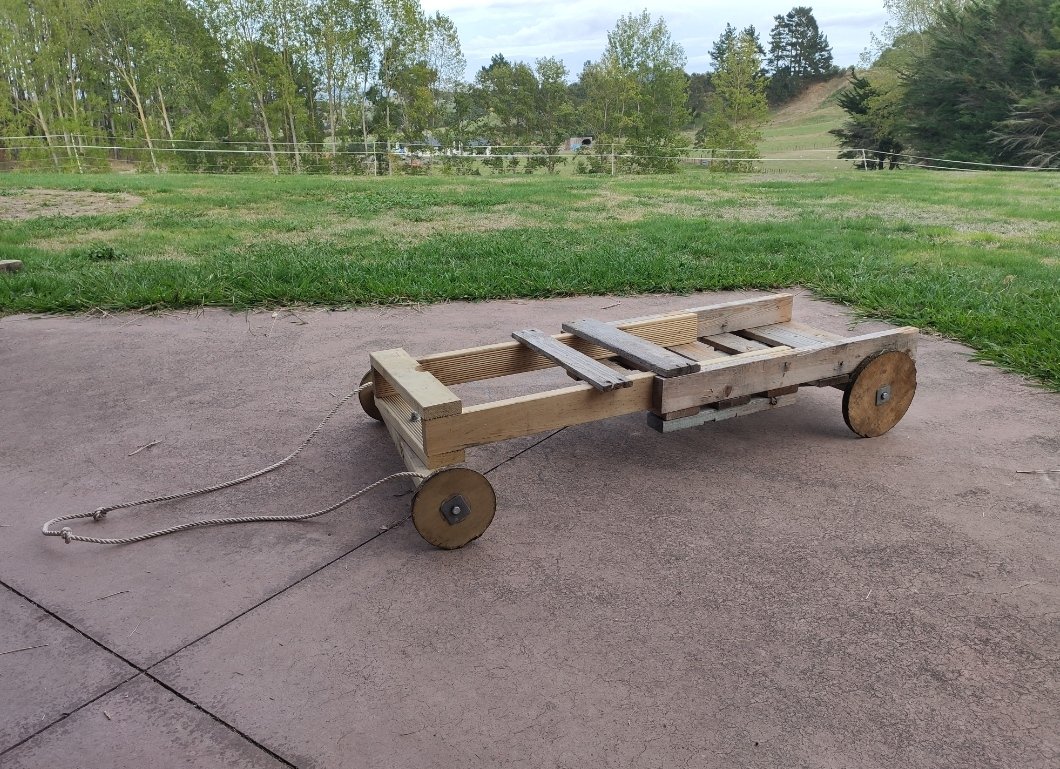
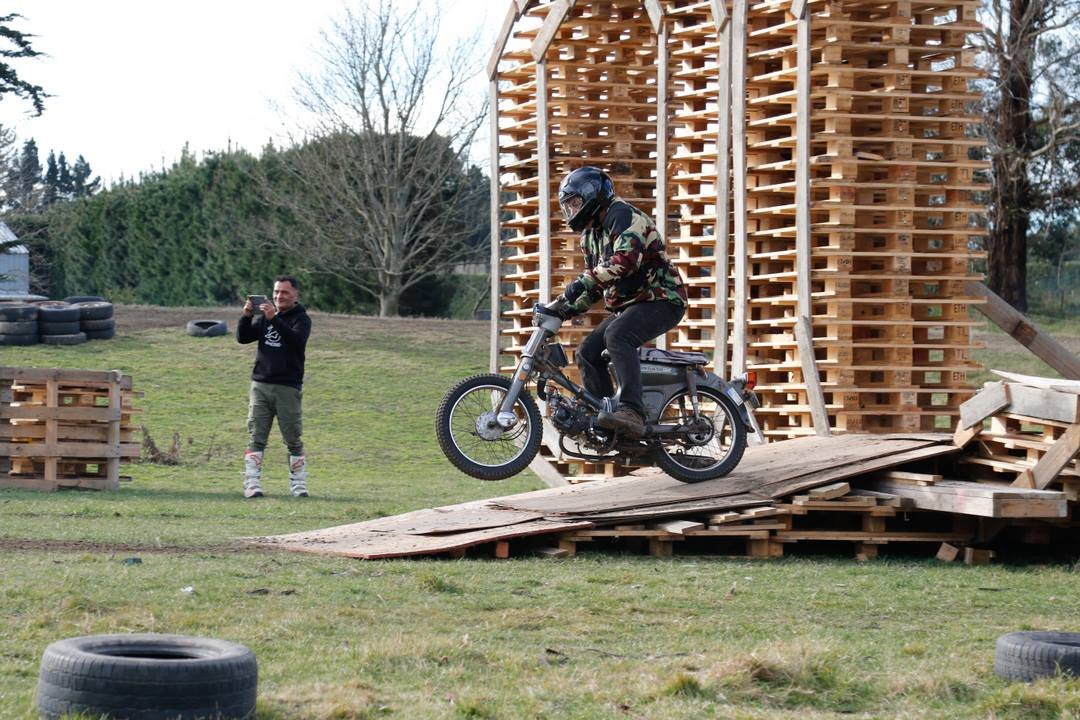
Probably putting out a few more ponies than this lockdown-spec number I knocked together in a couple of hrs on Saturday. Sadly I couldn't find any donor bikes/carts/barrows for wheels so half of the time was jigsawing the epic 7-ply wagon wheels (with stainless tube-bushed, coach screw axles)... Goes hard for what it is
9 points
-
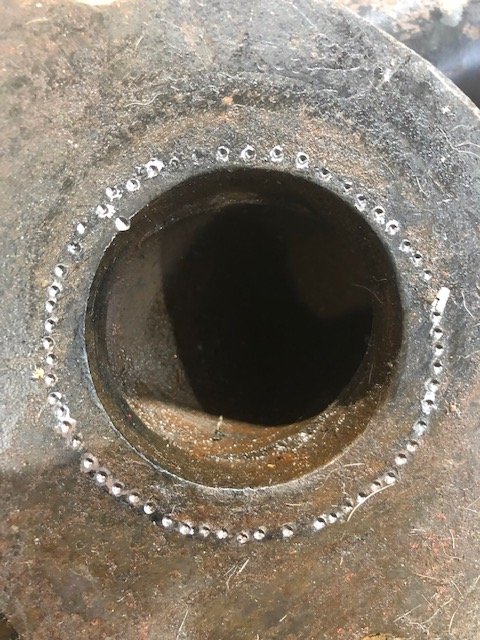
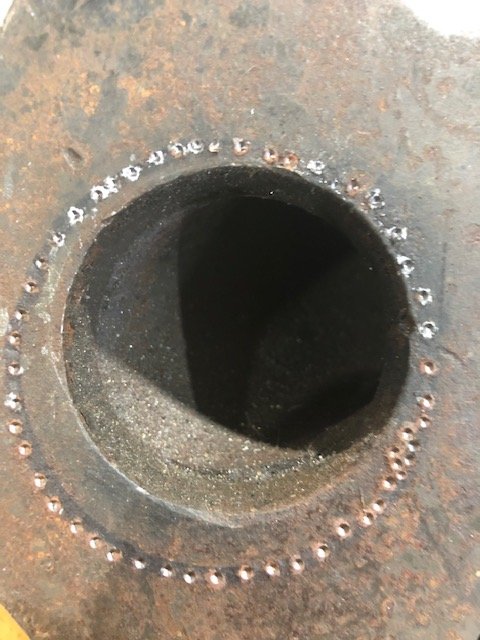
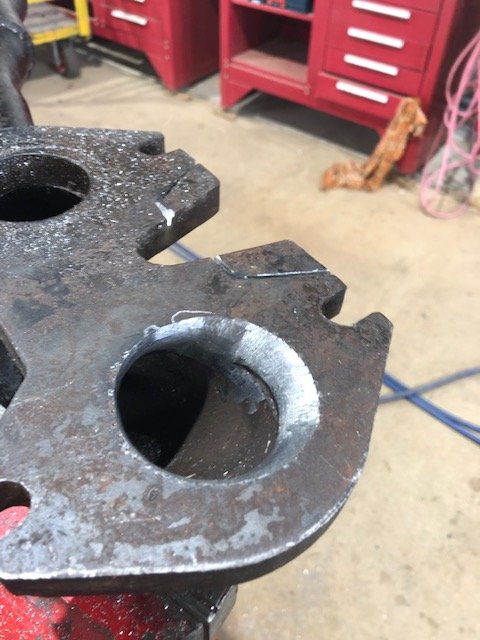
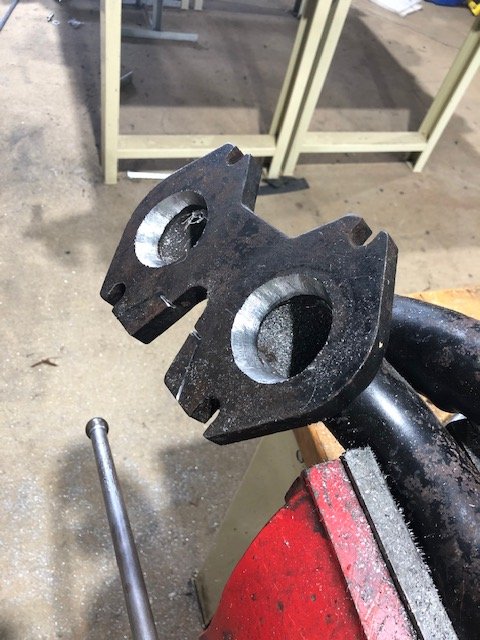
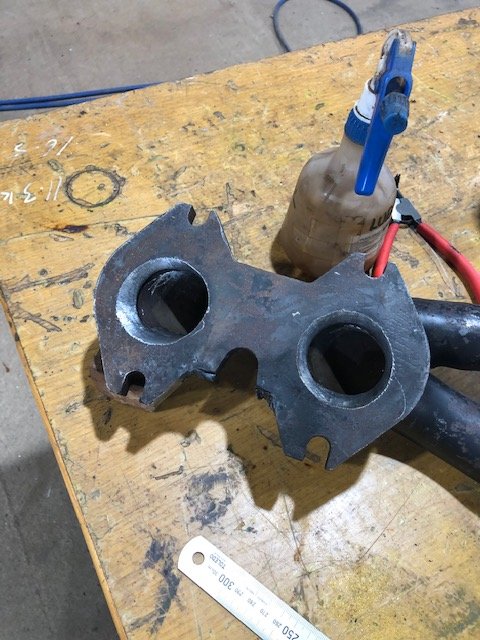
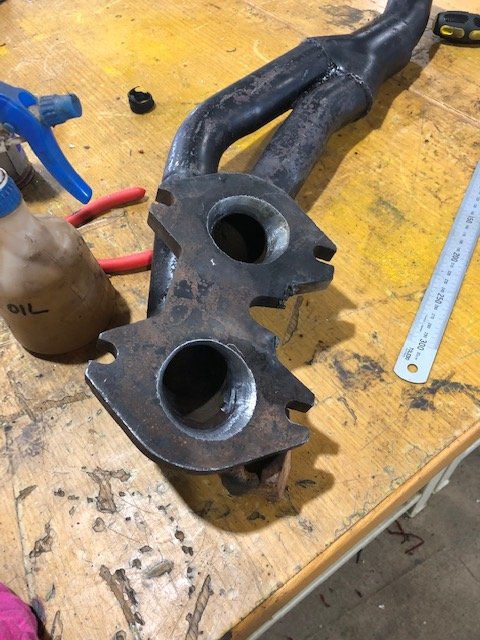
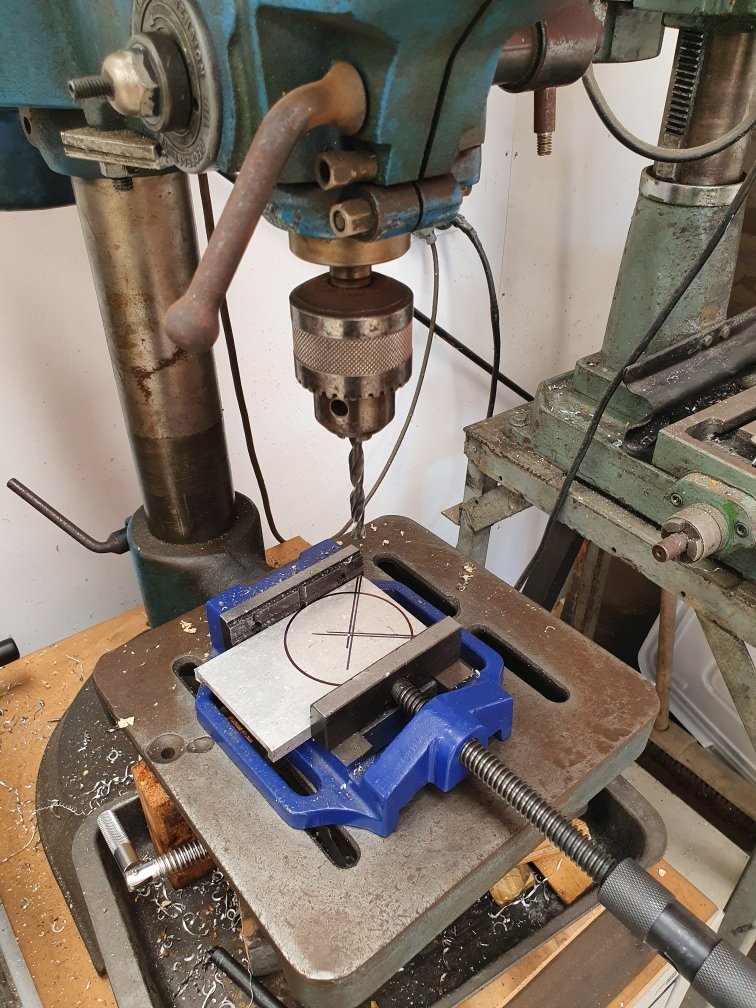
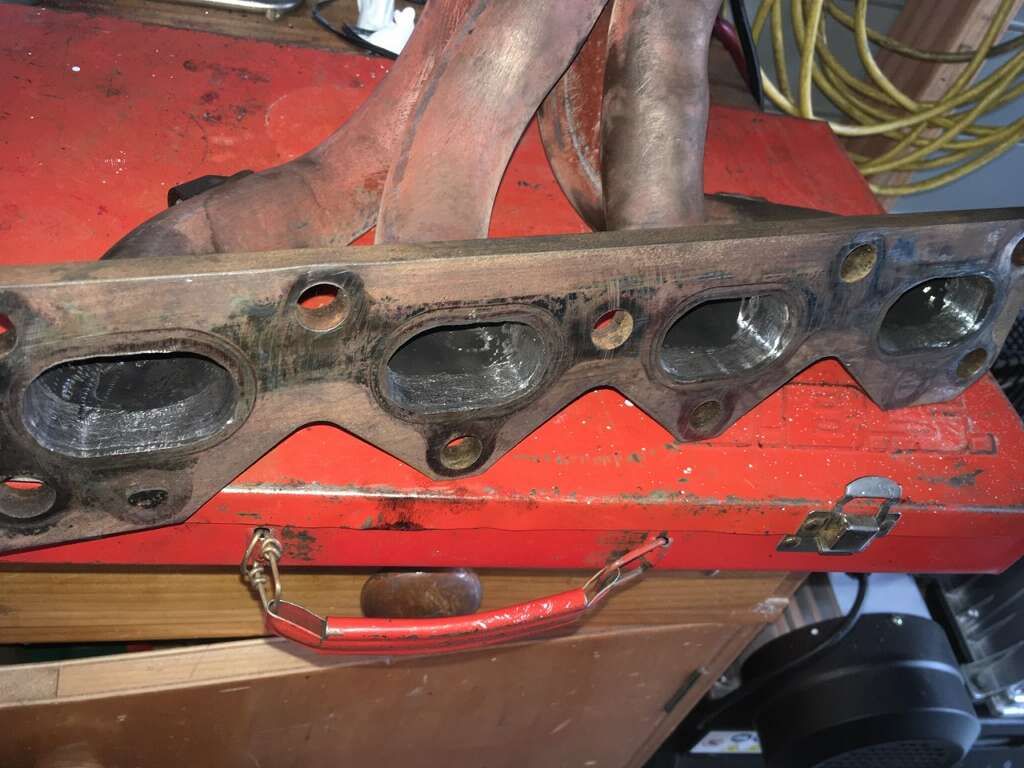
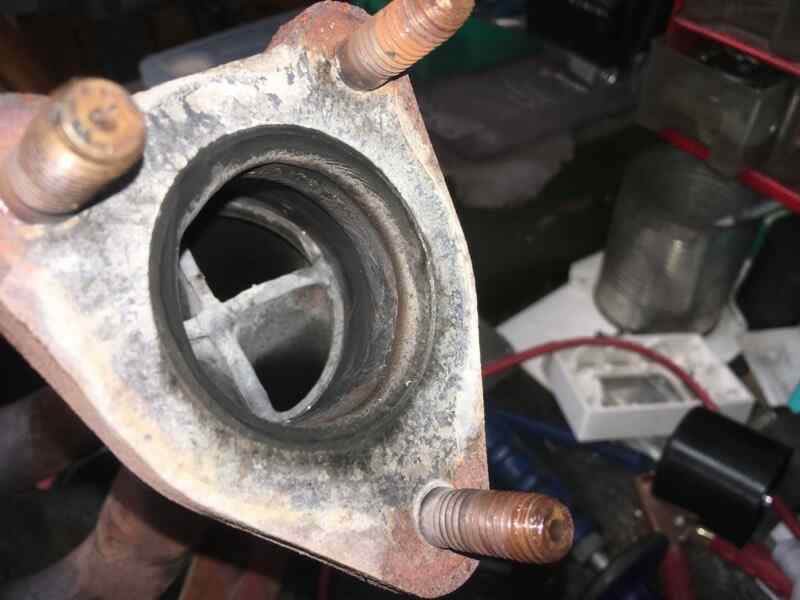
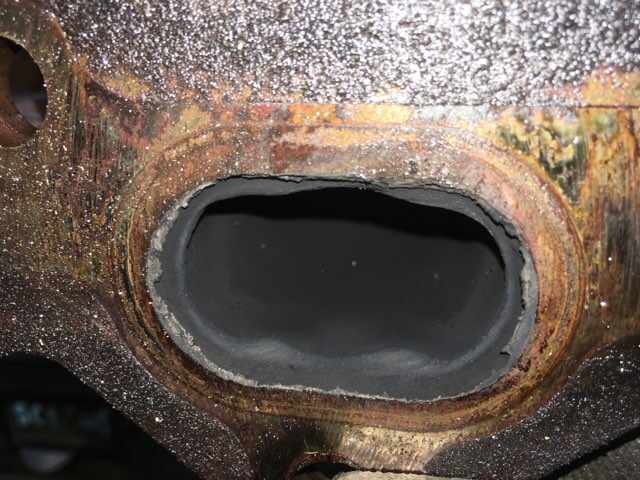
I’m going to run the extractors I got with my bridgeport as I’m doing this on a pretty tight budget. That and I wanna see how cheap but solid I can build it. anyways, when I put the exhaust manifold gasket up to the manifold flange, it was quite clear whoever built the manifold wasn’t worried about flow. so traced the outline of the exhaust gasket on the extractors and centre punched it so I don’t lose the outline. got my die grinder in hand and went to work. its not going to be perfect by any means, the tubes didnt join to the flange at 90deg so there’s no real way of having perfect outlet flow. But I did my best and I guess a picture tells a thousand words.
8 points
-
Yip, they like to suck still air. There's a lot of science that I have no idea about - but basically if you have a smaller intake hole in the air box than the carburetor has it creates a flux capacitor effect where the pixies get high and it enables time travel? *actual results may differ*7 points
-
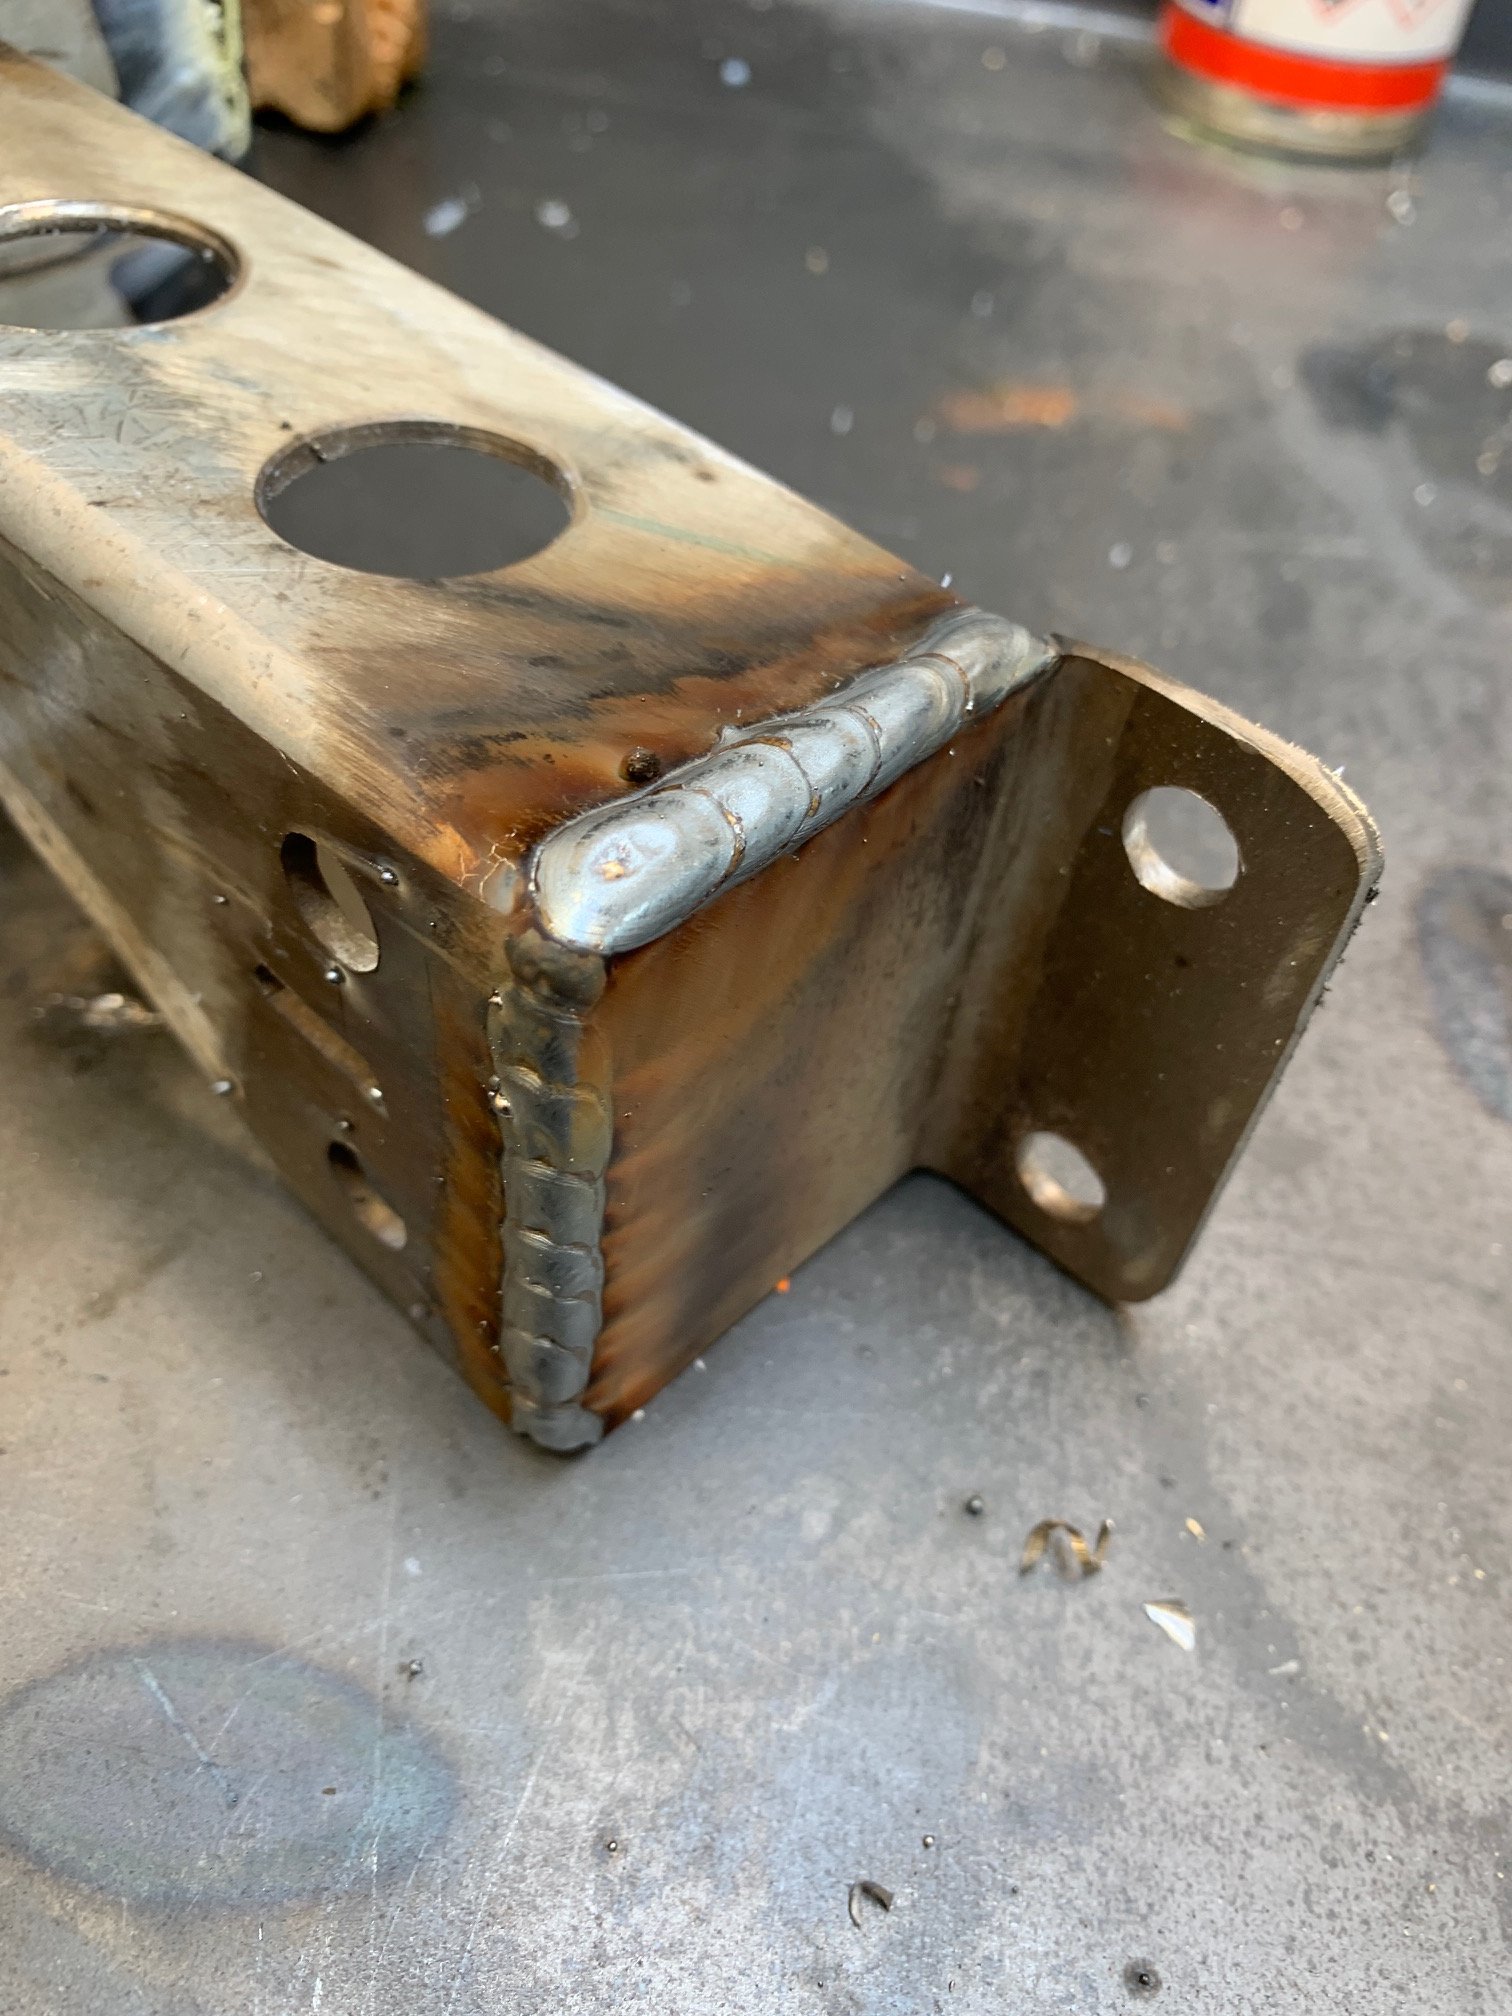
Spare tyres. Not the ones round your middle, the ones you need when you get a puncture. Mine wont fit it in the original spot, if you leave it chained in the bed it's a pain in the arse and if you bolt it to the side of the bed (as I did) it's in the way. Sooo...... Went and had a dive in the Landrover scrap bin and came up with this. A quick measure showed it was pretty close to a perfect fit, cleared the lights & the mounts were near places I could bolt to. Made a top mount out of some 3 x 3 angle and as luck would have it one of the winch bracket ends I chopped up would be perfect for a lower mount once bolted to the chassis, all I'd have to do is notch the valance a bit. Clamped it all up to see where stuff landed. All cut, shut, drilled, painted and bolted up. Pretty pleased with that, and not a single weld needed so far. Probably not going to be so lucky with the PCD change, but we'll see about that tomorrow.7 points
-
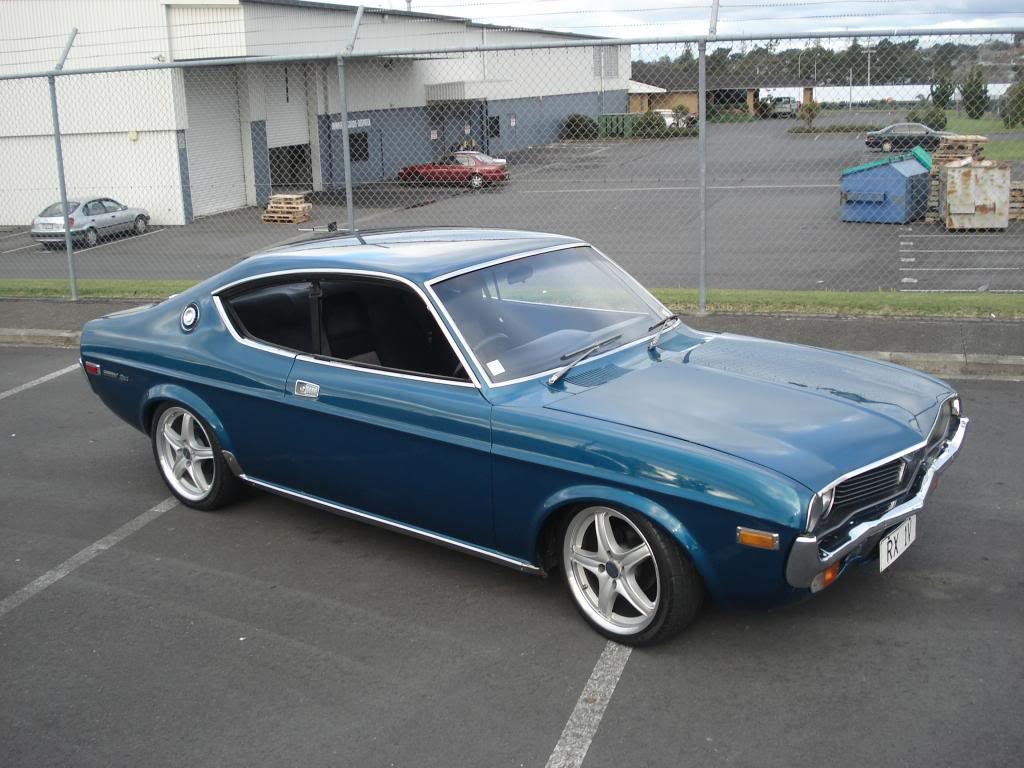
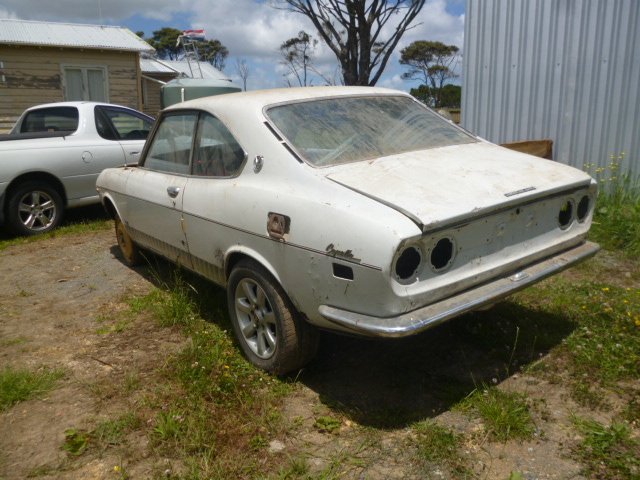
It also had a 9 inch full spool diff in it that was way too wide - hence the reason for trying to flare the arches, luckily they gave up after only doing one side!, also had s5 brakes all around with 5 stud conversion.
7 points
-
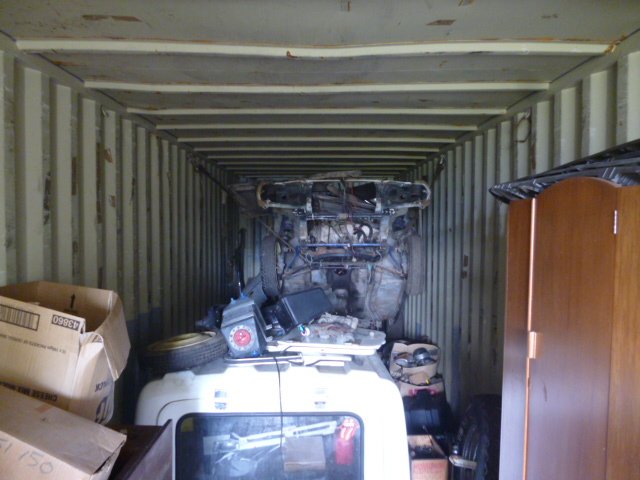
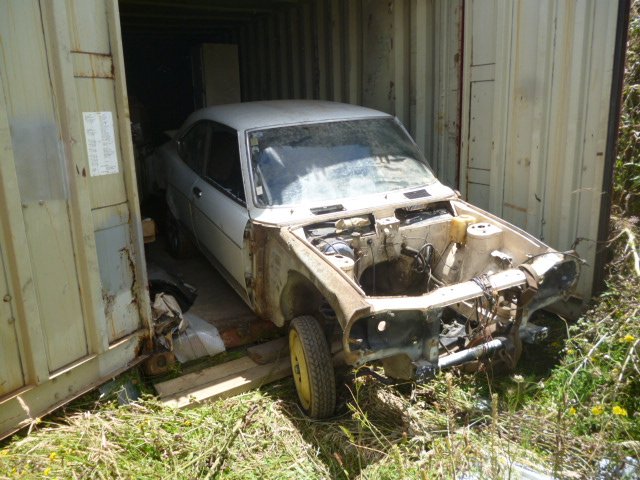
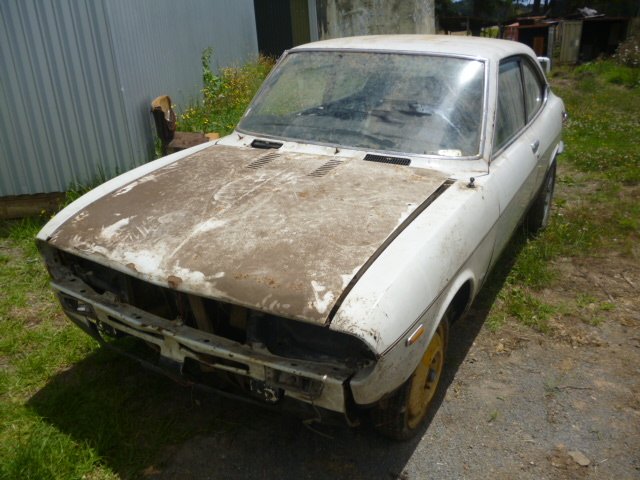
And that leads me to this – after I bought a house, it wasn’t long before I found a new project, it was a mates that he had stashed in a a shipping container for around 12 years, he basically had zero interest in restoring it as he had other cars to play with, we struck a deal and that was that DABUZZ version rx2.1 Introducing my 1971 Mazda Capella RE, ‘T-Dash’ Coupe. It was tied to the roof at the very rear of the 40ft shipping container it had sat in, with a mountain of crap in front of it, took half a day to get it out, what appeared was a car that had had a bit of a hard life- as they all do, rust, rear ¼ damage, missing a bunch of parts, but no crash damage, and overall worth a save.
7 points
-
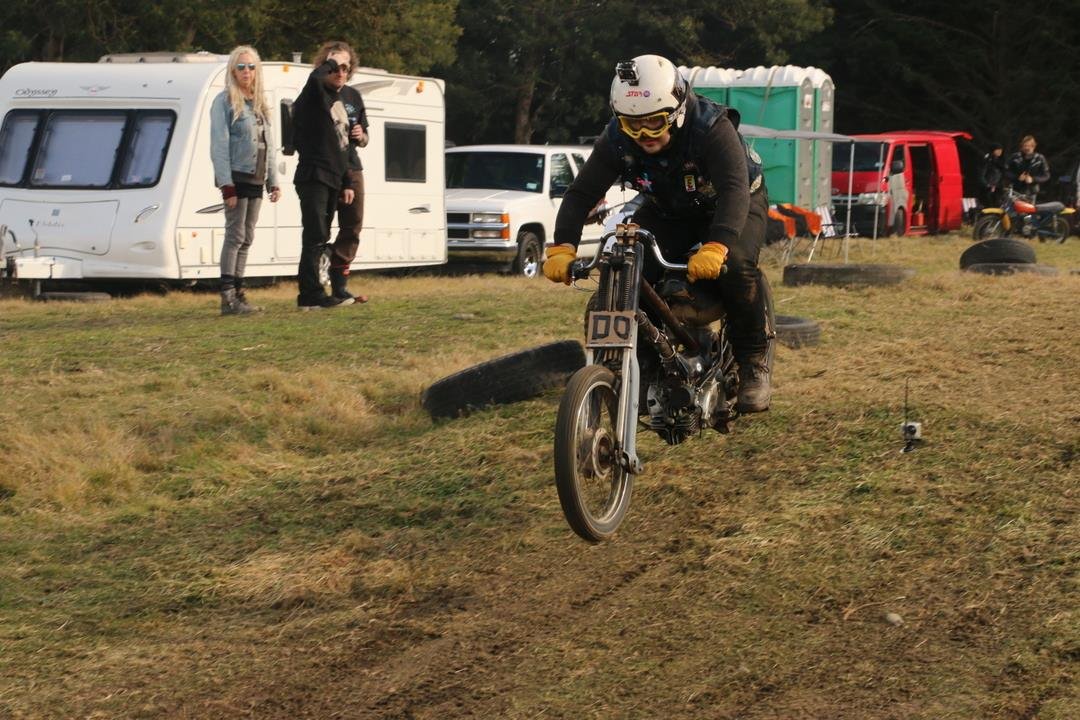
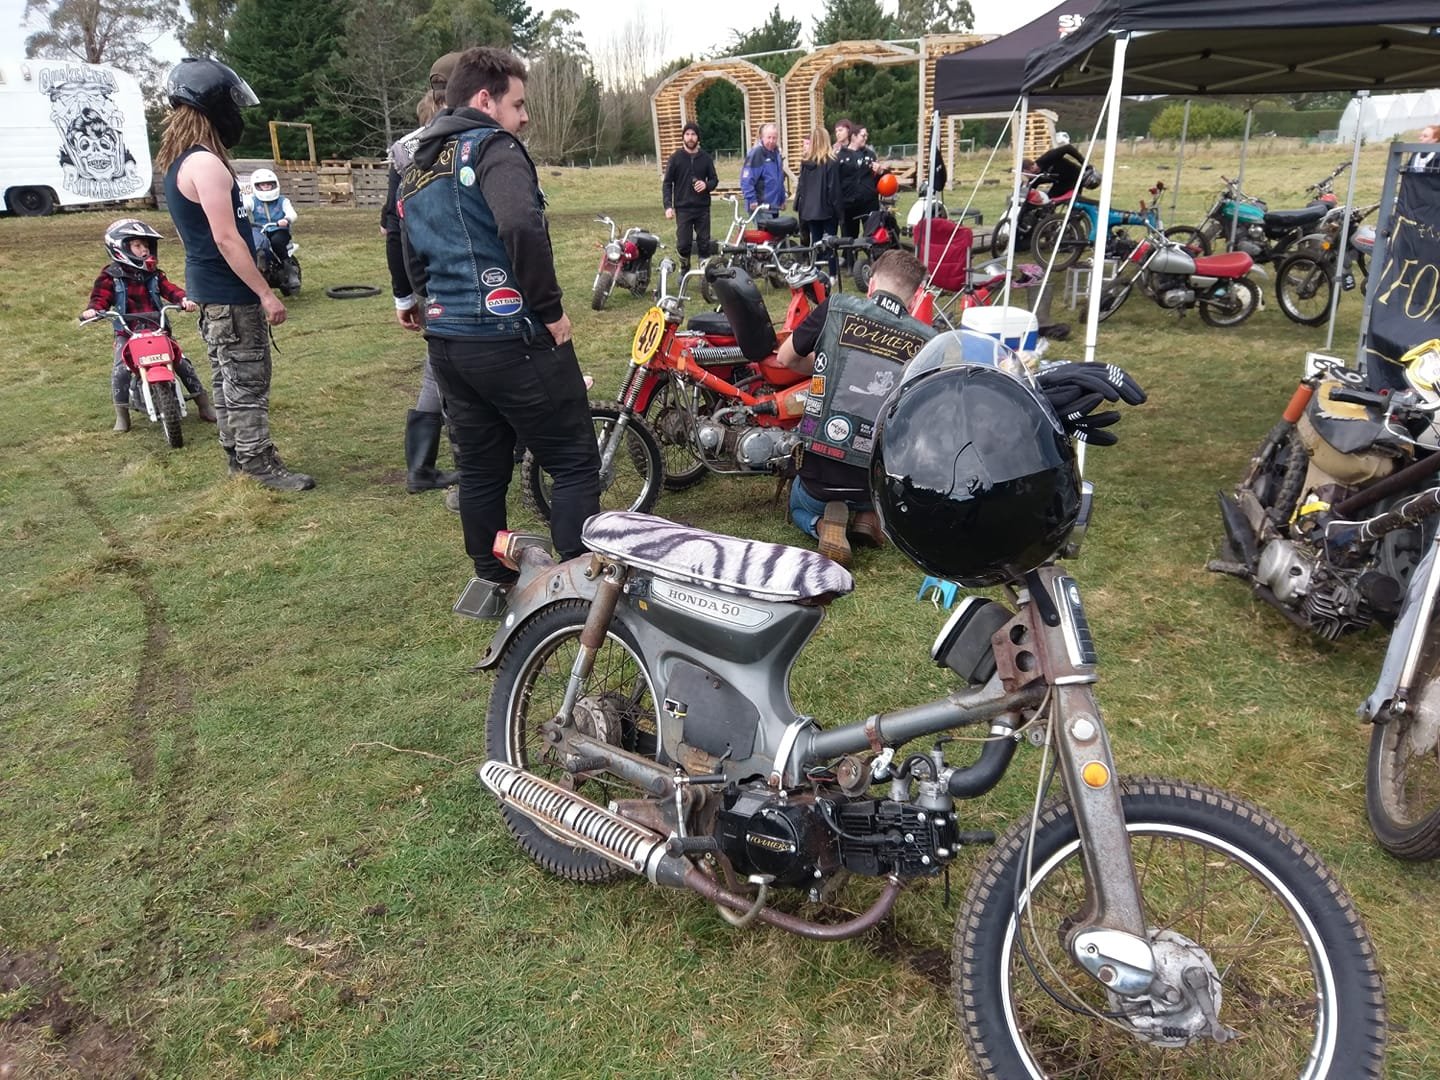
Having had this thing nearly two years time for an update. Was lucky enough to take it to QCR's "Dirt Masters" and ride it inappropriately. Just removed the front guard and fitted some Golden Boy tyres. So much fun was had, along with @GuyWithAviators on his absolutely ridiculous super stretched Yamaha V50 (Don't try this at home - not a dirt bike :))
6 points
-
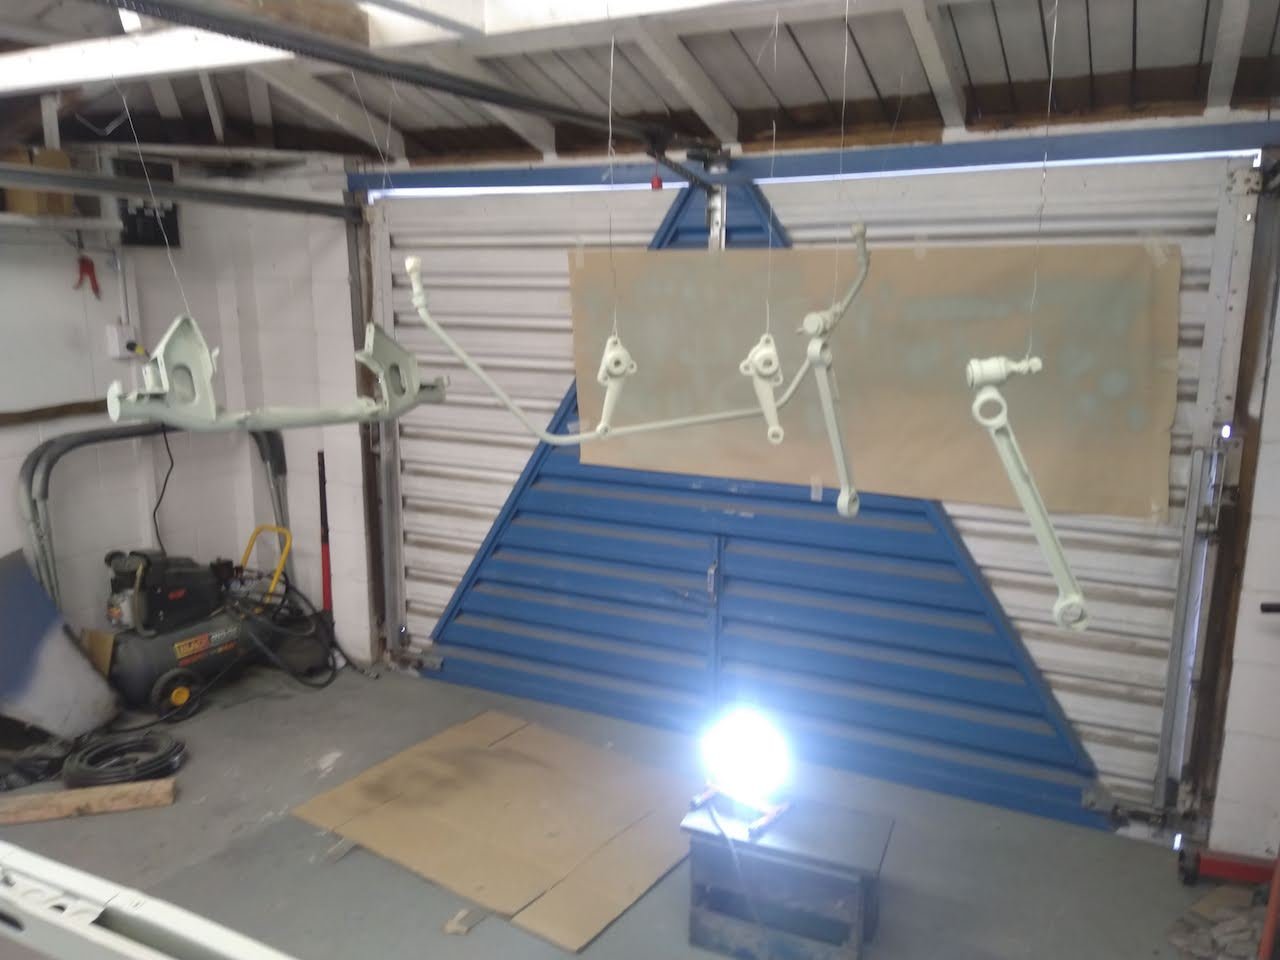
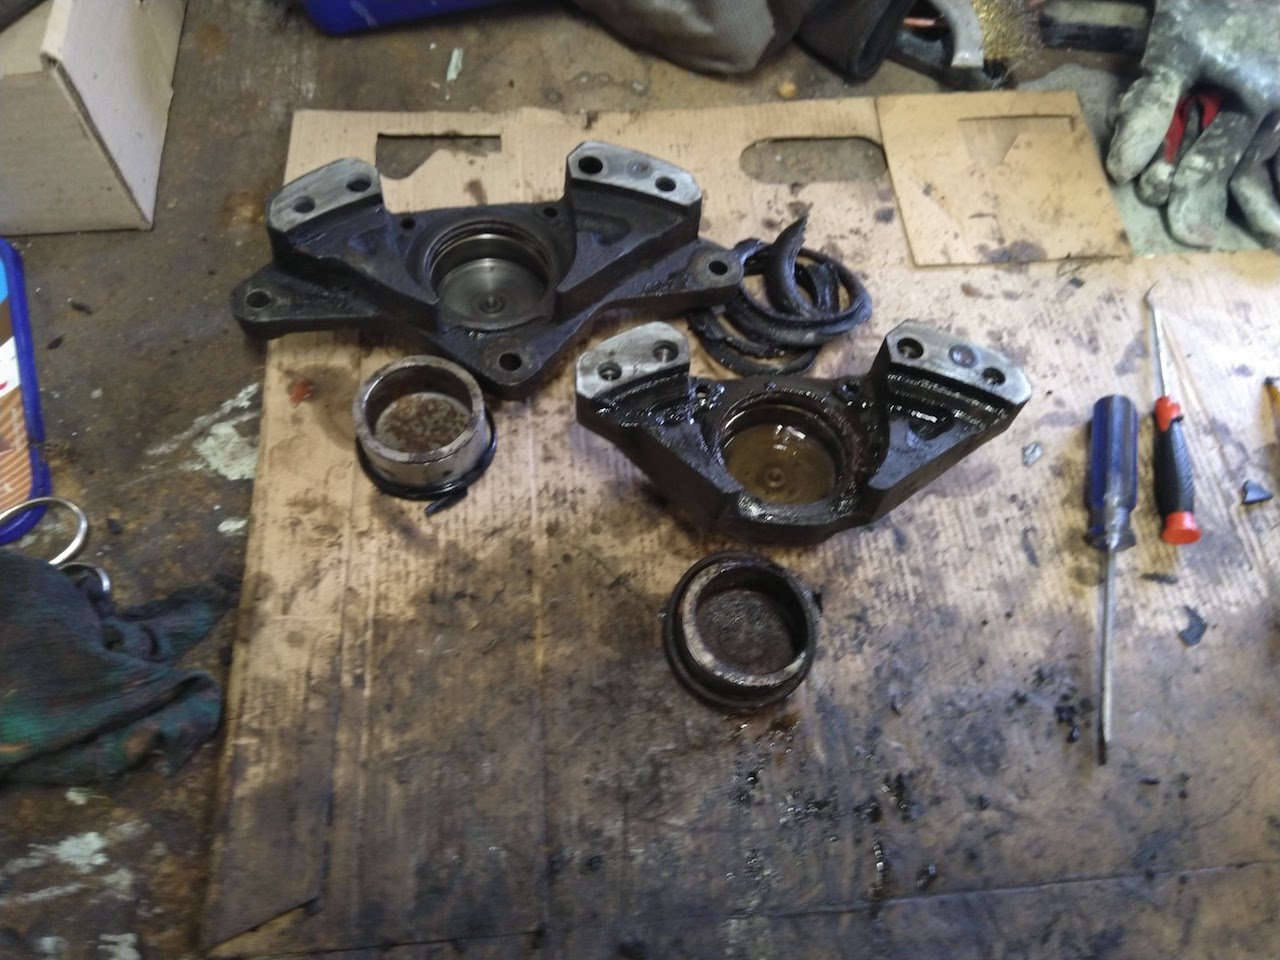
Got most of my font suspension bits stripped, rust treated with phosphoric acid and into epoxy primer. I will get some 2K black when I can. I'm going to get the struts converted to gas. Stripped the brake calipers down. The pistons had a bit of rust, but the housings have cleaned up well. Ordered a rebuild kit with new pistons. Took out the poorly installed front bucket seats and test fitted the bench seat. For some reason when they installed the bucket seats they had drilled new holes directly next to the mounting points for the original seat. Hopefully can patch without too much drama. Floor pan is generally pretty good, mostly surface rust. Only found one rust hole about the size of a finger nail so far.
6 points
-
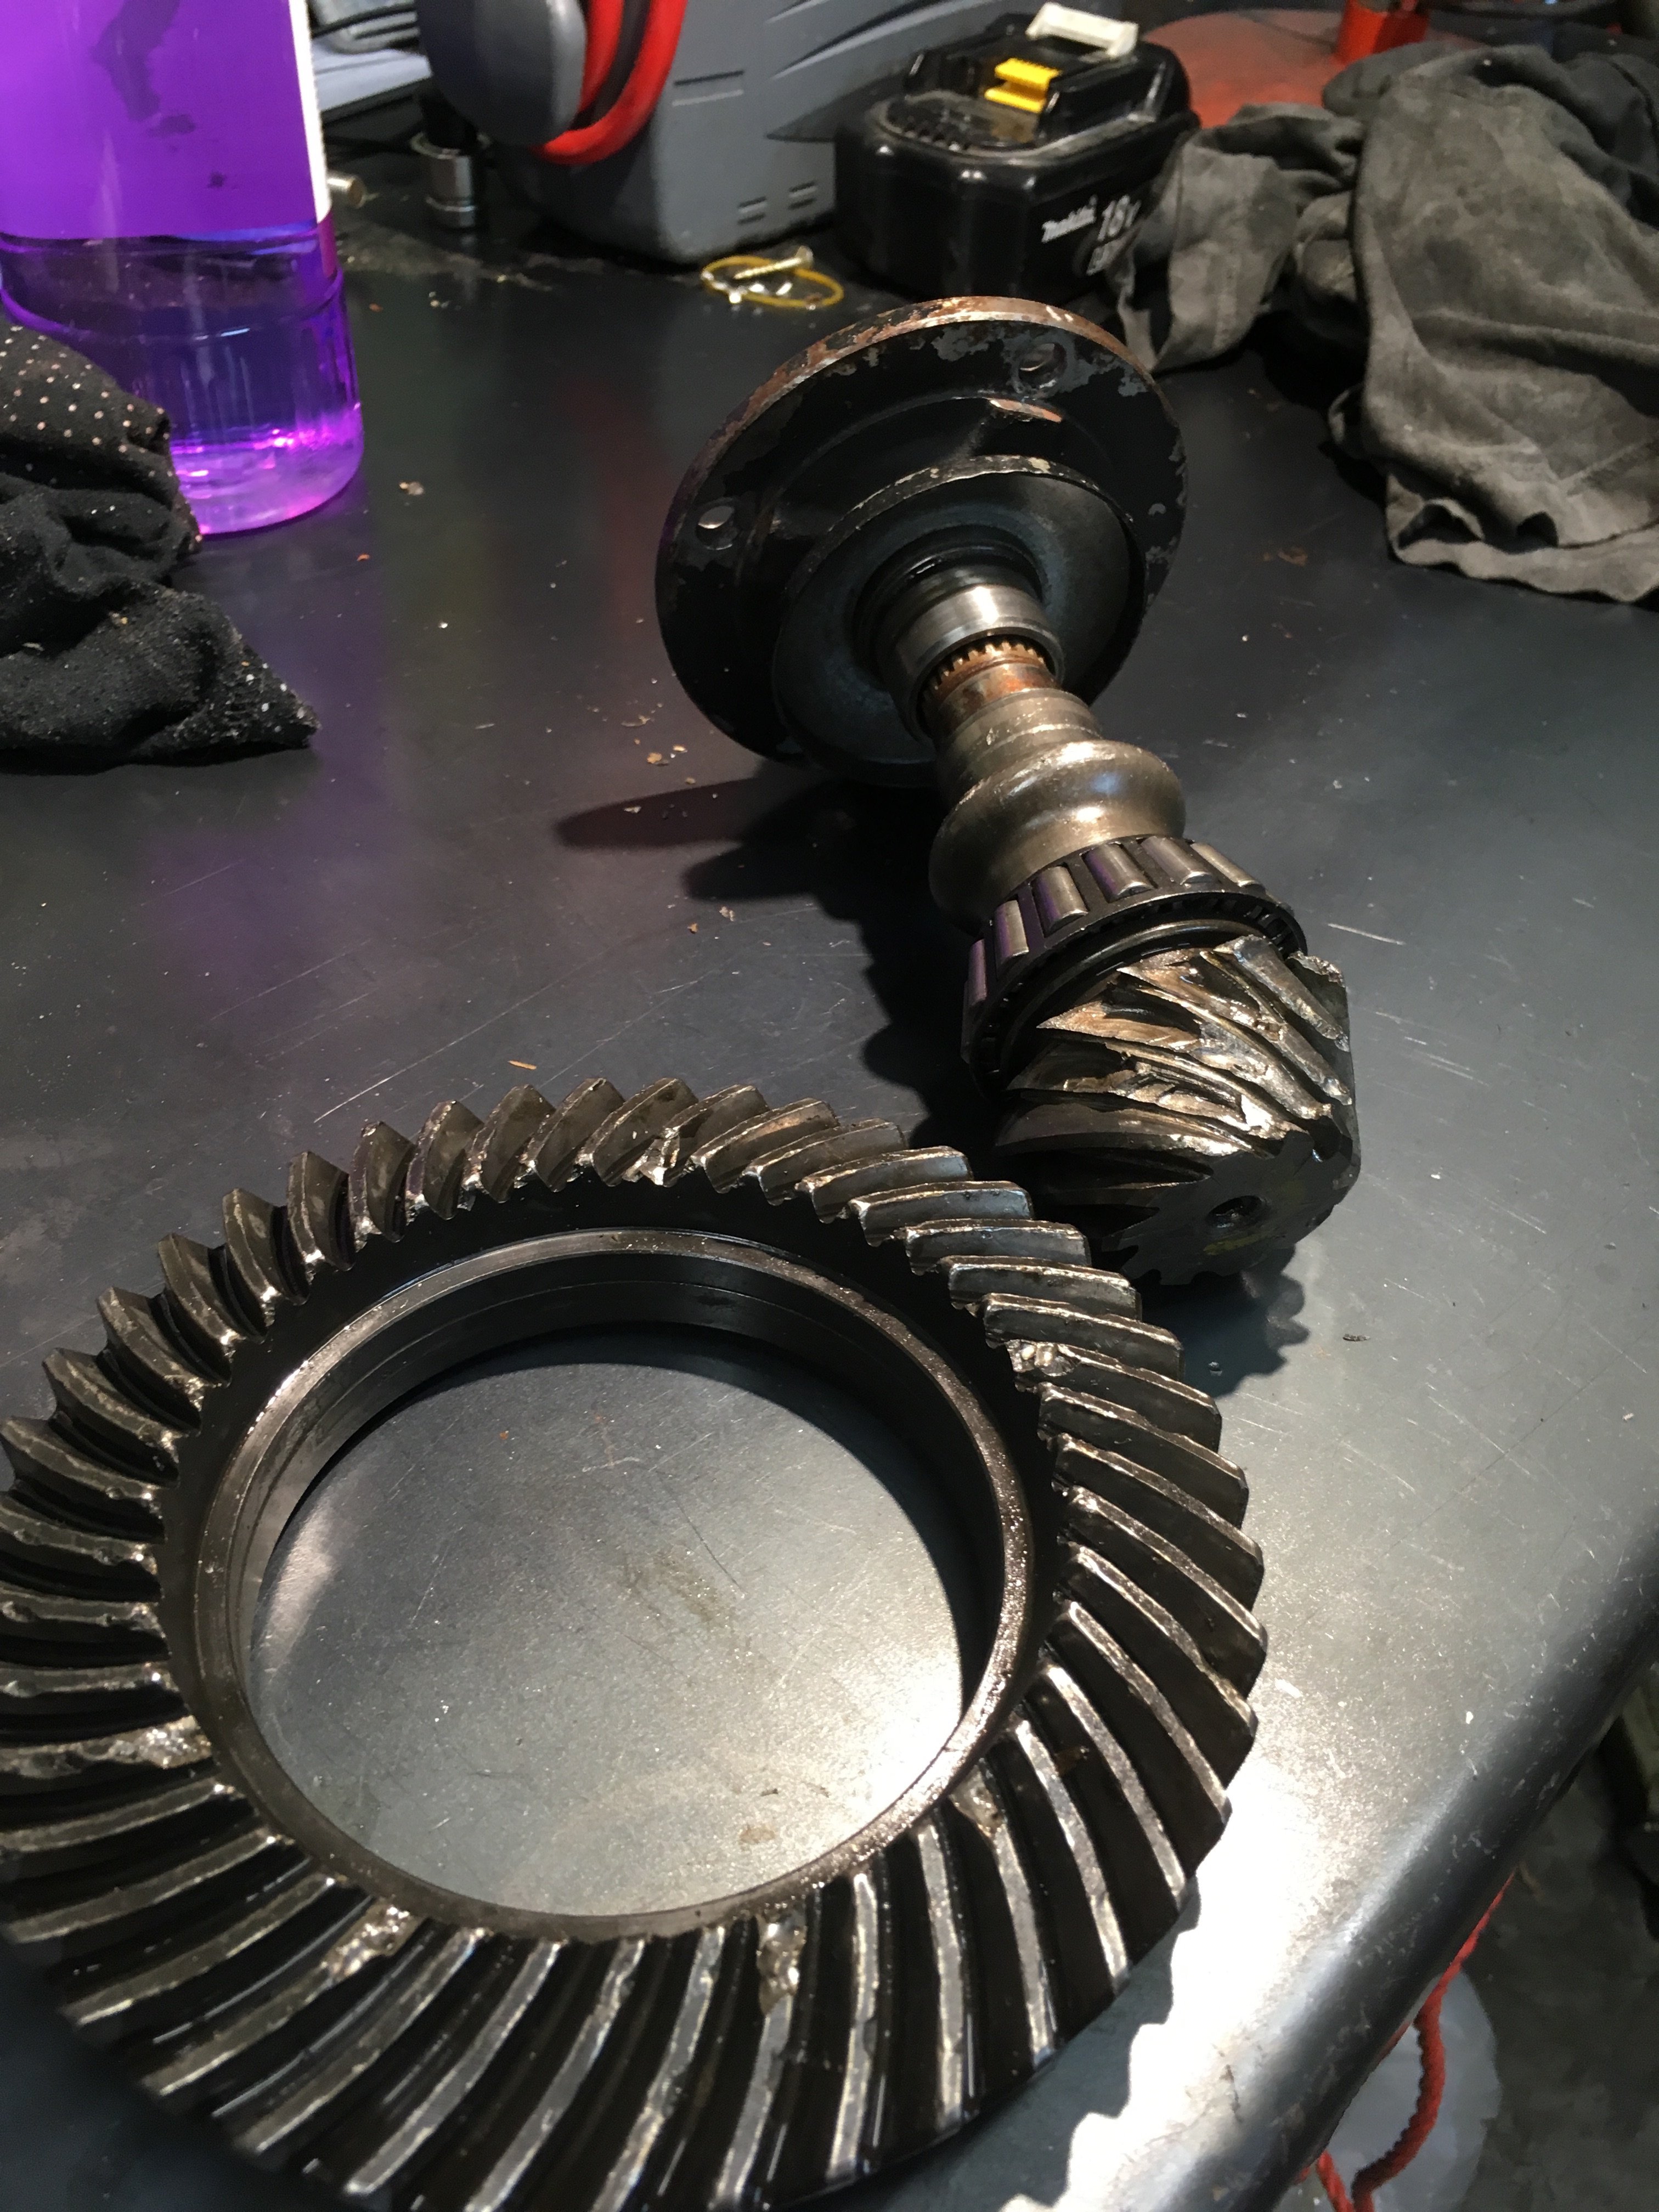
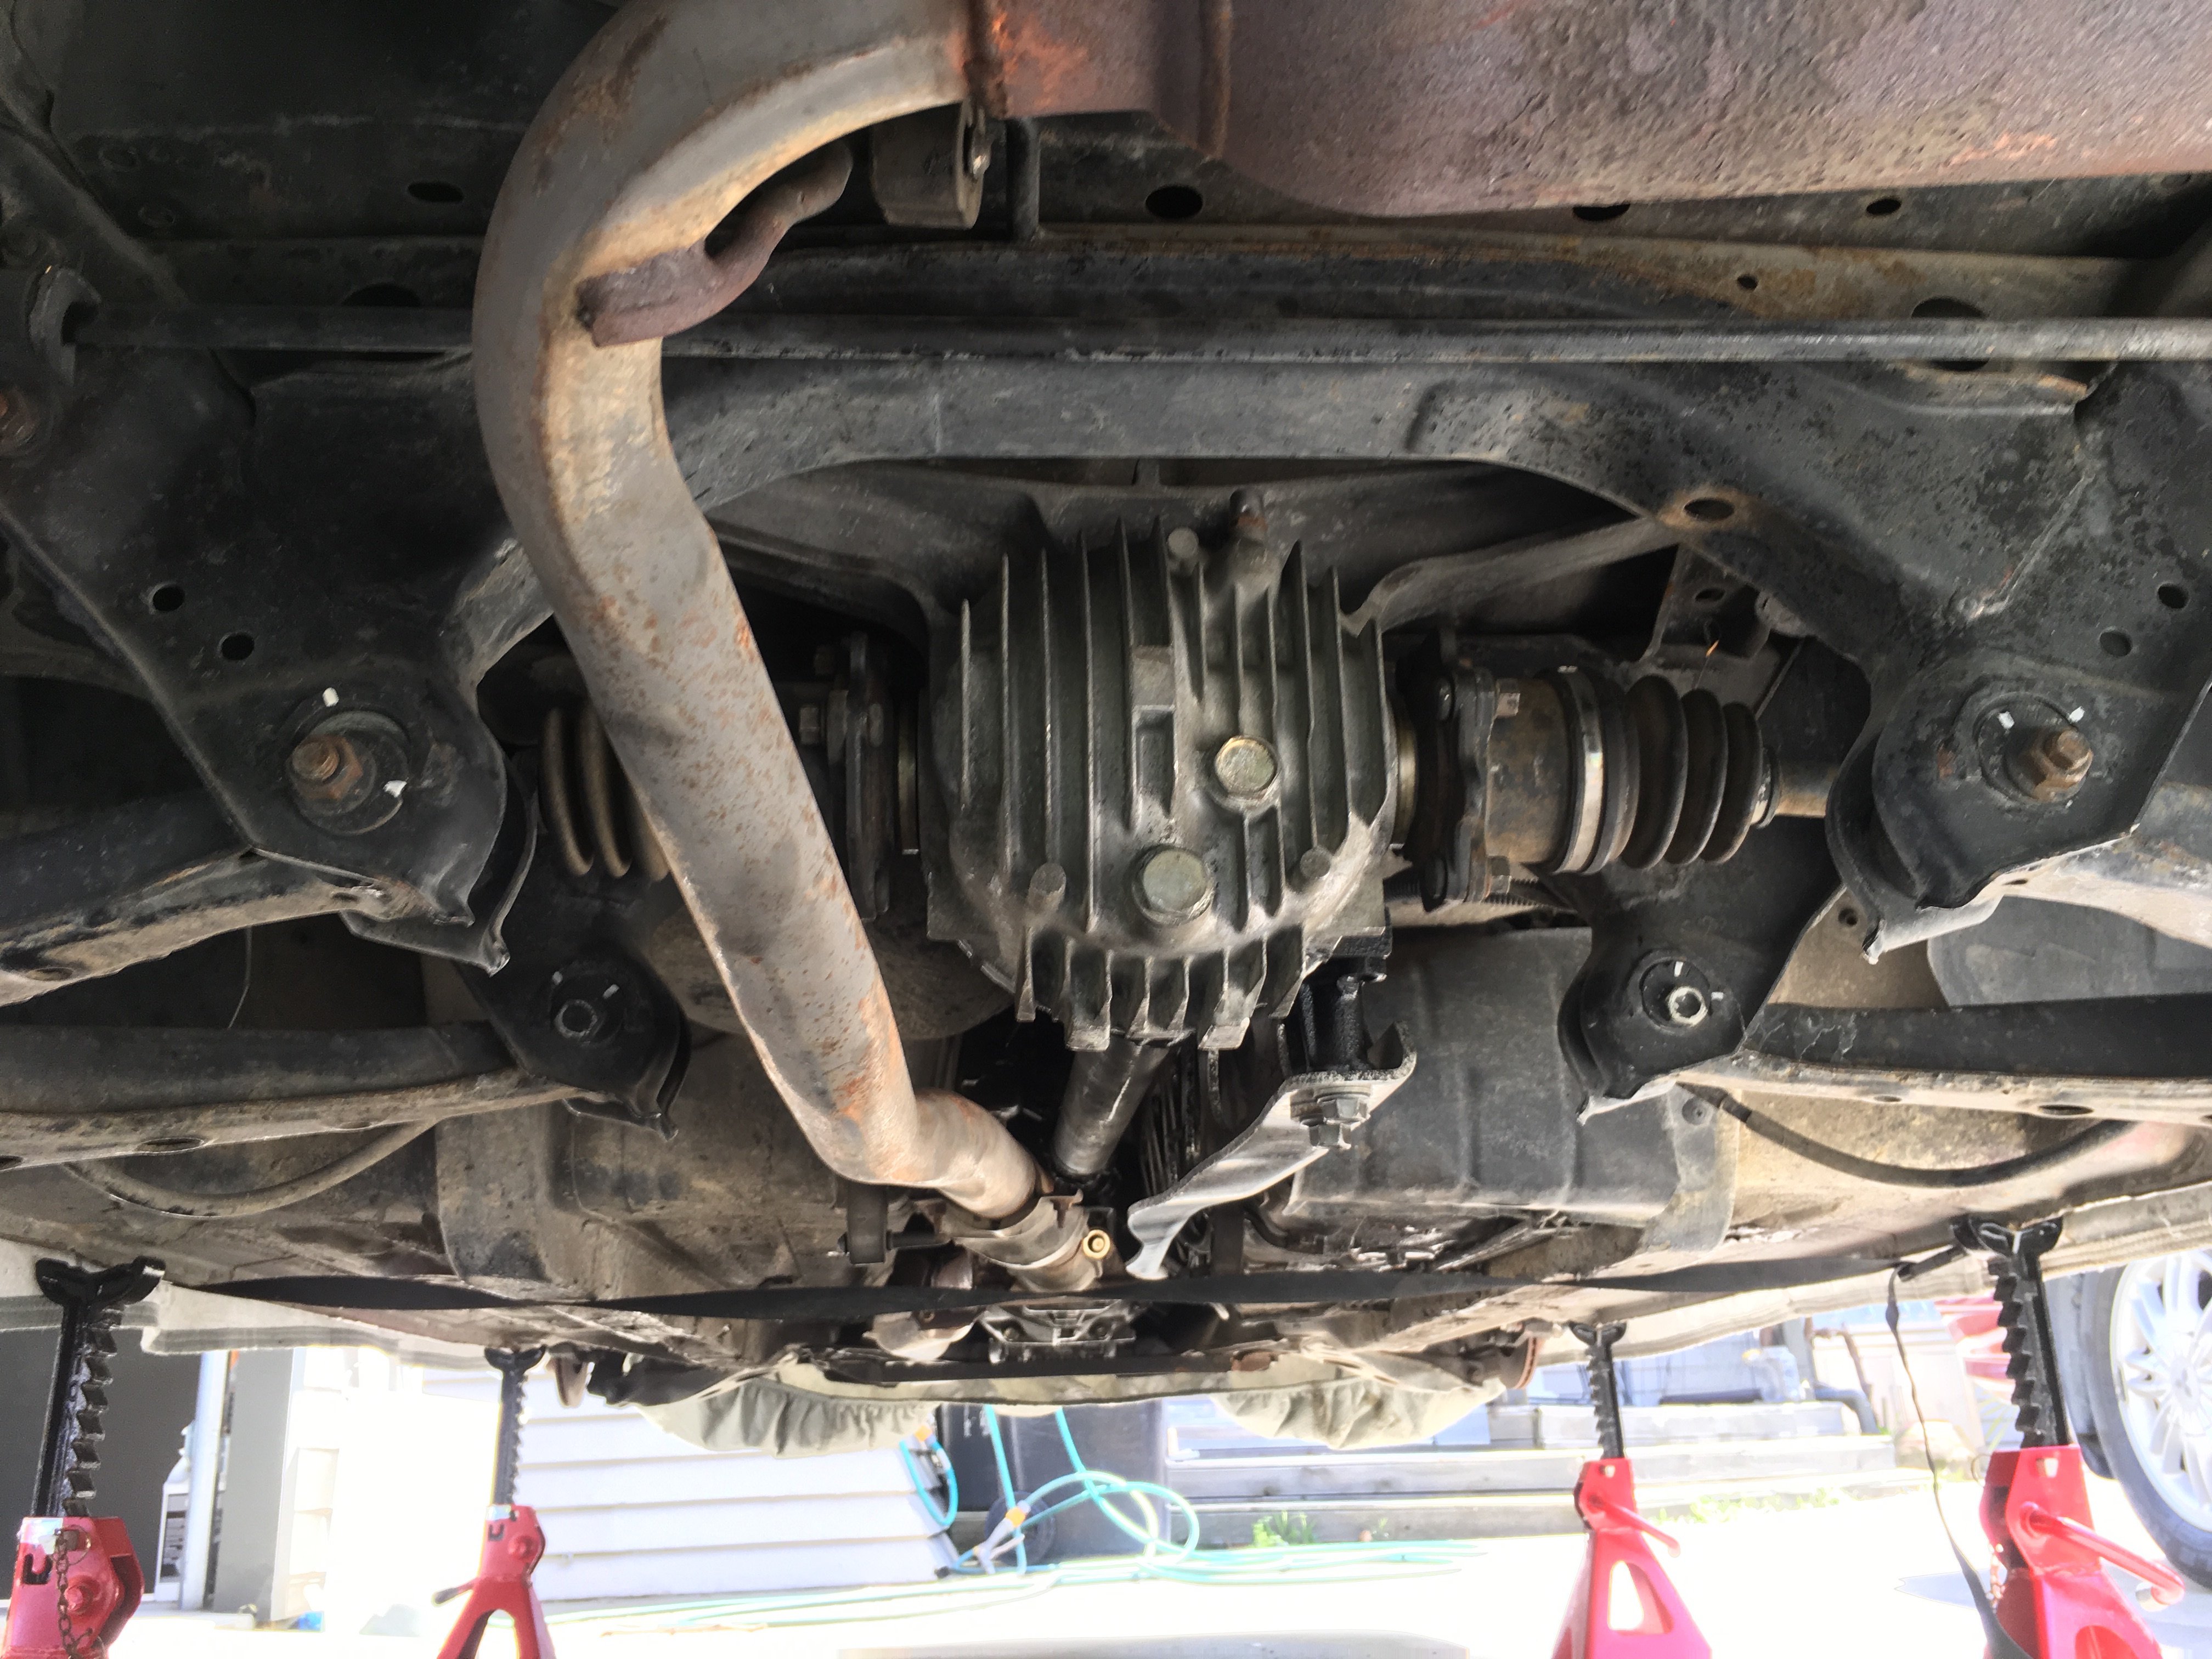
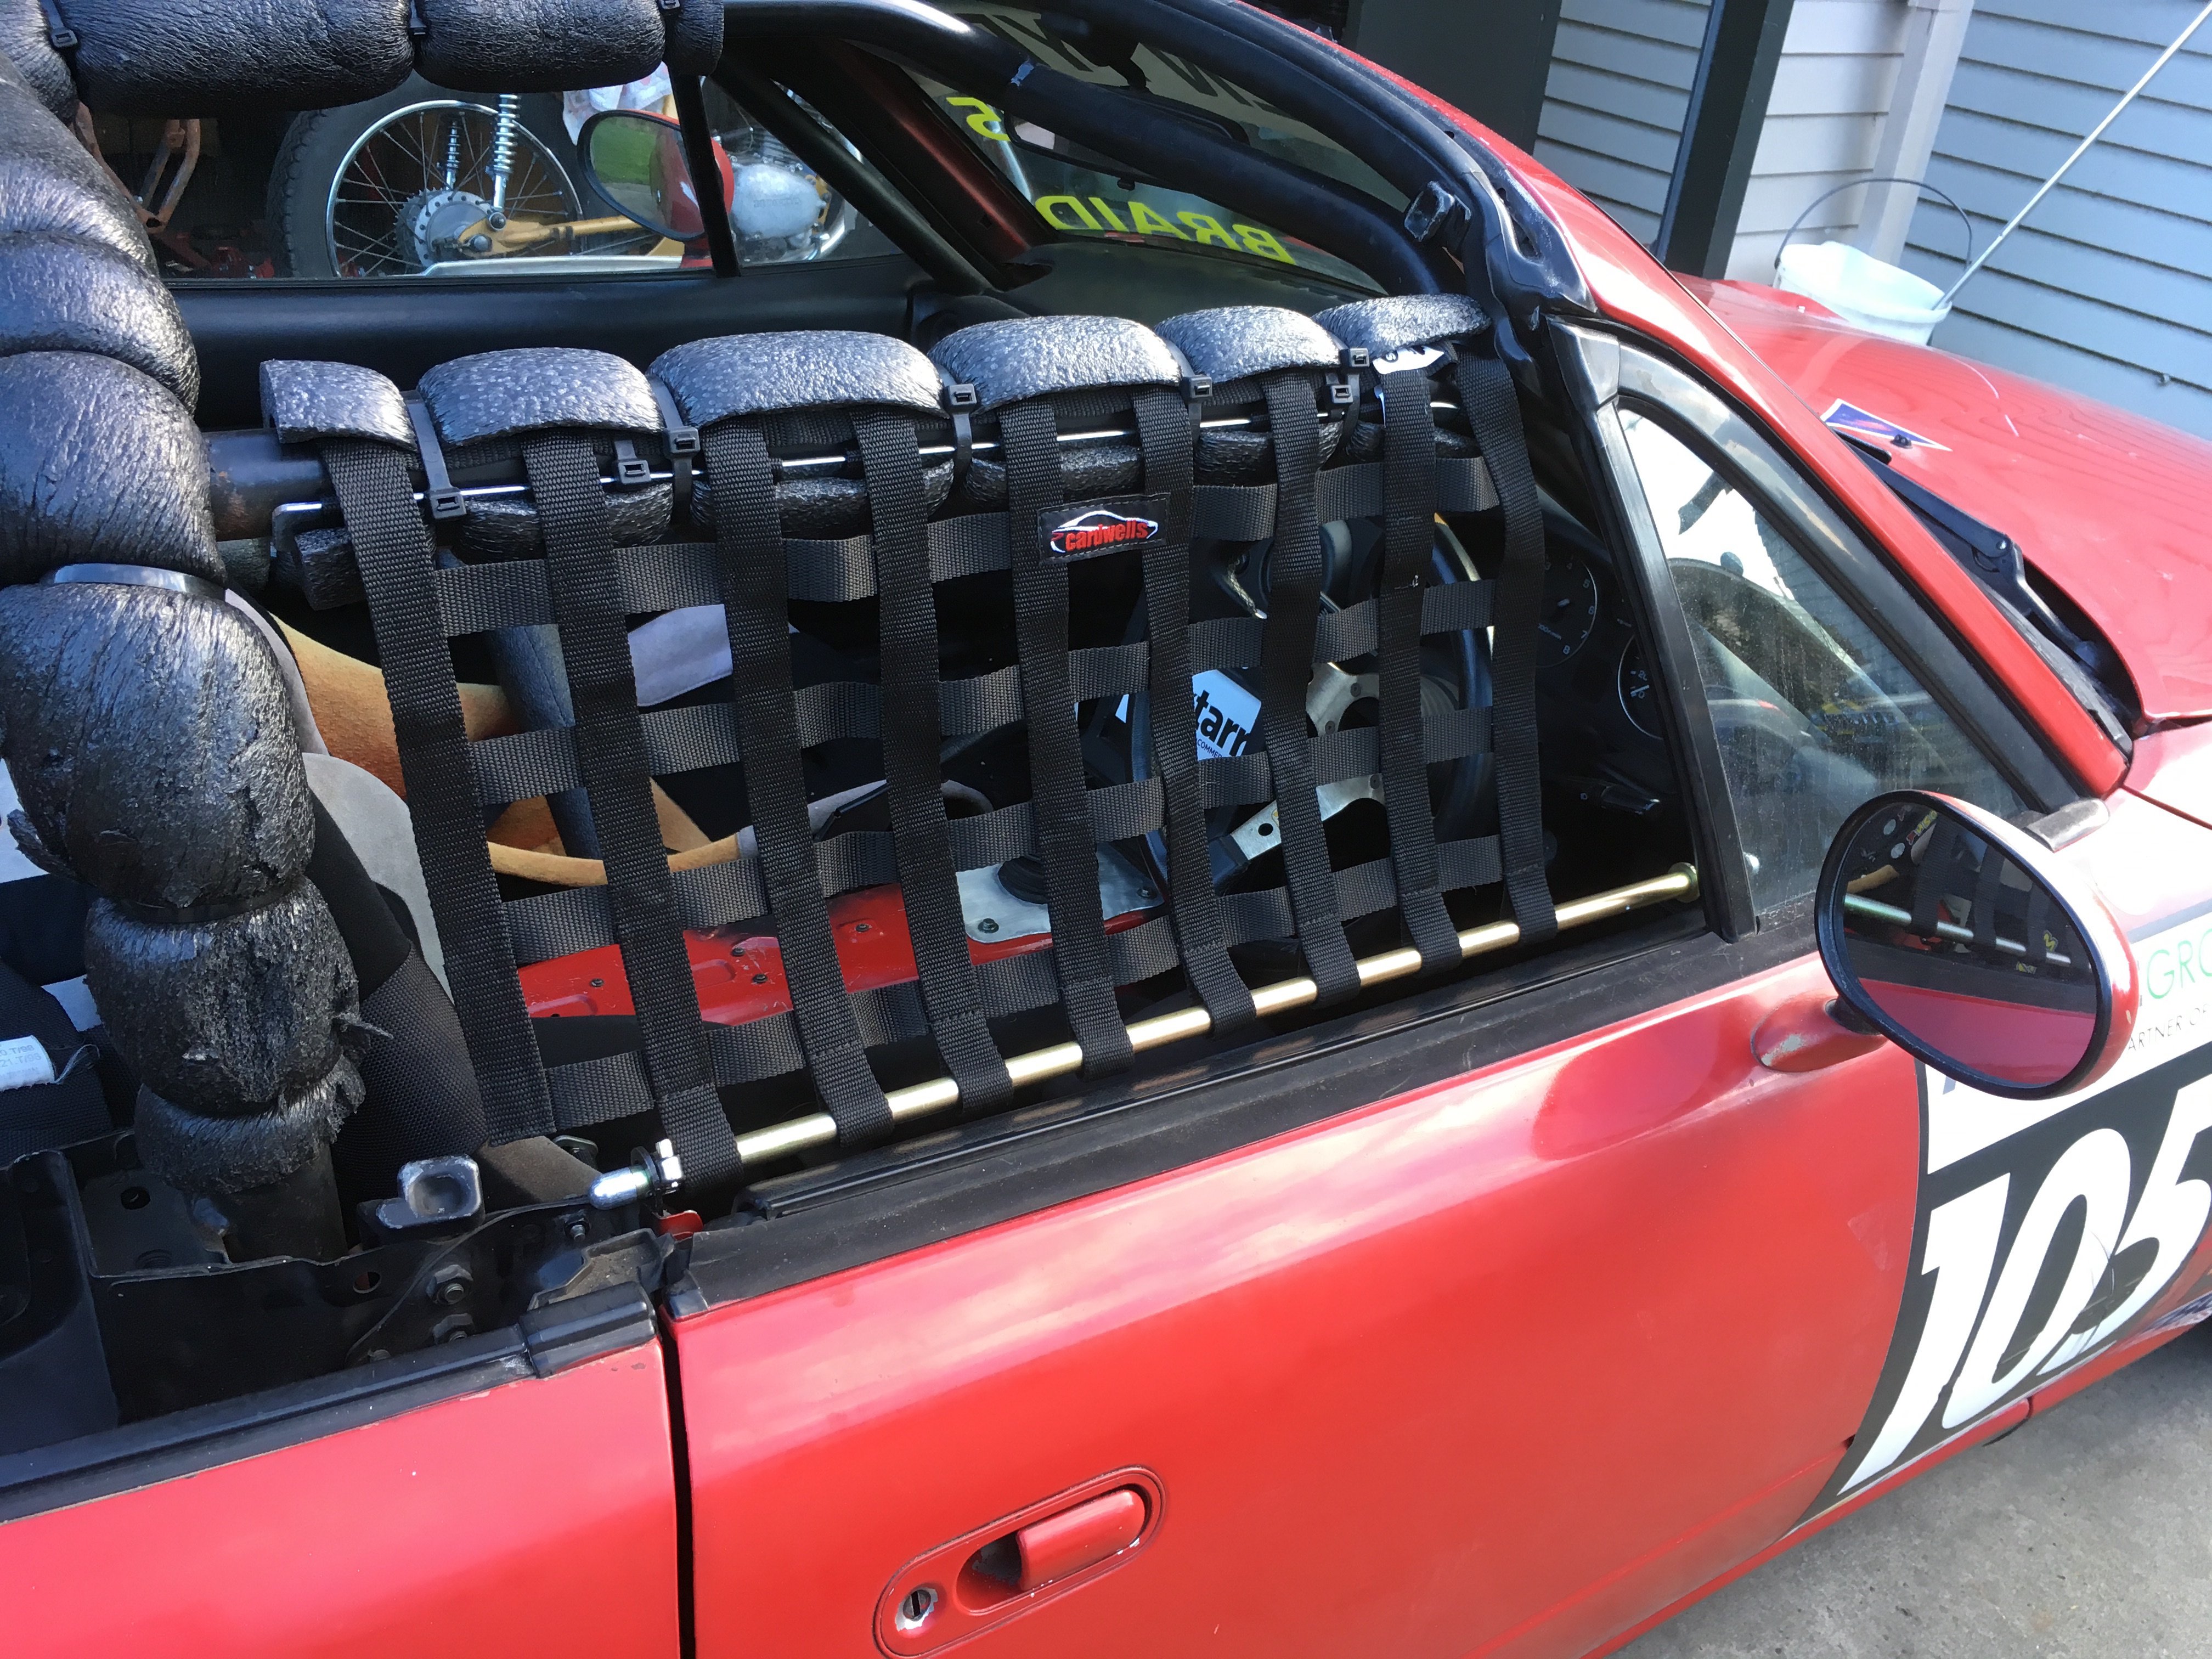
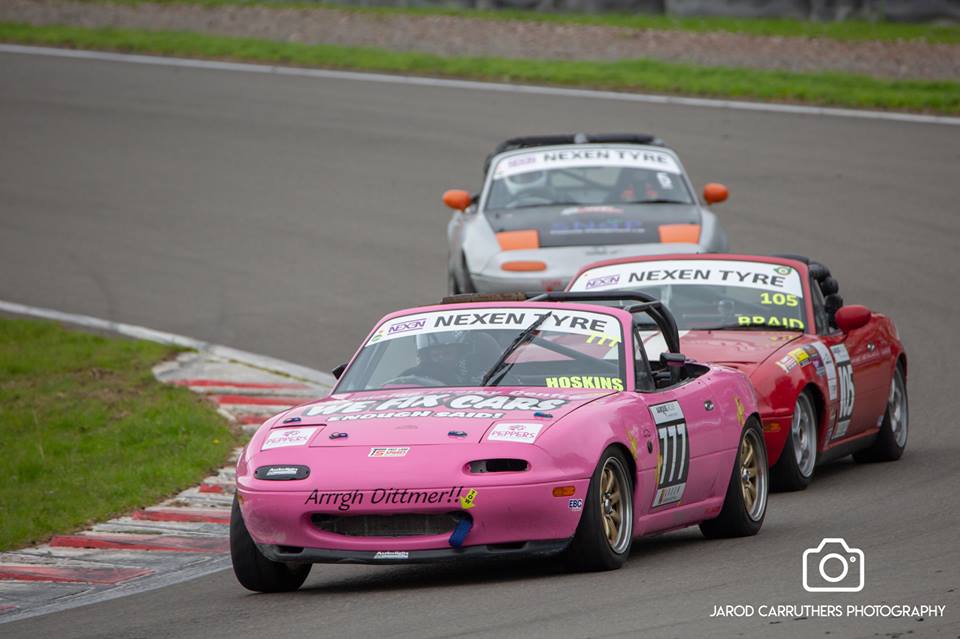
I took this car out for a race weekend back in September and had a goal in mind of winning an MX5 race. The car was quick and I managed to put it qualify in P2 for the first race. Bryce managed to get a good jump from the start and went from 3rd to 1st during the first lap. He pulled a bit of a gap, so I stuck my head down and chipped away at him for a few laps. The last couple of laps were good - I managed to get ahead of him and we were battling right up to the last corner. We crossed the line side-by-side and he won by a nose. Race 2 is reverse grid and it was busy as always! I got caught behind a slower car at the start and had to catch the other fast guys through traffic. Bryce and Matt pulled ahead and were battling hard all the way until the last corner.... When Matt overcooked it a bit, caught the grass on the inside and ended up spearing off the outside of the track into the tyres! This promoted be to another 2nd place finish. For race 3 I was set to start in P2 again and it was my last chance to get a win for the weekend. Unfortunately the car didn't make it to the start line because the diff let go! This was the original diff and we'd never opened it up. So it had lived a full life on the road (140,000ks or so) and has had 10 years of track abuse before letting go. It was a bit disappointing not to compete in the last race, but the weekend was still good fun! I whipped the diff out the next day and Dad pulled it apart. Yep, she's chooched! It's now been rebuilt by the local gearbox shop along with a solid spacer kit to get rid of the crush tube. I think the crush tube had squashed after 10 years of limiter launches . Oh yeah, we also fitted a window net to comply with the Mazda Racing Series rules for our summer racing:
6 points
-
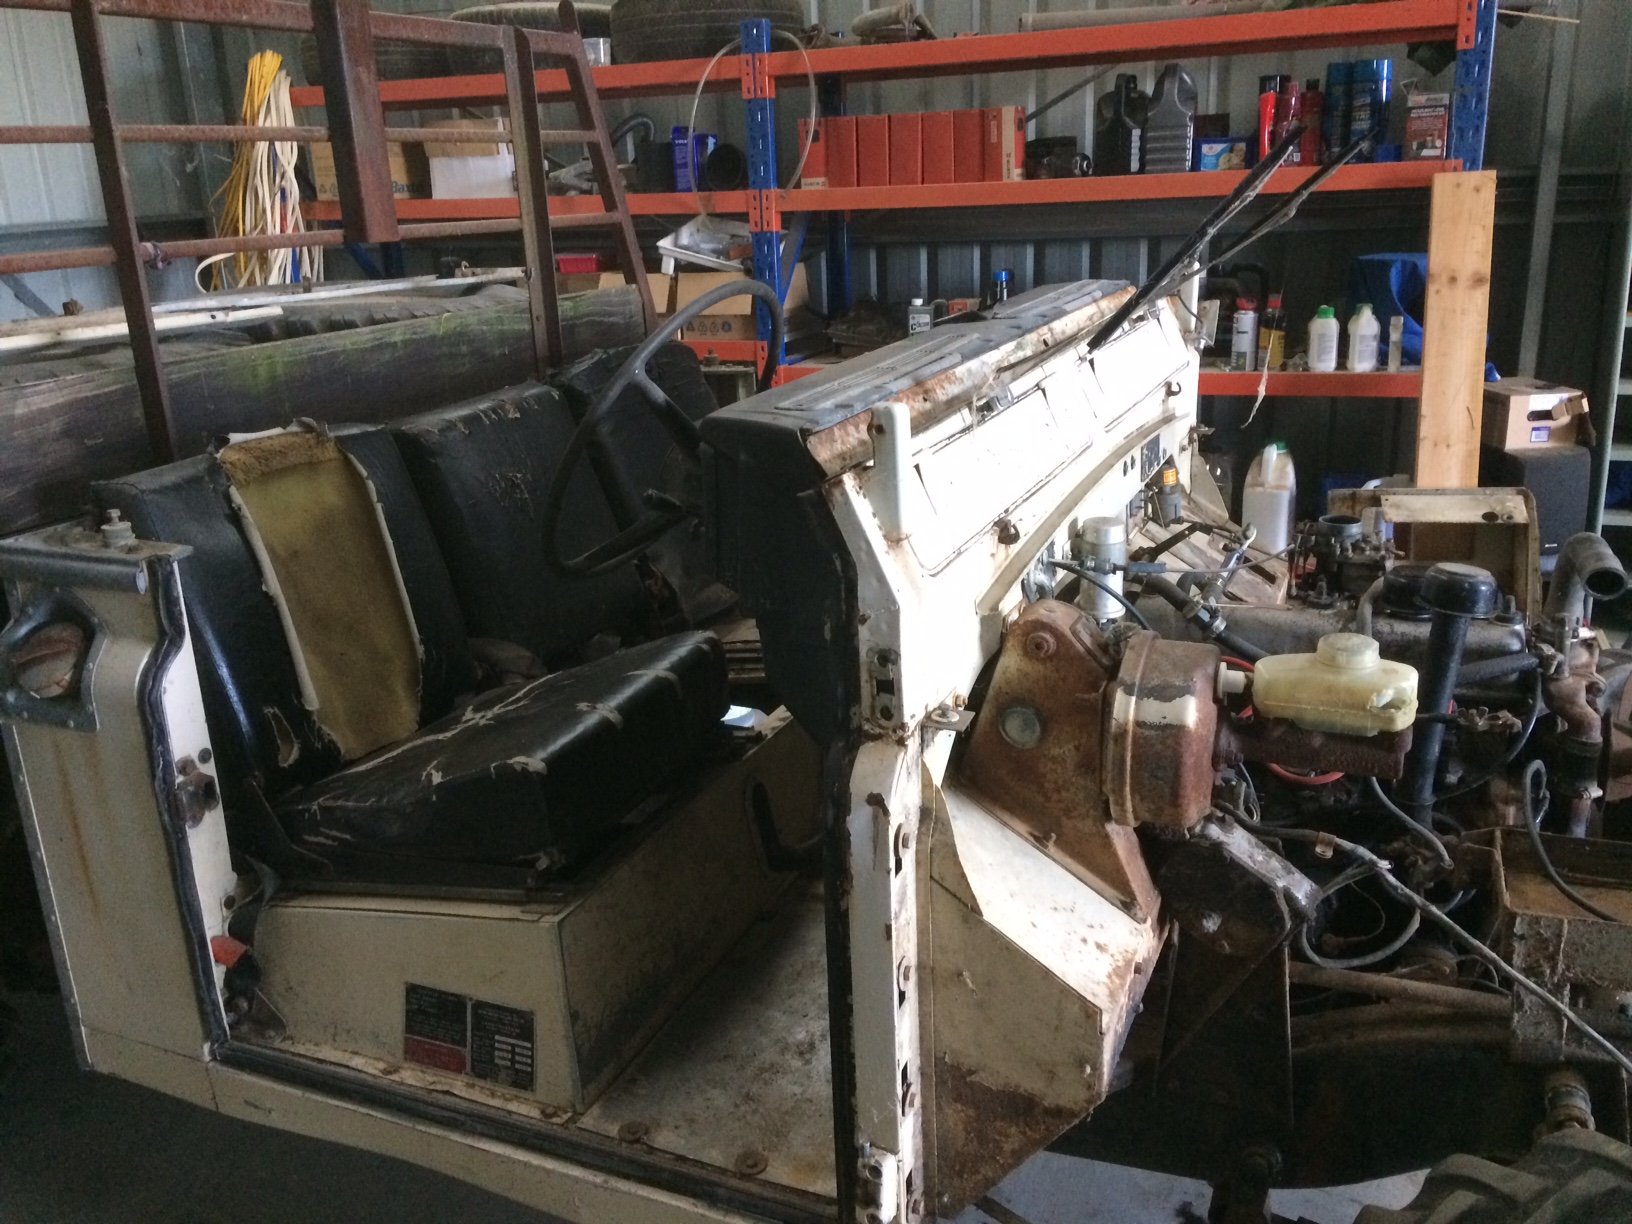
Another semi productive day in the shed. As well as replacing front wheel bearings on the ride-on and cutting the grass, I have managed to pull some more bits off the Landy. Pretty simple stuff really. A couple of the hinge screws wouldn’t budge so I just smacked the hinge pins out. The rest of the hinge screws came out very easily. The roof bolts are also a doddle, and the whole thing is very light once you break the seal. The windscreen then comes off very easily. Many archeological discoveries were made too. A pocket knife, numerous ancient, live .22 rounds and bits of Nana’s finest china. Next was the rear cab panel which also didn’t put up much of a fight. I might do the seat box next. I should get one of the kids to lie under the truck and hold the 7/16ths spanner on the nuts while I go to town with the impact driver and socket. Other observations: the driver’s door is pretty wrecked. It needs a new door top and the frame is also rusty and has some large structural cracks in it. Passenger door is fixable. The bulkhead will need some patches and new footwell panels. It’s going to be a big job...
5 points
-
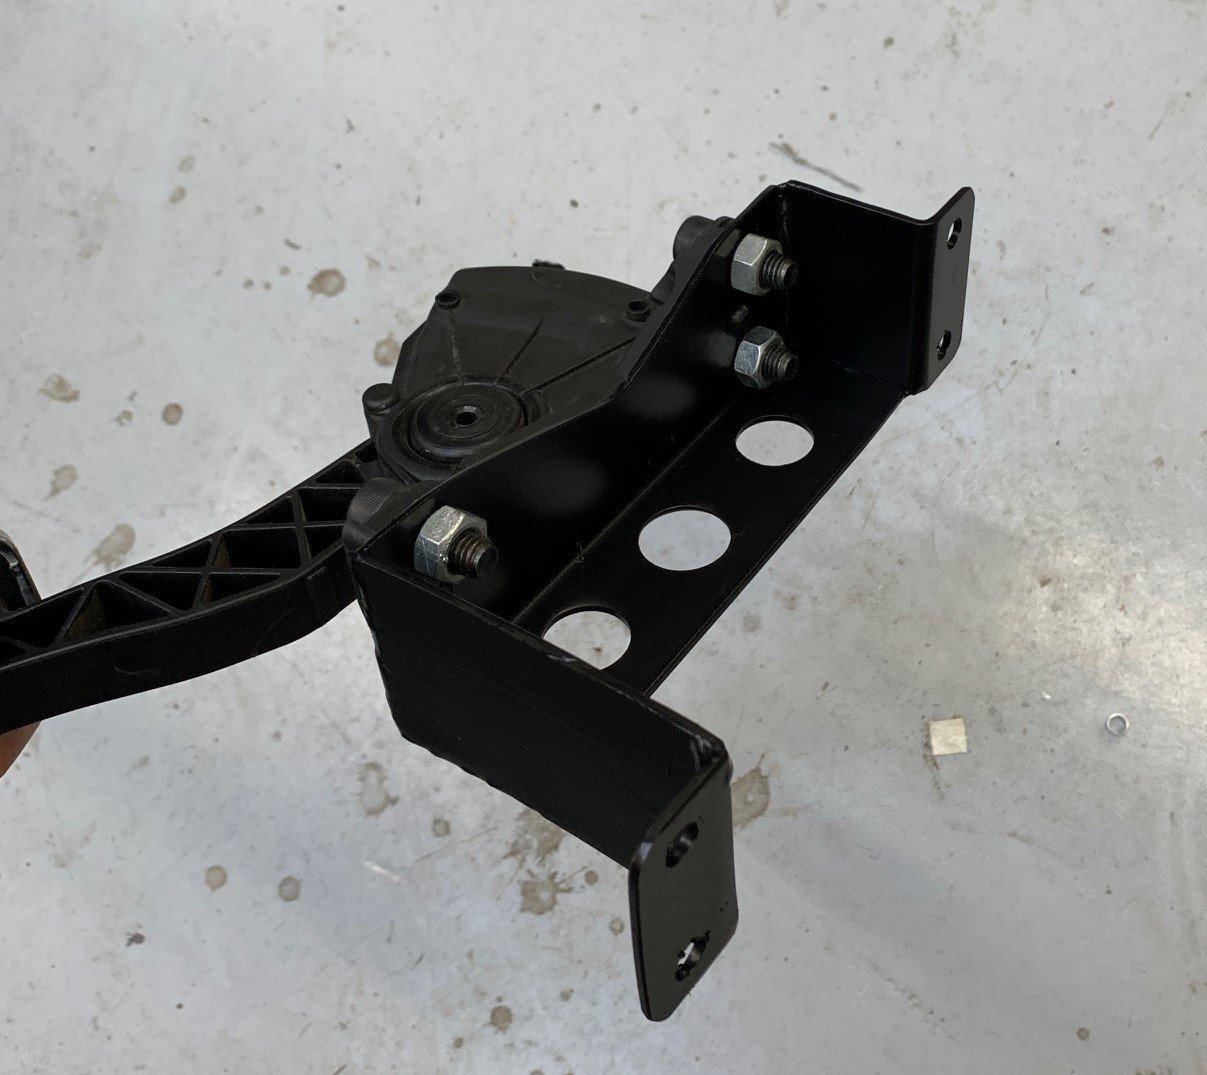
Trying to find things to do that don't require new bits. Lockdown and all. Thought I'd get stuck into the go pedal. The LS I'm using has an E-throttle, where the bmw setup used the other kind of wires. The BMW one also hinged off the floor (I forget name for this style) but the commodore one is normal. I actually really liked the BMW one and would have kept it and butchered the commy pedal and gutted it, if only it wasn't plastic. So instead, I pulled up carpet ripped out some fire damaged foam, cleared some space, and in a strange turn of events the BMW firewall is flat where i need to mount. The pedal needed spacing out from firewall quite a lot which meant getting my binky on and making a bracket. Pretty limited on available supplies so found some galv RHS to cut up and got to work. Tacked up what I thought would work and then did some trial fitting. Seemed to be ok but was too wide and hit the +ve cable coming from battery (runs along under/beside the pedal) so trimmed it down quite a bit. When I was happy, whipped out the welder and smoked out the garage. De-spatter and a lick of paint and it's not actually too yuck. I put in some speed holes because I didn't want it to look like its made from RHS. I don't have access to dimple kit so they can stay as normal holes. Needs to move over a bit but I'm just hanging it off an old hole in the firewall for photo shoot. That hole happens to be the old throttle cable hole, which makes it feel right! Will probably weld a threaded plate onto firewall for lower bolts, and just have captive nuts for the upper ones. I think lower holes disappear into a cavity somewhere. Added bonus is that the OG throttle stop/button thing is in roughly the right place, so that can be the NOS switch one day...
5 points
-
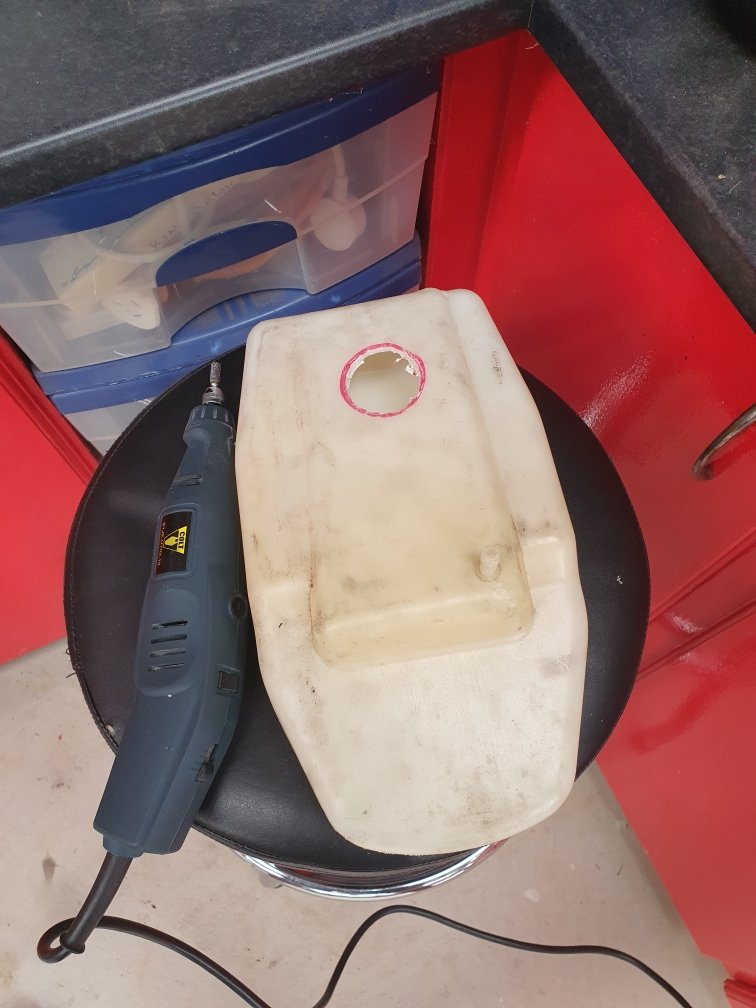
DIY air box, so CV carburetor can run in a slight vacuum. Yes, yes that is a fuel tank off a kids pocket bike...but fuck, what a difference it makes! I'm being a pussy, as I'm starting to totally destroy my lawn. It's a lot bumpier than it looks, gets pretty sketchy in a few places, so not wanting to add to the health service burden, I'm taking it easy to remain unharmed.
5 points
-
I have this coffee mug from 1944. It is the only one I use due to its perfection of size, finish and history. Like a twat I dropped in in the sink and it has developed a crack; So today I decided to make a double skinned stainless one that will be difficult to break; I started with so 80mm pipe, put it in the lathe and applied some heat, this allowed me to flare the top edge a bit; Then I got so into it I forgot to take anymore pics like a legend, so this is the finished result. It appears to work ok. I should probably find some better pipe sizes and do it again later but better. The outer skin I had to make from some sheet and the butt joint is skanky. But it'll do for now... Edit; coffee doesn't leak out and it stays warm. It also weighs really quite a lot.5 points
-
The funny thing is I was really grumpy when I made this as the perfectionist in me wanted to do a good job, but the reality is the kids couldn't give a shit and have been playing with it way more than full effort stuff I've made4 points
-
I like that the original DABUZZ was the silhouette used for the original oldschool.co.nz logo.4 points
-
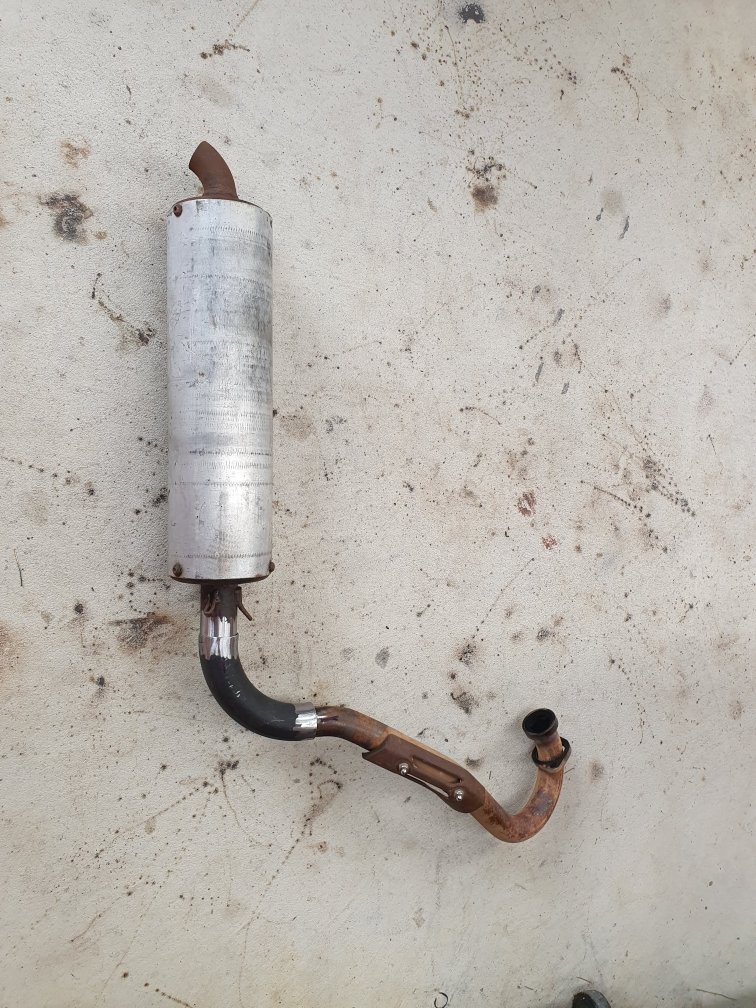
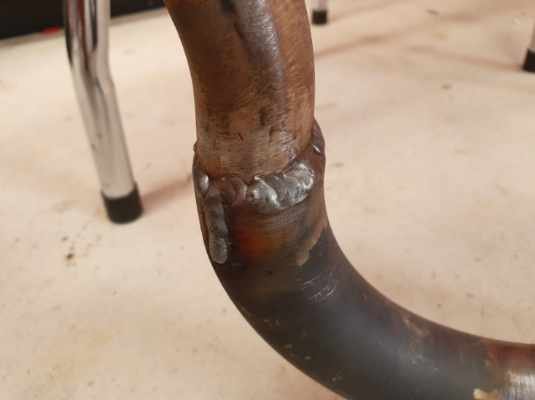
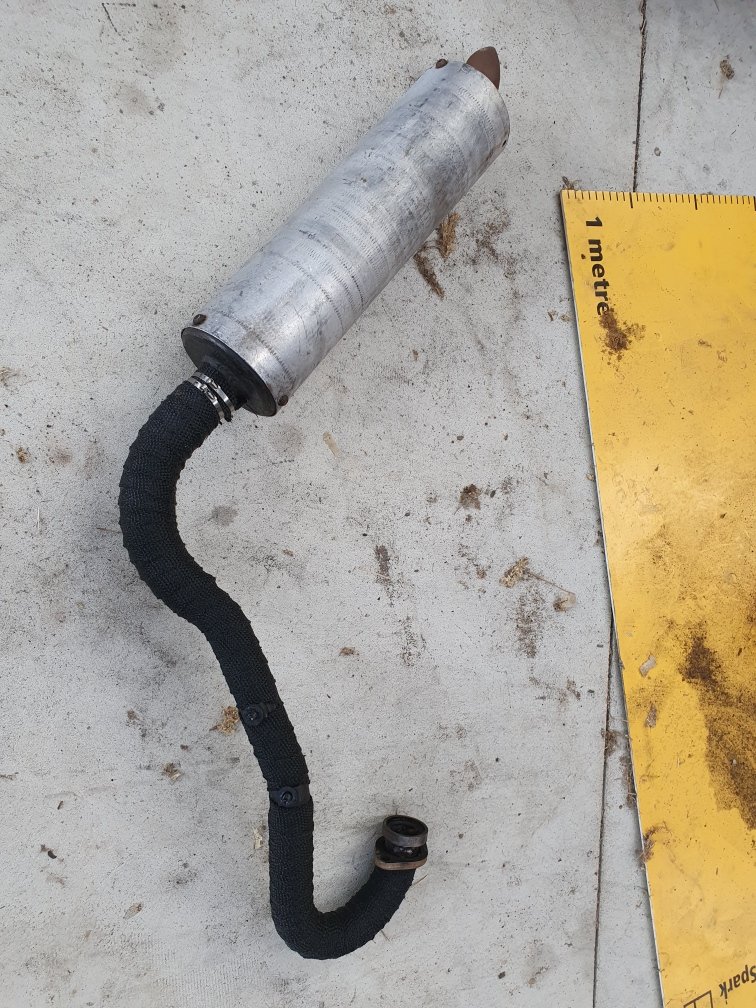
i put the front bumper back together and put it back on and it looks ace, i did however forget to take a picture so yea.... anywho i did some other stuff. the rear muffler was too big, hit the ground a lot and made the car way to quiet so i fitted a smaller one. it doesn't hit the ground and the car is louder which is good. old muffler with custom flat bottom, 2020-04-06_05-10-26 by sheepers, on Flickr new muffler. 2020-04-06_05-10-17 by sheepers, on Flickr so the next thing i wanted to do was make new bits for the tops of the rear bumper. the ones i had were fucked so i made some new ones out of 8mm aluminium plate. ill let the photos do the talking but some points to note, the only file i used for this whole process is the one pictured which is called a dreadnought file if you've never seen one before. there is no better file for working with aluminium, you can get a great surface finish with these files if you know how to use them and they will remove heaps of material very fast too. things they dont like however include filing steel, that will fuck them. the other thing is that i used my 60mm DA sander/polisher to go from file finish to polished because DA sanders are the best thing in the world, get some. 2020-04-06_05-10-09 by sheepers, on Flickr 2020-04-06_05-10-00 by sheepers, on Flickr 2020-04-06_05-09-29 by sheepers, on Flickr 2020-04-06_05-09-46 by sheepers, on Flickr 2020-04-06_05-09-38 by sheepers, on Flickr 2020-04-06_05-09-20 by sheepers, on Flickr 2020-04-06_05-09-06 by sheepers, on Flickr 2020-04-06_05-08-56 by sheepers, on Flickr 2020-04-06_05-08-46 by sheepers, on Flickr 2020-04-06_05-08-35 by sheepers, on Flickr 2020-04-06_05-08-25 by sheepers, on Flickr 2020-04-06_05-08-15 by sheepers, on Flickr 2020-04-06_05-08-06 by sheepers, on Flickr 2020-04-06_05-07-48 by sheepers, on Flickr 2020-04-06_05-07-39 by sheepers, on Flickr 2020-04-06_05-07-31 by sheepers, on Flickr 2020-04-06_05-07-22 by sheepers, on Flickr 2020-04-06_05-07-12 by sheepers, on Flickr 2020-04-06_05-06-55 by sheepers, on Flickr 2020-04-06_05-06-45 by sheepers, on Flickr4 points
-
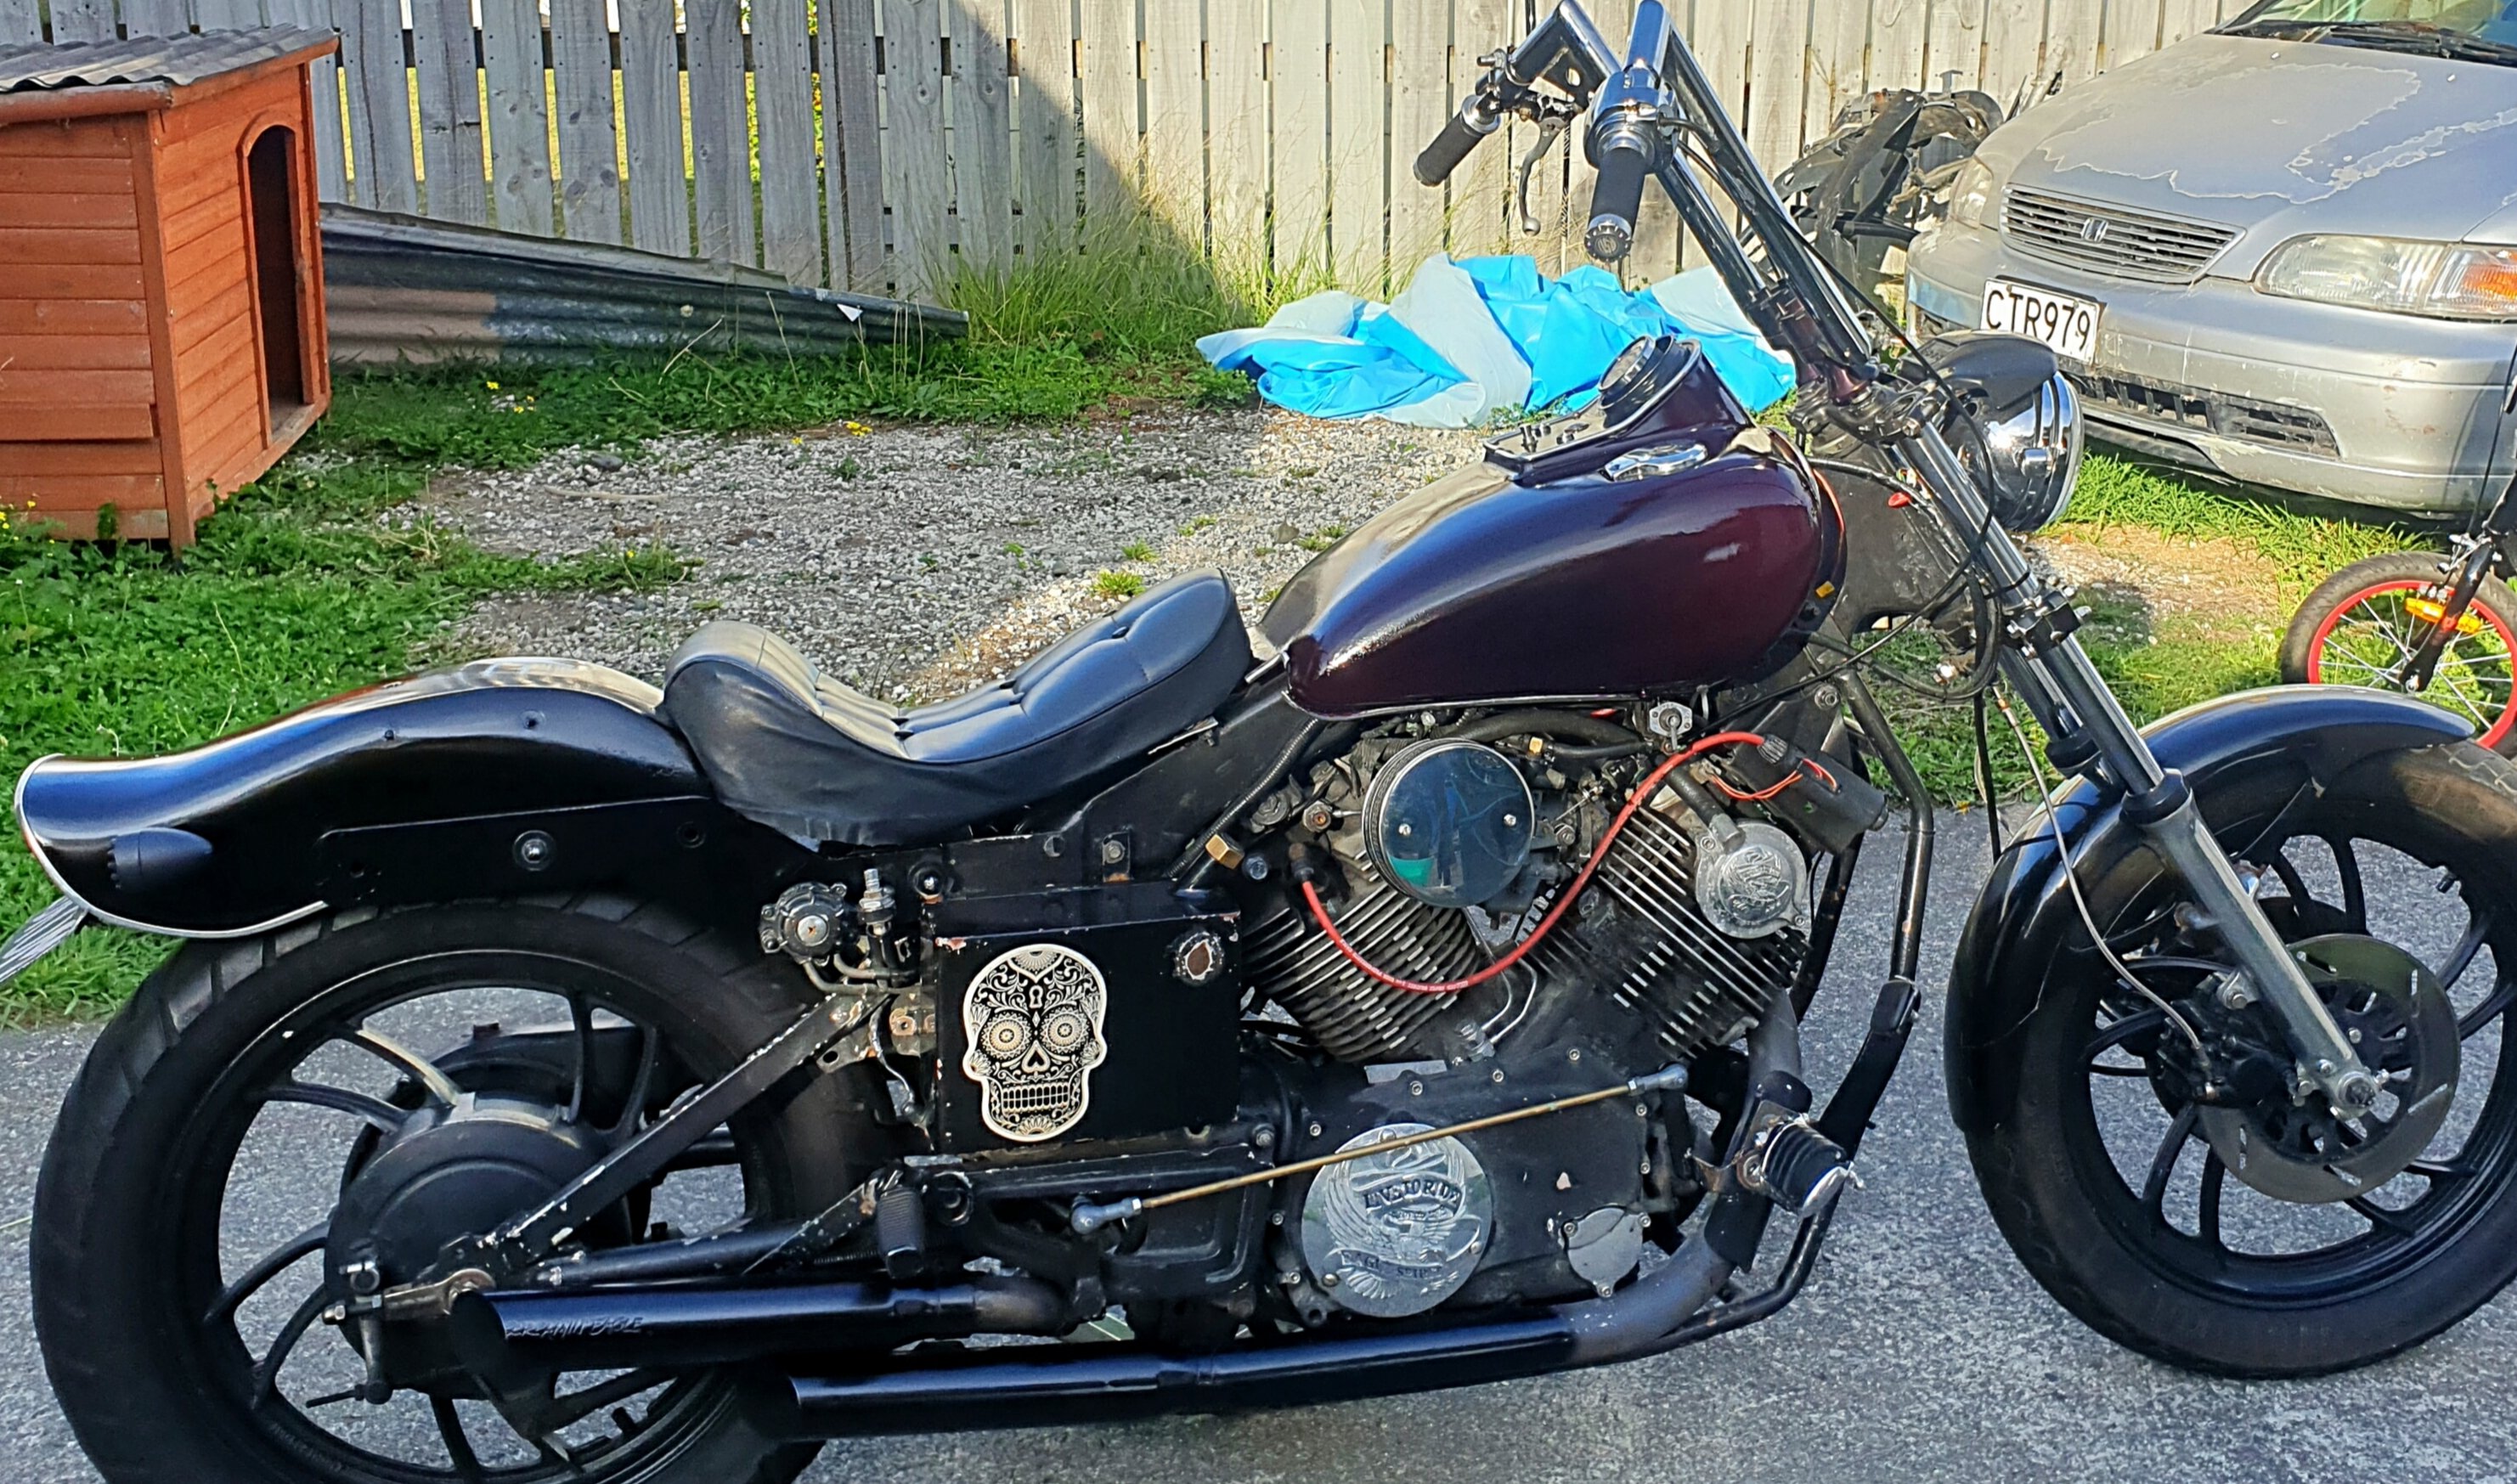
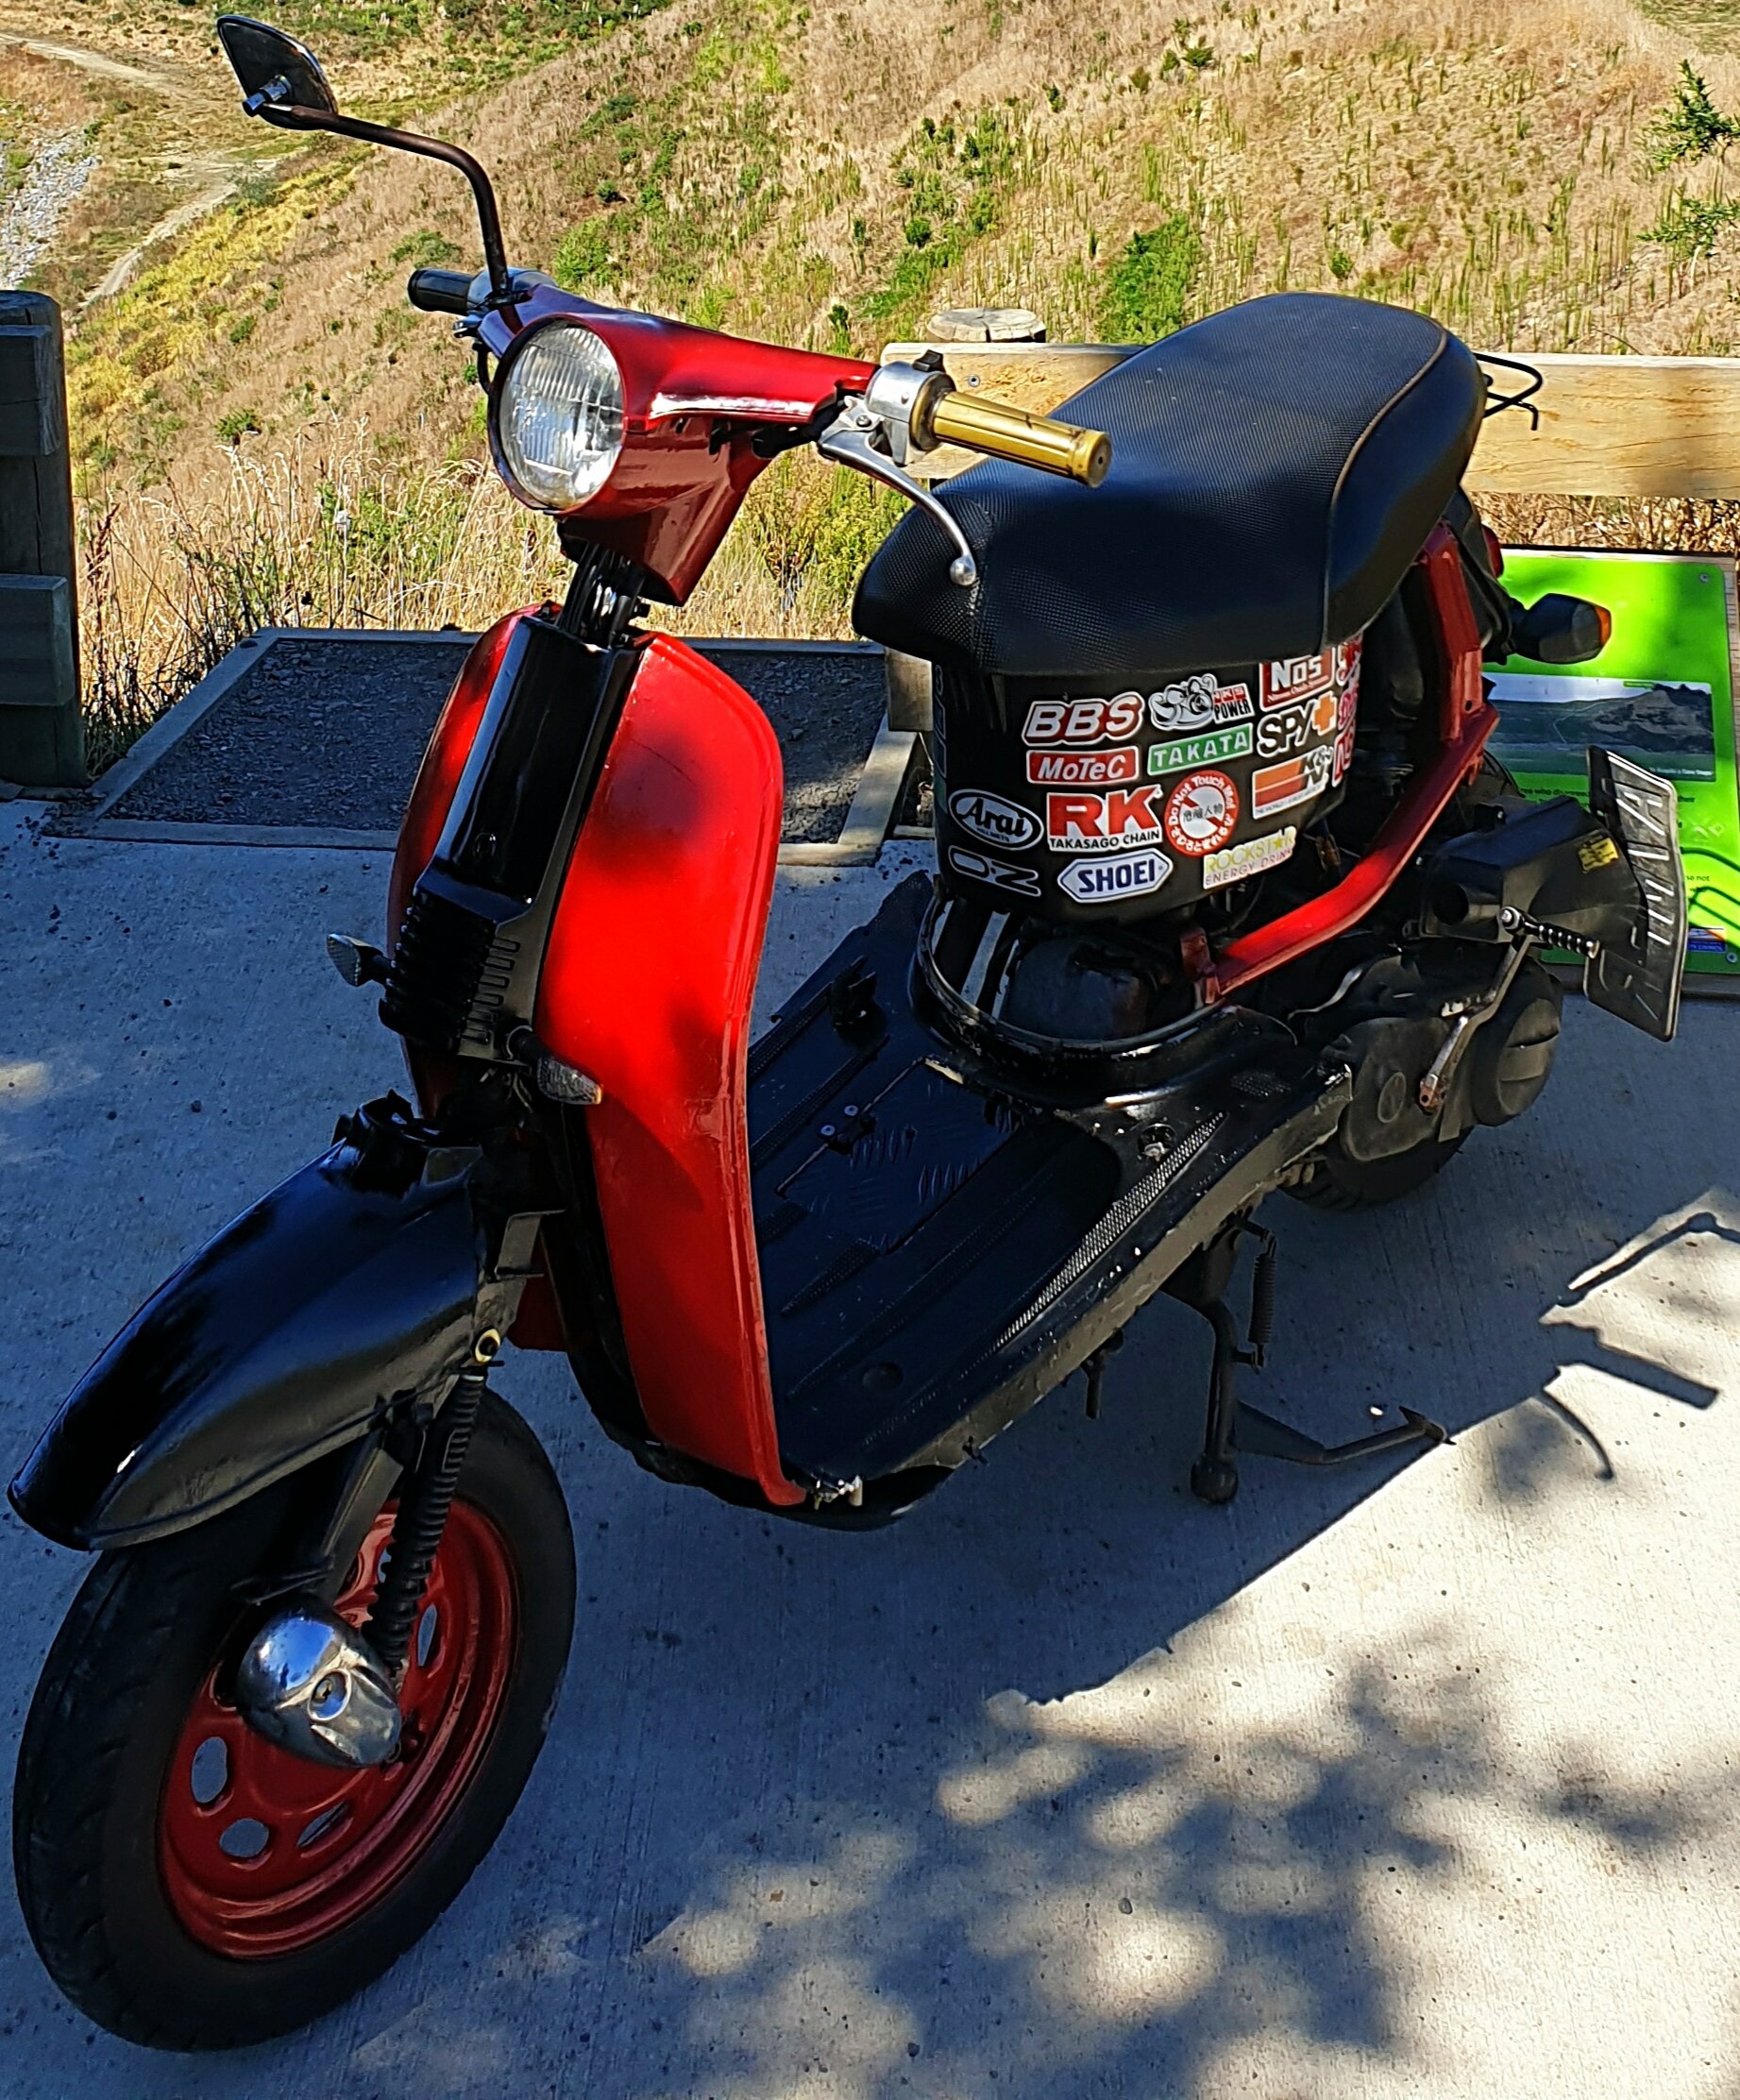
So got bord and painted the tank and rear fender and exhausts. Havnt put on the sisy bar as of yet want too make it better. But likening it without it hmhm. After all the tidying up a couple rides. And the startermotor craped out hahha oh well in lockdown anyway..
3 points
-
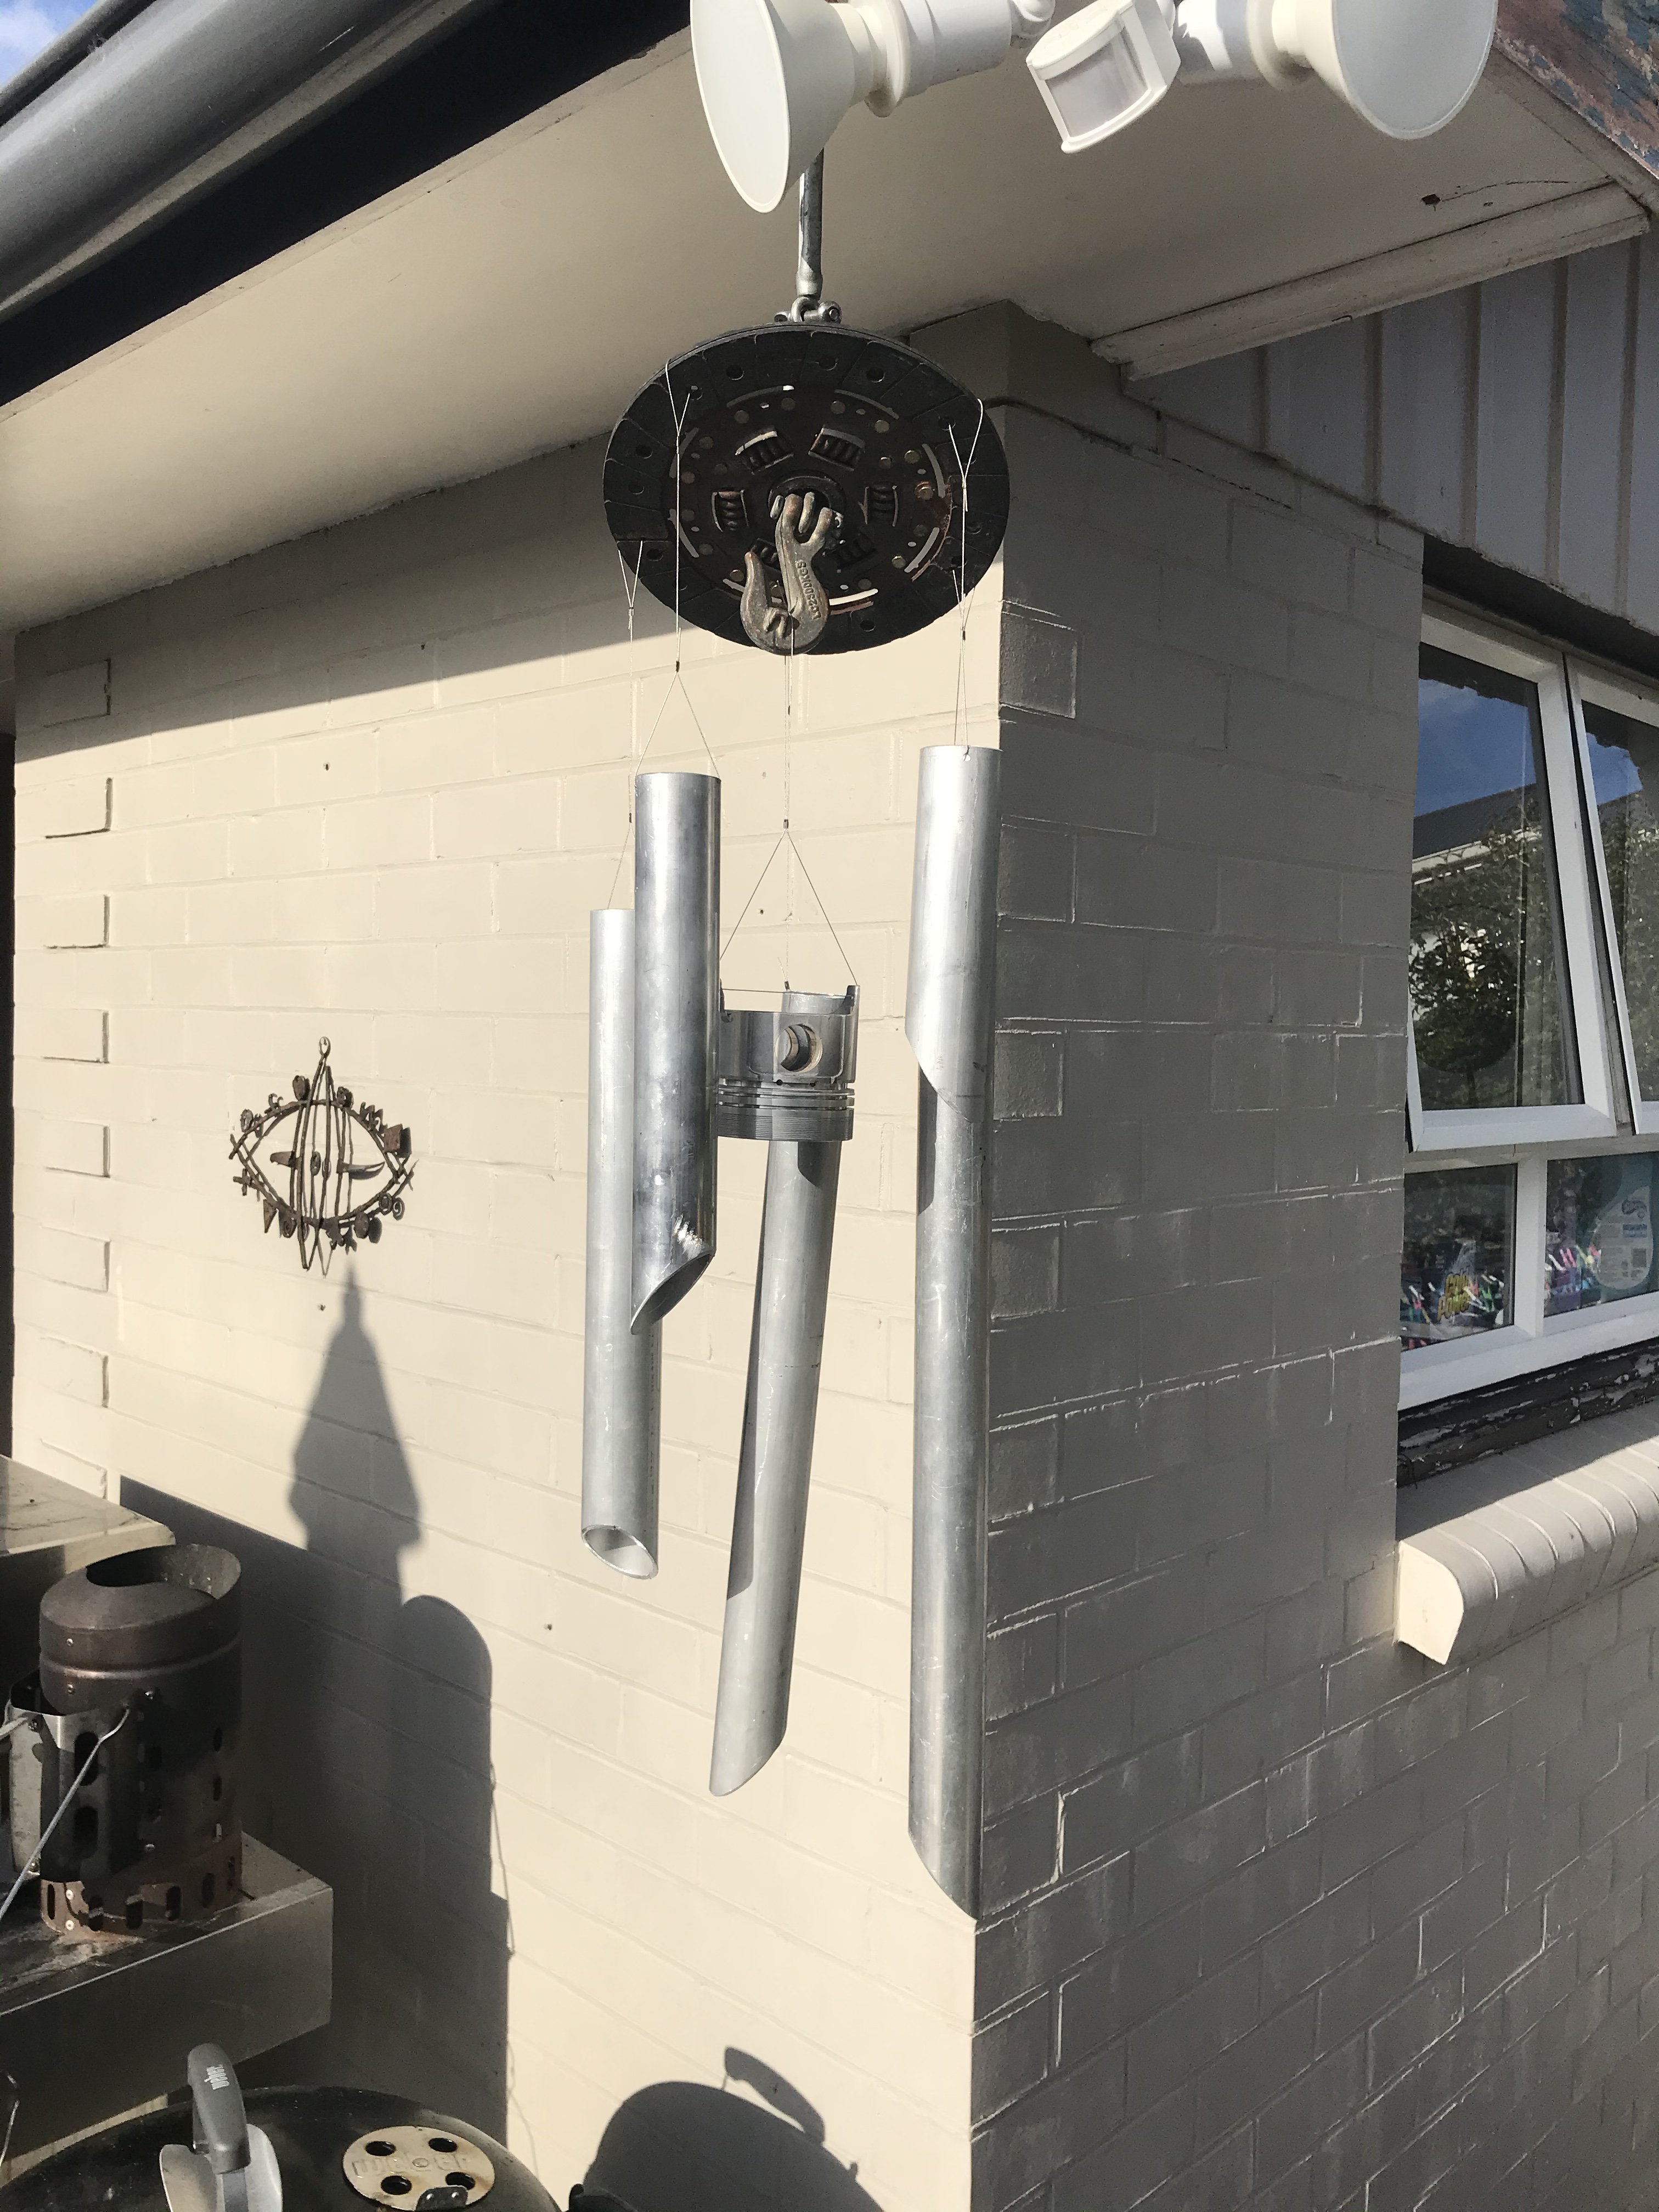
Also made a wind chime to annoy the missus. made from an old clutch disk , flutes are are from and old intake manifold project and the bell knocky thing in the middle is a yanmar digger piston . I will balance it a bit better later.
3 points
-
Well I must say I do love the new Recaro seats. They are so comfy and hold you in place soooo much better in the corners. I had still been using it heaps through summer. Got a shot of it next to an I8. Huge cars!!!... What else? We took the Imp over to Blenheim for the big classic car show they have there. Its getting bigger every year and I have kept missing it each time. Not this time though! The weather was a perfect Med like blue sky day and the cars that turned up for the show were a really nice mix of everything. My parents came along too. My dad is 87 and not too fast on his feet having pretty bad lungs now. I was worried he would struggle but I kid you not- he seemed to perk up more every minute and flitted about all the old cars really quite animated. It was great to see and I'm so happy he made it along. Mum loved it too and we met some great people. Pics.. The show.. Dad pondering if he could have fitted a V10 into his Moris traveller he once had, or maybe the 120y wagon they had... Hannah's favourite car of the show (and her dream car)... Some sweet old boats there... Me next to dad, holding a 8 month old Kelpie puppy(my favourite brand of dog, we used to have one).. The Imp (wtf the Toyota Pius was doing there we don't know..)... There was actually a car there that made the Imp look huge... The Imp was popular, being bright blue and the only one there. Lots of people checking it out all morning. I printed off some photos of the restoration onto a4 sheets and stuck them in a plastic binder with a quick note for each. People I spotted seemed to enjoy the read and I imagine it made for more admiration for the little car that was rescued from a field. The trip to and from Blenheim was fun and uneventful. The Datsun engine impressed again with its thriftyness by managing 44.8mpg and that was with some spirited motoring too Drove some nice roads near my old home town. Very very dry over there and sadly they still have not had much rain. But fantastic grape season if that's your thing. Once back home I decided to put the car up on the hoist and deal to a couple of jobs I have been putting off. Those of you with a good memory may well remember the state of the ring gear. It was worn badly in two locations, 180 degrees apart. This meant that it had a 2 in 4 chance of stopping roughly near one of those spots. It seems that sods law dictated a sliding scale of when it would stop and this scale was linked to how many people are around when I would go to start the engine. Worse if those people were probably of the type that think 'oh that a nice old car but they are very unreliable'. When the time was right the starter would ignore my want for turning over the engine and instead may a horrible loud racket as it wore the ring gear worse. I would have to then sit the car in 4th gear, put my foot out the door and rock the car- so moving the flywheel around just a bit. Then start the car and drive away red faced as the people now watching tut tutted... Never did it do this on our property btw... The other thing was that the rear main seal was leaking badly. Bad enough that the clutch was playing up and I'd have to think carefully about where I was to park the car when going to the country club* for fear of meeting those same people again and only going to reinforce their misguided opinions about old cars. I had the chance to replace the seal when I took the engine out way back at the beginning. But remember who I am - a tight wad who likes to save money and $25 seemed like an awful lot for a seal that 'looked ok' Silly me. So out with the engine then. Made easier by using my special custom made bespoke 'Datsun A12 engine cradle' Here's the worn ring gear. I drilled it and broke it off. Removed the old seal. It was indeed very hard and not very sealy. More like a ceramic ring then a seal.. The oil had coated the clutch disc.. Luckily that cleaned up sweet with a load of brake cleaner and was deemed good to use (please refer to note above about tight wad..) Went to my old workplace, Autofocus in Nelson and used the gas set there to remove the good ring gear from another flywheel that came on the A15 engine I had bought. I then dropped it onto the A12 flywheel... With that done the engine was given a quick clean whilst out and slung back in place. Oh but not before making using the opportunity of an empty engine bay to size up a different engine. That however is secret squirrel and will be announced later in the year The Datsun was all plumbed and wired back up. It started straight away and after bleeding the coolant system I took it for a hoon. Clutch feels great and no horrible starter noise roulette... However..... the bloody speedo gave up and decided that the needle should reside at around 90 mph. It had been getting ever so more optimistic over the last few months and I had read that the springs can weaken. It doesn't affect the odometer which is mechanically linked to the speedo cable, just the speed reading. Now though, having just fixed some other issues my 'unreliable old car' decided to throw another at me. When I returned home from said hoon the needle decided it would resolutely remain at around 60 mph even when the wee car was stationary. So this happened... I'm so glad that I had added plugs to the wiring birds nest that resides behind the instruments because it made removal much quicker and easier. I took the speedo apart and found this... It seems that the sponge sealing which fits between the telltale warning lamps and the speedo face had broken down and crumbled into the speedos magnetic disc area so creating drag. I'm not sure but it was messy in there with lots of friction. Rather then muck about trying to clean it all out I instead pulled the spare speedo head from my stash of Imp parts and fitted that instead. I removed all traces of the old foam, opened my little alladins drawer of various foas and double sided tapes and stuck on some new stuff... This lot will be binned in the future as I fully intend to replace the whole cluster with nicer modern gauges (but with a classic style to them) including moving over to an electronic speedo head. Speedo cables and all their wobbles can leave by the back door thank you please. So since the world has gone a bit weird and we all have extra time I decided that instead of refitting the dash into the car in the poor evening light I would instead do an update. I'll refit it tomorrow. One other job to look at is a rattle from the steering rack. I think I know what it is and I have already stripped and inspected a good spare that I might swap in. Other than that I'll just get back to using the Imp, obviously only for shopping purposes at this point in time. I now have plenty of other tinkering jobs to do and hopefully in the next update there will be some very exciting news * I don't actually belong to a country club. But I do like a spot of lawn bowls....3 points
-
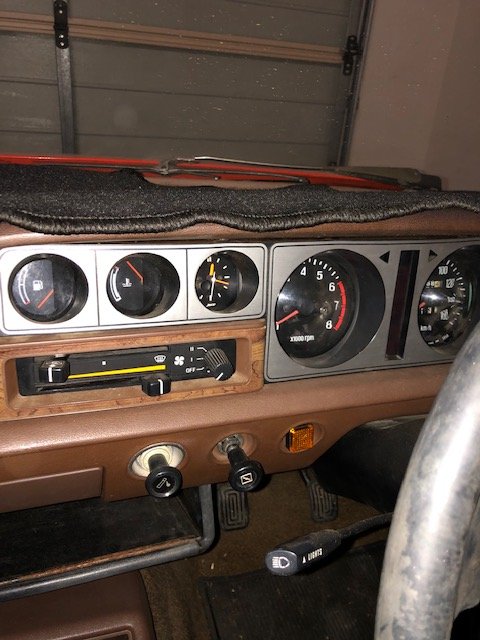
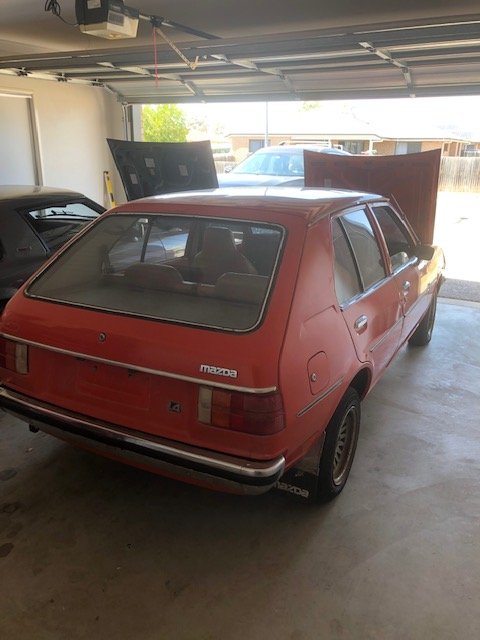
Howdy folk... a couple of months ago I pick up a 78 323 for a paltry sum of $2300. it seems in sound condition, with the only visual rust being a bubble in the bottom of the drivers door that hasn’t blistered, and some on the inside of the tail gate where the chrome/plastic trim fixes. Small shopping trolley dents on every panel... Like my rx7 post, I’m shithouse with computers so this will likely be painful but just bear with me. my objective is to do as much as I can myself, have a bit of fun with a basic low budget build. So I’ve converted a b600 diff to lsd, with disc brakes. Built a gearbox for it. Acquired a 13bpp, and 13b bp. And converted most of it. Anyways... enough of this jibber jabber. No prick likes that. I’ll throw up some pics.... here goes
2 points
-
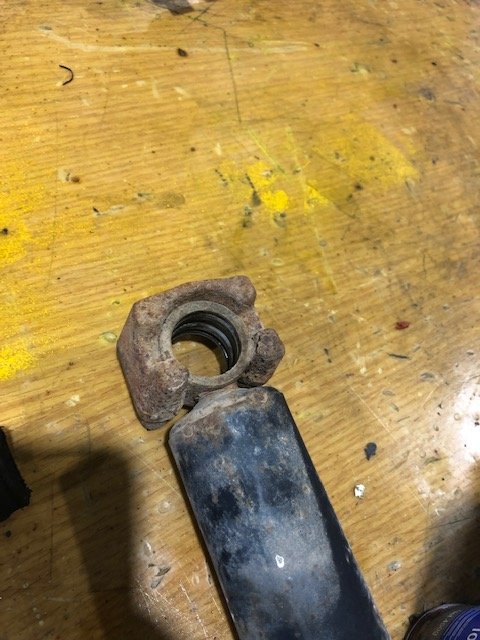
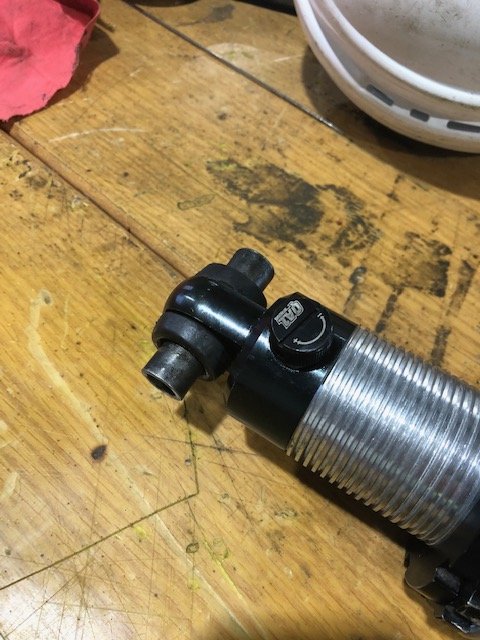
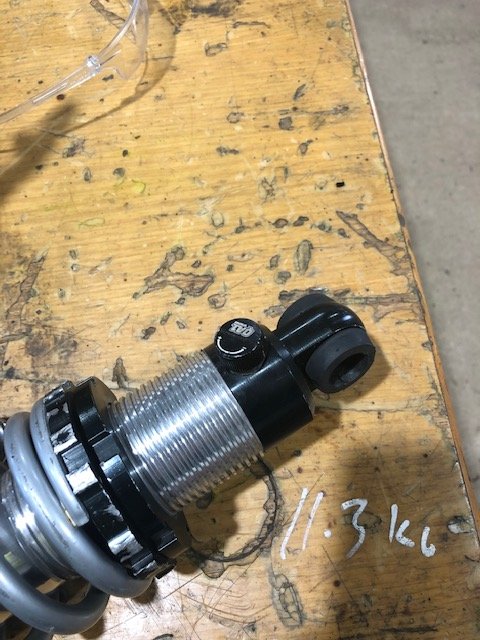
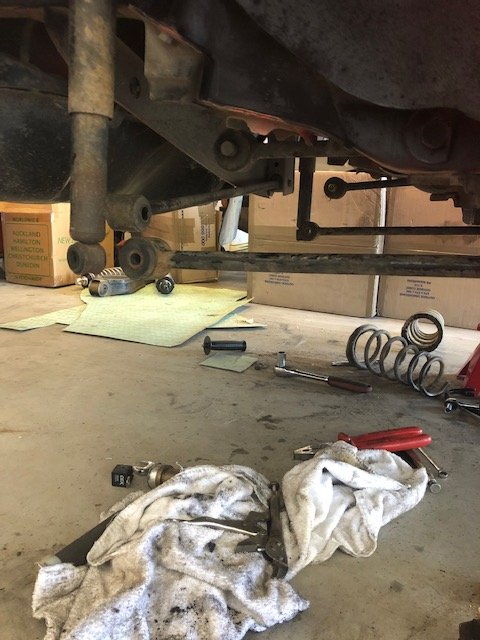
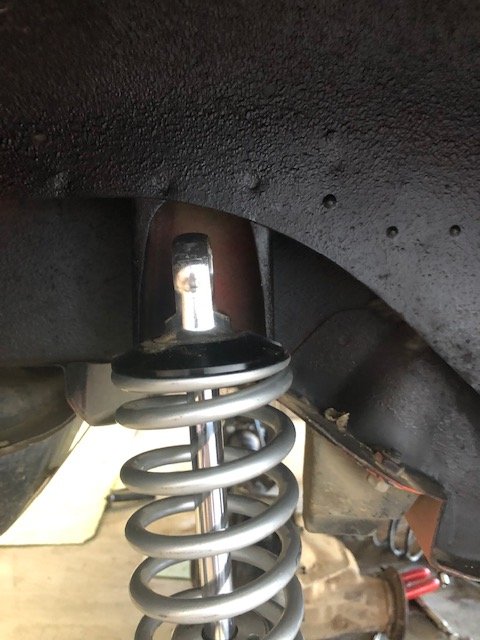
I had a bit more progress with my qa1 shock. The steel inserts/crush tubes for the upper shock mounts weren’t the right size so I had to figure out what I was going to do. So I took the easy way out. I pressed out the rubber bush from the original shock. Remove all the rubber from the original shock crush tube and pressed that it. Right length, o.d and I.d bloody winner!!! Im going to try run the other bushes from the other end of the shock and see how things go. They slip in, fit what seems appropriate enough so will have to report back after a few k’s are put on it when I finally get it on the rd
2 points
-
CV carbs like to suck still air2 points
-
Explain this airbox wizardry plz So jealous of paddock and gokarts..2 points
-
That's all that is good! Perfectly made and will provide hours of entertainment.2 points
-
Rough as fuck found a chair id chopped legs of ages ago for some tube for something random.... Anyway made a very rough but actually not horrible to sit on squab has a bit of foam padding.
2 points
-
*grabs popcorn and settles in for the journey*2 points
-
Hahaha...I'm not even sure if the cam opens the valves half the time. It's such a rattly pile of shit. But does skids on the lawn, so it's a keeper.2 points
-
Bit of work done today on this crappy old gokart. To be fair...it just keeps going and going, despite all of the abuse it receives, so I have a love/hate relationship with it. Anyways: Electric start all sorted. Push button...Brom brommmm.... Then: Much nicer exhaust on it than before. It still vibrates and rattles like buggery...but better than it was. I've added a support bracket (not pictured).
2 points
-
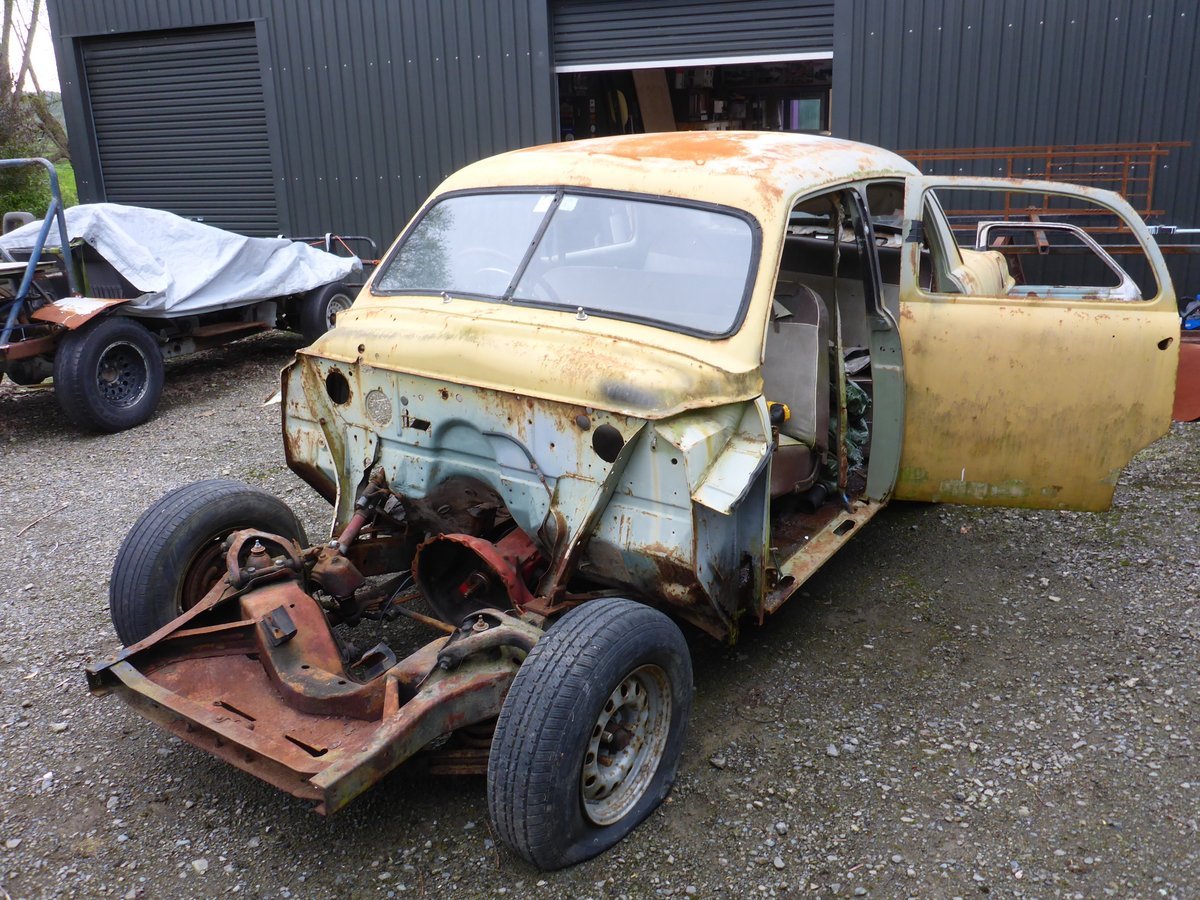
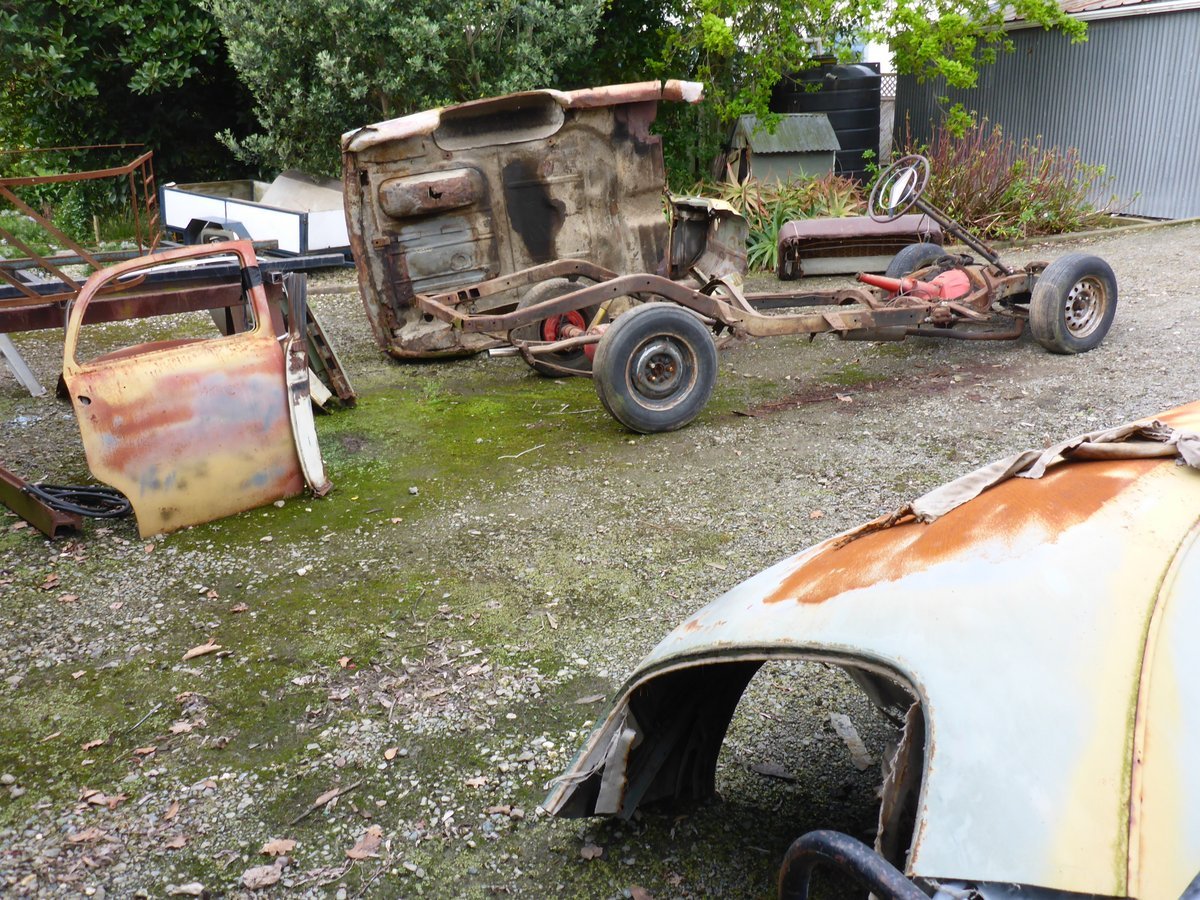
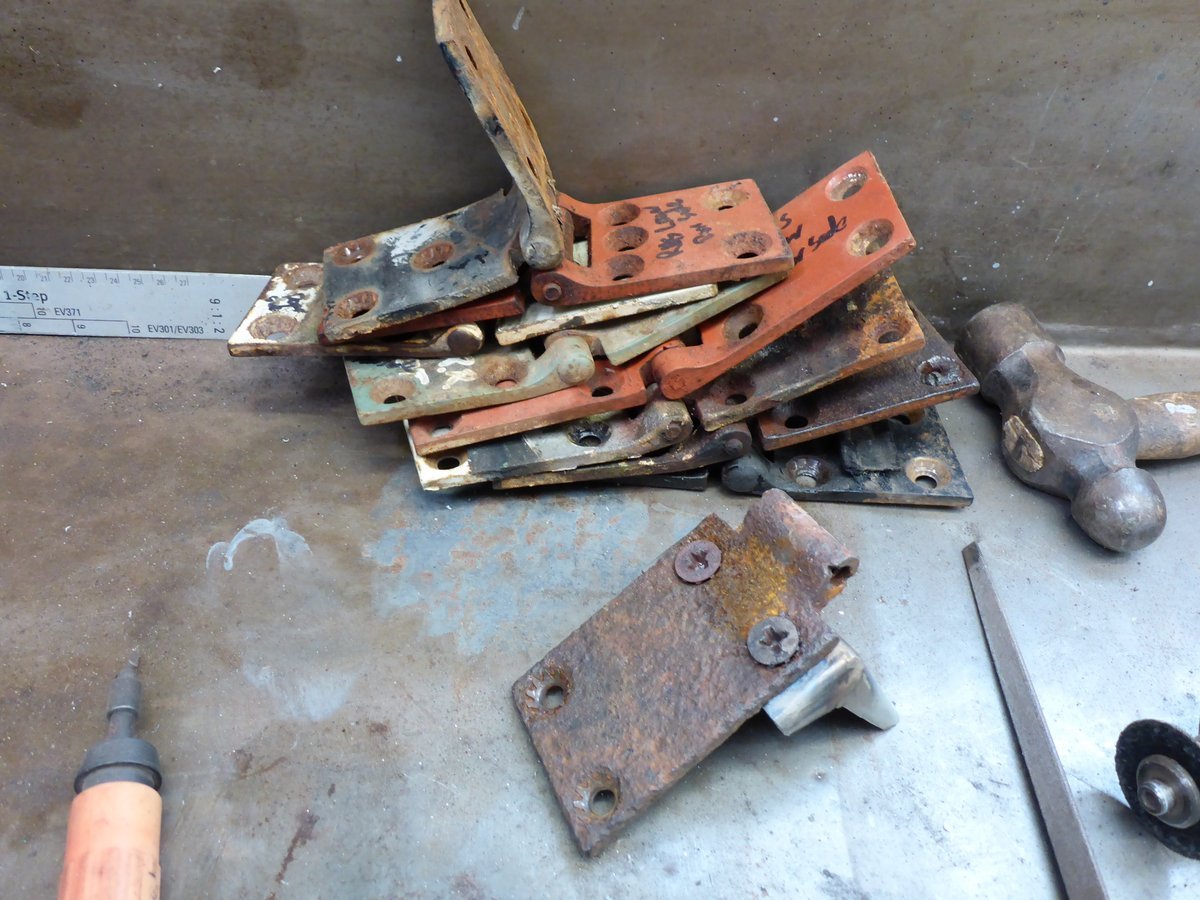
I got offered a 1951 Ford body shell for 'free' if I removed it from the rolling chassis. I was in pretty haggard shape, and past any restoration. Unfortunately the front panel were long gone. Apparently it had been in a field near Levin for quite a while. Anyway, paid some $$ to have it delivered from Levin. And attacked it with a sabre saw.... Main things collected where a much better set of door hinges, the rusty one in front is from the woodies and is pretty rooted. And this RHS A-pillar cut. I plan to graft this into the woodie shell as the existing one is pretty much missing.
2 points
-
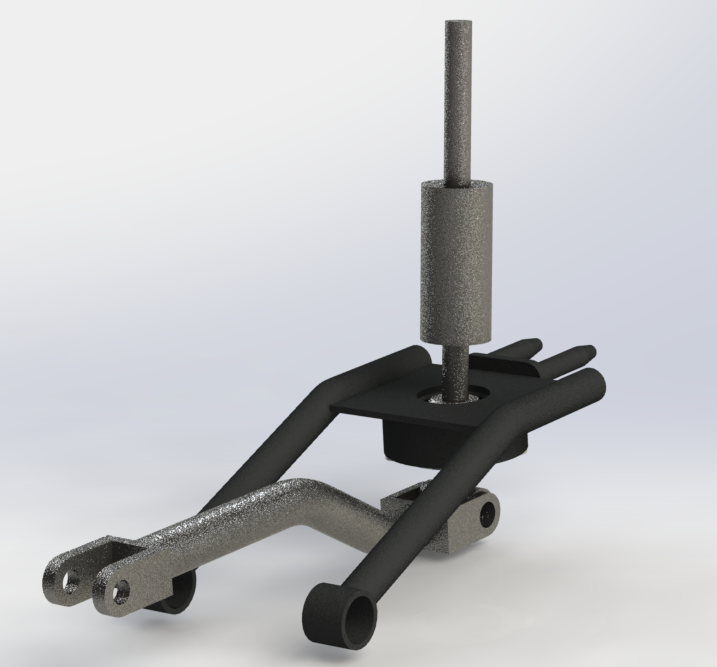
Been trying to sort shifter out. Thanks to solidworks I have been able to have a good go at this. The pic below is for brothers one (which sits stick back from gbox a lot further) but mine looks pretty similar. I've designed it to use all the original commodore bushes to save hassle. Fingers crossed for it to not hit things in the car, I cbf modelling the tunnel and gbox.
2 points
-
some time later... So much for a new roof being decent. about the time I went to filler prime the roof around a hot day, my spray gun fucked out. Borrowed another and off we went. I primed my mrs enginebay too. then today I see the next few days weather is a bit pooze for this sort of thing so I pushed on and then primed in 2K black primer. I had a spare tin and needed cheering up, hence black. Pretty happy with it, still some repairs to go however2 points
-
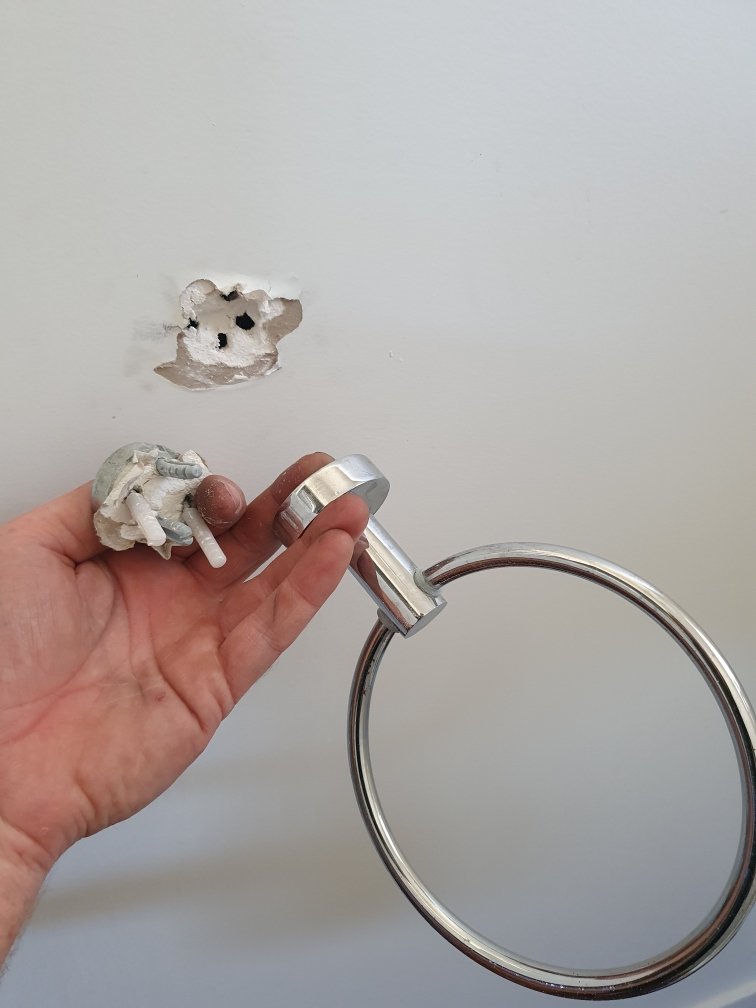
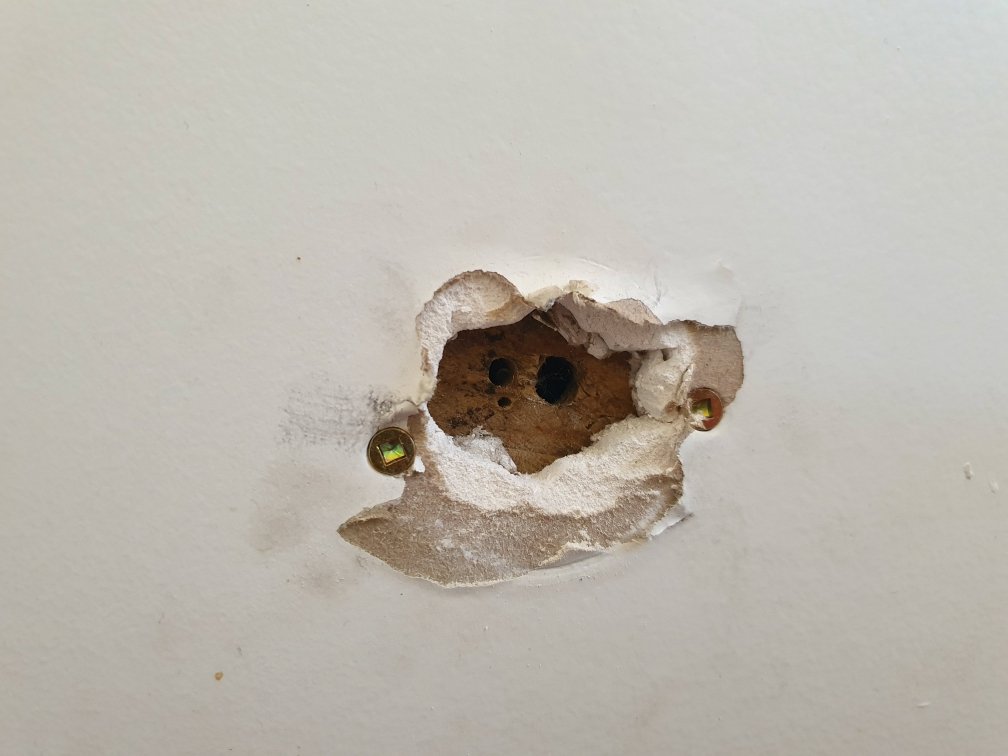
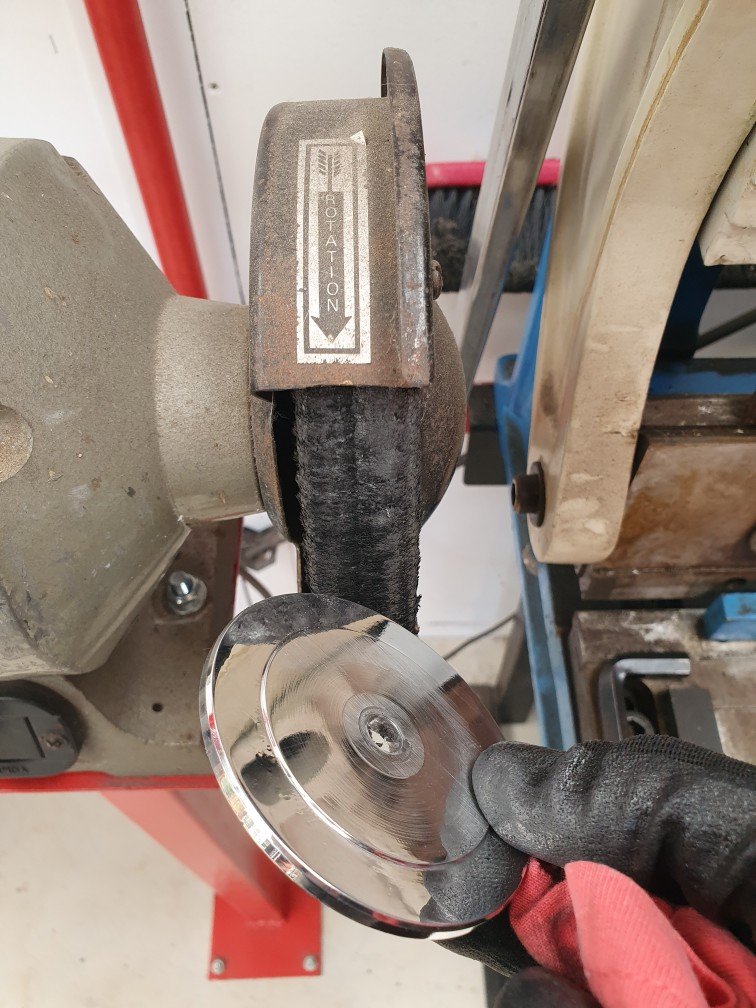
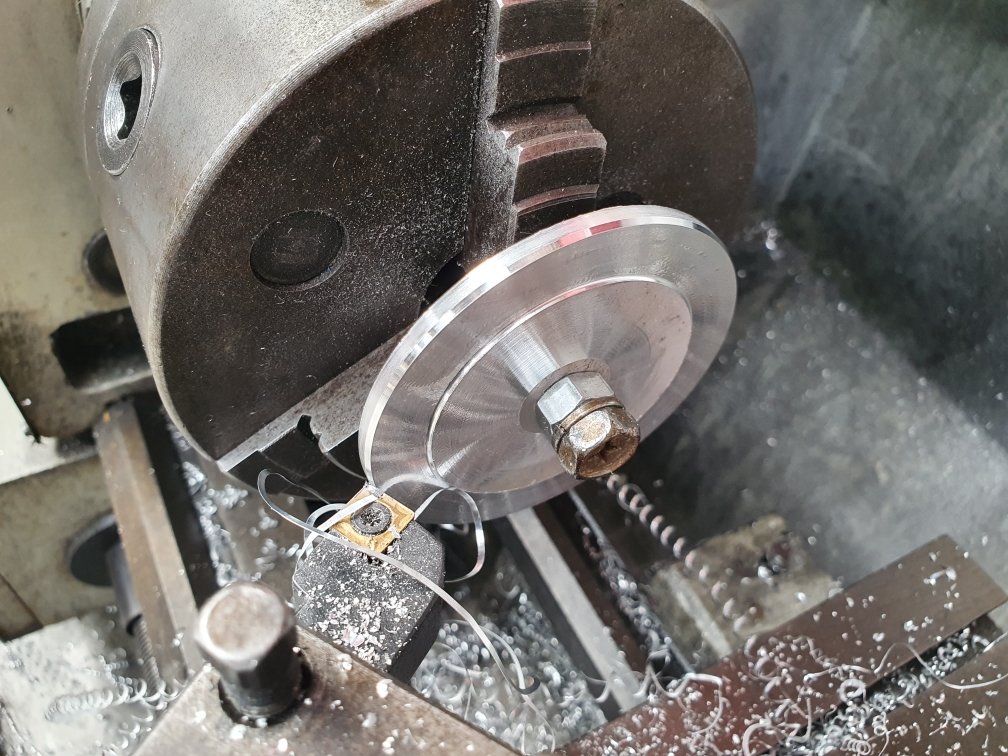
Anyone with kids will appreciate that half your life is spent cleaning or fixing the path of destruction they leave in their wake. Apparently the towel holder isn't rated for climbing on...go figure eh!!! Nothing some serious over engineering can't fix though. And finally
2 points
-
Crikey! Its been over 3 months since I last updated this thread. The reason being I have been busy just enjoying summer and driving the Imp whenever I can. Its such a hoot . I'll use any excuse I can to take it for a hoon. We have now covered over 3500kms since getting it on the road at the end of May last year. Considering we work from home so no commute I was quite surprised at how much its had! Its been incredibly cheap to run (very easy to get over 40mpg while still having a laugh) and is sooooo much fun to trash along on windy roads. The reception we both get whenever either of us uses it for a shopping run etc is fantastic. It really does make people smile- which is nice A few various friends, some from Oldschool, have also taken it out for a good thrash. Its really interesting seeing how different people drive it, their style, ease with the handling and gear change, confidence. Generally they have all found it super easy to drive and all seemed to love the handling. If only it had another 50 bhp... I have done a few little jobs here and there to improve it. Back in the last exciting episode I left off with some sexy photos of a new Hitachi carb. I swapped the relevant linkages/cable stops I had made for the previous carb across onto the new one , bolted it in place and hoped for the best. Started the car up but flooded it because the new carb seems to have a more effective choke. Cleared it and started it proper. Straight away I noticed how better the engine sat at idle. I few twiddles of both the throttle stop screw and the idle mixture and I had it running sweet at idle. I then took it for a hoon up the road. WOW- what a difference. No more flat spots, the transition off idle was smooth as, the transition onto the secondaries was smooth. No stumbling when coming to a stop and a super smooth idle. The jerkiness at slow speed in high gear was gone. Overall a huge improvement. Best $120 I'd spent in ages!! Here's a pic of said wonder carb.. Next job on the list was to improve the brake pedal feel. They work really well but I would still prefer a firmer pedal. I knew that the original Honda Civic brake hoses on the front were far too long, needlessly long. So that was a good place to start. I ordered a pair of new stainless braided hoses from Nelson brake services, impressed I was with the previous set I had them make for my Viva. $55 each which is a bargain. I fitted them and noticed a big improvement in feel. much nicer firmer feel with a better defined bite point on the front. But it can still be better and I think that its possible the brand new Lada master cylinder fitted has a slightly weak seal. If I press hard on the pedal and hold the pressure the pedal will slowly sink. I can also pump the pedal up a bit harder and I have done so many attempts at bleeding it I am pretty sure there is no air in the system. @NickJ ever so kindly sent me a spare set of seals he had. However Nick has warned me that they are from the same vendor he got the master cylinder from, which did come wrapped up in newspaper with these two fellas on the front... Interestingly the seals are a odd shape I have not seen before in a brake cylinder. They have a curved edge, like a worn o-ring outer rather than a lip that is forced against the bore like most brake seals I know.... I thought this was possibly the problem but after some googling it turns out that this master cylinder design and bore diameter is a very commonly used item across many Fiats, ladas and some other brands. So the seal design must work fine in use. Hannah's mum has come over from Blighty for a holiday and essential sun. So over a few weeks previous to her boarding her plane I kept an eye out on Ebay UK for anything interesting. She ended up bringing this stash of goodies... Apart from the very obvious Marmite with proper actual taste I bought a Haynes cutaway book filled with lots of Terry Davey's best pics, plus two old magazines with road tests on Imps- one of which was printed at the release of the Imp and is filled with heaps of articles, photos and fold out pages with extra large exploded diagrams. A total treat for any Imp nerd and one which kept me thoroughly delighted while reading it in the sunshine on coffee breaks... Lastly and more recently I have decided to sell on my Viva wagon. I'm not using it and have utterly fallen for the charm of the Imp. I would rather someone else make something of the wagon and what money I get for it can go towards this car (as well as another few projects in mind, and probably pushbike stuff...) So with that in mind I decided the VIva did not need fancy Recaro seats but the Imp does. The Mx5 seats are ok but not quite as figure hugging as I like, nor do they seem to offer the same lumber support that the Recaros do. Plus the Recaros just look so damn nice and fit in well with the little nippy go kart like car ethos I like in Imps. I was worried about them being a lot heavier but they only weigh 3kg more each. I can live with that for the comfort they offer! So I had to add some slightly wider spaced mounting points. Because the mx5 seat mounting points were welded on the back/inside of the box sections before they were welded on the floor I had to instead make up some flanged threaded bosses... which I then tigged in place (rather then risk mig splatter everywhere)... It was when tigging I remembered the steel was zincalume and made my welding a bit messier then I had hoped as the fumes came through... But all good and strong. I shortened the reach adjust levers while I was at it.. I also had to fix the mountings for one of the plastic covers which no matter what I did with the old push in plastic rivets would always come loose and rattle about . I machined some wee stubs and epoxied them in place... This (blurry..) pic dates the seats somewhat... (kids- ask your parents) I finally mounted them in proper and they look great. Much better to sit in and they also swing forwards further than the Mx5 seats - which to be fair really were never designed for a car with rear seats were they. The Recaros have a more suiting mixture of grey and black which suits the interior better I think. However I'll still keep looking for some suitable red leather sports seats much like the ones in my previous Viva for they were the best looking seats I've yet seen, although being slightly wider for 'larger" Alfa Romeo drivers and covered in slippery leather they were in use a little less hugging than these cloth Recaros. So that lot takes us up to date. Next on the list is to fit some carpet, now that I seem to have finally sealed the windscreen properly although the car has not seen much rain recently- its been so dry here since the start of December. I'm still tempted to play with injection. I bought a spare engine for $100 from the local wreckers. Its a 1500 and has the later oval port head. Larger ports and larger valves. We stripped it down together and its pretty good as far as wear goes on the guides etc. Certainly a good head I can clean up and fit without any machining. I have a inlet manifold to suit. However.... I may still yet re-power it with another engine, yet decided on. I do really like the idea of regaining my rear parcel shelf, currently cut to allow the valve cover to go through, because its missed and would be very handy for the weekly shop! Datto engine in the van after pickup... A tiny little tool box a found at the warehouse which was just soooo cute I had to get it... Goes here.. A tiny little trailer we built for some locals kayaks. Had to size it up... I sold the race car shell and it headed south to Queenstown on what was a comically huge transporter. Fuck I laughed... My Imp making other normal cars look huge... Finally my parting shot- because well... I just like this photo2 points
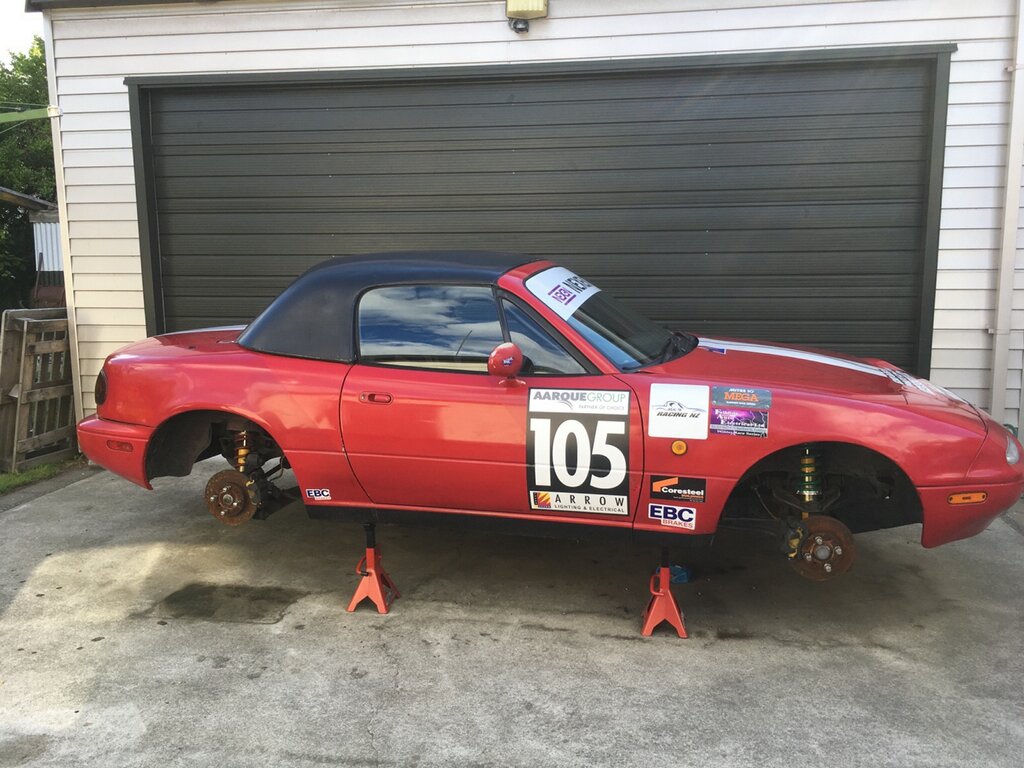
-
Round 1 of the Winter Series complete. We had a decent turnout, with 12 cars on the grid. The changes seem to have worked! The car felt great in testing and I was on the pace with the top guys again. Feelsgoodman.jpg Race 1: Started P3 and managed to pluck off the two cars in front. Made a pass for the lead on the last lap and it wasn't settled until after the last corner. Great race and stoked to get a win! Race 2: Reverse grid, so I was off the back. Pushed hard through traffic throughout the race and ended up in 3rd. Race 3: Handicap - started last and had a great race. Made it to up to second place, but couldn't quite challenge for the lead. I also had the quickest lap of the weekend with a 1:24.623... The next fastest was a 1:24.739 so there's not much in it! I'm pretty impressed with the lap times considering the track was ice cold all day. Here's a couple of pics:
2 points
-
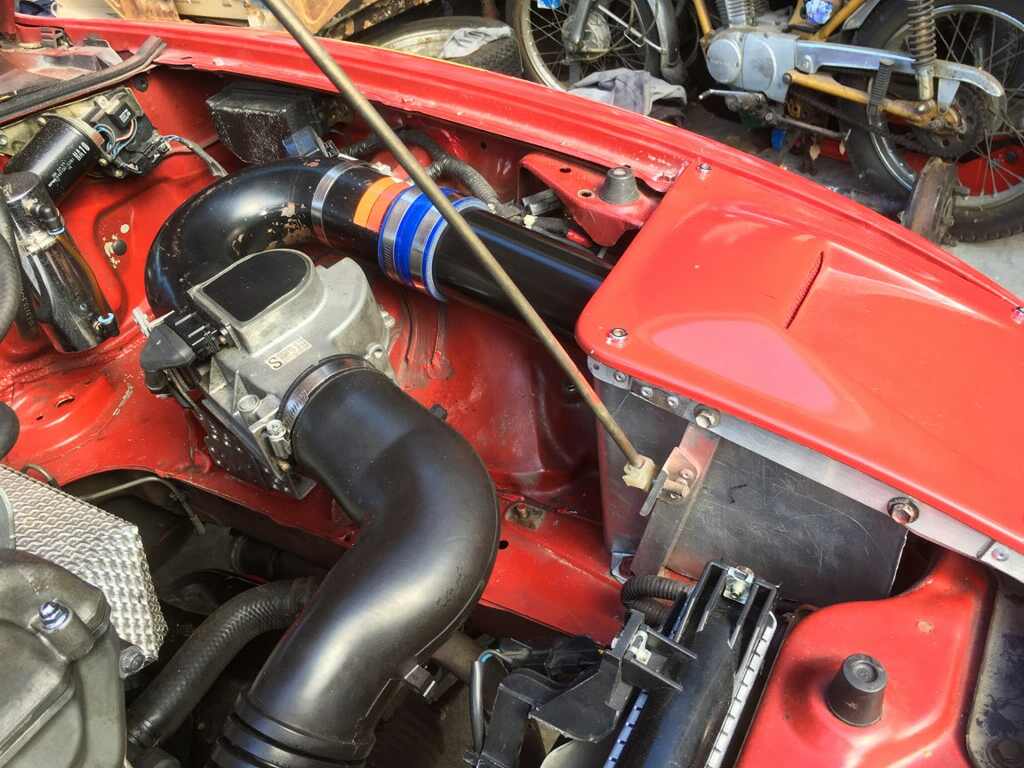
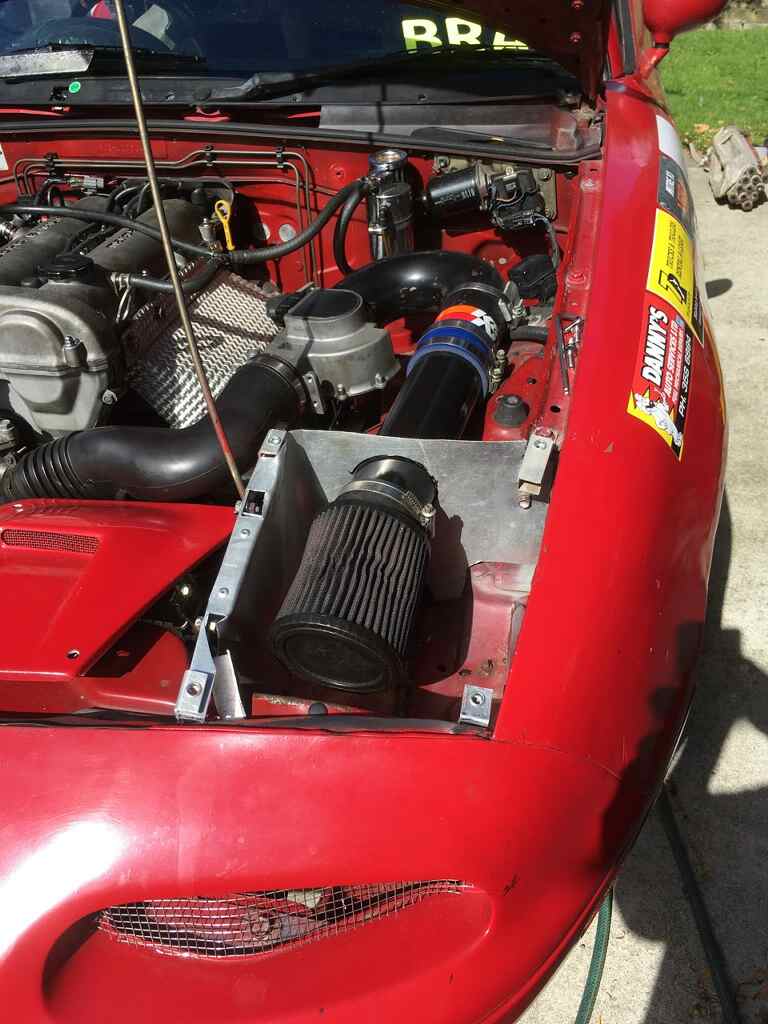
The quick guys were beating my lap times by roughly 1 second in all of the dry races, so there's definitely work to do on the car. The top 4 have all had their engines refreshed, so our car is the quickest of the original-motor crew... So the logical thing would be to get the engine rebuilt, right? WRONG It would be far more satisfying to catch them without doing the engine... I think... So we had to make a list of things to improve. The clutch is starting to slip, so that's due to be replaced. Next: inspect engine mounts. They were really bad! And wouldn't be helping the situation. Next up - cold air! Dad's added a bit of length to the filter pipe and made a box around the filter. Next - exhaust ports. They were pretty daggy! After: Next up: suspension.....
2 points
-
Over the last few months have done loads of rides and has been great
1 point
-
Weaselled my way into a few weeks in the sunshine, have rudely awakened the slumbering British cars. Just about finished tarting up the avenger- have ordered an essential buffing machine. Am now thinking of getting better seats - the dash is rekt, wonder how much of a c*nt swapping it would be - would transform the car
1 point
-
Got the timber deck put together on the weekend. Jarrah timber deck with new deck strips all painted up. Stoked with how its come out. One step closer to going for a VIN.
1 point
-
Yeah it was possibly one of the best shows I have been to. Best thing was that it had a nice spread of cars and wasn't all just hotrods, american cars and Holdens/fords Lots of Japanese, english and european cars- which are more my thing Not sure on dash yet. I was planning to do something similar to the viva instruments and make my own but the cost of alloy and all the pissing about exceeds my hassle factor ratio when compared to just buying some aftermarket gauges. The Viva ones worked well but never did looking completly right with their very Japanese 80's/90's car font.1 point
-
So I got to removing my standard diff today in preparation for the lsd. I purchased a pair of Rear lower Control arms from an rx7 to remove the big ugly 323 ones that incorporate the rear spring perch. After installing them in place of the originals with the standard diff in they’re a little too long, but that’s no issue. I’ll either shorten them, or lop a section out and add some fittings to make em adjustable. i did run into a bit of a predicament with the qa1 rear adjustables. id known they needed a bit of modding on the car, so putting it out there with everyone to gimme some feedback as to wether it’ll work.
1 point
-
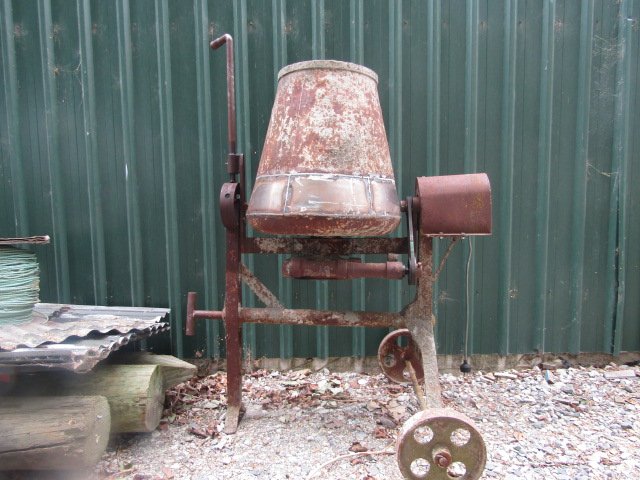
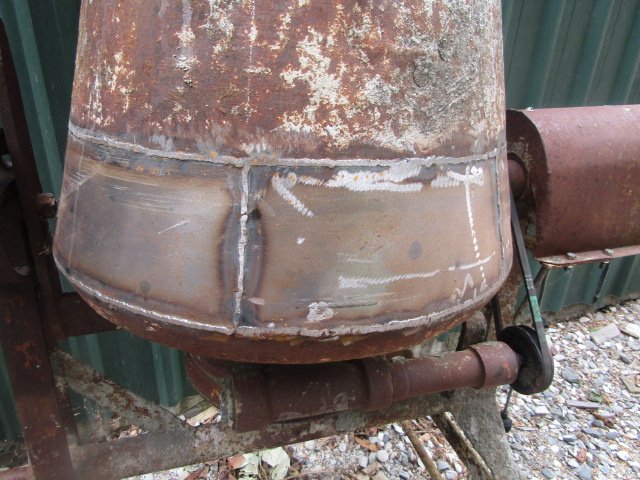
Also. As @RUNAMUCK stated previously little chinese concrete mixers are shit. Concrete mixers are a handy thing to have though so when I spotted this in the scrap pile at a friends yard I pounced on it. It has a cool worm drive gearbox, the motor looks like it's off an old fridge or washing machine. The locking handle was rusted in place and the bowl was badly rusted. I fixed both and now it goes hard for what it is, quietly and at a good height to tip into a barrow. Edit. I'd like to find a couple of pneumatic wheel barrow wheels to make it easier to move around because these steel ones suck.
1 point
-
Fixed the welder with a bit of wiring tracing and looking at stzz. Took out the circuit board behind the wire speed knob, cleaned years of garage dust/metal filling mix off the board which could of been bridging some circuits and doing something funny then there was a big grey box on the board that I guessed was a relay so gave that a tap with a screw driver and its back to working properly which is great because I didnt wanna have to buy a new welder1 point
-
So Hannah and I took the Imp for a two day road trip. Part business and part holiday. On Friday we drove up to Lake Rotoiti, Nelson lakes national park. On the way we checked out some old classic cars a fella owns who wants me to do a load of bodywork on. The Imp drove really well. The sun was out and the music cranking (some ambient tunes from David Tipper since you ask). We had a good coffee and then a nice walk on tracks around the lake. That evening we drove through to my olds place in Blenheim. A nice day out. Here's some photos... Chilled out at my parents, a feed of fish and chips, wine. A grand way to finish a day. Following morning we set to head home. Filled the Imp up, did some maths and allowing for a very optimistic speedo we reckon on around 40 mpg. Not bad considering the gearing at 100kph. Headed home, sadly into rain as a cold front was moving up the Island. Drove long way via Picton and Queen Charlotte drive because narrow twisty roads and go kart car... Over the Rai Saddle, sitting with the flow of traffic. I give the car some stick to pass a motorhome up the saddle and then when cruising down the other side the wee car does that thing.... 'JOLT!' The car does a small but very noticeable stumble. Like a tiny rev limiter. For those that have tuned megasquirt, or maybe other EFI, it felt like when you click burn. "What was that?" Hannah asks. "Shit- I don't know but it felt like an ignition thing, not spluttering fuel thing" I reply. We both go quiet. I almost want to turn the music down and listen for any untoward mechanical sounds that might be there. But I don't. I'll play it cool. Don't worry. Don't get Hannah worried. It was probably just a... fuck. I don't know. I'll just say nothing, drive a little slower and whatever it was will be a memory soon. The silence is piercing. Now I notice every bloody vibration. I'm watching all the gauges like a jet pilot. All the time my mind is going through all possible scenarios. What could that have been. What if we breakdown? 3km pass. It seems ok. I start to relax. Only one big set of hills to go. I pass another rental car, most likely the scurge of the kiwi roads, a Nissan Tiida. I dont know because I'm still having a mini stress.. 'JOLT'. Here we go. This is happening. This time its for good. The car dies and I have to quickly think where I'm going to stop to fix it and quick before I slow too much and that silver blob I just passed drives up my bum. I spot a forestry road on the right, coast across to it (whilst trying to make it look like nothing is wrong so saving face for all classic drivers who get the "oh old cars are so unreliable...") I pull to a stop and the engine splutters to its last road driven rotation with a bang. Bugger. Remain calm. Reception on phone? Not a chance. Tool kit in boot comes out and we go through all the obvious things, concluding that it is indeed the ignition. Annoyingly it was the ignition module, of which I didnt have a spare. If it were points I'd have fixed it. Such is life. Luckily the rain had stopped and double lucky that across the road from the forestry road we parked on was a farm house. The kind farmers wife took us in, let us use her phone and fed us tea and biscuits. I called a mate out with his trailer. We have AA membership however its the basic cover that would have got us to a garage. I knew a Garage wasn't going to fix this and we'd still have to get home. Yeah nah. Stuff that. Mate turns up with his trailer and we have a choice as chilled out trip home. We fed him dinner and it was all good in the end. Big thanks to @Sanfiddy for rescuing us! Oldschool spec favours. I only took one photo of the day... So that was that. On Sunday I removed the dizzy and then the module. It fails the tests as predicted. Here's the troublesome module... Come Monday and at my local wreckers looking for a module. I dont want to spend $120 on a new one when I'm about to fit full engine management. No luck locally but we were in Nelson on Tuesday and I found one at a wreckers there, cheap too. Fitted it that night and brooooooommmmmm The replacement was a proper Hitachi module whereas the one that let its smoke out was a no brand cheap one. Even felt lighter if that means anything. I took the broke one apart and it looks like a little cityscape inside- heck it would scare a Barry used to the kettering system... I also managed to score a spare couple of dizzies, converted with accuspark. My bench looks like a bomb went off in a hitachi factory... I'll need to fix them up, check them out and then I could always have a spare setup in case. That is until I fill the Imp with boxes of electronics and then there's no chance Mr AA man can help me. It'll be like every modern car- useless when broke. In other news- this turned up from China the day we left for the lakes... Its a brand new Hitachi 306 clone, all for not much more then a full carb gasket set costs. I had ordered this before I had scored all the other Megasquirt bits. Anyway- I'm still looking forward to trying it out because my worn out carb is about as good as I can get it. The new one looks so shiny. I'll report back with my findings on how deep the quality goes...1 point
-
The crazys in the workshop have been at it again....
1 point
-
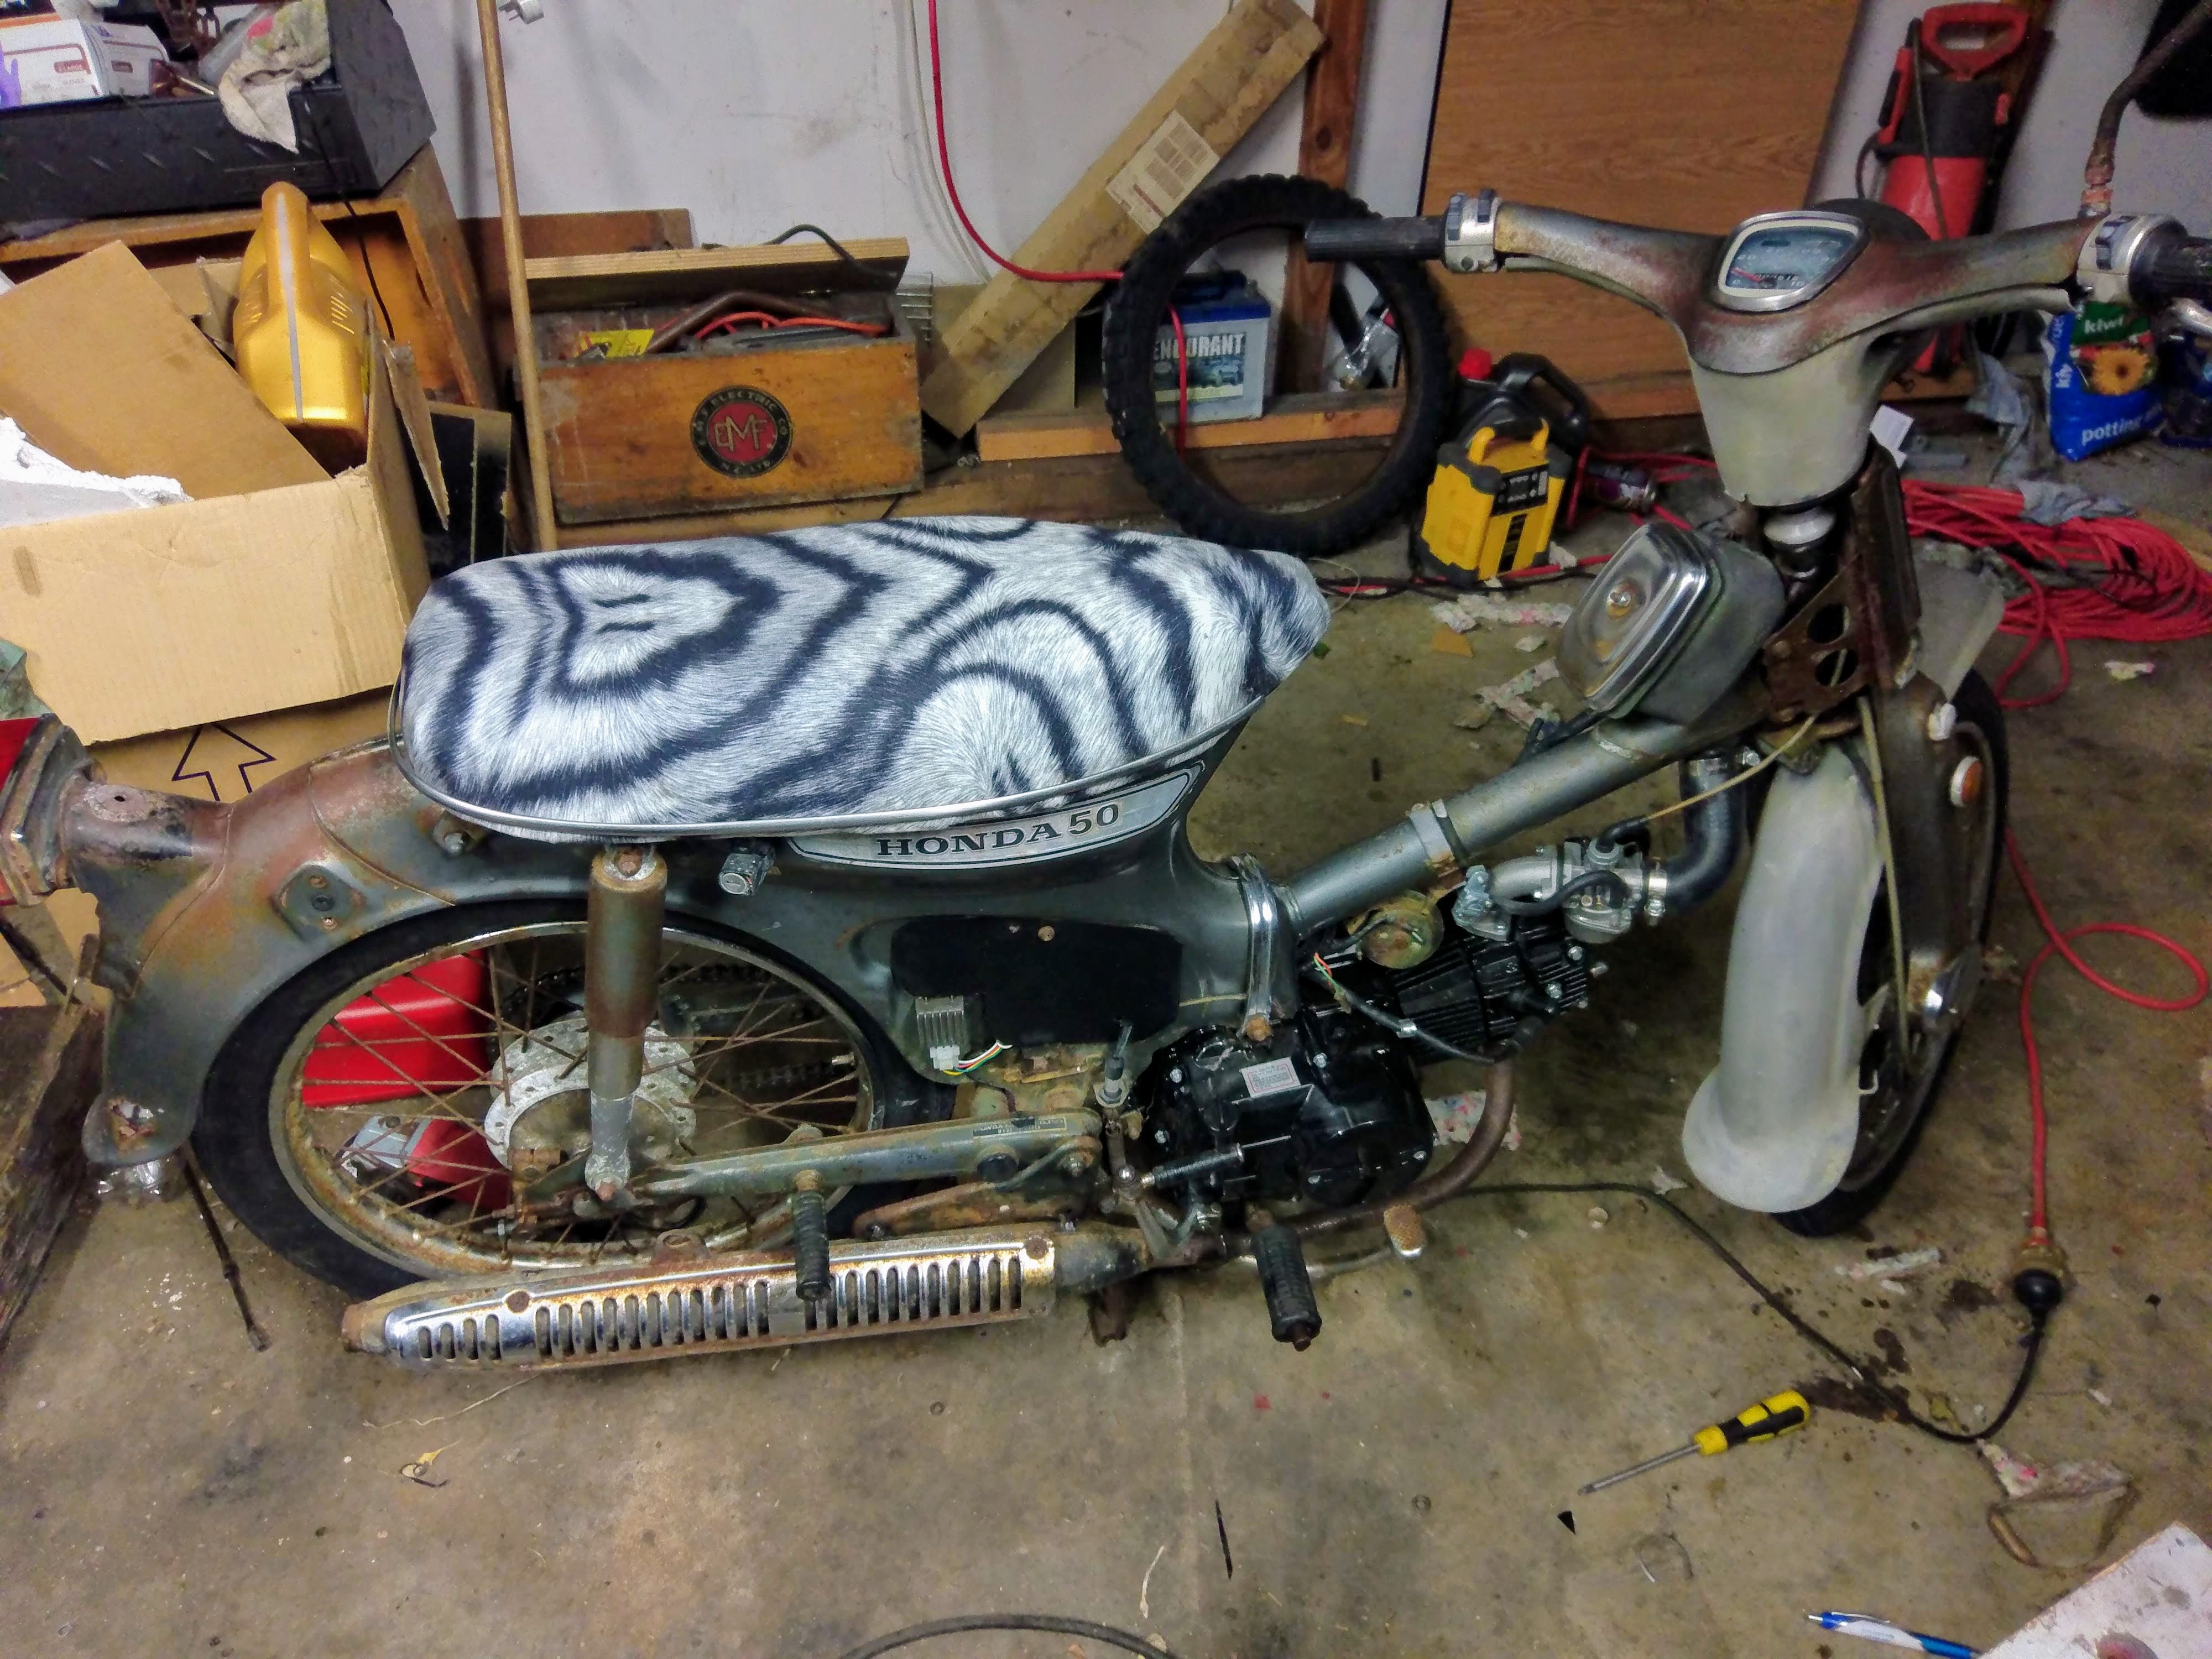
Quickly threw together a seat cover - all done!
1 point


.jpg.f47a2273dd34e692770e02a4f81a6438.jpg)

.jpg.62bade8a67daf552732be13d55ccfc7c.jpg)


This leaderboard is set to Auckland/GMT+12:00