
Leaderboard


Popular Content
Showing content with the highest reputation on 11/17/19 in Posts
-
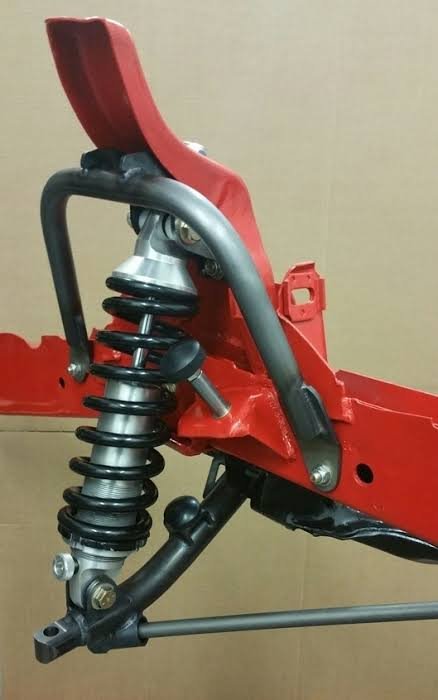
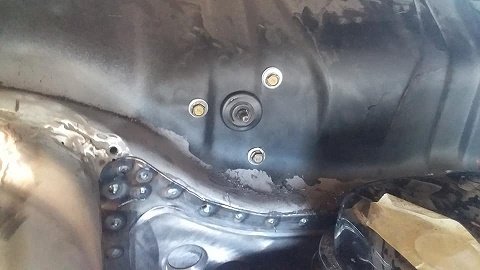
I'll probably copy this sort of brace for the upper mount
 17 points
 -
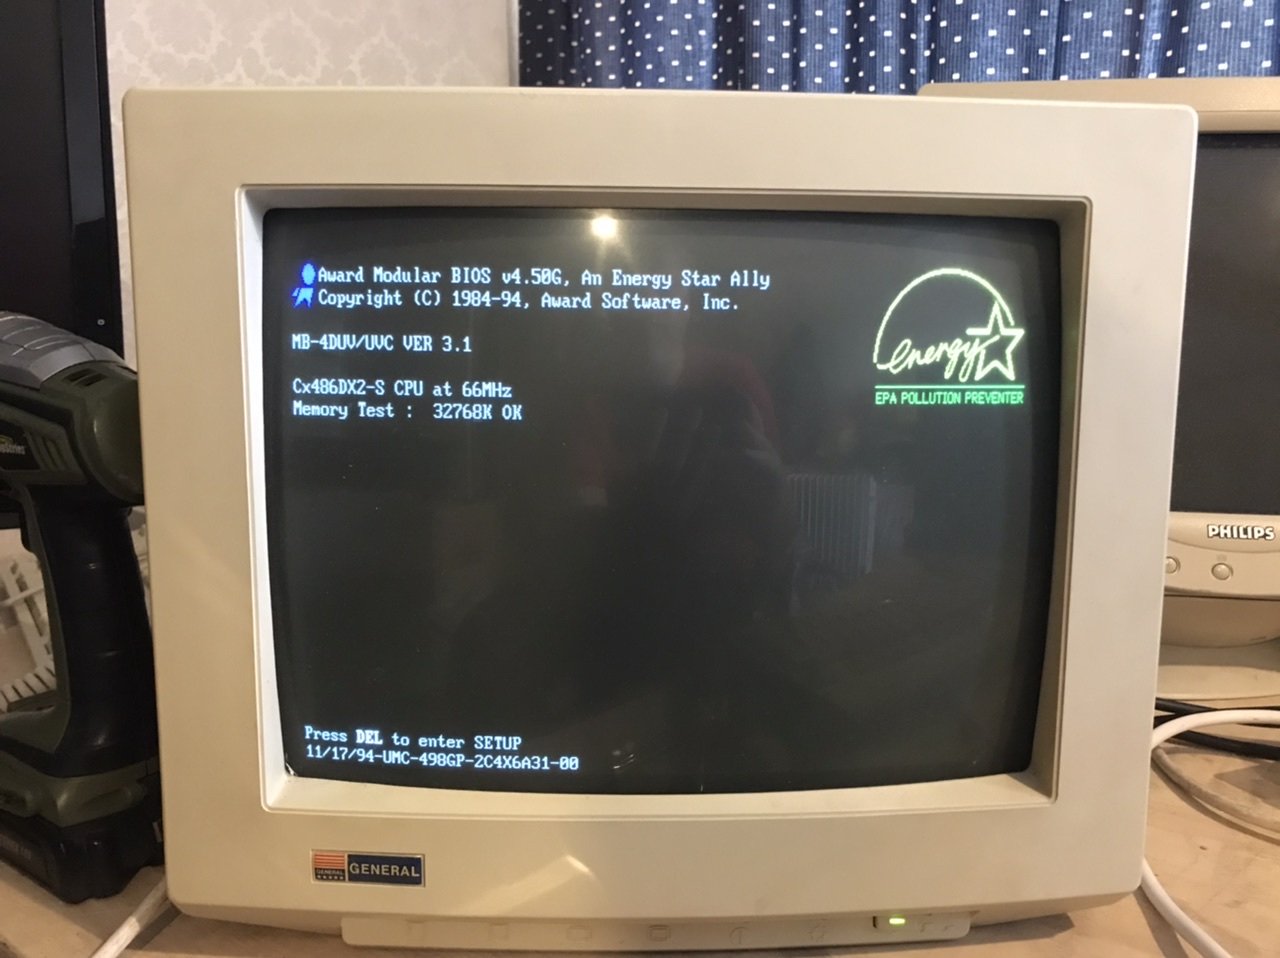
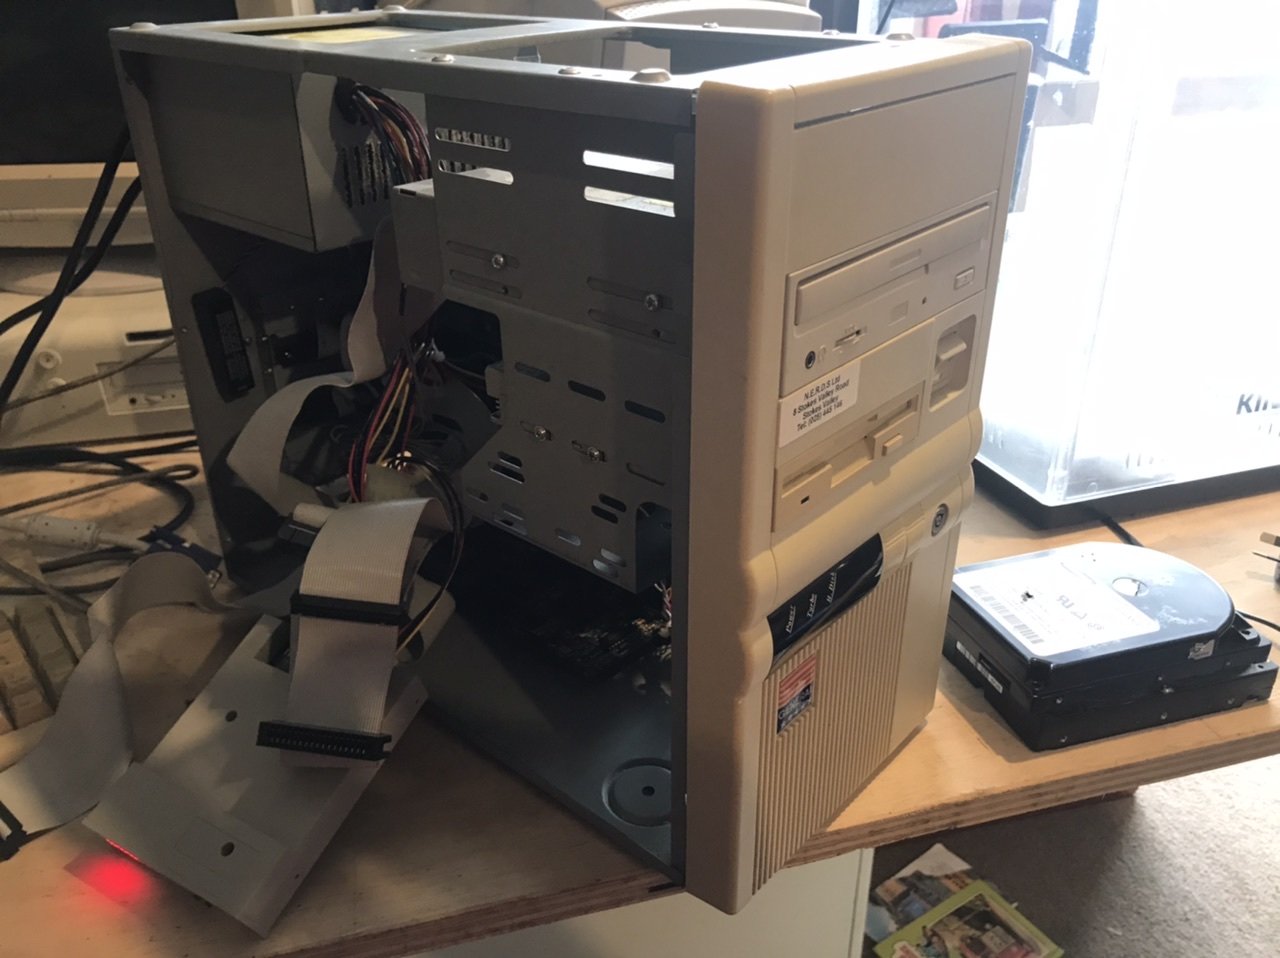
I like old computers (80's / 90's) because I grew up with them I guess, so here's a thread about doing stuff with them. Yesterday I picked up a few old computers for free from a local guy whos moving, have been looking out for something to build into a DOS gaming thing. They were under his house and the cases were a bit rusty, not a good sign. But they were all beige which means they should be at least from the 90's. Got them home and noticed one has a turbo button, which must be early 90's. Opened it up and found its a 486 DX2 66Mhz which is perfect. and the inside is in good condition. The VGA connector was corroded and the case is too. It did power on but didn't display anything or make cool old HDD or floppy drive noises, but after remounting and cleaning the video card etc it now displaying the POST check but then fails to read the HDD. After remounting the expansion card (which is for IDE, FDD etc) it started making clunking noises. Good....good... this is fine. It stopped hammering after the next power cycle. Opened it up and got it to at least spin and the arm moves but its not doing anything else, the bios doesn't detect it even if I manually put in the info. Pretty sure its from 1994, so the HDD is 25 years old. Probably wasn't designed to last this long. But these 486's are known to last for ever so hopefully the rest works. It also came with the original monitor with 'General' badging (with the USA flag design) which I know we had as a family computer. I think that was a Pentium 1 though, it could play Duke Nukem 3D at least. I'd like to see if a Compact Flash card would work as a HDD since IDE drives this small (this was a 426Mb one) aren't going to be easy to find. Then set it up to finally finish Kings Quest 3 and stuff haha
10 points
-
The monitor must be 13” and has awesome manual knob controls underneath. 32mb of ram, it must have been a beast in its day lol. 66Mhz which will be good for games of the era. I could just use dosbox to emulate but for proper nostalgia I want to have the right CRT display and hopefully a working IBM model M keyboard. also dosbox just doesn’t emulate the internal speaker noises right for me. I need to find a working 5 1/4” floppy drive now. and maybe figure out an lcd display for the cpu speed on the front since it has the window but no lcd stuff.
10 points
-
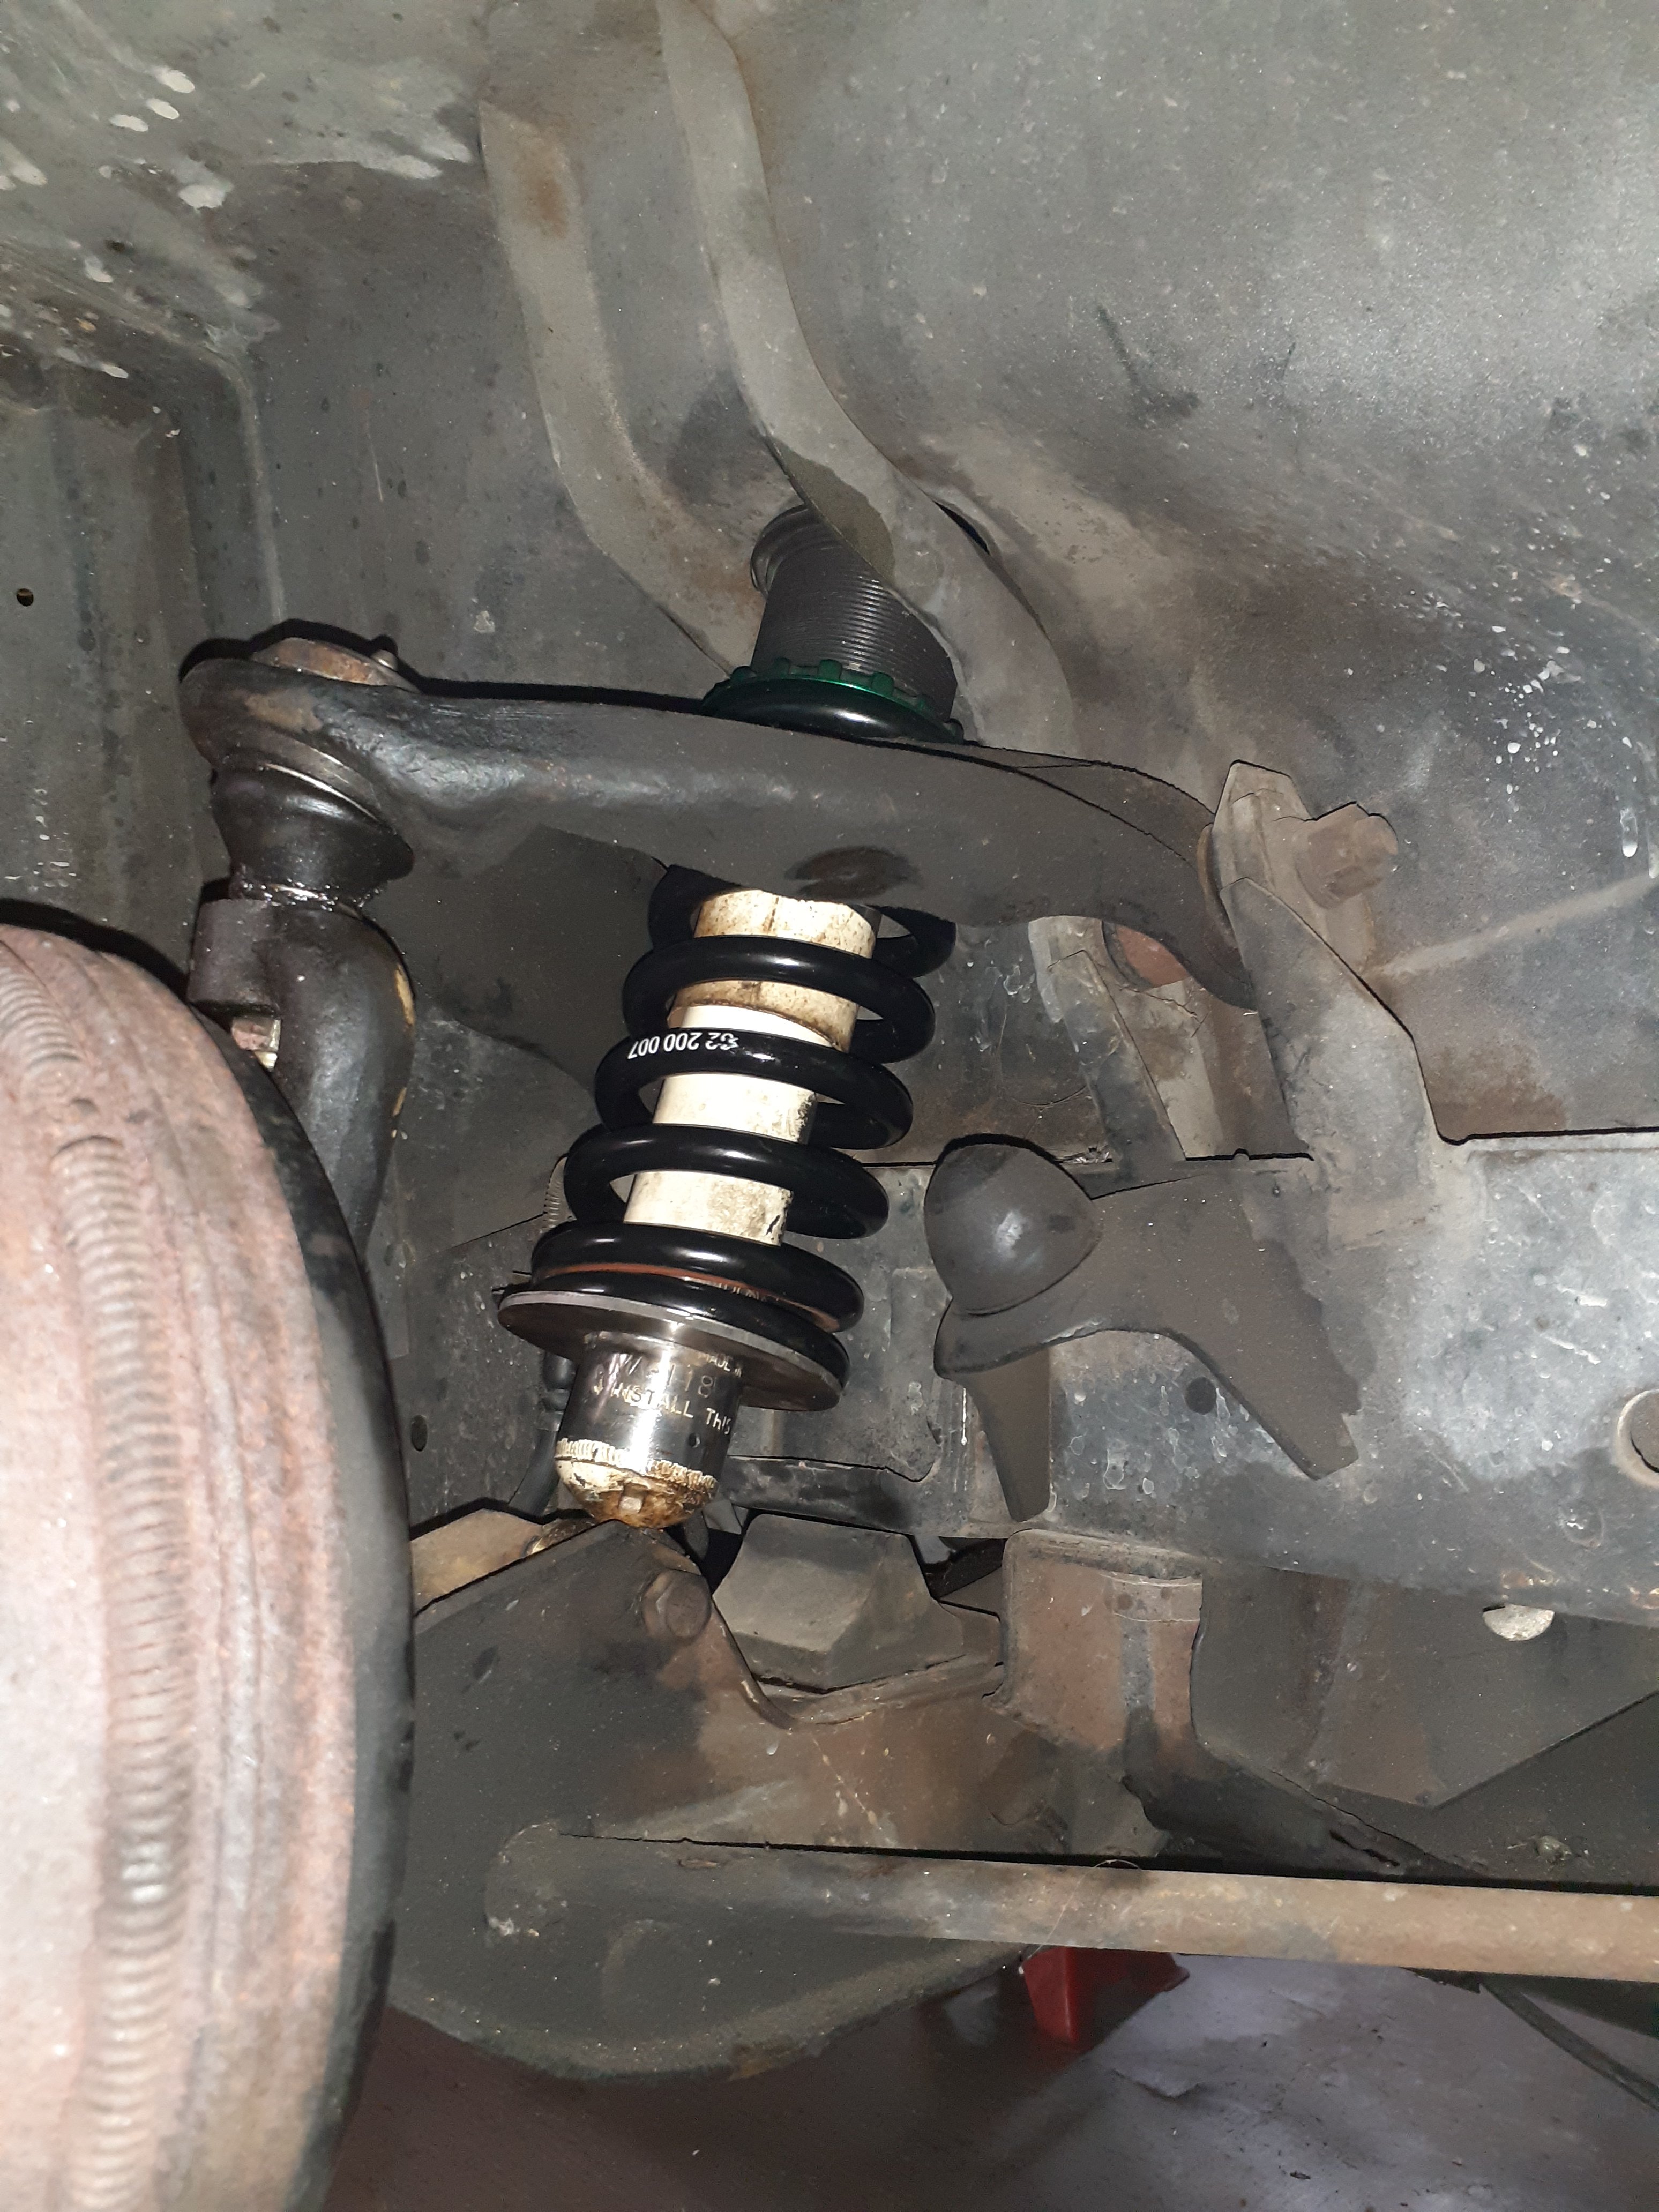
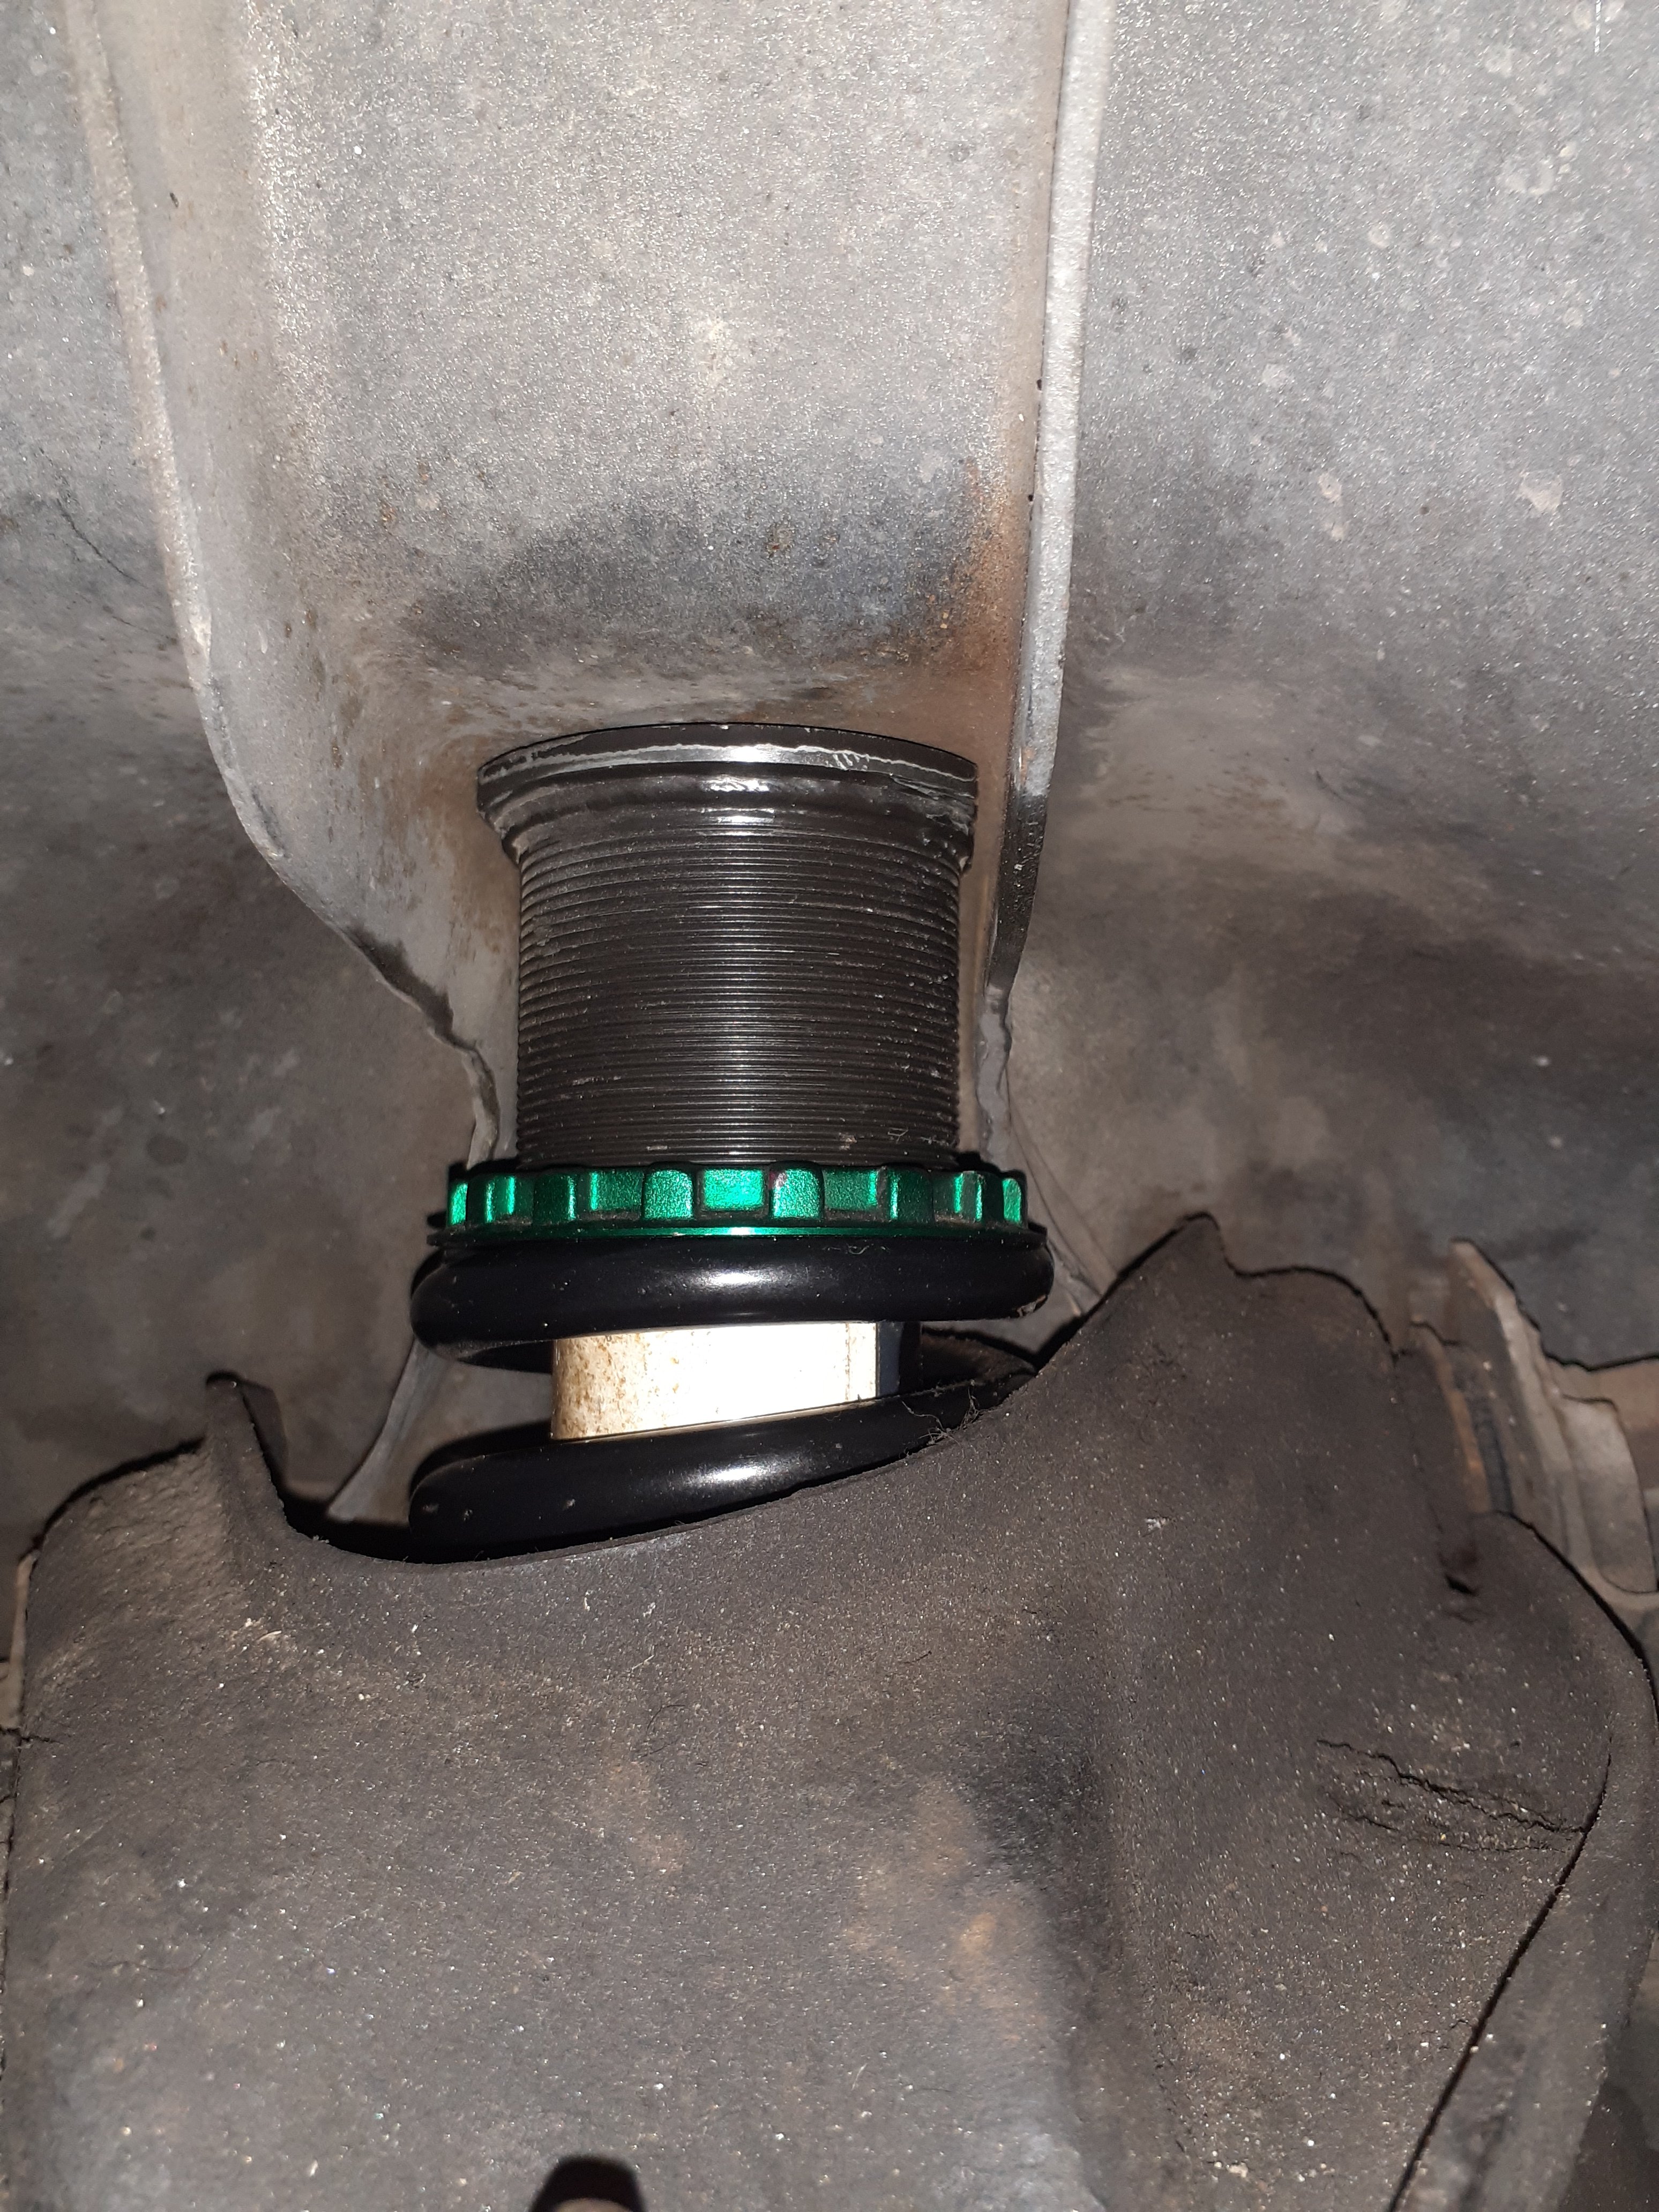
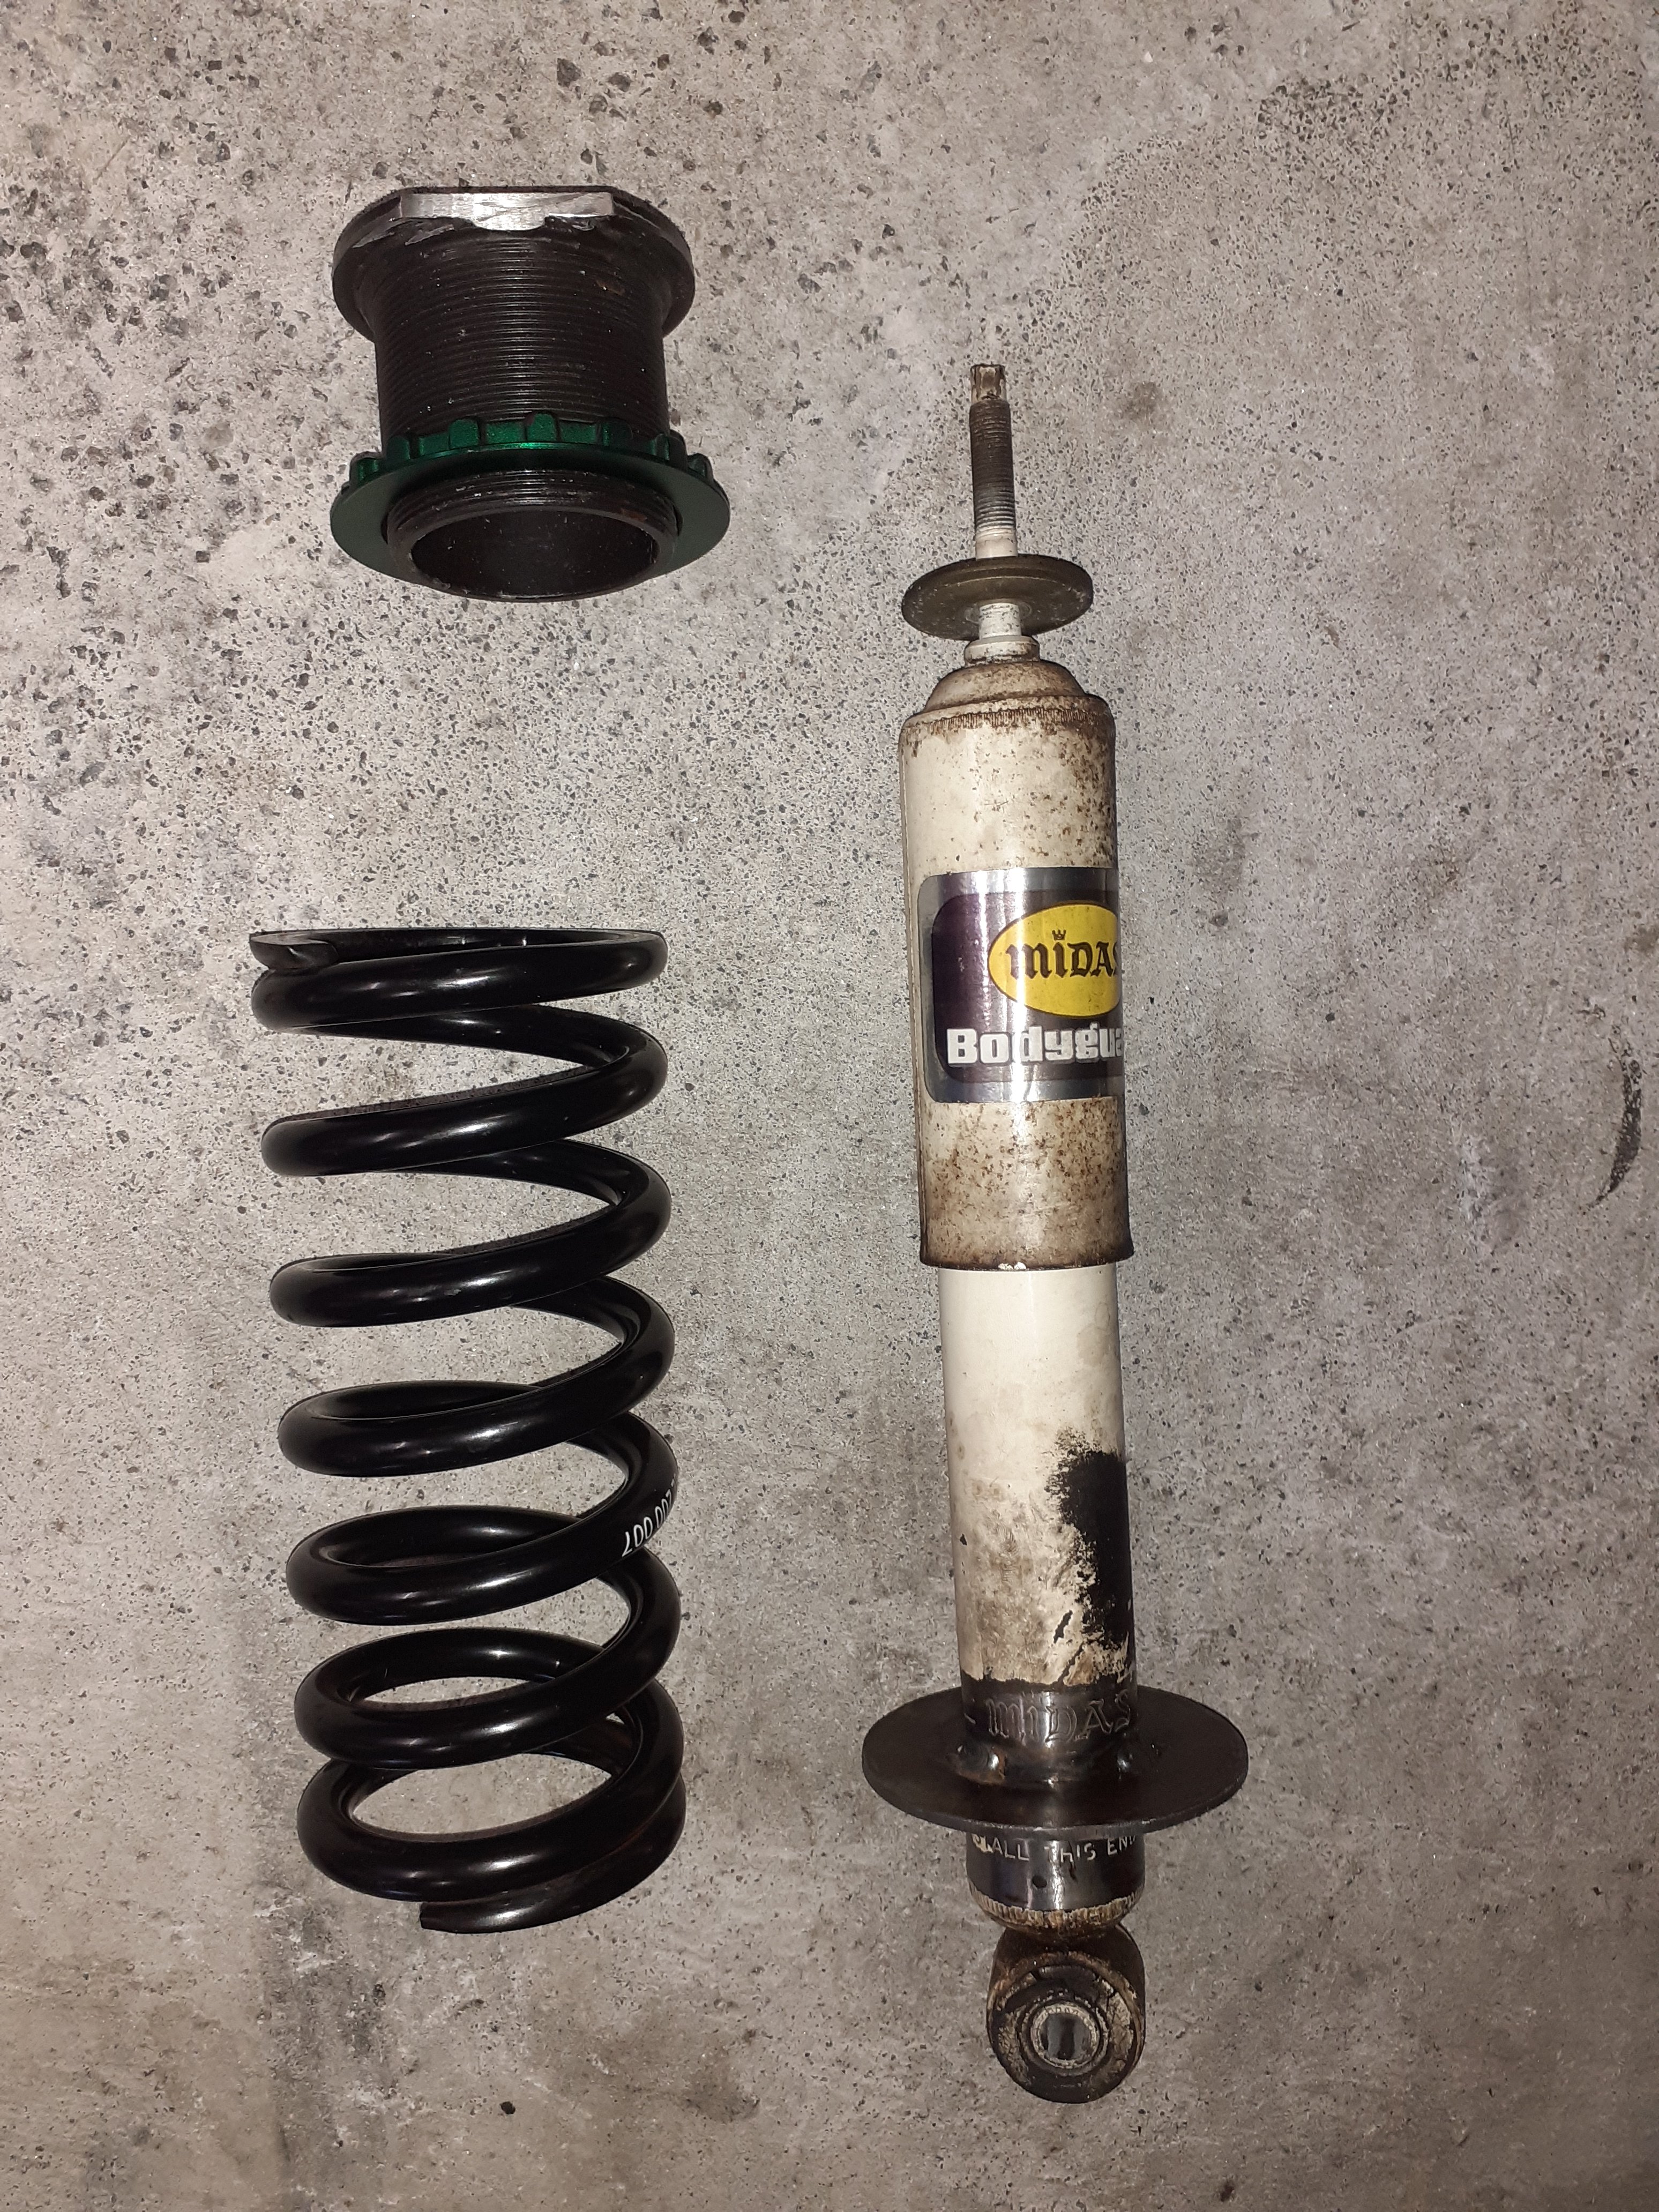
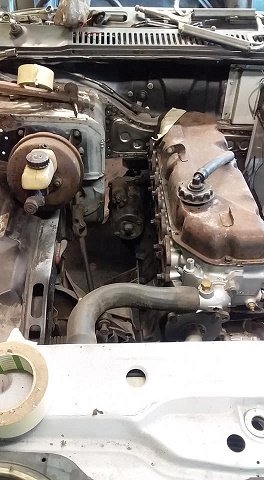
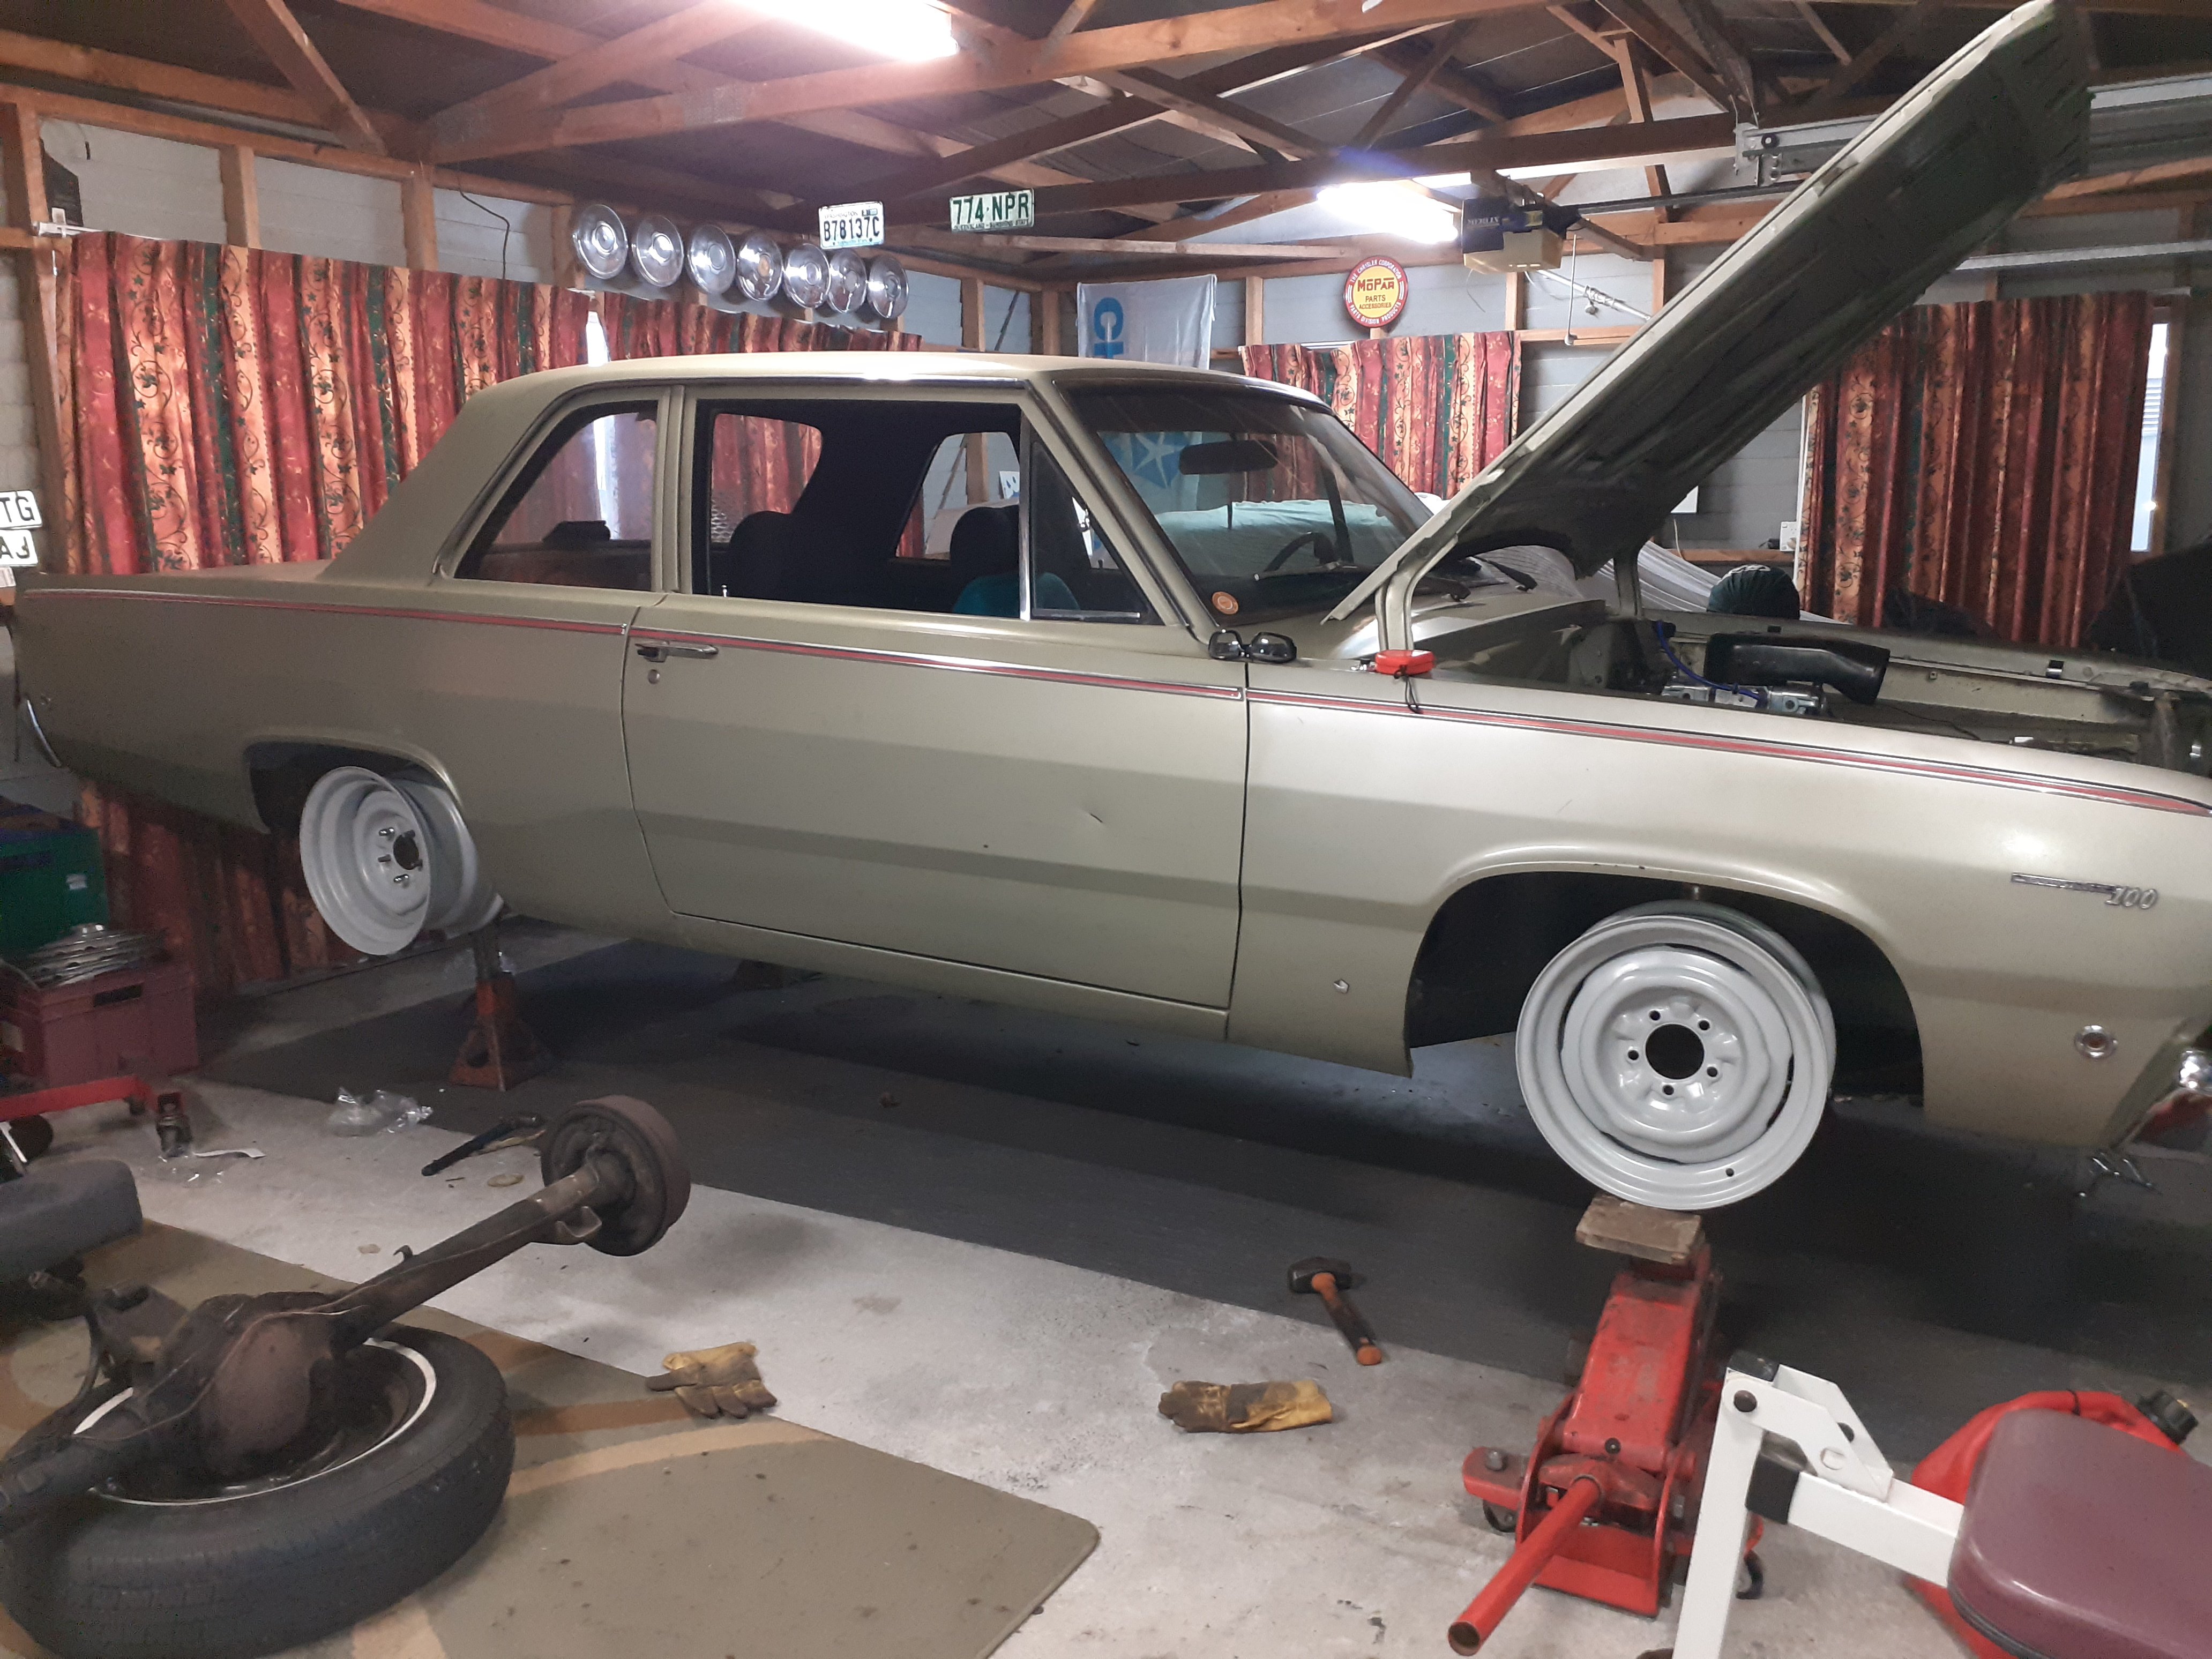
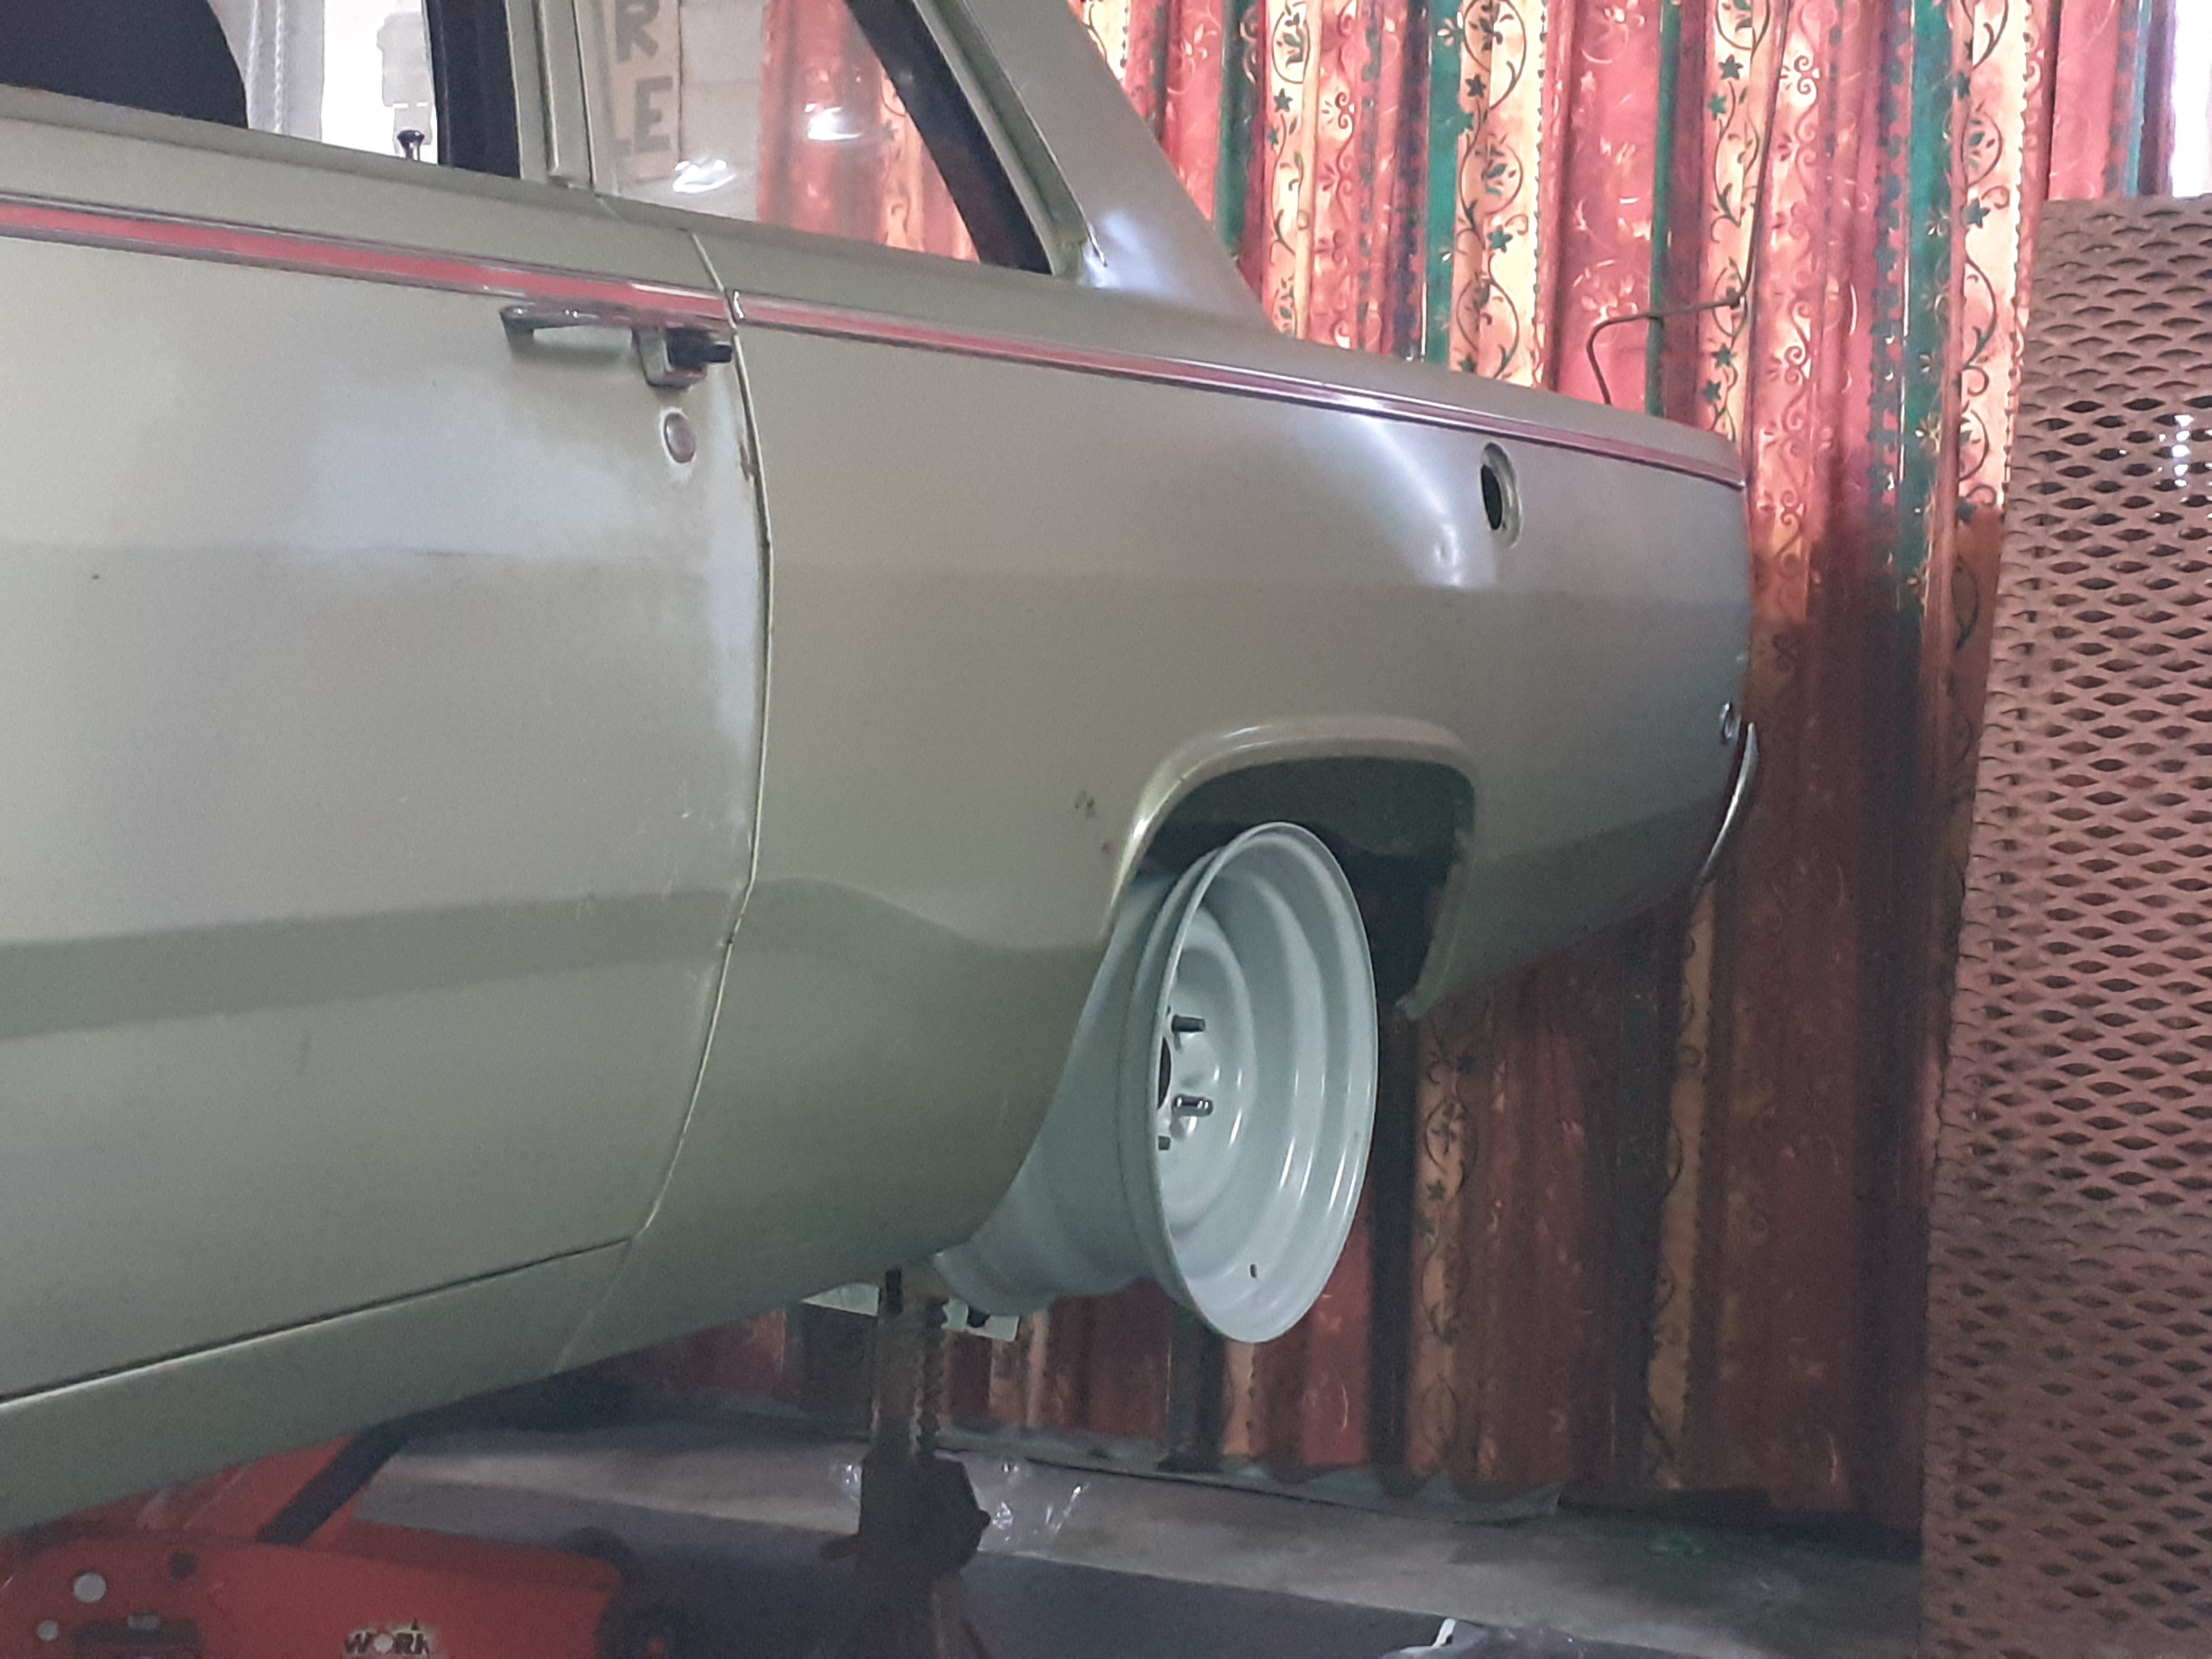
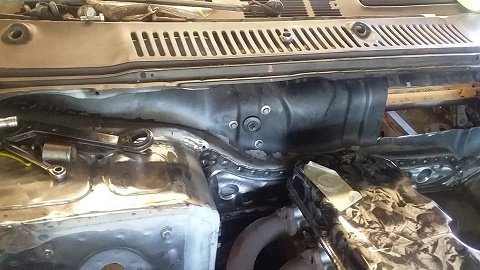
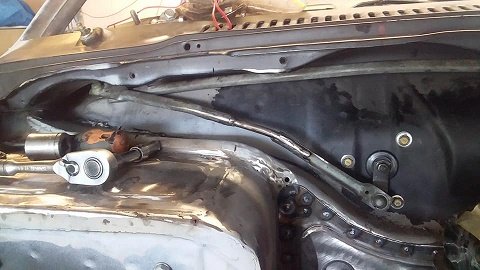
With the engine and trans in I started to look at what I was going to do for an exhaust I can choose 2 of the following 3 items Rh torsion bar Oil filter An exhaust that actually flows So I think the best option is to put coil springs in it and get rid of the torsion bars. I knocked up a dummy coilover using parts I had kicking around. I'll go see autolign this week and see if they can make a bilstein shock with a circlip adjustable lower platform and I can use the threaded one at the top. If this plan works I'll need to modify the lower arm inner pivot bush and strengthen the shock mount to cope with the weight
10 points
-
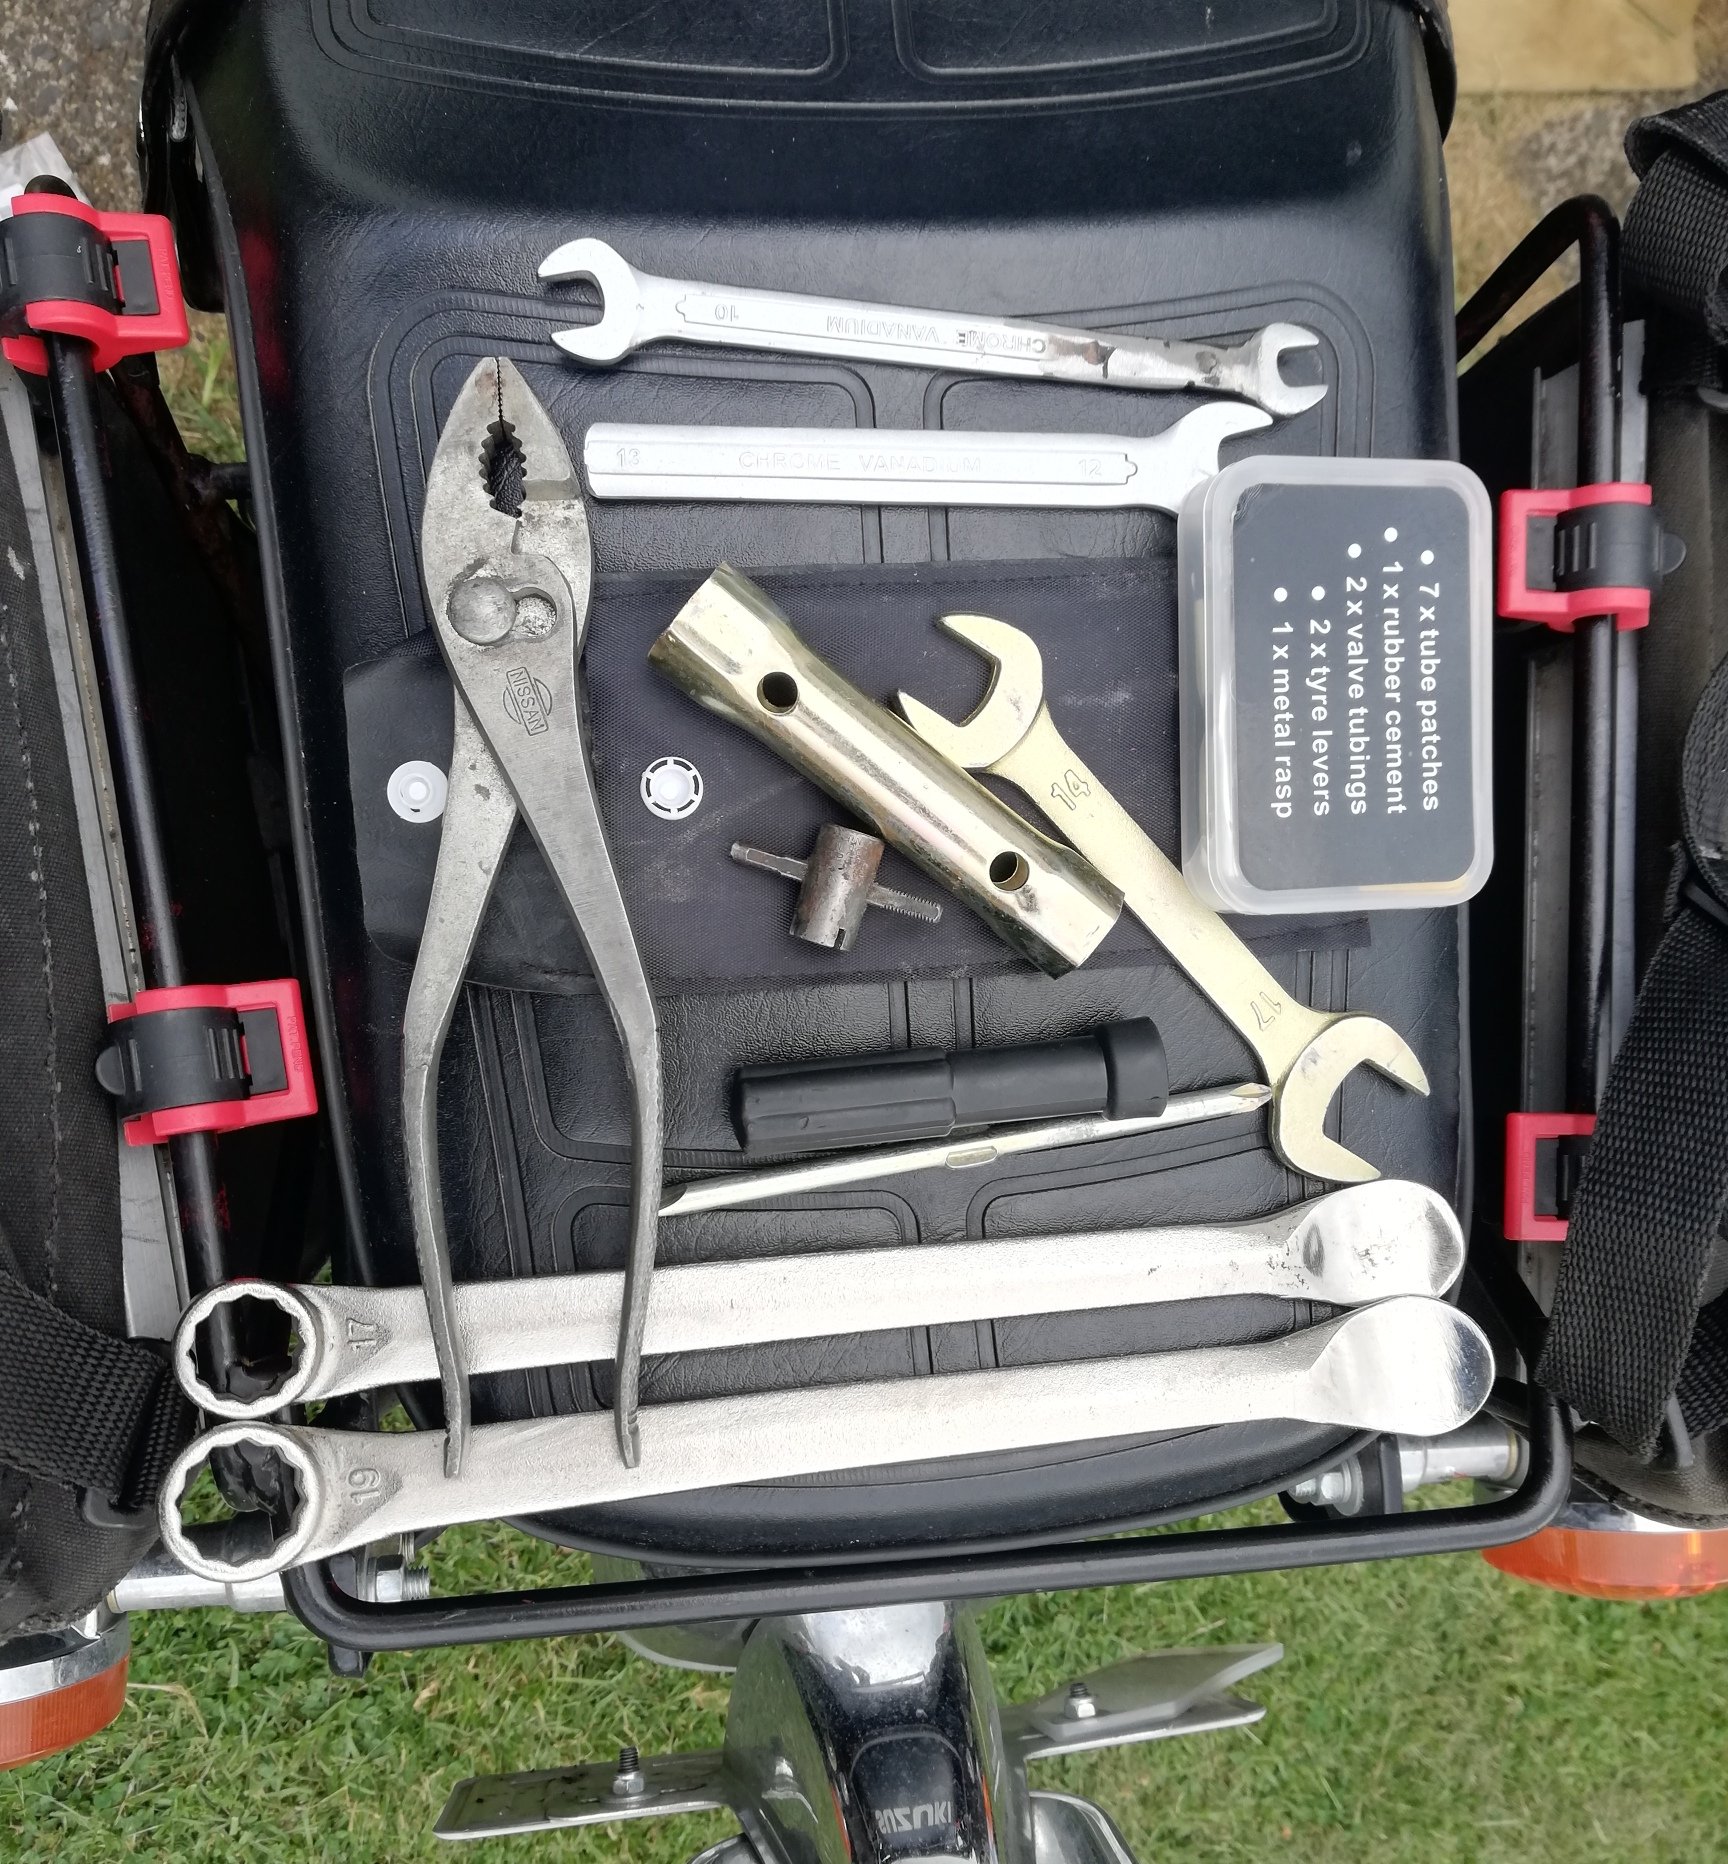
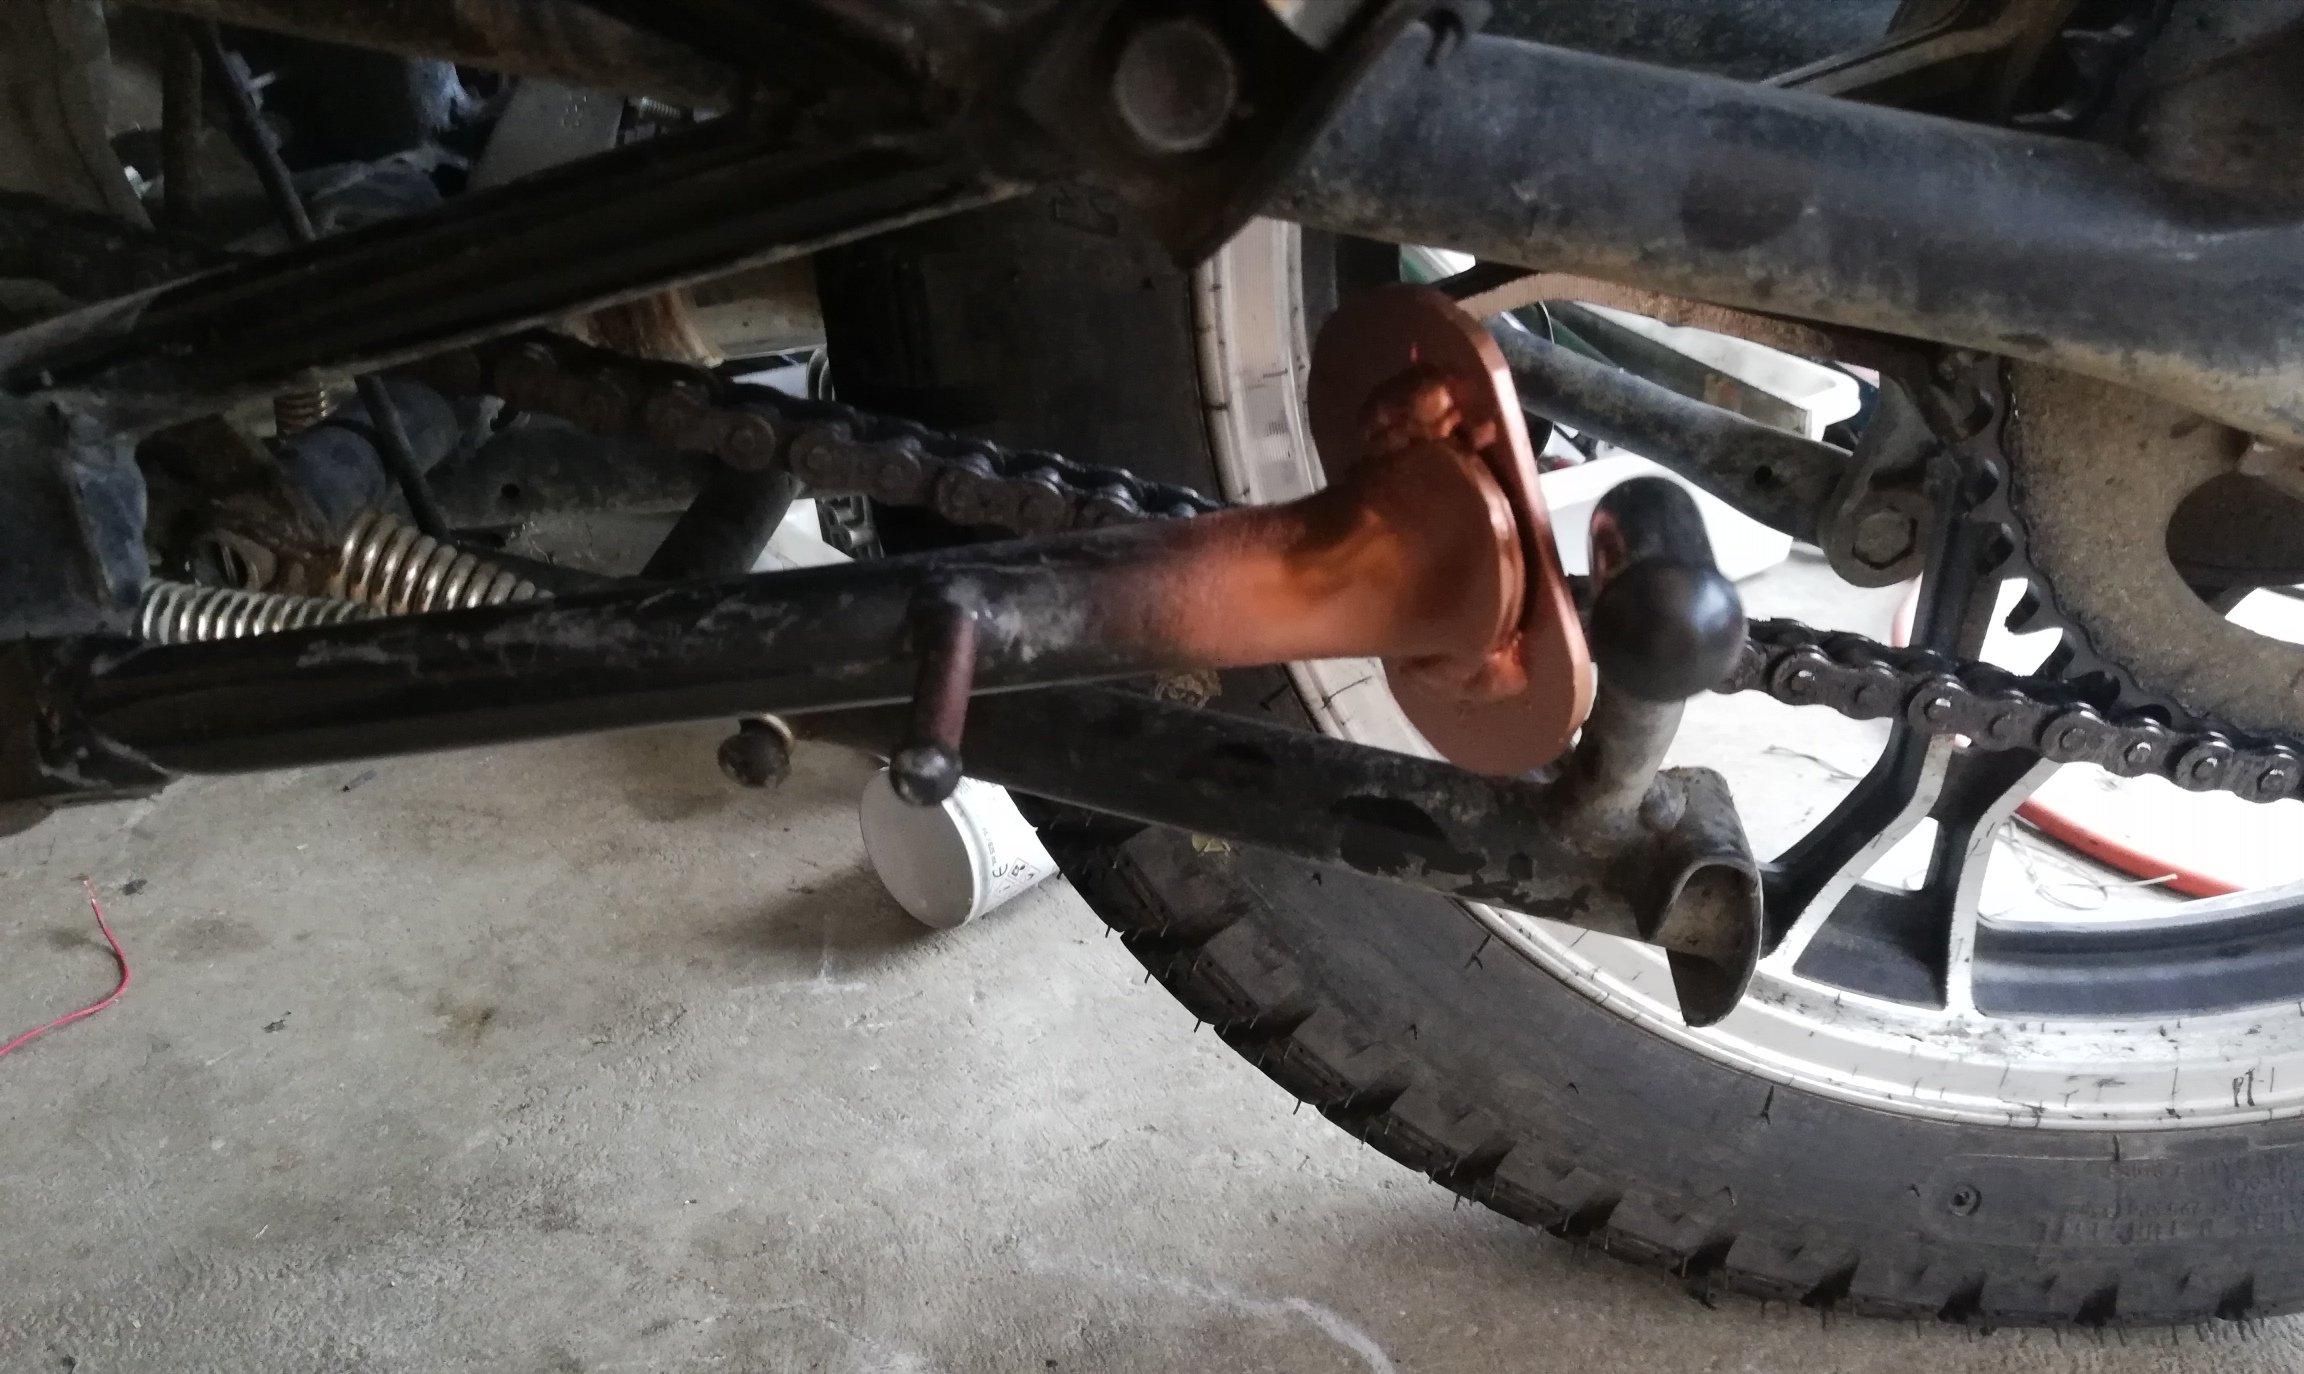
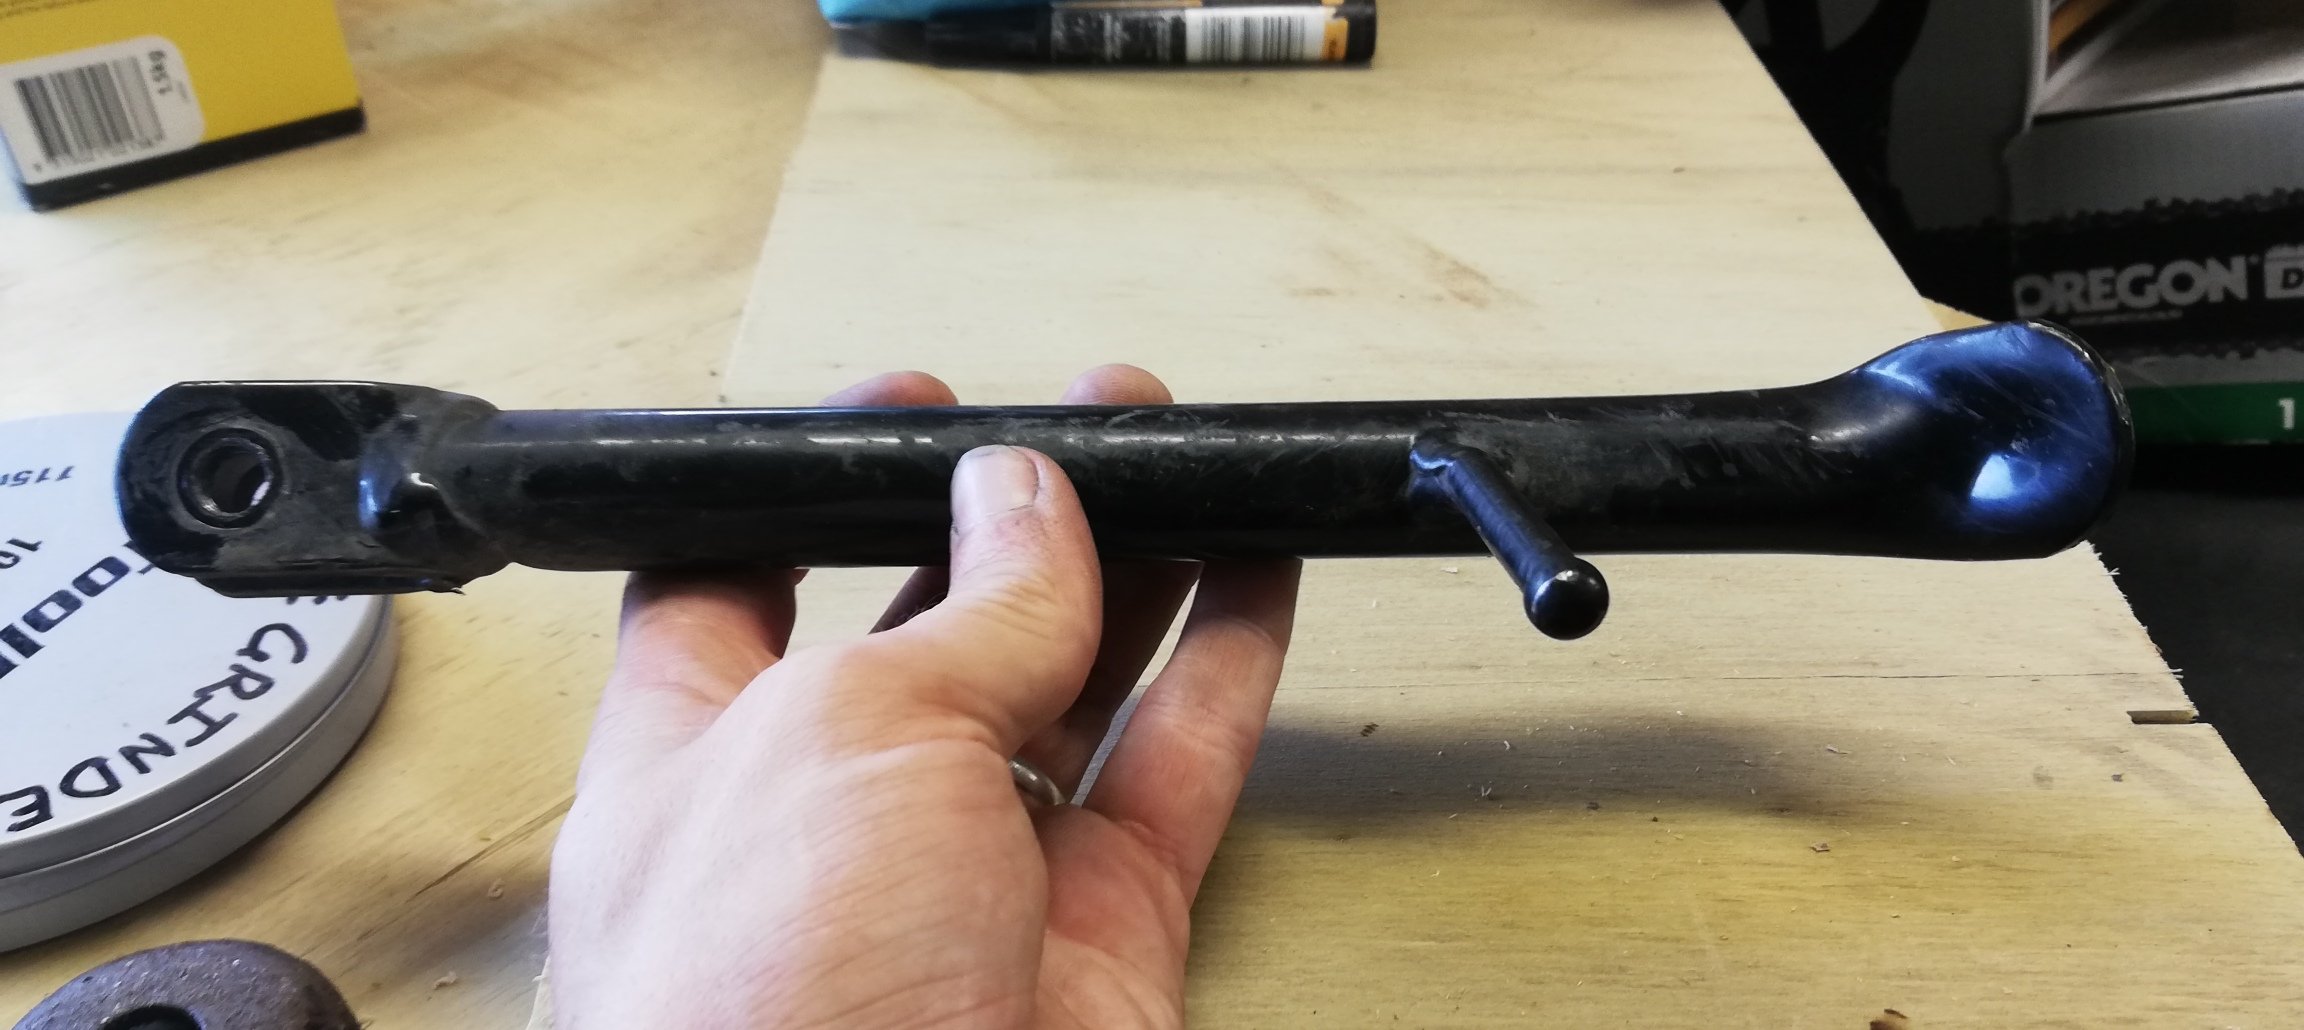
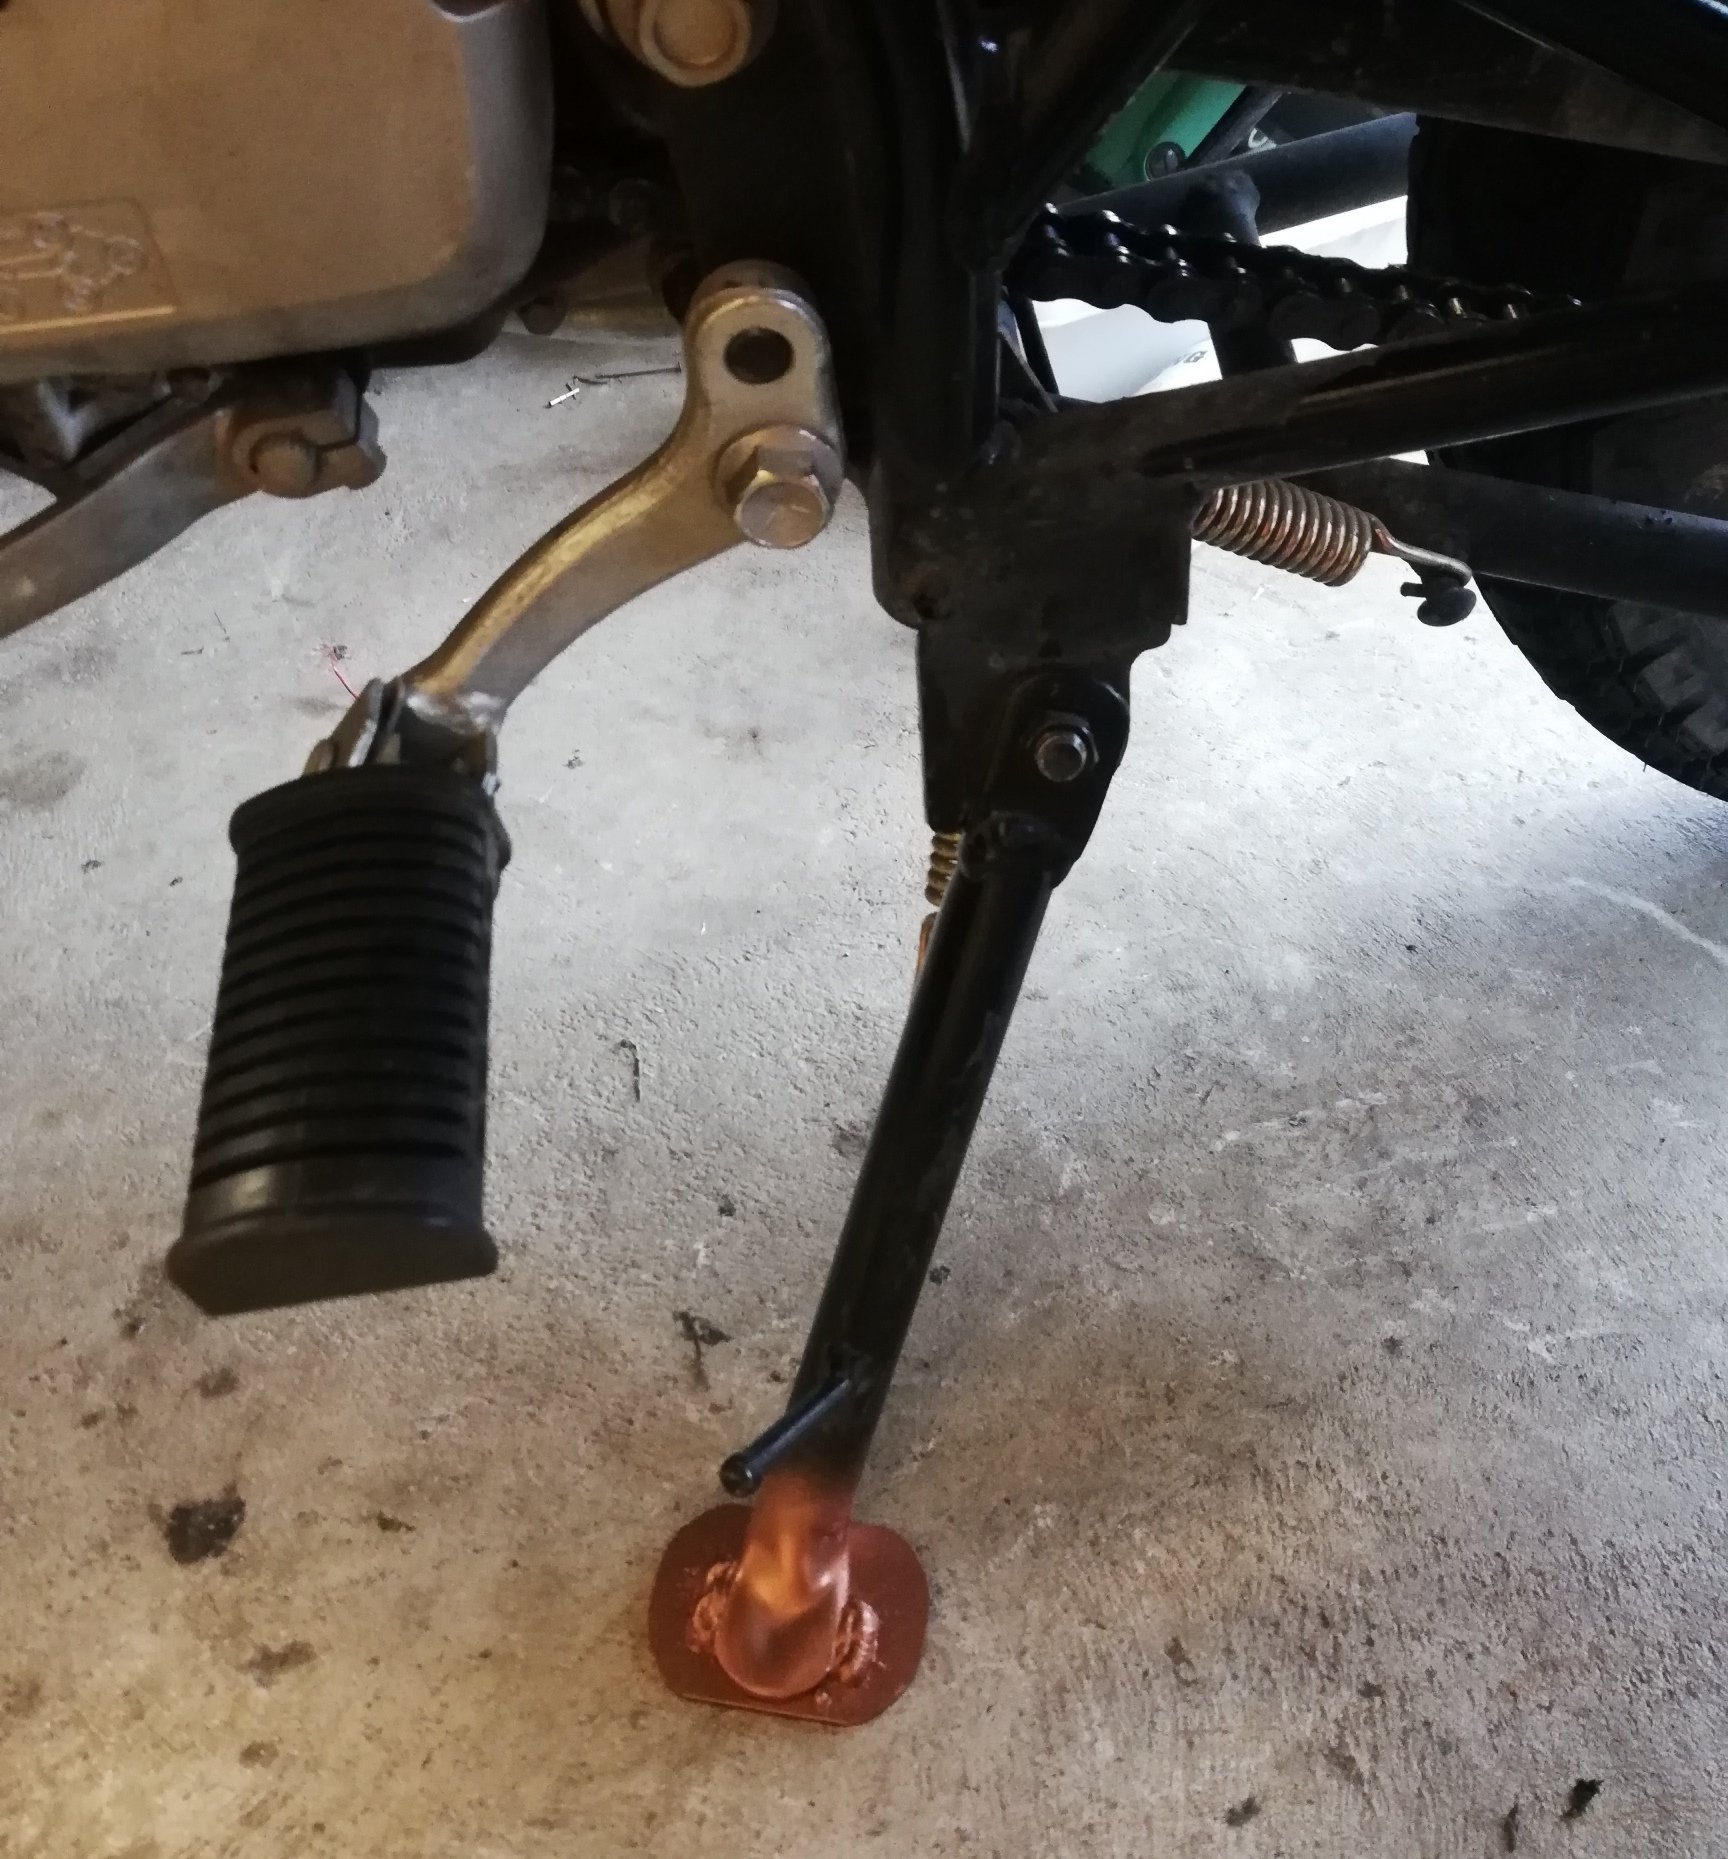
Put together an extensive tool kit Not quite enough to fully strip the bike and engine, but close enough. And then I figured I may as well make a larger foot for the side stand. It sunk a little in the Motu river bed, probably not a big issue really, but here it is. As big as you can go without modding anything else.
9 points
-
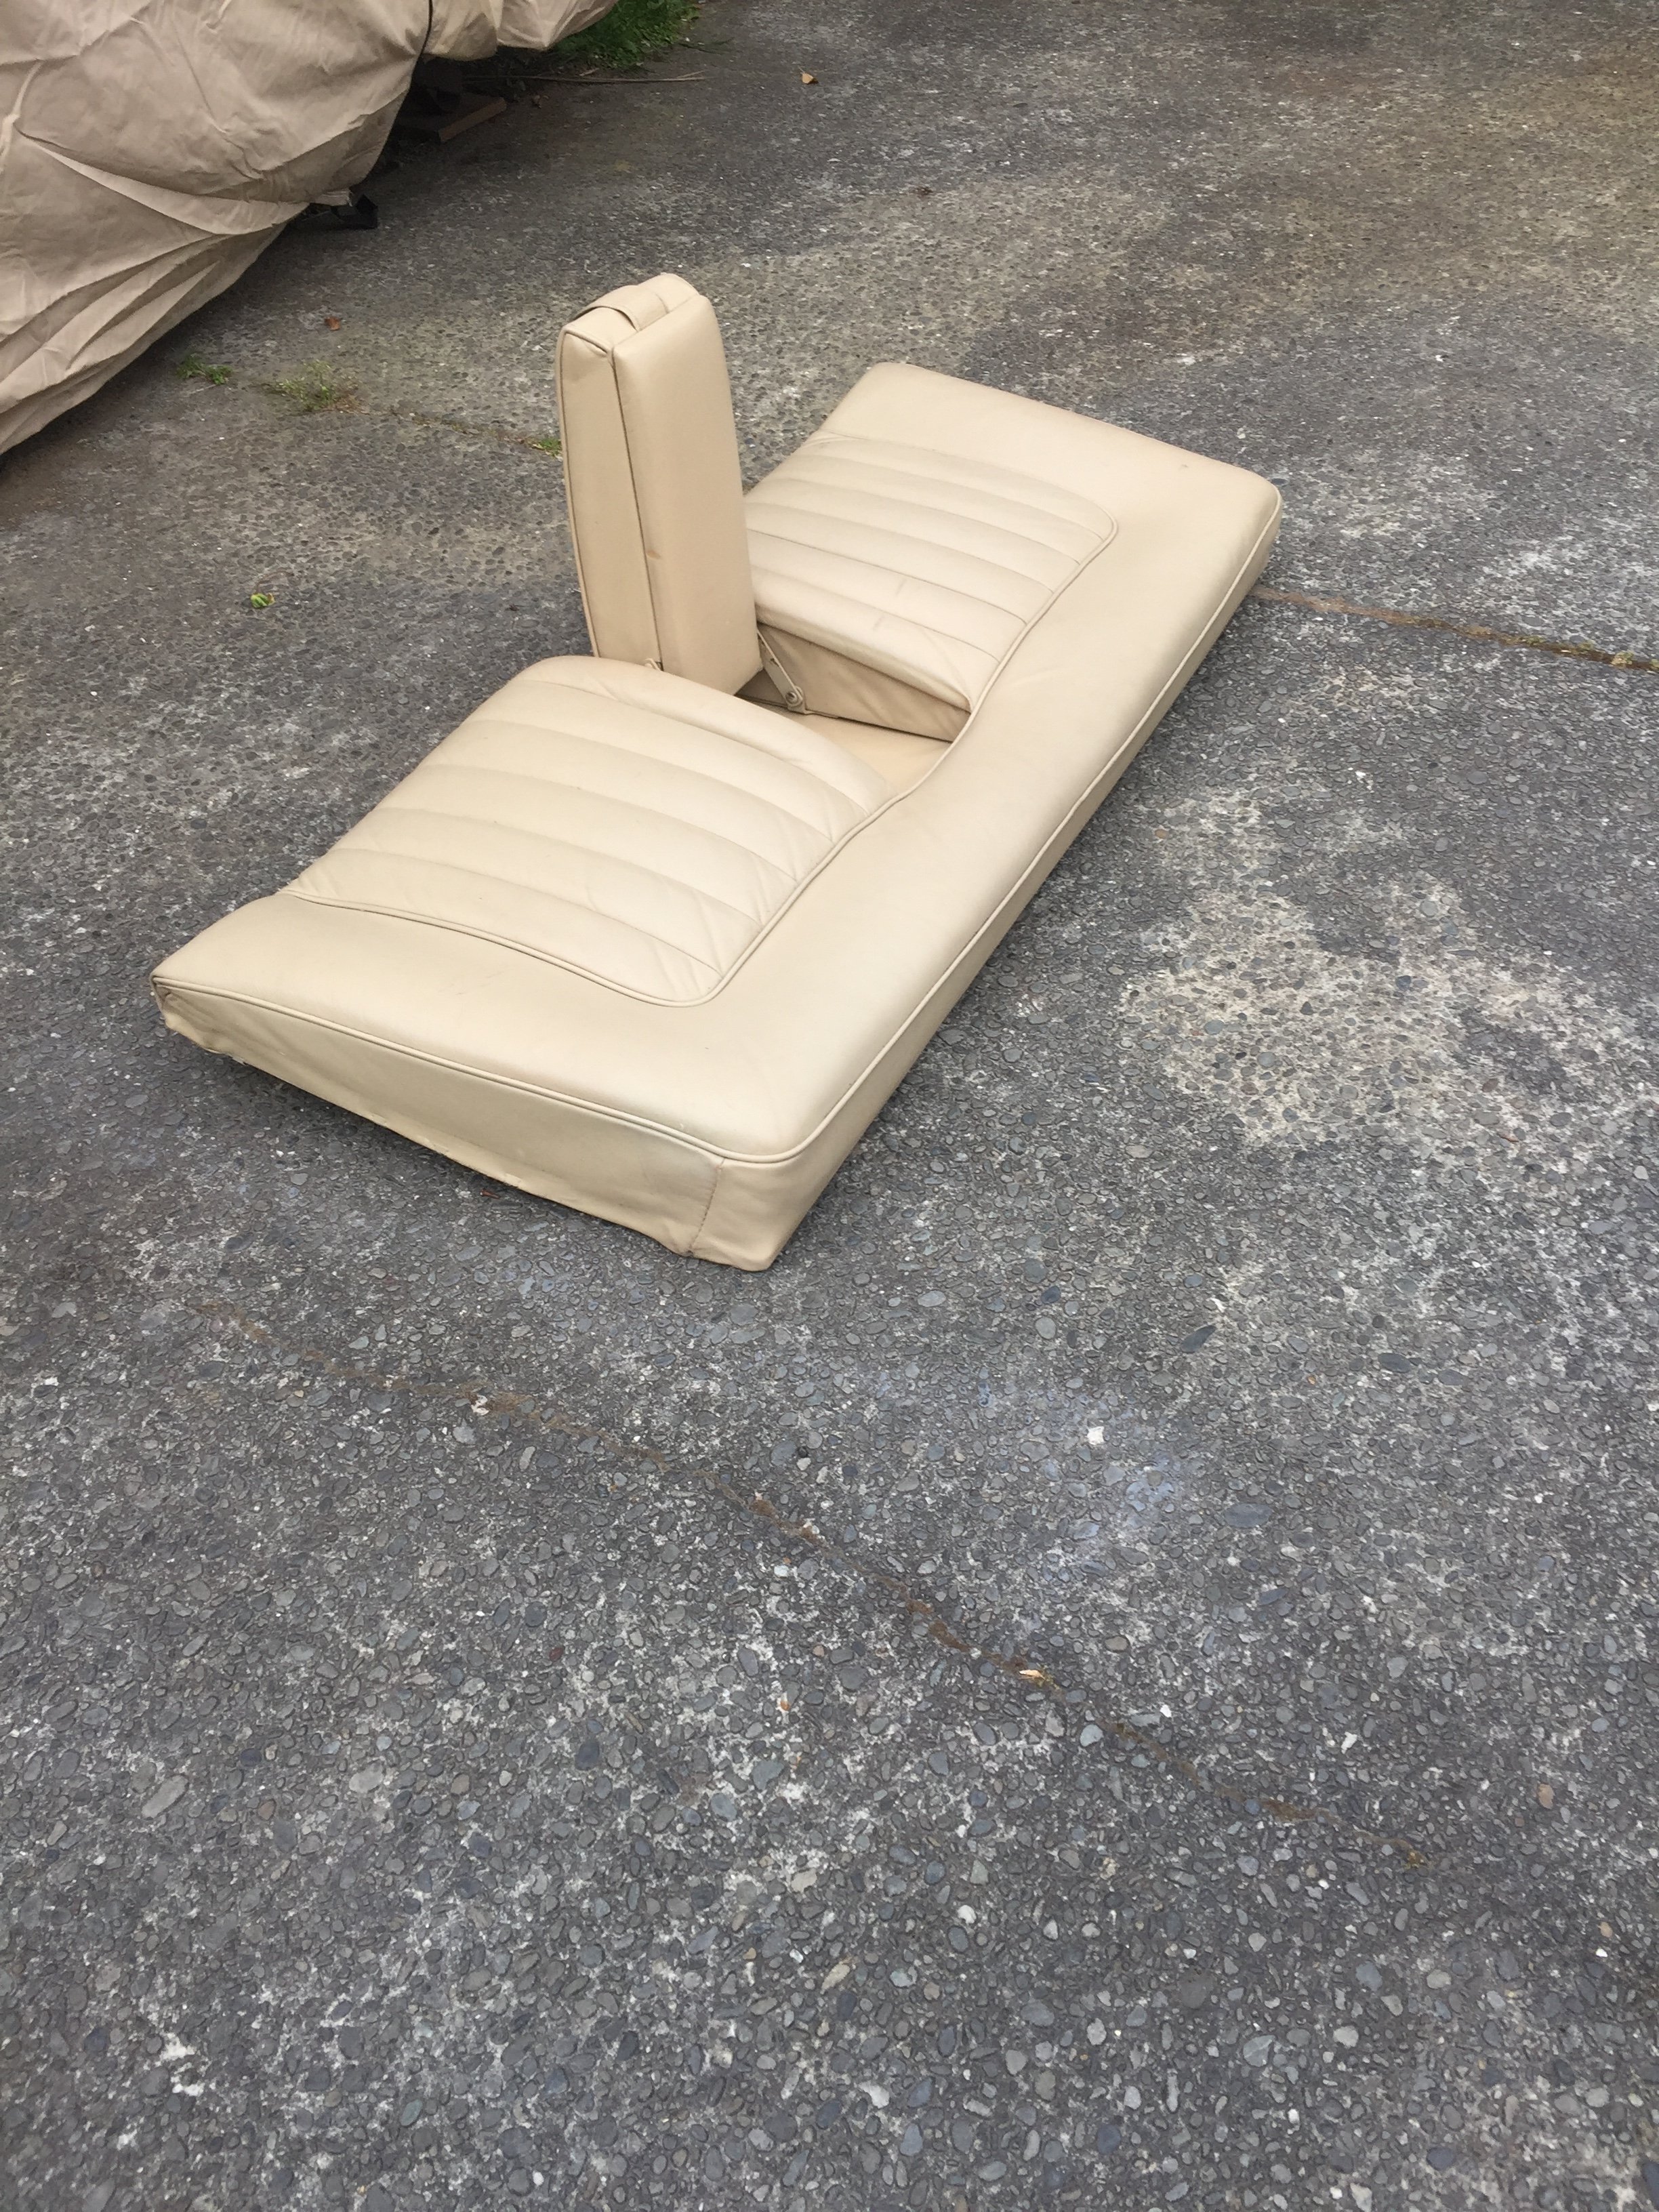
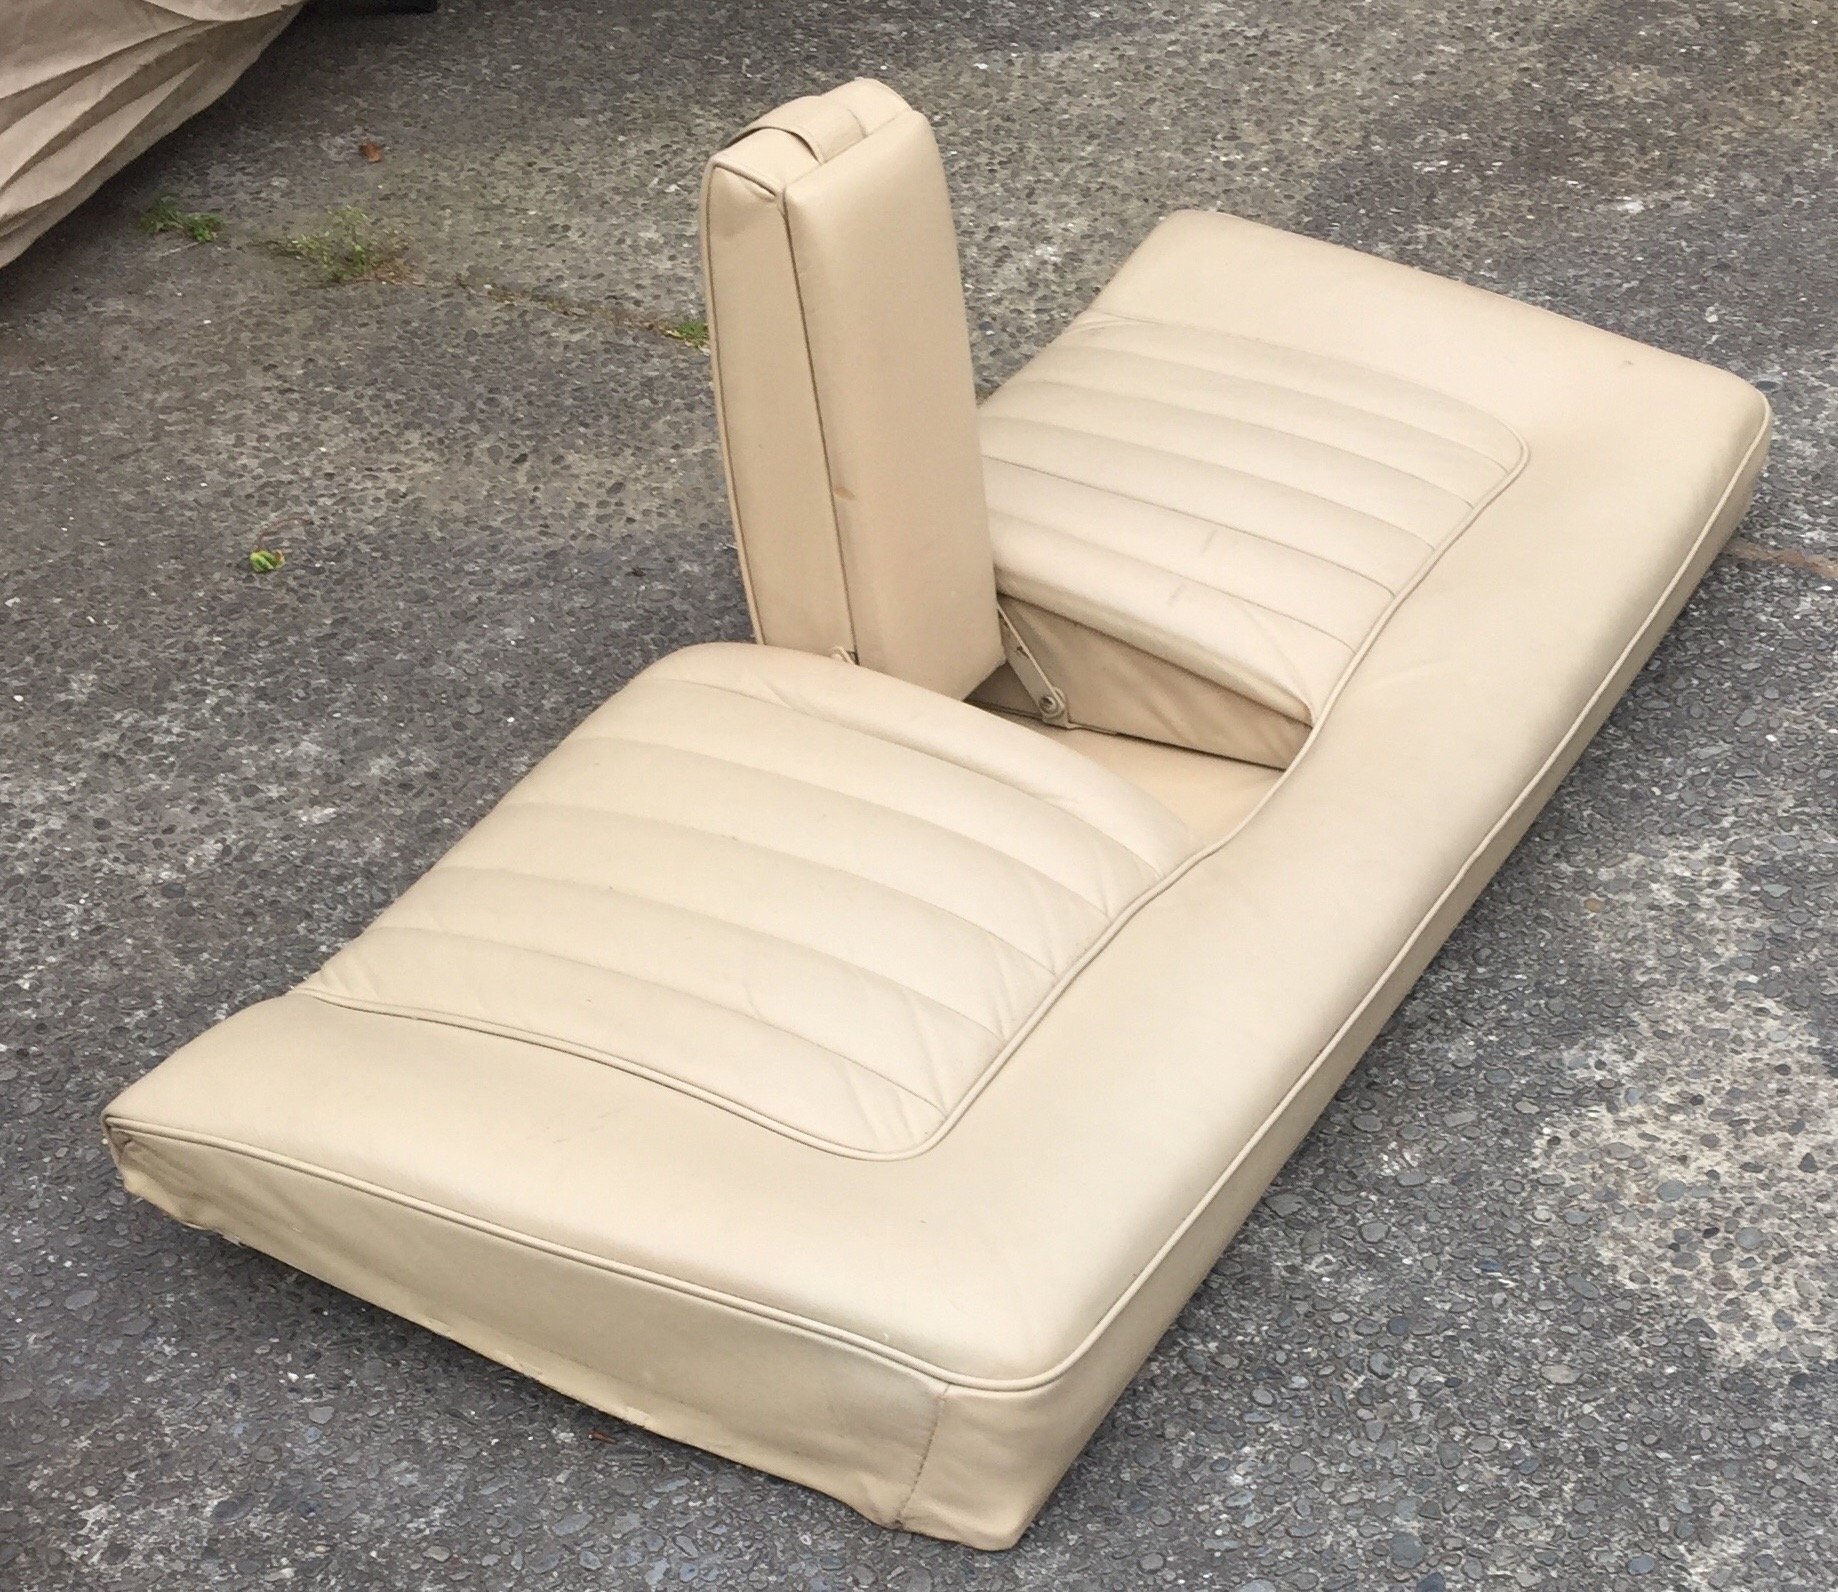
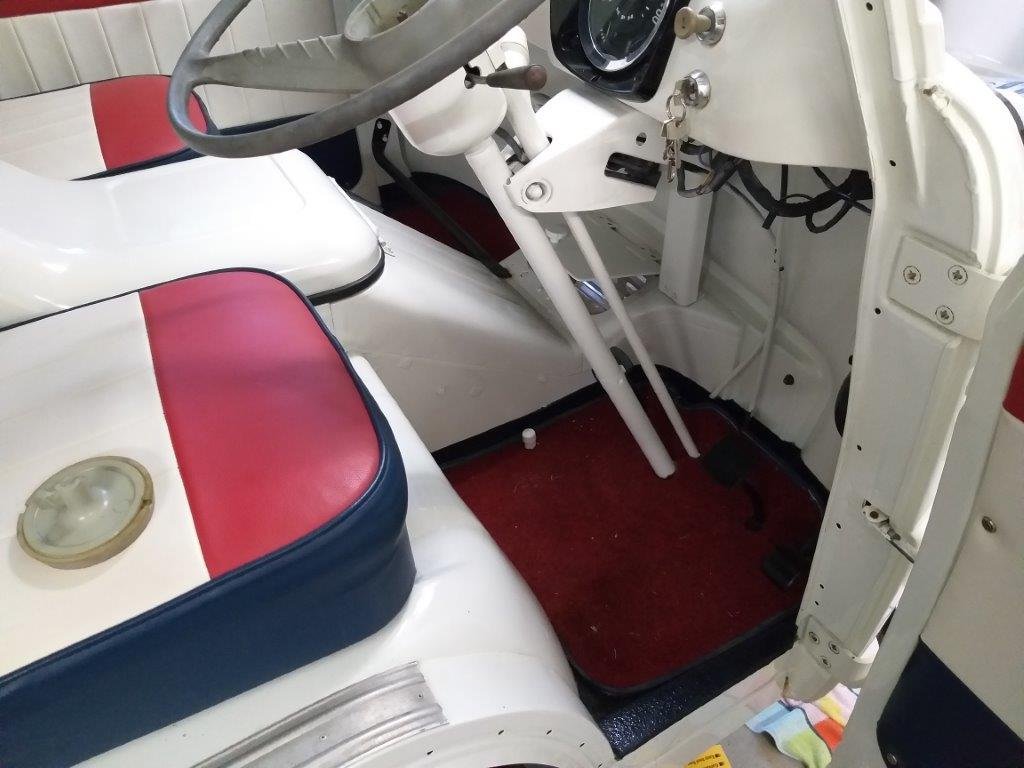
I am astounded by the condition and quality of the leather seats. Faultless. I’ve got them out for a clean up and need to get some fancy leather treatment on to them. The carpets are pretty decent too. I gave them a shampoo last week but have been a busy boy since. Will upload photos for people who appreciate the finer things in life
7 points
-
I scrounged up a #115 jet and went for a tootle around the back roads of East South Auckland. It's an improvement. It's now on the rich side of a good tune throughout the throttle range. Splitting the difference at #112.5 if there is such a thing may be spot on till I get some altitude under me I guess. It is kinda warm today though too. Am I going to become one of those 2 lane blacktop guys, probably not, but the wideband can stay in for a while and the jets can stay in my pocket. So far so good7 points
-
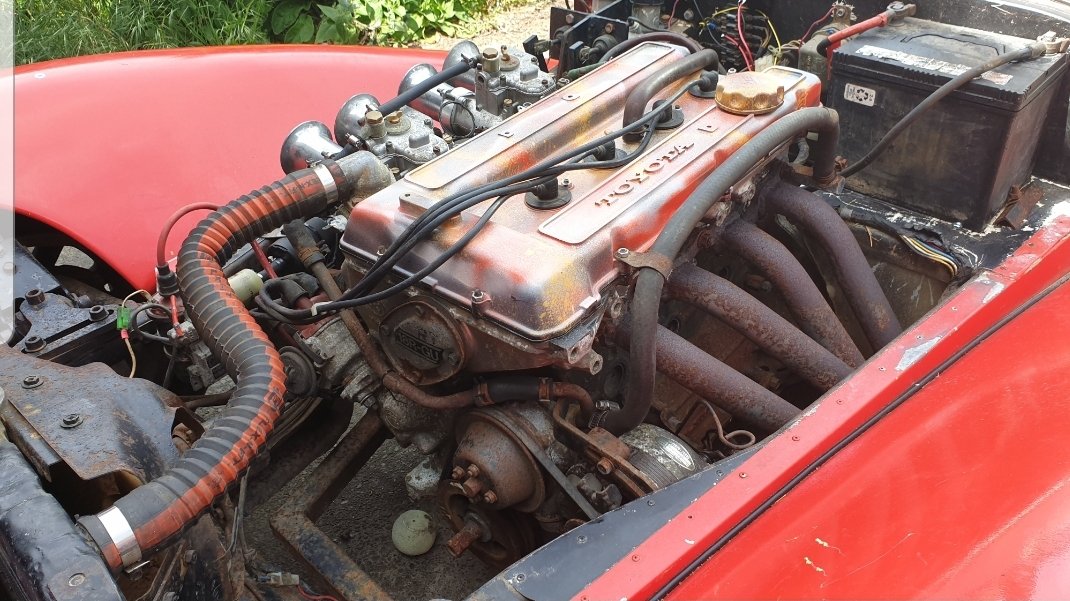
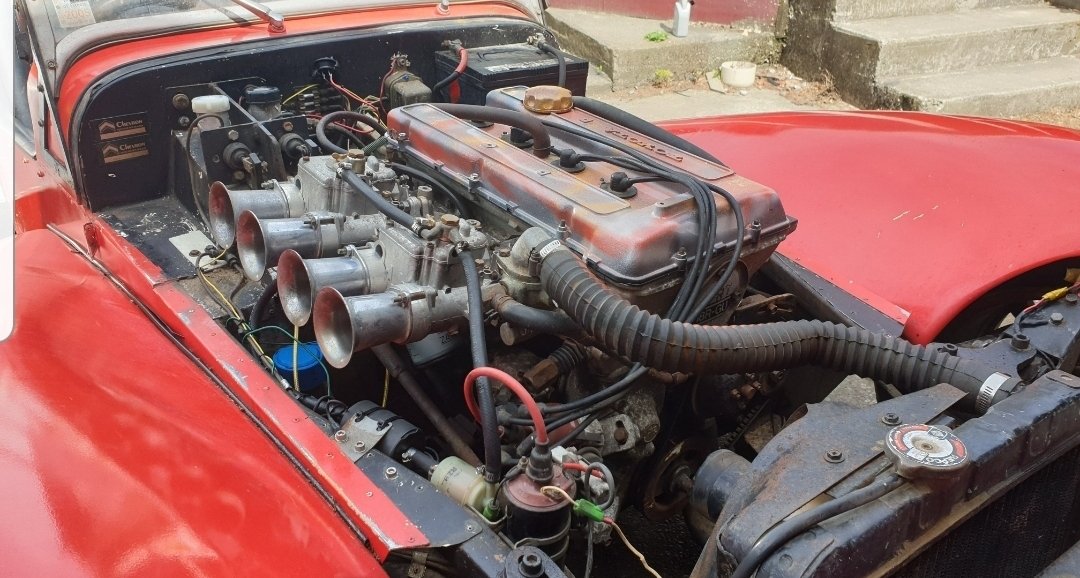
threw the seal kit into the carbs and no more leaks and no more lean spitting. (also put new O rings in the soft mount kit) went for a drive around the block and it cruised great but any time you tried to accelerate quickly it would hit the wall hard and sound like a rev limiter. not something you could drive through. clearly a major issue in the carb setup. Luckily i took photos off all the jets and tubes while i was rekitting them. Went inside for a coffee and looked up some suggested specs. found all the jets to be similar enough to the suggested specs that they were probably within tune, except for the venturi chokes, the were 30mm and suggested was around 35mm. Included with the car was a set of 34mm chokes, im not sure why the 30s were swapped in but i doubt it ever drove well. fitted the 34mms and it woke right up! still not perfect, but it runs pretty bloody strong! comes on cam (i heavily suspect its hiding something fun under the cam cover) pretty hard and sounds like the apocalypse at about 5000rpm. wof very soon and then ill have to try get some video. only new photo i have is of the grill i had a play around with painting. quite like it.
7 points
-
Would be better with sound...6 points
-
3rd pull start. All the 2-stroke goodness. Pics to come..6 points
-
5 points
-
All assembled bar a few things that need finishing... Did this first, not sure what it should be but seems low...? But it popped into life on third pull. Was bloody surprised, and shut it down cos was just running in air. Quickly rigged a bucket to get some cooling water through it... And it chucked water everywhere, Bucket obvs not up to task so emptied the old wheely bin I use for scrap and it seemed to be pumping cooling water through ok... Had daughter holding it for that pic, she wasn't keen... Ran ok but had a few backfires after a couple of minutes, and stopped a couple of times. Could have been low on fuel as I only put a little bit in and had used a bit tickling the carb, plus I'm waiting on a plug cap so the connection's only finger tight, and am unsure how it likes running off choke. Really need some sea-trials to see how it's going... And should be able to see where I've been on the water if this residue is any indication... Stoked it ran though. Now I need to fix the boat to put it on...5 points
-
New tail lights fitted, no dramas, all working now. Decided I'd let my daughter paint one of my spare cam covers. Turned out pretty cool in the end. Quite pleased and looks a million times better than what was there. The pretty cool looking headers will get a tidy up and probably heat wrapped at some point.
5 points
-
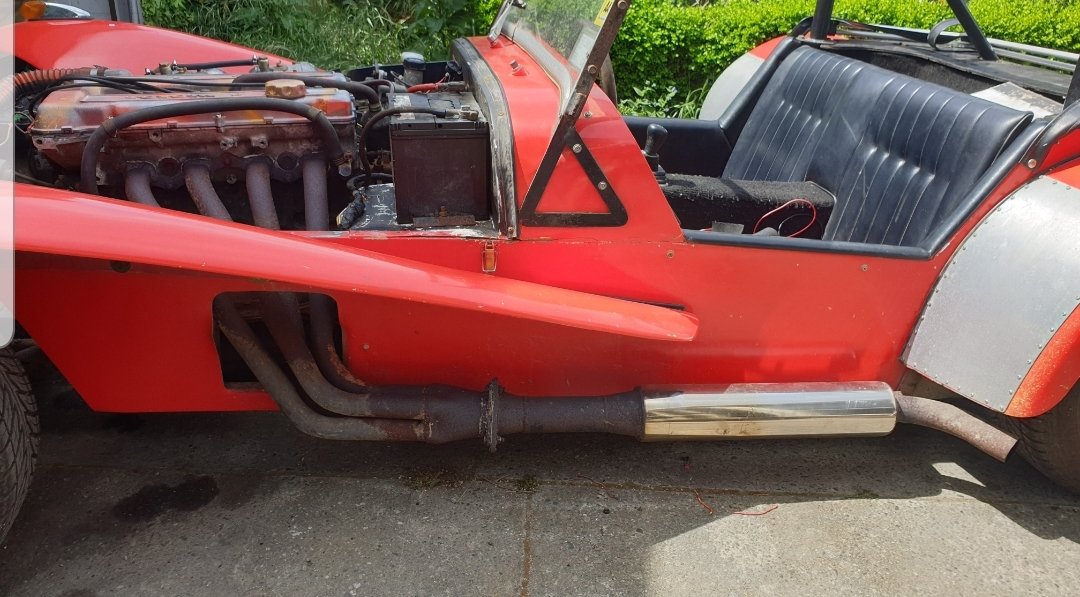
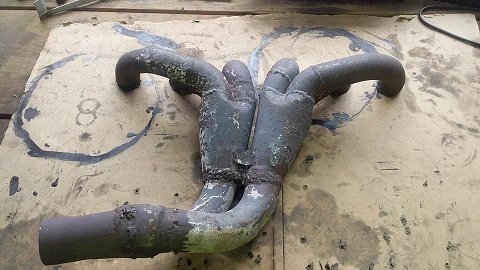
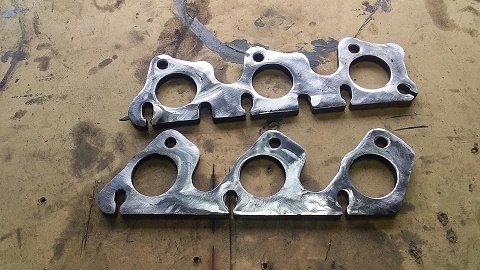
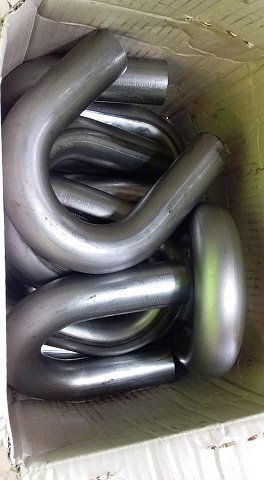
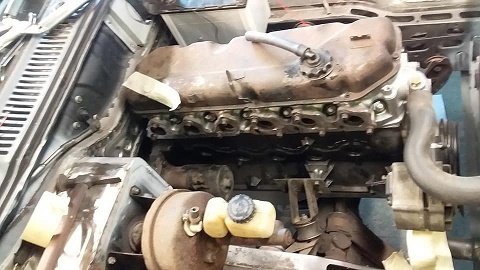
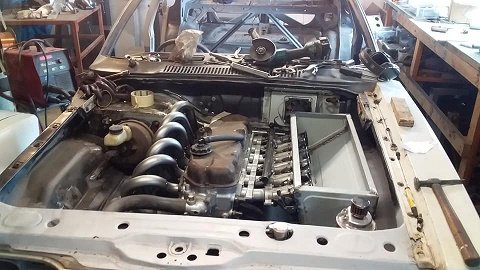
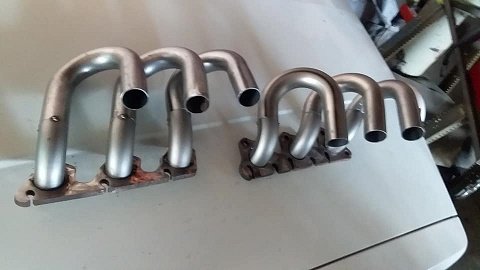
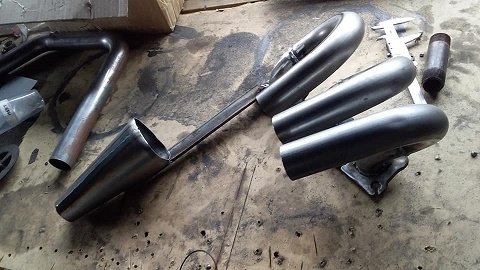
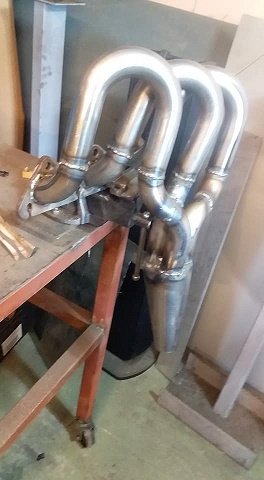
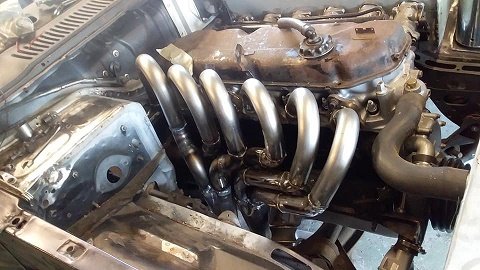
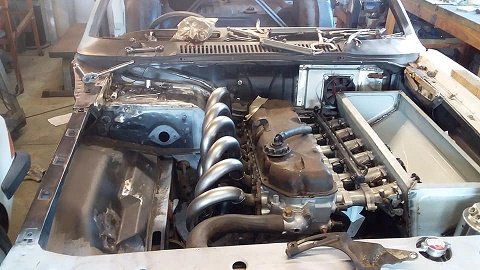
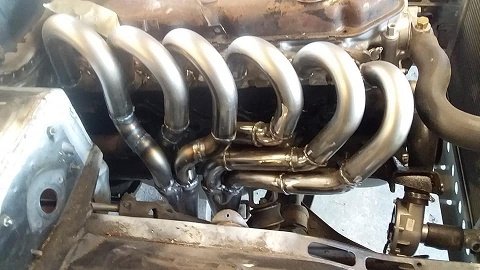
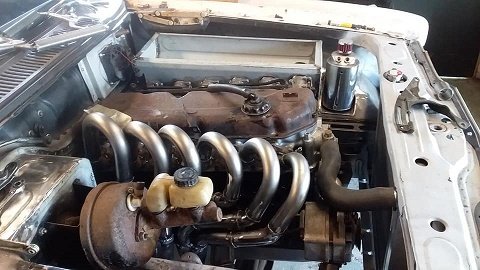
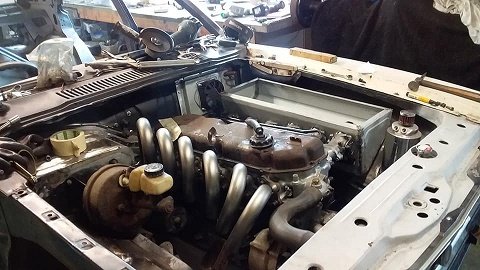
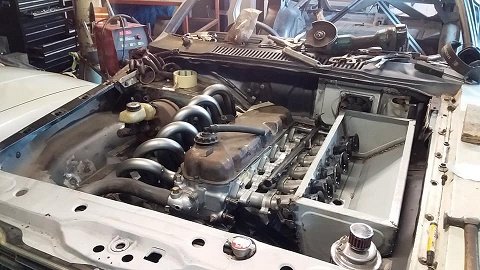
this is the 1st set of headers iver ever made and no i cant tig weld so mig was used........they will be wrapped to cover my shame ........and heat. so i dont like any of the off the shelf headers for the 4.1 and much prefer the huge looping JDM style headers .. these are the crap headers that cam on the motor. the only good part was the flangers so i cut them off to re use. i was talking to a guy in aussie that builds high performance 200 and 250 xflow motors and he said the ideal set up for a street car and will work with a lot of setups. 6 into 2 using front 3 and rear 3...41mm tube 660mm primerys 3into 1 collector.....then 2" -2.5" dual exhaust to the rear of the car with mufflers and a v8 stlye x pipe.. so i ordered some bends.........and i got all 6 within 10 mm of the 660mm and each other. at least there is room to play with then started with the setup i wanted it to look like before i build the rest. then made the rest front 3 rear 3 bolted in
5 points
-
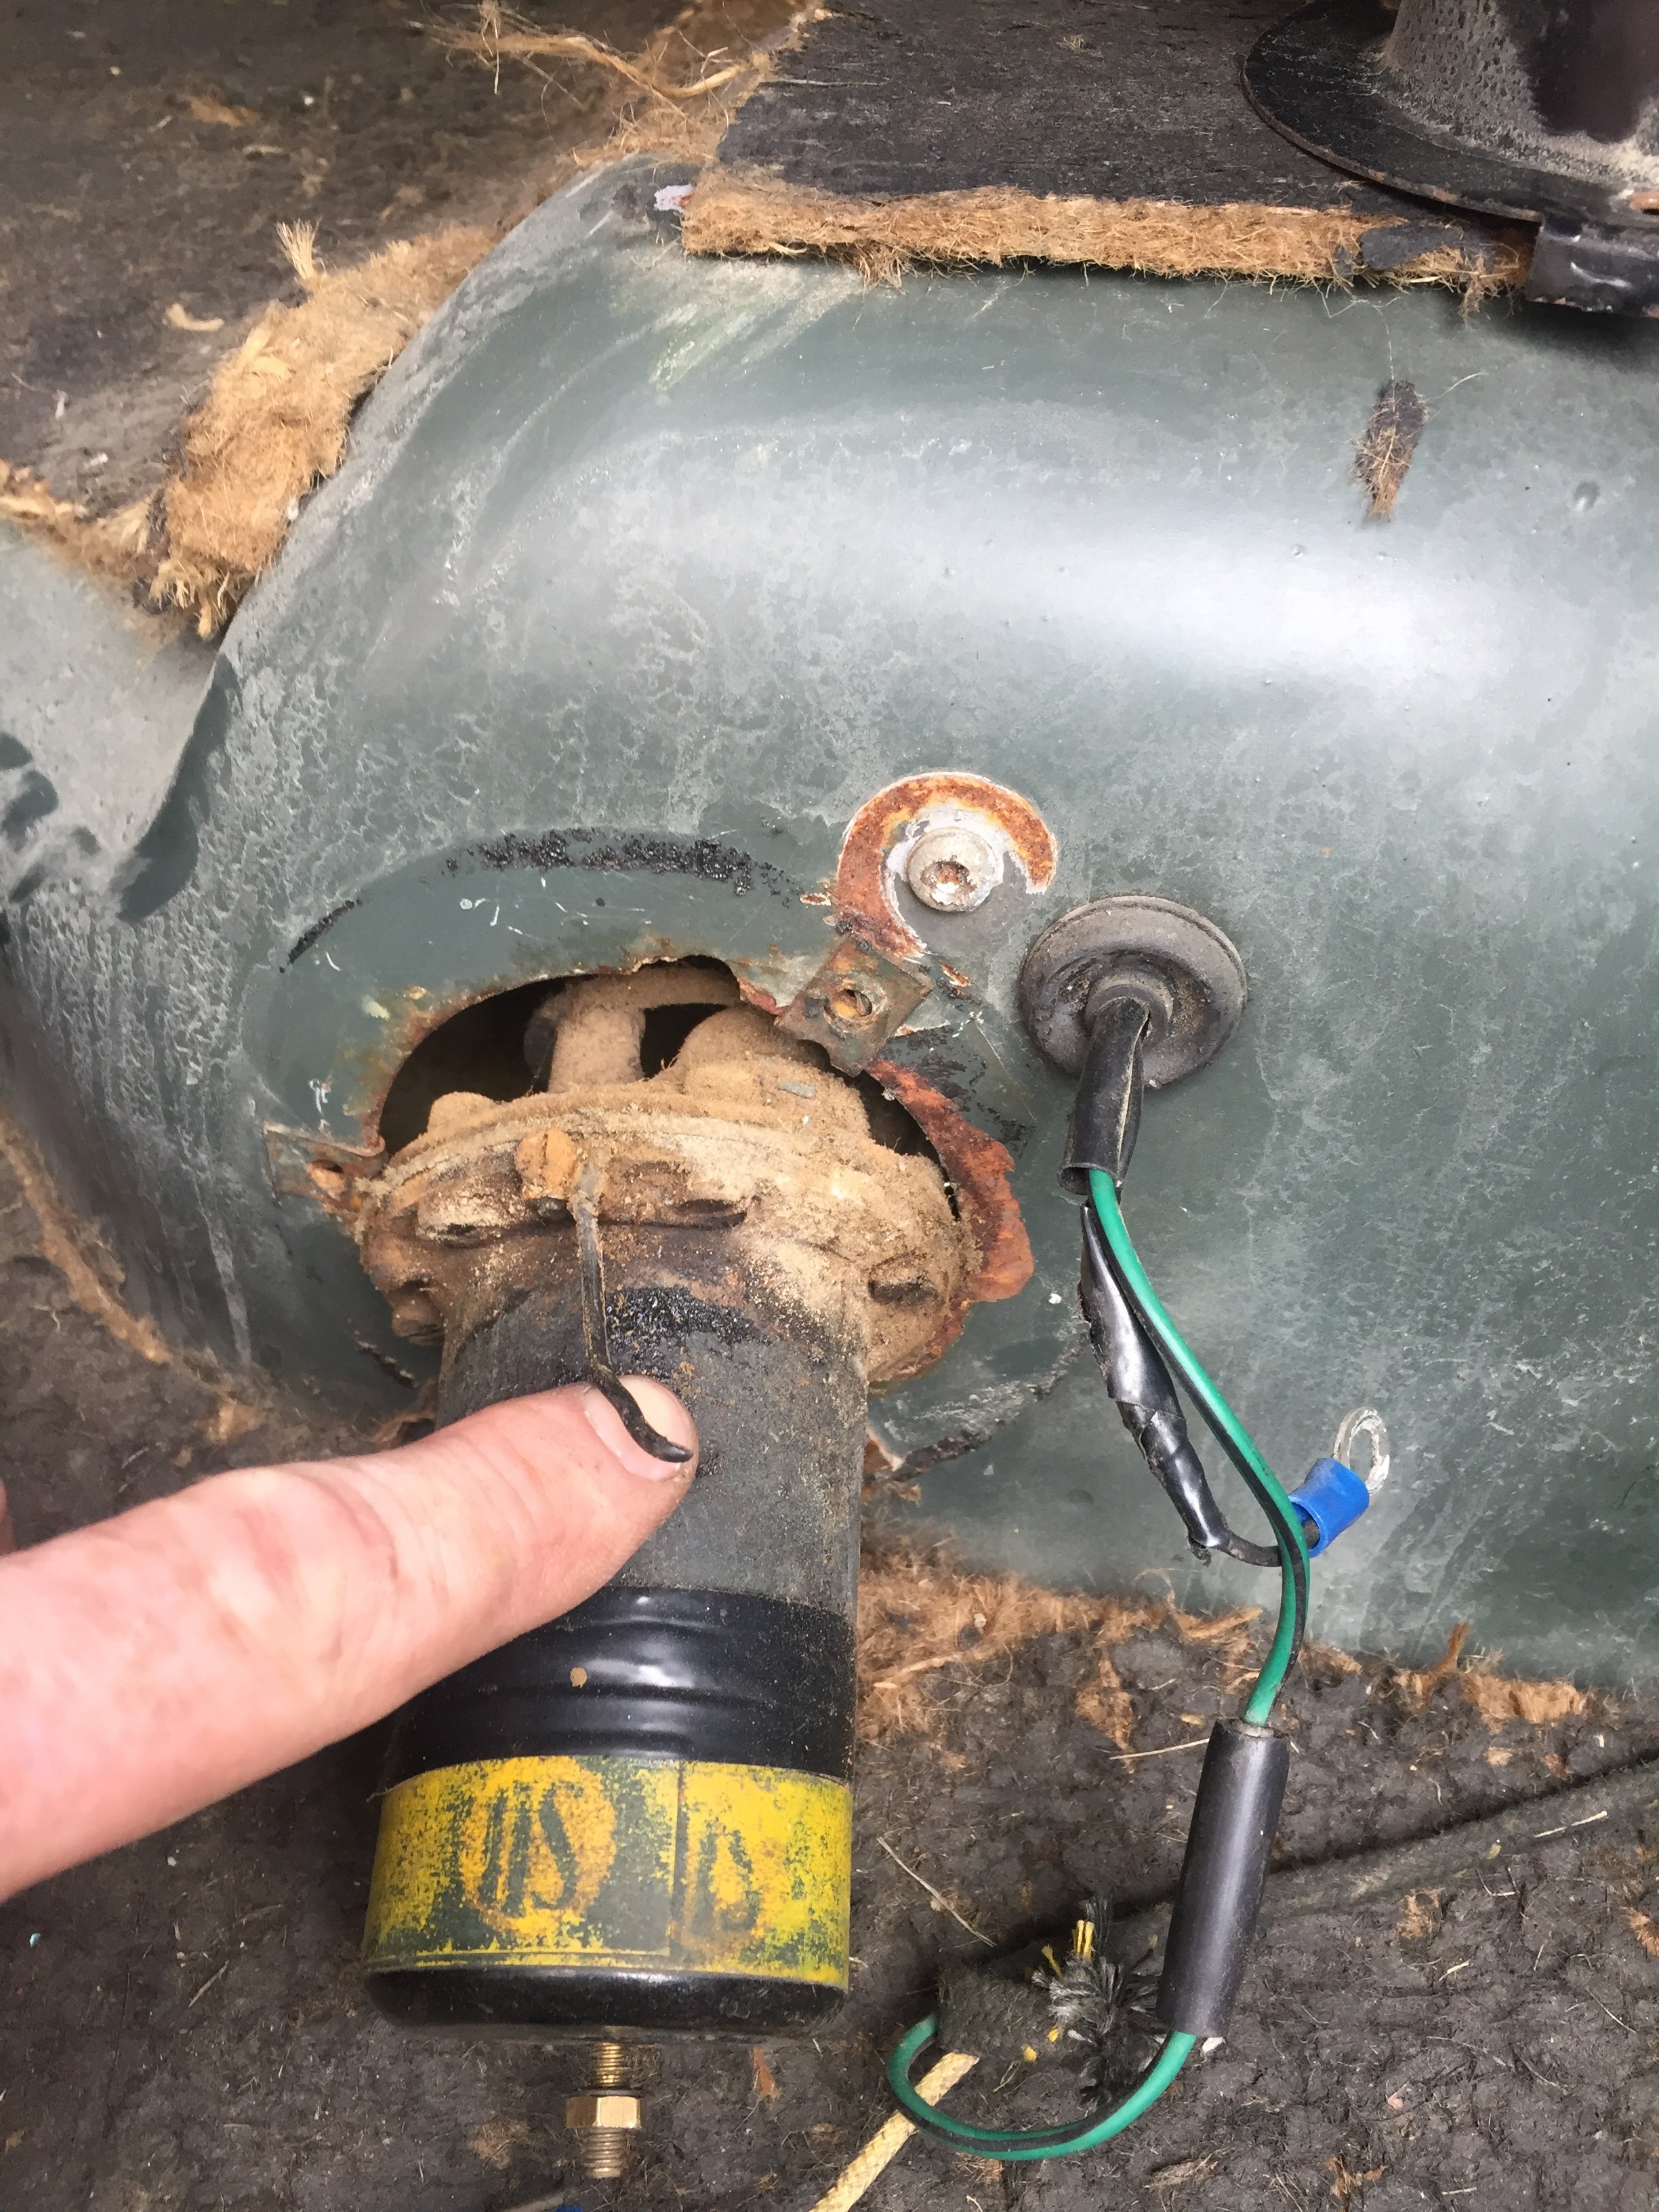
A bit of progress on the ol girl over the past week. clutch was siezed “released” - new slave arrived now so I’ll pop that on. No fuel pump sound when car turned on. Slid fuel pump out and saw this ground wire not connected to anything (pump is In isolating rubber sleeve). Curious. Then found the body lug it should have been connected to connected to another lug connecting the body of the car to the body of the car 20mm away. Nice one previous owner. Cleaned and connected. Pumpin! Pumped some old fuel through and threw 10 litres of new in. Still no start. Pulled float bowls - no fuel and sticky valves - loosened up and cranked her over.....
4 points
-
Chur, for those around on Thursday night, I have an excess number of Beers. For those that enjoy Beers, and are not fussy what kind, drink my Beers.4 points
-
Making plenty more progress, but this bit feels like a bit of a grind for some reason. Probably cos I keep not quite finishing things because I need something, then getting halfway through something else before stopping cos I need something, then bits turning up so I carry on with the other.... and so on seemingly endlessly. Whatever you whining prick. This is what did get done, finished or not.. An exhaust. The tip is not 100%, I need to get the deck back on to finish this nice and tidy. Added an EGT sensor to the stumpy adaptor thingy so I know exactly when I am about to detonate the engine; Oil feed line to the turbly, probably needs a heat shield going past the manifold; Oil drain pipe from the turbly to the sump. This might get tidied a bit as it gets kindof close to the boost actuator rod; I also got given a boost actuator, some amateur sleuthing involving a tyre pump gauge and compressor tells me it is cracking the seal at about 15psi. I mounted this and discovered my bracket would hit the chassis, so I had to remake the bracket. It's all sorted but I forgot to take pics, maybe later you will be able to admire the simple elegance of this.4 points
-
Driving from TGA Fridee morning. /ling Repaired the rack from Callum’s first Eastcape crash today to use on my bike. and also installed the forks from that same bike. Hope the curse of the pink Chaly doesn’t affect me this time round.4 points
-
Finally found a front disc brake set up and a few handy spares, hopefully strip it this week, fingers crossed the 5 speed is in good condition.
4 points
-
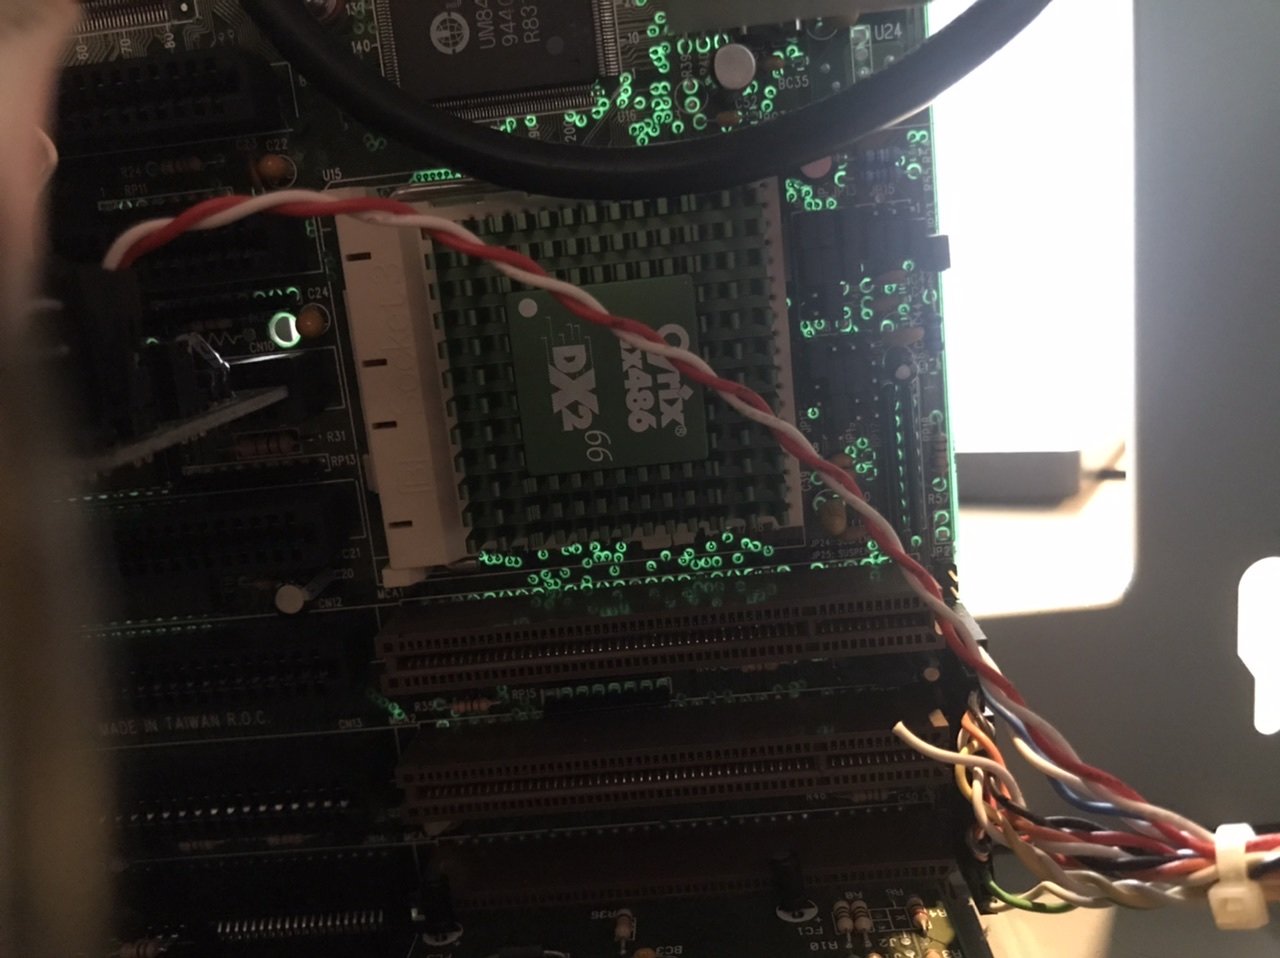
Poverty spec. Cyrix instead of an Intel, damn yo. Get some Carmen Sandiago up in thurr or some Heretic or Doom I, maybe Rise of the Triads.4 points
-
So New "genuine" rings in. Looks better than the last set. One was near touching in the bore so filed it open a bit. No data on that in the manual but around 0.2 mm was the maths. Max gap is 0.5mm in the manual 120# main jet in As suspected its rich. About 12.9-13.2 at idle. About that again at very part throttle High rpm cruise about 11.4 WOT 10.2-10.9 So a #115 is likely the correct one4 points
-
And just finished some assembly... And a test spin worried me as no obvious spark. Hooked it up to the drill though and while trying to hold the plug against the block got a decent belt, then after a good spin up it seems to be sparking well, even with a rudimentary points gap setting... And where I left it for the day. Fuel system to go... Got a temporary clamp holding it in place till some bits arrive and still have to fill gearbox and set points/plug gaps, but hopefully not far off a test run...4 points
-
Also as it’s not very busy at work/too windy to do actual work I’ve taken the cub in fitted slotted brake pads from webike and new wheel bearings in the rear fired it up for some motovation hopefully do the front end this week and try and get the lights/indicators working3 points
-
Solved the main oil leak mystery And with a free gasket courtesy of Mike, the motor now appears to be free of annoying oil leaks.
3 points
-
Oh yeah, that energy star logo, legit!3 points
-
3 points
-
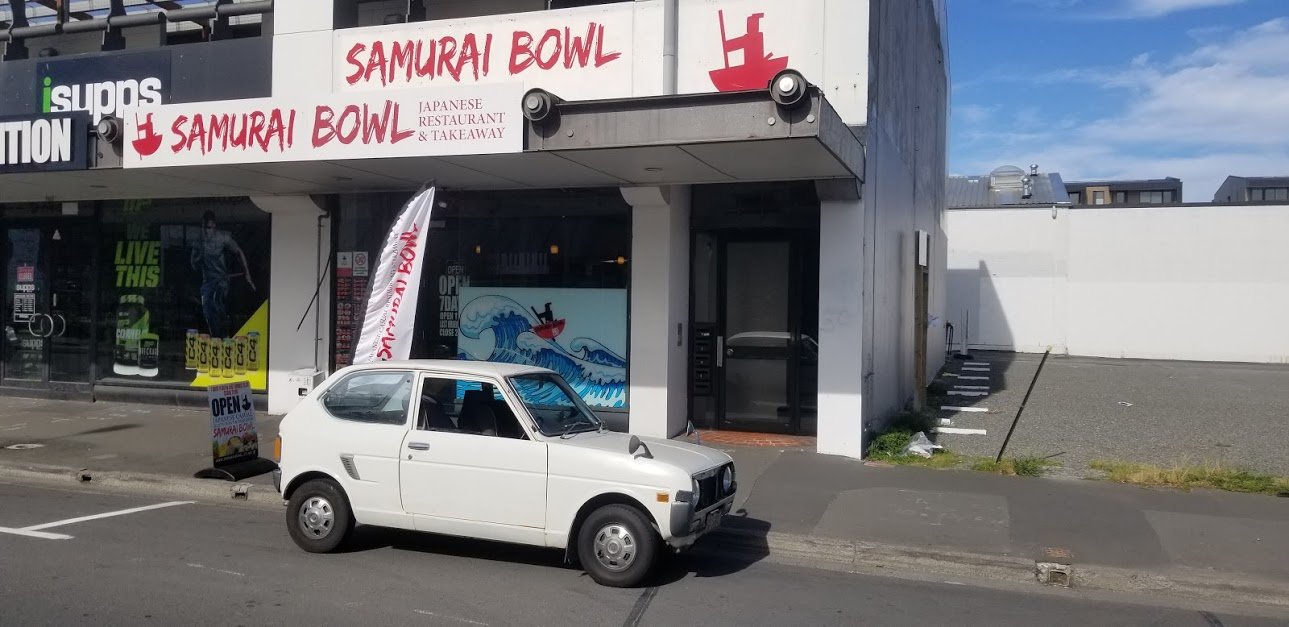
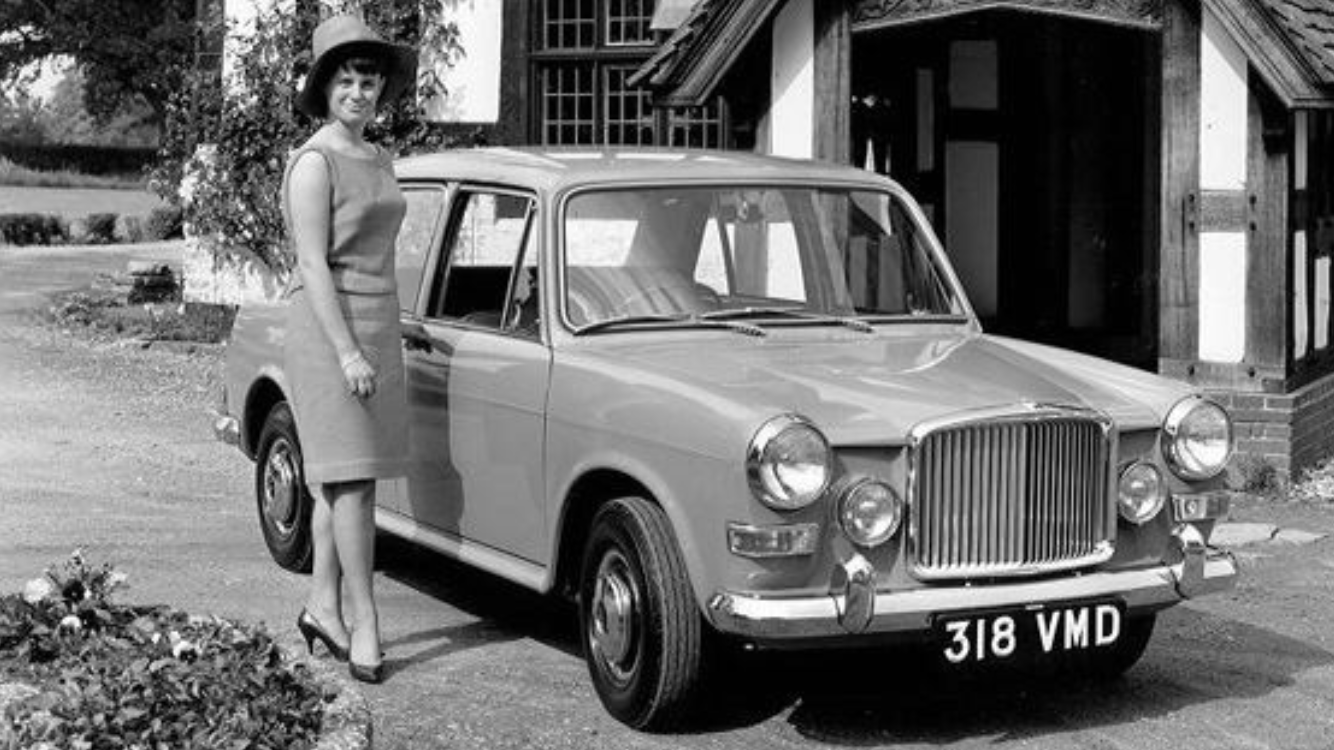
Want a Rolls Royce but can’t afford one? Then buy a Vandenplas Princess 1100. Connelly Leather seats, fold down walnut trays in the rear, twin carb 1100cc motor, walnut trim. Luxury front grill. Only two on the road in NZ ABSURD and therefore awesome ill be recommissioning it but it’s an excellent start point - I couldn’t help myself Bring it on runamuck - hit me in the comments Need to get it re checked as plates dead but will apply to keep black plates. 85000 odd kms. Strangely only first registered in 1971 even though 1965 - but not an import
2 points
-
Hey so i'm going to be bringing an assortment of small bike related crap that i will either give away or swap for roadside bj's. So if you have shit you want to unload, or maybe take my shit, then bring along your shit! The very least, J5 gets more shit!2 points
-
You can see the useless blue lug in the photo of the pump. Hilarious. Engine sounds very solid - need to get my arse in to gear and put slave on so I can taker her for a run. It’s on bump stops on left side for now but I have a replacement hydrolastic displacer and borrowed the grease gun hydrolastic tool off the guy Craig too. I helped him pull it out which gave me a good idea of the cuntyness. Also shampood the carpets and headlining - carpets are very very good. Still original - photos to come. Headlining is very decent but still some mould stains to come out. And the seats..... did I mention the seats. They are unbelievable!- they look like they’re from a 5 year old car and the rear parcel shelf has been covered and is minty too. Suggestions for a good product to keep them supple? Mothers I guess but will take suggestions
2 points
-
wired up the fan and got the polarity right the second time so the flows the right way. Did a test fill with water and it bled up fine with no airlocks etc. heater started working too which is a first since i've owned it. ran it for 20-30 mins and it didn't overheat or leak. The fan cycled on and off a few times so I'm calling it fixed. Took it for a quick doort and the intake is now the loudest part which is how it should be.2 points
-
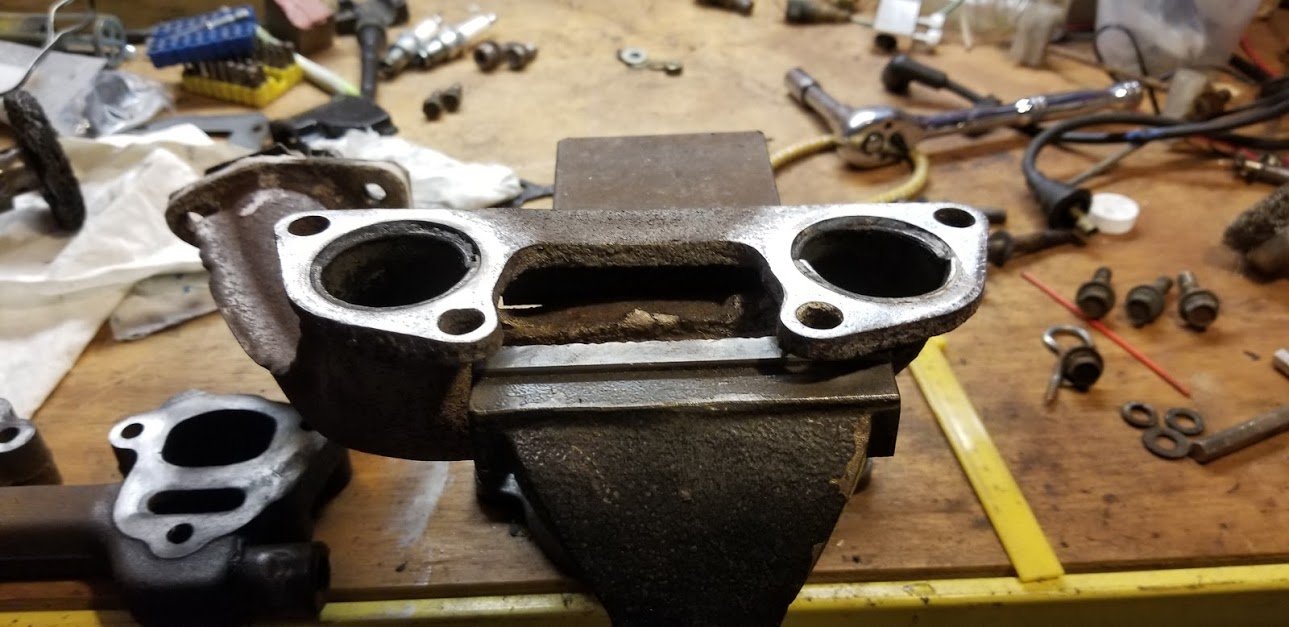
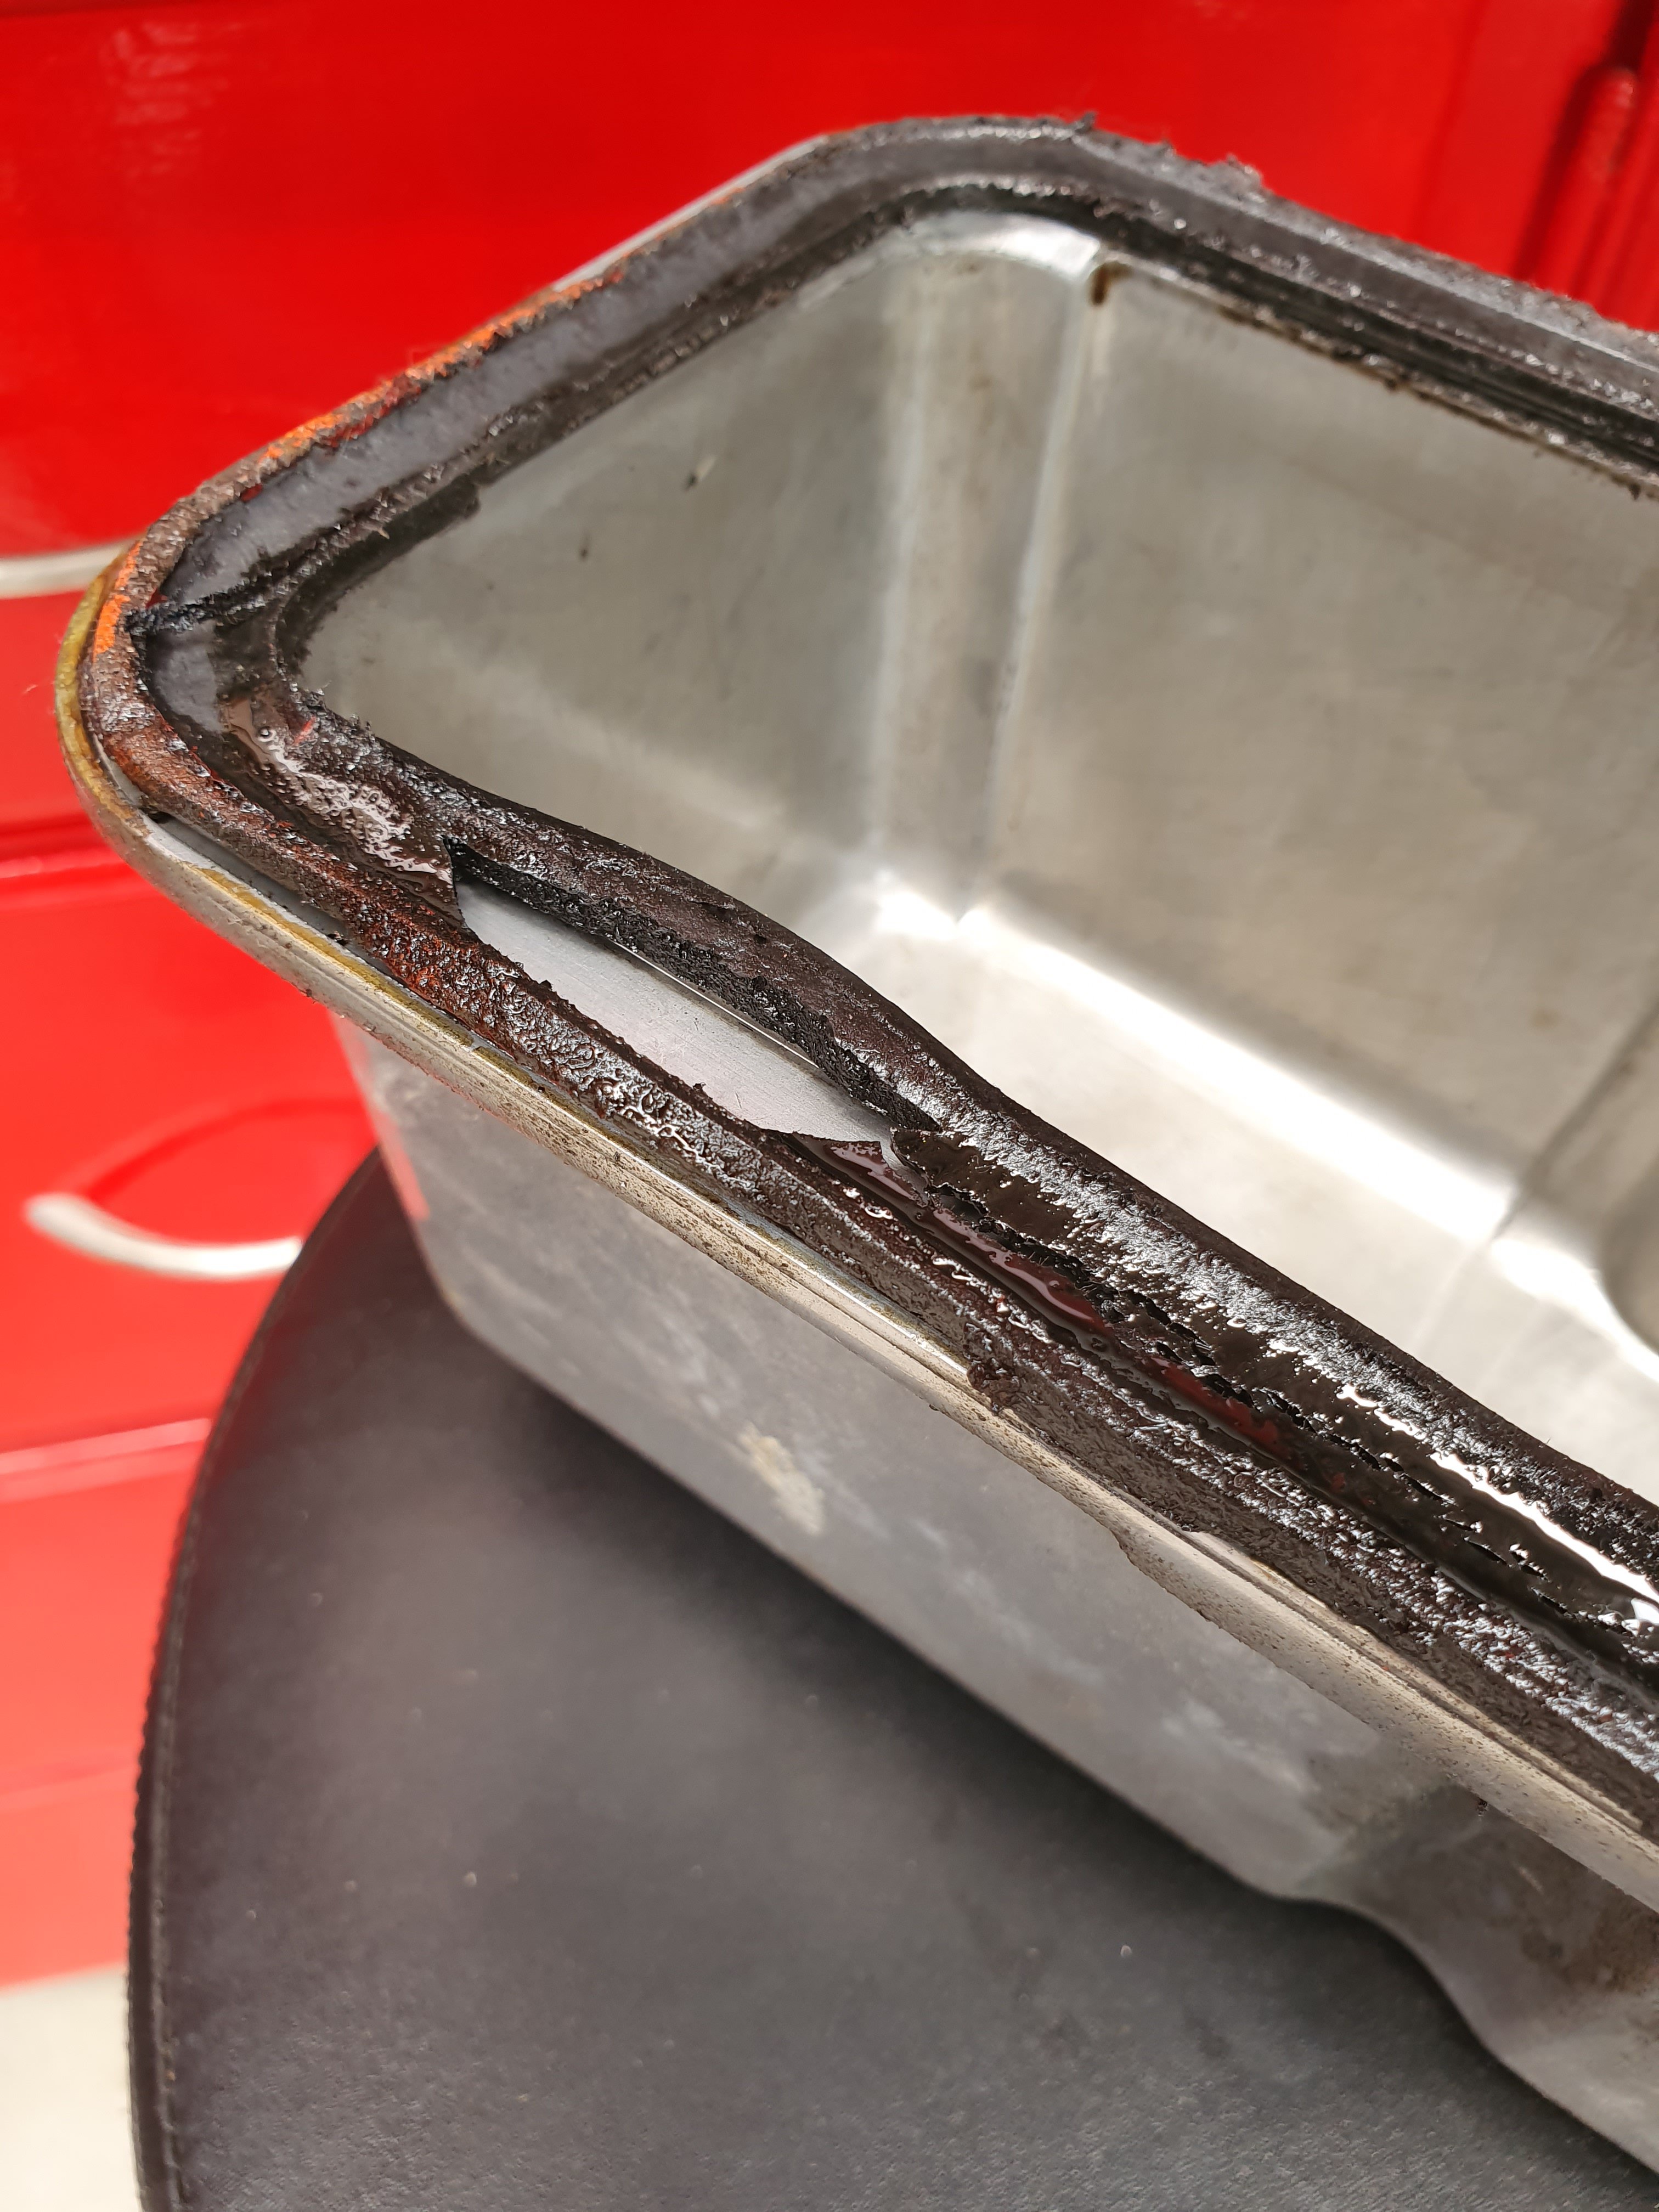
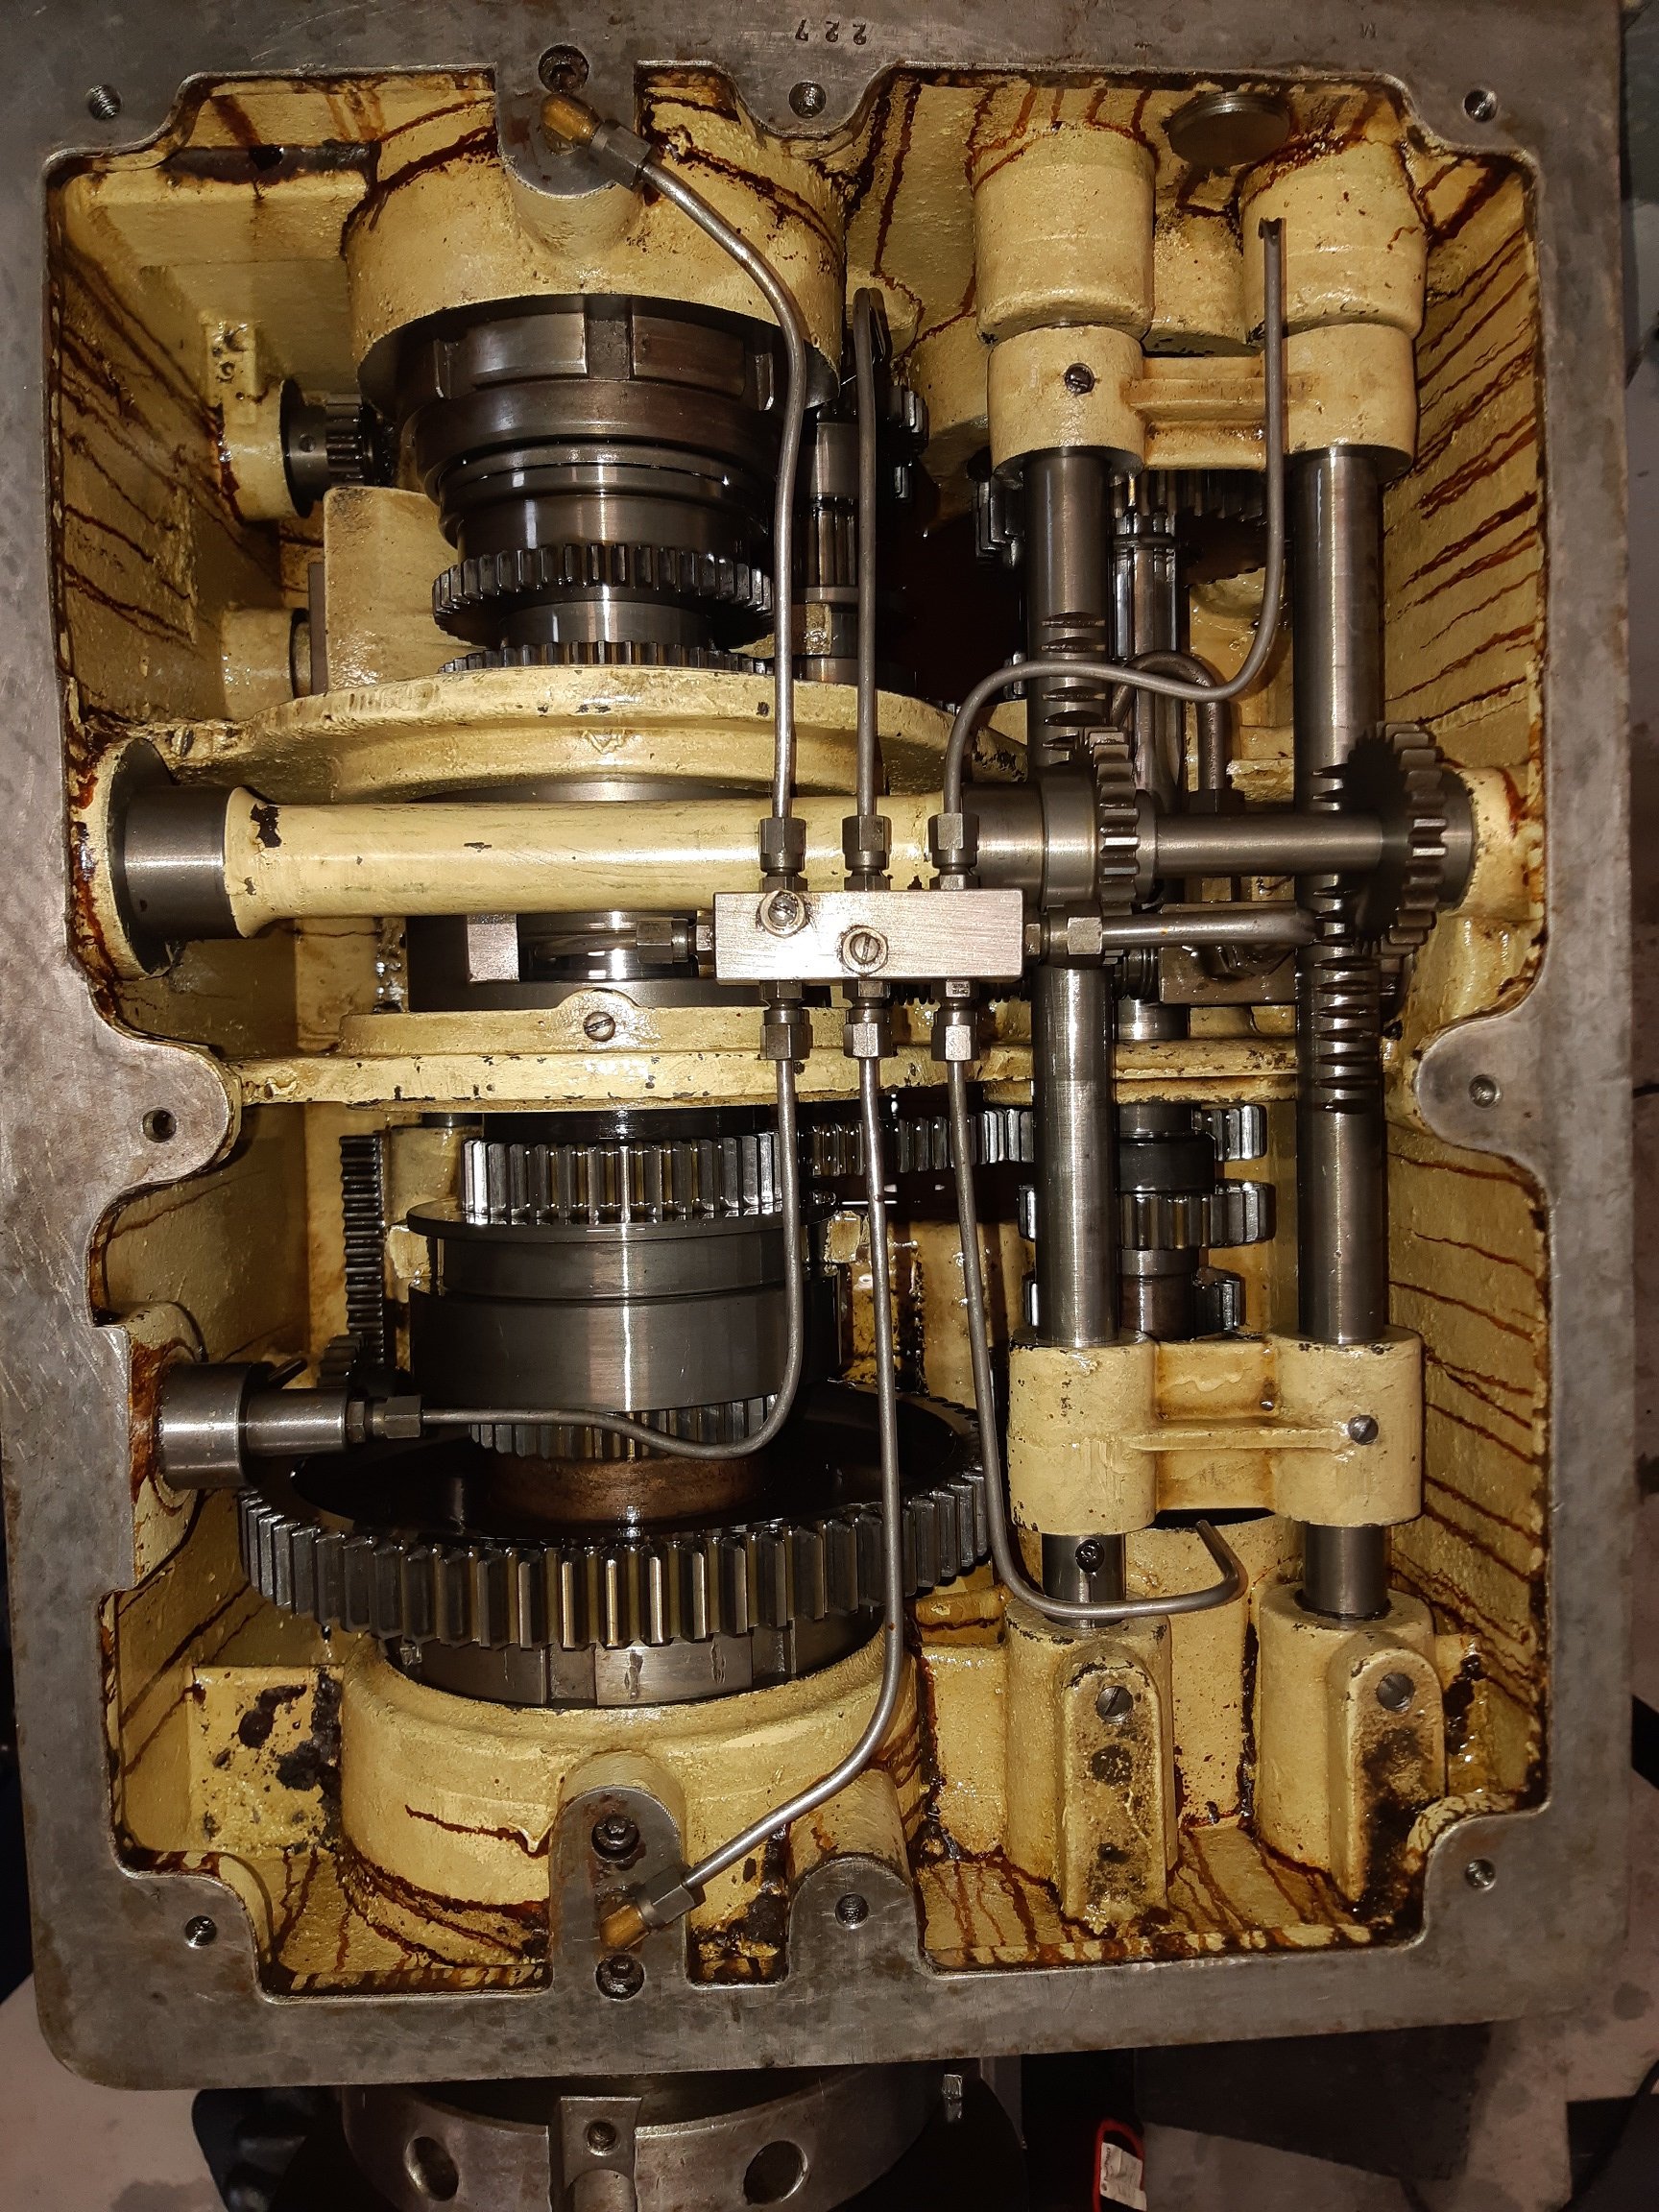
I took the lid off so I can de-rust it. Looks okay in there. Everything is oily. There's no obvious wear. The brown/orange streaks are not oil, it's almost like dried varnish. I suspect it's some kind of liquid gasket/sealer.
2 points
-
I'm not super worried, it was more to confirm it worked and was roughly what the dude said it was, plus that I could get it into a good place. I think I will invest in something that I can change the springs in later. It was one of those things I didn't have that was stopping progress, but it's sorted for now.2 points
-
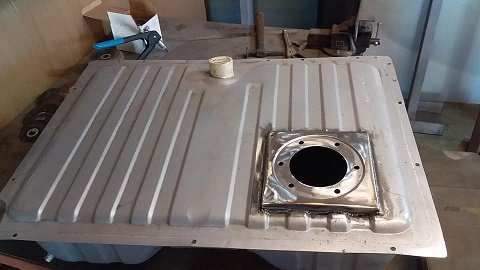
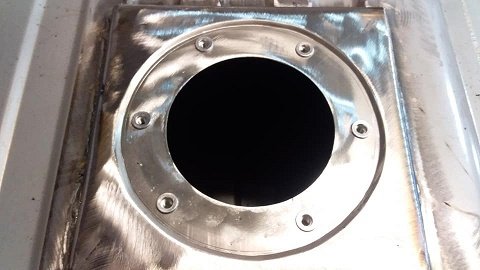
Filler neck and mounts welded up by someone who actually knows what they are doing Made some plates and test fitted. Seems to clear everything so I'll give it a paint and figure out a bracket for the fillerneck tomorrow I took a look at the rear muffler I took off and there wasn't any fiberglass left in it which probably explains the noise2 points
-
@peteretep - it’s a little pump that runs off the primary reduction gear / main clutch gear and it’s operated by the throttle via a split cable. As you wind the throttle on it opens the pump more and you can set the min/max position of the pump. The pumps can wear our and get weak, which I suspect has happened here. I’ll probably rebuild it later on for ease of use. I tested mine by pulling the hose off and idling the bike with the pump turned to max and it gave a dribble so I figured it was good. The proper way is to set the RPM and measure how much comes out (which I didn’t do because no tacho).2 points
-
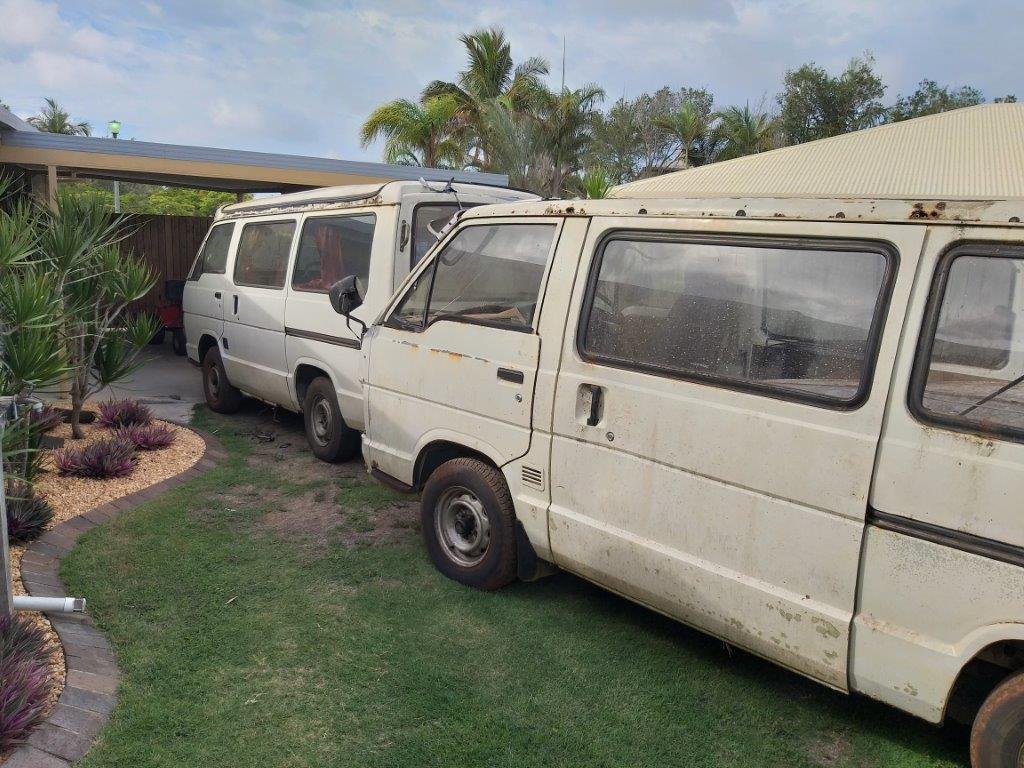
Thanks for supporting my HiAce drive-train direction sr2. Nirvana for me would be using the Thames as my daily driver whilst retaining the minimalist interior look and I can only achieve that goal if I stick to a column shift gearbox and a narrow enough engine to fit in the existing engine box. My HiAce donor has a 5 speed column shift which I am hoping to use as well as the Toyota rear axle. Engine wise I'm thinking of giving the 4Y a go. Sure it was originally designed as a forklift motor, so is unlikely to win any races, but like you say they go forever and parts are cheap and plentiful. The existing Consul derived motor runs okay for what it is, but parts are getting hard to find. Shot of the interior to show how minimalist it is.
2 points
-
Outer camtree patterns 2 of 22 points
-
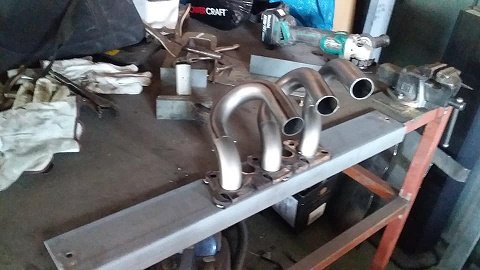
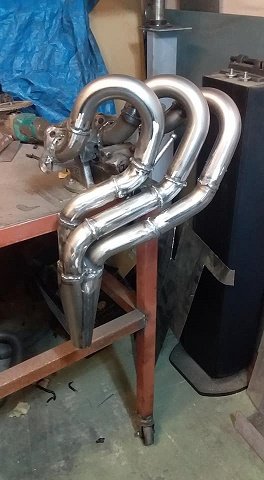
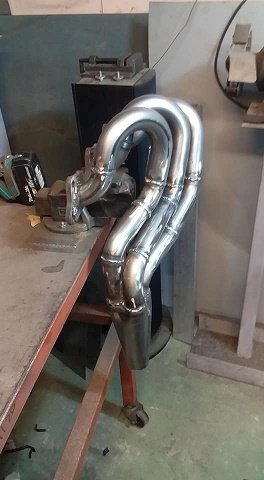
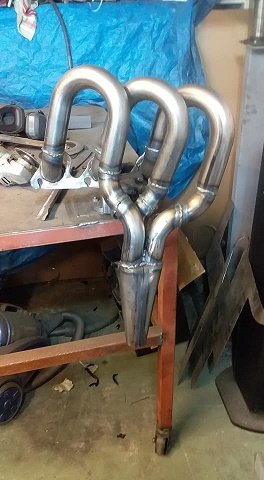
some exhaust bits turned up so i made a start on my 1st set of headers ive made.... just need to get somemore bits and ill fully make them up.
2 points
-
I actually really like this. Something about the luxury wood trim on a tiny base design tickles my fancy... And another NEGATIVE is that it will be a punishing Barry-magnet...2 points
-
2 points
-
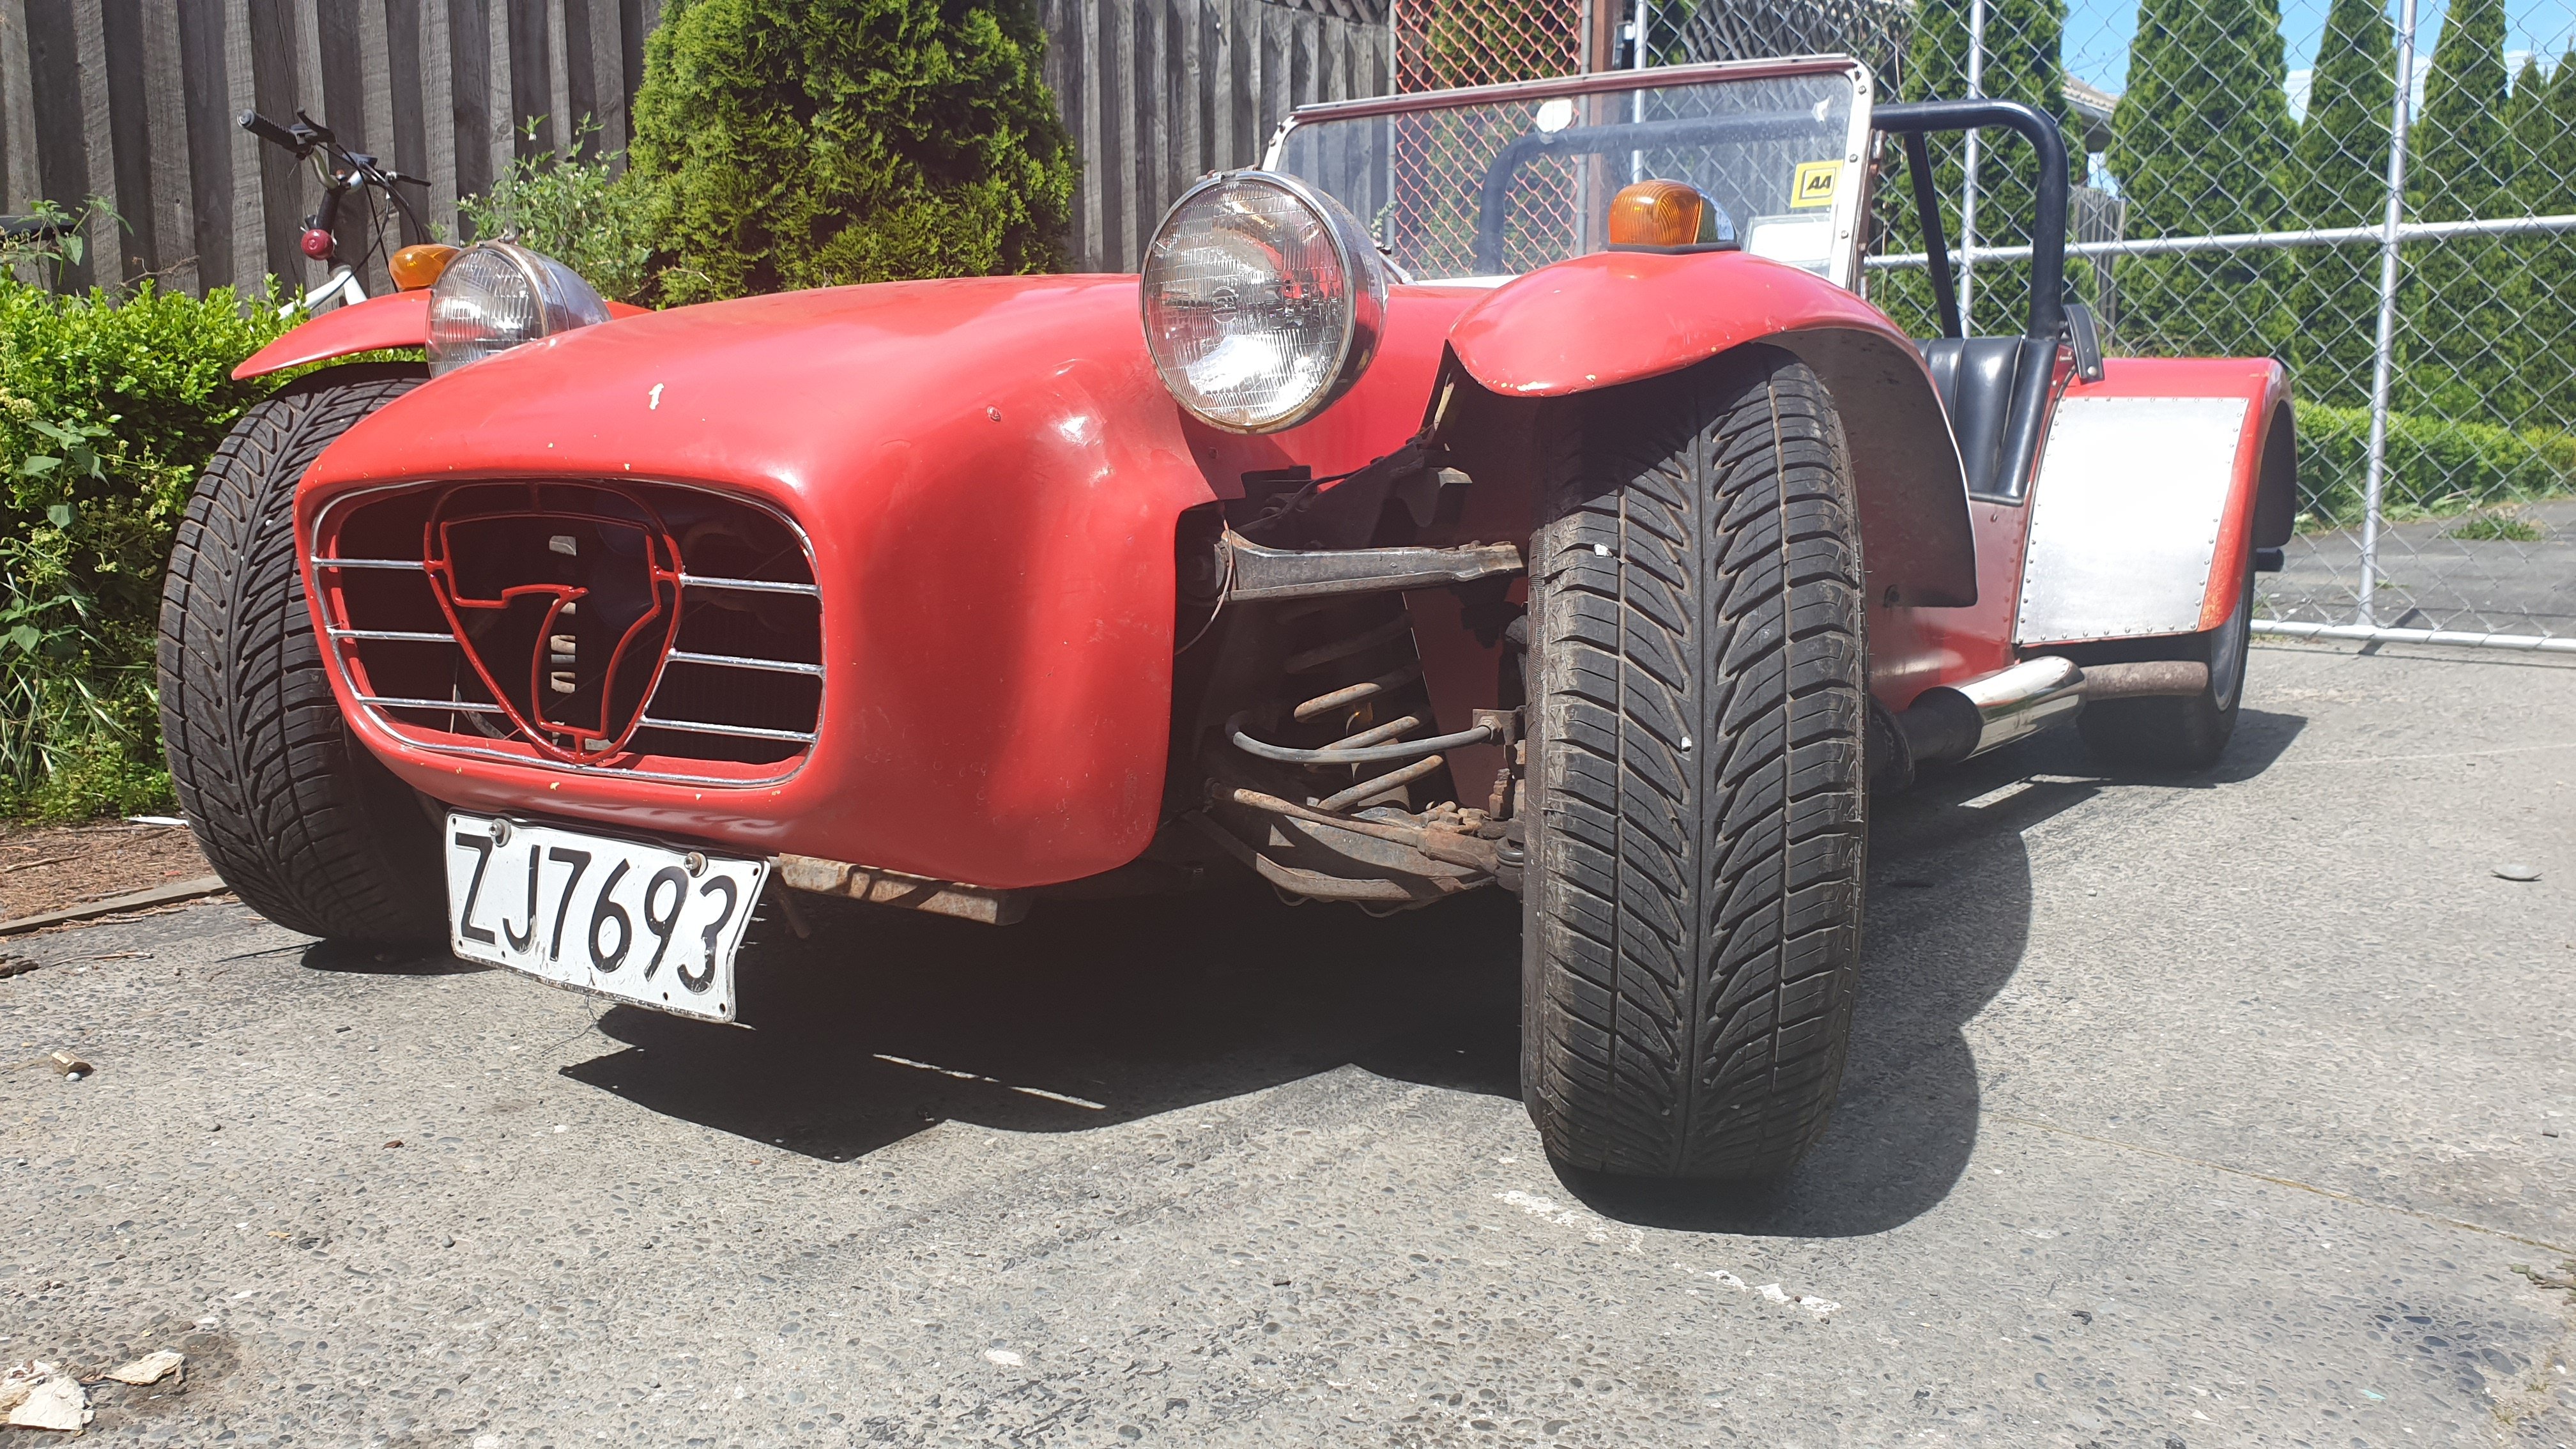
Short version of the story goes, the guys who sold me the pallet of 18rg parts to help me repair the corona engine also had a Lotus Seven replica also running an 18rg on twin weber 40s. Has been in their barn for the last 14 years, but recently they dug it out. Some fresh fuel and a slight fiddle and it was running again. I heard through the grapevine that he was was looking at selling it, and it had my name ALL over it. So several phone calls and a bit of time passed and a deal was struck. So a car I've always liked but never thought I'd really be able to own was mine, even better it was RG powered. Traikered it to the ferry, drove on, drove off, allegedly a quick fang through Picton and onto another trailer back to chch. From what I can see, the webers will need a rebuild kit thrown at them, an oil leak from the sump plug, probably just a new copper washer, and the wiring for the lights repairing. Then wof time! Included in the deal was a roof, doors than can also zip in half, and a torneou cover which can also zip in half speedster style. I love it so much, even my wife admitted it was really cool, and she's usually indifferent to my cars.
1 point
-
Hooked Sega (not genuine unit) up to a TV yesterday, Micro Machines FTW. Not a PC, but same sort of era. All the original sega units I have seem to connect via the aerial which is a bit more of a ballache to setup.1 point
-
Good day to you Peter I briefly thought about it, but it means a lot more work/ rework of things I've already done or purchased, and changes the look of the engine bay quite a lot which I'm not keen on If my plan works, I think it should be quite straight forward and easy to achieve, and still look factory in the engine bay Bilstein shocks with circlip grooves for the lower spring platform Already have springs and upper adjusters in stock Lower arm will need a bush housing machining up, tig it in, will replace Chrysler bush and pin setup with a long bolt , probably use a leaf spring shackle bush setup Strengthening the shock mount I think a curved bar welded to the chassis and shock brace should be good enough I went down a tangent of mounting the turbo at the back again which would have its pluses and minuses but I think this path is easier and potentially a better result1 point
-
Lol yeah Cyrix got into trouble for reverse engineering intels stuff. Heretic!1 point
-
Oh man, heretic. That brings back memories.1 point
-
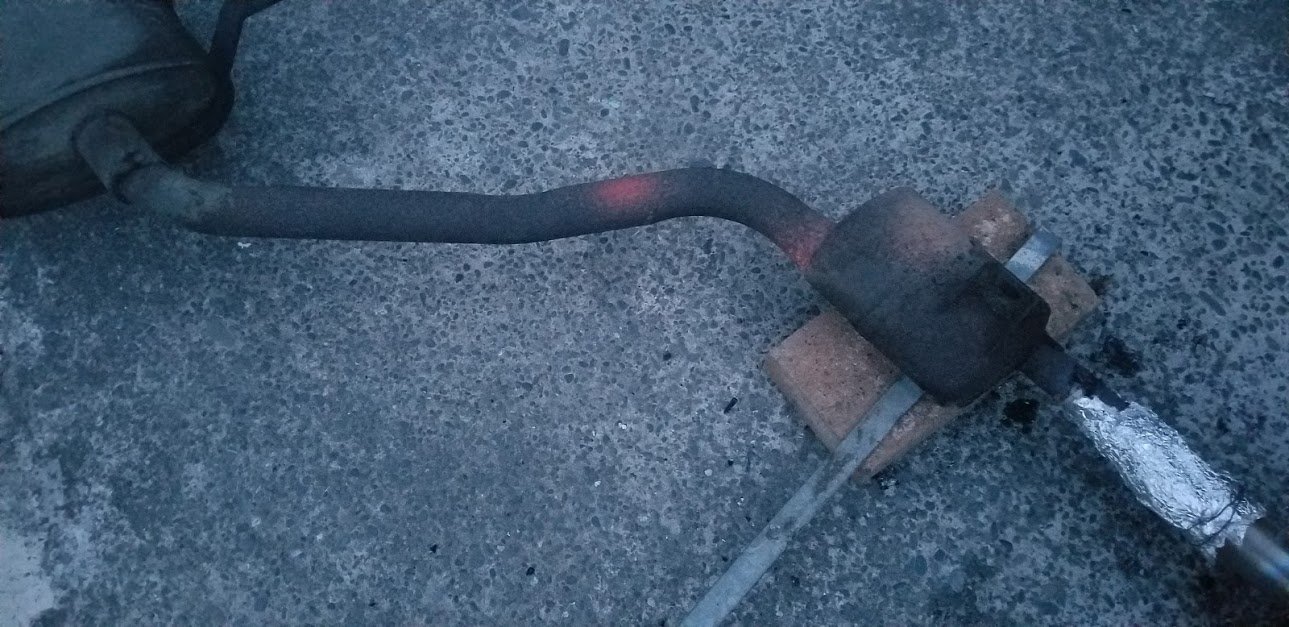
Have split that into assemblies, and had another go. Some observations: It works rather well (6" flames out the oil clagged expansion chamber just now). https://photos.app.goo.gl/t8qnrSrJkiMN4Fev8 The heat gun seems to work well for getting them started, but sometimes needs just a touch of butane into it to ignite the internals (WOOF!) say, about 1 second too much butane trashes the heaters on your heat gun in about 2 seconds (ask me how I know) That crap smells vile! Like creosote. The red band where I presume the internal carbon is burning creeps along the pipe at about 1 foot per 20 min.
1 point
-
Yikes time flies. Can't believe its almost 10 months since my last post. Our house reno has taken up all of my free time this year, but I did manage to spend some time thinking about the direction I want to take on mechanical upgrades for the old Thames in between and also did a bit of pesting on the tech forum seeking some advice from those more knowledgeable than I am. Result is that I have kind of set my mind on going with some form of Toyota running gear to replace the rather dated original kit. Main reason for this is that the engine box has very limited space so I will need to stick with a non cross flow motor if I want to keep the floor pan stock. Also first prize would be to retain a column shift but go for a 5 speed gearbox. With this in mind I set a target on a mid '80s Toyota HiAce van as these came out with a 5 speed column shift manual box. As luck would have it back in march I tracked down a 5 speed column shift gearbox. Only snag was that the seller wouldn't sell the gearbox on it's own, so I had to take the whole van. To make matters more interesting he offered me a second spares van for free if I took it away. So I ended up with these two beauties sitting in our back garden.
1 point
-
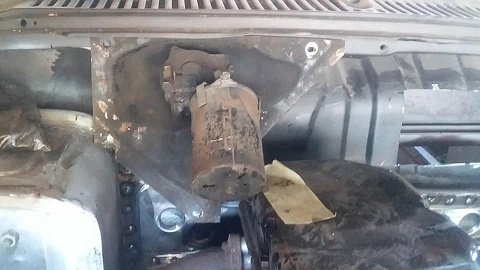
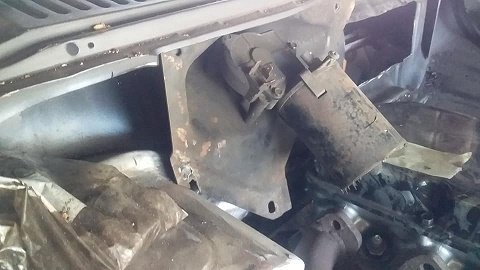
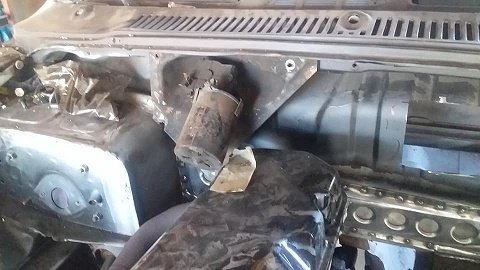
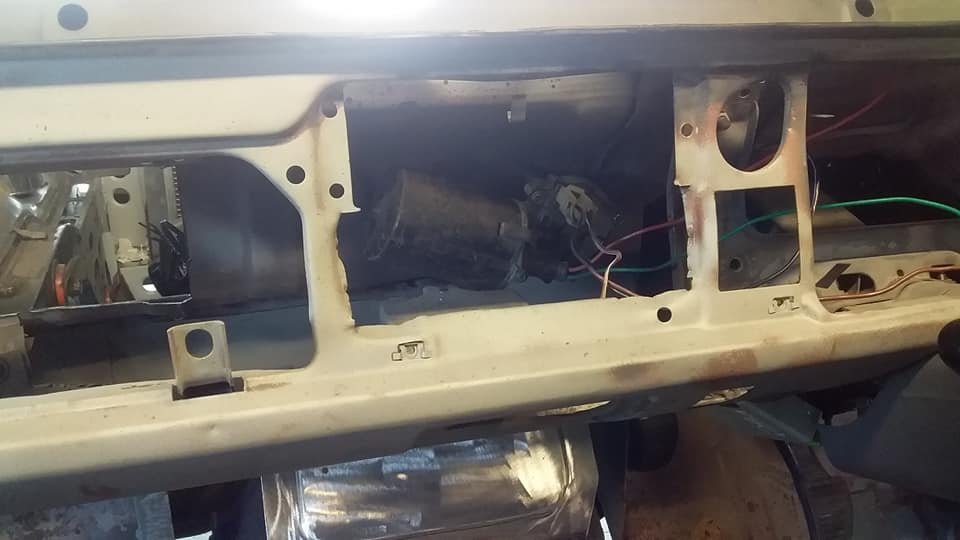
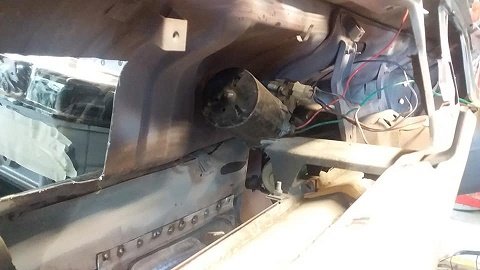
i was wanting to have a look at the wipers and see what can be done. ive never been a fan of the ugly motor bolted to a plate screwed to the firewall setup... and when i tried it in place .....seems the flacon motor is in the way.........lucky me. i could have just unbolted the wiper motor and clocked around a bit and drill new hole......but it would still look crap. so i maked out where the center of the motor kind of needs to be and looked at some option..... i found i could just bolt the motor under the dash and bolt it threw the firewall using roofing rubber sealing washers then i just had to cut the rod turn the end around and weld a rod into join them. much better.....hopefully the heater core i bought turns up soon so i can start making a heater.....or even the bends so i can have a go at making headers.
1 point
-
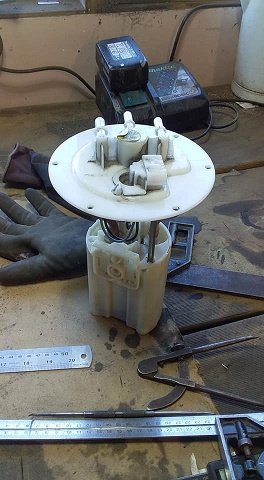
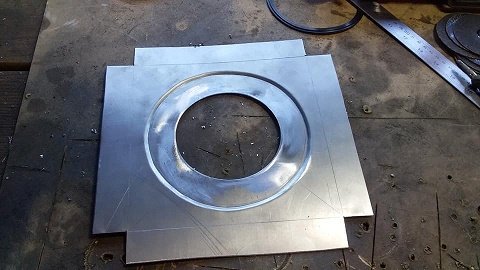
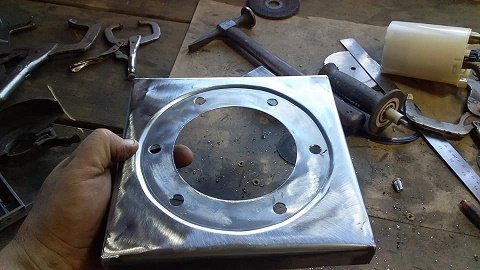
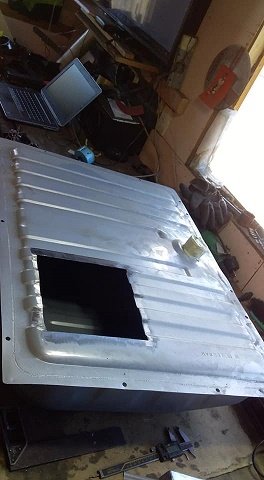
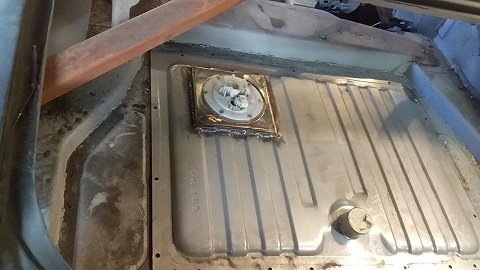
ticked another thing off the list......fuel pump. i went with falcon BA turbo intank setup....reasons being they are cheap second hand (this one $40) as they have a tenancy to stop working.......the main reason for that is they rise and sink with fuel level and tend to full with crap ....rise and not sink back down so they suffer from starvation .. they supply more than enough fuel for my needs and new or second hand readily available. . it will be fine for me as i will mount it at full compression so no need to rise and sink....i just needed to make a mounting plate then i had to cut a hole in my brand new tank weld it in add some riv nuts all done
1 point
-
Well yeah, Bosch K-Jetronic.... I now understand why it's so widely hated. This will be a rather large post, as this covers about 6 weeks of work. The TVR has been out of commission for a while now, since the running issue was getting worse to the point it wasn't able to make it down the road anymore. The last update regarding the engine saw me remove the plenum and injectors to test them. This lead to the discovery that the flow was there, but the pattern was rubbish, so new injectors were sourced. New Bosch injectors for the cologne are big money, and I'm trying to sort this issue for minimal cost (within reason). There is a lot of discussion online about using Mercedes injectors in various KJet powered cars (mainly VW), and it all seems good, and the injectors are much cheaper. I found one single blog post on a foreign website, that once translated confirmed that the Merc injectors do indeed work on the Cologne V6. Good enough for me. The injectors in question are Bosch part number 0437502047, and I also got new seals, Febi 034133557E. I sourced both from FCP Euro. The Bosch boxes made me laugh. MECHANIC ONLY! You can see the obvious difference here. The new injectors are shorter, both in the overall length, but also in the hex part at the top. I can now confirm that these do indeed fit, and if you check the link to the other blog above, you can see that the injector does stick out into the intake tract less, but won't be an issue (and some say is better for intake flow). You can see the shorter hex here These are the plastic retainers. These sit on top of the O-ring, and appear to be what actually holds the injector into the manifold, by the metal retainer pushing down on the plastic retainer, which pressed down on the O-ring. The tapered face visible in the first photo is what sits against the O-ring. Due to the replacement injectors having a shorter hex, you cannot fit the retainer and O-ring, and then still have space to tighten the injector pipe. I found it easiest to slip the plastic retainer, O-ring and metal retainer on, leave them at the bottom of the injector, and then fit and tighten the pipe on the car. Once tight, then you slip the retainer and O-ring up into place. So that finally solves the mystery of the injector seal. It's a normal KJet O-ring, with a plastic retainer on it. With the new injectors sorted, they all got refitted into the manifold and secured with the metal retainer and screw. Next was to remove and clean the fuel distributor. This is the big weird thing on top of the air box, which feeds all the injectors. This has a plunger inside it, which the sensor plate presses up on as it opens. This plunger is known to get sticky when cars are left sitting. Mine was slow to return, and wasn't moving as free as it should. Carefully crack off all of the banjo fittings, including the feed and return on the side, and then remove the banjo bolts. Take care to collect all the copper washers, as there will be two on each banjo fitting. With the fuel lines disconnected this gives access to the three flat head screws that secure the unit to the air filter housing. Remove these screws. Now the distributor can be CAREFULLY removed. Make sure to slip a hand under it and stop the plunger from dropping right out. If it falls out and gets damaged, the whole distributor is a write-off! You can see the plunger in the center of the unit. With the unit on the bench you can turn it over and let the plunger slip out. If it doesn't freely drop out, it may need some compressed air in the top fuel fitting to push it out. Mine dropped out OK. Be VERY careful handling the plunger, and keep it very clean. I cleaned the plunger and its cylinder in the main unit, and sprayed and soaked all fuel ports with carb and brake cleaner. In the injector outlets there are individual filter baskets. I used a long, thin screw to gently screw into them, and then a sharp pull freed them They all had some traces of dirt on them, but nothing major. I soaked them in brake clean overnight and then refitted them The regulator was the last part to clean and overhaul. This resides on the side and is a 5/8" hex. I ordered a replacement seal kit from Delorean GO as they use the same part in their Kjet setup. The regulator kit is PN 102807A and I also got a new seal for between the fuel distributor and airbox, PN 102855 I used a small pick to remove the old seals, and replaced them with the new green ones. The old ones looked in good shape, I wonder if they had been replaced recently to try and fix the issue? Be careful handling the regulator too, just above the o-ring in the below photo are two very small shims. These set the fuel pressure, so don't lose them! You can add or subtract shims to increase or decrease system pressure. I also did the o-ring on the regulator piston, but no photo of that. That's about all I could do with the distributor without splitting it, and that is a risky job that could result in further damage or leaks. The next part to clean out was the (incorrectly named) Warm Up Regulator. This is the main control pressure regulator (the one above only controls the system pressure), and controls how rich or lean the engine runs. It has two bolts holding it down, two fuel banjo fittings, a power connector, and a vacuum hose. Mine was pretty grotty. A lot of parts on the engine have been badly painted grey, which is flaking off and being ugly. I'll deal with that another time. I could see some dirt in the inlet mesh already, so not a good start. There isn't a lot to break on these, but take care taking it apart. Opening it up is easy; there are four screws on the bottom, which when removed will split the two halves. There are a few things of interest inside the top half Orange Arrow - Adjustment pin for COLD pressure Green Arrow - Heater element Blue Arrow - Bimetallic Strip Red Arrow - "Mexican Hat" and pin Bascially, when the engine is cold it needs a richer mixture, like a choke on a carb. A LOWER control pressure will give this result. The springs in the bottom half press on the mexican hat, which pushes on the pin, which then places pressure on the diaphragm via a little cup. This force is countered by the bimetallic strip, which pushes down on the mexican hat when cold, reducing the internal restriction. Of course you couldn't run that rich all the time, so to lean it out when warm, the WUR is warmed by both engine ambient heat, and by a 12v heating element. This heat causes the bimetallic strip to slowly bow upwards, which releases pressure against the mexican hat, allowing it to rise up and towards the diaphragm, creating an internal restriction, raising the control pressure, and leaning the mixture. The cold pressure is set by adjusting how much the bimetallic strip pushes down on the mexican hat when cold. This is done by moving the adjustment pin up and down.... with a hammer and punch. Anyway, to continue disassembly you need to remove the clip that retains the heater connector. A large screwdriver to lever it out does the trick And then remove the 10mm nut from the bimetallic strip and remove it. Take note of the washer placement This is the fuel unit containing the cup and diaphragm. I have removed two of the screws already. The cup is in the middle, filled with grease (to lubricate and retain the pin) CAREFULLY remove the disk and diaphragm. Don't damage the diaphragm as its hard to get a replacement (although there are some rebuild kits on eBay now which may work). Removing these gives you access to the o-ring and fuel ports. One of them has a very fine five-layer mesh filter in it. Internet wisdom says to clean it, but not to remove it as it can cause issues with pressures if you do (reduces restriction). I hosed it from inside out with brake clean, and got a whole heap of what I can only describe as a fine sand from it. There was heaps. After much testing, I eventually went back and actually threw the disassembled top half into my ultrasonic cleaner, which seemed to clean the filter out well. I tested it by shining a light through it, and there were some big differences in how much light came through. There was almost no light passing through at first, before cleaning. Cool moody shot from that night I refit the distributor and WUR, and refit the fuel pipes I also plumbed in the fuel pressure testing kit, between the fuel distributor and WUR. The system pressure was a little low, it should be over 5BAR But the cold control pressure was crazy. It should be about 0.5BAR, not 3.6BAR! Keep in mind this is after only cleaning, but without any adjustments. No wonder the car was leaning out hard. Remember, higher pressure is a leaner mixture. This triggered the next couple of weeks messing with the system trying to iron out the pressures. I tried many things, including running the WUR naked, with no internals And setting the pressure with the adjustment pin, located here Then it all started to turn to custard, and the system pressure was low at about 4BAR, and wouldn't come up even with additional shims in the regulator. This lead to buying a replacement fuel pump. The old pump is pretty easy to remove. Four bolts hold the mount to the car, two hoses, and two wires need to be removed. I clamped the feed hose as the tanks had fuel in them now and set about removing the pump Pump on the bench The pump has an inlet filter in it, and this is what came out of that filter. It's not rust, which is good, but almost looks like fluff, some organic matter (bits of leaf?) and a lump of metal, which kinda looks like lead or solder. I might get a pre-pump filter. The new pump is bigger and slightly longer, but otherwise a direct replacement. I couldn't reuse the sleeve from the old pump, but reused the rubber insulator The old pump was a Bosch 0580464125. A good pump, but mine wasn't having a good time anymore. The replacement is a generic pump which met the required criteria (high flow, and up to 8BAR pressure). The new pump sounds nicer, but the system pressure hasn't changed much at all. I tried adding a whopping great washer as a shim on the regulator and finally got 5BAR pressure, but I'm sure that isn't right. I have had the WUR open so many times now that I can open it in about 30 seconds for adjustment, but I'm still getting weird results. Right now, the system pressure is around 5BAR with the extra shims. The cold control pressure should be about 0.5BAR (as that's what I dropped it down to after resetting the pin) but either it's very slow to rise on the gauge, or doesn't rise at all now. Warm pressure is about 2BAR, 0.9BAR too low. The new pump can obviously do the pressure, but its either being restricted or bled off somewhere. There are no leaks, and the fuel filter was replaced when I got the car (although I do now wonder about it after the pump packing a sad). Anyway, I reassembled the intake today, and removed the pressure tester And fired the car into life. It had some issues at first, but tweaking the mixture screw sorted that out and it idled OK, albeit a bit lumpy and revved on about 5 cylinders. The more I ran the car, the more it was happy to pick up all the cylinders and rev again. I set the idle by ear, and so far I have taken it for a dodgy run back and forth along my road, which it seemed OK. I haven't been brave enough to take it further yet as I might take a support car with me just in case it dies in the middle of the road again. I still want to know what the pressures are doing, but I suspect there is an issue with my pressure tester. Either that or I have a weird issue in my KJet system. I'm trying to source a second testing setup now to compare and see what happens. If I can set the pressures correctly, in theory I should be able to get a nice happy running car. Fingers crossed. Oh, it wouldn't be my car if it didn't spill some coolant. Thankfully I believe this is just from me overfilling the radiator, as it was from the overflow. Looks like it'll need a flush at some point too.1 point
-
This is a not so amazing up date. (turn back now) After fixing the ignition getting the car going then have it die and burn a trigger out I replaced it put a tank of fuel threw it around town. Today I drove over the Takaka hill ginger careful. No AA roadside assist. It's all in my head that it's going to not make it.. It glided threw 240K of solid driving without issue. Here It is at collingwood. I think that issue can be put to bed. The tyres still have 5mm tread I need to finish them before wraping the Superstars in a better choice of tyre. Thinking slightly stretched and lots lower in profile. What do you guys think ? 205/80 is way to big in the sidewall for the new rims ?1 point


.jpg.96532ca71905db2d5a60bc2f3f1f42a1.jpg)


This leaderboard is set to Auckland/GMT+12:00