
Leaderboard


.thumb.jpeg.384ff72c8d2b0ee0d34a7bdedb55bdcf.jpeg)
Popular Content
Showing content with the highest reputation on 08/15/19 in all areas
-
hey also, here's a technical tip for those of you interested in the finer details of auto trans setup, if you want it to not leak fluid out the bottom, do up the drain plug. you got that?6 points
-
Actually you can see Liv and Seedy are both looking at a pink phone. The same phone? It probably went like this:
 5 points
 -
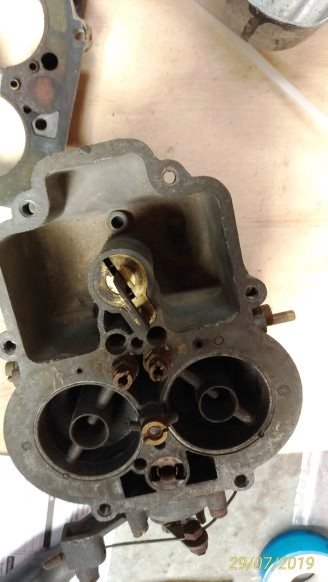
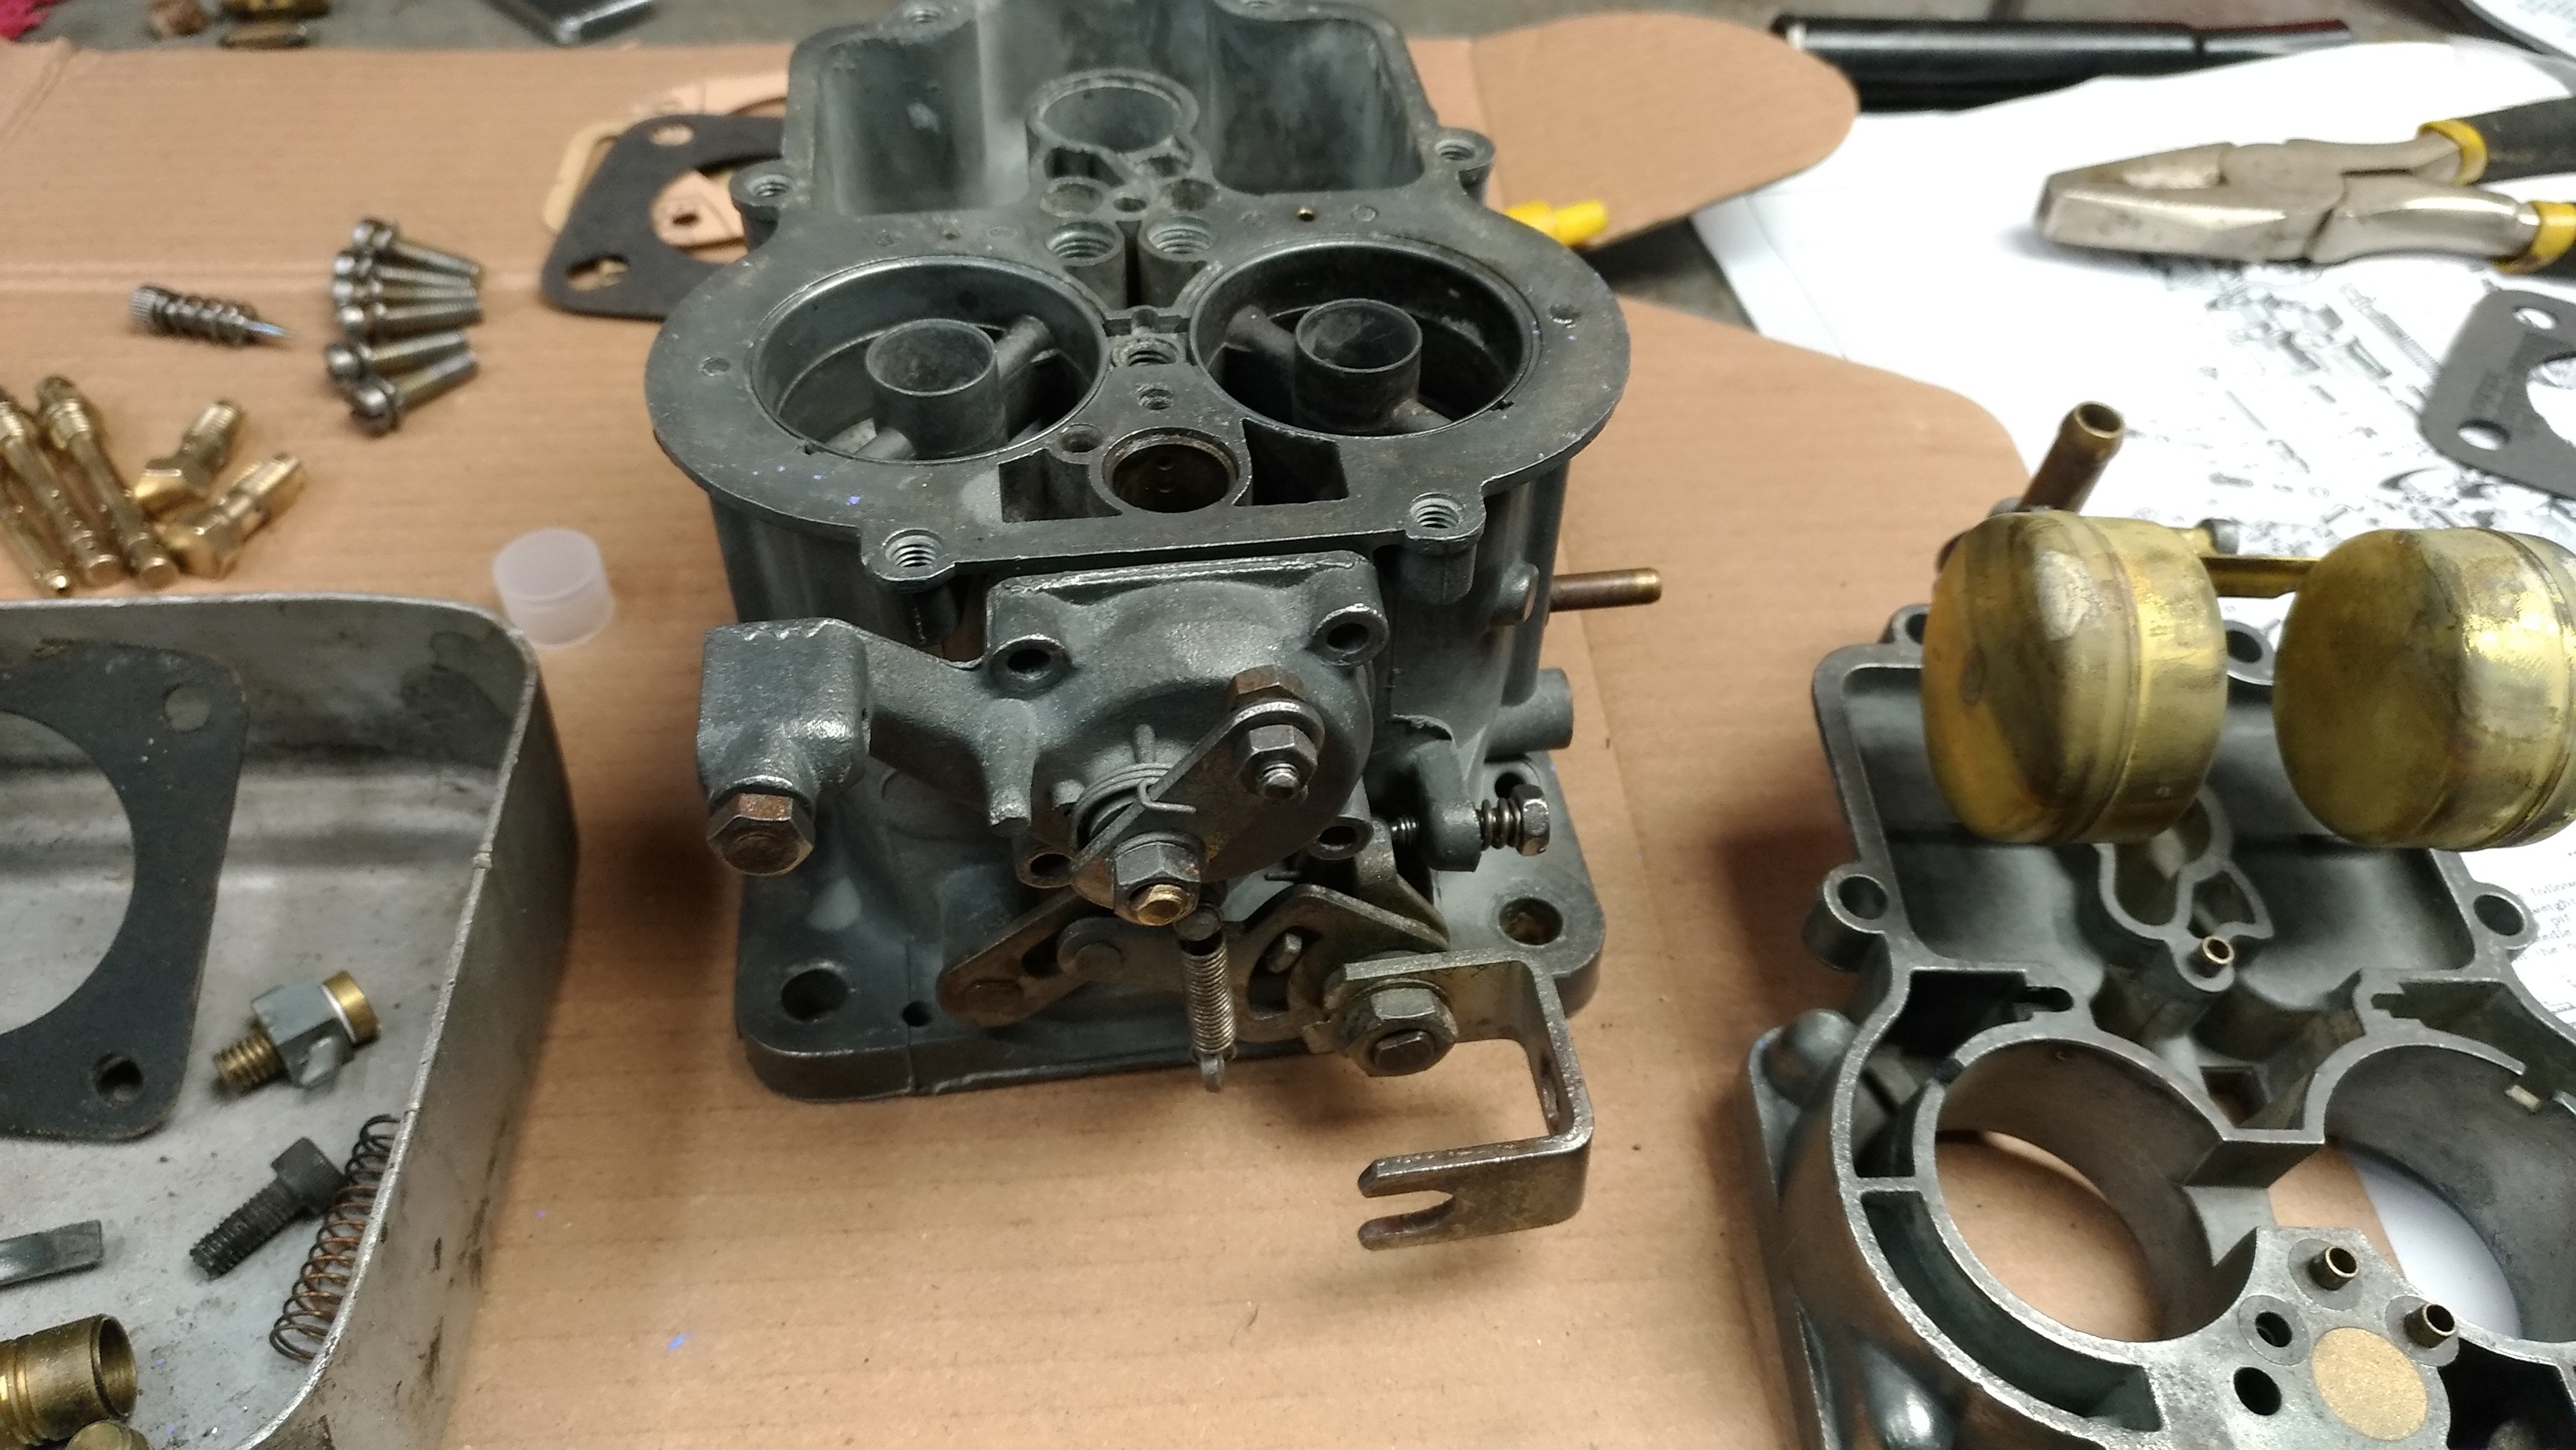
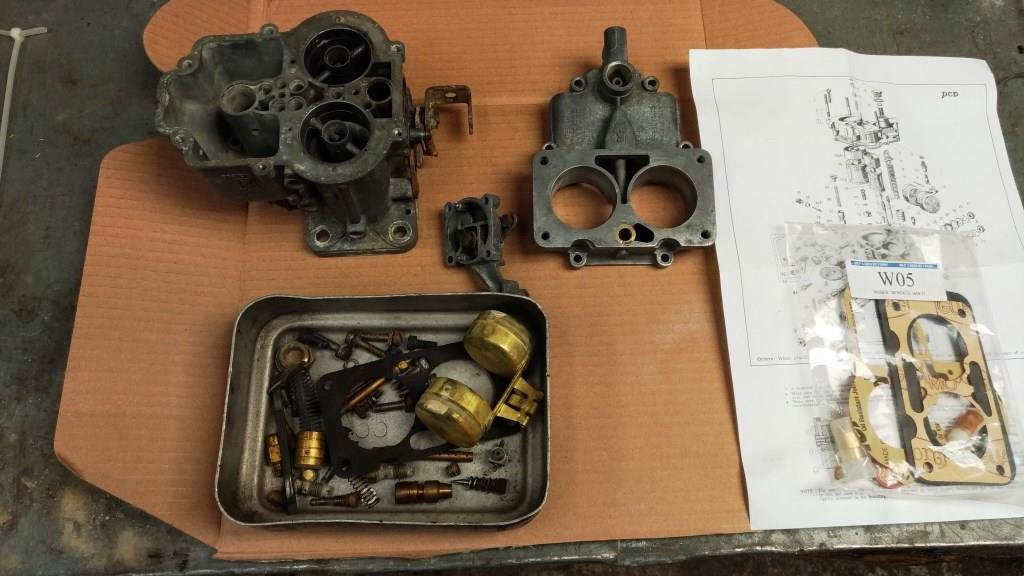
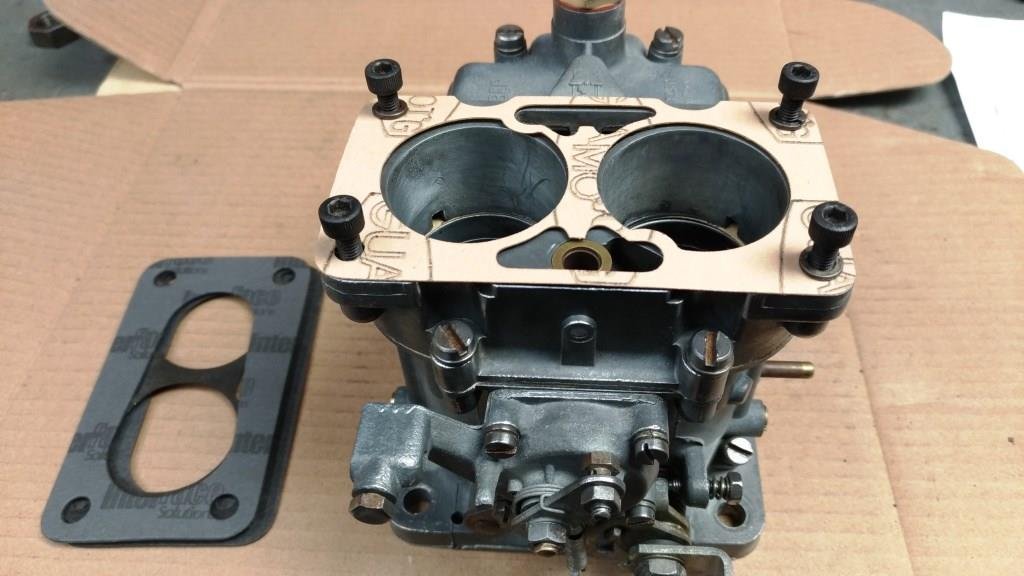
Thought it was about time to have a look at my favorite DCD Weber; we go back a long way, purchased new in 1974 it was looking a little 2nd hand. Stripped it down and on closer inspection the throttle spindles showed little almost no wear and the call was made to give it a good clean and assemble with a new float valve and gaskets. Finally located a rebuild kit from MLP Carbs in Victoria, (don’t you hate it when bloody Aussies turn out to be the good guys……!). After an enjoyable evening in the world famous sr2 man cave rattling the neighbourhood with Pink Floyd playing loud and ½ a bottle of cheap (ish) pinot noir - one more job’s ticked off the list.
3 points
-
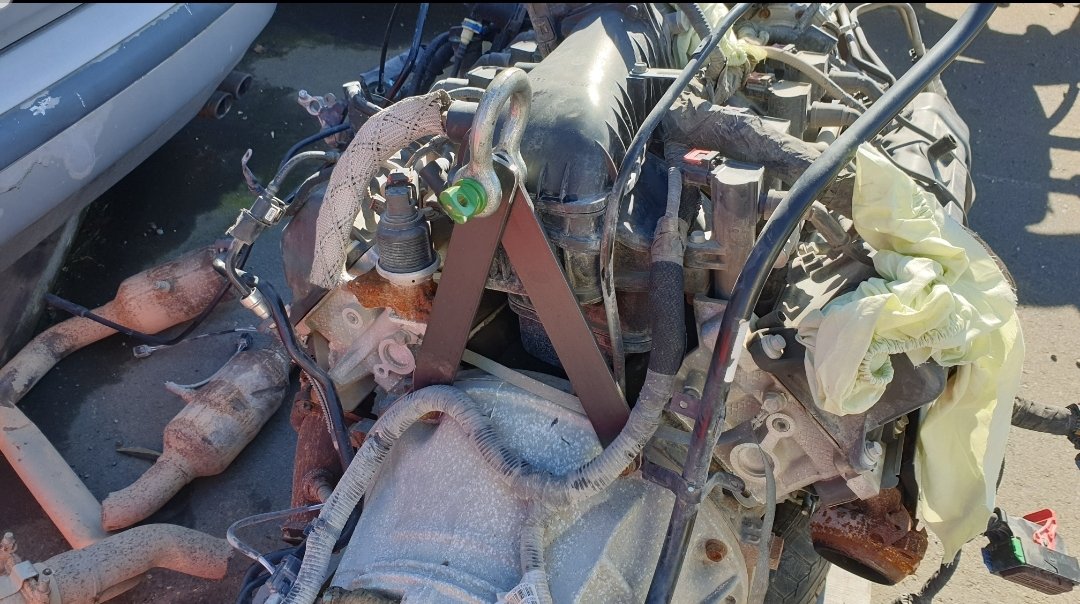
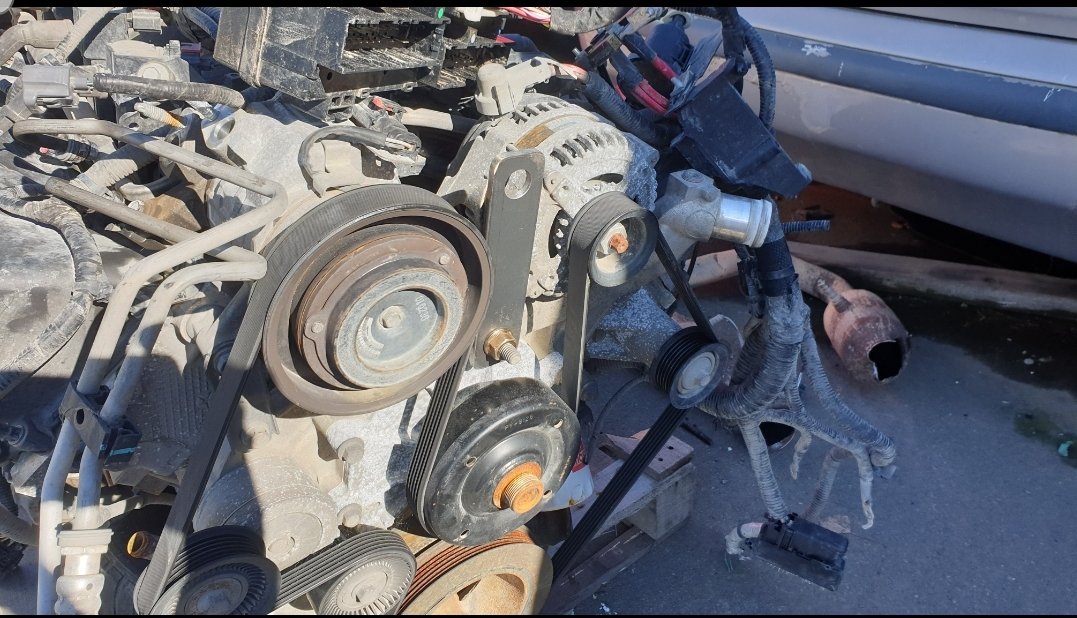
Yesterday I made some engine lifting points as weirdly this engine doesn't have any. I assume they are under the manifold, but I have no interest in pulling the manifold off. These will also alow the use of an engine leveler as I hope to fit the engine and trans as one unit
2 points
-
The test is when you sand it back, have had epoxy stick not so well to a bunch of things when you start sanding. When block sanding you will go through your epoxy and/or high build primer and that is the real test, if you have some shit adhesion at the base layer (like some shit single stage rust primer or badly prepped steel) the edges don't feather and things come off in little clumps leaving sharp edges, just making more work by needing filler etc to fix it. Then in the back of your mind for the next 10 years that your paint job is stuck on real shit. You get away with it on internal fix ups where you just poo it on and walk away, it sticks so well to itself that it doesn't go anywhere.2 points
-
Have spoken to mazda they said they will get the same codes if they are there.1 point
-
Fuck yeah...got it sorted!!! So loud, seriously think I've damaged my hearing. Ear plugs a must!1 point
-
I think the pink phone was actually Seedy's1 point
-
See you dicks in a few hours!1 point
-
Thanks for the comments everyone, good feed back. I have been working on a process of elimination in order of cost and based on your comments I will upgrade the leads as is being suggested and go from there. They are old and would look better even if it doesn't run haha. I will post again after that and advise how it went. Dizy cap could be next after that if no success with leads1 point
-
What is the general condition of the engine, I would do a compression test on all cylinders. Less compression will make the fuel air mix harder to fire.1 point
-
Sounds like it needed a bit of scuffing first.1 point
-
Flying update. I hate updates without photos. I like the pretty pictures... I also read playboy for the articles. Things missing off the donor. IE things I’ve replaced... Engine. Shocks. Leaf springs. Bumpies. perches 90% of the right front corner. Lower control arm. Spindle. Hub. Rotor. Shield. Tie rod. Dash. Cluster. Door light switches. Door cards. Theres a few more things piled up in the garage. But there isn’t a lot left. List of new stuff: ball joints. Bushes. Shackles. gaskets. Frost plugs. Plugs. Crank seals. 2” blocks in the rear and reindexed the front to suit. still to go: Had a good look under the Ute While it was on the hoist and made a check list. Brakes need attention. There’s a teeny tiny fuel leak coming from somewhere. And the fuel sender needs replacing. The radiator/exposed fan needs sorting. Tappets need tweaking up. Rims and tires. Alignment and wof. gotta play musical rims/tires a bit with my bongo van (southern hospitality spec green and white turd) to get the rims and tires I want on everything but should all be done and dusted well before the more attractive half and I take on Fleetwood Mac and the v8 Supercars in Auckland.1 point
-
Professional troglodyte.1 point
-
Throw out the spark booster. I have bh6s plugs in my sidevalve minor as standard so 12v is fine. Inspect the distributor cap for cracks. The distributor in these is right between the exhaust ports and gets pretty hot. I imagine it still has copper leads, potentially they are cracked too, or the insulation is passed its best. It's hard to get the screw in style distributor cap, but you can get reproduction ones that take the more modern press in leads, so you can run modern/new leads I also had an issue where the distributor body had come loose on its shaft so it could rock back and forth (but no play in shaft) it only became apparent when I had the head shaved and started getting wierd missfires1 point
-
Liv and Seedy are messenging each other behind Dave's back Dave's just laughing at cat memes1 point
-
As those who are more familiar with us will know both Rigamortice and myself have a great affinity for the environment and take climate change (i.e. the thing we used to “call global warming” before it got cold again!) very seriously. Stricken by remorse and overwhelmed by guilt over the tons of negative carbon credits I’ve released on the global economy through years of motor racing, driving cars for the love of it, and behaving like a typically irresponsible older ‘Oldschool’ member I have acquired an EV! You may scoff at the fact that it’s a clapped out old warehouse sweeper with buggered batteries saved from the scrap heap but to Rigamortice and myself it is a powerful symbol of our indefatigable commitment to a green and politically correct future. With help from my brother providing advice, encouragement and the Wild Turkey may I present the definitive green, negative carbon credit, EV solution to taking the wheelie bins out when you live down a long driveway, (what could possibly go wrong!). Commentary and camera work courtesy of the ever lovely Mrs sr2.1 point
-
After running the engine with the new spark plugs and there is no miss. Then removing the plugs when the miss appears what condition are all the plugs in? particularly no 4 This also might help identify what the plugs are doing.1 point
-
Maybe, have thought about getting out but hard to actually do it, retention is very high in my team for a few reasons, last person to join the team was 10 years ago, 2 have left in that time, the last about 6 years back. 17 of us at the mo.1 point
-
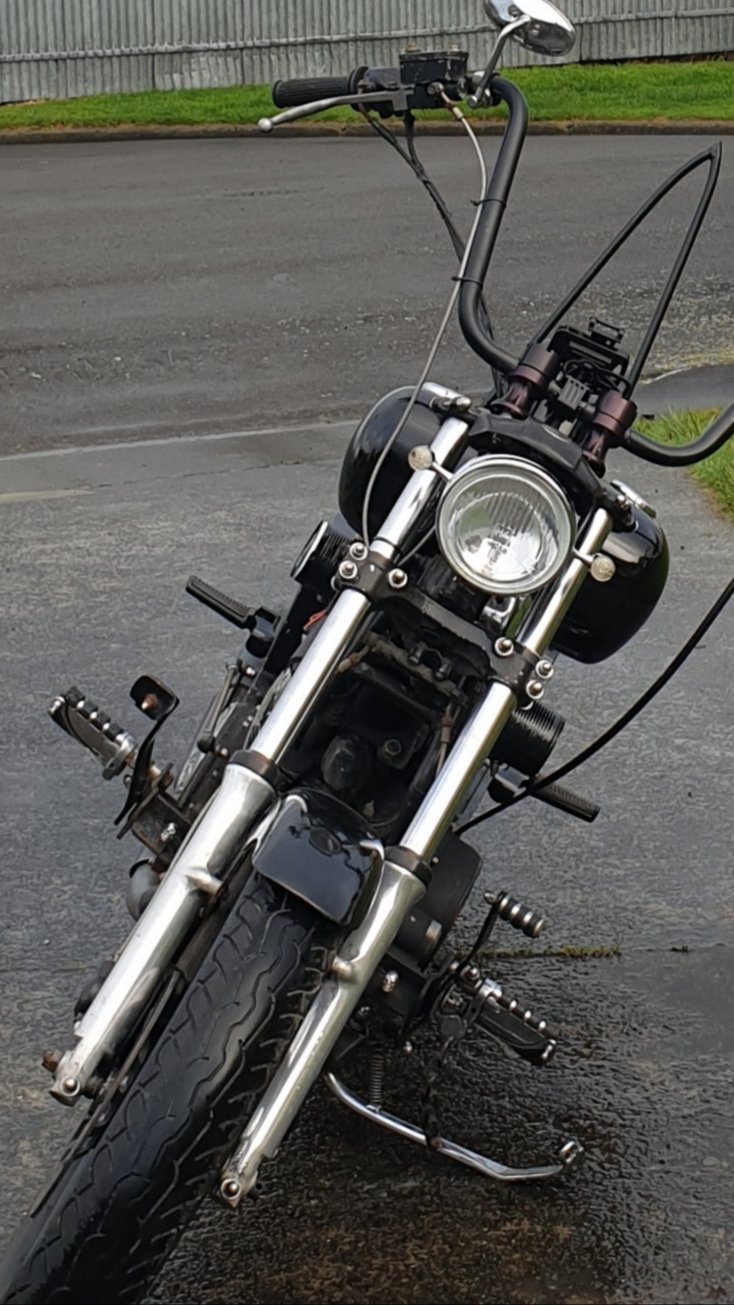
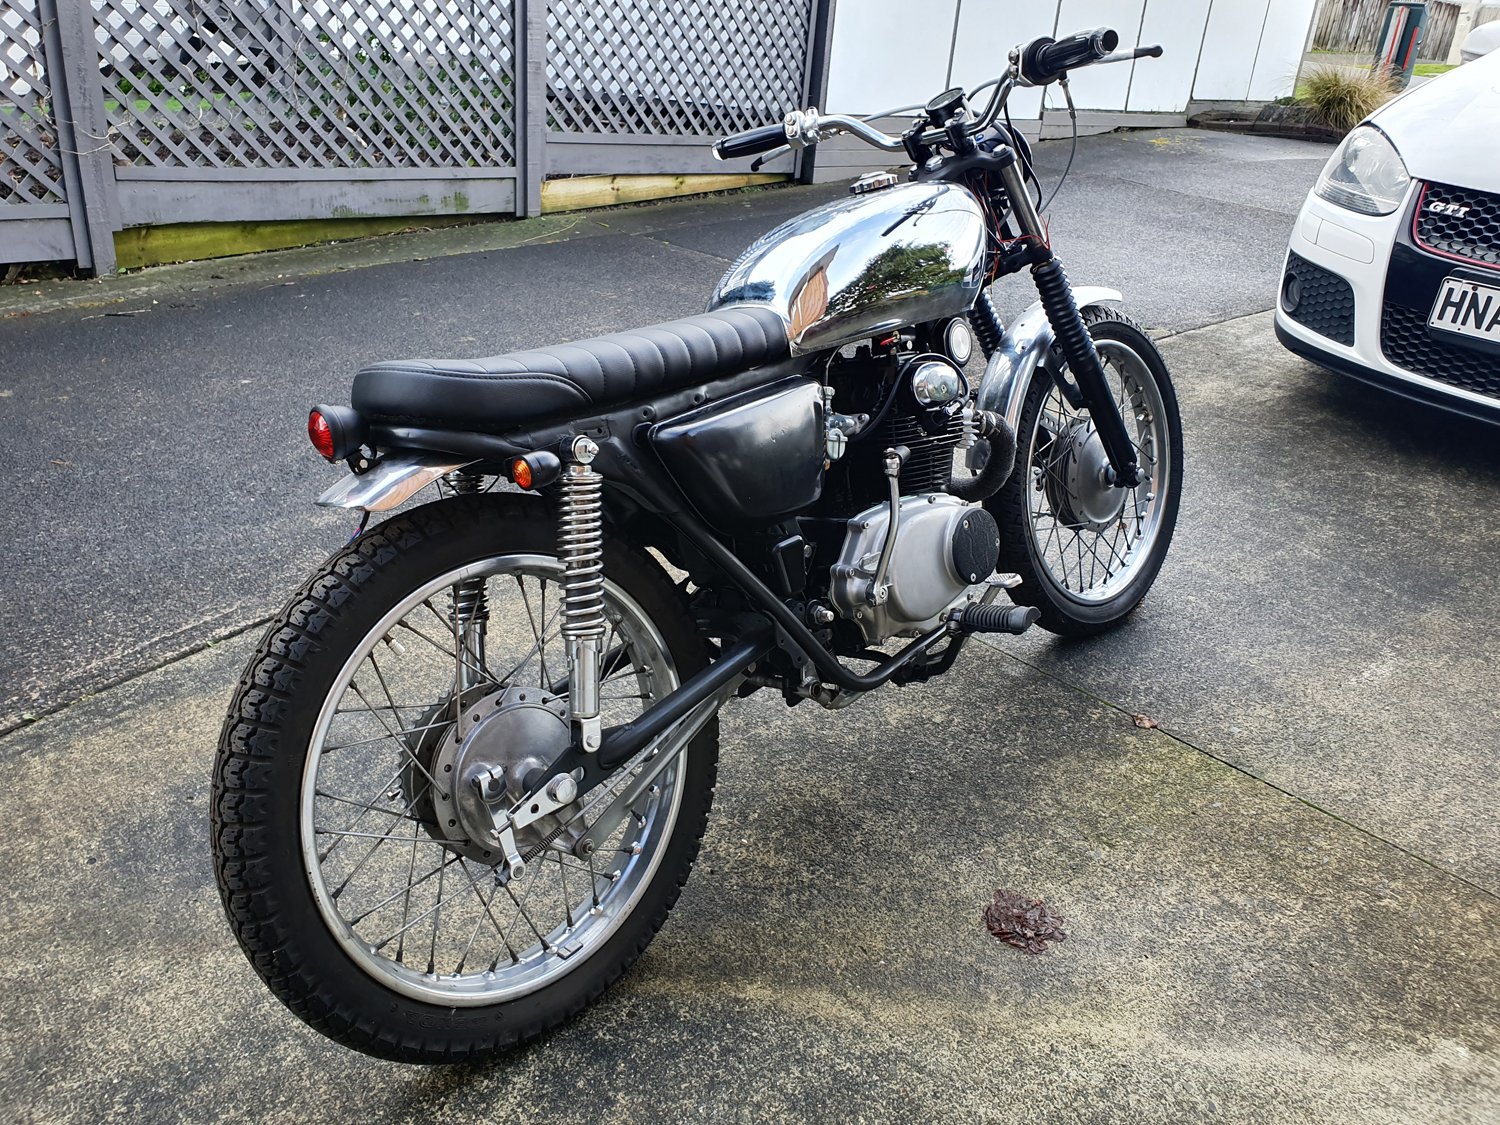
Taken it out twice - both times weather looked good and both times it totally shat itself raining. Bring on summer
1 point
-
A crook battery can make cars throw codes.1 point
-
Clear codes, drive car for a bit, see if they return. Not sure on the first code, but yeah the second looks like it'd be the battery.1 point
-
Not much has happened due to me having the flu, but the weather was too good not to take the TVR for a quick blat around the block Anyone who has had Man-Flu knows how hard it is to survive a normal day, let alone a day playing with old British cars, so my freight train of progress is halted at the station for a bit, as the garage is just too cold for me to be working in (its the middle of winter, and its been horrible weather recently). Due to said horrible weather, the tiny little "first drive" mentioned in the previous post did only consist of popping down to the end of the street and back, a return trip of about 100m. Today was the first day we saw some sun, and because I heard getting some fresh air and sun is good for you when you're sick, I took this as a sign that the TVR should go for a quick run around the block. I didn't go far, only a total distance of 1km according to Google Maps, but further than the car has been driven in probably 3 years. The car was already warm in this video as technically I had already taken it around the block twice before I thought I should grab a video. It started easily from dead cold, and as you can see warm starting is pretty good for an 80s K-Jet too. I had the targa panel off but the rear section up to reduce wind noise, and even then, what a sound that Cologne makes! It surrounds you. What a silly little car to drive, but such fun. It's not all happy days. The steering wheel is way on the piss (as you can see), the brakes pulsate badly, and it seems to misfire under load at about 4500rpm. There is still work to do, but its good to know that the car is actually driveable. The new spark plugs arrived today, so I'll probably throw them in this weekend, and I'll check over the rest of the ignition system at the same time. It could also do with some more fuel as I must be burning dinosaurs at a rapid rate of knots, and there wasn't a lot in there to start with.1 point
-
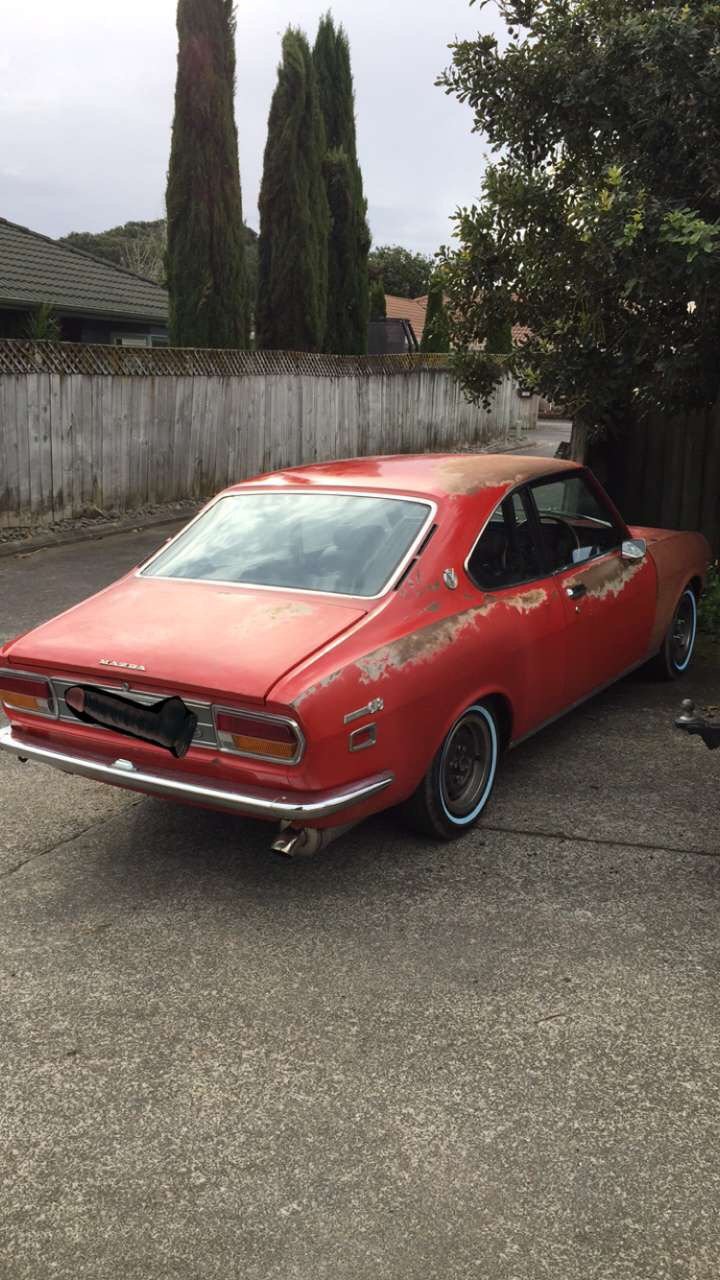
Raised it back up to get the outer sills painted white and straightened up and a few bubbles around rear guards seam tidied up. Struts have been crack tested, camber adjustable rear subframe ready to go in with f series 3.7 clutch pack lsd. Just need to fix various oil leaks and fit 205/60 tyres somehow and then try my luck at getting it legal
1 point
-
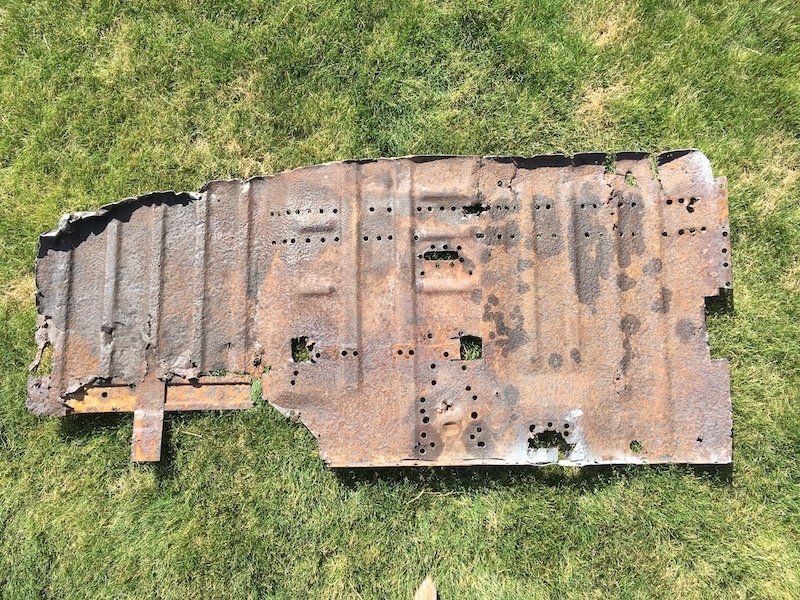
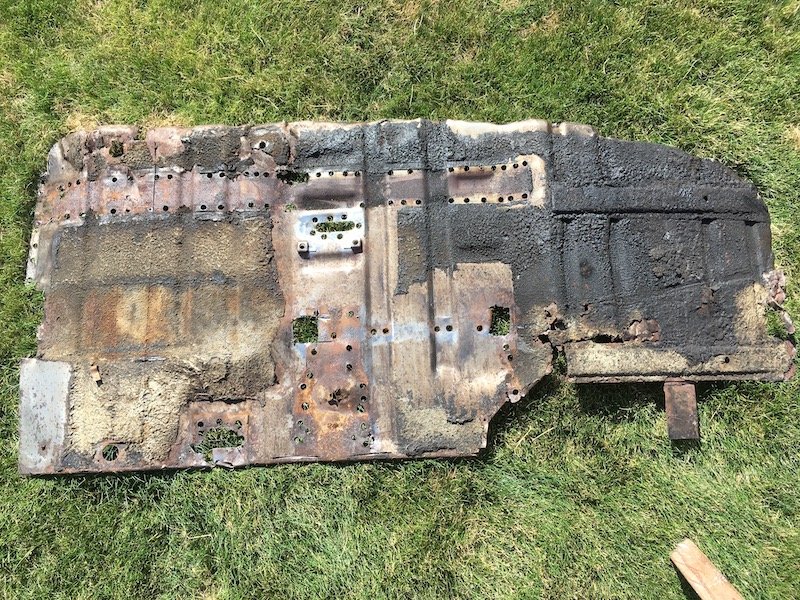
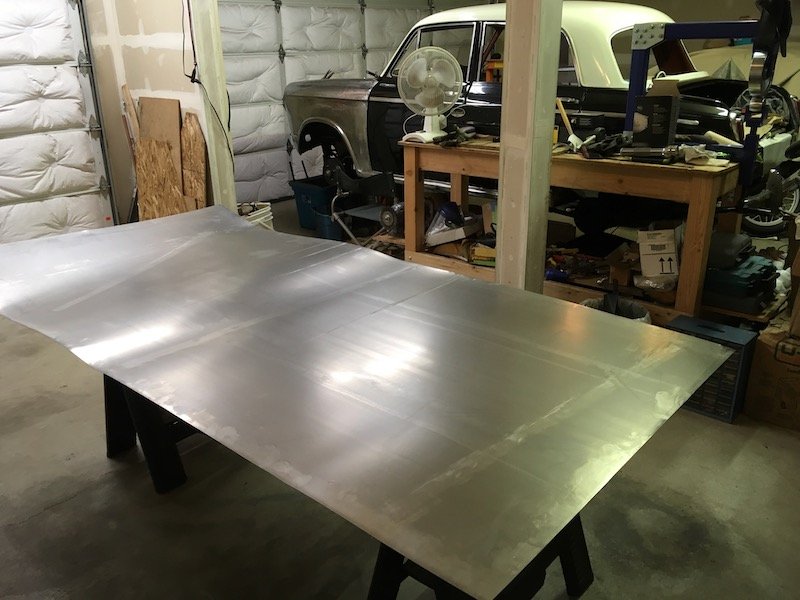
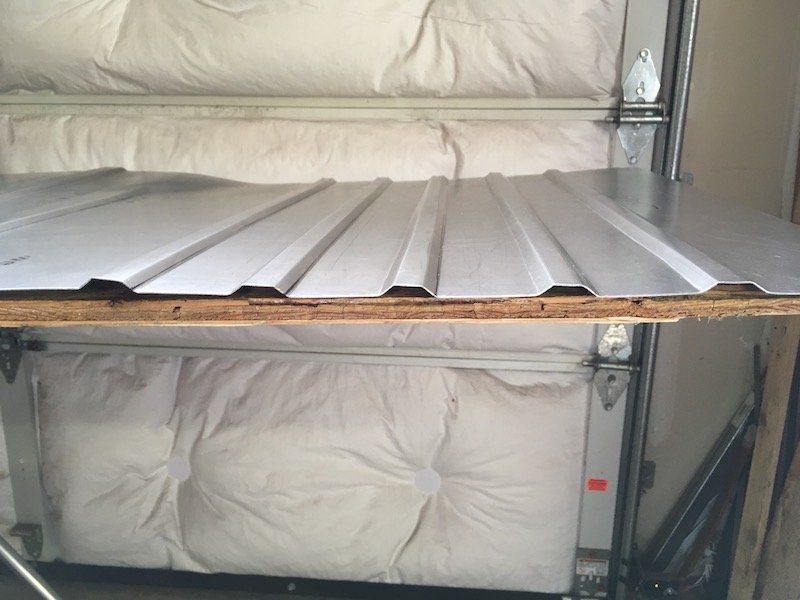
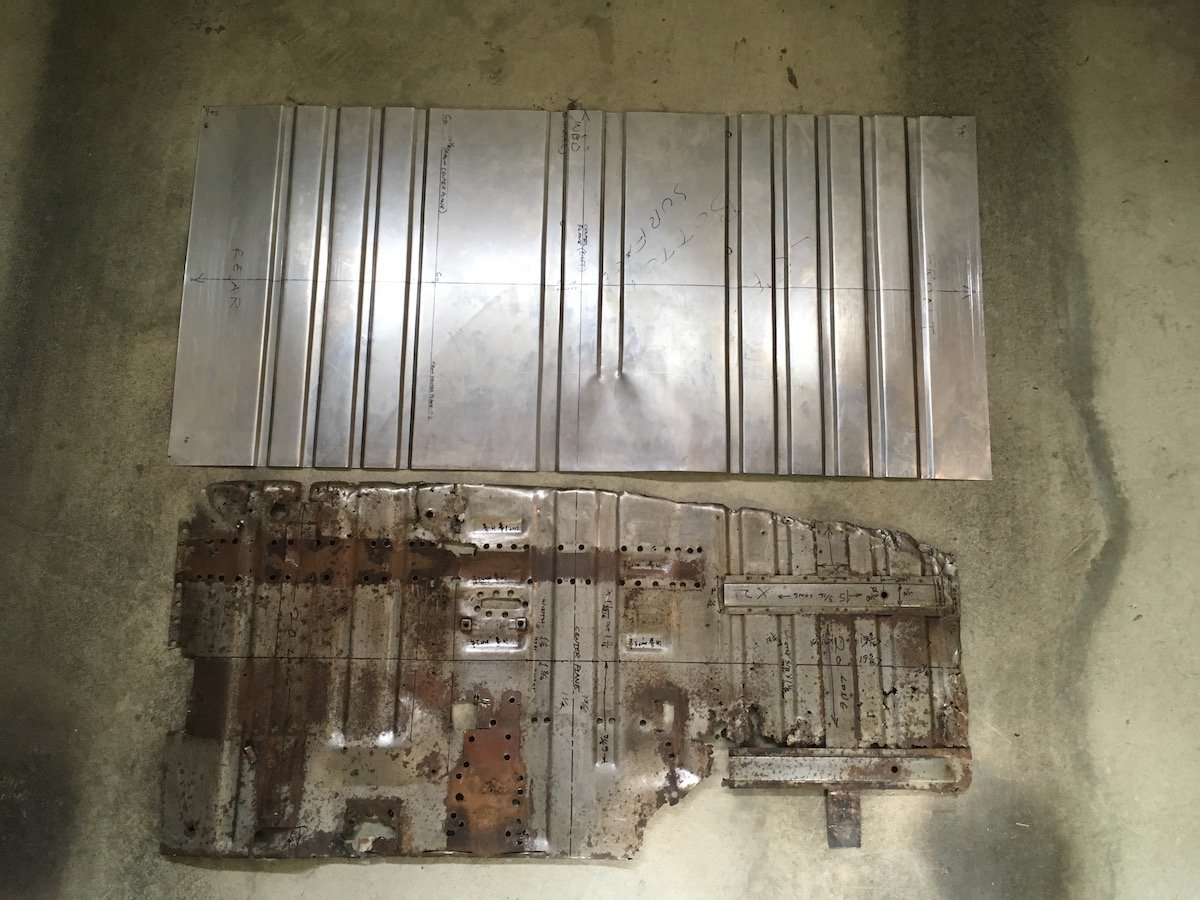
Back to work on reproducing the '61 310 Bluebird left side floor pan. First, I drilled out the spot welds to all the bits I wanted off the original floor. Top side Bottom side My collection of saved and de-rusted parts; including the seat bracket, longitudinal stiffener structure, hand brake reveal, B-pillar body mount bracket, and a couple of other brackets that are too far gone but get in the way. Bought some more steel sheet. Four foot by eight. I cut out a 26 by 56 inch blank and made some corrugated steel with a bead roller Scraped most of the under seal off the old floor pan bottom surface, did some measurements and began duplicating what was left. The bottom surface was more useful for measuring since it was much less rusty than topside. I'm leaving an extra inch or more all around to accommodate fit and trim later. Side-by-side compare Now I have to figure out a way to form some of the 3D shapes around the where the B-pillar body mount goes and the shallow depression under the hand brake lever. Hammer form over a wooden buck? Or form separate parts, cut the floor and weld in? Still have lots of work to do. Discussion: https://oldschool.co.nz/index.php?/topic/60267-marts-pl310-61-datsun-bluebird-sedan/
1 point
-
Phosphoric is great stuff, I've got a shell in bare steel with it on it and the panel shows little sign of oxidation after a few years.... My tips? Dilute it 3-1, apply it by soaking a rag and wipe it on, have another rag to wipe off the excess. Then after dry, wipe with thinners and a rag. Stopped having all of those yellowing/oxidation problems after doing that.1 point
-
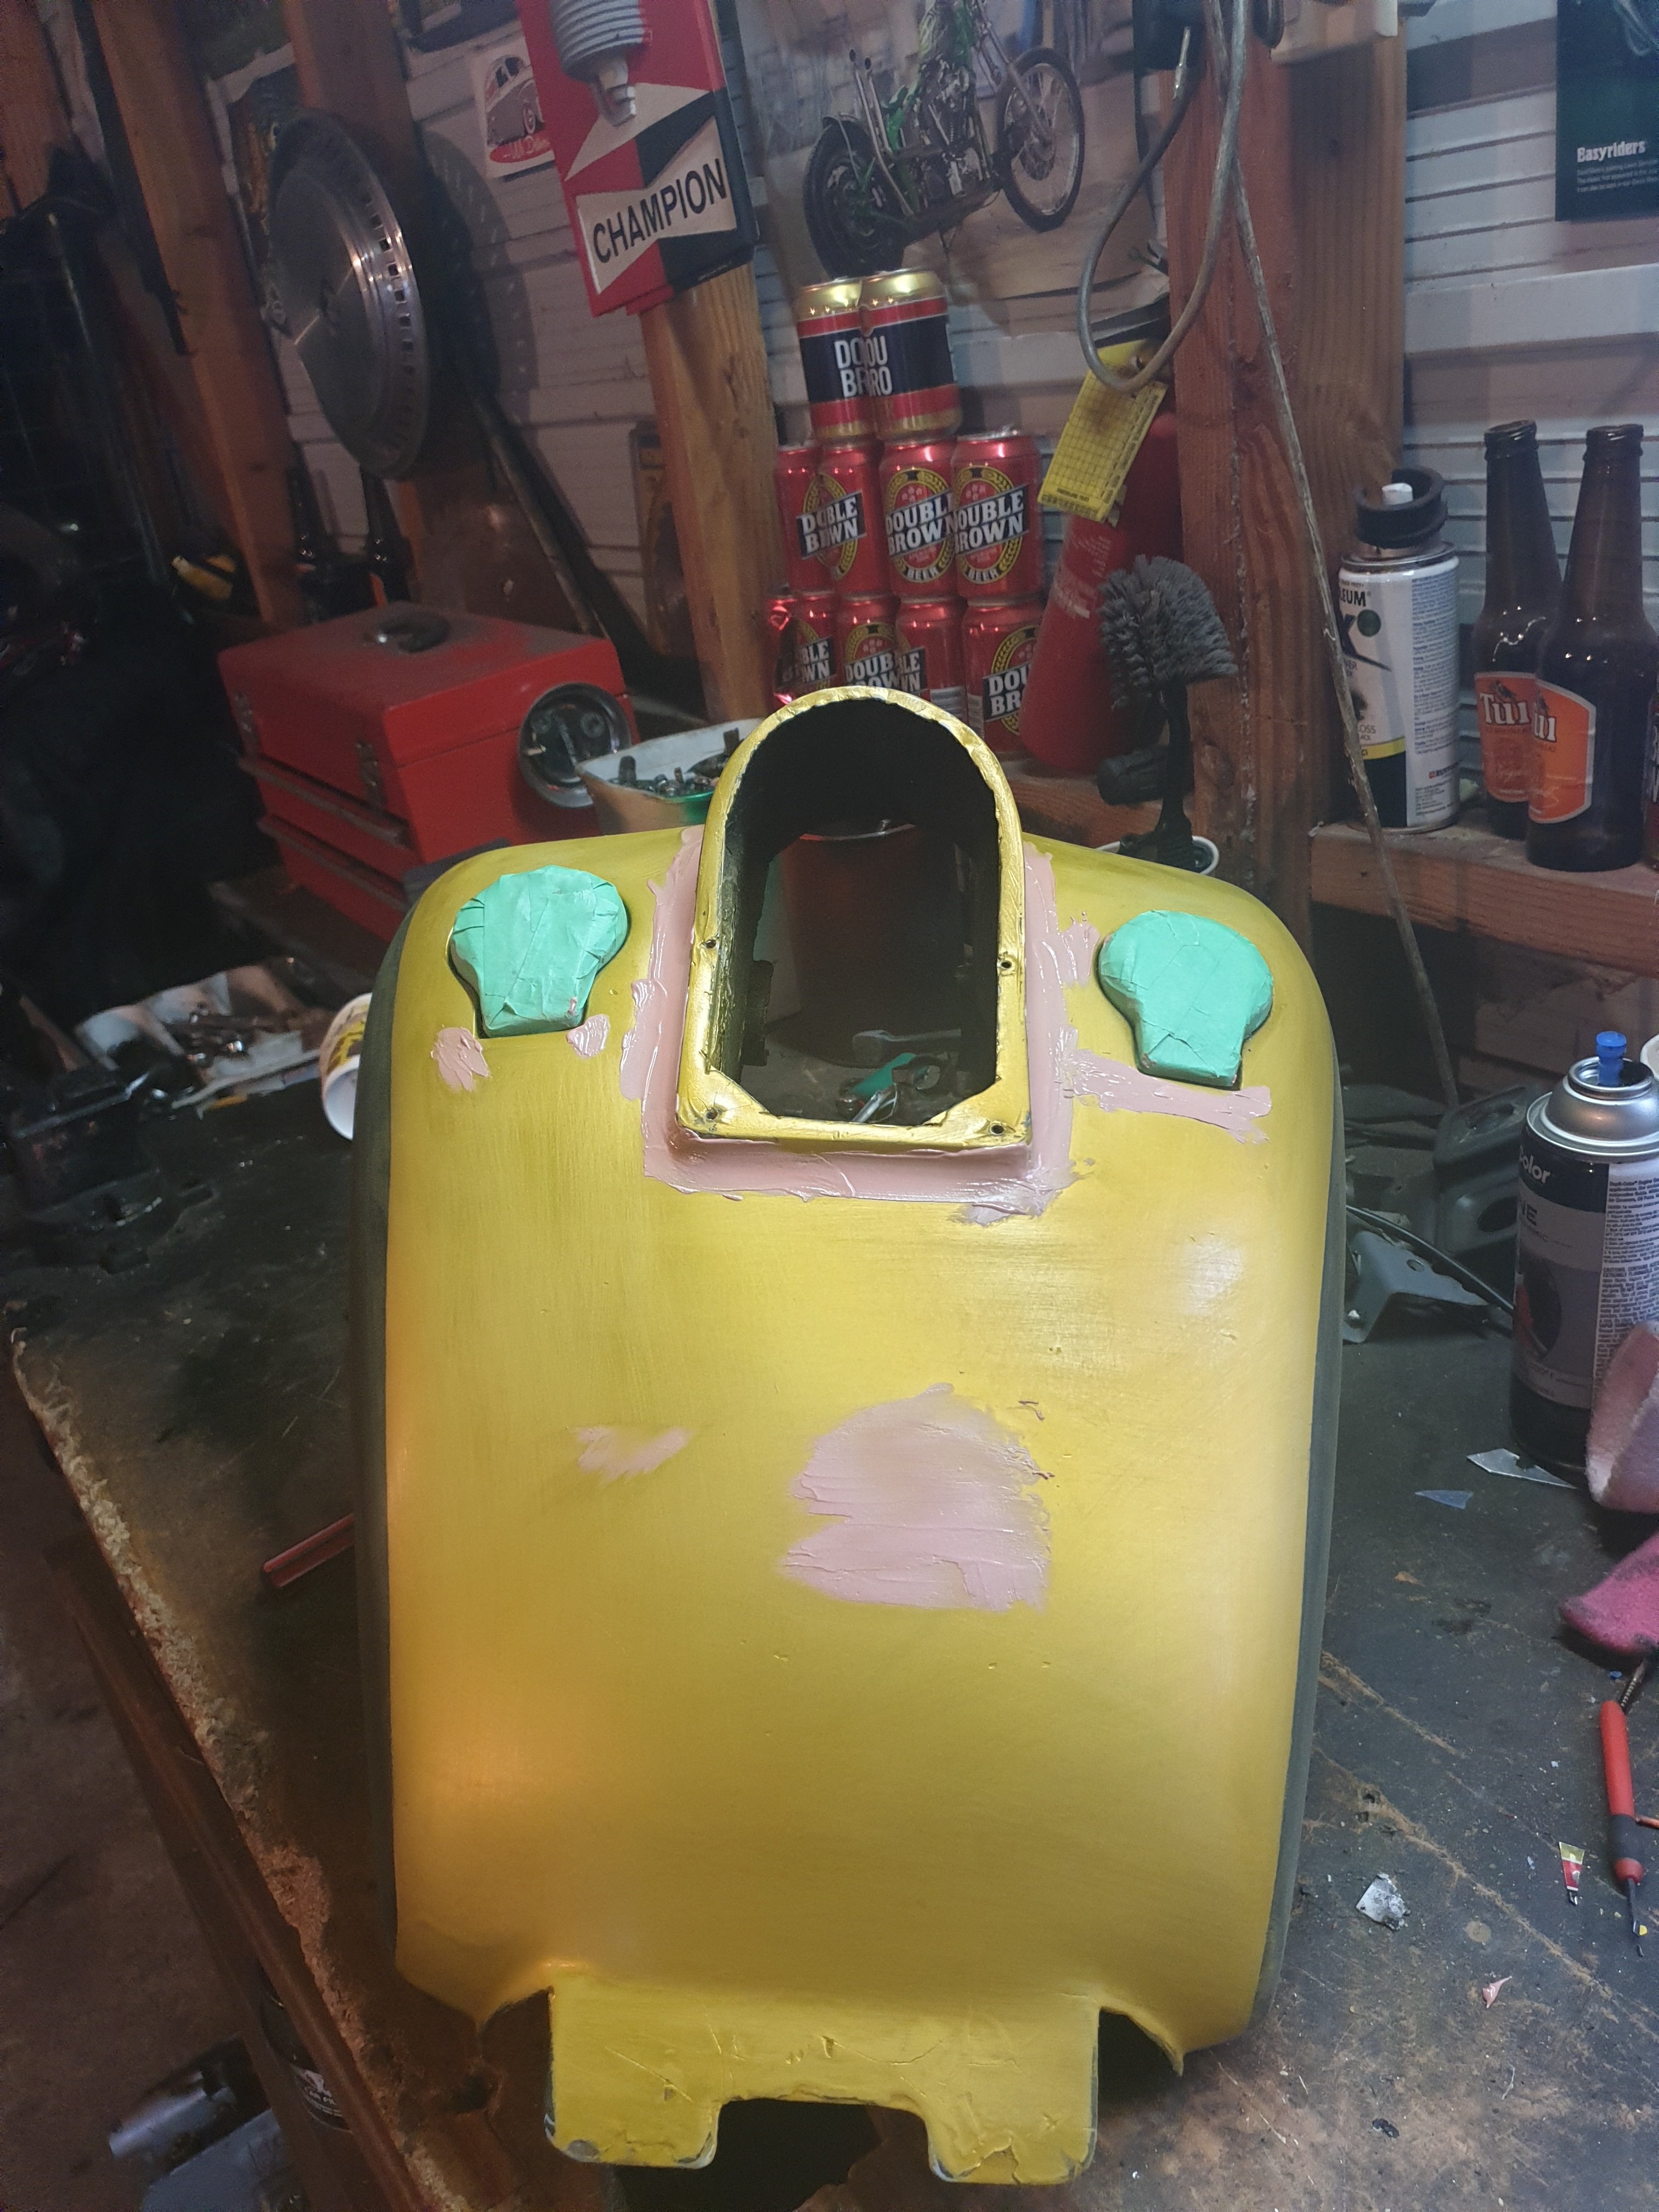
Fone wont let me upload better photos but you get the idea.. Fixed up some cracks in factory bondo. Had some black... is only ment to be a base coat for maby a matellic purple with flake but for now im happy looks prety ruffless. What you guys think
1 point
-
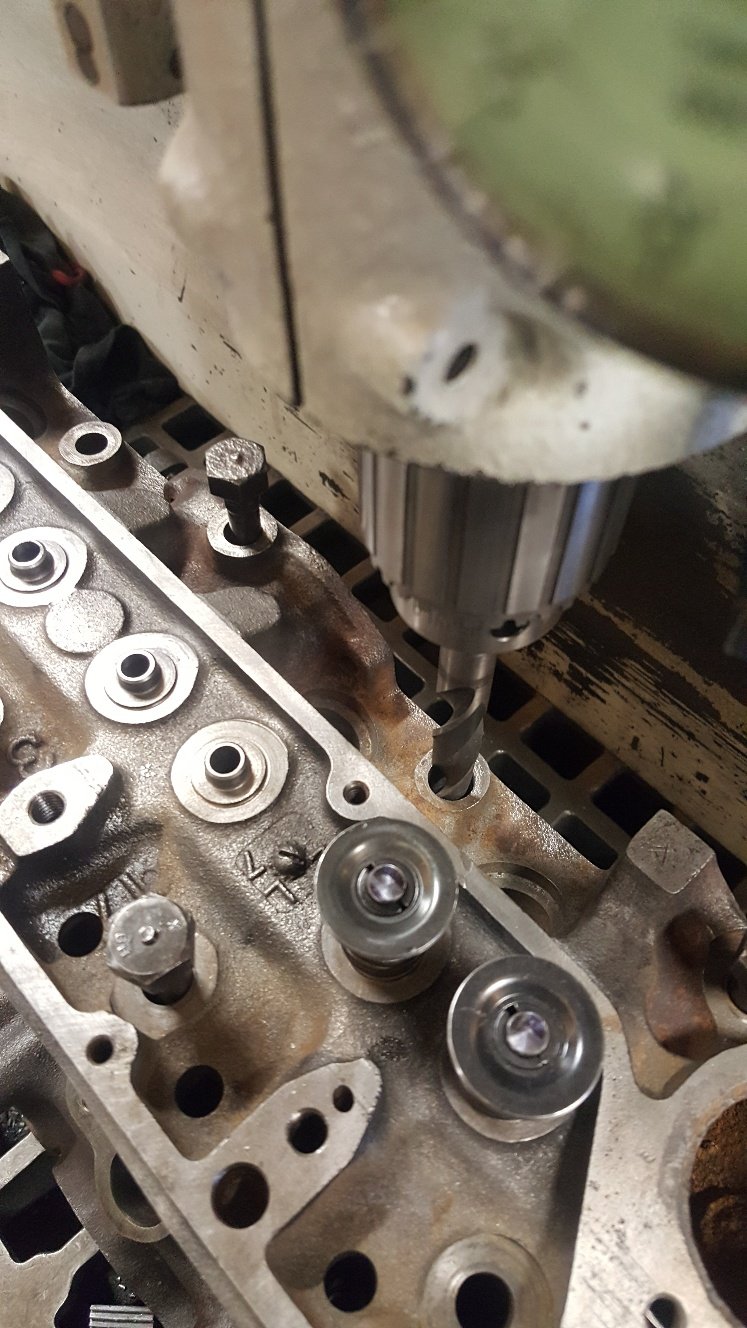
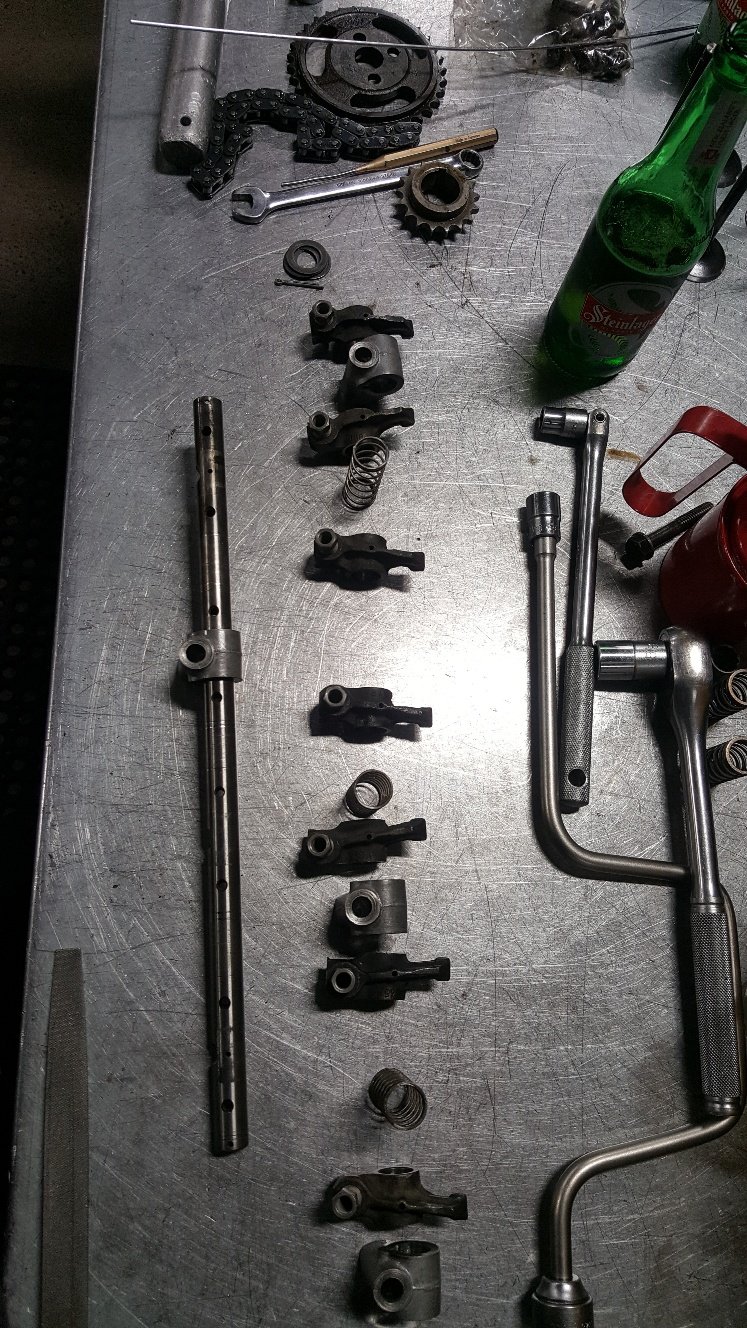
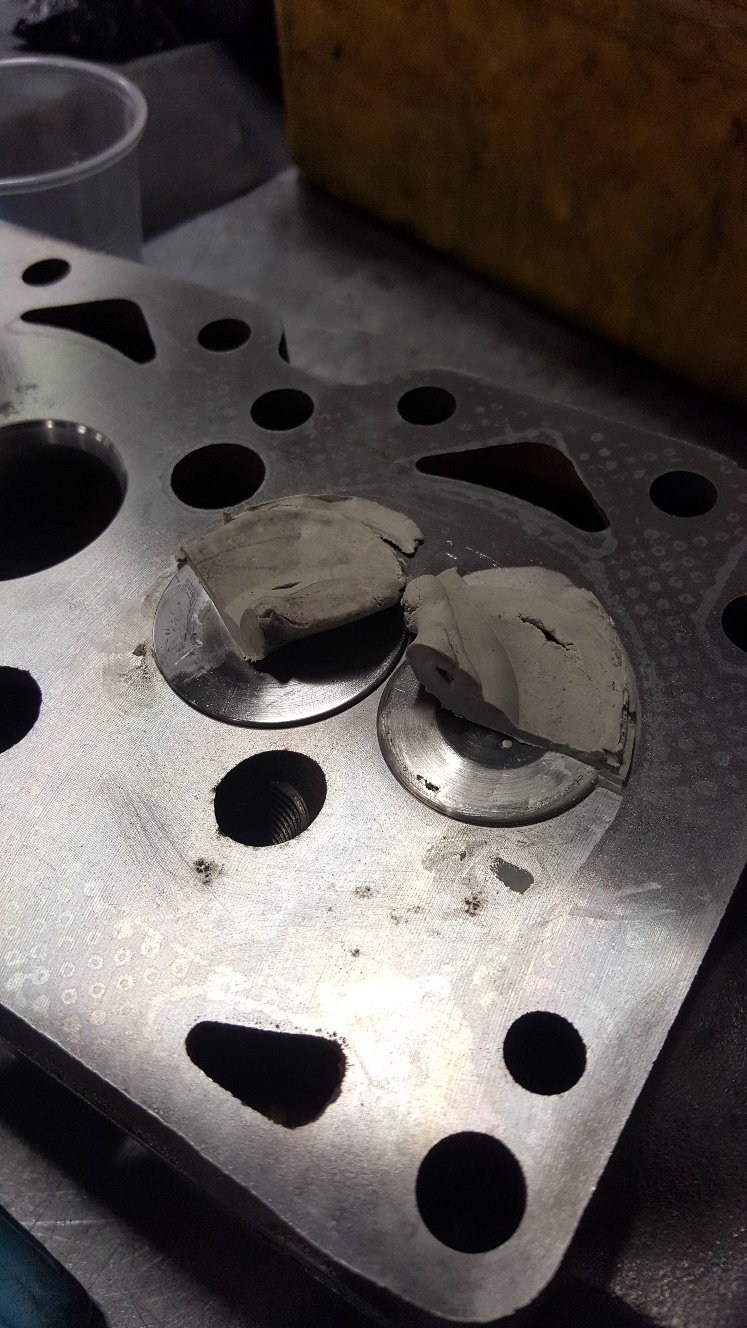
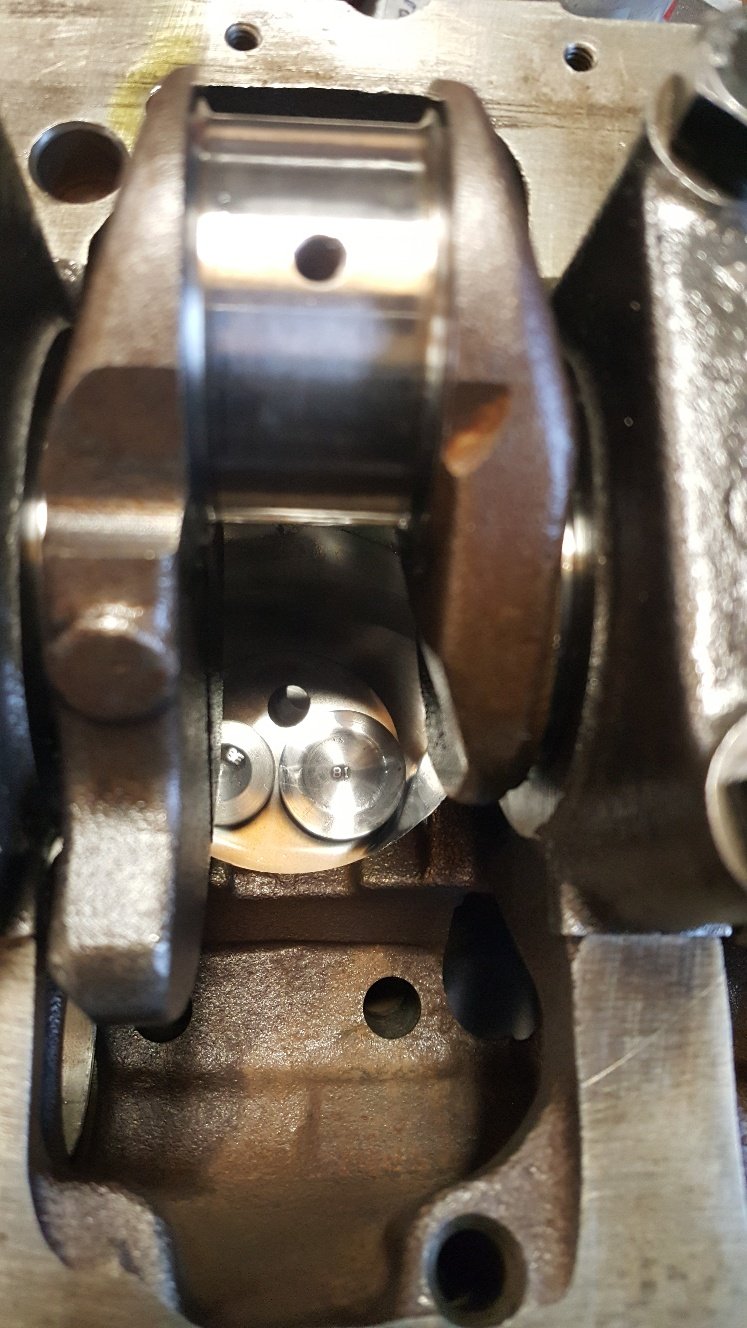
With the head sorted i can put the camshaft in and check piston to valve clearance. But first I need to dowel the head to the block. These old beast come from the factory without any location other than the head bolts. So I center off one of the head bolt holes and drilled it to 14mm. Then bolt the head one without moving anything and drill the head bolt hole out to 14mm. Then fit the head on the dowel and drill the other head bolt hole for the second dowl. So dialed the cam in. Then bolted the head on and found my rockers where a little worn so gave them a tidy up. Forgot to take pictures of the head fitted. But basically fitted the head, put two layers of plastersene on top of the piston in the valve cut outs. Then turned the engine over to get the valves to in print into the plaster. Then I cut half the plaster away to see how thick it is. This gives you a good indication of the piston to valve clearance.
1 point
-
Sunday evening update time. Fuck the weeks go past fast, I must be getting old. I made some hatches for the rear openings; I added some covers for the drawers so my tools don't fall out; I have yet to find a really good lock system for those big drawers yet... I then made a bracket to hold a power steering reservoir in a place where it was easy to access; I made some radiator supports; After I made these I found the Dyna rad supports in my box of shite, so now that I have adjusted these into the correct position with the cab on I will probably change these over. The Dyna ones have some isolation built in which is a good thing. The rad itself is sitting on two M8 isolation mounts on the underside, connected to that bit of angle. I will cut the angle into two smaller brackets, that shit was just to get them in the right spot during the setup. All snugly in place. The reservoir cap does hit the cover so something will need a cut and shut. I then stood back and admired the goodness; O fuck yes.1 point
-
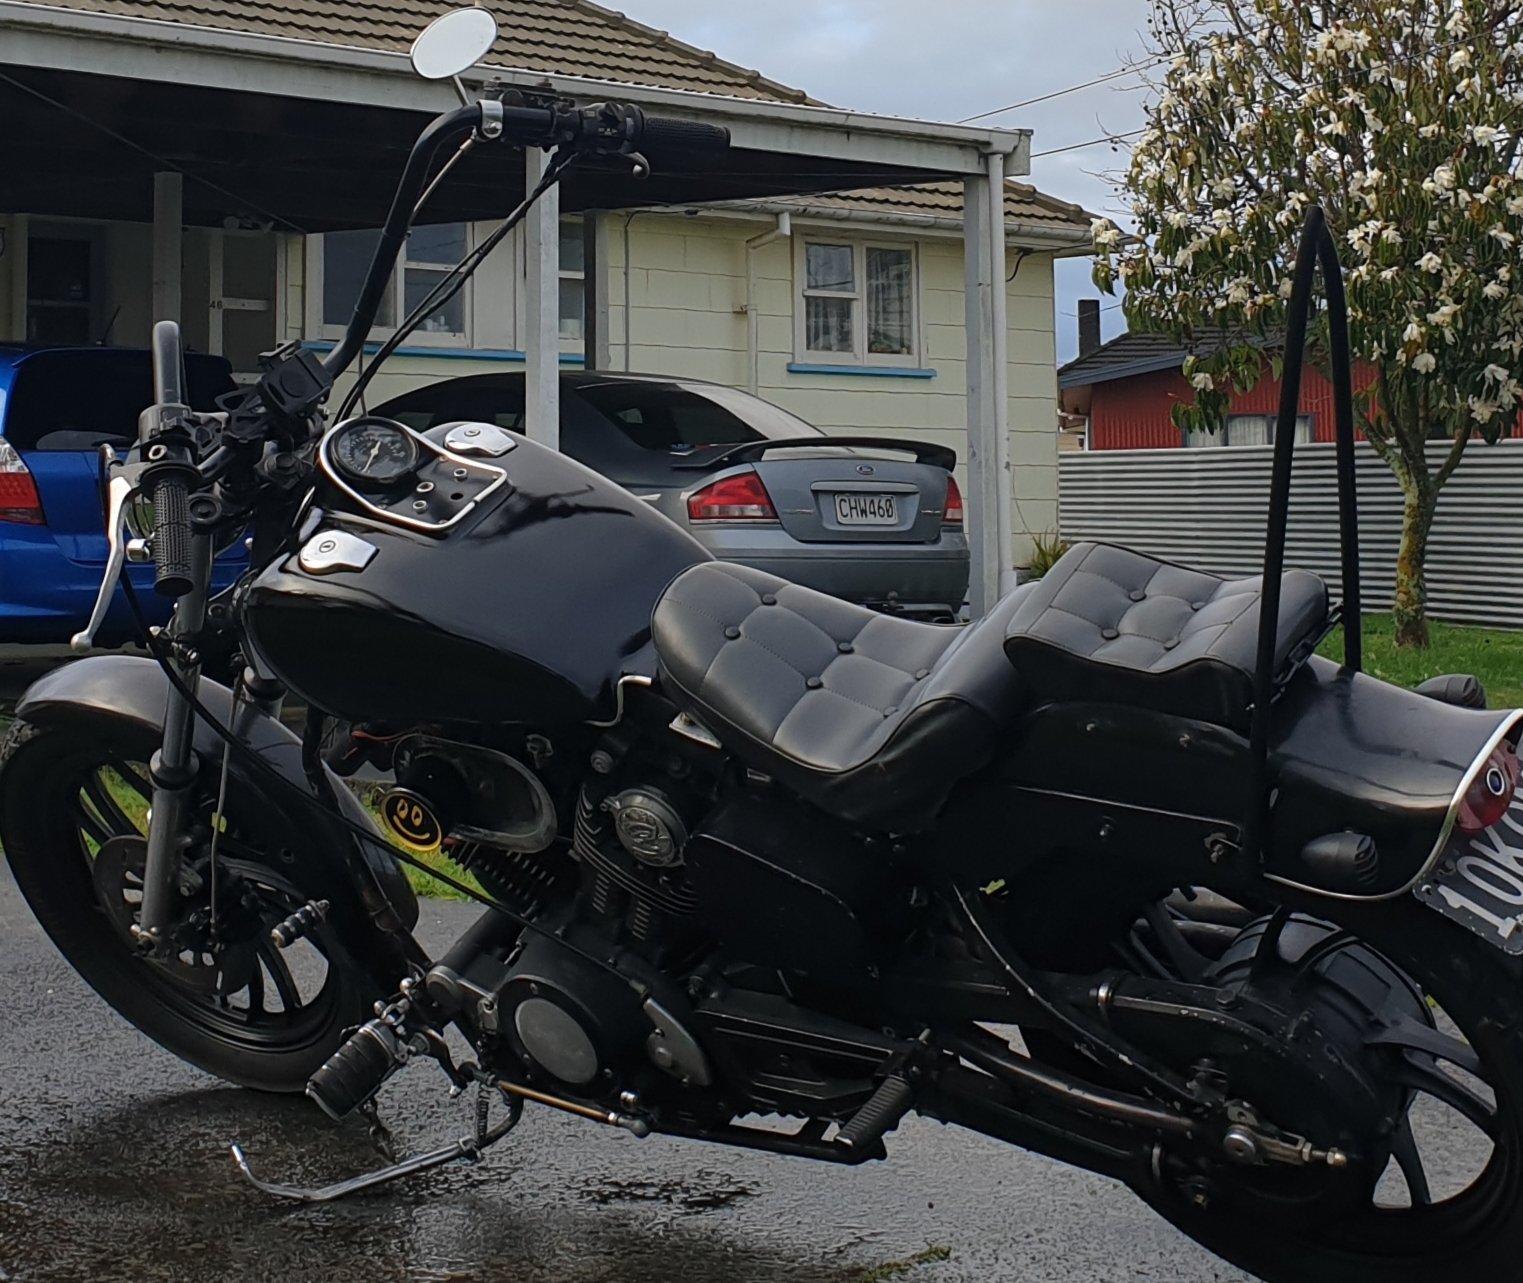
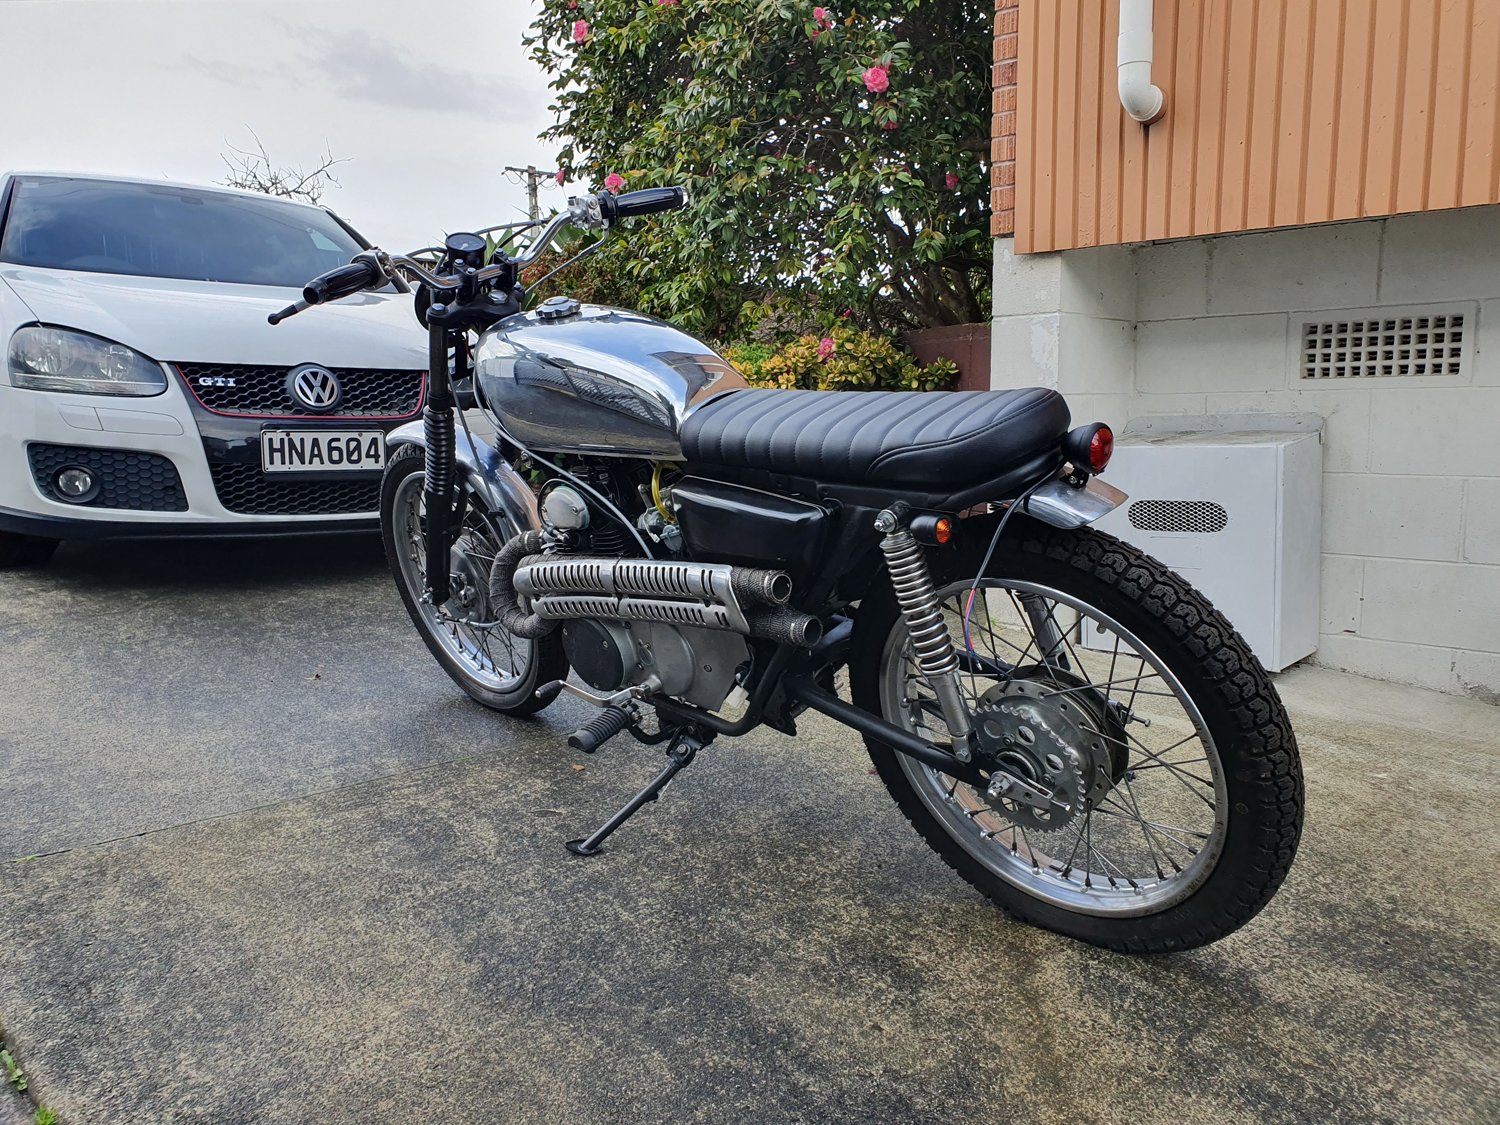
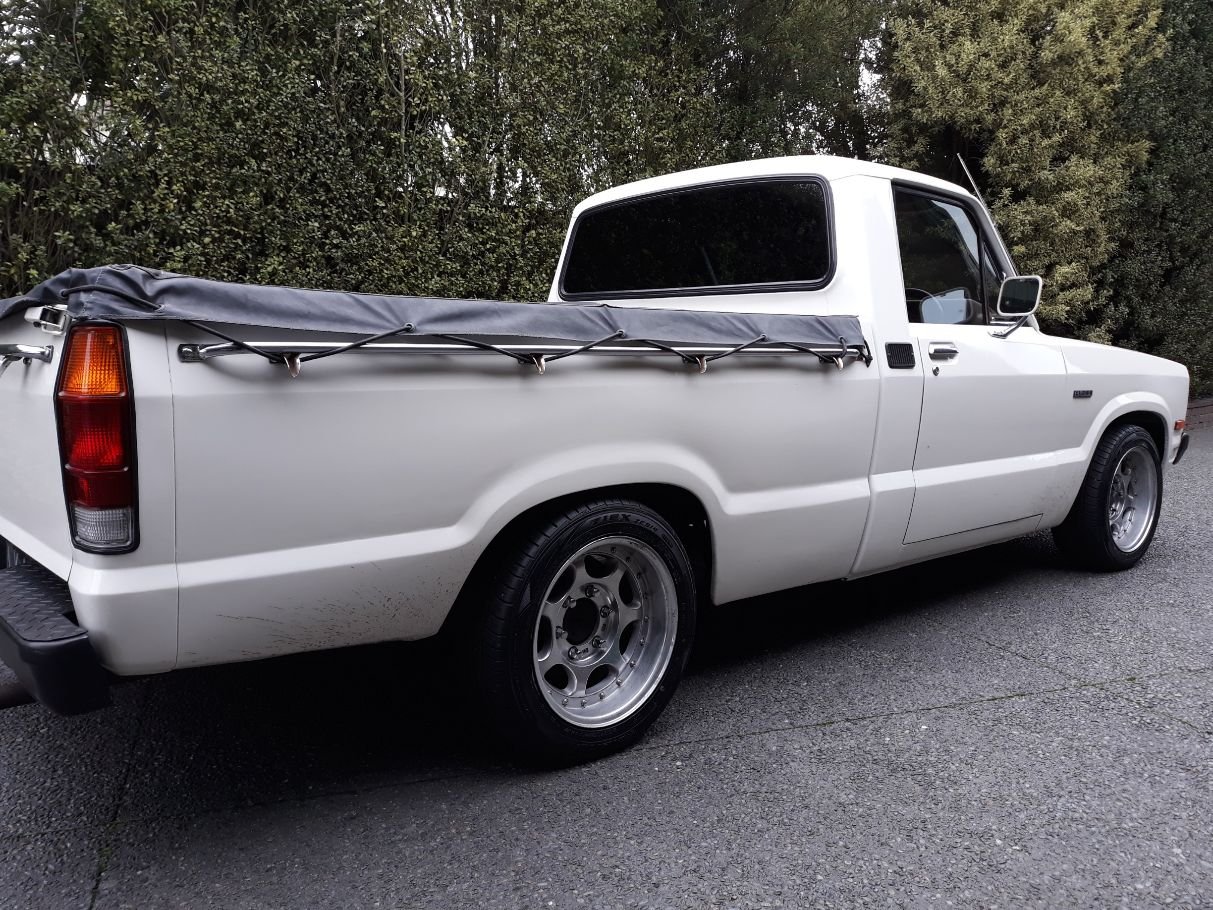
First time it's seen daylight in about 3 years. Have just discovered a leaky rear shock so I guess I have to throw some more $$ at it haha.
1 point
-
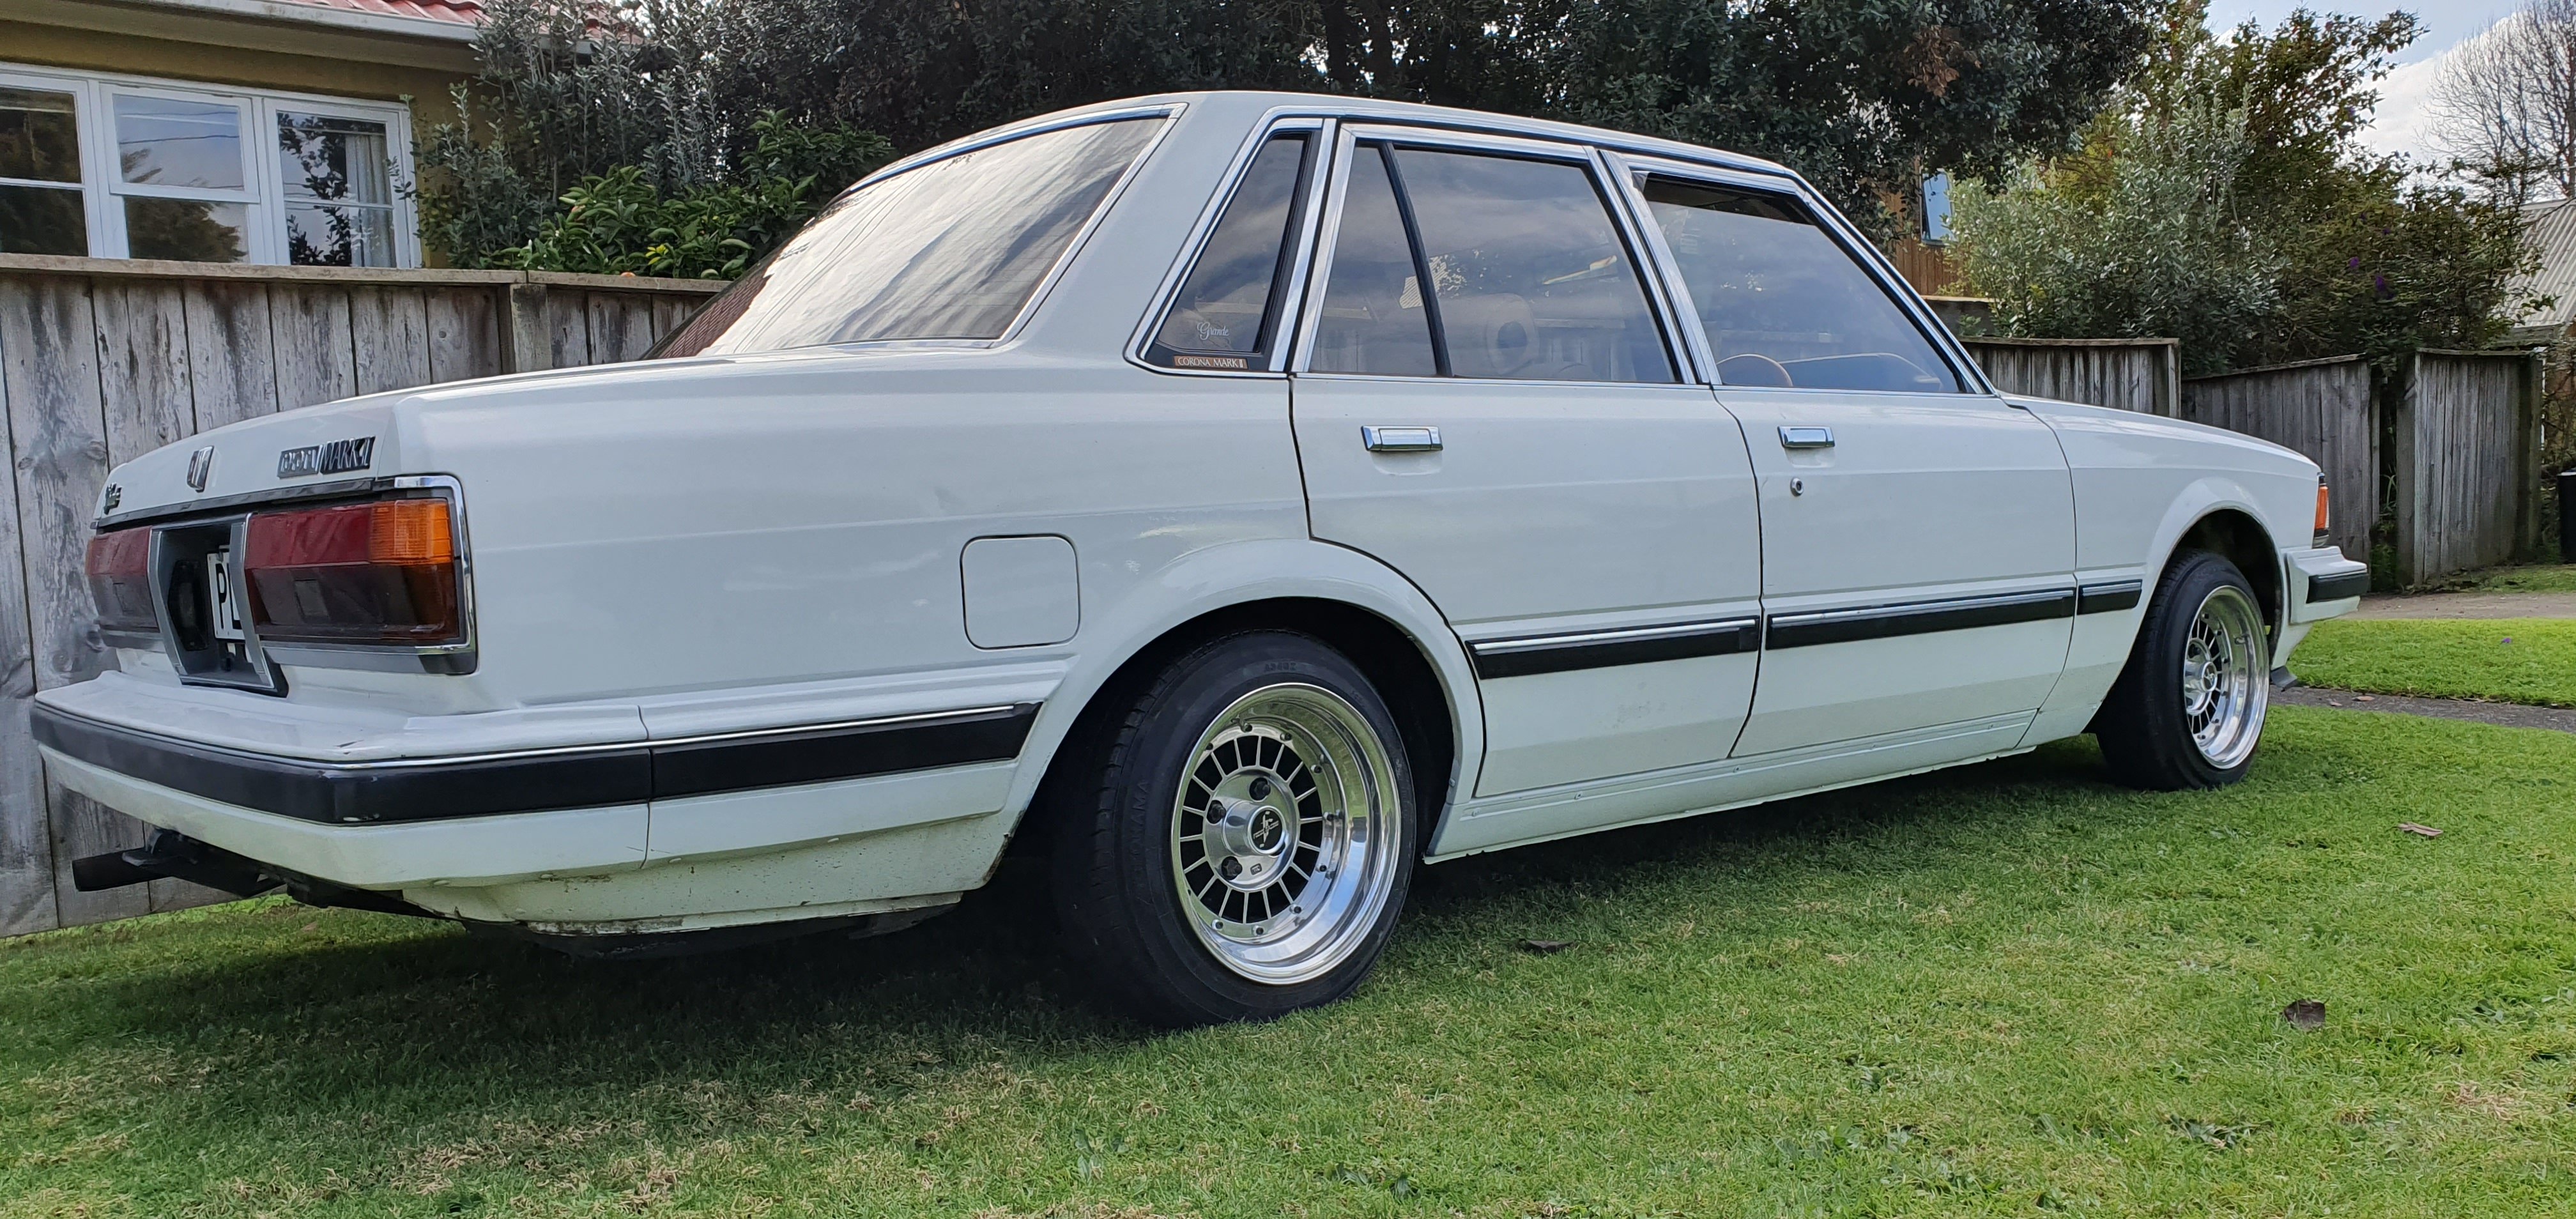
We never got onto the interior, got a bit side tracked with my mazda. But after hunting off and on for some other wheels, a mate spotted these on facebook. Stoked with the fitment, and best of all, Rebekah agrees with me that it needs more low, so I've been given the go ahead to go down another inch and a half. After a morning at the hotrod breakfast, she now wants a small front chin spoiler/air dam.
1 point
-
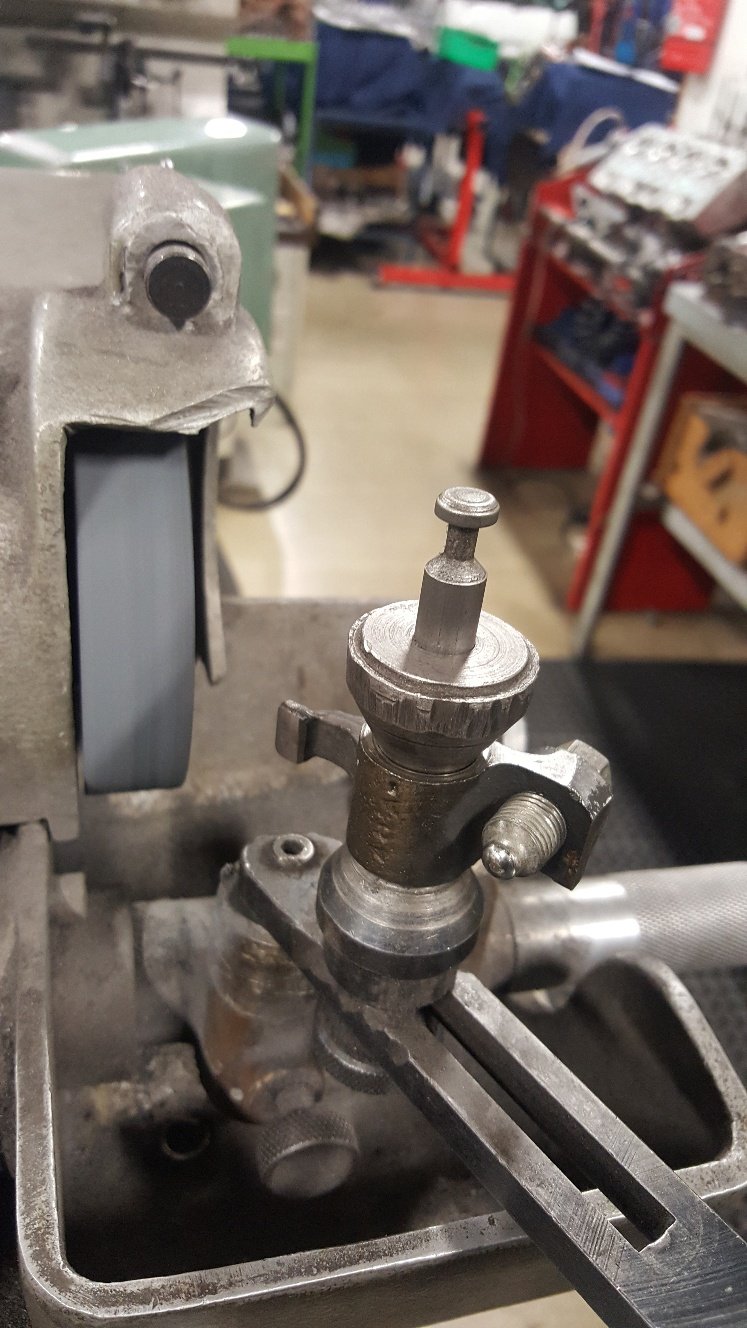
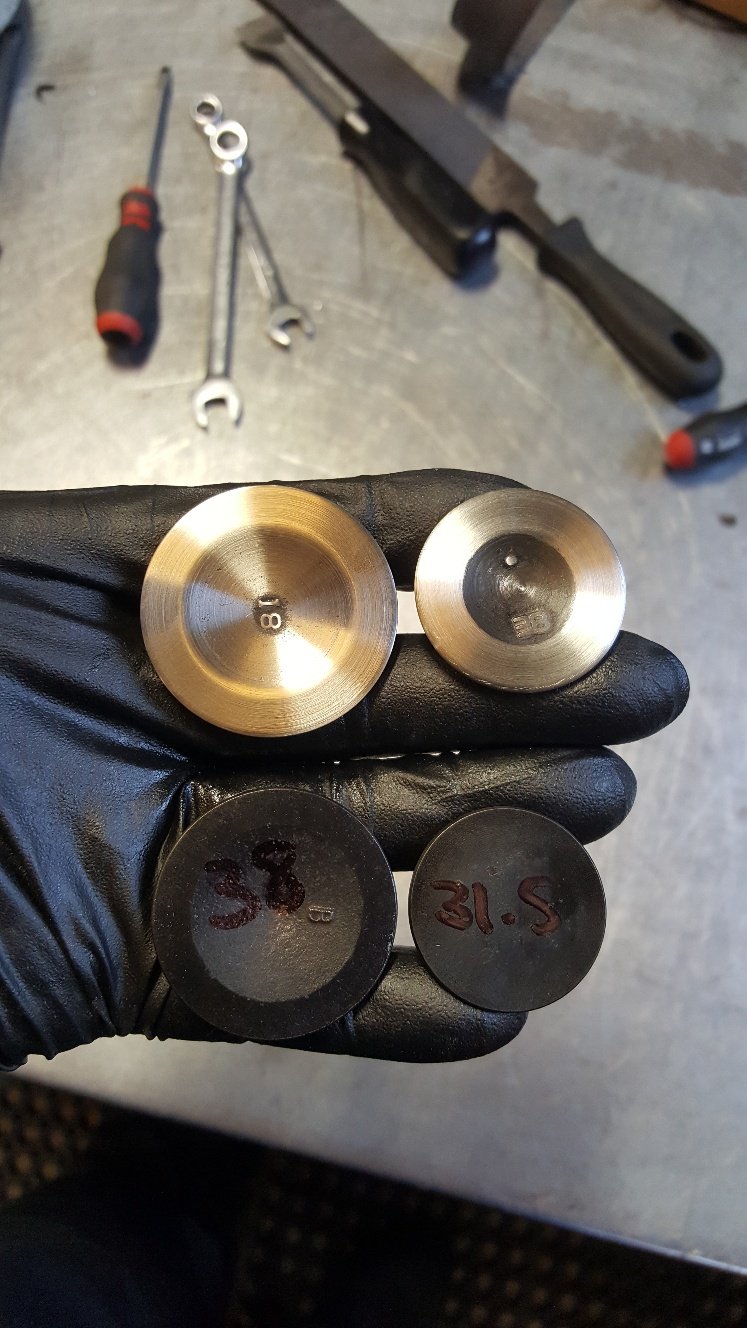
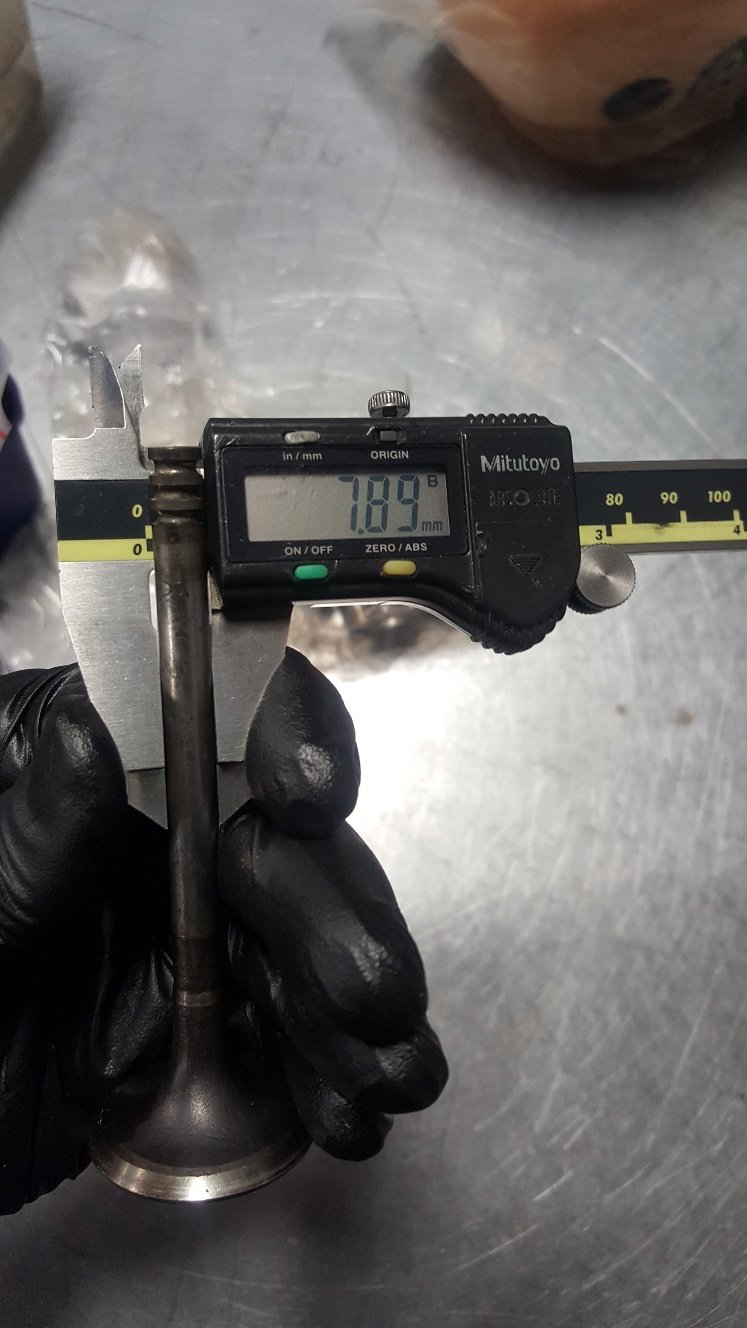
I'm happy with the valve size. So I cut seats into the new valve inserts. I cut all the seats as close to the same height as possible. Al my work mate had done some research into the best seat angles, and we used a radius throat cutter profile. Once they are all cut to the right depth and right size to get the 45degree seating where we want it on the valve face we are ready to synchro seat the seats with the stone gear. We believe this gives a good sealing finish on the seats. I didn't get any pictures of this, but basically you face the valve seat grinding stone on the valve facer to get the same exact angle. Here's a picture of me stoning the seat. You can see the seats are polished up. I now check to see if they are seating the whole width on the valve face. I didn't get a picture of this. But we use a engineers blue to wipe on the valve the put the valve into the head and push the valve onto the seat and look to see if the engineers blue makes full contact from the valve to the seat. So the valve and seats are done. So I need some valve springs so I went down to Kennelly Cams to see PK and Adam. They have a good selection of springs in stock. This is also where I got my cam reground. So running the FE Mazda valves I need to use a different valve spring retainer to the stock xflow item. I looked at using the FE retainers but unfortunately that was going to make my spring install height to tight. The spring install height is the measurement from the spring seat on the head to the valve spring retainer. Stock xflow is around 33mm. So that's what I'm trying to get close to. So Al grabbed a Toyota 1kz retainer and we took a measurement and they looked like they would do the job with a bit of turning in the lathe. You can see the spring isn't sitting in the right spot. So I made a arbor to spin the retainers in the lathe Finished retainers sitting on the spring.
1 point
-
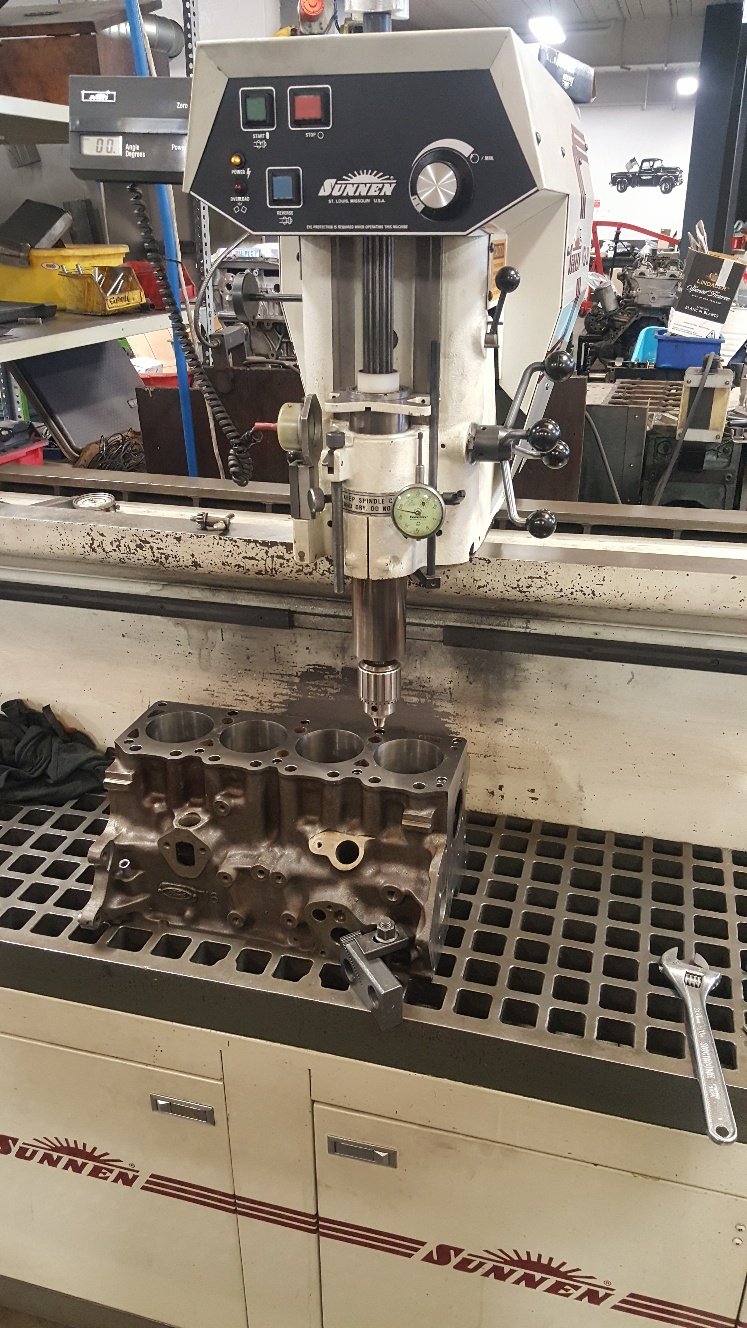
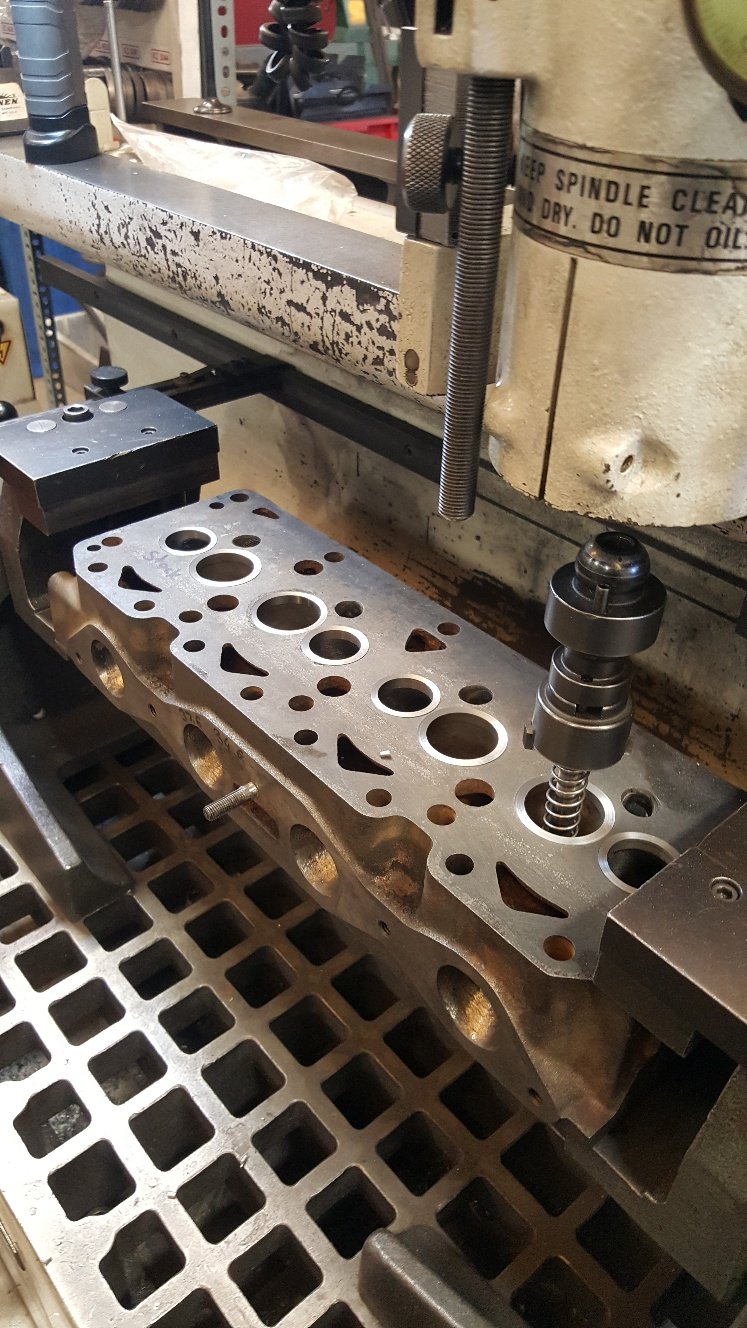
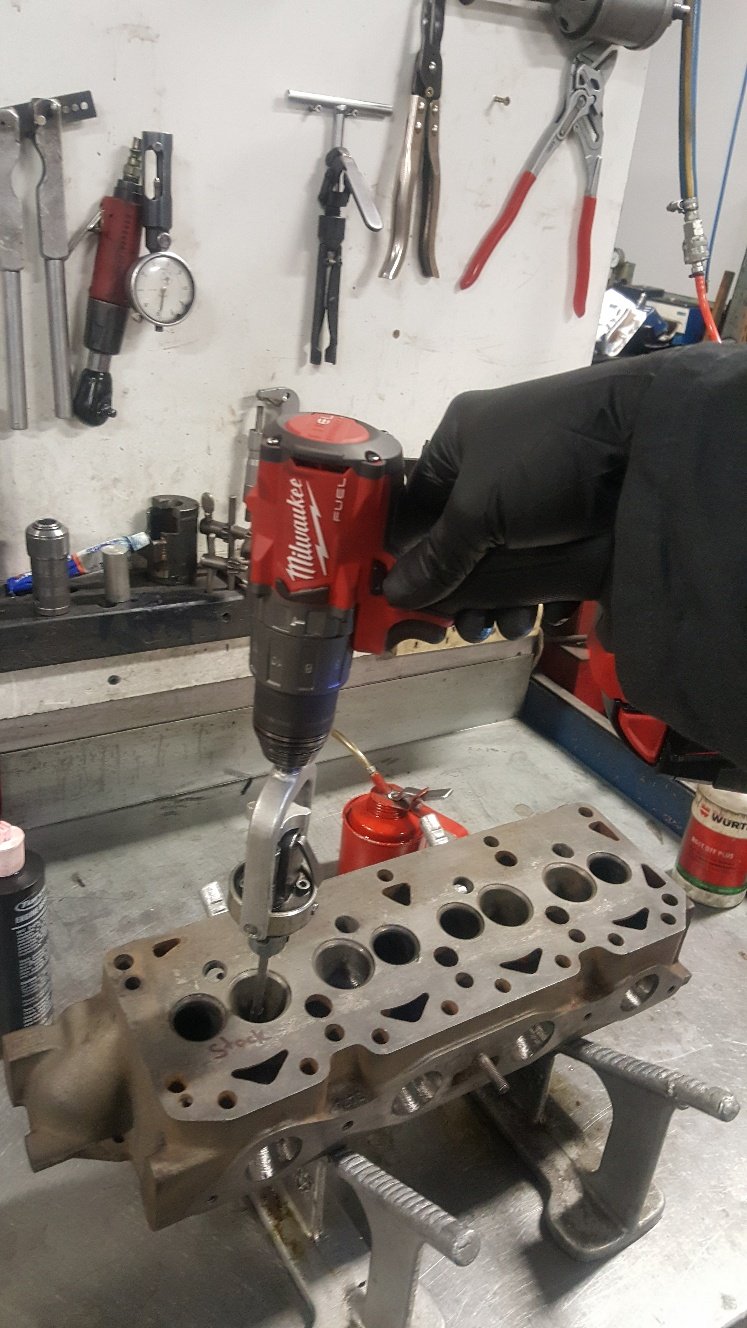
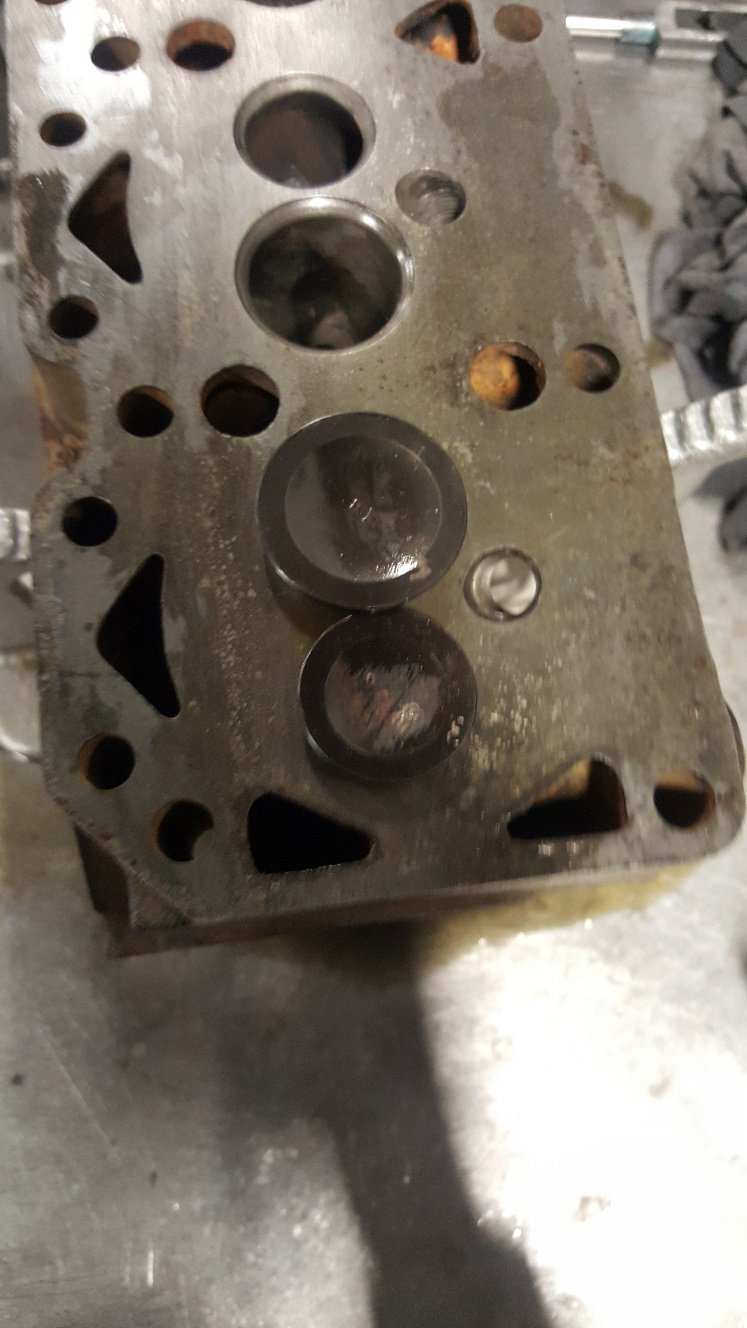
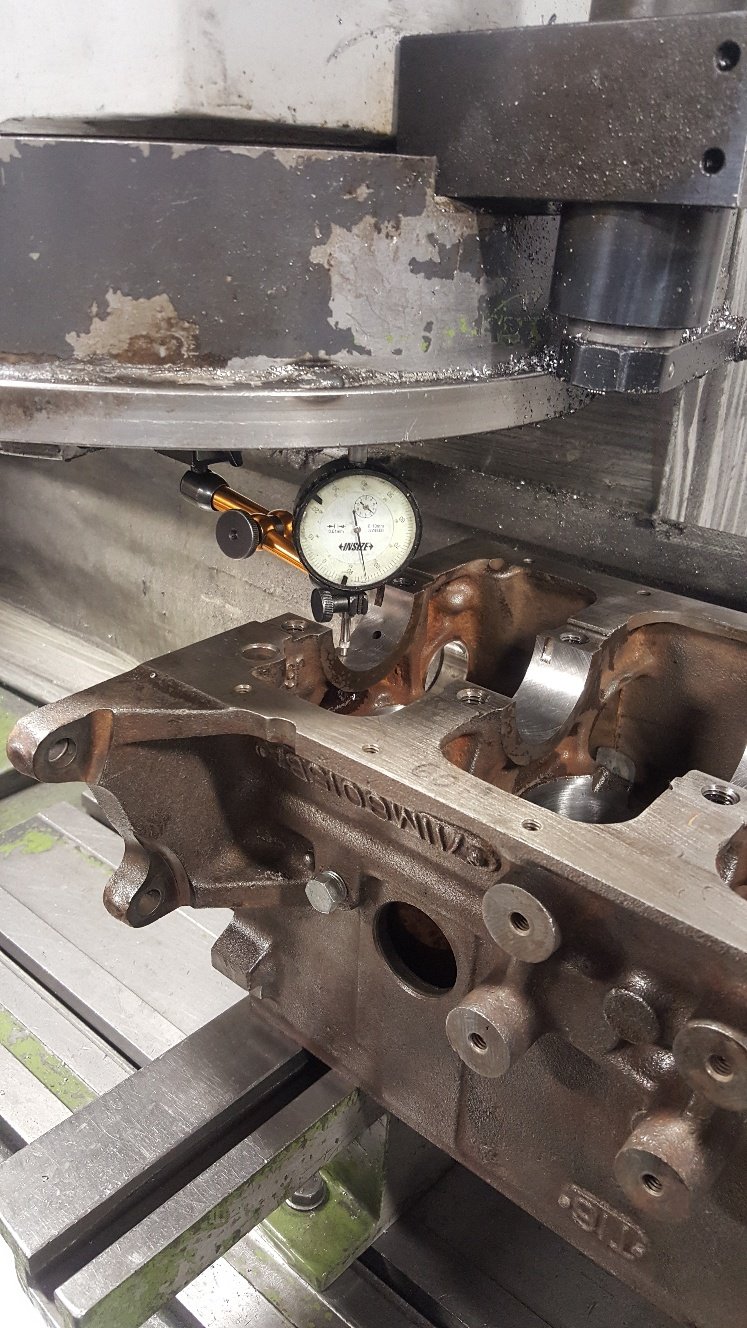
Time to cut some holes for valve seat inserts. We have a Sunnen VGS for all our head work. First picture is setting up the tool cutter to cut the hole. We are looking for between 3-5 tho crush. Once holes are cut just hammer the inserts in. Then turned down a intake valve and a exhaust so had something to check valve spacing and clearance of the side of the bore. I detopped the inserts in the VGS and then surfaced the head. I didn't get a picture of it in the surface grinder as there's pictures of that previously. Here's the valves. And a shot of the head bolted on to the block looking into the bore to see how much clearance the valves have off the side of the bore.
1 point
-
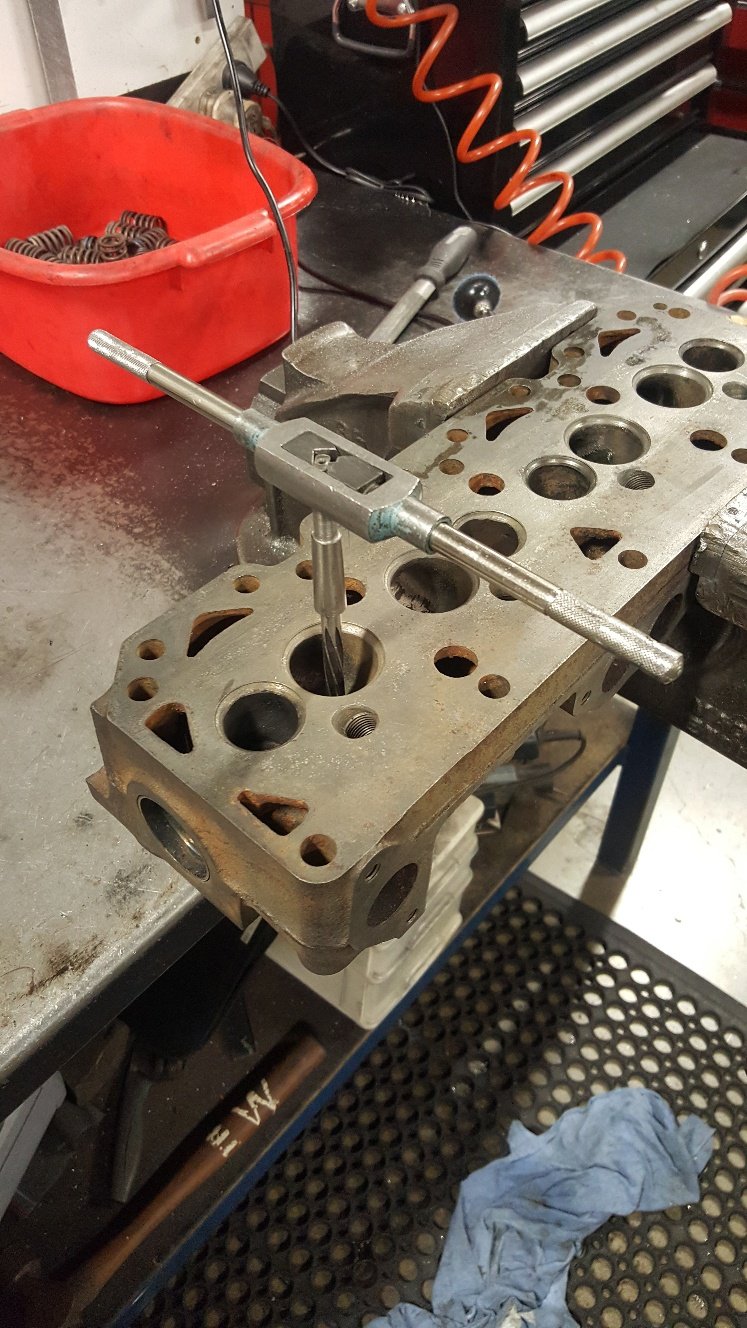
Here's a picture of the standard valve stem size Here's the Mazda FE valve stem size. So I need to open the guides up to accept the bigger stem size. This is also good because it means I don't need to fit a new valve guide. Its just a matter of reaming the guide hole the honing to finished size And now the guides are big enough to get the valves in. I will be machining these down to 42mm for the intake and 34.5mm for the exhaust.
1 point
-
I need a bigger garage.1 point
-
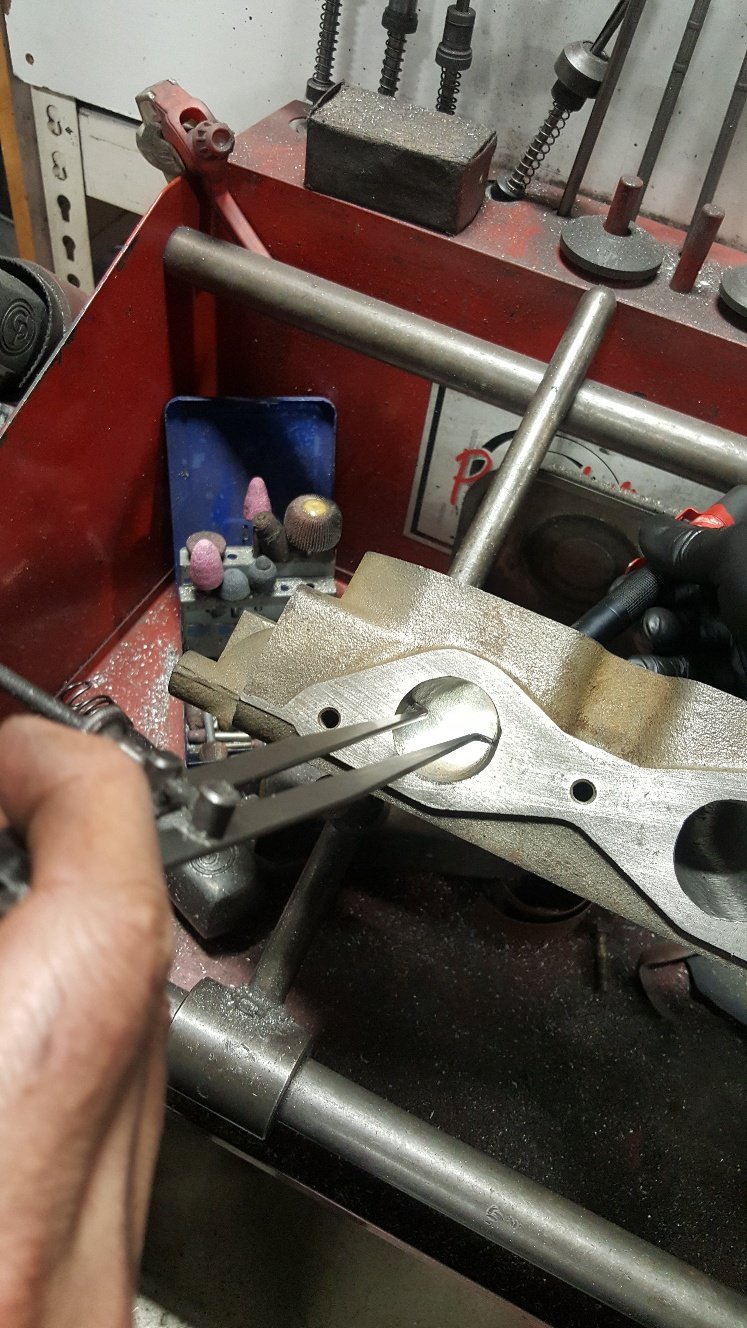
So I turned a Accumulator groove into my pistons. Its a groove machined into the ring land between the top and second ring. This groove accumulates residual gasses from combustion to stop ring flutter improving ring seal. I also added some Contact Reduction Grooves in the top land these limit piston to cylinder contact during high rpm and high temperature. They also disrupt detonation waves. Now I've pretty much got most of the bottom end machined except for the valve reliefs. But to machine these I need to figure out what size I want to make my valves. Here's a picture of standard valves vs some oversize valves. I won't be useing these particular valves. I will make some valves out of Mazda/Ford FE 8v valves. While the head was lying around my work mate Al decided he would do a little porting to open up the intake runner where it pinches down at the intake manifold face. You can see he has opened it up enough to be able to run the calipers down the runner to the bowl area without it pinching the calipers this tells him he's got it pretty evenly round. This should give good even area volume. So the intake flow stays at a even speed. Before hand you would expect the intake flow was speeding up through this area then slowing down before getting to the back of the valve. Hopefully I explained this ok. I'm no guru on porting. This is just rough cut off the burr. We will probably leave it that way as it can help in atomization.
1 point
-
Seems im overdue for another update. Best remedy that I guess and spew forth more pics.To keep all the electricals ticking im using a Powermaster 150amp 1 or 3 wire alternator. As i stated above I wanted all the brackets as low as possible. unfortunitly cooling hoses got in the way in the middle positions and the powerstearing rack when it was really low. So its had to go up higher but is still low as we could get it. Still its not to bad I guess.Also mounted up the radiators overflow seen above.On the other side of the rad we mounted up the PS/hydroboost reservoir. Three port jobbie.Under the car a fly wheel cover was fabbed up. Stock would not work due to the trans adapter. Bit of split pipe was used for the notches to clear the torque converters covers ridges.Car is off the jack stands and front panels are bolted on. not all the bots etc are in but enough to keep it together until I get new bolts for it all and get it done right. Old Nailhead sits in there nicely.Steering wheel thrown on just so we can roll it about easier. GT Performance 9 bolt hub, 15.5" wheel and horn. Really wanted a wheel with a horn ring cus I love those things but ones that suit smaller wheels are bleeping expensive so it can wait.Car is sitting pretty darn low. Like the lowest part is the brace that joins/strengthens the front sub side to side much like the original Hudson setup. I haven't measured it but I guess we have 30-40mm clearance to the road. As you can see with the good old beer bottle next to the car... it low.keep in mind we still have to add side pipes - its that big ol hole you may of spotted in the above pic. You will see also that we will have a heap of room for them under the rockers. They also have a bit of a curve whats a bonus as it will (with luck) keep them out of ankle range whilst keeping them nicely tucked up so we dont rip em off.and moving right along... side shot just cus I like it. yes I know the car is dirty but so is my mind and I like it that way.Now talking about burning ankles on side pipes a subject by gal has mentioned most times I bring up lake pipes. My answer generally goes along the lines of "wear heels" below pic proves it. Ankle out of burn range.. toes on the other hand she has never mentioned.But seriously - like the back tire viewed air out side on.Enough farting around talking about air out this and that. Throw a battery in and test that shiz. Yip yours truly testing it out. We left it air up for a few days and I was pleasantly surprised to find it stayed there with only a few psi drop from what I left it at uniformly across each wheel. I will mark that to atmosphere and not any slow leak due to it being across all four wheels not just one.yeah i know the front could be bolted on a bit better but ahh stuff it it will be off again anyway.And just cus im feeling all gangsta...i know it aint hydraulics but it will do me. When air up we must be around 150mm at that one low point in the middle just behind the wheels. Ass end that has larger bags naturally goes much higher.1 point
-
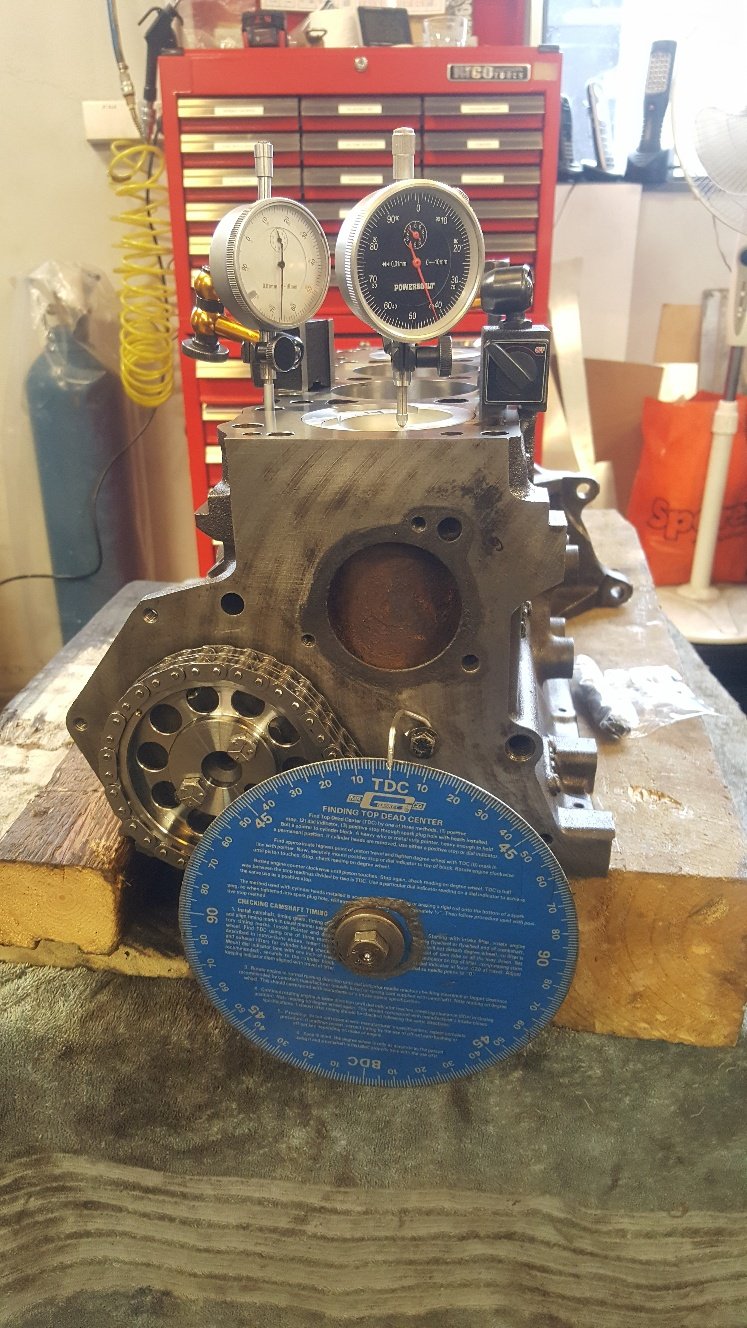
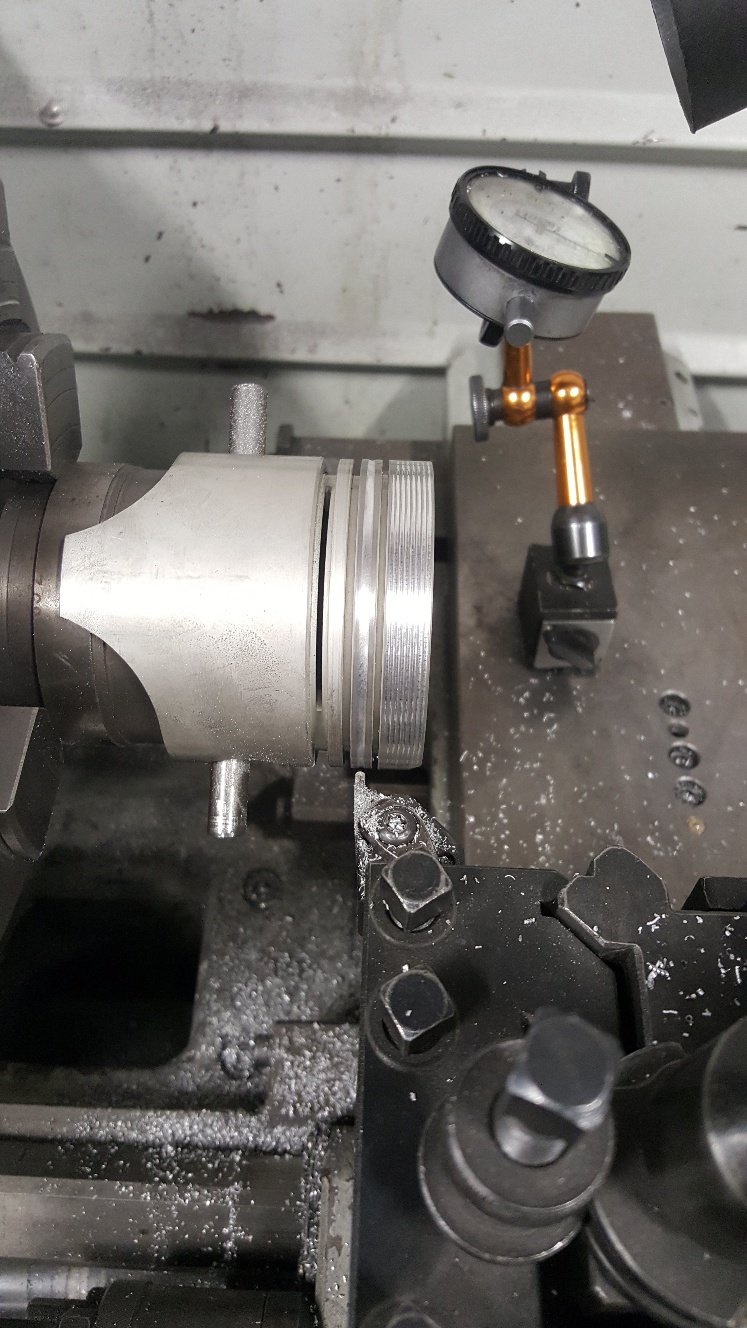
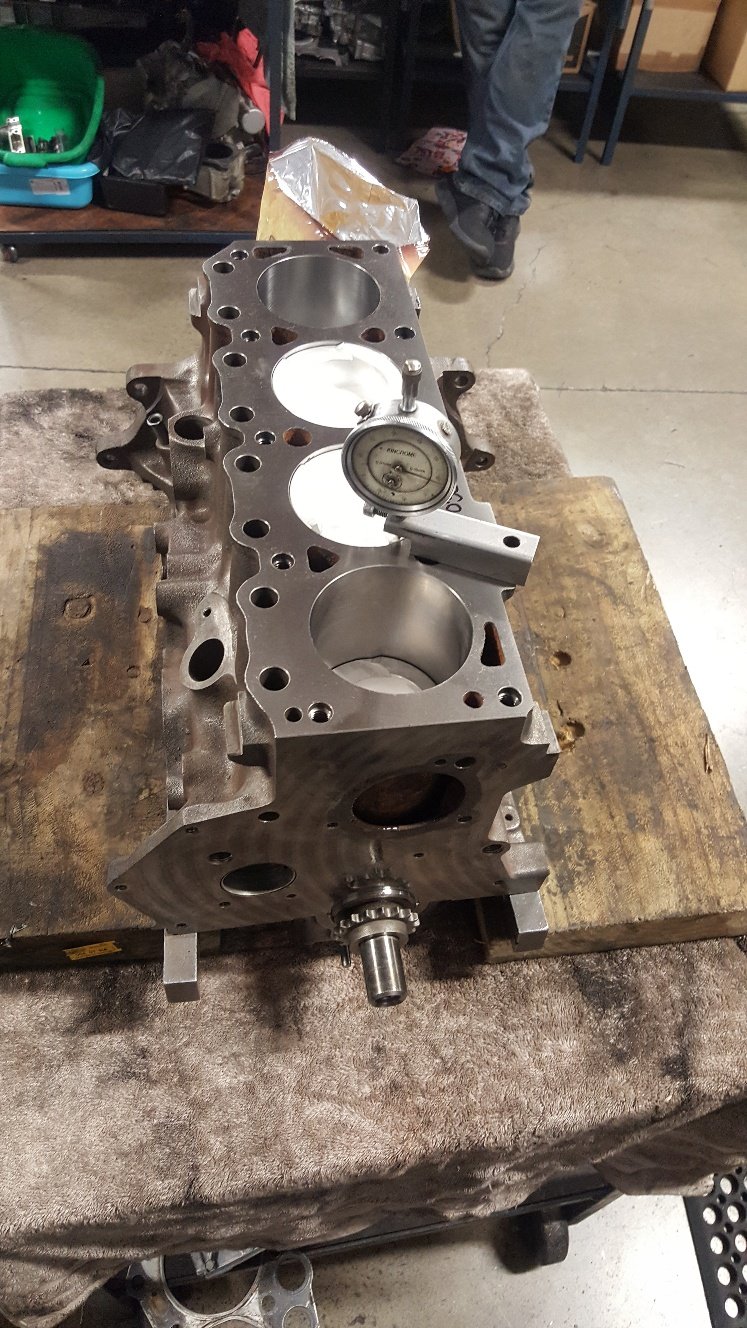
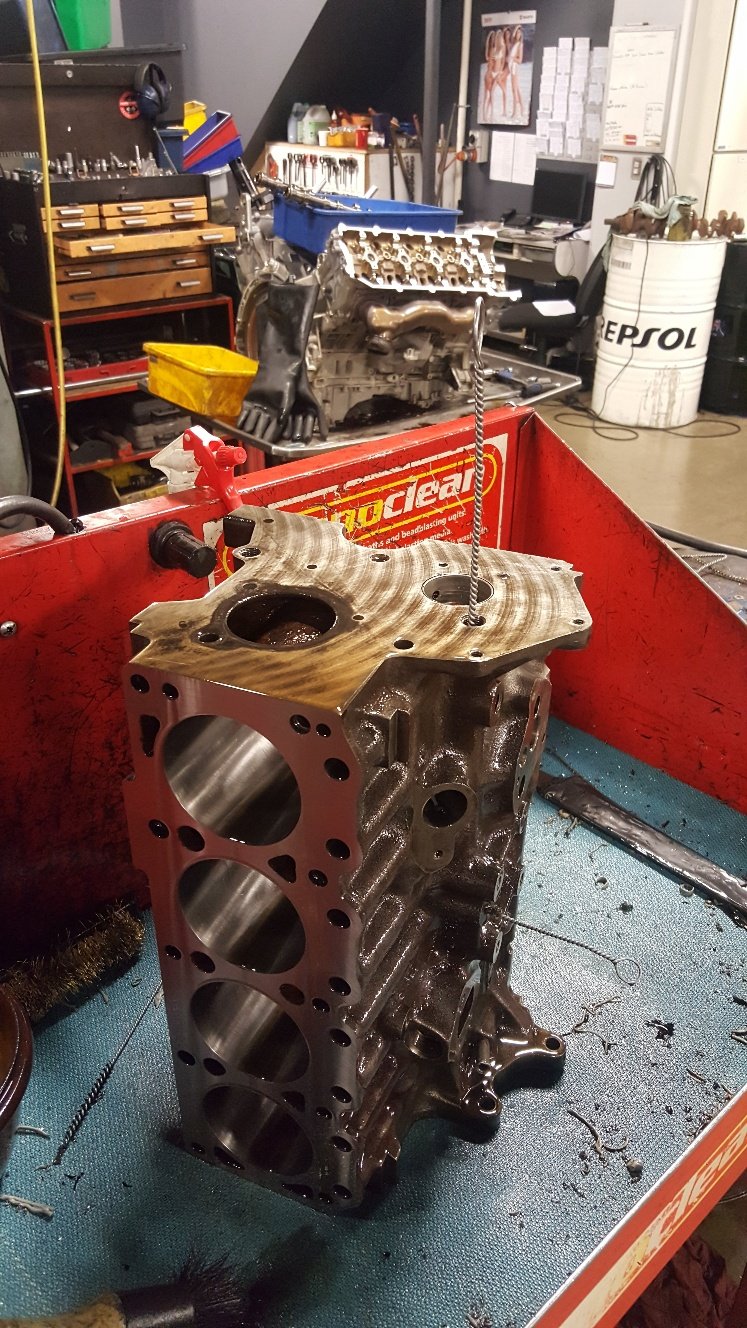
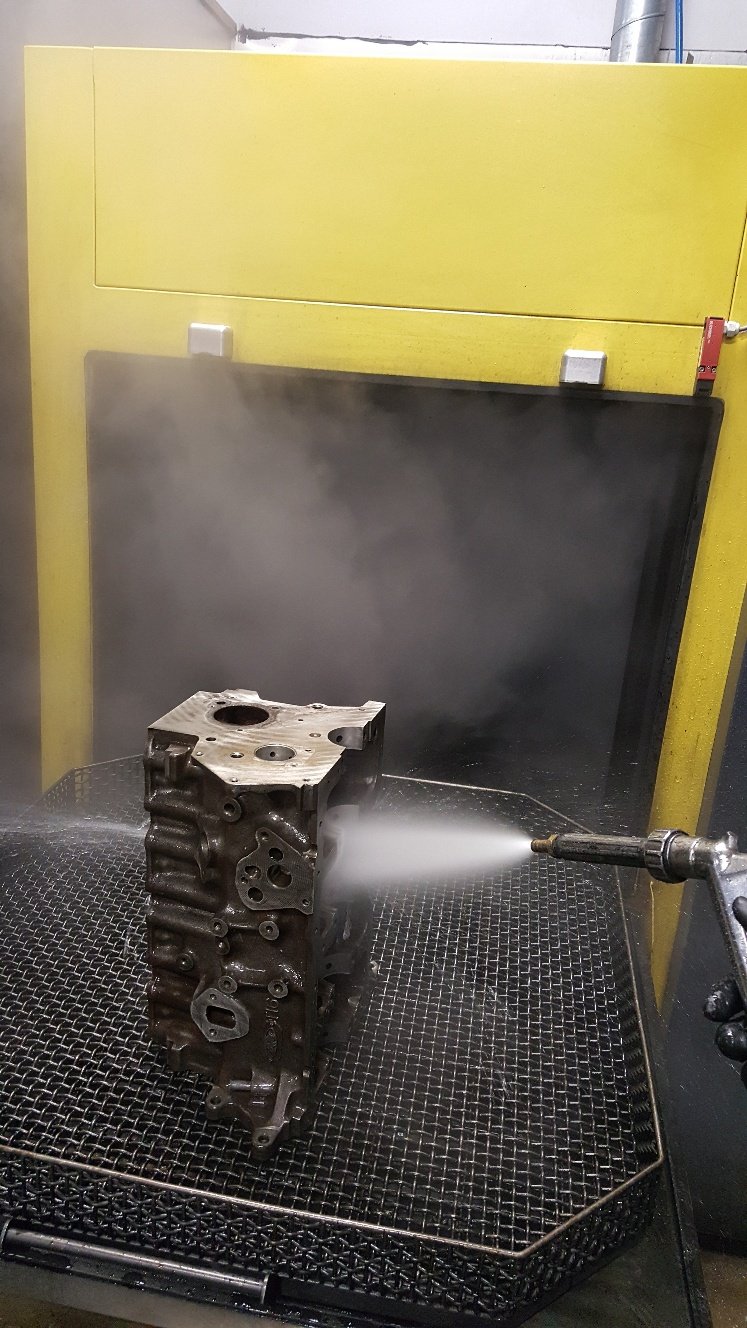
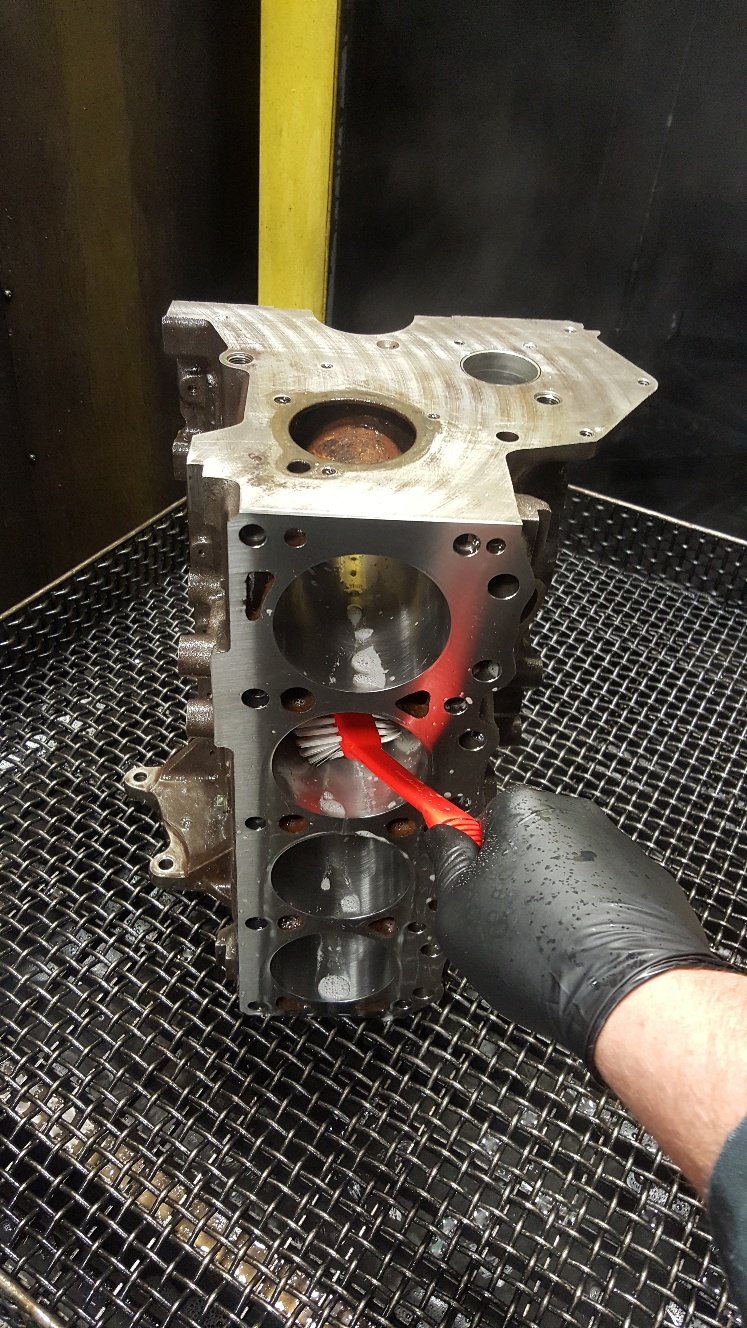
So assembled the short block to check piston heights. Normally old engines have heaps of piston to head clearance. I found the pistons are below the deck surface 20 thou or half a mm. My head gasket 52 thou thick. So ideally i won't the piston above the deck 10 thou to get my 40 thou piston to head clearance for good squish. So it was back to the surface grinder to remove 30 thou. While i was there i sat the block in the surface grinder on it's deck surface and run a dti through the main tunnel to check how true the tunnel is to the deck and i was surprised to find it was within 1.5 thou. I haven't put a pic of it being surfaced as there's already one earlier on. So I gave it a wash. I went through all the galleries with gallery brushes. Then put it in our Bupi wash. This is pretty much just a big dish washer. Made in Germany and it's one of the more handy things in the workshop. Then we just give them a good going over with soapy water. Normally just dish washing liquid and hot water to brake down any left over honing oil. And really get all the machining swarf out of the oil galleries and other spots in the block.
1 point
-
George stocks reckon they don't stock anything similar. Autolign says the same - but will made some for a vast expense. Best idea I've been given is attacking a K-Mart white chopping board with a 44mm hole saw.1 point
-
Depends if you want the extra gear for acceleration or lower revs for cruzing in top. The extra gear in these boxes is for better pick up I reckon, 3/4/5th are really close, but 6th is not higher that 5th in most boxes. My tezza still does like 3500rpm at 100kmh (1gfe)1 point


.jpg.6bad9a6445b94f09aa1f2c7b8234b610.jpg)
.jpg.545f8d51bfdc7a5686662b67bbd75739.jpg)
.jpg.3227af7b75300c0b66faf772e209db31.jpg)
.jpg.5f805a6cfb842fa8306033f88f8916e3.jpg)
.jpg.85d77c8af690c47279b517535edb8caf.jpg)
.jpg.581c90704662574e0a970a55f37722c7.jpg)
.jpg.5fa267efc35a6bf42cb348ed931d77c3.jpg)
.jpg.af1c754ef7f486cec470f40f3756f389.jpg)
.jpg.419fa298e2d0e54da445eec3b78f9c95.jpg)
.jpg.f29fb048178ff1065a621e7eea5277fd.jpg)
.jpg.fad084fe446608465f7c0af112e953ce.jpg)
.jpg.751d99e600c4bd5ff389dbe2554b0cb5.jpg)


This leaderboard is set to Auckland/GMT+12:00