
Leaderboard


Popular Content
Showing content with the highest reputation on 07/11/19 in all areas
-
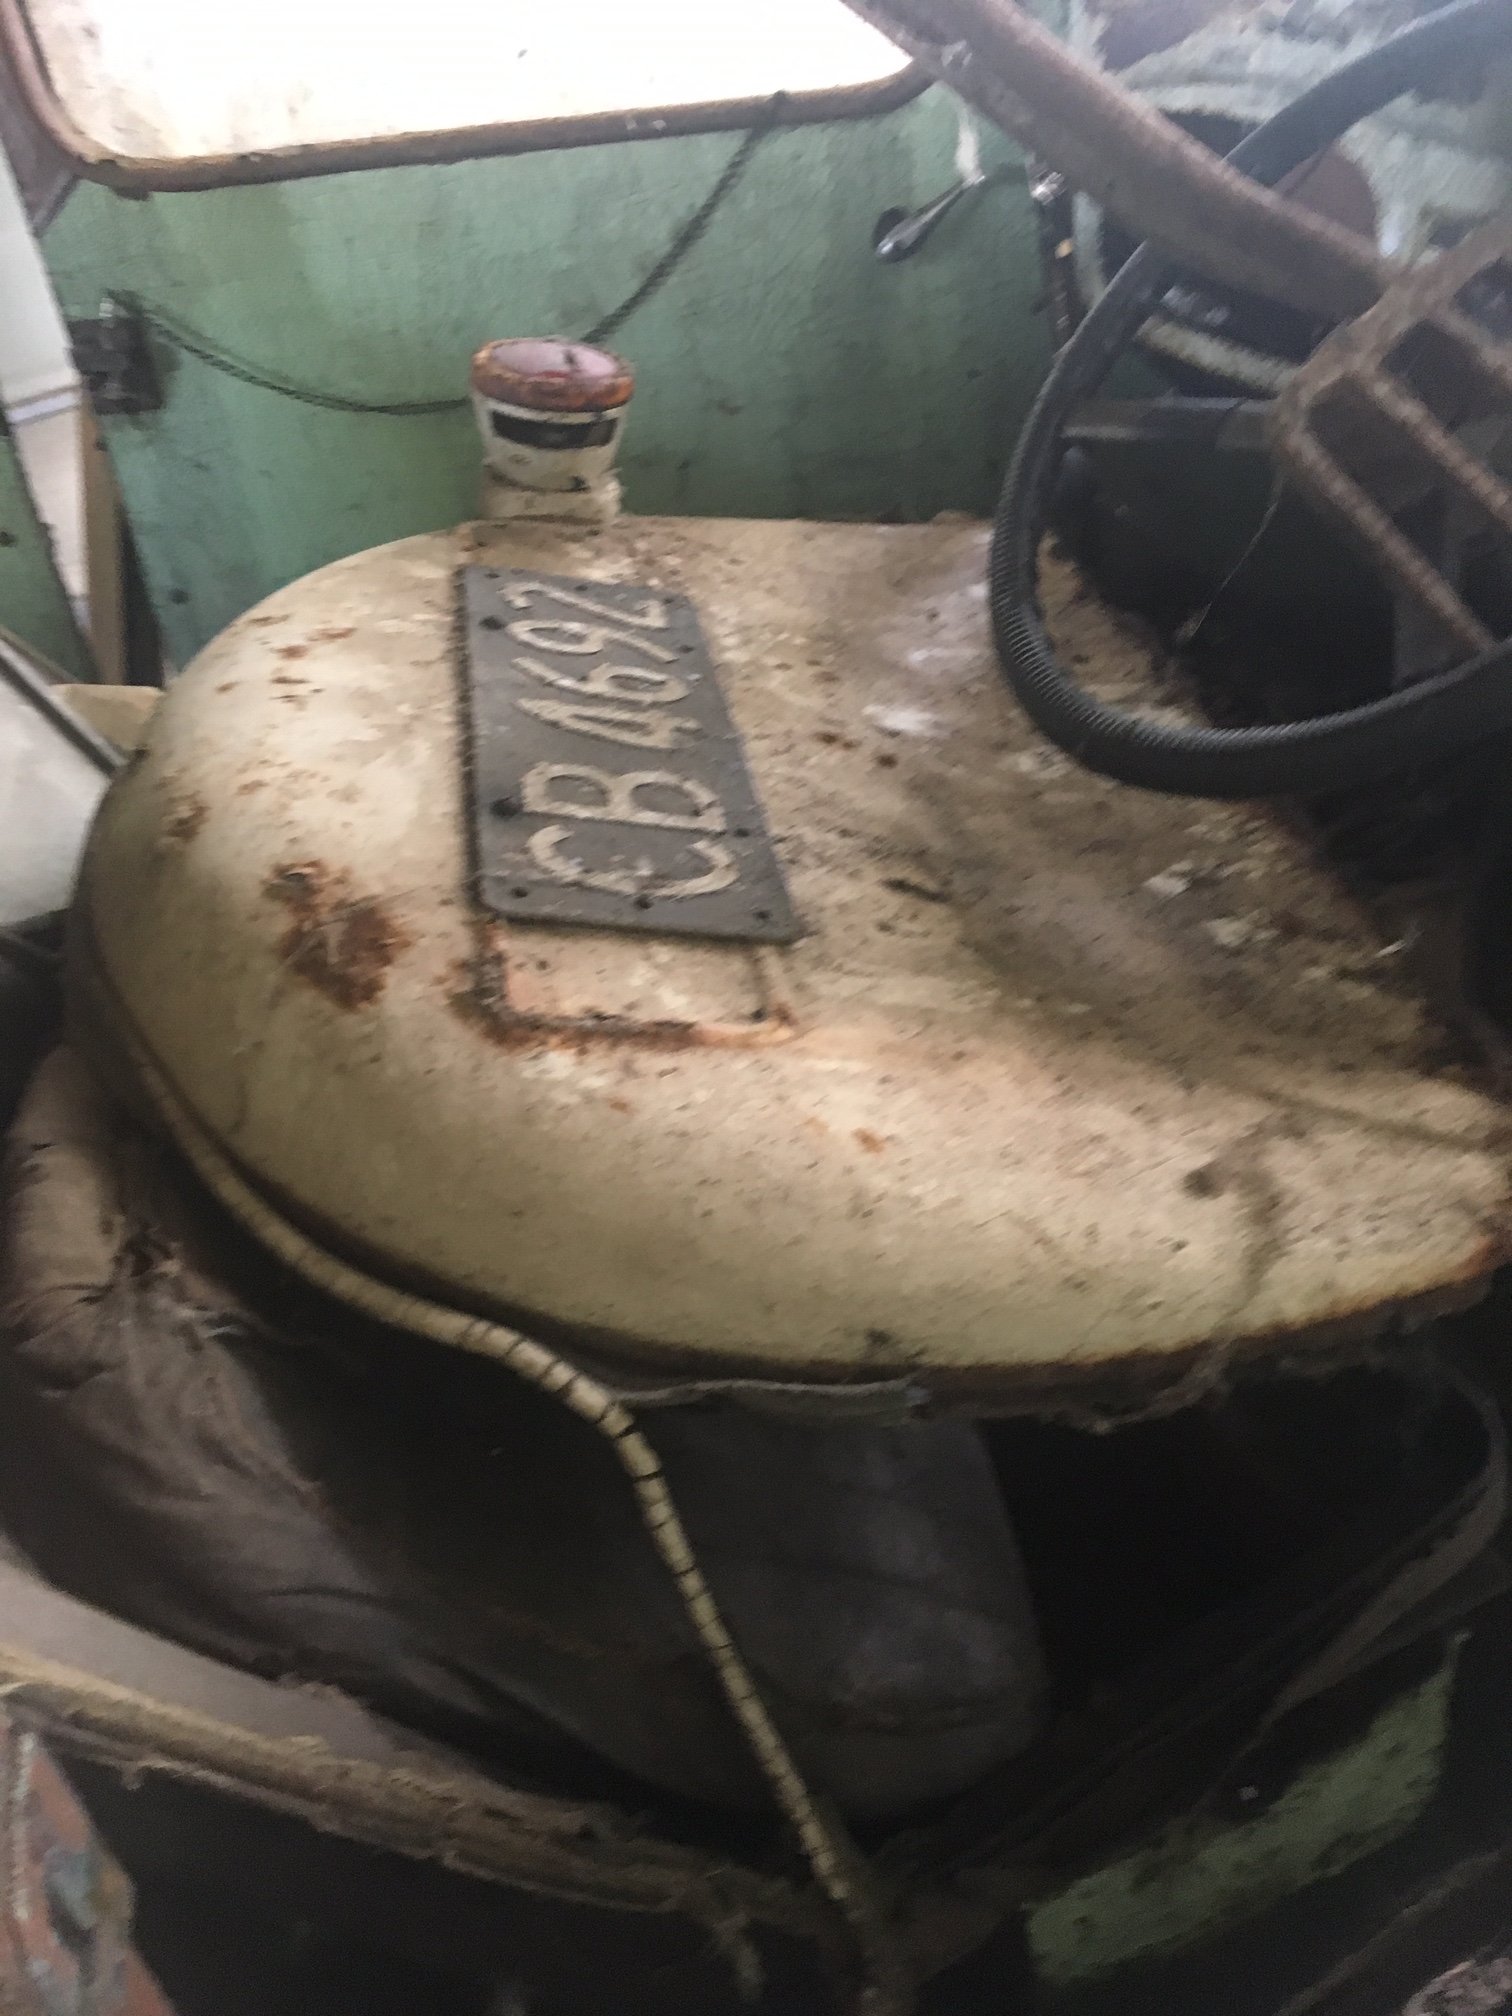
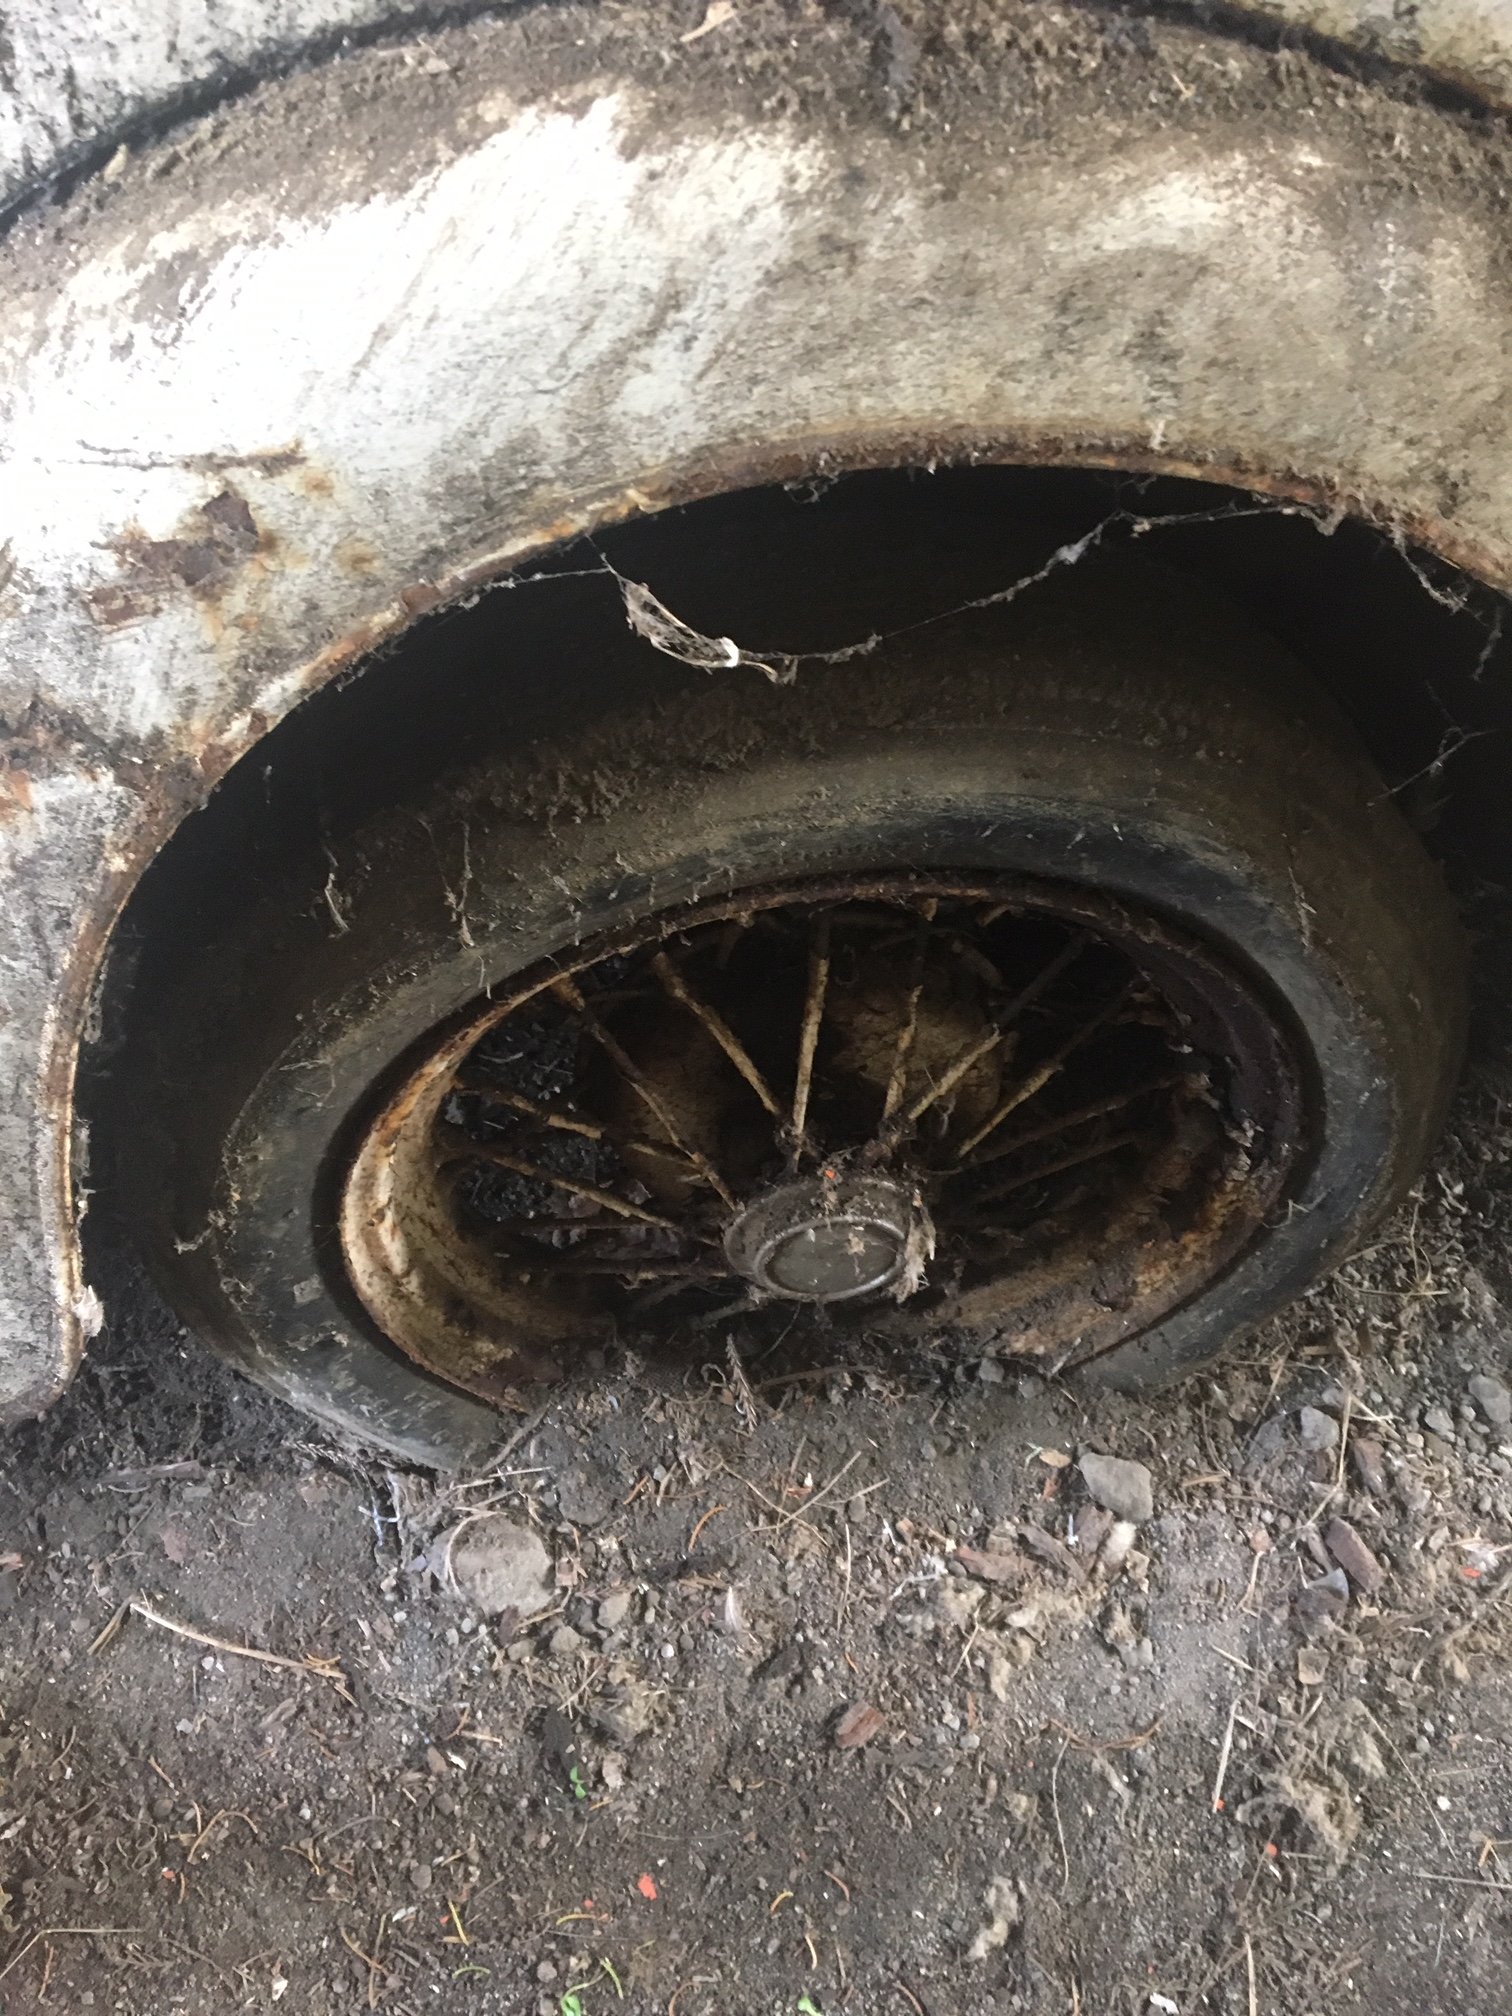
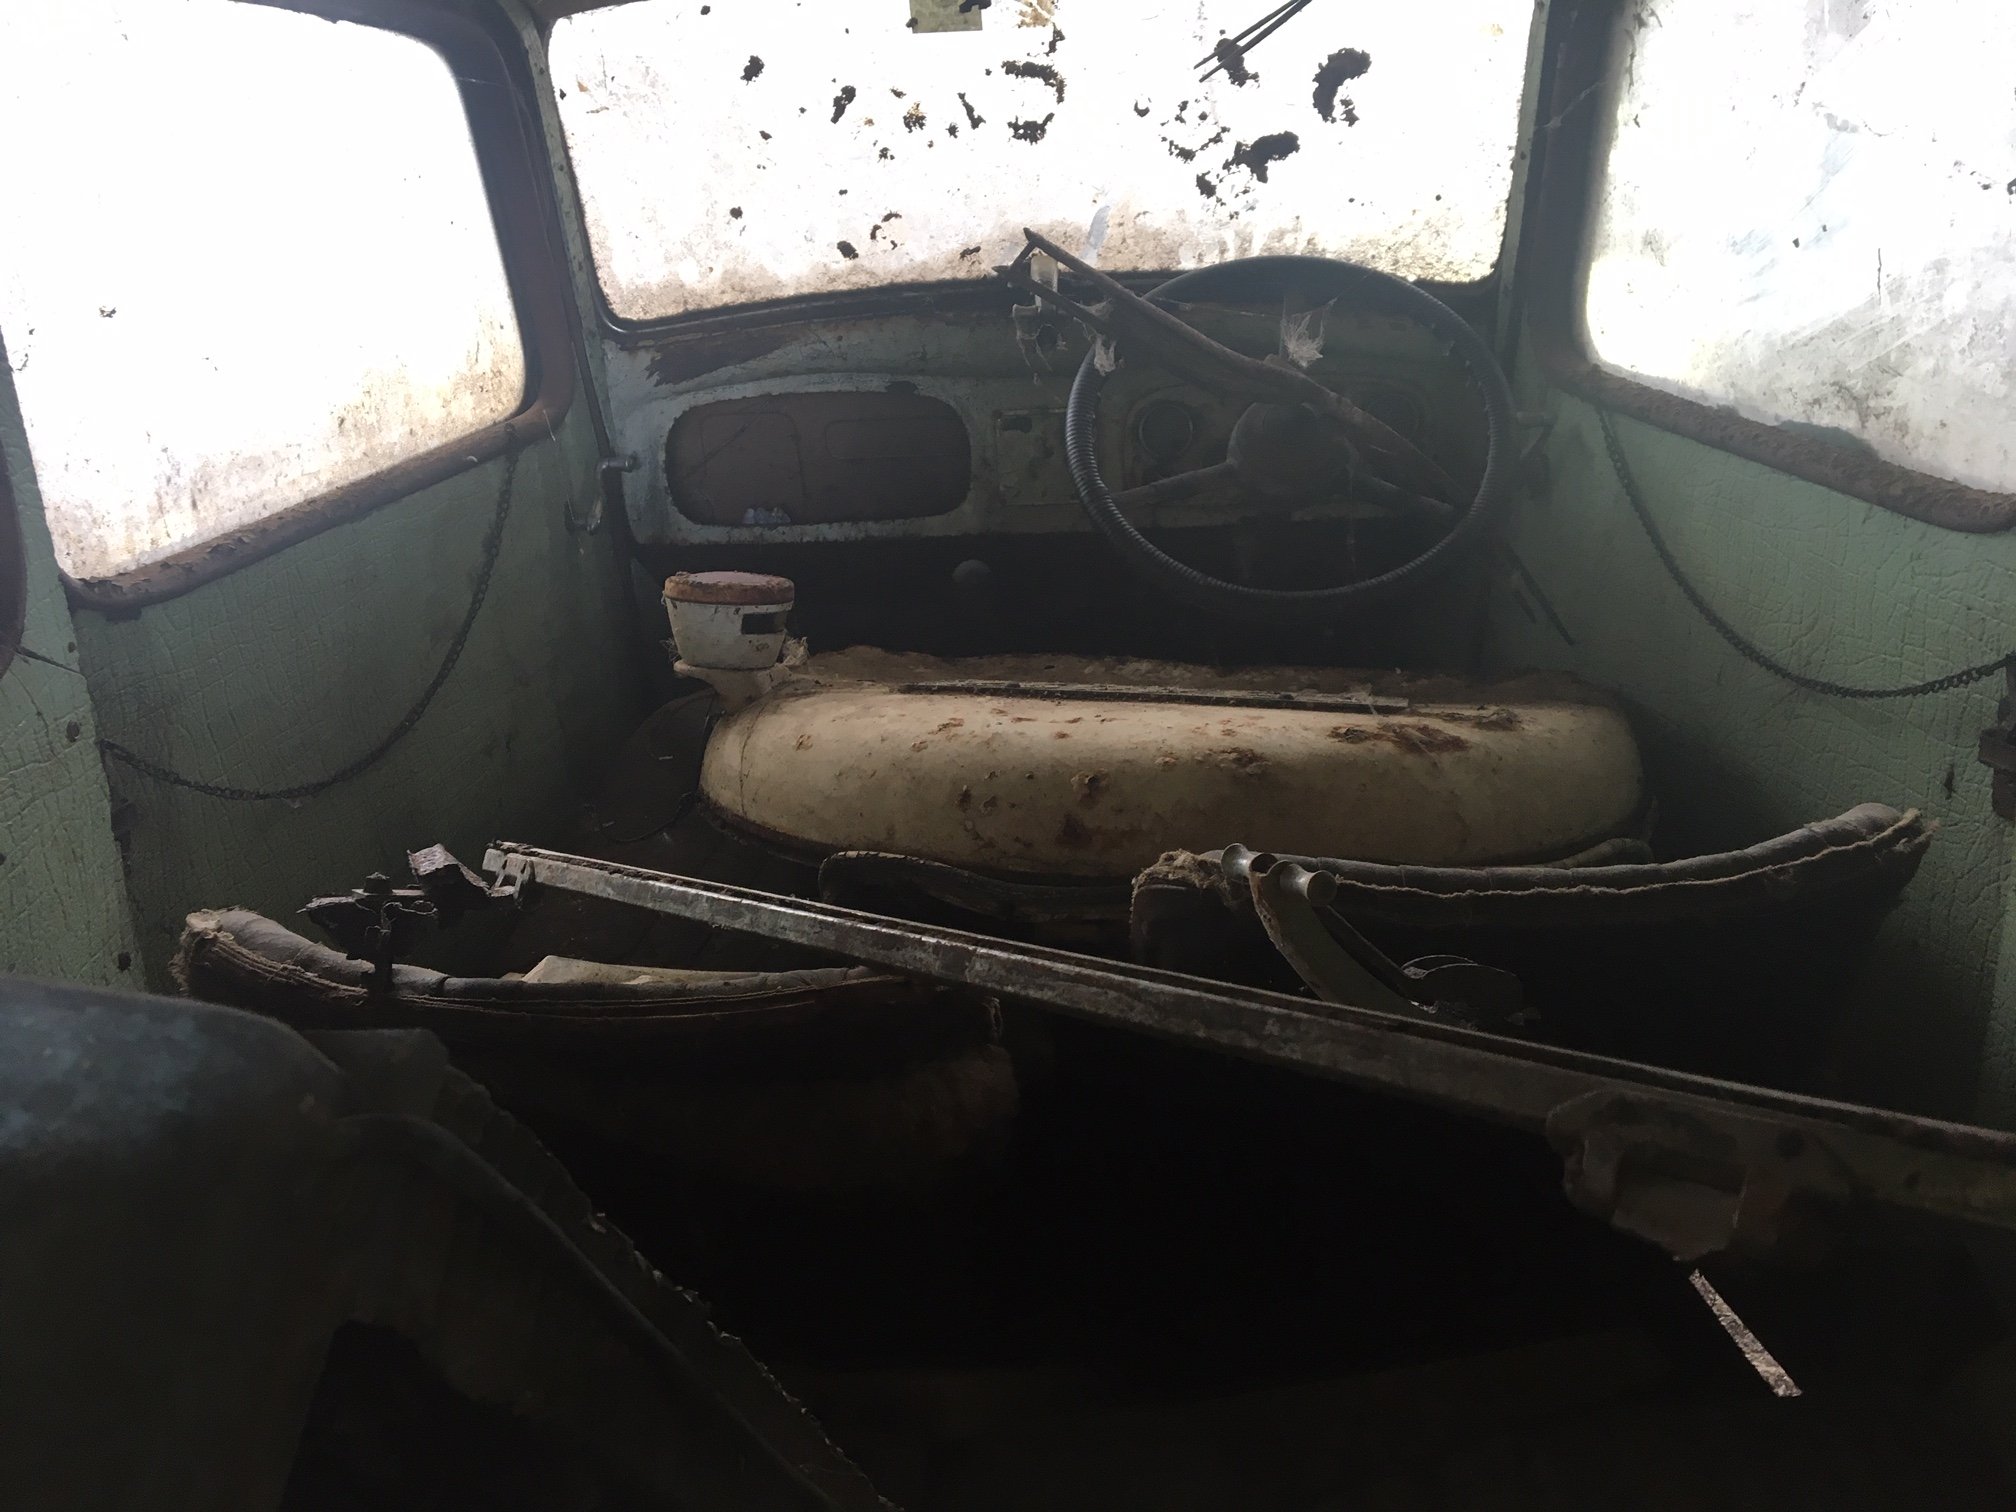
Discussion: Lurking in the back shed at my grandads farm for all of eternity has been an old Austin 7. There was a bunch of old cars there that as kids we used to play in, but the Austin had been there for so long that it was completely buried under hoarded shit and was far too scary to play in, but was always interesting to see if you peered past the old L300, Fergie 19 & piles of old timber. As a 10 year old kid, I was smart enough to know that this one was well beyond rescue... Fast forward 20 years: Grandad has passed on and the sheds have been mostly cleaned out for the next generation of hoarding, revealing this little Austin. Now 30 year old Jeff is not half as smart as his 10 year old self... So now I look at it and think "I reckon I can save that... maybe..."
 16 points
 -
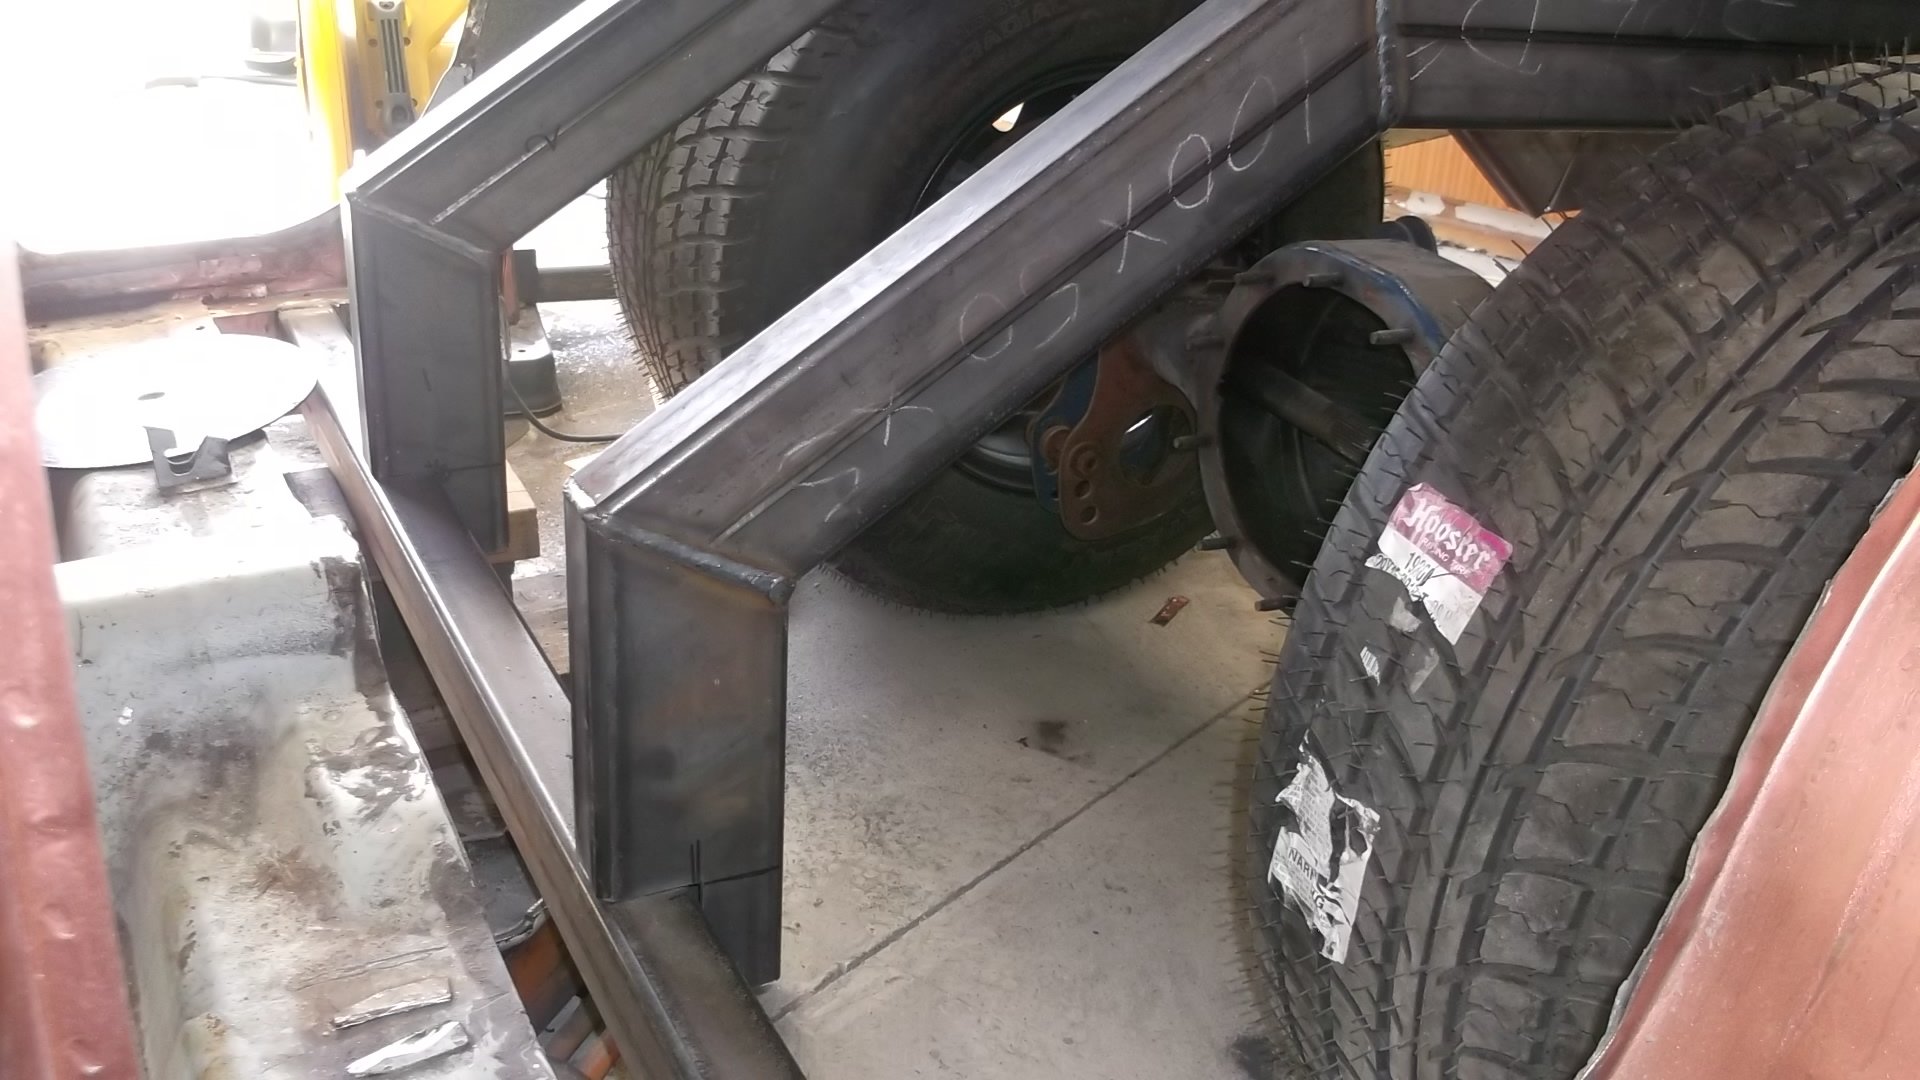
So I started to hatch a bit of a plan. Retrieving it was going to need a decent plan, the poor thing has been parked there for nearly 50 years and had literally started to become one with the earth. I started a tradme saved search for "Austin 7" just to see what kind of stuff came up. I scored a good set of wheels, and then some tires that were just round the corner from home. So armed with knowing that I had decent rolling stock, it was time to start seriously thinking about uplifting it. From the limited access we could get, the underneath of it was looking pretty rusty, so we wanted to be very careful about what we lifted off/pulled on to get it out of the shed. The plan was to put some box section through underneath it from one side to the other, and jack up the box section lifting the car on that. I was going to get it high enough using that method to then wheel the trailer underneath and lower it back down onto the trailer. Lets face it, its been 50 years, those wheels aren't going to turn...
13 points
-
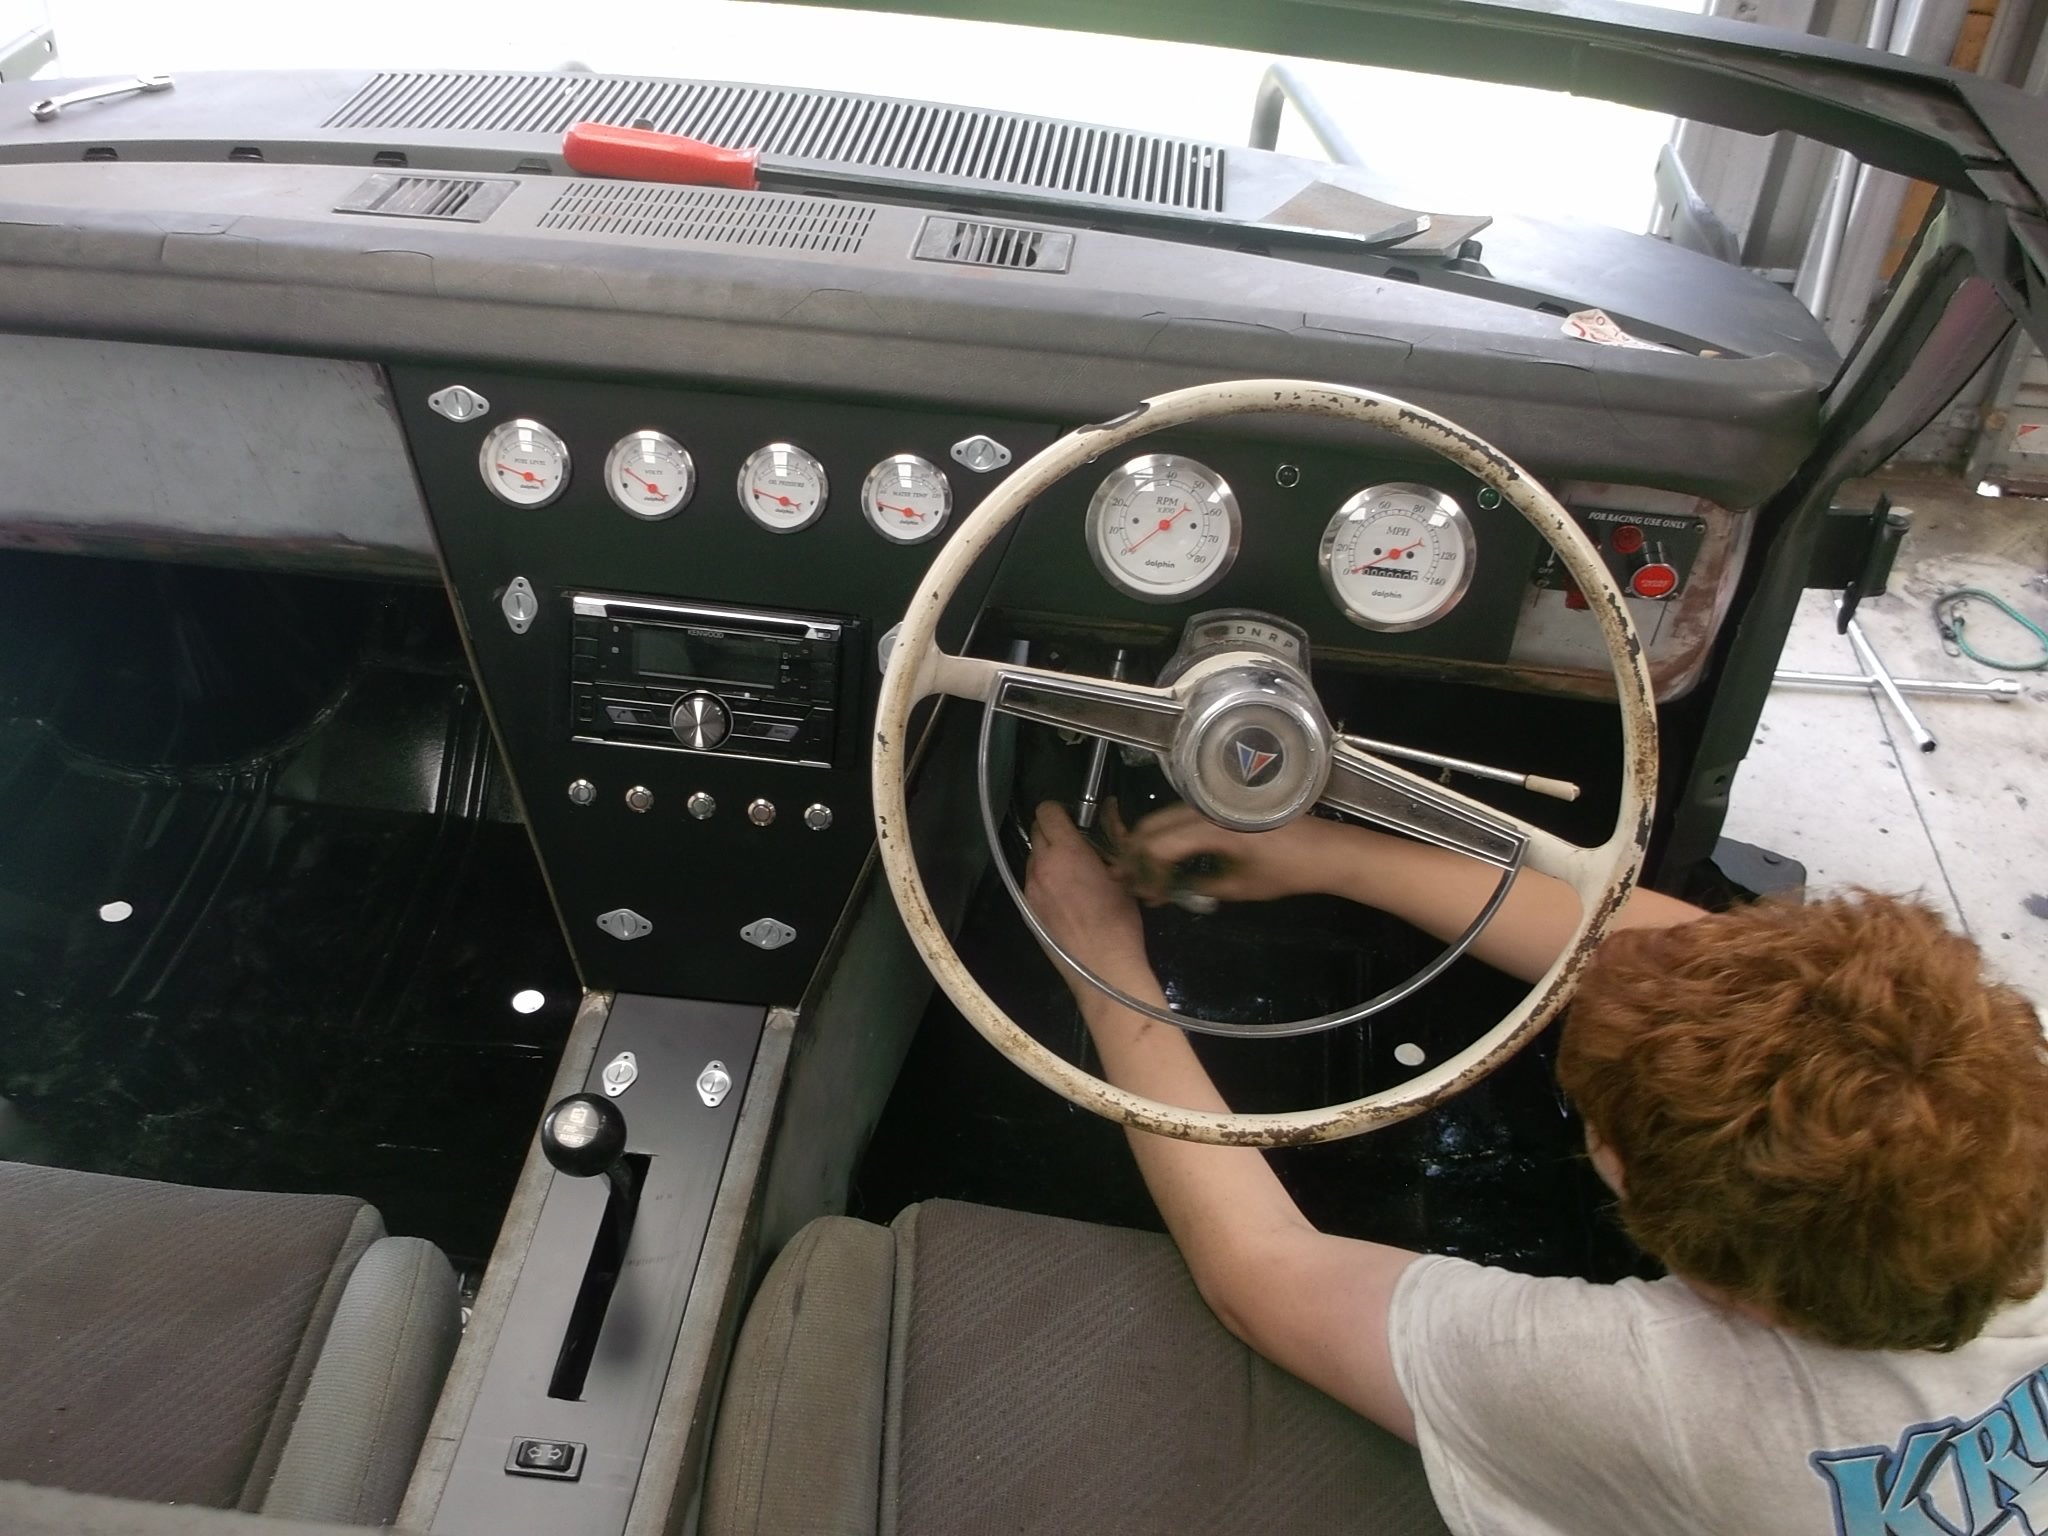
Been on hols, got back today and had a couple of hours in the shed tonight so I mounted the Safari cluster in the Dyna dash. I had mostly fitted the dash before we went away. Shit will fit ok I reckon, I had to trim the cluster hole quite a bit bigger. Factory looking eh. It's all 1992 So no stylistic clashes happening.8 points
-
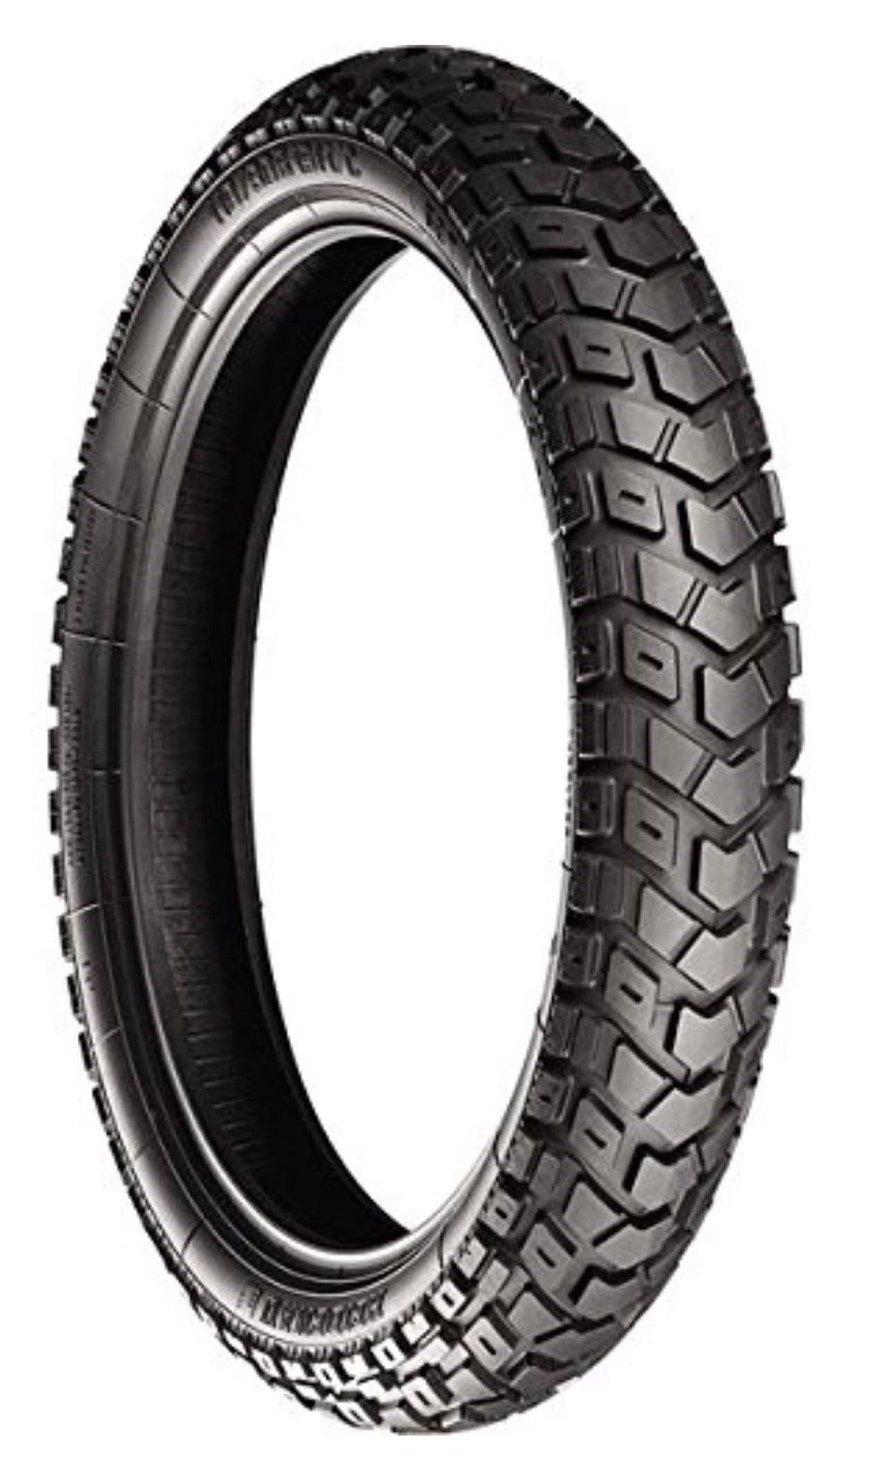
Standard Bort repellent A Heidenau K60 Scout, same size as original front tyre, but a 50/50 adventure tread. That's going on the front. Didn't see any 16's I want for the rear, but it has a kinda chunky tread anyways and I'm more concerned about the front washing out than losing the rear end
5 points
-
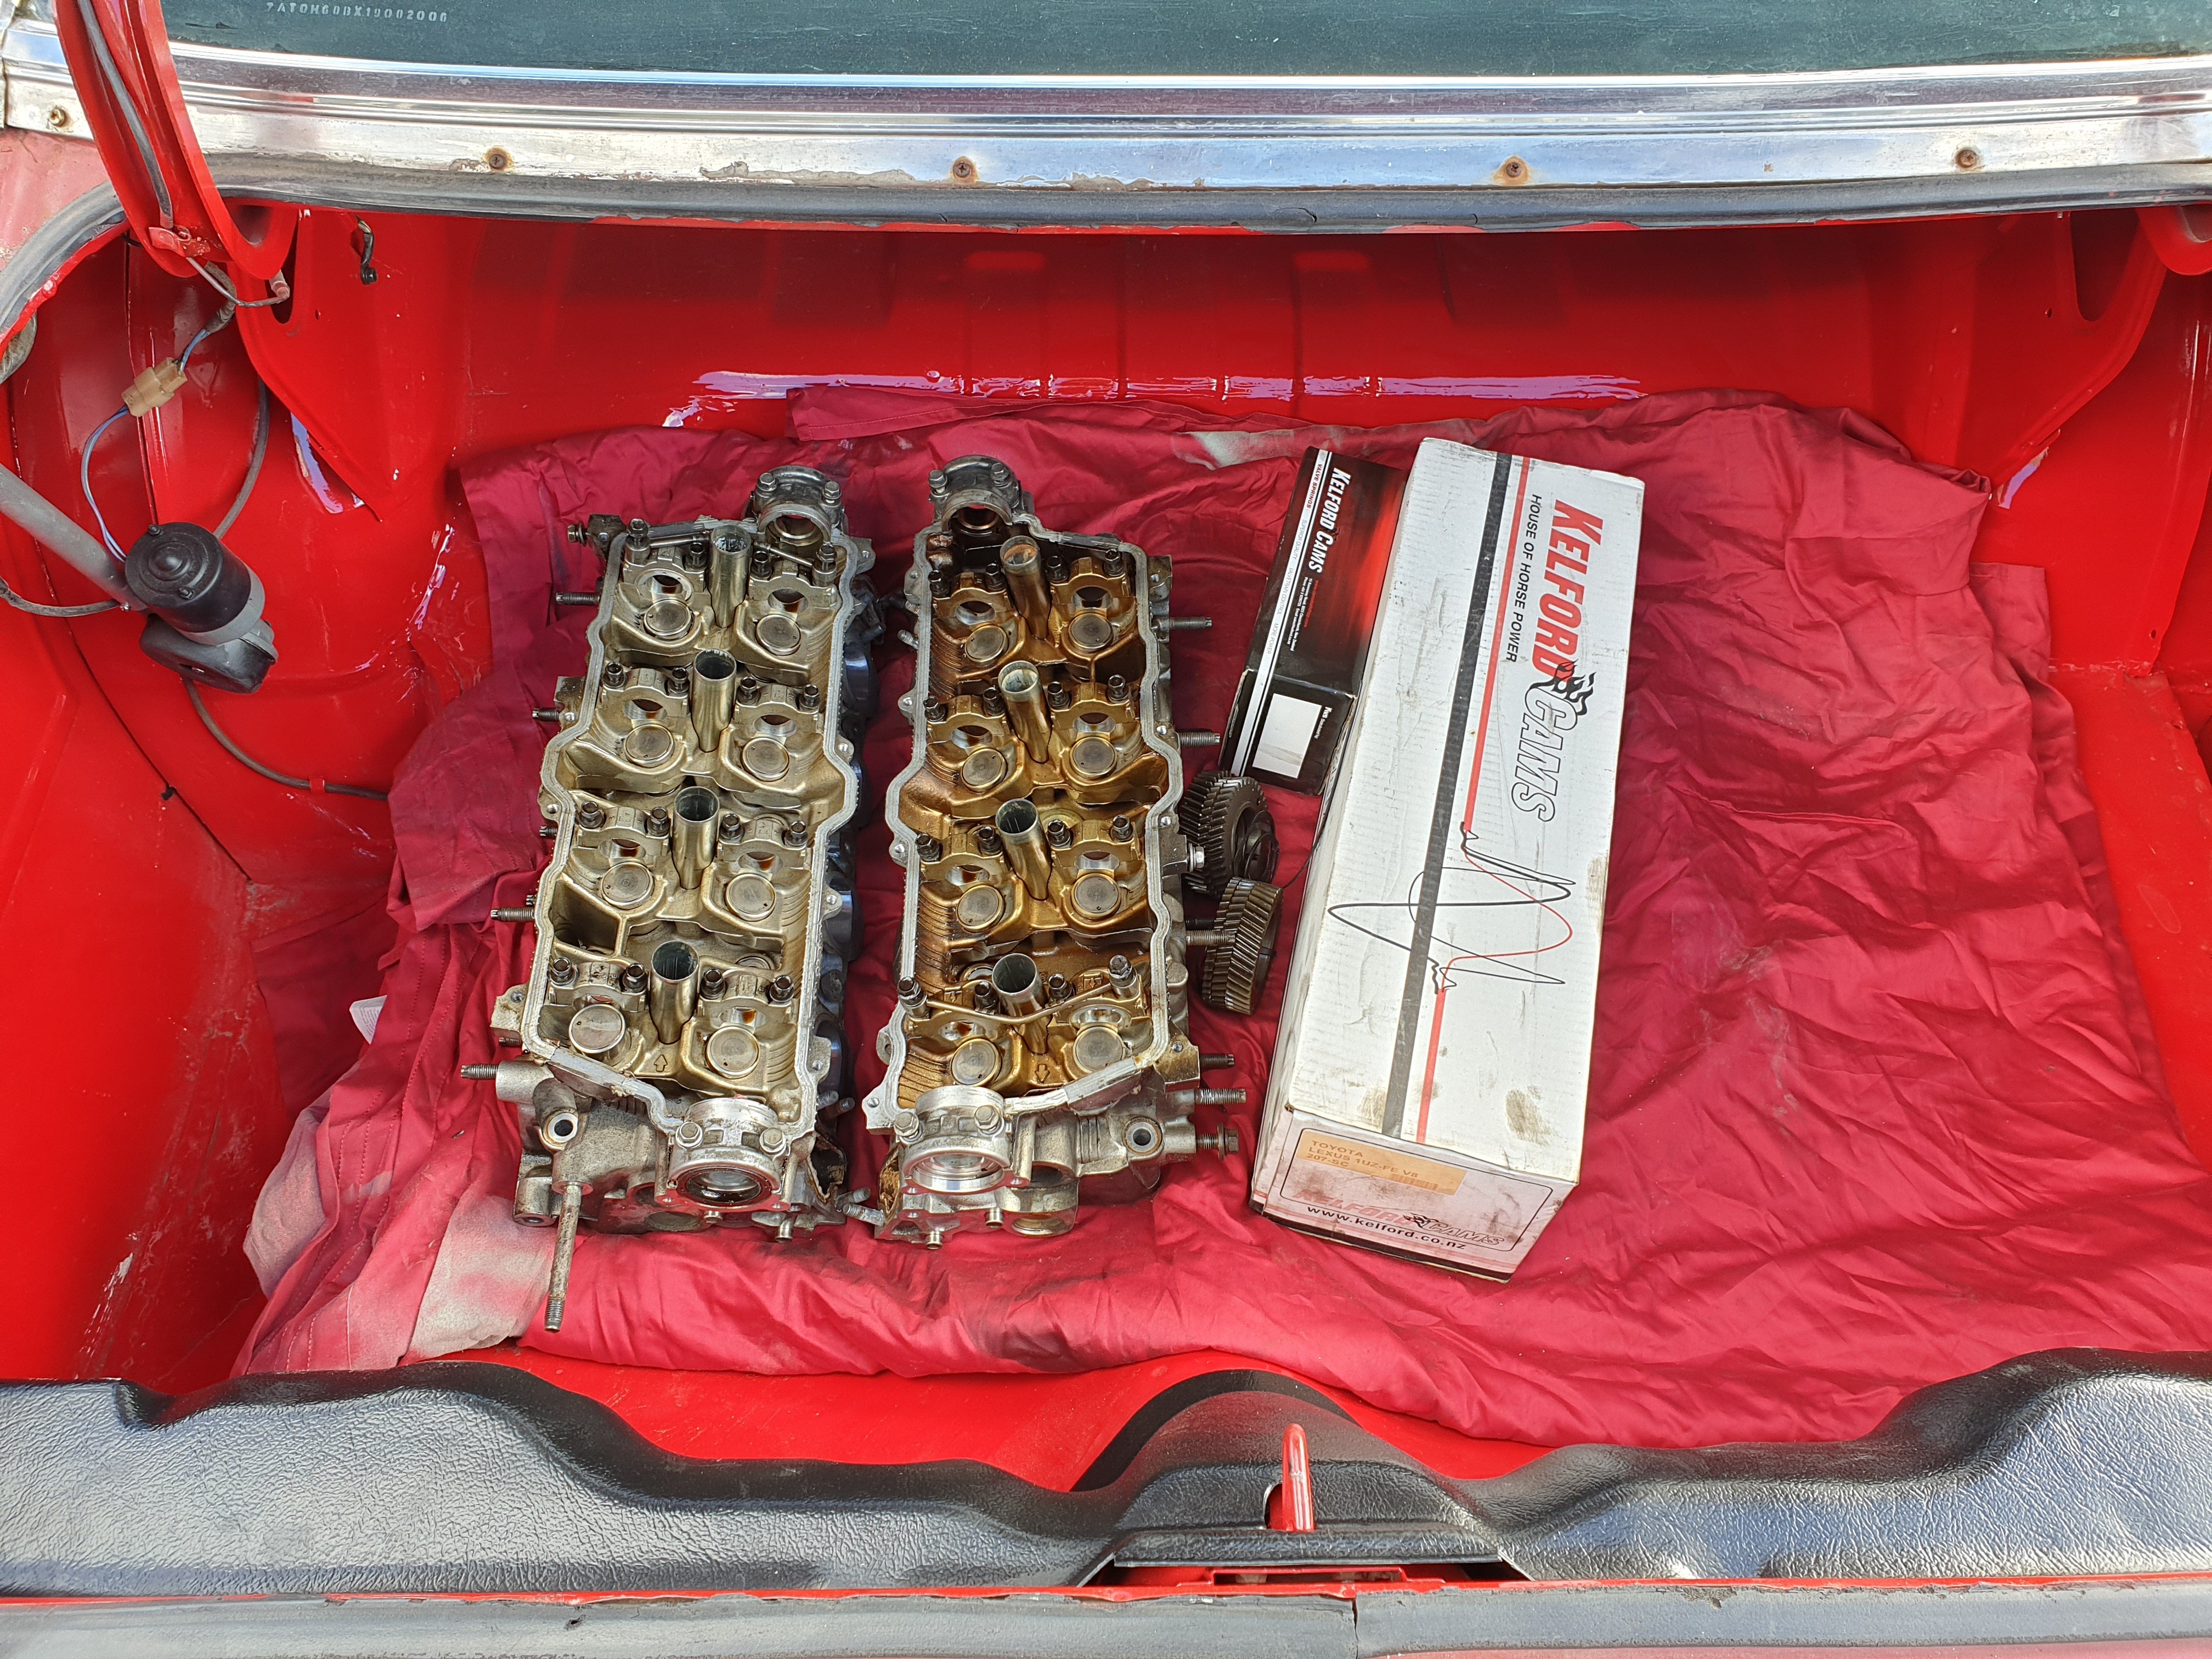
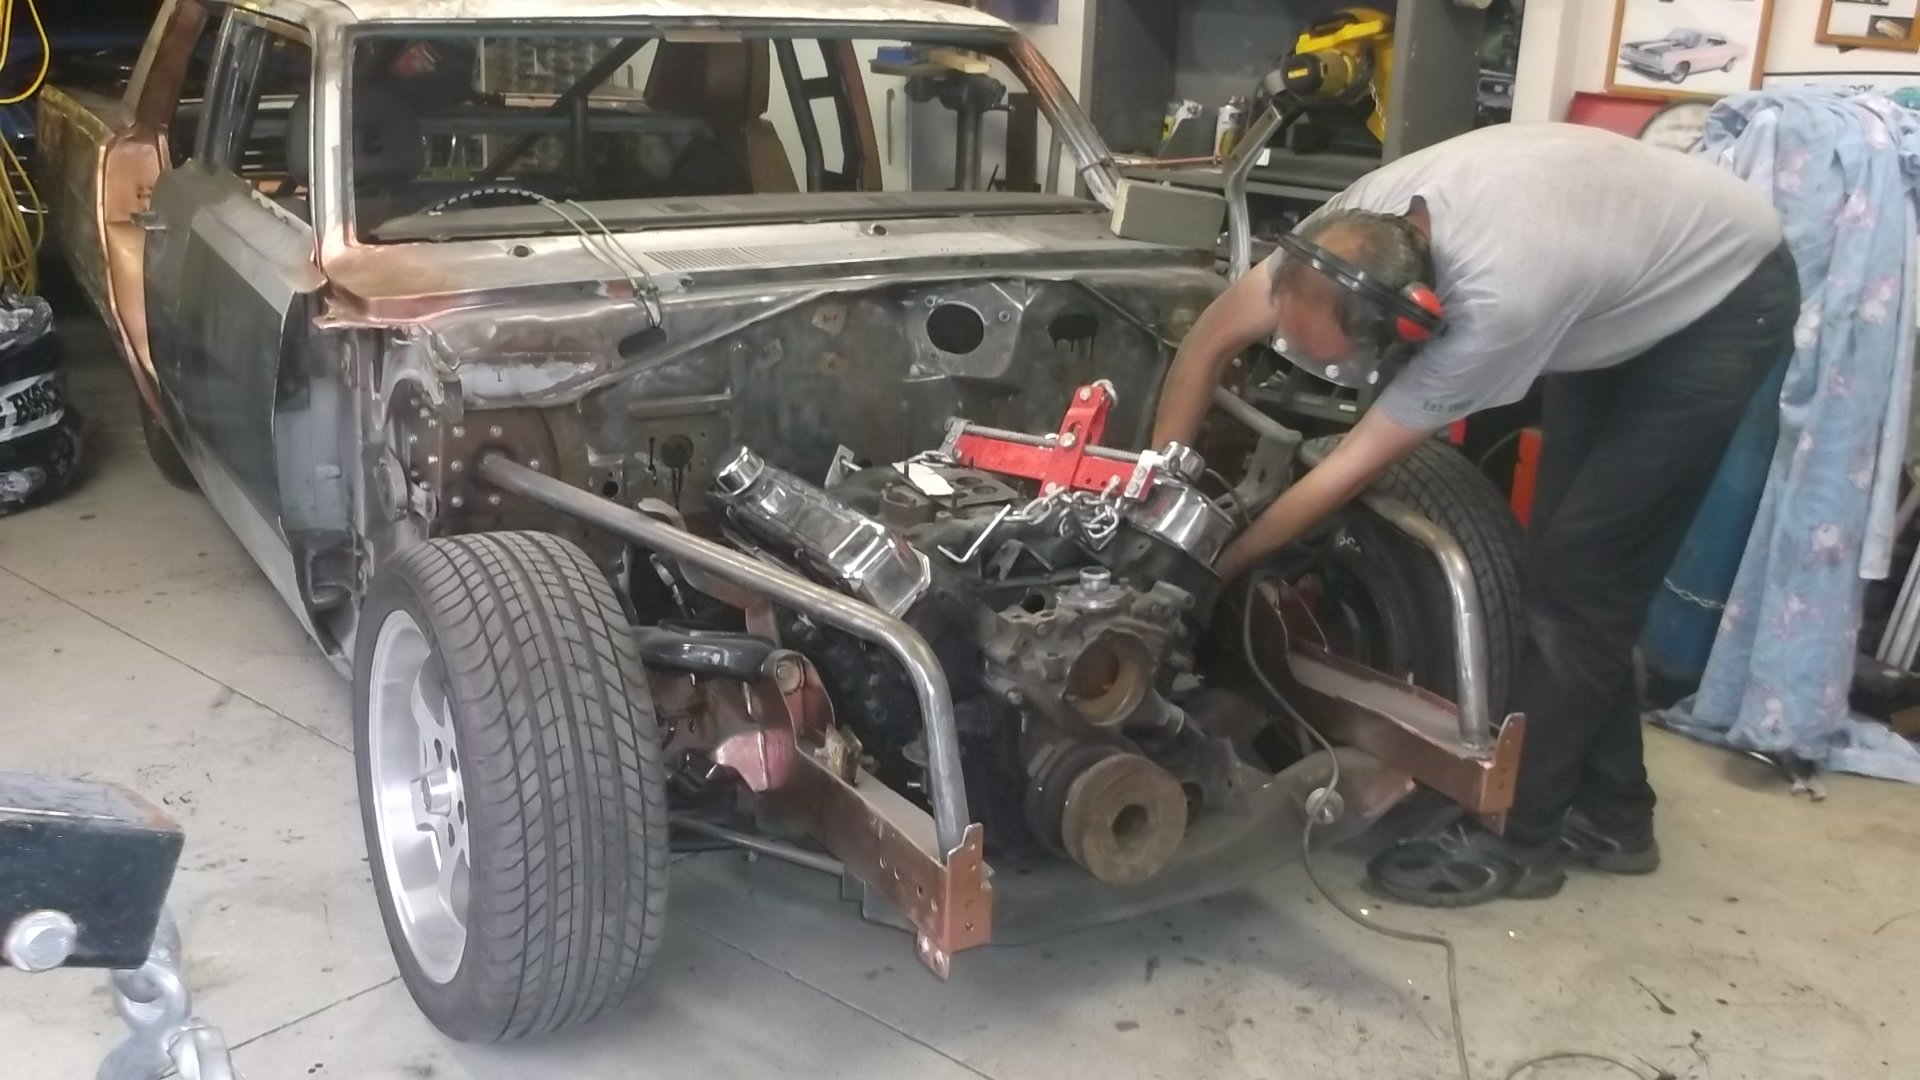
Since my last update I have re-kitted the P/S pump I’ve also shimmed the relief valve to lower the assistance given as the steering was too light at higher road speeds, I’ve replaced all the inner and out tie rod ends and the drag link, I dropped the block, crank and heads off to my machinist, block had been acid tanked, honed and had the cam bearings replaced. The heads have been checked over, machined, machined to take the valve springs, couple of worn valve guides replaced. The valve springs turned into a bit of a headache, the double springs supplied with my cam kit ended up having 140lbs of swat pressure which is was too high for a hydraulic flat tappet cam, We ended up ditching the inner spring and shimming the outer to end up with 100lbs seat pressure. A bit annoying but at least it didn’t turn into a major. Dont have any photos yet as it’s all plastic wrapped as it will be a couple of weeks before I start assembling slowly coming together, made another couple of orders from rock auto got a cam thrust plate with a tensioner (from a Dodge V6) as the factory 318 doesn’t have one, got some rubber lower arm inner bushes as apparently the complete polyurethane bush kit I got for the car doesn’t come with them (and no one lists a poly bush for it) ordered new rad hoses, bypass hose, rear spring shackles (as mine were too rusty) also ordered a starter motor from a 1992 dodge Dakota as with the headers I can’t use my factory starter due to the size. You can buy A/M mini starters but they are around $400, or as most of the guys in the states do you can get a Dakota starter and it’s basically a factory mini starter and at $71usd plus shipping it’s still way cheaper than an A/M unit. For now I need to let the bank account recover so ill be working on tidying up the rear suspension mounts and springs.4 points
-
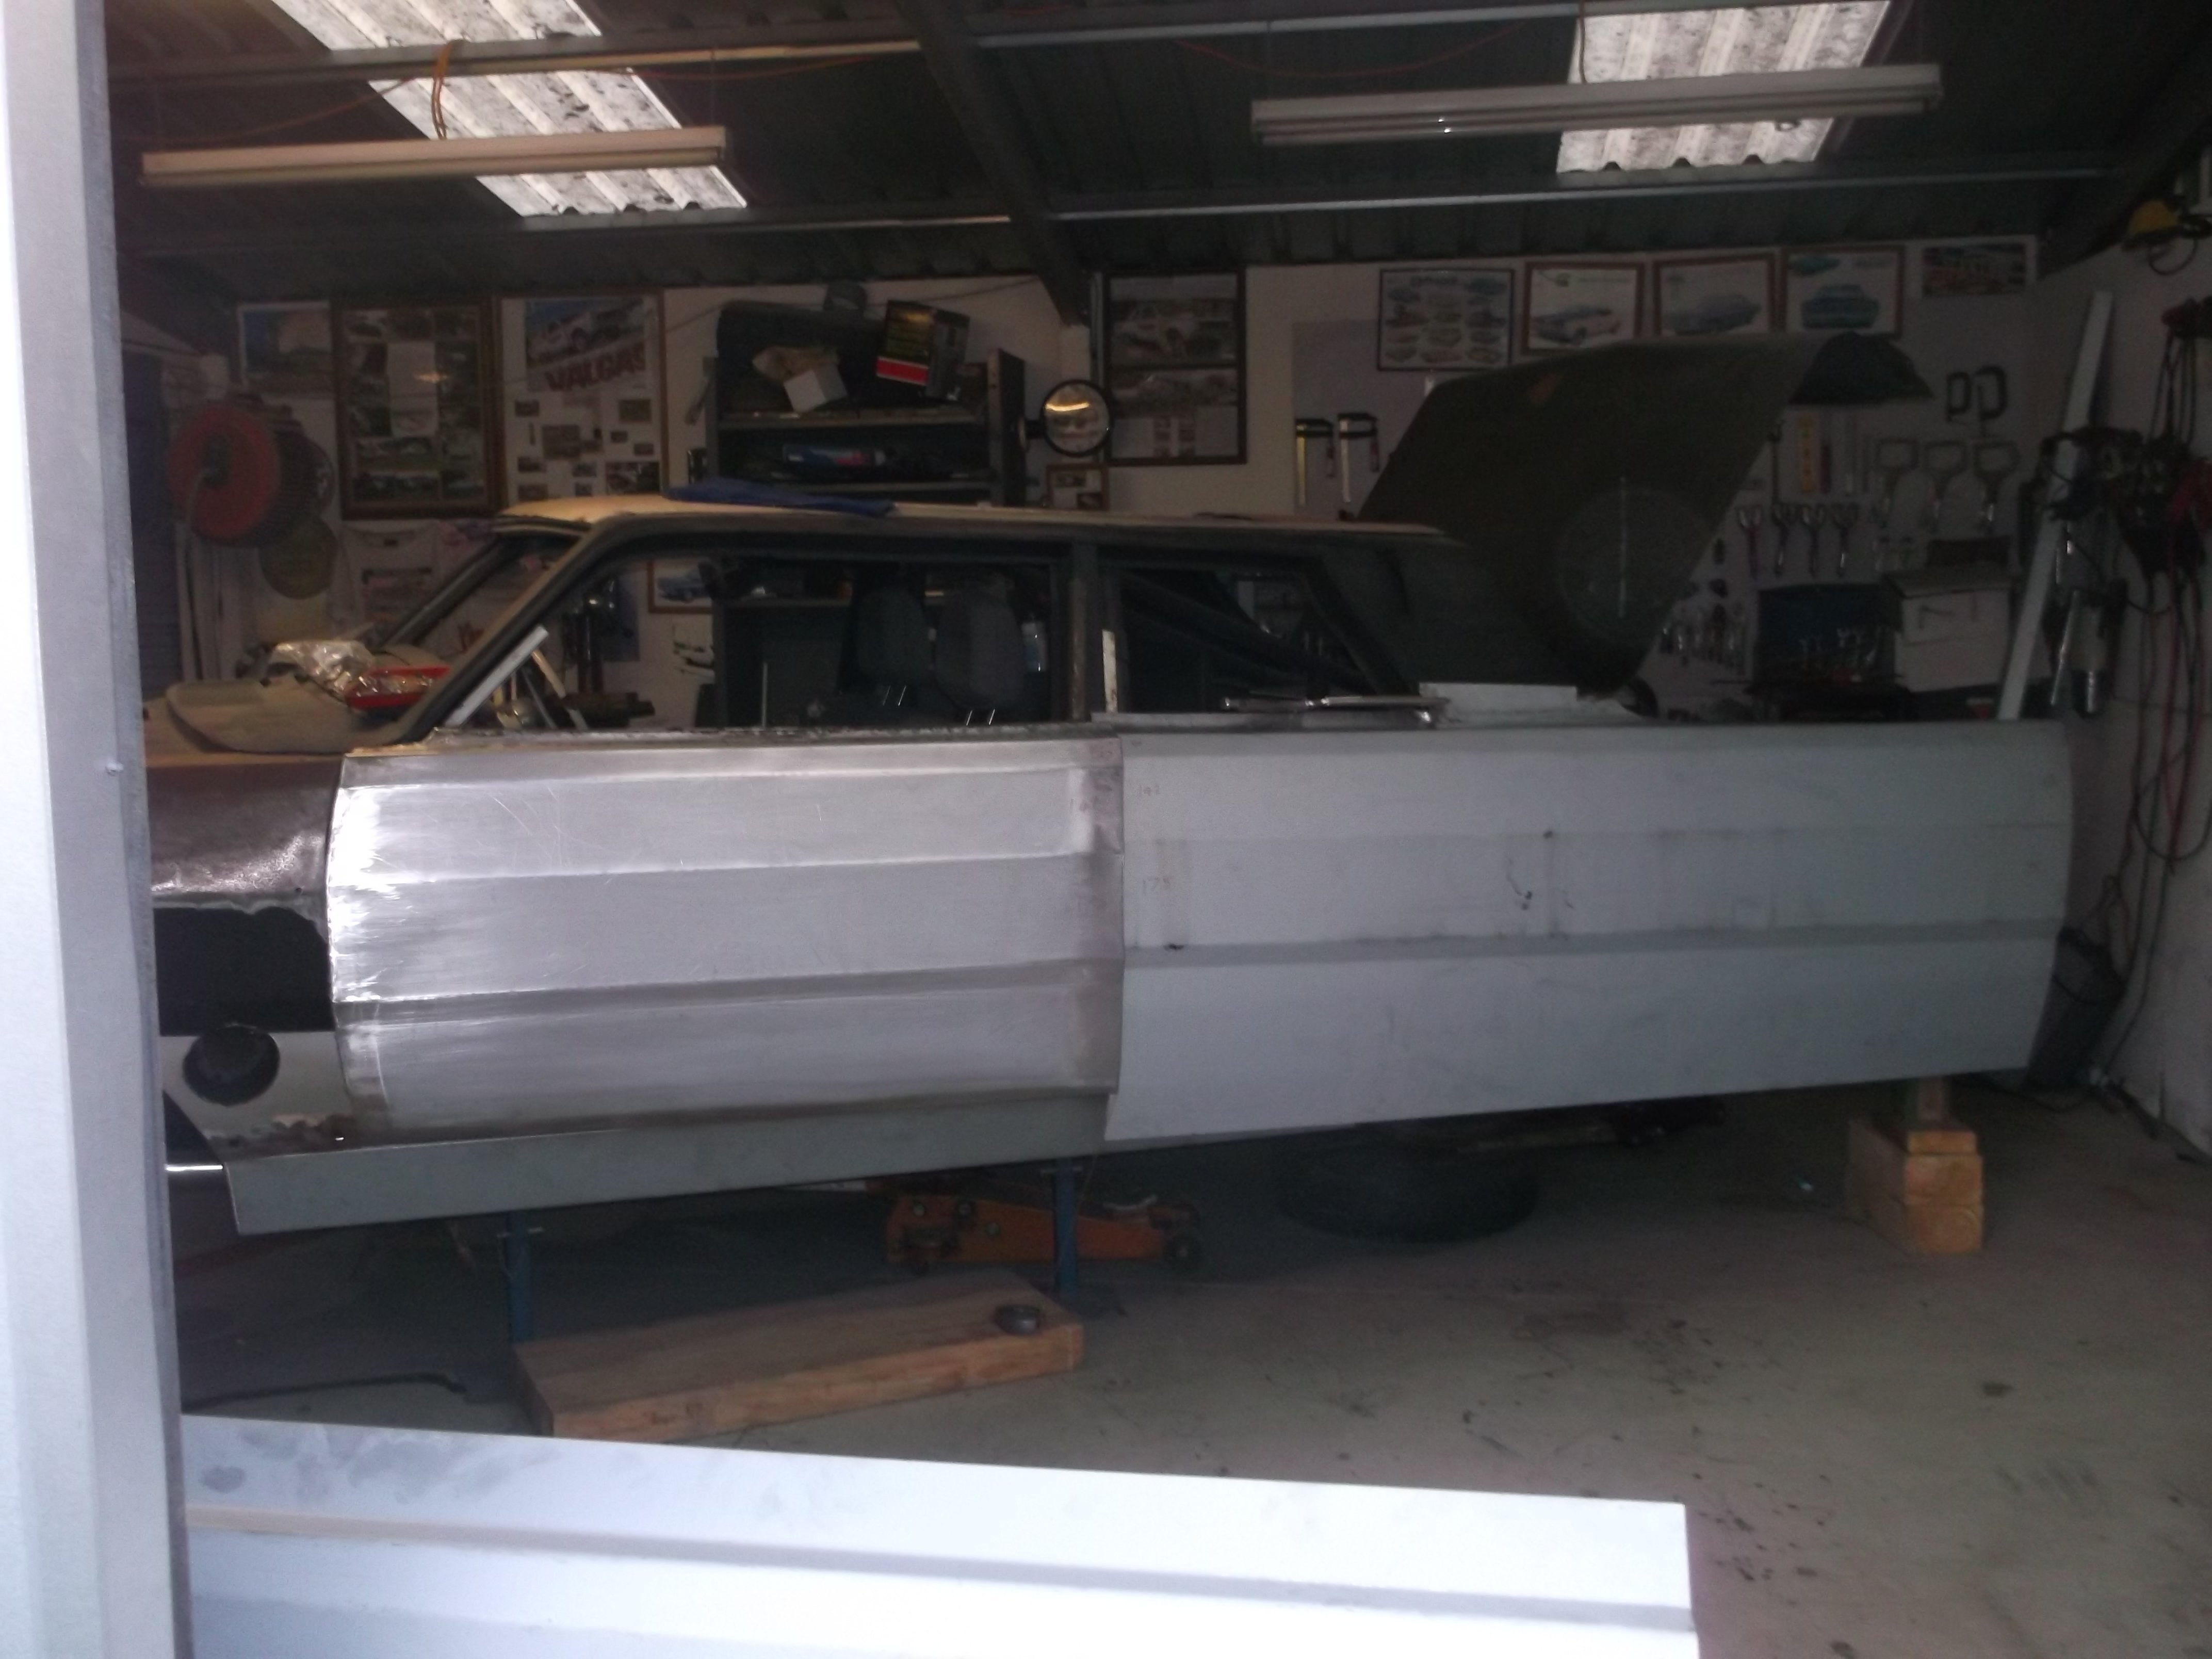
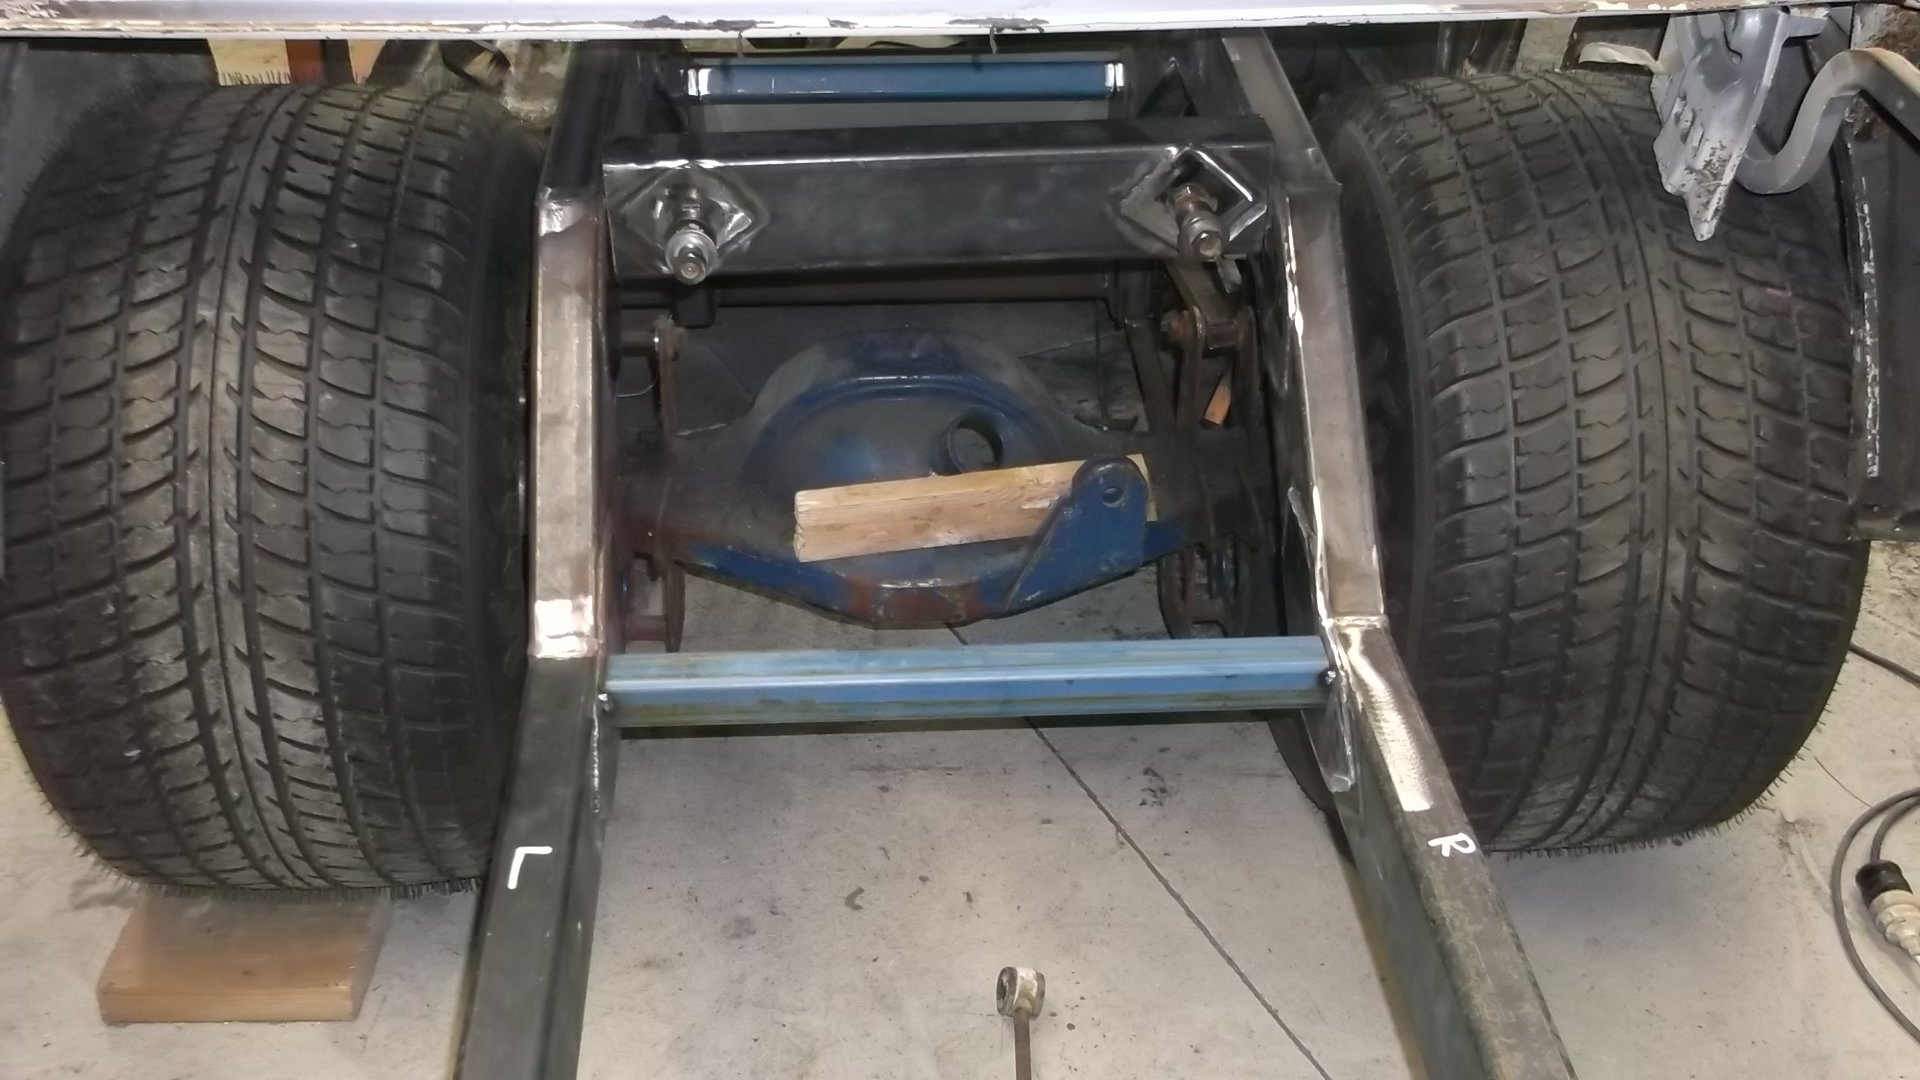
Seems im overdue for another update. Best remedy that I guess and spew forth more pics.To keep all the electricals ticking im using a Powermaster 150amp 1 or 3 wire alternator. As i stated above I wanted all the brackets as low as possible. unfortunitly cooling hoses got in the way in the middle positions and the powerstearing rack when it was really low. So its had to go up higher but is still low as we could get it. Still its not to bad I guess.Also mounted up the radiators overflow seen above.On the other side of the rad we mounted up the PS/hydroboost reservoir. Three port jobbie.Under the car a fly wheel cover was fabbed up. Stock would not work due to the trans adapter. Bit of split pipe was used for the notches to clear the torque converters covers ridges.Car is off the jack stands and front panels are bolted on. not all the bots etc are in but enough to keep it together until I get new bolts for it all and get it done right. Old Nailhead sits in there nicely.Steering wheel thrown on just so we can roll it about easier. GT Performance 9 bolt hub, 15.5" wheel and horn. Really wanted a wheel with a horn ring cus I love those things but ones that suit smaller wheels are bleeping expensive so it can wait.Car is sitting pretty darn low. Like the lowest part is the brace that joins/strengthens the front sub side to side much like the original Hudson setup. I haven't measured it but I guess we have 30-40mm clearance to the road. As you can see with the good old beer bottle next to the car... it low.keep in mind we still have to add side pipes - its that big ol hole you may of spotted in the above pic. You will see also that we will have a heap of room for them under the rockers. They also have a bit of a curve whats a bonus as it will (with luck) keep them out of ankle range whilst keeping them nicely tucked up so we dont rip em off.and moving right along... side shot just cus I like it. yes I know the car is dirty but so is my mind and I like it that way.Now talking about burning ankles on side pipes a subject by gal has mentioned most times I bring up lake pipes. My answer generally goes along the lines of "wear heels" below pic proves it. Ankle out of burn range.. toes on the other hand she has never mentioned.But seriously - like the back tire viewed air out side on.Enough farting around talking about air out this and that. Throw a battery in and test that shiz. Yip yours truly testing it out. We left it air up for a few days and I was pleasantly surprised to find it stayed there with only a few psi drop from what I left it at uniformly across each wheel. I will mark that to atmosphere and not any slow leak due to it being across all four wheels not just one.yeah i know the front could be bolted on a bit better but ahh stuff it it will be off again anyway.And just cus im feeling all gangsta...i know it aint hydraulics but it will do me. When air up we must be around 150mm at that one low point in the middle just behind the wheels. Ass end that has larger bags naturally goes much higher.3 points
-
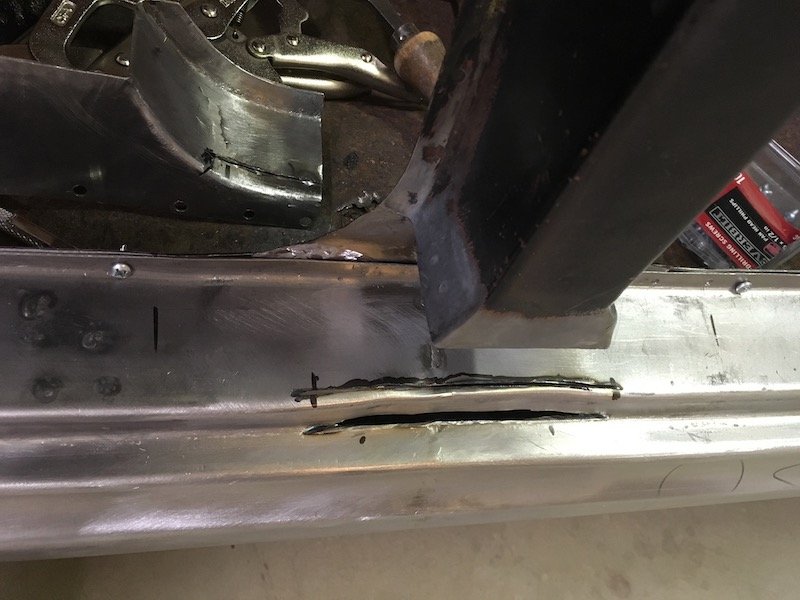
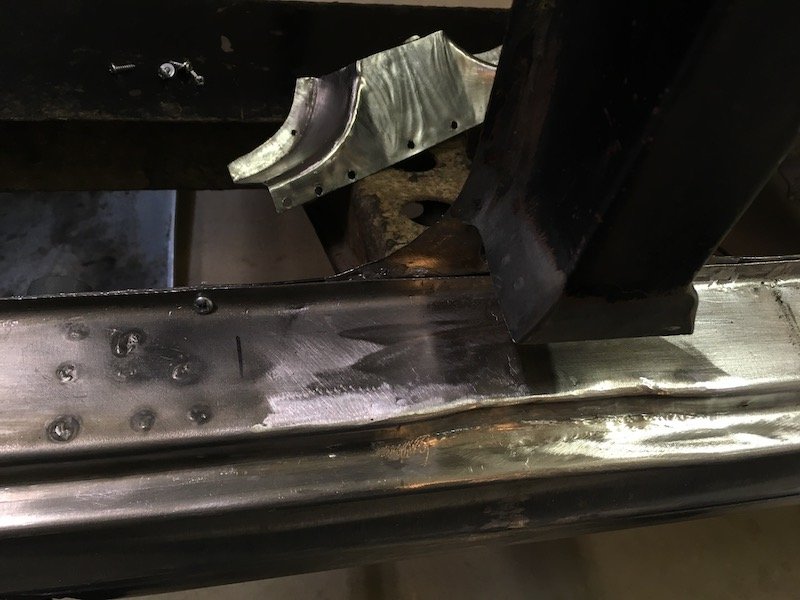
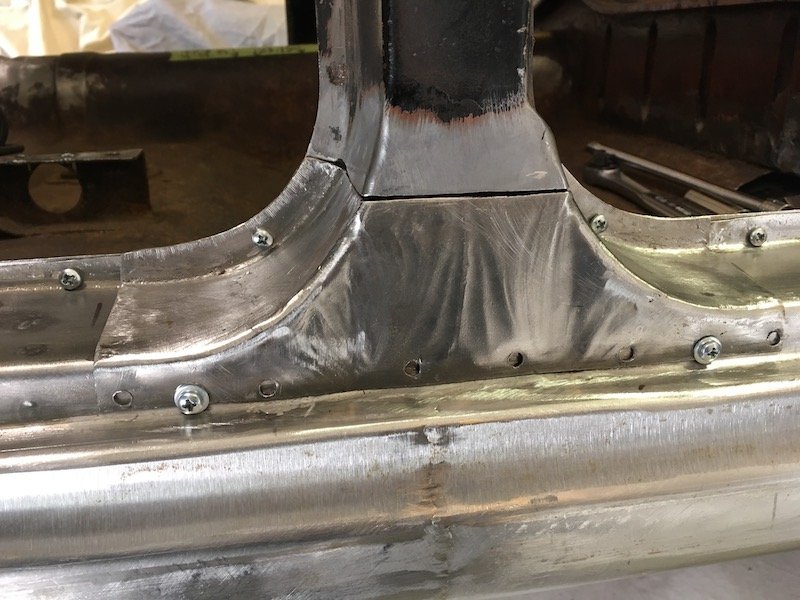
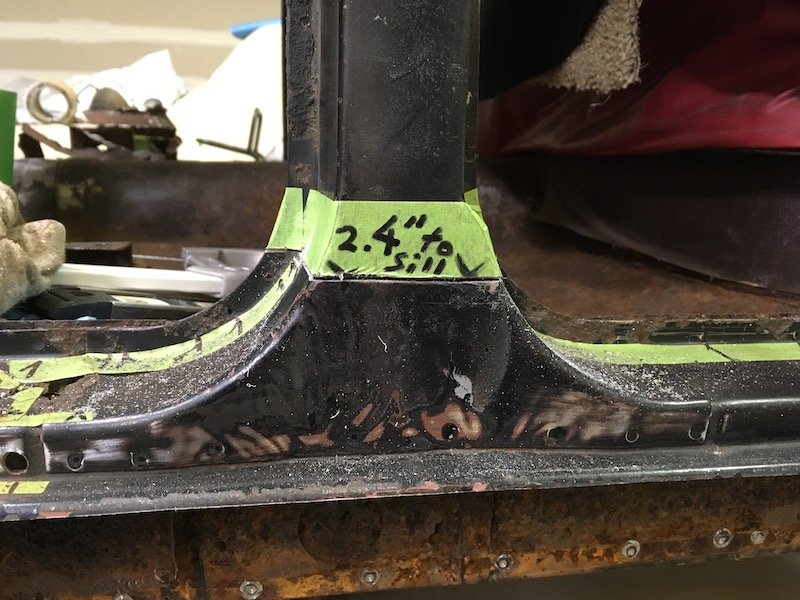
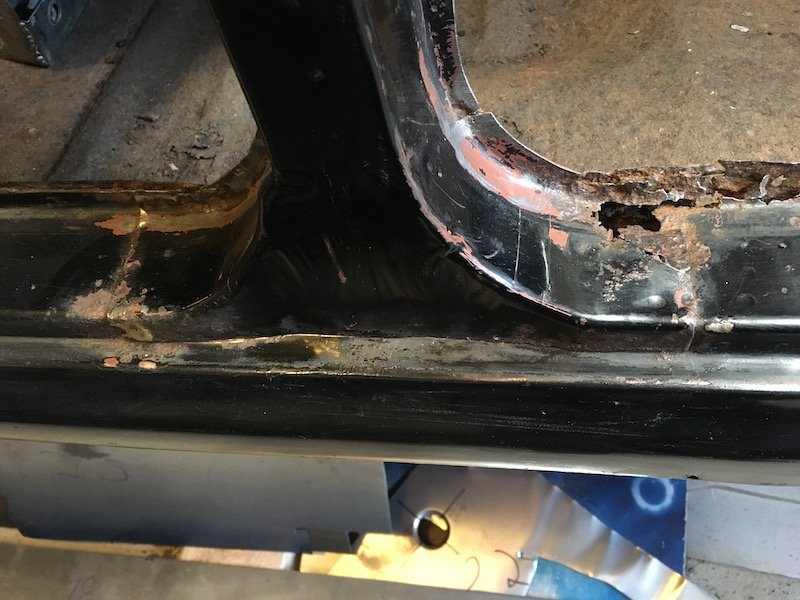
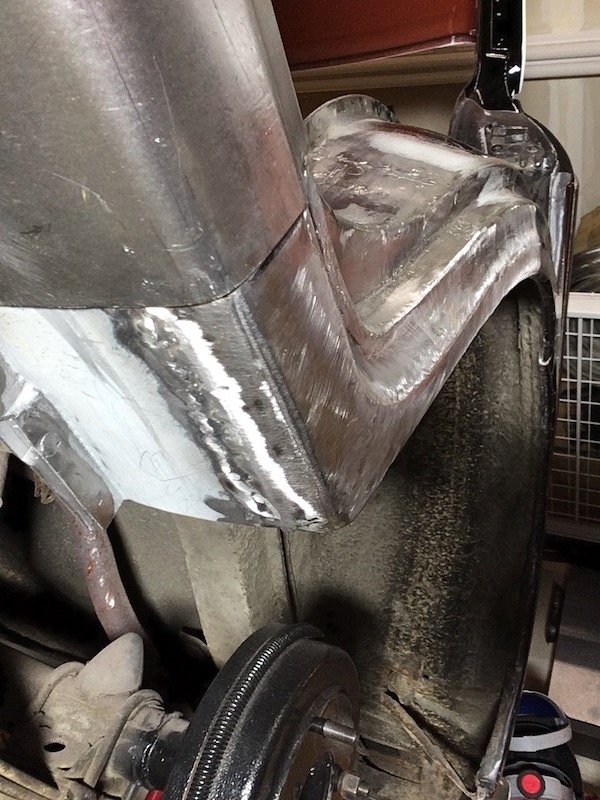
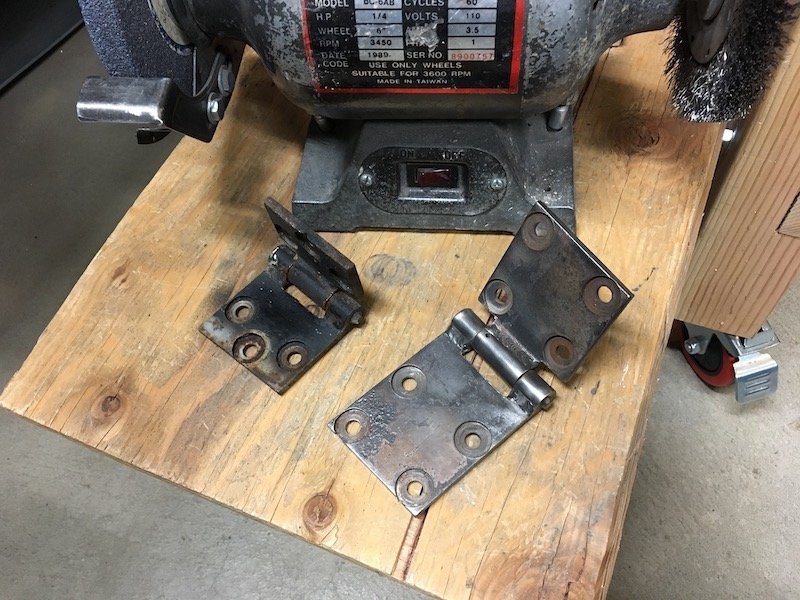
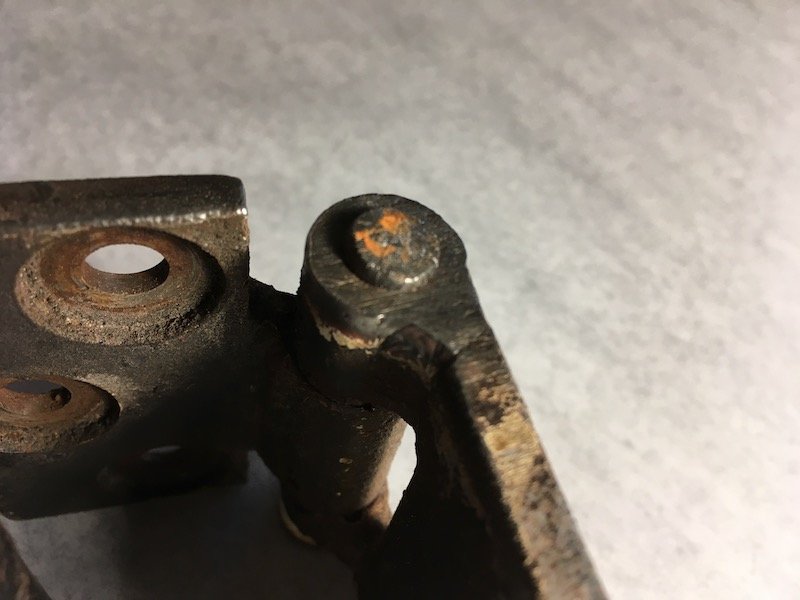
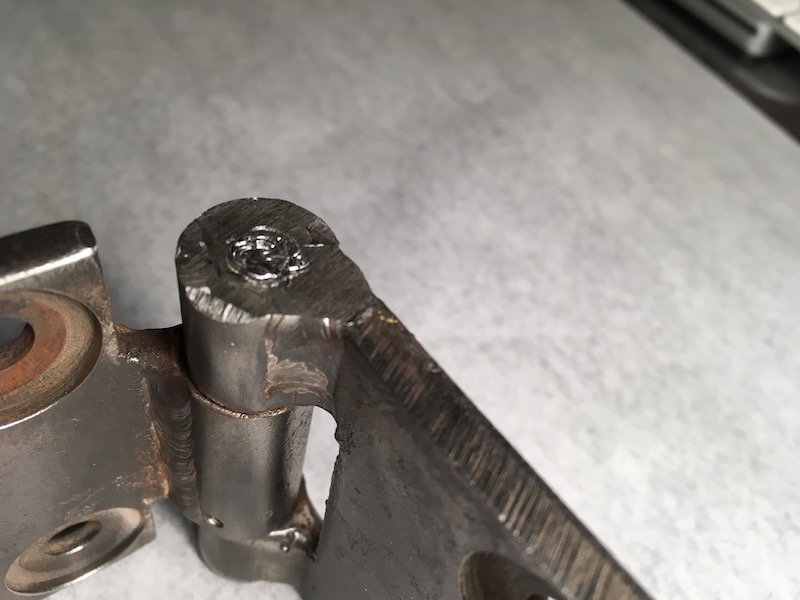
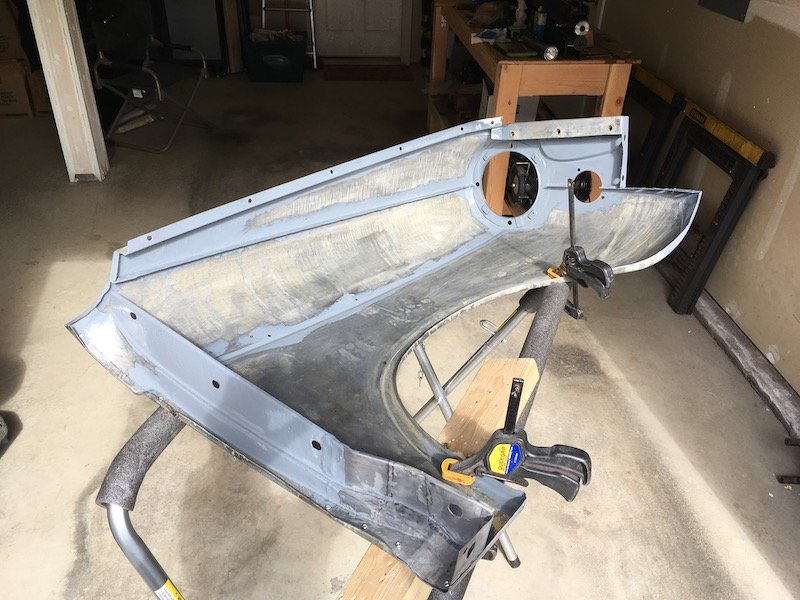
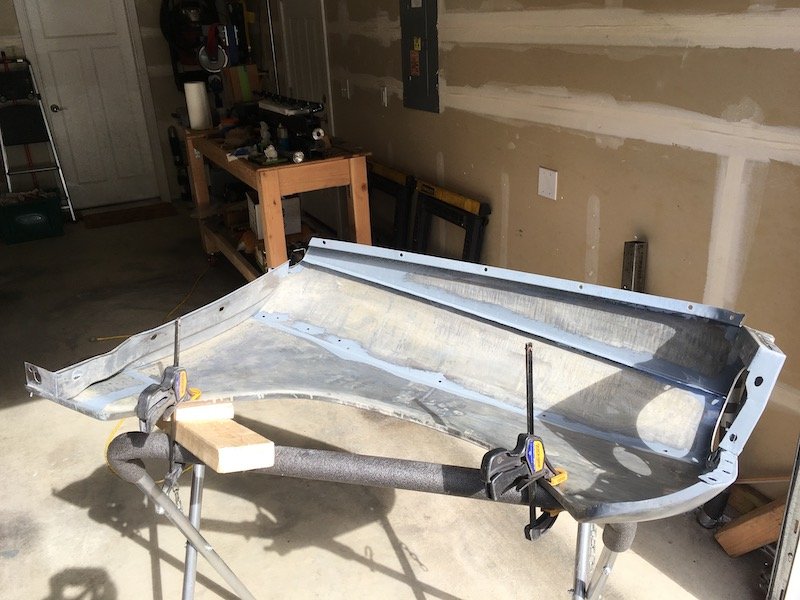
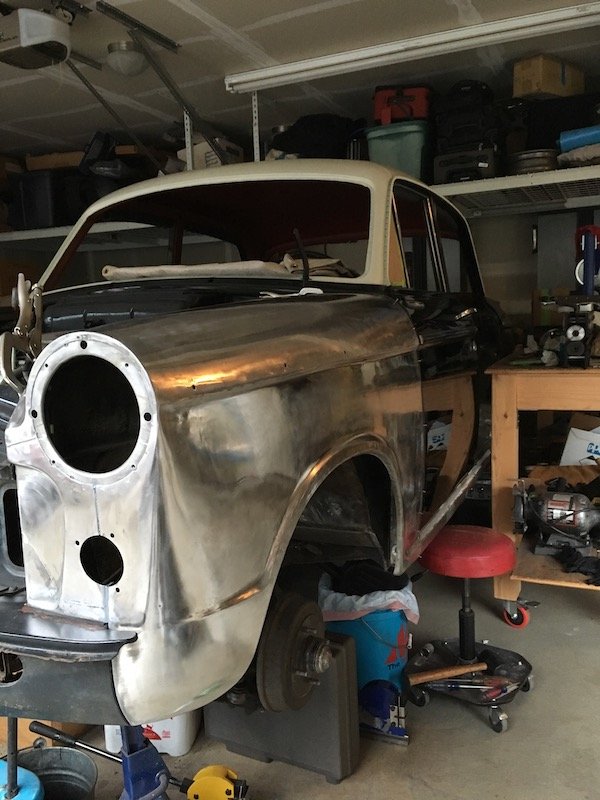
Catching up with progress today. Beware of this, my favorite tool over the last 26 years, the good old knotted wire wheel and angle grinder. Very handy but dangerous. Took a nip out of my flesh the other day. Ripped right through the glove. I should reinstall the guard of course. So I went to work by finessing the fit of the forward end on the outer sill by forming a lip on the end, making pie cuts and welding up the gaps. The objective to set it up for a flush contact with the A-pillar stub. Btw, the outer sill assembly will not be welded to the body until the floor is fabricated and installed so I can get a coat of epoxy primer over the resulting welds on the inside of the sill box. I've got it fastened with screws temporarily. Next, I had to make adjustments at the base of the B-pillar by joggling the upper surface of the sill inboard. Did this with some cuts, pushed metal in and welded shut. The top flange of the sill was originally joggled as shown in these left and right B-pillar base pics. Next I adjusted the C-pillar or dogleg. The bottom of which was tucked in way too far inboard. This resulted in an unacceptable mismatch with the outer sill profile. So I cut a slot in the bottom plate and welded in a 1/4 inch strip. Then had some fun time buffing out and polishing the now 42 year old repaint job on the doors. Don't ask why, I just did it on impulse. The doors do need repainting but it does not show that in the pics. I wanted to rebuild the hinges to make sure thing are fitting correctly. I grabbed the hinges off the right front door to experiment with. It did not go well with my attempted pin removal methods. First I tried pressing the pins out with a hydraulic press but it just began mushrooming the pin. Same for the big hammer and drift pin technique. And yes, I was pushing on the correct (not splined) end and supported the hinge properly on the other side. It looks like the pins will have to be drilled out. I'm not going to do that with a hand drill and not without sourcing new pins and bushings first. It appears I'll have to send them in for rebuild at a shop somewhere. Before I pushed against this end of pin Fail Fail Then worked on the left front fender some more. Welded the two halves of the aft inner vertical structure together with a lap joint for a rigidity. Cleaned, acid etched and painted rust scarred and pitted areas on the inside with POR-15 gray. Polished the outer surface with 3M scuff pads on the angle grinder to help see the waves and indentations better and work it smooth with hammer, dolly, rubber hammer, etc. I'll weld the inner structure to the fender once everything is coated with epoxy primer. And finally I set about repairing a bunch of damage on the trans/driveshaft tunnel. This 310 Bluebird has had the wrong transmission swapped into it back in the early 80s. The original trans wore out the 2-3 shift fork and this spare unit was installed but would not fit. So the side of the tunnel got torched out and it was made to fit. There is a huge difference in size between the two trans. The all synchro trans is a side loader, which is not only much wider but also longer. The original 310 trans is a top loader. Anyways I had to fix the gapping hole and make it adaptable to either trans since I still have the original and it is repairable. Then I went on to replace the aft section the covers the driveshaft. Then patched the rusty area midway between the other patches. All is just tack welded for the moment. Pics below tell the rest of the story. Below pic is looking up at side loader. The original 310 top loader trans. Above pic. It was no fun trying to do those three plug welds upside down. Notice the parallel hat section reinforcement structure or beams running fore and aft, I don't think these were installed on later 312 Bluebirds? Looks like I hit my maximum upload limit here for this post, and it is a late work night. Plan to catch up on the remainder tomorrow. Discussion: https://oldschool.co.nz/index.php?/topic/60267-marts-pl310-61-datsun-bluebird-sedan/
3 points
-
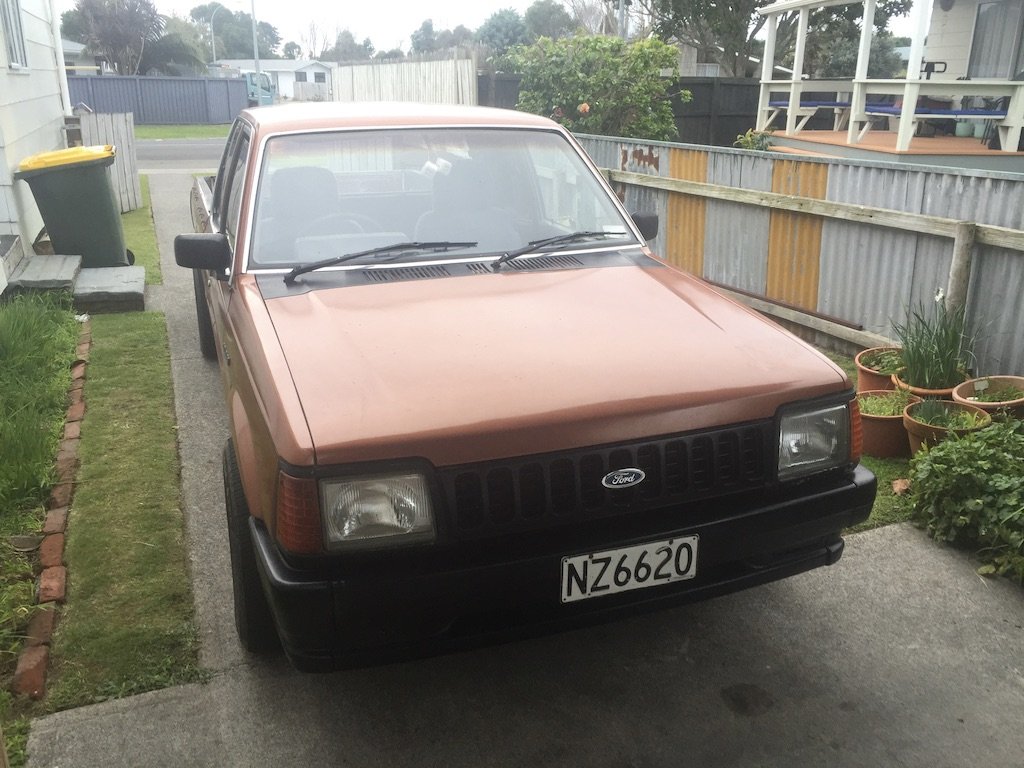
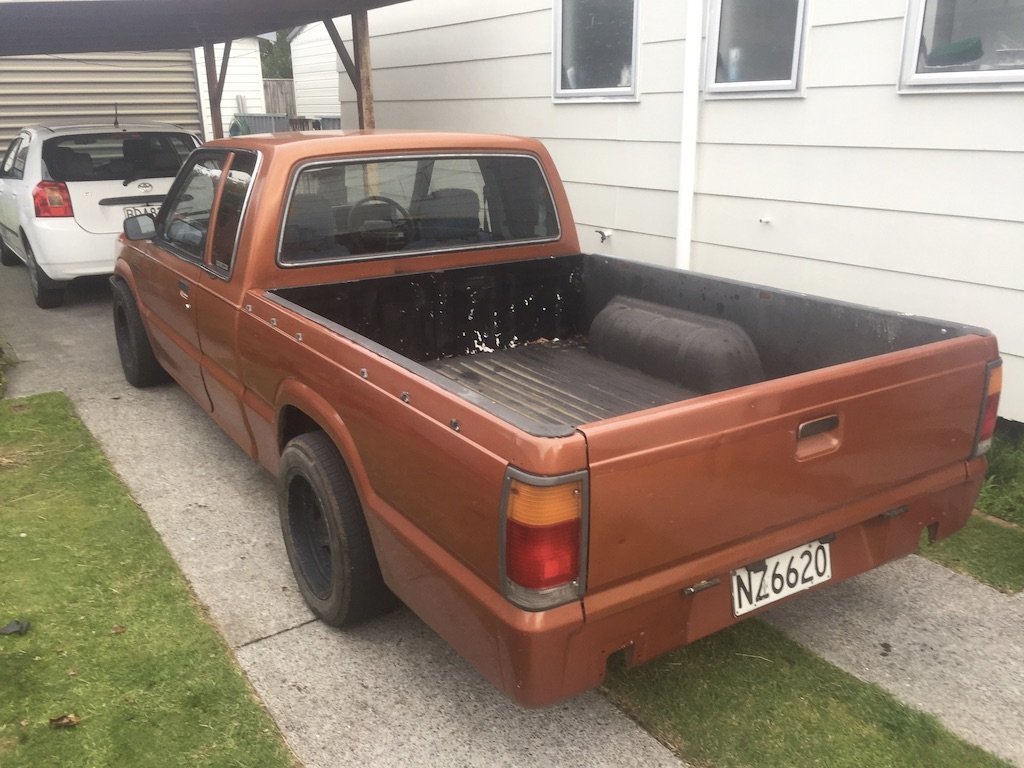
Hey Team. Been AWOL quite a long time. Had some serious hickups in life that slowed me down and forced me to let go of my last project. a mk3 Ford Cortina. And frankly, I went through a pretty nasty period of depression. But you can't keep a good guy down. And you won't stop a grease monkey eventually getting covered in grease. Around a month ago, My Daily Driver 2000 Ford Mondeo slipped a tooth on the timing belt on the exhaust cam, and did some bendy valve stuff. A friend had this sitting in his hay shed taking up space. And Rather than try and rebuild the Mondeo motor (Which had only done 30,000k since I did a rebuild on it anyway) I jumped at the chance to get into something RWD, with a carb, and a tray. Repainted sometime in its past, But rather neglected of late. I saw this as a chance to tinker with something oldish again. Fresh Battery and some fuel and she fired right up. She didn't sound right, but she did start. Got her home running like a bag full of assholes. Popped the bonnet to find green alien blood pretty much pissing out the Number 4 exhaust. (Sigh... Headgasket) So.... List of things on the to do list... Head Gasket (Or just pull the motor and rebuild the whole thing, It's done 300,000+ k) The steering wheel is toast. The Fuel Sender is bung (This is pretty common in these from what I've read) The tray needs that water trap bedliner scrapped and a spray on liner done. The offset on those rims is FAR too positive. Add more tie down points. Fix the Fuel door Stupid little interior blanks with holes drilled in them need sorting Screws missing in the interior. Giant speaker holes in the door cards. Apply power steering (If I can find the stuff to do it) Headunit with bluetooth. Other minor cosmetic things. Sort the suspension. Answer every question/problem in life with "Just chuck it on the back of the ute" Create discussion thread.
2 points
-
Good chance it is 25 spline. I used to look for xd-xf ute or panel van diffs to get 25 spline lsd centers to put into valiants, utes often had 3.23 ratios, sedans if they were lsd were usually 2.77 which had a different offset ring gear mount surface which didn't work for any other ratio2 points
-
sorry for the late notice. July meet up, its on the book of faces too if you need a reminder2 points
-
Ah im in Hornby So dead reg and Unknown motor with some other issues. Id offer ya $3002 points
-
So, a month later and not much has happened. Took the heads to the reconditioners. Will sort out a new clutch then I can take the short block in for a reco as well.
2 points
-
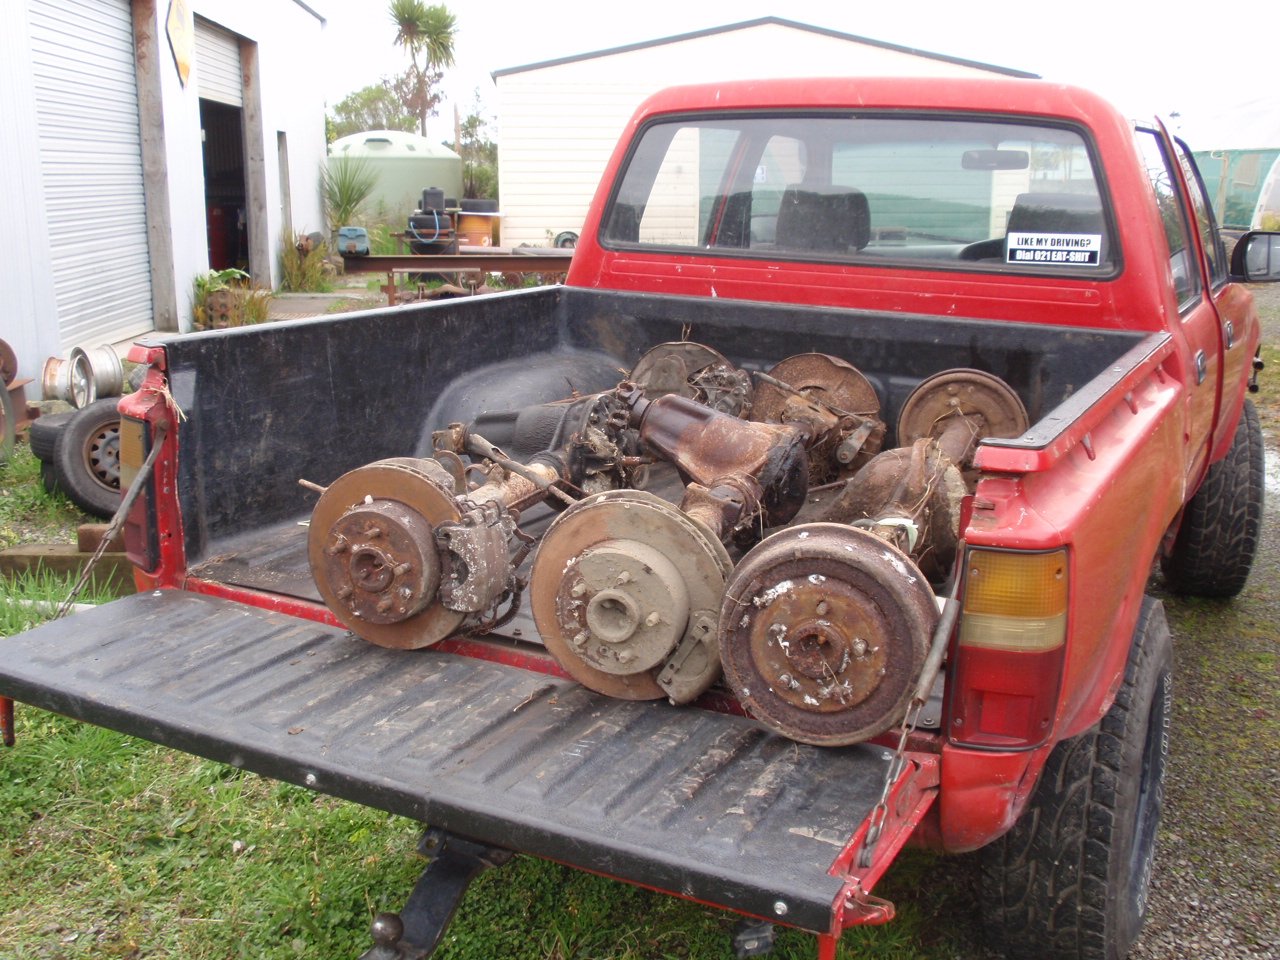
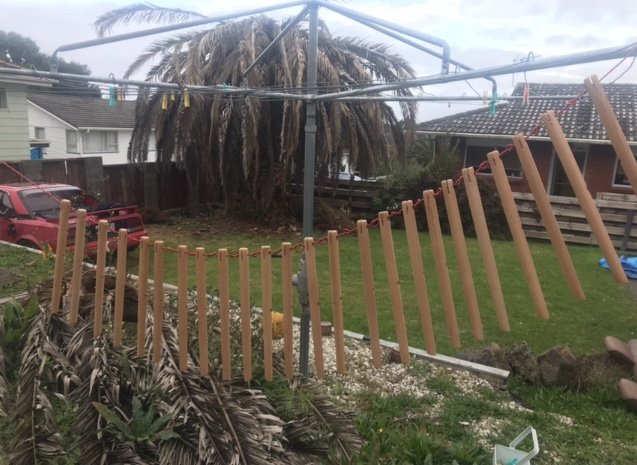
Parts haulin....
2 points
-
Looking good, recommend learning how to use a router and giving laminated ply a go. very on trend lol. about $120 for a sheet, not bad IMO. Flip with a router you can make so many things! I just made this from scratch (Stripped the room bare), learning how to router on the job. Don't recommend Bunnings ply! GIB plastering isn't all that difficult either. (handles still to be fitting to all draws)2 points
-
better shot of the dash. rear parcel self remade to fit around cage .383 painted
2 points
-
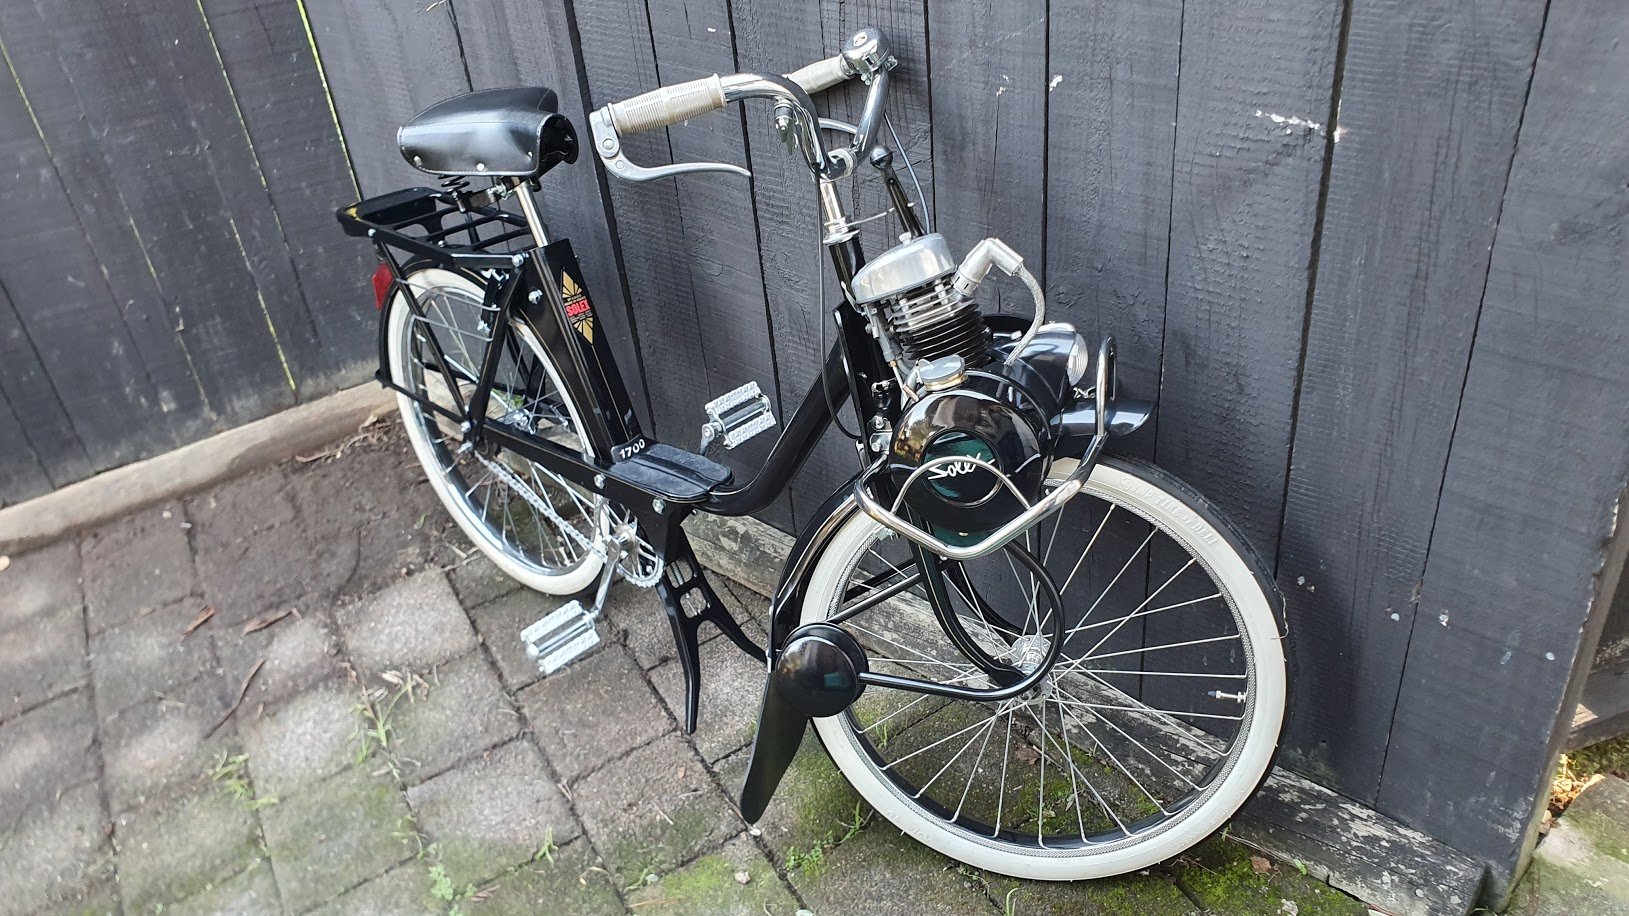
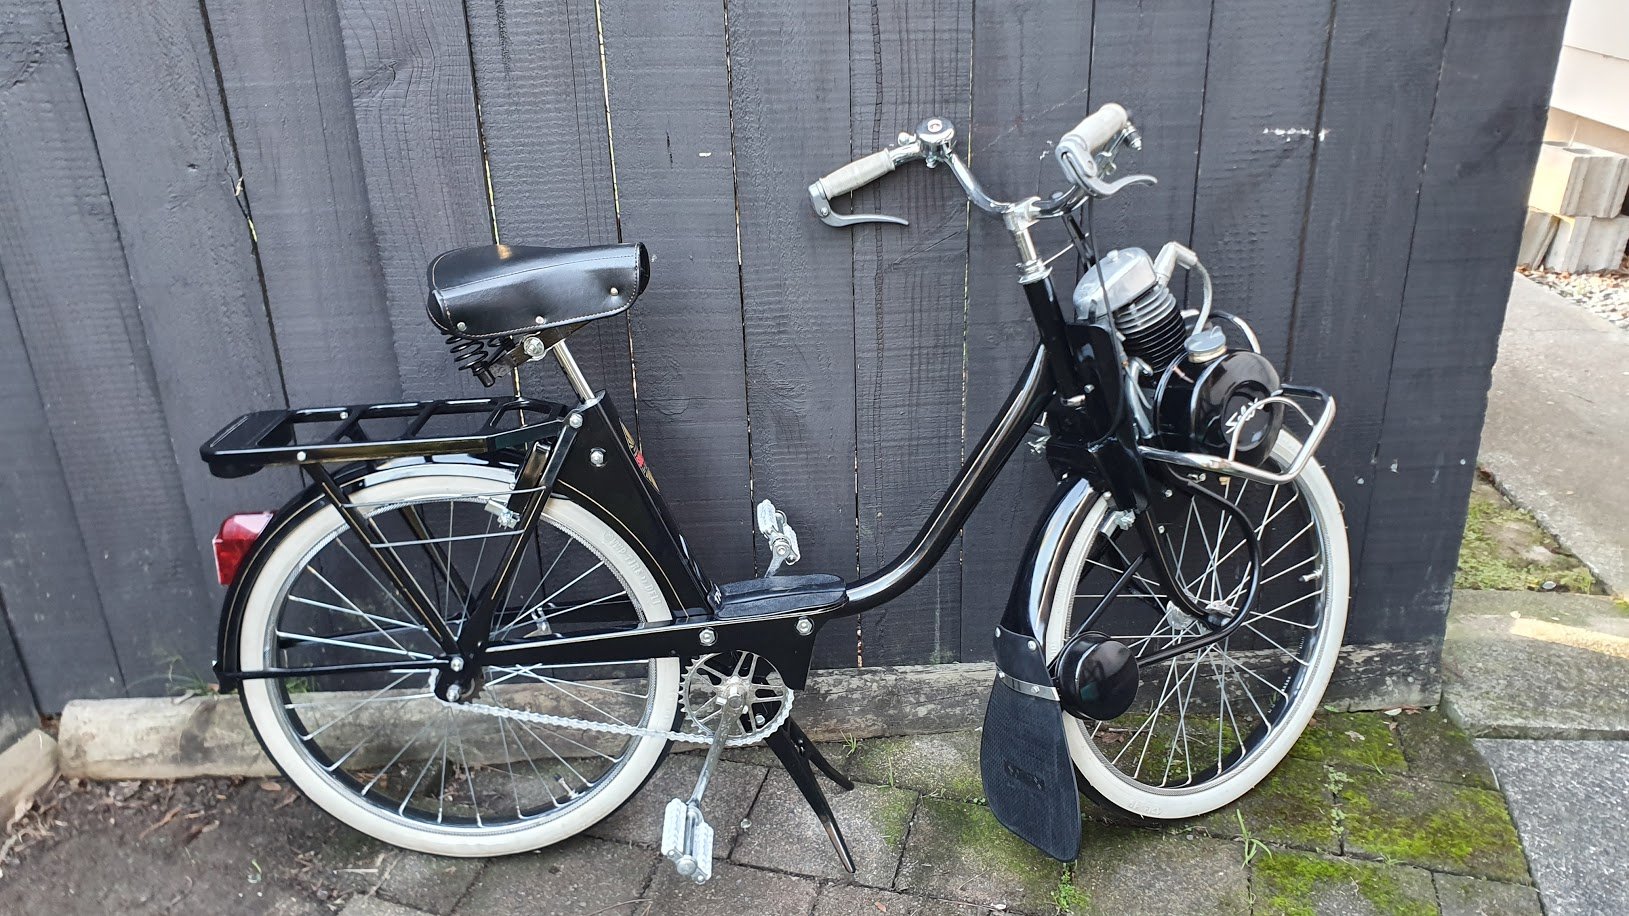
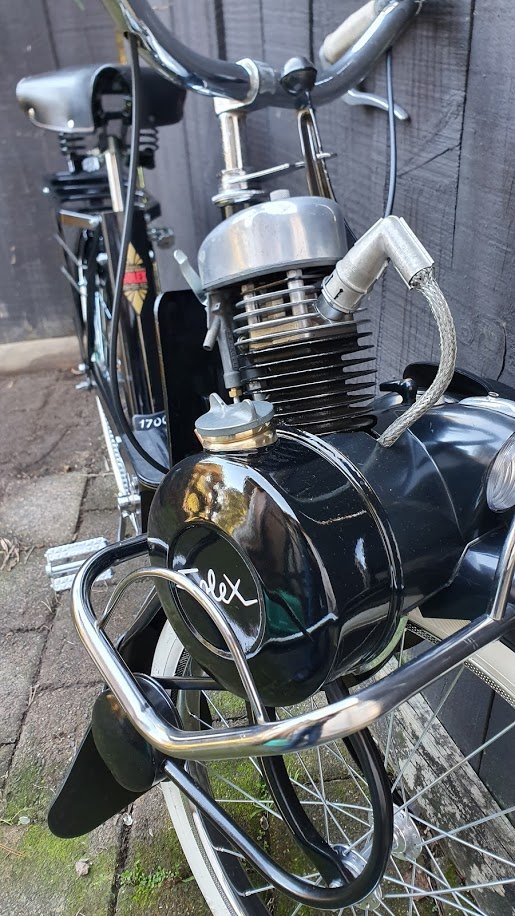
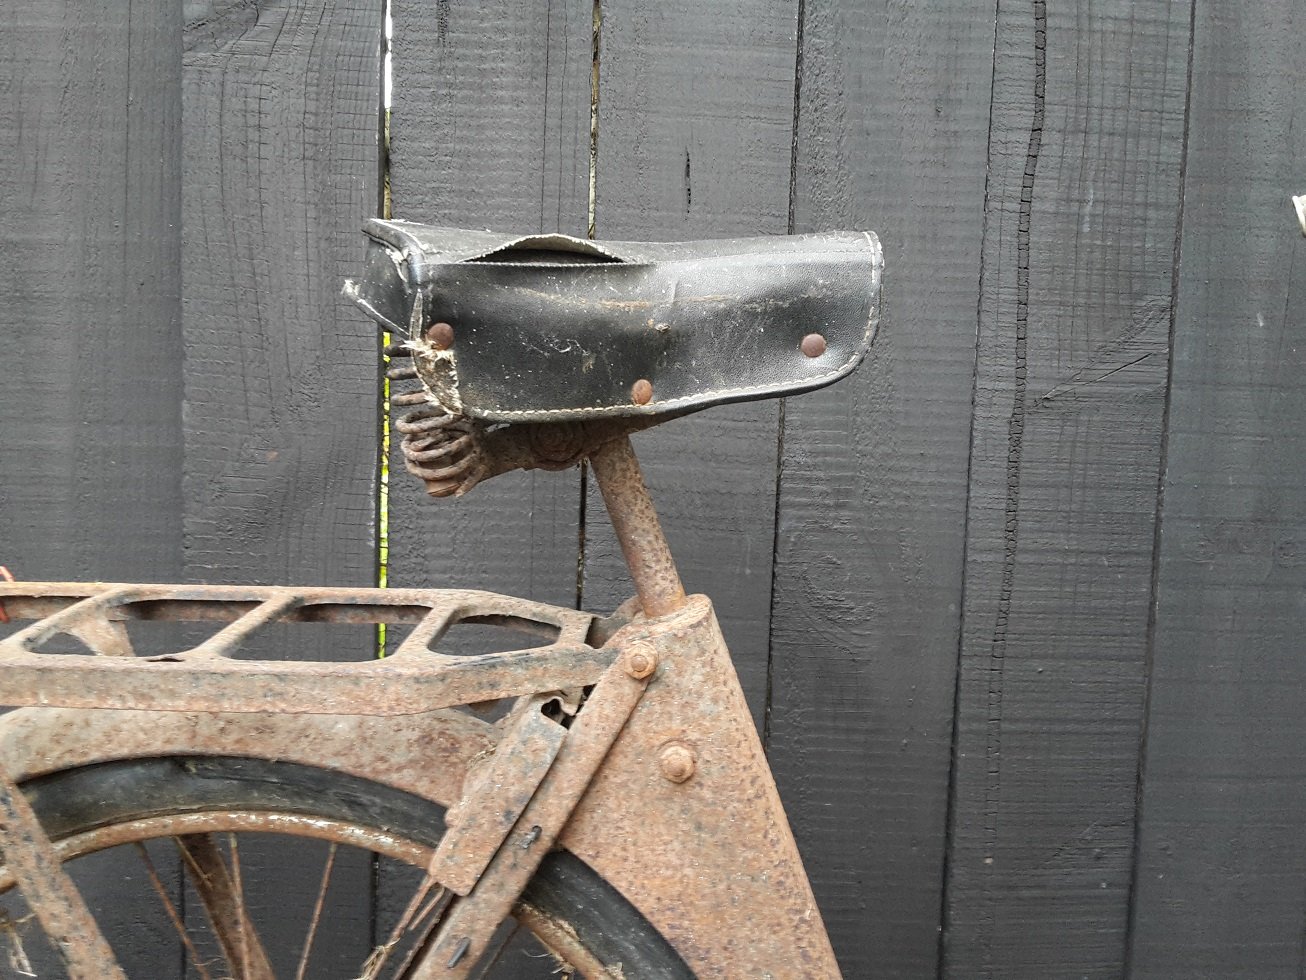
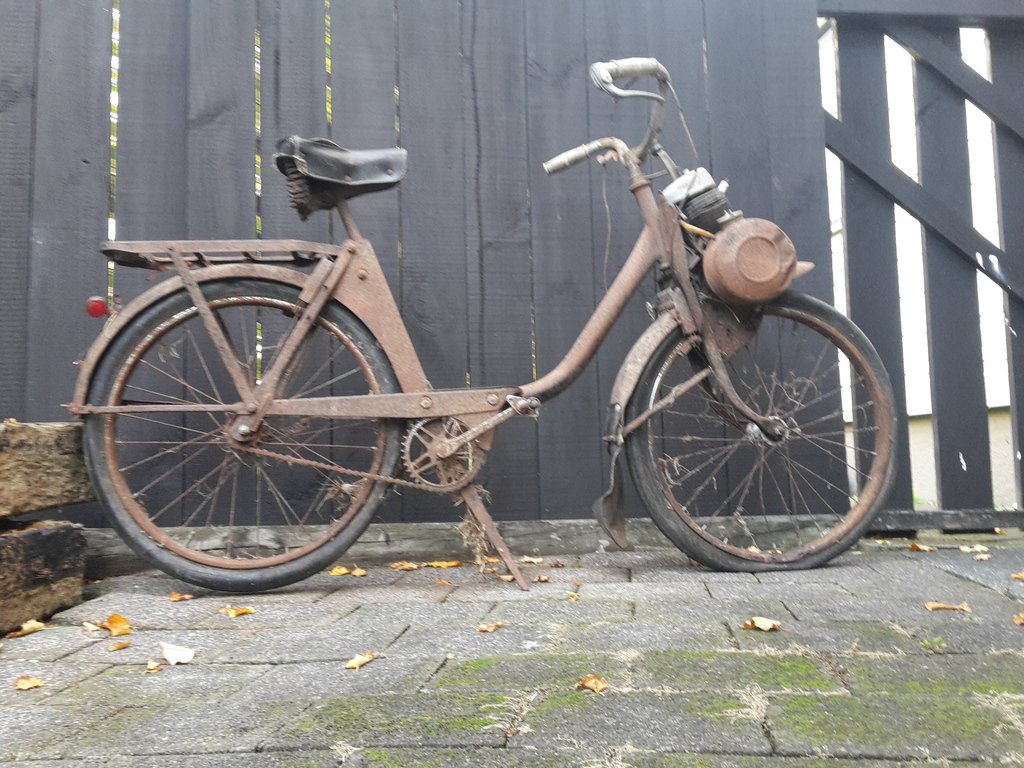
A couple of years back I bought a YSR50 with a TS185 engine transplant, half complete, from an estate garage sale; it may be the best value purchase of my life. I haven't touched it, never got it running. After reading about the upcoming Urewera Undertaking, I knew it was time. The factory YSR frame is only rated for 65kgs and I weigh more than that... I'm also looking at a horsepower increase of something like 240%... and I should probably make some kind of concession for the gravel. So there's a bit to be done. Step one, amalgamate the looms and achieve stable idle voltage. Step B, celebratory burnout. Watch this space.
2 points
-
No mate, never.1 point
-
@johnny.race have you played with Dana 60 units?1 point
-
And an inside shot of the fork.
1 point
-
Im about to buy some new forks of Alixpress after seeing a mates ones that looked really good. Maybe you could try there for some new ones1 point
-
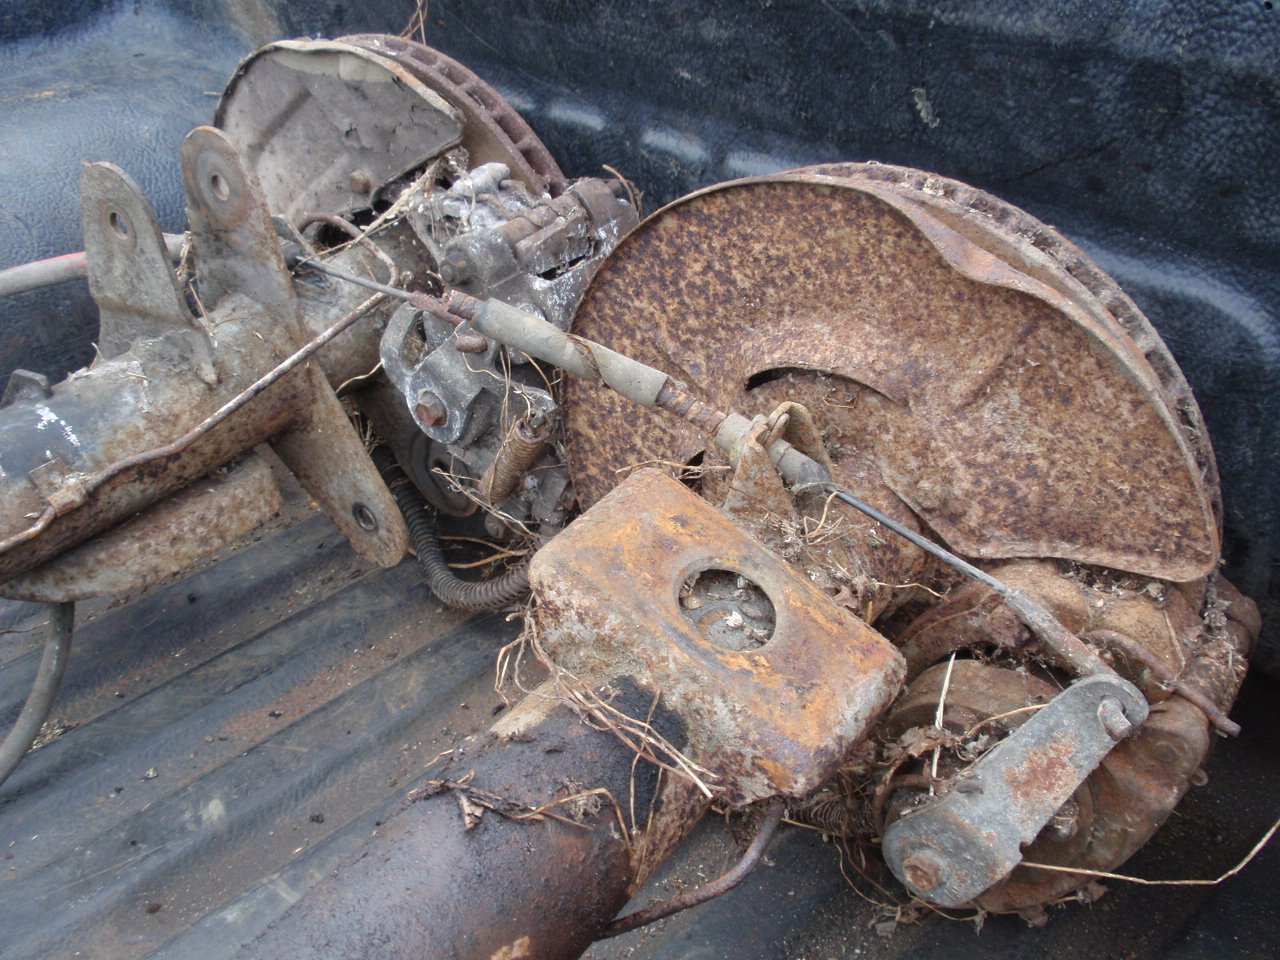
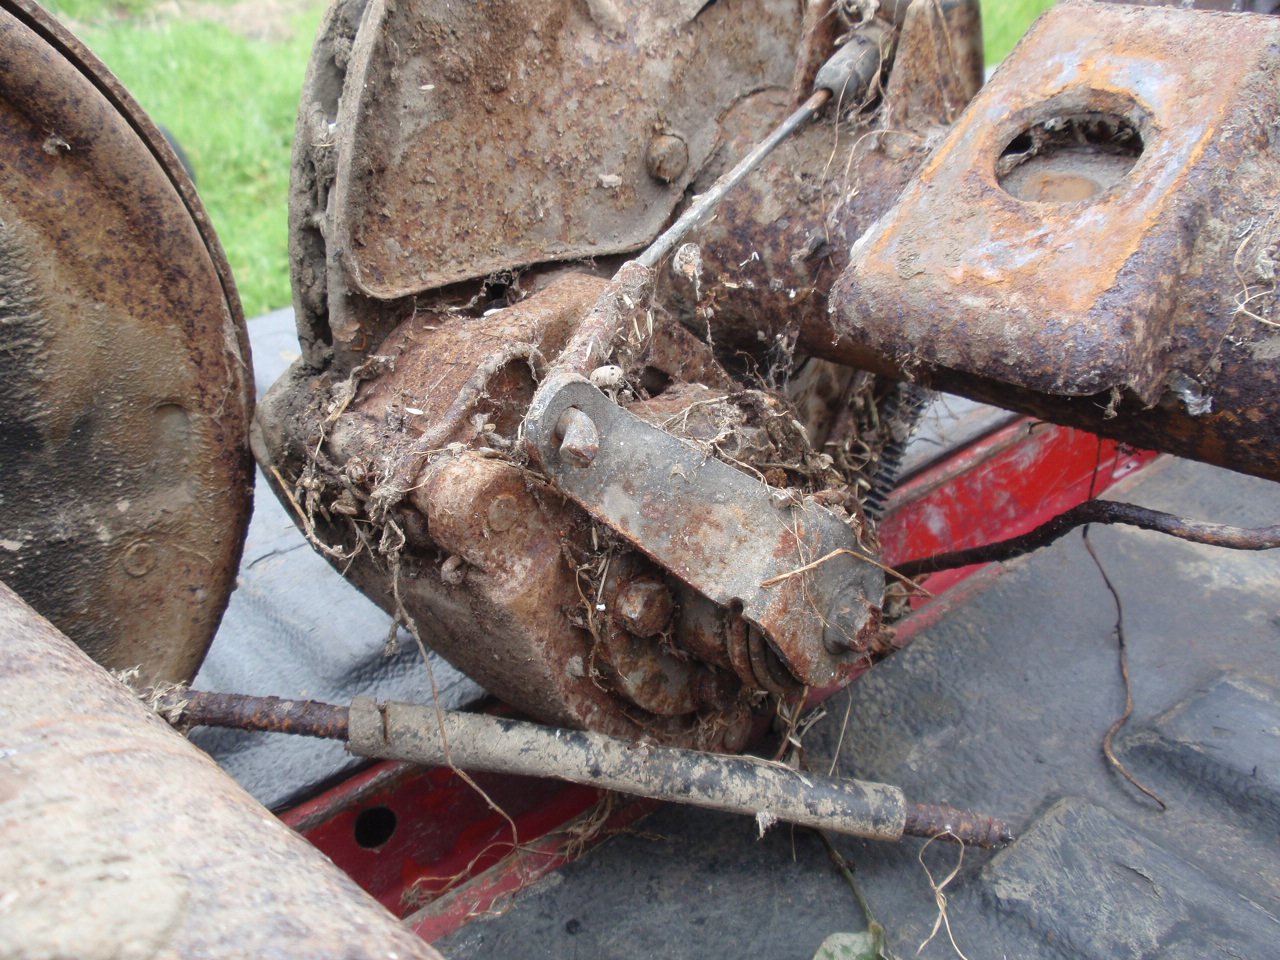
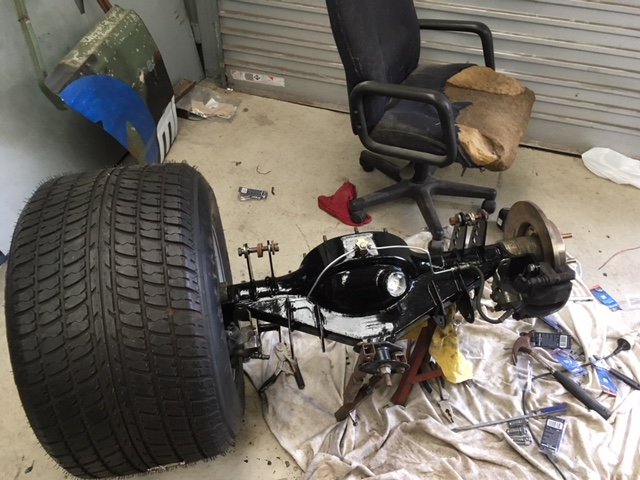
His paint doesn't shine anymore and he hasn't got an un-dinged panel to his name. He's runs leaf springs in the front and is almost topped out at the legal speed limit. 26 years young and still the fucking business! Coon diffs. Thought of you @igor :)) Hey @yetchh I had to go back and check those pics you posted earlier. Two of these diffs feature vented rotors. I'd seen the later type before but not the cast iron type. The car was an XC by the looks of it. They are like your ones aye? It was stripped and had been fucked over by the loader, but XC as far as I could tell. The later one was an XD and the drum one was out of a ute that was either an XB or an XC as far as I could too. The old stuff is still out there, just gotta look wayyy harder now. All of them measured in at 1550mm outside to outside give or take a few mm either way. I have got a couple of 9"'s to do so have been tuned into BW/Ford sorta stuff of late. Stay warm.
1 point
-
Awesome stuff man!! Looks really good! It’s amazing what you can do with ply. old boy builder I’ve been doing some jobs with just built a walk in pantry out of it. Used 3 sheets at $67 a sheet. just a skill saw, glue, screws and drill. Their getting cupboard doors done by a cabinetry place when they get the kitchen done, but super impressed with what he could do with so little1 point
-
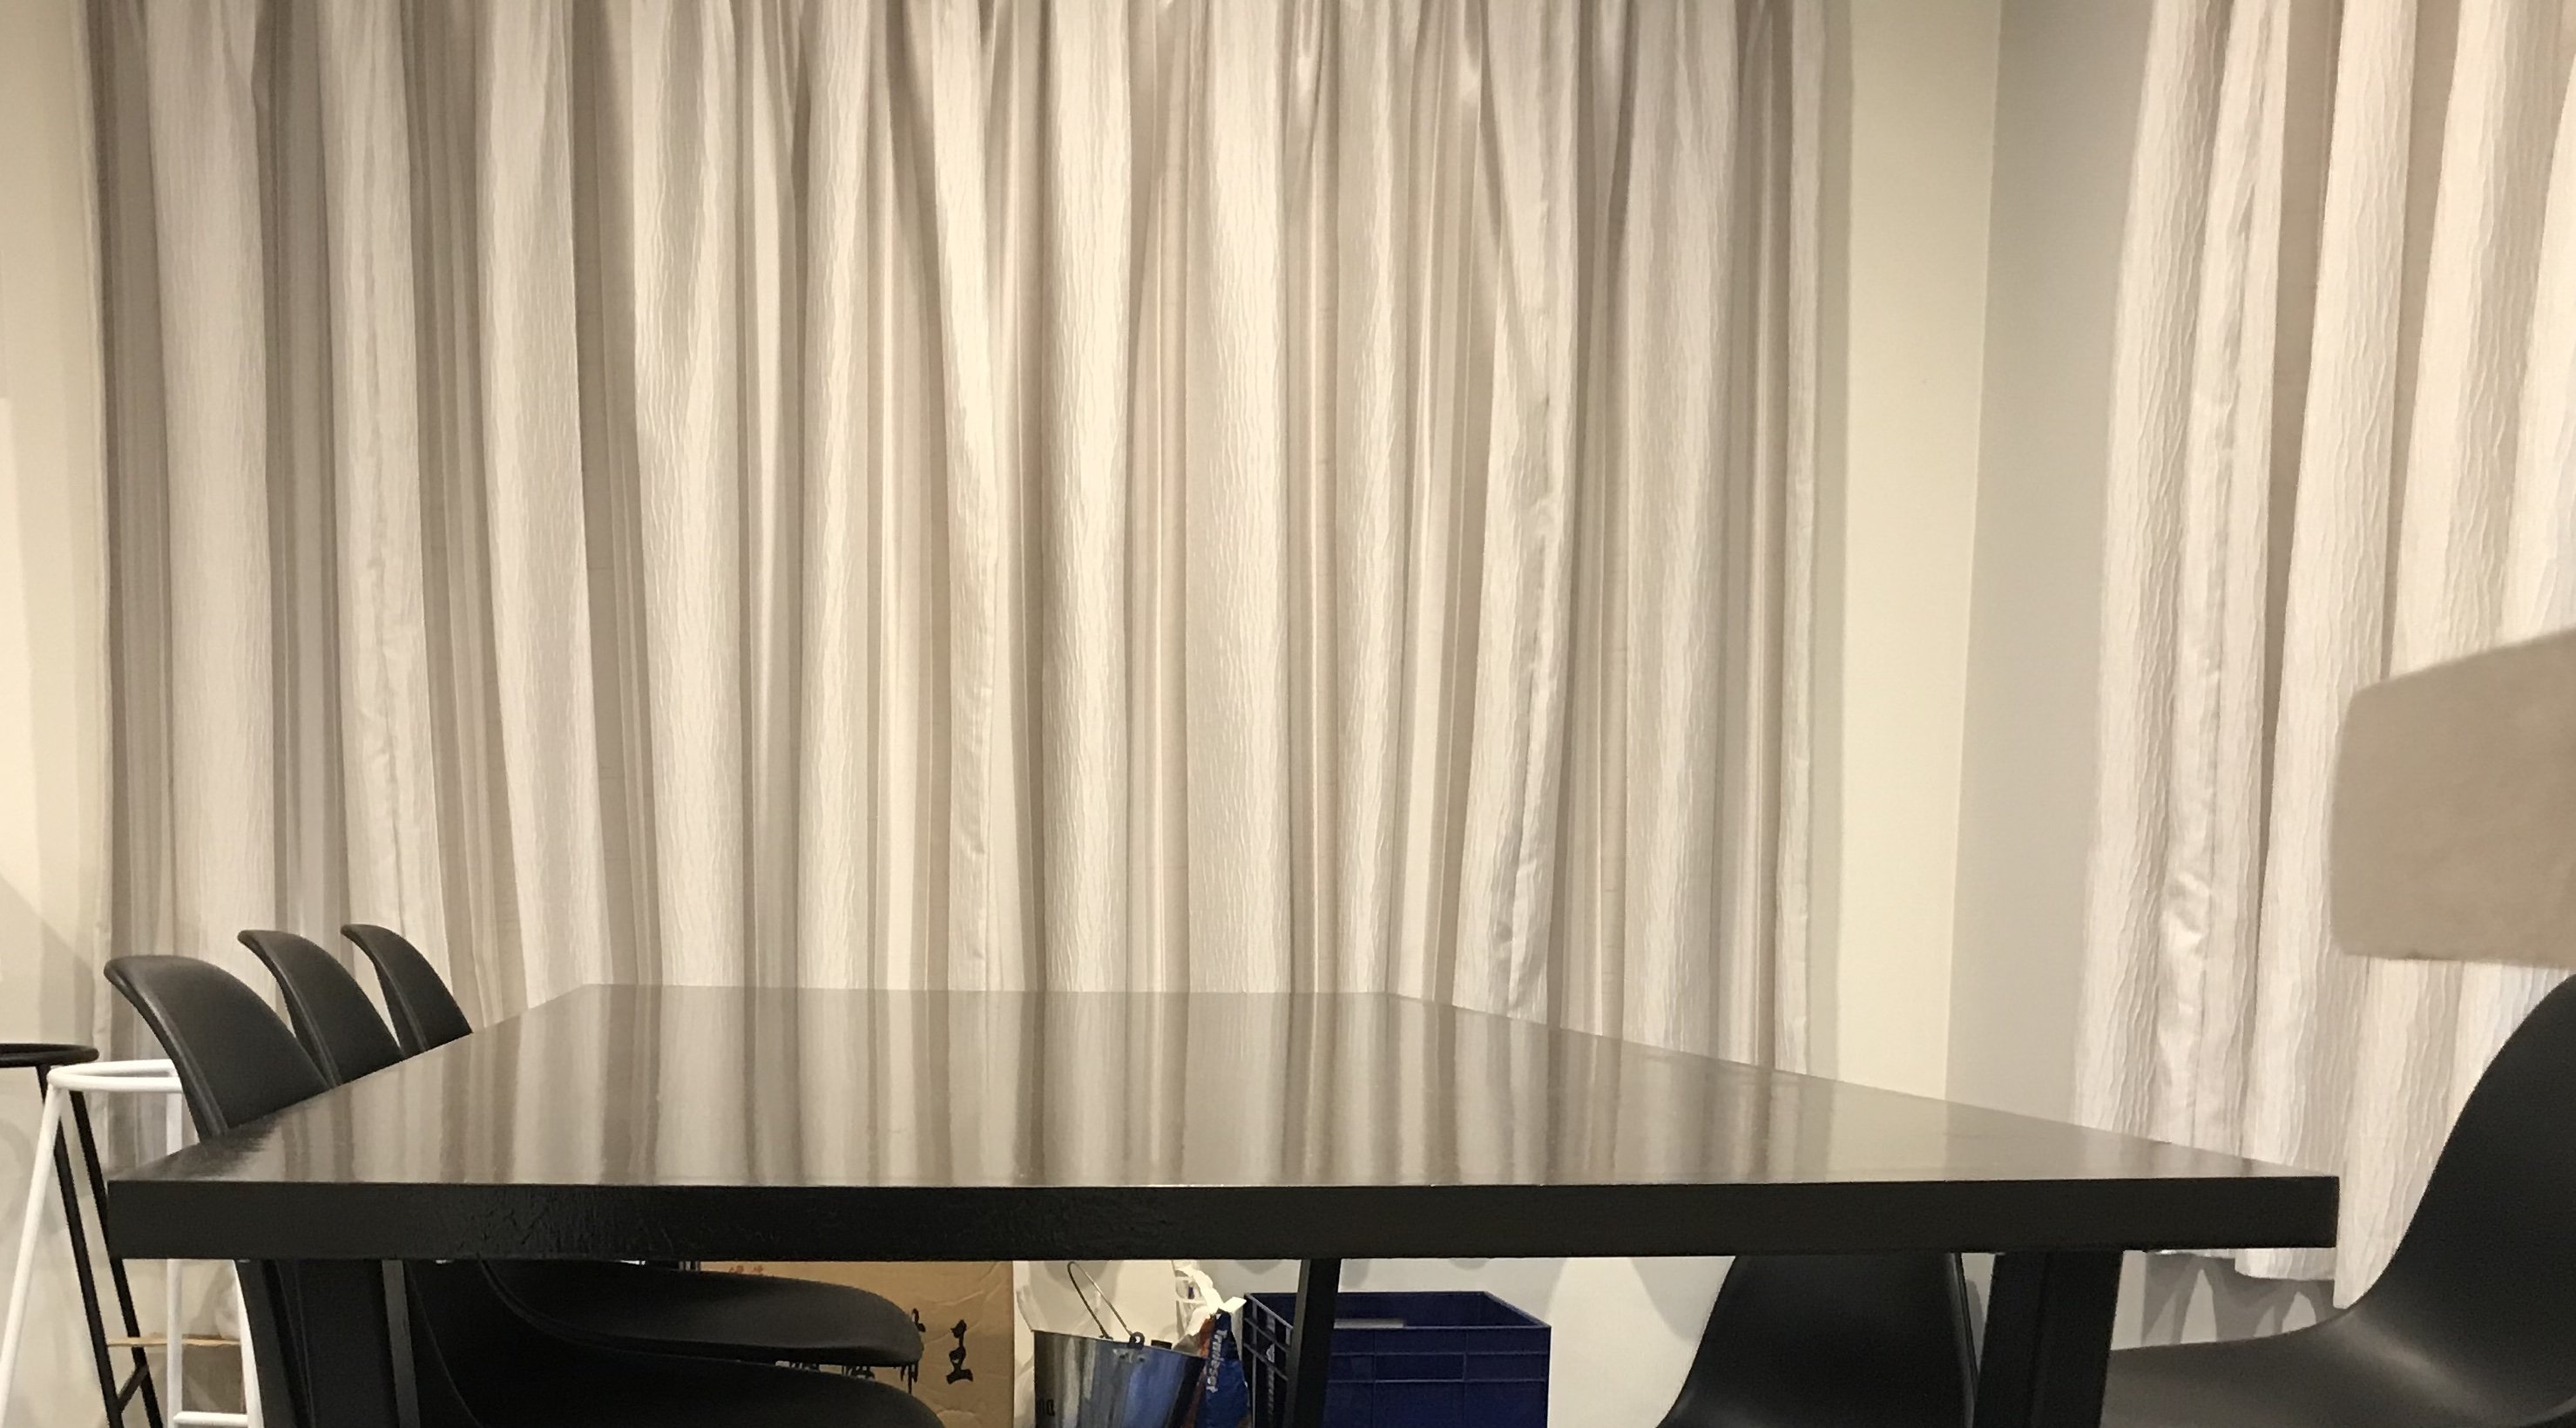
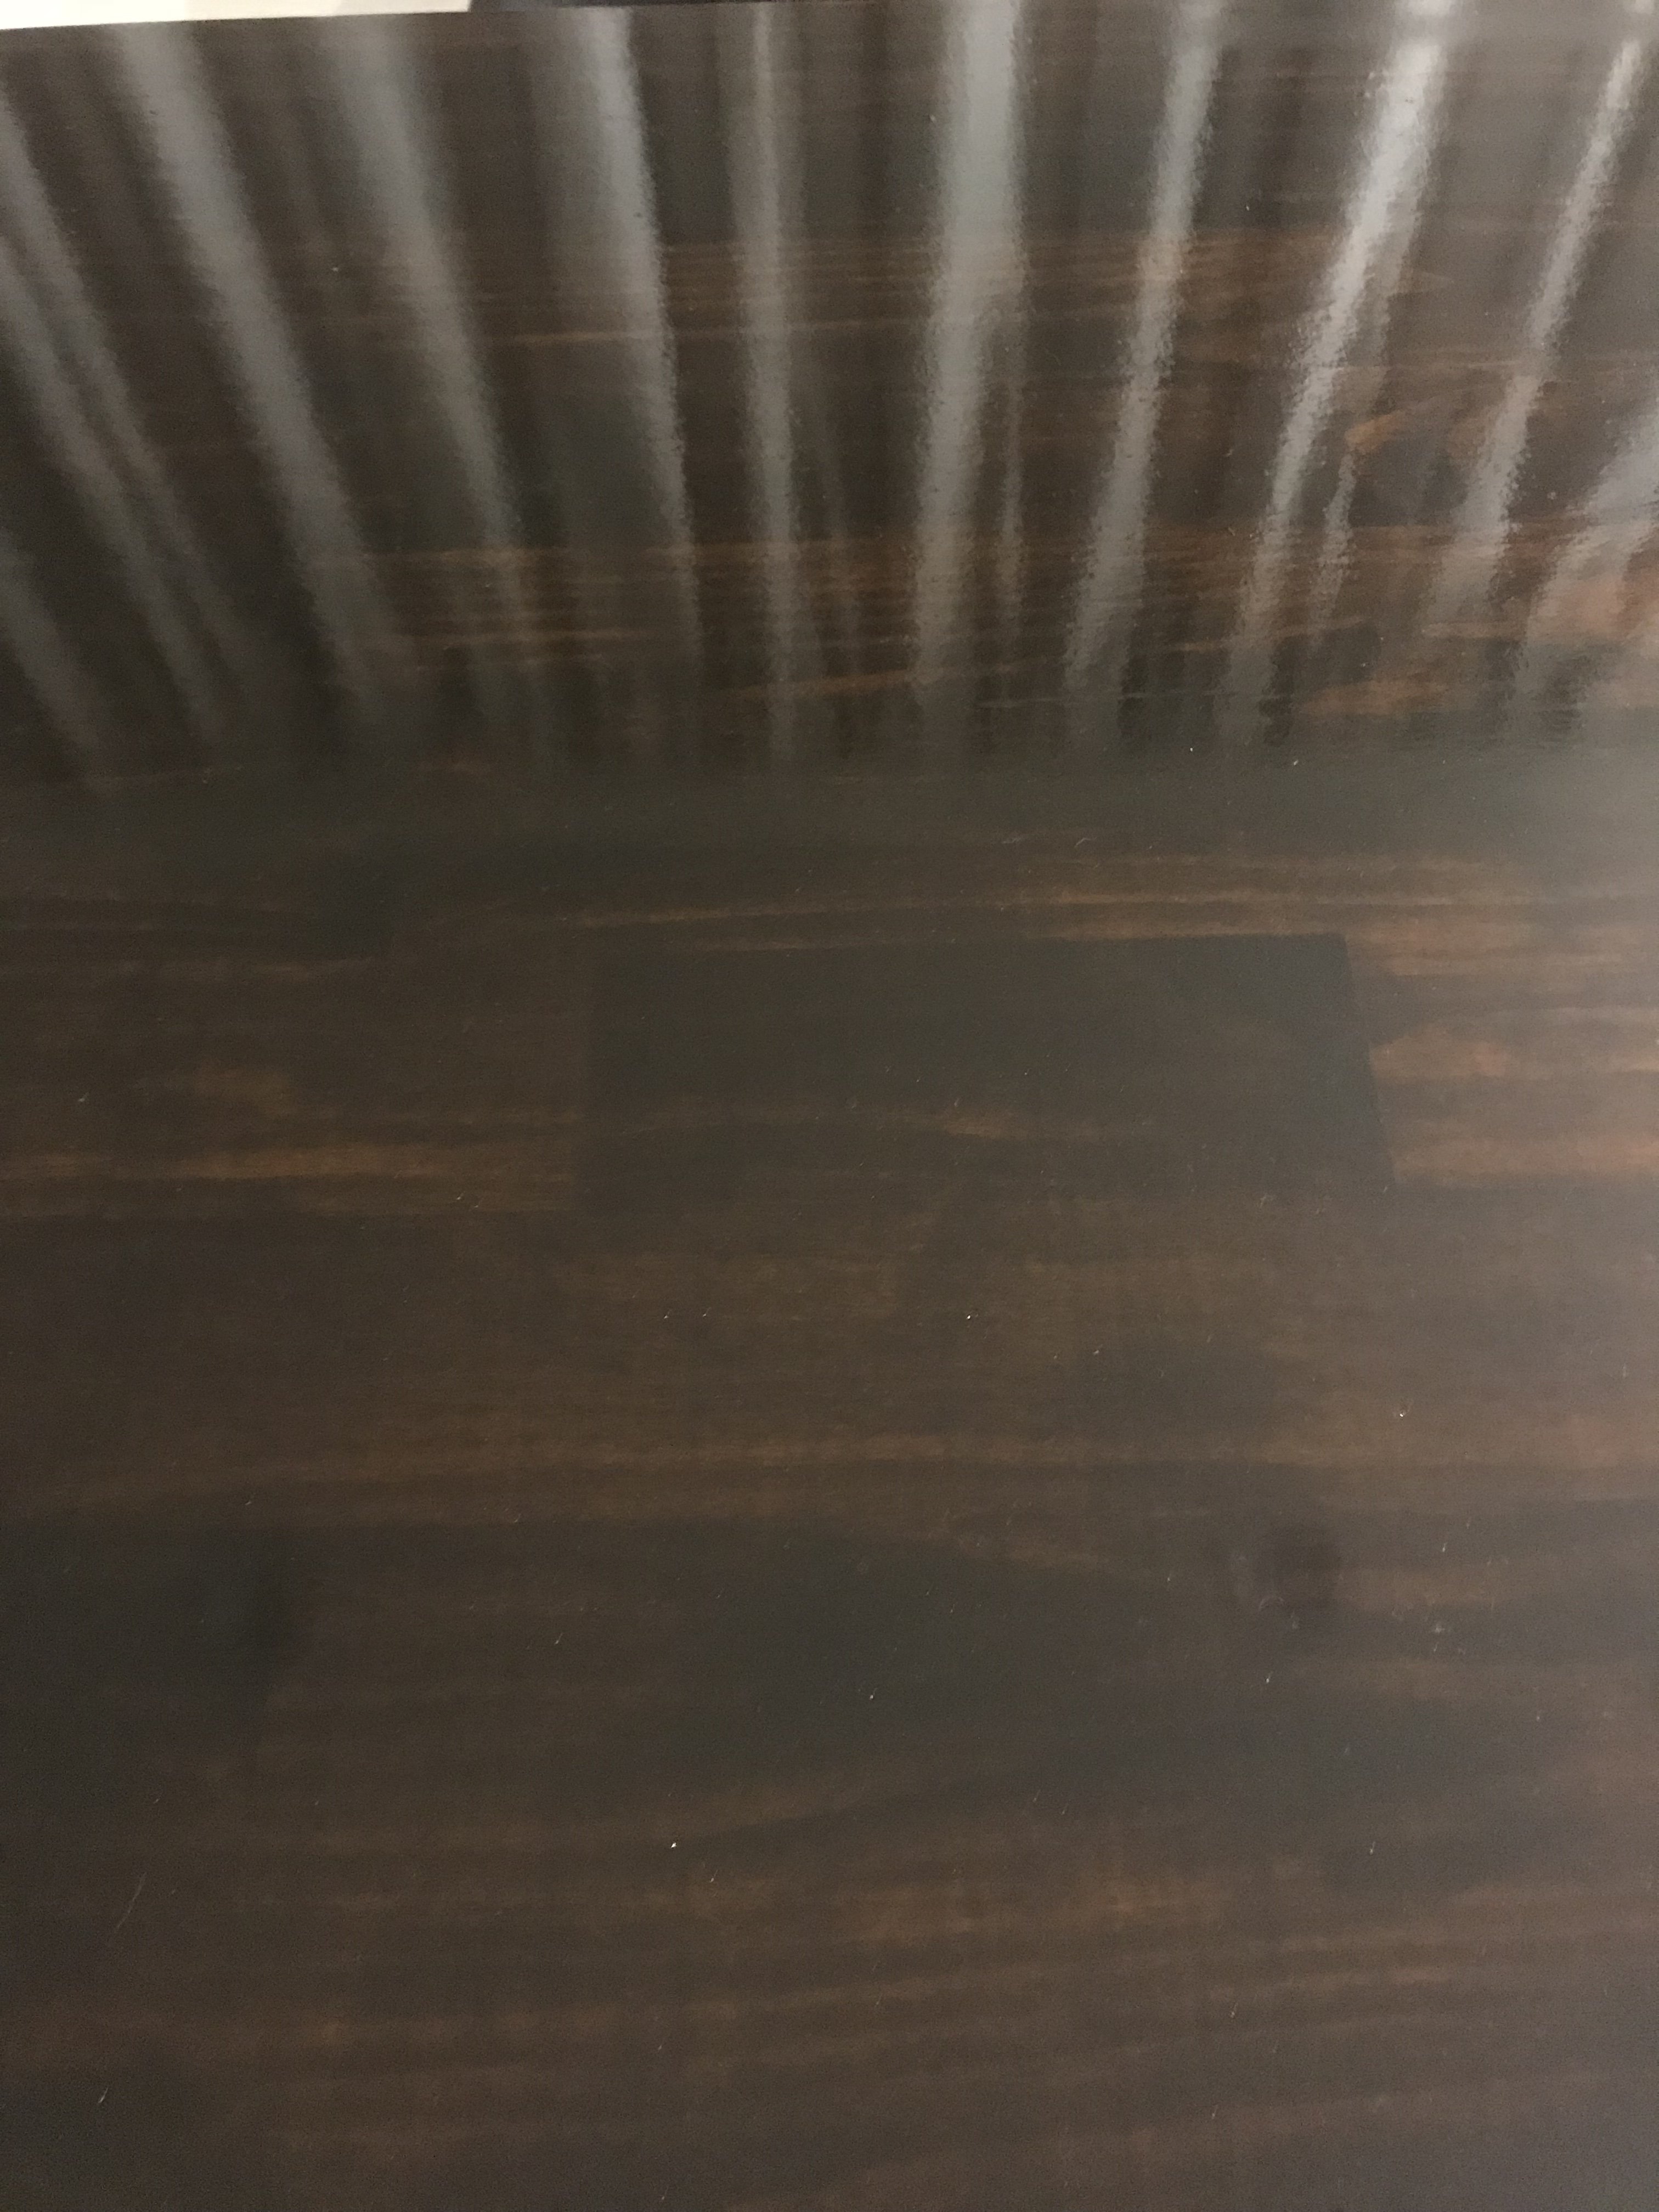
Here’s some better photos of the finish. probably used more clear on it then the black. sanded it with 600gr between the final coats and thinned it right down
1 point
-
Big fan of Galaxies, this one is super cool! Good work so far man!1 point
-
mmkay pops in -as ya do says hi to sr2 [Simon you have email re inverter] **Waves at unca Jake** Okily Dokily on the old Mark 3 Go Tina...the ballast wire was about a foot or so long with the standard old round bullet connectors and was a thick GREY wire. Recall has it possibly under the bonnet catch radiator support upper panel area... pic of wire (with ends reterminated here) https://thumbsnap.com/1q1cINlX End of the day running a ballast resistor with a bypass is actually a tad better for starting. However if you decide to go that way a standard issue common garden 3k/4k toyota earlier mitsis etc as here https://www.repco.co.nz/en/brands/oex/oex-oex-ballast-resistor-acx1955/p/A1195390 Can simply be mounted and wired direct from the ignition feed to the ballast coil-as to the ballast bypass giving more available power on cranking/starting well as simple as a diode fitted in to a wire connected to the starter solenoid feed and connected direct to the coil... Hope This Helps Edits to add **newbie**.....Yeah Right.............(Passes round Tuis......-As Ya Do...) Reason for edit Older Experienced Time Served Qualified Mechanic **Newbie**1 point
-
Sheeit, this is next week. This month is going fast! Next meet is Thursday July 18th at 7pm. See you at Burgerfuel! Here's the facebook event: https://www.facebook.com/events/348168292782181/1 point
-
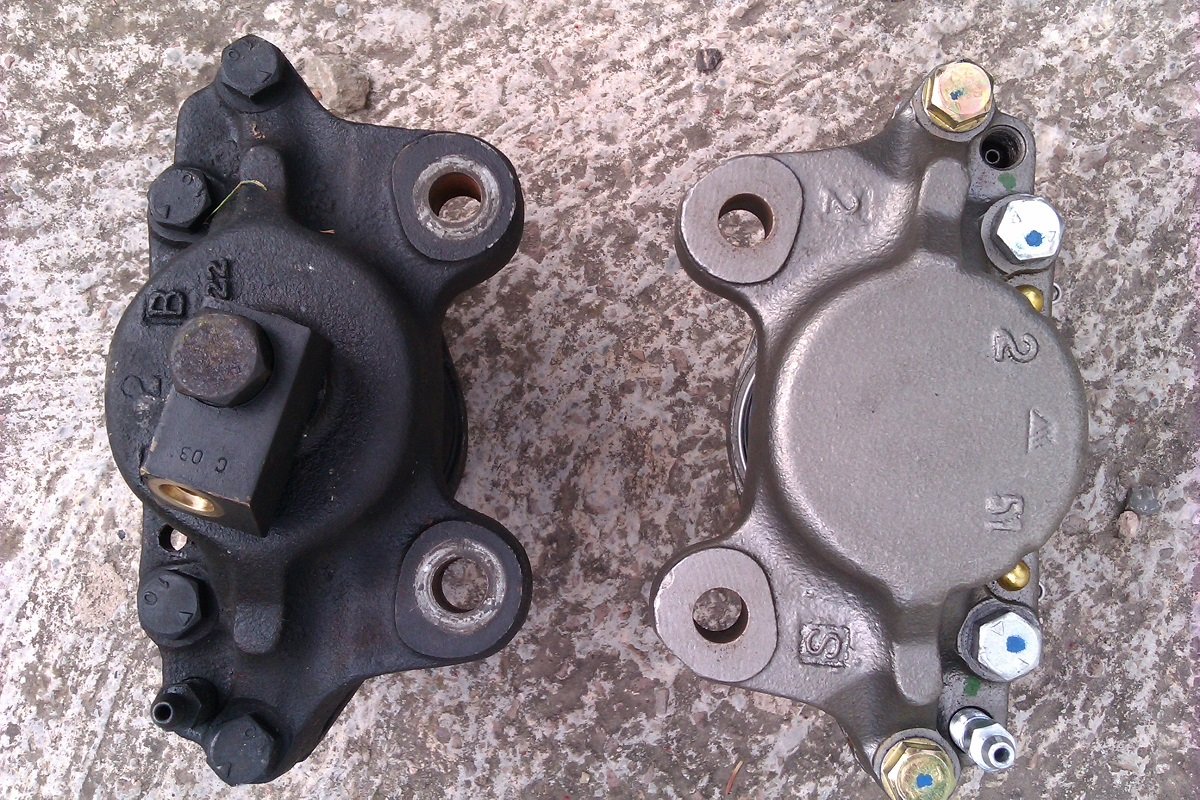
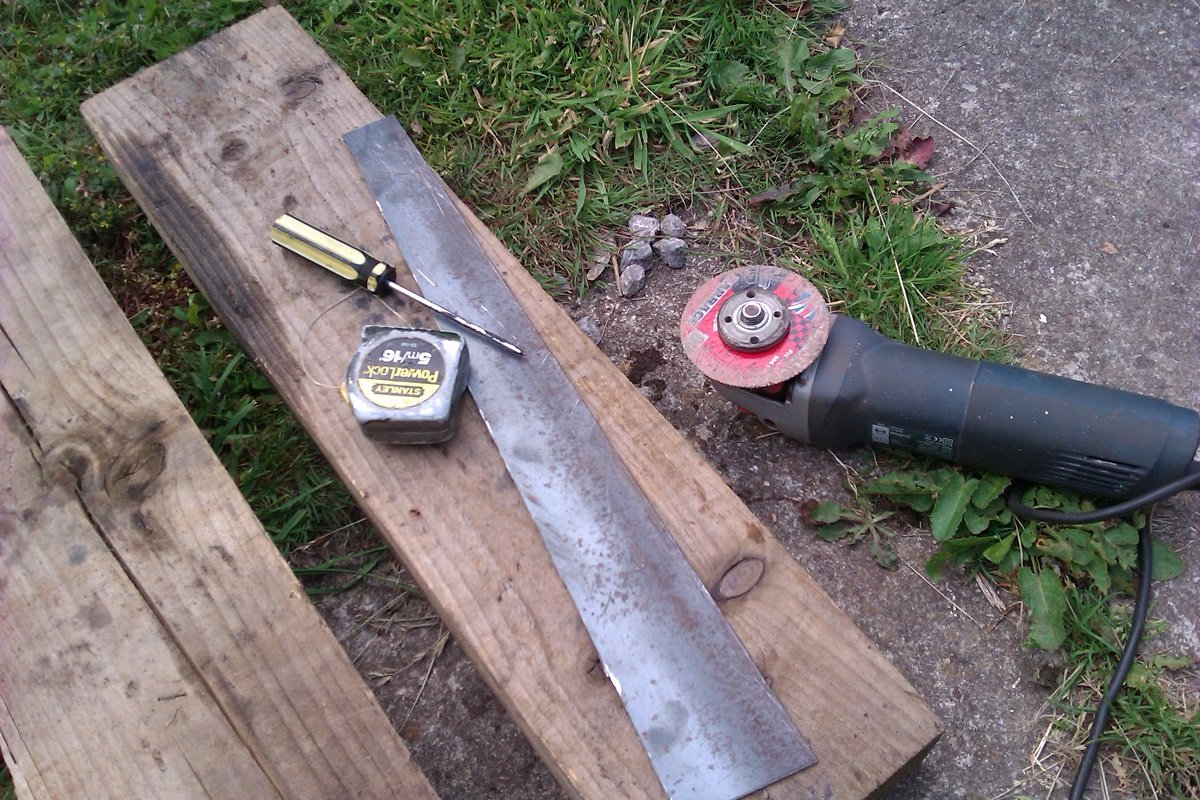
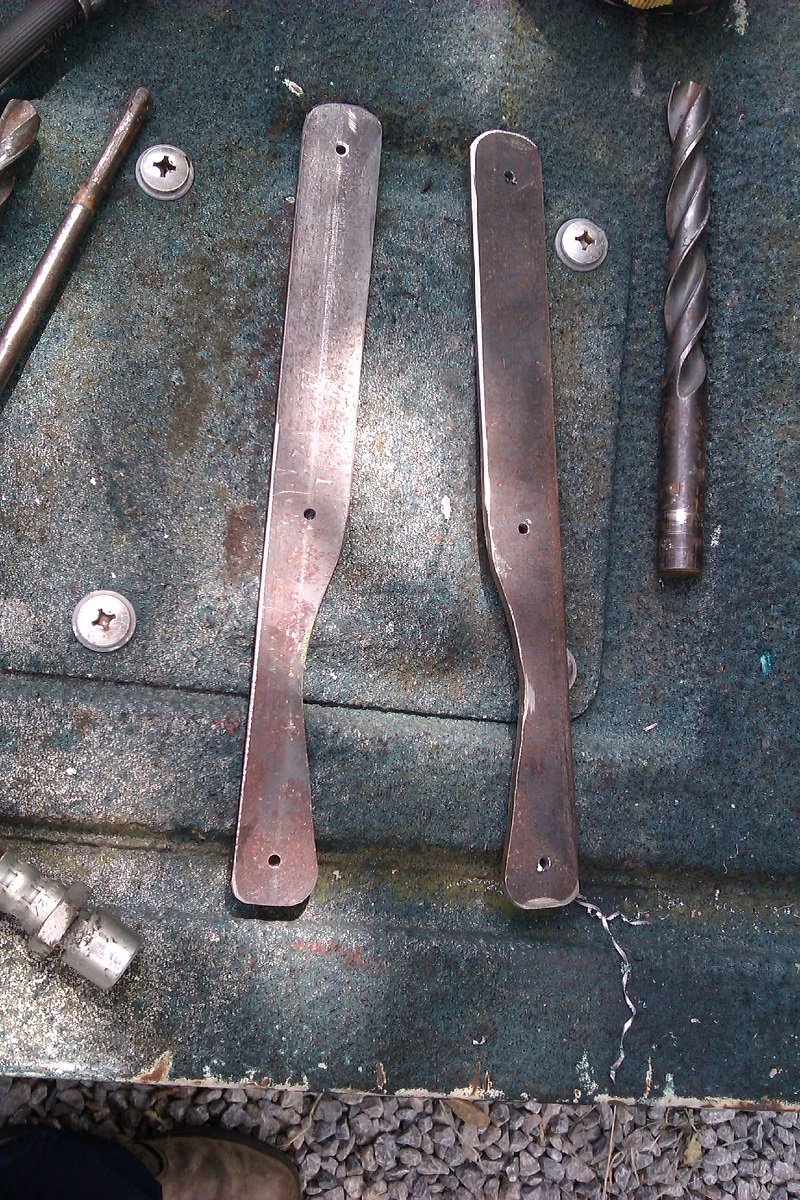
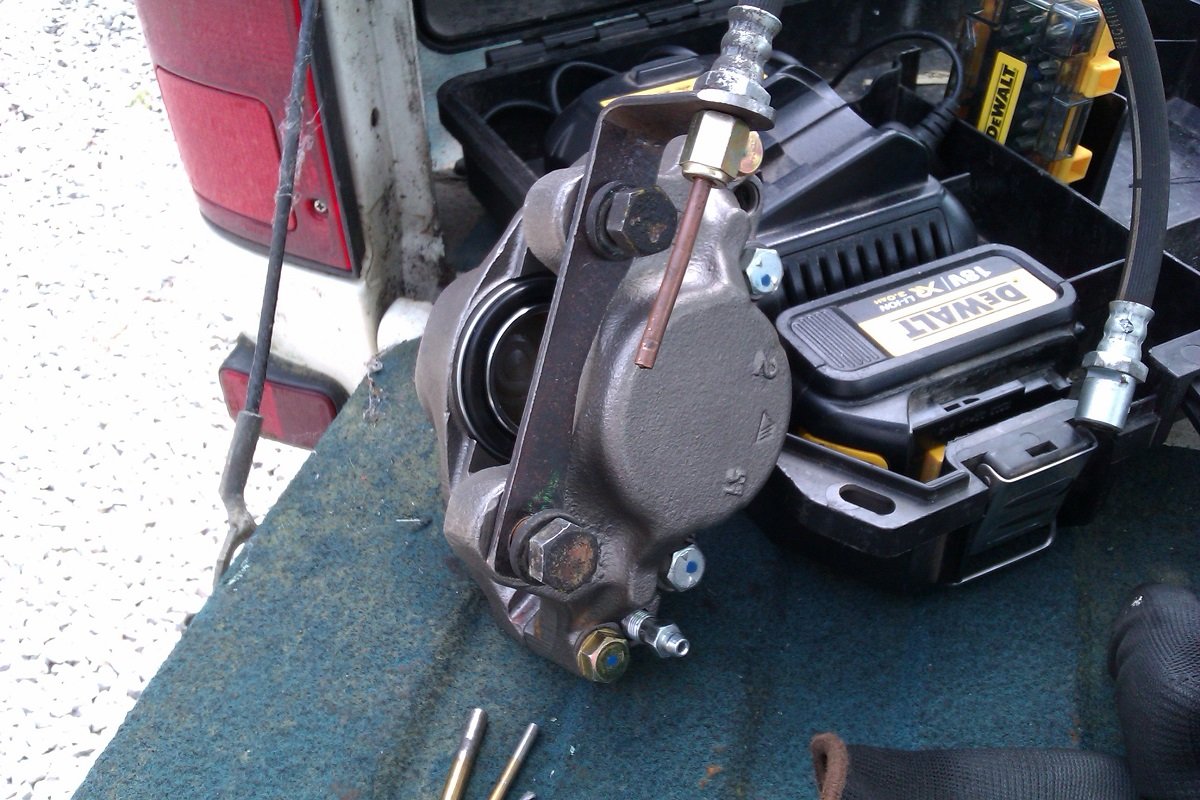
Monday afternoon shenanigans As mentioned the new calipers differ where the pipe goes in. Aftrer a bit of thinking I decided to stick with the standard flexi hoses but extend then using hard lines. This means I have to put a small taper into the end of the flexi hose and make upsome brackets to support the join. Given my usual level of bodgery, I'm quite glad how it looks so far. Pics... Same/not the same A bit of 3mm off-cut I had kicking around. Cut and cleaned up. Trimmed to clear the calipers. This was plan "A" on the length, I cut them back to clear the bumpstop mount. Measuring up for the hard lines. Finished off with a coat of "Sump disaster" red, hopefully the curse won't follow it... Making up the pipes later so hopefully all back together by the end of tomorrow. Woo-Hoo
1 point
-
"At the Toyota meet in Geneva you told us that it was user negligence that caused the failure." "The Toyota Warranty department pressured me to lie" *crowd gasps* "Although the users were highly irresponsible, ultimately the cause of failure was the graphite material on the tip of the gasket. When the waterpump speed falls below 500rpm, as per their test, any increase in con rod speed with blow the graphite into the exhaust and an unstoppable thermal reaction begins." "So turning the heater on would not help cool the engine, as per protocol?" "It would turn the heater core coolant straight into an explosive gas further destroying the gasket" *crowd gasps* "Order! Order! Please continue. Why was it designed this way?" "Same as everything else on a 5M-E! To save money! Every other company use higher torque on the bolts and a multi layer steel gasket!" *crowd gasps*1 point
-
I made this just for this thread. Some Highly enriched original content.. enjoy1 point
-
Not great; not terrible
1 point
-
Yeah mate super stoked with how it’s turned out. it is super dark though so I’d definitely recommend picking up a pot of clear and mixing it for the added coats. And get 3-4 bottles of turps straight jap black super thick for the first coat then sand it to get the grain. then clear and jap black mixes to get it to where you want is the go. heres some photos of it with the chairs I’ve just finish staining, still needs a finishing coat, witch will be clear thats thinned down a lot so it self levels and releases bubbles easy
1 point
-
and DONE (almost)
1 point
-
Yes it is very depressing. Love the car as well, cant wait to see u get yours done too.1 point
-
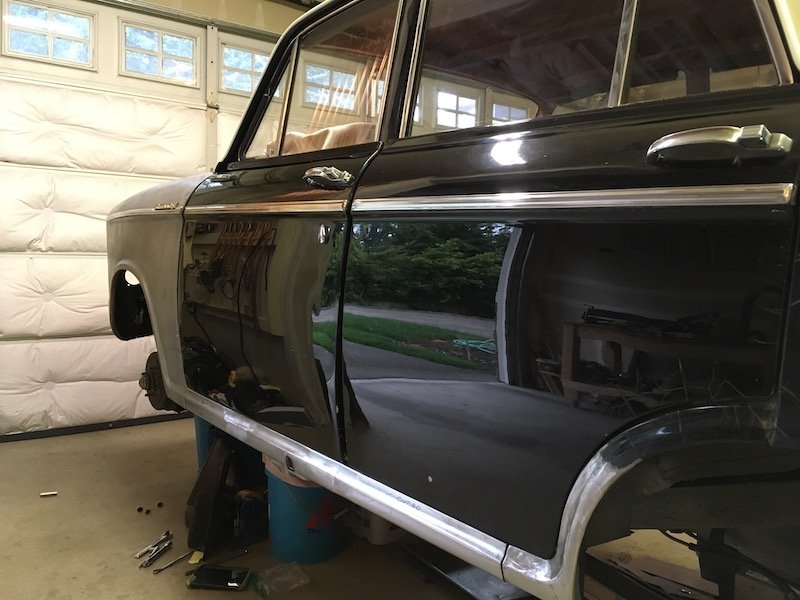
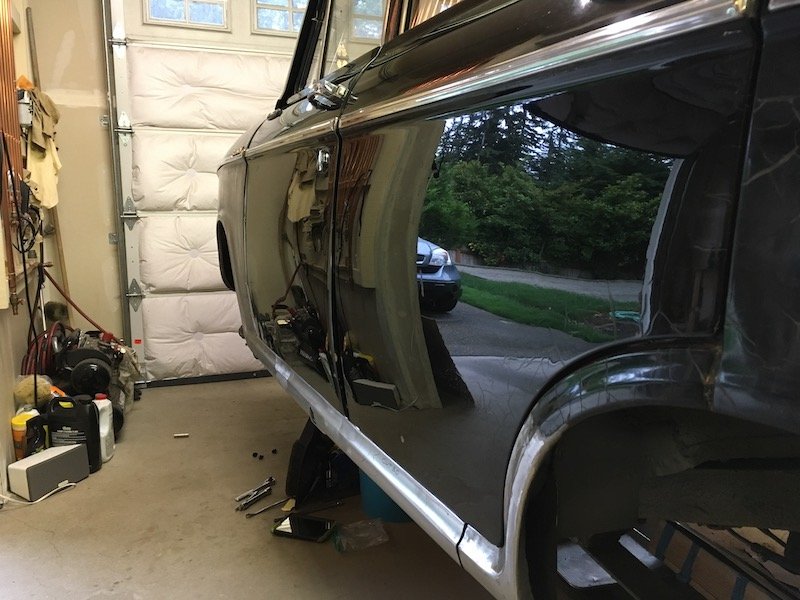
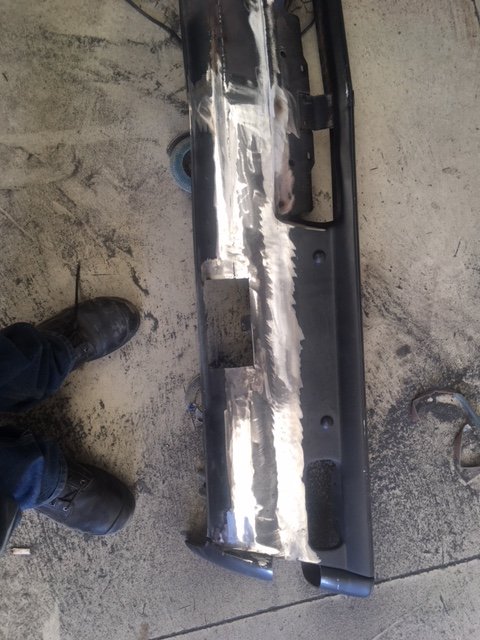
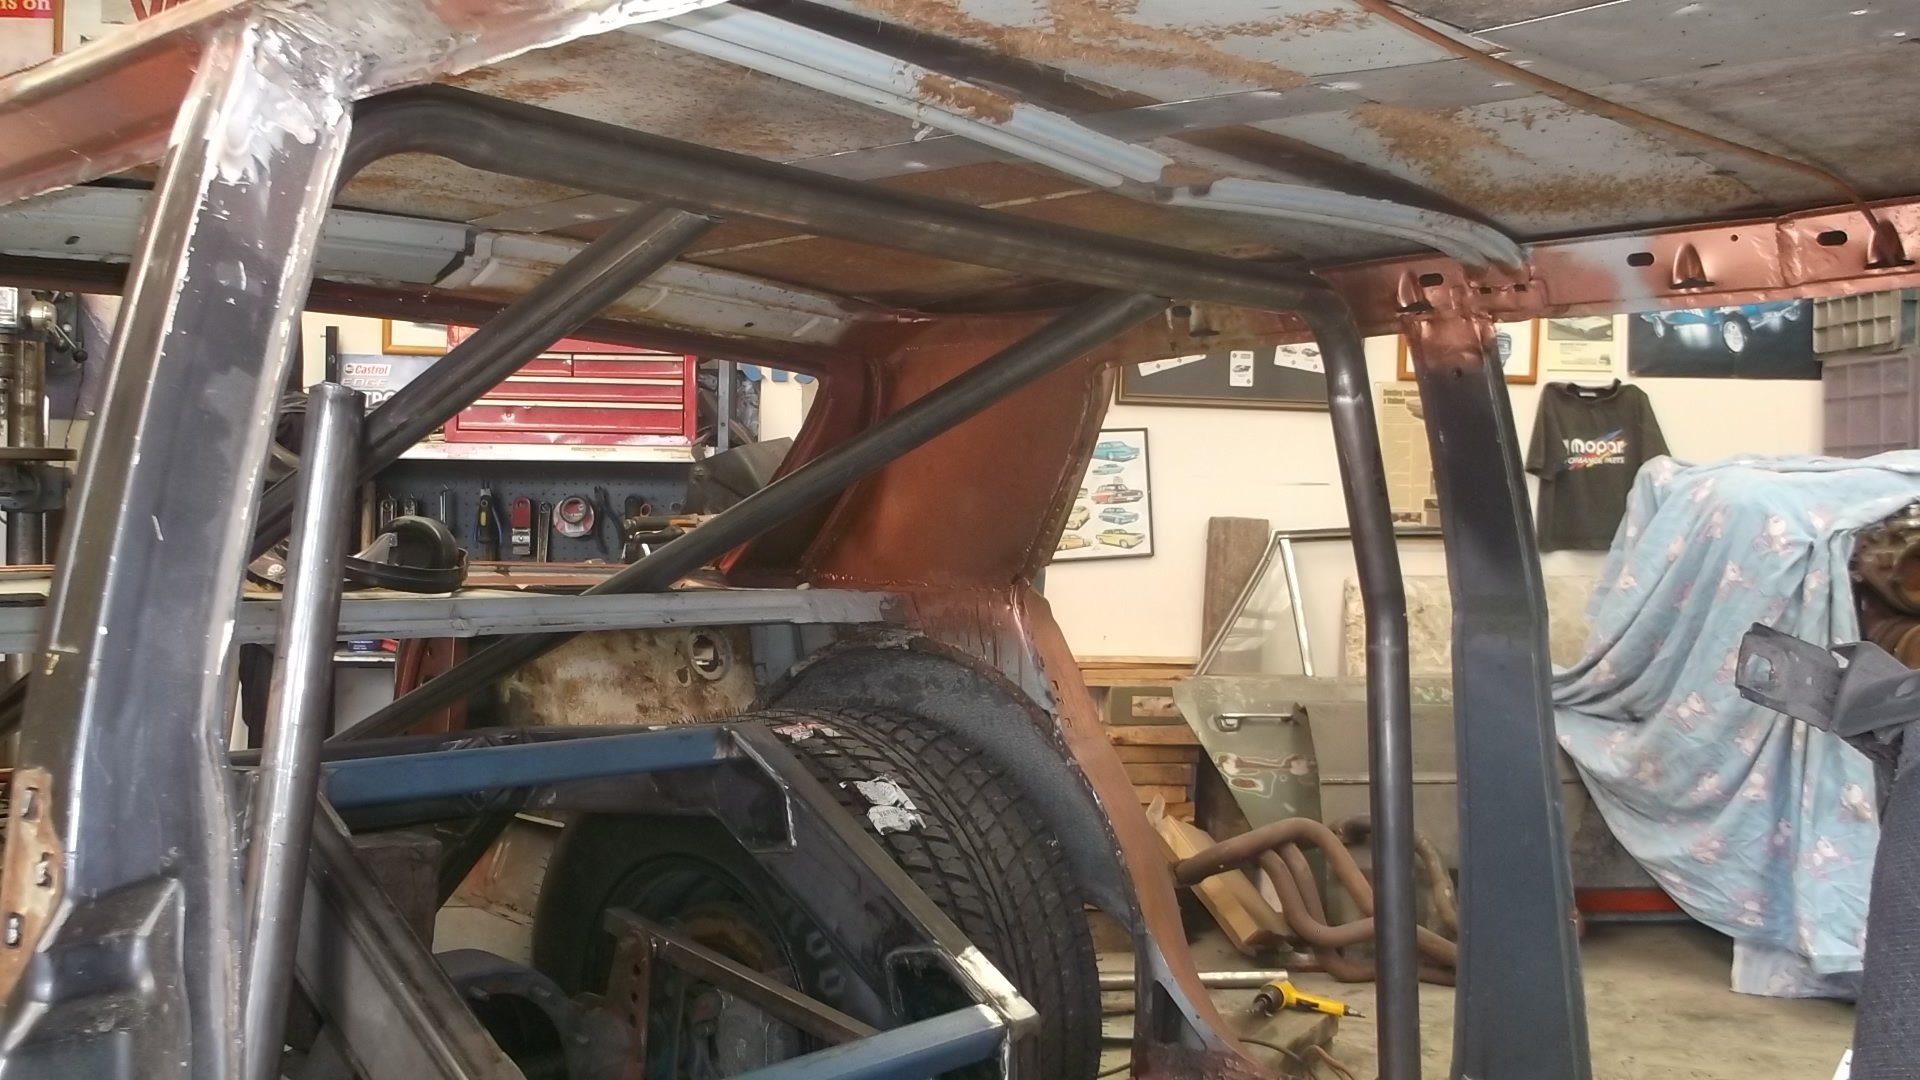
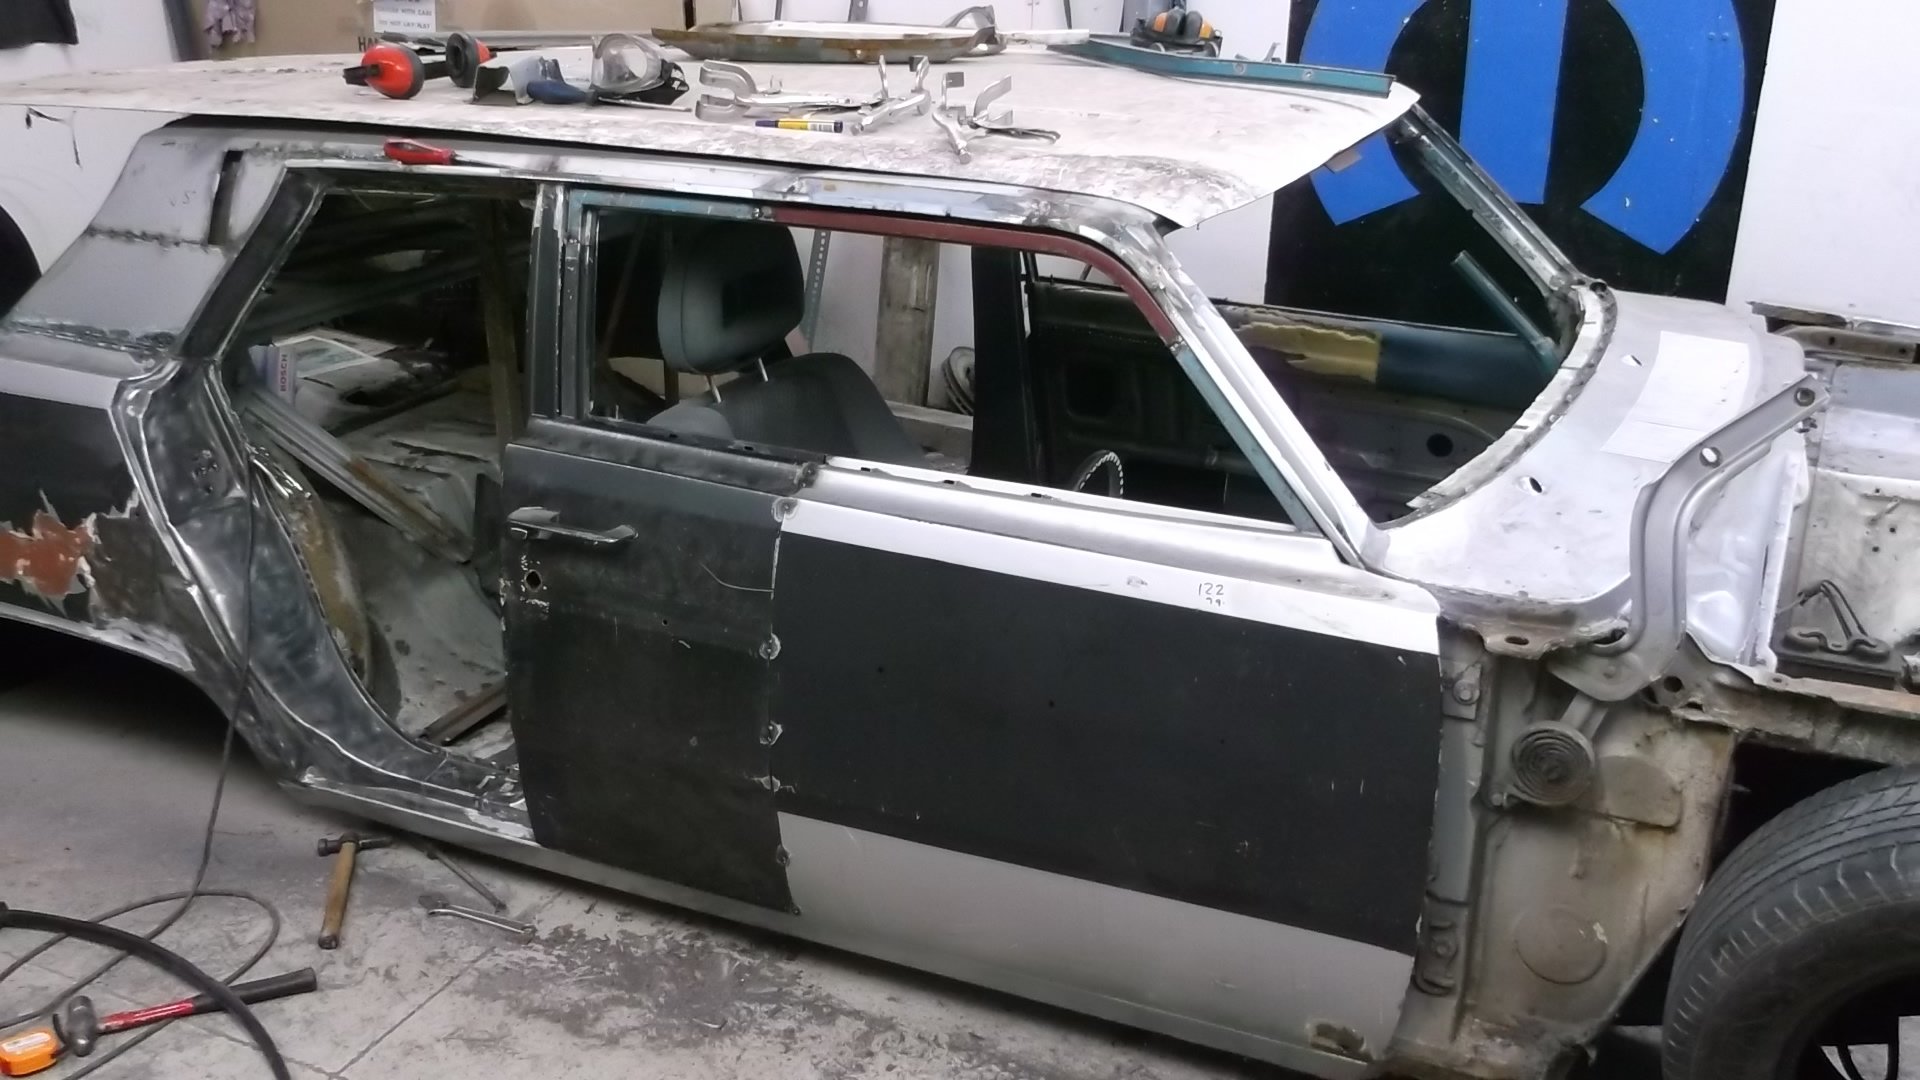
just doing the doors and rear guards at the moment new skins on doors and rear guards and new sills had them made deeper so car looks lower to the ground ,also cut the rear bumper and added two inchs into it
1 point
-
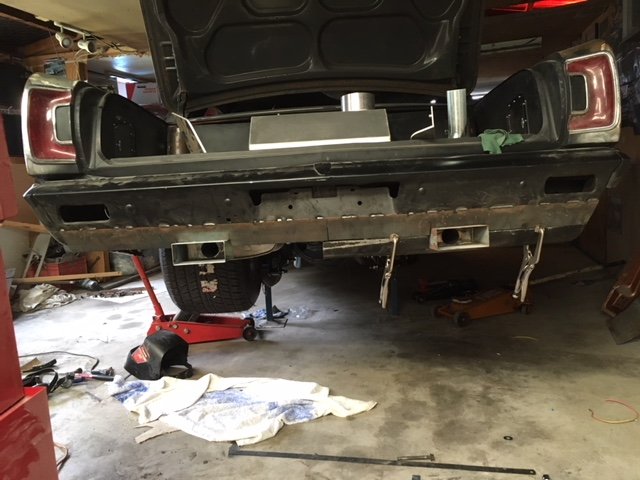
diff and rear wheels,and rool bar and rear legs in
1 point
-
Isnt that meaning of owning a classic car?1 point
-
its had the b pillars moved back and made into a two door .dash has been changed too
1 point
-
its also half chassised with 15 by 15 under it and a 383 big block
1 point
-
WOW I DIDN'T NOTICE1 point
-
Join the club Oh wait....1 point
-
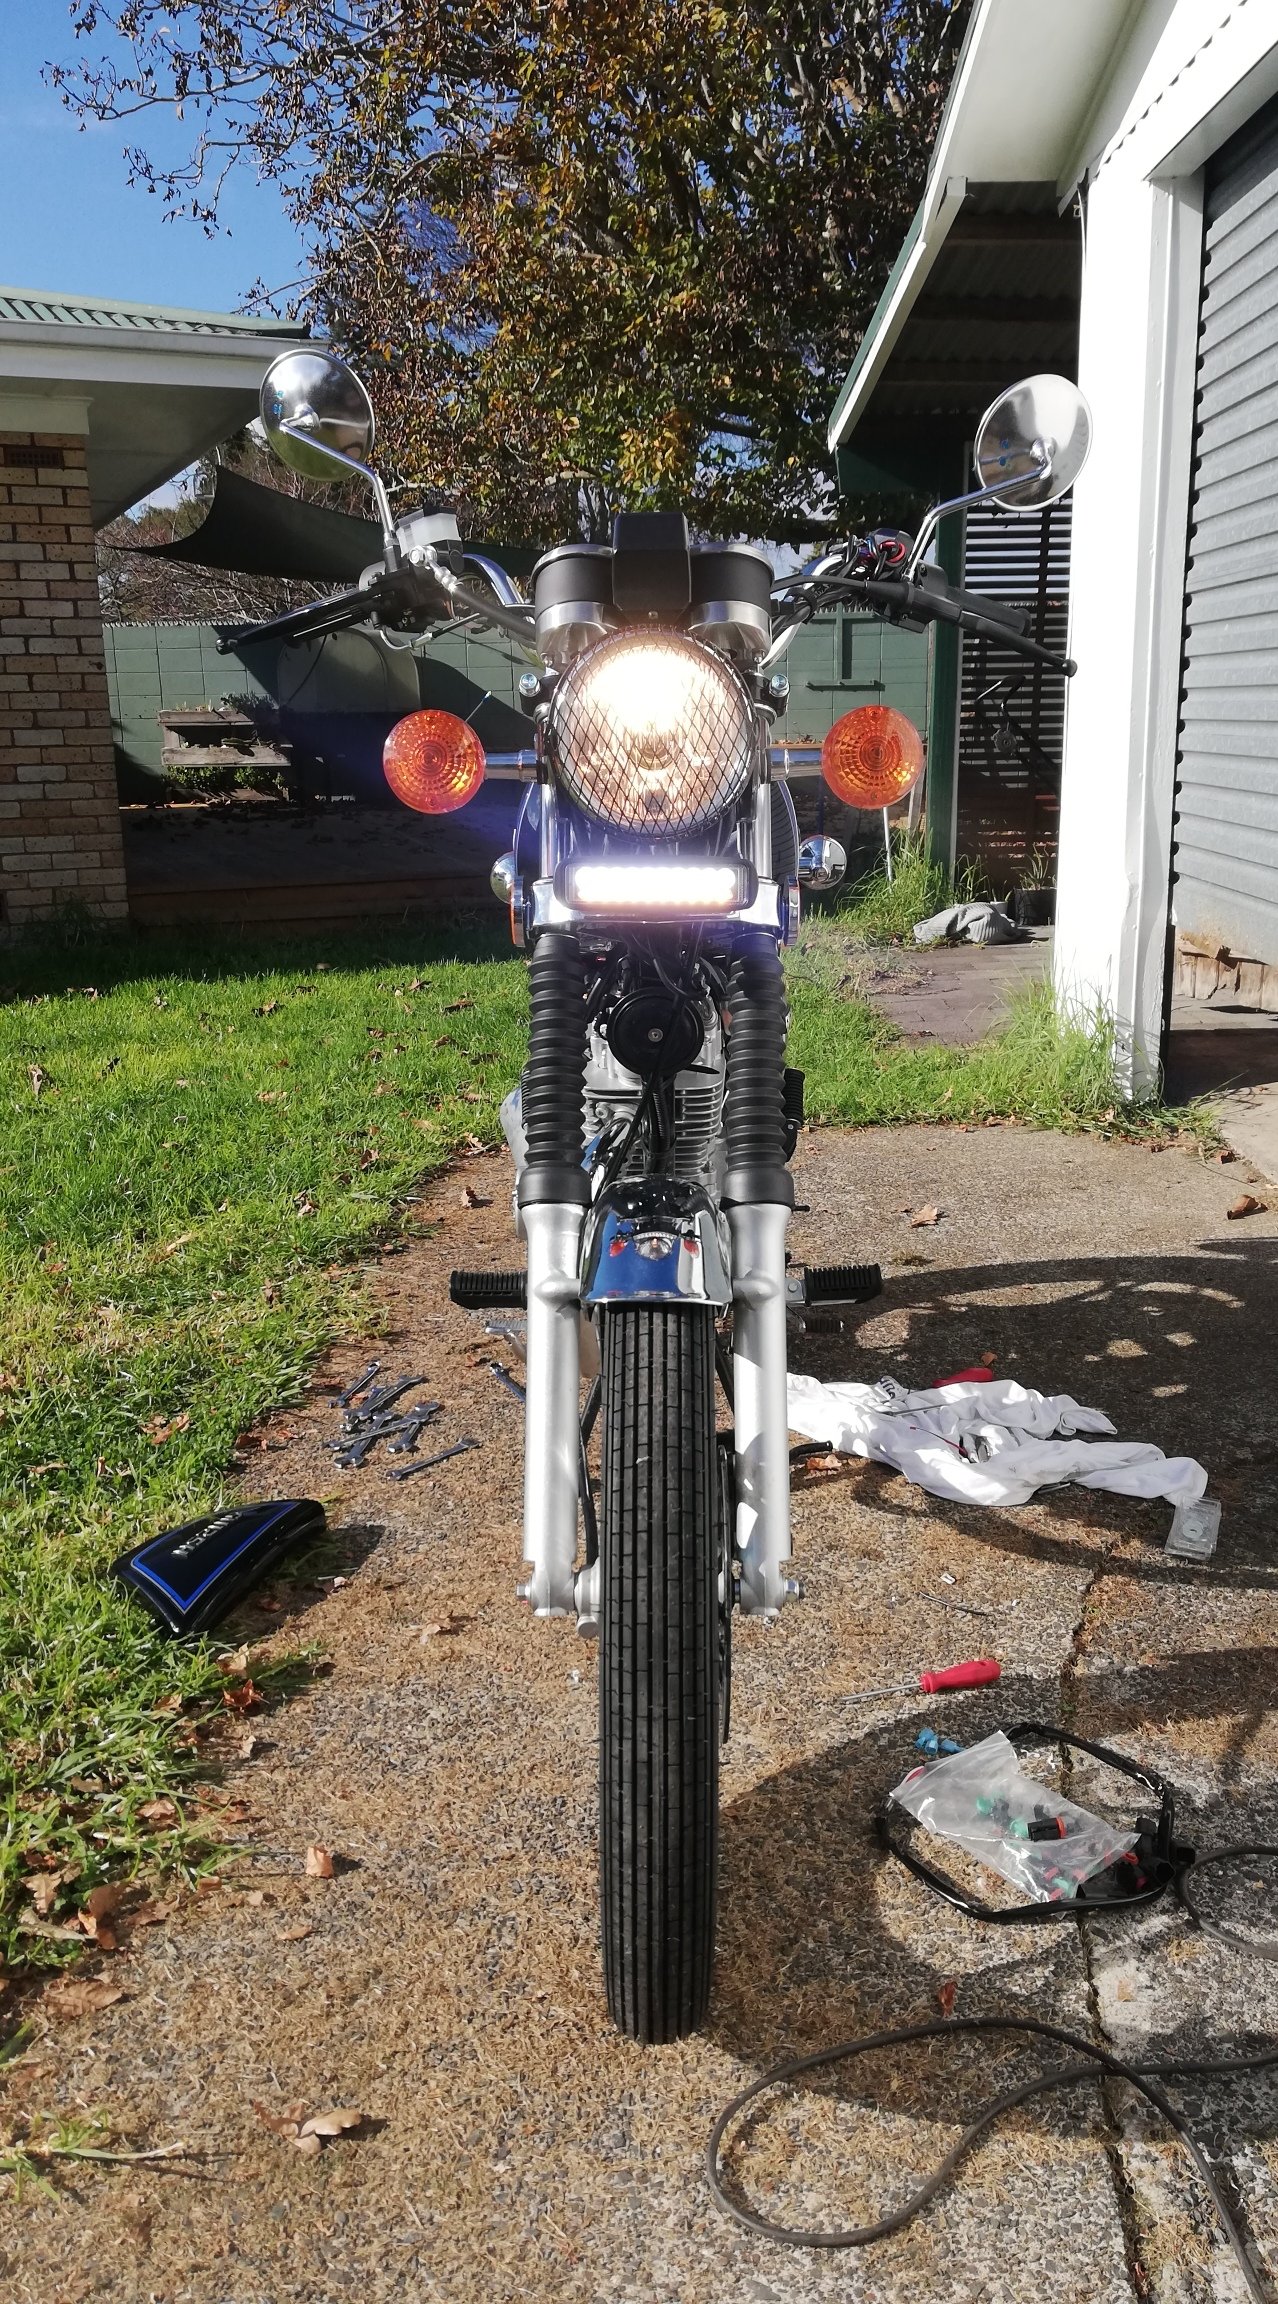
Ordered an off-on switch instead of an on-off-on. So that's on its way now. Installed the rest anyways two toggles ziptied to the handle bar should be alright for now. Run off a relay from the battery rather than the key, but I don't think il forget to turn it off. White flood and amber fog led light bar. Ready for some #adventureGN
1 point
-
2+ years might be a stretch though.1 point
-
Gravel and dust don't agree with fork chrome and seals. Neither does city road grit. #adventureGN Spending is getting out of control. I think I'm over the $20 mark now. Have a few more items, but I'm over worked and ordered a wrong part, which needs to go on before the rest. So another weekend. Currently costs $0.05 per km in fuel. Over 5 times cheaper than ute
1 point
-
Pretty sure iv been told this by woman.1 point
-
Would always be the spider gears that let go wouldn't it? The ones I've broken have all been subjected to teenager activity, ie big one wheel peels till the spider gear melts a bit and it and the pin goes blue and says yeah nah I'm out of here next time you drop the clutch1 point
-
Hilux LSD is useless.. have it done up it's shagged 2 weeks later. But there are full spools out there that fit up to hilux a old boss had a hilux diff in a 8.90 drag car. Never missed a beat. Light rotary application.1 point
-
I can't remember which bay I stopped at, but the local dairy owner told me my jazz was gay. Can't wait for him to see the postie bike.1 point
-
Yeah the three of us are gonna share one pair of undies. To save weight etc.1 point
-
so a while ago i said i was going to buy these flares, http://www.ebay.com/itm/JDM-set-for-TOYOTA-CELICA-TA22-TA23-Fender-Flares-Wheel-arch-front-lip-spoiler-/152131201793?hash=item236bb9eb01:g:ZnoAAOSwAuNW358r&vxp=mtr which i did and they arrived ages ago but ive not really mocked them up yet to see how they fit. last night i did a bit of dicking around with them to see how they look. they fit very well and im super happy with the construction of them. they are pretty wide though. i stuck them on the side of the 28 to see if they would fit a liftback and they will fit perfectly. these flares aren't intended for this car and neither are these wheels but it was easier to show them on this car. anywho, back. this is a 17x10 with a neg 40 offset (wheel is neg 20 and there is a 20mm spacer on there, hub face to hub face on this car is 1340 or whatever the stock celice diff width is, i think its 1340?) 2016-06-21_04-56-56 by sheepers, on Flickr 2016-06-21_04-57-04 by sheepers, on Flickr 2016-06-21_04-56-34 by sheepers, on Flickr this is a 315 35 17 sitting in the hole. there is about 50mm gap on the inside and the cars guard lip is sitting on top of the tyre. 2016-06-21_06-14-35 by sheepers, on Flickr 2016-06-21_06-14-45 by sheepers, on Flickr front. 17x9.5 pos 12. very close to the strut on the inside but it could be made to work with a 5mm spacer and youd probably get away with a 245 40 17 tyre. 2016-06-21_07-06-26 by sheepers, on Flickr 2016-06-21_07-06-34 by sheepers, on Flickr 2016-06-21_07-06-42 by sheepers, on Flickr so yea. i hope this information is of some use to you.1 point


.thumb.jpeg.384ff72c8d2b0ee0d34a7bdedb55bdcf.jpeg)

This leaderboard is set to Auckland/GMT+12:00