
Leaderboard


Popular Content
Showing content with the highest reputation on 04/19/19 in all areas
-
Haters gonna hate.. but i LOVE the 80s/90s drag look. Test fit (was hard as suspension arms werent retained by anything) to see if i need a narrowed beam. I do.
 8 points
 -
I got me an air filter, just fits, hits the mudguard under full compression or full lock, but good enough. Also got a stand alone throttle, might bend the bend in the cable to straighten it up a bit. Couldn't find the banjo fittings I needed for the oil cooler, so cut up the std lines and a pair of hydraulic fittings from work. Easy flowed them together, neat. Fitted the oil cooler lines, fuel line and a few other bits n bobs (after stripping it to paint parts of the frame) and decided to play around with the wiring. Then realized there was no reason not to start it, so had a crack. 3 kicks and it was away. Haven't played with the carb, but it seems to run well and is super responsive/crisp. Muffler needs some packing or something, as it's stupid loud, which is understandable as it's just a ribbed tube at the moment. One thing I haven't worked out, is what these wire are for. They seem to put out about 4-5 volts at idle, and come out of the CDI. I was hoping one was the AC (charge coil?) out put, but that wouldn't come from the CDI would it? I think my motor may not have a charge coil, which I'll have to remedy. Yeh wires make no sense to me, lols. Regards, V "electronically impotent" G.5 points
-
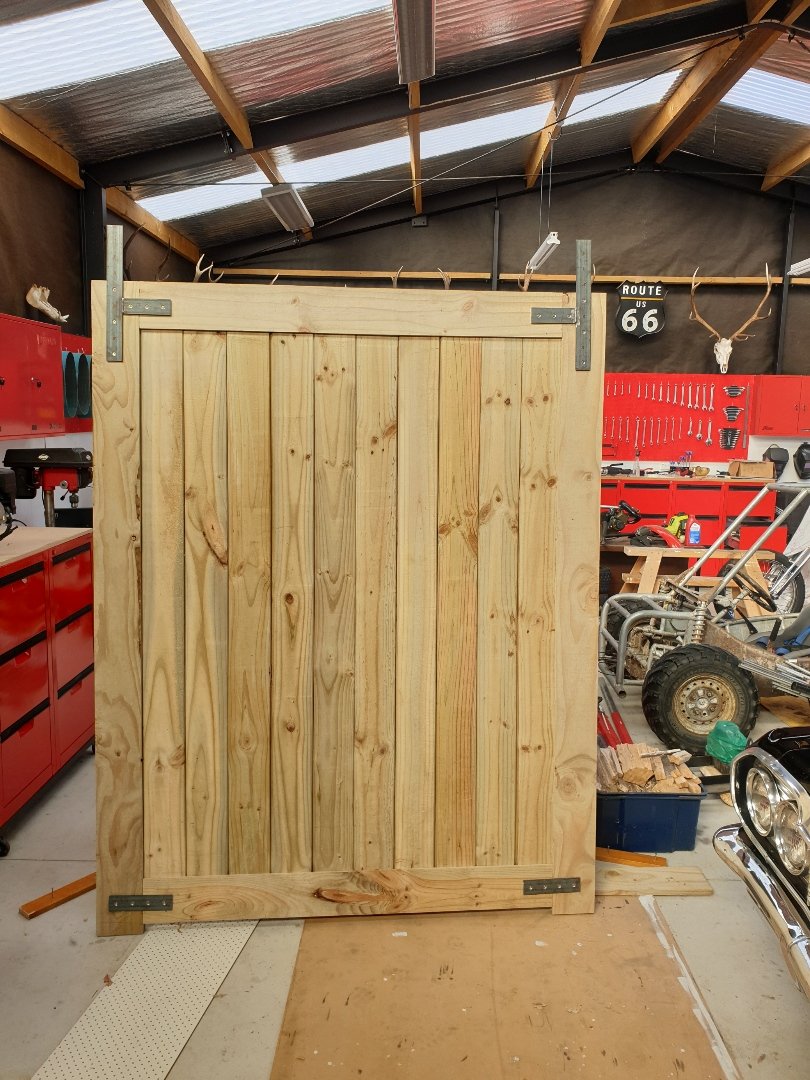
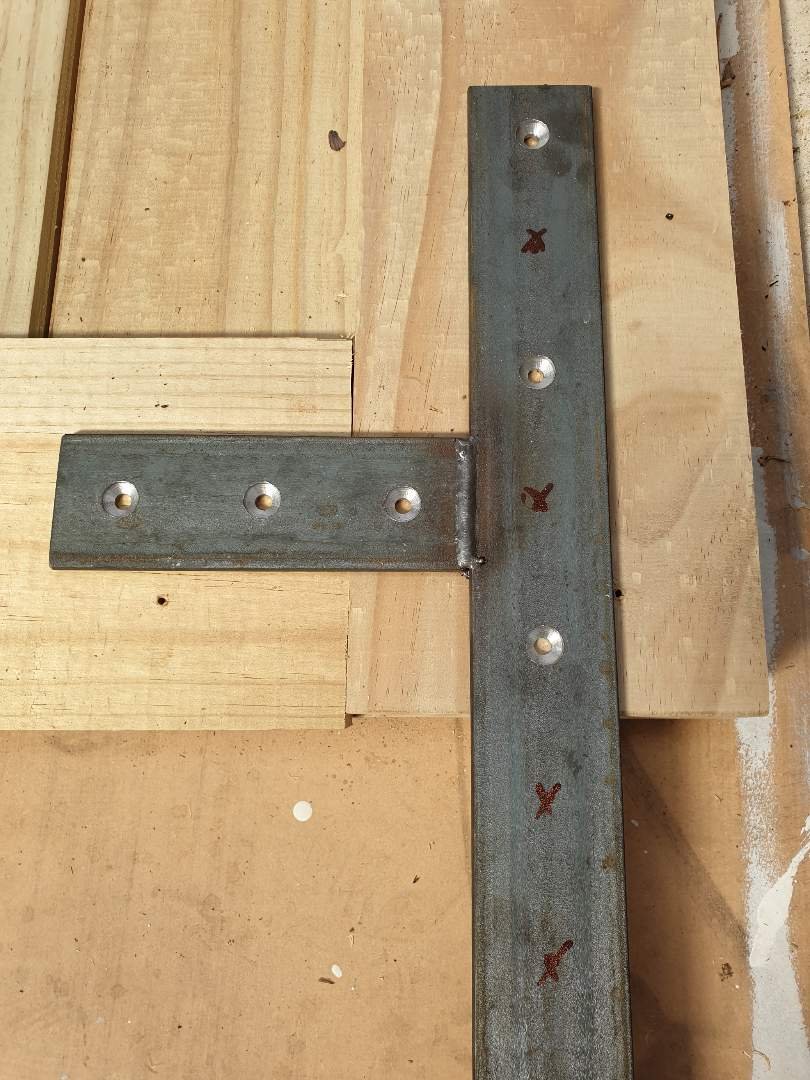
Barn door update. I've been away so much lately that this took a backseat. Anyway, a few more hours spent on getting it done this afternoon Ready to stain and hang on the wall.
4 points
-
I agree, that's why I had my fast friend ride it while I rode my R1.3 points
-
yea sorry this build has gone faster than my spare time to write out the next post. so for the mean time i would like to show you what you can achieve in 11 days after work doing a few hours here and a few hours there. A huge thanks to Paul. now dont worry i will go into detail on what we have done and how i went about it all, but i feel the need to show you guys and gals this. Cheers team, we might just be driving George the kombi over the Easter & Anzac break.3 points
-
Got them early currently they are in the motel room with me.. too paranoid to leave in back of ute, lol.
3 points
-
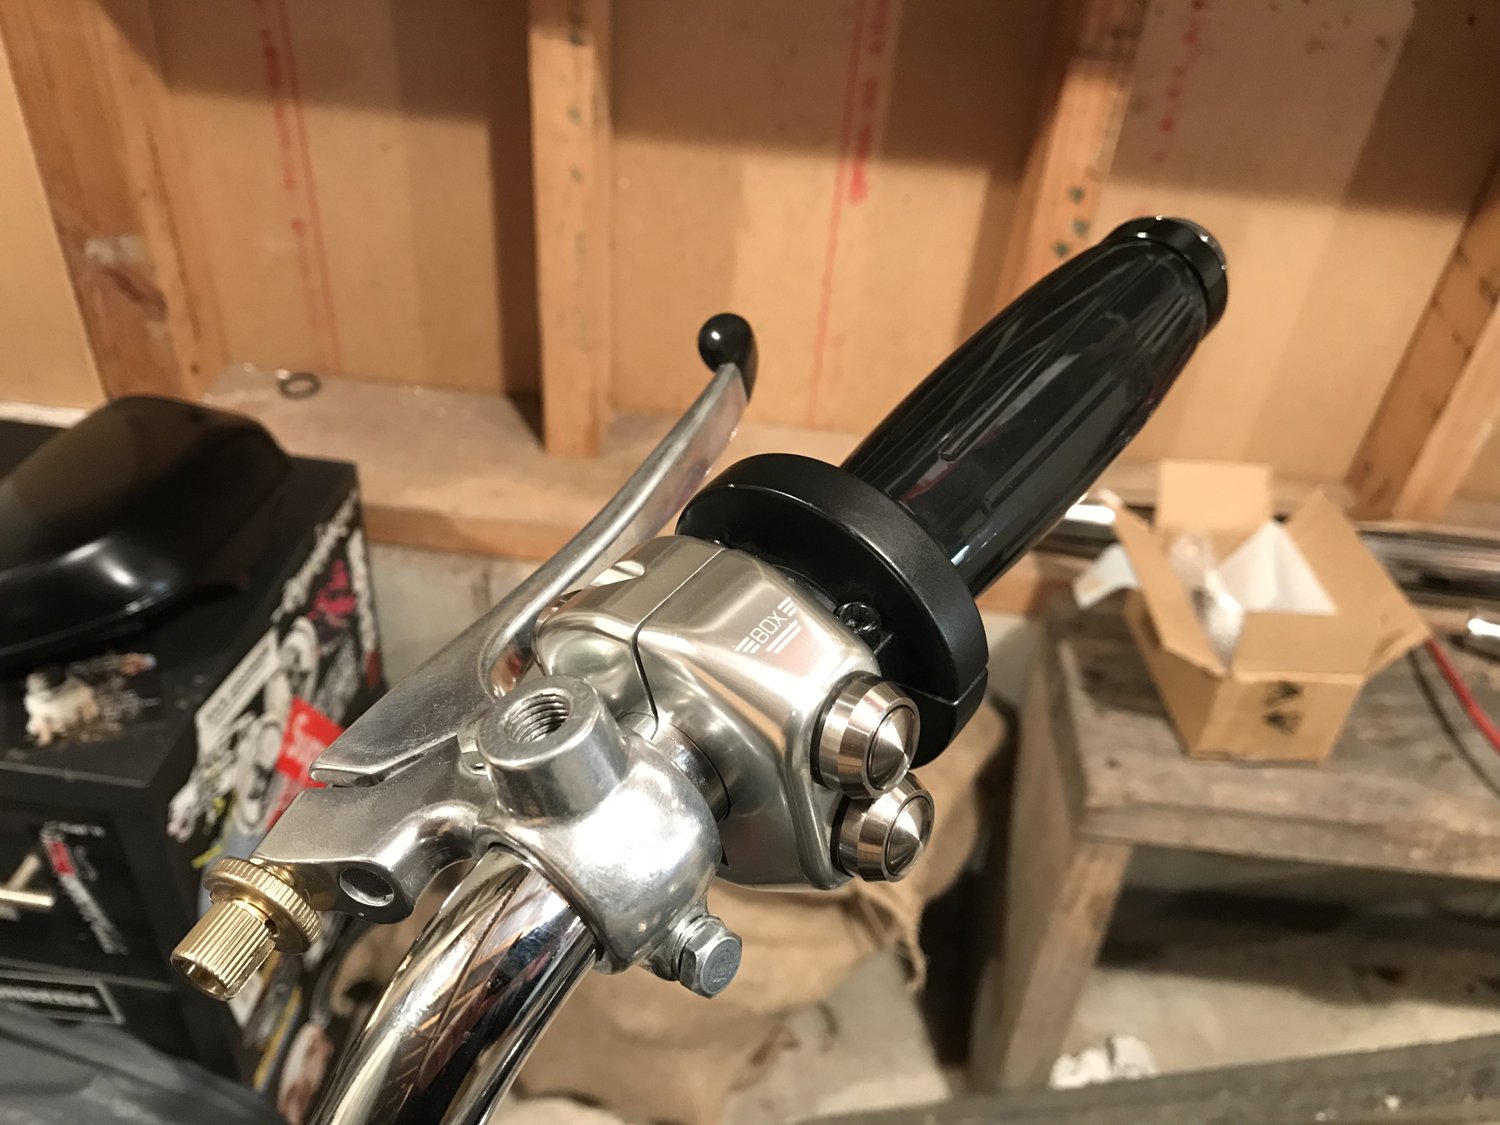
Installed the controls today by routing the cables through the bars. Pretty tricky but if you were good at the boardgame 'Operation' as a kid I'm sure it'll be a breeze.
2 points
-
2 points
-
So got a bit distracted with local rotary travel and a rotary storage workshop. First things first, I priced up materials for re-upholstery and bought some tools and foam before realising nobody would just do a stitch job basically wanted all or nothing. So we went to Stephen's old mate who offered a completely mind-boggling irresistible cash price job, so took him up on that offer. He even had the exact fabric. Got the rears back already and they needed completely re-doing due to the heat damage cracking the top piece and subsequently shrinking the fabric elsewhere. So meanwhile we've been busy fiddling around stripping it out completely of wiring, brake lines, and most of the underseal except that one spot over the tunnel that you leave until last and when last comes you go 'why on earth did I leave the worst bit til last' so you just never ever touch it again... someone want a job?? Mostly it's in great condition, although once we finally ground off the welds holding the guards to the body (first WTF moment) we found the RHS front had significant damage as bad as to completely crumple the crush tube and crease the engine bay. The damage is a bit of a financial set-back and obviously means a bigger job for compliance, so it did then require blasting and prep to be repaired. Bonus find this time round, a charming ring down in the door panel over the lock. As things go, I had it set up and masked off to blast myself, and then the compressor died. So after looking around I found C.A. Levien in Henderson to give the underneath, inner guards, engine bay, windscreen channels, and rear quarter rust patches a blast. Yes, everything except the great patina and heinous tagging. (my least favourite side, with BB gun dents and what appears to be acid damage). Even the sandblasters they thought it was hilarious to save the patina, but they made such a huge improvement on the car it actually looks purposeful now. Highly recommended, they even stored it away in it's own shed. The rear quarters were only 5% worse than expected, the underneath is absolutely fantastic, and the weird panel under rear windscreen that was mysteriously primer is happily not bog and is solid steel. Kyle was kind enough to take and send me some pictures of the process too: So after a year of ownership it was transported off again on Monday to it's new temporary home. Thankfully we found an old school repairer who will be able to save it without us finding a new front cut. From what I understand, he will cut from firewall and slowly pull the front back into original shape, beating out the creases. While it's there I may gain the fucks needed to finish off the underseal and chuck some durepox over it but probably won't. He'll also be teaching me a mix of painting and airbrushing to get the touched quarters back to their patina best. And I'll pull apart the twin dizzy to see what the options are. That's all for now folks.2 points
-
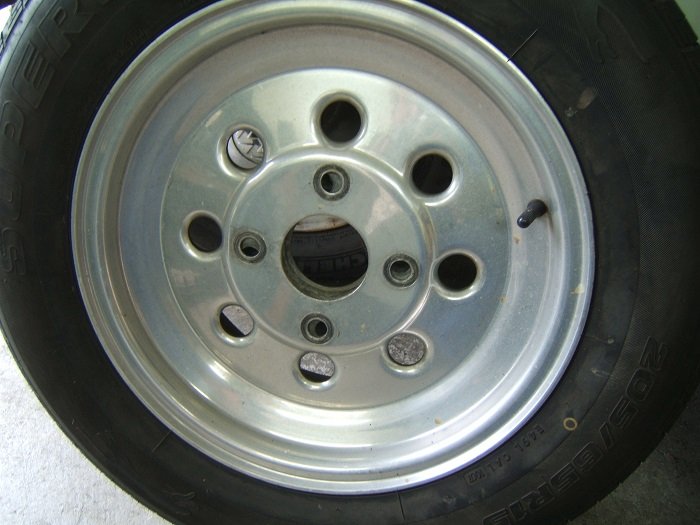
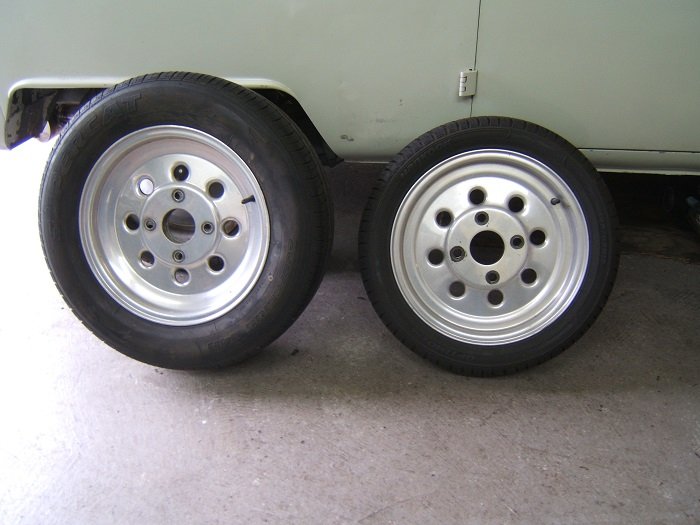
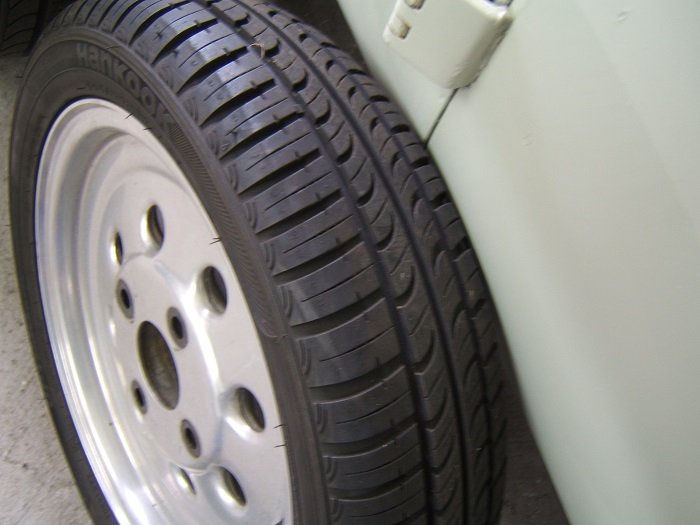
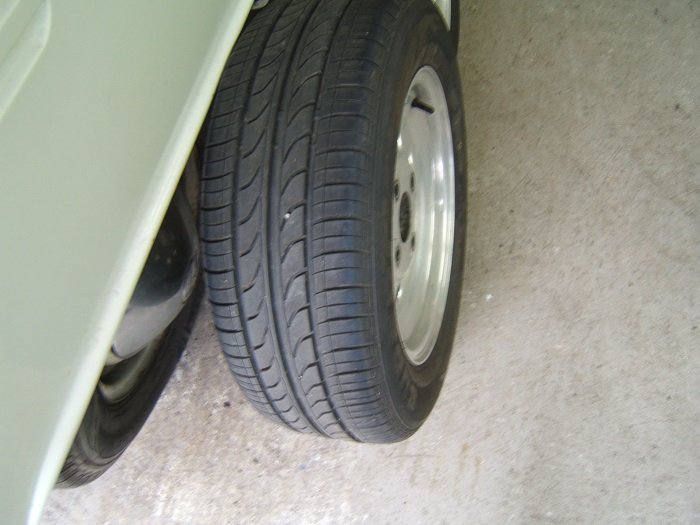
The wheels went out to Pine engineering. I was not stoked with the old fasteners. One lip was suspect. Actually a lot of stuff not real flash. I was not disappointed I had them done by Pine either.2 points
-
North Shore Rotary Club present a 1995 Workshop Coupe (as it has only 2 doors). Back in December old mate rot808 and I bought a workshop on the North Shore for a bit of classic rotary storage, which is great because families get excited to free up their garage space but realistically it means we can now buy more Mazdas. It's a tilt slab studio spec thing with only 2 doors for less whores (maybe why the brothel unit shut down opposite us but thats another story). Based in a group of 13 or so units which keeps the bodycorp and maintenance down heaps, the neighbours are great because from the ones we have met they have classic cars, two units are mechanics, and one races Targa. Built in '95 most the other units were converted to mezzanine all the way through, but ours in one of a couple left standard with a smaller mezzanine, and more room for cars. Even 3 phase for eventual hoist storage options. The upstairs is a fair size for office/lounge area and for collection of naked lady supercar pics. The funny story about the pics is that we won the Ferrari one and was one road away from collecting it as a man brought out the Lambo one to side of road. We immediately stopped and did a u-turn to ensure it was free. It was "after 10 years in the garage my wife told me to choose between topless lady Lambo or bottomless lady Porsche", so after admiring the other choices we chucked in the Lambo and went off to pick up the Ferrari. Functionally it can host 2 Mazda's, and tightly 3. Cleared out for overseas adventures it can host 4 (thanks to our specific bathroom measurements to not exceed two Mazda's door to door) and the 5th Mazda can of course be hosted with eventual hoist but we don't own 5 (... yet) Rocked up to meet the ex-owner of the workshop in my car, to find out he owned RX7's and the guy over the road has an FC outside his too. Bonus features not listed in sale agreement are weekend rotary burnouts - did not realise this, quite happy with the outcome. So we grabbed some workshop toolboxes and shelves to act as a kitchen for an industrial theme. Even added the slam bike for a feature, and $3 plants which I eventually forgot to water and they RIP'd. So it's come a fair way in 3 months considering it's a blank canvas to try design. The bathroom was extended out with help from Mr Ryan Fels, and I left him and rot808 alone too long and they made a ridiculous small door under the stairs with handle at bottom (it's all functional now though so great job guys). Then I taught myself how to gib-stop & subsequently developed stronger language skills. My mate Leonard (the fridge) was $10 on Trademe, won before we even had the workshop, but didn't check location… so down to Tauranga and back for one of the best purchases… second only to the fabulous Rothmans cigarettes dairy sign which required pick up and storage by the lovely Danger Dane until we could fly it home. So now that it was all painted and ready to go, we had the idea to invite a concrete grinder in to take off the paint I had just applied. Forward thinking does help these situations but anyway. These 2 guys came over from a company called Auckland Concrete Grinding and worked for 3 days perfecting the floor, grinding it back around 3mm and coating it with a couple layers of penetrating sealer and coater that smells like Tolene, to become water and stain resistant. Thankfully we don't own British cars so didn't need another 3 protective coats. The results are far more impressive than we thought, we assumed a light grind would just be a lighter grey finish with none of the speckles visible but they did an amazing job. Even got the back wall coated to act as a splashback. Before, During & Afters: So that's the basics of the downstairs for now, and after sorting out the plumbing and wiring downstairs we will then start to tackle the layout. First point of confusion how to lay things out... Will be updating some of the projects as I get time, feel free to follow along and give recommendations etc.1 point
-
Back in the late eighties I built a ford pop which I sold to a guy in Aussie. He contacted me the other day and sent a couple of photos through of it all painted. I had it finished in black primer so all he had to do was tear it down to paint an upholster. I had it roof chopped 3 inches and we channeled the body over the frame 3 inches also. ran a 302 Cleveland c4 and 9 inch. Came out pretty good I thought.
1 point
-
1 point
-
1 point
-
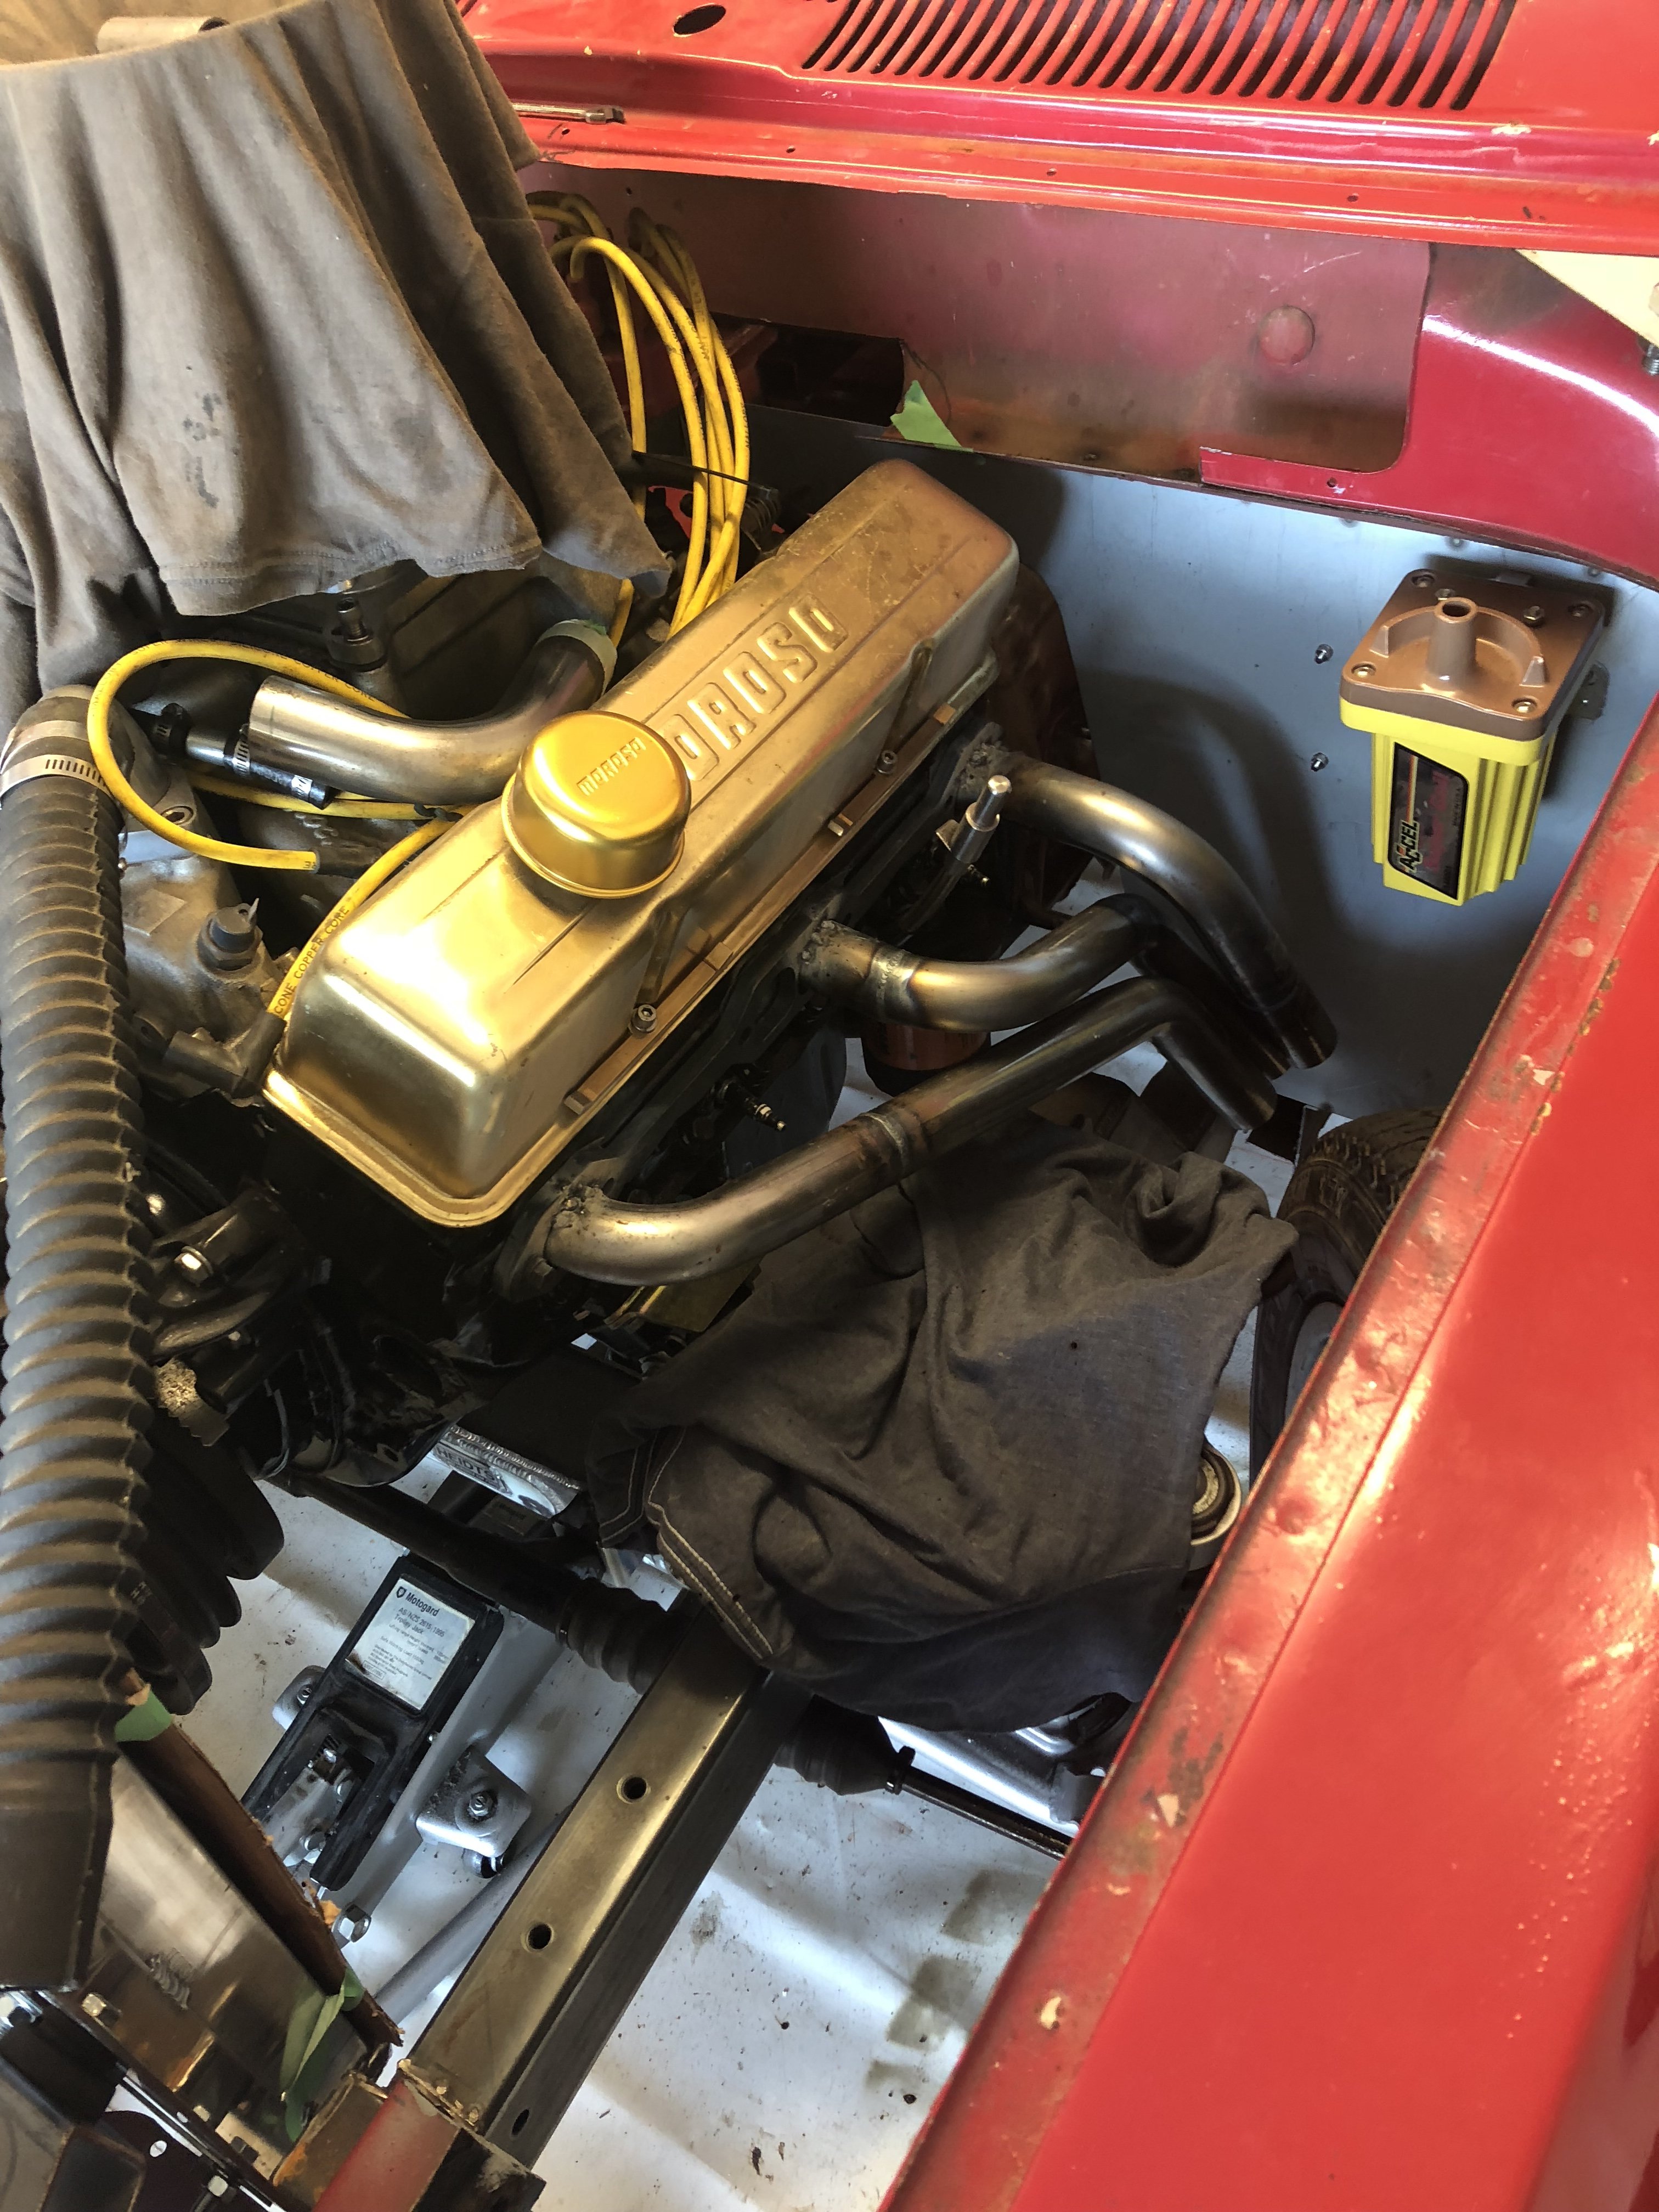
Slow work on the headers but are coming along.
1 point
-
.1 point
-
Toy make some beautiful things my man, well done1 point
-
That looks clean!1 point
-
Sure can. It's hard to see from that angle, but the end of the lever bottoms out on the grip. It actually clears that back button by a few millimetres.1 point
-
Looks good. Can you still pull the brake lever in all the way?1 point
-
Get some aluminium round of the appropriate diameter and we could have a go at making some on the lathe? @Archetype could make some decals to go on the flats or we could laser cut a template?1 point
-
Paint code is KH2 - Show me some photos if you do! Got in some seat time today. Took pics because it doesn't count unless you take a photo, right? I need to do something with the footpegs.. They vibrate a lot at 100kmph.. Wouldn't do my bung knee's any good on a long trip Any suggestions?
1 point
-
$3-$5 k In 2K white. Any reasonable painter will want to prime the car, plus sort out the chips, rusting etc. Therefore two full sandings and blocking, masking x 2 plus ? time to sort minor issues. I've been fixing quite a few hail damaged Aus cars, and it's around $3500 for roof repair, Cant rails, bonnet (usually replace).1 point
-
Yep. Just checked, your rego is still active. Go do some skids up main street.1 point
-
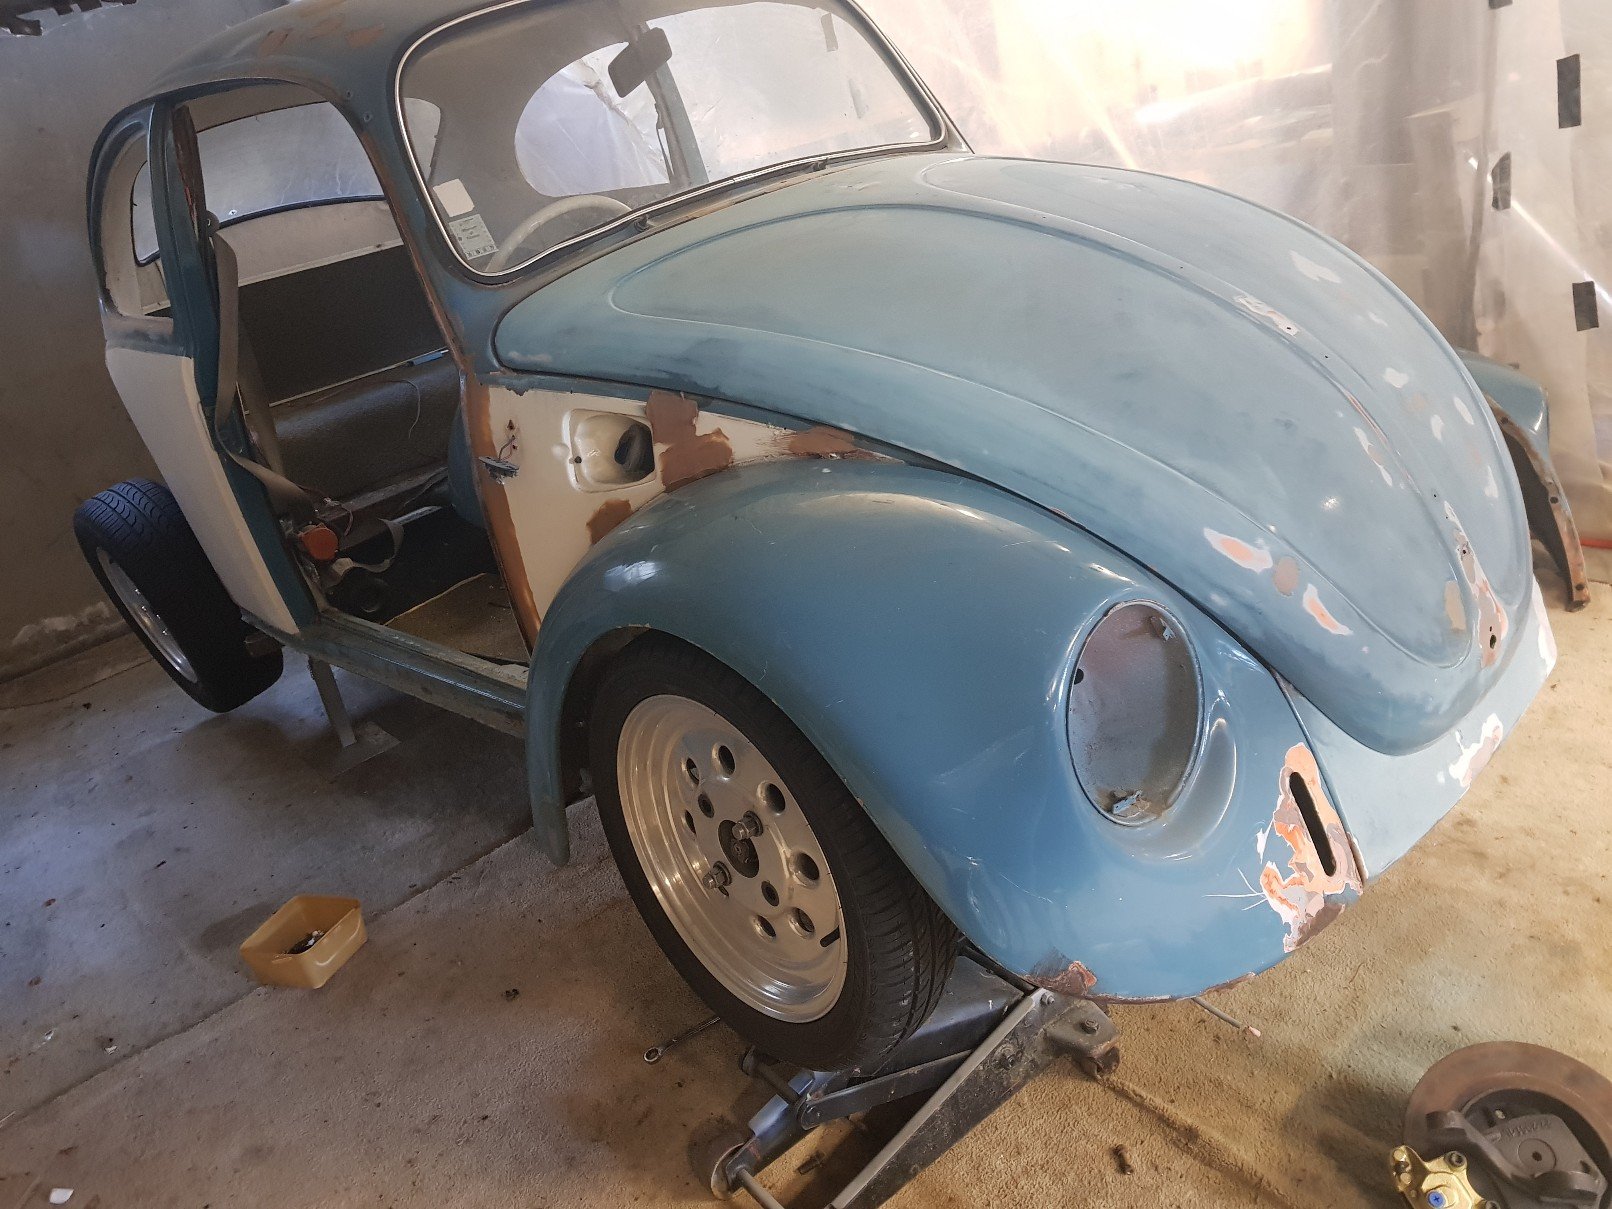
Wow. Had this thing a year and not even used it. Wheels are still off it. So rusty i cant bring myself to bolt them on (although they are perfectly usable) Today i got this message "Len here . George just got a nzta letter in the mail about ownership. Can you ring him when your free xxxxxxxx he also found the Fergie grill" What does this mean?!? Plates are still live? He told me they werent. Dunno how farm stuff works. The bare metal with peneteol looks great. Just a few streaks of rust from where i didn't put on enough peneteol. One year (nearly) outside in the elements so im super impressed!!!!!1 point
-
Hi I managed to find a full engine gasket set from the us so I've ordered one of them which will turn up next month.. Have been cracking on with putting the interior back together I'm needing a few trim clips/door card clips I guess they look like P shaped? Also the plastic circles that slot into the inner door skins so will see if can purchase some new ones. Cheers1 point
-
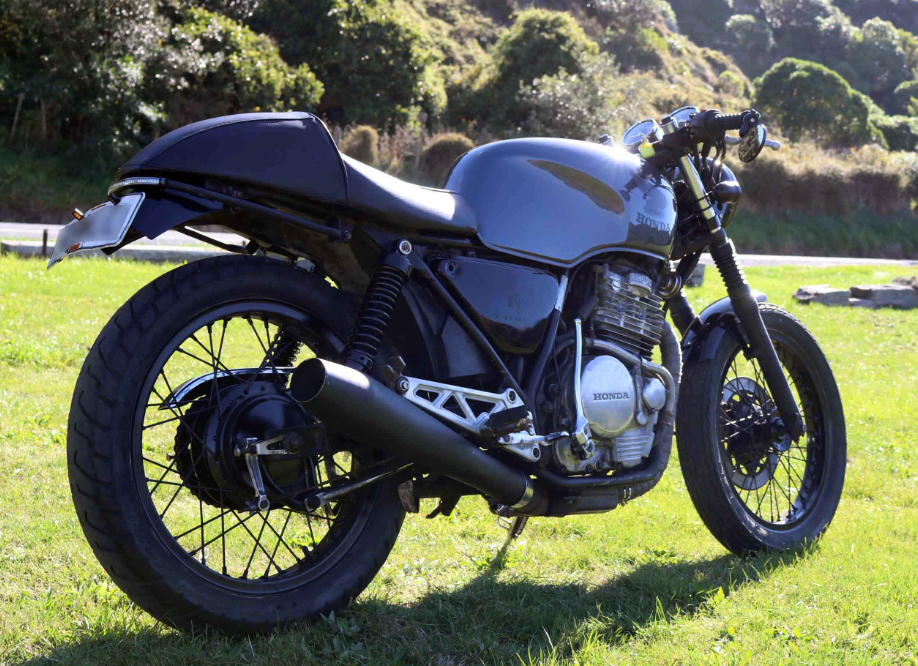
Thanks man! Well, thats the big tick done - WOF Complete! Failed as expected but only on the reflectors and he had some on deck so brought those off him. Happy with that result I rode it home from the mechanics which was approx. 15 minutes on the highway. Initial thoughts are it feels small.. A bit like a gorilla on a rollerskate haha Felt good at 100kms an hour. It's got a "speed" light that comes on at around 85kms an hour which is a big red light.. Thats got to go because even though I know about it, it still makes me heart skip a beat thinking there is an oil issue. Needs a good clean, a couple little things here and there but otherwise it's a cool little bike! The "build" isn't over yet. I've just brought a new house which has a garage (woop!) so i'll be able to get it up on a lift and have more room to work with which I am super excited about. Cheers to all tho have followed so far and have been interested in the process so far - appreciate it1 point
-
all working now. 2019-04-15_08-43-48 by sheepers, on Flickr1 point
-
Budget shelter nearly finished. We had to add 4 more ribs today to get the iron to sit better. Aesthetically its quite poor. Practicality, and budget wise it's very good.1 point
-
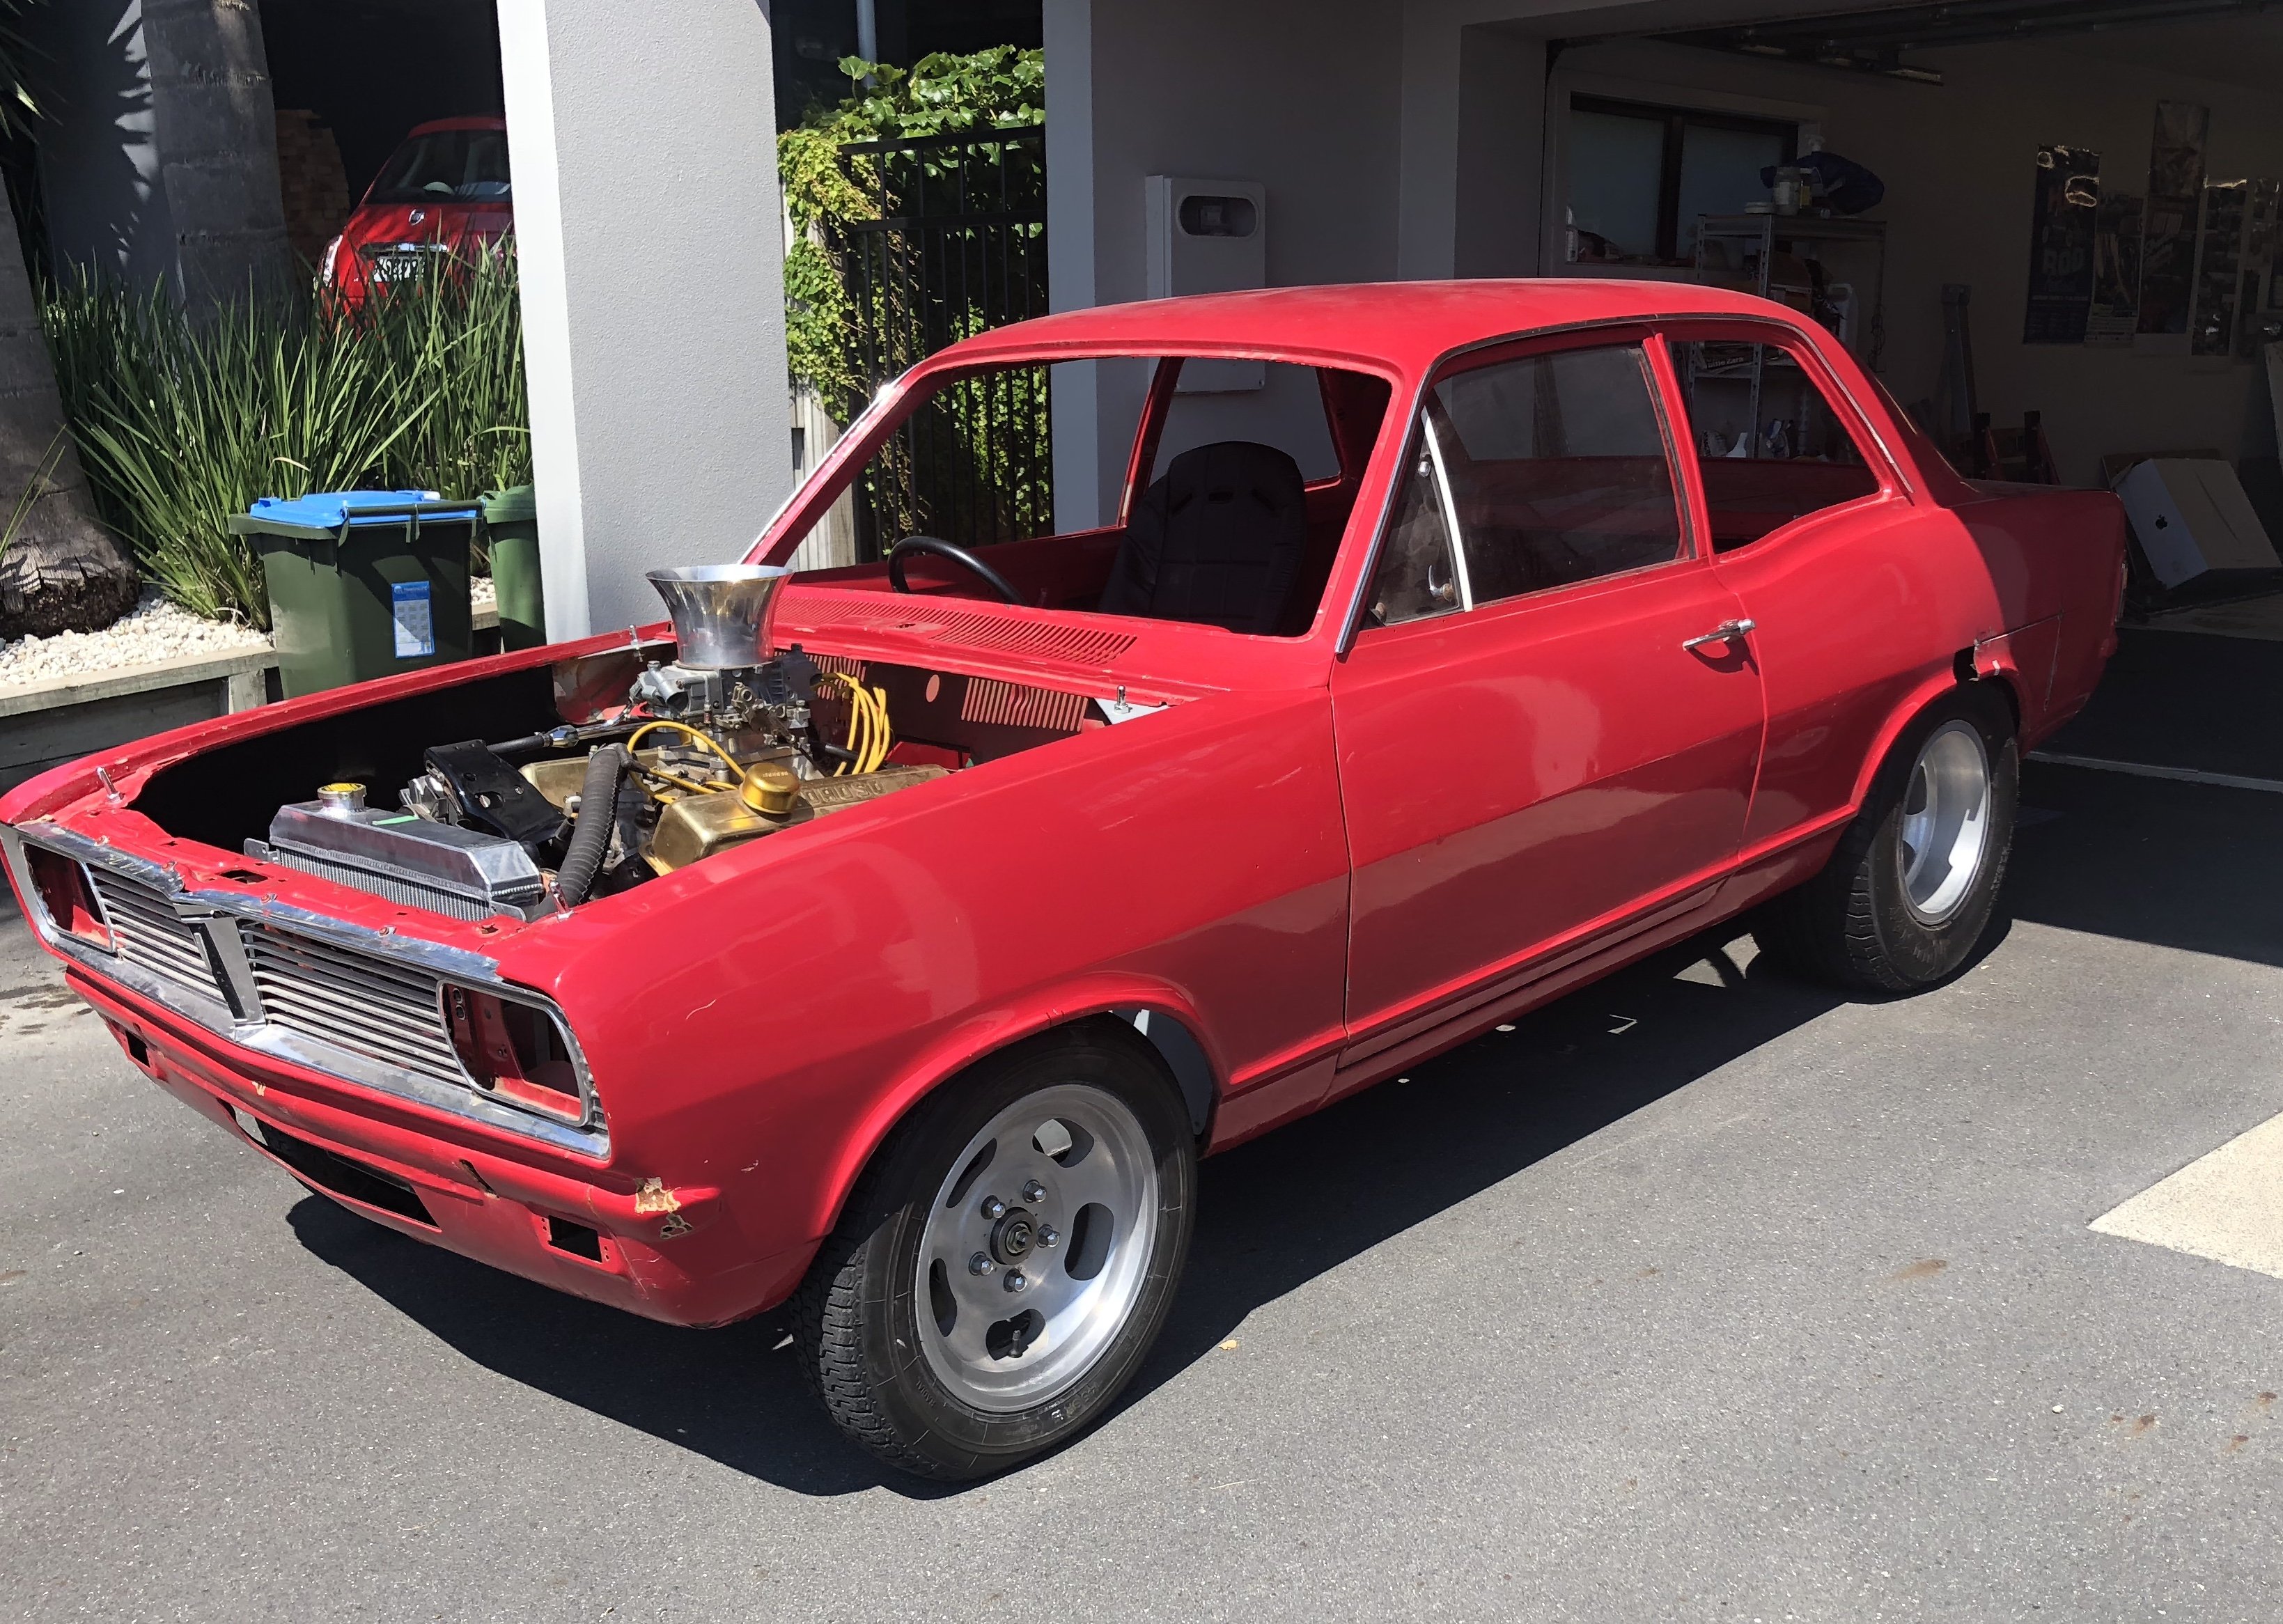
Proud new owner! Wanted this so much, I had it shipped up from chch. Unfortunately, previous owner ran into something, so I've been working away fixing that up. Lots and lots of other things to fix and improve. Little bits of bubbling paint really coming through, suspension is completely shot, and the 5 puck clutch makes for a pretty rough ride. Have been going over the entire engine bay hiding away many loose wires, securing power steer lines, and plugging firewall holes and the like. Here it is now, just over 2 years since the last thread update. The temporary Jolly chrome steel wheels will be for sale in the near future if anybody is interested. More to come soon! choice1 point
-
painted the boot. its not great tbh, got a couple of runs in it but its only a boot i suppose.... 2019-04-13_06-22-45 by sheepers, on Flickr 2019-04-13_06-22-53 by sheepers, on Flickr i also painted the dash. it was looking a bit shit and the sliver edging was all fucked so i had a go at masking the edges and using some chrome spray paint to bring it back to life. it came out super awesomeo! im really happy with it. the chrome isnt "chrome" as it was but its pretty close. sure looks way better than it did. im giving it a turbo win out of ten. 2019-04-13_06-22-37 by sheepers, on Flickr1 point
-
A bit more progress. I bought some Vitara seats from the wreckers, these are the same frame as the ones I put into my bus so I know they can sit pretty low once you start cutting and shutting. They are a bit more supportive than the Dyna seat, and they have the added benefit of being a pair, not a single. Banana for scale; I removed the bar that runs along the back of the seats, this allows the seats to recline into a far more comfortable position. It will go back in when the seats are installed and I know how much clearance it will need. I will need to split that engine cover lengthways and add another hinge and latch. This means I can still get into the rad space without removing the passenger seat. This shouldn't be a drama. I also checked the bump steer situation last weekend, first with the factory setup, then with the new arrangement. The new setup turned out pretty shit as my positioning of the new steering box did not put the tierod exactly in line with the factory setup. This was due to some geometry that I had to guess at a few weeks ago, but when I moved the box up 25mm this made a huge difference, it is now slightly better than the factory setup which is a big relief. The brakes look pretty new with minimal disc wear so that is good. About there is where things have stalled as my back went out pretty badly and I spent a couple of nights in hospital. I'm home now and itching to do stuff but I should probably take it easy for a while. I am going to have to get serious about losing my belly as I am sure that would make a huge difference to the situation. Fat old fuck that I am.1 point
-
So last Saturday i headed out to the v-dub shoppe to make a start on my engine. Paul was kind enough to work late and help me out. This is my engine and everything that is ment to go with it. inc the two boxes on the floor. I get all the bitch type jobs, clean this, clean that, and yeah clean that as well. so start with cleaning the crank. a little scotch in the cleaning tub and then we rinse it off with hot water. want to know why we use hot water? well hot water evaporates and doesn't leave any residue and wont rust. unlike cold water. now that that's done onto the casing. his has been machined out to fit the larger barrels and pistons to make it a 1776 so yeah lets crack it open see how many peaces of raw material i can find. oh hello. this stuff has gone everywhere. see if you can spot the peace tucked away here. that little peace of silver on the oil pick up is what you are looking for, well now that they are all cleaned up out side to wash these down with cold water. cause these are not steel and they wont rust away. hey presto we looking good now. 1st things 1st. dizzy gear in. i didn't snap a photo of this but here is one off the net. with that lubed up and in place the dizzy goes in over top. while i was putting that in Paul was putting the bearings in and making sure they lined up and marking them to make our life easier for when the crank slides in. i have also slid on 6 little rubber gaskets over the main bolts. bearing 1st. cam gear next, with some heat slid on over and sitting in place with its key way in next is distributor drive gear. my key way was a little lose, luckily we were in the right place and a few steps to the left was a container with a bunch of them in, found one that fitted better. some heat on this and on it went. bearings for the rods and on they go now. no photo of this stage my hands fill and doing other things but lets drop that on in in she goes and lined up Pauls pink dots and dropped the cam in as well.so far the only things out of the old engine are the gear peaces on the crank and the dizzy, even the dizzy drive was in a pile of other parts to the left of me that Paul just pulled out of old stuff. The rods and cam are from another purchase of parts i ended up with including the bearings and all the gaskets.Next Paul swears at his employees for leaving his gasket goo with out a lid and we put some goo on the casing and he drops the other side of the block on. finds some nuts that should come with the casing and he torques them up. its bloody handy having a store room the size he has, off i went find myself some lock nuts, re stock the draw in the engine build section. they get thrown at the engine and torqued up but to a smaller amount. sump on and well bake to the store room to find some dome nuts for the sump plug and the mesh for in side that, and a stud kit for the fuel pump, oil pump and a few other things. actually here is a photo of the kit, thanks google ahh while this was up side down we also dropped these in. which i learnt the other day is a duel pressure relief, vw casings come out duel and single, only early ones come out single. ended up watching a YouTube video of how it works and where they are. if you want to learn here is the video i watched it was a pretty good Saturday learning and building the new engine. last night i headed in and done some more work. removed all the head studs while Paul was on the phone and cleaned them up, he then came down and gave me some shit about how i didn't get the fly wheel and shims ready for him, few seconds later he had them, he worked out the end float and put some shims in allowing some small amount of thou. he was also trying to calculate out loud and man that shit was confusing as fuck to me. with that all sorted i now have the fly wheel and we are off to get skimmed and it has a really nasty lip where the rear main seal would usually sit so ill take that to geophfey and get him to take the lip off that. all in all shes been a great few days so far.1 point
-
And these!! Painted rocks with the kids one day.
1 point
-
Top tip for doing wrap is coat your arms and hands with talcum powder. The fine granules fill your pores stopping the fibreglass strands from hooking in there which is the cause of the itch. Works great for doing house insulation too1 point
-
I collected the crx gearbox today and spent a few hours in the garage. I ground away my welding sins ready for sons thick paint. It's not perfect or straight but it's as good as I can get it. Refitted gearbox While the car is jacked up I figured I should probably install the new thermal intake gasket. I'm skeptical as to much difference it'll make but I've got the Bluetooth data logging so I can keep a eye on it. Refitted the exhaust manifold and test fitted the radiator. It's a squeeze but it clears which is a improvement on before. The lower support is a tad lower than before but that gives me a bit of adjustment for a extra few mm between the rad and manifold. I plan to either get a half size rad or 'tuck' the radiator. By tuck I mean measure up one that'll fit where the ac condenser would usually sit I need to do a spanner check on the stuff I've done today and refit the front crossmember along with replace the cv grease and boots.1 point
-
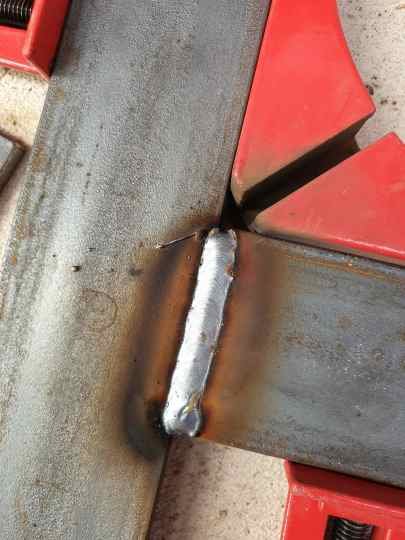
The shuttle was surging and running like shit. I suspected the fuel pump was on its way out so I whipped it out. All gunked up with dried fuel sadness. Luckily the tank doesn't seem to be rusty enough to need lots of work to clean it out. I thought I'd finally attack the new to me headers for the crx as they had some surface rust and peeling paint. Quick once over with the flap disc and a squirt of paint and they are presentable The crx rad support was pretty bent and buckled which pushed the rad into the manifold so that needed fixing. I had kept a nose cut off one of the shuttles I've wrecked so drilled out all the spot welds. A quick check to see how close the shuttle stuff is to the crx. Carefully cut the fucked mount out Some carefully trained seagulls later and its in. Bonus now the bottom of the t bracket actually lines up with the bolt hole. The gearbox should be ready this week so I'll chuck it in soon. Might give the rest of the exhaust a quick squirt of paint too as it's mild steel. I also chucked some non fucked headlights on too as the other ones were all yellow and the brackets were butchered on or broken1 point
-
So I got a big ass fancy ol carb from @Raizer which came complete with delicious and entertaining packaging, I set about making a stainless manifold for it, this is the first thing I have ever Tig welded, so didn't complicate things with filler. I had to mount it facing forwards for several reasons, I then made a mount for the oil cooler, this is about the only place it would fit, didn't have to cut the leg shields, The donor bike didn't come with any foot pegs, so I made a set. I nicked the rubbery foot bits from my velo bike, which came from an NC50 I think? I will strengthen these up in the future, Then I set about mounting the muffler, couldn't decide to go big angle or straight out, until I realized it would be a cunt to mount it low down, I made a mount (which took a lot longer than you would think) to mount the muffler, it hangs down just in front of the rear shock, Once the muffler was mostly mounted, I set about making the header, out of stainless tube (as that's what I had at work with the correct ID for the exhaust port) It came out pretty well, hopefully it doesn't crack/fall off too quickly. I then trimmed the leg shield to clear the motor and pipe. Bent the kick start a tiny bit to clear the muffler, Its on quite an angle, but looks OK I reckon. I then cracked open the China oil cooler to have a nose. The silicon was blocking half of the galleries, so glad I opened it. I also magic'd the green off it while it was apart, I made some gaskets for it, but I might make some more out of thinner material, 3mm is a bit thick. I also ported the insides of this a bit to help with flow. Annnnnnnnnnnnnnnnnnnnnnnnnnd that's where I'm up to. Reagrds, V "taken forever to do fuck all" G1 point
-
So I've made progress of sorts on both the crx and the the shuttle. My friend jason came around and helped remade the crx exhaust for me. Its tucked up nicely and the muffler is actually level and nothing rattles which is a win. I pulled the gearbag out and that is currently at the gearbox shop getting a new synchro and the mfactory diff fitted. The shuttle went for a wof and failed on a leaking master (that explains where the fluid went) and a rear seatbelt. I found the seatbelt while looking for other stuff in my hoard which was great. I had taken the door card off when I parked it ages ago for some reason and when shutting the door I managed to smash the speaker. Que replacements for both the shuittle and crx. I also got a new head unit and put the shuttle one into the crx. I started putting sound deadening mat on the doors but ran out when I got to the drivers door so I'll have to get some more. I've also ordered new engine side plugs so I can make a new engine loom for the shuttle as i'm not too happy with the current one1 point
-
Already found RX2TMR is available1 point
-
I've got a cigweld 220 amp mig with a 15amp plug filed down to 10amp.. never had an issue, even welding 6mm plate together..1 point
-
Been MIG and TIG welding on a 10A plug for ever. Even some quite high currents. 20Amp breaker on the circuit.1 point
-
First up, massive style props absolutely have to go to the Sheeper for his efforts this weekend - basically he's put in a whole lot of hours, and we've managed to get towards the very end of the fabrication work on the car. So this weekend, we tackled the brake/clutch pedalbox and the gearbox crossmember. The idea was to end up with a pedalbox layout similar to KPR's KP60 build, and Kris has been awesome answering my stupid questions and flicking through his build shots so that we were able to easily get a handle on how things needed to happen. IMG_8467 by Richard Opie, on Flickr Proceeded to measure up the Wilwood reverse swing unit, in order to build a basic rectangle frame using pieces of scrap angle iron. IMG_8501 by Richard Opie, on Flickr IMG_8474 by Richard Opie, on Flickr So this was the reeeeal basic start. It gave us the dimension we needed to work with essentially. IMG_8486 by Richard Opie, on Flickr IMG_8490 by Richard Opie, on Flickr Clamp into place, and drill some mounting holes. IMG_8534 by Richard Opie, on Flickr Bolted in place, things kinda start to look like they're all coming together. IMG_8550 by Richard Opie, on Flickr IMG_8552 by Richard Opie, on Flickr The front edge (nearest firewall) bolts onto the firewall using the original location for the booster. This section of the firewall is recessed however, so in order to get around this we used KPR's technique of mashing a couple of threaded bosses onto this edge of the frame, enabling it to be secured with bolts from the firewall side - much tidier in the bay itself. IMG_8603 by Richard Opie, on Flickr IMG_8611 by Richard Opie, on Flickr With those welded on, some faffing about with the old pedalbox pressing (factory) and the steering column height was needed - and from this, it was found that the factory column angle was 20 degrees or thereabouts. Cue one times pie cut in the frame, and some bending to get the angle cock-on, as this unit also doubles as the column mount. Weld solid. IMG_8627 by Richard Opie, on Flickr IMG_8631 by Richard Opie, on Flickr Time to organise some bits for the whole thing to mount to the scuttle area of the firewall. Odd shapes are because the master cylinders need to fit in there! IMG_8639 by Richard Opie, on Flickr A little bit more faffing around with a tape measure, then Sheepers does some cutting and welding. IMG_8653 by Richard Opie, on Flickr And magically, it all bolts in and is super solid to boot. Feels like you could lift the car in the air with this thing. IMG_8671 by Richard Opie, on Flickr IMG_8675 by Richard Opie, on Flickr Then all of sudden! Finished! You'll note the steering column mount section has been changed, we actually needed to shorten the whole thing slightly to fit it in. Reservoirs will need to stay where they are, lurking under the dash. Thanks for reading!1 point

.thumb.jpeg.384ff72c8d2b0ee0d34a7bdedb55bdcf.jpeg)


This leaderboard is set to Auckland/GMT+12:00