
Leaderboard


Popular Content
Showing content with the highest reputation on 10/15/17 in all areas
-
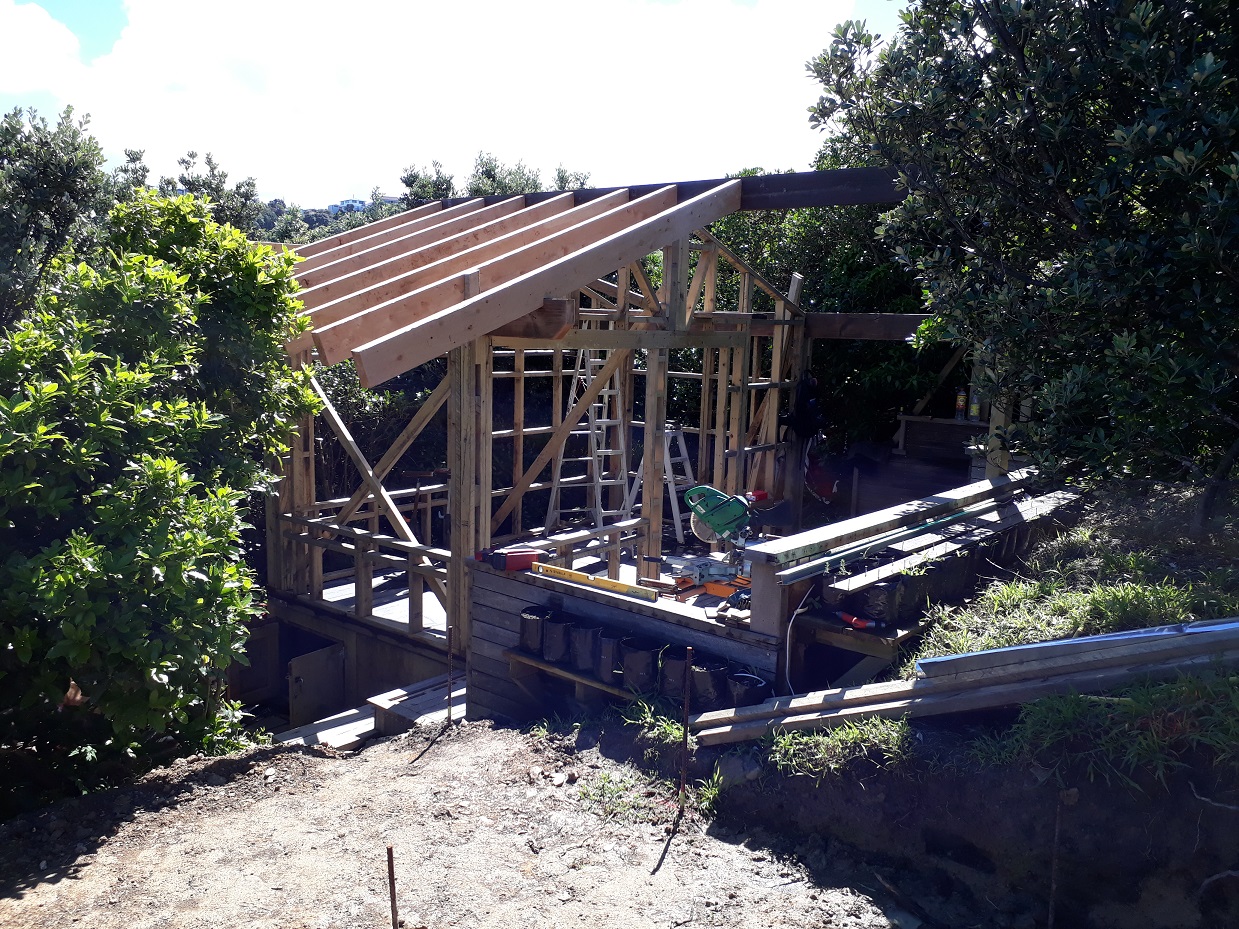
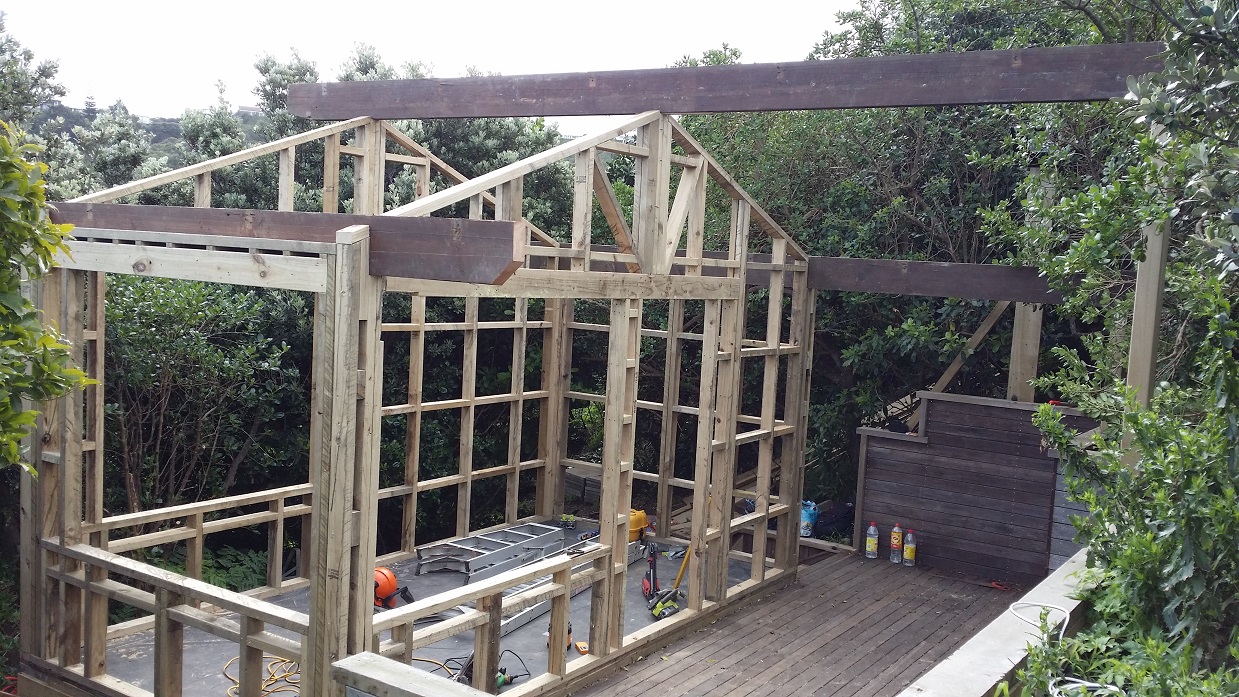
Getting the rafters up by myself has been a mission, but it's about a third done.
 14 points
 -
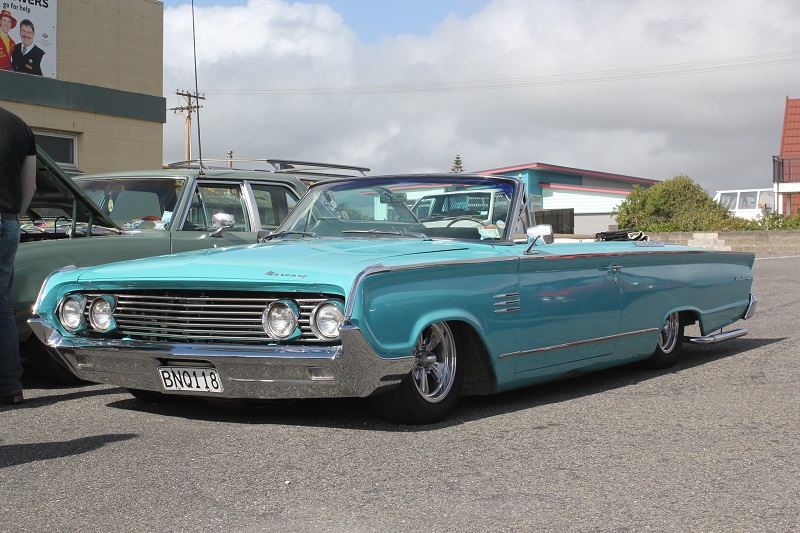
I got the old gal some new boots. Always planned on wider and 13in anyway. mate sold her van and kept the wheels so had no use for them, I’ve always liked Jilbas so once I test fit and they cleared, we struck a deal! Two were pretty grubby and brake dust starting to eat into them but they cleaned up pretty well with some truck wash, my electric toothbrush and a fine steelo pad. SSR Jilba 13x6.5 Type A. Nankang 175/50swith decent tread. Now I know how much I need to lower it, the front especially. It’s quite high at the x-member.12 points
-
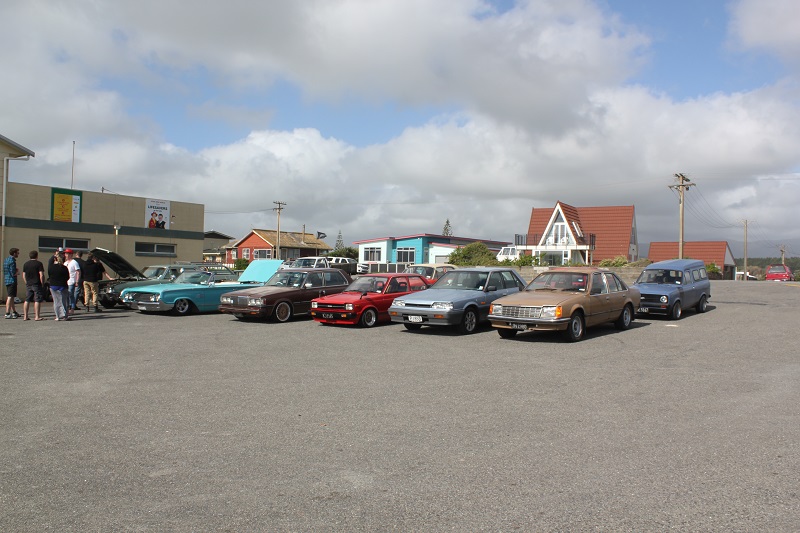
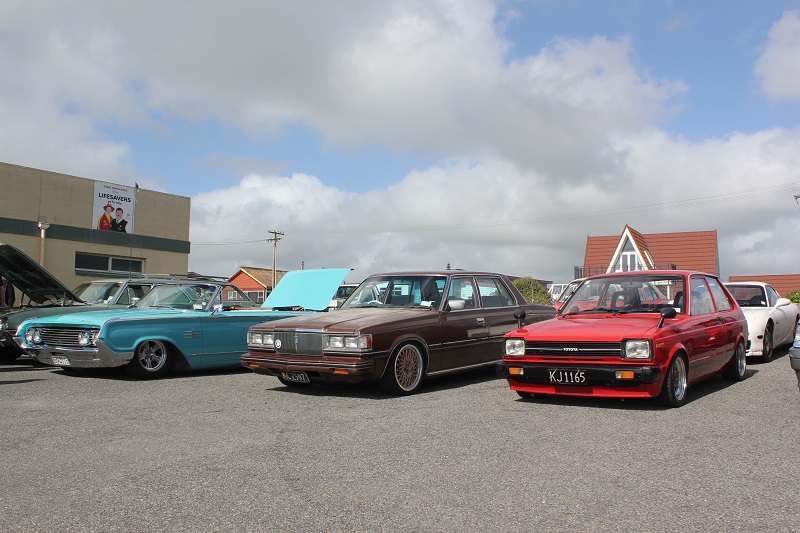
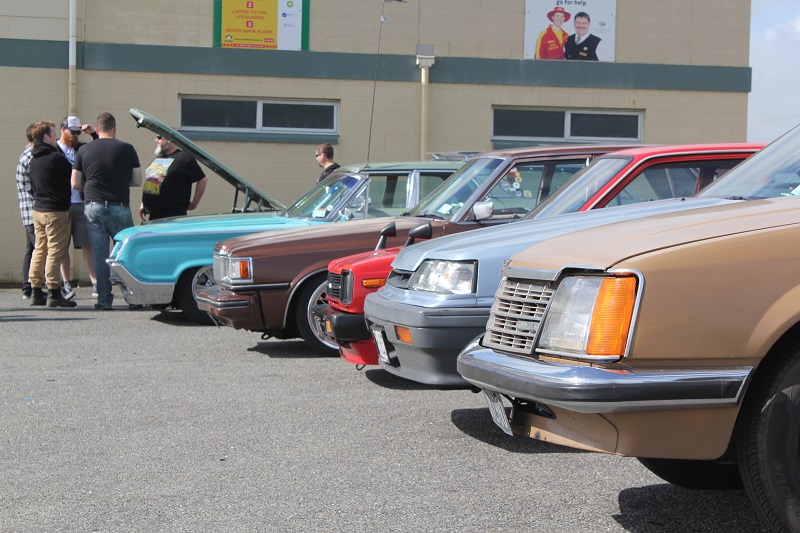
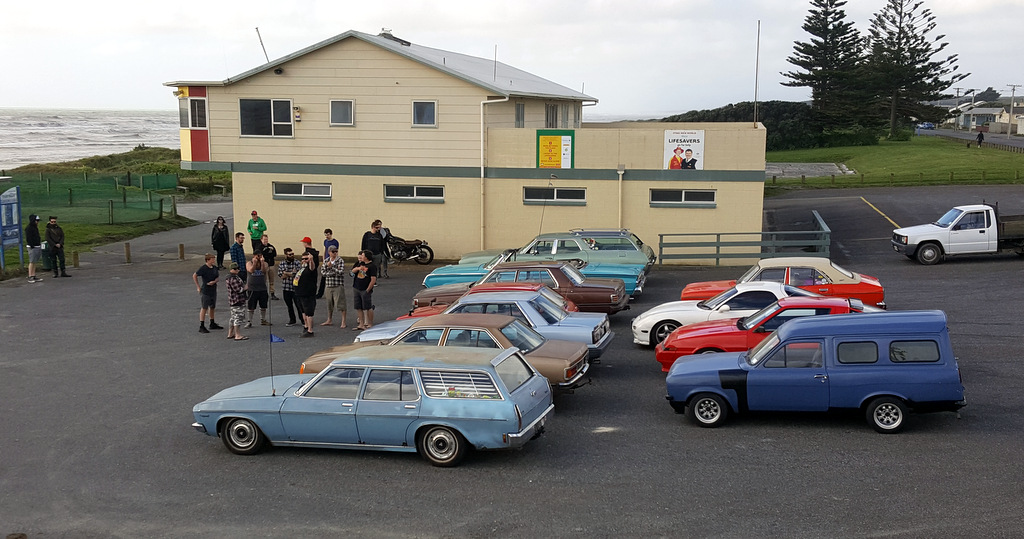
Pics of the same Thanks again hobbs All you welly folk its monthly meet this thursday too.
9 points
-
Been daily driving this lately. No big issues. Still waiting on some Aliexpress electrical stuff before I put the dash back together. The 24v > 12v DC converter I ordered from Banggood arrived, nice 40amp unit. Changed the engine and gearbox oils. All 15l of them. Not including the 18l of coolant. Went to an Oldschool meat. Had a ride on an AA tow truck. ... wait what? Just a fuel bleed nipple fitting that decided to go missing... The empty looking spot near the filter. Didn't notice for a little too long... Diesel everywhere. Nice and clean under the truck now though. Back window has a nice sheen to it now also. Put a new fitting and filter on and she is all good now.6 points
-
Apart from the poor palmy turnout, it was good! More same pics6 points
-
more rust. I always think it wont take very long but it does. I tend to work in sections and batch things to the tools needed - saves trying to find that tool while your lying around on the ground, as its always in your hand. . Eg mark sections, drill all the spot welds, cut all the holes with the slit disc, tidy with the other grinder ends and powerfile etc. Then make all the CAD templates, cut all the steel, then fine work to get teh patch to suit the hole, weld, grind, weld pinholes, grind, sand, primer. Also means i can do a bunch of quieter stuff after work etc and do all the welding and especially grinding in a single annoying spurt on the weekend instead of a little all the time Section A Wheel Arches. Figured id get this done so i can loosely fit the tins and start pile crap back in there. Pretty much 3 matching areas both sides, plus a couple of random blebs out of shot Section B: Rear Valance etc Took the tow bar off to get into this area, this section is 'closed' (lol) from road debris form the wheels and tray areas and does not have very big drain holes (there are some humps in the inner section that his plugs to that face forwards...) so trapped wet grime sitting on the flat sections has made its own way out. First batch of patches. I should have replaced the whole bottom section right across TBH, i added a couple drain holes in the big patch which should help let dirt and stuff out (and cavity wax in). I will also seam seal before i underspreay as there isnt much on this car, and some of the gaps are pretty bad! Moving around to the passenger side, thought id get away with filling a few pinholes, but ive since done what i should have done the first time, and cut the corner off like onm the drivers side, as well as extended the big patch in the middle both ways. You can also see the strengthener on the flank where trapped muck and holed the side, below the bumper, from the inside out, and it was just the same on the other side. Got all the remaining patches for this area ready to weld in during the week some time. Remaining rust (i know about!) to be cut out, which isnt that much if you say it fast is: - 1 tricky to fold section if the rear lower corner of rear passenger wheel arch (just in front of the mudflap) - 2 & 3 holes/bands in rust trap factory positioning things that look like jacking points but are not... of outer floor section behind front wheels, both sides - 4 rear cab/floor area (will probably use rust cuts here) pass and drivers - 5 lower rear tray to tailgate seal lip, but can leave it till after summer/WoF , and will get a section bent up so i can spot it in easy, like the 2300 section in the same place5 points
-
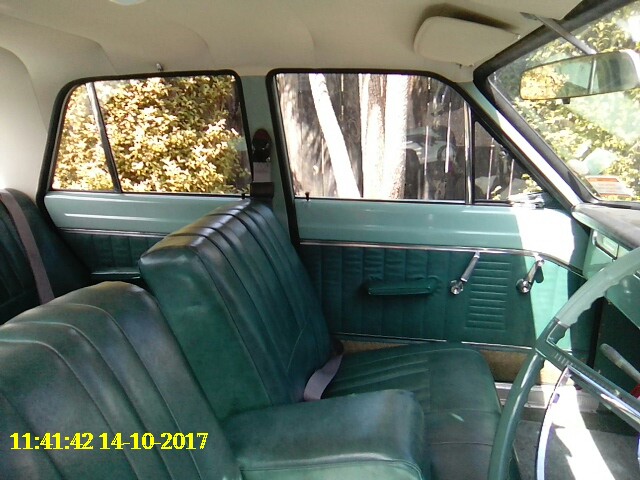
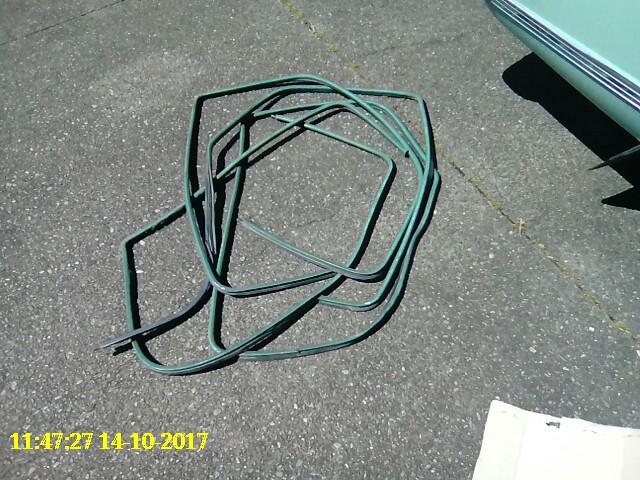
Also installed the new door seals this weekend. These have been sitting on my work bench for months so it's about time. I removed the old seals and was very happy to find all the sheet metal in good condition. New seals fitted and looking way tidier.
4 points
-
Been too long between updates! Nothing too exciting to post though, my shorter (hopefully) levers left China a few days ago so are at least on the way, dash went Hong Kong to Kuala Lumpur, fingers crossed next stop is NZ haha! Been mucking around with small bits and pieces, was going to do the switch wiring but have decided to wait until I've got the new dash just so I don't have to redo any of the wiring when it gets here. I know it's been covered on the forum before, but meh, acidic rust removal: took the seat mount bracket/hinge parts which looked like this on both sides: Added white vinegar Started bubbling pretty much instantly! Realized my container was way too small and swapped it out into a bigger one. Checked on it a few hours later: After less than 24 hours I ran the bits under the tap and gave them a wipe up with a rag, result! Ready for a quick scuff up and a coat of black paint3 points
-
3 points
-
Goob some anti corrosion primer on IV got some more rust down at the front of the sill, so once I've done that Il spray it full of blackguard and cavity wax Should look as good as any other part of the truck once I smooth the inner rail out with seam sealer3 points
-
It was a very pleasant experience.3 points
-
This was rad. Good job every one Was nice to get out of town for an afternoon.3 points
-
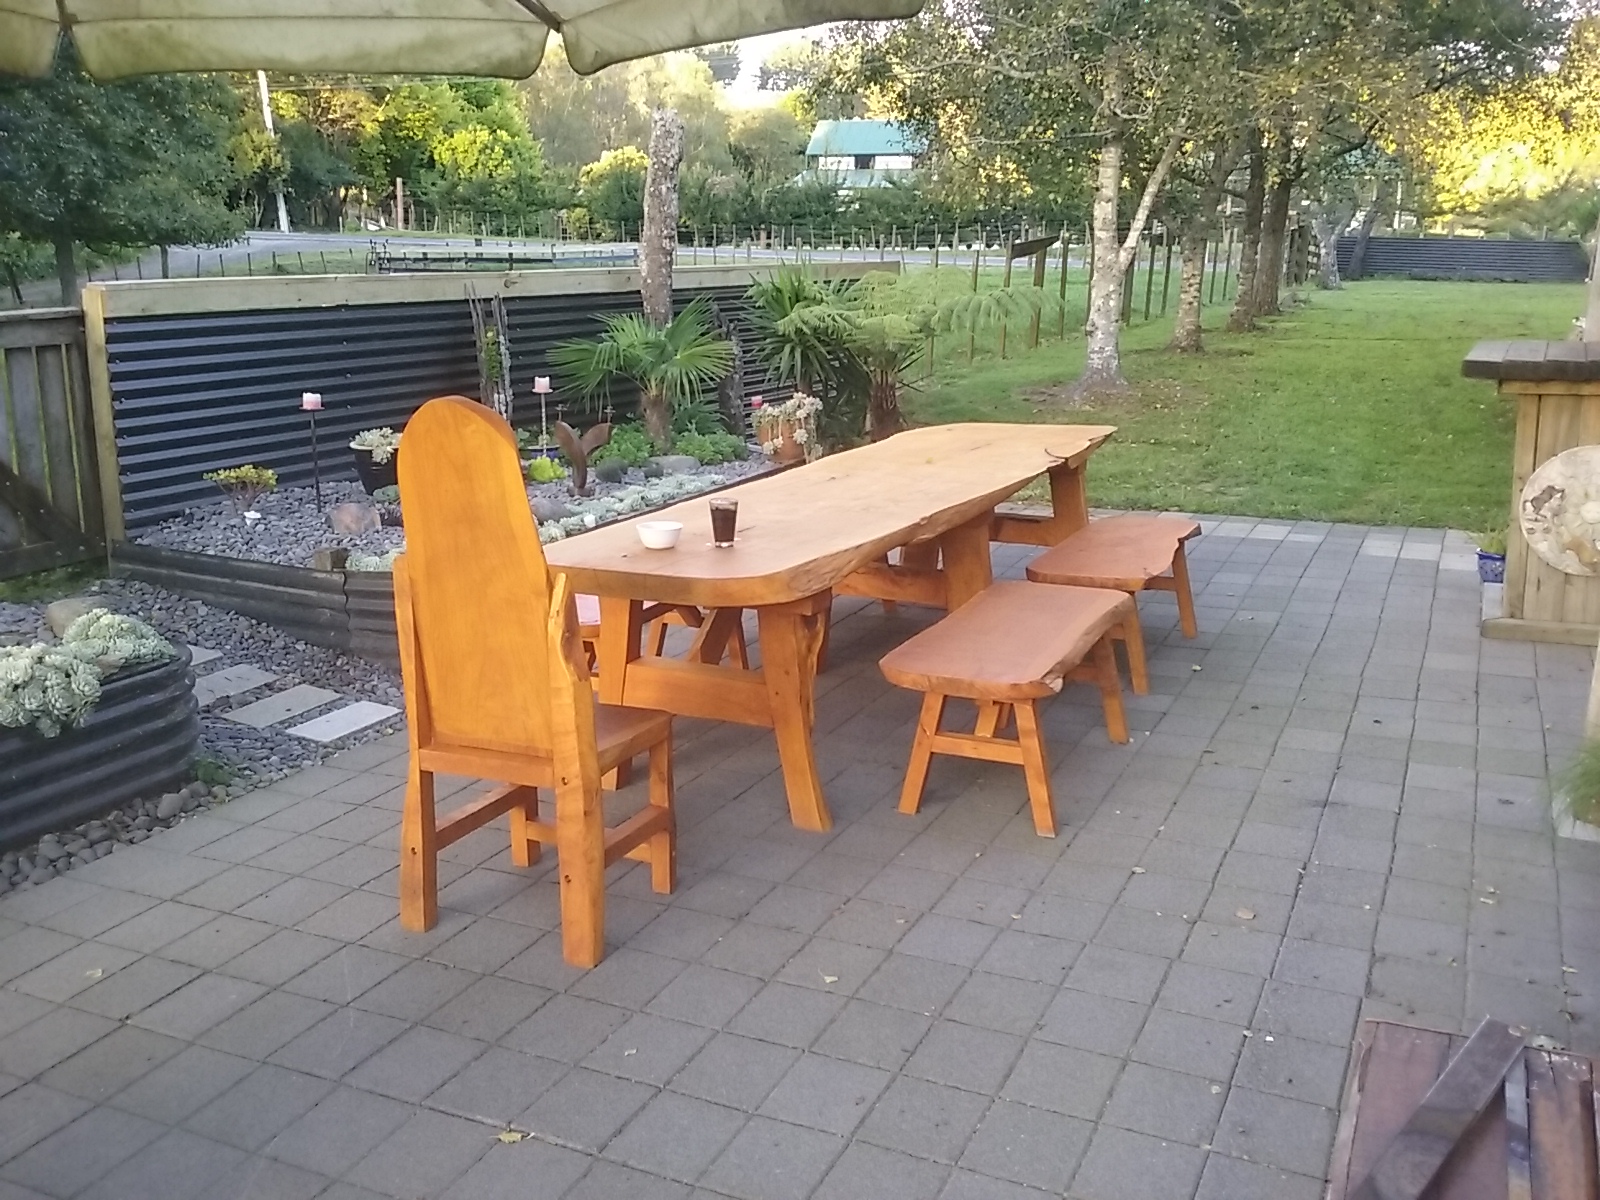
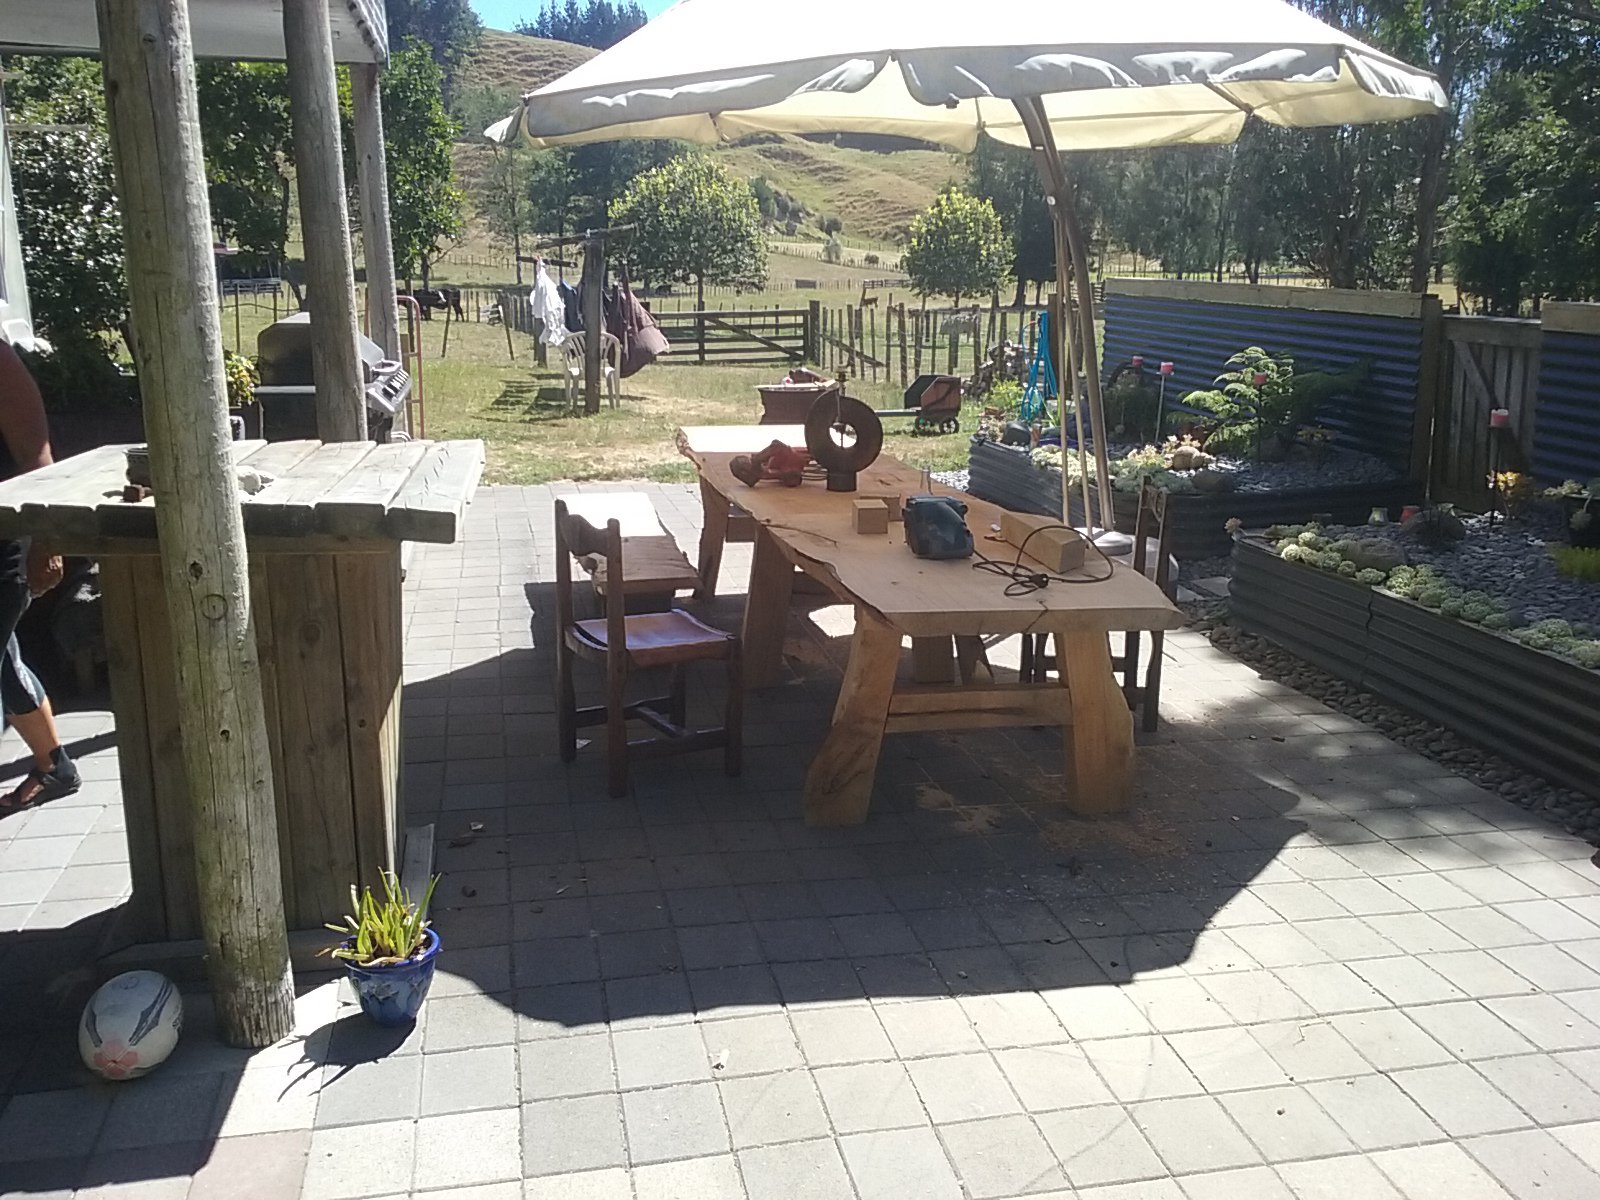
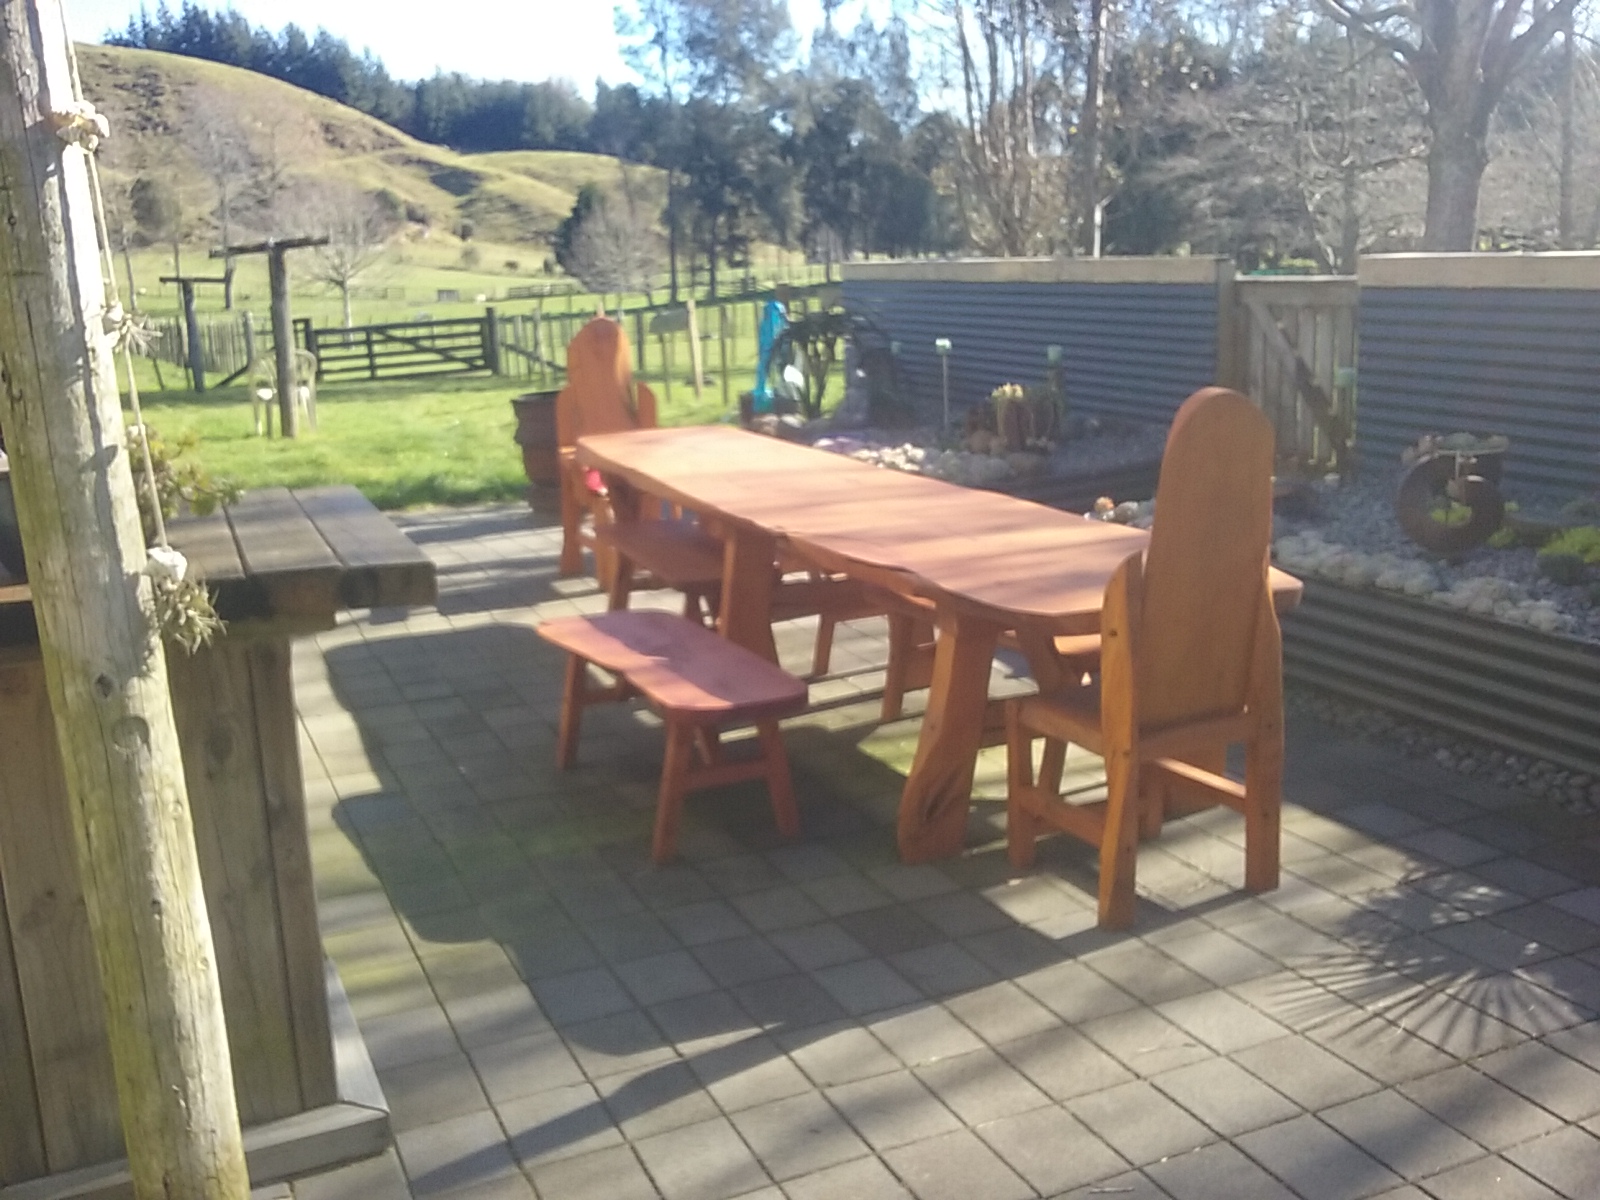
Been doing mantenance at a local mill for quite a few years in return for timber for home renos. Decided it was time for a new outdoor ale consumption suite. grabbed half a dozen slabs of macrocarpa and set to them with chainsaw, belt sander and paint brush. Took a month of weekends but not a bad result for a alcoholic with a roofing problem
3 points
-
Painted the 9inch blue and put it in And then this weekend after the new trans and headers showed up, i decided to chuck it in and test fit everything. I went for an AOD trans so i got overdrive, and i should be able to run a higher diff ratio while keeping cruising speeds down. Its a pretty tough built one i got from a shop up north. The headers are Hurricane, and completely fowl the steering box so ill have to modify them at work. Our car hoist also serves as an engine hoist. After these photos i mounted the rad, oil cooler, oil filter and fuel pump, its gonna be a busy engine bay!2 points
-
yea I went back & watched the cops take photo's & interview driver while Middy did more 'shopping' didn't leave till 6, big puddle of claret on the road & a suspect Honda Integra with windscreen caved in gave me a bit of a shock & yeah chur for the meet Hobbs & thanks @_Matt for the company on the way down, soz felt bad for bailing & not letting you know what we were doing on way hm2 points
-
Paints done. I've done better...but it's rough enough. Now it's literally a matter of watching paint dry, then onto final assembly.
2 points
-
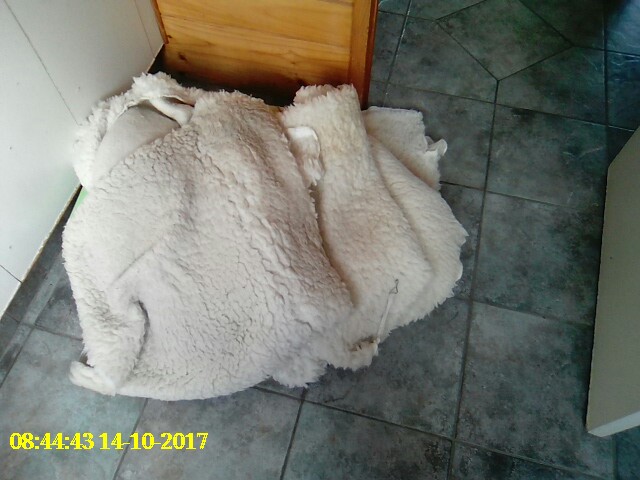
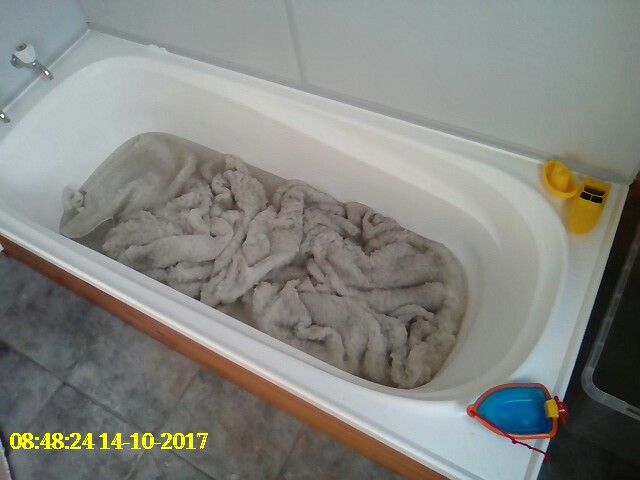
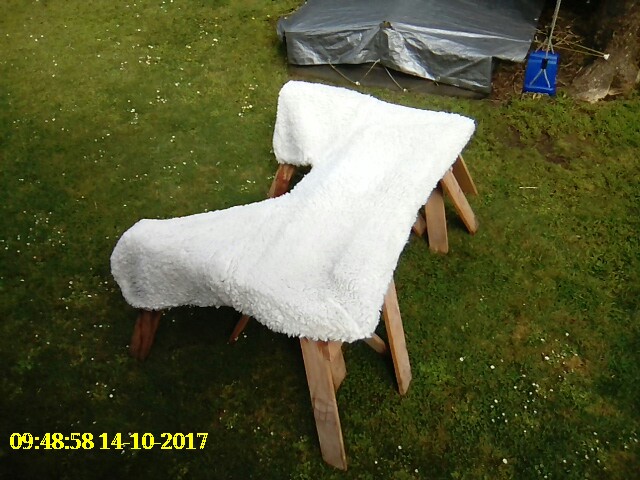
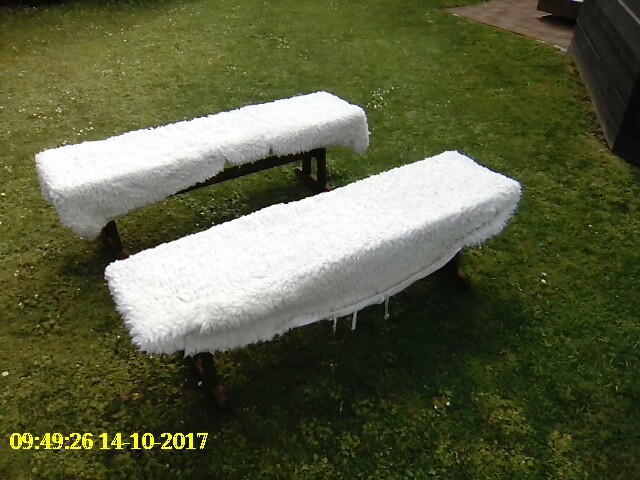
I started the weekend by doing some laundry............. Take sheepskin seat covers Risk marital disharmony by soaking in suitably sized container Stir around a little until water turns this delightful colour MMMMMMMM YUMMY! And outside to dry in the sun
2 points
-
That was fun, nice hanging out with y'all!2 points
-
Good time - thanks Hobbs.
2 points
-
While on a family jaunt to Papamoa last week, Mr Chris Grant was taking photos of trash on the side of the road, and messaged me some pics: a 1989 Fabryka Samochodów Osobowych (FSO) 125p Pickup, which is a Polish licenced version of a FIAT 125 (Russian Ladas are FIAT 124 based) https://en.wikipedia.org/wiki/Polski_Fiat_125p These have 125-eque bodies and the preceeding 1300/1500 model running gear Anyway, i got him to investigate further and he sent me this: Its got a twin cam it instead of the factory 1500 pushrod (same engine as my 2300 with 2 less cylinders) Anyway, seems legit and i ring the guy to organise a viewing the following weekend (on my way to wellington) and if (LOL) i buy it, to collect it on the way home a week later. So thats what happened... discussion \/1 point
-
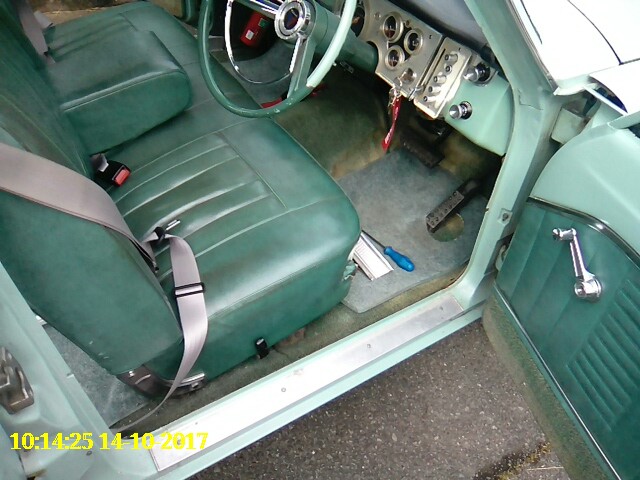
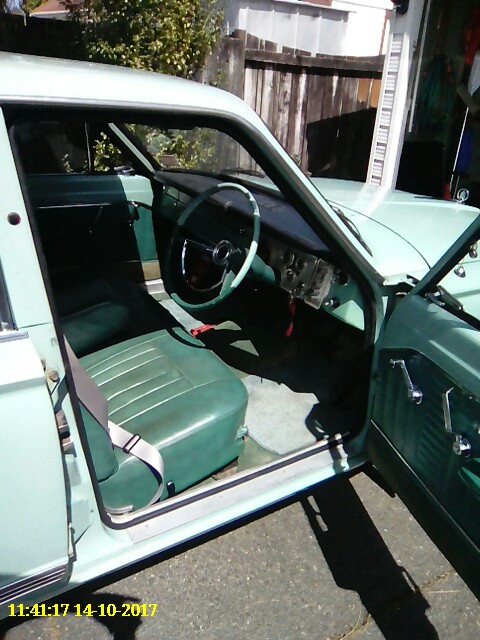
It's time to waste a whole lot of time and money that should probably be spent on other stuff. Some people on the forum will know our 1963 AP5 Valiant Regal but for everybody else who is interested here is a little history. My Dad purchased this car in 1983 and it was our regular family car for many years. Here is a photo taken some time in the early 80's. Dad had 2 AP5's at the time, the grey one on the right was a dedicated tow vehicle and was modified accordingly. The green one on the left is ours. About 7 years ago we were lucky enough to get our hands on this original and well looked car however a few things needed attention fairly quickly. Almost immediately we did a few safety upgrades. The car got a front disc brake conversion, new seatbelts and we replaced the wheels and tires in order to make it safe to drive in the rain. Until fairly recently I was hanging out on another forum dedicated to the fine products of the Chrysler Corporation with a few other members that have since come across to Oldschool and unfortunately a lot of the details of the work completed on the car to date was lost when the forum closed earlier this year. Lucky for me the Oldschool forum is awesome and I am very happy to be joining you all over here. This is how the car looked after its first round of upgrades. We drove it around for a while with the stock drive-line and aside from a little oil burning/leaking issue all was well. Then this happened. This was coolant leaking from a very bad place, yep cracked block! So naturally this happened next. And finally with the help of a local engine builder here in Auckland this happened. Sounds simple enough but it actually took nearly 12 months to resurrect the Slant 6 as the engine was in bad shape. We were very keen to salvage the original block and keep the car numbers matching but it was no easy task. I did as much work myself as possible but given the challenges involved in fixing the engine I was very happy to be working with a skilled engine builder and I am very happy with the result. This engine is awesome and it's still a numbers matching car. That's all for now, next post will be all about the current build. Feel free to discuss here. //oldschool.co.nz/index.php?/topic/56384-1963-ap5s-valiant-regal-discussion/1 point
-
Got it filled and primed 'good enough'. Painting the inside of car is even worse than the outside! I need some of the correct thinner before I can make it yellow/get runs everywhere.1 point
-
Spent Friday evening lowering the rear with R33 skyline front struts using the R31 tophats, the result was disappointing as it only came down about an inch. As it turns out you need lowering springs or an angle grinder to get the desired result, need to pull it apart again anyway cos the LHS shock is buggered. Chucked a new knob on and changed the steering wheel to a larger diameter OMP one Then today I did some maintenance, adjusted drive belts etc. Pulled the IAC valve off to give it a clean and found a perished coolant hose with a nicely hidden pin prick hole leaking coolant, quick trip to Repco cos I had nothing at home that would work and she was good to go again. So over Labour weekend I will rip the front struts out and replace the springs/massage them with the angle grinder, The rear suspension will come out again to lose a couple of coils and hopefully I will have found a replacement shock by then too.1 point
-
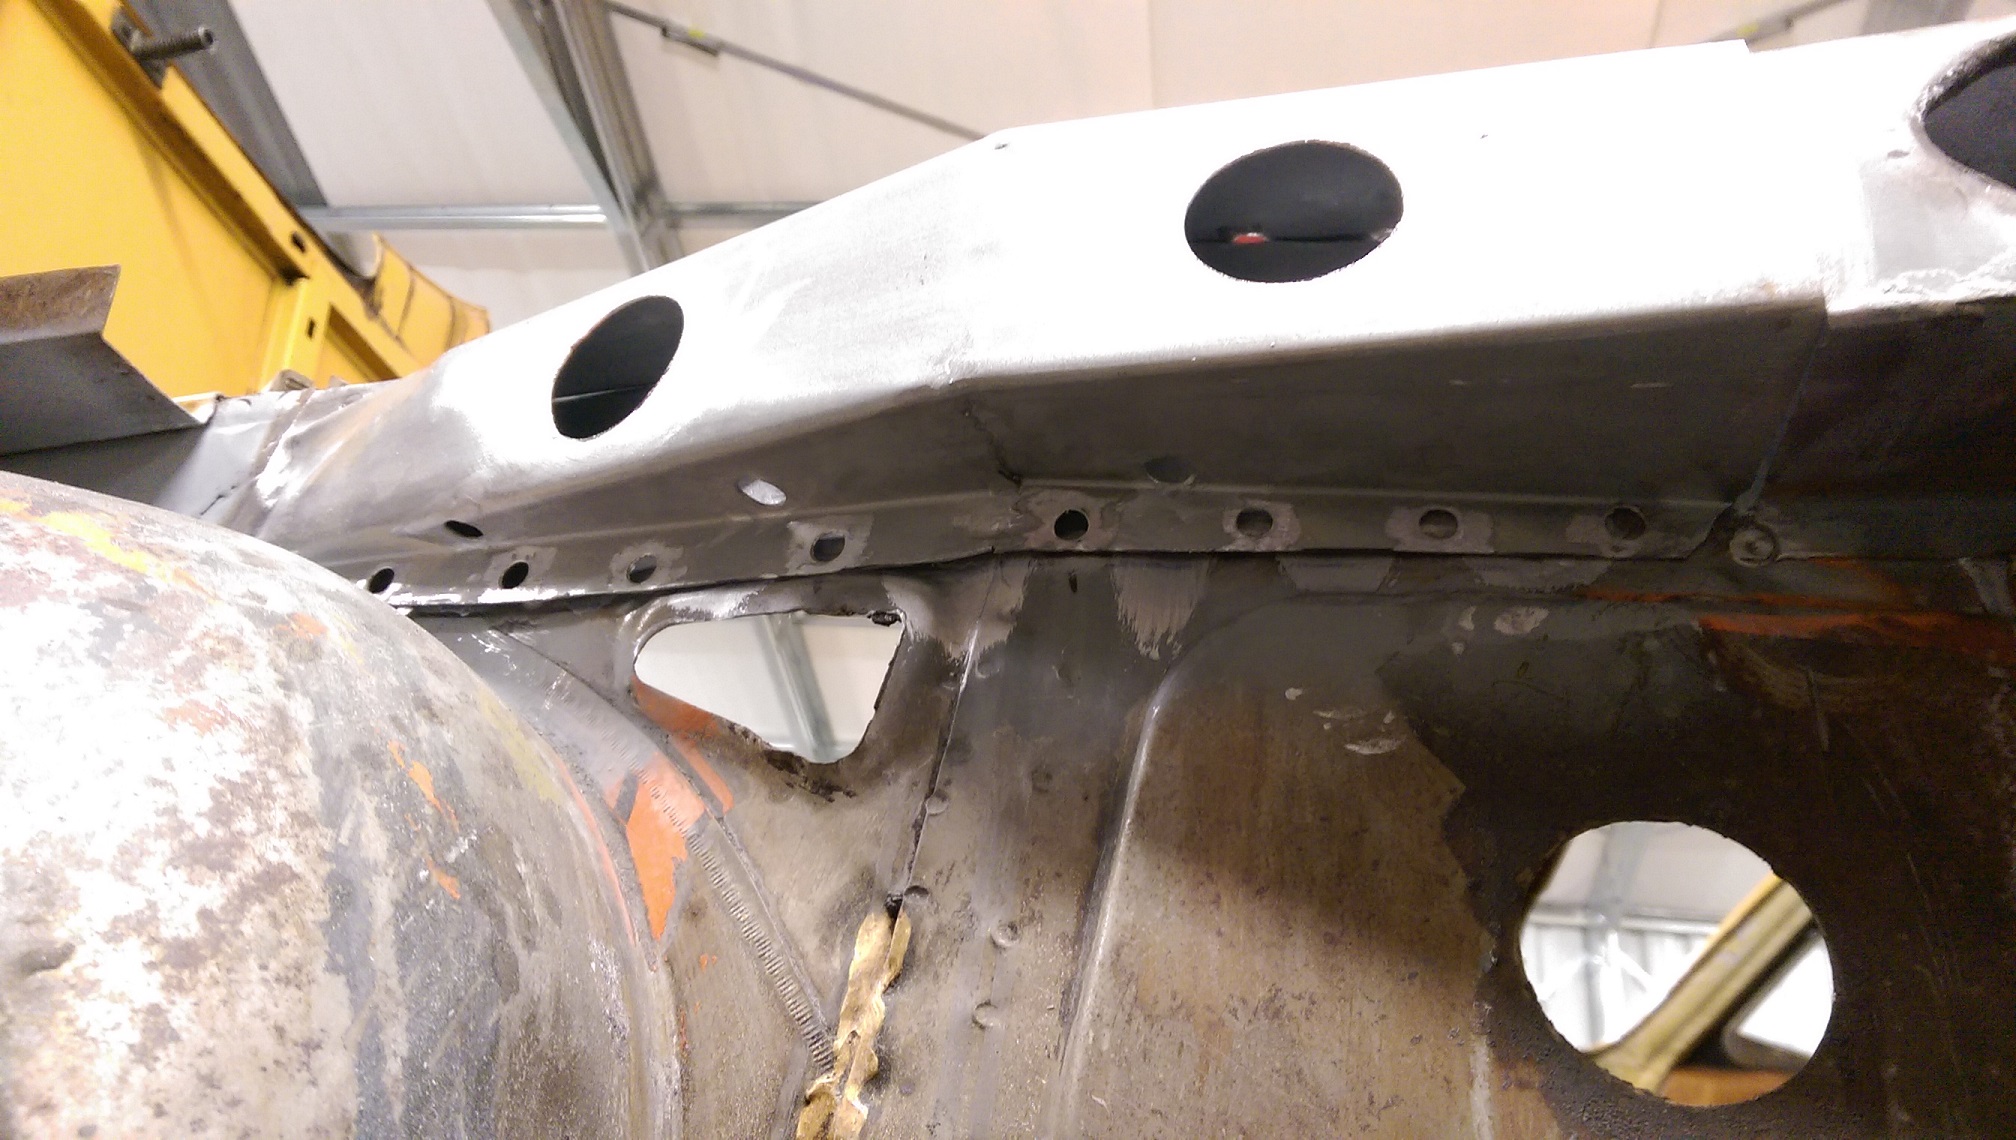
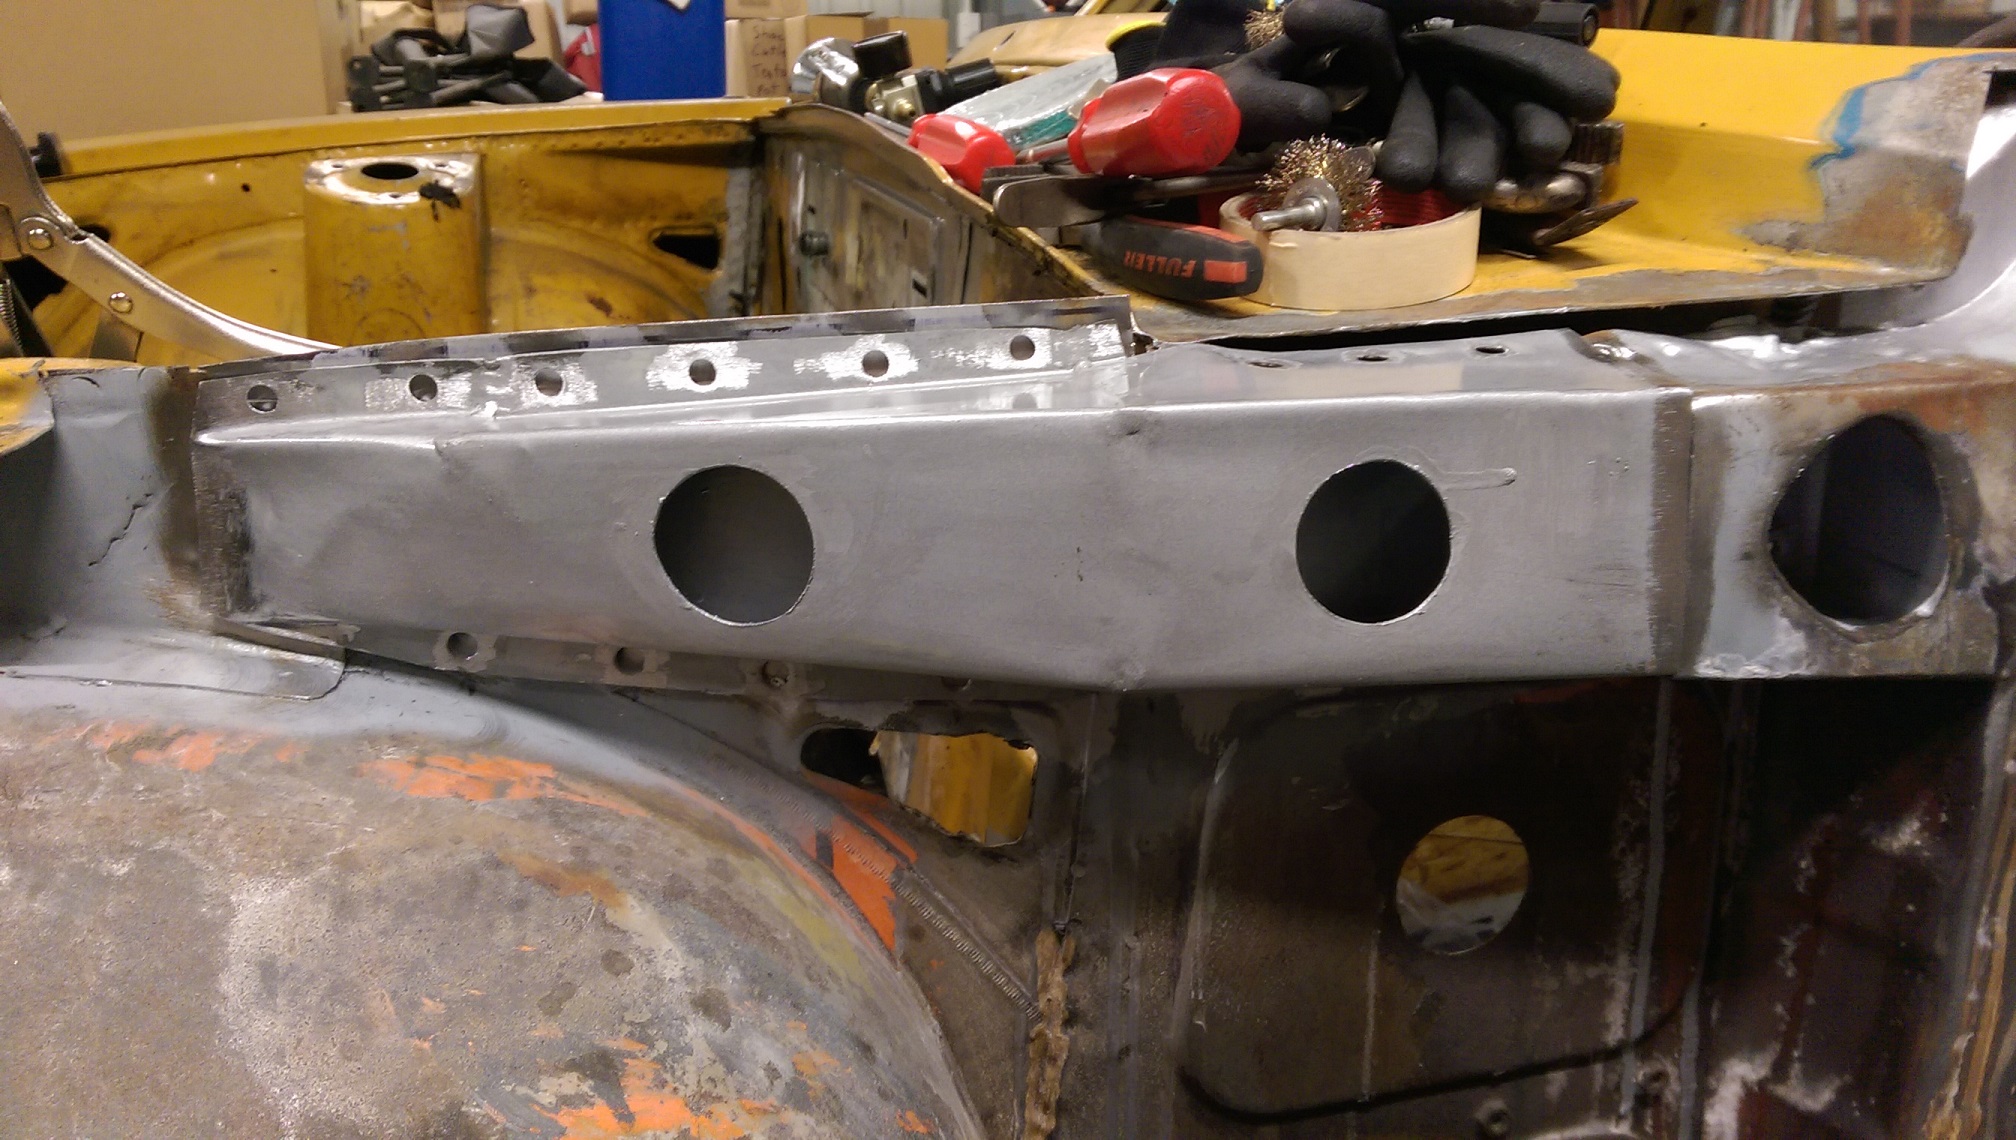
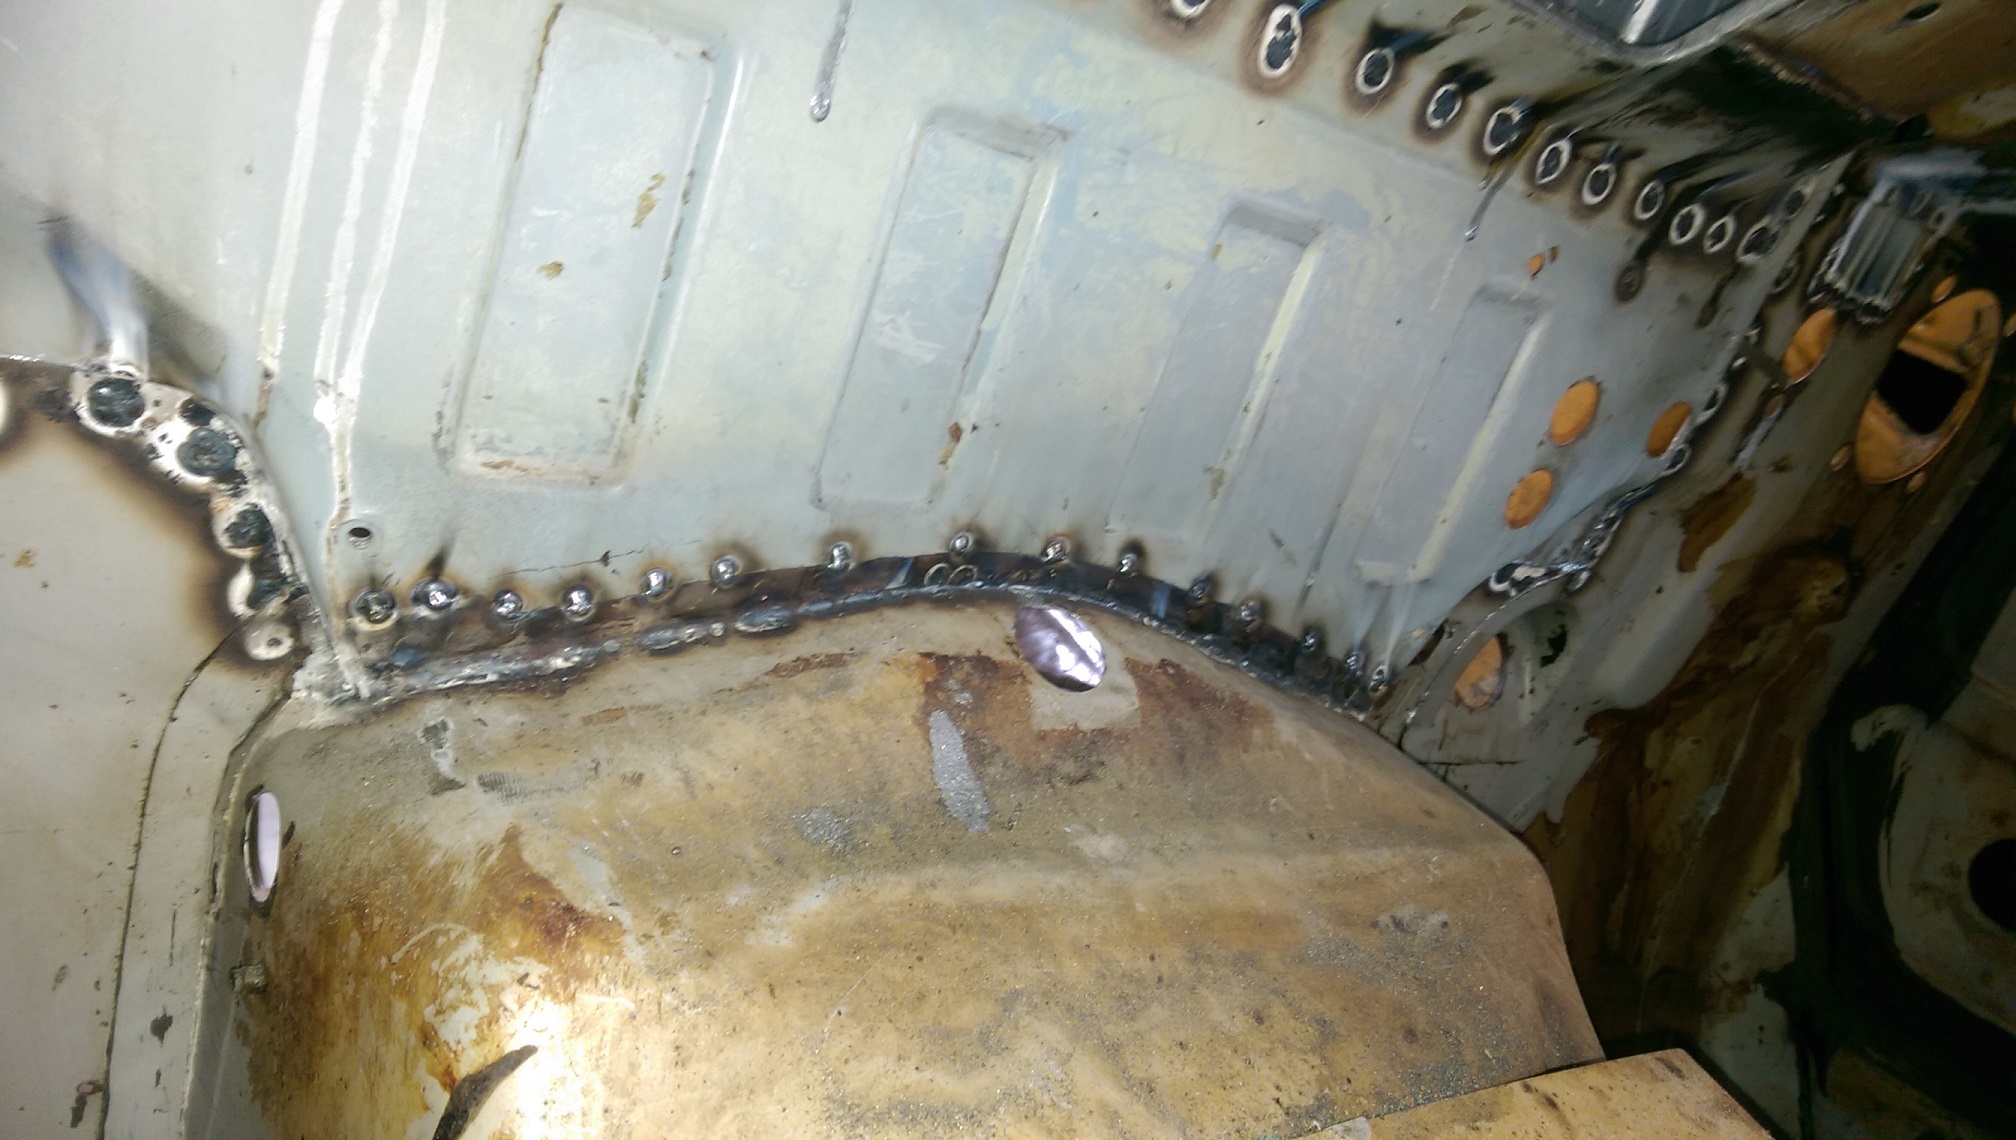
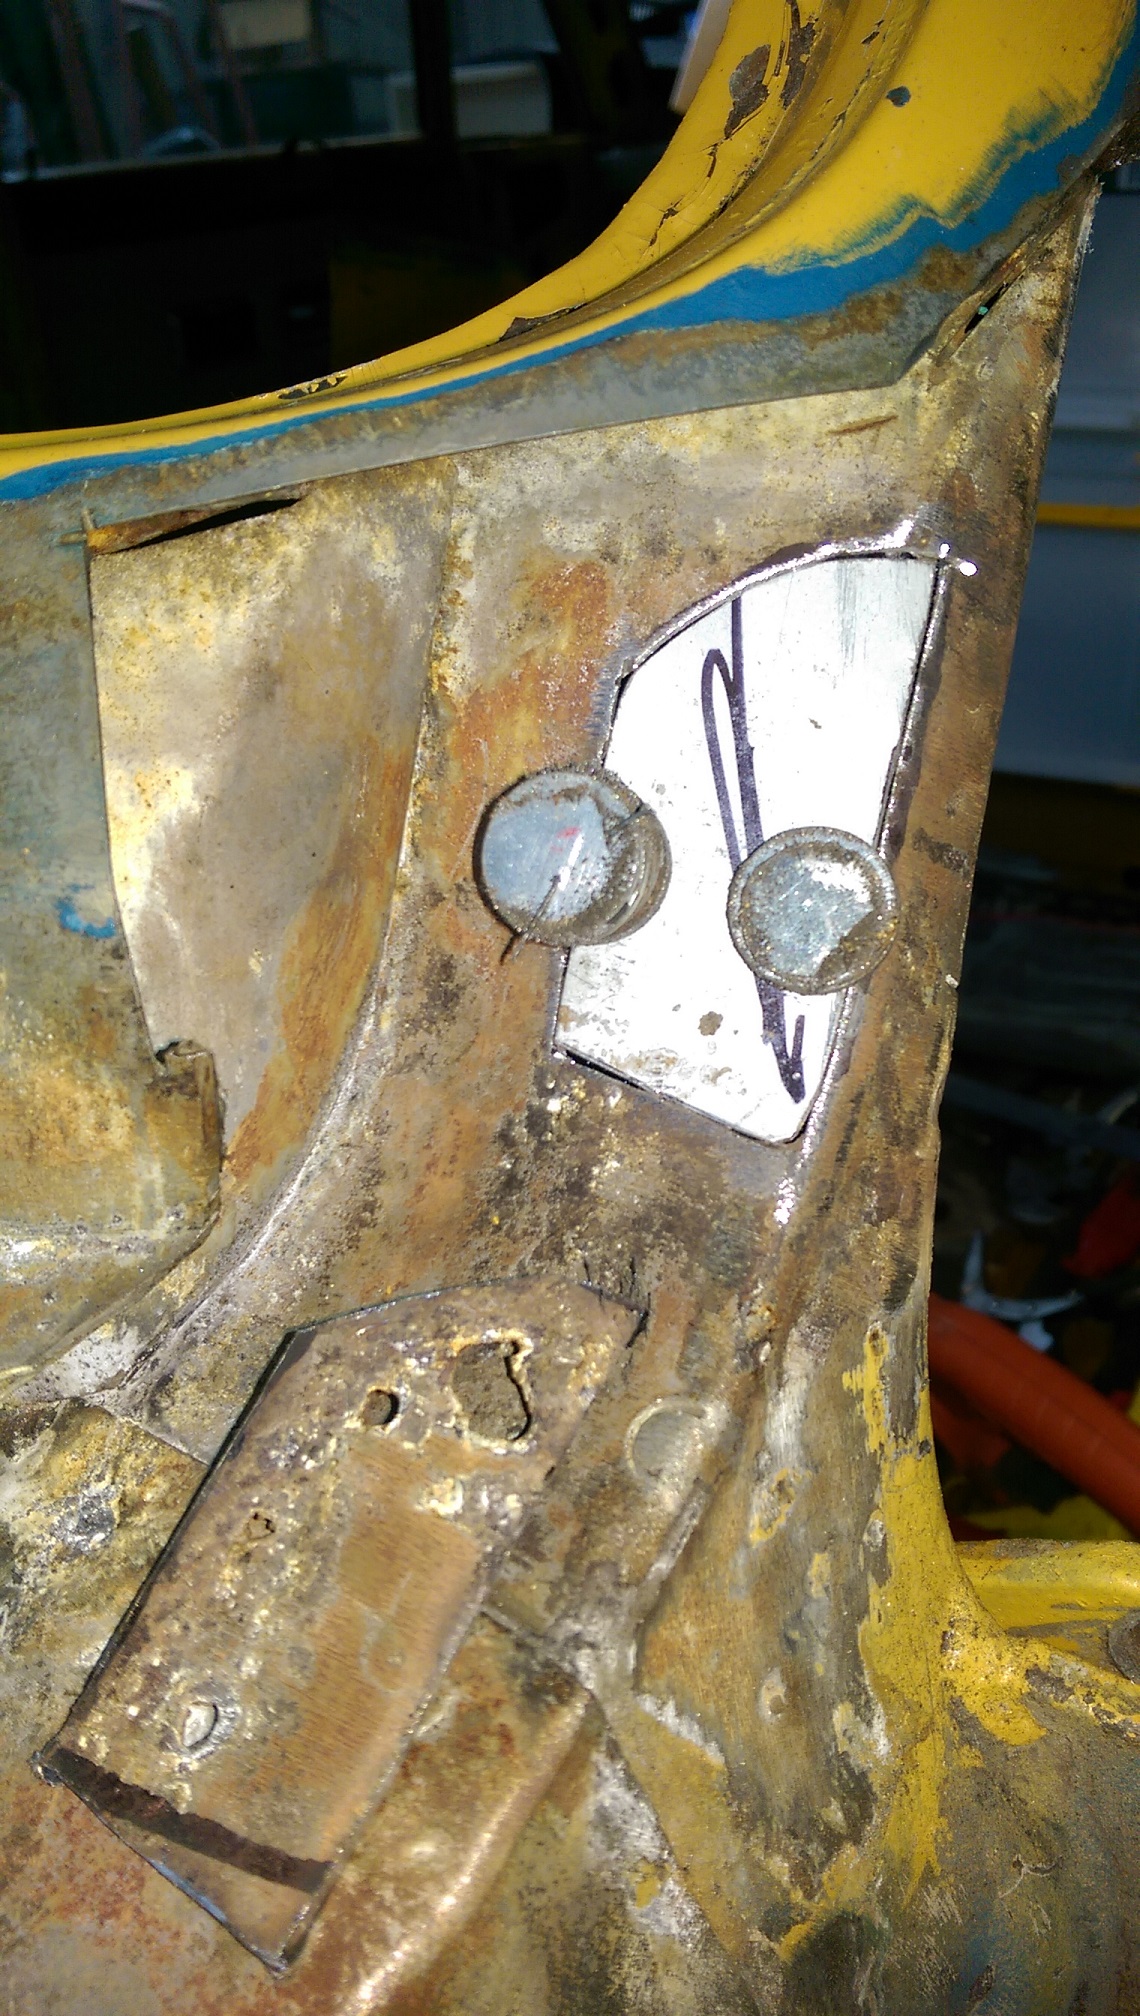
I drilled the spot weld holes and cleaned up where welding is going to happen. I also added some holes so I can stick some more paint in the back of the seams once welded. And just in case, I added some drain holes. The original had a hole in the top, that let water in but no way for the water to get back out, so the bottom rusted out.
1 point
-
Yeah I got caught coming back into town, pedestrian got knocked up about 100m from the roundabout. Traffic was terrible1 point
-
We were bloody lucky to get out of otaki when we did! Much longer and we would have been stuck in traffic diversions1 point
-
Ah balls, totally forgot this was on. Wondered why i spotted a couple of mint old cars as i was heading back from Pram in my Honda parts hauler.1 point
-
After welding the cuts and cleaning up. Painted it with POR15. I'll sand it off in the weld areas and drill the spot weld holes when it's dry.
1 point
-
Today i went around to my brothers house and used his ta63 carina as a lathe, and polised up the WORK Lesco Pulse 1s. all i can say is that i am so far beyond stoked with these wheels. my cellphone pictures dont do it justice but the fitment and style suit this car down to a t and a couple nicer but still cellphone photos of how the engine is looking, its getting dangerously close to firing up, with the only things left to do are finish welding the tensioner (have wire now) wire up the ecu and a sensors hook up a throttle cable track down a water pump pulley discussion -1 point
-
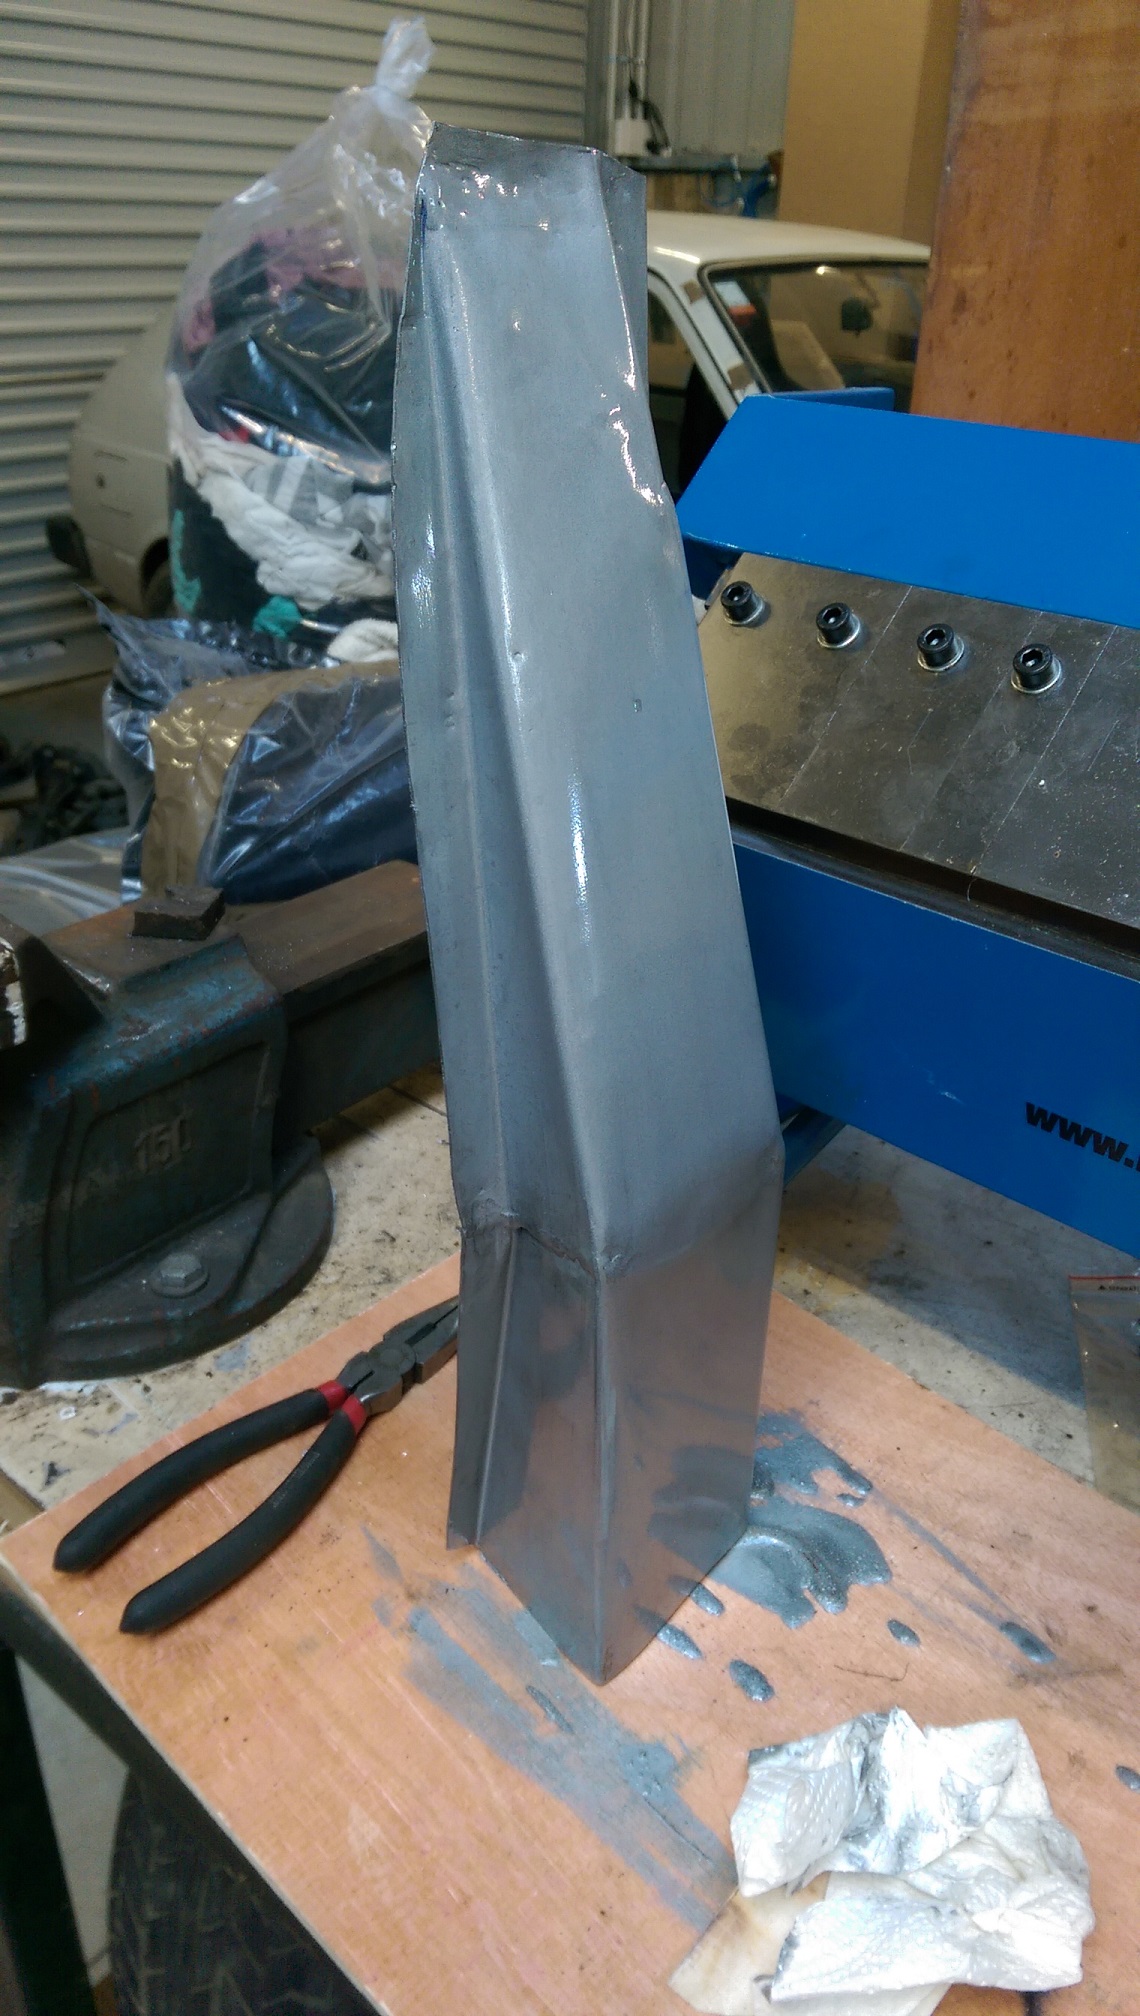
So i grabbed this rig off my father inlaw so didnt build all of it but just finished modifying it to suit my setup. Made new pedal mount and seat mounts. Now to do some racing.
1 point
-
That's where you're wrong kiddo
1 point
-
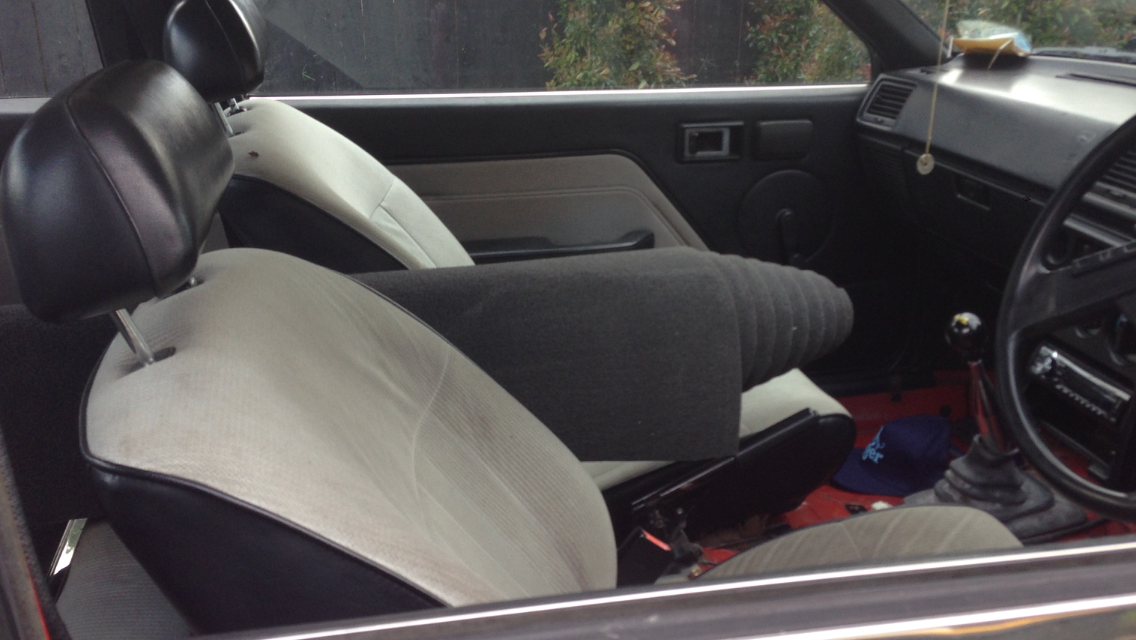
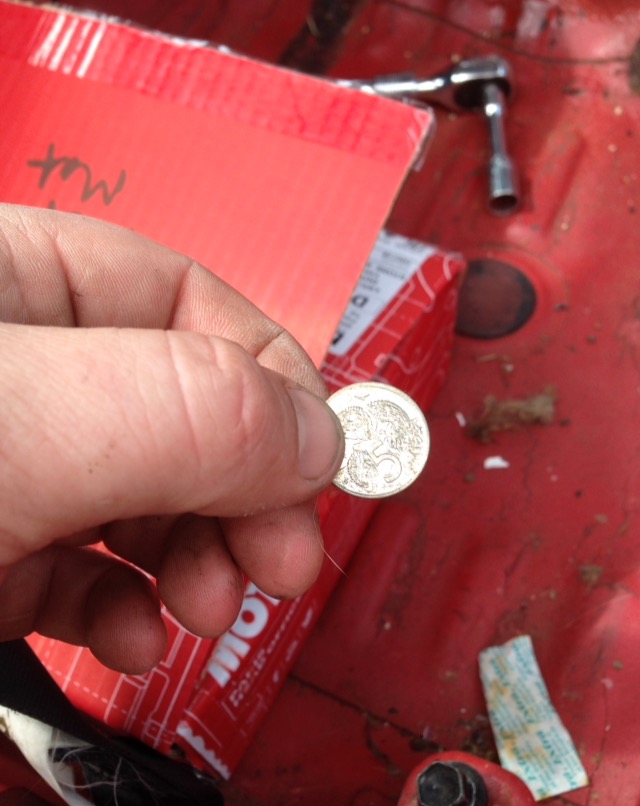
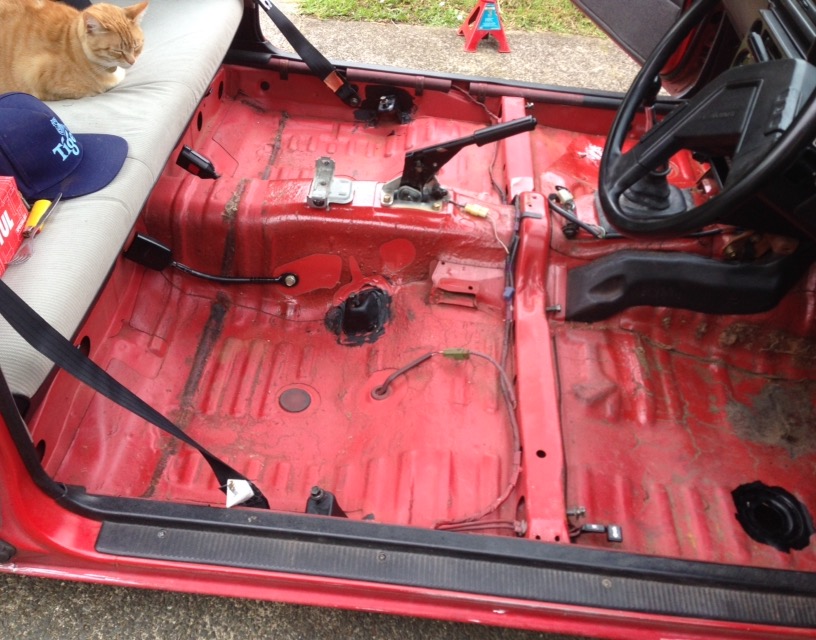
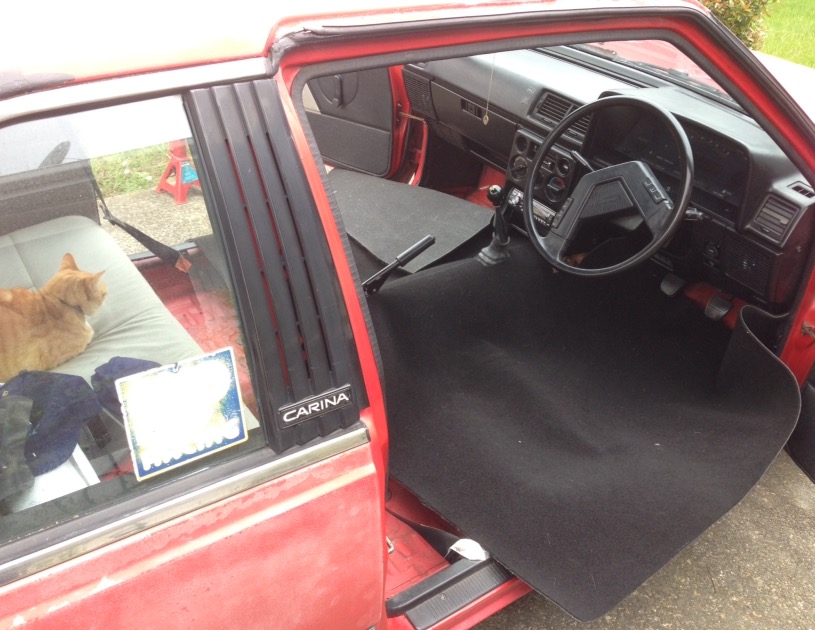
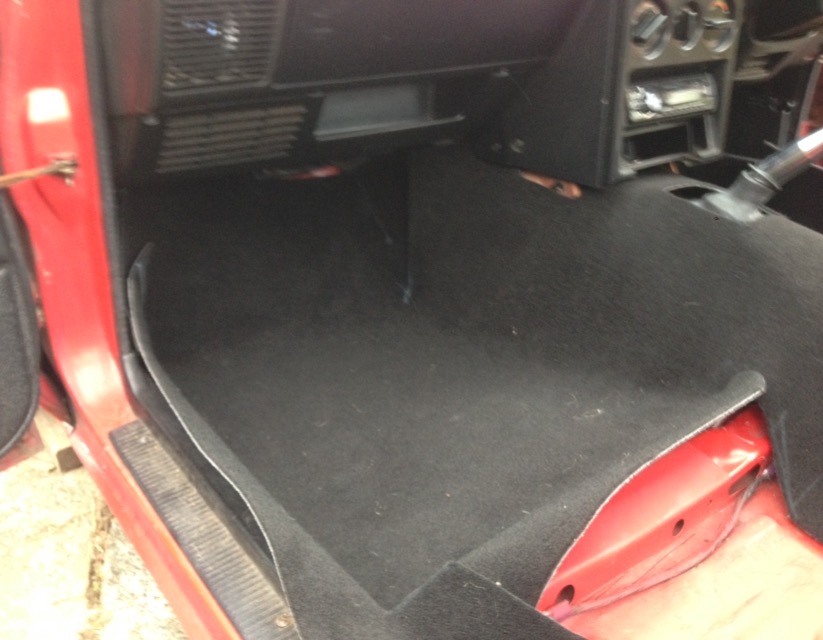
Picked up carpet. started fitting carpet. pretty stoked with the first days work. Small cuts/refit/cut/refit. will haft to sew it up into shape but it's mint so far. Rear will be the hardest, probably haft to do it in two parts and sew them together. couple little places where I'll need to add carpet and sew it from behind but that's sweet, will be perfect fit and hard wearing when done. got 5meters so I'll do mats and dash protector too. wahoo! Car will be more civilised again found oldschool coins too, I'll chuck me back under when I'm done
1 point
-
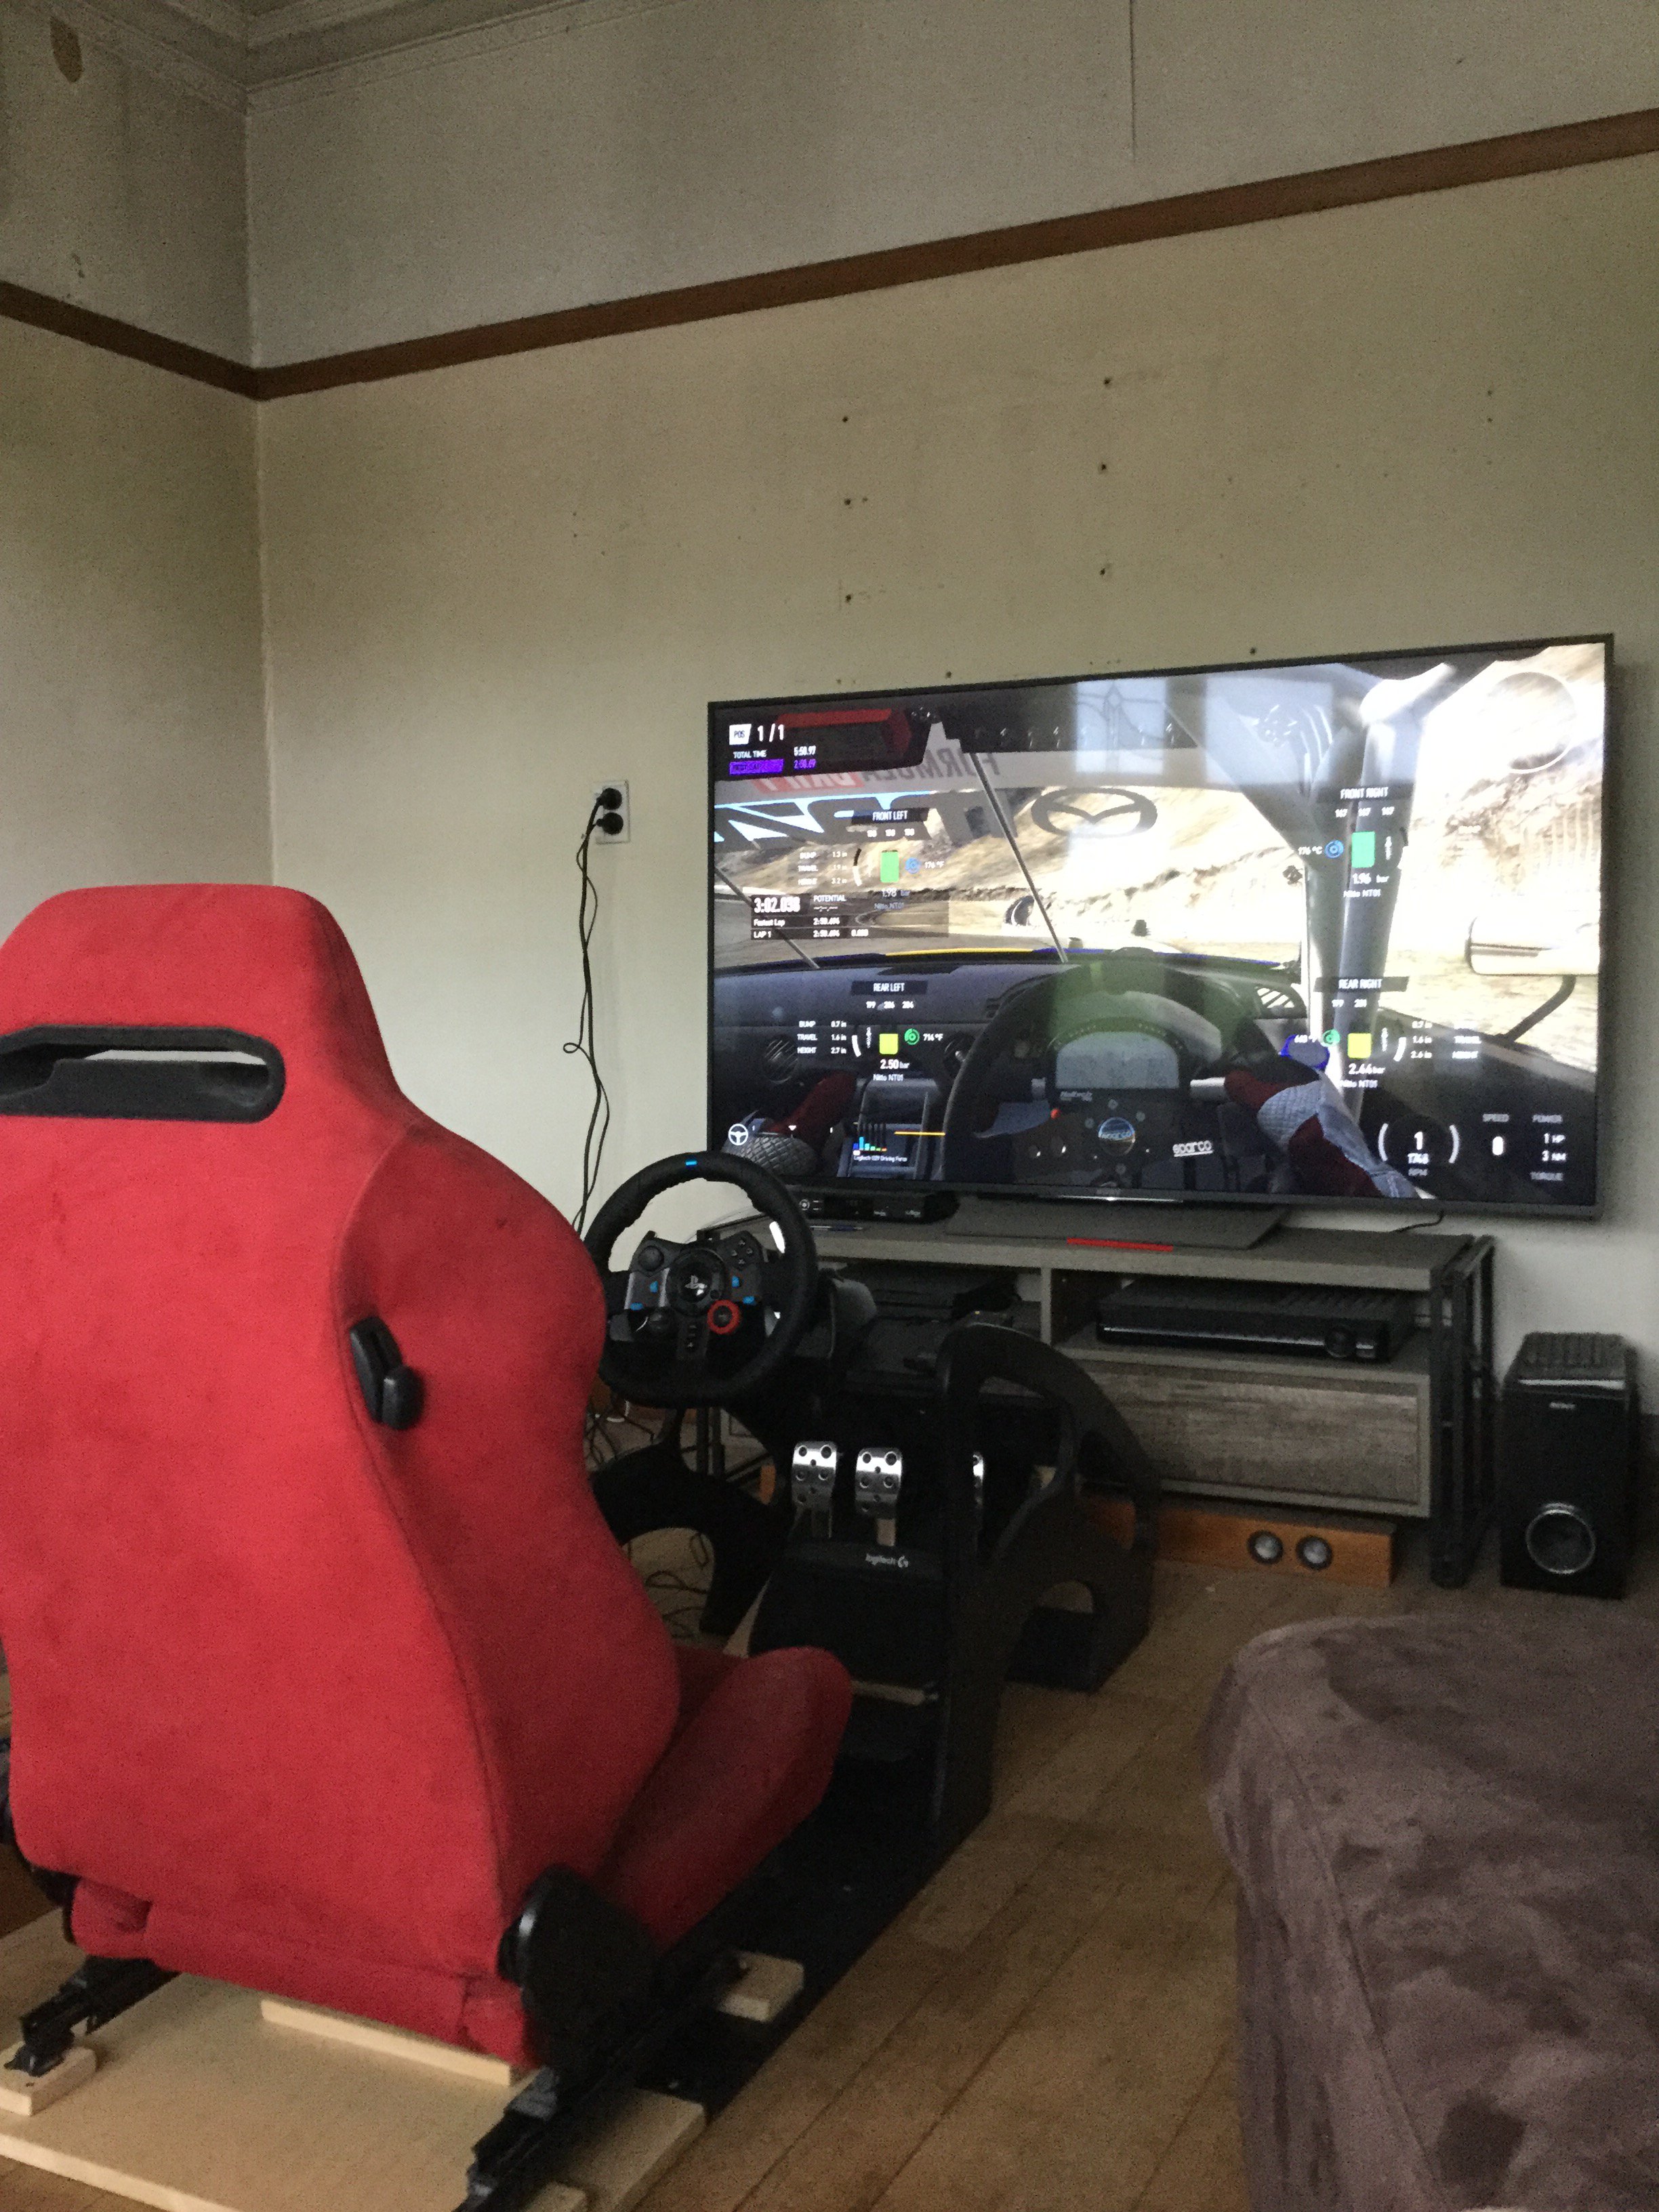
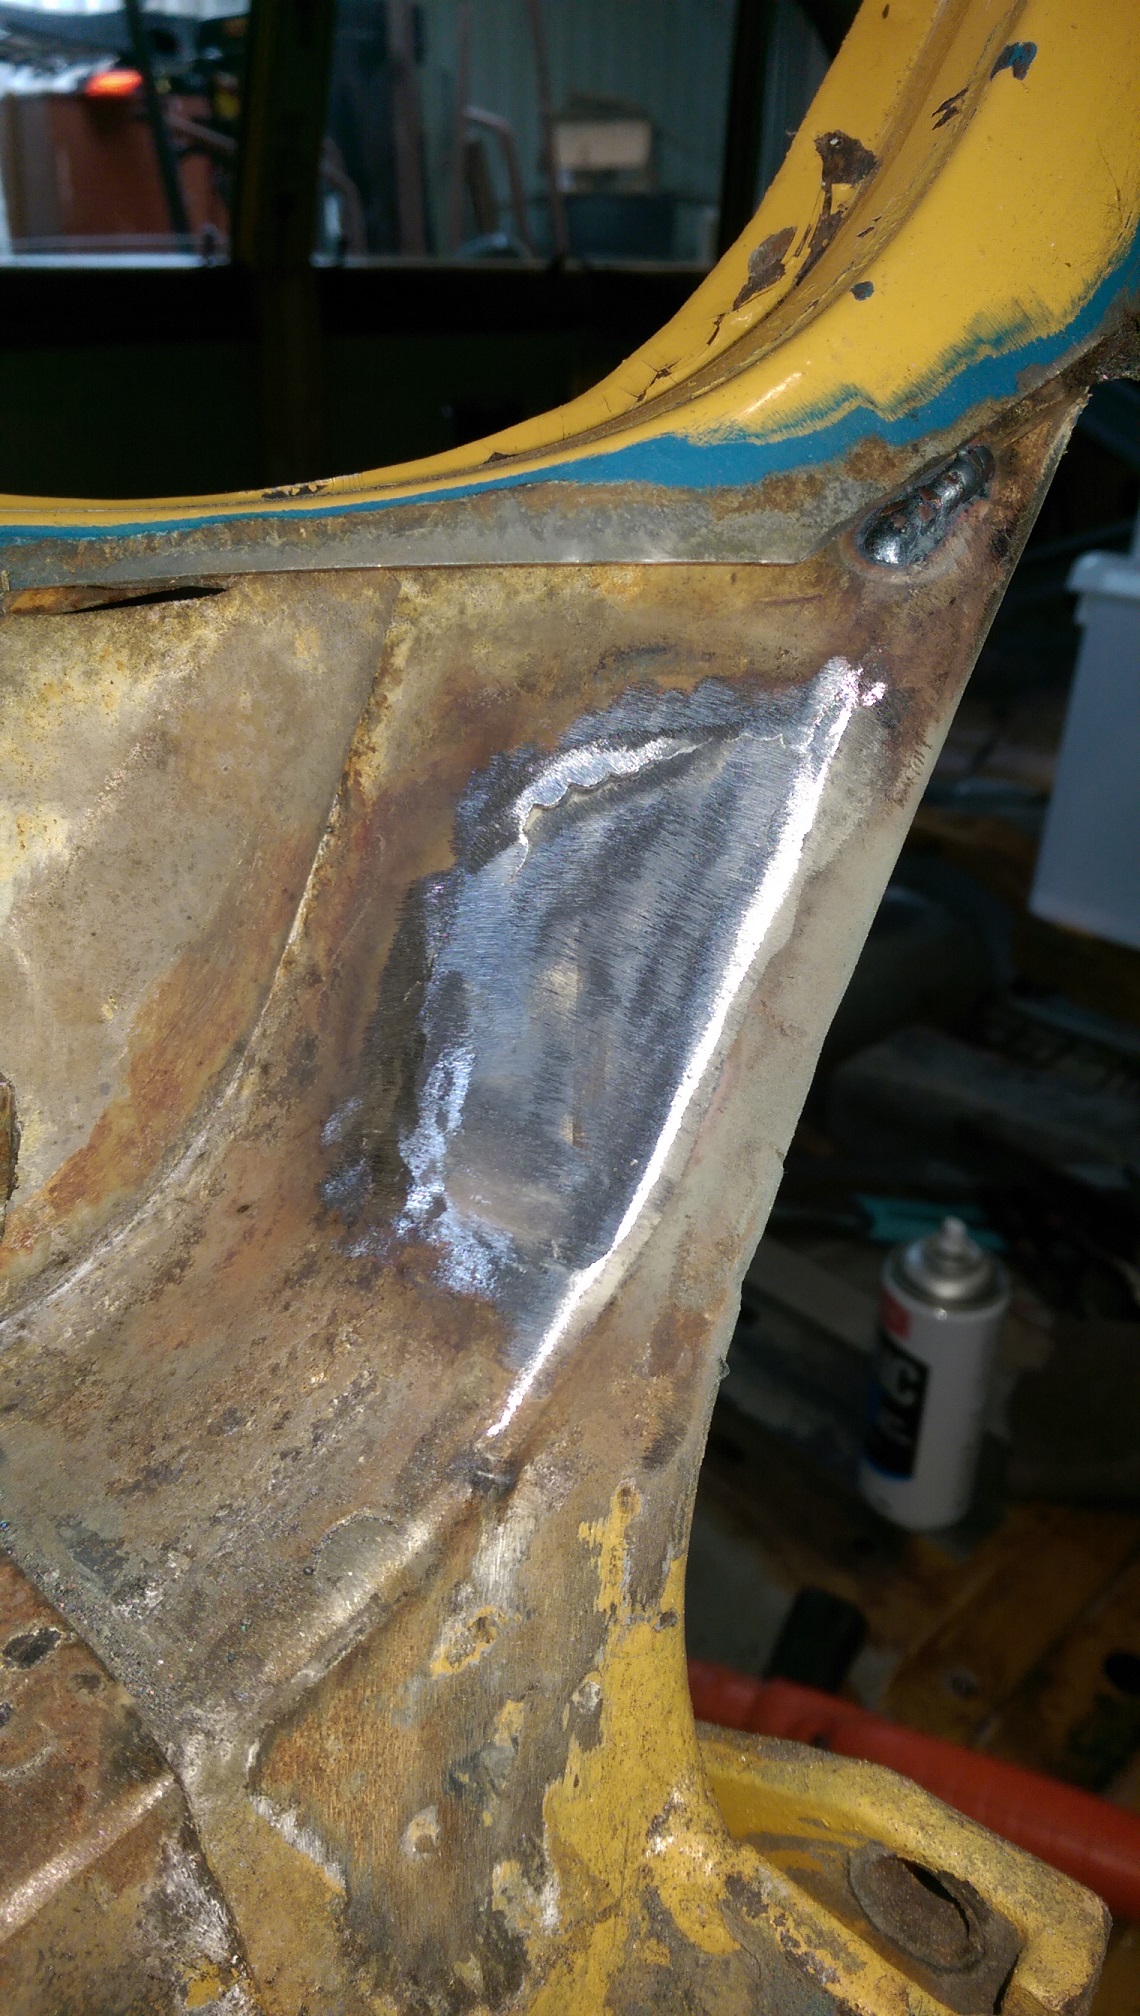
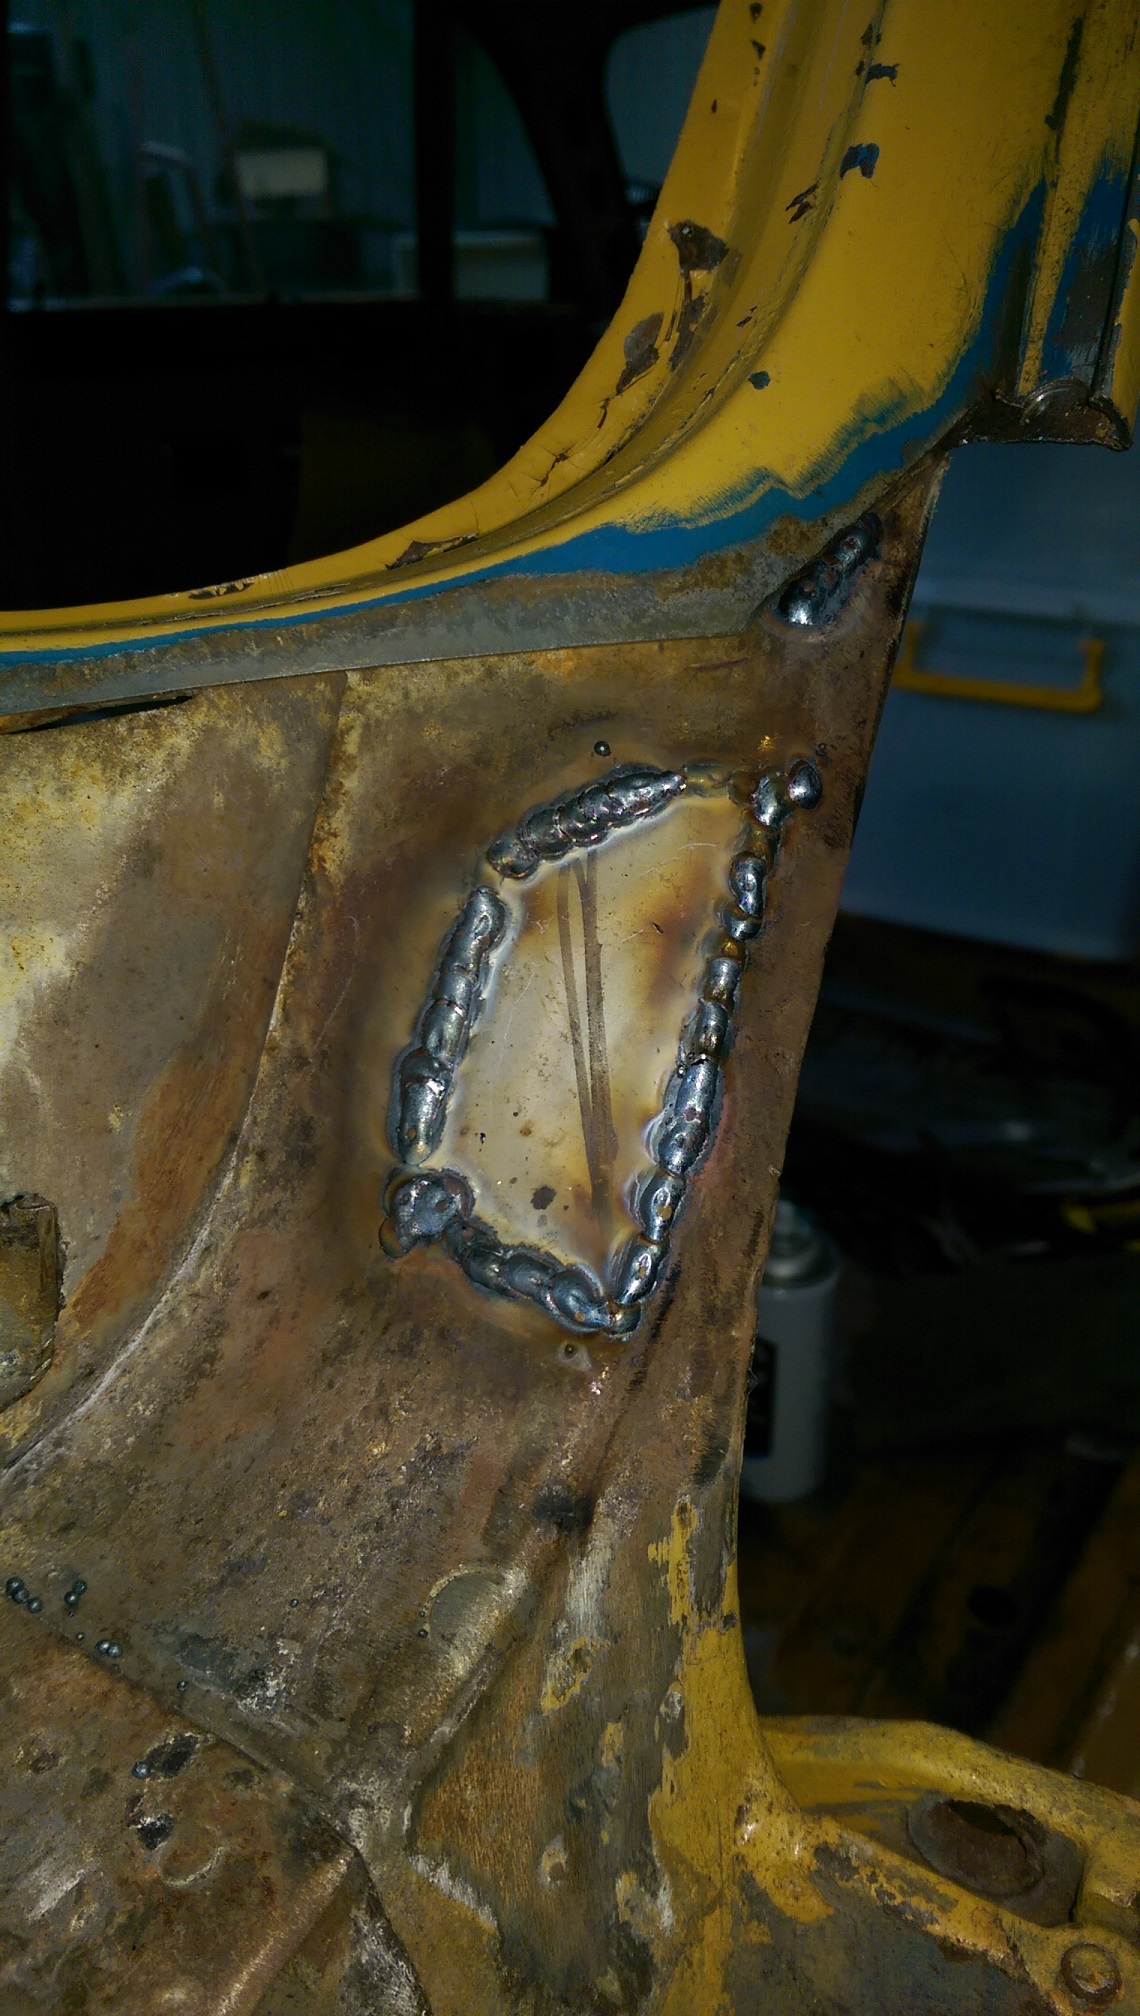
And also! I patched a hole in the A pillar. And I finally got around to putting some tacks on the rear of the tunnel seam. This is all I will do, it's seam welded all the way on the other side. And I noticed my Argoshield is on 'empty'.
1 point
-
Decision was made to try and bring the cost down of the consumables (Pads and Tyres) So I dropped the wheel size down to 13inch so I could run TRS slicks. Old wheels and tyres weighed 17kg each, new ones are 12kg. New Wilwood Calipers on the front to fit the new rims. For the rear, since I'm still running standard AE86 axle I have waterjet cut down some Wilwood Polymatrix pads to suit. Of course all these changes meant the cert plate was no longer valid, so the decision was to make the car a dedicated race car, which saves having to do 6 months warrants, authority card and on road insurance.1 point
-
While we were doing the wiring, quad throttles, with trumpets, adapter plate (sq engineering) and filters came up on trademe, I couldn't help myself, lucky they just fitted... Move the battery to the back And started installing the new loom After many months we finally finished the wiring.1 point
-
No WOF checks recently I keep going deeper into cert territory plus I want to swap my L28 in at some point so I should just pull finger and get it done.1 point
-
So a bit more digging today, i pulled out the interior, seats and carpets are fine to reuse, floors and sills and pillars are excellent. but there was a suspicious amount of no more gaps with a coat of bitumen spray over it on the rear cab/floor join, inside and the tray side. After lots of thinners soaked rags to get rid of the black tarry shit, and about an hour of wire brushing, and emptying the vacuum twice. That no more gaps sure is is sticky stuff! This is the passenger side from inside the cab and is the worst, drivers only has a couple of spots This is the drivers side from the tray side, and is the worst, but passenger side has a couple of hole too. Might be easiest to cut and shut ~100mm wide sections from a sedan floor as they never rust there. My red 125 body is in now in Hamilton and ive been meaning to grab some bits back off it so i guess thats moved up the list. This are will probalby be the last to do as a result. The cab wall itself is fine. More rust chasing I think i found the 'custombuilt' part of this truck. The vertical shock mounts have actually been removed and the angled setup installed. I didnt have a very good look underneath but it looks factory, so i wonder if its got 1500 bits under there. There are a few holes to fill in both inner arches due to the torn spot welds rusting. There are also matching holes in front of each arch where ive never seen a sedan rust. As well as adding rusty holes to the list, I crossed some off. The tail gate was rusted though in one corner, but now it isnt! I was in the zone and forget to take pics till i put the first coat of primer on, but you get the idea. Will need a skim of putty (especially to fill my wonky edge line!) but im pretty happy with that for the first patch.1 point
-
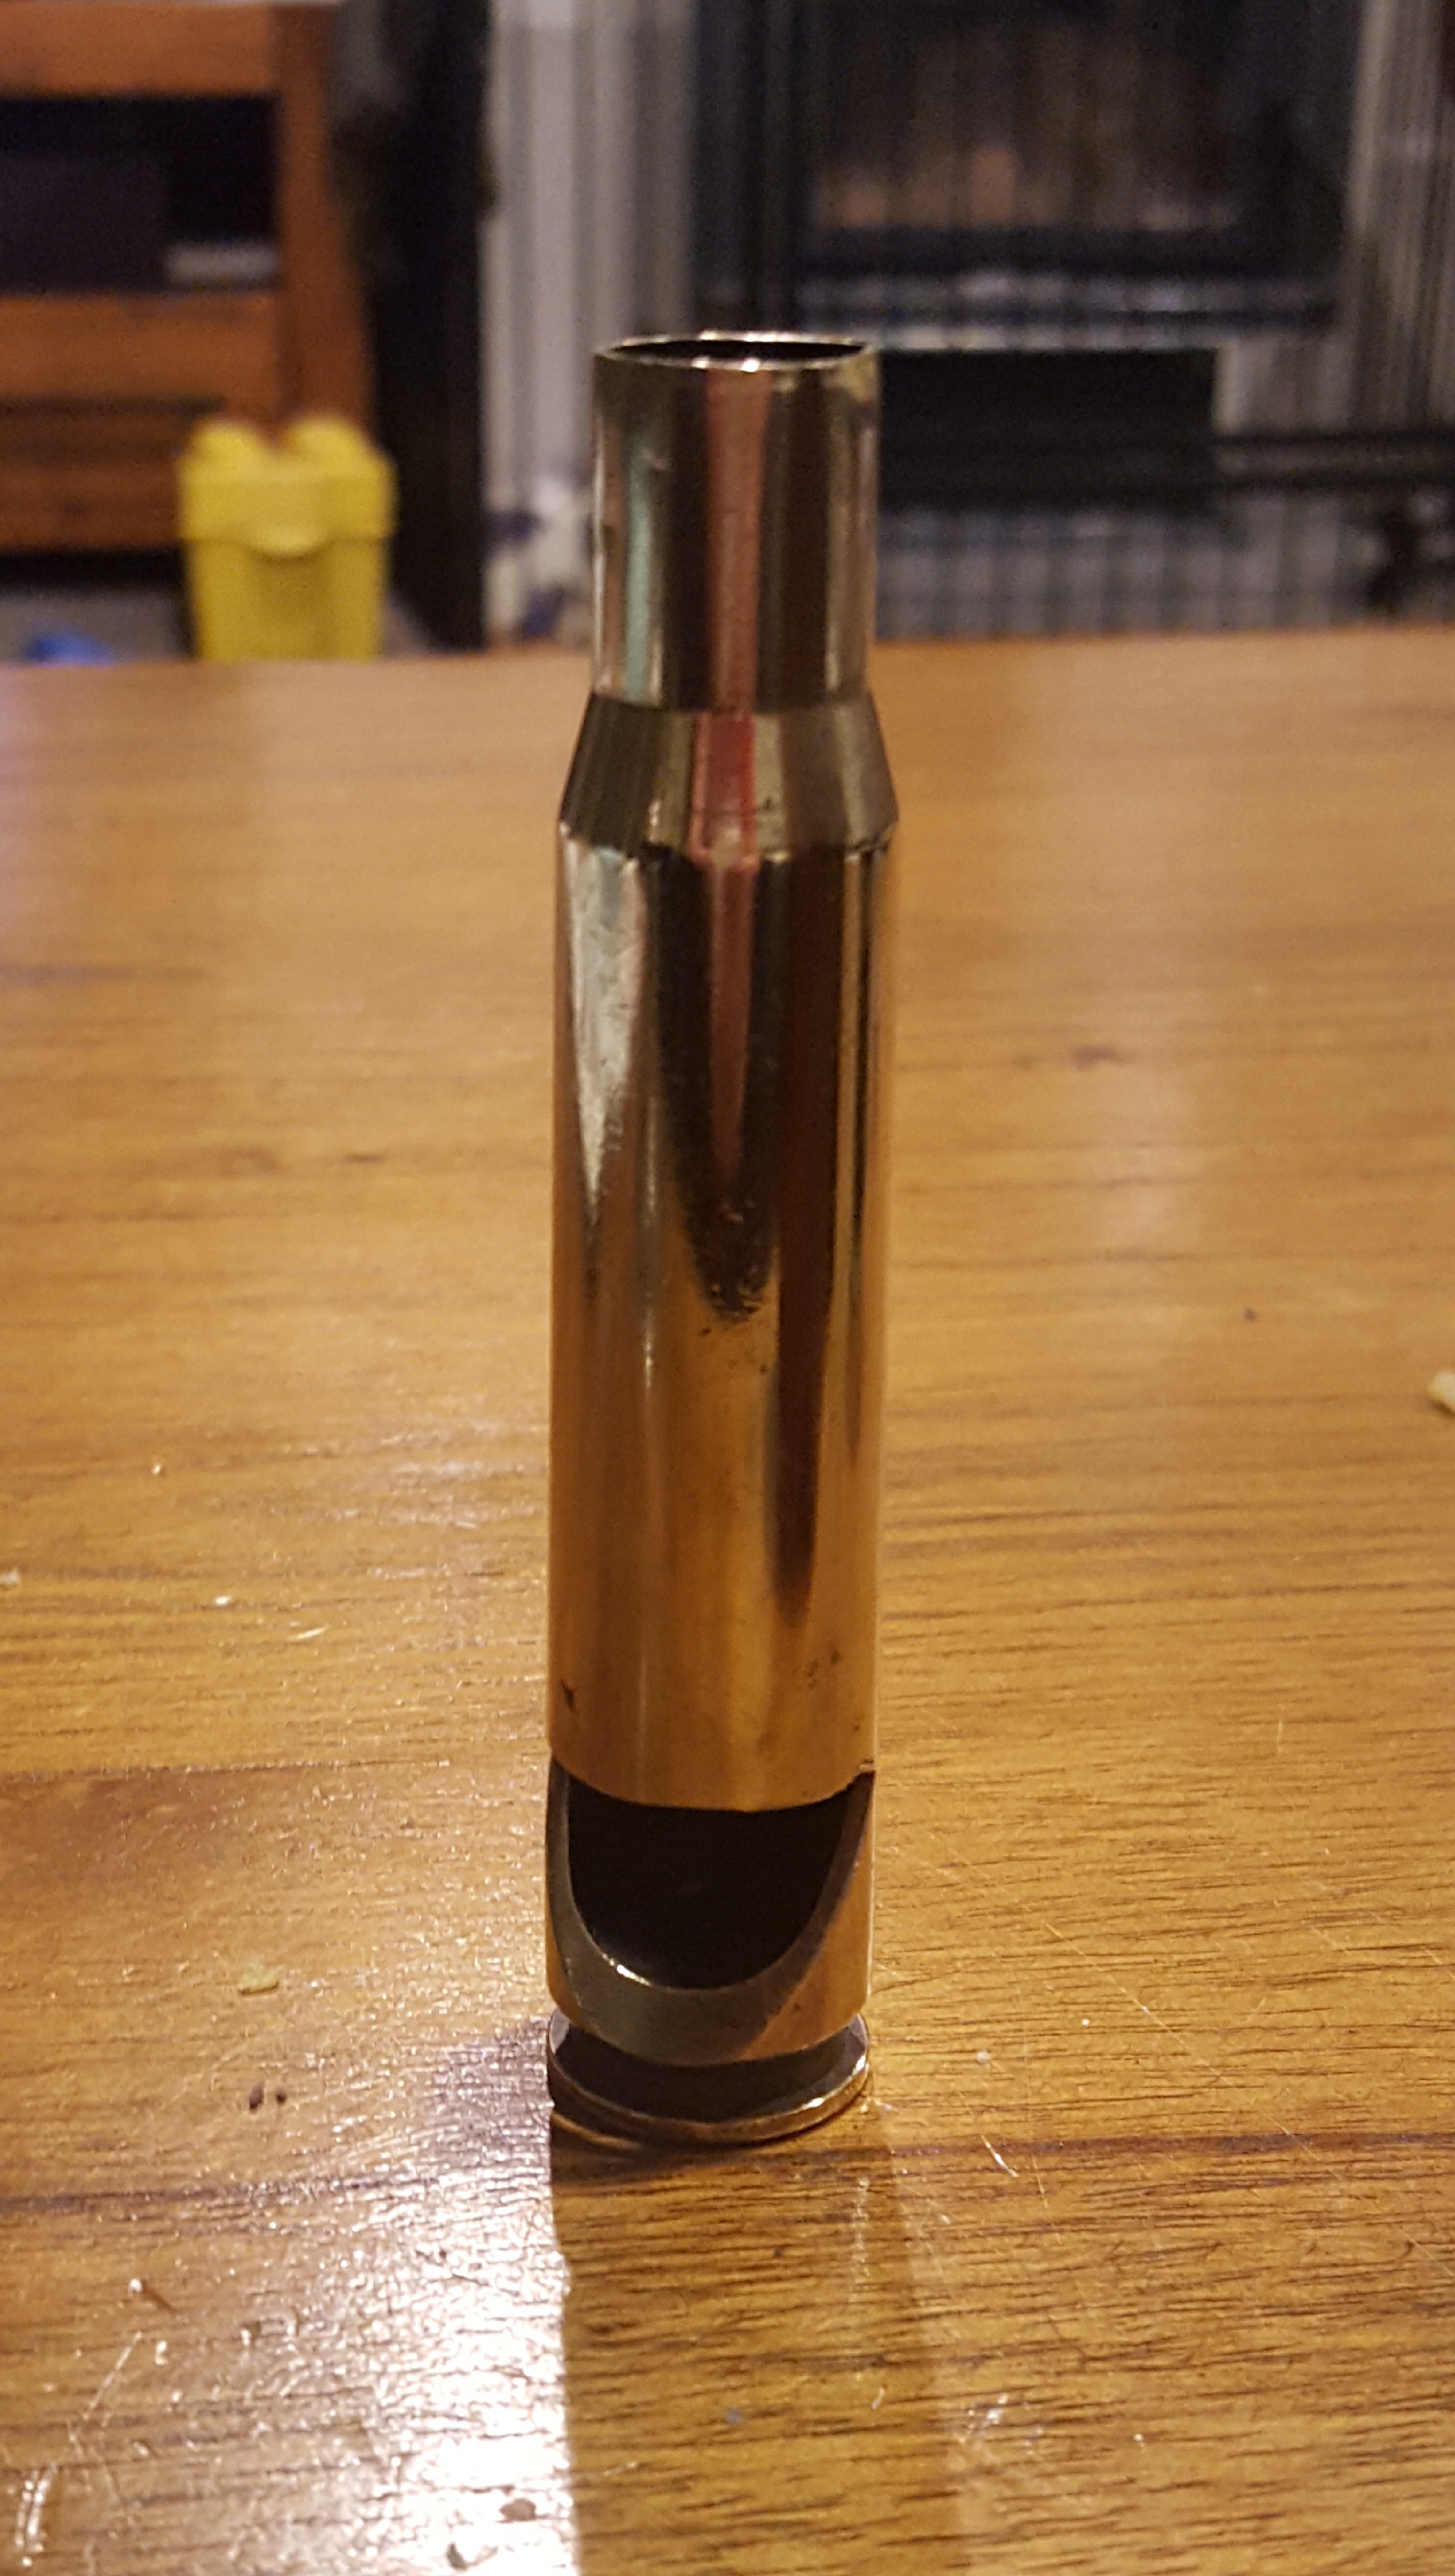
.50 cal bottle opener. Spent shell is from the long ago decommissioned and scrapped HMNZS Taranaki.
1 point
-
Been have been having a nightmare getting this thing legal, Drove it to work a couple weeks back as I was feeling to weak with a headcold to ride my bike anymore, Knocked off early and went to see Frank at the local vw workshop, but he had staff off sick also and was flatout himself. So I rolled the dice at a nice looking garage across the road from work.I didn't want to leave my baby with any fuckwit or some young guy who wouldn't even know how to drive a real old car, this guy has been in the trade for nearly 30 years and use to own/work on bugs back in the day, Sorted.Or so I thought, it failed, which I was fully expecting, as the brakes are not great and the rear tyres are old,hard and nearly bald. But it didn't fail on any of those things, there were a few small things like rear seat belts are old and one won't adjust, somehow though the rear tyres pasted and the front one didn't because apparently they are full on drift spec stretched tyres, ie to narrow for the rims and the real kicker the chassis number doesn't match the paper work, this was something I've always know about, this car is build from about 12 bugs, but no one has ever worried or picked up on it before, so I was off to the vtnz, handly just up the road also, filled out MR16 change of reg details form, waited a week, computer says no. can't just be swapping chassis numbers around I guess.So now I'm waiting again for the faceless bureaucrats to rubber stamp me a new VIN number and I should be good to go! still need to sort a couple small things but tyres really piss me off,I looked up the rim size they fit on(145.65.15) a smart car and it's 5inchs, these mags are 5.5inch, that an't stretched fuck all and in my opinion, the rear tyres are more dangerous as most of the vehicles weight is on the rear.rant rant ranty rant, I know the guy is just doing his job, but I'm running out of energy at this point.anyway as our recently departed friend Mr Petty sang, Waiting is the hardest part.so I didn't rush hour still sucks1 point
-
Have repaired the last of the body rust now (not counting doors here). Last weekend I cut out the flat area that was holy (holey) along the rear window. Bent up some replacement parts (I did it in two pieces to make the folding/fitting easier) Also filled the holes in the C-pillar on the passenger side where a seatbelt had been bolted through. The inside wasn't as neat as the pillar was a bit crushed. Both rear sides now ready for prep and paint. Then I can get the glass back in and hopefully back on the road.1 point
-
I was looking forward to driving it to work the other Saturday cause my work car is boring, but when I did it was flat as fuck, boring and generally disappointing. when I got home I put the timing light on it to find it had moved a little, so tightened. Needed a warrant so I put a standard carb on, so it had choke and wasn’t a jerk to start for them. hosed gas into the engine when you shut it off. pulled it apart and cleaned it, did the same thing. then discovered the power valve actuator was frozen up Freed that up and it was mint, but The morning of the warrant it started doing it again. passed with a clean sheet! Was a totaI knob to start afterwards so I hotwired it and wouldn’t rev out, popped and banged, so chugged it home. They didn’t mention it doing this to them so she must have behaved. more of the same. Have since thrown the twin carbs back on. it pulled a bit under brakes so I ripped the other caliper off (did the opposite side before last warrant) and: one Piston was a bit scabby so used a spare and got it back together, cheers to mint16 for the bleeding help! cheers also to the above for making my sweet rocker shaft spacers. likely overkill but it’s a cool old school mod which replaces the springs with a brass bushes to stop the rockers moving laterally under revs I also modified the mazda air box a while back so the bonnet closes over it. required me to cut most of the base, push down at front and then fill the pie-cut section with panel steel. and found out the hard way that if you leave the key on while you go check something else, it can get ultra hot,produce a lot of rank smelling smoke, drip Brown shit out of it and fail! Lucky I had a spare generic one, cooked one was a GT40. I have a new one, but I’m planning to go electronic dizzy soon so needed to be a non-resistor type. Heres a shot of the current state of play. I used to have the fuel line running over the rocker cover into a tee, but discovered that the factory hard line will reach with a little bending. Much tidier and safer.1 point
-
So here's the solution to a true first world problem. I need to play around with the flow controllers to set the speeds at which the gates open etc...to "time" them. Warning, you'll lose a minute of your life you'll never get back if you watch this!1 point
-
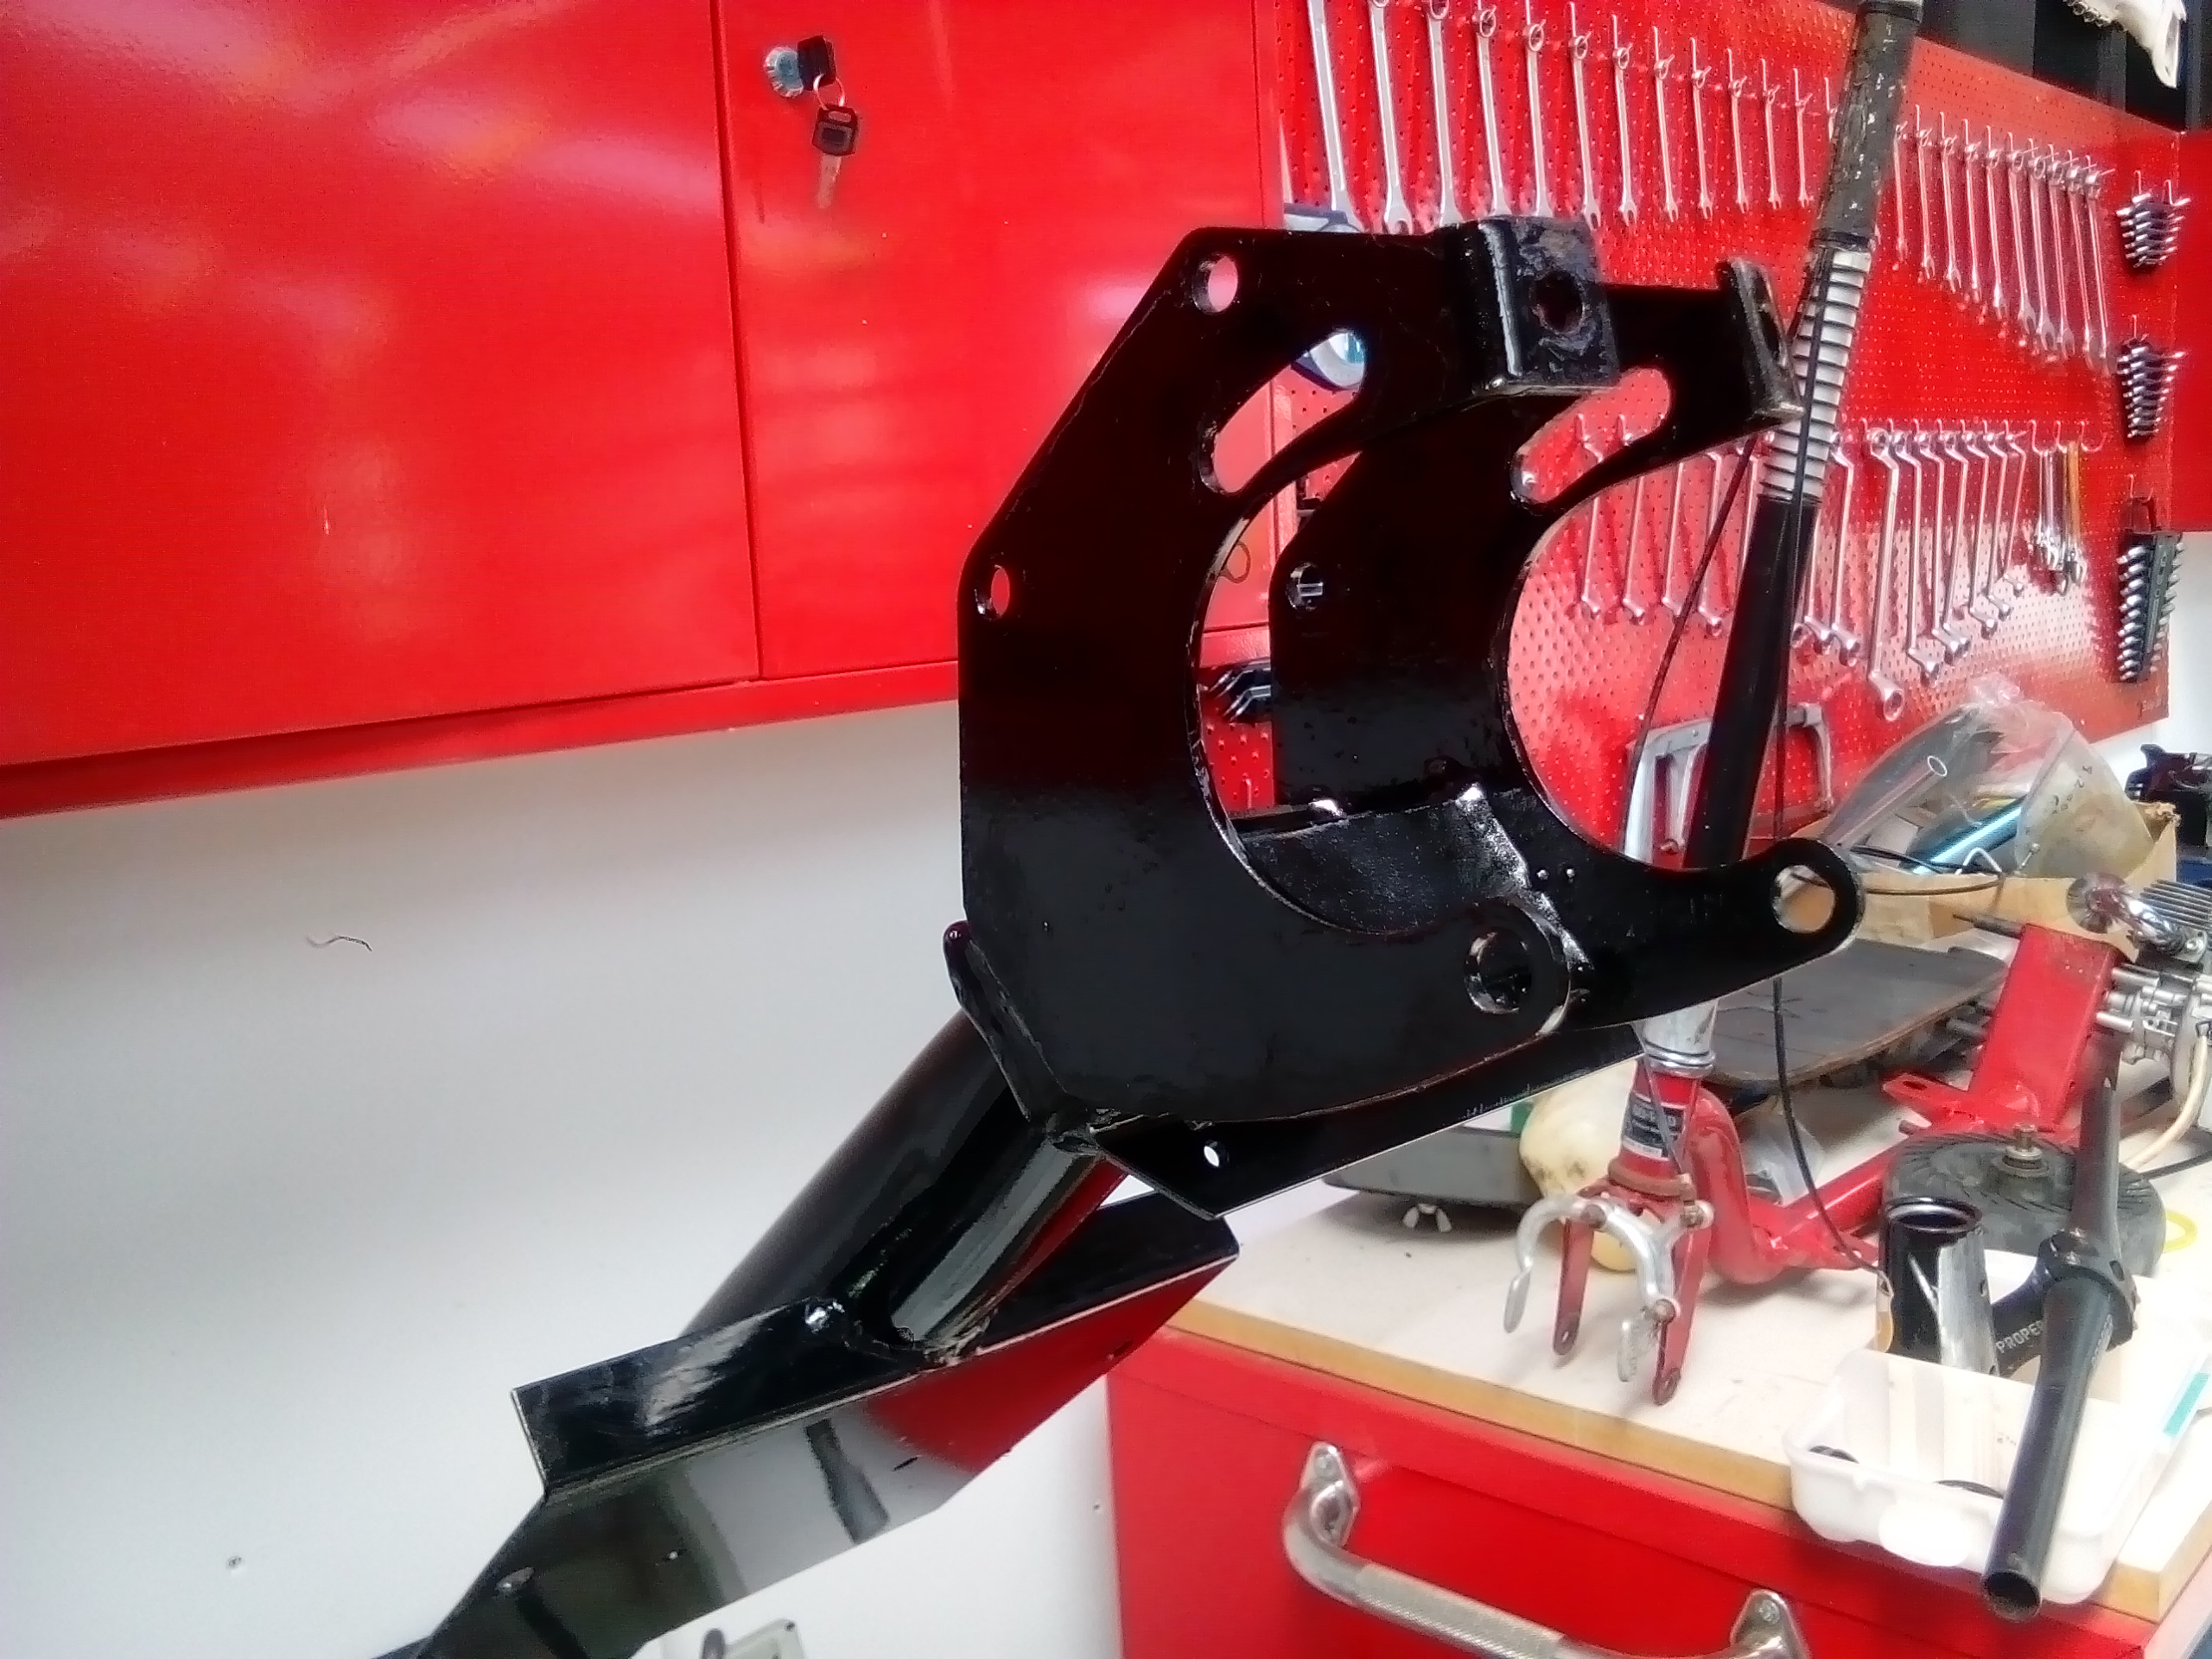
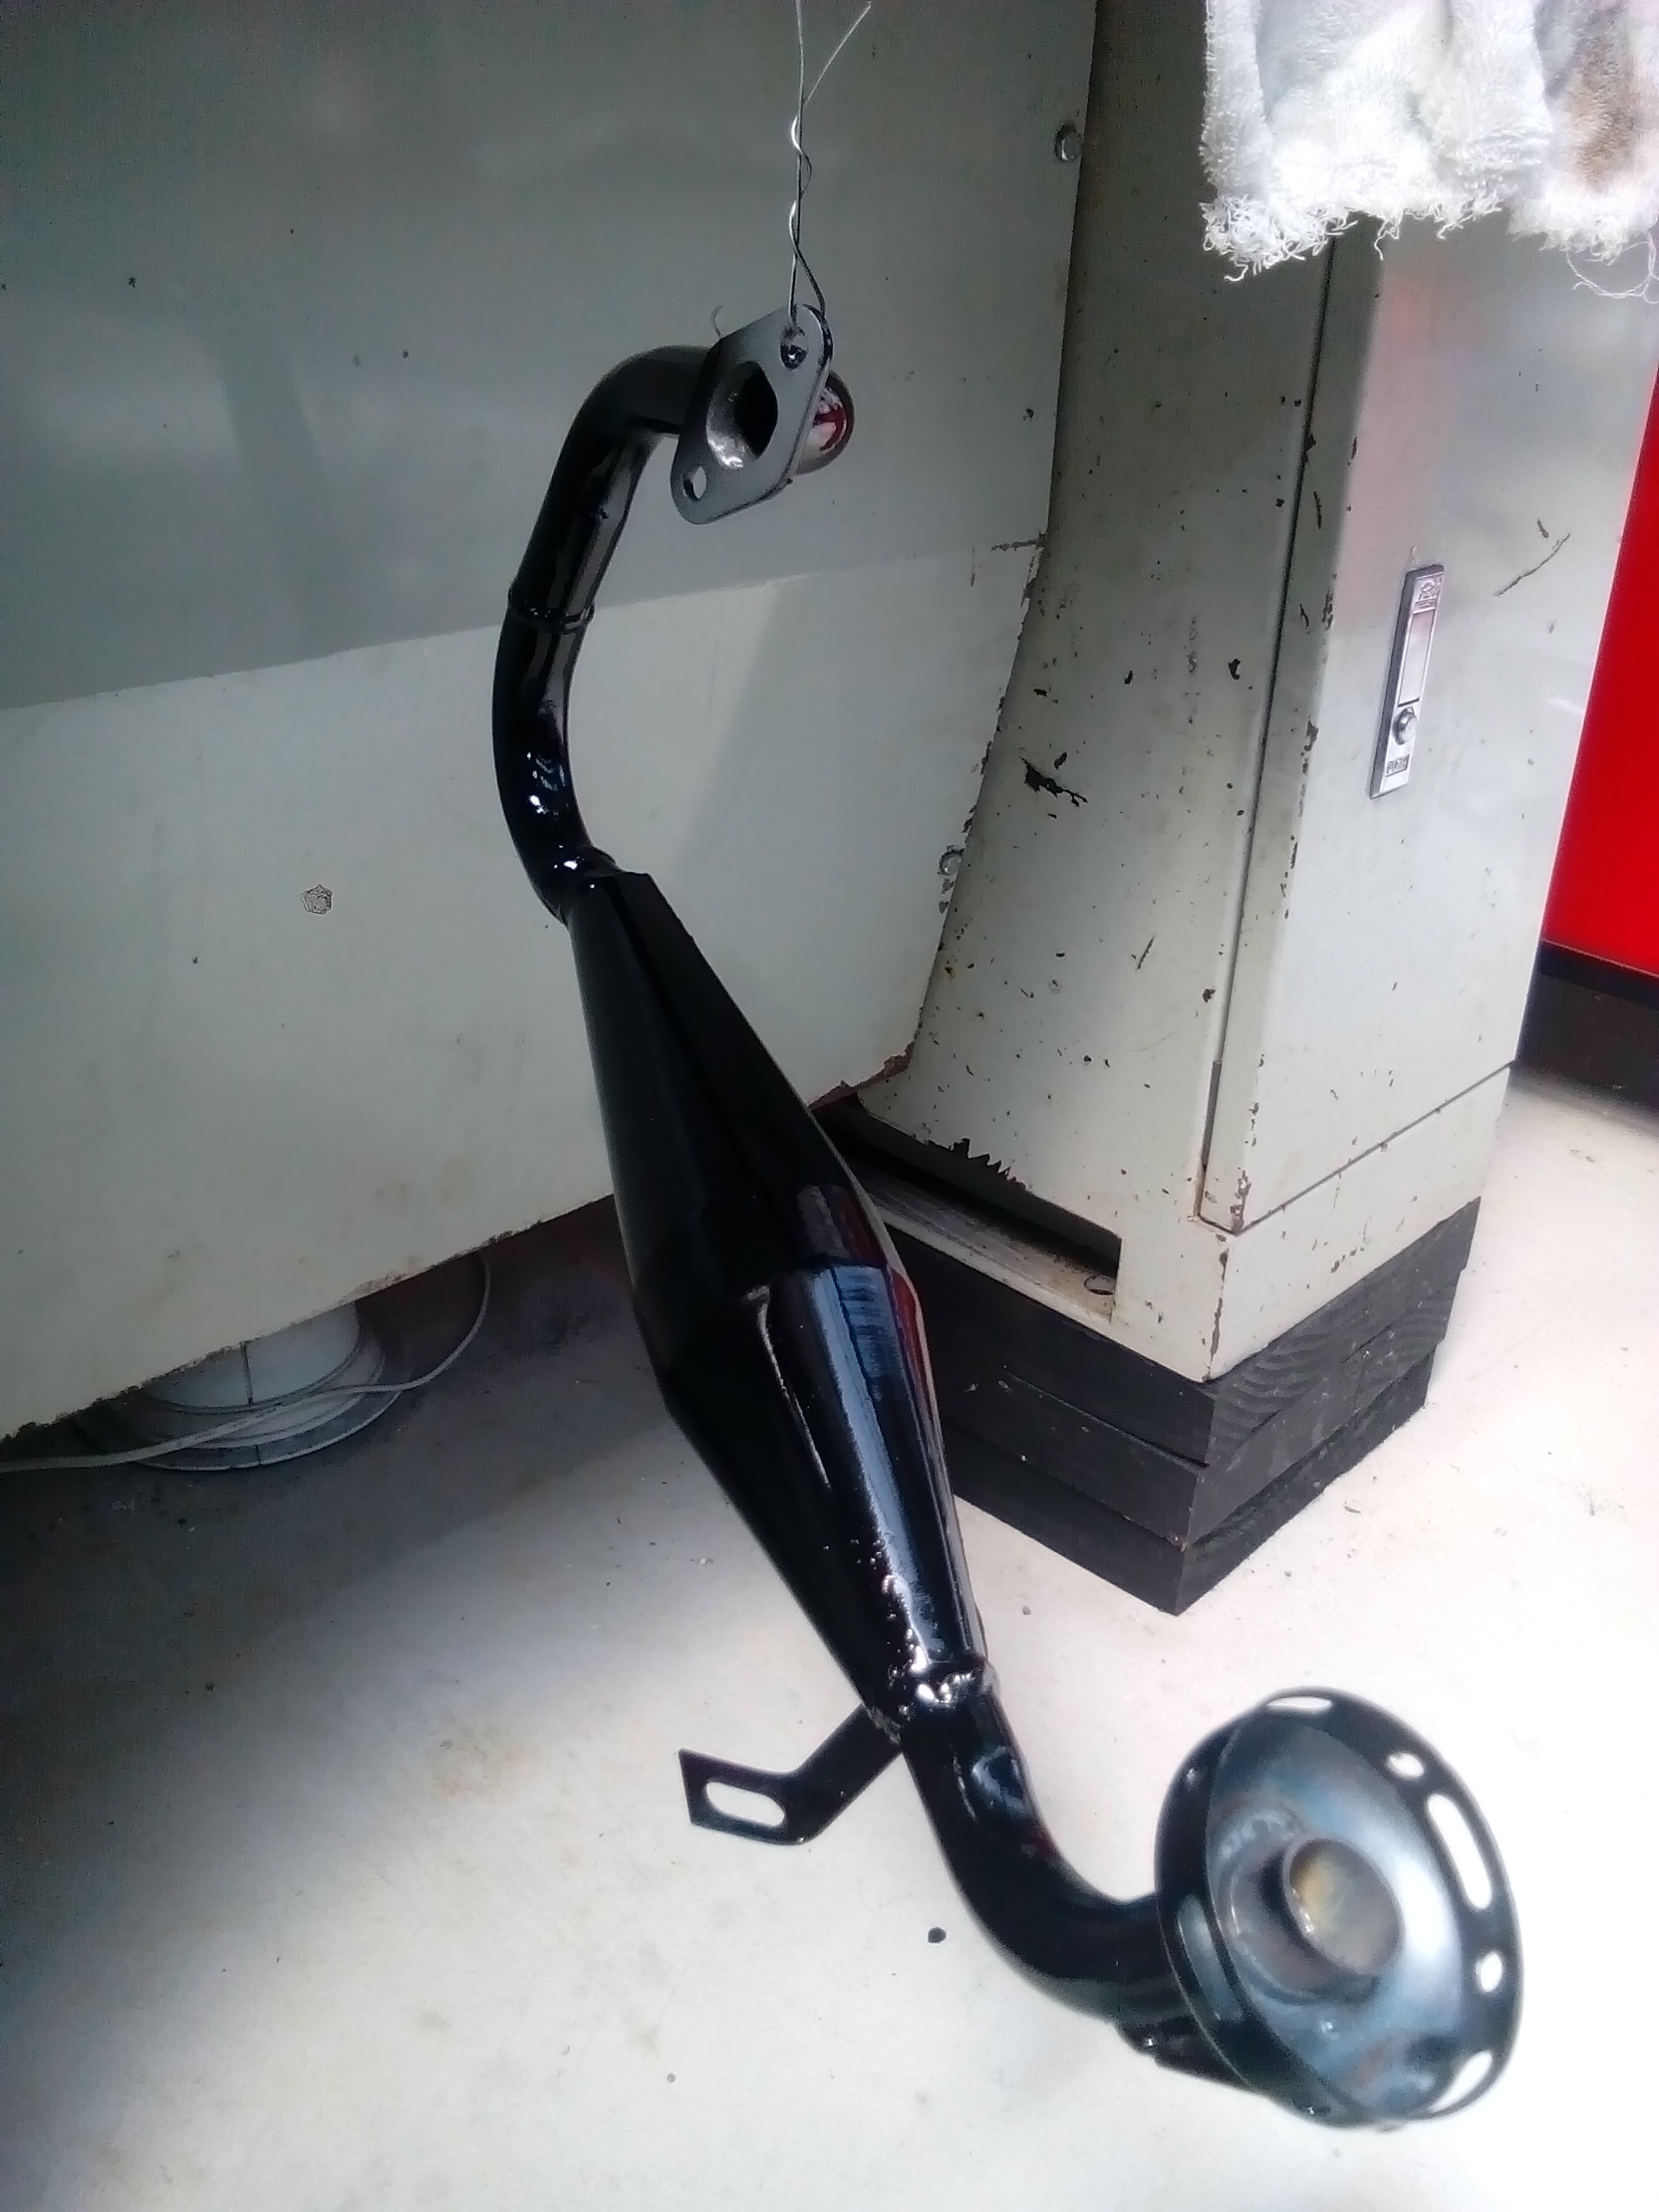
So i have been pretty quiet on the corona front, Firstly due to needing/wanting to build a new bike for QCR Dirtmasters '17, which saw me spending every evening in the garage for the best part of a month smashing out this pretty wild gn125 powered XL80(mostly) build. Whilst all that was happening i went through a couple of jobs and money was very tight (the xl80 build was only possible thanks to the epic group that is QCR!) but things have started to come right, and ultimately ill be making a big career change in the future, but its almost guaranteed financial security so onward with the projects! things i have done but dont have pictures of are fit the 450cc injectors Modify the fuel rail to have a AN- fitting on the regulator side to facilitate a boost referenced fuel regulator which i am yet to purchase. die grind all the internals of the pipe work after the welding, and formed a bead for the silicone joiner to secure over. make a top bracket for the blower so now its rock solid (you can see this in following pictures) Paint the new wheels and polish the spokes. now need to polish the lips before purchasing tires and fitting. Yesterday i set up all my heat lamps and gave the blower, brackets and pipework a good coat of wrinkle black and im so stoked with how it looks. the pipes not look almost like factory castings. the intake pipe will need a touch up as an area obviously didn't have enough heat to wrinkle up but no big deal. the HT leads will also be run underneath the manifold. longer ones may be required but i have a few sets here to try out. sorry about the blury photos, i had to hold my lamps up and take the picture with one hand since i cant roll the car out of my gloomy garage! Discussion -
1 point
-
I got the battery hooked up good last night and it barely had enough juice to run the fuel pump.Had it on charge all night will see if it works tonight pretty sure it's FUBAR. Lookie Lookie what turned up yesterday!ah yeah.was slightly worried they might not fit under the engine lid, my old single dell had the shorter 1inch filter which rubbed.the 1-2 side is close but no touch also had another play with the front drum adjusters and the pedal adjustment for 1/2 inch of free play,much better! still seems a bit soft and firms up after a pump but at least it's not hitting the firewall anymore.air in the lines? needs more bleeding?? what you guys think?1 point
-
also, proof it has been out of the shed. all the neighbours came for a jack, colour looks different outside, got the carbs tuned a bit better, set the tappets, changed the oil, and then it wouldn't start. faaarrk!1 point


(Custom).thumb.jpg.50cbfadc2369f551fe14d9ec26aac0d5.jpg)


This leaderboard is set to Auckland/GMT+12:00