
Leaderboard


Popular Content
Showing content with the highest reputation on 05/26/17 in all areas
-
This is the 'space stuff'. Great day for NZ10 points
-
block work is done. concrete to fill blocks is booked for Tuesday after queens birthday. 2017-05-26_04-10-33 by sheepers, on Flickr 2017-05-26_04-10-20 by sheepers, on Flickr9 points
-
got wheels sorted at M&T , admin can delete now3 points
-
Well just when you thought i couldn't finish my current projects, i thought why not add another! Discussion click here So here is my 1972 Vauxhall Viva Estate. Last registered in 2012 and been off the road since. It use to have the stock 1259cc but that has since been removed. A bit of a special car too, being the first in NZ with plate number 1. The previous owner has spent a lot of time and effort in getting the new motor built up. Its a Blydenstein 1259cc (1.3L now) and lets just say its not stock anymore. Heres how the car sat when it was on the road: Stay tuned in the coming weeks2 points
-
I have met a bunch of those guys and went for a job interview there (failed)- a genuinely GREAT bunch of people and even the owner is such a nice bloke- I was extremely surprised to actually be interviewed by him and basically sat there the whole time thinking about how hes the smartest person I'm ever likely to meet and IM NOT WORTHY etc. SOOO good to see that they have made this milestone as they all really really deserve it.2 points
-
2jz eeeer day2 points
-
Judging by the bend in old mates back in the first pic.. I'd say he'd laid a lot of blocks.. the old three block nose bleed/back break2 points
-
Finished another patch of rust. Hate trying to do them when you can't get in behind with a dolly, makes it difficult. Made up some strap sort of things to mount the fuel tank. Spent a lot of time trying to figure out how to mount it and decided that adding another bar between the chassis rails was the best. The straps pull the tank up against the top brackets, should hopefully hold it in place well enough. Made up a aluminium tray to mount the air tank and compressor in. Being able to draw stuff up in cad, program it, laser cut and use a CNC press-brake is pretty great! It's pretty tight but fits. Will swap the tank to the back as the tank will look better being visible through those holes than the compressor. I'm sure I'll paint it black so it's a bit more subtle. Got the rest of the exhaust tacked together as well. Not sure if I'll change where it exits, because at the moment it sort of comes out between the tailgate and bumper or just leave it as is. I think the whole exhaust has 10-12 u-bends in it now haha.2 points
-
Towers done. Paint isn't really the same colour, but i'm sure it will all blend in through the first mud hole Gotta weld a bend to the compressor housing to clear the tower. other than that everything seems to be fitting2 points
-
Dragged this home yesterday. IMG_20170513_102342 by John Bell, on Flickr Needs a little bit of a birthday, but really is in pretty good shape for its age. It came from some family friends who have had it since the beginning of time so has a bit of a history. I'm new to Land Rover details, but I think its an early Series 3, although the plate inside the cab says 2A. Its been fitted with a Nissan LD28, and has no sign of a cert, but has been issued Warrants in this configuration so I need to figure out if it ever had a declaration and if a copy still exists. The LD28 doesn't exactly fit very well though, and the diff head hits the oil pump, this apparently is a fairly common conversion so I'm curious as to how others have gotten around this. Apparently the original motor didn't have anything wrong with it, and is still available so if it is too difficult to get the LD28 to work (and legal) I may look into this. The tyres are a set of very perished 'oodYear' retreads which I find hilarious, my guess is that GoodYear didn't like you reusing their casings for retreads so they all have the 'G' rubbed off. The wooden deck is solid enough for now, but it might need a bit of attention, I'd love to be able to fit a wellside to it possibly. For now its home back indoors. I've got to sort out a few things before I get into it properly. I'm pretty excited to have a project that you can buy parts for. LD28 IMG_20170513_111906 by John Bell, on Flickr IMG_20170513_113127 by John Bell, on Flickr IMG_20170513_143948 by John Bell, on Flickr IMG_20170513_144002 by John Bell, on Flickr Tell me the secrets of Britannia here1 point
-
It's time to waste a whole lot of time and money that should probably be spent on other stuff. Some people on the forum will know our 1963 AP5 Valiant Regal but for everybody else who is interested here is a little history. My Dad purchased this car in 1983 and it was our regular family car for many years. Here is a photo taken some time in the early 80's. Dad had 2 AP5's at the time, the grey one on the right was a dedicated tow vehicle and was modified accordingly. The green one on the left is ours. About 7 years ago we were lucky enough to get our hands on this original and well looked car however a few things needed attention fairly quickly. Almost immediately we did a few safety upgrades. The car got a front disc brake conversion, new seatbelts and we replaced the wheels and tires in order to make it safe to drive in the rain. Until fairly recently I was hanging out on another forum dedicated to the fine products of the Chrysler Corporation with a few other members that have since come across to Oldschool and unfortunately a lot of the details of the work completed on the car to date was lost when the forum closed earlier this year. Lucky for me the Oldschool forum is awesome and I am very happy to be joining you all over here. This is how the car looked after its first round of upgrades. We drove it around for a while with the stock drive-line and aside from a little oil burning/leaking issue all was well. Then this happened. This was coolant leaking from a very bad place, yep cracked block! So naturally this happened next. And finally with the help of a local engine builder here in Auckland this happened. Sounds simple enough but it actually took nearly 12 months to resurrect the Slant 6 as the engine was in bad shape. We were very keen to salvage the original block and keep the car numbers matching but it was no easy task. I did as much work myself as possible but given the challenges involved in fixing the engine I was very happy to be working with a skilled engine builder and I am very happy with the result. This engine is awesome and it's still a numbers matching car. That's all for now, next post will be all about the current build. Feel free to discuss here. //oldschool.co.nz/index.php?/topic/56384-1963-ap5s-valiant-regal-discussion/1 point
-
Yes you can get it working but you need to keep the e-throttle working. You also need to keep the factory MAF housing or it will likely run like an absolute bucket of shit. Get the e-throttle working and then use an OBD2 scanner to see what other error codes you are addressing and fix them one by one. Then after a lot of effort to have a car that doesnt run right you will probably give up or buy an ECU. You dont need a drive by wire throttle pedal as it has a TPS and APS on both sides of the factory throttle body. You just need a cable pulling on it then it sorts out the rest.1 point
-
Looks like I will need to do some rust repair on the sills. There is no rust on the outside/underside, though I still need to do a comprehensive search. So far... I can stab a screwdriver through the front left corner of the passenger footwell. The front end of the drivers sill in the wheel arch has some rusty holes. The end of the passenger sill in the wheel arch has some roughly tacked on patches. The front outer part of this sill has been repaired, but I don't know if they cut the rust out first or just slapped a panel over the top because there is a lap weld rather than a butt weld where the repair ends. The end of the sill in the rear wheel arch is rusting through around the seatbelt reinforcing plate. This guys thread is most helpful to make it look less intimidating. http://retrorides.proboards.com/thread/173102 I'm supposed to be getting electricity in the shed TODAY! So I could use tools other than my cordless drill.1 point
-
Good progress in the last couple of weeks despite having to go away for work Master Cylinder Mounted to booster with (hopefully) the correct clearance for the pushrod. Header plates have arrived, so now need to buy some U bends and start cutting and welding Filler is on the petrol tank, very useful having a second tank to chop up and steal the filler neck from Mounts for the traction bars cut off, shortened up by 15 mm and rewelded. Photos to come1 point
-
Sta still has them on their website listed in stock (on the off chance you hadn't looked haha)1 point
-
damn. just saw this, i happen to have a tire machine at work that i can use at my disposal1 point
-
Sorry I didn't attend was sharing the night together with dr hook although I was the only young fellow there as a milf said to me your too young to be here i was much too young! Too young to be 161 point
-
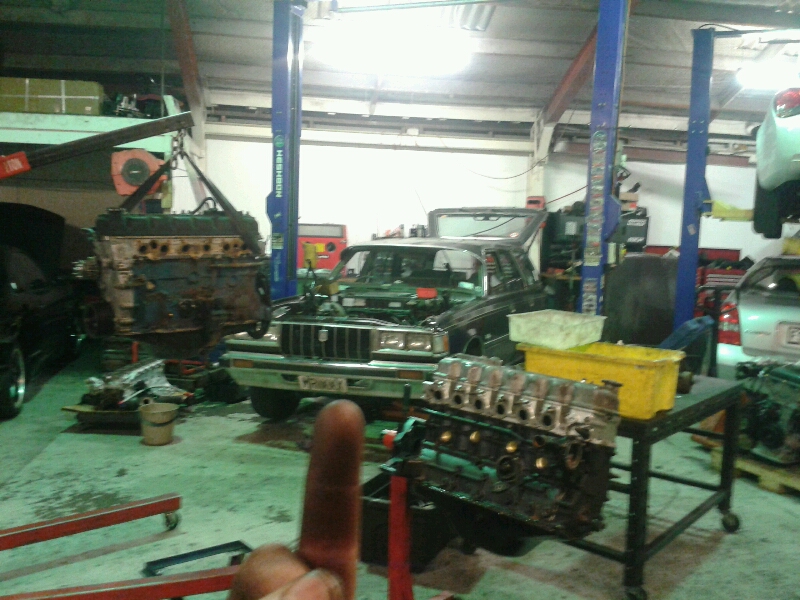
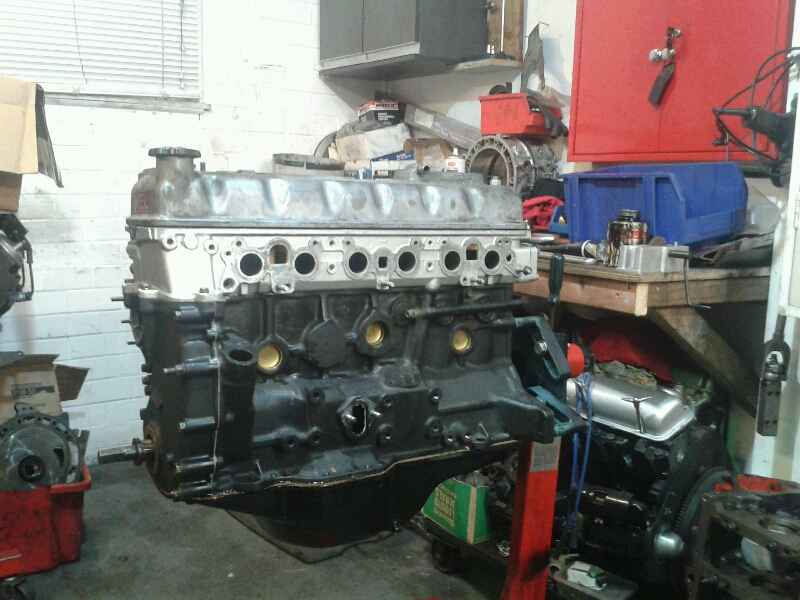
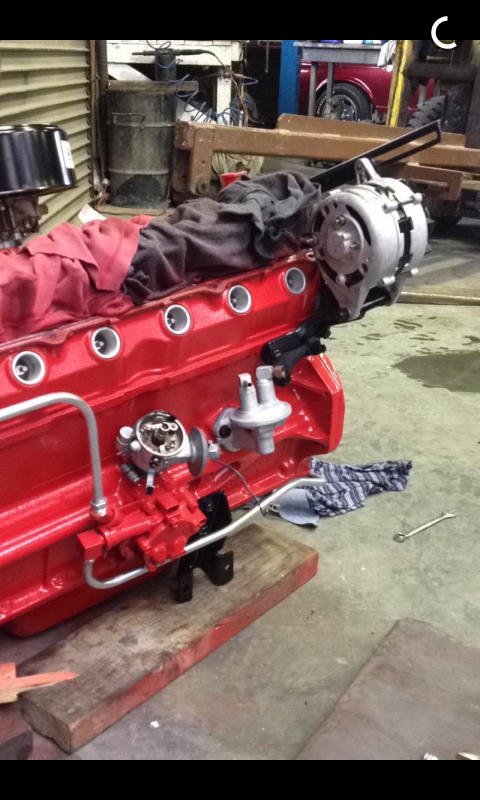
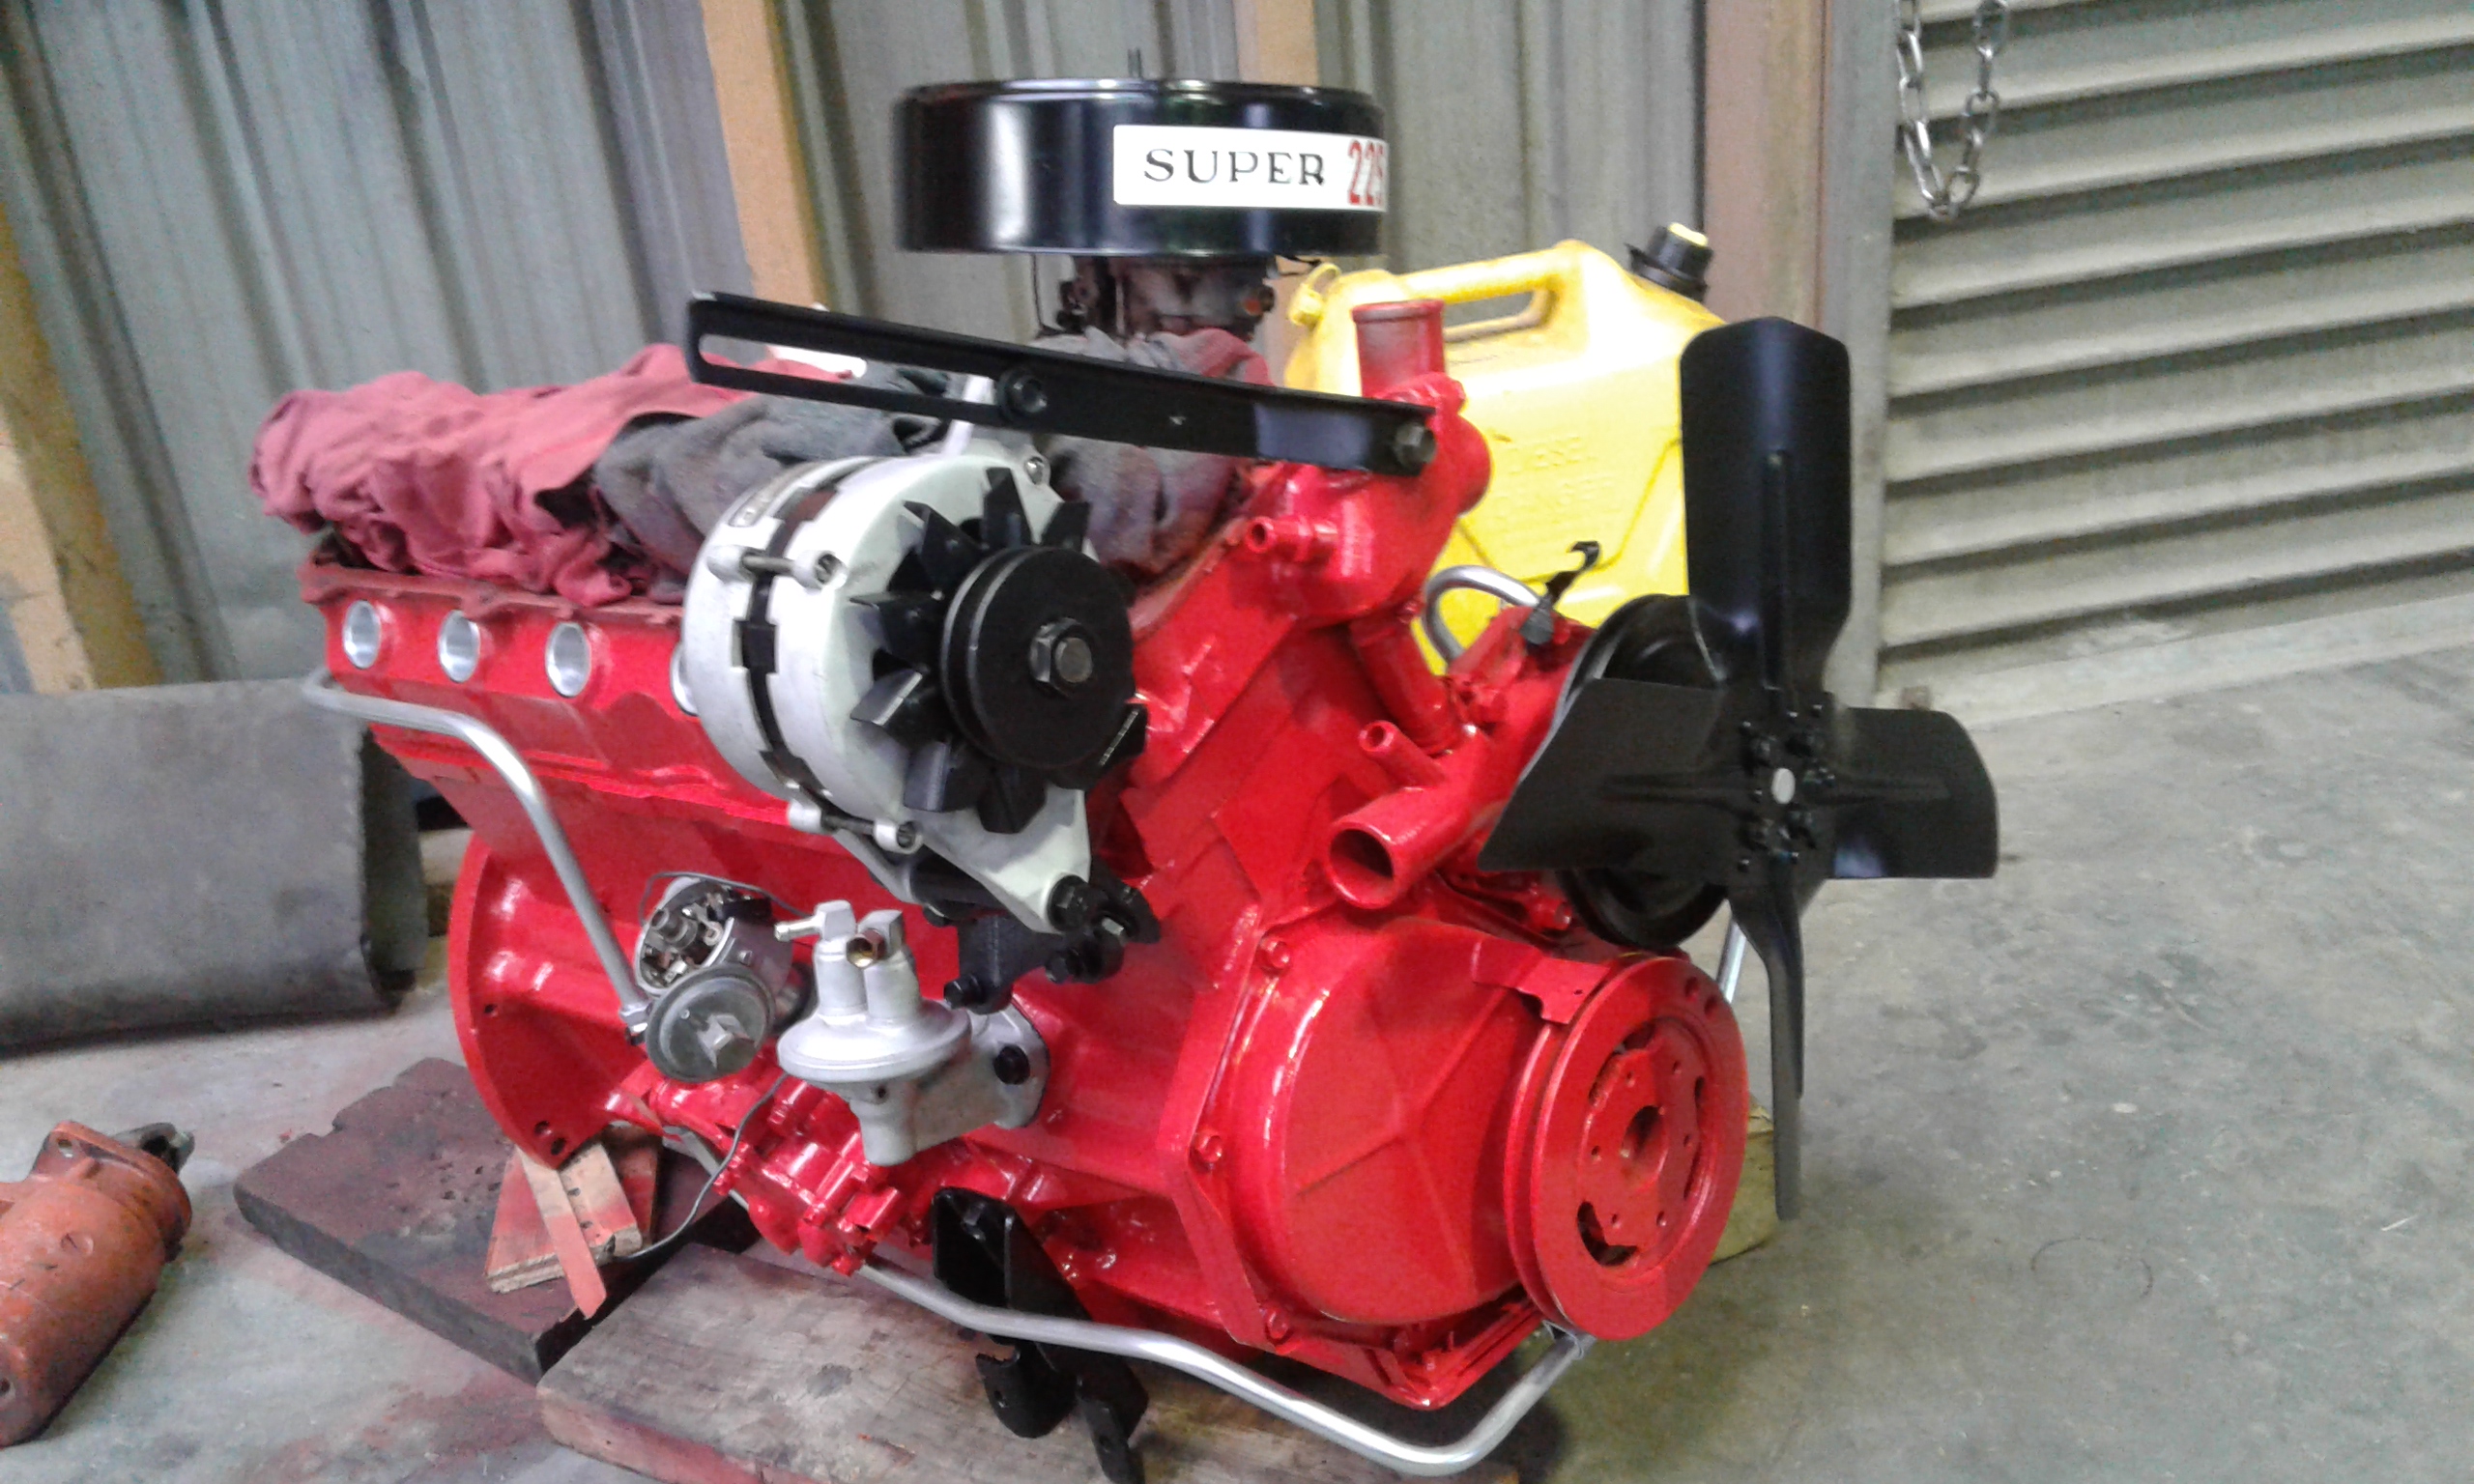
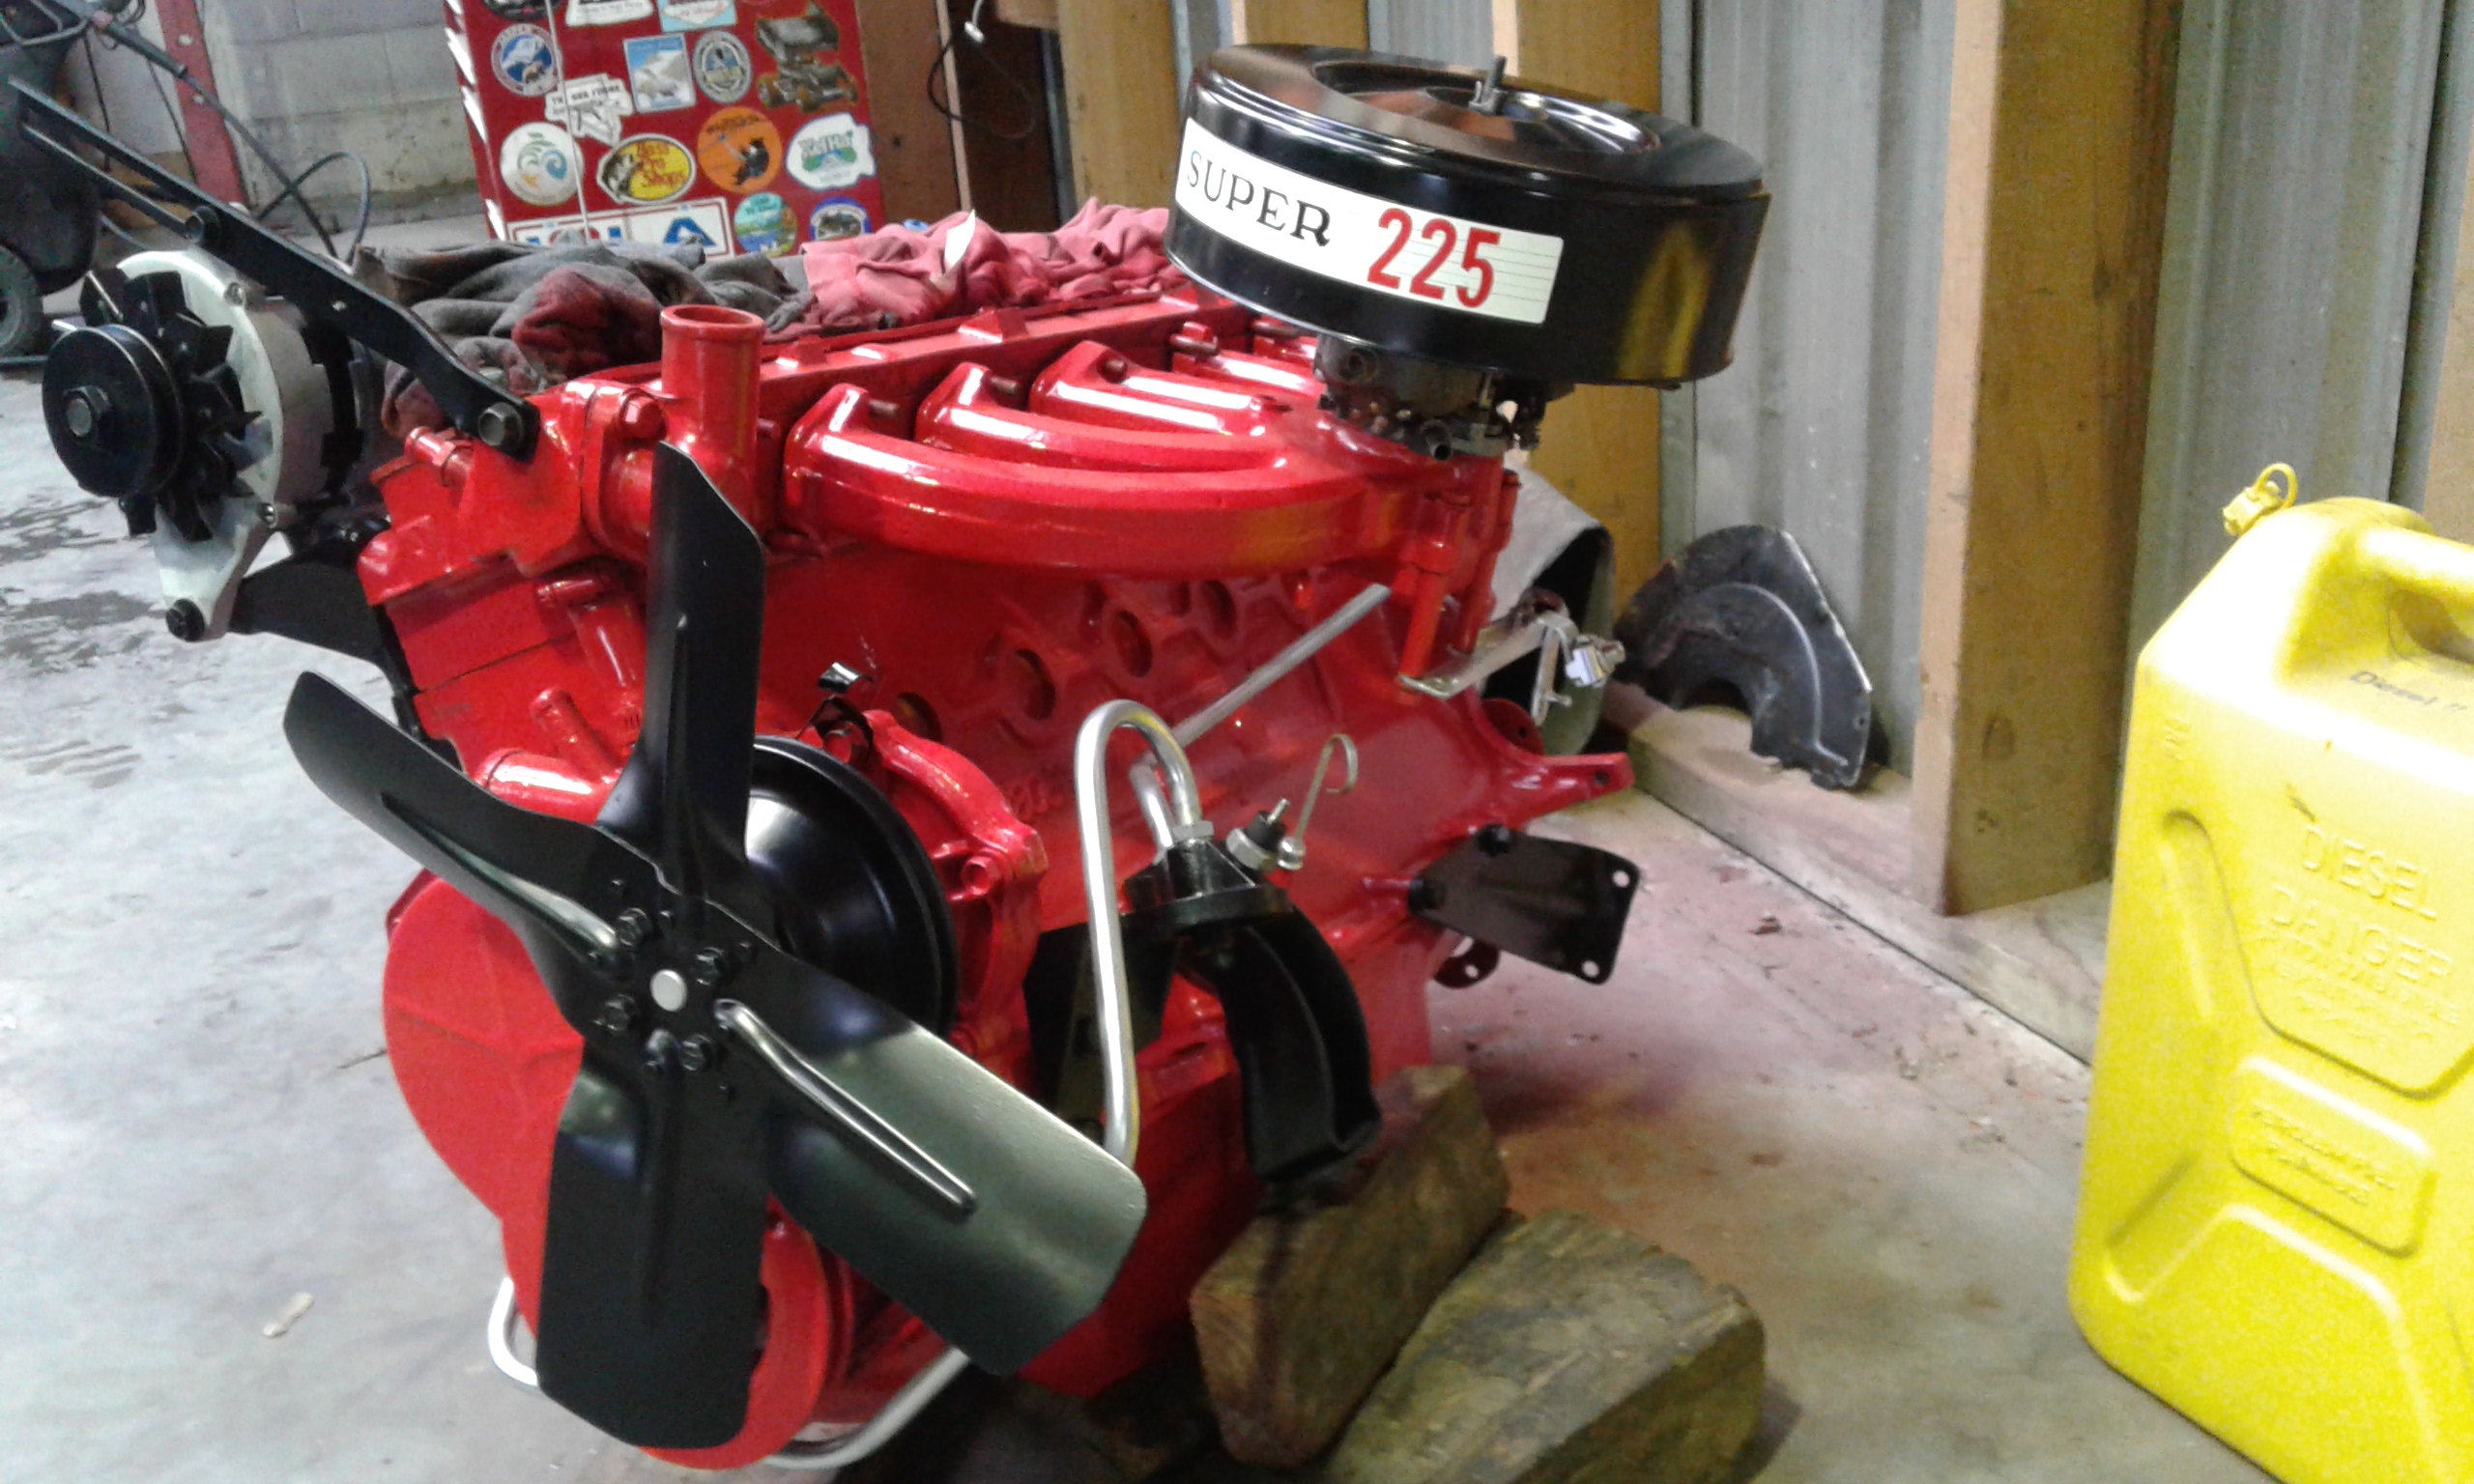
Oh hey, an update, of pretty much the same old boring rinse and repeat sort of shit. Axuillery shaft bearings turned up and were correct. Deff feels alot nicer in there. Then all my work mates were on my case telling me its stripped down this much, why not pull the crank out and do a complete check over. So that was my Saturday. After a bunch of measuring found that number 1 main bearing was measuring up a bit odd diganoly across the oil holes and had a tad bit of extra clearance. So we worked some magic and got that sorted so it's within spec. So, hopefully, the combination of the main bearing and the Axuillery shaft bearing clearances now being a bit better will cure this oil pressure problem. Motor is now all buttoned back up, and with a bit of luck I will be swapping it over again this weekend, just depends on how packed with cars we are come Friday. Other option is I do at lock up, which will take 3 times as long most likely. Anyway. Exciting I know! Heres a picture of what looks like all the others of this motor lol. In other news I have been driving this with the 2l all this week. Has been nice using it, especially since the heater started actually making heat haha. But my god its slow with that engine.
 1 point
 -
are you wanting to get on the track or suggesting OS should hold a trackday @Minister88? I don't think I / we understand your question or statement in the OP because yea I cant speak or represent Admin here either but don't hold your breath for reasons mentioned by @Spencer these days it ends up costing money & with the available options its not worth the stress or hassle most open trackdays do generally have GC's as the "boyracers" tend to stay away shoot even Manfield is having a FREE test day coming up as long as you can take Marshalls & helpers for rides (on a Friday btw)1 point
-
Woo, more stuff. Good and bad.... So the good. Had the windows tinted. Has made it much cleaner looking. Excuse bad photos. Fitted up front lip. (Fitment isn't 100% due to slightly warped guard.) Looks so much coooolleerrr. Swapped factory engine mounts back in. No more vibrations through the car anymore. Note to self, for street driven car, do not put polyurethane engine mounts in. And the bad Took it for a drive to Tauranga last weekend. All good, or so I thought. Lifted it up on the hoist at work to do a quick check over on everything and oh good lord, fluid everywhere. Rear gearbox seal and front pinion seal on diff are leaking terribly. And I've blown the left rear shock. So, back home and on stands again. Seeing as I had to pull the diff out, I decided to replace the crown wheel and pinion so I can get my rev and speedo to more friendly. So managed to track down a 3.5 Hilux diff, bought that. I've got a drivetrain specialist swapping the crown wheel and pinion to my current LSD centre, tightening the LSD a bit more and giving it a freshen up with new bearings and seal/s. Should be perfect afterwards. While it's in pieces, I got the axles checked to make sure there was no runout as one of the brake rotors was grinding on the caliper. No issues there so I think my caliper is a few mm to close to the hub, so I'm getting new brackets cut out as well to improve that. So it's in pieces, random photo for the sake of another photo. I've still got to take a shock out to send to Autolign so they can match it with some damper adjustable Bilstein ones. Also had to go through and pull my drivers door apart to get the window out as one of the plastic guides for it had fallen off. Thankfully I had a complete parts door I was able to pull apart first to see how difficult it was. (Turns out it's easy as shit.) Factory plastic guide had a crack through it so it had come loose. Put the one from the parts door in, and it's perfect. And because we were working on it late one night, group photo at my work! Once the diff is back in, I'll take it somewhere nice to get a couple of decent photos of it. I haven't managed to take any proper ones since it's been road legal.1 point
-
Thread is 10 years old. She hasn't posted for 8 years or been online for at least 3. So chance of an answer is minimal sorry.1 point
-
WOF time and one problem I hadn't fixed is the gauge light didn't work. Upon spending an hour removing the gauge cluster I was reminded some pratt had glued the gauge lights in with RTV. So the fix was to reinstate the original poverty spec gauge cluster and repair it with parts from the diesel one. I realized that of the wires that were cooked only 2 needed connecting up. A few hours work and I had my MPH gauge cluster with functional illumination installed in the car. Leaving mums place the first bump I went over the speedo light went out... bugger. The second bump set off lights and sirens in the car. turns out the oil pressure sender wire came off and grounded on the engine making the car think there was no oil pressure. The car got a wof and is now ready for another 6 months of driving and breaking down.1 point
-
It looks like this now, a guy I know bought it off Chris
1 point
-
Coming together nicely... Need to start on the engine bay.
1 point
-
Yeah was great fun! You should slap some mudd's on the AX100 and join us next time Richard, might even have some tyres in stock. Be keen on a little Redrocks mission if interested / ken? Russ1 point
-
and this it todays efforts.holy shit painting a car takes ages!!!this was about 5 hours work, sanding down all the insides of the bonnet, engine lid and all four fender.I was hoping the do the insides of the doors aswell but didn't have enough time.I don't think I used any filler inside these panels because why? except for the engine lid around the vents, so the finish isn't great and the bonnet had to lay on some cardboard on the floor. less than ideal but its all shiny and red and thats the main thing!1 point
-
So here's the plan. Last time I pulled this car apart it was a major, it was properly broken and couldn't be used until a whole lot of stuff was fixed. This time things are different as the car is running great, has proved to be very reliable and doesn't really need anything major in order to keep it on the road. This project is all about fixing up a whole lot of little things that are bugging me and I want to starting getting the car finished to a higher standard. The to do list: My friendly WOF guy politely suggested that I should replace the upper control arm bushes and one of the upper ball joints before the next warrant check so this will be done. The weather belts on all the side windows need to be replaced as they are all in bad shape The side window glass is all pretty average as well and I have collected up a full set of replacement glass for the car so all the side windows will be replaced. Door seals are leaky and looking very shabby so all will be replaced Door cards require some attention to repair and replace the trim clips that hold them on, a couple are held on by screws that don't look too flash. The stainless trim on the side of the car also requires some renovation, a couple of them are held on by rivets so they will be removed, repaired and refitted with new trim clips. There is a little bit of rust showing in the left rear guard and this will be repaired before it gets nasty. I am sure I will discover plenty of other little things to tidy up along the way but I want it all finished before the start of summer so will do my best to stick to the plan.1 point
-
Success, Karapoti completed trouble free. image upload no resize1 point
-
Poor thing Didn't want to start for me last time I tried so I cranked it on the starter until it got here. I'm actually quite liking the steelie/whitewall combo. I need to tidy the garage enough so I can get it inside. I have ordered some bosch ev1 plugs off aliexpress so I can replace all the fucked injector/temp sensor plugs1 point
-
1 point
-
It seemed like a scratchy day and I didn't achieve as much as previous days but it all counts. Seam sealed where needed and threw the door back on, couple of patches where the guard bolts on Going to be a laugh making this cunt again! HAZAH! Moved the car across and Got the drivers guard off and the sill is far far better! Guard it's-self not as bad as passengers but the brace and bottom is still cooned1 point
-
I got it running long enough to bleed it today and the bubbles have mostly gone which is good, It still has the large surges? for lack of a better term. It ran long enough for me to think its a good idea to take it for a test drive and I got 50 mt up the road before it lost a rotor. I'll get it in the garage and make a start on running a new fuel pump wire and getting the rad fan mounted and wired.1 point
-
So over the past however long its been ive had some good progress on repainting it. The panels have been quite bad and i am working to get them perfect. Before i started the strip down i grabbed dads mags and chucked them on to see what they would look like, with a slight polish it should look good when its done. So i finally completed the two doors that were giving me the most heartache along with the bonnet and starting on the rear quarter panel. Both quarter panels were especially bad so im fairly happy with how close it is at the momment. And finally the other doors are undercoated and dont require alot of work.1 point
-
I really hope the other side is better1 point
-
Will try and document the more interesting things I thought this was a nice touch. Fuel cap IMG_20170513_144634 by John Bell, on Flickr Looks pretty normal, has a straining mesh in there IMG_20170513_144642 by John Bell, on Flickr It pulls out and locks in like a spout so you can fill your vehicle with roadside diesel from innapropriate vessels in Africa/Ruatoria IMG_20170513_144701 by John Bell, on Flickr1 point
-
I chopped off the mounting tabs and moved them so they would bolt onto the fc rad. The swift fan is a pretty good fit I think, its a score for $20 Got my monies worth out of the cutting disc Welding is getting less bad Lovely, the wiring even comes out in a nice place. I didn't plan it that well it needs a bit more tweaking making the holes bigger & nicer for the hoses but I'm happy with fitment for how little work it needed I tried warming it up again but it decided to do a few backfires and run on one rotor. I suspect the injectors are gummed up again and the fuel pump wiring is still shit. I need to stop being impatient and sort out the running problems instead of trying to get it good enough to do a skid go for a test drive. There is what looks like a thermo switch in the bottom of the rad so I'll test it to make sure it works and actually is a thermo switch and wire it up with a relay. I figured out the fan wiring, it appears there are two sets of brushes in the motor, if you have either powered up it'll be low speed and have both connected in parallel it'll go full tit. Another option could be series/parallel them for extra low but thats for later. I've ordered some of these for the shroud so hopefully it'll prevent any vibration etc1 point
-
Haha. I work here www.rocketlabusa.com and will be doing bigger better stuff in the US. Bigger better space stuff.1 point
-
You can't just say "build space stuff" then bugger off. SPACE STUFF!!1 point
-
Any day now!1 point
-
Post office doesn't do it any more. Stopped in 2011. I used to head in with a list of plates of old corollas and holdens that I saw old people driving, pay my $3 per plate or whatever and send postcards out asking if they wanted to sell.1 point


This leaderboard is set to Auckland/GMT+12:00