
Leaderboard


Popular Content
Showing content with the highest reputation on 05/24/17 in all areas
-
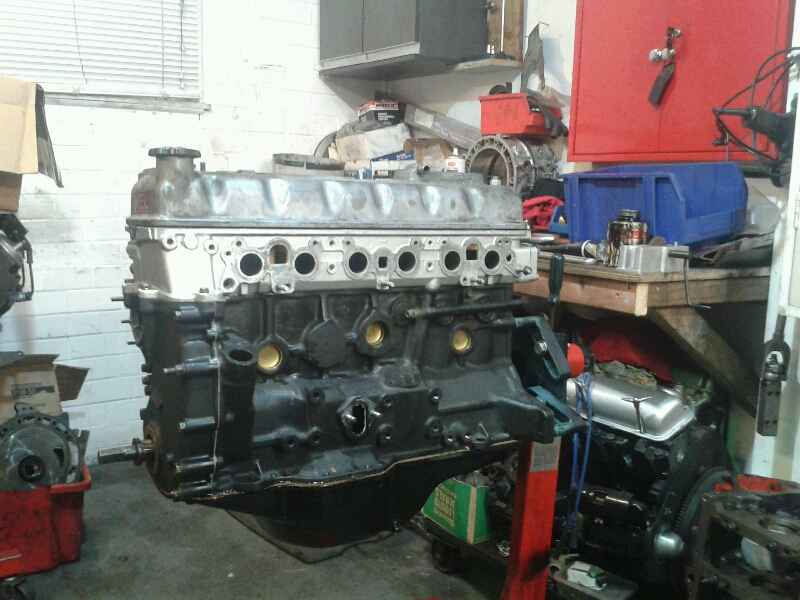
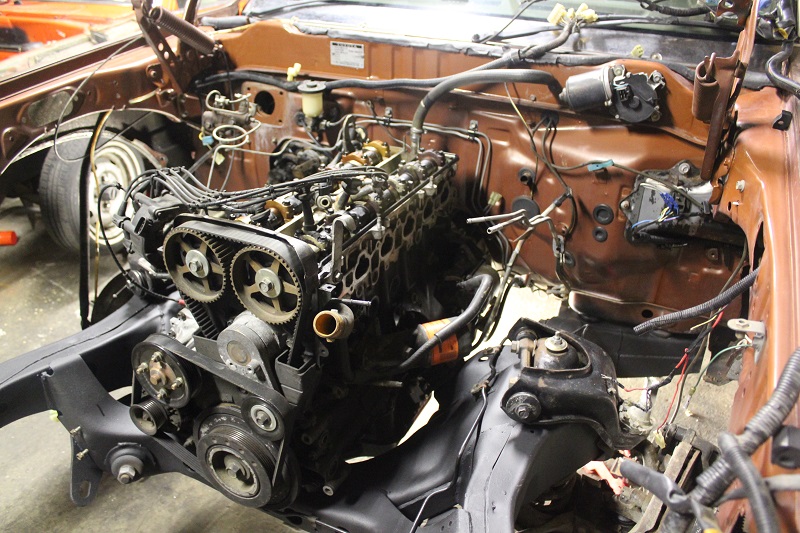
Oh hey, an update, of pretty much the same old boring rinse and repeat sort of shit. Axuillery shaft bearings turned up and were correct. Deff feels alot nicer in there. Then all my work mates were on my case telling me its stripped down this much, why not pull the crank out and do a complete check over. So that was my Saturday. After a bunch of measuring found that number 1 main bearing was measuring up a bit odd diganoly across the oil holes and had a tad bit of extra clearance. So we worked some magic and got that sorted so it's within spec. So, hopefully, the combination of the main bearing and the Axuillery shaft bearing clearances now being a bit better will cure this oil pressure problem. Motor is now all buttoned back up, and with a bit of luck I will be swapping it over again this weekend, just depends on how packed with cars we are come Friday. Other option is I do at lock up, which will take 3 times as long most likely. Anyway. Exciting I know! Heres a picture of what looks like all the others of this motor lol. In other news I have been driving this with the 2l all this week. Has been nice using it, especially since the heater started actually making heat haha. But my god its slow with that engine.
 10 points
 -
Just a note on the free test day at Manfeild - it's not an open invite for all and sundry to come and play on the track for free. It's free for entrants and club members with the idea being that we can take our volunteers for rides as thanks for all the hard work they do. If you want to get on track I suggest attending one of the Envirowaste clubsport events: http://manawatucarclub.org.nz/find-enter-events/club-sport-series/ I'm open to the idea of running another OS trackday with the proviso being that we only use track 3 at Taupo because it's cheap.5 points
-
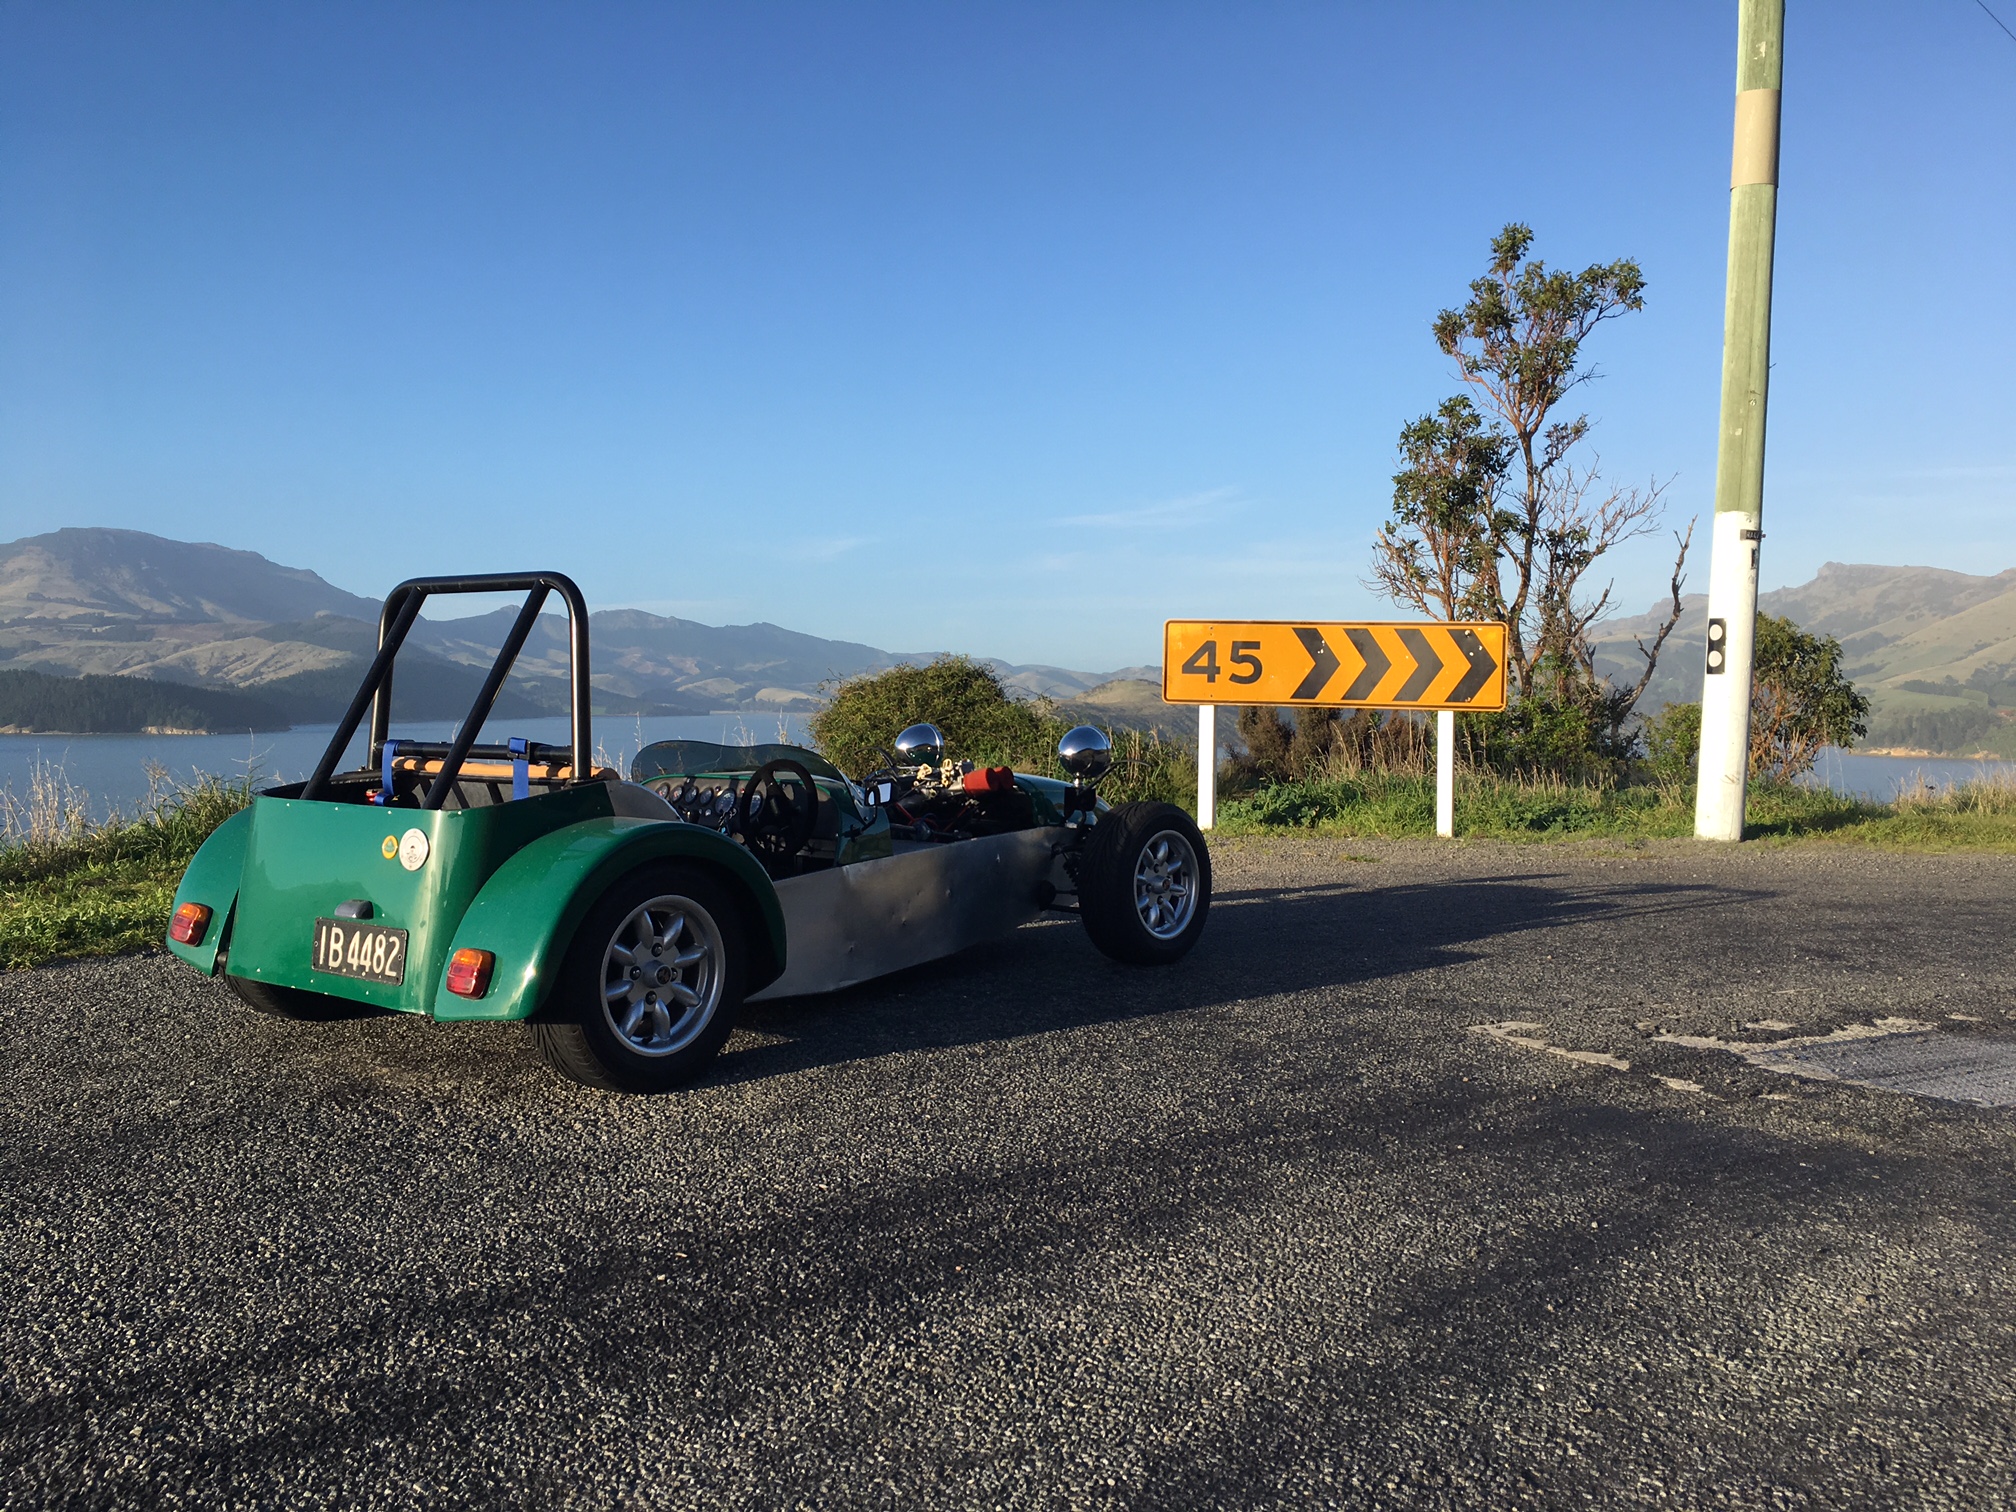
Have put around 800k's on this so far, nothing has really gone wrong apart from the clam shell bracket breaking, the diff continuing to whine, and being caught out in the rain on 3 occasions. Looking to change to cycle guards- will have to figure a plan out for that. Also looking into changing the diff- might go for a helical LSD. Fitted some nice low profile side mirrors. Also need to sort a bonnet- which I will need to get fabricated. Currently it has a single side draft, but the manifold is on quite a rake, so there will need to be a hole in the bonnet so the carb can protrude. A solution would be to switch to a twin carb manifold which would keep the carbs horizontal, and run twin 40's so I get full bonnet clearance, but this is a further expense, further complexity and it's running great with the single 40. Anyway- photo from the last outing Cheers
5 points
-
Then you won't mind being outside in the rain5 points
-
Woo, more stuff. Good and bad.... So the good. Had the windows tinted. Has made it much cleaner looking. Excuse bad photos. Fitted up front lip. (Fitment isn't 100% due to slightly warped guard.) Looks so much coooolleerrr. Swapped factory engine mounts back in. No more vibrations through the car anymore. Note to self, for street driven car, do not put polyurethane engine mounts in. And the bad Took it for a drive to Tauranga last weekend. All good, or so I thought. Lifted it up on the hoist at work to do a quick check over on everything and oh good lord, fluid everywhere. Rear gearbox seal and front pinion seal on diff are leaking terribly. And I've blown the left rear shock. So, back home and on stands again. Seeing as I had to pull the diff out, I decided to replace the crown wheel and pinion so I can get my rev and speedo to more friendly. So managed to track down a 3.5 Hilux diff, bought that. I've got a drivetrain specialist swapping the crown wheel and pinion to my current LSD centre, tightening the LSD a bit more and giving it a freshen up with new bearings and seal/s. Should be perfect afterwards. While it's in pieces, I got the axles checked to make sure there was no runout as one of the brake rotors was grinding on the caliper. No issues there so I think my caliper is a few mm to close to the hub, so I'm getting new brackets cut out as well to improve that. So it's in pieces, random photo for the sake of another photo. I've still got to take a shock out to send to Autolign so they can match it with some damper adjustable Bilstein ones. Also had to go through and pull my drivers door apart to get the window out as one of the plastic guides for it had fallen off. Thankfully I had a complete parts door I was able to pull apart first to see how difficult it was. (Turns out it's easy as shit.) Factory plastic guide had a crack through it so it had come loose. Put the one from the parts door in, and it's perfect. And because we were working on it late one night, group photo at my work! Once the diff is back in, I'll take it somewhere nice to get a couple of decent photos of it. I haven't managed to take any proper ones since it's been road legal.4 points
-
Personally as a old man I would just replace to standy spec if you can be bothered. Removing leaves or lowering big-useful leaf sprung vehicles usually makes them more shit for not much gain.3 points
-
We ran many track days back around 2007-2012+ ish and would usually only just cover the costs, usually have to desperately try drum up entries over the last few weeks to break even. I think it would be even harder these days? just seems like less active members with cars they want to thrash on the track now (our community is older/busier?). I think most tracks cost more now due to safety stuff, not entirely sure on specifics as its been awhile. I can't talk for admin but I don't think you would find anyone who is willing to take that risk on anymore ($4-6k initial outlay, then herding cats to get entries and money back). Drag day seems like the way for OS racing events, cheap, easier on the cars and gets the numbers pretty easy. Anyway talk to admin.3 points
-
It’s taken a bit of working to get the motivation to write this post. Work on the bike has kinda slowed to a crawl, but I stripped the carbs and have started putting them together again. So I removed the carbs and took the float bowls off them in the last post, to discover that carb one had a lot of gunk in it, and the other three were a little crusty from sitting. The next day I started to strip down carb one, to see how bad it was. I took the floats and jet housings off first These are the jets from carb two. You can see the difference in size between the two jets. The pilot jet lives down the deep recess between the two other jets. Speaking of pilot jets, the pilot jet for carb one was completely blocked solid, and took a lot of soaking in carb cleaner and poking with a thick strand of wire to clear it. The other two jets on carb one also had debris in their holes, but the pilot was the worst. Remember, this is what the jets looked like. It’s no surprise. I then started separating the carbs, as they are all linked together The seals on the main fuel feed were in very bad shape with multiple cracks in the rubber. Thankfully I ordered replacements from Litetek. I pulled the cap off carb one, removed the spring and needle And removed the slide. Under the diaphragm was this black stuff. Its been on all the carbs of the carbs so far. It’s almost like powered plastic shavings? Theres no obvious wear on the slides. I cleaned all the black stuff out and removed the choke needle Organisation is key This first carb was a bit of an experiment on following the instructions to a tee. I’ll soon learn not to do that. Following the instructions I removed the throttle plate and shaft This was to replace the shaft seal, which wasnt worn or hard anyway Next up I removed the pilot mixture screw. This was covered in some sort of oily mixture. Just FYI too, all my carbs had this screw set at 2 full turns from fully in. I purchased a small 2.5L ultrasonic cleaner, so gave it a shot with the carb body since it was stripped. It started out like this I filled it with about 50:50 water:simple green, got the mix to 65c, and dropped the body in. I soaked it for about an hour and it came out like this, with no scrubbing. It was pretty effective, although im sure if I just used some brake clean I would have got the same results in minutes; and I did, on the other carbs (I scrubbed with a tooth-brush and brake clean whilst I waited on the cleaner to finish). At least I know the ultrasonic cleans out all the tiny little holes and channels in the carb. My makeshift parts washer You can see I didn’t remove the slide housing. I tried to pull it out earlier and it wouldn’t budge, so I left it. Now, that’s where I left the carbs that day. The next day I finally had my syphon arrive (thanks to a run-around by the useless couriers), so I could drain the Evapo-Rust from the tank. It had done a pretty decent job of stripping the surface rust. The inside is mostly clean, but unfortunately it did spring a small leak at the back of the tank where there is a seam. This was the nail in the coffin, I had to do it properly. I used the syphon to drain the tank back into the bottles. The liquid came out pretty dark, but I should be able to get a little more use from the solution. I also had some small bits just chilling in the bottom of the tub the tank was sitting on (to catch leaking liquid, which it did well), sitting in the fluid that had leaked out. All of these bits were really rusty, including the idle adjustment screw (which I thought was a write off). The idle screw came up really well Its pitted, but no longer rusty. Compared to how it was, it’s a miracle. All the screws and hose clamps that I left in the solution came out well too. It’s quite powerful stuff. Once its taken out of the solution I rinse in water and then coat in WD40 to stop it rusting again. Since the tank was now leaky, I couldn’t just stop here and put it back on the bike. Looking around, I decided to purchase a tank refurb kit which comes with a cleaner, rust remover and a tank sealer. The sealer should stop it rusting again, and will block the tiny leak. I was trying to avoid having to seal the tank as it is likely messy to do, but this should mean it lasts a lot longer. It should arrive in a couple of days. I was feeling a bit unmotivated so left the bike for a bit. A couple of days ago I decided to get back into the carbs and see if I could get one back together again. I tried a bit harder and got the slide housing out of carb one This is where I should have gone off script and just left it alone, but I didn’t. I had the seals, so decided to do them. I removed the seal at the top and the square seal The top seal was quite flat, but in decent condition really (not hard and no cracks). I fit the new seals and slotted the housing back into the carb body And then it all turned to custard. The instructions say to push the housing down and to nip up the screw, but don’t rely on using just the screw to pull it together…. clearly I didn’t push hard enough. The first screw went ping, and snapped into two pieces. Nuts. Because im a muppet though I forgot to use the washer under the screw, so I thought “hmm, maybe thats why it snapped”. So I grabbed the screw from carb two… and snapped that too. Good thing I purchased a set of Easy Outs a while back. They are little hollow brass screws, so very little structural integrity. I rage quit and went back into the house and left it there. I ordered three new screws out of the states for a few bucks each, so they should be here in a week or so. Sigh. Yesterday I couldn’t be bothered with the carbs but wanted to do something to feel useful, so I bled the brakes. Both brakes had really bad feel. The front lever was really soft and spongy, and the rear wasnt much better. I had figured I was probably up for a rebuild of the cylinders and calipers anyway, so what harm is there in bleeding it and seeing what happens? It’s funny how much easier bike brakes are to bleed than a car. I can lean on the lever whilst closing the valve to do the front, and pump the rear with my foot whilst working the valve. No need for a second person. The res was full of slime when I got it, but I flushed that all through And both calipers played nice and bled well. Minimal air, but foul fluid Now both brakes actually have solid feel and feel pretty good. I don’t know if the calipers are still sticking as the bike can’t move, but at least I might be able to put off spending too much on the brakes immediately. All the hoses look visually good with no cracking. Whoever the bloody sadist is that designed where the rear brake fluid res is located should be slapped hard. Its located in such a way that to get the cap off you have to remove a side panel, unbolt the res and have it hanging in the air, otherwise the cap doesnt clear the frame, and there is no way you could pour fluid in it. Moving along; This morning I was considering just selling the damn bike for parts as it was pissing me off and I was getting pretty demotivated with it all. So much work to do, and nothing going right, but at the end of the day that’s not how I work. So having a short day at work today, I shot home and went straight into the garage. I swapped the O-ring on the slide housing back the old one, and using the screw from carb THREE, I managed to get it nipped up nicely without snapping it. All the jets also went back in after a thorough cleaning. The float needle seat went in next, with its new O-ring And then the needle, float and bowl Finally it was the slide, needle, springs and cap, to top it off That’s carb one, done and ready to go. I then stripped, cleaned and assembled carb two Now I have a pair of carbs. Just need the screws to arrive and I can do the other two and then bench sync them. I’m hoping to have the carbs ready to go when the tank is ready, so that I can assemble and fire it up on my stand and see what the gearbox is like. After that, it’s a full tear down to do the frame. Oh yeah, I think I forgot to mention that I got a rear stand. No room to use it where the bike is at the moment, but once the car is living outside and I’m stripping the bike it will have all the room for activities.3 points
-
Thread is 10 years old. She hasn't posted for 8 years or been online for at least 3. So chance of an answer is minimal sorry.3 points
-
Mine or Josh? If it's poxy spray a bit of blackguard/rust converter around in there? Then maybe cavity wax or don't leave your car out in the weather for years on end?2 points
-
are you wanting to get on the track or suggesting OS should hold a trackday @Minister88? I don't think I / we understand your question or statement in the OP because yea I cant speak or represent Admin here either but don't hold your breath for reasons mentioned by @Spencer these days it ends up costing money & with the available options its not worth the stress or hassle most open trackdays do generally have GC's as the "boyracers" tend to stay away shoot even Manfield is having a FREE test day coming up as long as you can take Marshalls & helpers for rides (on a Friday btw)2 points
-
I agree what your saying Joker, If I wanted to take my car to track for a spin, would definitely attend a open track day etc The reason why I ask is because at any playdays you could be on the track with a 700hp r34 gtr or a nissan march which can cause a bit of conflicting interest to those who attend even though this is well controlled by the organizers. it would just be nice to setup a closed OS trackday in Taupo/manfield which might work for OSer's throughout the north is region to get together and not worry about pissing anyone off. you can also stretch the rules and reg a bit to match it to this club environment etc. I think the media would be keen to see this since its not the usual toyota or sub club.2 points
-
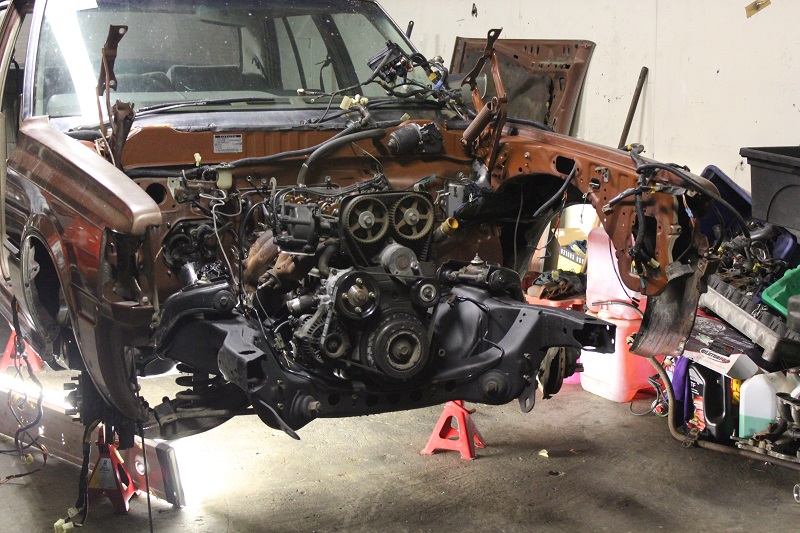
Turns out I was lying about it being a treefiddy. I had a look at the build plate and figured out all the codes. It looks like its a povo pack with a few extras. 305? TBI explains why it started and drove so nicely. A01- WINDOW, TINTED, ALL SHADED, W/S A12- WINDOW, RR, STA BACK DR A51- SEAT, FRT BKT PASS, DRIVER A57- SEAT PASSENGER AUXILIARY, ONE, FLDG B3W -TIRE ALL P205/50R 15/N BL RIPE ST TL KW4 C5S-GVW RATING, 6600 LBS C60- HVAC SYSTEM, AIR CONDITIONER FRT MAN CONTROLS D1V- GEAR, SPEEDO DRIVEN D20-: SUNSHADE, WINDSHIELD, PASS SIDE D45- MIRROR O/S, SST E24-WWR SIDE, CARGO, HINGED E5Z-SPEEDOMETER ADAPTER (DELETE) E60-?? E9Z-SPEEDOMETER KEY (DELETE) F59- STABILIZER SHAFT FR, GU6- AXLE REAR, 3.42 RATIO G50- SPRING REAR, HEAVY DUTY, VAR 1 JB5- BRAKE, POWER, DISC/DRUM, 6400 LBS K19- REACTOR SYSTEM, AIR INJECTION K60- GENERATOR, 100 AMP LOD- ?? L03-5.0 LITER V-8 TBI ENGINE MX81-?? M40- Turbo Hydra-matic Transmission NA5-EMISSION SYSTEM, FEDERAL, TIER O NL7-FUEL TANK,I25L, 33 GAL N33-STEERING COLUMN, TILT TYPE N40 - STEERING, POWER, NON-VARIABLE RATIO SLM - ?? V37 - BUUPER, FRT & RR, CHROME V73 - ANTENNA, FIXED XET - TIRE FRONT, P245/75R16-109S BW R/PE ST TL AT YD3 - FRONT AXLE, BASE EQUIPMENT FOR SCHEDULING, GVW PLATE YD5- ?? ZET- ?? ZW9-B0DY EQUIPMENT, BASE BODY OR CHASSIS ZY1 - COLOR COMBINATION, SOLID Z53 CLUSTER, INST, OIL, COOL, TEMP, VOLTS 12U-?? 62I- INTERIOR TRIM, LT SADDLE (I) 62V-TRIM COMBINATION, VINYL, LT SADDLE (V)2 points
-
Good excuse for a cb radio2 points
-
Plus you shouldn't be going camping to watch god damn TV...blardy kids these days2 points
-
It just fits down the side of the house... I got some more pics today in the daylight. Dat ass For some reason I really like the twin pipes hanging out Lush chairs If you line the side doors up and press the retaining strap in the right spot they open up really wide, Wide enough to hit the passengers mirror hence the open front door Crappy under bonnet(hood) shot and the worlds longest dipstick. Its longer than my leg. It smells the same as my old c10. I guess a mix of 350 horsepower sweat (have to find somewhere for the power to go thats not the wheels) and dust. I had plans of washing it today but had a nap instead2 points
-
Finished another patch of rust. Hate trying to do them when you can't get in behind with a dolly, makes it difficult. Made up some strap sort of things to mount the fuel tank. Spent a lot of time trying to figure out how to mount it and decided that adding another bar between the chassis rails was the best. The straps pull the tank up against the top brackets, should hopefully hold it in place well enough. Made up a aluminium tray to mount the air tank and compressor in. Being able to draw stuff up in cad, program it, laser cut and use a CNC press-brake is pretty great! It's pretty tight but fits. Will swap the tank to the back as the tank will look better being visible through those holes than the compressor. I'm sure I'll paint it black so it's a bit more subtle. Got the rest of the exhaust tacked together as well. Not sure if I'll change where it exits, because at the moment it sort of comes out between the tailgate and bumper or just leave it as is. I think the whole exhaust has 10-12 u-bends in it now haha.2 points
-
Dragged this home yesterday. IMG_20170513_102342 by John Bell, on Flickr Needs a little bit of a birthday, but really is in pretty good shape for its age. It came from some family friends who have had it since the beginning of time so has a bit of a history. I'm new to Land Rover details, but I think its an early Series 3, although the plate inside the cab says 2A. Its been fitted with a Nissan LD28, and has no sign of a cert, but has been issued Warrants in this configuration so I need to figure out if it ever had a declaration and if a copy still exists. The LD28 doesn't exactly fit very well though, and the diff head hits the oil pump, this apparently is a fairly common conversion so I'm curious as to how others have gotten around this. Apparently the original motor didn't have anything wrong with it, and is still available so if it is too difficult to get the LD28 to work (and legal) I may look into this. The tyres are a set of very perished 'oodYear' retreads which I find hilarious, my guess is that GoodYear didn't like you reusing their casings for retreads so they all have the 'G' rubbed off. The wooden deck is solid enough for now, but it might need a bit of attention, I'd love to be able to fit a wellside to it possibly. For now its home back indoors. I've got to sort out a few things before I get into it properly. I'm pretty excited to have a project that you can buy parts for. LD28 IMG_20170513_111906 by John Bell, on Flickr IMG_20170513_113127 by John Bell, on Flickr IMG_20170513_143948 by John Bell, on Flickr IMG_20170513_144002 by John Bell, on Flickr Tell me the secrets of Britannia here1 point
-
^ that OS track day at taupo was one of the most fun things I've done in a car. Keen for more hoons now I have a more suitable vehicle for such activities1 point
-
AFWE have everything for chev trucks so I assume they would for the vans1 point
-
Actually I once had a leaky oil pressure gauge which dripped down into the chassis quite well because it soaked through the wooden floor. I recommend cleaning it out as best you can. Rust converter, Then a zinc layer, then cover what you can with something like por15, then cavity wax Morris ankor wax is rated, can also run it on crusty paint to protect patina1 point
-
I should bring my gopro and "vlog" the meet, potentially including angry old men. Hmmmm.1 point
-
also (sorry to harp on) @Roman started up a wee page recently before he was Exiled to the Mainland link : https://www.facebook.com/groups/1708890559124986/1 point
-
I don't remember. I removed it because it had both heater hoses Going in and out. So I got no flow through the heater. Being cold su ks worse than a flat spot.1 point
-
Hello Gents. So the 28th is this weekend. Neil and Glenn are now longer able to help. Chris is keen Ned may make an appearance Anyone else that can lend a hand would be appreciated. Mike (quarto) is kindly lending me the plasma cutter for the weekend so this will make things much faster. I will have pulled all the parts out of the cars to gain accesses. Im keen to get 2nd and 3rd opnions as to which car to cut up also. They both have their merits and detractions. This decision will be made on Sunday. Thanks1 point
-
fair point, but in nz we aren't likely to have big arse fires I guess we are likely to have a flood etc but if the weather is that shit you shouldn't be camping anyway arguably. and its all digital now and wont get reception I barely watch tv at home tbh, once a week maybe when we got to the mrs family for dinner so its not something I feel the need to take camping. Bloody newspapers are only good for starting fires.1 point
-
Each to their own. But no. Not always you can drive away. Years ago on a trip we got caught up in huge bushfires. Exits sealed etc. Had no idea where to go what to do etc. Stuck at camp site we managed to get the local news on the tv. It showed aerial shots of everything and talked about where it was and where the emergency evac points were. From that we made our way out of trouble. So the tv actually saved our ass.1 point
-
I don't know what they were using in my FoMoCo gearbox but its totally black inside from the sulphur, but syncros seem ok1 point
-
And a Viking ship. Also West coast mirrors, Cragars & lots of crushed velvet. There's a good chap.1 point
-
I'll need someone to draw up a mural with lots of titties1 point
-
Pretty sure it works like a 4A-GZE one, the ECU triggers that relay based on intake manifold vacuum. When vacuum drops below 8" the supercharger clutch is engaged. The clutch stays on until intake manifold vacuum has risen to over 10" for a period of 5 seconds. This time delay was added to avoid cycling of the clutch during shifts and momentary throttle transitions. http://mr2.com/TEXT/SuperChargerInfo.html1 point
-
A DKW 3=6 that popped up for sale last week. Click the picture to go to the Trademe Auction:1 point
-
Poor thing Didn't want to start for me last time I tried so I cranked it on the starter until it got here. I'm actually quite liking the steelie/whitewall combo. I need to tidy the garage enough so I can get it inside. I have ordered some bosch ev1 plugs off aliexpress so I can replace all the fucked injector/temp sensor plugs1 point
-
1 point
-
Over the new month I get the tune better & better but I started to notice that not all was good. All that extra weight in the boot had changed the car, the way it handled and they way it drove was very different and not for the better. I guess there would be about 40kg in the boot and it was all high above and behind the rear diff, this made car feel like it had a few bags of cement in the boot all the time, but worse, much worse. What was once a nible agile car had been ruined, what had I done! Early 2011 and now “life” really started to accelerate for me and over the next four years, I started my own business, began a family, purchased a house, family got bigger, I took a stable job at a large multi-national and my career sky rocketed. Through all of this I was battling health problems and progress on the car took a back seat. Truth be told, I was also pretty pissed at myself for the direction I had taken the car. If only I had found the cyclone issue with the intake manifold after it was first tuned, then I wouldn’t have the car in this state. I could have been driving the car for years without spending all the cash – yada / yada. Hindsight is 20/20 – I wasn’t going to sell it, so lets make it what I should be. Back to the overheating issue, I wasn’t convinced that I had solved the problem by adding the bonnet vents and wrapping the exhaust manifold. The car has airconditioning, but I had never been able to use it as when the car starts to overheat the A/C would cut out and I would actually have to turn the heater on to help bring the temp down. This was unbearable on a 38deg day sitting in the car with the windows, sunroof open and the heater blowing full tilt, picture a sauna, that’s what it was like – except not as pleasant. Well, the revaltion to me was that I should get rid of the A/C as without the condensor it would give me a better mounting position for some slimline fans and if that works in keeping the engine cooler, it would actually make it more pleasant to drive as I wouldn’t need to have the heater turned all the way up on a hot day. Thinking man. So out comes the air conditioning. And in the place of the A/C condensor goes two 12” SPAL slimlines. The little cooler you can see is for the powersteering. I took a good look at the stock radiator and decided it could use an upgrade at the same time , ADRAD in SA built a custom radiator that fits magnificantly, it seems to be based off an Evo 1-3 radiator but at slightly different dimensions. The heatwrap on the exhaust manifold got binned as well and I had the manifold, waste gate screamer pipe, turbo exhaust housing and the turbo dump pipe ceramic coated by a local coater. This should solve the overheating once and for all. The new slim line fans are now mounted in the best position, I plugged all the gaps around the radiator with foam, there was no more A/C condensor adding resistence to the fans while stationary. The ceramic coating would (hopefully) provide some radiant heat sheilding and the new radiator would add another level of confidence that the problem should be erradicated for good. 2012 rolled around and time for another brake upgrade. The VR4 Twin Pots were much better than stock, but still not what I would call great. I could have gone late model Bremboes, but that’s a common upgrade. I found Wilwood 6 piston kit ex US with 320mm two piece rotors for a very reasonable price. Shortley after installing the bigger brakes I took the car out for a glamour shoot.1 point
-
Here is a picture with the rears adjusted as low as they go without touching the spring perch height. I levelled the ride height out and this is what I have been running since. There is a lot of room for camber adjustment in the front as well, this is with the camber set in the max position. I briefly entertained the idea of running some chromies on the car. Only Super Cheap’s finest would do. Now it was time to start wiring the Link Plus G3 and associated bits together. I distinctly remember this time in the build as I was literally dreaming rainbows of wire colours. With the dual twin ignitors, I had always planned to run sequential ignition vs the standard dual coil wasted spark setup of a stock system. This meant finding some coils that would work and again I turned to the US where there were off the shelf kits based of Chrysler 300M dumb coils. This was before the trend of using Yaris/Echo coils, which would have saved me installing the ignitors and also given me an option to buy locally. I do have a setup of Yaris coils waiting to go in at a later date. One of things I wish I could change is how I wired the ECU. At the time, I integrated the G3 into the stock wiring and wired the G3 to replace the stock ECU, instead of focusing on actually what the G3 was capable of controlling. What I mean is that the G3 can control the Radiator Fans, the A/C and has far more inputs for Oil Pressure/Fuel Pressure etc. Instead I focused on replicating the stock setup which has resulted in a configuration that’s not as good as it could have been. I needed to add a clutch switch for launch control to work in the G3 and after looking at how the pedal box had been setup it looked like I could use a normal brake pedal switch in the clutch pedal end stop. But alas the thread size was different, M12 vs M10 but I ended up drilling and tapping out the old stop and threading it for M12. This was not fun with the pedal box in the car, in fact I think my shoulder still tweaks when I think about it. After about 2 or maybe 3 weeks I had a finished loom on the living room floor for the G3 that plugged into all the standard harnesses and connectors. And this was all the standard wiring I removed and replaced… To my absolute amazement, after some basic configuration of the G3 the engine fired into life very easily. Over the next few weeks I roughed in an idle tune and checked everything was working as expected. At this point it was late 2008 and about 18 months since the car was last driving and here it was being flat bedded to be tuned. In 2008, not many people were tuning with Links in Perth, ViPec hadn’t been incorporated and they were still seen as an odd ball kiwi ECU to a few of the local tuners. I did manage to find someone willing to give it ago, I said to do a safe tune, 21psi or 350hp atw, whatever it makes first. After a few days, I had the car back. Well, that wasn’t what I was expecting. Sure, surfing the ramp is fun but at 20psi where is the rest of the power? The tuner mentioned that the way the car was behaving on the dyno looked like there was something choking it, perhaps the intercooler or just a shit turbo. It’s probably worth noting that this power level is pretty much what the previous setup on the little 16G could make and be significantly more drivable. Something wasn’t right. Back to the drawing board, well box of beer and contemplation. The car drove in that guise for about 6 months, it drove great, very economical under 4krpm but an animal above, very Dr Jekyll and Mr Hyde. I couldn’t help but think something wasn’t right thought. Reading through the forums indicated that it probably wasn’t the turbo, it should be able to make 350hp at the wheels on 20psi quite easily. Perhaps it was the modified JDM VR4 Intercooler?1 point
-
In a semi-serious continuing effort to stop the overheating when stationary on hot days I thought about adding some bonnet vents and in my opinion, the only ones that would be correct for the car are VR4 RS vents. I did consider some Evo 3 bonnet vents but I just didn’t think it would work right as they are much larger. I was pretty nervous doing those first few cuts into the bonnet, but in the end, it came up okay, not perfect but good enough. I did plenty of measuring to find the right spot for the vents in the bonnet, I’m not using the best position for heat extraction, but rather a position that is as close to where the vents sit on a standard VR4 RS bonnet. This puts the vents half over the radiator support and half over the exhaust manifold. With liberal amounts of Sikaflex I glued the vents into the bonnet and even after 8 years there has been no sign of movement. I went to super cheap and got them to mix up and rattle can of the standard paint and it turned out awesome. Until I applied the clear to them which made them go a milky colour. *sigh* I ended on masking them up and painting them satin black recently. I put the engine back in the car with the new clutch, gearbox, turbo. I had also entered into a group buy for some custom Front & Rear Strut braces which I finally got to test fit. Remember how the handling was pretty bad because of the shortened rear King Springs I installed? I bought a set of G4’s for a VR4, taking a gamble that I could adjust enough height out the rear to get the Cyborg sitting right. This wasn’t the case and the rears were far too tall but the G4 dealer in Australia was more than happy to help in customising the coil overs to work. I sent the rears back with some measurements and this was what the result is, one very shortened rear coil over which worked! Some of you might be thinking, “But G4’s are cheap shite” and, well yea they’re not the best, but they are light years better than what was there previously. There is a slight difference in the way the front suspension mounts between the VR4 and Cyborg. You can see in the picture above the standard front VR4 top hat is mounted with three studs and the Cyborg is mounted with 2 studs. The two stud tops hat do look similar to the later model CC Lancer/Evo 1-3 but it’s not quite the same. This meant I needed a custom top hat made. This was actually quite fun to do, we put the standard top hat onto a flatbed scanner to get the profile, did the same with the G4 top hat then superimposed to two together to get a CAM profile for the CNC router. All bolted in perfectly, like it was meant to be.1 point
-
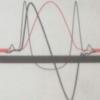
I replaced the twin plate with a Fidanza Aluminium flywheel, sintered puck friction plate and a something/something pressure plate – yes, I obviously had not learned anything from the twin plate fiasco. I got to thinking about why Mitsubishi rotated the engine and gearbox 180deg in the Evo 4+, common reasoning is that it removes a shaft in the gearbox. Earlier models need 3 shafts, Input, Intermediate and Output whereas the Evo 4+ have only an Input and Intermediate. Or perhaps it’s so if the flywheel explodes it takes the passengers nads out and not the drivers. Hrmm, think I need a scatter shield. Actually, I need a polished scatter shield. Next minute these goodies arrived. A set of Brian Crower 280 degree duration cams, matching heavy duty valve springs, titanium retainers, Fidanza cam gears, ARP head studs and ARP rod bolts. Totally over kill for a standard short block but, you know, why not right? Matchstick for scale, tissues for clean-up. To install the valve springs, it was easiest to take the head off for a freshen up. I used a local machining shop to clean up the head, skim, check the valve seats, install new guide seals, springs and retainers. Next up was a Cometic Multi Layered Steel Head Gasket along with the ARP head studs. Brian Crower recommend the 280’s to be installed straight up but at the time I didn’t have a dial indicator to check for actual Top Dead Center of the Pistons since the head and gasket height were different now. I have since checked with a dial indicator and it’s just under half a degree out, not enough for me to worry about cracking the Loctite on the cam gears retaining nuts. And another turn for the project, a local was selling this low km turbo and I had to impulse buy! Unfortunately, the standard unit of measurement, the Nokia phone was unavailable, I had to substitute with another period correct device. It’s a PTE SCM 6152E, in hindsight it’s a complete ass of a turbo, but it’s a bolt-on to the Mitsubishi mounting flange and well, bigger is better, right? Apparently its rated for 630hp, with a 3.5” Inlet, 56 trim compressor wheel with an Inducer of 61mm and Exducer of 82mm. What really lets it down is the custom rear housing made by PTE to suit the Mitsubishi flange and the 76 trim T350 turbine. But what’s done is done. With a bigger turbo, you need bigger injectors and I picked up a set of second hand SARD 800cc injectors and had them cleaned before installing. What’s annoying about these injectors is SARD don’t offer any decent specifications on them, just a vague Dead/Lag Time of 1.1ms, like at what voltage and fuel pressure? It turns out that at 3 bar fuel pressure these are closer to 855cc. Not quite enough for corn juice, but that wasn’t even available in West Australia when I was building this. Getting ahead a little here, but I recently purchased an oscilloscope and measured the actual dead time on the car while it was running. The Hantek DSO 6074BE IV is a kit specific for cars and makes testing this stuff easy. I varied the voltage by turning on ancillaries, disconnecting the alternator and running on battery power etc. then used a non-linear extrapolation to get the lower voltages. At standard operating voltages, the dead times are now exact and much closer at the lower voltages. I dummied the engine up on the engine stand to see how much additional clearance would be needed on the water pump inlet pipe which runs behind the turbo, fortunately none was needed. I also gave the exhaust manifold a heat wrap in the hope it would help with the overheating the car had while sitting at traffic lights. On a stock car, there would be some heat shielding on the manifolds and dump pipes and maybe with the tighter engine bay in the Cyborg compared to the VR4, the unwrapped manifold may have been radiating too much heat into the bay for the near stock cooling system to dissipate. It couldn’t hurt, right? One of the other changes here was that the oil feed for the turbo could not come from the stock location in the head as the oil pressure at this point is too low, PTE recommend taking the oil straight from the filter housing which is as close to max pressure you can get.1 point
-
@grunta being the GC he is kindly sent me his old Carter 2 BBL!! So will look at rebuilding that and slapping it on at some stage in the near future. Was this your handy work mate... hahahaha!!1 point
-
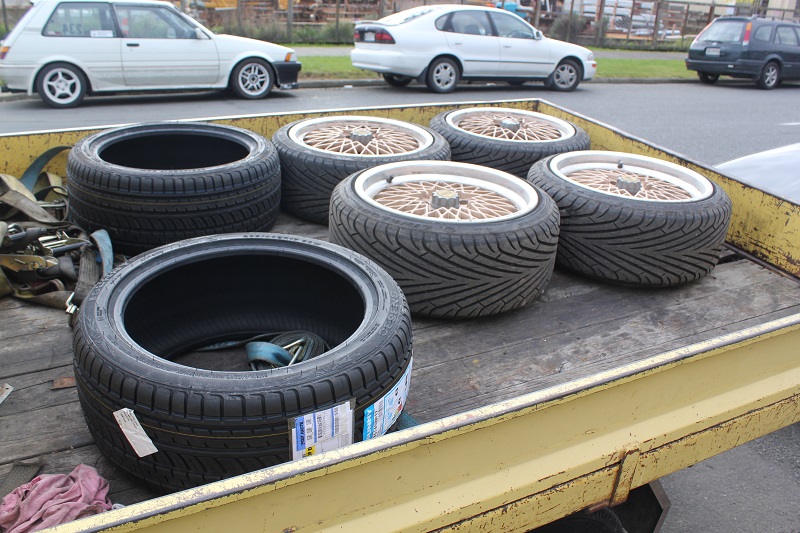
Now we are at present day. I have a track day on the 27th, and I wanted to make some changes. First was the diff ratio is way long for the torque of the car. So I bought a 4.3 ratio LSD to fit. I also bought a seat rail to take an old Racepro I have kicking around Some tow hooks And these: 18 x 8.5, 30th anniversary 350z Wheels, +30 offset To go with them I also got some 6.5kg/mm lowering springs. No Pictures of them but just the finished product from today: Car still has Wof, and rego and the objective is to keep it running as a daily. Idea is it will stop me from ripping the motor out to put a V8 in it, and to keep it running on the most reliable setup for as long as possible.1 point
-
What a week. Everything was put on hold, because I got married! But now that I’m home again, and going back to work tomorrow, I thought I would have a quick catch up on the Zeal. Whilst I was away I left about a litre of white vinegar in the fuel tank to see if it would do anything to the rust. Unfortunately even after a week it had done very little. This is what I poured out. It had started to strip some of the lighter rust, but wasn’t working quick enough. I was going to try electrolysis, but it just seemed like a lot of faffing about to set up. I was doing some research and came across a product called Evapo-Rust. It’s safe for the environment, safe to touch, reusable and safe on paint… but it monsters rust. A few people have used it for tanks, and it seems to do a good job. So, I scoured the local Supercheap Autos, and picked up 15L of the stuff. Before I could pour it into the tank, I had to seal the fuel tap hole in the tank better than the leaking duct tape I had used with the vinegar. To do this I used some scrap aluminium, a drill and the old gasket. I smeared some sealant on both sides of the gasket, and bolted the plate to the tank. So far, touch wood, it’s sealed tight. With some strategic placement of some wood and a tub, I got the tank as flat as possible and filled with all 15L of the Evapo-rust. The tank has a 15L rated fuel capacity, but it didn’t quite fill the tank. Whilst I was away I also got some sweet packages from overseas. The first was a set of legit JIS screwdrivers from Japan. These are to Japanese standards, which is very slightly different to the Phillips cross profile. The difference is subtle, but enough that if you try to use a standard Phillips driver in a JIS screw, it’ll strip out like it’s made of cheese (as the screwdriver tries to “cam-out” by jumping out of the slots). JIS drivers will slot in and fit perfectly. The carbs on this bike (and most bikes) use JIS screws and are super common for stripping out when JIS drivers aren’t used. Revlimiter has an awesome write up on the differences between Phillips and JIS. Another package I got was the set of LiteTek carb and fuel tap gaskets. This means I can put my fuel tap back together, and start work on the carbs. I started putting the fuel tap together I used a small bit of 2000 grit wet/dry paper to smooth out the rough edges on the pitting, so it wouldn’t damage the new gasket. Happyface. And in goes the new gasket. Scaredface. Bits The completed fuel tap. So this has been stripped, ultrasonic cleaned, new seals, and the screws treated in Evapo-Rust (which worked really well for a couple of hours soaking. The screws where heavily rusted, with thick coating of crud). Now it’s ready to go on the tank again when that is done. And what it looked like before Next I took the carbs off the bike. Not hard to do, once the airbox is off it’s only 4 hose clamps and 3 cables to disconnect. So much grot by the starter that I need to clean out too. I tried draining the float bowls, and only liquid came from cylinders 1 and 2. And I say liquid, because you can’t call it fuel. It was yellow, and smelt like paint stripper. Using my awesome new JIS screwdrivers, I then removed the float bowls. Most of the screws cracked ok, but some needed a little help (and one needed the help of some vice grips). It turns out the flats on the driver are perfect for a spanner. With all of the bowls off it was easy to see why I was doing this. Cylinders 2 through 4 had gritty sandy stuff in the bowl, and cylinder 1? Well, that’s where all the fuel in the rail drained to when the bike was sitting (leans to the left on its stand). The carb jets will obviously need cleaning, and the bodies are filthy. They will need stripping and soaking in the ultrasonic for a bit. I need to work on my plan of attack. The LiteTek site has an awesome write-up on how to rebuild the carbs, so I’ll go over that and get cracking on it. I also need to work out what to do with the frame. I’m slightly leaning towards stripping the bike and getting the frame blasted and powder coated, but it’s a lot of work, time and money.1 point
-
https://imgur.com/gallery/qh0hd1 point
-
1 month in of driving. The gearbox is making bad noises, the carb is not working properly but running in a reasonable AFR range so its ok, all the door and heater vent seals leak and it fills up water, IT IS SLOOOOOOOOOOOOW. 45kw makes it no rocket ship. Time to change that. Watch This Space...1 point
-
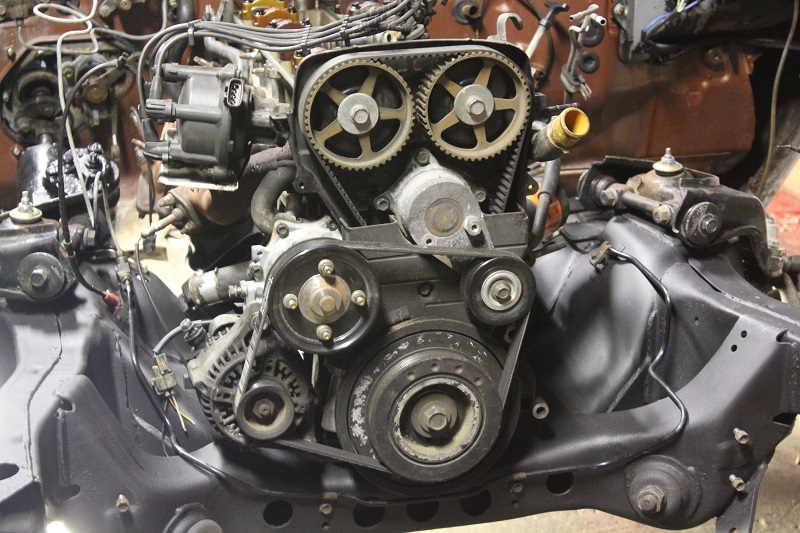
Another week. Not so freaken sure where all th time went. I mean, I got some shit done, but it doesn't really feel like it was much However, motor is now mounted in the car, gear box bolted up, drive shaft in etc. Might have to modify the clutch slave mounting some how, It clearly isn't right, and my guess is I was in to much of a hurry last time to do anything about it, I suspect the clutch slave movement isn't enough to fully operate the clutch fork. Maybe why I had issues with clutch slippage. Then again its probably fine. So next up is strip all the stuff off the front of the engine for painting. Which I guess is what this week is going to consist of mostly. Need the rocker covers and intake manifold painted so I can sit the loom back on the engine and figure out the few mods to the loom I need to do. As I plan on doing everything in wrinkle finish, I also need to figure out some sort of paint booth where I can use some heat. Oh and My 235 / 40/ 17's turned up so droped all my wheels down to local tire wizard for some fitting Not looking forward to finding out how much space I don't have Rad I know
1 point
-
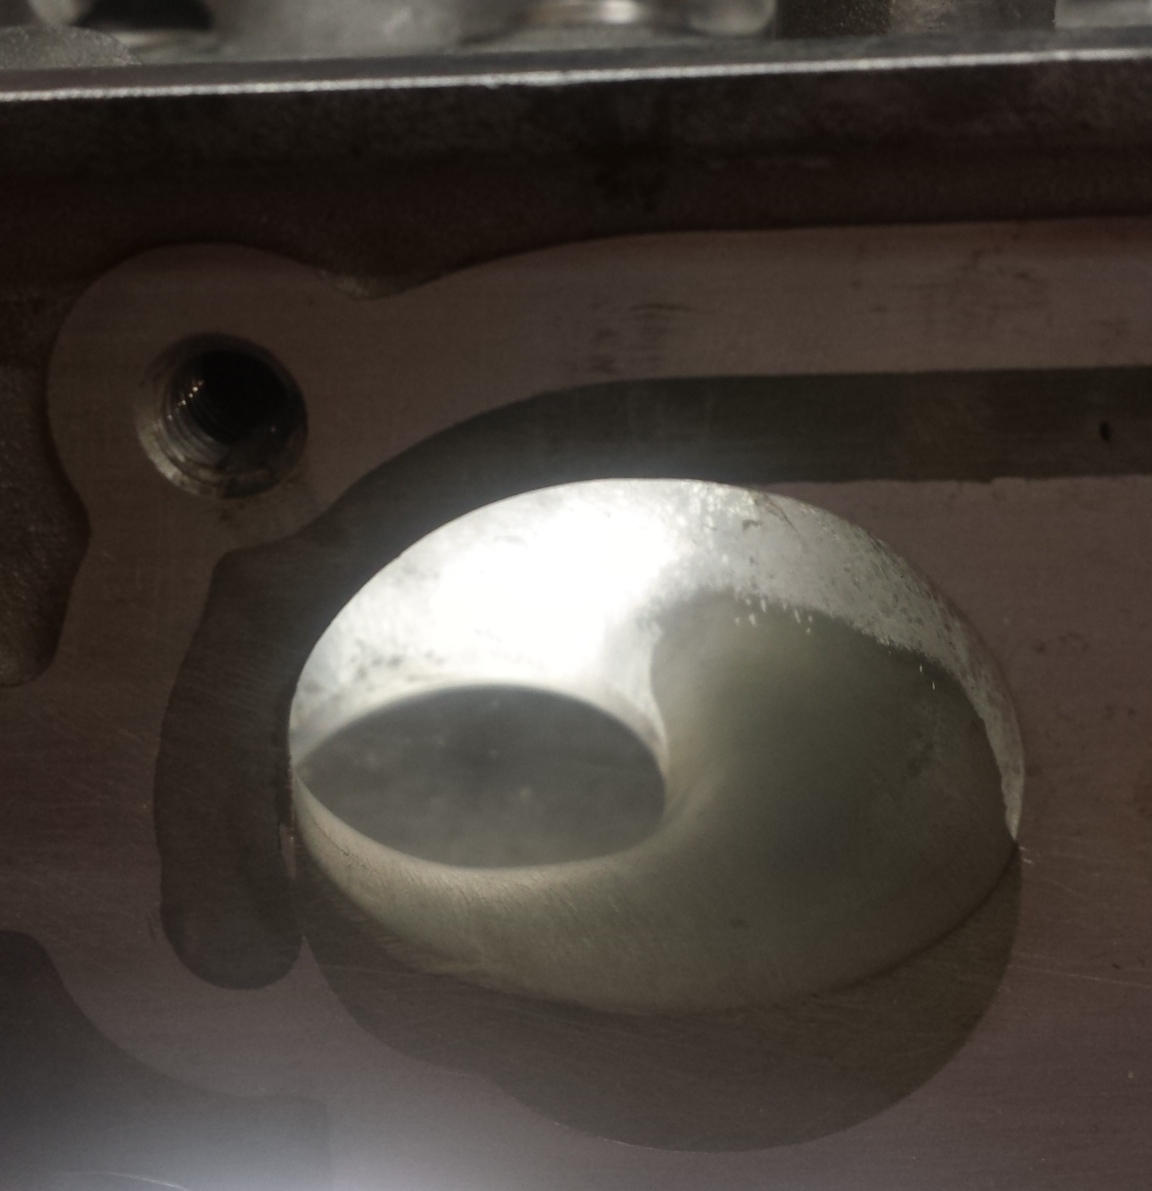
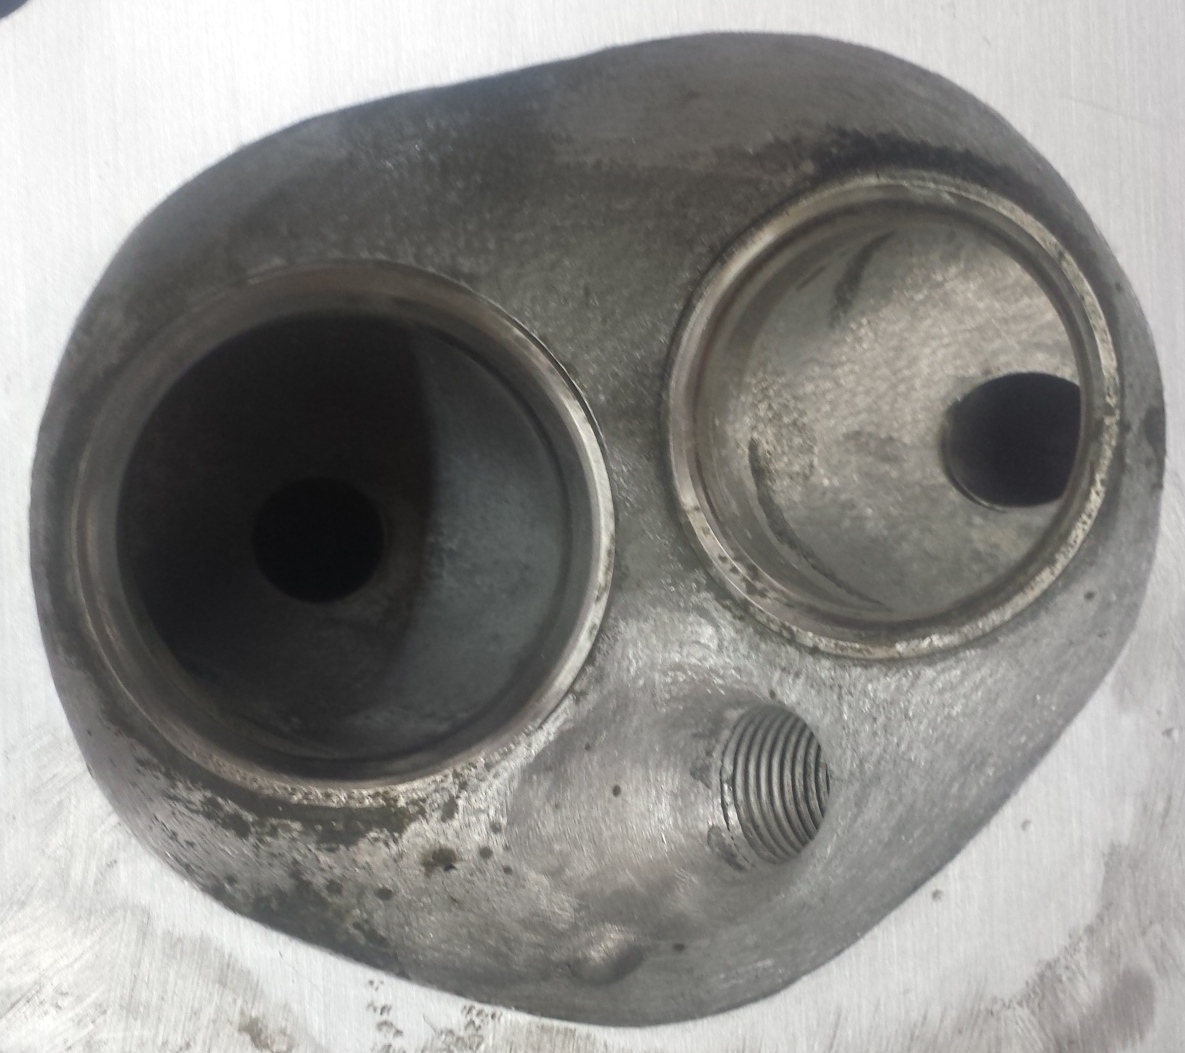
Here is a quick update showing the new inlet port design (lots of bog!!) and the new combustion chamber shape (Ready to make around 12:1 compression after the head receives its skim).
1 point
-
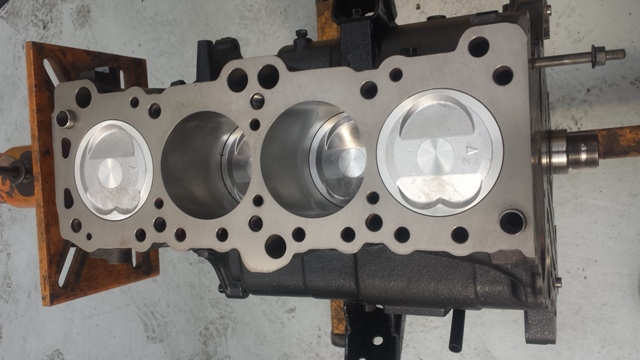
Picked the block up today. Cylinders re-bored +0.5mm, Deck skimmed, pistons machined and everything balanced, cleaned up and assembled. Could not be happier with the Job completed by Glen at Glen Durie Engine re conditioners in Woolston.
1 point
-
Quick update, nothing photo worthy though sorry. Have been busy porting the head, it is currently ready to be bogged up. Have sorted out new springs, titanium retainers, machined spring seats and have got most of the fuel delivery system assembled. Purchased new clutch which has been sent along with flywheel to the machinist for balancing. Should hopefully have most of the engine, except for intake runners, ready for mock up by the end of next week.1 point
-
Here is the finished result. Down from 9.8 kg to 6 kg.
1 point
-
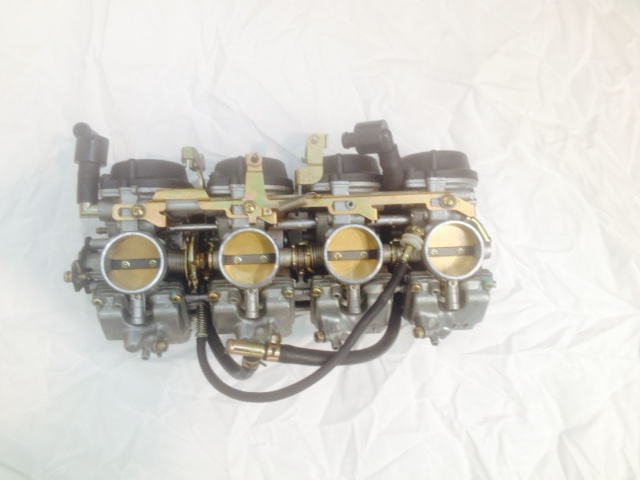
These bad boys just showed up all the way from Germany. In really good condition for the $$. So long to the terrible stock manifold.
1 point


This leaderboard is set to Auckland/GMT+12:00