
Leaderboard


Popular Content
Showing content with the highest reputation on 05/19/17 in all areas
-
So you want to bring your vehicle home from the usa and can't find a write up either well here is the process I went/am going through. My memory isn't 100% but I'll make is as accurate as possibly I found my van in phoenix and had a friend look over it, He gave the ok and went and got it. If you are lucky you can get your friend/contact etc to act as a agent for you saving a $75 us title transfer fee. Make sure you get a bill of sale at this point in time. Now is the time to order whatever parts you want and stick them in said car. When you are ready contact your exporter/shipper, They will give you a SLI form. you'll need to fill in your details and the sellers or the person acting as your agents details. Complete it and send it off to the shipper. Your agent then should hand the title, bill of sale and and any receipts for parts along with the vehicle over to the shipper. When the container lands you will get a arrival notice. If you do not have a customs client code you'll fill in a form and send it off with proof of photo id. When that has been processed you will get a customs certificate shortly followed by a a invoice for gst and customs fees. For me in may 2017 they are customs import transaction fee of nz$42.85+gst and customs facility fee of 49.99 + gst, You will also pay import gst. My understanding is this worked out on the total cost of parts, the vehicle, and all shipping to nz. Pay this and a few days later you will get a invoice for shipping. I've broken it down here - Fumigation - 165+ - Destination cartage 235+ -Destination port service charge 395 - International freight 2270 - Origin cartage (im my case shipping from phoenix to la, $450 usd) - 687 - EDI processing fee 40+ - Customs clearance 65+ - Container handling - 150 - MPI inspection fee - 85.00+ - NZTA border inspection fee - 95+ Once that is cleared (I've just paid so i'll update this later) you'll receive the release documents and be able to collect your ride. I assume I will recieve my title and bill of sale upon collection of the van TLDR: A rough cost (less duty) for a van from LA to Auckland in a container is NZ$3611.74 Add $100 for customs fees and 15% of the vehicle purchase price & shipping. Hopefully this helps people on here who are thinking about bringing something back from usa. I asked/researched as much as I could and had a idea of the process but not what the costs were, its a bit more than I expected but I expected that I used cfrline to bring my van back and am happy with their service so far15 points
-
So I have been looking at bigger brakes. Looking at S30 upgrade info, the first port of call are Toyota Hilux calipers, 4 piston and vented. Sounds good, will they fit? Don't know yet. I picked up a S12+8 caliper for a vented disc off a Landcruiser for a dollar to do some measurements. Stock caliper mount bolt centre to centre is 3.5", so is the Toyota caliper, yuss. Stock caliper mount boss is 19mm thick and the bottom mount slots in between the steering knuckle and the spindle, Toyota caliper is 19mm too so no problems there. Fitting the caliper looks sweet, now to find a disc that will work with minimal mucking around. After trawling through the DBA disc catalogue the vented 5 stud Z31 86-89 Turbo (DBA604) one looked promising. Stock Z31 Disc OD 271mm 274mm Disc ID 81mm 81mm Thickness 12.5mm 22mm Width 43.5mm 35.5mm Only thing I wasn't sure of was the bolt pcd as the 260C one is around 103mm, so I ordered some hoping that Nissan had kept it the same. Bolted up to the back of the holes sweet. An 8mm-ish spacer will get it sitting in the right spot. A couple things I'll need to check later is how the disc fits in the caliper, the disc is 22mm and the caliper slot is 23.3mm and also the disc is 3mm larger in diameter and the calipers both have the same distance from the mount holes to the bottom of the slot, should be a simple fix if needed.9 points
-
Since the car has been on the road again, I’ve put on a set of Bridgestone Potenza RE003’s and printed some custom hub-centric rings. For the hub-centric rings I used ABS plastic which should be okay, its transition temperature is around 105c and it would probably still be okay around 140c. Really its only used to locate the wheels while doing them up and don’t really serve a purposed after that. This is where I am today, almost the middle of 2017, 12 years after buying the car. Where to from here?6 points
-
20 K USD http://barnfinds.com/4wd-motorhome-1975-mercedes-l9115 points
-
4 points
-
Today I learn something interesting about caliper placement. The 350Z at work has some big ass Stoptech calipers with some big floating discs on it. Which now causes the problem of pad knockback... When you have a larger diameter disc, when the hub flexes it maginfies how much the outer edge of the disc moves. When you have a 4 pot caliper located on "top" of the disc, (as per 350Z) this means that the disc is being pushed against the pads which pushes the pistons in during hard cornering. A 2 or 1 pot slider caliper is more resilient to this problem because the caliper just moves with the disc. If you put the caliper at the 3 or 9 o clock position instead, with the start of the pad just above or below the centreline of the disc. Then you are much less affected by the hub flexing under cornering and you dont get knockback. (as much) There are kits for the 350Z to relocate the caliper to this position, for this reason. Pad knock back sounds scary as fuck. Coming in hot to a corner then your pedal sinks haha.3 points
-
Thanks for all the help i have been getting from people. Not to much has happend but i i gave it a quick little polish, it come up much better than i expected. Also picked up some lowering springs the back looks good but the fronts still too high, so i might get the fronts springs compressed a little. its looking pretty cool tho. Also test fitted some other wheels 14x7 Enkei Crossfever im leaning towards keeping the Work Equips tho. Also have some 14x8 ssr Starsharks that ill test fit, once i get tires for them. assume they will be to wide tho.
 3 points
 -
This is how close the vn instrument cluster is to the l200 cluster Obviously the gauge bodies won't fit without cutting the housing. I could adapt the l200 glass to the vn body. You would have to cut off the idiot light section and make some mounts. I'm going to put the vn gauges in the l200 body mainly because I have to remake the pcb as a loom because they are old and cracked and not worth fixing and no repos available. This suits me because actual wire and some proper connectors will be much more reliable than thin copper traces on floppy plastic, and more forgiving when removing the plugs as I've damaged the current one by having it in and out too many times. Also, either way I will have to remove the idiot lamps to fit it in. Couple that with being able to get rid of half of them because I won't need them (and most Commodores never used them anyway). It looks like I can use the l200 indicator lamps on the top either side of the speedo but the rest (oil, battery, check engine, parking brake, fog lamps, and high beam and low beam) are going to be a challenge. Either I make a strip up from the vn cluster and install it on or in the dash someplace, or I could use small LED's embedded in the gauges much smaller than the originals and either remember the colours or gave some stickers made up.3 points
-
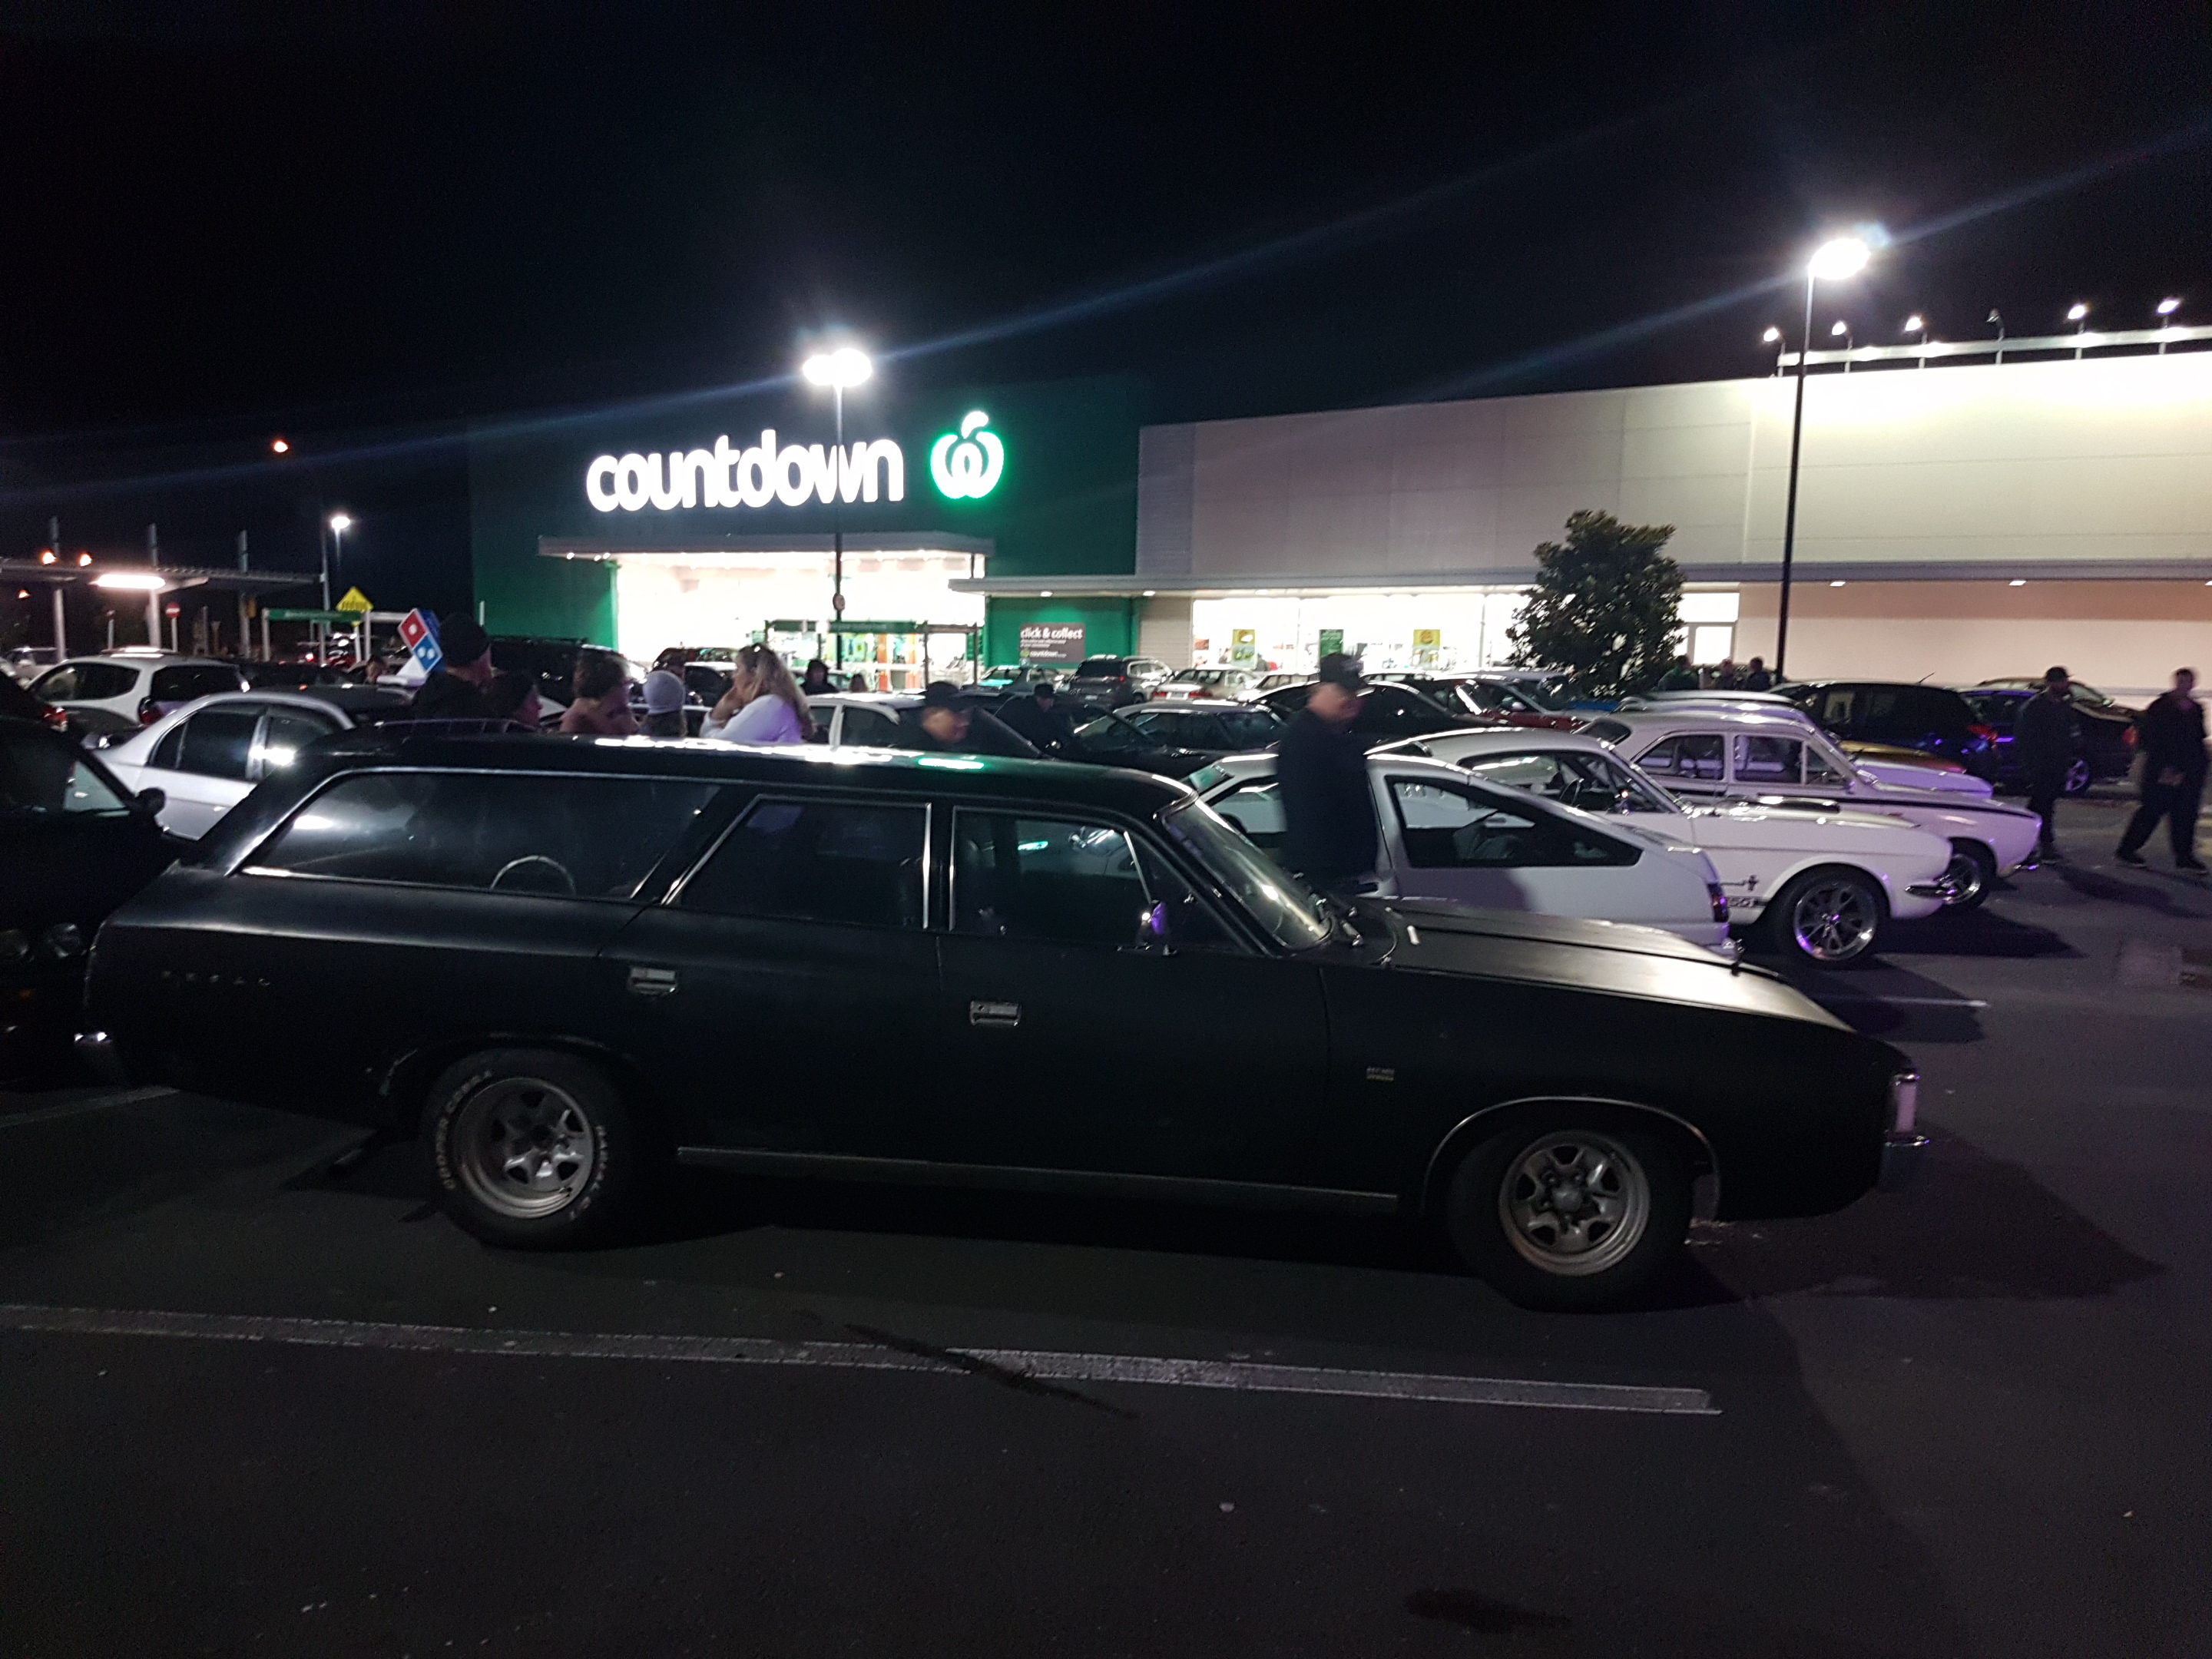
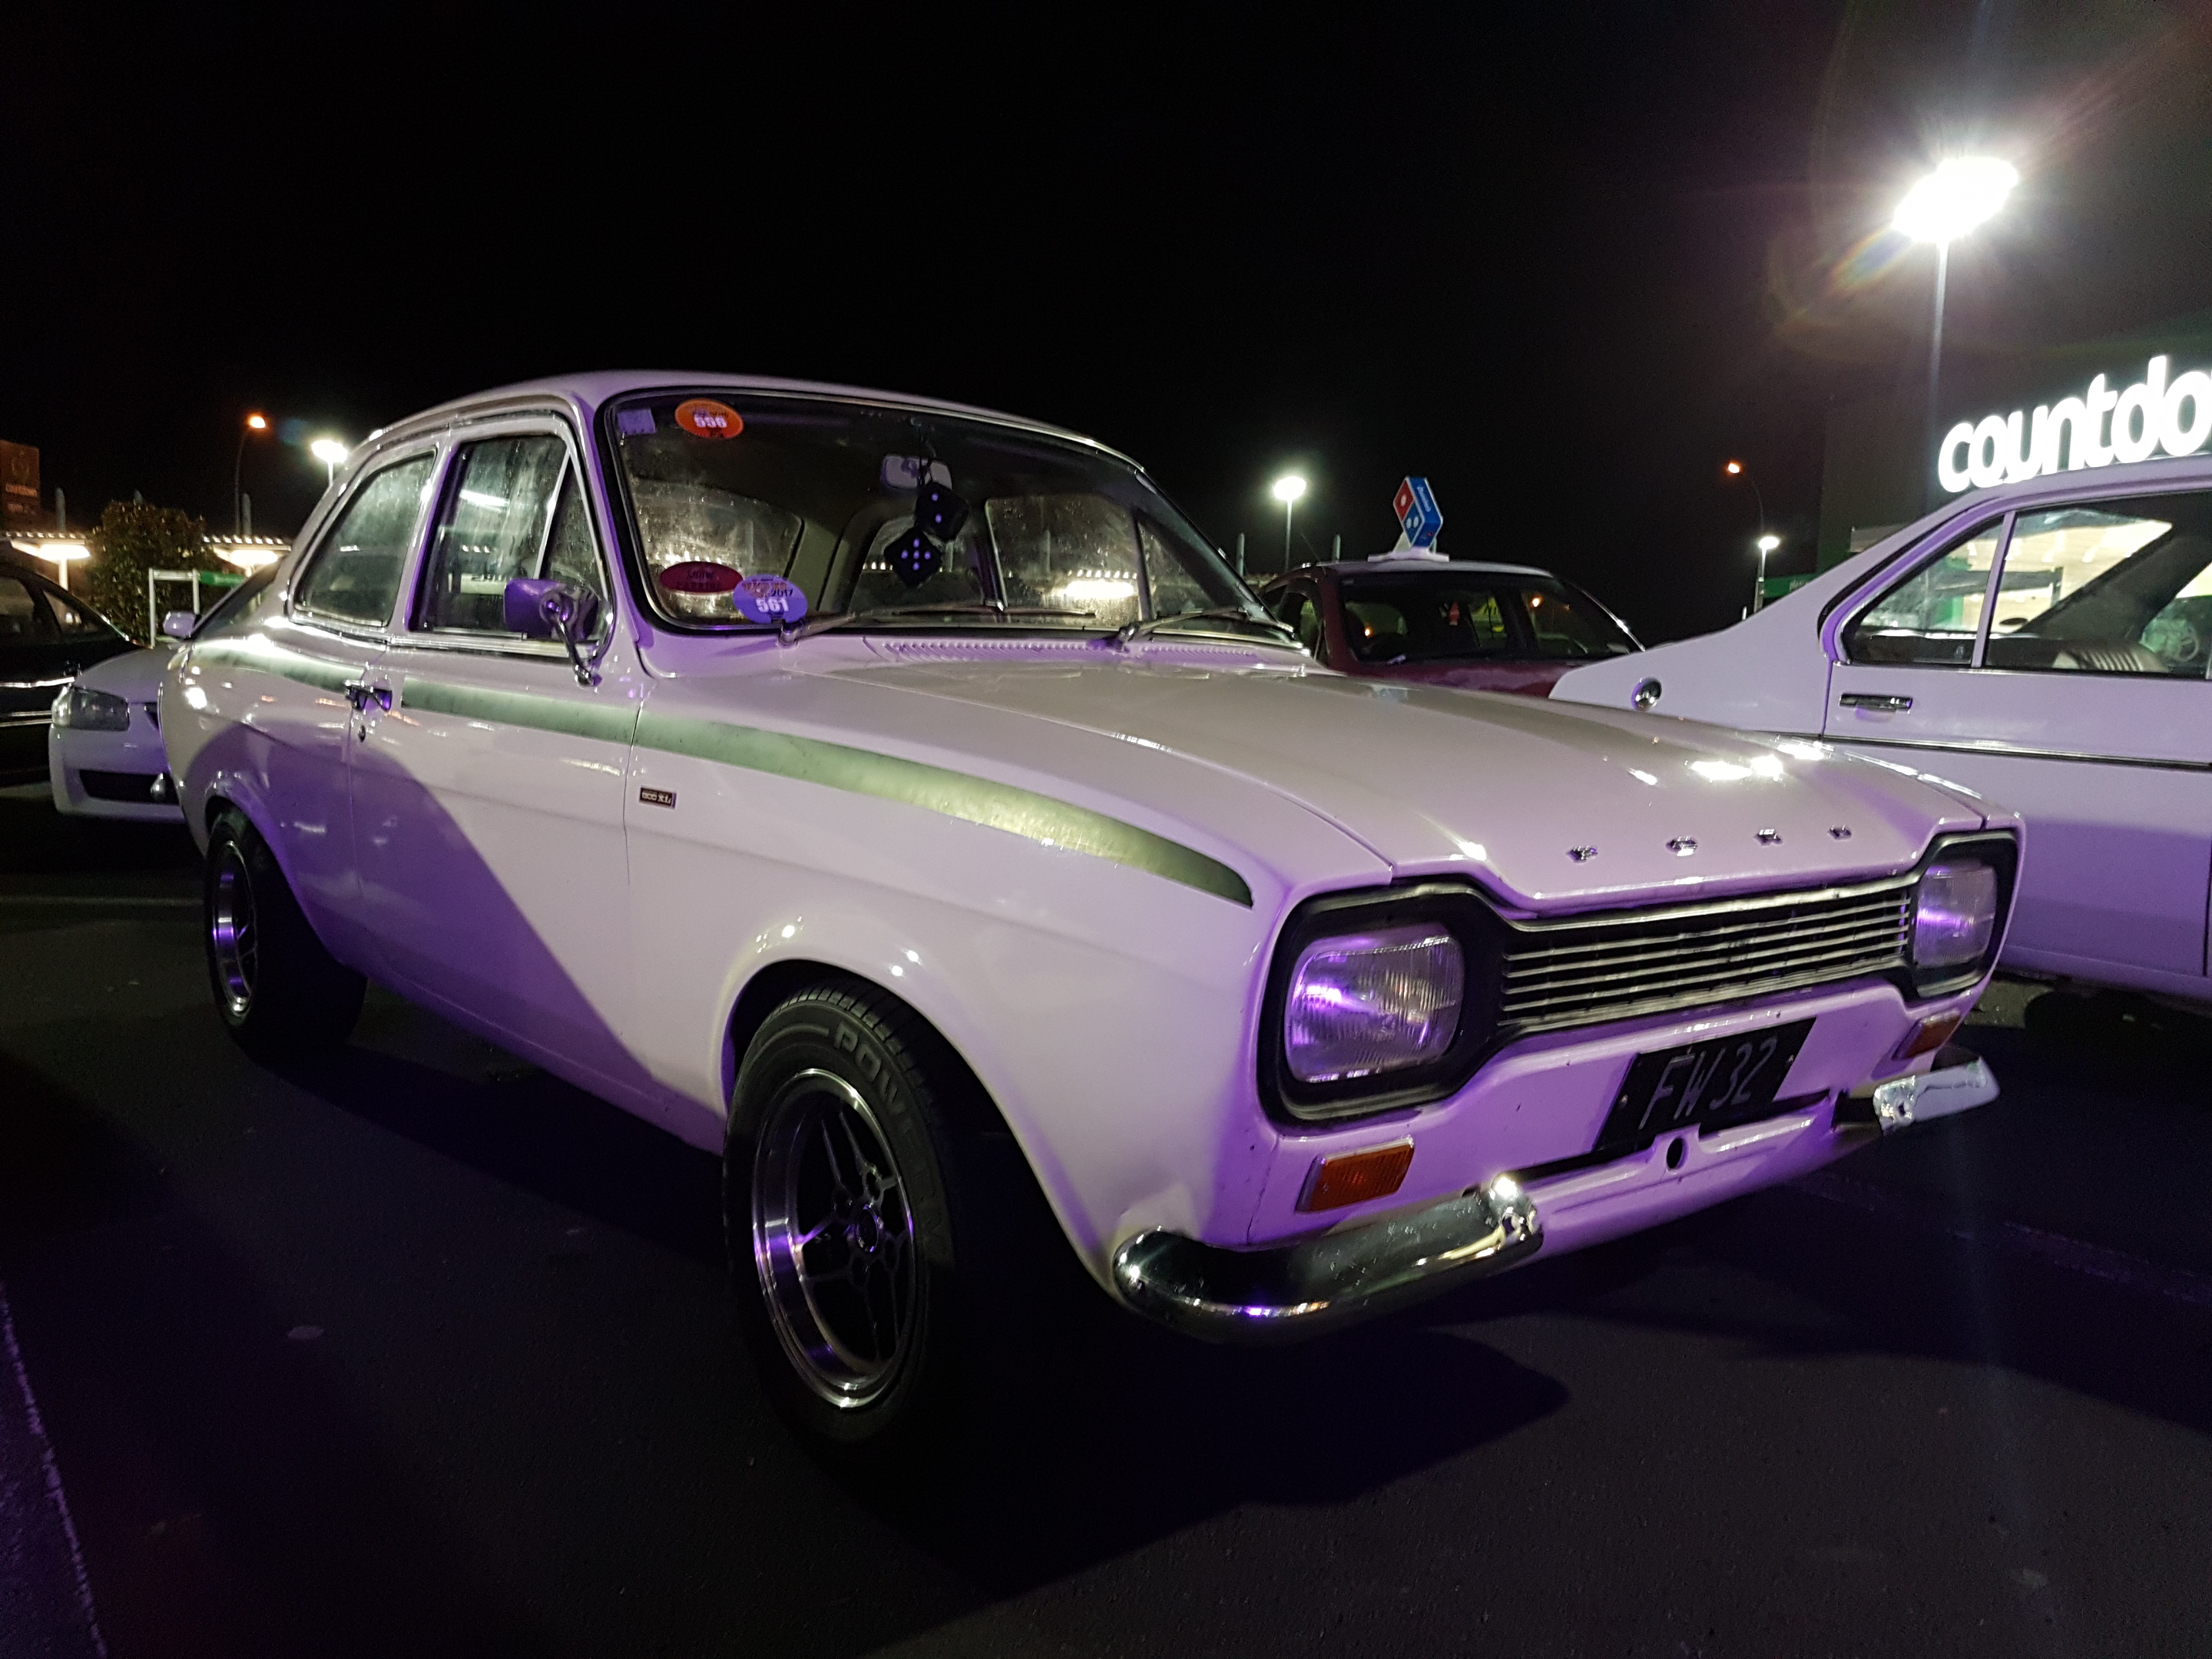
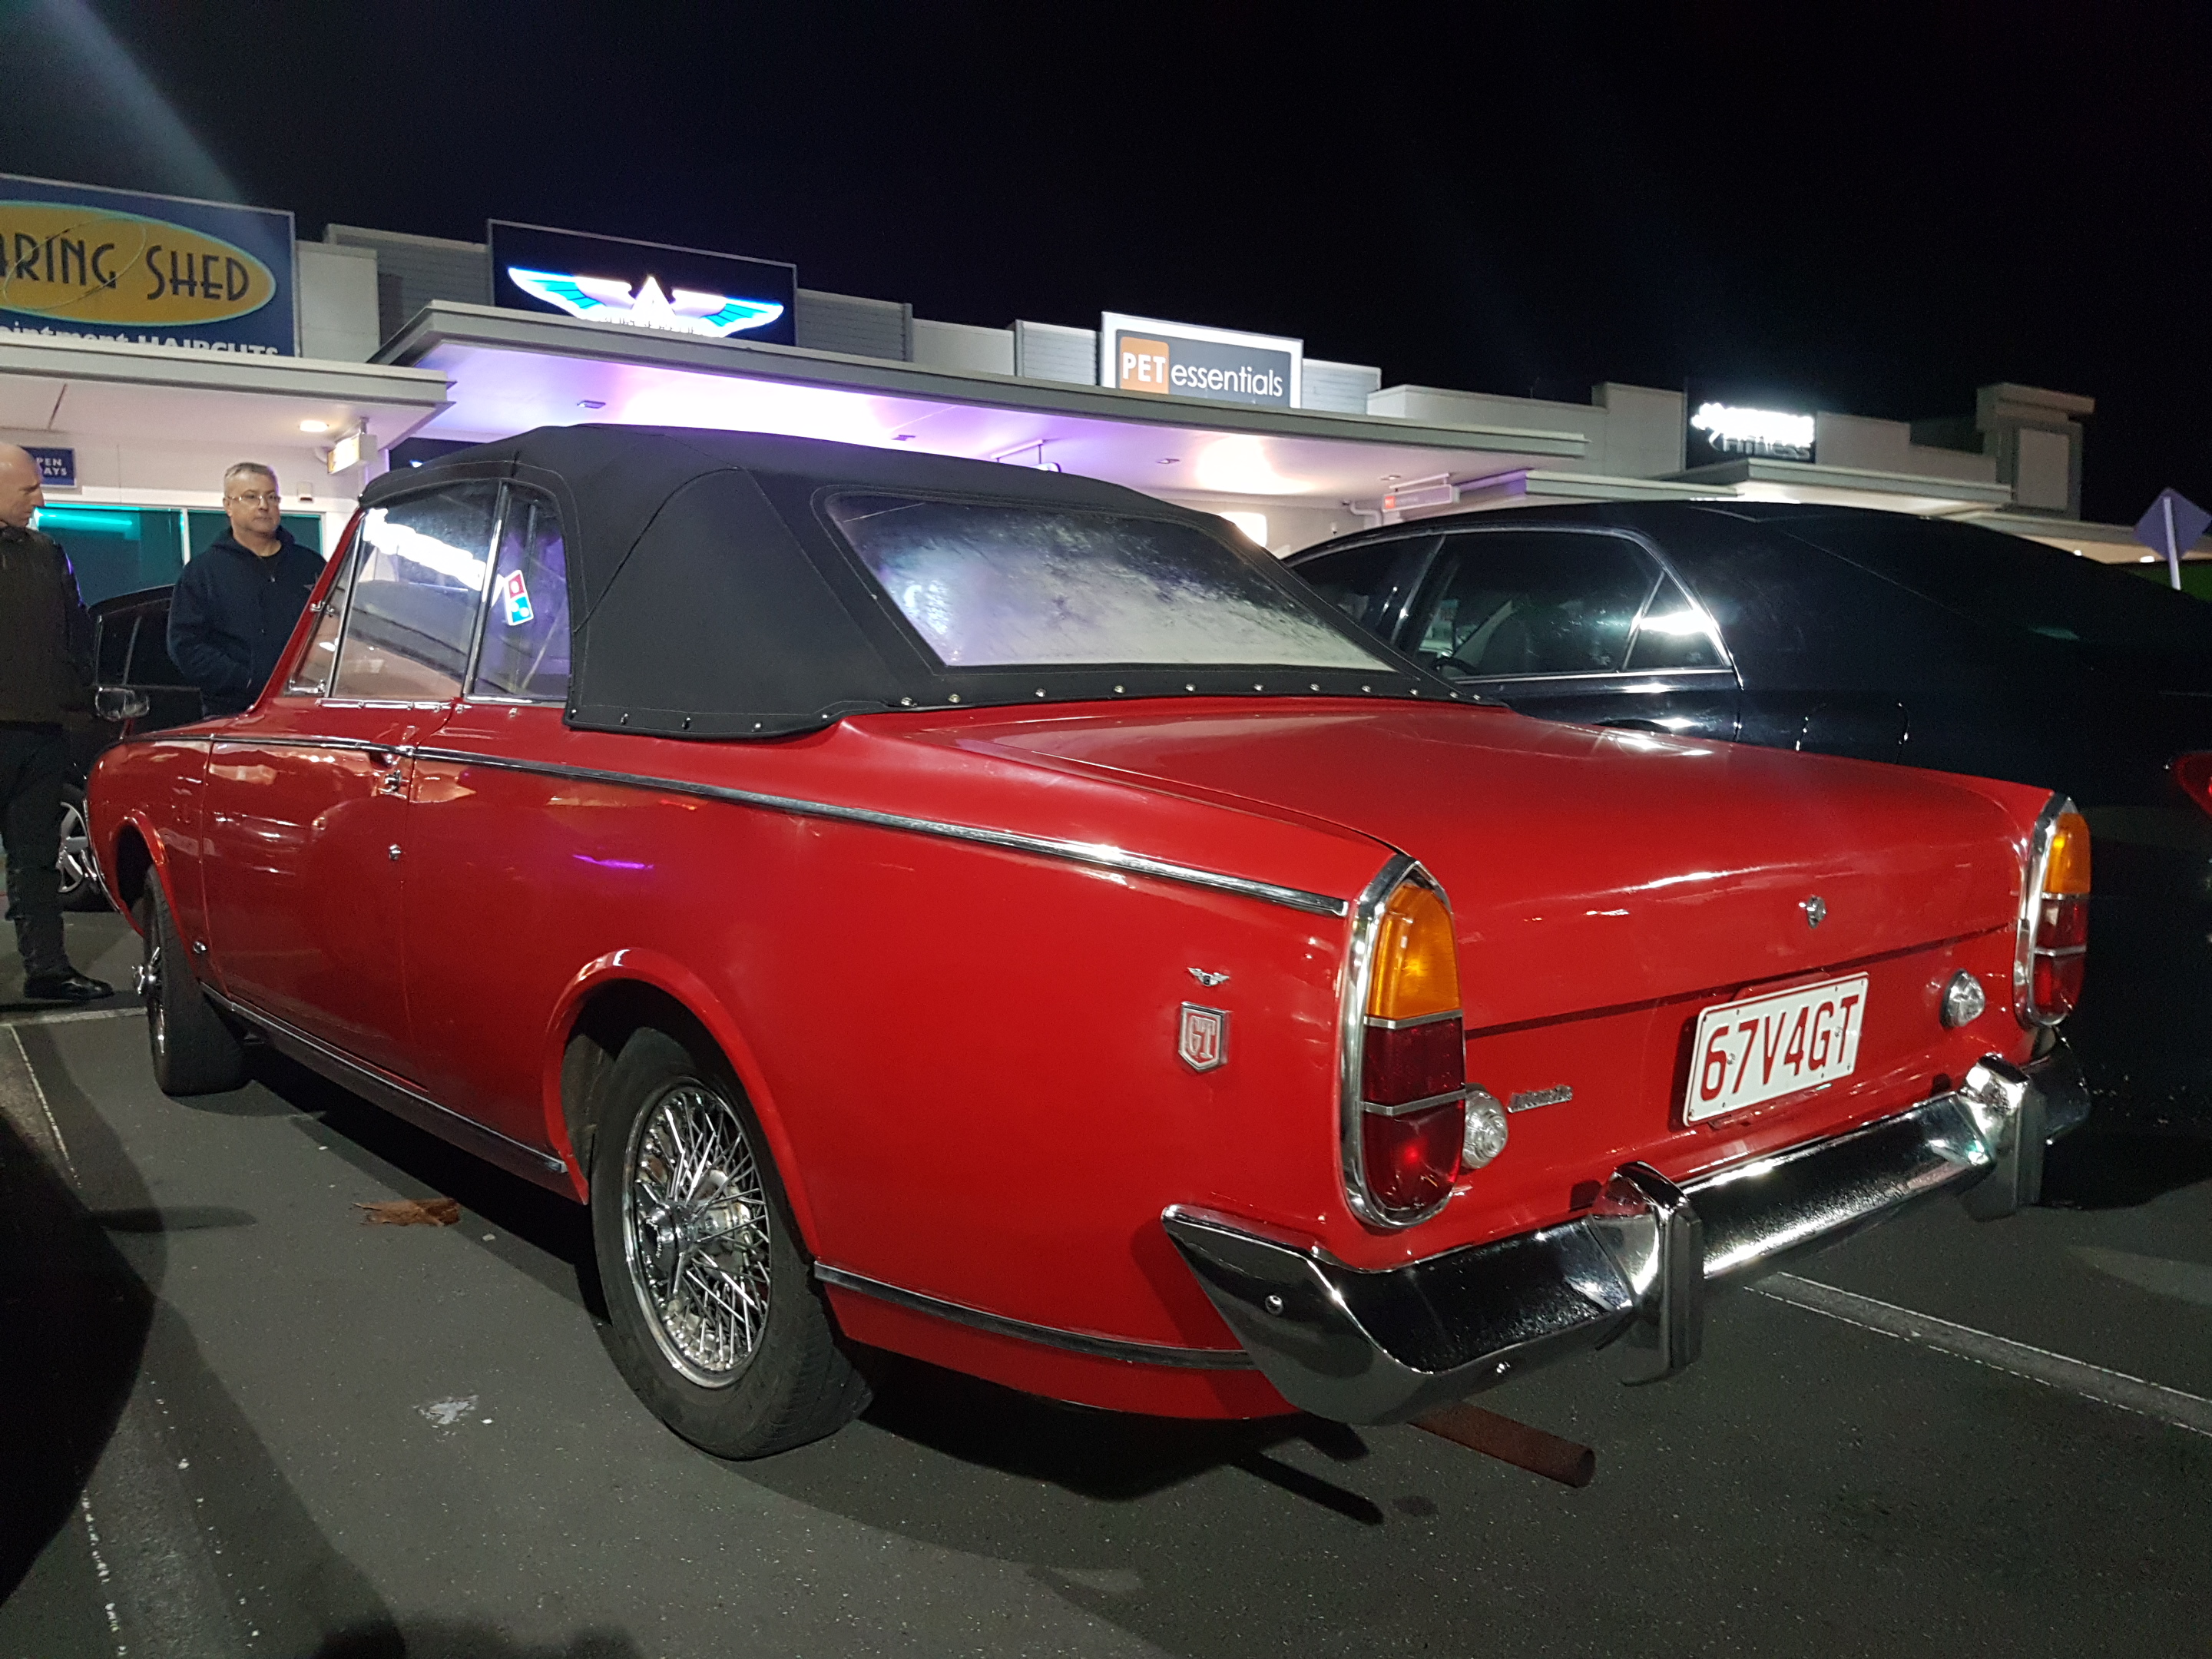
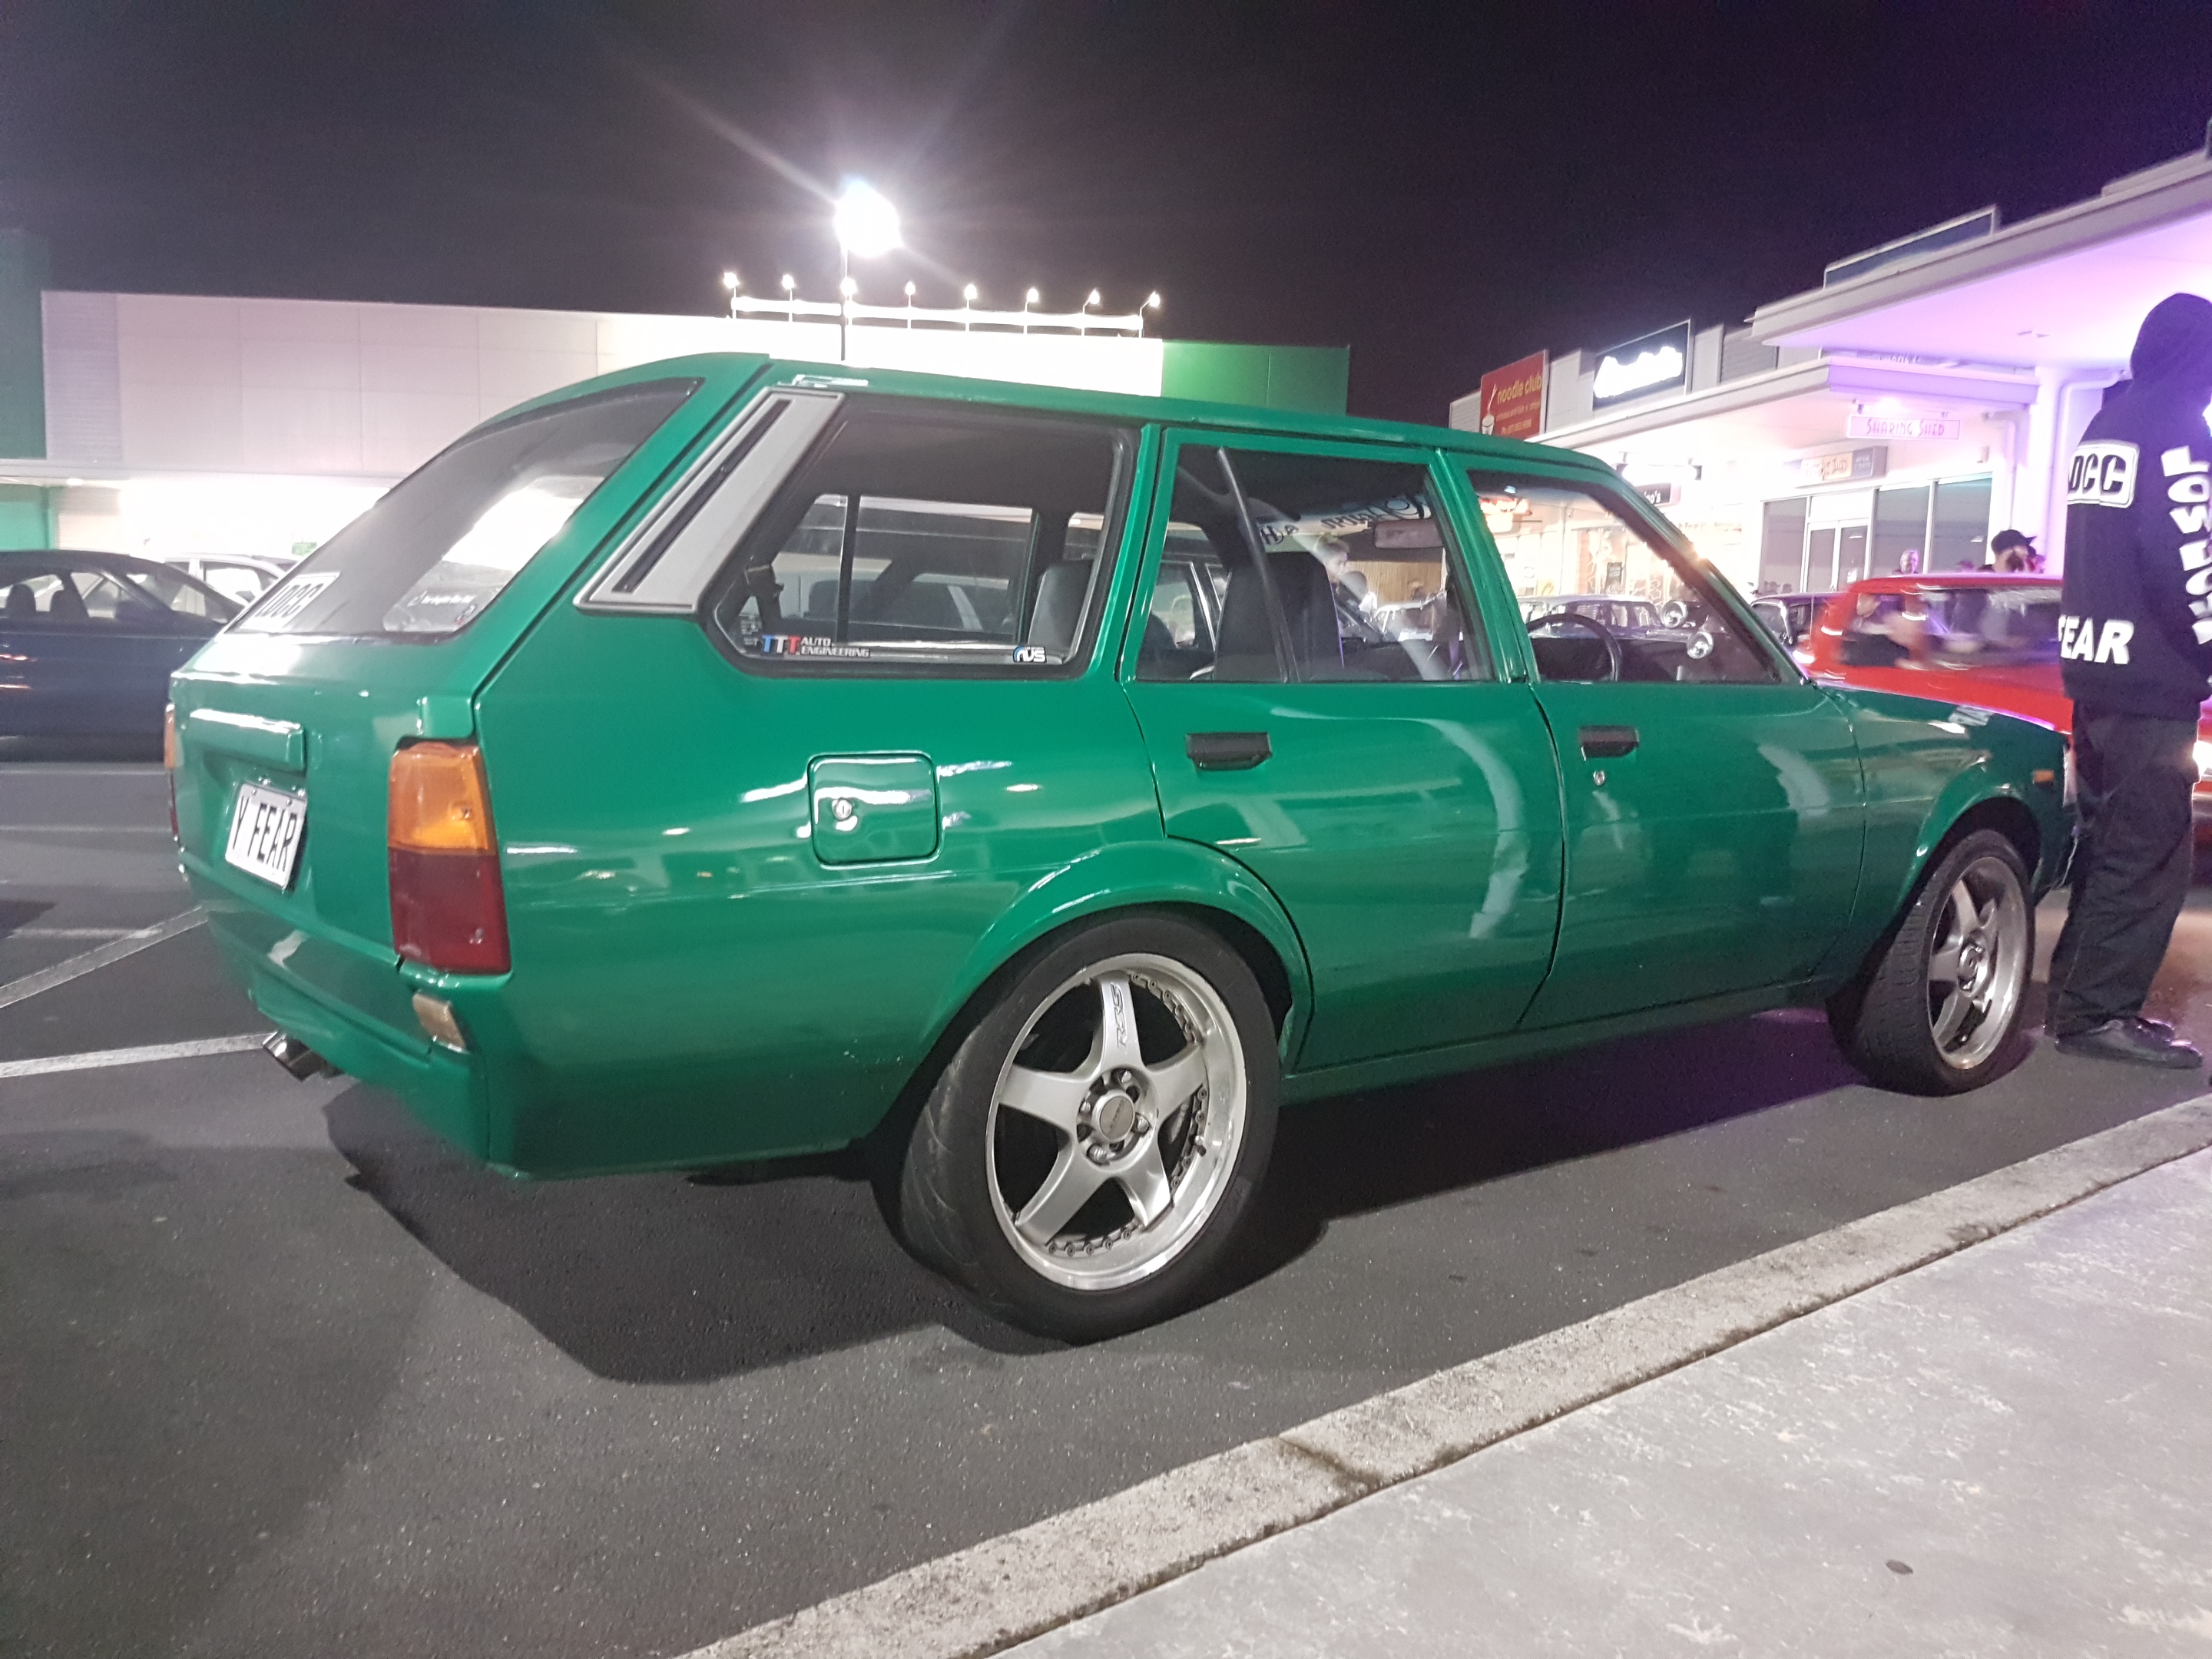
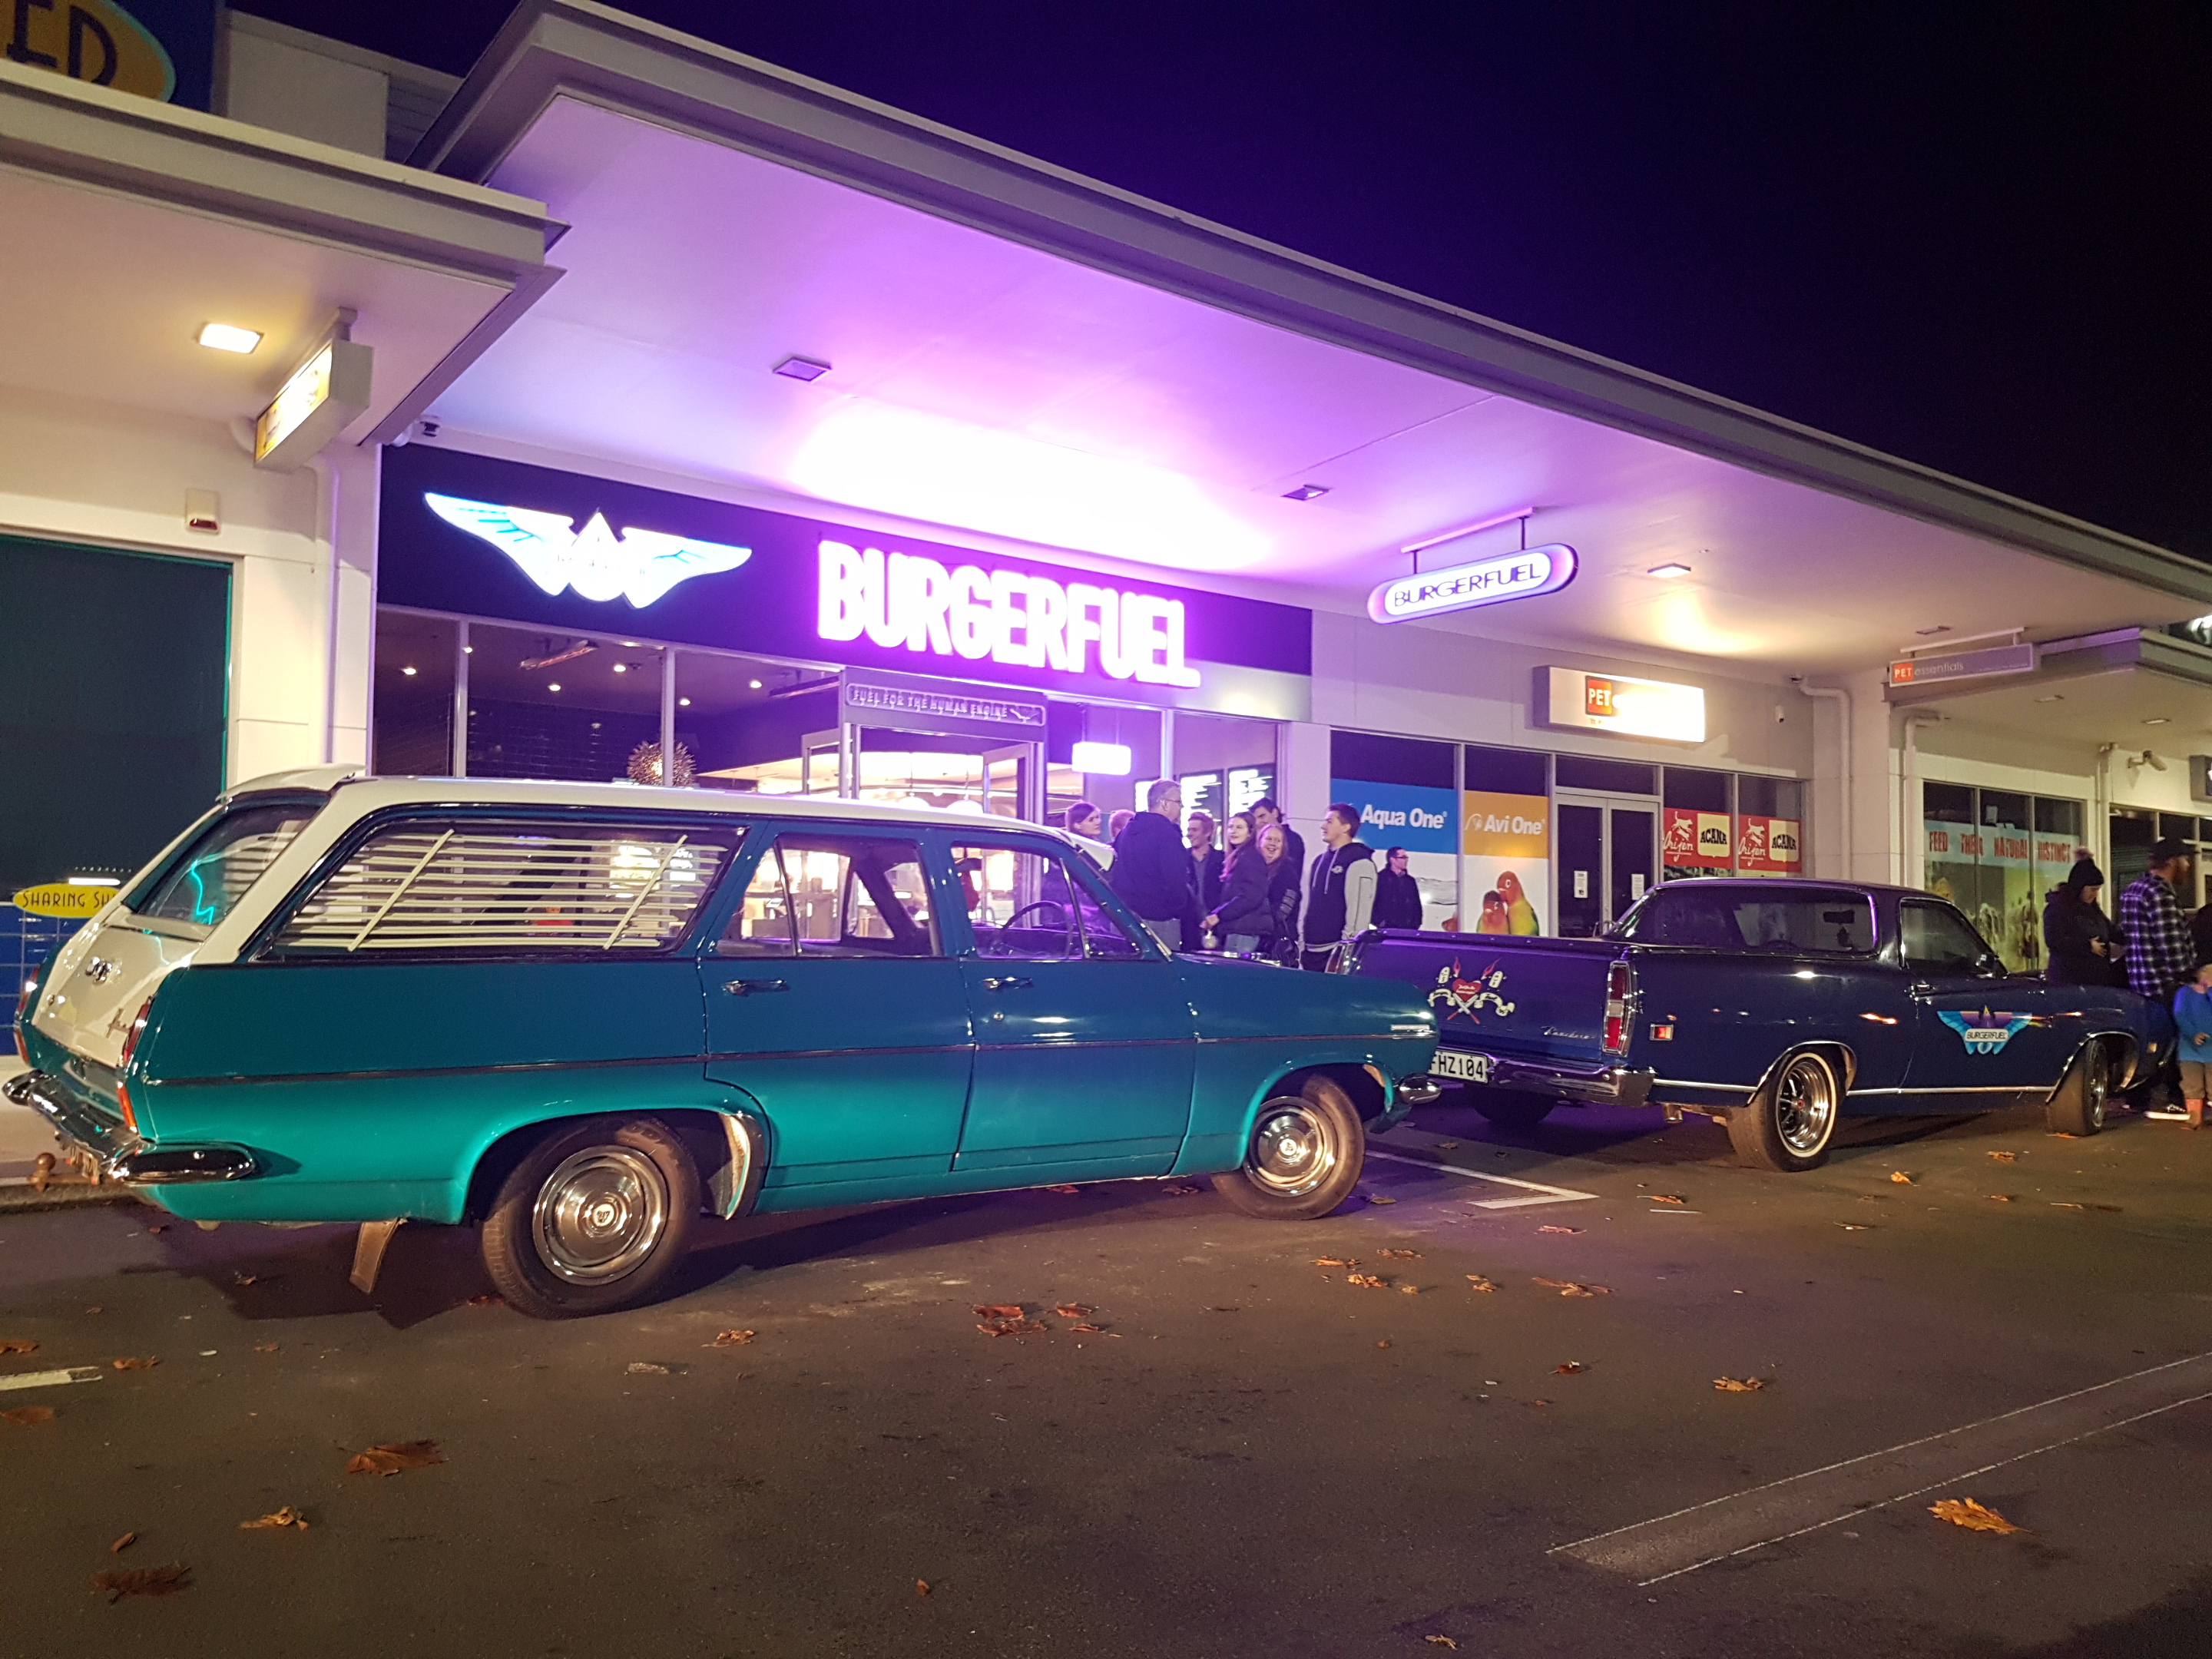
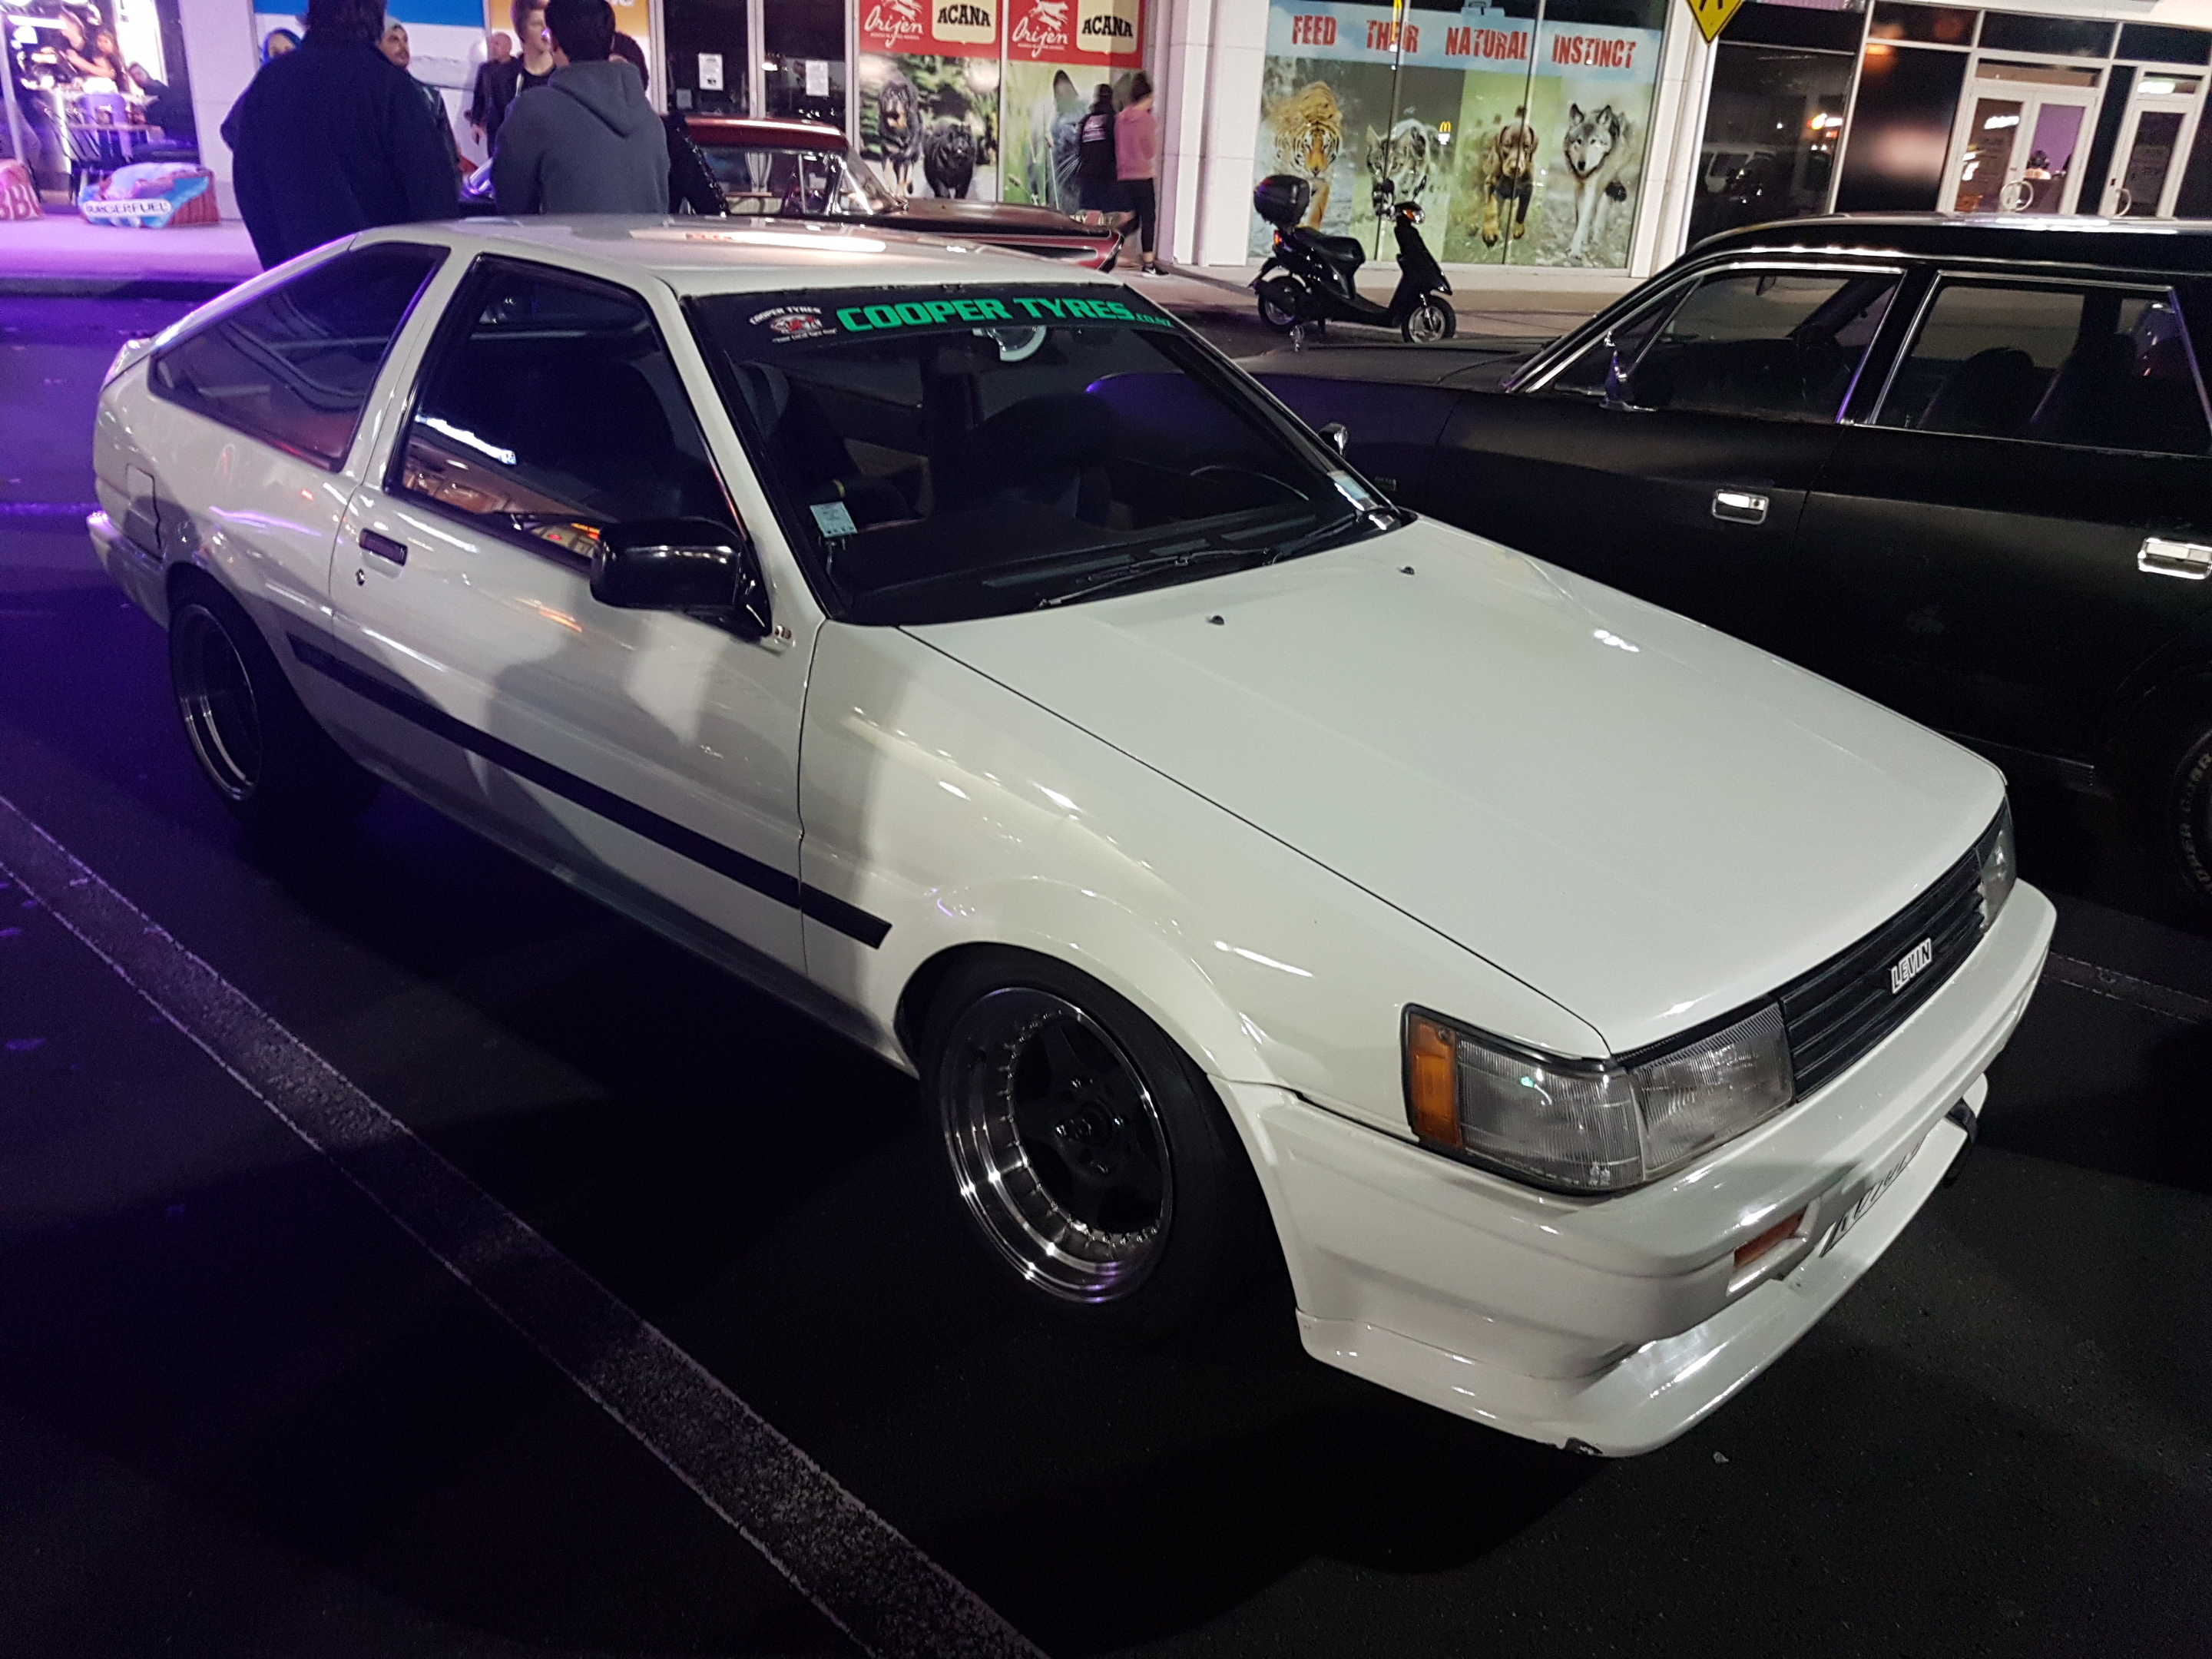
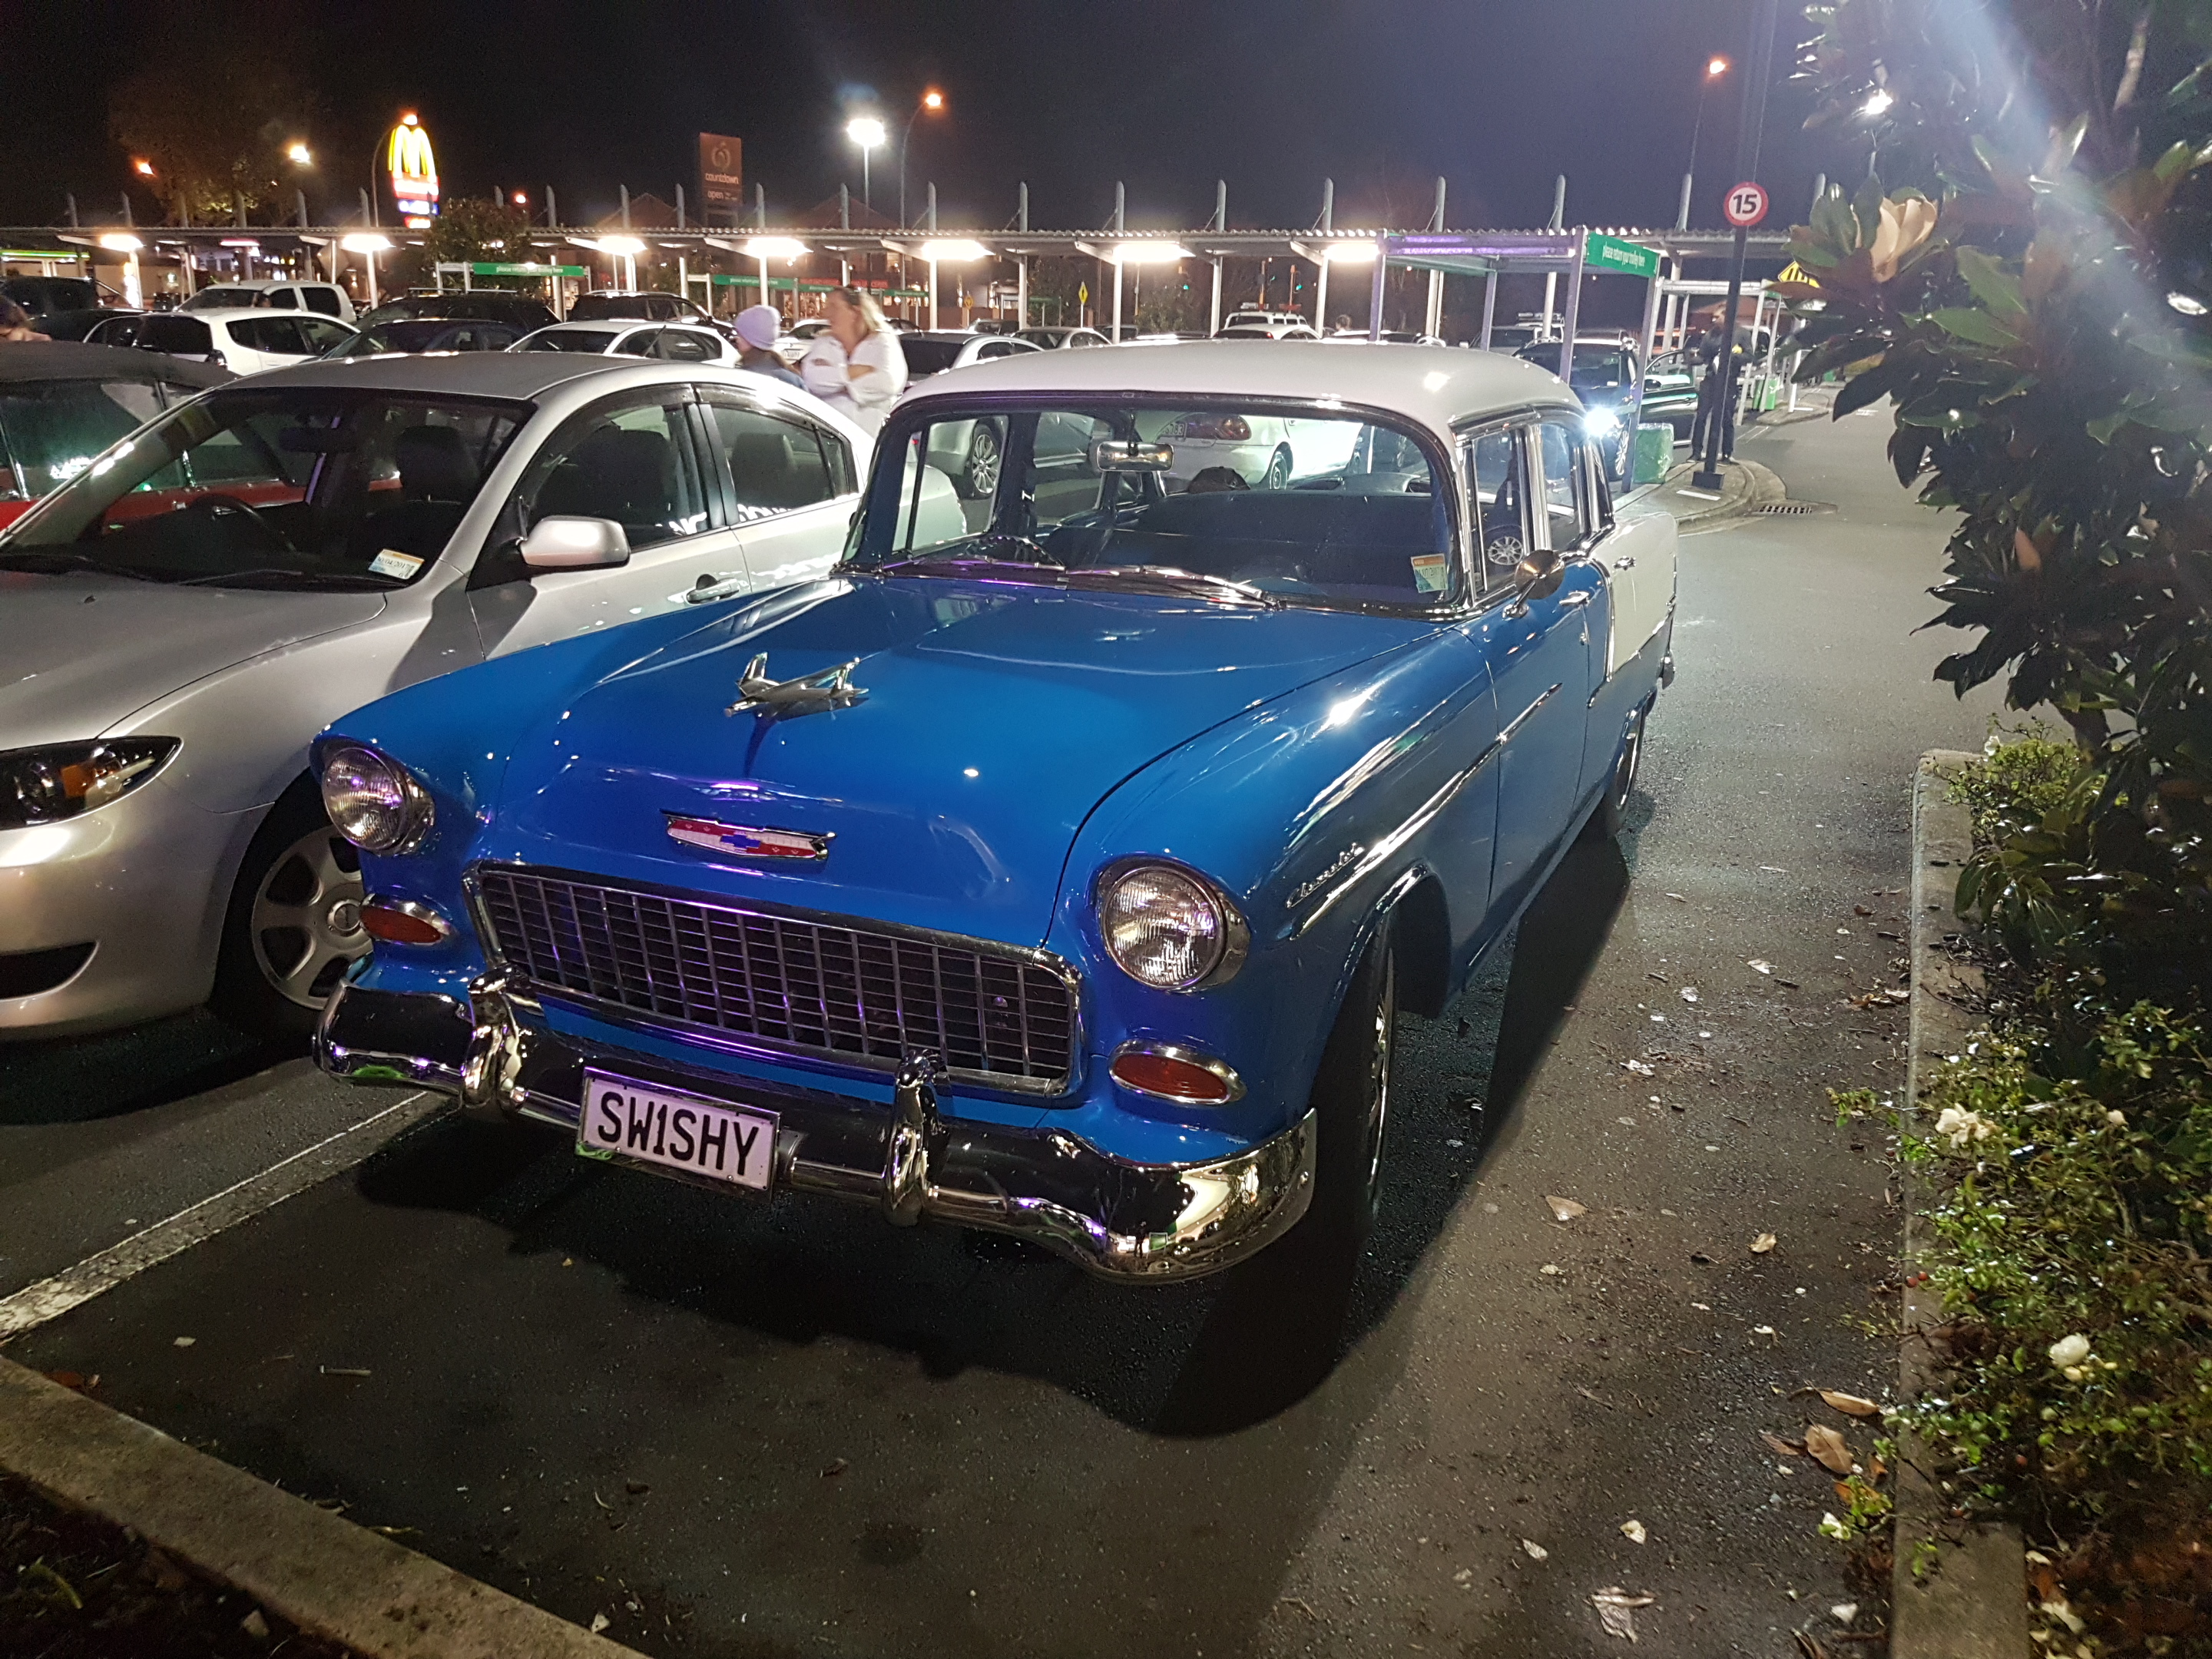
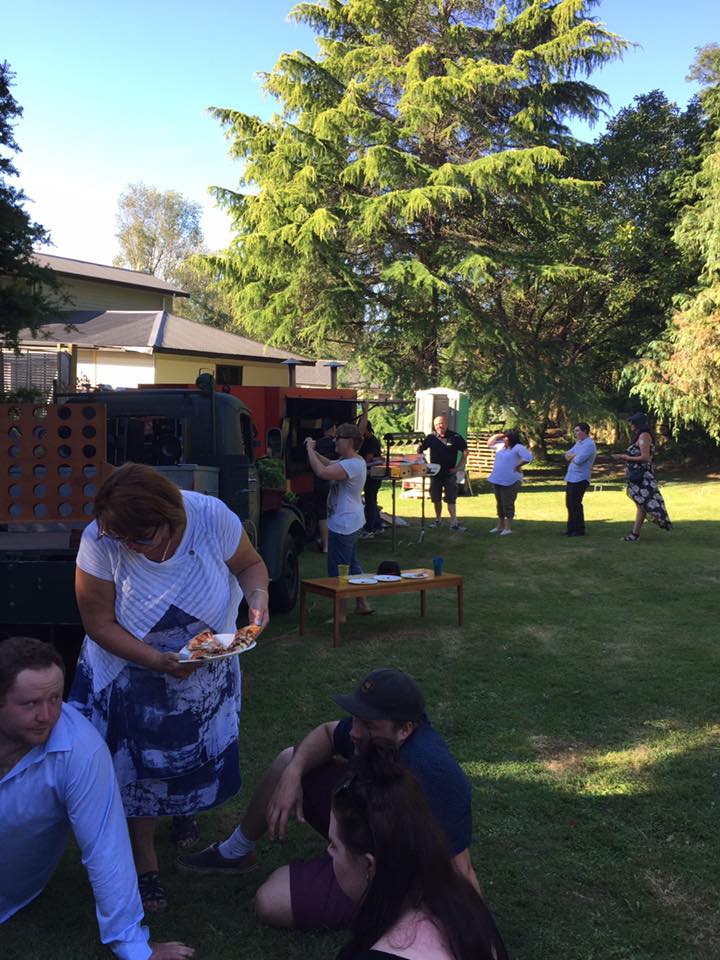
Great meet tonight! Thanks to everyone who came along. We had an A+ turnout.
3 points
-
Make you feel like a man with that between your legs I bet puhuhuhu2 points
-
Ebay=special with a fist worth of extra length . . . RIP Raleigh 20 forks pictures upload2 points
-
I'm still trying to digest all the meat. Had BBQ lunch today for meat top up.2 points
-
Going up some dirt tracks this Sunday so gave it a small birthday. Really should get a seat made! image upload no limit Removed one chain link and replaced pensioners. New Zorst. Removed center stand and made a side stand. Made blanking plate for starter motor (man the motor on the other side is ugly!). New bars. New Clutch & Brake leavers.2 points
-
This car had a few partial resprays in Japan, its definity good from afar but far from good. At some point the boot lid had been resprayed and the original decals where missing. I thought it would be quite hard to get a set but thankfully a knowledgeable person in a Mitsubishi dealership was able to track down both the Mickey Mouse Club and Cyborg decal ex Japan. Originally, there would have been MIRAGE in the centre of the tail garnesh, but there were none available when I enquired. I should look at getting a reproduction made as it would just be a normal vinyl sticker. I quite offten keep an eye on the forums for items of interest for sale when I spotted a full Cyborg driveline that was from a 1990+, this mean it was the newer style gearbox and 3.545 ratio, but even better front and rear LSDs! I jumped and had it sent from Sydney to Perth. Nice 3.545 rear mechanical LSD. Here is a look at the tiny 22 spline rear axles, this is now a spare set as the ones in the car have already started to twist the splines from all the launches. W5M33 with a front LSD. Delish! I’ve added these to the parts collection for when I break all the early model geaboxes and diffs I’ve amassed. It was late 2010 by the time I finished installing the barrel cooler setup and because the old tune was for a different intake and cooler setup, the car needed a re-tune. I started looking at closely at the ECU map and comparing against other tunes from across the web. I was quite taken back at the amount of the total ignition timing that it was running, 20 deg which seems right up at the peaky end of where you would like to be. The original tune was the based of the stock VR4 map that comes with the Link and when I compared with the the Evo 1-3 the VR4 map was missing a lot of resolution in the fuel and ignition tables. Ignoring the engine differences between the VR4 & Evo motors the Evo map did look like a better starting point. I loaded the Evo map, set the base configuration and roughed in an idle tune, had a mate drive the car around the streets while I sat on the laptop letting auto tune sort out the low to part throttle fuel table. We pulled into a small carpark when I heard a loud “thunk” at the back of the car, I get out and look at the back of the car where I heard the noise and there was a bloody dent/scratch behind the wheel arch. WTF. I looked across the road and there were two kids, probably 7 or 8 who had thrown a rock and when they saw that I had put 2 & 2 together they piss bolted for the nearest alleyway. I gave chase and the kids headed straight to their home where, after I caught my breath, I tried to have an adult conversation with their junkie mother that went something along the lines of “my little johnny is an angel, he wouldn’t do anything like that, you are making it all up, im not talking to you any more, come back with the police”. Nothing ever became of it and it wasnt worth pursuing, it does still piss me off that the first day on the road after nearly two years in the garage the car gets a dent from two stupid kids playing silly buggers.2 points
-
I replaced the twin plate with a Fidanza Aluminium flywheel, sintered puck friction plate and a something/something pressure plate – yes, I obviously had not learned anything from the twin plate fiasco. I got to thinking about why Mitsubishi rotated the engine and gearbox 180deg in the Evo 4+, common reasoning is that it removes a shaft in the gearbox. Earlier models need 3 shafts, Input, Intermediate and Output whereas the Evo 4+ have only an Input and Intermediate. Or perhaps it’s so if the flywheel explodes it takes the passengers nads out and not the drivers. Hrmm, think I need a scatter shield. Actually, I need a polished scatter shield. Next minute these goodies arrived. A set of Brian Crower 280 degree duration cams, matching heavy duty valve springs, titanium retainers, Fidanza cam gears, ARP head studs and ARP rod bolts. Totally over kill for a standard short block but, you know, why not right? Matchstick for scale, tissues for clean-up. To install the valve springs, it was easiest to take the head off for a freshen up. I used a local machining shop to clean up the head, skim, check the valve seats, install new guide seals, springs and retainers. Next up was a Cometic Multi Layered Steel Head Gasket along with the ARP head studs. Brian Crower recommend the 280’s to be installed straight up but at the time I didn’t have a dial indicator to check for actual Top Dead Center of the Pistons since the head and gasket height were different now. I have since checked with a dial indicator and it’s just under half a degree out, not enough for me to worry about cracking the Loctite on the cam gears retaining nuts. And another turn for the project, a local was selling this low km turbo and I had to impulse buy! Unfortunately, the standard unit of measurement, the Nokia phone was unavailable, I had to substitute with another period correct device. It’s a PTE SCM 6152E, in hindsight it’s a complete ass of a turbo, but it’s a bolt-on to the Mitsubishi mounting flange and well, bigger is better, right? Apparently its rated for 630hp, with a 3.5” Inlet, 56 trim compressor wheel with an Inducer of 61mm and Exducer of 82mm. What really lets it down is the custom rear housing made by PTE to suit the Mitsubishi flange and the 76 trim T350 turbine. But what’s done is done. With a bigger turbo, you need bigger injectors and I picked up a set of second hand SARD 800cc injectors and had them cleaned before installing. What’s annoying about these injectors is SARD don’t offer any decent specifications on them, just a vague Dead/Lag Time of 1.1ms, like at what voltage and fuel pressure? It turns out that at 3 bar fuel pressure these are closer to 855cc. Not quite enough for corn juice, but that wasn’t even available in West Australia when I was building this. Getting ahead a little here, but I recently purchased an oscilloscope and measured the actual dead time on the car while it was running. The Hantek DSO 6074BE IV is a kit specific for cars and makes testing this stuff easy. I varied the voltage by turning on ancillaries, disconnecting the alternator and running on battery power etc. then used a non-linear extrapolation to get the lower voltages. At standard operating voltages, the dead times are now exact and much closer at the lower voltages. I dummied the engine up on the engine stand to see how much additional clearance would be needed on the water pump inlet pipe which runs behind the turbo, fortunately none was needed. I also gave the exhaust manifold a heat wrap in the hope it would help with the overheating the car had while sitting at traffic lights. On a stock car, there would be some heat shielding on the manifolds and dump pipes and maybe with the tighter engine bay in the Cyborg compared to the VR4, the unwrapped manifold may have been radiating too much heat into the bay for the near stock cooling system to dissipate. It couldn’t hurt, right? One of the other changes here was that the oil feed for the turbo could not come from the stock location in the head as the oil pressure at this point is too low, PTE recommend taking the oil straight from the filter housing which is as close to max pressure you can get.2 points
-
concrete in the hole 2017-05-18_04-27-19 by sheepers, on Flickr2 points
-
Limit straps on may have an issue with inner guard clearance. fine when the suspension is fully compressed on both sides. but at full flex, have tyre to inner guard contact. because of where bumpstops are mounted. will likely never get this much travel,, so maybe a non issue. putting a rubber bumpstop on shock shaft, or cutting the inner guard some more will fix it, if it turns out to be a drama currently getting the outer towers sorted. passenger side almost ready for paint on bumps2 points
-
A bit quiet here Scored some Nissan stainless monsoon shields off yahoo which I am stoked with. Had the diff out to narrow a wee bit to fit the 9's better, props to Halcrow engineering, excellent work and a 2 day turn around. Had 15mm cut off each axle, enough spline so no need for cutting and welding it. Also replaced the wheel bearings and all the leaf spring bushes while there. Old New2 points
-
I’ve had a few build threads around the net for this car, but over the year’s images and forums have gone offline, so I thought it was about time to document the story of this car again. I look back at the 12 years I’ve owned the car and think the journey has been more fun than arriving at the final iteration. I have learnt a lot owning and modifying this car and I’ve tried a lot of things that didn’t work that’s for sure, as you’ll read later. Taking a trip back, it all started in 2005 when I found this nugget at a Perth importer. It’s a 1988 Mitsubishi Mirage Cyborg and It has a lot in common with the Australian assembled CB Lancer as far as body panels and standard trim components, but as with most imports the JDM version’s specification was much higher with more standard electric gizmos, better seats and interior trimming, plus a turbo engine and 4WD drivetrain. You could consider this basically the little brother of the Galant VR4 of the same vintage, but with several differences. Standard, the specs read like; • 1600 Twin cam, Turbo and Intercooled / 4G61T / TD04 11g / 8psi • 4WD with Viscous Center Coupling, Solid Rear Diff (Open Standard/Optional LSD) • 5 Speed Manual, 2.844 diff ratio • A/C / Elec Windows & Mirrors • Grand Slam Sticker And the standard performance is a spirited; • 95.5KW / 144NM • 0-100 kph in 10.3s • 1/4m 17.2s • Kerb weight ~1200kg I can’t say I was wowed when I first inspected it, it had horrid wheels and underwhelming performance and at the time I was really looking for a EVO 1-3. But after about 3 weeks I convinced myself to buy the car and parted with $7,000 of the good stuff, it was clean, only had 90,000kms on the clock and a very rare option of the sunroof. This is where the journey began… The very first mod I did was get rid of the 15” Racing Hart CP Competition wheels, they were very light and probably rare – but I wasn’t a fan. (fast forward a couple of years and the Harts were wrecked when I lent them out) I really wanted a set of Enkei Tarmac Evo’s, but they were impossible to find at the time, especially in a 4x114.3 stud pattern. I settled on a similar design by Advanti called the SA15 which I ordered in 17” with some 215/40 tyres. This puts the rolling diameter about 10% higher than stock but it is the largest rim/tyre package that would fit comfortably in the guards. Second mod was to lower the car but of course there were no off the shelf springs available in Australia for this car. The Fronts were easy as the MacPherson strut setup is the same as the ADM CB Lancer GSR, but the GSR springs wouldn’t work in the rear because the Rear diff made the lower mounting higher. With a lack of options, I ended up getting a set of CB Lancer GSR King Springs anyway and shortening the rear springs to fit. This made the rear very stiff and quite horrible to drive, but it looked better than being 4” too high in the rear. Shortly after I installed an Auto Meter Phantom Series boost gauge that has since day one, never read accurate. It’s always hovered around 1psi when at normal air pressure and I’ve hunted for a calibration bung, but there isn’t one. The momo steering wheel came with the car and I think it’s perfect, I intended the button as a scramble boost toggle, but it’s never been hooked up. I drove the car around like that for a few months and then had a custom 3” Mandrel bent exhaust installed combined with a dodgy boost tap the car went pretty good.1 point
-
this is worth a look... http://www.hotrod.com/articles/slant-sickness-add-77-hp-mopar-slant-six/1 point
-
i vote use some spoke washers and monitor the hub flange and spoke eyelets disk brakes are alot harder on spokes than a rim brake spokes are kind of expensive if you need to change the lenghts, bout you could consider changing to a 4 cross pattern if the number is right. If you want i can bring my wheel stand, dial gauges and spoke tension tool down to hamilton, and we can improve the wheel over the machine built spec, itl last better that way, get the tensions right and you dont have uneven stresses iv destroyed a wheel with a 50cc 2 stroke attached to it, it snapped the spokes at the elbow. it was a 50 year old wheel though (built really strong but probably alot of wear) and have torn spokes out on my touring bike.1 point
-
Over the new month I get the tune better & better but I started to notice that not all was good. All that extra weight in the boot had changed the car, the way it handled and they way it drove was very different and not for the better. I guess there would be about 40kg in the boot and it was all high above and behind the rear diff, this made car feel like it had a few bags of cement in the boot all the time, but worse, much worse. What was once a nible agile car had been ruined, what had I done! Early 2011 and now “life” really started to accelerate for me and over the next four years, I started my own business, began a family, purchased a house, family got bigger, I took a stable job at a large multi-national and my career sky rocketed. Through all of this I was battling health problems and progress on the car took a back seat. Truth be told, I was also pretty pissed at myself for the direction I had taken the car. If only I had found the cyclone issue with the intake manifold after it was first tuned, then I wouldn’t have the car in this state. I could have been driving the car for years without spending all the cash – yada / yada. Hindsight is 20/20 – I wasn’t going to sell it, so lets make it what I should be. Back to the overheating issue, I wasn’t convinced that I had solved the problem by adding the bonnet vents and wrapping the exhaust manifold. The car has airconditioning, but I had never been able to use it as when the car starts to overheat the A/C would cut out and I would actually have to turn the heater on to help bring the temp down. This was unbearable on a 38deg day sitting in the car with the windows, sunroof open and the heater blowing full tilt, picture a sauna, that’s what it was like – except not as pleasant. Well, the revaltion to me was that I should get rid of the A/C as without the condensor it would give me a better mounting position for some slimline fans and if that works in keeping the engine cooler, it would actually make it more pleasant to drive as I wouldn’t need to have the heater turned all the way up on a hot day. Thinking man. So out comes the air conditioning. And in the place of the A/C condensor goes two 12” SPAL slimlines. The little cooler you can see is for the powersteering. I took a good look at the stock radiator and decided it could use an upgrade at the same time , ADRAD in SA built a custom radiator that fits magnificantly, it seems to be based off an Evo 1-3 radiator but at slightly different dimensions. The heatwrap on the exhaust manifold got binned as well and I had the manifold, waste gate screamer pipe, turbo exhaust housing and the turbo dump pipe ceramic coated by a local coater. This should solve the overheating once and for all. The new slim line fans are now mounted in the best position, I plugged all the gaps around the radiator with foam, there was no more A/C condensor adding resistence to the fans while stationary. The ceramic coating would (hopefully) provide some radiant heat sheilding and the new radiator would add another level of confidence that the problem should be erradicated for good. 2012 rolled around and time for another brake upgrade. The VR4 Twin Pots were much better than stock, but still not what I would call great. I could have gone late model Bremboes, but that’s a common upgrade. I found Wilwood 6 piston kit ex US with 320mm two piece rotors for a very reasonable price. Shortley after installing the bigger brakes I took the car out for a glamour shoot.1 point
-
Mounting the W2A radiator was easy, right where the old A2A unit was. Except there was quite a bit extra room now. The reservoir on the other hand was intended to go in the boot of the car which meant that lovely boot I had built would need to be hacked apart. It also means I needed a way to get the water from the boot to the engine bay and back again. I didn’t have access to a bender at the time and looking back I should’ve used some aluminin bundy, but instead I decided to use hosing to run from the rear to the front and this is probably a good example of the way it “should not be done” I also thought that the underside of the car gets pretty hot so to be sure, I wrapped it in foam insulation to try and give it a chance of staying cool. I mounted most of the W2A hardware into the spare wheel well and ran the hosing through large grommets. It’s a bosch water pump and it flows a silly amount of water, pefect for sending all of this water to the front and back again. The boot did look like it was a bit unbalanced with that reservoir sitting on the left side all by itself. I know, lets put a sub in the other side. …and while we are at it, I visited super cheap to purchase a new head unit and some speakers to redo the audio system. Im not fussy here as anything would be better than what was there so I just went with a full Sony setup. It works well enough for me. My car never had door speakers, just little 4” speakers in the side of the dash so I needed to make some small pods to fit the 6.5” splits. And similar with the rear where I needed to build up a rear parcel shelf. It was a bit of trial and error to get it to fit nicely as there isnt a lot of room to fit a set of 6x9’s with the steep rear window. With the boot all finished up it came out quite neat, you can see the handle on the floor section that lifts out to give access to the water pump and valving. I added a Alpine PDX.1000 as the AMP for the sub and the whole stereo made pretty good doof, doof noises. I’ve had some problems keeping all the oil in the sump with this car, probably not a good thing I know. But it would ocassionaly drop a few drips here and there and this was because I had taken the sump off a few times which had cause some stress fractures where the oil could seep through. I had also modified the stock two bolt turbo oil drain for something a bit larger with hose fittings, but the welding had also cracked in a few places that lead to more leaks. After pulling the modified stock oil pan a few times to re-weld and repair it because obvious that it was just getting worse each time. The leaks really annoyed me so I purhcased a Chinabay Moroso copy sump, which soon after it was installed leaked more that the old pan it replaced. FFS. The qaulity looked passable before it was installed and it generally held liquid well except oil has a tendency to calpilery out where the oil pan meets the flange (not flange -> engine). I couldnt be bothered removing the pan again to fix it so I just smeared a shit load of goop around until the leak stopped, but it seems leaks stopped in one spot and started in another. Its not leaking bad, a few drips every now and then, fucken over it though – try and fix something – make it worse. With the W2A system, I connected the water pump up to the ECU so I could control when it was turning on/off. I had some crazy thoughts about pulsing it with intake temperatures yada yada. But I atleast wanted some sort of indicator in the car to tell me when it was working. I added these two small led’s on the intrument cluster. Green for when the pump is running Orange for when the Intake Air Temp reaches a certain temperature, Its currently set to 65c. (with no prior experience) I’ve always wanted a car with bucket seats for as long as I can remember, so it seemed like an opportune time to add a set of fake Brides to the car. I mounted fire extingushers to both rails and spent a bit of time making sure they were centered properly as well as low as possible. Knowing what I know now I wouldn’t have done this, the seats are very tight and not very comfortable after a short time seated. Live and learn.1 point
-
Following that line of thinking I spotted a second hand PWR barrel cooler setup for sale that was used on a very well sorted VR4, perfect! When it first arrived, I set it all up for a test run. The reservoir was built quite large and had a [dry] ice pocket inside for extra cools, but that also made it large and heavy. The reservoir was originally mounted in the boot of the VR4 it came from so that’s the route I intended to take. I added some ball valves so the system could be drained and to allow bypassing the radiator for pure Icey cooled water, most likely a bit overboard. Now, I was still using the Fidanza Aluminium flywheel, sintered puck friction plate and a something/something pressure plate that I mentioned earlier and I had come to the realisation that it too, much like the twin plate was probably a bit unsuitable for this cars driveline. Since I had the barrel cooler setup to install now would be a good time to drop the gearbox and install something a bit more practical. This time around I went for a Fidanza chromoly flywheel, ClutchNet Kevlar puck friction plate and Fidanza 1500kg pressure plate. The idea here is that the Kevlar friction plate provides enough slip to give a good increase in driveability, while also being resistant to overheating and the heavy pressure plate helps with the overall power handling capacity. Clutch setup No#3 While the box was out again I installed some Nolothane engine mount inserts in the north – south, gearbox and cam mounts. This was not an easy task as the new mount inserts eliminates all the minor free play needed to bolt the engine in easily. I needed to get quite creative with the order in which the mounts were installed, jacks and pry bars to get it all lined up and installed. Before reinstalling the gearbox, I gave it a quick lick of paint to help hide it in the engine bay. Gearbox Nolothane mount installed as well, engines rock solid now. Tick. How the heck was I going to fit that barrel cooler? The outlet of the barrel was 3” and the throttle body was 2.5”. It also needed to reduce through a nearly 90 degree bend and had to be a little flexible. Easiest way I could see the cooler fitting is like the below dummy setup, but if the throttle body was 3” it would work well for the top bend. Taking a closer look at the intake manifold. It’s the original Cyclone intake from the VR4 the engine came from. It’s a rather complicated intake manifold compared to others in this generation as it has two runners per cylinder of differing lengths. In the picture below the blue line is the short runner and the green the long runner. The short runner has a set of butterflies that close at low rpm to help promote velocity through the longer runner and then the short runners open at about 4000rpm or 6 psi of boost. Interestingly if the butterflies were closed at high rpm it would be a significant restriction as it would act like a choke… hang on… let me re-check the wiring to the Link G3 – Fuck! Turns out I had setup the G3 to Close the butterflies at 4000rpm instead of opening! This was likely the restriction that gave the lower than expected dyno result! FFS! Too far into it now to stop though… The next logical purchase to solve the barrel cooler mounting problem and my inability to check the old manifolds cyclone wiring is of course a new intake manifold. Perfect sense. Only the best eBay here, but I had them move the vacuum port location from the top of the manifold the rear and to leave off the standard throttle body flange. I then ordered a Plazman 3” throttle boy and had the adapter flange welded to the new intake manifold. The throttle body, unlike the manifold is a work of art and has a cammed/progressive linkage to try and help with small throttle positioning. In the picture below I briefly consider mounting the barrel over the top of the turbo inlet and clocking the turbo. Eventually I decided against mounting the barrel high and used the original low route, I think it makes it look like there is more room in the engine bay. Here you can see the short outlet pipe from the turbo to the barrel, on the underside of that pipe is the blow off valve which just vents to atmosphere, though it does have a little filter on it to keep shit out.1 point
-
Here is a picture with the rears adjusted as low as they go without touching the spring perch height. I levelled the ride height out and this is what I have been running since. There is a lot of room for camber adjustment in the front as well, this is with the camber set in the max position. I briefly entertained the idea of running some chromies on the car. Only Super Cheap’s finest would do. Now it was time to start wiring the Link Plus G3 and associated bits together. I distinctly remember this time in the build as I was literally dreaming rainbows of wire colours. With the dual twin ignitors, I had always planned to run sequential ignition vs the standard dual coil wasted spark setup of a stock system. This meant finding some coils that would work and again I turned to the US where there were off the shelf kits based of Chrysler 300M dumb coils. This was before the trend of using Yaris/Echo coils, which would have saved me installing the ignitors and also given me an option to buy locally. I do have a setup of Yaris coils waiting to go in at a later date. One of things I wish I could change is how I wired the ECU. At the time, I integrated the G3 into the stock wiring and wired the G3 to replace the stock ECU, instead of focusing on actually what the G3 was capable of controlling. What I mean is that the G3 can control the Radiator Fans, the A/C and has far more inputs for Oil Pressure/Fuel Pressure etc. Instead I focused on replicating the stock setup which has resulted in a configuration that’s not as good as it could have been. I needed to add a clutch switch for launch control to work in the G3 and after looking at how the pedal box had been setup it looked like I could use a normal brake pedal switch in the clutch pedal end stop. But alas the thread size was different, M12 vs M10 but I ended up drilling and tapping out the old stop and threading it for M12. This was not fun with the pedal box in the car, in fact I think my shoulder still tweaks when I think about it. After about 2 or maybe 3 weeks I had a finished loom on the living room floor for the G3 that plugged into all the standard harnesses and connectors. And this was all the standard wiring I removed and replaced… To my absolute amazement, after some basic configuration of the G3 the engine fired into life very easily. Over the next few weeks I roughed in an idle tune and checked everything was working as expected. At this point it was late 2008 and about 18 months since the car was last driving and here it was being flat bedded to be tuned. In 2008, not many people were tuning with Links in Perth, ViPec hadn’t been incorporated and they were still seen as an odd ball kiwi ECU to a few of the local tuners. I did manage to find someone willing to give it ago, I said to do a safe tune, 21psi or 350hp atw, whatever it makes first. After a few days, I had the car back. Well, that wasn’t what I was expecting. Sure, surfing the ramp is fun but at 20psi where is the rest of the power? The tuner mentioned that the way the car was behaving on the dyno looked like there was something choking it, perhaps the intercooler or just a shit turbo. It’s probably worth noting that this power level is pretty much what the previous setup on the little 16G could make and be significantly more drivable. Something wasn’t right. Back to the drawing board, well box of beer and contemplation. The car drove in that guise for about 6 months, it drove great, very economical under 4krpm but an animal above, very Dr Jekyll and Mr Hyde. I couldn’t help but think something wasn’t right thought. Reading through the forums indicated that it probably wasn’t the turbo, it should be able to make 350hp at the wheels on 20psi quite easily. Perhaps it was the modified JDM VR4 Intercooler?1 point
-
VR4 Brake conversion all completed, I ran a seal kit through the front and rear calipers while at it. With the new rotors and calipers, combined with a re-sleaved 1” VR4 brake master cylinder and the car finally stops reasonably well. It still feels like it needs a larger booster ratio as you still really need to step on the brakes to start hauling up – buts its much improved over standard. A month or so after doing the brakes I noticed a couple of drips of gearbox oil on the driveway. It seemed the 5th gear retaining nut had back out and cracked the end of the gearbox housing. A quick torque up again and a bigger hit with the hitting stick on the 5th gear nut crush points seemed to solve it for the time. A benefit of transverse mounted engine is that it is easy to replace the front gearbox cover, just jack the car up, take off the driver’s side wheel and there it is. Now as luck would have it, when you own an odd ball car, owner’s kind of group together and someone not too far away from me had two KM221 gearboxes for sale with transfer cases, these are the standard Cyborg gearboxes with the 2.844 ratio diffs. I borrowed one of the front covers from the gearboxes I had just collected, problem solved. If you recall earlier in the thread I mentioned I had a habit of launching the car, well I had been itching to try this “stutter box” out and… well… when I did; 1. The output shaft of the transfer case snapped off. 2. A whole bunch of teeth on the rear diff crown wheel were ripped off. Seems the on/off nature of the twin plate clutch and fused center diff attacked the next weakest links in the driveline. It still drove that broken though, with the locked center diff it was just and open diff front wheel drive and it sucked, it would fry the front single wheel in 4th very easily and was basically unusable. Thankfully though, I had a spare transfer from the gearboxes I picked up earlier and I also managed to source a 2.844 ratio rear mechanical LSD off retardme.co.nz, I’ve never heard of one let alone seen one for sale, score! Speaking of ratios, VR4s/RVRs and Evo 1-3’s share a common set of rear diff ratios, 3.547, 3.909 or 3.312 for some Auto’s. The diff ratio doesn’t equate to the total final drive though as there is also a primary reduction ratio of 1.275 in the gearbox and a further 1.090 ratio in the transfer case which brings the total final drive 4.929 for 3.5’s and 5.433 for 3.9’s. Where am I going with this? Well the pre-1990 Cyborg’s were the only series that had a 2.844 rear diff ratio and this is because they used a KM221 gearbox which has a different primary reduction ratio of 1.640. With the transfer case ratio of 1.090 this brings the total final drive to 5.084 very similar to a standard VR4’s. Anyway, I digress, I put the spare transfer case in and swapped in the new rear LSD and it was good. For about a month, then I kept on hitting ignition breakdown, it would just start running on 2 cylinders, which in a wasted spark setup points to a coil. I swapped in multiple different coils, changed out Power Transistor Units (Ignitors), probed the loom looking for issues but I just couldn’t keep the car running reliably, it seemed to be spitting coils for some reason. Looking back at it now, this is where I think most sane people should have stopped and just maintained/fixed and enjoyed the car, but I must have been dropped on my head when I was a baby as I continued tipping money into this thing at an increasing rate. I cracked the shits at the ignition problem and then this happened. Innovate LC-1, Link Plus G3 with wire in loom, 7 bar Map Sensor, Dual – Twin Ignitors and a Jaycar kit to make a set of “Det Cans”. I bought the Link Plus G3 a few months before the G4 was released, but thankfully the hardware is the same in the G3 and you can unlock the same features as the G4 with a $150 software unlock. And so, begins the next round of mods, my solution to the ignition problem… At this time, I also pulled the engine and gearbox out again, this was so I can get rid of the twin plate clutch and put something in that would actually act as a fuse on the driveline, rather than the murderer. It was also a suitable time to swap in a gearbox that didn’t have a welded center diff. I didn’t drop in a standard gearbox though, I modified the center diff off one of the gearboxes I scored earlier for a 4-spider center. This is a rather simple mod that almost doubles the power holding of the center diff and also helps a little with shocking load capability. The mod is straight forward you machine the cross bar down… (machined left, standard right) …and then slide a set of additional spider gears on and machine a small amount off the side of the center diff housing. It was fairly expensive machining the crossbar as it was hardened tool steel but a local tool sharpener was more than happy to have a crack and he did a magic job. All bolted together an installed into another good gearbox. I’ve kept the gearbox with the locked centre for another time.1 point
-
Remember the “Ting” noise I heard when I did a launch earlier? Well it seems I smashed the two spider gears in the Centre diff and they had wedged themselves in such a way that they locked the diff up. This explains the car driving like it had a locked rear diff. So why not do the job properly and weld the whole thing together with bird shit? Theory being it won’t break again right? With the drive train sorted, I swapped the 4G61T engine mounts onto the 4G63T and it all dropped in like it was meant to be there. I wish I had known at this point how much further I had to go. With the 2.0 litre finally in the car I started on swapping some of the VR4 sensors into the 4G61 loom, mainly the Cam/Crank Angle Sensor, Throttle Position Sensor and Idle Stepper Motor. I also added a SARD FPR to the stock fuel rail and gave the rocker cover a lick of paint. Electrically, the swap from the 4G61 to 4G63 is very easy as the wiring between the Cyborg & VR4 is almost identical. Only a few sensor plugs need updating and the VR4 ECU even plugs right in. I then started to plan the fuel system, the standard pump is guessed to be around 120lph which would probably be ok for standard power levels but I wanted to build some future proof in. My thoughts were to use the stock pump as a lift pump into a surge tank with a single Bosch 044 as the primary. That should give me a bit of head room. Now, where to put it? Might as well relocate the battery to the boot at the same time, this will free up some engine bay space for cold air induction. I ran a length of 32mm2 double insulated power cable from the front to rear of the car.1 point
-
Now around 2006, I started attending a few of the local car cruises and on one night I had done a few clutch dump launches in a row and then heard a little “ting”. The car still drove okay but something wasn’t right, it would almost drive like it had a locked rear diff. I wonder what it could be? Mmmm never mind it still drove. One of the reasons I convinced myself to by the Borg was because of how easy it was to upgrade with VR4 parts and after keeping an eye out in the local trading paper I found a 1992 ADM Galant GSR that had a JDM Galant VR4 Evo Zero front cut installed, but it wasn’t running properly. This made me start thinking of doing an engine swap, which from what I had read was easy enough as the 4G63T is the same family as the 4G61T except 2.0 litre vs 1.6 and the only real physical different is a 10mm taller block. A good reason to hunt down a VR4 Evo Zero was because of the factory upgrades over a standard VR4. The Evo Zero makes 176kw and 304nm vs 150kw and 294nm for the standard VR4, this is mainly achieved with 510cc vs 450cc Injectors, TD05 Small 16G vs 14B, Larger Intercooler and piping, slightly more aggressive Cams and a better tune in the ECU, which is a single board and chippable. When I looked at the swapped Galant GSR, the engine ran fine, compression was good but it wouldn’t shift into any gear and the clutch just didn’t feel like it was there at all, but the basis looked good enough and I really wanted that engine! $1800 later and it was mine. No use wasting time then… I sold the stock 4G61T complete minus wiring loom to someone in Adelaide for almost the cost of the Galant with the VR4 motor, probably the best deal I had with the car. Gave the VR4 motor a birthday, new Cambelt, pulleys, water pump and balance shaft removal. When removing the balance shafts in 4G63’s it tends to increase the oil pressure significantly, it’s not uncommon for it to go way above 100psi which can cause a few problems with turbo oil seals etc. The common solution is to port the standard oil pressure relief valve, I may have gone just a little for far here, but it works! I had a new engine, just needed to sort out a gearbox. The one that came with the new motor was cactus, it had a dodgy FWD conversion done, broken bellhousing from probably running into something and the clutch release bearing had collapsed. I stripped it down for some bits and binned the rest. It wasn’t too much of an issue that the VR4 gearbox was unusable because with just a VR4 clutch and flywheel the stock 4G61 gearbox would bolt up fine. I just needed to find a clutch and flywheel… Lucky for me I guess, I found a Direct Clutch Twin Plate for sale on eBay, total over kill!1 point
-
Vortex were 4wd too, selector was on the gear lever. EA82T was slower than a wet week though, couldn't much past 180 in my one1 point
-
That was lush. What choice people.1 point
-
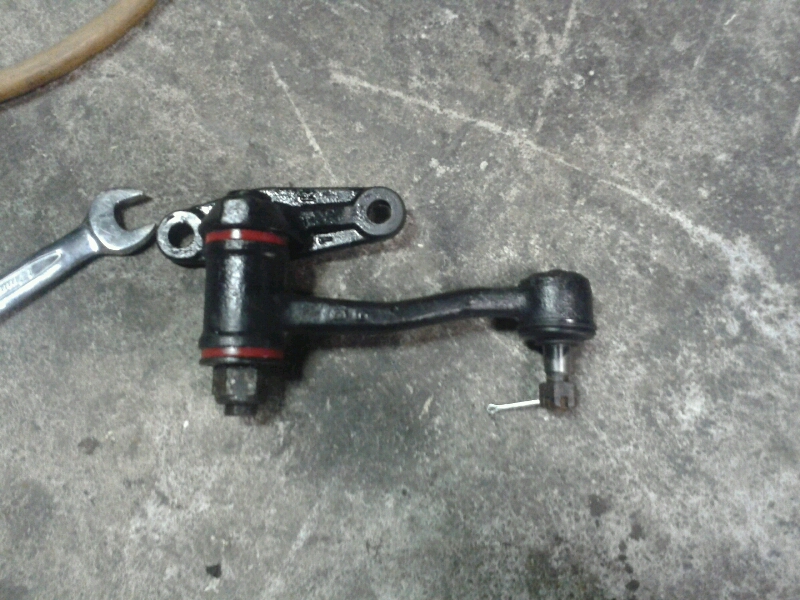
Well wof on Monday never happened, due to a bunch of fucking around with different parts places trying to figure out this steering idler. Anyway way figured out what I needed about 5.25 yesterday evening and much to brad doritos naysaying they turned up today. So hopefully everything is now repaired to vtnz standard. Idler went in this evening. Off to vtnz tomorrow again. Digits crossed.
1 point
-
It's neat. I'm keen to drive it once when you get it, Al. So sweet.1 point
-
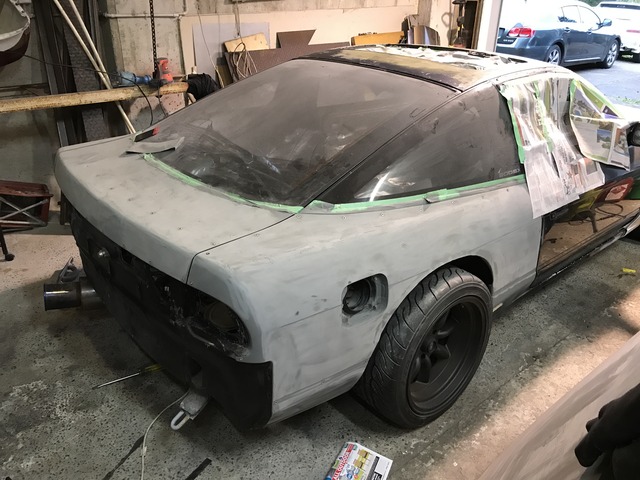
OK so the SAFC is working, I can change fuel percentage at idle and see the AFR's change, as well as hear the engine note change. Not sure if the Knock reading is working, will recheck that. The weather has been wet so I can't test drive with primered rear quarters that want to suck up water. So I've bought some White Autothane paint, primer, thinner, filler, mixing cups, filters, proper mask etc etc. I've welded up the Aerial hole, wiper hole and high stop light since it is covered by the wing. Lots of sanding etc. Sanded rear quarters, yay sanding. Don't have to worry too much here since it's covered by fibreglass panels. Finally got the damn tail lights out, they were silicon sealered in there and I couldn't get to it. But finally off after making a weird shaped knife blade and some levering to break the bond. Surprisingly didn't break the lights, cool. The roof has been painted with terrible black paint, no prep and looks shit. So I took it back as far as I could with the orbital sander, dust every where. Love sanding. But the original paint underneath wasn't in good condition so time for the paint stripper. Fck off shitty paint: Started sanding rear: Primered overfenders, used special primer for fibreglass. The colour is actually pretty cool, would look good with clear coat.... Also trimmed the rear fibreglass arches because wide wheels are wide: Where it will sit until ready to paint:
1 point
-
I got this golf lip for it, the valence I used had already had one on so I left the holes in when I painted it for this reason. it sits high, not hideous but I will lower it and see. That will change the angle too. i scrubbed clean and painted the sump yesterday1 point
-
I recognise that car! Give it death1 point
-
Now we are at present day. I have a track day on the 27th, and I wanted to make some changes. First was the diff ratio is way long for the torque of the car. So I bought a 4.3 ratio LSD to fit. I also bought a seat rail to take an old Racepro I have kicking around Some tow hooks And these: 18 x 8.5, 30th anniversary 350z Wheels, +30 offset To go with them I also got some 6.5kg/mm lowering springs. No Pictures of them but just the finished product from today: Car still has Wof, and rego and the objective is to keep it running as a daily. Idea is it will stop me from ripping the motor out to put a V8 in it, and to keep it running on the most reliable setup for as long as possible.1 point
-
Moo'ing out on the farm1 point
-
yesterday they dug the foundation trenches and poured the concrete for the bridges that go over the sewer line. in the pouring rain. 2017-05-11_04-48-53 by sheepers, on Flickr1 point
-
As they say...to make omelettes, you've gotta break a few eggs! So, fully committed here goes: Limited time to spend on it, so mocked it up for a rough overview. Looks crappy now, but should all come together at the end.1 point
-
Got another Q also, it can be jammed in this thread too. 1943 Karrier superpoise, has an hq front subframe and a very nice cab & chassis. Is declared for 350/th350/9", but has 253/trimatic/bw78. Actually drives really nicely, but realistically it will probably be easier/cheaper to return it to 350ci etc than cert it as is. All i've done so far to it is rig up a choke, jam an air filter on it and swap out the plugs, just for ease of starting/moving round the property etc. Will probably tart up the body and interior and when circumstances allow, hand it over to a shop for full drivetrain conversion.
1 point
-
Here are the pics of the full respray, car was mostly flat AFTER 28 years, little here and there some dent etc. colour is original ,Sarajevo Weis W18, but in clear coat it was added a bit of a crystal gold pearl, without sun or light you cant see it, it turned out very very good, and I was very satisfied with that. preparing the car for painting Preimer: Ready for paint Colour:1 point
-
Not sure why I didn't do it earlier, pretty happy with it tbh1 point
-
Despite a self-imposed ban on tutu-ing due to hectic schedule: New battery, fuel filter & fresh gas (reading through the history, the truck seems to have about 5 fuel blockages to the points failure, really needs a screen or sediment bowl that isn't in the fuel pump, of course its all hardline) replaced carby inlet seal washer, painted scuttle and inside of cab. Have been using it a bit to blow the cobwebs out, not going to win any races but runs really well. Slowly getting the hang of crashbox, in fact only time i seem to miss gears is in traffic when it actually matters To do: continue paintin' cab, underside etc Grease everything (the lube chart is like a star map) Check steering box oil New tyres & exhaust Figure out why wipers & roof lights not working (suspect bad earth?) both rear axles leak a bit, doesnt seem too bad i.e not all over the tyres so down the list with it There is a massive stash of s15 commer (different sheetmetal on the front and ohv motor) parts near htown on t.m, i'm a bit torn as to whether to get it or not as the dude wants it all gone as one lot, realistically i'd have to "take the best and scrap the rest" in total there is "2 side valve motors 3 ohv motors ,5 gear boxs 3 chassis 3 front axles 3 diffs radiators 1 cab with 2 doors 10 rims 8 tyres and more". Probably enough parts to keep the thing going another couple of centuries, but i'll be sleeping in the spare cab if I drag 3 old chassis home! Also am fickle with vehicles so a lot of effort to shift everything if I sell/garden ornamentise the Q. Also used it as mobile connect 4/stereo transporter for my wedding on sunday, was a great hit. (and then used it to drag a portaloo back to hirepool and dispose of 1,000,000 bottles)
1 point
-
Engine DONE! here a few pics of a details1 point
-
With my lightning quick reactions, I pressed this plan into action a mere 21 months later than expected: Note the kayak on the roof for extra internet cool points and also the headlights, grille and bonnet removed, to make the job look more involved. That's not me on the ground doing stuff by the way; that's my cousin, who did a vast majority of the work, whilst I pondered over various bits and did a small fraction of removing stuff, plus took some terrible photos on an outdated camera phone, for the benefit of a few people who like to read about old cars on the internet. Here's a very similar photo, just prior to the one above (where 'we' were removing the Nissan gearbox) which shows the LD28 freshly removed and testing the load bearing capabilities of some old seatbelts, whilst I pause to take another photo. There's a bit more to say about the 308 motor but that'll have to wait for another time, as I've had a few drinks tonight to celebrate/commiserate the LD28's passing.1 point
-
Hako makes it's first official public outing. I was asked by one of the organisers of a car show if I could bring the Skyline out to have on a Nissan stand. So I agreed. It's crazy to see the size difference between old and new.. everything has just become so much bigger.1 point
-
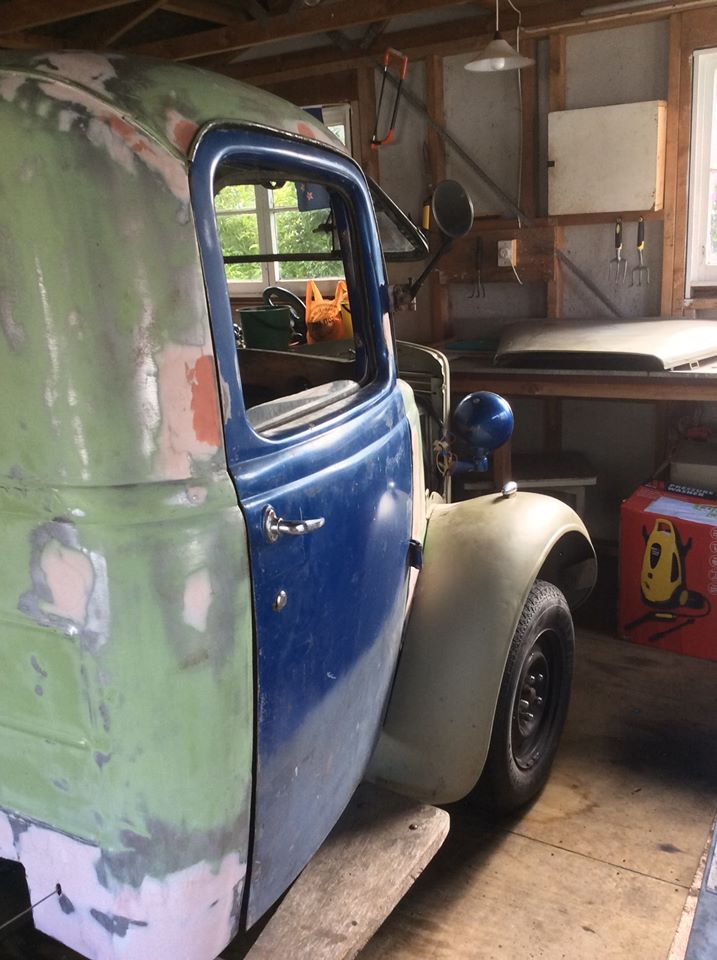
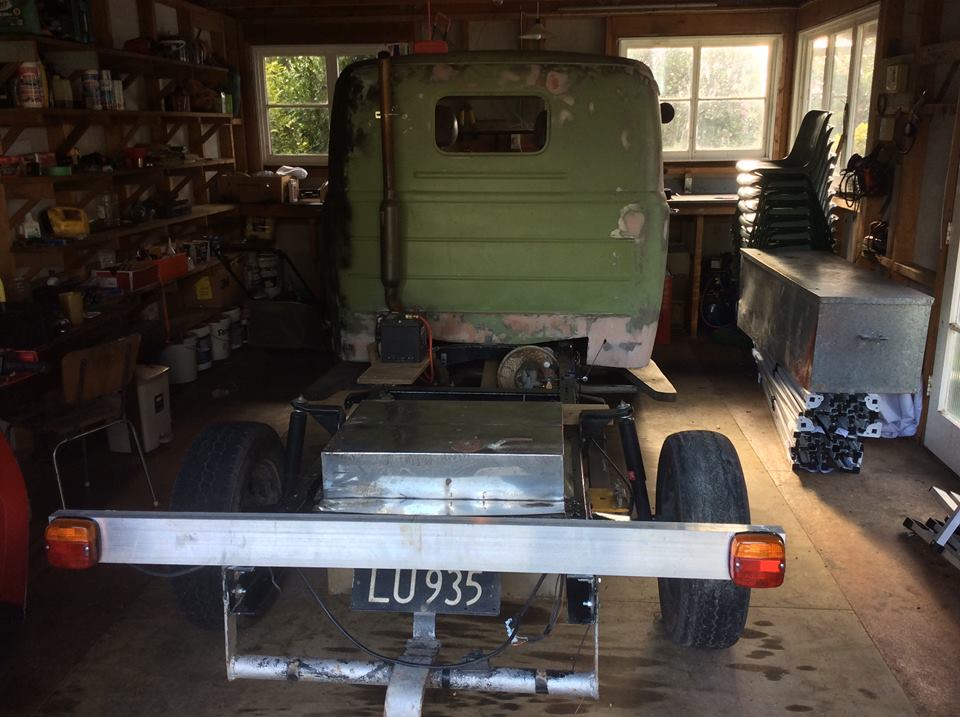
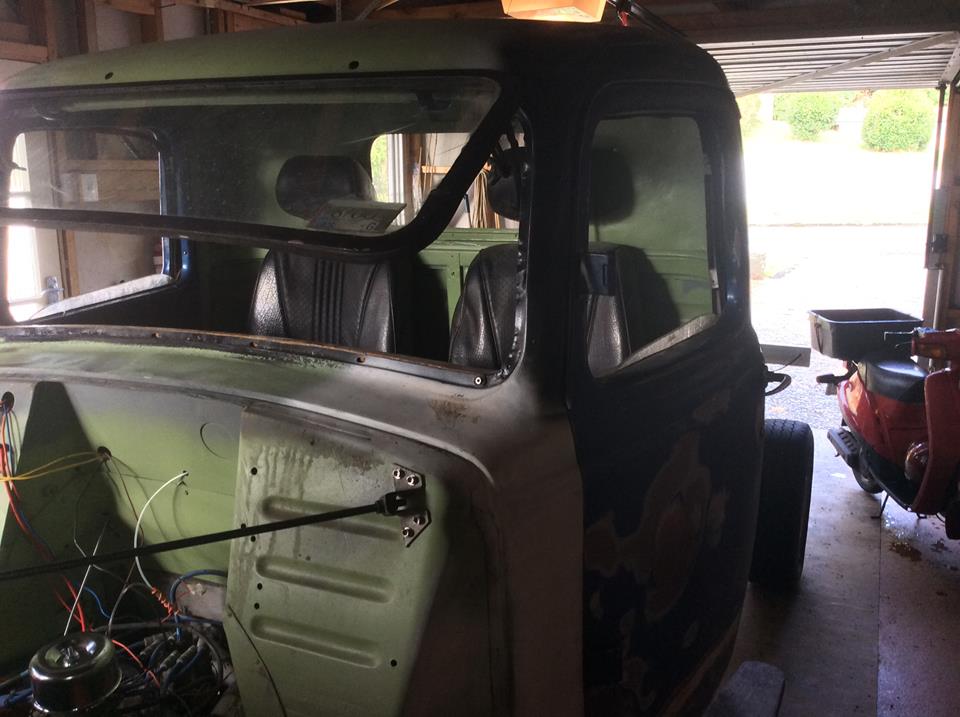
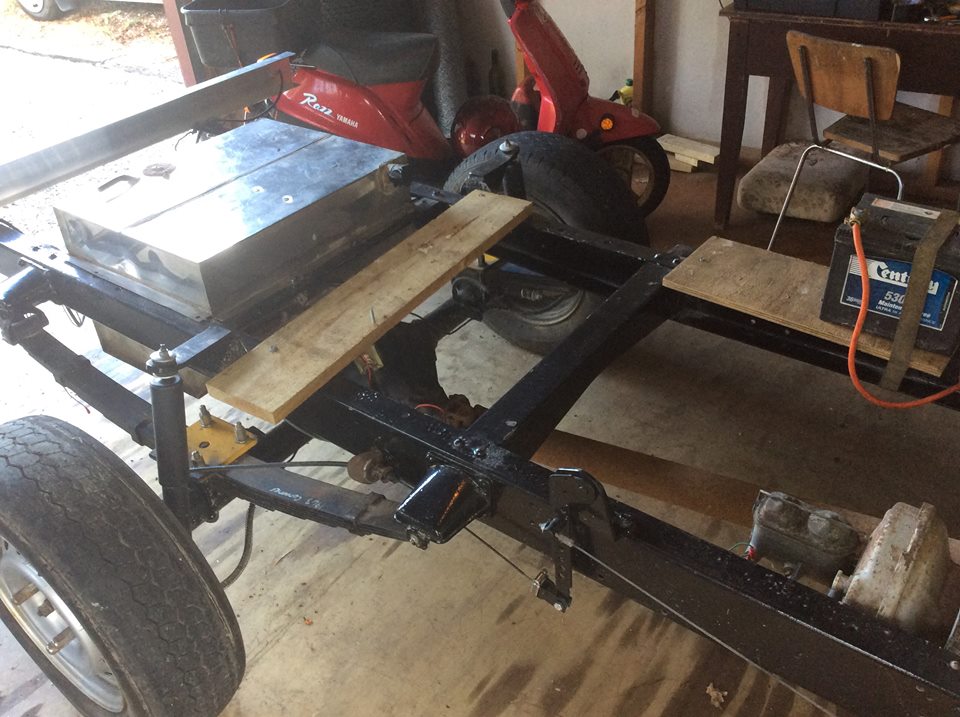
I have been slowly working away on this van, and dropped the engine in yesterday. What a bloody mission! The extra height of the supercharger made it REALLY tight to get in there. I had to notch the front crossmember to allow the sump to drop down and clear it, and it is really tight for space in all directions. But it does fit! And no cutting or beating of the floorpan or bulkhead required! There are a few tweaks needed for clearance, but nothing major. Here is a pic of it sitting in place. I have also installed a MK3 Transit power steering box. The steering box was straightforward enough, remove the Mk2 mounting plate and fit the Mk3 version. For the steering column I used the Mk2 outer part, and cut it off where it protrudes through the bulkhead. I fitted the Mk5 shaft to this. And used a coupling from a Mk5 with the 2x UJ's so that I could get rid of the rubber coupling that the Mk3 has, and also keep the steering column on its original axis. There was a little bit more to it than this, but you get the idea. //oldschool.co.nz/index.php?/topic/50625-browndogs-supervan-2-yet-another-one/
1 point
-
I've been saving my pennies to get this. 1974 model with 3.0 Carrera engine (n/a version of 930 turbo).1 point
-
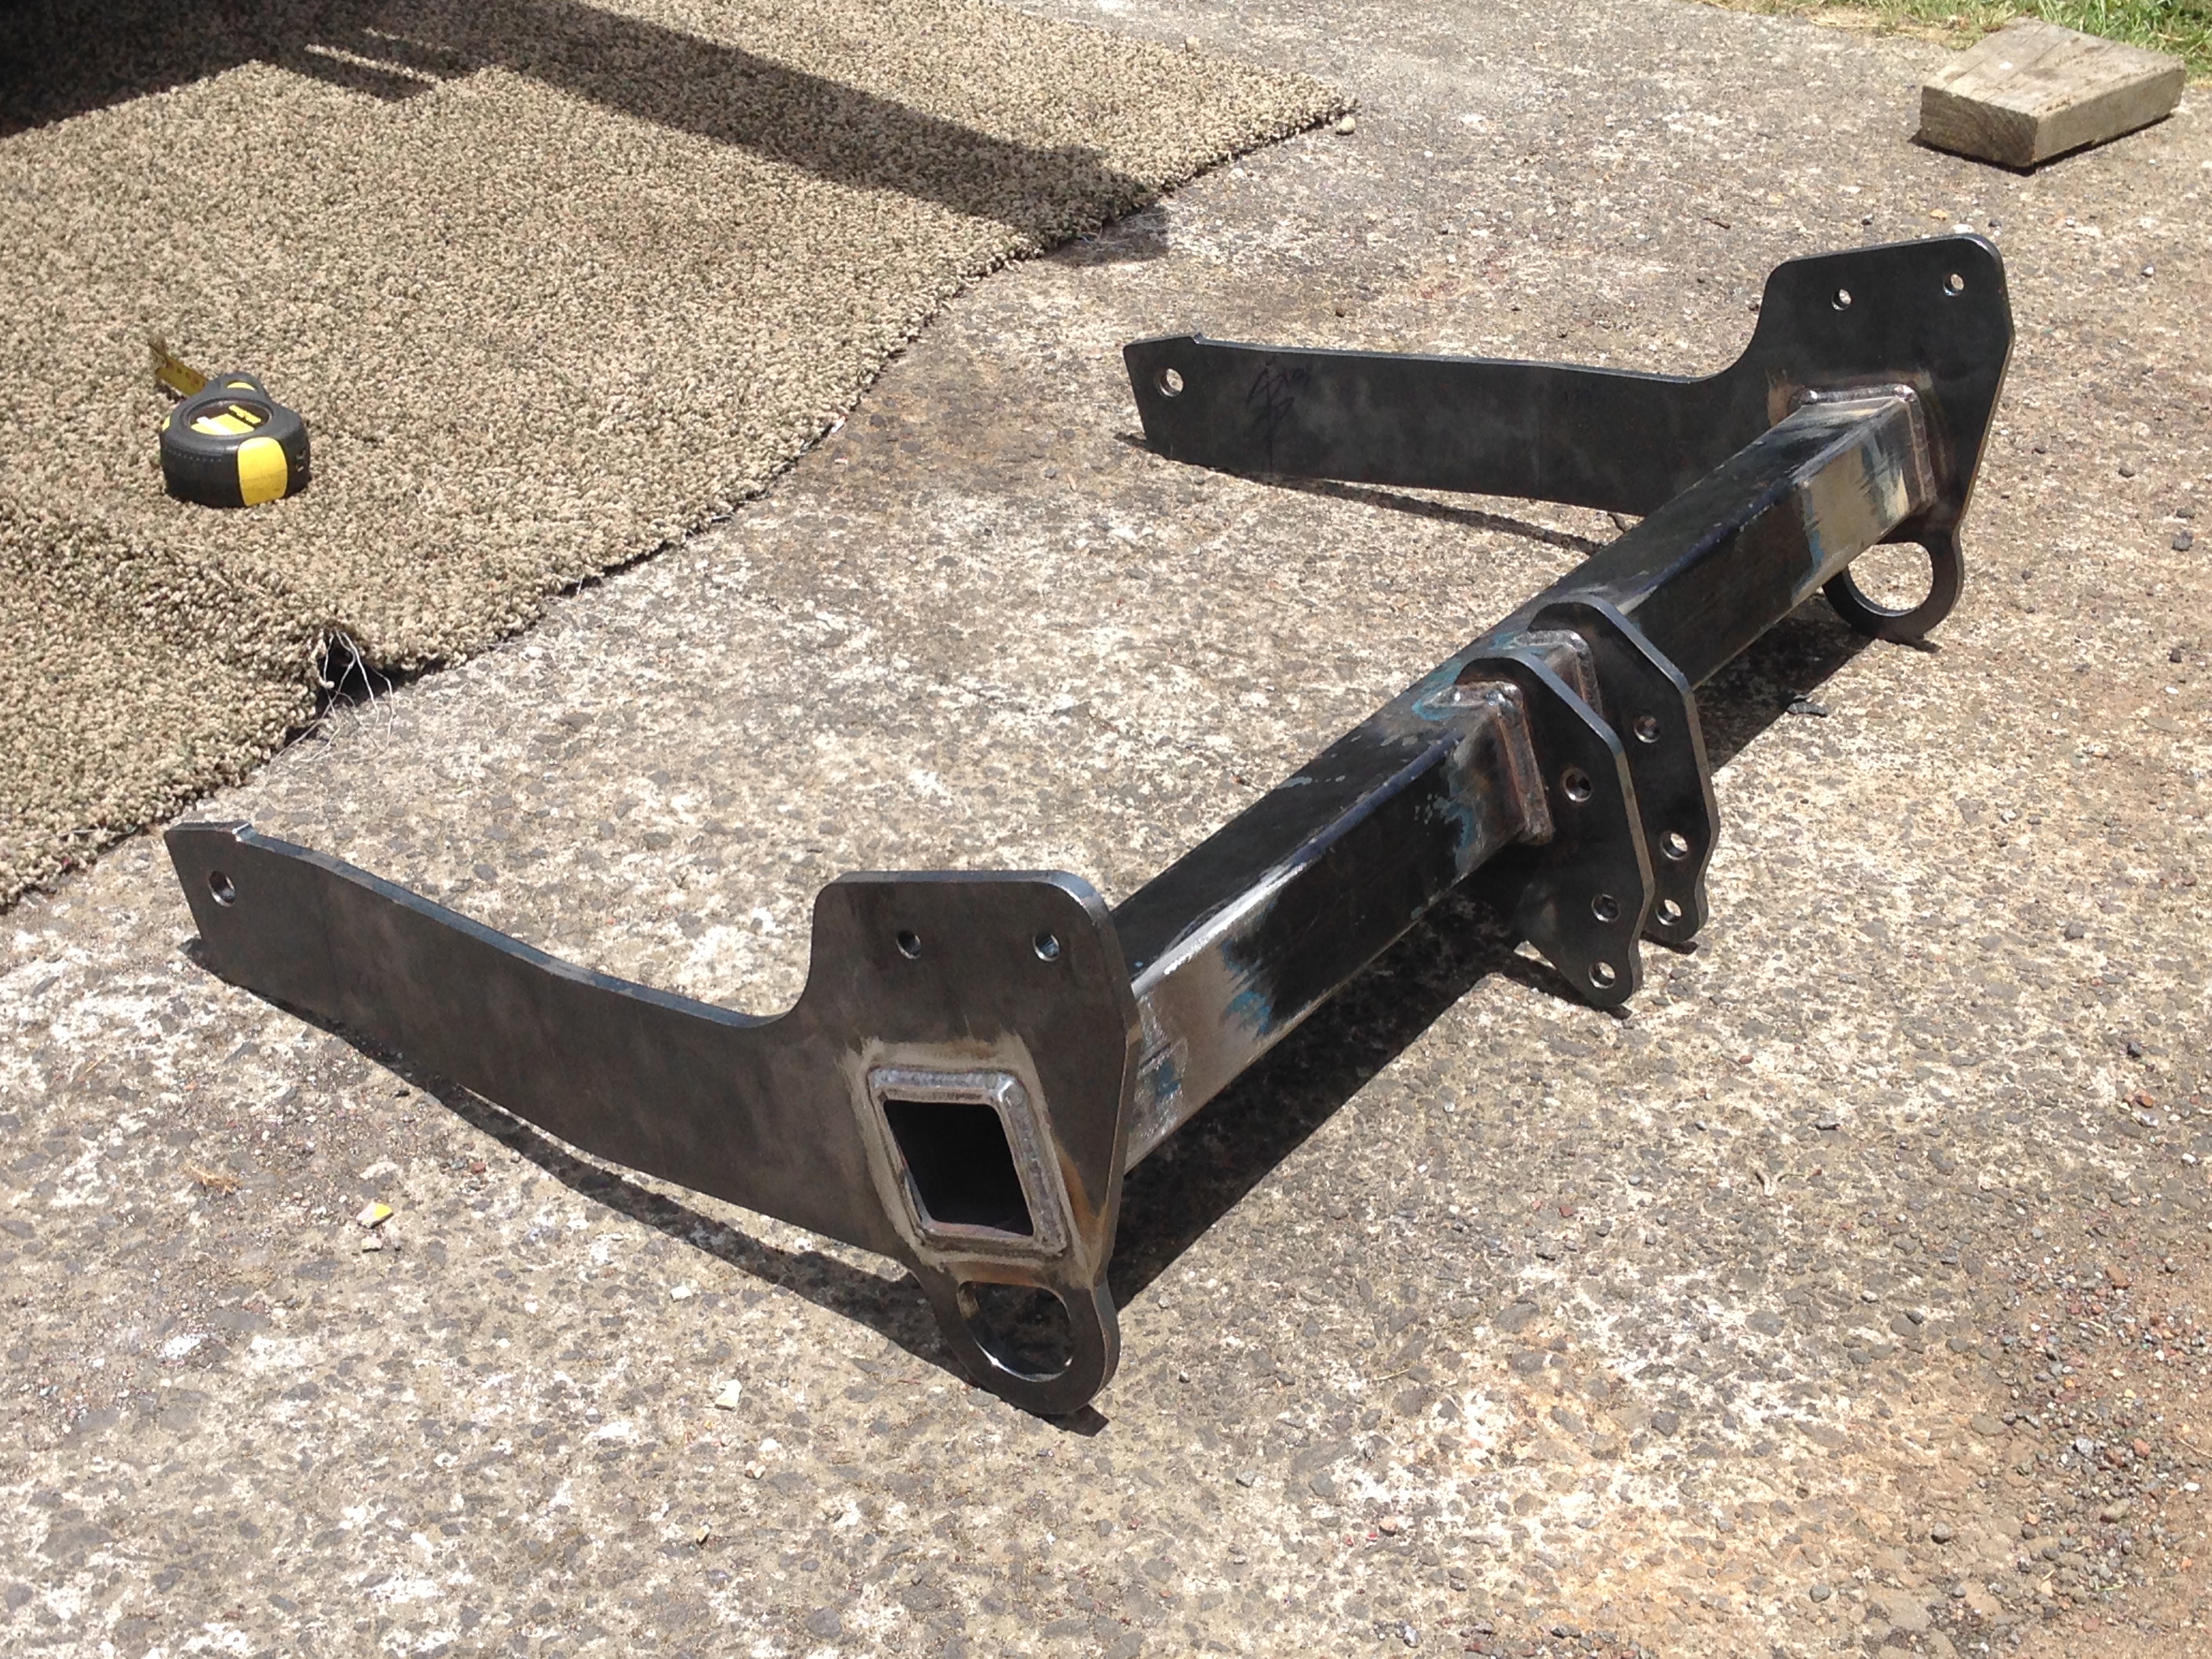
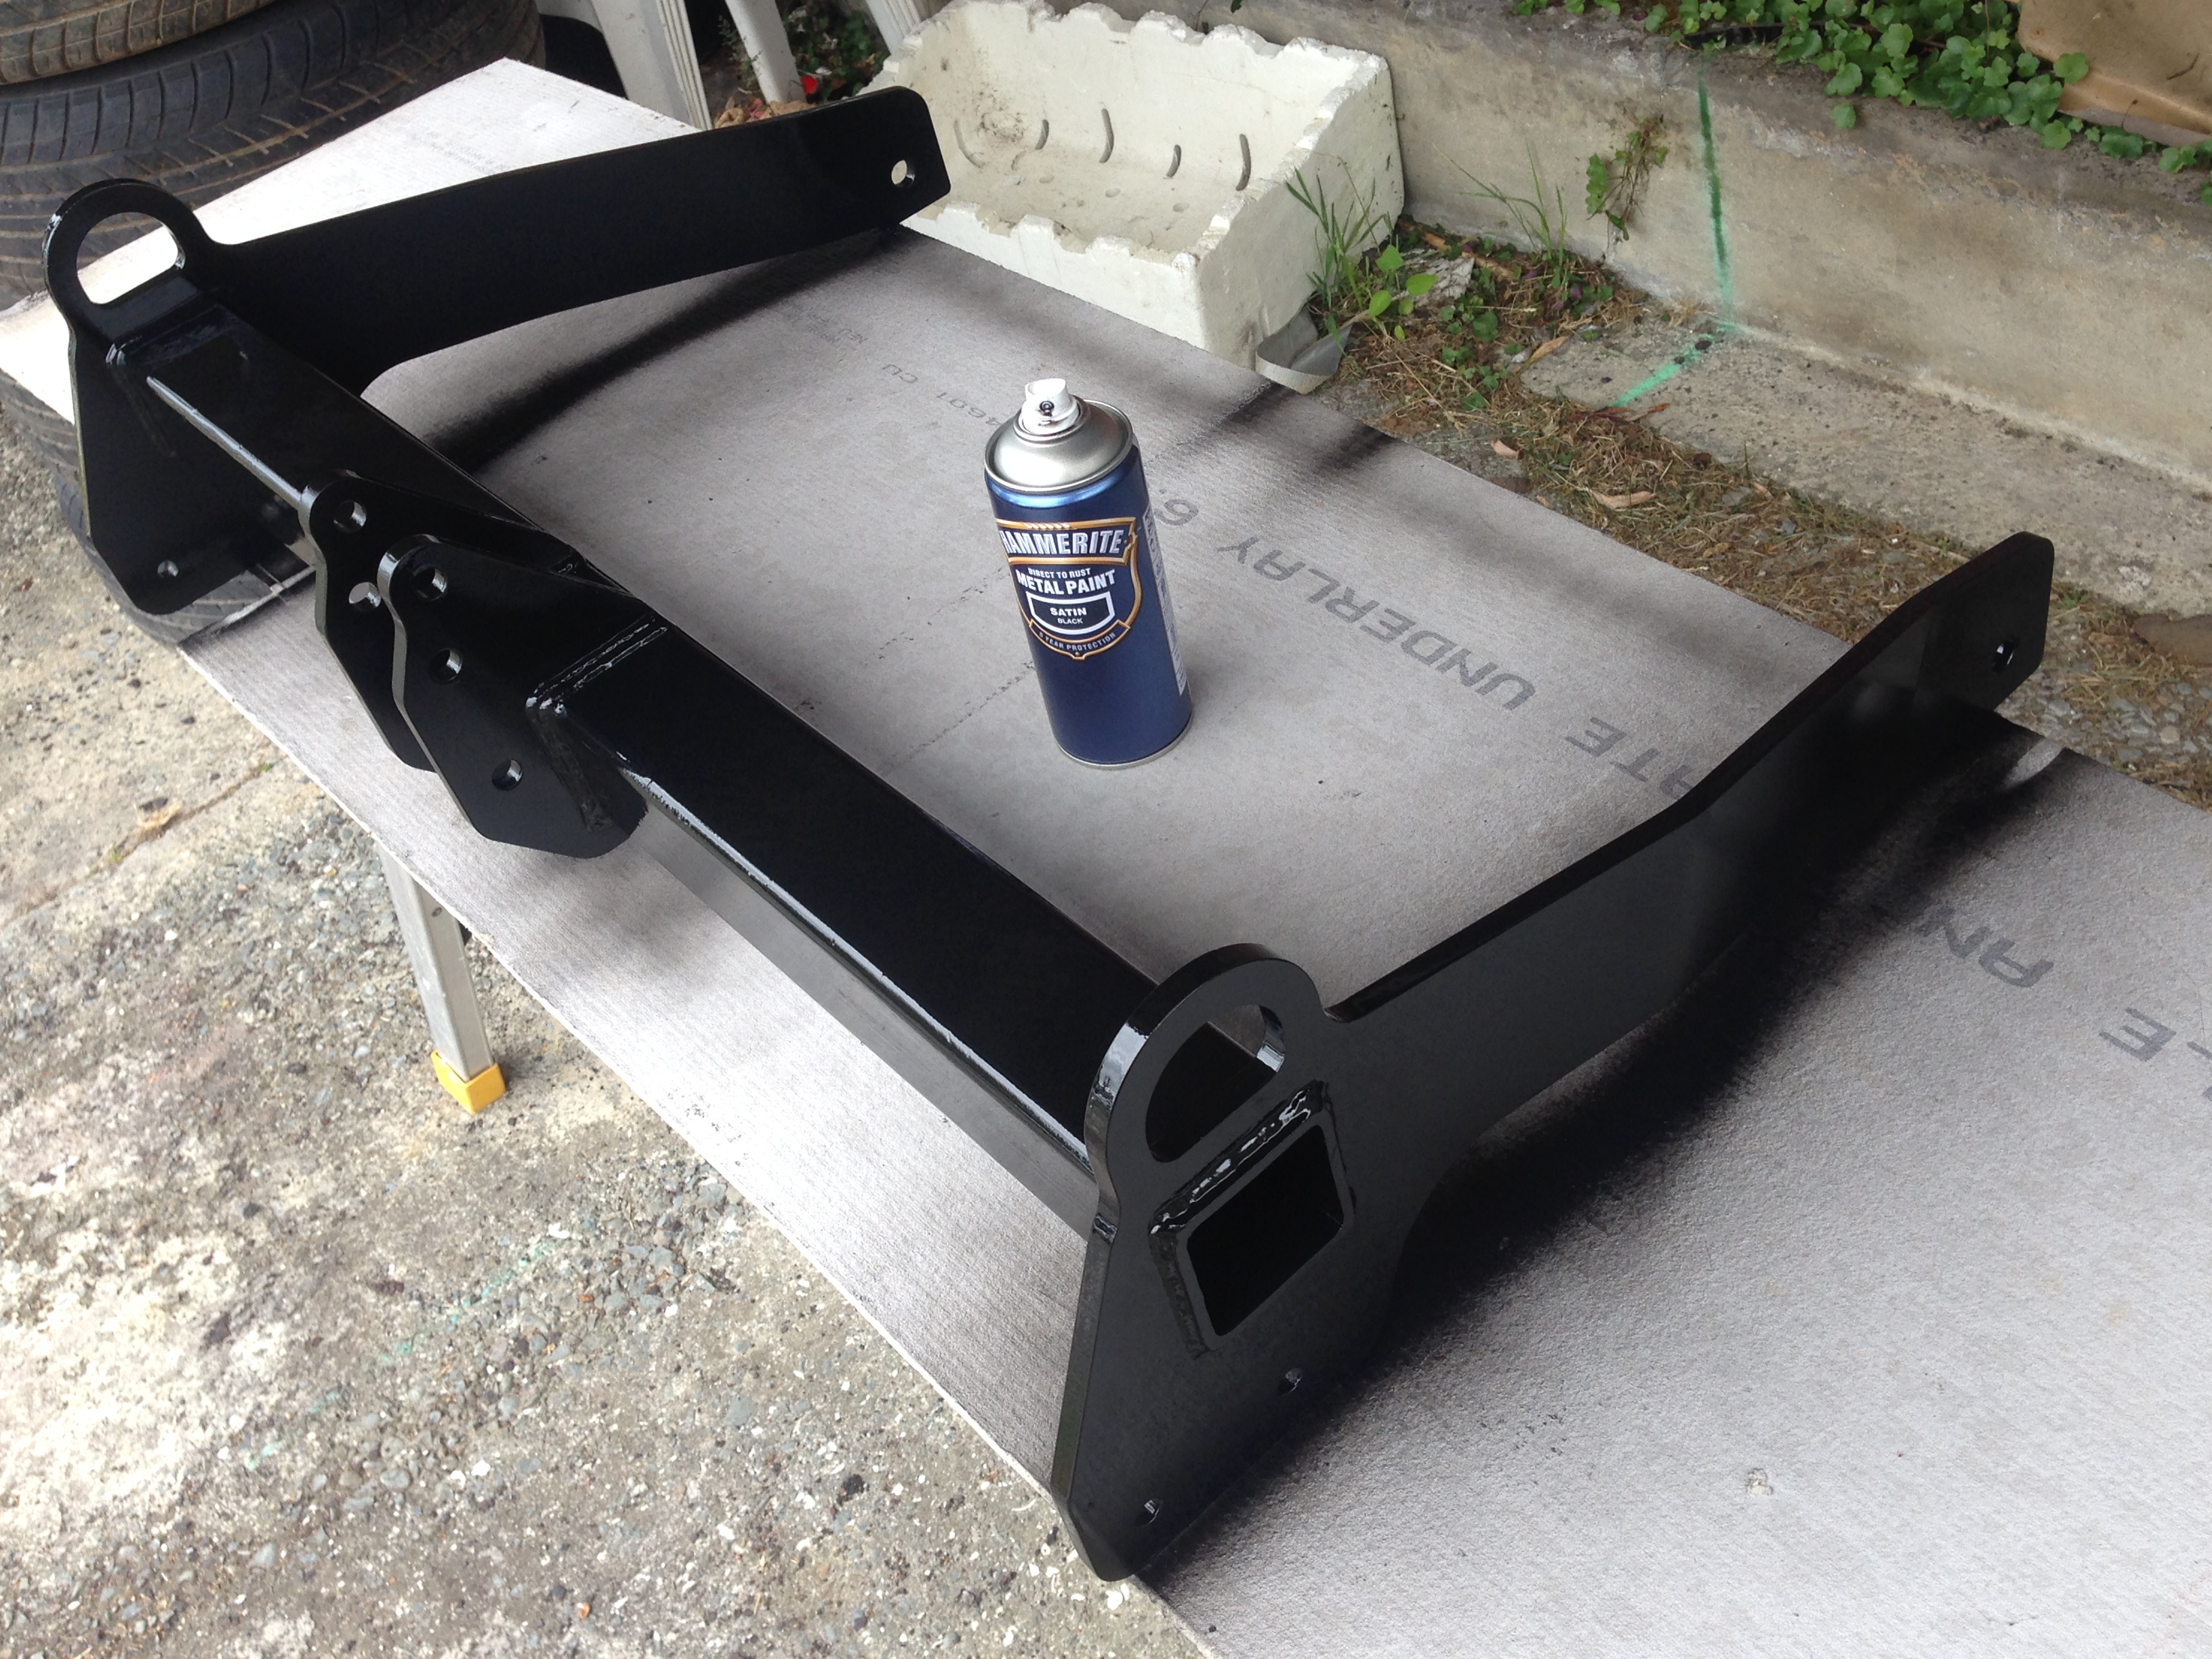
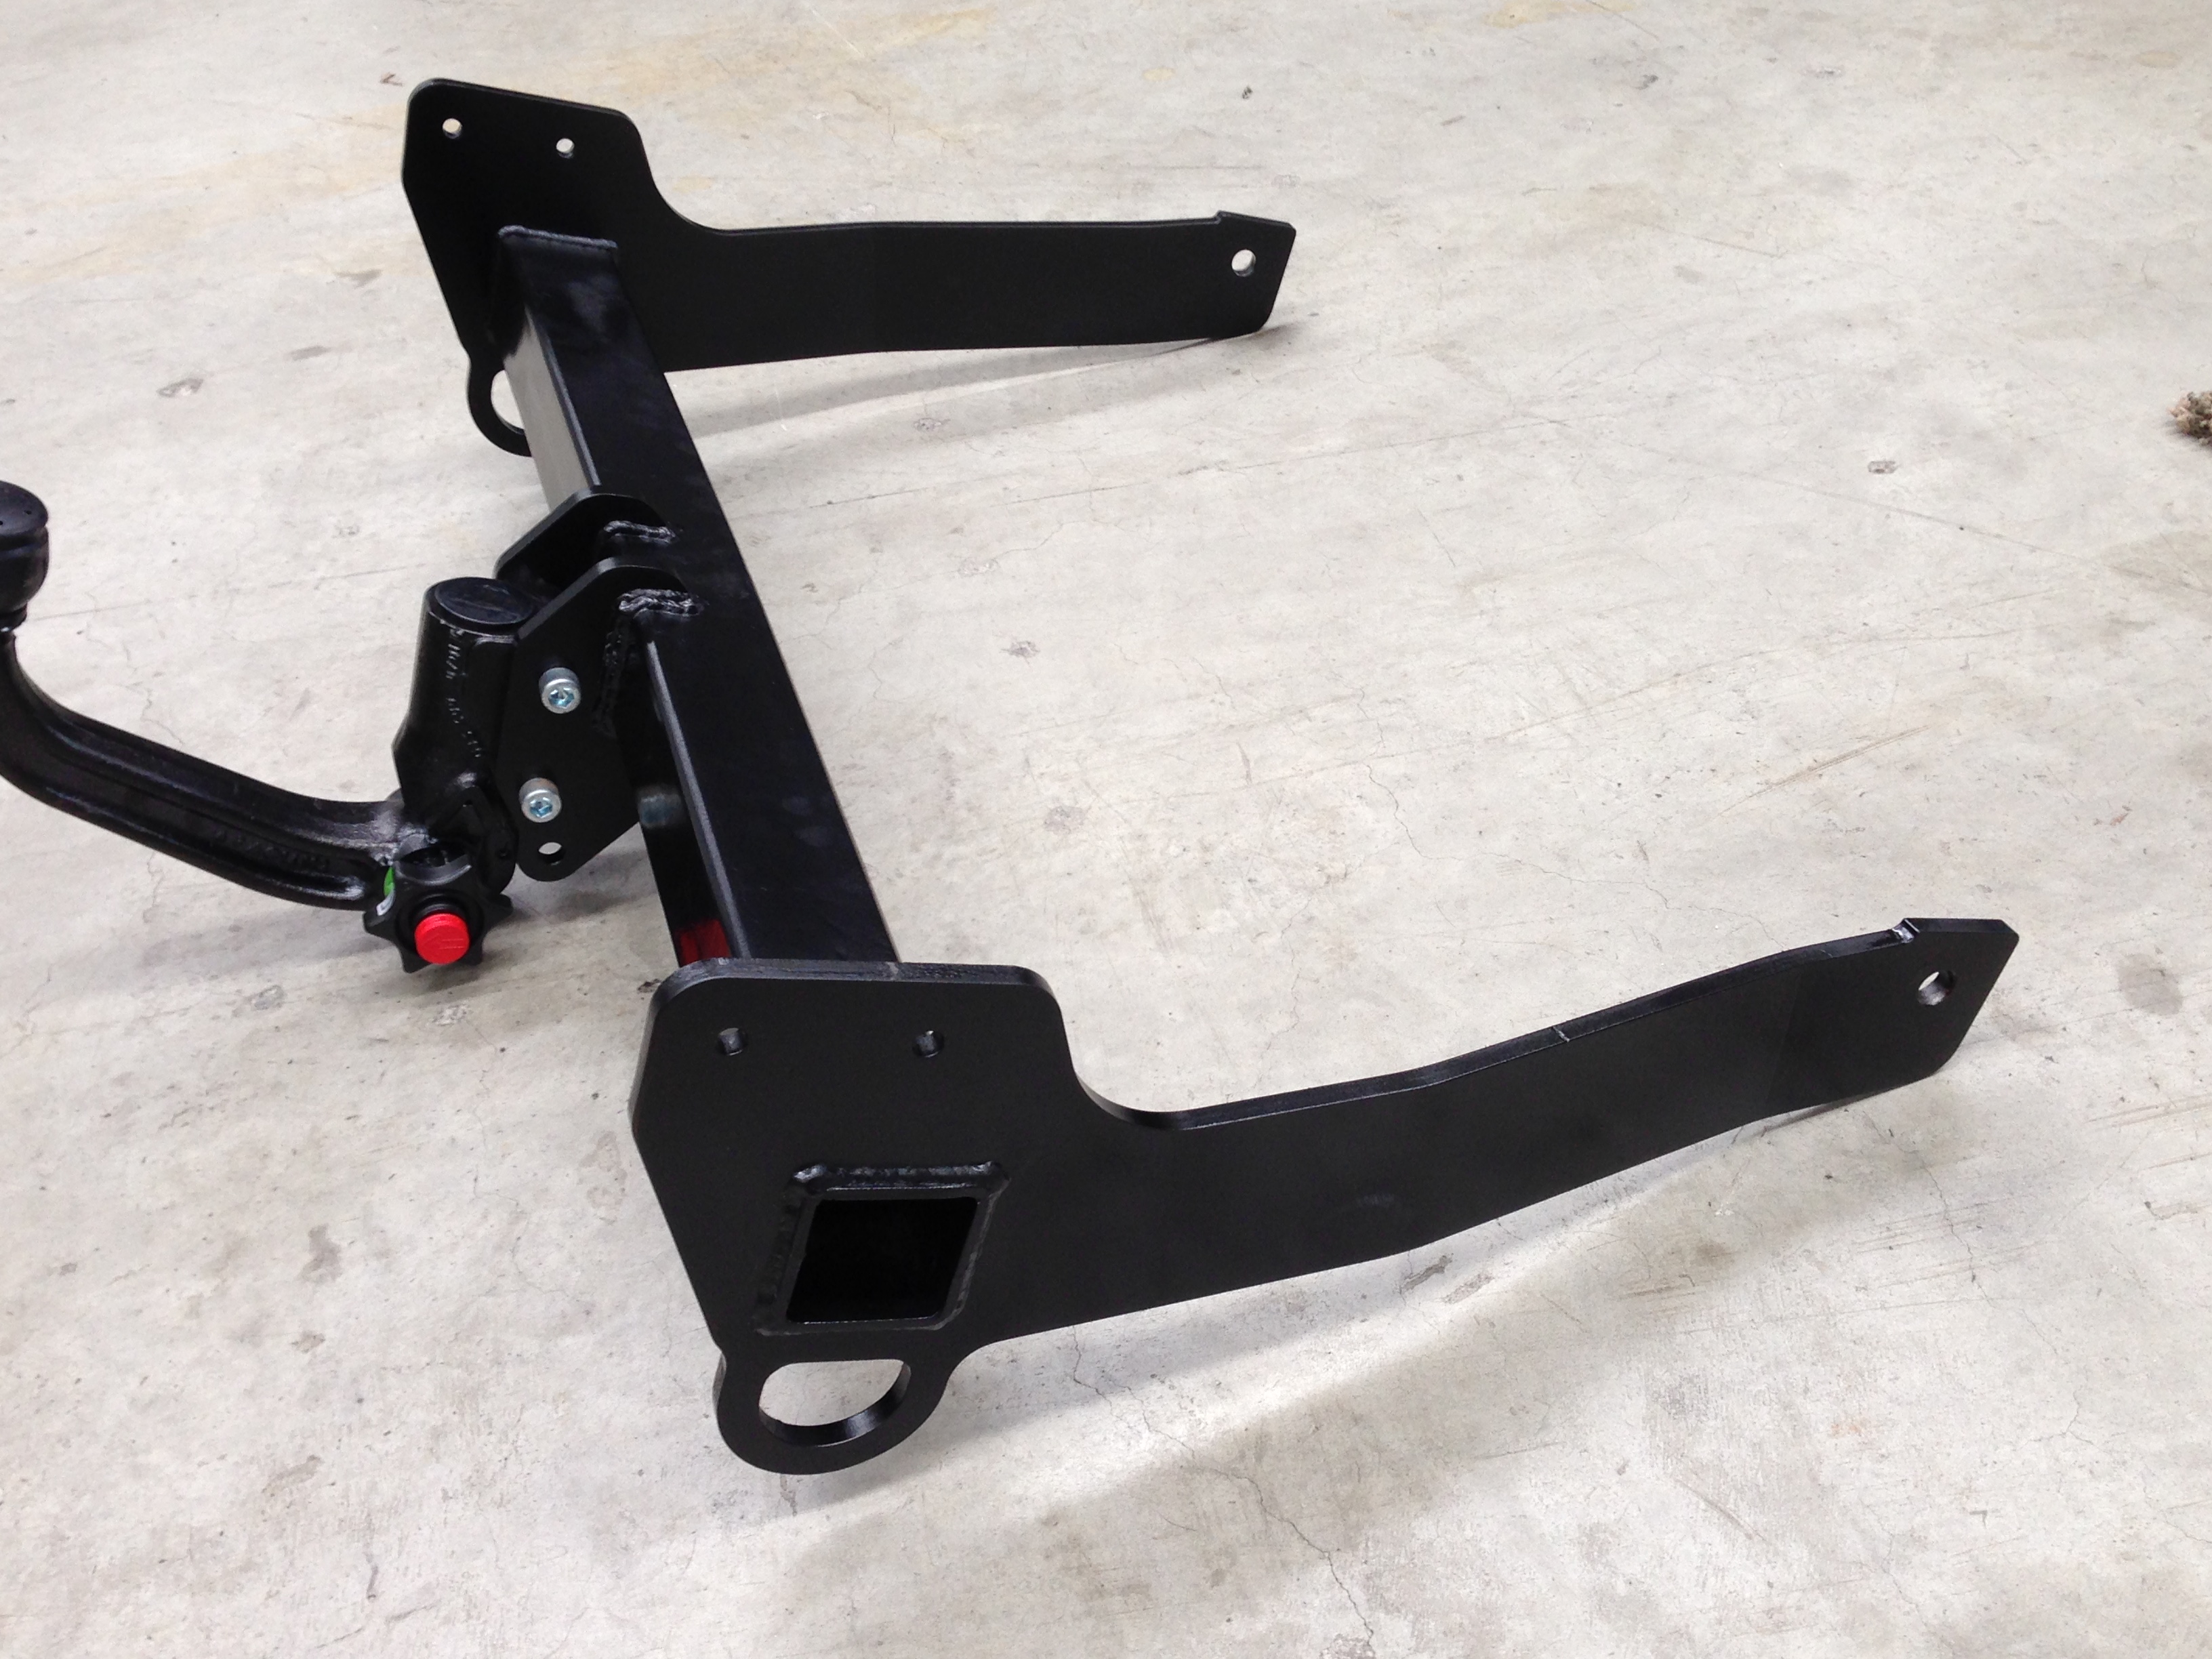
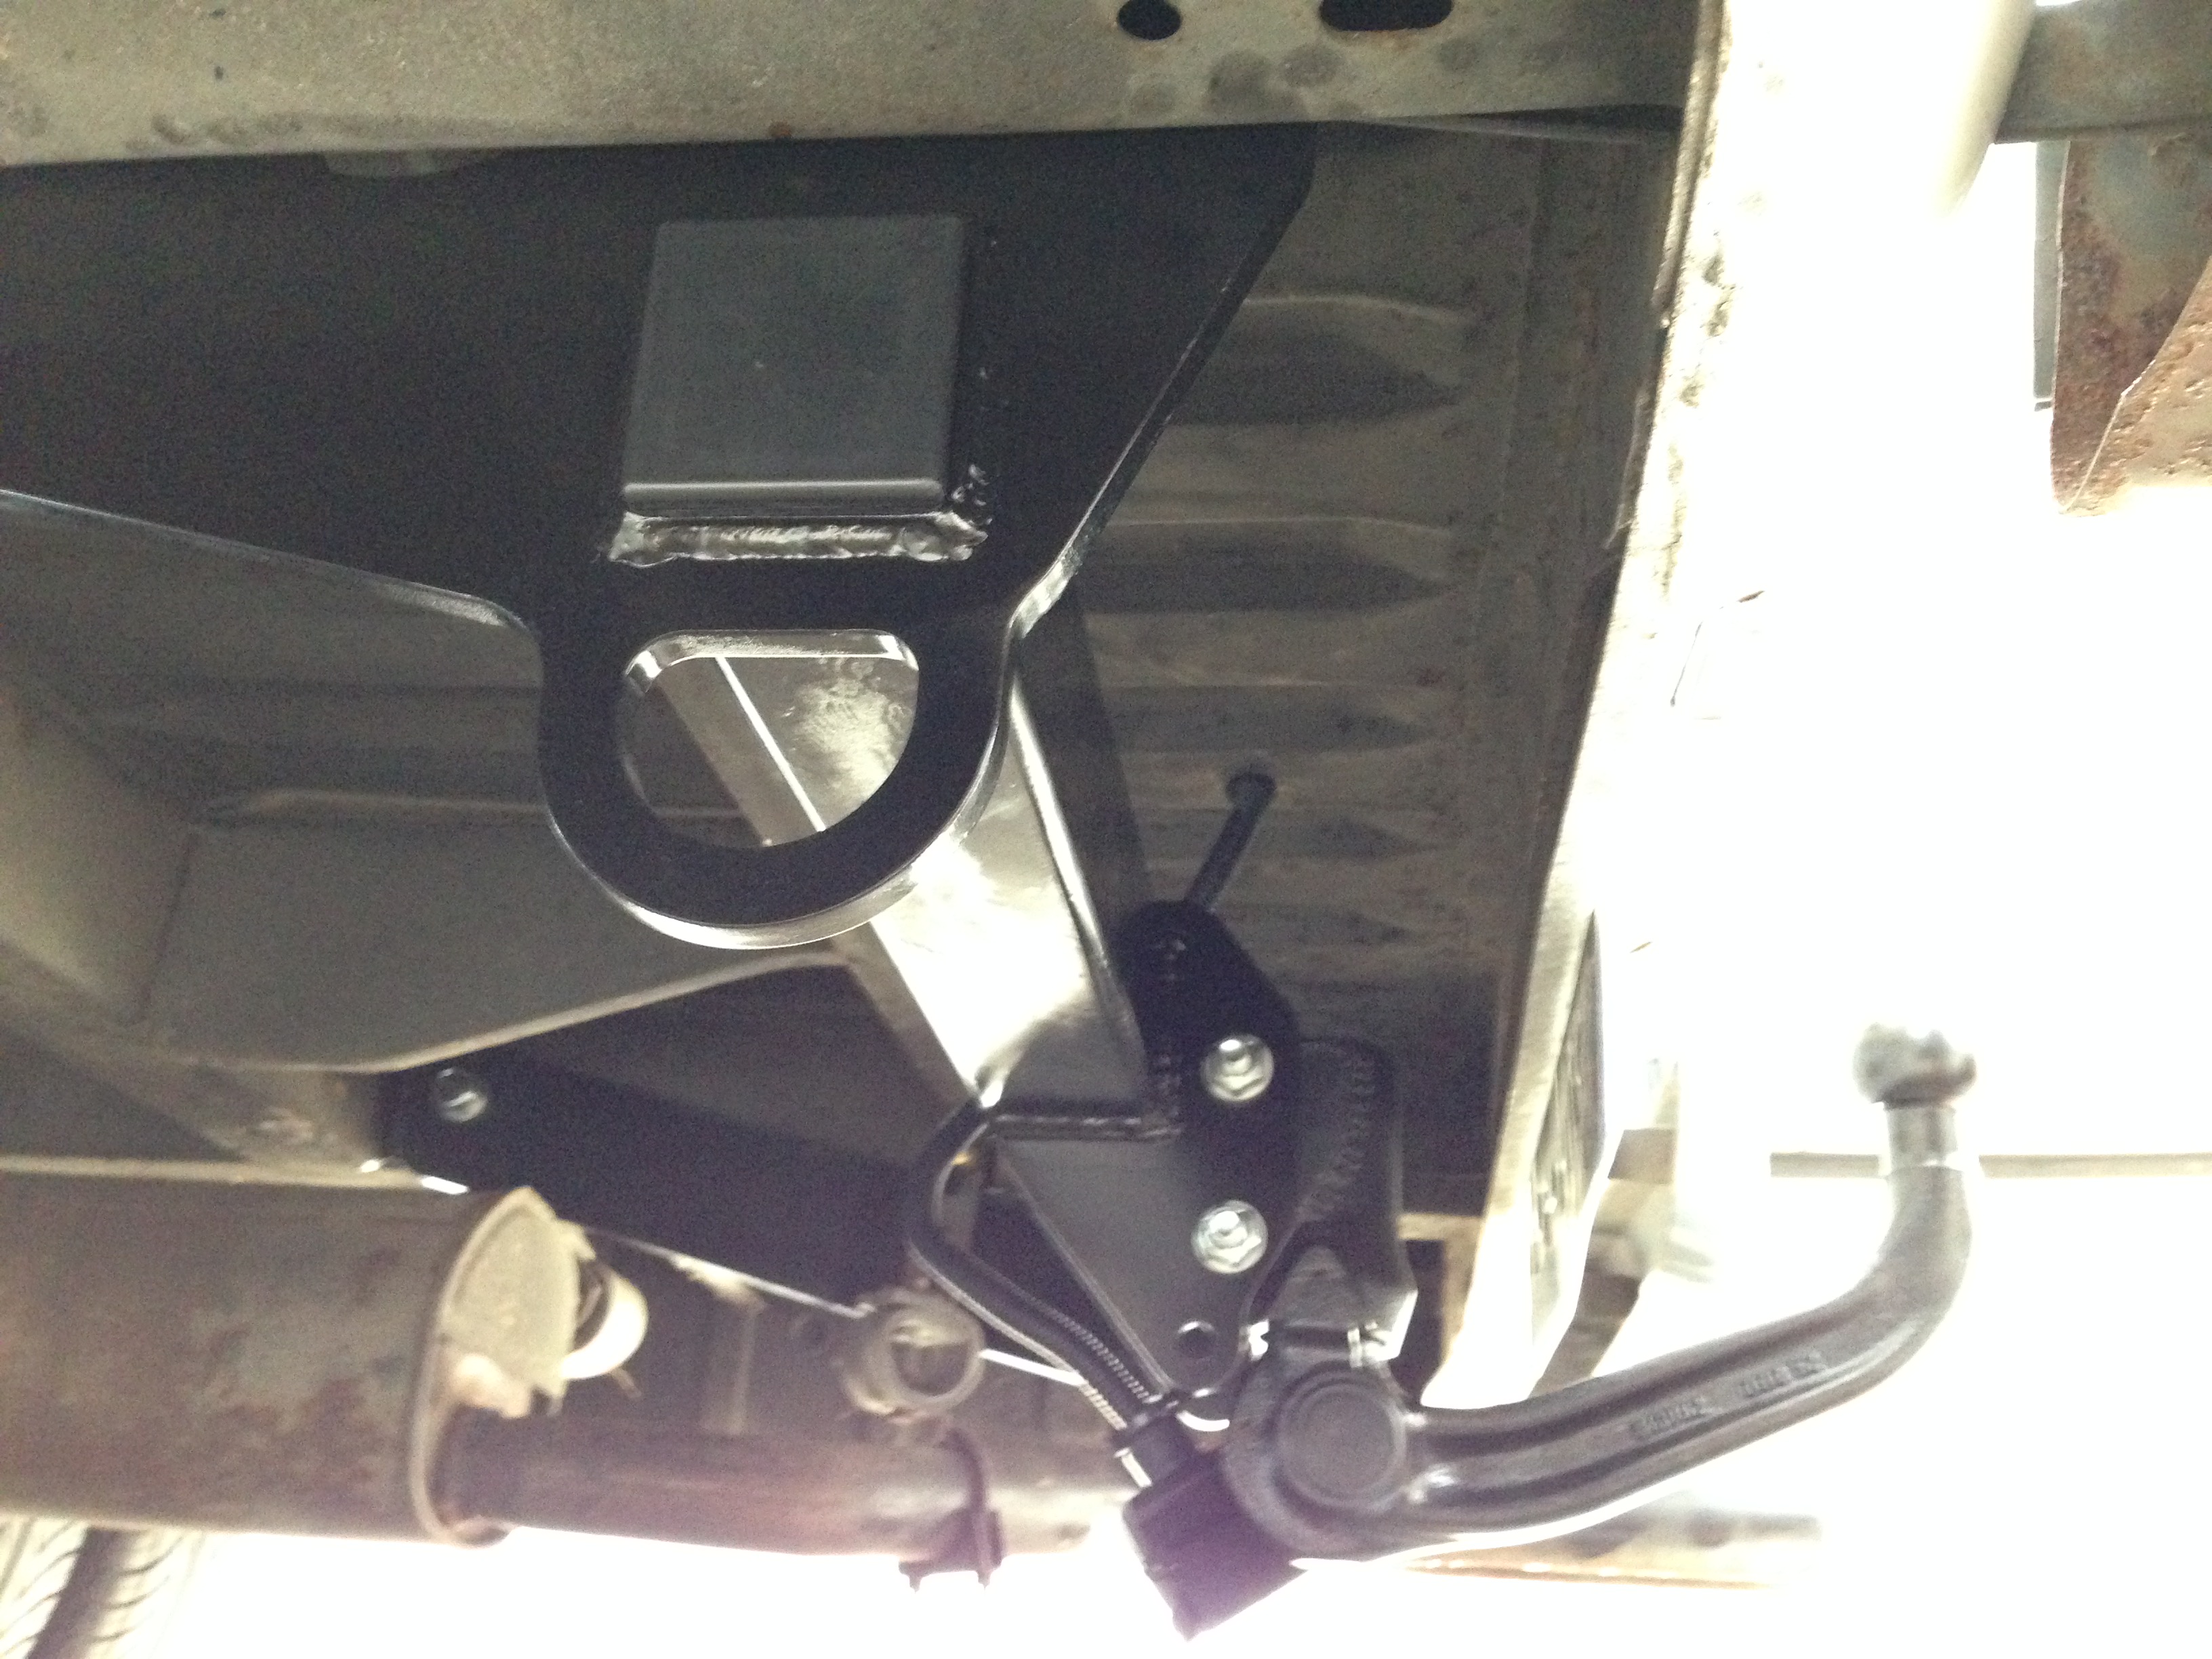
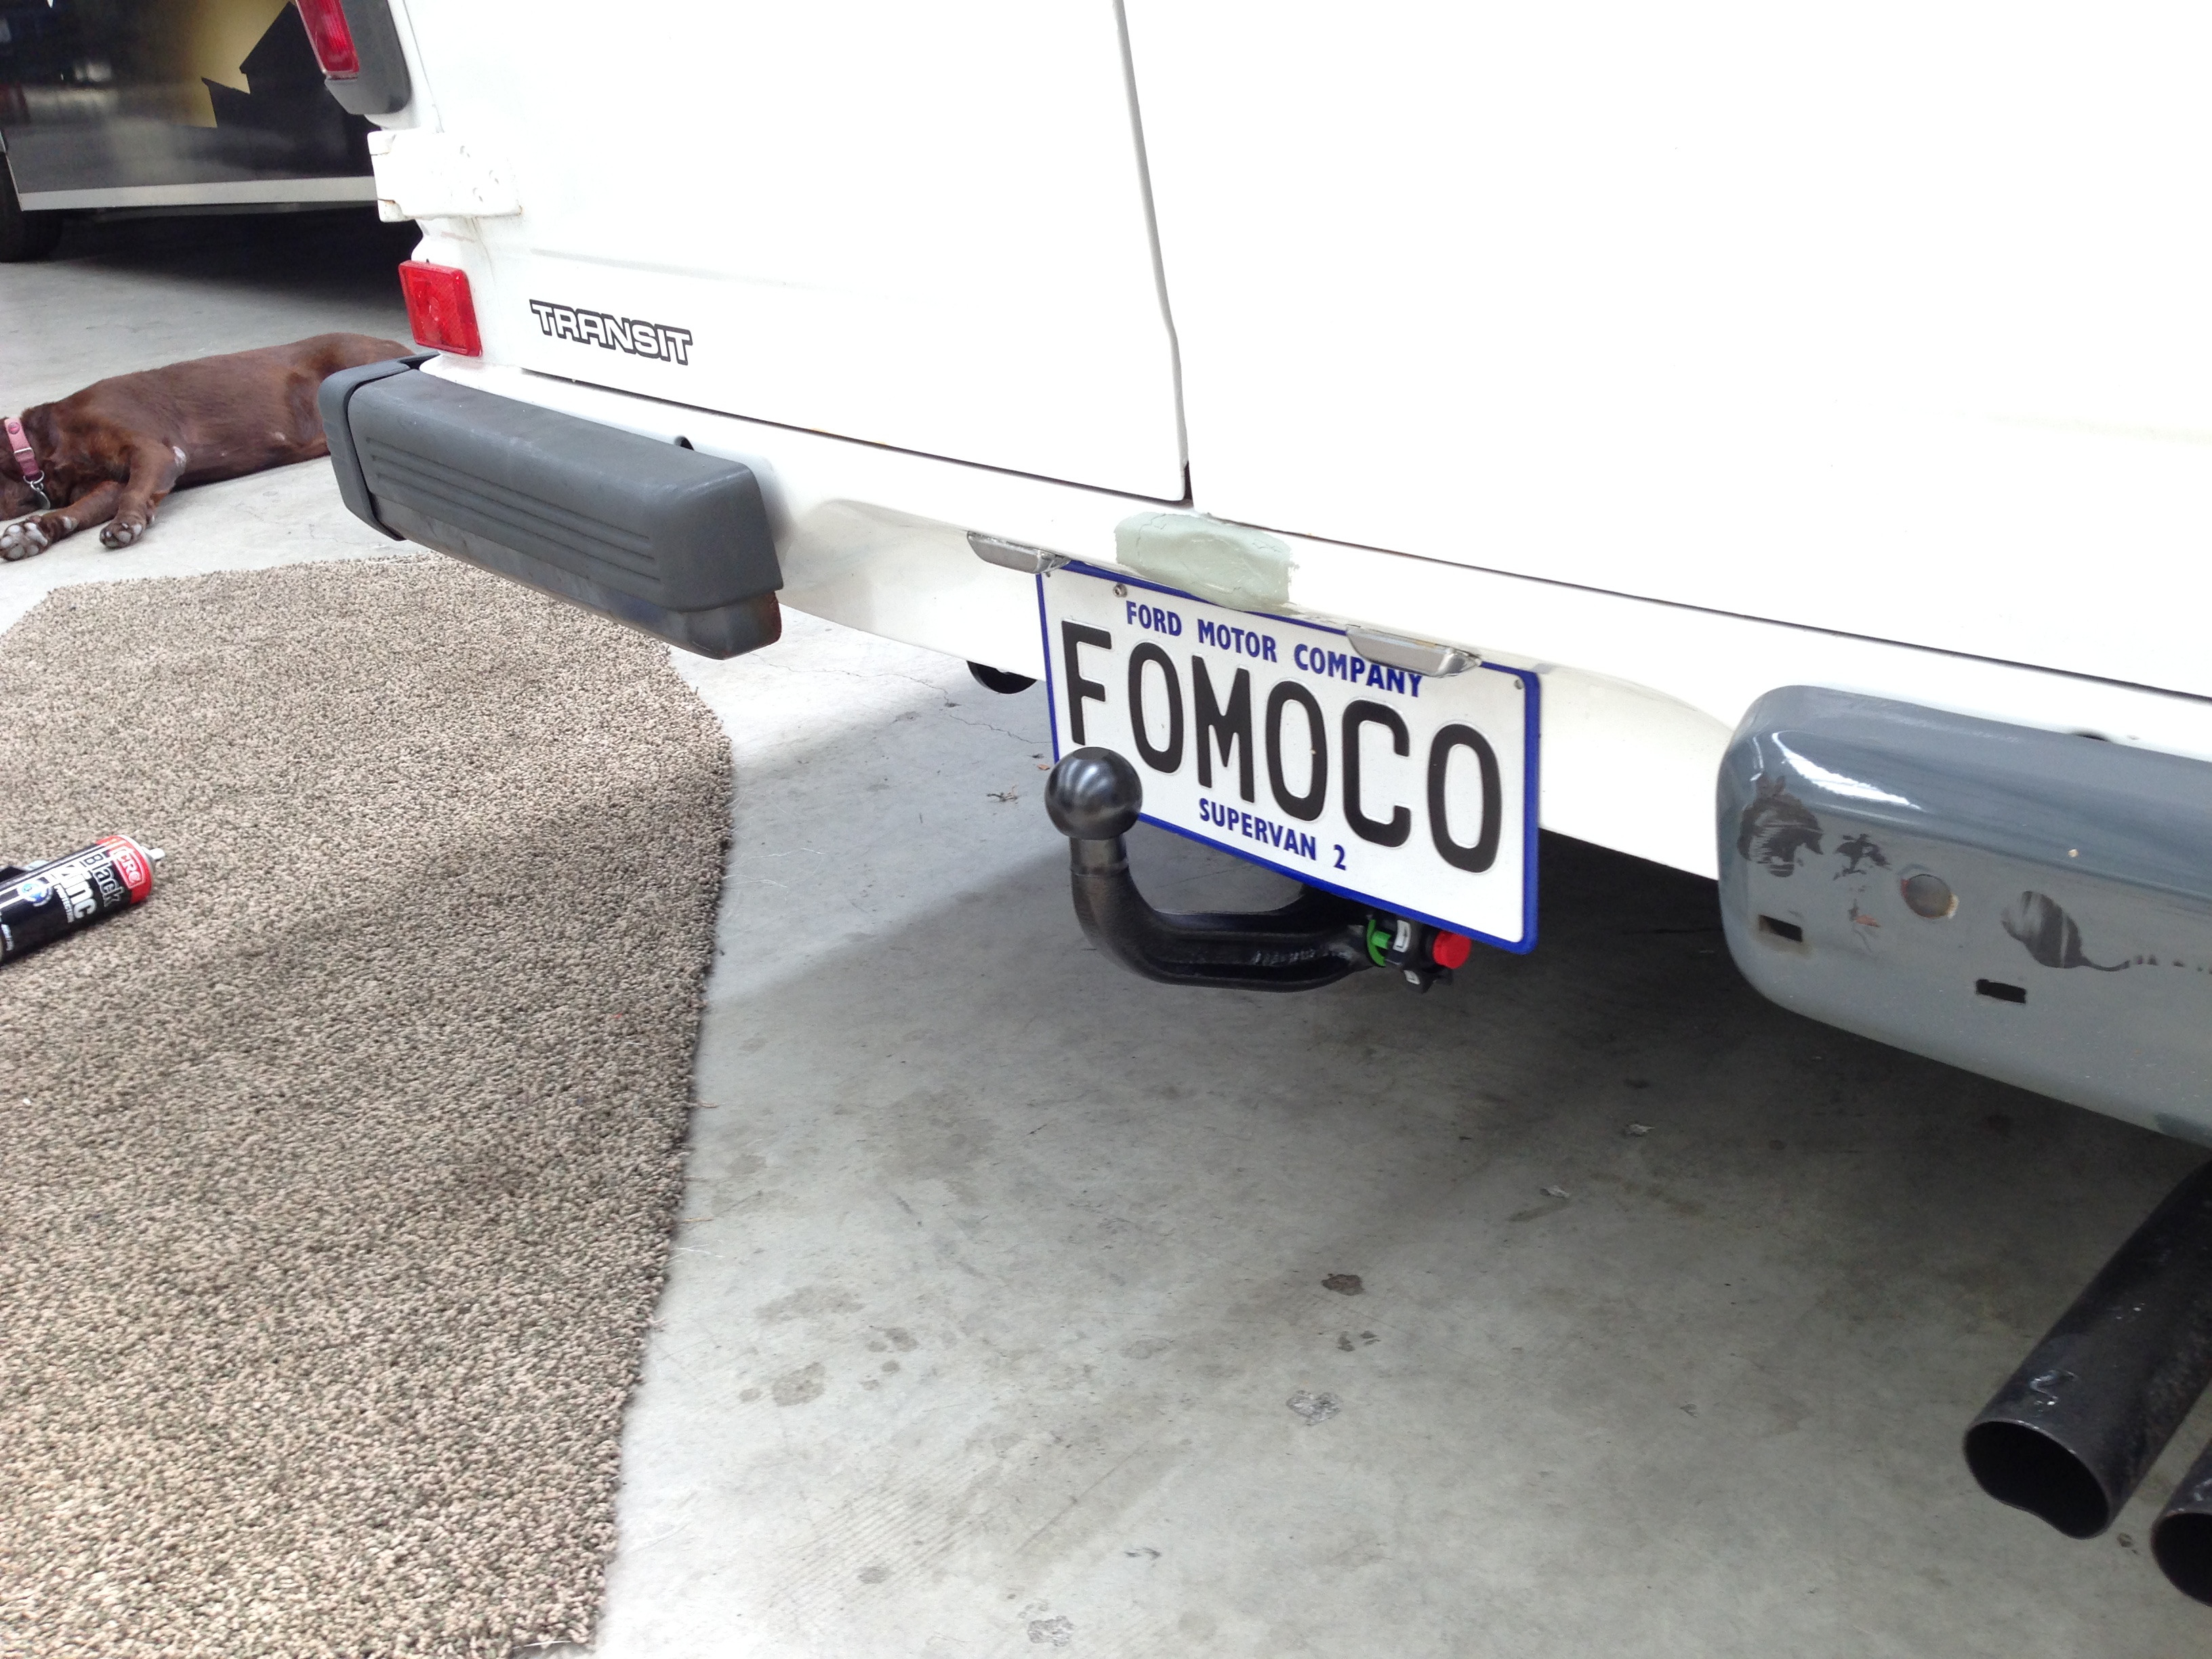
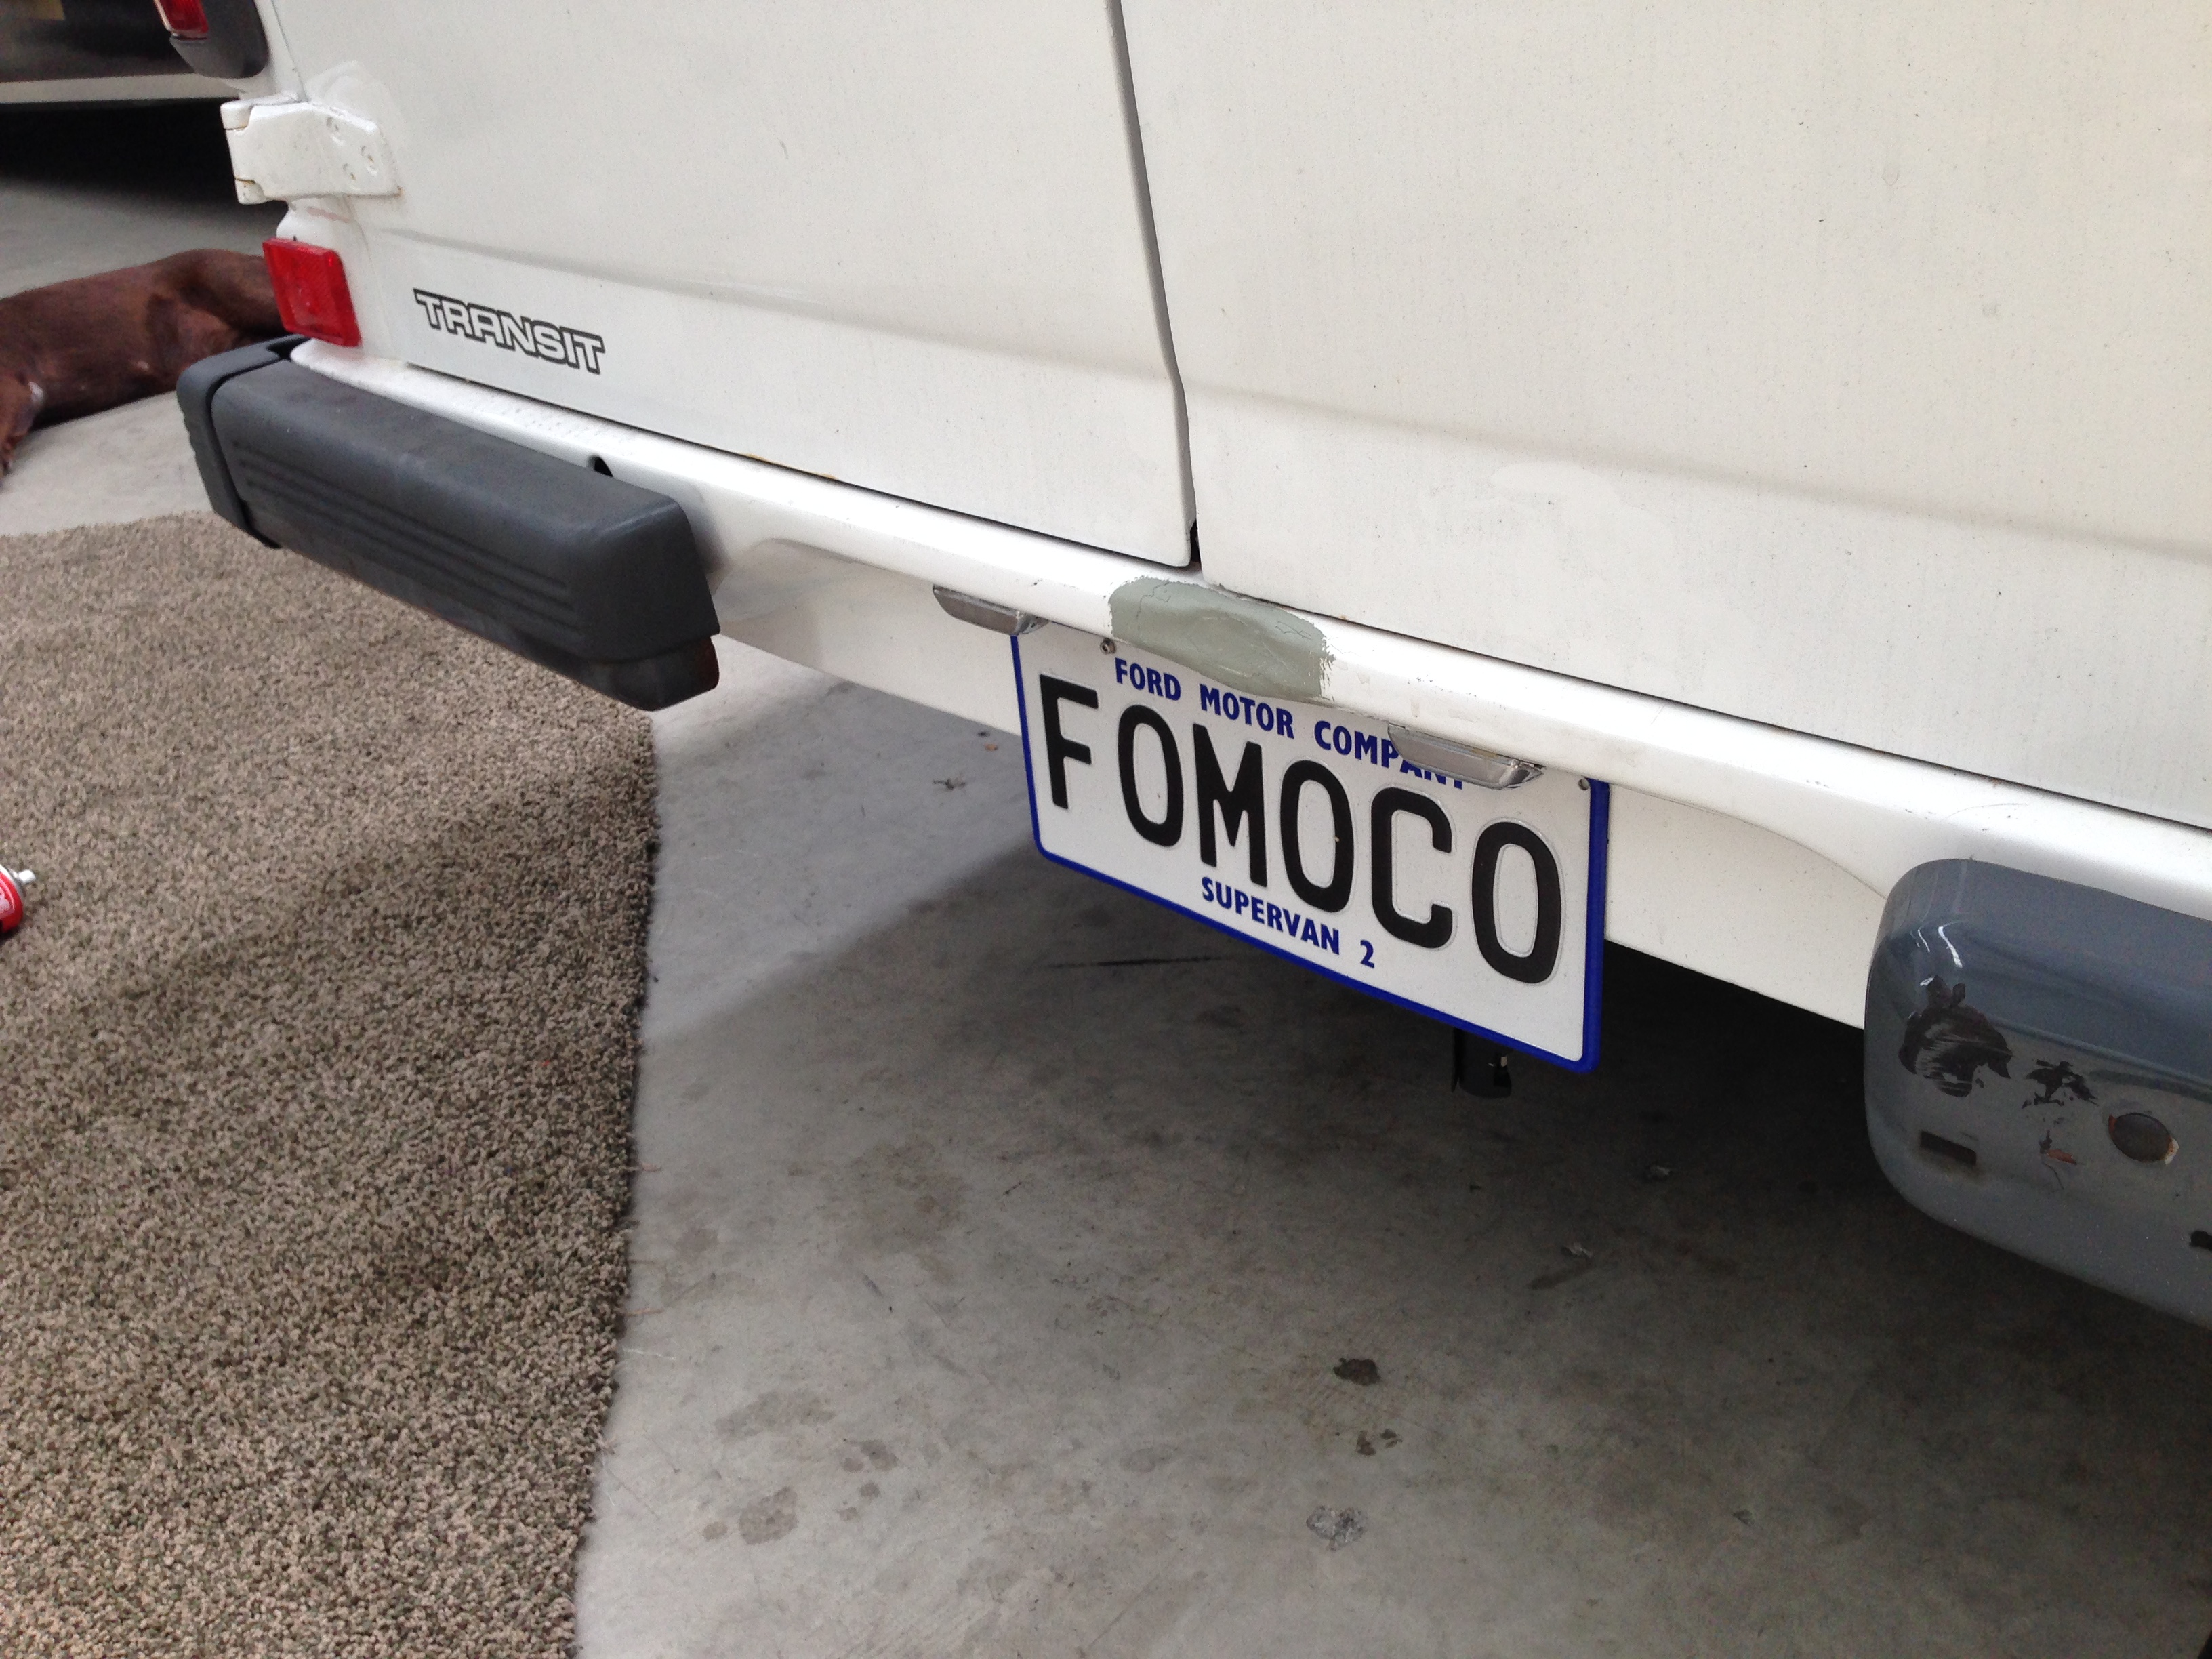
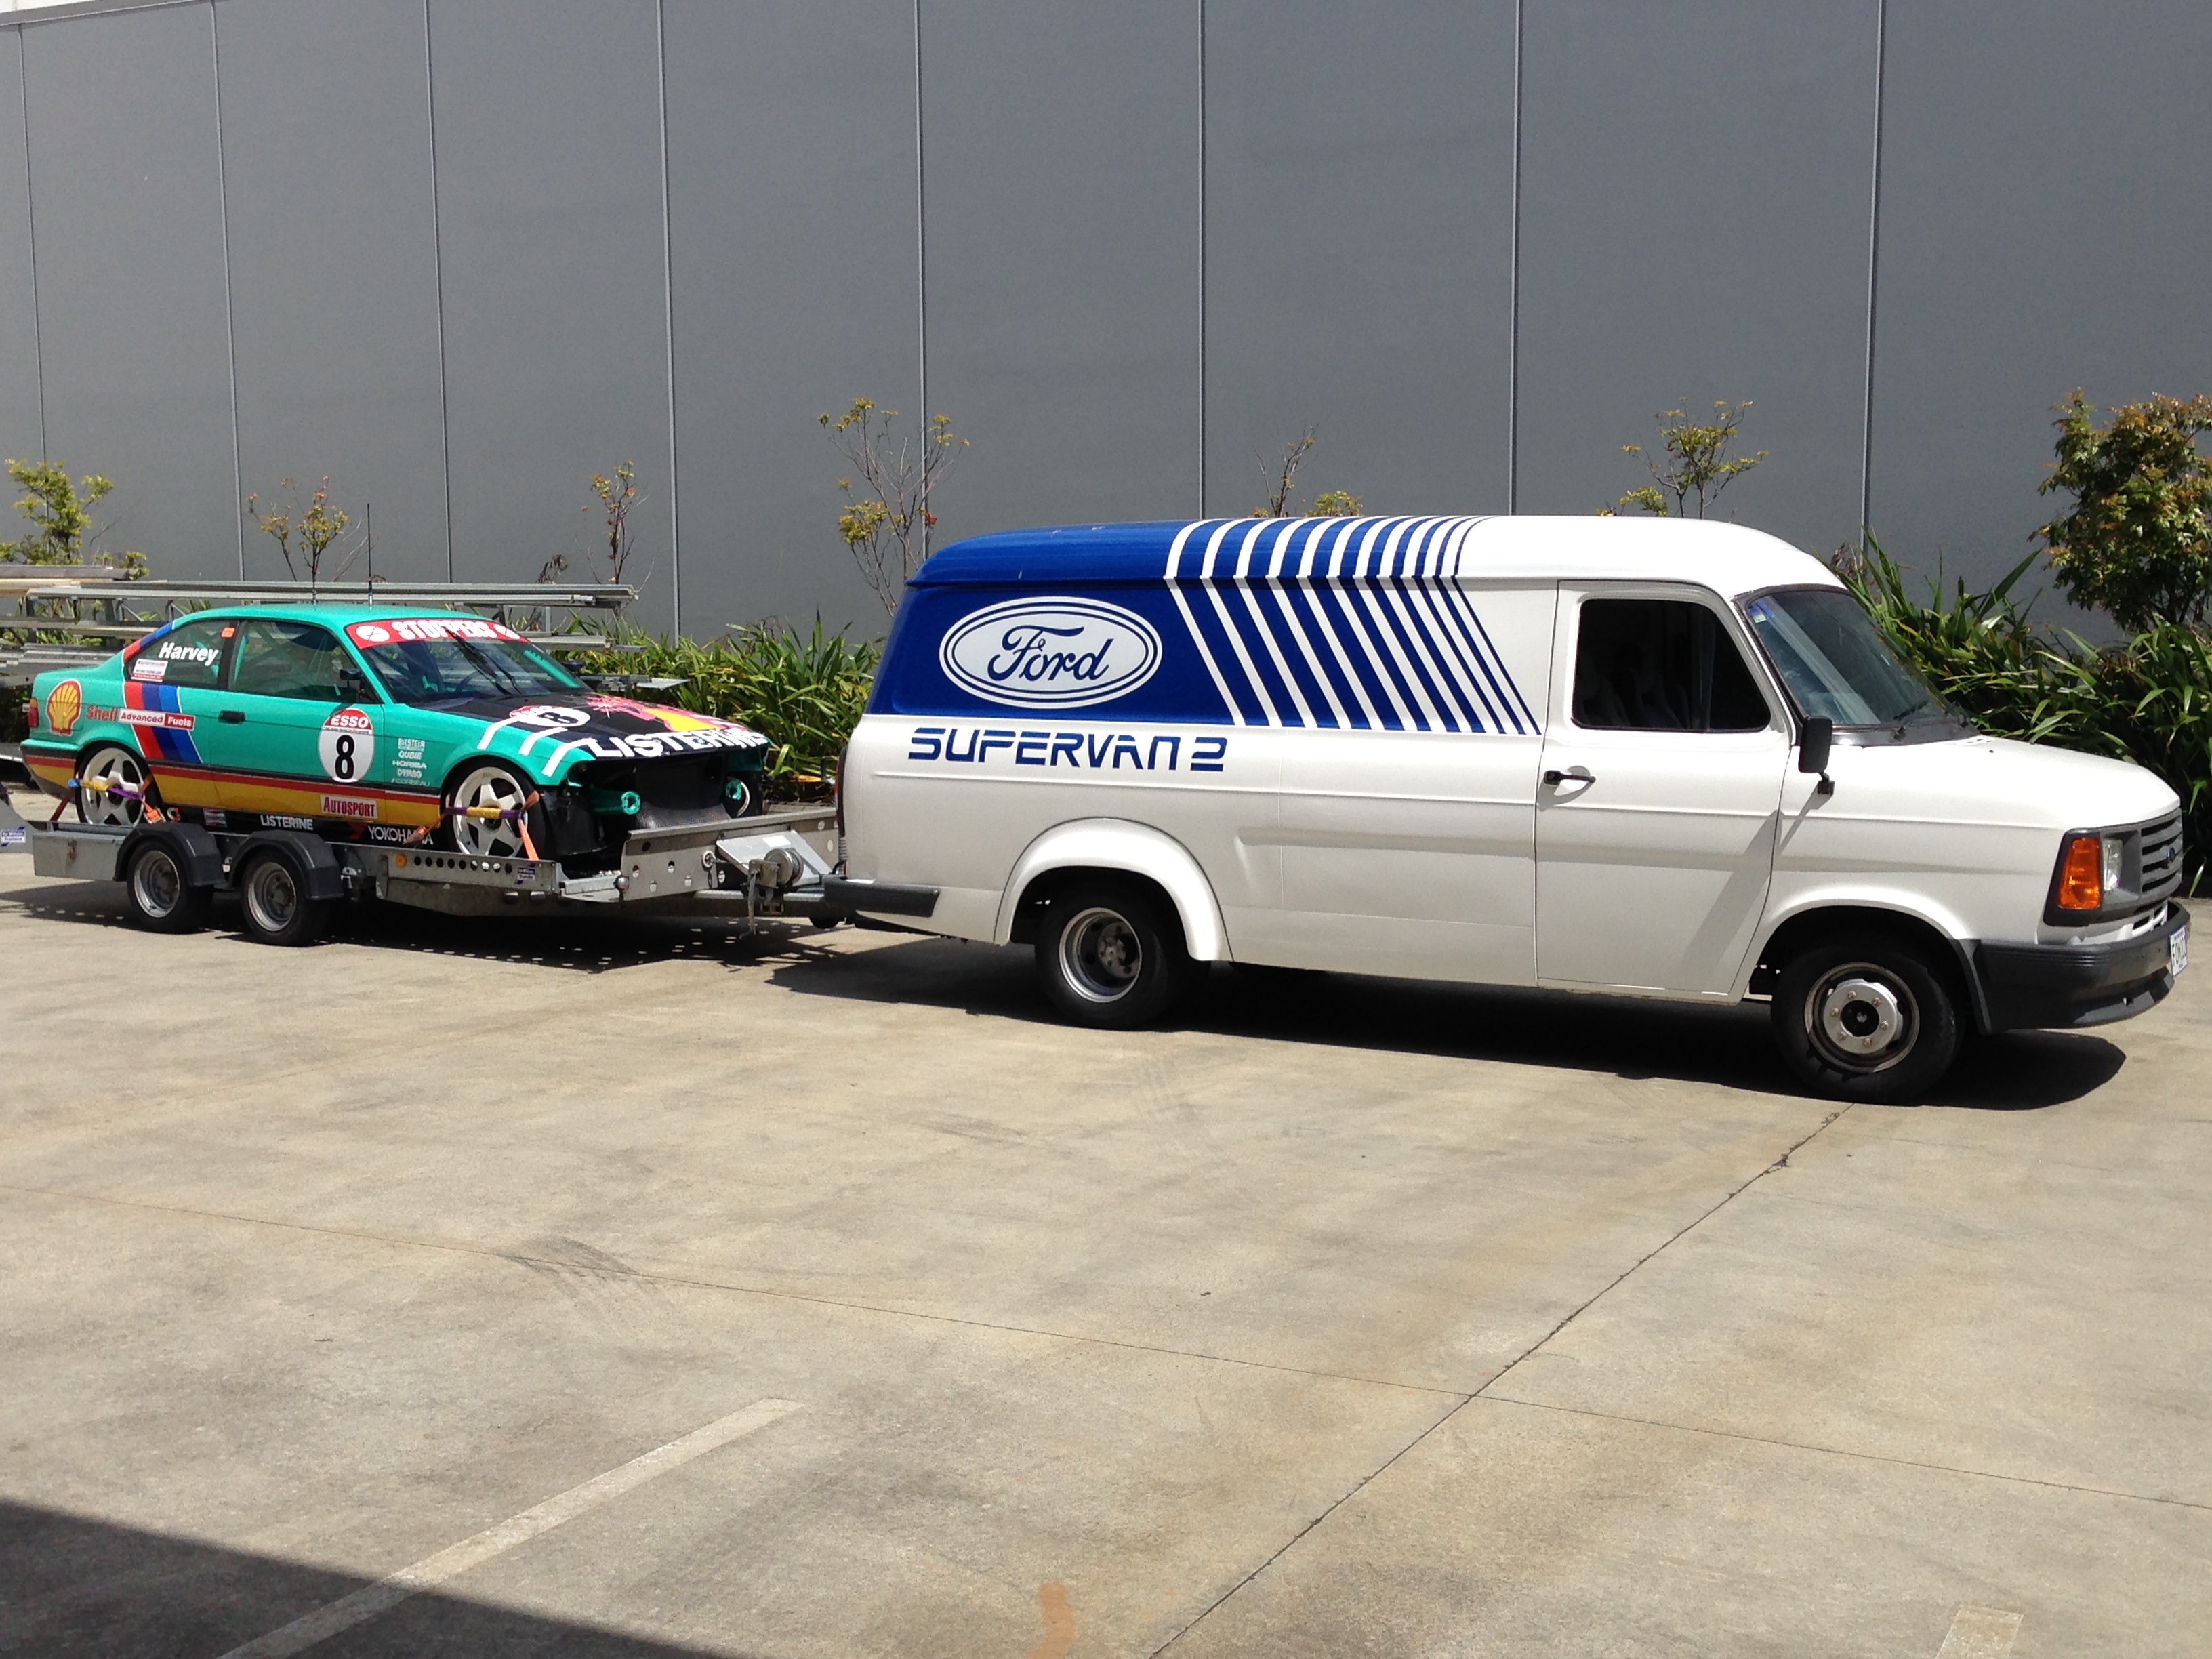
SV2 was bought with the intention of becoming my new tow vehicle, to replace my LDV 400 "police van". I went and got a quote for a towbar to be made for it, and was a bit shocked at the price of $1000 so I thought, "bugger that, I will make one myself" I really wanted a detachable towbar, so I scoured trademe and found a NOS Westfalia kit for a Subaru, which was rated at 1800kgs. I bought this, and set about chopping it into small pieces. In the end I used only the gooseneck, receiver, and a section of the square crosstube. I drew up some templates on autocad for the side and centre brackets, printed them out and a bit of a test fit, then sent the drawing to the shop to have them cut out of 10mm steel plate on the waterjet. The main side brackets needed a couple of kinks to follow the chassis rail,and then another test fit before welding, and they fitted a treat. Got my fabricator to weld them up for me, my welding is okay, but needed the skill of someone really good for this job, as failure is not an option! A can of black Hammerite and looking better: gooseneck and receiver fitted: And installed, still need to make a mounting bracket for the electrical connector: Now you see it: Now you don't And what better way to test it than find one of the most expensive race cars in the workshop, put it on the trailer and take it for a drive 30 minutes across town! Van towed beautifully, and has plenty of power for the job. All up, I came in a few hundred dollars shy of the price I was quoted to make a crappy fixed towbar, and this included me buying a 50mm gooseneck as well, because the kit came supplied with a 1 7/8" gooseneck. So I am a very happy chappy : )
1 point


.JPG.48b13980a6c90d9b0813be9f3a2cd547.JPG)

This leaderboard is set to Auckland/GMT+12:00