
Leaderboard


Popular Content
Showing content with the highest reputation on 05/11/17 in all areas
-
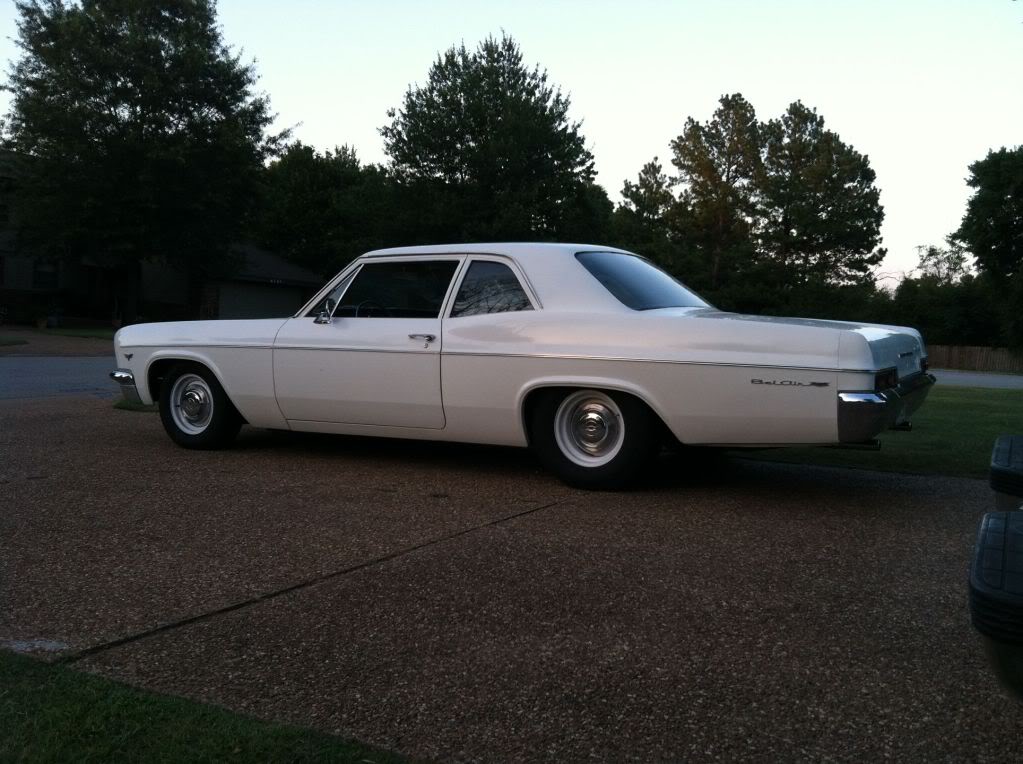
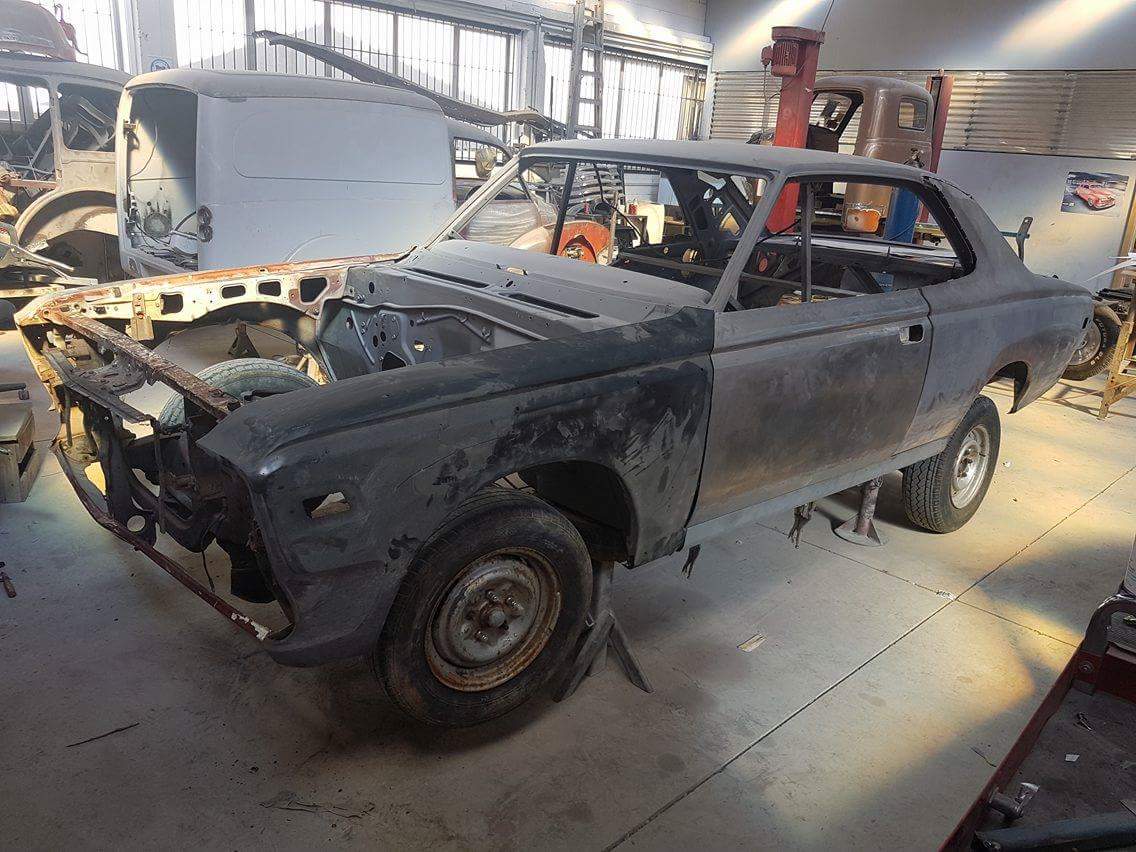
Hey wow so this happened IMG_5652 by Allan Ainsworth, on Flickr And then today this happened IMG_5651 by Allan Ainsworth, on Flickr So yeah........... getting there. not to bad of a list for a car thats been off the road for 2 years. Managed to replace the ball joint with a new one after work today, hopefully have a steering idler coming tomorrow if repcos listings are any near correct. Checked out the fuel leak, looks like the washer where the fitting goes out of the pump is junk, so need to replace that, which sounds easy, but is a cunty Mc cunt getting soaked in gas sort of job. And adjusting the hand brake while I'm under there should be a piece of custard square too hopefully. Wof on monday fingers crossed.10 points
-
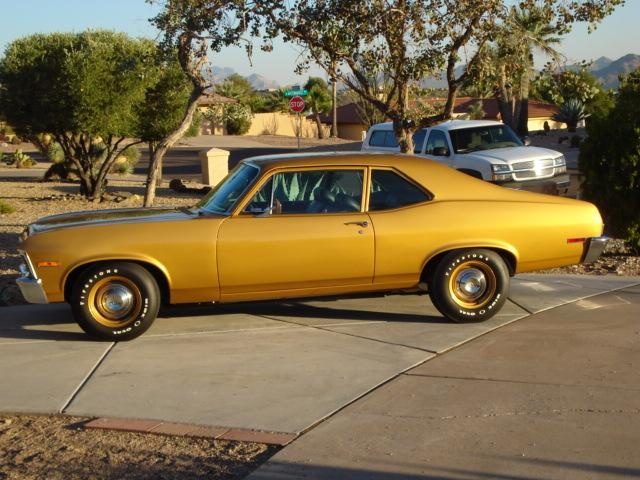
Forgot I had this one ;D In Japan finding Inspration In Japan Finding Parts5 points
-
If we've been booted out of the venue no worries - We can just have the meet on the street in front of his house.4 points
-
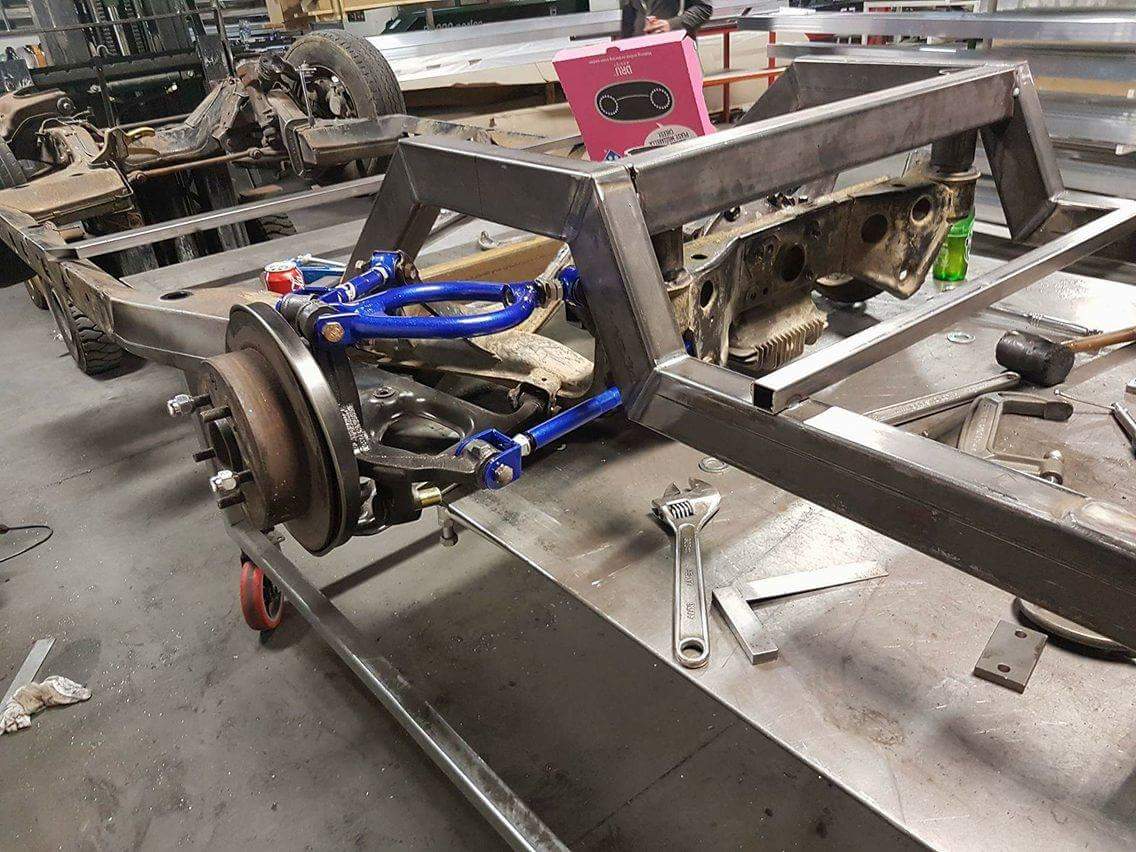
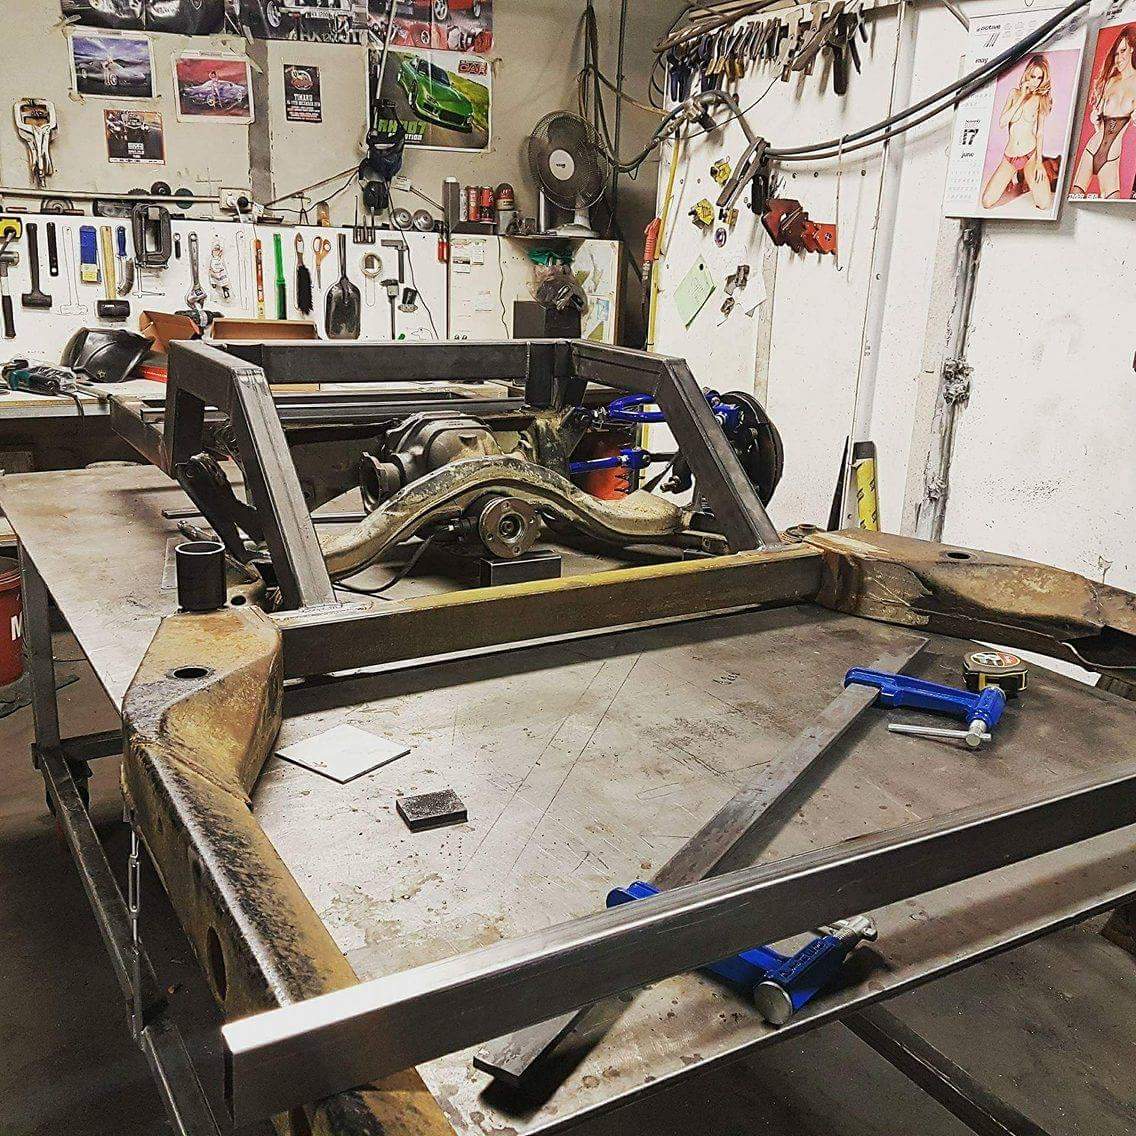
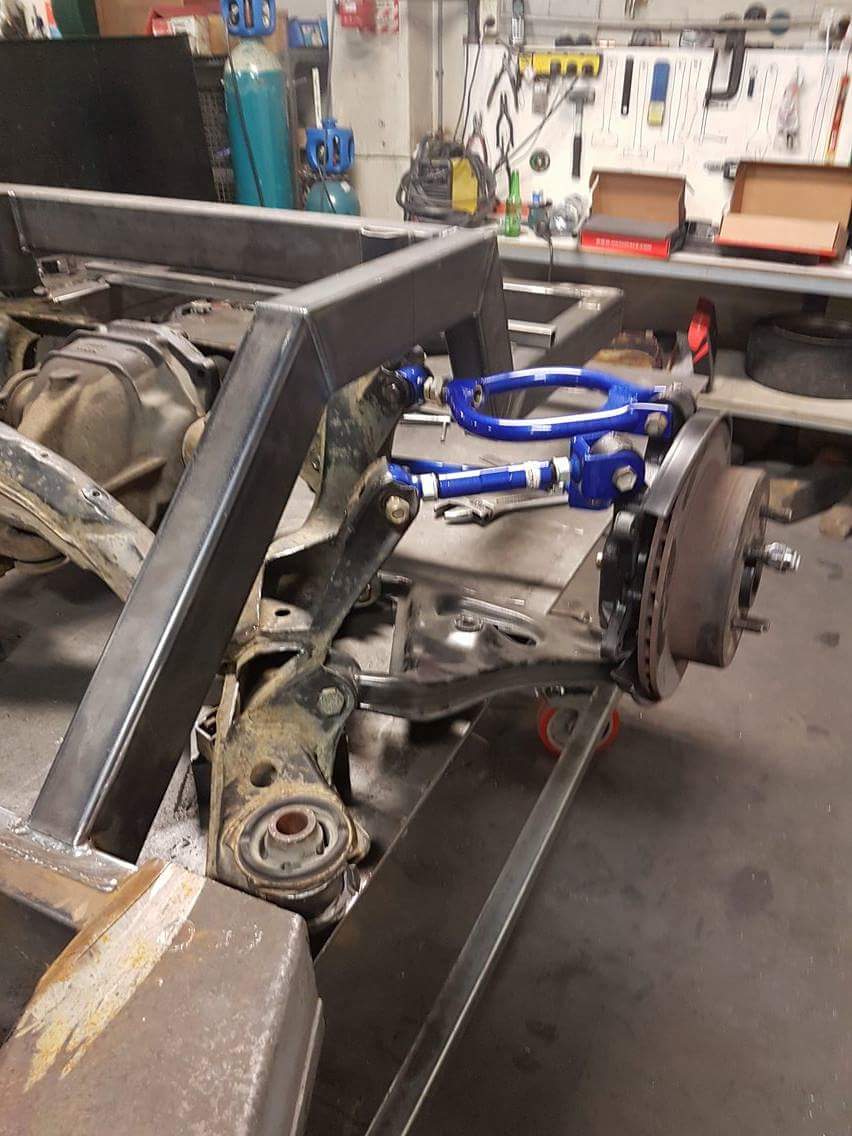
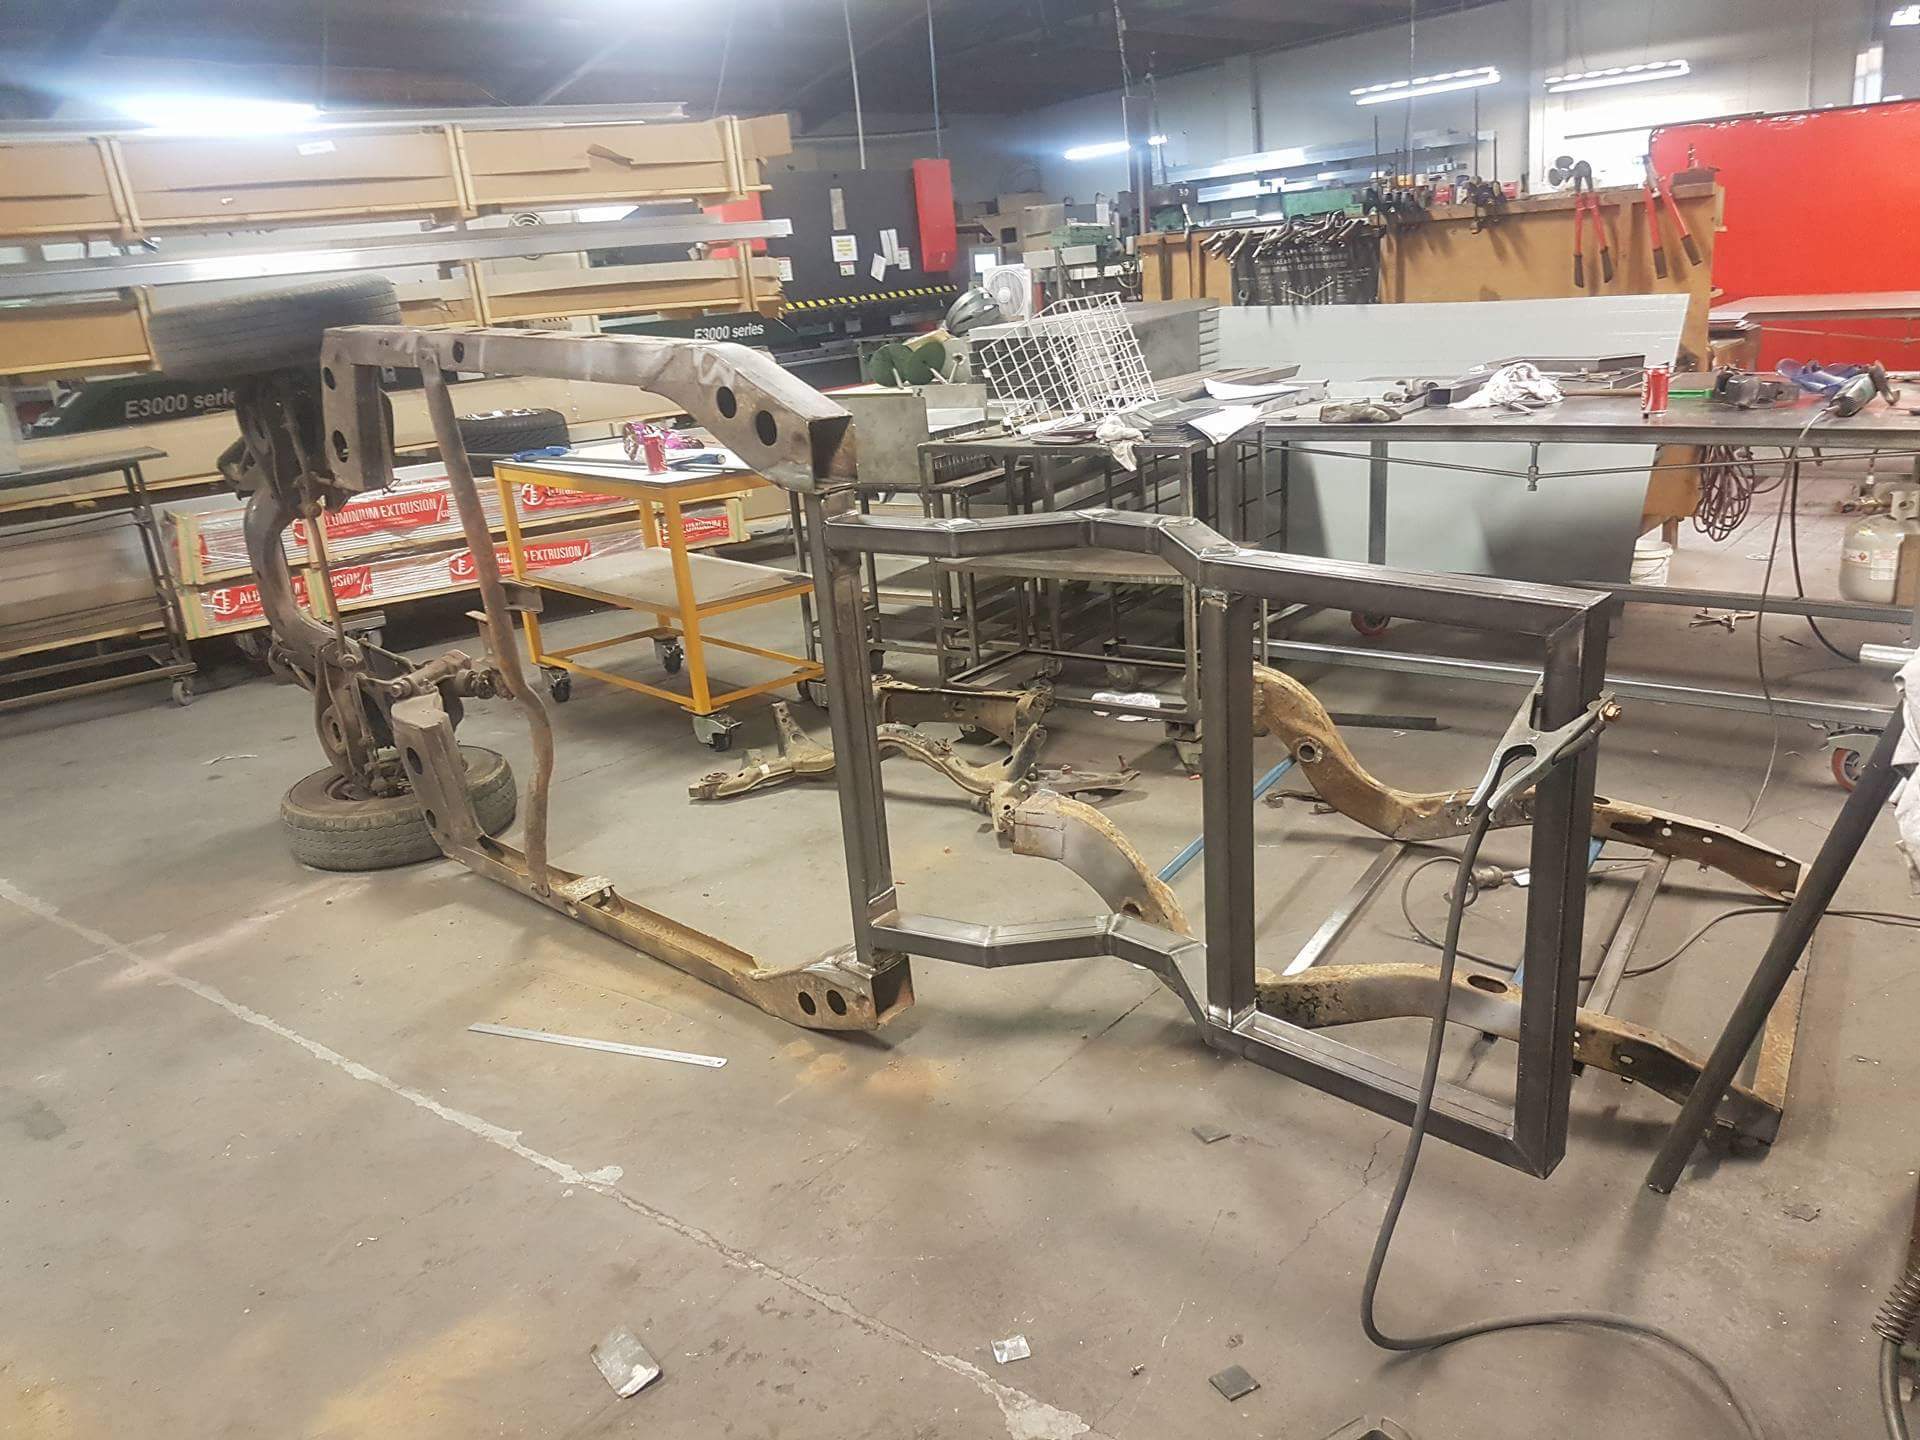
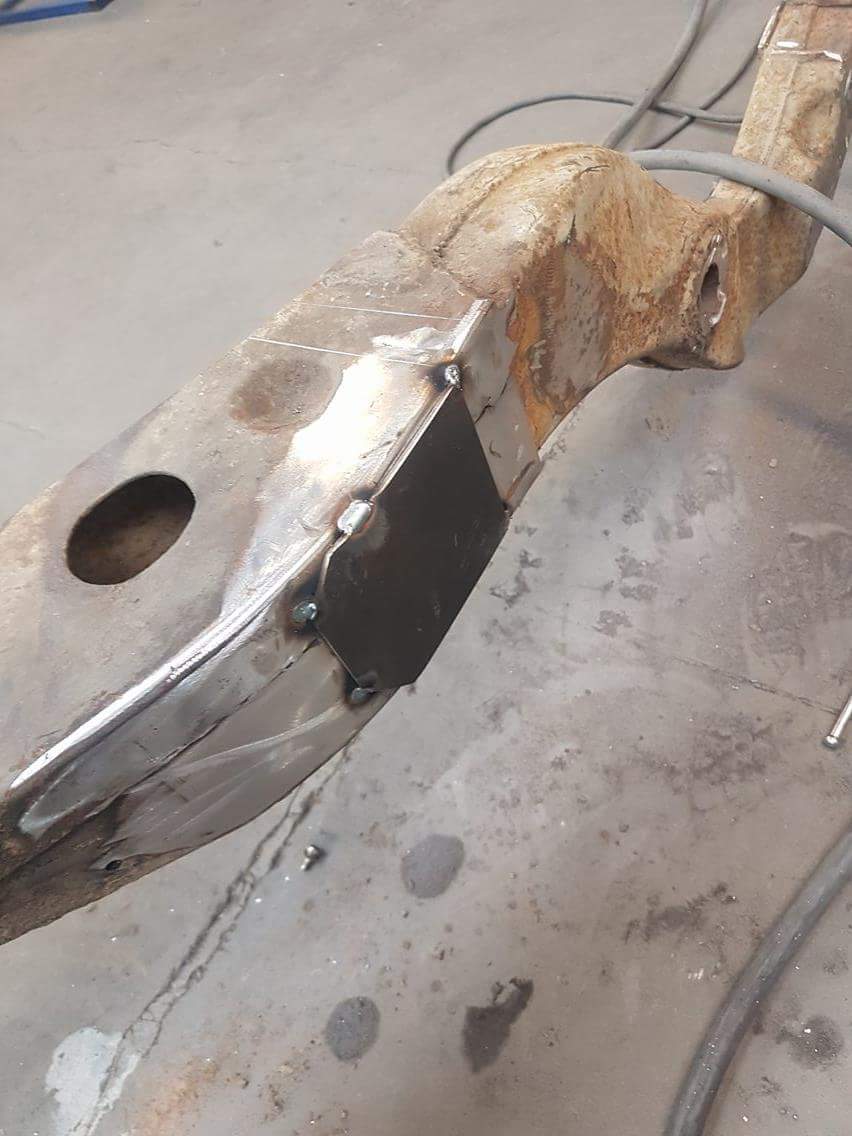
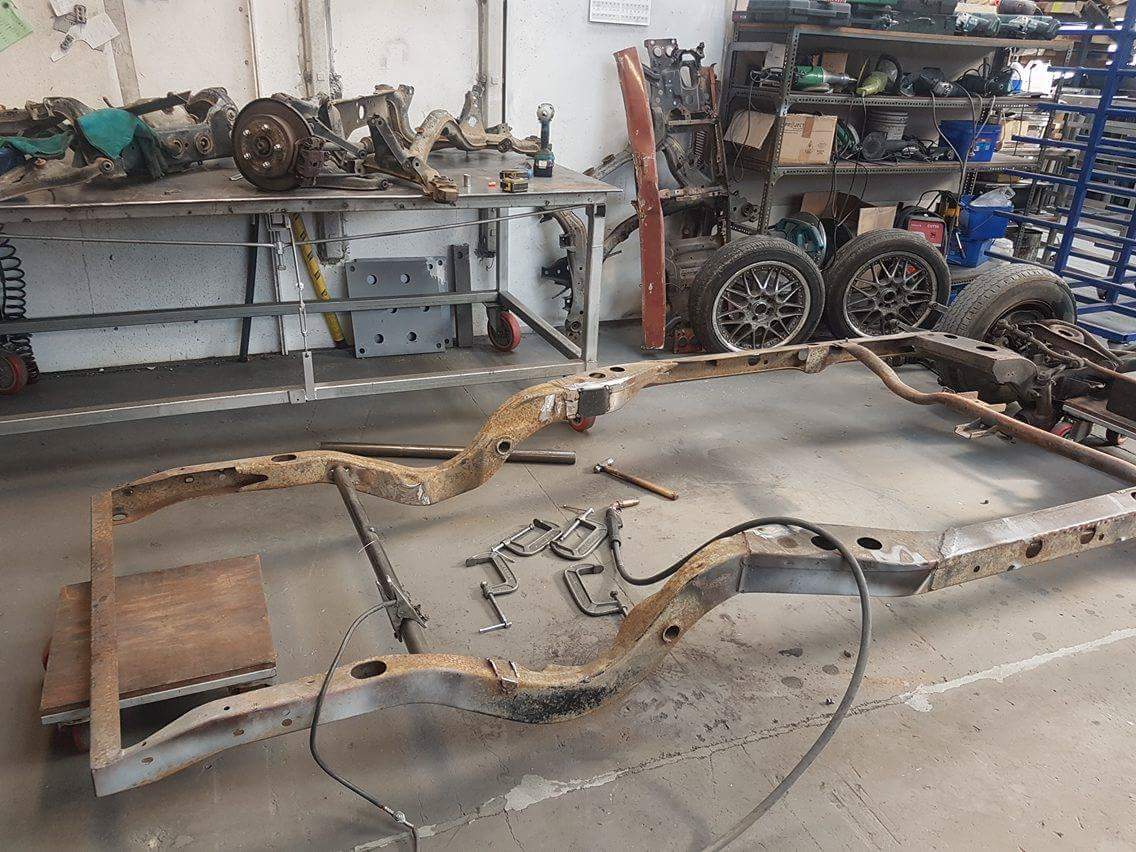
That rear didn't work out so well so off with it we go and on to the mark 2 . Sub frame half mounted and looking mint this time . Using all new adjustable arms just waiting on the lower arms to come . Subframe is . S13/r32 Nissan. R200 diff
 4 points
 -
Travels around the world. Still wearing work boots and shorts. Good cunt!3 points
-
i drive this to work every day and its the only car i have access to at the moment. no issues to report other than an idle issue that needs some tweaking in the program to sort out and it nearly went up in flames. 2017-05-10_06-31-41 by sheepers, on Flickr stock toyota headlight wiring. toyota have a relay for the power feeds to the headlights from factory. BUT they switch the negative for high and low beam so the full current still goes through the switch. i would recommend fitting a relay to switch the negative if you're still running stock toyota wiring. the factory wiring will let you down eventually and it ain't pretty when it happens.3 points
-
Well if I can make it, ill tell him to go fuck himself, I also live in his tranquil neighbourhood and have no issues with the club meets whatsoever. Perhaps he chooses to just ignore the far noisier motorway just feet away from the venue because it wont tolerate his bullshit. That might be inflamatory2 points
-
one step further / LMGTFY https://www.theturboforums.com/threads/vise-grip-tube-bead-roller-tool-for-only-7-83.350500/ GIS link (if it works) https://www.google.co.nz/search?q=diy+bead+roller+poly+grips&tbm=isch&imgil=ZIPwQs4oAfxaFM%3A%3BMWLUizxIwhIasM%3Bhttp%253A%252F%252Fwww.d-series.org%252Fforums%252Fdiy-forum%252F163148-diy-%252525245-charge-pipe-bead-roller.html&source=iu&pf=m&fir=ZIPwQs4oAfxaFM%3A%2CMWLUizxIwhIasM%2C_&usg=__JR2vA5FGQb2i0bybB_mQPWYsf5U%3D&biw=1280&bih=882&ved=0ahUKEwi1hPb7jufTAhXLy7wKHcw0BkUQyjcIMA&ei=xvcTWbWJEsuX8wXM6ZioBA#q=diy+bead+roller+poly+grips&tbm=isch&tbs=rimg:CWSD8ELOKAH8IjjZgbzk-pgusKlIQEeXIVp-MFkpu59Gxhn3GX5mXzo26AX8Kh9t-hQDwJibS4SJyUkpPZ6reNASUCoSCdmBvOT6mC6wEQ0OXxrQRJOqKhIJqUhAR5chWn4RkU1k4jQCGYQqEgkwWSm7n0bGGREacptyjNathyoSCfcZfmZfOjboEc33okCb9HUtKhIJBfwqH236FAMRw7eYmIGllZkqEgnAmJtLhInJSRHdg6WnPZhlBCoSCSk9nqt40BJQEYLe4it-6Gcr or : http://www.offroadexpress.kiwi/Forums/viewtopic.php?t=43349 which is closer to the original thing I think I saw once 10 years ago2 points
-
Little bit more progress this morning. I tried cutting up a old 90 I had so it'd clear the control arm, I ended up using one of the new bends. I take back what I said about liking them now the sta bends are pretty frustrating to work with. I must of had some really old sta bends in stock which werent as bad. After a few million test fits and mucking around I got there The hanger even lines up nicely which is a complete fluke. The pipe is fairly close to the tank so I'll use my leftover wrap to be doubly safe. Its about time for a nap so I'll figure out the muffler etc after lunch and a sleep2 points
-
Hey @azzurro, thanks anyway! Have managed to find something else (just came by here to edit the post). We've ended up hiring a London cab from Metropolitan rentals...a bit of a different direction, but at least will mean the cameraman can fit in a bit easier! This is the singer's first release, coming out later this month, so you definitely won't have heard of her yet! I can post the video here when it comes out2 points
-
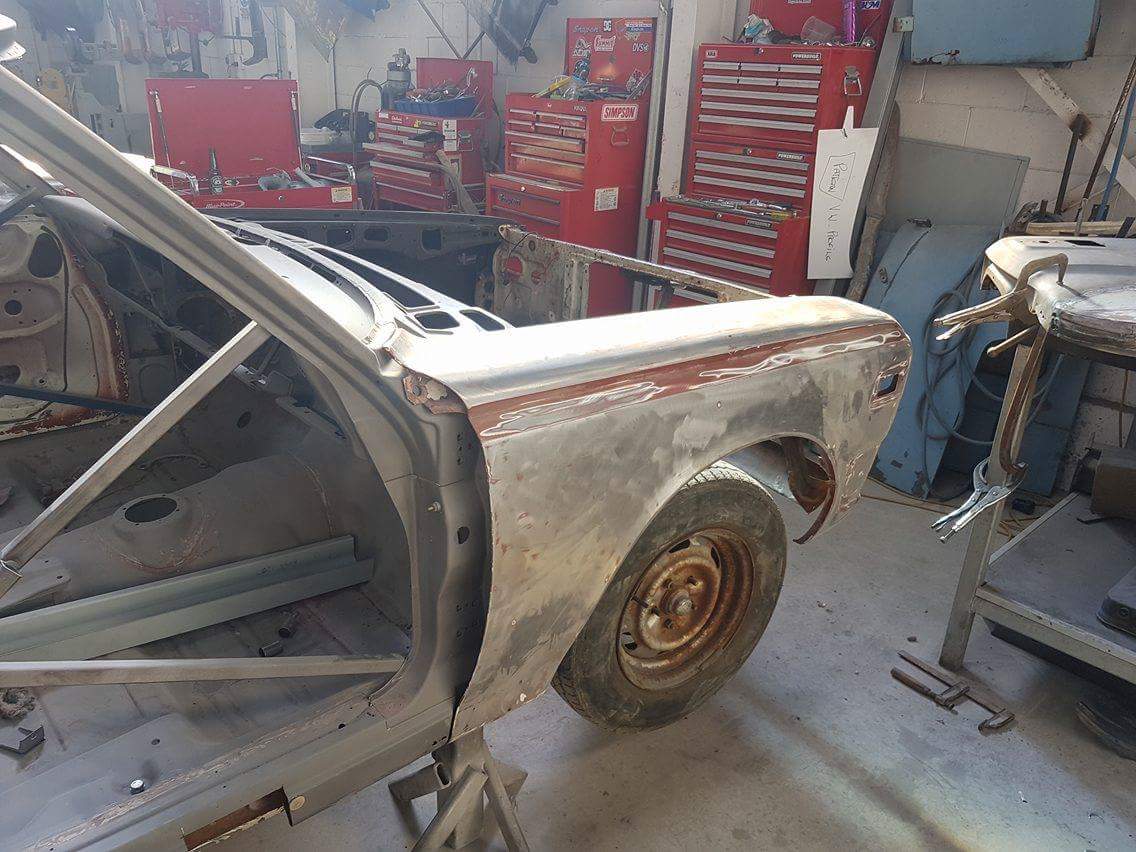
Ah, the culprit to all of the roof woes!! I wondered what the knife marks were around the fuel cap, the roof use to have one of those vinyl covers on top of it. I haven't ever seen one of those come out good after 30 years. they all have a mountain of orange metal under them. I was about to start the front cowl but underneath it was a rusty river so it all has to come off. I drilled these welds out with a drill but have gone and bought a spot drill bit online as I guess it is good to do things properly! I shall resume with the cowl removal on Friday. As you can see, good I removed these. rusty as, and would hate to think how much is under other panels like this. I finished off some more of the body, overall quite happy with the rear end, a couple of dents but all very easy fixes and over it's very straight so that's a bonus. Duscussion: //oldschool.co.nz/index.php?/topic/56136-pbaines-1977-toyota-corolla-ke30/2 points
-
Anyone got a dealer plate and I'll bring a tang. No drill ports though unfortunately.2 points
-
Aiming for something similar to these except not sure about hubcaps, probably get some push in caps spun up
2 points
-
2 points
-
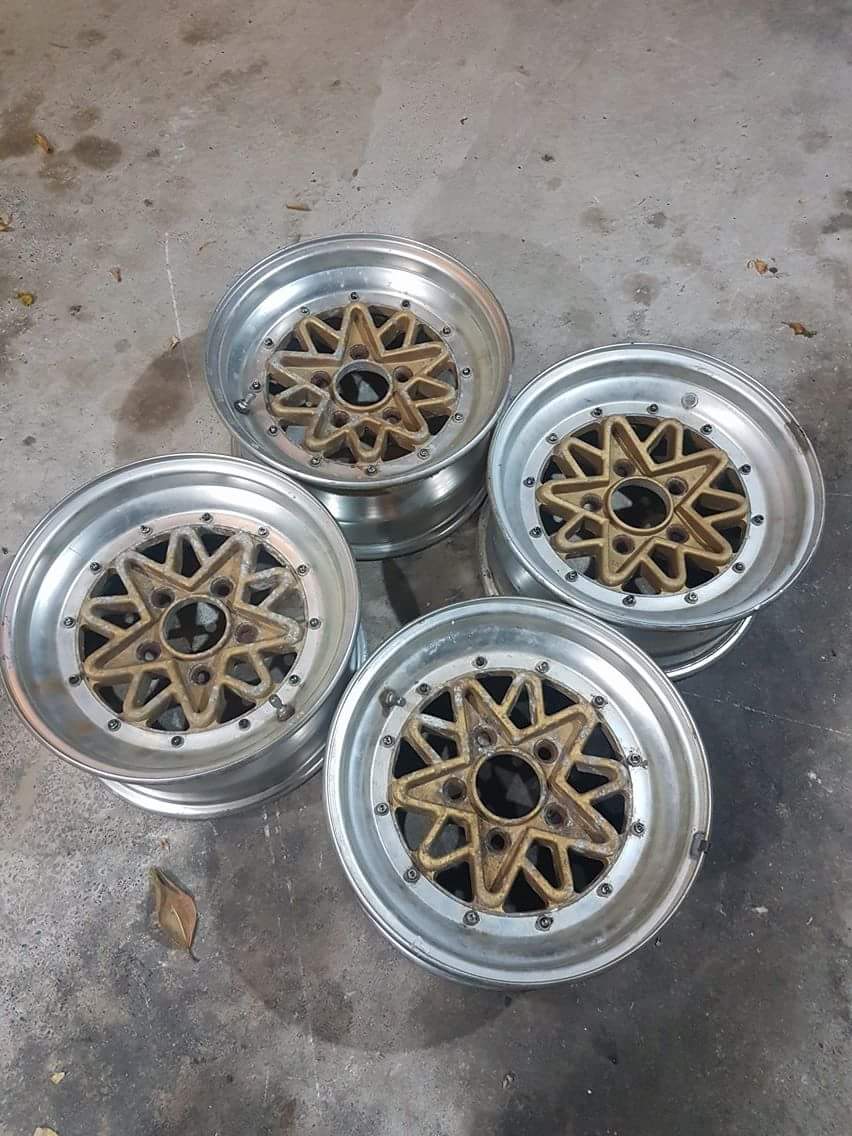
wheels from Japan ssr super stars 14x6.5
2 points
-
asking for a mate/s sister pic provided even!1 point
-
OK that's awesome!1 point
-
Cheers all of you guys, Joker, I'm going to Google that DIY bead roller when I get home, I've got some spare old vice grips looking for a use...1 point
-
Lift kit finally on its why from oz. 2inch anti inversion shackles. Now to find some adjustable shocks.1 point
-
Would a plumber's croxing tool work the same? It should if you could find a big enough size.1 point
-
Ohh shit yeah, primo!. Cheers. A rusty Gx611 point
-
Ha ha, nah trailered it to Chch for the guy who built the engine to check it over and tune it. It is all run in now so will finally be able to open it up and see what it will do. Have taken the family so driving it wasn't really going to fly.1 point
-
The local Burgerfuel team are really getting behind this! See you next Thursday.
1 point
-
I dealt with Sam at Mag and Turbs, he was real good. He is the manager. They took really good care and used stick on weights as requested with a great balance (not like some other monkeys that stick over 100g of stick on weights on wheels.)1 point
-
Well well, another 1G fan. What car is it in? Look through this lot. I'm using it to help with the 1GGE in my GS126V. https://bluetwentyeight.wordpress.com/tech-docs/1 point
-
it's surprising how much work can be done when no one is around and there aren't any distractions!1 point
-
old people sleep less1 point
-
Hi Sherry, glad you made it to the forum! Surely one of you guys must be keen for a $150 bonus this weekend? There's quite a few cars in Auckland that fit the bill!1 point
-
i leave for work at about 5.30- 5.40 so they aint gonna bother me weekdays. and tbh im usually awake by 7.30 on the weekends anyway so i think we'll be right. the wife leave early too so no drama there. its taken so long to get to the actual construction phase of this that i would love to be woken by builders turning up on site on a saturday or sunday. it would be music to my ears.1 point
-
Come on bro.. it's not the movies.1 point
-
well then. when i got home from work some vandals had tied string all over the place. i tried to shoo them away but they just laughed and said they would be back tomorrow!! and not only that! they said that on Thursday they were going to dig holes and then fill them up with concrete!! 2017-05-09_05-08-25 by sheepers, on Flickr 2017-05-09_05-08-39 by sheepers, on Flickr1 point
-
Before After This has been a long drawn out job, only in my spare time. Will be loosing this workshop soon so needed to get the paint on it before winter. Bought a Iwata gun for the final coat, instead of the $150 gun i used for the primer. Just didnt want the risk of it going on bad, glad i did, but prob could have done ok with the cheap gun too. Now it turns into a assembly job, which is going to be prob as much work as the panel and paint, in that its never really been assembled before, so its going to be like a jigsaw puzzle, without the box, and grey side up!1 point
-
Right, so with my Crown sedan waiting on its cert plate to turn up, I figured best not let the momentum die off now. So tripped over the 5m out of this at work today and thought fuck it, lets get that apart so I can get this wagon actually driving good instead of the under powered over fueling turd it is now. So this happened. So far I am pretty certain the issue is what I have always suspected, the bearings for the auxiliary shaft. Had a look at them and feel terrible. But can also move tge shaft latterly in the bearings. So most likely worn and letting the oil escape. These are feed after the crank, so probably a good thing. But will have a proper measure tomorrow to confirm. Then its a matter of tracking down new ones. Research suggests they are the same as a 7mge etc.
1 point
-
By some weird-arse miracle I started patching in the last part of the pillar I've been working on, and it was going supr sweet. My patch panel was sitting bang on, and my welds were sweet, and only half the sparks went in my hair and burnt my head. It was the best day ever. Pre bog pics shown here. So I gloated about it on spam here about how good my day was going. I was stoked; such a sweet, smooth process. Then I decided to take off some trim on the A Pillar to prime and respray it as part of the general overhaul. And of course, as soon as i pulled off the trim I found a big rusty fucking hole... Beware the jinx of Gloat1 point
-
PLEASE READ THE FOLLOWING At last months' meet, we had a disgruntled resident turn up and cause a fuss. Accusing us of being unnecessarily loud and a blight on his tranquil neighbourhood. He was unreasonable and arrogant. He then complained to several of the businesses in the area and convinced other residents to also complain. We have since been asked by the majority tenant of the premises to refrain from using the upstairs carpark, though we have been unable to contact the property owner to confirm this. Even though the property owner themselves are the only party that can prevent us from using the carpark, this months' meet will go ahead BUT it will be in the downstairs carpark. DO NOT use the upstairs carpark. While we aim to sort out this issue, let's not try to agitate things any further. Also be aware that the same complaining resident may show up again. I will try to be there earlier this month so just direct him to me and I'll stand there and listen to him rant for as long as I need to. Cheers, Neal.1 point
-
Now I need to buy a sheet metal folder to make these parts decent. I only have a vice and a chunk of railway iron to form shapes but this being structural, I need it to be proper.1 point
-
Urgh. Old people. YOU JUST DON'T GET IT!!1 point
-
Almost 2 years little van has been busy done a couple of Gumboot rallies with all of of the greatness of 49hp then the motor gave up 1.3 xflow they go forever sometimes . Motor finally died so put the old sport engine into this to help it get a little more power so fancy rebuild a few extra engine bits and what can it do ???? drive line has a fair bit of work to match loads to update
1 point
-
Note to self: Wheels like this.1 point
-
Not relevant to the topic, but please don't do that stupid F shit. This isn't facebook, commenting F does not notify you when there are replies. Do this if you really want notifications for this topic, don't spam up the thread.
1 point
-
So, as above I got some rattlecans made, and they were average, but I didn't realise how average, (and by average, I mean utterly shit) until I grabbed some balls, and blew a coat of paint over the guard using a paint gun, something I've only used for hi-fill primer so far. Farrrrk, I felt like a pro. Suddenly I realised how much better it could be, so I sanded it back, and sprayed it again, and sanded, and clear coated, and sanded, and sanded and clear coated, and cut it back, and realised it needed to be better, so sanded and clearcoated a few more times. It's still average, and would benefit from a proper cut and polish by someone who knows what they're doing, and I can see all the shit bogging I did, but for a shitty old coon ute, it'll definitely do. First blast from the gun: About 4 rounds of clear and wetsanding later A rough idea of how bad the fade is on the door vs the bonnet which was resprayed a couple of years back and looks quite good. I can see where the bog spots are sunken and shit. #fuckconcours to celebrate all this I fired the old thing up, chucked a beer crate in as a seat and drove it half out of the shed for the first time in over a year and washed off the dust and suddenly it seemed like progress was being made. Before with dust: After with no dust: Also good to check all the drains under the guards are working. Also before the excitement of paint, and in between coats, I finished a ratshit weldjob on the B pillar and bogged it and sanded, and bogged, and sanded that into a passable state. Still needs another bit welded in when I have some money for a gas bottle. All in all, possibly the best holiday I've had in years. And the next one will probably involve a crack at painting the rest of it.1 point
-
1 point
-
Had a bit of spare time on my hands so I decided it was time for a little work on the mighty Golf. First port of call was removing the carb and giving it a damn good clean because the car has been running like shit for the past couple months. I cut out a new gasket for the 2 halves of the carb but was lazy with everything else and used grey RTV. Next was breaking out the Bosch one way lowering kit. having a extra set of springs from the parts car comes in handy about now. After a bit of measuring I thought lopping a coil out of each spring was a good start. I could probably take another coil out of the rear springs but the fronts will no longer be captive if I make them any smaller. I should just stop being cheep and get a set of coilovers if I want to go lower. It hasn't made a huge amount of difference but the rear end has come down getting rid of the "Stink Bug" stance.1 point
-
1 point
-
looks sweet, but seriously, earth wire and a fuse on the primary bro.1 point
-
Il sign that pic of me if you want Horsey.1 point
-
Another busy day. Got a new rain drip rail for the left rear window, very happy with how it turned out. Was going to cost 180 to get one made by APC in Aussie and get it shipped over. This one was folded by me at a mates metal shop, then trimmed and bent to shape. I've finished the rust repairs on both doors and hung them and got them as square as i can given the play in the hinges (any sources in NZ for new ones?) Fitted guards and started to move them around to get them lined up, and then fitted the front valance and started to square it up and make it look pretty. //oldschool.co.nz/index.php?/topic/43814-darryls-3rd-1200-coupe-discuss/1 point
-
I'm not sure how the pros do it but here's how i made bumps in steel if you're interested. step 1 - own three cars that all need floor repairs. step 2 - read the internet needed a floor panel for the wagon. measure up, choose swage positions and mark out. testing. using a 1200mm foot guillotine and 1200mm finger folder, both in ok condition. i made two folds in the steel both the same way, then bent the sheet back to 'straight'. it bent between the two folds, giving me the bump. close enough is good enough do em all the same as above in the folder use the folder to clamp the swages at the outer edges flat. sheet warped like a pringle. not sure if you're allowed to do this with a folder. the warp is because the outer border of the panel is larger than the inner area, as i've shrunk the inner area by using up material to make the swages. the outer needs to be shrunk to compensate. shrinking - heat it up, cool it quickly with water/wet rag. hammer flat, trim down to size. soft hammer on anvil - didnt want to thin the steel any, which would do the opposite of shrinking. did both sides. shrink again, hammer flat again. encouraging the swages to be more how i like. hammers, bits of scrap, as you see. anvil, saw horses etc. quick squirt of flat black and a check to see if it's working: trim again, finish up and couple of mild folds down the edges to encourage the edges into straight. in place - still a bit of a warp, but metal hot glue will hold it right. well it's no chip foose but good enough to fill a hole in a 50 yr old floor. thought i'd write it up cos it was surprisingly easy and yall may need to do similar next wof! last time i was cutting and welding the ends of the swages and they were all over the show. turns out patience, fire and hammers were the key. Talk about it here1 point
-
So, after extensive shitting round with the thermostat and associated gaskets over the past few weeks she has been running like a dream. A slightly warmer than kosher dream, because the thermostat is not the right temp range, but a dream, of sorts, with a twist. So the twist today was hootling along to pick up the kids from school and suddenly finding a fog bank emerging from the bonnet. Automatic shit-yourself response is self-loathing for not changing the thermostat; so pulled over and opened the bonnet to see the expected damage to find all the fog blowing from around the LPG unit. Further shitting of daks in fear of LPG explosion before realisation that it is not LPG but steam from a hole in the m-fing heater hose. Drive back to nearby garage, and two geezers replace the hose in ten minutes for f-all dollars. Hooyah! Took them some beers too because Friday is Friday and I can drive another day. In other news two newer guards are in the tray thanks to the OS GC Freight Department. Awesome, thanks guys.1 point


(Custom).thumb.jpg.50cbfadc2369f551fe14d9ec26aac0d5.jpg)


.thumb.png.b2aee08688778d18bdc7b3e3c1852d9c.png)


This leaderboard is set to Auckland/GMT+12:00