
Leaderboard


Popular Content
Showing content with the highest reputation on 19/03/17 in all areas
-
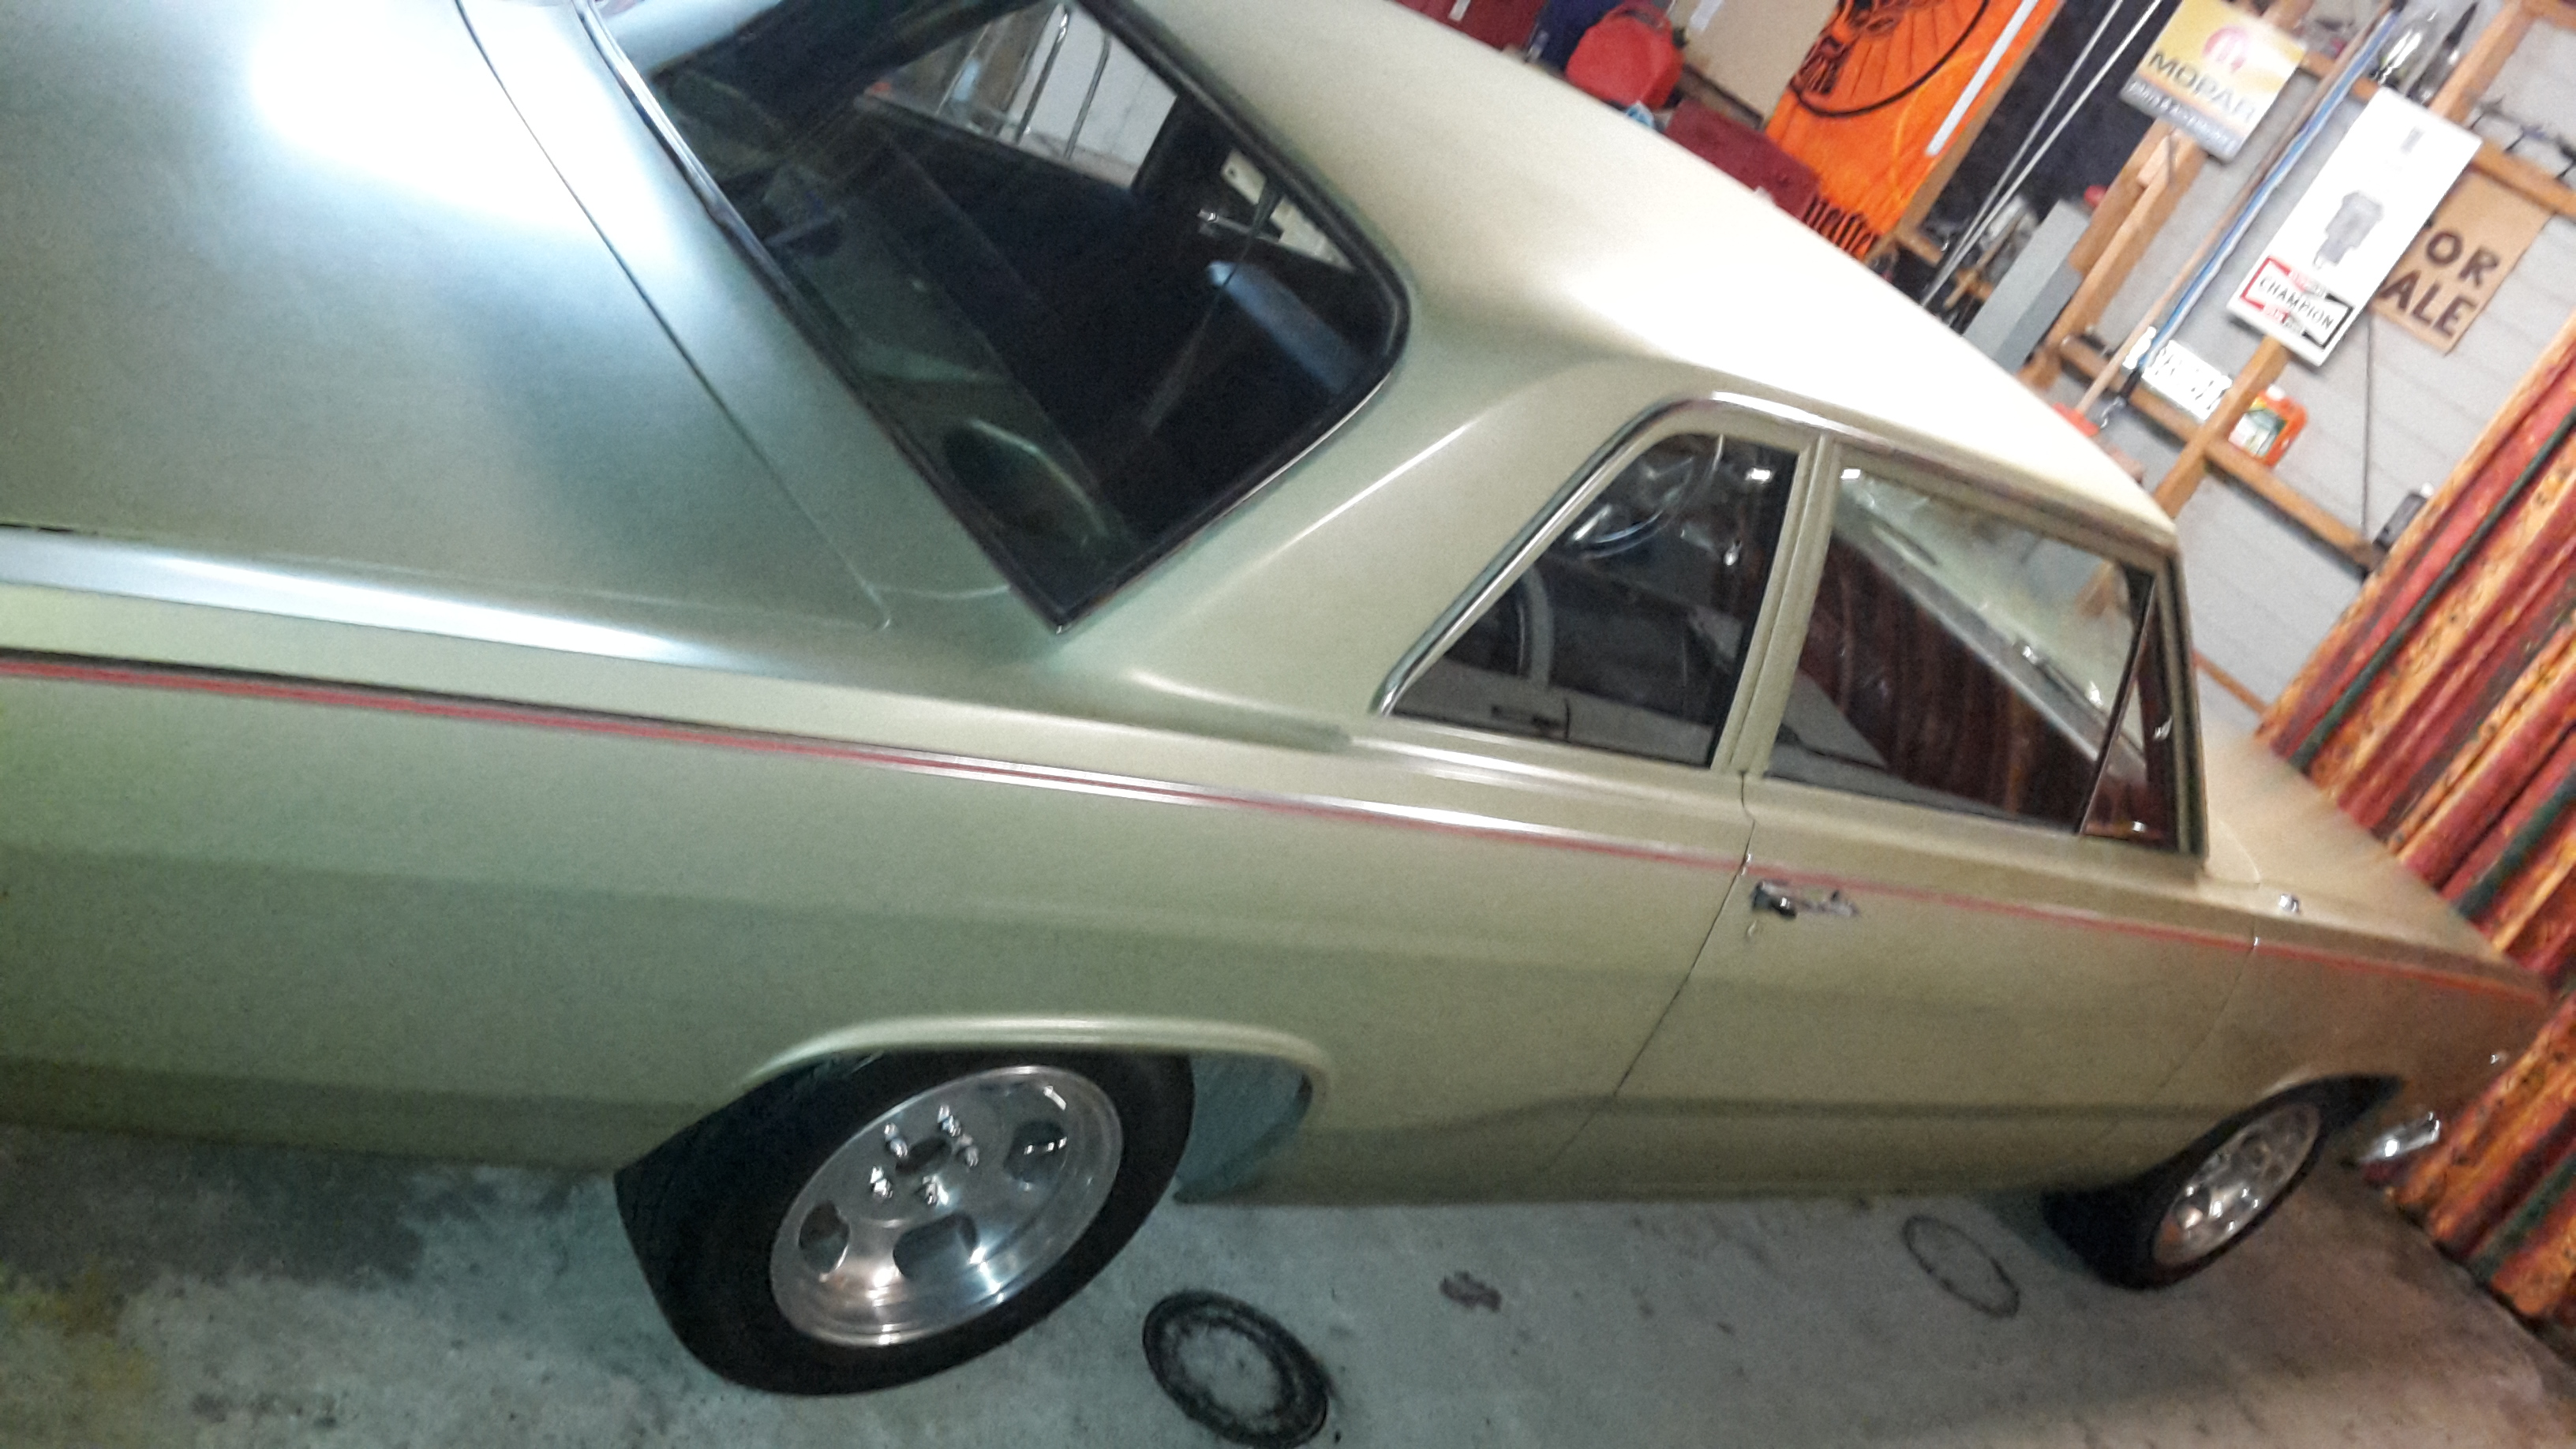
Booked this in for a WoF today. Didnt quite make it all the way. (run out of gas) Lucky i had someone who thought it was flippin hilarious driving the support vehicle Looks pretty cool even busted on the side of the road, but "get the fuel sender working" is now at the top of the list! Ive put about 30l of gas in it since i put the tank back in, and ive driven it maybe 3km, so not sure where it all went! Cruising in traffic. Goes pretty good, but i think i will get the radiator swapped out for a newer one that doesnt leak and maybe a couple of pusher fans. Dash guage reads near the top of normal when its sitting, but the mechanical one reads normal (~90degC), but thats in the lower hose. Up on the hoist. Nice to see the underside from more than a foot away! Guys were pretty happy with it. !!!WOF AQUIRED!!! After that popped around to Mr and Mrs Grants to show off, and went to Burger Fuel for lunch in it, gets lots of looks and thumbs up, and 'what is its?' Swung by the beach for a surf check on the way home No surf, so then made a start on the post-WoF list of things to sort! - Fuel sender - wheel alignment - radiator + fans - door & boot locks (no key for any of them) - more driving!15 points
-
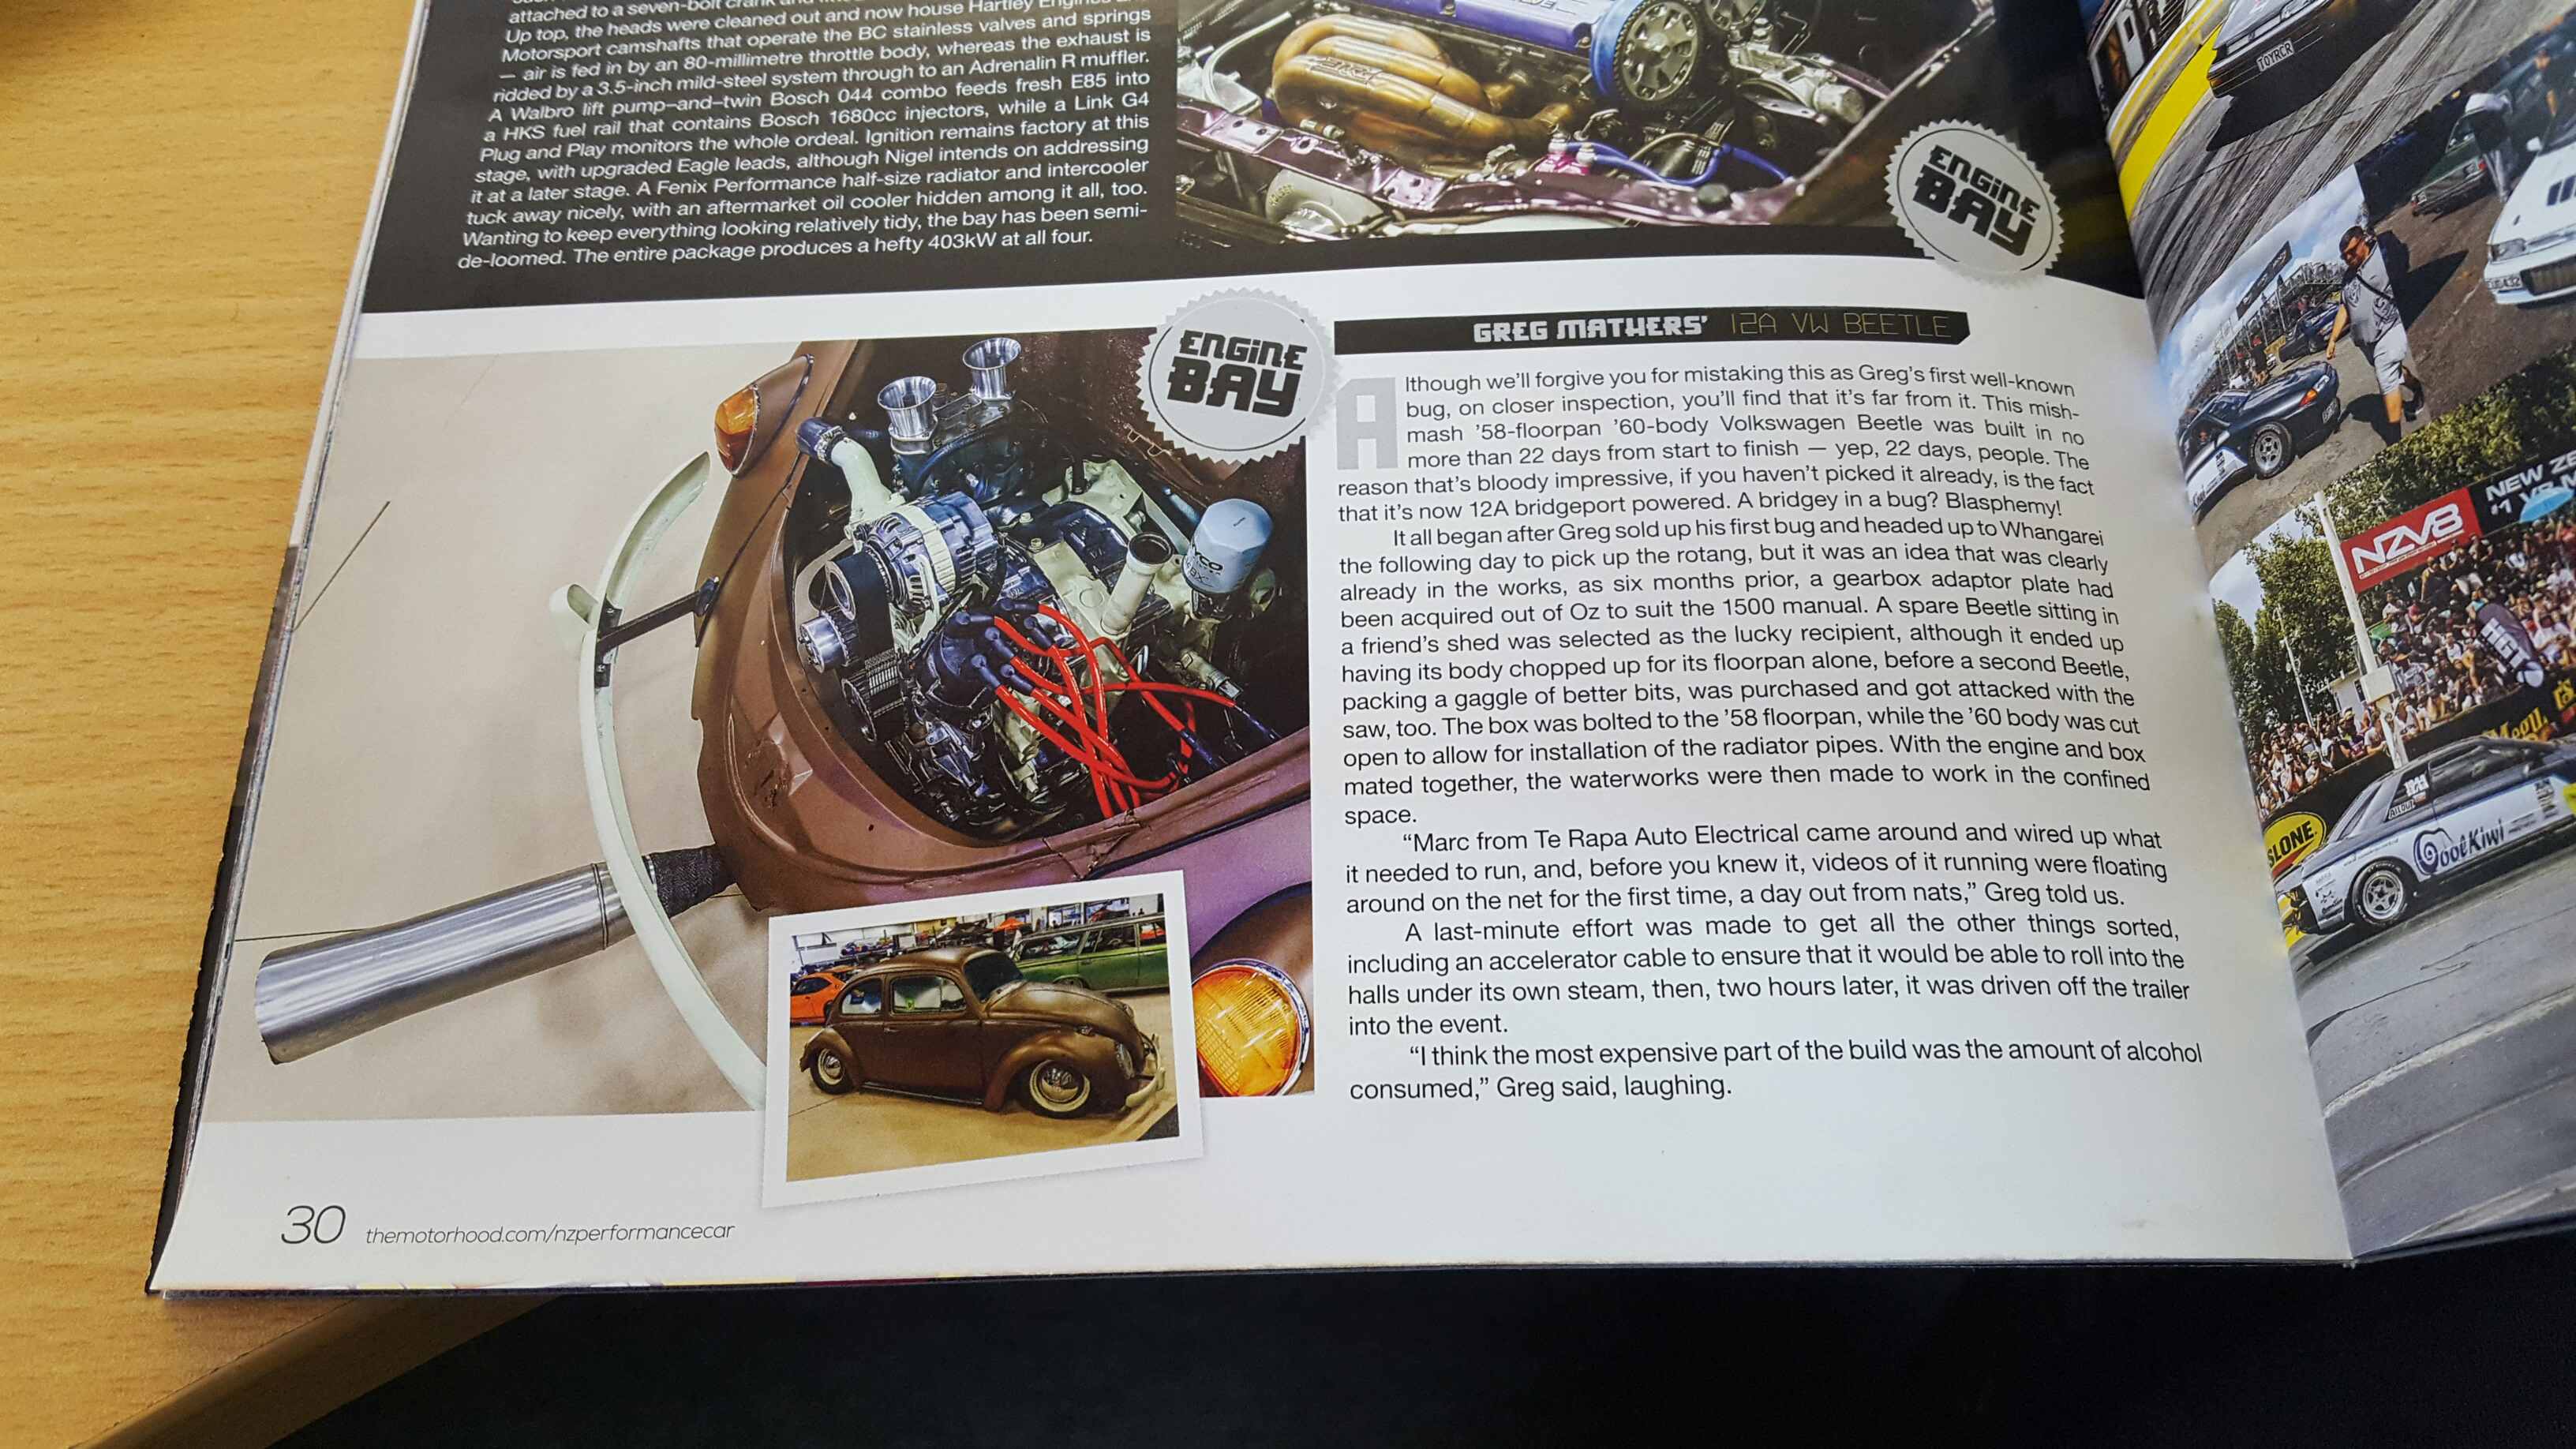
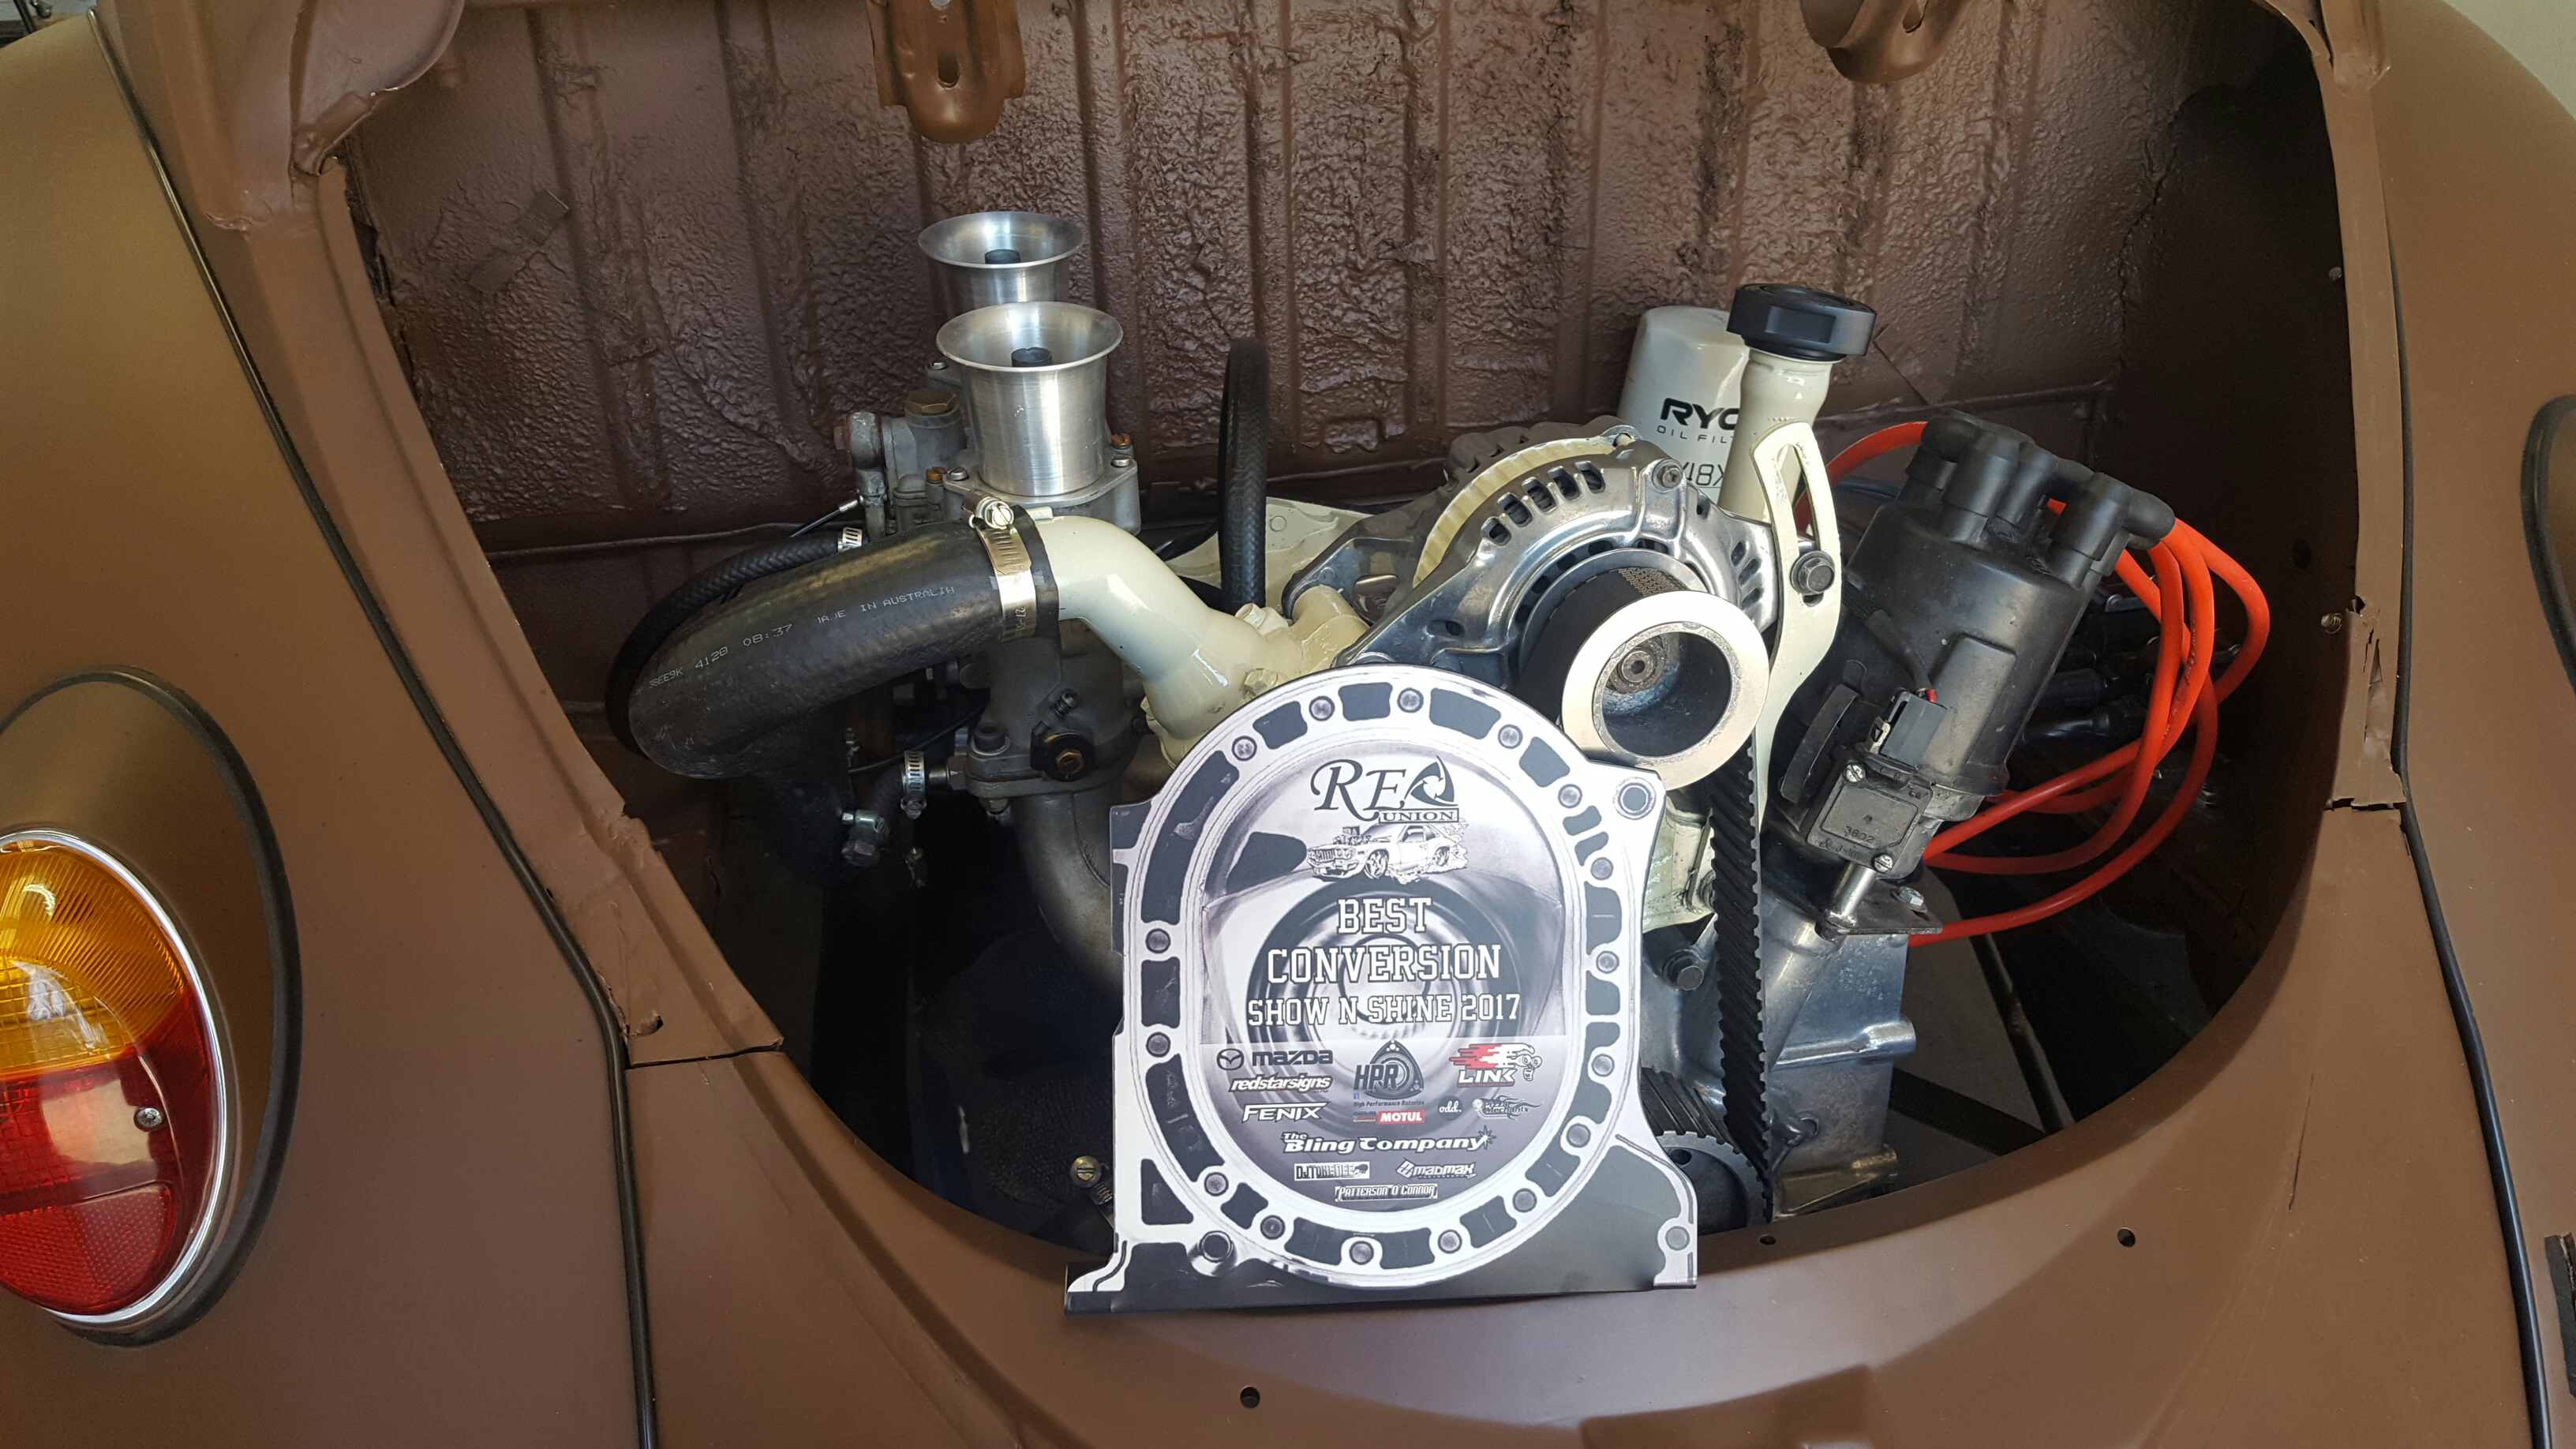
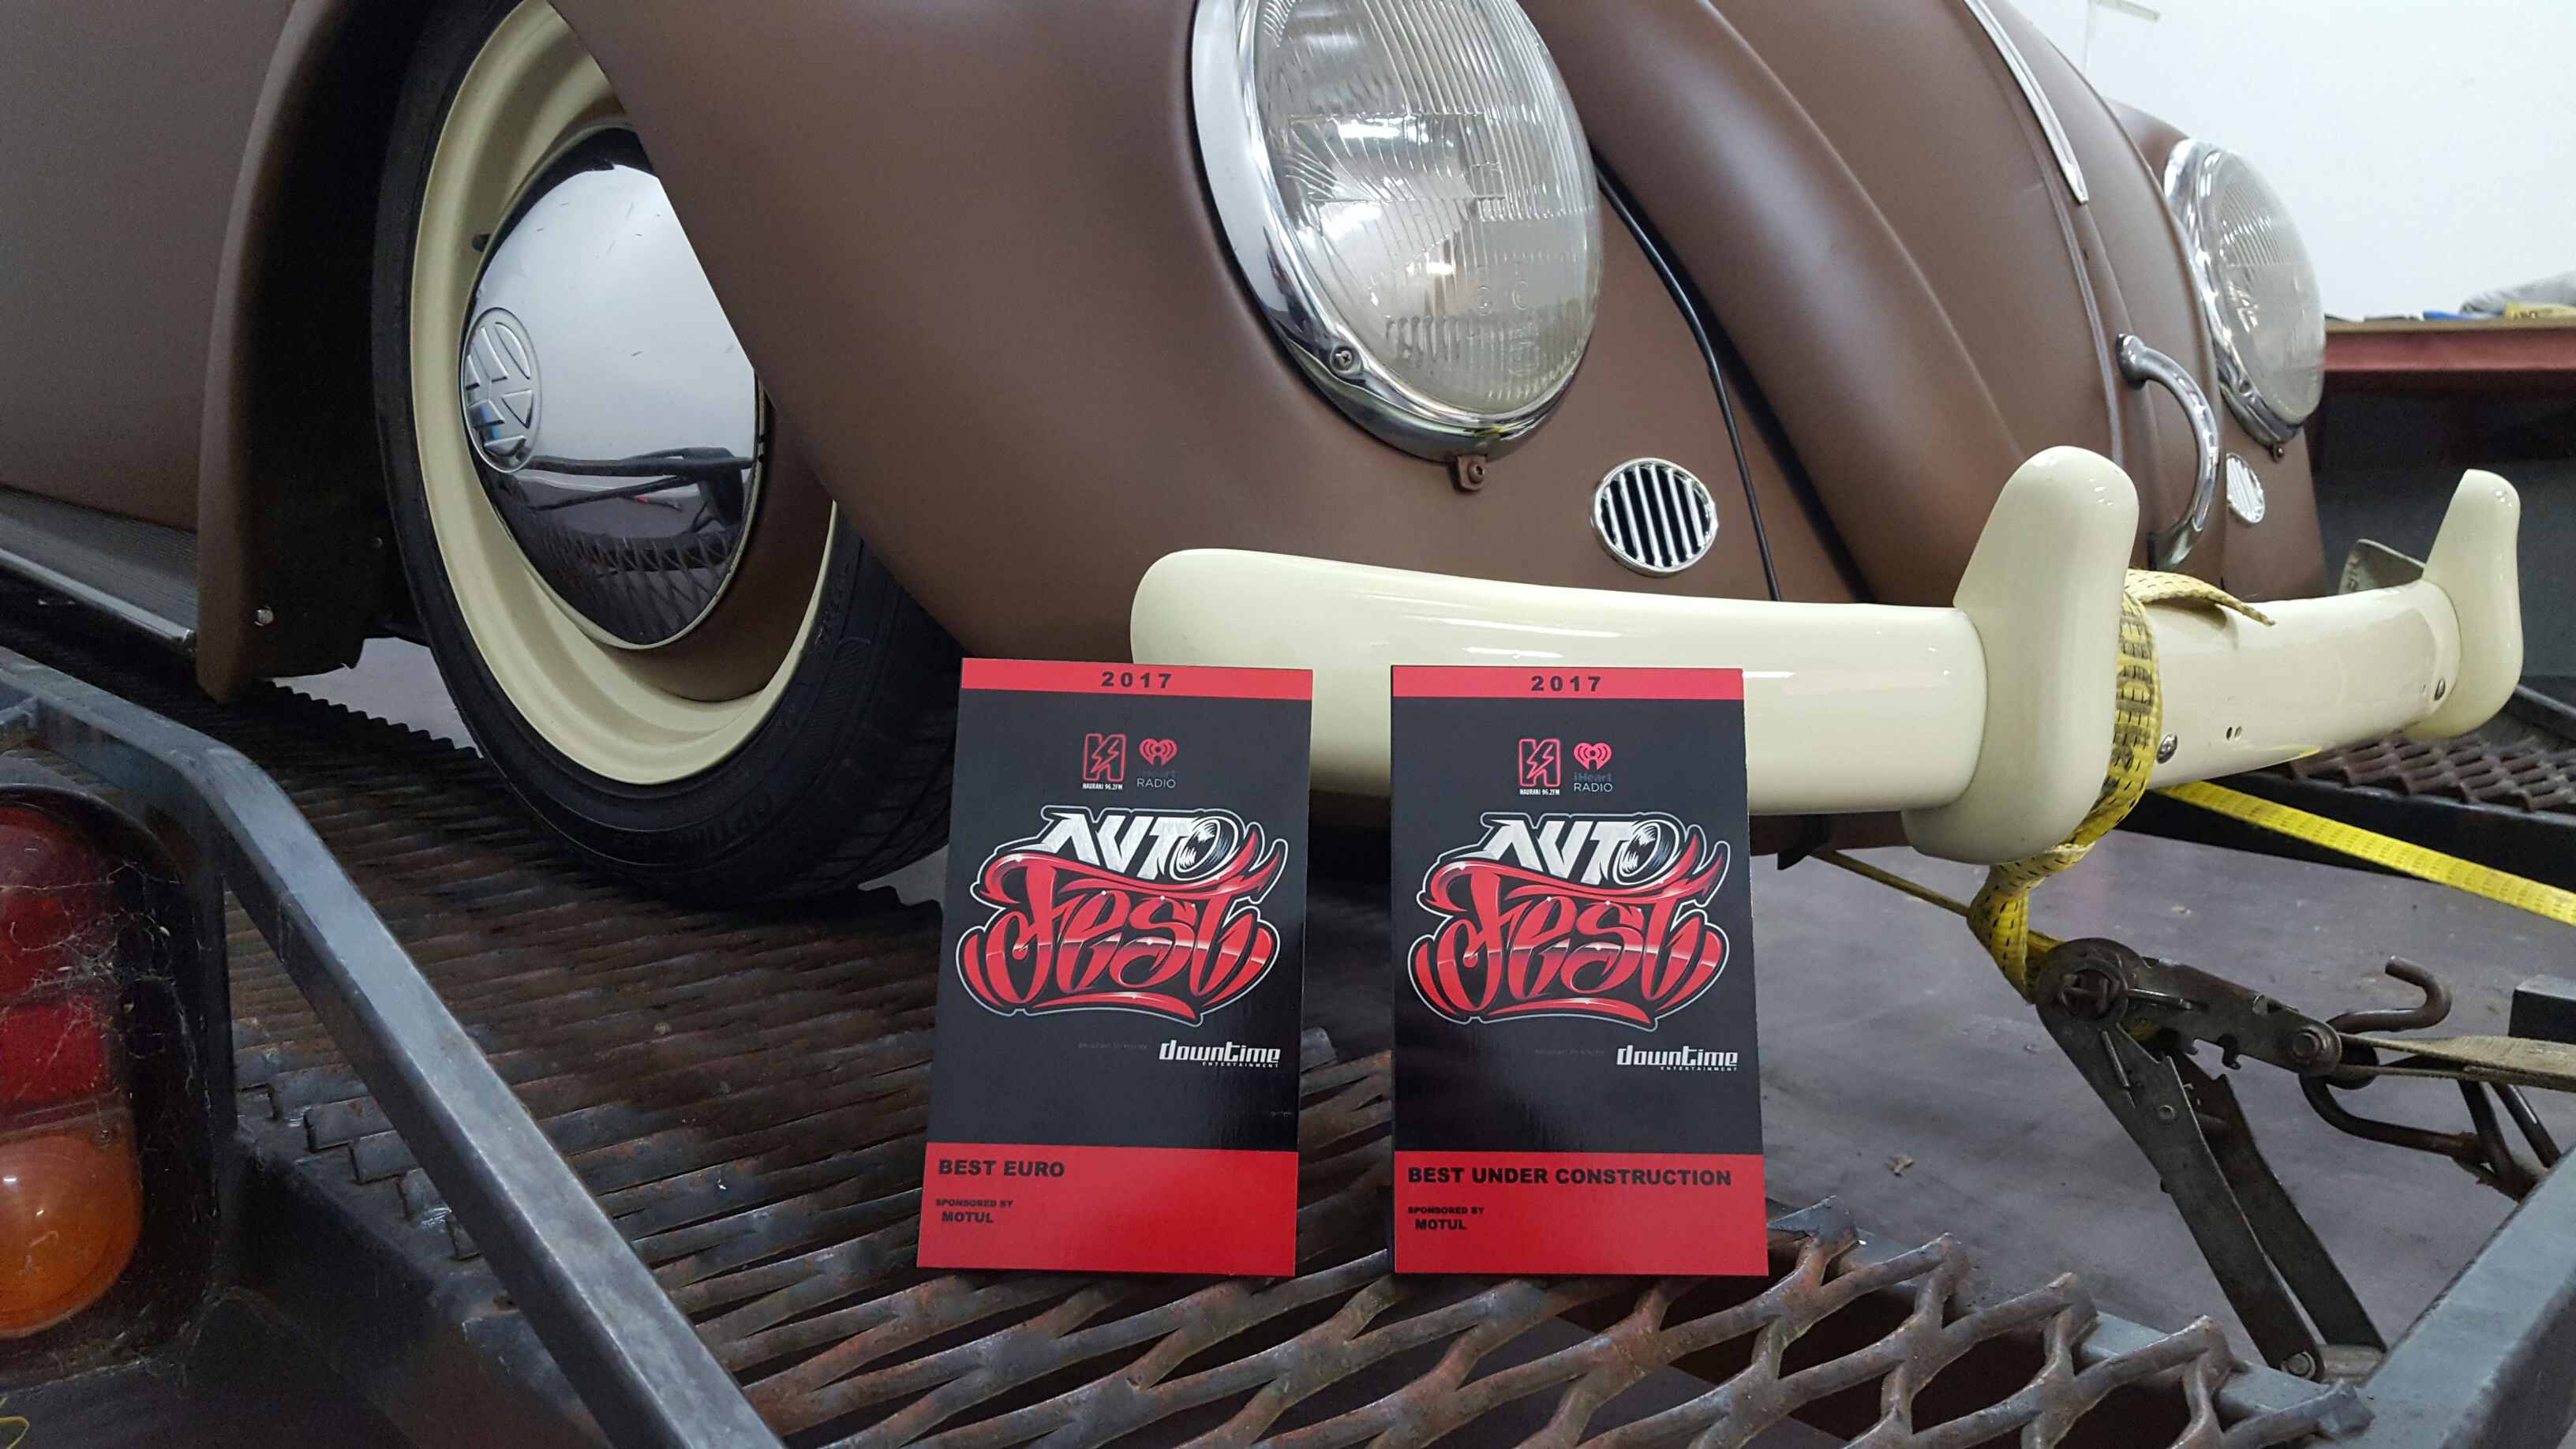
Just a little update. Made it into performance car mag Won best conversion at reunion Got best under construction and best euro at auto fest in the weekend. Time to do the last things ready for beach hop.
 10 points
 -
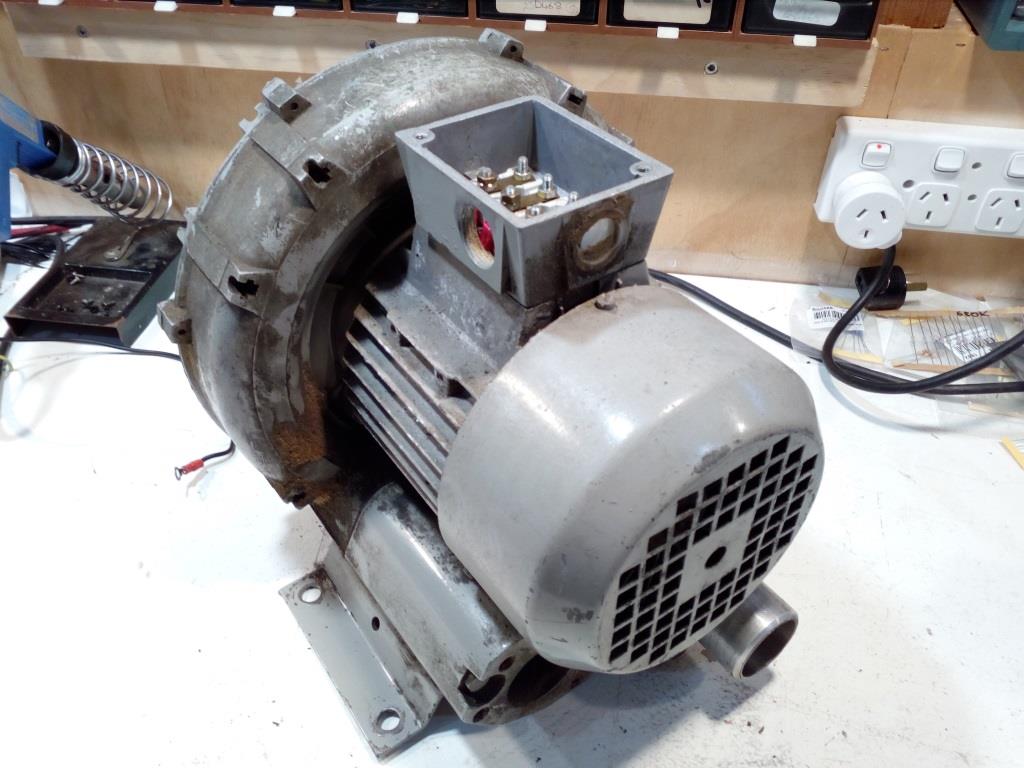
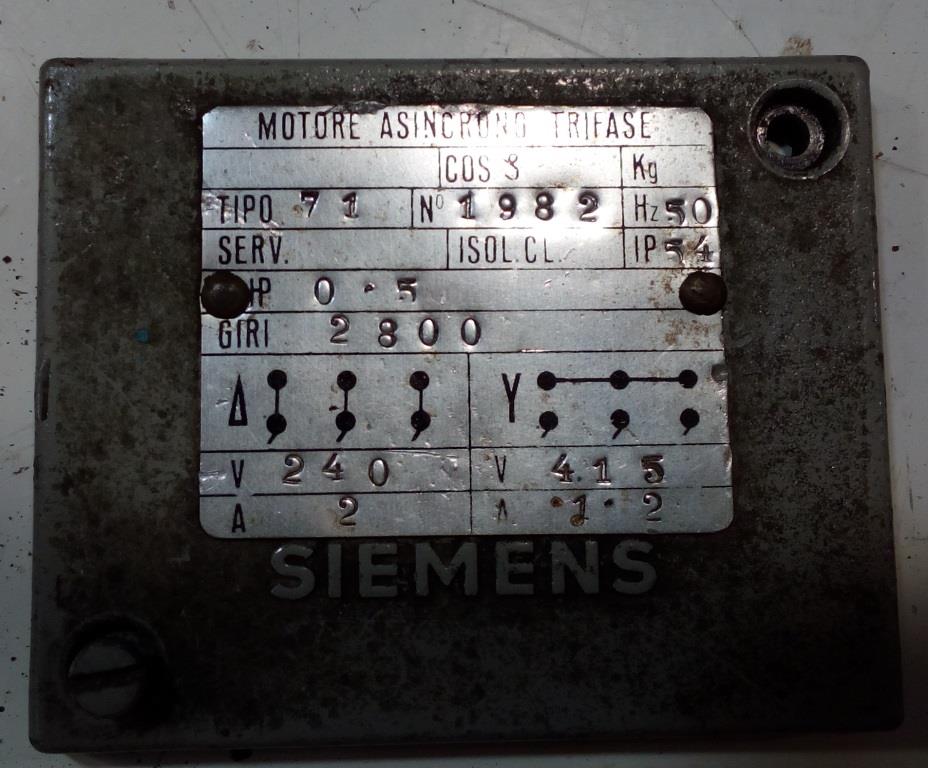
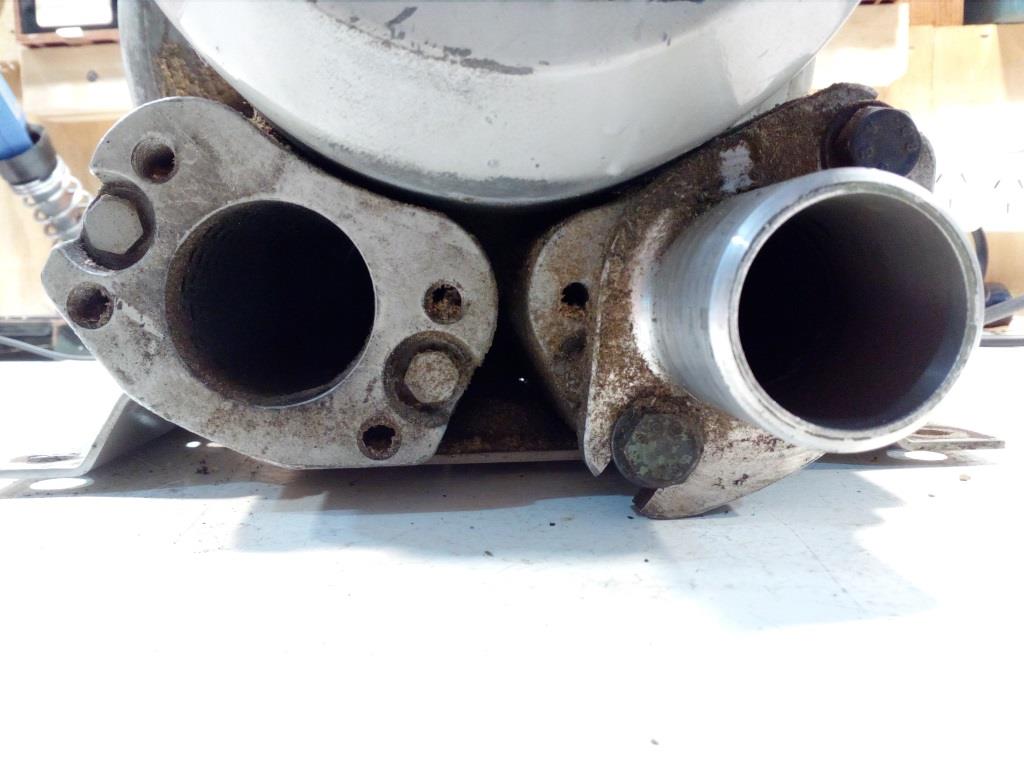
I ended up with this air pump from the shed tour. It's a Siemens 3 phase industrial pump and it caught my eye for the purpose of an extraction fan for my bead blaster. Initially I had thoughts of swapping the motor for a single phase 230v or even a DC motor with a controller so I can adjust the speed, I need the flow rate high enough to keep the cabinet free of dust but not too high so it starts sucking out all the media. Was just about to dismantle it for a clean up when wiped the dust off the top cap which showed the connection options and this is when it got a little more interesting, this motor can be wired in 3 Phase Star or 3 Phase Delta. (Obligatory warning, Dont ever try this unless you are qualified to do this as there's a chance of electrocution, explosion, fire, pestilence, flood and other nastiness) As you can see, in delta the windings are configured in a 240v config, but however if you did hook up a 230v source to say L1 and L2 the motor wont start, it'll just sit there and him and get hot! as there's no air moving to cool it down, you can get the motor running by spinning the shaft and eventually it will start but at a lesser power output and of course wont restart. Remembering a bit of my NZCE done years ago I know that adding a capacitor can have the effect of a phase shift or delay which is similar to adding another phase, there's a few calculations you need to do which I wont go into here in the interest of safety as things can go horribly wrong if you mess it up End result is a very use able 3 phase air pump on single phase, I have a Variac that can make this variable speed, win!
8 points
-
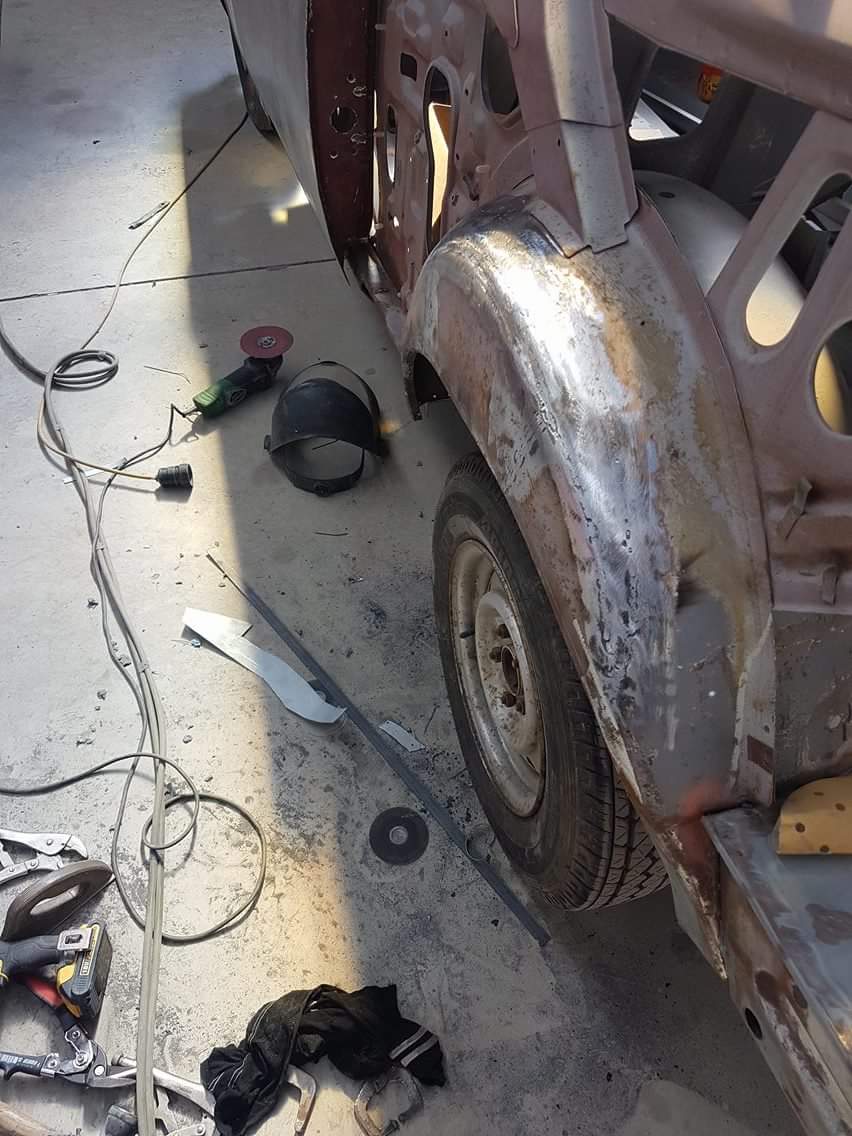
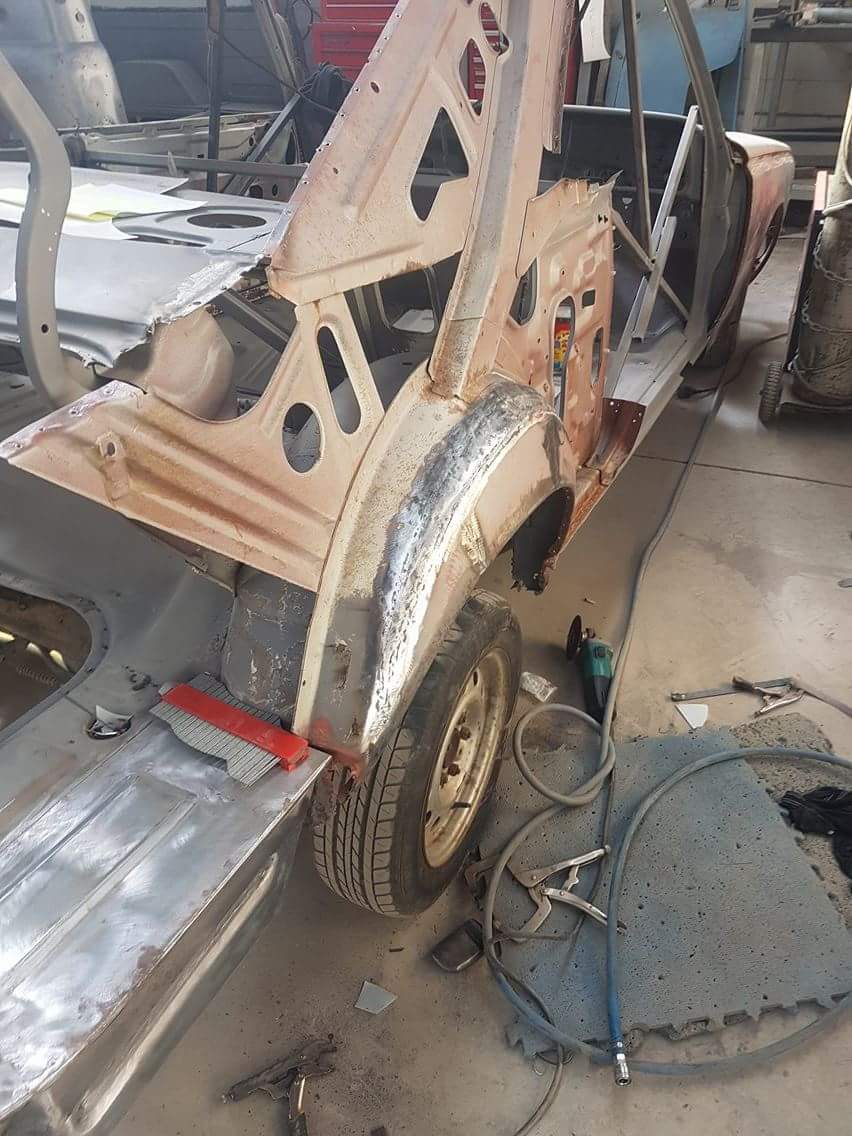
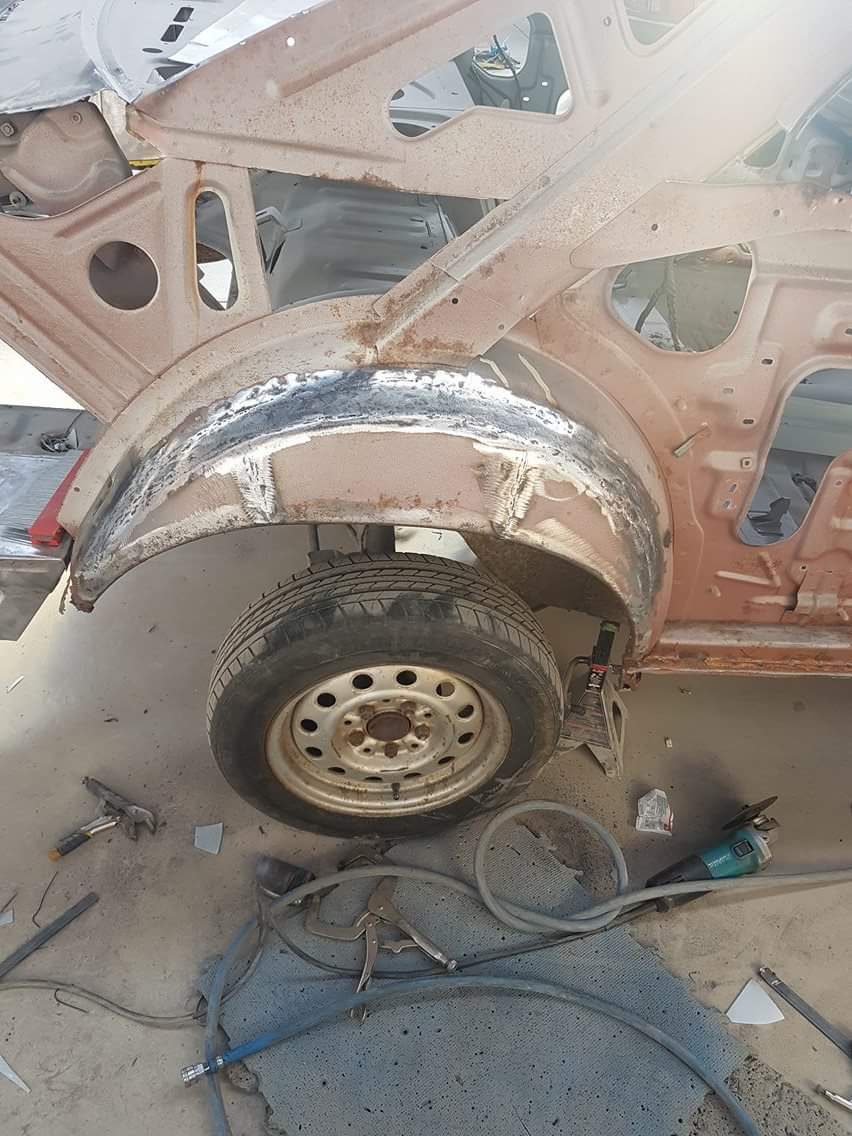
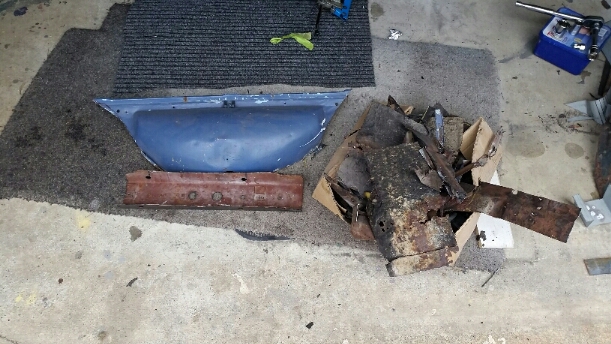
Bit more progress, I was trying to get this done so I could take it to the grasskhana that the Nelson car club ran today, but didn't quite make it, part of the reason is this When I was getting the front panel lined up ready for welding a crack opened up about 50mm from the join, so while I was cleaning up the welds I had made I did a little bit of investigating and found this. Left side Right side So it appears that I was not the first person to chop off the front sheet metal, I was however the first person to weld it up properly.... apparently a few spot welds and heaps of bog was the order of the day for that particular repair, in fairness they had used heaps of underseal behind it which kept the rust away so it was just a matter of cutting the welds re-aligning it all and welding it back together. Next up fitting the fan to the radiator, I got a bit lazy and just used those push through tie things And engine back in, oil cooler and radiator fitted, fan re-wired with a digital controller as the analogue one was a bit huckory So all that work was basically just for this Before After I have some bits turning up for the exhaust tomorrow so have decided to build the new one rather than fit the old one back on7 points
-
well, the innaugral AGM for newly founded www.midschool.co.ng went fantastically. great turnout of enthusiasts with a passion for economic mid 80's japanese compact vehicles, and then some wankers with actual old cars turned up. first agenda item: banish all european vehicles and send them back to their country of origin via telegram second motion to be tabled: rummage some mega GC barry's shed full of awesome cars and bikes, and haggle some sheepskin seat covers. featuring glorious 2 tangs and 2m's once Mabel had listened to her favourite meatloaf tapes, it was off to the stoat and gristle with barbara for a drink. then, haunted speights were consumed in a haunted pub, and some delightful sharns were induced by locals who had never seen such an awful display of cars. after enjoying a bacardi breezer, ol man ky started breakdancing for the local patrons shit chat aside, what an awesome day. massive thanks to everyone who came, hope you all enjoyed it. see you for the next one!4 points
-
Shit that was a good day even with wagon playing up, after the bonnet poping open for about the 5th time we stopped in alex on the way home and stropped it shut. Thanks @gettinroundtuit For the strop. The wagon started missing and struggling slowly getting worse till we found the battery cable had come off easy fix with the help of @kyteler's trusty pocket knife. I brought my mate along and he said it was one of the best cruises hes been on. Just shows how many GC's are in OS.4 points
-
and as a bonus when you burn out a phase you have 2 more spare4 points
-
Minitubing finished in the rear
4 points
-
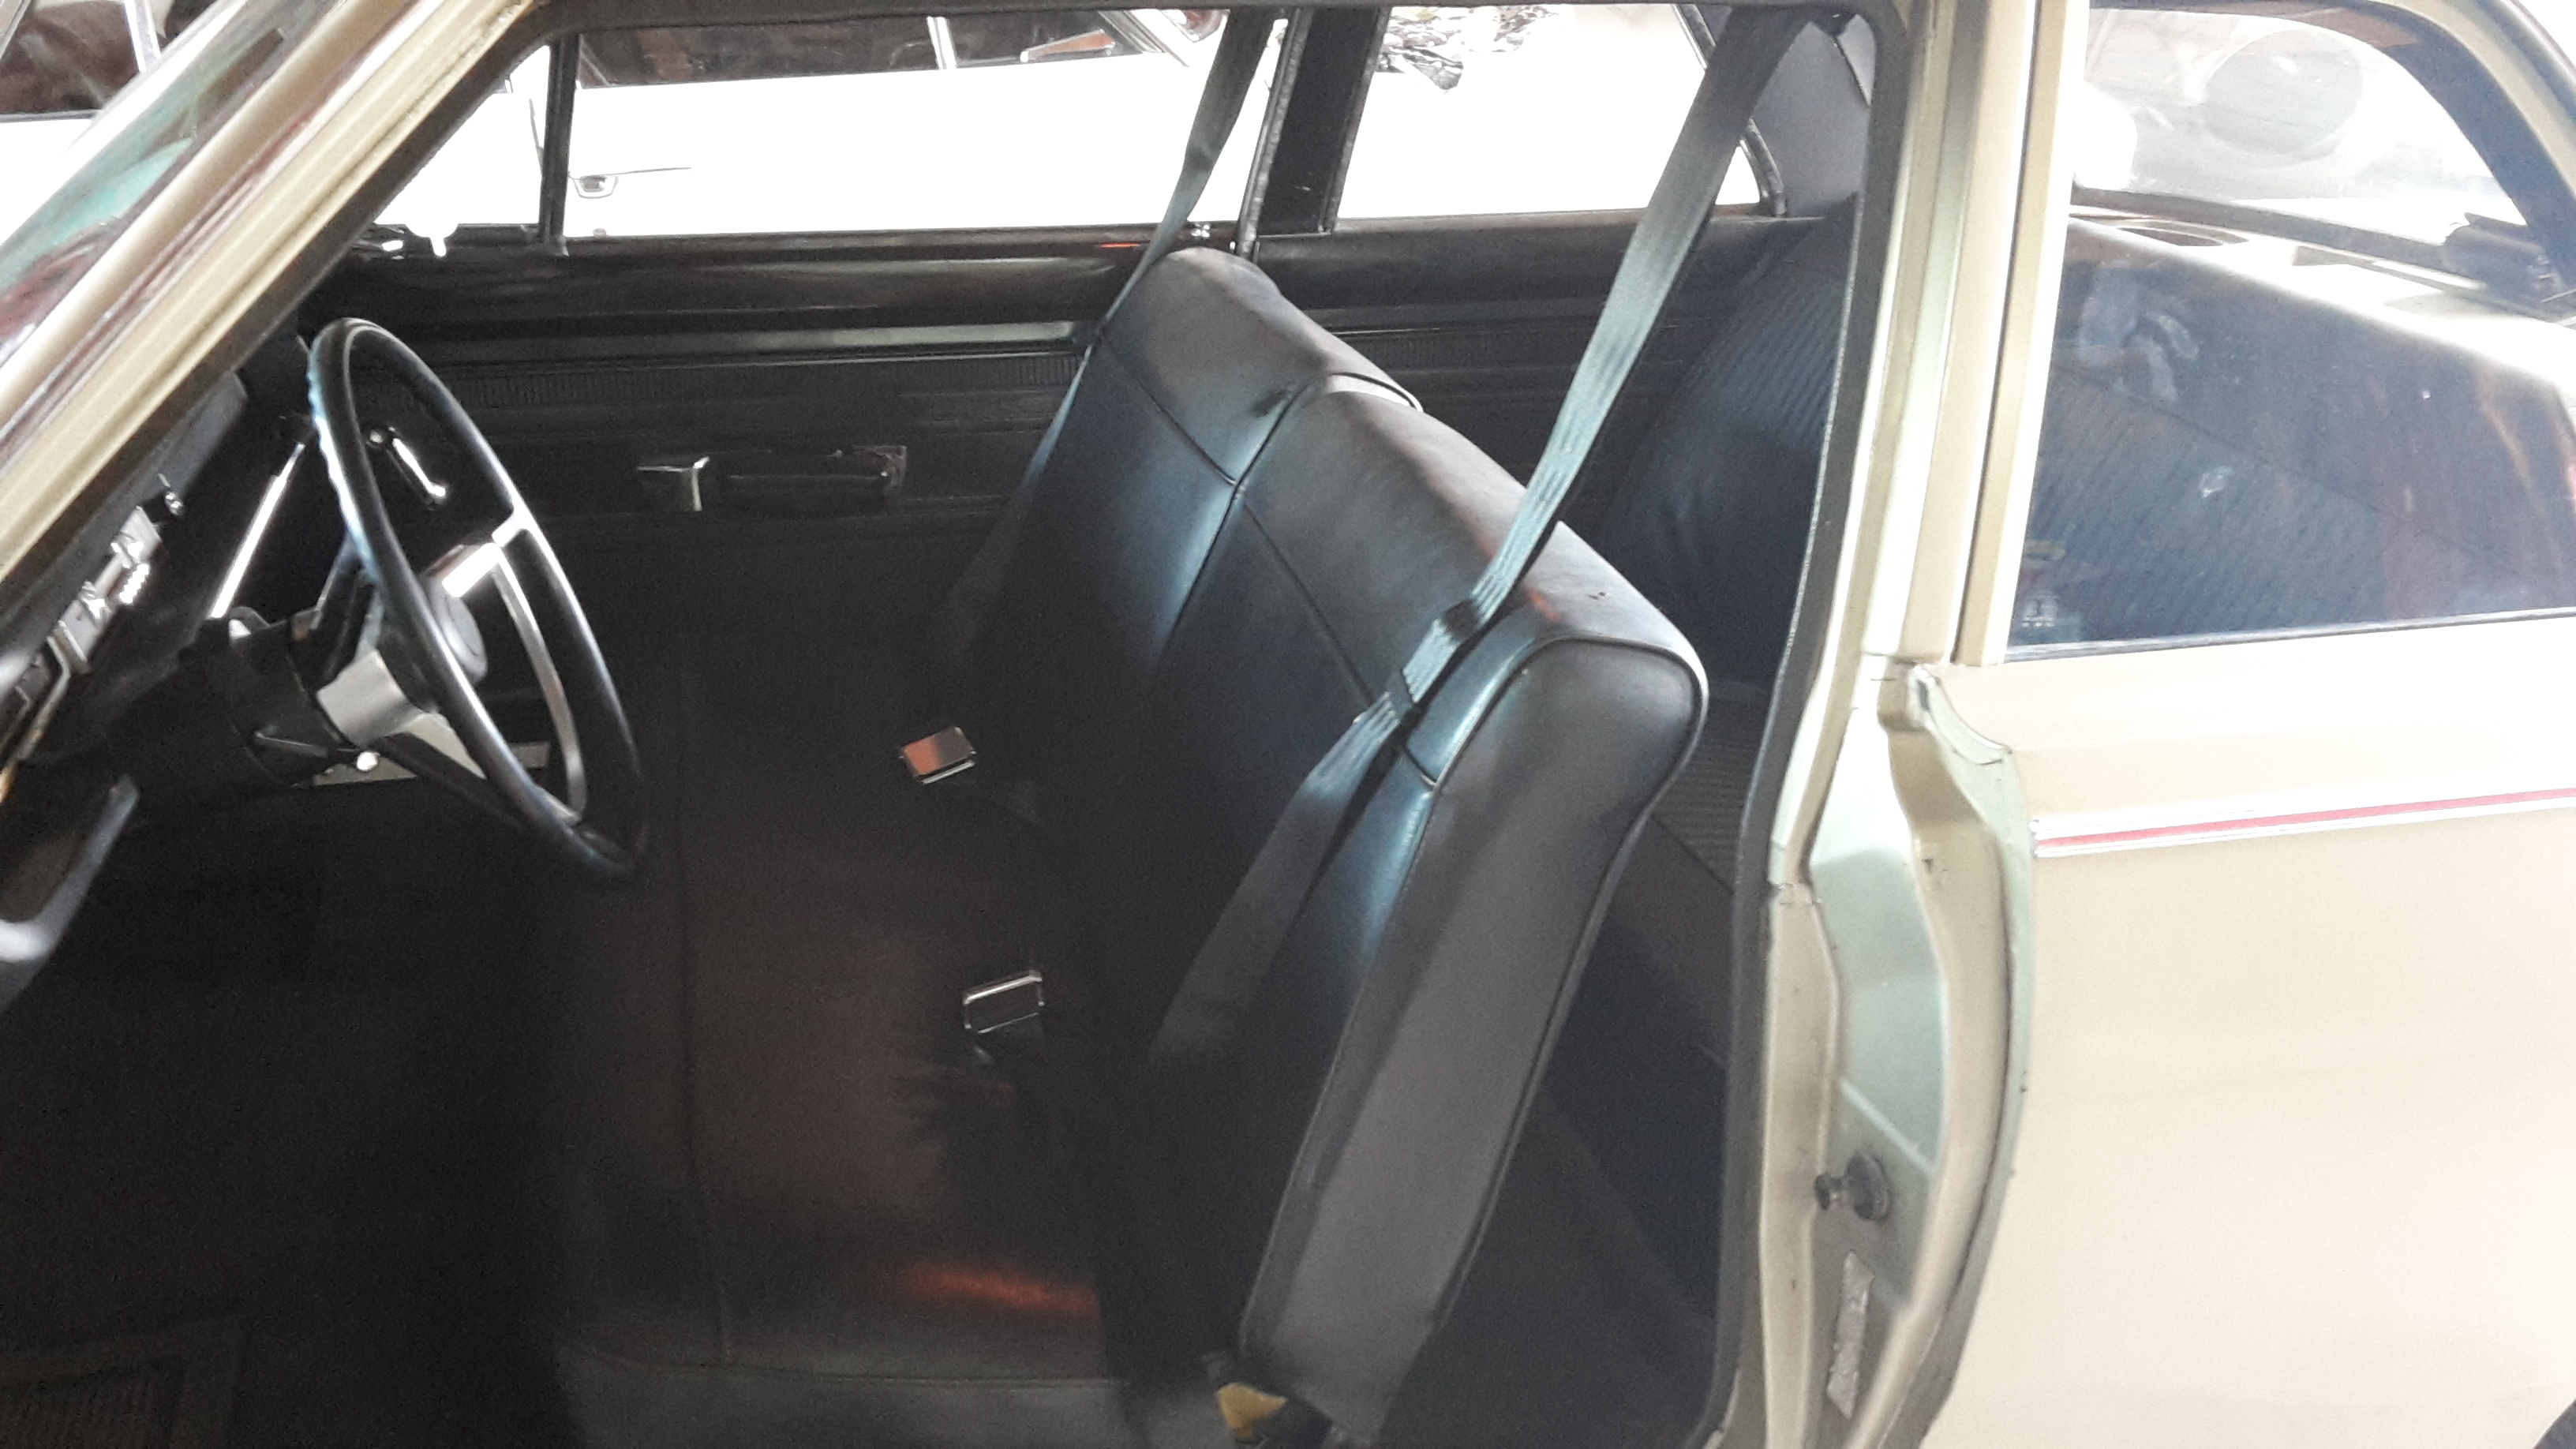
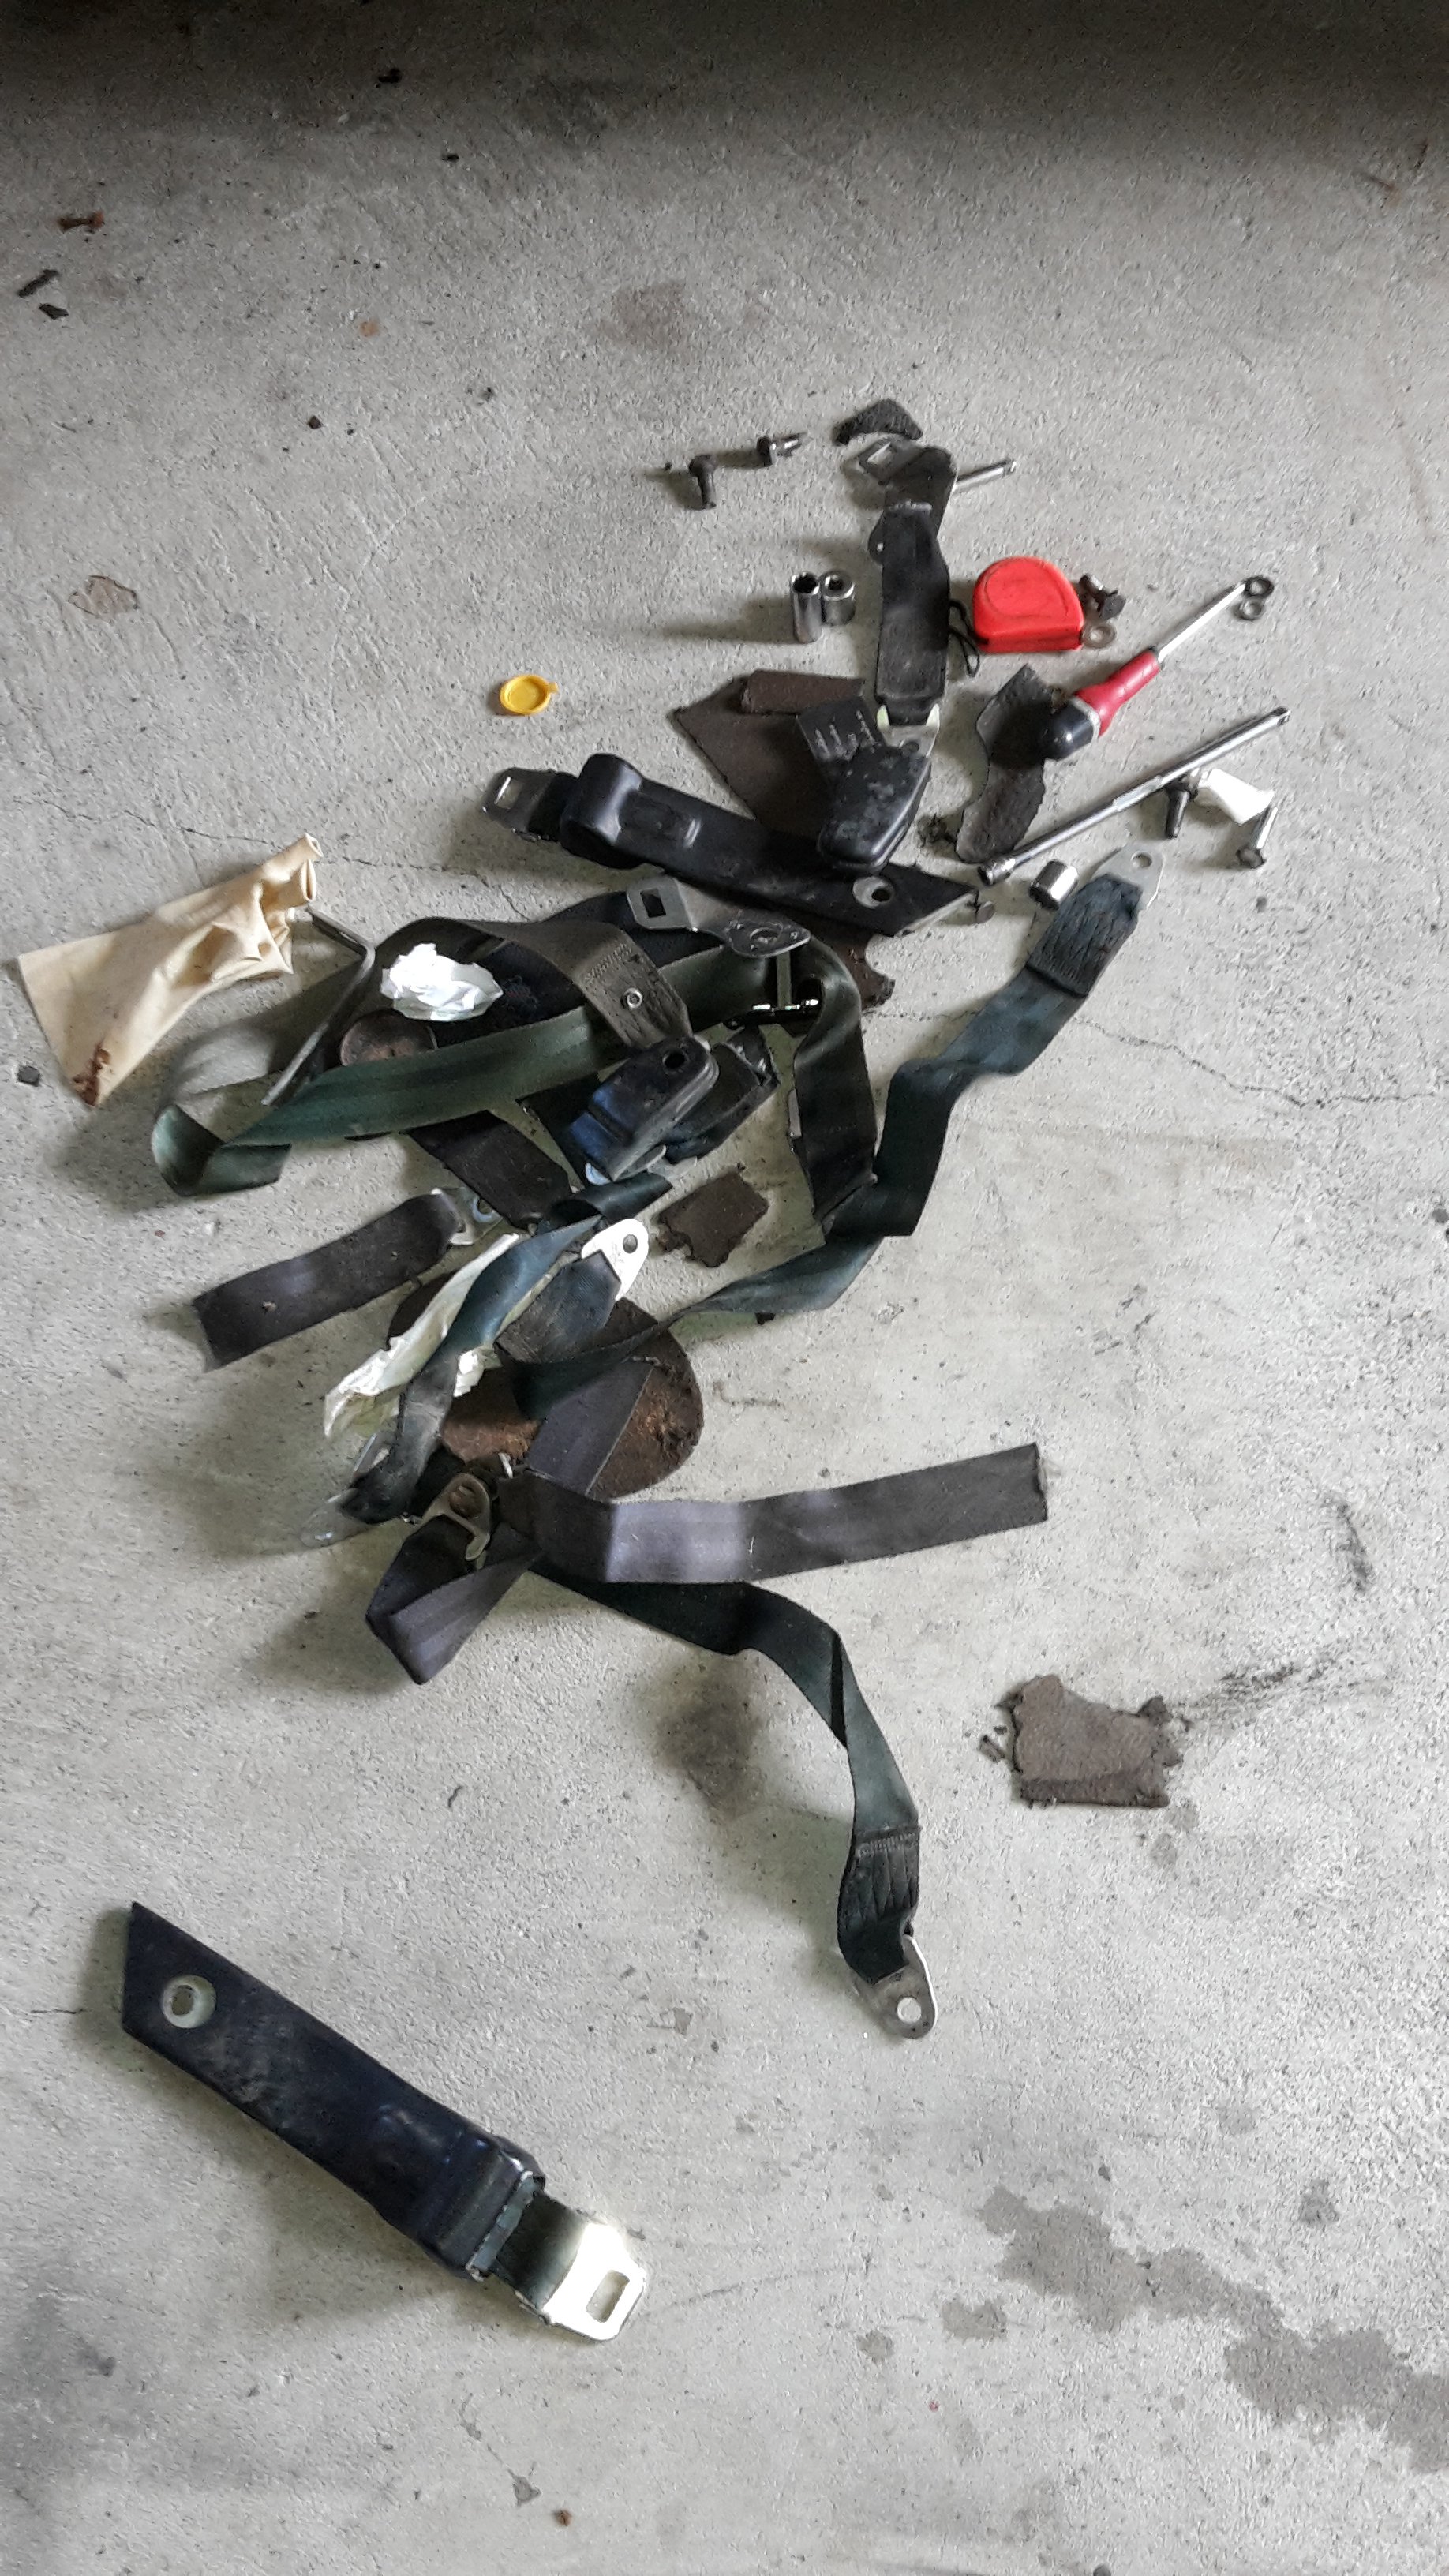
safety cletus says new seat belts are much better. In the front it had a diagonal belt, plus a lap belt so you had to put both on which was te dumb. It had no belts in the back, so I put the laps in the back, someone had cut off all the original old belts and left them bolted in for some reason. Put new lap and diagonal belts in the front, they have old style chrome leg burner buckles which look better than new plastic ones
4 points
-
Unfortunately due to me being too lazy to change lenses, the tree and the stupid Toyota van being in the way, this was the only OK Vulcan shot I got.3 points
-
Fuck yeah, thanks to all the good cunts and good vibes of the people who showed up at various stages. Good times again. Got back into town about 9pm which makes for 12hrs of OS real life times. Good times.3 points
-
Bit more progress this week. Starting with getting the old trans tunnel brace drilled out (it must have had a different gearbox in it at some stage and someone had mangled the old one), then the new one welded in and sealed (Cheers Joe). Also Por15'd the cross-member and sway-bar so it's ready for the motor to go back in now. Pile of goodies also turned up from the UK. Cheers Matt3 points
-
Probably just as well you sold the hard top.3 points
-
and then there were two.. Going to part this one out
3 points
-
super fucking great news man!!! well done, just in time to buy that AC 124 too.3 points
-
Top link mounts made and tacked in place. Next on the list is a brace/mount off the link mount, back to the chassis rail. will bolt it through the chassis with a few decent bolts. maybe something similar on the other side also, as the factory x member bolt locations are kinda limited, since the lower links take up the space needed to build something solid off them3 points
-
Further to this yarn. At this juncture, we encountered some drunken Alexandra locals, a pair of which seemed genuinely offended by my moustache, much to my entertainment, though I'm not sure a mulletted, leather vest wearing air compressor rider with a mulletted wife has much ground for such statements. Still, as I said, entertaining.2 points
-
By contrast I had a trouble free trip back. Found someone to race from ranfurly to Palmerston. Now I need to sort going back to retrieve mine and @Nick Ritchie's new projects. Cheers for an epic day guys!2 points
-
I don't think there would be many, I've seen 2 other Plymouth valiants here but they were 4 doors. When my mate bought it, it had been on trademe for quite a while so I thought there must have been something wrong with it, but I think it was because they were the sort of car your nana would drive in america so never had a following like a barracuda or duster etc If it was a red mustang with cragars it would have sold quick2 points
-
On the road at 7am sounds good to me.2 points
-
I had planned on being on the road by 7am yeah it's early, but that should leave time cruise along at 80kmh /to stop and pine over junk on the way down, stop and buy food/refreshments for nats/ pitch tent in day light ect/ I just wanna get to nats also for route would it pay to see if any other people further down country wanna jump on the convoy and route route around that?? my 2c2 points
-
Here's another rushed and average pic of my new carpet. its much darker than it looked in the auction pictures, I like it.. so I think I'll rock it as is, reminds me of my old valiant.2 points
-
Quickly took the car down for an alignment this arvo to try and work out the pulling to the left situation. Well have a look at the "before" spec below.. haha! As they didn't have a listing for hako on the system I figured Kenmeri woud probably be closest. One of the front caster arms is bent which is causing some of that issue and the toe adjust arms are a bit shit but managed to get them back in line. There is a lot of rust underneath so I'll be loading up on repair panels in this next container! Went to stop in at the compliance place on the way back but it was closed Also I think I need a GT-Kai badge.. everyone thinks it's a GT-R and are crushingly disappointed when I tell them otherwise haha Oh, so result of alignment car definitely feels like it drives a bit straighter, still pulls to the side occasionally but I think that may be as a result of my spring situation. I received a few more bits for it from Kevin san (the aussie guy previously mentioned) so one day I'll get to putting those in and see if that makes the difference.2 points
-
Brown car left on a trailer headed to dunedin on saturday, so spent the rest of the weekend cleaning out the garage and went and got the white one back from storage, so i could start getting this one ready for Nats. Had the radiator fixed, it had a couple of small leaks, I think the 16 pound cap probably didn't help, put a 7pound one on instead. Have ordered some new seatbelts from www.classicseatbelts.co.nz so just waiting for those to arrive. gave the brakes a once over, greased and checked the front end, and for now have borrowed the wheels off the vg, I didnt trust the tyres on a long trip. Also I thought it would be rude to not remove some of the height out of the front while it was jacked up, so I did.
2 points
-
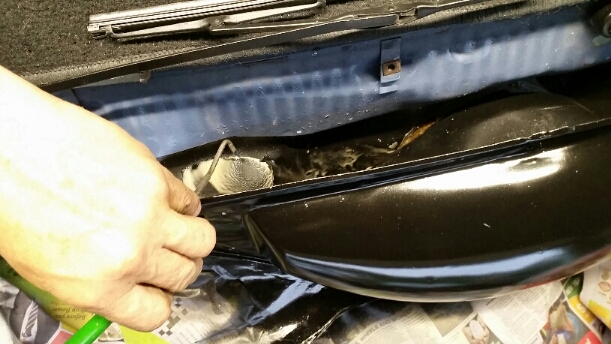
I picked up this a bout a month ago from Penrose (not Wanganui!) Ended up getting it sent from Ralph Moore Autoglass in Sydney who had one in stock, and they shipped it with an MG one for some other bloke to halve our shipping. This week i finally got it installed. Cracking the parts cats screen has not only been a very expensive fuckup but also meant ive pretty much missed cruising this summer. I reused the old rubbers, i cleaned them pretty good but they are a bit cracked and stretched in the corners so i hope they dont leak Sorting out the best surrounds, and had just enough unbroken clips, less 2 And on Pretty happy about the close fit to the opening given all the work i did around the screen top and bottom (not so much about the runs, but thats what accessories to hide them are for!) And paint run hider back on Too much or? Nothing like a pending >1200km road trip to procrastinate on sorting the list of wee jobs to sort and a few miles to put on, before hopefully a WoF Next weekend! If not then id better get the brakes on the 125 sorted! Here is a pic to remind me why I aught to pull finger:2 points
-
Right, so this happened then this Even managed to get it insured...... So yeah all done, well not really still needs an interior and some paint touchups but that can wait, its now time to put some kms on it, this has been a pretty long project so now all I am going to do is enjoy driving it. Pretty funny car to drive gets a fair few looks some good some not so good and mostly surprised, gas mileage is so bad, like next level bad, I took it out today and my average was about 4.4kms per liter but it is running really rich (yeah that'll be it, not the rotary under the bonnet ha ha), anyway combine that with the 30l Anglia tank and I am going to be spending some time at the gas station for sure! The biggest problem that I will have now is keeping it under 5000RPM (so hard to do when all it wants to do is rev....) for the next 1000kms which is what the engine builder recommended, work is about a 30km round trip so I only have to do that 34 times and at current gas milage it will only cost me about $500 ha ha ha Anyway it's all good And I will leave this as the last shot, and in my opinion the best angle of the car2 points
-
Not long until lift off!1 point
-
Sounds similar to mine then. Yeah seat time is good and you can only get better Just need a turbo now!1 point
-
I should have the clutch back tomorrow and I can make a start on getting the crx back to a drivable state. My friend popped over and clocked the turbo so the drain is sitting nicer. No idea why I never thought about... Learning is why we do this right? He also had a good idea on downpipe routing so when get the shuttle back from the panel beater I can make a start on that.1 point
-
not leaving town til @ 10, bloody english cars & their lousy oil retention abilities & tappets need doing again bit tight after retorquing head. Must remember to pack earmuffs!1 point
-
Bit late but yeah, that is a BW78 from out of a Falcon. It will have come out of either a wagon or a ute judging by its rear cover. The sedans had a different setup. You might be lucky and its got the 3.27:1 Ring and Pinion in it. Its not an AU because its running the early style bolt setup that holds the brake backing plate on to the housing. It will be 28 Spline and would have come out of something from the early to mid 90's at a guess. Narrowed a fair few of them, they are an ok diff.1 point
-
I had been holding off on an update until after the shed raid, I didn't want to give away too much before the team came round and had a look. The engine is in and mounts welded up, still some finishing to do on the drivers side once the engine comes out again. The gearbox cross member is in place. HQ holden narrowed by 300mm. Again some final welding to finish off when the engine is out. Brake booster brackets made, final hole in the firewall to finish off. We didn't do it the other night because my kids had gone to bed and the die grinder was going to make too much noise. I have been stuffing around with the diff angle and finding how much change there is in angle in normal suspension movement. I have decided to have the diff 2 degrees nose down, same as the Firebird. I have traction bars that mount under the spring pad at one end and below and forward of the front spring eye on the chassis. At expected ride height they are almost parallel with ground and the diff angle stays constant. The main thing I want is no axle tramp and I think these will do the trick.Traction is always going to be an issue with 215 tires. Still plenty to do but getting rapidly closer to all cuts cut, shuts shut and then off for final rust work and paint. Photos to come.1 point
-
Today's effort. New (half finished) gearbox/transfer case cross member. Lower links don't agree with the old one. new one will have a tower for the upper link with some adjustment holes. +50mm shocks look pretty short.1 point
-
Got a bit more done, not quite as much as I hoped as the weekend was a total fail but I am getting there All the fab is done Front welded back together So the motor can go back in now, however there is one small snag, because I can't leave things along there was something else that has been bothering me, basically the muffler hangs too low and it would be good to quieten it down a bit so a few months ago I bought these Now the exhaust is a bit of a basted to get in as it is all one piece so I chopped it and added some v-bands, this way the headers won't have to come out again Not sure if I will get the whole exhaust made this week as there are a few bits to figure out so it may end up with the old one back in for a bit longer yet, will just have to see how the week goes....1 point
-
Cleaned up a better heater bubble I had cut off a wreck a few years ago. Plug welded this in, rattle canned it, seam sealed it and canned everything one more time. 100x better. Every new panel was painted inside and out, sprayed with this 2k epoxy everywhere and seam sealed where nessecary. Its so much more solid and the cunty repairs are now finished. Long story short, it failed a warrant and I changed chicken mesh into metal to gain road legal status. Stoked. Most of the garbage I replaced.
1 point
-
Its started, hours of grinding. Lower links. the tube adapters were for some usa spec "dom" tubing. machined them down a few mm to fit sch40 1 1/2 pipe. Have cut all the existing mounts off the diff and tacked the lower link mounts in place for test fit. will do the same with the top link before finishing and welding them. Lower link chassis mount, will be trimmed and braced more, as they will likely get a bit of a hiding Its kinda working. lower links look like they will be ok. still trying to find some more up travel. easy way would be to run the truck at a higher ride height, but want to make it work at stock height, to keep it stable as possible. current things spoiling the fun are: sump, alternator, engine mount and the floor..1 point
-
Been up to fuck all with all the vehicles lately since moving to chch and having a little girl last week! But I did pick up a mint pair of gtx seats so had a spare moment this avo and fitted them up to the factory rails with a bit of trimming and drilling a few holes they fit perfectly and are a shit tonne more comfortable to drive in!1 point
-
Sigh* again, not as much as I wanted.. because Old mate from down the road brought his 1964 international round and did a bit of leveling.. in the rain for a bottle of bubbles for his missus. Not a bad job really, little high in some spots and a little low in others but I'm not complaining.. bit of rake work and she'll be all gravy. He bought it from vegas and drove it back to chch, took 5 1/2 hours..1 point
-
Gone all Roman dave science with the link setup. plugged the numbers into a calculator Tricky to get all the numbers in the acceptable range while working around the chassis, engine and wheels that need to turn. main compromise is chassis mounts on the lower links will hang below the chassis rails a bit. but still will be a touch above the transfer case x member, so shouldn't be too much drama. had to do this to get enough up travel without the links hitting the chassis rails, and also to get the roll steer numbers down. The rear is pretty text book since there wasn't really anything to work around after cutting and modifying the chassis. Done it without using a calculator, just following a guide some geezer wrote. putting the numbers in the calc, looks like got lucky and nailed it. can dial the anti squat up to 100% with the adjustment holes. but this is how it's setup currently got some springs for the coil overs 175lb top 300lb bottom. both 14'" long. shocks should be at 50% travel with the weight of the truck on them.1 point
-
Depends what you want to model...definitely don't need a scanner. Fusion 360 is free for most...probably where I'd start. If you've never done any computer modelling at all TinkerCAD is a nice simple toy.1 point
-
well, after a successful brew i was in no fit state to go for a ride on any bike, order of the day was a drunken lunch time nap, last batch of hops added to the mash ton. doesnt look very appetising i admit but sunday was a good day, first i took pinky (b120) for a ride to find it was running out of gas at full throttle, so pulled the carb and adjusted the float, another spin and she was bang on, even managed to get to 55mph on the flat hehe next on the cards was wee red (bridgestone) had to replace a buggered exhaust gasket, then decided id take her for a spin with out the seat, ran like a champ!! managed 80mph on the clocks and pulled pretty well getting there, big red (vtr) got a start up a wee run, as well, just because it'd been such a fruitful day blacky (bandit) didnt get any love pics for thread1 point
-
right, i took the seat to be recovered, so that'll be away a week or 2, also spoke to the vintage japanese motorcycle club (vjmc) about dating the bike for the dvla (vtnz in nz, dmv in the states) so that got done pretty painlessly still waiting for the dvla to send out the paperwork for me to fill in and send back (frankly astounded you cant just download the paperwork, british bureaucracy at its best, of course they've also shut down all their offices so you cant just pick it up either) so while i was waiting, i thought id work on the mrs suzuki B120 of 72 vintage. (not that she has ever ridden it, but she swears she's doing her licence this year.... ) it hadnt been started in a couple of years and last time i rode it, the fuel would piss out the float bowl, or alternatively run out of fuel because the bowl wasnt full enough. and since the carbs are almost the same as the bridgestone i thought id steal a float from one of the 4 spare carbs i have, and put that in, also uses a 95 main jet as well which i had a few spare, so a new one of those went in, put it back together, turned on the fuel, and... http://www.youtube.com/watch?v=0t6I7NK3L1M first kick after 2 years. might take it out for a spin if im not to drunk after ive done my beer brew in the morning. so probably wont take it out for a ride i really need to sell my vtr and buy another 2 stroke,1 point
-
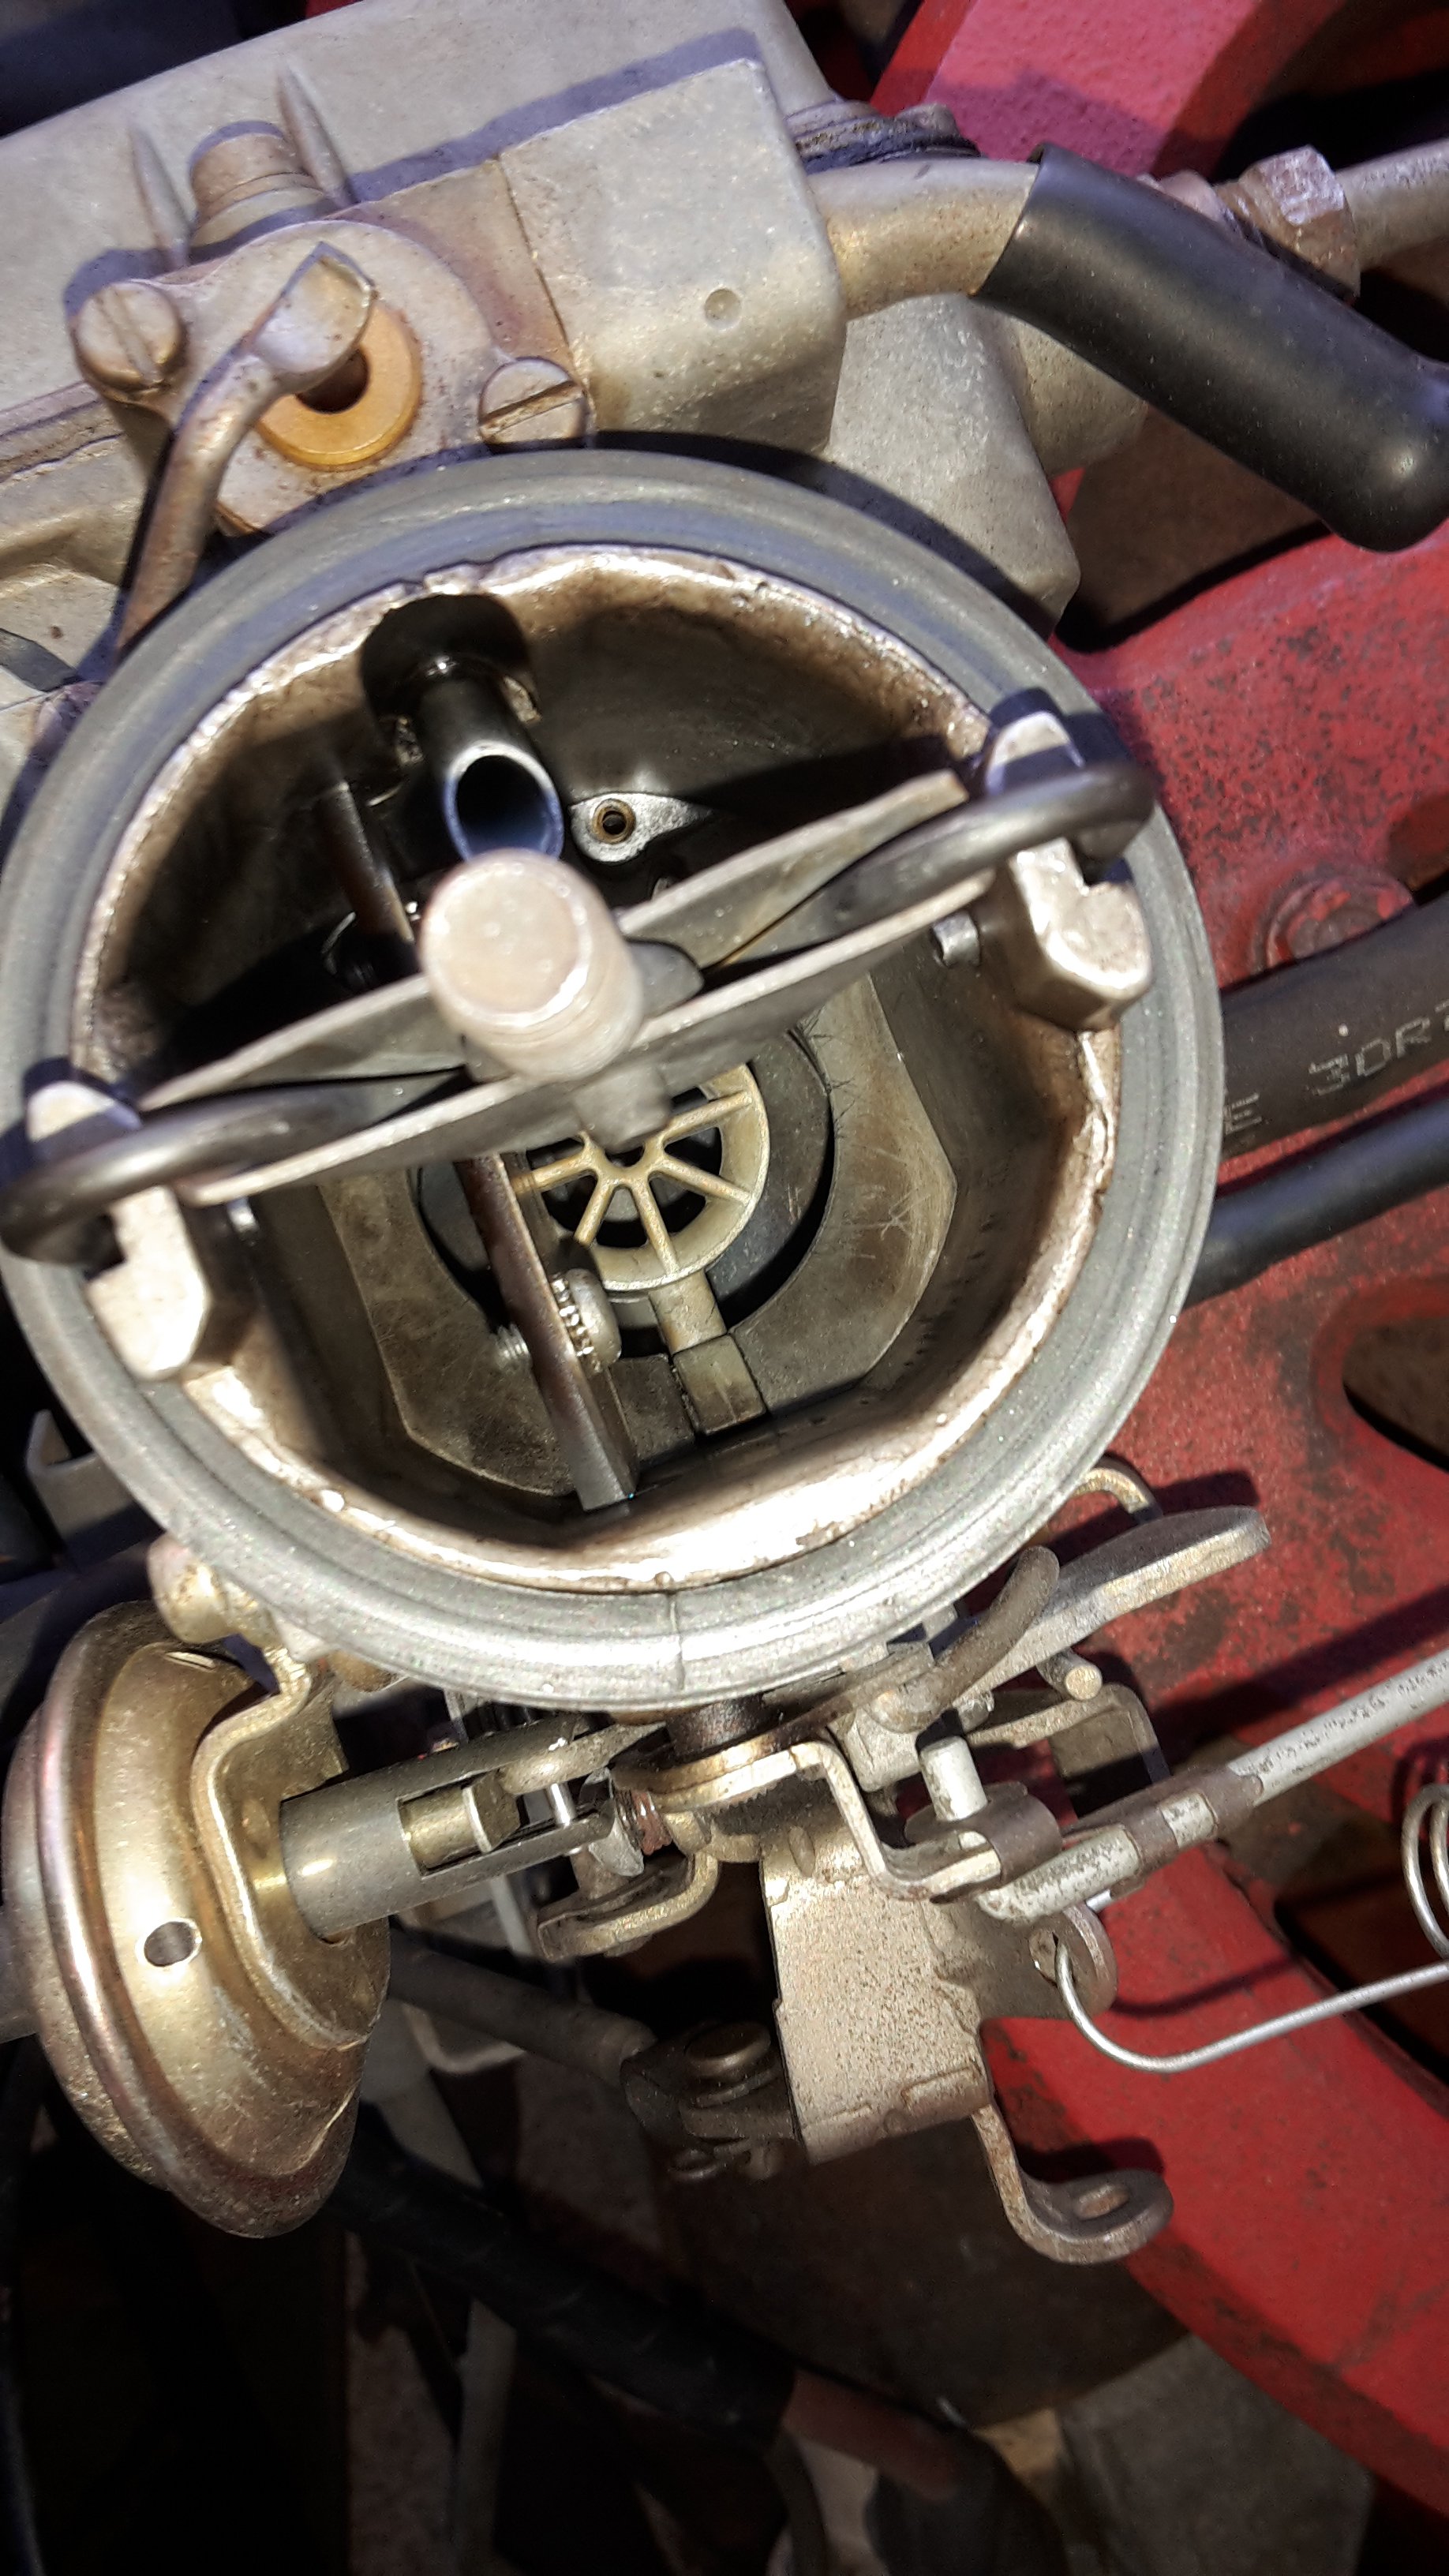
Also, look how tiny the carb is
1 point
-
Not a lot going on at the moment, have bought some bits like the MB cylinder, looking at a set of new shocks and may have a donor car shortly1 point
-
So christmas came a little late this year.who am I kidding, this was better!Mark at the Metric Nut sent me up pretty much everything I'd need to get this thing on the road.I wasn't going to bother with the shift rod seal but after cleaning up the gearbox, I'd found one small tear in one of the axle boots, so while it's apart we might as well stick one in, never had one before, fancy!got the front brakes back together.had to get the rear oil seals pressed in by the local shop (cheers frank and co) I tried doing my self but just mangled it. nearly didn't do that either as I read the seals don't work without the drums torqued up, again, glad I did as this was inside the leaking one.took the pedals apart, cleaned, painted, greased and reassembled.pretty much every part of the throttle linkage was all bent to hell.new bumpstopstwin circuit master with fluid res on top, started running new stainless brake lines that I brought ages ago.pedals installed.ran clutch and throttle cables, forgot how much of a ass hooking up the clutch cable was who designed that fucking thing!got the rear brakes back in along with the bearing seals, handbrake cables run and hooked up.cleaned up the tie rods and installed new inner ends, the outer one have been replaced in the last decade or so.I was going to polish up those stainless brake lines but I had run out of autosol and wanted to get it done, I've also realized how little things like a tube of this, a can of that, soon adds up, I needed rubber grommets for the brake line, some else this car has never had, and bugger me if stupercheap wanted over eight bucks for two.this shit adds up man!ah, forgot the lube!never forget the lube.then I came up with this genius way of getting it inside the steering box.and paint bla bla.front drums on, with new locking tabs for the bearings.rears all jammed on.and holy shit balls! it's on it's wheels!1 point
-
Been away for a few weeks camping, was supposed to take this as the tow vehicle but oh well. Next year maybe. Escort Van trailer went great, really miss having a van tho. Anywho, by the time we got back a few orders had showed up (ie not before xmans ), from LadaPower.com, Fiatparts.co.nz and WuM-Autotiele (ebay), main bits i was waiting on were the Starter bushes. No Shots of that but its all shiney in there new with new bushes and brushes. Still a bit intermittent tho :/ Will try better earthing. (I just realised what the red gear knob and rubber straps appear to be) A few parts are going to have to wait till the next rebuild like this adjustable cam sprocket: Anyway, with the starter installed and timing (finally!) set, it rolled under outside under its own steam for a wash and a drive. After a few more checks and tightening of varois clamps and nuts it was Family wagon outing in the the Familiare time And a bit of brum brum, this is after a few runs up and down my road and a blast up to the top of this hill: As mentioned the car seems to be getting better with some use (despite not having any advance at all) Engine so far has no oil leaks or majorly disturbing sounds, and seems to hold water fine. Ive since fiddled with some shakedown stuff: - ajusted the clutch - adjusted gear shift mechanism - swapped parts between 3 spare dizzies and new parts to heve one good dizzy with advance! just needed * advance weights * not ruined advance springs * not worn out pegs for weights and springs * working vacuum advance thinger * clean and lube, new dissy cap, rotor and points (already done before) - new oil light sender - actually a dud - dash out loose wires on some lights * also adjust choke on and handbrake on switches so they are not on all the time, and water temp guage wire so it works - changed out cheapo run in oil (no metallic flakes/poweder of any note) Tomorrow ill retorque the head bolts and adjust the tappets and take it for another blast. Feels good man!1 point
-
Or my lawn1 point
-
Got to work on doing the springs and shocks today, went with cut standards all round, cut one side of the cobra rears and the coil diameter was quite a bit thicker than standard coil. turns out by the time id cut to fit the short shocks it was so rigid because of such little weight in these cars that it hardly compressed more than 10-15mm when it was on the ground haha. so cut the standard rears to the same height and it slammed it down nicely. got a bit over-excited with the fronts and ended up cutting too much off... took it for a whip round the block and aside from the horrid sounds of mudguards scraping the ground the entire time, it was actually mighty comfortable, new shocks working a treat! thankfully i still have the cobra fronts to play around with to get the ride height mint.1 point


This leaderboard is set to Auckland/GMT+12:00