
Leaderboard


Popular Content
Showing content with the highest reputation on 03/28/16 in all areas
-
Hi all, as you all can tell i'm new to oldschool.co.nz but I hear you're a great crowed! This is my e30 that i've owned for a few years now. Was bought with a humble m20b20 engine that one day decided it did not like to live anymore. So I was more or less forced to do a m50b25 engine swap. These pictures will span over many years and life events. I feel that I have grown a lot with this car and can look back at the decisions i've made and learn from them. These were the 1st modifications I did, it took a lot longer than it should have and caused much anguish but it was all gone when I stood back and looked at her. The Patches if primer was the cancer (rust) forming - M20b20 (2 liter straight 6) - Manual conversion using 325i getrag 260, m20 lightweight flywheel, exedy clutch - Lowering springs with koni sport adjust shocks - Front and rear 325i sway bars I drove the car around as it was getting a feel for this new to me german vehicle. I did many minor modifications I pulled the trigger on attending my 1st track event. So I bought some things to make it feel more race car. But i had purchased this car for a reason, I wanted to build a rotary e30. A 20b NA powered e30. Ohh how this was gonna change... My girlfriend at the time was getting bored of me taking photos One cold winter's night, I was on my way back from a friends house when the humble m20 had enough. Twas the night before my day at hampton skid pan I have cool friends though and had started a following of e30 friends! Richard let me use his m50b25 powered e30 for the day So after I had a hoon I had to get back to reality. No rotary build for me. I needed a new engine and I needed something that I could do in a relatively short amount of time for a "budget" build... another thing I learnt, the term "budget" is not relative when it comes to cars. But after driving the m50 powered e30 and reading many (not enough) build threads/DIYs I started my search for a M50. Marcus (you'll hear his name a lot) had received a crashed e34 525i and offered me the engine and auxiliaries for a great price, so after checking the engine over, I gave him the thumbs up. I was now the proud owner of a M50b25 (cellphone pic FTL) And after a little more reading on feedback and noticing a trend with M50b25 swapped cars, I looked into selling this engine and find a m52b28. The reason being, most that did the swap found the m50b25 to have little reward for the effort. Until one day a friend asked why i'm not going to stroker it? So I started researching high and low for options and things I should do. I decided on the 2.8 stroker mainly because I had the conrods needed. I got a phone call from my wife (oh yea i got married) that she had bought me a birthday present. F*ck Yup my wife, bless her, pretty much upped my game for me and bought me the rotating assembly from an m54b30 (with help from ray@hellbm). So I guess I was going 3 liter. At this point I said screw it and sent the e30 in for panel and paint, my thoughts were by the time the e30 was finished the engine would be finished. This ended badly for me. I was naive and had put money down before they had finished the job. That is all I am going to say about the body. On a brighter note, PARTS! The apartment we were living in was not going to do, So we moved to a place with a double garage and just bigger in general. The apartment was super cramped, this town house we moved into was bigger, had a double garage and was the exact same price in rent. Auckland FTL Progress was going smooth for the rebuild Factory hone marks FTW while that was getting sorted I started unplugging the loom and disconnecting all the water and fuel lines as well as disconnecting the driveshaft and shifter linkage, work had shut down for the end of year break. I had 3 weeks to do the swap. Later that evening we got started on pulling the boat anchor out After much twisting and turning, prying and swearing it was out. and a me in the engine bay pic while Marcus makes it clear he is tired I prepped the engine bay, gave it a clean and changed the things that needed changing for the swap. I dont have pics, but the night before we dropped the m50 in, we installed the machined lightweight m20 flywheel and a brand new 6puk solid clutch between the engine and getrag 260 gearbox. The next morning we got on to fitting the engine IN after wiring up the engine and spending a few days diagnosing a non start, SUCCESS! https://www.youtube.com/watch?v=0vT7jQQLmbw&feature=youtu.be Between that day and present mistakes were made. I had issues left right and center. Not doing enough diagnosing and trying for the quick fix I bought a "tune" from a company in the united states that claimed to have the right chip for my car. This just made things worse. The tune was so rich averaging 10:1 all over the rev range. This chip was pretty expensive, and the car would still misfire, jerk and barely idle. It sat here for a long time. I was in the gutter, it had been 1.5 years and I couldn't for the life of me figure this car out. I had checked every sensor with a multimeter, bought some new ones just to double check, checked the coils resistances, changed ecus, checked codes. I had checked everything. Makeshift smoke tester Checking tps Double checking sensors It went up for sale, people were coming to view. I had given up on it. Marcus the beautiful yellow man came around one evening and forced me to check everything again, even though we both had gone through everything twice. So we fired her up, to get her warm and I pulled off the plastic ignitor cover... It was like a light from the car gods telling me that my pain and arguments with my wife had satisfied them and this is the cure to my cars' defiance to idle and drive... Only in the darkness we saw the light. The insulation on one of the coils had cracked, so spark was jumping out of the side of the ignitor pack to the rocker cover. I had a spare SET of coils sitting in my garage and the only reason I didn't change them over was that they measured fine. We VISUALLY inspected all the coils I had before installing my spare set. Took her out for a drive, I couldn't believe it. I had a idling, running non misfiring e30. skipping ahead to the present, the mods haven't stopped. 5 stud conversion with bigger brakes from an e46 328i installed with e46 coilovers, whiteline swaybars, an assortment of wheels, wof, regd and certified for everything. I can finally enjoy this car. I've been trying to attend every meet, every event, anywhere I can enjoy this car. Talk to people who have their own projects, their own stories. Here's to the good times Discussion Thread16 points
-
Been pineing for vanlyfe again because such practicality for all aspects of everything so been keeping an eye out for something suitable when this POS popped up. Cheers to BLIZZO for giving it a quick once over and a seal of approval before I placed a couple of bids and won it. Took the train down from Hamilton on Saturday to Palmy and drove it back that evening. Its a 1989 Hi-Ace Custom so its got some good supercustom bits like a coil sprung rear end and a column shift G55 gearbox but a gross 3Y-U with a billion vacuum lines on the carb that other than using all of the fuels it runs lush as fuck for 318thou kms. Spent all last Sunday arvo in the rain at PAP pulling this pile of yuck off a 3Y-EU Townace, at some point I will try fit it to the Hi-Ace. Will it make an improvement to anything? Maybe a bit better economy power but who knows. Got it home and tried to fit the supercustom big brakes I had lying round but thats a fail so while it was on the axle stands I swapped on the wheels of the Hilux Its got a heap of bog hiding in it and its filthy as builder spec inside(nails and screws in the bottom roller door channel). Needs a good clean up and my panel beater Barry to give it a once over. Plans are to take seats out of the rear and build a plywood base for camping/utilitarian duties. Maybe flip the ball joints and adjust the rear springs to get it tucking then see if I get a green sticker10 points
-
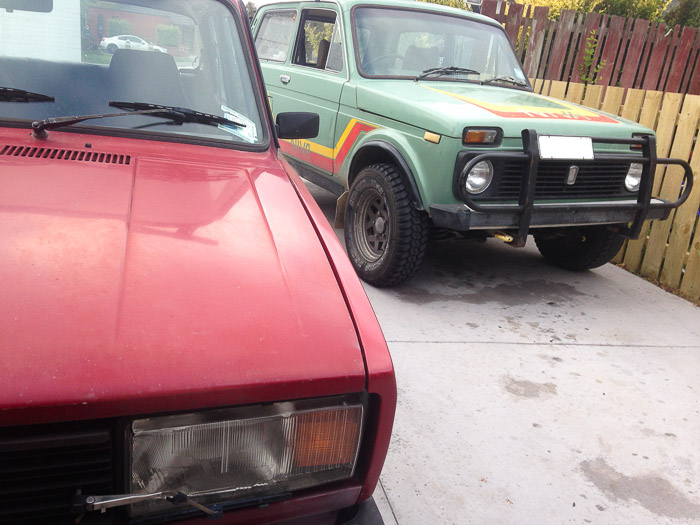
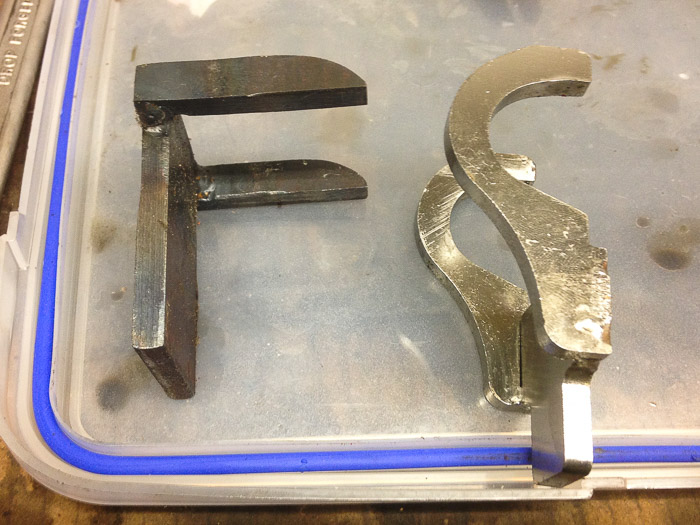
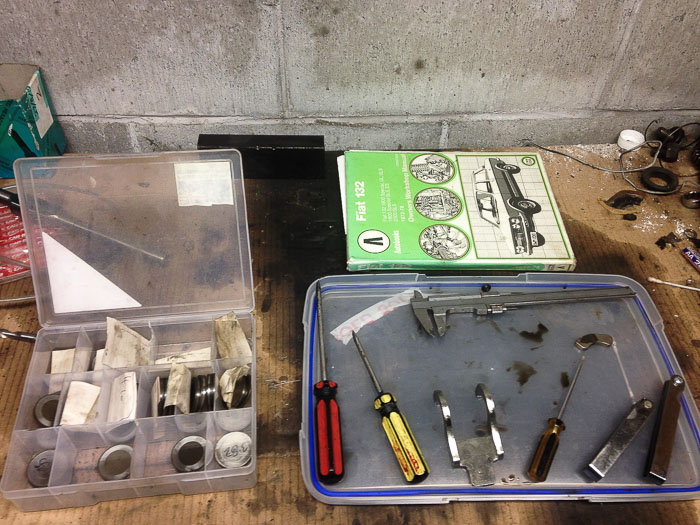
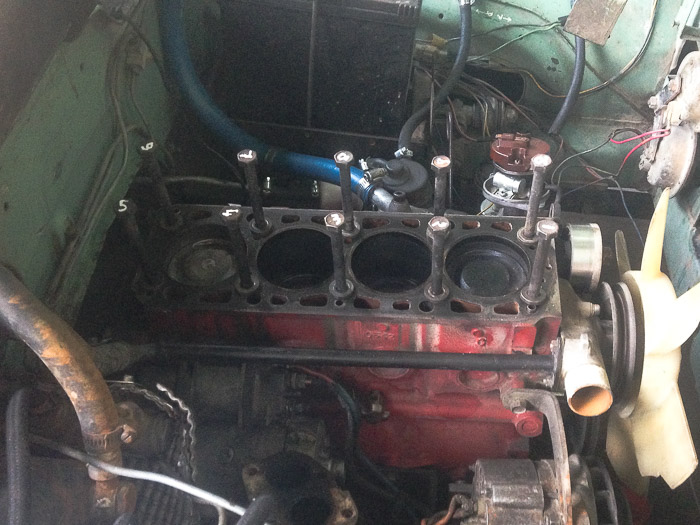
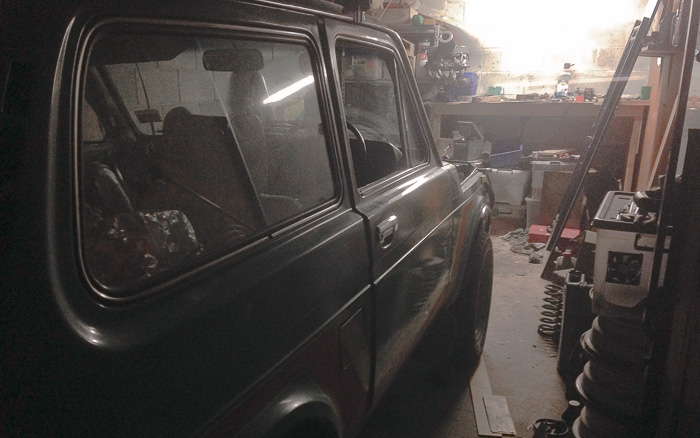
Long weekend and made it into the shed each night after dinner to tackle the engine Borrowed a bottom tap to clean up the threads and took my time checking and rechecking there was enough room to torque down the head, only just there, but just is enough! With the engine back together and running next stop was to check the valve clearance, while up in Matakana a month back I called in to see Azzurro who lent me some shims and the right tool for the job For laughs, here's my attempt at the valve bucket tool, next to the real deal After all the messing about I really only changed one shim, but it was pleasant having the right tools! Conclusion: Two running, road legal Ladas, or is that Ladii?
 7 points
 -
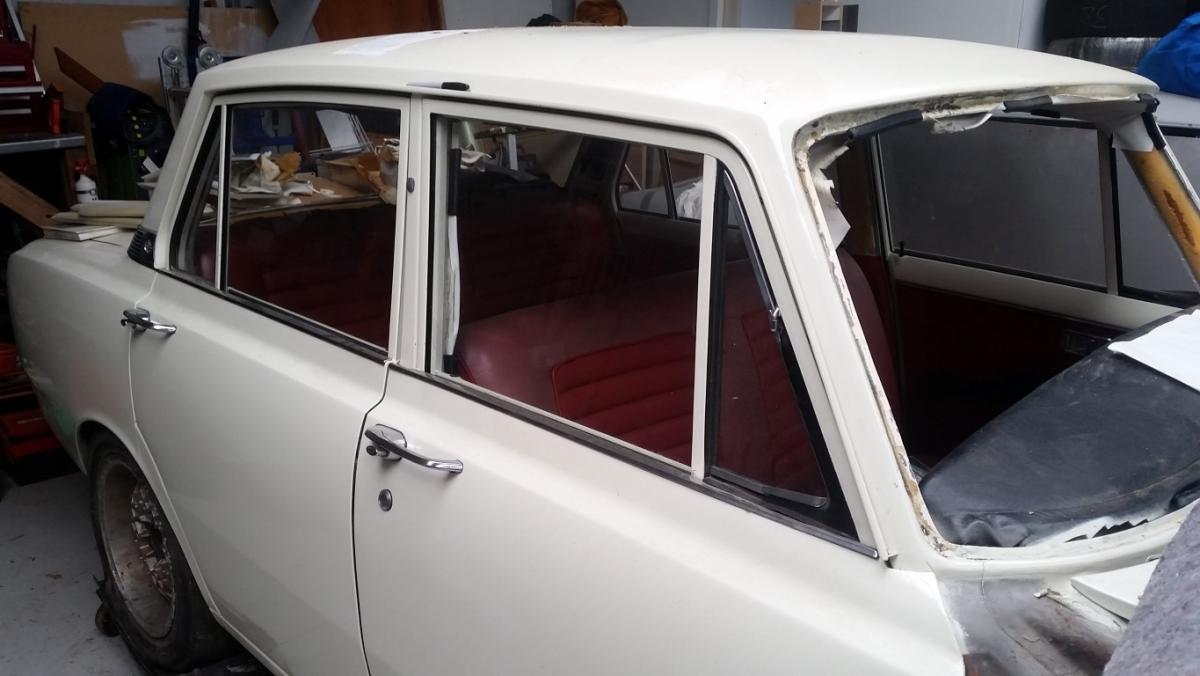
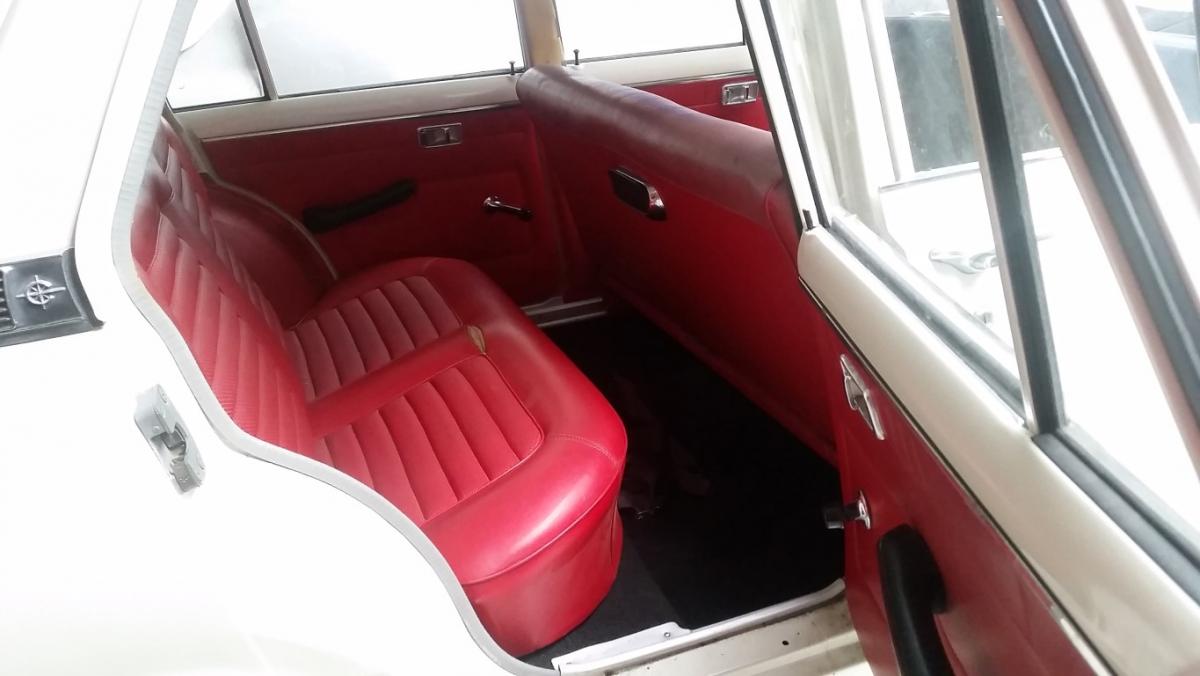
Bit of interior reassembly. Putting new carpet in makes such a huge difference.
6 points
-
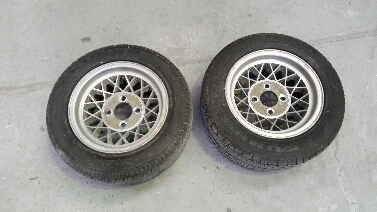
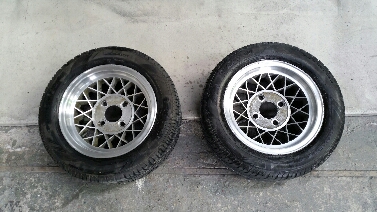
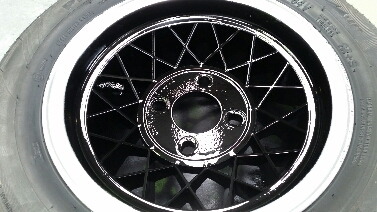
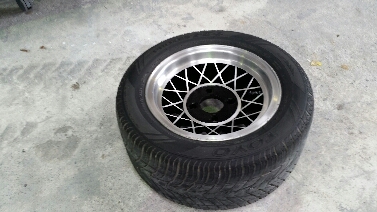
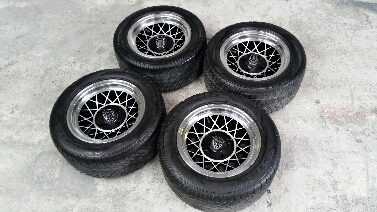
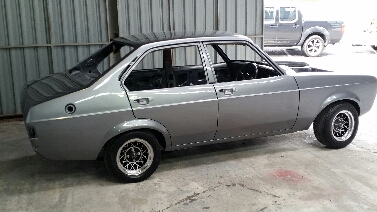
Pulled the wheels off today to give them a spruce up. They were looking a bit ratty and wasn't sure if they were the right choice Gave them a good sand up with 320 then 800,1000 and 1500 A few coats of satin black and a rag with some thinner on to wipe off the excess. And finally a heap of rags,metal polish and elbow grease... Came up good,much happier now. Still needs about 2" of drop but will have to wait till the rest of the weights in.still thinking modgies but might leave that for now as I've realistically got other things to blow money on for a while. Also filled it up with cavity wax
5 points
-
I was able to spend a bit of time on this over this long weekend and close up the rear quarter. First removed the remains of the inner skin and replace it with a single skin. Like the other side, instead of recreating the factory rust trap, i replicated the existing 'shelf' but made it an extra 5mm or so wider to attach directly to the outer skin. inner plate ready to bend to outer 1/4 profile inner bent up to outer profile. + a wee rebate for the bumper mount outer 1/4 from under neath (bumper rebate patch from the original just tacked on) hole which was cut from the original outer skin. It would probably have been easier to just tap it into the nice new steel given the state of it, and the amount of faffing blowing holes in it but its done now Next, make the lower panel to fit. A shrinker/stretcher would be awesome, but this tuned out ok. 1/4 fit looks ok test fit #4358754785 showing off my pie cuts and blow outs that make this shape 1/4 fit looks good, time to weld. I like to have the patch just 'fall' into place with no more than about 1.5mm gap at the most- if you have to force it it wont sit right once its welded and might warp - too big a gap and its a pain to weld and it will warp due to the amount of heat needed to bridge a big gap 1/4 tacked in, this is about 3 passes, just closing up the gaps each time letting it cool be fore stating the next pass. These big panels will warp very easily. 1/4 welds smoothed and ready for some primer Also fixed the rust patch in the sill, good to have a few patches on the go when welding as you can swap between them and avoid over doing it and warping the panel. insider the sill end, not bad for 50 years. Dunno why it rusted out above? sill patches tacked in And all ground back plus smoothed with the 40 grit sander and ready for some primer So that leaves only the front drivers floor and fender to do now rust wise, but I cant make a start on that untill the diff is back in and on its wheels. Axle seals turned up, so swapped them out, changed the pinion seal (the nut was suspiciously easy to get off so will get a new one before i put it back in) with some RTV behind the washer (to stop the leak into the flange). My handbrake pads and diff hard lines need picking up, and i need to get the leaves reset over the next week or so, and meanwhile have some crusty diff/suspension parts to clean.5 points
-
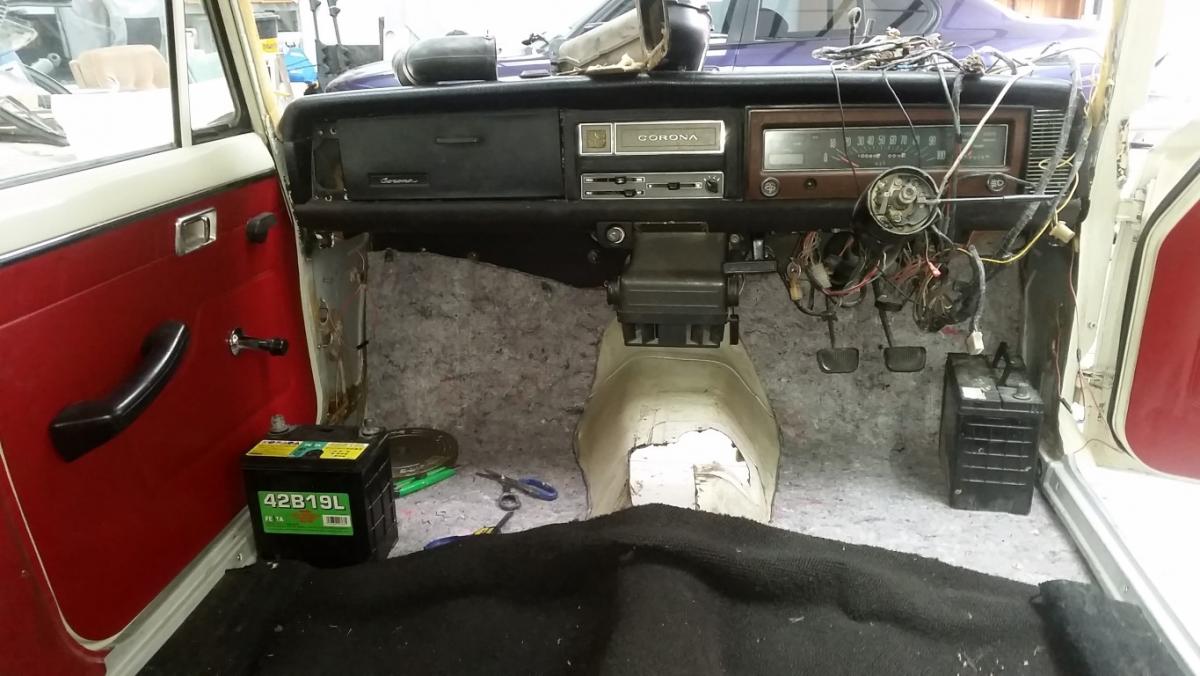
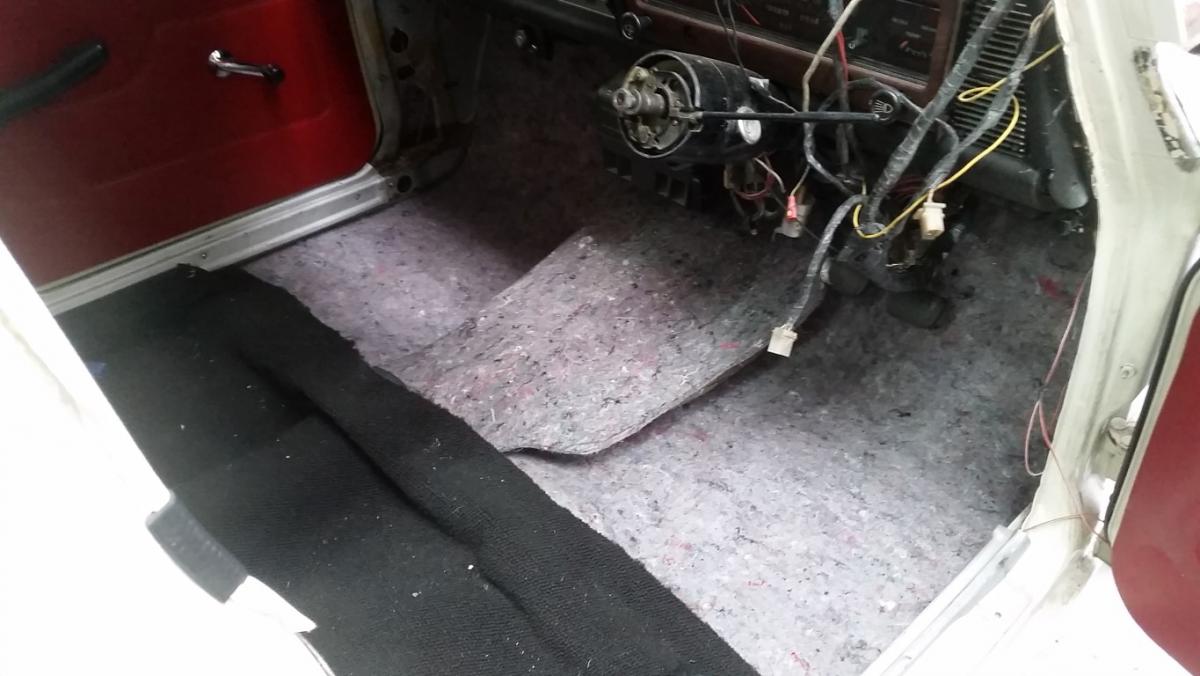
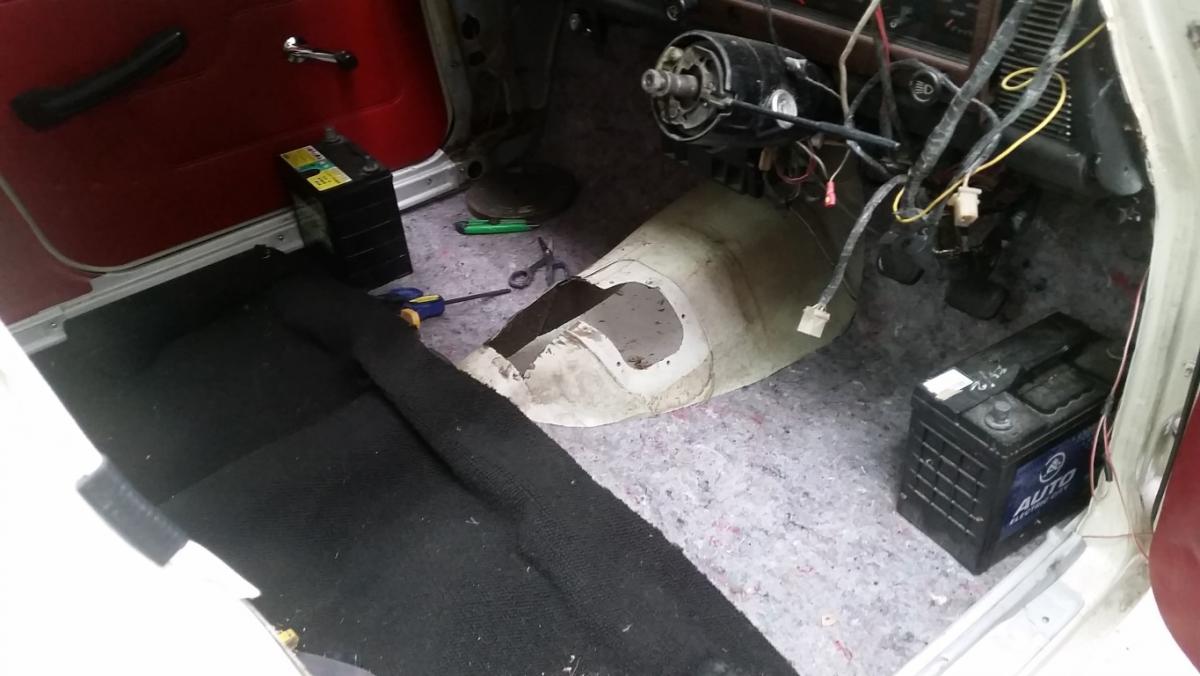
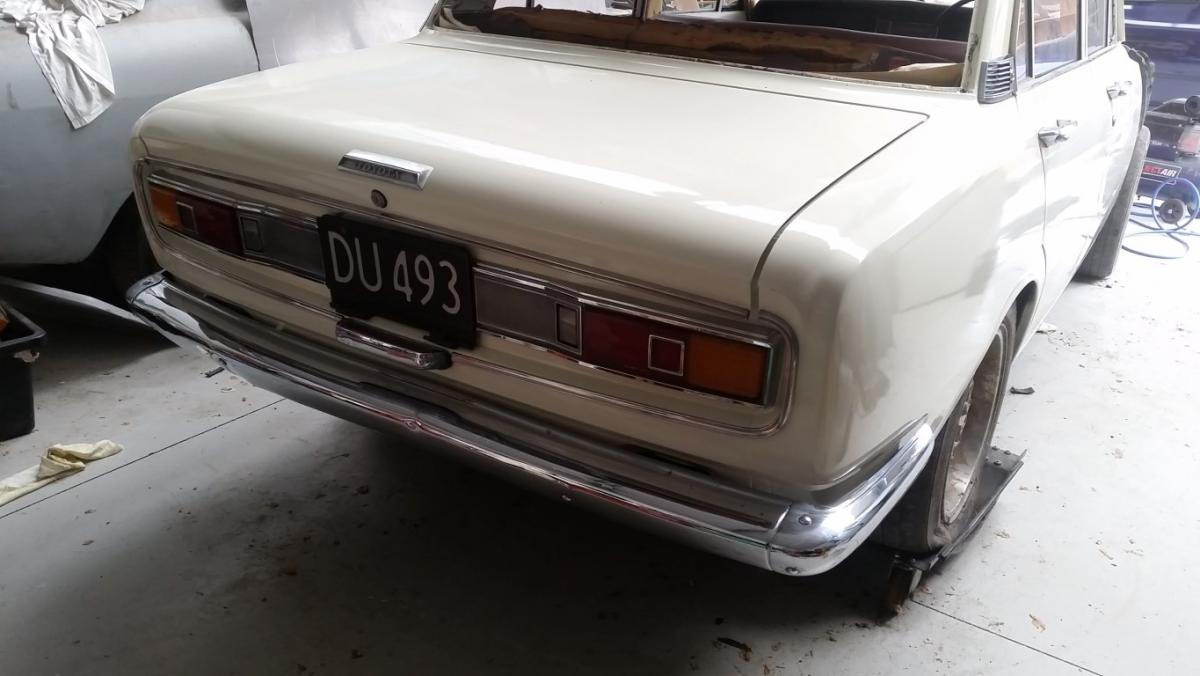
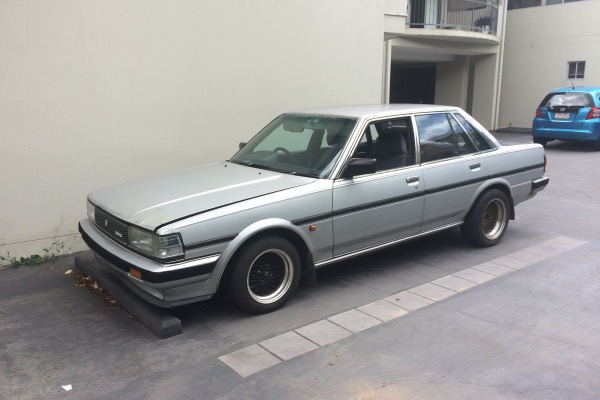
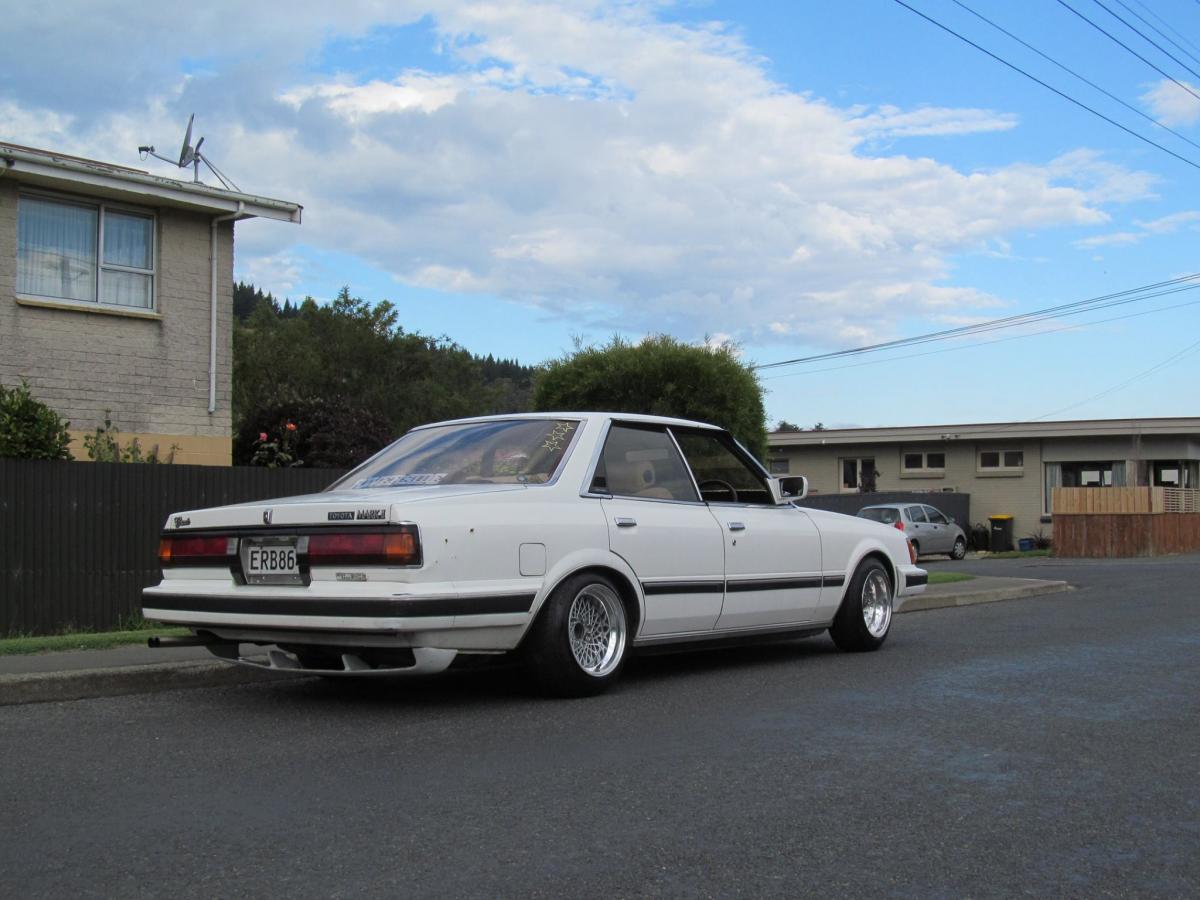
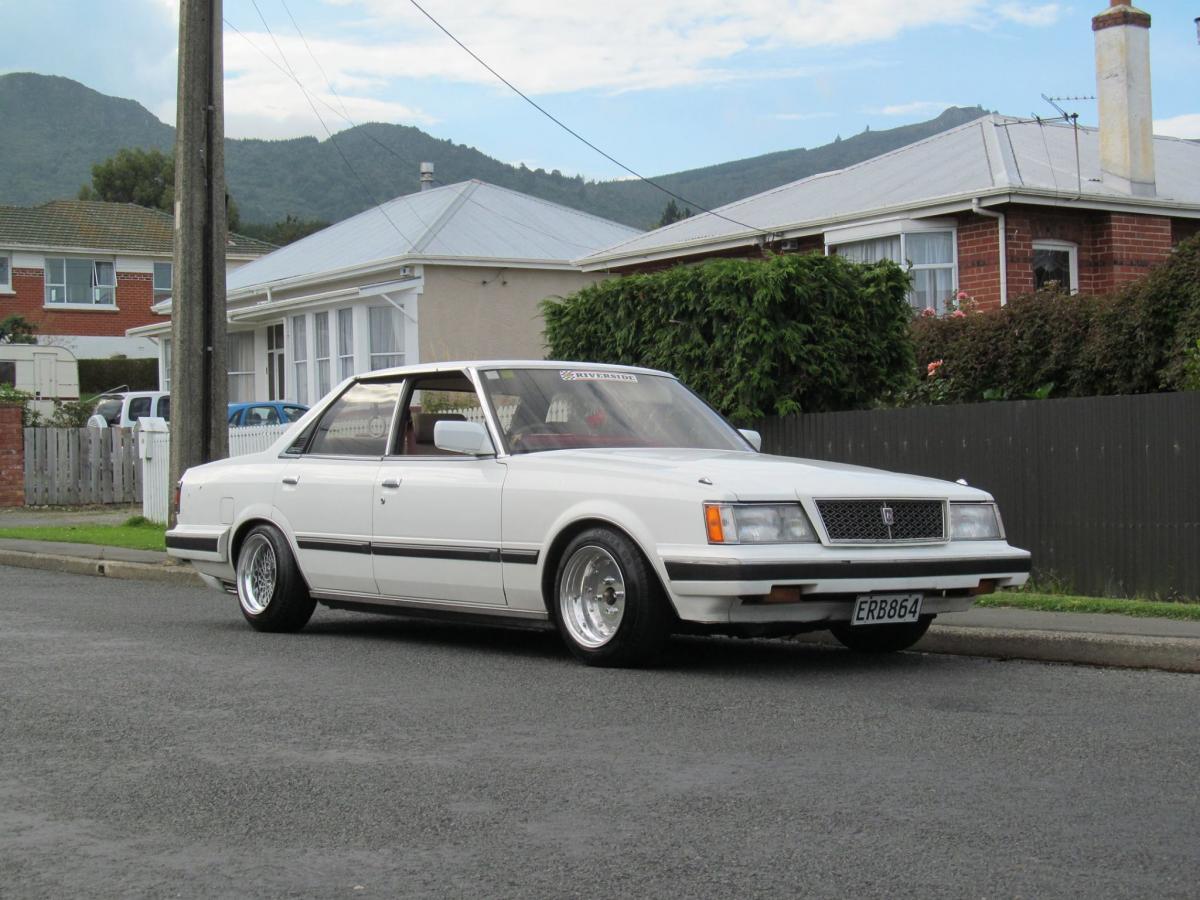
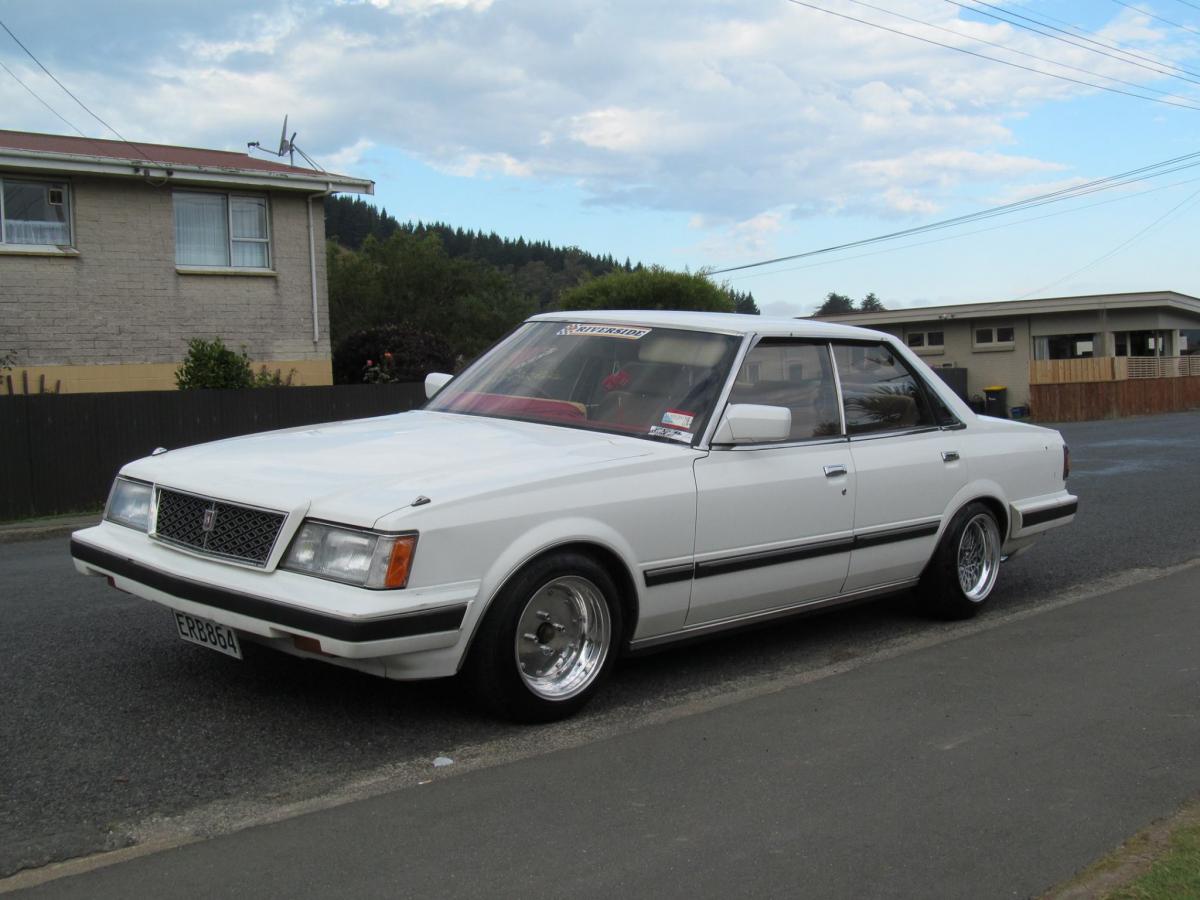
Won this auction the other day. Have a soft spot for Crowns but wagons especially.A few people on here would have been watching this auction, Will be delivered up to New Plymouth later this week sometime, Failed on a few things, so will need to sort out; the list is: *HP lights to be replaced * Diff Cross brace rubber to be replaced *Left hand side Idler Arm * Front + Rear top shock rubbers to be replaced *Indicators to work *Steering drop arm ball joint to be replaced *Machine rear drums *glove box to shut *cracked rubber Body to chassis mounts to be replaced to start with I just want to get it rego'ed, which will mean having to track down above parts, made harder by the fact I live overseas mostly, however a lot of internet searches and phone calls should have it sorted. Once it's legal then will look into 1JZ-GTE, the biggest issue (maybe) will be the fact that these still run a steering box, and not sure if it will be a straightforward drop in or involve some mods. Wheels - alot of options, that look good on these|: I'm also madly searching Yahoo.co.jp for a set of these lights, found on the base model vans, and deluxes; if anyone has or knows where I could find a set in NZ give me a yell The headlight conversion makes the car look 1000x better to my eyes, so I need them.. Also if anyone has a set of MS137 / UZS131 88-91 alloys for sale let me know, the old man wants them for his Hiace, same as the set below: If anyone can help with any of the parts i'm after will be eternally grateful.3 points
-
Intake and valve cover ready. Also finished sanding the spoiler but didn't get any photos. Will get some later when I do paint. Swap should be starting in 2 weeks, as soon as my last few bits arrive.3 points
-
Over a year later, an update. A whole lot of nothing happened because I moved cities. I chucked the new engine in, big thanks to KK and Manu who came over to lend a hand. Really appreciated that. I don't have pictures in progress, but you can imagine what an empty engine bay looks like along with the smiling faces of Manu and KK. Old engine - New engine - Have run it in a little bit (a few hundred miles) but it's not well tuned and I didn't have much time or motivation to sort it out. I've chucked on my wideband now to have a look and the mixture is all over the show, leaning out on acceleration and open road cruising. Rather than mess around with the old DCD, I came up with another plan. I have finally managed to get this bit of unobtainium from the land of hens teeth and rocking horse shit. Took me 10 years of trying to get this off a guy who was never going to use it. A super rare Blydenstein sidedraught manifold. I've only ever seen one other like it, and that was a photo from the UK. It is a combined manifold and rocker cover, but the downside is the engines have two ports in the head for an exhaust pre-heating setup. So, my dilemma is what material to make the gasket from? Standard, they have a cork gasket for the rocker cover and an exhaust gasket type material for the intake. I would use standard gasket paper, but not sure if the exhaust port will cause a problem with that and burn the paper, leading to a leak or some other unwanted events. I'm pointing to the intake port, but about an inch inwards from both intake ports are the exhaust preheating ports on the head. Or should I make the whole gasket out of some other material - like exhaust gasket material - but that would be a bit shit. Another option is to bung up the exhaust pre-heating outlets with a frost plug - although not sure the size would be standard. Give me your thoughts here please -> //oldschool.co.nz/index.php?/topic/33890-vivaspeeds-no2-viva-discussion/page-23 points
-
i now feel like the more analog version of romandave, but regarding valiant front suspension rather than toyotas. i got my new tie rod things painted and put in also made a thing to reduce the amount of droop travel to counteract the shortened bump stops, so the total suspension travel is more like original. this didnt make much difference to toe change problem though. check toe change again BINGO. toe change reduced from 23mm over 100mm of travel with original tie rod ends, down to 6mm with new ones. It drives much better, even with a wheel alignment done by eye, it feels much more stable at open road speed over humps etc. its quite surprising how much difference shifting the pivot point down a minimal amount can have such large effects on the geometry. the new tie rod ends are from memory about 9mm different to the original ones3 points
-
Fail ^ afr graph; pink line is the 44.5mm extractors, they match the old 38mm's from 6000rpm onwards. but are junk below 5000rpm, at part throttle and wide open. im not sure what is happening down low, lack of velocity or maybe getting a bit of reversion? but rules out that the 38mm tube is any kind of restriction. The fuel ratio is a bit junk in general. long story, but had to do a quick temp fix on cambelt, with an old belt. as some stones managed to get in there and destroy my poser toda belt. Im pretty sure the cam timing is off. as its gone lean through the midrange. but with that fuck up looks like it may have gained some more midrange power. as requries about 5% more fuel between 4500 & 6500 to get it back to where it was. when i throw the new belt on will see whats going on, and maybe finish dialing in the cam timing, that i was spose to do 2 years ago... looks like i got to 10degrees advance on the inlet and 10degrees retard on exhaust, over kelfords recommended.3 points
-
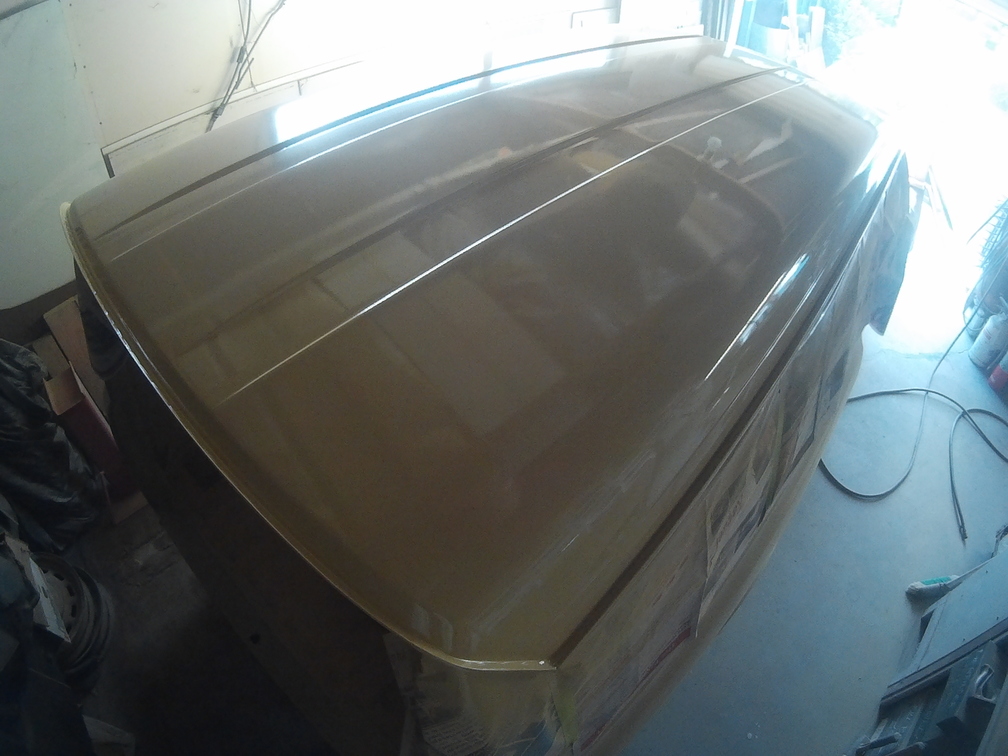
The roof was long boarded down and any imperfections were sorted out. Also seam sealed the two edges where the roof panel meets the sides. This is the rear corner looking over the roof. Sprayed on the final primer, dried very quickly but was able to keep it wet and glossy. Looking very straight now.
3 points
-
Finally have 4 pipes heading in the right direction. Has been tricky getting all runners the same length, while making them aesthetically pleasing and within the same constraints, so can bolt on swap back to the old extractors if need be.3 points
-
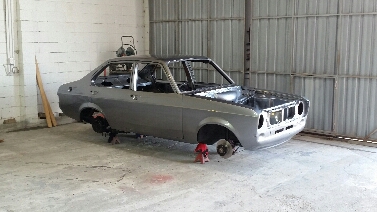
In completion of my AE86 project (which has been promoted to my 'Sunday Fun-day car, this is a very high rank) I have bought myself a pre-facelift KE25... for some reason. Have scored myself so far, KE20 1200 HI-Delux front guards, bonnet (not pictured) and grill setup from Japan TE27 Trueno rear tail lights from Japan 4k and K40 locally Going back to a K series engine but will probably upgrade to a K50. Barely any rust overall which is sound. Bit behind the rear tail lights but for a novice like me should be pretty easy as it's all flat in that area. Pretty keen to get this panel and primed myself (learn along the way), take it to somewhere in a booth to get exterior done properly. I predict that this will be a 2+ year long project, but looking forward to it none the less! Big thanks to Olds Cool Autos for supplying 90% of everything, including the shell.\ Discussion thread here: //oldschool.co.nz/index.php?/topic/52401-pbaines-1971-toyota-corolla-ke25/2 points
-
Talk smack here about this nice little e30 link to the build //oldschool.co.nz/index.php?/topic/52383-jibs-87-e30-24v-31l-stroker/ Very nice work. wow. S internals .At least you know your wife listens . i will be picking your brain me thinks2 points
-
I have acquired a super rare Blydenstein sidedraught manifold for my Viva. It is a combined manifold and rocker cover, but the downside is they have two ports in the head for an exhaust pre-heating setup (usually under where the Blydenstein wording is). Below I'm pointing at an intake port, not the exhaust port on the head. So, my dilemma is what material to make the gasket from? Standard, they have a cork gasket for the rocker cover and an exhaust gasket type material for the intake - because they are two separate parts. I would use standard gasket paper, but not sure if the exhaust port will cause a problem with that and burn the paper, leading to a leak or some other unwanted events. Or should I make the whole gasket out of some other material - like exhaust gasket material - but that would be a bit shit to make. Another option is to bung up the exhaust pre-heating outlets with a frost plug - although not sure the size would be standard. Give me your thoughts and also in my build thread discussion -> //oldschool.co.nz/index.php?/topic/33890-vivaspeeds-no2-viva-discussion/page-22 points
-
& turn your grain up & down alternates.... (cups)2 points
-
Adjusted the upper shock mounts a bit to allow a bit more shock travel (duh). Was looking under the car with CDL and noticed that one of the front bags was rubbing on the chassis pocket when down. Not necessarily a concern but I wanted to check it further, I found that there were a couple of (factory) weld dingles rubbing on the airbag so had to dismantle some of the suspension so I could grind them smooth. Came apart OK, and no other issues after 1 year/3000 miles on the bags. It's nice not to have to deal with spring compressors and such when splitting things apart. Have also topped up PS, bled brakes, drained and refilled air compressor (twice) so hopefully is all OK of BH16. Geez this thing looks untidy underneath!2 points
-
To aid in the explanation, I made this in Paint (the preferred engineering design software of oldschool)2 points
-
Can always go the other way home see a heap of the country in one day not a bad trip2 points
-
Laser cut copper They will last forever and are reusable2 points
-
I'm keen. Maybe an Oldschool meet up/display?2 points
-
Bit more assembly and underlay making. PITA cutting the underlay bit for the tunnel. Will cut transmission hole after welding up the old side exit shifter position and getting some sort of boot. Put all the chrome work on the back end.
2 points
-
There we go so in an effort to try keep some oil in the engine and not over my driveway / new shiny bits I chucked a new cam cover gasket in I also fitted some side stone protection made from some industrial belt material i have had that was for my other car its finally feeling like im getting towards the end now the list is getting smaller and smaller ive ordered my linkage so hopefully ill be able to report back after a test run this week2 points
-
Got tuning done, needs to go back soon to get the top end done, since we didn't want to rev it too high too soon. Any suggestions on what oil to run? I'm guessing some mineral oil with plenty of zinc?2 points
-
Anyone wanting to do the same thing- the tie rod ends i used are early commodore manual steer ones- Camelot part number TE526R available from Autolign the joiner part has a female 9/16 UNF left hand thread in one end to fit an original valiant inner tie rod end, and a 14x2? male thread to suit the commodore tie rod end at the other. the whole thing is 210mm long which should suit any valiant VE- on. the threads are cut to a length of 65mm. Also you will need 4 jam nuts, 2 to suit the valiant tie rod ends and 2 to suit the commodore ones, the left hand thread nuts were slightly tricky to find, but Atom Fasteners in east tamaki had some. The joiners themselves were made from 4130, not because thats what i asked for but thats what the guy who made them, had in stock.2 points
-
Windscreen still has remnants of the Nats roadtrip bug holocaust, will have to drag the car back out of the shed and give it a better clean. Thanks Alistair for the last minute wipe down before Caffeine and Classics today One zenki steering wheel installed. Discuss: http://oldschool.co....1-sc-chit-chat/2 points
-
Dunno why, but I've always preferred the design of the pre-facelift AW11 steering wheel (shared with AE86s, AE82s, and a couple of other 'sporty' Toyotas from the same era) over the facelift one. Here they are side by side for comparison... facelift on left, pre-facelift on right. Perspective is a bit off in the photo - they are actually the same diameter (but pre-facelift has a thinner rim). I installed the pre-facelift one today, we'll see how long it lasts before I go back to the Nardi/Personal. Discuss: http://oldschool.co....1-sc-chit-chat/2 points
-
2 points
-
Sooooo, unicorn shit has been aquired. Genuine TRD new old stock (thants right brand new) k50 close ratio gear kit. And not only one kit, but two, although the second is missing 5th gear, got lost someone in its last 30 years of storage. So pine right now2 points
-
Next week I'll fit an electric fan and pretend it's still a cooling issue, not water seals.2 points
-
Time for fuel tank - this job got entrusted to Jon and EUROChris at Strange Workshop. My requirements basically centered around not having any external pumps or additional surge tanks, I wanted to keep everything contained within the original tank confines beneath the car as a means of minimising clutter. Project_KP61_4AGE (163) by Richard Opie, on Flickr Stock tank. What a thoroughly uninspiring piece of crap. Acid dipped as I knew we'd be chopping it up, so why not purge the shit out of it somehow so we didn't blow ourselves up. Project_KP61_4AGE (2338) by Richard Opie, on Flickr This was an investigative foray into a spare tank I had, just to see what we were working with and to map out a location to pop the pump and eventual intank surge-tank arrangement. Project_KP61_4AGE (2352) by Richard Opie, on Flickr Project_KP61_4AGE (2381) by Richard Opie, on Flickr Project_KP61_4AGE (2404) by Richard Opie, on Flickr Project_KP61_4AGE (2436) by Richard Opie, on Flickr The requisite section was measured up and chopped from the shitty fuel tank, and transcribed across to the nice, shiny unmolested tank. This was effectively sized to accomodate the pump with some space around it. Project_KP61_4AGE (2327) by Richard Opie, on Flickr Project_KP61_4AGE (2407) by Richard Opie, on Flickr The inlet/outlet fitting flange was also salvaged from the scrap tank - although in this case it started life as the flange for the fuel filler pipe but was large enough to permit a hole size that suited getting the pump assembly through it. Cut, grind, linish, weld, done. A little bit of panelbeating was needed on the uneven tank surfaces. Project_KP61_4AGE (2414) by Richard Opie, on Flickr Project_KP61_4AGE (2451) by Richard Opie, on Flickr Project_KP61_4AGE (2481) by Richard Opie, on Flickr Chris folded a box up out of fresh steel and got busy welding it all together. Capacity sits at about 3 litres for this. Project_KP61_4AGE (2453) by Richard Opie, on Flickr Project_KP61_4AGE (2467) by Richard Opie, on Flickr Measurements satisfied, it's time to chop up the actual fuel tank. No pressure... Project_KP61_4AGE (2489) by Richard Opie, on Flickr Project_KP61_4AGE (2487) by Richard Opie, on Flickr Pop it in the hole maaaaaate. Levelled up so the surge tank's on the same plane as the fuel tank itself and shit's pretty well sorted. A little bit of trimming of the hole in the tank and it'll be an ideal fit. Project_KP61_4AGE (2562) by Richard Opie, on Flickr Project_KP61_4AGE (2569) by Richard Opie, on Flickr Project_KP61_4AGE (2585) by Richard Opie, on Flickr The fitting to accomodate the AN fittings for the return and feed lines, as well as support the pump via a cradle was fashioned from the spare fuel filler, the filler neck chopped off and a plate tacked across the top. The (dummy mounted to check space in this shot) AN fittings have been welded to pipes which sit below, with a soft line to run to the pump itself on the feed side. Project_KP61_4AGE (2604) by Richard Opie, on Flickr The pump/cradle itself is pretty cool I think. This is just bent up from ~5mm steel rod, welded and braced to the abovementioned plate. Pump's just the Joe average Walbro. Project_KP61_4AGE (2618) by Richard Opie, on Flickr Finally, the surge tank/pump/cradle/bulkhead combo deal perched outside the tank. Holes drilled in the surge tank as this area sits above the original bottom level of the fuel tank and of course we'll need to permit SOME fuel to flow into the unit. Final welding still to take place but afterwards, the tank will get a treatment/seal, the fittings will all be re-passivated and the tank given a coat of black paint to tidy it all up! Thanks for reading Bought not built.2 points
-
More unicorn-spec optional OEM parts have appeared on Yahoo, but the price = moonbeams. Factory monsoons for when it's pissing down but you absolutely need to have the window cracked open. At a cool NZ$700 I think I will let these pass by... I'm not even sure if I can have them and the roof racks fitted at the same time! Also for anyone who missed the gigantic Nats 2016 photo thread, here's a couple of cool shots of the AW with a fellow pop-up enthusiast at the top of the Bruce Road, Whakapapa. Covered the 750km round trip with no dramas although I have since noticed the starter is now a bit sticky when engaging. It's the perils of having just ticked over 100,000km I suppose! Also thanks to everyone's favourite train enthusiast Jamie/HighLUX for supplying a pair of replacement interior C-pillar trims without speaker grilles. Purists might argue that facelift AWs should have the grilles, but I discovered that having rear speakers was actually a big waste of time and prefer the cleaner look of the pre-facelift trims - so it all works out nicely in the end. Sample pic follows: Discuss: http://oldschool.co....1-sc-chit-chat/2 points
-
Thanks to the efforts of Slacker.Cam and the Jackson Factory (sounds like a cheesy movie...) the OEM Toyota roof racks have been securely fitted in time for OS Nats 2016. Cam turned up some small spacers for the rear section mounting points on the lathe and found a bunch of appropriate fasteners, while over the weekend I grabbed some felt padding for the front section. Nice and safe... but I don't think I'll be ambitious enough to tie anything to the racks just yet. Went for a quick dort out to Parau in the fading light and managed to grab a few shots before dusk. Look past all the small blemishes of being a thirty year old car, and the old wedge does clean up well for photos I must admit. More photos: https://flic.kr/s/aHskikS3t3 Looks real sicko spec now, haha. More photos: https://flic.kr/s/aHskikS3t3 After Nats the plan is to continue tidying up little bits and pieces on the side, while I focus my efforts on the Skylines. One annoyance I'm hoping to get sorted is to restore all of the exterior side trims to their original black colour. Discuss: http://oldschool.co....1-sc-chit-chat/2 points
-
Sheepers would be the man to ask about magnets. He knows so much about them that ferrous objects are attracted to him1 point
-
Ive been pretty slack... But my engine/gearbox are in and ready to be wired up. Gearbox ended up being a W58 which is an added bonus. Anyone know any local (dunedin or around) auto sparkys interested in wiring it up?1 point
-
Got a little tipsy tonight.. May need a new boot floor! This and the A pillars are the worst bits, the rest is pretty solid thankfully.1 point
-
Also has the 6mge 3 litre engine fitted
1 point
-
With the brake booster gone and compact Wilwood master cylinder now mounted on the firewall with the adaptor I machined, I had a heap of space behind the strut tower to fill. Enough space I could fill it with a catch can. Made a paper prototype to check the fit and then as usual left it in the good hands of Adam at C's Garage. Hes become my regular ali welding expert lately haha, works out good though as he often needs bits and pieces machined up here and there. Quality workmanship as always... Made up some -10 AN lines and it was done. Catch can crossed off the list! Next thing which has been bugging me for a while, was the shabbiness of the front panel. Obviously been in a crash (or two) before I bought the car, and the less than average repairs were starting to show with seam sealer peeling away from rusty bare panels, cracks in the upper rad support and even in the lower crossmember where the castor arms pick up from. So I went to the extreme and rather try to repair crap, I chopped the front off decided to start from scratch with some tube instead. Start of the top tube bent up. This is a bolt in piece. Hoping to make it so I can unbolt it and remove it with the headlights, grille, intercooler etc all attached to make engine removal and maintenance a breeze. Lower tube (38 x 2.6) welded in place with some gussets. Made up the castor arm bracket mounts. Notching them was a little tricky to get a nice fit, first one took over an hour, and the second one only took 15mins to get right haha. Evidence of the damaged panels there. That will get some more hammer and dolly work before it all gets painted. Added some 3/4" tube to the lower tube so I could weld the lower rad mounts on. And playing with the idea of doing some small tubs with the cardboard template. They take up a bit more room, but I dont have a lot to put in that space. Made up some end caps for the front tub/wings. This will add alot of strength back to those front tubs, also tidy up the front a bit also. They are just taped on atm as I need to dimple die those holes. Will have some more updates soon!1 point
-
Big thanks to Dave for delivering the Datsun out to us on Saturday night. We shuffled it into a good position for the morning sun and this morning Hannah and I gave it a decent wash. I wanted to keep all the moss in place but really it was just so covered it wouldn’t help my case when applying for a new registration/test. So off it was washed. I took some piccys first though.. Then wash time.. After it was washed down I pulled the seats out and removed the old carpet. As to be expected there is some rust holes where water has sat between the sound deadening and the floor. Luckily most of the floor is pretty solid as are the inner sills. So patchwork repairs will take place there. I'm sure once up on the hoist it will gift me more lovely rusty areas to repair but overall I am really pleasantly surprised at how well the thin steel on this car has survived! Engine bay pretty good but for a few little bits.. I pulled some of the filler out from the dents and apart from surface rust it is mainly just dents the filler was covering. Not really deep dents either. Someone has tried to make this car look pretty at some point which bodes well for it having had a proud owner. I wouldn’t be surprised if the dents were put there by my mum or dad when ferrying us kids around. It was quite a little hack for our family. The roof is really straight. Awesome! Plus the gutters, tailgate, doors etc are all solid as. It has the original Datsun screen still place and no signs at all of even bubbling around the seals. Happy about that! Whilst cleaning out the inside I scored some more treats as well as money. The car now owes me only $247.95. It would be less if the 20c coins I found were not the outdated ones. One of them is 1980. Could have been mine. Maybe I dropped it and missed out on my 20c sweet mixture that day. Oh really?.... I also spotted that it has already been fitted with top quality hifi speakers. Bonus.. So that’s it for now. With the carpet out the car is now nice and dry inside plus I know roughly what I have to do. But I need to finish the Viva wagon first before I start any rust repairs on this. So it will be pushed out back and brought inside when the time is right. Between now and then I can do my best to locate an engine or hopefully get the original 1200cc one back. Plus look for a disc brake front end and brake servo to suit. Oh..and some nice period alloys as well. Hopefully some turbos or even slot mags.1 point
-
this hit the shelves today. many thanks to Richie for his superior skills at taking pictures and making words good. Untitled by sheepers, on Flickr1 point
-
Decided to finish off some loose ends before I pulled the engine, free up some bench space and all that. I had started on a brake upgrade before the last track day but ran out of time to finish it. I had been talking to Barry Manon about his Wilwood setups, but he didnt have anything to fit a 14" wheel, so I grabbed his 15" brake kit to see how it would fit. Ended up having some other adaptors laser cut to bring the caliper in towards the center more. Picked up some BMW Mini 276mm Brembo blank rotors, re-drilled them to suit the hubs, opened up the centre bore to 68mm and added 8 curved slots to each face. Had to machine a 7mm spacer to sit between the rotor and the hub to get adequate caliper/wheel clearance. Gave the hubs a bit of a paint and put everything back together. From the inside, pretty close to the wheel center. If it wasnt for that radius on the inside of wheel, I could have fit a 300mm rotor. Had to take a little off the lower control arm to clear the rotor too. Also noticed when I took this picture that the bolt heads for the castor arm and knuckle were actually hitting on full lock, could of only been cause the suspension is drooped but never the less, decided to do something about it. Removed the castor arms and countersunk the holes. Hellaflush yo. With the brakes all done it was time to look at pulling the less than healthy 4AG from its place. I was off work for 4 weeks stuck in a sling, recovering from some shoulder surgery, so I tried to keep busy by doing little things. Had a heap of this gold reflective vinyl left over so decided to stick it in the engine bay where it gets a fair bit of heat from the turbo and exhaust etc. Also had a little front tyre issue at Pukekohe, wheels were getting caught on full lock on the inner tubs making it quite hard to turn off from full lock. So decided to go back to the 195/45 T1R. Id much prefer to use the Bridgestone as I think its a better tyre as far as grip goes, but its just too chubby in 185/55 with no other size options in 14". Anyway, with 195/45 T1R upfront (took them off the rear wheels), there was plenty of clearance everywhere but I needed some new rubber for the rear now. T1R also come in 225/45/14, so I grabbed a pair off those to go on the rear. They sit nicer on the 9j rim. Tuned up some ducting for the radiator and intercooler as well. I made some cardboard templates and had my mate Graeme at SMS fabrication cut them from aluminium for me. Drilled a few holes, bolted them together1 point
-
I did a track day at Pukekohe with the new power figure, car ran real well all day. Only issue being that the AE86 brakes were a real let down and that there was a high speed vibration. So I pulled the drive shaft out to get it checked/balanced. Turns out it had approx critical speed of only 7000 rpm and in 5th gear at 7500 rpm (engine speed, which I was almost getting to in 5th) the driveshaft will be turning 9500 rpm so I was pushing the limits of it. Decided to make a 2 piece drive shaft instead which puts the critical speed in 12000 rpm + range. Purchased a second hand 2 piece Hilux drive shaft and a hanger bearing/mount to suit the AE chassis. Here is the center mount with the right hanger mount on it. Took a few quick measurements and cut up my drive shaft, front half here. Left a little extra on to machine off once I had turned the spigot on the center mount to guarantee I got the right length. And here it is all bead blasted and tacked up making sure it fits. The drive shaft went to get balanced, so decided to make a new gearbox cross member (again) to raise the gearbox 25mm, which puts the output shaft back to factory location and reduces the working angle on the front UJ down to around 2 degrees instead of 6 degrees. I thought I had a few more pictures of it as I was making it but this seems to be it Notched a another bit of pipe and added some flat bar for the gearbox to mount to. Had to make a V shaped mount to bolt to the gearbox, allows me to bolt the gearbox to the cross member and shim it if needed to fine tune the drive shaft angles. Drive shaft back, painted and in the car. Ended up making some 10mm spacers for the cross member, just helped to reduce all the working angles on the UJ's down to 3-3.5 degrees. Brother and I went to another track day at Pukekohe, the drive shaft worked well for me which was good. Brothers car ran faultless all day. Kris sent me this vid as he was there in his red KP Starlet Was a pretty good day, but by the end of the last session the engine wasn't sounding that flash. It had developed a light knock in the bottom end unfortunately. I wasnt expecting it to even last that long to be honest. So the engine build begins...1 point
-
Toyos fitted. 225/40s are perfect in the rear, slight roll after I do the camber mod to the rear subframe and we should be good. Yeah.1 point
-
So carrying on, I got a chance to really test the new rear end setup (as well as the whole car) down in Taupo. Got an alignment on the Friday arvo to set the rear end up. I was expecting the housing to pull and bow from the welding and throw the alignment out, but came out okay at 0.5 degree negative camber in the rear and 1mm toe out each side. After that the car was already for the weekend. Headed down to Taupo early Sunday morning for another drift day held by Chris/Zero Class. Was a really good day, car went really well too so I was stoked about that. Have a few pictures here: Had a few tires delaminate and do some damage, first one tore the side skirt off and I must of ran it over, and did some damage to the already fucked guard. Second tire made it worse haha. I wasnt too fussed, needed fixed anyway. Some moving pictures from that weekend1 point
-
Was planning to buy some new 185/55 R14s but a cheap set of 185/60s came up so i grabbed them in the mean time. $80 for the set, couldnt really go wrong. Also picked up a Slit Spoiler fairly locally. Got them fitted once the MK1s were returned. Then got them on the car!
1 point
-
few bits I've picked up.1 point
-
another day another progress. made a patch for the inner guard and welded it in. Untitled by sheepers-ra28, on Flickr Untitled by sheepers-ra28, on Flickr then i copper coated the inside and welded to patch onto the outer skin. Untitled by sheepers-ra28, on Flickr Untitled by sheepers-ra28, on Flickr after much tacking and many beating with hammer its all stitched in, Untitled by sheepers-ra28, on Flickr shape wise its pretty good and a quick skim of bog will get it perfect. Untitled by sheepers-ra28, on Flickr then i cut the rust/bad repair fuckup out of the back of the arch. Untitled by sheepers-ra28, on Flickr I've started making the piece for the back but its still got a bit to go yet. ill do some more on it tomorrow night.1 point
-
started doing the rust work on this. this is the most common rust area in these things. it had a few holes but i cut the whole thing out and made a new panel. I've sandblasted, rust killed then primed the piece behind this so its brand new. when its finished i plan to empty a couple of thousand liters of cavity wax in the gap to stop it rusting in the future. Untitled by sheepers-ra28, on Flickr Untitled by sheepers-ra28, on Flickr Untitled by sheepers-ra28, on Flickr Untitled by sheepers-ra28, on Flickr Untitled by sheepers-ra28, on Flickr1 point
-
Whoops, been a bit slack in updating this build! Sorry about that. Recent work that has been done: Installed the Gymkhana shocks (pictured on the previous page) and Cheddas extended top hats. The shocks give a much firmer ride than factory - it's possibly a bit too firm given the earthquake ruined roads over here, but the car handles pretty well which is good. Unfortunately I didn't realise that the top hat bushes needed to be lubed, so they squeak and rattle and carry on, generally making a nuisance of themselves. Something I'll have to rectify. In other news, the car has been in to Honda here in Christchurch for a fairly extensive load of maintenance work: New water pump and seals New cam belt and cam seals New clutch, pressure plate, release bearing etc Rear main seal Valve stem seals Plugs and leads Miscellaneous other belts, various seals etc. Dropped in to pick it up again last week and had a lively conversation with the shop guys, who said everyone in the team had enjoyed having it in the shop as there are guys who've been working in the shop for a long time and remember these being around They ended up putting their most experienced guy on the job - he's usually held back for the more complicated diagnostics work, but as it happens he enjoyed doing the work and wouldn't let anyone else near it!1 point


This leaderboard is set to Auckland/GMT+12:00