PedRac3r
-
Posts
87 -
Joined
-
Last visited
Everything posted by PedRac3r
-
You get a really good powerband with the reed valve over piston port. Used to be kinda peaky when it was piston port, with power coming on around 8k rpm and hauling ass to around 17k then slowly dropping off to 19k, power comes on much sooner and a little better up top.
-
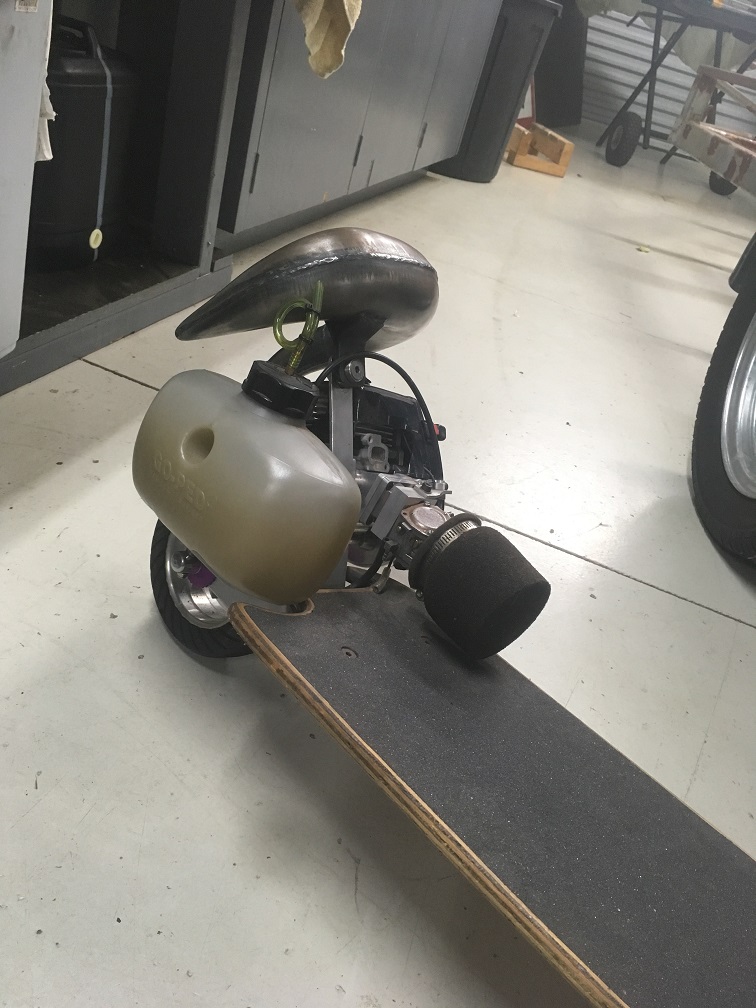
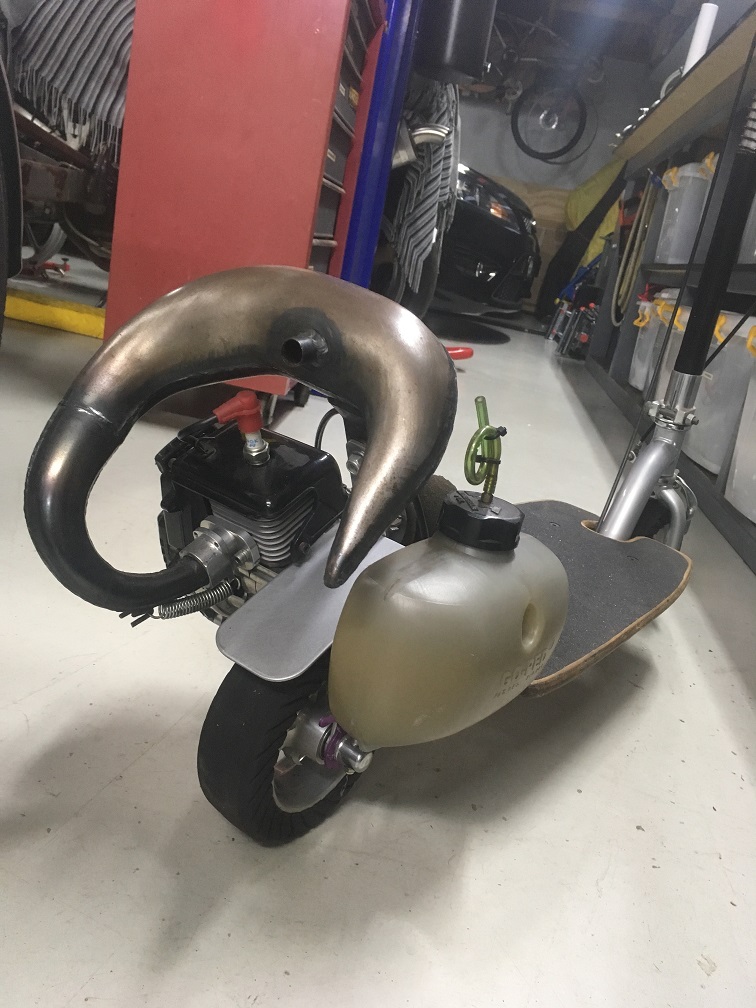
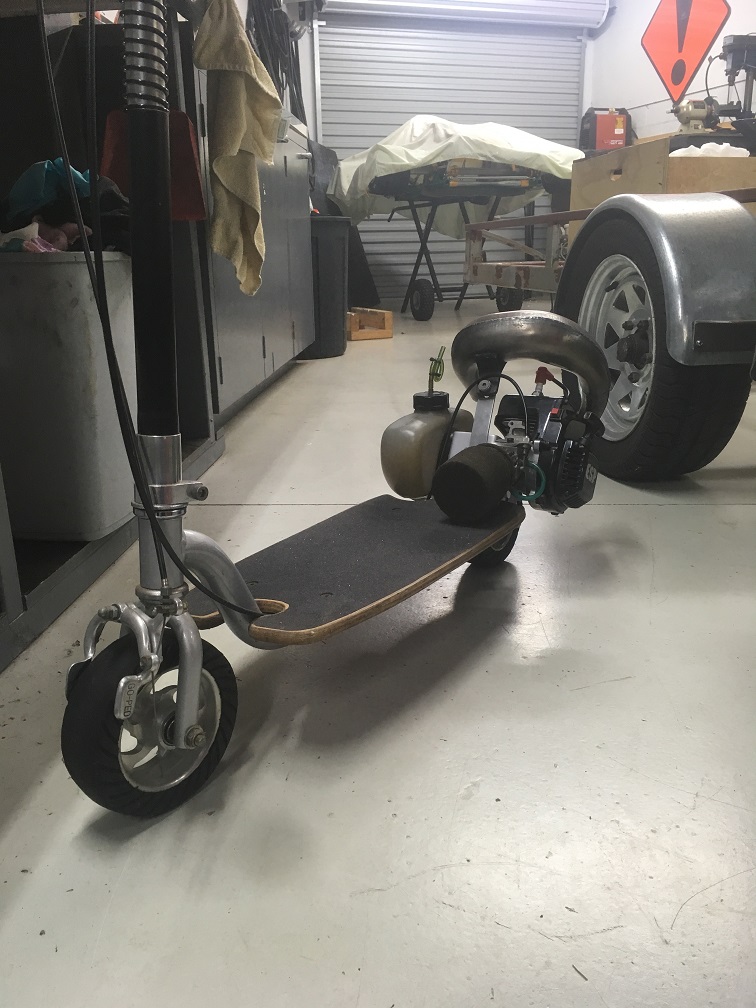
Couldnt find any of my old photos, used to have heaps, but this was nearly 13 years ago (Im 26 now)... Been lost through the few PC's over the years I guess. I dug it out of storage though, exhaust and other bits and pieces have some surface rust on it. TS Reed Cases, 2mm stroker crank, ESP ported cylinder head with the combustion chamber re-machined, Tillotson carb, ADA S1 pipe. Frame has a 3mm fender fully welded... as you know they break off after time. Billet wheels, rear needed a beadlock from memory, as the rubber would begin to expand and seperate from the wheel which felt pretty dodgy at high speed.

-
I built a few Go-Peds back when I was 11-13, still have one. Ill see if I can dig up some old pictures of it. Got Trevor Simpson reed cases, ported, 14:1 compression, ran it on methanol for a little while but too much up keep for a toy. It was pretty quick, would rev out to 19-20k rpm, I could be hooning down the foot path on a main road passing cars doing 50-55kph...
-
#Prerunner build is look good Kris! haha. Seriously though, next update should be it jumping the KP...
-
Yeah - sent the cluster to them, sorry should have been more clearerer
-
If you got a Link, then Roman and Stu are onto it. I did the same thing in my AE86 so that the stock rev counter works with the Link ECU. I just sent it down to NZEFI and let them deal with it, think it was only 30-40 dollars. Then you can calibrate it on the link (it will do a needle sweep with key on), more accurate than it could ever be from the factory.
-
You'll want one of these connector sets if your going to make a new engine harness http://www.nzefi.com/products/wiring/connector-sets/. No need to be cutting and soldering up in hur. Also speak to NZEFI about your shielded cable, Id imagine they would have a pretty good idea where to get it if they dont have it in stock already. Also www.msel.com for all your connectors, wire and heat shrink.
-
Has anyone nicked your oil filter yet?
-
Moving the rack for and aft will effect your ackerman angle closer to full lock, by altering the angle of the tie rod ends in relation to the tie rod/upright/knuckle (top view) and the leverage (and distance) it can apply to the tie rod.
-
You could probably run a Link Atom to control just ignition and go coil on plug, if you cant source a ignition kit like above. Obviously a bit more coin involved, but would ultimately allow the engine to be tuned better, and you could have ignition compensation tables for IAT's, water temp etc. Throw a few more pressure/temp sensors at it and you could data log/be warned of pressure and temps (fuel, oil etc). Food for thought.
-
So what are your thoughts on the GTX stuff?
-

OldNathans MX41 Mark II Grande talkie talkie
PedRac3r replied to OldNathan's topic in Project Discussion
Looks pretty sweet! Should have a pretty wicked doooort to it haha. -
I found the same problem with the STA bends as above, they suck. Chase, Autobend or Steel and Tube is where you want to get your bends from.
-
Had you been missing a screw driver? haha. You could look at raising the engine 7-8mm (which shouldnt have to much effect on much else), and same with ride height, to give you another 15mm sump clearance?
-
It has been a few weeks since an update, I was hoping to have everything done and painted by this point, but theres still a fair amount of work to do. I finished off the rear end/diff rebuild on my brothers car and got that all back together and driving, which has free'd up some space and cleared my plate so to speak. With my attention focused back on the front clip for my car, I was able to finish off a majority of it. Got the front tub end cap panels welded on which added a lot of rigidity back to the tub section. Picked up a new intercooler from Fenix. This one is slightly larger with 500x300 core, instead of the old 380x230 core. So intercooler and oil cooler mounts were added to the front clip, along with radiator and bonnet pin mounts. Made up some headlight mounts and got those welded on. The plan was originally going to be to have the entire head light mount to the front clip, so removing the front end was easy. At this stage only the inner mount of the headlight is attached to the front clip, and the standard outer mounting bracket still attaches to the front guards. Got the new tubs mocked up, they still need a little more trimming and tweaking here and there. Will remove the engine before I go ahead cut the factory tubs out and weld these ones in, which is pretty much where I'm up to at this stage.
-
Are you using that Motul RBF600 Stuff?
-
This could be irrelevant, and totally unscientific in every way, with no recorded data, or even adequate testing done other than feel. But I installed a trans cooler in my Hilux Surf after a hard day out on the beach in the sand climbing sand dunes etc, I could feel the heat in the car coming off the tunnel was immense. Since the install of the trans cooler (still plumbed into the radiator aswell), I have yet to feel the same immense heat from the tunnel, in the same or even slightly hotter weather conditions. As I said, totally unscientific, but reel woorld gainz wur hed i buleve.
-
Project Alan Mann (escort74's 1974 Ford Escort Mk1)
PedRac3r replied to escort74's topic in Project Discussion
Looks dope dude. Love it! -
DZ03G is another semi slick worth considering, probably one of the best semi slicks available, havent priced a set up in a while but they will be up there (or above) with the R888's price wise. A few mates have been running the Kumho Ecsta V710 semi slicks. They only have two grooves in them and some wear indicators, pretty much a slick, so they dont handle standing water/heavy rain that well. Mate reckoned they were a second quicker over the Nitto NT01's he was previously running, they lasted longer and were cheaper than the Nitto's too.
-
Try Pipeline on Patiki Road.
-
Ideally you would want them to be vertical and aligned with the end of the bar (or as close as possible) in the plane that have you drawn them. Rear sway bar will make a massive difference to how the car turns in. I went from nothing to a 19mm bar on my Integra, already had a 22mm bar upfront, and it was a dramatic improvement.
-
Might be able to get a replacement shaft from Stocks? Probably end up being the same price as a new shock though. Or check out the NZHonda forum, theres generally some Koni or Bilstein shocks floating about in the for sale section.
-
Project Alan Mann (escort74's 1974 Ford Escort Mk1)
PedRac3r replied to escort74's topic in Project Discussion
Which blasters did you use? -
http://www.adrenalinr.com/products.php?pCategory=resonators Ive used Cobys before and they truely do not compare to the AdrenalinR products. Yes they are more expensive, but you get what you pay for.
-
With the brake booster gone and compact Wilwood master cylinder now mounted on the firewall with the adaptor I machined, I had a heap of space behind the strut tower to fill. Enough space I could fill it with a catch can. Made a paper prototype to check the fit and then as usual left it in the good hands of Adam at C's Garage. Hes become my regular ali welding expert lately haha, works out good though as he often needs bits and pieces machined up here and there. Quality workmanship as always... Made up some -10 AN lines and it was done. Catch can crossed off the list! Next thing which has been bugging me for a while, was the shabbiness of the front panel. Obviously been in a crash (or two) before I bought the car, and the less than average repairs were starting to show with seam sealer peeling away from rusty bare panels, cracks in the upper rad support and even in the lower crossmember where the castor arms pick up from. So I went to the extreme and rather try to repair crap, I chopped the front off decided to start from scratch with some tube instead. Start of the top tube bent up. This is a bolt in piece. Hoping to make it so I can unbolt it and remove it with the headlights, grille, intercooler etc all attached to make engine removal and maintenance a breeze. Lower tube (38 x 2.6) welded in place with some gussets. Made up the castor arm bracket mounts. Notching them was a little tricky to get a nice fit, first one took over an hour, and the second one only took 15mins to get right haha. Evidence of the damaged panels there. That will get some more hammer and dolly work before it all gets painted. Added some 3/4" tube to the lower tube so I could weld the lower rad mounts on. And playing with the idea of doing some small tubs with the cardboard template. They take up a bit more room, but I dont have a lot to put in that space. Made up some end caps for the front tub/wings. This will add alot of strength back to those front tubs, also tidy up the front a bit also. They are just taped on atm as I need to dimple die those holes. Will have some more updates soon!