
Leaderboard


Popular Content
Showing content with the highest reputation on 03/19/16 in all areas
-
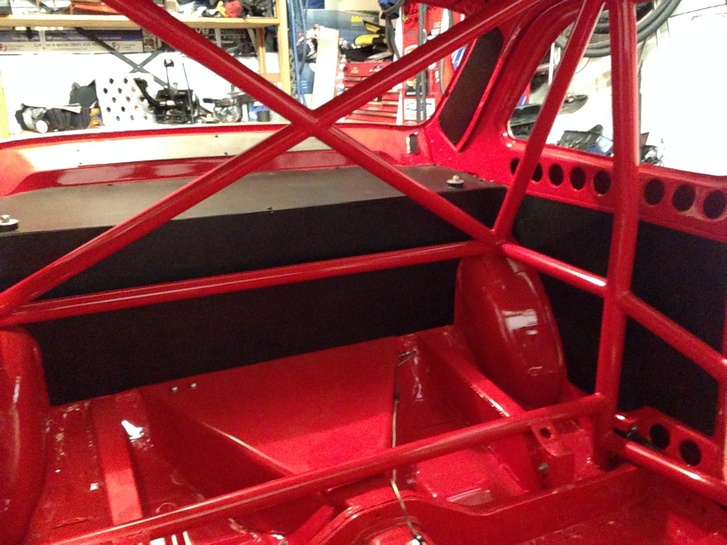
Engine bays almost ready Inside panels going in
 12 points
 -
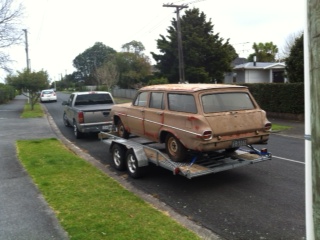
Chassis out in the sun for the first time. Stage one on it's journey home to meet the body.5 points
-
you have to have a semi believable reason as well like camo door cards are illegal cause if you open the door and a cyclist rides past, they wont be able to see the door cause of the camo and they might injure themselves. thats a dangerous fitting5 points
-
Been putting some hrs in commissioning at work so not a lot of progress, but today I was home and weather was great so I stripped a lot of the front grille area parts. These have suffered many years of exposure to the elements plus the odd immersion in rusty radiator water... Sanded the bits attached to the car, and began masking... And laid down some epoxy, looks much better already... Also got a lot of little bits painted, will try to get another couple of coats on tomorrow...3 points
-
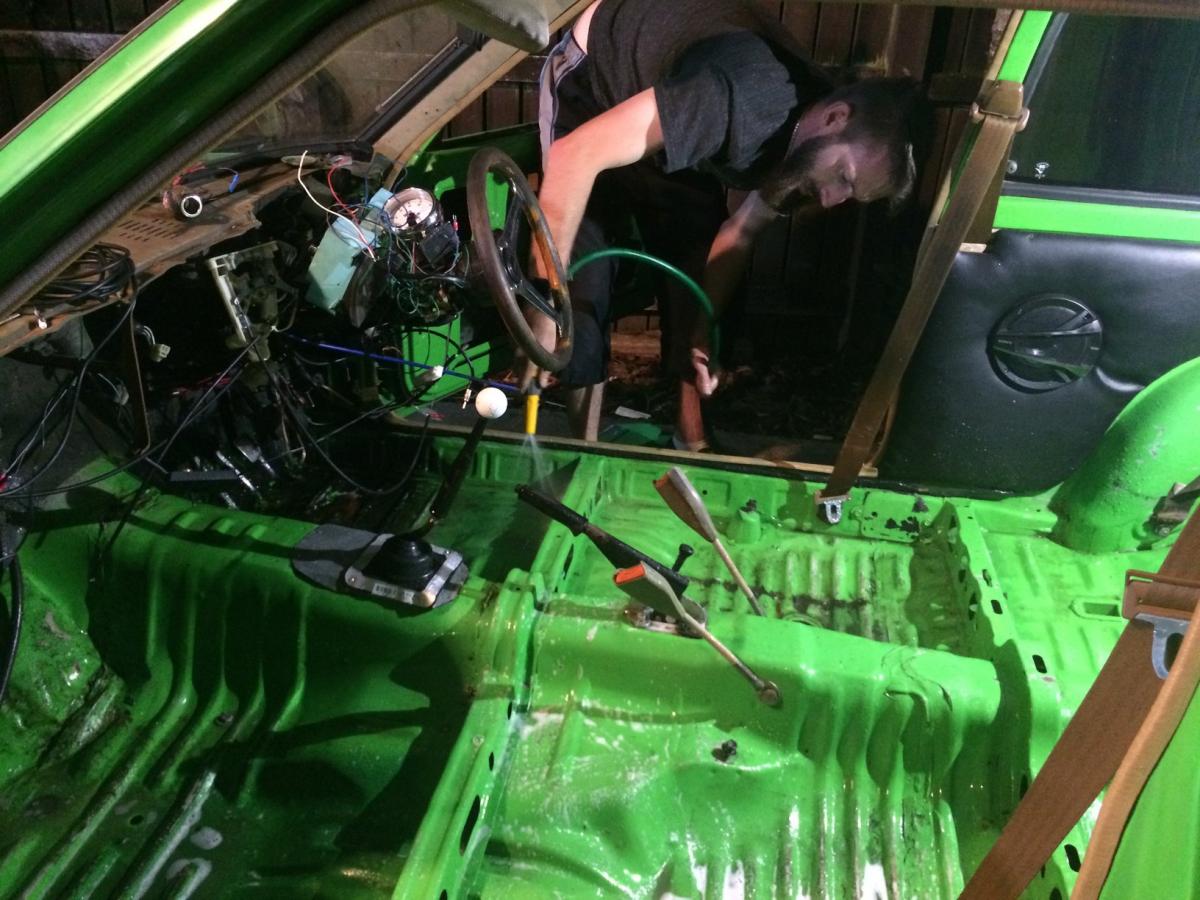
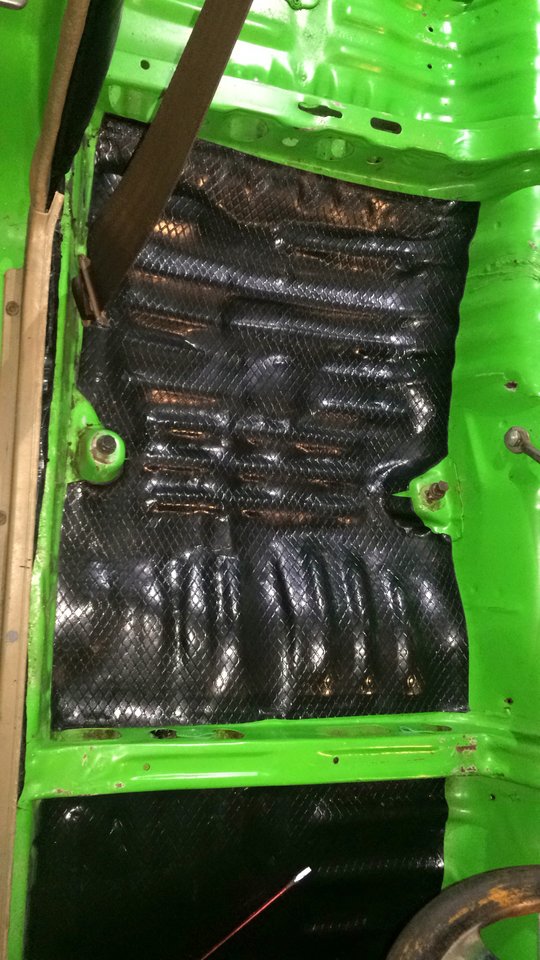
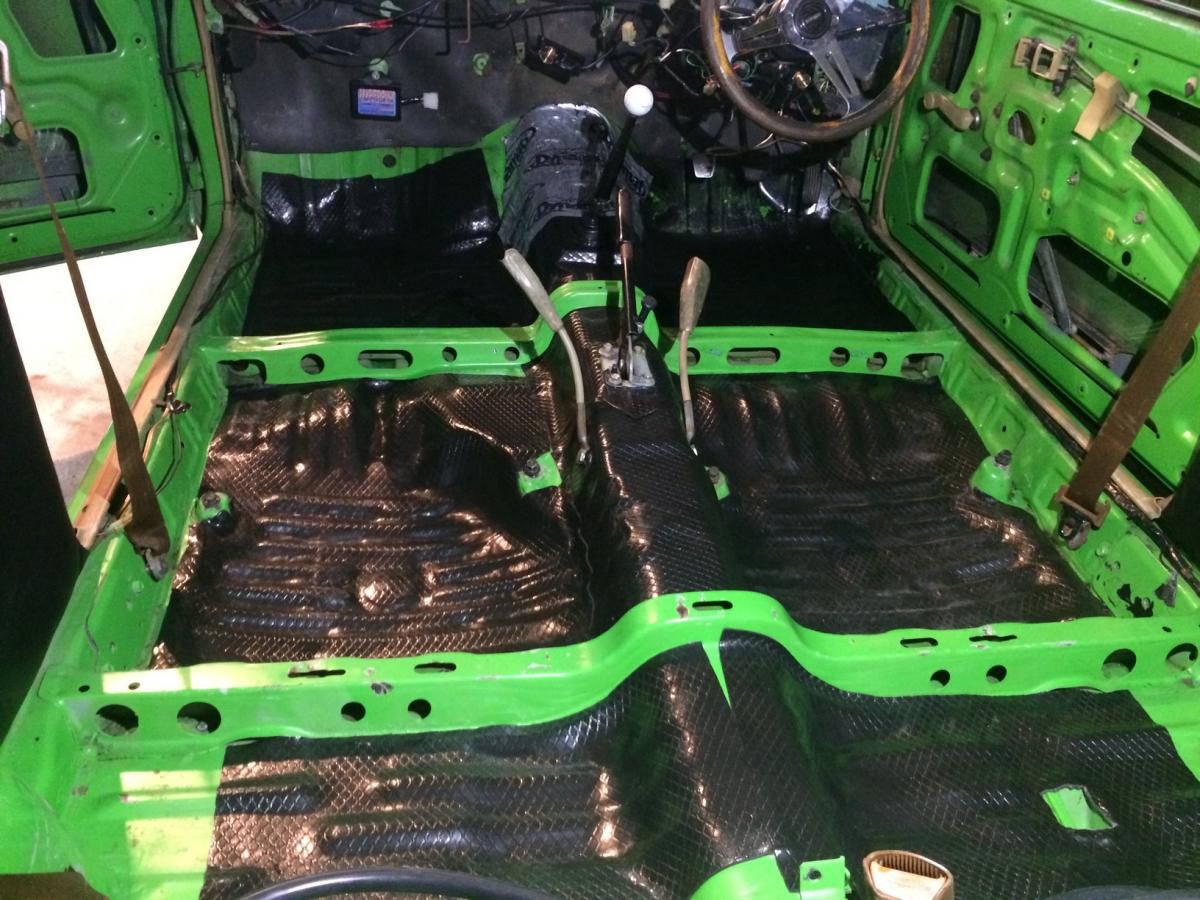
The Auto Sparky is booked in for monday so now to get on to the nicety's seeing as this car is built for gumbootrally (1000km of driving in a weekend) cumfort is important to my old body. step one fitting Teroden sp300 - its like dynamat but has more of an OEM look and is around half the price. I had a little Dynamat left over so I used that too. I got this from Car Colors if anyone wants to use it you cut it to shape peal the backing off and use heat (a fair bit) to mold it down id suggest a two man job and allow a couple of hours but the results speak for them selves. good time to give the car a good hose out too.
3 points
-
Project Uterus Picked up a solid old Courier/B series ute today from Ashburton. Was used as a farm hack, but overall it ran and had a fresh Wof and reg. Asked the guy what he wanted for it and $850 i was driving back to Chch. The steering box was super sloppy and i had to battle to keep her straight, good fun! I think its a 1.8 backed by a 4 speed. Anyways.... Someone welded a power bulge to the bonnet just to show what a powerhouse this thing is Interior was sweet usual kind of wear for a farm hack Looked behind the seat and found te woodys.... All in all good little score. No notable rust spots in the floor pan, a few small pinholes but all good. Once i strip the house paint off the cab it might bring up some uglies... Plans -Wellside -Fix up interior -Tighten up steering box -Strip down cab -Reupholster bench -Steels and caps -Good dose of low J-W-G2 points
-
That's just come to me, Rat Skin seat, as the noble pussies, one of them, deposited a fresh kill just outside the door and a few years ago we had a few up in the attic and I trapped a bunch and as I'd see some craft work where someone was farming rats in the ceiling and then curing them, the skins, and making little rat skin pouches. I had a go myself and spent a few hours sharpening up knives then divesting the little dead bodies of their coats but left the skins too long in the old tea bags solution and they rotted. I got this yesterday and I'm hugely chuffed as I'm so poor these days even the Mira is getting expensive to keep running so hooning about on a little beasty like this with a nice expansion chamber as jewellary hanging off one side really appeals to me.... and it's be so thin going between the cars on the motorway parking lot of modern Auck will be ton's of fun. Good golly, I just got my own joke... Something like this but no shine, can't be bothered with shine, so ratty and if it's got a rat skin seat... Oh, how cleverly Ironic! Custom chambers is just down the road, at least he was last time I looked sideways in the vicinty, but I had a word with him ages ago about just using his service to get the specs right,'cause I don't know shit 'bout designing 2 stroke expansion chambers or tuning stuff, and his foldy apparatus to assemble all the steels then I'll weld it all up and he was cool with that. First things first though and a clear out of the working space and bringing down the box of collected odds and ends and whether I did keep those rear sets from an old 250 racer style honda and which tractor headlight will look good.2 points
-
It's time....2 points
-
well i have ordered the Turbo and the injectors Will have to custom fabricate a new exhaust manifold and alter the layout of the engine bay slightly different intercooler, different exhaust layout today engine bay got painted again lol from silver to gloss black 2K2 points
-
modified a fan shroud to fit. it didn't have one before and proper TA23 fan shrouds are pretty hard to come by so i made this one fit. then i sand blasted it and I'm in the process of painting it right now, just waiting for the primer to flash off. the other thing is that the fan sits a long away from the radiator and i wasn't happy with that so i made some spacers to move the fan forward about 30mm. now it will sit inside the shroud and actually do something. i should also paint the fan black i suppose. 2016-03-18_07-08-02 by sheepers, on Flickr 2016-03-18_07-08-11 by sheepers, on Flickr 2016-03-18_07-08-41 by sheepers, on Flickr 2016-03-19_12-57-34 by sheepers, on Flickr 2016-03-19_01-35-53 by sheepers, on Flickr 2016-03-19_02-21-48 by sheepers, on Flickr2 points
-
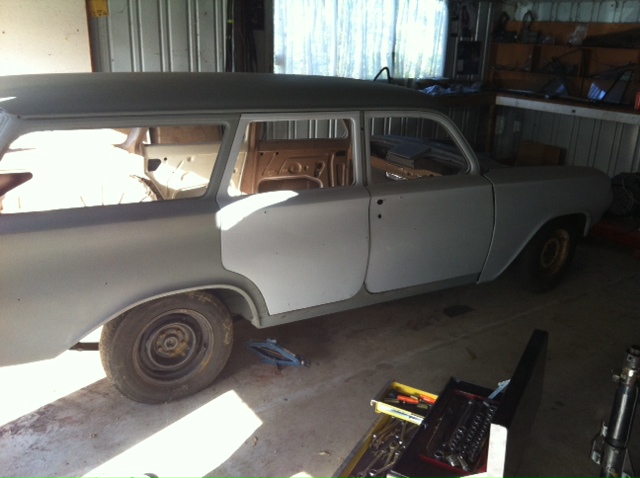
You will be hearing from me Al when I'm home and colour will be dark blue with a pearl or factory brown with a pearl. Still have a few things to do before it goes back for paint like laying some black lines down the road.2 points
-
Alright this is the beast. Someones disconnected the oil mixer I think, can someone have a look here and tell me whats up? Do I have just to go fuel tank with premix -> carb -> success?2 points
-
cant make a silk purse out of a sows ear mayte we used a copper sulphate solution for tanning the soft skins2 points
-
Minor update. The seatbelt guides & rear seatbelt repair kit turned up yesterday from the US of A. Only took about 2 weeks to get here so pretty rapt with that. For now I like the seat covers on the front seats so I cut a slot & steteched it around the guide mount.. Then popped the guides on easy as, so now the belt won't be cutting me in the side of the neck! Rear seatbelt kit literally took 15 seconds to install. The insides of the belt buckle went missing at least 10 years ago, but never got pulled up for a warrant. These seatbelt buckles have the nickname "the exploding seatbelt", this is because the plastic retainer gets brittle & the spring pops everything out.. Very happy with this as now I can feel a bit safer taking my kids out for a drive. I'll probably pick up another kit on my next parts order so the other one matches, but that's not a biggie for me.2 points
-
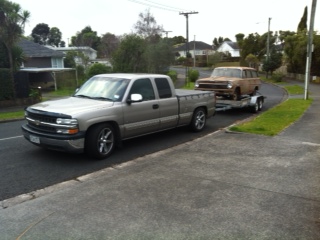
Picked up the old sled on Saturday. Will get it running and send it back for paint. Should be fun.2 points
-
And here she is... the much vaunted 1981 Toyota Starlet KP61 Lisse (a spec level I assume, from what I can gather she was the top-spec KP61 in it's day!). Known colloquially (at our place at least!) as the KPimp. So there she be.... all $490 dollars worth of cult-classic Jap RWD Econohatch. Motovation is provided by the perennial 4K pushrod engine, in the case of the KPimp it's a 4K-U, U being the designation for Jap emissions package... however this is also the most powerful of the carbied 4K engines with a reputed 74hp. Due mostly I would think to the heron-head combustion chamber design, the higher compression and so forth... the 4K-U also has a stronger bottom end (or so I read) than garden variety 4K's. Soon to receive a freer flowing exhaust courtesy of a parts car I've scored. She runs a very sweet K40 gearbox, great for round town work, sadly not-so-great for open road stuff as it's noisy and generally crap. Inside the KPimp showcases the very feature's that contribute to it's name... the rich, enveloping white velour/vinyl and maroon interior. Truly this is the interior of the kings... albeit with added dirt from years of ferrying round Joe and Jolene average in the course of their daily chores. Unfortunately 1981's idea of an audio system is not by any means acceptable.... the only acceptable facet of said audio is that EVERY (yes... all 5! 5 presets!) preset is tuned into Radio Hauraki. Classic rock hard. Note the brushed alumnium trim on the dash - now we know where Audi got the idea's for the TT from... GO TOYOTA! Steering is controlled via a premium public-transport issue steering wheel, which at some point will also be binned in favour of something less crap. A tacho is also an addition I think I will require, to allow me to keep tabs on the fearsome 4K lest it slip from it's incredibly narrow powerband (I am yet to find said powerband, someone once told me it was actually there..... somewhere!). And here she is showing off here insides... filthy wee thing. So.... what are my plans for this, the pinnacle of Toyota's automotive prowess? Well, to begin with, I'm sorting out a basic (read: cheap but reasonably effective) sound system. The source unit will be (sale pending) Pioneer DEH-P6450, which my flatmate is kindly selling me for $100. This will send musics to my recently acquired Audison VR404 amp (4x45wrms), which I also acquired for $100. No LP or HP filter though so an electronic crossover will be in order... I can sort that cheaply from Jaycar with my super-excellent rates! I ideally want to run components in the front, so I've got my peepers peeled for something cheapish and half-decent quality... probably actually going to go for a set of the Jaycar kevlar coned 6.5" comp's unless anyone has any particularly bad news about them! As for rolling stock, I already have a couple of options open to me... what, did ya think I was going to run around looking stock??? I just bought a set of SSR Mark I 14x7" rims off Trademe, ($100... there's a pattern emerging here) one of the earlier Jap 2 piece rims, stupidly light and very period! The parts car also came with a set of 13x6" Cheviot US800's... which are a tad bogan looking for me, but at least they've got tyres. Anyways, that's the intro, I'll keep this updated with any progress! The best thing is, I'm not putting k's on the Alfa any more! Cheers, and thanks for reading!1 point
-
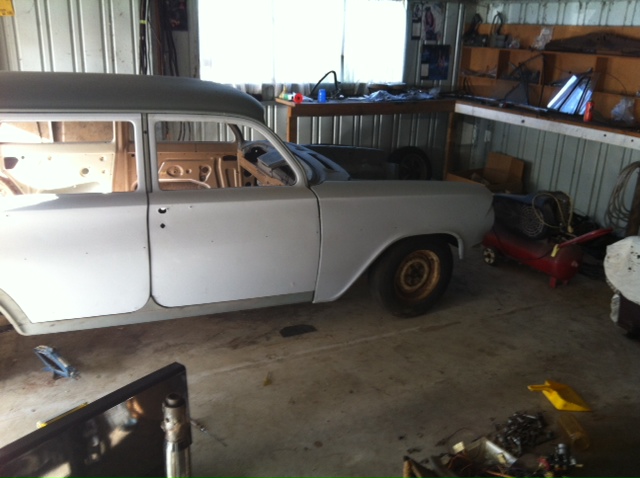
I bought this car as a rolling body the week my oldest son was born. The agreement with the wife was it could come home as soon as the bathroom was finished. Another son, house renovations and life got in the way and the car got ignored for about 6 years. I did occasionally think about the car and put a plan into place. I saw an article in Street Machine mag about a guy who put an LH Torana front end under an EK Holden. It didn't look too difficult and one turned up on trade me a couple of weeks later. That was the start of buying bits to fix the car and a good friend came over and we ripped into it. We found lots of good stuff, like the floor pans the were rotten and had sheets of steel pop riveted and braised in place. Thank you Holden for the built in rust traps of rubber flooring with sound deadening underneath to hold moisture and make rust. Amazingly the rest of the car and the usual rust spots are really good. The car has been off the road since 1989 and that is what saved it. Back to the plan. The LH Torana front is in the car, there is an injected 5Litre from a VT commodore sitting on my engine stand waiting for the HQ sump and pickup to be fitted. The engine has a 4 speed auto with it. I found a narrowed HZ ute diff that is under the car. The steering column is out of a LC Torana, its the column auto one. In my world the right place for the gear lever with a V8 and auto is the column, especially with a bench seat. Here is what I started with
1 point
-
I live pretty close to the yard so can go in and grab those bits. PM sent1 point
-
i fucked up the paint on the shroud. not sure exactly what i did but i think i didn't let the black dry enough before i put the clear on. ill have a go at fixing it tomorrow. fuck.1 point
-
I hate to see sh*t like this. Sorry man. I don't think it would need a full respray but it will need to be blended into surrounding panels such as door and trunk lid. Edit: Just saw post above. All the best getting it sorted.1 point
-
Parts parts parts parts Slowly I pick away and find things to buy to fix up the car, this morning a package arrived with Nissan OEM brake lines (seems like clutch lines are the same), Nissan OEM shift boot and also a rubber boot to go under it all as mine didn't really have one. Immediately run into an interesting problem. There are two types of these rubber boots listed for Hakosuka depending on the year, I picked up the one which was suitable to my year but it seems like the shifter itself is in the wrong place. So that makes me wonder if the gearbox is not a Hako gearbox, could be from any number of Datsuns of similar vintage. Regardless I put the boot there and it's kind of just sitting as it is better than nothing. This waas what was there before.. The shift boot looks cool! I just need to get a new chrome trim ring around the plastic where the shifter goes through. It looks like to get the boot to stay up it folds around that trim ring then the trim ring is screwed from below. I'm actually looking for a full new console as this one has cracks and various repairs etc out of it so not that great. Discuss: //oldschool.co.nz/index.php?/topic/49704-mlracings-hakosuka/page-7#entry16614471 point
-
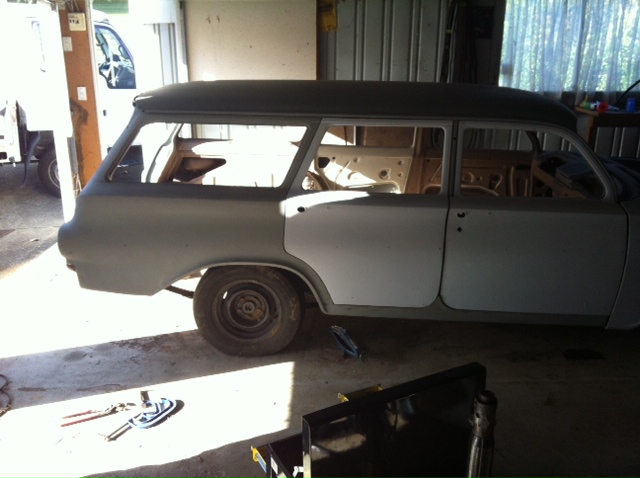
There has been slow progress since the last update. The panelbeater has been chipping away at the rust and it pretty much all gone, replaced with new steel. I bought a set of widened HQ holden wheels off trade me and picked them up today. There are 2 which are 7 inches wide without tires and 2 8 inches with tires. I'm hoping that the 8s will fit, they have a massive 5 inch back space and clearance could be an issue, or they could be bang on. Here's hoping. I'll go to the panel shop on Monday and see how they go. At the very worst the 7s will fit and the tires should be the right size 225/65/14 and they look almost new. Photos when they are on the car.1 point
-
Sorry taken so long. I am a yes.1 point
-
They are kind of shitty if you dont use the car all the time, and good electric fuel pumps are cheap enough to be a no brainer.1 point
-
start em young bring them along1 point
-
1 point
-
I suggest not changing, that seems to result in messyness. But I'll host a shed drinkies some tuesday in a week or two (woolston).1 point
-
Yesterday was parts day my manifold arrived blizzo has sorted me out a 45mm dcoe that was on his kp so hopefully should have that next week when I get paid. This is the last one lynx had and I can't imagine them making any more for an obscure car now.1 point
-
What was it I heard somewhere that there is a clause in the TPPA about drifting?1 point
-
So I want these doors solid, I'm just not completely disassembling them like the shell. That said the bottom hinge on the drivers door needs some major work, some numpty(me) tried to drill out the pin about ten years ago, removed runningboard, jack car up on one side and drilled straight up, sept the car was on a angle this it's self would be bad enough, having to drill out the rivets in the door, fit a new hinge and then suss out nuts and bolts to hold it in place, but I can't. Because someone at some point folded this door right round and half ripped the rivets out, and then welded everything back together. So. This is stuffed anyway, so off it came. See how I skillfully drilled out half of the pin! this is looking from the bottom of the door, there is even less meat left on the top of the hinge. I was hoping to somehow fix this half of the hinge and just use half of the new hinge, but everything is so bent and twisted it really needs replacing. after thinking long and hard about the easiest, fastest or best way to fix this thing, I did this. and chopped the inner panel, hinge and all, out. started removing rust and hammering the folded door skin flat, something I couldn't do with the inner panel in the way. Also cut this out of the other end on the bottom of the same door. very krusty in here. removed parts and new hinge from this angle you can see how far the hinge has pulled though the door. it's going to take some work still to separate the hinge without damaging the door panels shape. Again, What have I done!! started making a patch for the bottom corner, might have to wait till the weekend till I can cut the hinge out of the door panel. Also finally welded up what must be the last rust hole in the body, on the passenger rear quarter window sill. and just a wide shot of the shed just to prove I haven't cut the whole thing into tiny chunks. my names Angus and that's my story.1 point
-
Wrap exhaust with this: http://www.aliexpress.com/item/UNIVERSAL-TURBO-WRAP-HEAT-SHIELD-TURBOCHARGER-COVER-WRAP/1871678780.html And stick this on bottom of carbs / fuel lines / heat shield (making a heat shield that has an air gap to both the carbs and exhaust is best idea) http://www.aliexpress.com/item/Free-Shipping-EPMAN-2-x5-Meter-Roll-SELF-ADHESIVE-REFLECT-A-GOLD-HEAT-WRAP-BARRIER-Hot/32403580701.html The gold reflective stuff has the glue turn to mush if you get fuel on it though. That heat wrap is infinity billion times better than the normal fibreglass stuff. Made a big difference to engine bay temps in my car. I havent tested conclusively about the Gold sticker stuff, but other people have used it to stop their bonnets melting or whatever when very close to a very hot turbo.1 point
-
Beaver is onto it. It's a common L-series (6 & 4) issue, the factory manifolds have heat shields for both carb and EFi, yet when people upgrade their fuel and air, introducing more heat, they often remove said shield. Solutions: 1. A basic heat shield between the headers and the intake and carburettors (you can buy fancy aftermarket baller shields for the 6) 2. Header wrap 3. Header coating 4. A combination of 1 and 2/3. Unless your fuel lines are closer than the carbs, it's more likely to be boiling in the carbs before the lines would be affected. You could try some basic reflective heat shielding on the fuel lines first before committing to braided lines. TBH, I don't think you need braided lines.1 point
-
Would it not be a lot cheaper and easier to try fitting an exhaust/heat shield ans see if that helps?1 point
-
I'm a stupid moron, without looking at the date properly I went there tonight. I just saw Wednesday, and thought sweet. It didn't stop me from parking up and having burger fuel for dinner though. When it comes to this Mirage, I just don't seem to think properly. Argh. So impatient to show it off. Grrrrr1 point
-
Oh and I picked up the headlight buckets. I grabbed these off the Bay as they were cheap enough for a punt (came to around $35 delivered). Donated from a F100 of unknown vintage (picking mid 70s) and arrived 90% blasted clean and very sound... And just needed a slight mod to fit, cut a shaped slot, tapped in a recess with a punch and drilled it for spring attachment... and ready for paint... They will sit around 5mm further out than the originals but that won't be noticable, and I quite like the thought of these things travelling from Robinson, Crawford County, Illinois (pop. 7000) to Invergumboot (pop. slightly more) to be used again...1 point
-
Too buggered to do much today, plus had surf to city with the kids. But did give the shed a real good tidy up this morning as it was a tip. Tools, rags, oil and rubbish everywhere (a consequence of fitting in bits of work when I get the chance). Floor is now spotless, makes it easier to find bits when you drop 'em... And put all my painting stuff in a surplus packing crate I scored from work. One of my best purchases was a bulk load of measuring cups, about 20c each and really make mixing ratios easier... And pulled some more bits off the front and waterblasted some crud off in prep for painting... And tidied up the timing cover. I was concerned about the state of the water passages, but they cleaned up ok... So now just gotta paint random bits etc while I'm waiting for parts to arrive, so's can begin the fun stage...1 point
-
after multiple fuck ups on my part involving welding the cam cover back together then breaking it again numerous times i finally got it sorted, in that Mike gave me another one with cooler text on it. the other one is usable but this one is way better. so this evening i attempted to paint it and highlight the letters. what a fuck around. so i got there in the end. I'm not a fan of painting clear straight onto aluminum but Richie wouldn't shut up so i did it this way. 2016-03-07_07-19-04 by sheepers, on Flickr 2016-03-07_07-19-13 by sheepers, on Flickr 2016-03-07_07-19-23 by sheepers, on Flickr1 point
-
Although this isn't a new idea, I thought I'd flip it round from the way it is usually mounted on solid rear axles, and put the adjustable bits on the chassis. The mount is made from 3mm steel with 3mm gusset and a 3mm box section internally to give support where the bolt-holes are. So there are 6mm thick side panels with effectively two 3mm vertical blades either side of the hole-line. 'Moveable' brackets are in 5mm steel. These give 75mm of total adjustment in 15mm increments from this: To this: Welded on to the chassis: I'm only using one pair of coil-overs which will be mounted in front of the axle.1 point
-
I have managed to get the rear diff-mount 'gusset' made and in place: Which you will notice has a captive nut welded into it which is for this: Brake pipe Tee. The feed will come in as a hard-line to the front, and short flexi's will then go out to the calipers from either side.1 point
-
Good day in the shed. Laid out my toys after removing driveshaft and all but the last couple of bolts... Then jacked the back up to make removal easier. My patented engine stands are laid out on the lawn. As I was removing engine and trans together I planned to drop the sump into the larger tyre and rest the tranny on the littl'un so I could separate them... Now, I was going to get a mate round to help, but I was keen to try the leveller out, so just had a wee go, and next thing you know the guts were out of her... Leveller and a good hoist made it really easy, just wriggled if forward then angled up, lifted to clear things and changed angle to slide the thing out the front. I had checked the hoist lift height and chain length etc beforehand - Be a bugger to hit the roof with the thing only half out... I had no intention of doing it myself but it worked out ok. I just snapped on a couple of used gloves to stop fluid leaking out the back end. The bits are separated now, my weiner engine stand is not big enough to mount the engine but will hold the trans ok. Waiting on a mate to get back from holiday so I can use his stand to begin engine work...1 point
-
Nick the sparky came over last night and did some wires. the wiring on this thing was really fucked, there was just shit going everywhere and things linked that should not be linked etc so Nick has pretty much re-wired the front part of the car. the lights/indicator loom wasnt too bad but hes tidied that up and looped the high/low circuits so all four headlights work as high/low. the engine loom is in two parts now with the computer loom being separate and the power feeds/alternator/starter trigger/gauge feeds all being together and running in their own loom. it is pretty tidy now with just a few things needing hooking up under the dash to get the motor running. oh, while Nick was practicing being a choice cunt he also reco'd the starter and the alternator so they're both brand new now too. but last thing last night he started going on about mopars so i cut his head off and rested it on the dash, as you can see in this picture, 2016-01-28_08-57-45 by sheepers, on Flickr1 point
-
wait a minute, theres also this. 2016-01-07_03-46-33 by sheepers, on Flickr 2016-01-07_03-44-36 by sheepers, on Flickr 2016-01-07_03-44-27 by sheepers, on Flickr 2016-01-07_03-44-14 by sheepers, on Flickr 2016-01-07_03-44-03 by sheepers, on Flickr so yea. pretty happy with that. it needs to come down about 75mm and its currently got 0 camber so i think there will be some coil overs in this cars future. now I'm going to take a well deserved break. and work on my blue car for a few days before i go back to work.1 point
-
Well Ive not spent as much time working on this as I was planning this weekend just gone. In fact I did nothing to it on Saturday. This morning I woke up to snow on the mountains around us. It never really warmed up and felt like what a proper cold winter day should be like. However I managed to get enough done today worthy of an update. First off I finished the passenger side repairs. I had to put the car up on hoist so I could shift a Volvo under it. Was quite nice standing up to do these last outer skins. Since it was up in the air I repaired that hole on the inner sill which meant I was able to paint epoxy on the entire inside before welding a new skin in place. I wont grind the last welds down because well, I just cant be bothered right now as its boring grinding. I might just paint them over in primer to go along with the rest of the fancy paint job the car currently wears. I know not what could possibly be under this lumpy looking skin but it feels crunchy. I think I will leave that till later... I put the car back on its feet and shuffled it over to attack the other side. Its not as bad on the inside floorpan. Just a couple of areas that need cutting out. However the outer sill...mmmmm. Yeah pretty shot although with the squeeze test it feels like the bottom might be ok. Will find out soon. Good news- I found more money to offset the cost of the car.. So into it then. First off I cut out the rotten area around the drain. It would be easy to just weld in a square of steel and be done but I want the floors to drain as they should so I had to make a go at replicating what I cut out. Hole sawed a hole into a piece of 1mm thick steel quite a bit bigger than needed and then using a bit of pipe and a piece of round solid about the right size I formed the step in the vice. Turned out good and I was a happy chappy. I had to form one corner to suit the two channels and then cut the square to size. Welded it in and ground down the welds where the channels enter. I'll finish the floor and then cut open the sill. Oooooh I cant wait! ...its going to be like a really shit Kinder surprise isn't it.1 point
-
Today in pictures. With some text. So I finished welding up the floor and inner sill then tidied up some other frilly bits in there near the front. There are more little holes in the floor here and there but I will leave all the little bits for later once the big yucky stuff is done. This mudguard... I normally don't like them. But it seems to tie in well with the car in that utilitarian sort of way. So I carefully removed it. Then I cut away what was left of the outer sill.. Here's a bit of the sill.. ..and here is most of the sill... I was hoping that more of the top of the outside face of the sill would be solid but upon closer inspection it look like this wagon has had a replacement sill already. You can just make out on this section I cut off where they had blended the new sill in just below the corner and then ground it back. So I cut the sill top back further and will butt weld the new sill on the top face. Speaking of butt welding... this is my preferred method for all joins where ever possible. My several reasons why.. Firstly - it means that there will never be a overlap of steel. No matter what you seal it with its always a place where rust will begin because moisture creeps. Even if one uses a seam sealer its not perfect because usually one panel is corroded and if sealed up against another fresh bit of panel it can still continue to corrode. If you butt weld panels together you can prep them properly both sides and paint them properly. The join will last. No collection point. Secondly- both panels are flush so once the weld is ground back you get a neat flat surface that should hopefully require the bare minimum of filler (if one is bothered). Butt welding is a lot trickier especially with one panel usually being thinner and rusty. But if the welder is set up just right then by carefully zapping the join and getting just the right heat in the weld will go right through and create a good solid join.I like to see the weld coming through the other side. If the steel is thick enough, like say 0.8 ~1mm, then a very small gap will fuse together with the wire melting in and leaving very little proud. If I do have to do a lap joint somewhere I will always have the overlap facing down so moisture cant enter from above. However if its done without the use of a Joggler to put a step in one panel so the panel faces end up flush I think it always looks a bit messy plus will need more filler to smooth it off. I suppose it all just depends on what the repair is for and how much bother one wants to take. Areas that get the most moisture and you want to last I reckon it makes sense to avoid any extra traps. Enough blabbing. Photos. I was also foolishly hoping the lowest parts on the inner sills would be ok to re-use. I started to grind back what was left of the outer and it was shit. So I just cut the lot off back to good solid steel and welded in fresh sheet. This actually took less time then it would have to try to clean up what was there. Here's what I chopped off.. New steel in place.. Now onto folding up some new sill outers. I can only do 600mm at a time so I had to take time and try to do each half evenly so they would match. I had made a little gauge based off the old sill as a pattern. The sills turned out OK. Not as neat as if I had some rollers because you can see the gentle ridges where I did all the little folds. But they'll most likely get covered with underseal and hell- look at the rest of the car... Folding.. Cut, bend, tweak and generally shape the front end where I will be rebuilding the bottom of the A pillar.. Oh shit- is that the time? Decide I need to eat but on a roll so just quickly bbq some sausages and drink some beer.. Treat the inside of the sills while I can.. This is pretty much where I'm up to now... Hopefully the other side wont be as bad but I am expecting it will be.1 point
-
Coffee time so update time. Floor all welded up and feeling a lot more solid Next up the passenger side sill. Before I cut it out I thought Id show you all what a truly wonderful bit of filling work had been attempted to hide the rot. I think whoever did this had slapped the filler on and just gave up. I thought I might cut a section from the spare sill I had. But no. Its been attacked before and the old man who had owned that car obviously didnt have a welder but certainly had a pop riveter... Hopefully it will all go OK. Im hoping the rot has not extended right up the top as I want something to weld to. If it has I will just have more sections to make. Will report back later with my findings. I will have to do it in 600mm long repairs whatever as that is the length my folder will take.1 point
-
Photo time now I have showered off a heap of rust dust and grinding dust. Im pretty happy with how far I got today. First off, a photo of some of the patina I would really like to keep. I would like to treat the rusty scrapes and surface rust with something that keeps the colour but stops it getting worse? All the rust neutralisers I know of turn the rust black which wont look so good. Ideas? Clear coating it is an option. It doesnt have to last for ages because after a while Im sure I'll want to paint it but for at least first year or so would be good. I was going to remove the windscreen to avoid getting grinding sparks marking the glass on the inside. But I didnt. Three reasons; the rubber will disintegrate and I dont want to fork out $100 for new stuff right now, the glass is scratched already so might as well wait till later when the car is insured and then has a random stone hit it...., I like the moss. It adds character. I took on the worst area, the passenger floor and inner sill, which is also the area which dealt with first because it will put some strength back into the shell. The steel on these HB Vivas is actually quite good quality and quite thick. It certainly knocks cut off discs down quickly. I picked my way out to good steel and chopped away. First off this bit.. I am not really fussed about trying to piece this back together the way it was from the factory. If its strong and lasts Im happy. But I want to keep things like the channels in the floor because it will leak and they do help let water out. Plus they keep the flat bits of steel from being wobbly. So I whipped up a jig the right size and hammered the channels into the steel.. Now the nasty bit. The inner sill was beyond patching. But I am very very lucky that the top of the sill is rust free and solid which meant I could happily chop out this lot and not have the door aperture move on me. Also helped by the fact that Vivas have nice substantial chassis rails too. Not that the inner sill, or what was left, was doing much. It pretty much fell out. Next job was to cut out what I needed from the spare sill/floor pan I had been given. I think its about here that we should give a few seconds silence for the little Viva that sacrificed its life for this part. Not my choice- it was chopped up by a man in christchurch who insists that every Viva he kills makes his worth more. But at least I got something from it. Poor viva. The piece I required was cut out.. Then heatgun and scrape the underseal off.. Followed by lots of chopping, measuring, trimming, measuring and finally in place ready to be welded. Which is about where I finished off today. My bin of rust is filling up.. Tomorrow I'll weld that bit in place and start on the outer sill and sill ends. I'd love to put it up on the hoist to do that but then I think I would be risking things moving out of place. So I'll continue kneeling on my 5 layers of carpet off cuts and persevere.1 point
-
Today I played Hookey from work and got the car over to the panel shop. Managed to dodge the rain showers and only get a little bit of rain on it. My wife came and helped with the pushing around and winding the winch on the trailer. With the stress of the weather I forgot to take any photos. I will go down to the panel shop tomorrow if I get a chance and take a couple. Heres a couple of photos from the other day when I go the doors on and the threaded rod in to hold the front suspension up. It's got the 70's nose down thing going on big time.
1 point
-
IMG_3464 by Richard Opie, on Flickr So I got this. What a K series sellout. Probably the worst call ever but it was a relatively good deal. So... 4AGE smallport, TRD Atlantic pistons, shotpeened rods, balanced bottom end, TRD headgasket, ports tidied up, on stock cams for now. One of kpr's old inlet manifolds with silvertop ITB's. Various new TGP parts abound. Also came with a Toda flywheel and a fancy clutch which I can't remember the type but it is a sprung center 3 puck. Came with a V5 Link which will be up for sale soonlytimes. Also came with a T50 equipped with a C's short shifter, and a T series rear packing a 2 way TRD LSD. Could be fun. So once the car is back on it's wheels, it's time to start removing the ancillaries from this engine and tidying everything up to immaco-spec and make things more hidden. Other plans too but I will enlighten all as I go.1 point
-
Right then, since I'm on holiday I figured I'd best make some attempt to get some work done on this old thing. Step one was rolling it out into the sunlight. The front end parts have all been refitted, with nice freshly plated nuts and bolts to maintain a good clean appearance. IMG_7462 by Richard Opie, on Flickr IMG_7471 by Richard Opie, on Flickr Visible in this never before seen shot of both of the jalopies together, are the new refurbished rain gutter trims. These are made out of some weirdo plastic-tinfoil hybrid shit that turns to dust with age, cracks and generally looks rubbish. I'd never been happy with my existing ones and managed to salvage these items off a car Mark (AE25) and I wrecked a couple of years ago. A quick prep, repaint and refit and they're looking better than ever. IMG_7474 by Richard Opie, on Flickr Another piece of work completed by the good lads at GT Refinishers in Penrose, was the painting and fitting of a new bonnet to replace the previous one that while it was painted ok, was royally fucked by the last painter who did some noob sandblasting to it and warped it beyond repair. Now nice and straight and as it ought to be. IMG_7567 by Richard Opie, on Flickr In addition to plating all of my fasteners, some of the fittings and brackets etc have also been done to ensure uniformity of finish throughout. This is the bonnet catch, you can also see the radiator blank off panel which has been powdercoated, next to this but not visible in this shot is a completely refurbished radiator fan which looks brand new. IMG_7493 by Richard Opie, on Flickr And the brake master cylinder and booster have both been rebuilt and painted. IMG_7499 by Richard Opie, on Flickr Here's a size comparison between the new brake rotors and the old solid items. IMG_7522 by Richard Opie, on Flickr IMG_7535 by Richard Opie, on Flickr Over the past couple of years I've been acquiring wheels when I find suitable ones pop up for a good rate. These are some of the current line up, 14x6 +3 BRX BR-1, 13x7 -5 (ish) Riverside, 14x6.5 0 SSR Brightspeed, 13x7 +6 and -8 Hayashi Street and 13x6 +6 Advan A3A IMG_7539 by Richard Opie, on Flickr And lastly, this is what I'm working towards installing this week, although plating and powdercoating of a few items is required before I can do it. New crossmember, new TGP lower arms, new TGP tie rod ends, reconditioned steering rack with new rack ends, powdercoated swaybar with new bushes, reconditioned hubs with longer wheel studs, new grease caps and new wheel bearings, homebrewed coilovers with T3 camber plates, 200lb springs and new Boge shocks, T3 RCA's, Wilwood Dynalite 4 pot with custom caliper brackets, larger rotors and a Cusco strut brace. IMG_7560 by Richard Opie, on Flickr Before I can do this though, I need to get up in the guards and apply some body deadener/underseal type shit. Thanks for looking! Discussion: //oldschool.co.nz/index.php?/topic/18803-snoozins-1981-kpiz-starlet/1 point
-
Current status: Engineless but awesome, I think. Add to this some pictures of PROGRESS! Awwwww yeeeeaaaaah. That doesn't happen too often now does it? After a hearty clean, of 7 months worth of farm/barn/general filth was removed from the paintwork of my baby. It still looks pretty bloody sharp, however there are several abrasions and scratches that have been caused (I can only surmise) by possums and cats climbing over the thing as it was barn stored. I've removed a few with a light polish, so I don't think it will be much to worry about. The current state of the engine bay... shiny! Pretty chuffed with the job overall, barring the damage to the bonnet caused by blasting - more on that later - but the spots where the brackets have been removed, and holes filled are undetectable. Right hand side inner guard - the battery tray has been removed from just forward of the guard and some holes filled. Passenger side inner guard, voltage regulator removed from the front of the strut tower and once again holes have been welded up. Firewall, relatively untouched bar a few holes filled... In behind the grille, I did consider a satin black finish on this, but as it was red from factory I thought it best to retain as much originality as possible... if I don't like this at least it's simple to go back to a satin black finish. Scuttle panel on both sides of the car, both of these spots had fairly serious rot in them. BAM! The rust is gone! Bugger about the overspray on the wiper mechanism but an easy fix I guess. Psuedo arty shot of brand new fasteners used to reattach the panels. I'm thinking stainless cap screws would be cooler... so these will be replaced. Argh! The bad part... the bonnet is poked, with the distortion clearly evident in these pics. A bit pissy about it, at least I wasn't charged, and Wez (1vaknd, who is the MAN by the way) has kindly assisted with providing a replacement bonnet. Lastly - the motivational pic (as long as it doesn't overshadow the actual progress!!!) as scribed by everyones favourite automotive artist, Nikk (Squid). When I saw it, I think my words were something along the lines of FUCK YES. Ok so the A3A's are a touch wider than what I have, but you get the general idea. Over and out - broadcast your thoughts on my hatchback here ---> //oldschool.co.nz/phpbb/viewtopic.php?f=18&t=42071 point


This leaderboard is set to Auckland/GMT+12:00